How to Insulate a Cabin for Winter (The Right Way)
It’s January, the thermometer outside reads 12°F, and your wood stove is running flat-out. The cabin should be cozy — but every time the wind picks up, you can feel cold air pushing through the walls, seeping up through the floor, and leaking around the window frames. You’re burning a cord of wood every three weeks and still wearing three layers inside. Sound familiar? That’s not a heating problem. That’s an insulation problem.
Most cabin owners make the mistake of upgrading the heat source first — a bigger stove, a propane heater, a pellet burner. The result is a slightly warmer cabin that still bleeds heat as fast as you can make it. Every dollar you pour into fuel disappears right through the walls. The brutal truth is that a cabin with poor insulation will defeat any heat source you install. You’re not heating your cabin; you’re heating the outdoors.
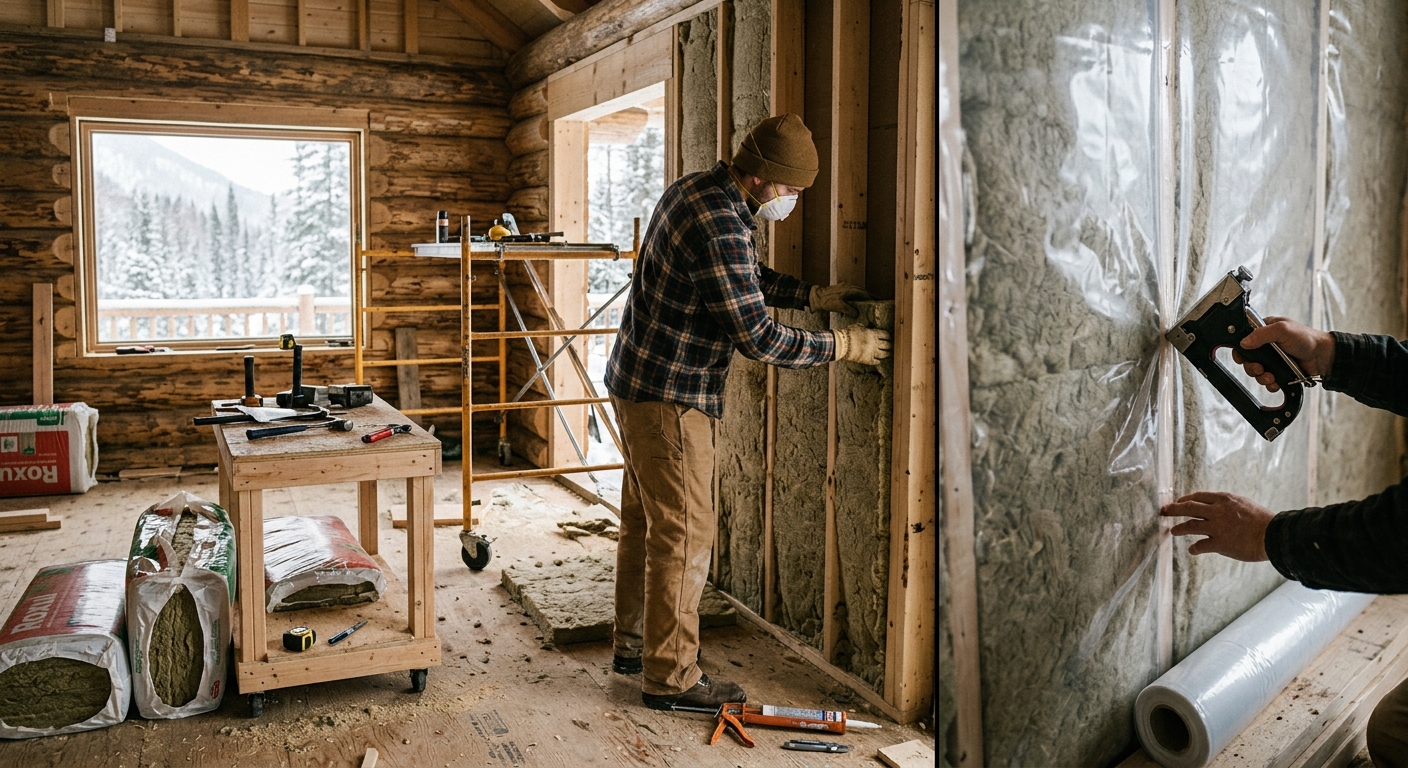
This guide walks you through everything you need to know about how to insulate a cabin for winter correctly: what R-values your walls, floors, and roof actually need for your climate, which insulation materials make sense for off-grid builds, how to stop air leaks (the step most DIYers skip entirely), and a practical step-by-step sequence whether you’re building new or retrofitting an existing structure. By the end, you’ll have a clear action plan that makes your heating fuel go two to three times further.
Quick Answer: What You Need to Insulate a Cabin for Winter
Effective cabin insulation comes down to four elements working together: the right R-value for your climate zone, the right insulation material for your space, a proper vapor barrier, and — most importantly — thorough air sealing. Skipping any one of these turns the others into a waste of money.
- Walls: R-13 to R-21 minimum (R-13 for mild climates, R-21+ for Zone 5 and colder)
- Floors/foundation: R-19 to R-30 for cabins on piers or crawl spaces
- Roof/ceiling: R-38 to R-60 (heat rises — the ceiling is your biggest loss point)
- Windows: Double-pane minimum; triple-pane for Zone 6 and above
- Air sealing: Non-negotiable at rim joists, electrical boxes, window frames, and door gaps
Why Insulation Beats the Heat Source Every Time
The $1 Saves $2-3 Math
Energy auditors and building scientists consistently report the same finding: every dollar spent on quality insulation returns $2 to $3 in heating cost savings over the life of the building. For an off-grid cabin where fuel — propane, firewood, heating oil — has to be hauled in or harvested by hand, that math is even more compelling. A properly insulated 400-square-foot cabin in a cold climate might need 1.5 to 2 cords of wood per winter. The same cabin with no insulation or air sealing can burn through 4 to 5 cords. That’s the difference between comfortable and exhausted.
Understanding R-Value
R-value measures thermal resistance — how well a material slows heat transfer. The higher the number, the better the insulation. R-value is additive, so 3.5 inches of fiberglass batt (R-13) plus 1 inch of rigid foam on the exterior (R-6) gives you a wall assembly of roughly R-19. What you need depends on your IECC (International Energy Conservation Code) climate zone, which runs from Zone 1 (Miami) to Zone 8 (interior Alaska).
| IECC Climate Zone | Example States/Regions | Wall R-Value | Floor R-Value | Ceiling R-Value |
|---|---|---|---|---|
| Zone 3 | Georgia, Tennessee, N. California coast | R-13 to R-15 | R-19 | R-38 |
| Zone 4 | Virginia, Kentucky, Pacific Northwest | R-13 to R-21 | R-25 | R-49 |
| Zone 5 | Minnesota, Wisconsin, Montana, New England | R-20 to R-21 | R-30 | R-49 |
| Zone 6 | Upper Michigan, Wyoming, Vermont | R-20 to R-21 | R-30 | R-60 |
| Zone 7 | Northern Minnesota, Maine highlands | R-21+ | R-38 | R-60 |
Look up your specific county’s IECC zone at the Department of Energy’s website — don’t guess. A Zone 5 build insulated to Zone 3 standards will leave you cold and broke.
Insulation Types: Which One Is Right for Your Cabin?
Fiberglass Batts — The Budget Option
Fiberglass batts are what most people picture when they think of insulation — those pink or yellow rolls that fit between standard 2×4 or 2×6 stud bays. They’re the cheapest option per square foot (roughly $0.30–$0.60/sq ft installed DIY), widely available at any home improvement store, and easy to cut and fit. The downside: fiberglass only delivers about R-3.1 to R-3.4 per inch, so a 2×4 wall cavity gives you R-13, and a 2×6 gives R-19. It also performs poorly if it gets compressed, wet, or if there are air gaps around it. For a budget new build in Zones 3 or 4, fiberglass batts are fine. For colder zones or retrofit work, they’re a starting point, not a finish line.
Rigid Foam Board — Best R-Value per Inch
Rigid foam panels (polyisocyanurate, EPS, or XPS) deliver R-3.8 to R-6.5 per inch depending on the type. Polyiso is the highest performer at R-6 to R-6.5 per inch and is the smart choice for small or tiny cabins where wall thickness is a constraint. Foam board excels on the exterior of walls (continuous insulation that eliminates thermal bridging through studs), under slab floors, and on the interior of basement or crawl space walls. A 2-inch layer of polyiso on the exterior of a standard 2×4 stud wall brings your total assembly from R-13 to roughly R-25 — a dramatic improvement. Brand options include Owens Corning FOAMULAR (XPS) and Atlas EnergyShield (polyiso). Budget roughly $0.70–$1.10 per square foot for materials.
Spray Foam — Best Air Seal, Highest Cost
Closed-cell spray polyurethane foam (SPF) delivers R-6 to R-7 per inch AND creates an essentially impenetrable air barrier simultaneously. It’s the Cadillac of cabin insulation and the best choice for rim joists, irregular gaps, and situations where you want to insulate and air-seal in one step. The problem is cost: professional spray foam runs $1.50–$3.00 per board foot installed, making it prohibitive as a whole-cabin solution. DIY two-component spray foam kits (brands like Tiger Foam or Foam It Green, ranging from $150 to $400 per kit) are a practical option for targeted areas — rim joists, around pipes, behind outlet boxes — without hiring a contractor.
Cellulose — Best for Retrofits
Blown-in cellulose (made from 80–85% recycled newsprint) delivers about R-3.5 per inch and is the top choice for retrofitting insulation into existing walls and attic floors without tearing everything apart. A contractor drills small holes in the siding or drywall, blows cellulose in with a hose, then patches. It densely packs cavities, reducing air movement within the insulation layer. Settled attic applications typically run $0.50–$0.80 per square foot for materials. It does absorb moisture if a vapor barrier is missing, so installation details matter.
Air Sealing: The Most Overlooked Step in Cabin Insulation
Why Air Sealing Matters More Than R-Value Alone
The building science community has a saying: « insulate for energy, seal for comfort. » Air infiltration can account for 25–40% of a cabin’s heat loss — and adding more fiberglass won’t fix it because batts don’t stop air movement. You can have an R-30 wall and still feel cold drafts if the air sealing is poor. Before you even think about insulation type, identify and seal every penetration, gap, and joint in your building envelope.
Where Air Leaks Hide in a Cabin
- Rim joists: The band of framing where the floor system meets the foundation — one of the single biggest air leak locations in any wood-framed building. Seal with cut-and-cobble rigid foam plus spray foam around the edges, or closed-cell spray foam applied at 2-inch thickness.
- Electrical outlets and switches on exterior walls: Each outlet box is a hole punched through your wall. Install foam gaskets behind the cover plate (available in bulk packs for under $15) and seal the cable penetration through the back of the box with low-expansion spray foam.
- Window frames: The gap between the rough opening framing and the window frame is notorious for air leaks. Use low-expansion foam or backer rod plus caulk — never high-expansion foam, which can bow the frame and prevent proper operation.
- Door gaps: Check your door sweep and weatherstripping annually. A gap you can see daylight under loses as much heat as leaving a window cracked. Quality door sweeps from brands like M-D Building Products run $15–$30 and take 20 minutes to install.
- Ceiling penetrations: Every light fixture, fan, plumbing vent, or chimney penetration through the ceiling plane needs to be air-sealed with fire-rated caulk or foam before insulation covers it.
- Log cabin chinking: For traditional log cabins, failing chinking between logs is the primary air seal issue. Re-chink with Perma-Chink or Sashco Chink products before adding any other insulation strategy.
Windows, Floors, and Foundation: Don’t Leave Heat on the Table
Window Insulation for Off-Grid Cabins
A single-pane window has an R-value of roughly R-1. A double-pane low-E window is R-3 to R-4. Triple-pane units reach R-5 to R-8 but carry a significant cost premium. For cabins in Zone 5 and above, double-pane low-E windows are the minimum — no exceptions. If you’re stuck with older single-pane windows and a tight budget, two cheap solutions add meaningful improvement: interior plastic film window insulation kits (3M Window Insulator Kit, roughly $30 for five windows) add roughly R-1 to R-2 and take 30 minutes to install. Heavy thermal curtains (look for curtains with multiple fabric layers and a reflective backing) can reduce window heat loss by 25–40% when drawn at night.
Floor Insulation for Cabins on Piers
Cabins elevated on concrete piers or wooden posts have a fully exposed floor assembly — cold air circulates freely underneath. This is sometimes colder than the walls. Install rigid foam or fiberglass batts between the floor joists, targeting R-19 for Zone 4 and R-30 for Zone 5 and above. Use a product specifically designed for this application — Owens Corning EcoTouch batts with a kraft facing work well, held in place with wire insulation supports or netting stapled to the joist bottoms. Cover the underside with a rigid material (rigid foam, OSB, or housewrap) to protect from moisture and pests.
Vapor Barrier Placement
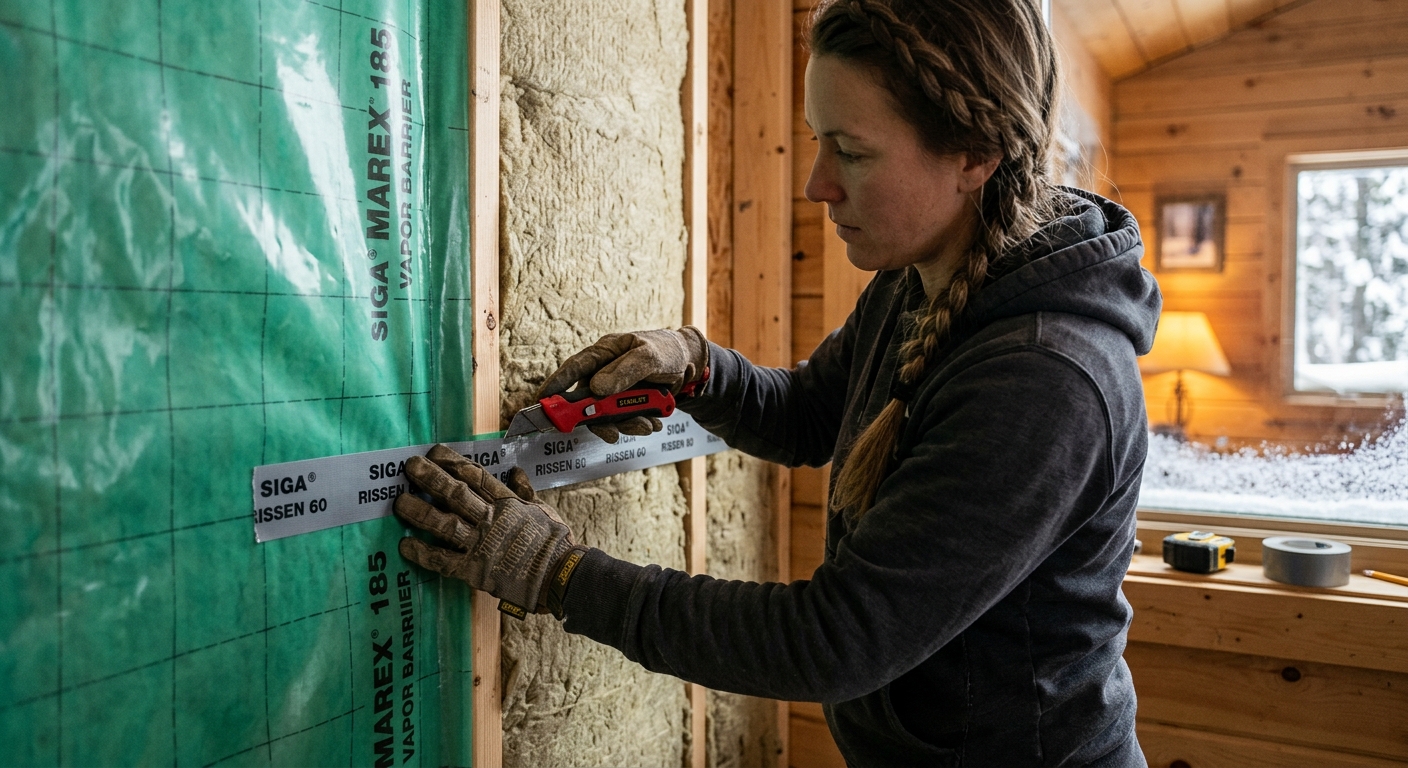
This is where many cabin builders make a critical mistake. In cold climates (Zones 5–7), the vapor barrier goes on the warm side of the insulation — meaning the interior side of your wall and ceiling assembly. This prevents warm, moist interior air from migrating into the cold insulation layer where it would condense and cause rot and mold. In hot-humid climates (Zones 1–3), the logic sometimes reverses — the vapor retarder may go on the exterior side to block moisture from coming in from outside during summer. When in doubt for a mixed climate, use a variable-permeance vapor retarder (such as CertainTeed MemBrain), which adjusts to seasonal conditions.
Step-by-Step Insulation Sequence for Your Cabin
For a New Build
- Frame and rough-in all mechanicals first. Every pipe, wire, and duct penetration through the building envelope must be placed before you insulate.
- Air seal all rough-in penetrations. Spray foam around every pipe and wire that passes through framing or the subfloor.
- Insulate and air seal the rim joists with 2 inches of closed-cell spray foam or cut-and-cobble rigid foam plus sealant.
- Install floor insulation between joists if on piers, targeting your climate zone R-value.
- Install wall insulation — batts, blown-in, or rigid foam per your plan. For 2×4 walls in cold zones, add a continuous layer of rigid foam on the exterior before sheathing or on the interior before drywall.
- Install ceiling/attic insulation last. Seal all ceiling penetrations with fire-rated caulk, then blow in or lay batts to achieve target R-value. The ceiling gets the highest R-value — don’t shortchange it.
- Install vapor barrier on the appropriate side for your climate before hanging drywall.
- Install windows and doors, sealing the perimeter of each rough opening with low-expansion foam and caulk.
For a Retrofit Cabin
- Audit before you spend. Walk the cabin on a cold, windy day with incense or a smoke pencil to find air leaks — you’ll see the smoke bend toward every infiltration point.
- Air seal first. Seal outlets, windows, door gaps, rim joists, and ceiling penetrations. This step alone often improves comfort by 20–30% at near-zero cost.
- Add insulation to the attic/ceiling plane — the easiest DIY improvement with the highest return. Blown cellulose is the most practical for existing attic floors.
- Address the floor if on piers — access from below and install batts or rigid foam between joists.
- Tackle walls last. For existing finished walls, blown-in cellulose or dense-pack fiberglass are the least disruptive options. For unfinished or gut-renovated walls, treat like new construction.
- Upgrade windows or add window film and thermal curtains as the final layer.
Common Mistakes to Avoid
- Compressing fiberglass batts: Compression kills R-value. A batt rated R-19 crammed into a 3.5-inch cavity becomes R-13 or worse. Use the right thickness for the cavity — or switch to spray foam in tight spaces.
- Skipping the ceiling: A poorly insulated ceiling can account for 25–35% of total heat loss in a single-story cabin. Don’t under-invest here because you can’t see it.
- Ignoring thermal bridging: Wood studs conduct heat around 5 times better than fiberglass insulation. In cold zones, a continuous layer of exterior rigid foam that covers the studs is worth doing — it can improve effective wall R-value by 30–40% compared to cavity insulation alone.
- Using the wrong vapor barrier placement: Installing poly sheeting on the wrong side of the wall for your climate is a rot time bomb. Know your zone before you staple anything.
- Using high-expansion foam around windows: It bows frames, binds operation, and voids warranties. Always use low-expansion window and door foam (look for that label on the can).
- Insulating before air sealing: Insulation covers up the gaps but doesn’t seal them. Always air seal first.
⚡ Heat Less, Save More
Good insulation cuts your heating fuel in half — but pairing it with the right off-grid power setup is what makes winter truly comfortable. This off-grid energy efficiency guide shows you how to design a complete system: insulation + heat source + backup power working together.
*Affiliate link — we may earn a commission at no cost to you.
The Bottom Line
Learning how to insulate a cabin for winter correctly is the single highest-return investment you can make in off-grid comfort. Start by finding your IECC climate zone and setting R-value targets for your walls, floor, and ceiling. Choose your insulation material based on your budget, wall thickness constraints, and whether you’re building new or retrofitting. Then — before you install a single batt — air seal every penetration, outlet, window frame, and rim joist you can find. That step is free or nearly free and it changes everything. Finish with a properly placed vapor barrier and address windows with film or thermal curtains if a full replacement is out of budget. Done in the right sequence, this approach cuts heating fuel consumption in half and keeps your cabin genuinely comfortable through the hardest winters.
If you want to take the next step beyond insulation, this off-grid energy efficiency guide walks you through integrating your insulation strategy with the right heat source and backup power system — because a well-insulated cabin deserves an equally well-designed energy setup.
Have questions about your specific situation? Drop them in the comments below — we read every one. If this guide helped you, share it with someone planning their off-grid setup.