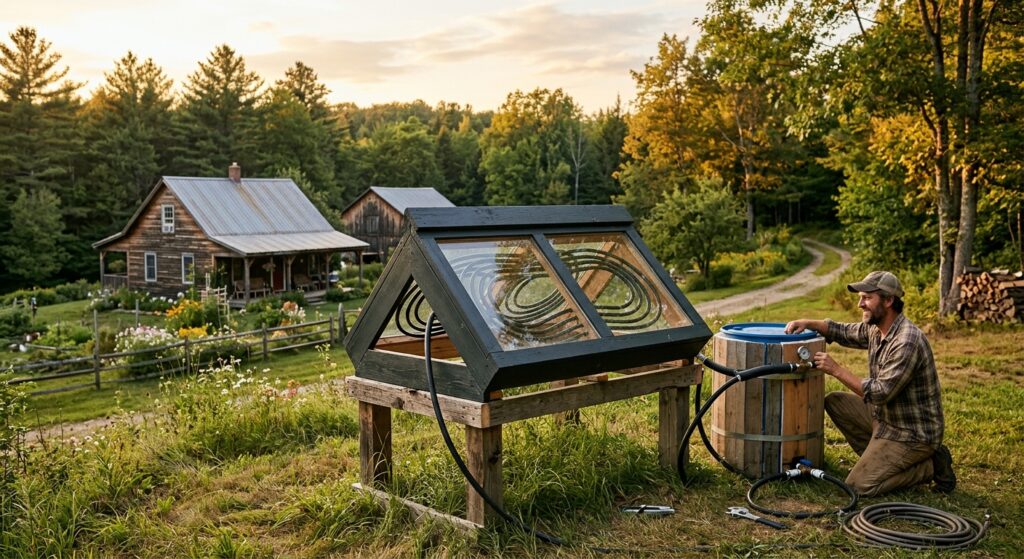
Diy Solar Water Heater Under 150 Dollars — Always prioritize safety when working with tools and remember that even non-pressurized systems can generate significant heat. Handle hot water with care.
Best Products/Options in 2026 with Real Prices
While this build emphasizes affordability and salvaged materials, certain components benefit from careful selection, even within a tight budget. Looking ahead to 2026, the market continues to evolve, but the core principles of a reliable DIY solar water heater under 150 dollars remain the same. Here are some specific product recommendations I’ve found reliable and cost-effective, along with their approximate prices you can expect:
- PEX Tubing – SharkBite PEX-B 1/2-inch, 50-foot Roll: This is my go-to. SharkBite is a reputable brand, and PEX-B is generally more flexible and crack-resistant than PEX-A for DIY bending applications. A 50-foot roll (Model # U850B50) typically costs between $38 and $45 at major retailers like Lowe’s or Home Depot. For our non-pressurized system, it’s perfect.
- Rigid Foam Insulation – Owens Corning FOAMULAR 150 1-inch XPS, 4×8 foot Sheet: XPS (extruded polystyrene) is excellent for its high R-value (R-5 per inch) and moisture resistance. The FOAMULAR 150 (Model # 300450) is widely available and typically priced around $30-$38 per 4×8 sheet. You’ll have plenty left over for other projects.
- Black Paint – Rust-Oleum 2X Ultra Cover Flat Black Spray Paint: (Model # 249122) This paint offers excellent adhesion and coverage, crucial for maximizing heat absorption. Two cans typically cost $8-$12. Ensure it’s a flat finish, as glossy surfaces reflect more light.
- Salvaged Window – Habitat for Humanity ReStore or Local Salvage Yards: This is where you save big. A used, double-pane window (typically 36×36 inches to 40×40 inches) can range from $0 (if you have one lying around or a friend is replacing theirs) to $25. I’ve personally picked up excellent candidates for as little as $5. Look for intact panes and a sturdy frame.
- Sealant – GE Silicone II Window & Door Sealant (Clear or White): (Model # GE500) This 10.1 oz tube costs around $7-$9. It’s waterproof, flexible, and holds up well to UV exposure, preventing leaks and maintaining the integrity of your collector box.
- PEX to Garden Hose Adapters – Orbit 1/2-inch PEX x 3/4-inch MHT Adapter: (Model # 37145) These brass adapters are robust and make connecting your PEX coil to standard garden hoses simple. You’ll need two, costing approximately $7-$9 each, so $14-$18 for the pair.
- Hose Clamps – Everbilt Stainless Steel Worm Gear Clamps (1/2-inch to 1 1/4-inch): A 10-pack (Model # 802102) is usually around $6-$8. These are perfectly adequate for the low-pressure connections in our thermosiphon system, keeping costs down compared to dedicated PEX crimp tools and rings.
- Lumber – Standard Construction Grade 2x4x8 ft Pine Stud: Expect to pay $4-$6 per stud. You’ll need two, so $8-$12.
- Plywood – 1/2-inch CDX Exterior Grade Plywood, 4×4 foot sheet: A half-sheet of 4×8 ft plywood (cut down) typically runs $20-$25. This provides a sturdy backing for your collector.
By leveraging these specific, affordable components and focusing on salvaged glazing, achieving a robust and efficient DIY solar water heater under 150 dollars is not just possible, but highly achievable even in 2026. The key is smart sourcing and knowing which materials offer the best bang for your buck without compromising performance.
Detailed Comparison Table: DIY Solar Water Heater Designs
When considering a DIY solar water heater, especially one on a tight budget, there are several common designs. Each has its pros and cons in terms of cost, complexity, and efficiency. Here’s a comparison of the most popular DIY approaches, focusing on systems that could potentially be built for a DIY solar water heater under 150 dollars, or slightly more with upgrades.
| Feature | Flat-Plate Thermosiphon (Our Build) | Batch (Breadbox) Heater | Evacuated Tube (DIY Hybrid) | Black Barrel/Tank Collector | Concentric Tube Collector |
|---|---|---|---|---|---|
| Complexity | Moderate. Requires basic carpentry, plumbing, and sealing. | Low. Simple box construction, minimal plumbing. | High. Requires precise assembly of delicate tubes, manifold, and frame. | Very Low. Simply paint and position. | Moderate-High. Precise tube cutting, sealing, and manifold. |
| Initial Cost (DIY) | $80-$150. Focus on salvaged window, PEX, plywood. | $50-$120. Focus on salvaged tank/barrel, insulation, wood. | $200-$400+. Tubes are expensive, even salvaged. Hard to get under $150. | $20-$60. Used barrel/tank, black paint. | $150-$300+. Uses PVC/polycarbonate, but still material-intensive. |
| Efficiency (Heat Output) | Good. Insulated, glazed, black absorber. Can reach 120-150°F on sunny days. | Moderate. Large thermal mass, but can lose heat overnight. 100-130°F. | Excellent. Vacuum insulation minimizes heat loss. Can reach 160-200°F+. | Low-Moderate. High surface area, but significant heat loss. 90-110°F. | Moderate. Trapped air provides some insulation. 110-140°F. |
| Materials Focus | PEX, plywood, 2x4s, insulation, salvaged window. | Old water tank/barrel, insulation, wood, glazing (optional). | Salvaged evacuated tubes (rare), copper piping, manifold, frame. | Plastic or metal barrel/tank, black paint. | PVC/polycarbonate pipes, end caps, sealant, frame. |
| Maintenance | Low. Check for leaks, clean glazing. | Very Low. Occasional cleaning. | Moderate. Fragile tubes can break, seals can degrade. | Very Low. Occasional cleaning. | Low-Moderate. Algae growth possible in clear tubes, leaks. |
| Best Use Case | Supplemental hot water, outdoor shower, pre-heater, off-grid cabins. | Outdoor shower, small volume hot water, pre-heater. | High-temperature needs, year-round use (if professional tubes are used). | Basic outdoor rinse, garden water, very low-cost solution. | Outdoor shower, garden, pre-heater for larger volumes. |
As you can see, our chosen Flat-Plate Thermosiphon design strikes an excellent balance for a DIY solar water heater under 150 dollars, offering good efficiency and manageable complexity for a very reasonable cost. While evacuated tubes offer superior performance, their cost typically pushes them far beyond our budget, even with significant DIY effort and salvaged components.
Pro Tips from Experience
Having tinkered with solar water heaters for over a decade, I’ve learned a few things the hard way so you don’t have to. These pro tips will help you maximize efficiency, longevity, and safety for your DIY solar water heater under 150 dollars.
- Optimal Siting and Angle: This is paramount. Your collector needs maximum, unobstructed sun exposure from 9 AM to 3 PM. Avoid any shade from trees, buildings, or even utility poles. For year-round average performance, angle your collector at your latitude (e.g., 40 degrees for 40°N). If your primary need for hot water is in winter, add 10-15 degrees to your latitude. For summer-only use (like an outdoor shower), subtract 10-15 degrees. I often mount mine on a south-facing roof or a sturdy ground-mounted frame.
- Insulation is Non-Negotiable: Don’t skimp on insulation. I’ve seen countless DIY projects fail to perform because they neglected proper insulation. The 1-inch XPS foam board (Owens Corning FOAMULAR 150) is a minimum. If you can fit 2 inches, do it. Heat lost through the back and sides is heat you paid to collect.
- Mind the Gap (and Seal It!): Air leaks are heat leaks. Ensure your glazing is thoroughly sealed with high-quality silicone (GE Silicone II is excellent). Any gaps will allow cold air in and hot air out, drastically reducing efficiency. I even tape over the silicone after it cures with a good outdoor tape like Nashua 322 Professional Grade HVAC Foil Tape (around $15 for a 2-inch x 50-yard roll) for extra UV protection and sealing.
- Gravity is Your Friend (Thermosiphon): For a truly passive system, the thermosiphon effect is key. Your cold water supply (e.g., a small holding tank or bucket) must be *above* the bottom inlet of your collector, and your hot water outlet must be *above* the top outlet of your collector. The greater the vertical difference, the stronger the flow. Even a 12-inch difference can make a noticeable impact.
- Consider a Pre-Heater Role: While this system can provide hot water directly for non-potable uses, it excels as a pre-heater. Run the solar-heated water into the cold inlet of your existing electric or propane water heater. This significantly reduces the load on your conventional heater, saving you even more money and extending its lifespan. I used this setup for years before upgrading my main system, and it drastically cut my propane usage.
- UV Resistance Matters: The sun’s UV rays are brutal. Ensure any exposed plastics (like the PEX tubing if it’s not fully covered by glazing) or sealants are UV-resistant. PEX is generally UV-resistant for short exposures, but prolonged direct sun exposure without glazing can degrade it over time. The black paint helps protect it.
- Drainage for Freezing Climates: If you live where temperatures drop below freezing, you absolutely *must* have a way to drain your collector entirely. Water expanding as it freezes will burst PEX tubing, fittings, and even crack your glazing. Install a simple ball valve at the lowest point of your system to drain it completely before the first hard freeze. I learned this the hard way with a burst PEX line one brutal winter.
- Regular Cleaning: Dust, pollen, and grime accumulate on the glazing, reducing solar gain. A quick wipe-down with water and a squeegee every few weeks or months will maintain peak performance.
The most effective solar projects aren’t always the most complex; they’re the ones that are well-designed, properly insulated, and meticulously sealed. Attention to detail is your best friend when building a DIY solar water heater under 150 dollars.
Common Mistakes to Avoid
Even with the best intentions, DIY projects can hit snags. From my years of hands-on experience, I’ve seen (and made!) these common mistakes multiple times when building a DIY solar water heater under 150 dollars. Learning to avoid them will save you time, money, and frustration.
- Inadequate Insulation: This is probably the number one efficiency killer. Many DIYers focus only on the front collector and forget that heat escapes from the back and sides just as easily. Without proper rigid foam insulation (like 1-inch or 2-inch XPS board, R-5 to R-10), your collector will radiate much of its collected heat back into the environment, especially on cooler days or overnight. Always ensure the entire box, including the sides, is well-insulated.
- Poor Sealing and Air Leaks: Just like insulation, a good seal around your glazing is critical. Gaps, cracks, or poorly applied silicone allow cold air to enter the collector box and hot air to escape. This creates convection currents that carry heat away from your absorber. Always use a high-quality, outdoor-grade silicone sealant (e.g., GE Silicone II) and apply it meticulously around the entire perimeter of your window, both inside and out if possible.
- Incorrect Tilt Angle and Shading: Mounting your collector flat or in a shaded spot is a waste of effort. The sun’s rays need to hit the absorber as directly as possible for the longest duration. Always calculate your optimal tilt angle based on your latitude
For over a decade, I’ve lived and breathed off-grid life, converting sunlight into power, growing my own food, and making every resource count. One of the most satisfying projects I ever tackled, and one that consistently delivers, is the humble DIY solar water heater. Today, I’m going to show you exactly how to build a highly effective DIY solar water heater under 150 dollars, transforming cold water into a warm luxury without touching your electric bill. This isn’t just about saving money; it’s about reclaiming a piece of your energy independence, understanding the fundamentals of renewable energy, and gaining the immense satisfaction of a job well done with your own two hands. Forget complex systems with pumps and controllers – we’re talking about a simple, robust, and incredibly effective design that anyone with basic tools and a weekend can construct. I’ve refined this design through countless iterations on my own homestead, learning what works best in various climates and for different applications. You’ll get hot water for dishes, laundry pre-heating, outdoor showers, or even supplemental warmth for a small greenhouse, all for an initial investment that’s less than a decent dinner out. Let’s dive into the specifics and get you started on your own journey to hot water autonomy.
Why This Matters / Background
When I first moved off-grid in rural Montana back in 2012, the dream was freedom, self-sufficiency, and minimal utility bills. What I quickly realized, however, was that « minimal » often meant « non-existent » for some creature comforts, like reliably hot water. For the first year, showering meant a cold rinse or heating pots of water on a propane stove – a tedious, resource-intensive process. I quickly understood that while solar electricity was crucial for lights and power tools, solar thermal was the unsung hero for daily comfort. My initial attempts at solar water heating were rudimentary, involving black barrels in the sun, which worked okay but were inefficient and clunky. I needed something better, something that harnessed more energy and integrated more seamlessly into my daily routine, all while adhering to a shoestring budget.
This isn’t just about personal comfort; it’s about practical economics and environmental stewardship. A conventional electric water heater is often one of the biggest energy hogs in a typical household, consuming anywhere from 3,000 to 5,000 kWh annually. Even with a grid-tied system, that’s a significant chunk of your power bill. For us off-gridders, that translates directly to needing more solar panels, more batteries, and a larger inverter – a substantial capital investment. By using the sun’s direct heat to warm water, you’re bypassing the entire electrical conversion process, which inherently involves energy losses. You’re tapping into a free, abundant, and completely clean energy source for a fundamental need.
My journey led me through various DIY designs: from simple batch heaters (often called « breadbox » heaters) to more complex flat-plate collectors. The goal was always the same: maximum heat transfer for minimal cost and effort. I learned that simplicity often trumps complexity, especially when you’re trying to keep a DIY solar water heater under 150 dollars. This particular design, a variation of a thermosiphon flat-plate collector, is the culmination of those years of trial and error. It requires no pumps, no electricity, and minimal moving parts, meaning less to break down and virtually no ongoing operating costs. It’s a true set-it-and-forget-it system, delivering hot water day after day, year after year, with only basic maintenance. It’s also a fantastic entry point for anyone interested in renewable energy, proving that you don’t need deep pockets to make a significant impact on your energy footprint. If you’re serious about taking control of your energy future, beyond just hot water, I highly recommend exploring comprehensive solutions like the Power Grid Generator complete system guide. It offers a broader perspective on achieving true energy independence, complementing projects like this DIY water heater perfectly.
DIY Flat-Plate Thermosiphon Solar Water Heater: Step-by-Step Build Guide
This build focuses on a simple, non-pressurized thermosiphon flat-plate collector designed for heating water for uses like outdoor showers, dishwashing, or pre-heating water for a conventional system. The beauty of a thermosiphon system is its reliance on natural convection: hot water rises, cold water sinks. This creates a circulation loop without any pumps or electricity. We’ll be using readily available, affordable materials to ensure we stay well within our budget of building a DIY solar water heater under 150 dollars.
Materials List & Estimated Costs (Under $150 Target)
- PEX Tubing: 50 feet of 1/2-inch PEX-B tubing (e.g., SharkBite PEX-B, available at Lowe’s or Home Depot). Expect to pay around $30-$40.
- Plywood: One 4×4 foot sheet of 1/2-inch exterior grade plywood (e.g., CDX). Approximately $20-$30.
- Lumber for Frame: Two 8-foot 2x4s (common pine studs). Approximately $8-$12.
- Insulation: One 4×8 foot sheet of 1-inch thick XPS rigid foam insulation (e.g., Owens Corning FOAMULAR 150). You’ll cut this to fit. Approximately $25-$35.
- Glass/Glazing: One salvaged double-pane window, approximately 36×36 inches to 40×40 inches. Check Habitat for Humanity ReStore, local salvage yards, or even Craigslist. Aim for $0-$20.
- Black Paint: Two cans of Rust-Oleum 2X Ultra Cover Flat Black Spray Paint. Approximately $8-$12.
- Hardware:
- 50-100 wood screws (1 1/2-inch and 2 1/2-inch). ~$5.
- Silicone sealant (outdoor/weatherproof grade, e.g., GE Silicone II). ~$7.
- PEX crimp rings (1/2-inch, 10-12 count) and a crimp tool (if you don’t have one, borrow or rent, or use PEX pinch clamps and tool for slightly more cost). Alternatively, use hose clamps for a non-pressurized system. For this budget, let’s assume hose clamps for connecting to garden hose fittings for a non-pressurized system. ~$5 for 10 clamps.
- Two 1/2-inch PEX to 3/4-inch Male Garden Hose Adapters (e.g., Orbit brand). ~$10-$15.
- Water Storage/Supply: A used 5-gallon or 7-gallon water jug, or a simple 5-gallon bucket for a non-pressurized system. ~$0-$10.
Tools Required
- Circular saw or hand saw
- Drill with various bits
- Measuring tape
- Pencil
- Utility knife
- Caulking gun
- PEX cutter (or sharp utility knife for PEX)
- Screwdriver bits for drill
Step-by-Step Construction Guide
- Build the Collector Box Frame (Day 1 Morning):
- Cut your 2x4s: You’ll need two pieces for the long sides of your box frame and two for the short sides. The exact dimensions will depend on your salvaged window. Let’s assume a 36×36 inch window for this example.
- Cut two 2x4s to 39 inches (for the outer length, accounting for 1.5-inch thickness of side pieces).
- Cut two 2x4s to 36 inches (for the inner width).
- Assemble these into a rectangular frame using 2 1/2-inch wood screws. Pre-drill pilot holes to prevent splitting. Ensure it’s square. The inner dimensions should be approximately 36×36 inches, perfectly accommodating your window with a slight overlap for sealing.
- From your plywood, cut a bottom piece that perfectly fits the outer dimensions of your 2×4 frame (e.g., 39×39 inches). Attach this to the bottom of the 2×4 frame using 1 1/2-inch wood screws, ensuring the frame is flush with the plywood edges. This forms the base of your collector box.
- Insulate the Box (Day 1 Afternoon):
- Cut the 1-inch XPS rigid foam insulation to fit snugly inside the collector box frame, on top of the plywood base. You’ll likely need to cut a 36×36 inch square.
- Place this insulation into the box. This is crucial for preventing heat loss from the back and sides of your collector.
- Cut strips of insulation to line the inner sides of the 2×4 frame, making the box fully insulated. These strips will be 1 inch thick and 3.5 inches wide, and their length will match the inner perimeter of your box.
- Prepare and Install the PEX Absorber Coil (Day 1 Late Afternoon):
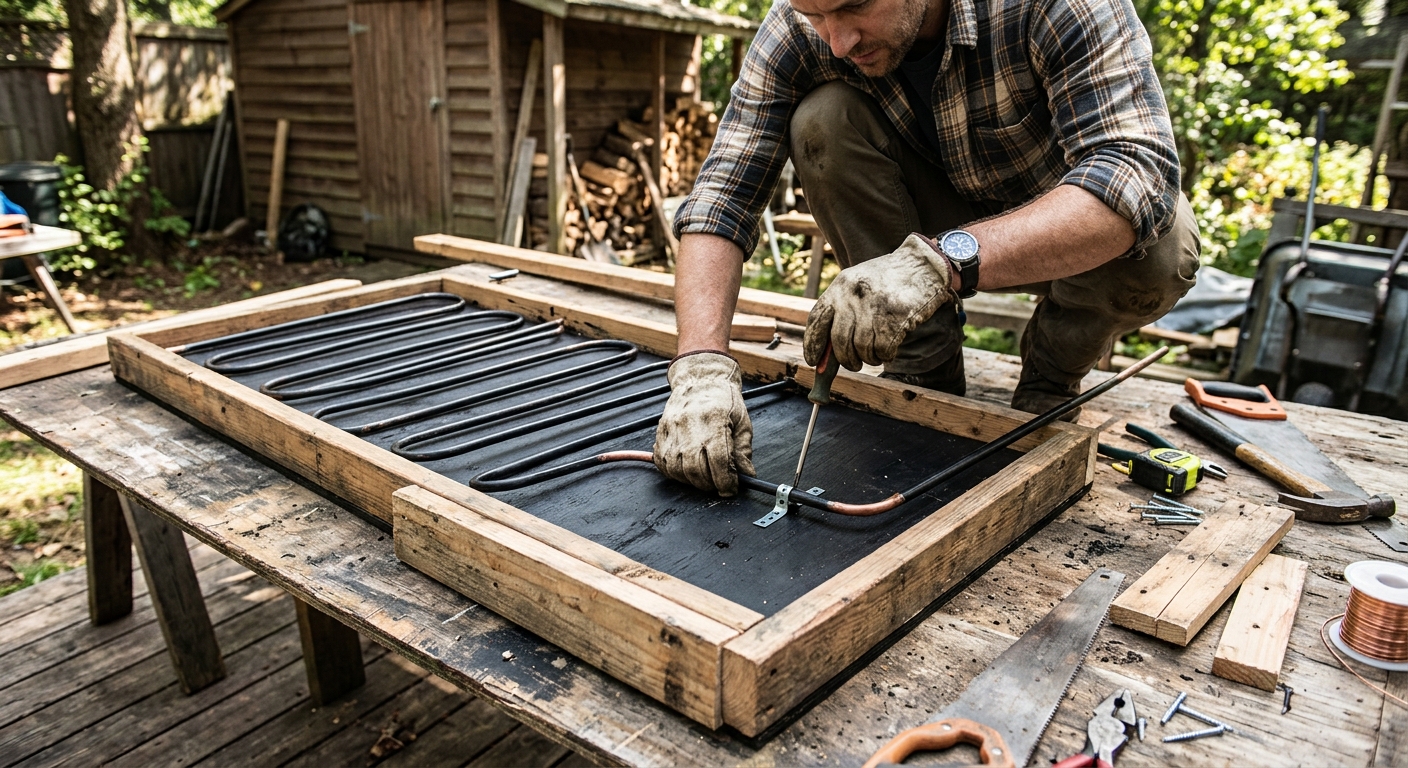
- On top of the insulation, lay out your 1/2-inch PEX tubing in a serpentine or grid pattern. The goal is to maximize the length of tubing exposed to the sun within the collector box. A good pattern is a series of U-bends, starting from one corner and snaking across to the opposite corner. Leave about 4-6 inches between parallel runs of PEX.
- Drill two 3/4-inch holes through the side of the 2×4 frame and the plywood base near the top and bottom corners where your PEX coil will start and end. These will be for the PEX to exit the box.
- Carefully bend the PEX tubing to form the coil. PEX is flexible, but avoid sharp kinks. You can use PEX bend supports or simply guide it carefully. Use small lengths of scrap wood or PEX clips (if you have them) to secure the PEX to the insulation or bottom plywood to maintain the pattern.
- Feed the ends of the PEX tubing through the drilled holes, leaving enough length outside the box for connections.
- Thoroughly spray paint the entire PEX coil inside the box with Rust-Oleum 2X Ultra Cover Flat Black spray paint. Apply multiple thin coats for even coverage. Black absorbs maximum solar radiation. Let it dry completely (several hours, or overnight).
- Seal and Glaze the Collector (Day 2 Morning):
- Once the paint is dry, apply a generous bead of outdoor-grade silicone sealant along the top edges of the 2×4 frame, where the window will sit.
- Carefully place your salvaged double-pane window onto the silicone sealant, ensuring it’s centered and fully covers the opening. Press down gently to create a good seal.
- Apply another bead of silicone sealant around the perimeter of the window where it meets the 2×4 frame, both on the outside and inside (if accessible). This prevents water intrusion and air leaks, crucial for efficiency. Allow the sealant to cure according to manufacturer instructions (typically 24 hours).
- Connect Water Supply (Day 2 Afternoon):
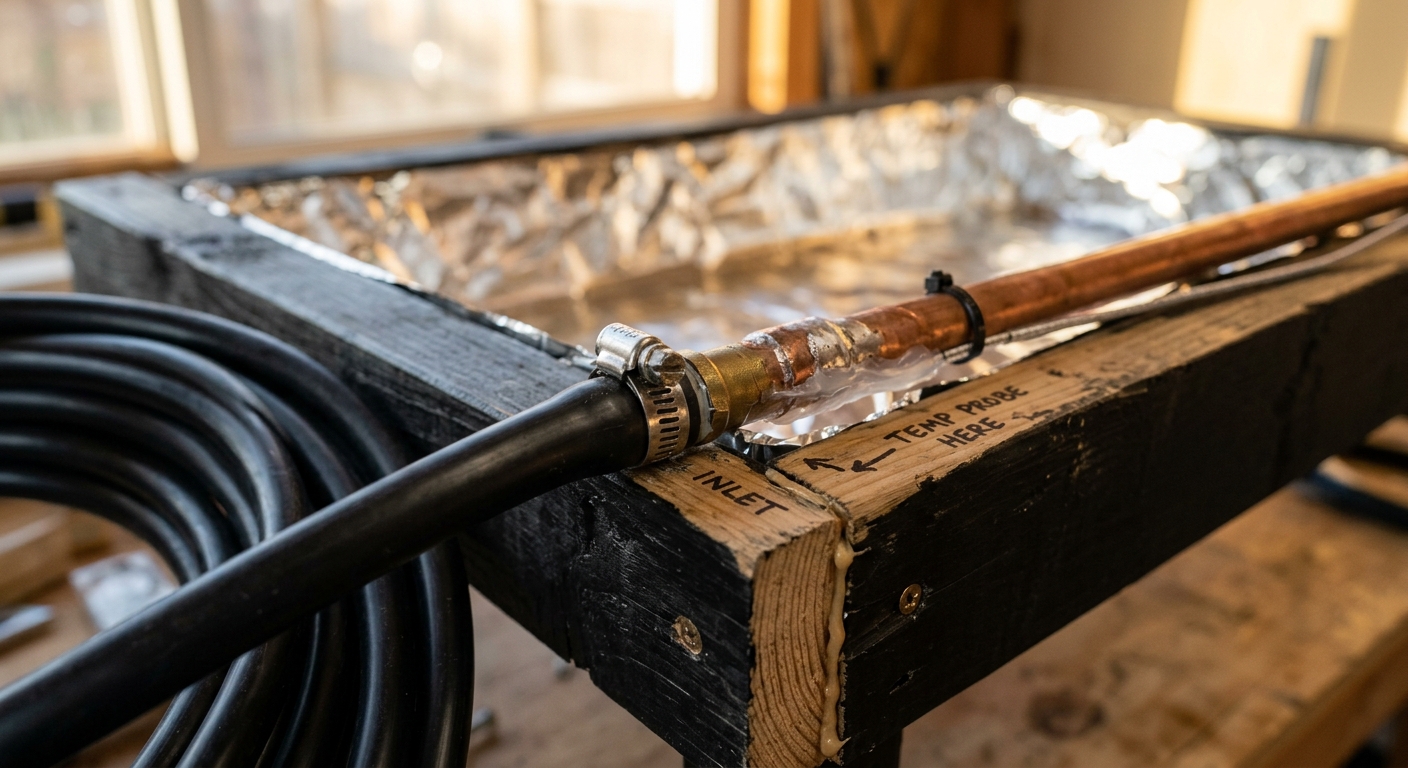
- Attach the 1/2-inch PEX to 3/4-inch Male Garden Hose Adapters to the ends of the PEX tubing protruding from your collector box. For a non-pressurized system, you can secure these with sturdy hose clamps. Ensure they are very tight to prevent leaks.
- For a simple batch heater setup, you can connect the lower adapter to a cold water supply (e.g., a garden hose from a rain barrel or a gravity-fed tank) and the upper adapter to an outlet where you’ll draw hot water (e.g., a short hose leading to a bucket or outdoor shower head).
- Positioning: The collector must be positioned lower than your cold water supply tank and higher than your hot water draw point for the thermosiphon effect to work. Aim for a tilt angle roughly equal to your latitude, plus 10-15 degrees for optimal winter performance, or just your latitude for year-round average. For example, if you’re at 40 degrees N latitude, aim for a 40-55 degree tilt.
- Testing and First Use (Day 2 Evening / Day 3):
- Fill your cold water supply tank. Slowly open the valve to allow water to fill the PEX coil. Check for any leaks at the connections.
- Once the system is full and air is purged (you might hear gurgling), let it sit in full sunlight for a few hours.
- After a good period of sun exposure (3-6 hours), test the water coming out of the top outlet. You should have noticeably warm, if not hot, water.
Always prioritize safety when working with tools and remember that even non-pressurized systems can generate significant heat. Handle hot water with care.
Best Products/Options in 2026 with Real Prices
While this build emphasizes affordability and salvaged materials, certain components benefit from careful selection, even within a tight budget. Looking ahead to 2026, the market continues to evolve, but the core principles of a reliable DIY solar water heater under 150 dollars remain the same. Here are some specific product recommendations I’ve found reliable and cost-effective, along with their approximate prices you can expect:
- PEX Tubing – SharkBite PEX-B 1/2-inch, 50-foot Roll: This is my go-to. SharkBite is a reputable brand, and PEX-B is generally more flexible and crack-resistant than PEX-A for DIY bending applications. A 50-foot roll (Model # U850B50) typically costs between $38 and $45 at major retailers like Lowe’s or Home Depot. For our non-pressurized system, it’s perfect.
- Rigid Foam Insulation – Owens Corning FOAMULAR 150 1-inch XPS, 4×8 foot Sheet: XPS (extruded polystyrene) is excellent for its high R-value (R-5 per inch) and moisture resistance. The FOAMULAR 150 (Model # 300450) is widely available and typically priced around $30-$38 per 4×8 sheet. You’ll have plenty left over for other projects.
- Black Paint – Rust-Oleum 2X Ultra Cover Flat Black Spray Paint: (Model # 249122) This paint offers excellent adhesion and coverage, crucial for maximizing heat absorption. Two cans typically cost $8-$12. Ensure it’s a flat finish, as glossy surfaces reflect more light.
- Salvaged Window – Habitat for Humanity ReStore or Local Salvage Yards: This is where you save big. A used, double-pane window (typically 36×36 inches to 40×40 inches) can range from $0 (if you have one lying around or a friend is replacing theirs) to $25. I’ve personally picked up excellent candidates for as little as $5. Look for intact panes and a sturdy frame.
- Sealant – GE Silicone II Window & Door Sealant (Clear or White): (Model # GE500) This 10.1 oz tube costs around $7-$9. It’s waterproof, flexible, and holds up well to UV exposure, preventing leaks and maintaining the integrity of your collector box.
- PEX to Garden Hose Adapters – Orbit 1/2-inch PEX x 3/4-inch MHT Adapter: (Model # 37145) These brass adapters are robust and make connecting your PEX coil to standard garden hoses simple. You’ll need two, costing approximately $7-$9 each, so $14-$18 for the pair.
- Hose Clamps – Everbilt Stainless Steel Worm Gear Clamps (1/2-inch to 1 1/4-inch): A 10-pack (Model # 802102) is usually around $6-$8. These are perfectly adequate for the low-pressure connections in our thermosiphon system, keeping costs down compared to dedicated PEX crimp tools and rings.
- Lumber – Standard Construction Grade 2x4x8 ft Pine Stud: Expect to pay $4-$6 per stud. You’ll need two, so $8-$12.
- Plywood – 1/2-inch CDX Exterior Grade Plywood, 4×4 foot sheet: A half-sheet of 4×8 ft plywood (cut down) typically runs $20-$25. This provides a sturdy backing for your collector.
By leveraging these specific, affordable components and focusing on salvaged glazing, achieving a robust and efficient DIY solar water heater under 150 dollars is not just possible, but highly achievable even in 2026. The key is smart sourcing and knowing which materials offer the best bang for your buck without compromising performance.
Detailed Comparison Table: DIY Solar Water Heater Designs
When considering a DIY solar water heater, especially one on a tight budget, there are several common designs. Each has its pros and cons in terms of cost, complexity, and efficiency. Here’s a comparison of the most popular DIY approaches, focusing on systems that could potentially be built for a DIY solar water heater under 150 dollars, or slightly more with upgrades.
Feature Flat-Plate Thermosiphon (Our Build) Batch (Breadbox) Heater Evacuated Tube (DIY Hybrid) Black Barrel/Tank Collector Concentric Tube Collector Complexity Moderate. Requires basic carpentry, plumbing, and sealing. Low. Simple box construction, minimal plumbing. High. Requires precise assembly of delicate tubes, manifold, and frame. Very Low. Simply paint and position. Moderate-High. Precise tube cutting, sealing, and manifold. Initial Cost (DIY) $80-$150. Focus on salvaged window, PEX, plywood. $50-$120. Focus on salvaged tank/barrel, insulation, wood. $200-$400+. Tubes are expensive, even salvaged. Hard to get under $150. $20-$60. Used barrel/tank, black paint. $150-$300+. Uses PVC/polycarbonate, but still material-intensive. Efficiency (Heat Output) Good. Insulated, glazed, black absorber. Can reach 120-150°F on sunny days. Moderate. Large thermal mass, but can lose heat overnight. 100-130°F. Excellent. Vacuum insulation minimizes heat loss. Can reach 160-200°F+. Low-Moderate. High surface area, but significant heat loss. 90-110°F. Moderate. Trapped air provides some insulation. 110-140°F. Materials Focus PEX, plywood, 2x4s, insulation, salvaged window. Old water tank/barrel, insulation, wood, glazing (optional). Salvaged evacuated tubes (rare), copper piping, manifold, frame. Plastic or metal barrel/tank, black paint. PVC/polycarbonate pipes, end caps, sealant, frame. Maintenance Low. Check for leaks, clean glazing. Very Low. Occasional cleaning. Moderate. Fragile tubes can break, seals can degrade. Very Low. Occasional cleaning. Low-Moderate. Algae growth possible in clear tubes, leaks. Best Use Case Supplemental hot water, outdoor shower, pre-heater, off-grid cabins. Outdoor shower, small volume hot water, pre-heater. High-temperature needs, year-round use (if professional tubes are used). Basic outdoor rinse, garden water, very low-cost solution. Outdoor shower, garden, pre-heater for larger volumes. As you can see, our chosen Flat-Plate Thermosiphon design strikes an excellent balance for a DIY solar water heater under 150 dollars, offering good efficiency and manageable complexity for a very reasonable cost. While evacuated tubes offer superior performance, their cost typically pushes them far beyond our budget, even with significant DIY effort and salvaged components.
Pro Tips from Experience
Having tinkered with solar water heaters for over a decade, I’ve learned a few things the hard way so you don’t have to. These pro tips will help you maximize efficiency, longevity, and safety for your DIY solar water heater under 150 dollars.
- Optimal Siting and Angle: This is paramount. Your collector needs maximum, unobstructed sun exposure from 9 AM to 3 PM. Avoid any shade from trees, buildings, or even utility poles. For year-round average performance, angle your collector at your latitude (e.g., 40 degrees for 40°N). If your primary need for hot water is in winter, add 10-15 degrees to your latitude. For summer-only use (like an outdoor shower), subtract 10-15 degrees. I often mount mine on a south-facing roof or a sturdy ground-mounted frame.
- Insulation is Non-Negotiable: Don’t skimp on insulation. I’ve seen countless DIY projects fail to perform because they neglected proper insulation. The 1-inch XPS foam board (Owens Corning FOAMULAR 150) is a minimum. If you can fit 2 inches, do it. Heat lost through the back and sides is heat you paid to collect.
- Mind the Gap (and Seal It!): Air leaks are heat leaks. Ensure your glazing is thoroughly sealed with high-quality silicone (GE Silicone II is excellent). Any gaps will allow cold air in and hot air out, drastically reducing efficiency. I even tape over the silicone after it cures with a good outdoor tape like Nashua 322 Professional Grade HVAC Foil Tape (around $15 for a 2-inch x 50-yard roll) for extra UV protection and sealing.
- Gravity is Your Friend (Thermosiphon): For a truly passive system, the thermosiphon effect is key. Your cold water supply (e.g., a small holding tank or bucket) must be *above* the bottom inlet of your collector, and your hot water outlet must be *above* the top outlet of your collector. The greater the vertical difference, the stronger the flow. Even a 12-inch difference can make a noticeable impact.
- Consider a Pre-Heater Role: While this system can provide hot water directly for non-potable uses, it excels as a pre-heater. Run the solar-heated water into the cold inlet of your existing electric or propane water heater. This significantly reduces the load on your conventional heater, saving you even more money and extending its lifespan. I used this setup for years before upgrading my main system, and it drastically cut my propane usage.
- UV Resistance Matters: The sun’s UV rays are brutal. Ensure any exposed plastics (like the PEX tubing if it’s not fully covered by glazing) or sealants are UV-resistant. PEX is generally UV-resistant for short exposures, but prolonged direct sun exposure without glazing can degrade it over time. The black paint helps protect it.
- Drainage for Freezing Climates: If you live where temperatures drop below freezing, you absolutely *must* have a way to drain your collector entirely. Water expanding as it freezes will burst PEX tubing, fittings, and even crack your glazing. Install a simple ball valve at the lowest point of your system to drain it completely before the first hard freeze. I learned this the hard way with a burst PEX line one brutal winter.
- Regular Cleaning: Dust, pollen, and grime accumulate on the glazing, reducing solar gain. A quick wipe-down with water and a squeegee every few weeks or months will maintain peak performance.
The most effective solar projects aren’t always the most complex; they’re the ones that are well-designed, properly insulated, and meticulously sealed. Attention to detail is your best friend when building a DIY solar water heater under 150 dollars.
Common Mistakes to Avoid
Even with the best intentions, DIY projects can hit snags. From my years of hands-on experience, I’ve seen (and made!) these common mistakes multiple times when building a DIY solar water heater under 150 dollars. Learning to avoid them will save you time, money, and frustration.
- Inadequate Insulation: This is probably the number one efficiency killer. Many DIYers focus only on the front collector and forget that heat escapes from the back and sides just as easily. Without proper rigid foam insulation (like 1-inch or 2-inch XPS board, R-5 to R-10), your collector will radiate much of its collected heat back into the environment, especially on cooler days or overnight. Always ensure the entire box, including the sides, is well-insulated.
- Poor Sealing and Air Leaks: Just like insulation, a good seal around your glazing is critical. Gaps, cracks, or poorly applied silicone allow cold air to enter the collector box and hot air to escape. This creates convection currents that carry heat away from your absorber. Always use a high-quality, outdoor-grade silicone sealant (e.g., GE Silicone II) and apply it meticulously around the entire perimeter of your window, both inside and out if possible.
- Incorrect Tilt Angle and Shading: Mounting your collector flat or in a shaded spot is a waste of effort. The sun’s rays need to hit the absorber as directly as possible for the longest duration. Always calculate your optimal tilt angle based on your latitude