DIY Solar Water Heater: Build One for Under $150
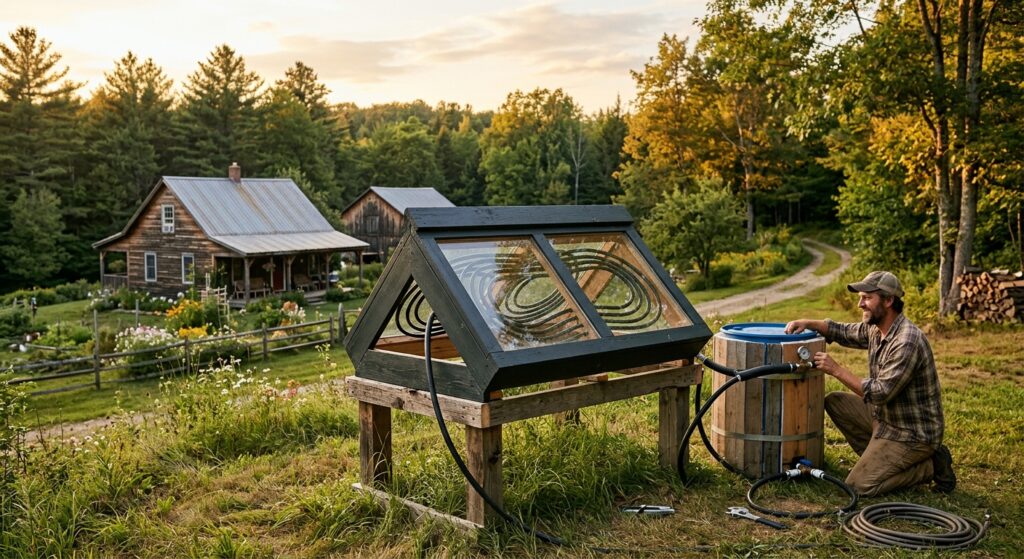
A simple DIY solar water heater is one of the most cost-effective projects for an off-grid home. This guide shows you how to build a passive flat-plate collector from PEX tubing, plywood, rigid foam and a salvaged window for around $150, with no pumps, controllers or electricity. It provides warm water for dishes, outdoor showers, laundry pre-heating or pre-heating the supply to a conventional water heater, and it can be built over a weekend with basic tools.
Why Solar Water Heating Makes Sense Off-Grid
Without a reliable hot water source, off-grid showers often mean a cold rinse or heating pots of water on a propane stove, which is tedious and uses fuel. Solar electricity handles lights and tools, but solar thermal is the more direct way to heat water.
A conventional electric water heater is often one of the largest loads in a household, using roughly 3,000–5,000 kWh a year. Off-grid, that translates into more solar panels, more batteries and a larger inverter. Heating water directly with the sun’s heat skips the electrical conversion step, and its losses, entirely.
DIY designs range from simple black barrels and batch (“breadbox”) heaters to flat-plate collectors. Simpler designs tend to be more reliable, and the flat-plate thermosiphon collector described here balances efficiency and cost well. With no pumps or electricity and almost no moving parts, it has very little to break and virtually no operating cost.
How a Thermosiphon Collector Works
This build is a non-pressurized flat-plate collector. Thermosiphon systems rely on natural convection: hot water rises and cold water sinks, which creates circulation without a pump. Black-painted tubing inside an insulated, glazed box absorbs sunlight, and the glazing and insulation keep the heat in.
Materials List and Estimated Costs
- PEX tubing: 50 ft of 1/2-inch PEX-B (for example SharkBite PEX-B, available at Lowe’s or Home Depot). About $30–$45.
- Plywood: One 4×4 ft sheet of 1/2-inch exterior-grade plywood (CDX). About $20–$30.
- Lumber: Two 8 ft 2×4 pine studs. About $8–$12.
- Insulation: One 4×8 ft sheet of 1-inch XPS rigid foam (for example Owens Corning FOAMULAR 150), cut to fit. About $25–$38.
- Glazing: A salvaged double-pane window, roughly 36×36 to 40×40 inches, from a Habitat for Humanity ReStore, salvage yard or Craigslist. $0–$25.
- Black paint: Two cans of Rust-Oleum 2X Ultra Cover Flat Black spray paint. About $8–$12.
- Hardware:
- 50–100 wood screws (1 1/2-inch and 2 1/2-inch): about $5
- Outdoor-grade silicone sealant (for example GE Silicone II): about $7–$9
- Hose clamps (10-pack): about $5–$8. In a non-pressurized system these replace PEX crimp rings and a crimp tool.
- Two 1/2-inch PEX to 3/4-inch male garden hose adapters (for example Orbit): about $10–$18
- Water supply/storage: A used 5- or 7-gallon water jug or a 5-gallon bucket. $0–$10.
Budget reality check: Adding up the ranges above gives roughly $120–$210. Staying under $150 depends on getting the window free or very cheap and using leftover screws, sealant or lumber you already have.
Tools Required
- Circular saw or hand saw
- Drill with assorted bits and screwdriver bits
- Measuring tape and pencil
- Utility knife
- Caulking gun
- PEX cutter (or a sharp utility knife)
Step-by-Step Build Guide
The dimensions below assume a 36×36-inch window. Adjust them to fit the window you find.
- Build the collector box frame (Day 1, morning):
- Cut two 2x4s to 39 inches (the outer length, accounting for the 1.5-inch thickness of the side pieces) and two to 36 inches (the inner width).
- Assemble them into a square frame with 2 1/2-inch screws, pre-drilling pilot holes to prevent splitting. The inner dimensions should be about 36×36 inches.
- Cut a plywood base to the frame’s outer dimensions (about 39×39 inches) and attach it with 1 1/2-inch screws so the edges are flush.
- Insulate the box (Day 1, afternoon):
- Cut the 1-inch XPS foam to fit snugly on the plywood base inside the frame (about 36×36 inches).
- Cut strips 1 inch thick and 3.5 inches wide to line the inner sides of the frame so the box is fully insulated. This prevents heat loss through the back and sides.
- Install the PEX absorber coil (Day 1, late afternoon):
- Lay the PEX on the insulation in a serpentine pattern of U-bends, starting at one corner and snaking to the opposite corner, with 4–6 inches between parallel runs.
- Drill two 3/4-inch holes through the frame near the bottom and top corners where the coil starts and ends.
- Bend the PEX carefully, avoiding kinks (bend supports help), and secure it with PEX clips or small scraps of wood.
- Feed the ends out through the holes, leaving enough length for connections.
- Spray the coil with several thin coats of flat black paint and let it dry completely (several hours or overnight).
- Seal and glaze the collector (Day 2, morning):
- Run a generous bead of silicone along the top edges of the frame.
- Center the window on the sealant so it fully covers the opening and press down gently.
- Seal the perimeter where the window meets the frame, outside and inside where accessible, to stop water intrusion and air leaks. Let it cure as directed (typically 24 hours).
- Connect the water supply (Day 2, afternoon):
- Fit the PEX-to-garden-hose adapters to both PEX ends and tighten hose clamps firmly to prevent leaks.
- Connect the lower (inlet) adapter to your cold water supply, such as a hose from a rain barrel or gravity-fed tank, and the upper (outlet) adapter to wherever you will draw or store hot water.
- Positioning: Water enters at the bottom of the collector and leaves at the top. For true thermosiphon circulation, the tank that receives the hot water must sit above the top outlet of the collector, and the cold supply must sit above the bottom inlet; the greater the height difference, the stronger the flow. Tilt the collector at roughly your latitude for year-round use, or latitude plus 10–15 degrees for better winter performance (at 40°N, a 40–55 degree tilt).
- Test (Day 2 evening or Day 3):
- Fill the supply tank and slowly open the valve to fill the coil. Check every connection for leaks.
- Once the system is full and air has purged (you may hear gurgling), leave it in full sun.
- After 3–6 hours of sun, check the water at the top outlet. It should be noticeably warm or hot.
Always work safely with power tools, and remember that even a non-pressurized collector can produce very hot water. Test the temperature before using it for showers or washing.
Recommended Components and Approximate Prices
Most of this build can use salvaged materials, but a few components are worth choosing carefully. Prices below are approximate 2026 retail ranges.
- SharkBite PEX-B 1/2-inch, 50 ft roll (Model U850B50): A widely available reputable brand. About $38–$45 at major retailers.
- Owens Corning FOAMULAR 150 1-inch XPS, 4×8 sheet (Model 300450): XPS offers about R-5 per inch and resists moisture. About $30–$38 per sheet, with plenty left over.
- Rust-Oleum 2X Ultra Cover Flat Black (Model 249122): Good adhesion and coverage. Use a flat finish, since glossy surfaces reflect more light. About $8–$12 for two cans.
- Salvaged window: The biggest saving. A used double-pane window (36×36 to 40×40 inches) typically costs $0–$25 at a ReStore or salvage yard. Look for intact panes and a sturdy frame.
- GE Silicone II Window & Door Sealant (Model GE500, 10.1 oz): Waterproof, flexible and UV-resistant. About $7–$9.
- Orbit 1/2-inch PEX x 3/4-inch MHT adapter (Model 37145): Brass adapters for connecting to standard garden hoses. About $7–$9 each, $14–$18 for two.
- Everbilt stainless steel worm gear clamps, 1/2 to 1 1/4-inch (10-pack, Model 802102): Adequate for low-pressure thermosiphon connections. About $6–$8.
- 2x4x8 ft pine studs: About $4–$6 each.
- 1/2-inch CDX plywood: A half sheet of 4×8 cut down runs about $20–$25.
Comparison of DIY Solar Water Heater Designs
| Feature | Flat-Plate Thermosiphon (This Build) | Batch (Breadbox) Heater | Evacuated Tube (DIY Hybrid) | Black Barrel/Tank | Concentric Tube Collector |
|---|---|---|---|---|---|
| Complexity | Moderate: basic carpentry, plumbing and sealing | Low: simple box, minimal plumbing | High: delicate tubes, manifold and frame | Very low: paint and position | Moderate–high: precise cutting, sealing, manifold |
| Approx. DIY cost | $80–$150 with a salvaged window | $50–$120 with a salvaged tank | $200–$400+; tubes are expensive | $20–$60 | $150–$300+ |
| Typical water temperature | Good: 120–150°F on sunny days | Moderate: 100–130°F; loses heat overnight | Excellent: 160–200°F+ | Low–moderate: 90–110°F | Moderate: 110–140°F |
| Main materials | PEX, plywood, 2x4s, insulation, salvaged window | Old tank/barrel, insulation, wood, optional glazing | Evacuated tubes, copper pipe, manifold, frame | Plastic or metal barrel, black paint | PVC/polycarbonate pipes, end caps, sealant, frame |
| Maintenance | Low: check for leaks, clean glazing | Very low | Moderate: fragile tubes, seals degrade | Very low | Low–moderate: algae in clear tubes, leaks |
| Best use | Supplemental hot water, outdoor shower, pre-heater, cabins | Outdoor shower, small volumes, pre-heater | High-temperature, year-round use | Basic rinse, garden water | Outdoor shower, garden, pre-heating larger volumes |
The flat-plate thermosiphon design offers a good balance of efficiency, complexity and cost. Evacuated tubes perform better but usually cost far more than this budget allows.
Pro Tips
- Site and angle carefully: The collector needs unobstructed sun from about 9 AM to 3 PM, with no shade from trees, buildings or poles. Use your latitude as the tilt for year-round use, add 10–15 degrees for winter-focused use, or subtract 10–15 degrees for summer-only uses like an outdoor shower. A south-facing roof or a sturdy ground frame both work.
- Don’t skimp on insulation: 1-inch XPS is the minimum; use 2 inches if it fits. Heat lost through the back and sides is heat you worked to collect.
- Seal every gap: Air leaks are heat leaks. For extra UV protection, you can cover cured silicone with an outdoor foil tape such as Nashua 322 Professional Grade HVAC Foil Tape (about $15 for a 2-inch x 50-yard roll).
- Use height to drive circulation: Even a 12-inch height difference between the collector and the tanks can noticeably improve thermosiphon flow.
- Use it as a pre-heater: Feeding solar-warmed water into the cold inlet of an existing electric or propane water heater reduces the load on that heater, cutting fuel or electricity use and extending its life.
- Protect against UV: Make sure exposed plastics and sealants are UV-resistant. PEX tolerates short sun exposure, but prolonged direct sun without glazing can degrade it.
- Plan for freezing: In freezing climates you must be able to drain the collector completely. Freezing water bursts PEX and fittings and can crack glazing. Fit a ball valve at the lowest point and drain the system before the first hard freeze.
- Clean the glazing: Dust, pollen and grime reduce solar gain. Wipe the glass with water and a squeegee every few weeks or months.
Common Mistakes to Avoid
- Inadequate insulation: Heat escapes through the back and sides as easily as through the front. Without rigid foam (1- or 2-inch XPS, R-5 to R-10), much of the collected heat radiates away, especially on cool days and overnight.
- Poor sealing: Gaps or sloppy silicone let cold air in and hot air out, creating convection currents that strip heat from the absorber. Seal the whole window perimeter inside and out with outdoor-grade silicone.
- Wrong tilt or shading: A collector mounted flat or in partial shade wastes most of its potential. Calculate your tilt from your latitude and confirm the site gets full sun through the middle of the day.
- Tanks at the wrong height: If the hot water tank sits below the collector outlet, thermosiphon circulation will not work. Plan the mounting heights before you build.
- Forgetting to drain before winter: A single hard freeze can split the PEX coil. Make draining part of your fall routine.
Conclusion
A flat-plate thermosiphon collector is an accessible first step into solar thermal energy. With careful sourcing, especially a free or low-cost salvaged window, the materials can come in around $150, and the result is a passive heater with no running costs. Focus on the details that matter most: good insulation, careful sealing, correct tilt and tank heights, and a reliable way to drain the system in freezing weather.
Marcus Reid
Founder & Editor, OffGridSage
Marcus founded OffGridSage to bring practical off-grid knowledge together in one place. Guides are built from official and expert sources (NREL, the EPA, the USDA and university extension services), manufacturer documentation and reader feedback, and are updated when information changes.