How to Build a Root Cellar: Step-by-Step Plans for Any Budget
Last October, a neighbor called me in a panic. He had 200 pounds of potatoes sitting in his garage, temperatures dropping fast, and no plan for long-term storage. By December, half of them had rotted. The other half had sprouted into something that looked like it belonged in a science experiment. Two full growing seasons of work, gone. If you’ve ever lost a harvest to rot, freezing, or early spoilage, you already understand exactly why knowing how to build a root cellar is one of the most valuable skills a homesteader can have.
Without the right conditions — consistent cool temperature, controlled humidity, and good airflow — even a perfect harvest falls apart within weeks. Grocery stores spend billions engineering cold chain logistics to solve this exact problem. A well-built root cellar solves it for a few hundred dollars and zero electricity. But build it wrong and you end up with mold, frozen carrots, or a space that’s too warm to store anything past February. The details matter a lot more than most guides let on.
This guide covers everything you need: the ideal temperature and humidity targets, the four main root cellar types ranked from cheapest to most expensive, a full step-by-step build walkthrough for the most popular option (the hillside cellar), a vegetable storage reference table, ventilation rules, and the most common mistakes that kill otherwise good cellars. Whether you have $50 or $5,000, there’s a workable option here for your situation.
Quick Answer: What You Need to Know About Building a Root Cellar
A root cellar keeps food at 32–40°F with 85–95% relative humidity — conditions that dramatically slow bacterial growth, ethylene production, and moisture loss. The four main build types range from a $20 buried trash can to an $8,000 poured-concrete underground room. For most homesteaders, a hillside earth-sheltered cellar in the $200–$800 range hits the sweet spot of cost, capacity, and performance.
- Ideal temperature: 32–40°F (0–4°C) — cold enough to slow rot, warm enough to prevent freezing
- Ideal humidity: 85–95% relative humidity — prevents vegetables from drying out and shriveling
- Cheapest option: Buried trash can cellar — $20–$100, best for small quantities of root vegetables
- Most practical option: Hillside earth-sheltered cellar — $200–$800, 30–60 bushels of storage capacity
- Key rule: Never store apples with root vegetables — ethylene gas from apples accelerates spoilage
- Ventilation is non-negotiable: Inlet pipe low, outlet pipe high — without airflow, humidity and CO2 build up to dangerous levels
Ideal Root Cellar Conditions: Why Temperature and Humidity Both Matter
The 32–40°F Temperature Window
This narrow range is what separates a functional root cellar from a glorified hole in the ground. At temperatures above 40°F, most root vegetables begin to respire rapidly, consuming their own starches for energy and softening within weeks. At or below 32°F, cell walls rupture as water freezes — carrots and potatoes that freeze and then thaw turn to mush. Hitting the 34–38°F sweet spot consistently throughout winter is the real engineering challenge of root cellar design. The earth itself helps: once you get 4–6 feet below the frost line, soil temperature stays remarkably stable, typically between 50–55°F year-round in most US climate zones. Your job is to use ventilation and insulation to pull that ambient temperature down another 10–15 degrees during late fall and winter.
Why 85–95% Humidity Is Not Optional
Low humidity is the silent killer of root cellar storage. At 50% relative humidity — typical of a dry basement — carrots lose moisture rapidly and become limp and bitter within four to six weeks. Beets wrinkle. Turnips hollow out. At 85–95% humidity, the same vegetables stay crisp and palatable through April or May. You achieve high humidity partly through the earth itself (soil moisture naturally keeps cellar air damp) and partly through active management: a gravel floor with a shallow layer of damp sand on top, or damp sawdust packed around stored carrots in wooden crates. Never use a sealed concrete floor without drainage — standing water leads to rot and mold, which is different from controlled high humidity.
The 4 Types of Root Cellars: Cheapest to Most Expensive
Option 1 — Corner Basement Root Cellar ($50–$200)
If you already have an unheated basement, this is the fastest path to functional cold storage. Choose a corner on the north or northwest wall — these exterior walls stay naturally cooler in winter. Insulate the two interior walls (the ones facing the heated part of the house) with 2-inch rigid foam board, sealed with spray foam at the edges. Leave the exterior walls uninsulated so they draw cold from outside. Frame a simple stud wall with a well-insulated door, and run two 4-inch PVC pipes through the rim joist: one low for cold air intake, one high near the ceiling for warm air exhaust. Add a digital thermometer/hygrometer (the $15 AcuRite units work fine) and you have a functional cellar in a weekend. Capacity depends on your corner size, but a 6×8-foot space holds 15–20 bushels comfortably. Limitation: if your basement is heated, you’ll fight temperature creep all winter and may never get below 45°F on warm days.
Option 2 — Buried Trash Can Cellar ($20–$100)
This is the most underrated root cellar option for small-scale homesteaders and renters. Buy a 32-gallon Rubbermaid Brute or heavy-duty metal trash can. Drill or punch a dozen half-inch drainage holes in the bottom. Dig a hole 6–8 inches deeper than the can’s height, fill the bottom with 6 inches of gravel for drainage, and set the can in place. Pack 6 inches of soil around the outside of the can for insulation. Fill the interior with root vegetables layered in damp straw or sand — never pack them tightly or let them touch each other. Place the lid on top, then mound 12–18 inches of straw over the lid and hold it down with a tarp and a few rocks. Mark the location with a stake — you’ll need to find it under snow. Retrieve vegetables as needed through winter by pulling back the straw and opening the lid. This method stores 30–50 pounds of potatoes or carrots reliably through zone 5 winters. Cost: a $25 trash can, $10 of straw, and an afternoon of digging.
Option 3 — Hillside Earth-Sheltered Cellar ($200–$800)
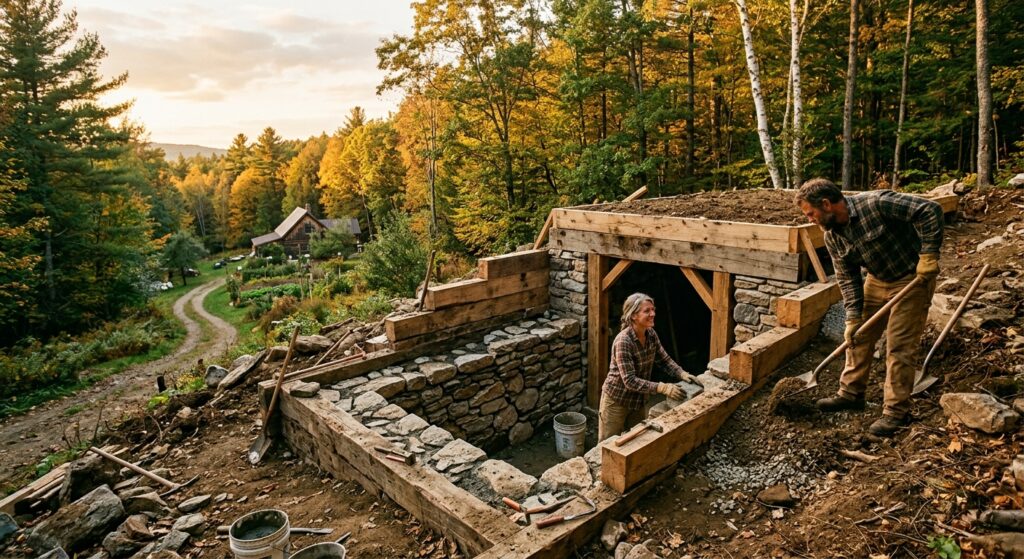
This is the most traditional and most practical full-size root cellar for homesteaders with a little land. You excavate into a natural hillside or berm, which gives you three or four walls of earth-insulation for free, plus natural drainage away from the cellar. A timber frame with a metal or corrugated steel roof, covered in 18–24 inches of soil, completes the thermal envelope. Properly built, a hillside cellar maintains 32–40°F without any mechanical refrigeration from late October through late April in most of the northern US. Capacity: a 10×12-foot cellar holds 60–80 bushels — enough for a family to store a full year’s root vegetable harvest. The full step-by-step build guide for this option is in the section below.
Option 4 — Full Underground Concrete Block Room ($2,000–$8,000)
For serious homesteaders with large harvests and long-term infrastructure goals, a poured concrete or concrete block underground room is the gold standard. You’ll need a contractor for the excavation (typically $800–$1,500 for a 12×16-foot dig) and basic masonry skills or a mason for the block work. Advantages: near-unlimited lifespan, rodent-proof, fire-resistant, and capable of maintaining perfect conditions even in harsh climates. The walls need a waterproofing membrane (DRYLOK or parged exterior) and a quality door — a pre-hung insulated steel exterior door works well. Budget $200–$400 for a proper ventilation system with adjustable dampers. This option makes sense if you’re building a permanent homestead and want a root cellar that outlasts you.
Step-by-Step Build Guide: The Hillside Earth-Sheltered Root Cellar
Materials List (10×12-foot cellar)
- 6×6 pressure-treated posts (8 pieces, 10 feet long) — approximately $180
- 2×8 pressure-treated lumber for sill plates and roof framing — approximately $120
- Corrugated metal roofing panels (14 linear feet) — approximately $90
- 1/2-inch exterior plywood for roof sheathing — approximately $60
- 6-mil polyethylene sheeting for waterproofing membrane — approximately $40
- 4-inch PVC pipe (20 feet total for two vent runs) — approximately $35
- Pre-hung insulated steel exterior door (32×80 inches) — approximately $180
- Hardware: joist hangers, structural screws, PVC fittings — approximately $60
- Total materials: approximately $765
Step 1 — Site Selection
Choose a hillside with a north or east-facing slope if possible — these get less direct sun in summer, which helps keep interior temperatures lower. The slope should allow you to excavate horizontally rather than straight down, which simplifies construction and drainage dramatically. Avoid sites with oak trees directly overhead (tannins from falling leaves affect stored food over time) and stay at least 50 feet from any septic system. Check for subsurface water by digging a test hole 3 feet deep after a heavy rain — if it fills with water within 24 hours, choose a different site or install a French drain first.
Step 2 — Excavation
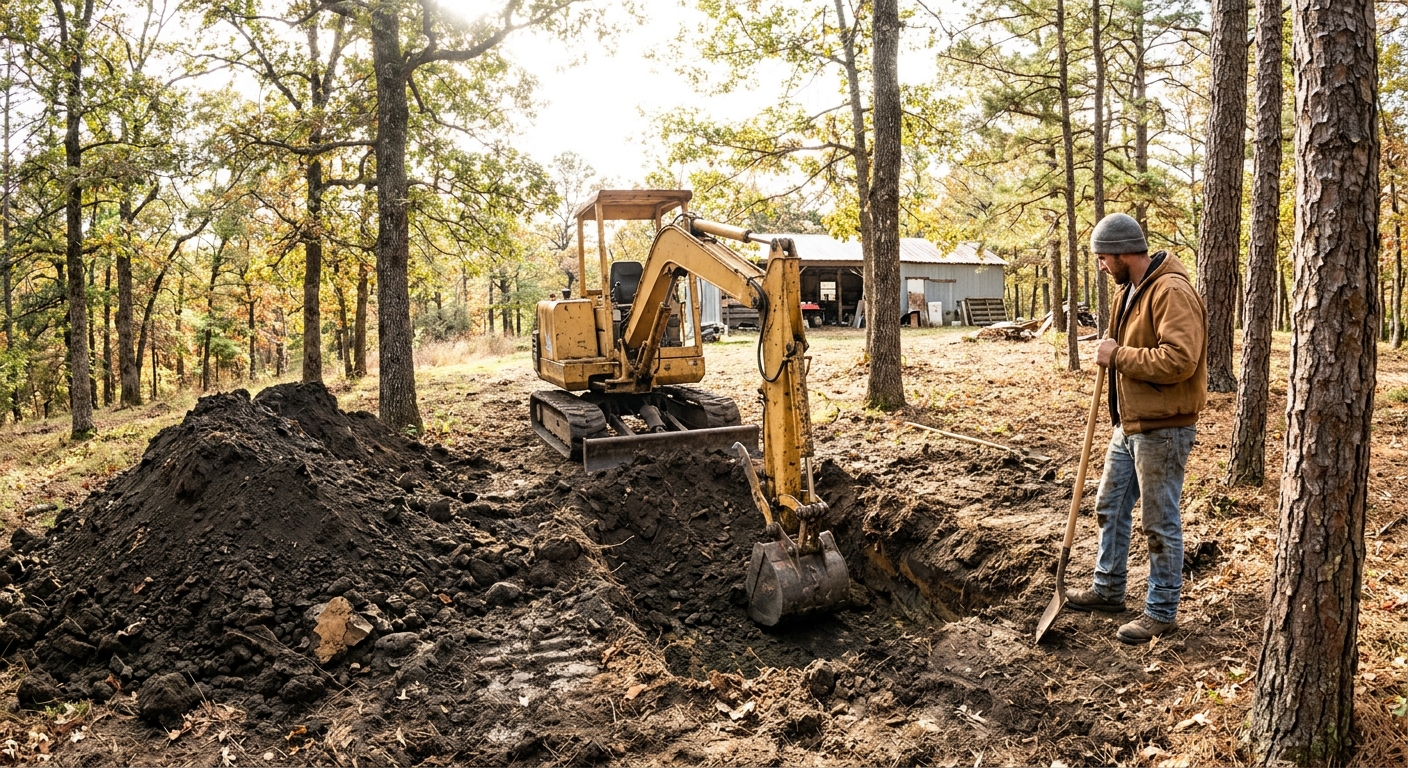
Mark your 10×12-foot footprint on the hillside and excavate 7 feet deep (this gives you 6 feet of clearance inside with a dirt floor plus a few inches for gravel). Angle the floor slightly (1/4 inch per foot) toward the entrance for drainage. Rent a mini-excavator for $250–$350 per day — this job is possible by hand but will take 3–4 full days of labor in firm soil. Cut the entry portal into the slope face last, slightly narrower than your door opening so you can trim to fit.
Step 3 — Set the Posts and Frame the Walls
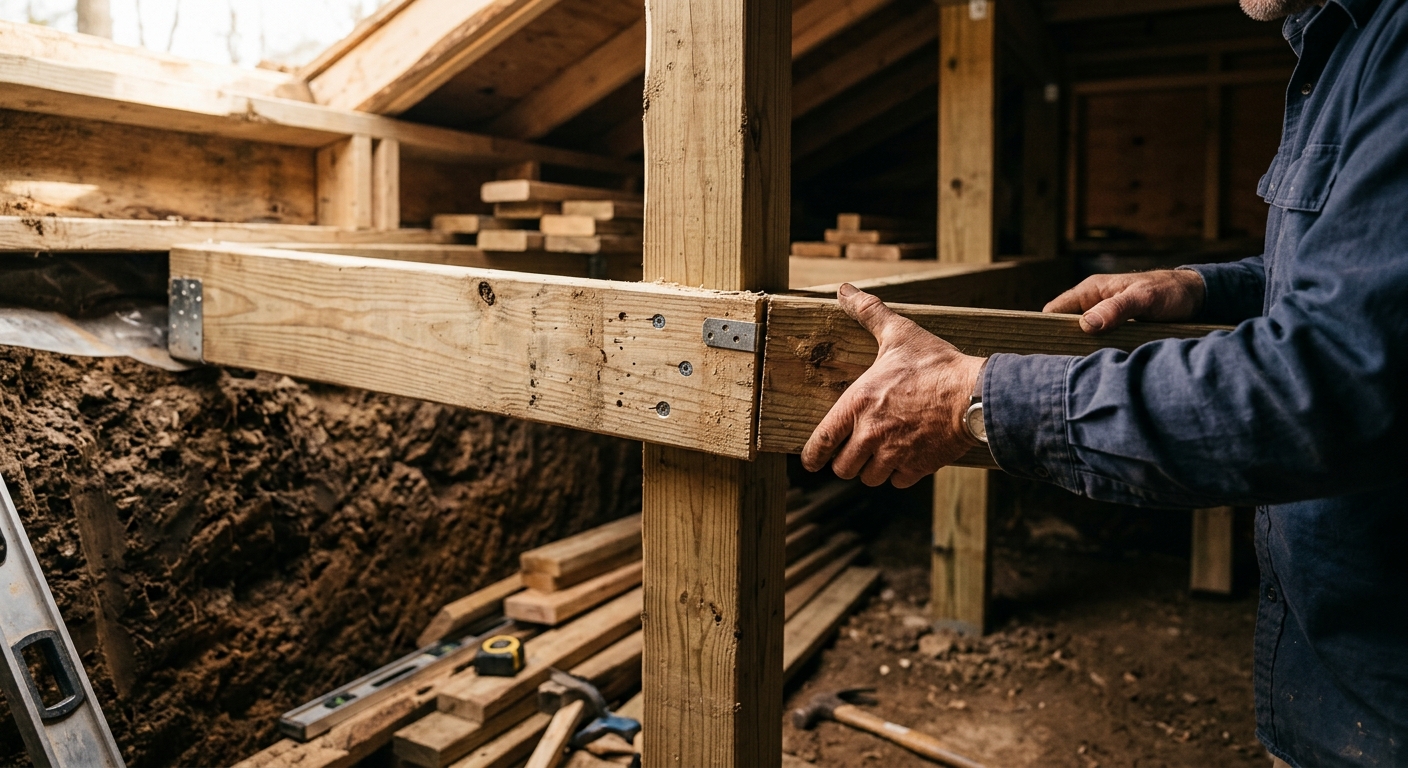
Set your 6×6 posts in pairs along the long walls, spaced 4 feet on center, with the bases on flat stones or concrete deck blocks (direct soil contact will rot even pressure-treated lumber over time). Use a level and temporary bracing to keep everything plumb. Run your 2×8 sill plates along the tops of the posts on each side, then frame the roof with 2×8 rafters spaced 24 inches on center. The front wall framing goes in last — frame it around your door opening, leaving a rough opening of 34×82 inches for a standard 32×80 prehung door.
Step 4 — Roof Sheathing and Waterproofing
Sheath the roof framing with 1/2-inch exterior plywood, then lay your corrugated metal roofing over the top. Lap each panel 6 inches and seal the overlaps with butyl tape. Over the entire roof and back wall, drape 6-mil poly sheeting, lapping it at least 12 inches at all seams and taping with waterproof seam tape. This membrane is critical — it prevents groundwater from seeping through the soil overburden and dripping onto your stored food. Skipping or skimping on the membrane is the single most common and most expensive mistake in hillside cellar construction.
Step 5 — Backfill and Cover
Backfill over the roof and sides with the excavated soil, starting from the back and working forward. Mound the soil at least 18–24 inches deep over the roof — this is your insulation. Compact it lightly in 6-inch lifts using a plate compactor or by hand-tamping. Seed the mound with grass immediately to prevent erosion. Leave the entry portal and the first 2 feet of the front face uncovered for access. Place flat stepping stones or a simple gravel path leading to the door.
Step 6 — Install Ventilation
Cut two 4-inch holes through the front wall framing, one low (bottom 12 inches of the wall) and one high (top 6 inches near the peak). Run 4-inch Schedule 40 PVC pipe through each hole. The low pipe is your cold air inlet — cap it with a screened elbow that faces down to prevent rain entry and keep rodents out. The high pipe is your warm air exhaust — run it up and out through the roof or over the top of the mound with a screened cap. Install a manual damper on each pipe so you can adjust airflow. On cold nights below 20°F, close the intake damper partially to prevent freezing. On warm October days, open both fully to flush warm air out. A $25 digital remote thermometer with a sensor inside the cellar lets you monitor temperature from your house without opening the door every day.
Step 7 — Finish the Interior
Spread 4–6 inches of clean gravel over the entire floor for drainage. Lay wooden pallets or pressure-treated 2×4 runners on top to keep storage crates off the floor. Build simple slatted shelving along the walls from untreated pine — avoid cedar (aromatic oils can transfer to stored produce) and pressure-treated lumber for interior shelving. Hang your thermometer/hygrometer at mid-height on one wall. Install a single battery-powered LED lantern or a low-voltage light on a timer. Hang the pre-hung door, seal the frame with spray foam, and you’re done.
Vegetable Storage Conditions and Expected Duration
| Vegetable | Ideal Temp (°F) | Ideal Humidity | Storage Duration | Best Storage Method |
|---|---|---|---|---|
| Carrots | 32–38°F | 90–95% | 4–6 months | Layered in damp sand or sawdust |
| Potatoes | 38–40°F | 85–90% | 4–8 months | Wooden crates, no light exposure |
| Turnips | 32–38°F | 90–95% | 4–5 months | Loose in bins, tops removed |
| Beets | 32–38°F | 90–95% | 4–5 months | Layered in damp sand, tops trimmed to 1 inch |
| Cabbage | 32–38°F | 80–90% | 3–4 months | Wrapped individually in newspaper, on shelves |
| Apples | 32–38°F | 80–90% | 3–5 months | Wrapped in paper, stored separately from all root vegetables |
| Parsnips | 32–38°F | 90–95% | 4–6 months | Damp sand, same as carrots |
| Winter squash | 50–55°F | 60–70% | 2–4 months | Single layer on shelves, stem intact |
| Garlic | 32–38°F | 60–70% | 6–8 months | Mesh bags or braided, hung from rafters |
Ventilation: The System Most Builders Get Wrong
Ventilation is where most DIY root cellars fail — not in construction, but in day-to-day operation. The principle is straightforward: cold air is denser than warm air, so it sinks. An inlet pipe placed low in the cellar allows cold outside air to flow in along the floor, while warm, CO2-laden air rises and exits through a high outlet pipe. This passive convection system requires no fan or electricity to function, but it only works if both pipes are correctly positioned and unobstructed.
Common mistakes: running both pipes at the same height (negates convection), using pipes smaller than 4 inches in diameter (restricts airflow enough that humidity builds to rot-promoting levels), and forgetting to screen both pipe ends (mice and squirrels will colonize an unscreened root cellar within one winter season). If your cellar runs warmer than expected, check first that your inlet pipe isn’t blocked by debris or snow accumulation. A simple $8 pipe cap with a built-in screen, available at any hardware store, solves the rodent problem permanently.
What NOT to Store Together — The Ethylene Problem
Apples produce ethylene gas as they ripen — a natural plant hormone that signals other produce nearby to ripen and deteriorate faster. A single bushel of apples stored in the same small cellar as your carrots and potatoes will accelerate spoilage by three to six weeks. If you need to store apples, build a simple partition or use a separate smaller space. Pears are also high ethylene producers. Onions should be stored separately as well — not because of ethylene, but because onion vapors cause potatoes to sprout prematurely and impart a mild onion flavor to nearby vegetables over long storage periods. Winter squash also prefers warmer, drier conditions (50–55°F, 60–70% humidity) that are incompatible with root vegetable storage — give it a shelf in a cool mudroom instead.
Moisture Management: Getting Humidity Right Without Creating Rot
The gravel floor is your first moisture management tool — it allows water vapor to rise naturally from the soil below while preventing standing water from pooling under your produce. For carrots, beets, and parsnips, the best method is layering: alternate 2-inch layers of produce with 2-inch layers of damp (not wet) coarse sand or slightly moistened sawdust in wooden crates. Check the moisture level by squeezing a handful — it should clump slightly but not drip. Re-dampen every 4–6 weeks as needed. For potatoes, a loose open crate with ventilation gaps on all sides is better than packing in sand — potatoes need airflow more than they need added moisture, and they’ll source enough humidity from the cellar air itself. If your hygrometer reads below 80% regularly, set a shallow tray of water on the floor near the intake vent to add passive evaporation.
Common Root Cellar Mistakes to Avoid
- Skipping the waterproofing membrane: Groundwater infiltration causes mold, rot, and structural damage within two to three seasons. Don’t skip it.
- Using a single vent pipe: One pipe doesn’t create convection — you need both an inlet and outlet at different heights.
- Storing damaged produce: One bad potato or bruised carrot will spread rot to everything it touches within weeks. Sort ruthlessly before storing anything.
- Not checking temperature for the first month: Your cellar may run warmer or cooler than expected. Adjust vent dampers during October and November until you dial in the right range.
- Storing too early: Putting warm produce into your cellar in September, before outside temperatures have dropped, creates condensation and accelerates spoilage. Wait until consistent outdoor lows drop below 45°F before loading the cellar.
- Ignoring rodent proofing: Screen every opening. Pack any gaps around vent pipes with steel wool before caulking — mice chew through foam and wood easily but avoid steel wool.
🌱 Build Your Food Independence
A root cellar is just one piece of a fully self-sufficient food system. The Self-Sufficient Backyard covers the whole picture: what to grow, how to preserve it, and how to set up a root cellar that keeps food perfect from October through May.
*Affiliate link — we may earn a commission at no cost to you.
The Bottom Line
Knowing how to build a root cellar is one of those skills that pays for itself in the first season. A properly built hillside cellar in the $200–$800 range will reliably store 60–80 bushels of root vegetables through winter without electricity, without running costs, and without the anxiety of watching a harvest slowly spoil in your garage. The key variables — temperature between 32–40°F, humidity between 85–95%, passive ventilation with inlet low and outlet high, and careful attention to which produce is stored together — are all achievable with basic tools and a weekend of focused work. Start with a buried trash can cellar this fall if you’re not ready to build full-scale. The experience of successfully storing your first 50 pounds of carrots through a hard winter is genuinely motivating, and it will make the case for the bigger build better than any article can.
If you want to take your food self-sufficiency further than just root vegetable storage, The Self-Sufficient Backyard is the most comprehensive resource we’ve found for tying together growing, preserving, and storing a full year’s food supply — root cellar setup included.
Have questions about your specific situation? Drop them in the comments below — we read every one. If this guide helped you, share it with someone planning their off-grid setup.