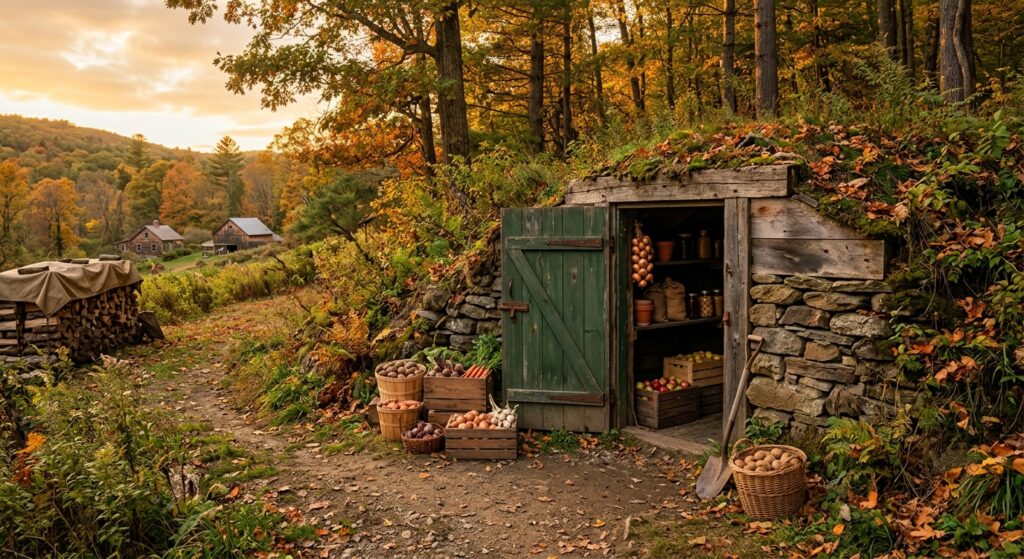
As an off-grid living enthusiast with over a decade of hands-on experience, I’ve learned that true self-sufficiency hinges on smart, sustainable systems. One of the most rewarding and practical projects I’ve ever undertaken is learning how to build a root cellar DIY. There’s an undeniable satisfaction in preserving your harvest without relying on electricity, keeping your food fresh, crisp, and nutrient-dense for months on end. This isn’t just about saving money; it’s about connecting with your food, reducing waste, and building resilience into your homestead. In this comprehensive guide, I’ll walk you through every step of constructing your own root cellar, sharing the lessons I’ve learned, the specific materials I’ve used, and the invaluable tips that will ensure your project is a resounding success. Get ready to transform your food storage capabilities and embrace a more sustainable way of life.
Why a Root Cellar Matters for Off-Grid Living
For anyone serious about off-grid living, food security is paramount. While solar panels and battery banks handle power, and rainwater harvesting systems tackle water, food preservation often gets overlooked or relegated to freezers and dehydrators, which still demand energy. This is precisely where a root cellar shines as an indispensable, zero-energy solution. Imagine a winter where you’re still enjoying crisp apples, firm potatoes, and sweet carrots from your garden, all stored without a single watt of electricity. That’s the power of a well-built root cellar.
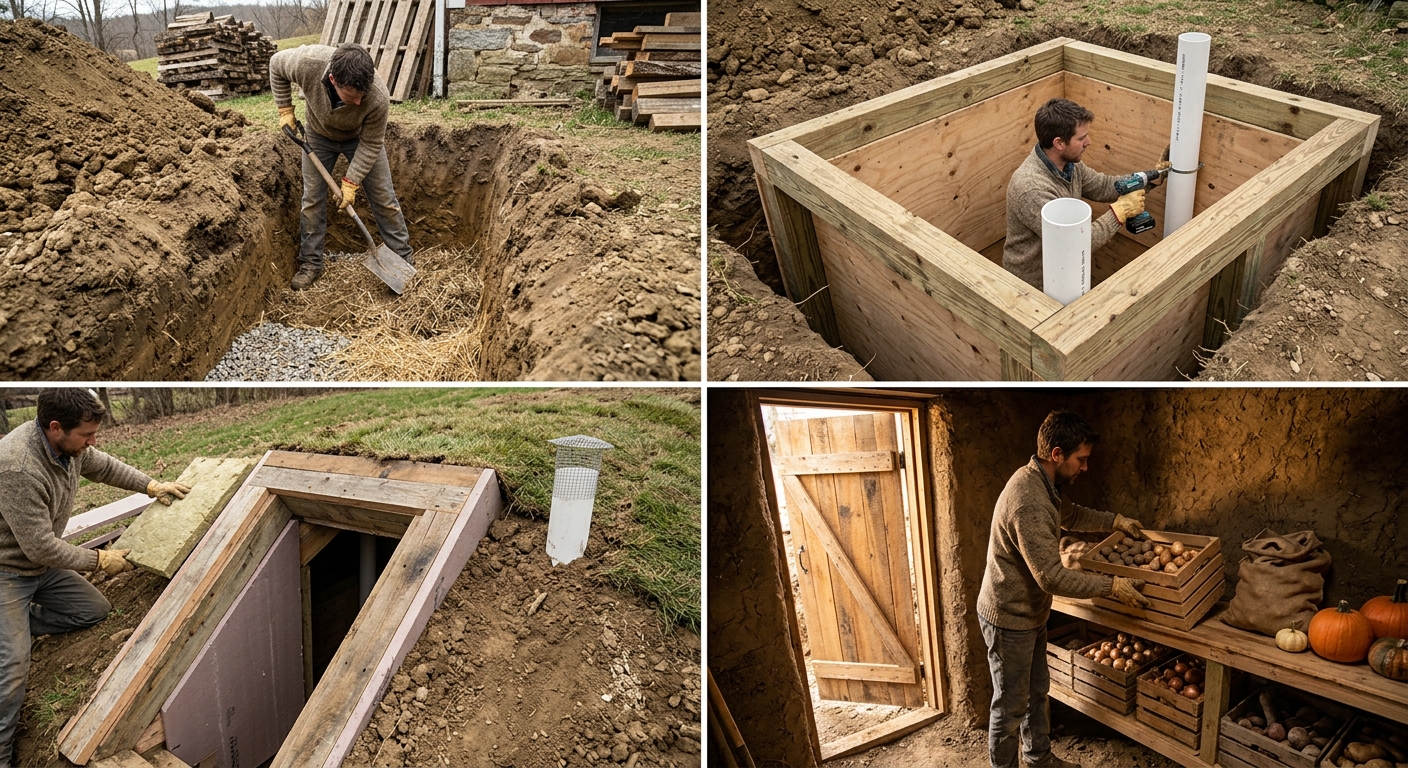
My first few years off-grid, I relied heavily on canning and freezing. While effective, canning is labor-intensive, and freezing is a constant drain on my precious battery bank. After a particularly long power outage that threatened my entire freezer contents, I knew I needed a more robust, passive storage method. That’s when I committed to building my first dedicated root cellar. The benefits were immediate and profound. Not only did I reduce my energy consumption significantly, but the quality of my stored produce was noticeably superior. Root cellars maintain a high humidity and cool, stable temperature, conditions that mimic nature’s perfect storage environment—think of it as a natural refrigerator for your harvest.
Beyond the practical energy savings and superior food quality, there’s a deeper satisfaction. A root cellar fosters a greater connection to the seasons and your food supply. It encourages you to grow more, knowing you have a reliable place to store the bounty. It reduces food waste, as you’re less likely to have produce spoil on the counter or in an over-stuffed fridge. For me, it became a cornerstone of my self-sufficient lifestyle, a tangible link between the soil, my labor, and my family’s sustenance throughout the year. It’s a low-tech, high-impact solution that every off-grid homestead, or even a suburban home looking for greater resilience, should consider.
How to Build a Root Cellar DIY: Complete Step-by-Step Guide
Building a functional root cellar isn’t rocket science, but it does require careful planning and execution. I’ve built a few different types over the years, and for this guide, I’m going to detail the construction of a partially buried, insulated outdoor root cellar – a robust and highly effective design suitable for most climates. This specific design aims for a roughly 8’x10′ internal storage space, which I’ve found to be ample for a family of four to six.
Step 1: Site Selection and Planning
- Choose Your Location Carefully: This is perhaps the most critical first step. You want a shaded area, preferably on the north side of a building or under dense evergreen trees to minimize solar gain. Crucially, assess the drainage. Avoid low-lying areas where water collects. I used a simple shovel and dug a few test holes (about 2 feet deep) to check for standing water after a heavy rain. Ensure you are away from septic systems, utility lines, and any large tree roots that could interfere with excavation or structural integrity.
- Determine Size and Depth: For an 8’x10′ interior, you’ll need to excavate a larger area to allow for wall thickness and working room. I typically plan for an exterior dimension of 10’x12′. The depth is vital: you need to get below your local frost line. In my area (Zone 6b), the frost line is about 30 inches. I excavated to a depth of 6 feet (72 inches) to ensure consistent cool temperatures year-round, even during deep freezes. This also allows for ample head room inside.
- Check Regulations: Before you dig, always check local zoning laws and building codes. Some areas may require permits for structures of this size or depth.
Step 2: Excavation
- Mark the Area: Use stakes and string to clearly mark your 10’x12′ excavation area.
- Digging: This is the most labor-intensive part. For a 6-foot deep, 10’x12′ pit, you’re looking at moving approximately 25-30 cubic yards of soil. While you can do this by hand (I did my first one!), renting a mini-excavator (e.g., a Kubota K008-3 for about $250-$350/day) is highly recommended. Excavate to your planned depth, ensuring the bottom is as level as possible.
- Drainage Layer (Optional but Recommended): If your soil has any clay or poor drainage, lay down a 6-inch layer of crushed gravel (e.g., #57 stone, about $30-$50 per ton) at the bottom of the pit. This helps prevent water from wicking up into the cellar floor.
Step 3: Foundation and Floor
- Pouring the Footings: For an 8’x10′ interior, I pour footings that are 12 inches wide and 8 inches deep around the perimeter. Use 2×8 lumber for forms. Fill with concrete mix (e.g., Quikrete 5000 High-Strength Concrete Mix, ~$5 per 80lb bag; you’ll need about 50-60 bags for the footings and floor). Embed rebar (e.g., #4 rebar, 1/2-inch diameter, ~$8-$10 per 20-foot stick) into the footings for structural integrity. I typically use two runs of rebar per footing.
- Pouring the Floor Slab: Once the footings cure (24-48 hours), remove the forms. Lay a 6-mil polyethylene vapor barrier (e.g., Husky 6 Mil Black Polyethylene Film, 10’x100′ roll for ~$60) over the gravel base, overlapping seams by 6-12 inches and taping them with construction tape (e.g., Tyvek Tape, ~$15). Pour a 4-inch thick concrete slab over the vapor barrier. Again, embed rebar or wire mesh (e.g., 6×6-10/10 wire mesh, 5’x150′ roll for ~$80) for strength. Smooth with a float.
Step 4: Wall Construction
- Framing the Walls: I prefer using pressure-treated lumber (e.g., YellaWood KDAT 2x6x10′, ~$15-$20 each) for the framing due to its resistance to moisture and rot. Build standard 2×6 stud walls for an 8’x10′ interior. Frame a door opening (e.g., 30″x72″) and two ventilation openings (one high, one low, about 6″x6″ each). Anchor the bottom plates to the concrete slab using anchor bolts or concrete screws (e.g., Tapcon 3/8″ x 3″ concrete screws, ~$20 for 25).
- Exterior Sheathing: Attach exterior-grade plywood (e.g., CDX Plywood 1/2″ x 4’x8′, ~$30-$40 per sheet) to the outside of the studs. Cover this with a waterproof membrane (e.g., Delta-MS Foundation Waterproofing Membrane, ~$200 for a 4’x65′ roll) to protect against moisture from the surrounding soil. This is critical for preventing dampness and eventual rot.
- Backfilling (Partial): Once the exterior is sealed, backfill around the walls with well-draining soil, compacting it in 12-inch lifts. Leave about 18-24 inches of the wall exposed above ground level for the roof and entrance.
Step 5: Roof Construction
- Roof Framing: I typically build a simple shed roof or a low-pitch gable roof. Use 2×8 or 2×10 pressure-treated lumber for rafters, spaced 16 inches on center. If you’re going for a buried roof, ensure it’s strong enough to support the weight of soil and snow. For an 8’x10′ structure, I’d use 2x10s for rafters spanning the 10-foot width, with a slight pitch.
- Sheathing and Waterproofing: Cover the rafters with 3/4″ exterior-grade plywood (e.g., OSB T&G 3/4″ x 4’x8′, ~$35-$45 per sheet). Apply a heavy-duty rubber membrane (e.g., EPDM Rubber Roofing, 10’x12′ for ~$200-$300) over the plywood. Overlap seams generously and seal with EPDM adhesive. This is your primary waterproof layer against the elements and any soil you backfill.
- Insulation and Backfill (Roof): For maximum thermal stability, I lay 4 inches of rigid foam insulation (e.g., Dow Styrofoam Brand Scoreboard R-5 per inch, so 4 sheets of 1″ thick, ~$200 for 4×8 sheets) on top of the EPDM. Then, backfill with at least 18-24 inches of soil on top of the insulation. This soil mass provides excellent thermal mass and insulation. Plant native grasses or ground cover on top to prevent erosion.
Step 6: Insulation and Interior Finishing
- Wall Insulation: Inside the 2×6 wall cavities, install R-19 or R-21 fiberglass batts (e.g., Owens Corning R-19 Kraft Faced Fiberglass Insulation, 15″x93″, ~$40 per roll covering 60 sq ft). Ensure a good fit without compressing the insulation.
- Vapor Barrier and Interior Sheathing: Cover the interior side of the studs and insulation with a 6-mil polyethylene vapor barrier (e.g., Husky 6 Mil Clear Polyethylene Film, ~$60 for 10’x100′ roll) to prevent moisture from the cellar air from condensing within the walls. Then, install interior sheathing. I prefer untreated plywood (e.g., ACX Plywood 1/2″ x 4’x8′, ~$40-$50 per sheet) or even rough-sawn lumber for a rustic, breathable finish. Avoid drywall, as it’s not suitable for high-humidity environments.
- Door Installation: Install a sturdy, insulated exterior door (e.g., a pre-hung steel exterior door, 30″x72″, ~$250-$400). Ensure it seals tightly to prevent air leaks.
Step 7: Ventilation System
- Intake and Exhaust Vents: Proper ventilation is crucial for regulating temperature, humidity, and preventing mold. I install two 4-inch PVC pipes (e.g., Schedule 40 PVC pipe, 4″x10′, ~$20-$30 per length) through the walls/roof: one low (intake, extending to about 6 inches from the floor) and one high (exhaust, extending just below the ceiling). Both pipes should extend outside and be capped with screened vents (e.g., Deflecto 4-inch vent hood with screen, ~$10-$15 each) to keep pests out.
- Fan (Optional but Recommended): While passive ventilation works, a small exhaust fan greatly improves air circulation. I use an AC Infinity CLOUDLINE T4 Inline Duct Fan with Temperature and Humidity Controller (4-inch, 205 CFM, ~$130). This allows me to set desired temperature and humidity ranges, and the fan automatically kicks on to exhaust stale, warm, or overly humid air.
Step 8: Shelving and Storage
- Build Sturdy Shelving: Use rot-resistant materials like cedar, redwood, or pressure-treated lumber (e.g., 2x4s and 1x6s, ~$5-$10 per 8-foot length). I build freestanding units about 24 inches deep and 18 inches high per shelf, leaving adequate space for air circulation around stored produce. My 8’x10′ cellar comfortably fits two 6-foot long, 24-inch deep shelving units along the long walls, leaving a 6-foot wide aisle.
- Storage Containers: Invest in slatted wooden crates or plastic bins with good airflow. Avoid sealed containers.
Step 9: Monitoring and Maintenance
- Thermometer/Hygrometer: Place a reliable digital thermometer/hygrometer (e.g., ThermoPro TP-65 with outdoor sensor, ~$40) inside to constantly monitor conditions. Aim for 35-50°F (2-10°C) and 85-95% relative humidity.
- Humidity Control: If humidity is too low, I place a bucket of water with a burlap sack partially submerged in it; the burlap wicks water and increases evaporation. If too high, increase ventilation.
This detailed approach to how to build a root cellar DIY ensures a robust, efficient, and long-lasting storage solution for your off-grid homestead.
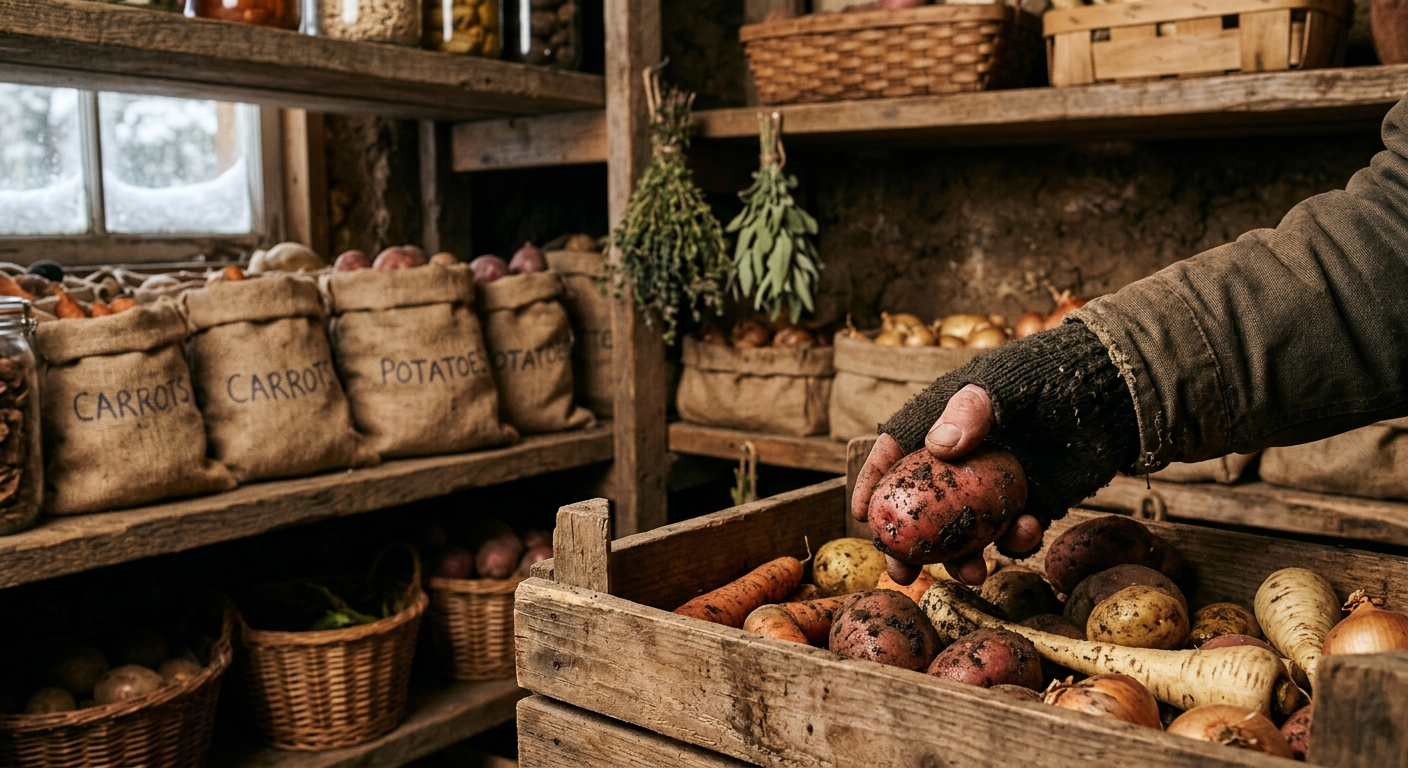
Best Products/Options in 2026 for Your Root Cellar
Having built and maintained several root cellars, I’ve learned that investing in quality materials and tools upfront saves a lot of headaches down the line. Here are my top recommendations for essential products and options in 2026, complete with specific models and price estimates.
- Excavation Equipment (Rental): For serious digging, don’t skimp. A Kubota K008-3 Mini Excavator is my go-to. It’s compact enough for most backyards but powerful enough to get the job done efficiently.
- Cost: ~$250-$350 per day, often with multi-day discounts.
- Concrete Mix: For footings and slabs, I always opt for high-strength concrete. Quikrete 5000 High-Strength Concrete Mix is excellent, offering 5000 PSI strength at 28 days.
- Cost: ~$5-$6 per 80lb bag.
- Rigid Foam Insulation: This is critical for thermal stability, especially for the roof and any exposed walls. Dow Styrofoam Brand Scoreboard Insulation (XPS) offers an R-value of R-5 per inch. I typically use 2-4 inches for walls and roof.
- Cost: ~$25-$35 per 4’x8′ sheet for 1-inch thickness.
- Waterproofing Membrane (Foundation): Protecting your underground walls from moisture is vital. Delta-MS Foundation Waterproofing Membrane is a dimpled sheet that creates an air gap, allowing water to drain away.
- Cost: ~$200-$250 for a 4’x65′ roll.
- EPDM Rubber Roofing: For the roof, especially if it’s going to be buried or partially buried, EPDM is incredibly durable and watertight. I use 60-mil thickness.
- Cost: ~$2.50-$3.50 per square foot (e.g., a 10’x12′ piece would be ~$300-$420).
- Ventilation Fan & Controller: While passive ventilation is good, an active system provides superior control. The AC Infinity CLOUDLINE T4 Inline Duct Fan with Temperature and Humidity Controller (4-inch, 205 CFM) is perfect. It automatically adjusts based on your set parameters.
- Cost: ~$130-$150.
- Digital Thermometer/Hygrometer: Constant monitoring is key. The ThermoPro TP-65 Wireless Indoor/Outdoor Thermometer & Hygrometer is reliable and accurate, allowing you to monitor conditions from outside the cellar.
- Cost: ~$40-$50.
- Pressure-Treated Lumber: For any wood in contact with soil or high humidity, pressure-treated is a must. YellaWood KDAT (Kiln-Dried After Treatment) 2x6x10′ is excellent as it’s less prone to warping.
- Cost: ~$15-$20 per board (prices vary significantly).
- LED Lighting (Battery Operated): For occasional illumination, avoid wired electricity in a damp environment. The DURACELL DURABRIGHT 1500 Lumen LED Work Light (battery-powered, ~$50) provides ample light without permanent wiring.
- Cost: ~$50-$60.
These specific products represent a balance of durability, performance, and value that I’ve found crucial for a successful how to build a root cellar DIY project. Don’t underestimate the importance of these items in creating a long-lasting and effective food storage solution.
Detailed Comparison Table: Types of Root Cellars
While this guide focuses on a specific type of outdoor, partially buried root cellar, it’s helpful to understand the different options available. Each has its pros and cons, making certain types more suitable for specific climates, budgets, or existing structures. Here’s a comparison to help you weigh your choices.
| Feature | Buried Outdoor Cellar (This Guide) | Basement Root Cellar | Insulated Shed/Above-Ground | Earth-Sheltered (Fully Buried) | Simple Pit/Barrel Cellar |
|---|---|---|---|---|---|
| Description | Partially buried structure, often with a framed roof, excellent temperature stability. | Converted section of an existing basement, typically in a cool corner. | Well-insulated shed or outbuilding, relies heavily on insulation, less on earth. | Completely underground, often with an entry tunnel, maximum thermal stability. | Barrel or container buried in the ground, simple, small scale. |
| Cost Range (DIY) | $2,000 – $5,000+ | $300 – $1,500 | $1,000 – $3,000 | $5,000 – $15,000+ | $100 – $500 |
| Installation Difficulty | Moderate to High (excavation, concrete, framing) | Low to Moderate (framing, insulation, ventilation) | Moderate (framing, heavy insulation, ventilation) | Very High (extensive excavation, structural engineering, waterproofing) | Low (simple digging, container placement) |
| Capacity | Medium to Large (8’x10′ example: 1000-2000 lbs) | Small to Medium (depends on basement size, 200-1000 lbs) | Small to Medium (depends on shed size, 200-1000 lbs) | Large to Very Large (highly customizable) | Very Small (50-200 lbs) |
| Ideal Climate | Most temperate to cold climates, performs well in varying temps. | Homes with cool, damp basements, less effective in warm climates. | Colder climates where ambient air is consistently cool, requires active cooling in warmer seasons. | All climates, especially extreme ones, due to ultimate thermal mass. | Colder climates with consistent ground temperatures. |
| Key Advantage | Excellent balance of cost, capacity, and thermal performance. | Utilizes existing structure, minimal excavation, easy access. | No excavation, can be built anywhere with space. | Ultimate passive temperature control, highly resilient. | Extremely low cost, quick to implement for small needs. |
| Key Disadvantage | Requires significant excavation and construction effort. | Limited by basement conditions, potential for pest issues if not sealed. | More susceptible to external temperature fluctuations, higher reliance on insulation. | Very expensive, complex construction, major earth disturbance. | Limited capacity, can be prone to rodent/pest issues, difficult access. |
Pro Tips from My 10+ Years of Experience
After years of trial and error, I’ve gathered some invaluable insights that can make or break your root cellar’s success. These aren’t just theoretical; they come from real-world application on my own homestead.
- Pre-Cure Your Produce: This is a game-changer. Before storing, many vegetables (like potatoes, sweet potatoes, onions, squash) benefit from a « curing » period. For potatoes, this means leaving them in a dark, humid, 50-60°F environment for 1-2 weeks after harvest. This toughens their skins, heals minor cuts, and significantly extends storage life. I typically do this in a shaded, ventilated corner of my garage before moving them to the cellar.
- Airflow is Everything: Don’t stack produce directly against walls or in solid, airtight containers. Use slatted shelves, wire baskets, or wooden crates. Leave at least an inch of space between containers and the walls, and ensure air can circulate around individual items. This prevents moisture buildup and mold growth. My shelves are always slatted, made from 1×4 cedar with 1/2-inch gaps.
- Segregate Your Storage: Not all produce likes the same conditions, and some emit gases (like ethylene from apples) that can spoil others. Store apples and pears in a separate, tightly sealed bin or even a different section of the cellar if possible. Keep potatoes away from onions. I use distinct zones and sometimes even separate bins for ethylene emitters.
- Monitor and Adjust Relentlessly: Your root cellar isn’t a « set it and forget it » system. Check your thermometer/hygrometer daily, especially during seasonal transitions. If humidity drops, add a bucket of water. If it rises too high, increase ventilation. If temperatures creep up, open vents at night when it’s cooler. My AC Infinity fan allows for automated adjustments, but I still do visual checks.
- Pest Control (Passive): Prevention is key. Ensure all vents are screened with fine mesh (1/4-inch hardware cloth works well). Seal any gaps or cracks in walls and around the door. I also place a few non-toxic bait stations (e.g., Tomcat Bait Stations, ~$15 for 4-pack) outside the cellar, away from the entrance, to intercept rodents before they get inside. Never use poisons inside the cellar near food.
- Seasonal Rotation and Inspection: Don’t just dump and forget. Regularly inspect your stored produce. Remove any spoiled or damaged items immediately to prevent rot from spreading. Plan your meals around what’s stored, using older items first. I keep a whiteboard inside my cellar to track what’s stored and when it was put in.
The success of your root cellar isn’t just in its construction, but in how diligently you manage its environment and its contents. It’s a living system, not just a box in the ground.
Common Mistakes to Avoid When Building a Root Cellar
Building a root cellar is a rewarding project, but it’s easy to make mistakes that compromise its effectiveness. Having gone through the learning curve myself, I can point out these common pitfalls:
- Poor Site Selection and Drainage Issues: This is perhaps the most common and catastrophic mistake. Building in a low-lying area or heavy clay soil without adequate drainage will lead to a perpetually wet, moldy cellar, or worse, flooding. I once built a small experimental pit cellar that, after a torrential downpour, became a swimming pool for potatoes. Always dig test holes and consider a gravel drainage layer and exterior foundation waterproofing (like the Delta-MS membrane) to divert water away.
- Inadequate Ventilation: A root cellar needs fresh air. Without proper intake and exhaust vents, air becomes stagnant, leading to a buildup of ethylene gas (which speeds spoilage), off-flavors, and prime conditions for mold and mildew. Many DIYers install only one vent or vents that are too small. You need both a low intake and a high exhaust vent, ideally with a slight temperature difference to create a passive « stack effect. » An active fan, like the AC Infinity CLOUDLINE T4, is even better.
- Insufficient Insulation: While the earth provides thermal mass, it’s not enough on its own, especially for the parts of the cellar exposed or near the surface (door, upper walls, roof). Skimping on rigid foam insulation (e.g., Dow Styrofoam XPS, R-5 per inch) on the roof and upper walls will lead to temperature fluctuations, making it harder to maintain the ideal cool, stable environment. I learned this the hard way with my first cellar having an insufficiently insulated roof, leading to warmer temps in summer.
- Lack of a Vapor Barrier: In high-humidity environments like a root cellar, moisture can migrate into wall cavities, causing insulation to lose effectiveness and promoting rot in wood framing. Forgetting a 6-mil polyethylene vapor barrier on the warm side of the insulation (the interior side in a root cellar) is a critical error. This barrier keeps moisture from reaching the framing and insulation.
- Improper Shelving and Storage Practices: Stacking produce directly on the floor or in sealed plastic containers is a recipe for disaster. This restricts airflow, promotes moisture buildup, and allows rot to spread quickly. Always use slatted shelves or open crates, ensuring plenty of space for air circulation around and between stored items. Also, mixing ethylene-producing fruits (like apples) with vegetables like carrots can cause the vegetables to sprout or bitter, so segregation is important.
- Ignoring Monitoring Equipment: « Eyeballing » the temperature and humidity is not enough. A cheap but reliable digital thermometer/hygrometer (e.g., ThermoPro TP-65) is a must. Without accurate readings, you can’t make informed adjustments to your ventilation or humidity control, leading to suboptimal storage conditions and spoiled food.
- Using Non-Treated Wood in Damp Areas: Any wood in direct contact with soil or consistently high humidity (like your shelving or internal framing if not properly vapor-barriered) should be pressure-treated or naturally rot-resistant (e.g.,