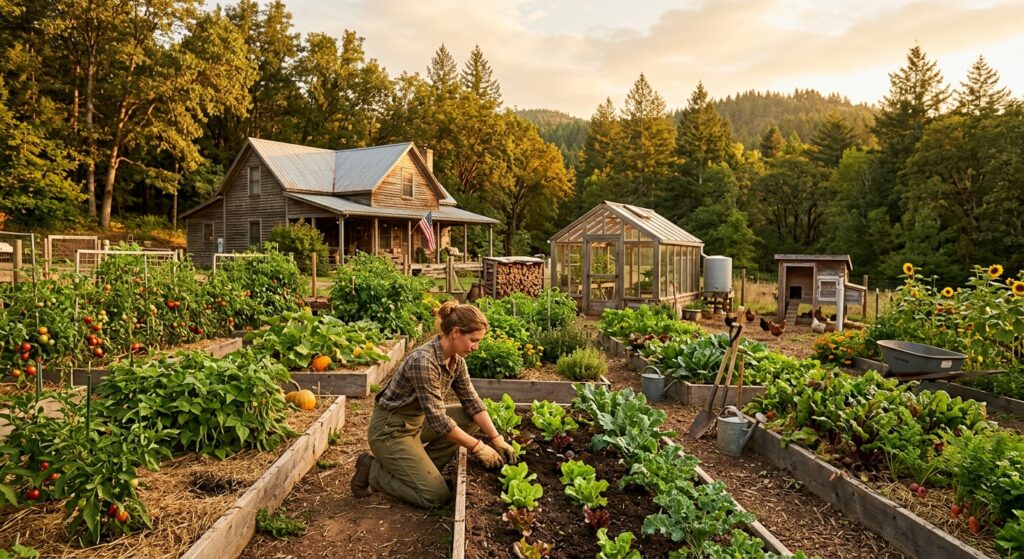
Embarking on the journey to cultivate a self sufficient garden from scratch is one of the most empowering decisions you can make for your homestead, your family, and your personal well-being. After more than a decade living off-grid, growing the vast majority of my own food, I’ve learned that the earth is an incredibly generous provider if you understand how to work with it, not against it. This isn’t just about saving money on groceries; it’s about reclaiming control over your food source, understanding where your sustenance comes from, and fostering a deep connection with the natural world. In this comprehensive guide, I’ll walk you through every critical step, from the initial planning stages to harvesting your first bounty and beyond, sharing the practical knowledge and specific product recommendations I’ve gathered from years of hands-on experience. My goal is to equip you with the detailed, actionable information you need to transform a patch of land into a thriving, self-sustaining food system.
Why This Matters / Background
For me, the decision to pursue a self-sufficient lifestyle, including growing my own food, wasn’t just a hobby; it was a response to a growing unease about our modern food systems. Over ten years ago, I started noticing the rising cost of produce, the questionable origins of much of what was available in supermarkets, and the increasing fragility of global supply chains. Living off-grid intensified these concerns, highlighting the absolute necessity of being able to provide for oneself. I remember one particularly harsh winter when a major storm crippled transportation routes for days. While my neighbors worried about dwindling supermarket shelves, I was harvesting carrots and kale from my cold frames and canning pickles from the previous summer’s bounty. That experience solidified my conviction: food independence is not a luxury; it’s a fundamental pillar of true resilience.
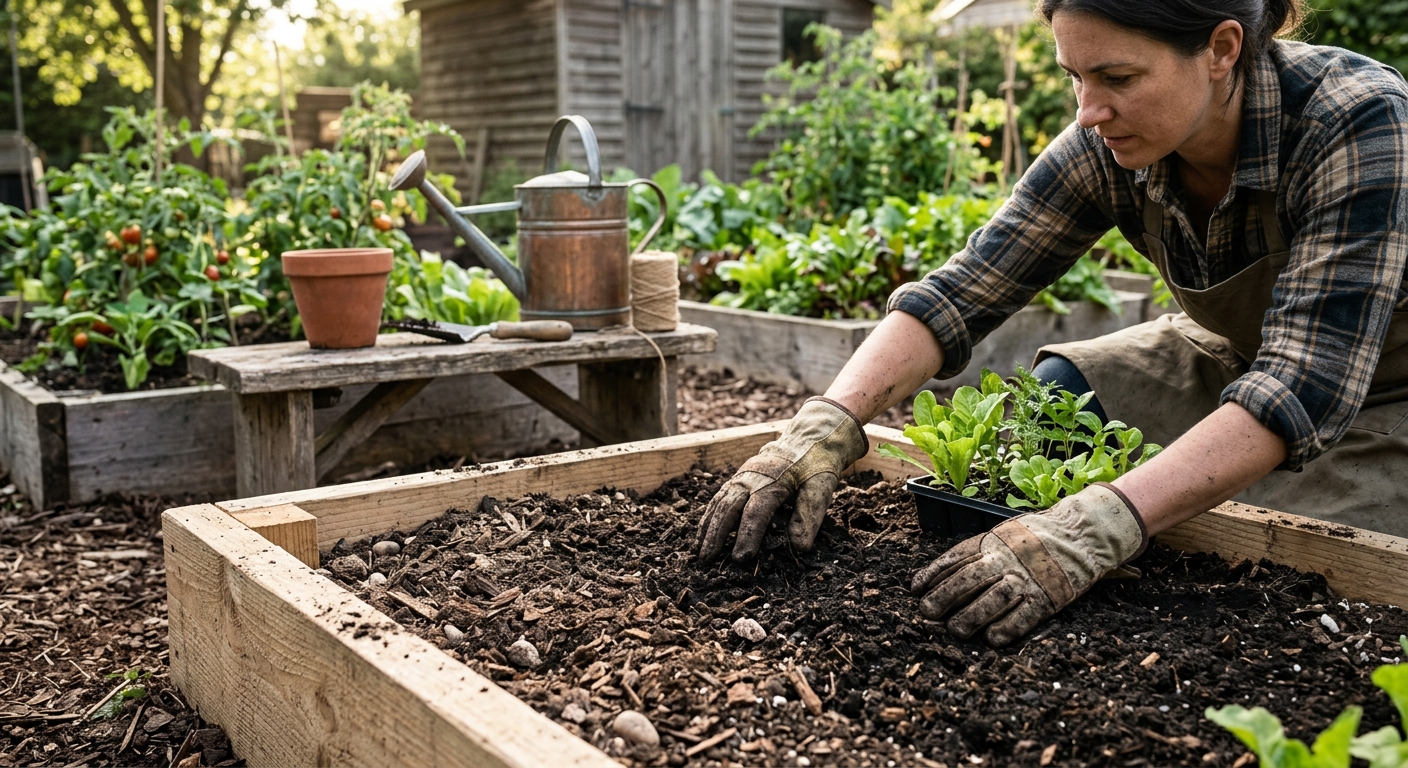
Beyond the practical aspects of food security, there are profound benefits to nurturing a self sufficient garden from scratch. The health advantages are undeniable. When you grow your own food, you control what goes into it – no harmful pesticides, herbicides, or genetically modified organisms. My family eats fresh, nutrient-dense produce every day, picked at its peak ripeness, which means higher vitamin and mineral content than anything trucked across states. Furthermore, the act of gardening itself is incredibly therapeutic. It connects you to the rhythms of nature, reduces stress, and provides a sense of accomplishment that few other activities can match. It’s a tangible way to reduce your carbon footprint, minimize waste, and contribute to a healthier planet. The initial investment of time and effort pays dividends not just in produce, but in peace of mind, improved health, and a profound sense of self-reliance that truly transforms your way of life. It’s about building a legacy, teaching invaluable skills to future generations, and ensuring that no matter what the world throws at you, you’ll always have wholesome food on your table.
Complete Step-by-Step Guide: Building Your Self-Sufficient Garden
Step 1: Site Selection & Initial Planning
The foundation of any successful self-sufficient garden is careful planning, starting with site selection. This isn’t a step to rush; it will dictate much of your garden’s success for years to come.
- Observe Sun Exposure: Most fruiting vegetables (tomatoes, peppers, squash, beans) require at least 6-8 hours of direct sunlight daily. Leafy greens and root vegetables can tolerate 4-6 hours. Spend a full day observing different spots in your yard. I use a simple compass app on my phone to note cardinal directions and track where shadows fall throughout the day. Ideally, you want a south-facing plot (in the Northern Hemisphere) that gets full sun from late morning to late afternoon. For example, my main garden plot, which measures roughly 20 feet by 30 feet, receives a solid 9 hours of direct sun from 9 AM to 6 PM during peak summer, perfect for my heat-loving crops.
- Assess Water Access: Proximity to a reliable water source is paramount. Hauling water by hand is incredibly labor-intensive and unsustainable for a larger garden. Consider your well, a natural spring, or a rainwater collection system. If you plan to use a pump, calculate the distance and elevation gain. My initial garden was 150 feet from my well, requiring 1-inch Schedule 40 PVC pipe to minimize pressure loss for my drip system.
- Evaluate Soil Drainage: Dig a small test pit (1 foot deep, 1 foot wide) and fill it with water. If it drains within 15-30 minutes, you have good drainage. If it takes hours, you’ll need to amend your soil significantly or consider raised beds. Poor drainage leads to root rot and nutrient leaching.
- Consider Prevailing Winds & Protection: Strong winds can damage plants, dry out soil quickly, and hinder pollination. Think about natural windbreaks like existing structures, fences, or evergreen hedges. My property has a natural tree line to the west, which protects against harsh afternoon winds. If you don’t have natural protection, a sturdy fence or a row of sunflowers can help.
- Map Your Garden: Draw a detailed plan. Include bed dimensions (e.g., 4×8 ft raised beds, or 3-foot wide in-ground rows with 2-foot paths), plant spacing, and estimated yields. This helps you visualize the space, plan crop rotations, and avoid overcrowding. I use graph paper and colored pencils, but there are free online tools like « Garden Planner » that can help.
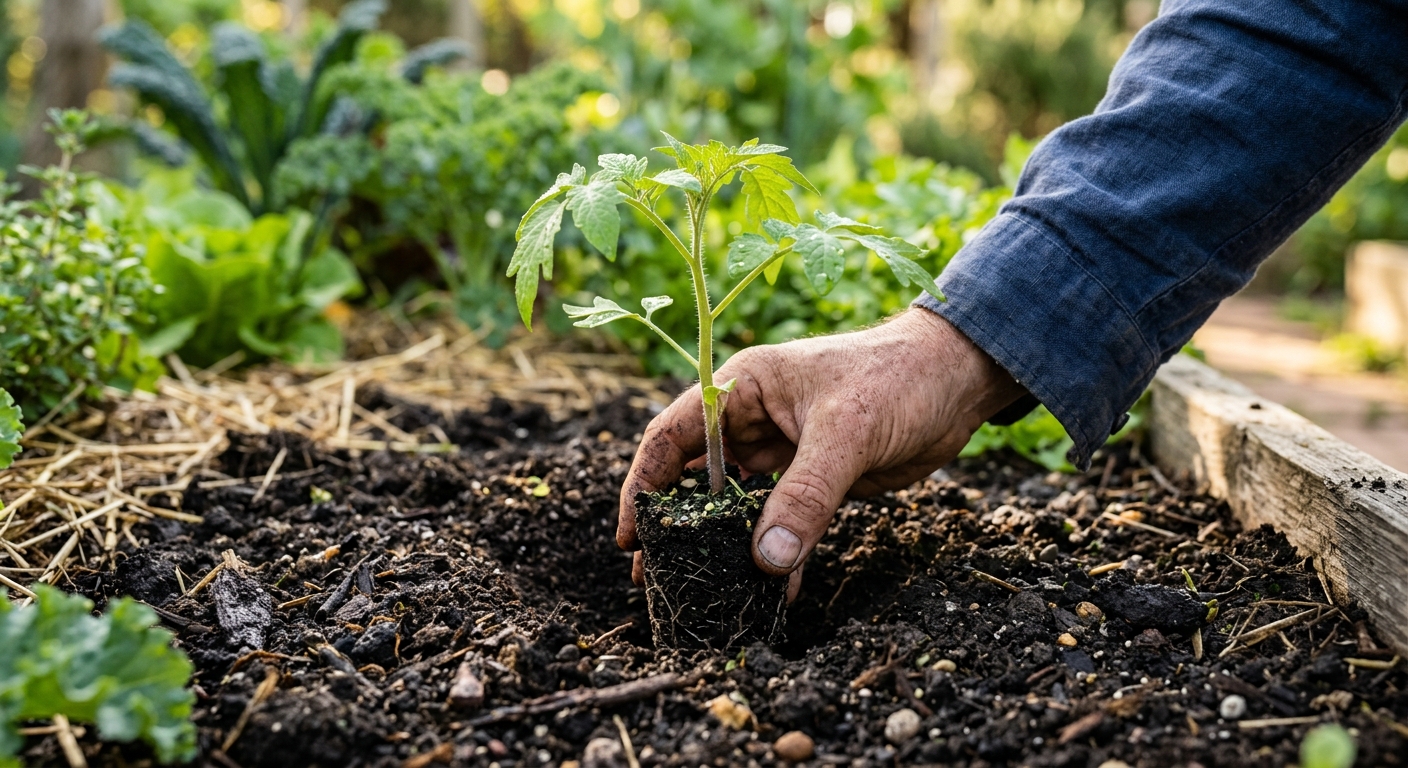
Step 2: Soil Testing & Amendment
Step 8: Season Extension & Winterizing
Extend your harvest and protect your garden for the off-season to truly maximize your self sufficient garden from scratch.
- Cold Frames: Simple structures with a transparent top (glass, polycarbonate, or old windows) that sit over garden beds. They trap solar heat, allowing you to grow cold-hardy crops (lettuce, spinach, kale, radishes) well into winter or start seeds earlier in spring. A basic cold frame can be built from 2×6 lumber and a sheet of polycarbonate for under $100.
- Hoop Houses/Low Tunnels: Larger structures made from flexible hoops (PVC pipe or EMT conduit) covered with greenhouse plastic. These provide more space and greater temperature moderation. A 10×20 ft DIY low tunnel kit can cost $200-$500, while a larger, more robust hoop house kit might be $1,000-$3,000. I use a 6×12 ft low tunnel made from 1/2-inch PVC hoops and 6mil greenhouse plastic, which extends my lettuce and spinach harvest by at least
- Harvesting Techniques:
- Timing: Harvest vegetables at their peak ripeness for best flavor and nutritional value. For example, green beans should snap cleanly, cucumbers should be firm, and tomatoes should be fully colored.
- Frequency: Many crops, like zucchini, cucumbers, and bush beans, produce more if harvested frequently. Pick daily or every other day.
- Tools: Use clean, sharp pruners (e.g., Corona ClassicCUT Bypass Pruner BP 3180, ~$30) or a sharp knife for clean cuts, minimizing damage to the plant.
- Seed Saving: This is where the « self-sufficient » aspect truly shines.
- Selection: Only save seeds from your healthiest, most vigorous plants that show desired traits (disease resistance, good flavor, high yield).
- Isolation: To ensure true-to-type seeds, prevent cross-pollination. This can be challenging for open-pollinated crops that readily cross (e.g., squash, corn). For beginners, focus on self-pollinating plants like beans, peas, lettuce, and tomatoes.
- Processing:
- Dry Seeds (Beans, Peas, Lettuce, Grains): Allow pods/seed heads to dry completely on the plant. Harvest, shell, and clean the seeds, removing chaff.
- Wet Seeds (Tomatoes, Cucumbers, Squash): For tomatoes, ferment the seeds in water for a few days to remove the gel coating and inhibit disease. For cucumbers/squash, scrape out seeds, wash thoroughly, and dry.
- Drying: Spread seeds thinly on screens or paper plates in a cool, dry, well-ventilated area for 1-4 weeks. Ensure they are bone-dry before storage. I aim for less than 8% moisture content.
- Storage: Store seeds in airtight containers (glass jars with desiccant packets work well) in a cool, dark, dry place (ideally 40-50°F and 30-40% humidity). Label clearly with variety and date. Properly stored seeds can remain viable for 3-10 years or more.
Step 8: Season Extension & Winterizing
Extend your harvest and protect your garden for the off-season to truly maximize your self sufficient garden from scratch.
- Cold Frames: Simple structures with a transparent top (glass, polycarbonate, or old windows) that sit over garden beds. They trap solar heat, allowing you to grow cold-hardy crops (lettuce, spinach, kale, radishes) well into winter or start seeds earlier in spring. A basic cold frame can be built from 2×6 lumber and a sheet of polycarbonate for under $100.
- Hoop Houses/Low Tunnels: Larger structures made from flexible hoops (PVC pipe or EMT conduit) covered with greenhouse plastic. These provide more space and greater temperature moderation. A 10×20 ft DIY low tunnel kit can cost $200-$500, while a larger, more robust hoop house kit might be $1,000-$3,000. I use a 6×12 ft low tunnel made from 1/2-inch PVC hoops and 6mil greenhouse plastic, which extends my lettuce and spinach harvest by at least
- Harvesting Techniques:
The culmination of your efforts is the harvest, and seed saving closes the loop on self-sufficiency.
- Harvesting Techniques:
- Timing: Harvest vegetables at their peak ripeness for best flavor and nutritional value. For example, green beans should snap cleanly, cucumbers should be firm, and tomatoes should be fully colored.
- Frequency: Many crops, like zucchini, cucumbers, and bush beans, produce more if harvested frequently. Pick daily or every other day.
- Tools: Use clean, sharp pruners (e.g., Corona ClassicCUT Bypass Pruner BP 3180, ~$30) or a sharp knife for clean cuts, minimizing damage to the plant.
- Seed Saving: This is where the « self-sufficient » aspect truly shines.
- Selection: Only save seeds from your healthiest, most vigorous plants that show desired traits (disease resistance, good flavor, high yield).
- Isolation: To ensure true-to-type seeds, prevent cross-pollination. This can be challenging for open-pollinated crops that readily cross (e.g., squash, corn). For beginners, focus on self-pollinating plants like beans, peas, lettuce, and tomatoes.
- Processing:
- Dry Seeds (Beans, Peas, Lettuce, Grains): Allow pods/seed heads to dry completely on the plant. Harvest, shell, and clean the seeds, removing chaff.
- Wet Seeds (Tomatoes, Cucumbers, Squash): For tomatoes, ferment the seeds in water for a few days to remove the gel coating and inhibit disease. For cucumbers/squash, scrape out seeds, wash thoroughly, and dry.
- Drying: Spread seeds thinly on screens or paper plates in a cool, dry, well-ventilated area for 1-4 weeks. Ensure they are bone-dry before storage. I aim for less than 8% moisture content.
- Storage: Store seeds in airtight containers (glass jars with desiccant packets work well) in a cool, dark, dry place (ideally 40-50°F and 30-40% humidity). Label clearly with variety and date. Properly stored seeds can remain viable for 3-10 years or more.
Step 8: Season Extension & Winterizing
Extend your harvest and protect your garden for the off-season to truly maximize your self sufficient garden from scratch.
- Cold Frames: Simple structures with a transparent top (glass, polycarbonate, or old windows) that sit over garden beds. They trap solar heat, allowing you to grow cold-hardy crops (lettuce, spinach, kale, radishes) well into winter or start seeds earlier in spring. A basic cold frame can be built from 2×6 lumber and a sheet of polycarbonate for under $100.
- Hoop Houses/Low Tunnels: Larger structures made from flexible hoops (PVC pipe or EMT conduit) covered with greenhouse plastic. These provide more space and greater temperature moderation. A 10×20 ft DIY low tunnel kit can cost $200-$500, while a larger, more robust hoop house kit might be $1,000-$3,000. I use a 6×12 ft low tunnel made from 1/2-inch PVC hoops and 6mil greenhouse plastic, which extends my lettuce and spinach harvest by at least
Step 7: Harvesting & Seed Saving
The culmination of your efforts is the harvest, and seed saving closes the loop on self-sufficiency.
- Harvesting Techniques:
- Timing: Harvest vegetables at their peak ripeness for best flavor and nutritional value. For example, green beans should snap cleanly, cucumbers should be firm, and tomatoes should be fully colored.
- Frequency: Many crops, like zucchini, cucumbers, and bush beans, produce more if harvested frequently. Pick daily or every other day.
- Tools: Use clean, sharp pruners (e.g., Corona ClassicCUT Bypass Pruner BP 3180, ~$30) or a sharp knife for clean cuts, minimizing damage to the plant.
- Seed Saving: This is where the « self-sufficient » aspect truly shines.
- Selection: Only save seeds from your healthiest, most vigorous plants that show desired traits (disease resistance, good flavor, high yield).
- Isolation: To ensure true-to-type seeds, prevent cross-pollination. This can be challenging for open-pollinated crops that readily cross (e.g., squash, corn). For beginners, focus on self-pollinating plants like beans, peas, lettuce, and tomatoes.
- Processing:
- Dry Seeds (Beans, Peas, Lettuce, Grains): Allow pods/seed heads to dry completely on the plant. Harvest, shell, and clean the seeds, removing chaff.
- Wet Seeds (Tomatoes, Cucumbers, Squash): For tomatoes, ferment the seeds in water for a few days to remove the gel coating and inhibit disease. For cucumbers/squash, scrape out seeds, wash thoroughly, and dry.
- Drying: Spread seeds thinly on screens or paper plates in a cool, dry, well-ventilated area for 1-4 weeks. Ensure they are bone-dry before storage. I aim for less than 8% moisture content.
- Storage: Store seeds in airtight containers (glass jars with desiccant packets work well) in a cool, dark, dry place (ideally 40-50°F and 30-40% humidity). Label clearly with variety and date. Properly stored seeds can remain viable for 3-10 years or more.
Step 8: Season Extension & Winterizing
Extend your harvest and protect your garden for the off-season to truly maximize your self sufficient garden from scratch.
- Cold Frames: Simple structures with a transparent top (glass, polycarbonate, or old windows) that sit over garden beds. They trap solar heat, allowing you to grow cold-hardy crops (lettuce, spinach, kale, radishes) well into winter or start seeds earlier in spring. A basic cold frame can be built from 2×6 lumber and a sheet of polycarbonate for under $100.
- Hoop Houses/Low Tunnels: Larger structures made from flexible hoops (PVC pipe or EMT conduit) covered with greenhouse plastic. These provide more space and greater temperature moderation. A 10×20 ft DIY low tunnel kit can cost $200-$500, while a larger, more robust hoop house kit might be $1,000-$3,000. I use a 6×12 ft low tunnel made from 1/2-inch PVC hoops and 6mil greenhouse plastic, which extends my lettuce and spinach harvest by at least
- Integrated Pest Management (IPM): This holistic approach combines several strategies.
- Observation: Regularly inspect your plants for early signs of pests or disease. Catching issues early is key.
- Physical Barriers: Use row covers (e.g., Agribon AG-19 floating row cover, 10×20 ft, ~$20) to protect young plants from insect pests like cabbage worms and squash bugs. Install fences (e.g., 2×4 welded wire mesh, 4 ft tall, 50 ft roll ~$70) to keep out deer, rabbits, and other larger animals.
- Hand-Picking: For larger pests like tomato hornworms or squash bugs, simply pick them off and drop them into a bucket of soapy water.
- Companion Planting: As mentioned, certain plants repel pests. Marigolds, garlic, and onions are excellent deterrents.
- Attract Beneficial Insects: Plant flowers like dill, fennel, cosmos, and sweet alyssum to attract ladybugs, lacewings, and parasitic wasps, which prey on common garden pests.
- Organic Sprays & Treatments:
- Neem Oil: An excellent broad-spectrum organic insecticide and fungicide. Bonide Neem Oil Concentrate (16oz, ~$20) can be mixed at a rate of 1-2 tbsp per gallon of water and sprayed on affected plants.
- Insecticidal Soap: Effective against soft-bodied insects like aphids, whiteflies, and spider mites. Garden Safe Insecticidal Soap (24oz ready-to-use, ~$10).
- Bacillus thuringiensis (Bt): A naturally occurring soil bacterium that targets caterpillars and worms. Monterey BT Worm & Caterpillar Killer (16oz, ~$18) is highly effective and safe for beneficial insects.
- Copper or Sulfur Sprays: For fungal diseases like powdery mildew or blight, organic copper (e.g., Bonide Copper Fungicide, ~$15 for 1lb) or sulfur (e.g., Safer Brand Garden Fungicide, ~$10 for 16oz) can be used as a last resort.
Step 7: Harvesting & Seed Saving
The culmination of your efforts is the harvest, and seed saving closes the loop on self-sufficiency.
- Harvesting Techniques:
- Timing: Harvest vegetables at their peak ripeness for best flavor and nutritional value. For example, green beans should snap cleanly, cucumbers should be firm, and tomatoes should be fully colored.
- Frequency: Many crops, like zucchini, cucumbers, and bush beans, produce more if harvested frequently. Pick daily or every other day.
- Tools: Use clean, sharp pruners (e.g., Corona ClassicCUT Bypass Pruner BP 3180, ~$30) or a sharp knife for clean cuts, minimizing damage to the plant.
- Seed Saving: This is where the « self-sufficient » aspect truly shines.
- Selection: Only save seeds from your healthiest, most vigorous plants that show desired traits (disease resistance, good flavor, high yield).
- Isolation: To ensure true-to-type seeds, prevent cross-pollination. This can be challenging for open-pollinated crops that readily cross (e.g., squash, corn). For beginners, focus on self-pollinating plants like beans, peas, lettuce, and tomatoes.
- Processing:
- Dry Seeds (Beans, Peas, Lettuce, Grains): Allow pods/seed heads to dry completely on the plant. Harvest, shell, and clean the seeds, removing chaff.
- Wet Seeds (Tomatoes, Cucumbers, Squash): For tomatoes, ferment the seeds in water for a few days to remove the gel coating and inhibit disease. For cucumbers/squash, scrape out seeds, wash thoroughly, and dry.
- Drying: Spread seeds thinly on screens or paper plates in a cool, dry, well-ventilated area for 1-4 weeks. Ensure they are bone-dry before storage. I aim for less than 8% moisture content.
- Storage: Store seeds in airtight containers (glass jars with desiccant packets work well) in a cool, dark, dry place (ideally 40-50°F and 30-40% humidity). Label clearly with variety and date. Properly stored seeds can remain viable for 3-10 years or more.
Step 8: Season Extension & Winterizing
Extend your harvest and protect your garden for the off-season to truly maximize your self sufficient garden from scratch.
- Cold Frames: Simple structures with a transparent top (glass, polycarbonate, or old windows) that sit over garden beds. They trap solar heat, allowing you to grow cold-hardy crops (lettuce, spinach, kale, radishes) well into winter or start seeds earlier in spring. A basic cold frame can be built from 2×6 lumber and a sheet of polycarbonate for under $100.
- Hoop Houses/Low Tunnels: Larger structures made from flexible hoops (PVC pipe or EMT conduit) covered with greenhouse plastic. These provide more space and greater temperature moderation. A 10×20 ft DIY low tunnel kit can cost $200-$500, while a larger, more robust hoop house kit might be $1,000-$3,000. I use a 6×12 ft low tunnel made from 1/2-inch PVC hoops and 6mil greenhouse plastic, which extends my lettuce and spinach harvest by at least
Maintaining a self sufficient garden from scratch means embracing organic pest and disease control.
- Integrated Pest Management (IPM): This holistic approach combines several strategies.
- Observation: Regularly inspect your plants for early signs of pests or disease. Catching issues early is key.
- Physical Barriers: Use row covers (e.g., Agribon AG-19 floating row cover, 10×20 ft, ~$20) to protect young plants from insect pests like cabbage worms and squash bugs. Install fences (e.g., 2×4 welded wire mesh, 4 ft tall, 50 ft roll ~$70) to keep out deer, rabbits, and other larger animals.
- Hand-Picking: For larger pests like tomato hornworms or squash bugs, simply pick them off and drop them into a bucket of soapy water.
- Companion Planting: As mentioned, certain plants repel pests. Marigolds, garlic, and onions are excellent deterrents.
- Attract Beneficial Insects: Plant flowers like dill, fennel, cosmos, and sweet alyssum to attract ladybugs, lacewings, and parasitic wasps, which prey on common garden pests.
- Organic Sprays & Treatments:
- Neem Oil: An excellent broad-spectrum organic insecticide and fungicide. Bonide Neem Oil Concentrate (16oz, ~$20) can be mixed at a rate of 1-2 tbsp per gallon of water and sprayed on affected plants.
- Insecticidal Soap: Effective against soft-bodied insects like aphids, whiteflies, and spider mites. Garden Safe Insecticidal Soap (24oz ready-to-use, ~$10).
- Bacillus thuringiensis (Bt): A naturally occurring soil bacterium that targets caterpillars and worms. Monterey BT Worm & Caterpillar Killer (16oz, ~$18) is highly effective and safe for beneficial insects.
- Copper or Sulfur Sprays: For fungal diseases like powdery mildew or blight, organic copper (e.g., Bonide Copper Fungicide, ~$15 for 1lb) or sulfur (e.g., Safer Brand Garden Fungicide, ~$10 for 16oz) can be used as a last resort.
Step 7: Harvesting & Seed Saving
The culmination of your efforts is the harvest, and seed saving closes the loop on self-sufficiency.
- Harvesting Techniques:
- Timing: Harvest vegetables at their peak ripeness for best flavor and nutritional value. For example, green beans should snap cleanly, cucumbers should be firm, and tomatoes should be fully colored.
- Frequency: Many crops, like zucchini, cucumbers, and bush beans, produce more if harvested frequently. Pick daily or every other day.
- Tools: Use clean, sharp pruners (e.g., Corona ClassicCUT Bypass Pruner BP 3180, ~$30) or a sharp knife for clean cuts, minimizing damage to the plant.
- Seed Saving: This is where the « self-sufficient » aspect truly shines.
- Selection: Only save seeds from your healthiest, most vigorous plants that show desired traits (disease resistance, good flavor, high yield).
- Isolation: To ensure true-to-type seeds, prevent cross-pollination. This can be challenging for open-pollinated crops that readily cross (e.g., squash, corn). For beginners, focus on self-pollinating plants like beans, peas, lettuce, and tomatoes.
- Processing:
- Dry Seeds (Beans, Peas, Lettuce, Grains): Allow pods/seed heads to dry completely on the plant. Harvest, shell, and clean the seeds, removing chaff.
- Wet Seeds (Tomatoes, Cucumbers, Squash): For tomatoes, ferment the seeds in water for a few days to remove the gel coating and inhibit disease. For cucumbers/squash, scrape out seeds, wash thoroughly, and dry.
- Drying: Spread seeds thinly on screens or paper plates in a cool, dry, well-ventilated area for 1-4 weeks. Ensure they are bone-dry before storage. I aim for less than 8% moisture content.
- Storage: Store seeds in airtight containers (glass jars with desiccant packets work well) in a cool, dark, dry place (ideally 40-50°F and 30-40% humidity). Label clearly with variety and date. Properly stored seeds can remain viable for 3-10 years or more.
Step 8: Season Extension & Winterizing
Extend your harvest and protect your garden for the off-season to truly maximize your self sufficient garden from scratch.
- Cold Frames: Simple structures with a transparent top (glass, polycarbonate, or old windows) that sit over garden beds. They trap solar heat, allowing you to grow cold-hardy crops (lettuce, spinach, kale, radishes) well into winter or start seeds earlier in spring. A basic cold frame can be built from 2×6 lumber and a sheet of polycarbonate for under $100.
- Hoop Houses/Low Tunnels: Larger structures made from flexible hoops (PVC pipe or EMT conduit) covered with greenhouse plastic. These provide more space and greater temperature moderation. A 10×20 ft DIY low tunnel kit can cost $200-$500, while a larger, more robust hoop house kit might be $1,000-$3,000. I use a 6×12 ft low tunnel made from 1/2-inch PVC hoops and 6mil greenhouse plastic, which extends my lettuce and spinach harvest by at least
Step 6: Pest & Disease Management (Organic)
Maintaining a self sufficient garden from scratch means embracing organic pest and disease control.
- Integrated Pest Management (IPM): This holistic approach combines several strategies.
- Observation: Regularly inspect your plants for early signs of pests or disease. Catching issues early is key.
- Physical Barriers: Use row covers (e.g., Agribon AG-19 floating row cover, 10×20 ft, ~$20) to protect young plants from insect pests like cabbage worms and squash bugs. Install fences (e.g., 2×4 welded wire mesh, 4 ft tall, 50 ft roll ~$70) to keep out deer, rabbits, and other larger animals.
- Hand-Picking: For larger pests like tomato hornworms or squash bugs, simply pick them off and drop them into a bucket of soapy water.
- Companion Planting: As mentioned, certain plants repel pests. Marigolds, garlic, and onions are excellent deterrents.
- Attract Beneficial Insects: Plant flowers like dill, fennel, cosmos, and sweet alyssum to attract ladybugs, lacewings, and parasitic wasps, which prey on common garden pests.
- Organic Sprays & Treatments:
- Neem Oil: An excellent broad-spectrum organic insecticide and fungicide. Bonide Neem Oil Concentrate (16oz, ~$20) can be mixed at a rate of 1-2 tbsp per gallon of water and sprayed on affected plants.
- Insecticidal Soap: Effective against soft-bodied insects like aphids, whiteflies, and spider mites. Garden Safe Insecticidal Soap (24oz ready-to-use, ~$10).
- Bacillus thuringiensis (Bt): A naturally occurring soil bacterium that targets caterpillars and worms. Monterey BT Worm & Caterpillar Killer (16oz, ~$18) is highly effective and safe for beneficial insects.
- Copper or Sulfur Sprays: For fungal diseases like powdery mildew or blight, organic copper (e.g., Bonide Copper Fungicide, ~$15 for 1lb) or sulfur (e.g., Safer Brand Garden Fungicide, ~$10 for 16oz) can be used as a last resort.
Step 7: Harvesting & Seed Saving
The culmination of your efforts is the harvest, and seed saving closes the loop on self-sufficiency.
- Harvesting Techniques:
- Timing: Harvest vegetables at their peak ripeness for best flavor and nutritional value. For example, green beans should snap cleanly, cucumbers should be firm, and tomatoes should be fully colored.
- Frequency: Many crops, like zucchini, cucumbers, and bush beans, produce more if harvested frequently. Pick daily or every other day.
- Tools: Use clean, sharp pruners (e.g., Corona ClassicCUT Bypass Pruner BP 3180, ~$30) or a sharp knife for clean cuts, minimizing damage to the plant.
- Seed Saving: This is where the « self-sufficient » aspect truly shines.
- Selection: Only save seeds from your healthiest, most vigorous plants that show desired traits (disease resistance, good flavor, high yield).
- Isolation: To ensure true-to-type seeds, prevent cross-pollination. This can be challenging for open-pollinated crops that readily cross (e.g., squash, corn). For beginners, focus on self-pollinating plants like beans, peas, lettuce, and tomatoes.
- Processing:
- Dry Seeds (Beans, Peas, Lettuce, Grains): Allow pods/seed heads to dry completely on the plant. Harvest, shell, and clean the seeds, removing chaff.
- Wet Seeds (Tomatoes, Cucumbers, Squash): For tomatoes, ferment the seeds in water for a few days to remove the gel coating and inhibit disease. For cucumbers/squash, scrape out seeds, wash thoroughly, and dry.
- Drying: Spread seeds thinly on screens or paper plates in a cool, dry, well-ventilated area for 1-4 weeks. Ensure they are bone-dry before storage. I aim for less than 8% moisture content.
- Storage: Store seeds in airtight containers (glass jars with desiccant packets work well) in a cool, dark, dry place (ideally 40-50°F and 30-40% humidity). Label clearly with variety and date. Properly stored seeds can remain viable for 3-10 years or more.
Step 8: Season Extension & Winterizing
Extend your harvest and protect your garden for the off-season to truly maximize your self sufficient garden from scratch.
- Cold Frames: Simple structures with a transparent top (glass, polycarbonate, or old windows) that sit over garden beds. They trap solar heat, allowing you to grow cold-hardy crops (lettuce, spinach, kale, radishes) well into winter or start seeds earlier in spring. A basic cold frame can be built from 2×6 lumber and a sheet of polycarbonate for under $100.
- Hoop Houses/Low Tunnels: Larger structures made from flexible hoops (PVC pipe or EMT conduit) covered with greenhouse plastic. These provide more space and greater temperature moderation. A 10×20 ft DIY low tunnel kit can cost $200-$500, while a larger, more robust hoop house kit might be $1,000-$3,000. I use a 6×12 ft low tunnel made from 1/2-inch PVC hoops and 6mil greenhouse plastic, which extends my lettuce and spinach harvest by at least
- Choose Heirloom & Open-Pollinated Seeds: These varieties produce seeds that will grow true to type, meaning you can save seeds from your harvest year after year. F1 hybrids, while often vigorous, will not produce consistent offspring from saved seeds. Reputable seed companies include Baker Creek Heirloom Seeds, High Mowing Organic Seeds, and Seed Savers Exchange. Start with common, reliable varieties like ‘Black Krim’ tomatoes, ‘Provider’ bush beans, ‘Waltham Butternut’ squash, and ‘Black Seeded Simpson’ lettuce.
- Start Seeds Indoors (Optional but Recommended): For longer growing seasons or specific crops, starting seeds indoors gives you a head start. Use seed-starting mix (e.g., Espoma Organic Seed Starter Mix, ~$10 for 16qt bag) in seed trays (Jiffy Professional Greenhouse 72-cell kit, ~$15). Provide adequate light with LED grow lights (Barrina T5 2ft 4-pack LED Grow Lights, 20W each, ~$50) for 14-16 hours a day, positioned 2-4 inches above seedlings. Maintain consistent temperatures (65-75°F for most).
- Direct Sowing vs. Transplanting: Some crops (carrots, radishes, beans, corn) prefer direct sowing into the garden bed. Others (tomatoes, peppers, broccoli, kale) benefit from being started indoors and transplanted. Follow seed packet instructions for planting depths (e.g., lettuce seeds are often surface-sown or planted 1/8 inch deep, while beans are 1 inch deep) and spacing.
- Companion Planting: Strategically plant different species together to enhance growth, deter pests, and attract beneficial insects. For example, planting marigolds near tomatoes can deter nematodes, and basil improves tomato flavor. Nasturtiums can act as a trap crop for aphids.
- Succession Planting: For a continuous harvest, plant small batches of quick-growing crops (lettuce, radishes, cilantro) every 2-3 weeks. As one crop finishes, another is ready to take its place.
Step 6: Pest & Disease Management (Organic)
Maintaining a self sufficient garden from scratch means embracing organic pest and disease control.
- Integrated Pest Management (IPM): This holistic approach combines several strategies.
- Observation: Regularly inspect your plants for early signs of pests or disease. Catching issues early is key.
- Physical Barriers: Use row covers (e.g., Agribon AG-19 floating row cover, 10×20 ft, ~$20) to protect young plants from insect pests like cabbage worms and squash bugs. Install fences (e.g., 2×4 welded wire mesh, 4 ft tall, 50 ft roll ~$70) to keep out deer, rabbits, and other larger animals.
- Hand-Picking: For larger pests like tomato hornworms or squash bugs, simply pick them off and drop them into a bucket of soapy water.
- Companion Planting: As mentioned, certain plants repel pests. Marigolds, garlic, and onions are excellent deterrents.
- Attract Beneficial Insects: Plant flowers like dill, fennel, cosmos, and sweet alyssum to attract ladybugs, lacewings, and parasitic wasps, which prey on common garden pests.
- Organic Sprays & Treatments:
- Neem Oil: An excellent broad-spectrum organic insecticide and fungicide. Bonide Neem Oil Concentrate (16oz, ~$20) can be mixed at a rate of 1-2 tbsp per gallon of water and sprayed on affected plants.
- Insecticidal Soap: Effective against soft-bodied insects like aphids, whiteflies, and spider mites. Garden Safe Insecticidal Soap (24oz ready-to-use, ~$10).
- Bacillus thuringiensis (Bt): A naturally occurring soil bacterium that targets caterpillars and worms. Monterey BT Worm & Caterpillar Killer (16oz, ~$18) is highly effective and safe for beneficial insects.
- Copper or Sulfur Sprays: For fungal diseases like powdery mildew or blight, organic copper (e.g., Bonide Copper Fungicide, ~$15 for 1lb) or sulfur (e.g., Safer Brand Garden Fungicide, ~$10 for 16oz) can be used as a last resort.
Step 7: Harvesting & Seed Saving
The culmination of your efforts is the harvest, and seed saving closes the loop on self-sufficiency.
- Harvesting Techniques:
- Timing: Harvest vegetables at their peak ripeness for best flavor and nutritional value. For example, green beans should snap cleanly, cucumbers should be firm, and tomatoes should be fully colored.
- Frequency: Many crops, like zucchini, cucumbers, and bush beans, produce more if harvested frequently. Pick daily or every other day.
- Tools: Use clean, sharp pruners (e.g., Corona ClassicCUT Bypass Pruner BP 3180, ~$30) or a sharp knife for clean cuts, minimizing damage to the plant.
- Seed Saving: This is where the « self-sufficient » aspect truly shines.
- Selection: Only save seeds from your healthiest, most vigorous plants that show desired traits (disease resistance, good flavor, high yield).
- Isolation: To ensure true-to-type seeds, prevent cross-pollination. This can be challenging for open-pollinated crops that readily cross (e.g., squash, corn). For beginners, focus on self-pollinating plants like beans, peas, lettuce, and tomatoes.
- Processing:
- Dry Seeds (Beans, Peas, Lettuce, Grains): Allow pods/seed heads to dry completely on the plant. Harvest, shell, and clean the seeds, removing chaff.
- Wet Seeds (Tomatoes, Cucumbers, Squash): For tomatoes, ferment the seeds in water for a few days to remove the gel coating and inhibit disease. For cucumbers/squash, scrape out seeds, wash thoroughly, and dry.
- Drying: Spread seeds thinly on screens or paper plates in a cool, dry, well-ventilated area for 1-4 weeks. Ensure they are bone-dry before storage. I aim for less than 8% moisture content.
- Storage: Store seeds in airtight containers (glass jars with desiccant packets work well) in a cool, dark, dry place (ideally 40-50°F and 30-40% humidity). Label clearly with variety and date. Properly stored seeds can remain viable for 3-10 years or more.
Step 8: Season Extension & Winterizing
Extend your harvest and protect your garden for the off-season to truly maximize your self sufficient garden from scratch.
- Cold Frames: Simple structures with a transparent top (glass, polycarbonate, or old windows) that sit over garden beds. They trap solar heat, allowing you to grow cold-hardy crops (lettuce, spinach, kale, radishes) well into winter or start seeds earlier in spring. A basic cold frame can be built from 2×6 lumber and a sheet of polycarbonate for under $100.
- Hoop Houses/Low Tunnels: Larger structures made from flexible hoops (PVC pipe or EMT conduit) covered with greenhouse plastic. These provide more space and greater temperature moderation. A 10×20 ft DIY low tunnel kit can cost $200-$500, while a larger, more robust hoop house kit might be $1,000-$3,000. I use a 6×12 ft low tunnel made from 1/2-inch PVC hoops and 6mil greenhouse plastic, which extends my lettuce and spinach harvest by at least
The choice of seeds is crucial for a truly self sufficient garden from scratch.
- Choose Heirloom & Open-Pollinated Seeds: These varieties produce seeds that will grow true to type, meaning you can save seeds from your harvest year after year. F1 hybrids, while often vigorous, will not produce consistent offspring from saved seeds. Reputable seed companies include Baker Creek Heirloom Seeds, High Mowing Organic Seeds, and Seed Savers Exchange. Start with common, reliable varieties like ‘Black Krim’ tomatoes, ‘Provider’ bush beans, ‘Waltham Butternut’ squash, and ‘Black Seeded Simpson’ lettuce.
- Start Seeds Indoors (Optional but Recommended): For longer growing seasons or specific crops, starting seeds indoors gives you a head start. Use seed-starting mix (e.g., Espoma Organic Seed Starter Mix, ~$10 for 16qt bag) in seed trays (Jiffy Professional Greenhouse 72-cell kit, ~$15). Provide adequate light with LED grow lights (Barrina T5 2ft 4-pack LED Grow Lights, 20W each, ~$50) for 14-16 hours a day, positioned 2-4 inches above seedlings. Maintain consistent temperatures (65-75°F for most).
- Direct Sowing vs. Transplanting: Some crops (carrots, radishes, beans, corn) prefer direct sowing into the garden bed. Others (tomatoes, peppers, broccoli, kale) benefit from being started indoors and transplanted. Follow seed packet instructions for planting depths (e.g., lettuce seeds are often surface-sown or planted 1/8 inch deep, while beans are 1 inch deep) and spacing.
- Companion Planting: Strategically plant different species together to enhance growth, deter pests, and attract beneficial insects. For example, planting marigolds near tomatoes can deter nematodes, and basil improves tomato flavor. Nasturtiums can act as a trap crop for aphids.
- Succession Planting: For a continuous harvest, plant small batches of quick-growing crops (lettuce, radishes, cilantro) every 2-3 weeks. As one crop finishes, another is ready to take its place.
Step 6: Pest & Disease Management (Organic)
Maintaining a self sufficient garden from scratch means embracing organic pest and disease control.
- Integrated Pest Management (IPM): This holistic approach combines several strategies.
- Observation: Regularly inspect your plants for early signs of pests or disease. Catching issues early is key.
- Physical Barriers: Use row covers (e.g., Agribon AG-19 floating row cover, 10×20 ft, ~$20) to protect young plants from insect pests like cabbage worms and squash bugs. Install fences (e.g., 2×4 welded wire mesh, 4 ft tall, 50 ft roll ~$70) to keep out deer, rabbits, and other larger animals.
- Hand-Picking: For larger pests like tomato hornworms or squash bugs, simply pick them off and drop them into a bucket of soapy water.
- Companion Planting: As mentioned, certain plants repel pests. Marigolds, garlic, and onions are excellent deterrents.
- Attract Beneficial Insects: Plant flowers like dill, fennel, cosmos, and sweet alyssum to attract ladybugs, lacewings, and parasitic wasps, which prey on common garden pests.
- Organic Sprays & Treatments:
- Neem Oil: An excellent broad-spectrum organic insecticide and fungicide. Bonide Neem Oil Concentrate (16oz, ~$20) can be mixed at a rate of 1-2 tbsp per gallon of water and sprayed on affected plants.
- Insecticidal Soap: Effective against soft-bodied insects like aphids, whiteflies, and spider mites. Garden Safe Insecticidal Soap (24oz ready-to-use, ~$10).
- Bacillus thuringiensis (Bt): A naturally occurring soil bacterium that targets caterpillars and worms. Monterey BT Worm & Caterpillar Killer (16oz, ~$18) is highly effective and safe for beneficial insects.
- Copper or Sulfur Sprays: For fungal diseases like powdery mildew or blight, organic copper (e.g., Bonide Copper Fungicide, ~$15 for 1lb) or sulfur (e.g., Safer Brand Garden Fungicide, ~$10 for 16oz) can be used as a last resort.
Step 7: Harvesting & Seed Saving
The culmination of your efforts is the harvest, and seed saving closes the loop on self-sufficiency.
- Harvesting Techniques:
- Timing: Harvest vegetables at their peak ripeness for best flavor and nutritional value. For example, green beans should snap cleanly, cucumbers should be firm, and tomatoes should be fully colored.
- Frequency: Many crops, like zucchini, cucumbers, and bush beans, produce more if harvested frequently. Pick daily or every other day.
- Tools: Use clean, sharp pruners (e.g., Corona ClassicCUT Bypass Pruner BP 3180, ~$30) or a sharp knife for clean cuts, minimizing damage to the plant.
- Seed Saving: This is where the « self-sufficient » aspect truly shines.
- Selection: Only save seeds from your healthiest, most vigorous plants that show desired traits (disease resistance, good flavor, high yield).
- Isolation: To ensure true-to-type seeds, prevent cross-pollination. This can be challenging for open-pollinated crops that readily cross (e.g., squash, corn). For beginners, focus on self-pollinating plants like beans, peas, lettuce, and tomatoes.
- Processing:
- Dry Seeds (Beans, Peas, Lettuce, Grains): Allow pods/seed heads to dry completely on the plant. Harvest, shell, and clean the seeds, removing chaff.
- Wet Seeds (Tomatoes, Cucumbers, Squash): For tomatoes, ferment the seeds in water for a few days to remove the gel coating and inhibit disease. For cucumbers/squash, scrape out seeds, wash thoroughly, and dry.
- Drying: Spread seeds thinly on screens or paper plates in a cool, dry, well-ventilated area for 1-4 weeks. Ensure they are bone-dry before storage. I aim for less than 8% moisture content.
- Storage: Store seeds in airtight containers (glass jars with desiccant packets work well) in a cool, dark, dry place (ideally 40-50°F and 30-40% humidity). Label clearly with variety and date. Properly stored seeds can remain viable for 3-10 years or more.
Step 8: Season Extension & Winterizing
Extend your harvest and protect your garden for the off-season to truly maximize your self sufficient garden from scratch.
- Cold Frames: Simple structures with a transparent top (glass, polycarbonate, or old windows) that sit over garden beds. They trap solar heat, allowing you to grow cold-hardy crops (lettuce, spinach, kale, radishes) well into winter or start seeds earlier in spring. A basic cold frame can be built from 2×6 lumber and a sheet of polycarbonate for under $100.
- Hoop Houses/Low Tunnels: Larger structures made from flexible hoops (PVC pipe or EMT conduit) covered with greenhouse plastic. These provide more space and greater temperature moderation. A 10×20 ft DIY low tunnel kit can cost $200-$500, while a larger, more robust hoop house kit might be $1,000-$3,000. I use a 6×12 ft low tunnel made from 1/2-inch PVC hoops and 6mil greenhouse plastic, which extends my lettuce and spinach harvest by at least
Step 5: Seed Selection & Planting
The choice of seeds is crucial for a truly self sufficient garden from scratch.
- Choose Heirloom & Open-Pollinated Seeds: These varieties produce seeds that will grow true to type, meaning you can save seeds from your harvest year after year. F1 hybrids, while often vigorous, will not produce consistent offspring from saved seeds. Reputable seed companies include Baker Creek Heirloom Seeds, High Mowing Organic Seeds, and Seed Savers Exchange. Start with common, reliable varieties like ‘Black Krim’ tomatoes, ‘Provider’ bush beans, ‘Waltham Butternut’ squash, and ‘Black Seeded Simpson’ lettuce.
- Start Seeds Indoors (Optional but Recommended): For longer growing seasons or specific crops, starting seeds indoors gives you a head start. Use seed-starting mix (e.g., Espoma Organic Seed Starter Mix, ~$10 for 16qt bag) in seed trays (Jiffy Professional Greenhouse 72-cell kit, ~$15). Provide adequate light with LED grow lights (Barrina T5 2ft 4-pack LED Grow Lights, 20W each, ~$50) for 14-16 hours a day, positioned 2-4 inches above seedlings. Maintain consistent temperatures (65-75°F for most).
- Direct Sowing vs. Transplanting: Some crops (carrots, radishes, beans, corn) prefer direct sowing into the garden bed. Others (tomatoes, peppers, broccoli, kale) benefit from being started indoors and transplanted. Follow seed packet instructions for planting depths (e.g., lettuce seeds are often surface-sown or planted 1/8 inch deep, while beans are 1 inch deep) and spacing.
- Companion Planting: Strategically plant different species together to enhance growth, deter pests, and attract beneficial insects. For example, planting marigolds near tomatoes can deter nematodes, and basil improves tomato flavor. Nasturtiums can act as a trap crop for aphids.
- Succession Planting: For a continuous harvest, plant small batches of quick-growing crops (lettuce, radishes, cilantro) every 2-3 weeks. As one crop finishes, another is ready to take its place.
Step 6: Pest & Disease Management (Organic)
Maintaining a self sufficient garden from scratch means embracing organic pest and disease control.
- Integrated Pest Management (IPM): This holistic approach combines several strategies.
- Observation: Regularly inspect your plants for early signs of pests or disease. Catching issues early is key.
- Physical Barriers: Use row covers (e.g., Agribon AG-19 floating row cover, 10×20 ft, ~$20) to protect young plants from insect pests like cabbage worms and squash bugs. Install fences (e.g., 2×4 welded wire mesh, 4 ft tall, 50 ft roll ~$70) to keep out deer, rabbits, and other larger animals.
- Hand-Picking: For larger pests like tomato hornworms or squash bugs, simply pick them off and drop them into a bucket of soapy water.
- Companion Planting: As mentioned, certain plants repel pests. Marigolds, garlic, and onions are excellent deterrents.
- Attract Beneficial Insects: Plant flowers like dill, fennel, cosmos, and sweet alyssum to attract ladybugs, lacewings, and parasitic wasps, which prey on common garden pests.
- Organic Sprays & Treatments:
- Neem Oil: An excellent broad-spectrum organic insecticide and fungicide. Bonide Neem Oil Concentrate (16oz, ~$20) can be mixed at a rate of 1-2 tbsp per gallon of water and sprayed on affected plants.
- Insecticidal Soap: Effective against soft-bodied insects like aphids, whiteflies, and spider mites. Garden Safe Insecticidal Soap (24oz ready-to-use, ~$10).
- Bacillus thuringiensis (Bt): A naturally occurring soil bacterium that targets caterpillars and worms. Monterey BT Worm & Caterpillar Killer (16oz, ~$18) is highly effective and safe for beneficial insects.
- Copper or Sulfur Sprays: For fungal diseases like powdery mildew or blight, organic copper (e.g., Bonide Copper Fungicide, ~$15 for 1lb) or sulfur (e.g., Safer Brand Garden Fungicide, ~$10 for 16oz) can be used as a last resort.
Step 7: Harvesting & Seed Saving
The culmination of your efforts is the harvest, and seed saving closes the loop on self-sufficiency.
- Harvesting Techniques:
- Timing: Harvest vegetables at their peak ripeness for best flavor and nutritional value. For example, green beans should snap cleanly, cucumbers should be firm, and tomatoes should be fully colored.
- Frequency: Many crops, like zucchini, cucumbers, and bush beans, produce more if harvested frequently. Pick daily or every other day.
- Tools: Use clean, sharp pruners (e.g., Corona ClassicCUT Bypass Pruner BP 3180, ~$30) or a sharp knife for clean cuts, minimizing damage to the plant.
- Seed Saving: This is where the « self-sufficient » aspect truly shines.
- Selection: Only save seeds from your healthiest, most vigorous plants that show desired traits (disease resistance, good flavor, high yield).
- Isolation: To ensure true-to-type seeds, prevent cross-pollination. This can be challenging for open-pollinated crops that readily cross (e.g., squash, corn). For beginners, focus on self-pollinating plants like beans, peas, lettuce, and tomatoes.
- Processing:
- Dry Seeds (Beans, Peas, Lettuce, Grains): Allow pods/seed heads to dry completely on the plant. Harvest, shell, and clean the seeds, removing chaff.
- Wet Seeds (Tomatoes, Cucumbers, Squash): For tomatoes, ferment the seeds in water for a few days to remove the gel coating and inhibit disease. For cucumbers/squash, scrape out seeds, wash thoroughly, and dry.
- Drying: Spread seeds thinly on screens or paper plates in a cool, dry, well-ventilated area for 1-4 weeks. Ensure they are bone-dry before storage. I aim for less than 8% moisture content.
- Storage: Store seeds in airtight containers (glass jars with desiccant packets work well) in a cool, dark, dry place (ideally 40-50°F and 30-40% humidity). Label clearly with variety and date. Properly stored seeds can remain viable for 3-10 years or more.
Step 8: Season Extension & Winterizing
Extend your harvest and protect your garden for the off-season to truly maximize your self sufficient garden from scratch.
- Cold Frames: Simple structures with a transparent top (glass, polycarbonate, or old windows) that sit over garden beds. They trap solar heat, allowing you to grow cold-hardy crops (lettuce, spinach, kale, radishes) well into winter or start seeds earlier in spring. A basic cold frame can be built from 2×6 lumber and a sheet of polycarbonate for under $100.
- Hoop Houses/Low Tunnels: Larger structures made from flexible hoops (PVC pipe or EMT conduit) covered with greenhouse plastic. These provide more space and greater temperature moderation. A 10×20 ft DIY low tunnel kit can cost $200-$500, while a larger, more robust hoop house kit might be $1,000-$3,000. I use a 6×12 ft low tunnel made from 1/2-inch PVC hoops and 6mil greenhouse plastic, which extends my lettuce and spinach harvest by at least
- Rainwater Harvesting: This is my primary source of irrigation water. A 55-gallon rain barrel (e.g., EarthMark Rain Barrel, ~$120-$150) connected to a downspout can collect significant water. For larger needs, I use two 275-gallon IBC totes (Intermediate Bulk Containers, often available used for $100-$200 each from food-grade sources) connected in series. A 1,000 sq ft roof can collect approximately 620 gallons of water for every inch of rainfall. My 1,500 sq ft roof provides ample water for my 600 sq ft garden through multiple barrels and totes.
- Drip Irrigation: This is by far the most water-efficient method, delivering water directly to the plant’s root zone, minimizing evaporation and weed growth.
- Components: A typical drip system includes a pressure regulator (e.g., Rain Bird PRV-10, ~$15), a filter (Rain Bird RBY filter, ~$20), main tubing (1/2-inch poly tubing, 100ft ~$25), smaller feeder lines (1/4-inch tubing), and emitters (0.5 GPH or 1 GPH per plant).
- Kits: For beginners, a starter kit like the Rain Bird Drip Irrigation Garden Kit (model DDI-KIT-1P, ~$40-$60) is excellent for a small garden. For larger setups, I use Netafim Techline CV Drip Line (500ft roll, ~$150-$200), which has pressure-compensating emitters built-in, ensuring even watering across long runs.
- Automation: For true self-sufficiency, consider a battery-powered timer (e.g., Orbit B-Hyve Bluetooth Hose Faucet Timer, ~$50) or a solar-powered timer connected to a small 12V pump.
- Solar-Powered Pumps: For lifting water from a well, pond, or large storage tank to your garden, a solar pump is a game-changer. For a smaller drip system, a Shurflo 2088-594-152 Diaphragm Pump (12V, 3.5 GPM, ~$180) can be powered by a single 100W solar panel (e.g., Renogy 100W Monocrystalline Solar Panel, ~$100) and a small 12V battery (e.g., a 50Ah LiFePO4 battery like the Battle Born 50Ah, ~$450). For larger operations or deeper wells, more robust systems are needed. If you’re looking to build out a comprehensive off-grid power system to support your garden’s water needs, or indeed your entire homestead, you might want to explore resources like the Power Grid Generator complete system guide to understand the full scope of what’s possible in terms of energy independence.
Step 5: Seed Selection & Planting
The choice of seeds is crucial for a truly self sufficient garden from scratch.
- Choose Heirloom & Open-Pollinated Seeds: These varieties produce seeds that will grow true to type, meaning you can save seeds from your harvest year after year. F1 hybrids, while often vigorous, will not produce consistent offspring from saved seeds. Reputable seed companies include Baker Creek Heirloom Seeds, High Mowing Organic Seeds, and Seed Savers Exchange. Start with common, reliable varieties like ‘Black Krim’ tomatoes, ‘Provider’ bush beans, ‘Waltham Butternut’ squash, and ‘Black Seeded Simpson’ lettuce.
- Start Seeds Indoors (Optional but Recommended): For longer growing seasons or specific crops, starting seeds indoors gives you a head start. Use seed-starting mix (e.g., Espoma Organic Seed Starter Mix, ~$10 for 16qt bag) in seed trays (Jiffy Professional Greenhouse 72-cell kit, ~$15). Provide adequate light with LED grow lights (Barrina T5 2ft 4-pack LED Grow Lights, 20W each, ~$50) for 14-16 hours a day, positioned 2-4 inches above seedlings. Maintain consistent temperatures (65-75°F for most).
- Direct Sowing vs. Transplanting: Some crops (carrots, radishes, beans, corn) prefer direct sowing into the garden bed. Others (tomatoes, peppers, broccoli, kale) benefit from being started indoors and transplanted. Follow seed packet instructions for planting depths (e.g., lettuce seeds are often surface-sown or planted 1/8 inch deep, while beans are 1 inch deep) and spacing.
- Companion Planting: Strategically plant different species together to enhance growth, deter pests, and attract beneficial insects. For example, planting marigolds near tomatoes can deter nematodes, and basil improves tomato flavor. Nasturtiums can act as a trap crop for aphids.
- Succession Planting: For a continuous harvest, plant small batches of quick-growing crops (lettuce, radishes, cilantro) every 2-3 weeks. As one crop finishes, another is ready to take its place.
Step 6: Pest & Disease Management (Organic)
Maintaining a self sufficient garden from scratch means embracing organic pest and disease control.
- Integrated Pest Management (IPM): This holistic approach combines several strategies.
- Observation: Regularly inspect your plants for early signs of pests or disease. Catching issues early is key.
- Physical Barriers: Use row covers (e.g., Agribon AG-19 floating row cover, 10×20 ft, ~$20) to protect young plants from insect pests like cabbage worms and squash bugs. Install fences (e.g., 2×4 welded wire mesh, 4 ft tall, 50 ft roll ~$70) to keep out deer, rabbits, and other larger animals.
- Hand-Picking: For larger pests like tomato hornworms or squash bugs, simply pick them off and drop them into a bucket of soapy water.
- Companion Planting: As mentioned, certain plants repel pests. Marigolds, garlic, and onions are excellent deterrents.
- Attract Beneficial Insects: Plant flowers like dill, fennel, cosmos, and sweet alyssum to attract ladybugs, lacewings, and parasitic wasps, which prey on common garden pests.
- Organic Sprays & Treatments:
- Neem Oil: An excellent broad-spectrum organic insecticide and fungicide. Bonide Neem Oil Concentrate (16oz, ~$20) can be mixed at a rate of 1-2 tbsp per gallon of water and sprayed on affected plants.
- Insecticidal Soap: Effective against soft-bodied insects like aphids, whiteflies, and spider mites. Garden Safe Insecticidal Soap (24oz ready-to-use, ~$10).
- Bacillus thuringiensis (Bt): A naturally occurring soil bacterium that targets caterpillars and worms. Monterey BT Worm & Caterpillar Killer (16oz, ~$18) is highly effective and safe for beneficial insects.
- Copper or Sulfur Sprays: For fungal diseases like powdery mildew or blight, organic copper (e.g., Bonide Copper Fungicide, ~$15 for 1lb) or sulfur (e.g., Safer Brand Garden Fungicide, ~$10 for 16oz) can be used as a last resort.
Step 7: Harvesting & Seed Saving
The culmination of your efforts is the harvest, and seed saving closes the loop on self-sufficiency.
- Harvesting Techniques:
- Timing: Harvest vegetables at their peak ripeness for best flavor and nutritional value. For example, green beans should snap cleanly, cucumbers should be firm, and tomatoes should be fully colored.
- Frequency: Many crops, like zucchini, cucumbers, and bush beans, produce more if harvested frequently. Pick daily or every other day.
- Tools: Use clean, sharp pruners (e.g., Corona ClassicCUT Bypass Pruner BP 3180, ~$30) or a sharp knife for clean cuts, minimizing damage to the plant.
- Seed Saving: This is where the « self-sufficient » aspect truly shines.
- Selection: Only save seeds from your healthiest, most vigorous plants that show desired traits (disease resistance, good flavor, high yield).
- Isolation: To ensure true-to-type seeds, prevent cross-pollination. This can be challenging for open-pollinated crops that readily cross (e.g., squash, corn). For beginners, focus on self-pollinating plants like beans, peas, lettuce, and tomatoes.
- Processing:
- Dry Seeds (Beans, Peas, Lettuce, Grains): Allow pods/seed heads to dry completely on the plant. Harvest, shell, and clean the seeds, removing chaff.
- Wet Seeds (Tomatoes, Cucumbers, Squash): For tomatoes, ferment the seeds in water for a few days to remove the gel coating and inhibit disease. For cucumbers/squash, scrape out seeds, wash thoroughly, and dry.
- Drying: Spread seeds thinly on screens or paper plates in a cool, dry, well-ventilated area for 1-4 weeks. Ensure they are bone-dry before storage. I aim for less than 8% moisture content.
- Storage: Store seeds in airtight containers (glass jars with desiccant packets work well) in a cool, dark, dry place (ideally 40-50°F and 30-40% humidity). Label clearly with variety and date. Properly stored seeds can remain viable for 3-10 years or more.
Step 8: Season Extension & Winterizing
Extend your harvest and protect your garden for the off-season to truly maximize your self sufficient garden from scratch.
- Cold Frames: Simple structures with a transparent top (glass, polycarbonate, or old windows) that sit over garden beds. They trap solar heat, allowing you to grow cold-hardy crops (lettuce, spinach, kale, radishes) well into winter or start seeds earlier in spring. A basic cold frame can be built from 2×6 lumber and a sheet of polycarbonate for under $100.
- Hoop Houses/Low Tunnels: Larger structures made from flexible hoops (PVC pipe or EMT conduit) covered with greenhouse plastic. These provide more space and greater temperature moderation. A 10×20 ft DIY low tunnel kit can cost $200-$500, while a larger, more robust hoop house kit might be $1,000-$3,000. I use a 6×12 ft low tunnel made from 1/2-inch PVC hoops and 6mil greenhouse plastic, which extends my lettuce and spinach harvest by at least
Efficient water management is critical for a self sufficient garden from scratch, especially in off-grid living where water resources might be limited.
- Rainwater Harvesting: This is my primary source of irrigation water. A 55-gallon rain barrel (e.g., EarthMark Rain Barrel, ~$120-$150) connected to a downspout can collect significant water. For larger needs, I use two 275-gallon IBC totes (Intermediate Bulk Containers, often available used for $100-$200 each from food-grade sources) connected in series. A 1,000 sq ft roof can collect approximately 620 gallons of water for every inch of rainfall. My 1,500 sq ft roof provides ample water for my 600 sq ft garden through multiple barrels and totes.
- Drip Irrigation: This is by far the most water-efficient method, delivering water directly to the plant’s root zone, minimizing evaporation and weed growth.
- Components: A typical drip system includes a pressure regulator (e.g., Rain Bird PRV-10, ~$15), a filter (Rain Bird RBY filter, ~$20), main tubing (1/2-inch poly tubing, 100ft ~$25), smaller feeder lines (1/4-inch tubing), and emitters (0.5 GPH or 1 GPH per plant).
- Kits: For beginners, a starter kit like the Rain Bird Drip Irrigation Garden Kit (model DDI-KIT-1P, ~$40-$60) is excellent for a small garden. For larger setups, I use Netafim Techline CV Drip Line (500ft roll, ~$150-$200), which has pressure-compensating emitters built-in, ensuring even watering across long runs.
- Automation: For true self-sufficiency, consider a battery-powered timer (e.g., Orbit B-Hyve Bluetooth Hose Faucet Timer, ~$50) or a solar-powered timer connected to a small 12V pump.
- Solar-Powered Pumps: For lifting water from a well, pond, or large storage tank to your garden, a solar pump is a game-changer. For a smaller drip system, a Shurflo 2088-594-152 Diaphragm Pump (12V, 3.5 GPM, ~$180) can be powered by a single 100W solar panel (e.g., Renogy 100W Monocrystalline Solar Panel, ~$100) and a small 12V battery (e.g., a 50Ah LiFePO4 battery like the Battle Born 50Ah, ~$450). For larger operations or deeper wells, more robust systems are needed. If you’re looking to build out a comprehensive off-grid power system to support your garden’s water needs, or indeed your entire homestead, you might want to explore resources like the Power Grid Generator complete system guide to understand the full scope of what’s possible in terms of energy independence.
Step 5: Seed Selection & Planting
The choice of seeds is crucial for a truly self sufficient garden from scratch.
- Choose Heirloom & Open-Pollinated Seeds: These varieties produce seeds that will grow true to type, meaning you can save seeds from your harvest year after year. F1 hybrids, while often vigorous, will not produce consistent offspring from saved seeds. Reputable seed companies include Baker Creek Heirloom Seeds, High Mowing Organic Seeds, and Seed Savers Exchange. Start with common, reliable varieties like ‘Black Krim’ tomatoes, ‘Provider’ bush beans, ‘Waltham Butternut’ squash, and ‘Black Seeded Simpson’ lettuce.
- Start Seeds Indoors (Optional but Recommended): For longer growing seasons or specific crops, starting seeds indoors gives you a head start. Use seed-starting mix (e.g., Espoma Organic Seed Starter Mix, ~$10 for 16qt bag) in seed trays (Jiffy Professional Greenhouse 72-cell kit, ~$15). Provide adequate light with LED grow lights (Barrina T5 2ft 4-pack LED Grow Lights, 20W each, ~$50) for 14-16 hours a day, positioned 2-4 inches above seedlings. Maintain consistent temperatures (65-75°F for most).
- Direct Sowing vs. Transplanting: Some crops (carrots, radishes, beans, corn) prefer direct sowing into the garden bed. Others (tomatoes, peppers, broccoli, kale) benefit from being started indoors and transplanted. Follow seed packet instructions for planting depths (e.g., lettuce seeds are often surface-sown or planted 1/8 inch deep, while beans are 1 inch deep) and spacing.
- Companion Planting: Strategically plant different species together to enhance growth, deter pests, and attract beneficial insects. For example, planting marigolds near tomatoes can deter nematodes, and basil improves tomato flavor. Nasturtiums can act as a trap crop for aphids.
- Succession Planting: For a continuous harvest, plant small batches of quick-growing crops (lettuce, radishes, cilantro) every 2-3 weeks. As one crop finishes, another is ready to take its place.
Step 6: Pest & Disease Management (Organic)
Maintaining a self sufficient garden from scratch means embracing organic pest and disease control.
- Integrated Pest Management (IPM): This holistic approach combines several strategies.
- Observation: Regularly inspect your plants for early signs of pests or disease. Catching issues early is key.
- Physical Barriers: Use row covers (e.g., Agribon AG-19 floating row cover, 10×20 ft, ~$20) to protect young plants from insect pests like cabbage worms and squash bugs. Install fences (e.g., 2×4 welded wire mesh, 4 ft tall, 50 ft roll ~$70) to keep out deer, rabbits, and other larger animals.
- Hand-Picking: For larger pests like tomato hornworms or squash bugs, simply pick them off and drop them into a bucket of soapy water.
- Companion Planting: As mentioned, certain plants repel pests. Marigolds, garlic, and onions are excellent deterrents.
- Attract Beneficial Insects: Plant flowers like dill, fennel, cosmos, and sweet alyssum to attract ladybugs, lacewings, and parasitic wasps, which prey on common garden pests.
- Organic Sprays & Treatments:
- Neem Oil: An excellent broad-spectrum organic insecticide and fungicide. Bonide Neem Oil Concentrate (16oz, ~$20) can be mixed at a rate of 1-2 tbsp per gallon of water and sprayed on affected plants.
- Insecticidal Soap: Effective against soft-bodied insects like aphids, whiteflies, and spider mites. Garden Safe Insecticidal Soap (24oz ready-to-use, ~$10).
- Bacillus thuringiensis (Bt): A naturally occurring soil bacterium that targets caterpillars and worms. Monterey BT Worm & Caterpillar Killer (16oz, ~$18) is highly effective and safe for beneficial insects.
- Copper or Sulfur Sprays: For fungal diseases like powdery mildew or blight, organic copper (e.g., Bonide Copper Fungicide, ~$15 for 1lb) or sulfur (e.g., Safer Brand Garden Fungicide, ~$10 for 16oz) can be used as a last resort.
Step 7: Harvesting & Seed Saving
The culmination of your efforts is the harvest, and seed saving closes the loop on self-sufficiency.
- Harvesting Techniques:
- Timing: Harvest vegetables at their peak ripeness for best flavor and nutritional value. For example, green beans should snap cleanly, cucumbers should be firm, and tomatoes should be fully colored.
- Frequency: Many crops, like zucchini, cucumbers, and bush beans, produce more if harvested frequently. Pick daily or every other day.
- Tools: Use clean, sharp pruners (e.g., Corona ClassicCUT Bypass Pruner BP 3180, ~$30) or a sharp knife for clean cuts, minimizing damage to the plant.
- Seed Saving: This is where the « self-sufficient » aspect truly shines.
- Selection: Only save seeds from your healthiest, most vigorous plants that show desired traits (disease resistance, good flavor, high yield).
- Isolation: To ensure true-to-type seeds, prevent cross-pollination. This can be challenging for open-pollinated crops that readily cross (e.g., squash, corn). For beginners, focus on self-pollinating plants like beans, peas, lettuce, and tomatoes.
- Processing:
- Dry Seeds (Beans, Peas, Lettuce, Grains): Allow pods/seed heads to dry completely on the plant. Harvest, shell, and clean the seeds, removing chaff.
- Wet Seeds (Tomatoes, Cucumbers, Squash): For tomatoes, ferment the seeds in water for a few days to remove the gel coating and inhibit disease. For cucumbers/squash, scrape out seeds, wash thoroughly, and dry.
- Drying: Spread seeds thinly on screens or paper plates in a cool, dry, well-ventilated area for 1-4 weeks. Ensure they are bone-dry before storage. I aim for less than 8% moisture content.
- Storage: Store seeds in airtight containers (glass jars with desiccant packets work well) in a cool, dark, dry place (ideally 40-50°F and 30-40% humidity). Label clearly with variety and date. Properly stored seeds can remain viable for 3-10 years or more.
Step 8: Season Extension & Winterizing
Extend your harvest and protect your garden for the off-season to truly maximize your self sufficient garden from scratch.
- Cold Frames: Simple structures with a transparent top (glass, polycarbonate, or old windows) that sit over garden beds. They trap solar heat, allowing you to grow cold-hardy crops (lettuce, spinach, kale, radishes) well into winter or start seeds earlier in spring. A basic cold frame can be built from 2×6 lumber and a sheet of polycarbonate for under $100.
- Hoop Houses/Low Tunnels: Larger structures made from flexible hoops (PVC pipe or EMT conduit) covered with greenhouse plastic. These provide more space and greater temperature moderation. A 10×20 ft DIY low tunnel kit can cost $200-$500, while a larger, more robust hoop house kit might be $1,000-$3,000. I use a 6×12 ft low tunnel made from 1/2-inch PVC hoops and 6mil greenhouse plastic, which extends my lettuce and spinach harvest by at least
Step 4: Water Management & Irrigation
Efficient water management is critical for a self sufficient garden from scratch, especially in off-grid living where water resources might be limited.
- Rainwater Harvesting: This is my primary source of irrigation water. A 55-gallon rain barrel (e.g., EarthMark Rain Barrel, ~$120-$150) connected to a downspout can collect significant water. For larger needs, I use two 275-gallon IBC totes (Intermediate Bulk Containers, often available used for $100-$200 each from food-grade sources) connected in series. A 1,000 sq ft roof can collect approximately 620 gallons of water for every inch of rainfall. My 1,500 sq ft roof provides ample water for my 600 sq ft garden through multiple barrels and totes.
- Drip Irrigation: This is by far the most water-efficient method, delivering water directly to the plant’s root zone, minimizing evaporation and weed growth.
- Components: A typical drip system includes a pressure regulator (e.g., Rain Bird PRV-10, ~$15), a filter (Rain Bird RBY filter, ~$20), main tubing (1/2-inch poly tubing, 100ft ~$25), smaller feeder lines (1/4-inch tubing), and emitters (0.5 GPH or 1 GPH per plant).
- Kits: For beginners, a starter kit like the Rain Bird Drip Irrigation Garden Kit (model DDI-KIT-1P, ~$40-$60) is excellent for a small garden. For larger setups, I use Netafim Techline CV Drip Line (500ft roll, ~$150-$200), which has pressure-compensating emitters built-in, ensuring even watering across long runs.
- Automation: For true self-sufficiency, consider a battery-powered timer (e.g., Orbit B-Hyve Bluetooth Hose Faucet Timer, ~$50) or a solar-powered timer connected to a small 12V pump.
- Solar-Powered Pumps: For lifting water from a well, pond, or large storage tank to your garden, a solar pump is a game-changer. For a smaller drip system, a Shurflo 2088-594-152 Diaphragm Pump (12V, 3.5 GPM, ~$180) can be powered by a single 100W solar panel (e.g., Renogy 100W Monocrystalline Solar Panel, ~$100) and a small 12V battery (e.g., a 50Ah LiFePO4 battery like the Battle Born 50Ah, ~$450). For larger operations or deeper wells, more robust systems are needed. If you’re looking to build out a comprehensive off-grid power system to support your garden’s water needs, or indeed your entire homestead, you might want to explore resources like the Power Grid Generator complete system guide to understand the full scope of what’s possible in terms of energy independence.
Step 5: Seed Selection & Planting
The choice of seeds is crucial for a truly self sufficient garden from scratch.
- Choose Heirloom & Open-Pollinated Seeds: These varieties produce seeds that will grow true to type, meaning you can save seeds from your harvest year after year. F1 hybrids, while often vigorous, will not produce consistent offspring from saved seeds. Reputable seed companies include Baker Creek Heirloom Seeds, High Mowing Organic Seeds, and Seed Savers Exchange. Start with common, reliable varieties like ‘Black Krim’ tomatoes, ‘Provider’ bush beans, ‘Waltham Butternut’ squash, and ‘Black Seeded Simpson’ lettuce.
- Start Seeds Indoors (Optional but Recommended): For longer growing seasons or specific crops, starting seeds indoors gives you a head start. Use seed-starting mix (e.g., Espoma Organic Seed Starter Mix, ~$10 for 16qt bag) in seed trays (Jiffy Professional Greenhouse 72-cell kit, ~$15). Provide adequate light with LED grow lights (Barrina T5 2ft 4-pack LED Grow Lights, 20W each, ~$50) for 14-16 hours a day, positioned 2-4 inches above seedlings. Maintain consistent temperatures (65-75°F for most).
- Direct Sowing vs. Transplanting: Some crops (carrots, radishes, beans, corn) prefer direct sowing into the garden bed. Others (tomatoes, peppers, broccoli, kale) benefit from being started indoors and transplanted. Follow seed packet instructions for planting depths (e.g., lettuce seeds are often surface-sown or planted 1/8 inch deep, while beans are 1 inch deep) and spacing.
- Companion Planting: Strategically plant different species together to enhance growth, deter pests, and attract beneficial insects. For example, planting marigolds near tomatoes can deter nematodes, and basil improves tomato flavor. Nasturtiums can act as a trap crop for aphids.
- Succession Planting: For a continuous harvest, plant small batches of quick-growing crops (lettuce, radishes, cilantro) every 2-3 weeks. As one crop finishes, another is ready to take its place.
Step 6: Pest & Disease Management (Organic)
Maintaining a self sufficient garden from scratch means embracing organic pest and disease control.
- Integrated Pest Management (IPM): This holistic approach combines several strategies.
- Observation: Regularly inspect your plants for early signs of pests or disease. Catching issues early is key.
- Physical Barriers: Use row covers (e.g., Agribon AG-19 floating row cover, 10×20 ft, ~$20) to protect young plants from insect pests like cabbage worms and squash bugs. Install fences (e.g., 2×4 welded wire mesh, 4 ft tall, 50 ft roll ~$70) to keep out deer, rabbits, and other larger animals.
- Hand-Picking: For larger pests like tomato hornworms or squash bugs, simply pick them off and drop them into a bucket of soapy water.
- Companion Planting: As mentioned, certain plants repel pests. Marigolds, garlic, and onions are excellent deterrents.
- Attract Beneficial Insects: Plant flowers like dill, fennel, cosmos, and sweet alyssum to attract ladybugs, lacewings, and parasitic wasps, which prey on common garden pests.
- Organic Sprays & Treatments:
- Neem Oil: An excellent broad-spectrum organic insecticide and fungicide. Bonide Neem Oil Concentrate (16oz, ~$20) can be mixed at a rate of 1-2 tbsp per gallon of water and sprayed on affected plants.
- Insecticidal Soap: Effective against soft-bodied insects like aphids, whiteflies, and spider mites. Garden Safe Insecticidal Soap (24oz ready-to-use, ~$10).
- Bacillus thuringiensis (Bt): A naturally occurring soil bacterium that targets caterpillars and worms. Monterey BT Worm & Caterpillar Killer (16oz, ~$18) is highly effective and safe for beneficial insects.
- Copper or Sulfur Sprays: For fungal diseases like powdery mildew or blight, organic copper (e.g., Bonide Copper Fungicide, ~$15 for 1lb) or sulfur (e.g., Safer Brand Garden Fungicide, ~$10 for 16oz) can be used as a last resort.
Step 7: Harvesting & Seed Saving
The culmination of your efforts is the harvest, and seed saving closes the loop on self-sufficiency.
- Harvesting Techniques:
- Timing: Harvest vegetables at their peak ripeness for best flavor and nutritional value. For example, green beans should snap cleanly, cucumbers should be firm, and tomatoes should be fully colored.
- Frequency: Many crops, like zucchini, cucumbers, and bush beans, produce more if harvested frequently. Pick daily or every other day.
- Tools: Use clean, sharp pruners (e.g., Corona ClassicCUT Bypass Pruner BP 3180, ~$30) or a sharp knife for clean cuts, minimizing damage to the plant.
- Seed Saving: This is where the « self-sufficient » aspect truly shines.
- Selection: Only save seeds from your healthiest, most vigorous plants that show desired traits (disease resistance, good flavor, high yield).
- Isolation: To ensure true-to-type seeds, prevent cross-pollination. This can be challenging for open-pollinated crops that readily cross (e.g., squash, corn). For beginners, focus on self-pollinating plants like beans, peas, lettuce, and tomatoes.
- Processing:
- Dry Seeds (Beans, Peas, Lettuce, Grains): Allow pods/seed heads to dry completely on the plant. Harvest, shell, and clean the seeds, removing chaff.
- Wet Seeds (Tomatoes, Cucumbers, Squash): For tomatoes, ferment the seeds in water for a few days to remove the gel coating and inhibit disease. For cucumbers/squash, scrape out seeds, wash thoroughly, and dry.
- Drying: Spread seeds thinly on screens or paper plates in a cool, dry, well-ventilated area for 1-4 weeks. Ensure they are bone-dry before storage. I aim for less than 8% moisture content.
- Storage: Store seeds in airtight containers (glass jars with desiccant packets work well) in a cool, dark, dry place (ideally 40-50°F and 30-40% humidity). Label clearly with variety and date. Properly stored seeds can remain viable for 3-10 years or more.
Step 8: Season Extension & Winterizing
Extend your harvest and protect your garden for the off-season to truly maximize your self sufficient garden from scratch.
- Cold Frames: Simple structures with a transparent top (glass, polycarbonate, or old windows) that sit over garden beds. They trap solar heat, allowing you to grow cold-hardy crops (lettuce, spinach, kale, radishes) well into winter or start seeds earlier in spring. A basic cold frame can be built from 2×6 lumber and a sheet of polycarbonate for under $100.
- Hoop Houses/Low Tunnels: Larger structures made from flexible hoops (PVC pipe or EMT conduit) covered with greenhouse plastic. These provide more space and greater temperature moderation. A 10×20 ft DIY low tunnel kit can cost $200-$500, while a larger, more robust hoop house kit might be $1,000-$3,000. I use a 6×12 ft low tunnel made from 1/2-inch PVC hoops and 6mil greenhouse plastic, which extends my lettuce and spinach harvest by at least
- In-Ground Beds: If you have excellent native soil and good drainage, in-ground beds are the most economical. Double-digging (loosening soil two shovel depths) can significantly improve drainage and aeration. For my main garden, I primarily use in-ground beds, but I focus on building up the soil over time with consistent compost additions and cover cropping. I aim for beds that are no wider than 3-4 feet so I can reach the center without stepping on the soil, compacting it.
- Raised Beds: Raised beds offer numerous advantages, especially for poor soil, heavy clay, or rocky areas. They provide better drainage, warm up faster in spring, reduce compaction, and make weeding and harvesting easier on your back.
- Material Options:
- Untreated Cedar: Naturally rot-resistant and chemical-free. A 4×8 ft bed, 12 inches deep, typically requires three 2x12x8 ft cedar boards, costing around $50-$60 per board (total ~$150-$180) plus corner brackets or screws. My first raised beds were cedar and are still going strong after 7 years.
- Galvanized Steel: Durable, long-lasting, and aesthetically pleasing. Brands like Vego Garden offer modular kits. A Vego Garden 17″ Tall 8-in-1 Metal Raised Garden Bed (can be configured to 4×8 ft) costs approximately $250-$300.
- Concrete Blocks/Stones: Very durable but can leach minerals (though generally safe once weathered) and can be expensive.
- Recycled Materials: Pallets (check for chemical treatment stamps like « HT » for heat-treated), old tires (controversial due to potential chemical leaching).
- Filling Raised Beds: Don’t just fill with topsoil. Use a « Hugelkultur » approach (logs, branches, leaves, then compost, then topsoil) or a mixture of 60% good quality topsoil, 30% compost, and 10% perlite or vermiculite for drainage. A 4x8x1 ft raised bed requires about 32 cubic feet (or ~1.2 cubic yards) of soil mix, which can cost $100-$200 depending on your source.
- Material Options:
Step 4: Water Management & Irrigation
Efficient water management is critical for a self sufficient garden from scratch, especially in off-grid living where water resources might be limited.
- Rainwater Harvesting: This is my primary source of irrigation water. A 55-gallon rain barrel (e.g., EarthMark Rain Barrel, ~$120-$150) connected to a downspout can collect significant water. For larger needs, I use two 275-gallon IBC totes (Intermediate Bulk Containers, often available used for $100-$200 each from food-grade sources) connected in series. A 1,000 sq ft roof can collect approximately 620 gallons of water for every inch of rainfall. My 1,500 sq ft roof provides ample water for my 600 sq ft garden through multiple barrels and totes.
- Drip Irrigation: This is by far the most water-efficient method, delivering water directly to the plant’s root zone, minimizing evaporation and weed growth.
- Components: A typical drip system includes a pressure regulator (e.g., Rain Bird PRV-10, ~$15), a filter (Rain Bird RBY filter, ~$20), main tubing (1/2-inch poly tubing, 100ft ~$25), smaller feeder lines (1/4-inch tubing), and emitters (0.5 GPH or 1 GPH per plant).
- Kits: For beginners, a starter kit like the Rain Bird Drip Irrigation Garden Kit (model DDI-KIT-1P, ~$40-$60) is excellent for a small garden. For larger setups, I use Netafim Techline CV Drip Line (500ft roll, ~$150-$200), which has pressure-compensating emitters built-in, ensuring even watering across long runs.
- Automation: For true self-sufficiency, consider a battery-powered timer (e.g., Orbit B-Hyve Bluetooth Hose Faucet Timer, ~$50) or a solar-powered timer connected to a small 12V pump.
- Solar-Powered Pumps: For lifting water from a well, pond, or large storage tank to your garden, a solar pump is a game-changer. For a smaller drip system, a Shurflo 2088-594-152 Diaphragm Pump (12V, 3.5 GPM, ~$180) can be powered by a single 100W solar panel (e.g., Renogy 100W Monocrystalline Solar Panel, ~$100) and a small 12V battery (e.g., a 50Ah LiFePO4 battery like the Battle Born 50Ah, ~$450). For larger operations or deeper wells, more robust systems are needed. If you’re looking to build out a comprehensive off-grid power system to support your garden’s water needs, or indeed your entire homestead, you might want to explore resources like the Power Grid Generator complete system guide to understand the full scope of what’s possible in terms of energy independence.
Step 5: Seed Selection & Planting
The choice of seeds is crucial for a truly self sufficient garden from scratch.
- Choose Heirloom & Open-Pollinated Seeds: These varieties produce seeds that will grow true to type, meaning you can save seeds from your harvest year after year. F1 hybrids, while often vigorous, will not produce consistent offspring from saved seeds. Reputable seed companies include Baker Creek Heirloom Seeds, High Mowing Organic Seeds, and Seed Savers Exchange. Start with common, reliable varieties like ‘Black Krim’ tomatoes, ‘Provider’ bush beans, ‘Waltham Butternut’ squash, and ‘Black Seeded Simpson’ lettuce.
- Start Seeds Indoors (Optional but Recommended): For longer growing seasons or specific crops, starting seeds indoors gives you a head start. Use seed-starting mix (e.g., Espoma Organic Seed Starter Mix, ~$10 for 16qt bag) in seed trays (Jiffy Professional Greenhouse 72-cell kit, ~$15). Provide adequate light with LED grow lights (Barrina T5 2ft 4-pack LED Grow Lights, 20W each, ~$50) for 14-16 hours a day, positioned 2-4 inches above seedlings. Maintain consistent temperatures (65-75°F for most).
- Direct Sowing vs. Transplanting: Some crops (carrots, radishes, beans, corn) prefer direct sowing into the garden bed. Others (tomatoes, peppers, broccoli, kale) benefit from being started indoors and transplanted. Follow seed packet instructions for planting depths (e.g., lettuce seeds are often surface-sown or planted 1/8 inch deep, while beans are 1 inch deep) and spacing.
- Companion Planting: Strategically plant different species together to enhance growth, deter pests, and attract beneficial insects. For example, planting marigolds near tomatoes can deter nematodes, and basil improves tomato flavor. Nasturtiums can act as a trap crop for aphids.
- Succession Planting: For a continuous harvest, plant small batches of quick-growing crops (lettuce, radishes, cilantro) every 2-3 weeks. As one crop finishes, another is ready to take its place.
Step 6: Pest & Disease Management (Organic)
Maintaining a self sufficient garden from scratch means embracing organic pest and disease control.
- Integrated Pest Management (IPM): This holistic approach combines several strategies.
- Observation: Regularly inspect your plants for early signs of pests or disease. Catching issues early is key.
- Physical Barriers: Use row covers (e.g., Agribon AG-19 floating row cover, 10×20 ft, ~$20) to protect young plants from insect pests like cabbage worms and squash bugs. Install fences (e.g., 2×4 welded wire mesh, 4 ft tall, 50 ft roll ~$70) to keep out deer, rabbits, and other larger animals.
- Hand-Picking: For larger pests like tomato hornworms or squash bugs, simply pick them off and drop them into a bucket of soapy water.
- Companion Planting: As mentioned, certain plants repel pests. Marigolds, garlic, and onions are excellent deterrents.
- Attract Beneficial Insects: Plant flowers like dill, fennel, cosmos, and sweet alyssum to attract ladybugs, lacewings, and parasitic wasps, which prey on common garden pests.
- Organic Sprays & Treatments:
- Neem Oil: An excellent broad-spectrum organic insecticide and fungicide. Bonide Neem Oil Concentrate (16oz, ~$20) can be mixed at a rate of 1-2 tbsp per gallon of water and sprayed on affected plants.
- Insecticidal Soap: Effective against soft-bodied insects like aphids, whiteflies, and spider mites. Garden Safe Insecticidal Soap (24oz ready-to-use, ~$10).
- Bacillus thuringiensis (Bt): A naturally occurring soil bacterium that targets caterpillars and worms. Monterey BT Worm & Caterpillar Killer (16oz, ~$18) is highly effective and safe for beneficial insects.
- Copper or Sulfur Sprays: For fungal diseases like powdery mildew or blight, organic copper (e.g., Bonide Copper Fungicide, ~$15 for 1lb) or sulfur (e.g., Safer Brand Garden Fungicide, ~$10 for 16oz) can be used as a last resort.
Step 7: Harvesting & Seed Saving
The culmination of your efforts is the harvest, and seed saving closes the loop on self-sufficiency.
- Harvesting Techniques:
- Timing: Harvest vegetables at their peak ripeness for best flavor and nutritional value. For example, green beans should snap cleanly, cucumbers should be firm, and tomatoes should be fully colored.
- Frequency: Many crops, like zucchini, cucumbers, and bush beans, produce more if harvested frequently. Pick daily or every other day.
- Tools: Use clean, sharp pruners (e.g., Corona ClassicCUT Bypass Pruner BP 3180, ~$30) or a sharp knife for clean cuts, minimizing damage to the plant.
- Seed Saving: This is where the « self-sufficient » aspect truly shines.
- Selection: Only save seeds from your healthiest, most vigorous plants that show desired traits (disease resistance, good flavor, high yield).
- Isolation: To ensure true-to-type seeds, prevent cross-pollination. This can be challenging for open-pollinated crops that readily cross (e.g., squash, corn). For beginners, focus on self-pollinating plants like beans, peas, lettuce, and tomatoes.
- Processing:
- Dry Seeds (Beans, Peas, Lettuce, Grains): Allow pods/seed heads to dry completely on the plant. Harvest, shell, and clean the seeds, removing chaff.
- Wet Seeds (Tomatoes, Cucumbers, Squash): For tomatoes, ferment the seeds in water for a few days to remove the gel coating and inhibit disease. For cucumbers/squash, scrape out seeds, wash thoroughly, and dry.
- Drying: Spread seeds thinly on screens or paper plates in a cool, dry, well-ventilated area for 1-4 weeks. Ensure they are bone-dry before storage. I aim for less than 8% moisture content.
- Storage: Store seeds in airtight containers (glass jars with desiccant packets work well) in a cool, dark, dry place (ideally 40-50°F and 30-40% humidity). Label clearly with variety and date. Properly stored seeds can remain viable for 3-10 years or more.
Step 8: Season Extension & Winterizing
Extend your harvest and protect your garden for the off-season to truly maximize your self sufficient garden from scratch.
- Cold Frames: Simple structures with a transparent top (glass, polycarbonate, or old windows) that sit over garden beds. They trap solar heat, allowing you to grow cold-hardy crops (lettuce, spinach, kale, radishes) well into winter or start seeds earlier in spring. A basic cold frame can be built from 2×6 lumber and a sheet of polycarbonate for under $100.
- Hoop Houses/Low Tunnels: Larger structures made from flexible hoops (PVC pipe or EMT conduit) covered with greenhouse plastic. These provide more space and greater temperature moderation. A 10×20 ft DIY low tunnel kit can cost $200-$500, while a larger, more robust hoop house kit might be $1,000-$3,000. I use a 6×12 ft low tunnel made from 1/2-inch PVC hoops and 6mil greenhouse plastic, which extends my lettuce and spinach harvest by at least
Deciding between raised beds and in-ground beds depends on your soil, budget, and physical capabilities.
- In-Ground Beds: If you have excellent native soil and good drainage, in-ground beds are the most economical. Double-digging (loosening soil two shovel depths) can significantly improve drainage and aeration. For my main garden, I primarily use in-ground beds, but I focus on building up the soil over time with consistent compost additions and cover cropping. I aim for beds that are no wider than 3-4 feet so I can reach the center without stepping on the soil, compacting it.
- Raised Beds: Raised beds offer numerous advantages, especially for poor soil, heavy clay, or rocky areas. They provide better drainage, warm up faster in spring, reduce compaction, and make weeding and harvesting easier on your back.
- Material Options:
- Untreated Cedar: Naturally rot-resistant and chemical-free. A 4×8 ft bed, 12 inches deep, typically requires three 2x12x8 ft cedar boards, costing around $50-$60 per board (total ~$150-$180) plus corner brackets or screws. My first raised beds were cedar and are still going strong after 7 years.
- Galvanized Steel: Durable, long-lasting, and aesthetically pleasing. Brands like Vego Garden offer modular kits. A Vego Garden 17″ Tall 8-in-1 Metal Raised Garden Bed (can be configured to 4×8 ft) costs approximately $250-$300.
- Concrete Blocks/Stones: Very durable but can leach minerals (though generally safe once weathered) and can be expensive.
- Recycled Materials: Pallets (check for chemical treatment stamps like « HT » for heat-treated), old tires (controversial due to potential chemical leaching).
- Filling Raised Beds: Don’t just fill with topsoil. Use a « Hugelkultur » approach (logs, branches, leaves, then compost, then topsoil) or a mixture of 60% good quality topsoil, 30% compost, and 10% perlite or vermiculite for drainage. A 4x8x1 ft raised bed requires about 32 cubic feet (or ~1.2 cubic yards) of soil mix, which can cost $100-$200 depending on your source.
- Material Options:
Step 4: Water Management & Irrigation
Efficient water management is critical for a self sufficient garden from scratch, especially in off-grid living where water resources might be limited.
- Rainwater Harvesting: This is my primary source of irrigation water. A 55-gallon rain barrel (e.g., EarthMark Rain Barrel, ~$120-$150) connected to a downspout can collect significant water. For larger needs, I use two 275-gallon IBC totes (Intermediate Bulk Containers, often available used for $100-$200 each from food-grade sources) connected in series. A 1,000 sq ft roof can collect approximately 620 gallons of water for every inch of rainfall. My 1,500 sq ft roof provides ample water for my 600 sq ft garden through multiple barrels and totes.
- Drip Irrigation: This is by far the most water-efficient method, delivering water directly to the plant’s root zone, minimizing evaporation and weed growth.
- Components: A typical drip system includes a pressure regulator (e.g., Rain Bird PRV-10, ~$15), a filter (Rain Bird RBY filter, ~$20), main tubing (1/2-inch poly tubing, 100ft ~$25), smaller feeder lines (1/4-inch tubing), and emitters (0.5 GPH or 1 GPH per plant).
- Kits: For beginners, a starter kit like the Rain Bird Drip Irrigation Garden Kit (model DDI-KIT-1P, ~$40-$60) is excellent for a small garden. For larger setups, I use Netafim Techline CV Drip Line (500ft roll, ~$150-$200), which has pressure-compensating emitters built-in, ensuring even watering across long runs.
- Automation: For true self-sufficiency, consider a battery-powered timer (e.g., Orbit B-Hyve Bluetooth Hose Faucet Timer, ~$50) or a solar-powered timer connected to a small 12V pump.
- Solar-Powered Pumps: For lifting water from a well, pond, or large storage tank to your garden, a solar pump is a game-changer. For a smaller drip system, a Shurflo 2088-594-152 Diaphragm Pump (12V, 3.5 GPM, ~$180) can be powered by a single 100W solar panel (e.g., Renogy 100W Monocrystalline Solar Panel, ~$100) and a small 12V battery (e.g., a 50Ah LiFePO4 battery like the Battle Born 50Ah, ~$450). For larger operations or deeper wells, more robust systems are needed. If you’re looking to build out a comprehensive off-grid power system to support your garden’s water needs, or indeed your entire homestead, you might want to explore resources like the Power Grid Generator complete system guide to understand the full scope of what’s possible in terms of energy independence.
Step 5: Seed Selection & Planting
The choice of seeds is crucial for a truly self sufficient garden from scratch.
- Choose Heirloom & Open-Pollinated Seeds: These varieties produce seeds that will grow true to type, meaning you can save seeds from your harvest year after year. F1 hybrids, while often vigorous, will not produce consistent offspring from saved seeds. Reputable seed companies include Baker Creek Heirloom Seeds, High Mowing Organic Seeds, and Seed Savers Exchange. Start with common, reliable varieties like ‘Black Krim’ tomatoes, ‘Provider’ bush beans, ‘Waltham Butternut’ squash, and ‘Black Seeded Simpson’ lettuce.
- Start Seeds Indoors (Optional but Recommended): For longer growing seasons or specific crops, starting seeds indoors gives you a head start. Use seed-starting mix (e.g., Espoma Organic Seed Starter Mix, ~$10 for 16qt bag) in seed trays (Jiffy Professional Greenhouse 72-cell kit, ~$15). Provide adequate light with LED grow lights (Barrina T5 2ft 4-pack LED Grow Lights, 20W each, ~$50) for 14-16 hours a day, positioned 2-4 inches above seedlings. Maintain consistent temperatures (65-75°F for most).
- Direct Sowing vs. Transplanting: Some crops (carrots, radishes, beans, corn) prefer direct sowing into the garden bed. Others (tomatoes, peppers, broccoli, kale) benefit from being started indoors and transplanted. Follow seed packet instructions for planting depths (e.g., lettuce seeds are often surface-sown or planted 1/8 inch deep, while beans are 1 inch deep) and spacing.
- Companion Planting: Strategically plant different species together to enhance growth, deter pests, and attract beneficial insects. For example, planting marigolds near tomatoes can deter nematodes, and basil improves tomato flavor. Nasturtiums can act as a trap crop for aphids.
- Succession Planting: For a continuous harvest, plant small batches of quick-growing crops (lettuce, radishes, cilantro) every 2-3 weeks. As one crop finishes, another is ready to take its place.
Step 6: Pest & Disease Management (Organic)
Maintaining a self sufficient garden from scratch means embracing organic pest and disease control.
- Integrated Pest Management (IPM): This holistic approach combines several strategies.
- Observation: Regularly inspect your plants for early signs of pests or disease. Catching issues early is key.
- Physical Barriers: Use row covers (e.g., Agribon AG-19 floating row cover, 10×20 ft, ~$20) to protect young plants from insect pests like cabbage worms and squash bugs. Install fences (e.g., 2×4 welded wire mesh, 4 ft tall, 50 ft roll ~$70) to keep out deer, rabbits, and other larger animals.
- Hand-Picking: For larger pests like tomato hornworms or squash bugs, simply pick them off and drop them into a bucket of soapy water.
- Companion Planting: As mentioned, certain plants repel pests. Marigolds, garlic, and onions are excellent deterrents.
- Attract Beneficial Insects: Plant flowers like dill, fennel, cosmos, and sweet alyssum to attract ladybugs, lacewings, and parasitic wasps, which prey on common garden pests.
- Organic Sprays & Treatments:
- Neem Oil: An excellent broad-spectrum organic insecticide and fungicide. Bonide Neem Oil Concentrate (16oz, ~$20) can be mixed at a rate of 1-2 tbsp per gallon of water and sprayed on affected plants.
- Insecticidal Soap: Effective against soft-bodied insects like aphids, whiteflies, and spider mites. Garden Safe Insecticidal Soap (24oz ready-to-use, ~$10).
- Bacillus thuringiensis (Bt): A naturally occurring soil bacterium that targets caterpillars and worms. Monterey BT Worm & Caterpillar Killer (16oz, ~$18) is highly effective and safe for beneficial insects.
- Copper or Sulfur Sprays: For fungal diseases like powdery mildew or blight, organic copper (e.g., Bonide Copper Fungicide, ~$15 for 1lb) or sulfur (e.g., Safer Brand Garden Fungicide, ~$10 for 16oz) can be used as a last resort.
Step 7: Harvesting & Seed Saving
The culmination of your efforts is the harvest, and seed saving closes the loop on self-sufficiency.
- Harvesting Techniques:
- Timing: Harvest vegetables at their peak ripeness for best flavor and nutritional value. For example, green beans should snap cleanly, cucumbers should be firm, and tomatoes should be fully colored.
- Frequency: Many crops, like zucchini, cucumbers, and bush beans, produce more if harvested frequently. Pick daily or every other day.
- Tools: Use clean, sharp pruners (e.g., Corona ClassicCUT Bypass Pruner BP 3180, ~$30) or a sharp knife for clean cuts, minimizing damage to the plant.
- Seed Saving: This is where the « self-sufficient » aspect truly shines.
- Selection: Only save seeds from your healthiest, most vigorous plants that show desired traits (disease resistance, good flavor, high yield).
- Isolation: To ensure true-to-type seeds, prevent cross-pollination. This can be challenging for open-pollinated crops that readily cross (e.g., squash, corn). For beginners, focus on self-pollinating plants like beans, peas, lettuce, and tomatoes.
- Processing:
- Dry Seeds (Beans, Peas, Lettuce, Grains): Allow pods/seed heads to dry completely on the plant. Harvest, shell, and clean the seeds, removing chaff.
- Wet Seeds (Tomatoes, Cucumbers, Squash): For tomatoes, ferment the seeds in water for a few days to remove the gel coating and inhibit disease. For cucumbers/squash, scrape out seeds, wash thoroughly, and dry.
- Drying: Spread seeds thinly on screens or paper plates in a cool, dry, well-ventilated area for 1-4 weeks. Ensure they are bone-dry before storage. I aim for less than 8% moisture content.
- Storage: Store seeds in airtight containers (glass jars with desiccant packets work well) in a cool, dark, dry place (ideally 40-50°F and 30-40% humidity). Label clearly with variety and date. Properly stored seeds can remain viable for 3-10 years or more.
Step 8: Season Extension & Winterizing
Extend your harvest and protect your garden for the off-season to truly maximize your self sufficient garden from scratch.
- Cold Frames: Simple structures with a transparent top (glass, polycarbonate, or old windows) that sit over garden beds. They trap solar heat, allowing you to grow cold-hardy crops (lettuce, spinach, kale, radishes) well into winter or start seeds earlier in spring. A basic cold frame can be built from 2×6 lumber and a sheet of polycarbonate for under $100.
- Hoop Houses/Low Tunnels: Larger structures made from flexible hoops (PVC pipe or EMT conduit) covered with greenhouse plastic. These provide more space and greater temperature moderation. A 10×20 ft DIY low tunnel kit can cost $200-$500, while a larger, more robust hoop house kit might be $1,000-$3,000. I use a 6×12 ft low tunnel made from 1/2-inch PVC hoops and 6mil greenhouse plastic, which extends my lettuce and spinach harvest by at least
Healthy soil is the bedrock of a productive, self-sufficient garden. You can’t guess what your soil needs; you have to test it.
- Perform a Soil Test: A professional soil test will give you precise data on your soil’s pH, nutrient levels (N-P-K), and organic matter content. I recommend sending a sample to your local agricultural extension office; it typically costs $20-$50 and provides detailed recommendations. Alternatively, for a quick homeowner check, a Rapitest Soil Test Kit (40-test kit, model 1663, ~$20 on Amazon) provides a good baseline for pH, Nitrogen, Phosphorus, and Potash. Aim for a pH between 6.0 and 7.0 for most vegetables.
- Amend for pH Imbalance: If your soil is too acidic (below 6.0), add agricultural lime (dolomitic lime adds magnesium, calcitic lime adds calcium). Apply 5-10 lbs per 100 sq ft for a moderate adjustment. If it’s too alkaline (above 7.0), add elemental sulfur (e.g., Espoma Soil Acidifier, ~$15 for 6.75 lbs) or generous amounts of organic matter like peat moss or pine needles.
- Build Organic Matter: This is the single most important step for long-term soil health. Organic matter improves soil structure, water retention, drainage, and nutrient availability. Incorporate 2-4 inches of high-quality compost into your top 6-12 inches of soil annually. I make my own compost from kitchen scraps, garden waste, and shredded leaves, but you can purchase it. Local nurseries often sell bulk compost for $30-$50 per cubic yard. Aged manure (from chickens, cows, or horses – ensure it’s well-rotted to avoid burning plants) is also excellent.
- Address Nutrient Deficiencies: Based on your soil test, add specific organic amendments. If Nitrogen (N) is low, add blood meal (12-0-0, ~$20 for 3 lbs) or feather meal. For Phosphorus (P), use bone meal (3-15-0, ~$15 for 3 lbs) or rock phosphate. For Potassium (K), greensand (0-0-2.5, ~$25 for 5 lbs) or kelp meal are good choices. I rely heavily on Espoma Organic Garden-tone (5-3-3, ~$25 for an 8lb bag) as a balanced, all-purpose organic fertilizer during planting.
Step 3: Garden Bed Preparation
Deciding between raised beds and in-ground beds depends on your soil, budget, and physical capabilities.
- In-Ground Beds: If you have excellent native soil and good drainage, in-ground beds are the most economical. Double-digging (loosening soil two shovel depths) can significantly improve drainage and aeration. For my main garden, I primarily use in-ground beds, but I focus on building up the soil over time with consistent compost additions and cover cropping. I aim for beds that are no wider than 3-4 feet so I can reach the center without stepping on the soil, compacting it.
- Raised Beds: Raised beds offer numerous advantages, especially for poor soil, heavy clay, or rocky areas. They provide better drainage, warm up faster in spring, reduce compaction, and make weeding and harvesting easier on your back.
- Material Options:
- Untreated Cedar: Naturally rot-resistant and chemical-free. A 4×8 ft bed, 12 inches deep, typically requires three 2x12x8 ft cedar boards, costing around $50-$60 per board (total ~$150-$180) plus corner brackets or screws. My first raised beds were cedar and are still going strong after 7 years.
- Galvanized Steel: Durable, long-lasting, and aesthetically pleasing. Brands like Vego Garden offer modular kits. A Vego Garden 17″ Tall 8-in-1 Metal Raised Garden Bed (can be configured to 4×8 ft) costs approximately $250-$300.
- Concrete Blocks/Stones: Very durable but can leach minerals (though generally safe once weathered) and can be expensive.
- Recycled Materials: Pallets (check for chemical treatment stamps like « HT » for heat-treated), old tires (controversial due to potential chemical leaching).
- Filling Raised Beds: Don’t just fill with topsoil. Use a « Hugelkultur » approach (logs, branches, leaves, then compost, then topsoil) or a mixture of 60% good quality topsoil, 30% compost, and 10% perlite or vermiculite for drainage. A 4x8x1 ft raised bed requires about 32 cubic feet (or ~1.2 cubic yards) of soil mix, which can cost $100-$200 depending on your source.
- Material Options:
Step 4: Water Management & Irrigation
Efficient water management is critical for a self sufficient garden from scratch, especially in off-grid living where water resources might be limited.
- Rainwater Harvesting: This is my primary source of irrigation water. A 55-gallon rain barrel (e.g., EarthMark Rain Barrel, ~$120-$150) connected to a downspout can collect significant water. For larger needs, I use two 275-gallon IBC totes (Intermediate Bulk Containers, often available used for $100-$200 each from food-grade sources) connected in series. A 1,000 sq ft roof can collect approximately 620 gallons of water for every inch of rainfall. My 1,500 sq ft roof provides ample water for my 600 sq ft garden through multiple barrels and totes.
- Drip Irrigation: This is by far the most water-efficient method, delivering water directly to the plant’s root zone, minimizing evaporation and weed growth.
- Components: A typical drip system includes a pressure regulator (e.g., Rain Bird PRV-10, ~$15), a filter (Rain Bird RBY filter, ~$20), main tubing (1/2-inch poly tubing, 100ft ~$25), smaller feeder lines (1/4-inch tubing), and emitters (0.5 GPH or 1 GPH per plant).
- Kits: For beginners, a starter kit like the Rain Bird Drip Irrigation Garden Kit (model DDI-KIT-1P, ~$40-$60) is excellent for a small garden. For larger setups, I use Netafim Techline CV Drip Line (500ft roll, ~$150-$200), which has pressure-compensating emitters built-in, ensuring even watering across long runs.
- Automation: For true self-sufficiency, consider a battery-powered timer (e.g., Orbit B-Hyve Bluetooth Hose Faucet Timer, ~$50) or a solar-powered timer connected to a small 12V pump.
- Solar-Powered Pumps: For lifting water from a well, pond, or large storage tank to your garden, a solar pump is a game-changer. For a smaller drip system, a Shurflo 2088-594-152 Diaphragm Pump (12V, 3.5 GPM, ~$180) can be powered by a single 100W solar panel (e.g., Renogy 100W Monocrystalline Solar Panel, ~$100) and a small 12V battery (e.g., a 50Ah LiFePO4 battery like the Battle Born 50Ah, ~$450). For larger operations or deeper wells, more robust systems are needed. If you’re looking to build out a comprehensive off-grid power system to support your garden’s water needs, or indeed your entire homestead, you might want to explore resources like the Power Grid Generator complete system guide to understand the full scope of what’s possible in terms of energy independence.
Step 5: Seed Selection & Planting
The choice of seeds is crucial for a truly self sufficient garden from scratch.
- Choose Heirloom & Open-Pollinated Seeds: These varieties produce seeds that will grow true to type, meaning you can save seeds from your harvest year after year. F1 hybrids, while often vigorous, will not produce consistent offspring from saved seeds. Reputable seed companies include Baker Creek Heirloom Seeds, High Mowing Organic Seeds, and Seed Savers Exchange. Start with common, reliable varieties like ‘Black Krim’ tomatoes, ‘Provider’ bush beans, ‘Waltham Butternut’ squash, and ‘Black Seeded Simpson’ lettuce.
- Start Seeds Indoors (Optional but Recommended): For longer growing seasons or specific crops, starting seeds indoors gives you a head start. Use seed-starting mix (e.g., Espoma Organic Seed Starter Mix, ~$10 for 16qt bag) in seed trays (Jiffy Professional Greenhouse 72-cell kit, ~$15). Provide adequate light with LED grow lights (Barrina T5 2ft 4-pack LED Grow Lights, 20W each, ~$50) for 14-16 hours a day, positioned 2-4 inches above seedlings. Maintain consistent temperatures (65-75°F for most).
- Direct Sowing vs. Transplanting: Some crops (carrots, radishes, beans, corn) prefer direct sowing into the garden bed. Others (tomatoes, peppers, broccoli, kale) benefit from being started indoors and transplanted. Follow seed packet instructions for planting depths (e.g., lettuce seeds are often surface-sown or planted 1/8 inch deep, while beans are 1 inch deep) and spacing.
- Companion Planting: Strategically plant different species together to enhance growth, deter pests, and attract beneficial insects. For example, planting marigolds near tomatoes can deter nematodes, and basil improves tomato flavor. Nasturtiums can act as a trap crop for aphids.
- Succession Planting: For a continuous harvest, plant small batches of quick-growing crops (lettuce, radishes, cilantro) every 2-3 weeks. As one crop finishes, another is ready to take its place.
Step 6: Pest & Disease Management (Organic)
Maintaining a self sufficient garden from scratch means embracing organic pest and disease control.
- Integrated Pest Management (IPM): This holistic approach combines several strategies.
- Observation: Regularly inspect your plants for early signs of pests or disease. Catching issues early is key.
- Physical Barriers: Use row covers (e.g., Agribon AG-19 floating row cover, 10×20 ft, ~$20) to protect young plants from insect pests like cabbage worms and squash bugs. Install fences (e.g., 2×4 welded wire mesh, 4 ft tall, 50 ft roll ~$70) to keep out deer, rabbits, and other larger animals.
- Hand-Picking: For larger pests like tomato hornworms or squash bugs, simply pick them off and drop them into a bucket of soapy water.
- Companion Planting: As mentioned, certain plants repel pests. Marigolds, garlic, and onions are excellent deterrents.
- Attract Beneficial Insects: Plant flowers like dill, fennel, cosmos, and sweet alyssum to attract ladybugs, lacewings, and parasitic wasps, which prey on common garden pests.
- Organic Sprays & Treatments:
- Neem Oil: An excellent broad-spectrum organic insecticide and fungicide. Bonide Neem Oil Concentrate (16oz, ~$20) can be mixed at a rate of 1-2 tbsp per gallon of water and sprayed on affected plants.
- Insecticidal Soap: Effective against soft-bodied insects like aphids, whiteflies, and spider mites. Garden Safe Insecticidal Soap (24oz ready-to-use, ~$10).
- Bacillus thuringiensis (Bt): A naturally occurring soil bacterium that targets caterpillars and worms. Monterey BT Worm & Caterpillar Killer (16oz, ~$18) is highly effective and safe for beneficial insects.
- Copper or Sulfur Sprays: For fungal diseases like powdery mildew or blight, organic copper (e.g., Bonide Copper Fungicide, ~$15 for 1lb) or sulfur (e.g., Safer Brand Garden Fungicide, ~$10 for 16oz) can be used as a last resort.
Step 7: Harvesting & Seed Saving
The culmination of your efforts is the harvest, and seed saving closes the loop on self-sufficiency.
- Harvesting Techniques:
- Timing: Harvest vegetables at their peak ripeness for best flavor and nutritional value. For example, green beans should snap cleanly, cucumbers should be firm, and tomatoes should be fully colored.
- Frequency: Many crops, like zucchini, cucumbers, and bush beans, produce more if harvested frequently. Pick daily or every other day.
- Tools: Use clean, sharp pruners (e.g., Corona ClassicCUT Bypass Pruner BP 3180, ~$30) or a sharp knife for clean cuts, minimizing damage to the plant.
- Seed Saving: This is where the « self-sufficient » aspect truly shines.
- Selection: Only save seeds from your healthiest, most vigorous plants that show desired traits (disease resistance, good flavor, high yield).
- Isolation: To ensure true-to-type seeds, prevent cross-pollination. This can be challenging for open-pollinated crops that readily cross (e.g., squash, corn). For beginners, focus on self-pollinating plants like beans, peas, lettuce, and tomatoes.
- Processing:
- Dry Seeds (Beans, Peas, Lettuce, Grains): Allow pods/seed heads to dry completely on the plant. Harvest, shell, and clean the seeds, removing chaff.
- Wet Seeds (Tomatoes, Cucumbers, Squash): For tomatoes, ferment the seeds in water for a few days to remove the gel coating and inhibit disease. For cucumbers/squash, scrape out seeds, wash thoroughly, and dry.
- Drying: Spread seeds thinly on screens or paper plates in a cool, dry, well-ventilated area for 1-4 weeks. Ensure they are bone-dry before storage. I aim for less than 8% moisture content.
- Storage: Store seeds in airtight containers (glass jars with desiccant packets work well) in a cool, dark, dry place (ideally 40-50°F and 30-40% humidity). Label clearly with variety and date. Properly stored seeds can remain viable for 3-10 years or more.
Step 8: Season Extension & Winterizing
Extend your harvest and protect your garden for the off-season to truly maximize your self sufficient garden from scratch.
- Cold Frames: Simple structures with a transparent top (glass, polycarbonate, or old windows) that sit over garden beds. They trap solar heat, allowing you to grow cold-hardy crops (lettuce, spinach, kale, radishes) well into winter or start seeds earlier in spring. A basic cold frame can be built from 2×6 lumber and a sheet of polycarbonate for under $100.
- Hoop Houses/Low Tunnels: Larger structures made from flexible hoops (PVC pipe or EMT conduit) covered with greenhouse plastic. These provide more space and greater temperature moderation. A 10×20 ft DIY low tunnel kit can cost $200-$500, while a larger, more robust hoop house kit might be $1,000-$3,000. I use a 6×12 ft low tunnel made from 1/2-inch PVC hoops and 6mil greenhouse plastic, which extends my lettuce and spinach harvest by at least
- Harvesting Techniques:
- Timing: Harvest vegetables at their peak ripeness for best flavor and nutritional value. For example, green beans should snap cleanly, cucumbers should be firm, and tomatoes should be fully colored.
- Frequency: Many crops, like zucchini, cucumbers, and bush beans, produce more if harvested frequently. Pick daily or every other day.
- Tools: Use clean, sharp pruners (e.g., Corona ClassicCUT Bypass Pruner BP 3180, ~$30) or a sharp knife for clean cuts, minimizing damage to the plant.
- Seed Saving: This is where the « self-sufficient » aspect truly shines.
- Selection: Only save seeds from your healthiest, most vigorous plants that show desired traits (disease resistance, good flavor, high yield).
- Isolation: To ensure true-to-type seeds, prevent cross-pollination. This can be challenging for open-pollinated crops that readily cross (e.g., squash, corn). For beginners, focus on self-pollinating plants like beans, peas, lettuce, and tomatoes.
- Processing:
- Dry Seeds (Beans, Peas, Lettuce, Grains): Allow pods/seed heads to dry completely on the plant. Harvest, shell, and clean the seeds, removing chaff.
- Wet Seeds (Tomatoes, Cucumbers, Squash): For tomatoes, ferment the seeds in water for a few days to remove the gel coating and inhibit disease. For cucumbers/squash, scrape out seeds, wash thoroughly, and dry.
- Drying: Spread seeds thinly on screens or paper plates in a cool, dry, well-ventilated area for 1-4 weeks. Ensure they are bone-dry before storage. I aim for less than 8% moisture content.
- Storage: Store seeds in airtight containers (glass jars with desiccant packets work well) in a cool, dark, dry place (ideally 40-50°F and 30-40% humidity). Label clearly with variety and date. Properly stored seeds can remain viable for 3-10 years or more.
Step 8: Season Extension & Winterizing
Extend your harvest and protect your garden for the off-season to truly maximize your self sufficient garden from scratch.
- Cold Frames: Simple structures with a transparent top (glass, polycarbonate, or old windows) that sit over garden beds. They trap solar heat, allowing you to grow cold-hardy crops (lettuce, spinach, kale, radishes) well into winter or start seeds earlier in spring. A basic cold frame can be built from 2×6 lumber and a sheet of polycarbonate for under $100.
- Hoop Houses/Low Tunnels: Larger structures made from flexible hoops (PVC pipe or EMT conduit) covered with greenhouse plastic. These provide more space and greater temperature moderation. A 10×20 ft DIY low tunnel kit can cost $200-$500, while a larger, more robust hoop house kit might be $1,000-$3,000. I use a 6×12 ft low tunnel made from 1/2-inch PVC hoops and 6mil greenhouse plastic, which extends my lettuce and spinach harvest by at least
Healthy soil is the bedrock of a productive, self-sufficient garden. You can’t guess what your soil needs; you have to test it.
- Perform a Soil Test: A professional soil test will give you precise data on your soil’s pH, nutrient levels (N-P-K), and organic matter content. I recommend sending a sample to your local agricultural extension office; it typically costs $20-$50 and provides detailed recommendations. Alternatively, for a quick homeowner check, a Rapitest Soil Test Kit (40-test kit, model 1663, ~$20 on Amazon) provides a good baseline for pH, Nitrogen, Phosphorus, and Potash. Aim for a pH between 6.0 and 7.0 for most vegetables.
- Amend for pH Imbalance: If your soil is too acidic (below 6.0), add agricultural lime (dolomitic lime adds magnesium, calcitic lime adds calcium). Apply 5-10 lbs per 100 sq ft for a moderate adjustment. If it’s too alkaline (above 7.0), add elemental sulfur (e.g., Espoma Soil Acidifier, ~$15 for 6.75 lbs) or generous amounts of organic matter like peat moss or pine needles.
- Build Organic Matter: This is the single most important step for long-term soil health. Organic matter improves soil structure, water retention, drainage, and nutrient availability. Incorporate 2-4 inches of high-quality compost into your top 6-12 inches of soil annually. I make my own compost from kitchen scraps, garden waste, and shredded leaves, but you can purchase it. Local nurseries often sell bulk compost for $30-$50 per cubic yard. Aged manure (from chickens, cows, or horses – ensure it’s well-rotted to avoid burning plants) is also excellent.
- Address Nutrient Deficiencies: Based on your soil test, add specific organic amendments. If Nitrogen (N) is low, add blood meal (12-0-0, ~$20 for 3 lbs) or feather meal. For Phosphorus (P), use bone meal (3-15-0, ~$15 for 3 lbs) or rock phosphate. For Potassium (K), greensand (0-0-2.5, ~$25 for 5 lbs) or kelp meal are good choices. I rely heavily on Espoma Organic Garden-tone (5-3-3, ~$25 for an 8lb bag) as a balanced, all-purpose organic fertilizer during planting.
Step 3: Garden Bed Preparation
Deciding between raised beds and in-ground beds depends on your soil, budget, and physical capabilities.
- In-Ground Beds: If you have excellent native soil and good drainage, in-ground beds are the most economical. Double-digging (loosening soil two shovel depths) can significantly improve drainage and aeration. For my main garden, I primarily use in-ground beds, but I focus on building up the soil over time with consistent compost additions and cover cropping. I aim for beds that are no wider than 3-4 feet so I can reach the center without stepping on the soil, compacting it.
- Raised Beds: Raised beds offer numerous advantages, especially for poor soil, heavy clay, or rocky areas. They provide better drainage, warm up faster in spring, reduce compaction, and make weeding and harvesting easier on your back.
- Material Options:
- Untreated Cedar: Naturally rot-resistant and chemical-free. A 4×8 ft bed, 12 inches deep, typically requires three 2x12x8 ft cedar boards, costing around $50-$60 per board (total ~$150-$180) plus corner brackets or screws. My first raised beds were cedar and are still going strong after 7 years.
- Galvanized Steel: Durable, long-lasting, and aesthetically pleasing. Brands like Vego Garden offer modular kits. A Vego Garden 17″ Tall 8-in-1 Metal Raised Garden Bed (can be configured to 4×8 ft) costs approximately $250-$300.
- Concrete Blocks/Stones: Very durable but can leach minerals (though generally safe once weathered) and can be expensive.
- Recycled Materials: Pallets (check for chemical treatment stamps like « HT » for heat-treated), old tires (controversial due to potential chemical leaching).
- Filling Raised Beds: Don’t just fill with topsoil. Use a « Hugelkultur » approach (logs, branches, leaves, then compost, then topsoil) or a mixture of 60% good quality topsoil, 30% compost, and 10% perlite or vermiculite for drainage. A 4x8x1 ft raised bed requires about 32 cubic feet (or ~1.2 cubic yards) of soil mix, which can cost $100-$200 depending on your source.
- Material Options:
Step 4: Water Management & Irrigation
Efficient water management is critical for a self sufficient garden from scratch, especially in off-grid living where water resources might be limited.
- Rainwater Harvesting: This is my primary source of irrigation water. A 55-gallon rain barrel (e.g., EarthMark Rain Barrel, ~$120-$150) connected to a downspout can collect significant water. For larger needs, I use two 275-gallon IBC totes (Intermediate Bulk Containers, often available used for $100-$200 each from food-grade sources) connected in series. A 1,000 sq ft roof can collect approximately 620 gallons of water for every inch of rainfall. My 1,500 sq ft roof provides ample water for my 600 sq ft garden through multiple barrels and totes.
- Drip Irrigation: This is by far the most water-efficient method, delivering water directly to the plant’s root zone, minimizing evaporation and weed growth.
- Components: A typical drip system includes a pressure regulator (e.g., Rain Bird PRV-10, ~$15), a filter (Rain Bird RBY filter, ~$20), main tubing (1/2-inch poly tubing, 100ft ~$25), smaller feeder lines (1/4-inch tubing), and emitters (0.5 GPH or 1 GPH per plant).
- Kits: For beginners, a starter kit like the Rain Bird Drip Irrigation Garden Kit (model DDI-KIT-1P, ~$40-$60) is excellent for a small garden. For larger setups, I use Netafim Techline CV Drip Line (500ft roll, ~$150-$200), which has pressure-compensating emitters built-in, ensuring even watering across long runs.
- Automation: For true self-sufficiency, consider a battery-powered timer (e.g., Orbit B-Hyve Bluetooth Hose Faucet Timer, ~$50) or a solar-powered timer connected to a small 12V pump.
- Solar-Powered Pumps: For lifting water from a well, pond, or large storage tank to your garden, a solar pump is a game-changer. For a smaller drip system, a Shurflo 2088-594-152 Diaphragm Pump (12V, 3.5 GPM, ~$180) can be powered by a single 100W solar panel (e.g., Renogy 100W Monocrystalline Solar Panel, ~$100) and a small 12V battery (e.g., a 50Ah LiFePO4 battery like the Battle Born 50Ah, ~$450). For larger operations or deeper wells, more robust systems are needed. If you’re looking to build out a comprehensive off-grid power system to support your garden’s water needs, or indeed your entire homestead, you might want to explore resources like the Power Grid Generator complete system guide to understand the full scope of what’s possible in terms of energy independence.
Step 5: Seed Selection & Planting
The choice of seeds is crucial for a truly self sufficient garden from scratch.
- Choose Heirloom & Open-Pollinated Seeds: These varieties produce seeds that will grow true to type, meaning you can save seeds from your harvest year after year. F1 hybrids, while often vigorous, will not produce consistent offspring from saved seeds. Reputable seed companies include Baker Creek Heirloom Seeds, High Mowing Organic Seeds, and Seed Savers Exchange. Start with common, reliable varieties like ‘Black Krim’ tomatoes, ‘Provider’ bush beans, ‘Waltham Butternut’ squash, and ‘Black Seeded Simpson’ lettuce.
- Start Seeds Indoors (Optional but Recommended): For longer growing seasons or specific crops, starting seeds indoors gives you a head start. Use seed-starting mix (e.g., Espoma Organic Seed Starter Mix, ~$10 for 16qt bag) in seed trays (Jiffy Professional Greenhouse 72-cell kit, ~$15). Provide adequate light with LED grow lights (Barrina T5 2ft 4-pack LED Grow Lights, 20W each, ~$50) for 14-16 hours a day, positioned 2-4 inches above seedlings. Maintain consistent temperatures (65-75°F for most).
- Direct Sowing vs. Transplanting: Some crops (carrots, radishes, beans, corn) prefer direct sowing into the garden bed. Others (tomatoes, peppers, broccoli, kale) benefit from being started indoors and transplanted. Follow seed packet instructions for planting depths (e.g., lettuce seeds are often surface-sown or planted 1/8 inch deep, while beans are 1 inch deep) and spacing.
- Companion Planting: Strategically plant different species together to enhance growth, deter pests, and attract beneficial insects. For example, planting marigolds near tomatoes can deter nematodes, and basil improves tomato flavor. Nasturtiums can act as a trap crop for aphids.
- Succession Planting: For a continuous harvest, plant small batches of quick-growing crops (lettuce, radishes, cilantro) every 2-3 weeks. As one crop finishes, another is ready to take its place.
Step 6: Pest & Disease Management (Organic)
Maintaining a self sufficient garden from scratch means embracing organic pest and disease control.
- Integrated Pest Management (IPM): This holistic approach combines several strategies.
- Observation: Regularly inspect your plants for early signs of pests or disease. Catching issues early is key.
- Physical Barriers: Use row covers (e.g., Agribon AG-19 floating row cover, 10×20 ft, ~$20) to protect young plants from insect pests like cabbage worms and squash bugs. Install fences (e.g., 2×4 welded wire mesh, 4 ft tall, 50 ft roll ~$70) to keep out deer, rabbits, and other larger animals.
- Hand-Picking: For larger pests like tomato hornworms or squash bugs, simply pick them off and drop them into a bucket of soapy water.
- Companion Planting: As mentioned, certain plants repel pests. Marigolds, garlic, and onions are excellent deterrents.
- Attract Beneficial Insects: Plant flowers like dill, fennel, cosmos, and sweet alyssum to attract ladybugs, lacewings, and parasitic wasps, which prey on common garden pests.
- Organic Sprays & Treatments:
- Neem Oil: An excellent broad-spectrum organic insecticide and fungicide. Bonide Neem Oil Concentrate (16oz, ~$20) can be mixed at a rate of 1-2 tbsp per gallon of water and sprayed on affected plants.
- Insecticidal Soap: Effective against soft-bodied insects like aphids, whiteflies, and spider mites. Garden Safe Insecticidal Soap (24oz ready-to-use, ~$10).
- Bacillus thuringiensis (Bt): A naturally occurring soil bacterium that targets caterpillars and worms. Monterey BT Worm & Caterpillar Killer (16oz, ~$18) is highly effective and safe for beneficial insects.
- Copper or Sulfur Sprays: For fungal diseases like powdery mildew or blight, organic copper (e.g., Bonide Copper Fungicide, ~$15 for 1lb) or sulfur (e.g., Safer Brand Garden Fungicide, ~$10 for 16oz) can be used as a last resort.
Step 7: Harvesting & Seed Saving
The culmination of your efforts is the harvest, and seed saving closes the loop on self-sufficiency.
- Harvesting Techniques:
- Timing: Harvest vegetables at their peak ripeness for best flavor and nutritional value. For example, green beans should snap cleanly, cucumbers should be firm, and tomatoes should be fully colored.
- Frequency: Many crops, like zucchini, cucumbers, and bush beans, produce more if harvested frequently. Pick daily or every other day.
- Tools: Use clean, sharp pruners (e.g., Corona ClassicCUT Bypass Pruner BP 3180, ~$30) or a sharp knife for clean cuts, minimizing damage to the plant.
- Seed Saving: This is where the « self-sufficient » aspect truly shines.
- Selection: Only save seeds from your healthiest, most vigorous plants that show desired traits (disease resistance, good flavor, high yield).
- Isolation: To ensure true-to-type seeds, prevent cross-pollination. This can be challenging for open-pollinated crops that readily cross (e.g., squash, corn). For beginners, focus on self-pollinating plants like beans, peas, lettuce, and tomatoes.
- Processing:
- Dry Seeds (Beans, Peas, Lettuce, Grains): Allow pods/seed heads to dry completely on the plant. Harvest, shell, and clean the seeds, removing chaff.
- Wet Seeds (Tomatoes, Cucumbers, Squash): For tomatoes, ferment the seeds in water for a few days to remove the gel coating and inhibit disease. For cucumbers/squash, scrape out seeds, wash thoroughly, and dry.
- Drying: Spread seeds thinly on screens or paper plates in a cool, dry, well-ventilated area for 1-4 weeks. Ensure they are bone-dry before storage. I aim for less than 8% moisture content.
- Storage: Store seeds in airtight containers (glass jars with desiccant packets work well) in a cool, dark, dry place (ideally 40-50°F and 30-40% humidity). Label clearly with variety and date. Properly stored seeds can remain viable for 3-10 years or more.
Step 8: Season Extension & Winterizing
Extend your harvest and protect your garden for the off-season to truly maximize your self sufficient garden from scratch.
- Cold Frames: Simple structures with a transparent top (glass, polycarbonate, or old windows) that sit over garden beds. They trap solar heat, allowing you to grow cold-hardy crops (lettuce, spinach, kale, radishes) well into winter or start seeds earlier in spring. A basic cold frame can be built from 2×6 lumber and a sheet of polycarbonate for under $100.
- Hoop Houses/Low Tunnels: Larger structures made from flexible hoops (PVC pipe or EMT conduit) covered with greenhouse plastic. These provide more space and greater temperature moderation. A 10×20 ft DIY low tunnel kit can cost $200-$500, while a larger, more robust hoop house kit might be $1,000-$3,000. I use a 6×12 ft low tunnel made from 1/2-inch PVC hoops and 6mil greenhouse plastic, which extends my lettuce and spinach harvest by at least
The culmination of your efforts is the harvest, and seed saving closes the loop on self-sufficiency.
- Harvesting Techniques:
- Timing: Harvest vegetables at their peak ripeness for best flavor and nutritional value. For example, green beans should snap cleanly, cucumbers should be firm, and tomatoes should be fully colored.
- Frequency: Many crops, like zucchini, cucumbers, and bush beans, produce more if harvested frequently. Pick daily or every other day.
- Tools: Use clean, sharp pruners (e.g., Corona ClassicCUT Bypass Pruner BP 3180, ~$30) or a sharp knife for clean cuts, minimizing damage to the plant.
- Seed Saving: This is where the « self-sufficient » aspect truly shines.
- Selection: Only save seeds from your healthiest, most vigorous plants that show desired traits (disease resistance, good flavor, high yield).
- Isolation: To ensure true-to-type seeds, prevent cross-pollination. This can be challenging for open-pollinated crops that readily cross (e.g., squash, corn). For beginners, focus on self-pollinating plants like beans, peas, lettuce, and tomatoes.
- Processing:
- Dry Seeds (Beans, Peas, Lettuce, Grains): Allow pods/seed heads to dry completely on the plant. Harvest, shell, and clean the seeds, removing chaff.
- Wet Seeds (Tomatoes, Cucumbers, Squash): For tomatoes, ferment the seeds in water for a few days to remove the gel coating and inhibit disease. For cucumbers/squash, scrape out seeds, wash thoroughly, and dry.
- Drying: Spread seeds thinly on screens or paper plates in a cool, dry, well-ventilated area for 1-4 weeks. Ensure they are bone-dry before storage. I aim for less than 8% moisture content.
- Storage: Store seeds in airtight containers (glass jars with desiccant packets work well) in a cool, dark, dry place (ideally 40-50°F and 30-40% humidity). Label clearly with variety and date. Properly stored seeds can remain viable for 3-10 years or more.
Step 8: Season Extension & Winterizing
Extend your harvest and protect your garden for the off-season to truly maximize your self sufficient garden from scratch.
- Cold Frames: Simple structures with a transparent top (glass, polycarbonate, or old windows) that sit over garden beds. They trap solar heat, allowing you to grow cold-hardy crops (lettuce, spinach, kale, radishes) well into winter or start seeds earlier in spring. A basic cold frame can be built from 2×6 lumber and a sheet of polycarbonate for under $100.
- Hoop Houses/Low Tunnels: Larger structures made from flexible hoops (PVC pipe or EMT conduit) covered with greenhouse plastic. These provide more space and greater temperature moderation. A 10×20 ft DIY low tunnel kit can cost $200-$500, while a larger, more robust hoop house kit might be $1,000-$3,000. I use a 6×12 ft low tunnel made from 1/2-inch PVC hoops and 6mil greenhouse plastic, which extends my lettuce and spinach harvest by at least
Healthy soil is the bedrock of a productive, self-sufficient garden. You can’t guess what your soil needs; you have to test it.
- Perform a Soil Test: A professional soil test will give you precise data on your soil’s pH, nutrient levels (N-P-K), and organic matter content. I recommend sending a sample to your local agricultural extension office; it typically costs $20-$50 and provides detailed recommendations. Alternatively, for a quick homeowner check, a Rapitest Soil Test Kit (40-test kit, model 1663, ~$20 on Amazon) provides a good baseline for pH, Nitrogen, Phosphorus, and Potash. Aim for a pH between 6.0 and 7.0 for most vegetables.
- Amend for pH Imbalance: If your soil is too acidic (below 6.0), add agricultural lime (dolomitic lime adds magnesium, calcitic lime adds calcium). Apply 5-10 lbs per 100 sq ft for a moderate adjustment. If it’s too alkaline (above 7.0), add elemental sulfur (e.g., Espoma Soil Acidifier, ~$15 for 6.75 lbs) or generous amounts of organic matter like peat moss or pine needles.
- Build Organic Matter: This is the single most important step for long-term soil health. Organic matter improves soil structure, water retention, drainage, and nutrient availability. Incorporate 2-4 inches of high-quality compost into your top 6-12 inches of soil annually. I make my own compost from kitchen scraps, garden waste, and shredded leaves, but you can purchase it. Local nurseries often sell bulk compost for $30-$50 per cubic yard. Aged manure (from chickens, cows, or horses – ensure it’s well-rotted to avoid burning plants) is also excellent.
- Address Nutrient Deficiencies: Based on your soil test, add specific organic amendments. If Nitrogen (N) is low, add blood meal (12-0-0, ~$20 for 3 lbs) or feather meal. For Phosphorus (P), use bone meal (3-15-0, ~$15 for 3 lbs) or rock phosphate. For Potassium (K), greensand (0-0-2.5, ~$25 for 5 lbs) or kelp meal are good choices. I rely heavily on Espoma Organic Garden-tone (5-3-3, ~$25 for an 8lb bag) as a balanced, all-purpose organic fertilizer during planting.
Step 3: Garden Bed Preparation
Deciding between raised beds and in-ground beds depends on your soil, budget, and physical capabilities.
- In-Ground Beds: If you have excellent native soil and good drainage, in-ground beds are the most economical. Double-digging (loosening soil two shovel depths) can significantly improve drainage and aeration. For my main garden, I primarily use in-ground beds, but I focus on building up the soil over time with consistent compost additions and cover cropping. I aim for beds that are no wider than 3-4 feet so I can reach the center without stepping on the soil, compacting it.
- Raised Beds: Raised beds offer numerous advantages, especially for poor soil, heavy clay, or rocky areas. They provide better drainage, warm up faster in spring, reduce compaction, and make weeding and harvesting easier on your back.
- Material Options:
- Untreated Cedar: Naturally rot-resistant and chemical-free. A 4×8 ft bed, 12 inches deep, typically requires three 2x12x8 ft cedar boards, costing around $50-$60 per board (total ~$150-$180) plus corner brackets or screws. My first raised beds were cedar and are still going strong after 7 years.
- Galvanized Steel: Durable, long-lasting, and aesthetically pleasing. Brands like Vego Garden offer modular kits. A Vego Garden 17″ Tall 8-in-1 Metal Raised Garden Bed (can be configured to 4×8 ft) costs approximately $250-$300.
- Concrete Blocks/Stones: Very durable but can leach minerals (though generally safe once weathered) and can be expensive.
- Recycled Materials: Pallets (check for chemical treatment stamps like « HT » for heat-treated), old tires (controversial due to potential chemical leaching).
- Filling Raised Beds: Don’t just fill with topsoil. Use a « Hugelkultur » approach (logs, branches, leaves, then compost, then topsoil) or a mixture of 60% good quality topsoil, 30% compost, and 10% perlite or vermiculite for drainage. A 4x8x1 ft raised bed requires about 32 cubic feet (or ~1.2 cubic yards) of soil mix, which can cost $100-$200 depending on your source.
- Material Options:
Step 4: Water Management & Irrigation
Efficient water management is critical for a self sufficient garden from scratch, especially in off-grid living where water resources might be limited.
- Rainwater Harvesting: This is my primary source of irrigation water. A 55-gallon rain barrel (e.g., EarthMark Rain Barrel, ~$120-$150) connected to a downspout can collect significant water. For larger needs, I use two 275-gallon IBC totes (Intermediate Bulk Containers, often available used for $100-$200 each from food-grade sources) connected in series. A 1,000 sq ft roof can collect approximately 620 gallons of water for every inch of rainfall. My 1,500 sq ft roof provides ample water for my 600 sq ft garden through multiple barrels and totes.
- Drip Irrigation: This is by far the most water-efficient method, delivering water directly to the plant’s root zone, minimizing evaporation and weed growth.
- Components: A typical drip system includes a pressure regulator (e.g., Rain Bird PRV-10, ~$15), a filter (Rain Bird RBY filter, ~$20), main tubing (1/2-inch poly tubing, 100ft ~$25), smaller feeder lines (1/4-inch tubing), and emitters (0.5 GPH or 1 GPH per plant).
- Kits: For beginners, a starter kit like the Rain Bird Drip Irrigation Garden Kit (model DDI-KIT-1P, ~$40-$60) is excellent for a small garden. For larger setups, I use Netafim Techline CV Drip Line (500ft roll, ~$150-$200), which has pressure-compensating emitters built-in, ensuring even watering across long runs.
- Automation: For true self-sufficiency, consider a battery-powered timer (e.g., Orbit B-Hyve Bluetooth Hose Faucet Timer, ~$50) or a solar-powered timer connected to a small 12V pump.
- Solar-Powered Pumps: For lifting water from a well, pond, or large storage tank to your garden, a solar pump is a game-changer. For a smaller drip system, a Shurflo 2088-594-152 Diaphragm Pump (12V, 3.5 GPM, ~$180) can be powered by a single 100W solar panel (e.g., Renogy 100W Monocrystalline Solar Panel, ~$100) and a small 12V battery (e.g., a 50Ah LiFePO4 battery like the Battle Born 50Ah, ~$450). For larger operations or deeper wells, more robust systems are needed. If you’re looking to build out a comprehensive off-grid power system to support your garden’s water needs, or indeed your entire homestead, you might want to explore resources like the Power Grid Generator complete system guide to understand the full scope of what’s possible in terms of energy independence.
Step 5: Seed Selection & Planting
The choice of seeds is crucial for a truly self sufficient garden from scratch.
- Choose Heirloom & Open-Pollinated Seeds: These varieties produce seeds that will grow true to type, meaning you can save seeds from your harvest year after year. F1 hybrids, while often vigorous, will not produce consistent offspring from saved seeds. Reputable seed companies include Baker Creek Heirloom Seeds, High Mowing Organic Seeds, and Seed Savers Exchange. Start with common, reliable varieties like ‘Black Krim’ tomatoes, ‘Provider’ bush beans, ‘Waltham Butternut’ squash, and ‘Black Seeded Simpson’ lettuce.
- Start Seeds Indoors (Optional but Recommended): For longer growing seasons or specific crops, starting seeds indoors gives you a head start. Use seed-starting mix (e.g., Espoma Organic Seed Starter Mix, ~$10 for 16qt bag) in seed trays (Jiffy Professional Greenhouse 72-cell kit, ~$15). Provide adequate light with LED grow lights (Barrina T5 2ft 4-pack LED Grow Lights, 20W each, ~$50) for 14-16 hours a day, positioned 2-4 inches above seedlings. Maintain consistent temperatures (65-75°F for most).
- Direct Sowing vs. Transplanting: Some crops (carrots, radishes, beans, corn) prefer direct sowing into the garden bed. Others (tomatoes, peppers, broccoli, kale) benefit from being started indoors and transplanted. Follow seed packet instructions for planting depths (e.g., lettuce seeds are often surface-sown or planted 1/8 inch deep, while beans are 1 inch deep) and spacing.
- Companion Planting: Strategically plant different species together to enhance growth, deter pests, and attract beneficial insects. For example, planting marigolds near tomatoes can deter nematodes, and basil improves tomato flavor. Nasturtiums can act as a trap crop for aphids.
- Succession Planting: For a continuous harvest, plant small batches of quick-growing crops (lettuce, radishes, cilantro) every 2-3 weeks. As one crop finishes, another is ready to take its place.
Step 6: Pest & Disease Management (Organic)
Maintaining a self sufficient garden from scratch means embracing organic pest and disease control.
- Integrated Pest Management (IPM): This holistic approach combines several strategies.
- Observation: Regularly inspect your plants for early signs of pests or disease. Catching issues early is key.
- Physical Barriers: Use row covers (e.g., Agribon AG-19 floating row cover, 10×20 ft, ~$20) to protect young plants from insect pests like cabbage worms and squash bugs. Install fences (e.g., 2×4 welded wire mesh, 4 ft tall, 50 ft roll ~$70) to keep out deer, rabbits, and other larger animals.
- Hand-Picking: For larger pests like tomato hornworms or squash bugs, simply pick them off and drop them into a bucket of soapy water.
- Companion Planting: As mentioned, certain plants repel pests. Marigolds, garlic, and onions are excellent deterrents.
- Attract Beneficial Insects: Plant flowers like dill, fennel, cosmos, and sweet alyssum to attract ladybugs, lacewings, and parasitic wasps, which prey on common garden pests.
- Organic Sprays & Treatments:
- Neem Oil: An excellent broad-spectrum organic insecticide and fungicide. Bonide Neem Oil Concentrate (16oz, ~$20) can be mixed at a rate of 1-2 tbsp per gallon of water and sprayed on affected plants.
- Insecticidal Soap: Effective against soft-bodied insects like aphids, whiteflies, and spider mites. Garden Safe Insecticidal Soap (24oz ready-to-use, ~$10).
- Bacillus thuringiensis (Bt): A naturally occurring soil bacterium that targets caterpillars and worms. Monterey BT Worm & Caterpillar Killer (16oz, ~$18) is highly effective and safe for beneficial insects.
- Copper or Sulfur Sprays: For fungal diseases like powdery mildew or blight, organic copper (e.g., Bonide Copper Fungicide, ~$15 for 1lb) or sulfur (e.g., Safer Brand Garden Fungicide, ~$10 for 16oz) can be used as a last resort.
Step 7: Harvesting & Seed Saving
The culmination of your efforts is the harvest, and seed saving closes the loop on self-sufficiency.
- Harvesting Techniques:
- Timing: Harvest vegetables at their peak ripeness for best flavor and nutritional value. For example, green beans should snap cleanly, cucumbers should be firm, and tomatoes should be fully colored.
- Frequency: Many crops, like zucchini, cucumbers, and bush beans, produce more if harvested frequently. Pick daily or every other day.
- Tools: Use clean, sharp pruners (e.g., Corona ClassicCUT Bypass Pruner BP 3180, ~$30) or a sharp knife for clean cuts, minimizing damage to the plant.
- Seed Saving: This is where the « self-sufficient » aspect truly shines.
- Selection: Only save seeds from your healthiest, most vigorous plants that show desired traits (disease resistance, good flavor, high yield).
- Isolation: To ensure true-to-type seeds, prevent cross-pollination. This can be challenging for open-pollinated crops that readily cross (e.g., squash, corn). For beginners, focus on self-pollinating plants like beans, peas, lettuce, and tomatoes.
- Processing:
- Dry Seeds (Beans, Peas, Lettuce, Grains): Allow pods/seed heads to dry completely on the plant. Harvest, shell, and clean the seeds, removing chaff.
- Wet Seeds (Tomatoes, Cucumbers, Squash): For tomatoes, ferment the seeds in water for a few days to remove the gel coating and inhibit disease. For cucumbers/squash, scrape out seeds, wash thoroughly, and dry.
- Drying: Spread seeds thinly on screens or paper plates in a cool, dry, well-ventilated area for 1-4 weeks. Ensure they are bone-dry before storage. I aim for less than 8% moisture content.
- Storage: Store seeds in airtight containers (glass jars with desiccant packets work well) in a cool, dark, dry place (ideally 40-50°F and 30-40% humidity). Label clearly with variety and date. Properly stored seeds can remain viable for 3-10 years or more.
Step 8: Season Extension & Winterizing
Extend your harvest and protect your garden for the off-season to truly maximize your self sufficient garden from scratch.
- Cold Frames: Simple structures with a transparent top (glass, polycarbonate, or old windows) that sit over garden beds. They trap solar heat, allowing you to grow cold-hardy crops (lettuce, spinach, kale, radishes) well into winter or start seeds earlier in spring. A basic cold frame can be built from 2×6 lumber and a sheet of polycarbonate for under $100.
- Hoop Houses/Low Tunnels: Larger structures made from flexible hoops (PVC pipe or EMT conduit) covered with greenhouse plastic. These provide more space and greater temperature moderation. A 10×20 ft DIY low tunnel kit can cost $200-$500, while a larger, more robust hoop house kit might be $1,000-$3,000. I use a 6×12 ft low tunnel made from 1/2-inch PVC hoops and 6mil greenhouse plastic, which extends my lettuce and spinach harvest by at least
Step 7: Harvesting & Seed Saving
The culmination of your efforts is the harvest, and seed saving closes the loop on self-sufficiency.
- Harvesting Techniques:
- Timing: Harvest vegetables at their peak ripeness for best flavor and nutritional value. For example, green beans should snap cleanly, cucumbers should be firm, and tomatoes should be fully colored.
- Frequency: Many crops, like zucchini, cucumbers, and bush beans, produce more if harvested frequently. Pick daily or every other day.
- Tools: Use clean, sharp pruners (e.g., Corona ClassicCUT Bypass Pruner BP 3180, ~$30) or a sharp knife for clean cuts, minimizing damage to the plant.
- Seed Saving: This is where the « self-sufficient » aspect truly shines.
- Selection: Only save seeds from your healthiest, most vigorous plants that show desired traits (disease resistance, good flavor, high yield).
- Isolation: To ensure true-to-type seeds, prevent cross-pollination. This can be challenging for open-pollinated crops that readily cross (e.g., squash, corn). For beginners, focus on self-pollinating plants like beans, peas, lettuce, and tomatoes.
- Processing:
- Dry Seeds (Beans, Peas, Lettuce, Grains): Allow pods/seed heads to dry completely on the plant. Harvest, shell, and clean the seeds, removing chaff.
- Wet Seeds (Tomatoes, Cucumbers, Squash): For tomatoes, ferment the seeds in water for a few days to remove the gel coating and inhibit disease. For cucumbers/squash, scrape out seeds, wash thoroughly, and dry.
- Drying: Spread seeds thinly on screens or paper plates in a cool, dry, well-ventilated area for 1-4 weeks. Ensure they are bone-dry before storage. I aim for less than 8% moisture content.
- Storage: Store seeds in airtight containers (glass jars with desiccant packets work well) in a cool, dark, dry place (ideally 40-50°F and 30-40% humidity). Label clearly with variety and date. Properly stored seeds can remain viable for 3-10 years or more.
Step 8: Season Extension & Winterizing
Extend your harvest and protect your garden for the off-season to truly maximize your self sufficient garden from scratch.
- Cold Frames: Simple structures with a transparent top (glass, polycarbonate, or old windows) that sit over garden beds. They trap solar heat, allowing you to grow cold-hardy crops (lettuce, spinach, kale, radishes) well into winter or start seeds earlier in spring. A basic cold frame can be built from 2×6 lumber and a sheet of polycarbonate for under $100.
- Hoop Houses/Low Tunnels: Larger structures made from flexible hoops (PVC pipe or EMT conduit) covered with greenhouse plastic. These provide more space and greater temperature moderation. A 10×20 ft DIY low tunnel kit can cost $200-$500, while a larger, more robust hoop house kit might be $1,000-$3,000. I use a 6×12 ft low tunnel made from 1/2-inch PVC hoops and 6mil greenhouse plastic, which extends my lettuce and spinach harvest by at least
Healthy soil is the bedrock of a productive, self-sufficient garden. You can’t guess what your soil needs; you have to test it.
- Perform a Soil Test: A professional soil test will give you precise data on your soil’s pH, nutrient levels (N-P-K), and organic matter content. I recommend sending a sample to your local agricultural extension office; it typically costs $20-$50 and provides detailed recommendations. Alternatively, for a quick homeowner check, a Rapitest Soil Test Kit (40-test kit, model 1663, ~$20 on Amazon) provides a good baseline for pH, Nitrogen, Phosphorus, and Potash. Aim for a pH between 6.0 and 7.0 for most vegetables.
- Amend for pH Imbalance: If your soil is too acidic (below 6.0), add agricultural lime (dolomitic lime adds magnesium, calcitic lime adds calcium). Apply 5-10 lbs per 100 sq ft for a moderate adjustment. If it’s too alkaline (above 7.0), add elemental sulfur (e.g., Espoma Soil Acidifier, ~$15 for 6.75 lbs) or generous amounts of organic matter like peat moss or pine needles.
- Build Organic Matter: This is the single most important step for long-term soil health. Organic matter improves soil structure, water retention, drainage, and nutrient availability. Incorporate 2-4 inches of high-quality compost into your top 6-12 inches of soil annually. I make my own compost from kitchen scraps, garden waste, and shredded leaves, but you can purchase it. Local nurseries often sell bulk compost for $30-$50 per cubic yard. Aged manure (from chickens, cows, or horses – ensure it’s well-rotted to avoid burning plants) is also excellent.
- Address Nutrient Deficiencies: Based on your soil test, add specific organic amendments. If Nitrogen (N) is low, add blood meal (12-0-0, ~$20 for 3 lbs) or feather meal. For Phosphorus (P), use bone meal (3-15-0, ~$15 for 3 lbs) or rock phosphate. For Potassium (K), greensand (0-0-2.5, ~$25 for 5 lbs) or kelp meal are good choices. I rely heavily on Espoma Organic Garden-tone (5-3-3, ~$25 for an 8lb bag) as a balanced, all-purpose organic fertilizer during planting.
Step 3: Garden Bed Preparation
Deciding between raised beds and in-ground beds depends on your soil, budget, and physical capabilities.
- In-Ground Beds: If you have excellent native soil and good drainage, in-ground beds are the most economical. Double-digging (loosening soil two shovel depths) can significantly improve drainage and aeration. For my main garden, I primarily use in-ground beds, but I focus on building up the soil over time with consistent compost additions and cover cropping. I aim for beds that are no wider than 3-4 feet so I can reach the center without stepping on the soil, compacting it.
- Raised Beds: Raised beds offer numerous advantages, especially for poor soil, heavy clay, or rocky areas. They provide better drainage, warm up faster in spring, reduce compaction, and make weeding and harvesting easier on your back.
- Material Options:
- Untreated Cedar: Naturally rot-resistant and chemical-free. A 4×8 ft bed, 12 inches deep, typically requires three 2x12x8 ft cedar boards, costing around $50-$60 per board (total ~$150-$180) plus corner brackets or screws. My first raised beds were cedar and are still going strong after 7 years.
- Galvanized Steel: Durable, long-lasting, and aesthetically pleasing. Brands like Vego Garden offer modular kits. A Vego Garden 17″ Tall 8-in-1 Metal Raised Garden Bed (can be configured to 4×8 ft) costs approximately $250-$300.
- Concrete Blocks/Stones: Very durable but can leach minerals (though generally safe once weathered) and can be expensive.
- Recycled Materials: Pallets (check for chemical treatment stamps like « HT » for heat-treated), old tires (controversial due to potential chemical leaching).
- Filling Raised Beds: Don’t just fill with topsoil. Use a « Hugelkultur » approach (logs, branches, leaves, then compost, then topsoil) or a mixture of 60% good quality topsoil, 30% compost, and 10% perlite or vermiculite for drainage. A 4x8x1 ft raised bed requires about 32 cubic feet (or ~1.2 cubic yards) of soil mix, which can cost $100-$200 depending on your source.
- Material Options:
Step 4: Water Management & Irrigation
Efficient water management is critical for a self sufficient garden from scratch, especially in off-grid living where water resources might be limited.
- Rainwater Harvesting: This is my primary source of irrigation water. A 55-gallon rain barrel (e.g., EarthMark Rain Barrel, ~$120-$150) connected to a downspout can collect significant water. For larger needs, I use two 275-gallon IBC totes (Intermediate Bulk Containers, often available used for $100-$200 each from food-grade sources) connected in series. A 1,000 sq ft roof can collect approximately 620 gallons of water for every inch of rainfall. My 1,500 sq ft roof provides ample water for my 600 sq ft garden through multiple barrels and totes.
- Drip Irrigation: This is by far the most water-efficient method, delivering water directly to the plant’s root zone, minimizing evaporation and weed growth.
- Components: A typical drip system includes a pressure regulator (e.g., Rain Bird PRV-10, ~$15), a filter (Rain Bird RBY filter, ~$20), main tubing (1/2-inch poly tubing, 100ft ~$25), smaller feeder lines (1/4-inch tubing), and emitters (0.5 GPH or 1 GPH per plant).
- Kits: For beginners, a starter kit like the Rain Bird Drip Irrigation Garden Kit (model DDI-KIT-1P, ~$40-$60) is excellent for a small garden. For larger setups, I use Netafim Techline CV Drip Line (500ft roll, ~$150-$200), which has pressure-compensating emitters built-in, ensuring even watering across long runs.
- Automation: For true self-sufficiency, consider a battery-powered timer (e.g., Orbit B-Hyve Bluetooth Hose Faucet Timer, ~$50) or a solar-powered timer connected to a small 12V pump.
- Solar-Powered Pumps: For lifting water from a well, pond, or large storage tank to your garden, a solar pump is a game-changer. For a smaller drip system, a Shurflo 2088-594-152 Diaphragm Pump (12V, 3.5 GPM, ~$180) can be powered by a single 100W solar panel (e.g., Renogy 100W Monocrystalline Solar Panel, ~$100) and a small 12V battery (e.g., a 50Ah LiFePO4 battery like the Battle Born 50Ah, ~$450). For larger operations or deeper wells, more robust systems are needed. If you’re looking to build out a comprehensive off-grid power system to support your garden’s water needs, or indeed your entire homestead, you might want to explore resources like the Power Grid Generator complete system guide to understand the full scope of what’s possible in terms of energy independence.
Step 5: Seed Selection & Planting
The choice of seeds is crucial for a truly self sufficient garden from scratch.
- Choose Heirloom & Open-Pollinated Seeds: These varieties produce seeds that will grow true to type, meaning you can save seeds from your harvest year after year. F1 hybrids, while often vigorous, will not produce consistent offspring from saved seeds. Reputable seed companies include Baker Creek Heirloom Seeds, High Mowing Organic Seeds, and Seed Savers Exchange. Start with common, reliable varieties like ‘Black Krim’ tomatoes, ‘Provider’ bush beans, ‘Waltham Butternut’ squash, and ‘Black Seeded Simpson’ lettuce.
- Start Seeds Indoors (Optional but Recommended): For longer growing seasons or specific crops, starting seeds indoors gives you a head start. Use seed-starting mix (e.g., Espoma Organic Seed Starter Mix, ~$10 for 16qt bag) in seed trays (Jiffy Professional Greenhouse 72-cell kit, ~$15). Provide adequate light with LED grow lights (Barrina T5 2ft 4-pack LED Grow Lights, 20W each, ~$50) for 14-16 hours a day, positioned 2-4 inches above seedlings. Maintain consistent temperatures (65-75°F for most).
- Direct Sowing vs. Transplanting: Some crops (carrots, radishes, beans, corn) prefer direct sowing into the garden bed. Others (tomatoes, peppers, broccoli, kale) benefit from being started indoors and transplanted. Follow seed packet instructions for planting depths (e.g., lettuce seeds are often surface-sown or planted 1/8 inch deep, while beans are 1 inch deep) and spacing.
- Companion Planting: Strategically plant different species together to enhance growth, deter pests, and attract beneficial insects. For example, planting marigolds near tomatoes can deter nematodes, and basil improves tomato flavor. Nasturtiums can act as a trap crop for aphids.
- Succession Planting: For a continuous harvest, plant small batches of quick-growing crops (lettuce, radishes, cilantro) every 2-3 weeks. As one crop finishes, another is ready to take its place.
Step 6: Pest & Disease Management (Organic)
Maintaining a self sufficient garden from scratch means embracing organic pest and disease control.
- Integrated Pest Management (IPM): This holistic approach combines several strategies.
- Observation: Regularly inspect your plants for early signs of pests or disease. Catching issues early is key.
- Physical Barriers: Use row covers (e.g., Agribon AG-19 floating row cover, 10×20 ft, ~$20) to protect young plants from insect pests like cabbage worms and squash bugs. Install fences (e.g., 2×4 welded wire mesh, 4 ft tall, 50 ft roll ~$70) to keep out deer, rabbits, and other larger animals.
- Hand-Picking: For larger pests like tomato hornworms or squash bugs, simply pick them off and drop them into a bucket of soapy water.
- Companion Planting: As mentioned, certain plants repel pests. Marigolds, garlic, and onions are excellent deterrents.
- Attract Beneficial Insects: Plant flowers like dill, fennel, cosmos, and sweet alyssum to attract ladybugs, lacewings, and parasitic wasps, which prey on common garden pests.
- Organic Sprays & Treatments:
- Neem Oil: An excellent broad-spectrum organic insecticide and fungicide. Bonide Neem Oil Concentrate (16oz, ~$20) can be mixed at a rate of 1-2 tbsp per gallon of water and sprayed on affected plants.
- Insecticidal Soap: Effective against soft-bodied insects like aphids, whiteflies, and spider mites. Garden Safe Insecticidal Soap (24oz ready-to-use, ~$10).
- Bacillus thuringiensis (Bt): A naturally occurring soil bacterium that targets caterpillars and worms. Monterey BT Worm & Caterpillar Killer (16oz, ~$18) is highly effective and safe for beneficial insects.
- Copper or Sulfur Sprays: For fungal diseases like powdery mildew or blight, organic copper (e.g., Bonide Copper Fungicide, ~$15 for 1lb) or sulfur (e.g., Safer Brand Garden Fungicide, ~$10 for 16oz) can be used as a last resort.
Step 7: Harvesting & Seed Saving
The culmination of your efforts is the harvest, and seed saving closes the loop on self-sufficiency.
- Harvesting Techniques:
- Timing: Harvest vegetables at their peak ripeness for best flavor and nutritional value. For example, green beans should snap cleanly, cucumbers should be firm, and tomatoes should be fully colored.
- Frequency: Many crops, like zucchini, cucumbers, and bush beans, produce more if harvested frequently. Pick daily or every other day.
- Tools: Use clean, sharp pruners (e.g., Corona ClassicCUT Bypass Pruner BP 3180, ~$30) or a sharp knife for clean cuts, minimizing damage to the plant.
- Seed Saving: This is where the « self-sufficient » aspect truly shines.
- Selection: Only save seeds from your healthiest, most vigorous plants that show desired traits (disease resistance, good flavor, high yield).
- Isolation: To ensure true-to-type seeds, prevent cross-pollination. This can be challenging for open-pollinated crops that readily cross (e.g., squash, corn). For beginners, focus on self-pollinating plants like beans, peas, lettuce, and tomatoes.
- Processing:
- Dry Seeds (Beans, Peas, Lettuce, Grains): Allow pods/seed heads to dry completely on the plant. Harvest, shell, and clean the seeds, removing chaff.
- Wet Seeds (Tomatoes, Cucumbers, Squash): For tomatoes, ferment the seeds in water for a few days to remove the gel coating and inhibit disease. For cucumbers/squash, scrape out seeds, wash thoroughly, and dry.
- Drying: Spread seeds thinly on screens or paper plates in a cool, dry, well-ventilated area for 1-4 weeks. Ensure they are bone-dry before storage. I aim for less than 8% moisture content.
- Storage: Store seeds in airtight containers (glass jars with desiccant packets work well) in a cool, dark, dry place (ideally 40-50°F and 30-40% humidity). Label clearly with variety and date. Properly stored seeds can remain viable for 3-10 years or more.
Step 8: Season Extension & Winterizing
Extend your harvest and protect your garden for the off-season to truly maximize your self sufficient garden from scratch.
- Cold Frames: Simple structures with a transparent top (glass, polycarbonate, or old windows) that sit over garden beds. They trap solar heat, allowing you to grow cold-hardy crops (lettuce, spinach, kale, radishes) well into winter or start seeds earlier in spring. A basic cold frame can be built from 2×6 lumber and a sheet of polycarbonate for under $100.
- Hoop Houses/Low Tunnels: Larger structures made from flexible hoops (PVC pipe or EMT conduit) covered with greenhouse plastic. These provide more space and greater temperature moderation. A 10×20 ft DIY low tunnel kit can cost $200-$500, while a larger, more robust hoop house kit might be $1,000-$3,000. I use a 6×12 ft low tunnel made from 1/2-inch PVC hoops and 6mil greenhouse plastic, which extends my lettuce and spinach harvest by at least
- Integrated Pest Management (IPM): This holistic approach combines several strategies.
- Observation: Regularly inspect your plants for early signs of pests or disease. Catching issues early is key.
- Physical Barriers: Use row covers (e.g., Agribon AG-19 floating row cover, 10×20 ft, ~$20) to protect young plants from insect pests like cabbage worms and squash bugs. Install fences (e.g., 2×4 welded wire mesh, 4 ft tall, 50 ft roll ~$70) to keep out deer, rabbits, and other larger animals.
- Hand-Picking: For larger pests like tomato hornworms or squash bugs, simply pick them off and drop them into a bucket of soapy water.
- Companion Planting: As mentioned, certain plants repel pests. Marigolds, garlic, and onions are excellent deterrents.
- Attract Beneficial Insects: Plant flowers like dill, fennel, cosmos, and sweet alyssum to attract ladybugs, lacewings, and parasitic wasps, which prey on common garden pests.
- Organic Sprays & Treatments:
- Neem Oil: An excellent broad-spectrum organic insecticide and fungicide. Bonide Neem Oil Concentrate (16oz, ~$20) can be mixed at a rate of 1-2 tbsp per gallon of water and sprayed on affected plants.
- Insecticidal Soap: Effective against soft-bodied insects like aphids, whiteflies, and spider mites. Garden Safe Insecticidal Soap (24oz ready-to-use, ~$10).
- Bacillus thuringiensis (Bt): A naturally occurring soil bacterium that targets caterpillars and worms. Monterey BT Worm & Caterpillar Killer (16oz, ~$18) is highly effective and safe for beneficial insects.
- Copper or Sulfur Sprays: For fungal diseases like powdery mildew or blight, organic copper (e.g., Bonide Copper Fungicide, ~$15 for 1lb) or sulfur (e.g., Safer Brand Garden Fungicide, ~$10 for 16oz) can be used as a last resort.
Step 7: Harvesting & Seed Saving
The culmination of your efforts is the harvest, and seed saving closes the loop on self-sufficiency.
- Harvesting Techniques:
- Timing: Harvest vegetables at their peak ripeness for best flavor and nutritional value. For example, green beans should snap cleanly, cucumbers should be firm, and tomatoes should be fully colored.
- Frequency: Many crops, like zucchini, cucumbers, and bush beans, produce more if harvested frequently. Pick daily or every other day.
- Tools: Use clean, sharp pruners (e.g., Corona ClassicCUT Bypass Pruner BP 3180, ~$30) or a sharp knife for clean cuts, minimizing damage to the plant.
- Seed Saving: This is where the « self-sufficient » aspect truly shines.
- Selection: Only save seeds from your healthiest, most vigorous plants that show desired traits (disease resistance, good flavor, high yield).
- Isolation: To ensure true-to-type seeds, prevent cross-pollination. This can be challenging for open-pollinated crops that readily cross (e.g., squash, corn). For beginners, focus on self-pollinating plants like beans, peas, lettuce, and tomatoes.
- Processing:
- Dry Seeds (Beans, Peas, Lettuce, Grains): Allow pods/seed heads to dry completely on the plant. Harvest, shell, and clean the seeds, removing chaff.
- Wet Seeds (Tomatoes, Cucumbers, Squash): For tomatoes, ferment the seeds in water for a few days to remove the gel coating and inhibit disease. For cucumbers/squash, scrape out seeds, wash thoroughly, and dry.
- Drying: Spread seeds thinly on screens or paper plates in a cool, dry, well-ventilated area for 1-4 weeks. Ensure they are bone-dry before storage. I aim for less than 8% moisture content.
- Storage: Store seeds in airtight containers (glass jars with desiccant packets work well) in a cool, dark, dry place (ideally 40-50°F and 30-40% humidity). Label clearly with variety and date. Properly stored seeds can remain viable for 3-10 years or more.
Step 8: Season Extension & Winterizing
Extend your harvest and protect your garden for the off-season to truly maximize your self sufficient garden from scratch.
- Cold Frames: Simple structures with a transparent top (glass, polycarbonate, or old windows) that sit over garden beds. They trap solar heat, allowing you to grow cold-hardy crops (lettuce, spinach, kale, radishes) well into winter or start seeds earlier in spring. A basic cold frame can be built from 2×6 lumber and a sheet of polycarbonate for under $100.
- Hoop Houses/Low Tunnels: Larger structures made from flexible hoops (PVC pipe or EMT conduit) covered with greenhouse plastic. These provide more space and greater temperature moderation. A 10×20 ft DIY low tunnel kit can cost $200-$500, while a larger, more robust hoop house kit might be $1,000-$3,000. I use a 6×12 ft low tunnel made from 1/2-inch PVC hoops and 6mil greenhouse plastic, which extends my lettuce and spinach harvest by at least
Healthy soil is the bedrock of a productive, self-sufficient garden. You can’t guess what your soil needs; you have to test it.
- Perform a Soil Test: A professional soil test will give you precise data on your soil’s pH, nutrient levels (N-P-K), and organic matter content. I recommend sending a sample to your local agricultural extension office; it typically costs $20-$50 and provides detailed recommendations. Alternatively, for a quick homeowner check, a Rapitest Soil Test Kit (40-test kit, model 1663, ~$20 on Amazon) provides a good baseline for pH, Nitrogen, Phosphorus, and Potash. Aim for a pH between 6.0 and 7.0 for most vegetables.
- Amend for pH Imbalance: If your soil is too acidic (below 6.0), add agricultural lime (dolomitic lime adds magnesium, calcitic lime adds calcium). Apply 5-10 lbs per 100 sq ft for a moderate adjustment. If it’s too alkaline (above 7.0), add elemental sulfur (e.g., Espoma Soil Acidifier, ~$15 for 6.75 lbs) or generous amounts of organic matter like peat moss or pine needles.
- Build Organic Matter: This is the single most important step for long-term soil health. Organic matter improves soil structure, water retention, drainage, and nutrient availability. Incorporate 2-4 inches of high-quality compost into your top 6-12 inches of soil annually. I make my own compost from kitchen scraps, garden waste, and shredded leaves, but you can purchase it. Local nurseries often sell bulk compost for $30-$50 per cubic yard. Aged manure (from chickens, cows, or horses – ensure it’s well-rotted to avoid burning plants) is also excellent.
- Address Nutrient Deficiencies: Based on your soil test, add specific organic amendments. If Nitrogen (N) is low, add blood meal (12-0-0, ~$20 for 3 lbs) or feather meal. For Phosphorus (P), use bone meal (3-15-0, ~$15 for 3 lbs) or rock phosphate. For Potassium (K), greensand (0-0-2.5, ~$25 for 5 lbs) or kelp meal are good choices. I rely heavily on Espoma Organic Garden-tone (5-3-3, ~$25 for an 8lb bag) as a balanced, all-purpose organic fertilizer during planting.
Step 3: Garden Bed Preparation
Deciding between raised beds and in-ground beds depends on your soil, budget, and physical capabilities.
- In-Ground Beds: If you have excellent native soil and good drainage, in-ground beds are the most economical. Double-digging (loosening soil two shovel depths) can significantly improve drainage and aeration. For my main garden, I primarily use in-ground beds, but I focus on building up the soil over time with consistent compost additions and cover cropping. I aim for beds that are no wider than 3-4 feet so I can reach the center without stepping on the soil, compacting it.
- Raised Beds: Raised beds offer numerous advantages, especially for poor soil, heavy clay, or rocky areas. They provide better drainage, warm up faster in spring, reduce compaction, and make weeding and harvesting easier on your back.
- Material Options:
- Untreated Cedar: Naturally rot-resistant and chemical-free. A 4×8 ft bed, 12 inches deep, typically requires three 2x12x8 ft cedar boards, costing around $50-$60 per board (total ~$150-$180) plus corner brackets or screws. My first raised beds were cedar and are still going strong after 7 years.
- Galvanized Steel: Durable, long-lasting, and aesthetically pleasing. Brands like Vego Garden offer modular kits. A Vego Garden 17″ Tall 8-in-1 Metal Raised Garden Bed (can be configured to 4×8 ft) costs approximately $250-$300.
- Concrete Blocks/Stones: Very durable but can leach minerals (though generally safe once weathered) and can be expensive.
- Recycled Materials: Pallets (check for chemical treatment stamps like « HT » for heat-treated), old tires (controversial due to potential chemical leaching).
- Filling Raised Beds: Don’t just fill with topsoil. Use a « Hugelkultur » approach (logs, branches, leaves, then compost, then topsoil) or a mixture of 60% good quality topsoil, 30% compost, and 10% perlite or vermiculite for drainage. A 4x8x1 ft raised bed requires about 32 cubic feet (or ~1.2 cubic yards) of soil mix, which can cost $100-$200 depending on your source.
- Material Options:
Step 4: Water Management & Irrigation
Efficient water management is critical for a self sufficient garden from scratch, especially in off-grid living where water resources might be limited.
- Rainwater Harvesting: This is my primary source of irrigation water. A 55-gallon rain barrel (e.g., EarthMark Rain Barrel, ~$120-$150) connected to a downspout can collect significant water. For larger needs, I use two 275-gallon IBC totes (Intermediate Bulk Containers, often available used for $100-$200 each from food-grade sources) connected in series. A 1,000 sq ft roof can collect approximately 620 gallons of water for every inch of rainfall. My 1,500 sq ft roof provides ample water for my 600 sq ft garden through multiple barrels and totes.
- Drip Irrigation: This is by far the most water-efficient method, delivering water directly to the plant’s root zone, minimizing evaporation and weed growth.
- Components: A typical drip system includes a pressure regulator (e.g., Rain Bird PRV-10, ~$15), a filter (Rain Bird RBY filter, ~$20), main tubing (1/2-inch poly tubing, 100ft ~$25), smaller feeder lines (1/4-inch tubing), and emitters (0.5 GPH or 1 GPH per plant).
- Kits: For beginners, a starter kit like the Rain Bird Drip Irrigation Garden Kit (model DDI-KIT-1P, ~$40-$60) is excellent for a small garden. For larger setups, I use Netafim Techline CV Drip Line (500ft roll, ~$150-$200), which has pressure-compensating emitters built-in, ensuring even watering across long runs.
- Automation: For true self-sufficiency, consider a battery-powered timer (e.g., Orbit B-Hyve Bluetooth Hose Faucet Timer, ~$50) or a solar-powered timer connected to a small 12V pump.
- Solar-Powered Pumps: For lifting water from a well, pond, or large storage tank to your garden, a solar pump is a game-changer. For a smaller drip system, a Shurflo 2088-594-152 Diaphragm Pump (12V, 3.5 GPM, ~$180) can be powered by a single 100W solar panel (e.g., Renogy 100W Monocrystalline Solar Panel, ~$100) and a small 12V battery (e.g., a 50Ah LiFePO4 battery like the Battle Born 50Ah, ~$450). For larger operations or deeper wells, more robust systems are needed. If you’re looking to build out a comprehensive off-grid power system to support your garden’s water needs, or indeed your entire homestead, you might want to explore resources like the Power Grid Generator complete system guide to understand the full scope of what’s possible in terms of energy independence.
Step 5: Seed Selection & Planting
The choice of seeds is crucial for a truly self sufficient garden from scratch.
- Choose Heirloom & Open-Pollinated Seeds: These varieties produce seeds that will grow true to type, meaning you can save seeds from your harvest year after year. F1 hybrids, while often vigorous, will not produce consistent offspring from saved seeds. Reputable seed companies include Baker Creek Heirloom Seeds, High Mowing Organic Seeds, and Seed Savers Exchange. Start with common, reliable varieties like ‘Black Krim’ tomatoes, ‘Provider’ bush beans, ‘Waltham Butternut’ squash, and ‘Black Seeded Simpson’ lettuce.
- Start Seeds Indoors (Optional but Recommended): For longer growing seasons or specific crops, starting seeds indoors gives you a head start. Use seed-starting mix (e.g., Espoma Organic Seed Starter Mix, ~$10 for 16qt bag) in seed trays (Jiffy Professional Greenhouse 72-cell kit, ~$15). Provide adequate light with LED grow lights (Barrina T5 2ft 4-pack LED Grow Lights, 20W each, ~$50) for 14-16 hours a day, positioned 2-4 inches above seedlings. Maintain consistent temperatures (65-75°F for most).
- Direct Sowing vs. Transplanting: Some crops (carrots, radishes, beans, corn) prefer direct sowing into the garden bed. Others (tomatoes, peppers, broccoli, kale) benefit from being started indoors and transplanted. Follow seed packet instructions for planting depths (e.g., lettuce seeds are often surface-sown or planted 1/8 inch deep, while beans are 1 inch deep) and spacing.
- Companion Planting: Strategically plant different species together to enhance growth, deter pests, and attract beneficial insects. For example, planting marigolds near tomatoes can deter nematodes, and basil improves tomato flavor. Nasturtiums can act as a trap crop for aphids.
- Succession Planting: For a continuous harvest, plant small batches of quick-growing crops (lettuce, radishes, cilantro) every 2-3 weeks. As one crop finishes, another is ready to take its place.
Step 6: Pest & Disease Management (Organic)
Maintaining a self sufficient garden from scratch means embracing organic pest and disease control.
- Integrated Pest Management (IPM): This holistic approach combines several strategies.
- Observation: Regularly inspect your plants for early signs of pests or disease. Catching issues early is key.
- Physical Barriers: Use row covers (e.g., Agribon AG-19 floating row cover, 10×20 ft, ~$20) to protect young plants from insect pests like cabbage worms and squash bugs. Install fences (e.g., 2×4 welded wire mesh, 4 ft tall, 50 ft roll ~$70) to keep out deer, rabbits, and other larger animals.
- Hand-Picking: For larger pests like tomato hornworms or squash bugs, simply pick them off and drop them into a bucket of soapy water.
- Companion Planting: As mentioned, certain plants repel pests. Marigolds, garlic, and onions are excellent deterrents.
- Attract Beneficial Insects: Plant flowers like dill, fennel, cosmos, and sweet alyssum to attract ladybugs, lacewings, and parasitic wasps, which prey on common garden pests.
- Organic Sprays & Treatments:
- Neem Oil: An excellent broad-spectrum organic insecticide and fungicide. Bonide Neem Oil Concentrate (16oz, ~$20) can be mixed at a rate of 1-2 tbsp per gallon of water and sprayed on affected plants.
- Insecticidal Soap: Effective against soft-bodied insects like aphids, whiteflies, and spider mites. Garden Safe Insecticidal Soap (24oz ready-to-use, ~$10).
- Bacillus thuringiensis (Bt): A naturally occurring soil bacterium that targets caterpillars and worms. Monterey BT Worm & Caterpillar Killer (16oz, ~$18) is highly effective and safe for beneficial insects.
- Copper or Sulfur Sprays: For fungal diseases like powdery mildew or blight, organic copper (e.g., Bonide Copper Fungicide, ~$15 for 1lb) or sulfur (e.g., Safer Brand Garden Fungicide, ~$10 for 16oz) can be used as a last resort.
Step 7: Harvesting & Seed Saving
The culmination of your efforts is the harvest, and seed saving closes the loop on self-sufficiency.
- Harvesting Techniques:
- Timing: Harvest vegetables at their peak ripeness for best flavor and nutritional value. For example, green beans should snap cleanly, cucumbers should be firm, and tomatoes should be fully colored.
- Frequency: Many crops, like zucchini, cucumbers, and bush beans, produce more if harvested frequently. Pick daily or every other day.
- Tools: Use clean, sharp pruners (e.g., Corona ClassicCUT Bypass Pruner BP 3180, ~$30) or a sharp knife for clean cuts, minimizing damage to the plant.
- Seed Saving: This is where the « self-sufficient » aspect truly shines.
- Selection: Only save seeds from your healthiest, most vigorous plants that show desired traits (disease resistance, good flavor, high yield).
- Isolation: To ensure true-to-type seeds, prevent cross-pollination. This can be challenging for open-pollinated crops that readily cross (e.g., squash, corn). For beginners, focus on self-pollinating plants like beans, peas, lettuce, and tomatoes.
- Processing:
- Dry Seeds (Beans, Peas, Lettuce, Grains): Allow pods/seed heads to dry completely on the plant. Harvest, shell, and clean the seeds, removing chaff.
- Wet Seeds (Tomatoes, Cucumbers, Squash): For tomatoes, ferment the seeds in water for a few days to remove the gel coating and inhibit disease. For cucumbers/squash, scrape out seeds, wash thoroughly, and dry.
- Drying: Spread seeds thinly on screens or paper plates in a cool, dry, well-ventilated area for 1-4 weeks. Ensure they are bone-dry before storage. I aim for less than 8% moisture content.
- Storage: Store seeds in airtight containers (glass jars with desiccant packets work well) in a cool, dark, dry place (ideally 40-50°F and 30-40% humidity). Label clearly with variety and date. Properly stored seeds can remain viable for 3-10 years or more.
Step 8: Season Extension & Winterizing
Extend your harvest and protect your garden for the off-season to truly maximize your self sufficient garden from scratch.
- Cold Frames: Simple structures with a transparent top (glass, polycarbonate, or old windows) that sit over garden beds. They trap solar heat, allowing you to grow cold-hardy crops (lettuce, spinach, kale, radishes) well into winter or start seeds earlier in spring. A basic cold frame can be built from 2×6 lumber and a sheet of polycarbonate for under $100.
- Hoop Houses/Low Tunnels: Larger structures made from flexible hoops (PVC pipe or EMT conduit) covered with greenhouse plastic. These provide more space and greater temperature moderation. A 10×20 ft DIY low tunnel kit can cost $200-$500, while a larger, more robust hoop house kit might be $1,000-$3,000. I use a 6×12 ft low tunnel made from 1/2-inch PVC hoops and 6mil greenhouse plastic, which extends my lettuce and spinach harvest by at least
Maintaining a self sufficient garden from scratch means embracing organic pest and disease control.
- Integrated Pest Management (IPM): This holistic approach combines several strategies.
- Observation: Regularly inspect your plants for early signs of pests or disease. Catching issues early is key.
- Physical Barriers: Use row covers (e.g., Agribon AG-19 floating row cover, 10×20 ft, ~$20) to protect young plants from insect pests like cabbage worms and squash bugs. Install fences (e.g., 2×4 welded wire mesh, 4 ft tall, 50 ft roll ~$70) to keep out deer, rabbits, and other larger animals.
- Hand-Picking: For larger pests like tomato hornworms or squash bugs, simply pick them off and drop them into a bucket of soapy water.
- Companion Planting: As mentioned, certain plants repel pests. Marigolds, garlic, and onions are excellent deterrents.
- Attract Beneficial Insects: Plant flowers like dill, fennel, cosmos, and sweet alyssum to attract ladybugs, lacewings, and parasitic wasps, which prey on common garden pests.
- Organic Sprays & Treatments:
- Neem Oil: An excellent broad-spectrum organic insecticide and fungicide. Bonide Neem Oil Concentrate (16oz, ~$20) can be mixed at a rate of 1-2 tbsp per gallon of water and sprayed on affected plants.
- Insecticidal Soap: Effective against soft-bodied insects like aphids, whiteflies, and spider mites. Garden Safe Insecticidal Soap (24oz ready-to-use, ~$10).
- Bacillus thuringiensis (Bt): A naturally occurring soil bacterium that targets caterpillars and worms. Monterey BT Worm & Caterpillar Killer (16oz, ~$18) is highly effective and safe for beneficial insects.
- Copper or Sulfur Sprays: For fungal diseases like powdery mildew or blight, organic copper (e.g., Bonide Copper Fungicide, ~$15 for 1lb) or sulfur (e.g., Safer Brand Garden Fungicide, ~$10 for 16oz) can be used as a last resort.
Step 7: Harvesting & Seed Saving
The culmination of your efforts is the harvest, and seed saving closes the loop on self-sufficiency.
- Harvesting Techniques:
- Timing: Harvest vegetables at their peak ripeness for best flavor and nutritional value. For example, green beans should snap cleanly, cucumbers should be firm, and tomatoes should be fully colored.
- Frequency: Many crops, like zucchini, cucumbers, and bush beans, produce more if harvested frequently. Pick daily or every other day.
- Tools: Use clean, sharp pruners (e.g., Corona ClassicCUT Bypass Pruner BP 3180, ~$30) or a sharp knife for clean cuts, minimizing damage to the plant.
- Seed Saving: This is where the « self-sufficient » aspect truly shines.
- Selection: Only save seeds from your healthiest, most vigorous plants that show desired traits (disease resistance, good flavor, high yield).
- Isolation: To ensure true-to-type seeds, prevent cross-pollination. This can be challenging for open-pollinated crops that readily cross (e.g., squash, corn). For beginners, focus on self-pollinating plants like beans, peas, lettuce, and tomatoes.
- Processing:
- Dry Seeds (Beans, Peas, Lettuce, Grains): Allow pods/seed heads to dry completely on the plant. Harvest, shell, and clean the seeds, removing chaff.
- Wet Seeds (Tomatoes, Cucumbers, Squash): For tomatoes, ferment the seeds in water for a few days to remove the gel coating and inhibit disease. For cucumbers/squash, scrape out seeds, wash thoroughly, and dry.
- Drying: Spread seeds thinly on screens or paper plates in a cool, dry, well-ventilated area for 1-4 weeks. Ensure they are bone-dry before storage. I aim for less than 8% moisture content.
- Storage: Store seeds in airtight containers (glass jars with desiccant packets work well) in a cool, dark, dry place (ideally 40-50°F and 30-40% humidity). Label clearly with variety and date. Properly stored seeds can remain viable for 3-10 years or more.
Step 8: Season Extension & Winterizing
Extend your harvest and protect your garden for the off-season to truly maximize your self sufficient garden from scratch.
- Cold Frames: Simple structures with a transparent top (glass, polycarbonate, or old windows) that sit over garden beds. They trap solar heat, allowing you to grow cold-hardy crops (lettuce, spinach, kale, radishes) well into winter or start seeds earlier in spring. A basic cold frame can be built from 2×6 lumber and a sheet of polycarbonate for under $100.
- Hoop Houses/Low Tunnels: Larger structures made from flexible hoops (PVC pipe or EMT conduit) covered with greenhouse plastic. These provide more space and greater temperature moderation. A 10×20 ft DIY low tunnel kit can cost $200-$500, while a larger, more robust hoop house kit might be $1,000-$3,000. I use a 6×12 ft low tunnel made from 1/2-inch PVC hoops and 6mil greenhouse plastic, which extends my lettuce and spinach harvest by at least
Healthy soil is the bedrock of a productive, self-sufficient garden. You can’t guess what your soil needs; you have to test it.
- Perform a Soil Test: A professional soil test will give you precise data on your soil’s pH, nutrient levels (N-P-K), and organic matter content. I recommend sending a sample to your local agricultural extension office; it typically costs $20-$50 and provides detailed recommendations. Alternatively, for a quick homeowner check, a Rapitest Soil Test Kit (40-test kit, model 1663, ~$20 on Amazon) provides a good baseline for pH, Nitrogen, Phosphorus, and Potash. Aim for a pH between 6.0 and 7.0 for most vegetables.
- Amend for pH Imbalance: If your soil is too acidic (below 6.0), add agricultural lime (dolomitic lime adds magnesium, calcitic lime adds calcium). Apply 5-10 lbs per 100 sq ft for a moderate adjustment. If it’s too alkaline (above 7.0), add elemental sulfur (e.g., Espoma Soil Acidifier, ~$15 for 6.75 lbs) or generous amounts of organic matter like peat moss or pine needles.
- Build Organic Matter: This is the single most important step for long-term soil health. Organic matter improves soil structure, water retention, drainage, and nutrient availability. Incorporate 2-4 inches of high-quality compost into your top 6-12 inches of soil annually. I make my own compost from kitchen scraps, garden waste, and shredded leaves, but you can purchase it. Local nurseries often sell bulk compost for $30-$50 per cubic yard. Aged manure (from chickens, cows, or horses – ensure it’s well-rotted to avoid burning plants) is also excellent.
- Address Nutrient Deficiencies: Based on your soil test, add specific organic amendments. If Nitrogen (N) is low, add blood meal (12-0-0, ~$20 for 3 lbs) or feather meal. For Phosphorus (P), use bone meal (3-15-0, ~$15 for 3 lbs) or rock phosphate. For Potassium (K), greensand (0-0-2.5, ~$25 for 5 lbs) or kelp meal are good choices. I rely heavily on Espoma Organic Garden-tone (5-3-3, ~$25 for an 8lb bag) as a balanced, all-purpose organic fertilizer during planting.
Step 3: Garden Bed Preparation
Deciding between raised beds and in-ground beds depends on your soil, budget, and physical capabilities.
- In-Ground Beds: If you have excellent native soil and good drainage, in-ground beds are the most economical. Double-digging (loosening soil two shovel depths) can significantly improve drainage and aeration. For my main garden, I primarily use in-ground beds, but I focus on building up the soil over time with consistent compost additions and cover cropping. I aim for beds that are no wider than 3-4 feet so I can reach the center without stepping on the soil, compacting it.
- Raised Beds: Raised beds offer numerous advantages, especially for poor soil, heavy clay, or rocky areas. They provide better drainage, warm up faster in spring, reduce compaction, and make weeding and harvesting easier on your back.
- Material Options:
- Untreated Cedar: Naturally rot-resistant and chemical-free. A 4×8 ft bed, 12 inches deep, typically requires three 2x12x8 ft cedar boards, costing around $50-$60 per board (total ~$150-$180) plus corner brackets or screws. My first raised beds were cedar and are still going strong after 7 years.
- Galvanized Steel: Durable, long-lasting, and aesthetically pleasing. Brands like Vego Garden offer modular kits. A Vego Garden 17″ Tall 8-in-1 Metal Raised Garden Bed (can be configured to 4×8 ft) costs approximately $250-$300.
- Concrete Blocks/Stones: Very durable but can leach minerals (though generally safe once weathered) and can be expensive.
- Recycled Materials: Pallets (check for chemical treatment stamps like « HT » for heat-treated), old tires (controversial due to potential chemical leaching).
- Filling Raised Beds: Don’t just fill with topsoil. Use a « Hugelkultur » approach (logs, branches, leaves, then compost, then topsoil) or a mixture of 60% good quality topsoil, 30% compost, and 10% perlite or vermiculite for drainage. A 4x8x1 ft raised bed requires about 32 cubic feet (or ~1.2 cubic yards) of soil mix, which can cost $100-$200 depending on your source.
- Material Options:
Step 4: Water Management & Irrigation
Efficient water management is critical for a self sufficient garden from scratch, especially in off-grid living where water resources might be limited.
- Rainwater Harvesting: This is my primary source of irrigation water. A 55-gallon rain barrel (e.g., EarthMark Rain Barrel, ~$120-$150) connected to a downspout can collect significant water. For larger needs, I use two 275-gallon IBC totes (Intermediate Bulk Containers, often available used for $100-$200 each from food-grade sources) connected in series. A 1,000 sq ft roof can collect approximately 620 gallons of water for every inch of rainfall. My 1,500 sq ft roof provides ample water for my 600 sq ft garden through multiple barrels and totes.
- Drip Irrigation: This is by far the most water-efficient method, delivering water directly to the plant’s root zone, minimizing evaporation and weed growth.
- Components: A typical drip system includes a pressure regulator (e.g., Rain Bird PRV-10, ~$15), a filter (Rain Bird RBY filter, ~$20), main tubing (1/2-inch poly tubing, 100ft ~$25), smaller feeder lines (1/4-inch tubing), and emitters (0.5 GPH or 1 GPH per plant).
- Kits: For beginners, a starter kit like the Rain Bird Drip Irrigation Garden Kit (model DDI-KIT-1P, ~$40-$60) is excellent for a small garden. For larger setups, I use Netafim Techline CV Drip Line (500ft roll, ~$150-$200), which has pressure-compensating emitters built-in, ensuring even watering across long runs.
- Automation: For true self-sufficiency, consider a battery-powered timer (e.g., Orbit B-Hyve Bluetooth Hose Faucet Timer, ~$50) or a solar-powered timer connected to a small 12V pump.
- Solar-Powered Pumps: For lifting water from a well, pond, or large storage tank to your garden, a solar pump is a game-changer. For a smaller drip system, a Shurflo 2088-594-152 Diaphragm Pump (12V, 3.5 GPM, ~$180) can be powered by a single 100W solar panel (e.g., Renogy 100W Monocrystalline Solar Panel, ~$100) and a small 12V battery (e.g., a 50Ah LiFePO4 battery like the Battle Born 50Ah, ~$450). For larger operations or deeper wells, more robust systems are needed. If you’re looking to build out a comprehensive off-grid power system to support your garden’s water needs, or indeed your entire homestead, you might want to explore resources like the Power Grid Generator complete system guide to understand the full scope of what’s possible in terms of energy independence.
Step 5: Seed Selection & Planting
The choice of seeds is crucial for a truly self sufficient garden from scratch.
- Choose Heirloom & Open-Pollinated Seeds: These varieties produce seeds that will grow true to type, meaning you can save seeds from your harvest year after year. F1 hybrids, while often vigorous, will not produce consistent offspring from saved seeds. Reputable seed companies include Baker Creek Heirloom Seeds, High Mowing Organic Seeds, and Seed Savers Exchange. Start with common, reliable varieties like ‘Black Krim’ tomatoes, ‘Provider’ bush beans, ‘Waltham Butternut’ squash, and ‘Black Seeded Simpson’ lettuce.
- Start Seeds Indoors (Optional but Recommended): For longer growing seasons or specific crops, starting seeds indoors gives you a head start. Use seed-starting mix (e.g., Espoma Organic Seed Starter Mix, ~$10 for 16qt bag) in seed trays (Jiffy Professional Greenhouse 72-cell kit, ~$15). Provide adequate light with LED grow lights (Barrina T5 2ft 4-pack LED Grow Lights, 20W each, ~$50) for 14-16 hours a day, positioned 2-4 inches above seedlings. Maintain consistent temperatures (65-75°F for most).
- Direct Sowing vs. Transplanting: Some crops (carrots, radishes, beans, corn) prefer direct sowing into the garden bed. Others (tomatoes, peppers, broccoli, kale) benefit from being started indoors and transplanted. Follow seed packet instructions for planting depths (e.g., lettuce seeds are often surface-sown or planted 1/8 inch deep, while beans are 1 inch deep) and spacing.
- Companion Planting: Strategically plant different species together to enhance growth, deter pests, and attract beneficial insects. For example, planting marigolds near tomatoes can deter nematodes, and basil improves tomato flavor. Nasturtiums can act as a trap crop for aphids.
- Succession Planting: For a continuous harvest, plant small batches of quick-growing crops (lettuce, radishes, cilantro) every 2-3 weeks. As one crop finishes, another is ready to take its place.
Step 6: Pest & Disease Management (Organic)
Maintaining a self sufficient garden from scratch means embracing organic pest and disease control.
- Integrated Pest Management (IPM): This holistic approach combines several strategies.
- Observation: Regularly inspect your plants for early signs of pests or disease. Catching issues early is key.
- Physical Barriers: Use row covers (e.g., Agribon AG-19 floating row cover, 10×20 ft, ~$20) to protect young plants from insect pests like cabbage worms and squash bugs. Install fences (e.g., 2×4 welded wire mesh, 4 ft tall, 50 ft roll ~$70) to keep out deer, rabbits, and other larger animals.
- Hand-Picking: For larger pests like tomato hornworms or squash bugs, simply pick them off and drop them into a bucket of soapy water.
- Companion Planting: As mentioned, certain plants repel pests. Marigolds, garlic, and onions are excellent deterrents.
- Attract Beneficial Insects: Plant flowers like dill, fennel, cosmos, and sweet alyssum to attract ladybugs, lacewings, and parasitic wasps, which prey on common garden pests.
- Organic Sprays & Treatments:
- Neem Oil: An excellent broad-spectrum organic insecticide and fungicide. Bonide Neem Oil Concentrate (16oz, ~$20) can be mixed at a rate of 1-2 tbsp per gallon of water and sprayed on affected plants.
- Insecticidal Soap: Effective against soft-bodied insects like aphids, whiteflies, and spider mites. Garden Safe Insecticidal Soap (24oz ready-to-use, ~$10).
- Bacillus thuringiensis (Bt): A naturally occurring soil bacterium that targets caterpillars and worms. Monterey BT Worm & Caterpillar Killer (16oz, ~$18) is highly effective and safe for beneficial insects.
- Copper or Sulfur Sprays: For fungal diseases like powdery mildew or blight, organic copper (e.g., Bonide Copper Fungicide, ~$15 for 1lb) or sulfur (e.g., Safer Brand Garden Fungicide, ~$10 for 16oz) can be used as a last resort.
Step 7: Harvesting & Seed Saving
The culmination of your efforts is the harvest, and seed saving closes the loop on self-sufficiency.
- Harvesting Techniques:
- Timing: Harvest vegetables at their peak ripeness for best flavor and nutritional value. For example, green beans should snap cleanly, cucumbers should be firm, and tomatoes should be fully colored.
- Frequency: Many crops, like zucchini, cucumbers, and bush beans, produce more if harvested frequently. Pick daily or every other day.
- Tools: Use clean, sharp pruners (e.g., Corona ClassicCUT Bypass Pruner BP 3180, ~$30) or a sharp knife for clean cuts, minimizing damage to the plant.
- Seed Saving: This is where the « self-sufficient » aspect truly shines.
- Selection: Only save seeds from your healthiest, most vigorous plants that show desired traits (disease resistance, good flavor, high yield).
- Isolation: To ensure true-to-type seeds, prevent cross-pollination. This can be challenging for open-pollinated crops that readily cross (e.g., squash, corn). For beginners, focus on self-pollinating plants like beans, peas, lettuce, and tomatoes.
- Processing:
- Dry Seeds (Beans, Peas, Lettuce, Grains): Allow pods/seed heads to dry completely on the plant. Harvest, shell, and clean the seeds, removing chaff.
- Wet Seeds (Tomatoes, Cucumbers, Squash): For tomatoes, ferment the seeds in water for a few days to remove the gel coating and inhibit disease. For cucumbers/squash, scrape out seeds, wash thoroughly, and dry.
- Drying: Spread seeds thinly on screens or paper plates in a cool, dry, well-ventilated area for 1-4 weeks. Ensure they are bone-dry before storage. I aim for less than 8% moisture content.
- Storage: Store seeds in airtight containers (glass jars with desiccant packets work well) in a cool, dark, dry place (ideally 40-50°F and 30-40% humidity). Label clearly with variety and date. Properly stored seeds can remain viable for 3-10 years or more.
Step 8: Season Extension & Winterizing
Extend your harvest and protect your garden for the off-season to truly maximize your self sufficient garden from scratch.
- Cold Frames: Simple structures with a transparent top (glass, polycarbonate, or old windows) that sit over garden beds. They trap solar heat, allowing you to grow cold-hardy crops (lettuce, spinach, kale, radishes) well into winter or start seeds earlier in spring. A basic cold frame can be built from 2×6 lumber and a sheet of polycarbonate for under $100.
- Hoop Houses/Low Tunnels: Larger structures made from flexible hoops (PVC pipe or EMT conduit) covered with greenhouse plastic. These provide more space and greater temperature moderation. A 10×20 ft DIY low tunnel kit can cost $200-$500, while a larger, more robust hoop house kit might be $1,000-$3,000. I use a 6×12 ft low tunnel made from 1/2-inch PVC hoops and 6mil greenhouse plastic, which extends my lettuce and spinach harvest by at least
Step 6: Pest & Disease Management (Organic)
Maintaining a self sufficient garden from scratch means embracing organic pest and disease control.
- Integrated Pest Management (IPM): This holistic approach combines several strategies.
- Observation: Regularly inspect your plants for early signs of pests or disease. Catching issues early is key.
- Physical Barriers: Use row covers (e.g., Agribon AG-19 floating row cover, 10×20 ft, ~$20) to protect young plants from insect pests like cabbage worms and squash bugs. Install fences (e.g., 2×4 welded wire mesh, 4 ft tall, 50 ft roll ~$70) to keep out deer, rabbits, and other larger animals.
- Hand-Picking: For larger pests like tomato hornworms or squash bugs, simply pick them off and drop them into a bucket of soapy water.
- Companion Planting: As mentioned, certain plants repel pests. Marigolds, garlic, and onions are excellent deterrents.
- Attract Beneficial Insects: Plant flowers like dill, fennel, cosmos, and sweet alyssum to attract ladybugs, lacewings, and parasitic wasps, which prey on common garden pests.
- Organic Sprays & Treatments:
- Neem Oil: An excellent broad-spectrum organic insecticide and fungicide. Bonide Neem Oil Concentrate (16oz, ~$20) can be mixed at a rate of 1-2 tbsp per gallon of water and sprayed on affected plants.
- Insecticidal Soap: Effective against soft-bodied insects like aphids, whiteflies, and spider mites. Garden Safe Insecticidal Soap (24oz ready-to-use, ~$10).
- Bacillus thuringiensis (Bt): A naturally occurring soil bacterium that targets caterpillars and worms. Monterey BT Worm & Caterpillar Killer (16oz, ~$18) is highly effective and safe for beneficial insects.
- Copper or Sulfur Sprays: For fungal diseases like powdery mildew or blight, organic copper (e.g., Bonide Copper Fungicide, ~$15 for 1lb) or sulfur (e.g., Safer Brand Garden Fungicide, ~$10 for 16oz) can be used as a last resort.
Step 7: Harvesting & Seed Saving
The culmination of your efforts is the harvest, and seed saving closes the loop on self-sufficiency.
- Harvesting Techniques:
- Timing: Harvest vegetables at their peak ripeness for best flavor and nutritional value. For example, green beans should snap cleanly, cucumbers should be firm, and tomatoes should be fully colored.
- Frequency: Many crops, like zucchini, cucumbers, and bush beans, produce more if harvested frequently. Pick daily or every other day.
- Tools: Use clean, sharp pruners (e.g., Corona ClassicCUT Bypass Pruner BP 3180, ~$30) or a sharp knife for clean cuts, minimizing damage to the plant.
- Seed Saving: This is where the « self-sufficient » aspect truly shines.
- Selection: Only save seeds from your healthiest, most vigorous plants that show desired traits (disease resistance, good flavor, high yield).
- Isolation: To ensure true-to-type seeds, prevent cross-pollination. This can be challenging for open-pollinated crops that readily cross (e.g., squash, corn). For beginners, focus on self-pollinating plants like beans, peas, lettuce, and tomatoes.
- Processing:
- Dry Seeds (Beans, Peas, Lettuce, Grains): Allow pods/seed heads to dry completely on the plant. Harvest, shell, and clean the seeds, removing chaff.
- Wet Seeds (Tomatoes, Cucumbers, Squash): For tomatoes, ferment the seeds in water for a few days to remove the gel coating and inhibit disease. For cucumbers/squash, scrape out seeds, wash thoroughly, and dry.
- Drying: Spread seeds thinly on screens or paper plates in a cool, dry, well-ventilated area for 1-4 weeks. Ensure they are bone-dry before storage. I aim for less than 8% moisture content.
- Storage: Store seeds in airtight containers (glass jars with desiccant packets work well) in a cool, dark, dry place (ideally 40-50°F and 30-40% humidity). Label clearly with variety and date. Properly stored seeds can remain viable for 3-10 years or more.
Step 8: Season Extension & Winterizing
Extend your harvest and protect your garden for the off-season to truly maximize your self sufficient garden from scratch.
- Cold Frames: Simple structures with a transparent top (glass, polycarbonate, or old windows) that sit over garden beds. They trap solar heat, allowing you to grow cold-hardy crops (lettuce, spinach, kale, radishes) well into winter or start seeds earlier in spring. A basic cold frame can be built from 2×6 lumber and a sheet of polycarbonate for under $100.
- Hoop Houses/Low Tunnels: Larger structures made from flexible hoops (PVC pipe or EMT conduit) covered with greenhouse plastic. These provide more space and greater temperature moderation. A 10×20 ft DIY low tunnel kit can cost $200-$500, while a larger, more robust hoop house kit might be $1,000-$3,000. I use a 6×12 ft low tunnel made from 1/2-inch PVC hoops and 6mil greenhouse plastic, which extends my lettuce and spinach harvest by at least
Healthy soil is the bedrock of a productive, self-sufficient garden. You can’t guess what your soil needs; you have to test it.
- Perform a Soil Test: A professional soil test will give you precise data on your soil’s pH, nutrient levels (N-P-K), and organic matter content. I recommend sending a sample to your local agricultural extension office; it typically costs $20-$50 and provides detailed recommendations. Alternatively, for a quick homeowner check, a Rapitest Soil Test Kit (40-test kit, model 1663, ~$20 on Amazon) provides a good baseline for pH, Nitrogen, Phosphorus, and Potash. Aim for a pH between 6.0 and 7.0 for most vegetables.
- Amend for pH Imbalance: If your soil is too acidic (below 6.0), add agricultural lime (dolomitic lime adds magnesium, calcitic lime adds calcium). Apply 5-10 lbs per 100 sq ft for a moderate adjustment. If it’s too alkaline (above 7.0), add elemental sulfur (e.g., Espoma Soil Acidifier, ~$15 for 6.75 lbs) or generous amounts of organic matter like peat moss or pine needles.
- Build Organic Matter: This is the single most important step for long-term soil health. Organic matter improves soil structure, water retention, drainage, and nutrient availability. Incorporate 2-4 inches of high-quality compost into your top 6-12 inches of soil annually. I make my own compost from kitchen scraps, garden waste, and shredded leaves, but you can purchase it. Local nurseries often sell bulk compost for $30-$50 per cubic yard. Aged manure (from chickens, cows, or horses – ensure it’s well-rotted to avoid burning plants) is also excellent.
- Address Nutrient Deficiencies: Based on your soil test, add specific organic amendments. If Nitrogen (N) is low, add blood meal (12-0-0, ~$20 for 3 lbs) or feather meal. For Phosphorus (P), use bone meal (3-15-0, ~$15 for 3 lbs) or rock phosphate. For Potassium (K), greensand (0-0-2.5, ~$25 for 5 lbs) or kelp meal are good choices. I rely heavily on Espoma Organic Garden-tone (5-3-3, ~$25 for an 8lb bag) as a balanced, all-purpose organic fertilizer during planting.
Step 3: Garden Bed Preparation
Deciding between raised beds and in-ground beds depends on your soil, budget, and physical capabilities.
- In-Ground Beds: If you have excellent native soil and good drainage, in-ground beds are the most economical. Double-digging (loosening soil two shovel depths) can significantly improve drainage and aeration. For my main garden, I primarily use in-ground beds, but I focus on building up the soil over time with consistent compost additions and cover cropping. I aim for beds that are no wider than 3-4 feet so I can reach the center without stepping on the soil, compacting it.
- Raised Beds: Raised beds offer numerous advantages, especially for poor soil, heavy clay, or rocky areas. They provide better drainage, warm up faster in spring, reduce compaction, and make weeding and harvesting easier on your back.
- Material Options:
- Untreated Cedar: Naturally rot-resistant and chemical-free. A 4×8 ft bed, 12 inches deep, typically requires three 2x12x8 ft cedar boards, costing around $50-$60 per board (total ~$150-$180) plus corner brackets or screws. My first raised beds were cedar and are still going strong after 7 years.
- Galvanized Steel: Durable, long-lasting, and aesthetically pleasing. Brands like Vego Garden offer modular kits. A Vego Garden 17″ Tall 8-in-1 Metal Raised Garden Bed (can be configured to 4×8 ft) costs approximately $250-$300.
- Concrete Blocks/Stones: Very durable but can leach minerals (though generally safe once weathered) and can be expensive.
- Recycled Materials: Pallets (check for chemical treatment stamps like « HT » for heat-treated), old tires (controversial due to potential chemical leaching).
- Filling Raised Beds: Don’t just fill with topsoil. Use a « Hugelkultur » approach (logs, branches, leaves, then compost, then topsoil) or a mixture of 60% good quality topsoil, 30% compost, and 10% perlite or vermiculite for drainage. A 4x8x1 ft raised bed requires about 32 cubic feet (or ~1.2 cubic yards) of soil mix, which can cost $100-$200 depending on your source.
- Material Options:
Step 4: Water Management & Irrigation
Efficient water management is critical for a self sufficient garden from scratch, especially in off-grid living where water resources might be limited.
- Rainwater Harvesting: This is my primary source of irrigation water. A 55-gallon rain barrel (e.g., EarthMark Rain Barrel, ~$120-$150) connected to a downspout can collect significant water. For larger needs, I use two 275-gallon IBC totes (Intermediate Bulk Containers, often available used for $100-$200 each from food-grade sources) connected in series. A 1,000 sq ft roof can collect approximately 620 gallons of water for every inch of rainfall. My 1,500 sq ft roof provides ample water for my 600 sq ft garden through multiple barrels and totes.
- Drip Irrigation: This is by far the most water-efficient method, delivering water directly to the plant’s root zone, minimizing evaporation and weed growth.
- Components: A typical drip system includes a pressure regulator (e.g., Rain Bird PRV-10, ~$15), a filter (Rain Bird RBY filter, ~$20), main tubing (1/2-inch poly tubing, 100ft ~$25), smaller feeder lines (1/4-inch tubing), and emitters (0.5 GPH or 1 GPH per plant).
- Kits: For beginners, a starter kit like the Rain Bird Drip Irrigation Garden Kit (model DDI-KIT-1P, ~$40-$60) is excellent for a small garden. For larger setups, I use Netafim Techline CV Drip Line (500ft roll, ~$150-$200), which has pressure-compensating emitters built-in, ensuring even watering across long runs.
- Automation: For true self-sufficiency, consider a battery-powered timer (e.g., Orbit B-Hyve Bluetooth Hose Faucet Timer, ~$50) or a solar-powered timer connected to a small 12V pump.
- Solar-Powered Pumps: For lifting water from a well, pond, or large storage tank to your garden, a solar pump is a game-changer. For a smaller drip system, a Shurflo 2088-594-152 Diaphragm Pump (12V, 3.5 GPM, ~$180) can be powered by a single 100W solar panel (e.g., Renogy 100W Monocrystalline Solar Panel, ~$100) and a small 12V battery (e.g., a 50Ah LiFePO4 battery like the Battle Born 50Ah, ~$450). For larger operations or deeper wells, more robust systems are needed. If you’re looking to build out a comprehensive off-grid power system to support your garden’s water needs, or indeed your entire homestead, you might want to explore resources like the Power Grid Generator complete system guide to understand the full scope of what’s possible in terms of energy independence.
Step 5: Seed Selection & Planting
The choice of seeds is crucial for a truly self sufficient garden from scratch.
- Choose Heirloom & Open-Pollinated Seeds: These varieties produce seeds that will grow true to type, meaning you can save seeds from your harvest year after year. F1 hybrids, while often vigorous, will not produce consistent offspring from saved seeds. Reputable seed companies include Baker Creek Heirloom Seeds, High Mowing Organic Seeds, and Seed Savers Exchange. Start with common, reliable varieties like ‘Black Krim’ tomatoes, ‘Provider’ bush beans, ‘Waltham Butternut’ squash, and ‘Black Seeded Simpson’ lettuce.
- Start Seeds Indoors (Optional but Recommended): For longer growing seasons or specific crops, starting seeds indoors gives you a head start. Use seed-starting mix (e.g., Espoma Organic Seed Starter Mix, ~$10 for 16qt bag) in seed trays (Jiffy Professional Greenhouse 72-cell kit, ~$15). Provide adequate light with LED grow lights (Barrina T5 2ft 4-pack LED Grow Lights, 20W each, ~$50) for 14-16 hours a day, positioned 2-4 inches above seedlings. Maintain consistent temperatures (65-75°F for most).
- Direct Sowing vs. Transplanting: Some crops (carrots, radishes, beans, corn) prefer direct sowing into the garden bed. Others (tomatoes, peppers, broccoli, kale) benefit from being started indoors and transplanted. Follow seed packet instructions for planting depths (e.g., lettuce seeds are often surface-sown or planted 1/8 inch deep, while beans are 1 inch deep) and spacing.
- Companion Planting: Strategically plant different species together to enhance growth, deter pests, and attract beneficial insects. For example, planting marigolds near tomatoes can deter nematodes, and basil improves tomato flavor. Nasturtiums can act as a trap crop for aphids.
- Succession Planting: For a continuous harvest, plant small batches of quick-growing crops (lettuce, radishes, cilantro) every 2-3 weeks. As one crop finishes, another is ready to take its place.
Step 6: Pest & Disease Management (Organic)
Maintaining a self sufficient garden from scratch means embracing organic pest and disease control.
- Integrated Pest Management (IPM): This holistic approach combines several strategies.
- Observation: Regularly inspect your plants for early signs of pests or disease. Catching issues early is key.
- Physical Barriers: Use row covers (e.g., Agribon AG-19 floating row cover, 10×20 ft, ~$20) to protect young plants from insect pests like cabbage worms and squash bugs. Install fences (e.g., 2×4 welded wire mesh, 4 ft tall, 50 ft roll ~$70) to keep out deer, rabbits, and other larger animals.
- Hand-Picking: For larger pests like tomato hornworms or squash bugs, simply pick them off and drop them into a bucket of soapy water.
- Companion Planting: As mentioned, certain plants repel pests. Marigolds, garlic, and onions are excellent deterrents.
- Attract Beneficial Insects: Plant flowers like dill, fennel, cosmos, and sweet alyssum to attract ladybugs, lacewings, and parasitic wasps, which prey on common garden pests.
- Organic Sprays & Treatments:
- Neem Oil: An excellent broad-spectrum organic insecticide and fungicide. Bonide Neem Oil Concentrate (16oz, ~$20) can be mixed at a rate of 1-2 tbsp per gallon of water and sprayed on affected plants.
- Insecticidal Soap: Effective against soft-bodied insects like aphids, whiteflies, and spider mites. Garden Safe Insecticidal Soap (24oz ready-to-use, ~$10).
- Bacillus thuringiensis (Bt): A naturally occurring soil bacterium that targets caterpillars and worms. Monterey BT Worm & Caterpillar Killer (16oz, ~$18) is highly effective and safe for beneficial insects.
- Copper or Sulfur Sprays: For fungal diseases like powdery mildew or blight, organic copper (e.g., Bonide Copper Fungicide, ~$15 for 1lb) or sulfur (e.g., Safer Brand Garden Fungicide, ~$10 for 16oz) can be used as a last resort.
Step 7: Harvesting & Seed Saving
The culmination of your efforts is the harvest, and seed saving closes the loop on self-sufficiency.
- Harvesting Techniques:
- Timing: Harvest vegetables at their peak ripeness for best flavor and nutritional value. For example, green beans should snap cleanly, cucumbers should be firm, and tomatoes should be fully colored.
- Frequency: Many crops, like zucchini, cucumbers, and bush beans, produce more if harvested frequently. Pick daily or every other day.
- Tools: Use clean, sharp pruners (e.g., Corona ClassicCUT Bypass Pruner BP 3180, ~$30) or a sharp knife for clean cuts, minimizing damage to the plant.
- Seed Saving: This is where the « self-sufficient » aspect truly shines.
- Selection: Only save seeds from your healthiest, most vigorous plants that show desired traits (disease resistance, good flavor, high yield).
- Isolation: To ensure true-to-type seeds, prevent cross-pollination. This can be challenging for open-pollinated crops that readily cross (e.g., squash, corn). For beginners, focus on self-pollinating plants like beans, peas, lettuce, and tomatoes.
- Processing:
- Dry Seeds (Beans, Peas, Lettuce, Grains): Allow pods/seed heads to dry completely on the plant. Harvest, shell, and clean the seeds, removing chaff.
- Wet Seeds (Tomatoes, Cucumbers, Squash): For tomatoes, ferment the seeds in water for a few days to remove the gel coating and inhibit disease. For cucumbers/squash, scrape out seeds, wash thoroughly, and dry.
- Drying: Spread seeds thinly on screens or paper plates in a cool, dry, well-ventilated area for 1-4 weeks. Ensure they are bone-dry before storage. I aim for less than 8% moisture content.
- Storage: Store seeds in airtight containers (glass jars with desiccant packets work well) in a cool, dark, dry place (ideally 40-50°F and 30-40% humidity). Label clearly with variety and date. Properly stored seeds can remain viable for 3-10 years or more.
Step 8: Season Extension & Winterizing
Extend your harvest and protect your garden for the off-season to truly maximize your self sufficient garden from scratch.
- Cold Frames: Simple structures with a transparent top (glass, polycarbonate, or old windows) that sit over garden beds. They trap solar heat, allowing you to grow cold-hardy crops (lettuce, spinach, kale, radishes) well into winter or start seeds earlier in spring. A basic cold frame can be built from 2×6 lumber and a sheet of polycarbonate for under $100.
- Hoop Houses/Low Tunnels: Larger structures made from flexible hoops (PVC pipe or EMT conduit) covered with greenhouse plastic. These provide more space and greater temperature moderation. A 10×20 ft DIY low tunnel kit can cost $200-$500, while a larger, more robust hoop house kit might be $1,000-$3,000. I use a 6×12 ft low tunnel made from 1/2-inch PVC hoops and 6mil greenhouse plastic, which extends my lettuce and spinach harvest by at least
- Choose Heirloom & Open-Pollinated Seeds: These varieties produce seeds that will grow true to type, meaning you can save seeds from your harvest year after year. F1 hybrids, while often vigorous, will not produce consistent offspring from saved seeds. Reputable seed companies include Baker Creek Heirloom Seeds, High Mowing Organic Seeds, and Seed Savers Exchange. Start with common, reliable varieties like ‘Black Krim’ tomatoes, ‘Provider’ bush beans, ‘Waltham Butternut’ squash, and ‘Black Seeded Simpson’ lettuce.
- Start Seeds Indoors (Optional but Recommended): For longer growing seasons or specific crops, starting seeds indoors gives you a head start. Use seed-starting mix (e.g., Espoma Organic Seed Starter Mix, ~$10 for 16qt bag) in seed trays (Jiffy Professional Greenhouse 72-cell kit, ~$15). Provide adequate light with LED grow lights (Barrina T5 2ft 4-pack LED Grow Lights, 20W each, ~$50) for 14-16 hours a day, positioned 2-4 inches above seedlings. Maintain consistent temperatures (65-75°F for most).
- Direct Sowing vs. Transplanting: Some crops (carrots, radishes, beans, corn) prefer direct sowing into the garden bed. Others (tomatoes, peppers, broccoli, kale) benefit from being started indoors and transplanted. Follow seed packet instructions for planting depths (e.g., lettuce seeds are often surface-sown or planted 1/8 inch deep, while beans are 1 inch deep) and spacing.
- Companion Planting: Strategically plant different species together to enhance growth, deter pests, and attract beneficial insects. For example, planting marigolds near tomatoes can deter nematodes, and basil improves tomato flavor. Nasturtiums can act as a trap crop for aphids.
- Succession Planting: For a continuous harvest, plant small batches of quick-growing crops (lettuce, radishes, cilantro) every 2-3 weeks. As one crop finishes, another is ready to take its place.
Step 6: Pest & Disease Management (Organic)
Maintaining a self sufficient garden from scratch means embracing organic pest and disease control.
- Integrated Pest Management (IPM): This holistic approach combines several strategies.
- Observation: Regularly inspect your plants for early signs of pests or disease. Catching issues early is key.
- Physical Barriers: Use row covers (e.g., Agribon AG-19 floating row cover, 10×20 ft, ~$20) to protect young plants from insect pests like cabbage worms and squash bugs. Install fences (e.g., 2×4 welded wire mesh, 4 ft tall, 50 ft roll ~$70) to keep out deer, rabbits, and other larger animals.
- Hand-Picking: For larger pests like tomato hornworms or squash bugs, simply pick them off and drop them into a bucket of soapy water.
- Companion Planting: As mentioned, certain plants repel pests. Marigolds, garlic, and onions are excellent deterrents.
- Attract Beneficial Insects: Plant flowers like dill, fennel, cosmos, and sweet alyssum to attract ladybugs, lacewings, and parasitic wasps, which prey on common garden pests.
- Organic Sprays & Treatments:
- Neem Oil: An excellent broad-spectrum organic insecticide and fungicide. Bonide Neem Oil Concentrate (16oz, ~$20) can be mixed at a rate of 1-2 tbsp per gallon of water and sprayed on affected plants.
- Insecticidal Soap: Effective against soft-bodied insects like aphids, whiteflies, and spider mites. Garden Safe Insecticidal Soap (24oz ready-to-use, ~$10).
- Bacillus thuringiensis (Bt): A naturally occurring soil bacterium that targets caterpillars and worms. Monterey BT Worm & Caterpillar Killer (16oz, ~$18) is highly effective and safe for beneficial insects.
- Copper or Sulfur Sprays: For fungal diseases like powdery mildew or blight, organic copper (e.g., Bonide Copper Fungicide, ~$15 for 1lb) or sulfur (e.g., Safer Brand Garden Fungicide, ~$10 for 16oz) can be used as a last resort.
Step 7: Harvesting & Seed Saving
The culmination of your efforts is the harvest, and seed saving closes the loop on self-sufficiency.
- Harvesting Techniques:
- Timing: Harvest vegetables at their peak ripeness for best flavor and nutritional value. For example, green beans should snap cleanly, cucumbers should be firm, and tomatoes should be fully colored.
- Frequency: Many crops, like zucchini, cucumbers, and bush beans, produce more if harvested frequently. Pick daily or every other day.
- Tools: Use clean, sharp pruners (e.g., Corona ClassicCUT Bypass Pruner BP 3180, ~$30) or a sharp knife for clean cuts, minimizing damage to the plant.
- Seed Saving: This is where the « self-sufficient » aspect truly shines.
- Selection: Only save seeds from your healthiest, most vigorous plants that show desired traits (disease resistance, good flavor, high yield).
- Isolation: To ensure true-to-type seeds, prevent cross-pollination. This can be challenging for open-pollinated crops that readily cross (e.g., squash, corn). For beginners, focus on self-pollinating plants like beans, peas, lettuce, and tomatoes.
- Processing:
- Dry Seeds (Beans, Peas, Lettuce, Grains): Allow pods/seed heads to dry completely on the plant. Harvest, shell, and clean the seeds, removing chaff.
- Wet Seeds (Tomatoes, Cucumbers, Squash): For tomatoes, ferment the seeds in water for a few days to remove the gel coating and inhibit disease. For cucumbers/squash, scrape out seeds, wash thoroughly, and dry.
- Drying: Spread seeds thinly on screens or paper plates in a cool, dry, well-ventilated area for 1-4 weeks. Ensure they are bone-dry before storage. I aim for less than 8% moisture content.
- Storage: Store seeds in airtight containers (glass jars with desiccant packets work well) in a cool, dark, dry place (ideally 40-50°F and 30-40% humidity). Label clearly with variety and date. Properly stored seeds can remain viable for 3-10 years or more.
Step 8: Season Extension & Winterizing
Extend your harvest and protect your garden for the off-season to truly maximize your self sufficient garden from scratch.
- Cold Frames: Simple structures with a transparent top (glass, polycarbonate, or old windows) that sit over garden beds. They trap solar heat, allowing you to grow cold-hardy crops (lettuce, spinach, kale, radishes) well into winter or start seeds earlier in spring. A basic cold frame can be built from 2×6 lumber and a sheet of polycarbonate for under $100.
- Hoop Houses/Low Tunnels: Larger structures made from flexible hoops (PVC pipe or EMT conduit) covered with greenhouse plastic. These provide more space and greater temperature moderation. A 10×20 ft DIY low tunnel kit can cost $200-$500, while a larger, more robust hoop house kit might be $1,000-$3,000. I use a 6×12 ft low tunnel made from 1/2-inch PVC hoops and 6mil greenhouse plastic, which extends my lettuce and spinach harvest by at least
Healthy soil is the bedrock of a productive, self-sufficient garden. You can’t guess what your soil needs; you have to test it.
- Perform a Soil Test: A professional soil test will give you precise data on your soil’s pH, nutrient levels (N-P-K), and organic matter content. I recommend sending a sample to your local agricultural extension office; it typically costs $20-$50 and provides detailed recommendations. Alternatively, for a quick homeowner check, a Rapitest Soil Test Kit (40-test kit, model 1663, ~$20 on Amazon) provides a good baseline for pH, Nitrogen, Phosphorus, and Potash. Aim for a pH between 6.0 and 7.0 for most vegetables.
- Amend for pH Imbalance: If your soil is too acidic (below 6.0), add agricultural lime (dolomitic lime adds magnesium, calcitic lime adds calcium). Apply 5-10 lbs per 100 sq ft for a moderate adjustment. If it’s too alkaline (above 7.0), add elemental sulfur (e.g., Espoma Soil Acidifier, ~$15 for 6.75 lbs) or generous amounts of organic matter like peat moss or pine needles.
- Build Organic Matter: This is the single most important step for long-term soil health. Organic matter improves soil structure, water retention, drainage, and nutrient availability. Incorporate 2-4 inches of high-quality compost into your top 6-12 inches of soil annually. I make my own compost from kitchen scraps, garden waste, and shredded leaves, but you can purchase it. Local nurseries often sell bulk compost for $30-$50 per cubic yard. Aged manure (from chickens, cows, or horses – ensure it’s well-rotted to avoid burning plants) is also excellent.
- Address Nutrient Deficiencies: Based on your soil test, add specific organic amendments. If Nitrogen (N) is low, add blood meal (12-0-0, ~$20 for 3 lbs) or feather meal. For Phosphorus (P), use bone meal (3-15-0, ~$15 for 3 lbs) or rock phosphate. For Potassium (K), greensand (0-0-2.5, ~$25 for 5 lbs) or kelp meal are good choices. I rely heavily on Espoma Organic Garden-tone (5-3-3, ~$25 for an 8lb bag) as a balanced, all-purpose organic fertilizer during planting.
Step 3: Garden Bed Preparation
Deciding between raised beds and in-ground beds depends on your soil, budget, and physical capabilities.
- In-Ground Beds: If you have excellent native soil and good drainage, in-ground beds are the most economical. Double-digging (loosening soil two shovel depths) can significantly improve drainage and aeration. For my main garden, I primarily use in-ground beds, but I focus on building up the soil over time with consistent compost additions and cover cropping. I aim for beds that are no wider than 3-4 feet so I can reach the center without stepping on the soil, compacting it.
- Raised Beds: Raised beds offer numerous advantages, especially for poor soil, heavy clay, or rocky areas. They provide better drainage, warm up faster in spring, reduce compaction, and make weeding and harvesting easier on your back.
- Material Options:
- Untreated Cedar: Naturally rot-resistant and chemical-free. A 4×8 ft bed, 12 inches deep, typically requires three 2x12x8 ft cedar boards, costing around $50-$60 per board (total ~$150-$180) plus corner brackets or screws. My first raised beds were cedar and are still going strong after 7 years.
- Galvanized Steel: Durable, long-lasting, and aesthetically pleasing. Brands like Vego Garden offer modular kits. A Vego Garden 17″ Tall 8-in-1 Metal Raised Garden Bed (can be configured to 4×8 ft) costs approximately $250-$300.
- Concrete Blocks/Stones: Very durable but can leach minerals (though generally safe once weathered) and can be expensive.
- Recycled Materials: Pallets (check for chemical treatment stamps like « HT » for heat-treated), old tires (controversial due to potential chemical leaching).
- Filling Raised Beds: Don’t just fill with topsoil. Use a « Hugelkultur » approach (logs, branches, leaves, then compost, then topsoil) or a mixture of 60% good quality topsoil, 30% compost, and 10% perlite or vermiculite for drainage. A 4x8x1 ft raised bed requires about 32 cubic feet (or ~1.2 cubic yards) of soil mix, which can cost $100-$200 depending on your source.
- Material Options:
Step 4: Water Management & Irrigation
Efficient water management is critical for a self sufficient garden from scratch, especially in off-grid living where water resources might be limited.
- Rainwater Harvesting: This is my primary source of irrigation water. A 55-gallon rain barrel (e.g., EarthMark Rain Barrel, ~$120-$150) connected to a downspout can collect significant water. For larger needs, I use two 275-gallon IBC totes (Intermediate Bulk Containers, often available used for $100-$200 each from food-grade sources) connected in series. A 1,000 sq ft roof can collect approximately 620 gallons of water for every inch of rainfall. My 1,500 sq ft roof provides ample water for my 600 sq ft garden through multiple barrels and totes.
- Drip Irrigation: This is by far the most water-efficient method, delivering water directly to the plant’s root zone, minimizing evaporation and weed growth.
- Components: A typical drip system includes a pressure regulator (e.g., Rain Bird PRV-10, ~$15), a filter (Rain Bird RBY filter, ~$20), main tubing (1/2-inch poly tubing, 100ft ~$25), smaller feeder lines (1/4-inch tubing), and emitters (0.5 GPH or 1 GPH per plant).
- Kits: For beginners, a starter kit like the Rain Bird Drip Irrigation Garden Kit (model DDI-KIT-1P, ~$40-$60) is excellent for a small garden. For larger setups, I use Netafim Techline CV Drip Line (500ft roll, ~$150-$200), which has pressure-compensating emitters built-in, ensuring even watering across long runs.
- Automation: For true self-sufficiency, consider a battery-powered timer (e.g., Orbit B-Hyve Bluetooth Hose Faucet Timer, ~$50) or a solar-powered timer connected to a small 12V pump.
- Solar-Powered Pumps: For lifting water from a well, pond, or large storage tank to your garden, a solar pump is a game-changer. For a smaller drip system, a Shurflo 2088-594-152 Diaphragm Pump (12V, 3.5 GPM, ~$180) can be powered by a single 100W solar panel (e.g., Renogy 100W Monocrystalline Solar Panel, ~$100) and a small 12V battery (e.g., a 50Ah LiFePO4 battery like the Battle Born 50Ah, ~$450). For larger operations or deeper wells, more robust systems are needed. If you’re looking to build out a comprehensive off-grid power system to support your garden’s water needs, or indeed your entire homestead, you might want to explore resources like the Power Grid Generator complete system guide to understand the full scope of what’s possible in terms of energy independence.
Step 5: Seed Selection & Planting
The choice of seeds is crucial for a truly self sufficient garden from scratch.
- Choose Heirloom & Open-Pollinated Seeds: These varieties produce seeds that will grow true to type, meaning you can save seeds from your harvest year after year. F1 hybrids, while often vigorous, will not produce consistent offspring from saved seeds. Reputable seed companies include Baker Creek Heirloom Seeds, High Mowing Organic Seeds, and Seed Savers Exchange. Start with common, reliable varieties like ‘Black Krim’ tomatoes, ‘Provider’ bush beans, ‘Waltham Butternut’ squash, and ‘Black Seeded Simpson’ lettuce.
- Start Seeds Indoors (Optional but Recommended): For longer growing seasons or specific crops, starting seeds indoors gives you a head start. Use seed-starting mix (e.g., Espoma Organic Seed Starter Mix, ~$10 for 16qt bag) in seed trays (Jiffy Professional Greenhouse 72-cell kit, ~$15). Provide adequate light with LED grow lights (Barrina T5 2ft 4-pack LED Grow Lights, 20W each, ~$50) for 14-16 hours a day, positioned 2-4 inches above seedlings. Maintain consistent temperatures (65-75°F for most).
- Direct Sowing vs. Transplanting: Some crops (carrots, radishes, beans, corn) prefer direct sowing into the garden bed. Others (tomatoes, peppers, broccoli, kale) benefit from being started indoors and transplanted. Follow seed packet instructions for planting depths (e.g., lettuce seeds are often surface-sown or planted 1/8 inch deep, while beans are 1 inch deep) and spacing.
- Companion Planting: Strategically plant different species together to enhance growth, deter pests, and attract beneficial insects. For example, planting marigolds near tomatoes can deter nematodes, and basil improves tomato flavor. Nasturtiums can act as a trap crop for aphids.
- Succession Planting: For a continuous harvest, plant small batches of quick-growing crops (lettuce, radishes, cilantro) every 2-3 weeks. As one crop finishes, another is ready to take its place.
Step 6: Pest & Disease Management (Organic)
Maintaining a self sufficient garden from scratch means embracing organic pest and disease control.
- Integrated Pest Management (IPM): This holistic approach combines several strategies.
- Observation: Regularly inspect your plants for early signs of pests or disease. Catching issues early is key.
- Physical Barriers: Use row covers (e.g., Agribon AG-19 floating row cover, 10×20 ft, ~$20) to protect young plants from insect pests like cabbage worms and squash bugs. Install fences (e.g., 2×4 welded wire mesh, 4 ft tall, 50 ft roll ~$70) to keep out deer, rabbits, and other larger animals.
- Hand-Picking: For larger pests like tomato hornworms or squash bugs, simply pick them off and drop them into a bucket of soapy water.
- Companion Planting: As mentioned, certain plants repel pests. Marigolds, garlic, and onions are excellent deterrents.
- Attract Beneficial Insects: Plant flowers like dill, fennel, cosmos, and sweet alyssum to attract ladybugs, lacewings, and parasitic wasps, which prey on common garden pests.
- Organic Sprays & Treatments:
- Neem Oil: An excellent broad-spectrum organic insecticide and fungicide. Bonide Neem Oil Concentrate (16oz, ~$20) can be mixed at a rate of 1-2 tbsp per gallon of water and sprayed on affected plants.
- Insecticidal Soap: Effective against soft-bodied insects like aphids, whiteflies, and spider mites. Garden Safe Insecticidal Soap (24oz ready-to-use, ~$10).
- Bacillus thuringiensis (Bt): A naturally occurring soil bacterium that targets caterpillars and worms. Monterey BT Worm & Caterpillar Killer (16oz, ~$18) is highly effective and safe for beneficial insects.
- Copper or Sulfur Sprays: For fungal diseases like powdery mildew or blight, organic copper (e.g., Bonide Copper Fungicide, ~$15 for 1lb) or sulfur (e.g., Safer Brand Garden Fungicide, ~$10 for 16oz) can be used as a last resort.
Step 7: Harvesting & Seed Saving
The culmination of your efforts is the harvest, and seed saving closes the loop on self-sufficiency.
- Harvesting Techniques:
- Timing: Harvest vegetables at their peak ripeness for best flavor and nutritional value. For example, green beans should snap cleanly, cucumbers should be firm, and tomatoes should be fully colored.
- Frequency: Many crops, like zucchini, cucumbers, and bush beans, produce more if harvested frequently. Pick daily or every other day.
- Tools: Use clean, sharp pruners (e.g., Corona ClassicCUT Bypass Pruner BP 3180, ~$30) or a sharp knife for clean cuts, minimizing damage to the plant.
- Seed Saving: This is where the « self-sufficient » aspect truly shines.
- Selection: Only save seeds from your healthiest, most vigorous plants that show desired traits (disease resistance, good flavor, high yield).
- Isolation: To ensure true-to-type seeds, prevent cross-pollination. This can be challenging for open-pollinated crops that readily cross (e.g., squash, corn). For beginners, focus on self-pollinating plants like beans, peas, lettuce, and tomatoes.
- Processing:
- Dry Seeds (Beans, Peas, Lettuce, Grains): Allow pods/seed heads to dry completely on the plant. Harvest, shell, and clean the seeds, removing chaff.
- Wet Seeds (Tomatoes, Cucumbers, Squash): For tomatoes, ferment the seeds in water for a few days to remove the gel coating and inhibit disease. For cucumbers/squash, scrape out seeds, wash thoroughly, and dry.
- Drying: Spread seeds thinly on screens or paper plates in a cool, dry, well-ventilated area for 1-4 weeks. Ensure they are bone-dry before storage. I aim for less than 8% moisture content.
- Storage: Store seeds in airtight containers (glass jars with desiccant packets work well) in a cool, dark, dry place (ideally 40-50°F and 30-40% humidity). Label clearly with variety and date. Properly stored seeds can remain viable for 3-10 years or more.
Step 8: Season Extension & Winterizing
Extend your harvest and protect your garden for the off-season to truly maximize your self sufficient garden from scratch.
- Cold Frames: Simple structures with a transparent top (glass, polycarbonate, or old windows) that sit over garden beds. They trap solar heat, allowing you to grow cold-hardy crops (lettuce, spinach, kale, radishes) well into winter or start seeds earlier in spring. A basic cold frame can be built from 2×6 lumber and a sheet of polycarbonate for under $100.
- Hoop Houses/Low Tunnels: Larger structures made from flexible hoops (PVC pipe or EMT conduit) covered with greenhouse plastic. These provide more space and greater temperature moderation. A 10×20 ft DIY low tunnel kit can cost $200-$500, while a larger, more robust hoop house kit might be $1,000-$3,000. I use a 6×12 ft low tunnel made from 1/2-inch PVC hoops and 6mil greenhouse plastic, which extends my lettuce and spinach harvest by at least
The choice of seeds is crucial for a truly self sufficient garden from scratch.
- Choose Heirloom & Open-Pollinated Seeds: These varieties produce seeds that will grow true to type, meaning you can save seeds from your harvest year after year. F1 hybrids, while often vigorous, will not produce consistent offspring from saved seeds. Reputable seed companies include Baker Creek Heirloom Seeds, High Mowing Organic Seeds, and Seed Savers Exchange. Start with common, reliable varieties like ‘Black Krim’ tomatoes, ‘Provider’ bush beans, ‘Waltham Butternut’ squash, and ‘Black Seeded Simpson’ lettuce.
- Start Seeds Indoors (Optional but Recommended): For longer growing seasons or specific crops, starting seeds indoors gives you a head start. Use seed-starting mix (e.g., Espoma Organic Seed Starter Mix, ~$10 for 16qt bag) in seed trays (Jiffy Professional Greenhouse 72-cell kit, ~$15). Provide adequate light with LED grow lights (Barrina T5 2ft 4-pack LED Grow Lights, 20W each, ~$50) for 14-16 hours a day, positioned 2-4 inches above seedlings. Maintain consistent temperatures (65-75°F for most).
- Direct Sowing vs. Transplanting: Some crops (carrots, radishes, beans, corn) prefer direct sowing into the garden bed. Others (tomatoes, peppers, broccoli, kale) benefit from being started indoors and transplanted. Follow seed packet instructions for planting depths (e.g., lettuce seeds are often surface-sown or planted 1/8 inch deep, while beans are 1 inch deep) and spacing.
- Companion Planting: Strategically plant different species together to enhance growth, deter pests, and attract beneficial insects. For example, planting marigolds near tomatoes can deter nematodes, and basil improves tomato flavor. Nasturtiums can act as a trap crop for aphids.
- Succession Planting: For a continuous harvest, plant small batches of quick-growing crops (lettuce, radishes, cilantro) every 2-3 weeks. As one crop finishes, another is ready to take its place.
Step 6: Pest & Disease Management (Organic)
Maintaining a self sufficient garden from scratch means embracing organic pest and disease control.
- Integrated Pest Management (IPM): This holistic approach combines several strategies.
- Observation: Regularly inspect your plants for early signs of pests or disease. Catching issues early is key.
- Physical Barriers: Use row covers (e.g., Agribon AG-19 floating row cover, 10×20 ft, ~$20) to protect young plants from insect pests like cabbage worms and squash bugs. Install fences (e.g., 2×4 welded wire mesh, 4 ft tall, 50 ft roll ~$70) to keep out deer, rabbits, and other larger animals.
- Hand-Picking: For larger pests like tomato hornworms or squash bugs, simply pick them off and drop them into a bucket of soapy water.
- Companion Planting: As mentioned, certain plants repel pests. Marigolds, garlic, and onions are excellent deterrents.
- Attract Beneficial Insects: Plant flowers like dill, fennel, cosmos, and sweet alyssum to attract ladybugs, lacewings, and parasitic wasps, which prey on common garden pests.
- Organic Sprays & Treatments:
- Neem Oil: An excellent broad-spectrum organic insecticide and fungicide. Bonide Neem Oil Concentrate (16oz, ~$20) can be mixed at a rate of 1-2 tbsp per gallon of water and sprayed on affected plants.
- Insecticidal Soap: Effective against soft-bodied insects like aphids, whiteflies, and spider mites. Garden Safe Insecticidal Soap (24oz ready-to-use, ~$10).
- Bacillus thuringiensis (Bt): A naturally occurring soil bacterium that targets caterpillars and worms. Monterey BT Worm & Caterpillar Killer (16oz, ~$18) is highly effective and safe for beneficial insects.
- Copper or Sulfur Sprays: For fungal diseases like powdery mildew or blight, organic copper (e.g., Bonide Copper Fungicide, ~$15 for 1lb) or sulfur (e.g., Safer Brand Garden Fungicide, ~$10 for 16oz) can be used as a last resort.
Step 7: Harvesting & Seed Saving
The culmination of your efforts is the harvest, and seed saving closes the loop on self-sufficiency.
- Harvesting Techniques:
- Timing: Harvest vegetables at their peak ripeness for best flavor and nutritional value. For example, green beans should snap cleanly, cucumbers should be firm, and tomatoes should be fully colored.
- Frequency: Many crops, like zucchini, cucumbers, and bush beans, produce more if harvested frequently. Pick daily or every other day.
- Tools: Use clean, sharp pruners (e.g., Corona ClassicCUT Bypass Pruner BP 3180, ~$30) or a sharp knife for clean cuts, minimizing damage to the plant.
- Seed Saving: This is where the « self-sufficient » aspect truly shines.
- Selection: Only save seeds from your healthiest, most vigorous plants that show desired traits (disease resistance, good flavor, high yield).
- Isolation: To ensure true-to-type seeds, prevent cross-pollination. This can be challenging for open-pollinated crops that readily cross (e.g., squash, corn). For beginners, focus on self-pollinating plants like beans, peas, lettuce, and tomatoes.
- Processing:
- Dry Seeds (Beans, Peas, Lettuce, Grains): Allow pods/seed heads to dry completely on the plant. Harvest, shell, and clean the seeds, removing chaff.
- Wet Seeds (Tomatoes, Cucumbers, Squash): For tomatoes, ferment the seeds in water for a few days to remove the gel coating and inhibit disease. For cucumbers/squash, scrape out seeds, wash thoroughly, and dry.
- Drying: Spread seeds thinly on screens or paper plates in a cool, dry, well-ventilated area for 1-4 weeks. Ensure they are bone-dry before storage. I aim for less than 8% moisture content.
- Storage: Store seeds in airtight containers (glass jars with desiccant packets work well) in a cool, dark, dry place (ideally 40-50°F and 30-40% humidity). Label clearly with variety and date. Properly stored seeds can remain viable for 3-10 years or more.
Step 8: Season Extension & Winterizing
Extend your harvest and protect your garden for the off-season to truly maximize your self sufficient garden from scratch.
- Cold Frames: Simple structures with a transparent top (glass, polycarbonate, or old windows) that sit over garden beds. They trap solar heat, allowing you to grow cold-hardy crops (lettuce, spinach, kale, radishes) well into winter or start seeds earlier in spring. A basic cold frame can be built from 2×6 lumber and a sheet of polycarbonate for under $100.
- Hoop Houses/Low Tunnels: Larger structures made from flexible hoops (PVC pipe or EMT conduit) covered with greenhouse plastic. These provide more space and greater temperature moderation. A 10×20 ft DIY low tunnel kit can cost $200-$500, while a larger, more robust hoop house kit might be $1,000-$3,000. I use a 6×12 ft low tunnel made from 1/2-inch PVC hoops and 6mil greenhouse plastic, which extends my lettuce and spinach harvest by at least
Healthy soil is the bedrock of a productive, self-sufficient garden. You can’t guess what your soil needs; you have to test it.
- Perform a Soil Test: A professional soil test will give you precise data on your soil’s pH, nutrient levels (N-P-K), and organic matter content. I recommend sending a sample to your local agricultural extension office; it typically costs $20-$50 and provides detailed recommendations. Alternatively, for a quick homeowner check, a Rapitest Soil Test Kit (40-test kit, model 1663, ~$20 on Amazon) provides a good baseline for pH, Nitrogen, Phosphorus, and Potash. Aim for a pH between 6.0 and 7.0 for most vegetables.
- Amend for pH Imbalance: If your soil is too acidic (below 6.0), add agricultural lime (dolomitic lime adds magnesium, calcitic lime adds calcium). Apply 5-10 lbs per 100 sq ft for a moderate adjustment. If it’s too alkaline (above 7.0), add elemental sulfur (e.g., Espoma Soil Acidifier, ~$15 for 6.75 lbs) or generous amounts of organic matter like peat moss or pine needles.
- Build Organic Matter: This is the single most important step for long-term soil health. Organic matter improves soil structure, water retention, drainage, and nutrient availability. Incorporate 2-4 inches of high-quality compost into your top 6-12 inches of soil annually. I make my own compost from kitchen scraps, garden waste, and shredded leaves, but you can purchase it. Local nurseries often sell bulk compost for $30-$50 per cubic yard. Aged manure (from chickens, cows, or horses – ensure it’s well-rotted to avoid burning plants) is also excellent.
- Address Nutrient Deficiencies: Based on your soil test, add specific organic amendments. If Nitrogen (N) is low, add blood meal (12-0-0, ~$20 for 3 lbs) or feather meal. For Phosphorus (P), use bone meal (3-15-0, ~$15 for 3 lbs) or rock phosphate. For Potassium (K), greensand (0-0-2.5, ~$25 for 5 lbs) or kelp meal are good choices. I rely heavily on Espoma Organic Garden-tone (5-3-3, ~$25 for an 8lb bag) as a balanced, all-purpose organic fertilizer during planting.
Step 3: Garden Bed Preparation
Deciding between raised beds and in-ground beds depends on your soil, budget, and physical capabilities.
- In-Ground Beds: If you have excellent native soil and good drainage, in-ground beds are the most economical. Double-digging (loosening soil two shovel depths) can significantly improve drainage and aeration. For my main garden, I primarily use in-ground beds, but I focus on building up the soil over time with consistent compost additions and cover cropping. I aim for beds that are no wider than 3-4 feet so I can reach the center without stepping on the soil, compacting it.
- Raised Beds: Raised beds offer numerous advantages, especially for poor soil, heavy clay, or rocky areas. They provide better drainage, warm up faster in spring, reduce compaction, and make weeding and harvesting easier on your back.
- Material Options:
- Untreated Cedar: Naturally rot-resistant and chemical-free. A 4×8 ft bed, 12 inches deep, typically requires three 2x12x8 ft cedar boards, costing around $50-$60 per board (total ~$150-$180) plus corner brackets or screws. My first raised beds were cedar and are still going strong after 7 years.
- Galvanized Steel: Durable, long-lasting, and aesthetically pleasing. Brands like Vego Garden offer modular kits. A Vego Garden 17″ Tall 8-in-1 Metal Raised Garden Bed (can be configured to 4×8 ft) costs approximately $250-$300.
- Concrete Blocks/Stones: Very durable but can leach minerals (though generally safe once weathered) and can be expensive.
- Recycled Materials: Pallets (check for chemical treatment stamps like « HT » for heat-treated), old tires (controversial due to potential chemical leaching).
- Filling Raised Beds: Don’t just fill with topsoil. Use a « Hugelkultur » approach (logs, branches, leaves, then compost, then topsoil) or a mixture of 60% good quality topsoil, 30% compost, and 10% perlite or vermiculite for drainage. A 4x8x1 ft raised bed requires about 32 cubic feet (or ~1.2 cubic yards) of soil mix, which can cost $100-$200 depending on your source.
- Material Options:
Step 4: Water Management & Irrigation
Efficient water management is critical for a self sufficient garden from scratch, especially in off-grid living where water resources might be limited.
- Rainwater Harvesting: This is my primary source of irrigation water. A 55-gallon rain barrel (e.g., EarthMark Rain Barrel, ~$120-$150) connected to a downspout can collect significant water. For larger needs, I use two 275-gallon IBC totes (Intermediate Bulk Containers, often available used for $100-$200 each from food-grade sources) connected in series. A 1,000 sq ft roof can collect approximately 620 gallons of water for every inch of rainfall. My 1,500 sq ft roof provides ample water for my 600 sq ft garden through multiple barrels and totes.
- Drip Irrigation: This is by far the most water-efficient method, delivering water directly to the plant’s root zone, minimizing evaporation and weed growth.
- Components: A typical drip system includes a pressure regulator (e.g., Rain Bird PRV-10, ~$15), a filter (Rain Bird RBY filter, ~$20), main tubing (1/2-inch poly tubing, 100ft ~$25), smaller feeder lines (1/4-inch tubing), and emitters (0.5 GPH or 1 GPH per plant).
- Kits: For beginners, a starter kit like the Rain Bird Drip Irrigation Garden Kit (model DDI-KIT-1P, ~$40-$60) is excellent for a small garden. For larger setups, I use Netafim Techline CV Drip Line (500ft roll, ~$150-$200), which has pressure-compensating emitters built-in, ensuring even watering across long runs.
- Automation: For true self-sufficiency, consider a battery-powered timer (e.g., Orbit B-Hyve Bluetooth Hose Faucet Timer, ~$50) or a solar-powered timer connected to a small 12V pump.
- Solar-Powered Pumps: For lifting water from a well, pond, or large storage tank to your garden, a solar pump is a game-changer. For a smaller drip system, a Shurflo 2088-594-152 Diaphragm Pump (12V, 3.5 GPM, ~$180) can be powered by a single 100W solar panel (e.g., Renogy 100W Monocrystalline Solar Panel, ~$100) and a small 12V battery (e.g., a 50Ah LiFePO4 battery like the Battle Born 50Ah, ~$450). For larger operations or deeper wells, more robust systems are needed. If you’re looking to build out a comprehensive off-grid power system to support your garden’s water needs, or indeed your entire homestead, you might want to explore resources like the Power Grid Generator complete system guide to understand the full scope of what’s possible in terms of energy independence.
Step 5: Seed Selection & Planting
The choice of seeds is crucial for a truly self sufficient garden from scratch.
- Choose Heirloom & Open-Pollinated Seeds: These varieties produce seeds that will grow true to type, meaning you can save seeds from your harvest year after year. F1 hybrids, while often vigorous, will not produce consistent offspring from saved seeds. Reputable seed companies include Baker Creek Heirloom Seeds, High Mowing Organic Seeds, and Seed Savers Exchange. Start with common, reliable varieties like ‘Black Krim’ tomatoes, ‘Provider’ bush beans, ‘Waltham Butternut’ squash, and ‘Black Seeded Simpson’ lettuce.
- Start Seeds Indoors (Optional but Recommended): For longer growing seasons or specific crops, starting seeds indoors gives you a head start. Use seed-starting mix (e.g., Espoma Organic Seed Starter Mix, ~$10 for 16qt bag) in seed trays (Jiffy Professional Greenhouse 72-cell kit, ~$15). Provide adequate light with LED grow lights (Barrina T5 2ft 4-pack LED Grow Lights, 20W each, ~$50) for 14-16 hours a day, positioned 2-4 inches above seedlings. Maintain consistent temperatures (65-75°F for most).
- Direct Sowing vs. Transplanting: Some crops (carrots, radishes, beans, corn) prefer direct sowing into the garden bed. Others (tomatoes, peppers, broccoli, kale) benefit from being started indoors and transplanted. Follow seed packet instructions for planting depths (e.g., lettuce seeds are often surface-sown or planted 1/8 inch deep, while beans are 1 inch deep) and spacing.
- Companion Planting: Strategically plant different species together to enhance growth, deter pests, and attract beneficial insects. For example, planting marigolds near tomatoes can deter nematodes, and basil improves tomato flavor. Nasturtiums can act as a trap crop for aphids.
- Succession Planting: For a continuous harvest, plant small batches of quick-growing crops (lettuce, radishes, cilantro) every 2-3 weeks. As one crop finishes, another is ready to take its place.
Step 6: Pest & Disease Management (Organic)
Maintaining a self sufficient garden from scratch means embracing organic pest and disease control.
- Integrated Pest Management (IPM): This holistic approach combines several strategies.
- Observation: Regularly inspect your plants for early signs of pests or disease. Catching issues early is key.
- Physical Barriers: Use row covers (e.g., Agribon AG-19 floating row cover, 10×20 ft, ~$20) to protect young plants from insect pests like cabbage worms and squash bugs. Install fences (e.g., 2×4 welded wire mesh, 4 ft tall, 50 ft roll ~$70) to keep out deer, rabbits, and other larger animals.
- Hand-Picking: For larger pests like tomato hornworms or squash bugs, simply pick them off and drop them into a bucket of soapy water.
- Companion Planting: As mentioned, certain plants repel pests. Marigolds, garlic, and onions are excellent deterrents.
- Attract Beneficial Insects: Plant flowers like dill, fennel, cosmos, and sweet alyssum to attract ladybugs, lacewings, and parasitic wasps, which prey on common garden pests.
- Organic Sprays & Treatments:
- Neem Oil: An excellent broad-spectrum organic insecticide and fungicide. Bonide Neem Oil Concentrate (16oz, ~$20) can be mixed at a rate of 1-2 tbsp per gallon of water and sprayed on affected plants.
- Insecticidal Soap: Effective against soft-bodied insects like aphids, whiteflies, and spider mites. Garden Safe Insecticidal Soap (24oz ready-to-use, ~$10).
- Bacillus thuringiensis (Bt): A naturally occurring soil bacterium that targets caterpillars and worms. Monterey BT Worm & Caterpillar Killer (16oz, ~$18) is highly effective and safe for beneficial insects.
- Copper or Sulfur Sprays: For fungal diseases like powdery mildew or blight, organic copper (e.g., Bonide Copper Fungicide, ~$15 for 1lb) or sulfur (e.g., Safer Brand Garden Fungicide, ~$10 for 16oz) can be used as a last resort.
Step 7: Harvesting & Seed Saving
The culmination of your efforts is the harvest, and seed saving closes the loop on self-sufficiency.
- Harvesting Techniques:
- Timing: Harvest vegetables at their peak ripeness for best flavor and nutritional value. For example, green beans should snap cleanly, cucumbers should be firm, and tomatoes should be fully colored.
- Frequency: Many crops, like zucchini, cucumbers, and bush beans, produce more if harvested frequently. Pick daily or every other day.
- Tools: Use clean, sharp pruners (e.g., Corona ClassicCUT Bypass Pruner BP 3180, ~$30) or a sharp knife for clean cuts, minimizing damage to the plant.
- Seed Saving: This is where the « self-sufficient » aspect truly shines.
- Selection: Only save seeds from your healthiest, most vigorous plants that show desired traits (disease resistance, good flavor, high yield).
- Isolation: To ensure true-to-type seeds, prevent cross-pollination. This can be challenging for open-pollinated crops that readily cross (e.g., squash, corn). For beginners, focus on self-pollinating plants like beans, peas, lettuce, and tomatoes.
- Processing:
- Dry Seeds (Beans, Peas, Lettuce, Grains): Allow pods/seed heads to dry completely on the plant. Harvest, shell, and clean the seeds, removing chaff.
- Wet Seeds (Tomatoes, Cucumbers, Squash): For tomatoes, ferment the seeds in water for a few days to remove the gel coating and inhibit disease. For cucumbers/squash, scrape out seeds, wash thoroughly, and dry.
- Drying: Spread seeds thinly on screens or paper plates in a cool, dry, well-ventilated area for 1-4 weeks. Ensure they are bone-dry before storage. I aim for less than 8% moisture content.
- Storage: Store seeds in airtight containers (glass jars with desiccant packets work well) in a cool, dark, dry place (ideally 40-50°F and 30-40% humidity). Label clearly with variety and date. Properly stored seeds can remain viable for 3-10 years or more.
Step 8: Season Extension & Winterizing
Extend your harvest and protect your garden for the off-season to truly maximize your self sufficient garden from scratch.
- Cold Frames: Simple structures with a transparent top (glass, polycarbonate, or old windows) that sit over garden beds. They trap solar heat, allowing you to grow cold-hardy crops (lettuce, spinach, kale, radishes) well into winter or start seeds earlier in spring. A basic cold frame can be built from 2×6 lumber and a sheet of polycarbonate for under $100.
- Hoop Houses/Low Tunnels: Larger structures made from flexible hoops (PVC pipe or EMT conduit) covered with greenhouse plastic. These provide more space and greater temperature moderation. A 10×20 ft DIY low tunnel kit can cost $200-$500, while a larger, more robust hoop house kit might be $1,000-$3,000. I use a 6×12 ft low tunnel made from 1/2-inch PVC hoops and 6mil greenhouse plastic, which extends my lettuce and spinach harvest by at least
Step 5: Seed Selection & Planting
The choice of seeds is crucial for a truly self sufficient garden from scratch.
- Choose Heirloom & Open-Pollinated Seeds: These varieties produce seeds that will grow true to type, meaning you can save seeds from your harvest year after year. F1 hybrids, while often vigorous, will not produce consistent offspring from saved seeds. Reputable seed companies include Baker Creek Heirloom Seeds, High Mowing Organic Seeds, and Seed Savers Exchange. Start with common, reliable varieties like ‘Black Krim’ tomatoes, ‘Provider’ bush beans, ‘Waltham Butternut’ squash, and ‘Black Seeded Simpson’ lettuce.
- Start Seeds Indoors (Optional but Recommended): For longer growing seasons or specific crops, starting seeds indoors gives you a head start. Use seed-starting mix (e.g., Espoma Organic Seed Starter Mix, ~$10 for 16qt bag) in seed trays (Jiffy Professional Greenhouse 72-cell kit, ~$15). Provide adequate light with LED grow lights (Barrina T5 2ft 4-pack LED Grow Lights, 20W each, ~$50) for 14-16 hours a day, positioned 2-4 inches above seedlings. Maintain consistent temperatures (65-75°F for most).
- Direct Sowing vs. Transplanting: Some crops (carrots, radishes, beans, corn) prefer direct sowing into the garden bed. Others (tomatoes, peppers, broccoli, kale) benefit from being started indoors and transplanted. Follow seed packet instructions for planting depths (e.g., lettuce seeds are often surface-sown or planted 1/8 inch deep, while beans are 1 inch deep) and spacing.
- Companion Planting: Strategically plant different species together to enhance growth, deter pests, and attract beneficial insects. For example, planting marigolds near tomatoes can deter nematodes, and basil improves tomato flavor. Nasturtiums can act as a trap crop for aphids.
- Succession Planting: For a continuous harvest, plant small batches of quick-growing crops (lettuce, radishes, cilantro) every 2-3 weeks. As one crop finishes, another is ready to take its place.
Step 6: Pest & Disease Management (Organic)
Maintaining a self sufficient garden from scratch means embracing organic pest and disease control.
- Integrated Pest Management (IPM): This holistic approach combines several strategies.
- Observation: Regularly inspect your plants for early signs of pests or disease. Catching issues early is key.
- Physical Barriers: Use row covers (e.g., Agribon AG-19 floating row cover, 10×20 ft, ~$20) to protect young plants from insect pests like cabbage worms and squash bugs. Install fences (e.g., 2×4 welded wire mesh, 4 ft tall, 50 ft roll ~$70) to keep out deer, rabbits, and other larger animals.
- Hand-Picking: For larger pests like tomato hornworms or squash bugs, simply pick them off and drop them into a bucket of soapy water.
- Companion Planting: As mentioned, certain plants repel pests. Marigolds, garlic, and onions are excellent deterrents.
- Attract Beneficial Insects: Plant flowers like dill, fennel, cosmos, and sweet alyssum to attract ladybugs, lacewings, and parasitic wasps, which prey on common garden pests.
- Organic Sprays & Treatments:
- Neem Oil: An excellent broad-spectrum organic insecticide and fungicide. Bonide Neem Oil Concentrate (16oz, ~$20) can be mixed at a rate of 1-2 tbsp per gallon of water and sprayed on affected plants.
- Insecticidal Soap: Effective against soft-bodied insects like aphids, whiteflies, and spider mites. Garden Safe Insecticidal Soap (24oz ready-to-use, ~$10).
- Bacillus thuringiensis (Bt): A naturally occurring soil bacterium that targets caterpillars and worms. Monterey BT Worm & Caterpillar Killer (16oz, ~$18) is highly effective and safe for beneficial insects.
- Copper or Sulfur Sprays: For fungal diseases like powdery mildew or blight, organic copper (e.g., Bonide Copper Fungicide, ~$15 for 1lb) or sulfur (e.g., Safer Brand Garden Fungicide, ~$10 for 16oz) can be used as a last resort.
Step 7: Harvesting & Seed Saving
The culmination of your efforts is the harvest, and seed saving closes the loop on self-sufficiency.
- Harvesting Techniques:
- Timing: Harvest vegetables at their peak ripeness for best flavor and nutritional value. For example, green beans should snap cleanly, cucumbers should be firm, and tomatoes should be fully colored.
- Frequency: Many crops, like zucchini, cucumbers, and bush beans, produce more if harvested frequently. Pick daily or every other day.
- Tools: Use clean, sharp pruners (e.g., Corona ClassicCUT Bypass Pruner BP 3180, ~$30) or a sharp knife for clean cuts, minimizing damage to the plant.
- Seed Saving: This is where the « self-sufficient » aspect truly shines.
- Selection: Only save seeds from your healthiest, most vigorous plants that show desired traits (disease resistance, good flavor, high yield).
- Isolation: To ensure true-to-type seeds, prevent cross-pollination. This can be challenging for open-pollinated crops that readily cross (e.g., squash, corn). For beginners, focus on self-pollinating plants like beans, peas, lettuce, and tomatoes.
- Processing:
- Dry Seeds (Beans, Peas, Lettuce, Grains): Allow pods/seed heads to dry completely on the plant. Harvest, shell, and clean the seeds, removing chaff.
- Wet Seeds (Tomatoes, Cucumbers, Squash): For tomatoes, ferment the seeds in water for a few days to remove the gel coating and inhibit disease. For cucumbers/squash, scrape out seeds, wash thoroughly, and dry.
- Drying: Spread seeds thinly on screens or paper plates in a cool, dry, well-ventilated area for 1-4 weeks. Ensure they are bone-dry before storage. I aim for less than 8% moisture content.
- Storage: Store seeds in airtight containers (glass jars with desiccant packets work well) in a cool, dark, dry place (ideally 40-50°F and 30-40% humidity). Label clearly with variety and date. Properly stored seeds can remain viable for 3-10 years or more.
Step 8: Season Extension & Winterizing
Extend your harvest and protect your garden for the off-season to truly maximize your self sufficient garden from scratch.
- Cold Frames: Simple structures with a transparent top (glass, polycarbonate, or old windows) that sit over garden beds. They trap solar heat, allowing you to grow cold-hardy crops (lettuce, spinach, kale, radishes) well into winter or start seeds earlier in spring. A basic cold frame can be built from 2×6 lumber and a sheet of polycarbonate for under $100.
- Hoop Houses/Low Tunnels: Larger structures made from flexible hoops (PVC pipe or EMT conduit) covered with greenhouse plastic. These provide more space and greater temperature moderation. A 10×20 ft DIY low tunnel kit can cost $200-$500, while a larger, more robust hoop house kit might be $1,000-$3,000. I use a 6×12 ft low tunnel made from 1/2-inch PVC hoops and 6mil greenhouse plastic, which extends my lettuce and spinach harvest by at least
Healthy soil is the bedrock of a productive, self-sufficient garden. You can’t guess what your soil needs; you have to test it.
- Perform a Soil Test: A professional soil test will give you precise data on your soil’s pH, nutrient levels (N-P-K), and organic matter content. I recommend sending a sample to your local agricultural extension office; it typically costs $20-$50 and provides detailed recommendations. Alternatively, for a quick homeowner check, a Rapitest Soil Test Kit (40-test kit, model 1663, ~$20 on Amazon) provides a good baseline for pH, Nitrogen, Phosphorus, and Potash. Aim for a pH between 6.0 and 7.0 for most vegetables.
- Amend for pH Imbalance: If your soil is too acidic (below 6.0), add agricultural lime (dolomitic lime adds magnesium, calcitic lime adds calcium). Apply 5-10 lbs per 100 sq ft for a moderate adjustment. If it’s too alkaline (above 7.0), add elemental sulfur (e.g., Espoma Soil Acidifier, ~$15 for 6.75 lbs) or generous amounts of organic matter like peat moss or pine needles.
- Build Organic Matter: This is the single most important step for long-term soil health. Organic matter improves soil structure, water retention, drainage, and nutrient availability. Incorporate 2-4 inches of high-quality compost into your top 6-12 inches of soil annually. I make my own compost from kitchen scraps, garden waste, and shredded leaves, but you can purchase it. Local nurseries often sell bulk compost for $30-$50 per cubic yard. Aged manure (from chickens, cows, or horses – ensure it’s well-rotted to avoid burning plants) is also excellent.
- Address Nutrient Deficiencies: Based on your soil test, add specific organic amendments. If Nitrogen (N) is low, add blood meal (12-0-0, ~$20 for 3 lbs) or feather meal. For Phosphorus (P), use bone meal (3-15-0, ~$15 for 3 lbs) or rock phosphate. For Potassium (K), greensand (0-0-2.5, ~$25 for 5 lbs) or kelp meal are good choices. I rely heavily on Espoma Organic Garden-tone (5-3-3, ~$25 for an 8lb bag) as a balanced, all-purpose organic fertilizer during planting.
Step 3: Garden Bed Preparation
Deciding between raised beds and in-ground beds depends on your soil, budget, and physical capabilities.
- In-Ground Beds: If you have excellent native soil and good drainage, in-ground beds are the most economical. Double-digging (loosening soil two shovel depths) can significantly improve drainage and aeration. For my main garden, I primarily use in-ground beds, but I focus on building up the soil over time with consistent compost additions and cover cropping. I aim for beds that are no wider than 3-4 feet so I can reach the center without stepping on the soil, compacting it.
- Raised Beds: Raised beds offer numerous advantages, especially for poor soil, heavy clay, or rocky areas. They provide better drainage, warm up faster in spring, reduce compaction, and make weeding and harvesting easier on your back.
- Material Options:
- Untreated Cedar: Naturally rot-resistant and chemical-free. A 4×8 ft bed, 12 inches deep, typically requires three 2x12x8 ft cedar boards, costing around $50-$60 per board (total ~$150-$180) plus corner brackets or screws. My first raised beds were cedar and are still going strong after 7 years.
- Galvanized Steel: Durable, long-lasting, and aesthetically pleasing. Brands like Vego Garden offer modular kits. A Vego Garden 17″ Tall 8-in-1 Metal Raised Garden Bed (can be configured to 4×8 ft) costs approximately $250-$300.
- Concrete Blocks/Stones: Very durable but can leach minerals (though generally safe once weathered) and can be expensive.
- Recycled Materials: Pallets (check for chemical treatment stamps like « HT » for heat-treated), old tires (controversial due to potential chemical leaching).
- Filling Raised Beds: Don’t just fill with topsoil. Use a « Hugelkultur » approach (logs, branches, leaves, then compost, then topsoil) or a mixture of 60% good quality topsoil, 30% compost, and 10% perlite or vermiculite for drainage. A 4x8x1 ft raised bed requires about 32 cubic feet (or ~1.2 cubic yards) of soil mix, which can cost $100-$200 depending on your source.
- Material Options:
Step 4: Water Management & Irrigation
Efficient water management is critical for a self sufficient garden from scratch, especially in off-grid living where water resources might be limited.
- Rainwater Harvesting: This is my primary source of irrigation water. A 55-gallon rain barrel (e.g., EarthMark Rain Barrel, ~$120-$150) connected to a downspout can collect significant water. For larger needs, I use two 275-gallon IBC totes (Intermediate Bulk Containers, often available used for $100-$200 each from food-grade sources) connected in series. A 1,000 sq ft roof can collect approximately 620 gallons of water for every inch of rainfall. My 1,500 sq ft roof provides ample water for my 600 sq ft garden through multiple barrels and totes.
- Drip Irrigation: This is by far the most water-efficient method, delivering water directly to the plant’s root zone, minimizing evaporation and weed growth.
- Components: A typical drip system includes a pressure regulator (e.g., Rain Bird PRV-10, ~$15), a filter (Rain Bird RBY filter, ~$20), main tubing (1/2-inch poly tubing, 100ft ~$25), smaller feeder lines (1/4-inch tubing), and emitters (0.5 GPH or 1 GPH per plant).
- Kits: For beginners, a starter kit like the Rain Bird Drip Irrigation Garden Kit (model DDI-KIT-1P, ~$40-$60) is excellent for a small garden. For larger setups, I use Netafim Techline CV Drip Line (500ft roll, ~$150-$200), which has pressure-compensating emitters built-in, ensuring even watering across long runs.
- Automation: For true self-sufficiency, consider a battery-powered timer (e.g., Orbit B-Hyve Bluetooth Hose Faucet Timer, ~$50) or a solar-powered timer connected to a small 12V pump.
- Solar-Powered Pumps: For lifting water from a well, pond, or large storage tank to your garden, a solar pump is a game-changer. For a smaller drip system, a Shurflo 2088-594-152 Diaphragm Pump (12V, 3.5 GPM, ~$180) can be powered by a single 100W solar panel (e.g., Renogy 100W Monocrystalline Solar Panel, ~$100) and a small 12V battery (e.g., a 50Ah LiFePO4 battery like the Battle Born 50Ah, ~$450). For larger operations or deeper wells, more robust systems are needed. If you’re looking to build out a comprehensive off-grid power system to support your garden’s water needs, or indeed your entire homestead, you might want to explore resources like the Power Grid Generator complete system guide to understand the full scope of what’s possible in terms of energy independence.
Step 5: Seed Selection & Planting
The choice of seeds is crucial for a truly self sufficient garden from scratch.
- Choose Heirloom & Open-Pollinated Seeds: These varieties produce seeds that will grow true to type, meaning you can save seeds from your harvest year after year. F1 hybrids, while often vigorous, will not produce consistent offspring from saved seeds. Reputable seed companies include Baker Creek Heirloom Seeds, High Mowing Organic Seeds, and Seed Savers Exchange. Start with common, reliable varieties like ‘Black Krim’ tomatoes, ‘Provider’ bush beans, ‘Waltham Butternut’ squash, and ‘Black Seeded Simpson’ lettuce.
- Start Seeds Indoors (Optional but Recommended): For longer growing seasons or specific crops, starting seeds indoors gives you a head start. Use seed-starting mix (e.g., Espoma Organic Seed Starter Mix, ~$10 for 16qt bag) in seed trays (Jiffy Professional Greenhouse 72-cell kit, ~$15). Provide adequate light with LED grow lights (Barrina T5 2ft 4-pack LED Grow Lights, 20W each, ~$50) for 14-16 hours a day, positioned 2-4 inches above seedlings. Maintain consistent temperatures (65-75°F for most).
- Direct Sowing vs. Transplanting: Some crops (carrots, radishes, beans, corn) prefer direct sowing into the garden bed. Others (tomatoes, peppers, broccoli, kale) benefit from being started indoors and transplanted. Follow seed packet instructions for planting depths (e.g., lettuce seeds are often surface-sown or planted 1/8 inch deep, while beans are 1 inch deep) and spacing.
- Companion Planting: Strategically plant different species together to enhance growth, deter pests, and attract beneficial insects. For example, planting marigolds near tomatoes can deter nematodes, and basil improves tomato flavor. Nasturtiums can act as a trap crop for aphids.
- Succession Planting: For a continuous harvest, plant small batches of quick-growing crops (lettuce, radishes, cilantro) every 2-3 weeks. As one crop finishes, another is ready to take its place.
Step 6: Pest & Disease Management (Organic)
Maintaining a self sufficient garden from scratch means embracing organic pest and disease control.
- Integrated Pest Management (IPM): This holistic approach combines several strategies.
- Observation: Regularly inspect your plants for early signs of pests or disease. Catching issues early is key.
- Physical Barriers: Use row covers (e.g., Agribon AG-19 floating row cover, 10×20 ft, ~$20) to protect young plants from insect pests like cabbage worms and squash bugs. Install fences (e.g., 2×4 welded wire mesh, 4 ft tall, 50 ft roll ~$70) to keep out deer, rabbits, and other larger animals.
- Hand-Picking: For larger pests like tomato hornworms or squash bugs, simply pick them off and drop them into a bucket of soapy water.
- Companion Planting: As mentioned, certain plants repel pests. Marigolds, garlic, and onions are excellent deterrents.
- Attract Beneficial Insects: Plant flowers like dill, fennel, cosmos, and sweet alyssum to attract ladybugs, lacewings, and parasitic wasps, which prey on common garden pests.
- Organic Sprays & Treatments:
- Neem Oil: An excellent broad-spectrum organic insecticide and fungicide. Bonide Neem Oil Concentrate (16oz, ~$20) can be mixed at a rate of 1-2 tbsp per gallon of water and sprayed on affected plants.
- Insecticidal Soap: Effective against soft-bodied insects like aphids, whiteflies, and spider mites. Garden Safe Insecticidal Soap (24oz ready-to-use, ~$10).
- Bacillus thuringiensis (Bt): A naturally occurring soil bacterium that targets caterpillars and worms. Monterey BT Worm & Caterpillar Killer (16oz, ~$18) is highly effective and safe for beneficial insects.
- Copper or Sulfur Sprays: For fungal diseases like powdery mildew or blight, organic copper (e.g., Bonide Copper Fungicide, ~$15 for 1lb) or sulfur (e.g., Safer Brand Garden Fungicide, ~$10 for 16oz) can be used as a last resort.
Step 7: Harvesting & Seed Saving
The culmination of your efforts is the harvest, and seed saving closes the loop on self-sufficiency.
- Harvesting Techniques:
- Timing: Harvest vegetables at their peak ripeness for best flavor and nutritional value. For example, green beans should snap cleanly, cucumbers should be firm, and tomatoes should be fully colored.
- Frequency: Many crops, like zucchini, cucumbers, and bush beans, produce more if harvested frequently. Pick daily or every other day.
- Tools: Use clean, sharp pruners (e.g., Corona ClassicCUT Bypass Pruner BP 3180, ~$30) or a sharp knife for clean cuts, minimizing damage to the plant.
- Seed Saving: This is where the « self-sufficient » aspect truly shines.
- Selection: Only save seeds from your healthiest, most vigorous plants that show desired traits (disease resistance, good flavor, high yield).
- Isolation: To ensure true-to-type seeds, prevent cross-pollination. This can be challenging for open-pollinated crops that readily cross (e.g., squash, corn). For beginners, focus on self-pollinating plants like beans, peas, lettuce, and tomatoes.
- Processing:
- Dry Seeds (Beans, Peas, Lettuce, Grains): Allow pods/seed heads to dry completely on the plant. Harvest, shell, and clean the seeds, removing chaff.
- Wet Seeds (Tomatoes, Cucumbers, Squash): For tomatoes, ferment the seeds in water for a few days to remove the gel coating and inhibit disease. For cucumbers/squash, scrape out seeds, wash thoroughly, and dry.
- Drying: Spread seeds thinly on screens or paper plates in a cool, dry, well-ventilated area for 1-4 weeks. Ensure they are bone-dry before storage. I aim for less than 8% moisture content.
- Storage: Store seeds in airtight containers (glass jars with desiccant packets work well) in a cool, dark, dry place (ideally 40-50°F and 30-40% humidity). Label clearly with variety and date. Properly stored seeds can remain viable for 3-10 years or more.
Step 8: Season Extension & Winterizing
Extend your harvest and protect your garden for the off-season to truly maximize your self sufficient garden from scratch.
- Cold Frames: Simple structures with a transparent top (glass, polycarbonate, or old windows) that sit over garden beds. They trap solar heat, allowing you to grow cold-hardy crops (lettuce, spinach, kale, radishes) well into winter or start seeds earlier in spring. A basic cold frame can be built from 2×6 lumber and a sheet of polycarbonate for under $100.
- Hoop Houses/Low Tunnels: Larger structures made from flexible hoops (PVC pipe or EMT conduit) covered with greenhouse plastic. These provide more space and greater temperature moderation. A 10×20 ft DIY low tunnel kit can cost $200-$500, while a larger, more robust hoop house kit might be $1,000-$3,000. I use a 6×12 ft low tunnel made from 1/2-inch PVC hoops and 6mil greenhouse plastic, which extends my lettuce and spinach harvest by at least
- Rainwater Harvesting: This is my primary source of irrigation water. A 55-gallon rain barrel (e.g., EarthMark Rain Barrel, ~$120-$150) connected to a downspout can collect significant water. For larger needs, I use two 275-gallon IBC totes (Intermediate Bulk Containers, often available used for $100-$200 each from food-grade sources) connected in series. A 1,000 sq ft roof can collect approximately 620 gallons of water for every inch of rainfall. My 1,500 sq ft roof provides ample water for my 600 sq ft garden through multiple barrels and totes.
- Drip Irrigation: This is by far the most water-efficient method, delivering water directly to the plant’s root zone, minimizing evaporation and weed growth.
- Components: A typical drip system includes a pressure regulator (e.g., Rain Bird PRV-10, ~$15), a filter (Rain Bird RBY filter, ~$20), main tubing (1/2-inch poly tubing, 100ft ~$25), smaller feeder lines (1/4-inch tubing), and emitters (0.5 GPH or 1 GPH per plant).
- Kits: For beginners, a starter kit like the Rain Bird Drip Irrigation Garden Kit (model DDI-KIT-1P, ~$40-$60) is excellent for a small garden. For larger setups, I use Netafim Techline CV Drip Line (500ft roll, ~$150-$200), which has pressure-compensating emitters built-in, ensuring even watering across long runs.
- Automation: For true self-sufficiency, consider a battery-powered timer (e.g., Orbit B-Hyve Bluetooth Hose Faucet Timer, ~$50) or a solar-powered timer connected to a small 12V pump.
- Solar-Powered Pumps: For lifting water from a well, pond, or large storage tank to your garden, a solar pump is a game-changer. For a smaller drip system, a Shurflo 2088-594-152 Diaphragm Pump (12V, 3.5 GPM, ~$180) can be powered by a single 100W solar panel (e.g., Renogy 100W Monocrystalline Solar Panel, ~$100) and a small 12V battery (e.g., a 50Ah LiFePO4 battery like the Battle Born 50Ah, ~$450). For larger operations or deeper wells, more robust systems are needed. If you’re looking to build out a comprehensive off-grid power system to support your garden’s water needs, or indeed your entire homestead, you might want to explore resources like the Power Grid Generator complete system guide to understand the full scope of what’s possible in terms of energy independence.
Step 5: Seed Selection & Planting
The choice of seeds is crucial for a truly self sufficient garden from scratch.
- Choose Heirloom & Open-Pollinated Seeds: These varieties produce seeds that will grow true to type, meaning you can save seeds from your harvest year after year. F1 hybrids, while often vigorous, will not produce consistent offspring from saved seeds. Reputable seed companies include Baker Creek Heirloom Seeds, High Mowing Organic Seeds, and Seed Savers Exchange. Start with common, reliable varieties like ‘Black Krim’ tomatoes, ‘Provider’ bush beans, ‘Waltham Butternut’ squash, and ‘Black Seeded Simpson’ lettuce.
- Start Seeds Indoors (Optional but Recommended): For longer growing seasons or specific crops, starting seeds indoors gives you a head start. Use seed-starting mix (e.g., Espoma Organic Seed Starter Mix, ~$10 for 16qt bag) in seed trays (Jiffy Professional Greenhouse 72-cell kit, ~$15). Provide adequate light with LED grow lights (Barrina T5 2ft 4-pack LED Grow Lights, 20W each, ~$50) for 14-16 hours a day, positioned 2-4 inches above seedlings. Maintain consistent temperatures (65-75°F for most).
- Direct Sowing vs. Transplanting: Some crops (carrots, radishes, beans, corn) prefer direct sowing into the garden bed. Others (tomatoes, peppers, broccoli, kale) benefit from being started indoors and transplanted. Follow seed packet instructions for planting depths (e.g., lettuce seeds are often surface-sown or planted 1/8 inch deep, while beans are 1 inch deep) and spacing.
- Companion Planting: Strategically plant different species together to enhance growth, deter pests, and attract beneficial insects. For example, planting marigolds near tomatoes can deter nematodes, and basil improves tomato flavor. Nasturtiums can act as a trap crop for aphids.
- Succession Planting: For a continuous harvest, plant small batches of quick-growing crops (lettuce, radishes, cilantro) every 2-3 weeks. As one crop finishes, another is ready to take its place.
Step 6: Pest & Disease Management (Organic)
Maintaining a self sufficient garden from scratch means embracing organic pest and disease control.
- Integrated Pest Management (IPM): This holistic approach combines several strategies.
- Observation: Regularly inspect your plants for early signs of pests or disease. Catching issues early is key.
- Physical Barriers: Use row covers (e.g., Agribon AG-19 floating row cover, 10×20 ft, ~$20) to protect young plants from insect pests like cabbage worms and squash bugs. Install fences (e.g., 2×4 welded wire mesh, 4 ft tall, 50 ft roll ~$70) to keep out deer, rabbits, and other larger animals.
- Hand-Picking: For larger pests like tomato hornworms or squash bugs, simply pick them off and drop them into a bucket of soapy water.
- Companion Planting: As mentioned, certain plants repel pests. Marigolds, garlic, and onions are excellent deterrents.
- Attract Beneficial Insects: Plant flowers like dill, fennel, cosmos, and sweet alyssum to attract ladybugs, lacewings, and parasitic wasps, which prey on common garden pests.
- Organic Sprays & Treatments:
- Neem Oil: An excellent broad-spectrum organic insecticide and fungicide. Bonide Neem Oil Concentrate (16oz, ~$20) can be mixed at a rate of 1-2 tbsp per gallon of water and sprayed on affected plants.
- Insecticidal Soap: Effective against soft-bodied insects like aphids, whiteflies, and spider mites. Garden Safe Insecticidal Soap (24oz ready-to-use, ~$10).
- Bacillus thuringiensis (Bt): A naturally occurring soil bacterium that targets caterpillars and worms. Monterey BT Worm & Caterpillar Killer (16oz, ~$18) is highly effective and safe for beneficial insects.
- Copper or Sulfur Sprays: For fungal diseases like powdery mildew or blight, organic copper (e.g., Bonide Copper Fungicide, ~$15 for 1lb) or sulfur (e.g., Safer Brand Garden Fungicide, ~$10 for 16oz) can be used as a last resort.
Step 7: Harvesting & Seed Saving
The culmination of your efforts is the harvest, and seed saving closes the loop on self-sufficiency.
- Harvesting Techniques:
- Timing: Harvest vegetables at their peak ripeness for best flavor and nutritional value. For example, green beans should snap cleanly, cucumbers should be firm, and tomatoes should be fully colored.
- Frequency: Many crops, like zucchini, cucumbers, and bush beans, produce more if harvested frequently. Pick daily or every other day.
- Tools: Use clean, sharp pruners (e.g., Corona ClassicCUT Bypass Pruner BP 3180, ~$30) or a sharp knife for clean cuts, minimizing damage to the plant.
- Seed Saving: This is where the « self-sufficient » aspect truly shines.
- Selection: Only save seeds from your healthiest, most vigorous plants that show desired traits (disease resistance, good flavor, high yield).
- Isolation: To ensure true-to-type seeds, prevent cross-pollination. This can be challenging for open-pollinated crops that readily cross (e.g., squash, corn). For beginners, focus on self-pollinating plants like beans, peas, lettuce, and tomatoes.
- Processing:
- Dry Seeds (Beans, Peas, Lettuce, Grains): Allow pods/seed heads to dry completely on the plant. Harvest, shell, and clean the seeds, removing chaff.
- Wet Seeds (Tomatoes, Cucumbers, Squash): For tomatoes, ferment the seeds in water for a few days to remove the gel coating and inhibit disease. For cucumbers/squash, scrape out seeds, wash thoroughly, and dry.
- Drying: Spread seeds thinly on screens or paper plates in a cool, dry, well-ventilated area for 1-4 weeks. Ensure they are bone-dry before storage. I aim for less than 8% moisture content.
- Storage: Store seeds in airtight containers (glass jars with desiccant packets work well) in a cool, dark, dry place (ideally 40-50°F and 30-40% humidity). Label clearly with variety and date. Properly stored seeds can remain viable for 3-10 years or more.
Step 8: Season Extension & Winterizing
Extend your harvest and protect your garden for the off-season to truly maximize your self sufficient garden from scratch.
- Cold Frames: Simple structures with a transparent top (glass, polycarbonate, or old windows) that sit over garden beds. They trap solar heat, allowing you to grow cold-hardy crops (lettuce, spinach, kale, radishes) well into winter or start seeds earlier in spring. A basic cold frame can be built from 2×6 lumber and a sheet of polycarbonate for under $100.
- Hoop Houses/Low Tunnels: Larger structures made from flexible hoops (PVC pipe or EMT conduit) covered with greenhouse plastic. These provide more space and greater temperature moderation. A 10×20 ft DIY low tunnel kit can cost $200-$500, while a larger, more robust hoop house kit might be $1,000-$3,000. I use a 6×12 ft low tunnel made from 1/2-inch PVC hoops and 6mil greenhouse plastic, which extends my lettuce and spinach harvest by at least
Healthy soil is the bedrock of a productive, self-sufficient garden. You can’t guess what your soil needs; you have to test it.
- Perform a Soil Test: A professional soil test will give you precise data on your soil’s pH, nutrient levels (N-P-K), and organic matter content. I recommend sending a sample to your local agricultural extension office; it typically costs $20-$50 and provides detailed recommendations. Alternatively, for a quick homeowner check, a Rapitest Soil Test Kit (40-test kit, model 1663, ~$20 on Amazon) provides a good baseline for pH, Nitrogen, Phosphorus, and Potash. Aim for a pH between 6.0 and 7.0 for most vegetables.
- Amend for pH Imbalance: If your soil is too acidic (below 6.0), add agricultural lime (dolomitic lime adds magnesium, calcitic lime adds calcium). Apply 5-10 lbs per 100 sq ft for a moderate adjustment. If it’s too alkaline (above 7.0), add elemental sulfur (e.g., Espoma Soil Acidifier, ~$15 for 6.75 lbs) or generous amounts of organic matter like peat moss or pine needles.
- Build Organic Matter: This is the single most important step for long-term soil health. Organic matter improves soil structure, water retention, drainage, and nutrient availability. Incorporate 2-4 inches of high-quality compost into your top 6-12 inches of soil annually. I make my own compost from kitchen scraps, garden waste, and shredded leaves, but you can purchase it. Local nurseries often sell bulk compost for $30-$50 per cubic yard. Aged manure (from chickens, cows, or horses – ensure it’s well-rotted to avoid burning plants) is also excellent.
- Address Nutrient Deficiencies: Based on your soil test, add specific organic amendments. If Nitrogen (N) is low, add blood meal (12-0-0, ~$20 for 3 lbs) or feather meal. For Phosphorus (P), use bone meal (3-15-0, ~$15 for 3 lbs) or rock phosphate. For Potassium (K), greensand (0-0-2.5, ~$25 for 5 lbs) or kelp meal are good choices. I rely heavily on Espoma Organic Garden-tone (5-3-3, ~$25 for an 8lb bag) as a balanced, all-purpose organic fertilizer during planting.
Step 3: Garden Bed Preparation
Deciding between raised beds and in-ground beds depends on your soil, budget, and physical capabilities.
- In-Ground Beds: If you have excellent native soil and good drainage, in-ground beds are the most economical. Double-digging (loosening soil two shovel depths) can significantly improve drainage and aeration. For my main garden, I primarily use in-ground beds, but I focus on building up the soil over time with consistent compost additions and cover cropping. I aim for beds that are no wider than 3-4 feet so I can reach the center without stepping on the soil, compacting it.
- Raised Beds: Raised beds offer numerous advantages, especially for poor soil, heavy clay, or rocky areas. They provide better drainage, warm up faster in spring, reduce compaction, and make weeding and harvesting easier on your back.
- Material Options:
- Untreated Cedar: Naturally rot-resistant and chemical-free. A 4×8 ft bed, 12 inches deep, typically requires three 2x12x8 ft cedar boards, costing around $50-$60 per board (total ~$150-$180) plus corner brackets or screws. My first raised beds were cedar and are still going strong after 7 years.
- Galvanized Steel: Durable, long-lasting, and aesthetically pleasing. Brands like Vego Garden offer modular kits. A Vego Garden 17″ Tall 8-in-1 Metal Raised Garden Bed (can be configured to 4×8 ft) costs approximately $250-$300.
- Concrete Blocks/Stones: Very durable but can leach minerals (though generally safe once weathered) and can be expensive.
- Recycled Materials: Pallets (check for chemical treatment stamps like « HT » for heat-treated), old tires (controversial due to potential chemical leaching).
- Filling Raised Beds: Don’t just fill with topsoil. Use a « Hugelkultur » approach (logs, branches, leaves, then compost, then topsoil) or a mixture of 60% good quality topsoil, 30% compost, and 10% perlite or vermiculite for drainage. A 4x8x1 ft raised bed requires about 32 cubic feet (or ~1.2 cubic yards) of soil mix, which can cost $100-$200 depending on your source.
- Material Options:
Step 4: Water Management & Irrigation
Efficient water management is critical for a self sufficient garden from scratch, especially in off-grid living where water resources might be limited.
- Rainwater Harvesting: This is my primary source of irrigation water. A 55-gallon rain barrel (e.g., EarthMark Rain Barrel, ~$120-$150) connected to a downspout can collect significant water. For larger needs, I use two 275-gallon IBC totes (Intermediate Bulk Containers, often available used for $100-$200 each from food-grade sources) connected in series. A 1,000 sq ft roof can collect approximately 620 gallons of water for every inch of rainfall. My 1,500 sq ft roof provides ample water for my 600 sq ft garden through multiple barrels and totes.
- Drip Irrigation: This is by far the most water-efficient method, delivering water directly to the plant’s root zone, minimizing evaporation and weed growth.
- Components: A typical drip system includes a pressure regulator (e.g., Rain Bird PRV-10, ~$15), a filter (Rain Bird RBY filter, ~$20), main tubing (1/2-inch poly tubing, 100ft ~$25), smaller feeder lines (1/4-inch tubing), and emitters (0.5 GPH or 1 GPH per plant).
- Kits: For beginners, a starter kit like the Rain Bird Drip Irrigation Garden Kit (model DDI-KIT-1P, ~$40-$60) is excellent for a small garden. For larger setups, I use Netafim Techline CV Drip Line (500ft roll, ~$150-$200), which has pressure-compensating emitters built-in, ensuring even watering across long runs.
- Automation: For true self-sufficiency, consider a battery-powered timer (e.g., Orbit B-Hyve Bluetooth Hose Faucet Timer, ~$50) or a solar-powered timer connected to a small 12V pump.
- Solar-Powered Pumps: For lifting water from a well, pond, or large storage tank to your garden, a solar pump is a game-changer. For a smaller drip system, a Shurflo 2088-594-152 Diaphragm Pump (12V, 3.5 GPM, ~$180) can be powered by a single 100W solar panel (e.g., Renogy 100W Monocrystalline Solar Panel, ~$100) and a small 12V battery (e.g., a 50Ah LiFePO4 battery like the Battle Born 50Ah, ~$450). For larger operations or deeper wells, more robust systems are needed. If you’re looking to build out a comprehensive off-grid power system to support your garden’s water needs, or indeed your entire homestead, you might want to explore resources like the Power Grid Generator complete system guide to understand the full scope of what’s possible in terms of energy independence.
Step 5: Seed Selection & Planting
The choice of seeds is crucial for a truly self sufficient garden from scratch.
- Choose Heirloom & Open-Pollinated Seeds: These varieties produce seeds that will grow true to type, meaning you can save seeds from your harvest year after year. F1 hybrids, while often vigorous, will not produce consistent offspring from saved seeds. Reputable seed companies include Baker Creek Heirloom Seeds, High Mowing Organic Seeds, and Seed Savers Exchange. Start with common, reliable varieties like ‘Black Krim’ tomatoes, ‘Provider’ bush beans, ‘Waltham Butternut’ squash, and ‘Black Seeded Simpson’ lettuce.
- Start Seeds Indoors (Optional but Recommended): For longer growing seasons or specific crops, starting seeds indoors gives you a head start. Use seed-starting mix (e.g., Espoma Organic Seed Starter Mix, ~$10 for 16qt bag) in seed trays (Jiffy Professional Greenhouse 72-cell kit, ~$15). Provide adequate light with LED grow lights (Barrina T5 2ft 4-pack LED Grow Lights, 20W each, ~$50) for 14-16 hours a day, positioned 2-4 inches above seedlings. Maintain consistent temperatures (65-75°F for most).
- Direct Sowing vs. Transplanting: Some crops (carrots, radishes, beans, corn) prefer direct sowing into the garden bed. Others (tomatoes, peppers, broccoli, kale) benefit from being started indoors and transplanted. Follow seed packet instructions for planting depths (e.g., lettuce seeds are often surface-sown or planted 1/8 inch deep, while beans are 1 inch deep) and spacing.
- Companion Planting: Strategically plant different species together to enhance growth, deter pests, and attract beneficial insects. For example, planting marigolds near tomatoes can deter nematodes, and basil improves tomato flavor. Nasturtiums can act as a trap crop for aphids.
- Succession Planting: For a continuous harvest, plant small batches of quick-growing crops (lettuce, radishes, cilantro) every 2-3 weeks. As one crop finishes, another is ready to take its place.
Step 6: Pest & Disease Management (Organic)
Maintaining a self sufficient garden from scratch means embracing organic pest and disease control.
- Integrated Pest Management (IPM): This holistic approach combines several strategies.
- Observation: Regularly inspect your plants for early signs of pests or disease. Catching issues early is key.
- Physical Barriers: Use row covers (e.g., Agribon AG-19 floating row cover, 10×20 ft, ~$20) to protect young plants from insect pests like cabbage worms and squash bugs. Install fences (e.g., 2×4 welded wire mesh, 4 ft tall, 50 ft roll ~$70) to keep out deer, rabbits, and other larger animals.
- Hand-Picking: For larger pests like tomato hornworms or squash bugs, simply pick them off and drop them into a bucket of soapy water.
- Companion Planting: As mentioned, certain plants repel pests. Marigolds, garlic, and onions are excellent deterrents.
- Attract Beneficial Insects: Plant flowers like dill, fennel, cosmos, and sweet alyssum to attract ladybugs, lacewings, and parasitic wasps, which prey on common garden pests.
- Organic Sprays & Treatments:
- Neem Oil: An excellent broad-spectrum organic insecticide and fungicide. Bonide Neem Oil Concentrate (16oz, ~$20) can be mixed at a rate of 1-2 tbsp per gallon of water and sprayed on affected plants.
- Insecticidal Soap: Effective against soft-bodied insects like aphids, whiteflies, and spider mites. Garden Safe Insecticidal Soap (24oz ready-to-use, ~$10).
- Bacillus thuringiensis (Bt): A naturally occurring soil bacterium that targets caterpillars and worms. Monterey BT Worm & Caterpillar Killer (16oz, ~$18) is highly effective and safe for beneficial insects.
- Copper or Sulfur Sprays: For fungal diseases like powdery mildew or blight, organic copper (e.g., Bonide Copper Fungicide, ~$15 for 1lb) or sulfur (e.g., Safer Brand Garden Fungicide, ~$10 for 16oz) can be used as a last resort.
Step 7: Harvesting & Seed Saving
The culmination of your efforts is the harvest, and seed saving closes the loop on self-sufficiency.
- Harvesting Techniques:
- Timing: Harvest vegetables at their peak ripeness for best flavor and nutritional value. For example, green beans should snap cleanly, cucumbers should be firm, and tomatoes should be fully colored.
- Frequency: Many crops, like zucchini, cucumbers, and bush beans, produce more if harvested frequently. Pick daily or every other day.
- Tools: Use clean, sharp pruners (e.g., Corona ClassicCUT Bypass Pruner BP 3180, ~$30) or a sharp knife for clean cuts, minimizing damage to the plant.
- Seed Saving: This is where the « self-sufficient » aspect truly shines.
- Selection: Only save seeds from your healthiest, most vigorous plants that show desired traits (disease resistance, good flavor, high yield).
- Isolation: To ensure true-to-type seeds, prevent cross-pollination. This can be challenging for open-pollinated crops that readily cross (e.g., squash, corn). For beginners, focus on self-pollinating plants like beans, peas, lettuce, and tomatoes.
- Processing:
- Dry Seeds (Beans, Peas, Lettuce, Grains): Allow pods/seed heads to dry completely on the plant. Harvest, shell, and clean the seeds, removing chaff.
- Wet Seeds (Tomatoes, Cucumbers, Squash): For tomatoes, ferment the seeds in water for a few days to remove the gel coating and inhibit disease. For cucumbers/squash, scrape out seeds, wash thoroughly, and dry.
- Drying: Spread seeds thinly on screens or paper plates in a cool, dry, well-ventilated area for 1-4 weeks. Ensure they are bone-dry before storage. I aim for less than 8% moisture content.
- Storage: Store seeds in airtight containers (glass jars with desiccant packets work well) in a cool, dark, dry place (ideally 40-50°F and 30-40% humidity). Label clearly with variety and date. Properly stored seeds can remain viable for 3-10 years or more.
Step 8: Season Extension & Winterizing
Extend your harvest and protect your garden for the off-season to truly maximize your self sufficient garden from scratch.
- Cold Frames: Simple structures with a transparent top (glass, polycarbonate, or old windows) that sit over garden beds. They trap solar heat, allowing you to grow cold-hardy crops (lettuce, spinach, kale, radishes) well into winter or start seeds earlier in spring. A basic cold frame can be built from 2×6 lumber and a sheet of polycarbonate for under $100.
- Hoop Houses/Low Tunnels: Larger structures made from flexible hoops (PVC pipe or EMT conduit) covered with greenhouse plastic. These provide more space and greater temperature moderation. A 10×20 ft DIY low tunnel kit can cost $200-$500, while a larger, more robust hoop house kit might be $1,000-$3,000. I use a 6×12 ft low tunnel made from 1/2-inch PVC hoops and 6mil greenhouse plastic, which extends my lettuce and spinach harvest by at least
Efficient water management is critical for a self sufficient garden from scratch, especially in off-grid living where water resources might be limited.
- Rainwater Harvesting: This is my primary source of irrigation water. A 55-gallon rain barrel (e.g., EarthMark Rain Barrel, ~$120-$150) connected to a downspout can collect significant water. For larger needs, I use two 275-gallon IBC totes (Intermediate Bulk Containers, often available used for $100-$200 each from food-grade sources) connected in series. A 1,000 sq ft roof can collect approximately 620 gallons of water for every inch of rainfall. My 1,500 sq ft roof provides ample water for my 600 sq ft garden through multiple barrels and totes.
- Drip Irrigation: This is by far the most water-efficient method, delivering water directly to the plant’s root zone, minimizing evaporation and weed growth.
- Components: A typical drip system includes a pressure regulator (e.g., Rain Bird PRV-10, ~$15), a filter (Rain Bird RBY filter, ~$20), main tubing (1/2-inch poly tubing, 100ft ~$25), smaller feeder lines (1/4-inch tubing), and emitters (0.5 GPH or 1 GPH per plant).
- Kits: For beginners, a starter kit like the Rain Bird Drip Irrigation Garden Kit (model DDI-KIT-1P, ~$40-$60) is excellent for a small garden. For larger setups, I use Netafim Techline CV Drip Line (500ft roll, ~$150-$200), which has pressure-compensating emitters built-in, ensuring even watering across long runs.
- Automation: For true self-sufficiency, consider a battery-powered timer (e.g., Orbit B-Hyve Bluetooth Hose Faucet Timer, ~$50) or a solar-powered timer connected to a small 12V pump.
- Solar-Powered Pumps: For lifting water from a well, pond, or large storage tank to your garden, a solar pump is a game-changer. For a smaller drip system, a Shurflo 2088-594-152 Diaphragm Pump (12V, 3.5 GPM, ~$180) can be powered by a single 100W solar panel (e.g., Renogy 100W Monocrystalline Solar Panel, ~$100) and a small 12V battery (e.g., a 50Ah LiFePO4 battery like the Battle Born 50Ah, ~$450). For larger operations or deeper wells, more robust systems are needed. If you’re looking to build out a comprehensive off-grid power system to support your garden’s water needs, or indeed your entire homestead, you might want to explore resources like the Power Grid Generator complete system guide to understand the full scope of what’s possible in terms of energy independence.
Step 5: Seed Selection & Planting
The choice of seeds is crucial for a truly self sufficient garden from scratch.
- Choose Heirloom & Open-Pollinated Seeds: These varieties produce seeds that will grow true to type, meaning you can save seeds from your harvest year after year. F1 hybrids, while often vigorous, will not produce consistent offspring from saved seeds. Reputable seed companies include Baker Creek Heirloom Seeds, High Mowing Organic Seeds, and Seed Savers Exchange. Start with common, reliable varieties like ‘Black Krim’ tomatoes, ‘Provider’ bush beans, ‘Waltham Butternut’ squash, and ‘Black Seeded Simpson’ lettuce.
- Start Seeds Indoors (Optional but Recommended): For longer growing seasons or specific crops, starting seeds indoors gives you a head start. Use seed-starting mix (e.g., Espoma Organic Seed Starter Mix, ~$10 for 16qt bag) in seed trays (Jiffy Professional Greenhouse 72-cell kit, ~$15). Provide adequate light with LED grow lights (Barrina T5 2ft 4-pack LED Grow Lights, 20W each, ~$50) for 14-16 hours a day, positioned 2-4 inches above seedlings. Maintain consistent temperatures (65-75°F for most).
- Direct Sowing vs. Transplanting: Some crops (carrots, radishes, beans, corn) prefer direct sowing into the garden bed. Others (tomatoes, peppers, broccoli, kale) benefit from being started indoors and transplanted. Follow seed packet instructions for planting depths (e.g., lettuce seeds are often surface-sown or planted 1/8 inch deep, while beans are 1 inch deep) and spacing.
- Companion Planting: Strategically plant different species together to enhance growth, deter pests, and attract beneficial insects. For example, planting marigolds near tomatoes can deter nematodes, and basil improves tomato flavor. Nasturtiums can act as a trap crop for aphids.
- Succession Planting: For a continuous harvest, plant small batches of quick-growing crops (lettuce, radishes, cilantro) every 2-3 weeks. As one crop finishes, another is ready to take its place.
Step 6: Pest & Disease Management (Organic)
Maintaining a self sufficient garden from scratch means embracing organic pest and disease control.
- Integrated Pest Management (IPM): This holistic approach combines several strategies.
- Observation: Regularly inspect your plants for early signs of pests or disease. Catching issues early is key.
- Physical Barriers: Use row covers (e.g., Agribon AG-19 floating row cover, 10×20 ft, ~$20) to protect young plants from insect pests like cabbage worms and squash bugs. Install fences (e.g., 2×4 welded wire mesh, 4 ft tall, 50 ft roll ~$70) to keep out deer, rabbits, and other larger animals.
- Hand-Picking: For larger pests like tomato hornworms or squash bugs, simply pick them off and drop them into a bucket of soapy water.
- Companion Planting: As mentioned, certain plants repel pests. Marigolds, garlic, and onions are excellent deterrents.
- Attract Beneficial Insects: Plant flowers like dill, fennel, cosmos, and sweet alyssum to attract ladybugs, lacewings, and parasitic wasps, which prey on common garden pests.
- Organic Sprays & Treatments:
- Neem Oil: An excellent broad-spectrum organic insecticide and fungicide. Bonide Neem Oil Concentrate (16oz, ~$20) can be mixed at a rate of 1-2 tbsp per gallon of water and sprayed on affected plants.
- Insecticidal Soap: Effective against soft-bodied insects like aphids, whiteflies, and spider mites. Garden Safe Insecticidal Soap (24oz ready-to-use, ~$10).
- Bacillus thuringiensis (Bt): A naturally occurring soil bacterium that targets caterpillars and worms. Monterey BT Worm & Caterpillar Killer (16oz, ~$18) is highly effective and safe for beneficial insects.
- Copper or Sulfur Sprays: For fungal diseases like powdery mildew or blight, organic copper (e.g., Bonide Copper Fungicide, ~$15 for 1lb) or sulfur (e.g., Safer Brand Garden Fungicide, ~$10 for 16oz) can be used as a last resort.
Step 7: Harvesting & Seed Saving
The culmination of your efforts is the harvest, and seed saving closes the loop on self-sufficiency.
- Harvesting Techniques:
- Timing: Harvest vegetables at their peak ripeness for best flavor and nutritional value. For example, green beans should snap cleanly, cucumbers should be firm, and tomatoes should be fully colored.
- Frequency: Many crops, like zucchini, cucumbers, and bush beans, produce more if harvested frequently. Pick daily or every other day.
- Tools: Use clean, sharp pruners (e.g., Corona ClassicCUT Bypass Pruner BP 3180, ~$30) or a sharp knife for clean cuts, minimizing damage to the plant.
- Seed Saving: This is where the « self-sufficient » aspect truly shines.
- Selection: Only save seeds from your healthiest, most vigorous plants that show desired traits (disease resistance, good flavor, high yield).
- Isolation: To ensure true-to-type seeds, prevent cross-pollination. This can be challenging for open-pollinated crops that readily cross (e.g., squash, corn). For beginners, focus on self-pollinating plants like beans, peas, lettuce, and tomatoes.
- Processing:
- Dry Seeds (Beans, Peas, Lettuce, Grains): Allow pods/seed heads to dry completely on the plant. Harvest, shell, and clean the seeds, removing chaff.
- Wet Seeds (Tomatoes, Cucumbers, Squash): For tomatoes, ferment the seeds in water for a few days to remove the gel coating and inhibit disease. For cucumbers/squash, scrape out seeds, wash thoroughly, and dry.
- Drying: Spread seeds thinly on screens or paper plates in a cool, dry, well-ventilated area for 1-4 weeks. Ensure they are bone-dry before storage. I aim for less than 8% moisture content.
- Storage: Store seeds in airtight containers (glass jars with desiccant packets work well) in a cool, dark, dry place (ideally 40-50°F and 30-40% humidity). Label clearly with variety and date. Properly stored seeds can remain viable for 3-10 years or more.
Step 8: Season Extension & Winterizing
Extend your harvest and protect your garden for the off-season to truly maximize your self sufficient garden from scratch.
- Cold Frames: Simple structures with a transparent top (glass, polycarbonate, or old windows) that sit over garden beds. They trap solar heat, allowing you to grow cold-hardy crops (lettuce, spinach, kale, radishes) well into winter or start seeds earlier in spring. A basic cold frame can be built from 2×6 lumber and a sheet of polycarbonate for under $100.
- Hoop Houses/Low Tunnels: Larger structures made from flexible hoops (PVC pipe or EMT conduit) covered with greenhouse plastic. These provide more space and greater temperature moderation. A 10×20 ft DIY low tunnel kit can cost $200-$500, while a larger, more robust hoop house kit might be $1,000-$3,000. I use a 6×12 ft low tunnel made from 1/2-inch PVC hoops and 6mil greenhouse plastic, which extends my lettuce and spinach harvest by at least
Healthy soil is the bedrock of a productive, self-sufficient garden. You can’t guess what your soil needs; you have to test it.
- Perform a Soil Test: A professional soil test will give you precise data on your soil’s pH, nutrient levels (N-P-K), and organic matter content. I recommend sending a sample to your local agricultural extension office; it typically costs $20-$50 and provides detailed recommendations. Alternatively, for a quick homeowner check, a Rapitest Soil Test Kit (40-test kit, model 1663, ~$20 on Amazon) provides a good baseline for pH, Nitrogen, Phosphorus, and Potash. Aim for a pH between 6.0 and 7.0 for most vegetables.
- Amend for pH Imbalance: If your soil is too acidic (below 6.0), add agricultural lime (dolomitic lime adds magnesium, calcitic lime adds calcium). Apply 5-10 lbs per 100 sq ft for a moderate adjustment. If it’s too alkaline (above 7.0), add elemental sulfur (e.g., Espoma Soil Acidifier, ~$15 for 6.75 lbs) or generous amounts of organic matter like peat moss or pine needles.
- Build Organic Matter: This is the single most important step for long-term soil health. Organic matter improves soil structure, water retention, drainage, and nutrient availability. Incorporate 2-4 inches of high-quality compost into your top 6-12 inches of soil annually. I make my own compost from kitchen scraps, garden waste, and shredded leaves, but you can purchase it. Local nurseries often sell bulk compost for $30-$50 per cubic yard. Aged manure (from chickens, cows, or horses – ensure it’s well-rotted to avoid burning plants) is also excellent.
- Address Nutrient Deficiencies: Based on your soil test, add specific organic amendments. If Nitrogen (N) is low, add blood meal (12-0-0, ~$20 for 3 lbs) or feather meal. For Phosphorus (P), use bone meal (3-15-0, ~$15 for 3 lbs) or rock phosphate. For Potassium (K), greensand (0-0-2.5, ~$25 for 5 lbs) or kelp meal are good choices. I rely heavily on Espoma Organic Garden-tone (5-3-3, ~$25 for an 8lb bag) as a balanced, all-purpose organic fertilizer during planting.
Step 3: Garden Bed Preparation
Deciding between raised beds and in-ground beds depends on your soil, budget, and physical capabilities.
- In-Ground Beds: If you have excellent native soil and good drainage, in-ground beds are the most economical. Double-digging (loosening soil two shovel depths) can significantly improve drainage and aeration. For my main garden, I primarily use in-ground beds, but I focus on building up the soil over time with consistent compost additions and cover cropping. I aim for beds that are no wider than 3-4 feet so I can reach the center without stepping on the soil, compacting it.
- Raised Beds: Raised beds offer numerous advantages, especially for poor soil, heavy clay, or rocky areas. They provide better drainage, warm up faster in spring, reduce compaction, and make weeding and harvesting easier on your back.
- Material Options:
- Untreated Cedar: Naturally rot-resistant and chemical-free. A 4×8 ft bed, 12 inches deep, typically requires three 2x12x8 ft cedar boards, costing around $50-$60 per board (total ~$150-$180) plus corner brackets or screws. My first raised beds were cedar and are still going strong after 7 years.
- Galvanized Steel: Durable, long-lasting, and aesthetically pleasing. Brands like Vego Garden offer modular kits. A Vego Garden 17″ Tall 8-in-1 Metal Raised Garden Bed (can be configured to 4×8 ft) costs approximately $250-$300.
- Concrete Blocks/Stones: Very durable but can leach minerals (though generally safe once weathered) and can be expensive.
- Recycled Materials: Pallets (check for chemical treatment stamps like « HT » for heat-treated), old tires (controversial due to potential chemical leaching).
- Filling Raised Beds: Don’t just fill with topsoil. Use a « Hugelkultur » approach (logs, branches, leaves, then compost, then topsoil) or a mixture of 60% good quality topsoil, 30% compost, and 10% perlite or vermiculite for drainage. A 4x8x1 ft raised bed requires about 32 cubic feet (or ~1.2 cubic yards) of soil mix, which can cost $100-$200 depending on your source.
- Material Options:
Step 4: Water Management & Irrigation
Efficient water management is critical for a self sufficient garden from scratch, especially in off-grid living where water resources might be limited.
- Rainwater Harvesting: This is my primary source of irrigation water. A 55-gallon rain barrel (e.g., EarthMark Rain Barrel, ~$120-$150) connected to a downspout can collect significant water. For larger needs, I use two 275-gallon IBC totes (Intermediate Bulk Containers, often available used for $100-$200 each from food-grade sources) connected in series. A 1,000 sq ft roof can collect approximately 620 gallons of water for every inch of rainfall. My 1,500 sq ft roof provides ample water for my 600 sq ft garden through multiple barrels and totes.
- Drip Irrigation: This is by far the most water-efficient method, delivering water directly to the plant’s root zone, minimizing evaporation and weed growth.
- Components: A typical drip system includes a pressure regulator (e.g., Rain Bird PRV-10, ~$15), a filter (Rain Bird RBY filter, ~$20), main tubing (1/2-inch poly tubing, 100ft ~$25), smaller feeder lines (1/4-inch tubing), and emitters (0.5 GPH or 1 GPH per plant).
- Kits: For beginners, a starter kit like the Rain Bird Drip Irrigation Garden Kit (model DDI-KIT-1P, ~$40-$60) is excellent for a small garden. For larger setups, I use Netafim Techline CV Drip Line (500ft roll, ~$150-$200), which has pressure-compensating emitters built-in, ensuring even watering across long runs.
- Automation: For true self-sufficiency, consider a battery-powered timer (e.g., Orbit B-Hyve Bluetooth Hose Faucet Timer, ~$50) or a solar-powered timer connected to a small 12V pump.
- Solar-Powered Pumps: For lifting water from a well, pond, or large storage tank to your garden, a solar pump is a game-changer. For a smaller drip system, a Shurflo 2088-594-152 Diaphragm Pump (12V, 3.5 GPM, ~$180) can be powered by a single 100W solar panel (e.g., Renogy 100W Monocrystalline Solar Panel, ~$100) and a small 12V battery (e.g., a 50Ah LiFePO4 battery like the Battle Born 50Ah, ~$450). For larger operations or deeper wells, more robust systems are needed. If you’re looking to build out a comprehensive off-grid power system to support your garden’s water needs, or indeed your entire homestead, you might want to explore resources like the Power Grid Generator complete system guide to understand the full scope of what’s possible in terms of energy independence.
Step 5: Seed Selection & Planting
The choice of seeds is crucial for a truly self sufficient garden from scratch.
- Choose Heirloom & Open-Pollinated Seeds: These varieties produce seeds that will grow true to type, meaning you can save seeds from your harvest year after year. F1 hybrids, while often vigorous, will not produce consistent offspring from saved seeds. Reputable seed companies include Baker Creek Heirloom Seeds, High Mowing Organic Seeds, and Seed Savers Exchange. Start with common, reliable varieties like ‘Black Krim’ tomatoes, ‘Provider’ bush beans, ‘Waltham Butternut’ squash, and ‘Black Seeded Simpson’ lettuce.
- Start Seeds Indoors (Optional but Recommended): For longer growing seasons or specific crops, starting seeds indoors gives you a head start. Use seed-starting mix (e.g., Espoma Organic Seed Starter Mix, ~$10 for 16qt bag) in seed trays (Jiffy Professional Greenhouse 72-cell kit, ~$15). Provide adequate light with LED grow lights (Barrina T5 2ft 4-pack LED Grow Lights, 20W each, ~$50) for 14-16 hours a day, positioned 2-4 inches above seedlings. Maintain consistent temperatures (65-75°F for most).
- Direct Sowing vs. Transplanting: Some crops (carrots, radishes, beans, corn) prefer direct sowing into the garden bed. Others (tomatoes, peppers, broccoli, kale) benefit from being started indoors and transplanted. Follow seed packet instructions for planting depths (e.g., lettuce seeds are often surface-sown or planted 1/8 inch deep, while beans are 1 inch deep) and spacing.
- Companion Planting: Strategically plant different species together to enhance growth, deter pests, and attract beneficial insects. For example, planting marigolds near tomatoes can deter nematodes, and basil improves tomato flavor. Nasturtiums can act as a trap crop for aphids.
- Succession Planting: For a continuous harvest, plant small batches of quick-growing crops (lettuce, radishes, cilantro) every 2-3 weeks. As one crop finishes, another is ready to take its place.
Step 6: Pest & Disease Management (Organic)
Maintaining a self sufficient garden from scratch means embracing organic pest and disease control.
- Integrated Pest Management (IPM): This holistic approach combines several strategies.
- Observation: Regularly inspect your plants for early signs of pests or disease. Catching issues early is key.
- Physical Barriers: Use row covers (e.g., Agribon AG-19 floating row cover, 10×20 ft, ~$20) to protect young plants from insect pests like cabbage worms and squash bugs. Install fences (e.g., 2×4 welded wire mesh, 4 ft tall, 50 ft roll ~$70) to keep out deer, rabbits, and other larger animals.
- Hand-Picking: For larger pests like tomato hornworms or squash bugs, simply pick them off and drop them into a bucket of soapy water.
- Companion Planting: As mentioned, certain plants repel pests. Marigolds, garlic, and onions are excellent deterrents.
- Attract Beneficial Insects: Plant flowers like dill, fennel, cosmos, and sweet alyssum to attract ladybugs, lacewings, and parasitic wasps, which prey on common garden pests.
- Organic Sprays & Treatments:
- Neem Oil: An excellent broad-spectrum organic insecticide and fungicide. Bonide Neem Oil Concentrate (16oz, ~$20) can be mixed at a rate of 1-2 tbsp per gallon of water and sprayed on affected plants.
- Insecticidal Soap: Effective against soft-bodied insects like aphids, whiteflies, and spider mites. Garden Safe Insecticidal Soap (24oz ready-to-use, ~$10).
- Bacillus thuringiensis (Bt): A naturally occurring soil bacterium that targets caterpillars and worms. Monterey BT Worm & Caterpillar Killer (16oz, ~$18) is highly effective and safe for beneficial insects.
- Copper or Sulfur Sprays: For fungal diseases like powdery mildew or blight, organic copper (e.g., Bonide Copper Fungicide, ~$15 for 1lb) or sulfur (e.g., Safer Brand Garden Fungicide, ~$10 for 16oz) can be used as a last resort.
Step 7: Harvesting & Seed Saving
The culmination of your efforts is the harvest, and seed saving closes the loop on self-sufficiency.
- Harvesting Techniques:
- Timing: Harvest vegetables at their peak ripeness for best flavor and nutritional value. For example, green beans should snap cleanly, cucumbers should be firm, and tomatoes should be fully colored.
- Frequency: Many crops, like zucchini, cucumbers, and bush beans, produce more if harvested frequently. Pick daily or every other day.
- Tools: Use clean, sharp pruners (e.g., Corona ClassicCUT Bypass Pruner BP 3180, ~$30) or a sharp knife for clean cuts, minimizing damage to the plant.
- Seed Saving: This is where the « self-sufficient » aspect truly shines.
- Selection: Only save seeds from your healthiest, most vigorous plants that show desired traits (disease resistance, good flavor, high yield).
- Isolation: To ensure true-to-type seeds, prevent cross-pollination. This can be challenging for open-pollinated crops that readily cross (e.g., squash, corn). For beginners, focus on self-pollinating plants like beans, peas, lettuce, and tomatoes.
- Processing:
- Dry Seeds (Beans, Peas, Lettuce, Grains): Allow pods/seed heads to dry completely on the plant. Harvest, shell, and clean the seeds, removing chaff.
- Wet Seeds (Tomatoes, Cucumbers, Squash): For tomatoes, ferment the seeds in water for a few days to remove the gel coating and inhibit disease. For cucumbers/squash, scrape out seeds, wash thoroughly, and dry.
- Drying: Spread seeds thinly on screens or paper plates in a cool, dry, well-ventilated area for 1-4 weeks. Ensure they are bone-dry before storage. I aim for less than 8% moisture content.
- Storage: Store seeds in airtight containers (glass jars with desiccant packets work well) in a cool, dark, dry place (ideally 40-50°F and 30-40% humidity). Label clearly with variety and date. Properly stored seeds can remain viable for 3-10 years or more.
Step 8: Season Extension & Winterizing
Extend your harvest and protect your garden for the off-season to truly maximize your self sufficient garden from scratch.
- Cold Frames: Simple structures with a transparent top (glass, polycarbonate, or old windows) that sit over garden beds. They trap solar heat, allowing you to grow cold-hardy crops (lettuce, spinach, kale, radishes) well into winter or start seeds earlier in spring. A basic cold frame can be built from 2×6 lumber and a sheet of polycarbonate for under $100.
- Hoop Houses/Low Tunnels: Larger structures made from flexible hoops (PVC pipe or EMT conduit) covered with greenhouse plastic. These provide more space and greater temperature moderation. A 10×20 ft DIY low tunnel kit can cost $200-$500, while a larger, more robust hoop house kit might be $1,000-$3,000. I use a 6×12 ft low tunnel made from 1/2-inch PVC hoops and 6mil greenhouse plastic, which extends my lettuce and spinach harvest by at least
Step 4: Water Management & Irrigation
Efficient water management is critical for a self sufficient garden from scratch, especially in off-grid living where water resources might be limited.
- Rainwater Harvesting: This is my primary source of irrigation water. A 55-gallon rain barrel (e.g., EarthMark Rain Barrel, ~$120-$150) connected to a downspout can collect significant water. For larger needs, I use two 275-gallon IBC totes (Intermediate Bulk Containers, often available used for $100-$200 each from food-grade sources) connected in series. A 1,000 sq ft roof can collect approximately 620 gallons of water for every inch of rainfall. My 1,500 sq ft roof provides ample water for my 600 sq ft garden through multiple barrels and totes.
- Drip Irrigation: This is by far the most water-efficient method, delivering water directly to the plant’s root zone, minimizing evaporation and weed growth.
- Components: A typical drip system includes a pressure regulator (e.g., Rain Bird PRV-10, ~$15), a filter (Rain Bird RBY filter, ~$20), main tubing (1/2-inch poly tubing, 100ft ~$25), smaller feeder lines (1/4-inch tubing), and emitters (0.5 GPH or 1 GPH per plant).
- Kits: For beginners, a starter kit like the Rain Bird Drip Irrigation Garden Kit (model DDI-KIT-1P, ~$40-$60) is excellent for a small garden. For larger setups, I use Netafim Techline CV Drip Line (500ft roll, ~$150-$200), which has pressure-compensating emitters built-in, ensuring even watering across long runs.
- Automation: For true self-sufficiency, consider a battery-powered timer (e.g., Orbit B-Hyve Bluetooth Hose Faucet Timer, ~$50) or a solar-powered timer connected to a small 12V pump.
- Solar-Powered Pumps: For lifting water from a well, pond, or large storage tank to your garden, a solar pump is a game-changer. For a smaller drip system, a Shurflo 2088-594-152 Diaphragm Pump (12V, 3.5 GPM, ~$180) can be powered by a single 100W solar panel (e.g., Renogy 100W Monocrystalline Solar Panel, ~$100) and a small 12V battery (e.g., a 50Ah LiFePO4 battery like the Battle Born 50Ah, ~$450). For larger operations or deeper wells, more robust systems are needed. If you’re looking to build out a comprehensive off-grid power system to support your garden’s water needs, or indeed your entire homestead, you might want to explore resources like the Power Grid Generator complete system guide to understand the full scope of what’s possible in terms of energy independence.
Step 5: Seed Selection & Planting
The choice of seeds is crucial for a truly self sufficient garden from scratch.
- Choose Heirloom & Open-Pollinated Seeds: These varieties produce seeds that will grow true to type, meaning you can save seeds from your harvest year after year. F1 hybrids, while often vigorous, will not produce consistent offspring from saved seeds. Reputable seed companies include Baker Creek Heirloom Seeds, High Mowing Organic Seeds, and Seed Savers Exchange. Start with common, reliable varieties like ‘Black Krim’ tomatoes, ‘Provider’ bush beans, ‘Waltham Butternut’ squash, and ‘Black Seeded Simpson’ lettuce.
- Start Seeds Indoors (Optional but Recommended): For longer growing seasons or specific crops, starting seeds indoors gives you a head start. Use seed-starting mix (e.g., Espoma Organic Seed Starter Mix, ~$10 for 16qt bag) in seed trays (Jiffy Professional Greenhouse 72-cell kit, ~$15). Provide adequate light with LED grow lights (Barrina T5 2ft 4-pack LED Grow Lights, 20W each, ~$50) for 14-16 hours a day, positioned 2-4 inches above seedlings. Maintain consistent temperatures (65-75°F for most).
- Direct Sowing vs. Transplanting: Some crops (carrots, radishes, beans, corn) prefer direct sowing into the garden bed. Others (tomatoes, peppers, broccoli, kale) benefit from being started indoors and transplanted. Follow seed packet instructions for planting depths (e.g., lettuce seeds are often surface-sown or planted 1/8 inch deep, while beans are 1 inch deep) and spacing.
- Companion Planting: Strategically plant different species together to enhance growth, deter pests, and attract beneficial insects. For example, planting marigolds near tomatoes can deter nematodes, and basil improves tomato flavor. Nasturtiums can act as a trap crop for aphids.
- Succession Planting: For a continuous harvest, plant small batches of quick-growing crops (lettuce, radishes, cilantro) every 2-3 weeks. As one crop finishes, another is ready to take its place.
Step 6: Pest & Disease Management (Organic)
Maintaining a self sufficient garden from scratch means embracing organic pest and disease control.
- Integrated Pest Management (IPM): This holistic approach combines several strategies.
- Observation: Regularly inspect your plants for early signs of pests or disease. Catching issues early is key.
- Physical Barriers: Use row covers (e.g., Agribon AG-19 floating row cover, 10×20 ft, ~$20) to protect young plants from insect pests like cabbage worms and squash bugs. Install fences (e.g., 2×4 welded wire mesh, 4 ft tall, 50 ft roll ~$70) to keep out deer, rabbits, and other larger animals.
- Hand-Picking: For larger pests like tomato hornworms or squash bugs, simply pick them off and drop them into a bucket of soapy water.
- Companion Planting: As mentioned, certain plants repel pests. Marigolds, garlic, and onions are excellent deterrents.
- Attract Beneficial Insects: Plant flowers like dill, fennel, cosmos, and sweet alyssum to attract ladybugs, lacewings, and parasitic wasps, which prey on common garden pests.
- Organic Sprays & Treatments:
- Neem Oil: An excellent broad-spectrum organic insecticide and fungicide. Bonide Neem Oil Concentrate (16oz, ~$20) can be mixed at a rate of 1-2 tbsp per gallon of water and sprayed on affected plants.
- Insecticidal Soap: Effective against soft-bodied insects like aphids, whiteflies, and spider mites. Garden Safe Insecticidal Soap (24oz ready-to-use, ~$10).
- Bacillus thuringiensis (Bt): A naturally occurring soil bacterium that targets caterpillars and worms. Monterey BT Worm & Caterpillar Killer (16oz, ~$18) is highly effective and safe for beneficial insects.
- Copper or Sulfur Sprays: For fungal diseases like powdery mildew or blight, organic copper (e.g., Bonide Copper Fungicide, ~$15 for 1lb) or sulfur (e.g., Safer Brand Garden Fungicide, ~$10 for 16oz) can be used as a last resort.
Step 7: Harvesting & Seed Saving
The culmination of your efforts is the harvest, and seed saving closes the loop on self-sufficiency.
- Harvesting Techniques:
- Timing: Harvest vegetables at their peak ripeness for best flavor and nutritional value. For example, green beans should snap cleanly, cucumbers should be firm, and tomatoes should be fully colored.
- Frequency: Many crops, like zucchini, cucumbers, and bush beans, produce more if harvested frequently. Pick daily or every other day.
- Tools: Use clean, sharp pruners (e.g., Corona ClassicCUT Bypass Pruner BP 3180, ~$30) or a sharp knife for clean cuts, minimizing damage to the plant.
- Seed Saving: This is where the « self-sufficient » aspect truly shines.
- Selection: Only save seeds from your healthiest, most vigorous plants that show desired traits (disease resistance, good flavor, high yield).
- Isolation: To ensure true-to-type seeds, prevent cross-pollination. This can be challenging for open-pollinated crops that readily cross (e.g., squash, corn). For beginners, focus on self-pollinating plants like beans, peas, lettuce, and tomatoes.
- Processing:
- Dry Seeds (Beans, Peas, Lettuce, Grains): Allow pods/seed heads to dry completely on the plant. Harvest, shell, and clean the seeds, removing chaff.
- Wet Seeds (Tomatoes, Cucumbers, Squash): For tomatoes, ferment the seeds in water for a few days to remove the gel coating and inhibit disease. For cucumbers/squash, scrape out seeds, wash thoroughly, and dry.
- Drying: Spread seeds thinly on screens or paper plates in a cool, dry, well-ventilated area for 1-4 weeks. Ensure they are bone-dry before storage. I aim for less than 8% moisture content.
- Storage: Store seeds in airtight containers (glass jars with desiccant packets work well) in a cool, dark, dry place (ideally 40-50°F and 30-40% humidity). Label clearly with variety and date. Properly stored seeds can remain viable for 3-10 years or more.
Step 8: Season Extension & Winterizing
Extend your harvest and protect your garden for the off-season to truly maximize your self sufficient garden from scratch.
- Cold Frames: Simple structures with a transparent top (glass, polycarbonate, or old windows) that sit over garden beds. They trap solar heat, allowing you to grow cold-hardy crops (lettuce, spinach, kale, radishes) well into winter or start seeds earlier in spring. A basic cold frame can be built from 2×6 lumber and a sheet of polycarbonate for under $100.
- Hoop Houses/Low Tunnels: Larger structures made from flexible hoops (PVC pipe or EMT conduit) covered with greenhouse plastic. These provide more space and greater temperature moderation. A 10×20 ft DIY low tunnel kit can cost $200-$500, while a larger, more robust hoop house kit might be $1,000-$3,000. I use a 6×12 ft low tunnel made from 1/2-inch PVC hoops and 6mil greenhouse plastic, which extends my lettuce and spinach harvest by at least
Healthy soil is the bedrock of a productive, self-sufficient garden. You can’t guess what your soil needs; you have to test it.
- Perform a Soil Test: A professional soil test will give you precise data on your soil’s pH, nutrient levels (N-P-K), and organic matter content. I recommend sending a sample to your local agricultural extension office; it typically costs $20-$50 and provides detailed recommendations. Alternatively, for a quick homeowner check, a Rapitest Soil Test Kit (40-test kit, model 1663, ~$20 on Amazon) provides a good baseline for pH, Nitrogen, Phosphorus, and Potash. Aim for a pH between 6.0 and 7.0 for most vegetables.
- Amend for pH Imbalance: If your soil is too acidic (below 6.0), add agricultural lime (dolomitic lime adds magnesium, calcitic lime adds calcium). Apply 5-10 lbs per 100 sq ft for a moderate adjustment. If it’s too alkaline (above 7.0), add elemental sulfur (e.g., Espoma Soil Acidifier, ~$15 for 6.75 lbs) or generous amounts of organic matter like peat moss or pine needles.
- Build Organic Matter: This is the single most important step for long-term soil health. Organic matter improves soil structure, water retention, drainage, and nutrient availability. Incorporate 2-4 inches of high-quality compost into your top 6-12 inches of soil annually. I make my own compost from kitchen scraps, garden waste, and shredded leaves, but you can purchase it. Local nurseries often sell bulk compost for $30-$50 per cubic yard. Aged manure (from chickens, cows, or horses – ensure it’s well-rotted to avoid burning plants) is also excellent.
- Address Nutrient Deficiencies: Based on your soil test, add specific organic amendments. If Nitrogen (N) is low, add blood meal (12-0-0, ~$20 for 3 lbs) or feather meal. For Phosphorus (P), use bone meal (3-15-0, ~$15 for 3 lbs) or rock phosphate. For Potassium (K), greensand (0-0-2.5, ~$25 for 5 lbs) or kelp meal are good choices. I rely heavily on Espoma Organic Garden-tone (5-3-3, ~$25 for an 8lb bag) as a balanced, all-purpose organic fertilizer during planting.
Step 3: Garden Bed Preparation
Deciding between raised beds and in-ground beds depends on your soil, budget, and physical capabilities.
- In-Ground Beds: If you have excellent native soil and good drainage, in-ground beds are the most economical. Double-digging (loosening soil two shovel depths) can significantly improve drainage and aeration. For my main garden, I primarily use in-ground beds, but I focus on building up the soil over time with consistent compost additions and cover cropping. I aim for beds that are no wider than 3-4 feet so I can reach the center without stepping on the soil, compacting it.
- Raised Beds: Raised beds offer numerous advantages, especially for poor soil, heavy clay, or rocky areas. They provide better drainage, warm up faster in spring, reduce compaction, and make weeding and harvesting easier on your back.
- Material Options:
- Untreated Cedar: Naturally rot-resistant and chemical-free. A 4×8 ft bed, 12 inches deep, typically requires three 2x12x8 ft cedar boards, costing around $50-$60 per board (total ~$150-$180) plus corner brackets or screws. My first raised beds were cedar and are still going strong after 7 years.
- Galvanized Steel: Durable, long-lasting, and aesthetically pleasing. Brands like Vego Garden offer modular kits. A Vego Garden 17″ Tall 8-in-1 Metal Raised Garden Bed (can be configured to 4×8 ft) costs approximately $250-$300.
- Concrete Blocks/Stones: Very durable but can leach minerals (though generally safe once weathered) and can be expensive.
- Recycled Materials: Pallets (check for chemical treatment stamps like « HT » for heat-treated), old tires (controversial due to potential chemical leaching).
- Filling Raised Beds: Don’t just fill with topsoil. Use a « Hugelkultur » approach (logs, branches, leaves, then compost, then topsoil) or a mixture of 60% good quality topsoil, 30% compost, and 10% perlite or vermiculite for drainage. A 4x8x1 ft raised bed requires about 32 cubic feet (or ~1.2 cubic yards) of soil mix, which can cost $100-$200 depending on your source.
- Material Options:
Step 4: Water Management & Irrigation
Efficient water management is critical for a self sufficient garden from scratch, especially in off-grid living where water resources might be limited.
- Rainwater Harvesting: This is my primary source of irrigation water. A 55-gallon rain barrel (e.g., EarthMark Rain Barrel, ~$120-$150) connected to a downspout can collect significant water. For larger needs, I use two 275-gallon IBC totes (Intermediate Bulk Containers, often available used for $100-$200 each from food-grade sources) connected in series. A 1,000 sq ft roof can collect approximately 620 gallons of water for every inch of rainfall. My 1,500 sq ft roof provides ample water for my 600 sq ft garden through multiple barrels and totes.
- Drip Irrigation: This is by far the most water-efficient method, delivering water directly to the plant’s root zone, minimizing evaporation and weed growth.
- Components: A typical drip system includes a pressure regulator (e.g., Rain Bird PRV-10, ~$15), a filter (Rain Bird RBY filter, ~$20), main tubing (1/2-inch poly tubing, 100ft ~$25), smaller feeder lines (1/4-inch tubing), and emitters (0.5 GPH or 1 GPH per plant).
- Kits: For beginners, a starter kit like the Rain Bird Drip Irrigation Garden Kit (model DDI-KIT-1P, ~$40-$60) is excellent for a small garden. For larger setups, I use Netafim Techline CV Drip Line (500ft roll, ~$150-$200), which has pressure-compensating emitters built-in, ensuring even watering across long runs.
- Automation: For true self-sufficiency, consider a battery-powered timer (e.g., Orbit B-Hyve Bluetooth Hose Faucet Timer, ~$50) or a solar-powered timer connected to a small 12V pump.
- Solar-Powered Pumps: For lifting water from a well, pond, or large storage tank to your garden, a solar pump is a game-changer. For a smaller drip system, a Shurflo 2088-594-152 Diaphragm Pump (12V, 3.5 GPM, ~$180) can be powered by a single 100W solar panel (e.g., Renogy 100W Monocrystalline Solar Panel, ~$100) and a small 12V battery (e.g., a 50Ah LiFePO4 battery like the Battle Born 50Ah, ~$450). For larger operations or deeper wells, more robust systems are needed. If you’re looking to build out a comprehensive off-grid power system to support your garden’s water needs, or indeed your entire homestead, you might want to explore resources like the Power Grid Generator complete system guide to understand the full scope of what’s possible in terms of energy independence.
Step 5: Seed Selection & Planting
The choice of seeds is crucial for a truly self sufficient garden from scratch.
- Choose Heirloom & Open-Pollinated Seeds: These varieties produce seeds that will grow true to type, meaning you can save seeds from your harvest year after year. F1 hybrids, while often vigorous, will not produce consistent offspring from saved seeds. Reputable seed companies include Baker Creek Heirloom Seeds, High Mowing Organic Seeds, and Seed Savers Exchange. Start with common, reliable varieties like ‘Black Krim’ tomatoes, ‘Provider’ bush beans, ‘Waltham Butternut’ squash, and ‘Black Seeded Simpson’ lettuce.
- Start Seeds Indoors (Optional but Recommended): For longer growing seasons or specific crops, starting seeds indoors gives you a head start. Use seed-starting mix (e.g., Espoma Organic Seed Starter Mix, ~$10 for 16qt bag) in seed trays (Jiffy Professional Greenhouse 72-cell kit, ~$15). Provide adequate light with LED grow lights (Barrina T5 2ft 4-pack LED Grow Lights, 20W each, ~$50) for 14-16 hours a day, positioned 2-4 inches above seedlings. Maintain consistent temperatures (65-75°F for most).
- Direct Sowing vs. Transplanting: Some crops (carrots, radishes, beans, corn) prefer direct sowing into the garden bed. Others (tomatoes, peppers, broccoli, kale) benefit from being started indoors and transplanted. Follow seed packet instructions for planting depths (e.g., lettuce seeds are often surface-sown or planted 1/8 inch deep, while beans are 1 inch deep) and spacing.
- Companion Planting: Strategically plant different species together to enhance growth, deter pests, and attract beneficial insects. For example, planting marigolds near tomatoes can deter nematodes, and basil improves tomato flavor. Nasturtiums can act as a trap crop for aphids.
- Succession Planting: For a continuous harvest, plant small batches of quick-growing crops (lettuce, radishes, cilantro) every 2-3 weeks. As one crop finishes, another is ready to take its place.
Step 6: Pest & Disease Management (Organic)
Maintaining a self sufficient garden from scratch means embracing organic pest and disease control.
- Integrated Pest Management (IPM): This holistic approach combines several strategies.
- Observation: Regularly inspect your plants for early signs of pests or disease. Catching issues early is key.
- Physical Barriers: Use row covers (e.g., Agribon AG-19 floating row cover, 10×20 ft, ~$20) to protect young plants from insect pests like cabbage worms and squash bugs. Install fences (e.g., 2×4 welded wire mesh, 4 ft tall, 50 ft roll ~$70) to keep out deer, rabbits, and other larger animals.
- Hand-Picking: For larger pests like tomato hornworms or squash bugs, simply pick them off and drop them into a bucket of soapy water.
- Companion Planting: As mentioned, certain plants repel pests. Marigolds, garlic, and onions are excellent deterrents.
- Attract Beneficial Insects: Plant flowers like dill, fennel, cosmos, and sweet alyssum to attract ladybugs, lacewings, and parasitic wasps, which prey on common garden pests.
- Organic Sprays & Treatments:
- Neem Oil: An excellent broad-spectrum organic insecticide and fungicide. Bonide Neem Oil Concentrate (16oz, ~$20) can be mixed at a rate of 1-2 tbsp per gallon of water and sprayed on affected plants.
- Insecticidal Soap: Effective against soft-bodied insects like aphids, whiteflies, and spider mites. Garden Safe Insecticidal Soap (24oz ready-to-use, ~$10).
- Bacillus thuringiensis (Bt): A naturally occurring soil bacterium that targets caterpillars and worms. Monterey BT Worm & Caterpillar Killer (16oz, ~$18) is highly effective and safe for beneficial insects.
- Copper or Sulfur Sprays: For fungal diseases like powdery mildew or blight, organic copper (e.g., Bonide Copper Fungicide, ~$15 for 1lb) or sulfur (e.g., Safer Brand Garden Fungicide, ~$10 for 16oz) can be used as a last resort.
Step 7: Harvesting & Seed Saving
The culmination of your efforts is the harvest, and seed saving closes the loop on self-sufficiency.
- Harvesting Techniques:
- Timing: Harvest vegetables at their peak ripeness for best flavor and nutritional value. For example, green beans should snap cleanly, cucumbers should be firm, and tomatoes should be fully colored.
- Frequency: Many crops, like zucchini, cucumbers, and bush beans, produce more if harvested frequently. Pick daily or every other day.
- Tools: Use clean, sharp pruners (e.g., Corona ClassicCUT Bypass Pruner BP 3180, ~$30) or a sharp knife for clean cuts, minimizing damage to the plant.
- Seed Saving: This is where the « self-sufficient » aspect truly shines.
- Selection: Only save seeds from your healthiest, most vigorous plants that show desired traits (disease resistance, good flavor, high yield).
- Isolation: To ensure true-to-type seeds, prevent cross-pollination. This can be challenging for open-pollinated crops that readily cross (e.g., squash, corn). For beginners, focus on self-pollinating plants like beans, peas, lettuce, and tomatoes.
- Processing:
- Dry Seeds (Beans, Peas, Lettuce, Grains): Allow pods/seed heads to dry completely on the plant. Harvest, shell, and clean the seeds, removing chaff.
- Wet Seeds (Tomatoes, Cucumbers, Squash): For tomatoes, ferment the seeds in water for a few days to remove the gel coating and inhibit disease. For cucumbers/squash, scrape out seeds, wash thoroughly, and dry.
- Drying: Spread seeds thinly on screens or paper plates in a cool, dry, well-ventilated area for 1-4 weeks. Ensure they are bone-dry before storage. I aim for less than 8% moisture content.
- Storage: Store seeds in airtight containers (glass jars with desiccant packets work well) in a cool, dark, dry place (ideally 40-50°F and 30-40% humidity). Label clearly with variety and date. Properly stored seeds can remain viable for 3-10 years or more.
Step 8: Season Extension & Winterizing
Extend your harvest and protect your garden for the off-season to truly maximize your self sufficient garden from scratch.
- Cold Frames: Simple structures with a transparent top (glass, polycarbonate, or old windows) that sit over garden beds. They trap solar heat, allowing you to grow cold-hardy crops (lettuce, spinach, kale, radishes) well into winter or start seeds earlier in spring. A basic cold frame can be built from 2×6 lumber and a sheet of polycarbonate for under $100.
- Hoop Houses/Low Tunnels: Larger structures made from flexible hoops (PVC pipe or EMT conduit) covered with greenhouse plastic. These provide more space and greater temperature moderation. A 10×20 ft DIY low tunnel kit can cost $200-$500, while a larger, more robust hoop house kit might be $1,000-$3,000. I use a 6×12 ft low tunnel made from 1/2-inch PVC hoops and 6mil greenhouse plastic, which extends my lettuce and spinach harvest by at least
- In-Ground Beds: If you have excellent native soil and good drainage, in-ground beds are the most economical. Double-digging (loosening soil two shovel depths) can significantly improve drainage and aeration. For my main garden, I primarily use in-ground beds, but I focus on building up the soil over time with consistent compost additions and cover cropping. I aim for beds that are no wider than 3-4 feet so I can reach the center without stepping on the soil, compacting it.
- Raised Beds: Raised beds offer numerous advantages, especially for poor soil, heavy clay, or rocky areas. They provide better drainage, warm up faster in spring, reduce compaction, and make weeding and harvesting easier on your back.
- Material Options:
- Untreated Cedar: Naturally rot-resistant and chemical-free. A 4×8 ft bed, 12 inches deep, typically requires three 2x12x8 ft cedar boards, costing around $50-$60 per board (total ~$150-$180) plus corner brackets or screws. My first raised beds were cedar and are still going strong after 7 years.
- Galvanized Steel: Durable, long-lasting, and aesthetically pleasing. Brands like Vego Garden offer modular kits. A Vego Garden 17″ Tall 8-in-1 Metal Raised Garden Bed (can be configured to 4×8 ft) costs approximately $250-$300.
- Concrete Blocks/Stones: Very durable but can leach minerals (though generally safe once weathered) and can be expensive.
- Recycled Materials: Pallets (check for chemical treatment stamps like « HT » for heat-treated), old tires (controversial due to potential chemical leaching).
- Filling Raised Beds: Don’t just fill with topsoil. Use a « Hugelkultur » approach (logs, branches, leaves, then compost, then topsoil) or a mixture of 60% good quality topsoil, 30% compost, and 10% perlite or vermiculite for drainage. A 4x8x1 ft raised bed requires about 32 cubic feet (or ~1.2 cubic yards) of soil mix, which can cost $100-$200 depending on your source.
- Material Options:
Step 4: Water Management & Irrigation
Efficient water management is critical for a self sufficient garden from scratch, especially in off-grid living where water resources might be limited.
- Rainwater Harvesting: This is my primary source of irrigation water. A 55-gallon rain barrel (e.g., EarthMark Rain Barrel, ~$120-$150) connected to a downspout can collect significant water. For larger needs, I use two 275-gallon IBC totes (Intermediate Bulk Containers, often available used for $100-$200 each from food-grade sources) connected in series. A 1,000 sq ft roof can collect approximately 620 gallons of water for every inch of rainfall. My 1,500 sq ft roof provides ample water for my 600 sq ft garden through multiple barrels and totes.
- Drip Irrigation: This is by far the most water-efficient method, delivering water directly to the plant’s root zone, minimizing evaporation and weed growth.
- Components: A typical drip system includes a pressure regulator (e.g., Rain Bird PRV-10, ~$15), a filter (Rain Bird RBY filter, ~$20), main tubing (1/2-inch poly tubing, 100ft ~$25), smaller feeder lines (1/4-inch tubing), and emitters (0.5 GPH or 1 GPH per plant).
- Kits: For beginners, a starter kit like the Rain Bird Drip Irrigation Garden Kit (model DDI-KIT-1P, ~$40-$60) is excellent for a small garden. For larger setups, I use Netafim Techline CV Drip Line (500ft roll, ~$150-$200), which has pressure-compensating emitters built-in, ensuring even watering across long runs.
- Automation: For true self-sufficiency, consider a battery-powered timer (e.g., Orbit B-Hyve Bluetooth Hose Faucet Timer, ~$50) or a solar-powered timer connected to a small 12V pump.
- Solar-Powered Pumps: For lifting water from a well, pond, or large storage tank to your garden, a solar pump is a game-changer. For a smaller drip system, a Shurflo 2088-594-152 Diaphragm Pump (12V, 3.5 GPM, ~$180) can be powered by a single 100W solar panel (e.g., Renogy 100W Monocrystalline Solar Panel, ~$100) and a small 12V battery (e.g., a 50Ah LiFePO4 battery like the Battle Born 50Ah, ~$450). For larger operations or deeper wells, more robust systems are needed. If you’re looking to build out a comprehensive off-grid power system to support your garden’s water needs, or indeed your entire homestead, you might want to explore resources like the Power Grid Generator complete system guide to understand the full scope of what’s possible in terms of energy independence.
Step 5: Seed Selection & Planting
The choice of seeds is crucial for a truly self sufficient garden from scratch.
- Choose Heirloom & Open-Pollinated Seeds: These varieties produce seeds that will grow true to type, meaning you can save seeds from your harvest year after year. F1 hybrids, while often vigorous, will not produce consistent offspring from saved seeds. Reputable seed companies include Baker Creek Heirloom Seeds, High Mowing Organic Seeds, and Seed Savers Exchange. Start with common, reliable varieties like ‘Black Krim’ tomatoes, ‘Provider’ bush beans, ‘Waltham Butternut’ squash, and ‘Black Seeded Simpson’ lettuce.
- Start Seeds Indoors (Optional but Recommended): For longer growing seasons or specific crops, starting seeds indoors gives you a head start. Use seed-starting mix (e.g., Espoma Organic Seed Starter Mix, ~$10 for 16qt bag) in seed trays (Jiffy Professional Greenhouse 72-cell kit, ~$15). Provide adequate light with LED grow lights (Barrina T5 2ft 4-pack LED Grow Lights, 20W each, ~$50) for 14-16 hours a day, positioned 2-4 inches above seedlings. Maintain consistent temperatures (65-75°F for most).
- Direct Sowing vs. Transplanting: Some crops (carrots, radishes, beans, corn) prefer direct sowing into the garden bed. Others (tomatoes, peppers, broccoli, kale) benefit from being started indoors and transplanted. Follow seed packet instructions for planting depths (e.g., lettuce seeds are often surface-sown or planted 1/8 inch deep, while beans are 1 inch deep) and spacing.
- Companion Planting: Strategically plant different species together to enhance growth, deter pests, and attract beneficial insects. For example, planting marigolds near tomatoes can deter nematodes, and basil improves tomato flavor. Nasturtiums can act as a trap crop for aphids.
- Succession Planting: For a continuous harvest, plant small batches of quick-growing crops (lettuce, radishes, cilantro) every 2-3 weeks. As one crop finishes, another is ready to take its place.
Step 6: Pest & Disease Management (Organic)
Maintaining a self sufficient garden from scratch means embracing organic pest and disease control.
- Integrated Pest Management (IPM): This holistic approach combines several strategies.
- Observation: Regularly inspect your plants for early signs of pests or disease. Catching issues early is key.
- Physical Barriers: Use row covers (e.g., Agribon AG-19 floating row cover, 10×20 ft, ~$20) to protect young plants from insect pests like cabbage worms and squash bugs. Install fences (e.g., 2×4 welded wire mesh, 4 ft tall, 50 ft roll ~$70) to keep out deer, rabbits, and other larger animals.
- Hand-Picking: For larger pests like tomato hornworms or squash bugs, simply pick them off and drop them into a bucket of soapy water.
- Companion Planting: As mentioned, certain plants repel pests. Marigolds, garlic, and onions are excellent deterrents.
- Attract Beneficial Insects: Plant flowers like dill, fennel, cosmos, and sweet alyssum to attract ladybugs, lacewings, and parasitic wasps, which prey on common garden pests.
- Organic Sprays & Treatments:
- Neem Oil: An excellent broad-spectrum organic insecticide and fungicide. Bonide Neem Oil Concentrate (16oz, ~$20) can be mixed at a rate of 1-2 tbsp per gallon of water and sprayed on affected plants.
- Insecticidal Soap: Effective against soft-bodied insects like aphids, whiteflies, and spider mites. Garden Safe Insecticidal Soap (24oz ready-to-use, ~$10).
- Bacillus thuringiensis (Bt): A naturally occurring soil bacterium that targets caterpillars and worms. Monterey BT Worm & Caterpillar Killer (16oz, ~$18) is highly effective and safe for beneficial insects.
- Copper or Sulfur Sprays: For fungal diseases like powdery mildew or blight, organic copper (e.g., Bonide Copper Fungicide, ~$15 for 1lb) or sulfur (e.g., Safer Brand Garden Fungicide, ~$10 for 16oz) can be used as a last resort.
Step 7: Harvesting & Seed Saving
The culmination of your efforts is the harvest, and seed saving closes the loop on self-sufficiency.
- Harvesting Techniques:
- Timing: Harvest vegetables at their peak ripeness for best flavor and nutritional value. For example, green beans should snap cleanly, cucumbers should be firm, and tomatoes should be fully colored.
- Frequency: Many crops, like zucchini, cucumbers, and bush beans, produce more if harvested frequently. Pick daily or every other day.
- Tools: Use clean, sharp pruners (e.g., Corona ClassicCUT Bypass Pruner BP 3180, ~$30) or a sharp knife for clean cuts, minimizing damage to the plant.
- Seed Saving: This is where the « self-sufficient » aspect truly shines.
- Selection: Only save seeds from your healthiest, most vigorous plants that show desired traits (disease resistance, good flavor, high yield).
- Isolation: To ensure true-to-type seeds, prevent cross-pollination. This can be challenging for open-pollinated crops that readily cross (e.g., squash, corn). For beginners, focus on self-pollinating plants like beans, peas, lettuce, and tomatoes.
- Processing:
- Dry Seeds (Beans, Peas, Lettuce, Grains): Allow pods/seed heads to dry completely on the plant. Harvest, shell, and clean the seeds, removing chaff.
- Wet Seeds (Tomatoes, Cucumbers, Squash): For tomatoes, ferment the seeds in water for a few days to remove the gel coating and inhibit disease. For cucumbers/squash, scrape out seeds, wash thoroughly, and dry.
- Drying: Spread seeds thinly on screens or paper plates in a cool, dry, well-ventilated area for 1-4 weeks. Ensure they are bone-dry before storage. I aim for less than 8% moisture content.
- Storage: Store seeds in airtight containers (glass jars with desiccant packets work well) in a cool, dark, dry place (ideally 40-50°F and 30-40% humidity). Label clearly with variety and date. Properly stored seeds can remain viable for 3-10 years or more.
Step 8: Season Extension & Winterizing
Extend your harvest and protect your garden for the off-season to truly maximize your self sufficient garden from scratch.
- Cold Frames: Simple structures with a transparent top (glass, polycarbonate, or old windows) that sit over garden beds. They trap solar heat, allowing you to grow cold-hardy crops (lettuce, spinach, kale, radishes) well into winter or start seeds earlier in spring. A basic cold frame can be built from 2×6 lumber and a sheet of polycarbonate for under $100.
- Hoop Houses/Low Tunnels: Larger structures made from flexible hoops (PVC pipe or EMT conduit) covered with greenhouse plastic. These provide more space and greater temperature moderation. A 10×20 ft DIY low tunnel kit can cost $200-$500, while a larger, more robust hoop house kit might be $1,000-$3,000. I use a 6×12 ft low tunnel made from 1/2-inch PVC hoops and 6mil greenhouse plastic, which extends my lettuce and spinach harvest by at least
Healthy soil is the bedrock of a productive, self-sufficient garden. You can’t guess what your soil needs; you have to test it.
- Perform a Soil Test: A professional soil test will give you precise data on your soil’s pH, nutrient levels (N-P-K), and organic matter content. I recommend sending a sample to your local agricultural extension office; it typically costs $20-$50 and provides detailed recommendations. Alternatively, for a quick homeowner check, a Rapitest Soil Test Kit (40-test kit, model 1663, ~$20 on Amazon) provides a good baseline for pH, Nitrogen, Phosphorus, and Potash. Aim for a pH between 6.0 and 7.0 for most vegetables.
- Amend for pH Imbalance: If your soil is too acidic (below 6.0), add agricultural lime (dolomitic lime adds magnesium, calcitic lime adds calcium). Apply 5-10 lbs per 100 sq ft for a moderate adjustment. If it’s too alkaline (above 7.0), add elemental sulfur (e.g., Espoma Soil Acidifier, ~$15 for 6.75 lbs) or generous amounts of organic matter like peat moss or pine needles.
- Build Organic Matter: This is the single most important step for long-term soil health. Organic matter improves soil structure, water retention, drainage, and nutrient availability. Incorporate 2-4 inches of high-quality compost into your top 6-12 inches of soil annually. I make my own compost from kitchen scraps, garden waste, and shredded leaves, but you can purchase it. Local nurseries often sell bulk compost for $30-$50 per cubic yard. Aged manure (from chickens, cows, or horses – ensure it’s well-rotted to avoid burning plants) is also excellent.
- Address Nutrient Deficiencies: Based on your soil test, add specific organic amendments. If Nitrogen (N) is low, add blood meal (12-0-0, ~$20 for 3 lbs) or feather meal. For Phosphorus (P), use bone meal (3-15-0, ~$15 for 3 lbs) or rock phosphate. For Potassium (K), greensand (0-0-2.5, ~$25 for 5 lbs) or kelp meal are good choices. I rely heavily on Espoma Organic Garden-tone (5-3-3, ~$25 for an 8lb bag) as a balanced, all-purpose organic fertilizer during planting.
Step 3: Garden Bed Preparation
Deciding between raised beds and in-ground beds depends on your soil, budget, and physical capabilities.
- In-Ground Beds: If you have excellent native soil and good drainage, in-ground beds are the most economical. Double-digging (loosening soil two shovel depths) can significantly improve drainage and aeration. For my main garden, I primarily use in-ground beds, but I focus on building up the soil over time with consistent compost additions and cover cropping. I aim for beds that are no wider than 3-4 feet so I can reach the center without stepping on the soil, compacting it.
- Raised Beds: Raised beds offer numerous advantages, especially for poor soil, heavy clay, or rocky areas. They provide better drainage, warm up faster in spring, reduce compaction, and make weeding and harvesting easier on your back.
- Material Options:
- Untreated Cedar: Naturally rot-resistant and chemical-free. A 4×8 ft bed, 12 inches deep, typically requires three 2x12x8 ft cedar boards, costing around $50-$60 per board (total ~$150-$180) plus corner brackets or screws. My first raised beds were cedar and are still going strong after 7 years.
- Galvanized Steel: Durable, long-lasting, and aesthetically pleasing. Brands like Vego Garden offer modular kits. A Vego Garden 17″ Tall 8-in-1 Metal Raised Garden Bed (can be configured to 4×8 ft) costs approximately $250-$300.
- Concrete Blocks/Stones: Very durable but can leach minerals (though generally safe once weathered) and can be expensive.
- Recycled Materials: Pallets (check for chemical treatment stamps like « HT » for heat-treated), old tires (controversial due to potential chemical leaching).
- Filling Raised Beds: Don’t just fill with topsoil. Use a « Hugelkultur » approach (logs, branches, leaves, then compost, then topsoil) or a mixture of 60% good quality topsoil, 30% compost, and 10% perlite or vermiculite for drainage. A 4x8x1 ft raised bed requires about 32 cubic feet (or ~1.2 cubic yards) of soil mix, which can cost $100-$200 depending on your source.
- Material Options:
Step 4: Water Management & Irrigation
Efficient water management is critical for a self sufficient garden from scratch, especially in off-grid living where water resources might be limited.
- Rainwater Harvesting: This is my primary source of irrigation water. A 55-gallon rain barrel (e.g., EarthMark Rain Barrel, ~$120-$150) connected to a downspout can collect significant water. For larger needs, I use two 275-gallon IBC totes (Intermediate Bulk Containers, often available used for $100-$200 each from food-grade sources) connected in series. A 1,000 sq ft roof can collect approximately 620 gallons of water for every inch of rainfall. My 1,500 sq ft roof provides ample water for my 600 sq ft garden through multiple barrels and totes.
- Drip Irrigation: This is by far the most water-efficient method, delivering water directly to the plant’s root zone, minimizing evaporation and weed growth.
- Components: A typical drip system includes a pressure regulator (e.g., Rain Bird PRV-10, ~$15), a filter (Rain Bird RBY filter, ~$20), main tubing (1/2-inch poly tubing, 100ft ~$25), smaller feeder lines (1/4-inch tubing), and emitters (0.5 GPH or 1 GPH per plant).
- Kits: For beginners, a starter kit like the Rain Bird Drip Irrigation Garden Kit (model DDI-KIT-1P, ~$40-$60) is excellent for a small garden. For larger setups, I use Netafim Techline CV Drip Line (500ft roll, ~$150-$200), which has pressure-compensating emitters built-in, ensuring even watering across long runs.
- Automation: For true self-sufficiency, consider a battery-powered timer (e.g., Orbit B-Hyve Bluetooth Hose Faucet Timer, ~$50) or a solar-powered timer connected to a small 12V pump.
- Solar-Powered Pumps: For lifting water from a well, pond, or large storage tank to your garden, a solar pump is a game-changer. For a smaller drip system, a Shurflo 2088-594-152 Diaphragm Pump (12V, 3.5 GPM, ~$180) can be powered by a single 100W solar panel (e.g., Renogy 100W Monocrystalline Solar Panel, ~$100) and a small 12V battery (e.g., a 50Ah LiFePO4 battery like the Battle Born 50Ah, ~$450). For larger operations or deeper wells, more robust systems are needed. If you’re looking to build out a comprehensive off-grid power system to support your garden’s water needs, or indeed your entire homestead, you might want to explore resources like the Power Grid Generator complete system guide to understand the full scope of what’s possible in terms of energy independence.
Step 5: Seed Selection & Planting
The choice of seeds is crucial for a truly self sufficient garden from scratch.
- Choose Heirloom & Open-Pollinated Seeds: These varieties produce seeds that will grow true to type, meaning you can save seeds from your harvest year after year. F1 hybrids, while often vigorous, will not produce consistent offspring from saved seeds. Reputable seed companies include Baker Creek Heirloom Seeds, High Mowing Organic Seeds, and Seed Savers Exchange. Start with common, reliable varieties like ‘Black Krim’ tomatoes, ‘Provider’ bush beans, ‘Waltham Butternut’ squash, and ‘Black Seeded Simpson’ lettuce.
- Start Seeds Indoors (Optional but Recommended): For longer growing seasons or specific crops, starting seeds indoors gives you a head start. Use seed-starting mix (e.g., Espoma Organic Seed Starter Mix, ~$10 for 16qt bag) in seed trays (Jiffy Professional Greenhouse 72-cell kit, ~$15). Provide adequate light with LED grow lights (Barrina T5 2ft 4-pack LED Grow Lights, 20W each, ~$50) for 14-16 hours a day, positioned 2-4 inches above seedlings. Maintain consistent temperatures (65-75°F for most).
- Direct Sowing vs. Transplanting: Some crops (carrots, radishes, beans, corn) prefer direct sowing into the garden bed. Others (tomatoes, peppers, broccoli, kale) benefit from being started indoors and transplanted. Follow seed packet instructions for planting depths (e.g., lettuce seeds are often surface-sown or planted 1/8 inch deep, while beans are 1 inch deep) and spacing.
- Companion Planting: Strategically plant different species together to enhance growth, deter pests, and attract beneficial insects. For example, planting marigolds near tomatoes can deter nematodes, and basil improves tomato flavor. Nasturtiums can act as a trap crop for aphids.
- Succession Planting: For a continuous harvest, plant small batches of quick-growing crops (lettuce, radishes, cilantro) every 2-3 weeks. As one crop finishes, another is ready to take its place.
Step 6: Pest & Disease Management (Organic)
Maintaining a self sufficient garden from scratch means embracing organic pest and disease control.
- Integrated Pest Management (IPM): This holistic approach combines several strategies.
- Observation: Regularly inspect your plants for early signs of pests or disease. Catching issues early is key.
- Physical Barriers: Use row covers (e.g., Agribon AG-19 floating row cover, 10×20 ft, ~$20) to protect young plants from insect pests like cabbage worms and squash bugs. Install fences (e.g., 2×4 welded wire mesh, 4 ft tall, 50 ft roll ~$70) to keep out deer, rabbits, and other larger animals.
- Hand-Picking: For larger pests like tomato hornworms or squash bugs, simply pick them off and drop them into a bucket of soapy water.
- Companion Planting: As mentioned, certain plants repel pests. Marigolds, garlic, and onions are excellent deterrents.
- Attract Beneficial Insects: Plant flowers like dill, fennel, cosmos, and sweet alyssum to attract ladybugs, lacewings, and parasitic wasps, which prey on common garden pests.
- Organic Sprays & Treatments:
- Neem Oil: An excellent broad-spectrum organic insecticide and fungicide. Bonide Neem Oil Concentrate (16oz, ~$20) can be mixed at a rate of 1-2 tbsp per gallon of water and sprayed on affected plants.
- Insecticidal Soap: Effective against soft-bodied insects like aphids, whiteflies, and spider mites. Garden Safe Insecticidal Soap (24oz ready-to-use, ~$10).
- Bacillus thuringiensis (Bt): A naturally occurring soil bacterium that targets caterpillars and worms. Monterey BT Worm & Caterpillar Killer (16oz, ~$18) is highly effective and safe for beneficial insects.
- Copper or Sulfur Sprays: For fungal diseases like powdery mildew or blight, organic copper (e.g., Bonide Copper Fungicide, ~$15 for 1lb) or sulfur (e.g., Safer Brand Garden Fungicide, ~$10 for 16oz) can be used as a last resort.
Step 7: Harvesting & Seed Saving
The culmination of your efforts is the harvest, and seed saving closes the loop on self-sufficiency.
- Harvesting Techniques:
- Timing: Harvest vegetables at their peak ripeness for best flavor and nutritional value. For example, green beans should snap cleanly, cucumbers should be firm, and tomatoes should be fully colored.
- Frequency: Many crops, like zucchini, cucumbers, and bush beans, produce more if harvested frequently. Pick daily or every other day.
- Tools: Use clean, sharp pruners (e.g., Corona ClassicCUT Bypass Pruner BP 3180, ~$30) or a sharp knife for clean cuts, minimizing damage to the plant.
- Seed Saving: This is where the « self-sufficient » aspect truly shines.
- Selection: Only save seeds from your healthiest, most vigorous plants that show desired traits (disease resistance, good flavor, high yield).
- Isolation: To ensure true-to-type seeds, prevent cross-pollination. This can be challenging for open-pollinated crops that readily cross (e.g., squash, corn). For beginners, focus on self-pollinating plants like beans, peas, lettuce, and tomatoes.
- Processing:
- Dry Seeds (Beans, Peas, Lettuce, Grains): Allow pods/seed heads to dry completely on the plant. Harvest, shell, and clean the seeds, removing chaff.
- Wet Seeds (Tomatoes, Cucumbers, Squash): For tomatoes, ferment the seeds in water for a few days to remove the gel coating and inhibit disease. For cucumbers/squash, scrape out seeds, wash thoroughly, and dry.
- Drying: Spread seeds thinly on screens or paper plates in a cool, dry, well-ventilated area for 1-4 weeks. Ensure they are bone-dry before storage. I aim for less than 8% moisture content.
- Storage: Store seeds in airtight containers (glass jars with desiccant packets work well) in a cool, dark, dry place (ideally 40-50°F and 30-40% humidity). Label clearly with variety and date. Properly stored seeds can remain viable for 3-10 years or more.
Step 8: Season Extension & Winterizing
Extend your harvest and protect your garden for the off-season to truly maximize your self sufficient garden from scratch.
- Cold Frames: Simple structures with a transparent top (glass, polycarbonate, or old windows) that sit over garden beds. They trap solar heat, allowing you to grow cold-hardy crops (lettuce, spinach, kale, radishes) well into winter or start seeds earlier in spring. A basic cold frame can be built from 2×6 lumber and a sheet of polycarbonate for under $100.
- Hoop Houses/Low Tunnels: Larger structures made from flexible hoops (PVC pipe or EMT conduit) covered with greenhouse plastic. These provide more space and greater temperature moderation. A 10×20 ft DIY low tunnel kit can cost $200-$500, while a larger, more robust hoop house kit might be $1,000-$3,000. I use a 6×12 ft low tunnel made from 1/2-inch PVC hoops and 6mil greenhouse plastic, which extends my lettuce and spinach harvest by at least
Deciding between raised beds and in-ground beds depends on your soil, budget, and physical capabilities.
- In-Ground Beds: If you have excellent native soil and good drainage, in-ground beds are the most economical. Double-digging (loosening soil two shovel depths) can significantly improve drainage and aeration. For my main garden, I primarily use in-ground beds, but I focus on building up the soil over time with consistent compost additions and cover cropping. I aim for beds that are no wider than 3-4 feet so I can reach the center without stepping on the soil, compacting it.
- Raised Beds: Raised beds offer numerous advantages, especially for poor soil, heavy clay, or rocky areas. They provide better drainage, warm up faster in spring, reduce compaction, and make weeding and harvesting easier on your back.
- Material Options:
- Untreated Cedar: Naturally rot-resistant and chemical-free. A 4×8 ft bed, 12 inches deep, typically requires three 2x12x8 ft cedar boards, costing around $50-$60 per board (total ~$150-$180) plus corner brackets or screws. My first raised beds were cedar and are still going strong after 7 years.
- Galvanized Steel: Durable, long-lasting, and aesthetically pleasing. Brands like Vego Garden offer modular kits. A Vego Garden 17″ Tall 8-in-1 Metal Raised Garden Bed (can be configured to 4×8 ft) costs approximately $250-$300.
- Concrete Blocks/Stones: Very durable but can leach minerals (though generally safe once weathered) and can be expensive.
- Recycled Materials: Pallets (check for chemical treatment stamps like « HT » for heat-treated), old tires (controversial due to potential chemical leaching).
- Filling Raised Beds: Don’t just fill with topsoil. Use a « Hugelkultur » approach (logs, branches, leaves, then compost, then topsoil) or a mixture of 60% good quality topsoil, 30% compost, and 10% perlite or vermiculite for drainage. A 4x8x1 ft raised bed requires about 32 cubic feet (or ~1.2 cubic yards) of soil mix, which can cost $100-$200 depending on your source.
- Material Options:
Step 4: Water Management & Irrigation
Efficient water management is critical for a self sufficient garden from scratch, especially in off-grid living where water resources might be limited.
- Rainwater Harvesting: This is my primary source of irrigation water. A 55-gallon rain barrel (e.g., EarthMark Rain Barrel, ~$120-$150) connected to a downspout can collect significant water. For larger needs, I use two 275-gallon IBC totes (Intermediate Bulk Containers, often available used for $100-$200 each from food-grade sources) connected in series. A 1,000 sq ft roof can collect approximately 620 gallons of water for every inch of rainfall. My 1,500 sq ft roof provides ample water for my 600 sq ft garden through multiple barrels and totes.
- Drip Irrigation: This is by far the most water-efficient method, delivering water directly to the plant’s root zone, minimizing evaporation and weed growth.
- Components: A typical drip system includes a pressure regulator (e.g., Rain Bird PRV-10, ~$15), a filter (Rain Bird RBY filter, ~$20), main tubing (1/2-inch poly tubing, 100ft ~$25), smaller feeder lines (1/4-inch tubing), and emitters (0.5 GPH or 1 GPH per plant).
- Kits: For beginners, a starter kit like the Rain Bird Drip Irrigation Garden Kit (model DDI-KIT-1P, ~$40-$60) is excellent for a small garden. For larger setups, I use Netafim Techline CV Drip Line (500ft roll, ~$150-$200), which has pressure-compensating emitters built-in, ensuring even watering across long runs.
- Automation: For true self-sufficiency, consider a battery-powered timer (e.g., Orbit B-Hyve Bluetooth Hose Faucet Timer, ~$50) or a solar-powered timer connected to a small 12V pump.
- Solar-Powered Pumps: For lifting water from a well, pond, or large storage tank to your garden, a solar pump is a game-changer. For a smaller drip system, a Shurflo 2088-594-152 Diaphragm Pump (12V, 3.5 GPM, ~$180) can be powered by a single 100W solar panel (e.g., Renogy 100W Monocrystalline Solar Panel, ~$100) and a small 12V battery (e.g., a 50Ah LiFePO4 battery like the Battle Born 50Ah, ~$450). For larger operations or deeper wells, more robust systems are needed. If you’re looking to build out a comprehensive off-grid power system to support your garden’s water needs, or indeed your entire homestead, you might want to explore resources like the Power Grid Generator complete system guide to understand the full scope of what’s possible in terms of energy independence.
Step 5: Seed Selection & Planting
The choice of seeds is crucial for a truly self sufficient garden from scratch.
- Choose Heirloom & Open-Pollinated Seeds: These varieties produce seeds that will grow true to type, meaning you can save seeds from your harvest year after year. F1 hybrids, while often vigorous, will not produce consistent offspring from saved seeds. Reputable seed companies include Baker Creek Heirloom Seeds, High Mowing Organic Seeds, and Seed Savers Exchange. Start with common, reliable varieties like ‘Black Krim’ tomatoes, ‘Provider’ bush beans, ‘Waltham Butternut’ squash, and ‘Black Seeded Simpson’ lettuce.
- Start Seeds Indoors (Optional but Recommended): For longer growing seasons or specific crops, starting seeds indoors gives you a head start. Use seed-starting mix (e.g., Espoma Organic Seed Starter Mix, ~$10 for 16qt bag) in seed trays (Jiffy Professional Greenhouse 72-cell kit, ~$15). Provide adequate light with LED grow lights (Barrina T5 2ft 4-pack LED Grow Lights, 20W each, ~$50) for 14-16 hours a day, positioned 2-4 inches above seedlings. Maintain consistent temperatures (65-75°F for most).
- Direct Sowing vs. Transplanting: Some crops (carrots, radishes, beans, corn) prefer direct sowing into the garden bed. Others (tomatoes, peppers, broccoli, kale) benefit from being started indoors and transplanted. Follow seed packet instructions for planting depths (e.g., lettuce seeds are often surface-sown or planted 1/8 inch deep, while beans are 1 inch deep) and spacing.
- Companion Planting: Strategically plant different species together to enhance growth, deter pests, and attract beneficial insects. For example, planting marigolds near tomatoes can deter nematodes, and basil improves tomato flavor. Nasturtiums can act as a trap crop for aphids.
- Succession Planting: For a continuous harvest, plant small batches of quick-growing crops (lettuce, radishes, cilantro) every 2-3 weeks. As one crop finishes, another is ready to take its place.
Step 6: Pest & Disease Management (Organic)
Maintaining a self sufficient garden from scratch means embracing organic pest and disease control.
- Integrated Pest Management (IPM): This holistic approach combines several strategies.
- Observation: Regularly inspect your plants for early signs of pests or disease. Catching issues early is key.
- Physical Barriers: Use row covers (e.g., Agribon AG-19 floating row cover, 10×20 ft, ~$20) to protect young plants from insect pests like cabbage worms and squash bugs. Install fences (e.g., 2×4 welded wire mesh, 4 ft tall, 50 ft roll ~$70) to keep out deer, rabbits, and other larger animals.
- Hand-Picking: For larger pests like tomato hornworms or squash bugs, simply pick them off and drop them into a bucket of soapy water.
- Companion Planting: As mentioned, certain plants repel pests. Marigolds, garlic, and onions are excellent deterrents.
- Attract Beneficial Insects: Plant flowers like dill, fennel, cosmos, and sweet alyssum to attract ladybugs, lacewings, and parasitic wasps, which prey on common garden pests.
- Organic Sprays & Treatments:
- Neem Oil: An excellent broad-spectrum organic insecticide and fungicide. Bonide Neem Oil Concentrate (16oz, ~$20) can be mixed at a rate of 1-2 tbsp per gallon of water and sprayed on affected plants.
- Insecticidal Soap: Effective against soft-bodied insects like aphids, whiteflies, and spider mites. Garden Safe Insecticidal Soap (24oz ready-to-use, ~$10).
- Bacillus thuringiensis (Bt): A naturally occurring soil bacterium that targets caterpillars and worms. Monterey BT Worm & Caterpillar Killer (16oz, ~$18) is highly effective and safe for beneficial insects.
- Copper or Sulfur Sprays: For fungal diseases like powdery mildew or blight, organic copper (e.g., Bonide Copper Fungicide, ~$15 for 1lb) or sulfur (e.g., Safer Brand Garden Fungicide, ~$10 for 16oz) can be used as a last resort.
Step 7: Harvesting & Seed Saving
The culmination of your efforts is the harvest, and seed saving closes the loop on self-sufficiency.
- Harvesting Techniques:
- Timing: Harvest vegetables at their peak ripeness for best flavor and nutritional value. For example, green beans should snap cleanly, cucumbers should be firm, and tomatoes should be fully colored.
- Frequency: Many crops, like zucchini, cucumbers, and bush beans, produce more if harvested frequently. Pick daily or every other day.
- Tools: Use clean, sharp pruners (e.g., Corona ClassicCUT Bypass Pruner BP 3180, ~$30) or a sharp knife for clean cuts, minimizing damage to the plant.
- Seed Saving: This is where the « self-sufficient » aspect truly shines.
- Selection: Only save seeds from your healthiest, most vigorous plants that show desired traits (disease resistance, good flavor, high yield).
- Isolation: To ensure true-to-type seeds, prevent cross-pollination. This can be challenging for open-pollinated crops that readily cross (e.g., squash, corn). For beginners, focus on self-pollinating plants like beans, peas, lettuce, and tomatoes.
- Processing:
- Dry Seeds (Beans, Peas, Lettuce, Grains): Allow pods/seed heads to dry completely on the plant. Harvest, shell, and clean the seeds, removing chaff.
- Wet Seeds (Tomatoes, Cucumbers, Squash): For tomatoes, ferment the seeds in water for a few days to remove the gel coating and inhibit disease. For cucumbers/squash, scrape out seeds, wash thoroughly, and dry.
- Drying: Spread seeds thinly on screens or paper plates in a cool, dry, well-ventilated area for 1-4 weeks. Ensure they are bone-dry before storage. I aim for less than 8% moisture content.
- Storage: Store seeds in airtight containers (glass jars with desiccant packets work well) in a cool, dark, dry place (ideally 40-50°F and 30-40% humidity). Label clearly with variety and date. Properly stored seeds can remain viable for 3-10 years or more.
Step 8: Season Extension & Winterizing
Extend your harvest and protect your garden for the off-season to truly maximize your self sufficient garden from scratch.
- Cold Frames: Simple structures with a transparent top (glass, polycarbonate, or old windows) that sit over garden beds. They trap solar heat, allowing you to grow cold-hardy crops (lettuce, spinach, kale, radishes) well into winter or start seeds earlier in spring. A basic cold frame can be built from 2×6 lumber and a sheet of polycarbonate for under $100.
- Hoop Houses/Low Tunnels: Larger structures made from flexible hoops (PVC pipe or EMT conduit) covered with greenhouse plastic. These provide more space and greater temperature moderation. A 10×20 ft DIY low tunnel kit can cost $200-$500, while a larger, more robust hoop house kit might be $1,000-$3,000. I use a 6×12 ft low tunnel made from 1/2-inch PVC hoops and 6mil greenhouse plastic, which extends my lettuce and spinach harvest by at least
Healthy soil is the bedrock of a productive, self-sufficient garden. You can’t guess what your soil needs; you have to test it.
- Perform a Soil Test: A professional soil test will give you precise data on your soil’s pH, nutrient levels (N-P-K), and organic matter content. I recommend sending a sample to your local agricultural extension office; it typically costs $20-$50 and provides detailed recommendations. Alternatively, for a quick homeowner check, a Rapitest Soil Test Kit (40-test kit, model 1663, ~$20 on Amazon) provides a good baseline for pH, Nitrogen, Phosphorus, and Potash. Aim for a pH between 6.0 and 7.0 for most vegetables.
- Amend for pH Imbalance: If your soil is too acidic (below 6.0), add agricultural lime (dolomitic lime adds magnesium, calcitic lime adds calcium). Apply 5-10 lbs per 100 sq ft for a moderate adjustment. If it’s too alkaline (above 7.0), add elemental sulfur (e.g., Espoma Soil Acidifier, ~$15 for 6.75 lbs) or generous amounts of organic matter like peat moss or pine needles.
- Build Organic Matter: This is the single most important step for long-term soil health. Organic matter improves soil structure, water retention, drainage, and nutrient availability. Incorporate 2-4 inches of high-quality compost into your top 6-12 inches of soil annually. I make my own compost from kitchen scraps, garden waste, and shredded leaves, but you can purchase it. Local nurseries often sell bulk compost for $30-$50 per cubic yard. Aged manure (from chickens, cows, or horses – ensure it’s well-rotted to avoid burning plants) is also excellent.
- Address Nutrient Deficiencies: Based on your soil test, add specific organic amendments. If Nitrogen (N) is low, add blood meal (12-0-0, ~$20 for 3 lbs) or feather meal. For Phosphorus (P), use bone meal (3-15-0, ~$15 for 3 lbs) or rock phosphate. For Potassium (K), greensand (0-0-2.5, ~$25 for 5 lbs) or kelp meal are good choices. I rely heavily on Espoma Organic Garden-tone (5-3-3, ~$25 for an 8lb bag) as a balanced, all-purpose organic fertilizer during planting.
Step 3: Garden Bed Preparation
Deciding between raised beds and in-ground beds depends on your soil, budget, and physical capabilities.
- In-Ground Beds: If you have excellent native soil and good drainage, in-ground beds are the most economical. Double-digging (loosening soil two shovel depths) can significantly improve drainage and aeration. For my main garden, I primarily use in-ground beds, but I focus on building up the soil over time with consistent compost additions and cover cropping. I aim for beds that are no wider than 3-4 feet so I can reach the center without stepping on the soil, compacting it.
- Raised Beds: Raised beds offer numerous advantages, especially for poor soil, heavy clay, or rocky areas. They provide better drainage, warm up faster in spring, reduce compaction, and make weeding and harvesting easier on your back.
- Material Options:
- Untreated Cedar: Naturally rot-resistant and chemical-free. A 4×8 ft bed, 12 inches deep, typically requires three 2x12x8 ft cedar boards, costing around $50-$60 per board (total ~$150-$180) plus corner brackets or screws. My first raised beds were cedar and are still going strong after 7 years.
- Galvanized Steel: Durable, long-lasting, and aesthetically pleasing. Brands like Vego Garden offer modular kits. A Vego Garden 17″ Tall 8-in-1 Metal Raised Garden Bed (can be configured to 4×8 ft) costs approximately $250-$300.
- Concrete Blocks/Stones: Very durable but can leach minerals (though generally safe once weathered) and can be expensive.
- Recycled Materials: Pallets (check for chemical treatment stamps like « HT » for heat-treated), old tires (controversial due to potential chemical leaching).
- Filling Raised Beds: Don’t just fill with topsoil. Use a « Hugelkultur » approach (logs, branches, leaves, then compost, then topsoil) or a mixture of 60% good quality topsoil, 30% compost, and 10% perlite or vermiculite for drainage. A 4x8x1 ft raised bed requires about 32 cubic feet (or ~1.2 cubic yards) of soil mix, which can cost $100-$200 depending on your source.
- Material Options:
Step 4: Water Management & Irrigation
Efficient water management is critical for a self sufficient garden from scratch, especially in off-grid living where water resources might be limited.
- Rainwater Harvesting: This is my primary source of irrigation water. A 55-gallon rain barrel (e.g., EarthMark Rain Barrel, ~$120-$150) connected to a downspout can collect significant water. For larger needs, I use two 275-gallon IBC totes (Intermediate Bulk Containers, often available used for $100-$200 each from food-grade sources) connected in series. A 1,000 sq ft roof can collect approximately 620 gallons of water for every inch of rainfall. My 1,500 sq ft roof provides ample water for my 600 sq ft garden through multiple barrels and totes.
- Drip Irrigation: This is by far the most water-efficient method, delivering water directly to the plant’s root zone, minimizing evaporation and weed growth.
- Components: A typical drip system includes a pressure regulator (e.g., Rain Bird PRV-10, ~$15), a filter (Rain Bird RBY filter, ~$20), main tubing (1/2-inch poly tubing, 100ft ~$25), smaller feeder lines (1/4-inch tubing), and emitters (0.5 GPH or 1 GPH per plant).
- Kits: For beginners, a starter kit like the Rain Bird Drip Irrigation Garden Kit (model DDI-KIT-1P, ~$40-$60) is excellent for a small garden. For larger setups, I use Netafim Techline CV Drip Line (500ft roll, ~$150-$200), which has pressure-compensating emitters built-in, ensuring even watering across long runs.
- Automation: For true self-sufficiency, consider a battery-powered timer (e.g., Orbit B-Hyve Bluetooth Hose Faucet Timer, ~$50) or a solar-powered timer connected to a small 12V pump.
- Solar-Powered Pumps: For lifting water from a well, pond, or large storage tank to your garden, a solar pump is a game-changer. For a smaller drip system, a Shurflo 2088-594-152 Diaphragm Pump (12V, 3.5 GPM, ~$180) can be powered by a single 100W solar panel (e.g., Renogy 100W Monocrystalline Solar Panel, ~$100) and a small 12V battery (e.g., a 50Ah LiFePO4 battery like the Battle Born 50Ah, ~$450). For larger operations or deeper wells, more robust systems are needed. If you’re looking to build out a comprehensive off-grid power system to support your garden’s water needs, or indeed your entire homestead, you might want to explore resources like the Power Grid Generator complete system guide to understand the full scope of what’s possible in terms of energy independence.
Step 5: Seed Selection & Planting
The choice of seeds is crucial for a truly self sufficient garden from scratch.
- Choose Heirloom & Open-Pollinated Seeds: These varieties produce seeds that will grow true to type, meaning you can save seeds from your harvest year after year. F1 hybrids, while often vigorous, will not produce consistent offspring from saved seeds. Reputable seed companies include Baker Creek Heirloom Seeds, High Mowing Organic Seeds, and Seed Savers Exchange. Start with common, reliable varieties like ‘Black Krim’ tomatoes, ‘Provider’ bush beans, ‘Waltham Butternut’ squash, and ‘Black Seeded Simpson’ lettuce.
- Start Seeds Indoors (Optional but Recommended): For longer growing seasons or specific crops, starting seeds indoors gives you a head start. Use seed-starting mix (e.g., Espoma Organic Seed Starter Mix, ~$10 for 16qt bag) in seed trays (Jiffy Professional Greenhouse 72-cell kit, ~$15). Provide adequate light with LED grow lights (Barrina T5 2ft 4-pack LED Grow Lights, 20W each, ~$50) for 14-16 hours a day, positioned 2-4 inches above seedlings. Maintain consistent temperatures (65-75°F for most).
- Direct Sowing vs. Transplanting: Some crops (carrots, radishes, beans, corn) prefer direct sowing into the garden bed. Others (tomatoes, peppers, broccoli, kale) benefit from being started indoors and transplanted. Follow seed packet instructions for planting depths (e.g., lettuce seeds are often surface-sown or planted 1/8 inch deep, while beans are 1 inch deep) and spacing.
- Companion Planting: Strategically plant different species together to enhance growth, deter pests, and attract beneficial insects. For example, planting marigolds near tomatoes can deter nematodes, and basil improves tomato flavor. Nasturtiums can act as a trap crop for aphids.
- Succession Planting: For a continuous harvest, plant small batches of quick-growing crops (lettuce, radishes, cilantro) every 2-3 weeks. As one crop finishes, another is ready to take its place.
Step 6: Pest & Disease Management (Organic)
Maintaining a self sufficient garden from scratch means embracing organic pest and disease control.
- Integrated Pest Management (IPM): This holistic approach combines several strategies.
- Observation: Regularly inspect your plants for early signs of pests or disease. Catching issues early is key.
- Physical Barriers: Use row covers (e.g., Agribon AG-19 floating row cover, 10×20 ft, ~$20) to protect young plants from insect pests like cabbage worms and squash bugs. Install fences (e.g., 2×4 welded wire mesh, 4 ft tall, 50 ft roll ~$70) to keep out deer, rabbits, and other larger animals.
- Hand-Picking: For larger pests like tomato hornworms or squash bugs, simply pick them off and drop them into a bucket of soapy water.
- Companion Planting: As mentioned, certain plants repel pests. Marigolds, garlic, and onions are excellent deterrents.
- Attract Beneficial Insects: Plant flowers like dill, fennel, cosmos, and sweet alyssum to attract ladybugs, lacewings, and parasitic wasps, which prey on common garden pests.
- Organic Sprays & Treatments:
- Neem Oil: An excellent broad-spectrum organic insecticide and fungicide. Bonide Neem Oil Concentrate (16oz, ~$20) can be mixed at a rate of 1-2 tbsp per gallon of water and sprayed on affected plants.
- Insecticidal Soap: Effective against soft-bodied insects like aphids, whiteflies, and spider mites. Garden Safe Insecticidal Soap (24oz ready-to-use, ~$10).
- Bacillus thuringiensis (Bt): A naturally occurring soil bacterium that targets caterpillars and worms. Monterey BT Worm & Caterpillar Killer (16oz, ~$18) is highly effective and safe for beneficial insects.
- Copper or Sulfur Sprays: For fungal diseases like powdery mildew or blight, organic copper (e.g., Bonide Copper Fungicide, ~$15 for 1lb) or sulfur (e.g., Safer Brand Garden Fungicide, ~$10 for 16oz) can be used as a last resort.
Step 7: Harvesting & Seed Saving
The culmination of your efforts is the harvest, and seed saving closes the loop on self-sufficiency.
- Harvesting Techniques:
- Timing: Harvest vegetables at their peak ripeness for best flavor and nutritional value. For example, green beans should snap cleanly, cucumbers should be firm, and tomatoes should be fully colored.
- Frequency: Many crops, like zucchini, cucumbers, and bush beans, produce more if harvested frequently. Pick daily or every other day.
- Tools: Use clean, sharp pruners (e.g., Corona ClassicCUT Bypass Pruner BP 3180, ~$30) or a sharp knife for clean cuts, minimizing damage to the plant.
- Seed Saving: This is where the « self-sufficient » aspect truly shines.
- Selection: Only save seeds from your healthiest, most vigorous plants that show desired traits (disease resistance, good flavor, high yield).
- Isolation: To ensure true-to-type seeds, prevent cross-pollination. This can be challenging for open-pollinated crops that readily cross (e.g., squash, corn). For beginners, focus on self-pollinating plants like beans, peas, lettuce, and tomatoes.
- Processing:
- Dry Seeds (Beans, Peas, Lettuce, Grains): Allow pods/seed heads to dry completely on the plant. Harvest, shell, and clean the seeds, removing chaff.
- Wet Seeds (Tomatoes, Cucumbers, Squash): For tomatoes, ferment the seeds in water for a few days to remove the gel coating and inhibit disease. For cucumbers/squash, scrape out seeds, wash thoroughly, and dry.
- Drying: Spread seeds thinly on screens or paper plates in a cool, dry, well-ventilated area for 1-4 weeks. Ensure they are bone-dry before storage. I aim for less than 8% moisture content.
- Storage: Store seeds in airtight containers (glass jars with desiccant packets work well) in a cool, dark, dry place (ideally 40-50°F and 30-40% humidity). Label clearly with variety and date. Properly stored seeds can remain viable for 3-10 years or more.
Step 8: Season Extension & Winterizing
Extend your harvest and protect your garden for the off-season to truly maximize your self sufficient garden from scratch.
- Cold Frames: Simple structures with a transparent top (glass, polycarbonate, or old windows) that sit over garden beds. They trap solar heat, allowing you to grow cold-hardy crops (lettuce, spinach, kale, radishes) well into winter or start seeds earlier in spring. A basic cold frame can be built from 2×6 lumber and a sheet of polycarbonate for under $100.
- Hoop Houses/Low Tunnels: Larger structures made from flexible hoops (PVC pipe or EMT conduit) covered with greenhouse plastic. These provide more space and greater temperature moderation. A 10×20 ft DIY low tunnel kit can cost $200-$500, while a larger, more robust hoop house kit might be $1,000-$3,000. I use a 6×12 ft low tunnel made from 1/2-inch PVC hoops and 6mil greenhouse plastic, which extends my lettuce and spinach harvest by at least
- Harvesting Techniques:
- Timing: Harvest vegetables at their peak ripeness for best flavor and nutritional value. For example, green beans should snap cleanly, cucumbers should be firm, and tomatoes should be fully colored.
- Frequency: Many crops, like zucchini, cucumbers, and bush beans, produce more if harvested frequently. Pick daily or every other day.
- Tools: Use clean, sharp pruners (e.g., Corona ClassicCUT Bypass Pruner BP 3180, ~$30) or a sharp knife for clean cuts, minimizing damage to the plant.
- Seed Saving: This is where the « self-sufficient » aspect truly shines.
- Selection: Only save seeds from your healthiest, most vigorous plants that show desired traits (disease resistance, good flavor, high yield).
- Isolation: To ensure true-to-type seeds, prevent cross-pollination. This can be challenging for open-pollinated crops that readily cross (e.g., squash, corn). For beginners, focus on self-pollinating plants like beans, peas, lettuce, and tomatoes.
- Processing:
- Dry Seeds (Beans, Peas, Lettuce, Grains): Allow pods/seed heads to dry completely on the plant. Harvest, shell, and clean the seeds, removing chaff.
- Wet Seeds (Tomatoes, Cucumbers, Squash): For tomatoes, ferment the seeds in water for a few days to remove the gel coating and inhibit disease. For cucumbers/squash, scrape out seeds, wash thoroughly, and dry.
- Drying: Spread seeds thinly on screens or paper plates in a cool, dry, well-ventilated area for 1-4 weeks. Ensure they are bone-dry before storage. I aim for less than 8% moisture content.
- Storage: Store seeds in airtight containers (glass jars with desiccant packets work well) in a cool, dark, dry place (ideally 40-50°F and 30-40% humidity). Label clearly with variety and date. Properly stored seeds can remain viable for 3-10 years or more.
Step 8: Season Extension & Winterizing
Extend your harvest and protect your garden for the off-season to truly maximize your self sufficient garden from scratch.
- Cold Frames: Simple structures with a transparent top (glass, polycarbonate, or old windows) that sit over garden beds. They trap solar heat, allowing you to grow cold-hardy crops (lettuce, spinach, kale, radishes) well into winter or start seeds earlier in spring. A basic cold frame can be built from 2×6 lumber and a sheet of polycarbonate for under $100.
- Hoop Houses/Low Tunnels: Larger structures made from flexible hoops (PVC pipe or EMT conduit) covered with greenhouse plastic. These provide more space and greater temperature moderation. A 10×20 ft DIY low tunnel kit can cost $200-$500, while a larger, more robust hoop house kit might be $1,000-$3,000. I use a 6×12 ft low tunnel made from 1/2-inch PVC hoops and 6mil greenhouse plastic, which extends my lettuce and spinach harvest by at least
Deciding between raised beds and in-ground beds depends on your soil, budget, and physical capabilities.
- In-Ground Beds: If you have excellent native soil and good drainage, in-ground beds are the most economical. Double-digging (loosening soil two shovel depths) can significantly improve drainage and aeration. For my main garden, I primarily use in-ground beds, but I focus on building up the soil over time with consistent compost additions and cover cropping. I aim for beds that are no wider than 3-4 feet so I can reach the center without stepping on the soil, compacting it.
- Raised Beds: Raised beds offer numerous advantages, especially for poor soil, heavy clay, or rocky areas. They provide better drainage, warm up faster in spring, reduce compaction, and make weeding and harvesting easier on your back.
- Material Options:
- Untreated Cedar: Naturally rot-resistant and chemical-free. A 4×8 ft bed, 12 inches deep, typically requires three 2x12x8 ft cedar boards, costing around $50-$60 per board (total ~$150-$180) plus corner brackets or screws. My first raised beds were cedar and are still going strong after 7 years.
- Galvanized Steel: Durable, long-lasting, and aesthetically pleasing. Brands like Vego Garden offer modular kits. A Vego Garden 17″ Tall 8-in-1 Metal Raised Garden Bed (can be configured to 4×8 ft) costs approximately $250-$300.
- Concrete Blocks/Stones: Very durable but can leach minerals (though generally safe once weathered) and can be expensive.
- Recycled Materials: Pallets (check for chemical treatment stamps like « HT » for heat-treated), old tires (controversial due to potential chemical leaching).
- Filling Raised Beds: Don’t just fill with topsoil. Use a « Hugelkultur » approach (logs, branches, leaves, then compost, then topsoil) or a mixture of 60% good quality topsoil, 30% compost, and 10% perlite or vermiculite for drainage. A 4x8x1 ft raised bed requires about 32 cubic feet (or ~1.2 cubic yards) of soil mix, which can cost $100-$200 depending on your source.
- Material Options:
Step 4: Water Management & Irrigation
Efficient water management is critical for a self sufficient garden from scratch, especially in off-grid living where water resources might be limited.
- Rainwater Harvesting: This is my primary source of irrigation water. A 55-gallon rain barrel (e.g., EarthMark Rain Barrel, ~$120-$150) connected to a downspout can collect significant water. For larger needs, I use two 275-gallon IBC totes (Intermediate Bulk Containers, often available used for $100-$200 each from food-grade sources) connected in series. A 1,000 sq ft roof can collect approximately 620 gallons of water for every inch of rainfall. My 1,500 sq ft roof provides ample water for my 600 sq ft garden through multiple barrels and totes.
- Drip Irrigation: This is by far the most water-efficient method, delivering water directly to the plant’s root zone, minimizing evaporation and weed growth.
- Components: A typical drip system includes a pressure regulator (e.g., Rain Bird PRV-10, ~$15), a filter (Rain Bird RBY filter, ~$20), main tubing (1/2-inch poly tubing, 100ft ~$25), smaller feeder lines (1/4-inch tubing), and emitters (0.5 GPH or 1 GPH per plant).
- Kits: For beginners, a starter kit like the Rain Bird Drip Irrigation Garden Kit (model DDI-KIT-1P, ~$40-$60) is excellent for a small garden. For larger setups, I use Netafim Techline CV Drip Line (500ft roll, ~$150-$200), which has pressure-compensating emitters built-in, ensuring even watering across long runs.
- Automation: For true self-sufficiency, consider a battery-powered timer (e.g., Orbit B-Hyve Bluetooth Hose Faucet Timer, ~$50) or a solar-powered timer connected to a small 12V pump.
- Solar-Powered Pumps: For lifting water from a well, pond, or large storage tank to your garden, a solar pump is a game-changer. For a smaller drip system, a Shurflo 2088-594-152 Diaphragm Pump (12V, 3.5 GPM, ~$180) can be powered by a single 100W solar panel (e.g., Renogy 100W Monocrystalline Solar Panel, ~$100) and a small 12V battery (e.g., a 50Ah LiFePO4 battery like the Battle Born 50Ah, ~$450). For larger operations or deeper wells, more robust systems are needed. If you’re looking to build out a comprehensive off-grid power system to support your garden’s water needs, or indeed your entire homestead, you might want to explore resources like the Power Grid Generator complete system guide to understand the full scope of what’s possible in terms of energy independence.
Step 5: Seed Selection & Planting
The choice of seeds is crucial for a truly self sufficient garden from scratch.
- Choose Heirloom & Open-Pollinated Seeds: These varieties produce seeds that will grow true to type, meaning you can save seeds from your harvest year after year. F1 hybrids, while often vigorous, will not produce consistent offspring from saved seeds. Reputable seed companies include Baker Creek Heirloom Seeds, High Mowing Organic Seeds, and Seed Savers Exchange. Start with common, reliable varieties like ‘Black Krim’ tomatoes, ‘Provider’ bush beans, ‘Waltham Butternut’ squash, and ‘Black Seeded Simpson’ lettuce.
- Start Seeds Indoors (Optional but Recommended): For longer growing seasons or specific crops, starting seeds indoors gives you a head start. Use seed-starting mix (e.g., Espoma Organic Seed Starter Mix, ~$10 for 16qt bag) in seed trays (Jiffy Professional Greenhouse 72-cell kit, ~$15). Provide adequate light with LED grow lights (Barrina T5 2ft 4-pack LED Grow Lights, 20W each, ~$50) for 14-16 hours a day, positioned 2-4 inches above seedlings. Maintain consistent temperatures (65-75°F for most).
- Direct Sowing vs. Transplanting: Some crops (carrots, radishes, beans, corn) prefer direct sowing into the garden bed. Others (tomatoes, peppers, broccoli, kale) benefit from being started indoors and transplanted. Follow seed packet instructions for planting depths (e.g., lettuce seeds are often surface-sown or planted 1/8 inch deep, while beans are 1 inch deep) and spacing.
- Companion Planting: Strategically plant different species together to enhance growth, deter pests, and attract beneficial insects. For example, planting marigolds near tomatoes can deter nematodes, and basil improves tomato flavor. Nasturtiums can act as a trap crop for aphids.
- Succession Planting: For a continuous harvest, plant small batches of quick-growing crops (lettuce, radishes, cilantro) every 2-3 weeks. As one crop finishes, another is ready to take its place.
Step 6: Pest & Disease Management (Organic)
Maintaining a self sufficient garden from scratch means embracing organic pest and disease control.
- Integrated Pest Management (IPM): This holistic approach combines several strategies.
- Observation: Regularly inspect your plants for early signs of pests or disease. Catching issues early is key.
- Physical Barriers: Use row covers (e.g., Agribon AG-19 floating row cover, 10×20 ft, ~$20) to protect young plants from insect pests like cabbage worms and squash bugs. Install fences (e.g., 2×4 welded wire mesh, 4 ft tall, 50 ft roll ~$70) to keep out deer, rabbits, and other larger animals.
- Hand-Picking: For larger pests like tomato hornworms or squash bugs, simply pick them off and drop them into a bucket of soapy water.
- Companion Planting: As mentioned, certain plants repel pests. Marigolds, garlic, and onions are excellent deterrents.
- Attract Beneficial Insects: Plant flowers like dill, fennel, cosmos, and sweet alyssum to attract ladybugs, lacewings, and parasitic wasps, which prey on common garden pests.
- Organic Sprays & Treatments:
- Neem Oil: An excellent broad-spectrum organic insecticide and fungicide. Bonide Neem Oil Concentrate (16oz, ~$20) can be mixed at a rate of 1-2 tbsp per gallon of water and sprayed on affected plants.
- Insecticidal Soap: Effective against soft-bodied insects like aphids, whiteflies, and spider mites. Garden Safe Insecticidal Soap (24oz ready-to-use, ~$10).
- Bacillus thuringiensis (Bt): A naturally occurring soil bacterium that targets caterpillars and worms. Monterey BT Worm & Caterpillar Killer (16oz, ~$18) is highly effective and safe for beneficial insects.
- Copper or Sulfur Sprays: For fungal diseases like powdery mildew or blight, organic copper (e.g., Bonide Copper Fungicide, ~$15 for 1lb) or sulfur (e.g., Safer Brand Garden Fungicide, ~$10 for 16oz) can be used as a last resort.
Step 7: Harvesting & Seed Saving
The culmination of your efforts is the harvest, and seed saving closes the loop on self-sufficiency.
- Harvesting Techniques:
- Timing: Harvest vegetables at their peak ripeness for best flavor and nutritional value. For example, green beans should snap cleanly, cucumbers should be firm, and tomatoes should be fully colored.
- Frequency: Many crops, like zucchini, cucumbers, and bush beans, produce more if harvested frequently. Pick daily or every other day.
- Tools: Use clean, sharp pruners (e.g., Corona ClassicCUT Bypass Pruner BP 3180, ~$30) or a sharp knife for clean cuts, minimizing damage to the plant.
- Seed Saving: This is where the « self-sufficient » aspect truly shines.
- Selection: Only save seeds from your healthiest, most vigorous plants that show desired traits (disease resistance, good flavor, high yield).
- Isolation: To ensure true-to-type seeds, prevent cross-pollination. This can be challenging for open-pollinated crops that readily cross (e.g., squash, corn). For beginners, focus on self-pollinating plants like beans, peas, lettuce, and tomatoes.
- Processing:
- Dry Seeds (Beans, Peas, Lettuce, Grains): Allow pods/seed heads to dry completely on the plant. Harvest, shell, and clean the seeds, removing chaff.
- Wet Seeds (Tomatoes, Cucumbers, Squash): For tomatoes, ferment the seeds in water for a few days to remove the gel coating and inhibit disease. For cucumbers/squash, scrape out seeds, wash thoroughly, and dry.
- Drying: Spread seeds thinly on screens or paper plates in a cool, dry, well-ventilated area for 1-4 weeks. Ensure they are bone-dry before storage. I aim for less than 8% moisture content.
- Storage: Store seeds in airtight containers (glass jars with desiccant packets work well) in a cool, dark, dry place (ideally 40-50°F and 30-40% humidity). Label clearly with variety and date. Properly stored seeds can remain viable for 3-10 years or more.
Step 8: Season Extension & Winterizing
Extend your harvest and protect your garden for the off-season to truly maximize your self sufficient garden from scratch.
- Cold Frames: Simple structures with a transparent top (glass, polycarbonate, or old windows) that sit over garden beds. They trap solar heat, allowing you to grow cold-hardy crops (lettuce, spinach, kale, radishes) well into winter or start seeds earlier in spring. A basic cold frame can be built from 2×6 lumber and a sheet of polycarbonate for under $100.
- Hoop Houses/Low Tunnels: Larger structures made from flexible hoops (PVC pipe or EMT conduit) covered with greenhouse plastic. These provide more space and greater temperature moderation. A 10×20 ft DIY low tunnel kit can cost $200-$500, while a larger, more robust hoop house kit might be $1,000-$3,000. I use a 6×12 ft low tunnel made from 1/2-inch PVC hoops and 6mil greenhouse plastic, which extends my lettuce and spinach harvest by at least
Healthy soil is the bedrock of a productive, self-sufficient garden. You can’t guess what your soil needs; you have to test it.
- Perform a Soil Test: A professional soil test will give you precise data on your soil’s pH, nutrient levels (N-P-K), and organic matter content. I recommend sending a sample to your local agricultural extension office; it typically costs $20-$50 and provides detailed recommendations. Alternatively, for a quick homeowner check, a Rapitest Soil Test Kit (40-test kit, model 1663, ~$20 on Amazon) provides a good baseline for pH, Nitrogen, Phosphorus, and Potash. Aim for a pH between 6.0 and 7.0 for most vegetables.
- Amend for pH Imbalance: If your soil is too acidic (below 6.0), add agricultural lime (dolomitic lime adds magnesium, calcitic lime adds calcium). Apply 5-10 lbs per 100 sq ft for a moderate adjustment. If it’s too alkaline (above 7.0), add elemental sulfur (e.g., Espoma Soil Acidifier, ~$15 for 6.75 lbs) or generous amounts of organic matter like peat moss or pine needles.
- Build Organic Matter: This is the single most important step for long-term soil health. Organic matter improves soil structure, water retention, drainage, and nutrient availability. Incorporate 2-4 inches of high-quality compost into your top 6-12 inches of soil annually. I make my own compost from kitchen scraps, garden waste, and shredded leaves, but you can purchase it. Local nurseries often sell bulk compost for $30-$50 per cubic yard. Aged manure (from chickens, cows, or horses – ensure it’s well-rotted to avoid burning plants) is also excellent.
- Address Nutrient Deficiencies: Based on your soil test, add specific organic amendments. If Nitrogen (N) is low, add blood meal (12-0-0, ~$20 for 3 lbs) or feather meal. For Phosphorus (P), use bone meal (3-15-0, ~$15 for 3 lbs) or rock phosphate. For Potassium (K), greensand (0-0-2.5, ~$25 for 5 lbs) or kelp meal are good choices. I rely heavily on Espoma Organic Garden-tone (5-3-3, ~$25 for an 8lb bag) as a balanced, all-purpose organic fertilizer during planting.
Step 3: Garden Bed Preparation
Deciding between raised beds and in-ground beds depends on your soil, budget, and physical capabilities.
- In-Ground Beds: If you have excellent native soil and good drainage, in-ground beds are the most economical. Double-digging (loosening soil two shovel depths) can significantly improve drainage and aeration. For my main garden, I primarily use in-ground beds, but I focus on building up the soil over time with consistent compost additions and cover cropping. I aim for beds that are no wider than 3-4 feet so I can reach the center without stepping on the soil, compacting it.
- Raised Beds: Raised beds offer numerous advantages, especially for poor soil, heavy clay, or rocky areas. They provide better drainage, warm up faster in spring, reduce compaction, and make weeding and harvesting easier on your back.
- Material Options:
- Untreated Cedar: Naturally rot-resistant and chemical-free. A 4×8 ft bed, 12 inches deep, typically requires three 2x12x8 ft cedar boards, costing around $50-$60 per board (total ~$150-$180) plus corner brackets or screws. My first raised beds were cedar and are still going strong after 7 years.
- Galvanized Steel: Durable, long-lasting, and aesthetically pleasing. Brands like Vego Garden offer modular kits. A Vego Garden 17″ Tall 8-in-1 Metal Raised Garden Bed (can be configured to 4×8 ft) costs approximately $250-$300.
- Concrete Blocks/Stones: Very durable but can leach minerals (though generally safe once weathered) and can be expensive.
- Recycled Materials: Pallets (check for chemical treatment stamps like « HT » for heat-treated), old tires (controversial due to potential chemical leaching).
- Filling Raised Beds: Don’t just fill with topsoil. Use a « Hugelkultur » approach (logs, branches, leaves, then compost, then topsoil) or a mixture of 60% good quality topsoil, 30% compost, and 10% perlite or vermiculite for drainage. A 4x8x1 ft raised bed requires about 32 cubic feet (or ~1.2 cubic yards) of soil mix, which can cost $100-$200 depending on your source.
- Material Options:
Step 4: Water Management & Irrigation
Efficient water management is critical for a self sufficient garden from scratch, especially in off-grid living where water resources might be limited.
- Rainwater Harvesting: This is my primary source of irrigation water. A 55-gallon rain barrel (e.g., EarthMark Rain Barrel, ~$120-$150) connected to a downspout can collect significant water. For larger needs, I use two 275-gallon IBC totes (Intermediate Bulk Containers, often available used for $100-$200 each from food-grade sources) connected in series. A 1,000 sq ft roof can collect approximately 620 gallons of water for every inch of rainfall. My 1,500 sq ft roof provides ample water for my 600 sq ft garden through multiple barrels and totes.
- Drip Irrigation: This is by far the most water-efficient method, delivering water directly to the plant’s root zone, minimizing evaporation and weed growth.
- Components: A typical drip system includes a pressure regulator (e.g., Rain Bird PRV-10, ~$15), a filter (Rain Bird RBY filter, ~$20), main tubing (1/2-inch poly tubing, 100ft ~$25), smaller feeder lines (1/4-inch tubing), and emitters (0.5 GPH or 1 GPH per plant).
- Kits: For beginners, a starter kit like the Rain Bird Drip Irrigation Garden Kit (model DDI-KIT-1P, ~$40-$60) is excellent for a small garden. For larger setups, I use Netafim Techline CV Drip Line (500ft roll, ~$150-$200), which has pressure-compensating emitters built-in, ensuring even watering across long runs.
- Automation: For true self-sufficiency, consider a battery-powered timer (e.g., Orbit B-Hyve Bluetooth Hose Faucet Timer, ~$50) or a solar-powered timer connected to a small 12V pump.
- Solar-Powered Pumps: For lifting water from a well, pond, or large storage tank to your garden, a solar pump is a game-changer. For a smaller drip system, a Shurflo 2088-594-152 Diaphragm Pump (12V, 3.5 GPM, ~$180) can be powered by a single 100W solar panel (e.g., Renogy 100W Monocrystalline Solar Panel, ~$100) and a small 12V battery (e.g., a 50Ah LiFePO4 battery like the Battle Born 50Ah, ~$450). For larger operations or deeper wells, more robust systems are needed. If you’re looking to build out a comprehensive off-grid power system to support your garden’s water needs, or indeed your entire homestead, you might want to explore resources like the Power Grid Generator complete system guide to understand the full scope of what’s possible in terms of energy independence.
Step 5: Seed Selection & Planting
The choice of seeds is crucial for a truly self sufficient garden from scratch.
- Choose Heirloom & Open-Pollinated Seeds: These varieties produce seeds that will grow true to type, meaning you can save seeds from your harvest year after year. F1 hybrids, while often vigorous, will not produce consistent offspring from saved seeds. Reputable seed companies include Baker Creek Heirloom Seeds, High Mowing Organic Seeds, and Seed Savers Exchange. Start with common, reliable varieties like ‘Black Krim’ tomatoes, ‘Provider’ bush beans, ‘Waltham Butternut’ squash, and ‘Black Seeded Simpson’ lettuce.
- Start Seeds Indoors (Optional but Recommended): For longer growing seasons or specific crops, starting seeds indoors gives you a head start. Use seed-starting mix (e.g., Espoma Organic Seed Starter Mix, ~$10 for 16qt bag) in seed trays (Jiffy Professional Greenhouse 72-cell kit, ~$15). Provide adequate light with LED grow lights (Barrina T5 2ft 4-pack LED Grow Lights, 20W each, ~$50) for 14-16 hours a day, positioned 2-4 inches above seedlings. Maintain consistent temperatures (65-75°F for most).
- Direct Sowing vs. Transplanting: Some crops (carrots, radishes, beans, corn) prefer direct sowing into the garden bed. Others (tomatoes, peppers, broccoli, kale) benefit from being started indoors and transplanted. Follow seed packet instructions for planting depths (e.g., lettuce seeds are often surface-sown or planted 1/8 inch deep, while beans are 1 inch deep) and spacing.
- Companion Planting: Strategically plant different species together to enhance growth, deter pests, and attract beneficial insects. For example, planting marigolds near tomatoes can deter nematodes, and basil improves tomato flavor. Nasturtiums can act as a trap crop for aphids.
- Succession Planting: For a continuous harvest, plant small batches of quick-growing crops (lettuce, radishes, cilantro) every 2-3 weeks. As one crop finishes, another is ready to take its place.
Step 6: Pest & Disease Management (Organic)
Maintaining a self sufficient garden from scratch means embracing organic pest and disease control.
- Integrated Pest Management (IPM): This holistic approach combines several strategies.
- Observation: Regularly inspect your plants for early signs of pests or disease. Catching issues early is key.
- Physical Barriers: Use row covers (e.g., Agribon AG-19 floating row cover, 10×20 ft, ~$20) to protect young plants from insect pests like cabbage worms and squash bugs. Install fences (e.g., 2×4 welded wire mesh, 4 ft tall, 50 ft roll ~$70) to keep out deer, rabbits, and other larger animals.
- Hand-Picking: For larger pests like tomato hornworms or squash bugs, simply pick them off and drop them into a bucket of soapy water.
- Companion Planting: As mentioned, certain plants repel pests. Marigolds, garlic, and onions are excellent deterrents.
- Attract Beneficial Insects: Plant flowers like dill, fennel, cosmos, and sweet alyssum to attract ladybugs, lacewings, and parasitic wasps, which prey on common garden pests.
- Organic Sprays & Treatments:
- Neem Oil: An excellent broad-spectrum organic insecticide and fungicide. Bonide Neem Oil Concentrate (16oz, ~$20) can be mixed at a rate of 1-2 tbsp per gallon of water and sprayed on affected plants.
- Insecticidal Soap: Effective against soft-bodied insects like aphids, whiteflies, and spider mites. Garden Safe Insecticidal Soap (24oz ready-to-use, ~$10).
- Bacillus thuringiensis (Bt): A naturally occurring soil bacterium that targets caterpillars and worms. Monterey BT Worm & Caterpillar Killer (16oz, ~$18) is highly effective and safe for beneficial insects.
- Copper or Sulfur Sprays: For fungal diseases like powdery mildew or blight, organic copper (e.g., Bonide Copper Fungicide, ~$15 for 1lb) or sulfur (e.g., Safer Brand Garden Fungicide, ~$10 for 16oz) can be used as a last resort.
Step 7: Harvesting & Seed Saving
The culmination of your efforts is the harvest, and seed saving closes the loop on self-sufficiency.
- Harvesting Techniques:
- Timing: Harvest vegetables at their peak ripeness for best flavor and nutritional value. For example, green beans should snap cleanly, cucumbers should be firm, and tomatoes should be fully colored.
- Frequency: Many crops, like zucchini, cucumbers, and bush beans, produce more if harvested frequently. Pick daily or every other day.
- Tools: Use clean, sharp pruners (e.g., Corona ClassicCUT Bypass Pruner BP 3180, ~$30) or a sharp knife for clean cuts, minimizing damage to the plant.
- Seed Saving: This is where the « self-sufficient » aspect truly shines.
- Selection: Only save seeds from your healthiest, most vigorous plants that show desired traits (disease resistance, good flavor, high yield).
- Isolation: To ensure true-to-type seeds, prevent cross-pollination. This can be challenging for open-pollinated crops that readily cross (e.g., squash, corn). For beginners, focus on self-pollinating plants like beans, peas, lettuce, and tomatoes.
- Processing:
- Dry Seeds (Beans, Peas, Lettuce, Grains): Allow pods/seed heads to dry completely on the plant. Harvest, shell, and clean the seeds, removing chaff.
- Wet Seeds (Tomatoes, Cucumbers, Squash): For tomatoes, ferment the seeds in water for a few days to remove the gel coating and inhibit disease. For cucumbers/squash, scrape out seeds, wash thoroughly, and dry.
- Drying: Spread seeds thinly on screens or paper plates in a cool, dry, well-ventilated area for 1-4 weeks. Ensure they are bone-dry before storage. I aim for less than 8% moisture content.
- Storage: Store seeds in airtight containers (glass jars with desiccant packets work well) in a cool, dark, dry place (ideally 40-50°F and 30-40% humidity). Label clearly with variety and date. Properly stored seeds can remain viable for 3-10 years or more.
Step 8: Season Extension & Winterizing
Extend your harvest and protect your garden for the off-season to truly maximize your self sufficient garden from scratch.
- Cold Frames: Simple structures with a transparent top (glass, polycarbonate, or old windows) that sit over garden beds. They trap solar heat, allowing you to grow cold-hardy crops (lettuce, spinach, kale, radishes) well into winter or start seeds earlier in spring. A basic cold frame can be built from 2×6 lumber and a sheet of polycarbonate for under $100.
- Hoop Houses/Low Tunnels: Larger structures made from flexible hoops (PVC pipe or EMT conduit) covered with greenhouse plastic. These provide more space and greater temperature moderation. A 10×20 ft DIY low tunnel kit can cost $200-$500, while a larger, more robust hoop house kit might be $1,000-$3,000. I use a 6×12 ft low tunnel made from 1/2-inch PVC hoops and 6mil greenhouse plastic, which extends my lettuce and spinach harvest by at least
The culmination of your efforts is the harvest, and seed saving closes the loop on self-sufficiency.
- Harvesting Techniques:
- Timing: Harvest vegetables at their peak ripeness for best flavor and nutritional value. For example, green beans should snap cleanly, cucumbers should be firm, and tomatoes should be fully colored.
- Frequency: Many crops, like zucchini, cucumbers, and bush beans, produce more if harvested frequently. Pick daily or every other day.
- Tools: Use clean, sharp pruners (e.g., Corona ClassicCUT Bypass Pruner BP 3180, ~$30) or a sharp knife for clean cuts, minimizing damage to the plant.
- Seed Saving: This is where the « self-sufficient » aspect truly shines.
- Selection: Only save seeds from your healthiest, most vigorous plants that show desired traits (disease resistance, good flavor, high yield).
- Isolation: To ensure true-to-type seeds, prevent cross-pollination. This can be challenging for open-pollinated crops that readily cross (e.g., squash, corn). For beginners, focus on self-pollinating plants like beans, peas, lettuce, and tomatoes.
- Processing:
- Dry Seeds (Beans, Peas, Lettuce, Grains): Allow pods/seed heads to dry completely on the plant. Harvest, shell, and clean the seeds, removing chaff.
- Wet Seeds (Tomatoes, Cucumbers, Squash): For tomatoes, ferment the seeds in water for a few days to remove the gel coating and inhibit disease. For cucumbers/squash, scrape out seeds, wash thoroughly, and dry.
- Drying: Spread seeds thinly on screens or paper plates in a cool, dry, well-ventilated area for 1-4 weeks. Ensure they are bone-dry before storage. I aim for less than 8% moisture content.
- Storage: Store seeds in airtight containers (glass jars with desiccant packets work well) in a cool, dark, dry place (ideally 40-50°F and 30-40% humidity). Label clearly with variety and date. Properly stored seeds can remain viable for 3-10 years or more.
Step 8: Season Extension & Winterizing
Extend your harvest and protect your garden for the off-season to truly maximize your self sufficient garden from scratch.
- Cold Frames: Simple structures with a transparent top (glass, polycarbonate, or old windows) that sit over garden beds. They trap solar heat, allowing you to grow cold-hardy crops (lettuce, spinach, kale, radishes) well into winter or start seeds earlier in spring. A basic cold frame can be built from 2×6 lumber and a sheet of polycarbonate for under $100.
- Hoop Houses/Low Tunnels: Larger structures made from flexible hoops (PVC pipe or EMT conduit) covered with greenhouse plastic. These provide more space and greater temperature moderation. A 10×20 ft DIY low tunnel kit can cost $200-$500, while a larger, more robust hoop house kit might be $1,000-$3,000. I use a 6×12 ft low tunnel made from 1/2-inch PVC hoops and 6mil greenhouse plastic, which extends my lettuce and spinach harvest by at least
Deciding between raised beds and in-ground beds depends on your soil, budget, and physical capabilities.
- In-Ground Beds: If you have excellent native soil and good drainage, in-ground beds are the most economical. Double-digging (loosening soil two shovel depths) can significantly improve drainage and aeration. For my main garden, I primarily use in-ground beds, but I focus on building up the soil over time with consistent compost additions and cover cropping. I aim for beds that are no wider than 3-4 feet so I can reach the center without stepping on the soil, compacting it.
- Raised Beds: Raised beds offer numerous advantages, especially for poor soil, heavy clay, or rocky areas. They provide better drainage, warm up faster in spring, reduce compaction, and make weeding and harvesting easier on your back.
- Material Options:
- Untreated Cedar: Naturally rot-resistant and chemical-free. A 4×8 ft bed, 12 inches deep, typically requires three 2x12x8 ft cedar boards, costing around $50-$60 per board (total ~$150-$180) plus corner brackets or screws. My first raised beds were cedar and are still going strong after 7 years.
- Galvanized Steel: Durable, long-lasting, and aesthetically pleasing. Brands like Vego Garden offer modular kits. A Vego Garden 17″ Tall 8-in-1 Metal Raised Garden Bed (can be configured to 4×8 ft) costs approximately $250-$300.
- Concrete Blocks/Stones: Very durable but can leach minerals (though generally safe once weathered) and can be expensive.
- Recycled Materials: Pallets (check for chemical treatment stamps like « HT » for heat-treated), old tires (controversial due to potential chemical leaching).
- Filling Raised Beds: Don’t just fill with topsoil. Use a « Hugelkultur » approach (logs, branches, leaves, then compost, then topsoil) or a mixture of 60% good quality topsoil, 30% compost, and 10% perlite or vermiculite for drainage. A 4x8x1 ft raised bed requires about 32 cubic feet (or ~1.2 cubic yards) of soil mix, which can cost $100-$200 depending on your source.
- Material Options:
Step 4: Water Management & Irrigation
Efficient water management is critical for a self sufficient garden from scratch, especially in off-grid living where water resources might be limited.
- Rainwater Harvesting: This is my primary source of irrigation water. A 55-gallon rain barrel (e.g., EarthMark Rain Barrel, ~$120-$150) connected to a downspout can collect significant water. For larger needs, I use two 275-gallon IBC totes (Intermediate Bulk Containers, often available used for $100-$200 each from food-grade sources) connected in series. A 1,000 sq ft roof can collect approximately 620 gallons of water for every inch of rainfall. My 1,500 sq ft roof provides ample water for my 600 sq ft garden through multiple barrels and totes.
- Drip Irrigation: This is by far the most water-efficient method, delivering water directly to the plant’s root zone, minimizing evaporation and weed growth.
- Components: A typical drip system includes a pressure regulator (e.g., Rain Bird PRV-10, ~$15), a filter (Rain Bird RBY filter, ~$20), main tubing (1/2-inch poly tubing, 100ft ~$25), smaller feeder lines (1/4-inch tubing), and emitters (0.5 GPH or 1 GPH per plant).
- Kits: For beginners, a starter kit like the Rain Bird Drip Irrigation Garden Kit (model DDI-KIT-1P, ~$40-$60) is excellent for a small garden. For larger setups, I use Netafim Techline CV Drip Line (500ft roll, ~$150-$200), which has pressure-compensating emitters built-in, ensuring even watering across long runs.
- Automation: For true self-sufficiency, consider a battery-powered timer (e.g., Orbit B-Hyve Bluetooth Hose Faucet Timer, ~$50) or a solar-powered timer connected to a small 12V pump.
- Solar-Powered Pumps: For lifting water from a well, pond, or large storage tank to your garden, a solar pump is a game-changer. For a smaller drip system, a Shurflo 2088-594-152 Diaphragm Pump (12V, 3.5 GPM, ~$180) can be powered by a single 100W solar panel (e.g., Renogy 100W Monocrystalline Solar Panel, ~$100) and a small 12V battery (e.g., a 50Ah LiFePO4 battery like the Battle Born 50Ah, ~$450). For larger operations or deeper wells, more robust systems are needed. If you’re looking to build out a comprehensive off-grid power system to support your garden’s water needs, or indeed your entire homestead, you might want to explore resources like the Power Grid Generator complete system guide to understand the full scope of what’s possible in terms of energy independence.
Step 5: Seed Selection & Planting
The choice of seeds is crucial for a truly self sufficient garden from scratch.
- Choose Heirloom & Open-Pollinated Seeds: These varieties produce seeds that will grow true to type, meaning you can save seeds from your harvest year after year. F1 hybrids, while often vigorous, will not produce consistent offspring from saved seeds. Reputable seed companies include Baker Creek Heirloom Seeds, High Mowing Organic Seeds, and Seed Savers Exchange. Start with common, reliable varieties like ‘Black Krim’ tomatoes, ‘Provider’ bush beans, ‘Waltham Butternut’ squash, and ‘Black Seeded Simpson’ lettuce.
- Start Seeds Indoors (Optional but Recommended): For longer growing seasons or specific crops, starting seeds indoors gives you a head start. Use seed-starting mix (e.g., Espoma Organic Seed Starter Mix, ~$10 for 16qt bag) in seed trays (Jiffy Professional Greenhouse 72-cell kit, ~$15). Provide adequate light with LED grow lights (Barrina T5 2ft 4-pack LED Grow Lights, 20W each, ~$50) for 14-16 hours a day, positioned 2-4 inches above seedlings. Maintain consistent temperatures (65-75°F for most).
- Direct Sowing vs. Transplanting: Some crops (carrots, radishes, beans, corn) prefer direct sowing into the garden bed. Others (tomatoes, peppers, broccoli, kale) benefit from being started indoors and transplanted. Follow seed packet instructions for planting depths (e.g., lettuce seeds are often surface-sown or planted 1/8 inch deep, while beans are 1 inch deep) and spacing.
- Companion Planting: Strategically plant different species together to enhance growth, deter pests, and attract beneficial insects. For example, planting marigolds near tomatoes can deter nematodes, and basil improves tomato flavor. Nasturtiums can act as a trap crop for aphids.
- Succession Planting: For a continuous harvest, plant small batches of quick-growing crops (lettuce, radishes, cilantro) every 2-3 weeks. As one crop finishes, another is ready to take its place.
Step 6: Pest & Disease Management (Organic)
Maintaining a self sufficient garden from scratch means embracing organic pest and disease control.
- Integrated Pest Management (IPM): This holistic approach combines several strategies.
- Observation: Regularly inspect your plants for early signs of pests or disease. Catching issues early is key.
- Physical Barriers: Use row covers (e.g., Agribon AG-19 floating row cover, 10×20 ft, ~$20) to protect young plants from insect pests like cabbage worms and squash bugs. Install fences (e.g., 2×4 welded wire mesh, 4 ft tall, 50 ft roll ~$70) to keep out deer, rabbits, and other larger animals.
- Hand-Picking: For larger pests like tomato hornworms or squash bugs, simply pick them off and drop them into a bucket of soapy water.
- Companion Planting: As mentioned, certain plants repel pests. Marigolds, garlic, and onions are excellent deterrents.
- Attract Beneficial Insects: Plant flowers like dill, fennel, cosmos, and sweet alyssum to attract ladybugs, lacewings, and parasitic wasps, which prey on common garden pests.
- Organic Sprays & Treatments:
- Neem Oil: An excellent broad-spectrum organic insecticide and fungicide. Bonide Neem Oil Concentrate (16oz, ~$20) can be mixed at a rate of 1-2 tbsp per gallon of water and sprayed on affected plants.
- Insecticidal Soap: Effective against soft-bodied insects like aphids, whiteflies, and spider mites. Garden Safe Insecticidal Soap (24oz ready-to-use, ~$10).
- Bacillus thuringiensis (Bt): A naturally occurring soil bacterium that targets caterpillars and worms. Monterey BT Worm & Caterpillar Killer (16oz, ~$18) is highly effective and safe for beneficial insects.
- Copper or Sulfur Sprays: For fungal diseases like powdery mildew or blight, organic copper (e.g., Bonide Copper Fungicide, ~$15 for 1lb) or sulfur (e.g., Safer Brand Garden Fungicide, ~$10 for 16oz) can be used as a last resort.
Step 7: Harvesting & Seed Saving
The culmination of your efforts is the harvest, and seed saving closes the loop on self-sufficiency.
- Harvesting Techniques:
- Timing: Harvest vegetables at their peak ripeness for best flavor and nutritional value. For example, green beans should snap cleanly, cucumbers should be firm, and tomatoes should be fully colored.
- Frequency: Many crops, like zucchini, cucumbers, and bush beans, produce more if harvested frequently. Pick daily or every other day.
- Tools: Use clean, sharp pruners (e.g., Corona ClassicCUT Bypass Pruner BP 3180, ~$30) or a sharp knife for clean cuts, minimizing damage to the plant.
- Seed Saving: This is where the « self-sufficient » aspect truly shines.
- Selection: Only save seeds from your healthiest, most vigorous plants that show desired traits (disease resistance, good flavor, high yield).
- Isolation: To ensure true-to-type seeds, prevent cross-pollination. This can be challenging for open-pollinated crops that readily cross (e.g., squash, corn). For beginners, focus on self-pollinating plants like beans, peas, lettuce, and tomatoes.
- Processing:
- Dry Seeds (Beans, Peas, Lettuce, Grains): Allow pods/seed heads to dry completely on the plant. Harvest, shell, and clean the seeds, removing chaff.
- Wet Seeds (Tomatoes, Cucumbers, Squash): For tomatoes, ferment the seeds in water for a few days to remove the gel coating and inhibit disease. For cucumbers/squash, scrape out seeds, wash thoroughly, and dry.
- Drying: Spread seeds thinly on screens or paper plates in a cool, dry, well-ventilated area for 1-4 weeks. Ensure they are bone-dry before storage. I aim for less than 8% moisture content.
- Storage: Store seeds in airtight containers (glass jars with desiccant packets work well) in a cool, dark, dry place (ideally 40-50°F and 30-40% humidity). Label clearly with variety and date. Properly stored seeds can remain viable for 3-10 years or more.
Step 8: Season Extension & Winterizing
Extend your harvest and protect your garden for the off-season to truly maximize your self sufficient garden from scratch.
- Cold Frames: Simple structures with a transparent top (glass, polycarbonate, or old windows) that sit over garden beds. They trap solar heat, allowing you to grow cold-hardy crops (lettuce, spinach, kale, radishes) well into winter or start seeds earlier in spring. A basic cold frame can be built from 2×6 lumber and a sheet of polycarbonate for under $100.
- Hoop Houses/Low Tunnels: Larger structures made from flexible hoops (PVC pipe or EMT conduit) covered with greenhouse plastic. These provide more space and greater temperature moderation. A 10×20 ft DIY low tunnel kit can cost $200-$500, while a larger, more robust hoop house kit might be $1,000-$3,000. I use a 6×12 ft low tunnel made from 1/2-inch PVC hoops and 6mil greenhouse plastic, which extends my lettuce and spinach harvest by at least
Healthy soil is the bedrock of a productive, self-sufficient garden. You can’t guess what your soil needs; you have to test it.
- Perform a Soil Test: A professional soil test will give you precise data on your soil’s pH, nutrient levels (N-P-K), and organic matter content. I recommend sending a sample to your local agricultural extension office; it typically costs $20-$50 and provides detailed recommendations. Alternatively, for a quick homeowner check, a Rapitest Soil Test Kit (40-test kit, model 1663, ~$20 on Amazon) provides a good baseline for pH, Nitrogen, Phosphorus, and Potash. Aim for a pH between 6.0 and 7.0 for most vegetables.
- Amend for pH Imbalance: If your soil is too acidic (below 6.0), add agricultural lime (dolomitic lime adds magnesium, calcitic lime adds calcium). Apply 5-10 lbs per 100 sq ft for a moderate adjustment. If it’s too alkaline (above 7.0), add elemental sulfur (e.g., Espoma Soil Acidifier, ~$15 for 6.75 lbs) or generous amounts of organic matter like peat moss or pine needles.
- Build Organic Matter: This is the single most important step for long-term soil health. Organic matter improves soil structure, water retention, drainage, and nutrient availability. Incorporate 2-4 inches of high-quality compost into your top 6-12 inches of soil annually. I make my own compost from kitchen scraps, garden waste, and shredded leaves, but you can purchase it. Local nurseries often sell bulk compost for $30-$50 per cubic yard. Aged manure (from chickens, cows, or horses – ensure it’s well-rotted to avoid burning plants) is also excellent.
- Address Nutrient Deficiencies: Based on your soil test, add specific organic amendments. If Nitrogen (N) is low, add blood meal (12-0-0, ~$20 for 3 lbs) or feather meal. For Phosphorus (P), use bone meal (3-15-0, ~$15 for 3 lbs) or rock phosphate. For Potassium (K), greensand (0-0-2.5, ~$25 for 5 lbs) or kelp meal are good choices. I rely heavily on Espoma Organic Garden-tone (5-3-3, ~$25 for an 8lb bag) as a balanced, all-purpose organic fertilizer during planting.
Step 3: Garden Bed Preparation
Deciding between raised beds and in-ground beds depends on your soil, budget, and physical capabilities.
- In-Ground Beds: If you have excellent native soil and good drainage, in-ground beds are the most economical. Double-digging (loosening soil two shovel depths) can significantly improve drainage and aeration. For my main garden, I primarily use in-ground beds, but I focus on building up the soil over time with consistent compost additions and cover cropping. I aim for beds that are no wider than 3-4 feet so I can reach the center without stepping on the soil, compacting it.
- Raised Beds: Raised beds offer numerous advantages, especially for poor soil, heavy clay, or rocky areas. They provide better drainage, warm up faster in spring, reduce compaction, and make weeding and harvesting easier on your back.
- Material Options:
- Untreated Cedar: Naturally rot-resistant and chemical-free. A 4×8 ft bed, 12 inches deep, typically requires three 2x12x8 ft cedar boards, costing around $50-$60 per board (total ~$150-$180) plus corner brackets or screws. My first raised beds were cedar and are still going strong after 7 years.
- Galvanized Steel: Durable, long-lasting, and aesthetically pleasing. Brands like Vego Garden offer modular kits. A Vego Garden 17″ Tall 8-in-1 Metal Raised Garden Bed (can be configured to 4×8 ft) costs approximately $250-$300.
- Concrete Blocks/Stones: Very durable but can leach minerals (though generally safe once weathered) and can be expensive.
- Recycled Materials: Pallets (check for chemical treatment stamps like « HT » for heat-treated), old tires (controversial due to potential chemical leaching).
- Filling Raised Beds: Don’t just fill with topsoil. Use a « Hugelkultur » approach (logs, branches, leaves, then compost, then topsoil) or a mixture of 60% good quality topsoil, 30% compost, and 10% perlite or vermiculite for drainage. A 4x8x1 ft raised bed requires about 32 cubic feet (or ~1.2 cubic yards) of soil mix, which can cost $100-$200 depending on your source.
- Material Options:
Step 4: Water Management & Irrigation
Efficient water management is critical for a self sufficient garden from scratch, especially in off-grid living where water resources might be limited.
- Rainwater Harvesting: This is my primary source of irrigation water. A 55-gallon rain barrel (e.g., EarthMark Rain Barrel, ~$120-$150) connected to a downspout can collect significant water. For larger needs, I use two 275-gallon IBC totes (Intermediate Bulk Containers, often available used for $100-$200 each from food-grade sources) connected in series. A 1,000 sq ft roof can collect approximately 620 gallons of water for every inch of rainfall. My 1,500 sq ft roof provides ample water for my 600 sq ft garden through multiple barrels and totes.
- Drip Irrigation: This is by far the most water-efficient method, delivering water directly to the plant’s root zone, minimizing evaporation and weed growth.
- Components: A typical drip system includes a pressure regulator (e.g., Rain Bird PRV-10, ~$15), a filter (Rain Bird RBY filter, ~$20), main tubing (1/2-inch poly tubing, 100ft ~$25), smaller feeder lines (1/4-inch tubing), and emitters (0.5 GPH or 1 GPH per plant).
- Kits: For beginners, a starter kit like the Rain Bird Drip Irrigation Garden Kit (model DDI-KIT-1P, ~$40-$60) is excellent for a small garden. For larger setups, I use Netafim Techline CV Drip Line (500ft roll, ~$150-$200), which has pressure-compensating emitters built-in, ensuring even watering across long runs.
- Automation: For true self-sufficiency, consider a battery-powered timer (e.g., Orbit B-Hyve Bluetooth Hose Faucet Timer, ~$50) or a solar-powered timer connected to a small 12V pump.
- Solar-Powered Pumps: For lifting water from a well, pond, or large storage tank to your garden, a solar pump is a game-changer. For a smaller drip system, a Shurflo 2088-594-152 Diaphragm Pump (12V, 3.5 GPM, ~$180) can be powered by a single 100W solar panel (e.g., Renogy 100W Monocrystalline Solar Panel, ~$100) and a small 12V battery (e.g., a 50Ah LiFePO4 battery like the Battle Born 50Ah, ~$450). For larger operations or deeper wells, more robust systems are needed. If you’re looking to build out a comprehensive off-grid power system to support your garden’s water needs, or indeed your entire homestead, you might want to explore resources like the Power Grid Generator complete system guide to understand the full scope of what’s possible in terms of energy independence.
Step 5: Seed Selection & Planting
The choice of seeds is crucial for a truly self sufficient garden from scratch.
- Choose Heirloom & Open-Pollinated Seeds: These varieties produce seeds that will grow true to type, meaning you can save seeds from your harvest year after year. F1 hybrids, while often vigorous, will not produce consistent offspring from saved seeds. Reputable seed companies include Baker Creek Heirloom Seeds, High Mowing Organic Seeds, and Seed Savers Exchange. Start with common, reliable varieties like ‘Black Krim’ tomatoes, ‘Provider’ bush beans, ‘Waltham Butternut’ squash, and ‘Black Seeded Simpson’ lettuce.
- Start Seeds Indoors (Optional but Recommended): For longer growing seasons or specific crops, starting seeds indoors gives you a head start. Use seed-starting mix (e.g., Espoma Organic Seed Starter Mix, ~$10 for 16qt bag) in seed trays (Jiffy Professional Greenhouse 72-cell kit, ~$15). Provide adequate light with LED grow lights (Barrina T5 2ft 4-pack LED Grow Lights, 20W each, ~$50) for 14-16 hours a day, positioned 2-4 inches above seedlings. Maintain consistent temperatures (65-75°F for most).
- Direct Sowing vs. Transplanting: Some crops (carrots, radishes, beans, corn) prefer direct sowing into the garden bed. Others (tomatoes, peppers, broccoli, kale) benefit from being started indoors and transplanted. Follow seed packet instructions for planting depths (e.g., lettuce seeds are often surface-sown or planted 1/8 inch deep, while beans are 1 inch deep) and spacing.
- Companion Planting: Strategically plant different species together to enhance growth, deter pests, and attract beneficial insects. For example, planting marigolds near tomatoes can deter nematodes, and basil improves tomato flavor. Nasturtiums can act as a trap crop for aphids.
- Succession Planting: For a continuous harvest, plant small batches of quick-growing crops (lettuce, radishes, cilantro) every 2-3 weeks. As one crop finishes, another is ready to take its place.
Step 6: Pest & Disease Management (Organic)
Maintaining a self sufficient garden from scratch means embracing organic pest and disease control.
- Integrated Pest Management (IPM): This holistic approach combines several strategies.
- Observation: Regularly inspect your plants for early signs of pests or disease. Catching issues early is key.
- Physical Barriers: Use row covers (e.g., Agribon AG-19 floating row cover, 10×20 ft, ~$20) to protect young plants from insect pests like cabbage worms and squash bugs. Install fences (e.g., 2×4 welded wire mesh, 4 ft tall, 50 ft roll ~$70) to keep out deer, rabbits, and other larger animals.
- Hand-Picking: For larger pests like tomato hornworms or squash bugs, simply pick them off and drop them into a bucket of soapy water.
- Companion Planting: As mentioned, certain plants repel pests. Marigolds, garlic, and onions are excellent deterrents.
- Attract Beneficial Insects: Plant flowers like dill, fennel, cosmos, and sweet alyssum to attract ladybugs, lacewings, and parasitic wasps, which prey on common garden pests.
- Organic Sprays & Treatments:
- Neem Oil: An excellent broad-spectrum organic insecticide and fungicide. Bonide Neem Oil Concentrate (16oz, ~$20) can be mixed at a rate of 1-2 tbsp per gallon of water and sprayed on affected plants.
- Insecticidal Soap: Effective against soft-bodied insects like aphids, whiteflies, and spider mites. Garden Safe Insecticidal Soap (24oz ready-to-use, ~$10).
- Bacillus thuringiensis (Bt): A naturally occurring soil bacterium that targets caterpillars and worms. Monterey BT Worm & Caterpillar Killer (16oz, ~$18) is highly effective and safe for beneficial insects.
- Copper or Sulfur Sprays: For fungal diseases like powdery mildew or blight, organic copper (e.g., Bonide Copper Fungicide, ~$15 for 1lb) or sulfur (e.g., Safer Brand Garden Fungicide, ~$10 for 16oz) can be used as a last resort.
Step 7: Harvesting & Seed Saving
The culmination of your efforts is the harvest, and seed saving closes the loop on self-sufficiency.
- Harvesting Techniques:
- Timing: Harvest vegetables at their peak ripeness for best flavor and nutritional value. For example, green beans should snap cleanly, cucumbers should be firm, and tomatoes should be fully colored.
- Frequency: Many crops, like zucchini, cucumbers, and bush beans, produce more if harvested frequently. Pick daily or every other day.
- Tools: Use clean, sharp pruners (e.g., Corona ClassicCUT Bypass Pruner BP 3180, ~$30) or a sharp knife for clean cuts, minimizing damage to the plant.
- Seed Saving: This is where the « self-sufficient » aspect truly shines.
- Selection: Only save seeds from your healthiest, most vigorous plants that show desired traits (disease resistance, good flavor, high yield).
- Isolation: To ensure true-to-type seeds, prevent cross-pollination. This can be challenging for open-pollinated crops that readily cross (e.g., squash, corn). For beginners, focus on self-pollinating plants like beans, peas, lettuce, and tomatoes.
- Processing:
- Dry Seeds (Beans, Peas, Lettuce, Grains): Allow pods/seed heads to dry completely on the plant. Harvest, shell, and clean the seeds, removing chaff.
- Wet Seeds (Tomatoes, Cucumbers, Squash): For tomatoes, ferment the seeds in water for a few days to remove the gel coating and inhibit disease. For cucumbers/squash, scrape out seeds, wash thoroughly, and dry.
- Drying: Spread seeds thinly on screens or paper plates in a cool, dry, well-ventilated area for 1-4 weeks. Ensure they are bone-dry before storage. I aim for less than 8% moisture content.
- Storage: Store seeds in airtight containers (glass jars with desiccant packets work well) in a cool, dark, dry place (ideally 40-50°F and 30-40% humidity). Label clearly with variety and date. Properly stored seeds can remain viable for 3-10 years or more.
Step 8: Season Extension & Winterizing
Extend your harvest and protect your garden for the off-season to truly maximize your self sufficient garden from scratch.
- Cold Frames: Simple structures with a transparent top (glass, polycarbonate, or old windows) that sit over garden beds. They trap solar heat, allowing you to grow cold-hardy crops (lettuce, spinach, kale, radishes) well into winter or start seeds earlier in spring. A basic cold frame can be built from 2×6 lumber and a sheet of polycarbonate for under $100.
- Hoop Houses/Low Tunnels: Larger structures made from flexible hoops (PVC pipe or EMT conduit) covered with greenhouse plastic. These provide more space and greater temperature moderation. A 10×20 ft DIY low tunnel kit can cost $200-$500, while a larger, more robust hoop house kit might be $1,000-$3,000. I use a 6×12 ft low tunnel made from 1/2-inch PVC hoops and 6mil greenhouse plastic, which extends my lettuce and spinach harvest by at least
Step 7: Harvesting & Seed Saving
The culmination of your efforts is the harvest, and seed saving closes the loop on self-sufficiency.
- Harvesting Techniques:
- Timing: Harvest vegetables at their peak ripeness for best flavor and nutritional value. For example, green beans should snap cleanly, cucumbers should be firm, and tomatoes should be fully colored.
- Frequency: Many crops, like zucchini, cucumbers, and bush beans, produce more if harvested frequently. Pick daily or every other day.
- Tools: Use clean, sharp pruners (e.g., Corona ClassicCUT Bypass Pruner BP 3180, ~$30) or a sharp knife for clean cuts, minimizing damage to the plant.
- Seed Saving: This is where the « self-sufficient » aspect truly shines.
- Selection: Only save seeds from your healthiest, most vigorous plants that show desired traits (disease resistance, good flavor, high yield).
- Isolation: To ensure true-to-type seeds, prevent cross-pollination. This can be challenging for open-pollinated crops that readily cross (e.g., squash, corn). For beginners, focus on self-pollinating plants like beans, peas, lettuce, and tomatoes.
- Processing:
- Dry Seeds (Beans, Peas, Lettuce, Grains): Allow pods/seed heads to dry completely on the plant. Harvest, shell, and clean the seeds, removing chaff.
- Wet Seeds (Tomatoes, Cucumbers, Squash): For tomatoes, ferment the seeds in water for a few days to remove the gel coating and inhibit disease. For cucumbers/squash, scrape out seeds, wash thoroughly, and dry.
- Drying: Spread seeds thinly on screens or paper plates in a cool, dry, well-ventilated area for 1-4 weeks. Ensure they are bone-dry before storage. I aim for less than 8% moisture content.
- Storage: Store seeds in airtight containers (glass jars with desiccant packets work well) in a cool, dark, dry place (ideally 40-50°F and 30-40% humidity). Label clearly with variety and date. Properly stored seeds can remain viable for 3-10 years or more.
Step 8: Season Extension & Winterizing
Extend your harvest and protect your garden for the off-season to truly maximize your self sufficient garden from scratch.
- Cold Frames: Simple structures with a transparent top (glass, polycarbonate, or old windows) that sit over garden beds. They trap solar heat, allowing you to grow cold-hardy crops (lettuce, spinach, kale, radishes) well into winter or start seeds earlier in spring. A basic cold frame can be built from 2×6 lumber and a sheet of polycarbonate for under $100.
- Hoop Houses/Low Tunnels: Larger structures made from flexible hoops (PVC pipe or EMT conduit) covered with greenhouse plastic. These provide more space and greater temperature moderation. A 10×20 ft DIY low tunnel kit can cost $200-$500, while a larger, more robust hoop house kit might be $1,000-$3,000. I use a 6×12 ft low tunnel made from 1/2-inch PVC hoops and 6mil greenhouse plastic, which extends my lettuce and spinach harvest by at least
Deciding between raised beds and in-ground beds depends on your soil, budget, and physical capabilities.
- In-Ground Beds: If you have excellent native soil and good drainage, in-ground beds are the most economical. Double-digging (loosening soil two shovel depths) can significantly improve drainage and aeration. For my main garden, I primarily use in-ground beds, but I focus on building up the soil over time with consistent compost additions and cover cropping. I aim for beds that are no wider than 3-4 feet so I can reach the center without stepping on the soil, compacting it.
- Raised Beds: Raised beds offer numerous advantages, especially for poor soil, heavy clay, or rocky areas. They provide better drainage, warm up faster in spring, reduce compaction, and make weeding and harvesting easier on your back.
- Material Options:
- Untreated Cedar: Naturally rot-resistant and chemical-free. A 4×8 ft bed, 12 inches deep, typically requires three 2x12x8 ft cedar boards, costing around $50-$60 per board (total ~$150-$180) plus corner brackets or screws. My first raised beds were cedar and are still going strong after 7 years.
- Galvanized Steel: Durable, long-lasting, and aesthetically pleasing. Brands like Vego Garden offer modular kits. A Vego Garden 17″ Tall 8-in-1 Metal Raised Garden Bed (can be configured to 4×8 ft) costs approximately $250-$300.
- Concrete Blocks/Stones: Very durable but can leach minerals (though generally safe once weathered) and can be expensive.
- Recycled Materials: Pallets (check for chemical treatment stamps like « HT » for heat-treated), old tires (controversial due to potential chemical leaching).
- Filling Raised Beds: Don’t just fill with topsoil. Use a « Hugelkultur » approach (logs, branches, leaves, then compost, then topsoil) or a mixture of 60% good quality topsoil, 30% compost, and 10% perlite or vermiculite for drainage. A 4x8x1 ft raised bed requires about 32 cubic feet (or ~1.2 cubic yards) of soil mix, which can cost $100-$200 depending on your source.
- Material Options:
Step 4: Water Management & Irrigation
Efficient water management is critical for a self sufficient garden from scratch, especially in off-grid living where water resources might be limited.
- Rainwater Harvesting: This is my primary source of irrigation water. A 55-gallon rain barrel (e.g., EarthMark Rain Barrel, ~$120-$150) connected to a downspout can collect significant water. For larger needs, I use two 275-gallon IBC totes (Intermediate Bulk Containers, often available used for $100-$200 each from food-grade sources) connected in series. A 1,000 sq ft roof can collect approximately 620 gallons of water for every inch of rainfall. My 1,500 sq ft roof provides ample water for my 600 sq ft garden through multiple barrels and totes.
- Drip Irrigation: This is by far the most water-efficient method, delivering water directly to the plant’s root zone, minimizing evaporation and weed growth.
- Components: A typical drip system includes a pressure regulator (e.g., Rain Bird PRV-10, ~$15), a filter (Rain Bird RBY filter, ~$20), main tubing (1/2-inch poly tubing, 100ft ~$25), smaller feeder lines (1/4-inch tubing), and emitters (0.5 GPH or 1 GPH per plant).
- Kits: For beginners, a starter kit like the Rain Bird Drip Irrigation Garden Kit (model DDI-KIT-1P, ~$40-$60) is excellent for a small garden. For larger setups, I use Netafim Techline CV Drip Line (500ft roll, ~$150-$200), which has pressure-compensating emitters built-in, ensuring even watering across long runs.
- Automation: For true self-sufficiency, consider a battery-powered timer (e.g., Orbit B-Hyve Bluetooth Hose Faucet Timer, ~$50) or a solar-powered timer connected to a small 12V pump.
- Solar-Powered Pumps: For lifting water from a well, pond, or large storage tank to your garden, a solar pump is a game-changer. For a smaller drip system, a Shurflo 2088-594-152 Diaphragm Pump (12V, 3.5 GPM, ~$180) can be powered by a single 100W solar panel (e.g., Renogy 100W Monocrystalline Solar Panel, ~$100) and a small 12V battery (e.g., a 50Ah LiFePO4 battery like the Battle Born 50Ah, ~$450). For larger operations or deeper wells, more robust systems are needed. If you’re looking to build out a comprehensive off-grid power system to support your garden’s water needs, or indeed your entire homestead, you might want to explore resources like the Power Grid Generator complete system guide to understand the full scope of what’s possible in terms of energy independence.
Step 5: Seed Selection & Planting
The choice of seeds is crucial for a truly self sufficient garden from scratch.
- Choose Heirloom & Open-Pollinated Seeds: These varieties produce seeds that will grow true to type, meaning you can save seeds from your harvest year after year. F1 hybrids, while often vigorous, will not produce consistent offspring from saved seeds. Reputable seed companies include Baker Creek Heirloom Seeds, High Mowing Organic Seeds, and Seed Savers Exchange. Start with common, reliable varieties like ‘Black Krim’ tomatoes, ‘Provider’ bush beans, ‘Waltham Butternut’ squash, and ‘Black Seeded Simpson’ lettuce.
- Start Seeds Indoors (Optional but Recommended): For longer growing seasons or specific crops, starting seeds indoors gives you a head start. Use seed-starting mix (e.g., Espoma Organic Seed Starter Mix, ~$10 for 16qt bag) in seed trays (Jiffy Professional Greenhouse 72-cell kit, ~$15). Provide adequate light with LED grow lights (Barrina T5 2ft 4-pack LED Grow Lights, 20W each, ~$50) for 14-16 hours a day, positioned 2-4 inches above seedlings. Maintain consistent temperatures (65-75°F for most).
- Direct Sowing vs. Transplanting: Some crops (carrots, radishes, beans, corn) prefer direct sowing into the garden bed. Others (tomatoes, peppers, broccoli, kale) benefit from being started indoors and transplanted. Follow seed packet instructions for planting depths (e.g., lettuce seeds are often surface-sown or planted 1/8 inch deep, while beans are 1 inch deep) and spacing.
- Companion Planting: Strategically plant different species together to enhance growth, deter pests, and attract beneficial insects. For example, planting marigolds near tomatoes can deter nematodes, and basil improves tomato flavor. Nasturtiums can act as a trap crop for aphids.
- Succession Planting: For a continuous harvest, plant small batches of quick-growing crops (lettuce, radishes, cilantro) every 2-3 weeks. As one crop finishes, another is ready to take its place.
Step 6: Pest & Disease Management (Organic)
Maintaining a self sufficient garden from scratch means embracing organic pest and disease control.
- Integrated Pest Management (IPM): This holistic approach combines several strategies.
- Observation: Regularly inspect your plants for early signs of pests or disease. Catching issues early is key.
- Physical Barriers: Use row covers (e.g., Agribon AG-19 floating row cover, 10×20 ft, ~$20) to protect young plants from insect pests like cabbage worms and squash bugs. Install fences (e.g., 2×4 welded wire mesh, 4 ft tall, 50 ft roll ~$70) to keep out deer, rabbits, and other larger animals.
- Hand-Picking: For larger pests like tomato hornworms or squash bugs, simply pick them off and drop them into a bucket of soapy water.
- Companion Planting: As mentioned, certain plants repel pests. Marigolds, garlic, and onions are excellent deterrents.
- Attract Beneficial Insects: Plant flowers like dill, fennel, cosmos, and sweet alyssum to attract ladybugs, lacewings, and parasitic wasps, which prey on common garden pests.
- Organic Sprays & Treatments:
- Neem Oil: An excellent broad-spectrum organic insecticide and fungicide. Bonide Neem Oil Concentrate (16oz, ~$20) can be mixed at a rate of 1-2 tbsp per gallon of water and sprayed on affected plants.
- Insecticidal Soap: Effective against soft-bodied insects like aphids, whiteflies, and spider mites. Garden Safe Insecticidal Soap (24oz ready-to-use, ~$10).
- Bacillus thuringiensis (Bt): A naturally occurring soil bacterium that targets caterpillars and worms. Monterey BT Worm & Caterpillar Killer (16oz, ~$18) is highly effective and safe for beneficial insects.
- Copper or Sulfur Sprays: For fungal diseases like powdery mildew or blight, organic copper (e.g., Bonide Copper Fungicide, ~$15 for 1lb) or sulfur (e.g., Safer Brand Garden Fungicide, ~$10 for 16oz) can be used as a last resort.
Step 7: Harvesting & Seed Saving
The culmination of your efforts is the harvest, and seed saving closes the loop on self-sufficiency.
- Harvesting Techniques:
- Timing: Harvest vegetables at their peak ripeness for best flavor and nutritional value. For example, green beans should snap cleanly, cucumbers should be firm, and tomatoes should be fully colored.
- Frequency: Many crops, like zucchini, cucumbers, and bush beans, produce more if harvested frequently. Pick daily or every other day.
- Tools: Use clean, sharp pruners (e.g., Corona ClassicCUT Bypass Pruner BP 3180, ~$30) or a sharp knife for clean cuts, minimizing damage to the plant.
- Seed Saving: This is where the « self-sufficient » aspect truly shines.
- Selection: Only save seeds from your healthiest, most vigorous plants that show desired traits (disease resistance, good flavor, high yield).
- Isolation: To ensure true-to-type seeds, prevent cross-pollination. This can be challenging for open-pollinated crops that readily cross (e.g., squash, corn). For beginners, focus on self-pollinating plants like beans, peas, lettuce, and tomatoes.
- Processing:
- Dry Seeds (Beans, Peas, Lettuce, Grains): Allow pods/seed heads to dry completely on the plant. Harvest, shell, and clean the seeds, removing chaff.
- Wet Seeds (Tomatoes, Cucumbers, Squash): For tomatoes, ferment the seeds in water for a few days to remove the gel coating and inhibit disease. For cucumbers/squash, scrape out seeds, wash thoroughly, and dry.
- Drying: Spread seeds thinly on screens or paper plates in a cool, dry, well-ventilated area for 1-4 weeks. Ensure they are bone-dry before storage. I aim for less than 8% moisture content.
- Storage: Store seeds in airtight containers (glass jars with desiccant packets work well) in a cool, dark, dry place (ideally 40-50°F and 30-40% humidity). Label clearly with variety and date. Properly stored seeds can remain viable for 3-10 years or more.
Step 8: Season Extension & Winterizing
Extend your harvest and protect your garden for the off-season to truly maximize your self sufficient garden from scratch.
- Cold Frames: Simple structures with a transparent top (glass, polycarbonate, or old windows) that sit over garden beds. They trap solar heat, allowing you to grow cold-hardy crops (lettuce, spinach, kale, radishes) well into winter or start seeds earlier in spring. A basic cold frame can be built from 2×6 lumber and a sheet of polycarbonate for under $100.
- Hoop Houses/Low Tunnels: Larger structures made from flexible hoops (PVC pipe or EMT conduit) covered with greenhouse plastic. These provide more space and greater temperature moderation. A 10×20 ft DIY low tunnel kit can cost $200-$500, while a larger, more robust hoop house kit might be $1,000-$3,000. I use a 6×12 ft low tunnel made from 1/2-inch PVC hoops and 6mil greenhouse plastic, which extends my lettuce and spinach harvest by at least
Healthy soil is the bedrock of a productive, self-sufficient garden. You can’t guess what your soil needs; you have to test it.
- Perform a Soil Test: A professional soil test will give you precise data on your soil’s pH, nutrient levels (N-P-K), and organic matter content. I recommend sending a sample to your local agricultural extension office; it typically costs $20-$50 and provides detailed recommendations. Alternatively, for a quick homeowner check, a Rapitest Soil Test Kit (40-test kit, model 1663, ~$20 on Amazon) provides a good baseline for pH, Nitrogen, Phosphorus, and Potash. Aim for a pH between 6.0 and 7.0 for most vegetables.
- Amend for pH Imbalance: If your soil is too acidic (below 6.0), add agricultural lime (dolomitic lime adds magnesium, calcitic lime adds calcium). Apply 5-10 lbs per 100 sq ft for a moderate adjustment. If it’s too alkaline (above 7.0), add elemental sulfur (e.g., Espoma Soil Acidifier, ~$15 for 6.75 lbs) or generous amounts of organic matter like peat moss or pine needles.
- Build Organic Matter: This is the single most important step for long-term soil health. Organic matter improves soil structure, water retention, drainage, and nutrient availability. Incorporate 2-4 inches of high-quality compost into your top 6-12 inches of soil annually. I make my own compost from kitchen scraps, garden waste, and shredded leaves, but you can purchase it. Local nurseries often sell bulk compost for $30-$50 per cubic yard. Aged manure (from chickens, cows, or horses – ensure it’s well-rotted to avoid burning plants) is also excellent.
- Address Nutrient Deficiencies: Based on your soil test, add specific organic amendments. If Nitrogen (N) is low, add blood meal (12-0-0, ~$20 for 3 lbs) or feather meal. For Phosphorus (P), use bone meal (3-15-0, ~$15 for 3 lbs) or rock phosphate. For Potassium (K), greensand (0-0-2.5, ~$25 for 5 lbs) or kelp meal are good choices. I rely heavily on Espoma Organic Garden-tone (5-3-3, ~$25 for an 8lb bag) as a balanced, all-purpose organic fertilizer during planting.
Step 3: Garden Bed Preparation
Deciding between raised beds and in-ground beds depends on your soil, budget, and physical capabilities.
- In-Ground Beds: If you have excellent native soil and good drainage, in-ground beds are the most economical. Double-digging (loosening soil two shovel depths) can significantly improve drainage and aeration. For my main garden, I primarily use in-ground beds, but I focus on building up the soil over time with consistent compost additions and cover cropping. I aim for beds that are no wider than 3-4 feet so I can reach the center without stepping on the soil, compacting it.
- Raised Beds: Raised beds offer numerous advantages, especially for poor soil, heavy clay, or rocky areas. They provide better drainage, warm up faster in spring, reduce compaction, and make weeding and harvesting easier on your back.
- Material Options:
- Untreated Cedar: Naturally rot-resistant and chemical-free. A 4×8 ft bed, 12 inches deep, typically requires three 2x12x8 ft cedar boards, costing around $50-$60 per board (total ~$150-$180) plus corner brackets or screws. My first raised beds were cedar and are still going strong after 7 years.
- Galvanized Steel: Durable, long-lasting, and aesthetically pleasing. Brands like Vego Garden offer modular kits. A Vego Garden 17″ Tall 8-in-1 Metal Raised Garden Bed (can be configured to 4×8 ft) costs approximately $250-$300.
- Concrete Blocks/Stones: Very durable but can leach minerals (though generally safe once weathered) and can be expensive.
- Recycled Materials: Pallets (check for chemical treatment stamps like « HT » for heat-treated), old tires (controversial due to potential chemical leaching).
- Filling Raised Beds: Don’t just fill with topsoil. Use a « Hugelkultur » approach (logs, branches, leaves, then compost, then topsoil) or a mixture of 60% good quality topsoil, 30% compost, and 10% perlite or vermiculite for drainage. A 4x8x1 ft raised bed requires about 32 cubic feet (or ~1.2 cubic yards) of soil mix, which can cost $100-$200 depending on your source.
- Material Options:
Step 4: Water Management & Irrigation
Efficient water management is critical for a self sufficient garden from scratch, especially in off-grid living where water resources might be limited.
- Rainwater Harvesting: This is my primary source of irrigation water. A 55-gallon rain barrel (e.g., EarthMark Rain Barrel, ~$120-$150) connected to a downspout can collect significant water. For larger needs, I use two 275-gallon IBC totes (Intermediate Bulk Containers, often available used for $100-$200 each from food-grade sources) connected in series. A 1,000 sq ft roof can collect approximately 620 gallons of water for every inch of rainfall. My 1,500 sq ft roof provides ample water for my 600 sq ft garden through multiple barrels and totes.
- Drip Irrigation: This is by far the most water-efficient method, delivering water directly to the plant’s root zone, minimizing evaporation and weed growth.
- Components: A typical drip system includes a pressure regulator (e.g., Rain Bird PRV-10, ~$15), a filter (Rain Bird RBY filter, ~$20), main tubing (1/2-inch poly tubing, 100ft ~$25), smaller feeder lines (1/4-inch tubing), and emitters (0.5 GPH or 1 GPH per plant).
- Kits: For beginners, a starter kit like the Rain Bird Drip Irrigation Garden Kit (model DDI-KIT-1P, ~$40-$60) is excellent for a small garden. For larger setups, I use Netafim Techline CV Drip Line (500ft roll, ~$150-$200), which has pressure-compensating emitters built-in, ensuring even watering across long runs.
- Automation: For true self-sufficiency, consider a battery-powered timer (e.g., Orbit B-Hyve Bluetooth Hose Faucet Timer, ~$50) or a solar-powered timer connected to a small 12V pump.
- Solar-Powered Pumps: For lifting water from a well, pond, or large storage tank to your garden, a solar pump is a game-changer. For a smaller drip system, a Shurflo 2088-594-152 Diaphragm Pump (12V, 3.5 GPM, ~$180) can be powered by a single 100W solar panel (e.g., Renogy 100W Monocrystalline Solar Panel, ~$100) and a small 12V battery (e.g., a 50Ah LiFePO4 battery like the Battle Born 50Ah, ~$450). For larger operations or deeper wells, more robust systems are needed. If you’re looking to build out a comprehensive off-grid power system to support your garden’s water needs, or indeed your entire homestead, you might want to explore resources like the Power Grid Generator complete system guide to understand the full scope of what’s possible in terms of energy independence.
Step 5: Seed Selection & Planting
The choice of seeds is crucial for a truly self sufficient garden from scratch.
- Choose Heirloom & Open-Pollinated Seeds: These varieties produce seeds that will grow true to type, meaning you can save seeds from your harvest year after year. F1 hybrids, while often vigorous, will not produce consistent offspring from saved seeds. Reputable seed companies include Baker Creek Heirloom Seeds, High Mowing Organic Seeds, and Seed Savers Exchange. Start with common, reliable varieties like ‘Black Krim’ tomatoes, ‘Provider’ bush beans, ‘Waltham Butternut’ squash, and ‘Black Seeded Simpson’ lettuce.
- Start Seeds Indoors (Optional but Recommended): For longer growing seasons or specific crops, starting seeds indoors gives you a head start. Use seed-starting mix (e.g., Espoma Organic Seed Starter Mix, ~$10 for 16qt bag) in seed trays (Jiffy Professional Greenhouse 72-cell kit, ~$15). Provide adequate light with LED grow lights (Barrina T5 2ft 4-pack LED Grow Lights, 20W each, ~$50) for 14-16 hours a day, positioned 2-4 inches above seedlings. Maintain consistent temperatures (65-75°F for most).
- Direct Sowing vs. Transplanting: Some crops (carrots, radishes, beans, corn) prefer direct sowing into the garden bed. Others (tomatoes, peppers, broccoli, kale) benefit from being started indoors and transplanted. Follow seed packet instructions for planting depths (e.g., lettuce seeds are often surface-sown or planted 1/8 inch deep, while beans are 1 inch deep) and spacing.
- Companion Planting: Strategically plant different species together to enhance growth, deter pests, and attract beneficial insects. For example, planting marigolds near tomatoes can deter nematodes, and basil improves tomato flavor. Nasturtiums can act as a trap crop for aphids.
- Succession Planting: For a continuous harvest, plant small batches of quick-growing crops (lettuce, radishes, cilantro) every 2-3 weeks. As one crop finishes, another is ready to take its place.
Step 6: Pest & Disease Management (Organic)
Maintaining a self sufficient garden from scratch means embracing organic pest and disease control.
- Integrated Pest Management (IPM): This holistic approach combines several strategies.
- Observation: Regularly inspect your plants for early signs of pests or disease. Catching issues early is key.
- Physical Barriers: Use row covers (e.g., Agribon AG-19 floating row cover, 10×20 ft, ~$20) to protect young plants from insect pests like cabbage worms and squash bugs. Install fences (e.g., 2×4 welded wire mesh, 4 ft tall, 50 ft roll ~$70) to keep out deer, rabbits, and other larger animals.
- Hand-Picking: For larger pests like tomato hornworms or squash bugs, simply pick them off and drop them into a bucket of soapy water.
- Companion Planting: As mentioned, certain plants repel pests. Marigolds, garlic, and onions are excellent deterrents.
- Attract Beneficial Insects: Plant flowers like dill, fennel, cosmos, and sweet alyssum to attract ladybugs, lacewings, and parasitic wasps, which prey on common garden pests.
- Organic Sprays & Treatments:
- Neem Oil: An excellent broad-spectrum organic insecticide and fungicide. Bonide Neem Oil Concentrate (16oz, ~$20) can be mixed at a rate of 1-2 tbsp per gallon of water and sprayed on affected plants.
- Insecticidal Soap: Effective against soft-bodied insects like aphids, whiteflies, and spider mites. Garden Safe Insecticidal Soap (24oz ready-to-use, ~$10).
- Bacillus thuringiensis (Bt): A naturally occurring soil bacterium that targets caterpillars and worms. Monterey BT Worm & Caterpillar Killer (16oz, ~$18) is highly effective and safe for beneficial insects.
- Copper or Sulfur Sprays: For fungal diseases like powdery mildew or blight, organic copper (e.g., Bonide Copper Fungicide, ~$15 for 1lb) or sulfur (e.g., Safer Brand Garden Fungicide, ~$10 for 16oz) can be used as a last resort.
Step 7: Harvesting & Seed Saving
The culmination of your efforts is the harvest, and seed saving closes the loop on self-sufficiency.
- Harvesting Techniques:
- Timing: Harvest vegetables at their peak ripeness for best flavor and nutritional value. For example, green beans should snap cleanly, cucumbers should be firm, and tomatoes should be fully colored.
- Frequency: Many crops, like zucchini, cucumbers, and bush beans, produce more if harvested frequently. Pick daily or every other day.
- Tools: Use clean, sharp pruners (e.g., Corona ClassicCUT Bypass Pruner BP 3180, ~$30) or a sharp knife for clean cuts, minimizing damage to the plant.
- Seed Saving: This is where the « self-sufficient » aspect truly shines.
- Selection: Only save seeds from your healthiest, most vigorous plants that show desired traits (disease resistance, good flavor, high yield).
- Isolation: To ensure true-to-type seeds, prevent cross-pollination. This can be challenging for open-pollinated crops that readily cross (e.g., squash, corn). For beginners, focus on self-pollinating plants like beans, peas, lettuce, and tomatoes.
- Processing:
- Dry Seeds (Beans, Peas, Lettuce, Grains): Allow pods/seed heads to dry completely on the plant. Harvest, shell, and clean the seeds, removing chaff.
- Wet Seeds (Tomatoes, Cucumbers, Squash): For tomatoes, ferment the seeds in water for a few days to remove the gel coating and inhibit disease. For cucumbers/squash, scrape out seeds, wash thoroughly, and dry.
- Drying: Spread seeds thinly on screens or paper plates in a cool, dry, well-ventilated area for 1-4 weeks. Ensure they are bone-dry before storage. I aim for less than 8% moisture content.
- Storage: Store seeds in airtight containers (glass jars with desiccant packets work well) in a cool, dark, dry place (ideally 40-50°F and 30-40% humidity). Label clearly with variety and date. Properly stored seeds can remain viable for 3-10 years or more.
Step 8: Season Extension & Winterizing
Extend your harvest and protect your garden for the off-season to truly maximize your self sufficient garden from scratch.
- Cold Frames: Simple structures with a transparent top (glass, polycarbonate, or old windows) that sit over garden beds. They trap solar heat, allowing you to grow cold-hardy crops (lettuce, spinach, kale, radishes) well into winter or start seeds earlier in spring. A basic cold frame can be built from 2×6 lumber and a sheet of polycarbonate for under $100.
- Hoop Houses/Low Tunnels: Larger structures made from flexible hoops (PVC pipe or EMT conduit) covered with greenhouse plastic. These provide more space and greater temperature moderation. A 10×20 ft DIY low tunnel kit can cost $200-$500, while a larger, more robust hoop house kit might be $1,000-$3,000. I use a 6×12 ft low tunnel made from 1/2-inch PVC hoops and 6mil greenhouse plastic, which extends my lettuce and spinach harvest by at least
- Integrated Pest Management (IPM): This holistic approach combines several strategies.
- Observation: Regularly inspect your plants for early signs of pests or disease. Catching issues early is key.
- Physical Barriers: Use row covers (e.g., Agribon AG-19 floating row cover, 10×20 ft, ~$20) to protect young plants from insect pests like cabbage worms and squash bugs. Install fences (e.g., 2×4 welded wire mesh, 4 ft tall, 50 ft roll ~$70) to keep out deer, rabbits, and other larger animals.
- Hand-Picking: For larger pests like tomato hornworms or squash bugs, simply pick them off and drop them into a bucket of soapy water.
- Companion Planting: As mentioned, certain plants repel pests. Marigolds, garlic, and onions are excellent deterrents.
- Attract Beneficial Insects: Plant flowers like dill, fennel, cosmos, and sweet alyssum to attract ladybugs, lacewings, and parasitic wasps, which prey on common garden pests.
- Organic Sprays & Treatments:
- Neem Oil: An excellent broad-spectrum organic insecticide and fungicide. Bonide Neem Oil Concentrate (16oz, ~$20) can be mixed at a rate of 1-2 tbsp per gallon of water and sprayed on affected plants.
- Insecticidal Soap: Effective against soft-bodied insects like aphids, whiteflies, and spider mites. Garden Safe Insecticidal Soap (24oz ready-to-use, ~$10).
- Bacillus thuringiensis (Bt): A naturally occurring soil bacterium that targets caterpillars and worms. Monterey BT Worm & Caterpillar Killer (16oz, ~$18) is highly effective and safe for beneficial insects.
- Copper or Sulfur Sprays: For fungal diseases like powdery mildew or blight, organic copper (e.g., Bonide Copper Fungicide, ~$15 for 1lb) or sulfur (e.g., Safer Brand Garden Fungicide, ~$10 for 16oz) can be used as a last resort.
Step 7: Harvesting & Seed Saving
The culmination of your efforts is the harvest, and seed saving closes the loop on self-sufficiency.
- Harvesting Techniques:
- Timing: Harvest vegetables at their peak ripeness for best flavor and nutritional value. For example, green beans should snap cleanly, cucumbers should be firm, and tomatoes should be fully colored.
- Frequency: Many crops, like zucchini, cucumbers, and bush beans, produce more if harvested frequently. Pick daily or every other day.
- Tools: Use clean, sharp pruners (e.g., Corona ClassicCUT Bypass Pruner BP 3180, ~$30) or a sharp knife for clean cuts, minimizing damage to the plant.
- Seed Saving: This is where the « self-sufficient » aspect truly shines.
- Selection: Only save seeds from your healthiest, most vigorous plants that show desired traits (disease resistance, good flavor, high yield).
- Isolation: To ensure true-to-type seeds, prevent cross-pollination. This can be challenging for open-pollinated crops that readily cross (e.g., squash, corn). For beginners, focus on self-pollinating plants like beans, peas, lettuce, and tomatoes.
- Processing:
- Dry Seeds (Beans, Peas, Lettuce, Grains): Allow pods/seed heads to dry completely on the plant. Harvest, shell, and clean the seeds, removing chaff.
- Wet Seeds (Tomatoes, Cucumbers, Squash): For tomatoes, ferment the seeds in water for a few days to remove the gel coating and inhibit disease. For cucumbers/squash, scrape out seeds, wash thoroughly, and dry.
- Drying: Spread seeds thinly on screens or paper plates in a cool, dry, well-ventilated area for 1-4 weeks. Ensure they are bone-dry before storage. I aim for less than 8% moisture content.
- Storage: Store seeds in airtight containers (glass jars with desiccant packets work well) in a cool, dark, dry place (ideally 40-50°F and 30-40% humidity). Label clearly with variety and date. Properly stored seeds can remain viable for 3-10 years or more.
Step 8: Season Extension & Winterizing
Extend your harvest and protect your garden for the off-season to truly maximize your self sufficient garden from scratch.
- Cold Frames: Simple structures with a transparent top (glass, polycarbonate, or old windows) that sit over garden beds. They trap solar heat, allowing you to grow cold-hardy crops (lettuce, spinach, kale, radishes) well into winter or start seeds earlier in spring. A basic cold frame can be built from 2×6 lumber and a sheet of polycarbonate for under $100.
- Hoop Houses/Low Tunnels: Larger structures made from flexible hoops (PVC pipe or EMT conduit) covered with greenhouse plastic. These provide more space and greater temperature moderation. A 10×20 ft DIY low tunnel kit can cost $200-$500, while a larger, more robust hoop house kit might be $1,000-$3,000. I use a 6×12 ft low tunnel made from 1/2-inch PVC hoops and 6mil greenhouse plastic, which extends my lettuce and spinach harvest by at least
Deciding between raised beds and in-ground beds depends on your soil, budget, and physical capabilities.
- In-Ground Beds: If you have excellent native soil and good drainage, in-ground beds are the most economical. Double-digging (loosening soil two shovel depths) can significantly improve drainage and aeration. For my main garden, I primarily use in-ground beds, but I focus on building up the soil over time with consistent compost additions and cover cropping. I aim for beds that are no wider than 3-4 feet so I can reach the center without stepping on the soil, compacting it.
- Raised Beds: Raised beds offer numerous advantages, especially for poor soil, heavy clay, or rocky areas. They provide better drainage, warm up faster in spring, reduce compaction, and make weeding and harvesting easier on your back.
- Material Options:
- Untreated Cedar: Naturally rot-resistant and chemical-free. A 4×8 ft bed, 12 inches deep, typically requires three 2x12x8 ft cedar boards, costing around $50-$60 per board (total ~$150-$180) plus corner brackets or screws. My first raised beds were cedar and are still going strong after 7 years.
- Galvanized Steel: Durable, long-lasting, and aesthetically pleasing. Brands like Vego Garden offer modular kits. A Vego Garden 17″ Tall 8-in-1 Metal Raised Garden Bed (can be configured to 4×8 ft) costs approximately $250-$300.
- Concrete Blocks/Stones: Very durable but can leach minerals (though generally safe once weathered) and can be expensive.
- Recycled Materials: Pallets (check for chemical treatment stamps like « HT » for heat-treated), old tires (controversial due to potential chemical leaching).
- Filling Raised Beds: Don’t just fill with topsoil. Use a « Hugelkultur » approach (logs, branches, leaves, then compost, then topsoil) or a mixture of 60% good quality topsoil, 30% compost, and 10% perlite or vermiculite for drainage. A 4x8x1 ft raised bed requires about 32 cubic feet (or ~1.2 cubic yards) of soil mix, which can cost $100-$200 depending on your source.
- Material Options:
Step 4: Water Management & Irrigation
Efficient water management is critical for a self sufficient garden from scratch, especially in off-grid living where water resources might be limited.
- Rainwater Harvesting: This is my primary source of irrigation water. A 55-gallon rain barrel (e.g., EarthMark Rain Barrel, ~$120-$150) connected to a downspout can collect significant water. For larger needs, I use two 275-gallon IBC totes (Intermediate Bulk Containers, often available used for $100-$200 each from food-grade sources) connected in series. A 1,000 sq ft roof can collect approximately 620 gallons of water for every inch of rainfall. My 1,500 sq ft roof provides ample water for my 600 sq ft garden through multiple barrels and totes.
- Drip Irrigation: This is by far the most water-efficient method, delivering water directly to the plant’s root zone, minimizing evaporation and weed growth.
- Components: A typical drip system includes a pressure regulator (e.g., Rain Bird PRV-10, ~$15), a filter (Rain Bird RBY filter, ~$20), main tubing (1/2-inch poly tubing, 100ft ~$25), smaller feeder lines (1/4-inch tubing), and emitters (0.5 GPH or 1 GPH per plant).
- Kits: For beginners, a starter kit like the Rain Bird Drip Irrigation Garden Kit (model DDI-KIT-1P, ~$40-$60) is excellent for a small garden. For larger setups, I use Netafim Techline CV Drip Line (500ft roll, ~$150-$200), which has pressure-compensating emitters built-in, ensuring even watering across long runs.
- Automation: For true self-sufficiency, consider a battery-powered timer (e.g., Orbit B-Hyve Bluetooth Hose Faucet Timer, ~$50) or a solar-powered timer connected to a small 12V pump.
- Solar-Powered Pumps: For lifting water from a well, pond, or large storage tank to your garden, a solar pump is a game-changer. For a smaller drip system, a Shurflo 2088-594-152 Diaphragm Pump (12V, 3.5 GPM, ~$180) can be powered by a single 100W solar panel (e.g., Renogy 100W Monocrystalline Solar Panel, ~$100) and a small 12V battery (e.g., a 50Ah LiFePO4 battery like the Battle Born 50Ah, ~$450). For larger operations or deeper wells, more robust systems are needed. If you’re looking to build out a comprehensive off-grid power system to support your garden’s water needs, or indeed your entire homestead, you might want to explore resources like the Power Grid Generator complete system guide to understand the full scope of what’s possible in terms of energy independence.
Step 5: Seed Selection & Planting
The choice of seeds is crucial for a truly self sufficient garden from scratch.
- Choose Heirloom & Open-Pollinated Seeds: These varieties produce seeds that will grow true to type, meaning you can save seeds from your harvest year after year. F1 hybrids, while often vigorous, will not produce consistent offspring from saved seeds. Reputable seed companies include Baker Creek Heirloom Seeds, High Mowing Organic Seeds, and Seed Savers Exchange. Start with common, reliable varieties like ‘Black Krim’ tomatoes, ‘Provider’ bush beans, ‘Waltham Butternut’ squash, and ‘Black Seeded Simpson’ lettuce.
- Start Seeds Indoors (Optional but Recommended): For longer growing seasons or specific crops, starting seeds indoors gives you a head start. Use seed-starting mix (e.g., Espoma Organic Seed Starter Mix, ~$10 for 16qt bag) in seed trays (Jiffy Professional Greenhouse 72-cell kit, ~$15). Provide adequate light with LED grow lights (Barrina T5 2ft 4-pack LED Grow Lights, 20W each, ~$50) for 14-16 hours a day, positioned 2-4 inches above seedlings. Maintain consistent temperatures (65-75°F for most).
- Direct Sowing vs. Transplanting: Some crops (carrots, radishes, beans, corn) prefer direct sowing into the garden bed. Others (tomatoes, peppers, broccoli, kale) benefit from being started indoors and transplanted. Follow seed packet instructions for planting depths (e.g., lettuce seeds are often surface-sown or planted 1/8 inch deep, while beans are 1 inch deep) and spacing.
- Companion Planting: Strategically plant different species together to enhance growth, deter pests, and attract beneficial insects. For example, planting marigolds near tomatoes can deter nematodes, and basil improves tomato flavor. Nasturtiums can act as a trap crop for aphids.
- Succession Planting: For a continuous harvest, plant small batches of quick-growing crops (lettuce, radishes, cilantro) every 2-3 weeks. As one crop finishes, another is ready to take its place.
Step 6: Pest & Disease Management (Organic)
Maintaining a self sufficient garden from scratch means embracing organic pest and disease control.
- Integrated Pest Management (IPM): This holistic approach combines several strategies.
- Observation: Regularly inspect your plants for early signs of pests or disease. Catching issues early is key.
- Physical Barriers: Use row covers (e.g., Agribon AG-19 floating row cover, 10×20 ft, ~$20) to protect young plants from insect pests like cabbage worms and squash bugs. Install fences (e.g., 2×4 welded wire mesh, 4 ft tall, 50 ft roll ~$70) to keep out deer, rabbits, and other larger animals.
- Hand-Picking: For larger pests like tomato hornworms or squash bugs, simply pick them off and drop them into a bucket of soapy water.
- Companion Planting: As mentioned, certain plants repel pests. Marigolds, garlic, and onions are excellent deterrents.
- Attract Beneficial Insects: Plant flowers like dill, fennel, cosmos, and sweet alyssum to attract ladybugs, lacewings, and parasitic wasps, which prey on common garden pests.
- Organic Sprays & Treatments:
- Neem Oil: An excellent broad-spectrum organic insecticide and fungicide. Bonide Neem Oil Concentrate (16oz, ~$20) can be mixed at a rate of 1-2 tbsp per gallon of water and sprayed on affected plants.
- Insecticidal Soap: Effective against soft-bodied insects like aphids, whiteflies, and spider mites. Garden Safe Insecticidal Soap (24oz ready-to-use, ~$10).
- Bacillus thuringiensis (Bt): A naturally occurring soil bacterium that targets caterpillars and worms. Monterey BT Worm & Caterpillar Killer (16oz, ~$18) is highly effective and safe for beneficial insects.
- Copper or Sulfur Sprays: For fungal diseases like powdery mildew or blight, organic copper (e.g., Bonide Copper Fungicide, ~$15 for 1lb) or sulfur (e.g., Safer Brand Garden Fungicide, ~$10 for 16oz) can be used as a last resort.
Step 7: Harvesting & Seed Saving
The culmination of your efforts is the harvest, and seed saving closes the loop on self-sufficiency.
- Harvesting Techniques:
- Timing: Harvest vegetables at their peak ripeness for best flavor and nutritional value. For example, green beans should snap cleanly, cucumbers should be firm, and tomatoes should be fully colored.
- Frequency: Many crops, like zucchini, cucumbers, and bush beans, produce more if harvested frequently. Pick daily or every other day.
- Tools: Use clean, sharp pruners (e.g., Corona ClassicCUT Bypass Pruner BP 3180, ~$30) or a sharp knife for clean cuts, minimizing damage to the plant.
- Seed Saving: This is where the « self-sufficient » aspect truly shines.
- Selection: Only save seeds from your healthiest, most vigorous plants that show desired traits (disease resistance, good flavor, high yield).
- Isolation: To ensure true-to-type seeds, prevent cross-pollination. This can be challenging for open-pollinated crops that readily cross (e.g., squash, corn). For beginners, focus on self-pollinating plants like beans, peas, lettuce, and tomatoes.
- Processing:
- Dry Seeds (Beans, Peas, Lettuce, Grains): Allow pods/seed heads to dry completely on the plant. Harvest, shell, and clean the seeds, removing chaff.
- Wet Seeds (Tomatoes, Cucumbers, Squash): For tomatoes, ferment the seeds in water for a few days to remove the gel coating and inhibit disease. For cucumbers/squash, scrape out seeds, wash thoroughly, and dry.
- Drying: Spread seeds thinly on screens or paper plates in a cool, dry, well-ventilated area for 1-4 weeks. Ensure they are bone-dry before storage. I aim for less than 8% moisture content.
- Storage: Store seeds in airtight containers (glass jars with desiccant packets work well) in a cool, dark, dry place (ideally 40-50°F and 30-40% humidity). Label clearly with variety and date. Properly stored seeds can remain viable for 3-10 years or more.
Step 8: Season Extension & Winterizing
Extend your harvest and protect your garden for the off-season to truly maximize your self sufficient garden from scratch.
- Cold Frames: Simple structures with a transparent top (glass, polycarbonate, or old windows) that sit over garden beds. They trap solar heat, allowing you to grow cold-hardy crops (lettuce, spinach, kale, radishes) well into winter or start seeds earlier in spring. A basic cold frame can be built from 2×6 lumber and a sheet of polycarbonate for under $100.
- Hoop Houses/Low Tunnels: Larger structures made from flexible hoops (PVC pipe or EMT conduit) covered with greenhouse plastic. These provide more space and greater temperature moderation. A 10×20 ft DIY low tunnel kit can cost $200-$500, while a larger, more robust hoop house kit might be $1,000-$3,000. I use a 6×12 ft low tunnel made from 1/2-inch PVC hoops and 6mil greenhouse plastic, which extends my lettuce and spinach harvest by at least
Healthy soil is the bedrock of a productive, self-sufficient garden. You can’t guess what your soil needs; you have to test it.
- Perform a Soil Test: A professional soil test will give you precise data on your soil’s pH, nutrient levels (N-P-K), and organic matter content. I recommend sending a sample to your local agricultural extension office; it typically costs $20-$50 and provides detailed recommendations. Alternatively, for a quick homeowner check, a Rapitest Soil Test Kit (40-test kit, model 1663, ~$20 on Amazon) provides a good baseline for pH, Nitrogen, Phosphorus, and Potash. Aim for a pH between 6.0 and 7.0 for most vegetables.
- Amend for pH Imbalance: If your soil is too acidic (below 6.0), add agricultural lime (dolomitic lime adds magnesium, calcitic lime adds calcium). Apply 5-10 lbs per 100 sq ft for a moderate adjustment. If it’s too alkaline (above 7.0), add elemental sulfur (e.g., Espoma Soil Acidifier, ~$15 for 6.75 lbs) or generous amounts of organic matter like peat moss or pine needles.
- Build Organic Matter: This is the single most important step for long-term soil health. Organic matter improves soil structure, water retention, drainage, and nutrient availability. Incorporate 2-4 inches of high-quality compost into your top 6-12 inches of soil annually. I make my own compost from kitchen scraps, garden waste, and shredded leaves, but you can purchase it. Local nurseries often sell bulk compost for $30-$50 per cubic yard. Aged manure (from chickens, cows, or horses – ensure it’s well-rotted to avoid burning plants) is also excellent.
- Address Nutrient Deficiencies: Based on your soil test, add specific organic amendments. If Nitrogen (N) is low, add blood meal (12-0-0, ~$20 for 3 lbs) or feather meal. For Phosphorus (P), use bone meal (3-15-0, ~$15 for 3 lbs) or rock phosphate. For Potassium (K), greensand (0-0-2.5, ~$25 for 5 lbs) or kelp meal are good choices. I rely heavily on Espoma Organic Garden-tone (5-3-3, ~$25 for an 8lb bag) as a balanced, all-purpose organic fertilizer during planting.
Step 3: Garden Bed Preparation
Deciding between raised beds and in-ground beds depends on your soil, budget, and physical capabilities.
- In-Ground Beds: If you have excellent native soil and good drainage, in-ground beds are the most economical. Double-digging (loosening soil two shovel depths) can significantly improve drainage and aeration. For my main garden, I primarily use in-ground beds, but I focus on building up the soil over time with consistent compost additions and cover cropping. I aim for beds that are no wider than 3-4 feet so I can reach the center without stepping on the soil, compacting it.
- Raised Beds: Raised beds offer numerous advantages, especially for poor soil, heavy clay, or rocky areas. They provide better drainage, warm up faster in spring, reduce compaction, and make weeding and harvesting easier on your back.
- Material Options:
- Untreated Cedar: Naturally rot-resistant and chemical-free. A 4×8 ft bed, 12 inches deep, typically requires three 2x12x8 ft cedar boards, costing around $50-$60 per board (total ~$150-$180) plus corner brackets or screws. My first raised beds were cedar and are still going strong after 7 years.
- Galvanized Steel: Durable, long-lasting, and aesthetically pleasing. Brands like Vego Garden offer modular kits. A Vego Garden 17″ Tall 8-in-1 Metal Raised Garden Bed (can be configured to 4×8 ft) costs approximately $250-$300.
- Concrete Blocks/Stones: Very durable but can leach minerals (though generally safe once weathered) and can be expensive.
- Recycled Materials: Pallets (check for chemical treatment stamps like « HT » for heat-treated), old tires (controversial due to potential chemical leaching).
- Filling Raised Beds: Don’t just fill with topsoil. Use a « Hugelkultur » approach (logs, branches, leaves, then compost, then topsoil) or a mixture of 60% good quality topsoil, 30% compost, and 10% perlite or vermiculite for drainage. A 4x8x1 ft raised bed requires about 32 cubic feet (or ~1.2 cubic yards) of soil mix, which can cost $100-$200 depending on your source.
- Material Options:
Step 4: Water Management & Irrigation
Efficient water management is critical for a self sufficient garden from scratch, especially in off-grid living where water resources might be limited.
- Rainwater Harvesting: This is my primary source of irrigation water. A 55-gallon rain barrel (e.g., EarthMark Rain Barrel, ~$120-$150) connected to a downspout can collect significant water. For larger needs, I use two 275-gallon IBC totes (Intermediate Bulk Containers, often available used for $100-$200 each from food-grade sources) connected in series. A 1,000 sq ft roof can collect approximately 620 gallons of water for every inch of rainfall. My 1,500 sq ft roof provides ample water for my 600 sq ft garden through multiple barrels and totes.
- Drip Irrigation: This is by far the most water-efficient method, delivering water directly to the plant’s root zone, minimizing evaporation and weed growth.
- Components: A typical drip system includes a pressure regulator (e.g., Rain Bird PRV-10, ~$15), a filter (Rain Bird RBY filter, ~$20), main tubing (1/2-inch poly tubing, 100ft ~$25), smaller feeder lines (1/4-inch tubing), and emitters (0.5 GPH or 1 GPH per plant).
- Kits: For beginners, a starter kit like the Rain Bird Drip Irrigation Garden Kit (model DDI-KIT-1P, ~$40-$60) is excellent for a small garden. For larger setups, I use Netafim Techline CV Drip Line (500ft roll, ~$150-$200), which has pressure-compensating emitters built-in, ensuring even watering across long runs.
- Automation: For true self-sufficiency, consider a battery-powered timer (e.g., Orbit B-Hyve Bluetooth Hose Faucet Timer, ~$50) or a solar-powered timer connected to a small 12V pump.
- Solar-Powered Pumps: For lifting water from a well, pond, or large storage tank to your garden, a solar pump is a game-changer. For a smaller drip system, a Shurflo 2088-594-152 Diaphragm Pump (12V, 3.5 GPM, ~$180) can be powered by a single 100W solar panel (e.g., Renogy 100W Monocrystalline Solar Panel, ~$100) and a small 12V battery (e.g., a 50Ah LiFePO4 battery like the Battle Born 50Ah, ~$450). For larger operations or deeper wells, more robust systems are needed. If you’re looking to build out a comprehensive off-grid power system to support your garden’s water needs, or indeed your entire homestead, you might want to explore resources like the Power Grid Generator complete system guide to understand the full scope of what’s possible in terms of energy independence.
Step 5: Seed Selection & Planting
The choice of seeds is crucial for a truly self sufficient garden from scratch.
- Choose Heirloom & Open-Pollinated Seeds: These varieties produce seeds that will grow true to type, meaning you can save seeds from your harvest year after year. F1 hybrids, while often vigorous, will not produce consistent offspring from saved seeds. Reputable seed companies include Baker Creek Heirloom Seeds, High Mowing Organic Seeds, and Seed Savers Exchange. Start with common, reliable varieties like ‘Black Krim’ tomatoes, ‘Provider’ bush beans, ‘Waltham Butternut’ squash, and ‘Black Seeded Simpson’ lettuce.
- Start Seeds Indoors (Optional but Recommended): For longer growing seasons or specific crops, starting seeds indoors gives you a head start. Use seed-starting mix (e.g., Espoma Organic Seed Starter Mix, ~$10 for 16qt bag) in seed trays (Jiffy Professional Greenhouse 72-cell kit, ~$15). Provide adequate light with LED grow lights (Barrina T5 2ft 4-pack LED Grow Lights, 20W each, ~$50) for 14-16 hours a day, positioned 2-4 inches above seedlings. Maintain consistent temperatures (65-75°F for most).
- Direct Sowing vs. Transplanting: Some crops (carrots, radishes, beans, corn) prefer direct sowing into the garden bed. Others (tomatoes, peppers, broccoli, kale) benefit from being started indoors and transplanted. Follow seed packet instructions for planting depths (e.g., lettuce seeds are often surface-sown or planted 1/8 inch deep, while beans are 1 inch deep) and spacing.
- Companion Planting: Strategically plant different species together to enhance growth, deter pests, and attract beneficial insects. For example, planting marigolds near tomatoes can deter nematodes, and basil improves tomato flavor. Nasturtiums can act as a trap crop for aphids.
- Succession Planting: For a continuous harvest, plant small batches of quick-growing crops (lettuce, radishes, cilantro) every 2-3 weeks. As one crop finishes, another is ready to take its place.
Step 6: Pest & Disease Management (Organic)
Maintaining a self sufficient garden from scratch means embracing organic pest and disease control.
- Integrated Pest Management (IPM): This holistic approach combines several strategies.
- Observation: Regularly inspect your plants for early signs of pests or disease. Catching issues early is key.
- Physical Barriers: Use row covers (e.g., Agribon AG-19 floating row cover, 10×20 ft, ~$20) to protect young plants from insect pests like cabbage worms and squash bugs. Install fences (e.g., 2×4 welded wire mesh, 4 ft tall, 50 ft roll ~$70) to keep out deer, rabbits, and other larger animals.
- Hand-Picking: For larger pests like tomato hornworms or squash bugs, simply pick them off and drop them into a bucket of soapy water.
- Companion Planting: As mentioned, certain plants repel pests. Marigolds, garlic, and onions are excellent deterrents.
- Attract Beneficial Insects: Plant flowers like dill, fennel, cosmos, and sweet alyssum to attract ladybugs, lacewings, and parasitic wasps, which prey on common garden pests.
- Organic Sprays & Treatments:
- Neem Oil: An excellent broad-spectrum organic insecticide and fungicide. Bonide Neem Oil Concentrate (16oz, ~$20) can be mixed at a rate of 1-2 tbsp per gallon of water and sprayed on affected plants.
- Insecticidal Soap: Effective against soft-bodied insects like aphids, whiteflies, and spider mites. Garden Safe Insecticidal Soap (24oz ready-to-use, ~$10).
- Bacillus thuringiensis (Bt): A naturally occurring soil bacterium that targets caterpillars and worms. Monterey BT Worm & Caterpillar Killer (16oz, ~$18) is highly effective and safe for beneficial insects.
- Copper or Sulfur Sprays: For fungal diseases like powdery mildew or blight, organic copper (e.g., Bonide Copper Fungicide, ~$15 for 1lb) or sulfur (e.g., Safer Brand Garden Fungicide, ~$10 for 16oz) can be used as a last resort.
Step 7: Harvesting & Seed Saving
The culmination of your efforts is the harvest, and seed saving closes the loop on self-sufficiency.
- Harvesting Techniques:
- Timing: Harvest vegetables at their peak ripeness for best flavor and nutritional value. For example, green beans should snap cleanly, cucumbers should be firm, and tomatoes should be fully colored.
- Frequency: Many crops, like zucchini, cucumbers, and bush beans, produce more if harvested frequently. Pick daily or every other day.
- Tools: Use clean, sharp pruners (e.g., Corona ClassicCUT Bypass Pruner BP 3180, ~$30) or a sharp knife for clean cuts, minimizing damage to the plant.
- Seed Saving: This is where the « self-sufficient » aspect truly shines.
- Selection: Only save seeds from your healthiest, most vigorous plants that show desired traits (disease resistance, good flavor, high yield).
- Isolation: To ensure true-to-type seeds, prevent cross-pollination. This can be challenging for open-pollinated crops that readily cross (e.g., squash, corn). For beginners, focus on self-pollinating plants like beans, peas, lettuce, and tomatoes.
- Processing:
- Dry Seeds (Beans, Peas, Lettuce, Grains): Allow pods/seed heads to dry completely on the plant. Harvest, shell, and clean the seeds, removing chaff.
- Wet Seeds (Tomatoes, Cucumbers, Squash): For tomatoes, ferment the seeds in water for a few days to remove the gel coating and inhibit disease. For cucumbers/squash, scrape out seeds, wash thoroughly, and dry.
- Drying: Spread seeds thinly on screens or paper plates in a cool, dry, well-ventilated area for 1-4 weeks. Ensure they are bone-dry before storage. I aim for less than 8% moisture content.
- Storage: Store seeds in airtight containers (glass jars with desiccant packets work well) in a cool, dark, dry place (ideally 40-50°F and 30-40% humidity). Label clearly with variety and date. Properly stored seeds can remain viable for 3-10 years or more.
Step 8: Season Extension & Winterizing
Extend your harvest and protect your garden for the off-season to truly maximize your self sufficient garden from scratch.
- Cold Frames: Simple structures with a transparent top (glass, polycarbonate, or old windows) that sit over garden beds. They trap solar heat, allowing you to grow cold-hardy crops (lettuce, spinach, kale, radishes) well into winter or start seeds earlier in spring. A basic cold frame can be built from 2×6 lumber and a sheet of polycarbonate for under $100.
- Hoop Houses/Low Tunnels: Larger structures made from flexible hoops (PVC pipe or EMT conduit) covered with greenhouse plastic. These provide more space and greater temperature moderation. A 10×20 ft DIY low tunnel kit can cost $200-$500, while a larger, more robust hoop house kit might be $1,000-$3,000. I use a 6×12 ft low tunnel made from 1/2-inch PVC hoops and 6mil greenhouse plastic, which extends my lettuce and spinach harvest by at least
Maintaining a self sufficient garden from scratch means embracing organic pest and disease control.
- Integrated Pest Management (IPM): This holistic approach combines several strategies.
- Observation: Regularly inspect your plants for early signs of pests or disease. Catching issues early is key.
- Physical Barriers: Use row covers (e.g., Agribon AG-19 floating row cover, 10×20 ft, ~$20) to protect young plants from insect pests like cabbage worms and squash bugs. Install fences (e.g., 2×4 welded wire mesh, 4 ft tall, 50 ft roll ~$70) to keep out deer, rabbits, and other larger animals.
- Hand-Picking: For larger pests like tomato hornworms or squash bugs, simply pick them off and drop them into a bucket of soapy water.
- Companion Planting: As mentioned, certain plants repel pests. Marigolds, garlic, and onions are excellent deterrents.
- Attract Beneficial Insects: Plant flowers like dill, fennel, cosmos, and sweet alyssum to attract ladybugs, lacewings, and parasitic wasps, which prey on common garden pests.
- Organic Sprays & Treatments:
- Neem Oil: An excellent broad-spectrum organic insecticide and fungicide. Bonide Neem Oil Concentrate (16oz, ~$20) can be mixed at a rate of 1-2 tbsp per gallon of water and sprayed on affected plants.
- Insecticidal Soap: Effective against soft-bodied insects like aphids, whiteflies, and spider mites. Garden Safe Insecticidal Soap (24oz ready-to-use, ~$10).
- Bacillus thuringiensis (Bt): A naturally occurring soil bacterium that targets caterpillars and worms. Monterey BT Worm & Caterpillar Killer (16oz, ~$18) is highly effective and safe for beneficial insects.
- Copper or Sulfur Sprays: For fungal diseases like powdery mildew or blight, organic copper (e.g., Bonide Copper Fungicide, ~$15 for 1lb) or sulfur (e.g., Safer Brand Garden Fungicide, ~$10 for 16oz) can be used as a last resort.
Step 7: Harvesting & Seed Saving
The culmination of your efforts is the harvest, and seed saving closes the loop on self-sufficiency.
- Harvesting Techniques:
- Timing: Harvest vegetables at their peak ripeness for best flavor and nutritional value. For example, green beans should snap cleanly, cucumbers should be firm, and tomatoes should be fully colored.
- Frequency: Many crops, like zucchini, cucumbers, and bush beans, produce more if harvested frequently. Pick daily or every other day.
- Tools: Use clean, sharp pruners (e.g., Corona ClassicCUT Bypass Pruner BP 3180, ~$30) or a sharp knife for clean cuts, minimizing damage to the plant.
- Seed Saving: This is where the « self-sufficient » aspect truly shines.
- Selection: Only save seeds from your healthiest, most vigorous plants that show desired traits (disease resistance, good flavor, high yield).
- Isolation: To ensure true-to-type seeds, prevent cross-pollination. This can be challenging for open-pollinated crops that readily cross (e.g., squash, corn). For beginners, focus on self-pollinating plants like beans, peas, lettuce, and tomatoes.
- Processing:
- Dry Seeds (Beans, Peas, Lettuce, Grains): Allow pods/seed heads to dry completely on the plant. Harvest, shell, and clean the seeds, removing chaff.
- Wet Seeds (Tomatoes, Cucumbers, Squash): For tomatoes, ferment the seeds in water for a few days to remove the gel coating and inhibit disease. For cucumbers/squash, scrape out seeds, wash thoroughly, and dry.
- Drying: Spread seeds thinly on screens or paper plates in a cool, dry, well-ventilated area for 1-4 weeks. Ensure they are bone-dry before storage. I aim for less than 8% moisture content.
- Storage: Store seeds in airtight containers (glass jars with desiccant packets work well) in a cool, dark, dry place (ideally 40-50°F and 30-40% humidity). Label clearly with variety and date. Properly stored seeds can remain viable for 3-10 years or more.
Step 8: Season Extension & Winterizing
Extend your harvest and protect your garden for the off-season to truly maximize your self sufficient garden from scratch.
- Cold Frames: Simple structures with a transparent top (glass, polycarbonate, or old windows) that sit over garden beds. They trap solar heat, allowing you to grow cold-hardy crops (lettuce, spinach, kale, radishes) well into winter or start seeds earlier in spring. A basic cold frame can be built from 2×6 lumber and a sheet of polycarbonate for under $100.
- Hoop Houses/Low Tunnels: Larger structures made from flexible hoops (PVC pipe or EMT conduit) covered with greenhouse plastic. These provide more space and greater temperature moderation. A 10×20 ft DIY low tunnel kit can cost $200-$500, while a larger, more robust hoop house kit might be $1,000-$3,000. I use a 6×12 ft low tunnel made from 1/2-inch PVC hoops and 6mil greenhouse plastic, which extends my lettuce and spinach harvest by at least
Deciding between raised beds and in-ground beds depends on your soil, budget, and physical capabilities.
- In-Ground Beds: If you have excellent native soil and good drainage, in-ground beds are the most economical. Double-digging (loosening soil two shovel depths) can significantly improve drainage and aeration. For my main garden, I primarily use in-ground beds, but I focus on building up the soil over time with consistent compost additions and cover cropping. I aim for beds that are no wider than 3-4 feet so I can reach the center without stepping on the soil, compacting it.
- Raised Beds: Raised beds offer numerous advantages, especially for poor soil, heavy clay, or rocky areas. They provide better drainage, warm up faster in spring, reduce compaction, and make weeding and harvesting easier on your back.
- Material Options:
- Untreated Cedar: Naturally rot-resistant and chemical-free. A 4×8 ft bed, 12 inches deep, typically requires three 2x12x8 ft cedar boards, costing around $50-$60 per board (total ~$150-$180) plus corner brackets or screws. My first raised beds were cedar and are still going strong after 7 years.
- Galvanized Steel: Durable, long-lasting, and aesthetically pleasing. Brands like Vego Garden offer modular kits. A Vego Garden 17″ Tall 8-in-1 Metal Raised Garden Bed (can be configured to 4×8 ft) costs approximately $250-$300.
- Concrete Blocks/Stones: Very durable but can leach minerals (though generally safe once weathered) and can be expensive.
- Recycled Materials: Pallets (check for chemical treatment stamps like « HT » for heat-treated), old tires (controversial due to potential chemical leaching).
- Filling Raised Beds: Don’t just fill with topsoil. Use a « Hugelkultur » approach (logs, branches, leaves, then compost, then topsoil) or a mixture of 60% good quality topsoil, 30% compost, and 10% perlite or vermiculite for drainage. A 4x8x1 ft raised bed requires about 32 cubic feet (or ~1.2 cubic yards) of soil mix, which can cost $100-$200 depending on your source.
- Material Options:
Step 4: Water Management & Irrigation
Efficient water management is critical for a self sufficient garden from scratch, especially in off-grid living where water resources might be limited.
- Rainwater Harvesting: This is my primary source of irrigation water. A 55-gallon rain barrel (e.g., EarthMark Rain Barrel, ~$120-$150) connected to a downspout can collect significant water. For larger needs, I use two 275-gallon IBC totes (Intermediate Bulk Containers, often available used for $100-$200 each from food-grade sources) connected in series. A 1,000 sq ft roof can collect approximately 620 gallons of water for every inch of rainfall. My 1,500 sq ft roof provides ample water for my 600 sq ft garden through multiple barrels and totes.
- Drip Irrigation: This is by far the most water-efficient method, delivering water directly to the plant’s root zone, minimizing evaporation and weed growth.
- Components: A typical drip system includes a pressure regulator (e.g., Rain Bird PRV-10, ~$15), a filter (Rain Bird RBY filter, ~$20), main tubing (1/2-inch poly tubing, 100ft ~$25), smaller feeder lines (1/4-inch tubing), and emitters (0.5 GPH or 1 GPH per plant).
- Kits: For beginners, a starter kit like the Rain Bird Drip Irrigation Garden Kit (model DDI-KIT-1P, ~$40-$60) is excellent for a small garden. For larger setups, I use Netafim Techline CV Drip Line (500ft roll, ~$150-$200), which has pressure-compensating emitters built-in, ensuring even watering across long runs.
- Automation: For true self-sufficiency, consider a battery-powered timer (e.g., Orbit B-Hyve Bluetooth Hose Faucet Timer, ~$50) or a solar-powered timer connected to a small 12V pump.
- Solar-Powered Pumps: For lifting water from a well, pond, or large storage tank to your garden, a solar pump is a game-changer. For a smaller drip system, a Shurflo 2088-594-152 Diaphragm Pump (12V, 3.5 GPM, ~$180) can be powered by a single 100W solar panel (e.g., Renogy 100W Monocrystalline Solar Panel, ~$100) and a small 12V battery (e.g., a 50Ah LiFePO4 battery like the Battle Born 50Ah, ~$450). For larger operations or deeper wells, more robust systems are needed. If you’re looking to build out a comprehensive off-grid power system to support your garden’s water needs, or indeed your entire homestead, you might want to explore resources like the Power Grid Generator complete system guide to understand the full scope of what’s possible in terms of energy independence.
Step 5: Seed Selection & Planting
The choice of seeds is crucial for a truly self sufficient garden from scratch.
- Choose Heirloom & Open-Pollinated Seeds: These varieties produce seeds that will grow true to type, meaning you can save seeds from your harvest year after year. F1 hybrids, while often vigorous, will not produce consistent offspring from saved seeds. Reputable seed companies include Baker Creek Heirloom Seeds, High Mowing Organic Seeds, and Seed Savers Exchange. Start with common, reliable varieties like ‘Black Krim’ tomatoes, ‘Provider’ bush beans, ‘Waltham Butternut’ squash, and ‘Black Seeded Simpson’ lettuce.
- Start Seeds Indoors (Optional but Recommended): For longer growing seasons or specific crops, starting seeds indoors gives you a head start. Use seed-starting mix (e.g., Espoma Organic Seed Starter Mix, ~$10 for 16qt bag) in seed trays (Jiffy Professional Greenhouse 72-cell kit, ~$15). Provide adequate light with LED grow lights (Barrina T5 2ft 4-pack LED Grow Lights, 20W each, ~$50) for 14-16 hours a day, positioned 2-4 inches above seedlings. Maintain consistent temperatures (65-75°F for most).
- Direct Sowing vs. Transplanting: Some crops (carrots, radishes, beans, corn) prefer direct sowing into the garden bed. Others (tomatoes, peppers, broccoli, kale) benefit from being started indoors and transplanted. Follow seed packet instructions for planting depths (e.g., lettuce seeds are often surface-sown or planted 1/8 inch deep, while beans are 1 inch deep) and spacing.
- Companion Planting: Strategically plant different species together to enhance growth, deter pests, and attract beneficial insects. For example, planting marigolds near tomatoes can deter nematodes, and basil improves tomato flavor. Nasturtiums can act as a trap crop for aphids.
- Succession Planting: For a continuous harvest, plant small batches of quick-growing crops (lettuce, radishes, cilantro) every 2-3 weeks. As one crop finishes, another is ready to take its place.
Step 6: Pest & Disease Management (Organic)
Maintaining a self sufficient garden from scratch means embracing organic pest and disease control.
- Integrated Pest Management (IPM): This holistic approach combines several strategies.
- Observation: Regularly inspect your plants for early signs of pests or disease. Catching issues early is key.
- Physical Barriers: Use row covers (e.g., Agribon AG-19 floating row cover, 10×20 ft, ~$20) to protect young plants from insect pests like cabbage worms and squash bugs. Install fences (e.g., 2×4 welded wire mesh, 4 ft tall, 50 ft roll ~$70) to keep out deer, rabbits, and other larger animals.
- Hand-Picking: For larger pests like tomato hornworms or squash bugs, simply pick them off and drop them into a bucket of soapy water.
- Companion Planting: As mentioned, certain plants repel pests. Marigolds, garlic, and onions are excellent deterrents.
- Attract Beneficial Insects: Plant flowers like dill, fennel, cosmos, and sweet alyssum to attract ladybugs, lacewings, and parasitic wasps, which prey on common garden pests.
- Organic Sprays & Treatments:
- Neem Oil: An excellent broad-spectrum organic insecticide and fungicide. Bonide Neem Oil Concentrate (16oz, ~$20) can be mixed at a rate of 1-2 tbsp per gallon of water and sprayed on affected plants.
- Insecticidal Soap: Effective against soft-bodied insects like aphids, whiteflies, and spider mites. Garden Safe Insecticidal Soap (24oz ready-to-use, ~$10).
- Bacillus thuringiensis (Bt): A naturally occurring soil bacterium that targets caterpillars and worms. Monterey BT Worm & Caterpillar Killer (16oz, ~$18) is highly effective and safe for beneficial insects.
- Copper or Sulfur Sprays: For fungal diseases like powdery mildew or blight, organic copper (e.g., Bonide Copper Fungicide, ~$15 for 1lb) or sulfur (e.g., Safer Brand Garden Fungicide, ~$10 for 16oz) can be used as a last resort.
Step 7: Harvesting & Seed Saving
The culmination of your efforts is the harvest, and seed saving closes the loop on self-sufficiency.
- Harvesting Techniques:
- Timing: Harvest vegetables at their peak ripeness for best flavor and nutritional value. For example, green beans should snap cleanly, cucumbers should be firm, and tomatoes should be fully colored.
- Frequency: Many crops, like zucchini, cucumbers, and bush beans, produce more if harvested frequently. Pick daily or every other day.
- Tools: Use clean, sharp pruners (e.g., Corona ClassicCUT Bypass Pruner BP 3180, ~$30) or a sharp knife for clean cuts, minimizing damage to the plant.
- Seed Saving: This is where the « self-sufficient » aspect truly shines.
- Selection: Only save seeds from your healthiest, most vigorous plants that show desired traits (disease resistance, good flavor, high yield).
- Isolation: To ensure true-to-type seeds, prevent cross-pollination. This can be challenging for open-pollinated crops that readily cross (e.g., squash, corn). For beginners, focus on self-pollinating plants like beans, peas, lettuce, and tomatoes.
- Processing:
- Dry Seeds (Beans, Peas, Lettuce, Grains): Allow pods/seed heads to dry completely on the plant. Harvest, shell, and clean the seeds, removing chaff.
- Wet Seeds (Tomatoes, Cucumbers, Squash): For tomatoes, ferment the seeds in water for a few days to remove the gel coating and inhibit disease. For cucumbers/squash, scrape out seeds, wash thoroughly, and dry.
- Drying: Spread seeds thinly on screens or paper plates in a cool, dry, well-ventilated area for 1-4 weeks. Ensure they are bone-dry before storage. I aim for less than 8% moisture content.
- Storage: Store seeds in airtight containers (glass jars with desiccant packets work well) in a cool, dark, dry place (ideally 40-50°F and 30-40% humidity). Label clearly with variety and date. Properly stored seeds can remain viable for 3-10 years or more.
Step 8: Season Extension & Winterizing
Extend your harvest and protect your garden for the off-season to truly maximize your self sufficient garden from scratch.
- Cold Frames: Simple structures with a transparent top (glass, polycarbonate, or old windows) that sit over garden beds. They trap solar heat, allowing you to grow cold-hardy crops (lettuce, spinach, kale, radishes) well into winter or start seeds earlier in spring. A basic cold frame can be built from 2×6 lumber and a sheet of polycarbonate for under $100.
- Hoop Houses/Low Tunnels: Larger structures made from flexible hoops (PVC pipe or EMT conduit) covered with greenhouse plastic. These provide more space and greater temperature moderation. A 10×20 ft DIY low tunnel kit can cost $200-$500, while a larger, more robust hoop house kit might be $1,000-$3,000. I use a 6×12 ft low tunnel made from 1/2-inch PVC hoops and 6mil greenhouse plastic, which extends my lettuce and spinach harvest by at least
Healthy soil is the bedrock of a productive, self-sufficient garden. You can’t guess what your soil needs; you have to test it.
- Perform a Soil Test: A professional soil test will give you precise data on your soil’s pH, nutrient levels (N-P-K), and organic matter content. I recommend sending a sample to your local agricultural extension office; it typically costs $20-$50 and provides detailed recommendations. Alternatively, for a quick homeowner check, a Rapitest Soil Test Kit (40-test kit, model 1663, ~$20 on Amazon) provides a good baseline for pH, Nitrogen, Phosphorus, and Potash. Aim for a pH between 6.0 and 7.0 for most vegetables.
- Amend for pH Imbalance: If your soil is too acidic (below 6.0), add agricultural lime (dolomitic lime adds magnesium, calcitic lime adds calcium). Apply 5-10 lbs per 100 sq ft for a moderate adjustment. If it’s too alkaline (above 7.0), add elemental sulfur (e.g., Espoma Soil Acidifier, ~$15 for 6.75 lbs) or generous amounts of organic matter like peat moss or pine needles.
- Build Organic Matter: This is the single most important step for long-term soil health. Organic matter improves soil structure, water retention, drainage, and nutrient availability. Incorporate 2-4 inches of high-quality compost into your top 6-12 inches of soil annually. I make my own compost from kitchen scraps, garden waste, and shredded leaves, but you can purchase it. Local nurseries often sell bulk compost for $30-$50 per cubic yard. Aged manure (from chickens, cows, or horses – ensure it’s well-rotted to avoid burning plants) is also excellent.
- Address Nutrient Deficiencies: Based on your soil test, add specific organic amendments. If Nitrogen (N) is low, add blood meal (12-0-0, ~$20 for 3 lbs) or feather meal. For Phosphorus (P), use bone meal (3-15-0, ~$15 for 3 lbs) or rock phosphate. For Potassium (K), greensand (0-0-2.5, ~$25 for 5 lbs) or kelp meal are good choices. I rely heavily on Espoma Organic Garden-tone (5-3-3, ~$25 for an 8lb bag) as a balanced, all-purpose organic fertilizer during planting.
Step 3: Garden Bed Preparation
Deciding between raised beds and in-ground beds depends on your soil, budget, and physical capabilities.
- In-Ground Beds: If you have excellent native soil and good drainage, in-ground beds are the most economical. Double-digging (loosening soil two shovel depths) can significantly improve drainage and aeration. For my main garden, I primarily use in-ground beds, but I focus on building up the soil over time with consistent compost additions and cover cropping. I aim for beds that are no wider than 3-4 feet so I can reach the center without stepping on the soil, compacting it.
- Raised Beds: Raised beds offer numerous advantages, especially for poor soil, heavy clay, or rocky areas. They provide better drainage, warm up faster in spring, reduce compaction, and make weeding and harvesting easier on your back.
- Material Options:
- Untreated Cedar: Naturally rot-resistant and chemical-free. A 4×8 ft bed, 12 inches deep, typically requires three 2x12x8 ft cedar boards, costing around $50-$60 per board (total ~$150-$180) plus corner brackets or screws. My first raised beds were cedar and are still going strong after 7 years.
- Galvanized Steel: Durable, long-lasting, and aesthetically pleasing. Brands like Vego Garden offer modular kits. A Vego Garden 17″ Tall 8-in-1 Metal Raised Garden Bed (can be configured to 4×8 ft) costs approximately $250-$300.
- Concrete Blocks/Stones: Very durable but can leach minerals (though generally safe once weathered) and can be expensive.
- Recycled Materials: Pallets (check for chemical treatment stamps like « HT » for heat-treated), old tires (controversial due to potential chemical leaching).
- Filling Raised Beds: Don’t just fill with topsoil. Use a « Hugelkultur » approach (logs, branches, leaves, then compost, then topsoil) or a mixture of 60% good quality topsoil, 30% compost, and 10% perlite or vermiculite for drainage. A 4x8x1 ft raised bed requires about 32 cubic feet (or ~1.2 cubic yards) of soil mix, which can cost $100-$200 depending on your source.
- Material Options:
Step 4: Water Management & Irrigation
Efficient water management is critical for a self sufficient garden from scratch, especially in off-grid living where water resources might be limited.
- Rainwater Harvesting: This is my primary source of irrigation water. A 55-gallon rain barrel (e.g., EarthMark Rain Barrel, ~$120-$150) connected to a downspout can collect significant water. For larger needs, I use two 275-gallon IBC totes (Intermediate Bulk Containers, often available used for $100-$200 each from food-grade sources) connected in series. A 1,000 sq ft roof can collect approximately 620 gallons of water for every inch of rainfall. My 1,500 sq ft roof provides ample water for my 600 sq ft garden through multiple barrels and totes.
- Drip Irrigation: This is by far the most water-efficient method, delivering water directly to the plant’s root zone, minimizing evaporation and weed growth.
- Components: A typical drip system includes a pressure regulator (e.g., Rain Bird PRV-10, ~$15), a filter (Rain Bird RBY filter, ~$20), main tubing (1/2-inch poly tubing, 100ft ~$25), smaller feeder lines (1/4-inch tubing), and emitters (0.5 GPH or 1 GPH per plant).
- Kits: For beginners, a starter kit like the Rain Bird Drip Irrigation Garden Kit (model DDI-KIT-1P, ~$40-$60) is excellent for a small garden. For larger setups, I use Netafim Techline CV Drip Line (500ft roll, ~$150-$200), which has pressure-compensating emitters built-in, ensuring even watering across long runs.
- Automation: For true self-sufficiency, consider a battery-powered timer (e.g., Orbit B-Hyve Bluetooth Hose Faucet Timer, ~$50) or a solar-powered timer connected to a small 12V pump.
- Solar-Powered Pumps: For lifting water from a well, pond, or large storage tank to your garden, a solar pump is a game-changer. For a smaller drip system, a Shurflo 2088-594-152 Diaphragm Pump (12V, 3.5 GPM, ~$180) can be powered by a single 100W solar panel (e.g., Renogy 100W Monocrystalline Solar Panel, ~$100) and a small 12V battery (e.g., a 50Ah LiFePO4 battery like the Battle Born 50Ah, ~$450). For larger operations or deeper wells, more robust systems are needed. If you’re looking to build out a comprehensive off-grid power system to support your garden’s water needs, or indeed your entire homestead, you might want to explore resources like the Power Grid Generator complete system guide to understand the full scope of what’s possible in terms of energy independence.
Step 5: Seed Selection & Planting
The choice of seeds is crucial for a truly self sufficient garden from scratch.
- Choose Heirloom & Open-Pollinated Seeds: These varieties produce seeds that will grow true to type, meaning you can save seeds from your harvest year after year. F1 hybrids, while often vigorous, will not produce consistent offspring from saved seeds. Reputable seed companies include Baker Creek Heirloom Seeds, High Mowing Organic Seeds, and Seed Savers Exchange. Start with common, reliable varieties like ‘Black Krim’ tomatoes, ‘Provider’ bush beans, ‘Waltham Butternut’ squash, and ‘Black Seeded Simpson’ lettuce.
- Start Seeds Indoors (Optional but Recommended): For longer growing seasons or specific crops, starting seeds indoors gives you a head start. Use seed-starting mix (e.g., Espoma Organic Seed Starter Mix, ~$10 for 16qt bag) in seed trays (Jiffy Professional Greenhouse 72-cell kit, ~$15). Provide adequate light with LED grow lights (Barrina T5 2ft 4-pack LED Grow Lights, 20W each, ~$50) for 14-16 hours a day, positioned 2-4 inches above seedlings. Maintain consistent temperatures (65-75°F for most).
- Direct Sowing vs. Transplanting: Some crops (carrots, radishes, beans, corn) prefer direct sowing into the garden bed. Others (tomatoes, peppers, broccoli, kale) benefit from being started indoors and transplanted. Follow seed packet instructions for planting depths (e.g., lettuce seeds are often surface-sown or planted 1/8 inch deep, while beans are 1 inch deep) and spacing.
- Companion Planting: Strategically plant different species together to enhance growth, deter pests, and attract beneficial insects. For example, planting marigolds near tomatoes can deter nematodes, and basil improves tomato flavor. Nasturtiums can act as a trap crop for aphids.
- Succession Planting: For a continuous harvest, plant small batches of quick-growing crops (lettuce, radishes, cilantro) every 2-3 weeks. As one crop finishes, another is ready to take its place.
Step 6: Pest & Disease Management (Organic)
Maintaining a self sufficient garden from scratch means embracing organic pest and disease control.
- Integrated Pest Management (IPM): This holistic approach combines several strategies.
- Observation: Regularly inspect your plants for early signs of pests or disease. Catching issues early is key.
- Physical Barriers: Use row covers (e.g., Agribon AG-19 floating row cover, 10×20 ft, ~$20) to protect young plants from insect pests like cabbage worms and squash bugs. Install fences (e.g., 2×4 welded wire mesh, 4 ft tall, 50 ft roll ~$70) to keep out deer, rabbits, and other larger animals.
- Hand-Picking: For larger pests like tomato hornworms or squash bugs, simply pick them off and drop them into a bucket of soapy water.
- Companion Planting: As mentioned, certain plants repel pests. Marigolds, garlic, and onions are excellent deterrents.
- Attract Beneficial Insects: Plant flowers like dill, fennel, cosmos, and sweet alyssum to attract ladybugs, lacewings, and parasitic wasps, which prey on common garden pests.
- Organic Sprays & Treatments:
- Neem Oil: An excellent broad-spectrum organic insecticide and fungicide. Bonide Neem Oil Concentrate (16oz, ~$20) can be mixed at a rate of 1-2 tbsp per gallon of water and sprayed on affected plants.
- Insecticidal Soap: Effective against soft-bodied insects like aphids, whiteflies, and spider mites. Garden Safe Insecticidal Soap (24oz ready-to-use, ~$10).
- Bacillus thuringiensis (Bt): A naturally occurring soil bacterium that targets caterpillars and worms. Monterey BT Worm & Caterpillar Killer (16oz, ~$18) is highly effective and safe for beneficial insects.
- Copper or Sulfur Sprays: For fungal diseases like powdery mildew or blight, organic copper (e.g., Bonide Copper Fungicide, ~$15 for 1lb) or sulfur (e.g., Safer Brand Garden Fungicide, ~$10 for 16oz) can be used as a last resort.
Step 7: Harvesting & Seed Saving
The culmination of your efforts is the harvest, and seed saving closes the loop on self-sufficiency.
- Harvesting Techniques:
- Timing: Harvest vegetables at their peak ripeness for best flavor and nutritional value. For example, green beans should snap cleanly, cucumbers should be firm, and tomatoes should be fully colored.
- Frequency: Many crops, like zucchini, cucumbers, and bush beans, produce more if harvested frequently. Pick daily or every other day.
- Tools: Use clean, sharp pruners (e.g., Corona ClassicCUT Bypass Pruner BP 3180, ~$30) or a sharp knife for clean cuts, minimizing damage to the plant.
- Seed Saving: This is where the « self-sufficient » aspect truly shines.
- Selection: Only save seeds from your healthiest, most vigorous plants that show desired traits (disease resistance, good flavor, high yield).
- Isolation: To ensure true-to-type seeds, prevent cross-pollination. This can be challenging for open-pollinated crops that readily cross (e.g., squash, corn). For beginners, focus on self-pollinating plants like beans, peas, lettuce, and tomatoes.
- Processing:
- Dry Seeds (Beans, Peas, Lettuce, Grains): Allow pods/seed heads to dry completely on the plant. Harvest, shell, and clean the seeds, removing chaff.
- Wet Seeds (Tomatoes, Cucumbers, Squash): For tomatoes, ferment the seeds in water for a few days to remove the gel coating and inhibit disease. For cucumbers/squash, scrape out seeds, wash thoroughly, and dry.
- Drying: Spread seeds thinly on screens or paper plates in a cool, dry, well-ventilated area for 1-4 weeks. Ensure they are bone-dry before storage. I aim for less than 8% moisture content.
- Storage: Store seeds in airtight containers (glass jars with desiccant packets work well) in a cool, dark, dry place (ideally 40-50°F and 30-40% humidity). Label clearly with variety and date. Properly stored seeds can remain viable for 3-10 years or more.
Step 8: Season Extension & Winterizing
Extend your harvest and protect your garden for the off-season to truly maximize your self sufficient garden from scratch.
- Cold Frames: Simple structures with a transparent top (glass, polycarbonate, or old windows) that sit over garden beds. They trap solar heat, allowing you to grow cold-hardy crops (lettuce, spinach, kale, radishes) well into winter or start seeds earlier in spring. A basic cold frame can be built from 2×6 lumber and a sheet of polycarbonate for under $100.
- Hoop Houses/Low Tunnels: Larger structures made from flexible hoops (PVC pipe or EMT conduit) covered with greenhouse plastic. These provide more space and greater temperature moderation. A 10×20 ft DIY low tunnel kit can cost $200-$500, while a larger, more robust hoop house kit might be $1,000-$3,000. I use a 6×12 ft low tunnel made from 1/2-inch PVC hoops and 6mil greenhouse plastic, which extends my lettuce and spinach harvest by at least
Step 6: Pest & Disease Management (Organic)
Maintaining a self sufficient garden from scratch means embracing organic pest and disease control.
- Integrated Pest Management (IPM): This holistic approach combines several strategies.
- Observation: Regularly inspect your plants for early signs of pests or disease. Catching issues early is key.
- Physical Barriers: Use row covers (e.g., Agribon AG-19 floating row cover, 10×20 ft, ~$20) to protect young plants from insect pests like cabbage worms and squash bugs. Install fences (e.g., 2×4 welded wire mesh, 4 ft tall, 50 ft roll ~$70) to keep out deer, rabbits, and other larger animals.
- Hand-Picking: For larger pests like tomato hornworms or squash bugs, simply pick them off and drop them into a bucket of soapy water.
- Companion Planting: As mentioned, certain plants repel pests. Marigolds, garlic, and onions are excellent deterrents.
- Attract Beneficial Insects: Plant flowers like dill, fennel, cosmos, and sweet alyssum to attract ladybugs, lacewings, and parasitic wasps, which prey on common garden pests.
- Organic Sprays & Treatments:
- Neem Oil: An excellent broad-spectrum organic insecticide and fungicide. Bonide Neem Oil Concentrate (16oz, ~$20) can be mixed at a rate of 1-2 tbsp per gallon of water and sprayed on affected plants.
- Insecticidal Soap: Effective against soft-bodied insects like aphids, whiteflies, and spider mites. Garden Safe Insecticidal Soap (24oz ready-to-use, ~$10).
- Bacillus thuringiensis (Bt): A naturally occurring soil bacterium that targets caterpillars and worms. Monterey BT Worm & Caterpillar Killer (16oz, ~$18) is highly effective and safe for beneficial insects.
- Copper or Sulfur Sprays: For fungal diseases like powdery mildew or blight, organic copper (e.g., Bonide Copper Fungicide, ~$15 for 1lb) or sulfur (e.g., Safer Brand Garden Fungicide, ~$10 for 16oz) can be used as a last resort.
Step 7: Harvesting & Seed Saving
The culmination of your efforts is the harvest, and seed saving closes the loop on self-sufficiency.
- Harvesting Techniques:
- Timing: Harvest vegetables at their peak ripeness for best flavor and nutritional value. For example, green beans should snap cleanly, cucumbers should be firm, and tomatoes should be fully colored.
- Frequency: Many crops, like zucchini, cucumbers, and bush beans, produce more if harvested frequently. Pick daily or every other day.
- Tools: Use clean, sharp pruners (e.g., Corona ClassicCUT Bypass Pruner BP 3180, ~$30) or a sharp knife for clean cuts, minimizing damage to the plant.
- Seed Saving: This is where the « self-sufficient » aspect truly shines.
- Selection: Only save seeds from your healthiest, most vigorous plants that show desired traits (disease resistance, good flavor, high yield).
- Isolation: To ensure true-to-type seeds, prevent cross-pollination. This can be challenging for open-pollinated crops that readily cross (e.g., squash, corn). For beginners, focus on self-pollinating plants like beans, peas, lettuce, and tomatoes.
- Processing:
- Dry Seeds (Beans, Peas, Lettuce, Grains): Allow pods/seed heads to dry completely on the plant. Harvest, shell, and clean the seeds, removing chaff.
- Wet Seeds (Tomatoes, Cucumbers, Squash): For tomatoes, ferment the seeds in water for a few days to remove the gel coating and inhibit disease. For cucumbers/squash, scrape out seeds, wash thoroughly, and dry.
- Drying: Spread seeds thinly on screens or paper plates in a cool, dry, well-ventilated area for 1-4 weeks. Ensure they are bone-dry before storage. I aim for less than 8% moisture content.
- Storage: Store seeds in airtight containers (glass jars with desiccant packets work well) in a cool, dark, dry place (ideally 40-50°F and 30-40% humidity). Label clearly with variety and date. Properly stored seeds can remain viable for 3-10 years or more.
Step 8: Season Extension & Winterizing
Extend your harvest and protect your garden for the off-season to truly maximize your self sufficient garden from scratch.
- Cold Frames: Simple structures with a transparent top (glass, polycarbonate, or old windows) that sit over garden beds. They trap solar heat, allowing you to grow cold-hardy crops (lettuce, spinach, kale, radishes) well into winter or start seeds earlier in spring. A basic cold frame can be built from 2×6 lumber and a sheet of polycarbonate for under $100.
- Hoop Houses/Low Tunnels: Larger structures made from flexible hoops (PVC pipe or EMT conduit) covered with greenhouse plastic. These provide more space and greater temperature moderation. A 10×20 ft DIY low tunnel kit can cost $200-$500, while a larger, more robust hoop house kit might be $1,000-$3,000. I use a 6×12 ft low tunnel made from 1/2-inch PVC hoops and 6mil greenhouse plastic, which extends my lettuce and spinach harvest by at least
Deciding between raised beds and in-ground beds depends on your soil, budget, and physical capabilities.
- In-Ground Beds: If you have excellent native soil and good drainage, in-ground beds are the most economical. Double-digging (loosening soil two shovel depths) can significantly improve drainage and aeration. For my main garden, I primarily use in-ground beds, but I focus on building up the soil over time with consistent compost additions and cover cropping. I aim for beds that are no wider than 3-4 feet so I can reach the center without stepping on the soil, compacting it.
- Raised Beds: Raised beds offer numerous advantages, especially for poor soil, heavy clay, or rocky areas. They provide better drainage, warm up faster in spring, reduce compaction, and make weeding and harvesting easier on your back.
- Material Options:
- Untreated Cedar: Naturally rot-resistant and chemical-free. A 4×8 ft bed, 12 inches deep, typically requires three 2x12x8 ft cedar boards, costing around $50-$60 per board (total ~$150-$180) plus corner brackets or screws. My first raised beds were cedar and are still going strong after 7 years.
- Galvanized Steel: Durable, long-lasting, and aesthetically pleasing. Brands like Vego Garden offer modular kits. A Vego Garden 17″ Tall 8-in-1 Metal Raised Garden Bed (can be configured to 4×8 ft) costs approximately $250-$300.
- Concrete Blocks/Stones: Very durable but can leach minerals (though generally safe once weathered) and can be expensive.
- Recycled Materials: Pallets (check for chemical treatment stamps like « HT » for heat-treated), old tires (controversial due to potential chemical leaching).
- Filling Raised Beds: Don’t just fill with topsoil. Use a « Hugelkultur » approach (logs, branches, leaves, then compost, then topsoil) or a mixture of 60% good quality topsoil, 30% compost, and 10% perlite or vermiculite for drainage. A 4x8x1 ft raised bed requires about 32 cubic feet (or ~1.2 cubic yards) of soil mix, which can cost $100-$200 depending on your source.
- Material Options:
Step 4: Water Management & Irrigation
Efficient water management is critical for a self sufficient garden from scratch, especially in off-grid living where water resources might be limited.
- Rainwater Harvesting: This is my primary source of irrigation water. A 55-gallon rain barrel (e.g., EarthMark Rain Barrel, ~$120-$150) connected to a downspout can collect significant water. For larger needs, I use two 275-gallon IBC totes (Intermediate Bulk Containers, often available used for $100-$200 each from food-grade sources) connected in series. A 1,000 sq ft roof can collect approximately 620 gallons of water for every inch of rainfall. My 1,500 sq ft roof provides ample water for my 600 sq ft garden through multiple barrels and totes.
- Drip Irrigation: This is by far the most water-efficient method, delivering water directly to the plant’s root zone, minimizing evaporation and weed growth.
- Components: A typical drip system includes a pressure regulator (e.g., Rain Bird PRV-10, ~$15), a filter (Rain Bird RBY filter, ~$20), main tubing (1/2-inch poly tubing, 100ft ~$25), smaller feeder lines (1/4-inch tubing), and emitters (0.5 GPH or 1 GPH per plant).
- Kits: For beginners, a starter kit like the Rain Bird Drip Irrigation Garden Kit (model DDI-KIT-1P, ~$40-$60) is excellent for a small garden. For larger setups, I use Netafim Techline CV Drip Line (500ft roll, ~$150-$200), which has pressure-compensating emitters built-in, ensuring even watering across long runs.
- Automation: For true self-sufficiency, consider a battery-powered timer (e.g., Orbit B-Hyve Bluetooth Hose Faucet Timer, ~$50) or a solar-powered timer connected to a small 12V pump.
- Solar-Powered Pumps: For lifting water from a well, pond, or large storage tank to your garden, a solar pump is a game-changer. For a smaller drip system, a Shurflo 2088-594-152 Diaphragm Pump (12V, 3.5 GPM, ~$180) can be powered by a single 100W solar panel (e.g., Renogy 100W Monocrystalline Solar Panel, ~$100) and a small 12V battery (e.g., a 50Ah LiFePO4 battery like the Battle Born 50Ah, ~$450). For larger operations or deeper wells, more robust systems are needed. If you’re looking to build out a comprehensive off-grid power system to support your garden’s water needs, or indeed your entire homestead, you might want to explore resources like the Power Grid Generator complete system guide to understand the full scope of what’s possible in terms of energy independence.
Step 5: Seed Selection & Planting
The choice of seeds is crucial for a truly self sufficient garden from scratch.
- Choose Heirloom & Open-Pollinated Seeds: These varieties produce seeds that will grow true to type, meaning you can save seeds from your harvest year after year. F1 hybrids, while often vigorous, will not produce consistent offspring from saved seeds. Reputable seed companies include Baker Creek Heirloom Seeds, High Mowing Organic Seeds, and Seed Savers Exchange. Start with common, reliable varieties like ‘Black Krim’ tomatoes, ‘Provider’ bush beans, ‘Waltham Butternut’ squash, and ‘Black Seeded Simpson’ lettuce.
- Start Seeds Indoors (Optional but Recommended): For longer growing seasons or specific crops, starting seeds indoors gives you a head start. Use seed-starting mix (e.g., Espoma Organic Seed Starter Mix, ~$10 for 16qt bag) in seed trays (Jiffy Professional Greenhouse 72-cell kit, ~$15). Provide adequate light with LED grow lights (Barrina T5 2ft 4-pack LED Grow Lights, 20W each, ~$50) for 14-16 hours a day, positioned 2-4 inches above seedlings. Maintain consistent temperatures (65-75°F for most).
- Direct Sowing vs. Transplanting: Some crops (carrots, radishes, beans, corn) prefer direct sowing into the garden bed. Others (tomatoes, peppers, broccoli, kale) benefit from being started indoors and transplanted. Follow seed packet instructions for planting depths (e.g., lettuce seeds are often surface-sown or planted 1/8 inch deep, while beans are 1 inch deep) and spacing.
- Companion Planting: Strategically plant different species together to enhance growth, deter pests, and attract beneficial insects. For example, planting marigolds near tomatoes can deter nematodes, and basil improves tomato flavor. Nasturtiums can act as a trap crop for aphids.
- Succession Planting: For a continuous harvest, plant small batches of quick-growing crops (lettuce, radishes, cilantro) every 2-3 weeks. As one crop finishes, another is ready to take its place.
Step 6: Pest & Disease Management (Organic)
Maintaining a self sufficient garden from scratch means embracing organic pest and disease control.
- Integrated Pest Management (IPM): This holistic approach combines several strategies.
- Observation: Regularly inspect your plants for early signs of pests or disease. Catching issues early is key.
- Physical Barriers: Use row covers (e.g., Agribon AG-19 floating row cover, 10×20 ft, ~$20) to protect young plants from insect pests like cabbage worms and squash bugs. Install fences (e.g., 2×4 welded wire mesh, 4 ft tall, 50 ft roll ~$70) to keep out deer, rabbits, and other larger animals.
- Hand-Picking: For larger pests like tomato hornworms or squash bugs, simply pick them off and drop them into a bucket of soapy water.
- Companion Planting: As mentioned, certain plants repel pests. Marigolds, garlic, and onions are excellent deterrents.
- Attract Beneficial Insects: Plant flowers like dill, fennel, cosmos, and sweet alyssum to attract ladybugs, lacewings, and parasitic wasps, which prey on common garden pests.
- Organic Sprays & Treatments:
- Neem Oil: An excellent broad-spectrum organic insecticide and fungicide. Bonide Neem Oil Concentrate (16oz, ~$20) can be mixed at a rate of 1-2 tbsp per gallon of water and sprayed on affected plants.
- Insecticidal Soap: Effective against soft-bodied insects like aphids, whiteflies, and spider mites. Garden Safe Insecticidal Soap (24oz ready-to-use, ~$10).
- Bacillus thuringiensis (Bt): A naturally occurring soil bacterium that targets caterpillars and worms. Monterey BT Worm & Caterpillar Killer (16oz, ~$18) is highly effective and safe for beneficial insects.
- Copper or Sulfur Sprays: For fungal diseases like powdery mildew or blight, organic copper (e.g., Bonide Copper Fungicide, ~$15 for 1lb) or sulfur (e.g., Safer Brand Garden Fungicide, ~$10 for 16oz) can be used as a last resort.
Step 7: Harvesting & Seed Saving
The culmination of your efforts is the harvest, and seed saving closes the loop on self-sufficiency.
- Harvesting Techniques:
- Timing: Harvest vegetables at their peak ripeness for best flavor and nutritional value. For example, green beans should snap cleanly, cucumbers should be firm, and tomatoes should be fully colored.
- Frequency: Many crops, like zucchini, cucumbers, and bush beans, produce more if harvested frequently. Pick daily or every other day.
- Tools: Use clean, sharp pruners (e.g., Corona ClassicCUT Bypass Pruner BP 3180, ~$30) or a sharp knife for clean cuts, minimizing damage to the plant.
- Seed Saving: This is where the « self-sufficient » aspect truly shines.
- Selection: Only save seeds from your healthiest, most vigorous plants that show desired traits (disease resistance, good flavor, high yield).
- Isolation: To ensure true-to-type seeds, prevent cross-pollination. This can be challenging for open-pollinated crops that readily cross (e.g., squash, corn). For beginners, focus on self-pollinating plants like beans, peas, lettuce, and tomatoes.
- Processing:
- Dry Seeds (Beans, Peas, Lettuce, Grains): Allow pods/seed heads to dry completely on the plant. Harvest, shell, and clean the seeds, removing chaff.
- Wet Seeds (Tomatoes, Cucumbers, Squash): For tomatoes, ferment the seeds in water for a few days to remove the gel coating and inhibit disease. For cucumbers/squash, scrape out seeds, wash thoroughly, and dry.
- Drying: Spread seeds thinly on screens or paper plates in a cool, dry, well-ventilated area for 1-4 weeks. Ensure they are bone-dry before storage. I aim for less than 8% moisture content.
- Storage: Store seeds in airtight containers (glass jars with desiccant packets work well) in a cool, dark, dry place (ideally 40-50°F and 30-40% humidity). Label clearly with variety and date. Properly stored seeds can remain viable for 3-10 years or more.
Step 8: Season Extension & Winterizing
Extend your harvest and protect your garden for the off-season to truly maximize your self sufficient garden from scratch.
- Cold Frames: Simple structures with a transparent top (glass, polycarbonate, or old windows) that sit over garden beds. They trap solar heat, allowing you to grow cold-hardy crops (lettuce, spinach, kale, radishes) well into winter or start seeds earlier in spring. A basic cold frame can be built from 2×6 lumber and a sheet of polycarbonate for under $100.
- Hoop Houses/Low Tunnels: Larger structures made from flexible hoops (PVC pipe or EMT conduit) covered with greenhouse plastic. These provide more space and greater temperature moderation. A 10×20 ft DIY low tunnel kit can cost $200-$500, while a larger, more robust hoop house kit might be $1,000-$3,000. I use a 6×12 ft low tunnel made from 1/2-inch PVC hoops and 6mil greenhouse plastic, which extends my lettuce and spinach harvest by at least
Healthy soil is the bedrock of a productive, self-sufficient garden. You can’t guess what your soil needs; you have to test it.
- Perform a Soil Test: A professional soil test will give you precise data on your soil’s pH, nutrient levels (N-P-K), and organic matter content. I recommend sending a sample to your local agricultural extension office; it typically costs $20-$50 and provides detailed recommendations. Alternatively, for a quick homeowner check, a Rapitest Soil Test Kit (40-test kit, model 1663, ~$20 on Amazon) provides a good baseline for pH, Nitrogen, Phosphorus, and Potash. Aim for a pH between 6.0 and 7.0 for most vegetables.
- Amend for pH Imbalance: If your soil is too acidic (below 6.0), add agricultural lime (dolomitic lime adds magnesium, calcitic lime adds calcium). Apply 5-10 lbs per 100 sq ft for a moderate adjustment. If it’s too alkaline (above 7.0), add elemental sulfur (e.g., Espoma Soil Acidifier, ~$15 for 6.75 lbs) or generous amounts of organic matter like peat moss or pine needles.
- Build Organic Matter: This is the single most important step for long-term soil health. Organic matter improves soil structure, water retention, drainage, and nutrient availability. Incorporate 2-4 inches of high-quality compost into your top 6-12 inches of soil annually. I make my own compost from kitchen scraps, garden waste, and shredded leaves, but you can purchase it. Local nurseries often sell bulk compost for $30-$50 per cubic yard. Aged manure (from chickens, cows, or horses – ensure it’s well-rotted to avoid burning plants) is also excellent.
- Address Nutrient Deficiencies: Based on your soil test, add specific organic amendments. If Nitrogen (N) is low, add blood meal (12-0-0, ~$20 for 3 lbs) or feather meal. For Phosphorus (P), use bone meal (3-15-0, ~$15 for 3 lbs) or rock phosphate. For Potassium (K), greensand (0-0-2.5, ~$25 for 5 lbs) or kelp meal are good choices. I rely heavily on Espoma Organic Garden-tone (5-3-3, ~$25 for an 8lb bag) as a balanced, all-purpose organic fertilizer during planting.
Step 3: Garden Bed Preparation
Deciding between raised beds and in-ground beds depends on your soil, budget, and physical capabilities.
- In-Ground Beds: If you have excellent native soil and good drainage, in-ground beds are the most economical. Double-digging (loosening soil two shovel depths) can significantly improve drainage and aeration. For my main garden, I primarily use in-ground beds, but I focus on building up the soil over time with consistent compost additions and cover cropping. I aim for beds that are no wider than 3-4 feet so I can reach the center without stepping on the soil, compacting it.
- Raised Beds: Raised beds offer numerous advantages, especially for poor soil, heavy clay, or rocky areas. They provide better drainage, warm up faster in spring, reduce compaction, and make weeding and harvesting easier on your back.
- Material Options:
- Untreated Cedar: Naturally rot-resistant and chemical-free. A 4×8 ft bed, 12 inches deep, typically requires three 2x12x8 ft cedar boards, costing around $50-$60 per board (total ~$150-$180) plus corner brackets or screws. My first raised beds were cedar and are still going strong after 7 years.
- Galvanized Steel: Durable, long-lasting, and aesthetically pleasing. Brands like Vego Garden offer modular kits. A Vego Garden 17″ Tall 8-in-1 Metal Raised Garden Bed (can be configured to 4×8 ft) costs approximately $250-$300.
- Concrete Blocks/Stones: Very durable but can leach minerals (though generally safe once weathered) and can be expensive.
- Recycled Materials: Pallets (check for chemical treatment stamps like « HT » for heat-treated), old tires (controversial due to potential chemical leaching).
- Filling Raised Beds: Don’t just fill with topsoil. Use a « Hugelkultur » approach (logs, branches, leaves, then compost, then topsoil) or a mixture of 60% good quality topsoil, 30% compost, and 10% perlite or vermiculite for drainage. A 4x8x1 ft raised bed requires about 32 cubic feet (or ~1.2 cubic yards) of soil mix, which can cost $100-$200 depending on your source.
- Material Options:
Step 4: Water Management & Irrigation
Efficient water management is critical for a self sufficient garden from scratch, especially in off-grid living where water resources might be limited.
- Rainwater Harvesting: This is my primary source of irrigation water. A 55-gallon rain barrel (e.g., EarthMark Rain Barrel, ~$120-$150) connected to a downspout can collect significant water. For larger needs, I use two 275-gallon IBC totes (Intermediate Bulk Containers, often available used for $100-$200 each from food-grade sources) connected in series. A 1,000 sq ft roof can collect approximately 620 gallons of water for every inch of rainfall. My 1,500 sq ft roof provides ample water for my 600 sq ft garden through multiple barrels and totes.
- Drip Irrigation: This is by far the most water-efficient method, delivering water directly to the plant’s root zone, minimizing evaporation and weed growth.
- Components: A typical drip system includes a pressure regulator (e.g., Rain Bird PRV-10, ~$15), a filter (Rain Bird RBY filter, ~$20), main tubing (1/2-inch poly tubing, 100ft ~$25), smaller feeder lines (1/4-inch tubing), and emitters (0.5 GPH or 1 GPH per plant).
- Kits: For beginners, a starter kit like the Rain Bird Drip Irrigation Garden Kit (model DDI-KIT-1P, ~$40-$60) is excellent for a small garden. For larger setups, I use Netafim Techline CV Drip Line (500ft roll, ~$150-$200), which has pressure-compensating emitters built-in, ensuring even watering across long runs.
- Automation: For true self-sufficiency, consider a battery-powered timer (e.g., Orbit B-Hyve Bluetooth Hose Faucet Timer, ~$50) or a solar-powered timer connected to a small 12V pump.
- Solar-Powered Pumps: For lifting water from a well, pond, or large storage tank to your garden, a solar pump is a game-changer. For a smaller drip system, a Shurflo 2088-594-152 Diaphragm Pump (12V, 3.5 GPM, ~$180) can be powered by a single 100W solar panel (e.g., Renogy 100W Monocrystalline Solar Panel, ~$100) and a small 12V battery (e.g., a 50Ah LiFePO4 battery like the Battle Born 50Ah, ~$450). For larger operations or deeper wells, more robust systems are needed. If you’re looking to build out a comprehensive off-grid power system to support your garden’s water needs, or indeed your entire homestead, you might want to explore resources like the Power Grid Generator complete system guide to understand the full scope of what’s possible in terms of energy independence.
Step 5: Seed Selection & Planting
The choice of seeds is crucial for a truly self sufficient garden from scratch.
- Choose Heirloom & Open-Pollinated Seeds: These varieties produce seeds that will grow true to type, meaning you can save seeds from your harvest year after year. F1 hybrids, while often vigorous, will not produce consistent offspring from saved seeds. Reputable seed companies include Baker Creek Heirloom Seeds, High Mowing Organic Seeds, and Seed Savers Exchange. Start with common, reliable varieties like ‘Black Krim’ tomatoes, ‘Provider’ bush beans, ‘Waltham Butternut’ squash, and ‘Black Seeded Simpson’ lettuce.
- Start Seeds Indoors (Optional but Recommended): For longer growing seasons or specific crops, starting seeds indoors gives you a head start. Use seed-starting mix (e.g., Espoma Organic Seed Starter Mix, ~$10 for 16qt bag) in seed trays (Jiffy Professional Greenhouse 72-cell kit, ~$15). Provide adequate light with LED grow lights (Barrina T5 2ft 4-pack LED Grow Lights, 20W each, ~$50) for 14-16 hours a day, positioned 2-4 inches above seedlings. Maintain consistent temperatures (65-75°F for most).
- Direct Sowing vs. Transplanting: Some crops (carrots, radishes, beans, corn) prefer direct sowing into the garden bed. Others (tomatoes, peppers, broccoli, kale) benefit from being started indoors and transplanted. Follow seed packet instructions for planting depths (e.g., lettuce seeds are often surface-sown or planted 1/8 inch deep, while beans are 1 inch deep) and spacing.
- Companion Planting: Strategically plant different species together to enhance growth, deter pests, and attract beneficial insects. For example, planting marigolds near tomatoes can deter nematodes, and basil improves tomato flavor. Nasturtiums can act as a trap crop for aphids.
- Succession Planting: For a continuous harvest, plant small batches of quick-growing crops (lettuce, radishes, cilantro) every 2-3 weeks. As one crop finishes, another is ready to take its place.
Step 6: Pest & Disease Management (Organic)
Maintaining a self sufficient garden from scratch means embracing organic pest and disease control.
- Integrated Pest Management (IPM): This holistic approach combines several strategies.
- Observation: Regularly inspect your plants for early signs of pests or disease. Catching issues early is key.
- Physical Barriers: Use row covers (e.g., Agribon AG-19 floating row cover, 10×20 ft, ~$20) to protect young plants from insect pests like cabbage worms and squash bugs. Install fences (e.g., 2×4 welded wire mesh, 4 ft tall, 50 ft roll ~$70) to keep out deer, rabbits, and other larger animals.
- Hand-Picking: For larger pests like tomato hornworms or squash bugs, simply pick them off and drop them into a bucket of soapy water.
- Companion Planting: As mentioned, certain plants repel pests. Marigolds, garlic, and onions are excellent deterrents.
- Attract Beneficial Insects: Plant flowers like dill, fennel, cosmos, and sweet alyssum to attract ladybugs, lacewings, and parasitic wasps, which prey on common garden pests.
- Organic Sprays & Treatments:
- Neem Oil: An excellent broad-spectrum organic insecticide and fungicide. Bonide Neem Oil Concentrate (16oz, ~$20) can be mixed at a rate of 1-2 tbsp per gallon of water and sprayed on affected plants.
- Insecticidal Soap: Effective against soft-bodied insects like aphids, whiteflies, and spider mites. Garden Safe Insecticidal Soap (24oz ready-to-use, ~$10).
- Bacillus thuringiensis (Bt): A naturally occurring soil bacterium that targets caterpillars and worms. Monterey BT Worm & Caterpillar Killer (16oz, ~$18) is highly effective and safe for beneficial insects.
- Copper or Sulfur Sprays: For fungal diseases like powdery mildew or blight, organic copper (e.g., Bonide Copper Fungicide, ~$15 for 1lb) or sulfur (e.g., Safer Brand Garden Fungicide, ~$10 for 16oz) can be used as a last resort.
Step 7: Harvesting & Seed Saving
The culmination of your efforts is the harvest, and seed saving closes the loop on self-sufficiency.
- Harvesting Techniques:
- Timing: Harvest vegetables at their peak ripeness for best flavor and nutritional value. For example, green beans should snap cleanly, cucumbers should be firm, and tomatoes should be fully colored.
- Frequency: Many crops, like zucchini, cucumbers, and bush beans, produce more if harvested frequently. Pick daily or every other day.
- Tools: Use clean, sharp pruners (e.g., Corona ClassicCUT Bypass Pruner BP 3180, ~$30) or a sharp knife for clean cuts, minimizing damage to the plant.
- Seed Saving: This is where the « self-sufficient » aspect truly shines.
- Selection: Only save seeds from your healthiest, most vigorous plants that show desired traits (disease resistance, good flavor, high yield).
- Isolation: To ensure true-to-type seeds, prevent cross-pollination. This can be challenging for open-pollinated crops that readily cross (e.g., squash, corn). For beginners, focus on self-pollinating plants like beans, peas, lettuce, and tomatoes.
- Processing:
- Dry Seeds (Beans, Peas, Lettuce, Grains): Allow pods/seed heads to dry completely on the plant. Harvest, shell, and clean the seeds, removing chaff.
- Wet Seeds (Tomatoes, Cucumbers, Squash): For tomatoes, ferment the seeds in water for a few days to remove the gel coating and inhibit disease. For cucumbers/squash, scrape out seeds, wash thoroughly, and dry.
- Drying: Spread seeds thinly on screens or paper plates in a cool, dry, well-ventilated area for 1-4 weeks. Ensure they are bone-dry before storage. I aim for less than 8% moisture content.
- Storage: Store seeds in airtight containers (glass jars with desiccant packets work well) in a cool, dark, dry place (ideally 40-50°F and 30-40% humidity). Label clearly with variety and date. Properly stored seeds can remain viable for 3-10 years or more.
Step 8: Season Extension & Winterizing
Extend your harvest and protect your garden for the off-season to truly maximize your self sufficient garden from scratch.
- Cold Frames: Simple structures with a transparent top (glass, polycarbonate, or old windows) that sit over garden beds. They trap solar heat, allowing you to grow cold-hardy crops (lettuce, spinach, kale, radishes) well into winter or start seeds earlier in spring. A basic cold frame can be built from 2×6 lumber and a sheet of polycarbonate for under $100.
- Hoop Houses/Low Tunnels: Larger structures made from flexible hoops (PVC pipe or EMT conduit) covered with greenhouse plastic. These provide more space and greater temperature moderation. A 10×20 ft DIY low tunnel kit can cost $200-$500, while a larger, more robust hoop house kit might be $1,000-$3,000. I use a 6×12 ft low tunnel made from 1/2-inch PVC hoops and 6mil greenhouse plastic, which extends my lettuce and spinach harvest by at least
- Choose Heirloom & Open-Pollinated Seeds: These varieties produce seeds that will grow true to type, meaning you can save seeds from your harvest year after year. F1 hybrids, while often vigorous, will not produce consistent offspring from saved seeds. Reputable seed companies include Baker Creek Heirloom Seeds, High Mowing Organic Seeds, and Seed Savers Exchange. Start with common, reliable varieties like ‘Black Krim’ tomatoes, ‘Provider’ bush beans, ‘Waltham Butternut’ squash, and ‘Black Seeded Simpson’ lettuce.
- Start Seeds Indoors (Optional but Recommended): For longer growing seasons or specific crops, starting seeds indoors gives you a head start. Use seed-starting mix (e.g., Espoma Organic Seed Starter Mix, ~$10 for 16qt bag) in seed trays (Jiffy Professional Greenhouse 72-cell kit, ~$15). Provide adequate light with LED grow lights (Barrina T5 2ft 4-pack LED Grow Lights, 20W each, ~$50) for 14-16 hours a day, positioned 2-4 inches above seedlings. Maintain consistent temperatures (65-75°F for most).
- Direct Sowing vs. Transplanting: Some crops (carrots, radishes, beans, corn) prefer direct sowing into the garden bed. Others (tomatoes, peppers, broccoli, kale) benefit from being started indoors and transplanted. Follow seed packet instructions for planting depths (e.g., lettuce seeds are often surface-sown or planted 1/8 inch deep, while beans are 1 inch deep) and spacing.
- Companion Planting: Strategically plant different species together to enhance growth, deter pests, and attract beneficial insects. For example, planting marigolds near tomatoes can deter nematodes, and basil improves tomato flavor. Nasturtiums can act as a trap crop for aphids.
- Succession Planting: For a continuous harvest, plant small batches of quick-growing crops (lettuce, radishes, cilantro) every 2-3 weeks. As one crop finishes, another is ready to take its place.
Step 6: Pest & Disease Management (Organic)
Maintaining a self sufficient garden from scratch means embracing organic pest and disease control.
- Integrated Pest Management (IPM): This holistic approach combines several strategies.
- Observation: Regularly inspect your plants for early signs of pests or disease. Catching issues early is key.
- Physical Barriers: Use row covers (e.g., Agribon AG-19 floating row cover, 10×20 ft, ~$20) to protect young plants from insect pests like cabbage worms and squash bugs. Install fences (e.g., 2×4 welded wire mesh, 4 ft tall, 50 ft roll ~$70) to keep out deer, rabbits, and other larger animals.
- Hand-Picking: For larger pests like tomato hornworms or squash bugs, simply pick them off and drop them into a bucket of soapy water.
- Companion Planting: As mentioned, certain plants repel pests. Marigolds, garlic, and onions are excellent deterrents.
- Attract Beneficial Insects: Plant flowers like dill, fennel, cosmos, and sweet alyssum to attract ladybugs, lacewings, and parasitic wasps, which prey on common garden pests.
- Organic Sprays & Treatments:
- Neem Oil: An excellent broad-spectrum organic insecticide and fungicide. Bonide Neem Oil Concentrate (16oz, ~$20) can be mixed at a rate of 1-2 tbsp per gallon of water and sprayed on affected plants.
- Insecticidal Soap: Effective against soft-bodied insects like aphids, whiteflies, and spider mites. Garden Safe Insecticidal Soap (24oz ready-to-use, ~$10).
- Bacillus thuringiensis (Bt): A naturally occurring soil bacterium that targets caterpillars and worms. Monterey BT Worm & Caterpillar Killer (16oz, ~$18) is highly effective and safe for beneficial insects.
- Copper or Sulfur Sprays: For fungal diseases like powdery mildew or blight, organic copper (e.g., Bonide Copper Fungicide, ~$15 for 1lb) or sulfur (e.g., Safer Brand Garden Fungicide, ~$10 for 16oz) can be used as a last resort.
Step 7: Harvesting & Seed Saving
The culmination of your efforts is the harvest, and seed saving closes the loop on self-sufficiency.
- Harvesting Techniques:
- Timing: Harvest vegetables at their peak ripeness for best flavor and nutritional value. For example, green beans should snap cleanly, cucumbers should be firm, and tomatoes should be fully colored.
- Frequency: Many crops, like zucchini, cucumbers, and bush beans, produce more if harvested frequently. Pick daily or every other day.
- Tools: Use clean, sharp pruners (e.g., Corona ClassicCUT Bypass Pruner BP 3180, ~$30) or a sharp knife for clean cuts, minimizing damage to the plant.
- Seed Saving: This is where the « self-sufficient » aspect truly shines.
- Selection: Only save seeds from your healthiest, most vigorous plants that show desired traits (disease resistance, good flavor, high yield).
- Isolation: To ensure true-to-type seeds, prevent cross-pollination. This can be challenging for open-pollinated crops that readily cross (e.g., squash, corn). For beginners, focus on self-pollinating plants like beans, peas, lettuce, and tomatoes.
- Processing:
- Dry Seeds (Beans, Peas, Lettuce, Grains): Allow pods/seed heads to dry completely on the plant. Harvest, shell, and clean the seeds, removing chaff.
- Wet Seeds (Tomatoes, Cucumbers, Squash): For tomatoes, ferment the seeds in water for a few days to remove the gel coating and inhibit disease. For cucumbers/squash, scrape out seeds, wash thoroughly, and dry.
- Drying: Spread seeds thinly on screens or paper plates in a cool, dry, well-ventilated area for 1-4 weeks. Ensure they are bone-dry before storage. I aim for less than 8% moisture content.
- Storage: Store seeds in airtight containers (glass jars with desiccant packets work well) in a cool, dark, dry place (ideally 40-50°F and 30-40% humidity). Label clearly with variety and date. Properly stored seeds can remain viable for 3-10 years or more.
Step 8: Season Extension & Winterizing
Extend your harvest and protect your garden for the off-season to truly maximize your self sufficient garden from scratch.
- Cold Frames: Simple structures with a transparent top (glass, polycarbonate, or old windows) that sit over garden beds. They trap solar heat, allowing you to grow cold-hardy crops (lettuce, spinach, kale, radishes) well into winter or start seeds earlier in spring. A basic cold frame can be built from 2×6 lumber and a sheet of polycarbonate for under $100.
- Hoop Houses/Low Tunnels: Larger structures made from flexible hoops (PVC pipe or EMT conduit) covered with greenhouse plastic. These provide more space and greater temperature moderation. A 10×20 ft DIY low tunnel kit can cost $200-$500, while a larger, more robust hoop house kit might be $1,000-$3,000. I use a 6×12 ft low tunnel made from 1/2-inch PVC hoops and 6mil greenhouse plastic, which extends my lettuce and spinach harvest by at least
Deciding between raised beds and in-ground beds depends on your soil, budget, and physical capabilities.
- In-Ground Beds: If you have excellent native soil and good drainage, in-ground beds are the most economical. Double-digging (loosening soil two shovel depths) can significantly improve drainage and aeration. For my main garden, I primarily use in-ground beds, but I focus on building up the soil over time with consistent compost additions and cover cropping. I aim for beds that are no wider than 3-4 feet so I can reach the center without stepping on the soil, compacting it.
- Raised Beds: Raised beds offer numerous advantages, especially for poor soil, heavy clay, or rocky areas. They provide better drainage, warm up faster in spring, reduce compaction, and make weeding and harvesting easier on your back.
- Material Options:
- Untreated Cedar: Naturally rot-resistant and chemical-free. A 4×8 ft bed, 12 inches deep, typically requires three 2x12x8 ft cedar boards, costing around $50-$60 per board (total ~$150-$180) plus corner brackets or screws. My first raised beds were cedar and are still going strong after 7 years.
- Galvanized Steel: Durable, long-lasting, and aesthetically pleasing. Brands like Vego Garden offer modular kits. A Vego Garden 17″ Tall 8-in-1 Metal Raised Garden Bed (can be configured to 4×8 ft) costs approximately $250-$300.
- Concrete Blocks/Stones: Very durable but can leach minerals (though generally safe once weathered) and can be expensive.
- Recycled Materials: Pallets (check for chemical treatment stamps like « HT » for heat-treated), old tires (controversial due to potential chemical leaching).
- Filling Raised Beds: Don’t just fill with topsoil. Use a « Hugelkultur » approach (logs, branches, leaves, then compost, then topsoil) or a mixture of 60% good quality topsoil, 30% compost, and 10% perlite or vermiculite for drainage. A 4x8x1 ft raised bed requires about 32 cubic feet (or ~1.2 cubic yards) of soil mix, which can cost $100-$200 depending on your source.
- Material Options:
Step 4: Water Management & Irrigation
Efficient water management is critical for a self sufficient garden from scratch, especially in off-grid living where water resources might be limited.
- Rainwater Harvesting: This is my primary source of irrigation water. A 55-gallon rain barrel (e.g., EarthMark Rain Barrel, ~$120-$150) connected to a downspout can collect significant water. For larger needs, I use two 275-gallon IBC totes (Intermediate Bulk Containers, often available used for $100-$200 each from food-grade sources) connected in series. A 1,000 sq ft roof can collect approximately 620 gallons of water for every inch of rainfall. My 1,500 sq ft roof provides ample water for my 600 sq ft garden through multiple barrels and totes.
- Drip Irrigation: This is by far the most water-efficient method, delivering water directly to the plant’s root zone, minimizing evaporation and weed growth.
- Components: A typical drip system includes a pressure regulator (e.g., Rain Bird PRV-10, ~$15), a filter (Rain Bird RBY filter, ~$20), main tubing (1/2-inch poly tubing, 100ft ~$25), smaller feeder lines (1/4-inch tubing), and emitters (0.5 GPH or 1 GPH per plant).
- Kits: For beginners, a starter kit like the Rain Bird Drip Irrigation Garden Kit (model DDI-KIT-1P, ~$40-$60) is excellent for a small garden. For larger setups, I use Netafim Techline CV Drip Line (500ft roll, ~$150-$200), which has pressure-compensating emitters built-in, ensuring even watering across long runs.
- Automation: For true self-sufficiency, consider a battery-powered timer (e.g., Orbit B-Hyve Bluetooth Hose Faucet Timer, ~$50) or a solar-powered timer connected to a small 12V pump.
- Solar-Powered Pumps: For lifting water from a well, pond, or large storage tank to your garden, a solar pump is a game-changer. For a smaller drip system, a Shurflo 2088-594-152 Diaphragm Pump (12V, 3.5 GPM, ~$180) can be powered by a single 100W solar panel (e.g., Renogy 100W Monocrystalline Solar Panel, ~$100) and a small 12V battery (e.g., a 50Ah LiFePO4 battery like the Battle Born 50Ah, ~$450). For larger operations or deeper wells, more robust systems are needed. If you’re looking to build out a comprehensive off-grid power system to support your garden’s water needs, or indeed your entire homestead, you might want to explore resources like the Power Grid Generator complete system guide to understand the full scope of what’s possible in terms of energy independence.
Step 5: Seed Selection & Planting
The choice of seeds is crucial for a truly self sufficient garden from scratch.
- Choose Heirloom & Open-Pollinated Seeds: These varieties produce seeds that will grow true to type, meaning you can save seeds from your harvest year after year. F1 hybrids, while often vigorous, will not produce consistent offspring from saved seeds. Reputable seed companies include Baker Creek Heirloom Seeds, High Mowing Organic Seeds, and Seed Savers Exchange. Start with common, reliable varieties like ‘Black Krim’ tomatoes, ‘Provider’ bush beans, ‘Waltham Butternut’ squash, and ‘Black Seeded Simpson’ lettuce.
- Start Seeds Indoors (Optional but Recommended): For longer growing seasons or specific crops, starting seeds indoors gives you a head start. Use seed-starting mix (e.g., Espoma Organic Seed Starter Mix, ~$10 for 16qt bag) in seed trays (Jiffy Professional Greenhouse 72-cell kit, ~$15). Provide adequate light with LED grow lights (Barrina T5 2ft 4-pack LED Grow Lights, 20W each, ~$50) for 14-16 hours a day, positioned 2-4 inches above seedlings. Maintain consistent temperatures (65-75°F for most).
- Direct Sowing vs. Transplanting: Some crops (carrots, radishes, beans, corn) prefer direct sowing into the garden bed. Others (tomatoes, peppers, broccoli, kale) benefit from being started indoors and transplanted. Follow seed packet instructions for planting depths (e.g., lettuce seeds are often surface-sown or planted 1/8 inch deep, while beans are 1 inch deep) and spacing.
- Companion Planting: Strategically plant different species together to enhance growth, deter pests, and attract beneficial insects. For example, planting marigolds near tomatoes can deter nematodes, and basil improves tomato flavor. Nasturtiums can act as a trap crop for aphids.
- Succession Planting: For a continuous harvest, plant small batches of quick-growing crops (lettuce, radishes, cilantro) every 2-3 weeks. As one crop finishes, another is ready to take its place.
Step 6: Pest & Disease Management (Organic)
Maintaining a self sufficient garden from scratch means embracing organic pest and disease control.
- Integrated Pest Management (IPM): This holistic approach combines several strategies.
- Observation: Regularly inspect your plants for early signs of pests or disease. Catching issues early is key.
- Physical Barriers: Use row covers (e.g., Agribon AG-19 floating row cover, 10×20 ft, ~$20) to protect young plants from insect pests like cabbage worms and squash bugs. Install fences (e.g., 2×4 welded wire mesh, 4 ft tall, 50 ft roll ~$70) to keep out deer, rabbits, and other larger animals.
- Hand-Picking: For larger pests like tomato hornworms or squash bugs, simply pick them off and drop them into a bucket of soapy water.
- Companion Planting: As mentioned, certain plants repel pests. Marigolds, garlic, and onions are excellent deterrents.
- Attract Beneficial Insects: Plant flowers like dill, fennel, cosmos, and sweet alyssum to attract ladybugs, lacewings, and parasitic wasps, which prey on common garden pests.
- Organic Sprays & Treatments:
- Neem Oil: An excellent broad-spectrum organic insecticide and fungicide. Bonide Neem Oil Concentrate (16oz, ~$20) can be mixed at a rate of 1-2 tbsp per gallon of water and sprayed on affected plants.
- Insecticidal Soap: Effective against soft-bodied insects like aphids, whiteflies, and spider mites. Garden Safe Insecticidal Soap (24oz ready-to-use, ~$10).
- Bacillus thuringiensis (Bt): A naturally occurring soil bacterium that targets caterpillars and worms. Monterey BT Worm & Caterpillar Killer (16oz, ~$18) is highly effective and safe for beneficial insects.
- Copper or Sulfur Sprays: For fungal diseases like powdery mildew or blight, organic copper (e.g., Bonide Copper Fungicide, ~$15 for 1lb) or sulfur (e.g., Safer Brand Garden Fungicide, ~$10 for 16oz) can be used as a last resort.
Step 7: Harvesting & Seed Saving
The culmination of your efforts is the harvest, and seed saving closes the loop on self-sufficiency.
- Harvesting Techniques:
- Timing: Harvest vegetables at their peak ripeness for best flavor and nutritional value. For example, green beans should snap cleanly, cucumbers should be firm, and tomatoes should be fully colored.
- Frequency: Many crops, like zucchini, cucumbers, and bush beans, produce more if harvested frequently. Pick daily or every other day.
- Tools: Use clean, sharp pruners (e.g., Corona ClassicCUT Bypass Pruner BP 3180, ~$30) or a sharp knife for clean cuts, minimizing damage to the plant.
- Seed Saving: This is where the « self-sufficient » aspect truly shines.
- Selection: Only save seeds from your healthiest, most vigorous plants that show desired traits (disease resistance, good flavor, high yield).
- Isolation: To ensure true-to-type seeds, prevent cross-pollination. This can be challenging for open-pollinated crops that readily cross (e.g., squash, corn). For beginners, focus on self-pollinating plants like beans, peas, lettuce, and tomatoes.
- Processing:
- Dry Seeds (Beans, Peas, Lettuce, Grains): Allow pods/seed heads to dry completely on the plant. Harvest, shell, and clean the seeds, removing chaff.
- Wet Seeds (Tomatoes, Cucumbers, Squash): For tomatoes, ferment the seeds in water for a few days to remove the gel coating and inhibit disease. For cucumbers/squash, scrape out seeds, wash thoroughly, and dry.
- Drying: Spread seeds thinly on screens or paper plates in a cool, dry, well-ventilated area for 1-4 weeks. Ensure they are bone-dry before storage. I aim for less than 8% moisture content.
- Storage: Store seeds in airtight containers (glass jars with desiccant packets work well) in a cool, dark, dry place (ideally 40-50°F and 30-40% humidity). Label clearly with variety and date. Properly stored seeds can remain viable for 3-10 years or more.
Step 8: Season Extension & Winterizing
Extend your harvest and protect your garden for the off-season to truly maximize your self sufficient garden from scratch.
- Cold Frames: Simple structures with a transparent top (glass, polycarbonate, or old windows) that sit over garden beds. They trap solar heat, allowing you to grow cold-hardy crops (lettuce, spinach, kale, radishes) well into winter or start seeds earlier in spring. A basic cold frame can be built from 2×6 lumber and a sheet of polycarbonate for under $100.
- Hoop Houses/Low Tunnels: Larger structures made from flexible hoops (PVC pipe or EMT conduit) covered with greenhouse plastic. These provide more space and greater temperature moderation. A 10×20 ft DIY low tunnel kit can cost $200-$500, while a larger, more robust hoop house kit might be $1,000-$3,000. I use a 6×12 ft low tunnel made from 1/2-inch PVC hoops and 6mil greenhouse plastic, which extends my lettuce and spinach harvest by at least
Healthy soil is the bedrock of a productive, self-sufficient garden. You can’t guess what your soil needs; you have to test it.
- Perform a Soil Test: A professional soil test will give you precise data on your soil’s pH, nutrient levels (N-P-K), and organic matter content. I recommend sending a sample to your local agricultural extension office; it typically costs $20-$50 and provides detailed recommendations. Alternatively, for a quick homeowner check, a Rapitest Soil Test Kit (40-test kit, model 1663, ~$20 on Amazon) provides a good baseline for pH, Nitrogen, Phosphorus, and Potash. Aim for a pH between 6.0 and 7.0 for most vegetables.
- Amend for pH Imbalance: If your soil is too acidic (below 6.0), add agricultural lime (dolomitic lime adds magnesium, calcitic lime adds calcium). Apply 5-10 lbs per 100 sq ft for a moderate adjustment. If it’s too alkaline (above 7.0), add elemental sulfur (e.g., Espoma Soil Acidifier, ~$15 for 6.75 lbs) or generous amounts of organic matter like peat moss or pine needles.
- Build Organic Matter: This is the single most important step for long-term soil health. Organic matter improves soil structure, water retention, drainage, and nutrient availability. Incorporate 2-4 inches of high-quality compost into your top 6-12 inches of soil annually. I make my own compost from kitchen scraps, garden waste, and shredded leaves, but you can purchase it. Local nurseries often sell bulk compost for $30-$50 per cubic yard. Aged manure (from chickens, cows, or horses – ensure it’s well-rotted to avoid burning plants) is also excellent.
- Address Nutrient Deficiencies: Based on your soil test, add specific organic amendments. If Nitrogen (N) is low, add blood meal (12-0-0, ~$20 for 3 lbs) or feather meal. For Phosphorus (P), use bone meal (3-15-0, ~$15 for 3 lbs) or rock phosphate. For Potassium (K), greensand (0-0-2.5, ~$25 for 5 lbs) or kelp meal are good choices. I rely heavily on Espoma Organic Garden-tone (5-3-3, ~$25 for an 8lb bag) as a balanced, all-purpose organic fertilizer during planting.
Step 3: Garden Bed Preparation
Deciding between raised beds and in-ground beds depends on your soil, budget, and physical capabilities.
- In-Ground Beds: If you have excellent native soil and good drainage, in-ground beds are the most economical. Double-digging (loosening soil two shovel depths) can significantly improve drainage and aeration. For my main garden, I primarily use in-ground beds, but I focus on building up the soil over time with consistent compost additions and cover cropping. I aim for beds that are no wider than 3-4 feet so I can reach the center without stepping on the soil, compacting it.
- Raised Beds: Raised beds offer numerous advantages, especially for poor soil, heavy clay, or rocky areas. They provide better drainage, warm up faster in spring, reduce compaction, and make weeding and harvesting easier on your back.
- Material Options:
- Untreated Cedar: Naturally rot-resistant and chemical-free. A 4×8 ft bed, 12 inches deep, typically requires three 2x12x8 ft cedar boards, costing around $50-$60 per board (total ~$150-$180) plus corner brackets or screws. My first raised beds were cedar and are still going strong after 7 years.
- Galvanized Steel: Durable, long-lasting, and aesthetically pleasing. Brands like Vego Garden offer modular kits. A Vego Garden 17″ Tall 8-in-1 Metal Raised Garden Bed (can be configured to 4×8 ft) costs approximately $250-$300.
- Concrete Blocks/Stones: Very durable but can leach minerals (though generally safe once weathered) and can be expensive.
- Recycled Materials: Pallets (check for chemical treatment stamps like « HT » for heat-treated), old tires (controversial due to potential chemical leaching).
- Filling Raised Beds: Don’t just fill with topsoil. Use a « Hugelkultur » approach (logs, branches, leaves, then compost, then topsoil) or a mixture of 60% good quality topsoil, 30% compost, and 10% perlite or vermiculite for drainage. A 4x8x1 ft raised bed requires about 32 cubic feet (or ~1.2 cubic yards) of soil mix, which can cost $100-$200 depending on your source.
- Material Options:
Step 4: Water Management & Irrigation
Efficient water management is critical for a self sufficient garden from scratch, especially in off-grid living where water resources might be limited.
- Rainwater Harvesting: This is my primary source of irrigation water. A 55-gallon rain barrel (e.g., EarthMark Rain Barrel, ~$120-$150) connected to a downspout can collect significant water. For larger needs, I use two 275-gallon IBC totes (Intermediate Bulk Containers, often available used for $100-$200 each from food-grade sources) connected in series. A 1,000 sq ft roof can collect approximately 620 gallons of water for every inch of rainfall. My 1,500 sq ft roof provides ample water for my 600 sq ft garden through multiple barrels and totes.
- Drip Irrigation: This is by far the most water-efficient method, delivering water directly to the plant’s root zone, minimizing evaporation and weed growth.
- Components: A typical drip system includes a pressure regulator (e.g., Rain Bird PRV-10, ~$15), a filter (Rain Bird RBY filter, ~$20), main tubing (1/2-inch poly tubing, 100ft ~$25), smaller feeder lines (1/4-inch tubing), and emitters (0.5 GPH or 1 GPH per plant).
- Kits: For beginners, a starter kit like the Rain Bird Drip Irrigation Garden Kit (model DDI-KIT-1P, ~$40-$60) is excellent for a small garden. For larger setups, I use Netafim Techline CV Drip Line (500ft roll, ~$150-$200), which has pressure-compensating emitters built-in, ensuring even watering across long runs.
- Automation: For true self-sufficiency, consider a battery-powered timer (e.g., Orbit B-Hyve Bluetooth Hose Faucet Timer, ~$50) or a solar-powered timer connected to a small 12V pump.
- Solar-Powered Pumps: For lifting water from a well, pond, or large storage tank to your garden, a solar pump is a game-changer. For a smaller drip system, a Shurflo 2088-594-152 Diaphragm Pump (12V, 3.5 GPM, ~$180) can be powered by a single 100W solar panel (e.g., Renogy 100W Monocrystalline Solar Panel, ~$100) and a small 12V battery (e.g., a 50Ah LiFePO4 battery like the Battle Born 50Ah, ~$450). For larger operations or deeper wells, more robust systems are needed. If you’re looking to build out a comprehensive off-grid power system to support your garden’s water needs, or indeed your entire homestead, you might want to explore resources like the Power Grid Generator complete system guide to understand the full scope of what’s possible in terms of energy independence.
Step 5: Seed Selection & Planting
The choice of seeds is crucial for a truly self sufficient garden from scratch.
- Choose Heirloom & Open-Pollinated Seeds: These varieties produce seeds that will grow true to type, meaning you can save seeds from your harvest year after year. F1 hybrids, while often vigorous, will not produce consistent offspring from saved seeds. Reputable seed companies include Baker Creek Heirloom Seeds, High Mowing Organic Seeds, and Seed Savers Exchange. Start with common, reliable varieties like ‘Black Krim’ tomatoes, ‘Provider’ bush beans, ‘Waltham Butternut’ squash, and ‘Black Seeded Simpson’ lettuce.
- Start Seeds Indoors (Optional but Recommended): For longer growing seasons or specific crops, starting seeds indoors gives you a head start. Use seed-starting mix (e.g., Espoma Organic Seed Starter Mix, ~$10 for 16qt bag) in seed trays (Jiffy Professional Greenhouse 72-cell kit, ~$15). Provide adequate light with LED grow lights (Barrina T5 2ft 4-pack LED Grow Lights, 20W each, ~$50) for 14-16 hours a day, positioned 2-4 inches above seedlings. Maintain consistent temperatures (65-75°F for most).
- Direct Sowing vs. Transplanting: Some crops (carrots, radishes, beans, corn) prefer direct sowing into the garden bed. Others (tomatoes, peppers, broccoli, kale) benefit from being started indoors and transplanted. Follow seed packet instructions for planting depths (e.g., lettuce seeds are often surface-sown or planted 1/8 inch deep, while beans are 1 inch deep) and spacing.
- Companion Planting: Strategically plant different species together to enhance growth, deter pests, and attract beneficial insects. For example, planting marigolds near tomatoes can deter nematodes, and basil improves tomato flavor. Nasturtiums can act as a trap crop for aphids.
- Succession Planting: For a continuous harvest, plant small batches of quick-growing crops (lettuce, radishes, cilantro) every 2-3 weeks. As one crop finishes, another is ready to take its place.
Step 6: Pest & Disease Management (Organic)
Maintaining a self sufficient garden from scratch means embracing organic pest and disease control.
- Integrated Pest Management (IPM): This holistic approach combines several strategies.
- Observation: Regularly inspect your plants for early signs of pests or disease. Catching issues early is key.
- Physical Barriers: Use row covers (e.g., Agribon AG-19 floating row cover, 10×20 ft, ~$20) to protect young plants from insect pests like cabbage worms and squash bugs. Install fences (e.g., 2×4 welded wire mesh, 4 ft tall, 50 ft roll ~$70) to keep out deer, rabbits, and other larger animals.
- Hand-Picking: For larger pests like tomato hornworms or squash bugs, simply pick them off and drop them into a bucket of soapy water.
- Companion Planting: As mentioned, certain plants repel pests. Marigolds, garlic, and onions are excellent deterrents.
- Attract Beneficial Insects: Plant flowers like dill, fennel, cosmos, and sweet alyssum to attract ladybugs, lacewings, and parasitic wasps, which prey on common garden pests.
- Organic Sprays & Treatments:
- Neem Oil: An excellent broad-spectrum organic insecticide and fungicide. Bonide Neem Oil Concentrate (16oz, ~$20) can be mixed at a rate of 1-2 tbsp per gallon of water and sprayed on affected plants.
- Insecticidal Soap: Effective against soft-bodied insects like aphids, whiteflies, and spider mites. Garden Safe Insecticidal Soap (24oz ready-to-use, ~$10).
- Bacillus thuringiensis (Bt): A naturally occurring soil bacterium that targets caterpillars and worms. Monterey BT Worm & Caterpillar Killer (16oz, ~$18) is highly effective and safe for beneficial insects.
- Copper or Sulfur Sprays: For fungal diseases like powdery mildew or blight, organic copper (e.g., Bonide Copper Fungicide, ~$15 for 1lb) or sulfur (e.g., Safer Brand Garden Fungicide, ~$10 for 16oz) can be used as a last resort.
Step 7: Harvesting & Seed Saving
The culmination of your efforts is the harvest, and seed saving closes the loop on self-sufficiency.
- Harvesting Techniques:
- Timing: Harvest vegetables at their peak ripeness for best flavor and nutritional value. For example, green beans should snap cleanly, cucumbers should be firm, and tomatoes should be fully colored.
- Frequency: Many crops, like zucchini, cucumbers, and bush beans, produce more if harvested frequently. Pick daily or every other day.
- Tools: Use clean, sharp pruners (e.g., Corona ClassicCUT Bypass Pruner BP 3180, ~$30) or a sharp knife for clean cuts, minimizing damage to the plant.
- Seed Saving: This is where the « self-sufficient » aspect truly shines.
- Selection: Only save seeds from your healthiest, most vigorous plants that show desired traits (disease resistance, good flavor, high yield).
- Isolation: To ensure true-to-type seeds, prevent cross-pollination. This can be challenging for open-pollinated crops that readily cross (e.g., squash, corn). For beginners, focus on self-pollinating plants like beans, peas, lettuce, and tomatoes.
- Processing:
- Dry Seeds (Beans, Peas, Lettuce, Grains): Allow pods/seed heads to dry completely on the plant. Harvest, shell, and clean the seeds, removing chaff.
- Wet Seeds (Tomatoes, Cucumbers, Squash): For tomatoes, ferment the seeds in water for a few days to remove the gel coating and inhibit disease. For cucumbers/squash, scrape out seeds, wash thoroughly, and dry.
- Drying: Spread seeds thinly on screens or paper plates in a cool, dry, well-ventilated area for 1-4 weeks. Ensure they are bone-dry before storage. I aim for less than 8% moisture content.
- Storage: Store seeds in airtight containers (glass jars with desiccant packets work well) in a cool, dark, dry place (ideally 40-50°F and 30-40% humidity). Label clearly with variety and date. Properly stored seeds can remain viable for 3-10 years or more.
Step 8: Season Extension & Winterizing
Extend your harvest and protect your garden for the off-season to truly maximize your self sufficient garden from scratch.
- Cold Frames: Simple structures with a transparent top (glass, polycarbonate, or old windows) that sit over garden beds. They trap solar heat, allowing you to grow cold-hardy crops (lettuce, spinach, kale, radishes) well into winter or start seeds earlier in spring. A basic cold frame can be built from 2×6 lumber and a sheet of polycarbonate for under $100.
- Hoop Houses/Low Tunnels: Larger structures made from flexible hoops (PVC pipe or EMT conduit) covered with greenhouse plastic. These provide more space and greater temperature moderation. A 10×20 ft DIY low tunnel kit can cost $200-$500, while a larger, more robust hoop house kit might be $1,000-$3,000. I use a 6×12 ft low tunnel made from 1/2-inch PVC hoops and 6mil greenhouse plastic, which extends my lettuce and spinach harvest by at least
The choice of seeds is crucial for a truly self sufficient garden from scratch.
- Choose Heirloom & Open-Pollinated Seeds: These varieties produce seeds that will grow true to type, meaning you can save seeds from your harvest year after year. F1 hybrids, while often vigorous, will not produce consistent offspring from saved seeds. Reputable seed companies include Baker Creek Heirloom Seeds, High Mowing Organic Seeds, and Seed Savers Exchange. Start with common, reliable varieties like ‘Black Krim’ tomatoes, ‘Provider’ bush beans, ‘Waltham Butternut’ squash, and ‘Black Seeded Simpson’ lettuce.
- Start Seeds Indoors (Optional but Recommended): For longer growing seasons or specific crops, starting seeds indoors gives you a head start. Use seed-starting mix (e.g., Espoma Organic Seed Starter Mix, ~$10 for 16qt bag) in seed trays (Jiffy Professional Greenhouse 72-cell kit, ~$15). Provide adequate light with LED grow lights (Barrina T5 2ft 4-pack LED Grow Lights, 20W each, ~$50) for 14-16 hours a day, positioned 2-4 inches above seedlings. Maintain consistent temperatures (65-75°F for most).
- Direct Sowing vs. Transplanting: Some crops (carrots, radishes, beans, corn) prefer direct sowing into the garden bed. Others (tomatoes, peppers, broccoli, kale) benefit from being started indoors and transplanted. Follow seed packet instructions for planting depths (e.g., lettuce seeds are often surface-sown or planted 1/8 inch deep, while beans are 1 inch deep) and spacing.
- Companion Planting: Strategically plant different species together to enhance growth, deter pests, and attract beneficial insects. For example, planting marigolds near tomatoes can deter nematodes, and basil improves tomato flavor. Nasturtiums can act as a trap crop for aphids.
- Succession Planting: For a continuous harvest, plant small batches of quick-growing crops (lettuce, radishes, cilantro) every 2-3 weeks. As one crop finishes, another is ready to take its place.
Step 6: Pest & Disease Management (Organic)
Maintaining a self sufficient garden from scratch means embracing organic pest and disease control.
- Integrated Pest Management (IPM): This holistic approach combines several strategies.
- Observation: Regularly inspect your plants for early signs of pests or disease. Catching issues early is key.
- Physical Barriers: Use row covers (e.g., Agribon AG-19 floating row cover, 10×20 ft, ~$20) to protect young plants from insect pests like cabbage worms and squash bugs. Install fences (e.g., 2×4 welded wire mesh, 4 ft tall, 50 ft roll ~$70) to keep out deer, rabbits, and other larger animals.
- Hand-Picking: For larger pests like tomato hornworms or squash bugs, simply pick them off and drop them into a bucket of soapy water.
- Companion Planting: As mentioned, certain plants repel pests. Marigolds, garlic, and onions are excellent deterrents.
- Attract Beneficial Insects: Plant flowers like dill, fennel, cosmos, and sweet alyssum to attract ladybugs, lacewings, and parasitic wasps, which prey on common garden pests.
- Organic Sprays & Treatments:
- Neem Oil: An excellent broad-spectrum organic insecticide and fungicide. Bonide Neem Oil Concentrate (16oz, ~$20) can be mixed at a rate of 1-2 tbsp per gallon of water and sprayed on affected plants.
- Insecticidal Soap: Effective against soft-bodied insects like aphids, whiteflies, and spider mites. Garden Safe Insecticidal Soap (24oz ready-to-use, ~$10).
- Bacillus thuringiensis (Bt): A naturally occurring soil bacterium that targets caterpillars and worms. Monterey BT Worm & Caterpillar Killer (16oz, ~$18) is highly effective and safe for beneficial insects.
- Copper or Sulfur Sprays: For fungal diseases like powdery mildew or blight, organic copper (e.g., Bonide Copper Fungicide, ~$15 for 1lb) or sulfur (e.g., Safer Brand Garden Fungicide, ~$10 for 16oz) can be used as a last resort.
Step 7: Harvesting & Seed Saving
The culmination of your efforts is the harvest, and seed saving closes the loop on self-sufficiency.
- Harvesting Techniques:
- Timing: Harvest vegetables at their peak ripeness for best flavor and nutritional value. For example, green beans should snap cleanly, cucumbers should be firm, and tomatoes should be fully colored.
- Frequency: Many crops, like zucchini, cucumbers, and bush beans, produce more if harvested frequently. Pick daily or every other day.
- Tools: Use clean, sharp pruners (e.g., Corona ClassicCUT Bypass Pruner BP 3180, ~$30) or a sharp knife for clean cuts, minimizing damage to the plant.
- Seed Saving: This is where the « self-sufficient » aspect truly shines.
- Selection: Only save seeds from your healthiest, most vigorous plants that show desired traits (disease resistance, good flavor, high yield).
- Isolation: To ensure true-to-type seeds, prevent cross-pollination. This can be challenging for open-pollinated crops that readily cross (e.g., squash, corn). For beginners, focus on self-pollinating plants like beans, peas, lettuce, and tomatoes.
- Processing:
- Dry Seeds (Beans, Peas, Lettuce, Grains): Allow pods/seed heads to dry completely on the plant. Harvest, shell, and clean the seeds, removing chaff.
- Wet Seeds (Tomatoes, Cucumbers, Squash): For tomatoes, ferment the seeds in water for a few days to remove the gel coating and inhibit disease. For cucumbers/squash, scrape out seeds, wash thoroughly, and dry.
- Drying: Spread seeds thinly on screens or paper plates in a cool, dry, well-ventilated area for 1-4 weeks. Ensure they are bone-dry before storage. I aim for less than 8% moisture content.
- Storage: Store seeds in airtight containers (glass jars with desiccant packets work well) in a cool, dark, dry place (ideally 40-50°F and 30-40% humidity). Label clearly with variety and date. Properly stored seeds can remain viable for 3-10 years or more.
Step 8: Season Extension & Winterizing
Extend your harvest and protect your garden for the off-season to truly maximize your self sufficient garden from scratch.
- Cold Frames: Simple structures with a transparent top (glass, polycarbonate, or old windows) that sit over garden beds. They trap solar heat, allowing you to grow cold-hardy crops (lettuce, spinach, kale, radishes) well into winter or start seeds earlier in spring. A basic cold frame can be built from 2×6 lumber and a sheet of polycarbonate for under $100.
- Hoop Houses/Low Tunnels: Larger structures made from flexible hoops (PVC pipe or EMT conduit) covered with greenhouse plastic. These provide more space and greater temperature moderation. A 10×20 ft DIY low tunnel kit can cost $200-$500, while a larger, more robust hoop house kit might be $1,000-$3,000. I use a 6×12 ft low tunnel made from 1/2-inch PVC hoops and 6mil greenhouse plastic, which extends my lettuce and spinach harvest by at least
Deciding between raised beds and in-ground beds depends on your soil, budget, and physical capabilities.
- In-Ground Beds: If you have excellent native soil and good drainage, in-ground beds are the most economical. Double-digging (loosening soil two shovel depths) can significantly improve drainage and aeration. For my main garden, I primarily use in-ground beds, but I focus on building up the soil over time with consistent compost additions and cover cropping. I aim for beds that are no wider than 3-4 feet so I can reach the center without stepping on the soil, compacting it.
- Raised Beds: Raised beds offer numerous advantages, especially for poor soil, heavy clay, or rocky areas. They provide better drainage, warm up faster in spring, reduce compaction, and make weeding and harvesting easier on your back.
- Material Options:
- Untreated Cedar: Naturally rot-resistant and chemical-free. A 4×8 ft bed, 12 inches deep, typically requires three 2x12x8 ft cedar boards, costing around $50-$60 per board (total ~$150-$180) plus corner brackets or screws. My first raised beds were cedar and are still going strong after 7 years.
- Galvanized Steel: Durable, long-lasting, and aesthetically pleasing. Brands like Vego Garden offer modular kits. A Vego Garden 17″ Tall 8-in-1 Metal Raised Garden Bed (can be configured to 4×8 ft) costs approximately $250-$300.
- Concrete Blocks/Stones: Very durable but can leach minerals (though generally safe once weathered) and can be expensive.
- Recycled Materials: Pallets (check for chemical treatment stamps like « HT » for heat-treated), old tires (controversial due to potential chemical leaching).
- Filling Raised Beds: Don’t just fill with topsoil. Use a « Hugelkultur » approach (logs, branches, leaves, then compost, then topsoil) or a mixture of 60% good quality topsoil, 30% compost, and 10% perlite or vermiculite for drainage. A 4x8x1 ft raised bed requires about 32 cubic feet (or ~1.2 cubic yards) of soil mix, which can cost $100-$200 depending on your source.
- Material Options:
Step 4: Water Management & Irrigation
Efficient water management is critical for a self sufficient garden from scratch, especially in off-grid living where water resources might be limited.
- Rainwater Harvesting: This is my primary source of irrigation water. A 55-gallon rain barrel (e.g., EarthMark Rain Barrel, ~$120-$150) connected to a downspout can collect significant water. For larger needs, I use two 275-gallon IBC totes (Intermediate Bulk Containers, often available used for $100-$200 each from food-grade sources) connected in series. A 1,000 sq ft roof can collect approximately 620 gallons of water for every inch of rainfall. My 1,500 sq ft roof provides ample water for my 600 sq ft garden through multiple barrels and totes.
- Drip Irrigation: This is by far the most water-efficient method, delivering water directly to the plant’s root zone, minimizing evaporation and weed growth.
- Components: A typical drip system includes a pressure regulator (e.g., Rain Bird PRV-10, ~$15), a filter (Rain Bird RBY filter, ~$20), main tubing (1/2-inch poly tubing, 100ft ~$25), smaller feeder lines (1/4-inch tubing), and emitters (0.5 GPH or 1 GPH per plant).
- Kits: For beginners, a starter kit like the Rain Bird Drip Irrigation Garden Kit (model DDI-KIT-1P, ~$40-$60) is excellent for a small garden. For larger setups, I use Netafim Techline CV Drip Line (500ft roll, ~$150-$200), which has pressure-compensating emitters built-in, ensuring even watering across long runs.
- Automation: For true self-sufficiency, consider a battery-powered timer (e.g., Orbit B-Hyve Bluetooth Hose Faucet Timer, ~$50) or a solar-powered timer connected to a small 12V pump.
- Solar-Powered Pumps: For lifting water from a well, pond, or large storage tank to your garden, a solar pump is a game-changer. For a smaller drip system, a Shurflo 2088-594-152 Diaphragm Pump (12V, 3.5 GPM, ~$180) can be powered by a single 100W solar panel (e.g., Renogy 100W Monocrystalline Solar Panel, ~$100) and a small 12V battery (e.g., a 50Ah LiFePO4 battery like the Battle Born 50Ah, ~$450). For larger operations or deeper wells, more robust systems are needed. If you’re looking to build out a comprehensive off-grid power system to support your garden’s water needs, or indeed your entire homestead, you might want to explore resources like the Power Grid Generator complete system guide to understand the full scope of what’s possible in terms of energy independence.
Step 5: Seed Selection & Planting
The choice of seeds is crucial for a truly self sufficient garden from scratch.
- Choose Heirloom & Open-Pollinated Seeds: These varieties produce seeds that will grow true to type, meaning you can save seeds from your harvest year after year. F1 hybrids, while often vigorous, will not produce consistent offspring from saved seeds. Reputable seed companies include Baker Creek Heirloom Seeds, High Mowing Organic Seeds, and Seed Savers Exchange. Start with common, reliable varieties like ‘Black Krim’ tomatoes, ‘Provider’ bush beans, ‘Waltham Butternut’ squash, and ‘Black Seeded Simpson’ lettuce.
- Start Seeds Indoors (Optional but Recommended): For longer growing seasons or specific crops, starting seeds indoors gives you a head start. Use seed-starting mix (e.g., Espoma Organic Seed Starter Mix, ~$10 for 16qt bag) in seed trays (Jiffy Professional Greenhouse 72-cell kit, ~$15). Provide adequate light with LED grow lights (Barrina T5 2ft 4-pack LED Grow Lights, 20W each, ~$50) for 14-16 hours a day, positioned 2-4 inches above seedlings. Maintain consistent temperatures (65-75°F for most).
- Direct Sowing vs. Transplanting: Some crops (carrots, radishes, beans, corn) prefer direct sowing into the garden bed. Others (tomatoes, peppers, broccoli, kale) benefit from being started indoors and transplanted. Follow seed packet instructions for planting depths (e.g., lettuce seeds are often surface-sown or planted 1/8 inch deep, while beans are 1 inch deep) and spacing.
- Companion Planting: Strategically plant different species together to enhance growth, deter pests, and attract beneficial insects. For example, planting marigolds near tomatoes can deter nematodes, and basil improves tomato flavor. Nasturtiums can act as a trap crop for aphids.
- Succession Planting: For a continuous harvest, plant small batches of quick-growing crops (lettuce, radishes, cilantro) every 2-3 weeks. As one crop finishes, another is ready to take its place.
Step 6: Pest & Disease Management (Organic)
Maintaining a self sufficient garden from scratch means embracing organic pest and disease control.
- Integrated Pest Management (IPM): This holistic approach combines several strategies.
- Observation: Regularly inspect your plants for early signs of pests or disease. Catching issues early is key.
- Physical Barriers: Use row covers (e.g., Agribon AG-19 floating row cover, 10×20 ft, ~$20) to protect young plants from insect pests like cabbage worms and squash bugs. Install fences (e.g., 2×4 welded wire mesh, 4 ft tall, 50 ft roll ~$70) to keep out deer, rabbits, and other larger animals.
- Hand-Picking: For larger pests like tomato hornworms or squash bugs, simply pick them off and drop them into a bucket of soapy water.
- Companion Planting: As mentioned, certain plants repel pests. Marigolds, garlic, and onions are excellent deterrents.
- Attract Beneficial Insects: Plant flowers like dill, fennel, cosmos, and sweet alyssum to attract ladybugs, lacewings, and parasitic wasps, which prey on common garden pests.
- Organic Sprays & Treatments:
- Neem Oil: An excellent broad-spectrum organic insecticide and fungicide. Bonide Neem Oil Concentrate (16oz, ~$20) can be mixed at a rate of 1-2 tbsp per gallon of water and sprayed on affected plants.
- Insecticidal Soap: Effective against soft-bodied insects like aphids, whiteflies, and spider mites. Garden Safe Insecticidal Soap (24oz ready-to-use, ~$10).
- Bacillus thuringiensis (Bt): A naturally occurring soil bacterium that targets caterpillars and worms. Monterey BT Worm & Caterpillar Killer (16oz, ~$18) is highly effective and safe for beneficial insects.
- Copper or Sulfur Sprays: For fungal diseases like powdery mildew or blight, organic copper (e.g., Bonide Copper Fungicide, ~$15 for 1lb) or sulfur (e.g., Safer Brand Garden Fungicide, ~$10 for 16oz) can be used as a last resort.
Step 7: Harvesting & Seed Saving
The culmination of your efforts is the harvest, and seed saving closes the loop on self-sufficiency.
- Harvesting Techniques:
- Timing: Harvest vegetables at their peak ripeness for best flavor and nutritional value. For example, green beans should snap cleanly, cucumbers should be firm, and tomatoes should be fully colored.
- Frequency: Many crops, like zucchini, cucumbers, and bush beans, produce more if harvested frequently. Pick daily or every other day.
- Tools: Use clean, sharp pruners (e.g., Corona ClassicCUT Bypass Pruner BP 3180, ~$30) or a sharp knife for clean cuts, minimizing damage to the plant.
- Seed Saving: This is where the « self-sufficient » aspect truly shines.
- Selection: Only save seeds from your healthiest, most vigorous plants that show desired traits (disease resistance, good flavor, high yield).
- Isolation: To ensure true-to-type seeds, prevent cross-pollination. This can be challenging for open-pollinated crops that readily cross (e.g., squash, corn). For beginners, focus on self-pollinating plants like beans, peas, lettuce, and tomatoes.
- Processing:
- Dry Seeds (Beans, Peas, Lettuce, Grains): Allow pods/seed heads to dry completely on the plant. Harvest, shell, and clean the seeds, removing chaff.
- Wet Seeds (Tomatoes, Cucumbers, Squash): For tomatoes, ferment the seeds in water for a few days to remove the gel coating and inhibit disease. For cucumbers/squash, scrape out seeds, wash thoroughly, and dry.
- Drying: Spread seeds thinly on screens or paper plates in a cool, dry, well-ventilated area for 1-4 weeks. Ensure they are bone-dry before storage. I aim for less than 8% moisture content.
- Storage: Store seeds in airtight containers (glass jars with desiccant packets work well) in a cool, dark, dry place (ideally 40-50°F and 30-40% humidity). Label clearly with variety and date. Properly stored seeds can remain viable for 3-10 years or more.
Step 8: Season Extension & Winterizing
Extend your harvest and protect your garden for the off-season to truly maximize your self sufficient garden from scratch.
- Cold Frames: Simple structures with a transparent top (glass, polycarbonate, or old windows) that sit over garden beds. They trap solar heat, allowing you to grow cold-hardy crops (lettuce, spinach, kale, radishes) well into winter or start seeds earlier in spring. A basic cold frame can be built from 2×6 lumber and a sheet of polycarbonate for under $100.
- Hoop Houses/Low Tunnels: Larger structures made from flexible hoops (PVC pipe or EMT conduit) covered with greenhouse plastic. These provide more space and greater temperature moderation. A 10×20 ft DIY low tunnel kit can cost $200-$500, while a larger, more robust hoop house kit might be $1,000-$3,000. I use a 6×12 ft low tunnel made from 1/2-inch PVC hoops and 6mil greenhouse plastic, which extends my lettuce and spinach harvest by at least
Healthy soil is the bedrock of a productive, self-sufficient garden. You can’t guess what your soil needs; you have to test it.
- Perform a Soil Test: A professional soil test will give you precise data on your soil’s pH, nutrient levels (N-P-K), and organic matter content. I recommend sending a sample to your local agricultural extension office; it typically costs $20-$50 and provides detailed recommendations. Alternatively, for a quick homeowner check, a Rapitest Soil Test Kit (40-test kit, model 1663, ~$20 on Amazon) provides a good baseline for pH, Nitrogen, Phosphorus, and Potash. Aim for a pH between 6.0 and 7.0 for most vegetables.
- Amend for pH Imbalance: If your soil is too acidic (below 6.0), add agricultural lime (dolomitic lime adds magnesium, calcitic lime adds calcium). Apply 5-10 lbs per 100 sq ft for a moderate adjustment. If it’s too alkaline (above 7.0), add elemental sulfur (e.g., Espoma Soil Acidifier, ~$15 for 6.75 lbs) or generous amounts of organic matter like peat moss or pine needles.
- Build Organic Matter: This is the single most important step for long-term soil health. Organic matter improves soil structure, water retention, drainage, and nutrient availability. Incorporate 2-4 inches of high-quality compost into your top 6-12 inches of soil annually. I make my own compost from kitchen scraps, garden waste, and shredded leaves, but you can purchase it. Local nurseries often sell bulk compost for $30-$50 per cubic yard. Aged manure (from chickens, cows, or horses – ensure it’s well-rotted to avoid burning plants) is also excellent.
- Address Nutrient Deficiencies: Based on your soil test, add specific organic amendments. If Nitrogen (N) is low, add blood meal (12-0-0, ~$20 for 3 lbs) or feather meal. For Phosphorus (P), use bone meal (3-15-0, ~$15 for 3 lbs) or rock phosphate. For Potassium (K), greensand (0-0-2.5, ~$25 for 5 lbs) or kelp meal are good choices. I rely heavily on Espoma Organic Garden-tone (5-3-3, ~$25 for an 8lb bag) as a balanced, all-purpose organic fertilizer during planting.
Step 3: Garden Bed Preparation
Deciding between raised beds and in-ground beds depends on your soil, budget, and physical capabilities.
- In-Ground Beds: If you have excellent native soil and good drainage, in-ground beds are the most economical. Double-digging (loosening soil two shovel depths) can significantly improve drainage and aeration. For my main garden, I primarily use in-ground beds, but I focus on building up the soil over time with consistent compost additions and cover cropping. I aim for beds that are no wider than 3-4 feet so I can reach the center without stepping on the soil, compacting it.
- Raised Beds: Raised beds offer numerous advantages, especially for poor soil, heavy clay, or rocky areas. They provide better drainage, warm up faster in spring, reduce compaction, and make weeding and harvesting easier on your back.
- Material Options:
- Untreated Cedar: Naturally rot-resistant and chemical-free. A 4×8 ft bed, 12 inches deep, typically requires three 2x12x8 ft cedar boards, costing around $50-$60 per board (total ~$150-$180) plus corner brackets or screws. My first raised beds were cedar and are still going strong after 7 years.
- Galvanized Steel: Durable, long-lasting, and aesthetically pleasing. Brands like Vego Garden offer modular kits. A Vego Garden 17″ Tall 8-in-1 Metal Raised Garden Bed (can be configured to 4×8 ft) costs approximately $250-$300.
- Concrete Blocks/Stones: Very durable but can leach minerals (though generally safe once weathered) and can be expensive.
- Recycled Materials: Pallets (check for chemical treatment stamps like « HT » for heat-treated), old tires (controversial due to potential chemical leaching).
- Filling Raised Beds: Don’t just fill with topsoil. Use a « Hugelkultur » approach (logs, branches, leaves, then compost, then topsoil) or a mixture of 60% good quality topsoil, 30% compost, and 10% perlite or vermiculite for drainage. A 4x8x1 ft raised bed requires about 32 cubic feet (or ~1.2 cubic yards) of soil mix, which can cost $100-$200 depending on your source.
- Material Options:
Step 4: Water Management & Irrigation
Efficient water management is critical for a self sufficient garden from scratch, especially in off-grid living where water resources might be limited.
- Rainwater Harvesting: This is my primary source of irrigation water. A 55-gallon rain barrel (e.g., EarthMark Rain Barrel, ~$120-$150) connected to a downspout can collect significant water. For larger needs, I use two 275-gallon IBC totes (Intermediate Bulk Containers, often available used for $100-$200 each from food-grade sources) connected in series. A 1,000 sq ft roof can collect approximately 620 gallons of water for every inch of rainfall. My 1,500 sq ft roof provides ample water for my 600 sq ft garden through multiple barrels and totes.
- Drip Irrigation: This is by far the most water-efficient method, delivering water directly to the plant’s root zone, minimizing evaporation and weed growth.
- Components: A typical drip system includes a pressure regulator (e.g., Rain Bird PRV-10, ~$15), a filter (Rain Bird RBY filter, ~$20), main tubing (1/2-inch poly tubing, 100ft ~$25), smaller feeder lines (1/4-inch tubing), and emitters (0.5 GPH or 1 GPH per plant).
- Kits: For beginners, a starter kit like the Rain Bird Drip Irrigation Garden Kit (model DDI-KIT-1P, ~$40-$60) is excellent for a small garden. For larger setups, I use Netafim Techline CV Drip Line (500ft roll, ~$150-$200), which has pressure-compensating emitters built-in, ensuring even watering across long runs.
- Automation: For true self-sufficiency, consider a battery-powered timer (e.g., Orbit B-Hyve Bluetooth Hose Faucet Timer, ~$50) or a solar-powered timer connected to a small 12V pump.
- Solar-Powered Pumps: For lifting water from a well, pond, or large storage tank to your garden, a solar pump is a game-changer. For a smaller drip system, a Shurflo 2088-594-152 Diaphragm Pump (12V, 3.5 GPM, ~$180) can be powered by a single 100W solar panel (e.g., Renogy 100W Monocrystalline Solar Panel, ~$100) and a small 12V battery (e.g., a 50Ah LiFePO4 battery like the Battle Born 50Ah, ~$450). For larger operations or deeper wells, more robust systems are needed. If you’re looking to build out a comprehensive off-grid power system to support your garden’s water needs, or indeed your entire homestead, you might want to explore resources like the Power Grid Generator complete system guide to understand the full scope of what’s possible in terms of energy independence.
Step 5: Seed Selection & Planting
The choice of seeds is crucial for a truly self sufficient garden from scratch.
- Choose Heirloom & Open-Pollinated Seeds: These varieties produce seeds that will grow true to type, meaning you can save seeds from your harvest year after year. F1 hybrids, while often vigorous, will not produce consistent offspring from saved seeds. Reputable seed companies include Baker Creek Heirloom Seeds, High Mowing Organic Seeds, and Seed Savers Exchange. Start with common, reliable varieties like ‘Black Krim’ tomatoes, ‘Provider’ bush beans, ‘Waltham Butternut’ squash, and ‘Black Seeded Simpson’ lettuce.
- Start Seeds Indoors (Optional but Recommended): For longer growing seasons or specific crops, starting seeds indoors gives you a head start. Use seed-starting mix (e.g., Espoma Organic Seed Starter Mix, ~$10 for 16qt bag) in seed trays (Jiffy Professional Greenhouse 72-cell kit, ~$15). Provide adequate light with LED grow lights (Barrina T5 2ft 4-pack LED Grow Lights, 20W each, ~$50) for 14-16 hours a day, positioned 2-4 inches above seedlings. Maintain consistent temperatures (65-75°F for most).
- Direct Sowing vs. Transplanting: Some crops (carrots, radishes, beans, corn) prefer direct sowing into the garden bed. Others (tomatoes, peppers, broccoli, kale) benefit from being started indoors and transplanted. Follow seed packet instructions for planting depths (e.g., lettuce seeds are often surface-sown or planted 1/8 inch deep, while beans are 1 inch deep) and spacing.
- Companion Planting: Strategically plant different species together to enhance growth, deter pests, and attract beneficial insects. For example, planting marigolds near tomatoes can deter nematodes, and basil improves tomato flavor. Nasturtiums can act as a trap crop for aphids.
- Succession Planting: For a continuous harvest, plant small batches of quick-growing crops (lettuce, radishes, cilantro) every 2-3 weeks. As one crop finishes, another is ready to take its place.
Step 6: Pest & Disease Management (Organic)
Maintaining a self sufficient garden from scratch means embracing organic pest and disease control.
- Integrated Pest Management (IPM): This holistic approach combines several strategies.
- Observation: Regularly inspect your plants for early signs of pests or disease. Catching issues early is key.
- Physical Barriers: Use row covers (e.g., Agribon AG-19 floating row cover, 10×20 ft, ~$20) to protect young plants from insect pests like cabbage worms and squash bugs. Install fences (e.g., 2×4 welded wire mesh, 4 ft tall, 50 ft roll ~$70) to keep out deer, rabbits, and other larger animals.
- Hand-Picking: For larger pests like tomato hornworms or squash bugs, simply pick them off and drop them into a bucket of soapy water.
- Companion Planting: As mentioned, certain plants repel pests. Marigolds, garlic, and onions are excellent deterrents.
- Attract Beneficial Insects: Plant flowers like dill, fennel, cosmos, and sweet alyssum to attract ladybugs, lacewings, and parasitic wasps, which prey on common garden pests.
- Organic Sprays & Treatments:
- Neem Oil: An excellent broad-spectrum organic insecticide and fungicide. Bonide Neem Oil Concentrate (16oz, ~$20) can be mixed at a rate of 1-2 tbsp per gallon of water and sprayed on affected plants.
- Insecticidal Soap: Effective against soft-bodied insects like aphids, whiteflies, and spider mites. Garden Safe Insecticidal Soap (24oz ready-to-use, ~$10).
- Bacillus thuringiensis (Bt): A naturally occurring soil bacterium that targets caterpillars and worms. Monterey BT Worm & Caterpillar Killer (16oz, ~$18) is highly effective and safe for beneficial insects.
- Copper or Sulfur Sprays: For fungal diseases like powdery mildew or blight, organic copper (e.g., Bonide Copper Fungicide, ~$15 for 1lb) or sulfur (e.g., Safer Brand Garden Fungicide, ~$10 for 16oz) can be used as a last resort.
Step 7: Harvesting & Seed Saving
The culmination of your efforts is the harvest, and seed saving closes the loop on self-sufficiency.
- Harvesting Techniques:
- Timing: Harvest vegetables at their peak ripeness for best flavor and nutritional value. For example, green beans should snap cleanly, cucumbers should be firm, and tomatoes should be fully colored.
- Frequency: Many crops, like zucchini, cucumbers, and bush beans, produce more if harvested frequently. Pick daily or every other day.
- Tools: Use clean, sharp pruners (e.g., Corona ClassicCUT Bypass Pruner BP 3180, ~$30) or a sharp knife for clean cuts, minimizing damage to the plant.
- Seed Saving: This is where the « self-sufficient » aspect truly shines.
- Selection: Only save seeds from your healthiest, most vigorous plants that show desired traits (disease resistance, good flavor, high yield).
- Isolation: To ensure true-to-type seeds, prevent cross-pollination. This can be challenging for open-pollinated crops that readily cross (e.g., squash, corn). For beginners, focus on self-pollinating plants like beans, peas, lettuce, and tomatoes.
- Processing:
- Dry Seeds (Beans, Peas, Lettuce, Grains): Allow pods/seed heads to dry completely on the plant. Harvest, shell, and clean the seeds, removing chaff.
- Wet Seeds (Tomatoes, Cucumbers, Squash): For tomatoes, ferment the seeds in water for a few days to remove the gel coating and inhibit disease. For cucumbers/squash, scrape out seeds, wash thoroughly, and dry.
- Drying: Spread seeds thinly on screens or paper plates in a cool, dry, well-ventilated area for 1-4 weeks. Ensure they are bone-dry before storage. I aim for less than 8% moisture content.
- Storage: Store seeds in airtight containers (glass jars with desiccant packets work well) in a cool, dark, dry place (ideally 40-50°F and 30-40% humidity). Label clearly with variety and date. Properly stored seeds can remain viable for 3-10 years or more.
Step 8: Season Extension & Winterizing
Extend your harvest and protect your garden for the off-season to truly maximize your self sufficient garden from scratch.
- Cold Frames: Simple structures with a transparent top (glass, polycarbonate, or old windows) that sit over garden beds. They trap solar heat, allowing you to grow cold-hardy crops (lettuce, spinach, kale, radishes) well into winter or start seeds earlier in spring. A basic cold frame can be built from 2×6 lumber and a sheet of polycarbonate for under $100.
- Hoop Houses/Low Tunnels: Larger structures made from flexible hoops (PVC pipe or EMT conduit) covered with greenhouse plastic. These provide more space and greater temperature moderation. A 10×20 ft DIY low tunnel kit can cost $200-$500, while a larger, more robust hoop house kit might be $1,000-$3,000. I use a 6×12 ft low tunnel made from 1/2-inch PVC hoops and 6mil greenhouse plastic, which extends my lettuce and spinach harvest by at least
Step 5: Seed Selection & Planting
The choice of seeds is crucial for a truly self sufficient garden from scratch.
- Choose Heirloom & Open-Pollinated Seeds: These varieties produce seeds that will grow true to type, meaning you can save seeds from your harvest year after year. F1 hybrids, while often vigorous, will not produce consistent offspring from saved seeds. Reputable seed companies include Baker Creek Heirloom Seeds, High Mowing Organic Seeds, and Seed Savers Exchange. Start with common, reliable varieties like ‘Black Krim’ tomatoes, ‘Provider’ bush beans, ‘Waltham Butternut’ squash, and ‘Black Seeded Simpson’ lettuce.
- Start Seeds Indoors (Optional but Recommended): For longer growing seasons or specific crops, starting seeds indoors gives you a head start. Use seed-starting mix (e.g., Espoma Organic Seed Starter Mix, ~$10 for 16qt bag) in seed trays (Jiffy Professional Greenhouse 72-cell kit, ~$15). Provide adequate light with LED grow lights (Barrina T5 2ft 4-pack LED Grow Lights, 20W each, ~$50) for 14-16 hours a day, positioned 2-4 inches above seedlings. Maintain consistent temperatures (65-75°F for most).
- Direct Sowing vs. Transplanting: Some crops (carrots, radishes, beans, corn) prefer direct sowing into the garden bed. Others (tomatoes, peppers, broccoli, kale) benefit from being started indoors and transplanted. Follow seed packet instructions for planting depths (e.g., lettuce seeds are often surface-sown or planted 1/8 inch deep, while beans are 1 inch deep) and spacing.
- Companion Planting: Strategically plant different species together to enhance growth, deter pests, and attract beneficial insects. For example, planting marigolds near tomatoes can deter nematodes, and basil improves tomato flavor. Nasturtiums can act as a trap crop for aphids.
- Succession Planting: For a continuous harvest, plant small batches of quick-growing crops (lettuce, radishes, cilantro) every 2-3 weeks. As one crop finishes, another is ready to take its place.
Step 6: Pest & Disease Management (Organic)
Maintaining a self sufficient garden from scratch means embracing organic pest and disease control.
- Integrated Pest Management (IPM): This holistic approach combines several strategies.
- Observation: Regularly inspect your plants for early signs of pests or disease. Catching issues early is key.
- Physical Barriers: Use row covers (e.g., Agribon AG-19 floating row cover, 10×20 ft, ~$20) to protect young plants from insect pests like cabbage worms and squash bugs. Install fences (e.g., 2×4 welded wire mesh, 4 ft tall, 50 ft roll ~$70) to keep out deer, rabbits, and other larger animals.
- Hand-Picking: For larger pests like tomato hornworms or squash bugs, simply pick them off and drop them into a bucket of soapy water.
- Companion Planting: As mentioned, certain plants repel pests. Marigolds, garlic, and onions are excellent deterrents.
- Attract Beneficial Insects: Plant flowers like dill, fennel, cosmos, and sweet alyssum to attract ladybugs, lacewings, and parasitic wasps, which prey on common garden pests.
- Organic Sprays & Treatments:
- Neem Oil: An excellent broad-spectrum organic insecticide and fungicide. Bonide Neem Oil Concentrate (16oz, ~$20) can be mixed at a rate of 1-2 tbsp per gallon of water and sprayed on affected plants.
- Insecticidal Soap: Effective against soft-bodied insects like aphids, whiteflies, and spider mites. Garden Safe Insecticidal Soap (24oz ready-to-use, ~$10).
- Bacillus thuringiensis (Bt): A naturally occurring soil bacterium that targets caterpillars and worms. Monterey BT Worm & Caterpillar Killer (16oz, ~$18) is highly effective and safe for beneficial insects.
- Copper or Sulfur Sprays: For fungal diseases like powdery mildew or blight, organic copper (e.g., Bonide Copper Fungicide, ~$15 for 1lb) or sulfur (e.g., Safer Brand Garden Fungicide, ~$10 for 16oz) can be used as a last resort.
Step 7: Harvesting & Seed Saving
The culmination of your efforts is the harvest, and seed saving closes the loop on self-sufficiency.
- Harvesting Techniques:
- Timing: Harvest vegetables at their peak ripeness for best flavor and nutritional value. For example, green beans should snap cleanly, cucumbers should be firm, and tomatoes should be fully colored.
- Frequency: Many crops, like zucchini, cucumbers, and bush beans, produce more if harvested frequently. Pick daily or every other day.
- Tools: Use clean, sharp pruners (e.g., Corona ClassicCUT Bypass Pruner BP 3180, ~$30) or a sharp knife for clean cuts, minimizing damage to the plant.
- Seed Saving: This is where the « self-sufficient » aspect truly shines.
- Selection: Only save seeds from your healthiest, most vigorous plants that show desired traits (disease resistance, good flavor, high yield).
- Isolation: To ensure true-to-type seeds, prevent cross-pollination. This can be challenging for open-pollinated crops that readily cross (e.g., squash, corn). For beginners, focus on self-pollinating plants like beans, peas, lettuce, and tomatoes.
- Processing:
- Dry Seeds (Beans, Peas, Lettuce, Grains): Allow pods/seed heads to dry completely on the plant. Harvest, shell, and clean the seeds, removing chaff.
- Wet Seeds (Tomatoes, Cucumbers, Squash): For tomatoes, ferment the seeds in water for a few days to remove the gel coating and inhibit disease. For cucumbers/squash, scrape out seeds, wash thoroughly, and dry.
- Drying: Spread seeds thinly on screens or paper plates in a cool, dry, well-ventilated area for 1-4 weeks. Ensure they are bone-dry before storage. I aim for less than 8% moisture content.
- Storage: Store seeds in airtight containers (glass jars with desiccant packets work well) in a cool, dark, dry place (ideally 40-50°F and 30-40% humidity). Label clearly with variety and date. Properly stored seeds can remain viable for 3-10 years or more.
Step 8: Season Extension & Winterizing
Extend your harvest and protect your garden for the off-season to truly maximize your self sufficient garden from scratch.
- Cold Frames: Simple structures with a transparent top (glass, polycarbonate, or old windows) that sit over garden beds. They trap solar heat, allowing you to grow cold-hardy crops (lettuce, spinach, kale, radishes) well into winter or start seeds earlier in spring. A basic cold frame can be built from 2×6 lumber and a sheet of polycarbonate for under $100.
- Hoop Houses/Low Tunnels: Larger structures made from flexible hoops (PVC pipe or EMT conduit) covered with greenhouse plastic. These provide more space and greater temperature moderation. A 10×20 ft DIY low tunnel kit can cost $200-$500, while a larger, more robust hoop house kit might be $1,000-$3,000. I use a 6×12 ft low tunnel made from 1/2-inch PVC hoops and 6mil greenhouse plastic, which extends my lettuce and spinach harvest by at least
Deciding between raised beds and in-ground beds depends on your soil, budget, and physical capabilities.
- In-Ground Beds: If you have excellent native soil and good drainage, in-ground beds are the most economical. Double-digging (loosening soil two shovel depths) can significantly improve drainage and aeration. For my main garden, I primarily use in-ground beds, but I focus on building up the soil over time with consistent compost additions and cover cropping. I aim for beds that are no wider than 3-4 feet so I can reach the center without stepping on the soil, compacting it.
- Raised Beds: Raised beds offer numerous advantages, especially for poor soil, heavy clay, or rocky areas. They provide better drainage, warm up faster in spring, reduce compaction, and make weeding and harvesting easier on your back.
- Material Options:
- Untreated Cedar: Naturally rot-resistant and chemical-free. A 4×8 ft bed, 12 inches deep, typically requires three 2x12x8 ft cedar boards, costing around $50-$60 per board (total ~$150-$180) plus corner brackets or screws. My first raised beds were cedar and are still going strong after 7 years.
- Galvanized Steel: Durable, long-lasting, and aesthetically pleasing. Brands like Vego Garden offer modular kits. A Vego Garden 17″ Tall 8-in-1 Metal Raised Garden Bed (can be configured to 4×8 ft) costs approximately $250-$300.
- Concrete Blocks/Stones: Very durable but can leach minerals (though generally safe once weathered) and can be expensive.
- Recycled Materials: Pallets (check for chemical treatment stamps like « HT » for heat-treated), old tires (controversial due to potential chemical leaching).
- Filling Raised Beds: Don’t just fill with topsoil. Use a « Hugelkultur » approach (logs, branches, leaves, then compost, then topsoil) or a mixture of 60% good quality topsoil, 30% compost, and 10% perlite or vermiculite for drainage. A 4x8x1 ft raised bed requires about 32 cubic feet (or ~1.2 cubic yards) of soil mix, which can cost $100-$200 depending on your source.
- Material Options:
Step 4: Water Management & Irrigation
Efficient water management is critical for a self sufficient garden from scratch, especially in off-grid living where water resources might be limited.
- Rainwater Harvesting: This is my primary source of irrigation water. A 55-gallon rain barrel (e.g., EarthMark Rain Barrel, ~$120-$150) connected to a downspout can collect significant water. For larger needs, I use two 275-gallon IBC totes (Intermediate Bulk Containers, often available used for $100-$200 each from food-grade sources) connected in series. A 1,000 sq ft roof can collect approximately 620 gallons of water for every inch of rainfall. My 1,500 sq ft roof provides ample water for my 600 sq ft garden through multiple barrels and totes.
- Drip Irrigation: This is by far the most water-efficient method, delivering water directly to the plant’s root zone, minimizing evaporation and weed growth.
- Components: A typical drip system includes a pressure regulator (e.g., Rain Bird PRV-10, ~$15), a filter (Rain Bird RBY filter, ~$20), main tubing (1/2-inch poly tubing, 100ft ~$25), smaller feeder lines (1/4-inch tubing), and emitters (0.5 GPH or 1 GPH per plant).
- Kits: For beginners, a starter kit like the Rain Bird Drip Irrigation Garden Kit (model DDI-KIT-1P, ~$40-$60) is excellent for a small garden. For larger setups, I use Netafim Techline CV Drip Line (500ft roll, ~$150-$200), which has pressure-compensating emitters built-in, ensuring even watering across long runs.
- Automation: For true self-sufficiency, consider a battery-powered timer (e.g., Orbit B-Hyve Bluetooth Hose Faucet Timer, ~$50) or a solar-powered timer connected to a small 12V pump.
- Solar-Powered Pumps: For lifting water from a well, pond, or large storage tank to your garden, a solar pump is a game-changer. For a smaller drip system, a Shurflo 2088-594-152 Diaphragm Pump (12V, 3.5 GPM, ~$180) can be powered by a single 100W solar panel (e.g., Renogy 100W Monocrystalline Solar Panel, ~$100) and a small 12V battery (e.g., a 50Ah LiFePO4 battery like the Battle Born 50Ah, ~$450). For larger operations or deeper wells, more robust systems are needed. If you’re looking to build out a comprehensive off-grid power system to support your garden’s water needs, or indeed your entire homestead, you might want to explore resources like the Power Grid Generator complete system guide to understand the full scope of what’s possible in terms of energy independence.
Step 5: Seed Selection & Planting
The choice of seeds is crucial for a truly self sufficient garden from scratch.
- Choose Heirloom & Open-Pollinated Seeds: These varieties produce seeds that will grow true to type, meaning you can save seeds from your harvest year after year. F1 hybrids, while often vigorous, will not produce consistent offspring from saved seeds. Reputable seed companies include Baker Creek Heirloom Seeds, High Mowing Organic Seeds, and Seed Savers Exchange. Start with common, reliable varieties like ‘Black Krim’ tomatoes, ‘Provider’ bush beans, ‘Waltham Butternut’ squash, and ‘Black Seeded Simpson’ lettuce.
- Start Seeds Indoors (Optional but Recommended): For longer growing seasons or specific crops, starting seeds indoors gives you a head start. Use seed-starting mix (e.g., Espoma Organic Seed Starter Mix, ~$10 for 16qt bag) in seed trays (Jiffy Professional Greenhouse 72-cell kit, ~$15). Provide adequate light with LED grow lights (Barrina T5 2ft 4-pack LED Grow Lights, 20W each, ~$50) for 14-16 hours a day, positioned 2-4 inches above seedlings. Maintain consistent temperatures (65-75°F for most).
- Direct Sowing vs. Transplanting: Some crops (carrots, radishes, beans, corn) prefer direct sowing into the garden bed. Others (tomatoes, peppers, broccoli, kale) benefit from being started indoors and transplanted. Follow seed packet instructions for planting depths (e.g., lettuce seeds are often surface-sown or planted 1/8 inch deep, while beans are 1 inch deep) and spacing.
- Companion Planting: Strategically plant different species together to enhance growth, deter pests, and attract beneficial insects. For example, planting marigolds near tomatoes can deter nematodes, and basil improves tomato flavor. Nasturtiums can act as a trap crop for aphids.
- Succession Planting: For a continuous harvest, plant small batches of quick-growing crops (lettuce, radishes, cilantro) every 2-3 weeks. As one crop finishes, another is ready to take its place.
Step 6: Pest & Disease Management (Organic)
Maintaining a self sufficient garden from scratch means embracing organic pest and disease control.
- Integrated Pest Management (IPM): This holistic approach combines several strategies.
- Observation: Regularly inspect your plants for early signs of pests or disease. Catching issues early is key.
- Physical Barriers: Use row covers (e.g., Agribon AG-19 floating row cover, 10×20 ft, ~$20) to protect young plants from insect pests like cabbage worms and squash bugs. Install fences (e.g., 2×4 welded wire mesh, 4 ft tall, 50 ft roll ~$70) to keep out deer, rabbits, and other larger animals.
- Hand-Picking: For larger pests like tomato hornworms or squash bugs, simply pick them off and drop them into a bucket of soapy water.
- Companion Planting: As mentioned, certain plants repel pests. Marigolds, garlic, and onions are excellent deterrents.
- Attract Beneficial Insects: Plant flowers like dill, fennel, cosmos, and sweet alyssum to attract ladybugs, lacewings, and parasitic wasps, which prey on common garden pests.
- Organic Sprays & Treatments:
- Neem Oil: An excellent broad-spectrum organic insecticide and fungicide. Bonide Neem Oil Concentrate (16oz, ~$20) can be mixed at a rate of 1-2 tbsp per gallon of water and sprayed on affected plants.
- Insecticidal Soap: Effective against soft-bodied insects like aphids, whiteflies, and spider mites. Garden Safe Insecticidal Soap (24oz ready-to-use, ~$10).
- Bacillus thuringiensis (Bt): A naturally occurring soil bacterium that targets caterpillars and worms. Monterey BT Worm & Caterpillar Killer (16oz, ~$18) is highly effective and safe for beneficial insects.
- Copper or Sulfur Sprays: For fungal diseases like powdery mildew or blight, organic copper (e.g., Bonide Copper Fungicide, ~$15 for 1lb) or sulfur (e.g., Safer Brand Garden Fungicide, ~$10 for 16oz) can be used as a last resort.
Step 7: Harvesting & Seed Saving
The culmination of your efforts is the harvest, and seed saving closes the loop on self-sufficiency.
- Harvesting Techniques:
- Timing: Harvest vegetables at their peak ripeness for best flavor and nutritional value. For example, green beans should snap cleanly, cucumbers should be firm, and tomatoes should be fully colored.
- Frequency: Many crops, like zucchini, cucumbers, and bush beans, produce more if harvested frequently. Pick daily or every other day.
- Tools: Use clean, sharp pruners (e.g., Corona ClassicCUT Bypass Pruner BP 3180, ~$30) or a sharp knife for clean cuts, minimizing damage to the plant.
- Seed Saving: This is where the « self-sufficient » aspect truly shines.
- Selection: Only save seeds from your healthiest, most vigorous plants that show desired traits (disease resistance, good flavor, high yield).
- Isolation: To ensure true-to-type seeds, prevent cross-pollination. This can be challenging for open-pollinated crops that readily cross (e.g., squash, corn). For beginners, focus on self-pollinating plants like beans, peas, lettuce, and tomatoes.
- Processing:
- Dry Seeds (Beans, Peas, Lettuce, Grains): Allow pods/seed heads to dry completely on the plant. Harvest, shell, and clean the seeds, removing chaff.
- Wet Seeds (Tomatoes, Cucumbers, Squash): For tomatoes, ferment the seeds in water for a few days to remove the gel coating and inhibit disease. For cucumbers/squash, scrape out seeds, wash thoroughly, and dry.
- Drying: Spread seeds thinly on screens or paper plates in a cool, dry, well-ventilated area for 1-4 weeks. Ensure they are bone-dry before storage. I aim for less than 8% moisture content.
- Storage: Store seeds in airtight containers (glass jars with desiccant packets work well) in a cool, dark, dry place (ideally 40-50°F and 30-40% humidity). Label clearly with variety and date. Properly stored seeds can remain viable for 3-10 years or more.
Step 8: Season Extension & Winterizing
Extend your harvest and protect your garden for the off-season to truly maximize your self sufficient garden from scratch.
- Cold Frames: Simple structures with a transparent top (glass, polycarbonate, or old windows) that sit over garden beds. They trap solar heat, allowing you to grow cold-hardy crops (lettuce, spinach, kale, radishes) well into winter or start seeds earlier in spring. A basic cold frame can be built from 2×6 lumber and a sheet of polycarbonate for under $100.
- Hoop Houses/Low Tunnels: Larger structures made from flexible hoops (PVC pipe or EMT conduit) covered with greenhouse plastic. These provide more space and greater temperature moderation. A 10×20 ft DIY low tunnel kit can cost $200-$500, while a larger, more robust hoop house kit might be $1,000-$3,000. I use a 6×12 ft low tunnel made from 1/2-inch PVC hoops and 6mil greenhouse plastic, which extends my lettuce and spinach harvest by at least
Healthy soil is the bedrock of a productive, self-sufficient garden. You can’t guess what your soil needs; you have to test it.
- Perform a Soil Test: A professional soil test will give you precise data on your soil’s pH, nutrient levels (N-P-K), and organic matter content. I recommend sending a sample to your local agricultural extension office; it typically costs $20-$50 and provides detailed recommendations. Alternatively, for a quick homeowner check, a Rapitest Soil Test Kit (40-test kit, model 1663, ~$20 on Amazon) provides a good baseline for pH, Nitrogen, Phosphorus, and Potash. Aim for a pH between 6.0 and 7.0 for most vegetables.
- Amend for pH Imbalance: If your soil is too acidic (below 6.0), add agricultural lime (dolomitic lime adds magnesium, calcitic lime adds calcium). Apply 5-10 lbs per 100 sq ft for a moderate adjustment. If it’s too alkaline (above 7.0), add elemental sulfur (e.g., Espoma Soil Acidifier, ~$15 for 6.75 lbs) or generous amounts of organic matter like peat moss or pine needles.
- Build Organic Matter: This is the single most important step for long-term soil health. Organic matter improves soil structure, water retention, drainage, and nutrient availability. Incorporate 2-4 inches of high-quality compost into your top 6-12 inches of soil annually. I make my own compost from kitchen scraps, garden waste, and shredded leaves, but you can purchase it. Local nurseries often sell bulk compost for $30-$50 per cubic yard. Aged manure (from chickens, cows, or horses – ensure it’s well-rotted to avoid burning plants) is also excellent.
- Address Nutrient Deficiencies: Based on your soil test, add specific organic amendments. If Nitrogen (N) is low, add blood meal (12-0-0, ~$20 for 3 lbs) or feather meal. For Phosphorus (P), use bone meal (3-15-0, ~$15 for 3 lbs) or rock phosphate. For Potassium (K), greensand (0-0-2.5, ~$25 for 5 lbs) or kelp meal are good choices. I rely heavily on Espoma Organic Garden-tone (5-3-3, ~$25 for an 8lb bag) as a balanced, all-purpose organic fertilizer during planting.
Step 3: Garden Bed Preparation
Deciding between raised beds and in-ground beds depends on your soil, budget, and physical capabilities.
- In-Ground Beds: If you have excellent native soil and good drainage, in-ground beds are the most economical. Double-digging (loosening soil two shovel depths) can significantly improve drainage and aeration. For my main garden, I primarily use in-ground beds, but I focus on building up the soil over time with consistent compost additions and cover cropping. I aim for beds that are no wider than 3-4 feet so I can reach the center without stepping on the soil, compacting it.
- Raised Beds: Raised beds offer numerous advantages, especially for poor soil, heavy clay, or rocky areas. They provide better drainage, warm up faster in spring, reduce compaction, and make weeding and harvesting easier on your back.
- Material Options:
- Untreated Cedar: Naturally rot-resistant and chemical-free. A 4×8 ft bed, 12 inches deep, typically requires three 2x12x8 ft cedar boards, costing around $50-$60 per board (total ~$150-$180) plus corner brackets or screws. My first raised beds were cedar and are still going strong after 7 years.
- Galvanized Steel: Durable, long-lasting, and aesthetically pleasing. Brands like Vego Garden offer modular kits. A Vego Garden 17″ Tall 8-in-1 Metal Raised Garden Bed (can be configured to 4×8 ft) costs approximately $250-$300.
- Concrete Blocks/Stones: Very durable but can leach minerals (though generally safe once weathered) and can be expensive.
- Recycled Materials: Pallets (check for chemical treatment stamps like « HT » for heat-treated), old tires (controversial due to potential chemical leaching).
- Filling Raised Beds: Don’t just fill with topsoil. Use a « Hugelkultur » approach (logs, branches, leaves, then compost, then topsoil) or a mixture of 60% good quality topsoil, 30% compost, and 10% perlite or vermiculite for drainage. A 4x8x1 ft raised bed requires about 32 cubic feet (or ~1.2 cubic yards) of soil mix, which can cost $100-$200 depending on your source.
- Material Options:
Step 4: Water Management & Irrigation
Efficient water management is critical for a self sufficient garden from scratch, especially in off-grid living where water resources might be limited.
- Rainwater Harvesting: This is my primary source of irrigation water. A 55-gallon rain barrel (e.g., EarthMark Rain Barrel, ~$120-$150) connected to a downspout can collect significant water. For larger needs, I use two 275-gallon IBC totes (Intermediate Bulk Containers, often available used for $100-$200 each from food-grade sources) connected in series. A 1,000 sq ft roof can collect approximately 620 gallons of water for every inch of rainfall. My 1,500 sq ft roof provides ample water for my 600 sq ft garden through multiple barrels and totes.
- Drip Irrigation: This is by far the most water-efficient method, delivering water directly to the plant’s root zone, minimizing evaporation and weed growth.
- Components: A typical drip system includes a pressure regulator (e.g., Rain Bird PRV-10, ~$15), a filter (Rain Bird RBY filter, ~$20), main tubing (1/2-inch poly tubing, 100ft ~$25), smaller feeder lines (1/4-inch tubing), and emitters (0.5 GPH or 1 GPH per plant).
- Kits: For beginners, a starter kit like the Rain Bird Drip Irrigation Garden Kit (model DDI-KIT-1P, ~$40-$60) is excellent for a small garden. For larger setups, I use Netafim Techline CV Drip Line (500ft roll, ~$150-$200), which has pressure-compensating emitters built-in, ensuring even watering across long runs.
- Automation: For true self-sufficiency, consider a battery-powered timer (e.g., Orbit B-Hyve Bluetooth Hose Faucet Timer, ~$50) or a solar-powered timer connected to a small 12V pump.
- Solar-Powered Pumps: For lifting water from a well, pond, or large storage tank to your garden, a solar pump is a game-changer. For a smaller drip system, a Shurflo 2088-594-152 Diaphragm Pump (12V, 3.5 GPM, ~$180) can be powered by a single 100W solar panel (e.g., Renogy 100W Monocrystalline Solar Panel, ~$100) and a small 12V battery (e.g., a 50Ah LiFePO4 battery like the Battle Born 50Ah, ~$450). For larger operations or deeper wells, more robust systems are needed. If you’re looking to build out a comprehensive off-grid power system to support your garden’s water needs, or indeed your entire homestead, you might want to explore resources like the Power Grid Generator complete system guide to understand the full scope of what’s possible in terms of energy independence.
Step 5: Seed Selection & Planting
The choice of seeds is crucial for a truly self sufficient garden from scratch.
- Choose Heirloom & Open-Pollinated Seeds: These varieties produce seeds that will grow true to type, meaning you can save seeds from your harvest year after year. F1 hybrids, while often vigorous, will not produce consistent offspring from saved seeds. Reputable seed companies include Baker Creek Heirloom Seeds, High Mowing Organic Seeds, and Seed Savers Exchange. Start with common, reliable varieties like ‘Black Krim’ tomatoes, ‘Provider’ bush beans, ‘Waltham Butternut’ squash, and ‘Black Seeded Simpson’ lettuce.
- Start Seeds Indoors (Optional but Recommended): For longer growing seasons or specific crops, starting seeds indoors gives you a head start. Use seed-starting mix (e.g., Espoma Organic Seed Starter Mix, ~$10 for 16qt bag) in seed trays (Jiffy Professional Greenhouse 72-cell kit, ~$15). Provide adequate light with LED grow lights (Barrina T5 2ft 4-pack LED Grow Lights, 20W each, ~$50) for 14-16 hours a day, positioned 2-4 inches above seedlings. Maintain consistent temperatures (65-75°F for most).
- Direct Sowing vs. Transplanting: Some crops (carrots, radishes, beans, corn) prefer direct sowing into the garden bed. Others (tomatoes, peppers, broccoli, kale) benefit from being started indoors and transplanted. Follow seed packet instructions for planting depths (e.g., lettuce seeds are often surface-sown or planted 1/8 inch deep, while beans are 1 inch deep) and spacing.
- Companion Planting: Strategically plant different species together to enhance growth, deter pests, and attract beneficial insects. For example, planting marigolds near tomatoes can deter nematodes, and basil improves tomato flavor. Nasturtiums can act as a trap crop for aphids.
- Succession Planting: For a continuous harvest, plant small batches of quick-growing crops (lettuce, radishes, cilantro) every 2-3 weeks. As one crop finishes, another is ready to take its place.
Step 6: Pest & Disease Management (Organic)
Maintaining a self sufficient garden from scratch means embracing organic pest and disease control.
- Integrated Pest Management (IPM): This holistic approach combines several strategies.
- Observation: Regularly inspect your plants for early signs of pests or disease. Catching issues early is key.
- Physical Barriers: Use row covers (e.g., Agribon AG-19 floating row cover, 10×20 ft, ~$20) to protect young plants from insect pests like cabbage worms and squash bugs. Install fences (e.g., 2×4 welded wire mesh, 4 ft tall, 50 ft roll ~$70) to keep out deer, rabbits, and other larger animals.
- Hand-Picking: For larger pests like tomato hornworms or squash bugs, simply pick them off and drop them into a bucket of soapy water.
- Companion Planting: As mentioned, certain plants repel pests. Marigolds, garlic, and onions are excellent deterrents.
- Attract Beneficial Insects: Plant flowers like dill, fennel, cosmos, and sweet alyssum to attract ladybugs, lacewings, and parasitic wasps, which prey on common garden pests.
- Organic Sprays & Treatments:
- Neem Oil: An excellent broad-spectrum organic insecticide and fungicide. Bonide Neem Oil Concentrate (16oz, ~$20) can be mixed at a rate of 1-2 tbsp per gallon of water and sprayed on affected plants.
- Insecticidal Soap: Effective against soft-bodied insects like aphids, whiteflies, and spider mites. Garden Safe Insecticidal Soap (24oz ready-to-use, ~$10).
- Bacillus thuringiensis (Bt): A naturally occurring soil bacterium that targets caterpillars and worms. Monterey BT Worm & Caterpillar Killer (16oz, ~$18) is highly effective and safe for beneficial insects.
- Copper or Sulfur Sprays: For fungal diseases like powdery mildew or blight, organic copper (e.g., Bonide Copper Fungicide, ~$15 for 1lb) or sulfur (e.g., Safer Brand Garden Fungicide, ~$10 for 16oz) can be used as a last resort.
Step 7: Harvesting & Seed Saving
The culmination of your efforts is the harvest, and seed saving closes the loop on self-sufficiency.
- Harvesting Techniques:
- Timing: Harvest vegetables at their peak ripeness for best flavor and nutritional value. For example, green beans should snap cleanly, cucumbers should be firm, and tomatoes should be fully colored.
- Frequency: Many crops, like zucchini, cucumbers, and bush beans, produce more if harvested frequently. Pick daily or every other day.
- Tools: Use clean, sharp pruners (e.g., Corona ClassicCUT Bypass Pruner BP 3180, ~$30) or a sharp knife for clean cuts, minimizing damage to the plant.
- Seed Saving: This is where the « self-sufficient » aspect truly shines.
- Selection: Only save seeds from your healthiest, most vigorous plants that show desired traits (disease resistance, good flavor, high yield).
- Isolation: To ensure true-to-type seeds, prevent cross-pollination. This can be challenging for open-pollinated crops that readily cross (e.g., squash, corn). For beginners, focus on self-pollinating plants like beans, peas, lettuce, and tomatoes.
- Processing:
- Dry Seeds (Beans, Peas, Lettuce, Grains): Allow pods/seed heads to dry completely on the plant. Harvest, shell, and clean the seeds, removing chaff.
- Wet Seeds (Tomatoes, Cucumbers, Squash): For tomatoes, ferment the seeds in water for a few days to remove the gel coating and inhibit disease. For cucumbers/squash, scrape out seeds, wash thoroughly, and dry.
- Drying: Spread seeds thinly on screens or paper plates in a cool, dry, well-ventilated area for 1-4 weeks. Ensure they are bone-dry before storage. I aim for less than 8% moisture content.
- Storage: Store seeds in airtight containers (glass jars with desiccant packets work well) in a cool, dark, dry place (ideally 40-50°F and 30-40% humidity). Label clearly with variety and date. Properly stored seeds can remain viable for 3-10 years or more.
Step 8: Season Extension & Winterizing
Extend your harvest and protect your garden for the off-season to truly maximize your self sufficient garden from scratch.
- Cold Frames: Simple structures with a transparent top (glass, polycarbonate, or old windows) that sit over garden beds. They trap solar heat, allowing you to grow cold-hardy crops (lettuce, spinach, kale, radishes) well into winter or start seeds earlier in spring. A basic cold frame can be built from 2×6 lumber and a sheet of polycarbonate for under $100.
- Hoop Houses/Low Tunnels: Larger structures made from flexible hoops (PVC pipe or EMT conduit) covered with greenhouse plastic. These provide more space and greater temperature moderation. A 10×20 ft DIY low tunnel kit can cost $200-$500, while a larger, more robust hoop house kit might be $1,000-$3,000. I use a 6×12 ft low tunnel made from 1/2-inch PVC hoops and 6mil greenhouse plastic, which extends my lettuce and spinach harvest by at least
- Rainwater Harvesting: This is my primary source of irrigation water. A 55-gallon rain barrel (e.g., EarthMark Rain Barrel, ~$120-$150) connected to a downspout can collect significant water. For larger needs, I use two 275-gallon IBC totes (Intermediate Bulk Containers, often available used for $100-$200 each from food-grade sources) connected in series. A 1,000 sq ft roof can collect approximately 620 gallons of water for every inch of rainfall. My 1,500 sq ft roof provides ample water for my 600 sq ft garden through multiple barrels and totes.
- Drip Irrigation: This is by far the most water-efficient method, delivering water directly to the plant’s root zone, minimizing evaporation and weed growth.
- Components: A typical drip system includes a pressure regulator (e.g., Rain Bird PRV-10, ~$15), a filter (Rain Bird RBY filter, ~$20), main tubing (1/2-inch poly tubing, 100ft ~$25), smaller feeder lines (1/4-inch tubing), and emitters (0.5 GPH or 1 GPH per plant).
- Kits: For beginners, a starter kit like the Rain Bird Drip Irrigation Garden Kit (model DDI-KIT-1P, ~$40-$60) is excellent for a small garden. For larger setups, I use Netafim Techline CV Drip Line (500ft roll, ~$150-$200), which has pressure-compensating emitters built-in, ensuring even watering across long runs.
- Automation: For true self-sufficiency, consider a battery-powered timer (e.g., Orbit B-Hyve Bluetooth Hose Faucet Timer, ~$50) or a solar-powered timer connected to a small 12V pump.
- Solar-Powered Pumps: For lifting water from a well, pond, or large storage tank to your garden, a solar pump is a game-changer. For a smaller drip system, a Shurflo 2088-594-152 Diaphragm Pump (12V, 3.5 GPM, ~$180) can be powered by a single 100W solar panel (e.g., Renogy 100W Monocrystalline Solar Panel, ~$100) and a small 12V battery (e.g., a 50Ah LiFePO4 battery like the Battle Born 50Ah, ~$450). For larger operations or deeper wells, more robust systems are needed. If you’re looking to build out a comprehensive off-grid power system to support your garden’s water needs, or indeed your entire homestead, you might want to explore resources like the Power Grid Generator complete system guide to understand the full scope of what’s possible in terms of energy independence.
Step 5: Seed Selection & Planting
The choice of seeds is crucial for a truly self sufficient garden from scratch.
- Choose Heirloom & Open-Pollinated Seeds: These varieties produce seeds that will grow true to type, meaning you can save seeds from your harvest year after year. F1 hybrids, while often vigorous, will not produce consistent offspring from saved seeds. Reputable seed companies include Baker Creek Heirloom Seeds, High Mowing Organic Seeds, and Seed Savers Exchange. Start with common, reliable varieties like ‘Black Krim’ tomatoes, ‘Provider’ bush beans, ‘Waltham Butternut’ squash, and ‘Black Seeded Simpson’ lettuce.
- Start Seeds Indoors (Optional but Recommended): For longer growing seasons or specific crops, starting seeds indoors gives you a head start. Use seed-starting mix (e.g., Espoma Organic Seed Starter Mix, ~$10 for 16qt bag) in seed trays (Jiffy Professional Greenhouse 72-cell kit, ~$15). Provide adequate light with LED grow lights (Barrina T5 2ft 4-pack LED Grow Lights, 20W each, ~$50) for 14-16 hours a day, positioned 2-4 inches above seedlings. Maintain consistent temperatures (65-75°F for most).
- Direct Sowing vs. Transplanting: Some crops (carrots, radishes, beans, corn) prefer direct sowing into the garden bed. Others (tomatoes, peppers, broccoli, kale) benefit from being started indoors and transplanted. Follow seed packet instructions for planting depths (e.g., lettuce seeds are often surface-sown or planted 1/8 inch deep, while beans are 1 inch deep) and spacing.
- Companion Planting: Strategically plant different species together to enhance growth, deter pests, and attract beneficial insects. For example, planting marigolds near tomatoes can deter nematodes, and basil improves tomato flavor. Nasturtiums can act as a trap crop for aphids.
- Succession Planting: For a continuous harvest, plant small batches of quick-growing crops (lettuce, radishes, cilantro) every 2-3 weeks. As one crop finishes, another is ready to take its place.
Step 6: Pest & Disease Management (Organic)
Maintaining a self sufficient garden from scratch means embracing organic pest and disease control.
- Integrated Pest Management (IPM): This holistic approach combines several strategies.
- Observation: Regularly inspect your plants for early signs of pests or disease. Catching issues early is key.
- Physical Barriers: Use row covers (e.g., Agribon AG-19 floating row cover, 10×20 ft, ~$20) to protect young plants from insect pests like cabbage worms and squash bugs. Install fences (e.g., 2×4 welded wire mesh, 4 ft tall, 50 ft roll ~$70) to keep out deer, rabbits, and other larger animals.
- Hand-Picking: For larger pests like tomato hornworms or squash bugs, simply pick them off and drop them into a bucket of soapy water.
- Companion Planting: As mentioned, certain plants repel pests. Marigolds, garlic, and onions are excellent deterrents.
- Attract Beneficial Insects: Plant flowers like dill, fennel, cosmos, and sweet alyssum to attract ladybugs, lacewings, and parasitic wasps, which prey on common garden pests.
- Organic Sprays & Treatments:
- Neem Oil: An excellent broad-spectrum organic insecticide and fungicide. Bonide Neem Oil Concentrate (16oz, ~$20) can be mixed at a rate of 1-2 tbsp per gallon of water and sprayed on affected plants.
- Insecticidal Soap: Effective against soft-bodied insects like aphids, whiteflies, and spider mites. Garden Safe Insecticidal Soap (24oz ready-to-use, ~$10).
- Bacillus thuringiensis (Bt): A naturally occurring soil bacterium that targets caterpillars and worms. Monterey BT Worm & Caterpillar Killer (16oz, ~$18) is highly effective and safe for beneficial insects.
- Copper or Sulfur Sprays: For fungal diseases like powdery mildew or blight, organic copper (e.g., Bonide Copper Fungicide, ~$15 for 1lb) or sulfur (e.g., Safer Brand Garden Fungicide, ~$10 for 16oz) can be used as a last resort.
Step 7: Harvesting & Seed Saving
The culmination of your efforts is the harvest, and seed saving closes the loop on self-sufficiency.
- Harvesting Techniques:
- Timing: Harvest vegetables at their peak ripeness for best flavor and nutritional value. For example, green beans should snap cleanly, cucumbers should be firm, and tomatoes should be fully colored.
- Frequency: Many crops, like zucchini, cucumbers, and bush beans, produce more if harvested frequently. Pick daily or every other day.
- Tools: Use clean, sharp pruners (e.g., Corona ClassicCUT Bypass Pruner BP 3180, ~$30) or a sharp knife for clean cuts, minimizing damage to the plant.
- Seed Saving: This is where the « self-sufficient » aspect truly shines.
- Selection: Only save seeds from your healthiest, most vigorous plants that show desired traits (disease resistance, good flavor, high yield).
- Isolation: To ensure true-to-type seeds, prevent cross-pollination. This can be challenging for open-pollinated crops that readily cross (e.g., squash, corn). For beginners, focus on self-pollinating plants like beans, peas, lettuce, and tomatoes.
- Processing:
- Dry Seeds (Beans, Peas, Lettuce, Grains): Allow pods/seed heads to dry completely on the plant. Harvest, shell, and clean the seeds, removing chaff.
- Wet Seeds (Tomatoes, Cucumbers, Squash): For tomatoes, ferment the seeds in water for a few days to remove the gel coating and inhibit disease. For cucumbers/squash, scrape out seeds, wash thoroughly, and dry.
- Drying: Spread seeds thinly on screens or paper plates in a cool, dry, well-ventilated area for 1-4 weeks. Ensure they are bone-dry before storage. I aim for less than 8% moisture content.
- Storage: Store seeds in airtight containers (glass jars with desiccant packets work well) in a cool, dark, dry place (ideally 40-50°F and 30-40% humidity). Label clearly with variety and date. Properly stored seeds can remain viable for 3-10 years or more.
Step 8: Season Extension & Winterizing
Extend your harvest and protect your garden for the off-season to truly maximize your self sufficient garden from scratch.
- Cold Frames: Simple structures with a transparent top (glass, polycarbonate, or old windows) that sit over garden beds. They trap solar heat, allowing you to grow cold-hardy crops (lettuce, spinach, kale, radishes) well into winter or start seeds earlier in spring. A basic cold frame can be built from 2×6 lumber and a sheet of polycarbonate for under $100.
- Hoop Houses/Low Tunnels: Larger structures made from flexible hoops (PVC pipe or EMT conduit) covered with greenhouse plastic. These provide more space and greater temperature moderation. A 10×20 ft DIY low tunnel kit can cost $200-$500, while a larger, more robust hoop house kit might be $1,000-$3,000. I use a 6×12 ft low tunnel made from 1/2-inch PVC hoops and 6mil greenhouse plastic, which extends my lettuce and spinach harvest by at least
Deciding between raised beds and in-ground beds depends on your soil, budget, and physical capabilities.
- In-Ground Beds: If you have excellent native soil and good drainage, in-ground beds are the most economical. Double-digging (loosening soil two shovel depths) can significantly improve drainage and aeration. For my main garden, I primarily use in-ground beds, but I focus on building up the soil over time with consistent compost additions and cover cropping. I aim for beds that are no wider than 3-4 feet so I can reach the center without stepping on the soil, compacting it.
- Raised Beds: Raised beds offer numerous advantages, especially for poor soil, heavy clay, or rocky areas. They provide better drainage, warm up faster in spring, reduce compaction, and make weeding and harvesting easier on your back.
- Material Options:
- Untreated Cedar: Naturally rot-resistant and chemical-free. A 4×8 ft bed, 12 inches deep, typically requires three 2x12x8 ft cedar boards, costing around $50-$60 per board (total ~$150-$180) plus corner brackets or screws. My first raised beds were cedar and are still going strong after 7 years.
- Galvanized Steel: Durable, long-lasting, and aesthetically pleasing. Brands like Vego Garden offer modular kits. A Vego Garden 17″ Tall 8-in-1 Metal Raised Garden Bed (can be configured to 4×8 ft) costs approximately $250-$300.
- Concrete Blocks/Stones: Very durable but can leach minerals (though generally safe once weathered) and can be expensive.
- Recycled Materials: Pallets (check for chemical treatment stamps like « HT » for heat-treated), old tires (controversial due to potential chemical leaching).
- Filling Raised Beds: Don’t just fill with topsoil. Use a « Hugelkultur » approach (logs, branches, leaves, then compost, then topsoil) or a mixture of 60% good quality topsoil, 30% compost, and 10% perlite or vermiculite for drainage. A 4x8x1 ft raised bed requires about 32 cubic feet (or ~1.2 cubic yards) of soil mix, which can cost $100-$200 depending on your source.
- Material Options:
Step 4: Water Management & Irrigation
Efficient water management is critical for a self sufficient garden from scratch, especially in off-grid living where water resources might be limited.
- Rainwater Harvesting: This is my primary source of irrigation water. A 55-gallon rain barrel (e.g., EarthMark Rain Barrel, ~$120-$150) connected to a downspout can collect significant water. For larger needs, I use two 275-gallon IBC totes (Intermediate Bulk Containers, often available used for $100-$200 each from food-grade sources) connected in series. A 1,000 sq ft roof can collect approximately 620 gallons of water for every inch of rainfall. My 1,500 sq ft roof provides ample water for my 600 sq ft garden through multiple barrels and totes.
- Drip Irrigation: This is by far the most water-efficient method, delivering water directly to the plant’s root zone, minimizing evaporation and weed growth.
- Components: A typical drip system includes a pressure regulator (e.g., Rain Bird PRV-10, ~$15), a filter (Rain Bird RBY filter, ~$20), main tubing (1/2-inch poly tubing, 100ft ~$25), smaller feeder lines (1/4-inch tubing), and emitters (0.5 GPH or 1 GPH per plant).
- Kits: For beginners, a starter kit like the Rain Bird Drip Irrigation Garden Kit (model DDI-KIT-1P, ~$40-$60) is excellent for a small garden. For larger setups, I use Netafim Techline CV Drip Line (500ft roll, ~$150-$200), which has pressure-compensating emitters built-in, ensuring even watering across long runs.
- Automation: For true self-sufficiency, consider a battery-powered timer (e.g., Orbit B-Hyve Bluetooth Hose Faucet Timer, ~$50) or a solar-powered timer connected to a small 12V pump.
- Solar-Powered Pumps: For lifting water from a well, pond, or large storage tank to your garden, a solar pump is a game-changer. For a smaller drip system, a Shurflo 2088-594-152 Diaphragm Pump (12V, 3.5 GPM, ~$180) can be powered by a single 100W solar panel (e.g., Renogy 100W Monocrystalline Solar Panel, ~$100) and a small 12V battery (e.g., a 50Ah LiFePO4 battery like the Battle Born 50Ah, ~$450). For larger operations or deeper wells, more robust systems are needed. If you’re looking to build out a comprehensive off-grid power system to support your garden’s water needs, or indeed your entire homestead, you might want to explore resources like the Power Grid Generator complete system guide to understand the full scope of what’s possible in terms of energy independence.
Step 5: Seed Selection & Planting
The choice of seeds is crucial for a truly self sufficient garden from scratch.
- Choose Heirloom & Open-Pollinated Seeds: These varieties produce seeds that will grow true to type, meaning you can save seeds from your harvest year after year. F1 hybrids, while often vigorous, will not produce consistent offspring from saved seeds. Reputable seed companies include Baker Creek Heirloom Seeds, High Mowing Organic Seeds, and Seed Savers Exchange. Start with common, reliable varieties like ‘Black Krim’ tomatoes, ‘Provider’ bush beans, ‘Waltham Butternut’ squash, and ‘Black Seeded Simpson’ lettuce.
- Start Seeds Indoors (Optional but Recommended): For longer growing seasons or specific crops, starting seeds indoors gives you a head start. Use seed-starting mix (e.g., Espoma Organic Seed Starter Mix, ~$10 for 16qt bag) in seed trays (Jiffy Professional Greenhouse 72-cell kit, ~$15). Provide adequate light with LED grow lights (Barrina T5 2ft 4-pack LED Grow Lights, 20W each, ~$50) for 14-16 hours a day, positioned 2-4 inches above seedlings. Maintain consistent temperatures (65-75°F for most).
- Direct Sowing vs. Transplanting: Some crops (carrots, radishes, beans, corn) prefer direct sowing into the garden bed. Others (tomatoes, peppers, broccoli, kale) benefit from being started indoors and transplanted. Follow seed packet instructions for planting depths (e.g., lettuce seeds are often surface-sown or planted 1/8 inch deep, while beans are 1 inch deep) and spacing.
- Companion Planting: Strategically plant different species together to enhance growth, deter pests, and attract beneficial insects. For example, planting marigolds near tomatoes can deter nematodes, and basil improves tomato flavor. Nasturtiums can act as a trap crop for aphids.
- Succession Planting: For a continuous harvest, plant small batches of quick-growing crops (lettuce, radishes, cilantro) every 2-3 weeks. As one crop finishes, another is ready to take its place.
Step 6: Pest & Disease Management (Organic)
Maintaining a self sufficient garden from scratch means embracing organic pest and disease control.
- Integrated Pest Management (IPM): This holistic approach combines several strategies.
- Observation: Regularly inspect your plants for early signs of pests or disease. Catching issues early is key.
- Physical Barriers: Use row covers (e.g., Agribon AG-19 floating row cover, 10×20 ft, ~$20) to protect young plants from insect pests like cabbage worms and squash bugs. Install fences (e.g., 2×4 welded wire mesh, 4 ft tall, 50 ft roll ~$70) to keep out deer, rabbits, and other larger animals.
- Hand-Picking: For larger pests like tomato hornworms or squash bugs, simply pick them off and drop them into a bucket of soapy water.
- Companion Planting: As mentioned, certain plants repel pests. Marigolds, garlic, and onions are excellent deterrents.
- Attract Beneficial Insects: Plant flowers like dill, fennel, cosmos, and sweet alyssum to attract ladybugs, lacewings, and parasitic wasps, which prey on common garden pests.
- Organic Sprays & Treatments:
- Neem Oil: An excellent broad-spectrum organic insecticide and fungicide. Bonide Neem Oil Concentrate (16oz, ~$20) can be mixed at a rate of 1-2 tbsp per gallon of water and sprayed on affected plants.
- Insecticidal Soap: Effective against soft-bodied insects like aphids, whiteflies, and spider mites. Garden Safe Insecticidal Soap (24oz ready-to-use, ~$10).
- Bacillus thuringiensis (Bt): A naturally occurring soil bacterium that targets caterpillars and worms. Monterey BT Worm & Caterpillar Killer (16oz, ~$18) is highly effective and safe for beneficial insects.
- Copper or Sulfur Sprays: For fungal diseases like powdery mildew or blight, organic copper (e.g., Bonide Copper Fungicide, ~$15 for 1lb) or sulfur (e.g., Safer Brand Garden Fungicide, ~$10 for 16oz) can be used as a last resort.
Step 7: Harvesting & Seed Saving
The culmination of your efforts is the harvest, and seed saving closes the loop on self-sufficiency.
- Harvesting Techniques:
- Timing: Harvest vegetables at their peak ripeness for best flavor and nutritional value. For example, green beans should snap cleanly, cucumbers should be firm, and tomatoes should be fully colored.
- Frequency: Many crops, like zucchini, cucumbers, and bush beans, produce more if harvested frequently. Pick daily or every other day.
- Tools: Use clean, sharp pruners (e.g., Corona ClassicCUT Bypass Pruner BP 3180, ~$30) or a sharp knife for clean cuts, minimizing damage to the plant.
- Seed Saving: This is where the « self-sufficient » aspect truly shines.
- Selection: Only save seeds from your healthiest, most vigorous plants that show desired traits (disease resistance, good flavor, high yield).
- Isolation: To ensure true-to-type seeds, prevent cross-pollination. This can be challenging for open-pollinated crops that readily cross (e.g., squash, corn). For beginners, focus on self-pollinating plants like beans, peas, lettuce, and tomatoes.
- Processing:
- Dry Seeds (Beans, Peas, Lettuce, Grains): Allow pods/seed heads to dry completely on the plant. Harvest, shell, and clean the seeds, removing chaff.
- Wet Seeds (Tomatoes, Cucumbers, Squash): For tomatoes, ferment the seeds in water for a few days to remove the gel coating and inhibit disease. For cucumbers/squash, scrape out seeds, wash thoroughly, and dry.
- Drying: Spread seeds thinly on screens or paper plates in a cool, dry, well-ventilated area for 1-4 weeks. Ensure they are bone-dry before storage. I aim for less than 8% moisture content.
- Storage: Store seeds in airtight containers (glass jars with desiccant packets work well) in a cool, dark, dry place (ideally 40-50°F and 30-40% humidity). Label clearly with variety and date. Properly stored seeds can remain viable for 3-10 years or more.
Step 8: Season Extension & Winterizing
Extend your harvest and protect your garden for the off-season to truly maximize your self sufficient garden from scratch.
- Cold Frames: Simple structures with a transparent top (glass, polycarbonate, or old windows) that sit over garden beds. They trap solar heat, allowing you to grow cold-hardy crops (lettuce, spinach, kale, radishes) well into winter or start seeds earlier in spring. A basic cold frame can be built from 2×6 lumber and a sheet of polycarbonate for under $100.
- Hoop Houses/Low Tunnels: Larger structures made from flexible hoops (PVC pipe or EMT conduit) covered with greenhouse plastic. These provide more space and greater temperature moderation. A 10×20 ft DIY low tunnel kit can cost $200-$500, while a larger, more robust hoop house kit might be $1,000-$3,000. I use a 6×12 ft low tunnel made from 1/2-inch PVC hoops and 6mil greenhouse plastic, which extends my lettuce and spinach harvest by at least
Healthy soil is the bedrock of a productive, self-sufficient garden. You can’t guess what your soil needs; you have to test it.
- Perform a Soil Test: A professional soil test will give you precise data on your soil’s pH, nutrient levels (N-P-K), and organic matter content. I recommend sending a sample to your local agricultural extension office; it typically costs $20-$50 and provides detailed recommendations. Alternatively, for a quick homeowner check, a Rapitest Soil Test Kit (40-test kit, model 1663, ~$20 on Amazon) provides a good baseline for pH, Nitrogen, Phosphorus, and Potash. Aim for a pH between 6.0 and 7.0 for most vegetables.
- Amend for pH Imbalance: If your soil is too acidic (below 6.0), add agricultural lime (dolomitic lime adds magnesium, calcitic lime adds calcium). Apply 5-10 lbs per 100 sq ft for a moderate adjustment. If it’s too alkaline (above 7.0), add elemental sulfur (e.g., Espoma Soil Acidifier, ~$15 for 6.75 lbs) or generous amounts of organic matter like peat moss or pine needles.
- Build Organic Matter: This is the single most important step for long-term soil health. Organic matter improves soil structure, water retention, drainage, and nutrient availability. Incorporate 2-4 inches of high-quality compost into your top 6-12 inches of soil annually. I make my own compost from kitchen scraps, garden waste, and shredded leaves, but you can purchase it. Local nurseries often sell bulk compost for $30-$50 per cubic yard. Aged manure (from chickens, cows, or horses – ensure it’s well-rotted to avoid burning plants) is also excellent.
- Address Nutrient Deficiencies: Based on your soil test, add specific organic amendments. If Nitrogen (N) is low, add blood meal (12-0-0, ~$20 for 3 lbs) or feather meal. For Phosphorus (P), use bone meal (3-15-0, ~$15 for 3 lbs) or rock phosphate. For Potassium (K), greensand (0-0-2.5, ~$25 for 5 lbs) or kelp meal are good choices. I rely heavily on Espoma Organic Garden-tone (5-3-3, ~$25 for an 8lb bag) as a balanced, all-purpose organic fertilizer during planting.
Step 3: Garden Bed Preparation
Deciding between raised beds and in-ground beds depends on your soil, budget, and physical capabilities.
- In-Ground Beds: If you have excellent native soil and good drainage, in-ground beds are the most economical. Double-digging (loosening soil two shovel depths) can significantly improve drainage and aeration. For my main garden, I primarily use in-ground beds, but I focus on building up the soil over time with consistent compost additions and cover cropping. I aim for beds that are no wider than 3-4 feet so I can reach the center without stepping on the soil, compacting it.
- Raised Beds: Raised beds offer numerous advantages, especially for poor soil, heavy clay, or rocky areas. They provide better drainage, warm up faster in spring, reduce compaction, and make weeding and harvesting easier on your back.
- Material Options:
- Untreated Cedar: Naturally rot-resistant and chemical-free. A 4×8 ft bed, 12 inches deep, typically requires three 2x12x8 ft cedar boards, costing around $50-$60 per board (total ~$150-$180) plus corner brackets or screws. My first raised beds were cedar and are still going strong after 7 years.
- Galvanized Steel: Durable, long-lasting, and aesthetically pleasing. Brands like Vego Garden offer modular kits. A Vego Garden 17″ Tall 8-in-1 Metal Raised Garden Bed (can be configured to 4×8 ft) costs approximately $250-$300.
- Concrete Blocks/Stones: Very durable but can leach minerals (though generally safe once weathered) and can be expensive.
- Recycled Materials: Pallets (check for chemical treatment stamps like « HT » for heat-treated), old tires (controversial due to potential chemical leaching).
- Filling Raised Beds: Don’t just fill with topsoil. Use a « Hugelkultur » approach (logs, branches, leaves, then compost, then topsoil) or a mixture of 60% good quality topsoil, 30% compost, and 10% perlite or vermiculite for drainage. A 4x8x1 ft raised bed requires about 32 cubic feet (or ~1.2 cubic yards) of soil mix, which can cost $100-$200 depending on your source.
- Material Options:
Step 4: Water Management & Irrigation
Efficient water management is critical for a self sufficient garden from scratch, especially in off-grid living where water resources might be limited.
- Rainwater Harvesting: This is my primary source of irrigation water. A 55-gallon rain barrel (e.g., EarthMark Rain Barrel, ~$120-$150) connected to a downspout can collect significant water. For larger needs, I use two 275-gallon IBC totes (Intermediate Bulk Containers, often available used for $100-$200 each from food-grade sources) connected in series. A 1,000 sq ft roof can collect approximately 620 gallons of water for every inch of rainfall. My 1,500 sq ft roof provides ample water for my 600 sq ft garden through multiple barrels and totes.
- Drip Irrigation: This is by far the most water-efficient method, delivering water directly to the plant’s root zone, minimizing evaporation and weed growth.
- Components: A typical drip system includes a pressure regulator (e.g., Rain Bird PRV-10, ~$15), a filter (Rain Bird RBY filter, ~$20), main tubing (1/2-inch poly tubing, 100ft ~$25), smaller feeder lines (1/4-inch tubing), and emitters (0.5 GPH or 1 GPH per plant).
- Kits: For beginners, a starter kit like the Rain Bird Drip Irrigation Garden Kit (model DDI-KIT-1P, ~$40-$60) is excellent for a small garden. For larger setups, I use Netafim Techline CV Drip Line (500ft roll, ~$150-$200), which has pressure-compensating emitters built-in, ensuring even watering across long runs.
- Automation: For true self-sufficiency, consider a battery-powered timer (e.g., Orbit B-Hyve Bluetooth Hose Faucet Timer, ~$50) or a solar-powered timer connected to a small 12V pump.
- Solar-Powered Pumps: For lifting water from a well, pond, or large storage tank to your garden, a solar pump is a game-changer. For a smaller drip system, a Shurflo 2088-594-152 Diaphragm Pump (12V, 3.5 GPM, ~$180) can be powered by a single 100W solar panel (e.g., Renogy 100W Monocrystalline Solar Panel, ~$100) and a small 12V battery (e.g., a 50Ah LiFePO4 battery like the Battle Born 50Ah, ~$450). For larger operations or deeper wells, more robust systems are needed. If you’re looking to build out a comprehensive off-grid power system to support your garden’s water needs, or indeed your entire homestead, you might want to explore resources like the Power Grid Generator complete system guide to understand the full scope of what’s possible in terms of energy independence.
Step 5: Seed Selection & Planting
The choice of seeds is crucial for a truly self sufficient garden from scratch.
- Choose Heirloom & Open-Pollinated Seeds: These varieties produce seeds that will grow true to type, meaning you can save seeds from your harvest year after year. F1 hybrids, while often vigorous, will not produce consistent offspring from saved seeds. Reputable seed companies include Baker Creek Heirloom Seeds, High Mowing Organic Seeds, and Seed Savers Exchange. Start with common, reliable varieties like ‘Black Krim’ tomatoes, ‘Provider’ bush beans, ‘Waltham Butternut’ squash, and ‘Black Seeded Simpson’ lettuce.
- Start Seeds Indoors (Optional but Recommended): For longer growing seasons or specific crops, starting seeds indoors gives you a head start. Use seed-starting mix (e.g., Espoma Organic Seed Starter Mix, ~$10 for 16qt bag) in seed trays (Jiffy Professional Greenhouse 72-cell kit, ~$15). Provide adequate light with LED grow lights (Barrina T5 2ft 4-pack LED Grow Lights, 20W each, ~$50) for 14-16 hours a day, positioned 2-4 inches above seedlings. Maintain consistent temperatures (65-75°F for most).
- Direct Sowing vs. Transplanting: Some crops (carrots, radishes, beans, corn) prefer direct sowing into the garden bed. Others (tomatoes, peppers, broccoli, kale) benefit from being started indoors and transplanted. Follow seed packet instructions for planting depths (e.g., lettuce seeds are often surface-sown or planted 1/8 inch deep, while beans are 1 inch deep) and spacing.
- Companion Planting: Strategically plant different species together to enhance growth, deter pests, and attract beneficial insects. For example, planting marigolds near tomatoes can deter nematodes, and basil improves tomato flavor. Nasturtiums can act as a trap crop for aphids.
- Succession Planting: For a continuous harvest, plant small batches of quick-growing crops (lettuce, radishes, cilantro) every 2-3 weeks. As one crop finishes, another is ready to take its place.
Step 6: Pest & Disease Management (Organic)
Maintaining a self sufficient garden from scratch means embracing organic pest and disease control.
- Integrated Pest Management (IPM): This holistic approach combines several strategies.
- Observation: Regularly inspect your plants for early signs of pests or disease. Catching issues early is key.
- Physical Barriers: Use row covers (e.g., Agribon AG-19 floating row cover, 10×20 ft, ~$20) to protect young plants from insect pests like cabbage worms and squash bugs. Install fences (e.g., 2×4 welded wire mesh, 4 ft tall, 50 ft roll ~$70) to keep out deer, rabbits, and other larger animals.
- Hand-Picking: For larger pests like tomato hornworms or squash bugs, simply pick them off and drop them into a bucket of soapy water.
- Companion Planting: As mentioned, certain plants repel pests. Marigolds, garlic, and onions are excellent deterrents.
- Attract Beneficial Insects: Plant flowers like dill, fennel, cosmos, and sweet alyssum to attract ladybugs, lacewings, and parasitic wasps, which prey on common garden pests.
- Organic Sprays & Treatments:
- Neem Oil: An excellent broad-spectrum organic insecticide and fungicide. Bonide Neem Oil Concentrate (16oz, ~$20) can be mixed at a rate of 1-2 tbsp per gallon of water and sprayed on affected plants.
- Insecticidal Soap: Effective against soft-bodied insects like aphids, whiteflies, and spider mites. Garden Safe Insecticidal Soap (24oz ready-to-use, ~$10).
- Bacillus thuringiensis (Bt): A naturally occurring soil bacterium that targets caterpillars and worms. Monterey BT Worm & Caterpillar Killer (16oz, ~$18) is highly effective and safe for beneficial insects.
- Copper or Sulfur Sprays: For fungal diseases like powdery mildew or blight, organic copper (e.g., Bonide Copper Fungicide, ~$15 for 1lb) or sulfur (e.g., Safer Brand Garden Fungicide, ~$10 for 16oz) can be used as a last resort.
Step 7: Harvesting & Seed Saving
The culmination of your efforts is the harvest, and seed saving closes the loop on self-sufficiency.
- Harvesting Techniques:
- Timing: Harvest vegetables at their peak ripeness for best flavor and nutritional value. For example, green beans should snap cleanly, cucumbers should be firm, and tomatoes should be fully colored.
- Frequency: Many crops, like zucchini, cucumbers, and bush beans, produce more if harvested frequently. Pick daily or every other day.
- Tools: Use clean, sharp pruners (e.g., Corona ClassicCUT Bypass Pruner BP 3180, ~$30) or a sharp knife for clean cuts, minimizing damage to the plant.
- Seed Saving: This is where the « self-sufficient » aspect truly shines.
- Selection: Only save seeds from your healthiest, most vigorous plants that show desired traits (disease resistance, good flavor, high yield).
- Isolation: To ensure true-to-type seeds, prevent cross-pollination. This can be challenging for open-pollinated crops that readily cross (e.g., squash, corn). For beginners, focus on self-pollinating plants like beans, peas, lettuce, and tomatoes.
- Processing:
- Dry Seeds (Beans, Peas, Lettuce, Grains): Allow pods/seed heads to dry completely on the plant. Harvest, shell, and clean the seeds, removing chaff.
- Wet Seeds (Tomatoes, Cucumbers, Squash): For tomatoes, ferment the seeds in water for a few days to remove the gel coating and inhibit disease. For cucumbers/squash, scrape out seeds, wash thoroughly, and dry.
- Drying: Spread seeds thinly on screens or paper plates in a cool, dry, well-ventilated area for 1-4 weeks. Ensure they are bone-dry before storage. I aim for less than 8% moisture content.
- Storage: Store seeds in airtight containers (glass jars with desiccant packets work well) in a cool, dark, dry place (ideally 40-50°F and 30-40% humidity). Label clearly with variety and date. Properly stored seeds can remain viable for 3-10 years or more.
Step 8: Season Extension & Winterizing
Extend your harvest and protect your garden for the off-season to truly maximize your self sufficient garden from scratch.
- Cold Frames: Simple structures with a transparent top (glass, polycarbonate, or old windows) that sit over garden beds. They trap solar heat, allowing you to grow cold-hardy crops (lettuce, spinach, kale, radishes) well into winter or start seeds earlier in spring. A basic cold frame can be built from 2×6 lumber and a sheet of polycarbonate for under $100.
- Hoop Houses/Low Tunnels: Larger structures made from flexible hoops (PVC pipe or EMT conduit) covered with greenhouse plastic. These provide more space and greater temperature moderation. A 10×20 ft DIY low tunnel kit can cost $200-$500, while a larger, more robust hoop house kit might be $1,000-$3,000. I use a 6×12 ft low tunnel made from 1/2-inch PVC hoops and 6mil greenhouse plastic, which extends my lettuce and spinach harvest by at least
Efficient water management is critical for a self sufficient garden from scratch, especially in off-grid living where water resources might be limited.
- Rainwater Harvesting: This is my primary source of irrigation water. A 55-gallon rain barrel (e.g., EarthMark Rain Barrel, ~$120-$150) connected to a downspout can collect significant water. For larger needs, I use two 275-gallon IBC totes (Intermediate Bulk Containers, often available used for $100-$200 each from food-grade sources) connected in series. A 1,000 sq ft roof can collect approximately 620 gallons of water for every inch of rainfall. My 1,500 sq ft roof provides ample water for my 600 sq ft garden through multiple barrels and totes.
- Drip Irrigation: This is by far the most water-efficient method, delivering water directly to the plant’s root zone, minimizing evaporation and weed growth.
- Components: A typical drip system includes a pressure regulator (e.g., Rain Bird PRV-10, ~$15), a filter (Rain Bird RBY filter, ~$20), main tubing (1/2-inch poly tubing, 100ft ~$25), smaller feeder lines (1/4-inch tubing), and emitters (0.5 GPH or 1 GPH per plant).
- Kits: For beginners, a starter kit like the Rain Bird Drip Irrigation Garden Kit (model DDI-KIT-1P, ~$40-$60) is excellent for a small garden. For larger setups, I use Netafim Techline CV Drip Line (500ft roll, ~$150-$200), which has pressure-compensating emitters built-in, ensuring even watering across long runs.
- Automation: For true self-sufficiency, consider a battery-powered timer (e.g., Orbit B-Hyve Bluetooth Hose Faucet Timer, ~$50) or a solar-powered timer connected to a small 12V pump.
- Solar-Powered Pumps: For lifting water from a well, pond, or large storage tank to your garden, a solar pump is a game-changer. For a smaller drip system, a Shurflo 2088-594-152 Diaphragm Pump (12V, 3.5 GPM, ~$180) can be powered by a single 100W solar panel (e.g., Renogy 100W Monocrystalline Solar Panel, ~$100) and a small 12V battery (e.g., a 50Ah LiFePO4 battery like the Battle Born 50Ah, ~$450). For larger operations or deeper wells, more robust systems are needed. If you’re looking to build out a comprehensive off-grid power system to support your garden’s water needs, or indeed your entire homestead, you might want to explore resources like the Power Grid Generator complete system guide to understand the full scope of what’s possible in terms of energy independence.
Step 5: Seed Selection & Planting
The choice of seeds is crucial for a truly self sufficient garden from scratch.
- Choose Heirloom & Open-Pollinated Seeds: These varieties produce seeds that will grow true to type, meaning you can save seeds from your harvest year after year. F1 hybrids, while often vigorous, will not produce consistent offspring from saved seeds. Reputable seed companies include Baker Creek Heirloom Seeds, High Mowing Organic Seeds, and Seed Savers Exchange. Start with common, reliable varieties like ‘Black Krim’ tomatoes, ‘Provider’ bush beans, ‘Waltham Butternut’ squash, and ‘Black Seeded Simpson’ lettuce.
- Start Seeds Indoors (Optional but Recommended): For longer growing seasons or specific crops, starting seeds indoors gives you a head start. Use seed-starting mix (e.g., Espoma Organic Seed Starter Mix, ~$10 for 16qt bag) in seed trays (Jiffy Professional Greenhouse 72-cell kit, ~$15). Provide adequate light with LED grow lights (Barrina T5 2ft 4-pack LED Grow Lights, 20W each, ~$50) for 14-16 hours a day, positioned 2-4 inches above seedlings. Maintain consistent temperatures (65-75°F for most).
- Direct Sowing vs. Transplanting: Some crops (carrots, radishes, beans, corn) prefer direct sowing into the garden bed. Others (tomatoes, peppers, broccoli, kale) benefit from being started indoors and transplanted. Follow seed packet instructions for planting depths (e.g., lettuce seeds are often surface-sown or planted 1/8 inch deep, while beans are 1 inch deep) and spacing.
- Companion Planting: Strategically plant different species together to enhance growth, deter pests, and attract beneficial insects. For example, planting marigolds near tomatoes can deter nematodes, and basil improves tomato flavor. Nasturtiums can act as a trap crop for aphids.
- Succession Planting: For a continuous harvest, plant small batches of quick-growing crops (lettuce, radishes, cilantro) every 2-3 weeks. As one crop finishes, another is ready to take its place.
Step 6: Pest & Disease Management (Organic)
Maintaining a self sufficient garden from scratch means embracing organic pest and disease control.
- Integrated Pest Management (IPM): This holistic approach combines several strategies.
- Observation: Regularly inspect your plants for early signs of pests or disease. Catching issues early is key.
- Physical Barriers: Use row covers (e.g., Agribon AG-19 floating row cover, 10×20 ft, ~$20) to protect young plants from insect pests like cabbage worms and squash bugs. Install fences (e.g., 2×4 welded wire mesh, 4 ft tall, 50 ft roll ~$70) to keep out deer, rabbits, and other larger animals.
- Hand-Picking: For larger pests like tomato hornworms or squash bugs, simply pick them off and drop them into a bucket of soapy water.
- Companion Planting: As mentioned, certain plants repel pests. Marigolds, garlic, and onions are excellent deterrents.
- Attract Beneficial Insects: Plant flowers like dill, fennel, cosmos, and sweet alyssum to attract ladybugs, lacewings, and parasitic wasps, which prey on common garden pests.
- Organic Sprays & Treatments:
- Neem Oil: An excellent broad-spectrum organic insecticide and fungicide. Bonide Neem Oil Concentrate (16oz, ~$20) can be mixed at a rate of 1-2 tbsp per gallon of water and sprayed on affected plants.
- Insecticidal Soap: Effective against soft-bodied insects like aphids, whiteflies, and spider mites. Garden Safe Insecticidal Soap (24oz ready-to-use, ~$10).
- Bacillus thuringiensis (Bt): A naturally occurring soil bacterium that targets caterpillars and worms. Monterey BT Worm & Caterpillar Killer (16oz, ~$18) is highly effective and safe for beneficial insects.
- Copper or Sulfur Sprays: For fungal diseases like powdery mildew or blight, organic copper (e.g., Bonide Copper Fungicide, ~$15 for 1lb) or sulfur (e.g., Safer Brand Garden Fungicide, ~$10 for 16oz) can be used as a last resort.
Step 7: Harvesting & Seed Saving
The culmination of your efforts is the harvest, and seed saving closes the loop on self-sufficiency.
- Harvesting Techniques:
- Timing: Harvest vegetables at their peak ripeness for best flavor and nutritional value. For example, green beans should snap cleanly, cucumbers should be firm, and tomatoes should be fully colored.
- Frequency: Many crops, like zucchini, cucumbers, and bush beans, produce more if harvested frequently. Pick daily or every other day.
- Tools: Use clean, sharp pruners (e.g., Corona ClassicCUT Bypass Pruner BP 3180, ~$30) or a sharp knife for clean cuts, minimizing damage to the plant.
- Seed Saving: This is where the « self-sufficient » aspect truly shines.
- Selection: Only save seeds from your healthiest, most vigorous plants that show desired traits (disease resistance, good flavor, high yield).
- Isolation: To ensure true-to-type seeds, prevent cross-pollination. This can be challenging for open-pollinated crops that readily cross (e.g., squash, corn). For beginners, focus on self-pollinating plants like beans, peas, lettuce, and tomatoes.
- Processing:
- Dry Seeds (Beans, Peas, Lettuce, Grains): Allow pods/seed heads to dry completely on the plant. Harvest, shell, and clean the seeds, removing chaff.
- Wet Seeds (Tomatoes, Cucumbers, Squash): For tomatoes, ferment the seeds in water for a few days to remove the gel coating and inhibit disease. For cucumbers/squash, scrape out seeds, wash thoroughly, and dry.
- Drying: Spread seeds thinly on screens or paper plates in a cool, dry, well-ventilated area for 1-4 weeks. Ensure they are bone-dry before storage. I aim for less than 8% moisture content.
- Storage: Store seeds in airtight containers (glass jars with desiccant packets work well) in a cool, dark, dry place (ideally 40-50°F and 30-40% humidity). Label clearly with variety and date. Properly stored seeds can remain viable for 3-10 years or more.
Step 8: Season Extension & Winterizing
Extend your harvest and protect your garden for the off-season to truly maximize your self sufficient garden from scratch.
- Cold Frames: Simple structures with a transparent top (glass, polycarbonate, or old windows) that sit over garden beds. They trap solar heat, allowing you to grow cold-hardy crops (lettuce, spinach, kale, radishes) well into winter or start seeds earlier in spring. A basic cold frame can be built from 2×6 lumber and a sheet of polycarbonate for under $100.
- Hoop Houses/Low Tunnels: Larger structures made from flexible hoops (PVC pipe or EMT conduit) covered with greenhouse plastic. These provide more space and greater temperature moderation. A 10×20 ft DIY low tunnel kit can cost $200-$500, while a larger, more robust hoop house kit might be $1,000-$3,000. I use a 6×12 ft low tunnel made from 1/2-inch PVC hoops and 6mil greenhouse plastic, which extends my lettuce and spinach harvest by at least
Deciding between raised beds and in-ground beds depends on your soil, budget, and physical capabilities.
- In-Ground Beds: If you have excellent native soil and good drainage, in-ground beds are the most economical. Double-digging (loosening soil two shovel depths) can significantly improve drainage and aeration. For my main garden, I primarily use in-ground beds, but I focus on building up the soil over time with consistent compost additions and cover cropping. I aim for beds that are no wider than 3-4 feet so I can reach the center without stepping on the soil, compacting it.
- Raised Beds: Raised beds offer numerous advantages, especially for poor soil, heavy clay, or rocky areas. They provide better drainage, warm up faster in spring, reduce compaction, and make weeding and harvesting easier on your back.
- Material Options:
- Untreated Cedar: Naturally rot-resistant and chemical-free. A 4×8 ft bed, 12 inches deep, typically requires three 2x12x8 ft cedar boards, costing around $50-$60 per board (total ~$150-$180) plus corner brackets or screws. My first raised beds were cedar and are still going strong after 7 years.
- Galvanized Steel: Durable, long-lasting, and aesthetically pleasing. Brands like Vego Garden offer modular kits. A Vego Garden 17″ Tall 8-in-1 Metal Raised Garden Bed (can be configured to 4×8 ft) costs approximately $250-$300.
- Concrete Blocks/Stones: Very durable but can leach minerals (though generally safe once weathered) and can be expensive.
- Recycled Materials: Pallets (check for chemical treatment stamps like « HT » for heat-treated), old tires (controversial due to potential chemical leaching).
- Filling Raised Beds: Don’t just fill with topsoil. Use a « Hugelkultur » approach (logs, branches, leaves, then compost, then topsoil) or a mixture of 60% good quality topsoil, 30% compost, and 10% perlite or vermiculite for drainage. A 4x8x1 ft raised bed requires about 32 cubic feet (or ~1.2 cubic yards) of soil mix, which can cost $100-$200 depending on your source.
- Material Options:
Step 4: Water Management & Irrigation
Efficient water management is critical for a self sufficient garden from scratch, especially in off-grid living where water resources might be limited.
- Rainwater Harvesting: This is my primary source of irrigation water. A 55-gallon rain barrel (e.g., EarthMark Rain Barrel, ~$120-$150) connected to a downspout can collect significant water. For larger needs, I use two 275-gallon IBC totes (Intermediate Bulk Containers, often available used for $100-$200 each from food-grade sources) connected in series. A 1,000 sq ft roof can collect approximately 620 gallons of water for every inch of rainfall. My 1,500 sq ft roof provides ample water for my 600 sq ft garden through multiple barrels and totes.
- Drip Irrigation: This is by far the most water-efficient method, delivering water directly to the plant’s root zone, minimizing evaporation and weed growth.
- Components: A typical drip system includes a pressure regulator (e.g., Rain Bird PRV-10, ~$15), a filter (Rain Bird RBY filter, ~$20), main tubing (1/2-inch poly tubing, 100ft ~$25), smaller feeder lines (1/4-inch tubing), and emitters (0.5 GPH or 1 GPH per plant).
- Kits: For beginners, a starter kit like the Rain Bird Drip Irrigation Garden Kit (model DDI-KIT-1P, ~$40-$60) is excellent for a small garden. For larger setups, I use Netafim Techline CV Drip Line (500ft roll, ~$150-$200), which has pressure-compensating emitters built-in, ensuring even watering across long runs.
- Automation: For true self-sufficiency, consider a battery-powered timer (e.g., Orbit B-Hyve Bluetooth Hose Faucet Timer, ~$50) or a solar-powered timer connected to a small 12V pump.
- Solar-Powered Pumps: For lifting water from a well, pond, or large storage tank to your garden, a solar pump is a game-changer. For a smaller drip system, a Shurflo 2088-594-152 Diaphragm Pump (12V, 3.5 GPM, ~$180) can be powered by a single 100W solar panel (e.g., Renogy 100W Monocrystalline Solar Panel, ~$100) and a small 12V battery (e.g., a 50Ah LiFePO4 battery like the Battle Born 50Ah, ~$450). For larger operations or deeper wells, more robust systems are needed. If you’re looking to build out a comprehensive off-grid power system to support your garden’s water needs, or indeed your entire homestead, you might want to explore resources like the Power Grid Generator complete system guide to understand the full scope of what’s possible in terms of energy independence.
Step 5: Seed Selection & Planting
The choice of seeds is crucial for a truly self sufficient garden from scratch.
- Choose Heirloom & Open-Pollinated Seeds: These varieties produce seeds that will grow true to type, meaning you can save seeds from your harvest year after year. F1 hybrids, while often vigorous, will not produce consistent offspring from saved seeds. Reputable seed companies include Baker Creek Heirloom Seeds, High Mowing Organic Seeds, and Seed Savers Exchange. Start with common, reliable varieties like ‘Black Krim’ tomatoes, ‘Provider’ bush beans, ‘Waltham Butternut’ squash, and ‘Black Seeded Simpson’ lettuce.
- Start Seeds Indoors (Optional but Recommended): For longer growing seasons or specific crops, starting seeds indoors gives you a head start. Use seed-starting mix (e.g., Espoma Organic Seed Starter Mix, ~$10 for 16qt bag) in seed trays (Jiffy Professional Greenhouse 72-cell kit, ~$15). Provide adequate light with LED grow lights (Barrina T5 2ft 4-pack LED Grow Lights, 20W each, ~$50) for 14-16 hours a day, positioned 2-4 inches above seedlings. Maintain consistent temperatures (65-75°F for most).
- Direct Sowing vs. Transplanting: Some crops (carrots, radishes, beans, corn) prefer direct sowing into the garden bed. Others (tomatoes, peppers, broccoli, kale) benefit from being started indoors and transplanted. Follow seed packet instructions for planting depths (e.g., lettuce seeds are often surface-sown or planted 1/8 inch deep, while beans are 1 inch deep) and spacing.
- Companion Planting: Strategically plant different species together to enhance growth, deter pests, and attract beneficial insects. For example, planting marigolds near tomatoes can deter nematodes, and basil improves tomato flavor. Nasturtiums can act as a trap crop for aphids.
- Succession Planting: For a continuous harvest, plant small batches of quick-growing crops (lettuce, radishes, cilantro) every 2-3 weeks. As one crop finishes, another is ready to take its place.
Step 6: Pest & Disease Management (Organic)
Maintaining a self sufficient garden from scratch means embracing organic pest and disease control.
- Integrated Pest Management (IPM): This holistic approach combines several strategies.
- Observation: Regularly inspect your plants for early signs of pests or disease. Catching issues early is key.
- Physical Barriers: Use row covers (e.g., Agribon AG-19 floating row cover, 10×20 ft, ~$20) to protect young plants from insect pests like cabbage worms and squash bugs. Install fences (e.g., 2×4 welded wire mesh, 4 ft tall, 50 ft roll ~$70) to keep out deer, rabbits, and other larger animals.
- Hand-Picking: For larger pests like tomato hornworms or squash bugs, simply pick them off and drop them into a bucket of soapy water.
- Companion Planting: As mentioned, certain plants repel pests. Marigolds, garlic, and onions are excellent deterrents.
- Attract Beneficial Insects: Plant flowers like dill, fennel, cosmos, and sweet alyssum to attract ladybugs, lacewings, and parasitic wasps, which prey on common garden pests.
- Organic Sprays & Treatments:
- Neem Oil: An excellent broad-spectrum organic insecticide and fungicide. Bonide Neem Oil Concentrate (16oz, ~$20) can be mixed at a rate of 1-2 tbsp per gallon of water and sprayed on affected plants.
- Insecticidal Soap: Effective against soft-bodied insects like aphids, whiteflies, and spider mites. Garden Safe Insecticidal Soap (24oz ready-to-use, ~$10).
- Bacillus thuringiensis (Bt): A naturally occurring soil bacterium that targets caterpillars and worms. Monterey BT Worm & Caterpillar Killer (16oz, ~$18) is highly effective and safe for beneficial insects.
- Copper or Sulfur Sprays: For fungal diseases like powdery mildew or blight, organic copper (e.g., Bonide Copper Fungicide, ~$15 for 1lb) or sulfur (e.g., Safer Brand Garden Fungicide, ~$10 for 16oz) can be used as a last resort.
Step 7: Harvesting & Seed Saving
The culmination of your efforts is the harvest, and seed saving closes the loop on self-sufficiency.
- Harvesting Techniques:
- Timing: Harvest vegetables at their peak ripeness for best flavor and nutritional value. For example, green beans should snap cleanly, cucumbers should be firm, and tomatoes should be fully colored.
- Frequency: Many crops, like zucchini, cucumbers, and bush beans, produce more if harvested frequently. Pick daily or every other day.
- Tools: Use clean, sharp pruners (e.g., Corona ClassicCUT Bypass Pruner BP 3180, ~$30) or a sharp knife for clean cuts, minimizing damage to the plant.
- Seed Saving: This is where the « self-sufficient » aspect truly shines.
- Selection: Only save seeds from your healthiest, most vigorous plants that show desired traits (disease resistance, good flavor, high yield).
- Isolation: To ensure true-to-type seeds, prevent cross-pollination. This can be challenging for open-pollinated crops that readily cross (e.g., squash, corn). For beginners, focus on self-pollinating plants like beans, peas, lettuce, and tomatoes.
- Processing:
- Dry Seeds (Beans, Peas, Lettuce, Grains): Allow pods/seed heads to dry completely on the plant. Harvest, shell, and clean the seeds, removing chaff.
- Wet Seeds (Tomatoes, Cucumbers, Squash): For tomatoes, ferment the seeds in water for a few days to remove the gel coating and inhibit disease. For cucumbers/squash, scrape out seeds, wash thoroughly, and dry.
- Drying: Spread seeds thinly on screens or paper plates in a cool, dry, well-ventilated area for 1-4 weeks. Ensure they are bone-dry before storage. I aim for less than 8% moisture content.
- Storage: Store seeds in airtight containers (glass jars with desiccant packets work well) in a cool, dark, dry place (ideally 40-50°F and 30-40% humidity). Label clearly with variety and date. Properly stored seeds can remain viable for 3-10 years or more.
Step 8: Season Extension & Winterizing
Extend your harvest and protect your garden for the off-season to truly maximize your self sufficient garden from scratch.
- Cold Frames: Simple structures with a transparent top (glass, polycarbonate, or old windows) that sit over garden beds. They trap solar heat, allowing you to grow cold-hardy crops (lettuce, spinach, kale, radishes) well into winter or start seeds earlier in spring. A basic cold frame can be built from 2×6 lumber and a sheet of polycarbonate for under $100.
- Hoop Houses/Low Tunnels: Larger structures made from flexible hoops (PVC pipe or EMT conduit) covered with greenhouse plastic. These provide more space and greater temperature moderation. A 10×20 ft DIY low tunnel kit can cost $200-$500, while a larger, more robust hoop house kit might be $1,000-$3,000. I use a 6×12 ft low tunnel made from 1/2-inch PVC hoops and 6mil greenhouse plastic, which extends my lettuce and spinach harvest by at least
Healthy soil is the bedrock of a productive, self-sufficient garden. You can’t guess what your soil needs; you have to test it.
- Perform a Soil Test: A professional soil test will give you precise data on your soil’s pH, nutrient levels (N-P-K), and organic matter content. I recommend sending a sample to your local agricultural extension office; it typically costs $20-$50 and provides detailed recommendations. Alternatively, for a quick homeowner check, a Rapitest Soil Test Kit (40-test kit, model 1663, ~$20 on Amazon) provides a good baseline for pH, Nitrogen, Phosphorus, and Potash. Aim for a pH between 6.0 and 7.0 for most vegetables.
- Amend for pH Imbalance: If your soil is too acidic (below 6.0), add agricultural lime (dolomitic lime adds magnesium, calcitic lime adds calcium). Apply 5-10 lbs per 100 sq ft for a moderate adjustment. If it’s too alkaline (above 7.0), add elemental sulfur (e.g., Espoma Soil Acidifier, ~$15 for 6.75 lbs) or generous amounts of organic matter like peat moss or pine needles.
- Build Organic Matter: This is the single most important step for long-term soil health. Organic matter improves soil structure, water retention, drainage, and nutrient availability. Incorporate 2-4 inches of high-quality compost into your top 6-12 inches of soil annually. I make my own compost from kitchen scraps, garden waste, and shredded leaves, but you can purchase it. Local nurseries often sell bulk compost for $30-$50 per cubic yard. Aged manure (from chickens, cows, or horses – ensure it’s well-rotted to avoid burning plants) is also excellent.
- Address Nutrient Deficiencies: Based on your soil test, add specific organic amendments. If Nitrogen (N) is low, add blood meal (12-0-0, ~$20 for 3 lbs) or feather meal. For Phosphorus (P), use bone meal (3-15-0, ~$15 for 3 lbs) or rock phosphate. For Potassium (K), greensand (0-0-2.5, ~$25 for 5 lbs) or kelp meal are good choices. I rely heavily on Espoma Organic Garden-tone (5-3-3, ~$25 for an 8lb bag) as a balanced, all-purpose organic fertilizer during planting.
Step 3: Garden Bed Preparation
Deciding between raised beds and in-ground beds depends on your soil, budget, and physical capabilities.
- In-Ground Beds: If you have excellent native soil and good drainage, in-ground beds are the most economical. Double-digging (loosening soil two shovel depths) can significantly improve drainage and aeration. For my main garden, I primarily use in-ground beds, but I focus on building up the soil over time with consistent compost additions and cover cropping. I aim for beds that are no wider than 3-4 feet so I can reach the center without stepping on the soil, compacting it.
- Raised Beds: Raised beds offer numerous advantages, especially for poor soil, heavy clay, or rocky areas. They provide better drainage, warm up faster in spring, reduce compaction, and make weeding and harvesting easier on your back.
- Material Options:
- Untreated Cedar: Naturally rot-resistant and chemical-free. A 4×8 ft bed, 12 inches deep, typically requires three 2x12x8 ft cedar boards, costing around $50-$60 per board (total ~$150-$180) plus corner brackets or screws. My first raised beds were cedar and are still going strong after 7 years.
- Galvanized Steel: Durable, long-lasting, and aesthetically pleasing. Brands like Vego Garden offer modular kits. A Vego Garden 17″ Tall 8-in-1 Metal Raised Garden Bed (can be configured to 4×8 ft) costs approximately $250-$300.
- Concrete Blocks/Stones: Very durable but can leach minerals (though generally safe once weathered) and can be expensive.
- Recycled Materials: Pallets (check for chemical treatment stamps like « HT » for heat-treated), old tires (controversial due to potential chemical leaching).
- Filling Raised Beds: Don’t just fill with topsoil. Use a « Hugelkultur » approach (logs, branches, leaves, then compost, then topsoil) or a mixture of 60% good quality topsoil, 30% compost, and 10% perlite or vermiculite for drainage. A 4x8x1 ft raised bed requires about 32 cubic feet (or ~1.2 cubic yards) of soil mix, which can cost $100-$200 depending on your source.
- Material Options:
Step 4: Water Management & Irrigation
Efficient water management is critical for a self sufficient garden from scratch, especially in off-grid living where water resources might be limited.
- Rainwater Harvesting: This is my primary source of irrigation water. A 55-gallon rain barrel (e.g., EarthMark Rain Barrel, ~$120-$150) connected to a downspout can collect significant water. For larger needs, I use two 275-gallon IBC totes (Intermediate Bulk Containers, often available used for $100-$200 each from food-grade sources) connected in series. A 1,000 sq ft roof can collect approximately 620 gallons of water for every inch of rainfall. My 1,500 sq ft roof provides ample water for my 600 sq ft garden through multiple barrels and totes.
- Drip Irrigation: This is by far the most water-efficient method, delivering water directly to the plant’s root zone, minimizing evaporation and weed growth.
- Components: A typical drip system includes a pressure regulator (e.g., Rain Bird PRV-10, ~$15), a filter (Rain Bird RBY filter, ~$20), main tubing (1/2-inch poly tubing, 100ft ~$25), smaller feeder lines (1/4-inch tubing), and emitters (0.5 GPH or 1 GPH per plant).
- Kits: For beginners, a starter kit like the Rain Bird Drip Irrigation Garden Kit (model DDI-KIT-1P, ~$40-$60) is excellent for a small garden. For larger setups, I use Netafim Techline CV Drip Line (500ft roll, ~$150-$200), which has pressure-compensating emitters built-in, ensuring even watering across long runs.
- Automation: For true self-sufficiency, consider a battery-powered timer (e.g., Orbit B-Hyve Bluetooth Hose Faucet Timer, ~$50) or a solar-powered timer connected to a small 12V pump.
- Solar-Powered Pumps: For lifting water from a well, pond, or large storage tank to your garden, a solar pump is a game-changer. For a smaller drip system, a Shurflo 2088-594-152 Diaphragm Pump (12V, 3.5 GPM, ~$180) can be powered by a single 100W solar panel (e.g., Renogy 100W Monocrystalline Solar Panel, ~$100) and a small 12V battery (e.g., a 50Ah LiFePO4 battery like the Battle Born 50Ah, ~$450). For larger operations or deeper wells, more robust systems are needed. If you’re looking to build out a comprehensive off-grid power system to support your garden’s water needs, or indeed your entire homestead, you might want to explore resources like the Power Grid Generator complete system guide to understand the full scope of what’s possible in terms of energy independence.
Step 5: Seed Selection & Planting
The choice of seeds is crucial for a truly self sufficient garden from scratch.
- Choose Heirloom & Open-Pollinated Seeds: These varieties produce seeds that will grow true to type, meaning you can save seeds from your harvest year after year. F1 hybrids, while often vigorous, will not produce consistent offspring from saved seeds. Reputable seed companies include Baker Creek Heirloom Seeds, High Mowing Organic Seeds, and Seed Savers Exchange. Start with common, reliable varieties like ‘Black Krim’ tomatoes, ‘Provider’ bush beans, ‘Waltham Butternut’ squash, and ‘Black Seeded Simpson’ lettuce.
- Start Seeds Indoors (Optional but Recommended): For longer growing seasons or specific crops, starting seeds indoors gives you a head start. Use seed-starting mix (e.g., Espoma Organic Seed Starter Mix, ~$10 for 16qt bag) in seed trays (Jiffy Professional Greenhouse 72-cell kit, ~$15). Provide adequate light with LED grow lights (Barrina T5 2ft 4-pack LED Grow Lights, 20W each, ~$50) for 14-16 hours a day, positioned 2-4 inches above seedlings. Maintain consistent temperatures (65-75°F for most).
- Direct Sowing vs. Transplanting: Some crops (carrots, radishes, beans, corn) prefer direct sowing into the garden bed. Others (tomatoes, peppers, broccoli, kale) benefit from being started indoors and transplanted. Follow seed packet instructions for planting depths (e.g., lettuce seeds are often surface-sown or planted 1/8 inch deep, while beans are 1 inch deep) and spacing.
- Companion Planting: Strategically plant different species together to enhance growth, deter pests, and attract beneficial insects. For example, planting marigolds near tomatoes can deter nematodes, and basil improves tomato flavor. Nasturtiums can act as a trap crop for aphids.
- Succession Planting: For a continuous harvest, plant small batches of quick-growing crops (lettuce, radishes, cilantro) every 2-3 weeks. As one crop finishes, another is ready to take its place.
Step 6: Pest & Disease Management (Organic)
Maintaining a self sufficient garden from scratch means embracing organic pest and disease control.
- Integrated Pest Management (IPM): This holistic approach combines several strategies.
- Observation: Regularly inspect your plants for early signs of pests or disease. Catching issues early is key.
- Physical Barriers: Use row covers (e.g., Agribon AG-19 floating row cover, 10×20 ft, ~$20) to protect young plants from insect pests like cabbage worms and squash bugs. Install fences (e.g., 2×4 welded wire mesh, 4 ft tall, 50 ft roll ~$70) to keep out deer, rabbits, and other larger animals.
- Hand-Picking: For larger pests like tomato hornworms or squash bugs, simply pick them off and drop them into a bucket of soapy water.
- Companion Planting: As mentioned, certain plants repel pests. Marigolds, garlic, and onions are excellent deterrents.
- Attract Beneficial Insects: Plant flowers like dill, fennel, cosmos, and sweet alyssum to attract ladybugs, lacewings, and parasitic wasps, which prey on common garden pests.
- Organic Sprays & Treatments:
- Neem Oil: An excellent broad-spectrum organic insecticide and fungicide. Bonide Neem Oil Concentrate (16oz, ~$20) can be mixed at a rate of 1-2 tbsp per gallon of water and sprayed on affected plants.
- Insecticidal Soap: Effective against soft-bodied insects like aphids, whiteflies, and spider mites. Garden Safe Insecticidal Soap (24oz ready-to-use, ~$10).
- Bacillus thuringiensis (Bt): A naturally occurring soil bacterium that targets caterpillars and worms. Monterey BT Worm & Caterpillar Killer (16oz, ~$18) is highly effective and safe for beneficial insects.
- Copper or Sulfur Sprays: For fungal diseases like powdery mildew or blight, organic copper (e.g., Bonide Copper Fungicide, ~$15 for 1lb) or sulfur (e.g., Safer Brand Garden Fungicide, ~$10 for 16oz) can be used as a last resort.
Step 7: Harvesting & Seed Saving
The culmination of your efforts is the harvest, and seed saving closes the loop on self-sufficiency.
- Harvesting Techniques:
- Timing: Harvest vegetables at their peak ripeness for best flavor and nutritional value. For example, green beans should snap cleanly, cucumbers should be firm, and tomatoes should be fully colored.
- Frequency: Many crops, like zucchini, cucumbers, and bush beans, produce more if harvested frequently. Pick daily or every other day.
- Tools: Use clean, sharp pruners (e.g., Corona ClassicCUT Bypass Pruner BP 3180, ~$30) or a sharp knife for clean cuts, minimizing damage to the plant.
- Seed Saving: This is where the « self-sufficient » aspect truly shines.
- Selection: Only save seeds from your healthiest, most vigorous plants that show desired traits (disease resistance, good flavor, high yield).
- Isolation: To ensure true-to-type seeds, prevent cross-pollination. This can be challenging for open-pollinated crops that readily cross (e.g., squash, corn). For beginners, focus on self-pollinating plants like beans, peas, lettuce, and tomatoes.
- Processing:
- Dry Seeds (Beans, Peas, Lettuce, Grains): Allow pods/seed heads to dry completely on the plant. Harvest, shell, and clean the seeds, removing chaff.
- Wet Seeds (Tomatoes, Cucumbers, Squash): For tomatoes, ferment the seeds in water for a few days to remove the gel coating and inhibit disease. For cucumbers/squash, scrape out seeds, wash thoroughly, and dry.
- Drying: Spread seeds thinly on screens or paper plates in a cool, dry, well-ventilated area for 1-4 weeks. Ensure they are bone-dry before storage. I aim for less than 8% moisture content.
- Storage: Store seeds in airtight containers (glass jars with desiccant packets work well) in a cool, dark, dry place (ideally 40-50°F and 30-40% humidity). Label clearly with variety and date. Properly stored seeds can remain viable for 3-10 years or more.
Step 8: Season Extension & Winterizing
Extend your harvest and protect your garden for the off-season to truly maximize your self sufficient garden from scratch.
- Cold Frames: Simple structures with a transparent top (glass, polycarbonate, or old windows) that sit over garden beds. They trap solar heat, allowing you to grow cold-hardy crops (lettuce, spinach, kale, radishes) well into winter or start seeds earlier in spring. A basic cold frame can be built from 2×6 lumber and a sheet of polycarbonate for under $100.
- Hoop Houses/Low Tunnels: Larger structures made from flexible hoops (PVC pipe or EMT conduit) covered with greenhouse plastic. These provide more space and greater temperature moderation. A 10×20 ft DIY low tunnel kit can cost $200-$500, while a larger, more robust hoop house kit might be $1,000-$3,000. I use a 6×12 ft low tunnel made from 1/2-inch PVC hoops and 6mil greenhouse plastic, which extends my lettuce and spinach harvest by at least
Step 4: Water Management & Irrigation
Efficient water management is critical for a self sufficient garden from scratch, especially in off-grid living where water resources might be limited.
- Rainwater Harvesting: This is my primary source of irrigation water. A 55-gallon rain barrel (e.g., EarthMark Rain Barrel, ~$120-$150) connected to a downspout can collect significant water. For larger needs, I use two 275-gallon IBC totes (Intermediate Bulk Containers, often available used for $100-$200 each from food-grade sources) connected in series. A 1,000 sq ft roof can collect approximately 620 gallons of water for every inch of rainfall. My 1,500 sq ft roof provides ample water for my 600 sq ft garden through multiple barrels and totes.
- Drip Irrigation: This is by far the most water-efficient method, delivering water directly to the plant’s root zone, minimizing evaporation and weed growth.
- Components: A typical drip system includes a pressure regulator (e.g., Rain Bird PRV-10, ~$15), a filter (Rain Bird RBY filter, ~$20), main tubing (1/2-inch poly tubing, 100ft ~$25), smaller feeder lines (1/4-inch tubing), and emitters (0.5 GPH or 1 GPH per plant).
- Kits: For beginners, a starter kit like the Rain Bird Drip Irrigation Garden Kit (model DDI-KIT-1P, ~$40-$60) is excellent for a small garden. For larger setups, I use Netafim Techline CV Drip Line (500ft roll, ~$150-$200), which has pressure-compensating emitters built-in, ensuring even watering across long runs.
- Automation: For true self-sufficiency, consider a battery-powered timer (e.g., Orbit B-Hyve Bluetooth Hose Faucet Timer, ~$50) or a solar-powered timer connected to a small 12V pump.
- Solar-Powered Pumps: For lifting water from a well, pond, or large storage tank to your garden, a solar pump is a game-changer. For a smaller drip system, a Shurflo 2088-594-152 Diaphragm Pump (12V, 3.5 GPM, ~$180) can be powered by a single 100W solar panel (e.g., Renogy 100W Monocrystalline Solar Panel, ~$100) and a small 12V battery (e.g., a 50Ah LiFePO4 battery like the Battle Born 50Ah, ~$450). For larger operations or deeper wells, more robust systems are needed. If you’re looking to build out a comprehensive off-grid power system to support your garden’s water needs, or indeed your entire homestead, you might want to explore resources like the Power Grid Generator complete system guide to understand the full scope of what’s possible in terms of energy independence.
Step 5: Seed Selection & Planting
The choice of seeds is crucial for a truly self sufficient garden from scratch.
- Choose Heirloom & Open-Pollinated Seeds: These varieties produce seeds that will grow true to type, meaning you can save seeds from your harvest year after year. F1 hybrids, while often vigorous, will not produce consistent offspring from saved seeds. Reputable seed companies include Baker Creek Heirloom Seeds, High Mowing Organic Seeds, and Seed Savers Exchange. Start with common, reliable varieties like ‘Black Krim’ tomatoes, ‘Provider’ bush beans, ‘Waltham Butternut’ squash, and ‘Black Seeded Simpson’ lettuce.
- Start Seeds Indoors (Optional but Recommended): For longer growing seasons or specific crops, starting seeds indoors gives you a head start. Use seed-starting mix (e.g., Espoma Organic Seed Starter Mix, ~$10 for 16qt bag) in seed trays (Jiffy Professional Greenhouse 72-cell kit, ~$15). Provide adequate light with LED grow lights (Barrina T5 2ft 4-pack LED Grow Lights, 20W each, ~$50) for 14-16 hours a day, positioned 2-4 inches above seedlings. Maintain consistent temperatures (65-75°F for most).
- Direct Sowing vs. Transplanting: Some crops (carrots, radishes, beans, corn) prefer direct sowing into the garden bed. Others (tomatoes, peppers, broccoli, kale) benefit from being started indoors and transplanted. Follow seed packet instructions for planting depths (e.g., lettuce seeds are often surface-sown or planted 1/8 inch deep, while beans are 1 inch deep) and spacing.
- Companion Planting: Strategically plant different species together to enhance growth, deter pests, and attract beneficial insects. For example, planting marigolds near tomatoes can deter nematodes, and basil improves tomato flavor. Nasturtiums can act as a trap crop for aphids.
- Succession Planting: For a continuous harvest, plant small batches of quick-growing crops (lettuce, radishes, cilantro) every 2-3 weeks. As one crop finishes, another is ready to take its place.
Step 6: Pest & Disease Management (Organic)
Maintaining a self sufficient garden from scratch means embracing organic pest and disease control.
- Integrated Pest Management (IPM): This holistic approach combines several strategies.
- Observation: Regularly inspect your plants for early signs of pests or disease. Catching issues early is key.
- Physical Barriers: Use row covers (e.g., Agribon AG-19 floating row cover, 10×20 ft, ~$20) to protect young plants from insect pests like cabbage worms and squash bugs. Install fences (e.g., 2×4 welded wire mesh, 4 ft tall, 50 ft roll ~$70) to keep out deer, rabbits, and other larger animals.
- Hand-Picking: For larger pests like tomato hornworms or squash bugs, simply pick them off and drop them into a bucket of soapy water.
- Companion Planting: As mentioned, certain plants repel pests. Marigolds, garlic, and onions are excellent deterrents.
- Attract Beneficial Insects: Plant flowers like dill, fennel, cosmos, and sweet alyssum to attract ladybugs, lacewings, and parasitic wasps, which prey on common garden pests.
- Organic Sprays & Treatments:
- Neem Oil: An excellent broad-spectrum organic insecticide and fungicide. Bonide Neem Oil Concentrate (16oz, ~$20) can be mixed at a rate of 1-2 tbsp per gallon of water and sprayed on affected plants.
- Insecticidal Soap: Effective against soft-bodied insects like aphids, whiteflies, and spider mites. Garden Safe Insecticidal Soap (24oz ready-to-use, ~$10).
- Bacillus thuringiensis (Bt): A naturally occurring soil bacterium that targets caterpillars and worms. Monterey BT Worm & Caterpillar Killer (16oz, ~$18) is highly effective and safe for beneficial insects.
- Copper or Sulfur Sprays: For fungal diseases like powdery mildew or blight, organic copper (e.g., Bonide Copper Fungicide, ~$15 for 1lb) or sulfur (e.g., Safer Brand Garden Fungicide, ~$10 for 16oz) can be used as a last resort.
Step 7: Harvesting & Seed Saving
The culmination of your efforts is the harvest, and seed saving closes the loop on self-sufficiency.
- Harvesting Techniques:
- Timing: Harvest vegetables at their peak ripeness for best flavor and nutritional value. For example, green beans should snap cleanly, cucumbers should be firm, and tomatoes should be fully colored.
- Frequency: Many crops, like zucchini, cucumbers, and bush beans, produce more if harvested frequently. Pick daily or every other day.
- Tools: Use clean, sharp pruners (e.g., Corona ClassicCUT Bypass Pruner BP 3180, ~$30) or a sharp knife for clean cuts, minimizing damage to the plant.
- Seed Saving: This is where the « self-sufficient » aspect truly shines.
- Selection: Only save seeds from your healthiest, most vigorous plants that show desired traits (disease resistance, good flavor, high yield).
- Isolation: To ensure true-to-type seeds, prevent cross-pollination. This can be challenging for open-pollinated crops that readily cross (e.g., squash, corn). For beginners, focus on self-pollinating plants like beans, peas, lettuce, and tomatoes.
- Processing:
- Dry Seeds (Beans, Peas, Lettuce, Grains): Allow pods/seed heads to dry completely on the plant. Harvest, shell, and clean the seeds, removing chaff.
- Wet Seeds (Tomatoes, Cucumbers, Squash): For tomatoes, ferment the seeds in water for a few days to remove the gel coating and inhibit disease. For cucumbers/squash, scrape out seeds, wash thoroughly, and dry.
- Drying: Spread seeds thinly on screens or paper plates in a cool, dry, well-ventilated area for 1-4 weeks. Ensure they are bone-dry before storage. I aim for less than 8% moisture content.
- Storage: Store seeds in airtight containers (glass jars with desiccant packets work well) in a cool, dark, dry place (ideally 40-50°F and 30-40% humidity). Label clearly with variety and date. Properly stored seeds can remain viable for 3-10 years or more.
Step 8: Season Extension & Winterizing
Extend your harvest and protect your garden for the off-season to truly maximize your self sufficient garden from scratch.
- Cold Frames: Simple structures with a transparent top (glass, polycarbonate, or old windows) that sit over garden beds. They trap solar heat, allowing you to grow cold-hardy crops (lettuce, spinach, kale, radishes) well into winter or start seeds earlier in spring. A basic cold frame can be built from 2×6 lumber and a sheet of polycarbonate for under $100.
- Hoop Houses/Low Tunnels: Larger structures made from flexible hoops (PVC pipe or EMT conduit) covered with greenhouse plastic. These provide more space and greater temperature moderation. A 10×20 ft DIY low tunnel kit can cost $200-$500, while a larger, more robust hoop house kit might be $1,000-$3,000. I use a 6×12 ft low tunnel made from 1/2-inch PVC hoops and 6mil greenhouse plastic, which extends my lettuce and spinach harvest by at least
Deciding between raised beds and in-ground beds depends on your soil, budget, and physical capabilities.
- In-Ground Beds: If you have excellent native soil and good drainage, in-ground beds are the most economical. Double-digging (loosening soil two shovel depths) can significantly improve drainage and aeration. For my main garden, I primarily use in-ground beds, but I focus on building up the soil over time with consistent compost additions and cover cropping. I aim for beds that are no wider than 3-4 feet so I can reach the center without stepping on the soil, compacting it.
- Raised Beds: Raised beds offer numerous advantages, especially for poor soil, heavy clay, or rocky areas. They provide better drainage, warm up faster in spring, reduce compaction, and make weeding and harvesting easier on your back.
- Material Options:
- Untreated Cedar: Naturally rot-resistant and chemical-free. A 4×8 ft bed, 12 inches deep, typically requires three 2x12x8 ft cedar boards, costing around $50-$60 per board (total ~$150-$180) plus corner brackets or screws. My first raised beds were cedar and are still going strong after 7 years.
- Galvanized Steel: Durable, long-lasting, and aesthetically pleasing. Brands like Vego Garden offer modular kits. A Vego Garden 17″ Tall 8-in-1 Metal Raised Garden Bed (can be configured to 4×8 ft) costs approximately $250-$300.
- Concrete Blocks/Stones: Very durable but can leach minerals (though generally safe once weathered) and can be expensive.
- Recycled Materials: Pallets (check for chemical treatment stamps like « HT » for heat-treated), old tires (controversial due to potential chemical leaching).
- Filling Raised Beds: Don’t just fill with topsoil. Use a « Hugelkultur » approach (logs, branches, leaves, then compost, then topsoil) or a mixture of 60% good quality topsoil, 30% compost, and 10% perlite or vermiculite for drainage. A 4x8x1 ft raised bed requires about 32 cubic feet (or ~1.2 cubic yards) of soil mix, which can cost $100-$200 depending on your source.
- Material Options:
Step 4: Water Management & Irrigation
Efficient water management is critical for a self sufficient garden from scratch, especially in off-grid living where water resources might be limited.
- Rainwater Harvesting: This is my primary source of irrigation water. A 55-gallon rain barrel (e.g., EarthMark Rain Barrel, ~$120-$150) connected to a downspout can collect significant water. For larger needs, I use two 275-gallon IBC totes (Intermediate Bulk Containers, often available used for $100-$200 each from food-grade sources) connected in series. A 1,000 sq ft roof can collect approximately 620 gallons of water for every inch of rainfall. My 1,500 sq ft roof provides ample water for my 600 sq ft garden through multiple barrels and totes.
- Drip Irrigation: This is by far the most water-efficient method, delivering water directly to the plant’s root zone, minimizing evaporation and weed growth.
- Components: A typical drip system includes a pressure regulator (e.g., Rain Bird PRV-10, ~$15), a filter (Rain Bird RBY filter, ~$20), main tubing (1/2-inch poly tubing, 100ft ~$25), smaller feeder lines (1/4-inch tubing), and emitters (0.5 GPH or 1 GPH per plant).
- Kits: For beginners, a starter kit like the Rain Bird Drip Irrigation Garden Kit (model DDI-KIT-1P, ~$40-$60) is excellent for a small garden. For larger setups, I use Netafim Techline CV Drip Line (500ft roll, ~$150-$200), which has pressure-compensating emitters built-in, ensuring even watering across long runs.
- Automation: For true self-sufficiency, consider a battery-powered timer (e.g., Orbit B-Hyve Bluetooth Hose Faucet Timer, ~$50) or a solar-powered timer connected to a small 12V pump.
- Solar-Powered Pumps: For lifting water from a well, pond, or large storage tank to your garden, a solar pump is a game-changer. For a smaller drip system, a Shurflo 2088-594-152 Diaphragm Pump (12V, 3.5 GPM, ~$180) can be powered by a single 100W solar panel (e.g., Renogy 100W Monocrystalline Solar Panel, ~$100) and a small 12V battery (e.g., a 50Ah LiFePO4 battery like the Battle Born 50Ah, ~$450). For larger operations or deeper wells, more robust systems are needed. If you’re looking to build out a comprehensive off-grid power system to support your garden’s water needs, or indeed your entire homestead, you might want to explore resources like the Power Grid Generator complete system guide to understand the full scope of what’s possible in terms of energy independence.
Step 5: Seed Selection & Planting
The choice of seeds is crucial for a truly self sufficient garden from scratch.
- Choose Heirloom & Open-Pollinated Seeds: These varieties produce seeds that will grow true to type, meaning you can save seeds from your harvest year after year. F1 hybrids, while often vigorous, will not produce consistent offspring from saved seeds. Reputable seed companies include Baker Creek Heirloom Seeds, High Mowing Organic Seeds, and Seed Savers Exchange. Start with common, reliable varieties like ‘Black Krim’ tomatoes, ‘Provider’ bush beans, ‘Waltham Butternut’ squash, and ‘Black Seeded Simpson’ lettuce.
- Start Seeds Indoors (Optional but Recommended): For longer growing seasons or specific crops, starting seeds indoors gives you a head start. Use seed-starting mix (e.g., Espoma Organic Seed Starter Mix, ~$10 for 16qt bag) in seed trays (Jiffy Professional Greenhouse 72-cell kit, ~$15). Provide adequate light with LED grow lights (Barrina T5 2ft 4-pack LED Grow Lights, 20W each, ~$50) for 14-16 hours a day, positioned 2-4 inches above seedlings. Maintain consistent temperatures (65-75°F for most).
- Direct Sowing vs. Transplanting: Some crops (carrots, radishes, beans, corn) prefer direct sowing into the garden bed. Others (tomatoes, peppers, broccoli, kale) benefit from being started indoors and transplanted. Follow seed packet instructions for planting depths (e.g., lettuce seeds are often surface-sown or planted 1/8 inch deep, while beans are 1 inch deep) and spacing.
- Companion Planting: Strategically plant different species together to enhance growth, deter pests, and attract beneficial insects. For example, planting marigolds near tomatoes can deter nematodes, and basil improves tomato flavor. Nasturtiums can act as a trap crop for aphids.
- Succession Planting: For a continuous harvest, plant small batches of quick-growing crops (lettuce, radishes, cilantro) every 2-3 weeks. As one crop finishes, another is ready to take its place.
Step 6: Pest & Disease Management (Organic)
Maintaining a self sufficient garden from scratch means embracing organic pest and disease control.
- Integrated Pest Management (IPM): This holistic approach combines several strategies.
- Observation: Regularly inspect your plants for early signs of pests or disease. Catching issues early is key.
- Physical Barriers: Use row covers (e.g., Agribon AG-19 floating row cover, 10×20 ft, ~$20) to protect young plants from insect pests like cabbage worms and squash bugs. Install fences (e.g., 2×4 welded wire mesh, 4 ft tall, 50 ft roll ~$70) to keep out deer, rabbits, and other larger animals.
- Hand-Picking: For larger pests like tomato hornworms or squash bugs, simply pick them off and drop them into a bucket of soapy water.
- Companion Planting: As mentioned, certain plants repel pests. Marigolds, garlic, and onions are excellent deterrents.
- Attract Beneficial Insects: Plant flowers like dill, fennel, cosmos, and sweet alyssum to attract ladybugs, lacewings, and parasitic wasps, which prey on common garden pests.
- Organic Sprays & Treatments:
- Neem Oil: An excellent broad-spectrum organic insecticide and fungicide. Bonide Neem Oil Concentrate (16oz, ~$20) can be mixed at a rate of 1-2 tbsp per gallon of water and sprayed on affected plants.
- Insecticidal Soap: Effective against soft-bodied insects like aphids, whiteflies, and spider mites. Garden Safe Insecticidal Soap (24oz ready-to-use, ~$10).
- Bacillus thuringiensis (Bt): A naturally occurring soil bacterium that targets caterpillars and worms. Monterey BT Worm & Caterpillar Killer (16oz, ~$18) is highly effective and safe for beneficial insects.
- Copper or Sulfur Sprays: For fungal diseases like powdery mildew or blight, organic copper (e.g., Bonide Copper Fungicide, ~$15 for 1lb) or sulfur (e.g., Safer Brand Garden Fungicide, ~$10 for 16oz) can be used as a last resort.
Step 7: Harvesting & Seed Saving
The culmination of your efforts is the harvest, and seed saving closes the loop on self-sufficiency.
- Harvesting Techniques:
- Timing: Harvest vegetables at their peak ripeness for best flavor and nutritional value. For example, green beans should snap cleanly, cucumbers should be firm, and tomatoes should be fully colored.
- Frequency: Many crops, like zucchini, cucumbers, and bush beans, produce more if harvested frequently. Pick daily or every other day.
- Tools: Use clean, sharp pruners (e.g., Corona ClassicCUT Bypass Pruner BP 3180, ~$30) or a sharp knife for clean cuts, minimizing damage to the plant.
- Seed Saving: This is where the « self-sufficient » aspect truly shines.
- Selection: Only save seeds from your healthiest, most vigorous plants that show desired traits (disease resistance, good flavor, high yield).
- Isolation: To ensure true-to-type seeds, prevent cross-pollination. This can be challenging for open-pollinated crops that readily cross (e.g., squash, corn). For beginners, focus on self-pollinating plants like beans, peas, lettuce, and tomatoes.
- Processing:
- Dry Seeds (Beans, Peas, Lettuce, Grains): Allow pods/seed heads to dry completely on the plant. Harvest, shell, and clean the seeds, removing chaff.
- Wet Seeds (Tomatoes, Cucumbers, Squash): For tomatoes, ferment the seeds in water for a few days to remove the gel coating and inhibit disease. For cucumbers/squash, scrape out seeds, wash thoroughly, and dry.
- Drying: Spread seeds thinly on screens or paper plates in a cool, dry, well-ventilated area for 1-4 weeks. Ensure they are bone-dry before storage. I aim for less than 8% moisture content.
- Storage: Store seeds in airtight containers (glass jars with desiccant packets work well) in a cool, dark, dry place (ideally 40-50°F and 30-40% humidity). Label clearly with variety and date. Properly stored seeds can remain viable for 3-10 years or more.
Step 8: Season Extension & Winterizing
Extend your harvest and protect your garden for the off-season to truly maximize your self sufficient garden from scratch.
- Cold Frames: Simple structures with a transparent top (glass, polycarbonate, or old windows) that sit over garden beds. They trap solar heat, allowing you to grow cold-hardy crops (lettuce, spinach, kale, radishes) well into winter or start seeds earlier in spring. A basic cold frame can be built from 2×6 lumber and a sheet of polycarbonate for under $100.
- Hoop Houses/Low Tunnels: Larger structures made from flexible hoops (PVC pipe or EMT conduit) covered with greenhouse plastic. These provide more space and greater temperature moderation. A 10×20 ft DIY low tunnel kit can cost $200-$500, while a larger, more robust hoop house kit might be $1,000-$3,000. I use a 6×12 ft low tunnel made from 1/2-inch PVC hoops and 6mil greenhouse plastic, which extends my lettuce and spinach harvest by at least
Healthy soil is the bedrock of a productive, self-sufficient garden. You can’t guess what your soil needs; you have to test it.
- Perform a Soil Test: A professional soil test will give you precise data on your soil’s pH, nutrient levels (N-P-K), and organic matter content. I recommend sending a sample to your local agricultural extension office; it typically costs $20-$50 and provides detailed recommendations. Alternatively, for a quick homeowner check, a Rapitest Soil Test Kit (40-test kit, model 1663, ~$20 on Amazon) provides a good baseline for pH, Nitrogen, Phosphorus, and Potash. Aim for a pH between 6.0 and 7.0 for most vegetables.
- Amend for pH Imbalance: If your soil is too acidic (below 6.0), add agricultural lime (dolomitic lime adds magnesium, calcitic lime adds calcium). Apply 5-10 lbs per 100 sq ft for a moderate adjustment. If it’s too alkaline (above 7.0), add elemental sulfur (e.g., Espoma Soil Acidifier, ~$15 for 6.75 lbs) or generous amounts of organic matter like peat moss or pine needles.
- Build Organic Matter: This is the single most important step for long-term soil health. Organic matter improves soil structure, water retention, drainage, and nutrient availability. Incorporate 2-4 inches of high-quality compost into your top 6-12 inches of soil annually. I make my own compost from kitchen scraps, garden waste, and shredded leaves, but you can purchase it. Local nurseries often sell bulk compost for $30-$50 per cubic yard. Aged manure (from chickens, cows, or horses – ensure it’s well-rotted to avoid burning plants) is also excellent.
- Address Nutrient Deficiencies: Based on your soil test, add specific organic amendments. If Nitrogen (N) is low, add blood meal (12-0-0, ~$20 for 3 lbs) or feather meal. For Phosphorus (P), use bone meal (3-15-0, ~$15 for 3 lbs) or rock phosphate. For Potassium (K), greensand (0-0-2.5, ~$25 for 5 lbs) or kelp meal are good choices. I rely heavily on Espoma Organic Garden-tone (5-3-3, ~$25 for an 8lb bag) as a balanced, all-purpose organic fertilizer during planting.
Step 3: Garden Bed Preparation
Deciding between raised beds and in-ground beds depends on your soil, budget, and physical capabilities.
- In-Ground Beds: If you have excellent native soil and good drainage, in-ground beds are the most economical. Double-digging (loosening soil two shovel depths) can significantly improve drainage and aeration. For my main garden, I primarily use in-ground beds, but I focus on building up the soil over time with consistent compost additions and cover cropping. I aim for beds that are no wider than 3-4 feet so I can reach the center without stepping on the soil, compacting it.
- Raised Beds: Raised beds offer numerous advantages, especially for poor soil, heavy clay, or rocky areas. They provide better drainage, warm up faster in spring, reduce compaction, and make weeding and harvesting easier on your back.
- Material Options:
- Untreated Cedar: Naturally rot-resistant and chemical-free. A 4×8 ft bed, 12 inches deep, typically requires three 2x12x8 ft cedar boards, costing around $50-$60 per board (total ~$150-$180) plus corner brackets or screws. My first raised beds were cedar and are still going strong after 7 years.
- Galvanized Steel: Durable, long-lasting, and aesthetically pleasing. Brands like Vego Garden offer modular kits. A Vego Garden 17″ Tall 8-in-1 Metal Raised Garden Bed (can be configured to 4×8 ft) costs approximately $250-$300.
- Concrete Blocks/Stones: Very durable but can leach minerals (though generally safe once weathered) and can be expensive.
- Recycled Materials: Pallets (check for chemical treatment stamps like « HT » for heat-treated), old tires (controversial due to potential chemical leaching).
- Filling Raised Beds: Don’t just fill with topsoil. Use a « Hugelkultur » approach (logs, branches, leaves, then compost, then topsoil) or a mixture of 60% good quality topsoil, 30% compost, and 10% perlite or vermiculite for drainage. A 4x8x1 ft raised bed requires about 32 cubic feet (or ~1.2 cubic yards) of soil mix, which can cost $100-$200 depending on your source.
- Material Options:
Step 4: Water Management & Irrigation
Efficient water management is critical for a self sufficient garden from scratch, especially in off-grid living where water resources might be limited.
- Rainwater Harvesting: This is my primary source of irrigation water. A 55-gallon rain barrel (e.g., EarthMark Rain Barrel, ~$120-$150) connected to a downspout can collect significant water. For larger needs, I use two 275-gallon IBC totes (Intermediate Bulk Containers, often available used for $100-$200 each from food-grade sources) connected in series. A 1,000 sq ft roof can collect approximately 620 gallons of water for every inch of rainfall. My 1,500 sq ft roof provides ample water for my 600 sq ft garden through multiple barrels and totes.
- Drip Irrigation: This is by far the most water-efficient method, delivering water directly to the plant’s root zone, minimizing evaporation and weed growth.
- Components: A typical drip system includes a pressure regulator (e.g., Rain Bird PRV-10, ~$15), a filter (Rain Bird RBY filter, ~$20), main tubing (1/2-inch poly tubing, 100ft ~$25), smaller feeder lines (1/4-inch tubing), and emitters (0.5 GPH or 1 GPH per plant).
- Kits: For beginners, a starter kit like the Rain Bird Drip Irrigation Garden Kit (model DDI-KIT-1P, ~$40-$60) is excellent for a small garden. For larger setups, I use Netafim Techline CV Drip Line (500ft roll, ~$150-$200), which has pressure-compensating emitters built-in, ensuring even watering across long runs.
- Automation: For true self-sufficiency, consider a battery-powered timer (e.g., Orbit B-Hyve Bluetooth Hose Faucet Timer, ~$50) or a solar-powered timer connected to a small 12V pump.
- Solar-Powered Pumps: For lifting water from a well, pond, or large storage tank to your garden, a solar pump is a game-changer. For a smaller drip system, a Shurflo 2088-594-152 Diaphragm Pump (12V, 3.5 GPM, ~$180) can be powered by a single 100W solar panel (e.g., Renogy 100W Monocrystalline Solar Panel, ~$100) and a small 12V battery (e.g., a 50Ah LiFePO4 battery like the Battle Born 50Ah, ~$450). For larger operations or deeper wells, more robust systems are needed. If you’re looking to build out a comprehensive off-grid power system to support your garden’s water needs, or indeed your entire homestead, you might want to explore resources like the Power Grid Generator complete system guide to understand the full scope of what’s possible in terms of energy independence.
Step 5: Seed Selection & Planting
The choice of seeds is crucial for a truly self sufficient garden from scratch.
- Choose Heirloom & Open-Pollinated Seeds: These varieties produce seeds that will grow true to type, meaning you can save seeds from your harvest year after year. F1 hybrids, while often vigorous, will not produce consistent offspring from saved seeds. Reputable seed companies include Baker Creek Heirloom Seeds, High Mowing Organic Seeds, and Seed Savers Exchange. Start with common, reliable varieties like ‘Black Krim’ tomatoes, ‘Provider’ bush beans, ‘Waltham Butternut’ squash, and ‘Black Seeded Simpson’ lettuce.
- Start Seeds Indoors (Optional but Recommended): For longer growing seasons or specific crops, starting seeds indoors gives you a head start. Use seed-starting mix (e.g., Espoma Organic Seed Starter Mix, ~$10 for 16qt bag) in seed trays (Jiffy Professional Greenhouse 72-cell kit, ~$15). Provide adequate light with LED grow lights (Barrina T5 2ft 4-pack LED Grow Lights, 20W each, ~$50) for 14-16 hours a day, positioned 2-4 inches above seedlings. Maintain consistent temperatures (65-75°F for most).
- Direct Sowing vs. Transplanting: Some crops (carrots, radishes, beans, corn) prefer direct sowing into the garden bed. Others (tomatoes, peppers, broccoli, kale) benefit from being started indoors and transplanted. Follow seed packet instructions for planting depths (e.g., lettuce seeds are often surface-sown or planted 1/8 inch deep, while beans are 1 inch deep) and spacing.
- Companion Planting: Strategically plant different species together to enhance growth, deter pests, and attract beneficial insects. For example, planting marigolds near tomatoes can deter nematodes, and basil improves tomato flavor. Nasturtiums can act as a trap crop for aphids.
- Succession Planting: For a continuous harvest, plant small batches of quick-growing crops (lettuce, radishes, cilantro) every 2-3 weeks. As one crop finishes, another is ready to take its place.
Step 6: Pest & Disease Management (Organic)
Maintaining a self sufficient garden from scratch means embracing organic pest and disease control.
- Integrated Pest Management (IPM): This holistic approach combines several strategies.
- Observation: Regularly inspect your plants for early signs of pests or disease. Catching issues early is key.
- Physical Barriers: Use row covers (e.g., Agribon AG-19 floating row cover, 10×20 ft, ~$20) to protect young plants from insect pests like cabbage worms and squash bugs. Install fences (e.g., 2×4 welded wire mesh, 4 ft tall, 50 ft roll ~$70) to keep out deer, rabbits, and other larger animals.
- Hand-Picking: For larger pests like tomato hornworms or squash bugs, simply pick them off and drop them into a bucket of soapy water.
- Companion Planting: As mentioned, certain plants repel pests. Marigolds, garlic, and onions are excellent deterrents.
- Attract Beneficial Insects: Plant flowers like dill, fennel, cosmos, and sweet alyssum to attract ladybugs, lacewings, and parasitic wasps, which prey on common garden pests.
- Organic Sprays & Treatments:
- Neem Oil: An excellent broad-spectrum organic insecticide and fungicide. Bonide Neem Oil Concentrate (16oz, ~$20) can be mixed at a rate of 1-2 tbsp per gallon of water and sprayed on affected plants.
- Insecticidal Soap: Effective against soft-bodied insects like aphids, whiteflies, and spider mites. Garden Safe Insecticidal Soap (24oz ready-to-use, ~$10).
- Bacillus thuringiensis (Bt): A naturally occurring soil bacterium that targets caterpillars and worms. Monterey BT Worm & Caterpillar Killer (16oz, ~$18) is highly effective and safe for beneficial insects.
- Copper or Sulfur Sprays: For fungal diseases like powdery mildew or blight, organic copper (e.g., Bonide Copper Fungicide, ~$15 for 1lb) or sulfur (e.g., Safer Brand Garden Fungicide, ~$10 for 16oz) can be used as a last resort.
Step 7: Harvesting & Seed Saving
The culmination of your efforts is the harvest, and seed saving closes the loop on self-sufficiency.
- Harvesting Techniques:
- Timing: Harvest vegetables at their peak ripeness for best flavor and nutritional value. For example, green beans should snap cleanly, cucumbers should be firm, and tomatoes should be fully colored.
- Frequency: Many crops, like zucchini, cucumbers, and bush beans, produce more if harvested frequently. Pick daily or every other day.
- Tools: Use clean, sharp pruners (e.g., Corona ClassicCUT Bypass Pruner BP 3180, ~$30) or a sharp knife for clean cuts, minimizing damage to the plant.
- Seed Saving: This is where the « self-sufficient » aspect truly shines.
- Selection: Only save seeds from your healthiest, most vigorous plants that show desired traits (disease resistance, good flavor, high yield).
- Isolation: To ensure true-to-type seeds, prevent cross-pollination. This can be challenging for open-pollinated crops that readily cross (e.g., squash, corn). For beginners, focus on self-pollinating plants like beans, peas, lettuce, and tomatoes.
- Processing:
- Dry Seeds (Beans, Peas, Lettuce, Grains): Allow pods/seed heads to dry completely on the plant. Harvest, shell, and clean the seeds, removing chaff.
- Wet Seeds (Tomatoes, Cucumbers, Squash): For tomatoes, ferment the seeds in water for a few days to remove the gel coating and inhibit disease. For cucumbers/squash, scrape out seeds, wash thoroughly, and dry.
- Drying: Spread seeds thinly on screens or paper plates in a cool, dry, well-ventilated area for 1-4 weeks. Ensure they are bone-dry before storage. I aim for less than 8% moisture content.
- Storage: Store seeds in airtight containers (glass jars with desiccant packets work well) in a cool, dark, dry place (ideally 40-50°F and 30-40% humidity). Label clearly with variety and date. Properly stored seeds can remain viable for 3-10 years or more.
Step 8: Season Extension & Winterizing
Extend your harvest and protect your garden for the off-season to truly maximize your self sufficient garden from scratch.
- Cold Frames: Simple structures with a transparent top (glass, polycarbonate, or old windows) that sit over garden beds. They trap solar heat, allowing you to grow cold-hardy crops (lettuce, spinach, kale, radishes) well into winter or start seeds earlier in spring. A basic cold frame can be built from 2×6 lumber and a sheet of polycarbonate for under $100.
- Hoop Houses/Low Tunnels: Larger structures made from flexible hoops (PVC pipe or EMT conduit) covered with greenhouse plastic. These provide more space and greater temperature moderation. A 10×20 ft DIY low tunnel kit can cost $200-$500, while a larger, more robust hoop house kit might be $1,000-$3,000. I use a 6×12 ft low tunnel made from 1/2-inch PVC hoops and 6mil greenhouse plastic, which extends my lettuce and spinach harvest by at least
- In-Ground Beds: If you have excellent native soil and good drainage, in-ground beds are the most economical. Double-digging (loosening soil two shovel depths) can significantly improve drainage and aeration. For my main garden, I primarily use in-ground beds, but I focus on building up the soil over time with consistent compost additions and cover cropping. I aim for beds that are no wider than 3-4 feet so I can reach the center without stepping on the soil, compacting it.
- Raised Beds: Raised beds offer numerous advantages, especially for poor soil, heavy clay, or rocky areas. They provide better drainage, warm up faster in spring, reduce compaction, and make weeding and harvesting easier on your back.
- Material Options:
- Untreated Cedar: Naturally rot-resistant and chemical-free. A 4×8 ft bed, 12 inches deep, typically requires three 2x12x8 ft cedar boards, costing around $50-$60 per board (total ~$150-$180) plus corner brackets or screws. My first raised beds were cedar and are still going strong after 7 years.
- Galvanized Steel: Durable, long-lasting, and aesthetically pleasing. Brands like Vego Garden offer modular kits. A Vego Garden 17″ Tall 8-in-1 Metal Raised Garden Bed (can be configured to 4×8 ft) costs approximately $250-$300.
- Concrete Blocks/Stones: Very durable but can leach minerals (though generally safe once weathered) and can be expensive.
- Recycled Materials: Pallets (check for chemical treatment stamps like « HT » for heat-treated), old tires (controversial due to potential chemical leaching).
- Filling Raised Beds: Don’t just fill with topsoil. Use a « Hugelkultur » approach (logs, branches, leaves, then compost, then topsoil) or a mixture of 60% good quality topsoil, 30% compost, and 10% perlite or vermiculite for drainage. A 4x8x1 ft raised bed requires about 32 cubic feet (or ~1.2 cubic yards) of soil mix, which can cost $100-$200 depending on your source.
- Material Options:
Step 4: Water Management & Irrigation
Efficient water management is critical for a self sufficient garden from scratch, especially in off-grid living where water resources might be limited.
- Rainwater Harvesting: This is my primary source of irrigation water. A 55-gallon rain barrel (e.g., EarthMark Rain Barrel, ~$120-$150) connected to a downspout can collect significant water. For larger needs, I use two 275-gallon IBC totes (Intermediate Bulk Containers, often available used for $100-$200 each from food-grade sources) connected in series. A 1,000 sq ft roof can collect approximately 620 gallons of water for every inch of rainfall. My 1,500 sq ft roof provides ample water for my 600 sq ft garden through multiple barrels and totes.
- Drip Irrigation: This is by far the most water-efficient method, delivering water directly to the plant’s root zone, minimizing evaporation and weed growth.
- Components: A typical drip system includes a pressure regulator (e.g., Rain Bird PRV-10, ~$15), a filter (Rain Bird RBY filter, ~$20), main tubing (1/2-inch poly tubing, 100ft ~$25), smaller feeder lines (1/4-inch tubing), and emitters (0.5 GPH or 1 GPH per plant).
- Kits: For beginners, a starter kit like the Rain Bird Drip Irrigation Garden Kit (model DDI-KIT-1P, ~$40-$60) is excellent for a small garden. For larger setups, I use Netafim Techline CV Drip Line (500ft roll, ~$150-$200), which has pressure-compensating emitters built-in, ensuring even watering across long runs.
- Automation: For true self-sufficiency, consider a battery-powered timer (e.g., Orbit B-Hyve Bluetooth Hose Faucet Timer, ~$50) or a solar-powered timer connected to a small 12V pump.
- Solar-Powered Pumps: For lifting water from a well, pond, or large storage tank to your garden, a solar pump is a game-changer. For a smaller drip system, a Shurflo 2088-594-152 Diaphragm Pump (12V, 3.5 GPM, ~$180) can be powered by a single 100W solar panel (e.g., Renogy 100W Monocrystalline Solar Panel, ~$100) and a small 12V battery (e.g., a 50Ah LiFePO4 battery like the Battle Born 50Ah, ~$450). For larger operations or deeper wells, more robust systems are needed. If you’re looking to build out a comprehensive off-grid power system to support your garden’s water needs, or indeed your entire homestead, you might want to explore resources like the Power Grid Generator complete system guide to understand the full scope of what’s possible in terms of energy independence.
Step 5: Seed Selection & Planting
The choice of seeds is crucial for a truly self sufficient garden from scratch.
- Choose Heirloom & Open-Pollinated Seeds: These varieties produce seeds that will grow true to type, meaning you can save seeds from your harvest year after year. F1 hybrids, while often vigorous, will not produce consistent offspring from saved seeds. Reputable seed companies include Baker Creek Heirloom Seeds, High Mowing Organic Seeds, and Seed Savers Exchange. Start with common, reliable varieties like ‘Black Krim’ tomatoes, ‘Provider’ bush beans, ‘Waltham Butternut’ squash, and ‘Black Seeded Simpson’ lettuce.
- Start Seeds Indoors (Optional but Recommended): For longer growing seasons or specific crops, starting seeds indoors gives you a head start. Use seed-starting mix (e.g., Espoma Organic Seed Starter Mix, ~$10 for 16qt bag) in seed trays (Jiffy Professional Greenhouse 72-cell kit, ~$15). Provide adequate light with LED grow lights (Barrina T5 2ft 4-pack LED Grow Lights, 20W each, ~$50) for 14-16 hours a day, positioned 2-4 inches above seedlings. Maintain consistent temperatures (65-75°F for most).
- Direct Sowing vs. Transplanting: Some crops (carrots, radishes, beans, corn) prefer direct sowing into the garden bed. Others (tomatoes, peppers, broccoli, kale) benefit from being started indoors and transplanted. Follow seed packet instructions for planting depths (e.g., lettuce seeds are often surface-sown or planted 1/8 inch deep, while beans are 1 inch deep) and spacing.
- Companion Planting: Strategically plant different species together to enhance growth, deter pests, and attract beneficial insects. For example, planting marigolds near tomatoes can deter nematodes, and basil improves tomato flavor. Nasturtiums can act as a trap crop for aphids.
- Succession Planting: For a continuous harvest, plant small batches of quick-growing crops (lettuce, radishes, cilantro) every 2-3 weeks. As one crop finishes, another is ready to take its place.
Step 6: Pest & Disease Management (Organic)
Maintaining a self sufficient garden from scratch means embracing organic pest and disease control.
- Integrated Pest Management (IPM): This holistic approach combines several strategies.
- Observation: Regularly inspect your plants for early signs of pests or disease. Catching issues early is key.
- Physical Barriers: Use row covers (e.g., Agribon AG-19 floating row cover, 10×20 ft, ~$20) to protect young plants from insect pests like cabbage worms and squash bugs. Install fences (e.g., 2×4 welded wire mesh, 4 ft tall, 50 ft roll ~$70) to keep out deer, rabbits, and other larger animals.
- Hand-Picking: For larger pests like tomato hornworms or squash bugs, simply pick them off and drop them into a bucket of soapy water.
- Companion Planting: As mentioned, certain plants repel pests. Marigolds, garlic, and onions are excellent deterrents.
- Attract Beneficial Insects: Plant flowers like dill, fennel, cosmos, and sweet alyssum to attract ladybugs, lacewings, and parasitic wasps, which prey on common garden pests.
- Organic Sprays & Treatments:
- Neem Oil: An excellent broad-spectrum organic insecticide and fungicide. Bonide Neem Oil Concentrate (16oz, ~$20) can be mixed at a rate of 1-2 tbsp per gallon of water and sprayed on affected plants.
- Insecticidal Soap: Effective against soft-bodied insects like aphids, whiteflies, and spider mites. Garden Safe Insecticidal Soap (24oz ready-to-use, ~$10).
- Bacillus thuringiensis (Bt): A naturally occurring soil bacterium that targets caterpillars and worms. Monterey BT Worm & Caterpillar Killer (16oz, ~$18) is highly effective and safe for beneficial insects.
- Copper or Sulfur Sprays: For fungal diseases like powdery mildew or blight, organic copper (e.g., Bonide Copper Fungicide, ~$15 for 1lb) or sulfur (e.g., Safer Brand Garden Fungicide, ~$10 for 16oz) can be used as a last resort.
Step 7: Harvesting & Seed Saving
The culmination of your efforts is the harvest, and seed saving closes the loop on self-sufficiency.
- Harvesting Techniques:
- Timing: Harvest vegetables at their peak ripeness for best flavor and nutritional value. For example, green beans should snap cleanly, cucumbers should be firm, and tomatoes should be fully colored.
- Frequency: Many crops, like zucchini, cucumbers, and bush beans, produce more if harvested frequently. Pick daily or every other day.
- Tools: Use clean, sharp pruners (e.g., Corona ClassicCUT Bypass Pruner BP 3180, ~$30) or a sharp knife for clean cuts, minimizing damage to the plant.
- Seed Saving: This is where the « self-sufficient » aspect truly shines.
- Selection: Only save seeds from your healthiest, most vigorous plants that show desired traits (disease resistance, good flavor, high yield).
- Isolation: To ensure true-to-type seeds, prevent cross-pollination. This can be challenging for open-pollinated crops that readily cross (e.g., squash, corn). For beginners, focus on self-pollinating plants like beans, peas, lettuce, and tomatoes.
- Processing:
- Dry Seeds (Beans, Peas, Lettuce, Grains): Allow pods/seed heads to dry completely on the plant. Harvest, shell, and clean the seeds, removing chaff.
- Wet Seeds (Tomatoes, Cucumbers, Squash): For tomatoes, ferment the seeds in water for a few days to remove the gel coating and inhibit disease. For cucumbers/squash, scrape out seeds, wash thoroughly, and dry.
- Drying: Spread seeds thinly on screens or paper plates in a cool, dry, well-ventilated area for 1-4 weeks. Ensure they are bone-dry before storage. I aim for less than 8% moisture content.
- Storage: Store seeds in airtight containers (glass jars with desiccant packets work well) in a cool, dark, dry place (ideally 40-50°F and 30-40% humidity). Label clearly with variety and date. Properly stored seeds can remain viable for 3-10 years or more.
Step 8: Season Extension & Winterizing
Extend your harvest and protect your garden for the off-season to truly maximize your self sufficient garden from scratch.
- Cold Frames: Simple structures with a transparent top (glass, polycarbonate, or old windows) that sit over garden beds. They trap solar heat, allowing you to grow cold-hardy crops (lettuce, spinach, kale, radishes) well into winter or start seeds earlier in spring. A basic cold frame can be built from 2×6 lumber and a sheet of polycarbonate for under $100.
- Hoop Houses/Low Tunnels: Larger structures made from flexible hoops (PVC pipe or EMT conduit) covered with greenhouse plastic. These provide more space and greater temperature moderation. A 10×20 ft DIY low tunnel kit can cost $200-$500, while a larger, more robust hoop house kit might be $1,000-$3,000. I use a 6×12 ft low tunnel made from 1/2-inch PVC hoops and 6mil greenhouse plastic, which extends my lettuce and spinach harvest by at least
Deciding between raised beds and in-ground beds depends on your soil, budget, and physical capabilities.
- In-Ground Beds: If you have excellent native soil and good drainage, in-ground beds are the most economical. Double-digging (loosening soil two shovel depths) can significantly improve drainage and aeration. For my main garden, I primarily use in-ground beds, but I focus on building up the soil over time with consistent compost additions and cover cropping. I aim for beds that are no wider than 3-4 feet so I can reach the center without stepping on the soil, compacting it.
- Raised Beds: Raised beds offer numerous advantages, especially for poor soil, heavy clay, or rocky areas. They provide better drainage, warm up faster in spring, reduce compaction, and make weeding and harvesting easier on your back.
- Material Options:
- Untreated Cedar: Naturally rot-resistant and chemical-free. A 4×8 ft bed, 12 inches deep, typically requires three 2x12x8 ft cedar boards, costing around $50-$60 per board (total ~$150-$180) plus corner brackets or screws. My first raised beds were cedar and are still going strong after 7 years.
- Galvanized Steel: Durable, long-lasting, and aesthetically pleasing. Brands like Vego Garden offer modular kits. A Vego Garden 17″ Tall 8-in-1 Metal Raised Garden Bed (can be configured to 4×8 ft) costs approximately $250-$300.
- Concrete Blocks/Stones: Very durable but can leach minerals (though generally safe once weathered) and can be expensive.
- Recycled Materials: Pallets (check for chemical treatment stamps like « HT » for heat-treated), old tires (controversial due to potential chemical leaching).
- Filling Raised Beds: Don’t just fill with topsoil. Use a « Hugelkultur » approach (logs, branches, leaves, then compost, then topsoil) or a mixture of 60% good quality topsoil, 30% compost, and 10% perlite or vermiculite for drainage. A 4x8x1 ft raised bed requires about 32 cubic feet (or ~1.2 cubic yards) of soil mix, which can cost $100-$200 depending on your source.
- Material Options:
Step 4: Water Management & Irrigation
Efficient water management is critical for a self sufficient garden from scratch, especially in off-grid living where water resources might be limited.
- Rainwater Harvesting: This is my primary source of irrigation water. A 55-gallon rain barrel (e.g., EarthMark Rain Barrel, ~$120-$150) connected to a downspout can collect significant water. For larger needs, I use two 275-gallon IBC totes (Intermediate Bulk Containers, often available used for $100-$200 each from food-grade sources) connected in series. A 1,000 sq ft roof can collect approximately 620 gallons of water for every inch of rainfall. My 1,500 sq ft roof provides ample water for my 600 sq ft garden through multiple barrels and totes.
- Drip Irrigation: This is by far the most water-efficient method, delivering water directly to the plant’s root zone, minimizing evaporation and weed growth.
- Components: A typical drip system includes a pressure regulator (e.g., Rain Bird PRV-10, ~$15), a filter (Rain Bird RBY filter, ~$20), main tubing (1/2-inch poly tubing, 100ft ~$25), smaller feeder lines (1/4-inch tubing), and emitters (0.5 GPH or 1 GPH per plant).
- Kits: For beginners, a starter kit like the Rain Bird Drip Irrigation Garden Kit (model DDI-KIT-1P, ~$40-$60) is excellent for a small garden. For larger setups, I use Netafim Techline CV Drip Line (500ft roll, ~$150-$200), which has pressure-compensating emitters built-in, ensuring even watering across long runs.
- Automation: For true self-sufficiency, consider a battery-powered timer (e.g., Orbit B-Hyve Bluetooth Hose Faucet Timer, ~$50) or a solar-powered timer connected to a small 12V pump.
- Solar-Powered Pumps: For lifting water from a well, pond, or large storage tank to your garden, a solar pump is a game-changer. For a smaller drip system, a Shurflo 2088-594-152 Diaphragm Pump (12V, 3.5 GPM, ~$180) can be powered by a single 100W solar panel (e.g., Renogy 100W Monocrystalline Solar Panel, ~$100) and a small 12V battery (e.g., a 50Ah LiFePO4 battery like the Battle Born 50Ah, ~$450). For larger operations or deeper wells, more robust systems are needed. If you’re looking to build out a comprehensive off-grid power system to support your garden’s water needs, or indeed your entire homestead, you might want to explore resources like the Power Grid Generator complete system guide to understand the full scope of what’s possible in terms of energy independence.
Step 5: Seed Selection & Planting
The choice of seeds is crucial for a truly self sufficient garden from scratch.
- Choose Heirloom & Open-Pollinated Seeds: These varieties produce seeds that will grow true to type, meaning you can save seeds from your harvest year after year. F1 hybrids, while often vigorous, will not produce consistent offspring from saved seeds. Reputable seed companies include Baker Creek Heirloom Seeds, High Mowing Organic Seeds, and Seed Savers Exchange. Start with common, reliable varieties like ‘Black Krim’ tomatoes, ‘Provider’ bush beans, ‘Waltham Butternut’ squash, and ‘Black Seeded Simpson’ lettuce.
- Start Seeds Indoors (Optional but Recommended): For longer growing seasons or specific crops, starting seeds indoors gives you a head start. Use seed-starting mix (e.g., Espoma Organic Seed Starter Mix, ~$10 for 16qt bag) in seed trays (Jiffy Professional Greenhouse 72-cell kit, ~$15). Provide adequate light with LED grow lights (Barrina T5 2ft 4-pack LED Grow Lights, 20W each, ~$50) for 14-16 hours a day, positioned 2-4 inches above seedlings. Maintain consistent temperatures (65-75°F for most).
- Direct Sowing vs. Transplanting: Some crops (carrots, radishes, beans, corn) prefer direct sowing into the garden bed. Others (tomatoes, peppers, broccoli, kale) benefit from being started indoors and transplanted. Follow seed packet instructions for planting depths (e.g., lettuce seeds are often surface-sown or planted 1/8 inch deep, while beans are 1 inch deep) and spacing.
- Companion Planting: Strategically plant different species together to enhance growth, deter pests, and attract beneficial insects. For example, planting marigolds near tomatoes can deter nematodes, and basil improves tomato flavor. Nasturtiums can act as a trap crop for aphids.
- Succession Planting: For a continuous harvest, plant small batches of quick-growing crops (lettuce, radishes, cilantro) every 2-3 weeks. As one crop finishes, another is ready to take its place.
Step 6: Pest & Disease Management (Organic)
Maintaining a self sufficient garden from scratch means embracing organic pest and disease control.
- Integrated Pest Management (IPM): This holistic approach combines several strategies.
- Observation: Regularly inspect your plants for early signs of pests or disease. Catching issues early is key.
- Physical Barriers: Use row covers (e.g., Agribon AG-19 floating row cover, 10×20 ft, ~$20) to protect young plants from insect pests like cabbage worms and squash bugs. Install fences (e.g., 2×4 welded wire mesh, 4 ft tall, 50 ft roll ~$70) to keep out deer, rabbits, and other larger animals.
- Hand-Picking: For larger pests like tomato hornworms or squash bugs, simply pick them off and drop them into a bucket of soapy water.
- Companion Planting: As mentioned, certain plants repel pests. Marigolds, garlic, and onions are excellent deterrents.
- Attract Beneficial Insects: Plant flowers like dill, fennel, cosmos, and sweet alyssum to attract ladybugs, lacewings, and parasitic wasps, which prey on common garden pests.
- Organic Sprays & Treatments:
- Neem Oil: An excellent broad-spectrum organic insecticide and fungicide. Bonide Neem Oil Concentrate (16oz, ~$20) can be mixed at a rate of 1-2 tbsp per gallon of water and sprayed on affected plants.
- Insecticidal Soap: Effective against soft-bodied insects like aphids, whiteflies, and spider mites. Garden Safe Insecticidal Soap (24oz ready-to-use, ~$10).
- Bacillus thuringiensis (Bt): A naturally occurring soil bacterium that targets caterpillars and worms. Monterey BT Worm & Caterpillar Killer (16oz, ~$18) is highly effective and safe for beneficial insects.
- Copper or Sulfur Sprays: For fungal diseases like powdery mildew or blight, organic copper (e.g., Bonide Copper Fungicide, ~$15 for 1lb) or sulfur (e.g., Safer Brand Garden Fungicide, ~$10 for 16oz) can be used as a last resort.
Step 7: Harvesting & Seed Saving
The culmination of your efforts is the harvest, and seed saving closes the loop on self-sufficiency.
- Harvesting Techniques:
- Timing: Harvest vegetables at their peak ripeness for best flavor and nutritional value. For example, green beans should snap cleanly, cucumbers should be firm, and tomatoes should be fully colored.
- Frequency: Many crops, like zucchini, cucumbers, and bush beans, produce more if harvested frequently. Pick daily or every other day.
- Tools: Use clean, sharp pruners (e.g., Corona ClassicCUT Bypass Pruner BP 3180, ~$30) or a sharp knife for clean cuts, minimizing damage to the plant.
- Seed Saving: This is where the « self-sufficient » aspect truly shines.
- Selection: Only save seeds from your healthiest, most vigorous plants that show desired traits (disease resistance, good flavor, high yield).
- Isolation: To ensure true-to-type seeds, prevent cross-pollination. This can be challenging for open-pollinated crops that readily cross (e.g., squash, corn). For beginners, focus on self-pollinating plants like beans, peas, lettuce, and tomatoes.
- Processing:
- Dry Seeds (Beans, Peas, Lettuce, Grains): Allow pods/seed heads to dry completely on the plant. Harvest, shell, and clean the seeds, removing chaff.
- Wet Seeds (Tomatoes, Cucumbers, Squash): For tomatoes, ferment the seeds in water for a few days to remove the gel coating and inhibit disease. For cucumbers/squash, scrape out seeds, wash thoroughly, and dry.
- Drying: Spread seeds thinly on screens or paper plates in a cool, dry, well-ventilated area for 1-4 weeks. Ensure they are bone-dry before storage. I aim for less than 8% moisture content.
- Storage: Store seeds in airtight containers (glass jars with desiccant packets work well) in a cool, dark, dry place (ideally 40-50°F and 30-40% humidity). Label clearly with variety and date. Properly stored seeds can remain viable for 3-10 years or more.
Step 8: Season Extension & Winterizing
Extend your harvest and protect your garden for the off-season to truly maximize your self sufficient garden from scratch.
- Cold Frames: Simple structures with a transparent top (glass, polycarbonate, or old windows) that sit over garden beds. They trap solar heat, allowing you to grow cold-hardy crops (lettuce, spinach, kale, radishes) well into winter or start seeds earlier in spring. A basic cold frame can be built from 2×6 lumber and a sheet of polycarbonate for under $100.
- Hoop Houses/Low Tunnels: Larger structures made from flexible hoops (PVC pipe or EMT conduit) covered with greenhouse plastic. These provide more space and greater temperature moderation. A 10×20 ft DIY low tunnel kit can cost $200-$500, while a larger, more robust hoop house kit might be $1,000-$3,000. I use a 6×12 ft low tunnel made from 1/2-inch PVC hoops and 6mil greenhouse plastic, which extends my lettuce and spinach harvest by at least
Healthy soil is the bedrock of a productive, self-sufficient garden. You can’t guess what your soil needs; you have to test it.
- Perform a Soil Test: A professional soil test will give you precise data on your soil’s pH, nutrient levels (N-P-K), and organic matter content. I recommend sending a sample to your local agricultural extension office; it typically costs $20-$50 and provides detailed recommendations. Alternatively, for a quick homeowner check, a Rapitest Soil Test Kit (40-test kit, model 1663, ~$20 on Amazon) provides a good baseline for pH, Nitrogen, Phosphorus, and Potash. Aim for a pH between 6.0 and 7.0 for most vegetables.
- Amend for pH Imbalance: If your soil is too acidic (below 6.0), add agricultural lime (dolomitic lime adds magnesium, calcitic lime adds calcium). Apply 5-10 lbs per 100 sq ft for a moderate adjustment. If it’s too alkaline (above 7.0), add elemental sulfur (e.g., Espoma Soil Acidifier, ~$15 for 6.75 lbs) or generous amounts of organic matter like peat moss or pine needles.
- Build Organic Matter: This is the single most important step for long-term soil health. Organic matter improves soil structure, water retention, drainage, and nutrient availability. Incorporate 2-4 inches of high-quality compost into your top 6-12 inches of soil annually. I make my own compost from kitchen scraps, garden waste, and shredded leaves, but you can purchase it. Local nurseries often sell bulk compost for $30-$50 per cubic yard. Aged manure (from chickens, cows, or horses – ensure it’s well-rotted to avoid burning plants) is also excellent.
- Address Nutrient Deficiencies: Based on your soil test, add specific organic amendments. If Nitrogen (N) is low, add blood meal (12-0-0, ~$20 for 3 lbs) or feather meal. For Phosphorus (P), use bone meal (3-15-0, ~$15 for 3 lbs) or rock phosphate. For Potassium (K), greensand (0-0-2.5, ~$25 for 5 lbs) or kelp meal are good choices. I rely heavily on Espoma Organic Garden-tone (5-3-3, ~$25 for an 8lb bag) as a balanced, all-purpose organic fertilizer during planting.
Step 3: Garden Bed Preparation
Deciding between raised beds and in-ground beds depends on your soil, budget, and physical capabilities.
- In-Ground Beds: If you have excellent native soil and good drainage, in-ground beds are the most economical. Double-digging (loosening soil two shovel depths) can significantly improve drainage and aeration. For my main garden, I primarily use in-ground beds, but I focus on building up the soil over time with consistent compost additions and cover cropping. I aim for beds that are no wider than 3-4 feet so I can reach the center without stepping on the soil, compacting it.
- Raised Beds: Raised beds offer numerous advantages, especially for poor soil, heavy clay, or rocky areas. They provide better drainage, warm up faster in spring, reduce compaction, and make weeding and harvesting easier on your back.
- Material Options:
- Untreated Cedar: Naturally rot-resistant and chemical-free. A 4×8 ft bed, 12 inches deep, typically requires three 2x12x8 ft cedar boards, costing around $50-$60 per board (total ~$150-$180) plus corner brackets or screws. My first raised beds were cedar and are still going strong after 7 years.
- Galvanized Steel: Durable, long-lasting, and aesthetically pleasing. Brands like Vego Garden offer modular kits. A Vego Garden 17″ Tall 8-in-1 Metal Raised Garden Bed (can be configured to 4×8 ft) costs approximately $250-$300.
- Concrete Blocks/Stones: Very durable but can leach minerals (though generally safe once weathered) and can be expensive.
- Recycled Materials: Pallets (check for chemical treatment stamps like « HT » for heat-treated), old tires (controversial due to potential chemical leaching).
- Filling Raised Beds: Don’t just fill with topsoil. Use a « Hugelkultur » approach (logs, branches, leaves, then compost, then topsoil) or a mixture of 60% good quality topsoil, 30% compost, and 10% perlite or vermiculite for drainage. A 4x8x1 ft raised bed requires about 32 cubic feet (or ~1.2 cubic yards) of soil mix, which can cost $100-$200 depending on your source.
- Material Options:
Step 4: Water Management & Irrigation
Efficient water management is critical for a self sufficient garden from scratch, especially in off-grid living where water resources might be limited.
- Rainwater Harvesting: This is my primary source of irrigation water. A 55-gallon rain barrel (e.g., EarthMark Rain Barrel, ~$120-$150) connected to a downspout can collect significant water. For larger needs, I use two 275-gallon IBC totes (Intermediate Bulk Containers, often available used for $100-$200 each from food-grade sources) connected in series. A 1,000 sq ft roof can collect approximately 620 gallons of water for every inch of rainfall. My 1,500 sq ft roof provides ample water for my 600 sq ft garden through multiple barrels and totes.
- Drip Irrigation: This is by far the most water-efficient method, delivering water directly to the plant’s root zone, minimizing evaporation and weed growth.
- Components: A typical drip system includes a pressure regulator (e.g., Rain Bird PRV-10, ~$15), a filter (Rain Bird RBY filter, ~$20), main tubing (1/2-inch poly tubing, 100ft ~$25), smaller feeder lines (1/4-inch tubing), and emitters (0.5 GPH or 1 GPH per plant).
- Kits: For beginners, a starter kit like the Rain Bird Drip Irrigation Garden Kit (model DDI-KIT-1P, ~$40-$60) is excellent for a small garden. For larger setups, I use Netafim Techline CV Drip Line (500ft roll, ~$150-$200), which has pressure-compensating emitters built-in, ensuring even watering across long runs.
- Automation: For true self-sufficiency, consider a battery-powered timer (e.g., Orbit B-Hyve Bluetooth Hose Faucet Timer, ~$50) or a solar-powered timer connected to a small 12V pump.
- Solar-Powered Pumps: For lifting water from a well, pond, or large storage tank to your garden, a solar pump is a game-changer. For a smaller drip system, a Shurflo 2088-594-152 Diaphragm Pump (12V, 3.5 GPM, ~$180) can be powered by a single 100W solar panel (e.g., Renogy 100W Monocrystalline Solar Panel, ~$100) and a small 12V battery (e.g., a 50Ah LiFePO4 battery like the Battle Born 50Ah, ~$450). For larger operations or deeper wells, more robust systems are needed. If you’re looking to build out a comprehensive off-grid power system to support your garden’s water needs, or indeed your entire homestead, you might want to explore resources like the Power Grid Generator complete system guide to understand the full scope of what’s possible in terms of energy independence.
Step 5: Seed Selection & Planting
The choice of seeds is crucial for a truly self sufficient garden from scratch.
- Choose Heirloom & Open-Pollinated Seeds: These varieties produce seeds that will grow true to type, meaning you can save seeds from your harvest year after year. F1 hybrids, while often vigorous, will not produce consistent offspring from saved seeds. Reputable seed companies include Baker Creek Heirloom Seeds, High Mowing Organic Seeds, and Seed Savers Exchange. Start with common, reliable varieties like ‘Black Krim’ tomatoes, ‘Provider’ bush beans, ‘Waltham Butternut’ squash, and ‘Black Seeded Simpson’ lettuce.
- Start Seeds Indoors (Optional but Recommended): For longer growing seasons or specific crops, starting seeds indoors gives you a head start. Use seed-starting mix (e.g., Espoma Organic Seed Starter Mix, ~$10 for 16qt bag) in seed trays (Jiffy Professional Greenhouse 72-cell kit, ~$15). Provide adequate light with LED grow lights (Barrina T5 2ft 4-pack LED Grow Lights, 20W each, ~$50) for 14-16 hours a day, positioned 2-4 inches above seedlings. Maintain consistent temperatures (65-75°F for most).
- Direct Sowing vs. Transplanting: Some crops (carrots, radishes, beans, corn) prefer direct sowing into the garden bed. Others (tomatoes, peppers, broccoli, kale) benefit from being started indoors and transplanted. Follow seed packet instructions for planting depths (e.g., lettuce seeds are often surface-sown or planted 1/8 inch deep, while beans are 1 inch deep) and spacing.
- Companion Planting: Strategically plant different species together to enhance growth, deter pests, and attract beneficial insects. For example, planting marigolds near tomatoes can deter nematodes, and basil improves tomato flavor. Nasturtiums can act as a trap crop for aphids.
- Succession Planting: For a continuous harvest, plant small batches of quick-growing crops (lettuce, radishes, cilantro) every 2-3 weeks. As one crop finishes, another is ready to take its place.
Step 6: Pest & Disease Management (Organic)
Maintaining a self sufficient garden from scratch means embracing organic pest and disease control.
- Integrated Pest Management (IPM): This holistic approach combines several strategies.
- Observation: Regularly inspect your plants for early signs of pests or disease. Catching issues early is key.
- Physical Barriers: Use row covers (e.g., Agribon AG-19 floating row cover, 10×20 ft, ~$20) to protect young plants from insect pests like cabbage worms and squash bugs. Install fences (e.g., 2×4 welded wire mesh, 4 ft tall, 50 ft roll ~$70) to keep out deer, rabbits, and other larger animals.
- Hand-Picking: For larger pests like tomato hornworms or squash bugs, simply pick them off and drop them into a bucket of soapy water.
- Companion Planting: As mentioned, certain plants repel pests. Marigolds, garlic, and onions are excellent deterrents.
- Attract Beneficial Insects: Plant flowers like dill, fennel, cosmos, and sweet alyssum to attract ladybugs, lacewings, and parasitic wasps, which prey on common garden pests.
- Organic Sprays & Treatments:
- Neem Oil: An excellent broad-spectrum organic insecticide and fungicide. Bonide Neem Oil Concentrate (16oz, ~$20) can be mixed at a rate of 1-2 tbsp per gallon of water and sprayed on affected plants.
- Insecticidal Soap: Effective against soft-bodied insects like aphids, whiteflies, and spider mites. Garden Safe Insecticidal Soap (24oz ready-to-use, ~$10).
- Bacillus thuringiensis (Bt): A naturally occurring soil bacterium that targets caterpillars and worms. Monterey BT Worm & Caterpillar Killer (16oz, ~$18) is highly effective and safe for beneficial insects.
- Copper or Sulfur Sprays: For fungal diseases like powdery mildew or blight, organic copper (e.g., Bonide Copper Fungicide, ~$15 for 1lb) or sulfur (e.g., Safer Brand Garden Fungicide, ~$10 for 16oz) can be used as a last resort.
Step 7: Harvesting & Seed Saving
The culmination of your efforts is the harvest, and seed saving closes the loop on self-sufficiency.
- Harvesting Techniques:
- Timing: Harvest vegetables at their peak ripeness for best flavor and nutritional value. For example, green beans should snap cleanly, cucumbers should be firm, and tomatoes should be fully colored.
- Frequency: Many crops, like zucchini, cucumbers, and bush beans, produce more if harvested frequently. Pick daily or every other day.
- Tools: Use clean, sharp pruners (e.g., Corona ClassicCUT Bypass Pruner BP 3180, ~$30) or a sharp knife for clean cuts, minimizing damage to the plant.
- Seed Saving: This is where the « self-sufficient » aspect truly shines.
- Selection: Only save seeds from your healthiest, most vigorous plants that show desired traits (disease resistance, good flavor, high yield).
- Isolation: To ensure true-to-type seeds, prevent cross-pollination. This can be challenging for open-pollinated crops that readily cross (e.g., squash, corn). For beginners, focus on self-pollinating plants like beans, peas, lettuce, and tomatoes.
- Processing:
- Dry Seeds (Beans, Peas, Lettuce, Grains): Allow pods/seed heads to dry completely on the plant. Harvest, shell, and clean the seeds, removing chaff.
- Wet Seeds (Tomatoes, Cucumbers, Squash): For tomatoes, ferment the seeds in water for a few days to remove the gel coating and inhibit disease. For cucumbers/squash, scrape out seeds, wash thoroughly, and dry.
- Drying: Spread seeds thinly on screens or paper plates in a cool, dry, well-ventilated area for 1-4 weeks. Ensure they are bone-dry before storage. I aim for less than 8% moisture content.
- Storage: Store seeds in airtight containers (glass jars with desiccant packets work well) in a cool, dark, dry place (ideally 40-50°F and 30-40% humidity). Label clearly with variety and date. Properly stored seeds can remain viable for 3-10 years or more.
Step 8: Season Extension & Winterizing
Extend your harvest and protect your garden for the off-season to truly maximize your self sufficient garden from scratch.
- Cold Frames: Simple structures with a transparent top (glass, polycarbonate, or old windows) that sit over garden beds. They trap solar heat, allowing you to grow cold-hardy crops (lettuce, spinach, kale, radishes) well into winter or start seeds earlier in spring. A basic cold frame can be built from 2×6 lumber and a sheet of polycarbonate for under $100.
- Hoop Houses/Low Tunnels: Larger structures made from flexible hoops (PVC pipe or EMT conduit) covered with greenhouse plastic. These provide more space and greater temperature moderation. A 10×20 ft DIY low tunnel kit can cost $200-$500, while a larger, more robust hoop house kit might be $1,000-$3,000. I use a 6×12 ft low tunnel made from 1/2-inch PVC hoops and 6mil greenhouse plastic, which extends my lettuce and spinach harvest by at least
- Harvesting Techniques:
- Timing: Harvest vegetables at their peak ripeness for best flavor and nutritional value. For example, green beans should snap cleanly, cucumbers should be firm, and tomatoes should be fully colored.
- Frequency: Many crops, like zucchini, cucumbers, and bush beans, produce more if harvested frequently. Pick daily or every other day.
- Tools: Use clean, sharp pruners (e.g., Corona ClassicCUT Bypass Pruner BP 3180, ~$30) or a sharp knife for clean cuts, minimizing damage to the plant.
- Seed Saving: This is where the « self-sufficient » aspect truly shines.
- Selection: Only save seeds from your healthiest, most vigorous plants that show desired traits (disease resistance, good flavor, high yield).
- Isolation: To ensure true-to-type seeds, prevent cross-pollination. This can be challenging for open-pollinated crops that readily cross (e.g., squash, corn). For beginners, focus on self-pollinating plants like beans, peas, lettuce, and tomatoes.
- Processing:
- Dry Seeds (Beans, Peas, Lettuce, Grains): Allow pods/seed heads to dry completely on the plant. Harvest, shell, and clean the seeds, removing chaff.
- Wet Seeds (Tomatoes, Cucumbers, Squash): For tomatoes, ferment the seeds in water for a few days to remove the gel coating and inhibit disease. For cucumbers/squash, scrape out seeds, wash thoroughly, and dry.
- Drying: Spread seeds thinly on screens or paper plates in a cool, dry, well-ventilated area for 1-4 weeks. Ensure they are bone-dry before storage. I aim for less than 8% moisture content.
- Storage: Store seeds in airtight containers (glass jars with desiccant packets work well) in a cool, dark, dry place (ideally 40-50°F and 30-40% humidity). Label clearly with variety and date. Properly stored seeds can remain viable for 3-10 years or more.
Step 8: Season Extension & Winterizing
Extend your harvest and protect your garden for the off-season to truly maximize your self sufficient garden from scratch.
- Cold Frames: Simple structures with a transparent top (glass, polycarbonate, or old windows) that sit over garden beds. They trap solar heat, allowing you to grow cold-hardy crops (lettuce, spinach, kale, radishes) well into winter or start seeds earlier in spring. A basic cold frame can be built from 2×6 lumber and a sheet of polycarbonate for under $100.
- Hoop Houses/Low Tunnels: Larger structures made from flexible hoops (PVC pipe or EMT conduit) covered with greenhouse plastic. These provide more space and greater temperature moderation. A 10×20 ft DIY low tunnel kit can cost $200-$500, while a larger, more robust hoop house kit might be $1,000-$3,000. I use a 6×12 ft low tunnel made from 1/2-inch PVC hoops and 6mil greenhouse plastic, which extends my lettuce and spinach harvest by at least
- In-Ground Beds: If you have excellent native soil and good drainage, in-ground beds are the most economical. Double-digging (loosening soil two shovel depths) can significantly improve drainage and aeration. For my main garden, I primarily use in-ground beds, but I focus on building up the soil over time with consistent compost additions and cover cropping. I aim for beds that are no wider than 3-4 feet so I can reach the center without stepping on the soil, compacting it.
- Raised Beds: Raised beds offer numerous advantages, especially for poor soil, heavy clay, or rocky areas. They provide better drainage, warm up faster in spring, reduce compaction, and make weeding and harvesting easier on your back.
- Material Options:
- Untreated Cedar: Naturally rot-resistant and chemical-free. A 4×8 ft bed, 12 inches deep, typically requires three 2x12x8 ft cedar boards, costing around $50-$60 per board (total ~$150-$180) plus corner brackets or screws. My first raised beds were cedar and are still going strong after 7 years.
- Galvanized Steel: Durable, long-lasting, and aesthetically pleasing. Brands like Vego Garden offer modular kits. A Vego Garden 17″ Tall 8-in-1 Metal Raised Garden Bed (can be configured to 4×8 ft) costs approximately $250-$300.
- Concrete Blocks/Stones: Very durable but can leach minerals (though generally safe once weathered) and can be expensive.
- Recycled Materials: Pallets (check for chemical treatment stamps like « HT » for heat-treated), old tires (controversial due to potential chemical leaching).
- Filling Raised Beds: Don’t just fill with topsoil. Use a « Hugelkultur » approach (logs, branches, leaves, then compost, then topsoil) or a mixture of 60% good quality topsoil, 30% compost, and 10% perlite or vermiculite for drainage. A 4x8x1 ft raised bed requires about 32 cubic feet (or ~1.2 cubic yards) of soil mix, which can cost $100-$200 depending on your source.
- Material Options:
Step 4: Water Management & Irrigation
Efficient water management is critical for a self sufficient garden from scratch, especially in off-grid living where water resources might be limited.
- Rainwater Harvesting: This is my primary source of irrigation water. A 55-gallon rain barrel (e.g., EarthMark Rain Barrel, ~$120-$150) connected to a downspout can collect significant water. For larger needs, I use two 275-gallon IBC totes (Intermediate Bulk Containers, often available used for $100-$200 each from food-grade sources) connected in series. A 1,000 sq ft roof can collect approximately 620 gallons of water for every inch of rainfall. My 1,500 sq ft roof provides ample water for my 600 sq ft garden through multiple barrels and totes.
- Drip Irrigation: This is by far the most water-efficient method, delivering water directly to the plant’s root zone, minimizing evaporation and weed growth.
- Components: A typical drip system includes a pressure regulator (e.g., Rain Bird PRV-10, ~$15), a filter (Rain Bird RBY filter, ~$20), main tubing (1/2-inch poly tubing, 100ft ~$25), smaller feeder lines (1/4-inch tubing), and emitters (0.5 GPH or 1 GPH per plant).
- Kits: For beginners, a starter kit like the Rain Bird Drip Irrigation Garden Kit (model DDI-KIT-1P, ~$40-$60) is excellent for a small garden. For larger setups, I use Netafim Techline CV Drip Line (500ft roll, ~$150-$200), which has pressure-compensating emitters built-in, ensuring even watering across long runs.
- Automation: For true self-sufficiency, consider a battery-powered timer (e.g., Orbit B-Hyve Bluetooth Hose Faucet Timer, ~$50) or a solar-powered timer connected to a small 12V pump.
- Solar-Powered Pumps: For lifting water from a well, pond, or large storage tank to your garden, a solar pump is a game-changer. For a smaller drip system, a Shurflo 2088-594-152 Diaphragm Pump (12V, 3.5 GPM, ~$180) can be powered by a single 100W solar panel (e.g., Renogy 100W Monocrystalline Solar Panel, ~$100) and a small 12V battery (e.g., a 50Ah LiFePO4 battery like the Battle Born 50Ah, ~$450). For larger operations or deeper wells, more robust systems are needed. If you’re looking to build out a comprehensive off-grid power system to support your garden’s water needs, or indeed your entire homestead, you might want to explore resources like the Power Grid Generator complete system guide to understand the full scope of what’s possible in terms of energy independence.
Step 5: Seed Selection & Planting
The choice of seeds is crucial for a truly self sufficient garden from scratch.
- Choose Heirloom & Open-Pollinated Seeds: These varieties produce seeds that will grow true to type, meaning you can save seeds from your harvest year after year. F1 hybrids, while often vigorous, will not produce consistent offspring from saved seeds. Reputable seed companies include Baker Creek Heirloom Seeds, High Mowing Organic Seeds, and Seed Savers Exchange. Start with common, reliable varieties like ‘Black Krim’ tomatoes, ‘Provider’ bush beans, ‘Waltham Butternut’ squash, and ‘Black Seeded Simpson’ lettuce.
- Start Seeds Indoors (Optional but Recommended): For longer growing seasons or specific crops, starting seeds indoors gives you a head start. Use seed-starting mix (e.g., Espoma Organic Seed Starter Mix, ~$10 for 16qt bag) in seed trays (Jiffy Professional Greenhouse 72-cell kit, ~$15). Provide adequate light with LED grow lights (Barrina T5 2ft 4-pack LED Grow Lights, 20W each, ~$50) for 14-16 hours a day, positioned 2-4 inches above seedlings. Maintain consistent temperatures (65-75°F for most).
- Direct Sowing vs. Transplanting: Some crops (carrots, radishes, beans, corn) prefer direct sowing into the garden bed. Others (tomatoes, peppers, broccoli, kale) benefit from being started indoors and transplanted. Follow seed packet instructions for planting depths (e.g., lettuce seeds are often surface-sown or planted 1/8 inch deep, while beans are 1 inch deep) and spacing.
- Companion Planting: Strategically plant different species together to enhance growth, deter pests, and attract beneficial insects. For example, planting marigolds near tomatoes can deter nematodes, and basil improves tomato flavor. Nasturtiums can act as a trap crop for aphids.
- Succession Planting: For a continuous harvest, plant small batches of quick-growing crops (lettuce, radishes, cilantro) every 2-3 weeks. As one crop finishes, another is ready to take its place.
Step 6: Pest & Disease Management (Organic)
Maintaining a self sufficient garden from scratch means embracing organic pest and disease control.
- Integrated Pest Management (IPM): This holistic approach combines several strategies.
- Observation: Regularly inspect your plants for early signs of pests or disease. Catching issues early is key.
- Physical Barriers: Use row covers (e.g., Agribon AG-19 floating row cover, 10×20 ft, ~$20) to protect young plants from insect pests like cabbage worms and squash bugs. Install fences (e.g., 2×4 welded wire mesh, 4 ft tall, 50 ft roll ~$70) to keep out deer, rabbits, and other larger animals.
- Hand-Picking: For larger pests like tomato hornworms or squash bugs, simply pick them off and drop them into a bucket of soapy water.
- Companion Planting: As mentioned, certain plants repel pests. Marigolds, garlic, and onions are excellent deterrents.
- Attract Beneficial Insects: Plant flowers like dill, fennel, cosmos, and sweet alyssum to attract ladybugs, lacewings, and parasitic wasps, which prey on common garden pests.
- Organic Sprays & Treatments:
- Neem Oil: An excellent broad-spectrum organic insecticide and fungicide. Bonide Neem Oil Concentrate (16oz, ~$20) can be mixed at a rate of 1-2 tbsp per gallon of water and sprayed on affected plants.
- Insecticidal Soap: Effective against soft-bodied insects like aphids, whiteflies, and spider mites. Garden Safe Insecticidal Soap (24oz ready-to-use, ~$10).
- Bacillus thuringiensis (Bt): A naturally occurring soil bacterium that targets caterpillars and worms. Monterey BT Worm & Caterpillar Killer (16oz, ~$18) is highly effective and safe for beneficial insects.
- Copper or Sulfur Sprays: For fungal diseases like powdery mildew or blight, organic copper (e.g., Bonide Copper Fungicide, ~$15 for 1lb) or sulfur (e.g., Safer Brand Garden Fungicide, ~$10 for 16oz) can be used as a last resort.
Step 7: Harvesting & Seed Saving
The culmination of your efforts is the harvest, and seed saving closes the loop on self-sufficiency.
- Harvesting Techniques:
- Timing: Harvest vegetables at their peak ripeness for best flavor and nutritional value. For example, green beans should snap cleanly, cucumbers should be firm, and tomatoes should be fully colored.
- Frequency: Many crops, like zucchini, cucumbers, and bush beans, produce more if harvested frequently. Pick daily or every other day.
- Tools: Use clean, sharp pruners (e.g., Corona ClassicCUT Bypass Pruner BP 3180, ~$30) or a sharp knife for clean cuts, minimizing damage to the plant.
- Seed Saving: This is where the « self-sufficient » aspect truly shines.
- Selection: Only save seeds from your healthiest, most vigorous plants that show desired traits (disease resistance, good flavor, high yield).
- Isolation: To ensure true-to-type seeds, prevent cross-pollination. This can be challenging for open-pollinated crops that readily cross (e.g., squash, corn). For beginners, focus on self-pollinating plants like beans, peas, lettuce, and tomatoes.
- Processing:
- Dry Seeds (Beans, Peas, Lettuce, Grains): Allow pods/seed heads to dry completely on the plant. Harvest, shell, and clean the seeds, removing chaff.
- Wet Seeds (Tomatoes, Cucumbers, Squash): For tomatoes, ferment the seeds in water for a few days to remove the gel coating and inhibit disease. For cucumbers/squash, scrape out seeds, wash thoroughly, and dry.
- Drying: Spread seeds thinly on screens or paper plates in a cool, dry, well-ventilated area for 1-4 weeks. Ensure they are bone-dry before storage. I aim for less than 8% moisture content.
- Storage: Store seeds in airtight containers (glass jars with desiccant packets work well) in a cool, dark, dry place (ideally 40-50°F and 30-40% humidity). Label clearly with variety and date. Properly stored seeds can remain viable for 3-10 years or more.
Step 8: Season Extension & Winterizing
Extend your harvest and protect your garden for the off-season to truly maximize your self sufficient garden from scratch.
- Cold Frames: Simple structures with a transparent top (glass, polycarbonate, or old windows) that sit over garden beds. They trap solar heat, allowing you to grow cold-hardy crops (lettuce, spinach, kale, radishes) well into winter or start seeds earlier in spring. A basic cold frame can be built from 2×6 lumber and a sheet of polycarbonate for under $100.
- Hoop Houses/Low Tunnels: Larger structures made from flexible hoops (PVC pipe or EMT conduit) covered with greenhouse plastic. These provide more space and greater temperature moderation. A 10×20 ft DIY low tunnel kit can cost $200-$500, while a larger, more robust hoop house kit might be $1,000-$3,000. I use a 6×12 ft low tunnel made from 1/2-inch PVC hoops and 6mil greenhouse plastic, which extends my lettuce and spinach harvest by at least
Deciding between raised beds and in-ground beds depends on your soil, budget, and physical capabilities.
- In-Ground Beds: If you have excellent native soil and good drainage, in-ground beds are the most economical. Double-digging (loosening soil two shovel depths) can significantly improve drainage and aeration. For my main garden, I primarily use in-ground beds, but I focus on building up the soil over time with consistent compost additions and cover cropping. I aim for beds that are no wider than 3-4 feet so I can reach the center without stepping on the soil, compacting it.
- Raised Beds: Raised beds offer numerous advantages, especially for poor soil, heavy clay, or rocky areas. They provide better drainage, warm up faster in spring, reduce compaction, and make weeding and harvesting easier on your back.
- Material Options:
- Untreated Cedar: Naturally rot-resistant and chemical-free. A 4×8 ft bed, 12 inches deep, typically requires three 2x12x8 ft cedar boards, costing around $50-$60 per board (total ~$150-$180) plus corner brackets or screws. My first raised beds were cedar and are still going strong after 7 years.
- Galvanized Steel: Durable, long-lasting, and aesthetically pleasing. Brands like Vego Garden offer modular kits. A Vego Garden 17″ Tall 8-in-1 Metal Raised Garden Bed (can be configured to 4×8 ft) costs approximately $250-$300.
- Concrete Blocks/Stones: Very durable but can leach minerals (though generally safe once weathered) and can be expensive.
- Recycled Materials: Pallets (check for chemical treatment stamps like « HT » for heat-treated), old tires (controversial due to potential chemical leaching).
- Filling Raised Beds: Don’t just fill with topsoil. Use a « Hugelkultur » approach (logs, branches, leaves, then compost, then topsoil) or a mixture of 60% good quality topsoil, 30% compost, and 10% perlite or vermiculite for drainage. A 4x8x1 ft raised bed requires about 32 cubic feet (or ~1.2 cubic yards) of soil mix, which can cost $100-$200 depending on your source.
- Material Options:
Step 4: Water Management & Irrigation
Efficient water management is critical for a self sufficient garden from scratch, especially in off-grid living where water resources might be limited.
- Rainwater Harvesting: This is my primary source of irrigation water. A 55-gallon rain barrel (e.g., EarthMark Rain Barrel, ~$120-$150) connected to a downspout can collect significant water. For larger needs, I use two 275-gallon IBC totes (Intermediate Bulk Containers, often available used for $100-$200 each from food-grade sources) connected in series. A 1,000 sq ft roof can collect approximately 620 gallons of water for every inch of rainfall. My 1,500 sq ft roof provides ample water for my 600 sq ft garden through multiple barrels and totes.
- Drip Irrigation: This is by far the most water-efficient method, delivering water directly to the plant’s root zone, minimizing evaporation and weed growth.
- Components: A typical drip system includes a pressure regulator (e.g., Rain Bird PRV-10, ~$15), a filter (Rain Bird RBY filter, ~$20), main tubing (1/2-inch poly tubing, 100ft ~$25), smaller feeder lines (1/4-inch tubing), and emitters (0.5 GPH or 1 GPH per plant).
- Kits: For beginners, a starter kit like the Rain Bird Drip Irrigation Garden Kit (model DDI-KIT-1P, ~$40-$60) is excellent for a small garden. For larger setups, I use Netafim Techline CV Drip Line (500ft roll, ~$150-$200), which has pressure-compensating emitters built-in, ensuring even watering across long runs.
- Automation: For true self-sufficiency, consider a battery-powered timer (e.g., Orbit B-Hyve Bluetooth Hose Faucet Timer, ~$50) or a solar-powered timer connected to a small 12V pump.
- Solar-Powered Pumps: For lifting water from a well, pond, or large storage tank to your garden, a solar pump is a game-changer. For a smaller drip system, a Shurflo 2088-594-152 Diaphragm Pump (12V, 3.5 GPM, ~$180) can be powered by a single 100W solar panel (e.g., Renogy 100W Monocrystalline Solar Panel, ~$100) and a small 12V battery (e.g., a 50Ah LiFePO4 battery like the Battle Born 50Ah, ~$450). For larger operations or deeper wells, more robust systems are needed. If you’re looking to build out a comprehensive off-grid power system to support your garden’s water needs, or indeed your entire homestead, you might want to explore resources like the Power Grid Generator complete system guide to understand the full scope of what’s possible in terms of energy independence.
Step 5: Seed Selection & Planting
The choice of seeds is crucial for a truly self sufficient garden from scratch.
- Choose Heirloom & Open-Pollinated Seeds: These varieties produce seeds that will grow true to type, meaning you can save seeds from your harvest year after year. F1 hybrids, while often vigorous, will not produce consistent offspring from saved seeds. Reputable seed companies include Baker Creek Heirloom Seeds, High Mowing Organic Seeds, and Seed Savers Exchange. Start with common, reliable varieties like ‘Black Krim’ tomatoes, ‘Provider’ bush beans, ‘Waltham Butternut’ squash, and ‘Black Seeded Simpson’ lettuce.
- Start Seeds Indoors (Optional but Recommended): For longer growing seasons or specific crops, starting seeds indoors gives you a head start. Use seed-starting mix (e.g., Espoma Organic Seed Starter Mix, ~$10 for 16qt bag) in seed trays (Jiffy Professional Greenhouse 72-cell kit, ~$15). Provide adequate light with LED grow lights (Barrina T5 2ft 4-pack LED Grow Lights, 20W each, ~$50) for 14-16 hours a day, positioned 2-4 inches above seedlings. Maintain consistent temperatures (65-75°F for most).
- Direct Sowing vs. Transplanting: Some crops (carrots, radishes, beans, corn) prefer direct sowing into the garden bed. Others (tomatoes, peppers, broccoli, kale) benefit from being started indoors and transplanted. Follow seed packet instructions for planting depths (e.g., lettuce seeds are often surface-sown or planted 1/8 inch deep, while beans are 1 inch deep) and spacing.
- Companion Planting: Strategically plant different species together to enhance growth, deter pests, and attract beneficial insects. For example, planting marigolds near tomatoes can deter nematodes, and basil improves tomato flavor. Nasturtiums can act as a trap crop for aphids.
- Succession Planting: For a continuous harvest, plant small batches of quick-growing crops (lettuce, radishes, cilantro) every 2-3 weeks. As one crop finishes, another is ready to take its place.
Step 6: Pest & Disease Management (Organic)
Maintaining a self sufficient garden from scratch means embracing organic pest and disease control.
- Integrated Pest Management (IPM): This holistic approach combines several strategies.
- Observation: Regularly inspect your plants for early signs of pests or disease. Catching issues early is key.
- Physical Barriers: Use row covers (e.g., Agribon AG-19 floating row cover, 10×20 ft, ~$20) to protect young plants from insect pests like cabbage worms and squash bugs. Install fences (e.g., 2×4 welded wire mesh, 4 ft tall, 50 ft roll ~$70) to keep out deer, rabbits, and other larger animals.
- Hand-Picking: For larger pests like tomato hornworms or squash bugs, simply pick them off and drop them into a bucket of soapy water.
- Companion Planting: As mentioned, certain plants repel pests. Marigolds, garlic, and onions are excellent deterrents.
- Attract Beneficial Insects: Plant flowers like dill, fennel, cosmos, and sweet alyssum to attract ladybugs, lacewings, and parasitic wasps, which prey on common garden pests.
- Organic Sprays & Treatments:
- Neem Oil: An excellent broad-spectrum organic insecticide and fungicide. Bonide Neem Oil Concentrate (16oz, ~$20) can be mixed at a rate of 1-2 tbsp per gallon of water and sprayed on affected plants.
- Insecticidal Soap: Effective against soft-bodied insects like aphids, whiteflies, and spider mites. Garden Safe Insecticidal Soap (24oz ready-to-use, ~$10).
- Bacillus thuringiensis (Bt): A naturally occurring soil bacterium that targets caterpillars and worms. Monterey BT Worm & Caterpillar Killer (16oz, ~$18) is highly effective and safe for beneficial insects.
- Copper or Sulfur Sprays: For fungal diseases like powdery mildew or blight, organic copper (e.g., Bonide Copper Fungicide, ~$15 for 1lb) or sulfur (e.g., Safer Brand Garden Fungicide, ~$10 for 16oz) can be used as a last resort.
Step 7: Harvesting & Seed Saving
The culmination of your efforts is the harvest, and seed saving closes the loop on self-sufficiency.
- Harvesting Techniques:
- Timing: Harvest vegetables at their peak ripeness for best flavor and nutritional value. For example, green beans should snap cleanly, cucumbers should be firm, and tomatoes should be fully colored.
- Frequency: Many crops, like zucchini, cucumbers, and bush beans, produce more if harvested frequently. Pick daily or every other day.
- Tools: Use clean, sharp pruners (e.g., Corona ClassicCUT Bypass Pruner BP 3180, ~$30) or a sharp knife for clean cuts, minimizing damage to the plant.
- Seed Saving: This is where the « self-sufficient » aspect truly shines.
- Selection: Only save seeds from your healthiest, most vigorous plants that show desired traits (disease resistance, good flavor, high yield).
- Isolation: To ensure true-to-type seeds, prevent cross-pollination. This can be challenging for open-pollinated crops that readily cross (e.g., squash, corn). For beginners, focus on self-pollinating plants like beans, peas, lettuce, and tomatoes.
- Processing:
- Dry Seeds (Beans, Peas, Lettuce, Grains): Allow pods/seed heads to dry completely on the plant. Harvest, shell, and clean the seeds, removing chaff.
- Wet Seeds (Tomatoes, Cucumbers, Squash): For tomatoes, ferment the seeds in water for a few days to remove the gel coating and inhibit disease. For cucumbers/squash, scrape out seeds, wash thoroughly, and dry.
- Drying: Spread seeds thinly on screens or paper plates in a cool, dry, well-ventilated area for 1-4 weeks. Ensure they are bone-dry before storage. I aim for less than 8% moisture content.
- Storage: Store seeds in airtight containers (glass jars with desiccant packets work well) in a cool, dark, dry place (ideally 40-50°F and 30-40% humidity). Label clearly with variety and date. Properly stored seeds can remain viable for 3-10 years or more.
Step 8: Season Extension & Winterizing
Extend your harvest and protect your garden for the off-season to truly maximize your self sufficient garden from scratch.
- Cold Frames: Simple structures with a transparent top (glass, polycarbonate, or old windows) that sit over garden beds. They trap solar heat, allowing you to grow cold-hardy crops (lettuce, spinach, kale, radishes) well into winter or start seeds earlier in spring. A basic cold frame can be built from 2×6 lumber and a sheet of polycarbonate for under $100.
- Hoop Houses/Low Tunnels: Larger structures made from flexible hoops (PVC pipe or EMT conduit) covered with greenhouse plastic. These provide more space and greater temperature moderation. A 10×20 ft DIY low tunnel kit can cost $200-$500, while a larger, more robust hoop house kit might be $1,000-$3,000. I use a 6×12 ft low tunnel made from 1/2-inch PVC hoops and 6mil greenhouse plastic, which extends my lettuce and spinach harvest by at least
Healthy soil is the bedrock of a productive, self-sufficient garden. You can’t guess what your soil needs; you have to test it.
- Perform a Soil Test: A professional soil test will give you precise data on your soil’s pH, nutrient levels (N-P-K), and organic matter content. I recommend sending a sample to your local agricultural extension office; it typically costs $20-$50 and provides detailed recommendations. Alternatively, for a quick homeowner check, a Rapitest Soil Test Kit (40-test kit, model 1663, ~$20 on Amazon) provides a good baseline for pH, Nitrogen, Phosphorus, and Potash. Aim for a pH between 6.0 and 7.0 for most vegetables.
- Amend for pH Imbalance: If your soil is too acidic (below 6.0), add agricultural lime (dolomitic lime adds magnesium, calcitic lime adds calcium). Apply 5-10 lbs per 100 sq ft for a moderate adjustment. If it’s too alkaline (above 7.0), add elemental sulfur (e.g., Espoma Soil Acidifier, ~$15 for 6.75 lbs) or generous amounts of organic matter like peat moss or pine needles.
- Build Organic Matter: This is the single most important step for long-term soil health. Organic matter improves soil structure, water retention, drainage, and nutrient availability. Incorporate 2-4 inches of high-quality compost into your top 6-12 inches of soil annually. I make my own compost from kitchen scraps, garden waste, and shredded leaves, but you can purchase it. Local nurseries often sell bulk compost for $30-$50 per cubic yard. Aged manure (from chickens, cows, or horses – ensure it’s well-rotted to avoid burning plants) is also excellent.
- Address Nutrient Deficiencies: Based on your soil test, add specific organic amendments. If Nitrogen (N) is low, add blood meal (12-0-0, ~$20 for 3 lbs) or feather meal. For Phosphorus (P), use bone meal (3-15-0, ~$15 for 3 lbs) or rock phosphate. For Potassium (K), greensand (0-0-2.5, ~$25 for 5 lbs) or kelp meal are good choices. I rely heavily on Espoma Organic Garden-tone (5-3-3, ~$25 for an 8lb bag) as a balanced, all-purpose organic fertilizer during planting.
Step 3: Garden Bed Preparation
Deciding between raised beds and in-ground beds depends on your soil, budget, and physical capabilities.
- In-Ground Beds: If you have excellent native soil and good drainage, in-ground beds are the most economical. Double-digging (loosening soil two shovel depths) can significantly improve drainage and aeration. For my main garden, I primarily use in-ground beds, but I focus on building up the soil over time with consistent compost additions and cover cropping. I aim for beds that are no wider than 3-4 feet so I can reach the center without stepping on the soil, compacting it.
- Raised Beds: Raised beds offer numerous advantages, especially for poor soil, heavy clay, or rocky areas. They provide better drainage, warm up faster in spring, reduce compaction, and make weeding and harvesting easier on your back.
- Material Options:
- Untreated Cedar: Naturally rot-resistant and chemical-free. A 4×8 ft bed, 12 inches deep, typically requires three 2x12x8 ft cedar boards, costing around $50-$60 per board (total ~$150-$180) plus corner brackets or screws. My first raised beds were cedar and are still going strong after 7 years.
- Galvanized Steel: Durable, long-lasting, and aesthetically pleasing. Brands like Vego Garden offer modular kits. A Vego Garden 17″ Tall 8-in-1 Metal Raised Garden Bed (can be configured to 4×8 ft) costs approximately $250-$300.
- Concrete Blocks/Stones: Very durable but can leach minerals (though generally safe once weathered) and can be expensive.
- Recycled Materials: Pallets (check for chemical treatment stamps like « HT » for heat-treated), old tires (controversial due to potential chemical leaching).
- Filling Raised Beds: Don’t just fill with topsoil. Use a « Hugelkultur » approach (logs, branches, leaves, then compost, then topsoil) or a mixture of 60% good quality topsoil, 30% compost, and 10% perlite or vermiculite for drainage. A 4x8x1 ft raised bed requires about 32 cubic feet (or ~1.2 cubic yards) of soil mix, which can cost $100-$200 depending on your source.
- Material Options:
Step 4: Water Management & Irrigation
Efficient water management is critical for a self sufficient garden from scratch, especially in off-grid living where water resources might be limited.
- Rainwater Harvesting: This is my primary source of irrigation water. A 55-gallon rain barrel (e.g., EarthMark Rain Barrel, ~$120-$150) connected to a downspout can collect significant water. For larger needs, I use two 275-gallon IBC totes (Intermediate Bulk Containers, often available used for $100-$200 each from food-grade sources) connected in series. A 1,000 sq ft roof can collect approximately 620 gallons of water for every inch of rainfall. My 1,500 sq ft roof provides ample water for my 600 sq ft garden through multiple barrels and totes.
- Drip Irrigation: This is by far the most water-efficient method, delivering water directly to the plant’s root zone, minimizing evaporation and weed growth.
- Components: A typical drip system includes a pressure regulator (e.g., Rain Bird PRV-10, ~$15), a filter (Rain Bird RBY filter, ~$20), main tubing (1/2-inch poly tubing, 100ft ~$25), smaller feeder lines (1/4-inch tubing), and emitters (0.5 GPH or 1 GPH per plant).
- Kits: For beginners, a starter kit like the Rain Bird Drip Irrigation Garden Kit (model DDI-KIT-1P, ~$40-$60) is excellent for a small garden. For larger setups, I use Netafim Techline CV Drip Line (500ft roll, ~$150-$200), which has pressure-compensating emitters built-in, ensuring even watering across long runs.
- Automation: For true self-sufficiency, consider a battery-powered timer (e.g., Orbit B-Hyve Bluetooth Hose Faucet Timer, ~$50) or a solar-powered timer connected to a small 12V pump.
- Solar-Powered Pumps: For lifting water from a well, pond, or large storage tank to your garden, a solar pump is a game-changer. For a smaller drip system, a Shurflo 2088-594-152 Diaphragm Pump (12V, 3.5 GPM, ~$180) can be powered by a single 100W solar panel (e.g., Renogy 100W Monocrystalline Solar Panel, ~$100) and a small 12V battery (e.g., a 50Ah LiFePO4 battery like the Battle Born 50Ah, ~$450). For larger operations or deeper wells, more robust systems are needed. If you’re looking to build out a comprehensive off-grid power system to support your garden’s water needs, or indeed your entire homestead, you might want to explore resources like the Power Grid Generator complete system guide to understand the full scope of what’s possible in terms of energy independence.
Step 5: Seed Selection & Planting
The choice of seeds is crucial for a truly self sufficient garden from scratch.
- Choose Heirloom & Open-Pollinated Seeds: These varieties produce seeds that will grow true to type, meaning you can save seeds from your harvest year after year. F1 hybrids, while often vigorous, will not produce consistent offspring from saved seeds. Reputable seed companies include Baker Creek Heirloom Seeds, High Mowing Organic Seeds, and Seed Savers Exchange. Start with common, reliable varieties like ‘Black Krim’ tomatoes, ‘Provider’ bush beans, ‘Waltham Butternut’ squash, and ‘Black Seeded Simpson’ lettuce.
- Start Seeds Indoors (Optional but Recommended): For longer growing seasons or specific crops, starting seeds indoors gives you a head start. Use seed-starting mix (e.g., Espoma Organic Seed Starter Mix, ~$10 for 16qt bag) in seed trays (Jiffy Professional Greenhouse 72-cell kit, ~$15). Provide adequate light with LED grow lights (Barrina T5 2ft 4-pack LED Grow Lights, 20W each, ~$50) for 14-16 hours a day, positioned 2-4 inches above seedlings. Maintain consistent temperatures (65-75°F for most).
- Direct Sowing vs. Transplanting: Some crops (carrots, radishes, beans, corn) prefer direct sowing into the garden bed. Others (tomatoes, peppers, broccoli, kale) benefit from being started indoors and transplanted. Follow seed packet instructions for planting depths (e.g., lettuce seeds are often surface-sown or planted 1/8 inch deep, while beans are 1 inch deep) and spacing.
- Companion Planting: Strategically plant different species together to enhance growth, deter pests, and attract beneficial insects. For example, planting marigolds near tomatoes can deter nematodes, and basil improves tomato flavor. Nasturtiums can act as a trap crop for aphids.
- Succession Planting: For a continuous harvest, plant small batches of quick-growing crops (lettuce, radishes, cilantro) every 2-3 weeks. As one crop finishes, another is ready to take its place.
Step 6: Pest & Disease Management (Organic)
Maintaining a self sufficient garden from scratch means embracing organic pest and disease control.
- Integrated Pest Management (IPM): This holistic approach combines several strategies.
- Observation: Regularly inspect your plants for early signs of pests or disease. Catching issues early is key.
- Physical Barriers: Use row covers (e.g., Agribon AG-19 floating row cover, 10×20 ft, ~$20) to protect young plants from insect pests like cabbage worms and squash bugs. Install fences (e.g., 2×4 welded wire mesh, 4 ft tall, 50 ft roll ~$70) to keep out deer, rabbits, and other larger animals.
- Hand-Picking: For larger pests like tomato hornworms or squash bugs, simply pick them off and drop them into a bucket of soapy water.
- Companion Planting: As mentioned, certain plants repel pests. Marigolds, garlic, and onions are excellent deterrents.
- Attract Beneficial Insects: Plant flowers like dill, fennel, cosmos, and sweet alyssum to attract ladybugs, lacewings, and parasitic wasps, which prey on common garden pests.
- Organic Sprays & Treatments:
- Neem Oil: An excellent broad-spectrum organic insecticide and fungicide. Bonide Neem Oil Concentrate (16oz, ~$20) can be mixed at a rate of 1-2 tbsp per gallon of water and sprayed on affected plants.
- Insecticidal Soap: Effective against soft-bodied insects like aphids, whiteflies, and spider mites. Garden Safe Insecticidal Soap (24oz ready-to-use, ~$10).
- Bacillus thuringiensis (Bt): A naturally occurring soil bacterium that targets caterpillars and worms. Monterey BT Worm & Caterpillar Killer (16oz, ~$18) is highly effective and safe for beneficial insects.
- Copper or Sulfur Sprays: For fungal diseases like powdery mildew or blight, organic copper (e.g., Bonide Copper Fungicide, ~$15 for 1lb) or sulfur (e.g., Safer Brand Garden Fungicide, ~$10 for 16oz) can be used as a last resort.
Step 7: Harvesting & Seed Saving
The culmination of your efforts is the harvest, and seed saving closes the loop on self-sufficiency.
- Harvesting Techniques:
- Timing: Harvest vegetables at their peak ripeness for best flavor and nutritional value. For example, green beans should snap cleanly, cucumbers should be firm, and tomatoes should be fully colored.
- Frequency: Many crops, like zucchini, cucumbers, and bush beans, produce more if harvested frequently. Pick daily or every other day.
- Tools: Use clean, sharp pruners (e.g., Corona ClassicCUT Bypass Pruner BP 3180, ~$30) or a sharp knife for clean cuts, minimizing damage to the plant.
- Seed Saving: This is where the « self-sufficient » aspect truly shines.
- Selection: Only save seeds from your healthiest, most vigorous plants that show desired traits (disease resistance, good flavor, high yield).
- Isolation: To ensure true-to-type seeds, prevent cross-pollination. This can be challenging for open-pollinated crops that readily cross (e.g., squash, corn). For beginners, focus on self-pollinating plants like beans, peas, lettuce, and tomatoes.
- Processing:
- Dry Seeds (Beans, Peas, Lettuce, Grains): Allow pods/seed heads to dry completely on the plant. Harvest, shell, and clean the seeds, removing chaff.
- Wet Seeds (Tomatoes, Cucumbers, Squash): For tomatoes, ferment the seeds in water for a few days to remove the gel coating and inhibit disease. For cucumbers/squash, scrape out seeds, wash thoroughly, and dry.
- Drying: Spread seeds thinly on screens or paper plates in a cool, dry, well-ventilated area for 1-4 weeks. Ensure they are bone-dry before storage. I aim for less than 8% moisture content.
- Storage: Store seeds in airtight containers (glass jars with desiccant packets work well) in a cool, dark, dry place (ideally 40-50°F and 30-40% humidity). Label clearly with variety and date. Properly stored seeds can remain viable for 3-10 years or more.
Step 8: Season Extension & Winterizing
Extend your harvest and protect your garden for the off-season to truly maximize your self sufficient garden from scratch.
- Cold Frames: Simple structures with a transparent top (glass, polycarbonate, or old windows) that sit over garden beds. They trap solar heat, allowing you to grow cold-hardy crops (lettuce, spinach, kale, radishes) well into winter or start seeds earlier in spring. A basic cold frame can be built from 2×6 lumber and a sheet of polycarbonate for under $100.
- Hoop Houses/Low Tunnels: Larger structures made from flexible hoops (PVC pipe or EMT conduit) covered with greenhouse plastic. These provide more space and greater temperature moderation. A 10×20 ft DIY low tunnel kit can cost $200-$500, while a larger, more robust hoop house kit might be $1,000-$3,000. I use a 6×12 ft low tunnel made from 1/2-inch PVC hoops and 6mil greenhouse plastic, which extends my lettuce and spinach harvest by at least
The culmination of your efforts is the harvest, and seed saving closes the loop on self-sufficiency.
- Harvesting Techniques:
- Timing: Harvest vegetables at their peak ripeness for best flavor and nutritional value. For example, green beans should snap cleanly, cucumbers should be firm, and tomatoes should be fully colored.
- Frequency: Many crops, like zucchini, cucumbers, and bush beans, produce more if harvested frequently. Pick daily or every other day.
- Tools: Use clean, sharp pruners (e.g., Corona ClassicCUT Bypass Pruner BP 3180, ~$30) or a sharp knife for clean cuts, minimizing damage to the plant.
- Seed Saving: This is where the « self-sufficient » aspect truly shines.
- Selection: Only save seeds from your healthiest, most vigorous plants that show desired traits (disease resistance, good flavor, high yield).
- Isolation: To ensure true-to-type seeds, prevent cross-pollination. This can be challenging for open-pollinated crops that readily cross (e.g., squash, corn). For beginners, focus on self-pollinating plants like beans, peas, lettuce, and tomatoes.
- Processing:
- Dry Seeds (Beans, Peas, Lettuce, Grains): Allow pods/seed heads to dry completely on the plant. Harvest, shell, and clean the seeds, removing chaff.
- Wet Seeds (Tomatoes, Cucumbers, Squash): For tomatoes, ferment the seeds in water for a few days to remove the gel coating and inhibit disease. For cucumbers/squash, scrape out seeds, wash thoroughly, and dry.
- Drying: Spread seeds thinly on screens or paper plates in a cool, dry, well-ventilated area for 1-4 weeks. Ensure they are bone-dry before storage. I aim for less than 8% moisture content.
- Storage: Store seeds in airtight containers (glass jars with desiccant packets work well) in a cool, dark, dry place (ideally 40-50°F and 30-40% humidity). Label clearly with variety and date. Properly stored seeds can remain viable for 3-10 years or more.
Step 8: Season Extension & Winterizing
Extend your harvest and protect your garden for the off-season to truly maximize your self sufficient garden from scratch.
- Cold Frames: Simple structures with a transparent top (glass, polycarbonate, or old windows) that sit over garden beds. They trap solar heat, allowing you to grow cold-hardy crops (lettuce, spinach, kale, radishes) well into winter or start seeds earlier in spring. A basic cold frame can be built from 2×6 lumber and a sheet of polycarbonate for under $100.
- Hoop Houses/Low Tunnels: Larger structures made from flexible hoops (PVC pipe or EMT conduit) covered with greenhouse plastic. These provide more space and greater temperature moderation. A 10×20 ft DIY low tunnel kit can cost $200-$500, while a larger, more robust hoop house kit might be $1,000-$3,000. I use a 6×12 ft low tunnel made from 1/2-inch PVC hoops and 6mil greenhouse plastic, which extends my lettuce and spinach harvest by at least
- In-Ground Beds: If you have excellent native soil and good drainage, in-ground beds are the most economical. Double-digging (loosening soil two shovel depths) can significantly improve drainage and aeration. For my main garden, I primarily use in-ground beds, but I focus on building up the soil over time with consistent compost additions and cover cropping. I aim for beds that are no wider than 3-4 feet so I can reach the center without stepping on the soil, compacting it.
- Raised Beds: Raised beds offer numerous advantages, especially for poor soil, heavy clay, or rocky areas. They provide better drainage, warm up faster in spring, reduce compaction, and make weeding and harvesting easier on your back.
- Material Options:
- Untreated Cedar: Naturally rot-resistant and chemical-free. A 4×8 ft bed, 12 inches deep, typically requires three 2x12x8 ft cedar boards, costing around $50-$60 per board (total ~$150-$180) plus corner brackets or screws. My first raised beds were cedar and are still going strong after 7 years.
- Galvanized Steel: Durable, long-lasting, and aesthetically pleasing. Brands like Vego Garden offer modular kits. A Vego Garden 17″ Tall 8-in-1 Metal Raised Garden Bed (can be configured to 4×8 ft) costs approximately $250-$300.
- Concrete Blocks/Stones: Very durable but can leach minerals (though generally safe once weathered) and can be expensive.
- Recycled Materials: Pallets (check for chemical treatment stamps like « HT » for heat-treated), old tires (controversial due to potential chemical leaching).
- Filling Raised Beds: Don’t just fill with topsoil. Use a « Hugelkultur » approach (logs, branches, leaves, then compost, then topsoil) or a mixture of 60% good quality topsoil, 30% compost, and 10% perlite or vermiculite for drainage. A 4x8x1 ft raised bed requires about 32 cubic feet (or ~1.2 cubic yards) of soil mix, which can cost $100-$200 depending on your source.
- Material Options:
Step 4: Water Management & Irrigation
Efficient water management is critical for a self sufficient garden from scratch, especially in off-grid living where water resources might be limited.
- Rainwater Harvesting: This is my primary source of irrigation water. A 55-gallon rain barrel (e.g., EarthMark Rain Barrel, ~$120-$150) connected to a downspout can collect significant water. For larger needs, I use two 275-gallon IBC totes (Intermediate Bulk Containers, often available used for $100-$200 each from food-grade sources) connected in series. A 1,000 sq ft roof can collect approximately 620 gallons of water for every inch of rainfall. My 1,500 sq ft roof provides ample water for my 600 sq ft garden through multiple barrels and totes.
- Drip Irrigation: This is by far the most water-efficient method, delivering water directly to the plant’s root zone, minimizing evaporation and weed growth.
- Components: A typical drip system includes a pressure regulator (e.g., Rain Bird PRV-10, ~$15), a filter (Rain Bird RBY filter, ~$20), main tubing (1/2-inch poly tubing, 100ft ~$25), smaller feeder lines (1/4-inch tubing), and emitters (0.5 GPH or 1 GPH per plant).
- Kits: For beginners, a starter kit like the Rain Bird Drip Irrigation Garden Kit (model DDI-KIT-1P, ~$40-$60) is excellent for a small garden. For larger setups, I use Netafim Techline CV Drip Line (500ft roll, ~$150-$200), which has pressure-compensating emitters built-in, ensuring even watering across long runs.
- Automation: For true self-sufficiency, consider a battery-powered timer (e.g., Orbit B-Hyve Bluetooth Hose Faucet Timer, ~$50) or a solar-powered timer connected to a small 12V pump.
- Solar-Powered Pumps: For lifting water from a well, pond, or large storage tank to your garden, a solar pump is a game-changer. For a smaller drip system, a Shurflo 2088-594-152 Diaphragm Pump (12V, 3.5 GPM, ~$180) can be powered by a single 100W solar panel (e.g., Renogy 100W Monocrystalline Solar Panel, ~$100) and a small 12V battery (e.g., a 50Ah LiFePO4 battery like the Battle Born 50Ah, ~$450). For larger operations or deeper wells, more robust systems are needed. If you’re looking to build out a comprehensive off-grid power system to support your garden’s water needs, or indeed your entire homestead, you might want to explore resources like the Power Grid Generator complete system guide to understand the full scope of what’s possible in terms of energy independence.
Step 5: Seed Selection & Planting
The choice of seeds is crucial for a truly self sufficient garden from scratch.
- Choose Heirloom & Open-Pollinated Seeds: These varieties produce seeds that will grow true to type, meaning you can save seeds from your harvest year after year. F1 hybrids, while often vigorous, will not produce consistent offspring from saved seeds. Reputable seed companies include Baker Creek Heirloom Seeds, High Mowing Organic Seeds, and Seed Savers Exchange. Start with common, reliable varieties like ‘Black Krim’ tomatoes, ‘Provider’ bush beans, ‘Waltham Butternut’ squash, and ‘Black Seeded Simpson’ lettuce.
- Start Seeds Indoors (Optional but Recommended): For longer growing seasons or specific crops, starting seeds indoors gives you a head start. Use seed-starting mix (e.g., Espoma Organic Seed Starter Mix, ~$10 for 16qt bag) in seed trays (Jiffy Professional Greenhouse 72-cell kit, ~$15). Provide adequate light with LED grow lights (Barrina T5 2ft 4-pack LED Grow Lights, 20W each, ~$50) for 14-16 hours a day, positioned 2-4 inches above seedlings. Maintain consistent temperatures (65-75°F for most).
- Direct Sowing vs. Transplanting: Some crops (carrots, radishes, beans, corn) prefer direct sowing into the garden bed. Others (tomatoes, peppers, broccoli, kale) benefit from being started indoors and transplanted. Follow seed packet instructions for planting depths (e.g., lettuce seeds are often surface-sown or planted 1/8 inch deep, while beans are 1 inch deep) and spacing.
- Companion Planting: Strategically plant different species together to enhance growth, deter pests, and attract beneficial insects. For example, planting marigolds near tomatoes can deter nematodes, and basil improves tomato flavor. Nasturtiums can act as a trap crop for aphids.
- Succession Planting: For a continuous harvest, plant small batches of quick-growing crops (lettuce, radishes, cilantro) every 2-3 weeks. As one crop finishes, another is ready to take its place.
Step 6: Pest & Disease Management (Organic)
Maintaining a self sufficient garden from scratch means embracing organic pest and disease control.
- Integrated Pest Management (IPM): This holistic approach combines several strategies.
- Observation: Regularly inspect your plants for early signs of pests or disease. Catching issues early is key.
- Physical Barriers: Use row covers (e.g., Agribon AG-19 floating row cover, 10×20 ft, ~$20) to protect young plants from insect pests like cabbage worms and squash bugs. Install fences (e.g., 2×4 welded wire mesh, 4 ft tall, 50 ft roll ~$70) to keep out deer, rabbits, and other larger animals.
- Hand-Picking: For larger pests like tomato hornworms or squash bugs, simply pick them off and drop them into a bucket of soapy water.
- Companion Planting: As mentioned, certain plants repel pests. Marigolds, garlic, and onions are excellent deterrents.
- Attract Beneficial Insects: Plant flowers like dill, fennel, cosmos, and sweet alyssum to attract ladybugs, lacewings, and parasitic wasps, which prey on common garden pests.
- Organic Sprays & Treatments:
- Neem Oil: An excellent broad-spectrum organic insecticide and fungicide. Bonide Neem Oil Concentrate (16oz, ~$20) can be mixed at a rate of 1-2 tbsp per gallon of water and sprayed on affected plants.
- Insecticidal Soap: Effective against soft-bodied insects like aphids, whiteflies, and spider mites. Garden Safe Insecticidal Soap (24oz ready-to-use, ~$10).
- Bacillus thuringiensis (Bt): A naturally occurring soil bacterium that targets caterpillars and worms. Monterey BT Worm & Caterpillar Killer (16oz, ~$18) is highly effective and safe for beneficial insects.
- Copper or Sulfur Sprays: For fungal diseases like powdery mildew or blight, organic copper (e.g., Bonide Copper Fungicide, ~$15 for 1lb) or sulfur (e.g., Safer Brand Garden Fungicide, ~$10 for 16oz) can be used as a last resort.
Step 7: Harvesting & Seed Saving
The culmination of your efforts is the harvest, and seed saving closes the loop on self-sufficiency.
- Harvesting Techniques:
- Timing: Harvest vegetables at their peak ripeness for best flavor and nutritional value. For example, green beans should snap cleanly, cucumbers should be firm, and tomatoes should be fully colored.
- Frequency: Many crops, like zucchini, cucumbers, and bush beans, produce more if harvested frequently. Pick daily or every other day.
- Tools: Use clean, sharp pruners (e.g., Corona ClassicCUT Bypass Pruner BP 3180, ~$30) or a sharp knife for clean cuts, minimizing damage to the plant.
- Seed Saving: This is where the « self-sufficient » aspect truly shines.
- Selection: Only save seeds from your healthiest, most vigorous plants that show desired traits (disease resistance, good flavor, high yield).
- Isolation: To ensure true-to-type seeds, prevent cross-pollination. This can be challenging for open-pollinated crops that readily cross (e.g., squash, corn). For beginners, focus on self-pollinating plants like beans, peas, lettuce, and tomatoes.
- Processing:
- Dry Seeds (Beans, Peas, Lettuce, Grains): Allow pods/seed heads to dry completely on the plant. Harvest, shell, and clean the seeds, removing chaff.
- Wet Seeds (Tomatoes, Cucumbers, Squash): For tomatoes, ferment the seeds in water for a few days to remove the gel coating and inhibit disease. For cucumbers/squash, scrape out seeds, wash thoroughly, and dry.
- Drying: Spread seeds thinly on screens or paper plates in a cool, dry, well-ventilated area for 1-4 weeks. Ensure they are bone-dry before storage. I aim for less than 8% moisture content.
- Storage: Store seeds in airtight containers (glass jars with desiccant packets work well) in a cool, dark, dry place (ideally 40-50°F and 30-40% humidity). Label clearly with variety and date. Properly stored seeds can remain viable for 3-10 years or more.
Step 8: Season Extension & Winterizing
Extend your harvest and protect your garden for the off-season to truly maximize your self sufficient garden from scratch.
- Cold Frames: Simple structures with a transparent top (glass, polycarbonate, or old windows) that sit over garden beds. They trap solar heat, allowing you to grow cold-hardy crops (lettuce, spinach, kale, radishes) well into winter or start seeds earlier in spring. A basic cold frame can be built from 2×6 lumber and a sheet of polycarbonate for under $100.
- Hoop Houses/Low Tunnels: Larger structures made from flexible hoops (PVC pipe or EMT conduit) covered with greenhouse plastic. These provide more space and greater temperature moderation. A 10×20 ft DIY low tunnel kit can cost $200-$500, while a larger, more robust hoop house kit might be $1,000-$3,000. I use a 6×12 ft low tunnel made from 1/2-inch PVC hoops and 6mil greenhouse plastic, which extends my lettuce and spinach harvest by at least
Deciding between raised beds and in-ground beds depends on your soil, budget, and physical capabilities.
- In-Ground Beds: If you have excellent native soil and good drainage, in-ground beds are the most economical. Double-digging (loosening soil two shovel depths) can significantly improve drainage and aeration. For my main garden, I primarily use in-ground beds, but I focus on building up the soil over time with consistent compost additions and cover cropping. I aim for beds that are no wider than 3-4 feet so I can reach the center without stepping on the soil, compacting it.
- Raised Beds: Raised beds offer numerous advantages, especially for poor soil, heavy clay, or rocky areas. They provide better drainage, warm up faster in spring, reduce compaction, and make weeding and harvesting easier on your back.
- Material Options:
- Untreated Cedar: Naturally rot-resistant and chemical-free. A 4×8 ft bed, 12 inches deep, typically requires three 2x12x8 ft cedar boards, costing around $50-$60 per board (total ~$150-$180) plus corner brackets or screws. My first raised beds were cedar and are still going strong after 7 years.
- Galvanized Steel: Durable, long-lasting, and aesthetically pleasing. Brands like Vego Garden offer modular kits. A Vego Garden 17″ Tall 8-in-1 Metal Raised Garden Bed (can be configured to 4×8 ft) costs approximately $250-$300.
- Concrete Blocks/Stones: Very durable but can leach minerals (though generally safe once weathered) and can be expensive.
- Recycled Materials: Pallets (check for chemical treatment stamps like « HT » for heat-treated), old tires (controversial due to potential chemical leaching).
- Filling Raised Beds: Don’t just fill with topsoil. Use a « Hugelkultur » approach (logs, branches, leaves, then compost, then topsoil) or a mixture of 60% good quality topsoil, 30% compost, and 10% perlite or vermiculite for drainage. A 4x8x1 ft raised bed requires about 32 cubic feet (or ~1.2 cubic yards) of soil mix, which can cost $100-$200 depending on your source.
- Material Options:
Step 4: Water Management & Irrigation
Efficient water management is critical for a self sufficient garden from scratch, especially in off-grid living where water resources might be limited.
- Rainwater Harvesting: This is my primary source of irrigation water. A 55-gallon rain barrel (e.g., EarthMark Rain Barrel, ~$120-$150) connected to a downspout can collect significant water. For larger needs, I use two 275-gallon IBC totes (Intermediate Bulk Containers, often available used for $100-$200 each from food-grade sources) connected in series. A 1,000 sq ft roof can collect approximately 620 gallons of water for every inch of rainfall. My 1,500 sq ft roof provides ample water for my 600 sq ft garden through multiple barrels and totes.
- Drip Irrigation: This is by far the most water-efficient method, delivering water directly to the plant’s root zone, minimizing evaporation and weed growth.
- Components: A typical drip system includes a pressure regulator (e.g., Rain Bird PRV-10, ~$15), a filter (Rain Bird RBY filter, ~$20), main tubing (1/2-inch poly tubing, 100ft ~$25), smaller feeder lines (1/4-inch tubing), and emitters (0.5 GPH or 1 GPH per plant).
- Kits: For beginners, a starter kit like the Rain Bird Drip Irrigation Garden Kit (model DDI-KIT-1P, ~$40-$60) is excellent for a small garden. For larger setups, I use Netafim Techline CV Drip Line (500ft roll, ~$150-$200), which has pressure-compensating emitters built-in, ensuring even watering across long runs.
- Automation: For true self-sufficiency, consider a battery-powered timer (e.g., Orbit B-Hyve Bluetooth Hose Faucet Timer, ~$50) or a solar-powered timer connected to a small 12V pump.
- Solar-Powered Pumps: For lifting water from a well, pond, or large storage tank to your garden, a solar pump is a game-changer. For a smaller drip system, a Shurflo 2088-594-152 Diaphragm Pump (12V, 3.5 GPM, ~$180) can be powered by a single 100W solar panel (e.g., Renogy 100W Monocrystalline Solar Panel, ~$100) and a small 12V battery (e.g., a 50Ah LiFePO4 battery like the Battle Born 50Ah, ~$450). For larger operations or deeper wells, more robust systems are needed. If you’re looking to build out a comprehensive off-grid power system to support your garden’s water needs, or indeed your entire homestead, you might want to explore resources like the Power Grid Generator complete system guide to understand the full scope of what’s possible in terms of energy independence.
Step 5: Seed Selection & Planting
The choice of seeds is crucial for a truly self sufficient garden from scratch.
- Choose Heirloom & Open-Pollinated Seeds: These varieties produce seeds that will grow true to type, meaning you can save seeds from your harvest year after year. F1 hybrids, while often vigorous, will not produce consistent offspring from saved seeds. Reputable seed companies include Baker Creek Heirloom Seeds, High Mowing Organic Seeds, and Seed Savers Exchange. Start with common, reliable varieties like ‘Black Krim’ tomatoes, ‘Provider’ bush beans, ‘Waltham Butternut’ squash, and ‘Black Seeded Simpson’ lettuce.
- Start Seeds Indoors (Optional but Recommended): For longer growing seasons or specific crops, starting seeds indoors gives you a head start. Use seed-starting mix (e.g., Espoma Organic Seed Starter Mix, ~$10 for 16qt bag) in seed trays (Jiffy Professional Greenhouse 72-cell kit, ~$15). Provide adequate light with LED grow lights (Barrina T5 2ft 4-pack LED Grow Lights, 20W each, ~$50) for 14-16 hours a day, positioned 2-4 inches above seedlings. Maintain consistent temperatures (65-75°F for most).
- Direct Sowing vs. Transplanting: Some crops (carrots, radishes, beans, corn) prefer direct sowing into the garden bed. Others (tomatoes, peppers, broccoli, kale) benefit from being started indoors and transplanted. Follow seed packet instructions for planting depths (e.g., lettuce seeds are often surface-sown or planted 1/8 inch deep, while beans are 1 inch deep) and spacing.
- Companion Planting: Strategically plant different species together to enhance growth, deter pests, and attract beneficial insects. For example, planting marigolds near tomatoes can deter nematodes, and basil improves tomato flavor. Nasturtiums can act as a trap crop for aphids.
- Succession Planting: For a continuous harvest, plant small batches of quick-growing crops (lettuce, radishes, cilantro) every 2-3 weeks. As one crop finishes, another is ready to take its place.
Step 6: Pest & Disease Management (Organic)
Maintaining a self sufficient garden from scratch means embracing organic pest and disease control.
- Integrated Pest Management (IPM): This holistic approach combines several strategies.
- Observation: Regularly inspect your plants for early signs of pests or disease. Catching issues early is key.
- Physical Barriers: Use row covers (e.g., Agribon AG-19 floating row cover, 10×20 ft, ~$20) to protect young plants from insect pests like cabbage worms and squash bugs. Install fences (e.g., 2×4 welded wire mesh, 4 ft tall, 50 ft roll ~$70) to keep out deer, rabbits, and other larger animals.
- Hand-Picking: For larger pests like tomato hornworms or squash bugs, simply pick them off and drop them into a bucket of soapy water.
- Companion Planting: As mentioned, certain plants repel pests. Marigolds, garlic, and onions are excellent deterrents.
- Attract Beneficial Insects: Plant flowers like dill, fennel, cosmos, and sweet alyssum to attract ladybugs, lacewings, and parasitic wasps, which prey on common garden pests.
- Organic Sprays & Treatments:
- Neem Oil: An excellent broad-spectrum organic insecticide and fungicide. Bonide Neem Oil Concentrate (16oz, ~$20) can be mixed at a rate of 1-2 tbsp per gallon of water and sprayed on affected plants.
- Insecticidal Soap: Effective against soft-bodied insects like aphids, whiteflies, and spider mites. Garden Safe Insecticidal Soap (24oz ready-to-use, ~$10).
- Bacillus thuringiensis (Bt): A naturally occurring soil bacterium that targets caterpillars and worms. Monterey BT Worm & Caterpillar Killer (16oz, ~$18) is highly effective and safe for beneficial insects.
- Copper or Sulfur Sprays: For fungal diseases like powdery mildew or blight, organic copper (e.g., Bonide Copper Fungicide, ~$15 for 1lb) or sulfur (e.g., Safer Brand Garden Fungicide, ~$10 for 16oz) can be used as a last resort.
Step 7: Harvesting & Seed Saving
The culmination of your efforts is the harvest, and seed saving closes the loop on self-sufficiency.
- Harvesting Techniques:
- Timing: Harvest vegetables at their peak ripeness for best flavor and nutritional value. For example, green beans should snap cleanly, cucumbers should be firm, and tomatoes should be fully colored.
- Frequency: Many crops, like zucchini, cucumbers, and bush beans, produce more if harvested frequently. Pick daily or every other day.
- Tools: Use clean, sharp pruners (e.g., Corona ClassicCUT Bypass Pruner BP 3180, ~$30) or a sharp knife for clean cuts, minimizing damage to the plant.
- Seed Saving: This is where the « self-sufficient » aspect truly shines.
- Selection: Only save seeds from your healthiest, most vigorous plants that show desired traits (disease resistance, good flavor, high yield).
- Isolation: To ensure true-to-type seeds, prevent cross-pollination. This can be challenging for open-pollinated crops that readily cross (e.g., squash, corn). For beginners, focus on self-pollinating plants like beans, peas, lettuce, and tomatoes.
- Processing:
- Dry Seeds (Beans, Peas, Lettuce, Grains): Allow pods/seed heads to dry completely on the plant. Harvest, shell, and clean the seeds, removing chaff.
- Wet Seeds (Tomatoes, Cucumbers, Squash): For tomatoes, ferment the seeds in water for a few days to remove the gel coating and inhibit disease. For cucumbers/squash, scrape out seeds, wash thoroughly, and dry.
- Drying: Spread seeds thinly on screens or paper plates in a cool, dry, well-ventilated area for 1-4 weeks. Ensure they are bone-dry before storage. I aim for less than 8% moisture content.
- Storage: Store seeds in airtight containers (glass jars with desiccant packets work well) in a cool, dark, dry place (ideally 40-50°F and 30-40% humidity). Label clearly with variety and date. Properly stored seeds can remain viable for 3-10 years or more.
Step 8: Season Extension & Winterizing
Extend your harvest and protect your garden for the off-season to truly maximize your self sufficient garden from scratch.
- Cold Frames: Simple structures with a transparent top (glass, polycarbonate, or old windows) that sit over garden beds. They trap solar heat, allowing you to grow cold-hardy crops (lettuce, spinach, kale, radishes) well into winter or start seeds earlier in spring. A basic cold frame can be built from 2×6 lumber and a sheet of polycarbonate for under $100.
- Hoop Houses/Low Tunnels: Larger structures made from flexible hoops (PVC pipe or EMT conduit) covered with greenhouse plastic. These provide more space and greater temperature moderation. A 10×20 ft DIY low tunnel kit can cost $200-$500, while a larger, more robust hoop house kit might be $1,000-$3,000. I use a 6×12 ft low tunnel made from 1/2-inch PVC hoops and 6mil greenhouse plastic, which extends my lettuce and spinach harvest by at least
Healthy soil is the bedrock of a productive, self-sufficient garden. You can’t guess what your soil needs; you have to test it.
- Perform a Soil Test: A professional soil test will give you precise data on your soil’s pH, nutrient levels (N-P-K), and organic matter content. I recommend sending a sample to your local agricultural extension office; it typically costs $20-$50 and provides detailed recommendations. Alternatively, for a quick homeowner check, a Rapitest Soil Test Kit (40-test kit, model 1663, ~$20 on Amazon) provides a good baseline for pH, Nitrogen, Phosphorus, and Potash. Aim for a pH between 6.0 and 7.0 for most vegetables.
- Amend for pH Imbalance: If your soil is too acidic (below 6.0), add agricultural lime (dolomitic lime adds magnesium, calcitic lime adds calcium). Apply 5-10 lbs per 100 sq ft for a moderate adjustment. If it’s too alkaline (above 7.0), add elemental sulfur (e.g., Espoma Soil Acidifier, ~$15 for 6.75 lbs) or generous amounts of organic matter like peat moss or pine needles.
- Build Organic Matter: This is the single most important step for long-term soil health. Organic matter improves soil structure, water retention, drainage, and nutrient availability. Incorporate 2-4 inches of high-quality compost into your top 6-12 inches of soil annually. I make my own compost from kitchen scraps, garden waste, and shredded leaves, but you can purchase it. Local nurseries often sell bulk compost for $30-$50 per cubic yard. Aged manure (from chickens, cows, or horses – ensure it’s well-rotted to avoid burning plants) is also excellent.
- Address Nutrient Deficiencies: Based on your soil test, add specific organic amendments. If Nitrogen (N) is low, add blood meal (12-0-0, ~$20 for 3 lbs) or feather meal. For Phosphorus (P), use bone meal (3-15-0, ~$15 for 3 lbs) or rock phosphate. For Potassium (K), greensand (0-0-2.5, ~$25 for 5 lbs) or kelp meal are good choices. I rely heavily on Espoma Organic Garden-tone (5-3-3, ~$25 for an 8lb bag) as a balanced, all-purpose organic fertilizer during planting.
Step 3: Garden Bed Preparation
Deciding between raised beds and in-ground beds depends on your soil, budget, and physical capabilities.
- In-Ground Beds: If you have excellent native soil and good drainage, in-ground beds are the most economical. Double-digging (loosening soil two shovel depths) can significantly improve drainage and aeration. For my main garden, I primarily use in-ground beds, but I focus on building up the soil over time with consistent compost additions and cover cropping. I aim for beds that are no wider than 3-4 feet so I can reach the center without stepping on the soil, compacting it.
- Raised Beds: Raised beds offer numerous advantages, especially for poor soil, heavy clay, or rocky areas. They provide better drainage, warm up faster in spring, reduce compaction, and make weeding and harvesting easier on your back.
- Material Options:
- Untreated Cedar: Naturally rot-resistant and chemical-free. A 4×8 ft bed, 12 inches deep, typically requires three 2x12x8 ft cedar boards, costing around $50-$60 per board (total ~$150-$180) plus corner brackets or screws. My first raised beds were cedar and are still going strong after 7 years.
- Galvanized Steel: Durable, long-lasting, and aesthetically pleasing. Brands like Vego Garden offer modular kits. A Vego Garden 17″ Tall 8-in-1 Metal Raised Garden Bed (can be configured to 4×8 ft) costs approximately $250-$300.
- Concrete Blocks/Stones: Very durable but can leach minerals (though generally safe once weathered) and can be expensive.
- Recycled Materials: Pallets (check for chemical treatment stamps like « HT » for heat-treated), old tires (controversial due to potential chemical leaching).
- Filling Raised Beds: Don’t just fill with topsoil. Use a « Hugelkultur » approach (logs, branches, leaves, then compost, then topsoil) or a mixture of 60% good quality topsoil, 30% compost, and 10% perlite or vermiculite for drainage. A 4x8x1 ft raised bed requires about 32 cubic feet (or ~1.2 cubic yards) of soil mix, which can cost $100-$200 depending on your source.
- Material Options:
Step 4: Water Management & Irrigation
Efficient water management is critical for a self sufficient garden from scratch, especially in off-grid living where water resources might be limited.
- Rainwater Harvesting: This is my primary source of irrigation water. A 55-gallon rain barrel (e.g., EarthMark Rain Barrel, ~$120-$150) connected to a downspout can collect significant water. For larger needs, I use two 275-gallon IBC totes (Intermediate Bulk Containers, often available used for $100-$200 each from food-grade sources) connected in series. A 1,000 sq ft roof can collect approximately 620 gallons of water for every inch of rainfall. My 1,500 sq ft roof provides ample water for my 600 sq ft garden through multiple barrels and totes.
- Drip Irrigation: This is by far the most water-efficient method, delivering water directly to the plant’s root zone, minimizing evaporation and weed growth.
- Components: A typical drip system includes a pressure regulator (e.g., Rain Bird PRV-10, ~$15), a filter (Rain Bird RBY filter, ~$20), main tubing (1/2-inch poly tubing, 100ft ~$25), smaller feeder lines (1/4-inch tubing), and emitters (0.5 GPH or 1 GPH per plant).
- Kits: For beginners, a starter kit like the Rain Bird Drip Irrigation Garden Kit (model DDI-KIT-1P, ~$40-$60) is excellent for a small garden. For larger setups, I use Netafim Techline CV Drip Line (500ft roll, ~$150-$200), which has pressure-compensating emitters built-in, ensuring even watering across long runs.
- Automation: For true self-sufficiency, consider a battery-powered timer (e.g., Orbit B-Hyve Bluetooth Hose Faucet Timer, ~$50) or a solar-powered timer connected to a small 12V pump.
- Solar-Powered Pumps: For lifting water from a well, pond, or large storage tank to your garden, a solar pump is a game-changer. For a smaller drip system, a Shurflo 2088-594-152 Diaphragm Pump (12V, 3.5 GPM, ~$180) can be powered by a single 100W solar panel (e.g., Renogy 100W Monocrystalline Solar Panel, ~$100) and a small 12V battery (e.g., a 50Ah LiFePO4 battery like the Battle Born 50Ah, ~$450). For larger operations or deeper wells, more robust systems are needed. If you’re looking to build out a comprehensive off-grid power system to support your garden’s water needs, or indeed your entire homestead, you might want to explore resources like the Power Grid Generator complete system guide to understand the full scope of what’s possible in terms of energy independence.
Step 5: Seed Selection & Planting
The choice of seeds is crucial for a truly self sufficient garden from scratch.
- Choose Heirloom & Open-Pollinated Seeds: These varieties produce seeds that will grow true to type, meaning you can save seeds from your harvest year after year. F1 hybrids, while often vigorous, will not produce consistent offspring from saved seeds. Reputable seed companies include Baker Creek Heirloom Seeds, High Mowing Organic Seeds, and Seed Savers Exchange. Start with common, reliable varieties like ‘Black Krim’ tomatoes, ‘Provider’ bush beans, ‘Waltham Butternut’ squash, and ‘Black Seeded Simpson’ lettuce.
- Start Seeds Indoors (Optional but Recommended): For longer growing seasons or specific crops, starting seeds indoors gives you a head start. Use seed-starting mix (e.g., Espoma Organic Seed Starter Mix, ~$10 for 16qt bag) in seed trays (Jiffy Professional Greenhouse 72-cell kit, ~$15). Provide adequate light with LED grow lights (Barrina T5 2ft 4-pack LED Grow Lights, 20W each, ~$50) for 14-16 hours a day, positioned 2-4 inches above seedlings. Maintain consistent temperatures (65-75°F for most).
- Direct Sowing vs. Transplanting: Some crops (carrots, radishes, beans, corn) prefer direct sowing into the garden bed. Others (tomatoes, peppers, broccoli, kale) benefit from being started indoors and transplanted. Follow seed packet instructions for planting depths (e.g., lettuce seeds are often surface-sown or planted 1/8 inch deep, while beans are 1 inch deep) and spacing.
- Companion Planting: Strategically plant different species together to enhance growth, deter pests, and attract beneficial insects. For example, planting marigolds near tomatoes can deter nematodes, and basil improves tomato flavor. Nasturtiums can act as a trap crop for aphids.
- Succession Planting: For a continuous harvest, plant small batches of quick-growing crops (lettuce, radishes, cilantro) every 2-3 weeks. As one crop finishes, another is ready to take its place.
Step 6: Pest & Disease Management (Organic)
Maintaining a self sufficient garden from scratch means embracing organic pest and disease control.
- Integrated Pest Management (IPM): This holistic approach combines several strategies.
- Observation: Regularly inspect your plants for early signs of pests or disease. Catching issues early is key.
- Physical Barriers: Use row covers (e.g., Agribon AG-19 floating row cover, 10×20 ft, ~$20) to protect young plants from insect pests like cabbage worms and squash bugs. Install fences (e.g., 2×4 welded wire mesh, 4 ft tall, 50 ft roll ~$70) to keep out deer, rabbits, and other larger animals.
- Hand-Picking: For larger pests like tomato hornworms or squash bugs, simply pick them off and drop them into a bucket of soapy water.
- Companion Planting: As mentioned, certain plants repel pests. Marigolds, garlic, and onions are excellent deterrents.
- Attract Beneficial Insects: Plant flowers like dill, fennel, cosmos, and sweet alyssum to attract ladybugs, lacewings, and parasitic wasps, which prey on common garden pests.
- Organic Sprays & Treatments:
- Neem Oil: An excellent broad-spectrum organic insecticide and fungicide. Bonide Neem Oil Concentrate (16oz, ~$20) can be mixed at a rate of 1-2 tbsp per gallon of water and sprayed on affected plants.
- Insecticidal Soap: Effective against soft-bodied insects like aphids, whiteflies, and spider mites. Garden Safe Insecticidal Soap (24oz ready-to-use, ~$10).
- Bacillus thuringiensis (Bt): A naturally occurring soil bacterium that targets caterpillars and worms. Monterey BT Worm & Caterpillar Killer (16oz, ~$18) is highly effective and safe for beneficial insects.
- Copper or Sulfur Sprays: For fungal diseases like powdery mildew or blight, organic copper (e.g., Bonide Copper Fungicide, ~$15 for 1lb) or sulfur (e.g., Safer Brand Garden Fungicide, ~$10 for 16oz) can be used as a last resort.
Step 7: Harvesting & Seed Saving
The culmination of your efforts is the harvest, and seed saving closes the loop on self-sufficiency.
- Harvesting Techniques:
- Timing: Harvest vegetables at their peak ripeness for best flavor and nutritional value. For example, green beans should snap cleanly, cucumbers should be firm, and tomatoes should be fully colored.
- Frequency: Many crops, like zucchini, cucumbers, and bush beans, produce more if harvested frequently. Pick daily or every other day.
- Tools: Use clean, sharp pruners (e.g., Corona ClassicCUT Bypass Pruner BP 3180, ~$30) or a sharp knife for clean cuts, minimizing damage to the plant.
- Seed Saving: This is where the « self-sufficient » aspect truly shines.
- Selection: Only save seeds from your healthiest, most vigorous plants that show desired traits (disease resistance, good flavor, high yield).
- Isolation: To ensure true-to-type seeds, prevent cross-pollination. This can be challenging for open-pollinated crops that readily cross (e.g., squash, corn). For beginners, focus on self-pollinating plants like beans, peas, lettuce, and tomatoes.
- Processing:
- Dry Seeds (Beans, Peas, Lettuce, Grains): Allow pods/seed heads to dry completely on the plant. Harvest, shell, and clean the seeds, removing chaff.
- Wet Seeds (Tomatoes, Cucumbers, Squash): For tomatoes, ferment the seeds in water for a few days to remove the gel coating and inhibit disease. For cucumbers/squash, scrape out seeds, wash thoroughly, and dry.
- Drying: Spread seeds thinly on screens or paper plates in a cool, dry, well-ventilated area for 1-4 weeks. Ensure they are bone-dry before storage. I aim for less than 8% moisture content.
- Storage: Store seeds in airtight containers (glass jars with desiccant packets work well) in a cool, dark, dry place (ideally 40-50°F and 30-40% humidity). Label clearly with variety and date. Properly stored seeds can remain viable for 3-10 years or more.
Step 8: Season Extension & Winterizing
Extend your harvest and protect your garden for the off-season to truly maximize your self sufficient garden from scratch.
- Cold Frames: Simple structures with a transparent top (glass, polycarbonate, or old windows) that sit over garden beds. They trap solar heat, allowing you to grow cold-hardy crops (lettuce, spinach, kale, radishes) well into winter or start seeds earlier in spring. A basic cold frame can be built from 2×6 lumber and a sheet of polycarbonate for under $100.
- Hoop Houses/Low Tunnels: Larger structures made from flexible hoops (PVC pipe or EMT conduit) covered with greenhouse plastic. These provide more space and greater temperature moderation. A 10×20 ft DIY low tunnel kit can cost $200-$500, while a larger, more robust hoop house kit might be $1,000-$3,000. I use a 6×12 ft low tunnel made from 1/2-inch PVC hoops and 6mil greenhouse plastic, which extends my lettuce and spinach harvest by at least
Step 7: Harvesting & Seed Saving
The culmination of your efforts is the harvest, and seed saving closes the loop on self-sufficiency.
- Harvesting Techniques:
- Timing: Harvest vegetables at their peak ripeness for best flavor and nutritional value. For example, green beans should snap cleanly, cucumbers should be firm, and tomatoes should be fully colored.
- Frequency: Many crops, like zucchini, cucumbers, and bush beans, produce more if harvested frequently. Pick daily or every other day.
- Tools: Use clean, sharp pruners (e.g., Corona ClassicCUT Bypass Pruner BP 3180, ~$30) or a sharp knife for clean cuts, minimizing damage to the plant.
- Seed Saving: This is where the « self-sufficient » aspect truly shines.
- Selection: Only save seeds from your healthiest, most vigorous plants that show desired traits (disease resistance, good flavor, high yield).
- Isolation: To ensure true-to-type seeds, prevent cross-pollination. This can be challenging for open-pollinated crops that readily cross (e.g., squash, corn). For beginners, focus on self-pollinating plants like beans, peas, lettuce, and tomatoes.
- Processing:
- Dry Seeds (Beans, Peas, Lettuce, Grains): Allow pods/seed heads to dry completely on the plant. Harvest, shell, and clean the seeds, removing chaff.
- Wet Seeds (Tomatoes, Cucumbers, Squash): For tomatoes, ferment the seeds in water for a few days to remove the gel coating and inhibit disease. For cucumbers/squash, scrape out seeds, wash thoroughly, and dry.
- Drying: Spread seeds thinly on screens or paper plates in a cool, dry, well-ventilated area for 1-4 weeks. Ensure they are bone-dry before storage. I aim for less than 8% moisture content.
- Storage: Store seeds in airtight containers (glass jars with desiccant packets work well) in a cool, dark, dry place (ideally 40-50°F and 30-40% humidity). Label clearly with variety and date. Properly stored seeds can remain viable for 3-10 years or more.
Step 8: Season Extension & Winterizing
Extend your harvest and protect your garden for the off-season to truly maximize your self sufficient garden from scratch.
- Cold Frames: Simple structures with a transparent top (glass, polycarbonate, or old windows) that sit over garden beds. They trap solar heat, allowing you to grow cold-hardy crops (lettuce, spinach, kale, radishes) well into winter or start seeds earlier in spring. A basic cold frame can be built from 2×6 lumber and a sheet of polycarbonate for under $100.
- Hoop Houses/Low Tunnels: Larger structures made from flexible hoops (PVC pipe or EMT conduit) covered with greenhouse plastic. These provide more space and greater temperature moderation. A 10×20 ft DIY low tunnel kit can cost $200-$500, while a larger, more robust hoop house kit might be $1,000-$3,000. I use a 6×12 ft low tunnel made from 1/2-inch PVC hoops and 6mil greenhouse plastic, which extends my lettuce and spinach harvest by at least
- In-Ground Beds: If you have excellent native soil and good drainage, in-ground beds are the most economical. Double-digging (loosening soil two shovel depths) can significantly improve drainage and aeration. For my main garden, I primarily use in-ground beds, but I focus on building up the soil over time with consistent compost additions and cover cropping. I aim for beds that are no wider than 3-4 feet so I can reach the center without stepping on the soil, compacting it.
- Raised Beds: Raised beds offer numerous advantages, especially for poor soil, heavy clay, or rocky areas. They provide better drainage, warm up faster in spring, reduce compaction, and make weeding and harvesting easier on your back.
- Material Options:
- Untreated Cedar: Naturally rot-resistant and chemical-free. A 4×8 ft bed, 12 inches deep, typically requires three 2x12x8 ft cedar boards, costing around $50-$60 per board (total ~$150-$180) plus corner brackets or screws. My first raised beds were cedar and are still going strong after 7 years.
- Galvanized Steel: Durable, long-lasting, and aesthetically pleasing. Brands like Vego Garden offer modular kits. A Vego Garden 17″ Tall 8-in-1 Metal Raised Garden Bed (can be configured to 4×8 ft) costs approximately $250-$300.
- Concrete Blocks/Stones: Very durable but can leach minerals (though generally safe once weathered) and can be expensive.
- Recycled Materials: Pallets (check for chemical treatment stamps like « HT » for heat-treated), old tires (controversial due to potential chemical leaching).
- Filling Raised Beds: Don’t just fill with topsoil. Use a « Hugelkultur » approach (logs, branches, leaves, then compost, then topsoil) or a mixture of 60% good quality topsoil, 30% compost, and 10% perlite or vermiculite for drainage. A 4x8x1 ft raised bed requires about 32 cubic feet (or ~1.2 cubic yards) of soil mix, which can cost $100-$200 depending on your source.
- Material Options:
Step 4: Water Management & Irrigation
Efficient water management is critical for a self sufficient garden from scratch, especially in off-grid living where water resources might be limited.
- Rainwater Harvesting: This is my primary source of irrigation water. A 55-gallon rain barrel (e.g., EarthMark Rain Barrel, ~$120-$150) connected to a downspout can collect significant water. For larger needs, I use two 275-gallon IBC totes (Intermediate Bulk Containers, often available used for $100-$200 each from food-grade sources) connected in series. A 1,000 sq ft roof can collect approximately 620 gallons of water for every inch of rainfall. My 1,500 sq ft roof provides ample water for my 600 sq ft garden through multiple barrels and totes.
- Drip Irrigation: This is by far the most water-efficient method, delivering water directly to the plant’s root zone, minimizing evaporation and weed growth.
- Components: A typical drip system includes a pressure regulator (e.g., Rain Bird PRV-10, ~$15), a filter (Rain Bird RBY filter, ~$20), main tubing (1/2-inch poly tubing, 100ft ~$25), smaller feeder lines (1/4-inch tubing), and emitters (0.5 GPH or 1 GPH per plant).
- Kits: For beginners, a starter kit like the Rain Bird Drip Irrigation Garden Kit (model DDI-KIT-1P, ~$40-$60) is excellent for a small garden. For larger setups, I use Netafim Techline CV Drip Line (500ft roll, ~$150-$200), which has pressure-compensating emitters built-in, ensuring even watering across long runs.
- Automation: For true self-sufficiency, consider a battery-powered timer (e.g., Orbit B-Hyve Bluetooth Hose Faucet Timer, ~$50) or a solar-powered timer connected to a small 12V pump.
- Solar-Powered Pumps: For lifting water from a well, pond, or large storage tank to your garden, a solar pump is a game-changer. For a smaller drip system, a Shurflo 2088-594-152 Diaphragm Pump (12V, 3.5 GPM, ~$180) can be powered by a single 100W solar panel (e.g., Renogy 100W Monocrystalline Solar Panel, ~$100) and a small 12V battery (e.g., a 50Ah LiFePO4 battery like the Battle Born 50Ah, ~$450). For larger operations or deeper wells, more robust systems are needed. If you’re looking to build out a comprehensive off-grid power system to support your garden’s water needs, or indeed your entire homestead, you might want to explore resources like the Power Grid Generator complete system guide to understand the full scope of what’s possible in terms of energy independence.
Step 5: Seed Selection & Planting
The choice of seeds is crucial for a truly self sufficient garden from scratch.
- Choose Heirloom & Open-Pollinated Seeds: These varieties produce seeds that will grow true to type, meaning you can save seeds from your harvest year after year. F1 hybrids, while often vigorous, will not produce consistent offspring from saved seeds. Reputable seed companies include Baker Creek Heirloom Seeds, High Mowing Organic Seeds, and Seed Savers Exchange. Start with common, reliable varieties like ‘Black Krim’ tomatoes, ‘Provider’ bush beans, ‘Waltham Butternut’ squash, and ‘Black Seeded Simpson’ lettuce.
- Start Seeds Indoors (Optional but Recommended): For longer growing seasons or specific crops, starting seeds indoors gives you a head start. Use seed-starting mix (e.g., Espoma Organic Seed Starter Mix, ~$10 for 16qt bag) in seed trays (Jiffy Professional Greenhouse 72-cell kit, ~$15). Provide adequate light with LED grow lights (Barrina T5 2ft 4-pack LED Grow Lights, 20W each, ~$50) for 14-16 hours a day, positioned 2-4 inches above seedlings. Maintain consistent temperatures (65-75°F for most).
- Direct Sowing vs. Transplanting: Some crops (carrots, radishes, beans, corn) prefer direct sowing into the garden bed. Others (tomatoes, peppers, broccoli, kale) benefit from being started indoors and transplanted. Follow seed packet instructions for planting depths (e.g., lettuce seeds are often surface-sown or planted 1/8 inch deep, while beans are 1 inch deep) and spacing.
- Companion Planting: Strategically plant different species together to enhance growth, deter pests, and attract beneficial insects. For example, planting marigolds near tomatoes can deter nematodes, and basil improves tomato flavor. Nasturtiums can act as a trap crop for aphids.
- Succession Planting: For a continuous harvest, plant small batches of quick-growing crops (lettuce, radishes, cilantro) every 2-3 weeks. As one crop finishes, another is ready to take its place.
Step 6: Pest & Disease Management (Organic)
Maintaining a self sufficient garden from scratch means embracing organic pest and disease control.
- Integrated Pest Management (IPM): This holistic approach combines several strategies.
- Observation: Regularly inspect your plants for early signs of pests or disease. Catching issues early is key.
- Physical Barriers: Use row covers (e.g., Agribon AG-19 floating row cover, 10×20 ft, ~$20) to protect young plants from insect pests like cabbage worms and squash bugs. Install fences (e.g., 2×4 welded wire mesh, 4 ft tall, 50 ft roll ~$70) to keep out deer, rabbits, and other larger animals.
- Hand-Picking: For larger pests like tomato hornworms or squash bugs, simply pick them off and drop them into a bucket of soapy water.
- Companion Planting: As mentioned, certain plants repel pests. Marigolds, garlic, and onions are excellent deterrents.
- Attract Beneficial Insects: Plant flowers like dill, fennel, cosmos, and sweet alyssum to attract ladybugs, lacewings, and parasitic wasps, which prey on common garden pests.
- Organic Sprays & Treatments:
- Neem Oil: An excellent broad-spectrum organic insecticide and fungicide. Bonide Neem Oil Concentrate (16oz, ~$20) can be mixed at a rate of 1-2 tbsp per gallon of water and sprayed on affected plants.
- Insecticidal Soap: Effective against soft-bodied insects like aphids, whiteflies, and spider mites. Garden Safe Insecticidal Soap (24oz ready-to-use, ~$10).
- Bacillus thuringiensis (Bt): A naturally occurring soil bacterium that targets caterpillars and worms. Monterey BT Worm & Caterpillar Killer (16oz, ~$18) is highly effective and safe for beneficial insects.
- Copper or Sulfur Sprays: For fungal diseases like powdery mildew or blight, organic copper (e.g., Bonide Copper Fungicide, ~$15 for 1lb) or sulfur (e.g., Safer Brand Garden Fungicide, ~$10 for 16oz) can be used as a last resort.
Step 7: Harvesting & Seed Saving
The culmination of your efforts is the harvest, and seed saving closes the loop on self-sufficiency.
- Harvesting Techniques:
- Timing: Harvest vegetables at their peak ripeness for best flavor and nutritional value. For example, green beans should snap cleanly, cucumbers should be firm, and tomatoes should be fully colored.
- Frequency: Many crops, like zucchini, cucumbers, and bush beans, produce more if harvested frequently. Pick daily or every other day.
- Tools: Use clean, sharp pruners (e.g., Corona ClassicCUT Bypass Pruner BP 3180, ~$30) or a sharp knife for clean cuts, minimizing damage to the plant.
- Seed Saving: This is where the « self-sufficient » aspect truly shines.
- Selection: Only save seeds from your healthiest, most vigorous plants that show desired traits (disease resistance, good flavor, high yield).
- Isolation: To ensure true-to-type seeds, prevent cross-pollination. This can be challenging for open-pollinated crops that readily cross (e.g., squash, corn). For beginners, focus on self-pollinating plants like beans, peas, lettuce, and tomatoes.
- Processing:
- Dry Seeds (Beans, Peas, Lettuce, Grains): Allow pods/seed heads to dry completely on the plant. Harvest, shell, and clean the seeds, removing chaff.
- Wet Seeds (Tomatoes, Cucumbers, Squash): For tomatoes, ferment the seeds in water for a few days to remove the gel coating and inhibit disease. For cucumbers/squash, scrape out seeds, wash thoroughly, and dry.
- Drying: Spread seeds thinly on screens or paper plates in a cool, dry, well-ventilated area for 1-4 weeks. Ensure they are bone-dry before storage. I aim for less than 8% moisture content.
- Storage: Store seeds in airtight containers (glass jars with desiccant packets work well) in a cool, dark, dry place (ideally 40-50°F and 30-40% humidity). Label clearly with variety and date. Properly stored seeds can remain viable for 3-10 years or more.
Step 8: Season Extension & Winterizing
Extend your harvest and protect your garden for the off-season to truly maximize your self sufficient garden from scratch.
- Cold Frames: Simple structures with a transparent top (glass, polycarbonate, or old windows) that sit over garden beds. They trap solar heat, allowing you to grow cold-hardy crops (lettuce, spinach, kale, radishes) well into winter or start seeds earlier in spring. A basic cold frame can be built from 2×6 lumber and a sheet of polycarbonate for under $100.
- Hoop Houses/Low Tunnels: Larger structures made from flexible hoops (PVC pipe or EMT conduit) covered with greenhouse plastic. These provide more space and greater temperature moderation. A 10×20 ft DIY low tunnel kit can cost $200-$500, while a larger, more robust hoop house kit might be $1,000-$3,000. I use a 6×12 ft low tunnel made from 1/2-inch PVC hoops and 6mil greenhouse plastic, which extends my lettuce and spinach harvest by at least
Deciding between raised beds and in-ground beds depends on your soil, budget, and physical capabilities.
- In-Ground Beds: If you have excellent native soil and good drainage, in-ground beds are the most economical. Double-digging (loosening soil two shovel depths) can significantly improve drainage and aeration. For my main garden, I primarily use in-ground beds, but I focus on building up the soil over time with consistent compost additions and cover cropping. I aim for beds that are no wider than 3-4 feet so I can reach the center without stepping on the soil, compacting it.
- Raised Beds: Raised beds offer numerous advantages, especially for poor soil, heavy clay, or rocky areas. They provide better drainage, warm up faster in spring, reduce compaction, and make weeding and harvesting easier on your back.
- Material Options:
- Untreated Cedar: Naturally rot-resistant and chemical-free. A 4×8 ft bed, 12 inches deep, typically requires three 2x12x8 ft cedar boards, costing around $50-$60 per board (total ~$150-$180) plus corner brackets or screws. My first raised beds were cedar and are still going strong after 7 years.
- Galvanized Steel: Durable, long-lasting, and aesthetically pleasing. Brands like Vego Garden offer modular kits. A Vego Garden 17″ Tall 8-in-1 Metal Raised Garden Bed (can be configured to 4×8 ft) costs approximately $250-$300.
- Concrete Blocks/Stones: Very durable but can leach minerals (though generally safe once weathered) and can be expensive.
- Recycled Materials: Pallets (check for chemical treatment stamps like « HT » for heat-treated), old tires (controversial due to potential chemical leaching).
- Filling Raised Beds: Don’t just fill with topsoil. Use a « Hugelkultur » approach (logs, branches, leaves, then compost, then topsoil) or a mixture of 60% good quality topsoil, 30% compost, and 10% perlite or vermiculite for drainage. A 4x8x1 ft raised bed requires about 32 cubic feet (or ~1.2 cubic yards) of soil mix, which can cost $100-$200 depending on your source.
- Material Options:
Step 4: Water Management & Irrigation
Efficient water management is critical for a self sufficient garden from scratch, especially in off-grid living where water resources might be limited.
- Rainwater Harvesting: This is my primary source of irrigation water. A 55-gallon rain barrel (e.g., EarthMark Rain Barrel, ~$120-$150) connected to a downspout can collect significant water. For larger needs, I use two 275-gallon IBC totes (Intermediate Bulk Containers, often available used for $100-$200 each from food-grade sources) connected in series. A 1,000 sq ft roof can collect approximately 620 gallons of water for every inch of rainfall. My 1,500 sq ft roof provides ample water for my 600 sq ft garden through multiple barrels and totes.
- Drip Irrigation: This is by far the most water-efficient method, delivering water directly to the plant’s root zone, minimizing evaporation and weed growth.
- Components: A typical drip system includes a pressure regulator (e.g., Rain Bird PRV-10, ~$15), a filter (Rain Bird RBY filter, ~$20), main tubing (1/2-inch poly tubing, 100ft ~$25), smaller feeder lines (1/4-inch tubing), and emitters (0.5 GPH or 1 GPH per plant).
- Kits: For beginners, a starter kit like the Rain Bird Drip Irrigation Garden Kit (model DDI-KIT-1P, ~$40-$60) is excellent for a small garden. For larger setups, I use Netafim Techline CV Drip Line (500ft roll, ~$150-$200), which has pressure-compensating emitters built-in, ensuring even watering across long runs.
- Automation: For true self-sufficiency, consider a battery-powered timer (e.g., Orbit B-Hyve Bluetooth Hose Faucet Timer, ~$50) or a solar-powered timer connected to a small 12V pump.
- Solar-Powered Pumps: For lifting water from a well, pond, or large storage tank to your garden, a solar pump is a game-changer. For a smaller drip system, a Shurflo 2088-594-152 Diaphragm Pump (12V, 3.5 GPM, ~$180) can be powered by a single 100W solar panel (e.g., Renogy 100W Monocrystalline Solar Panel, ~$100) and a small 12V battery (e.g., a 50Ah LiFePO4 battery like the Battle Born 50Ah, ~$450). For larger operations or deeper wells, more robust systems are needed. If you’re looking to build out a comprehensive off-grid power system to support your garden’s water needs, or indeed your entire homestead, you might want to explore resources like the Power Grid Generator complete system guide to understand the full scope of what’s possible in terms of energy independence.
Step 5: Seed Selection & Planting
The choice of seeds is crucial for a truly self sufficient garden from scratch.
- Choose Heirloom & Open-Pollinated Seeds: These varieties produce seeds that will grow true to type, meaning you can save seeds from your harvest year after year. F1 hybrids, while often vigorous, will not produce consistent offspring from saved seeds. Reputable seed companies include Baker Creek Heirloom Seeds, High Mowing Organic Seeds, and Seed Savers Exchange. Start with common, reliable varieties like ‘Black Krim’ tomatoes, ‘Provider’ bush beans, ‘Waltham Butternut’ squash, and ‘Black Seeded Simpson’ lettuce.
- Start Seeds Indoors (Optional but Recommended): For longer growing seasons or specific crops, starting seeds indoors gives you a head start. Use seed-starting mix (e.g., Espoma Organic Seed Starter Mix, ~$10 for 16qt bag) in seed trays (Jiffy Professional Greenhouse 72-cell kit, ~$15). Provide adequate light with LED grow lights (Barrina T5 2ft 4-pack LED Grow Lights, 20W each, ~$50) for 14-16 hours a day, positioned 2-4 inches above seedlings. Maintain consistent temperatures (65-75°F for most).
- Direct Sowing vs. Transplanting: Some crops (carrots, radishes, beans, corn) prefer direct sowing into the garden bed. Others (tomatoes, peppers, broccoli, kale) benefit from being started indoors and transplanted. Follow seed packet instructions for planting depths (e.g., lettuce seeds are often surface-sown or planted 1/8 inch deep, while beans are 1 inch deep) and spacing.
- Companion Planting: Strategically plant different species together to enhance growth, deter pests, and attract beneficial insects. For example, planting marigolds near tomatoes can deter nematodes, and basil improves tomato flavor. Nasturtiums can act as a trap crop for aphids.
- Succession Planting: For a continuous harvest, plant small batches of quick-growing crops (lettuce, radishes, cilantro) every 2-3 weeks. As one crop finishes, another is ready to take its place.
Step 6: Pest & Disease Management (Organic)
Maintaining a self sufficient garden from scratch means embracing organic pest and disease control.
- Integrated Pest Management (IPM): This holistic approach combines several strategies.
- Observation: Regularly inspect your plants for early signs of pests or disease. Catching issues early is key.
- Physical Barriers: Use row covers (e.g., Agribon AG-19 floating row cover, 10×20 ft, ~$20) to protect young plants from insect pests like cabbage worms and squash bugs. Install fences (e.g., 2×4 welded wire mesh, 4 ft tall, 50 ft roll ~$70) to keep out deer, rabbits, and other larger animals.
- Hand-Picking: For larger pests like tomato hornworms or squash bugs, simply pick them off and drop them into a bucket of soapy water.
- Companion Planting: As mentioned, certain plants repel pests. Marigolds, garlic, and onions are excellent deterrents.
- Attract Beneficial Insects: Plant flowers like dill, fennel, cosmos, and sweet alyssum to attract ladybugs, lacewings, and parasitic wasps, which prey on common garden pests.
- Organic Sprays & Treatments:
- Neem Oil: An excellent broad-spectrum organic insecticide and fungicide. Bonide Neem Oil Concentrate (16oz, ~$20) can be mixed at a rate of 1-2 tbsp per gallon of water and sprayed on affected plants.
- Insecticidal Soap: Effective against soft-bodied insects like aphids, whiteflies, and spider mites. Garden Safe Insecticidal Soap (24oz ready-to-use, ~$10).
- Bacillus thuringiensis (Bt): A naturally occurring soil bacterium that targets caterpillars and worms. Monterey BT Worm & Caterpillar Killer (16oz, ~$18) is highly effective and safe for beneficial insects.
- Copper or Sulfur Sprays: For fungal diseases like powdery mildew or blight, organic copper (e.g., Bonide Copper Fungicide, ~$15 for 1lb) or sulfur (e.g., Safer Brand Garden Fungicide, ~$10 for 16oz) can be used as a last resort.
Step 7: Harvesting & Seed Saving
The culmination of your efforts is the harvest, and seed saving closes the loop on self-sufficiency.
- Harvesting Techniques:
- Timing: Harvest vegetables at their peak ripeness for best flavor and nutritional value. For example, green beans should snap cleanly, cucumbers should be firm, and tomatoes should be fully colored.
- Frequency: Many crops, like zucchini, cucumbers, and bush beans, produce more if harvested frequently. Pick daily or every other day.
- Tools: Use clean, sharp pruners (e.g., Corona ClassicCUT Bypass Pruner BP 3180, ~$30) or a sharp knife for clean cuts, minimizing damage to the plant.
- Seed Saving: This is where the « self-sufficient » aspect truly shines.
- Selection: Only save seeds from your healthiest, most vigorous plants that show desired traits (disease resistance, good flavor, high yield).
- Isolation: To ensure true-to-type seeds, prevent cross-pollination. This can be challenging for open-pollinated crops that readily cross (e.g., squash, corn). For beginners, focus on self-pollinating plants like beans, peas, lettuce, and tomatoes.
- Processing:
- Dry Seeds (Beans, Peas, Lettuce, Grains): Allow pods/seed heads to dry completely on the plant. Harvest, shell, and clean the seeds, removing chaff.
- Wet Seeds (Tomatoes, Cucumbers, Squash): For tomatoes, ferment the seeds in water for a few days to remove the gel coating and inhibit disease. For cucumbers/squash, scrape out seeds, wash thoroughly, and dry.
- Drying: Spread seeds thinly on screens or paper plates in a cool, dry, well-ventilated area for 1-4 weeks. Ensure they are bone-dry before storage. I aim for less than 8% moisture content.
- Storage: Store seeds in airtight containers (glass jars with desiccant packets work well) in a cool, dark, dry place (ideally 40-50°F and 30-40% humidity). Label clearly with variety and date. Properly stored seeds can remain viable for 3-10 years or more.
Step 8: Season Extension & Winterizing
Extend your harvest and protect your garden for the off-season to truly maximize your self sufficient garden from scratch.
- Cold Frames: Simple structures with a transparent top (glass, polycarbonate, or old windows) that sit over garden beds. They trap solar heat, allowing you to grow cold-hardy crops (lettuce, spinach, kale, radishes) well into winter or start seeds earlier in spring. A basic cold frame can be built from 2×6 lumber and a sheet of polycarbonate for under $100.
- Hoop Houses/Low Tunnels: Larger structures made from flexible hoops (PVC pipe or EMT conduit) covered with greenhouse plastic. These provide more space and greater temperature moderation. A 10×20 ft DIY low tunnel kit can cost $200-$500, while a larger, more robust hoop house kit might be $1,000-$3,000. I use a 6×12 ft low tunnel made from 1/2-inch PVC hoops and 6mil greenhouse plastic, which extends my lettuce and spinach harvest by at least
Healthy soil is the bedrock of a productive, self-sufficient garden. You can’t guess what your soil needs; you have to test it.
- Perform a Soil Test: A professional soil test will give you precise data on your soil’s pH, nutrient levels (N-P-K), and organic matter content. I recommend sending a sample to your local agricultural extension office; it typically costs $20-$50 and provides detailed recommendations. Alternatively, for a quick homeowner check, a Rapitest Soil Test Kit (40-test kit, model 1663, ~$20 on Amazon) provides a good baseline for pH, Nitrogen, Phosphorus, and Potash. Aim for a pH between 6.0 and 7.0 for most vegetables.
- Amend for pH Imbalance: If your soil is too acidic (below 6.0), add agricultural lime (dolomitic lime adds magnesium, calcitic lime adds calcium). Apply 5-10 lbs per 100 sq ft for a moderate adjustment. If it’s too alkaline (above 7.0), add elemental sulfur (e.g., Espoma Soil Acidifier, ~$15 for 6.75 lbs) or generous amounts of organic matter like peat moss or pine needles.
- Build Organic Matter: This is the single most important step for long-term soil health. Organic matter improves soil structure, water retention, drainage, and nutrient availability. Incorporate 2-4 inches of high-quality compost into your top 6-12 inches of soil annually. I make my own compost from kitchen scraps, garden waste, and shredded leaves, but you can purchase it. Local nurseries often sell bulk compost for $30-$50 per cubic yard. Aged manure (from chickens, cows, or horses – ensure it’s well-rotted to avoid burning plants) is also excellent.
- Address Nutrient Deficiencies: Based on your soil test, add specific organic amendments. If Nitrogen (N) is low, add blood meal (12-0-0, ~$20 for 3 lbs) or feather meal. For Phosphorus (P), use bone meal (3-15-0, ~$15 for 3 lbs) or rock phosphate. For Potassium (K), greensand (0-0-2.5, ~$25 for 5 lbs) or kelp meal are good choices. I rely heavily on Espoma Organic Garden-tone (5-3-3, ~$25 for an 8lb bag) as a balanced, all-purpose organic fertilizer during planting.
Step 3: Garden Bed Preparation
Deciding between raised beds and in-ground beds depends on your soil, budget, and physical capabilities.
- In-Ground Beds: If you have excellent native soil and good drainage, in-ground beds are the most economical. Double-digging (loosening soil two shovel depths) can significantly improve drainage and aeration. For my main garden, I primarily use in-ground beds, but I focus on building up the soil over time with consistent compost additions and cover cropping. I aim for beds that are no wider than 3-4 feet so I can reach the center without stepping on the soil, compacting it.
- Raised Beds: Raised beds offer numerous advantages, especially for poor soil, heavy clay, or rocky areas. They provide better drainage, warm up faster in spring, reduce compaction, and make weeding and harvesting easier on your back.
- Material Options:
- Untreated Cedar: Naturally rot-resistant and chemical-free. A 4×8 ft bed, 12 inches deep, typically requires three 2x12x8 ft cedar boards, costing around $50-$60 per board (total ~$150-$180) plus corner brackets or screws. My first raised beds were cedar and are still going strong after 7 years.
- Galvanized Steel: Durable, long-lasting, and aesthetically pleasing. Brands like Vego Garden offer modular kits. A Vego Garden 17″ Tall 8-in-1 Metal Raised Garden Bed (can be configured to 4×8 ft) costs approximately $250-$300.
- Concrete Blocks/Stones: Very durable but can leach minerals (though generally safe once weathered) and can be expensive.
- Recycled Materials: Pallets (check for chemical treatment stamps like « HT » for heat-treated), old tires (controversial due to potential chemical leaching).
- Filling Raised Beds: Don’t just fill with topsoil. Use a « Hugelkultur » approach (logs, branches, leaves, then compost, then topsoil) or a mixture of 60% good quality topsoil, 30% compost, and 10% perlite or vermiculite for drainage. A 4x8x1 ft raised bed requires about 32 cubic feet (or ~1.2 cubic yards) of soil mix, which can cost $100-$200 depending on your source.
- Material Options:
Step 4: Water Management & Irrigation
Efficient water management is critical for a self sufficient garden from scratch, especially in off-grid living where water resources might be limited.
- Rainwater Harvesting: This is my primary source of irrigation water. A 55-gallon rain barrel (e.g., EarthMark Rain Barrel, ~$120-$150) connected to a downspout can collect significant water. For larger needs, I use two 275-gallon IBC totes (Intermediate Bulk Containers, often available used for $100-$200 each from food-grade sources) connected in series. A 1,000 sq ft roof can collect approximately 620 gallons of water for every inch of rainfall. My 1,500 sq ft roof provides ample water for my 600 sq ft garden through multiple barrels and totes.
- Drip Irrigation: This is by far the most water-efficient method, delivering water directly to the plant’s root zone, minimizing evaporation and weed growth.
- Components: A typical drip system includes a pressure regulator (e.g., Rain Bird PRV-10, ~$15), a filter (Rain Bird RBY filter, ~$20), main tubing (1/2-inch poly tubing, 100ft ~$25), smaller feeder lines (1/4-inch tubing), and emitters (0.5 GPH or 1 GPH per plant).
- Kits: For beginners, a starter kit like the Rain Bird Drip Irrigation Garden Kit (model DDI-KIT-1P, ~$40-$60) is excellent for a small garden. For larger setups, I use Netafim Techline CV Drip Line (500ft roll, ~$150-$200), which has pressure-compensating emitters built-in, ensuring even watering across long runs.
- Automation: For true self-sufficiency, consider a battery-powered timer (e.g., Orbit B-Hyve Bluetooth Hose Faucet Timer, ~$50) or a solar-powered timer connected to a small 12V pump.
- Solar-Powered Pumps: For lifting water from a well, pond, or large storage tank to your garden, a solar pump is a game-changer. For a smaller drip system, a Shurflo 2088-594-152 Diaphragm Pump (12V, 3.5 GPM, ~$180) can be powered by a single 100W solar panel (e.g., Renogy 100W Monocrystalline Solar Panel, ~$100) and a small 12V battery (e.g., a 50Ah LiFePO4 battery like the Battle Born 50Ah, ~$450). For larger operations or deeper wells, more robust systems are needed. If you’re looking to build out a comprehensive off-grid power system to support your garden’s water needs, or indeed your entire homestead, you might want to explore resources like the Power Grid Generator complete system guide to understand the full scope of what’s possible in terms of energy independence.
Step 5: Seed Selection & Planting
The choice of seeds is crucial for a truly self sufficient garden from scratch.
- Choose Heirloom & Open-Pollinated Seeds: These varieties produce seeds that will grow true to type, meaning you can save seeds from your harvest year after year. F1 hybrids, while often vigorous, will not produce consistent offspring from saved seeds. Reputable seed companies include Baker Creek Heirloom Seeds, High Mowing Organic Seeds, and Seed Savers Exchange. Start with common, reliable varieties like ‘Black Krim’ tomatoes, ‘Provider’ bush beans, ‘Waltham Butternut’ squash, and ‘Black Seeded Simpson’ lettuce.
- Start Seeds Indoors (Optional but Recommended): For longer growing seasons or specific crops, starting seeds indoors gives you a head start. Use seed-starting mix (e.g., Espoma Organic Seed Starter Mix, ~$10 for 16qt bag) in seed trays (Jiffy Professional Greenhouse 72-cell kit, ~$15). Provide adequate light with LED grow lights (Barrina T5 2ft 4-pack LED Grow Lights, 20W each, ~$50) for 14-16 hours a day, positioned 2-4 inches above seedlings. Maintain consistent temperatures (65-75°F for most).
- Direct Sowing vs. Transplanting: Some crops (carrots, radishes, beans, corn) prefer direct sowing into the garden bed. Others (tomatoes, peppers, broccoli, kale) benefit from being started indoors and transplanted. Follow seed packet instructions for planting depths (e.g., lettuce seeds are often surface-sown or planted 1/8 inch deep, while beans are 1 inch deep) and spacing.
- Companion Planting: Strategically plant different species together to enhance growth, deter pests, and attract beneficial insects. For example, planting marigolds near tomatoes can deter nematodes, and basil improves tomato flavor. Nasturtiums can act as a trap crop for aphids.
- Succession Planting: For a continuous harvest, plant small batches of quick-growing crops (lettuce, radishes, cilantro) every 2-3 weeks. As one crop finishes, another is ready to take its place.
Step 6: Pest & Disease Management (Organic)
Maintaining a self sufficient garden from scratch means embracing organic pest and disease control.
- Integrated Pest Management (IPM): This holistic approach combines several strategies.
- Observation: Regularly inspect your plants for early signs of pests or disease. Catching issues early is key.
- Physical Barriers: Use row covers (e.g., Agribon AG-19 floating row cover, 10×20 ft, ~$20) to protect young plants from insect pests like cabbage worms and squash bugs. Install fences (e.g., 2×4 welded wire mesh, 4 ft tall, 50 ft roll ~$70) to keep out deer, rabbits, and other larger animals.
- Hand-Picking: For larger pests like tomato hornworms or squash bugs, simply pick them off and drop them into a bucket of soapy water.
- Companion Planting: As mentioned, certain plants repel pests. Marigolds, garlic, and onions are excellent deterrents.
- Attract Beneficial Insects: Plant flowers like dill, fennel, cosmos, and sweet alyssum to attract ladybugs, lacewings, and parasitic wasps, which prey on common garden pests.
- Organic Sprays & Treatments:
- Neem Oil: An excellent broad-spectrum organic insecticide and fungicide. Bonide Neem Oil Concentrate (16oz, ~$20) can be mixed at a rate of 1-2 tbsp per gallon of water and sprayed on affected plants.
- Insecticidal Soap: Effective against soft-bodied insects like aphids, whiteflies, and spider mites. Garden Safe Insecticidal Soap (24oz ready-to-use, ~$10).
- Bacillus thuringiensis (Bt): A naturally occurring soil bacterium that targets caterpillars and worms. Monterey BT Worm & Caterpillar Killer (16oz, ~$18) is highly effective and safe for beneficial insects.
- Copper or Sulfur Sprays: For fungal diseases like powdery mildew or blight, organic copper (e.g., Bonide Copper Fungicide, ~$15 for 1lb) or sulfur (e.g., Safer Brand Garden Fungicide, ~$10 for 16oz) can be used as a last resort.
Step 7: Harvesting & Seed Saving
The culmination of your efforts is the harvest, and seed saving closes the loop on self-sufficiency.
- Harvesting Techniques:
- Timing: Harvest vegetables at their peak ripeness for best flavor and nutritional value. For example, green beans should snap cleanly, cucumbers should be firm, and tomatoes should be fully colored.
- Frequency: Many crops, like zucchini, cucumbers, and bush beans, produce more if harvested frequently. Pick daily or every other day.
- Tools: Use clean, sharp pruners (e.g., Corona ClassicCUT Bypass Pruner BP 3180, ~$30) or a sharp knife for clean cuts, minimizing damage to the plant.
- Seed Saving: This is where the « self-sufficient » aspect truly shines.
- Selection: Only save seeds from your healthiest, most vigorous plants that show desired traits (disease resistance, good flavor, high yield).
- Isolation: To ensure true-to-type seeds, prevent cross-pollination. This can be challenging for open-pollinated crops that readily cross (e.g., squash, corn). For beginners, focus on self-pollinating plants like beans, peas, lettuce, and tomatoes.
- Processing:
- Dry Seeds (Beans, Peas, Lettuce, Grains): Allow pods/seed heads to dry completely on the plant. Harvest, shell, and clean the seeds, removing chaff.
- Wet Seeds (Tomatoes, Cucumbers, Squash): For tomatoes, ferment the seeds in water for a few days to remove the gel coating and inhibit disease. For cucumbers/squash, scrape out seeds, wash thoroughly, and dry.
- Drying: Spread seeds thinly on screens or paper plates in a cool, dry, well-ventilated area for 1-4 weeks. Ensure they are bone-dry before storage. I aim for less than 8% moisture content.
- Storage: Store seeds in airtight containers (glass jars with desiccant packets work well) in a cool, dark, dry place (ideally 40-50°F and 30-40% humidity). Label clearly with variety and date. Properly stored seeds can remain viable for 3-10 years or more.
Step 8: Season Extension & Winterizing
Extend your harvest and protect your garden for the off-season to truly maximize your self sufficient garden from scratch.
- Cold Frames: Simple structures with a transparent top (glass, polycarbonate, or old windows) that sit over garden beds. They trap solar heat, allowing you to grow cold-hardy crops (lettuce, spinach, kale, radishes) well into winter or start seeds earlier in spring. A basic cold frame can be built from 2×6 lumber and a sheet of polycarbonate for under $100.
- Hoop Houses/Low Tunnels: Larger structures made from flexible hoops (PVC pipe or EMT conduit) covered with greenhouse plastic. These provide more space and greater temperature moderation. A 10×20 ft DIY low tunnel kit can cost $200-$500, while a larger, more robust hoop house kit might be $1,000-$3,000. I use a 6×12 ft low tunnel made from 1/2-inch PVC hoops and 6mil greenhouse plastic, which extends my lettuce and spinach harvest by at least
- Integrated Pest Management (IPM): This holistic approach combines several strategies.
- Observation: Regularly inspect your plants for early signs of pests or disease. Catching issues early is key.
- Physical Barriers: Use row covers (e.g., Agribon AG-19 floating row cover, 10×20 ft, ~$20) to protect young plants from insect pests like cabbage worms and squash bugs. Install fences (e.g., 2×4 welded wire mesh, 4 ft tall, 50 ft roll ~$70) to keep out deer, rabbits, and other larger animals.
- Hand-Picking: For larger pests like tomato hornworms or squash bugs, simply pick them off and drop them into a bucket of soapy water.
- Companion Planting: As mentioned, certain plants repel pests. Marigolds, garlic, and onions are excellent deterrents.
- Attract Beneficial Insects: Plant flowers like dill, fennel, cosmos, and sweet alyssum to attract ladybugs, lacewings, and parasitic wasps, which prey on common garden pests.
- Organic Sprays & Treatments:
- Neem Oil: An excellent broad-spectrum organic insecticide and fungicide. Bonide Neem Oil Concentrate (16oz, ~$20) can be mixed at a rate of 1-2 tbsp per gallon of water and sprayed on affected plants.
- Insecticidal Soap: Effective against soft-bodied insects like aphids, whiteflies, and spider mites. Garden Safe Insecticidal Soap (24oz ready-to-use, ~$10).
- Bacillus thuringiensis (Bt): A naturally occurring soil bacterium that targets caterpillars and worms. Monterey BT Worm & Caterpillar Killer (16oz, ~$18) is highly effective and safe for beneficial insects.
- Copper or Sulfur Sprays: For fungal diseases like powdery mildew or blight, organic copper (e.g., Bonide Copper Fungicide, ~$15 for 1lb) or sulfur (e.g., Safer Brand Garden Fungicide, ~$10 for 16oz) can be used as a last resort.
Step 7: Harvesting & Seed Saving
The culmination of your efforts is the harvest, and seed saving closes the loop on self-sufficiency.
- Harvesting Techniques:
- Timing: Harvest vegetables at their peak ripeness for best flavor and nutritional value. For example, green beans should snap cleanly, cucumbers should be firm, and tomatoes should be fully colored.
- Frequency: Many crops, like zucchini, cucumbers, and bush beans, produce more if harvested frequently. Pick daily or every other day.
- Tools: Use clean, sharp pruners (e.g., Corona ClassicCUT Bypass Pruner BP 3180, ~$30) or a sharp knife for clean cuts, minimizing damage to the plant.
- Seed Saving: This is where the « self-sufficient » aspect truly shines.
- Selection: Only save seeds from your healthiest, most vigorous plants that show desired traits (disease resistance, good flavor, high yield).
- Isolation: To ensure true-to-type seeds, prevent cross-pollination. This can be challenging for open-pollinated crops that readily cross (e.g., squash, corn). For beginners, focus on self-pollinating plants like beans, peas, lettuce, and tomatoes.
- Processing:
- Dry Seeds (Beans, Peas, Lettuce, Grains): Allow pods/seed heads to dry completely on the plant. Harvest, shell, and clean the seeds, removing chaff.
- Wet Seeds (Tomatoes, Cucumbers, Squash): For tomatoes, ferment the seeds in water for a few days to remove the gel coating and inhibit disease. For cucumbers/squash, scrape out seeds, wash thoroughly, and dry.
- Drying: Spread seeds thinly on screens or paper plates in a cool, dry, well-ventilated area for 1-4 weeks. Ensure they are bone-dry before storage. I aim for less than 8% moisture content.
- Storage: Store seeds in airtight containers (glass jars with desiccant packets work well) in a cool, dark, dry place (ideally 40-50°F and 30-40% humidity). Label clearly with variety and date. Properly stored seeds can remain viable for 3-10 years or more.
Step 8: Season Extension & Winterizing
Extend your harvest and protect your garden for the off-season to truly maximize your self sufficient garden from scratch.
- Cold Frames: Simple structures with a transparent top (glass, polycarbonate, or old windows) that sit over garden beds. They trap solar heat, allowing you to grow cold-hardy crops (lettuce, spinach, kale, radishes) well into winter or start seeds earlier in spring. A basic cold frame can be built from 2×6 lumber and a sheet of polycarbonate for under $100.
- Hoop Houses/Low Tunnels: Larger structures made from flexible hoops (PVC pipe or EMT conduit) covered with greenhouse plastic. These provide more space and greater temperature moderation. A 10×20 ft DIY low tunnel kit can cost $200-$500, while a larger, more robust hoop house kit might be $1,000-$3,000. I use a 6×12 ft low tunnel made from 1/2-inch PVC hoops and 6mil greenhouse plastic, which extends my lettuce and spinach harvest by at least
- In-Ground Beds: If you have excellent native soil and good drainage, in-ground beds are the most economical. Double-digging (loosening soil two shovel depths) can significantly improve drainage and aeration. For my main garden, I primarily use in-ground beds, but I focus on building up the soil over time with consistent compost additions and cover cropping. I aim for beds that are no wider than 3-4 feet so I can reach the center without stepping on the soil, compacting it.
- Raised Beds: Raised beds offer numerous advantages, especially for poor soil, heavy clay, or rocky areas. They provide better drainage, warm up faster in spring, reduce compaction, and make weeding and harvesting easier on your back.
- Material Options:
- Untreated Cedar: Naturally rot-resistant and chemical-free. A 4×8 ft bed, 12 inches deep, typically requires three 2x12x8 ft cedar boards, costing around $50-$60 per board (total ~$150-$180) plus corner brackets or screws. My first raised beds were cedar and are still going strong after 7 years.
- Galvanized Steel: Durable, long-lasting, and aesthetically pleasing. Brands like Vego Garden offer modular kits. A Vego Garden 17″ Tall 8-in-1 Metal Raised Garden Bed (can be configured to 4×8 ft) costs approximately $250-$300.
- Concrete Blocks/Stones: Very durable but can leach minerals (though generally safe once weathered) and can be expensive.
- Recycled Materials: Pallets (check for chemical treatment stamps like « HT » for heat-treated), old tires (controversial due to potential chemical leaching).
- Filling Raised Beds: Don’t just fill with topsoil. Use a « Hugelkultur » approach (logs, branches, leaves, then compost, then topsoil) or a mixture of 60% good quality topsoil, 30% compost, and 10% perlite or vermiculite for drainage. A 4x8x1 ft raised bed requires about 32 cubic feet (or ~1.2 cubic yards) of soil mix, which can cost $100-$200 depending on your source.
- Material Options:
Step 4: Water Management & Irrigation
Efficient water management is critical for a self sufficient garden from scratch, especially in off-grid living where water resources might be limited.
- Rainwater Harvesting: This is my primary source of irrigation water. A 55-gallon rain barrel (e.g., EarthMark Rain Barrel, ~$120-$150) connected to a downspout can collect significant water. For larger needs, I use two 275-gallon IBC totes (Intermediate Bulk Containers, often available used for $100-$200 each from food-grade sources) connected in series. A 1,000 sq ft roof can collect approximately 620 gallons of water for every inch of rainfall. My 1,500 sq ft roof provides ample water for my 600 sq ft garden through multiple barrels and totes.
- Drip Irrigation: This is by far the most water-efficient method, delivering water directly to the plant’s root zone, minimizing evaporation and weed growth.
- Components: A typical drip system includes a pressure regulator (e.g., Rain Bird PRV-10, ~$15), a filter (Rain Bird RBY filter, ~$20), main tubing (1/2-inch poly tubing, 100ft ~$25), smaller feeder lines (1/4-inch tubing), and emitters (0.5 GPH or 1 GPH per plant).
- Kits: For beginners, a starter kit like the Rain Bird Drip Irrigation Garden Kit (model DDI-KIT-1P, ~$40-$60) is excellent for a small garden. For larger setups, I use Netafim Techline CV Drip Line (500ft roll, ~$150-$200), which has pressure-compensating emitters built-in, ensuring even watering across long runs.
- Automation: For true self-sufficiency, consider a battery-powered timer (e.g., Orbit B-Hyve Bluetooth Hose Faucet Timer, ~$50) or a solar-powered timer connected to a small 12V pump.
- Solar-Powered Pumps: For lifting water from a well, pond, or large storage tank to your garden, a solar pump is a game-changer. For a smaller drip system, a Shurflo 2088-594-152 Diaphragm Pump (12V, 3.5 GPM, ~$180) can be powered by a single 100W solar panel (e.g., Renogy 100W Monocrystalline Solar Panel, ~$100) and a small 12V battery (e.g., a 50Ah LiFePO4 battery like the Battle Born 50Ah, ~$450). For larger operations or deeper wells, more robust systems are needed. If you’re looking to build out a comprehensive off-grid power system to support your garden’s water needs, or indeed your entire homestead, you might want to explore resources like the Power Grid Generator complete system guide to understand the full scope of what’s possible in terms of energy independence.
Step 5: Seed Selection & Planting
The choice of seeds is crucial for a truly self sufficient garden from scratch.
- Choose Heirloom & Open-Pollinated Seeds: These varieties produce seeds that will grow true to type, meaning you can save seeds from your harvest year after year. F1 hybrids, while often vigorous, will not produce consistent offspring from saved seeds. Reputable seed companies include Baker Creek Heirloom Seeds, High Mowing Organic Seeds, and Seed Savers Exchange. Start with common, reliable varieties like ‘Black Krim’ tomatoes, ‘Provider’ bush beans, ‘Waltham Butternut’ squash, and ‘Black Seeded Simpson’ lettuce.
- Start Seeds Indoors (Optional but Recommended): For longer growing seasons or specific crops, starting seeds indoors gives you a head start. Use seed-starting mix (e.g., Espoma Organic Seed Starter Mix, ~$10 for 16qt bag) in seed trays (Jiffy Professional Greenhouse 72-cell kit, ~$15). Provide adequate light with LED grow lights (Barrina T5 2ft 4-pack LED Grow Lights, 20W each, ~$50) for 14-16 hours a day, positioned 2-4 inches above seedlings. Maintain consistent temperatures (65-75°F for most).
- Direct Sowing vs. Transplanting: Some crops (carrots, radishes, beans, corn) prefer direct sowing into the garden bed. Others (tomatoes, peppers, broccoli, kale) benefit from being started indoors and transplanted. Follow seed packet instructions for planting depths (e.g., lettuce seeds are often surface-sown or planted 1/8 inch deep, while beans are 1 inch deep) and spacing.
- Companion Planting: Strategically plant different species together to enhance growth, deter pests, and attract beneficial insects. For example, planting marigolds near tomatoes can deter nematodes, and basil improves tomato flavor. Nasturtiums can act as a trap crop for aphids.
- Succession Planting: For a continuous harvest, plant small batches of quick-growing crops (lettuce, radishes, cilantro) every 2-3 weeks. As one crop finishes, another is ready to take its place.
Step 6: Pest & Disease Management (Organic)
Maintaining a self sufficient garden from scratch means embracing organic pest and disease control.
- Integrated Pest Management (IPM): This holistic approach combines several strategies.
- Observation: Regularly inspect your plants for early signs of pests or disease. Catching issues early is key.
- Physical Barriers: Use row covers (e.g., Agribon AG-19 floating row cover, 10×20 ft, ~$20) to protect young plants from insect pests like cabbage worms and squash bugs. Install fences (e.g., 2×4 welded wire mesh, 4 ft tall, 50 ft roll ~$70) to keep out deer, rabbits, and other larger animals.
- Hand-Picking: For larger pests like tomato hornworms or squash bugs, simply pick them off and drop them into a bucket of soapy water.
- Companion Planting: As mentioned, certain plants repel pests. Marigolds, garlic, and onions are excellent deterrents.
- Attract Beneficial Insects: Plant flowers like dill, fennel, cosmos, and sweet alyssum to attract ladybugs, lacewings, and parasitic wasps, which prey on common garden pests.
- Organic Sprays & Treatments:
- Neem Oil: An excellent broad-spectrum organic insecticide and fungicide. Bonide Neem Oil Concentrate (16oz, ~$20) can be mixed at a rate of 1-2 tbsp per gallon of water and sprayed on affected plants.
- Insecticidal Soap: Effective against soft-bodied insects like aphids, whiteflies, and spider mites. Garden Safe Insecticidal Soap (24oz ready-to-use, ~$10).
- Bacillus thuringiensis (Bt): A naturally occurring soil bacterium that targets caterpillars and worms. Monterey BT Worm & Caterpillar Killer (16oz, ~$18) is highly effective and safe for beneficial insects.
- Copper or Sulfur Sprays: For fungal diseases like powdery mildew or blight, organic copper (e.g., Bonide Copper Fungicide, ~$15 for 1lb) or sulfur (e.g., Safer Brand Garden Fungicide, ~$10 for 16oz) can be used as a last resort.
Step 7: Harvesting & Seed Saving
The culmination of your efforts is the harvest, and seed saving closes the loop on self-sufficiency.
- Harvesting Techniques:
- Timing: Harvest vegetables at their peak ripeness for best flavor and nutritional value. For example, green beans should snap cleanly, cucumbers should be firm, and tomatoes should be fully colored.
- Frequency: Many crops, like zucchini, cucumbers, and bush beans, produce more if harvested frequently. Pick daily or every other day.
- Tools: Use clean, sharp pruners (e.g., Corona ClassicCUT Bypass Pruner BP 3180, ~$30) or a sharp knife for clean cuts, minimizing damage to the plant.
- Seed Saving: This is where the « self-sufficient » aspect truly shines.
- Selection: Only save seeds from your healthiest, most vigorous plants that show desired traits (disease resistance, good flavor, high yield).
- Isolation: To ensure true-to-type seeds, prevent cross-pollination. This can be challenging for open-pollinated crops that readily cross (e.g., squash, corn). For beginners, focus on self-pollinating plants like beans, peas, lettuce, and tomatoes.
- Processing:
- Dry Seeds (Beans, Peas, Lettuce, Grains): Allow pods/seed heads to dry completely on the plant. Harvest, shell, and clean the seeds, removing chaff.
- Wet Seeds (Tomatoes, Cucumbers, Squash): For tomatoes, ferment the seeds in water for a few days to remove the gel coating and inhibit disease. For cucumbers/squash, scrape out seeds, wash thoroughly, and dry.
- Drying: Spread seeds thinly on screens or paper plates in a cool, dry, well-ventilated area for 1-4 weeks. Ensure they are bone-dry before storage. I aim for less than 8% moisture content.
- Storage: Store seeds in airtight containers (glass jars with desiccant packets work well) in a cool, dark, dry place (ideally 40-50°F and 30-40% humidity). Label clearly with variety and date. Properly stored seeds can remain viable for 3-10 years or more.
Step 8: Season Extension & Winterizing
Extend your harvest and protect your garden for the off-season to truly maximize your self sufficient garden from scratch.
- Cold Frames: Simple structures with a transparent top (glass, polycarbonate, or old windows) that sit over garden beds. They trap solar heat, allowing you to grow cold-hardy crops (lettuce, spinach, kale, radishes) well into winter or start seeds earlier in spring. A basic cold frame can be built from 2×6 lumber and a sheet of polycarbonate for under $100.
- Hoop Houses/Low Tunnels: Larger structures made from flexible hoops (PVC pipe or EMT conduit) covered with greenhouse plastic. These provide more space and greater temperature moderation. A 10×20 ft DIY low tunnel kit can cost $200-$500, while a larger, more robust hoop house kit might be $1,000-$3,000. I use a 6×12 ft low tunnel made from 1/2-inch PVC hoops and 6mil greenhouse plastic, which extends my lettuce and spinach harvest by at least
Deciding between raised beds and in-ground beds depends on your soil, budget, and physical capabilities.
- In-Ground Beds: If you have excellent native soil and good drainage, in-ground beds are the most economical. Double-digging (loosening soil two shovel depths) can significantly improve drainage and aeration. For my main garden, I primarily use in-ground beds, but I focus on building up the soil over time with consistent compost additions and cover cropping. I aim for beds that are no wider than 3-4 feet so I can reach the center without stepping on the soil, compacting it.
- Raised Beds: Raised beds offer numerous advantages, especially for poor soil, heavy clay, or rocky areas. They provide better drainage, warm up faster in spring, reduce compaction, and make weeding and harvesting easier on your back.
- Material Options:
- Untreated Cedar: Naturally rot-resistant and chemical-free. A 4×8 ft bed, 12 inches deep, typically requires three 2x12x8 ft cedar boards, costing around $50-$60 per board (total ~$150-$180) plus corner brackets or screws. My first raised beds were cedar and are still going strong after 7 years.
- Galvanized Steel: Durable, long-lasting, and aesthetically pleasing. Brands like Vego Garden offer modular kits. A Vego Garden 17″ Tall 8-in-1 Metal Raised Garden Bed (can be configured to 4×8 ft) costs approximately $250-$300.
- Concrete Blocks/Stones: Very durable but can leach minerals (though generally safe once weathered) and can be expensive.
- Recycled Materials: Pallets (check for chemical treatment stamps like « HT » for heat-treated), old tires (controversial due to potential chemical leaching).
- Filling Raised Beds: Don’t just fill with topsoil. Use a « Hugelkultur » approach (logs, branches, leaves, then compost, then topsoil) or a mixture of 60% good quality topsoil, 30% compost, and 10% perlite or vermiculite for drainage. A 4x8x1 ft raised bed requires about 32 cubic feet (or ~1.2 cubic yards) of soil mix, which can cost $100-$200 depending on your source.
- Material Options:
Step 4: Water Management & Irrigation
Efficient water management is critical for a self sufficient garden from scratch, especially in off-grid living where water resources might be limited.
- Rainwater Harvesting: This is my primary source of irrigation water. A 55-gallon rain barrel (e.g., EarthMark Rain Barrel, ~$120-$150) connected to a downspout can collect significant water. For larger needs, I use two 275-gallon IBC totes (Intermediate Bulk Containers, often available used for $100-$200 each from food-grade sources) connected in series. A 1,000 sq ft roof can collect approximately 620 gallons of water for every inch of rainfall. My 1,500 sq ft roof provides ample water for my 600 sq ft garden through multiple barrels and totes.
- Drip Irrigation: This is by far the most water-efficient method, delivering water directly to the plant’s root zone, minimizing evaporation and weed growth.
- Components: A typical drip system includes a pressure regulator (e.g., Rain Bird PRV-10, ~$15), a filter (Rain Bird RBY filter, ~$20), main tubing (1/2-inch poly tubing, 100ft ~$25), smaller feeder lines (1/4-inch tubing), and emitters (0.5 GPH or 1 GPH per plant).
- Kits: For beginners, a starter kit like the Rain Bird Drip Irrigation Garden Kit (model DDI-KIT-1P, ~$40-$60) is excellent for a small garden. For larger setups, I use Netafim Techline CV Drip Line (500ft roll, ~$150-$200), which has pressure-compensating emitters built-in, ensuring even watering across long runs.
- Automation: For true self-sufficiency, consider a battery-powered timer (e.g., Orbit B-Hyve Bluetooth Hose Faucet Timer, ~$50) or a solar-powered timer connected to a small 12V pump.
- Solar-Powered Pumps: For lifting water from a well, pond, or large storage tank to your garden, a solar pump is a game-changer. For a smaller drip system, a Shurflo 2088-594-152 Diaphragm Pump (12V, 3.5 GPM, ~$180) can be powered by a single 100W solar panel (e.g., Renogy 100W Monocrystalline Solar Panel, ~$100) and a small 12V battery (e.g., a 50Ah LiFePO4 battery like the Battle Born 50Ah, ~$450). For larger operations or deeper wells, more robust systems are needed. If you’re looking to build out a comprehensive off-grid power system to support your garden’s water needs, or indeed your entire homestead, you might want to explore resources like the Power Grid Generator complete system guide to understand the full scope of what’s possible in terms of energy independence.
Step 5: Seed Selection & Planting
The choice of seeds is crucial for a truly self sufficient garden from scratch.
- Choose Heirloom & Open-Pollinated Seeds: These varieties produce seeds that will grow true to type, meaning you can save seeds from your harvest year after year. F1 hybrids, while often vigorous, will not produce consistent offspring from saved seeds. Reputable seed companies include Baker Creek Heirloom Seeds, High Mowing Organic Seeds, and Seed Savers Exchange. Start with common, reliable varieties like ‘Black Krim’ tomatoes, ‘Provider’ bush beans, ‘Waltham Butternut’ squash, and ‘Black Seeded Simpson’ lettuce.
- Start Seeds Indoors (Optional but Recommended): For longer growing seasons or specific crops, starting seeds indoors gives you a head start. Use seed-starting mix (e.g., Espoma Organic Seed Starter Mix, ~$10 for 16qt bag) in seed trays (Jiffy Professional Greenhouse 72-cell kit, ~$15). Provide adequate light with LED grow lights (Barrina T5 2ft 4-pack LED Grow Lights, 20W each, ~$50) for 14-16 hours a day, positioned 2-4 inches above seedlings. Maintain consistent temperatures (65-75°F for most).
- Direct Sowing vs. Transplanting: Some crops (carrots, radishes, beans, corn) prefer direct sowing into the garden bed. Others (tomatoes, peppers, broccoli, kale) benefit from being started indoors and transplanted. Follow seed packet instructions for planting depths (e.g., lettuce seeds are often surface-sown or planted 1/8 inch deep, while beans are 1 inch deep) and spacing.
- Companion Planting: Strategically plant different species together to enhance growth, deter pests, and attract beneficial insects. For example, planting marigolds near tomatoes can deter nematodes, and basil improves tomato flavor. Nasturtiums can act as a trap crop for aphids.
- Succession Planting: For a continuous harvest, plant small batches of quick-growing crops (lettuce, radishes, cilantro) every 2-3 weeks. As one crop finishes, another is ready to take its place.
Step 6: Pest & Disease Management (Organic)
Maintaining a self sufficient garden from scratch means embracing organic pest and disease control.
- Integrated Pest Management (IPM): This holistic approach combines several strategies.
- Observation: Regularly inspect your plants for early signs of pests or disease. Catching issues early is key.
- Physical Barriers: Use row covers (e.g., Agribon AG-19 floating row cover, 10×20 ft, ~$20) to protect young plants from insect pests like cabbage worms and squash bugs. Install fences (e.g., 2×4 welded wire mesh, 4 ft tall, 50 ft roll ~$70) to keep out deer, rabbits, and other larger animals.
- Hand-Picking: For larger pests like tomato hornworms or squash bugs, simply pick them off and drop them into a bucket of soapy water.
- Companion Planting: As mentioned, certain plants repel pests. Marigolds, garlic, and onions are excellent deterrents.
- Attract Beneficial Insects: Plant flowers like dill, fennel, cosmos, and sweet alyssum to attract ladybugs, lacewings, and parasitic wasps, which prey on common garden pests.
- Organic Sprays & Treatments:
- Neem Oil: An excellent broad-spectrum organic insecticide and fungicide. Bonide Neem Oil Concentrate (16oz, ~$20) can be mixed at a rate of 1-2 tbsp per gallon of water and sprayed on affected plants.
- Insecticidal Soap: Effective against soft-bodied insects like aphids, whiteflies, and spider mites. Garden Safe Insecticidal Soap (24oz ready-to-use, ~$10).
- Bacillus thuringiensis (Bt): A naturally occurring soil bacterium that targets caterpillars and worms. Monterey BT Worm & Caterpillar Killer (16oz, ~$18) is highly effective and safe for beneficial insects.
- Copper or Sulfur Sprays: For fungal diseases like powdery mildew or blight, organic copper (e.g., Bonide Copper Fungicide, ~$15 for 1lb) or sulfur (e.g., Safer Brand Garden Fungicide, ~$10 for 16oz) can be used as a last resort.
Step 7: Harvesting & Seed Saving
The culmination of your efforts is the harvest, and seed saving closes the loop on self-sufficiency.
- Harvesting Techniques:
- Timing: Harvest vegetables at their peak ripeness for best flavor and nutritional value. For example, green beans should snap cleanly, cucumbers should be firm, and tomatoes should be fully colored.
- Frequency: Many crops, like zucchini, cucumbers, and bush beans, produce more if harvested frequently. Pick daily or every other day.
- Tools: Use clean, sharp pruners (e.g., Corona ClassicCUT Bypass Pruner BP 3180, ~$30) or a sharp knife for clean cuts, minimizing damage to the plant.
- Seed Saving: This is where the « self-sufficient » aspect truly shines.
- Selection: Only save seeds from your healthiest, most vigorous plants that show desired traits (disease resistance, good flavor, high yield).
- Isolation: To ensure true-to-type seeds, prevent cross-pollination. This can be challenging for open-pollinated crops that readily cross (e.g., squash, corn). For beginners, focus on self-pollinating plants like beans, peas, lettuce, and tomatoes.
- Processing:
- Dry Seeds (Beans, Peas, Lettuce, Grains): Allow pods/seed heads to dry completely on the plant. Harvest, shell, and clean the seeds, removing chaff.
- Wet Seeds (Tomatoes, Cucumbers, Squash): For tomatoes, ferment the seeds in water for a few days to remove the gel coating and inhibit disease. For cucumbers/squash, scrape out seeds, wash thoroughly, and dry.
- Drying: Spread seeds thinly on screens or paper plates in a cool, dry, well-ventilated area for 1-4 weeks. Ensure they are bone-dry before storage. I aim for less than 8% moisture content.
- Storage: Store seeds in airtight containers (glass jars with desiccant packets work well) in a cool, dark, dry place (ideally 40-50°F and 30-40% humidity). Label clearly with variety and date. Properly stored seeds can remain viable for 3-10 years or more.
Step 8: Season Extension & Winterizing
Extend your harvest and protect your garden for the off-season to truly maximize your self sufficient garden from scratch.
- Cold Frames: Simple structures with a transparent top (glass, polycarbonate, or old windows) that sit over garden beds. They trap solar heat, allowing you to grow cold-hardy crops (lettuce, spinach, kale, radishes) well into winter or start seeds earlier in spring. A basic cold frame can be built from 2×6 lumber and a sheet of polycarbonate for under $100.
- Hoop Houses/Low Tunnels: Larger structures made from flexible hoops (PVC pipe or EMT conduit) covered with greenhouse plastic. These provide more space and greater temperature moderation. A 10×20 ft DIY low tunnel kit can cost $200-$500, while a larger, more robust hoop house kit might be $1,000-$3,000. I use a 6×12 ft low tunnel made from 1/2-inch PVC hoops and 6mil greenhouse plastic, which extends my lettuce and spinach harvest by at least
Healthy soil is the bedrock of a productive, self-sufficient garden. You can’t guess what your soil needs; you have to test it.
- Perform a Soil Test: A professional soil test will give you precise data on your soil’s pH, nutrient levels (N-P-K), and organic matter content. I recommend sending a sample to your local agricultural extension office; it typically costs $20-$50 and provides detailed recommendations. Alternatively, for a quick homeowner check, a Rapitest Soil Test Kit (40-test kit, model 1663, ~$20 on Amazon) provides a good baseline for pH, Nitrogen, Phosphorus, and Potash. Aim for a pH between 6.0 and 7.0 for most vegetables.
- Amend for pH Imbalance: If your soil is too acidic (below 6.0), add agricultural lime (dolomitic lime adds magnesium, calcitic lime adds calcium). Apply 5-10 lbs per 100 sq ft for a moderate adjustment. If it’s too alkaline (above 7.0), add elemental sulfur (e.g., Espoma Soil Acidifier, ~$15 for 6.75 lbs) or generous amounts of organic matter like peat moss or pine needles.
- Build Organic Matter: This is the single most important step for long-term soil health. Organic matter improves soil structure, water retention, drainage, and nutrient availability. Incorporate 2-4 inches of high-quality compost into your top 6-12 inches of soil annually. I make my own compost from kitchen scraps, garden waste, and shredded leaves, but you can purchase it. Local nurseries often sell bulk compost for $30-$50 per cubic yard. Aged manure (from chickens, cows, or horses – ensure it’s well-rotted to avoid burning plants) is also excellent.
- Address Nutrient Deficiencies: Based on your soil test, add specific organic amendments. If Nitrogen (N) is low, add blood meal (12-0-0, ~$20 for 3 lbs) or feather meal. For Phosphorus (P), use bone meal (3-15-0, ~$15 for 3 lbs) or rock phosphate. For Potassium (K), greensand (0-0-2.5, ~$25 for 5 lbs) or kelp meal are good choices. I rely heavily on Espoma Organic Garden-tone (5-3-3, ~$25 for an 8lb bag) as a balanced, all-purpose organic fertilizer during planting.
Step 3: Garden Bed Preparation
Deciding between raised beds and in-ground beds depends on your soil, budget, and physical capabilities.
- In-Ground Beds: If you have excellent native soil and good drainage, in-ground beds are the most economical. Double-digging (loosening soil two shovel depths) can significantly improve drainage and aeration. For my main garden, I primarily use in-ground beds, but I focus on building up the soil over time with consistent compost additions and cover cropping. I aim for beds that are no wider than 3-4 feet so I can reach the center without stepping on the soil, compacting it.
- Raised Beds: Raised beds offer numerous advantages, especially for poor soil, heavy clay, or rocky areas. They provide better drainage, warm up faster in spring, reduce compaction, and make weeding and harvesting easier on your back.
- Material Options:
- Untreated Cedar: Naturally rot-resistant and chemical-free. A 4×8 ft bed, 12 inches deep, typically requires three 2x12x8 ft cedar boards, costing around $50-$60 per board (total ~$150-$180) plus corner brackets or screws. My first raised beds were cedar and are still going strong after 7 years.
- Galvanized Steel: Durable, long-lasting, and aesthetically pleasing. Brands like Vego Garden offer modular kits. A Vego Garden 17″ Tall 8-in-1 Metal Raised Garden Bed (can be configured to 4×8 ft) costs approximately $250-$300.
- Concrete Blocks/Stones: Very durable but can leach minerals (though generally safe once weathered) and can be expensive.
- Recycled Materials: Pallets (check for chemical treatment stamps like « HT » for heat-treated), old tires (controversial due to potential chemical leaching).
- Filling Raised Beds: Don’t just fill with topsoil. Use a « Hugelkultur » approach (logs, branches, leaves, then compost, then topsoil) or a mixture of 60% good quality topsoil, 30% compost, and 10% perlite or vermiculite for drainage. A 4x8x1 ft raised bed requires about 32 cubic feet (or ~1.2 cubic yards) of soil mix, which can cost $100-$200 depending on your source.
- Material Options:
Step 4: Water Management & Irrigation
Efficient water management is critical for a self sufficient garden from scratch, especially in off-grid living where water resources might be limited.
- Rainwater Harvesting: This is my primary source of irrigation water. A 55-gallon rain barrel (e.g., EarthMark Rain Barrel, ~$120-$150) connected to a downspout can collect significant water. For larger needs, I use two 275-gallon IBC totes (Intermediate Bulk Containers, often available used for $100-$200 each from food-grade sources) connected in series. A 1,000 sq ft roof can collect approximately 620 gallons of water for every inch of rainfall. My 1,500 sq ft roof provides ample water for my 600 sq ft garden through multiple barrels and totes.
- Drip Irrigation: This is by far the most water-efficient method, delivering water directly to the plant’s root zone, minimizing evaporation and weed growth.
- Components: A typical drip system includes a pressure regulator (e.g., Rain Bird PRV-10, ~$15), a filter (Rain Bird RBY filter, ~$20), main tubing (1/2-inch poly tubing, 100ft ~$25), smaller feeder lines (1/4-inch tubing), and emitters (0.5 GPH or 1 GPH per plant).
- Kits: For beginners, a starter kit like the Rain Bird Drip Irrigation Garden Kit (model DDI-KIT-1P, ~$40-$60) is excellent for a small garden. For larger setups, I use Netafim Techline CV Drip Line (500ft roll, ~$150-$200), which has pressure-compensating emitters built-in, ensuring even watering across long runs.
- Automation: For true self-sufficiency, consider a battery-powered timer (e.g., Orbit B-Hyve Bluetooth Hose Faucet Timer, ~$50) or a solar-powered timer connected to a small 12V pump.
- Solar-Powered Pumps: For lifting water from a well, pond, or large storage tank to your garden, a solar pump is a game-changer. For a smaller drip system, a Shurflo 2088-594-152 Diaphragm Pump (12V, 3.5 GPM, ~$180) can be powered by a single 100W solar panel (e.g., Renogy 100W Monocrystalline Solar Panel, ~$100) and a small 12V battery (e.g., a 50Ah LiFePO4 battery like the Battle Born 50Ah, ~$450). For larger operations or deeper wells, more robust systems are needed. If you’re looking to build out a comprehensive off-grid power system to support your garden’s water needs, or indeed your entire homestead, you might want to explore resources like the Power Grid Generator complete system guide to understand the full scope of what’s possible in terms of energy independence.
Step 5: Seed Selection & Planting
The choice of seeds is crucial for a truly self sufficient garden from scratch.
- Choose Heirloom & Open-Pollinated Seeds: These varieties produce seeds that will grow true to type, meaning you can save seeds from your harvest year after year. F1 hybrids, while often vigorous, will not produce consistent offspring from saved seeds. Reputable seed companies include Baker Creek Heirloom Seeds, High Mowing Organic Seeds, and Seed Savers Exchange. Start with common, reliable varieties like ‘Black Krim’ tomatoes, ‘Provider’ bush beans, ‘Waltham Butternut’ squash, and ‘Black Seeded Simpson’ lettuce.
- Start Seeds Indoors (Optional but Recommended): For longer growing seasons or specific crops, starting seeds indoors gives you a head start. Use seed-starting mix (e.g., Espoma Organic Seed Starter Mix, ~$10 for 16qt bag) in seed trays (Jiffy Professional Greenhouse 72-cell kit, ~$15). Provide adequate light with LED grow lights (Barrina T5 2ft 4-pack LED Grow Lights, 20W each, ~$50) for 14-16 hours a day, positioned 2-4 inches above seedlings. Maintain consistent temperatures (65-75°F for most).
- Direct Sowing vs. Transplanting: Some crops (carrots, radishes, beans, corn) prefer direct sowing into the garden bed. Others (tomatoes, peppers, broccoli, kale) benefit from being started indoors and transplanted. Follow seed packet instructions for planting depths (e.g., lettuce seeds are often surface-sown or planted 1/8 inch deep, while beans are 1 inch deep) and spacing.
- Companion Planting: Strategically plant different species together to enhance growth, deter pests, and attract beneficial insects. For example, planting marigolds near tomatoes can deter nematodes, and basil improves tomato flavor. Nasturtiums can act as a trap crop for aphids.
- Succession Planting: For a continuous harvest, plant small batches of quick-growing crops (lettuce, radishes, cilantro) every 2-3 weeks. As one crop finishes, another is ready to take its place.
Step 6: Pest & Disease Management (Organic)
Maintaining a self sufficient garden from scratch means embracing organic pest and disease control.
- Integrated Pest Management (IPM): This holistic approach combines several strategies.
- Observation: Regularly inspect your plants for early signs of pests or disease. Catching issues early is key.
- Physical Barriers: Use row covers (e.g., Agribon AG-19 floating row cover, 10×20 ft, ~$20) to protect young plants from insect pests like cabbage worms and squash bugs. Install fences (e.g., 2×4 welded wire mesh, 4 ft tall, 50 ft roll ~$70) to keep out deer, rabbits, and other larger animals.
- Hand-Picking: For larger pests like tomato hornworms or squash bugs, simply pick them off and drop them into a bucket of soapy water.
- Companion Planting: As mentioned, certain plants repel pests. Marigolds, garlic, and onions are excellent deterrents.
- Attract Beneficial Insects: Plant flowers like dill, fennel, cosmos, and sweet alyssum to attract ladybugs, lacewings, and parasitic wasps, which prey on common garden pests.
- Organic Sprays & Treatments:
- Neem Oil: An excellent broad-spectrum organic insecticide and fungicide. Bonide Neem Oil Concentrate (16oz, ~$20) can be mixed at a rate of 1-2 tbsp per gallon of water and sprayed on affected plants.
- Insecticidal Soap: Effective against soft-bodied insects like aphids, whiteflies, and spider mites. Garden Safe Insecticidal Soap (24oz ready-to-use, ~$10).
- Bacillus thuringiensis (Bt): A naturally occurring soil bacterium that targets caterpillars and worms. Monterey BT Worm & Caterpillar Killer (16oz, ~$18) is highly effective and safe for beneficial insects.
- Copper or Sulfur Sprays: For fungal diseases like powdery mildew or blight, organic copper (e.g., Bonide Copper Fungicide, ~$15 for 1lb) or sulfur (e.g., Safer Brand Garden Fungicide, ~$10 for 16oz) can be used as a last resort.
Step 7: Harvesting & Seed Saving
The culmination of your efforts is the harvest, and seed saving closes the loop on self-sufficiency.
- Harvesting Techniques:
- Timing: Harvest vegetables at their peak ripeness for best flavor and nutritional value. For example, green beans should snap cleanly, cucumbers should be firm, and tomatoes should be fully colored.
- Frequency: Many crops, like zucchini, cucumbers, and bush beans, produce more if harvested frequently. Pick daily or every other day.
- Tools: Use clean, sharp pruners (e.g., Corona ClassicCUT Bypass Pruner BP 3180, ~$30) or a sharp knife for clean cuts, minimizing damage to the plant.
- Seed Saving: This is where the « self-sufficient » aspect truly shines.
- Selection: Only save seeds from your healthiest, most vigorous plants that show desired traits (disease resistance, good flavor, high yield).
- Isolation: To ensure true-to-type seeds, prevent cross-pollination. This can be challenging for open-pollinated crops that readily cross (e.g., squash, corn). For beginners, focus on self-pollinating plants like beans, peas, lettuce, and tomatoes.
- Processing:
- Dry Seeds (Beans, Peas, Lettuce, Grains): Allow pods/seed heads to dry completely on the plant. Harvest, shell, and clean the seeds, removing chaff.
- Wet Seeds (Tomatoes, Cucumbers, Squash): For tomatoes, ferment the seeds in water for a few days to remove the gel coating and inhibit disease. For cucumbers/squash, scrape out seeds, wash thoroughly, and dry.
- Drying: Spread seeds thinly on screens or paper plates in a cool, dry, well-ventilated area for 1-4 weeks. Ensure they are bone-dry before storage. I aim for less than 8% moisture content.
- Storage: Store seeds in airtight containers (glass jars with desiccant packets work well) in a cool, dark, dry place (ideally 40-50°F and 30-40% humidity). Label clearly with variety and date. Properly stored seeds can remain viable for 3-10 years or more.
Step 8: Season Extension & Winterizing
Extend your harvest and protect your garden for the off-season to truly maximize your self sufficient garden from scratch.
- Cold Frames: Simple structures with a transparent top (glass, polycarbonate, or old windows) that sit over garden beds. They trap solar heat, allowing you to grow cold-hardy crops (lettuce, spinach, kale, radishes) well into winter or start seeds earlier in spring. A basic cold frame can be built from 2×6 lumber and a sheet of polycarbonate for under $100.
- Hoop Houses/Low Tunnels: Larger structures made from flexible hoops (PVC pipe or EMT conduit) covered with greenhouse plastic. These provide more space and greater temperature moderation. A 10×20 ft DIY low tunnel kit can cost $200-$500, while a larger, more robust hoop house kit might be $1,000-$3,000. I use a 6×12 ft low tunnel made from 1/2-inch PVC hoops and 6mil greenhouse plastic, which extends my lettuce and spinach harvest by at least
Maintaining a self sufficient garden from scratch means embracing organic pest and disease control.
- Integrated Pest Management (IPM): This holistic approach combines several strategies.
- Observation: Regularly inspect your plants for early signs of pests or disease. Catching issues early is key.
- Physical Barriers: Use row covers (e.g., Agribon AG-19 floating row cover, 10×20 ft, ~$20) to protect young plants from insect pests like cabbage worms and squash bugs. Install fences (e.g., 2×4 welded wire mesh, 4 ft tall, 50 ft roll ~$70) to keep out deer, rabbits, and other larger animals.
- Hand-Picking: For larger pests like tomato hornworms or squash bugs, simply pick them off and drop them into a bucket of soapy water.
- Companion Planting: As mentioned, certain plants repel pests. Marigolds, garlic, and onions are excellent deterrents.
- Attract Beneficial Insects: Plant flowers like dill, fennel, cosmos, and sweet alyssum to attract ladybugs, lacewings, and parasitic wasps, which prey on common garden pests.
- Organic Sprays & Treatments:
- Neem Oil: An excellent broad-spectrum organic insecticide and fungicide. Bonide Neem Oil Concentrate (16oz, ~$20) can be mixed at a rate of 1-2 tbsp per gallon of water and sprayed on affected plants.
- Insecticidal Soap: Effective against soft-bodied insects like aphids, whiteflies, and spider mites. Garden Safe Insecticidal Soap (24oz ready-to-use, ~$10).
- Bacillus thuringiensis (Bt): A naturally occurring soil bacterium that targets caterpillars and worms. Monterey BT Worm & Caterpillar Killer (16oz, ~$18) is highly effective and safe for beneficial insects.
- Copper or Sulfur Sprays: For fungal diseases like powdery mildew or blight, organic copper (e.g., Bonide Copper Fungicide, ~$15 for 1lb) or sulfur (e.g., Safer Brand Garden Fungicide, ~$10 for 16oz) can be used as a last resort.
Step 7: Harvesting & Seed Saving
The culmination of your efforts is the harvest, and seed saving closes the loop on self-sufficiency.
- Harvesting Techniques:
- Timing: Harvest vegetables at their peak ripeness for best flavor and nutritional value. For example, green beans should snap cleanly, cucumbers should be firm, and tomatoes should be fully colored.
- Frequency: Many crops, like zucchini, cucumbers, and bush beans, produce more if harvested frequently. Pick daily or every other day.
- Tools: Use clean, sharp pruners (e.g., Corona ClassicCUT Bypass Pruner BP 3180, ~$30) or a sharp knife for clean cuts, minimizing damage to the plant.
- Seed Saving: This is where the « self-sufficient » aspect truly shines.
- Selection: Only save seeds from your healthiest, most vigorous plants that show desired traits (disease resistance, good flavor, high yield).
- Isolation: To ensure true-to-type seeds, prevent cross-pollination. This can be challenging for open-pollinated crops that readily cross (e.g., squash, corn). For beginners, focus on self-pollinating plants like beans, peas, lettuce, and tomatoes.
- Processing:
- Dry Seeds (Beans, Peas, Lettuce, Grains): Allow pods/seed heads to dry completely on the plant. Harvest, shell, and clean the seeds, removing chaff.
- Wet Seeds (Tomatoes, Cucumbers, Squash): For tomatoes, ferment the seeds in water for a few days to remove the gel coating and inhibit disease. For cucumbers/squash, scrape out seeds, wash thoroughly, and dry.
- Drying: Spread seeds thinly on screens or paper plates in a cool, dry, well-ventilated area for 1-4 weeks. Ensure they are bone-dry before storage. I aim for less than 8% moisture content.
- Storage: Store seeds in airtight containers (glass jars with desiccant packets work well) in a cool, dark, dry place (ideally 40-50°F and 30-40% humidity). Label clearly with variety and date. Properly stored seeds can remain viable for 3-10 years or more.
Step 8: Season Extension & Winterizing
Extend your harvest and protect your garden for the off-season to truly maximize your self sufficient garden from scratch.
- Cold Frames: Simple structures with a transparent top (glass, polycarbonate, or old windows) that sit over garden beds. They trap solar heat, allowing you to grow cold-hardy crops (lettuce, spinach, kale, radishes) well into winter or start seeds earlier in spring. A basic cold frame can be built from 2×6 lumber and a sheet of polycarbonate for under $100.
- Hoop Houses/Low Tunnels: Larger structures made from flexible hoops (PVC pipe or EMT conduit) covered with greenhouse plastic. These provide more space and greater temperature moderation. A 10×20 ft DIY low tunnel kit can cost $200-$500, while a larger, more robust hoop house kit might be $1,000-$3,000. I use a 6×12 ft low tunnel made from 1/2-inch PVC hoops and 6mil greenhouse plastic, which extends my lettuce and spinach harvest by at least
- In-Ground Beds: If you have excellent native soil and good drainage, in-ground beds are the most economical. Double-digging (loosening soil two shovel depths) can significantly improve drainage and aeration. For my main garden, I primarily use in-ground beds, but I focus on building up the soil over time with consistent compost additions and cover cropping. I aim for beds that are no wider than 3-4 feet so I can reach the center without stepping on the soil, compacting it.
- Raised Beds: Raised beds offer numerous advantages, especially for poor soil, heavy clay, or rocky areas. They provide better drainage, warm up faster in spring, reduce compaction, and make weeding and harvesting easier on your back.
- Material Options:
- Untreated Cedar: Naturally rot-resistant and chemical-free. A 4×8 ft bed, 12 inches deep, typically requires three 2x12x8 ft cedar boards, costing around $50-$60 per board (total ~$150-$180) plus corner brackets or screws. My first raised beds were cedar and are still going strong after 7 years.
- Galvanized Steel: Durable, long-lasting, and aesthetically pleasing. Brands like Vego Garden offer modular kits. A Vego Garden 17″ Tall 8-in-1 Metal Raised Garden Bed (can be configured to 4×8 ft) costs approximately $250-$300.
- Concrete Blocks/Stones: Very durable but can leach minerals (though generally safe once weathered) and can be expensive.
- Recycled Materials: Pallets (check for chemical treatment stamps like « HT » for heat-treated), old tires (controversial due to potential chemical leaching).
- Filling Raised Beds: Don’t just fill with topsoil. Use a « Hugelkultur » approach (logs, branches, leaves, then compost, then topsoil) or a mixture of 60% good quality topsoil, 30% compost, and 10% perlite or vermiculite for drainage. A 4x8x1 ft raised bed requires about 32 cubic feet (or ~1.2 cubic yards) of soil mix, which can cost $100-$200 depending on your source.
- Material Options:
Step 4: Water Management & Irrigation
Efficient water management is critical for a self sufficient garden from scratch, especially in off-grid living where water resources might be limited.
- Rainwater Harvesting: This is my primary source of irrigation water. A 55-gallon rain barrel (e.g., EarthMark Rain Barrel, ~$120-$150) connected to a downspout can collect significant water. For larger needs, I use two 275-gallon IBC totes (Intermediate Bulk Containers, often available used for $100-$200 each from food-grade sources) connected in series. A 1,000 sq ft roof can collect approximately 620 gallons of water for every inch of rainfall. My 1,500 sq ft roof provides ample water for my 600 sq ft garden through multiple barrels and totes.
- Drip Irrigation: This is by far the most water-efficient method, delivering water directly to the plant’s root zone, minimizing evaporation and weed growth.
- Components: A typical drip system includes a pressure regulator (e.g., Rain Bird PRV-10, ~$15), a filter (Rain Bird RBY filter, ~$20), main tubing (1/2-inch poly tubing, 100ft ~$25), smaller feeder lines (1/4-inch tubing), and emitters (0.5 GPH or 1 GPH per plant).
- Kits: For beginners, a starter kit like the Rain Bird Drip Irrigation Garden Kit (model DDI-KIT-1P, ~$40-$60) is excellent for a small garden. For larger setups, I use Netafim Techline CV Drip Line (500ft roll, ~$150-$200), which has pressure-compensating emitters built-in, ensuring even watering across long runs.
- Automation: For true self-sufficiency, consider a battery-powered timer (e.g., Orbit B-Hyve Bluetooth Hose Faucet Timer, ~$50) or a solar-powered timer connected to a small 12V pump.
- Solar-Powered Pumps: For lifting water from a well, pond, or large storage tank to your garden, a solar pump is a game-changer. For a smaller drip system, a Shurflo 2088-594-152 Diaphragm Pump (12V, 3.5 GPM, ~$180) can be powered by a single 100W solar panel (e.g., Renogy 100W Monocrystalline Solar Panel, ~$100) and a small 12V battery (e.g., a 50Ah LiFePO4 battery like the Battle Born 50Ah, ~$450). For larger operations or deeper wells, more robust systems are needed. If you’re looking to build out a comprehensive off-grid power system to support your garden’s water needs, or indeed your entire homestead, you might want to explore resources like the Power Grid Generator complete system guide to understand the full scope of what’s possible in terms of energy independence.
Step 5: Seed Selection & Planting
The choice of seeds is crucial for a truly self sufficient garden from scratch.
- Choose Heirloom & Open-Pollinated Seeds: These varieties produce seeds that will grow true to type, meaning you can save seeds from your harvest year after year. F1 hybrids, while often vigorous, will not produce consistent offspring from saved seeds. Reputable seed companies include Baker Creek Heirloom Seeds, High Mowing Organic Seeds, and Seed Savers Exchange. Start with common, reliable varieties like ‘Black Krim’ tomatoes, ‘Provider’ bush beans, ‘Waltham Butternut’ squash, and ‘Black Seeded Simpson’ lettuce.
- Start Seeds Indoors (Optional but Recommended): For longer growing seasons or specific crops, starting seeds indoors gives you a head start. Use seed-starting mix (e.g., Espoma Organic Seed Starter Mix, ~$10 for 16qt bag) in seed trays (Jiffy Professional Greenhouse 72-cell kit, ~$15). Provide adequate light with LED grow lights (Barrina T5 2ft 4-pack LED Grow Lights, 20W each, ~$50) for 14-16 hours a day, positioned 2-4 inches above seedlings. Maintain consistent temperatures (65-75°F for most).
- Direct Sowing vs. Transplanting: Some crops (carrots, radishes, beans, corn) prefer direct sowing into the garden bed. Others (tomatoes, peppers, broccoli, kale) benefit from being started indoors and transplanted. Follow seed packet instructions for planting depths (e.g., lettuce seeds are often surface-sown or planted 1/8 inch deep, while beans are 1 inch deep) and spacing.
- Companion Planting: Strategically plant different species together to enhance growth, deter pests, and attract beneficial insects. For example, planting marigolds near tomatoes can deter nematodes, and basil improves tomato flavor. Nasturtiums can act as a trap crop for aphids.
- Succession Planting: For a continuous harvest, plant small batches of quick-growing crops (lettuce, radishes, cilantro) every 2-3 weeks. As one crop finishes, another is ready to take its place.
Step 6: Pest & Disease Management (Organic)
Maintaining a self sufficient garden from scratch means embracing organic pest and disease control.
- Integrated Pest Management (IPM): This holistic approach combines several strategies.
- Observation: Regularly inspect your plants for early signs of pests or disease. Catching issues early is key.
- Physical Barriers: Use row covers (e.g., Agribon AG-19 floating row cover, 10×20 ft, ~$20) to protect young plants from insect pests like cabbage worms and squash bugs. Install fences (e.g., 2×4 welded wire mesh, 4 ft tall, 50 ft roll ~$70) to keep out deer, rabbits, and other larger animals.
- Hand-Picking: For larger pests like tomato hornworms or squash bugs, simply pick them off and drop them into a bucket of soapy water.
- Companion Planting: As mentioned, certain plants repel pests. Marigolds, garlic, and onions are excellent deterrents.
- Attract Beneficial Insects: Plant flowers like dill, fennel, cosmos, and sweet alyssum to attract ladybugs, lacewings, and parasitic wasps, which prey on common garden pests.
- Organic Sprays & Treatments:
- Neem Oil: An excellent broad-spectrum organic insecticide and fungicide. Bonide Neem Oil Concentrate (16oz, ~$20) can be mixed at a rate of 1-2 tbsp per gallon of water and sprayed on affected plants.
- Insecticidal Soap: Effective against soft-bodied insects like aphids, whiteflies, and spider mites. Garden Safe Insecticidal Soap (24oz ready-to-use, ~$10).
- Bacillus thuringiensis (Bt): A naturally occurring soil bacterium that targets caterpillars and worms. Monterey BT Worm & Caterpillar Killer (16oz, ~$18) is highly effective and safe for beneficial insects.
- Copper or Sulfur Sprays: For fungal diseases like powdery mildew or blight, organic copper (e.g., Bonide Copper Fungicide, ~$15 for 1lb) or sulfur (e.g., Safer Brand Garden Fungicide, ~$10 for 16oz) can be used as a last resort.
Step 7: Harvesting & Seed Saving
The culmination of your efforts is the harvest, and seed saving closes the loop on self-sufficiency.
- Harvesting Techniques:
- Timing: Harvest vegetables at their peak ripeness for best flavor and nutritional value. For example, green beans should snap cleanly, cucumbers should be firm, and tomatoes should be fully colored.
- Frequency: Many crops, like zucchini, cucumbers, and bush beans, produce more if harvested frequently. Pick daily or every other day.
- Tools: Use clean, sharp pruners (e.g., Corona ClassicCUT Bypass Pruner BP 3180, ~$30) or a sharp knife for clean cuts, minimizing damage to the plant.
- Seed Saving: This is where the « self-sufficient » aspect truly shines.
- Selection: Only save seeds from your healthiest, most vigorous plants that show desired traits (disease resistance, good flavor, high yield).
- Isolation: To ensure true-to-type seeds, prevent cross-pollination. This can be challenging for open-pollinated crops that readily cross (e.g., squash, corn). For beginners, focus on self-pollinating plants like beans, peas, lettuce, and tomatoes.
- Processing:
- Dry Seeds (Beans, Peas, Lettuce, Grains): Allow pods/seed heads to dry completely on the plant. Harvest, shell, and clean the seeds, removing chaff.
- Wet Seeds (Tomatoes, Cucumbers, Squash): For tomatoes, ferment the seeds in water for a few days to remove the gel coating and inhibit disease. For cucumbers/squash, scrape out seeds, wash thoroughly, and dry.
- Drying: Spread seeds thinly on screens or paper plates in a cool, dry, well-ventilated area for 1-4 weeks. Ensure they are bone-dry before storage. I aim for less than 8% moisture content.
- Storage: Store seeds in airtight containers (glass jars with desiccant packets work well) in a cool, dark, dry place (ideally 40-50°F and 30-40% humidity). Label clearly with variety and date. Properly stored seeds can remain viable for 3-10 years or more.
Step 8: Season Extension & Winterizing
Extend your harvest and protect your garden for the off-season to truly maximize your self sufficient garden from scratch.
- Cold Frames: Simple structures with a transparent top (glass, polycarbonate, or old windows) that sit over garden beds. They trap solar heat, allowing you to grow cold-hardy crops (lettuce, spinach, kale, radishes) well into winter or start seeds earlier in spring. A basic cold frame can be built from 2×6 lumber and a sheet of polycarbonate for under $100.
- Hoop Houses/Low Tunnels: Larger structures made from flexible hoops (PVC pipe or EMT conduit) covered with greenhouse plastic. These provide more space and greater temperature moderation. A 10×20 ft DIY low tunnel kit can cost $200-$500, while a larger, more robust hoop house kit might be $1,000-$3,000. I use a 6×12 ft low tunnel made from 1/2-inch PVC hoops and 6mil greenhouse plastic, which extends my lettuce and spinach harvest by at least
Deciding between raised beds and in-ground beds depends on your soil, budget, and physical capabilities.
- In-Ground Beds: If you have excellent native soil and good drainage, in-ground beds are the most economical. Double-digging (loosening soil two shovel depths) can significantly improve drainage and aeration. For my main garden, I primarily use in-ground beds, but I focus on building up the soil over time with consistent compost additions and cover cropping. I aim for beds that are no wider than 3-4 feet so I can reach the center without stepping on the soil, compacting it.
- Raised Beds: Raised beds offer numerous advantages, especially for poor soil, heavy clay, or rocky areas. They provide better drainage, warm up faster in spring, reduce compaction, and make weeding and harvesting easier on your back.
- Material Options:
- Untreated Cedar: Naturally rot-resistant and chemical-free. A 4×8 ft bed, 12 inches deep, typically requires three 2x12x8 ft cedar boards, costing around $50-$60 per board (total ~$150-$180) plus corner brackets or screws. My first raised beds were cedar and are still going strong after 7 years.
- Galvanized Steel: Durable, long-lasting, and aesthetically pleasing. Brands like Vego Garden offer modular kits. A Vego Garden 17″ Tall 8-in-1 Metal Raised Garden Bed (can be configured to 4×8 ft) costs approximately $250-$300.
- Concrete Blocks/Stones: Very durable but can leach minerals (though generally safe once weathered) and can be expensive.
- Recycled Materials: Pallets (check for chemical treatment stamps like « HT » for heat-treated), old tires (controversial due to potential chemical leaching).
- Filling Raised Beds: Don’t just fill with topsoil. Use a « Hugelkultur » approach (logs, branches, leaves, then compost, then topsoil) or a mixture of 60% good quality topsoil, 30% compost, and 10% perlite or vermiculite for drainage. A 4x8x1 ft raised bed requires about 32 cubic feet (or ~1.2 cubic yards) of soil mix, which can cost $100-$200 depending on your source.
- Material Options:
Step 4: Water Management & Irrigation
Efficient water management is critical for a self sufficient garden from scratch, especially in off-grid living where water resources might be limited.
- Rainwater Harvesting: This is my primary source of irrigation water. A 55-gallon rain barrel (e.g., EarthMark Rain Barrel, ~$120-$150) connected to a downspout can collect significant water. For larger needs, I use two 275-gallon IBC totes (Intermediate Bulk Containers, often available used for $100-$200 each from food-grade sources) connected in series. A 1,000 sq ft roof can collect approximately 620 gallons of water for every inch of rainfall. My 1,500 sq ft roof provides ample water for my 600 sq ft garden through multiple barrels and totes.
- Drip Irrigation: This is by far the most water-efficient method, delivering water directly to the plant’s root zone, minimizing evaporation and weed growth.
- Components: A typical drip system includes a pressure regulator (e.g., Rain Bird PRV-10, ~$15), a filter (Rain Bird RBY filter, ~$20), main tubing (1/2-inch poly tubing, 100ft ~$25), smaller feeder lines (1/4-inch tubing), and emitters (0.5 GPH or 1 GPH per plant).
- Kits: For beginners, a starter kit like the Rain Bird Drip Irrigation Garden Kit (model DDI-KIT-1P, ~$40-$60) is excellent for a small garden. For larger setups, I use Netafim Techline CV Drip Line (500ft roll, ~$150-$200), which has pressure-compensating emitters built-in, ensuring even watering across long runs.
- Automation: For true self-sufficiency, consider a battery-powered timer (e.g., Orbit B-Hyve Bluetooth Hose Faucet Timer, ~$50) or a solar-powered timer connected to a small 12V pump.
- Solar-Powered Pumps: For lifting water from a well, pond, or large storage tank to your garden, a solar pump is a game-changer. For a smaller drip system, a Shurflo 2088-594-152 Diaphragm Pump (12V, 3.5 GPM, ~$180) can be powered by a single 100W solar panel (e.g., Renogy 100W Monocrystalline Solar Panel, ~$100) and a small 12V battery (e.g., a 50Ah LiFePO4 battery like the Battle Born 50Ah, ~$450). For larger operations or deeper wells, more robust systems are needed. If you’re looking to build out a comprehensive off-grid power system to support your garden’s water needs, or indeed your entire homestead, you might want to explore resources like the Power Grid Generator complete system guide to understand the full scope of what’s possible in terms of energy independence.
Step 5: Seed Selection & Planting
The choice of seeds is crucial for a truly self sufficient garden from scratch.
- Choose Heirloom & Open-Pollinated Seeds: These varieties produce seeds that will grow true to type, meaning you can save seeds from your harvest year after year. F1 hybrids, while often vigorous, will not produce consistent offspring from saved seeds. Reputable seed companies include Baker Creek Heirloom Seeds, High Mowing Organic Seeds, and Seed Savers Exchange. Start with common, reliable varieties like ‘Black Krim’ tomatoes, ‘Provider’ bush beans, ‘Waltham Butternut’ squash, and ‘Black Seeded Simpson’ lettuce.
- Start Seeds Indoors (Optional but Recommended): For longer growing seasons or specific crops, starting seeds indoors gives you a head start. Use seed-starting mix (e.g., Espoma Organic Seed Starter Mix, ~$10 for 16qt bag) in seed trays (Jiffy Professional Greenhouse 72-cell kit, ~$15). Provide adequate light with LED grow lights (Barrina T5 2ft 4-pack LED Grow Lights, 20W each, ~$50) for 14-16 hours a day, positioned 2-4 inches above seedlings. Maintain consistent temperatures (65-75°F for most).
- Direct Sowing vs. Transplanting: Some crops (carrots, radishes, beans, corn) prefer direct sowing into the garden bed. Others (tomatoes, peppers, broccoli, kale) benefit from being started indoors and transplanted. Follow seed packet instructions for planting depths (e.g., lettuce seeds are often surface-sown or planted 1/8 inch deep, while beans are 1 inch deep) and spacing.
- Companion Planting: Strategically plant different species together to enhance growth, deter pests, and attract beneficial insects. For example, planting marigolds near tomatoes can deter nematodes, and basil improves tomato flavor. Nasturtiums can act as a trap crop for aphids.
- Succession Planting: For a continuous harvest, plant small batches of quick-growing crops (lettuce, radishes, cilantro) every 2-3 weeks. As one crop finishes, another is ready to take its place.
Step 6: Pest & Disease Management (Organic)
Maintaining a self sufficient garden from scratch means embracing organic pest and disease control.
- Integrated Pest Management (IPM): This holistic approach combines several strategies.
- Observation: Regularly inspect your plants for early signs of pests or disease. Catching issues early is key.
- Physical Barriers: Use row covers (e.g., Agribon AG-19 floating row cover, 10×20 ft, ~$20) to protect young plants from insect pests like cabbage worms and squash bugs. Install fences (e.g., 2×4 welded wire mesh, 4 ft tall, 50 ft roll ~$70) to keep out deer, rabbits, and other larger animals.
- Hand-Picking: For larger pests like tomato hornworms or squash bugs, simply pick them off and drop them into a bucket of soapy water.
- Companion Planting: As mentioned, certain plants repel pests. Marigolds, garlic, and onions are excellent deterrents.
- Attract Beneficial Insects: Plant flowers like dill, fennel, cosmos, and sweet alyssum to attract ladybugs, lacewings, and parasitic wasps, which prey on common garden pests.
- Organic Sprays & Treatments:
- Neem Oil: An excellent broad-spectrum organic insecticide and fungicide. Bonide Neem Oil Concentrate (16oz, ~$20) can be mixed at a rate of 1-2 tbsp per gallon of water and sprayed on affected plants.
- Insecticidal Soap: Effective against soft-bodied insects like aphids, whiteflies, and spider mites. Garden Safe Insecticidal Soap (24oz ready-to-use, ~$10).
- Bacillus thuringiensis (Bt): A naturally occurring soil bacterium that targets caterpillars and worms. Monterey BT Worm & Caterpillar Killer (16oz, ~$18) is highly effective and safe for beneficial insects.
- Copper or Sulfur Sprays: For fungal diseases like powdery mildew or blight, organic copper (e.g., Bonide Copper Fungicide, ~$15 for 1lb) or sulfur (e.g., Safer Brand Garden Fungicide, ~$10 for 16oz) can be used as a last resort.
Step 7: Harvesting & Seed Saving
The culmination of your efforts is the harvest, and seed saving closes the loop on self-sufficiency.
- Harvesting Techniques:
- Timing: Harvest vegetables at their peak ripeness for best flavor and nutritional value. For example, green beans should snap cleanly, cucumbers should be firm, and tomatoes should be fully colored.
- Frequency: Many crops, like zucchini, cucumbers, and bush beans, produce more if harvested frequently. Pick daily or every other day.
- Tools: Use clean, sharp pruners (e.g., Corona ClassicCUT Bypass Pruner BP 3180, ~$30) or a sharp knife for clean cuts, minimizing damage to the plant.
- Seed Saving: This is where the « self-sufficient » aspect truly shines.
- Selection: Only save seeds from your healthiest, most vigorous plants that show desired traits (disease resistance, good flavor, high yield).
- Isolation: To ensure true-to-type seeds, prevent cross-pollination. This can be challenging for open-pollinated crops that readily cross (e.g., squash, corn). For beginners, focus on self-pollinating plants like beans, peas, lettuce, and tomatoes.
- Processing:
- Dry Seeds (Beans, Peas, Lettuce, Grains): Allow pods/seed heads to dry completely on the plant. Harvest, shell, and clean the seeds, removing chaff.
- Wet Seeds (Tomatoes, Cucumbers, Squash): For tomatoes, ferment the seeds in water for a few days to remove the gel coating and inhibit disease. For cucumbers/squash, scrape out seeds, wash thoroughly, and dry.
- Drying: Spread seeds thinly on screens or paper plates in a cool, dry, well-ventilated area for 1-4 weeks. Ensure they are bone-dry before storage. I aim for less than 8% moisture content.
- Storage: Store seeds in airtight containers (glass jars with desiccant packets work well) in a cool, dark, dry place (ideally 40-50°F and 30-40% humidity). Label clearly with variety and date. Properly stored seeds can remain viable for 3-10 years or more.
Step 8: Season Extension & Winterizing
Extend your harvest and protect your garden for the off-season to truly maximize your self sufficient garden from scratch.
- Cold Frames: Simple structures with a transparent top (glass, polycarbonate, or old windows) that sit over garden beds. They trap solar heat, allowing you to grow cold-hardy crops (lettuce, spinach, kale, radishes) well into winter or start seeds earlier in spring. A basic cold frame can be built from 2×6 lumber and a sheet of polycarbonate for under $100.
- Hoop Houses/Low Tunnels: Larger structures made from flexible hoops (PVC pipe or EMT conduit) covered with greenhouse plastic. These provide more space and greater temperature moderation. A 10×20 ft DIY low tunnel kit can cost $200-$500, while a larger, more robust hoop house kit might be $1,000-$3,000. I use a 6×12 ft low tunnel made from 1/2-inch PVC hoops and 6mil greenhouse plastic, which extends my lettuce and spinach harvest by at least
Healthy soil is the bedrock of a productive, self-sufficient garden. You can’t guess what your soil needs; you have to test it.
- Perform a Soil Test: A professional soil test will give you precise data on your soil’s pH, nutrient levels (N-P-K), and organic matter content. I recommend sending a sample to your local agricultural extension office; it typically costs $20-$50 and provides detailed recommendations. Alternatively, for a quick homeowner check, a Rapitest Soil Test Kit (40-test kit, model 1663, ~$20 on Amazon) provides a good baseline for pH, Nitrogen, Phosphorus, and Potash. Aim for a pH between 6.0 and 7.0 for most vegetables.
- Amend for pH Imbalance: If your soil is too acidic (below 6.0), add agricultural lime (dolomitic lime adds magnesium, calcitic lime adds calcium). Apply 5-10 lbs per 100 sq ft for a moderate adjustment. If it’s too alkaline (above 7.0), add elemental sulfur (e.g., Espoma Soil Acidifier, ~$15 for 6.75 lbs) or generous amounts of organic matter like peat moss or pine needles.
- Build Organic Matter: This is the single most important step for long-term soil health. Organic matter improves soil structure, water retention, drainage, and nutrient availability. Incorporate 2-4 inches of high-quality compost into your top 6-12 inches of soil annually. I make my own compost from kitchen scraps, garden waste, and shredded leaves, but you can purchase it. Local nurseries often sell bulk compost for $30-$50 per cubic yard. Aged manure (from chickens, cows, or horses – ensure it’s well-rotted to avoid burning plants) is also excellent.
- Address Nutrient Deficiencies: Based on your soil test, add specific organic amendments. If Nitrogen (N) is low, add blood meal (12-0-0, ~$20 for 3 lbs) or feather meal. For Phosphorus (P), use bone meal (3-15-0, ~$15 for 3 lbs) or rock phosphate. For Potassium (K), greensand (0-0-2.5, ~$25 for 5 lbs) or kelp meal are good choices. I rely heavily on Espoma Organic Garden-tone (5-3-3, ~$25 for an 8lb bag) as a balanced, all-purpose organic fertilizer during planting.
Step 3: Garden Bed Preparation
Deciding between raised beds and in-ground beds depends on your soil, budget, and physical capabilities.
- In-Ground Beds: If you have excellent native soil and good drainage, in-ground beds are the most economical. Double-digging (loosening soil two shovel depths) can significantly improve drainage and aeration. For my main garden, I primarily use in-ground beds, but I focus on building up the soil over time with consistent compost additions and cover cropping. I aim for beds that are no wider than 3-4 feet so I can reach the center without stepping on the soil, compacting it.
- Raised Beds: Raised beds offer numerous advantages, especially for poor soil, heavy clay, or rocky areas. They provide better drainage, warm up faster in spring, reduce compaction, and make weeding and harvesting easier on your back.
- Material Options:
- Untreated Cedar: Naturally rot-resistant and chemical-free. A 4×8 ft bed, 12 inches deep, typically requires three 2x12x8 ft cedar boards, costing around $50-$60 per board (total ~$150-$180) plus corner brackets or screws. My first raised beds were cedar and are still going strong after 7 years.
- Galvanized Steel: Durable, long-lasting, and aesthetically pleasing. Brands like Vego Garden offer modular kits. A Vego Garden 17″ Tall 8-in-1 Metal Raised Garden Bed (can be configured to 4×8 ft) costs approximately $250-$300.
- Concrete Blocks/Stones: Very durable but can leach minerals (though generally safe once weathered) and can be expensive.
- Recycled Materials: Pallets (check for chemical treatment stamps like « HT » for heat-treated), old tires (controversial due to potential chemical leaching).
- Filling Raised Beds: Don’t just fill with topsoil. Use a « Hugelkultur » approach (logs, branches, leaves, then compost, then topsoil) or a mixture of 60% good quality topsoil, 30% compost, and 10% perlite or vermiculite for drainage. A 4x8x1 ft raised bed requires about 32 cubic feet (or ~1.2 cubic yards) of soil mix, which can cost $100-$200 depending on your source.
- Material Options:
Step 4: Water Management & Irrigation
Efficient water management is critical for a self sufficient garden from scratch, especially in off-grid living where water resources might be limited.
- Rainwater Harvesting: This is my primary source of irrigation water. A 55-gallon rain barrel (e.g., EarthMark Rain Barrel, ~$120-$150) connected to a downspout can collect significant water. For larger needs, I use two 275-gallon IBC totes (Intermediate Bulk Containers, often available used for $100-$200 each from food-grade sources) connected in series. A 1,000 sq ft roof can collect approximately 620 gallons of water for every inch of rainfall. My 1,500 sq ft roof provides ample water for my 600 sq ft garden through multiple barrels and totes.
- Drip Irrigation: This is by far the most water-efficient method, delivering water directly to the plant’s root zone, minimizing evaporation and weed growth.
- Components: A typical drip system includes a pressure regulator (e.g., Rain Bird PRV-10, ~$15), a filter (Rain Bird RBY filter, ~$20), main tubing (1/2-inch poly tubing, 100ft ~$25), smaller feeder lines (1/4-inch tubing), and emitters (0.5 GPH or 1 GPH per plant).
- Kits: For beginners, a starter kit like the Rain Bird Drip Irrigation Garden Kit (model DDI-KIT-1P, ~$40-$60) is excellent for a small garden. For larger setups, I use Netafim Techline CV Drip Line (500ft roll, ~$150-$200), which has pressure-compensating emitters built-in, ensuring even watering across long runs.
- Automation: For true self-sufficiency, consider a battery-powered timer (e.g., Orbit B-Hyve Bluetooth Hose Faucet Timer, ~$50) or a solar-powered timer connected to a small 12V pump.
- Solar-Powered Pumps: For lifting water from a well, pond, or large storage tank to your garden, a solar pump is a game-changer. For a smaller drip system, a Shurflo 2088-594-152 Diaphragm Pump (12V, 3.5 GPM, ~$180) can be powered by a single 100W solar panel (e.g., Renogy 100W Monocrystalline Solar Panel, ~$100) and a small 12V battery (e.g., a 50Ah LiFePO4 battery like the Battle Born 50Ah, ~$450). For larger operations or deeper wells, more robust systems are needed. If you’re looking to build out a comprehensive off-grid power system to support your garden’s water needs, or indeed your entire homestead, you might want to explore resources like the Power Grid Generator complete system guide to understand the full scope of what’s possible in terms of energy independence.
Step 5: Seed Selection & Planting
The choice of seeds is crucial for a truly self sufficient garden from scratch.
- Choose Heirloom & Open-Pollinated Seeds: These varieties produce seeds that will grow true to type, meaning you can save seeds from your harvest year after year. F1 hybrids, while often vigorous, will not produce consistent offspring from saved seeds. Reputable seed companies include Baker Creek Heirloom Seeds, High Mowing Organic Seeds, and Seed Savers Exchange. Start with common, reliable varieties like ‘Black Krim’ tomatoes, ‘Provider’ bush beans, ‘Waltham Butternut’ squash, and ‘Black Seeded Simpson’ lettuce.
- Start Seeds Indoors (Optional but Recommended): For longer growing seasons or specific crops, starting seeds indoors gives you a head start. Use seed-starting mix (e.g., Espoma Organic Seed Starter Mix, ~$10 for 16qt bag) in seed trays (Jiffy Professional Greenhouse 72-cell kit, ~$15). Provide adequate light with LED grow lights (Barrina T5 2ft 4-pack LED Grow Lights, 20W each, ~$50) for 14-16 hours a day, positioned 2-4 inches above seedlings. Maintain consistent temperatures (65-75°F for most).
- Direct Sowing vs. Transplanting: Some crops (carrots, radishes, beans, corn) prefer direct sowing into the garden bed. Others (tomatoes, peppers, broccoli, kale) benefit from being started indoors and transplanted. Follow seed packet instructions for planting depths (e.g., lettuce seeds are often surface-sown or planted 1/8 inch deep, while beans are 1 inch deep) and spacing.
- Companion Planting: Strategically plant different species together to enhance growth, deter pests, and attract beneficial insects. For example, planting marigolds near tomatoes can deter nematodes, and basil improves tomato flavor. Nasturtiums can act as a trap crop for aphids.
- Succession Planting: For a continuous harvest, plant small batches of quick-growing crops (lettuce, radishes, cilantro) every 2-3 weeks. As one crop finishes, another is ready to take its place.
Step 6: Pest & Disease Management (Organic)
Maintaining a self sufficient garden from scratch means embracing organic pest and disease control.
- Integrated Pest Management (IPM): This holistic approach combines several strategies.
- Observation: Regularly inspect your plants for early signs of pests or disease. Catching issues early is key.
- Physical Barriers: Use row covers (e.g., Agribon AG-19 floating row cover, 10×20 ft, ~$20) to protect young plants from insect pests like cabbage worms and squash bugs. Install fences (e.g., 2×4 welded wire mesh, 4 ft tall, 50 ft roll ~$70) to keep out deer, rabbits, and other larger animals.
- Hand-Picking: For larger pests like tomato hornworms or squash bugs, simply pick them off and drop them into a bucket of soapy water.
- Companion Planting: As mentioned, certain plants repel pests. Marigolds, garlic, and onions are excellent deterrents.
- Attract Beneficial Insects: Plant flowers like dill, fennel, cosmos, and sweet alyssum to attract ladybugs, lacewings, and parasitic wasps, which prey on common garden pests.
- Organic Sprays & Treatments:
- Neem Oil: An excellent broad-spectrum organic insecticide and fungicide. Bonide Neem Oil Concentrate (16oz, ~$20) can be mixed at a rate of 1-2 tbsp per gallon of water and sprayed on affected plants.
- Insecticidal Soap: Effective against soft-bodied insects like aphids, whiteflies, and spider mites. Garden Safe Insecticidal Soap (24oz ready-to-use, ~$10).
- Bacillus thuringiensis (Bt): A naturally occurring soil bacterium that targets caterpillars and worms. Monterey BT Worm & Caterpillar Killer (16oz, ~$18) is highly effective and safe for beneficial insects.
- Copper or Sulfur Sprays: For fungal diseases like powdery mildew or blight, organic copper (e.g., Bonide Copper Fungicide, ~$15 for 1lb) or sulfur (e.g., Safer Brand Garden Fungicide, ~$10 for 16oz) can be used as a last resort.
Step 7: Harvesting & Seed Saving
The culmination of your efforts is the harvest, and seed saving closes the loop on self-sufficiency.
- Harvesting Techniques:
- Timing: Harvest vegetables at their peak ripeness for best flavor and nutritional value. For example, green beans should snap cleanly, cucumbers should be firm, and tomatoes should be fully colored.
- Frequency: Many crops, like zucchini, cucumbers, and bush beans, produce more if harvested frequently. Pick daily or every other day.
- Tools: Use clean, sharp pruners (e.g., Corona ClassicCUT Bypass Pruner BP 3180, ~$30) or a sharp knife for clean cuts, minimizing damage to the plant.
- Seed Saving: This is where the « self-sufficient » aspect truly shines.
- Selection: Only save seeds from your healthiest, most vigorous plants that show desired traits (disease resistance, good flavor, high yield).
- Isolation: To ensure true-to-type seeds, prevent cross-pollination. This can be challenging for open-pollinated crops that readily cross (e.g., squash, corn). For beginners, focus on self-pollinating plants like beans, peas, lettuce, and tomatoes.
- Processing:
- Dry Seeds (Beans, Peas, Lettuce, Grains): Allow pods/seed heads to dry completely on the plant. Harvest, shell, and clean the seeds, removing chaff.
- Wet Seeds (Tomatoes, Cucumbers, Squash): For tomatoes, ferment the seeds in water for a few days to remove the gel coating and inhibit disease. For cucumbers/squash, scrape out seeds, wash thoroughly, and dry.
- Drying: Spread seeds thinly on screens or paper plates in a cool, dry, well-ventilated area for 1-4 weeks. Ensure they are bone-dry before storage. I aim for less than 8% moisture content.
- Storage: Store seeds in airtight containers (glass jars with desiccant packets work well) in a cool, dark, dry place (ideally 40-50°F and 30-40% humidity). Label clearly with variety and date. Properly stored seeds can remain viable for 3-10 years or more.
Step 8: Season Extension & Winterizing
Extend your harvest and protect your garden for the off-season to truly maximize your self sufficient garden from scratch.
- Cold Frames: Simple structures with a transparent top (glass, polycarbonate, or old windows) that sit over garden beds. They trap solar heat, allowing you to grow cold-hardy crops (lettuce, spinach, kale, radishes) well into winter or start seeds earlier in spring. A basic cold frame can be built from 2×6 lumber and a sheet of polycarbonate for under $100.
- Hoop Houses/Low Tunnels: Larger structures made from flexible hoops (PVC pipe or EMT conduit) covered with greenhouse plastic. These provide more space and greater temperature moderation. A 10×20 ft DIY low tunnel kit can cost $200-$500, while a larger, more robust hoop house kit might be $1,000-$3,000. I use a 6×12 ft low tunnel made from 1/2-inch PVC hoops and 6mil greenhouse plastic, which extends my lettuce and spinach harvest by at least
Step 6: Pest & Disease Management (Organic)
Maintaining a self sufficient garden from scratch means embracing organic pest and disease control.
- Integrated Pest Management (IPM): This holistic approach combines several strategies.
- Observation: Regularly inspect your plants for early signs of pests or disease. Catching issues early is key.
- Physical Barriers: Use row covers (e.g., Agribon AG-19 floating row cover, 10×20 ft, ~$20) to protect young plants from insect pests like cabbage worms and squash bugs. Install fences (e.g., 2×4 welded wire mesh, 4 ft tall, 50 ft roll ~$70) to keep out deer, rabbits, and other larger animals.
- Hand-Picking: For larger pests like tomato hornworms or squash bugs, simply pick them off and drop them into a bucket of soapy water.
- Companion Planting: As mentioned, certain plants repel pests. Marigolds, garlic, and onions are excellent deterrents.
- Attract Beneficial Insects: Plant flowers like dill, fennel, cosmos, and sweet alyssum to attract ladybugs, lacewings, and parasitic wasps, which prey on common garden pests.
- Organic Sprays & Treatments:
- Neem Oil: An excellent broad-spectrum organic insecticide and fungicide. Bonide Neem Oil Concentrate (16oz, ~$20) can be mixed at a rate of 1-2 tbsp per gallon of water and sprayed on affected plants.
- Insecticidal Soap: Effective against soft-bodied insects like aphids, whiteflies, and spider mites. Garden Safe Insecticidal Soap (24oz ready-to-use, ~$10).
- Bacillus thuringiensis (Bt): A naturally occurring soil bacterium that targets caterpillars and worms. Monterey BT Worm & Caterpillar Killer (16oz, ~$18) is highly effective and safe for beneficial insects.
- Copper or Sulfur Sprays: For fungal diseases like powdery mildew or blight, organic copper (e.g., Bonide Copper Fungicide, ~$15 for 1lb) or sulfur (e.g., Safer Brand Garden Fungicide, ~$10 for 16oz) can be used as a last resort.
Step 7: Harvesting & Seed Saving
The culmination of your efforts is the harvest, and seed saving closes the loop on self-sufficiency.
- Harvesting Techniques:
- Timing: Harvest vegetables at their peak ripeness for best flavor and nutritional value. For example, green beans should snap cleanly, cucumbers should be firm, and tomatoes should be fully colored.
- Frequency: Many crops, like zucchini, cucumbers, and bush beans, produce more if harvested frequently. Pick daily or every other day.
- Tools: Use clean, sharp pruners (e.g., Corona ClassicCUT Bypass Pruner BP 3180, ~$30) or a sharp knife for clean cuts, minimizing damage to the plant.
- Seed Saving: This is where the « self-sufficient » aspect truly shines.
- Selection: Only save seeds from your healthiest, most vigorous plants that show desired traits (disease resistance, good flavor, high yield).
- Isolation: To ensure true-to-type seeds, prevent cross-pollination. This can be challenging for open-pollinated crops that readily cross (e.g., squash, corn). For beginners, focus on self-pollinating plants like beans, peas, lettuce, and tomatoes.
- Processing:
- Dry Seeds (Beans, Peas, Lettuce, Grains): Allow pods/seed heads to dry completely on the plant. Harvest, shell, and clean the seeds, removing chaff.
- Wet Seeds (Tomatoes, Cucumbers, Squash): For tomatoes, ferment the seeds in water for a few days to remove the gel coating and inhibit disease. For cucumbers/squash, scrape out seeds, wash thoroughly, and dry.
- Drying: Spread seeds thinly on screens or paper plates in a cool, dry, well-ventilated area for 1-4 weeks. Ensure they are bone-dry before storage. I aim for less than 8% moisture content.
- Storage: Store seeds in airtight containers (glass jars with desiccant packets work well) in a cool, dark, dry place (ideally 40-50°F and 30-40% humidity). Label clearly with variety and date. Properly stored seeds can remain viable for 3-10 years or more.
Step 8: Season Extension & Winterizing
Extend your harvest and protect your garden for the off-season to truly maximize your self sufficient garden from scratch.
- Cold Frames: Simple structures with a transparent top (glass, polycarbonate, or old windows) that sit over garden beds. They trap solar heat, allowing you to grow cold-hardy crops (lettuce, spinach, kale, radishes) well into winter or start seeds earlier in spring. A basic cold frame can be built from 2×6 lumber and a sheet of polycarbonate for under $100.
- Hoop Houses/Low Tunnels: Larger structures made from flexible hoops (PVC pipe or EMT conduit) covered with greenhouse plastic. These provide more space and greater temperature moderation. A 10×20 ft DIY low tunnel kit can cost $200-$500, while a larger, more robust hoop house kit might be $1,000-$3,000. I use a 6×12 ft low tunnel made from 1/2-inch PVC hoops and 6mil greenhouse plastic, which extends my lettuce and spinach harvest by at least
- In-Ground Beds: If you have excellent native soil and good drainage, in-ground beds are the most economical. Double-digging (loosening soil two shovel depths) can significantly improve drainage and aeration. For my main garden, I primarily use in-ground beds, but I focus on building up the soil over time with consistent compost additions and cover cropping. I aim for beds that are no wider than 3-4 feet so I can reach the center without stepping on the soil, compacting it.
- Raised Beds: Raised beds offer numerous advantages, especially for poor soil, heavy clay, or rocky areas. They provide better drainage, warm up faster in spring, reduce compaction, and make weeding and harvesting easier on your back.
- Material Options:
- Untreated Cedar: Naturally rot-resistant and chemical-free. A 4×8 ft bed, 12 inches deep, typically requires three 2x12x8 ft cedar boards, costing around $50-$60 per board (total ~$150-$180) plus corner brackets or screws. My first raised beds were cedar and are still going strong after 7 years.
- Galvanized Steel: Durable, long-lasting, and aesthetically pleasing. Brands like Vego Garden offer modular kits. A Vego Garden 17″ Tall 8-in-1 Metal Raised Garden Bed (can be configured to 4×8 ft) costs approximately $250-$300.
- Concrete Blocks/Stones: Very durable but can leach minerals (though generally safe once weathered) and can be expensive.
- Recycled Materials: Pallets (check for chemical treatment stamps like « HT » for heat-treated), old tires (controversial due to potential chemical leaching).
- Filling Raised Beds: Don’t just fill with topsoil. Use a « Hugelkultur » approach (logs, branches, leaves, then compost, then topsoil) or a mixture of 60% good quality topsoil, 30% compost, and 10% perlite or vermiculite for drainage. A 4x8x1 ft raised bed requires about 32 cubic feet (or ~1.2 cubic yards) of soil mix, which can cost $100-$200 depending on your source.
- Material Options:
Step 4: Water Management & Irrigation
Efficient water management is critical for a self sufficient garden from scratch, especially in off-grid living where water resources might be limited.
- Rainwater Harvesting: This is my primary source of irrigation water. A 55-gallon rain barrel (e.g., EarthMark Rain Barrel, ~$120-$150) connected to a downspout can collect significant water. For larger needs, I use two 275-gallon IBC totes (Intermediate Bulk Containers, often available used for $100-$200 each from food-grade sources) connected in series. A 1,000 sq ft roof can collect approximately 620 gallons of water for every inch of rainfall. My 1,500 sq ft roof provides ample water for my 600 sq ft garden through multiple barrels and totes.
- Drip Irrigation: This is by far the most water-efficient method, delivering water directly to the plant’s root zone, minimizing evaporation and weed growth.
- Components: A typical drip system includes a pressure regulator (e.g., Rain Bird PRV-10, ~$15), a filter (Rain Bird RBY filter, ~$20), main tubing (1/2-inch poly tubing, 100ft ~$25), smaller feeder lines (1/4-inch tubing), and emitters (0.5 GPH or 1 GPH per plant).
- Kits: For beginners, a starter kit like the Rain Bird Drip Irrigation Garden Kit (model DDI-KIT-1P, ~$40-$60) is excellent for a small garden. For larger setups, I use Netafim Techline CV Drip Line (500ft roll, ~$150-$200), which has pressure-compensating emitters built-in, ensuring even watering across long runs.
- Automation: For true self-sufficiency, consider a battery-powered timer (e.g., Orbit B-Hyve Bluetooth Hose Faucet Timer, ~$50) or a solar-powered timer connected to a small 12V pump.
- Solar-Powered Pumps: For lifting water from a well, pond, or large storage tank to your garden, a solar pump is a game-changer. For a smaller drip system, a Shurflo 2088-594-152 Diaphragm Pump (12V, 3.5 GPM, ~$180) can be powered by a single 100W solar panel (e.g., Renogy 100W Monocrystalline Solar Panel, ~$100) and a small 12V battery (e.g., a 50Ah LiFePO4 battery like the Battle Born 50Ah, ~$450). For larger operations or deeper wells, more robust systems are needed. If you’re looking to build out a comprehensive off-grid power system to support your garden’s water needs, or indeed your entire homestead, you might want to explore resources like the Power Grid Generator complete system guide to understand the full scope of what’s possible in terms of energy independence.
Step 5: Seed Selection & Planting
The choice of seeds is crucial for a truly self sufficient garden from scratch.
- Choose Heirloom & Open-Pollinated Seeds: These varieties produce seeds that will grow true to type, meaning you can save seeds from your harvest year after year. F1 hybrids, while often vigorous, will not produce consistent offspring from saved seeds. Reputable seed companies include Baker Creek Heirloom Seeds, High Mowing Organic Seeds, and Seed Savers Exchange. Start with common, reliable varieties like ‘Black Krim’ tomatoes, ‘Provider’ bush beans, ‘Waltham Butternut’ squash, and ‘Black Seeded Simpson’ lettuce.
- Start Seeds Indoors (Optional but Recommended): For longer growing seasons or specific crops, starting seeds indoors gives you a head start. Use seed-starting mix (e.g., Espoma Organic Seed Starter Mix, ~$10 for 16qt bag) in seed trays (Jiffy Professional Greenhouse 72-cell kit, ~$15). Provide adequate light with LED grow lights (Barrina T5 2ft 4-pack LED Grow Lights, 20W each, ~$50) for 14-16 hours a day, positioned 2-4 inches above seedlings. Maintain consistent temperatures (65-75°F for most).
- Direct Sowing vs. Transplanting: Some crops (carrots, radishes, beans, corn) prefer direct sowing into the garden bed. Others (tomatoes, peppers, broccoli, kale) benefit from being started indoors and transplanted. Follow seed packet instructions for planting depths (e.g., lettuce seeds are often surface-sown or planted 1/8 inch deep, while beans are 1 inch deep) and spacing.
- Companion Planting: Strategically plant different species together to enhance growth, deter pests, and attract beneficial insects. For example, planting marigolds near tomatoes can deter nematodes, and basil improves tomato flavor. Nasturtiums can act as a trap crop for aphids.
- Succession Planting: For a continuous harvest, plant small batches of quick-growing crops (lettuce, radishes, cilantro) every 2-3 weeks. As one crop finishes, another is ready to take its place.
Step 6: Pest & Disease Management (Organic)
Maintaining a self sufficient garden from scratch means embracing organic pest and disease control.
- Integrated Pest Management (IPM): This holistic approach combines several strategies.
- Observation: Regularly inspect your plants for early signs of pests or disease. Catching issues early is key.
- Physical Barriers: Use row covers (e.g., Agribon AG-19 floating row cover, 10×20 ft, ~$20) to protect young plants from insect pests like cabbage worms and squash bugs. Install fences (e.g., 2×4 welded wire mesh, 4 ft tall, 50 ft roll ~$70) to keep out deer, rabbits, and other larger animals.
- Hand-Picking: For larger pests like tomato hornworms or squash bugs, simply pick them off and drop them into a bucket of soapy water.
- Companion Planting: As mentioned, certain plants repel pests. Marigolds, garlic, and onions are excellent deterrents.
- Attract Beneficial Insects: Plant flowers like dill, fennel, cosmos, and sweet alyssum to attract ladybugs, lacewings, and parasitic wasps, which prey on common garden pests.
- Organic Sprays & Treatments:
- Neem Oil: An excellent broad-spectrum organic insecticide and fungicide. Bonide Neem Oil Concentrate (16oz, ~$20) can be mixed at a rate of 1-2 tbsp per gallon of water and sprayed on affected plants.
- Insecticidal Soap: Effective against soft-bodied insects like aphids, whiteflies, and spider mites. Garden Safe Insecticidal Soap (24oz ready-to-use, ~$10).
- Bacillus thuringiensis (Bt): A naturally occurring soil bacterium that targets caterpillars and worms. Monterey BT Worm & Caterpillar Killer (16oz, ~$18) is highly effective and safe for beneficial insects.
- Copper or Sulfur Sprays: For fungal diseases like powdery mildew or blight, organic copper (e.g., Bonide Copper Fungicide, ~$15 for 1lb) or sulfur (e.g., Safer Brand Garden Fungicide, ~$10 for 16oz) can be used as a last resort.
Step 7: Harvesting & Seed Saving
The culmination of your efforts is the harvest, and seed saving closes the loop on self-sufficiency.
- Harvesting Techniques:
- Timing: Harvest vegetables at their peak ripeness for best flavor and nutritional value. For example, green beans should snap cleanly, cucumbers should be firm, and tomatoes should be fully colored.
- Frequency: Many crops, like zucchini, cucumbers, and bush beans, produce more if harvested frequently. Pick daily or every other day.
- Tools: Use clean, sharp pruners (e.g., Corona ClassicCUT Bypass Pruner BP 3180, ~$30) or a sharp knife for clean cuts, minimizing damage to the plant.
- Seed Saving: This is where the « self-sufficient » aspect truly shines.
- Selection: Only save seeds from your healthiest, most vigorous plants that show desired traits (disease resistance, good flavor, high yield).
- Isolation: To ensure true-to-type seeds, prevent cross-pollination. This can be challenging for open-pollinated crops that readily cross (e.g., squash, corn). For beginners, focus on self-pollinating plants like beans, peas, lettuce, and tomatoes.
- Processing:
- Dry Seeds (Beans, Peas, Lettuce, Grains): Allow pods/seed heads to dry completely on the plant. Harvest, shell, and clean the seeds, removing chaff.
- Wet Seeds (Tomatoes, Cucumbers, Squash): For tomatoes, ferment the seeds in water for a few days to remove the gel coating and inhibit disease. For cucumbers/squash, scrape out seeds, wash thoroughly, and dry.
- Drying: Spread seeds thinly on screens or paper plates in a cool, dry, well-ventilated area for 1-4 weeks. Ensure they are bone-dry before storage. I aim for less than 8% moisture content.
- Storage: Store seeds in airtight containers (glass jars with desiccant packets work well) in a cool, dark, dry place (ideally 40-50°F and 30-40% humidity). Label clearly with variety and date. Properly stored seeds can remain viable for 3-10 years or more.
Step 8: Season Extension & Winterizing
Extend your harvest and protect your garden for the off-season to truly maximize your self sufficient garden from scratch.
- Cold Frames: Simple structures with a transparent top (glass, polycarbonate, or old windows) that sit over garden beds. They trap solar heat, allowing you to grow cold-hardy crops (lettuce, spinach, kale, radishes) well into winter or start seeds earlier in spring. A basic cold frame can be built from 2×6 lumber and a sheet of polycarbonate for under $100.
- Hoop Houses/Low Tunnels: Larger structures made from flexible hoops (PVC pipe or EMT conduit) covered with greenhouse plastic. These provide more space and greater temperature moderation. A 10×20 ft DIY low tunnel kit can cost $200-$500, while a larger, more robust hoop house kit might be $1,000-$3,000. I use a 6×12 ft low tunnel made from 1/2-inch PVC hoops and 6mil greenhouse plastic, which extends my lettuce and spinach harvest by at least
Deciding between raised beds and in-ground beds depends on your soil, budget, and physical capabilities.
- In-Ground Beds: If you have excellent native soil and good drainage, in-ground beds are the most economical. Double-digging (loosening soil two shovel depths) can significantly improve drainage and aeration. For my main garden, I primarily use in-ground beds, but I focus on building up the soil over time with consistent compost additions and cover cropping. I aim for beds that are no wider than 3-4 feet so I can reach the center without stepping on the soil, compacting it.
- Raised Beds: Raised beds offer numerous advantages, especially for poor soil, heavy clay, or rocky areas. They provide better drainage, warm up faster in spring, reduce compaction, and make weeding and harvesting easier on your back.
- Material Options:
- Untreated Cedar: Naturally rot-resistant and chemical-free. A 4×8 ft bed, 12 inches deep, typically requires three 2x12x8 ft cedar boards, costing around $50-$60 per board (total ~$150-$180) plus corner brackets or screws. My first raised beds were cedar and are still going strong after 7 years.
- Galvanized Steel: Durable, long-lasting, and aesthetically pleasing. Brands like Vego Garden offer modular kits. A Vego Garden 17″ Tall 8-in-1 Metal Raised Garden Bed (can be configured to 4×8 ft) costs approximately $250-$300.
- Concrete Blocks/Stones: Very durable but can leach minerals (though generally safe once weathered) and can be expensive.
- Recycled Materials: Pallets (check for chemical treatment stamps like « HT » for heat-treated), old tires (controversial due to potential chemical leaching).
- Filling Raised Beds: Don’t just fill with topsoil. Use a « Hugelkultur » approach (logs, branches, leaves, then compost, then topsoil) or a mixture of 60% good quality topsoil, 30% compost, and 10% perlite or vermiculite for drainage. A 4x8x1 ft raised bed requires about 32 cubic feet (or ~1.2 cubic yards) of soil mix, which can cost $100-$200 depending on your source.
- Material Options:
Step 4: Water Management & Irrigation
Efficient water management is critical for a self sufficient garden from scratch, especially in off-grid living where water resources might be limited.
- Rainwater Harvesting: This is my primary source of irrigation water. A 55-gallon rain barrel (e.g., EarthMark Rain Barrel, ~$120-$150) connected to a downspout can collect significant water. For larger needs, I use two 275-gallon IBC totes (Intermediate Bulk Containers, often available used for $100-$200 each from food-grade sources) connected in series. A 1,000 sq ft roof can collect approximately 620 gallons of water for every inch of rainfall. My 1,500 sq ft roof provides ample water for my 600 sq ft garden through multiple barrels and totes.
- Drip Irrigation: This is by far the most water-efficient method, delivering water directly to the plant’s root zone, minimizing evaporation and weed growth.
- Components: A typical drip system includes a pressure regulator (e.g., Rain Bird PRV-10, ~$15), a filter (Rain Bird RBY filter, ~$20), main tubing (1/2-inch poly tubing, 100ft ~$25), smaller feeder lines (1/4-inch tubing), and emitters (0.5 GPH or 1 GPH per plant).
- Kits: For beginners, a starter kit like the Rain Bird Drip Irrigation Garden Kit (model DDI-KIT-1P, ~$40-$60) is excellent for a small garden. For larger setups, I use Netafim Techline CV Drip Line (500ft roll, ~$150-$200), which has pressure-compensating emitters built-in, ensuring even watering across long runs.
- Automation: For true self-sufficiency, consider a battery-powered timer (e.g., Orbit B-Hyve Bluetooth Hose Faucet Timer, ~$50) or a solar-powered timer connected to a small 12V pump.
- Solar-Powered Pumps: For lifting water from a well, pond, or large storage tank to your garden, a solar pump is a game-changer. For a smaller drip system, a Shurflo 2088-594-152 Diaphragm Pump (12V, 3.5 GPM, ~$180) can be powered by a single 100W solar panel (e.g., Renogy 100W Monocrystalline Solar Panel, ~$100) and a small 12V battery (e.g., a 50Ah LiFePO4 battery like the Battle Born 50Ah, ~$450). For larger operations or deeper wells, more robust systems are needed. If you’re looking to build out a comprehensive off-grid power system to support your garden’s water needs, or indeed your entire homestead, you might want to explore resources like the Power Grid Generator complete system guide to understand the full scope of what’s possible in terms of energy independence.
Step 5: Seed Selection & Planting
The choice of seeds is crucial for a truly self sufficient garden from scratch.
- Choose Heirloom & Open-Pollinated Seeds: These varieties produce seeds that will grow true to type, meaning you can save seeds from your harvest year after year. F1 hybrids, while often vigorous, will not produce consistent offspring from saved seeds. Reputable seed companies include Baker Creek Heirloom Seeds, High Mowing Organic Seeds, and Seed Savers Exchange. Start with common, reliable varieties like ‘Black Krim’ tomatoes, ‘Provider’ bush beans, ‘Waltham Butternut’ squash, and ‘Black Seeded Simpson’ lettuce.
- Start Seeds Indoors (Optional but Recommended): For longer growing seasons or specific crops, starting seeds indoors gives you a head start. Use seed-starting mix (e.g., Espoma Organic Seed Starter Mix, ~$10 for 16qt bag) in seed trays (Jiffy Professional Greenhouse 72-cell kit, ~$15). Provide adequate light with LED grow lights (Barrina T5 2ft 4-pack LED Grow Lights, 20W each, ~$50) for 14-16 hours a day, positioned 2-4 inches above seedlings. Maintain consistent temperatures (65-75°F for most).
- Direct Sowing vs. Transplanting: Some crops (carrots, radishes, beans, corn) prefer direct sowing into the garden bed. Others (tomatoes, peppers, broccoli, kale) benefit from being started indoors and transplanted. Follow seed packet instructions for planting depths (e.g., lettuce seeds are often surface-sown or planted 1/8 inch deep, while beans are 1 inch deep) and spacing.
- Companion Planting: Strategically plant different species together to enhance growth, deter pests, and attract beneficial insects. For example, planting marigolds near tomatoes can deter nematodes, and basil improves tomato flavor. Nasturtiums can act as a trap crop for aphids.
- Succession Planting: For a continuous harvest, plant small batches of quick-growing crops (lettuce, radishes, cilantro) every 2-3 weeks. As one crop finishes, another is ready to take its place.
Step 6: Pest & Disease Management (Organic)
Maintaining a self sufficient garden from scratch means embracing organic pest and disease control.
- Integrated Pest Management (IPM): This holistic approach combines several strategies.
- Observation: Regularly inspect your plants for early signs of pests or disease. Catching issues early is key.
- Physical Barriers: Use row covers (e.g., Agribon AG-19 floating row cover, 10×20 ft, ~$20) to protect young plants from insect pests like cabbage worms and squash bugs. Install fences (e.g., 2×4 welded wire mesh, 4 ft tall, 50 ft roll ~$70) to keep out deer, rabbits, and other larger animals.
- Hand-Picking: For larger pests like tomato hornworms or squash bugs, simply pick them off and drop them into a bucket of soapy water.
- Companion Planting: As mentioned, certain plants repel pests. Marigolds, garlic, and onions are excellent deterrents.
- Attract Beneficial Insects: Plant flowers like dill, fennel, cosmos, and sweet alyssum to attract ladybugs, lacewings, and parasitic wasps, which prey on common garden pests.
- Organic Sprays & Treatments:
- Neem Oil: An excellent broad-spectrum organic insecticide and fungicide. Bonide Neem Oil Concentrate (16oz, ~$20) can be mixed at a rate of 1-2 tbsp per gallon of water and sprayed on affected plants.
- Insecticidal Soap: Effective against soft-bodied insects like aphids, whiteflies, and spider mites. Garden Safe Insecticidal Soap (24oz ready-to-use, ~$10).
- Bacillus thuringiensis (Bt): A naturally occurring soil bacterium that targets caterpillars and worms. Monterey BT Worm & Caterpillar Killer (16oz, ~$18) is highly effective and safe for beneficial insects.
- Copper or Sulfur Sprays: For fungal diseases like powdery mildew or blight, organic copper (e.g., Bonide Copper Fungicide, ~$15 for 1lb) or sulfur (e.g., Safer Brand Garden Fungicide, ~$10 for 16oz) can be used as a last resort.
Step 7: Harvesting & Seed Saving
The culmination of your efforts is the harvest, and seed saving closes the loop on self-sufficiency.
- Harvesting Techniques:
- Timing: Harvest vegetables at their peak ripeness for best flavor and nutritional value. For example, green beans should snap cleanly, cucumbers should be firm, and tomatoes should be fully colored.
- Frequency: Many crops, like zucchini, cucumbers, and bush beans, produce more if harvested frequently. Pick daily or every other day.
- Tools: Use clean, sharp pruners (e.g., Corona ClassicCUT Bypass Pruner BP 3180, ~$30) or a sharp knife for clean cuts, minimizing damage to the plant.
- Seed Saving: This is where the « self-sufficient » aspect truly shines.
- Selection: Only save seeds from your healthiest, most vigorous plants that show desired traits (disease resistance, good flavor, high yield).
- Isolation: To ensure true-to-type seeds, prevent cross-pollination. This can be challenging for open-pollinated crops that readily cross (e.g., squash, corn). For beginners, focus on self-pollinating plants like beans, peas, lettuce, and tomatoes.
- Processing:
- Dry Seeds (Beans, Peas, Lettuce, Grains): Allow pods/seed heads to dry completely on the plant. Harvest, shell, and clean the seeds, removing chaff.
- Wet Seeds (Tomatoes, Cucumbers, Squash): For tomatoes, ferment the seeds in water for a few days to remove the gel coating and inhibit disease. For cucumbers/squash, scrape out seeds, wash thoroughly, and dry.
- Drying: Spread seeds thinly on screens or paper plates in a cool, dry, well-ventilated area for 1-4 weeks. Ensure they are bone-dry before storage. I aim for less than 8% moisture content.
- Storage: Store seeds in airtight containers (glass jars with desiccant packets work well) in a cool, dark, dry place (ideally 40-50°F and 30-40% humidity). Label clearly with variety and date. Properly stored seeds can remain viable for 3-10 years or more.
Step 8: Season Extension & Winterizing
Extend your harvest and protect your garden for the off-season to truly maximize your self sufficient garden from scratch.
- Cold Frames: Simple structures with a transparent top (glass, polycarbonate, or old windows) that sit over garden beds. They trap solar heat, allowing you to grow cold-hardy crops (lettuce, spinach, kale, radishes) well into winter or start seeds earlier in spring. A basic cold frame can be built from 2×6 lumber and a sheet of polycarbonate for under $100.
- Hoop Houses/Low Tunnels: Larger structures made from flexible hoops (PVC pipe or EMT conduit) covered with greenhouse plastic. These provide more space and greater temperature moderation. A 10×20 ft DIY low tunnel kit can cost $200-$500, while a larger, more robust hoop house kit might be $1,000-$3,000. I use a 6×12 ft low tunnel made from 1/2-inch PVC hoops and 6mil greenhouse plastic, which extends my lettuce and spinach harvest by at least
Healthy soil is the bedrock of a productive, self-sufficient garden. You can’t guess what your soil needs; you have to test it.
- Perform a Soil Test: A professional soil test will give you precise data on your soil’s pH, nutrient levels (N-P-K), and organic matter content. I recommend sending a sample to your local agricultural extension office; it typically costs $20-$50 and provides detailed recommendations. Alternatively, for a quick homeowner check, a Rapitest Soil Test Kit (40-test kit, model 1663, ~$20 on Amazon) provides a good baseline for pH, Nitrogen, Phosphorus, and Potash. Aim for a pH between 6.0 and 7.0 for most vegetables.
- Amend for pH Imbalance: If your soil is too acidic (below 6.0), add agricultural lime (dolomitic lime adds magnesium, calcitic lime adds calcium). Apply 5-10 lbs per 100 sq ft for a moderate adjustment. If it’s too alkaline (above 7.0), add elemental sulfur (e.g., Espoma Soil Acidifier, ~$15 for 6.75 lbs) or generous amounts of organic matter like peat moss or pine needles.
- Build Organic Matter: This is the single most important step for long-term soil health. Organic matter improves soil structure, water retention, drainage, and nutrient availability. Incorporate 2-4 inches of high-quality compost into your top 6-12 inches of soil annually. I make my own compost from kitchen scraps, garden waste, and shredded leaves, but you can purchase it. Local nurseries often sell bulk compost for $30-$50 per cubic yard. Aged manure (from chickens, cows, or horses – ensure it’s well-rotted to avoid burning plants) is also excellent.
- Address Nutrient Deficiencies: Based on your soil test, add specific organic amendments. If Nitrogen (N) is low, add blood meal (12-0-0, ~$20 for 3 lbs) or feather meal. For Phosphorus (P), use bone meal (3-15-0, ~$15 for 3 lbs) or rock phosphate. For Potassium (K), greensand (0-0-2.5, ~$25 for 5 lbs) or kelp meal are good choices. I rely heavily on Espoma Organic Garden-tone (5-3-3, ~$25 for an 8lb bag) as a balanced, all-purpose organic fertilizer during planting.
Step 3: Garden Bed Preparation
Deciding between raised beds and in-ground beds depends on your soil, budget, and physical capabilities.
- In-Ground Beds: If you have excellent native soil and good drainage, in-ground beds are the most economical. Double-digging (loosening soil two shovel depths) can significantly improve drainage and aeration. For my main garden, I primarily use in-ground beds, but I focus on building up the soil over time with consistent compost additions and cover cropping. I aim for beds that are no wider than 3-4 feet so I can reach the center without stepping on the soil, compacting it.
- Raised Beds: Raised beds offer numerous advantages, especially for poor soil, heavy clay, or rocky areas. They provide better drainage, warm up faster in spring, reduce compaction, and make weeding and harvesting easier on your back.
- Material Options:
- Untreated Cedar: Naturally rot-resistant and chemical-free. A 4×8 ft bed, 12 inches deep, typically requires three 2x12x8 ft cedar boards, costing around $50-$60 per board (total ~$150-$180) plus corner brackets or screws. My first raised beds were cedar and are still going strong after 7 years.
- Galvanized Steel: Durable, long-lasting, and aesthetically pleasing. Brands like Vego Garden offer modular kits. A Vego Garden 17″ Tall 8-in-1 Metal Raised Garden Bed (can be configured to 4×8 ft) costs approximately $250-$300.
- Concrete Blocks/Stones: Very durable but can leach minerals (though generally safe once weathered) and can be expensive.
- Recycled Materials: Pallets (check for chemical treatment stamps like « HT » for heat-treated), old tires (controversial due to potential chemical leaching).
- Filling Raised Beds: Don’t just fill with topsoil. Use a « Hugelkultur » approach (logs, branches, leaves, then compost, then topsoil) or a mixture of 60% good quality topsoil, 30% compost, and 10% perlite or vermiculite for drainage. A 4x8x1 ft raised bed requires about 32 cubic feet (or ~1.2 cubic yards) of soil mix, which can cost $100-$200 depending on your source.
- Material Options:
Step 4: Water Management & Irrigation
Efficient water management is critical for a self sufficient garden from scratch, especially in off-grid living where water resources might be limited.
- Rainwater Harvesting: This is my primary source of irrigation water. A 55-gallon rain barrel (e.g., EarthMark Rain Barrel, ~$120-$150) connected to a downspout can collect significant water. For larger needs, I use two 275-gallon IBC totes (Intermediate Bulk Containers, often available used for $100-$200 each from food-grade sources) connected in series. A 1,000 sq ft roof can collect approximately 620 gallons of water for every inch of rainfall. My 1,500 sq ft roof provides ample water for my 600 sq ft garden through multiple barrels and totes.
- Drip Irrigation: This is by far the most water-efficient method, delivering water directly to the plant’s root zone, minimizing evaporation and weed growth.
- Components: A typical drip system includes a pressure regulator (e.g., Rain Bird PRV-10, ~$15), a filter (Rain Bird RBY filter, ~$20), main tubing (1/2-inch poly tubing, 100ft ~$25), smaller feeder lines (1/4-inch tubing), and emitters (0.5 GPH or 1 GPH per plant).
- Kits: For beginners, a starter kit like the Rain Bird Drip Irrigation Garden Kit (model DDI-KIT-1P, ~$40-$60) is excellent for a small garden. For larger setups, I use Netafim Techline CV Drip Line (500ft roll, ~$150-$200), which has pressure-compensating emitters built-in, ensuring even watering across long runs.
- Automation: For true self-sufficiency, consider a battery-powered timer (e.g., Orbit B-Hyve Bluetooth Hose Faucet Timer, ~$50) or a solar-powered timer connected to a small 12V pump.
- Solar-Powered Pumps: For lifting water from a well, pond, or large storage tank to your garden, a solar pump is a game-changer. For a smaller drip system, a Shurflo 2088-594-152 Diaphragm Pump (12V, 3.5 GPM, ~$180) can be powered by a single 100W solar panel (e.g., Renogy 100W Monocrystalline Solar Panel, ~$100) and a small 12V battery (e.g., a 50Ah LiFePO4 battery like the Battle Born 50Ah, ~$450). For larger operations or deeper wells, more robust systems are needed. If you’re looking to build out a comprehensive off-grid power system to support your garden’s water needs, or indeed your entire homestead, you might want to explore resources like the Power Grid Generator complete system guide to understand the full scope of what’s possible in terms of energy independence.
Step 5: Seed Selection & Planting
The choice of seeds is crucial for a truly self sufficient garden from scratch.
- Choose Heirloom & Open-Pollinated Seeds: These varieties produce seeds that will grow true to type, meaning you can save seeds from your harvest year after year. F1 hybrids, while often vigorous, will not produce consistent offspring from saved seeds. Reputable seed companies include Baker Creek Heirloom Seeds, High Mowing Organic Seeds, and Seed Savers Exchange. Start with common, reliable varieties like ‘Black Krim’ tomatoes, ‘Provider’ bush beans, ‘Waltham Butternut’ squash, and ‘Black Seeded Simpson’ lettuce.
- Start Seeds Indoors (Optional but Recommended): For longer growing seasons or specific crops, starting seeds indoors gives you a head start. Use seed-starting mix (e.g., Espoma Organic Seed Starter Mix, ~$10 for 16qt bag) in seed trays (Jiffy Professional Greenhouse 72-cell kit, ~$15). Provide adequate light with LED grow lights (Barrina T5 2ft 4-pack LED Grow Lights, 20W each, ~$50) for 14-16 hours a day, positioned 2-4 inches above seedlings. Maintain consistent temperatures (65-75°F for most).
- Direct Sowing vs. Transplanting: Some crops (carrots, radishes, beans, corn) prefer direct sowing into the garden bed. Others (tomatoes, peppers, broccoli, kale) benefit from being started indoors and transplanted. Follow seed packet instructions for planting depths (e.g., lettuce seeds are often surface-sown or planted 1/8 inch deep, while beans are 1 inch deep) and spacing.
- Companion Planting: Strategically plant different species together to enhance growth, deter pests, and attract beneficial insects. For example, planting marigolds near tomatoes can deter nematodes, and basil improves tomato flavor. Nasturtiums can act as a trap crop for aphids.
- Succession Planting: For a continuous harvest, plant small batches of quick-growing crops (lettuce, radishes, cilantro) every 2-3 weeks. As one crop finishes, another is ready to take its place.
Step 6: Pest & Disease Management (Organic)
Maintaining a self sufficient garden from scratch means embracing organic pest and disease control.
- Integrated Pest Management (IPM): This holistic approach combines several strategies.
- Observation: Regularly inspect your plants for early signs of pests or disease. Catching issues early is key.
- Physical Barriers: Use row covers (e.g., Agribon AG-19 floating row cover, 10×20 ft, ~$20) to protect young plants from insect pests like cabbage worms and squash bugs. Install fences (e.g., 2×4 welded wire mesh, 4 ft tall, 50 ft roll ~$70) to keep out deer, rabbits, and other larger animals.
- Hand-Picking: For larger pests like tomato hornworms or squash bugs, simply pick them off and drop them into a bucket of soapy water.
- Companion Planting: As mentioned, certain plants repel pests. Marigolds, garlic, and onions are excellent deterrents.
- Attract Beneficial Insects: Plant flowers like dill, fennel, cosmos, and sweet alyssum to attract ladybugs, lacewings, and parasitic wasps, which prey on common garden pests.
- Organic Sprays & Treatments:
- Neem Oil: An excellent broad-spectrum organic insecticide and fungicide. Bonide Neem Oil Concentrate (16oz, ~$20) can be mixed at a rate of 1-2 tbsp per gallon of water and sprayed on affected plants.
- Insecticidal Soap: Effective against soft-bodied insects like aphids, whiteflies, and spider mites. Garden Safe Insecticidal Soap (24oz ready-to-use, ~$10).
- Bacillus thuringiensis (Bt): A naturally occurring soil bacterium that targets caterpillars and worms. Monterey BT Worm & Caterpillar Killer (16oz, ~$18) is highly effective and safe for beneficial insects.
- Copper or Sulfur Sprays: For fungal diseases like powdery mildew or blight, organic copper (e.g., Bonide Copper Fungicide, ~$15 for 1lb) or sulfur (e.g., Safer Brand Garden Fungicide, ~$10 for 16oz) can be used as a last resort.
Step 7: Harvesting & Seed Saving
The culmination of your efforts is the harvest, and seed saving closes the loop on self-sufficiency.
- Harvesting Techniques:
- Timing: Harvest vegetables at their peak ripeness for best flavor and nutritional value. For example, green beans should snap cleanly, cucumbers should be firm, and tomatoes should be fully colored.
- Frequency: Many crops, like zucchini, cucumbers, and bush beans, produce more if harvested frequently. Pick daily or every other day.
- Tools: Use clean, sharp pruners (e.g., Corona ClassicCUT Bypass Pruner BP 3180, ~$30) or a sharp knife for clean cuts, minimizing damage to the plant.
- Seed Saving: This is where the « self-sufficient » aspect truly shines.
- Selection: Only save seeds from your healthiest, most vigorous plants that show desired traits (disease resistance, good flavor, high yield).
- Isolation: To ensure true-to-type seeds, prevent cross-pollination. This can be challenging for open-pollinated crops that readily cross (e.g., squash, corn). For beginners, focus on self-pollinating plants like beans, peas, lettuce, and tomatoes.
- Processing:
- Dry Seeds (Beans, Peas, Lettuce, Grains): Allow pods/seed heads to dry completely on the plant. Harvest, shell, and clean the seeds, removing chaff.
- Wet Seeds (Tomatoes, Cucumbers, Squash): For tomatoes, ferment the seeds in water for a few days to remove the gel coating and inhibit disease. For cucumbers/squash, scrape out seeds, wash thoroughly, and dry.
- Drying: Spread seeds thinly on screens or paper plates in a cool, dry, well-ventilated area for 1-4 weeks. Ensure they are bone-dry before storage. I aim for less than 8% moisture content.
- Storage: Store seeds in airtight containers (glass jars with desiccant packets work well) in a cool, dark, dry place (ideally 40-50°F and 30-40% humidity). Label clearly with variety and date. Properly stored seeds can remain viable for 3-10 years or more.
Step 8: Season Extension & Winterizing
Extend your harvest and protect your garden for the off-season to truly maximize your self sufficient garden from scratch.
- Cold Frames: Simple structures with a transparent top (glass, polycarbonate, or old windows) that sit over garden beds. They trap solar heat, allowing you to grow cold-hardy crops (lettuce, spinach, kale, radishes) well into winter or start seeds earlier in spring. A basic cold frame can be built from 2×6 lumber and a sheet of polycarbonate for under $100.
- Hoop Houses/Low Tunnels: Larger structures made from flexible hoops (PVC pipe or EMT conduit) covered with greenhouse plastic. These provide more space and greater temperature moderation. A 10×20 ft DIY low tunnel kit can cost $200-$500, while a larger, more robust hoop house kit might be $1,000-$3,000. I use a 6×12 ft low tunnel made from 1/2-inch PVC hoops and 6mil greenhouse plastic, which extends my lettuce and spinach harvest by at least
- Choose Heirloom & Open-Pollinated Seeds: These varieties produce seeds that will grow true to type, meaning you can save seeds from your harvest year after year. F1 hybrids, while often vigorous, will not produce consistent offspring from saved seeds. Reputable seed companies include Baker Creek Heirloom Seeds, High Mowing Organic Seeds, and Seed Savers Exchange. Start with common, reliable varieties like ‘Black Krim’ tomatoes, ‘Provider’ bush beans, ‘Waltham Butternut’ squash, and ‘Black Seeded Simpson’ lettuce.
- Start Seeds Indoors (Optional but Recommended): For longer growing seasons or specific crops, starting seeds indoors gives you a head start. Use seed-starting mix (e.g., Espoma Organic Seed Starter Mix, ~$10 for 16qt bag) in seed trays (Jiffy Professional Greenhouse 72-cell kit, ~$15). Provide adequate light with LED grow lights (Barrina T5 2ft 4-pack LED Grow Lights, 20W each, ~$50) for 14-16 hours a day, positioned 2-4 inches above seedlings. Maintain consistent temperatures (65-75°F for most).
- Direct Sowing vs. Transplanting: Some crops (carrots, radishes, beans, corn) prefer direct sowing into the garden bed. Others (tomatoes, peppers, broccoli, kale) benefit from being started indoors and transplanted. Follow seed packet instructions for planting depths (e.g., lettuce seeds are often surface-sown or planted 1/8 inch deep, while beans are 1 inch deep) and spacing.
- Companion Planting: Strategically plant different species together to enhance growth, deter pests, and attract beneficial insects. For example, planting marigolds near tomatoes can deter nematodes, and basil improves tomato flavor. Nasturtiums can act as a trap crop for aphids.
- Succession Planting: For a continuous harvest, plant small batches of quick-growing crops (lettuce, radishes, cilantro) every 2-3 weeks. As one crop finishes, another is ready to take its place.
Step 6: Pest & Disease Management (Organic)
Maintaining a self sufficient garden from scratch means embracing organic pest and disease control.
- Integrated Pest Management (IPM): This holistic approach combines several strategies.
- Observation: Regularly inspect your plants for early signs of pests or disease. Catching issues early is key.
- Physical Barriers: Use row covers (e.g., Agribon AG-19 floating row cover, 10×20 ft, ~$20) to protect young plants from insect pests like cabbage worms and squash bugs. Install fences (e.g., 2×4 welded wire mesh, 4 ft tall, 50 ft roll ~$70) to keep out deer, rabbits, and other larger animals.
- Hand-Picking: For larger pests like tomato hornworms or squash bugs, simply pick them off and drop them into a bucket of soapy water.
- Companion Planting: As mentioned, certain plants repel pests. Marigolds, garlic, and onions are excellent deterrents.
- Attract Beneficial Insects: Plant flowers like dill, fennel, cosmos, and sweet alyssum to attract ladybugs, lacewings, and parasitic wasps, which prey on common garden pests.
- Organic Sprays & Treatments:
- Neem Oil: An excellent broad-spectrum organic insecticide and fungicide. Bonide Neem Oil Concentrate (16oz, ~$20) can be mixed at a rate of 1-2 tbsp per gallon of water and sprayed on affected plants.
- Insecticidal Soap: Effective against soft-bodied insects like aphids, whiteflies, and spider mites. Garden Safe Insecticidal Soap (24oz ready-to-use, ~$10).
- Bacillus thuringiensis (Bt): A naturally occurring soil bacterium that targets caterpillars and worms. Monterey BT Worm & Caterpillar Killer (16oz, ~$18) is highly effective and safe for beneficial insects.
- Copper or Sulfur Sprays: For fungal diseases like powdery mildew or blight, organic copper (e.g., Bonide Copper Fungicide, ~$15 for 1lb) or sulfur (e.g., Safer Brand Garden Fungicide, ~$10 for 16oz) can be used as a last resort.
Step 7: Harvesting & Seed Saving
The culmination of your efforts is the harvest, and seed saving closes the loop on self-sufficiency.
- Harvesting Techniques:
- Timing: Harvest vegetables at their peak ripeness for best flavor and nutritional value. For example, green beans should snap cleanly, cucumbers should be firm, and tomatoes should be fully colored.
- Frequency: Many crops, like zucchini, cucumbers, and bush beans, produce more if harvested frequently. Pick daily or every other day.
- Tools: Use clean, sharp pruners (e.g., Corona ClassicCUT Bypass Pruner BP 3180, ~$30) or a sharp knife for clean cuts, minimizing damage to the plant.
- Seed Saving: This is where the « self-sufficient » aspect truly shines.
- Selection: Only save seeds from your healthiest, most vigorous plants that show desired traits (disease resistance, good flavor, high yield).
- Isolation: To ensure true-to-type seeds, prevent cross-pollination. This can be challenging for open-pollinated crops that readily cross (e.g., squash, corn). For beginners, focus on self-pollinating plants like beans, peas, lettuce, and tomatoes.
- Processing:
- Dry Seeds (Beans, Peas, Lettuce, Grains): Allow pods/seed heads to dry completely on the plant. Harvest, shell, and clean the seeds, removing chaff.
- Wet Seeds (Tomatoes, Cucumbers, Squash): For tomatoes, ferment the seeds in water for a few days to remove the gel coating and inhibit disease. For cucumbers/squash, scrape out seeds, wash thoroughly, and dry.
- Drying: Spread seeds thinly on screens or paper plates in a cool, dry, well-ventilated area for 1-4 weeks. Ensure they are bone-dry before storage. I aim for less than 8% moisture content.
- Storage: Store seeds in airtight containers (glass jars with desiccant packets work well) in a cool, dark, dry place (ideally 40-50°F and 30-40% humidity). Label clearly with variety and date. Properly stored seeds can remain viable for 3-10 years or more.
Step 8: Season Extension & Winterizing
Extend your harvest and protect your garden for the off-season to truly maximize your self sufficient garden from scratch.
- Cold Frames: Simple structures with a transparent top (glass, polycarbonate, or old windows) that sit over garden beds. They trap solar heat, allowing you to grow cold-hardy crops (lettuce, spinach, kale, radishes) well into winter or start seeds earlier in spring. A basic cold frame can be built from 2×6 lumber and a sheet of polycarbonate for under $100.
- Hoop Houses/Low Tunnels: Larger structures made from flexible hoops (PVC pipe or EMT conduit) covered with greenhouse plastic. These provide more space and greater temperature moderation. A 10×20 ft DIY low tunnel kit can cost $200-$500, while a larger, more robust hoop house kit might be $1,000-$3,000. I use a 6×12 ft low tunnel made from 1/2-inch PVC hoops and 6mil greenhouse plastic, which extends my lettuce and spinach harvest by at least
- In-Ground Beds: If you have excellent native soil and good drainage, in-ground beds are the most economical. Double-digging (loosening soil two shovel depths) can significantly improve drainage and aeration. For my main garden, I primarily use in-ground beds, but I focus on building up the soil over time with consistent compost additions and cover cropping. I aim for beds that are no wider than 3-4 feet so I can reach the center without stepping on the soil, compacting it.
- Raised Beds: Raised beds offer numerous advantages, especially for poor soil, heavy clay, or rocky areas. They provide better drainage, warm up faster in spring, reduce compaction, and make weeding and harvesting easier on your back.
- Material Options:
- Untreated Cedar: Naturally rot-resistant and chemical-free. A 4×8 ft bed, 12 inches deep, typically requires three 2x12x8 ft cedar boards, costing around $50-$60 per board (total ~$150-$180) plus corner brackets or screws. My first raised beds were cedar and are still going strong after 7 years.
- Galvanized Steel: Durable, long-lasting, and aesthetically pleasing. Brands like Vego Garden offer modular kits. A Vego Garden 17″ Tall 8-in-1 Metal Raised Garden Bed (can be configured to 4×8 ft) costs approximately $250-$300.
- Concrete Blocks/Stones: Very durable but can leach minerals (though generally safe once weathered) and can be expensive.
- Recycled Materials: Pallets (check for chemical treatment stamps like « HT » for heat-treated), old tires (controversial due to potential chemical leaching).
- Filling Raised Beds: Don’t just fill with topsoil. Use a « Hugelkultur » approach (logs, branches, leaves, then compost, then topsoil) or a mixture of 60% good quality topsoil, 30% compost, and 10% perlite or vermiculite for drainage. A 4x8x1 ft raised bed requires about 32 cubic feet (or ~1.2 cubic yards) of soil mix, which can cost $100-$200 depending on your source.
- Material Options:
Step 4: Water Management & Irrigation
Efficient water management is critical for a self sufficient garden from scratch, especially in off-grid living where water resources might be limited.
- Rainwater Harvesting: This is my primary source of irrigation water. A 55-gallon rain barrel (e.g., EarthMark Rain Barrel, ~$120-$150) connected to a downspout can collect significant water. For larger needs, I use two 275-gallon IBC totes (Intermediate Bulk Containers, often available used for $100-$200 each from food-grade sources) connected in series. A 1,000 sq ft roof can collect approximately 620 gallons of water for every inch of rainfall. My 1,500 sq ft roof provides ample water for my 600 sq ft garden through multiple barrels and totes.
- Drip Irrigation: This is by far the most water-efficient method, delivering water directly to the plant’s root zone, minimizing evaporation and weed growth.
- Components: A typical drip system includes a pressure regulator (e.g., Rain Bird PRV-10, ~$15), a filter (Rain Bird RBY filter, ~$20), main tubing (1/2-inch poly tubing, 100ft ~$25), smaller feeder lines (1/4-inch tubing), and emitters (0.5 GPH or 1 GPH per plant).
- Kits: For beginners, a starter kit like the Rain Bird Drip Irrigation Garden Kit (model DDI-KIT-1P, ~$40-$60) is excellent for a small garden. For larger setups, I use Netafim Techline CV Drip Line (500ft roll, ~$150-$200), which has pressure-compensating emitters built-in, ensuring even watering across long runs.
- Automation: For true self-sufficiency, consider a battery-powered timer (e.g., Orbit B-Hyve Bluetooth Hose Faucet Timer, ~$50) or a solar-powered timer connected to a small 12V pump.
- Solar-Powered Pumps: For lifting water from a well, pond, or large storage tank to your garden, a solar pump is a game-changer. For a smaller drip system, a Shurflo 2088-594-152 Diaphragm Pump (12V, 3.5 GPM, ~$180) can be powered by a single 100W solar panel (e.g., Renogy 100W Monocrystalline Solar Panel, ~$100) and a small 12V battery (e.g., a 50Ah LiFePO4 battery like the Battle Born 50Ah, ~$450). For larger operations or deeper wells, more robust systems are needed. If you’re looking to build out a comprehensive off-grid power system to support your garden’s water needs, or indeed your entire homestead, you might want to explore resources like the Power Grid Generator complete system guide to understand the full scope of what’s possible in terms of energy independence.
Step 5: Seed Selection & Planting
The choice of seeds is crucial for a truly self sufficient garden from scratch.
- Choose Heirloom & Open-Pollinated Seeds: These varieties produce seeds that will grow true to type, meaning you can save seeds from your harvest year after year. F1 hybrids, while often vigorous, will not produce consistent offspring from saved seeds. Reputable seed companies include Baker Creek Heirloom Seeds, High Mowing Organic Seeds, and Seed Savers Exchange. Start with common, reliable varieties like ‘Black Krim’ tomatoes, ‘Provider’ bush beans, ‘Waltham Butternut’ squash, and ‘Black Seeded Simpson’ lettuce.
- Start Seeds Indoors (Optional but Recommended): For longer growing seasons or specific crops, starting seeds indoors gives you a head start. Use seed-starting mix (e.g., Espoma Organic Seed Starter Mix, ~$10 for 16qt bag) in seed trays (Jiffy Professional Greenhouse 72-cell kit, ~$15). Provide adequate light with LED grow lights (Barrina T5 2ft 4-pack LED Grow Lights, 20W each, ~$50) for 14-16 hours a day, positioned 2-4 inches above seedlings. Maintain consistent temperatures (65-75°F for most).
- Direct Sowing vs. Transplanting: Some crops (carrots, radishes, beans, corn) prefer direct sowing into the garden bed. Others (tomatoes, peppers, broccoli, kale) benefit from being started indoors and transplanted. Follow seed packet instructions for planting depths (e.g., lettuce seeds are often surface-sown or planted 1/8 inch deep, while beans are 1 inch deep) and spacing.
- Companion Planting: Strategically plant different species together to enhance growth, deter pests, and attract beneficial insects. For example, planting marigolds near tomatoes can deter nematodes, and basil improves tomato flavor. Nasturtiums can act as a trap crop for aphids.
- Succession Planting: For a continuous harvest, plant small batches of quick-growing crops (lettuce, radishes, cilantro) every 2-3 weeks. As one crop finishes, another is ready to take its place.
Step 6: Pest & Disease Management (Organic)
Maintaining a self sufficient garden from scratch means embracing organic pest and disease control.
- Integrated Pest Management (IPM): This holistic approach combines several strategies.
- Observation: Regularly inspect your plants for early signs of pests or disease. Catching issues early is key.
- Physical Barriers: Use row covers (e.g., Agribon AG-19 floating row cover, 10×20 ft, ~$20) to protect young plants from insect pests like cabbage worms and squash bugs. Install fences (e.g., 2×4 welded wire mesh, 4 ft tall, 50 ft roll ~$70) to keep out deer, rabbits, and other larger animals.
- Hand-Picking: For larger pests like tomato hornworms or squash bugs, simply pick them off and drop them into a bucket of soapy water.
- Companion Planting: As mentioned, certain plants repel pests. Marigolds, garlic, and onions are excellent deterrents.
- Attract Beneficial Insects: Plant flowers like dill, fennel, cosmos, and sweet alyssum to attract ladybugs, lacewings, and parasitic wasps, which prey on common garden pests.
- Organic Sprays & Treatments:
- Neem Oil: An excellent broad-spectrum organic insecticide and fungicide. Bonide Neem Oil Concentrate (16oz, ~$20) can be mixed at a rate of 1-2 tbsp per gallon of water and sprayed on affected plants.
- Insecticidal Soap: Effective against soft-bodied insects like aphids, whiteflies, and spider mites. Garden Safe Insecticidal Soap (24oz ready-to-use, ~$10).
- Bacillus thuringiensis (Bt): A naturally occurring soil bacterium that targets caterpillars and worms. Monterey BT Worm & Caterpillar Killer (16oz, ~$18) is highly effective and safe for beneficial insects.
- Copper or Sulfur Sprays: For fungal diseases like powdery mildew or blight, organic copper (e.g., Bonide Copper Fungicide, ~$15 for 1lb) or sulfur (e.g., Safer Brand Garden Fungicide, ~$10 for 16oz) can be used as a last resort.
Step 7: Harvesting & Seed Saving
The culmination of your efforts is the harvest, and seed saving closes the loop on self-sufficiency.
- Harvesting Techniques:
- Timing: Harvest vegetables at their peak ripeness for best flavor and nutritional value. For example, green beans should snap cleanly, cucumbers should be firm, and tomatoes should be fully colored.
- Frequency: Many crops, like zucchini, cucumbers, and bush beans, produce more if harvested frequently. Pick daily or every other day.
- Tools: Use clean, sharp pruners (e.g., Corona ClassicCUT Bypass Pruner BP 3180, ~$30) or a sharp knife for clean cuts, minimizing damage to the plant.
- Seed Saving: This is where the « self-sufficient » aspect truly shines.
- Selection: Only save seeds from your healthiest, most vigorous plants that show desired traits (disease resistance, good flavor, high yield).
- Isolation: To ensure true-to-type seeds, prevent cross-pollination. This can be challenging for open-pollinated crops that readily cross (e.g., squash, corn). For beginners, focus on self-pollinating plants like beans, peas, lettuce, and tomatoes.
- Processing:
- Dry Seeds (Beans, Peas, Lettuce, Grains): Allow pods/seed heads to dry completely on the plant. Harvest, shell, and clean the seeds, removing chaff.
- Wet Seeds (Tomatoes, Cucumbers, Squash): For tomatoes, ferment the seeds in water for a few days to remove the gel coating and inhibit disease. For cucumbers/squash, scrape out seeds, wash thoroughly, and dry.
- Drying: Spread seeds thinly on screens or paper plates in a cool, dry, well-ventilated area for 1-4 weeks. Ensure they are bone-dry before storage. I aim for less than 8% moisture content.
- Storage: Store seeds in airtight containers (glass jars with desiccant packets work well) in a cool, dark, dry place (ideally 40-50°F and 30-40% humidity). Label clearly with variety and date. Properly stored seeds can remain viable for 3-10 years or more.
Step 8: Season Extension & Winterizing
Extend your harvest and protect your garden for the off-season to truly maximize your self sufficient garden from scratch.
- Cold Frames: Simple structures with a transparent top (glass, polycarbonate, or old windows) that sit over garden beds. They trap solar heat, allowing you to grow cold-hardy crops (lettuce, spinach, kale, radishes) well into winter or start seeds earlier in spring. A basic cold frame can be built from 2×6 lumber and a sheet of polycarbonate for under $100.
- Hoop Houses/Low Tunnels: Larger structures made from flexible hoops (PVC pipe or EMT conduit) covered with greenhouse plastic. These provide more space and greater temperature moderation. A 10×20 ft DIY low tunnel kit can cost $200-$500, while a larger, more robust hoop house kit might be $1,000-$3,000. I use a 6×12 ft low tunnel made from 1/2-inch PVC hoops and 6mil greenhouse plastic, which extends my lettuce and spinach harvest by at least
Deciding between raised beds and in-ground beds depends on your soil, budget, and physical capabilities.
- In-Ground Beds: If you have excellent native soil and good drainage, in-ground beds are the most economical. Double-digging (loosening soil two shovel depths) can significantly improve drainage and aeration. For my main garden, I primarily use in-ground beds, but I focus on building up the soil over time with consistent compost additions and cover cropping. I aim for beds that are no wider than 3-4 feet so I can reach the center without stepping on the soil, compacting it.
- Raised Beds: Raised beds offer numerous advantages, especially for poor soil, heavy clay, or rocky areas. They provide better drainage, warm up faster in spring, reduce compaction, and make weeding and harvesting easier on your back.
- Material Options:
- Untreated Cedar: Naturally rot-resistant and chemical-free. A 4×8 ft bed, 12 inches deep, typically requires three 2x12x8 ft cedar boards, costing around $50-$60 per board (total ~$150-$180) plus corner brackets or screws. My first raised beds were cedar and are still going strong after 7 years.
- Galvanized Steel: Durable, long-lasting, and aesthetically pleasing. Brands like Vego Garden offer modular kits. A Vego Garden 17″ Tall 8-in-1 Metal Raised Garden Bed (can be configured to 4×8 ft) costs approximately $250-$300.
- Concrete Blocks/Stones: Very durable but can leach minerals (though generally safe once weathered) and can be expensive.
- Recycled Materials: Pallets (check for chemical treatment stamps like « HT » for heat-treated), old tires (controversial due to potential chemical leaching).
- Filling Raised Beds: Don’t just fill with topsoil. Use a « Hugelkultur » approach (logs, branches, leaves, then compost, then topsoil) or a mixture of 60% good quality topsoil, 30% compost, and 10% perlite or vermiculite for drainage. A 4x8x1 ft raised bed requires about 32 cubic feet (or ~1.2 cubic yards) of soil mix, which can cost $100-$200 depending on your source.
- Material Options:
Step 4: Water Management & Irrigation
Efficient water management is critical for a self sufficient garden from scratch, especially in off-grid living where water resources might be limited.
- Rainwater Harvesting: This is my primary source of irrigation water. A 55-gallon rain barrel (e.g., EarthMark Rain Barrel, ~$120-$150) connected to a downspout can collect significant water. For larger needs, I use two 275-gallon IBC totes (Intermediate Bulk Containers, often available used for $100-$200 each from food-grade sources) connected in series. A 1,000 sq ft roof can collect approximately 620 gallons of water for every inch of rainfall. My 1,500 sq ft roof provides ample water for my 600 sq ft garden through multiple barrels and totes.
- Drip Irrigation: This is by far the most water-efficient method, delivering water directly to the plant’s root zone, minimizing evaporation and weed growth.
- Components: A typical drip system includes a pressure regulator (e.g., Rain Bird PRV-10, ~$15), a filter (Rain Bird RBY filter, ~$20), main tubing (1/2-inch poly tubing, 100ft ~$25), smaller feeder lines (1/4-inch tubing), and emitters (0.5 GPH or 1 GPH per plant).
- Kits: For beginners, a starter kit like the Rain Bird Drip Irrigation Garden Kit (model DDI-KIT-1P, ~$40-$60) is excellent for a small garden. For larger setups, I use Netafim Techline CV Drip Line (500ft roll, ~$150-$200), which has pressure-compensating emitters built-in, ensuring even watering across long runs.
- Automation: For true self-sufficiency, consider a battery-powered timer (e.g., Orbit B-Hyve Bluetooth Hose Faucet Timer, ~$50) or a solar-powered timer connected to a small 12V pump.
- Solar-Powered Pumps: For lifting water from a well, pond, or large storage tank to your garden, a solar pump is a game-changer. For a smaller drip system, a Shurflo 2088-594-152 Diaphragm Pump (12V, 3.5 GPM, ~$180) can be powered by a single 100W solar panel (e.g., Renogy 100W Monocrystalline Solar Panel, ~$100) and a small 12V battery (e.g., a 50Ah LiFePO4 battery like the Battle Born 50Ah, ~$450). For larger operations or deeper wells, more robust systems are needed. If you’re looking to build out a comprehensive off-grid power system to support your garden’s water needs, or indeed your entire homestead, you might want to explore resources like the Power Grid Generator complete system guide to understand the full scope of what’s possible in terms of energy independence.
Step 5: Seed Selection & Planting
The choice of seeds is crucial for a truly self sufficient garden from scratch.
- Choose Heirloom & Open-Pollinated Seeds: These varieties produce seeds that will grow true to type, meaning you can save seeds from your harvest year after year. F1 hybrids, while often vigorous, will not produce consistent offspring from saved seeds. Reputable seed companies include Baker Creek Heirloom Seeds, High Mowing Organic Seeds, and Seed Savers Exchange. Start with common, reliable varieties like ‘Black Krim’ tomatoes, ‘Provider’ bush beans, ‘Waltham Butternut’ squash, and ‘Black Seeded Simpson’ lettuce.
- Start Seeds Indoors (Optional but Recommended): For longer growing seasons or specific crops, starting seeds indoors gives you a head start. Use seed-starting mix (e.g., Espoma Organic Seed Starter Mix, ~$10 for 16qt bag) in seed trays (Jiffy Professional Greenhouse 72-cell kit, ~$15). Provide adequate light with LED grow lights (Barrina T5 2ft 4-pack LED Grow Lights, 20W each, ~$50) for 14-16 hours a day, positioned 2-4 inches above seedlings. Maintain consistent temperatures (65-75°F for most).
- Direct Sowing vs. Transplanting: Some crops (carrots, radishes, beans, corn) prefer direct sowing into the garden bed. Others (tomatoes, peppers, broccoli, kale) benefit from being started indoors and transplanted. Follow seed packet instructions for planting depths (e.g., lettuce seeds are often surface-sown or planted 1/8 inch deep, while beans are 1 inch deep) and spacing.
- Companion Planting: Strategically plant different species together to enhance growth, deter pests, and attract beneficial insects. For example, planting marigolds near tomatoes can deter nematodes, and basil improves tomato flavor. Nasturtiums can act as a trap crop for aphids.
- Succession Planting: For a continuous harvest, plant small batches of quick-growing crops (lettuce, radishes, cilantro) every 2-3 weeks. As one crop finishes, another is ready to take its place.
Step 6: Pest & Disease Management (Organic)
Maintaining a self sufficient garden from scratch means embracing organic pest and disease control.
- Integrated Pest Management (IPM): This holistic approach combines several strategies.
- Observation: Regularly inspect your plants for early signs of pests or disease. Catching issues early is key.
- Physical Barriers: Use row covers (e.g., Agribon AG-19 floating row cover, 10×20 ft, ~$20) to protect young plants from insect pests like cabbage worms and squash bugs. Install fences (e.g., 2×4 welded wire mesh, 4 ft tall, 50 ft roll ~$70) to keep out deer, rabbits, and other larger animals.
- Hand-Picking: For larger pests like tomato hornworms or squash bugs, simply pick them off and drop them into a bucket of soapy water.
- Companion Planting: As mentioned, certain plants repel pests. Marigolds, garlic, and onions are excellent deterrents.
- Attract Beneficial Insects: Plant flowers like dill, fennel, cosmos, and sweet alyssum to attract ladybugs, lacewings, and parasitic wasps, which prey on common garden pests.
- Organic Sprays & Treatments:
- Neem Oil: An excellent broad-spectrum organic insecticide and fungicide. Bonide Neem Oil Concentrate (16oz, ~$20) can be mixed at a rate of 1-2 tbsp per gallon of water and sprayed on affected plants.
- Insecticidal Soap: Effective against soft-bodied insects like aphids, whiteflies, and spider mites. Garden Safe Insecticidal Soap (24oz ready-to-use, ~$10).
- Bacillus thuringiensis (Bt): A naturally occurring soil bacterium that targets caterpillars and worms. Monterey BT Worm & Caterpillar Killer (16oz, ~$18) is highly effective and safe for beneficial insects.
- Copper or Sulfur Sprays: For fungal diseases like powdery mildew or blight, organic copper (e.g., Bonide Copper Fungicide, ~$15 for 1lb) or sulfur (e.g., Safer Brand Garden Fungicide, ~$10 for 16oz) can be used as a last resort.
Step 7: Harvesting & Seed Saving
The culmination of your efforts is the harvest, and seed saving closes the loop on self-sufficiency.
- Harvesting Techniques:
- Timing: Harvest vegetables at their peak ripeness for best flavor and nutritional value. For example, green beans should snap cleanly, cucumbers should be firm, and tomatoes should be fully colored.
- Frequency: Many crops, like zucchini, cucumbers, and bush beans, produce more if harvested frequently. Pick daily or every other day.
- Tools: Use clean, sharp pruners (e.g., Corona ClassicCUT Bypass Pruner BP 3180, ~$30) or a sharp knife for clean cuts, minimizing damage to the plant.
- Seed Saving: This is where the « self-sufficient » aspect truly shines.
- Selection: Only save seeds from your healthiest, most vigorous plants that show desired traits (disease resistance, good flavor, high yield).
- Isolation: To ensure true-to-type seeds, prevent cross-pollination. This can be challenging for open-pollinated crops that readily cross (e.g., squash, corn). For beginners, focus on self-pollinating plants like beans, peas, lettuce, and tomatoes.
- Processing:
- Dry Seeds (Beans, Peas, Lettuce, Grains): Allow pods/seed heads to dry completely on the plant. Harvest, shell, and clean the seeds, removing chaff.
- Wet Seeds (Tomatoes, Cucumbers, Squash): For tomatoes, ferment the seeds in water for a few days to remove the gel coating and inhibit disease. For cucumbers/squash, scrape out seeds, wash thoroughly, and dry.
- Drying: Spread seeds thinly on screens or paper plates in a cool, dry, well-ventilated area for 1-4 weeks. Ensure they are bone-dry before storage. I aim for less than 8% moisture content.
- Storage: Store seeds in airtight containers (glass jars with desiccant packets work well) in a cool, dark, dry place (ideally 40-50°F and 30-40% humidity). Label clearly with variety and date. Properly stored seeds can remain viable for 3-10 years or more.
Step 8: Season Extension & Winterizing
Extend your harvest and protect your garden for the off-season to truly maximize your self sufficient garden from scratch.
- Cold Frames: Simple structures with a transparent top (glass, polycarbonate, or old windows) that sit over garden beds. They trap solar heat, allowing you to grow cold-hardy crops (lettuce, spinach, kale, radishes) well into winter or start seeds earlier in spring. A basic cold frame can be built from 2×6 lumber and a sheet of polycarbonate for under $100.
- Hoop Houses/Low Tunnels: Larger structures made from flexible hoops (PVC pipe or EMT conduit) covered with greenhouse plastic. These provide more space and greater temperature moderation. A 10×20 ft DIY low tunnel kit can cost $200-$500, while a larger, more robust hoop house kit might be $1,000-$3,000. I use a 6×12 ft low tunnel made from 1/2-inch PVC hoops and 6mil greenhouse plastic, which extends my lettuce and spinach harvest by at least
Healthy soil is the bedrock of a productive, self-sufficient garden. You can’t guess what your soil needs; you have to test it.
- Perform a Soil Test: A professional soil test will give you precise data on your soil’s pH, nutrient levels (N-P-K), and organic matter content. I recommend sending a sample to your local agricultural extension office; it typically costs $20-$50 and provides detailed recommendations. Alternatively, for a quick homeowner check, a Rapitest Soil Test Kit (40-test kit, model 1663, ~$20 on Amazon) provides a good baseline for pH, Nitrogen, Phosphorus, and Potash. Aim for a pH between 6.0 and 7.0 for most vegetables.
- Amend for pH Imbalance: If your soil is too acidic (below 6.0), add agricultural lime (dolomitic lime adds magnesium, calcitic lime adds calcium). Apply 5-10 lbs per 100 sq ft for a moderate adjustment. If it’s too alkaline (above 7.0), add elemental sulfur (e.g., Espoma Soil Acidifier, ~$15 for 6.75 lbs) or generous amounts of organic matter like peat moss or pine needles.
- Build Organic Matter: This is the single most important step for long-term soil health. Organic matter improves soil structure, water retention, drainage, and nutrient availability. Incorporate 2-4 inches of high-quality compost into your top 6-12 inches of soil annually. I make my own compost from kitchen scraps, garden waste, and shredded leaves, but you can purchase it. Local nurseries often sell bulk compost for $30-$50 per cubic yard. Aged manure (from chickens, cows, or horses – ensure it’s well-rotted to avoid burning plants) is also excellent.
- Address Nutrient Deficiencies: Based on your soil test, add specific organic amendments. If Nitrogen (N) is low, add blood meal (12-0-0, ~$20 for 3 lbs) or feather meal. For Phosphorus (P), use bone meal (3-15-0, ~$15 for 3 lbs) or rock phosphate. For Potassium (K), greensand (0-0-2.5, ~$25 for 5 lbs) or kelp meal are good choices. I rely heavily on Espoma Organic Garden-tone (5-3-3, ~$25 for an 8lb bag) as a balanced, all-purpose organic fertilizer during planting.
Step 3: Garden Bed Preparation
Deciding between raised beds and in-ground beds depends on your soil, budget, and physical capabilities.
- In-Ground Beds: If you have excellent native soil and good drainage, in-ground beds are the most economical. Double-digging (loosening soil two shovel depths) can significantly improve drainage and aeration. For my main garden, I primarily use in-ground beds, but I focus on building up the soil over time with consistent compost additions and cover cropping. I aim for beds that are no wider than 3-4 feet so I can reach the center without stepping on the soil, compacting it.
- Raised Beds: Raised beds offer numerous advantages, especially for poor soil, heavy clay, or rocky areas. They provide better drainage, warm up faster in spring, reduce compaction, and make weeding and harvesting easier on your back.
- Material Options:
- Untreated Cedar: Naturally rot-resistant and chemical-free. A 4×8 ft bed, 12 inches deep, typically requires three 2x12x8 ft cedar boards, costing around $50-$60 per board (total ~$150-$180) plus corner brackets or screws. My first raised beds were cedar and are still going strong after 7 years.
- Galvanized Steel: Durable, long-lasting, and aesthetically pleasing. Brands like Vego Garden offer modular kits. A Vego Garden 17″ Tall 8-in-1 Metal Raised Garden Bed (can be configured to 4×8 ft) costs approximately $250-$300.
- Concrete Blocks/Stones: Very durable but can leach minerals (though generally safe once weathered) and can be expensive.
- Recycled Materials: Pallets (check for chemical treatment stamps like « HT » for heat-treated), old tires (controversial due to potential chemical leaching).
- Filling Raised Beds: Don’t just fill with topsoil. Use a « Hugelkultur » approach (logs, branches, leaves, then compost, then topsoil) or a mixture of 60% good quality topsoil, 30% compost, and 10% perlite or vermiculite for drainage. A 4x8x1 ft raised bed requires about 32 cubic feet (or ~1.2 cubic yards) of soil mix, which can cost $100-$200 depending on your source.
- Material Options:
Step 4: Water Management & Irrigation
Efficient water management is critical for a self sufficient garden from scratch, especially in off-grid living where water resources might be limited.
- Rainwater Harvesting: This is my primary source of irrigation water. A 55-gallon rain barrel (e.g., EarthMark Rain Barrel, ~$120-$150) connected to a downspout can collect significant water. For larger needs, I use two 275-gallon IBC totes (Intermediate Bulk Containers, often available used for $100-$200 each from food-grade sources) connected in series. A 1,000 sq ft roof can collect approximately 620 gallons of water for every inch of rainfall. My 1,500 sq ft roof provides ample water for my 600 sq ft garden through multiple barrels and totes.
- Drip Irrigation: This is by far the most water-efficient method, delivering water directly to the plant’s root zone, minimizing evaporation and weed growth.
- Components: A typical drip system includes a pressure regulator (e.g., Rain Bird PRV-10, ~$15), a filter (Rain Bird RBY filter, ~$20), main tubing (1/2-inch poly tubing, 100ft ~$25), smaller feeder lines (1/4-inch tubing), and emitters (0.5 GPH or 1 GPH per plant).
- Kits: For beginners, a starter kit like the Rain Bird Drip Irrigation Garden Kit (model DDI-KIT-1P, ~$40-$60) is excellent for a small garden. For larger setups, I use Netafim Techline CV Drip Line (500ft roll, ~$150-$200), which has pressure-compensating emitters built-in, ensuring even watering across long runs.
- Automation: For true self-sufficiency, consider a battery-powered timer (e.g., Orbit B-Hyve Bluetooth Hose Faucet Timer, ~$50) or a solar-powered timer connected to a small 12V pump.
- Solar-Powered Pumps: For lifting water from a well, pond, or large storage tank to your garden, a solar pump is a game-changer. For a smaller drip system, a Shurflo 2088-594-152 Diaphragm Pump (12V, 3.5 GPM, ~$180) can be powered by a single 100W solar panel (e.g., Renogy 100W Monocrystalline Solar Panel, ~$100) and a small 12V battery (e.g., a 50Ah LiFePO4 battery like the Battle Born 50Ah, ~$450). For larger operations or deeper wells, more robust systems are needed. If you’re looking to build out a comprehensive off-grid power system to support your garden’s water needs, or indeed your entire homestead, you might want to explore resources like the Power Grid Generator complete system guide to understand the full scope of what’s possible in terms of energy independence.
Step 5: Seed Selection & Planting
The choice of seeds is crucial for a truly self sufficient garden from scratch.
- Choose Heirloom & Open-Pollinated Seeds: These varieties produce seeds that will grow true to type, meaning you can save seeds from your harvest year after year. F1 hybrids, while often vigorous, will not produce consistent offspring from saved seeds. Reputable seed companies include Baker Creek Heirloom Seeds, High Mowing Organic Seeds, and Seed Savers Exchange. Start with common, reliable varieties like ‘Black Krim’ tomatoes, ‘Provider’ bush beans, ‘Waltham Butternut’ squash, and ‘Black Seeded Simpson’ lettuce.
- Start Seeds Indoors (Optional but Recommended): For longer growing seasons or specific crops, starting seeds indoors gives you a head start. Use seed-starting mix (e.g., Espoma Organic Seed Starter Mix, ~$10 for 16qt bag) in seed trays (Jiffy Professional Greenhouse 72-cell kit, ~$15). Provide adequate light with LED grow lights (Barrina T5 2ft 4-pack LED Grow Lights, 20W each, ~$50) for 14-16 hours a day, positioned 2-4 inches above seedlings. Maintain consistent temperatures (65-75°F for most).
- Direct Sowing vs. Transplanting: Some crops (carrots, radishes, beans, corn) prefer direct sowing into the garden bed. Others (tomatoes, peppers, broccoli, kale) benefit from being started indoors and transplanted. Follow seed packet instructions for planting depths (e.g., lettuce seeds are often surface-sown or planted 1/8 inch deep, while beans are 1 inch deep) and spacing.
- Companion Planting: Strategically plant different species together to enhance growth, deter pests, and attract beneficial insects. For example, planting marigolds near tomatoes can deter nematodes, and basil improves tomato flavor. Nasturtiums can act as a trap crop for aphids.
- Succession Planting: For a continuous harvest, plant small batches of quick-growing crops (lettuce, radishes, cilantro) every 2-3 weeks. As one crop finishes, another is ready to take its place.
Step 6: Pest & Disease Management (Organic)
Maintaining a self sufficient garden from scratch means embracing organic pest and disease control.
- Integrated Pest Management (IPM): This holistic approach combines several strategies.
- Observation: Regularly inspect your plants for early signs of pests or disease. Catching issues early is key.
- Physical Barriers: Use row covers (e.g., Agribon AG-19 floating row cover, 10×20 ft, ~$20) to protect young plants from insect pests like cabbage worms and squash bugs. Install fences (e.g., 2×4 welded wire mesh, 4 ft tall, 50 ft roll ~$70) to keep out deer, rabbits, and other larger animals.
- Hand-Picking: For larger pests like tomato hornworms or squash bugs, simply pick them off and drop them into a bucket of soapy water.
- Companion Planting: As mentioned, certain plants repel pests. Marigolds, garlic, and onions are excellent deterrents.
- Attract Beneficial Insects: Plant flowers like dill, fennel, cosmos, and sweet alyssum to attract ladybugs, lacewings, and parasitic wasps, which prey on common garden pests.
- Organic Sprays & Treatments:
- Neem Oil: An excellent broad-spectrum organic insecticide and fungicide. Bonide Neem Oil Concentrate (16oz, ~$20) can be mixed at a rate of 1-2 tbsp per gallon of water and sprayed on affected plants.
- Insecticidal Soap: Effective against soft-bodied insects like aphids, whiteflies, and spider mites. Garden Safe Insecticidal Soap (24oz ready-to-use, ~$10).
- Bacillus thuringiensis (Bt): A naturally occurring soil bacterium that targets caterpillars and worms. Monterey BT Worm & Caterpillar Killer (16oz, ~$18) is highly effective and safe for beneficial insects.
- Copper or Sulfur Sprays: For fungal diseases like powdery mildew or blight, organic copper (e.g., Bonide Copper Fungicide, ~$15 for 1lb) or sulfur (e.g., Safer Brand Garden Fungicide, ~$10 for 16oz) can be used as a last resort.
Step 7: Harvesting & Seed Saving
The culmination of your efforts is the harvest, and seed saving closes the loop on self-sufficiency.
- Harvesting Techniques:
- Timing: Harvest vegetables at their peak ripeness for best flavor and nutritional value. For example, green beans should snap cleanly, cucumbers should be firm, and tomatoes should be fully colored.
- Frequency: Many crops, like zucchini, cucumbers, and bush beans, produce more if harvested frequently. Pick daily or every other day.
- Tools: Use clean, sharp pruners (e.g., Corona ClassicCUT Bypass Pruner BP 3180, ~$30) or a sharp knife for clean cuts, minimizing damage to the plant.
- Seed Saving: This is where the « self-sufficient » aspect truly shines.
- Selection: Only save seeds from your healthiest, most vigorous plants that show desired traits (disease resistance, good flavor, high yield).
- Isolation: To ensure true-to-type seeds, prevent cross-pollination. This can be challenging for open-pollinated crops that readily cross (e.g., squash, corn). For beginners, focus on self-pollinating plants like beans, peas, lettuce, and tomatoes.
- Processing:
- Dry Seeds (Beans, Peas, Lettuce, Grains): Allow pods/seed heads to dry completely on the plant. Harvest, shell, and clean the seeds, removing chaff.
- Wet Seeds (Tomatoes, Cucumbers, Squash): For tomatoes, ferment the seeds in water for a few days to remove the gel coating and inhibit disease. For cucumbers/squash, scrape out seeds, wash thoroughly, and dry.
- Drying: Spread seeds thinly on screens or paper plates in a cool, dry, well-ventilated area for 1-4 weeks. Ensure they are bone-dry before storage. I aim for less than 8% moisture content.
- Storage: Store seeds in airtight containers (glass jars with desiccant packets work well) in a cool, dark, dry place (ideally 40-50°F and 30-40% humidity). Label clearly with variety and date. Properly stored seeds can remain viable for 3-10 years or more.
Step 8: Season Extension & Winterizing
Extend your harvest and protect your garden for the off-season to truly maximize your self sufficient garden from scratch.
- Cold Frames: Simple structures with a transparent top (glass, polycarbonate, or old windows) that sit over garden beds. They trap solar heat, allowing you to grow cold-hardy crops (lettuce, spinach, kale, radishes) well into winter or start seeds earlier in spring. A basic cold frame can be built from 2×6 lumber and a sheet of polycarbonate for under $100.
- Hoop Houses/Low Tunnels: Larger structures made from flexible hoops (PVC pipe or EMT conduit) covered with greenhouse plastic. These provide more space and greater temperature moderation. A 10×20 ft DIY low tunnel kit can cost $200-$500, while a larger, more robust hoop house kit might be $1,000-$3,000. I use a 6×12 ft low tunnel made from 1/2-inch PVC hoops and 6mil greenhouse plastic, which extends my lettuce and spinach harvest by at least
The choice of seeds is crucial for a truly self sufficient garden from scratch.
- Choose Heirloom & Open-Pollinated Seeds: These varieties produce seeds that will grow true to type, meaning you can save seeds from your harvest year after year. F1 hybrids, while often vigorous, will not produce consistent offspring from saved seeds. Reputable seed companies include Baker Creek Heirloom Seeds, High Mowing Organic Seeds, and Seed Savers Exchange. Start with common, reliable varieties like ‘Black Krim’ tomatoes, ‘Provider’ bush beans, ‘Waltham Butternut’ squash, and ‘Black Seeded Simpson’ lettuce.
- Start Seeds Indoors (Optional but Recommended): For longer growing seasons or specific crops, starting seeds indoors gives you a head start. Use seed-starting mix (e.g., Espoma Organic Seed Starter Mix, ~$10 for 16qt bag) in seed trays (Jiffy Professional Greenhouse 72-cell kit, ~$15). Provide adequate light with LED grow lights (Barrina T5 2ft 4-pack LED Grow Lights, 20W each, ~$50) for 14-16 hours a day, positioned 2-4 inches above seedlings. Maintain consistent temperatures (65-75°F for most).
- Direct Sowing vs. Transplanting: Some crops (carrots, radishes, beans, corn) prefer direct sowing into the garden bed. Others (tomatoes, peppers, broccoli, kale) benefit from being started indoors and transplanted. Follow seed packet instructions for planting depths (e.g., lettuce seeds are often surface-sown or planted 1/8 inch deep, while beans are 1 inch deep) and spacing.
- Companion Planting: Strategically plant different species together to enhance growth, deter pests, and attract beneficial insects. For example, planting marigolds near tomatoes can deter nematodes, and basil improves tomato flavor. Nasturtiums can act as a trap crop for aphids.
- Succession Planting: For a continuous harvest, plant small batches of quick-growing crops (lettuce, radishes, cilantro) every 2-3 weeks. As one crop finishes, another is ready to take its place.
Step 6: Pest & Disease Management (Organic)
Maintaining a self sufficient garden from scratch means embracing organic pest and disease control.
- Integrated Pest Management (IPM): This holistic approach combines several strategies.
- Observation: Regularly inspect your plants for early signs of pests or disease. Catching issues early is key.
- Physical Barriers: Use row covers (e.g., Agribon AG-19 floating row cover, 10×20 ft, ~$20) to protect young plants from insect pests like cabbage worms and squash bugs. Install fences (e.g., 2×4 welded wire mesh, 4 ft tall, 50 ft roll ~$70) to keep out deer, rabbits, and other larger animals.
- Hand-Picking: For larger pests like tomato hornworms or squash bugs, simply pick them off and drop them into a bucket of soapy water.
- Companion Planting: As mentioned, certain plants repel pests. Marigolds, garlic, and onions are excellent deterrents.
- Attract Beneficial Insects: Plant flowers like dill, fennel, cosmos, and sweet alyssum to attract ladybugs, lacewings, and parasitic wasps, which prey on common garden pests.
- Organic Sprays & Treatments:
- Neem Oil: An excellent broad-spectrum organic insecticide and fungicide. Bonide Neem Oil Concentrate (16oz, ~$20) can be mixed at a rate of 1-2 tbsp per gallon of water and sprayed on affected plants.
- Insecticidal Soap: Effective against soft-bodied insects like aphids, whiteflies, and spider mites. Garden Safe Insecticidal Soap (24oz ready-to-use, ~$10).
- Bacillus thuringiensis (Bt): A naturally occurring soil bacterium that targets caterpillars and worms. Monterey BT Worm & Caterpillar Killer (16oz, ~$18) is highly effective and safe for beneficial insects.
- Copper or Sulfur Sprays: For fungal diseases like powdery mildew or blight, organic copper (e.g., Bonide Copper Fungicide, ~$15 for 1lb) or sulfur (e.g., Safer Brand Garden Fungicide, ~$10 for 16oz) can be used as a last resort.
Step 7: Harvesting & Seed Saving
The culmination of your efforts is the harvest, and seed saving closes the loop on self-sufficiency.
- Harvesting Techniques:
- Timing: Harvest vegetables at their peak ripeness for best flavor and nutritional value. For example, green beans should snap cleanly, cucumbers should be firm, and tomatoes should be fully colored.
- Frequency: Many crops, like zucchini, cucumbers, and bush beans, produce more if harvested frequently. Pick daily or every other day.
- Tools: Use clean, sharp pruners (e.g., Corona ClassicCUT Bypass Pruner BP 3180, ~$30) or a sharp knife for clean cuts, minimizing damage to the plant.
- Seed Saving: This is where the « self-sufficient » aspect truly shines.
- Selection: Only save seeds from your healthiest, most vigorous plants that show desired traits (disease resistance, good flavor, high yield).
- Isolation: To ensure true-to-type seeds, prevent cross-pollination. This can be challenging for open-pollinated crops that readily cross (e.g., squash, corn). For beginners, focus on self-pollinating plants like beans, peas, lettuce, and tomatoes.
- Processing:
- Dry Seeds (Beans, Peas, Lettuce, Grains): Allow pods/seed heads to dry completely on the plant. Harvest, shell, and clean the seeds, removing chaff.
- Wet Seeds (Tomatoes, Cucumbers, Squash): For tomatoes, ferment the seeds in water for a few days to remove the gel coating and inhibit disease. For cucumbers/squash, scrape out seeds, wash thoroughly, and dry.
- Drying: Spread seeds thinly on screens or paper plates in a cool, dry, well-ventilated area for 1-4 weeks. Ensure they are bone-dry before storage. I aim for less than 8% moisture content.
- Storage: Store seeds in airtight containers (glass jars with desiccant packets work well) in a cool, dark, dry place (ideally 40-50°F and 30-40% humidity). Label clearly with variety and date. Properly stored seeds can remain viable for 3-10 years or more.
Step 8: Season Extension & Winterizing
Extend your harvest and protect your garden for the off-season to truly maximize your self sufficient garden from scratch.
- Cold Frames: Simple structures with a transparent top (glass, polycarbonate, or old windows) that sit over garden beds. They trap solar heat, allowing you to grow cold-hardy crops (lettuce, spinach, kale, radishes) well into winter or start seeds earlier in spring. A basic cold frame can be built from 2×6 lumber and a sheet of polycarbonate for under $100.
- Hoop Houses/Low Tunnels: Larger structures made from flexible hoops (PVC pipe or EMT conduit) covered with greenhouse plastic. These provide more space and greater temperature moderation. A 10×20 ft DIY low tunnel kit can cost $200-$500, while a larger, more robust hoop house kit might be $1,000-$3,000. I use a 6×12 ft low tunnel made from 1/2-inch PVC hoops and 6mil greenhouse plastic, which extends my lettuce and spinach harvest by at least
- In-Ground Beds: If you have excellent native soil and good drainage, in-ground beds are the most economical. Double-digging (loosening soil two shovel depths) can significantly improve drainage and aeration. For my main garden, I primarily use in-ground beds, but I focus on building up the soil over time with consistent compost additions and cover cropping. I aim for beds that are no wider than 3-4 feet so I can reach the center without stepping on the soil, compacting it.
- Raised Beds: Raised beds offer numerous advantages, especially for poor soil, heavy clay, or rocky areas. They provide better drainage, warm up faster in spring, reduce compaction, and make weeding and harvesting easier on your back.
- Material Options:
- Untreated Cedar: Naturally rot-resistant and chemical-free. A 4×8 ft bed, 12 inches deep, typically requires three 2x12x8 ft cedar boards, costing around $50-$60 per board (total ~$150-$180) plus corner brackets or screws. My first raised beds were cedar and are still going strong after 7 years.
- Galvanized Steel: Durable, long-lasting, and aesthetically pleasing. Brands like Vego Garden offer modular kits. A Vego Garden 17″ Tall 8-in-1 Metal Raised Garden Bed (can be configured to 4×8 ft) costs approximately $250-$300.
- Concrete Blocks/Stones: Very durable but can leach minerals (though generally safe once weathered) and can be expensive.
- Recycled Materials: Pallets (check for chemical treatment stamps like « HT » for heat-treated), old tires (controversial due to potential chemical leaching).
- Filling Raised Beds: Don’t just fill with topsoil. Use a « Hugelkultur » approach (logs, branches, leaves, then compost, then topsoil) or a mixture of 60% good quality topsoil, 30% compost, and 10% perlite or vermiculite for drainage. A 4x8x1 ft raised bed requires about 32 cubic feet (or ~1.2 cubic yards) of soil mix, which can cost $100-$200 depending on your source.
- Material Options:
Step 4: Water Management & Irrigation
Efficient water management is critical for a self sufficient garden from scratch, especially in off-grid living where water resources might be limited.
- Rainwater Harvesting: This is my primary source of irrigation water. A 55-gallon rain barrel (e.g., EarthMark Rain Barrel, ~$120-$150) connected to a downspout can collect significant water. For larger needs, I use two 275-gallon IBC totes (Intermediate Bulk Containers, often available used for $100-$200 each from food-grade sources) connected in series. A 1,000 sq ft roof can collect approximately 620 gallons of water for every inch of rainfall. My 1,500 sq ft roof provides ample water for my 600 sq ft garden through multiple barrels and totes.
- Drip Irrigation: This is by far the most water-efficient method, delivering water directly to the plant’s root zone, minimizing evaporation and weed growth.
- Components: A typical drip system includes a pressure regulator (e.g., Rain Bird PRV-10, ~$15), a filter (Rain Bird RBY filter, ~$20), main tubing (1/2-inch poly tubing, 100ft ~$25), smaller feeder lines (1/4-inch tubing), and emitters (0.5 GPH or 1 GPH per plant).
- Kits: For beginners, a starter kit like the Rain Bird Drip Irrigation Garden Kit (model DDI-KIT-1P, ~$40-$60) is excellent for a small garden. For larger setups, I use Netafim Techline CV Drip Line (500ft roll, ~$150-$200), which has pressure-compensating emitters built-in, ensuring even watering across long runs.
- Automation: For true self-sufficiency, consider a battery-powered timer (e.g., Orbit B-Hyve Bluetooth Hose Faucet Timer, ~$50) or a solar-powered timer connected to a small 12V pump.
- Solar-Powered Pumps: For lifting water from a well, pond, or large storage tank to your garden, a solar pump is a game-changer. For a smaller drip system, a Shurflo 2088-594-152 Diaphragm Pump (12V, 3.5 GPM, ~$180) can be powered by a single 100W solar panel (e.g., Renogy 100W Monocrystalline Solar Panel, ~$100) and a small 12V battery (e.g., a 50Ah LiFePO4 battery like the Battle Born 50Ah, ~$450). For larger operations or deeper wells, more robust systems are needed. If you’re looking to build out a comprehensive off-grid power system to support your garden’s water needs, or indeed your entire homestead, you might want to explore resources like the Power Grid Generator complete system guide to understand the full scope of what’s possible in terms of energy independence.
Step 5: Seed Selection & Planting
The choice of seeds is crucial for a truly self sufficient garden from scratch.
- Choose Heirloom & Open-Pollinated Seeds: These varieties produce seeds that will grow true to type, meaning you can save seeds from your harvest year after year. F1 hybrids, while often vigorous, will not produce consistent offspring from saved seeds. Reputable seed companies include Baker Creek Heirloom Seeds, High Mowing Organic Seeds, and Seed Savers Exchange. Start with common, reliable varieties like ‘Black Krim’ tomatoes, ‘Provider’ bush beans, ‘Waltham Butternut’ squash, and ‘Black Seeded Simpson’ lettuce.
- Start Seeds Indoors (Optional but Recommended): For longer growing seasons or specific crops, starting seeds indoors gives you a head start. Use seed-starting mix (e.g., Espoma Organic Seed Starter Mix, ~$10 for 16qt bag) in seed trays (Jiffy Professional Greenhouse 72-cell kit, ~$15). Provide adequate light with LED grow lights (Barrina T5 2ft 4-pack LED Grow Lights, 20W each, ~$50) for 14-16 hours a day, positioned 2-4 inches above seedlings. Maintain consistent temperatures (65-75°F for most).
- Direct Sowing vs. Transplanting: Some crops (carrots, radishes, beans, corn) prefer direct sowing into the garden bed. Others (tomatoes, peppers, broccoli, kale) benefit from being started indoors and transplanted. Follow seed packet instructions for planting depths (e.g., lettuce seeds are often surface-sown or planted 1/8 inch deep, while beans are 1 inch deep) and spacing.
- Companion Planting: Strategically plant different species together to enhance growth, deter pests, and attract beneficial insects. For example, planting marigolds near tomatoes can deter nematodes, and basil improves tomato flavor. Nasturtiums can act as a trap crop for aphids.
- Succession Planting: For a continuous harvest, plant small batches of quick-growing crops (lettuce, radishes, cilantro) every 2-3 weeks. As one crop finishes, another is ready to take its place.
Step 6: Pest & Disease Management (Organic)
Maintaining a self sufficient garden from scratch means embracing organic pest and disease control.
- Integrated Pest Management (IPM): This holistic approach combines several strategies.
- Observation: Regularly inspect your plants for early signs of pests or disease. Catching issues early is key.
- Physical Barriers: Use row covers (e.g., Agribon AG-19 floating row cover, 10×20 ft, ~$20) to protect young plants from insect pests like cabbage worms and squash bugs. Install fences (e.g., 2×4 welded wire mesh, 4 ft tall, 50 ft roll ~$70) to keep out deer, rabbits, and other larger animals.
- Hand-Picking: For larger pests like tomato hornworms or squash bugs, simply pick them off and drop them into a bucket of soapy water.
- Companion Planting: As mentioned, certain plants repel pests. Marigolds, garlic, and onions are excellent deterrents.
- Attract Beneficial Insects: Plant flowers like dill, fennel, cosmos, and sweet alyssum to attract ladybugs, lacewings, and parasitic wasps, which prey on common garden pests.
- Organic Sprays & Treatments:
- Neem Oil: An excellent broad-spectrum organic insecticide and fungicide. Bonide Neem Oil Concentrate (16oz, ~$20) can be mixed at a rate of 1-2 tbsp per gallon of water and sprayed on affected plants.
- Insecticidal Soap: Effective against soft-bodied insects like aphids, whiteflies, and spider mites. Garden Safe Insecticidal Soap (24oz ready-to-use, ~$10).
- Bacillus thuringiensis (Bt): A naturally occurring soil bacterium that targets caterpillars and worms. Monterey BT Worm & Caterpillar Killer (16oz, ~$18) is highly effective and safe for beneficial insects.
- Copper or Sulfur Sprays: For fungal diseases like powdery mildew or blight, organic copper (e.g., Bonide Copper Fungicide, ~$15 for 1lb) or sulfur (e.g., Safer Brand Garden Fungicide, ~$10 for 16oz) can be used as a last resort.
Step 7: Harvesting & Seed Saving
The culmination of your efforts is the harvest, and seed saving closes the loop on self-sufficiency.
- Harvesting Techniques:
- Timing: Harvest vegetables at their peak ripeness for best flavor and nutritional value. For example, green beans should snap cleanly, cucumbers should be firm, and tomatoes should be fully colored.
- Frequency: Many crops, like zucchini, cucumbers, and bush beans, produce more if harvested frequently. Pick daily or every other day.
- Tools: Use clean, sharp pruners (e.g., Corona ClassicCUT Bypass Pruner BP 3180, ~$30) or a sharp knife for clean cuts, minimizing damage to the plant.
- Seed Saving: This is where the « self-sufficient » aspect truly shines.
- Selection: Only save seeds from your healthiest, most vigorous plants that show desired traits (disease resistance, good flavor, high yield).
- Isolation: To ensure true-to-type seeds, prevent cross-pollination. This can be challenging for open-pollinated crops that readily cross (e.g., squash, corn). For beginners, focus on self-pollinating plants like beans, peas, lettuce, and tomatoes.
- Processing:
- Dry Seeds (Beans, Peas, Lettuce, Grains): Allow pods/seed heads to dry completely on the plant. Harvest, shell, and clean the seeds, removing chaff.
- Wet Seeds (Tomatoes, Cucumbers, Squash): For tomatoes, ferment the seeds in water for a few days to remove the gel coating and inhibit disease. For cucumbers/squash, scrape out seeds, wash thoroughly, and dry.
- Drying: Spread seeds thinly on screens or paper plates in a cool, dry, well-ventilated area for 1-4 weeks. Ensure they are bone-dry before storage. I aim for less than 8% moisture content.
- Storage: Store seeds in airtight containers (glass jars with desiccant packets work well) in a cool, dark, dry place (ideally 40-50°F and 30-40% humidity). Label clearly with variety and date. Properly stored seeds can remain viable for 3-10 years or more.
Step 8: Season Extension & Winterizing
Extend your harvest and protect your garden for the off-season to truly maximize your self sufficient garden from scratch.
- Cold Frames: Simple structures with a transparent top (glass, polycarbonate, or old windows) that sit over garden beds. They trap solar heat, allowing you to grow cold-hardy crops (lettuce, spinach, kale, radishes) well into winter or start seeds earlier in spring. A basic cold frame can be built from 2×6 lumber and a sheet of polycarbonate for under $100.
- Hoop Houses/Low Tunnels: Larger structures made from flexible hoops (PVC pipe or EMT conduit) covered with greenhouse plastic. These provide more space and greater temperature moderation. A 10×20 ft DIY low tunnel kit can cost $200-$500, while a larger, more robust hoop house kit might be $1,000-$3,000. I use a 6×12 ft low tunnel made from 1/2-inch PVC hoops and 6mil greenhouse plastic, which extends my lettuce and spinach harvest by at least
Deciding between raised beds and in-ground beds depends on your soil, budget, and physical capabilities.
- In-Ground Beds: If you have excellent native soil and good drainage, in-ground beds are the most economical. Double-digging (loosening soil two shovel depths) can significantly improve drainage and aeration. For my main garden, I primarily use in-ground beds, but I focus on building up the soil over time with consistent compost additions and cover cropping. I aim for beds that are no wider than 3-4 feet so I can reach the center without stepping on the soil, compacting it.
- Raised Beds: Raised beds offer numerous advantages, especially for poor soil, heavy clay, or rocky areas. They provide better drainage, warm up faster in spring, reduce compaction, and make weeding and harvesting easier on your back.
- Material Options:
- Untreated Cedar: Naturally rot-resistant and chemical-free. A 4×8 ft bed, 12 inches deep, typically requires three 2x12x8 ft cedar boards, costing around $50-$60 per board (total ~$150-$180) plus corner brackets or screws. My first raised beds were cedar and are still going strong after 7 years.
- Galvanized Steel: Durable, long-lasting, and aesthetically pleasing. Brands like Vego Garden offer modular kits. A Vego Garden 17″ Tall 8-in-1 Metal Raised Garden Bed (can be configured to 4×8 ft) costs approximately $250-$300.
- Concrete Blocks/Stones: Very durable but can leach minerals (though generally safe once weathered) and can be expensive.
- Recycled Materials: Pallets (check for chemical treatment stamps like « HT » for heat-treated), old tires (controversial due to potential chemical leaching).
- Filling Raised Beds: Don’t just fill with topsoil. Use a « Hugelkultur » approach (logs, branches, leaves, then compost, then topsoil) or a mixture of 60% good quality topsoil, 30% compost, and 10% perlite or vermiculite for drainage. A 4x8x1 ft raised bed requires about 32 cubic feet (or ~1.2 cubic yards) of soil mix, which can cost $100-$200 depending on your source.
- Material Options:
Step 4: Water Management & Irrigation
Efficient water management is critical for a self sufficient garden from scratch, especially in off-grid living where water resources might be limited.
- Rainwater Harvesting: This is my primary source of irrigation water. A 55-gallon rain barrel (e.g., EarthMark Rain Barrel, ~$120-$150) connected to a downspout can collect significant water. For larger needs, I use two 275-gallon IBC totes (Intermediate Bulk Containers, often available used for $100-$200 each from food-grade sources) connected in series. A 1,000 sq ft roof can collect approximately 620 gallons of water for every inch of rainfall. My 1,500 sq ft roof provides ample water for my 600 sq ft garden through multiple barrels and totes.
- Drip Irrigation: This is by far the most water-efficient method, delivering water directly to the plant’s root zone, minimizing evaporation and weed growth.
- Components: A typical drip system includes a pressure regulator (e.g., Rain Bird PRV-10, ~$15), a filter (Rain Bird RBY filter, ~$20), main tubing (1/2-inch poly tubing, 100ft ~$25), smaller feeder lines (1/4-inch tubing), and emitters (0.5 GPH or 1 GPH per plant).
- Kits: For beginners, a starter kit like the Rain Bird Drip Irrigation Garden Kit (model DDI-KIT-1P, ~$40-$60) is excellent for a small garden. For larger setups, I use Netafim Techline CV Drip Line (500ft roll, ~$150-$200), which has pressure-compensating emitters built-in, ensuring even watering across long runs.
- Automation: For true self-sufficiency, consider a battery-powered timer (e.g., Orbit B-Hyve Bluetooth Hose Faucet Timer, ~$50) or a solar-powered timer connected to a small 12V pump.
- Solar-Powered Pumps: For lifting water from a well, pond, or large storage tank to your garden, a solar pump is a game-changer. For a smaller drip system, a Shurflo 2088-594-152 Diaphragm Pump (12V, 3.5 GPM, ~$180) can be powered by a single 100W solar panel (e.g., Renogy 100W Monocrystalline Solar Panel, ~$100) and a small 12V battery (e.g., a 50Ah LiFePO4 battery like the Battle Born 50Ah, ~$450). For larger operations or deeper wells, more robust systems are needed. If you’re looking to build out a comprehensive off-grid power system to support your garden’s water needs, or indeed your entire homestead, you might want to explore resources like the Power Grid Generator complete system guide to understand the full scope of what’s possible in terms of energy independence.
Step 5: Seed Selection & Planting
The choice of seeds is crucial for a truly self sufficient garden from scratch.
- Choose Heirloom & Open-Pollinated Seeds: These varieties produce seeds that will grow true to type, meaning you can save seeds from your harvest year after year. F1 hybrids, while often vigorous, will not produce consistent offspring from saved seeds. Reputable seed companies include Baker Creek Heirloom Seeds, High Mowing Organic Seeds, and Seed Savers Exchange. Start with common, reliable varieties like ‘Black Krim’ tomatoes, ‘Provider’ bush beans, ‘Waltham Butternut’ squash, and ‘Black Seeded Simpson’ lettuce.
- Start Seeds Indoors (Optional but Recommended): For longer growing seasons or specific crops, starting seeds indoors gives you a head start. Use seed-starting mix (e.g., Espoma Organic Seed Starter Mix, ~$10 for 16qt bag) in seed trays (Jiffy Professional Greenhouse 72-cell kit, ~$15). Provide adequate light with LED grow lights (Barrina T5 2ft 4-pack LED Grow Lights, 20W each, ~$50) for 14-16 hours a day, positioned 2-4 inches above seedlings. Maintain consistent temperatures (65-75°F for most).
- Direct Sowing vs. Transplanting: Some crops (carrots, radishes, beans, corn) prefer direct sowing into the garden bed. Others (tomatoes, peppers, broccoli, kale) benefit from being started indoors and transplanted. Follow seed packet instructions for planting depths (e.g., lettuce seeds are often surface-sown or planted 1/8 inch deep, while beans are 1 inch deep) and spacing.
- Companion Planting: Strategically plant different species together to enhance growth, deter pests, and attract beneficial insects. For example, planting marigolds near tomatoes can deter nematodes, and basil improves tomato flavor. Nasturtiums can act as a trap crop for aphids.
- Succession Planting: For a continuous harvest, plant small batches of quick-growing crops (lettuce, radishes, cilantro) every 2-3 weeks. As one crop finishes, another is ready to take its place.
Step 6: Pest & Disease Management (Organic)
Maintaining a self sufficient garden from scratch means embracing organic pest and disease control.
- Integrated Pest Management (IPM): This holistic approach combines several strategies.
- Observation: Regularly inspect your plants for early signs of pests or disease. Catching issues early is key.
- Physical Barriers: Use row covers (e.g., Agribon AG-19 floating row cover, 10×20 ft, ~$20) to protect young plants from insect pests like cabbage worms and squash bugs. Install fences (e.g., 2×4 welded wire mesh, 4 ft tall, 50 ft roll ~$70) to keep out deer, rabbits, and other larger animals.
- Hand-Picking: For larger pests like tomato hornworms or squash bugs, simply pick them off and drop them into a bucket of soapy water.
- Companion Planting: As mentioned, certain plants repel pests. Marigolds, garlic, and onions are excellent deterrents.
- Attract Beneficial Insects: Plant flowers like dill, fennel, cosmos, and sweet alyssum to attract ladybugs, lacewings, and parasitic wasps, which prey on common garden pests.
- Organic Sprays & Treatments:
- Neem Oil: An excellent broad-spectrum organic insecticide and fungicide. Bonide Neem Oil Concentrate (16oz, ~$20) can be mixed at a rate of 1-2 tbsp per gallon of water and sprayed on affected plants.
- Insecticidal Soap: Effective against soft-bodied insects like aphids, whiteflies, and spider mites. Garden Safe Insecticidal Soap (24oz ready-to-use, ~$10).
- Bacillus thuringiensis (Bt): A naturally occurring soil bacterium that targets caterpillars and worms. Monterey BT Worm & Caterpillar Killer (16oz, ~$18) is highly effective and safe for beneficial insects.
- Copper or Sulfur Sprays: For fungal diseases like powdery mildew or blight, organic copper (e.g., Bonide Copper Fungicide, ~$15 for 1lb) or sulfur (e.g., Safer Brand Garden Fungicide, ~$10 for 16oz) can be used as a last resort.
Step 7: Harvesting & Seed Saving
The culmination of your efforts is the harvest, and seed saving closes the loop on self-sufficiency.
- Harvesting Techniques:
- Timing: Harvest vegetables at their peak ripeness for best flavor and nutritional value. For example, green beans should snap cleanly, cucumbers should be firm, and tomatoes should be fully colored.
- Frequency: Many crops, like zucchini, cucumbers, and bush beans, produce more if harvested frequently. Pick daily or every other day.
- Tools: Use clean, sharp pruners (e.g., Corona ClassicCUT Bypass Pruner BP 3180, ~$30) or a sharp knife for clean cuts, minimizing damage to the plant.
- Seed Saving: This is where the « self-sufficient » aspect truly shines.
- Selection: Only save seeds from your healthiest, most vigorous plants that show desired traits (disease resistance, good flavor, high yield).
- Isolation: To ensure true-to-type seeds, prevent cross-pollination. This can be challenging for open-pollinated crops that readily cross (e.g., squash, corn). For beginners, focus on self-pollinating plants like beans, peas, lettuce, and tomatoes.
- Processing:
- Dry Seeds (Beans, Peas, Lettuce, Grains): Allow pods/seed heads to dry completely on the plant. Harvest, shell, and clean the seeds, removing chaff.
- Wet Seeds (Tomatoes, Cucumbers, Squash): For tomatoes, ferment the seeds in water for a few days to remove the gel coating and inhibit disease. For cucumbers/squash, scrape out seeds, wash thoroughly, and dry.
- Drying: Spread seeds thinly on screens or paper plates in a cool, dry, well-ventilated area for 1-4 weeks. Ensure they are bone-dry before storage. I aim for less than 8% moisture content.
- Storage: Store seeds in airtight containers (glass jars with desiccant packets work well) in a cool, dark, dry place (ideally 40-50°F and 30-40% humidity). Label clearly with variety and date. Properly stored seeds can remain viable for 3-10 years or more.
Step 8: Season Extension & Winterizing
Extend your harvest and protect your garden for the off-season to truly maximize your self sufficient garden from scratch.
- Cold Frames: Simple structures with a transparent top (glass, polycarbonate, or old windows) that sit over garden beds. They trap solar heat, allowing you to grow cold-hardy crops (lettuce, spinach, kale, radishes) well into winter or start seeds earlier in spring. A basic cold frame can be built from 2×6 lumber and a sheet of polycarbonate for under $100.
- Hoop Houses/Low Tunnels: Larger structures made from flexible hoops (PVC pipe or EMT conduit) covered with greenhouse plastic. These provide more space and greater temperature moderation. A 10×20 ft DIY low tunnel kit can cost $200-$500, while a larger, more robust hoop house kit might be $1,000-$3,000. I use a 6×12 ft low tunnel made from 1/2-inch PVC hoops and 6mil greenhouse plastic, which extends my lettuce and spinach harvest by at least
Healthy soil is the bedrock of a productive, self-sufficient garden. You can’t guess what your soil needs; you have to test it.
- Perform a Soil Test: A professional soil test will give you precise data on your soil’s pH, nutrient levels (N-P-K), and organic matter content. I recommend sending a sample to your local agricultural extension office; it typically costs $20-$50 and provides detailed recommendations. Alternatively, for a quick homeowner check, a Rapitest Soil Test Kit (40-test kit, model 1663, ~$20 on Amazon) provides a good baseline for pH, Nitrogen, Phosphorus, and Potash. Aim for a pH between 6.0 and 7.0 for most vegetables.
- Amend for pH Imbalance: If your soil is too acidic (below 6.0), add agricultural lime (dolomitic lime adds magnesium, calcitic lime adds calcium). Apply 5-10 lbs per 100 sq ft for a moderate adjustment. If it’s too alkaline (above 7.0), add elemental sulfur (e.g., Espoma Soil Acidifier, ~$15 for 6.75 lbs) or generous amounts of organic matter like peat moss or pine needles.
- Build Organic Matter: This is the single most important step for long-term soil health. Organic matter improves soil structure, water retention, drainage, and nutrient availability. Incorporate 2-4 inches of high-quality compost into your top 6-12 inches of soil annually. I make my own compost from kitchen scraps, garden waste, and shredded leaves, but you can purchase it. Local nurseries often sell bulk compost for $30-$50 per cubic yard. Aged manure (from chickens, cows, or horses – ensure it’s well-rotted to avoid burning plants) is also excellent.
- Address Nutrient Deficiencies: Based on your soil test, add specific organic amendments. If Nitrogen (N) is low, add blood meal (12-0-0, ~$20 for 3 lbs) or feather meal. For Phosphorus (P), use bone meal (3-15-0, ~$15 for 3 lbs) or rock phosphate. For Potassium (K), greensand (0-0-2.5, ~$25 for 5 lbs) or kelp meal are good choices. I rely heavily on Espoma Organic Garden-tone (5-3-3, ~$25 for an 8lb bag) as a balanced, all-purpose organic fertilizer during planting.
Step 3: Garden Bed Preparation
Deciding between raised beds and in-ground beds depends on your soil, budget, and physical capabilities.
- In-Ground Beds: If you have excellent native soil and good drainage, in-ground beds are the most economical. Double-digging (loosening soil two shovel depths) can significantly improve drainage and aeration. For my main garden, I primarily use in-ground beds, but I focus on building up the soil over time with consistent compost additions and cover cropping. I aim for beds that are no wider than 3-4 feet so I can reach the center without stepping on the soil, compacting it.
- Raised Beds: Raised beds offer numerous advantages, especially for poor soil, heavy clay, or rocky areas. They provide better drainage, warm up faster in spring, reduce compaction, and make weeding and harvesting easier on your back.
- Material Options:
- Untreated Cedar: Naturally rot-resistant and chemical-free. A 4×8 ft bed, 12 inches deep, typically requires three 2x12x8 ft cedar boards, costing around $50-$60 per board (total ~$150-$180) plus corner brackets or screws. My first raised beds were cedar and are still going strong after 7 years.
- Galvanized Steel: Durable, long-lasting, and aesthetically pleasing. Brands like Vego Garden offer modular kits. A Vego Garden 17″ Tall 8-in-1 Metal Raised Garden Bed (can be configured to 4×8 ft) costs approximately $250-$300.
- Concrete Blocks/Stones: Very durable but can leach minerals (though generally safe once weathered) and can be expensive.
- Recycled Materials: Pallets (check for chemical treatment stamps like « HT » for heat-treated), old tires (controversial due to potential chemical leaching).
- Filling Raised Beds: Don’t just fill with topsoil. Use a « Hugelkultur » approach (logs, branches, leaves, then compost, then topsoil) or a mixture of 60% good quality topsoil, 30% compost, and 10% perlite or vermiculite for drainage. A 4x8x1 ft raised bed requires about 32 cubic feet (or ~1.2 cubic yards) of soil mix, which can cost $100-$200 depending on your source.
- Material Options:
Step 4: Water Management & Irrigation
Efficient water management is critical for a self sufficient garden from scratch, especially in off-grid living where water resources might be limited.
- Rainwater Harvesting: This is my primary source of irrigation water. A 55-gallon rain barrel (e.g., EarthMark Rain Barrel, ~$120-$150) connected to a downspout can collect significant water. For larger needs, I use two 275-gallon IBC totes (Intermediate Bulk Containers, often available used for $100-$200 each from food-grade sources) connected in series. A 1,000 sq ft roof can collect approximately 620 gallons of water for every inch of rainfall. My 1,500 sq ft roof provides ample water for my 600 sq ft garden through multiple barrels and totes.
- Drip Irrigation: This is by far the most water-efficient method, delivering water directly to the plant’s root zone, minimizing evaporation and weed growth.
- Components: A typical drip system includes a pressure regulator (e.g., Rain Bird PRV-10, ~$15), a filter (Rain Bird RBY filter, ~$20), main tubing (1/2-inch poly tubing, 100ft ~$25), smaller feeder lines (1/4-inch tubing), and emitters (0.5 GPH or 1 GPH per plant).
- Kits: For beginners, a starter kit like the Rain Bird Drip Irrigation Garden Kit (model DDI-KIT-1P, ~$40-$60) is excellent for a small garden. For larger setups, I use Netafim Techline CV Drip Line (500ft roll, ~$150-$200), which has pressure-compensating emitters built-in, ensuring even watering across long runs.
- Automation: For true self-sufficiency, consider a battery-powered timer (e.g., Orbit B-Hyve Bluetooth Hose Faucet Timer, ~$50) or a solar-powered timer connected to a small 12V pump.
- Solar-Powered Pumps: For lifting water from a well, pond, or large storage tank to your garden, a solar pump is a game-changer. For a smaller drip system, a Shurflo 2088-594-152 Diaphragm Pump (12V, 3.5 GPM, ~$180) can be powered by a single 100W solar panel (e.g., Renogy 100W Monocrystalline Solar Panel, ~$100) and a small 12V battery (e.g., a 50Ah LiFePO4 battery like the Battle Born 50Ah, ~$450). For larger operations or deeper wells, more robust systems are needed. If you’re looking to build out a comprehensive off-grid power system to support your garden’s water needs, or indeed your entire homestead, you might want to explore resources like the Power Grid Generator complete system guide to understand the full scope of what’s possible in terms of energy independence.
Step 5: Seed Selection & Planting
The choice of seeds is crucial for a truly self sufficient garden from scratch.
- Choose Heirloom & Open-Pollinated Seeds: These varieties produce seeds that will grow true to type, meaning you can save seeds from your harvest year after year. F1 hybrids, while often vigorous, will not produce consistent offspring from saved seeds. Reputable seed companies include Baker Creek Heirloom Seeds, High Mowing Organic Seeds, and Seed Savers Exchange. Start with common, reliable varieties like ‘Black Krim’ tomatoes, ‘Provider’ bush beans, ‘Waltham Butternut’ squash, and ‘Black Seeded Simpson’ lettuce.
- Start Seeds Indoors (Optional but Recommended): For longer growing seasons or specific crops, starting seeds indoors gives you a head start. Use seed-starting mix (e.g., Espoma Organic Seed Starter Mix, ~$10 for 16qt bag) in seed trays (Jiffy Professional Greenhouse 72-cell kit, ~$15). Provide adequate light with LED grow lights (Barrina T5 2ft 4-pack LED Grow Lights, 20W each, ~$50) for 14-16 hours a day, positioned 2-4 inches above seedlings. Maintain consistent temperatures (65-75°F for most).
- Direct Sowing vs. Transplanting: Some crops (carrots, radishes, beans, corn) prefer direct sowing into the garden bed. Others (tomatoes, peppers, broccoli, kale) benefit from being started indoors and transplanted. Follow seed packet instructions for planting depths (e.g., lettuce seeds are often surface-sown or planted 1/8 inch deep, while beans are 1 inch deep) and spacing.
- Companion Planting: Strategically plant different species together to enhance growth, deter pests, and attract beneficial insects. For example, planting marigolds near tomatoes can deter nematodes, and basil improves tomato flavor. Nasturtiums can act as a trap crop for aphids.
- Succession Planting: For a continuous harvest, plant small batches of quick-growing crops (lettuce, radishes, cilantro) every 2-3 weeks. As one crop finishes, another is ready to take its place.
Step 6: Pest & Disease Management (Organic)
Maintaining a self sufficient garden from scratch means embracing organic pest and disease control.
- Integrated Pest Management (IPM): This holistic approach combines several strategies.
- Observation: Regularly inspect your plants for early signs of pests or disease. Catching issues early is key.
- Physical Barriers: Use row covers (e.g., Agribon AG-19 floating row cover, 10×20 ft, ~$20) to protect young plants from insect pests like cabbage worms and squash bugs. Install fences (e.g., 2×4 welded wire mesh, 4 ft tall, 50 ft roll ~$70) to keep out deer, rabbits, and other larger animals.
- Hand-Picking: For larger pests like tomato hornworms or squash bugs, simply pick them off and drop them into a bucket of soapy water.
- Companion Planting: As mentioned, certain plants repel pests. Marigolds, garlic, and onions are excellent deterrents.
- Attract Beneficial Insects: Plant flowers like dill, fennel, cosmos, and sweet alyssum to attract ladybugs, lacewings, and parasitic wasps, which prey on common garden pests.
- Organic Sprays & Treatments:
- Neem Oil: An excellent broad-spectrum organic insecticide and fungicide. Bonide Neem Oil Concentrate (16oz, ~$20) can be mixed at a rate of 1-2 tbsp per gallon of water and sprayed on affected plants.
- Insecticidal Soap: Effective against soft-bodied insects like aphids, whiteflies, and spider mites. Garden Safe Insecticidal Soap (24oz ready-to-use, ~$10).
- Bacillus thuringiensis (Bt): A naturally occurring soil bacterium that targets caterpillars and worms. Monterey BT Worm & Caterpillar Killer (16oz, ~$18) is highly effective and safe for beneficial insects.
- Copper or Sulfur Sprays: For fungal diseases like powdery mildew or blight, organic copper (e.g., Bonide Copper Fungicide, ~$15 for 1lb) or sulfur (e.g., Safer Brand Garden Fungicide, ~$10 for 16oz) can be used as a last resort.
Step 7: Harvesting & Seed Saving
The culmination of your efforts is the harvest, and seed saving closes the loop on self-sufficiency.
- Harvesting Techniques:
- Timing: Harvest vegetables at their peak ripeness for best flavor and nutritional value. For example, green beans should snap cleanly, cucumbers should be firm, and tomatoes should be fully colored.
- Frequency: Many crops, like zucchini, cucumbers, and bush beans, produce more if harvested frequently. Pick daily or every other day.
- Tools: Use clean, sharp pruners (e.g., Corona ClassicCUT Bypass Pruner BP 3180, ~$30) or a sharp knife for clean cuts, minimizing damage to the plant.
- Seed Saving: This is where the « self-sufficient » aspect truly shines.
- Selection: Only save seeds from your healthiest, most vigorous plants that show desired traits (disease resistance, good flavor, high yield).
- Isolation: To ensure true-to-type seeds, prevent cross-pollination. This can be challenging for open-pollinated crops that readily cross (e.g., squash, corn). For beginners, focus on self-pollinating plants like beans, peas, lettuce, and tomatoes.
- Processing:
- Dry Seeds (Beans, Peas, Lettuce, Grains): Allow pods/seed heads to dry completely on the plant. Harvest, shell, and clean the seeds, removing chaff.
- Wet Seeds (Tomatoes, Cucumbers, Squash): For tomatoes, ferment the seeds in water for a few days to remove the gel coating and inhibit disease. For cucumbers/squash, scrape out seeds, wash thoroughly, and dry.
- Drying: Spread seeds thinly on screens or paper plates in a cool, dry, well-ventilated area for 1-4 weeks. Ensure they are bone-dry before storage. I aim for less than 8% moisture content.
- Storage: Store seeds in airtight containers (glass jars with desiccant packets work well) in a cool, dark, dry place (ideally 40-50°F and 30-40% humidity). Label clearly with variety and date. Properly stored seeds can remain viable for 3-10 years or more.
Step 8: Season Extension & Winterizing
Extend your harvest and protect your garden for the off-season to truly maximize your self sufficient garden from scratch.
- Cold Frames: Simple structures with a transparent top (glass, polycarbonate, or old windows) that sit over garden beds. They trap solar heat, allowing you to grow cold-hardy crops (lettuce, spinach, kale, radishes) well into winter or start seeds earlier in spring. A basic cold frame can be built from 2×6 lumber and a sheet of polycarbonate for under $100.
- Hoop Houses/Low Tunnels: Larger structures made from flexible hoops (PVC pipe or EMT conduit) covered with greenhouse plastic. These provide more space and greater temperature moderation. A 10×20 ft DIY low tunnel kit can cost $200-$500, while a larger, more robust hoop house kit might be $1,000-$3,000. I use a 6×12 ft low tunnel made from 1/2-inch PVC hoops and 6mil greenhouse plastic, which extends my lettuce and spinach harvest by at least
Step 5: Seed Selection & Planting
The choice of seeds is crucial for a truly self sufficient garden from scratch.
- Choose Heirloom & Open-Pollinated Seeds: These varieties produce seeds that will grow true to type, meaning you can save seeds from your harvest year after year. F1 hybrids, while often vigorous, will not produce consistent offspring from saved seeds. Reputable seed companies include Baker Creek Heirloom Seeds, High Mowing Organic Seeds, and Seed Savers Exchange. Start with common, reliable varieties like ‘Black Krim’ tomatoes, ‘Provider’ bush beans, ‘Waltham Butternut’ squash, and ‘Black Seeded Simpson’ lettuce.
- Start Seeds Indoors (Optional but Recommended): For longer growing seasons or specific crops, starting seeds indoors gives you a head start. Use seed-starting mix (e.g., Espoma Organic Seed Starter Mix, ~$10 for 16qt bag) in seed trays (Jiffy Professional Greenhouse 72-cell kit, ~$15). Provide adequate light with LED grow lights (Barrina T5 2ft 4-pack LED Grow Lights, 20W each, ~$50) for 14-16 hours a day, positioned 2-4 inches above seedlings. Maintain consistent temperatures (65-75°F for most).
- Direct Sowing vs. Transplanting: Some crops (carrots, radishes, beans, corn) prefer direct sowing into the garden bed. Others (tomatoes, peppers, broccoli, kale) benefit from being started indoors and transplanted. Follow seed packet instructions for planting depths (e.g., lettuce seeds are often surface-sown or planted 1/8 inch deep, while beans are 1 inch deep) and spacing.
- Companion Planting: Strategically plant different species together to enhance growth, deter pests, and attract beneficial insects. For example, planting marigolds near tomatoes can deter nematodes, and basil improves tomato flavor. Nasturtiums can act as a trap crop for aphids.
- Succession Planting: For a continuous harvest, plant small batches of quick-growing crops (lettuce, radishes, cilantro) every 2-3 weeks. As one crop finishes, another is ready to take its place.
Step 6: Pest & Disease Management (Organic)
Maintaining a self sufficient garden from scratch means embracing organic pest and disease control.
- Integrated Pest Management (IPM): This holistic approach combines several strategies.
- Observation: Regularly inspect your plants for early signs of pests or disease. Catching issues early is key.
- Physical Barriers: Use row covers (e.g., Agribon AG-19 floating row cover, 10×20 ft, ~$20) to protect young plants from insect pests like cabbage worms and squash bugs. Install fences (e.g., 2×4 welded wire mesh, 4 ft tall, 50 ft roll ~$70) to keep out deer, rabbits, and other larger animals.
- Hand-Picking: For larger pests like tomato hornworms or squash bugs, simply pick them off and drop them into a bucket of soapy water.
- Companion Planting: As mentioned, certain plants repel pests. Marigolds, garlic, and onions are excellent deterrents.
- Attract Beneficial Insects: Plant flowers like dill, fennel, cosmos, and sweet alyssum to attract ladybugs, lacewings, and parasitic wasps, which prey on common garden pests.
- Organic Sprays & Treatments:
- Neem Oil: An excellent broad-spectrum organic insecticide and fungicide. Bonide Neem Oil Concentrate (16oz, ~$20) can be mixed at a rate of 1-2 tbsp per gallon of water and sprayed on affected plants.
- Insecticidal Soap: Effective against soft-bodied insects like aphids, whiteflies, and spider mites. Garden Safe Insecticidal Soap (24oz ready-to-use, ~$10).
- Bacillus thuringiensis (Bt): A naturally occurring soil bacterium that targets caterpillars and worms. Monterey BT Worm & Caterpillar Killer (16oz, ~$18) is highly effective and safe for beneficial insects.
- Copper or Sulfur Sprays: For fungal diseases like powdery mildew or blight, organic copper (e.g., Bonide Copper Fungicide, ~$15 for 1lb) or sulfur (e.g., Safer Brand Garden Fungicide, ~$10 for 16oz) can be used as a last resort.
Step 7: Harvesting & Seed Saving
The culmination of your efforts is the harvest, and seed saving closes the loop on self-sufficiency.
- Harvesting Techniques:
- Timing: Harvest vegetables at their peak ripeness for best flavor and nutritional value. For example, green beans should snap cleanly, cucumbers should be firm, and tomatoes should be fully colored.
- Frequency: Many crops, like zucchini, cucumbers, and bush beans, produce more if harvested frequently. Pick daily or every other day.
- Tools: Use clean, sharp pruners (e.g., Corona ClassicCUT Bypass Pruner BP 3180, ~$30) or a sharp knife for clean cuts, minimizing damage to the plant.
- Seed Saving: This is where the « self-sufficient » aspect truly shines.
- Selection: Only save seeds from your healthiest, most vigorous plants that show desired traits (disease resistance, good flavor, high yield).
- Isolation: To ensure true-to-type seeds, prevent cross-pollination. This can be challenging for open-pollinated crops that readily cross (e.g., squash, corn). For beginners, focus on self-pollinating plants like beans, peas, lettuce, and tomatoes.
- Processing:
- Dry Seeds (Beans, Peas, Lettuce, Grains): Allow pods/seed heads to dry completely on the plant. Harvest, shell, and clean the seeds, removing chaff.
- Wet Seeds (Tomatoes, Cucumbers, Squash): For tomatoes, ferment the seeds in water for a few days to remove the gel coating and inhibit disease. For cucumbers/squash, scrape out seeds, wash thoroughly, and dry.
- Drying: Spread seeds thinly on screens or paper plates in a cool, dry, well-ventilated area for 1-4 weeks. Ensure they are bone-dry before storage. I aim for less than 8% moisture content.
- Storage: Store seeds in airtight containers (glass jars with desiccant packets work well) in a cool, dark, dry place (ideally 40-50°F and 30-40% humidity). Label clearly with variety and date. Properly stored seeds can remain viable for 3-10 years or more.
Step 8: Season Extension & Winterizing
Extend your harvest and protect your garden for the off-season to truly maximize your self sufficient garden from scratch.
- Cold Frames: Simple structures with a transparent top (glass, polycarbonate, or old windows) that sit over garden beds. They trap solar heat, allowing you to grow cold-hardy crops (lettuce, spinach, kale, radishes) well into winter or start seeds earlier in spring. A basic cold frame can be built from 2×6 lumber and a sheet of polycarbonate for under $100.
- Hoop Houses/Low Tunnels: Larger structures made from flexible hoops (PVC pipe or EMT conduit) covered with greenhouse plastic. These provide more space and greater temperature moderation. A 10×20 ft DIY low tunnel kit can cost $200-$500, while a larger, more robust hoop house kit might be $1,000-$3,000. I use a 6×12 ft low tunnel made from 1/2-inch PVC hoops and 6mil greenhouse plastic, which extends my lettuce and spinach harvest by at least
- In-Ground Beds: If you have excellent native soil and good drainage, in-ground beds are the most economical. Double-digging (loosening soil two shovel depths) can significantly improve drainage and aeration. For my main garden, I primarily use in-ground beds, but I focus on building up the soil over time with consistent compost additions and cover cropping. I aim for beds that are no wider than 3-4 feet so I can reach the center without stepping on the soil, compacting it.
- Raised Beds: Raised beds offer numerous advantages, especially for poor soil, heavy clay, or rocky areas. They provide better drainage, warm up faster in spring, reduce compaction, and make weeding and harvesting easier on your back.
- Material Options:
- Untreated Cedar: Naturally rot-resistant and chemical-free. A 4×8 ft bed, 12 inches deep, typically requires three 2x12x8 ft cedar boards, costing around $50-$60 per board (total ~$150-$180) plus corner brackets or screws. My first raised beds were cedar and are still going strong after 7 years.
- Galvanized Steel: Durable, long-lasting, and aesthetically pleasing. Brands like Vego Garden offer modular kits. A Vego Garden 17″ Tall 8-in-1 Metal Raised Garden Bed (can be configured to 4×8 ft) costs approximately $250-$300.
- Concrete Blocks/Stones: Very durable but can leach minerals (though generally safe once weathered) and can be expensive.
- Recycled Materials: Pallets (check for chemical treatment stamps like « HT » for heat-treated), old tires (controversial due to potential chemical leaching).
- Filling Raised Beds: Don’t just fill with topsoil. Use a « Hugelkultur » approach (logs, branches, leaves, then compost, then topsoil) or a mixture of 60% good quality topsoil, 30% compost, and 10% perlite or vermiculite for drainage. A 4x8x1 ft raised bed requires about 32 cubic feet (or ~1.2 cubic yards) of soil mix, which can cost $100-$200 depending on your source.
- Material Options:
Step 4: Water Management & Irrigation
Efficient water management is critical for a self sufficient garden from scratch, especially in off-grid living where water resources might be limited.
- Rainwater Harvesting: This is my primary source of irrigation water. A 55-gallon rain barrel (e.g., EarthMark Rain Barrel, ~$120-$150) connected to a downspout can collect significant water. For larger needs, I use two 275-gallon IBC totes (Intermediate Bulk Containers, often available used for $100-$200 each from food-grade sources) connected in series. A 1,000 sq ft roof can collect approximately 620 gallons of water for every inch of rainfall. My 1,500 sq ft roof provides ample water for my 600 sq ft garden through multiple barrels and totes.
- Drip Irrigation: This is by far the most water-efficient method, delivering water directly to the plant’s root zone, minimizing evaporation and weed growth.
- Components: A typical drip system includes a pressure regulator (e.g., Rain Bird PRV-10, ~$15), a filter (Rain Bird RBY filter, ~$20), main tubing (1/2-inch poly tubing, 100ft ~$25), smaller feeder lines (1/4-inch tubing), and emitters (0.5 GPH or 1 GPH per plant).
- Kits: For beginners, a starter kit like the Rain Bird Drip Irrigation Garden Kit (model DDI-KIT-1P, ~$40-$60) is excellent for a small garden. For larger setups, I use Netafim Techline CV Drip Line (500ft roll, ~$150-$200), which has pressure-compensating emitters built-in, ensuring even watering across long runs.
- Automation: For true self-sufficiency, consider a battery-powered timer (e.g., Orbit B-Hyve Bluetooth Hose Faucet Timer, ~$50) or a solar-powered timer connected to a small 12V pump.
- Solar-Powered Pumps: For lifting water from a well, pond, or large storage tank to your garden, a solar pump is a game-changer. For a smaller drip system, a Shurflo 2088-594-152 Diaphragm Pump (12V, 3.5 GPM, ~$180) can be powered by a single 100W solar panel (e.g., Renogy 100W Monocrystalline Solar Panel, ~$100) and a small 12V battery (e.g., a 50Ah LiFePO4 battery like the Battle Born 50Ah, ~$450). For larger operations or deeper wells, more robust systems are needed. If you’re looking to build out a comprehensive off-grid power system to support your garden’s water needs, or indeed your entire homestead, you might want to explore resources like the Power Grid Generator complete system guide to understand the full scope of what’s possible in terms of energy independence.
Step 5: Seed Selection & Planting
The choice of seeds is crucial for a truly self sufficient garden from scratch.
- Choose Heirloom & Open-Pollinated Seeds: These varieties produce seeds that will grow true to type, meaning you can save seeds from your harvest year after year. F1 hybrids, while often vigorous, will not produce consistent offspring from saved seeds. Reputable seed companies include Baker Creek Heirloom Seeds, High Mowing Organic Seeds, and Seed Savers Exchange. Start with common, reliable varieties like ‘Black Krim’ tomatoes, ‘Provider’ bush beans, ‘Waltham Butternut’ squash, and ‘Black Seeded Simpson’ lettuce.
- Start Seeds Indoors (Optional but Recommended): For longer growing seasons or specific crops, starting seeds indoors gives you a head start. Use seed-starting mix (e.g., Espoma Organic Seed Starter Mix, ~$10 for 16qt bag) in seed trays (Jiffy Professional Greenhouse 72-cell kit, ~$15). Provide adequate light with LED grow lights (Barrina T5 2ft 4-pack LED Grow Lights, 20W each, ~$50) for 14-16 hours a day, positioned 2-4 inches above seedlings. Maintain consistent temperatures (65-75°F for most).
- Direct Sowing vs. Transplanting: Some crops (carrots, radishes, beans, corn) prefer direct sowing into the garden bed. Others (tomatoes, peppers, broccoli, kale) benefit from being started indoors and transplanted. Follow seed packet instructions for planting depths (e.g., lettuce seeds are often surface-sown or planted 1/8 inch deep, while beans are 1 inch deep) and spacing.
- Companion Planting: Strategically plant different species together to enhance growth, deter pests, and attract beneficial insects. For example, planting marigolds near tomatoes can deter nematodes, and basil improves tomato flavor. Nasturtiums can act as a trap crop for aphids.
- Succession Planting: For a continuous harvest, plant small batches of quick-growing crops (lettuce, radishes, cilantro) every 2-3 weeks. As one crop finishes, another is ready to take its place.
Step 6: Pest & Disease Management (Organic)
Maintaining a self sufficient garden from scratch means embracing organic pest and disease control.
- Integrated Pest Management (IPM): This holistic approach combines several strategies.
- Observation: Regularly inspect your plants for early signs of pests or disease. Catching issues early is key.
- Physical Barriers: Use row covers (e.g., Agribon AG-19 floating row cover, 10×20 ft, ~$20) to protect young plants from insect pests like cabbage worms and squash bugs. Install fences (e.g., 2×4 welded wire mesh, 4 ft tall, 50 ft roll ~$70) to keep out deer, rabbits, and other larger animals.
- Hand-Picking: For larger pests like tomato hornworms or squash bugs, simply pick them off and drop them into a bucket of soapy water.
- Companion Planting: As mentioned, certain plants repel pests. Marigolds, garlic, and onions are excellent deterrents.
- Attract Beneficial Insects: Plant flowers like dill, fennel, cosmos, and sweet alyssum to attract ladybugs, lacewings, and parasitic wasps, which prey on common garden pests.
- Organic Sprays & Treatments:
- Neem Oil: An excellent broad-spectrum organic insecticide and fungicide. Bonide Neem Oil Concentrate (16oz, ~$20) can be mixed at a rate of 1-2 tbsp per gallon of water and sprayed on affected plants.
- Insecticidal Soap: Effective against soft-bodied insects like aphids, whiteflies, and spider mites. Garden Safe Insecticidal Soap (24oz ready-to-use, ~$10).
- Bacillus thuringiensis (Bt): A naturally occurring soil bacterium that targets caterpillars and worms. Monterey BT Worm & Caterpillar Killer (16oz, ~$18) is highly effective and safe for beneficial insects.
- Copper or Sulfur Sprays: For fungal diseases like powdery mildew or blight, organic copper (e.g., Bonide Copper Fungicide, ~$15 for 1lb) or sulfur (e.g., Safer Brand Garden Fungicide, ~$10 for 16oz) can be used as a last resort.
Step 7: Harvesting & Seed Saving
The culmination of your efforts is the harvest, and seed saving closes the loop on self-sufficiency.
- Harvesting Techniques:
- Timing: Harvest vegetables at their peak ripeness for best flavor and nutritional value. For example, green beans should snap cleanly, cucumbers should be firm, and tomatoes should be fully colored.
- Frequency: Many crops, like zucchini, cucumbers, and bush beans, produce more if harvested frequently. Pick daily or every other day.
- Tools: Use clean, sharp pruners (e.g., Corona ClassicCUT Bypass Pruner BP 3180, ~$30) or a sharp knife for clean cuts, minimizing damage to the plant.
- Seed Saving: This is where the « self-sufficient » aspect truly shines.
- Selection: Only save seeds from your healthiest, most vigorous plants that show desired traits (disease resistance, good flavor, high yield).
- Isolation: To ensure true-to-type seeds, prevent cross-pollination. This can be challenging for open-pollinated crops that readily cross (e.g., squash, corn). For beginners, focus on self-pollinating plants like beans, peas, lettuce, and tomatoes.
- Processing:
- Dry Seeds (Beans, Peas, Lettuce, Grains): Allow pods/seed heads to dry completely on the plant. Harvest, shell, and clean the seeds, removing chaff.
- Wet Seeds (Tomatoes, Cucumbers, Squash): For tomatoes, ferment the seeds in water for a few days to remove the gel coating and inhibit disease. For cucumbers/squash, scrape out seeds, wash thoroughly, and dry.
- Drying: Spread seeds thinly on screens or paper plates in a cool, dry, well-ventilated area for 1-4 weeks. Ensure they are bone-dry before storage. I aim for less than 8% moisture content.
- Storage: Store seeds in airtight containers (glass jars with desiccant packets work well) in a cool, dark, dry place (ideally 40-50°F and 30-40% humidity). Label clearly with variety and date. Properly stored seeds can remain viable for 3-10 years or more.
Step 8: Season Extension & Winterizing
Extend your harvest and protect your garden for the off-season to truly maximize your self sufficient garden from scratch.
- Cold Frames: Simple structures with a transparent top (glass, polycarbonate, or old windows) that sit over garden beds. They trap solar heat, allowing you to grow cold-hardy crops (lettuce, spinach, kale, radishes) well into winter or start seeds earlier in spring. A basic cold frame can be built from 2×6 lumber and a sheet of polycarbonate for under $100.
- Hoop Houses/Low Tunnels: Larger structures made from flexible hoops (PVC pipe or EMT conduit) covered with greenhouse plastic. These provide more space and greater temperature moderation. A 10×20 ft DIY low tunnel kit can cost $200-$500, while a larger, more robust hoop house kit might be $1,000-$3,000. I use a 6×12 ft low tunnel made from 1/2-inch PVC hoops and 6mil greenhouse plastic, which extends my lettuce and spinach harvest by at least
Deciding between raised beds and in-ground beds depends on your soil, budget, and physical capabilities.
- In-Ground Beds: If you have excellent native soil and good drainage, in-ground beds are the most economical. Double-digging (loosening soil two shovel depths) can significantly improve drainage and aeration. For my main garden, I primarily use in-ground beds, but I focus on building up the soil over time with consistent compost additions and cover cropping. I aim for beds that are no wider than 3-4 feet so I can reach the center without stepping on the soil, compacting it.
- Raised Beds: Raised beds offer numerous advantages, especially for poor soil, heavy clay, or rocky areas. They provide better drainage, warm up faster in spring, reduce compaction, and make weeding and harvesting easier on your back.
- Material Options:
- Untreated Cedar: Naturally rot-resistant and chemical-free. A 4×8 ft bed, 12 inches deep, typically requires three 2x12x8 ft cedar boards, costing around $50-$60 per board (total ~$150-$180) plus corner brackets or screws. My first raised beds were cedar and are still going strong after 7 years.
- Galvanized Steel: Durable, long-lasting, and aesthetically pleasing. Brands like Vego Garden offer modular kits. A Vego Garden 17″ Tall 8-in-1 Metal Raised Garden Bed (can be configured to 4×8 ft) costs approximately $250-$300.
- Concrete Blocks/Stones: Very durable but can leach minerals (though generally safe once weathered) and can be expensive.
- Recycled Materials: Pallets (check for chemical treatment stamps like « HT » for heat-treated), old tires (controversial due to potential chemical leaching).
- Filling Raised Beds: Don’t just fill with topsoil. Use a « Hugelkultur » approach (logs, branches, leaves, then compost, then topsoil) or a mixture of 60% good quality topsoil, 30% compost, and 10% perlite or vermiculite for drainage. A 4x8x1 ft raised bed requires about 32 cubic feet (or ~1.2 cubic yards) of soil mix, which can cost $100-$200 depending on your source.
- Material Options:
Step 4: Water Management & Irrigation
Efficient water management is critical for a self sufficient garden from scratch, especially in off-grid living where water resources might be limited.
- Rainwater Harvesting: This is my primary source of irrigation water. A 55-gallon rain barrel (e.g., EarthMark Rain Barrel, ~$120-$150) connected to a downspout can collect significant water. For larger needs, I use two 275-gallon IBC totes (Intermediate Bulk Containers, often available used for $100-$200 each from food-grade sources) connected in series. A 1,000 sq ft roof can collect approximately 620 gallons of water for every inch of rainfall. My 1,500 sq ft roof provides ample water for my 600 sq ft garden through multiple barrels and totes.
- Drip Irrigation: This is by far the most water-efficient method, delivering water directly to the plant’s root zone, minimizing evaporation and weed growth.
- Components: A typical drip system includes a pressure regulator (e.g., Rain Bird PRV-10, ~$15), a filter (Rain Bird RBY filter, ~$20), main tubing (1/2-inch poly tubing, 100ft ~$25), smaller feeder lines (1/4-inch tubing), and emitters (0.5 GPH or 1 GPH per plant).
- Kits: For beginners, a starter kit like the Rain Bird Drip Irrigation Garden Kit (model DDI-KIT-1P, ~$40-$60) is excellent for a small garden. For larger setups, I use Netafim Techline CV Drip Line (500ft roll, ~$150-$200), which has pressure-compensating emitters built-in, ensuring even watering across long runs.
- Automation: For true self-sufficiency, consider a battery-powered timer (e.g., Orbit B-Hyve Bluetooth Hose Faucet Timer, ~$50) or a solar-powered timer connected to a small 12V pump.
- Solar-Powered Pumps: For lifting water from a well, pond, or large storage tank to your garden, a solar pump is a game-changer. For a smaller drip system, a Shurflo 2088-594-152 Diaphragm Pump (12V, 3.5 GPM, ~$180) can be powered by a single 100W solar panel (e.g., Renogy 100W Monocrystalline Solar Panel, ~$100) and a small 12V battery (e.g., a 50Ah LiFePO4 battery like the Battle Born 50Ah, ~$450). For larger operations or deeper wells, more robust systems are needed. If you’re looking to build out a comprehensive off-grid power system to support your garden’s water needs, or indeed your entire homestead, you might want to explore resources like the Power Grid Generator complete system guide to understand the full scope of what’s possible in terms of energy independence.
Step 5: Seed Selection & Planting
The choice of seeds is crucial for a truly self sufficient garden from scratch.
- Choose Heirloom & Open-Pollinated Seeds: These varieties produce seeds that will grow true to type, meaning you can save seeds from your harvest year after year. F1 hybrids, while often vigorous, will not produce consistent offspring from saved seeds. Reputable seed companies include Baker Creek Heirloom Seeds, High Mowing Organic Seeds, and Seed Savers Exchange. Start with common, reliable varieties like ‘Black Krim’ tomatoes, ‘Provider’ bush beans, ‘Waltham Butternut’ squash, and ‘Black Seeded Simpson’ lettuce.
- Start Seeds Indoors (Optional but Recommended): For longer growing seasons or specific crops, starting seeds indoors gives you a head start. Use seed-starting mix (e.g., Espoma Organic Seed Starter Mix, ~$10 for 16qt bag) in seed trays (Jiffy Professional Greenhouse 72-cell kit, ~$15). Provide adequate light with LED grow lights (Barrina T5 2ft 4-pack LED Grow Lights, 20W each, ~$50) for 14-16 hours a day, positioned 2-4 inches above seedlings. Maintain consistent temperatures (65-75°F for most).
- Direct Sowing vs. Transplanting: Some crops (carrots, radishes, beans, corn) prefer direct sowing into the garden bed. Others (tomatoes, peppers, broccoli, kale) benefit from being started indoors and transplanted. Follow seed packet instructions for planting depths (e.g., lettuce seeds are often surface-sown or planted 1/8 inch deep, while beans are 1 inch deep) and spacing.
- Companion Planting: Strategically plant different species together to enhance growth, deter pests, and attract beneficial insects. For example, planting marigolds near tomatoes can deter nematodes, and basil improves tomato flavor. Nasturtiums can act as a trap crop for aphids.
- Succession Planting: For a continuous harvest, plant small batches of quick-growing crops (lettuce, radishes, cilantro) every 2-3 weeks. As one crop finishes, another is ready to take its place.
Step 6: Pest & Disease Management (Organic)
Maintaining a self sufficient garden from scratch means embracing organic pest and disease control.
- Integrated Pest Management (IPM): This holistic approach combines several strategies.
- Observation: Regularly inspect your plants for early signs of pests or disease. Catching issues early is key.
- Physical Barriers: Use row covers (e.g., Agribon AG-19 floating row cover, 10×20 ft, ~$20) to protect young plants from insect pests like cabbage worms and squash bugs. Install fences (e.g., 2×4 welded wire mesh, 4 ft tall, 50 ft roll ~$70) to keep out deer, rabbits, and other larger animals.
- Hand-Picking: For larger pests like tomato hornworms or squash bugs, simply pick them off and drop them into a bucket of soapy water.
- Companion Planting: As mentioned, certain plants repel pests. Marigolds, garlic, and onions are excellent deterrents.
- Attract Beneficial Insects: Plant flowers like dill, fennel, cosmos, and sweet alyssum to attract ladybugs, lacewings, and parasitic wasps, which prey on common garden pests.
- Organic Sprays & Treatments:
- Neem Oil: An excellent broad-spectrum organic insecticide and fungicide. Bonide Neem Oil Concentrate (16oz, ~$20) can be mixed at a rate of 1-2 tbsp per gallon of water and sprayed on affected plants.
- Insecticidal Soap: Effective against soft-bodied insects like aphids, whiteflies, and spider mites. Garden Safe Insecticidal Soap (24oz ready-to-use, ~$10).
- Bacillus thuringiensis (Bt): A naturally occurring soil bacterium that targets caterpillars and worms. Monterey BT Worm & Caterpillar Killer (16oz, ~$18) is highly effective and safe for beneficial insects.
- Copper or Sulfur Sprays: For fungal diseases like powdery mildew or blight, organic copper (e.g., Bonide Copper Fungicide, ~$15 for 1lb) or sulfur (e.g., Safer Brand Garden Fungicide, ~$10 for 16oz) can be used as a last resort.
Step 7: Harvesting & Seed Saving
The culmination of your efforts is the harvest, and seed saving closes the loop on self-sufficiency.
- Harvesting Techniques:
- Timing: Harvest vegetables at their peak ripeness for best flavor and nutritional value. For example, green beans should snap cleanly, cucumbers should be firm, and tomatoes should be fully colored.
- Frequency: Many crops, like zucchini, cucumbers, and bush beans, produce more if harvested frequently. Pick daily or every other day.
- Tools: Use clean, sharp pruners (e.g., Corona ClassicCUT Bypass Pruner BP 3180, ~$30) or a sharp knife for clean cuts, minimizing damage to the plant.
- Seed Saving: This is where the « self-sufficient » aspect truly shines.
- Selection: Only save seeds from your healthiest, most vigorous plants that show desired traits (disease resistance, good flavor, high yield).
- Isolation: To ensure true-to-type seeds, prevent cross-pollination. This can be challenging for open-pollinated crops that readily cross (e.g., squash, corn). For beginners, focus on self-pollinating plants like beans, peas, lettuce, and tomatoes.
- Processing:
- Dry Seeds (Beans, Peas, Lettuce, Grains): Allow pods/seed heads to dry completely on the plant. Harvest, shell, and clean the seeds, removing chaff.
- Wet Seeds (Tomatoes, Cucumbers, Squash): For tomatoes, ferment the seeds in water for a few days to remove the gel coating and inhibit disease. For cucumbers/squash, scrape out seeds, wash thoroughly, and dry.
- Drying: Spread seeds thinly on screens or paper plates in a cool, dry, well-ventilated area for 1-4 weeks. Ensure they are bone-dry before storage. I aim for less than 8% moisture content.
- Storage: Store seeds in airtight containers (glass jars with desiccant packets work well) in a cool, dark, dry place (ideally 40-50°F and 30-40% humidity). Label clearly with variety and date. Properly stored seeds can remain viable for 3-10 years or more.
Step 8: Season Extension & Winterizing
Extend your harvest and protect your garden for the off-season to truly maximize your self sufficient garden from scratch.
- Cold Frames: Simple structures with a transparent top (glass, polycarbonate, or old windows) that sit over garden beds. They trap solar heat, allowing you to grow cold-hardy crops (lettuce, spinach, kale, radishes) well into winter or start seeds earlier in spring. A basic cold frame can be built from 2×6 lumber and a sheet of polycarbonate for under $100.
- Hoop Houses/Low Tunnels: Larger structures made from flexible hoops (PVC pipe or EMT conduit) covered with greenhouse plastic. These provide more space and greater temperature moderation. A 10×20 ft DIY low tunnel kit can cost $200-$500, while a larger, more robust hoop house kit might be $1,000-$3,000. I use a 6×12 ft low tunnel made from 1/2-inch PVC hoops and 6mil greenhouse plastic, which extends my lettuce and spinach harvest by at least
Healthy soil is the bedrock of a productive, self-sufficient garden. You can’t guess what your soil needs; you have to test it.
- Perform a Soil Test: A professional soil test will give you precise data on your soil’s pH, nutrient levels (N-P-K), and organic matter content. I recommend sending a sample to your local agricultural extension office; it typically costs $20-$50 and provides detailed recommendations. Alternatively, for a quick homeowner check, a Rapitest Soil Test Kit (40-test kit, model 1663, ~$20 on Amazon) provides a good baseline for pH, Nitrogen, Phosphorus, and Potash. Aim for a pH between 6.0 and 7.0 for most vegetables.
- Amend for pH Imbalance: If your soil is too acidic (below 6.0), add agricultural lime (dolomitic lime adds magnesium, calcitic lime adds calcium). Apply 5-10 lbs per 100 sq ft for a moderate adjustment. If it’s too alkaline (above 7.0), add elemental sulfur (e.g., Espoma Soil Acidifier, ~$15 for 6.75 lbs) or generous amounts of organic matter like peat moss or pine needles.
- Build Organic Matter: This is the single most important step for long-term soil health. Organic matter improves soil structure, water retention, drainage, and nutrient availability. Incorporate 2-4 inches of high-quality compost into your top 6-12 inches of soil annually. I make my own compost from kitchen scraps, garden waste, and shredded leaves, but you can purchase it. Local nurseries often sell bulk compost for $30-$50 per cubic yard. Aged manure (from chickens, cows, or horses – ensure it’s well-rotted to avoid burning plants) is also excellent.
- Address Nutrient Deficiencies: Based on your soil test, add specific organic amendments. If Nitrogen (N) is low, add blood meal (12-0-0, ~$20 for 3 lbs) or feather meal. For Phosphorus (P), use bone meal (3-15-0, ~$15 for 3 lbs) or rock phosphate. For Potassium (K), greensand (0-0-2.5, ~$25 for 5 lbs) or kelp meal are good choices. I rely heavily on Espoma Organic Garden-tone (5-3-3, ~$25 for an 8lb bag) as a balanced, all-purpose organic fertilizer during planting.
Step 3: Garden Bed Preparation
Deciding between raised beds and in-ground beds depends on your soil, budget, and physical capabilities.
- In-Ground Beds: If you have excellent native soil and good drainage, in-ground beds are the most economical. Double-digging (loosening soil two shovel depths) can significantly improve drainage and aeration. For my main garden, I primarily use in-ground beds, but I focus on building up the soil over time with consistent compost additions and cover cropping. I aim for beds that are no wider than 3-4 feet so I can reach the center without stepping on the soil, compacting it.
- Raised Beds: Raised beds offer numerous advantages, especially for poor soil, heavy clay, or rocky areas. They provide better drainage, warm up faster in spring, reduce compaction, and make weeding and harvesting easier on your back.
- Material Options:
- Untreated Cedar: Naturally rot-resistant and chemical-free. A 4×8 ft bed, 12 inches deep, typically requires three 2x12x8 ft cedar boards, costing around $50-$60 per board (total ~$150-$180) plus corner brackets or screws. My first raised beds were cedar and are still going strong after 7 years.
- Galvanized Steel: Durable, long-lasting, and aesthetically pleasing. Brands like Vego Garden offer modular kits. A Vego Garden 17″ Tall 8-in-1 Metal Raised Garden Bed (can be configured to 4×8 ft) costs approximately $250-$300.
- Concrete Blocks/Stones: Very durable but can leach minerals (though generally safe once weathered) and can be expensive.
- Recycled Materials: Pallets (check for chemical treatment stamps like « HT » for heat-treated), old tires (controversial due to potential chemical leaching).
- Filling Raised Beds: Don’t just fill with topsoil. Use a « Hugelkultur » approach (logs, branches, leaves, then compost, then topsoil) or a mixture of 60% good quality topsoil, 30% compost, and 10% perlite or vermiculite for drainage. A 4x8x1 ft raised bed requires about 32 cubic feet (or ~1.2 cubic yards) of soil mix, which can cost $100-$200 depending on your source.
- Material Options:
Step 4: Water Management & Irrigation
Efficient water management is critical for a self sufficient garden from scratch, especially in off-grid living where water resources might be limited.
- Rainwater Harvesting: This is my primary source of irrigation water. A 55-gallon rain barrel (e.g., EarthMark Rain Barrel, ~$120-$150) connected to a downspout can collect significant water. For larger needs, I use two 275-gallon IBC totes (Intermediate Bulk Containers, often available used for $100-$200 each from food-grade sources) connected in series. A 1,000 sq ft roof can collect approximately 620 gallons of water for every inch of rainfall. My 1,500 sq ft roof provides ample water for my 600 sq ft garden through multiple barrels and totes.
- Drip Irrigation: This is by far the most water-efficient method, delivering water directly to the plant’s root zone, minimizing evaporation and weed growth.
- Components: A typical drip system includes a pressure regulator (e.g., Rain Bird PRV-10, ~$15), a filter (Rain Bird RBY filter, ~$20), main tubing (1/2-inch poly tubing, 100ft ~$25), smaller feeder lines (1/4-inch tubing), and emitters (0.5 GPH or 1 GPH per plant).
- Kits: For beginners, a starter kit like the Rain Bird Drip Irrigation Garden Kit (model DDI-KIT-1P, ~$40-$60) is excellent for a small garden. For larger setups, I use Netafim Techline CV Drip Line (500ft roll, ~$150-$200), which has pressure-compensating emitters built-in, ensuring even watering across long runs.
- Automation: For true self-sufficiency, consider a battery-powered timer (e.g., Orbit B-Hyve Bluetooth Hose Faucet Timer, ~$50) or a solar-powered timer connected to a small 12V pump.
- Solar-Powered Pumps: For lifting water from a well, pond, or large storage tank to your garden, a solar pump is a game-changer. For a smaller drip system, a Shurflo 2088-594-152 Diaphragm Pump (12V, 3.5 GPM, ~$180) can be powered by a single 100W solar panel (e.g., Renogy 100W Monocrystalline Solar Panel, ~$100) and a small 12V battery (e.g., a 50Ah LiFePO4 battery like the Battle Born 50Ah, ~$450). For larger operations or deeper wells, more robust systems are needed. If you’re looking to build out a comprehensive off-grid power system to support your garden’s water needs, or indeed your entire homestead, you might want to explore resources like the Power Grid Generator complete system guide to understand the full scope of what’s possible in terms of energy independence.
Step 5: Seed Selection & Planting
The choice of seeds is crucial for a truly self sufficient garden from scratch.
- Choose Heirloom & Open-Pollinated Seeds: These varieties produce seeds that will grow true to type, meaning you can save seeds from your harvest year after year. F1 hybrids, while often vigorous, will not produce consistent offspring from saved seeds. Reputable seed companies include Baker Creek Heirloom Seeds, High Mowing Organic Seeds, and Seed Savers Exchange. Start with common, reliable varieties like ‘Black Krim’ tomatoes, ‘Provider’ bush beans, ‘Waltham Butternut’ squash, and ‘Black Seeded Simpson’ lettuce.
- Start Seeds Indoors (Optional but Recommended): For longer growing seasons or specific crops, starting seeds indoors gives you a head start. Use seed-starting mix (e.g., Espoma Organic Seed Starter Mix, ~$10 for 16qt bag) in seed trays (Jiffy Professional Greenhouse 72-cell kit, ~$15). Provide adequate light with LED grow lights (Barrina T5 2ft 4-pack LED Grow Lights, 20W each, ~$50) for 14-16 hours a day, positioned 2-4 inches above seedlings. Maintain consistent temperatures (65-75°F for most).
- Direct Sowing vs. Transplanting: Some crops (carrots, radishes, beans, corn) prefer direct sowing into the garden bed. Others (tomatoes, peppers, broccoli, kale) benefit from being started indoors and transplanted. Follow seed packet instructions for planting depths (e.g., lettuce seeds are often surface-sown or planted 1/8 inch deep, while beans are 1 inch deep) and spacing.
- Companion Planting: Strategically plant different species together to enhance growth, deter pests, and attract beneficial insects. For example, planting marigolds near tomatoes can deter nematodes, and basil improves tomato flavor. Nasturtiums can act as a trap crop for aphids.
- Succession Planting: For a continuous harvest, plant small batches of quick-growing crops (lettuce, radishes, cilantro) every 2-3 weeks. As one crop finishes, another is ready to take its place.
Step 6: Pest & Disease Management (Organic)
Maintaining a self sufficient garden from scratch means embracing organic pest and disease control.
- Integrated Pest Management (IPM): This holistic approach combines several strategies.
- Observation: Regularly inspect your plants for early signs of pests or disease. Catching issues early is key.
- Physical Barriers: Use row covers (e.g., Agribon AG-19 floating row cover, 10×20 ft, ~$20) to protect young plants from insect pests like cabbage worms and squash bugs. Install fences (e.g., 2×4 welded wire mesh, 4 ft tall, 50 ft roll ~$70) to keep out deer, rabbits, and other larger animals.
- Hand-Picking: For larger pests like tomato hornworms or squash bugs, simply pick them off and drop them into a bucket of soapy water.
- Companion Planting: As mentioned, certain plants repel pests. Marigolds, garlic, and onions are excellent deterrents.
- Attract Beneficial Insects: Plant flowers like dill, fennel, cosmos, and sweet alyssum to attract ladybugs, lacewings, and parasitic wasps, which prey on common garden pests.
- Organic Sprays & Treatments:
- Neem Oil: An excellent broad-spectrum organic insecticide and fungicide. Bonide Neem Oil Concentrate (16oz, ~$20) can be mixed at a rate of 1-2 tbsp per gallon of water and sprayed on affected plants.
- Insecticidal Soap: Effective against soft-bodied insects like aphids, whiteflies, and spider mites. Garden Safe Insecticidal Soap (24oz ready-to-use, ~$10).
- Bacillus thuringiensis (Bt): A naturally occurring soil bacterium that targets caterpillars and worms. Monterey BT Worm & Caterpillar Killer (16oz, ~$18) is highly effective and safe for beneficial insects.
- Copper or Sulfur Sprays: For fungal diseases like powdery mildew or blight, organic copper (e.g., Bonide Copper Fungicide, ~$15 for 1lb) or sulfur (e.g., Safer Brand Garden Fungicide, ~$10 for 16oz) can be used as a last resort.
Step 7: Harvesting & Seed Saving
The culmination of your efforts is the harvest, and seed saving closes the loop on self-sufficiency.
- Harvesting Techniques:
- Timing: Harvest vegetables at their peak ripeness for best flavor and nutritional value. For example, green beans should snap cleanly, cucumbers should be firm, and tomatoes should be fully colored.
- Frequency: Many crops, like zucchini, cucumbers, and bush beans, produce more if harvested frequently. Pick daily or every other day.
- Tools: Use clean, sharp pruners (e.g., Corona ClassicCUT Bypass Pruner BP 3180, ~$30) or a sharp knife for clean cuts, minimizing damage to the plant.
- Seed Saving: This is where the « self-sufficient » aspect truly shines.
- Selection: Only save seeds from your healthiest, most vigorous plants that show desired traits (disease resistance, good flavor, high yield).
- Isolation: To ensure true-to-type seeds, prevent cross-pollination. This can be challenging for open-pollinated crops that readily cross (e.g., squash, corn). For beginners, focus on self-pollinating plants like beans, peas, lettuce, and tomatoes.
- Processing:
- Dry Seeds (Beans, Peas, Lettuce, Grains): Allow pods/seed heads to dry completely on the plant. Harvest, shell, and clean the seeds, removing chaff.
- Wet Seeds (Tomatoes, Cucumbers, Squash): For tomatoes, ferment the seeds in water for a few days to remove the gel coating and inhibit disease. For cucumbers/squash, scrape out seeds, wash thoroughly, and dry.
- Drying: Spread seeds thinly on screens or paper plates in a cool, dry, well-ventilated area for 1-4 weeks. Ensure they are bone-dry before storage. I aim for less than 8% moisture content.
- Storage: Store seeds in airtight containers (glass jars with desiccant packets work well) in a cool, dark, dry place (ideally 40-50°F and 30-40% humidity). Label clearly with variety and date. Properly stored seeds can remain viable for 3-10 years or more.
Step 8: Season Extension & Winterizing
Extend your harvest and protect your garden for the off-season to truly maximize your self sufficient garden from scratch.
- Cold Frames: Simple structures with a transparent top (glass, polycarbonate, or old windows) that sit over garden beds. They trap solar heat, allowing you to grow cold-hardy crops (lettuce, spinach, kale, radishes) well into winter or start seeds earlier in spring. A basic cold frame can be built from 2×6 lumber and a sheet of polycarbonate for under $100.
- Hoop Houses/Low Tunnels: Larger structures made from flexible hoops (PVC pipe or EMT conduit) covered with greenhouse plastic. These provide more space and greater temperature moderation. A 10×20 ft DIY low tunnel kit can cost $200-$500, while a larger, more robust hoop house kit might be $1,000-$3,000. I use a 6×12 ft low tunnel made from 1/2-inch PVC hoops and 6mil greenhouse plastic, which extends my lettuce and spinach harvest by at least
- Rainwater Harvesting: This is my primary source of irrigation water. A 55-gallon rain barrel (e.g., EarthMark Rain Barrel, ~$120-$150) connected to a downspout can collect significant water. For larger needs, I use two 275-gallon IBC totes (Intermediate Bulk Containers, often available used for $100-$200 each from food-grade sources) connected in series. A 1,000 sq ft roof can collect approximately 620 gallons of water for every inch of rainfall. My 1,500 sq ft roof provides ample water for my 600 sq ft garden through multiple barrels and totes.
- Drip Irrigation: This is by far the most water-efficient method, delivering water directly to the plant’s root zone, minimizing evaporation and weed growth.
- Components: A typical drip system includes a pressure regulator (e.g., Rain Bird PRV-10, ~$15), a filter (Rain Bird RBY filter, ~$20), main tubing (1/2-inch poly tubing, 100ft ~$25), smaller feeder lines (1/4-inch tubing), and emitters (0.5 GPH or 1 GPH per plant).
- Kits: For beginners, a starter kit like the Rain Bird Drip Irrigation Garden Kit (model DDI-KIT-1P, ~$40-$60) is excellent for a small garden. For larger setups, I use Netafim Techline CV Drip Line (500ft roll, ~$150-$200), which has pressure-compensating emitters built-in, ensuring even watering across long runs.
- Automation: For true self-sufficiency, consider a battery-powered timer (e.g., Orbit B-Hyve Bluetooth Hose Faucet Timer, ~$50) or a solar-powered timer connected to a small 12V pump.
- Solar-Powered Pumps: For lifting water from a well, pond, or large storage tank to your garden, a solar pump is a game-changer. For a smaller drip system, a Shurflo 2088-594-152 Diaphragm Pump (12V, 3.5 GPM, ~$180) can be powered by a single 100W solar panel (e.g., Renogy 100W Monocrystalline Solar Panel, ~$100) and a small 12V battery (e.g., a 50Ah LiFePO4 battery like the Battle Born 50Ah, ~$450). For larger operations or deeper wells, more robust systems are needed. If you’re looking to build out a comprehensive off-grid power system to support your garden’s water needs, or indeed your entire homestead, you might want to explore resources like the Power Grid Generator complete system guide to understand the full scope of what’s possible in terms of energy independence.
Step 5: Seed Selection & Planting
The choice of seeds is crucial for a truly self sufficient garden from scratch.
- Choose Heirloom & Open-Pollinated Seeds: These varieties produce seeds that will grow true to type, meaning you can save seeds from your harvest year after year. F1 hybrids, while often vigorous, will not produce consistent offspring from saved seeds. Reputable seed companies include Baker Creek Heirloom Seeds, High Mowing Organic Seeds, and Seed Savers Exchange. Start with common, reliable varieties like ‘Black Krim’ tomatoes, ‘Provider’ bush beans, ‘Waltham Butternut’ squash, and ‘Black Seeded Simpson’ lettuce.
- Start Seeds Indoors (Optional but Recommended): For longer growing seasons or specific crops, starting seeds indoors gives you a head start. Use seed-starting mix (e.g., Espoma Organic Seed Starter Mix, ~$10 for 16qt bag) in seed trays (Jiffy Professional Greenhouse 72-cell kit, ~$15). Provide adequate light with LED grow lights (Barrina T5 2ft 4-pack LED Grow Lights, 20W each, ~$50) for 14-16 hours a day, positioned 2-4 inches above seedlings. Maintain consistent temperatures (65-75°F for most).
- Direct Sowing vs. Transplanting: Some crops (carrots, radishes, beans, corn) prefer direct sowing into the garden bed. Others (tomatoes, peppers, broccoli, kale) benefit from being started indoors and transplanted. Follow seed packet instructions for planting depths (e.g., lettuce seeds are often surface-sown or planted 1/8 inch deep, while beans are 1 inch deep) and spacing.
- Companion Planting: Strategically plant different species together to enhance growth, deter pests, and attract beneficial insects. For example, planting marigolds near tomatoes can deter nematodes, and basil improves tomato flavor. Nasturtiums can act as a trap crop for aphids.
- Succession Planting: For a continuous harvest, plant small batches of quick-growing crops (lettuce, radishes, cilantro) every 2-3 weeks. As one crop finishes, another is ready to take its place.
Step 6: Pest & Disease Management (Organic)
Maintaining a self sufficient garden from scratch means embracing organic pest and disease control.
- Integrated Pest Management (IPM): This holistic approach combines several strategies.
- Observation: Regularly inspect your plants for early signs of pests or disease. Catching issues early is key.
- Physical Barriers: Use row covers (e.g., Agribon AG-19 floating row cover, 10×20 ft, ~$20) to protect young plants from insect pests like cabbage worms and squash bugs. Install fences (e.g., 2×4 welded wire mesh, 4 ft tall, 50 ft roll ~$70) to keep out deer, rabbits, and other larger animals.
- Hand-Picking: For larger pests like tomato hornworms or squash bugs, simply pick them off and drop them into a bucket of soapy water.
- Companion Planting: As mentioned, certain plants repel pests. Marigolds, garlic, and onions are excellent deterrents.
- Attract Beneficial Insects: Plant flowers like dill, fennel, cosmos, and sweet alyssum to attract ladybugs, lacewings, and parasitic wasps, which prey on common garden pests.
- Organic Sprays & Treatments:
- Neem Oil: An excellent broad-spectrum organic insecticide and fungicide. Bonide Neem Oil Concentrate (16oz, ~$20) can be mixed at a rate of 1-2 tbsp per gallon of water and sprayed on affected plants.
- Insecticidal Soap: Effective against soft-bodied insects like aphids, whiteflies, and spider mites. Garden Safe Insecticidal Soap (24oz ready-to-use, ~$10).
- Bacillus thuringiensis (Bt): A naturally occurring soil bacterium that targets caterpillars and worms. Monterey BT Worm & Caterpillar Killer (16oz, ~$18) is highly effective and safe for beneficial insects.
- Copper or Sulfur Sprays: For fungal diseases like powdery mildew or blight, organic copper (e.g., Bonide Copper Fungicide, ~$15 for 1lb) or sulfur (e.g., Safer Brand Garden Fungicide, ~$10 for 16oz) can be used as a last resort.
Step 7: Harvesting & Seed Saving
The culmination of your efforts is the harvest, and seed saving closes the loop on self-sufficiency.
- Harvesting Techniques:
- Timing: Harvest vegetables at their peak ripeness for best flavor and nutritional value. For example, green beans should snap cleanly, cucumbers should be firm, and tomatoes should be fully colored.
- Frequency: Many crops, like zucchini, cucumbers, and bush beans, produce more if harvested frequently. Pick daily or every other day.
- Tools: Use clean, sharp pruners (e.g., Corona ClassicCUT Bypass Pruner BP 3180, ~$30) or a sharp knife for clean cuts, minimizing damage to the plant.
- Seed Saving: This is where the « self-sufficient » aspect truly shines.
- Selection: Only save seeds from your healthiest, most vigorous plants that show desired traits (disease resistance, good flavor, high yield).
- Isolation: To ensure true-to-type seeds, prevent cross-pollination. This can be challenging for open-pollinated crops that readily cross (e.g., squash, corn). For beginners, focus on self-pollinating plants like beans, peas, lettuce, and tomatoes.
- Processing:
- Dry Seeds (Beans, Peas, Lettuce, Grains): Allow pods/seed heads to dry completely on the plant. Harvest, shell, and clean the seeds, removing chaff.
- Wet Seeds (Tomatoes, Cucumbers, Squash): For tomatoes, ferment the seeds in water for a few days to remove the gel coating and inhibit disease. For cucumbers/squash, scrape out seeds, wash thoroughly, and dry.
- Drying: Spread seeds thinly on screens or paper plates in a cool, dry, well-ventilated area for 1-4 weeks. Ensure they are bone-dry before storage. I aim for less than 8% moisture content.
- Storage: Store seeds in airtight containers (glass jars with desiccant packets work well) in a cool, dark, dry place (ideally 40-50°F and 30-40% humidity). Label clearly with variety and date. Properly stored seeds can remain viable for 3-10 years or more.
Step 8: Season Extension & Winterizing
Extend your harvest and protect your garden for the off-season to truly maximize your self sufficient garden from scratch.
- Cold Frames: Simple structures with a transparent top (glass, polycarbonate, or old windows) that sit over garden beds. They trap solar heat, allowing you to grow cold-hardy crops (lettuce, spinach, kale, radishes) well into winter or start seeds earlier in spring. A basic cold frame can be built from 2×6 lumber and a sheet of polycarbonate for under $100.
- Hoop Houses/Low Tunnels: Larger structures made from flexible hoops (PVC pipe or EMT conduit) covered with greenhouse plastic. These provide more space and greater temperature moderation. A 10×20 ft DIY low tunnel kit can cost $200-$500, while a larger, more robust hoop house kit might be $1,000-$3,000. I use a 6×12 ft low tunnel made from 1/2-inch PVC hoops and 6mil greenhouse plastic, which extends my lettuce and spinach harvest by at least
- In-Ground Beds: If you have excellent native soil and good drainage, in-ground beds are the most economical. Double-digging (loosening soil two shovel depths) can significantly improve drainage and aeration. For my main garden, I primarily use in-ground beds, but I focus on building up the soil over time with consistent compost additions and cover cropping. I aim for beds that are no wider than 3-4 feet so I can reach the center without stepping on the soil, compacting it.
- Raised Beds: Raised beds offer numerous advantages, especially for poor soil, heavy clay, or rocky areas. They provide better drainage, warm up faster in spring, reduce compaction, and make weeding and harvesting easier on your back.
- Material Options:
- Untreated Cedar: Naturally rot-resistant and chemical-free. A 4×8 ft bed, 12 inches deep, typically requires three 2x12x8 ft cedar boards, costing around $50-$60 per board (total ~$150-$180) plus corner brackets or screws. My first raised beds were cedar and are still going strong after 7 years.
- Galvanized Steel: Durable, long-lasting, and aesthetically pleasing. Brands like Vego Garden offer modular kits. A Vego Garden 17″ Tall 8-in-1 Metal Raised Garden Bed (can be configured to 4×8 ft) costs approximately $250-$300.
- Concrete Blocks/Stones: Very durable but can leach minerals (though generally safe once weathered) and can be expensive.
- Recycled Materials: Pallets (check for chemical treatment stamps like « HT » for heat-treated), old tires (controversial due to potential chemical leaching).
- Filling Raised Beds: Don’t just fill with topsoil. Use a « Hugelkultur » approach (logs, branches, leaves, then compost, then topsoil) or a mixture of 60% good quality topsoil, 30% compost, and 10% perlite or vermiculite for drainage. A 4x8x1 ft raised bed requires about 32 cubic feet (or ~1.2 cubic yards) of soil mix, which can cost $100-$200 depending on your source.
- Material Options:
Step 4: Water Management & Irrigation
Efficient water management is critical for a self sufficient garden from scratch, especially in off-grid living where water resources might be limited.
- Rainwater Harvesting: This is my primary source of irrigation water. A 55-gallon rain barrel (e.g., EarthMark Rain Barrel, ~$120-$150) connected to a downspout can collect significant water. For larger needs, I use two 275-gallon IBC totes (Intermediate Bulk Containers, often available used for $100-$200 each from food-grade sources) connected in series. A 1,000 sq ft roof can collect approximately 620 gallons of water for every inch of rainfall. My 1,500 sq ft roof provides ample water for my 600 sq ft garden through multiple barrels and totes.
- Drip Irrigation: This is by far the most water-efficient method, delivering water directly to the plant’s root zone, minimizing evaporation and weed growth.
- Components: A typical drip system includes a pressure regulator (e.g., Rain Bird PRV-10, ~$15), a filter (Rain Bird RBY filter, ~$20), main tubing (1/2-inch poly tubing, 100ft ~$25), smaller feeder lines (1/4-inch tubing), and emitters (0.5 GPH or 1 GPH per plant).
- Kits: For beginners, a starter kit like the Rain Bird Drip Irrigation Garden Kit (model DDI-KIT-1P, ~$40-$60) is excellent for a small garden. For larger setups, I use Netafim Techline CV Drip Line (500ft roll, ~$150-$200), which has pressure-compensating emitters built-in, ensuring even watering across long runs.
- Automation: For true self-sufficiency, consider a battery-powered timer (e.g., Orbit B-Hyve Bluetooth Hose Faucet Timer, ~$50) or a solar-powered timer connected to a small 12V pump.
- Solar-Powered Pumps: For lifting water from a well, pond, or large storage tank to your garden, a solar pump is a game-changer. For a smaller drip system, a Shurflo 2088-594-152 Diaphragm Pump (12V, 3.5 GPM, ~$180) can be powered by a single 100W solar panel (e.g., Renogy 100W Monocrystalline Solar Panel, ~$100) and a small 12V battery (e.g., a 50Ah LiFePO4 battery like the Battle Born 50Ah, ~$450). For larger operations or deeper wells, more robust systems are needed. If you’re looking to build out a comprehensive off-grid power system to support your garden’s water needs, or indeed your entire homestead, you might want to explore resources like the Power Grid Generator complete system guide to understand the full scope of what’s possible in terms of energy independence.
Step 5: Seed Selection & Planting
The choice of seeds is crucial for a truly self sufficient garden from scratch.
- Choose Heirloom & Open-Pollinated Seeds: These varieties produce seeds that will grow true to type, meaning you can save seeds from your harvest year after year. F1 hybrids, while often vigorous, will not produce consistent offspring from saved seeds. Reputable seed companies include Baker Creek Heirloom Seeds, High Mowing Organic Seeds, and Seed Savers Exchange. Start with common, reliable varieties like ‘Black Krim’ tomatoes, ‘Provider’ bush beans, ‘Waltham Butternut’ squash, and ‘Black Seeded Simpson’ lettuce.
- Start Seeds Indoors (Optional but Recommended): For longer growing seasons or specific crops, starting seeds indoors gives you a head start. Use seed-starting mix (e.g., Espoma Organic Seed Starter Mix, ~$10 for 16qt bag) in seed trays (Jiffy Professional Greenhouse 72-cell kit, ~$15). Provide adequate light with LED grow lights (Barrina T5 2ft 4-pack LED Grow Lights, 20W each, ~$50) for 14-16 hours a day, positioned 2-4 inches above seedlings. Maintain consistent temperatures (65-75°F for most).
- Direct Sowing vs. Transplanting: Some crops (carrots, radishes, beans, corn) prefer direct sowing into the garden bed. Others (tomatoes, peppers, broccoli, kale) benefit from being started indoors and transplanted. Follow seed packet instructions for planting depths (e.g., lettuce seeds are often surface-sown or planted 1/8 inch deep, while beans are 1 inch deep) and spacing.
- Companion Planting: Strategically plant different species together to enhance growth, deter pests, and attract beneficial insects. For example, planting marigolds near tomatoes can deter nematodes, and basil improves tomato flavor. Nasturtiums can act as a trap crop for aphids.
- Succession Planting: For a continuous harvest, plant small batches of quick-growing crops (lettuce, radishes, cilantro) every 2-3 weeks. As one crop finishes, another is ready to take its place.
Step 6: Pest & Disease Management (Organic)
Maintaining a self sufficient garden from scratch means embracing organic pest and disease control.
- Integrated Pest Management (IPM): This holistic approach combines several strategies.
- Observation: Regularly inspect your plants for early signs of pests or disease. Catching issues early is key.
- Physical Barriers: Use row covers (e.g., Agribon AG-19 floating row cover, 10×20 ft, ~$20) to protect young plants from insect pests like cabbage worms and squash bugs. Install fences (e.g., 2×4 welded wire mesh, 4 ft tall, 50 ft roll ~$70) to keep out deer, rabbits, and other larger animals.
- Hand-Picking: For larger pests like tomato hornworms or squash bugs, simply pick them off and drop them into a bucket of soapy water.
- Companion Planting: As mentioned, certain plants repel pests. Marigolds, garlic, and onions are excellent deterrents.
- Attract Beneficial Insects: Plant flowers like dill, fennel, cosmos, and sweet alyssum to attract ladybugs, lacewings, and parasitic wasps, which prey on common garden pests.
- Organic Sprays & Treatments:
- Neem Oil: An excellent broad-spectrum organic insecticide and fungicide. Bonide Neem Oil Concentrate (16oz, ~$20) can be mixed at a rate of 1-2 tbsp per gallon of water and sprayed on affected plants.
- Insecticidal Soap: Effective against soft-bodied insects like aphids, whiteflies, and spider mites. Garden Safe Insecticidal Soap (24oz ready-to-use, ~$10).
- Bacillus thuringiensis (Bt): A naturally occurring soil bacterium that targets caterpillars and worms. Monterey BT Worm & Caterpillar Killer (16oz, ~$18) is highly effective and safe for beneficial insects.
- Copper or Sulfur Sprays: For fungal diseases like powdery mildew or blight, organic copper (e.g., Bonide Copper Fungicide, ~$15 for 1lb) or sulfur (e.g., Safer Brand Garden Fungicide, ~$10 for 16oz) can be used as a last resort.
Step 7: Harvesting & Seed Saving
The culmination of your efforts is the harvest, and seed saving closes the loop on self-sufficiency.
- Harvesting Techniques:
- Timing: Harvest vegetables at their peak ripeness for best flavor and nutritional value. For example, green beans should snap cleanly, cucumbers should be firm, and tomatoes should be fully colored.
- Frequency: Many crops, like zucchini, cucumbers, and bush beans, produce more if harvested frequently. Pick daily or every other day.
- Tools: Use clean, sharp pruners (e.g., Corona ClassicCUT Bypass Pruner BP 3180, ~$30) or a sharp knife for clean cuts, minimizing damage to the plant.
- Seed Saving: This is where the « self-sufficient » aspect truly shines.
- Selection: Only save seeds from your healthiest, most vigorous plants that show desired traits (disease resistance, good flavor, high yield).
- Isolation: To ensure true-to-type seeds, prevent cross-pollination. This can be challenging for open-pollinated crops that readily cross (e.g., squash, corn). For beginners, focus on self-pollinating plants like beans, peas, lettuce, and tomatoes.
- Processing:
- Dry Seeds (Beans, Peas, Lettuce, Grains): Allow pods/seed heads to dry completely on the plant. Harvest, shell, and clean the seeds, removing chaff.
- Wet Seeds (Tomatoes, Cucumbers, Squash): For tomatoes, ferment the seeds in water for a few days to remove the gel coating and inhibit disease. For cucumbers/squash, scrape out seeds, wash thoroughly, and dry.
- Drying: Spread seeds thinly on screens or paper plates in a cool, dry, well-ventilated area for 1-4 weeks. Ensure they are bone-dry before storage. I aim for less than 8% moisture content.
- Storage: Store seeds in airtight containers (glass jars with desiccant packets work well) in a cool, dark, dry place (ideally 40-50°F and 30-40% humidity). Label clearly with variety and date. Properly stored seeds can remain viable for 3-10 years or more.
Step 8: Season Extension & Winterizing
Extend your harvest and protect your garden for the off-season to truly maximize your self sufficient garden from scratch.
- Cold Frames: Simple structures with a transparent top (glass, polycarbonate, or old windows) that sit over garden beds. They trap solar heat, allowing you to grow cold-hardy crops (lettuce, spinach, kale, radishes) well into winter or start seeds earlier in spring. A basic cold frame can be built from 2×6 lumber and a sheet of polycarbonate for under $100.
- Hoop Houses/Low Tunnels: Larger structures made from flexible hoops (PVC pipe or EMT conduit) covered with greenhouse plastic. These provide more space and greater temperature moderation. A 10×20 ft DIY low tunnel kit can cost $200-$500, while a larger, more robust hoop house kit might be $1,000-$3,000. I use a 6×12 ft low tunnel made from 1/2-inch PVC hoops and 6mil greenhouse plastic, which extends my lettuce and spinach harvest by at least
Deciding between raised beds and in-ground beds depends on your soil, budget, and physical capabilities.
- In-Ground Beds: If you have excellent native soil and good drainage, in-ground beds are the most economical. Double-digging (loosening soil two shovel depths) can significantly improve drainage and aeration. For my main garden, I primarily use in-ground beds, but I focus on building up the soil over time with consistent compost additions and cover cropping. I aim for beds that are no wider than 3-4 feet so I can reach the center without stepping on the soil, compacting it.
- Raised Beds: Raised beds offer numerous advantages, especially for poor soil, heavy clay, or rocky areas. They provide better drainage, warm up faster in spring, reduce compaction, and make weeding and harvesting easier on your back.
- Material Options:
- Untreated Cedar: Naturally rot-resistant and chemical-free. A 4×8 ft bed, 12 inches deep, typically requires three 2x12x8 ft cedar boards, costing around $50-$60 per board (total ~$150-$180) plus corner brackets or screws. My first raised beds were cedar and are still going strong after 7 years.
- Galvanized Steel: Durable, long-lasting, and aesthetically pleasing. Brands like Vego Garden offer modular kits. A Vego Garden 17″ Tall 8-in-1 Metal Raised Garden Bed (can be configured to 4×8 ft) costs approximately $250-$300.
- Concrete Blocks/Stones: Very durable but can leach minerals (though generally safe once weathered) and can be expensive.
- Recycled Materials: Pallets (check for chemical treatment stamps like « HT » for heat-treated), old tires (controversial due to potential chemical leaching).
- Filling Raised Beds: Don’t just fill with topsoil. Use a « Hugelkultur » approach (logs, branches, leaves, then compost, then topsoil) or a mixture of 60% good quality topsoil, 30% compost, and 10% perlite or vermiculite for drainage. A 4x8x1 ft raised bed requires about 32 cubic feet (or ~1.2 cubic yards) of soil mix, which can cost $100-$200 depending on your source.
- Material Options:
Step 4: Water Management & Irrigation
Efficient water management is critical for a self sufficient garden from scratch, especially in off-grid living where water resources might be limited.
- Rainwater Harvesting: This is my primary source of irrigation water. A 55-gallon rain barrel (e.g., EarthMark Rain Barrel, ~$120-$150) connected to a downspout can collect significant water. For larger needs, I use two 275-gallon IBC totes (Intermediate Bulk Containers, often available used for $100-$200 each from food-grade sources) connected in series. A 1,000 sq ft roof can collect approximately 620 gallons of water for every inch of rainfall. My 1,500 sq ft roof provides ample water for my 600 sq ft garden through multiple barrels and totes.
- Drip Irrigation: This is by far the most water-efficient method, delivering water directly to the plant’s root zone, minimizing evaporation and weed growth.
- Components: A typical drip system includes a pressure regulator (e.g., Rain Bird PRV-10, ~$15), a filter (Rain Bird RBY filter, ~$20), main tubing (1/2-inch poly tubing, 100ft ~$25), smaller feeder lines (1/4-inch tubing), and emitters (0.5 GPH or 1 GPH per plant).
- Kits: For beginners, a starter kit like the Rain Bird Drip Irrigation Garden Kit (model DDI-KIT-1P, ~$40-$60) is excellent for a small garden. For larger setups, I use Netafim Techline CV Drip Line (500ft roll, ~$150-$200), which has pressure-compensating emitters built-in, ensuring even watering across long runs.
- Automation: For true self-sufficiency, consider a battery-powered timer (e.g., Orbit B-Hyve Bluetooth Hose Faucet Timer, ~$50) or a solar-powered timer connected to a small 12V pump.
- Solar-Powered Pumps: For lifting water from a well, pond, or large storage tank to your garden, a solar pump is a game-changer. For a smaller drip system, a Shurflo 2088-594-152 Diaphragm Pump (12V, 3.5 GPM, ~$180) can be powered by a single 100W solar panel (e.g., Renogy 100W Monocrystalline Solar Panel, ~$100) and a small 12V battery (e.g., a 50Ah LiFePO4 battery like the Battle Born 50Ah, ~$450). For larger operations or deeper wells, more robust systems are needed. If you’re looking to build out a comprehensive off-grid power system to support your garden’s water needs, or indeed your entire homestead, you might want to explore resources like the Power Grid Generator complete system guide to understand the full scope of what’s possible in terms of energy independence.
Step 5: Seed Selection & Planting
The choice of seeds is crucial for a truly self sufficient garden from scratch.
- Choose Heirloom & Open-Pollinated Seeds: These varieties produce seeds that will grow true to type, meaning you can save seeds from your harvest year after year. F1 hybrids, while often vigorous, will not produce consistent offspring from saved seeds. Reputable seed companies include Baker Creek Heirloom Seeds, High Mowing Organic Seeds, and Seed Savers Exchange. Start with common, reliable varieties like ‘Black Krim’ tomatoes, ‘Provider’ bush beans, ‘Waltham Butternut’ squash, and ‘Black Seeded Simpson’ lettuce.
- Start Seeds Indoors (Optional but Recommended): For longer growing seasons or specific crops, starting seeds indoors gives you a head start. Use seed-starting mix (e.g., Espoma Organic Seed Starter Mix, ~$10 for 16qt bag) in seed trays (Jiffy Professional Greenhouse 72-cell kit, ~$15). Provide adequate light with LED grow lights (Barrina T5 2ft 4-pack LED Grow Lights, 20W each, ~$50) for 14-16 hours a day, positioned 2-4 inches above seedlings. Maintain consistent temperatures (65-75°F for most).
- Direct Sowing vs. Transplanting: Some crops (carrots, radishes, beans, corn) prefer direct sowing into the garden bed. Others (tomatoes, peppers, broccoli, kale) benefit from being started indoors and transplanted. Follow seed packet instructions for planting depths (e.g., lettuce seeds are often surface-sown or planted 1/8 inch deep, while beans are 1 inch deep) and spacing.
- Companion Planting: Strategically plant different species together to enhance growth, deter pests, and attract beneficial insects. For example, planting marigolds near tomatoes can deter nematodes, and basil improves tomato flavor. Nasturtiums can act as a trap crop for aphids.
- Succession Planting: For a continuous harvest, plant small batches of quick-growing crops (lettuce, radishes, cilantro) every 2-3 weeks. As one crop finishes, another is ready to take its place.
Step 6: Pest & Disease Management (Organic)
Maintaining a self sufficient garden from scratch means embracing organic pest and disease control.
- Integrated Pest Management (IPM): This holistic approach combines several strategies.
- Observation: Regularly inspect your plants for early signs of pests or disease. Catching issues early is key.
- Physical Barriers: Use row covers (e.g., Agribon AG-19 floating row cover, 10×20 ft, ~$20) to protect young plants from insect pests like cabbage worms and squash bugs. Install fences (e.g., 2×4 welded wire mesh, 4 ft tall, 50 ft roll ~$70) to keep out deer, rabbits, and other larger animals.
- Hand-Picking: For larger pests like tomato hornworms or squash bugs, simply pick them off and drop them into a bucket of soapy water.
- Companion Planting: As mentioned, certain plants repel pests. Marigolds, garlic, and onions are excellent deterrents.
- Attract Beneficial Insects: Plant flowers like dill, fennel, cosmos, and sweet alyssum to attract ladybugs, lacewings, and parasitic wasps, which prey on common garden pests.
- Organic Sprays & Treatments:
- Neem Oil: An excellent broad-spectrum organic insecticide and fungicide. Bonide Neem Oil Concentrate (16oz, ~$20) can be mixed at a rate of 1-2 tbsp per gallon of water and sprayed on affected plants.
- Insecticidal Soap: Effective against soft-bodied insects like aphids, whiteflies, and spider mites. Garden Safe Insecticidal Soap (24oz ready-to-use, ~$10).
- Bacillus thuringiensis (Bt): A naturally occurring soil bacterium that targets caterpillars and worms. Monterey BT Worm & Caterpillar Killer (16oz, ~$18) is highly effective and safe for beneficial insects.
- Copper or Sulfur Sprays: For fungal diseases like powdery mildew or blight, organic copper (e.g., Bonide Copper Fungicide, ~$15 for 1lb) or sulfur (e.g., Safer Brand Garden Fungicide, ~$10 for 16oz) can be used as a last resort.
Step 7: Harvesting & Seed Saving
The culmination of your efforts is the harvest, and seed saving closes the loop on self-sufficiency.
- Harvesting Techniques:
- Timing: Harvest vegetables at their peak ripeness for best flavor and nutritional value. For example, green beans should snap cleanly, cucumbers should be firm, and tomatoes should be fully colored.
- Frequency: Many crops, like zucchini, cucumbers, and bush beans, produce more if harvested frequently. Pick daily or every other day.
- Tools: Use clean, sharp pruners (e.g., Corona ClassicCUT Bypass Pruner BP 3180, ~$30) or a sharp knife for clean cuts, minimizing damage to the plant.
- Seed Saving: This is where the « self-sufficient » aspect truly shines.
- Selection: Only save seeds from your healthiest, most vigorous plants that show desired traits (disease resistance, good flavor, high yield).
- Isolation: To ensure true-to-type seeds, prevent cross-pollination. This can be challenging for open-pollinated crops that readily cross (e.g., squash, corn). For beginners, focus on self-pollinating plants like beans, peas, lettuce, and tomatoes.
- Processing:
- Dry Seeds (Beans, Peas, Lettuce, Grains): Allow pods/seed heads to dry completely on the plant. Harvest, shell, and clean the seeds, removing chaff.
- Wet Seeds (Tomatoes, Cucumbers, Squash): For tomatoes, ferment the seeds in water for a few days to remove the gel coating and inhibit disease. For cucumbers/squash, scrape out seeds, wash thoroughly, and dry.
- Drying: Spread seeds thinly on screens or paper plates in a cool, dry, well-ventilated area for 1-4 weeks. Ensure they are bone-dry before storage. I aim for less than 8% moisture content.
- Storage: Store seeds in airtight containers (glass jars with desiccant packets work well) in a cool, dark, dry place (ideally 40-50°F and 30-40% humidity). Label clearly with variety and date. Properly stored seeds can remain viable for 3-10 years or more.
Step 8: Season Extension & Winterizing
Extend your harvest and protect your garden for the off-season to truly maximize your self sufficient garden from scratch.
- Cold Frames: Simple structures with a transparent top (glass, polycarbonate, or old windows) that sit over garden beds. They trap solar heat, allowing you to grow cold-hardy crops (lettuce, spinach, kale, radishes) well into winter or start seeds earlier in spring. A basic cold frame can be built from 2×6 lumber and a sheet of polycarbonate for under $100.
- Hoop Houses/Low Tunnels: Larger structures made from flexible hoops (PVC pipe or EMT conduit) covered with greenhouse plastic. These provide more space and greater temperature moderation. A 10×20 ft DIY low tunnel kit can cost $200-$500, while a larger, more robust hoop house kit might be $1,000-$3,000. I use a 6×12 ft low tunnel made from 1/2-inch PVC hoops and 6mil greenhouse plastic, which extends my lettuce and spinach harvest by at least
Healthy soil is the bedrock of a productive, self-sufficient garden. You can’t guess what your soil needs; you have to test it.
- Perform a Soil Test: A professional soil test will give you precise data on your soil’s pH, nutrient levels (N-P-K), and organic matter content. I recommend sending a sample to your local agricultural extension office; it typically costs $20-$50 and provides detailed recommendations. Alternatively, for a quick homeowner check, a Rapitest Soil Test Kit (40-test kit, model 1663, ~$20 on Amazon) provides a good baseline for pH, Nitrogen, Phosphorus, and Potash. Aim for a pH between 6.0 and 7.0 for most vegetables.
- Amend for pH Imbalance: If your soil is too acidic (below 6.0), add agricultural lime (dolomitic lime adds magnesium, calcitic lime adds calcium). Apply 5-10 lbs per 100 sq ft for a moderate adjustment. If it’s too alkaline (above 7.0), add elemental sulfur (e.g., Espoma Soil Acidifier, ~$15 for 6.75 lbs) or generous amounts of organic matter like peat moss or pine needles.
- Build Organic Matter: This is the single most important step for long-term soil health. Organic matter improves soil structure, water retention, drainage, and nutrient availability. Incorporate 2-4 inches of high-quality compost into your top 6-12 inches of soil annually. I make my own compost from kitchen scraps, garden waste, and shredded leaves, but you can purchase it. Local nurseries often sell bulk compost for $30-$50 per cubic yard. Aged manure (from chickens, cows, or horses – ensure it’s well-rotted to avoid burning plants) is also excellent.
- Address Nutrient Deficiencies: Based on your soil test, add specific organic amendments. If Nitrogen (N) is low, add blood meal (12-0-0, ~$20 for 3 lbs) or feather meal. For Phosphorus (P), use bone meal (3-15-0, ~$15 for 3 lbs) or rock phosphate. For Potassium (K), greensand (0-0-2.5, ~$25 for 5 lbs) or kelp meal are good choices. I rely heavily on Espoma Organic Garden-tone (5-3-3, ~$25 for an 8lb bag) as a balanced, all-purpose organic fertilizer during planting.
Step 3: Garden Bed Preparation
Deciding between raised beds and in-ground beds depends on your soil, budget, and physical capabilities.
- In-Ground Beds: If you have excellent native soil and good drainage, in-ground beds are the most economical. Double-digging (loosening soil two shovel depths) can significantly improve drainage and aeration. For my main garden, I primarily use in-ground beds, but I focus on building up the soil over time with consistent compost additions and cover cropping. I aim for beds that are no wider than 3-4 feet so I can reach the center without stepping on the soil, compacting it.
- Raised Beds: Raised beds offer numerous advantages, especially for poor soil, heavy clay, or rocky areas. They provide better drainage, warm up faster in spring, reduce compaction, and make weeding and harvesting easier on your back.
- Material Options:
- Untreated Cedar: Naturally rot-resistant and chemical-free. A 4×8 ft bed, 12 inches deep, typically requires three 2x12x8 ft cedar boards, costing around $50-$60 per board (total ~$150-$180) plus corner brackets or screws. My first raised beds were cedar and are still going strong after 7 years.
- Galvanized Steel: Durable, long-lasting, and aesthetically pleasing. Brands like Vego Garden offer modular kits. A Vego Garden 17″ Tall 8-in-1 Metal Raised Garden Bed (can be configured to 4×8 ft) costs approximately $250-$300.
- Concrete Blocks/Stones: Very durable but can leach minerals (though generally safe once weathered) and can be expensive.
- Recycled Materials: Pallets (check for chemical treatment stamps like « HT » for heat-treated), old tires (controversial due to potential chemical leaching).
- Filling Raised Beds: Don’t just fill with topsoil. Use a « Hugelkultur » approach (logs, branches, leaves, then compost, then topsoil) or a mixture of 60% good quality topsoil, 30% compost, and 10% perlite or vermiculite for drainage. A 4x8x1 ft raised bed requires about 32 cubic feet (or ~1.2 cubic yards) of soil mix, which can cost $100-$200 depending on your source.
- Material Options:
Step 4: Water Management & Irrigation
Efficient water management is critical for a self sufficient garden from scratch, especially in off-grid living where water resources might be limited.
- Rainwater Harvesting: This is my primary source of irrigation water. A 55-gallon rain barrel (e.g., EarthMark Rain Barrel, ~$120-$150) connected to a downspout can collect significant water. For larger needs, I use two 275-gallon IBC totes (Intermediate Bulk Containers, often available used for $100-$200 each from food-grade sources) connected in series. A 1,000 sq ft roof can collect approximately 620 gallons of water for every inch of rainfall. My 1,500 sq ft roof provides ample water for my 600 sq ft garden through multiple barrels and totes.
- Drip Irrigation: This is by far the most water-efficient method, delivering water directly to the plant’s root zone, minimizing evaporation and weed growth.
- Components: A typical drip system includes a pressure regulator (e.g., Rain Bird PRV-10, ~$15), a filter (Rain Bird RBY filter, ~$20), main tubing (1/2-inch poly tubing, 100ft ~$25), smaller feeder lines (1/4-inch tubing), and emitters (0.5 GPH or 1 GPH per plant).
- Kits: For beginners, a starter kit like the Rain Bird Drip Irrigation Garden Kit (model DDI-KIT-1P, ~$40-$60) is excellent for a small garden. For larger setups, I use Netafim Techline CV Drip Line (500ft roll, ~$150-$200), which has pressure-compensating emitters built-in, ensuring even watering across long runs.
- Automation: For true self-sufficiency, consider a battery-powered timer (e.g., Orbit B-Hyve Bluetooth Hose Faucet Timer, ~$50) or a solar-powered timer connected to a small 12V pump.
- Solar-Powered Pumps: For lifting water from a well, pond, or large storage tank to your garden, a solar pump is a game-changer. For a smaller drip system, a Shurflo 2088-594-152 Diaphragm Pump (12V, 3.5 GPM, ~$180) can be powered by a single 100W solar panel (e.g., Renogy 100W Monocrystalline Solar Panel, ~$100) and a small 12V battery (e.g., a 50Ah LiFePO4 battery like the Battle Born 50Ah, ~$450). For larger operations or deeper wells, more robust systems are needed. If you’re looking to build out a comprehensive off-grid power system to support your garden’s water needs, or indeed your entire homestead, you might want to explore resources like the Power Grid Generator complete system guide to understand the full scope of what’s possible in terms of energy independence.
Step 5: Seed Selection & Planting
The choice of seeds is crucial for a truly self sufficient garden from scratch.
- Choose Heirloom & Open-Pollinated Seeds: These varieties produce seeds that will grow true to type, meaning you can save seeds from your harvest year after year. F1 hybrids, while often vigorous, will not produce consistent offspring from saved seeds. Reputable seed companies include Baker Creek Heirloom Seeds, High Mowing Organic Seeds, and Seed Savers Exchange. Start with common, reliable varieties like ‘Black Krim’ tomatoes, ‘Provider’ bush beans, ‘Waltham Butternut’ squash, and ‘Black Seeded Simpson’ lettuce.
- Start Seeds Indoors (Optional but Recommended): For longer growing seasons or specific crops, starting seeds indoors gives you a head start. Use seed-starting mix (e.g., Espoma Organic Seed Starter Mix, ~$10 for 16qt bag) in seed trays (Jiffy Professional Greenhouse 72-cell kit, ~$15). Provide adequate light with LED grow lights (Barrina T5 2ft 4-pack LED Grow Lights, 20W each, ~$50) for 14-16 hours a day, positioned 2-4 inches above seedlings. Maintain consistent temperatures (65-75°F for most).
- Direct Sowing vs. Transplanting: Some crops (carrots, radishes, beans, corn) prefer direct sowing into the garden bed. Others (tomatoes, peppers, broccoli, kale) benefit from being started indoors and transplanted. Follow seed packet instructions for planting depths (e.g., lettuce seeds are often surface-sown or planted 1/8 inch deep, while beans are 1 inch deep) and spacing.
- Companion Planting: Strategically plant different species together to enhance growth, deter pests, and attract beneficial insects. For example, planting marigolds near tomatoes can deter nematodes, and basil improves tomato flavor. Nasturtiums can act as a trap crop for aphids.
- Succession Planting: For a continuous harvest, plant small batches of quick-growing crops (lettuce, radishes, cilantro) every 2-3 weeks. As one crop finishes, another is ready to take its place.
Step 6: Pest & Disease Management (Organic)
Maintaining a self sufficient garden from scratch means embracing organic pest and disease control.
- Integrated Pest Management (IPM): This holistic approach combines several strategies.
- Observation: Regularly inspect your plants for early signs of pests or disease. Catching issues early is key.
- Physical Barriers: Use row covers (e.g., Agribon AG-19 floating row cover, 10×20 ft, ~$20) to protect young plants from insect pests like cabbage worms and squash bugs. Install fences (e.g., 2×4 welded wire mesh, 4 ft tall, 50 ft roll ~$70) to keep out deer, rabbits, and other larger animals.
- Hand-Picking: For larger pests like tomato hornworms or squash bugs, simply pick them off and drop them into a bucket of soapy water.
- Companion Planting: As mentioned, certain plants repel pests. Marigolds, garlic, and onions are excellent deterrents.
- Attract Beneficial Insects: Plant flowers like dill, fennel, cosmos, and sweet alyssum to attract ladybugs, lacewings, and parasitic wasps, which prey on common garden pests.
- Organic Sprays & Treatments:
- Neem Oil: An excellent broad-spectrum organic insecticide and fungicide. Bonide Neem Oil Concentrate (16oz, ~$20) can be mixed at a rate of 1-2 tbsp per gallon of water and sprayed on affected plants.
- Insecticidal Soap: Effective against soft-bodied insects like aphids, whiteflies, and spider mites. Garden Safe Insecticidal Soap (24oz ready-to-use, ~$10).
- Bacillus thuringiensis (Bt): A naturally occurring soil bacterium that targets caterpillars and worms. Monterey BT Worm & Caterpillar Killer (16oz, ~$18) is highly effective and safe for beneficial insects.
- Copper or Sulfur Sprays: For fungal diseases like powdery mildew or blight, organic copper (e.g., Bonide Copper Fungicide, ~$15 for 1lb) or sulfur (e.g., Safer Brand Garden Fungicide, ~$10 for 16oz) can be used as a last resort.
Step 7: Harvesting & Seed Saving
The culmination of your efforts is the harvest, and seed saving closes the loop on self-sufficiency.
- Harvesting Techniques:
- Timing: Harvest vegetables at their peak ripeness for best flavor and nutritional value. For example, green beans should snap cleanly, cucumbers should be firm, and tomatoes should be fully colored.
- Frequency: Many crops, like zucchini, cucumbers, and bush beans, produce more if harvested frequently. Pick daily or every other day.
- Tools: Use clean, sharp pruners (e.g., Corona ClassicCUT Bypass Pruner BP 3180, ~$30) or a sharp knife for clean cuts, minimizing damage to the plant.
- Seed Saving: This is where the « self-sufficient » aspect truly shines.
- Selection: Only save seeds from your healthiest, most vigorous plants that show desired traits (disease resistance, good flavor, high yield).
- Isolation: To ensure true-to-type seeds, prevent cross-pollination. This can be challenging for open-pollinated crops that readily cross (e.g., squash, corn). For beginners, focus on self-pollinating plants like beans, peas, lettuce, and tomatoes.
- Processing:
- Dry Seeds (Beans, Peas, Lettuce, Grains): Allow pods/seed heads to dry completely on the plant. Harvest, shell, and clean the seeds, removing chaff.
- Wet Seeds (Tomatoes, Cucumbers, Squash): For tomatoes, ferment the seeds in water for a few days to remove the gel coating and inhibit disease. For cucumbers/squash, scrape out seeds, wash thoroughly, and dry.
- Drying: Spread seeds thinly on screens or paper plates in a cool, dry, well-ventilated area for 1-4 weeks. Ensure they are bone-dry before storage. I aim for less than 8% moisture content.
- Storage: Store seeds in airtight containers (glass jars with desiccant packets work well) in a cool, dark, dry place (ideally 40-50°F and 30-40% humidity). Label clearly with variety and date. Properly stored seeds can remain viable for 3-10 years or more.
Step 8: Season Extension & Winterizing
Extend your harvest and protect your garden for the off-season to truly maximize your self sufficient garden from scratch.
- Cold Frames: Simple structures with a transparent top (glass, polycarbonate, or old windows) that sit over garden beds. They trap solar heat, allowing you to grow cold-hardy crops (lettuce, spinach, kale, radishes) well into winter or start seeds earlier in spring. A basic cold frame can be built from 2×6 lumber and a sheet of polycarbonate for under $100.
- Hoop Houses/Low Tunnels: Larger structures made from flexible hoops (PVC pipe or EMT conduit) covered with greenhouse plastic. These provide more space and greater temperature moderation. A 10×20 ft DIY low tunnel kit can cost $200-$500, while a larger, more robust hoop house kit might be $1,000-$3,000. I use a 6×12 ft low tunnel made from 1/2-inch PVC hoops and 6mil greenhouse plastic, which extends my lettuce and spinach harvest by at least
Efficient water management is critical for a self sufficient garden from scratch, especially in off-grid living where water resources might be limited.
- Rainwater Harvesting: This is my primary source of irrigation water. A 55-gallon rain barrel (e.g., EarthMark Rain Barrel, ~$120-$150) connected to a downspout can collect significant water. For larger needs, I use two 275-gallon IBC totes (Intermediate Bulk Containers, often available used for $100-$200 each from food-grade sources) connected in series. A 1,000 sq ft roof can collect approximately 620 gallons of water for every inch of rainfall. My 1,500 sq ft roof provides ample water for my 600 sq ft garden through multiple barrels and totes.
- Drip Irrigation: This is by far the most water-efficient method, delivering water directly to the plant’s root zone, minimizing evaporation and weed growth.
- Components: A typical drip system includes a pressure regulator (e.g., Rain Bird PRV-10, ~$15), a filter (Rain Bird RBY filter, ~$20), main tubing (1/2-inch poly tubing, 100ft ~$25), smaller feeder lines (1/4-inch tubing), and emitters (0.5 GPH or 1 GPH per plant).
- Kits: For beginners, a starter kit like the Rain Bird Drip Irrigation Garden Kit (model DDI-KIT-1P, ~$40-$60) is excellent for a small garden. For larger setups, I use Netafim Techline CV Drip Line (500ft roll, ~$150-$200), which has pressure-compensating emitters built-in, ensuring even watering across long runs.
- Automation: For true self-sufficiency, consider a battery-powered timer (e.g., Orbit B-Hyve Bluetooth Hose Faucet Timer, ~$50) or a solar-powered timer connected to a small 12V pump.
- Solar-Powered Pumps: For lifting water from a well, pond, or large storage tank to your garden, a solar pump is a game-changer. For a smaller drip system, a Shurflo 2088-594-152 Diaphragm Pump (12V, 3.5 GPM, ~$180) can be powered by a single 100W solar panel (e.g., Renogy 100W Monocrystalline Solar Panel, ~$100) and a small 12V battery (e.g., a 50Ah LiFePO4 battery like the Battle Born 50Ah, ~$450). For larger operations or deeper wells, more robust systems are needed. If you’re looking to build out a comprehensive off-grid power system to support your garden’s water needs, or indeed your entire homestead, you might want to explore resources like the Power Grid Generator complete system guide to understand the full scope of what’s possible in terms of energy independence.
Step 5: Seed Selection & Planting
The choice of seeds is crucial for a truly self sufficient garden from scratch.
- Choose Heirloom & Open-Pollinated Seeds: These varieties produce seeds that will grow true to type, meaning you can save seeds from your harvest year after year. F1 hybrids, while often vigorous, will not produce consistent offspring from saved seeds. Reputable seed companies include Baker Creek Heirloom Seeds, High Mowing Organic Seeds, and Seed Savers Exchange. Start with common, reliable varieties like ‘Black Krim’ tomatoes, ‘Provider’ bush beans, ‘Waltham Butternut’ squash, and ‘Black Seeded Simpson’ lettuce.
- Start Seeds Indoors (Optional but Recommended): For longer growing seasons or specific crops, starting seeds indoors gives you a head start. Use seed-starting mix (e.g., Espoma Organic Seed Starter Mix, ~$10 for 16qt bag) in seed trays (Jiffy Professional Greenhouse 72-cell kit, ~$15). Provide adequate light with LED grow lights (Barrina T5 2ft 4-pack LED Grow Lights, 20W each, ~$50) for 14-16 hours a day, positioned 2-4 inches above seedlings. Maintain consistent temperatures (65-75°F for most).
- Direct Sowing vs. Transplanting: Some crops (carrots, radishes, beans, corn) prefer direct sowing into the garden bed. Others (tomatoes, peppers, broccoli, kale) benefit from being started indoors and transplanted. Follow seed packet instructions for planting depths (e.g., lettuce seeds are often surface-sown or planted 1/8 inch deep, while beans are 1 inch deep) and spacing.
- Companion Planting: Strategically plant different species together to enhance growth, deter pests, and attract beneficial insects. For example, planting marigolds near tomatoes can deter nematodes, and basil improves tomato flavor. Nasturtiums can act as a trap crop for aphids.
- Succession Planting: For a continuous harvest, plant small batches of quick-growing crops (lettuce, radishes, cilantro) every 2-3 weeks. As one crop finishes, another is ready to take its place.
Step 6: Pest & Disease Management (Organic)
Maintaining a self sufficient garden from scratch means embracing organic pest and disease control.
- Integrated Pest Management (IPM): This holistic approach combines several strategies.
- Observation: Regularly inspect your plants for early signs of pests or disease. Catching issues early is key.
- Physical Barriers: Use row covers (e.g., Agribon AG-19 floating row cover, 10×20 ft, ~$20) to protect young plants from insect pests like cabbage worms and squash bugs. Install fences (e.g., 2×4 welded wire mesh, 4 ft tall, 50 ft roll ~$70) to keep out deer, rabbits, and other larger animals.
- Hand-Picking: For larger pests like tomato hornworms or squash bugs, simply pick them off and drop them into a bucket of soapy water.
- Companion Planting: As mentioned, certain plants repel pests. Marigolds, garlic, and onions are excellent deterrents.
- Attract Beneficial Insects: Plant flowers like dill, fennel, cosmos, and sweet alyssum to attract ladybugs, lacewings, and parasitic wasps, which prey on common garden pests.
- Organic Sprays & Treatments:
- Neem Oil: An excellent broad-spectrum organic insecticide and fungicide. Bonide Neem Oil Concentrate (16oz, ~$20) can be mixed at a rate of 1-2 tbsp per gallon of water and sprayed on affected plants.
- Insecticidal Soap: Effective against soft-bodied insects like aphids, whiteflies, and spider mites. Garden Safe Insecticidal Soap (24oz ready-to-use, ~$10).
- Bacillus thuringiensis (Bt): A naturally occurring soil bacterium that targets caterpillars and worms. Monterey BT Worm & Caterpillar Killer (16oz, ~$18) is highly effective and safe for beneficial insects.
- Copper or Sulfur Sprays: For fungal diseases like powdery mildew or blight, organic copper (e.g., Bonide Copper Fungicide, ~$15 for 1lb) or sulfur (e.g., Safer Brand Garden Fungicide, ~$10 for 16oz) can be used as a last resort.
Step 7: Harvesting & Seed Saving
The culmination of your efforts is the harvest, and seed saving closes the loop on self-sufficiency.
- Harvesting Techniques:
- Timing: Harvest vegetables at their peak ripeness for best flavor and nutritional value. For example, green beans should snap cleanly, cucumbers should be firm, and tomatoes should be fully colored.
- Frequency: Many crops, like zucchini, cucumbers, and bush beans, produce more if harvested frequently. Pick daily or every other day.
- Tools: Use clean, sharp pruners (e.g., Corona ClassicCUT Bypass Pruner BP 3180, ~$30) or a sharp knife for clean cuts, minimizing damage to the plant.
- Seed Saving: This is where the « self-sufficient » aspect truly shines.
- Selection: Only save seeds from your healthiest, most vigorous plants that show desired traits (disease resistance, good flavor, high yield).
- Isolation: To ensure true-to-type seeds, prevent cross-pollination. This can be challenging for open-pollinated crops that readily cross (e.g., squash, corn). For beginners, focus on self-pollinating plants like beans, peas, lettuce, and tomatoes.
- Processing:
- Dry Seeds (Beans, Peas, Lettuce, Grains): Allow pods/seed heads to dry completely on the plant. Harvest, shell, and clean the seeds, removing chaff.
- Wet Seeds (Tomatoes, Cucumbers, Squash): For tomatoes, ferment the seeds in water for a few days to remove the gel coating and inhibit disease. For cucumbers/squash, scrape out seeds, wash thoroughly, and dry.
- Drying: Spread seeds thinly on screens or paper plates in a cool, dry, well-ventilated area for 1-4 weeks. Ensure they are bone-dry before storage. I aim for less than 8% moisture content.
- Storage: Store seeds in airtight containers (glass jars with desiccant packets work well) in a cool, dark, dry place (ideally 40-50°F and 30-40% humidity). Label clearly with variety and date. Properly stored seeds can remain viable for 3-10 years or more.
Step 8: Season Extension & Winterizing
Extend your harvest and protect your garden for the off-season to truly maximize your self sufficient garden from scratch.
- Cold Frames: Simple structures with a transparent top (glass, polycarbonate, or old windows) that sit over garden beds. They trap solar heat, allowing you to grow cold-hardy crops (lettuce, spinach, kale, radishes) well into winter or start seeds earlier in spring. A basic cold frame can be built from 2×6 lumber and a sheet of polycarbonate for under $100.
- Hoop Houses/Low Tunnels: Larger structures made from flexible hoops (PVC pipe or EMT conduit) covered with greenhouse plastic. These provide more space and greater temperature moderation. A 10×20 ft DIY low tunnel kit can cost $200-$500, while a larger, more robust hoop house kit might be $1,000-$3,000. I use a 6×12 ft low tunnel made from 1/2-inch PVC hoops and 6mil greenhouse plastic, which extends my lettuce and spinach harvest by at least
- In-Ground Beds: If you have excellent native soil and good drainage, in-ground beds are the most economical. Double-digging (loosening soil two shovel depths) can significantly improve drainage and aeration. For my main garden, I primarily use in-ground beds, but I focus on building up the soil over time with consistent compost additions and cover cropping. I aim for beds that are no wider than 3-4 feet so I can reach the center without stepping on the soil, compacting it.
- Raised Beds: Raised beds offer numerous advantages, especially for poor soil, heavy clay, or rocky areas. They provide better drainage, warm up faster in spring, reduce compaction, and make weeding and harvesting easier on your back.
- Material Options:
- Untreated Cedar: Naturally rot-resistant and chemical-free. A 4×8 ft bed, 12 inches deep, typically requires three 2x12x8 ft cedar boards, costing around $50-$60 per board (total ~$150-$180) plus corner brackets or screws. My first raised beds were cedar and are still going strong after 7 years.
- Galvanized Steel: Durable, long-lasting, and aesthetically pleasing. Brands like Vego Garden offer modular kits. A Vego Garden 17″ Tall 8-in-1 Metal Raised Garden Bed (can be configured to 4×8 ft) costs approximately $250-$300.
- Concrete Blocks/Stones: Very durable but can leach minerals (though generally safe once weathered) and can be expensive.
- Recycled Materials: Pallets (check for chemical treatment stamps like « HT » for heat-treated), old tires (controversial due to potential chemical leaching).
- Filling Raised Beds: Don’t just fill with topsoil. Use a « Hugelkultur » approach (logs, branches, leaves, then compost, then topsoil) or a mixture of 60% good quality topsoil, 30% compost, and 10% perlite or vermiculite for drainage. A 4x8x1 ft raised bed requires about 32 cubic feet (or ~1.2 cubic yards) of soil mix, which can cost $100-$200 depending on your source.
- Material Options:
Step 4: Water Management & Irrigation
Efficient water management is critical for a self sufficient garden from scratch, especially in off-grid living where water resources might be limited.
- Rainwater Harvesting: This is my primary source of irrigation water. A 55-gallon rain barrel (e.g., EarthMark Rain Barrel, ~$120-$150) connected to a downspout can collect significant water. For larger needs, I use two 275-gallon IBC totes (Intermediate Bulk Containers, often available used for $100-$200 each from food-grade sources) connected in series. A 1,000 sq ft roof can collect approximately 620 gallons of water for every inch of rainfall. My 1,500 sq ft roof provides ample water for my 600 sq ft garden through multiple barrels and totes.
- Drip Irrigation: This is by far the most water-efficient method, delivering water directly to the plant’s root zone, minimizing evaporation and weed growth.
- Components: A typical drip system includes a pressure regulator (e.g., Rain Bird PRV-10, ~$15), a filter (Rain Bird RBY filter, ~$20), main tubing (1/2-inch poly tubing, 100ft ~$25), smaller feeder lines (1/4-inch tubing), and emitters (0.5 GPH or 1 GPH per plant).
- Kits: For beginners, a starter kit like the Rain Bird Drip Irrigation Garden Kit (model DDI-KIT-1P, ~$40-$60) is excellent for a small garden. For larger setups, I use Netafim Techline CV Drip Line (500ft roll, ~$150-$200), which has pressure-compensating emitters built-in, ensuring even watering across long runs.
- Automation: For true self-sufficiency, consider a battery-powered timer (e.g., Orbit B-Hyve Bluetooth Hose Faucet Timer, ~$50) or a solar-powered timer connected to a small 12V pump.
- Solar-Powered Pumps: For lifting water from a well, pond, or large storage tank to your garden, a solar pump is a game-changer. For a smaller drip system, a Shurflo 2088-594-152 Diaphragm Pump (12V, 3.5 GPM, ~$180) can be powered by a single 100W solar panel (e.g., Renogy 100W Monocrystalline Solar Panel, ~$100) and a small 12V battery (e.g., a 50Ah LiFePO4 battery like the Battle Born 50Ah, ~$450). For larger operations or deeper wells, more robust systems are needed. If you’re looking to build out a comprehensive off-grid power system to support your garden’s water needs, or indeed your entire homestead, you might want to explore resources like the Power Grid Generator complete system guide to understand the full scope of what’s possible in terms of energy independence.
Step 5: Seed Selection & Planting
The choice of seeds is crucial for a truly self sufficient garden from scratch.
- Choose Heirloom & Open-Pollinated Seeds: These varieties produce seeds that will grow true to type, meaning you can save seeds from your harvest year after year. F1 hybrids, while often vigorous, will not produce consistent offspring from saved seeds. Reputable seed companies include Baker Creek Heirloom Seeds, High Mowing Organic Seeds, and Seed Savers Exchange. Start with common, reliable varieties like ‘Black Krim’ tomatoes, ‘Provider’ bush beans, ‘Waltham Butternut’ squash, and ‘Black Seeded Simpson’ lettuce.
- Start Seeds Indoors (Optional but Recommended): For longer growing seasons or specific crops, starting seeds indoors gives you a head start. Use seed-starting mix (e.g., Espoma Organic Seed Starter Mix, ~$10 for 16qt bag) in seed trays (Jiffy Professional Greenhouse 72-cell kit, ~$15). Provide adequate light with LED grow lights (Barrina T5 2ft 4-pack LED Grow Lights, 20W each, ~$50) for 14-16 hours a day, positioned 2-4 inches above seedlings. Maintain consistent temperatures (65-75°F for most).
- Direct Sowing vs. Transplanting: Some crops (carrots, radishes, beans, corn) prefer direct sowing into the garden bed. Others (tomatoes, peppers, broccoli, kale) benefit from being started indoors and transplanted. Follow seed packet instructions for planting depths (e.g., lettuce seeds are often surface-sown or planted 1/8 inch deep, while beans are 1 inch deep) and spacing.
- Companion Planting: Strategically plant different species together to enhance growth, deter pests, and attract beneficial insects. For example, planting marigolds near tomatoes can deter nematodes, and basil improves tomato flavor. Nasturtiums can act as a trap crop for aphids.
- Succession Planting: For a continuous harvest, plant small batches of quick-growing crops (lettuce, radishes, cilantro) every 2-3 weeks. As one crop finishes, another is ready to take its place.
Step 6: Pest & Disease Management (Organic)
Maintaining a self sufficient garden from scratch means embracing organic pest and disease control.
- Integrated Pest Management (IPM): This holistic approach combines several strategies.
- Observation: Regularly inspect your plants for early signs of pests or disease. Catching issues early is key.
- Physical Barriers: Use row covers (e.g., Agribon AG-19 floating row cover, 10×20 ft, ~$20) to protect young plants from insect pests like cabbage worms and squash bugs. Install fences (e.g., 2×4 welded wire mesh, 4 ft tall, 50 ft roll ~$70) to keep out deer, rabbits, and other larger animals.
- Hand-Picking: For larger pests like tomato hornworms or squash bugs, simply pick them off and drop them into a bucket of soapy water.
- Companion Planting: As mentioned, certain plants repel pests. Marigolds, garlic, and onions are excellent deterrents.
- Attract Beneficial Insects: Plant flowers like dill, fennel, cosmos, and sweet alyssum to attract ladybugs, lacewings, and parasitic wasps, which prey on common garden pests.
- Organic Sprays & Treatments:
- Neem Oil: An excellent broad-spectrum organic insecticide and fungicide. Bonide Neem Oil Concentrate (16oz, ~$20) can be mixed at a rate of 1-2 tbsp per gallon of water and sprayed on affected plants.
- Insecticidal Soap: Effective against soft-bodied insects like aphids, whiteflies, and spider mites. Garden Safe Insecticidal Soap (24oz ready-to-use, ~$10).
- Bacillus thuringiensis (Bt): A naturally occurring soil bacterium that targets caterpillars and worms. Monterey BT Worm & Caterpillar Killer (16oz, ~$18) is highly effective and safe for beneficial insects.
- Copper or Sulfur Sprays: For fungal diseases like powdery mildew or blight, organic copper (e.g., Bonide Copper Fungicide, ~$15 for 1lb) or sulfur (e.g., Safer Brand Garden Fungicide, ~$10 for 16oz) can be used as a last resort.
Step 7: Harvesting & Seed Saving
The culmination of your efforts is the harvest, and seed saving closes the loop on self-sufficiency.
- Harvesting Techniques:
- Timing: Harvest vegetables at their peak ripeness for best flavor and nutritional value. For example, green beans should snap cleanly, cucumbers should be firm, and tomatoes should be fully colored.
- Frequency: Many crops, like zucchini, cucumbers, and bush beans, produce more if harvested frequently. Pick daily or every other day.
- Tools: Use clean, sharp pruners (e.g., Corona ClassicCUT Bypass Pruner BP 3180, ~$30) or a sharp knife for clean cuts, minimizing damage to the plant.
- Seed Saving: This is where the « self-sufficient » aspect truly shines.
- Selection: Only save seeds from your healthiest, most vigorous plants that show desired traits (disease resistance, good flavor, high yield).
- Isolation: To ensure true-to-type seeds, prevent cross-pollination. This can be challenging for open-pollinated crops that readily cross (e.g., squash, corn). For beginners, focus on self-pollinating plants like beans, peas, lettuce, and tomatoes.
- Processing:
- Dry Seeds (Beans, Peas, Lettuce, Grains): Allow pods/seed heads to dry completely on the plant. Harvest, shell, and clean the seeds, removing chaff.
- Wet Seeds (Tomatoes, Cucumbers, Squash): For tomatoes, ferment the seeds in water for a few days to remove the gel coating and inhibit disease. For cucumbers/squash, scrape out seeds, wash thoroughly, and dry.
- Drying: Spread seeds thinly on screens or paper plates in a cool, dry, well-ventilated area for 1-4 weeks. Ensure they are bone-dry before storage. I aim for less than 8% moisture content.
- Storage: Store seeds in airtight containers (glass jars with desiccant packets work well) in a cool, dark, dry place (ideally 40-50°F and 30-40% humidity). Label clearly with variety and date. Properly stored seeds can remain viable for 3-10 years or more.
Step 8: Season Extension & Winterizing
Extend your harvest and protect your garden for the off-season to truly maximize your self sufficient garden from scratch.
- Cold Frames: Simple structures with a transparent top (glass, polycarbonate, or old windows) that sit over garden beds. They trap solar heat, allowing you to grow cold-hardy crops (lettuce, spinach, kale, radishes) well into winter or start seeds earlier in spring. A basic cold frame can be built from 2×6 lumber and a sheet of polycarbonate for under $100.
- Hoop Houses/Low Tunnels: Larger structures made from flexible hoops (PVC pipe or EMT conduit) covered with greenhouse plastic. These provide more space and greater temperature moderation. A 10×20 ft DIY low tunnel kit can cost $200-$500, while a larger, more robust hoop house kit might be $1,000-$3,000. I use a 6×12 ft low tunnel made from 1/2-inch PVC hoops and 6mil greenhouse plastic, which extends my lettuce and spinach harvest by at least
Deciding between raised beds and in-ground beds depends on your soil, budget, and physical capabilities.
- In-Ground Beds: If you have excellent native soil and good drainage, in-ground beds are the most economical. Double-digging (loosening soil two shovel depths) can significantly improve drainage and aeration. For my main garden, I primarily use in-ground beds, but I focus on building up the soil over time with consistent compost additions and cover cropping. I aim for beds that are no wider than 3-4 feet so I can reach the center without stepping on the soil, compacting it.
- Raised Beds: Raised beds offer numerous advantages, especially for poor soil, heavy clay, or rocky areas. They provide better drainage, warm up faster in spring, reduce compaction, and make weeding and harvesting easier on your back.
- Material Options:
- Untreated Cedar: Naturally rot-resistant and chemical-free. A 4×8 ft bed, 12 inches deep, typically requires three 2x12x8 ft cedar boards, costing around $50-$60 per board (total ~$150-$180) plus corner brackets or screws. My first raised beds were cedar and are still going strong after 7 years.
- Galvanized Steel: Durable, long-lasting, and aesthetically pleasing. Brands like Vego Garden offer modular kits. A Vego Garden 17″ Tall 8-in-1 Metal Raised Garden Bed (can be configured to 4×8 ft) costs approximately $250-$300.
- Concrete Blocks/Stones: Very durable but can leach minerals (though generally safe once weathered) and can be expensive.
- Recycled Materials: Pallets (check for chemical treatment stamps like « HT » for heat-treated), old tires (controversial due to potential chemical leaching).
- Filling Raised Beds: Don’t just fill with topsoil. Use a « Hugelkultur » approach (logs, branches, leaves, then compost, then topsoil) or a mixture of 60% good quality topsoil, 30% compost, and 10% perlite or vermiculite for drainage. A 4x8x1 ft raised bed requires about 32 cubic feet (or ~1.2 cubic yards) of soil mix, which can cost $100-$200 depending on your source.
- Material Options:
Step 4: Water Management & Irrigation
Efficient water management is critical for a self sufficient garden from scratch, especially in off-grid living where water resources might be limited.
- Rainwater Harvesting: This is my primary source of irrigation water. A 55-gallon rain barrel (e.g., EarthMark Rain Barrel, ~$120-$150) connected to a downspout can collect significant water. For larger needs, I use two 275-gallon IBC totes (Intermediate Bulk Containers, often available used for $100-$200 each from food-grade sources) connected in series. A 1,000 sq ft roof can collect approximately 620 gallons of water for every inch of rainfall. My 1,500 sq ft roof provides ample water for my 600 sq ft garden through multiple barrels and totes.
- Drip Irrigation: This is by far the most water-efficient method, delivering water directly to the plant’s root zone, minimizing evaporation and weed growth.
- Components: A typical drip system includes a pressure regulator (e.g., Rain Bird PRV-10, ~$15), a filter (Rain Bird RBY filter, ~$20), main tubing (1/2-inch poly tubing, 100ft ~$25), smaller feeder lines (1/4-inch tubing), and emitters (0.5 GPH or 1 GPH per plant).
- Kits: For beginners, a starter kit like the Rain Bird Drip Irrigation Garden Kit (model DDI-KIT-1P, ~$40-$60) is excellent for a small garden. For larger setups, I use Netafim Techline CV Drip Line (500ft roll, ~$150-$200), which has pressure-compensating emitters built-in, ensuring even watering across long runs.
- Automation: For true self-sufficiency, consider a battery-powered timer (e.g., Orbit B-Hyve Bluetooth Hose Faucet Timer, ~$50) or a solar-powered timer connected to a small 12V pump.
- Solar-Powered Pumps: For lifting water from a well, pond, or large storage tank to your garden, a solar pump is a game-changer. For a smaller drip system, a Shurflo 2088-594-152 Diaphragm Pump (12V, 3.5 GPM, ~$180) can be powered by a single 100W solar panel (e.g., Renogy 100W Monocrystalline Solar Panel, ~$100) and a small 12V battery (e.g., a 50Ah LiFePO4 battery like the Battle Born 50Ah, ~$450). For larger operations or deeper wells, more robust systems are needed. If you’re looking to build out a comprehensive off-grid power system to support your garden’s water needs, or indeed your entire homestead, you might want to explore resources like the Power Grid Generator complete system guide to understand the full scope of what’s possible in terms of energy independence.
Step 5: Seed Selection & Planting
The choice of seeds is crucial for a truly self sufficient garden from scratch.
- Choose Heirloom & Open-Pollinated Seeds: These varieties produce seeds that will grow true to type, meaning you can save seeds from your harvest year after year. F1 hybrids, while often vigorous, will not produce consistent offspring from saved seeds. Reputable seed companies include Baker Creek Heirloom Seeds, High Mowing Organic Seeds, and Seed Savers Exchange. Start with common, reliable varieties like ‘Black Krim’ tomatoes, ‘Provider’ bush beans, ‘Waltham Butternut’ squash, and ‘Black Seeded Simpson’ lettuce.
- Start Seeds Indoors (Optional but Recommended): For longer growing seasons or specific crops, starting seeds indoors gives you a head start. Use seed-starting mix (e.g., Espoma Organic Seed Starter Mix, ~$10 for 16qt bag) in seed trays (Jiffy Professional Greenhouse 72-cell kit, ~$15). Provide adequate light with LED grow lights (Barrina T5 2ft 4-pack LED Grow Lights, 20W each, ~$50) for 14-16 hours a day, positioned 2-4 inches above seedlings. Maintain consistent temperatures (65-75°F for most).
- Direct Sowing vs. Transplanting: Some crops (carrots, radishes, beans, corn) prefer direct sowing into the garden bed. Others (tomatoes, peppers, broccoli, kale) benefit from being started indoors and transplanted. Follow seed packet instructions for planting depths (e.g., lettuce seeds are often surface-sown or planted 1/8 inch deep, while beans are 1 inch deep) and spacing.
- Companion Planting: Strategically plant different species together to enhance growth, deter pests, and attract beneficial insects. For example, planting marigolds near tomatoes can deter nematodes, and basil improves tomato flavor. Nasturtiums can act as a trap crop for aphids.
- Succession Planting: For a continuous harvest, plant small batches of quick-growing crops (lettuce, radishes, cilantro) every 2-3 weeks. As one crop finishes, another is ready to take its place.
Step 6: Pest & Disease Management (Organic)
Maintaining a self sufficient garden from scratch means embracing organic pest and disease control.
- Integrated Pest Management (IPM): This holistic approach combines several strategies.
- Observation: Regularly inspect your plants for early signs of pests or disease. Catching issues early is key.
- Physical Barriers: Use row covers (e.g., Agribon AG-19 floating row cover, 10×20 ft, ~$20) to protect young plants from insect pests like cabbage worms and squash bugs. Install fences (e.g., 2×4 welded wire mesh, 4 ft tall, 50 ft roll ~$70) to keep out deer, rabbits, and other larger animals.
- Hand-Picking: For larger pests like tomato hornworms or squash bugs, simply pick them off and drop them into a bucket of soapy water.
- Companion Planting: As mentioned, certain plants repel pests. Marigolds, garlic, and onions are excellent deterrents.
- Attract Beneficial Insects: Plant flowers like dill, fennel, cosmos, and sweet alyssum to attract ladybugs, lacewings, and parasitic wasps, which prey on common garden pests.
- Organic Sprays & Treatments:
- Neem Oil: An excellent broad-spectrum organic insecticide and fungicide. Bonide Neem Oil Concentrate (16oz, ~$20) can be mixed at a rate of 1-2 tbsp per gallon of water and sprayed on affected plants.
- Insecticidal Soap: Effective against soft-bodied insects like aphids, whiteflies, and spider mites. Garden Safe Insecticidal Soap (24oz ready-to-use, ~$10).
- Bacillus thuringiensis (Bt): A naturally occurring soil bacterium that targets caterpillars and worms. Monterey BT Worm & Caterpillar Killer (16oz, ~$18) is highly effective and safe for beneficial insects.
- Copper or Sulfur Sprays: For fungal diseases like powdery mildew or blight, organic copper (e.g., Bonide Copper Fungicide, ~$15 for 1lb) or sulfur (e.g., Safer Brand Garden Fungicide, ~$10 for 16oz) can be used as a last resort.
Step 7: Harvesting & Seed Saving
The culmination of your efforts is the harvest, and seed saving closes the loop on self-sufficiency.
- Harvesting Techniques:
- Timing: Harvest vegetables at their peak ripeness for best flavor and nutritional value. For example, green beans should snap cleanly, cucumbers should be firm, and tomatoes should be fully colored.
- Frequency: Many crops, like zucchini, cucumbers, and bush beans, produce more if harvested frequently. Pick daily or every other day.
- Tools: Use clean, sharp pruners (e.g., Corona ClassicCUT Bypass Pruner BP 3180, ~$30) or a sharp knife for clean cuts, minimizing damage to the plant.
- Seed Saving: This is where the « self-sufficient » aspect truly shines.
- Selection: Only save seeds from your healthiest, most vigorous plants that show desired traits (disease resistance, good flavor, high yield).
- Isolation: To ensure true-to-type seeds, prevent cross-pollination. This can be challenging for open-pollinated crops that readily cross (e.g., squash, corn). For beginners, focus on self-pollinating plants like beans, peas, lettuce, and tomatoes.
- Processing:
- Dry Seeds (Beans, Peas, Lettuce, Grains): Allow pods/seed heads to dry completely on the plant. Harvest, shell, and clean the seeds, removing chaff.
- Wet Seeds (Tomatoes, Cucumbers, Squash): For tomatoes, ferment the seeds in water for a few days to remove the gel coating and inhibit disease. For cucumbers/squash, scrape out seeds, wash thoroughly, and dry.
- Drying: Spread seeds thinly on screens or paper plates in a cool, dry, well-ventilated area for 1-4 weeks. Ensure they are bone-dry before storage. I aim for less than 8% moisture content.
- Storage: Store seeds in airtight containers (glass jars with desiccant packets work well) in a cool, dark, dry place (ideally 40-50°F and 30-40% humidity). Label clearly with variety and date. Properly stored seeds can remain viable for 3-10 years or more.
Step 8: Season Extension & Winterizing
Extend your harvest and protect your garden for the off-season to truly maximize your self sufficient garden from scratch.
- Cold Frames: Simple structures with a transparent top (glass, polycarbonate, or old windows) that sit over garden beds. They trap solar heat, allowing you to grow cold-hardy crops (lettuce, spinach, kale, radishes) well into winter or start seeds earlier in spring. A basic cold frame can be built from 2×6 lumber and a sheet of polycarbonate for under $100.
- Hoop Houses/Low Tunnels: Larger structures made from flexible hoops (PVC pipe or EMT conduit) covered with greenhouse plastic. These provide more space and greater temperature moderation. A 10×20 ft DIY low tunnel kit can cost $200-$500, while a larger, more robust hoop house kit might be $1,000-$3,000. I use a 6×12 ft low tunnel made from 1/2-inch PVC hoops and 6mil greenhouse plastic, which extends my lettuce and spinach harvest by at least
Healthy soil is the bedrock of a productive, self-sufficient garden. You can’t guess what your soil needs; you have to test it.
- Perform a Soil Test: A professional soil test will give you precise data on your soil’s pH, nutrient levels (N-P-K), and organic matter content. I recommend sending a sample to your local agricultural extension office; it typically costs $20-$50 and provides detailed recommendations. Alternatively, for a quick homeowner check, a Rapitest Soil Test Kit (40-test kit, model 1663, ~$20 on Amazon) provides a good baseline for pH, Nitrogen, Phosphorus, and Potash. Aim for a pH between 6.0 and 7.0 for most vegetables.
- Amend for pH Imbalance: If your soil is too acidic (below 6.0), add agricultural lime (dolomitic lime adds magnesium, calcitic lime adds calcium). Apply 5-10 lbs per 100 sq ft for a moderate adjustment. If it’s too alkaline (above 7.0), add elemental sulfur (e.g., Espoma Soil Acidifier, ~$15 for 6.75 lbs) or generous amounts of organic matter like peat moss or pine needles.
- Build Organic Matter: This is the single most important step for long-term soil health. Organic matter improves soil structure, water retention, drainage, and nutrient availability. Incorporate 2-4 inches of high-quality compost into your top 6-12 inches of soil annually. I make my own compost from kitchen scraps, garden waste, and shredded leaves, but you can purchase it. Local nurseries often sell bulk compost for $30-$50 per cubic yard. Aged manure (from chickens, cows, or horses – ensure it’s well-rotted to avoid burning plants) is also excellent.
- Address Nutrient Deficiencies: Based on your soil test, add specific organic amendments. If Nitrogen (N) is low, add blood meal (12-0-0, ~$20 for 3 lbs) or feather meal. For Phosphorus (P), use bone meal (3-15-0, ~$15 for 3 lbs) or rock phosphate. For Potassium (K), greensand (0-0-2.5, ~$25 for 5 lbs) or kelp meal are good choices. I rely heavily on Espoma Organic Garden-tone (5-3-3, ~$25 for an 8lb bag) as a balanced, all-purpose organic fertilizer during planting.
Step 3: Garden Bed Preparation
Deciding between raised beds and in-ground beds depends on your soil, budget, and physical capabilities.
- In-Ground Beds: If you have excellent native soil and good drainage, in-ground beds are the most economical. Double-digging (loosening soil two shovel depths) can significantly improve drainage and aeration. For my main garden, I primarily use in-ground beds, but I focus on building up the soil over time with consistent compost additions and cover cropping. I aim for beds that are no wider than 3-4 feet so I can reach the center without stepping on the soil, compacting it.
- Raised Beds: Raised beds offer numerous advantages, especially for poor soil, heavy clay, or rocky areas. They provide better drainage, warm up faster in spring, reduce compaction, and make weeding and harvesting easier on your back.
- Material Options:
- Untreated Cedar: Naturally rot-resistant and chemical-free. A 4×8 ft bed, 12 inches deep, typically requires three 2x12x8 ft cedar boards, costing around $50-$60 per board (total ~$150-$180) plus corner brackets or screws. My first raised beds were cedar and are still going strong after 7 years.
- Galvanized Steel: Durable, long-lasting, and aesthetically pleasing. Brands like Vego Garden offer modular kits. A Vego Garden 17″ Tall 8-in-1 Metal Raised Garden Bed (can be configured to 4×8 ft) costs approximately $250-$300.
- Concrete Blocks/Stones: Very durable but can leach minerals (though generally safe once weathered) and can be expensive.
- Recycled Materials: Pallets (check for chemical treatment stamps like « HT » for heat-treated), old tires (controversial due to potential chemical leaching).
- Filling Raised Beds: Don’t just fill with topsoil. Use a « Hugelkultur » approach (logs, branches, leaves, then compost, then topsoil) or a mixture of 60% good quality topsoil, 30% compost, and 10% perlite or vermiculite for drainage. A 4x8x1 ft raised bed requires about 32 cubic feet (or ~1.2 cubic yards) of soil mix, which can cost $100-$200 depending on your source.
- Material Options:
Step 4: Water Management & Irrigation
Efficient water management is critical for a self sufficient garden from scratch, especially in off-grid living where water resources might be limited.
- Rainwater Harvesting: This is my primary source of irrigation water. A 55-gallon rain barrel (e.g., EarthMark Rain Barrel, ~$120-$150) connected to a downspout can collect significant water. For larger needs, I use two 275-gallon IBC totes (Intermediate Bulk Containers, often available used for $100-$200 each from food-grade sources) connected in series. A 1,000 sq ft roof can collect approximately 620 gallons of water for every inch of rainfall. My 1,500 sq ft roof provides ample water for my 600 sq ft garden through multiple barrels and totes.
- Drip Irrigation: This is by far the most water-efficient method, delivering water directly to the plant’s root zone, minimizing evaporation and weed growth.
- Components: A typical drip system includes a pressure regulator (e.g., Rain Bird PRV-10, ~$15), a filter (Rain Bird RBY filter, ~$20), main tubing (1/2-inch poly tubing, 100ft ~$25), smaller feeder lines (1/4-inch tubing), and emitters (0.5 GPH or 1 GPH per plant).
- Kits: For beginners, a starter kit like the Rain Bird Drip Irrigation Garden Kit (model DDI-KIT-1P, ~$40-$60) is excellent for a small garden. For larger setups, I use Netafim Techline CV Drip Line (500ft roll, ~$150-$200), which has pressure-compensating emitters built-in, ensuring even watering across long runs.
- Automation: For true self-sufficiency, consider a battery-powered timer (e.g., Orbit B-Hyve Bluetooth Hose Faucet Timer, ~$50) or a solar-powered timer connected to a small 12V pump.
- Solar-Powered Pumps: For lifting water from a well, pond, or large storage tank to your garden, a solar pump is a game-changer. For a smaller drip system, a Shurflo 2088-594-152 Diaphragm Pump (12V, 3.5 GPM, ~$180) can be powered by a single 100W solar panel (e.g., Renogy 100W Monocrystalline Solar Panel, ~$100) and a small 12V battery (e.g., a 50Ah LiFePO4 battery like the Battle Born 50Ah, ~$450). For larger operations or deeper wells, more robust systems are needed. If you’re looking to build out a comprehensive off-grid power system to support your garden’s water needs, or indeed your entire homestead, you might want to explore resources like the Power Grid Generator complete system guide to understand the full scope of what’s possible in terms of energy independence.
Step 5: Seed Selection & Planting
The choice of seeds is crucial for a truly self sufficient garden from scratch.
- Choose Heirloom & Open-Pollinated Seeds: These varieties produce seeds that will grow true to type, meaning you can save seeds from your harvest year after year. F1 hybrids, while often vigorous, will not produce consistent offspring from saved seeds. Reputable seed companies include Baker Creek Heirloom Seeds, High Mowing Organic Seeds, and Seed Savers Exchange. Start with common, reliable varieties like ‘Black Krim’ tomatoes, ‘Provider’ bush beans, ‘Waltham Butternut’ squash, and ‘Black Seeded Simpson’ lettuce.
- Start Seeds Indoors (Optional but Recommended): For longer growing seasons or specific crops, starting seeds indoors gives you a head start. Use seed-starting mix (e.g., Espoma Organic Seed Starter Mix, ~$10 for 16qt bag) in seed trays (Jiffy Professional Greenhouse 72-cell kit, ~$15). Provide adequate light with LED grow lights (Barrina T5 2ft 4-pack LED Grow Lights, 20W each, ~$50) for 14-16 hours a day, positioned 2-4 inches above seedlings. Maintain consistent temperatures (65-75°F for most).
- Direct Sowing vs. Transplanting: Some crops (carrots, radishes, beans, corn) prefer direct sowing into the garden bed. Others (tomatoes, peppers, broccoli, kale) benefit from being started indoors and transplanted. Follow seed packet instructions for planting depths (e.g., lettuce seeds are often surface-sown or planted 1/8 inch deep, while beans are 1 inch deep) and spacing.
- Companion Planting: Strategically plant different species together to enhance growth, deter pests, and attract beneficial insects. For example, planting marigolds near tomatoes can deter nematodes, and basil improves tomato flavor. Nasturtiums can act as a trap crop for aphids.
- Succession Planting: For a continuous harvest, plant small batches of quick-growing crops (lettuce, radishes, cilantro) every 2-3 weeks. As one crop finishes, another is ready to take its place.
Step 6: Pest & Disease Management (Organic)
Maintaining a self sufficient garden from scratch means embracing organic pest and disease control.
- Integrated Pest Management (IPM): This holistic approach combines several strategies.
- Observation: Regularly inspect your plants for early signs of pests or disease. Catching issues early is key.
- Physical Barriers: Use row covers (e.g., Agribon AG-19 floating row cover, 10×20 ft, ~$20) to protect young plants from insect pests like cabbage worms and squash bugs. Install fences (e.g., 2×4 welded wire mesh, 4 ft tall, 50 ft roll ~$70) to keep out deer, rabbits, and other larger animals.
- Hand-Picking: For larger pests like tomato hornworms or squash bugs, simply pick them off and drop them into a bucket of soapy water.
- Companion Planting: As mentioned, certain plants repel pests. Marigolds, garlic, and onions are excellent deterrents.
- Attract Beneficial Insects: Plant flowers like dill, fennel, cosmos, and sweet alyssum to attract ladybugs, lacewings, and parasitic wasps, which prey on common garden pests.
- Organic Sprays & Treatments:
- Neem Oil: An excellent broad-spectrum organic insecticide and fungicide. Bonide Neem Oil Concentrate (16oz, ~$20) can be mixed at a rate of 1-2 tbsp per gallon of water and sprayed on affected plants.
- Insecticidal Soap: Effective against soft-bodied insects like aphids, whiteflies, and spider mites. Garden Safe Insecticidal Soap (24oz ready-to-use, ~$10).
- Bacillus thuringiensis (Bt): A naturally occurring soil bacterium that targets caterpillars and worms. Monterey BT Worm & Caterpillar Killer (16oz, ~$18) is highly effective and safe for beneficial insects.
- Copper or Sulfur Sprays: For fungal diseases like powdery mildew or blight, organic copper (e.g., Bonide Copper Fungicide, ~$15 for 1lb) or sulfur (e.g., Safer Brand Garden Fungicide, ~$10 for 16oz) can be used as a last resort.
Step 7: Harvesting & Seed Saving
The culmination of your efforts is the harvest, and seed saving closes the loop on self-sufficiency.
- Harvesting Techniques:
- Timing: Harvest vegetables at their peak ripeness for best flavor and nutritional value. For example, green beans should snap cleanly, cucumbers should be firm, and tomatoes should be fully colored.
- Frequency: Many crops, like zucchini, cucumbers, and bush beans, produce more if harvested frequently. Pick daily or every other day.
- Tools: Use clean, sharp pruners (e.g., Corona ClassicCUT Bypass Pruner BP 3180, ~$30) or a sharp knife for clean cuts, minimizing damage to the plant.
- Seed Saving: This is where the « self-sufficient » aspect truly shines.
- Selection: Only save seeds from your healthiest, most vigorous plants that show desired traits (disease resistance, good flavor, high yield).
- Isolation: To ensure true-to-type seeds, prevent cross-pollination. This can be challenging for open-pollinated crops that readily cross (e.g., squash, corn). For beginners, focus on self-pollinating plants like beans, peas, lettuce, and tomatoes.
- Processing:
- Dry Seeds (Beans, Peas, Lettuce, Grains): Allow pods/seed heads to dry completely on the plant. Harvest, shell, and clean the seeds, removing chaff.
- Wet Seeds (Tomatoes, Cucumbers, Squash): For tomatoes, ferment the seeds in water for a few days to remove the gel coating and inhibit disease. For cucumbers/squash, scrape out seeds, wash thoroughly, and dry.
- Drying: Spread seeds thinly on screens or paper plates in a cool, dry, well-ventilated area for 1-4 weeks. Ensure they are bone-dry before storage. I aim for less than 8% moisture content.
- Storage: Store seeds in airtight containers (glass jars with desiccant packets work well) in a cool, dark, dry place (ideally 40-50°F and 30-40% humidity). Label clearly with variety and date. Properly stored seeds can remain viable for 3-10 years or more.
Step 8: Season Extension & Winterizing
Extend your harvest and protect your garden for the off-season to truly maximize your self sufficient garden from scratch.
- Cold Frames: Simple structures with a transparent top (glass, polycarbonate, or old windows) that sit over garden beds. They trap solar heat, allowing you to grow cold-hardy crops (lettuce, spinach, kale, radishes) well into winter or start seeds earlier in spring. A basic cold frame can be built from 2×6 lumber and a sheet of polycarbonate for under $100.
- Hoop Houses/Low Tunnels: Larger structures made from flexible hoops (PVC pipe or EMT conduit) covered with greenhouse plastic. These provide more space and greater temperature moderation. A 10×20 ft DIY low tunnel kit can cost $200-$500, while a larger, more robust hoop house kit might be $1,000-$3,000. I use a 6×12 ft low tunnel made from 1/2-inch PVC hoops and 6mil greenhouse plastic, which extends my lettuce and spinach harvest by at least
Step 4: Water Management & Irrigation
Efficient water management is critical for a self sufficient garden from scratch, especially in off-grid living where water resources might be limited.
- Rainwater Harvesting: This is my primary source of irrigation water. A 55-gallon rain barrel (e.g., EarthMark Rain Barrel, ~$120-$150) connected to a downspout can collect significant water. For larger needs, I use two 275-gallon IBC totes (Intermediate Bulk Containers, often available used for $100-$200 each from food-grade sources) connected in series. A 1,000 sq ft roof can collect approximately 620 gallons of water for every inch of rainfall. My 1,500 sq ft roof provides ample water for my 600 sq ft garden through multiple barrels and totes.
- Drip Irrigation: This is by far the most water-efficient method, delivering water directly to the plant’s root zone, minimizing evaporation and weed growth.
- Components: A typical drip system includes a pressure regulator (e.g., Rain Bird PRV-10, ~$15), a filter (Rain Bird RBY filter, ~$20), main tubing (1/2-inch poly tubing, 100ft ~$25), smaller feeder lines (1/4-inch tubing), and emitters (0.5 GPH or 1 GPH per plant).
- Kits: For beginners, a starter kit like the Rain Bird Drip Irrigation Garden Kit (model DDI-KIT-1P, ~$40-$60) is excellent for a small garden. For larger setups, I use Netafim Techline CV Drip Line (500ft roll, ~$150-$200), which has pressure-compensating emitters built-in, ensuring even watering across long runs.
- Automation: For true self-sufficiency, consider a battery-powered timer (e.g., Orbit B-Hyve Bluetooth Hose Faucet Timer, ~$50) or a solar-powered timer connected to a small 12V pump.
- Solar-Powered Pumps: For lifting water from a well, pond, or large storage tank to your garden, a solar pump is a game-changer. For a smaller drip system, a Shurflo 2088-594-152 Diaphragm Pump (12V, 3.5 GPM, ~$180) can be powered by a single 100W solar panel (e.g., Renogy 100W Monocrystalline Solar Panel, ~$100) and a small 12V battery (e.g., a 50Ah LiFePO4 battery like the Battle Born 50Ah, ~$450). For larger operations or deeper wells, more robust systems are needed. If you’re looking to build out a comprehensive off-grid power system to support your garden’s water needs, or indeed your entire homestead, you might want to explore resources like the Power Grid Generator complete system guide to understand the full scope of what’s possible in terms of energy independence.
Step 5: Seed Selection & Planting
The choice of seeds is crucial for a truly self sufficient garden from scratch.
- Choose Heirloom & Open-Pollinated Seeds: These varieties produce seeds that will grow true to type, meaning you can save seeds from your harvest year after year. F1 hybrids, while often vigorous, will not produce consistent offspring from saved seeds. Reputable seed companies include Baker Creek Heirloom Seeds, High Mowing Organic Seeds, and Seed Savers Exchange. Start with common, reliable varieties like ‘Black Krim’ tomatoes, ‘Provider’ bush beans, ‘Waltham Butternut’ squash, and ‘Black Seeded Simpson’ lettuce.
- Start Seeds Indoors (Optional but Recommended): For longer growing seasons or specific crops, starting seeds indoors gives you a head start. Use seed-starting mix (e.g., Espoma Organic Seed Starter Mix, ~$10 for 16qt bag) in seed trays (Jiffy Professional Greenhouse 72-cell kit, ~$15). Provide adequate light with LED grow lights (Barrina T5 2ft 4-pack LED Grow Lights, 20W each, ~$50) for 14-16 hours a day, positioned 2-4 inches above seedlings. Maintain consistent temperatures (65-75°F for most).
- Direct Sowing vs. Transplanting: Some crops (carrots, radishes, beans, corn) prefer direct sowing into the garden bed. Others (tomatoes, peppers, broccoli, kale) benefit from being started indoors and transplanted. Follow seed packet instructions for planting depths (e.g., lettuce seeds are often surface-sown or planted 1/8 inch deep, while beans are 1 inch deep) and spacing.
- Companion Planting: Strategically plant different species together to enhance growth, deter pests, and attract beneficial insects. For example, planting marigolds near tomatoes can deter nematodes, and basil improves tomato flavor. Nasturtiums can act as a trap crop for aphids.
- Succession Planting: For a continuous harvest, plant small batches of quick-growing crops (lettuce, radishes, cilantro) every 2-3 weeks. As one crop finishes, another is ready to take its place.
Step 6: Pest & Disease Management (Organic)
Maintaining a self sufficient garden from scratch means embracing organic pest and disease control.
- Integrated Pest Management (IPM): This holistic approach combines several strategies.
- Observation: Regularly inspect your plants for early signs of pests or disease. Catching issues early is key.
- Physical Barriers: Use row covers (e.g., Agribon AG-19 floating row cover, 10×20 ft, ~$20) to protect young plants from insect pests like cabbage worms and squash bugs. Install fences (e.g., 2×4 welded wire mesh, 4 ft tall, 50 ft roll ~$70) to keep out deer, rabbits, and other larger animals.
- Hand-Picking: For larger pests like tomato hornworms or squash bugs, simply pick them off and drop them into a bucket of soapy water.
- Companion Planting: As mentioned, certain plants repel pests. Marigolds, garlic, and onions are excellent deterrents.
- Attract Beneficial Insects: Plant flowers like dill, fennel, cosmos, and sweet alyssum to attract ladybugs, lacewings, and parasitic wasps, which prey on common garden pests.
- Organic Sprays & Treatments:
- Neem Oil: An excellent broad-spectrum organic insecticide and fungicide. Bonide Neem Oil Concentrate (16oz, ~$20) can be mixed at a rate of 1-2 tbsp per gallon of water and sprayed on affected plants.
- Insecticidal Soap: Effective against soft-bodied insects like aphids, whiteflies, and spider mites. Garden Safe Insecticidal Soap (24oz ready-to-use, ~$10).
- Bacillus thuringiensis (Bt): A naturally occurring soil bacterium that targets caterpillars and worms. Monterey BT Worm & Caterpillar Killer (16oz, ~$18) is highly effective and safe for beneficial insects.
- Copper or Sulfur Sprays: For fungal diseases like powdery mildew or blight, organic copper (e.g., Bonide Copper Fungicide, ~$15 for 1lb) or sulfur (e.g., Safer Brand Garden Fungicide, ~$10 for 16oz) can be used as a last resort.
Step 7: Harvesting & Seed Saving
The culmination of your efforts is the harvest, and seed saving closes the loop on self-sufficiency.
- Harvesting Techniques:
- Timing: Harvest vegetables at their peak ripeness for best flavor and nutritional value. For example, green beans should snap cleanly, cucumbers should be firm, and tomatoes should be fully colored.
- Frequency: Many crops, like zucchini, cucumbers, and bush beans, produce more if harvested frequently. Pick daily or every other day.
- Tools: Use clean, sharp pruners (e.g., Corona ClassicCUT Bypass Pruner BP 3180, ~$30) or a sharp knife for clean cuts, minimizing damage to the plant.
- Seed Saving: This is where the « self-sufficient » aspect truly shines.
- Selection: Only save seeds from your healthiest, most vigorous plants that show desired traits (disease resistance, good flavor, high yield).
- Isolation: To ensure true-to-type seeds, prevent cross-pollination. This can be challenging for open-pollinated crops that readily cross (e.g., squash, corn). For beginners, focus on self-pollinating plants like beans, peas, lettuce, and tomatoes.
- Processing:
- Dry Seeds (Beans, Peas, Lettuce, Grains): Allow pods/seed heads to dry completely on the plant. Harvest, shell, and clean the seeds, removing chaff.
- Wet Seeds (Tomatoes, Cucumbers, Squash): For tomatoes, ferment the seeds in water for a few days to remove the gel coating and inhibit disease. For cucumbers/squash, scrape out seeds, wash thoroughly, and dry.
- Drying: Spread seeds thinly on screens or paper plates in a cool, dry, well-ventilated area for 1-4 weeks. Ensure they are bone-dry before storage. I aim for less than 8% moisture content.
- Storage: Store seeds in airtight containers (glass jars with desiccant packets work well) in a cool, dark, dry place (ideally 40-50°F and 30-40% humidity). Label clearly with variety and date. Properly stored seeds can remain viable for 3-10 years or more.
Step 8: Season Extension & Winterizing
Extend your harvest and protect your garden for the off-season to truly maximize your self sufficient garden from scratch.
- Cold Frames: Simple structures with a transparent top (glass, polycarbonate, or old windows) that sit over garden beds. They trap solar heat, allowing you to grow cold-hardy crops (lettuce, spinach, kale, radishes) well into winter or start seeds earlier in spring. A basic cold frame can be built from 2×6 lumber and a sheet of polycarbonate for under $100.
- Hoop Houses/Low Tunnels: Larger structures made from flexible hoops (PVC pipe or EMT conduit) covered with greenhouse plastic. These provide more space and greater temperature moderation. A 10×20 ft DIY low tunnel kit can cost $200-$500, while a larger, more robust hoop house kit might be $1,000-$3,000. I use a 6×12 ft low tunnel made from 1/2-inch PVC hoops and 6mil greenhouse plastic, which extends my lettuce and spinach harvest by at least
- In-Ground Beds: If you have excellent native soil and good drainage, in-ground beds are the most economical. Double-digging (loosening soil two shovel depths) can significantly improve drainage and aeration. For my main garden, I primarily use in-ground beds, but I focus on building up the soil over time with consistent compost additions and cover cropping. I aim for beds that are no wider than 3-4 feet so I can reach the center without stepping on the soil, compacting it.
- Raised Beds: Raised beds offer numerous advantages, especially for poor soil, heavy clay, or rocky areas. They provide better drainage, warm up faster in spring, reduce compaction, and make weeding and harvesting easier on your back.
- Material Options:
- Untreated Cedar: Naturally rot-resistant and chemical-free. A 4×8 ft bed, 12 inches deep, typically requires three 2x12x8 ft cedar boards, costing around $50-$60 per board (total ~$150-$180) plus corner brackets or screws. My first raised beds were cedar and are still going strong after 7 years.
- Galvanized Steel: Durable, long-lasting, and aesthetically pleasing. Brands like Vego Garden offer modular kits. A Vego Garden 17″ Tall 8-in-1 Metal Raised Garden Bed (can be configured to 4×8 ft) costs approximately $250-$300.
- Concrete Blocks/Stones: Very durable but can leach minerals (though generally safe once weathered) and can be expensive.
- Recycled Materials: Pallets (check for chemical treatment stamps like « HT » for heat-treated), old tires (controversial due to potential chemical leaching).
- Filling Raised Beds: Don’t just fill with topsoil. Use a « Hugelkultur » approach (logs, branches, leaves, then compost, then topsoil) or a mixture of 60% good quality topsoil, 30% compost, and 10% perlite or vermiculite for drainage. A 4x8x1 ft raised bed requires about 32 cubic feet (or ~1.2 cubic yards) of soil mix, which can cost $100-$200 depending on your source.
- Material Options:
Step 4: Water Management & Irrigation
Efficient water management is critical for a self sufficient garden from scratch, especially in off-grid living where water resources might be limited.
- Rainwater Harvesting: This is my primary source of irrigation water. A 55-gallon rain barrel (e.g., EarthMark Rain Barrel, ~$120-$150) connected to a downspout can collect significant water. For larger needs, I use two 275-gallon IBC totes (Intermediate Bulk Containers, often available used for $100-$200 each from food-grade sources) connected in series. A 1,000 sq ft roof can collect approximately 620 gallons of water for every inch of rainfall. My 1,500 sq ft roof provides ample water for my 600 sq ft garden through multiple barrels and totes.
- Drip Irrigation: This is by far the most water-efficient method, delivering water directly to the plant’s root zone, minimizing evaporation and weed growth.
- Components: A typical drip system includes a pressure regulator (e.g., Rain Bird PRV-10, ~$15), a filter (Rain Bird RBY filter, ~$20), main tubing (1/2-inch poly tubing, 100ft ~$25), smaller feeder lines (1/4-inch tubing), and emitters (0.5 GPH or 1 GPH per plant).
- Kits: For beginners, a starter kit like the Rain Bird Drip Irrigation Garden Kit (model DDI-KIT-1P, ~$40-$60) is excellent for a small garden. For larger setups, I use Netafim Techline CV Drip Line (500ft roll, ~$150-$200), which has pressure-compensating emitters built-in, ensuring even watering across long runs.
- Automation: For true self-sufficiency, consider a battery-powered timer (e.g., Orbit B-Hyve Bluetooth Hose Faucet Timer, ~$50) or a solar-powered timer connected to a small 12V pump.
- Solar-Powered Pumps: For lifting water from a well, pond, or large storage tank to your garden, a solar pump is a game-changer. For a smaller drip system, a Shurflo 2088-594-152 Diaphragm Pump (12V, 3.5 GPM, ~$180) can be powered by a single 100W solar panel (e.g., Renogy 100W Monocrystalline Solar Panel, ~$100) and a small 12V battery (e.g., a 50Ah LiFePO4 battery like the Battle Born 50Ah, ~$450). For larger operations or deeper wells, more robust systems are needed. If you’re looking to build out a comprehensive off-grid power system to support your garden’s water needs, or indeed your entire homestead, you might want to explore resources like the Power Grid Generator complete system guide to understand the full scope of what’s possible in terms of energy independence.
Step 5: Seed Selection & Planting
The choice of seeds is crucial for a truly self sufficient garden from scratch.
- Choose Heirloom & Open-Pollinated Seeds: These varieties produce seeds that will grow true to type, meaning you can save seeds from your harvest year after year. F1 hybrids, while often vigorous, will not produce consistent offspring from saved seeds. Reputable seed companies include Baker Creek Heirloom Seeds, High Mowing Organic Seeds, and Seed Savers Exchange. Start with common, reliable varieties like ‘Black Krim’ tomatoes, ‘Provider’ bush beans, ‘Waltham Butternut’ squash, and ‘Black Seeded Simpson’ lettuce.
- Start Seeds Indoors (Optional but Recommended): For longer growing seasons or specific crops, starting seeds indoors gives you a head start. Use seed-starting mix (e.g., Espoma Organic Seed Starter Mix, ~$10 for 16qt bag) in seed trays (Jiffy Professional Greenhouse 72-cell kit, ~$15). Provide adequate light with LED grow lights (Barrina T5 2ft 4-pack LED Grow Lights, 20W each, ~$50) for 14-16 hours a day, positioned 2-4 inches above seedlings. Maintain consistent temperatures (65-75°F for most).
- Direct Sowing vs. Transplanting: Some crops (carrots, radishes, beans, corn) prefer direct sowing into the garden bed. Others (tomatoes, peppers, broccoli, kale) benefit from being started indoors and transplanted. Follow seed packet instructions for planting depths (e.g., lettuce seeds are often surface-sown or planted 1/8 inch deep, while beans are 1 inch deep) and spacing.
- Companion Planting: Strategically plant different species together to enhance growth, deter pests, and attract beneficial insects. For example, planting marigolds near tomatoes can deter nematodes, and basil improves tomato flavor. Nasturtiums can act as a trap crop for aphids.
- Succession Planting: For a continuous harvest, plant small batches of quick-growing crops (lettuce, radishes, cilantro) every 2-3 weeks. As one crop finishes, another is ready to take its place.
Step 6: Pest & Disease Management (Organic)
Maintaining a self sufficient garden from scratch means embracing organic pest and disease control.
- Integrated Pest Management (IPM): This holistic approach combines several strategies.
- Observation: Regularly inspect your plants for early signs of pests or disease. Catching issues early is key.
- Physical Barriers: Use row covers (e.g., Agribon AG-19 floating row cover, 10×20 ft, ~$20) to protect young plants from insect pests like cabbage worms and squash bugs. Install fences (e.g., 2×4 welded wire mesh, 4 ft tall, 50 ft roll ~$70) to keep out deer, rabbits, and other larger animals.
- Hand-Picking: For larger pests like tomato hornworms or squash bugs, simply pick them off and drop them into a bucket of soapy water.
- Companion Planting: As mentioned, certain plants repel pests. Marigolds, garlic, and onions are excellent deterrents.
- Attract Beneficial Insects: Plant flowers like dill, fennel, cosmos, and sweet alyssum to attract ladybugs, lacewings, and parasitic wasps, which prey on common garden pests.
- Organic Sprays & Treatments:
- Neem Oil: An excellent broad-spectrum organic insecticide and fungicide. Bonide Neem Oil Concentrate (16oz, ~$20) can be mixed at a rate of 1-2 tbsp per gallon of water and sprayed on affected plants.
- Insecticidal Soap: Effective against soft-bodied insects like aphids, whiteflies, and spider mites. Garden Safe Insecticidal Soap (24oz ready-to-use, ~$10).
- Bacillus thuringiensis (Bt): A naturally occurring soil bacterium that targets caterpillars and worms. Monterey BT Worm & Caterpillar Killer (16oz, ~$18) is highly effective and safe for beneficial insects.
- Copper or Sulfur Sprays: For fungal diseases like powdery mildew or blight, organic copper (e.g., Bonide Copper Fungicide, ~$15 for 1lb) or sulfur (e.g., Safer Brand Garden Fungicide, ~$10 for 16oz) can be used as a last resort.
Step 7: Harvesting & Seed Saving
The culmination of your efforts is the harvest, and seed saving closes the loop on self-sufficiency.
- Harvesting Techniques:
- Timing: Harvest vegetables at their peak ripeness for best flavor and nutritional value. For example, green beans should snap cleanly, cucumbers should be firm, and tomatoes should be fully colored.
- Frequency: Many crops, like zucchini, cucumbers, and bush beans, produce more if harvested frequently. Pick daily or every other day.
- Tools: Use clean, sharp pruners (e.g., Corona ClassicCUT Bypass Pruner BP 3180, ~$30) or a sharp knife for clean cuts, minimizing damage to the plant.
- Seed Saving: This is where the « self-sufficient » aspect truly shines.
- Selection: Only save seeds from your healthiest, most vigorous plants that show desired traits (disease resistance, good flavor, high yield).
- Isolation: To ensure true-to-type seeds, prevent cross-pollination. This can be challenging for open-pollinated crops that readily cross (e.g., squash, corn). For beginners, focus on self-pollinating plants like beans, peas, lettuce, and tomatoes.
- Processing:
- Dry Seeds (Beans, Peas, Lettuce, Grains): Allow pods/seed heads to dry completely on the plant. Harvest, shell, and clean the seeds, removing chaff.
- Wet Seeds (Tomatoes, Cucumbers, Squash): For tomatoes, ferment the seeds in water for a few days to remove the gel coating and inhibit disease. For cucumbers/squash, scrape out seeds, wash thoroughly, and dry.
- Drying: Spread seeds thinly on screens or paper plates in a cool, dry, well-ventilated area for 1-4 weeks. Ensure they are bone-dry before storage. I aim for less than 8% moisture content.
- Storage: Store seeds in airtight containers (glass jars with desiccant packets work well) in a cool, dark, dry place (ideally 40-50°F and 30-40% humidity). Label clearly with variety and date. Properly stored seeds can remain viable for 3-10 years or more.
Step 8: Season Extension & Winterizing
Extend your harvest and protect your garden for the off-season to truly maximize your self sufficient garden from scratch.
- Cold Frames: Simple structures with a transparent top (glass, polycarbonate, or old windows) that sit over garden beds. They trap solar heat, allowing you to grow cold-hardy crops (lettuce, spinach, kale, radishes) well into winter or start seeds earlier in spring. A basic cold frame can be built from 2×6 lumber and a sheet of polycarbonate for under $100.
- Hoop Houses/Low Tunnels: Larger structures made from flexible hoops (PVC pipe or EMT conduit) covered with greenhouse plastic. These provide more space and greater temperature moderation. A 10×20 ft DIY low tunnel kit can cost $200-$500, while a larger, more robust hoop house kit might be $1,000-$3,000. I use a 6×12 ft low tunnel made from 1/2-inch PVC hoops and 6mil greenhouse plastic, which extends my lettuce and spinach harvest by at least
Deciding between raised beds and in-ground beds depends on your soil, budget, and physical capabilities.
- In-Ground Beds: If you have excellent native soil and good drainage, in-ground beds are the most economical. Double-digging (loosening soil two shovel depths) can significantly improve drainage and aeration. For my main garden, I primarily use in-ground beds, but I focus on building up the soil over time with consistent compost additions and cover cropping. I aim for beds that are no wider than 3-4 feet so I can reach the center without stepping on the soil, compacting it.
- Raised Beds: Raised beds offer numerous advantages, especially for poor soil, heavy clay, or rocky areas. They provide better drainage, warm up faster in spring, reduce compaction, and make weeding and harvesting easier on your back.
- Material Options:
- Untreated Cedar: Naturally rot-resistant and chemical-free. A 4×8 ft bed, 12 inches deep, typically requires three 2x12x8 ft cedar boards, costing around $50-$60 per board (total ~$150-$180) plus corner brackets or screws. My first raised beds were cedar and are still going strong after 7 years.
- Galvanized Steel: Durable, long-lasting, and aesthetically pleasing. Brands like Vego Garden offer modular kits. A Vego Garden 17″ Tall 8-in-1 Metal Raised Garden Bed (can be configured to 4×8 ft) costs approximately $250-$300.
- Concrete Blocks/Stones: Very durable but can leach minerals (though generally safe once weathered) and can be expensive.
- Recycled Materials: Pallets (check for chemical treatment stamps like « HT » for heat-treated), old tires (controversial due to potential chemical leaching).
- Filling Raised Beds: Don’t just fill with topsoil. Use a « Hugelkultur » approach (logs, branches, leaves, then compost, then topsoil) or a mixture of 60% good quality topsoil, 30% compost, and 10% perlite or vermiculite for drainage. A 4x8x1 ft raised bed requires about 32 cubic feet (or ~1.2 cubic yards) of soil mix, which can cost $100-$200 depending on your source.
- Material Options:
Step 4: Water Management & Irrigation
Efficient water management is critical for a self sufficient garden from scratch, especially in off-grid living where water resources might be limited.
- Rainwater Harvesting: This is my primary source of irrigation water. A 55-gallon rain barrel (e.g., EarthMark Rain Barrel, ~$120-$150) connected to a downspout can collect significant water. For larger needs, I use two 275-gallon IBC totes (Intermediate Bulk Containers, often available used for $100-$200 each from food-grade sources) connected in series. A 1,000 sq ft roof can collect approximately 620 gallons of water for every inch of rainfall. My 1,500 sq ft roof provides ample water for my 600 sq ft garden through multiple barrels and totes.
- Drip Irrigation: This is by far the most water-efficient method, delivering water directly to the plant’s root zone, minimizing evaporation and weed growth.
- Components: A typical drip system includes a pressure regulator (e.g., Rain Bird PRV-10, ~$15), a filter (Rain Bird RBY filter, ~$20), main tubing (1/2-inch poly tubing, 100ft ~$25), smaller feeder lines (1/4-inch tubing), and emitters (0.5 GPH or 1 GPH per plant).
- Kits: For beginners, a starter kit like the Rain Bird Drip Irrigation Garden Kit (model DDI-KIT-1P, ~$40-$60) is excellent for a small garden. For larger setups, I use Netafim Techline CV Drip Line (500ft roll, ~$150-$200), which has pressure-compensating emitters built-in, ensuring even watering across long runs.
- Automation: For true self-sufficiency, consider a battery-powered timer (e.g., Orbit B-Hyve Bluetooth Hose Faucet Timer, ~$50) or a solar-powered timer connected to a small 12V pump.
- Solar-Powered Pumps: For lifting water from a well, pond, or large storage tank to your garden, a solar pump is a game-changer. For a smaller drip system, a Shurflo 2088-594-152 Diaphragm Pump (12V, 3.5 GPM, ~$180) can be powered by a single 100W solar panel (e.g., Renogy 100W Monocrystalline Solar Panel, ~$100) and a small 12V battery (e.g., a 50Ah LiFePO4 battery like the Battle Born 50Ah, ~$450). For larger operations or deeper wells, more robust systems are needed. If you’re looking to build out a comprehensive off-grid power system to support your garden’s water needs, or indeed your entire homestead, you might want to explore resources like the Power Grid Generator complete system guide to understand the full scope of what’s possible in terms of energy independence.
Step 5: Seed Selection & Planting
The choice of seeds is crucial for a truly self sufficient garden from scratch.
- Choose Heirloom & Open-Pollinated Seeds: These varieties produce seeds that will grow true to type, meaning you can save seeds from your harvest year after year. F1 hybrids, while often vigorous, will not produce consistent offspring from saved seeds. Reputable seed companies include Baker Creek Heirloom Seeds, High Mowing Organic Seeds, and Seed Savers Exchange. Start with common, reliable varieties like ‘Black Krim’ tomatoes, ‘Provider’ bush beans, ‘Waltham Butternut’ squash, and ‘Black Seeded Simpson’ lettuce.
- Start Seeds Indoors (Optional but Recommended): For longer growing seasons or specific crops, starting seeds indoors gives you a head start. Use seed-starting mix (e.g., Espoma Organic Seed Starter Mix, ~$10 for 16qt bag) in seed trays (Jiffy Professional Greenhouse 72-cell kit, ~$15). Provide adequate light with LED grow lights (Barrina T5 2ft 4-pack LED Grow Lights, 20W each, ~$50) for 14-16 hours a day, positioned 2-4 inches above seedlings. Maintain consistent temperatures (65-75°F for most).
- Direct Sowing vs. Transplanting: Some crops (carrots, radishes, beans, corn) prefer direct sowing into the garden bed. Others (tomatoes, peppers, broccoli, kale) benefit from being started indoors and transplanted. Follow seed packet instructions for planting depths (e.g., lettuce seeds are often surface-sown or planted 1/8 inch deep, while beans are 1 inch deep) and spacing.
- Companion Planting: Strategically plant different species together to enhance growth, deter pests, and attract beneficial insects. For example, planting marigolds near tomatoes can deter nematodes, and basil improves tomato flavor. Nasturtiums can act as a trap crop for aphids.
- Succession Planting: For a continuous harvest, plant small batches of quick-growing crops (lettuce, radishes, cilantro) every 2-3 weeks. As one crop finishes, another is ready to take its place.
Step 6: Pest & Disease Management (Organic)
Maintaining a self sufficient garden from scratch means embracing organic pest and disease control.
- Integrated Pest Management (IPM): This holistic approach combines several strategies.
- Observation: Regularly inspect your plants for early signs of pests or disease. Catching issues early is key.
- Physical Barriers: Use row covers (e.g., Agribon AG-19 floating row cover, 10×20 ft, ~$20) to protect young plants from insect pests like cabbage worms and squash bugs. Install fences (e.g., 2×4 welded wire mesh, 4 ft tall, 50 ft roll ~$70) to keep out deer, rabbits, and other larger animals.
- Hand-Picking: For larger pests like tomato hornworms or squash bugs, simply pick them off and drop them into a bucket of soapy water.
- Companion Planting: As mentioned, certain plants repel pests. Marigolds, garlic, and onions are excellent deterrents.
- Attract Beneficial Insects: Plant flowers like dill, fennel, cosmos, and sweet alyssum to attract ladybugs, lacewings, and parasitic wasps, which prey on common garden pests.
- Organic Sprays & Treatments:
- Neem Oil: An excellent broad-spectrum organic insecticide and fungicide. Bonide Neem Oil Concentrate (16oz, ~$20) can be mixed at a rate of 1-2 tbsp per gallon of water and sprayed on affected plants.
- Insecticidal Soap: Effective against soft-bodied insects like aphids, whiteflies, and spider mites. Garden Safe Insecticidal Soap (24oz ready-to-use, ~$10).
- Bacillus thuringiensis (Bt): A naturally occurring soil bacterium that targets caterpillars and worms. Monterey BT Worm & Caterpillar Killer (16oz, ~$18) is highly effective and safe for beneficial insects.
- Copper or Sulfur Sprays: For fungal diseases like powdery mildew or blight, organic copper (e.g., Bonide Copper Fungicide, ~$15 for 1lb) or sulfur (e.g., Safer Brand Garden Fungicide, ~$10 for 16oz) can be used as a last resort.
Step 7: Harvesting & Seed Saving
The culmination of your efforts is the harvest, and seed saving closes the loop on self-sufficiency.
- Harvesting Techniques:
- Timing: Harvest vegetables at their peak ripeness for best flavor and nutritional value. For example, green beans should snap cleanly, cucumbers should be firm, and tomatoes should be fully colored.
- Frequency: Many crops, like zucchini, cucumbers, and bush beans, produce more if harvested frequently. Pick daily or every other day.
- Tools: Use clean, sharp pruners (e.g., Corona ClassicCUT Bypass Pruner BP 3180, ~$30) or a sharp knife for clean cuts, minimizing damage to the plant.
- Seed Saving: This is where the « self-sufficient » aspect truly shines.
- Selection: Only save seeds from your healthiest, most vigorous plants that show desired traits (disease resistance, good flavor, high yield).
- Isolation: To ensure true-to-type seeds, prevent cross-pollination. This can be challenging for open-pollinated crops that readily cross (e.g., squash, corn). For beginners, focus on self-pollinating plants like beans, peas, lettuce, and tomatoes.
- Processing:
- Dry Seeds (Beans, Peas, Lettuce, Grains): Allow pods/seed heads to dry completely on the plant. Harvest, shell, and clean the seeds, removing chaff.
- Wet Seeds (Tomatoes, Cucumbers, Squash): For tomatoes, ferment the seeds in water for a few days to remove the gel coating and inhibit disease. For cucumbers/squash, scrape out seeds, wash thoroughly, and dry.
- Drying: Spread seeds thinly on screens or paper plates in a cool, dry, well-ventilated area for 1-4 weeks. Ensure they are bone-dry before storage. I aim for less than 8% moisture content.
- Storage: Store seeds in airtight containers (glass jars with desiccant packets work well) in a cool, dark, dry place (ideally 40-50°F and 30-40% humidity). Label clearly with variety and date. Properly stored seeds can remain viable for 3-10 years or more.
Step 8: Season Extension & Winterizing
Extend your harvest and protect your garden for the off-season to truly maximize your self sufficient garden from scratch.
- Cold Frames: Simple structures with a transparent top (glass, polycarbonate, or old windows) that sit over garden beds. They trap solar heat, allowing you to grow cold-hardy crops (lettuce, spinach, kale, radishes) well into winter or start seeds earlier in spring. A basic cold frame can be built from 2×6 lumber and a sheet of polycarbonate for under $100.
- Hoop Houses/Low Tunnels: Larger structures made from flexible hoops (PVC pipe or EMT conduit) covered with greenhouse plastic. These provide more space and greater temperature moderation. A 10×20 ft DIY low tunnel kit can cost $200-$500, while a larger, more robust hoop house kit might be $1,000-$3,000. I use a 6×12 ft low tunnel made from 1/2-inch PVC hoops and 6mil greenhouse plastic, which extends my lettuce and spinach harvest by at least
Healthy soil is the bedrock of a productive, self-sufficient garden. You can’t guess what your soil needs; you have to test it.
- Perform a Soil Test: A professional soil test will give you precise data on your soil’s pH, nutrient levels (N-P-K), and organic matter content. I recommend sending a sample to your local agricultural extension office; it typically costs $20-$50 and provides detailed recommendations. Alternatively, for a quick homeowner check, a Rapitest Soil Test Kit (40-test kit, model 1663, ~$20 on Amazon) provides a good baseline for pH, Nitrogen, Phosphorus, and Potash. Aim for a pH between 6.0 and 7.0 for most vegetables.
- Amend for pH Imbalance: If your soil is too acidic (below 6.0), add agricultural lime (dolomitic lime adds magnesium, calcitic lime adds calcium). Apply 5-10 lbs per 100 sq ft for a moderate adjustment. If it’s too alkaline (above 7.0), add elemental sulfur (e.g., Espoma Soil Acidifier, ~$15 for 6.75 lbs) or generous amounts of organic matter like peat moss or pine needles.
- Build Organic Matter: This is the single most important step for long-term soil health. Organic matter improves soil structure, water retention, drainage, and nutrient availability. Incorporate 2-4 inches of high-quality compost into your top 6-12 inches of soil annually. I make my own compost from kitchen scraps, garden waste, and shredded leaves, but you can purchase it. Local nurseries often sell bulk compost for $30-$50 per cubic yard. Aged manure (from chickens, cows, or horses – ensure it’s well-rotted to avoid burning plants) is also excellent.
- Address Nutrient Deficiencies: Based on your soil test, add specific organic amendments. If Nitrogen (N) is low, add blood meal (12-0-0, ~$20 for 3 lbs) or feather meal. For Phosphorus (P), use bone meal (3-15-0, ~$15 for 3 lbs) or rock phosphate. For Potassium (K), greensand (0-0-2.5, ~$25 for 5 lbs) or kelp meal are good choices. I rely heavily on Espoma Organic Garden-tone (5-3-3, ~$25 for an 8lb bag) as a balanced, all-purpose organic fertilizer during planting.
Step 3: Garden Bed Preparation
Deciding between raised beds and in-ground beds depends on your soil, budget, and physical capabilities.
- In-Ground Beds: If you have excellent native soil and good drainage, in-ground beds are the most economical. Double-digging (loosening soil two shovel depths) can significantly improve drainage and aeration. For my main garden, I primarily use in-ground beds, but I focus on building up the soil over time with consistent compost additions and cover cropping. I aim for beds that are no wider than 3-4 feet so I can reach the center without stepping on the soil, compacting it.
- Raised Beds: Raised beds offer numerous advantages, especially for poor soil, heavy clay, or rocky areas. They provide better drainage, warm up faster in spring, reduce compaction, and make weeding and harvesting easier on your back.
- Material Options:
- Untreated Cedar: Naturally rot-resistant and chemical-free. A 4×8 ft bed, 12 inches deep, typically requires three 2x12x8 ft cedar boards, costing around $50-$60 per board (total ~$150-$180) plus corner brackets or screws. My first raised beds were cedar and are still going strong after 7 years.
- Galvanized Steel: Durable, long-lasting, and aesthetically pleasing. Brands like Vego Garden offer modular kits. A Vego Garden 17″ Tall 8-in-1 Metal Raised Garden Bed (can be configured to 4×8 ft) costs approximately $250-$300.
- Concrete Blocks/Stones: Very durable but can leach minerals (though generally safe once weathered) and can be expensive.
- Recycled Materials: Pallets (check for chemical treatment stamps like « HT » for heat-treated), old tires (controversial due to potential chemical leaching).
- Filling Raised Beds: Don’t just fill with topsoil. Use a « Hugelkultur » approach (logs, branches, leaves, then compost, then topsoil) or a mixture of 60% good quality topsoil, 30% compost, and 10% perlite or vermiculite for drainage. A 4x8x1 ft raised bed requires about 32 cubic feet (or ~1.2 cubic yards) of soil mix, which can cost $100-$200 depending on your source.
- Material Options:
Step 4: Water Management & Irrigation
Efficient water management is critical for a self sufficient garden from scratch, especially in off-grid living where water resources might be limited.
- Rainwater Harvesting: This is my primary source of irrigation water. A 55-gallon rain barrel (e.g., EarthMark Rain Barrel, ~$120-$150) connected to a downspout can collect significant water. For larger needs, I use two 275-gallon IBC totes (Intermediate Bulk Containers, often available used for $100-$200 each from food-grade sources) connected in series. A 1,000 sq ft roof can collect approximately 620 gallons of water for every inch of rainfall. My 1,500 sq ft roof provides ample water for my 600 sq ft garden through multiple barrels and totes.
- Drip Irrigation: This is by far the most water-efficient method, delivering water directly to the plant’s root zone, minimizing evaporation and weed growth.
- Components: A typical drip system includes a pressure regulator (e.g., Rain Bird PRV-10, ~$15), a filter (Rain Bird RBY filter, ~$20), main tubing (1/2-inch poly tubing, 100ft ~$25), smaller feeder lines (1/4-inch tubing), and emitters (0.5 GPH or 1 GPH per plant).
- Kits: For beginners, a starter kit like the Rain Bird Drip Irrigation Garden Kit (model DDI-KIT-1P, ~$40-$60) is excellent for a small garden. For larger setups, I use Netafim Techline CV Drip Line (500ft roll, ~$150-$200), which has pressure-compensating emitters built-in, ensuring even watering across long runs.
- Automation: For true self-sufficiency, consider a battery-powered timer (e.g., Orbit B-Hyve Bluetooth Hose Faucet Timer, ~$50) or a solar-powered timer connected to a small 12V pump.
- Solar-Powered Pumps: For lifting water from a well, pond, or large storage tank to your garden, a solar pump is a game-changer. For a smaller drip system, a Shurflo 2088-594-152 Diaphragm Pump (12V, 3.5 GPM, ~$180) can be powered by a single 100W solar panel (e.g., Renogy 100W Monocrystalline Solar Panel, ~$100) and a small 12V battery (e.g., a 50Ah LiFePO4 battery like the Battle Born 50Ah, ~$450). For larger operations or deeper wells, more robust systems are needed. If you’re looking to build out a comprehensive off-grid power system to support your garden’s water needs, or indeed your entire homestead, you might want to explore resources like the Power Grid Generator complete system guide to understand the full scope of what’s possible in terms of energy independence.
Step 5: Seed Selection & Planting
The choice of seeds is crucial for a truly self sufficient garden from scratch.
- Choose Heirloom & Open-Pollinated Seeds: These varieties produce seeds that will grow true to type, meaning you can save seeds from your harvest year after year. F1 hybrids, while often vigorous, will not produce consistent offspring from saved seeds. Reputable seed companies include Baker Creek Heirloom Seeds, High Mowing Organic Seeds, and Seed Savers Exchange. Start with common, reliable varieties like ‘Black Krim’ tomatoes, ‘Provider’ bush beans, ‘Waltham Butternut’ squash, and ‘Black Seeded Simpson’ lettuce.
- Start Seeds Indoors (Optional but Recommended): For longer growing seasons or specific crops, starting seeds indoors gives you a head start. Use seed-starting mix (e.g., Espoma Organic Seed Starter Mix, ~$10 for 16qt bag) in seed trays (Jiffy Professional Greenhouse 72-cell kit, ~$15). Provide adequate light with LED grow lights (Barrina T5 2ft 4-pack LED Grow Lights, 20W each, ~$50) for 14-16 hours a day, positioned 2-4 inches above seedlings. Maintain consistent temperatures (65-75°F for most).
- Direct Sowing vs. Transplanting: Some crops (carrots, radishes, beans, corn) prefer direct sowing into the garden bed. Others (tomatoes, peppers, broccoli, kale) benefit from being started indoors and transplanted. Follow seed packet instructions for planting depths (e.g., lettuce seeds are often surface-sown or planted 1/8 inch deep, while beans are 1 inch deep) and spacing.
- Companion Planting: Strategically plant different species together to enhance growth, deter pests, and attract beneficial insects. For example, planting marigolds near tomatoes can deter nematodes, and basil improves tomato flavor. Nasturtiums can act as a trap crop for aphids.
- Succession Planting: For a continuous harvest, plant small batches of quick-growing crops (lettuce, radishes, cilantro) every 2-3 weeks. As one crop finishes, another is ready to take its place.
Step 6: Pest & Disease Management (Organic)
Maintaining a self sufficient garden from scratch means embracing organic pest and disease control.
- Integrated Pest Management (IPM): This holistic approach combines several strategies.
- Observation: Regularly inspect your plants for early signs of pests or disease. Catching issues early is key.
- Physical Barriers: Use row covers (e.g., Agribon AG-19 floating row cover, 10×20 ft, ~$20) to protect young plants from insect pests like cabbage worms and squash bugs. Install fences (e.g., 2×4 welded wire mesh, 4 ft tall, 50 ft roll ~$70) to keep out deer, rabbits, and other larger animals.
- Hand-Picking: For larger pests like tomato hornworms or squash bugs, simply pick them off and drop them into a bucket of soapy water.
- Companion Planting: As mentioned, certain plants repel pests. Marigolds, garlic, and onions are excellent deterrents.
- Attract Beneficial Insects: Plant flowers like dill, fennel, cosmos, and sweet alyssum to attract ladybugs, lacewings, and parasitic wasps, which prey on common garden pests.
- Organic Sprays & Treatments:
- Neem Oil: An excellent broad-spectrum organic insecticide and fungicide. Bonide Neem Oil Concentrate (16oz, ~$20) can be mixed at a rate of 1-2 tbsp per gallon of water and sprayed on affected plants.
- Insecticidal Soap: Effective against soft-bodied insects like aphids, whiteflies, and spider mites. Garden Safe Insecticidal Soap (24oz ready-to-use, ~$10).
- Bacillus thuringiensis (Bt): A naturally occurring soil bacterium that targets caterpillars and worms. Monterey BT Worm & Caterpillar Killer (16oz, ~$18) is highly effective and safe for beneficial insects.
- Copper or Sulfur Sprays: For fungal diseases like powdery mildew or blight, organic copper (e.g., Bonide Copper Fungicide, ~$15 for 1lb) or sulfur (e.g., Safer Brand Garden Fungicide, ~$10 for 16oz) can be used as a last resort.
Step 7: Harvesting & Seed Saving
The culmination of your efforts is the harvest, and seed saving closes the loop on self-sufficiency.
- Harvesting Techniques:
- Timing: Harvest vegetables at their peak ripeness for best flavor and nutritional value. For example, green beans should snap cleanly, cucumbers should be firm, and tomatoes should be fully colored.
- Frequency: Many crops, like zucchini, cucumbers, and bush beans, produce more if harvested frequently. Pick daily or every other day.
- Tools: Use clean, sharp pruners (e.g., Corona ClassicCUT Bypass Pruner BP 3180, ~$30) or a sharp knife for clean cuts, minimizing damage to the plant.
- Seed Saving: This is where the « self-sufficient » aspect truly shines.
- Selection: Only save seeds from your healthiest, most vigorous plants that show desired traits (disease resistance, good flavor, high yield).
- Isolation: To ensure true-to-type seeds, prevent cross-pollination. This can be challenging for open-pollinated crops that readily cross (e.g., squash, corn). For beginners, focus on self-pollinating plants like beans, peas, lettuce, and tomatoes.
- Processing:
- Dry Seeds (Beans, Peas, Lettuce, Grains): Allow pods/seed heads to dry completely on the plant. Harvest, shell, and clean the seeds, removing chaff.
- Wet Seeds (Tomatoes, Cucumbers, Squash): For tomatoes, ferment the seeds in water for a few days to remove the gel coating and inhibit disease. For cucumbers/squash, scrape out seeds, wash thoroughly, and dry.
- Drying: Spread seeds thinly on screens or paper plates in a cool, dry, well-ventilated area for 1-4 weeks. Ensure they are bone-dry before storage. I aim for less than 8% moisture content.
- Storage: Store seeds in airtight containers (glass jars with desiccant packets work well) in a cool, dark, dry place (ideally 40-50°F and 30-40% humidity). Label clearly with variety and date. Properly stored seeds can remain viable for 3-10 years or more.
Step 8: Season Extension & Winterizing
Extend your harvest and protect your garden for the off-season to truly maximize your self sufficient garden from scratch.
- Cold Frames: Simple structures with a transparent top (glass, polycarbonate, or old windows) that sit over garden beds. They trap solar heat, allowing you to grow cold-hardy crops (lettuce, spinach, kale, radishes) well into winter or start seeds earlier in spring. A basic cold frame can be built from 2×6 lumber and a sheet of polycarbonate for under $100.
- Hoop Houses/Low Tunnels: Larger structures made from flexible hoops (PVC pipe or EMT conduit) covered with greenhouse plastic. These provide more space and greater temperature moderation. A 10×20 ft DIY low tunnel kit can cost $200-$500, while a larger, more robust hoop house kit might be $1,000-$3,000. I use a 6×12 ft low tunnel made from 1/2-inch PVC hoops and 6mil greenhouse plastic, which extends my lettuce and spinach harvest by at least
- Harvesting Techniques:
- Timing: Harvest vegetables at their peak ripeness for best flavor and nutritional value. For example, green beans should snap cleanly, cucumbers should be firm, and tomatoes should be fully colored.
- Frequency: Many crops, like zucchini, cucumbers, and bush beans, produce more if harvested frequently. Pick daily or every other day.
- Tools: Use clean, sharp pruners (e.g., Corona ClassicCUT Bypass Pruner BP 3180, ~$30) or a sharp knife for clean cuts, minimizing damage to the plant.
- Seed Saving: This is where the « self-sufficient » aspect truly shines.
- Selection: Only save seeds from your healthiest, most vigorous plants that show desired traits (disease resistance, good flavor, high yield).
- Isolation: To ensure true-to-type seeds, prevent cross-pollination. This can be challenging for open-pollinated crops that readily cross (e.g., squash, corn). For beginners, focus on self-pollinating plants like beans, peas, lettuce, and tomatoes.
- Processing:
- Dry Seeds (Beans, Peas, Lettuce, Grains): Allow pods/seed heads to dry completely on the plant. Harvest, shell, and clean the seeds, removing chaff.
- Wet Seeds (Tomatoes, Cucumbers, Squash): For tomatoes, ferment the seeds in water for a few days to remove the gel coating and inhibit disease. For cucumbers/squash, scrape out seeds, wash thoroughly, and dry.
- Drying: Spread seeds thinly on screens or paper plates in a cool, dry, well-ventilated area for 1-4 weeks. Ensure they are bone-dry before storage. I aim for less than 8% moisture content.
- Storage: Store seeds in airtight containers (glass jars with desiccant packets work well) in a cool, dark, dry place (ideally 40-50°F and 30-40% humidity). Label clearly with variety and date. Properly stored seeds can remain viable for 3-10 years or more.
Step 8: Season Extension & Winterizing
Extend your harvest and protect your garden for the off-season to truly maximize your self sufficient garden from scratch.
- Cold Frames: Simple structures with a transparent top (glass, polycarbonate, or old windows) that sit over garden beds. They trap solar heat, allowing you to grow cold-hardy crops (lettuce, spinach, kale, radishes) well into winter or start seeds earlier in spring. A basic cold frame can be built from 2×6 lumber and a sheet of polycarbonate for under $100.
- Hoop Houses/Low Tunnels: Larger structures made from flexible hoops (PVC pipe or EMT conduit) covered with greenhouse plastic. These provide more space and greater temperature moderation. A 10×20 ft DIY low tunnel kit can cost $200-$500, while a larger, more robust hoop house kit might be $1,000-$3,000. I use a 6×12 ft low tunnel made from 1/2-inch PVC hoops and 6mil greenhouse plastic, which extends my lettuce and spinach harvest by at least
Step 4: Water Management & Irrigation
Efficient water management is critical for a self sufficient garden from scratch, especially in off-grid living where water resources might be limited.
- Rainwater Harvesting: This is my primary source of irrigation water. A 55-gallon rain barrel (e.g., EarthMark Rain Barrel, ~$120-$150) connected to a downspout can collect significant water. For larger needs, I use two 275-gallon IBC totes (Intermediate Bulk Containers, often available used for $100-$200 each from food-grade sources) connected in series. A 1,000 sq ft roof can collect approximately 620 gallons of water for every inch of rainfall. My 1,500 sq ft roof provides ample water for my 600 sq ft garden through multiple barrels and totes.
- Drip Irrigation: This is by far the most water-efficient method, delivering water directly to the plant’s root zone, minimizing evaporation and weed growth.
- Components: A typical drip system includes a pressure regulator (e.g., Rain Bird PRV-10, ~$15), a filter (Rain Bird RBY filter, ~$20), main tubing (1/2-inch poly tubing, 100ft ~$25), smaller feeder lines (1/4-inch tubing), and emitters (0.5 GPH or 1 GPH per plant).
- Kits: For beginners, a starter kit like the Rain Bird Drip Irrigation Garden Kit (model DDI-KIT-1P, ~$40-$60) is excellent for a small garden. For larger setups, I use Netafim Techline CV Drip Line (500ft roll, ~$150-$200), which has pressure-compensating emitters built-in, ensuring even watering across long runs.
- Automation: For true self-sufficiency, consider a battery-powered timer (e.g., Orbit B-Hyve Bluetooth Hose Faucet Timer, ~$50) or a solar-powered timer connected to a small 12V pump.
- Solar-Powered Pumps: For lifting water from a well, pond, or large storage tank to your garden, a solar pump is a game-changer. For a smaller drip system, a Shurflo 2088-594-152 Diaphragm Pump (12V, 3.5 GPM, ~$180) can be powered by a single 100W solar panel (e.g., Renogy 100W Monocrystalline Solar Panel, ~$100) and a small 12V battery (e.g., a 50Ah LiFePO4 battery like the Battle Born 50Ah, ~$450). For larger operations or deeper wells, more robust systems are needed. If you’re looking to build out a comprehensive off-grid power system to support your garden’s water needs, or indeed your entire homestead, you might want to explore resources like the Power Grid Generator complete system guide to understand the full scope of what’s possible in terms of energy independence.
Step 5: Seed Selection & Planting
The choice of seeds is crucial for a truly self sufficient garden from scratch.
- Choose Heirloom & Open-Pollinated Seeds: These varieties produce seeds that will grow true to type, meaning you can save seeds from your harvest year after year. F1 hybrids, while often vigorous, will not produce consistent offspring from saved seeds. Reputable seed companies include Baker Creek Heirloom Seeds, High Mowing Organic Seeds, and Seed Savers Exchange. Start with common, reliable varieties like ‘Black Krim’ tomatoes, ‘Provider’ bush beans, ‘Waltham Butternut’ squash, and ‘Black Seeded Simpson’ lettuce.
- Start Seeds Indoors (Optional but Recommended): For longer growing seasons or specific crops, starting seeds indoors gives you a head start. Use seed-starting mix (e.g., Espoma Organic Seed Starter Mix, ~$10 for 16qt bag) in seed trays (Jiffy Professional Greenhouse 72-cell kit, ~$15). Provide adequate light with LED grow lights (Barrina T5 2ft 4-pack LED Grow Lights, 20W each, ~$50) for 14-16 hours a day, positioned 2-4 inches above seedlings. Maintain consistent temperatures (65-75°F for most).
- Direct Sowing vs. Transplanting: Some crops (carrots, radishes, beans, corn) prefer direct sowing into the garden bed. Others (tomatoes, peppers, broccoli, kale) benefit from being started indoors and transplanted. Follow seed packet instructions for planting depths (e.g., lettuce seeds are often surface-sown or planted 1/8 inch deep, while beans are 1 inch deep) and spacing.
- Companion Planting: Strategically plant different species together to enhance growth, deter pests, and attract beneficial insects. For example, planting marigolds near tomatoes can deter nematodes, and basil improves tomato flavor. Nasturtiums can act as a trap crop for aphids.
- Succession Planting: For a continuous harvest, plant small batches of quick-growing crops (lettuce, radishes, cilantro) every 2-3 weeks. As one crop finishes, another is ready to take its place.
Step 6: Pest & Disease Management (Organic)
Maintaining a self sufficient garden from scratch means embracing organic pest and disease control.
- Integrated Pest Management (IPM): This holistic approach combines several strategies.
- Observation: Regularly inspect your plants for early signs of pests or disease. Catching issues early is key.
- Physical Barriers: Use row covers (e.g., Agribon AG-19 floating row cover, 10×20 ft, ~$20) to protect young plants from insect pests like cabbage worms and squash bugs. Install fences (e.g., 2×4 welded wire mesh, 4 ft tall, 50 ft roll ~$70) to keep out deer, rabbits, and other larger animals.
- Hand-Picking: For larger pests like tomato hornworms or squash bugs, simply pick them off and drop them into a bucket of soapy water.
- Companion Planting: As mentioned, certain plants repel pests. Marigolds, garlic, and onions are excellent deterrents.
- Attract Beneficial Insects: Plant flowers like dill, fennel, cosmos, and sweet alyssum to attract ladybugs, lacewings, and parasitic wasps, which prey on common garden pests.
- Organic Sprays & Treatments:
- Neem Oil: An excellent broad-spectrum organic insecticide and fungicide. Bonide Neem Oil Concentrate (16oz, ~$20) can be mixed at a rate of 1-2 tbsp per gallon of water and sprayed on affected plants.
- Insecticidal Soap: Effective against soft-bodied insects like aphids, whiteflies, and spider mites. Garden Safe Insecticidal Soap (24oz ready-to-use, ~$10).
- Bacillus thuringiensis (Bt): A naturally occurring soil bacterium that targets caterpillars and worms. Monterey BT Worm & Caterpillar Killer (16oz, ~$18) is highly effective and safe for beneficial insects.
- Copper or Sulfur Sprays: For fungal diseases like powdery mildew or blight, organic copper (e.g., Bonide Copper Fungicide, ~$15 for 1lb) or sulfur (e.g., Safer Brand Garden Fungicide, ~$10 for 16oz) can be used as a last resort.
Step 7: Harvesting & Seed Saving
The culmination of your efforts is the harvest, and seed saving closes the loop on self-sufficiency.
- Harvesting Techniques:
- Timing: Harvest vegetables at their peak ripeness for best flavor and nutritional value. For example, green beans should snap cleanly, cucumbers should be firm, and tomatoes should be fully colored.
- Frequency: Many crops, like zucchini, cucumbers, and bush beans, produce more if harvested frequently. Pick daily or every other day.
- Tools: Use clean, sharp pruners (e.g., Corona ClassicCUT Bypass Pruner BP 3180, ~$30) or a sharp knife for clean cuts, minimizing damage to the plant.
- Seed Saving: This is where the « self-sufficient » aspect truly shines.
- Selection: Only save seeds from your healthiest, most vigorous plants that show desired traits (disease resistance, good flavor, high yield).
- Isolation: To ensure true-to-type seeds, prevent cross-pollination. This can be challenging for open-pollinated crops that readily cross (e.g., squash, corn). For beginners, focus on self-pollinating plants like beans, peas, lettuce, and tomatoes.
- Processing:
- Dry Seeds (Beans, Peas, Lettuce, Grains): Allow pods/seed heads to dry completely on the plant. Harvest, shell, and clean the seeds, removing chaff.
- Wet Seeds (Tomatoes, Cucumbers, Squash): For tomatoes, ferment the seeds in water for a few days to remove the gel coating and inhibit disease. For cucumbers/squash, scrape out seeds, wash thoroughly, and dry.
- Drying: Spread seeds thinly on screens or paper plates in a cool, dry, well-ventilated area for 1-4 weeks. Ensure they are bone-dry before storage. I aim for less than 8% moisture content.
- Storage: Store seeds in airtight containers (glass jars with desiccant packets work well) in a cool, dark, dry place (ideally 40-50°F and 30-40% humidity). Label clearly with variety and date. Properly stored seeds can remain viable for 3-10 years or more.
Step 8: Season Extension & Winterizing
Extend your harvest and protect your garden for the off-season to truly maximize your self sufficient garden from scratch.
- Cold Frames: Simple structures with a transparent top (glass, polycarbonate, or old windows) that sit over garden beds. They trap solar heat, allowing you to grow cold-hardy crops (lettuce, spinach, kale, radishes) well into winter or start seeds earlier in spring. A basic cold frame can be built from 2×6 lumber and a sheet of polycarbonate for under $100.
- Hoop Houses/Low Tunnels: Larger structures made from flexible hoops (PVC pipe or EMT conduit) covered with greenhouse plastic. These provide more space and greater temperature moderation. A 10×20 ft DIY low tunnel kit can cost $200-$500, while a larger, more robust hoop house kit might be $1,000-$3,000. I use a 6×12 ft low tunnel made from 1/2-inch PVC hoops and 6mil greenhouse plastic, which extends my lettuce and spinach harvest by at least
- In-Ground Beds: If you have excellent native soil and good drainage, in-ground beds are the most economical. Double-digging (loosening soil two shovel depths) can significantly improve drainage and aeration. For my main garden, I primarily use in-ground beds, but I focus on building up the soil over time with consistent compost additions and cover cropping. I aim for beds that are no wider than 3-4 feet so I can reach the center without stepping on the soil, compacting it.
- Raised Beds: Raised beds offer numerous advantages, especially for poor soil, heavy clay, or rocky areas. They provide better drainage, warm up faster in spring, reduce compaction, and make weeding and harvesting easier on your back.
- Material Options:
- Untreated Cedar: Naturally rot-resistant and chemical-free. A 4×8 ft bed, 12 inches deep, typically requires three 2x12x8 ft cedar boards, costing around $50-$60 per board (total ~$150-$180) plus corner brackets or screws. My first raised beds were cedar and are still going strong after 7 years.
- Galvanized Steel: Durable, long-lasting, and aesthetically pleasing. Brands like Vego Garden offer modular kits. A Vego Garden 17″ Tall 8-in-1 Metal Raised Garden Bed (can be configured to 4×8 ft) costs approximately $250-$300.
- Concrete Blocks/Stones: Very durable but can leach minerals (though generally safe once weathered) and can be expensive.
- Recycled Materials: Pallets (check for chemical treatment stamps like « HT » for heat-treated), old tires (controversial due to potential chemical leaching).
- Filling Raised Beds: Don’t just fill with topsoil. Use a « Hugelkultur » approach (logs, branches, leaves, then compost, then topsoil) or a mixture of 60% good quality topsoil, 30% compost, and 10% perlite or vermiculite for drainage. A 4x8x1 ft raised bed requires about 32 cubic feet (or ~1.2 cubic yards) of soil mix, which can cost $100-$200 depending on your source.
- Material Options:
Step 4: Water Management & Irrigation
Efficient water management is critical for a self sufficient garden from scratch, especially in off-grid living where water resources might be limited.
- Rainwater Harvesting: This is my primary source of irrigation water. A 55-gallon rain barrel (e.g., EarthMark Rain Barrel, ~$120-$150) connected to a downspout can collect significant water. For larger needs, I use two 275-gallon IBC totes (Intermediate Bulk Containers, often available used for $100-$200 each from food-grade sources) connected in series. A 1,000 sq ft roof can collect approximately 620 gallons of water for every inch of rainfall. My 1,500 sq ft roof provides ample water for my 600 sq ft garden through multiple barrels and totes.
- Drip Irrigation: This is by far the most water-efficient method, delivering water directly to the plant’s root zone, minimizing evaporation and weed growth.
- Components: A typical drip system includes a pressure regulator (e.g., Rain Bird PRV-10, ~$15), a filter (Rain Bird RBY filter, ~$20), main tubing (1/2-inch poly tubing, 100ft ~$25), smaller feeder lines (1/4-inch tubing), and emitters (0.5 GPH or 1 GPH per plant).
- Kits: For beginners, a starter kit like the Rain Bird Drip Irrigation Garden Kit (model DDI-KIT-1P, ~$40-$60) is excellent for a small garden. For larger setups, I use Netafim Techline CV Drip Line (500ft roll, ~$150-$200), which has pressure-compensating emitters built-in, ensuring even watering across long runs.
- Automation: For true self-sufficiency, consider a battery-powered timer (e.g., Orbit B-Hyve Bluetooth Hose Faucet Timer, ~$50) or a solar-powered timer connected to a small 12V pump.
- Solar-Powered Pumps: For lifting water from a well, pond, or large storage tank to your garden, a solar pump is a game-changer. For a smaller drip system, a Shurflo 2088-594-152 Diaphragm Pump (12V, 3.5 GPM, ~$180) can be powered by a single 100W solar panel (e.g., Renogy 100W Monocrystalline Solar Panel, ~$100) and a small 12V battery (e.g., a 50Ah LiFePO4 battery like the Battle Born 50Ah, ~$450). For larger operations or deeper wells, more robust systems are needed. If you’re looking to build out a comprehensive off-grid power system to support your garden’s water needs, or indeed your entire homestead, you might want to explore resources like the Power Grid Generator complete system guide to understand the full scope of what’s possible in terms of energy independence.
Step 5: Seed Selection & Planting
The choice of seeds is crucial for a truly self sufficient garden from scratch.
- Choose Heirloom & Open-Pollinated Seeds: These varieties produce seeds that will grow true to type, meaning you can save seeds from your harvest year after year. F1 hybrids, while often vigorous, will not produce consistent offspring from saved seeds. Reputable seed companies include Baker Creek Heirloom Seeds, High Mowing Organic Seeds, and Seed Savers Exchange. Start with common, reliable varieties like ‘Black Krim’ tomatoes, ‘Provider’ bush beans, ‘Waltham Butternut’ squash, and ‘Black Seeded Simpson’ lettuce.
- Start Seeds Indoors (Optional but Recommended): For longer growing seasons or specific crops, starting seeds indoors gives you a head start. Use seed-starting mix (e.g., Espoma Organic Seed Starter Mix, ~$10 for 16qt bag) in seed trays (Jiffy Professional Greenhouse 72-cell kit, ~$15). Provide adequate light with LED grow lights (Barrina T5 2ft 4-pack LED Grow Lights, 20W each, ~$50) for 14-16 hours a day, positioned 2-4 inches above seedlings. Maintain consistent temperatures (65-75°F for most).
- Direct Sowing vs. Transplanting: Some crops (carrots, radishes, beans, corn) prefer direct sowing into the garden bed. Others (tomatoes, peppers, broccoli, kale) benefit from being started indoors and transplanted. Follow seed packet instructions for planting depths (e.g., lettuce seeds are often surface-sown or planted 1/8 inch deep, while beans are 1 inch deep) and spacing.
- Companion Planting: Strategically plant different species together to enhance growth, deter pests, and attract beneficial insects. For example, planting marigolds near tomatoes can deter nematodes, and basil improves tomato flavor. Nasturtiums can act as a trap crop for aphids.
- Succession Planting: For a continuous harvest, plant small batches of quick-growing crops (lettuce, radishes, cilantro) every 2-3 weeks. As one crop finishes, another is ready to take its place.
Step 6: Pest & Disease Management (Organic)
Maintaining a self sufficient garden from scratch means embracing organic pest and disease control.
- Integrated Pest Management (IPM): This holistic approach combines several strategies.
- Observation: Regularly inspect your plants for early signs of pests or disease. Catching issues early is key.
- Physical Barriers: Use row covers (e.g., Agribon AG-19 floating row cover, 10×20 ft, ~$20) to protect young plants from insect pests like cabbage worms and squash bugs. Install fences (e.g., 2×4 welded wire mesh, 4 ft tall, 50 ft roll ~$70) to keep out deer, rabbits, and other larger animals.
- Hand-Picking: For larger pests like tomato hornworms or squash bugs, simply pick them off and drop them into a bucket of soapy water.
- Companion Planting: As mentioned, certain plants repel pests. Marigolds, garlic, and onions are excellent deterrents.
- Attract Beneficial Insects: Plant flowers like dill, fennel, cosmos, and sweet alyssum to attract ladybugs, lacewings, and parasitic wasps, which prey on common garden pests.
- Organic Sprays & Treatments:
- Neem Oil: An excellent broad-spectrum organic insecticide and fungicide. Bonide Neem Oil Concentrate (16oz, ~$20) can be mixed at a rate of 1-2 tbsp per gallon of water and sprayed on affected plants.
- Insecticidal Soap: Effective against soft-bodied insects like aphids, whiteflies, and spider mites. Garden Safe Insecticidal Soap (24oz ready-to-use, ~$10).
- Bacillus thuringiensis (Bt): A naturally occurring soil bacterium that targets caterpillars and worms. Monterey BT Worm & Caterpillar Killer (16oz, ~$18) is highly effective and safe for beneficial insects.
- Copper or Sulfur Sprays: For fungal diseases like powdery mildew or blight, organic copper (e.g., Bonide Copper Fungicide, ~$15 for 1lb) or sulfur (e.g., Safer Brand Garden Fungicide, ~$10 for 16oz) can be used as a last resort.
Step 7: Harvesting & Seed Saving
The culmination of your efforts is the harvest, and seed saving closes the loop on self-sufficiency.
- Harvesting Techniques:
- Timing: Harvest vegetables at their peak ripeness for best flavor and nutritional value. For example, green beans should snap cleanly, cucumbers should be firm, and tomatoes should be fully colored.
- Frequency: Many crops, like zucchini, cucumbers, and bush beans, produce more if harvested frequently. Pick daily or every other day.
- Tools: Use clean, sharp pruners (e.g., Corona ClassicCUT Bypass Pruner BP 3180, ~$30) or a sharp knife for clean cuts, minimizing damage to the plant.
- Seed Saving: This is where the « self-sufficient » aspect truly shines.
- Selection: Only save seeds from your healthiest, most vigorous plants that show desired traits (disease resistance, good flavor, high yield).
- Isolation: To ensure true-to-type seeds, prevent cross-pollination. This can be challenging for open-pollinated crops that readily cross (e.g., squash, corn). For beginners, focus on self-pollinating plants like beans, peas, lettuce, and tomatoes.
- Processing:
- Dry Seeds (Beans, Peas, Lettuce, Grains): Allow pods/seed heads to dry completely on the plant. Harvest, shell, and clean the seeds, removing chaff.
- Wet Seeds (Tomatoes, Cucumbers, Squash): For tomatoes, ferment the seeds in water for a few days to remove the gel coating and inhibit disease. For cucumbers/squash, scrape out seeds, wash thoroughly, and dry.
- Drying: Spread seeds thinly on screens or paper plates in a cool, dry, well-ventilated area for 1-4 weeks. Ensure they are bone-dry before storage. I aim for less than 8% moisture content.
- Storage: Store seeds in airtight containers (glass jars with desiccant packets work well) in a cool, dark, dry place (ideally 40-50°F and 30-40% humidity). Label clearly with variety and date. Properly stored seeds can remain viable for 3-10 years or more.
Step 8: Season Extension & Winterizing
Extend your harvest and protect your garden for the off-season to truly maximize your self sufficient garden from scratch.
- Cold Frames: Simple structures with a transparent top (glass, polycarbonate, or old windows) that sit over garden beds. They trap solar heat, allowing you to grow cold-hardy crops (lettuce, spinach, kale, radishes) well into winter or start seeds earlier in spring. A basic cold frame can be built from 2×6 lumber and a sheet of polycarbonate for under $100.
- Hoop Houses/Low Tunnels: Larger structures made from flexible hoops (PVC pipe or EMT conduit) covered with greenhouse plastic. These provide more space and greater temperature moderation. A 10×20 ft DIY low tunnel kit can cost $200-$500, while a larger, more robust hoop house kit might be $1,000-$3,000. I use a 6×12 ft low tunnel made from 1/2-inch PVC hoops and 6mil greenhouse plastic, which extends my lettuce and spinach harvest by at least
Deciding between raised beds and in-ground beds depends on your soil, budget, and physical capabilities.
- In-Ground Beds: If you have excellent native soil and good drainage, in-ground beds are the most economical. Double-digging (loosening soil two shovel depths) can significantly improve drainage and aeration. For my main garden, I primarily use in-ground beds, but I focus on building up the soil over time with consistent compost additions and cover cropping. I aim for beds that are no wider than 3-4 feet so I can reach the center without stepping on the soil, compacting it.
- Raised Beds: Raised beds offer numerous advantages, especially for poor soil, heavy clay, or rocky areas. They provide better drainage, warm up faster in spring, reduce compaction, and make weeding and harvesting easier on your back.
- Material Options:
- Untreated Cedar: Naturally rot-resistant and chemical-free. A 4×8 ft bed, 12 inches deep, typically requires three 2x12x8 ft cedar boards, costing around $50-$60 per board (total ~$150-$180) plus corner brackets or screws. My first raised beds were cedar and are still going strong after 7 years.
- Galvanized Steel: Durable, long-lasting, and aesthetically pleasing. Brands like Vego Garden offer modular kits. A Vego Garden 17″ Tall 8-in-1 Metal Raised Garden Bed (can be configured to 4×8 ft) costs approximately $250-$300.
- Concrete Blocks/Stones: Very durable but can leach minerals (though generally safe once weathered) and can be expensive.
- Recycled Materials: Pallets (check for chemical treatment stamps like « HT » for heat-treated), old tires (controversial due to potential chemical leaching).
- Filling Raised Beds: Don’t just fill with topsoil. Use a « Hugelkultur » approach (logs, branches, leaves, then compost, then topsoil) or a mixture of 60% good quality topsoil, 30% compost, and 10% perlite or vermiculite for drainage. A 4x8x1 ft raised bed requires about 32 cubic feet (or ~1.2 cubic yards) of soil mix, which can cost $100-$200 depending on your source.
- Material Options:
Step 4: Water Management & Irrigation
Efficient water management is critical for a self sufficient garden from scratch, especially in off-grid living where water resources might be limited.
- Rainwater Harvesting: This is my primary source of irrigation water. A 55-gallon rain barrel (e.g., EarthMark Rain Barrel, ~$120-$150) connected to a downspout can collect significant water. For larger needs, I use two 275-gallon IBC totes (Intermediate Bulk Containers, often available used for $100-$200 each from food-grade sources) connected in series. A 1,000 sq ft roof can collect approximately 620 gallons of water for every inch of rainfall. My 1,500 sq ft roof provides ample water for my 600 sq ft garden through multiple barrels and totes.
- Drip Irrigation: This is by far the most water-efficient method, delivering water directly to the plant’s root zone, minimizing evaporation and weed growth.
- Components: A typical drip system includes a pressure regulator (e.g., Rain Bird PRV-10, ~$15), a filter (Rain Bird RBY filter, ~$20), main tubing (1/2-inch poly tubing, 100ft ~$25), smaller feeder lines (1/4-inch tubing), and emitters (0.5 GPH or 1 GPH per plant).
- Kits: For beginners, a starter kit like the Rain Bird Drip Irrigation Garden Kit (model DDI-KIT-1P, ~$40-$60) is excellent for a small garden. For larger setups, I use Netafim Techline CV Drip Line (500ft roll, ~$150-$200), which has pressure-compensating emitters built-in, ensuring even watering across long runs.
- Automation: For true self-sufficiency, consider a battery-powered timer (e.g., Orbit B-Hyve Bluetooth Hose Faucet Timer, ~$50) or a solar-powered timer connected to a small 12V pump.
- Solar-Powered Pumps: For lifting water from a well, pond, or large storage tank to your garden, a solar pump is a game-changer. For a smaller drip system, a Shurflo 2088-594-152 Diaphragm Pump (12V, 3.5 GPM, ~$180) can be powered by a single 100W solar panel (e.g., Renogy 100W Monocrystalline Solar Panel, ~$100) and a small 12V battery (e.g., a 50Ah LiFePO4 battery like the Battle Born 50Ah, ~$450). For larger operations or deeper wells, more robust systems are needed. If you’re looking to build out a comprehensive off-grid power system to support your garden’s water needs, or indeed your entire homestead, you might want to explore resources like the Power Grid Generator complete system guide to understand the full scope of what’s possible in terms of energy independence.
Step 5: Seed Selection & Planting
The choice of seeds is crucial for a truly self sufficient garden from scratch.
- Choose Heirloom & Open-Pollinated Seeds: These varieties produce seeds that will grow true to type, meaning you can save seeds from your harvest year after year. F1 hybrids, while often vigorous, will not produce consistent offspring from saved seeds. Reputable seed companies include Baker Creek Heirloom Seeds, High Mowing Organic Seeds, and Seed Savers Exchange. Start with common, reliable varieties like ‘Black Krim’ tomatoes, ‘Provider’ bush beans, ‘Waltham Butternut’ squash, and ‘Black Seeded Simpson’ lettuce.
- Start Seeds Indoors (Optional but Recommended): For longer growing seasons or specific crops, starting seeds indoors gives you a head start. Use seed-starting mix (e.g., Espoma Organic Seed Starter Mix, ~$10 for 16qt bag) in seed trays (Jiffy Professional Greenhouse 72-cell kit, ~$15). Provide adequate light with LED grow lights (Barrina T5 2ft 4-pack LED Grow Lights, 20W each, ~$50) for 14-16 hours a day, positioned 2-4 inches above seedlings. Maintain consistent temperatures (65-75°F for most).
- Direct Sowing vs. Transplanting: Some crops (carrots, radishes, beans, corn) prefer direct sowing into the garden bed. Others (tomatoes, peppers, broccoli, kale) benefit from being started indoors and transplanted. Follow seed packet instructions for planting depths (e.g., lettuce seeds are often surface-sown or planted 1/8 inch deep, while beans are 1 inch deep) and spacing.
- Companion Planting: Strategically plant different species together to enhance growth, deter pests, and attract beneficial insects. For example, planting marigolds near tomatoes can deter nematodes, and basil improves tomato flavor. Nasturtiums can act as a trap crop for aphids.
- Succession Planting: For a continuous harvest, plant small batches of quick-growing crops (lettuce, radishes, cilantro) every 2-3 weeks. As one crop finishes, another is ready to take its place.
Step 6: Pest & Disease Management (Organic)
Maintaining a self sufficient garden from scratch means embracing organic pest and disease control.
- Integrated Pest Management (IPM): This holistic approach combines several strategies.
- Observation: Regularly inspect your plants for early signs of pests or disease. Catching issues early is key.
- Physical Barriers: Use row covers (e.g., Agribon AG-19 floating row cover, 10×20 ft, ~$20) to protect young plants from insect pests like cabbage worms and squash bugs. Install fences (e.g., 2×4 welded wire mesh, 4 ft tall, 50 ft roll ~$70) to keep out deer, rabbits, and other larger animals.
- Hand-Picking: For larger pests like tomato hornworms or squash bugs, simply pick them off and drop them into a bucket of soapy water.
- Companion Planting: As mentioned, certain plants repel pests. Marigolds, garlic, and onions are excellent deterrents.
- Attract Beneficial Insects: Plant flowers like dill, fennel, cosmos, and sweet alyssum to attract ladybugs, lacewings, and parasitic wasps, which prey on common garden pests.
- Organic Sprays & Treatments:
- Neem Oil: An excellent broad-spectrum organic insecticide and fungicide. Bonide Neem Oil Concentrate (16oz, ~$20) can be mixed at a rate of 1-2 tbsp per gallon of water and sprayed on affected plants.
- Insecticidal Soap: Effective against soft-bodied insects like aphids, whiteflies, and spider mites. Garden Safe Insecticidal Soap (24oz ready-to-use, ~$10).
- Bacillus thuringiensis (Bt): A naturally occurring soil bacterium that targets caterpillars and worms. Monterey BT Worm & Caterpillar Killer (16oz, ~$18) is highly effective and safe for beneficial insects.
- Copper or Sulfur Sprays: For fungal diseases like powdery mildew or blight, organic copper (e.g., Bonide Copper Fungicide, ~$15 for 1lb) or sulfur (e.g., Safer Brand Garden Fungicide, ~$10 for 16oz) can be used as a last resort.
Step 7: Harvesting & Seed Saving
The culmination of your efforts is the harvest, and seed saving closes the loop on self-sufficiency.
- Harvesting Techniques:
- Timing: Harvest vegetables at their peak ripeness for best flavor and nutritional value. For example, green beans should snap cleanly, cucumbers should be firm, and tomatoes should be fully colored.
- Frequency: Many crops, like zucchini, cucumbers, and bush beans, produce more if harvested frequently. Pick daily or every other day.
- Tools: Use clean, sharp pruners (e.g., Corona ClassicCUT Bypass Pruner BP 3180, ~$30) or a sharp knife for clean cuts, minimizing damage to the plant.
- Seed Saving: This is where the « self-sufficient » aspect truly shines.
- Selection: Only save seeds from your healthiest, most vigorous plants that show desired traits (disease resistance, good flavor, high yield).
- Isolation: To ensure true-to-type seeds, prevent cross-pollination. This can be challenging for open-pollinated crops that readily cross (e.g., squash, corn). For beginners, focus on self-pollinating plants like beans, peas, lettuce, and tomatoes.
- Processing:
- Dry Seeds (Beans, Peas, Lettuce, Grains): Allow pods/seed heads to dry completely on the plant. Harvest, shell, and clean the seeds, removing chaff.
- Wet Seeds (Tomatoes, Cucumbers, Squash): For tomatoes, ferment the seeds in water for a few days to remove the gel coating and inhibit disease. For cucumbers/squash, scrape out seeds, wash thoroughly, and dry.
- Drying: Spread seeds thinly on screens or paper plates in a cool, dry, well-ventilated area for 1-4 weeks. Ensure they are bone-dry before storage. I aim for less than 8% moisture content.
- Storage: Store seeds in airtight containers (glass jars with desiccant packets work well) in a cool, dark, dry place (ideally 40-50°F and 30-40% humidity). Label clearly with variety and date. Properly stored seeds can remain viable for 3-10 years or more.
Step 8: Season Extension & Winterizing
Extend your harvest and protect your garden for the off-season to truly maximize your self sufficient garden from scratch.
- Cold Frames: Simple structures with a transparent top (glass, polycarbonate, or old windows) that sit over garden beds. They trap solar heat, allowing you to grow cold-hardy crops (lettuce, spinach, kale, radishes) well into winter or start seeds earlier in spring. A basic cold frame can be built from 2×6 lumber and a sheet of polycarbonate for under $100.
- Hoop Houses/Low Tunnels: Larger structures made from flexible hoops (PVC pipe or EMT conduit) covered with greenhouse plastic. These provide more space and greater temperature moderation. A 10×20 ft DIY low tunnel kit can cost $200-$500, while a larger, more robust hoop house kit might be $1,000-$3,000. I use a 6×12 ft low tunnel made from 1/2-inch PVC hoops and 6mil greenhouse plastic, which extends my lettuce and spinach harvest by at least
Healthy soil is the bedrock of a productive, self-sufficient garden. You can’t guess what your soil needs; you have to test it.
- Perform a Soil Test: A professional soil test will give you precise data on your soil’s pH, nutrient levels (N-P-K), and organic matter content. I recommend sending a sample to your local agricultural extension office; it typically costs $20-$50 and provides detailed recommendations. Alternatively, for a quick homeowner check, a Rapitest Soil Test Kit (40-test kit, model 1663, ~$20 on Amazon) provides a good baseline for pH, Nitrogen, Phosphorus, and Potash. Aim for a pH between 6.0 and 7.0 for most vegetables.
- Amend for pH Imbalance: If your soil is too acidic (below 6.0), add agricultural lime (dolomitic lime adds magnesium, calcitic lime adds calcium). Apply 5-10 lbs per 100 sq ft for a moderate adjustment. If it’s too alkaline (above 7.0), add elemental sulfur (e.g., Espoma Soil Acidifier, ~$15 for 6.75 lbs) or generous amounts of organic matter like peat moss or pine needles.
- Build Organic Matter: This is the single most important step for long-term soil health. Organic matter improves soil structure, water retention, drainage, and nutrient availability. Incorporate 2-4 inches of high-quality compost into your top 6-12 inches of soil annually. I make my own compost from kitchen scraps, garden waste, and shredded leaves, but you can purchase it. Local nurseries often sell bulk compost for $30-$50 per cubic yard. Aged manure (from chickens, cows, or horses – ensure it’s well-rotted to avoid burning plants) is also excellent.
- Address Nutrient Deficiencies: Based on your soil test, add specific organic amendments. If Nitrogen (N) is low, add blood meal (12-0-0, ~$20 for 3 lbs) or feather meal. For Phosphorus (P), use bone meal (3-15-0, ~$15 for 3 lbs) or rock phosphate. For Potassium (K), greensand (0-0-2.5, ~$25 for 5 lbs) or kelp meal are good choices. I rely heavily on Espoma Organic Garden-tone (5-3-3, ~$25 for an 8lb bag) as a balanced, all-purpose organic fertilizer during planting.
Step 3: Garden Bed Preparation
Deciding between raised beds and in-ground beds depends on your soil, budget, and physical capabilities.
- In-Ground Beds: If you have excellent native soil and good drainage, in-ground beds are the most economical. Double-digging (loosening soil two shovel depths) can significantly improve drainage and aeration. For my main garden, I primarily use in-ground beds, but I focus on building up the soil over time with consistent compost additions and cover cropping. I aim for beds that are no wider than 3-4 feet so I can reach the center without stepping on the soil, compacting it.
- Raised Beds: Raised beds offer numerous advantages, especially for poor soil, heavy clay, or rocky areas. They provide better drainage, warm up faster in spring, reduce compaction, and make weeding and harvesting easier on your back.
- Material Options:
- Untreated Cedar: Naturally rot-resistant and chemical-free. A 4×8 ft bed, 12 inches deep, typically requires three 2x12x8 ft cedar boards, costing around $50-$60 per board (total ~$150-$180) plus corner brackets or screws. My first raised beds were cedar and are still going strong after 7 years.
- Galvanized Steel: Durable, long-lasting, and aesthetically pleasing. Brands like Vego Garden offer modular kits. A Vego Garden 17″ Tall 8-in-1 Metal Raised Garden Bed (can be configured to 4×8 ft) costs approximately $250-$300.
- Concrete Blocks/Stones: Very durable but can leach minerals (though generally safe once weathered) and can be expensive.
- Recycled Materials: Pallets (check for chemical treatment stamps like « HT » for heat-treated), old tires (controversial due to potential chemical leaching).
- Filling Raised Beds: Don’t just fill with topsoil. Use a « Hugelkultur » approach (logs, branches, leaves, then compost, then topsoil) or a mixture of 60% good quality topsoil, 30% compost, and 10% perlite or vermiculite for drainage. A 4x8x1 ft raised bed requires about 32 cubic feet (or ~1.2 cubic yards) of soil mix, which can cost $100-$200 depending on your source.
- Material Options:
Step 4: Water Management & Irrigation
Efficient water management is critical for a self sufficient garden from scratch, especially in off-grid living where water resources might be limited.
- Rainwater Harvesting: This is my primary source of irrigation water. A 55-gallon rain barrel (e.g., EarthMark Rain Barrel, ~$120-$150) connected to a downspout can collect significant water. For larger needs, I use two 275-gallon IBC totes (Intermediate Bulk Containers, often available used for $100-$200 each from food-grade sources) connected in series. A 1,000 sq ft roof can collect approximately 620 gallons of water for every inch of rainfall. My 1,500 sq ft roof provides ample water for my 600 sq ft garden through multiple barrels and totes.
- Drip Irrigation: This is by far the most water-efficient method, delivering water directly to the plant’s root zone, minimizing evaporation and weed growth.
- Components: A typical drip system includes a pressure regulator (e.g., Rain Bird PRV-10, ~$15), a filter (Rain Bird RBY filter, ~$20), main tubing (1/2-inch poly tubing, 100ft ~$25), smaller feeder lines (1/4-inch tubing), and emitters (0.5 GPH or 1 GPH per plant).
- Kits: For beginners, a starter kit like the Rain Bird Drip Irrigation Garden Kit (model DDI-KIT-1P, ~$40-$60) is excellent for a small garden. For larger setups, I use Netafim Techline CV Drip Line (500ft roll, ~$150-$200), which has pressure-compensating emitters built-in, ensuring even watering across long runs.
- Automation: For true self-sufficiency, consider a battery-powered timer (e.g., Orbit B-Hyve Bluetooth Hose Faucet Timer, ~$50) or a solar-powered timer connected to a small 12V pump.
- Solar-Powered Pumps: For lifting water from a well, pond, or large storage tank to your garden, a solar pump is a game-changer. For a smaller drip system, a Shurflo 2088-594-152 Diaphragm Pump (12V, 3.5 GPM, ~$180) can be powered by a single 100W solar panel (e.g., Renogy 100W Monocrystalline Solar Panel, ~$100) and a small 12V battery (e.g., a 50Ah LiFePO4 battery like the Battle Born 50Ah, ~$450). For larger operations or deeper wells, more robust systems are needed. If you’re looking to build out a comprehensive off-grid power system to support your garden’s water needs, or indeed your entire homestead, you might want to explore resources like the Power Grid Generator complete system guide to understand the full scope of what’s possible in terms of energy independence.
Step 5: Seed Selection & Planting
The choice of seeds is crucial for a truly self sufficient garden from scratch.
- Choose Heirloom & Open-Pollinated Seeds: These varieties produce seeds that will grow true to type, meaning you can save seeds from your harvest year after year. F1 hybrids, while often vigorous, will not produce consistent offspring from saved seeds. Reputable seed companies include Baker Creek Heirloom Seeds, High Mowing Organic Seeds, and Seed Savers Exchange. Start with common, reliable varieties like ‘Black Krim’ tomatoes, ‘Provider’ bush beans, ‘Waltham Butternut’ squash, and ‘Black Seeded Simpson’ lettuce.
- Start Seeds Indoors (Optional but Recommended): For longer growing seasons or specific crops, starting seeds indoors gives you a head start. Use seed-starting mix (e.g., Espoma Organic Seed Starter Mix, ~$10 for 16qt bag) in seed trays (Jiffy Professional Greenhouse 72-cell kit, ~$15). Provide adequate light with LED grow lights (Barrina T5 2ft 4-pack LED Grow Lights, 20W each, ~$50) for 14-16 hours a day, positioned 2-4 inches above seedlings. Maintain consistent temperatures (65-75°F for most).
- Direct Sowing vs. Transplanting: Some crops (carrots, radishes, beans, corn) prefer direct sowing into the garden bed. Others (tomatoes, peppers, broccoli, kale) benefit from being started indoors and transplanted. Follow seed packet instructions for planting depths (e.g., lettuce seeds are often surface-sown or planted 1/8 inch deep, while beans are 1 inch deep) and spacing.
- Companion Planting: Strategically plant different species together to enhance growth, deter pests, and attract beneficial insects. For example, planting marigolds near tomatoes can deter nematodes, and basil improves tomato flavor. Nasturtiums can act as a trap crop for aphids.
- Succession Planting: For a continuous harvest, plant small batches of quick-growing crops (lettuce, radishes, cilantro) every 2-3 weeks. As one crop finishes, another is ready to take its place.
Step 6: Pest & Disease Management (Organic)
Maintaining a self sufficient garden from scratch means embracing organic pest and disease control.
- Integrated Pest Management (IPM): This holistic approach combines several strategies.
- Observation: Regularly inspect your plants for early signs of pests or disease. Catching issues early is key.
- Physical Barriers: Use row covers (e.g., Agribon AG-19 floating row cover, 10×20 ft, ~$20) to protect young plants from insect pests like cabbage worms and squash bugs. Install fences (e.g., 2×4 welded wire mesh, 4 ft tall, 50 ft roll ~$70) to keep out deer, rabbits, and other larger animals.
- Hand-Picking: For larger pests like tomato hornworms or squash bugs, simply pick them off and drop them into a bucket of soapy water.
- Companion Planting: As mentioned, certain plants repel pests. Marigolds, garlic, and onions are excellent deterrents.
- Attract Beneficial Insects: Plant flowers like dill, fennel, cosmos, and sweet alyssum to attract ladybugs, lacewings, and parasitic wasps, which prey on common garden pests.
- Organic Sprays & Treatments:
- Neem Oil: An excellent broad-spectrum organic insecticide and fungicide. Bonide Neem Oil Concentrate (16oz, ~$20) can be mixed at a rate of 1-2 tbsp per gallon of water and sprayed on affected plants.
- Insecticidal Soap: Effective against soft-bodied insects like aphids, whiteflies, and spider mites. Garden Safe Insecticidal Soap (24oz ready-to-use, ~$10).
- Bacillus thuringiensis (Bt): A naturally occurring soil bacterium that targets caterpillars and worms. Monterey BT Worm & Caterpillar Killer (16oz, ~$18) is highly effective and safe for beneficial insects.
- Copper or Sulfur Sprays: For fungal diseases like powdery mildew or blight, organic copper (e.g., Bonide Copper Fungicide, ~$15 for 1lb) or sulfur (e.g., Safer Brand Garden Fungicide, ~$10 for 16oz) can be used as a last resort.
Step 7: Harvesting & Seed Saving
The culmination of your efforts is the harvest, and seed saving closes the loop on self-sufficiency.
- Harvesting Techniques:
- Timing: Harvest vegetables at their peak ripeness for best flavor and nutritional value. For example, green beans should snap cleanly, cucumbers should be firm, and tomatoes should be fully colored.
- Frequency: Many crops, like zucchini, cucumbers, and bush beans, produce more if harvested frequently. Pick daily or every other day.
- Tools: Use clean, sharp pruners (e.g., Corona ClassicCUT Bypass Pruner BP 3180, ~$30) or a sharp knife for clean cuts, minimizing damage to the plant.
- Seed Saving: This is where the « self-sufficient » aspect truly shines.
- Selection: Only save seeds from your healthiest, most vigorous plants that show desired traits (disease resistance, good flavor, high yield).
- Isolation: To ensure true-to-type seeds, prevent cross-pollination. This can be challenging for open-pollinated crops that readily cross (e.g., squash, corn). For beginners, focus on self-pollinating plants like beans, peas, lettuce, and tomatoes.
- Processing:
- Dry Seeds (Beans, Peas, Lettuce, Grains): Allow pods/seed heads to dry completely on the plant. Harvest, shell, and clean the seeds, removing chaff.
- Wet Seeds (Tomatoes, Cucumbers, Squash): For tomatoes, ferment the seeds in water for a few days to remove the gel coating and inhibit disease. For cucumbers/squash, scrape out seeds, wash thoroughly, and dry.
- Drying: Spread seeds thinly on screens or paper plates in a cool, dry, well-ventilated area for 1-4 weeks. Ensure they are bone-dry before storage. I aim for less than 8% moisture content.
- Storage: Store seeds in airtight containers (glass jars with desiccant packets work well) in a cool, dark, dry place (ideally 40-50°F and 30-40% humidity). Label clearly with variety and date. Properly stored seeds can remain viable for 3-10 years or more.
Step 8: Season Extension & Winterizing
Extend your harvest and protect your garden for the off-season to truly maximize your self sufficient garden from scratch.
- Cold Frames: Simple structures with a transparent top (glass, polycarbonate, or old windows) that sit over garden beds. They trap solar heat, allowing you to grow cold-hardy crops (lettuce, spinach, kale, radishes) well into winter or start seeds earlier in spring. A basic cold frame can be built from 2×6 lumber and a sheet of polycarbonate for under $100.
- Hoop Houses/Low Tunnels: Larger structures made from flexible hoops (PVC pipe or EMT conduit) covered with greenhouse plastic. These provide more space and greater temperature moderation. A 10×20 ft DIY low tunnel kit can cost $200-$500, while a larger, more robust hoop house kit might be $1,000-$3,000. I use a 6×12 ft low tunnel made from 1/2-inch PVC hoops and 6mil greenhouse plastic, which extends my lettuce and spinach harvest by at least
The culmination of your efforts is the harvest, and seed saving closes the loop on self-sufficiency.
- Harvesting Techniques:
- Timing: Harvest vegetables at their peak ripeness for best flavor and nutritional value. For example, green beans should snap cleanly, cucumbers should be firm, and tomatoes should be fully colored.
- Frequency: Many crops, like zucchini, cucumbers, and bush beans, produce more if harvested frequently. Pick daily or every other day.
- Tools: Use clean, sharp pruners (e.g., Corona ClassicCUT Bypass Pruner BP 3180, ~$30) or a sharp knife for clean cuts, minimizing damage to the plant.
- Seed Saving: This is where the « self-sufficient » aspect truly shines.
- Selection: Only save seeds from your healthiest, most vigorous plants that show desired traits (disease resistance, good flavor, high yield).
- Isolation: To ensure true-to-type seeds, prevent cross-pollination. This can be challenging for open-pollinated crops that readily cross (e.g., squash, corn). For beginners, focus on self-pollinating plants like beans, peas, lettuce, and tomatoes.
- Processing:
- Dry Seeds (Beans, Peas, Lettuce, Grains): Allow pods/seed heads to dry completely on the plant. Harvest, shell, and clean the seeds, removing chaff.
- Wet Seeds (Tomatoes, Cucumbers, Squash): For tomatoes, ferment the seeds in water for a few days to remove the gel coating and inhibit disease. For cucumbers/squash, scrape out seeds, wash thoroughly, and dry.
- Drying: Spread seeds thinly on screens or paper plates in a cool, dry, well-ventilated area for 1-4 weeks. Ensure they are bone-dry before storage. I aim for less than 8% moisture content.
- Storage: Store seeds in airtight containers (glass jars with desiccant packets work well) in a cool, dark, dry place (ideally 40-50°F and 30-40% humidity). Label clearly with variety and date. Properly stored seeds can remain viable for 3-10 years or more.
Step 8: Season Extension & Winterizing
Extend your harvest and protect your garden for the off-season to truly maximize your self sufficient garden from scratch.
- Cold Frames: Simple structures with a transparent top (glass, polycarbonate, or old windows) that sit over garden beds. They trap solar heat, allowing you to grow cold-hardy crops (lettuce, spinach, kale, radishes) well into winter or start seeds earlier in spring. A basic cold frame can be built from 2×6 lumber and a sheet of polycarbonate for under $100.
- Hoop Houses/Low Tunnels: Larger structures made from flexible hoops (PVC pipe or EMT conduit) covered with greenhouse plastic. These provide more space and greater temperature moderation. A 10×20 ft DIY low tunnel kit can cost $200-$500, while a larger, more robust hoop house kit might be $1,000-$3,000. I use a 6×12 ft low tunnel made from 1/2-inch PVC hoops and 6mil greenhouse plastic, which extends my lettuce and spinach harvest by at least
Step 4: Water Management & Irrigation
Efficient water management is critical for a self sufficient garden from scratch, especially in off-grid living where water resources might be limited.
- Rainwater Harvesting: This is my primary source of irrigation water. A 55-gallon rain barrel (e.g., EarthMark Rain Barrel, ~$120-$150) connected to a downspout can collect significant water. For larger needs, I use two 275-gallon IBC totes (Intermediate Bulk Containers, often available used for $100-$200 each from food-grade sources) connected in series. A 1,000 sq ft roof can collect approximately 620 gallons of water for every inch of rainfall. My 1,500 sq ft roof provides ample water for my 600 sq ft garden through multiple barrels and totes.
- Drip Irrigation: This is by far the most water-efficient method, delivering water directly to the plant’s root zone, minimizing evaporation and weed growth.
- Components: A typical drip system includes a pressure regulator (e.g., Rain Bird PRV-10, ~$15), a filter (Rain Bird RBY filter, ~$20), main tubing (1/2-inch poly tubing, 100ft ~$25), smaller feeder lines (1/4-inch tubing), and emitters (0.5 GPH or 1 GPH per plant).
- Kits: For beginners, a starter kit like the Rain Bird Drip Irrigation Garden Kit (model DDI-KIT-1P, ~$40-$60) is excellent for a small garden. For larger setups, I use Netafim Techline CV Drip Line (500ft roll, ~$150-$200), which has pressure-compensating emitters built-in, ensuring even watering across long runs.
- Automation: For true self-sufficiency, consider a battery-powered timer (e.g., Orbit B-Hyve Bluetooth Hose Faucet Timer, ~$50) or a solar-powered timer connected to a small 12V pump.
- Solar-Powered Pumps: For lifting water from a well, pond, or large storage tank to your garden, a solar pump is a game-changer. For a smaller drip system, a Shurflo 2088-594-152 Diaphragm Pump (12V, 3.5 GPM, ~$180) can be powered by a single 100W solar panel (e.g., Renogy 100W Monocrystalline Solar Panel, ~$100) and a small 12V battery (e.g., a 50Ah LiFePO4 battery like the Battle Born 50Ah, ~$450). For larger operations or deeper wells, more robust systems are needed. If you’re looking to build out a comprehensive off-grid power system to support your garden’s water needs, or indeed your entire homestead, you might want to explore resources like the Power Grid Generator complete system guide to understand the full scope of what’s possible in terms of energy independence.
Step 5: Seed Selection & Planting
The choice of seeds is crucial for a truly self sufficient garden from scratch.
- Choose Heirloom & Open-Pollinated Seeds: These varieties produce seeds that will grow true to type, meaning you can save seeds from your harvest year after year. F1 hybrids, while often vigorous, will not produce consistent offspring from saved seeds. Reputable seed companies include Baker Creek Heirloom Seeds, High Mowing Organic Seeds, and Seed Savers Exchange. Start with common, reliable varieties like ‘Black Krim’ tomatoes, ‘Provider’ bush beans, ‘Waltham Butternut’ squash, and ‘Black Seeded Simpson’ lettuce.
- Start Seeds Indoors (Optional but Recommended): For longer growing seasons or specific crops, starting seeds indoors gives you a head start. Use seed-starting mix (e.g., Espoma Organic Seed Starter Mix, ~$10 for 16qt bag) in seed trays (Jiffy Professional Greenhouse 72-cell kit, ~$15). Provide adequate light with LED grow lights (Barrina T5 2ft 4-pack LED Grow Lights, 20W each, ~$50) for 14-16 hours a day, positioned 2-4 inches above seedlings. Maintain consistent temperatures (65-75°F for most).
- Direct Sowing vs. Transplanting: Some crops (carrots, radishes, beans, corn) prefer direct sowing into the garden bed. Others (tomatoes, peppers, broccoli, kale) benefit from being started indoors and transplanted. Follow seed packet instructions for planting depths (e.g., lettuce seeds are often surface-sown or planted 1/8 inch deep, while beans are 1 inch deep) and spacing.
- Companion Planting: Strategically plant different species together to enhance growth, deter pests, and attract beneficial insects. For example, planting marigolds near tomatoes can deter nematodes, and basil improves tomato flavor. Nasturtiums can act as a trap crop for aphids.
- Succession Planting: For a continuous harvest, plant small batches of quick-growing crops (lettuce, radishes, cilantro) every 2-3 weeks. As one crop finishes, another is ready to take its place.
Step 6: Pest & Disease Management (Organic)
Maintaining a self sufficient garden from scratch means embracing organic pest and disease control.
- Integrated Pest Management (IPM): This holistic approach combines several strategies.
- Observation: Regularly inspect your plants for early signs of pests or disease. Catching issues early is key.
- Physical Barriers: Use row covers (e.g., Agribon AG-19 floating row cover, 10×20 ft, ~$20) to protect young plants from insect pests like cabbage worms and squash bugs. Install fences (e.g., 2×4 welded wire mesh, 4 ft tall, 50 ft roll ~$70) to keep out deer, rabbits, and other larger animals.
- Hand-Picking: For larger pests like tomato hornworms or squash bugs, simply pick them off and drop them into a bucket of soapy water.
- Companion Planting: As mentioned, certain plants repel pests. Marigolds, garlic, and onions are excellent deterrents.
- Attract Beneficial Insects: Plant flowers like dill, fennel, cosmos, and sweet alyssum to attract ladybugs, lacewings, and parasitic wasps, which prey on common garden pests.
- Organic Sprays & Treatments:
- Neem Oil: An excellent broad-spectrum organic insecticide and fungicide. Bonide Neem Oil Concentrate (16oz, ~$20) can be mixed at a rate of 1-2 tbsp per gallon of water and sprayed on affected plants.
- Insecticidal Soap: Effective against soft-bodied insects like aphids, whiteflies, and spider mites. Garden Safe Insecticidal Soap (24oz ready-to-use, ~$10).
- Bacillus thuringiensis (Bt): A naturally occurring soil bacterium that targets caterpillars and worms. Monterey BT Worm & Caterpillar Killer (16oz, ~$18) is highly effective and safe for beneficial insects.
- Copper or Sulfur Sprays: For fungal diseases like powdery mildew or blight, organic copper (e.g., Bonide Copper Fungicide, ~$15 for 1lb) or sulfur (e.g., Safer Brand Garden Fungicide, ~$10 for 16oz) can be used as a last resort.
Step 7: Harvesting & Seed Saving
The culmination of your efforts is the harvest, and seed saving closes the loop on self-sufficiency.
- Harvesting Techniques:
- Timing: Harvest vegetables at their peak ripeness for best flavor and nutritional value. For example, green beans should snap cleanly, cucumbers should be firm, and tomatoes should be fully colored.
- Frequency: Many crops, like zucchini, cucumbers, and bush beans, produce more if harvested frequently. Pick daily or every other day.
- Tools: Use clean, sharp pruners (e.g., Corona ClassicCUT Bypass Pruner BP 3180, ~$30) or a sharp knife for clean cuts, minimizing damage to the plant.
- Seed Saving: This is where the « self-sufficient » aspect truly shines.
- Selection: Only save seeds from your healthiest, most vigorous plants that show desired traits (disease resistance, good flavor, high yield).
- Isolation: To ensure true-to-type seeds, prevent cross-pollination. This can be challenging for open-pollinated crops that readily cross (e.g., squash, corn). For beginners, focus on self-pollinating plants like beans, peas, lettuce, and tomatoes.
- Processing:
- Dry Seeds (Beans, Peas, Lettuce, Grains): Allow pods/seed heads to dry completely on the plant. Harvest, shell, and clean the seeds, removing chaff.
- Wet Seeds (Tomatoes, Cucumbers, Squash): For tomatoes, ferment the seeds in water for a few days to remove the gel coating and inhibit disease. For cucumbers/squash, scrape out seeds, wash thoroughly, and dry.
- Drying: Spread seeds thinly on screens or paper plates in a cool, dry, well-ventilated area for 1-4 weeks. Ensure they are bone-dry before storage. I aim for less than 8% moisture content.
- Storage: Store seeds in airtight containers (glass jars with desiccant packets work well) in a cool, dark, dry place (ideally 40-50°F and 30-40% humidity). Label clearly with variety and date. Properly stored seeds can remain viable for 3-10 years or more.
Step 8: Season Extension & Winterizing
Extend your harvest and protect your garden for the off-season to truly maximize your self sufficient garden from scratch.
- Cold Frames: Simple structures with a transparent top (glass, polycarbonate, or old windows) that sit over garden beds. They trap solar heat, allowing you to grow cold-hardy crops (lettuce, spinach, kale, radishes) well into winter or start seeds earlier in spring. A basic cold frame can be built from 2×6 lumber and a sheet of polycarbonate for under $100.
- Hoop Houses/Low Tunnels: Larger structures made from flexible hoops (PVC pipe or EMT conduit) covered with greenhouse plastic. These provide more space and greater temperature moderation. A 10×20 ft DIY low tunnel kit can cost $200-$500, while a larger, more robust hoop house kit might be $1,000-$3,000. I use a 6×12 ft low tunnel made from 1/2-inch PVC hoops and 6mil greenhouse plastic, which extends my lettuce and spinach harvest by at least
- In-Ground Beds: If you have excellent native soil and good drainage, in-ground beds are the most economical. Double-digging (loosening soil two shovel depths) can significantly improve drainage and aeration. For my main garden, I primarily use in-ground beds, but I focus on building up the soil over time with consistent compost additions and cover cropping. I aim for beds that are no wider than 3-4 feet so I can reach the center without stepping on the soil, compacting it.
- Raised Beds: Raised beds offer numerous advantages, especially for poor soil, heavy clay, or rocky areas. They provide better drainage, warm up faster in spring, reduce compaction, and make weeding and harvesting easier on your back.
- Material Options:
- Untreated Cedar: Naturally rot-resistant and chemical-free. A 4×8 ft bed, 12 inches deep, typically requires three 2x12x8 ft cedar boards, costing around $50-$60 per board (total ~$150-$180) plus corner brackets or screws. My first raised beds were cedar and are still going strong after 7 years.
- Galvanized Steel: Durable, long-lasting, and aesthetically pleasing. Brands like Vego Garden offer modular kits. A Vego Garden 17″ Tall 8-in-1 Metal Raised Garden Bed (can be configured to 4×8 ft) costs approximately $250-$300.
- Concrete Blocks/Stones: Very durable but can leach minerals (though generally safe once weathered) and can be expensive.
- Recycled Materials: Pallets (check for chemical treatment stamps like « HT » for heat-treated), old tires (controversial due to potential chemical leaching).
- Filling Raised Beds: Don’t just fill with topsoil. Use a « Hugelkultur » approach (logs, branches, leaves, then compost, then topsoil) or a mixture of 60% good quality topsoil, 30% compost, and 10% perlite or vermiculite for drainage. A 4x8x1 ft raised bed requires about 32 cubic feet (or ~1.2 cubic yards) of soil mix, which can cost $100-$200 depending on your source.
- Material Options:
Step 4: Water Management & Irrigation
Efficient water management is critical for a self sufficient garden from scratch, especially in off-grid living where water resources might be limited.
- Rainwater Harvesting: This is my primary source of irrigation water. A 55-gallon rain barrel (e.g., EarthMark Rain Barrel, ~$120-$150) connected to a downspout can collect significant water. For larger needs, I use two 275-gallon IBC totes (Intermediate Bulk Containers, often available used for $100-$200 each from food-grade sources) connected in series. A 1,000 sq ft roof can collect approximately 620 gallons of water for every inch of rainfall. My 1,500 sq ft roof provides ample water for my 600 sq ft garden through multiple barrels and totes.
- Drip Irrigation: This is by far the most water-efficient method, delivering water directly to the plant’s root zone, minimizing evaporation and weed growth.
- Components: A typical drip system includes a pressure regulator (e.g., Rain Bird PRV-10, ~$15), a filter (Rain Bird RBY filter, ~$20), main tubing (1/2-inch poly tubing, 100ft ~$25), smaller feeder lines (1/4-inch tubing), and emitters (0.5 GPH or 1 GPH per plant).
- Kits: For beginners, a starter kit like the Rain Bird Drip Irrigation Garden Kit (model DDI-KIT-1P, ~$40-$60) is excellent for a small garden. For larger setups, I use Netafim Techline CV Drip Line (500ft roll, ~$150-$200), which has pressure-compensating emitters built-in, ensuring even watering across long runs.
- Automation: For true self-sufficiency, consider a battery-powered timer (e.g., Orbit B-Hyve Bluetooth Hose Faucet Timer, ~$50) or a solar-powered timer connected to a small 12V pump.
- Solar-Powered Pumps: For lifting water from a well, pond, or large storage tank to your garden, a solar pump is a game-changer. For a smaller drip system, a Shurflo 2088-594-152 Diaphragm Pump (12V, 3.5 GPM, ~$180) can be powered by a single 100W solar panel (e.g., Renogy 100W Monocrystalline Solar Panel, ~$100) and a small 12V battery (e.g., a 50Ah LiFePO4 battery like the Battle Born 50Ah, ~$450). For larger operations or deeper wells, more robust systems are needed. If you’re looking to build out a comprehensive off-grid power system to support your garden’s water needs, or indeed your entire homestead, you might want to explore resources like the Power Grid Generator complete system guide to understand the full scope of what’s possible in terms of energy independence.
Step 5: Seed Selection & Planting
The choice of seeds is crucial for a truly self sufficient garden from scratch.
- Choose Heirloom & Open-Pollinated Seeds: These varieties produce seeds that will grow true to type, meaning you can save seeds from your harvest year after year. F1 hybrids, while often vigorous, will not produce consistent offspring from saved seeds. Reputable seed companies include Baker Creek Heirloom Seeds, High Mowing Organic Seeds, and Seed Savers Exchange. Start with common, reliable varieties like ‘Black Krim’ tomatoes, ‘Provider’ bush beans, ‘Waltham Butternut’ squash, and ‘Black Seeded Simpson’ lettuce.
- Start Seeds Indoors (Optional but Recommended): For longer growing seasons or specific crops, starting seeds indoors gives you a head start. Use seed-starting mix (e.g., Espoma Organic Seed Starter Mix, ~$10 for 16qt bag) in seed trays (Jiffy Professional Greenhouse 72-cell kit, ~$15). Provide adequate light with LED grow lights (Barrina T5 2ft 4-pack LED Grow Lights, 20W each, ~$50) for 14-16 hours a day, positioned 2-4 inches above seedlings. Maintain consistent temperatures (65-75°F for most).
- Direct Sowing vs. Transplanting: Some crops (carrots, radishes, beans, corn) prefer direct sowing into the garden bed. Others (tomatoes, peppers, broccoli, kale) benefit from being started indoors and transplanted. Follow seed packet instructions for planting depths (e.g., lettuce seeds are often surface-sown or planted 1/8 inch deep, while beans are 1 inch deep) and spacing.
- Companion Planting: Strategically plant different species together to enhance growth, deter pests, and attract beneficial insects. For example, planting marigolds near tomatoes can deter nematodes, and basil improves tomato flavor. Nasturtiums can act as a trap crop for aphids.
- Succession Planting: For a continuous harvest, plant small batches of quick-growing crops (lettuce, radishes, cilantro) every 2-3 weeks. As one crop finishes, another is ready to take its place.
Step 6: Pest & Disease Management (Organic)
Maintaining a self sufficient garden from scratch means embracing organic pest and disease control.
- Integrated Pest Management (IPM): This holistic approach combines several strategies.
- Observation: Regularly inspect your plants for early signs of pests or disease. Catching issues early is key.
- Physical Barriers: Use row covers (e.g., Agribon AG-19 floating row cover, 10×20 ft, ~$20) to protect young plants from insect pests like cabbage worms and squash bugs. Install fences (e.g., 2×4 welded wire mesh, 4 ft tall, 50 ft roll ~$70) to keep out deer, rabbits, and other larger animals.
- Hand-Picking: For larger pests like tomato hornworms or squash bugs, simply pick them off and drop them into a bucket of soapy water.
- Companion Planting: As mentioned, certain plants repel pests. Marigolds, garlic, and onions are excellent deterrents.
- Attract Beneficial Insects: Plant flowers like dill, fennel, cosmos, and sweet alyssum to attract ladybugs, lacewings, and parasitic wasps, which prey on common garden pests.
- Organic Sprays & Treatments:
- Neem Oil: An excellent broad-spectrum organic insecticide and fungicide. Bonide Neem Oil Concentrate (16oz, ~$20) can be mixed at a rate of 1-2 tbsp per gallon of water and sprayed on affected plants.
- Insecticidal Soap: Effective against soft-bodied insects like aphids, whiteflies, and spider mites. Garden Safe Insecticidal Soap (24oz ready-to-use, ~$10).
- Bacillus thuringiensis (Bt): A naturally occurring soil bacterium that targets caterpillars and worms. Monterey BT Worm & Caterpillar Killer (16oz, ~$18) is highly effective and safe for beneficial insects.
- Copper or Sulfur Sprays: For fungal diseases like powdery mildew or blight, organic copper (e.g., Bonide Copper Fungicide, ~$15 for 1lb) or sulfur (e.g., Safer Brand Garden Fungicide, ~$10 for 16oz) can be used as a last resort.
Step 7: Harvesting & Seed Saving
The culmination of your efforts is the harvest, and seed saving closes the loop on self-sufficiency.
- Harvesting Techniques:
- Timing: Harvest vegetables at their peak ripeness for best flavor and nutritional value. For example, green beans should snap cleanly, cucumbers should be firm, and tomatoes should be fully colored.
- Frequency: Many crops, like zucchini, cucumbers, and bush beans, produce more if harvested frequently. Pick daily or every other day.
- Tools: Use clean, sharp pruners (e.g., Corona ClassicCUT Bypass Pruner BP 3180, ~$30) or a sharp knife for clean cuts, minimizing damage to the plant.
- Seed Saving: This is where the « self-sufficient » aspect truly shines.
- Selection: Only save seeds from your healthiest, most vigorous plants that show desired traits (disease resistance, good flavor, high yield).
- Isolation: To ensure true-to-type seeds, prevent cross-pollination. This can be challenging for open-pollinated crops that readily cross (e.g., squash, corn). For beginners, focus on self-pollinating plants like beans, peas, lettuce, and tomatoes.
- Processing:
- Dry Seeds (Beans, Peas, Lettuce, Grains): Allow pods/seed heads to dry completely on the plant. Harvest, shell, and clean the seeds, removing chaff.
- Wet Seeds (Tomatoes, Cucumbers, Squash): For tomatoes, ferment the seeds in water for a few days to remove the gel coating and inhibit disease. For cucumbers/squash, scrape out seeds, wash thoroughly, and dry.
- Drying: Spread seeds thinly on screens or paper plates in a cool, dry, well-ventilated area for 1-4 weeks. Ensure they are bone-dry before storage. I aim for less than 8% moisture content.
- Storage: Store seeds in airtight containers (glass jars with desiccant packets work well) in a cool, dark, dry place (ideally 40-50°F and 30-40% humidity). Label clearly with variety and date. Properly stored seeds can remain viable for 3-10 years or more.
Step 8: Season Extension & Winterizing
Extend your harvest and protect your garden for the off-season to truly maximize your self sufficient garden from scratch.
- Cold Frames: Simple structures with a transparent top (glass, polycarbonate, or old windows) that sit over garden beds. They trap solar heat, allowing you to grow cold-hardy crops (lettuce, spinach, kale, radishes) well into winter or start seeds earlier in spring. A basic cold frame can be built from 2×6 lumber and a sheet of polycarbonate for under $100.
- Hoop Houses/Low Tunnels: Larger structures made from flexible hoops (PVC pipe or EMT conduit) covered with greenhouse plastic. These provide more space and greater temperature moderation. A 10×20 ft DIY low tunnel kit can cost $200-$500, while a larger, more robust hoop house kit might be $1,000-$3,000. I use a 6×12 ft low tunnel made from 1/2-inch PVC hoops and 6mil greenhouse plastic, which extends my lettuce and spinach harvest by at least
Deciding between raised beds and in-ground beds depends on your soil, budget, and physical capabilities.
- In-Ground Beds: If you have excellent native soil and good drainage, in-ground beds are the most economical. Double-digging (loosening soil two shovel depths) can significantly improve drainage and aeration. For my main garden, I primarily use in-ground beds, but I focus on building up the soil over time with consistent compost additions and cover cropping. I aim for beds that are no wider than 3-4 feet so I can reach the center without stepping on the soil, compacting it.
- Raised Beds: Raised beds offer numerous advantages, especially for poor soil, heavy clay, or rocky areas. They provide better drainage, warm up faster in spring, reduce compaction, and make weeding and harvesting easier on your back.
- Material Options:
- Untreated Cedar: Naturally rot-resistant and chemical-free. A 4×8 ft bed, 12 inches deep, typically requires three 2x12x8 ft cedar boards, costing around $50-$60 per board (total ~$150-$180) plus corner brackets or screws. My first raised beds were cedar and are still going strong after 7 years.
- Galvanized Steel: Durable, long-lasting, and aesthetically pleasing. Brands like Vego Garden offer modular kits. A Vego Garden 17″ Tall 8-in-1 Metal Raised Garden Bed (can be configured to 4×8 ft) costs approximately $250-$300.
- Concrete Blocks/Stones: Very durable but can leach minerals (though generally safe once weathered) and can be expensive.
- Recycled Materials: Pallets (check for chemical treatment stamps like « HT » for heat-treated), old tires (controversial due to potential chemical leaching).
- Filling Raised Beds: Don’t just fill with topsoil. Use a « Hugelkultur » approach (logs, branches, leaves, then compost, then topsoil) or a mixture of 60% good quality topsoil, 30% compost, and 10% perlite or vermiculite for drainage. A 4x8x1 ft raised bed requires about 32 cubic feet (or ~1.2 cubic yards) of soil mix, which can cost $100-$200 depending on your source.
- Material Options:
Step 4: Water Management & Irrigation
Efficient water management is critical for a self sufficient garden from scratch, especially in off-grid living where water resources might be limited.
- Rainwater Harvesting: This is my primary source of irrigation water. A 55-gallon rain barrel (e.g., EarthMark Rain Barrel, ~$120-$150) connected to a downspout can collect significant water. For larger needs, I use two 275-gallon IBC totes (Intermediate Bulk Containers, often available used for $100-$200 each from food-grade sources) connected in series. A 1,000 sq ft roof can collect approximately 620 gallons of water for every inch of rainfall. My 1,500 sq ft roof provides ample water for my 600 sq ft garden through multiple barrels and totes.
- Drip Irrigation: This is by far the most water-efficient method, delivering water directly to the plant’s root zone, minimizing evaporation and weed growth.
- Components: A typical drip system includes a pressure regulator (e.g., Rain Bird PRV-10, ~$15), a filter (Rain Bird RBY filter, ~$20), main tubing (1/2-inch poly tubing, 100ft ~$25), smaller feeder lines (1/4-inch tubing), and emitters (0.5 GPH or 1 GPH per plant).
- Kits: For beginners, a starter kit like the Rain Bird Drip Irrigation Garden Kit (model DDI-KIT-1P, ~$40-$60) is excellent for a small garden. For larger setups, I use Netafim Techline CV Drip Line (500ft roll, ~$150-$200), which has pressure-compensating emitters built-in, ensuring even watering across long runs.
- Automation: For true self-sufficiency, consider a battery-powered timer (e.g., Orbit B-Hyve Bluetooth Hose Faucet Timer, ~$50) or a solar-powered timer connected to a small 12V pump.
- Solar-Powered Pumps: For lifting water from a well, pond, or large storage tank to your garden, a solar pump is a game-changer. For a smaller drip system, a Shurflo 2088-594-152 Diaphragm Pump (12V, 3.5 GPM, ~$180) can be powered by a single 100W solar panel (e.g., Renogy 100W Monocrystalline Solar Panel, ~$100) and a small 12V battery (e.g., a 50Ah LiFePO4 battery like the Battle Born 50Ah, ~$450). For larger operations or deeper wells, more robust systems are needed. If you’re looking to build out a comprehensive off-grid power system to support your garden’s water needs, or indeed your entire homestead, you might want to explore resources like the Power Grid Generator complete system guide to understand the full scope of what’s possible in terms of energy independence.
Step 5: Seed Selection & Planting
The choice of seeds is crucial for a truly self sufficient garden from scratch.
- Choose Heirloom & Open-Pollinated Seeds: These varieties produce seeds that will grow true to type, meaning you can save seeds from your harvest year after year. F1 hybrids, while often vigorous, will not produce consistent offspring from saved seeds. Reputable seed companies include Baker Creek Heirloom Seeds, High Mowing Organic Seeds, and Seed Savers Exchange. Start with common, reliable varieties like ‘Black Krim’ tomatoes, ‘Provider’ bush beans, ‘Waltham Butternut’ squash, and ‘Black Seeded Simpson’ lettuce.
- Start Seeds Indoors (Optional but Recommended): For longer growing seasons or specific crops, starting seeds indoors gives you a head start. Use seed-starting mix (e.g., Espoma Organic Seed Starter Mix, ~$10 for 16qt bag) in seed trays (Jiffy Professional Greenhouse 72-cell kit, ~$15). Provide adequate light with LED grow lights (Barrina T5 2ft 4-pack LED Grow Lights, 20W each, ~$50) for 14-16 hours a day, positioned 2-4 inches above seedlings. Maintain consistent temperatures (65-75°F for most).
- Direct Sowing vs. Transplanting: Some crops (carrots, radishes, beans, corn) prefer direct sowing into the garden bed. Others (tomatoes, peppers, broccoli, kale) benefit from being started indoors and transplanted. Follow seed packet instructions for planting depths (e.g., lettuce seeds are often surface-sown or planted 1/8 inch deep, while beans are 1 inch deep) and spacing.
- Companion Planting: Strategically plant different species together to enhance growth, deter pests, and attract beneficial insects. For example, planting marigolds near tomatoes can deter nematodes, and basil improves tomato flavor. Nasturtiums can act as a trap crop for aphids.
- Succession Planting: For a continuous harvest, plant small batches of quick-growing crops (lettuce, radishes, cilantro) every 2-3 weeks. As one crop finishes, another is ready to take its place.
Step 6: Pest & Disease Management (Organic)
Maintaining a self sufficient garden from scratch means embracing organic pest and disease control.
- Integrated Pest Management (IPM): This holistic approach combines several strategies.
- Observation: Regularly inspect your plants for early signs of pests or disease. Catching issues early is key.
- Physical Barriers: Use row covers (e.g., Agribon AG-19 floating row cover, 10×20 ft, ~$20) to protect young plants from insect pests like cabbage worms and squash bugs. Install fences (e.g., 2×4 welded wire mesh, 4 ft tall, 50 ft roll ~$70) to keep out deer, rabbits, and other larger animals.
- Hand-Picking: For larger pests like tomato hornworms or squash bugs, simply pick them off and drop them into a bucket of soapy water.
- Companion Planting: As mentioned, certain plants repel pests. Marigolds, garlic, and onions are excellent deterrents.
- Attract Beneficial Insects: Plant flowers like dill, fennel, cosmos, and sweet alyssum to attract ladybugs, lacewings, and parasitic wasps, which prey on common garden pests.
- Organic Sprays & Treatments:
- Neem Oil: An excellent broad-spectrum organic insecticide and fungicide. Bonide Neem Oil Concentrate (16oz, ~$20) can be mixed at a rate of 1-2 tbsp per gallon of water and sprayed on affected plants.
- Insecticidal Soap: Effective against soft-bodied insects like aphids, whiteflies, and spider mites. Garden Safe Insecticidal Soap (24oz ready-to-use, ~$10).
- Bacillus thuringiensis (Bt): A naturally occurring soil bacterium that targets caterpillars and worms. Monterey BT Worm & Caterpillar Killer (16oz, ~$18) is highly effective and safe for beneficial insects.
- Copper or Sulfur Sprays: For fungal diseases like powdery mildew or blight, organic copper (e.g., Bonide Copper Fungicide, ~$15 for 1lb) or sulfur (e.g., Safer Brand Garden Fungicide, ~$10 for 16oz) can be used as a last resort.
Step 7: Harvesting & Seed Saving
The culmination of your efforts is the harvest, and seed saving closes the loop on self-sufficiency.
- Harvesting Techniques:
- Timing: Harvest vegetables at their peak ripeness for best flavor and nutritional value. For example, green beans should snap cleanly, cucumbers should be firm, and tomatoes should be fully colored.
- Frequency: Many crops, like zucchini, cucumbers, and bush beans, produce more if harvested frequently. Pick daily or every other day.
- Tools: Use clean, sharp pruners (e.g., Corona ClassicCUT Bypass Pruner BP 3180, ~$30) or a sharp knife for clean cuts, minimizing damage to the plant.
- Seed Saving: This is where the « self-sufficient » aspect truly shines.
- Selection: Only save seeds from your healthiest, most vigorous plants that show desired traits (disease resistance, good flavor, high yield).
- Isolation: To ensure true-to-type seeds, prevent cross-pollination. This can be challenging for open-pollinated crops that readily cross (e.g., squash, corn). For beginners, focus on self-pollinating plants like beans, peas, lettuce, and tomatoes.
- Processing:
- Dry Seeds (Beans, Peas, Lettuce, Grains): Allow pods/seed heads to dry completely on the plant. Harvest, shell, and clean the seeds, removing chaff.
- Wet Seeds (Tomatoes, Cucumbers, Squash): For tomatoes, ferment the seeds in water for a few days to remove the gel coating and inhibit disease. For cucumbers/squash, scrape out seeds, wash thoroughly, and dry.
- Drying: Spread seeds thinly on screens or paper plates in a cool, dry, well-ventilated area for 1-4 weeks. Ensure they are bone-dry before storage. I aim for less than 8% moisture content.
- Storage: Store seeds in airtight containers (glass jars with desiccant packets work well) in a cool, dark, dry place (ideally 40-50°F and 30-40% humidity). Label clearly with variety and date. Properly stored seeds can remain viable for 3-10 years or more.
Step 8: Season Extension & Winterizing
Extend your harvest and protect your garden for the off-season to truly maximize your self sufficient garden from scratch.
- Cold Frames: Simple structures with a transparent top (glass, polycarbonate, or old windows) that sit over garden beds. They trap solar heat, allowing you to grow cold-hardy crops (lettuce, spinach, kale, radishes) well into winter or start seeds earlier in spring. A basic cold frame can be built from 2×6 lumber and a sheet of polycarbonate for under $100.
- Hoop Houses/Low Tunnels: Larger structures made from flexible hoops (PVC pipe or EMT conduit) covered with greenhouse plastic. These provide more space and greater temperature moderation. A 10×20 ft DIY low tunnel kit can cost $200-$500, while a larger, more robust hoop house kit might be $1,000-$3,000. I use a 6×12 ft low tunnel made from 1/2-inch PVC hoops and 6mil greenhouse plastic, which extends my lettuce and spinach harvest by at least
Healthy soil is the bedrock of a productive, self-sufficient garden. You can’t guess what your soil needs; you have to test it.
- Perform a Soil Test: A professional soil test will give you precise data on your soil’s pH, nutrient levels (N-P-K), and organic matter content. I recommend sending a sample to your local agricultural extension office; it typically costs $20-$50 and provides detailed recommendations. Alternatively, for a quick homeowner check, a Rapitest Soil Test Kit (40-test kit, model 1663, ~$20 on Amazon) provides a good baseline for pH, Nitrogen, Phosphorus, and Potash. Aim for a pH between 6.0 and 7.0 for most vegetables.
- Amend for pH Imbalance: If your soil is too acidic (below 6.0), add agricultural lime (dolomitic lime adds magnesium, calcitic lime adds calcium). Apply 5-10 lbs per 100 sq ft for a moderate adjustment. If it’s too alkaline (above 7.0), add elemental sulfur (e.g., Espoma Soil Acidifier, ~$15 for 6.75 lbs) or generous amounts of organic matter like peat moss or pine needles.
- Build Organic Matter: This is the single most important step for long-term soil health. Organic matter improves soil structure, water retention, drainage, and nutrient availability. Incorporate 2-4 inches of high-quality compost into your top 6-12 inches of soil annually. I make my own compost from kitchen scraps, garden waste, and shredded leaves, but you can purchase it. Local nurseries often sell bulk compost for $30-$50 per cubic yard. Aged manure (from chickens, cows, or horses – ensure it’s well-rotted to avoid burning plants) is also excellent.
- Address Nutrient Deficiencies: Based on your soil test, add specific organic amendments. If Nitrogen (N) is low, add blood meal (12-0-0, ~$20 for 3 lbs) or feather meal. For Phosphorus (P), use bone meal (3-15-0, ~$15 for 3 lbs) or rock phosphate. For Potassium (K), greensand (0-0-2.5, ~$25 for 5 lbs) or kelp meal are good choices. I rely heavily on Espoma Organic Garden-tone (5-3-3, ~$25 for an 8lb bag) as a balanced, all-purpose organic fertilizer during planting.
Step 3: Garden Bed Preparation
Deciding between raised beds and in-ground beds depends on your soil, budget, and physical capabilities.
- In-Ground Beds: If you have excellent native soil and good drainage, in-ground beds are the most economical. Double-digging (loosening soil two shovel depths) can significantly improve drainage and aeration. For my main garden, I primarily use in-ground beds, but I focus on building up the soil over time with consistent compost additions and cover cropping. I aim for beds that are no wider than 3-4 feet so I can reach the center without stepping on the soil, compacting it.
- Raised Beds: Raised beds offer numerous advantages, especially for poor soil, heavy clay, or rocky areas. They provide better drainage, warm up faster in spring, reduce compaction, and make weeding and harvesting easier on your back.
- Material Options:
- Untreated Cedar: Naturally rot-resistant and chemical-free. A 4×8 ft bed, 12 inches deep, typically requires three 2x12x8 ft cedar boards, costing around $50-$60 per board (total ~$150-$180) plus corner brackets or screws. My first raised beds were cedar and are still going strong after 7 years.
- Galvanized Steel: Durable, long-lasting, and aesthetically pleasing. Brands like Vego Garden offer modular kits. A Vego Garden 17″ Tall 8-in-1 Metal Raised Garden Bed (can be configured to 4×8 ft) costs approximately $250-$300.
- Concrete Blocks/Stones: Very durable but can leach minerals (though generally safe once weathered) and can be expensive.
- Recycled Materials: Pallets (check for chemical treatment stamps like « HT » for heat-treated), old tires (controversial due to potential chemical leaching).
- Filling Raised Beds: Don’t just fill with topsoil. Use a « Hugelkultur » approach (logs, branches, leaves, then compost, then topsoil) or a mixture of 60% good quality topsoil, 30% compost, and 10% perlite or vermiculite for drainage. A 4x8x1 ft raised bed requires about 32 cubic feet (or ~1.2 cubic yards) of soil mix, which can cost $100-$200 depending on your source.
- Material Options:
Step 4: Water Management & Irrigation
Efficient water management is critical for a self sufficient garden from scratch, especially in off-grid living where water resources might be limited.
- Rainwater Harvesting: This is my primary source of irrigation water. A 55-gallon rain barrel (e.g., EarthMark Rain Barrel, ~$120-$150) connected to a downspout can collect significant water. For larger needs, I use two 275-gallon IBC totes (Intermediate Bulk Containers, often available used for $100-$200 each from food-grade sources) connected in series. A 1,000 sq ft roof can collect approximately 620 gallons of water for every inch of rainfall. My 1,500 sq ft roof provides ample water for my 600 sq ft garden through multiple barrels and totes.
- Drip Irrigation: This is by far the most water-efficient method, delivering water directly to the plant’s root zone, minimizing evaporation and weed growth.
- Components: A typical drip system includes a pressure regulator (e.g., Rain Bird PRV-10, ~$15), a filter (Rain Bird RBY filter, ~$20), main tubing (1/2-inch poly tubing, 100ft ~$25), smaller feeder lines (1/4-inch tubing), and emitters (0.5 GPH or 1 GPH per plant).
- Kits: For beginners, a starter kit like the Rain Bird Drip Irrigation Garden Kit (model DDI-KIT-1P, ~$40-$60) is excellent for a small garden. For larger setups, I use Netafim Techline CV Drip Line (500ft roll, ~$150-$200), which has pressure-compensating emitters built-in, ensuring even watering across long runs.
- Automation: For true self-sufficiency, consider a battery-powered timer (e.g., Orbit B-Hyve Bluetooth Hose Faucet Timer, ~$50) or a solar-powered timer connected to a small 12V pump.
- Solar-Powered Pumps: For lifting water from a well, pond, or large storage tank to your garden, a solar pump is a game-changer. For a smaller drip system, a Shurflo 2088-594-152 Diaphragm Pump (12V, 3.5 GPM, ~$180) can be powered by a single 100W solar panel (e.g., Renogy 100W Monocrystalline Solar Panel, ~$100) and a small 12V battery (e.g., a 50Ah LiFePO4 battery like the Battle Born 50Ah, ~$450). For larger operations or deeper wells, more robust systems are needed. If you’re looking to build out a comprehensive off-grid power system to support your garden’s water needs, or indeed your entire homestead, you might want to explore resources like the Power Grid Generator complete system guide to understand the full scope of what’s possible in terms of energy independence.
Step 5: Seed Selection & Planting
The choice of seeds is crucial for a truly self sufficient garden from scratch.
- Choose Heirloom & Open-Pollinated Seeds: These varieties produce seeds that will grow true to type, meaning you can save seeds from your harvest year after year. F1 hybrids, while often vigorous, will not produce consistent offspring from saved seeds. Reputable seed companies include Baker Creek Heirloom Seeds, High Mowing Organic Seeds, and Seed Savers Exchange. Start with common, reliable varieties like ‘Black Krim’ tomatoes, ‘Provider’ bush beans, ‘Waltham Butternut’ squash, and ‘Black Seeded Simpson’ lettuce.
- Start Seeds Indoors (Optional but Recommended): For longer growing seasons or specific crops, starting seeds indoors gives you a head start. Use seed-starting mix (e.g., Espoma Organic Seed Starter Mix, ~$10 for 16qt bag) in seed trays (Jiffy Professional Greenhouse 72-cell kit, ~$15). Provide adequate light with LED grow lights (Barrina T5 2ft 4-pack LED Grow Lights, 20W each, ~$50) for 14-16 hours a day, positioned 2-4 inches above seedlings. Maintain consistent temperatures (65-75°F for most).
- Direct Sowing vs. Transplanting: Some crops (carrots, radishes, beans, corn) prefer direct sowing into the garden bed. Others (tomatoes, peppers, broccoli, kale) benefit from being started indoors and transplanted. Follow seed packet instructions for planting depths (e.g., lettuce seeds are often surface-sown or planted 1/8 inch deep, while beans are 1 inch deep) and spacing.
- Companion Planting: Strategically plant different species together to enhance growth, deter pests, and attract beneficial insects. For example, planting marigolds near tomatoes can deter nematodes, and basil improves tomato flavor. Nasturtiums can act as a trap crop for aphids.
- Succession Planting: For a continuous harvest, plant small batches of quick-growing crops (lettuce, radishes, cilantro) every 2-3 weeks. As one crop finishes, another is ready to take its place.
Step 6: Pest & Disease Management (Organic)
Maintaining a self sufficient garden from scratch means embracing organic pest and disease control.
- Integrated Pest Management (IPM): This holistic approach combines several strategies.
- Observation: Regularly inspect your plants for early signs of pests or disease. Catching issues early is key.
- Physical Barriers: Use row covers (e.g., Agribon AG-19 floating row cover, 10×20 ft, ~$20) to protect young plants from insect pests like cabbage worms and squash bugs. Install fences (e.g., 2×4 welded wire mesh, 4 ft tall, 50 ft roll ~$70) to keep out deer, rabbits, and other larger animals.
- Hand-Picking: For larger pests like tomato hornworms or squash bugs, simply pick them off and drop them into a bucket of soapy water.
- Companion Planting: As mentioned, certain plants repel pests. Marigolds, garlic, and onions are excellent deterrents.
- Attract Beneficial Insects: Plant flowers like dill, fennel, cosmos, and sweet alyssum to attract ladybugs, lacewings, and parasitic wasps, which prey on common garden pests.
- Organic Sprays & Treatments:
- Neem Oil: An excellent broad-spectrum organic insecticide and fungicide. Bonide Neem Oil Concentrate (16oz, ~$20) can be mixed at a rate of 1-2 tbsp per gallon of water and sprayed on affected plants.
- Insecticidal Soap: Effective against soft-bodied insects like aphids, whiteflies, and spider mites. Garden Safe Insecticidal Soap (24oz ready-to-use, ~$10).
- Bacillus thuringiensis (Bt): A naturally occurring soil bacterium that targets caterpillars and worms. Monterey BT Worm & Caterpillar Killer (16oz, ~$18) is highly effective and safe for beneficial insects.
- Copper or Sulfur Sprays: For fungal diseases like powdery mildew or blight, organic copper (e.g., Bonide Copper Fungicide, ~$15 for 1lb) or sulfur (e.g., Safer Brand Garden Fungicide, ~$10 for 16oz) can be used as a last resort.
Step 7: Harvesting & Seed Saving
The culmination of your efforts is the harvest, and seed saving closes the loop on self-sufficiency.
- Harvesting Techniques:
- Timing: Harvest vegetables at their peak ripeness for best flavor and nutritional value. For example, green beans should snap cleanly, cucumbers should be firm, and tomatoes should be fully colored.
- Frequency: Many crops, like zucchini, cucumbers, and bush beans, produce more if harvested frequently. Pick daily or every other day.
- Tools: Use clean, sharp pruners (e.g., Corona ClassicCUT Bypass Pruner BP 3180, ~$30) or a sharp knife for clean cuts, minimizing damage to the plant.
- Seed Saving: This is where the « self-sufficient » aspect truly shines.
- Selection: Only save seeds from your healthiest, most vigorous plants that show desired traits (disease resistance, good flavor, high yield).
- Isolation: To ensure true-to-type seeds, prevent cross-pollination. This can be challenging for open-pollinated crops that readily cross (e.g., squash, corn). For beginners, focus on self-pollinating plants like beans, peas, lettuce, and tomatoes.
- Processing:
- Dry Seeds (Beans, Peas, Lettuce, Grains): Allow pods/seed heads to dry completely on the plant. Harvest, shell, and clean the seeds, removing chaff.
- Wet Seeds (Tomatoes, Cucumbers, Squash): For tomatoes, ferment the seeds in water for a few days to remove the gel coating and inhibit disease. For cucumbers/squash, scrape out seeds, wash thoroughly, and dry.
- Drying: Spread seeds thinly on screens or paper plates in a cool, dry, well-ventilated area for 1-4 weeks. Ensure they are bone-dry before storage. I aim for less than 8% moisture content.
- Storage: Store seeds in airtight containers (glass jars with desiccant packets work well) in a cool, dark, dry place (ideally 40-50°F and 30-40% humidity). Label clearly with variety and date. Properly stored seeds can remain viable for 3-10 years or more.
Step 8: Season Extension & Winterizing
Extend your harvest and protect your garden for the off-season to truly maximize your self sufficient garden from scratch.
- Cold Frames: Simple structures with a transparent top (glass, polycarbonate, or old windows) that sit over garden beds. They trap solar heat, allowing you to grow cold-hardy crops (lettuce, spinach, kale, radishes) well into winter or start seeds earlier in spring. A basic cold frame can be built from 2×6 lumber and a sheet of polycarbonate for under $100.
- Hoop Houses/Low Tunnels: Larger structures made from flexible hoops (PVC pipe or EMT conduit) covered with greenhouse plastic. These provide more space and greater temperature moderation. A 10×20 ft DIY low tunnel kit can cost $200-$500, while a larger, more robust hoop house kit might be $1,000-$3,000. I use a 6×12 ft low tunnel made from 1/2-inch PVC hoops and 6mil greenhouse plastic, which extends my lettuce and spinach harvest by at least
Step 7: Harvesting & Seed Saving
The culmination of your efforts is the harvest, and seed saving closes the loop on self-sufficiency.
- Harvesting Techniques:
- Timing: Harvest vegetables at their peak ripeness for best flavor and nutritional value. For example, green beans should snap cleanly, cucumbers should be firm, and tomatoes should be fully colored.
- Frequency: Many crops, like zucchini, cucumbers, and bush beans, produce more if harvested frequently. Pick daily or every other day.
- Tools: Use clean, sharp pruners (e.g., Corona ClassicCUT Bypass Pruner BP 3180, ~$30) or a sharp knife for clean cuts, minimizing damage to the plant.
- Seed Saving: This is where the « self-sufficient » aspect truly shines.
- Selection: Only save seeds from your healthiest, most vigorous plants that show desired traits (disease resistance, good flavor, high yield).
- Isolation: To ensure true-to-type seeds, prevent cross-pollination. This can be challenging for open-pollinated crops that readily cross (e.g., squash, corn). For beginners, focus on self-pollinating plants like beans, peas, lettuce, and tomatoes.
- Processing:
- Dry Seeds (Beans, Peas, Lettuce, Grains): Allow pods/seed heads to dry completely on the plant. Harvest, shell, and clean the seeds, removing chaff.
- Wet Seeds (Tomatoes, Cucumbers, Squash): For tomatoes, ferment the seeds in water for a few days to remove the gel coating and inhibit disease. For cucumbers/squash, scrape out seeds, wash thoroughly, and dry.
- Drying: Spread seeds thinly on screens or paper plates in a cool, dry, well-ventilated area for 1-4 weeks. Ensure they are bone-dry before storage. I aim for less than 8% moisture content.
- Storage: Store seeds in airtight containers (glass jars with desiccant packets work well) in a cool, dark, dry place (ideally 40-50°F and 30-40% humidity). Label clearly with variety and date. Properly stored seeds can remain viable for 3-10 years or more.
Step 8: Season Extension & Winterizing
Extend your harvest and protect your garden for the off-season to truly maximize your self sufficient garden from scratch.
- Cold Frames: Simple structures with a transparent top (glass, polycarbonate, or old windows) that sit over garden beds. They trap solar heat, allowing you to grow cold-hardy crops (lettuce, spinach, kale, radishes) well into winter or start seeds earlier in spring. A basic cold frame can be built from 2×6 lumber and a sheet of polycarbonate for under $100.
- Hoop Houses/Low Tunnels: Larger structures made from flexible hoops (PVC pipe or EMT conduit) covered with greenhouse plastic. These provide more space and greater temperature moderation. A 10×20 ft DIY low tunnel kit can cost $200-$500, while a larger, more robust hoop house kit might be $1,000-$3,000. I use a 6×12 ft low tunnel made from 1/2-inch PVC hoops and 6mil greenhouse plastic, which extends my lettuce and spinach harvest by at least
Step 4: Water Management & Irrigation
Efficient water management is critical for a self sufficient garden from scratch, especially in off-grid living where water resources might be limited.
- Rainwater Harvesting: This is my primary source of irrigation water. A 55-gallon rain barrel (e.g., EarthMark Rain Barrel, ~$120-$150) connected to a downspout can collect significant water. For larger needs, I use two 275-gallon IBC totes (Intermediate Bulk Containers, often available used for $100-$200 each from food-grade sources) connected in series. A 1,000 sq ft roof can collect approximately 620 gallons of water for every inch of rainfall. My 1,500 sq ft roof provides ample water for my 600 sq ft garden through multiple barrels and totes.
- Drip Irrigation: This is by far the most water-efficient method, delivering water directly to the plant’s root zone, minimizing evaporation and weed growth.
- Components: A typical drip system includes a pressure regulator (e.g., Rain Bird PRV-10, ~$15), a filter (Rain Bird RBY filter, ~$20), main tubing (1/2-inch poly tubing, 100ft ~$25), smaller feeder lines (1/4-inch tubing), and emitters (0.5 GPH or 1 GPH per plant).
- Kits: For beginners, a starter kit like the Rain Bird Drip Irrigation Garden Kit (model DDI-KIT-1P, ~$40-$60) is excellent for a small garden. For larger setups, I use Netafim Techline CV Drip Line (500ft roll, ~$150-$200), which has pressure-compensating emitters built-in, ensuring even watering across long runs.
- Automation: For true self-sufficiency, consider a battery-powered timer (e.g., Orbit B-Hyve Bluetooth Hose Faucet Timer, ~$50) or a solar-powered timer connected to a small 12V pump.
- Solar-Powered Pumps: For lifting water from a well, pond, or large storage tank to your garden, a solar pump is a game-changer. For a smaller drip system, a Shurflo 2088-594-152 Diaphragm Pump (12V, 3.5 GPM, ~$180) can be powered by a single 100W solar panel (e.g., Renogy 100W Monocrystalline Solar Panel, ~$100) and a small 12V battery (e.g., a 50Ah LiFePO4 battery like the Battle Born 50Ah, ~$450). For larger operations or deeper wells, more robust systems are needed. If you’re looking to build out a comprehensive off-grid power system to support your garden’s water needs, or indeed your entire homestead, you might want to explore resources like the Power Grid Generator complete system guide to understand the full scope of what’s possible in terms of energy independence.
Step 5: Seed Selection & Planting
The choice of seeds is crucial for a truly self sufficient garden from scratch.
- Choose Heirloom & Open-Pollinated Seeds: These varieties produce seeds that will grow true to type, meaning you can save seeds from your harvest year after year. F1 hybrids, while often vigorous, will not produce consistent offspring from saved seeds. Reputable seed companies include Baker Creek Heirloom Seeds, High Mowing Organic Seeds, and Seed Savers Exchange. Start with common, reliable varieties like ‘Black Krim’ tomatoes, ‘Provider’ bush beans, ‘Waltham Butternut’ squash, and ‘Black Seeded Simpson’ lettuce.
- Start Seeds Indoors (Optional but Recommended): For longer growing seasons or specific crops, starting seeds indoors gives you a head start. Use seed-starting mix (e.g., Espoma Organic Seed Starter Mix, ~$10 for 16qt bag) in seed trays (Jiffy Professional Greenhouse 72-cell kit, ~$15). Provide adequate light with LED grow lights (Barrina T5 2ft 4-pack LED Grow Lights, 20W each, ~$50) for 14-16 hours a day, positioned 2-4 inches above seedlings. Maintain consistent temperatures (65-75°F for most).
- Direct Sowing vs. Transplanting: Some crops (carrots, radishes, beans, corn) prefer direct sowing into the garden bed. Others (tomatoes, peppers, broccoli, kale) benefit from being started indoors and transplanted. Follow seed packet instructions for planting depths (e.g., lettuce seeds are often surface-sown or planted 1/8 inch deep, while beans are 1 inch deep) and spacing.
- Companion Planting: Strategically plant different species together to enhance growth, deter pests, and attract beneficial insects. For example, planting marigolds near tomatoes can deter nematodes, and basil improves tomato flavor. Nasturtiums can act as a trap crop for aphids.
- Succession Planting: For a continuous harvest, plant small batches of quick-growing crops (lettuce, radishes, cilantro) every 2-3 weeks. As one crop finishes, another is ready to take its place.
Step 6: Pest & Disease Management (Organic)
Maintaining a self sufficient garden from scratch means embracing organic pest and disease control.
- Integrated Pest Management (IPM): This holistic approach combines several strategies.
- Observation: Regularly inspect your plants for early signs of pests or disease. Catching issues early is key.
- Physical Barriers: Use row covers (e.g., Agribon AG-19 floating row cover, 10×20 ft, ~$20) to protect young plants from insect pests like cabbage worms and squash bugs. Install fences (e.g., 2×4 welded wire mesh, 4 ft tall, 50 ft roll ~$70) to keep out deer, rabbits, and other larger animals.
- Hand-Picking: For larger pests like tomato hornworms or squash bugs, simply pick them off and drop them into a bucket of soapy water.
- Companion Planting: As mentioned, certain plants repel pests. Marigolds, garlic, and onions are excellent deterrents.
- Attract Beneficial Insects: Plant flowers like dill, fennel, cosmos, and sweet alyssum to attract ladybugs, lacewings, and parasitic wasps, which prey on common garden pests.
- Organic Sprays & Treatments:
- Neem Oil: An excellent broad-spectrum organic insecticide and fungicide. Bonide Neem Oil Concentrate (16oz, ~$20) can be mixed at a rate of 1-2 tbsp per gallon of water and sprayed on affected plants.
- Insecticidal Soap: Effective against soft-bodied insects like aphids, whiteflies, and spider mites. Garden Safe Insecticidal Soap (24oz ready-to-use, ~$10).
- Bacillus thuringiensis (Bt): A naturally occurring soil bacterium that targets caterpillars and worms. Monterey BT Worm & Caterpillar Killer (16oz, ~$18) is highly effective and safe for beneficial insects.
- Copper or Sulfur Sprays: For fungal diseases like powdery mildew or blight, organic copper (e.g., Bonide Copper Fungicide, ~$15 for 1lb) or sulfur (e.g., Safer Brand Garden Fungicide, ~$10 for 16oz) can be used as a last resort.
Step 7: Harvesting & Seed Saving
The culmination of your efforts is the harvest, and seed saving closes the loop on self-sufficiency.
- Harvesting Techniques:
- Timing: Harvest vegetables at their peak ripeness for best flavor and nutritional value. For example, green beans should snap cleanly, cucumbers should be firm, and tomatoes should be fully colored.
- Frequency: Many crops, like zucchini, cucumbers, and bush beans, produce more if harvested frequently. Pick daily or every other day.
- Tools: Use clean, sharp pruners (e.g., Corona ClassicCUT Bypass Pruner BP 3180, ~$30) or a sharp knife for clean cuts, minimizing damage to the plant.
- Seed Saving: This is where the « self-sufficient » aspect truly shines.
- Selection: Only save seeds from your healthiest, most vigorous plants that show desired traits (disease resistance, good flavor, high yield).
- Isolation: To ensure true-to-type seeds, prevent cross-pollination. This can be challenging for open-pollinated crops that readily cross (e.g., squash, corn). For beginners, focus on self-pollinating plants like beans, peas, lettuce, and tomatoes.
- Processing:
- Dry Seeds (Beans, Peas, Lettuce, Grains): Allow pods/seed heads to dry completely on the plant. Harvest, shell, and clean the seeds, removing chaff.
- Wet Seeds (Tomatoes, Cucumbers, Squash): For tomatoes, ferment the seeds in water for a few days to remove the gel coating and inhibit disease. For cucumbers/squash, scrape out seeds, wash thoroughly, and dry.
- Drying: Spread seeds thinly on screens or paper plates in a cool, dry, well-ventilated area for 1-4 weeks. Ensure they are bone-dry before storage. I aim for less than 8% moisture content.
- Storage: Store seeds in airtight containers (glass jars with desiccant packets work well) in a cool, dark, dry place (ideally 40-50°F and 30-40% humidity). Label clearly with variety and date. Properly stored seeds can remain viable for 3-10 years or more.
Step 8: Season Extension & Winterizing
Extend your harvest and protect your garden for the off-season to truly maximize your self sufficient garden from scratch.
- Cold Frames: Simple structures with a transparent top (glass, polycarbonate, or old windows) that sit over garden beds. They trap solar heat, allowing you to grow cold-hardy crops (lettuce, spinach, kale, radishes) well into winter or start seeds earlier in spring. A basic cold frame can be built from 2×6 lumber and a sheet of polycarbonate for under $100.
- Hoop Houses/Low Tunnels: Larger structures made from flexible hoops (PVC pipe or EMT conduit) covered with greenhouse plastic. These provide more space and greater temperature moderation. A 10×20 ft DIY low tunnel kit can cost $200-$500, while a larger, more robust hoop house kit might be $1,000-$3,000. I use a 6×12 ft low tunnel made from 1/2-inch PVC hoops and 6mil greenhouse plastic, which extends my lettuce and spinach harvest by at least
- In-Ground Beds: If you have excellent native soil and good drainage, in-ground beds are the most economical. Double-digging (loosening soil two shovel depths) can significantly improve drainage and aeration. For my main garden, I primarily use in-ground beds, but I focus on building up the soil over time with consistent compost additions and cover cropping. I aim for beds that are no wider than 3-4 feet so I can reach the center without stepping on the soil, compacting it.
- Raised Beds: Raised beds offer numerous advantages, especially for poor soil, heavy clay, or rocky areas. They provide better drainage, warm up faster in spring, reduce compaction, and make weeding and harvesting easier on your back.
- Material Options:
- Untreated Cedar: Naturally rot-resistant and chemical-free. A 4×8 ft bed, 12 inches deep, typically requires three 2x12x8 ft cedar boards, costing around $50-$60 per board (total ~$150-$180) plus corner brackets or screws. My first raised beds were cedar and are still going strong after 7 years.
- Galvanized Steel: Durable, long-lasting, and aesthetically pleasing. Brands like Vego Garden offer modular kits. A Vego Garden 17″ Tall 8-in-1 Metal Raised Garden Bed (can be configured to 4×8 ft) costs approximately $250-$300.
- Concrete Blocks/Stones: Very durable but can leach minerals (though generally safe once weathered) and can be expensive.
- Recycled Materials: Pallets (check for chemical treatment stamps like « HT » for heat-treated), old tires (controversial due to potential chemical leaching).
- Filling Raised Beds: Don’t just fill with topsoil. Use a « Hugelkultur » approach (logs, branches, leaves, then compost, then topsoil) or a mixture of 60% good quality topsoil, 30% compost, and 10% perlite or vermiculite for drainage. A 4x8x1 ft raised bed requires about 32 cubic feet (or ~1.2 cubic yards) of soil mix, which can cost $100-$200 depending on your source.
- Material Options:
Step 4: Water Management & Irrigation
Efficient water management is critical for a self sufficient garden from scratch, especially in off-grid living where water resources might be limited.
- Rainwater Harvesting: This is my primary source of irrigation water. A 55-gallon rain barrel (e.g., EarthMark Rain Barrel, ~$120-$150) connected to a downspout can collect significant water. For larger needs, I use two 275-gallon IBC totes (Intermediate Bulk Containers, often available used for $100-$200 each from food-grade sources) connected in series. A 1,000 sq ft roof can collect approximately 620 gallons of water for every inch of rainfall. My 1,500 sq ft roof provides ample water for my 600 sq ft garden through multiple barrels and totes.
- Drip Irrigation: This is by far the most water-efficient method, delivering water directly to the plant’s root zone, minimizing evaporation and weed growth.
- Components: A typical drip system includes a pressure regulator (e.g., Rain Bird PRV-10, ~$15), a filter (Rain Bird RBY filter, ~$20), main tubing (1/2-inch poly tubing, 100ft ~$25), smaller feeder lines (1/4-inch tubing), and emitters (0.5 GPH or 1 GPH per plant).
- Kits: For beginners, a starter kit like the Rain Bird Drip Irrigation Garden Kit (model DDI-KIT-1P, ~$40-$60) is excellent for a small garden. For larger setups, I use Netafim Techline CV Drip Line (500ft roll, ~$150-$200), which has pressure-compensating emitters built-in, ensuring even watering across long runs.
- Automation: For true self-sufficiency, consider a battery-powered timer (e.g., Orbit B-Hyve Bluetooth Hose Faucet Timer, ~$50) or a solar-powered timer connected to a small 12V pump.
- Solar-Powered Pumps: For lifting water from a well, pond, or large storage tank to your garden, a solar pump is a game-changer. For a smaller drip system, a Shurflo 2088-594-152 Diaphragm Pump (12V, 3.5 GPM, ~$180) can be powered by a single 100W solar panel (e.g., Renogy 100W Monocrystalline Solar Panel, ~$100) and a small 12V battery (e.g., a 50Ah LiFePO4 battery like the Battle Born 50Ah, ~$450). For larger operations or deeper wells, more robust systems are needed. If you’re looking to build out a comprehensive off-grid power system to support your garden’s water needs, or indeed your entire homestead, you might want to explore resources like the Power Grid Generator complete system guide to understand the full scope of what’s possible in terms of energy independence.
Step 5: Seed Selection & Planting
The choice of seeds is crucial for a truly self sufficient garden from scratch.
- Choose Heirloom & Open-Pollinated Seeds: These varieties produce seeds that will grow true to type, meaning you can save seeds from your harvest year after year. F1 hybrids, while often vigorous, will not produce consistent offspring from saved seeds. Reputable seed companies include Baker Creek Heirloom Seeds, High Mowing Organic Seeds, and Seed Savers Exchange. Start with common, reliable varieties like ‘Black Krim’ tomatoes, ‘Provider’ bush beans, ‘Waltham Butternut’ squash, and ‘Black Seeded Simpson’ lettuce.
- Start Seeds Indoors (Optional but Recommended): For longer growing seasons or specific crops, starting seeds indoors gives you a head start. Use seed-starting mix (e.g., Espoma Organic Seed Starter Mix, ~$10 for 16qt bag) in seed trays (Jiffy Professional Greenhouse 72-cell kit, ~$15). Provide adequate light with LED grow lights (Barrina T5 2ft 4-pack LED Grow Lights, 20W each, ~$50) for 14-16 hours a day, positioned 2-4 inches above seedlings. Maintain consistent temperatures (65-75°F for most).
- Direct Sowing vs. Transplanting: Some crops (carrots, radishes, beans, corn) prefer direct sowing into the garden bed. Others (tomatoes, peppers, broccoli, kale) benefit from being started indoors and transplanted. Follow seed packet instructions for planting depths (e.g., lettuce seeds are often surface-sown or planted 1/8 inch deep, while beans are 1 inch deep) and spacing.
- Companion Planting: Strategically plant different species together to enhance growth, deter pests, and attract beneficial insects. For example, planting marigolds near tomatoes can deter nematodes, and basil improves tomato flavor. Nasturtiums can act as a trap crop for aphids.
- Succession Planting: For a continuous harvest, plant small batches of quick-growing crops (lettuce, radishes, cilantro) every 2-3 weeks. As one crop finishes, another is ready to take its place.
Step 6: Pest & Disease Management (Organic)
Maintaining a self sufficient garden from scratch means embracing organic pest and disease control.
- Integrated Pest Management (IPM): This holistic approach combines several strategies.
- Observation: Regularly inspect your plants for early signs of pests or disease. Catching issues early is key.
- Physical Barriers: Use row covers (e.g., Agribon AG-19 floating row cover, 10×20 ft, ~$20) to protect young plants from insect pests like cabbage worms and squash bugs. Install fences (e.g., 2×4 welded wire mesh, 4 ft tall, 50 ft roll ~$70) to keep out deer, rabbits, and other larger animals.
- Hand-Picking: For larger pests like tomato hornworms or squash bugs, simply pick them off and drop them into a bucket of soapy water.
- Companion Planting: As mentioned, certain plants repel pests. Marigolds, garlic, and onions are excellent deterrents.
- Attract Beneficial Insects: Plant flowers like dill, fennel, cosmos, and sweet alyssum to attract ladybugs, lacewings, and parasitic wasps, which prey on common garden pests.
- Organic Sprays & Treatments:
- Neem Oil: An excellent broad-spectrum organic insecticide and fungicide. Bonide Neem Oil Concentrate (16oz, ~$20) can be mixed at a rate of 1-2 tbsp per gallon of water and sprayed on affected plants.
- Insecticidal Soap: Effective against soft-bodied insects like aphids, whiteflies, and spider mites. Garden Safe Insecticidal Soap (24oz ready-to-use, ~$10).
- Bacillus thuringiensis (Bt): A naturally occurring soil bacterium that targets caterpillars and worms. Monterey BT Worm & Caterpillar Killer (16oz, ~$18) is highly effective and safe for beneficial insects.
- Copper or Sulfur Sprays: For fungal diseases like powdery mildew or blight, organic copper (e.g., Bonide Copper Fungicide, ~$15 for 1lb) or sulfur (e.g., Safer Brand Garden Fungicide, ~$10 for 16oz) can be used as a last resort.
Step 7: Harvesting & Seed Saving
The culmination of your efforts is the harvest, and seed saving closes the loop on self-sufficiency.
- Harvesting Techniques:
- Timing: Harvest vegetables at their peak ripeness for best flavor and nutritional value. For example, green beans should snap cleanly, cucumbers should be firm, and tomatoes should be fully colored.
- Frequency: Many crops, like zucchini, cucumbers, and bush beans, produce more if harvested frequently. Pick daily or every other day.
- Tools: Use clean, sharp pruners (e.g., Corona ClassicCUT Bypass Pruner BP 3180, ~$30) or a sharp knife for clean cuts, minimizing damage to the plant.
- Seed Saving: This is where the « self-sufficient » aspect truly shines.
- Selection: Only save seeds from your healthiest, most vigorous plants that show desired traits (disease resistance, good flavor, high yield).
- Isolation: To ensure true-to-type seeds, prevent cross-pollination. This can be challenging for open-pollinated crops that readily cross (e.g., squash, corn). For beginners, focus on self-pollinating plants like beans, peas, lettuce, and tomatoes.
- Processing:
- Dry Seeds (Beans, Peas, Lettuce, Grains): Allow pods/seed heads to dry completely on the plant. Harvest, shell, and clean the seeds, removing chaff.
- Wet Seeds (Tomatoes, Cucumbers, Squash): For tomatoes, ferment the seeds in water for a few days to remove the gel coating and inhibit disease. For cucumbers/squash, scrape out seeds, wash thoroughly, and dry.
- Drying: Spread seeds thinly on screens or paper plates in a cool, dry, well-ventilated area for 1-4 weeks. Ensure they are bone-dry before storage. I aim for less than 8% moisture content.
- Storage: Store seeds in airtight containers (glass jars with desiccant packets work well) in a cool, dark, dry place (ideally 40-50°F and 30-40% humidity). Label clearly with variety and date. Properly stored seeds can remain viable for 3-10 years or more.
Step 8: Season Extension & Winterizing
Extend your harvest and protect your garden for the off-season to truly maximize your self sufficient garden from scratch.
- Cold Frames: Simple structures with a transparent top (glass, polycarbonate, or old windows) that sit over garden beds. They trap solar heat, allowing you to grow cold-hardy crops (lettuce, spinach, kale, radishes) well into winter or start seeds earlier in spring. A basic cold frame can be built from 2×6 lumber and a sheet of polycarbonate for under $100.
- Hoop Houses/Low Tunnels: Larger structures made from flexible hoops (PVC pipe or EMT conduit) covered with greenhouse plastic. These provide more space and greater temperature moderation. A 10×20 ft DIY low tunnel kit can cost $200-$500, while a larger, more robust hoop house kit might be $1,000-$3,000. I use a 6×12 ft low tunnel made from 1/2-inch PVC hoops and 6mil greenhouse plastic, which extends my lettuce and spinach harvest by at least
Deciding between raised beds and in-ground beds depends on your soil, budget, and physical capabilities.
- In-Ground Beds: If you have excellent native soil and good drainage, in-ground beds are the most economical. Double-digging (loosening soil two shovel depths) can significantly improve drainage and aeration. For my main garden, I primarily use in-ground beds, but I focus on building up the soil over time with consistent compost additions and cover cropping. I aim for beds that are no wider than 3-4 feet so I can reach the center without stepping on the soil, compacting it.
- Raised Beds: Raised beds offer numerous advantages, especially for poor soil, heavy clay, or rocky areas. They provide better drainage, warm up faster in spring, reduce compaction, and make weeding and harvesting easier on your back.
- Material Options:
- Untreated Cedar: Naturally rot-resistant and chemical-free. A 4×8 ft bed, 12 inches deep, typically requires three 2x12x8 ft cedar boards, costing around $50-$60 per board (total ~$150-$180) plus corner brackets or screws. My first raised beds were cedar and are still going strong after 7 years.
- Galvanized Steel: Durable, long-lasting, and aesthetically pleasing. Brands like Vego Garden offer modular kits. A Vego Garden 17″ Tall 8-in-1 Metal Raised Garden Bed (can be configured to 4×8 ft) costs approximately $250-$300.
- Concrete Blocks/Stones: Very durable but can leach minerals (though generally safe once weathered) and can be expensive.
- Recycled Materials: Pallets (check for chemical treatment stamps like « HT » for heat-treated), old tires (controversial due to potential chemical leaching).
- Filling Raised Beds: Don’t just fill with topsoil. Use a « Hugelkultur » approach (logs, branches, leaves, then compost, then topsoil) or a mixture of 60% good quality topsoil, 30% compost, and 10% perlite or vermiculite for drainage. A 4x8x1 ft raised bed requires about 32 cubic feet (or ~1.2 cubic yards) of soil mix, which can cost $100-$200 depending on your source.
- Material Options:
Step 4: Water Management & Irrigation
Efficient water management is critical for a self sufficient garden from scratch, especially in off-grid living where water resources might be limited.
- Rainwater Harvesting: This is my primary source of irrigation water. A 55-gallon rain barrel (e.g., EarthMark Rain Barrel, ~$120-$150) connected to a downspout can collect significant water. For larger needs, I use two 275-gallon IBC totes (Intermediate Bulk Containers, often available used for $100-$200 each from food-grade sources) connected in series. A 1,000 sq ft roof can collect approximately 620 gallons of water for every inch of rainfall. My 1,500 sq ft roof provides ample water for my 600 sq ft garden through multiple barrels and totes.
- Drip Irrigation: This is by far the most water-efficient method, delivering water directly to the plant’s root zone, minimizing evaporation and weed growth.
- Components: A typical drip system includes a pressure regulator (e.g., Rain Bird PRV-10, ~$15), a filter (Rain Bird RBY filter, ~$20), main tubing (1/2-inch poly tubing, 100ft ~$25), smaller feeder lines (1/4-inch tubing), and emitters (0.5 GPH or 1 GPH per plant).
- Kits: For beginners, a starter kit like the Rain Bird Drip Irrigation Garden Kit (model DDI-KIT-1P, ~$40-$60) is excellent for a small garden. For larger setups, I use Netafim Techline CV Drip Line (500ft roll, ~$150-$200), which has pressure-compensating emitters built-in, ensuring even watering across long runs.
- Automation: For true self-sufficiency, consider a battery-powered timer (e.g., Orbit B-Hyve Bluetooth Hose Faucet Timer, ~$50) or a solar-powered timer connected to a small 12V pump.
- Solar-Powered Pumps: For lifting water from a well, pond, or large storage tank to your garden, a solar pump is a game-changer. For a smaller drip system, a Shurflo 2088-594-152 Diaphragm Pump (12V, 3.5 GPM, ~$180) can be powered by a single 100W solar panel (e.g., Renogy 100W Monocrystalline Solar Panel, ~$100) and a small 12V battery (e.g., a 50Ah LiFePO4 battery like the Battle Born 50Ah, ~$450). For larger operations or deeper wells, more robust systems are needed. If you’re looking to build out a comprehensive off-grid power system to support your garden’s water needs, or indeed your entire homestead, you might want to explore resources like the Power Grid Generator complete system guide to understand the full scope of what’s possible in terms of energy independence.
Step 5: Seed Selection & Planting
The choice of seeds is crucial for a truly self sufficient garden from scratch.
- Choose Heirloom & Open-Pollinated Seeds: These varieties produce seeds that will grow true to type, meaning you can save seeds from your harvest year after year. F1 hybrids, while often vigorous, will not produce consistent offspring from saved seeds. Reputable seed companies include Baker Creek Heirloom Seeds, High Mowing Organic Seeds, and Seed Savers Exchange. Start with common, reliable varieties like ‘Black Krim’ tomatoes, ‘Provider’ bush beans, ‘Waltham Butternut’ squash, and ‘Black Seeded Simpson’ lettuce.
- Start Seeds Indoors (Optional but Recommended): For longer growing seasons or specific crops, starting seeds indoors gives you a head start. Use seed-starting mix (e.g., Espoma Organic Seed Starter Mix, ~$10 for 16qt bag) in seed trays (Jiffy Professional Greenhouse 72-cell kit, ~$15). Provide adequate light with LED grow lights (Barrina T5 2ft 4-pack LED Grow Lights, 20W each, ~$50) for 14-16 hours a day, positioned 2-4 inches above seedlings. Maintain consistent temperatures (65-75°F for most).
- Direct Sowing vs. Transplanting: Some crops (carrots, radishes, beans, corn) prefer direct sowing into the garden bed. Others (tomatoes, peppers, broccoli, kale) benefit from being started indoors and transplanted. Follow seed packet instructions for planting depths (e.g., lettuce seeds are often surface-sown or planted 1/8 inch deep, while beans are 1 inch deep) and spacing.
- Companion Planting: Strategically plant different species together to enhance growth, deter pests, and attract beneficial insects. For example, planting marigolds near tomatoes can deter nematodes, and basil improves tomato flavor. Nasturtiums can act as a trap crop for aphids.
- Succession Planting: For a continuous harvest, plant small batches of quick-growing crops (lettuce, radishes, cilantro) every 2-3 weeks. As one crop finishes, another is ready to take its place.
Step 6: Pest & Disease Management (Organic)
Maintaining a self sufficient garden from scratch means embracing organic pest and disease control.
- Integrated Pest Management (IPM): This holistic approach combines several strategies.
- Observation: Regularly inspect your plants for early signs of pests or disease. Catching issues early is key.
- Physical Barriers: Use row covers (e.g., Agribon AG-19 floating row cover, 10×20 ft, ~$20) to protect young plants from insect pests like cabbage worms and squash bugs. Install fences (e.g., 2×4 welded wire mesh, 4 ft tall, 50 ft roll ~$70) to keep out deer, rabbits, and other larger animals.
- Hand-Picking: For larger pests like tomato hornworms or squash bugs, simply pick them off and drop them into a bucket of soapy water.
- Companion Planting: As mentioned, certain plants repel pests. Marigolds, garlic, and onions are excellent deterrents.
- Attract Beneficial Insects: Plant flowers like dill, fennel, cosmos, and sweet alyssum to attract ladybugs, lacewings, and parasitic wasps, which prey on common garden pests.
- Organic Sprays & Treatments:
- Neem Oil: An excellent broad-spectrum organic insecticide and fungicide. Bonide Neem Oil Concentrate (16oz, ~$20) can be mixed at a rate of 1-2 tbsp per gallon of water and sprayed on affected plants.
- Insecticidal Soap: Effective against soft-bodied insects like aphids, whiteflies, and spider mites. Garden Safe Insecticidal Soap (24oz ready-to-use, ~$10).
- Bacillus thuringiensis (Bt): A naturally occurring soil bacterium that targets caterpillars and worms. Monterey BT Worm & Caterpillar Killer (16oz, ~$18) is highly effective and safe for beneficial insects.
- Copper or Sulfur Sprays: For fungal diseases like powdery mildew or blight, organic copper (e.g., Bonide Copper Fungicide, ~$15 for 1lb) or sulfur (e.g., Safer Brand Garden Fungicide, ~$10 for 16oz) can be used as a last resort.
Step 7: Harvesting & Seed Saving
The culmination of your efforts is the harvest, and seed saving closes the loop on self-sufficiency.
- Harvesting Techniques:
- Timing: Harvest vegetables at their peak ripeness for best flavor and nutritional value. For example, green beans should snap cleanly, cucumbers should be firm, and tomatoes should be fully colored.
- Frequency: Many crops, like zucchini, cucumbers, and bush beans, produce more if harvested frequently. Pick daily or every other day.
- Tools: Use clean, sharp pruners (e.g., Corona ClassicCUT Bypass Pruner BP 3180, ~$30) or a sharp knife for clean cuts, minimizing damage to the plant.
- Seed Saving: This is where the « self-sufficient » aspect truly shines.
- Selection: Only save seeds from your healthiest, most vigorous plants that show desired traits (disease resistance, good flavor, high yield).
- Isolation: To ensure true-to-type seeds, prevent cross-pollination. This can be challenging for open-pollinated crops that readily cross (e.g., squash, corn). For beginners, focus on self-pollinating plants like beans, peas, lettuce, and tomatoes.
- Processing:
- Dry Seeds (Beans, Peas, Lettuce, Grains): Allow pods/seed heads to dry completely on the plant. Harvest, shell, and clean the seeds, removing chaff.
- Wet Seeds (Tomatoes, Cucumbers, Squash): For tomatoes, ferment the seeds in water for a few days to remove the gel coating and inhibit disease. For cucumbers/squash, scrape out seeds, wash thoroughly, and dry.
- Drying: Spread seeds thinly on screens or paper plates in a cool, dry, well-ventilated area for 1-4 weeks. Ensure they are bone-dry before storage. I aim for less than 8% moisture content.
- Storage: Store seeds in airtight containers (glass jars with desiccant packets work well) in a cool, dark, dry place (ideally 40-50°F and 30-40% humidity). Label clearly with variety and date. Properly stored seeds can remain viable for 3-10 years or more.
Step 8: Season Extension & Winterizing
Extend your harvest and protect your garden for the off-season to truly maximize your self sufficient garden from scratch.
- Cold Frames: Simple structures with a transparent top (glass, polycarbonate, or old windows) that sit over garden beds. They trap solar heat, allowing you to grow cold-hardy crops (lettuce, spinach, kale, radishes) well into winter or start seeds earlier in spring. A basic cold frame can be built from 2×6 lumber and a sheet of polycarbonate for under $100.
- Hoop Houses/Low Tunnels: Larger structures made from flexible hoops (PVC pipe or EMT conduit) covered with greenhouse plastic. These provide more space and greater temperature moderation. A 10×20 ft DIY low tunnel kit can cost $200-$500, while a larger, more robust hoop house kit might be $1,000-$3,000. I use a 6×12 ft low tunnel made from 1/2-inch PVC hoops and 6mil greenhouse plastic, which extends my lettuce and spinach harvest by at least
Healthy soil is the bedrock of a productive, self-sufficient garden. You can’t guess what your soil needs; you have to test it.
- Perform a Soil Test: A professional soil test will give you precise data on your soil’s pH, nutrient levels (N-P-K), and organic matter content. I recommend sending a sample to your local agricultural extension office; it typically costs $20-$50 and provides detailed recommendations. Alternatively, for a quick homeowner check, a Rapitest Soil Test Kit (40-test kit, model 1663, ~$20 on Amazon) provides a good baseline for pH, Nitrogen, Phosphorus, and Potash. Aim for a pH between 6.0 and 7.0 for most vegetables.
- Amend for pH Imbalance: If your soil is too acidic (below 6.0), add agricultural lime (dolomitic lime adds magnesium, calcitic lime adds calcium). Apply 5-10 lbs per 100 sq ft for a moderate adjustment. If it’s too alkaline (above 7.0), add elemental sulfur (e.g., Espoma Soil Acidifier, ~$15 for 6.75 lbs) or generous amounts of organic matter like peat moss or pine needles.
- Build Organic Matter: This is the single most important step for long-term soil health. Organic matter improves soil structure, water retention, drainage, and nutrient availability. Incorporate 2-4 inches of high-quality compost into your top 6-12 inches of soil annually. I make my own compost from kitchen scraps, garden waste, and shredded leaves, but you can purchase it. Local nurseries often sell bulk compost for $30-$50 per cubic yard. Aged manure (from chickens, cows, or horses – ensure it’s well-rotted to avoid burning plants) is also excellent.
- Address Nutrient Deficiencies: Based on your soil test, add specific organic amendments. If Nitrogen (N) is low, add blood meal (12-0-0, ~$20 for 3 lbs) or feather meal. For Phosphorus (P), use bone meal (3-15-0, ~$15 for 3 lbs) or rock phosphate. For Potassium (K), greensand (0-0-2.5, ~$25 for 5 lbs) or kelp meal are good choices. I rely heavily on Espoma Organic Garden-tone (5-3-3, ~$25 for an 8lb bag) as a balanced, all-purpose organic fertilizer during planting.
Step 3: Garden Bed Preparation
Deciding between raised beds and in-ground beds depends on your soil, budget, and physical capabilities.
- In-Ground Beds: If you have excellent native soil and good drainage, in-ground beds are the most economical. Double-digging (loosening soil two shovel depths) can significantly improve drainage and aeration. For my main garden, I primarily use in-ground beds, but I focus on building up the soil over time with consistent compost additions and cover cropping. I aim for beds that are no wider than 3-4 feet so I can reach the center without stepping on the soil, compacting it.
- Raised Beds: Raised beds offer numerous advantages, especially for poor soil, heavy clay, or rocky areas. They provide better drainage, warm up faster in spring, reduce compaction, and make weeding and harvesting easier on your back.
- Material Options:
- Untreated Cedar: Naturally rot-resistant and chemical-free. A 4×8 ft bed, 12 inches deep, typically requires three 2x12x8 ft cedar boards, costing around $50-$60 per board (total ~$150-$180) plus corner brackets or screws. My first raised beds were cedar and are still going strong after 7 years.
- Galvanized Steel: Durable, long-lasting, and aesthetically pleasing. Brands like Vego Garden offer modular kits. A Vego Garden 17″ Tall 8-in-1 Metal Raised Garden Bed (can be configured to 4×8 ft) costs approximately $250-$300.
- Concrete Blocks/Stones: Very durable but can leach minerals (though generally safe once weathered) and can be expensive.
- Recycled Materials: Pallets (check for chemical treatment stamps like « HT » for heat-treated), old tires (controversial due to potential chemical leaching).
- Filling Raised Beds: Don’t just fill with topsoil. Use a « Hugelkultur » approach (logs, branches, leaves, then compost, then topsoil) or a mixture of 60% good quality topsoil, 30% compost, and 10% perlite or vermiculite for drainage. A 4x8x1 ft raised bed requires about 32 cubic feet (or ~1.2 cubic yards) of soil mix, which can cost $100-$200 depending on your source.
- Material Options:
Step 4: Water Management & Irrigation
Efficient water management is critical for a self sufficient garden from scratch, especially in off-grid living where water resources might be limited.
- Rainwater Harvesting: This is my primary source of irrigation water. A 55-gallon rain barrel (e.g., EarthMark Rain Barrel, ~$120-$150) connected to a downspout can collect significant water. For larger needs, I use two 275-gallon IBC totes (Intermediate Bulk Containers, often available used for $100-$200 each from food-grade sources) connected in series. A 1,000 sq ft roof can collect approximately 620 gallons of water for every inch of rainfall. My 1,500 sq ft roof provides ample water for my 600 sq ft garden through multiple barrels and totes.
- Drip Irrigation: This is by far the most water-efficient method, delivering water directly to the plant’s root zone, minimizing evaporation and weed growth.
- Components: A typical drip system includes a pressure regulator (e.g., Rain Bird PRV-10, ~$15), a filter (Rain Bird RBY filter, ~$20), main tubing (1/2-inch poly tubing, 100ft ~$25), smaller feeder lines (1/4-inch tubing), and emitters (0.5 GPH or 1 GPH per plant).
- Kits: For beginners, a starter kit like the Rain Bird Drip Irrigation Garden Kit (model DDI-KIT-1P, ~$40-$60) is excellent for a small garden. For larger setups, I use Netafim Techline CV Drip Line (500ft roll, ~$150-$200), which has pressure-compensating emitters built-in, ensuring even watering across long runs.
- Automation: For true self-sufficiency, consider a battery-powered timer (e.g., Orbit B-Hyve Bluetooth Hose Faucet Timer, ~$50) or a solar-powered timer connected to a small 12V pump.
- Solar-Powered Pumps: For lifting water from a well, pond, or large storage tank to your garden, a solar pump is a game-changer. For a smaller drip system, a Shurflo 2088-594-152 Diaphragm Pump (12V, 3.5 GPM, ~$180) can be powered by a single 100W solar panel (e.g., Renogy 100W Monocrystalline Solar Panel, ~$100) and a small 12V battery (e.g., a 50Ah LiFePO4 battery like the Battle Born 50Ah, ~$450). For larger operations or deeper wells, more robust systems are needed. If you’re looking to build out a comprehensive off-grid power system to support your garden’s water needs, or indeed your entire homestead, you might want to explore resources like the Power Grid Generator complete system guide to understand the full scope of what’s possible in terms of energy independence.
Step 5: Seed Selection & Planting
The choice of seeds is crucial for a truly self sufficient garden from scratch.
- Choose Heirloom & Open-Pollinated Seeds: These varieties produce seeds that will grow true to type, meaning you can save seeds from your harvest year after year. F1 hybrids, while often vigorous, will not produce consistent offspring from saved seeds. Reputable seed companies include Baker Creek Heirloom Seeds, High Mowing Organic Seeds, and Seed Savers Exchange. Start with common, reliable varieties like ‘Black Krim’ tomatoes, ‘Provider’ bush beans, ‘Waltham Butternut’ squash, and ‘Black Seeded Simpson’ lettuce.
- Start Seeds Indoors (Optional but Recommended): For longer growing seasons or specific crops, starting seeds indoors gives you a head start. Use seed-starting mix (e.g., Espoma Organic Seed Starter Mix, ~$10 for 16qt bag) in seed trays (Jiffy Professional Greenhouse 72-cell kit, ~$15). Provide adequate light with LED grow lights (Barrina T5 2ft 4-pack LED Grow Lights, 20W each, ~$50) for 14-16 hours a day, positioned 2-4 inches above seedlings. Maintain consistent temperatures (65-75°F for most).
- Direct Sowing vs. Transplanting: Some crops (carrots, radishes, beans, corn) prefer direct sowing into the garden bed. Others (tomatoes, peppers, broccoli, kale) benefit from being started indoors and transplanted. Follow seed packet instructions for planting depths (e.g., lettuce seeds are often surface-sown or planted 1/8 inch deep, while beans are 1 inch deep) and spacing.
- Companion Planting: Strategically plant different species together to enhance growth, deter pests, and attract beneficial insects. For example, planting marigolds near tomatoes can deter nematodes, and basil improves tomato flavor. Nasturtiums can act as a trap crop for aphids.
- Succession Planting: For a continuous harvest, plant small batches of quick-growing crops (lettuce, radishes, cilantro) every 2-3 weeks. As one crop finishes, another is ready to take its place.
Step 6: Pest & Disease Management (Organic)
Maintaining a self sufficient garden from scratch means embracing organic pest and disease control.
- Integrated Pest Management (IPM): This holistic approach combines several strategies.
- Observation: Regularly inspect your plants for early signs of pests or disease. Catching issues early is key.
- Physical Barriers: Use row covers (e.g., Agribon AG-19 floating row cover, 10×20 ft, ~$20) to protect young plants from insect pests like cabbage worms and squash bugs. Install fences (e.g., 2×4 welded wire mesh, 4 ft tall, 50 ft roll ~$70) to keep out deer, rabbits, and other larger animals.
- Hand-Picking: For larger pests like tomato hornworms or squash bugs, simply pick them off and drop them into a bucket of soapy water.
- Companion Planting: As mentioned, certain plants repel pests. Marigolds, garlic, and onions are excellent deterrents.
- Attract Beneficial Insects: Plant flowers like dill, fennel, cosmos, and sweet alyssum to attract ladybugs, lacewings, and parasitic wasps, which prey on common garden pests.
- Organic Sprays & Treatments:
- Neem Oil: An excellent broad-spectrum organic insecticide and fungicide. Bonide Neem Oil Concentrate (16oz, ~$20) can be mixed at a rate of 1-2 tbsp per gallon of water and sprayed on affected plants.
- Insecticidal Soap: Effective against soft-bodied insects like aphids, whiteflies, and spider mites. Garden Safe Insecticidal Soap (24oz ready-to-use, ~$10).
- Bacillus thuringiensis (Bt): A naturally occurring soil bacterium that targets caterpillars and worms. Monterey BT Worm & Caterpillar Killer (16oz, ~$18) is highly effective and safe for beneficial insects.
- Copper or Sulfur Sprays: For fungal diseases like powdery mildew or blight, organic copper (e.g., Bonide Copper Fungicide, ~$15 for 1lb) or sulfur (e.g., Safer Brand Garden Fungicide, ~$10 for 16oz) can be used as a last resort.
Step 7: Harvesting & Seed Saving
The culmination of your efforts is the harvest, and seed saving closes the loop on self-sufficiency.
- Harvesting Techniques:
- Timing: Harvest vegetables at their peak ripeness for best flavor and nutritional value. For example, green beans should snap cleanly, cucumbers should be firm, and tomatoes should be fully colored.
- Frequency: Many crops, like zucchini, cucumbers, and bush beans, produce more if harvested frequently. Pick daily or every other day.
- Tools: Use clean, sharp pruners (e.g., Corona ClassicCUT Bypass Pruner BP 3180, ~$30) or a sharp knife for clean cuts, minimizing damage to the plant.
- Seed Saving: This is where the « self-sufficient » aspect truly shines.
- Selection: Only save seeds from your healthiest, most vigorous plants that show desired traits (disease resistance, good flavor, high yield).
- Isolation: To ensure true-to-type seeds, prevent cross-pollination. This can be challenging for open-pollinated crops that readily cross (e.g., squash, corn). For beginners, focus on self-pollinating plants like beans, peas, lettuce, and tomatoes.
- Processing:
- Dry Seeds (Beans, Peas, Lettuce, Grains): Allow pods/seed heads to dry completely on the plant. Harvest, shell, and clean the seeds, removing chaff.
- Wet Seeds (Tomatoes, Cucumbers, Squash): For tomatoes, ferment the seeds in water for a few days to remove the gel coating and inhibit disease. For cucumbers/squash, scrape out seeds, wash thoroughly, and dry.
- Drying: Spread seeds thinly on screens or paper plates in a cool, dry, well-ventilated area for 1-4 weeks. Ensure they are bone-dry before storage. I aim for less than 8% moisture content.
- Storage: Store seeds in airtight containers (glass jars with desiccant packets work well) in a cool, dark, dry place (ideally 40-50°F and 30-40% humidity). Label clearly with variety and date. Properly stored seeds can remain viable for 3-10 years or more.
Step 8: Season Extension & Winterizing
Extend your harvest and protect your garden for the off-season to truly maximize your self sufficient garden from scratch.
- Cold Frames: Simple structures with a transparent top (glass, polycarbonate, or old windows) that sit over garden beds. They trap solar heat, allowing you to grow cold-hardy crops (lettuce, spinach, kale, radishes) well into winter or start seeds earlier in spring. A basic cold frame can be built from 2×6 lumber and a sheet of polycarbonate for under $100.
- Hoop Houses/Low Tunnels: Larger structures made from flexible hoops (PVC pipe or EMT conduit) covered with greenhouse plastic. These provide more space and greater temperature moderation. A 10×20 ft DIY low tunnel kit can cost $200-$500, while a larger, more robust hoop house kit might be $1,000-$3,000. I use a 6×12 ft low tunnel made from 1/2-inch PVC hoops and 6mil greenhouse plastic, which extends my lettuce and spinach harvest by at least
- Integrated Pest Management (IPM): This holistic approach combines several strategies.
- Observation: Regularly inspect your plants for early signs of pests or disease. Catching issues early is key.
- Physical Barriers: Use row covers (e.g., Agribon AG-19 floating row cover, 10×20 ft, ~$20) to protect young plants from insect pests like cabbage worms and squash bugs. Install fences (e.g., 2×4 welded wire mesh, 4 ft tall, 50 ft roll ~$70) to keep out deer, rabbits, and other larger animals.
- Hand-Picking: For larger pests like tomato hornworms or squash bugs, simply pick them off and drop them into a bucket of soapy water.
- Companion Planting: As mentioned, certain plants repel pests. Marigolds, garlic, and onions are excellent deterrents.
- Attract Beneficial Insects: Plant flowers like dill, fennel, cosmos, and sweet alyssum to attract ladybugs, lacewings, and parasitic wasps, which prey on common garden pests.
- Organic Sprays & Treatments:
- Neem Oil: An excellent broad-spectrum organic insecticide and fungicide. Bonide Neem Oil Concentrate (16oz, ~$20) can be mixed at a rate of 1-2 tbsp per gallon of water and sprayed on affected plants.
- Insecticidal Soap: Effective against soft-bodied insects like aphids, whiteflies, and spider mites. Garden Safe Insecticidal Soap (24oz ready-to-use, ~$10).
- Bacillus thuringiensis (Bt): A naturally occurring soil bacterium that targets caterpillars and worms. Monterey BT Worm & Caterpillar Killer (16oz, ~$18) is highly effective and safe for beneficial insects.
- Copper or Sulfur Sprays: For fungal diseases like powdery mildew or blight, organic copper (e.g., Bonide Copper Fungicide, ~$15 for 1lb) or sulfur (e.g., Safer Brand Garden Fungicide, ~$10 for 16oz) can be used as a last resort.
Step 7: Harvesting & Seed Saving
The culmination of your efforts is the harvest, and seed saving closes the loop on self-sufficiency.
- Harvesting Techniques:
- Timing: Harvest vegetables at their peak ripeness for best flavor and nutritional value. For example, green beans should snap cleanly, cucumbers should be firm, and tomatoes should be fully colored.
- Frequency: Many crops, like zucchini, cucumbers, and bush beans, produce more if harvested frequently. Pick daily or every other day.
- Tools: Use clean, sharp pruners (e.g., Corona ClassicCUT Bypass Pruner BP 3180, ~$30) or a sharp knife for clean cuts, minimizing damage to the plant.
- Seed Saving: This is where the « self-sufficient » aspect truly shines.
- Selection: Only save seeds from your healthiest, most vigorous plants that show desired traits (disease resistance, good flavor, high yield).
- Isolation: To ensure true-to-type seeds, prevent cross-pollination. This can be challenging for open-pollinated crops that readily cross (e.g., squash, corn). For beginners, focus on self-pollinating plants like beans, peas, lettuce, and tomatoes.
- Processing:
- Dry Seeds (Beans, Peas, Lettuce, Grains): Allow pods/seed heads to dry completely on the plant. Harvest, shell, and clean the seeds, removing chaff.
- Wet Seeds (Tomatoes, Cucumbers, Squash): For tomatoes, ferment the seeds in water for a few days to remove the gel coating and inhibit disease. For cucumbers/squash, scrape out seeds, wash thoroughly, and dry.
- Drying: Spread seeds thinly on screens or paper plates in a cool, dry, well-ventilated area for 1-4 weeks. Ensure they are bone-dry before storage. I aim for less than 8% moisture content.
- Storage: Store seeds in airtight containers (glass jars with desiccant packets work well) in a cool, dark, dry place (ideally 40-50°F and 30-40% humidity). Label clearly with variety and date. Properly stored seeds can remain viable for 3-10 years or more.
Step 8: Season Extension & Winterizing
Extend your harvest and protect your garden for the off-season to truly maximize your self sufficient garden from scratch.
- Cold Frames: Simple structures with a transparent top (glass, polycarbonate, or old windows) that sit over garden beds. They trap solar heat, allowing you to grow cold-hardy crops (lettuce, spinach, kale, radishes) well into winter or start seeds earlier in spring. A basic cold frame can be built from 2×6 lumber and a sheet of polycarbonate for under $100.
- Hoop Houses/Low Tunnels: Larger structures made from flexible hoops (PVC pipe or EMT conduit) covered with greenhouse plastic. These provide more space and greater temperature moderation. A 10×20 ft DIY low tunnel kit can cost $200-$500, while a larger, more robust hoop house kit might be $1,000-$3,000. I use a 6×12 ft low tunnel made from 1/2-inch PVC hoops and 6mil greenhouse plastic, which extends my lettuce and spinach harvest by at least
Step 4: Water Management & Irrigation
Efficient water management is critical for a self sufficient garden from scratch, especially in off-grid living where water resources might be limited.
- Rainwater Harvesting: This is my primary source of irrigation water. A 55-gallon rain barrel (e.g., EarthMark Rain Barrel, ~$120-$150) connected to a downspout can collect significant water. For larger needs, I use two 275-gallon IBC totes (Intermediate Bulk Containers, often available used for $100-$200 each from food-grade sources) connected in series. A 1,000 sq ft roof can collect approximately 620 gallons of water for every inch of rainfall. My 1,500 sq ft roof provides ample water for my 600 sq ft garden through multiple barrels and totes.
- Drip Irrigation: This is by far the most water-efficient method, delivering water directly to the plant’s root zone, minimizing evaporation and weed growth.
- Components: A typical drip system includes a pressure regulator (e.g., Rain Bird PRV-10, ~$15), a filter (Rain Bird RBY filter, ~$20), main tubing (1/2-inch poly tubing, 100ft ~$25), smaller feeder lines (1/4-inch tubing), and emitters (0.5 GPH or 1 GPH per plant).
- Kits: For beginners, a starter kit like the Rain Bird Drip Irrigation Garden Kit (model DDI-KIT-1P, ~$40-$60) is excellent for a small garden. For larger setups, I use Netafim Techline CV Drip Line (500ft roll, ~$150-$200), which has pressure-compensating emitters built-in, ensuring even watering across long runs.
- Automation: For true self-sufficiency, consider a battery-powered timer (e.g., Orbit B-Hyve Bluetooth Hose Faucet Timer, ~$50) or a solar-powered timer connected to a small 12V pump.
- Solar-Powered Pumps: For lifting water from a well, pond, or large storage tank to your garden, a solar pump is a game-changer. For a smaller drip system, a Shurflo 2088-594-152 Diaphragm Pump (12V, 3.5 GPM, ~$180) can be powered by a single 100W solar panel (e.g., Renogy 100W Monocrystalline Solar Panel, ~$100) and a small 12V battery (e.g., a 50Ah LiFePO4 battery like the Battle Born 50Ah, ~$450). For larger operations or deeper wells, more robust systems are needed. If you’re looking to build out a comprehensive off-grid power system to support your garden’s water needs, or indeed your entire homestead, you might want to explore resources like the Power Grid Generator complete system guide to understand the full scope of what’s possible in terms of energy independence.
Step 5: Seed Selection & Planting
The choice of seeds is crucial for a truly self sufficient garden from scratch.
- Choose Heirloom & Open-Pollinated Seeds: These varieties produce seeds that will grow true to type, meaning you can save seeds from your harvest year after year. F1 hybrids, while often vigorous, will not produce consistent offspring from saved seeds. Reputable seed companies include Baker Creek Heirloom Seeds, High Mowing Organic Seeds, and Seed Savers Exchange. Start with common, reliable varieties like ‘Black Krim’ tomatoes, ‘Provider’ bush beans, ‘Waltham Butternut’ squash, and ‘Black Seeded Simpson’ lettuce.
- Start Seeds Indoors (Optional but Recommended): For longer growing seasons or specific crops, starting seeds indoors gives you a head start. Use seed-starting mix (e.g., Espoma Organic Seed Starter Mix, ~$10 for 16qt bag) in seed trays (Jiffy Professional Greenhouse 72-cell kit, ~$15). Provide adequate light with LED grow lights (Barrina T5 2ft 4-pack LED Grow Lights, 20W each, ~$50) for 14-16 hours a day, positioned 2-4 inches above seedlings. Maintain consistent temperatures (65-75°F for most).
- Direct Sowing vs. Transplanting: Some crops (carrots, radishes, beans, corn) prefer direct sowing into the garden bed. Others (tomatoes, peppers, broccoli, kale) benefit from being started indoors and transplanted. Follow seed packet instructions for planting depths (e.g., lettuce seeds are often surface-sown or planted 1/8 inch deep, while beans are 1 inch deep) and spacing.
- Companion Planting: Strategically plant different species together to enhance growth, deter pests, and attract beneficial insects. For example, planting marigolds near tomatoes can deter nematodes, and basil improves tomato flavor. Nasturtiums can act as a trap crop for aphids.
- Succession Planting: For a continuous harvest, plant small batches of quick-growing crops (lettuce, radishes, cilantro) every 2-3 weeks. As one crop finishes, another is ready to take its place.
Step 6: Pest & Disease Management (Organic)
Maintaining a self sufficient garden from scratch means embracing organic pest and disease control.
- Integrated Pest Management (IPM): This holistic approach combines several strategies.
- Observation: Regularly inspect your plants for early signs of pests or disease. Catching issues early is key.
- Physical Barriers: Use row covers (e.g., Agribon AG-19 floating row cover, 10×20 ft, ~$20) to protect young plants from insect pests like cabbage worms and squash bugs. Install fences (e.g., 2×4 welded wire mesh, 4 ft tall, 50 ft roll ~$70) to keep out deer, rabbits, and other larger animals.
- Hand-Picking: For larger pests like tomato hornworms or squash bugs, simply pick them off and drop them into a bucket of soapy water.
- Companion Planting: As mentioned, certain plants repel pests. Marigolds, garlic, and onions are excellent deterrents.
- Attract Beneficial Insects: Plant flowers like dill, fennel, cosmos, and sweet alyssum to attract ladybugs, lacewings, and parasitic wasps, which prey on common garden pests.
- Organic Sprays & Treatments:
- Neem Oil: An excellent broad-spectrum organic insecticide and fungicide. Bonide Neem Oil Concentrate (16oz, ~$20) can be mixed at a rate of 1-2 tbsp per gallon of water and sprayed on affected plants.
- Insecticidal Soap: Effective against soft-bodied insects like aphids, whiteflies, and spider mites. Garden Safe Insecticidal Soap (24oz ready-to-use, ~$10).
- Bacillus thuringiensis (Bt): A naturally occurring soil bacterium that targets caterpillars and worms. Monterey BT Worm & Caterpillar Killer (16oz, ~$18) is highly effective and safe for beneficial insects.
- Copper or Sulfur Sprays: For fungal diseases like powdery mildew or blight, organic copper (e.g., Bonide Copper Fungicide, ~$15 for 1lb) or sulfur (e.g., Safer Brand Garden Fungicide, ~$10 for 16oz) can be used as a last resort.
Step 7: Harvesting & Seed Saving
The culmination of your efforts is the harvest, and seed saving closes the loop on self-sufficiency.
- Harvesting Techniques:
- Timing: Harvest vegetables at their peak ripeness for best flavor and nutritional value. For example, green beans should snap cleanly, cucumbers should be firm, and tomatoes should be fully colored.
- Frequency: Many crops, like zucchini, cucumbers, and bush beans, produce more if harvested frequently. Pick daily or every other day.
- Tools: Use clean, sharp pruners (e.g., Corona ClassicCUT Bypass Pruner BP 3180, ~$30) or a sharp knife for clean cuts, minimizing damage to the plant.
- Seed Saving: This is where the « self-sufficient » aspect truly shines.
- Selection: Only save seeds from your healthiest, most vigorous plants that show desired traits (disease resistance, good flavor, high yield).
- Isolation: To ensure true-to-type seeds, prevent cross-pollination. This can be challenging for open-pollinated crops that readily cross (e.g., squash, corn). For beginners, focus on self-pollinating plants like beans, peas, lettuce, and tomatoes.
- Processing:
- Dry Seeds (Beans, Peas, Lettuce, Grains): Allow pods/seed heads to dry completely on the plant. Harvest, shell, and clean the seeds, removing chaff.
- Wet Seeds (Tomatoes, Cucumbers, Squash): For tomatoes, ferment the seeds in water for a few days to remove the gel coating and inhibit disease. For cucumbers/squash, scrape out seeds, wash thoroughly, and dry.
- Drying: Spread seeds thinly on screens or paper plates in a cool, dry, well-ventilated area for 1-4 weeks. Ensure they are bone-dry before storage. I aim for less than 8% moisture content.
- Storage: Store seeds in airtight containers (glass jars with desiccant packets work well) in a cool, dark, dry place (ideally 40-50°F and 30-40% humidity). Label clearly with variety and date. Properly stored seeds can remain viable for 3-10 years or more.
Step 8: Season Extension & Winterizing
Extend your harvest and protect your garden for the off-season to truly maximize your self sufficient garden from scratch.
- Cold Frames: Simple structures with a transparent top (glass, polycarbonate, or old windows) that sit over garden beds. They trap solar heat, allowing you to grow cold-hardy crops (lettuce, spinach, kale, radishes) well into winter or start seeds earlier in spring. A basic cold frame can be built from 2×6 lumber and a sheet of polycarbonate for under $100.
- Hoop Houses/Low Tunnels: Larger structures made from flexible hoops (PVC pipe or EMT conduit) covered with greenhouse plastic. These provide more space and greater temperature moderation. A 10×20 ft DIY low tunnel kit can cost $200-$500, while a larger, more robust hoop house kit might be $1,000-$3,000. I use a 6×12 ft low tunnel made from 1/2-inch PVC hoops and 6mil greenhouse plastic, which extends my lettuce and spinach harvest by at least
- In-Ground Beds: If you have excellent native soil and good drainage, in-ground beds are the most economical. Double-digging (loosening soil two shovel depths) can significantly improve drainage and aeration. For my main garden, I primarily use in-ground beds, but I focus on building up the soil over time with consistent compost additions and cover cropping. I aim for beds that are no wider than 3-4 feet so I can reach the center without stepping on the soil, compacting it.
- Raised Beds: Raised beds offer numerous advantages, especially for poor soil, heavy clay, or rocky areas. They provide better drainage, warm up faster in spring, reduce compaction, and make weeding and harvesting easier on your back.
- Material Options:
- Untreated Cedar: Naturally rot-resistant and chemical-free. A 4×8 ft bed, 12 inches deep, typically requires three 2x12x8 ft cedar boards, costing around $50-$60 per board (total ~$150-$180) plus corner brackets or screws. My first raised beds were cedar and are still going strong after 7 years.
- Galvanized Steel: Durable, long-lasting, and aesthetically pleasing. Brands like Vego Garden offer modular kits. A Vego Garden 17″ Tall 8-in-1 Metal Raised Garden Bed (can be configured to 4×8 ft) costs approximately $250-$300.
- Concrete Blocks/Stones: Very durable but can leach minerals (though generally safe once weathered) and can be expensive.
- Recycled Materials: Pallets (check for chemical treatment stamps like « HT » for heat-treated), old tires (controversial due to potential chemical leaching).
- Filling Raised Beds: Don’t just fill with topsoil. Use a « Hugelkultur » approach (logs, branches, leaves, then compost, then topsoil) or a mixture of 60% good quality topsoil, 30% compost, and 10% perlite or vermiculite for drainage. A 4x8x1 ft raised bed requires about 32 cubic feet (or ~1.2 cubic yards) of soil mix, which can cost $100-$200 depending on your source.
- Material Options:
Step 4: Water Management & Irrigation
Efficient water management is critical for a self sufficient garden from scratch, especially in off-grid living where water resources might be limited.
- Rainwater Harvesting: This is my primary source of irrigation water. A 55-gallon rain barrel (e.g., EarthMark Rain Barrel, ~$120-$150) connected to a downspout can collect significant water. For larger needs, I use two 275-gallon IBC totes (Intermediate Bulk Containers, often available used for $100-$200 each from food-grade sources) connected in series. A 1,000 sq ft roof can collect approximately 620 gallons of water for every inch of rainfall. My 1,500 sq ft roof provides ample water for my 600 sq ft garden through multiple barrels and totes.
- Drip Irrigation: This is by far the most water-efficient method, delivering water directly to the plant’s root zone, minimizing evaporation and weed growth.
- Components: A typical drip system includes a pressure regulator (e.g., Rain Bird PRV-10, ~$15), a filter (Rain Bird RBY filter, ~$20), main tubing (1/2-inch poly tubing, 100ft ~$25), smaller feeder lines (1/4-inch tubing), and emitters (0.5 GPH or 1 GPH per plant).
- Kits: For beginners, a starter kit like the Rain Bird Drip Irrigation Garden Kit (model DDI-KIT-1P, ~$40-$60) is excellent for a small garden. For larger setups, I use Netafim Techline CV Drip Line (500ft roll, ~$150-$200), which has pressure-compensating emitters built-in, ensuring even watering across long runs.
- Automation: For true self-sufficiency, consider a battery-powered timer (e.g., Orbit B-Hyve Bluetooth Hose Faucet Timer, ~$50) or a solar-powered timer connected to a small 12V pump.
- Solar-Powered Pumps: For lifting water from a well, pond, or large storage tank to your garden, a solar pump is a game-changer. For a smaller drip system, a Shurflo 2088-594-152 Diaphragm Pump (12V, 3.5 GPM, ~$180) can be powered by a single 100W solar panel (e.g., Renogy 100W Monocrystalline Solar Panel, ~$100) and a small 12V battery (e.g., a 50Ah LiFePO4 battery like the Battle Born 50Ah, ~$450). For larger operations or deeper wells, more robust systems are needed. If you’re looking to build out a comprehensive off-grid power system to support your garden’s water needs, or indeed your entire homestead, you might want to explore resources like the Power Grid Generator complete system guide to understand the full scope of what’s possible in terms of energy independence.
Step 5: Seed Selection & Planting
The choice of seeds is crucial for a truly self sufficient garden from scratch.
- Choose Heirloom & Open-Pollinated Seeds: These varieties produce seeds that will grow true to type, meaning you can save seeds from your harvest year after year. F1 hybrids, while often vigorous, will not produce consistent offspring from saved seeds. Reputable seed companies include Baker Creek Heirloom Seeds, High Mowing Organic Seeds, and Seed Savers Exchange. Start with common, reliable varieties like ‘Black Krim’ tomatoes, ‘Provider’ bush beans, ‘Waltham Butternut’ squash, and ‘Black Seeded Simpson’ lettuce.
- Start Seeds Indoors (Optional but Recommended): For longer growing seasons or specific crops, starting seeds indoors gives you a head start. Use seed-starting mix (e.g., Espoma Organic Seed Starter Mix, ~$10 for 16qt bag) in seed trays (Jiffy Professional Greenhouse 72-cell kit, ~$15). Provide adequate light with LED grow lights (Barrina T5 2ft 4-pack LED Grow Lights, 20W each, ~$50) for 14-16 hours a day, positioned 2-4 inches above seedlings. Maintain consistent temperatures (65-75°F for most).
- Direct Sowing vs. Transplanting: Some crops (carrots, radishes, beans, corn) prefer direct sowing into the garden bed. Others (tomatoes, peppers, broccoli, kale) benefit from being started indoors and transplanted. Follow seed packet instructions for planting depths (e.g., lettuce seeds are often surface-sown or planted 1/8 inch deep, while beans are 1 inch deep) and spacing.
- Companion Planting: Strategically plant different species together to enhance growth, deter pests, and attract beneficial insects. For example, planting marigolds near tomatoes can deter nematodes, and basil improves tomato flavor. Nasturtiums can act as a trap crop for aphids.
- Succession Planting: For a continuous harvest, plant small batches of quick-growing crops (lettuce, radishes, cilantro) every 2-3 weeks. As one crop finishes, another is ready to take its place.
Step 6: Pest & Disease Management (Organic)
Maintaining a self sufficient garden from scratch means embracing organic pest and disease control.
- Integrated Pest Management (IPM): This holistic approach combines several strategies.
- Observation: Regularly inspect your plants for early signs of pests or disease. Catching issues early is key.
- Physical Barriers: Use row covers (e.g., Agribon AG-19 floating row cover, 10×20 ft, ~$20) to protect young plants from insect pests like cabbage worms and squash bugs. Install fences (e.g., 2×4 welded wire mesh, 4 ft tall, 50 ft roll ~$70) to keep out deer, rabbits, and other larger animals.
- Hand-Picking: For larger pests like tomato hornworms or squash bugs, simply pick them off and drop them into a bucket of soapy water.
- Companion Planting: As mentioned, certain plants repel pests. Marigolds, garlic, and onions are excellent deterrents.
- Attract Beneficial Insects: Plant flowers like dill, fennel, cosmos, and sweet alyssum to attract ladybugs, lacewings, and parasitic wasps, which prey on common garden pests.
- Organic Sprays & Treatments:
- Neem Oil: An excellent broad-spectrum organic insecticide and fungicide. Bonide Neem Oil Concentrate (16oz, ~$20) can be mixed at a rate of 1-2 tbsp per gallon of water and sprayed on affected plants.
- Insecticidal Soap: Effective against soft-bodied insects like aphids, whiteflies, and spider mites. Garden Safe Insecticidal Soap (24oz ready-to-use, ~$10).
- Bacillus thuringiensis (Bt): A naturally occurring soil bacterium that targets caterpillars and worms. Monterey BT Worm & Caterpillar Killer (16oz, ~$18) is highly effective and safe for beneficial insects.
- Copper or Sulfur Sprays: For fungal diseases like powdery mildew or blight, organic copper (e.g., Bonide Copper Fungicide, ~$15 for 1lb) or sulfur (e.g., Safer Brand Garden Fungicide, ~$10 for 16oz) can be used as a last resort.
Step 7: Harvesting & Seed Saving
The culmination of your efforts is the harvest, and seed saving closes the loop on self-sufficiency.
- Harvesting Techniques:
- Timing: Harvest vegetables at their peak ripeness for best flavor and nutritional value. For example, green beans should snap cleanly, cucumbers should be firm, and tomatoes should be fully colored.
- Frequency: Many crops, like zucchini, cucumbers, and bush beans, produce more if harvested frequently. Pick daily or every other day.
- Tools: Use clean, sharp pruners (e.g., Corona ClassicCUT Bypass Pruner BP 3180, ~$30) or a sharp knife for clean cuts, minimizing damage to the plant.
- Seed Saving: This is where the « self-sufficient » aspect truly shines.
- Selection: Only save seeds from your healthiest, most vigorous plants that show desired traits (disease resistance, good flavor, high yield).
- Isolation: To ensure true-to-type seeds, prevent cross-pollination. This can be challenging for open-pollinated crops that readily cross (e.g., squash, corn). For beginners, focus on self-pollinating plants like beans, peas, lettuce, and tomatoes.
- Processing:
- Dry Seeds (Beans, Peas, Lettuce, Grains): Allow pods/seed heads to dry completely on the plant. Harvest, shell, and clean the seeds, removing chaff.
- Wet Seeds (Tomatoes, Cucumbers, Squash): For tomatoes, ferment the seeds in water for a few days to remove the gel coating and inhibit disease. For cucumbers/squash, scrape out seeds, wash thoroughly, and dry.
- Drying: Spread seeds thinly on screens or paper plates in a cool, dry, well-ventilated area for 1-4 weeks. Ensure they are bone-dry before storage. I aim for less than 8% moisture content.
- Storage: Store seeds in airtight containers (glass jars with desiccant packets work well) in a cool, dark, dry place (ideally 40-50°F and 30-40% humidity). Label clearly with variety and date. Properly stored seeds can remain viable for 3-10 years or more.
Step 8: Season Extension & Winterizing
Extend your harvest and protect your garden for the off-season to truly maximize your self sufficient garden from scratch.
- Cold Frames: Simple structures with a transparent top (glass, polycarbonate, or old windows) that sit over garden beds. They trap solar heat, allowing you to grow cold-hardy crops (lettuce, spinach, kale, radishes) well into winter or start seeds earlier in spring. A basic cold frame can be built from 2×6 lumber and a sheet of polycarbonate for under $100.
- Hoop Houses/Low Tunnels: Larger structures made from flexible hoops (PVC pipe or EMT conduit) covered with greenhouse plastic. These provide more space and greater temperature moderation. A 10×20 ft DIY low tunnel kit can cost $200-$500, while a larger, more robust hoop house kit might be $1,000-$3,000. I use a 6×12 ft low tunnel made from 1/2-inch PVC hoops and 6mil greenhouse plastic, which extends my lettuce and spinach harvest by at least
Deciding between raised beds and in-ground beds depends on your soil, budget, and physical capabilities.
- In-Ground Beds: If you have excellent native soil and good drainage, in-ground beds are the most economical. Double-digging (loosening soil two shovel depths) can significantly improve drainage and aeration. For my main garden, I primarily use in-ground beds, but I focus on building up the soil over time with consistent compost additions and cover cropping. I aim for beds that are no wider than 3-4 feet so I can reach the center without stepping on the soil, compacting it.
- Raised Beds: Raised beds offer numerous advantages, especially for poor soil, heavy clay, or rocky areas. They provide better drainage, warm up faster in spring, reduce compaction, and make weeding and harvesting easier on your back.
- Material Options:
- Untreated Cedar: Naturally rot-resistant and chemical-free. A 4×8 ft bed, 12 inches deep, typically requires three 2x12x8 ft cedar boards, costing around $50-$60 per board (total ~$150-$180) plus corner brackets or screws. My first raised beds were cedar and are still going strong after 7 years.
- Galvanized Steel: Durable, long-lasting, and aesthetically pleasing. Brands like Vego Garden offer modular kits. A Vego Garden 17″ Tall 8-in-1 Metal Raised Garden Bed (can be configured to 4×8 ft) costs approximately $250-$300.
- Concrete Blocks/Stones: Very durable but can leach minerals (though generally safe once weathered) and can be expensive.
- Recycled Materials: Pallets (check for chemical treatment stamps like « HT » for heat-treated), old tires (controversial due to potential chemical leaching).
- Filling Raised Beds: Don’t just fill with topsoil. Use a « Hugelkultur » approach (logs, branches, leaves, then compost, then topsoil) or a mixture of 60% good quality topsoil, 30% compost, and 10% perlite or vermiculite for drainage. A 4x8x1 ft raised bed requires about 32 cubic feet (or ~1.2 cubic yards) of soil mix, which can cost $100-$200 depending on your source.
- Material Options:
Step 4: Water Management & Irrigation
Efficient water management is critical for a self sufficient garden from scratch, especially in off-grid living where water resources might be limited.
- Rainwater Harvesting: This is my primary source of irrigation water. A 55-gallon rain barrel (e.g., EarthMark Rain Barrel, ~$120-$150) connected to a downspout can collect significant water. For larger needs, I use two 275-gallon IBC totes (Intermediate Bulk Containers, often available used for $100-$200 each from food-grade sources) connected in series. A 1,000 sq ft roof can collect approximately 620 gallons of water for every inch of rainfall. My 1,500 sq ft roof provides ample water for my 600 sq ft garden through multiple barrels and totes.
- Drip Irrigation: This is by far the most water-efficient method, delivering water directly to the plant’s root zone, minimizing evaporation and weed growth.
- Components: A typical drip system includes a pressure regulator (e.g., Rain Bird PRV-10, ~$15), a filter (Rain Bird RBY filter, ~$20), main tubing (1/2-inch poly tubing, 100ft ~$25), smaller feeder lines (1/4-inch tubing), and emitters (0.5 GPH or 1 GPH per plant).
- Kits: For beginners, a starter kit like the Rain Bird Drip Irrigation Garden Kit (model DDI-KIT-1P, ~$40-$60) is excellent for a small garden. For larger setups, I use Netafim Techline CV Drip Line (500ft roll, ~$150-$200), which has pressure-compensating emitters built-in, ensuring even watering across long runs.
- Automation: For true self-sufficiency, consider a battery-powered timer (e.g., Orbit B-Hyve Bluetooth Hose Faucet Timer, ~$50) or a solar-powered timer connected to a small 12V pump.
- Solar-Powered Pumps: For lifting water from a well, pond, or large storage tank to your garden, a solar pump is a game-changer. For a smaller drip system, a Shurflo 2088-594-152 Diaphragm Pump (12V, 3.5 GPM, ~$180) can be powered by a single 100W solar panel (e.g., Renogy 100W Monocrystalline Solar Panel, ~$100) and a small 12V battery (e.g., a 50Ah LiFePO4 battery like the Battle Born 50Ah, ~$450). For larger operations or deeper wells, more robust systems are needed. If you’re looking to build out a comprehensive off-grid power system to support your garden’s water needs, or indeed your entire homestead, you might want to explore resources like the Power Grid Generator complete system guide to understand the full scope of what’s possible in terms of energy independence.
Step 5: Seed Selection & Planting
The choice of seeds is crucial for a truly self sufficient garden from scratch.
- Choose Heirloom & Open-Pollinated Seeds: These varieties produce seeds that will grow true to type, meaning you can save seeds from your harvest year after year. F1 hybrids, while often vigorous, will not produce consistent offspring from saved seeds. Reputable seed companies include Baker Creek Heirloom Seeds, High Mowing Organic Seeds, and Seed Savers Exchange. Start with common, reliable varieties like ‘Black Krim’ tomatoes, ‘Provider’ bush beans, ‘Waltham Butternut’ squash, and ‘Black Seeded Simpson’ lettuce.
- Start Seeds Indoors (Optional but Recommended): For longer growing seasons or specific crops, starting seeds indoors gives you a head start. Use seed-starting mix (e.g., Espoma Organic Seed Starter Mix, ~$10 for 16qt bag) in seed trays (Jiffy Professional Greenhouse 72-cell kit, ~$15). Provide adequate light with LED grow lights (Barrina T5 2ft 4-pack LED Grow Lights, 20W each, ~$50) for 14-16 hours a day, positioned 2-4 inches above seedlings. Maintain consistent temperatures (65-75°F for most).
- Direct Sowing vs. Transplanting: Some crops (carrots, radishes, beans, corn) prefer direct sowing into the garden bed. Others (tomatoes, peppers, broccoli, kale) benefit from being started indoors and transplanted. Follow seed packet instructions for planting depths (e.g., lettuce seeds are often surface-sown or planted 1/8 inch deep, while beans are 1 inch deep) and spacing.
- Companion Planting: Strategically plant different species together to enhance growth, deter pests, and attract beneficial insects. For example, planting marigolds near tomatoes can deter nematodes, and basil improves tomato flavor. Nasturtiums can act as a trap crop for aphids.
- Succession Planting: For a continuous harvest, plant small batches of quick-growing crops (lettuce, radishes, cilantro) every 2-3 weeks. As one crop finishes, another is ready to take its place.
Step 6: Pest & Disease Management (Organic)
Maintaining a self sufficient garden from scratch means embracing organic pest and disease control.
- Integrated Pest Management (IPM): This holistic approach combines several strategies.
- Observation: Regularly inspect your plants for early signs of pests or disease. Catching issues early is key.
- Physical Barriers: Use row covers (e.g., Agribon AG-19 floating row cover, 10×20 ft, ~$20) to protect young plants from insect pests like cabbage worms and squash bugs. Install fences (e.g., 2×4 welded wire mesh, 4 ft tall, 50 ft roll ~$70) to keep out deer, rabbits, and other larger animals.
- Hand-Picking: For larger pests like tomato hornworms or squash bugs, simply pick them off and drop them into a bucket of soapy water.
- Companion Planting: As mentioned, certain plants repel pests. Marigolds, garlic, and onions are excellent deterrents.
- Attract Beneficial Insects: Plant flowers like dill, fennel, cosmos, and sweet alyssum to attract ladybugs, lacewings, and parasitic wasps, which prey on common garden pests.
- Organic Sprays & Treatments:
- Neem Oil: An excellent broad-spectrum organic insecticide and fungicide. Bonide Neem Oil Concentrate (16oz, ~$20) can be mixed at a rate of 1-2 tbsp per gallon of water and sprayed on affected plants.
- Insecticidal Soap: Effective against soft-bodied insects like aphids, whiteflies, and spider mites. Garden Safe Insecticidal Soap (24oz ready-to-use, ~$10).
- Bacillus thuringiensis (Bt): A naturally occurring soil bacterium that targets caterpillars and worms. Monterey BT Worm & Caterpillar Killer (16oz, ~$18) is highly effective and safe for beneficial insects.
- Copper or Sulfur Sprays: For fungal diseases like powdery mildew or blight, organic copper (e.g., Bonide Copper Fungicide, ~$15 for 1lb) or sulfur (e.g., Safer Brand Garden Fungicide, ~$10 for 16oz) can be used as a last resort.
Step 7: Harvesting & Seed Saving
The culmination of your efforts is the harvest, and seed saving closes the loop on self-sufficiency.
- Harvesting Techniques:
- Timing: Harvest vegetables at their peak ripeness for best flavor and nutritional value. For example, green beans should snap cleanly, cucumbers should be firm, and tomatoes should be fully colored.
- Frequency: Many crops, like zucchini, cucumbers, and bush beans, produce more if harvested frequently. Pick daily or every other day.
- Tools: Use clean, sharp pruners (e.g., Corona ClassicCUT Bypass Pruner BP 3180, ~$30) or a sharp knife for clean cuts, minimizing damage to the plant.
- Seed Saving: This is where the « self-sufficient » aspect truly shines.
- Selection: Only save seeds from your healthiest, most vigorous plants that show desired traits (disease resistance, good flavor, high yield).
- Isolation: To ensure true-to-type seeds, prevent cross-pollination. This can be challenging for open-pollinated crops that readily cross (e.g., squash, corn). For beginners, focus on self-pollinating plants like beans, peas, lettuce, and tomatoes.
- Processing:
- Dry Seeds (Beans, Peas, Lettuce, Grains): Allow pods/seed heads to dry completely on the plant. Harvest, shell, and clean the seeds, removing chaff.
- Wet Seeds (Tomatoes, Cucumbers, Squash): For tomatoes, ferment the seeds in water for a few days to remove the gel coating and inhibit disease. For cucumbers/squash, scrape out seeds, wash thoroughly, and dry.
- Drying: Spread seeds thinly on screens or paper plates in a cool, dry, well-ventilated area for 1-4 weeks. Ensure they are bone-dry before storage. I aim for less than 8% moisture content.
- Storage: Store seeds in airtight containers (glass jars with desiccant packets work well) in a cool, dark, dry place (ideally 40-50°F and 30-40% humidity). Label clearly with variety and date. Properly stored seeds can remain viable for 3-10 years or more.
Step 8: Season Extension & Winterizing
Extend your harvest and protect your garden for the off-season to truly maximize your self sufficient garden from scratch.
- Cold Frames: Simple structures with a transparent top (glass, polycarbonate, or old windows) that sit over garden beds. They trap solar heat, allowing you to grow cold-hardy crops (lettuce, spinach, kale, radishes) well into winter or start seeds earlier in spring. A basic cold frame can be built from 2×6 lumber and a sheet of polycarbonate for under $100.
- Hoop Houses/Low Tunnels: Larger structures made from flexible hoops (PVC pipe or EMT conduit) covered with greenhouse plastic. These provide more space and greater temperature moderation. A 10×20 ft DIY low tunnel kit can cost $200-$500, while a larger, more robust hoop house kit might be $1,000-$3,000. I use a 6×12 ft low tunnel made from 1/2-inch PVC hoops and 6mil greenhouse plastic, which extends my lettuce and spinach harvest by at least
Healthy soil is the bedrock of a productive, self-sufficient garden. You can’t guess what your soil needs; you have to test it.
- Perform a Soil Test: A professional soil test will give you precise data on your soil’s pH, nutrient levels (N-P-K), and organic matter content. I recommend sending a sample to your local agricultural extension office; it typically costs $20-$50 and provides detailed recommendations. Alternatively, for a quick homeowner check, a Rapitest Soil Test Kit (40-test kit, model 1663, ~$20 on Amazon) provides a good baseline for pH, Nitrogen, Phosphorus, and Potash. Aim for a pH between 6.0 and 7.0 for most vegetables.
- Amend for pH Imbalance: If your soil is too acidic (below 6.0), add agricultural lime (dolomitic lime adds magnesium, calcitic lime adds calcium). Apply 5-10 lbs per 100 sq ft for a moderate adjustment. If it’s too alkaline (above 7.0), add elemental sulfur (e.g., Espoma Soil Acidifier, ~$15 for 6.75 lbs) or generous amounts of organic matter like peat moss or pine needles.
- Build Organic Matter: This is the single most important step for long-term soil health. Organic matter improves soil structure, water retention, drainage, and nutrient availability. Incorporate 2-4 inches of high-quality compost into your top 6-12 inches of soil annually. I make my own compost from kitchen scraps, garden waste, and shredded leaves, but you can purchase it. Local nurseries often sell bulk compost for $30-$50 per cubic yard. Aged manure (from chickens, cows, or horses – ensure it’s well-rotted to avoid burning plants) is also excellent.
- Address Nutrient Deficiencies: Based on your soil test, add specific organic amendments. If Nitrogen (N) is low, add blood meal (12-0-0, ~$20 for 3 lbs) or feather meal. For Phosphorus (P), use bone meal (3-15-0, ~$15 for 3 lbs) or rock phosphate. For Potassium (K), greensand (0-0-2.5, ~$25 for 5 lbs) or kelp meal are good choices. I rely heavily on Espoma Organic Garden-tone (5-3-3, ~$25 for an 8lb bag) as a balanced, all-purpose organic fertilizer during planting.
Step 3: Garden Bed Preparation
Deciding between raised beds and in-ground beds depends on your soil, budget, and physical capabilities.
- In-Ground Beds: If you have excellent native soil and good drainage, in-ground beds are the most economical. Double-digging (loosening soil two shovel depths) can significantly improve drainage and aeration. For my main garden, I primarily use in-ground beds, but I focus on building up the soil over time with consistent compost additions and cover cropping. I aim for beds that are no wider than 3-4 feet so I can reach the center without stepping on the soil, compacting it.
- Raised Beds: Raised beds offer numerous advantages, especially for poor soil, heavy clay, or rocky areas. They provide better drainage, warm up faster in spring, reduce compaction, and make weeding and harvesting easier on your back.
- Material Options:
- Untreated Cedar: Naturally rot-resistant and chemical-free. A 4×8 ft bed, 12 inches deep, typically requires three 2x12x8 ft cedar boards, costing around $50-$60 per board (total ~$150-$180) plus corner brackets or screws. My first raised beds were cedar and are still going strong after 7 years.
- Galvanized Steel: Durable, long-lasting, and aesthetically pleasing. Brands like Vego Garden offer modular kits. A Vego Garden 17″ Tall 8-in-1 Metal Raised Garden Bed (can be configured to 4×8 ft) costs approximately $250-$300.
- Concrete Blocks/Stones: Very durable but can leach minerals (though generally safe once weathered) and can be expensive.
- Recycled Materials: Pallets (check for chemical treatment stamps like « HT » for heat-treated), old tires (controversial due to potential chemical leaching).
- Filling Raised Beds: Don’t just fill with topsoil. Use a « Hugelkultur » approach (logs, branches, leaves, then compost, then topsoil) or a mixture of 60% good quality topsoil, 30% compost, and 10% perlite or vermiculite for drainage. A 4x8x1 ft raised bed requires about 32 cubic feet (or ~1.2 cubic yards) of soil mix, which can cost $100-$200 depending on your source.
- Material Options:
Step 4: Water Management & Irrigation
Efficient water management is critical for a self sufficient garden from scratch, especially in off-grid living where water resources might be limited.
- Rainwater Harvesting: This is my primary source of irrigation water. A 55-gallon rain barrel (e.g., EarthMark Rain Barrel, ~$120-$150) connected to a downspout can collect significant water. For larger needs, I use two 275-gallon IBC totes (Intermediate Bulk Containers, often available used for $100-$200 each from food-grade sources) connected in series. A 1,000 sq ft roof can collect approximately 620 gallons of water for every inch of rainfall. My 1,500 sq ft roof provides ample water for my 600 sq ft garden through multiple barrels and totes.
- Drip Irrigation: This is by far the most water-efficient method, delivering water directly to the plant’s root zone, minimizing evaporation and weed growth.
- Components: A typical drip system includes a pressure regulator (e.g., Rain Bird PRV-10, ~$15), a filter (Rain Bird RBY filter, ~$20), main tubing (1/2-inch poly tubing, 100ft ~$25), smaller feeder lines (1/4-inch tubing), and emitters (0.5 GPH or 1 GPH per plant).
- Kits: For beginners, a starter kit like the Rain Bird Drip Irrigation Garden Kit (model DDI-KIT-1P, ~$40-$60) is excellent for a small garden. For larger setups, I use Netafim Techline CV Drip Line (500ft roll, ~$150-$200), which has pressure-compensating emitters built-in, ensuring even watering across long runs.
- Automation: For true self-sufficiency, consider a battery-powered timer (e.g., Orbit B-Hyve Bluetooth Hose Faucet Timer, ~$50) or a solar-powered timer connected to a small 12V pump.
- Solar-Powered Pumps: For lifting water from a well, pond, or large storage tank to your garden, a solar pump is a game-changer. For a smaller drip system, a Shurflo 2088-594-152 Diaphragm Pump (12V, 3.5 GPM, ~$180) can be powered by a single 100W solar panel (e.g., Renogy 100W Monocrystalline Solar Panel, ~$100) and a small 12V battery (e.g., a 50Ah LiFePO4 battery like the Battle Born 50Ah, ~$450). For larger operations or deeper wells, more robust systems are needed. If you’re looking to build out a comprehensive off-grid power system to support your garden’s water needs, or indeed your entire homestead, you might want to explore resources like the Power Grid Generator complete system guide to understand the full scope of what’s possible in terms of energy independence.
Step 5: Seed Selection & Planting
The choice of seeds is crucial for a truly self sufficient garden from scratch.
- Choose Heirloom & Open-Pollinated Seeds: These varieties produce seeds that will grow true to type, meaning you can save seeds from your harvest year after year. F1 hybrids, while often vigorous, will not produce consistent offspring from saved seeds. Reputable seed companies include Baker Creek Heirloom Seeds, High Mowing Organic Seeds, and Seed Savers Exchange. Start with common, reliable varieties like ‘Black Krim’ tomatoes, ‘Provider’ bush beans, ‘Waltham Butternut’ squash, and ‘Black Seeded Simpson’ lettuce.
- Start Seeds Indoors (Optional but Recommended): For longer growing seasons or specific crops, starting seeds indoors gives you a head start. Use seed-starting mix (e.g., Espoma Organic Seed Starter Mix, ~$10 for 16qt bag) in seed trays (Jiffy Professional Greenhouse 72-cell kit, ~$15). Provide adequate light with LED grow lights (Barrina T5 2ft 4-pack LED Grow Lights, 20W each, ~$50) for 14-16 hours a day, positioned 2-4 inches above seedlings. Maintain consistent temperatures (65-75°F for most).
- Direct Sowing vs. Transplanting: Some crops (carrots, radishes, beans, corn) prefer direct sowing into the garden bed. Others (tomatoes, peppers, broccoli, kale) benefit from being started indoors and transplanted. Follow seed packet instructions for planting depths (e.g., lettuce seeds are often surface-sown or planted 1/8 inch deep, while beans are 1 inch deep) and spacing.
- Companion Planting: Strategically plant different species together to enhance growth, deter pests, and attract beneficial insects. For example, planting marigolds near tomatoes can deter nematodes, and basil improves tomato flavor. Nasturtiums can act as a trap crop for aphids.
- Succession Planting: For a continuous harvest, plant small batches of quick-growing crops (lettuce, radishes, cilantro) every 2-3 weeks. As one crop finishes, another is ready to take its place.
Step 6: Pest & Disease Management (Organic)
Maintaining a self sufficient garden from scratch means embracing organic pest and disease control.
- Integrated Pest Management (IPM): This holistic approach combines several strategies.
- Observation: Regularly inspect your plants for early signs of pests or disease. Catching issues early is key.
- Physical Barriers: Use row covers (e.g., Agribon AG-19 floating row cover, 10×20 ft, ~$20) to protect young plants from insect pests like cabbage worms and squash bugs. Install fences (e.g., 2×4 welded wire mesh, 4 ft tall, 50 ft roll ~$70) to keep out deer, rabbits, and other larger animals.
- Hand-Picking: For larger pests like tomato hornworms or squash bugs, simply pick them off and drop them into a bucket of soapy water.
- Companion Planting: As mentioned, certain plants repel pests. Marigolds, garlic, and onions are excellent deterrents.
- Attract Beneficial Insects: Plant flowers like dill, fennel, cosmos, and sweet alyssum to attract ladybugs, lacewings, and parasitic wasps, which prey on common garden pests.
- Organic Sprays & Treatments:
- Neem Oil: An excellent broad-spectrum organic insecticide and fungicide. Bonide Neem Oil Concentrate (16oz, ~$20) can be mixed at a rate of 1-2 tbsp per gallon of water and sprayed on affected plants.
- Insecticidal Soap: Effective against soft-bodied insects like aphids, whiteflies, and spider mites. Garden Safe Insecticidal Soap (24oz ready-to-use, ~$10).
- Bacillus thuringiensis (Bt): A naturally occurring soil bacterium that targets caterpillars and worms. Monterey BT Worm & Caterpillar Killer (16oz, ~$18) is highly effective and safe for beneficial insects.
- Copper or Sulfur Sprays: For fungal diseases like powdery mildew or blight, organic copper (e.g., Bonide Copper Fungicide, ~$15 for 1lb) or sulfur (e.g., Safer Brand Garden Fungicide, ~$10 for 16oz) can be used as a last resort.
Step 7: Harvesting & Seed Saving
The culmination of your efforts is the harvest, and seed saving closes the loop on self-sufficiency.
- Harvesting Techniques:
- Timing: Harvest vegetables at their peak ripeness for best flavor and nutritional value. For example, green beans should snap cleanly, cucumbers should be firm, and tomatoes should be fully colored.
- Frequency: Many crops, like zucchini, cucumbers, and bush beans, produce more if harvested frequently. Pick daily or every other day.
- Tools: Use clean, sharp pruners (e.g., Corona ClassicCUT Bypass Pruner BP 3180, ~$30) or a sharp knife for clean cuts, minimizing damage to the plant.
- Seed Saving: This is where the « self-sufficient » aspect truly shines.
- Selection: Only save seeds from your healthiest, most vigorous plants that show desired traits (disease resistance, good flavor, high yield).
- Isolation: To ensure true-to-type seeds, prevent cross-pollination. This can be challenging for open-pollinated crops that readily cross (e.g., squash, corn). For beginners, focus on self-pollinating plants like beans, peas, lettuce, and tomatoes.
- Processing:
- Dry Seeds (Beans, Peas, Lettuce, Grains): Allow pods/seed heads to dry completely on the plant. Harvest, shell, and clean the seeds, removing chaff.
- Wet Seeds (Tomatoes, Cucumbers, Squash): For tomatoes, ferment the seeds in water for a few days to remove the gel coating and inhibit disease. For cucumbers/squash, scrape out seeds, wash thoroughly, and dry.
- Drying: Spread seeds thinly on screens or paper plates in a cool, dry, well-ventilated area for 1-4 weeks. Ensure they are bone-dry before storage. I aim for less than 8% moisture content.
- Storage: Store seeds in airtight containers (glass jars with desiccant packets work well) in a cool, dark, dry place (ideally 40-50°F and 30-40% humidity). Label clearly with variety and date. Properly stored seeds can remain viable for 3-10 years or more.
Step 8: Season Extension & Winterizing
Extend your harvest and protect your garden for the off-season to truly maximize your self sufficient garden from scratch.
- Cold Frames: Simple structures with a transparent top (glass, polycarbonate, or old windows) that sit over garden beds. They trap solar heat, allowing you to grow cold-hardy crops (lettuce, spinach, kale, radishes) well into winter or start seeds earlier in spring. A basic cold frame can be built from 2×6 lumber and a sheet of polycarbonate for under $100.
- Hoop Houses/Low Tunnels: Larger structures made from flexible hoops (PVC pipe or EMT conduit) covered with greenhouse plastic. These provide more space and greater temperature moderation. A 10×20 ft DIY low tunnel kit can cost $200-$500, while a larger, more robust hoop house kit might be $1,000-$3,000. I use a 6×12 ft low tunnel made from 1/2-inch PVC hoops and 6mil greenhouse plastic, which extends my lettuce and spinach harvest by at least
Maintaining a self sufficient garden from scratch means embracing organic pest and disease control.
- Integrated Pest Management (IPM): This holistic approach combines several strategies.
- Observation: Regularly inspect your plants for early signs of pests or disease. Catching issues early is key.
- Physical Barriers: Use row covers (e.g., Agribon AG-19 floating row cover, 10×20 ft, ~$20) to protect young plants from insect pests like cabbage worms and squash bugs. Install fences (e.g., 2×4 welded wire mesh, 4 ft tall, 50 ft roll ~$70) to keep out deer, rabbits, and other larger animals.
- Hand-Picking: For larger pests like tomato hornworms or squash bugs, simply pick them off and drop them into a bucket of soapy water.
- Companion Planting: As mentioned, certain plants repel pests. Marigolds, garlic, and onions are excellent deterrents.
- Attract Beneficial Insects: Plant flowers like dill, fennel, cosmos, and sweet alyssum to attract ladybugs, lacewings, and parasitic wasps, which prey on common garden pests.
- Organic Sprays & Treatments:
- Neem Oil: An excellent broad-spectrum organic insecticide and fungicide. Bonide Neem Oil Concentrate (16oz, ~$20) can be mixed at a rate of 1-2 tbsp per gallon of water and sprayed on affected plants.
- Insecticidal Soap: Effective against soft-bodied insects like aphids, whiteflies, and spider mites. Garden Safe Insecticidal Soap (24oz ready-to-use, ~$10).
- Bacillus thuringiensis (Bt): A naturally occurring soil bacterium that targets caterpillars and worms. Monterey BT Worm & Caterpillar Killer (16oz, ~$18) is highly effective and safe for beneficial insects.
- Copper or Sulfur Sprays: For fungal diseases like powdery mildew or blight, organic copper (e.g., Bonide Copper Fungicide, ~$15 for 1lb) or sulfur (e.g., Safer Brand Garden Fungicide, ~$10 for 16oz) can be used as a last resort.
Step 7: Harvesting & Seed Saving
The culmination of your efforts is the harvest, and seed saving closes the loop on self-sufficiency.
- Harvesting Techniques:
- Timing: Harvest vegetables at their peak ripeness for best flavor and nutritional value. For example, green beans should snap cleanly, cucumbers should be firm, and tomatoes should be fully colored.
- Frequency: Many crops, like zucchini, cucumbers, and bush beans, produce more if harvested frequently. Pick daily or every other day.
- Tools: Use clean, sharp pruners (e.g., Corona ClassicCUT Bypass Pruner BP 3180, ~$30) or a sharp knife for clean cuts, minimizing damage to the plant.
- Seed Saving: This is where the « self-sufficient » aspect truly shines.
- Selection: Only save seeds from your healthiest, most vigorous plants that show desired traits (disease resistance, good flavor, high yield).
- Isolation: To ensure true-to-type seeds, prevent cross-pollination. This can be challenging for open-pollinated crops that readily cross (e.g., squash, corn). For beginners, focus on self-pollinating plants like beans, peas, lettuce, and tomatoes.
- Processing:
- Dry Seeds (Beans, Peas, Lettuce, Grains): Allow pods/seed heads to dry completely on the plant. Harvest, shell, and clean the seeds, removing chaff.
- Wet Seeds (Tomatoes, Cucumbers, Squash): For tomatoes, ferment the seeds in water for a few days to remove the gel coating and inhibit disease. For cucumbers/squash, scrape out seeds, wash thoroughly, and dry.
- Drying: Spread seeds thinly on screens or paper plates in a cool, dry, well-ventilated area for 1-4 weeks. Ensure they are bone-dry before storage. I aim for less than 8% moisture content.
- Storage: Store seeds in airtight containers (glass jars with desiccant packets work well) in a cool, dark, dry place (ideally 40-50°F and 30-40% humidity). Label clearly with variety and date. Properly stored seeds can remain viable for 3-10 years or more.
Step 8: Season Extension & Winterizing
Extend your harvest and protect your garden for the off-season to truly maximize your self sufficient garden from scratch.
- Cold Frames: Simple structures with a transparent top (glass, polycarbonate, or old windows) that sit over garden beds. They trap solar heat, allowing you to grow cold-hardy crops (lettuce, spinach, kale, radishes) well into winter or start seeds earlier in spring. A basic cold frame can be built from 2×6 lumber and a sheet of polycarbonate for under $100.
- Hoop Houses/Low Tunnels: Larger structures made from flexible hoops (PVC pipe or EMT conduit) covered with greenhouse plastic. These provide more space and greater temperature moderation. A 10×20 ft DIY low tunnel kit can cost $200-$500, while a larger, more robust hoop house kit might be $1,000-$3,000. I use a 6×12 ft low tunnel made from 1/2-inch PVC hoops and 6mil greenhouse plastic, which extends my lettuce and spinach harvest by at least
Step 4: Water Management & Irrigation
Efficient water management is critical for a self sufficient garden from scratch, especially in off-grid living where water resources might be limited.
- Rainwater Harvesting: This is my primary source of irrigation water. A 55-gallon rain barrel (e.g., EarthMark Rain Barrel, ~$120-$150) connected to a downspout can collect significant water. For larger needs, I use two 275-gallon IBC totes (Intermediate Bulk Containers, often available used for $100-$200 each from food-grade sources) connected in series. A 1,000 sq ft roof can collect approximately 620 gallons of water for every inch of rainfall. My 1,500 sq ft roof provides ample water for my 600 sq ft garden through multiple barrels and totes.
- Drip Irrigation: This is by far the most water-efficient method, delivering water directly to the plant’s root zone, minimizing evaporation and weed growth.
- Components: A typical drip system includes a pressure regulator (e.g., Rain Bird PRV-10, ~$15), a filter (Rain Bird RBY filter, ~$20), main tubing (1/2-inch poly tubing, 100ft ~$25), smaller feeder lines (1/4-inch tubing), and emitters (0.5 GPH or 1 GPH per plant).
- Kits: For beginners, a starter kit like the Rain Bird Drip Irrigation Garden Kit (model DDI-KIT-1P, ~$40-$60) is excellent for a small garden. For larger setups, I use Netafim Techline CV Drip Line (500ft roll, ~$150-$200), which has pressure-compensating emitters built-in, ensuring even watering across long runs.
- Automation: For true self-sufficiency, consider a battery-powered timer (e.g., Orbit B-Hyve Bluetooth Hose Faucet Timer, ~$50) or a solar-powered timer connected to a small 12V pump.
- Solar-Powered Pumps: For lifting water from a well, pond, or large storage tank to your garden, a solar pump is a game-changer. For a smaller drip system, a Shurflo 2088-594-152 Diaphragm Pump (12V, 3.5 GPM, ~$180) can be powered by a single 100W solar panel (e.g., Renogy 100W Monocrystalline Solar Panel, ~$100) and a small 12V battery (e.g., a 50Ah LiFePO4 battery like the Battle Born 50Ah, ~$450). For larger operations or deeper wells, more robust systems are needed. If you’re looking to build out a comprehensive off-grid power system to support your garden’s water needs, or indeed your entire homestead, you might want to explore resources like the Power Grid Generator complete system guide to understand the full scope of what’s possible in terms of energy independence.
Step 5: Seed Selection & Planting
The choice of seeds is crucial for a truly self sufficient garden from scratch.
- Choose Heirloom & Open-Pollinated Seeds: These varieties produce seeds that will grow true to type, meaning you can save seeds from your harvest year after year. F1 hybrids, while often vigorous, will not produce consistent offspring from saved seeds. Reputable seed companies include Baker Creek Heirloom Seeds, High Mowing Organic Seeds, and Seed Savers Exchange. Start with common, reliable varieties like ‘Black Krim’ tomatoes, ‘Provider’ bush beans, ‘Waltham Butternut’ squash, and ‘Black Seeded Simpson’ lettuce.
- Start Seeds Indoors (Optional but Recommended): For longer growing seasons or specific crops, starting seeds indoors gives you a head start. Use seed-starting mix (e.g., Espoma Organic Seed Starter Mix, ~$10 for 16qt bag) in seed trays (Jiffy Professional Greenhouse 72-cell kit, ~$15). Provide adequate light with LED grow lights (Barrina T5 2ft 4-pack LED Grow Lights, 20W each, ~$50) for 14-16 hours a day, positioned 2-4 inches above seedlings. Maintain consistent temperatures (65-75°F for most).
- Direct Sowing vs. Transplanting: Some crops (carrots, radishes, beans, corn) prefer direct sowing into the garden bed. Others (tomatoes, peppers, broccoli, kale) benefit from being started indoors and transplanted. Follow seed packet instructions for planting depths (e.g., lettuce seeds are often surface-sown or planted 1/8 inch deep, while beans are 1 inch deep) and spacing.
- Companion Planting: Strategically plant different species together to enhance growth, deter pests, and attract beneficial insects. For example, planting marigolds near tomatoes can deter nematodes, and basil improves tomato flavor. Nasturtiums can act as a trap crop for aphids.
- Succession Planting: For a continuous harvest, plant small batches of quick-growing crops (lettuce, radishes, cilantro) every 2-3 weeks. As one crop finishes, another is ready to take its place.
Step 6: Pest & Disease Management (Organic)
Maintaining a self sufficient garden from scratch means embracing organic pest and disease control.
- Integrated Pest Management (IPM): This holistic approach combines several strategies.
- Observation: Regularly inspect your plants for early signs of pests or disease. Catching issues early is key.
- Physical Barriers: Use row covers (e.g., Agribon AG-19 floating row cover, 10×20 ft, ~$20) to protect young plants from insect pests like cabbage worms and squash bugs. Install fences (e.g., 2×4 welded wire mesh, 4 ft tall, 50 ft roll ~$70) to keep out deer, rabbits, and other larger animals.
- Hand-Picking: For larger pests like tomato hornworms or squash bugs, simply pick them off and drop them into a bucket of soapy water.
- Companion Planting: As mentioned, certain plants repel pests. Marigolds, garlic, and onions are excellent deterrents.
- Attract Beneficial Insects: Plant flowers like dill, fennel, cosmos, and sweet alyssum to attract ladybugs, lacewings, and parasitic wasps, which prey on common garden pests.
- Organic Sprays & Treatments:
- Neem Oil: An excellent broad-spectrum organic insecticide and fungicide. Bonide Neem Oil Concentrate (16oz, ~$20) can be mixed at a rate of 1-2 tbsp per gallon of water and sprayed on affected plants.
- Insecticidal Soap: Effective against soft-bodied insects like aphids, whiteflies, and spider mites. Garden Safe Insecticidal Soap (24oz ready-to-use, ~$10).
- Bacillus thuringiensis (Bt): A naturally occurring soil bacterium that targets caterpillars and worms. Monterey BT Worm & Caterpillar Killer (16oz, ~$18) is highly effective and safe for beneficial insects.
- Copper or Sulfur Sprays: For fungal diseases like powdery mildew or blight, organic copper (e.g., Bonide Copper Fungicide, ~$15 for 1lb) or sulfur (e.g., Safer Brand Garden Fungicide, ~$10 for 16oz) can be used as a last resort.
Step 7: Harvesting & Seed Saving
The culmination of your efforts is the harvest, and seed saving closes the loop on self-sufficiency.
- Harvesting Techniques:
- Timing: Harvest vegetables at their peak ripeness for best flavor and nutritional value. For example, green beans should snap cleanly, cucumbers should be firm, and tomatoes should be fully colored.
- Frequency: Many crops, like zucchini, cucumbers, and bush beans, produce more if harvested frequently. Pick daily or every other day.
- Tools: Use clean, sharp pruners (e.g., Corona ClassicCUT Bypass Pruner BP 3180, ~$30) or a sharp knife for clean cuts, minimizing damage to the plant.
- Seed Saving: This is where the « self-sufficient » aspect truly shines.
- Selection: Only save seeds from your healthiest, most vigorous plants that show desired traits (disease resistance, good flavor, high yield).
- Isolation: To ensure true-to-type seeds, prevent cross-pollination. This can be challenging for open-pollinated crops that readily cross (e.g., squash, corn). For beginners, focus on self-pollinating plants like beans, peas, lettuce, and tomatoes.
- Processing:
- Dry Seeds (Beans, Peas, Lettuce, Grains): Allow pods/seed heads to dry completely on the plant. Harvest, shell, and clean the seeds, removing chaff.
- Wet Seeds (Tomatoes, Cucumbers, Squash): For tomatoes, ferment the seeds in water for a few days to remove the gel coating and inhibit disease. For cucumbers/squash, scrape out seeds, wash thoroughly, and dry.
- Drying: Spread seeds thinly on screens or paper plates in a cool, dry, well-ventilated area for 1-4 weeks. Ensure they are bone-dry before storage. I aim for less than 8% moisture content.
- Storage: Store seeds in airtight containers (glass jars with desiccant packets work well) in a cool, dark, dry place (ideally 40-50°F and 30-40% humidity). Label clearly with variety and date. Properly stored seeds can remain viable for 3-10 years or more.
Step 8: Season Extension & Winterizing
Extend your harvest and protect your garden for the off-season to truly maximize your self sufficient garden from scratch.
- Cold Frames: Simple structures with a transparent top (glass, polycarbonate, or old windows) that sit over garden beds. They trap solar heat, allowing you to grow cold-hardy crops (lettuce, spinach, kale, radishes) well into winter or start seeds earlier in spring. A basic cold frame can be built from 2×6 lumber and a sheet of polycarbonate for under $100.
- Hoop Houses/Low Tunnels: Larger structures made from flexible hoops (PVC pipe or EMT conduit) covered with greenhouse plastic. These provide more space and greater temperature moderation. A 10×20 ft DIY low tunnel kit can cost $200-$500, while a larger, more robust hoop house kit might be $1,000-$3,000. I use a 6×12 ft low tunnel made from 1/2-inch PVC hoops and 6mil greenhouse plastic, which extends my lettuce and spinach harvest by at least
- In-Ground Beds: If you have excellent native soil and good drainage, in-ground beds are the most economical. Double-digging (loosening soil two shovel depths) can significantly improve drainage and aeration. For my main garden, I primarily use in-ground beds, but I focus on building up the soil over time with consistent compost additions and cover cropping. I aim for beds that are no wider than 3-4 feet so I can reach the center without stepping on the soil, compacting it.
- Raised Beds: Raised beds offer numerous advantages, especially for poor soil, heavy clay, or rocky areas. They provide better drainage, warm up faster in spring, reduce compaction, and make weeding and harvesting easier on your back.
- Material Options:
- Untreated Cedar: Naturally rot-resistant and chemical-free. A 4×8 ft bed, 12 inches deep, typically requires three 2x12x8 ft cedar boards, costing around $50-$60 per board (total ~$150-$180) plus corner brackets or screws. My first raised beds were cedar and are still going strong after 7 years.
- Galvanized Steel: Durable, long-lasting, and aesthetically pleasing. Brands like Vego Garden offer modular kits. A Vego Garden 17″ Tall 8-in-1 Metal Raised Garden Bed (can be configured to 4×8 ft) costs approximately $250-$300.
- Concrete Blocks/Stones: Very durable but can leach minerals (though generally safe once weathered) and can be expensive.
- Recycled Materials: Pallets (check for chemical treatment stamps like « HT » for heat-treated), old tires (controversial due to potential chemical leaching).
- Filling Raised Beds: Don’t just fill with topsoil. Use a « Hugelkultur » approach (logs, branches, leaves, then compost, then topsoil) or a mixture of 60% good quality topsoil, 30% compost, and 10% perlite or vermiculite for drainage. A 4x8x1 ft raised bed requires about 32 cubic feet (or ~1.2 cubic yards) of soil mix, which can cost $100-$200 depending on your source.
- Material Options:
Step 4: Water Management & Irrigation
Efficient water management is critical for a self sufficient garden from scratch, especially in off-grid living where water resources might be limited.
- Rainwater Harvesting: This is my primary source of irrigation water. A 55-gallon rain barrel (e.g., EarthMark Rain Barrel, ~$120-$150) connected to a downspout can collect significant water. For larger needs, I use two 275-gallon IBC totes (Intermediate Bulk Containers, often available used for $100-$200 each from food-grade sources) connected in series. A 1,000 sq ft roof can collect approximately 620 gallons of water for every inch of rainfall. My 1,500 sq ft roof provides ample water for my 600 sq ft garden through multiple barrels and totes.
- Drip Irrigation: This is by far the most water-efficient method, delivering water directly to the plant’s root zone, minimizing evaporation and weed growth.
- Components: A typical drip system includes a pressure regulator (e.g., Rain Bird PRV-10, ~$15), a filter (Rain Bird RBY filter, ~$20), main tubing (1/2-inch poly tubing, 100ft ~$25), smaller feeder lines (1/4-inch tubing), and emitters (0.5 GPH or 1 GPH per plant).
- Kits: For beginners, a starter kit like the Rain Bird Drip Irrigation Garden Kit (model DDI-KIT-1P, ~$40-$60) is excellent for a small garden. For larger setups, I use Netafim Techline CV Drip Line (500ft roll, ~$150-$200), which has pressure-compensating emitters built-in, ensuring even watering across long runs.
- Automation: For true self-sufficiency, consider a battery-powered timer (e.g., Orbit B-Hyve Bluetooth Hose Faucet Timer, ~$50) or a solar-powered timer connected to a small 12V pump.
- Solar-Powered Pumps: For lifting water from a well, pond, or large storage tank to your garden, a solar pump is a game-changer. For a smaller drip system, a Shurflo 2088-594-152 Diaphragm Pump (12V, 3.5 GPM, ~$180) can be powered by a single 100W solar panel (e.g., Renogy 100W Monocrystalline Solar Panel, ~$100) and a small 12V battery (e.g., a 50Ah LiFePO4 battery like the Battle Born 50Ah, ~$450). For larger operations or deeper wells, more robust systems are needed. If you’re looking to build out a comprehensive off-grid power system to support your garden’s water needs, or indeed your entire homestead, you might want to explore resources like the Power Grid Generator complete system guide to understand the full scope of what’s possible in terms of energy independence.
Step 5: Seed Selection & Planting
The choice of seeds is crucial for a truly self sufficient garden from scratch.
- Choose Heirloom & Open-Pollinated Seeds: These varieties produce seeds that will grow true to type, meaning you can save seeds from your harvest year after year. F1 hybrids, while often vigorous, will not produce consistent offspring from saved seeds. Reputable seed companies include Baker Creek Heirloom Seeds, High Mowing Organic Seeds, and Seed Savers Exchange. Start with common, reliable varieties like ‘Black Krim’ tomatoes, ‘Provider’ bush beans, ‘Waltham Butternut’ squash, and ‘Black Seeded Simpson’ lettuce.
- Start Seeds Indoors (Optional but Recommended): For longer growing seasons or specific crops, starting seeds indoors gives you a head start. Use seed-starting mix (e.g., Espoma Organic Seed Starter Mix, ~$10 for 16qt bag) in seed trays (Jiffy Professional Greenhouse 72-cell kit, ~$15). Provide adequate light with LED grow lights (Barrina T5 2ft 4-pack LED Grow Lights, 20W each, ~$50) for 14-16 hours a day, positioned 2-4 inches above seedlings. Maintain consistent temperatures (65-75°F for most).
- Direct Sowing vs. Transplanting: Some crops (carrots, radishes, beans, corn) prefer direct sowing into the garden bed. Others (tomatoes, peppers, broccoli, kale) benefit from being started indoors and transplanted. Follow seed packet instructions for planting depths (e.g., lettuce seeds are often surface-sown or planted 1/8 inch deep, while beans are 1 inch deep) and spacing.
- Companion Planting: Strategically plant different species together to enhance growth, deter pests, and attract beneficial insects. For example, planting marigolds near tomatoes can deter nematodes, and basil improves tomato flavor. Nasturtiums can act as a trap crop for aphids.
- Succession Planting: For a continuous harvest, plant small batches of quick-growing crops (lettuce, radishes, cilantro) every 2-3 weeks. As one crop finishes, another is ready to take its place.
Step 6: Pest & Disease Management (Organic)
Maintaining a self sufficient garden from scratch means embracing organic pest and disease control.
- Integrated Pest Management (IPM): This holistic approach combines several strategies.
- Observation: Regularly inspect your plants for early signs of pests or disease. Catching issues early is key.
- Physical Barriers: Use row covers (e.g., Agribon AG-19 floating row cover, 10×20 ft, ~$20) to protect young plants from insect pests like cabbage worms and squash bugs. Install fences (e.g., 2×4 welded wire mesh, 4 ft tall, 50 ft roll ~$70) to keep out deer, rabbits, and other larger animals.
- Hand-Picking: For larger pests like tomato hornworms or squash bugs, simply pick them off and drop them into a bucket of soapy water.
- Companion Planting: As mentioned, certain plants repel pests. Marigolds, garlic, and onions are excellent deterrents.
- Attract Beneficial Insects: Plant flowers like dill, fennel, cosmos, and sweet alyssum to attract ladybugs, lacewings, and parasitic wasps, which prey on common garden pests.
- Organic Sprays & Treatments:
- Neem Oil: An excellent broad-spectrum organic insecticide and fungicide. Bonide Neem Oil Concentrate (16oz, ~$20) can be mixed at a rate of 1-2 tbsp per gallon of water and sprayed on affected plants.
- Insecticidal Soap: Effective against soft-bodied insects like aphids, whiteflies, and spider mites. Garden Safe Insecticidal Soap (24oz ready-to-use, ~$10).
- Bacillus thuringiensis (Bt): A naturally occurring soil bacterium that targets caterpillars and worms. Monterey BT Worm & Caterpillar Killer (16oz, ~$18) is highly effective and safe for beneficial insects.
- Copper or Sulfur Sprays: For fungal diseases like powdery mildew or blight, organic copper (e.g., Bonide Copper Fungicide, ~$15 for 1lb) or sulfur (e.g., Safer Brand Garden Fungicide, ~$10 for 16oz) can be used as a last resort.
Step 7: Harvesting & Seed Saving
The culmination of your efforts is the harvest, and seed saving closes the loop on self-sufficiency.
- Harvesting Techniques:
- Timing: Harvest vegetables at their peak ripeness for best flavor and nutritional value. For example, green beans should snap cleanly, cucumbers should be firm, and tomatoes should be fully colored.
- Frequency: Many crops, like zucchini, cucumbers, and bush beans, produce more if harvested frequently. Pick daily or every other day.
- Tools: Use clean, sharp pruners (e.g., Corona ClassicCUT Bypass Pruner BP 3180, ~$30) or a sharp knife for clean cuts, minimizing damage to the plant.
- Seed Saving: This is where the « self-sufficient » aspect truly shines.
- Selection: Only save seeds from your healthiest, most vigorous plants that show desired traits (disease resistance, good flavor, high yield).
- Isolation: To ensure true-to-type seeds, prevent cross-pollination. This can be challenging for open-pollinated crops that readily cross (e.g., squash, corn). For beginners, focus on self-pollinating plants like beans, peas, lettuce, and tomatoes.
- Processing:
- Dry Seeds (Beans, Peas, Lettuce, Grains): Allow pods/seed heads to dry completely on the plant. Harvest, shell, and clean the seeds, removing chaff.
- Wet Seeds (Tomatoes, Cucumbers, Squash): For tomatoes, ferment the seeds in water for a few days to remove the gel coating and inhibit disease. For cucumbers/squash, scrape out seeds, wash thoroughly, and dry.
- Drying: Spread seeds thinly on screens or paper plates in a cool, dry, well-ventilated area for 1-4 weeks. Ensure they are bone-dry before storage. I aim for less than 8% moisture content.
- Storage: Store seeds in airtight containers (glass jars with desiccant packets work well) in a cool, dark, dry place (ideally 40-50°F and 30-40% humidity). Label clearly with variety and date. Properly stored seeds can remain viable for 3-10 years or more.
Step 8: Season Extension & Winterizing
Extend your harvest and protect your garden for the off-season to truly maximize your self sufficient garden from scratch.
- Cold Frames: Simple structures with a transparent top (glass, polycarbonate, or old windows) that sit over garden beds. They trap solar heat, allowing you to grow cold-hardy crops (lettuce, spinach, kale, radishes) well into winter or start seeds earlier in spring. A basic cold frame can be built from 2×6 lumber and a sheet of polycarbonate for under $100.
- Hoop Houses/Low Tunnels: Larger structures made from flexible hoops (PVC pipe or EMT conduit) covered with greenhouse plastic. These provide more space and greater temperature moderation. A 10×20 ft DIY low tunnel kit can cost $200-$500, while a larger, more robust hoop house kit might be $1,000-$3,000. I use a 6×12 ft low tunnel made from 1/2-inch PVC hoops and 6mil greenhouse plastic, which extends my lettuce and spinach harvest by at least
Deciding between raised beds and in-ground beds depends on your soil, budget, and physical capabilities.
- In-Ground Beds: If you have excellent native soil and good drainage, in-ground beds are the most economical. Double-digging (loosening soil two shovel depths) can significantly improve drainage and aeration. For my main garden, I primarily use in-ground beds, but I focus on building up the soil over time with consistent compost additions and cover cropping. I aim for beds that are no wider than 3-4 feet so I can reach the center without stepping on the soil, compacting it.
- Raised Beds: Raised beds offer numerous advantages, especially for poor soil, heavy clay, or rocky areas. They provide better drainage, warm up faster in spring, reduce compaction, and make weeding and harvesting easier on your back.
- Material Options:
- Untreated Cedar: Naturally rot-resistant and chemical-free. A 4×8 ft bed, 12 inches deep, typically requires three 2x12x8 ft cedar boards, costing around $50-$60 per board (total ~$150-$180) plus corner brackets or screws. My first raised beds were cedar and are still going strong after 7 years.
- Galvanized Steel: Durable, long-lasting, and aesthetically pleasing. Brands like Vego Garden offer modular kits. A Vego Garden 17″ Tall 8-in-1 Metal Raised Garden Bed (can be configured to 4×8 ft) costs approximately $250-$300.
- Concrete Blocks/Stones: Very durable but can leach minerals (though generally safe once weathered) and can be expensive.
- Recycled Materials: Pallets (check for chemical treatment stamps like « HT » for heat-treated), old tires (controversial due to potential chemical leaching).
- Filling Raised Beds: Don’t just fill with topsoil. Use a « Hugelkultur » approach (logs, branches, leaves, then compost, then topsoil) or a mixture of 60% good quality topsoil, 30% compost, and 10% perlite or vermiculite for drainage. A 4x8x1 ft raised bed requires about 32 cubic feet (or ~1.2 cubic yards) of soil mix, which can cost $100-$200 depending on your source.
- Material Options:
Step 4: Water Management & Irrigation
Efficient water management is critical for a self sufficient garden from scratch, especially in off-grid living where water resources might be limited.
- Rainwater Harvesting: This is my primary source of irrigation water. A 55-gallon rain barrel (e.g., EarthMark Rain Barrel, ~$120-$150) connected to a downspout can collect significant water. For larger needs, I use two 275-gallon IBC totes (Intermediate Bulk Containers, often available used for $100-$200 each from food-grade sources) connected in series. A 1,000 sq ft roof can collect approximately 620 gallons of water for every inch of rainfall. My 1,500 sq ft roof provides ample water for my 600 sq ft garden through multiple barrels and totes.
- Drip Irrigation: This is by far the most water-efficient method, delivering water directly to the plant’s root zone, minimizing evaporation and weed growth.
- Components: A typical drip system includes a pressure regulator (e.g., Rain Bird PRV-10, ~$15), a filter (Rain Bird RBY filter, ~$20), main tubing (1/2-inch poly tubing, 100ft ~$25), smaller feeder lines (1/4-inch tubing), and emitters (0.5 GPH or 1 GPH per plant).
- Kits: For beginners, a starter kit like the Rain Bird Drip Irrigation Garden Kit (model DDI-KIT-1P, ~$40-$60) is excellent for a small garden. For larger setups, I use Netafim Techline CV Drip Line (500ft roll, ~$150-$200), which has pressure-compensating emitters built-in, ensuring even watering across long runs.
- Automation: For true self-sufficiency, consider a battery-powered timer (e.g., Orbit B-Hyve Bluetooth Hose Faucet Timer, ~$50) or a solar-powered timer connected to a small 12V pump.
- Solar-Powered Pumps: For lifting water from a well, pond, or large storage tank to your garden, a solar pump is a game-changer. For a smaller drip system, a Shurflo 2088-594-152 Diaphragm Pump (12V, 3.5 GPM, ~$180) can be powered by a single 100W solar panel (e.g., Renogy 100W Monocrystalline Solar Panel, ~$100) and a small 12V battery (e.g., a 50Ah LiFePO4 battery like the Battle Born 50Ah, ~$450). For larger operations or deeper wells, more robust systems are needed. If you’re looking to build out a comprehensive off-grid power system to support your garden’s water needs, or indeed your entire homestead, you might want to explore resources like the Power Grid Generator complete system guide to understand the full scope of what’s possible in terms of energy independence.
Step 5: Seed Selection & Planting
The choice of seeds is crucial for a truly self sufficient garden from scratch.
- Choose Heirloom & Open-Pollinated Seeds: These varieties produce seeds that will grow true to type, meaning you can save seeds from your harvest year after year. F1 hybrids, while often vigorous, will not produce consistent offspring from saved seeds. Reputable seed companies include Baker Creek Heirloom Seeds, High Mowing Organic Seeds, and Seed Savers Exchange. Start with common, reliable varieties like ‘Black Krim’ tomatoes, ‘Provider’ bush beans, ‘Waltham Butternut’ squash, and ‘Black Seeded Simpson’ lettuce.
- Start Seeds Indoors (Optional but Recommended): For longer growing seasons or specific crops, starting seeds indoors gives you a head start. Use seed-starting mix (e.g., Espoma Organic Seed Starter Mix, ~$10 for 16qt bag) in seed trays (Jiffy Professional Greenhouse 72-cell kit, ~$15). Provide adequate light with LED grow lights (Barrina T5 2ft 4-pack LED Grow Lights, 20W each, ~$50) for 14-16 hours a day, positioned 2-4 inches above seedlings. Maintain consistent temperatures (65-75°F for most).
- Direct Sowing vs. Transplanting: Some crops (carrots, radishes, beans, corn) prefer direct sowing into the garden bed. Others (tomatoes, peppers, broccoli, kale) benefit from being started indoors and transplanted. Follow seed packet instructions for planting depths (e.g., lettuce seeds are often surface-sown or planted 1/8 inch deep, while beans are 1 inch deep) and spacing.
- Companion Planting: Strategically plant different species together to enhance growth, deter pests, and attract beneficial insects. For example, planting marigolds near tomatoes can deter nematodes, and basil improves tomato flavor. Nasturtiums can act as a trap crop for aphids.
- Succession Planting: For a continuous harvest, plant small batches of quick-growing crops (lettuce, radishes, cilantro) every 2-3 weeks. As one crop finishes, another is ready to take its place.
Step 6: Pest & Disease Management (Organic)
Maintaining a self sufficient garden from scratch means embracing organic pest and disease control.
- Integrated Pest Management (IPM): This holistic approach combines several strategies.
- Observation: Regularly inspect your plants for early signs of pests or disease. Catching issues early is key.
- Physical Barriers: Use row covers (e.g., Agribon AG-19 floating row cover, 10×20 ft, ~$20) to protect young plants from insect pests like cabbage worms and squash bugs. Install fences (e.g., 2×4 welded wire mesh, 4 ft tall, 50 ft roll ~$70) to keep out deer, rabbits, and other larger animals.
- Hand-Picking: For larger pests like tomato hornworms or squash bugs, simply pick them off and drop them into a bucket of soapy water.
- Companion Planting: As mentioned, certain plants repel pests. Marigolds, garlic, and onions are excellent deterrents.
- Attract Beneficial Insects: Plant flowers like dill, fennel, cosmos, and sweet alyssum to attract ladybugs, lacewings, and parasitic wasps, which prey on common garden pests.
- Organic Sprays & Treatments:
- Neem Oil: An excellent broad-spectrum organic insecticide and fungicide. Bonide Neem Oil Concentrate (16oz, ~$20) can be mixed at a rate of 1-2 tbsp per gallon of water and sprayed on affected plants.
- Insecticidal Soap: Effective against soft-bodied insects like aphids, whiteflies, and spider mites. Garden Safe Insecticidal Soap (24oz ready-to-use, ~$10).
- Bacillus thuringiensis (Bt): A naturally occurring soil bacterium that targets caterpillars and worms. Monterey BT Worm & Caterpillar Killer (16oz, ~$18) is highly effective and safe for beneficial insects.
- Copper or Sulfur Sprays: For fungal diseases like powdery mildew or blight, organic copper (e.g., Bonide Copper Fungicide, ~$15 for 1lb) or sulfur (e.g., Safer Brand Garden Fungicide, ~$10 for 16oz) can be used as a last resort.
Step 7: Harvesting & Seed Saving
The culmination of your efforts is the harvest, and seed saving closes the loop on self-sufficiency.
- Harvesting Techniques:
- Timing: Harvest vegetables at their peak ripeness for best flavor and nutritional value. For example, green beans should snap cleanly, cucumbers should be firm, and tomatoes should be fully colored.
- Frequency: Many crops, like zucchini, cucumbers, and bush beans, produce more if harvested frequently. Pick daily or every other day.
- Tools: Use clean, sharp pruners (e.g., Corona ClassicCUT Bypass Pruner BP 3180, ~$30) or a sharp knife for clean cuts, minimizing damage to the plant.
- Seed Saving: This is where the « self-sufficient » aspect truly shines.
- Selection: Only save seeds from your healthiest, most vigorous plants that show desired traits (disease resistance, good flavor, high yield).
- Isolation: To ensure true-to-type seeds, prevent cross-pollination. This can be challenging for open-pollinated crops that readily cross (e.g., squash, corn). For beginners, focus on self-pollinating plants like beans, peas, lettuce, and tomatoes.
- Processing:
- Dry Seeds (Beans, Peas, Lettuce, Grains): Allow pods/seed heads to dry completely on the plant. Harvest, shell, and clean the seeds, removing chaff.
- Wet Seeds (Tomatoes, Cucumbers, Squash): For tomatoes, ferment the seeds in water for a few days to remove the gel coating and inhibit disease. For cucumbers/squash, scrape out seeds, wash thoroughly, and dry.
- Drying: Spread seeds thinly on screens or paper plates in a cool, dry, well-ventilated area for 1-4 weeks. Ensure they are bone-dry before storage. I aim for less than 8% moisture content.
- Storage: Store seeds in airtight containers (glass jars with desiccant packets work well) in a cool, dark, dry place (ideally 40-50°F and 30-40% humidity). Label clearly with variety and date. Properly stored seeds can remain viable for 3-10 years or more.
Step 8: Season Extension & Winterizing
Extend your harvest and protect your garden for the off-season to truly maximize your self sufficient garden from scratch.
- Cold Frames: Simple structures with a transparent top (glass, polycarbonate, or old windows) that sit over garden beds. They trap solar heat, allowing you to grow cold-hardy crops (lettuce, spinach, kale, radishes) well into winter or start seeds earlier in spring. A basic cold frame can be built from 2×6 lumber and a sheet of polycarbonate for under $100.
- Hoop Houses/Low Tunnels: Larger structures made from flexible hoops (PVC pipe or EMT conduit) covered with greenhouse plastic. These provide more space and greater temperature moderation. A 10×20 ft DIY low tunnel kit can cost $200-$500, while a larger, more robust hoop house kit might be $1,000-$3,000. I use a 6×12 ft low tunnel made from 1/2-inch PVC hoops and 6mil greenhouse plastic, which extends my lettuce and spinach harvest by at least
Healthy soil is the bedrock of a productive, self-sufficient garden. You can’t guess what your soil needs; you have to test it.
- Perform a Soil Test: A professional soil test will give you precise data on your soil’s pH, nutrient levels (N-P-K), and organic matter content. I recommend sending a sample to your local agricultural extension office; it typically costs $20-$50 and provides detailed recommendations. Alternatively, for a quick homeowner check, a Rapitest Soil Test Kit (40-test kit, model 1663, ~$20 on Amazon) provides a good baseline for pH, Nitrogen, Phosphorus, and Potash. Aim for a pH between 6.0 and 7.0 for most vegetables.
- Amend for pH Imbalance: If your soil is too acidic (below 6.0), add agricultural lime (dolomitic lime adds magnesium, calcitic lime adds calcium). Apply 5-10 lbs per 100 sq ft for a moderate adjustment. If it’s too alkaline (above 7.0), add elemental sulfur (e.g., Espoma Soil Acidifier, ~$15 for 6.75 lbs) or generous amounts of organic matter like peat moss or pine needles.
- Build Organic Matter: This is the single most important step for long-term soil health. Organic matter improves soil structure, water retention, drainage, and nutrient availability. Incorporate 2-4 inches of high-quality compost into your top 6-12 inches of soil annually. I make my own compost from kitchen scraps, garden waste, and shredded leaves, but you can purchase it. Local nurseries often sell bulk compost for $30-$50 per cubic yard. Aged manure (from chickens, cows, or horses – ensure it’s well-rotted to avoid burning plants) is also excellent.
- Address Nutrient Deficiencies: Based on your soil test, add specific organic amendments. If Nitrogen (N) is low, add blood meal (12-0-0, ~$20 for 3 lbs) or feather meal. For Phosphorus (P), use bone meal (3-15-0, ~$15 for 3 lbs) or rock phosphate. For Potassium (K), greensand (0-0-2.5, ~$25 for 5 lbs) or kelp meal are good choices. I rely heavily on Espoma Organic Garden-tone (5-3-3, ~$25 for an 8lb bag) as a balanced, all-purpose organic fertilizer during planting.
Step 3: Garden Bed Preparation
Deciding between raised beds and in-ground beds depends on your soil, budget, and physical capabilities.
- In-Ground Beds: If you have excellent native soil and good drainage, in-ground beds are the most economical. Double-digging (loosening soil two shovel depths) can significantly improve drainage and aeration. For my main garden, I primarily use in-ground beds, but I focus on building up the soil over time with consistent compost additions and cover cropping. I aim for beds that are no wider than 3-4 feet so I can reach the center without stepping on the soil, compacting it.
- Raised Beds: Raised beds offer numerous advantages, especially for poor soil, heavy clay, or rocky areas. They provide better drainage, warm up faster in spring, reduce compaction, and make weeding and harvesting easier on your back.
- Material Options:
- Untreated Cedar: Naturally rot-resistant and chemical-free. A 4×8 ft bed, 12 inches deep, typically requires three 2x12x8 ft cedar boards, costing around $50-$60 per board (total ~$150-$180) plus corner brackets or screws. My first raised beds were cedar and are still going strong after 7 years.
- Galvanized Steel: Durable, long-lasting, and aesthetically pleasing. Brands like Vego Garden offer modular kits. A Vego Garden 17″ Tall 8-in-1 Metal Raised Garden Bed (can be configured to 4×8 ft) costs approximately $250-$300.
- Concrete Blocks/Stones: Very durable but can leach minerals (though generally safe once weathered) and can be expensive.
- Recycled Materials: Pallets (check for chemical treatment stamps like « HT » for heat-treated), old tires (controversial due to potential chemical leaching).
- Filling Raised Beds: Don’t just fill with topsoil. Use a « Hugelkultur » approach (logs, branches, leaves, then compost, then topsoil) or a mixture of 60% good quality topsoil, 30% compost, and 10% perlite or vermiculite for drainage. A 4x8x1 ft raised bed requires about 32 cubic feet (or ~1.2 cubic yards) of soil mix, which can cost $100-$200 depending on your source.
- Material Options:
Step 4: Water Management & Irrigation
Efficient water management is critical for a self sufficient garden from scratch, especially in off-grid living where water resources might be limited.
- Rainwater Harvesting: This is my primary source of irrigation water. A 55-gallon rain barrel (e.g., EarthMark Rain Barrel, ~$120-$150) connected to a downspout can collect significant water. For larger needs, I use two 275-gallon IBC totes (Intermediate Bulk Containers, often available used for $100-$200 each from food-grade sources) connected in series. A 1,000 sq ft roof can collect approximately 620 gallons of water for every inch of rainfall. My 1,500 sq ft roof provides ample water for my 600 sq ft garden through multiple barrels and totes.
- Drip Irrigation: This is by far the most water-efficient method, delivering water directly to the plant’s root zone, minimizing evaporation and weed growth.
- Components: A typical drip system includes a pressure regulator (e.g., Rain Bird PRV-10, ~$15), a filter (Rain Bird RBY filter, ~$20), main tubing (1/2-inch poly tubing, 100ft ~$25), smaller feeder lines (1/4-inch tubing), and emitters (0.5 GPH or 1 GPH per plant).
- Kits: For beginners, a starter kit like the Rain Bird Drip Irrigation Garden Kit (model DDI-KIT-1P, ~$40-$60) is excellent for a small garden. For larger setups, I use Netafim Techline CV Drip Line (500ft roll, ~$150-$200), which has pressure-compensating emitters built-in, ensuring even watering across long runs.
- Automation: For true self-sufficiency, consider a battery-powered timer (e.g., Orbit B-Hyve Bluetooth Hose Faucet Timer, ~$50) or a solar-powered timer connected to a small 12V pump.
- Solar-Powered Pumps: For lifting water from a well, pond, or large storage tank to your garden, a solar pump is a game-changer. For a smaller drip system, a Shurflo 2088-594-152 Diaphragm Pump (12V, 3.5 GPM, ~$180) can be powered by a single 100W solar panel (e.g., Renogy 100W Monocrystalline Solar Panel, ~$100) and a small 12V battery (e.g., a 50Ah LiFePO4 battery like the Battle Born 50Ah, ~$450). For larger operations or deeper wells, more robust systems are needed. If you’re looking to build out a comprehensive off-grid power system to support your garden’s water needs, or indeed your entire homestead, you might want to explore resources like the Power Grid Generator complete system guide to understand the full scope of what’s possible in terms of energy independence.
Step 5: Seed Selection & Planting
The choice of seeds is crucial for a truly self sufficient garden from scratch.
- Choose Heirloom & Open-Pollinated Seeds: These varieties produce seeds that will grow true to type, meaning you can save seeds from your harvest year after year. F1 hybrids, while often vigorous, will not produce consistent offspring from saved seeds. Reputable seed companies include Baker Creek Heirloom Seeds, High Mowing Organic Seeds, and Seed Savers Exchange. Start with common, reliable varieties like ‘Black Krim’ tomatoes, ‘Provider’ bush beans, ‘Waltham Butternut’ squash, and ‘Black Seeded Simpson’ lettuce.
- Start Seeds Indoors (Optional but Recommended): For longer growing seasons or specific crops, starting seeds indoors gives you a head start. Use seed-starting mix (e.g., Espoma Organic Seed Starter Mix, ~$10 for 16qt bag) in seed trays (Jiffy Professional Greenhouse 72-cell kit, ~$15). Provide adequate light with LED grow lights (Barrina T5 2ft 4-pack LED Grow Lights, 20W each, ~$50) for 14-16 hours a day, positioned 2-4 inches above seedlings. Maintain consistent temperatures (65-75°F for most).
- Direct Sowing vs. Transplanting: Some crops (carrots, radishes, beans, corn) prefer direct sowing into the garden bed. Others (tomatoes, peppers, broccoli, kale) benefit from being started indoors and transplanted. Follow seed packet instructions for planting depths (e.g., lettuce seeds are often surface-sown or planted 1/8 inch deep, while beans are 1 inch deep) and spacing.
- Companion Planting: Strategically plant different species together to enhance growth, deter pests, and attract beneficial insects. For example, planting marigolds near tomatoes can deter nematodes, and basil improves tomato flavor. Nasturtiums can act as a trap crop for aphids.
- Succession Planting: For a continuous harvest, plant small batches of quick-growing crops (lettuce, radishes, cilantro) every 2-3 weeks. As one crop finishes, another is ready to take its place.
Step 6: Pest & Disease Management (Organic)
Maintaining a self sufficient garden from scratch means embracing organic pest and disease control.
- Integrated Pest Management (IPM): This holistic approach combines several strategies.
- Observation: Regularly inspect your plants for early signs of pests or disease. Catching issues early is key.
- Physical Barriers: Use row covers (e.g., Agribon AG-19 floating row cover, 10×20 ft, ~$20) to protect young plants from insect pests like cabbage worms and squash bugs. Install fences (e.g., 2×4 welded wire mesh, 4 ft tall, 50 ft roll ~$70) to keep out deer, rabbits, and other larger animals.
- Hand-Picking: For larger pests like tomato hornworms or squash bugs, simply pick them off and drop them into a bucket of soapy water.
- Companion Planting: As mentioned, certain plants repel pests. Marigolds, garlic, and onions are excellent deterrents.
- Attract Beneficial Insects: Plant flowers like dill, fennel, cosmos, and sweet alyssum to attract ladybugs, lacewings, and parasitic wasps, which prey on common garden pests.
- Organic Sprays & Treatments:
- Neem Oil: An excellent broad-spectrum organic insecticide and fungicide. Bonide Neem Oil Concentrate (16oz, ~$20) can be mixed at a rate of 1-2 tbsp per gallon of water and sprayed on affected plants.
- Insecticidal Soap: Effective against soft-bodied insects like aphids, whiteflies, and spider mites. Garden Safe Insecticidal Soap (24oz ready-to-use, ~$10).
- Bacillus thuringiensis (Bt): A naturally occurring soil bacterium that targets caterpillars and worms. Monterey BT Worm & Caterpillar Killer (16oz, ~$18) is highly effective and safe for beneficial insects.
- Copper or Sulfur Sprays: For fungal diseases like powdery mildew or blight, organic copper (e.g., Bonide Copper Fungicide, ~$15 for 1lb) or sulfur (e.g., Safer Brand Garden Fungicide, ~$10 for 16oz) can be used as a last resort.
Step 7: Harvesting & Seed Saving
The culmination of your efforts is the harvest, and seed saving closes the loop on self-sufficiency.
- Harvesting Techniques:
- Timing: Harvest vegetables at their peak ripeness for best flavor and nutritional value. For example, green beans should snap cleanly, cucumbers should be firm, and tomatoes should be fully colored.
- Frequency: Many crops, like zucchini, cucumbers, and bush beans, produce more if harvested frequently. Pick daily or every other day.
- Tools: Use clean, sharp pruners (e.g., Corona ClassicCUT Bypass Pruner BP 3180, ~$30) or a sharp knife for clean cuts, minimizing damage to the plant.
- Seed Saving: This is where the « self-sufficient » aspect truly shines.
- Selection: Only save seeds from your healthiest, most vigorous plants that show desired traits (disease resistance, good flavor, high yield).
- Isolation: To ensure true-to-type seeds, prevent cross-pollination. This can be challenging for open-pollinated crops that readily cross (e.g., squash, corn). For beginners, focus on self-pollinating plants like beans, peas, lettuce, and tomatoes.
- Processing:
- Dry Seeds (Beans, Peas, Lettuce, Grains): Allow pods/seed heads to dry completely on the plant. Harvest, shell, and clean the seeds, removing chaff.
- Wet Seeds (Tomatoes, Cucumbers, Squash): For tomatoes, ferment the seeds in water for a few days to remove the gel coating and inhibit disease. For cucumbers/squash, scrape out seeds, wash thoroughly, and dry.
- Drying: Spread seeds thinly on screens or paper plates in a cool, dry, well-ventilated area for 1-4 weeks. Ensure they are bone-dry before storage. I aim for less than 8% moisture content.
- Storage: Store seeds in airtight containers (glass jars with desiccant packets work well) in a cool, dark, dry place (ideally 40-50°F and 30-40% humidity). Label clearly with variety and date. Properly stored seeds can remain viable for 3-10 years or more.
Step 8: Season Extension & Winterizing
Extend your harvest and protect your garden for the off-season to truly maximize your self sufficient garden from scratch.
- Cold Frames: Simple structures with a transparent top (glass, polycarbonate, or old windows) that sit over garden beds. They trap solar heat, allowing you to grow cold-hardy crops (lettuce, spinach, kale, radishes) well into winter or start seeds earlier in spring. A basic cold frame can be built from 2×6 lumber and a sheet of polycarbonate for under $100.
- Hoop Houses/Low Tunnels: Larger structures made from flexible hoops (PVC pipe or EMT conduit) covered with greenhouse plastic. These provide more space and greater temperature moderation. A 10×20 ft DIY low tunnel kit can cost $200-$500, while a larger, more robust hoop house kit might be $1,000-$3,000. I use a 6×12 ft low tunnel made from 1/2-inch PVC hoops and 6mil greenhouse plastic, which extends my lettuce and spinach harvest by at least
Step 6: Pest & Disease Management (Organic)
Maintaining a self sufficient garden from scratch means embracing organic pest and disease control.
- Integrated Pest Management (IPM): This holistic approach combines several strategies.
- Observation: Regularly inspect your plants for early signs of pests or disease. Catching issues early is key.
- Physical Barriers: Use row covers (e.g., Agribon AG-19 floating row cover, 10×20 ft, ~$20) to protect young plants from insect pests like cabbage worms and squash bugs. Install fences (e.g., 2×4 welded wire mesh, 4 ft tall, 50 ft roll ~$70) to keep out deer, rabbits, and other larger animals.
- Hand-Picking: For larger pests like tomato hornworms or squash bugs, simply pick them off and drop them into a bucket of soapy water.
- Companion Planting: As mentioned, certain plants repel pests. Marigolds, garlic, and onions are excellent deterrents.
- Attract Beneficial Insects: Plant flowers like dill, fennel, cosmos, and sweet alyssum to attract ladybugs, lacewings, and parasitic wasps, which prey on common garden pests.
- Organic Sprays & Treatments:
- Neem Oil: An excellent broad-spectrum organic insecticide and fungicide. Bonide Neem Oil Concentrate (16oz, ~$20) can be mixed at a rate of 1-2 tbsp per gallon of water and sprayed on affected plants.
- Insecticidal Soap: Effective against soft-bodied insects like aphids, whiteflies, and spider mites. Garden Safe Insecticidal Soap (24oz ready-to-use, ~$10).
- Bacillus thuringiensis (Bt): A naturally occurring soil bacterium that targets caterpillars and worms. Monterey BT Worm & Caterpillar Killer (16oz, ~$18) is highly effective and safe for beneficial insects.
- Copper or Sulfur Sprays: For fungal diseases like powdery mildew or blight, organic copper (e.g., Bonide Copper Fungicide, ~$15 for 1lb) or sulfur (e.g., Safer Brand Garden Fungicide, ~$10 for 16oz) can be used as a last resort.
Step 7: Harvesting & Seed Saving
The culmination of your efforts is the harvest, and seed saving closes the loop on self-sufficiency.
- Harvesting Techniques:
- Timing: Harvest vegetables at their peak ripeness for best flavor and nutritional value. For example, green beans should snap cleanly, cucumbers should be firm, and tomatoes should be fully colored.
- Frequency: Many crops, like zucchini, cucumbers, and bush beans, produce more if harvested frequently. Pick daily or every other day.
- Tools: Use clean, sharp pruners (e.g., Corona ClassicCUT Bypass Pruner BP 3180, ~$30) or a sharp knife for clean cuts, minimizing damage to the plant.
- Seed Saving: This is where the « self-sufficient » aspect truly shines.
- Selection: Only save seeds from your healthiest, most vigorous plants that show desired traits (disease resistance, good flavor, high yield).
- Isolation: To ensure true-to-type seeds, prevent cross-pollination. This can be challenging for open-pollinated crops that readily cross (e.g., squash, corn). For beginners, focus on self-pollinating plants like beans, peas, lettuce, and tomatoes.
- Processing:
- Dry Seeds (Beans, Peas, Lettuce, Grains): Allow pods/seed heads to dry completely on the plant. Harvest, shell, and clean the seeds, removing chaff.
- Wet Seeds (Tomatoes, Cucumbers, Squash): For tomatoes, ferment the seeds in water for a few days to remove the gel coating and inhibit disease. For cucumbers/squash, scrape out seeds, wash thoroughly, and dry.
- Drying: Spread seeds thinly on screens or paper plates in a cool, dry, well-ventilated area for 1-4 weeks. Ensure they are bone-dry before storage. I aim for less than 8% moisture content.
- Storage: Store seeds in airtight containers (glass jars with desiccant packets work well) in a cool, dark, dry place (ideally 40-50°F and 30-40% humidity). Label clearly with variety and date. Properly stored seeds can remain viable for 3-10 years or more.
Step 8: Season Extension & Winterizing
Extend your harvest and protect your garden for the off-season to truly maximize your self sufficient garden from scratch.
- Cold Frames: Simple structures with a transparent top (glass, polycarbonate, or old windows) that sit over garden beds. They trap solar heat, allowing you to grow cold-hardy crops (lettuce, spinach, kale, radishes) well into winter or start seeds earlier in spring. A basic cold frame can be built from 2×6 lumber and a sheet of polycarbonate for under $100.
- Hoop Houses/Low Tunnels: Larger structures made from flexible hoops (PVC pipe or EMT conduit) covered with greenhouse plastic. These provide more space and greater temperature moderation. A 10×20 ft DIY low tunnel kit can cost $200-$500, while a larger, more robust hoop house kit might be $1,000-$3,000. I use a 6×12 ft low tunnel made from 1/2-inch PVC hoops and 6mil greenhouse plastic, which extends my lettuce and spinach harvest by at least
Step 4: Water Management & Irrigation
Efficient water management is critical for a self sufficient garden from scratch, especially in off-grid living where water resources might be limited.
- Rainwater Harvesting: This is my primary source of irrigation water. A 55-gallon rain barrel (e.g., EarthMark Rain Barrel, ~$120-$150) connected to a downspout can collect significant water. For larger needs, I use two 275-gallon IBC totes (Intermediate Bulk Containers, often available used for $100-$200 each from food-grade sources) connected in series. A 1,000 sq ft roof can collect approximately 620 gallons of water for every inch of rainfall. My 1,500 sq ft roof provides ample water for my 600 sq ft garden through multiple barrels and totes.
- Drip Irrigation: This is by far the most water-efficient method, delivering water directly to the plant’s root zone, minimizing evaporation and weed growth.
- Components: A typical drip system includes a pressure regulator (e.g., Rain Bird PRV-10, ~$15), a filter (Rain Bird RBY filter, ~$20), main tubing (1/2-inch poly tubing, 100ft ~$25), smaller feeder lines (1/4-inch tubing), and emitters (0.5 GPH or 1 GPH per plant).
- Kits: For beginners, a starter kit like the Rain Bird Drip Irrigation Garden Kit (model DDI-KIT-1P, ~$40-$60) is excellent for a small garden. For larger setups, I use Netafim Techline CV Drip Line (500ft roll, ~$150-$200), which has pressure-compensating emitters built-in, ensuring even watering across long runs.
- Automation: For true self-sufficiency, consider a battery-powered timer (e.g., Orbit B-Hyve Bluetooth Hose Faucet Timer, ~$50) or a solar-powered timer connected to a small 12V pump.
- Solar-Powered Pumps: For lifting water from a well, pond, or large storage tank to your garden, a solar pump is a game-changer. For a smaller drip system, a Shurflo 2088-594-152 Diaphragm Pump (12V, 3.5 GPM, ~$180) can be powered by a single 100W solar panel (e.g., Renogy 100W Monocrystalline Solar Panel, ~$100) and a small 12V battery (e.g., a 50Ah LiFePO4 battery like the Battle Born 50Ah, ~$450). For larger operations or deeper wells, more robust systems are needed. If you’re looking to build out a comprehensive off-grid power system to support your garden’s water needs, or indeed your entire homestead, you might want to explore resources like the Power Grid Generator complete system guide to understand the full scope of what’s possible in terms of energy independence.
Step 5: Seed Selection & Planting
The choice of seeds is crucial for a truly self sufficient garden from scratch.
- Choose Heirloom & Open-Pollinated Seeds: These varieties produce seeds that will grow true to type, meaning you can save seeds from your harvest year after year. F1 hybrids, while often vigorous, will not produce consistent offspring from saved seeds. Reputable seed companies include Baker Creek Heirloom Seeds, High Mowing Organic Seeds, and Seed Savers Exchange. Start with common, reliable varieties like ‘Black Krim’ tomatoes, ‘Provider’ bush beans, ‘Waltham Butternut’ squash, and ‘Black Seeded Simpson’ lettuce.
- Start Seeds Indoors (Optional but Recommended): For longer growing seasons or specific crops, starting seeds indoors gives you a head start. Use seed-starting mix (e.g., Espoma Organic Seed Starter Mix, ~$10 for 16qt bag) in seed trays (Jiffy Professional Greenhouse 72-cell kit, ~$15). Provide adequate light with LED grow lights (Barrina T5 2ft 4-pack LED Grow Lights, 20W each, ~$50) for 14-16 hours a day, positioned 2-4 inches above seedlings. Maintain consistent temperatures (65-75°F for most).
- Direct Sowing vs. Transplanting: Some crops (carrots, radishes, beans, corn) prefer direct sowing into the garden bed. Others (tomatoes, peppers, broccoli, kale) benefit from being started indoors and transplanted. Follow seed packet instructions for planting depths (e.g., lettuce seeds are often surface-sown or planted 1/8 inch deep, while beans are 1 inch deep) and spacing.
- Companion Planting: Strategically plant different species together to enhance growth, deter pests, and attract beneficial insects. For example, planting marigolds near tomatoes can deter nematodes, and basil improves tomato flavor. Nasturtiums can act as a trap crop for aphids.
- Succession Planting: For a continuous harvest, plant small batches of quick-growing crops (lettuce, radishes, cilantro) every 2-3 weeks. As one crop finishes, another is ready to take its place.
Step 6: Pest & Disease Management (Organic)
Maintaining a self sufficient garden from scratch means embracing organic pest and disease control.
- Integrated Pest Management (IPM): This holistic approach combines several strategies.
- Observation: Regularly inspect your plants for early signs of pests or disease. Catching issues early is key.
- Physical Barriers: Use row covers (e.g., Agribon AG-19 floating row cover, 10×20 ft, ~$20) to protect young plants from insect pests like cabbage worms and squash bugs. Install fences (e.g., 2×4 welded wire mesh, 4 ft tall, 50 ft roll ~$70) to keep out deer, rabbits, and other larger animals.
- Hand-Picking: For larger pests like tomato hornworms or squash bugs, simply pick them off and drop them into a bucket of soapy water.
- Companion Planting: As mentioned, certain plants repel pests. Marigolds, garlic, and onions are excellent deterrents.
- Attract Beneficial Insects: Plant flowers like dill, fennel, cosmos, and sweet alyssum to attract ladybugs, lacewings, and parasitic wasps, which prey on common garden pests.
- Organic Sprays & Treatments:
- Neem Oil: An excellent broad-spectrum organic insecticide and fungicide. Bonide Neem Oil Concentrate (16oz, ~$20) can be mixed at a rate of 1-2 tbsp per gallon of water and sprayed on affected plants.
- Insecticidal Soap: Effective against soft-bodied insects like aphids, whiteflies, and spider mites. Garden Safe Insecticidal Soap (24oz ready-to-use, ~$10).
- Bacillus thuringiensis (Bt): A naturally occurring soil bacterium that targets caterpillars and worms. Monterey BT Worm & Caterpillar Killer (16oz, ~$18) is highly effective and safe for beneficial insects.
- Copper or Sulfur Sprays: For fungal diseases like powdery mildew or blight, organic copper (e.g., Bonide Copper Fungicide, ~$15 for 1lb) or sulfur (e.g., Safer Brand Garden Fungicide, ~$10 for 16oz) can be used as a last resort.
Step 7: Harvesting & Seed Saving
The culmination of your efforts is the harvest, and seed saving closes the loop on self-sufficiency.
- Harvesting Techniques:
- Timing: Harvest vegetables at their peak ripeness for best flavor and nutritional value. For example, green beans should snap cleanly, cucumbers should be firm, and tomatoes should be fully colored.
- Frequency: Many crops, like zucchini, cucumbers, and bush beans, produce more if harvested frequently. Pick daily or every other day.
- Tools: Use clean, sharp pruners (e.g., Corona ClassicCUT Bypass Pruner BP 3180, ~$30) or a sharp knife for clean cuts, minimizing damage to the plant.
- Seed Saving: This is where the « self-sufficient » aspect truly shines.
- Selection: Only save seeds from your healthiest, most vigorous plants that show desired traits (disease resistance, good flavor, high yield).
- Isolation: To ensure true-to-type seeds, prevent cross-pollination. This can be challenging for open-pollinated crops that readily cross (e.g., squash, corn). For beginners, focus on self-pollinating plants like beans, peas, lettuce, and tomatoes.
- Processing:
- Dry Seeds (Beans, Peas, Lettuce, Grains): Allow pods/seed heads to dry completely on the plant. Harvest, shell, and clean the seeds, removing chaff.
- Wet Seeds (Tomatoes, Cucumbers, Squash): For tomatoes, ferment the seeds in water for a few days to remove the gel coating and inhibit disease. For cucumbers/squash, scrape out seeds, wash thoroughly, and dry.
- Drying: Spread seeds thinly on screens or paper plates in a cool, dry, well-ventilated area for 1-4 weeks. Ensure they are bone-dry before storage. I aim for less than 8% moisture content.
- Storage: Store seeds in airtight containers (glass jars with desiccant packets work well) in a cool, dark, dry place (ideally 40-50°F and 30-40% humidity). Label clearly with variety and date. Properly stored seeds can remain viable for 3-10 years or more.
Step 8: Season Extension & Winterizing
Extend your harvest and protect your garden for the off-season to truly maximize your self sufficient garden from scratch.
- Cold Frames: Simple structures with a transparent top (glass, polycarbonate, or old windows) that sit over garden beds. They trap solar heat, allowing you to grow cold-hardy crops (lettuce, spinach, kale, radishes) well into winter or start seeds earlier in spring. A basic cold frame can be built from 2×6 lumber and a sheet of polycarbonate for under $100.
- Hoop Houses/Low Tunnels: Larger structures made from flexible hoops (PVC pipe or EMT conduit) covered with greenhouse plastic. These provide more space and greater temperature moderation. A 10×20 ft DIY low tunnel kit can cost $200-$500, while a larger, more robust hoop house kit might be $1,000-$3,000. I use a 6×12 ft low tunnel made from 1/2-inch PVC hoops and 6mil greenhouse plastic, which extends my lettuce and spinach harvest by at least
- In-Ground Beds: If you have excellent native soil and good drainage, in-ground beds are the most economical. Double-digging (loosening soil two shovel depths) can significantly improve drainage and aeration. For my main garden, I primarily use in-ground beds, but I focus on building up the soil over time with consistent compost additions and cover cropping. I aim for beds that are no wider than 3-4 feet so I can reach the center without stepping on the soil, compacting it.
- Raised Beds: Raised beds offer numerous advantages, especially for poor soil, heavy clay, or rocky areas. They provide better drainage, warm up faster in spring, reduce compaction, and make weeding and harvesting easier on your back.
- Material Options:
- Untreated Cedar: Naturally rot-resistant and chemical-free. A 4×8 ft bed, 12 inches deep, typically requires three 2x12x8 ft cedar boards, costing around $50-$60 per board (total ~$150-$180) plus corner brackets or screws. My first raised beds were cedar and are still going strong after 7 years.
- Galvanized Steel: Durable, long-lasting, and aesthetically pleasing. Brands like Vego Garden offer modular kits. A Vego Garden 17″ Tall 8-in-1 Metal Raised Garden Bed (can be configured to 4×8 ft) costs approximately $250-$300.
- Concrete Blocks/Stones: Very durable but can leach minerals (though generally safe once weathered) and can be expensive.
- Recycled Materials: Pallets (check for chemical treatment stamps like « HT » for heat-treated), old tires (controversial due to potential chemical leaching).
- Filling Raised Beds: Don’t just fill with topsoil. Use a « Hugelkultur » approach (logs, branches, leaves, then compost, then topsoil) or a mixture of 60% good quality topsoil, 30% compost, and 10% perlite or vermiculite for drainage. A 4x8x1 ft raised bed requires about 32 cubic feet (or ~1.2 cubic yards) of soil mix, which can cost $100-$200 depending on your source.
- Material Options:
Step 4: Water Management & Irrigation
Efficient water management is critical for a self sufficient garden from scratch, especially in off-grid living where water resources might be limited.
- Rainwater Harvesting: This is my primary source of irrigation water. A 55-gallon rain barrel (e.g., EarthMark Rain Barrel, ~$120-$150) connected to a downspout can collect significant water. For larger needs, I use two 275-gallon IBC totes (Intermediate Bulk Containers, often available used for $100-$200 each from food-grade sources) connected in series. A 1,000 sq ft roof can collect approximately 620 gallons of water for every inch of rainfall. My 1,500 sq ft roof provides ample water for my 600 sq ft garden through multiple barrels and totes.
- Drip Irrigation: This is by far the most water-efficient method, delivering water directly to the plant’s root zone, minimizing evaporation and weed growth.
- Components: A typical drip system includes a pressure regulator (e.g., Rain Bird PRV-10, ~$15), a filter (Rain Bird RBY filter, ~$20), main tubing (1/2-inch poly tubing, 100ft ~$25), smaller feeder lines (1/4-inch tubing), and emitters (0.5 GPH or 1 GPH per plant).
- Kits: For beginners, a starter kit like the Rain Bird Drip Irrigation Garden Kit (model DDI-KIT-1P, ~$40-$60) is excellent for a small garden. For larger setups, I use Netafim Techline CV Drip Line (500ft roll, ~$150-$200), which has pressure-compensating emitters built-in, ensuring even watering across long runs.
- Automation: For true self-sufficiency, consider a battery-powered timer (e.g., Orbit B-Hyve Bluetooth Hose Faucet Timer, ~$50) or a solar-powered timer connected to a small 12V pump.
- Solar-Powered Pumps: For lifting water from a well, pond, or large storage tank to your garden, a solar pump is a game-changer. For a smaller drip system, a Shurflo 2088-594-152 Diaphragm Pump (12V, 3.5 GPM, ~$180) can be powered by a single 100W solar panel (e.g., Renogy 100W Monocrystalline Solar Panel, ~$100) and a small 12V battery (e.g., a 50Ah LiFePO4 battery like the Battle Born 50Ah, ~$450). For larger operations or deeper wells, more robust systems are needed. If you’re looking to build out a comprehensive off-grid power system to support your garden’s water needs, or indeed your entire homestead, you might want to explore resources like the Power Grid Generator complete system guide to understand the full scope of what’s possible in terms of energy independence.
Step 5: Seed Selection & Planting
The choice of seeds is crucial for a truly self sufficient garden from scratch.
- Choose Heirloom & Open-Pollinated Seeds: These varieties produce seeds that will grow true to type, meaning you can save seeds from your harvest year after year. F1 hybrids, while often vigorous, will not produce consistent offspring from saved seeds. Reputable seed companies include Baker Creek Heirloom Seeds, High Mowing Organic Seeds, and Seed Savers Exchange. Start with common, reliable varieties like ‘Black Krim’ tomatoes, ‘Provider’ bush beans, ‘Waltham Butternut’ squash, and ‘Black Seeded Simpson’ lettuce.
- Start Seeds Indoors (Optional but Recommended): For longer growing seasons or specific crops, starting seeds indoors gives you a head start. Use seed-starting mix (e.g., Espoma Organic Seed Starter Mix, ~$10 for 16qt bag) in seed trays (Jiffy Professional Greenhouse 72-cell kit, ~$15). Provide adequate light with LED grow lights (Barrina T5 2ft 4-pack LED Grow Lights, 20W each, ~$50) for 14-16 hours a day, positioned 2-4 inches above seedlings. Maintain consistent temperatures (65-75°F for most).
- Direct Sowing vs. Transplanting: Some crops (carrots, radishes, beans, corn) prefer direct sowing into the garden bed. Others (tomatoes, peppers, broccoli, kale) benefit from being started indoors and transplanted. Follow seed packet instructions for planting depths (e.g., lettuce seeds are often surface-sown or planted 1/8 inch deep, while beans are 1 inch deep) and spacing.
- Companion Planting: Strategically plant different species together to enhance growth, deter pests, and attract beneficial insects. For example, planting marigolds near tomatoes can deter nematodes, and basil improves tomato flavor. Nasturtiums can act as a trap crop for aphids.
- Succession Planting: For a continuous harvest, plant small batches of quick-growing crops (lettuce, radishes, cilantro) every 2-3 weeks. As one crop finishes, another is ready to take its place.
Step 6: Pest & Disease Management (Organic)
Maintaining a self sufficient garden from scratch means embracing organic pest and disease control.
- Integrated Pest Management (IPM): This holistic approach combines several strategies.
- Observation: Regularly inspect your plants for early signs of pests or disease. Catching issues early is key.
- Physical Barriers: Use row covers (e.g., Agribon AG-19 floating row cover, 10×20 ft, ~$20) to protect young plants from insect pests like cabbage worms and squash bugs. Install fences (e.g., 2×4 welded wire mesh, 4 ft tall, 50 ft roll ~$70) to keep out deer, rabbits, and other larger animals.
- Hand-Picking: For larger pests like tomato hornworms or squash bugs, simply pick them off and drop them into a bucket of soapy water.
- Companion Planting: As mentioned, certain plants repel pests. Marigolds, garlic, and onions are excellent deterrents.
- Attract Beneficial Insects: Plant flowers like dill, fennel, cosmos, and sweet alyssum to attract ladybugs, lacewings, and parasitic wasps, which prey on common garden pests.
- Organic Sprays & Treatments:
- Neem Oil: An excellent broad-spectrum organic insecticide and fungicide. Bonide Neem Oil Concentrate (16oz, ~$20) can be mixed at a rate of 1-2 tbsp per gallon of water and sprayed on affected plants.
- Insecticidal Soap: Effective against soft-bodied insects like aphids, whiteflies, and spider mites. Garden Safe Insecticidal Soap (24oz ready-to-use, ~$10).
- Bacillus thuringiensis (Bt): A naturally occurring soil bacterium that targets caterpillars and worms. Monterey BT Worm & Caterpillar Killer (16oz, ~$18) is highly effective and safe for beneficial insects.
- Copper or Sulfur Sprays: For fungal diseases like powdery mildew or blight, organic copper (e.g., Bonide Copper Fungicide, ~$15 for 1lb) or sulfur (e.g., Safer Brand Garden Fungicide, ~$10 for 16oz) can be used as a last resort.
Step 7: Harvesting & Seed Saving
The culmination of your efforts is the harvest, and seed saving closes the loop on self-sufficiency.
- Harvesting Techniques:
- Timing: Harvest vegetables at their peak ripeness for best flavor and nutritional value. For example, green beans should snap cleanly, cucumbers should be firm, and tomatoes should be fully colored.
- Frequency: Many crops, like zucchini, cucumbers, and bush beans, produce more if harvested frequently. Pick daily or every other day.
- Tools: Use clean, sharp pruners (e.g., Corona ClassicCUT Bypass Pruner BP 3180, ~$30) or a sharp knife for clean cuts, minimizing damage to the plant.
- Seed Saving: This is where the « self-sufficient » aspect truly shines.
- Selection: Only save seeds from your healthiest, most vigorous plants that show desired traits (disease resistance, good flavor, high yield).
- Isolation: To ensure true-to-type seeds, prevent cross-pollination. This can be challenging for open-pollinated crops that readily cross (e.g., squash, corn). For beginners, focus on self-pollinating plants like beans, peas, lettuce, and tomatoes.
- Processing:
- Dry Seeds (Beans, Peas, Lettuce, Grains): Allow pods/seed heads to dry completely on the plant. Harvest, shell, and clean the seeds, removing chaff.
- Wet Seeds (Tomatoes, Cucumbers, Squash): For tomatoes, ferment the seeds in water for a few days to remove the gel coating and inhibit disease. For cucumbers/squash, scrape out seeds, wash thoroughly, and dry.
- Drying: Spread seeds thinly on screens or paper plates in a cool, dry, well-ventilated area for 1-4 weeks. Ensure they are bone-dry before storage. I aim for less than 8% moisture content.
- Storage: Store seeds in airtight containers (glass jars with desiccant packets work well) in a cool, dark, dry place (ideally 40-50°F and 30-40% humidity). Label clearly with variety and date. Properly stored seeds can remain viable for 3-10 years or more.
Step 8: Season Extension & Winterizing
Extend your harvest and protect your garden for the off-season to truly maximize your self sufficient garden from scratch.
- Cold Frames: Simple structures with a transparent top (glass, polycarbonate, or old windows) that sit over garden beds. They trap solar heat, allowing you to grow cold-hardy crops (lettuce, spinach, kale, radishes) well into winter or start seeds earlier in spring. A basic cold frame can be built from 2×6 lumber and a sheet of polycarbonate for under $100.
- Hoop Houses/Low Tunnels: Larger structures made from flexible hoops (PVC pipe or EMT conduit) covered with greenhouse plastic. These provide more space and greater temperature moderation. A 10×20 ft DIY low tunnel kit can cost $200-$500, while a larger, more robust hoop house kit might be $1,000-$3,000. I use a 6×12 ft low tunnel made from 1/2-inch PVC hoops and 6mil greenhouse plastic, which extends my lettuce and spinach harvest by at least
Deciding between raised beds and in-ground beds depends on your soil, budget, and physical capabilities.
- In-Ground Beds: If you have excellent native soil and good drainage, in-ground beds are the most economical. Double-digging (loosening soil two shovel depths) can significantly improve drainage and aeration. For my main garden, I primarily use in-ground beds, but I focus on building up the soil over time with consistent compost additions and cover cropping. I aim for beds that are no wider than 3-4 feet so I can reach the center without stepping on the soil, compacting it.
- Raised Beds: Raised beds offer numerous advantages, especially for poor soil, heavy clay, or rocky areas. They provide better drainage, warm up faster in spring, reduce compaction, and make weeding and harvesting easier on your back.
- Material Options:
- Untreated Cedar: Naturally rot-resistant and chemical-free. A 4×8 ft bed, 12 inches deep, typically requires three 2x12x8 ft cedar boards, costing around $50-$60 per board (total ~$150-$180) plus corner brackets or screws. My first raised beds were cedar and are still going strong after 7 years.
- Galvanized Steel: Durable, long-lasting, and aesthetically pleasing. Brands like Vego Garden offer modular kits. A Vego Garden 17″ Tall 8-in-1 Metal Raised Garden Bed (can be configured to 4×8 ft) costs approximately $250-$300.
- Concrete Blocks/Stones: Very durable but can leach minerals (though generally safe once weathered) and can be expensive.
- Recycled Materials: Pallets (check for chemical treatment stamps like « HT » for heat-treated), old tires (controversial due to potential chemical leaching).
- Filling Raised Beds: Don’t just fill with topsoil. Use a « Hugelkultur » approach (logs, branches, leaves, then compost, then topsoil) or a mixture of 60% good quality topsoil, 30% compost, and 10% perlite or vermiculite for drainage. A 4x8x1 ft raised bed requires about 32 cubic feet (or ~1.2 cubic yards) of soil mix, which can cost $100-$200 depending on your source.
- Material Options:
Step 4: Water Management & Irrigation
Efficient water management is critical for a self sufficient garden from scratch, especially in off-grid living where water resources might be limited.
- Rainwater Harvesting: This is my primary source of irrigation water. A 55-gallon rain barrel (e.g., EarthMark Rain Barrel, ~$120-$150) connected to a downspout can collect significant water. For larger needs, I use two 275-gallon IBC totes (Intermediate Bulk Containers, often available used for $100-$200 each from food-grade sources) connected in series. A 1,000 sq ft roof can collect approximately 620 gallons of water for every inch of rainfall. My 1,500 sq ft roof provides ample water for my 600 sq ft garden through multiple barrels and totes.
- Drip Irrigation: This is by far the most water-efficient method, delivering water directly to the plant’s root zone, minimizing evaporation and weed growth.
- Components: A typical drip system includes a pressure regulator (e.g., Rain Bird PRV-10, ~$15), a filter (Rain Bird RBY filter, ~$20), main tubing (1/2-inch poly tubing, 100ft ~$25), smaller feeder lines (1/4-inch tubing), and emitters (0.5 GPH or 1 GPH per plant).
- Kits: For beginners, a starter kit like the Rain Bird Drip Irrigation Garden Kit (model DDI-KIT-1P, ~$40-$60) is excellent for a small garden. For larger setups, I use Netafim Techline CV Drip Line (500ft roll, ~$150-$200), which has pressure-compensating emitters built-in, ensuring even watering across long runs.
- Automation: For true self-sufficiency, consider a battery-powered timer (e.g., Orbit B-Hyve Bluetooth Hose Faucet Timer, ~$50) or a solar-powered timer connected to a small 12V pump.
- Solar-Powered Pumps: For lifting water from a well, pond, or large storage tank to your garden, a solar pump is a game-changer. For a smaller drip system, a Shurflo 2088-594-152 Diaphragm Pump (12V, 3.5 GPM, ~$180) can be powered by a single 100W solar panel (e.g., Renogy 100W Monocrystalline Solar Panel, ~$100) and a small 12V battery (e.g., a 50Ah LiFePO4 battery like the Battle Born 50Ah, ~$450). For larger operations or deeper wells, more robust systems are needed. If you’re looking to build out a comprehensive off-grid power system to support your garden’s water needs, or indeed your entire homestead, you might want to explore resources like the Power Grid Generator complete system guide to understand the full scope of what’s possible in terms of energy independence.
Step 5: Seed Selection & Planting
The choice of seeds is crucial for a truly self sufficient garden from scratch.
- Choose Heirloom & Open-Pollinated Seeds: These varieties produce seeds that will grow true to type, meaning you can save seeds from your harvest year after year. F1 hybrids, while often vigorous, will not produce consistent offspring from saved seeds. Reputable seed companies include Baker Creek Heirloom Seeds, High Mowing Organic Seeds, and Seed Savers Exchange. Start with common, reliable varieties like ‘Black Krim’ tomatoes, ‘Provider’ bush beans, ‘Waltham Butternut’ squash, and ‘Black Seeded Simpson’ lettuce.
- Start Seeds Indoors (Optional but Recommended): For longer growing seasons or specific crops, starting seeds indoors gives you a head start. Use seed-starting mix (e.g., Espoma Organic Seed Starter Mix, ~$10 for 16qt bag) in seed trays (Jiffy Professional Greenhouse 72-cell kit, ~$15). Provide adequate light with LED grow lights (Barrina T5 2ft 4-pack LED Grow Lights, 20W each, ~$50) for 14-16 hours a day, positioned 2-4 inches above seedlings. Maintain consistent temperatures (65-75°F for most).
- Direct Sowing vs. Transplanting: Some crops (carrots, radishes, beans, corn) prefer direct sowing into the garden bed. Others (tomatoes, peppers, broccoli, kale) benefit from being started indoors and transplanted. Follow seed packet instructions for planting depths (e.g., lettuce seeds are often surface-sown or planted 1/8 inch deep, while beans are 1 inch deep) and spacing.
- Companion Planting: Strategically plant different species together to enhance growth, deter pests, and attract beneficial insects. For example, planting marigolds near tomatoes can deter nematodes, and basil improves tomato flavor. Nasturtiums can act as a trap crop for aphids.
- Succession Planting: For a continuous harvest, plant small batches of quick-growing crops (lettuce, radishes, cilantro) every 2-3 weeks. As one crop finishes, another is ready to take its place.
Step 6: Pest & Disease Management (Organic)
Maintaining a self sufficient garden from scratch means embracing organic pest and disease control.
- Integrated Pest Management (IPM): This holistic approach combines several strategies.
- Observation: Regularly inspect your plants for early signs of pests or disease. Catching issues early is key.
- Physical Barriers: Use row covers (e.g., Agribon AG-19 floating row cover, 10×20 ft, ~$20) to protect young plants from insect pests like cabbage worms and squash bugs. Install fences (e.g., 2×4 welded wire mesh, 4 ft tall, 50 ft roll ~$70) to keep out deer, rabbits, and other larger animals.
- Hand-Picking: For larger pests like tomato hornworms or squash bugs, simply pick them off and drop them into a bucket of soapy water.
- Companion Planting: As mentioned, certain plants repel pests. Marigolds, garlic, and onions are excellent deterrents.
- Attract Beneficial Insects: Plant flowers like dill, fennel, cosmos, and sweet alyssum to attract ladybugs, lacewings, and parasitic wasps, which prey on common garden pests.
- Organic Sprays & Treatments:
- Neem Oil: An excellent broad-spectrum organic insecticide and fungicide. Bonide Neem Oil Concentrate (16oz, ~$20) can be mixed at a rate of 1-2 tbsp per gallon of water and sprayed on affected plants.
- Insecticidal Soap: Effective against soft-bodied insects like aphids, whiteflies, and spider mites. Garden Safe Insecticidal Soap (24oz ready-to-use, ~$10).
- Bacillus thuringiensis (Bt): A naturally occurring soil bacterium that targets caterpillars and worms. Monterey BT Worm & Caterpillar Killer (16oz, ~$18) is highly effective and safe for beneficial insects.
- Copper or Sulfur Sprays: For fungal diseases like powdery mildew or blight, organic copper (e.g., Bonide Copper Fungicide, ~$15 for 1lb) or sulfur (e.g., Safer Brand Garden Fungicide, ~$10 for 16oz) can be used as a last resort.
Step 7: Harvesting & Seed Saving
The culmination of your efforts is the harvest, and seed saving closes the loop on self-sufficiency.
- Harvesting Techniques:
- Timing: Harvest vegetables at their peak ripeness for best flavor and nutritional value. For example, green beans should snap cleanly, cucumbers should be firm, and tomatoes should be fully colored.
- Frequency: Many crops, like zucchini, cucumbers, and bush beans, produce more if harvested frequently. Pick daily or every other day.
- Tools: Use clean, sharp pruners (e.g., Corona ClassicCUT Bypass Pruner BP 3180, ~$30) or a sharp knife for clean cuts, minimizing damage to the plant.
- Seed Saving: This is where the « self-sufficient » aspect truly shines.
- Selection: Only save seeds from your healthiest, most vigorous plants that show desired traits (disease resistance, good flavor, high yield).
- Isolation: To ensure true-to-type seeds, prevent cross-pollination. This can be challenging for open-pollinated crops that readily cross (e.g., squash, corn). For beginners, focus on self-pollinating plants like beans, peas, lettuce, and tomatoes.
- Processing:
- Dry Seeds (Beans, Peas, Lettuce, Grains): Allow pods/seed heads to dry completely on the plant. Harvest, shell, and clean the seeds, removing chaff.
- Wet Seeds (Tomatoes, Cucumbers, Squash): For tomatoes, ferment the seeds in water for a few days to remove the gel coating and inhibit disease. For cucumbers/squash, scrape out seeds, wash thoroughly, and dry.
- Drying: Spread seeds thinly on screens or paper plates in a cool, dry, well-ventilated area for 1-4 weeks. Ensure they are bone-dry before storage. I aim for less than 8% moisture content.
- Storage: Store seeds in airtight containers (glass jars with desiccant packets work well) in a cool, dark, dry place (ideally 40-50°F and 30-40% humidity). Label clearly with variety and date. Properly stored seeds can remain viable for 3-10 years or more.
Step 8: Season Extension & Winterizing
Extend your harvest and protect your garden for the off-season to truly maximize your self sufficient garden from scratch.
- Cold Frames: Simple structures with a transparent top (glass, polycarbonate, or old windows) that sit over garden beds. They trap solar heat, allowing you to grow cold-hardy crops (lettuce, spinach, kale, radishes) well into winter or start seeds earlier in spring. A basic cold frame can be built from 2×6 lumber and a sheet of polycarbonate for under $100.
- Hoop Houses/Low Tunnels: Larger structures made from flexible hoops (PVC pipe or EMT conduit) covered with greenhouse plastic. These provide more space and greater temperature moderation. A 10×20 ft DIY low tunnel kit can cost $200-$500, while a larger, more robust hoop house kit might be $1,000-$3,000. I use a 6×12 ft low tunnel made from 1/2-inch PVC hoops and 6mil greenhouse plastic, which extends my lettuce and spinach harvest by at least
Healthy soil is the bedrock of a productive, self-sufficient garden. You can’t guess what your soil needs; you have to test it.
- Perform a Soil Test: A professional soil test will give you precise data on your soil’s pH, nutrient levels (N-P-K), and organic matter content. I recommend sending a sample to your local agricultural extension office; it typically costs $20-$50 and provides detailed recommendations. Alternatively, for a quick homeowner check, a Rapitest Soil Test Kit (40-test kit, model 1663, ~$20 on Amazon) provides a good baseline for pH, Nitrogen, Phosphorus, and Potash. Aim for a pH between 6.0 and 7.0 for most vegetables.
- Amend for pH Imbalance: If your soil is too acidic (below 6.0), add agricultural lime (dolomitic lime adds magnesium, calcitic lime adds calcium). Apply 5-10 lbs per 100 sq ft for a moderate adjustment. If it’s too alkaline (above 7.0), add elemental sulfur (e.g., Espoma Soil Acidifier, ~$15 for 6.75 lbs) or generous amounts of organic matter like peat moss or pine needles.
- Build Organic Matter: This is the single most important step for long-term soil health. Organic matter improves soil structure, water retention, drainage, and nutrient availability. Incorporate 2-4 inches of high-quality compost into your top 6-12 inches of soil annually. I make my own compost from kitchen scraps, garden waste, and shredded leaves, but you can purchase it. Local nurseries often sell bulk compost for $30-$50 per cubic yard. Aged manure (from chickens, cows, or horses – ensure it’s well-rotted to avoid burning plants) is also excellent.
- Address Nutrient Deficiencies: Based on your soil test, add specific organic amendments. If Nitrogen (N) is low, add blood meal (12-0-0, ~$20 for 3 lbs) or feather meal. For Phosphorus (P), use bone meal (3-15-0, ~$15 for 3 lbs) or rock phosphate. For Potassium (K), greensand (0-0-2.5, ~$25 for 5 lbs) or kelp meal are good choices. I rely heavily on Espoma Organic Garden-tone (5-3-3, ~$25 for an 8lb bag) as a balanced, all-purpose organic fertilizer during planting.
Step 3: Garden Bed Preparation
Deciding between raised beds and in-ground beds depends on your soil, budget, and physical capabilities.
- In-Ground Beds: If you have excellent native soil and good drainage, in-ground beds are the most economical. Double-digging (loosening soil two shovel depths) can significantly improve drainage and aeration. For my main garden, I primarily use in-ground beds, but I focus on building up the soil over time with consistent compost additions and cover cropping. I aim for beds that are no wider than 3-4 feet so I can reach the center without stepping on the soil, compacting it.
- Raised Beds: Raised beds offer numerous advantages, especially for poor soil, heavy clay, or rocky areas. They provide better drainage, warm up faster in spring, reduce compaction, and make weeding and harvesting easier on your back.
- Material Options:
- Untreated Cedar: Naturally rot-resistant and chemical-free. A 4×8 ft bed, 12 inches deep, typically requires three 2x12x8 ft cedar boards, costing around $50-$60 per board (total ~$150-$180) plus corner brackets or screws. My first raised beds were cedar and are still going strong after 7 years.
- Galvanized Steel: Durable, long-lasting, and aesthetically pleasing. Brands like Vego Garden offer modular kits. A Vego Garden 17″ Tall 8-in-1 Metal Raised Garden Bed (can be configured to 4×8 ft) costs approximately $250-$300.
- Concrete Blocks/Stones: Very durable but can leach minerals (though generally safe once weathered) and can be expensive.
- Recycled Materials: Pallets (check for chemical treatment stamps like « HT » for heat-treated), old tires (controversial due to potential chemical leaching).
- Filling Raised Beds: Don’t just fill with topsoil. Use a « Hugelkultur » approach (logs, branches, leaves, then compost, then topsoil) or a mixture of 60% good quality topsoil, 30% compost, and 10% perlite or vermiculite for drainage. A 4x8x1 ft raised bed requires about 32 cubic feet (or ~1.2 cubic yards) of soil mix, which can cost $100-$200 depending on your source.
- Material Options:
Step 4: Water Management & Irrigation
Efficient water management is critical for a self sufficient garden from scratch, especially in off-grid living where water resources might be limited.
- Rainwater Harvesting: This is my primary source of irrigation water. A 55-gallon rain barrel (e.g., EarthMark Rain Barrel, ~$120-$150) connected to a downspout can collect significant water. For larger needs, I use two 275-gallon IBC totes (Intermediate Bulk Containers, often available used for $100-$200 each from food-grade sources) connected in series. A 1,000 sq ft roof can collect approximately 620 gallons of water for every inch of rainfall. My 1,500 sq ft roof provides ample water for my 600 sq ft garden through multiple barrels and totes.
- Drip Irrigation: This is by far the most water-efficient method, delivering water directly to the plant’s root zone, minimizing evaporation and weed growth.
- Components: A typical drip system includes a pressure regulator (e.g., Rain Bird PRV-10, ~$15), a filter (Rain Bird RBY filter, ~$20), main tubing (1/2-inch poly tubing, 100ft ~$25), smaller feeder lines (1/4-inch tubing), and emitters (0.5 GPH or 1 GPH per plant).
- Kits: For beginners, a starter kit like the Rain Bird Drip Irrigation Garden Kit (model DDI-KIT-1P, ~$40-$60) is excellent for a small garden. For larger setups, I use Netafim Techline CV Drip Line (500ft roll, ~$150-$200), which has pressure-compensating emitters built-in, ensuring even watering across long runs.
- Automation: For true self-sufficiency, consider a battery-powered timer (e.g., Orbit B-Hyve Bluetooth Hose Faucet Timer, ~$50) or a solar-powered timer connected to a small 12V pump.
- Solar-Powered Pumps: For lifting water from a well, pond, or large storage tank to your garden, a solar pump is a game-changer. For a smaller drip system, a Shurflo 2088-594-152 Diaphragm Pump (12V, 3.5 GPM, ~$180) can be powered by a single 100W solar panel (e.g., Renogy 100W Monocrystalline Solar Panel, ~$100) and a small 12V battery (e.g., a 50Ah LiFePO4 battery like the Battle Born 50Ah, ~$450). For larger operations or deeper wells, more robust systems are needed. If you’re looking to build out a comprehensive off-grid power system to support your garden’s water needs, or indeed your entire homestead, you might want to explore resources like the Power Grid Generator complete system guide to understand the full scope of what’s possible in terms of energy independence.
Step 5: Seed Selection & Planting
The choice of seeds is crucial for a truly self sufficient garden from scratch.
- Choose Heirloom & Open-Pollinated Seeds: These varieties produce seeds that will grow true to type, meaning you can save seeds from your harvest year after year. F1 hybrids, while often vigorous, will not produce consistent offspring from saved seeds. Reputable seed companies include Baker Creek Heirloom Seeds, High Mowing Organic Seeds, and Seed Savers Exchange. Start with common, reliable varieties like ‘Black Krim’ tomatoes, ‘Provider’ bush beans, ‘Waltham Butternut’ squash, and ‘Black Seeded Simpson’ lettuce.
- Start Seeds Indoors (Optional but Recommended): For longer growing seasons or specific crops, starting seeds indoors gives you a head start. Use seed-starting mix (e.g., Espoma Organic Seed Starter Mix, ~$10 for 16qt bag) in seed trays (Jiffy Professional Greenhouse 72-cell kit, ~$15). Provide adequate light with LED grow lights (Barrina T5 2ft 4-pack LED Grow Lights, 20W each, ~$50) for 14-16 hours a day, positioned 2-4 inches above seedlings. Maintain consistent temperatures (65-75°F for most).
- Direct Sowing vs. Transplanting: Some crops (carrots, radishes, beans, corn) prefer direct sowing into the garden bed. Others (tomatoes, peppers, broccoli, kale) benefit from being started indoors and transplanted. Follow seed packet instructions for planting depths (e.g., lettuce seeds are often surface-sown or planted 1/8 inch deep, while beans are 1 inch deep) and spacing.
- Companion Planting: Strategically plant different species together to enhance growth, deter pests, and attract beneficial insects. For example, planting marigolds near tomatoes can deter nematodes, and basil improves tomato flavor. Nasturtiums can act as a trap crop for aphids.
- Succession Planting: For a continuous harvest, plant small batches of quick-growing crops (lettuce, radishes, cilantro) every 2-3 weeks. As one crop finishes, another is ready to take its place.
Step 6: Pest & Disease Management (Organic)
Maintaining a self sufficient garden from scratch means embracing organic pest and disease control.
- Integrated Pest Management (IPM): This holistic approach combines several strategies.
- Observation: Regularly inspect your plants for early signs of pests or disease. Catching issues early is key.
- Physical Barriers: Use row covers (e.g., Agribon AG-19 floating row cover, 10×20 ft, ~$20) to protect young plants from insect pests like cabbage worms and squash bugs. Install fences (e.g., 2×4 welded wire mesh, 4 ft tall, 50 ft roll ~$70) to keep out deer, rabbits, and other larger animals.
- Hand-Picking: For larger pests like tomato hornworms or squash bugs, simply pick them off and drop them into a bucket of soapy water.
- Companion Planting: As mentioned, certain plants repel pests. Marigolds, garlic, and onions are excellent deterrents.
- Attract Beneficial Insects: Plant flowers like dill, fennel, cosmos, and sweet alyssum to attract ladybugs, lacewings, and parasitic wasps, which prey on common garden pests.
- Organic Sprays & Treatments:
- Neem Oil: An excellent broad-spectrum organic insecticide and fungicide. Bonide Neem Oil Concentrate (16oz, ~$20) can be mixed at a rate of 1-2 tbsp per gallon of water and sprayed on affected plants.
- Insecticidal Soap: Effective against soft-bodied insects like aphids, whiteflies, and spider mites. Garden Safe Insecticidal Soap (24oz ready-to-use, ~$10).
- Bacillus thuringiensis (Bt): A naturally occurring soil bacterium that targets caterpillars and worms. Monterey BT Worm & Caterpillar Killer (16oz, ~$18) is highly effective and safe for beneficial insects.
- Copper or Sulfur Sprays: For fungal diseases like powdery mildew or blight, organic copper (e.g., Bonide Copper Fungicide, ~$15 for 1lb) or sulfur (e.g., Safer Brand Garden Fungicide, ~$10 for 16oz) can be used as a last resort.
Step 7: Harvesting & Seed Saving
The culmination of your efforts is the harvest, and seed saving closes the loop on self-sufficiency.
- Harvesting Techniques:
- Timing: Harvest vegetables at their peak ripeness for best flavor and nutritional value. For example, green beans should snap cleanly, cucumbers should be firm, and tomatoes should be fully colored.
- Frequency: Many crops, like zucchini, cucumbers, and bush beans, produce more if harvested frequently. Pick daily or every other day.
- Tools: Use clean, sharp pruners (e.g., Corona ClassicCUT Bypass Pruner BP 3180, ~$30) or a sharp knife for clean cuts, minimizing damage to the plant.
- Seed Saving: This is where the « self-sufficient » aspect truly shines.
- Selection: Only save seeds from your healthiest, most vigorous plants that show desired traits (disease resistance, good flavor, high yield).
- Isolation: To ensure true-to-type seeds, prevent cross-pollination. This can be challenging for open-pollinated crops that readily cross (e.g., squash, corn). For beginners, focus on self-pollinating plants like beans, peas, lettuce, and tomatoes.
- Processing:
- Dry Seeds (Beans, Peas, Lettuce, Grains): Allow pods/seed heads to dry completely on the plant. Harvest, shell, and clean the seeds, removing chaff.
- Wet Seeds (Tomatoes, Cucumbers, Squash): For tomatoes, ferment the seeds in water for a few days to remove the gel coating and inhibit disease. For cucumbers/squash, scrape out seeds, wash thoroughly, and dry.
- Drying: Spread seeds thinly on screens or paper plates in a cool, dry, well-ventilated area for 1-4 weeks. Ensure they are bone-dry before storage. I aim for less than 8% moisture content.
- Storage: Store seeds in airtight containers (glass jars with desiccant packets work well) in a cool, dark, dry place (ideally 40-50°F and 30-40% humidity). Label clearly with variety and date. Properly stored seeds can remain viable for 3-10 years or more.
Step 8: Season Extension & Winterizing
Extend your harvest and protect your garden for the off-season to truly maximize your self sufficient garden from scratch.
- Cold Frames: Simple structures with a transparent top (glass, polycarbonate, or old windows) that sit over garden beds. They trap solar heat, allowing you to grow cold-hardy crops (lettuce, spinach, kale, radishes) well into winter or start seeds earlier in spring. A basic cold frame can be built from 2×6 lumber and a sheet of polycarbonate for under $100.
- Hoop Houses/Low Tunnels: Larger structures made from flexible hoops (PVC pipe or EMT conduit) covered with greenhouse plastic. These provide more space and greater temperature moderation. A 10×20 ft DIY low tunnel kit can cost $200-$500, while a larger, more robust hoop house kit might be $1,000-$3,000. I use a 6×12 ft low tunnel made from 1/2-inch PVC hoops and 6mil greenhouse plastic, which extends my lettuce and spinach harvest by at least
- Choose Heirloom & Open-Pollinated Seeds: These varieties produce seeds that will grow true to type, meaning you can save seeds from your harvest year after year. F1 hybrids, while often vigorous, will not produce consistent offspring from saved seeds. Reputable seed companies include Baker Creek Heirloom Seeds, High Mowing Organic Seeds, and Seed Savers Exchange. Start with common, reliable varieties like ‘Black Krim’ tomatoes, ‘Provider’ bush beans, ‘Waltham Butternut’ squash, and ‘Black Seeded Simpson’ lettuce.
- Start Seeds Indoors (Optional but Recommended): For longer growing seasons or specific crops, starting seeds indoors gives you a head start. Use seed-starting mix (e.g., Espoma Organic Seed Starter Mix, ~$10 for 16qt bag) in seed trays (Jiffy Professional Greenhouse 72-cell kit, ~$15). Provide adequate light with LED grow lights (Barrina T5 2ft 4-pack LED Grow Lights, 20W each, ~$50) for 14-16 hours a day, positioned 2-4 inches above seedlings. Maintain consistent temperatures (65-75°F for most).
- Direct Sowing vs. Transplanting: Some crops (carrots, radishes, beans, corn) prefer direct sowing into the garden bed. Others (tomatoes, peppers, broccoli, kale) benefit from being started indoors and transplanted. Follow seed packet instructions for planting depths (e.g., lettuce seeds are often surface-sown or planted 1/8 inch deep, while beans are 1 inch deep) and spacing.
- Companion Planting: Strategically plant different species together to enhance growth, deter pests, and attract beneficial insects. For example, planting marigolds near tomatoes can deter nematodes, and basil improves tomato flavor. Nasturtiums can act as a trap crop for aphids.
- Succession Planting: For a continuous harvest, plant small batches of quick-growing crops (lettuce, radishes, cilantro) every 2-3 weeks. As one crop finishes, another is ready to take its place.
Step 6: Pest & Disease Management (Organic)
Maintaining a self sufficient garden from scratch means embracing organic pest and disease control.
- Integrated Pest Management (IPM): This holistic approach combines several strategies.
- Observation: Regularly inspect your plants for early signs of pests or disease. Catching issues early is key.
- Physical Barriers: Use row covers (e.g., Agribon AG-19 floating row cover, 10×20 ft, ~$20) to protect young plants from insect pests like cabbage worms and squash bugs. Install fences (e.g., 2×4 welded wire mesh, 4 ft tall, 50 ft roll ~$70) to keep out deer, rabbits, and other larger animals.
- Hand-Picking: For larger pests like tomato hornworms or squash bugs, simply pick them off and drop them into a bucket of soapy water.
- Companion Planting: As mentioned, certain plants repel pests. Marigolds, garlic, and onions are excellent deterrents.
- Attract Beneficial Insects: Plant flowers like dill, fennel, cosmos, and sweet alyssum to attract ladybugs, lacewings, and parasitic wasps, which prey on common garden pests.
- Organic Sprays & Treatments:
- Neem Oil: An excellent broad-spectrum organic insecticide and fungicide. Bonide Neem Oil Concentrate (16oz, ~$20) can be mixed at a rate of 1-2 tbsp per gallon of water and sprayed on affected plants.
- Insecticidal Soap: Effective against soft-bodied insects like aphids, whiteflies, and spider mites. Garden Safe Insecticidal Soap (24oz ready-to-use, ~$10).
- Bacillus thuringiensis (Bt): A naturally occurring soil bacterium that targets caterpillars and worms. Monterey BT Worm & Caterpillar Killer (16oz, ~$18) is highly effective and safe for beneficial insects.
- Copper or Sulfur Sprays: For fungal diseases like powdery mildew or blight, organic copper (e.g., Bonide Copper Fungicide, ~$15 for 1lb) or sulfur (e.g., Safer Brand Garden Fungicide, ~$10 for 16oz) can be used as a last resort.
Step 7: Harvesting & Seed Saving
The culmination of your efforts is the harvest, and seed saving closes the loop on self-sufficiency.
- Harvesting Techniques:
- Timing: Harvest vegetables at their peak ripeness for best flavor and nutritional value. For example, green beans should snap cleanly, cucumbers should be firm, and tomatoes should be fully colored.
- Frequency: Many crops, like zucchini, cucumbers, and bush beans, produce more if harvested frequently. Pick daily or every other day.
- Tools: Use clean, sharp pruners (e.g., Corona ClassicCUT Bypass Pruner BP 3180, ~$30) or a sharp knife for clean cuts, minimizing damage to the plant.
- Seed Saving: This is where the « self-sufficient » aspect truly shines.
- Selection: Only save seeds from your healthiest, most vigorous plants that show desired traits (disease resistance, good flavor, high yield).
- Isolation: To ensure true-to-type seeds, prevent cross-pollination. This can be challenging for open-pollinated crops that readily cross (e.g., squash, corn). For beginners, focus on self-pollinating plants like beans, peas, lettuce, and tomatoes.
- Processing:
- Dry Seeds (Beans, Peas, Lettuce, Grains): Allow pods/seed heads to dry completely on the plant. Harvest, shell, and clean the seeds, removing chaff.
- Wet Seeds (Tomatoes, Cucumbers, Squash): For tomatoes, ferment the seeds in water for a few days to remove the gel coating and inhibit disease. For cucumbers/squash, scrape out seeds, wash thoroughly, and dry.
- Drying: Spread seeds thinly on screens or paper plates in a cool, dry, well-ventilated area for 1-4 weeks. Ensure they are bone-dry before storage. I aim for less than 8% moisture content.
- Storage: Store seeds in airtight containers (glass jars with desiccant packets work well) in a cool, dark, dry place (ideally 40-50°F and 30-40% humidity). Label clearly with variety and date. Properly stored seeds can remain viable for 3-10 years or more.
Step 8: Season Extension & Winterizing
Extend your harvest and protect your garden for the off-season to truly maximize your self sufficient garden from scratch.
- Cold Frames: Simple structures with a transparent top (glass, polycarbonate, or old windows) that sit over garden beds. They trap solar heat, allowing you to grow cold-hardy crops (lettuce, spinach, kale, radishes) well into winter or start seeds earlier in spring. A basic cold frame can be built from 2×6 lumber and a sheet of polycarbonate for under $100.
- Hoop Houses/Low Tunnels: Larger structures made from flexible hoops (PVC pipe or EMT conduit) covered with greenhouse plastic. These provide more space and greater temperature moderation. A 10×20 ft DIY low tunnel kit can cost $200-$500, while a larger, more robust hoop house kit might be $1,000-$3,000. I use a 6×12 ft low tunnel made from 1/2-inch PVC hoops and 6mil greenhouse plastic, which extends my lettuce and spinach harvest by at least
Step 4: Water Management & Irrigation
Efficient water management is critical for a self sufficient garden from scratch, especially in off-grid living where water resources might be limited.
- Rainwater Harvesting: This is my primary source of irrigation water. A 55-gallon rain barrel (e.g., EarthMark Rain Barrel, ~$120-$150) connected to a downspout can collect significant water. For larger needs, I use two 275-gallon IBC totes (Intermediate Bulk Containers, often available used for $100-$200 each from food-grade sources) connected in series. A 1,000 sq ft roof can collect approximately 620 gallons of water for every inch of rainfall. My 1,500 sq ft roof provides ample water for my 600 sq ft garden through multiple barrels and totes.
- Drip Irrigation: This is by far the most water-efficient method, delivering water directly to the plant’s root zone, minimizing evaporation and weed growth.
- Components: A typical drip system includes a pressure regulator (e.g., Rain Bird PRV-10, ~$15), a filter (Rain Bird RBY filter, ~$20), main tubing (1/2-inch poly tubing, 100ft ~$25), smaller feeder lines (1/4-inch tubing), and emitters (0.5 GPH or 1 GPH per plant).
- Kits: For beginners, a starter kit like the Rain Bird Drip Irrigation Garden Kit (model DDI-KIT-1P, ~$40-$60) is excellent for a small garden. For larger setups, I use Netafim Techline CV Drip Line (500ft roll, ~$150-$200), which has pressure-compensating emitters built-in, ensuring even watering across long runs.
- Automation: For true self-sufficiency, consider a battery-powered timer (e.g., Orbit B-Hyve Bluetooth Hose Faucet Timer, ~$50) or a solar-powered timer connected to a small 12V pump.
- Solar-Powered Pumps: For lifting water from a well, pond, or large storage tank to your garden, a solar pump is a game-changer. For a smaller drip system, a Shurflo 2088-594-152 Diaphragm Pump (12V, 3.5 GPM, ~$180) can be powered by a single 100W solar panel (e.g., Renogy 100W Monocrystalline Solar Panel, ~$100) and a small 12V battery (e.g., a 50Ah LiFePO4 battery like the Battle Born 50Ah, ~$450). For larger operations or deeper wells, more robust systems are needed. If you’re looking to build out a comprehensive off-grid power system to support your garden’s water needs, or indeed your entire homestead, you might want to explore resources like the Power Grid Generator complete system guide to understand the full scope of what’s possible in terms of energy independence.
Step 5: Seed Selection & Planting
The choice of seeds is crucial for a truly self sufficient garden from scratch.
- Choose Heirloom & Open-Pollinated Seeds: These varieties produce seeds that will grow true to type, meaning you can save seeds from your harvest year after year. F1 hybrids, while often vigorous, will not produce consistent offspring from saved seeds. Reputable seed companies include Baker Creek Heirloom Seeds, High Mowing Organic Seeds, and Seed Savers Exchange. Start with common, reliable varieties like ‘Black Krim’ tomatoes, ‘Provider’ bush beans, ‘Waltham Butternut’ squash, and ‘Black Seeded Simpson’ lettuce.
- Start Seeds Indoors (Optional but Recommended): For longer growing seasons or specific crops, starting seeds indoors gives you a head start. Use seed-starting mix (e.g., Espoma Organic Seed Starter Mix, ~$10 for 16qt bag) in seed trays (Jiffy Professional Greenhouse 72-cell kit, ~$15). Provide adequate light with LED grow lights (Barrina T5 2ft 4-pack LED Grow Lights, 20W each, ~$50) for 14-16 hours a day, positioned 2-4 inches above seedlings. Maintain consistent temperatures (65-75°F for most).
- Direct Sowing vs. Transplanting: Some crops (carrots, radishes, beans, corn) prefer direct sowing into the garden bed. Others (tomatoes, peppers, broccoli, kale) benefit from being started indoors and transplanted. Follow seed packet instructions for planting depths (e.g., lettuce seeds are often surface-sown or planted 1/8 inch deep, while beans are 1 inch deep) and spacing.
- Companion Planting: Strategically plant different species together to enhance growth, deter pests, and attract beneficial insects. For example, planting marigolds near tomatoes can deter nematodes, and basil improves tomato flavor. Nasturtiums can act as a trap crop for aphids.
- Succession Planting: For a continuous harvest, plant small batches of quick-growing crops (lettuce, radishes, cilantro) every 2-3 weeks. As one crop finishes, another is ready to take its place.
Step 6: Pest & Disease Management (Organic)
Maintaining a self sufficient garden from scratch means embracing organic pest and disease control.
- Integrated Pest Management (IPM): This holistic approach combines several strategies.
- Observation: Regularly inspect your plants for early signs of pests or disease. Catching issues early is key.
- Physical Barriers: Use row covers (e.g., Agribon AG-19 floating row cover, 10×20 ft, ~$20) to protect young plants from insect pests like cabbage worms and squash bugs. Install fences (e.g., 2×4 welded wire mesh, 4 ft tall, 50 ft roll ~$70) to keep out deer, rabbits, and other larger animals.
- Hand-Picking: For larger pests like tomato hornworms or squash bugs, simply pick them off and drop them into a bucket of soapy water.
- Companion Planting: As mentioned, certain plants repel pests. Marigolds, garlic, and onions are excellent deterrents.
- Attract Beneficial Insects: Plant flowers like dill, fennel, cosmos, and sweet alyssum to attract ladybugs, lacewings, and parasitic wasps, which prey on common garden pests.
- Organic Sprays & Treatments:
- Neem Oil: An excellent broad-spectrum organic insecticide and fungicide. Bonide Neem Oil Concentrate (16oz, ~$20) can be mixed at a rate of 1-2 tbsp per gallon of water and sprayed on affected plants.
- Insecticidal Soap: Effective against soft-bodied insects like aphids, whiteflies, and spider mites. Garden Safe Insecticidal Soap (24oz ready-to-use, ~$10).
- Bacillus thuringiensis (Bt): A naturally occurring soil bacterium that targets caterpillars and worms. Monterey BT Worm & Caterpillar Killer (16oz, ~$18) is highly effective and safe for beneficial insects.
- Copper or Sulfur Sprays: For fungal diseases like powdery mildew or blight, organic copper (e.g., Bonide Copper Fungicide, ~$15 for 1lb) or sulfur (e.g., Safer Brand Garden Fungicide, ~$10 for 16oz) can be used as a last resort.
Step 7: Harvesting & Seed Saving
The culmination of your efforts is the harvest, and seed saving closes the loop on self-sufficiency.
- Harvesting Techniques:
- Timing: Harvest vegetables at their peak ripeness for best flavor and nutritional value. For example, green beans should snap cleanly, cucumbers should be firm, and tomatoes should be fully colored.
- Frequency: Many crops, like zucchini, cucumbers, and bush beans, produce more if harvested frequently. Pick daily or every other day.
- Tools: Use clean, sharp pruners (e.g., Corona ClassicCUT Bypass Pruner BP 3180, ~$30) or a sharp knife for clean cuts, minimizing damage to the plant.
- Seed Saving: This is where the « self-sufficient » aspect truly shines.
- Selection: Only save seeds from your healthiest, most vigorous plants that show desired traits (disease resistance, good flavor, high yield).
- Isolation: To ensure true-to-type seeds, prevent cross-pollination. This can be challenging for open-pollinated crops that readily cross (e.g., squash, corn). For beginners, focus on self-pollinating plants like beans, peas, lettuce, and tomatoes.
- Processing:
- Dry Seeds (Beans, Peas, Lettuce, Grains): Allow pods/seed heads to dry completely on the plant. Harvest, shell, and clean the seeds, removing chaff.
- Wet Seeds (Tomatoes, Cucumbers, Squash): For tomatoes, ferment the seeds in water for a few days to remove the gel coating and inhibit disease. For cucumbers/squash, scrape out seeds, wash thoroughly, and dry.
- Drying: Spread seeds thinly on screens or paper plates in a cool, dry, well-ventilated area for 1-4 weeks. Ensure they are bone-dry before storage. I aim for less than 8% moisture content.
- Storage: Store seeds in airtight containers (glass jars with desiccant packets work well) in a cool, dark, dry place (ideally 40-50°F and 30-40% humidity). Label clearly with variety and date. Properly stored seeds can remain viable for 3-10 years or more.
Step 8: Season Extension & Winterizing
Extend your harvest and protect your garden for the off-season to truly maximize your self sufficient garden from scratch.
- Cold Frames: Simple structures with a transparent top (glass, polycarbonate, or old windows) that sit over garden beds. They trap solar heat, allowing you to grow cold-hardy crops (lettuce, spinach, kale, radishes) well into winter or start seeds earlier in spring. A basic cold frame can be built from 2×6 lumber and a sheet of polycarbonate for under $100.
- Hoop Houses/Low Tunnels: Larger structures made from flexible hoops (PVC pipe or EMT conduit) covered with greenhouse plastic. These provide more space and greater temperature moderation. A 10×20 ft DIY low tunnel kit can cost $200-$500, while a larger, more robust hoop house kit might be $1,000-$3,000. I use a 6×12 ft low tunnel made from 1/2-inch PVC hoops and 6mil greenhouse plastic, which extends my lettuce and spinach harvest by at least
- In-Ground Beds: If you have excellent native soil and good drainage, in-ground beds are the most economical. Double-digging (loosening soil two shovel depths) can significantly improve drainage and aeration. For my main garden, I primarily use in-ground beds, but I focus on building up the soil over time with consistent compost additions and cover cropping. I aim for beds that are no wider than 3-4 feet so I can reach the center without stepping on the soil, compacting it.
- Raised Beds: Raised beds offer numerous advantages, especially for poor soil, heavy clay, or rocky areas. They provide better drainage, warm up faster in spring, reduce compaction, and make weeding and harvesting easier on your back.
- Material Options:
- Untreated Cedar: Naturally rot-resistant and chemical-free. A 4×8 ft bed, 12 inches deep, typically requires three 2x12x8 ft cedar boards, costing around $50-$60 per board (total ~$150-$180) plus corner brackets or screws. My first raised beds were cedar and are still going strong after 7 years.
- Galvanized Steel: Durable, long-lasting, and aesthetically pleasing. Brands like Vego Garden offer modular kits. A Vego Garden 17″ Tall 8-in-1 Metal Raised Garden Bed (can be configured to 4×8 ft) costs approximately $250-$300.
- Concrete Blocks/Stones: Very durable but can leach minerals (though generally safe once weathered) and can be expensive.
- Recycled Materials: Pallets (check for chemical treatment stamps like « HT » for heat-treated), old tires (controversial due to potential chemical leaching).
- Filling Raised Beds: Don’t just fill with topsoil. Use a « Hugelkultur » approach (logs, branches, leaves, then compost, then topsoil) or a mixture of 60% good quality topsoil, 30% compost, and 10% perlite or vermiculite for drainage. A 4x8x1 ft raised bed requires about 32 cubic feet (or ~1.2 cubic yards) of soil mix, which can cost $100-$200 depending on your source.
- Material Options:
Step 4: Water Management & Irrigation
Efficient water management is critical for a self sufficient garden from scratch, especially in off-grid living where water resources might be limited.
- Rainwater Harvesting: This is my primary source of irrigation water. A 55-gallon rain barrel (e.g., EarthMark Rain Barrel, ~$120-$150) connected to a downspout can collect significant water. For larger needs, I use two 275-gallon IBC totes (Intermediate Bulk Containers, often available used for $100-$200 each from food-grade sources) connected in series. A 1,000 sq ft roof can collect approximately 620 gallons of water for every inch of rainfall. My 1,500 sq ft roof provides ample water for my 600 sq ft garden through multiple barrels and totes.
- Drip Irrigation: This is by far the most water-efficient method, delivering water directly to the plant’s root zone, minimizing evaporation and weed growth.
- Components: A typical drip system includes a pressure regulator (e.g., Rain Bird PRV-10, ~$15), a filter (Rain Bird RBY filter, ~$20), main tubing (1/2-inch poly tubing, 100ft ~$25), smaller feeder lines (1/4-inch tubing), and emitters (0.5 GPH or 1 GPH per plant).
- Kits: For beginners, a starter kit like the Rain Bird Drip Irrigation Garden Kit (model DDI-KIT-1P, ~$40-$60) is excellent for a small garden. For larger setups, I use Netafim Techline CV Drip Line (500ft roll, ~$150-$200), which has pressure-compensating emitters built-in, ensuring even watering across long runs.
- Automation: For true self-sufficiency, consider a battery-powered timer (e.g., Orbit B-Hyve Bluetooth Hose Faucet Timer, ~$50) or a solar-powered timer connected to a small 12V pump.
- Solar-Powered Pumps: For lifting water from a well, pond, or large storage tank to your garden, a solar pump is a game-changer. For a smaller drip system, a Shurflo 2088-594-152 Diaphragm Pump (12V, 3.5 GPM, ~$180) can be powered by a single 100W solar panel (e.g., Renogy 100W Monocrystalline Solar Panel, ~$100) and a small 12V battery (e.g., a 50Ah LiFePO4 battery like the Battle Born 50Ah, ~$450). For larger operations or deeper wells, more robust systems are needed. If you’re looking to build out a comprehensive off-grid power system to support your garden’s water needs, or indeed your entire homestead, you might want to explore resources like the Power Grid Generator complete system guide to understand the full scope of what’s possible in terms of energy independence.
Step 5: Seed Selection & Planting
The choice of seeds is crucial for a truly self sufficient garden from scratch.
- Choose Heirloom & Open-Pollinated Seeds: These varieties produce seeds that will grow true to type, meaning you can save seeds from your harvest year after year. F1 hybrids, while often vigorous, will not produce consistent offspring from saved seeds. Reputable seed companies include Baker Creek Heirloom Seeds, High Mowing Organic Seeds, and Seed Savers Exchange. Start with common, reliable varieties like ‘Black Krim’ tomatoes, ‘Provider’ bush beans, ‘Waltham Butternut’ squash, and ‘Black Seeded Simpson’ lettuce.
- Start Seeds Indoors (Optional but Recommended): For longer growing seasons or specific crops, starting seeds indoors gives you a head start. Use seed-starting mix (e.g., Espoma Organic Seed Starter Mix, ~$10 for 16qt bag) in seed trays (Jiffy Professional Greenhouse 72-cell kit, ~$15). Provide adequate light with LED grow lights (Barrina T5 2ft 4-pack LED Grow Lights, 20W each, ~$50) for 14-16 hours a day, positioned 2-4 inches above seedlings. Maintain consistent temperatures (65-75°F for most).
- Direct Sowing vs. Transplanting: Some crops (carrots, radishes, beans, corn) prefer direct sowing into the garden bed. Others (tomatoes, peppers, broccoli, kale) benefit from being started indoors and transplanted. Follow seed packet instructions for planting depths (e.g., lettuce seeds are often surface-sown or planted 1/8 inch deep, while beans are 1 inch deep) and spacing.
- Companion Planting: Strategically plant different species together to enhance growth, deter pests, and attract beneficial insects. For example, planting marigolds near tomatoes can deter nematodes, and basil improves tomato flavor. Nasturtiums can act as a trap crop for aphids.
- Succession Planting: For a continuous harvest, plant small batches of quick-growing crops (lettuce, radishes, cilantro) every 2-3 weeks. As one crop finishes, another is ready to take its place.
Step 6: Pest & Disease Management (Organic)
Maintaining a self sufficient garden from scratch means embracing organic pest and disease control.
- Integrated Pest Management (IPM): This holistic approach combines several strategies.
- Observation: Regularly inspect your plants for early signs of pests or disease. Catching issues early is key.
- Physical Barriers: Use row covers (e.g., Agribon AG-19 floating row cover, 10×20 ft, ~$20) to protect young plants from insect pests like cabbage worms and squash bugs. Install fences (e.g., 2×4 welded wire mesh, 4 ft tall, 50 ft roll ~$70) to keep out deer, rabbits, and other larger animals.
- Hand-Picking: For larger pests like tomato hornworms or squash bugs, simply pick them off and drop them into a bucket of soapy water.
- Companion Planting: As mentioned, certain plants repel pests. Marigolds, garlic, and onions are excellent deterrents.
- Attract Beneficial Insects: Plant flowers like dill, fennel, cosmos, and sweet alyssum to attract ladybugs, lacewings, and parasitic wasps, which prey on common garden pests.
- Organic Sprays & Treatments:
- Neem Oil: An excellent broad-spectrum organic insecticide and fungicide. Bonide Neem Oil Concentrate (16oz, ~$20) can be mixed at a rate of 1-2 tbsp per gallon of water and sprayed on affected plants.
- Insecticidal Soap: Effective against soft-bodied insects like aphids, whiteflies, and spider mites. Garden Safe Insecticidal Soap (24oz ready-to-use, ~$10).
- Bacillus thuringiensis (Bt): A naturally occurring soil bacterium that targets caterpillars and worms. Monterey BT Worm & Caterpillar Killer (16oz, ~$18) is highly effective and safe for beneficial insects.
- Copper or Sulfur Sprays: For fungal diseases like powdery mildew or blight, organic copper (e.g., Bonide Copper Fungicide, ~$15 for 1lb) or sulfur (e.g., Safer Brand Garden Fungicide, ~$10 for 16oz) can be used as a last resort.
Step 7: Harvesting & Seed Saving
The culmination of your efforts is the harvest, and seed saving closes the loop on self-sufficiency.
- Harvesting Techniques:
- Timing: Harvest vegetables at their peak ripeness for best flavor and nutritional value. For example, green beans should snap cleanly, cucumbers should be firm, and tomatoes should be fully colored.
- Frequency: Many crops, like zucchini, cucumbers, and bush beans, produce more if harvested frequently. Pick daily or every other day.
- Tools: Use clean, sharp pruners (e.g., Corona ClassicCUT Bypass Pruner BP 3180, ~$30) or a sharp knife for clean cuts, minimizing damage to the plant.
- Seed Saving: This is where the « self-sufficient » aspect truly shines.
- Selection: Only save seeds from your healthiest, most vigorous plants that show desired traits (disease resistance, good flavor, high yield).
- Isolation: To ensure true-to-type seeds, prevent cross-pollination. This can be challenging for open-pollinated crops that readily cross (e.g., squash, corn). For beginners, focus on self-pollinating plants like beans, peas, lettuce, and tomatoes.
- Processing:
- Dry Seeds (Beans, Peas, Lettuce, Grains): Allow pods/seed heads to dry completely on the plant. Harvest, shell, and clean the seeds, removing chaff.
- Wet Seeds (Tomatoes, Cucumbers, Squash): For tomatoes, ferment the seeds in water for a few days to remove the gel coating and inhibit disease. For cucumbers/squash, scrape out seeds, wash thoroughly, and dry.
- Drying: Spread seeds thinly on screens or paper plates in a cool, dry, well-ventilated area for 1-4 weeks. Ensure they are bone-dry before storage. I aim for less than 8% moisture content.
- Storage: Store seeds in airtight containers (glass jars with desiccant packets work well) in a cool, dark, dry place (ideally 40-50°F and 30-40% humidity). Label clearly with variety and date. Properly stored seeds can remain viable for 3-10 years or more.
Step 8: Season Extension & Winterizing
Extend your harvest and protect your garden for the off-season to truly maximize your self sufficient garden from scratch.
- Cold Frames: Simple structures with a transparent top (glass, polycarbonate, or old windows) that sit over garden beds. They trap solar heat, allowing you to grow cold-hardy crops (lettuce, spinach, kale, radishes) well into winter or start seeds earlier in spring. A basic cold frame can be built from 2×6 lumber and a sheet of polycarbonate for under $100.
- Hoop Houses/Low Tunnels: Larger structures made from flexible hoops (PVC pipe or EMT conduit) covered with greenhouse plastic. These provide more space and greater temperature moderation. A 10×20 ft DIY low tunnel kit can cost $200-$500, while a larger, more robust hoop house kit might be $1,000-$3,000. I use a 6×12 ft low tunnel made from 1/2-inch PVC hoops and 6mil greenhouse plastic, which extends my lettuce and spinach harvest by at least
Deciding between raised beds and in-ground beds depends on your soil, budget, and physical capabilities.
- In-Ground Beds: If you have excellent native soil and good drainage, in-ground beds are the most economical. Double-digging (loosening soil two shovel depths) can significantly improve drainage and aeration. For my main garden, I primarily use in-ground beds, but I focus on building up the soil over time with consistent compost additions and cover cropping. I aim for beds that are no wider than 3-4 feet so I can reach the center without stepping on the soil, compacting it.
- Raised Beds: Raised beds offer numerous advantages, especially for poor soil, heavy clay, or rocky areas. They provide better drainage, warm up faster in spring, reduce compaction, and make weeding and harvesting easier on your back.
- Material Options:
- Untreated Cedar: Naturally rot-resistant and chemical-free. A 4×8 ft bed, 12 inches deep, typically requires three 2x12x8 ft cedar boards, costing around $50-$60 per board (total ~$150-$180) plus corner brackets or screws. My first raised beds were cedar and are still going strong after 7 years.
- Galvanized Steel: Durable, long-lasting, and aesthetically pleasing. Brands like Vego Garden offer modular kits. A Vego Garden 17″ Tall 8-in-1 Metal Raised Garden Bed (can be configured to 4×8 ft) costs approximately $250-$300.
- Concrete Blocks/Stones: Very durable but can leach minerals (though generally safe once weathered) and can be expensive.
- Recycled Materials: Pallets (check for chemical treatment stamps like « HT » for heat-treated), old tires (controversial due to potential chemical leaching).
- Filling Raised Beds: Don’t just fill with topsoil. Use a « Hugelkultur » approach (logs, branches, leaves, then compost, then topsoil) or a mixture of 60% good quality topsoil, 30% compost, and 10% perlite or vermiculite for drainage. A 4x8x1 ft raised bed requires about 32 cubic feet (or ~1.2 cubic yards) of soil mix, which can cost $100-$200 depending on your source.
- Material Options:
Step 4: Water Management & Irrigation
Efficient water management is critical for a self sufficient garden from scratch, especially in off-grid living where water resources might be limited.
- Rainwater Harvesting: This is my primary source of irrigation water. A 55-gallon rain barrel (e.g., EarthMark Rain Barrel, ~$120-$150) connected to a downspout can collect significant water. For larger needs, I use two 275-gallon IBC totes (Intermediate Bulk Containers, often available used for $100-$200 each from food-grade sources) connected in series. A 1,000 sq ft roof can collect approximately 620 gallons of water for every inch of rainfall. My 1,500 sq ft roof provides ample water for my 600 sq ft garden through multiple barrels and totes.
- Drip Irrigation: This is by far the most water-efficient method, delivering water directly to the plant’s root zone, minimizing evaporation and weed growth.
- Components: A typical drip system includes a pressure regulator (e.g., Rain Bird PRV-10, ~$15), a filter (Rain Bird RBY filter, ~$20), main tubing (1/2-inch poly tubing, 100ft ~$25), smaller feeder lines (1/4-inch tubing), and emitters (0.5 GPH or 1 GPH per plant).
- Kits: For beginners, a starter kit like the Rain Bird Drip Irrigation Garden Kit (model DDI-KIT-1P, ~$40-$60) is excellent for a small garden. For larger setups, I use Netafim Techline CV Drip Line (500ft roll, ~$150-$200), which has pressure-compensating emitters built-in, ensuring even watering across long runs.
- Automation: For true self-sufficiency, consider a battery-powered timer (e.g., Orbit B-Hyve Bluetooth Hose Faucet Timer, ~$50) or a solar-powered timer connected to a small 12V pump.
- Solar-Powered Pumps: For lifting water from a well, pond, or large storage tank to your garden, a solar pump is a game-changer. For a smaller drip system, a Shurflo 2088-594-152 Diaphragm Pump (12V, 3.5 GPM, ~$180) can be powered by a single 100W solar panel (e.g., Renogy 100W Monocrystalline Solar Panel, ~$100) and a small 12V battery (e.g., a 50Ah LiFePO4 battery like the Battle Born 50Ah, ~$450). For larger operations or deeper wells, more robust systems are needed. If you’re looking to build out a comprehensive off-grid power system to support your garden’s water needs, or indeed your entire homestead, you might want to explore resources like the Power Grid Generator complete system guide to understand the full scope of what’s possible in terms of energy independence.
Step 5: Seed Selection & Planting
The choice of seeds is crucial for a truly self sufficient garden from scratch.
- Choose Heirloom & Open-Pollinated Seeds: These varieties produce seeds that will grow true to type, meaning you can save seeds from your harvest year after year. F1 hybrids, while often vigorous, will not produce consistent offspring from saved seeds. Reputable seed companies include Baker Creek Heirloom Seeds, High Mowing Organic Seeds, and Seed Savers Exchange. Start with common, reliable varieties like ‘Black Krim’ tomatoes, ‘Provider’ bush beans, ‘Waltham Butternut’ squash, and ‘Black Seeded Simpson’ lettuce.
- Start Seeds Indoors (Optional but Recommended): For longer growing seasons or specific crops, starting seeds indoors gives you a head start. Use seed-starting mix (e.g., Espoma Organic Seed Starter Mix, ~$10 for 16qt bag) in seed trays (Jiffy Professional Greenhouse 72-cell kit, ~$15). Provide adequate light with LED grow lights (Barrina T5 2ft 4-pack LED Grow Lights, 20W each, ~$50) for 14-16 hours a day, positioned 2-4 inches above seedlings. Maintain consistent temperatures (65-75°F for most).
- Direct Sowing vs. Transplanting: Some crops (carrots, radishes, beans, corn) prefer direct sowing into the garden bed. Others (tomatoes, peppers, broccoli, kale) benefit from being started indoors and transplanted. Follow seed packet instructions for planting depths (e.g., lettuce seeds are often surface-sown or planted 1/8 inch deep, while beans are 1 inch deep) and spacing.
- Companion Planting: Strategically plant different species together to enhance growth, deter pests, and attract beneficial insects. For example, planting marigolds near tomatoes can deter nematodes, and basil improves tomato flavor. Nasturtiums can act as a trap crop for aphids.
- Succession Planting: For a continuous harvest, plant small batches of quick-growing crops (lettuce, radishes, cilantro) every 2-3 weeks. As one crop finishes, another is ready to take its place.
Step 6: Pest & Disease Management (Organic)
Maintaining a self sufficient garden from scratch means embracing organic pest and disease control.
- Integrated Pest Management (IPM): This holistic approach combines several strategies.
- Observation: Regularly inspect your plants for early signs of pests or disease. Catching issues early is key.
- Physical Barriers: Use row covers (e.g., Agribon AG-19 floating row cover, 10×20 ft, ~$20) to protect young plants from insect pests like cabbage worms and squash bugs. Install fences (e.g., 2×4 welded wire mesh, 4 ft tall, 50 ft roll ~$70) to keep out deer, rabbits, and other larger animals.
- Hand-Picking: For larger pests like tomato hornworms or squash bugs, simply pick them off and drop them into a bucket of soapy water.
- Companion Planting: As mentioned, certain plants repel pests. Marigolds, garlic, and onions are excellent deterrents.
- Attract Beneficial Insects: Plant flowers like dill, fennel, cosmos, and sweet alyssum to attract ladybugs, lacewings, and parasitic wasps, which prey on common garden pests.
- Organic Sprays & Treatments:
- Neem Oil: An excellent broad-spectrum organic insecticide and fungicide. Bonide Neem Oil Concentrate (16oz, ~$20) can be mixed at a rate of 1-2 tbsp per gallon of water and sprayed on affected plants.
- Insecticidal Soap: Effective against soft-bodied insects like aphids, whiteflies, and spider mites. Garden Safe Insecticidal Soap (24oz ready-to-use, ~$10).
- Bacillus thuringiensis (Bt): A naturally occurring soil bacterium that targets caterpillars and worms. Monterey BT Worm & Caterpillar Killer (16oz, ~$18) is highly effective and safe for beneficial insects.
- Copper or Sulfur Sprays: For fungal diseases like powdery mildew or blight, organic copper (e.g., Bonide Copper Fungicide, ~$15 for 1lb) or sulfur (e.g., Safer Brand Garden Fungicide, ~$10 for 16oz) can be used as a last resort.
Step 7: Harvesting & Seed Saving
The culmination of your efforts is the harvest, and seed saving closes the loop on self-sufficiency.
- Harvesting Techniques:
- Timing: Harvest vegetables at their peak ripeness for best flavor and nutritional value. For example, green beans should snap cleanly, cucumbers should be firm, and tomatoes should be fully colored.
- Frequency: Many crops, like zucchini, cucumbers, and bush beans, produce more if harvested frequently. Pick daily or every other day.
- Tools: Use clean, sharp pruners (e.g., Corona ClassicCUT Bypass Pruner BP 3180, ~$30) or a sharp knife for clean cuts, minimizing damage to the plant.
- Seed Saving: This is where the « self-sufficient » aspect truly shines.
- Selection: Only save seeds from your healthiest, most vigorous plants that show desired traits (disease resistance, good flavor, high yield).
- Isolation: To ensure true-to-type seeds, prevent cross-pollination. This can be challenging for open-pollinated crops that readily cross (e.g., squash, corn). For beginners, focus on self-pollinating plants like beans, peas, lettuce, and tomatoes.
- Processing:
- Dry Seeds (Beans, Peas, Lettuce, Grains): Allow pods/seed heads to dry completely on the plant. Harvest, shell, and clean the seeds, removing chaff.
- Wet Seeds (Tomatoes, Cucumbers, Squash): For tomatoes, ferment the seeds in water for a few days to remove the gel coating and inhibit disease. For cucumbers/squash, scrape out seeds, wash thoroughly, and dry.
- Drying: Spread seeds thinly on screens or paper plates in a cool, dry, well-ventilated area for 1-4 weeks. Ensure they are bone-dry before storage. I aim for less than 8% moisture content.
- Storage: Store seeds in airtight containers (glass jars with desiccant packets work well) in a cool, dark, dry place (ideally 40-50°F and 30-40% humidity). Label clearly with variety and date. Properly stored seeds can remain viable for 3-10 years or more.
Step 8: Season Extension & Winterizing
Extend your harvest and protect your garden for the off-season to truly maximize your self sufficient garden from scratch.
- Cold Frames: Simple structures with a transparent top (glass, polycarbonate, or old windows) that sit over garden beds. They trap solar heat, allowing you to grow cold-hardy crops (lettuce, spinach, kale, radishes) well into winter or start seeds earlier in spring. A basic cold frame can be built from 2×6 lumber and a sheet of polycarbonate for under $100.
- Hoop Houses/Low Tunnels: Larger structures made from flexible hoops (PVC pipe or EMT conduit) covered with greenhouse plastic. These provide more space and greater temperature moderation. A 10×20 ft DIY low tunnel kit can cost $200-$500, while a larger, more robust hoop house kit might be $1,000-$3,000. I use a 6×12 ft low tunnel made from 1/2-inch PVC hoops and 6mil greenhouse plastic, which extends my lettuce and spinach harvest by at least
Healthy soil is the bedrock of a productive, self-sufficient garden. You can’t guess what your soil needs; you have to test it.
- Perform a Soil Test: A professional soil test will give you precise data on your soil’s pH, nutrient levels (N-P-K), and organic matter content. I recommend sending a sample to your local agricultural extension office; it typically costs $20-$50 and provides detailed recommendations. Alternatively, for a quick homeowner check, a Rapitest Soil Test Kit (40-test kit, model 1663, ~$20 on Amazon) provides a good baseline for pH, Nitrogen, Phosphorus, and Potash. Aim for a pH between 6.0 and 7.0 for most vegetables.
- Amend for pH Imbalance: If your soil is too acidic (below 6.0), add agricultural lime (dolomitic lime adds magnesium, calcitic lime adds calcium). Apply 5-10 lbs per 100 sq ft for a moderate adjustment. If it’s too alkaline (above 7.0), add elemental sulfur (e.g., Espoma Soil Acidifier, ~$15 for 6.75 lbs) or generous amounts of organic matter like peat moss or pine needles.
- Build Organic Matter: This is the single most important step for long-term soil health. Organic matter improves soil structure, water retention, drainage, and nutrient availability. Incorporate 2-4 inches of high-quality compost into your top 6-12 inches of soil annually. I make my own compost from kitchen scraps, garden waste, and shredded leaves, but you can purchase it. Local nurseries often sell bulk compost for $30-$50 per cubic yard. Aged manure (from chickens, cows, or horses – ensure it’s well-rotted to avoid burning plants) is also excellent.
- Address Nutrient Deficiencies: Based on your soil test, add specific organic amendments. If Nitrogen (N) is low, add blood meal (12-0-0, ~$20 for 3 lbs) or feather meal. For Phosphorus (P), use bone meal (3-15-0, ~$15 for 3 lbs) or rock phosphate. For Potassium (K), greensand (0-0-2.5, ~$25 for 5 lbs) or kelp meal are good choices. I rely heavily on Espoma Organic Garden-tone (5-3-3, ~$25 for an 8lb bag) as a balanced, all-purpose organic fertilizer during planting.
Step 3: Garden Bed Preparation
Deciding between raised beds and in-ground beds depends on your soil, budget, and physical capabilities.
- In-Ground Beds: If you have excellent native soil and good drainage, in-ground beds are the most economical. Double-digging (loosening soil two shovel depths) can significantly improve drainage and aeration. For my main garden, I primarily use in-ground beds, but I focus on building up the soil over time with consistent compost additions and cover cropping. I aim for beds that are no wider than 3-4 feet so I can reach the center without stepping on the soil, compacting it.
- Raised Beds: Raised beds offer numerous advantages, especially for poor soil, heavy clay, or rocky areas. They provide better drainage, warm up faster in spring, reduce compaction, and make weeding and harvesting easier on your back.
- Material Options:
- Untreated Cedar: Naturally rot-resistant and chemical-free. A 4×8 ft bed, 12 inches deep, typically requires three 2x12x8 ft cedar boards, costing around $50-$60 per board (total ~$150-$180) plus corner brackets or screws. My first raised beds were cedar and are still going strong after 7 years.
- Galvanized Steel: Durable, long-lasting, and aesthetically pleasing. Brands like Vego Garden offer modular kits. A Vego Garden 17″ Tall 8-in-1 Metal Raised Garden Bed (can be configured to 4×8 ft) costs approximately $250-$300.
- Concrete Blocks/Stones: Very durable but can leach minerals (though generally safe once weathered) and can be expensive.
- Recycled Materials: Pallets (check for chemical treatment stamps like « HT » for heat-treated), old tires (controversial due to potential chemical leaching).
- Filling Raised Beds: Don’t just fill with topsoil. Use a « Hugelkultur » approach (logs, branches, leaves, then compost, then topsoil) or a mixture of 60% good quality topsoil, 30% compost, and 10% perlite or vermiculite for drainage. A 4x8x1 ft raised bed requires about 32 cubic feet (or ~1.2 cubic yards) of soil mix, which can cost $100-$200 depending on your source.
- Material Options:
Step 4: Water Management & Irrigation
Efficient water management is critical for a self sufficient garden from scratch, especially in off-grid living where water resources might be limited.
- Rainwater Harvesting: This is my primary source of irrigation water. A 55-gallon rain barrel (e.g., EarthMark Rain Barrel, ~$120-$150) connected to a downspout can collect significant water. For larger needs, I use two 275-gallon IBC totes (Intermediate Bulk Containers, often available used for $100-$200 each from food-grade sources) connected in series. A 1,000 sq ft roof can collect approximately 620 gallons of water for every inch of rainfall. My 1,500 sq ft roof provides ample water for my 600 sq ft garden through multiple barrels and totes.
- Drip Irrigation: This is by far the most water-efficient method, delivering water directly to the plant’s root zone, minimizing evaporation and weed growth.
- Components: A typical drip system includes a pressure regulator (e.g., Rain Bird PRV-10, ~$15), a filter (Rain Bird RBY filter, ~$20), main tubing (1/2-inch poly tubing, 100ft ~$25), smaller feeder lines (1/4-inch tubing), and emitters (0.5 GPH or 1 GPH per plant).
- Kits: For beginners, a starter kit like the Rain Bird Drip Irrigation Garden Kit (model DDI-KIT-1P, ~$40-$60) is excellent for a small garden. For larger setups, I use Netafim Techline CV Drip Line (500ft roll, ~$150-$200), which has pressure-compensating emitters built-in, ensuring even watering across long runs.
- Automation: For true self-sufficiency, consider a battery-powered timer (e.g., Orbit B-Hyve Bluetooth Hose Faucet Timer, ~$50) or a solar-powered timer connected to a small 12V pump.
- Solar-Powered Pumps: For lifting water from a well, pond, or large storage tank to your garden, a solar pump is a game-changer. For a smaller drip system, a Shurflo 2088-594-152 Diaphragm Pump (12V, 3.5 GPM, ~$180) can be powered by a single 100W solar panel (e.g., Renogy 100W Monocrystalline Solar Panel, ~$100) and a small 12V battery (e.g., a 50Ah LiFePO4 battery like the Battle Born 50Ah, ~$450). For larger operations or deeper wells, more robust systems are needed. If you’re looking to build out a comprehensive off-grid power system to support your garden’s water needs, or indeed your entire homestead, you might want to explore resources like the Power Grid Generator complete system guide to understand the full scope of what’s possible in terms of energy independence.
Step 5: Seed Selection & Planting
The choice of seeds is crucial for a truly self sufficient garden from scratch.
- Choose Heirloom & Open-Pollinated Seeds: These varieties produce seeds that will grow true to type, meaning you can save seeds from your harvest year after year. F1 hybrids, while often vigorous, will not produce consistent offspring from saved seeds. Reputable seed companies include Baker Creek Heirloom Seeds, High Mowing Organic Seeds, and Seed Savers Exchange. Start with common, reliable varieties like ‘Black Krim’ tomatoes, ‘Provider’ bush beans, ‘Waltham Butternut’ squash, and ‘Black Seeded Simpson’ lettuce.
- Start Seeds Indoors (Optional but Recommended): For longer growing seasons or specific crops, starting seeds indoors gives you a head start. Use seed-starting mix (e.g., Espoma Organic Seed Starter Mix, ~$10 for 16qt bag) in seed trays (Jiffy Professional Greenhouse 72-cell kit, ~$15). Provide adequate light with LED grow lights (Barrina T5 2ft 4-pack LED Grow Lights, 20W each, ~$50) for 14-16 hours a day, positioned 2-4 inches above seedlings. Maintain consistent temperatures (65-75°F for most).
- Direct Sowing vs. Transplanting: Some crops (carrots, radishes, beans, corn) prefer direct sowing into the garden bed. Others (tomatoes, peppers, broccoli, kale) benefit from being started indoors and transplanted. Follow seed packet instructions for planting depths (e.g., lettuce seeds are often surface-sown or planted 1/8 inch deep, while beans are 1 inch deep) and spacing.
- Companion Planting: Strategically plant different species together to enhance growth, deter pests, and attract beneficial insects. For example, planting marigolds near tomatoes can deter nematodes, and basil improves tomato flavor. Nasturtiums can act as a trap crop for aphids.
- Succession Planting: For a continuous harvest, plant small batches of quick-growing crops (lettuce, radishes, cilantro) every 2-3 weeks. As one crop finishes, another is ready to take its place.
Step 6: Pest & Disease Management (Organic)
Maintaining a self sufficient garden from scratch means embracing organic pest and disease control.
- Integrated Pest Management (IPM): This holistic approach combines several strategies.
- Observation: Regularly inspect your plants for early signs of pests or disease. Catching issues early is key.
- Physical Barriers: Use row covers (e.g., Agribon AG-19 floating row cover, 10×20 ft, ~$20) to protect young plants from insect pests like cabbage worms and squash bugs. Install fences (e.g., 2×4 welded wire mesh, 4 ft tall, 50 ft roll ~$70) to keep out deer, rabbits, and other larger animals.
- Hand-Picking: For larger pests like tomato hornworms or squash bugs, simply pick them off and drop them into a bucket of soapy water.
- Companion Planting: As mentioned, certain plants repel pests. Marigolds, garlic, and onions are excellent deterrents.
- Attract Beneficial Insects: Plant flowers like dill, fennel, cosmos, and sweet alyssum to attract ladybugs, lacewings, and parasitic wasps, which prey on common garden pests.
- Organic Sprays & Treatments:
- Neem Oil: An excellent broad-spectrum organic insecticide and fungicide. Bonide Neem Oil Concentrate (16oz, ~$20) can be mixed at a rate of 1-2 tbsp per gallon of water and sprayed on affected plants.
- Insecticidal Soap: Effective against soft-bodied insects like aphids, whiteflies, and spider mites. Garden Safe Insecticidal Soap (24oz ready-to-use, ~$10).
- Bacillus thuringiensis (Bt): A naturally occurring soil bacterium that targets caterpillars and worms. Monterey BT Worm & Caterpillar Killer (16oz, ~$18) is highly effective and safe for beneficial insects.
- Copper or Sulfur Sprays: For fungal diseases like powdery mildew or blight, organic copper (e.g., Bonide Copper Fungicide, ~$15 for 1lb) or sulfur (e.g., Safer Brand Garden Fungicide, ~$10 for 16oz) can be used as a last resort.
Step 7: Harvesting & Seed Saving
The culmination of your efforts is the harvest, and seed saving closes the loop on self-sufficiency.
- Harvesting Techniques:
- Timing: Harvest vegetables at their peak ripeness for best flavor and nutritional value. For example, green beans should snap cleanly, cucumbers should be firm, and tomatoes should be fully colored.
- Frequency: Many crops, like zucchini, cucumbers, and bush beans, produce more if harvested frequently. Pick daily or every other day.
- Tools: Use clean, sharp pruners (e.g., Corona ClassicCUT Bypass Pruner BP 3180, ~$30) or a sharp knife for clean cuts, minimizing damage to the plant.
- Seed Saving: This is where the « self-sufficient » aspect truly shines.
- Selection: Only save seeds from your healthiest, most vigorous plants that show desired traits (disease resistance, good flavor, high yield).
- Isolation: To ensure true-to-type seeds, prevent cross-pollination. This can be challenging for open-pollinated crops that readily cross (e.g., squash, corn). For beginners, focus on self-pollinating plants like beans, peas, lettuce, and tomatoes.
- Processing:
- Dry Seeds (Beans, Peas, Lettuce, Grains): Allow pods/seed heads to dry completely on the plant. Harvest, shell, and clean the seeds, removing chaff.
- Wet Seeds (Tomatoes, Cucumbers, Squash): For tomatoes, ferment the seeds in water for a few days to remove the gel coating and inhibit disease. For cucumbers/squash, scrape out seeds, wash thoroughly, and dry.
- Drying: Spread seeds thinly on screens or paper plates in a cool, dry, well-ventilated area for 1-4 weeks. Ensure they are bone-dry before storage. I aim for less than 8% moisture content.
- Storage: Store seeds in airtight containers (glass jars with desiccant packets work well) in a cool, dark, dry place (ideally 40-50°F and 30-40% humidity). Label clearly with variety and date. Properly stored seeds can remain viable for 3-10 years or more.
Step 8: Season Extension & Winterizing
Extend your harvest and protect your garden for the off-season to truly maximize your self sufficient garden from scratch.
- Cold Frames: Simple structures with a transparent top (glass, polycarbonate, or old windows) that sit over garden beds. They trap solar heat, allowing you to grow cold-hardy crops (lettuce, spinach, kale, radishes) well into winter or start seeds earlier in spring. A basic cold frame can be built from 2×6 lumber and a sheet of polycarbonate for under $100.
- Hoop Houses/Low Tunnels: Larger structures made from flexible hoops (PVC pipe or EMT conduit) covered with greenhouse plastic. These provide more space and greater temperature moderation. A 10×20 ft DIY low tunnel kit can cost $200-$500, while a larger, more robust hoop house kit might be $1,000-$3,000. I use a 6×12 ft low tunnel made from 1/2-inch PVC hoops and 6mil greenhouse plastic, which extends my lettuce and spinach harvest by at least
The choice of seeds is crucial for a truly self sufficient garden from scratch.
- Choose Heirloom & Open-Pollinated Seeds: These varieties produce seeds that will grow true to type, meaning you can save seeds from your harvest year after year. F1 hybrids, while often vigorous, will not produce consistent offspring from saved seeds. Reputable seed companies include Baker Creek Heirloom Seeds, High Mowing Organic Seeds, and Seed Savers Exchange. Start with common, reliable varieties like ‘Black Krim’ tomatoes, ‘Provider’ bush beans, ‘Waltham Butternut’ squash, and ‘Black Seeded Simpson’ lettuce.
- Start Seeds Indoors (Optional but Recommended): For longer growing seasons or specific crops, starting seeds indoors gives you a head start. Use seed-starting mix (e.g., Espoma Organic Seed Starter Mix, ~$10 for 16qt bag) in seed trays (Jiffy Professional Greenhouse 72-cell kit, ~$15). Provide adequate light with LED grow lights (Barrina T5 2ft 4-pack LED Grow Lights, 20W each, ~$50) for 14-16 hours a day, positioned 2-4 inches above seedlings. Maintain consistent temperatures (65-75°F for most).
- Direct Sowing vs. Transplanting: Some crops (carrots, radishes, beans, corn) prefer direct sowing into the garden bed. Others (tomatoes, peppers, broccoli, kale) benefit from being started indoors and transplanted. Follow seed packet instructions for planting depths (e.g., lettuce seeds are often surface-sown or planted 1/8 inch deep, while beans are 1 inch deep) and spacing.
- Companion Planting: Strategically plant different species together to enhance growth, deter pests, and attract beneficial insects. For example, planting marigolds near tomatoes can deter nematodes, and basil improves tomato flavor. Nasturtiums can act as a trap crop for aphids.
- Succession Planting: For a continuous harvest, plant small batches of quick-growing crops (lettuce, radishes, cilantro) every 2-3 weeks. As one crop finishes, another is ready to take its place.
Step 6: Pest & Disease Management (Organic)
Maintaining a self sufficient garden from scratch means embracing organic pest and disease control.
- Integrated Pest Management (IPM): This holistic approach combines several strategies.
- Observation: Regularly inspect your plants for early signs of pests or disease. Catching issues early is key.
- Physical Barriers: Use row covers (e.g., Agribon AG-19 floating row cover, 10×20 ft, ~$20) to protect young plants from insect pests like cabbage worms and squash bugs. Install fences (e.g., 2×4 welded wire mesh, 4 ft tall, 50 ft roll ~$70) to keep out deer, rabbits, and other larger animals.
- Hand-Picking: For larger pests like tomato hornworms or squash bugs, simply pick them off and drop them into a bucket of soapy water.
- Companion Planting: As mentioned, certain plants repel pests. Marigolds, garlic, and onions are excellent deterrents.
- Attract Beneficial Insects: Plant flowers like dill, fennel, cosmos, and sweet alyssum to attract ladybugs, lacewings, and parasitic wasps, which prey on common garden pests.
- Organic Sprays & Treatments:
- Neem Oil: An excellent broad-spectrum organic insecticide and fungicide. Bonide Neem Oil Concentrate (16oz, ~$20) can be mixed at a rate of 1-2 tbsp per gallon of water and sprayed on affected plants.
- Insecticidal Soap: Effective against soft-bodied insects like aphids, whiteflies, and spider mites. Garden Safe Insecticidal Soap (24oz ready-to-use, ~$10).
- Bacillus thuringiensis (Bt): A naturally occurring soil bacterium that targets caterpillars and worms. Monterey BT Worm & Caterpillar Killer (16oz, ~$18) is highly effective and safe for beneficial insects.
- Copper or Sulfur Sprays: For fungal diseases like powdery mildew or blight, organic copper (e.g., Bonide Copper Fungicide, ~$15 for 1lb) or sulfur (e.g., Safer Brand Garden Fungicide, ~$10 for 16oz) can be used as a last resort.
Step 7: Harvesting & Seed Saving
The culmination of your efforts is the harvest, and seed saving closes the loop on self-sufficiency.
- Harvesting Techniques:
- Timing: Harvest vegetables at their peak ripeness for best flavor and nutritional value. For example, green beans should snap cleanly, cucumbers should be firm, and tomatoes should be fully colored.
- Frequency: Many crops, like zucchini, cucumbers, and bush beans, produce more if harvested frequently. Pick daily or every other day.
- Tools: Use clean, sharp pruners (e.g., Corona ClassicCUT Bypass Pruner BP 3180, ~$30) or a sharp knife for clean cuts, minimizing damage to the plant.
- Seed Saving: This is where the « self-sufficient » aspect truly shines.
- Selection: Only save seeds from your healthiest, most vigorous plants that show desired traits (disease resistance, good flavor, high yield).
- Isolation: To ensure true-to-type seeds, prevent cross-pollination. This can be challenging for open-pollinated crops that readily cross (e.g., squash, corn). For beginners, focus on self-pollinating plants like beans, peas, lettuce, and tomatoes.
- Processing:
- Dry Seeds (Beans, Peas, Lettuce, Grains): Allow pods/seed heads to dry completely on the plant. Harvest, shell, and clean the seeds, removing chaff.
- Wet Seeds (Tomatoes, Cucumbers, Squash): For tomatoes, ferment the seeds in water for a few days to remove the gel coating and inhibit disease. For cucumbers/squash, scrape out seeds, wash thoroughly, and dry.
- Drying: Spread seeds thinly on screens or paper plates in a cool, dry, well-ventilated area for 1-4 weeks. Ensure they are bone-dry before storage. I aim for less than 8% moisture content.
- Storage: Store seeds in airtight containers (glass jars with desiccant packets work well) in a cool, dark, dry place (ideally 40-50°F and 30-40% humidity). Label clearly with variety and date. Properly stored seeds can remain viable for 3-10 years or more.
Step 8: Season Extension & Winterizing
Extend your harvest and protect your garden for the off-season to truly maximize your self sufficient garden from scratch.
- Cold Frames: Simple structures with a transparent top (glass, polycarbonate, or old windows) that sit over garden beds. They trap solar heat, allowing you to grow cold-hardy crops (lettuce, spinach, kale, radishes) well into winter or start seeds earlier in spring. A basic cold frame can be built from 2×6 lumber and a sheet of polycarbonate for under $100.
- Hoop Houses/Low Tunnels: Larger structures made from flexible hoops (PVC pipe or EMT conduit) covered with greenhouse plastic. These provide more space and greater temperature moderation. A 10×20 ft DIY low tunnel kit can cost $200-$500, while a larger, more robust hoop house kit might be $1,000-$3,000. I use a 6×12 ft low tunnel made from 1/2-inch PVC hoops and 6mil greenhouse plastic, which extends my lettuce and spinach harvest by at least
Step 4: Water Management & Irrigation
Efficient water management is critical for a self sufficient garden from scratch, especially in off-grid living where water resources might be limited.
- Rainwater Harvesting: This is my primary source of irrigation water. A 55-gallon rain barrel (e.g., EarthMark Rain Barrel, ~$120-$150) connected to a downspout can collect significant water. For larger needs, I use two 275-gallon IBC totes (Intermediate Bulk Containers, often available used for $100-$200 each from food-grade sources) connected in series. A 1,000 sq ft roof can collect approximately 620 gallons of water for every inch of rainfall. My 1,500 sq ft roof provides ample water for my 600 sq ft garden through multiple barrels and totes.
- Drip Irrigation: This is by far the most water-efficient method, delivering water directly to the plant’s root zone, minimizing evaporation and weed growth.
- Components: A typical drip system includes a pressure regulator (e.g., Rain Bird PRV-10, ~$15), a filter (Rain Bird RBY filter, ~$20), main tubing (1/2-inch poly tubing, 100ft ~$25), smaller feeder lines (1/4-inch tubing), and emitters (0.5 GPH or 1 GPH per plant).
- Kits: For beginners, a starter kit like the Rain Bird Drip Irrigation Garden Kit (model DDI-KIT-1P, ~$40-$60) is excellent for a small garden. For larger setups, I use Netafim Techline CV Drip Line (500ft roll, ~$150-$200), which has pressure-compensating emitters built-in, ensuring even watering across long runs.
- Automation: For true self-sufficiency, consider a battery-powered timer (e.g., Orbit B-Hyve Bluetooth Hose Faucet Timer, ~$50) or a solar-powered timer connected to a small 12V pump.
- Solar-Powered Pumps: For lifting water from a well, pond, or large storage tank to your garden, a solar pump is a game-changer. For a smaller drip system, a Shurflo 2088-594-152 Diaphragm Pump (12V, 3.5 GPM, ~$180) can be powered by a single 100W solar panel (e.g., Renogy 100W Monocrystalline Solar Panel, ~$100) and a small 12V battery (e.g., a 50Ah LiFePO4 battery like the Battle Born 50Ah, ~$450). For larger operations or deeper wells, more robust systems are needed. If you’re looking to build out a comprehensive off-grid power system to support your garden’s water needs, or indeed your entire homestead, you might want to explore resources like the Power Grid Generator complete system guide to understand the full scope of what’s possible in terms of energy independence.
Step 5: Seed Selection & Planting
The choice of seeds is crucial for a truly self sufficient garden from scratch.
- Choose Heirloom & Open-Pollinated Seeds: These varieties produce seeds that will grow true to type, meaning you can save seeds from your harvest year after year. F1 hybrids, while often vigorous, will not produce consistent offspring from saved seeds. Reputable seed companies include Baker Creek Heirloom Seeds, High Mowing Organic Seeds, and Seed Savers Exchange. Start with common, reliable varieties like ‘Black Krim’ tomatoes, ‘Provider’ bush beans, ‘Waltham Butternut’ squash, and ‘Black Seeded Simpson’ lettuce.
- Start Seeds Indoors (Optional but Recommended): For longer growing seasons or specific crops, starting seeds indoors gives you a head start. Use seed-starting mix (e.g., Espoma Organic Seed Starter Mix, ~$10 for 16qt bag) in seed trays (Jiffy Professional Greenhouse 72-cell kit, ~$15). Provide adequate light with LED grow lights (Barrina T5 2ft 4-pack LED Grow Lights, 20W each, ~$50) for 14-16 hours a day, positioned 2-4 inches above seedlings. Maintain consistent temperatures (65-75°F for most).
- Direct Sowing vs. Transplanting: Some crops (carrots, radishes, beans, corn) prefer direct sowing into the garden bed. Others (tomatoes, peppers, broccoli, kale) benefit from being started indoors and transplanted. Follow seed packet instructions for planting depths (e.g., lettuce seeds are often surface-sown or planted 1/8 inch deep, while beans are 1 inch deep) and spacing.
- Companion Planting: Strategically plant different species together to enhance growth, deter pests, and attract beneficial insects. For example, planting marigolds near tomatoes can deter nematodes, and basil improves tomato flavor. Nasturtiums can act as a trap crop for aphids.
- Succession Planting: For a continuous harvest, plant small batches of quick-growing crops (lettuce, radishes, cilantro) every 2-3 weeks. As one crop finishes, another is ready to take its place.
Step 6: Pest & Disease Management (Organic)
Maintaining a self sufficient garden from scratch means embracing organic pest and disease control.
- Integrated Pest Management (IPM): This holistic approach combines several strategies.
- Observation: Regularly inspect your plants for early signs of pests or disease. Catching issues early is key.
- Physical Barriers: Use row covers (e.g., Agribon AG-19 floating row cover, 10×20 ft, ~$20) to protect young plants from insect pests like cabbage worms and squash bugs. Install fences (e.g., 2×4 welded wire mesh, 4 ft tall, 50 ft roll ~$70) to keep out deer, rabbits, and other larger animals.
- Hand-Picking: For larger pests like tomato hornworms or squash bugs, simply pick them off and drop them into a bucket of soapy water.
- Companion Planting: As mentioned, certain plants repel pests. Marigolds, garlic, and onions are excellent deterrents.
- Attract Beneficial Insects: Plant flowers like dill, fennel, cosmos, and sweet alyssum to attract ladybugs, lacewings, and parasitic wasps, which prey on common garden pests.
- Organic Sprays & Treatments:
- Neem Oil: An excellent broad-spectrum organic insecticide and fungicide. Bonide Neem Oil Concentrate (16oz, ~$20) can be mixed at a rate of 1-2 tbsp per gallon of water and sprayed on affected plants.
- Insecticidal Soap: Effective against soft-bodied insects like aphids, whiteflies, and spider mites. Garden Safe Insecticidal Soap (24oz ready-to-use, ~$10).
- Bacillus thuringiensis (Bt): A naturally occurring soil bacterium that targets caterpillars and worms. Monterey BT Worm & Caterpillar Killer (16oz, ~$18) is highly effective and safe for beneficial insects.
- Copper or Sulfur Sprays: For fungal diseases like powdery mildew or blight, organic copper (e.g., Bonide Copper Fungicide, ~$15 for 1lb) or sulfur (e.g., Safer Brand Garden Fungicide, ~$10 for 16oz) can be used as a last resort.
Step 7: Harvesting & Seed Saving
The culmination of your efforts is the harvest, and seed saving closes the loop on self-sufficiency.
- Harvesting Techniques:
- Timing: Harvest vegetables at their peak ripeness for best flavor and nutritional value. For example, green beans should snap cleanly, cucumbers should be firm, and tomatoes should be fully colored.
- Frequency: Many crops, like zucchini, cucumbers, and bush beans, produce more if harvested frequently. Pick daily or every other day.
- Tools: Use clean, sharp pruners (e.g., Corona ClassicCUT Bypass Pruner BP 3180, ~$30) or a sharp knife for clean cuts, minimizing damage to the plant.
- Seed Saving: This is where the « self-sufficient » aspect truly shines.
- Selection: Only save seeds from your healthiest, most vigorous plants that show desired traits (disease resistance, good flavor, high yield).
- Isolation: To ensure true-to-type seeds, prevent cross-pollination. This can be challenging for open-pollinated crops that readily cross (e.g., squash, corn). For beginners, focus on self-pollinating plants like beans, peas, lettuce, and tomatoes.
- Processing:
- Dry Seeds (Beans, Peas, Lettuce, Grains): Allow pods/seed heads to dry completely on the plant. Harvest, shell, and clean the seeds, removing chaff.
- Wet Seeds (Tomatoes, Cucumbers, Squash): For tomatoes, ferment the seeds in water for a few days to remove the gel coating and inhibit disease. For cucumbers/squash, scrape out seeds, wash thoroughly, and dry.
- Drying: Spread seeds thinly on screens or paper plates in a cool, dry, well-ventilated area for 1-4 weeks. Ensure they are bone-dry before storage. I aim for less than 8% moisture content.
- Storage: Store seeds in airtight containers (glass jars with desiccant packets work well) in a cool, dark, dry place (ideally 40-50°F and 30-40% humidity). Label clearly with variety and date. Properly stored seeds can remain viable for 3-10 years or more.
Step 8: Season Extension & Winterizing
Extend your harvest and protect your garden for the off-season to truly maximize your self sufficient garden from scratch.
- Cold Frames: Simple structures with a transparent top (glass, polycarbonate, or old windows) that sit over garden beds. They trap solar heat, allowing you to grow cold-hardy crops (lettuce, spinach, kale, radishes) well into winter or start seeds earlier in spring. A basic cold frame can be built from 2×6 lumber and a sheet of polycarbonate for under $100.
- Hoop Houses/Low Tunnels: Larger structures made from flexible hoops (PVC pipe or EMT conduit) covered with greenhouse plastic. These provide more space and greater temperature moderation. A 10×20 ft DIY low tunnel kit can cost $200-$500, while a larger, more robust hoop house kit might be $1,000-$3,000. I use a 6×12 ft low tunnel made from 1/2-inch PVC hoops and 6mil greenhouse plastic, which extends my lettuce and spinach harvest by at least
- In-Ground Beds: If you have excellent native soil and good drainage, in-ground beds are the most economical. Double-digging (loosening soil two shovel depths) can significantly improve drainage and aeration. For my main garden, I primarily use in-ground beds, but I focus on building up the soil over time with consistent compost additions and cover cropping. I aim for beds that are no wider than 3-4 feet so I can reach the center without stepping on the soil, compacting it.
- Raised Beds: Raised beds offer numerous advantages, especially for poor soil, heavy clay, or rocky areas. They provide better drainage, warm up faster in spring, reduce compaction, and make weeding and harvesting easier on your back.
- Material Options:
- Untreated Cedar: Naturally rot-resistant and chemical-free. A 4×8 ft bed, 12 inches deep, typically requires three 2x12x8 ft cedar boards, costing around $50-$60 per board (total ~$150-$180) plus corner brackets or screws. My first raised beds were cedar and are still going strong after 7 years.
- Galvanized Steel: Durable, long-lasting, and aesthetically pleasing. Brands like Vego Garden offer modular kits. A Vego Garden 17″ Tall 8-in-1 Metal Raised Garden Bed (can be configured to 4×8 ft) costs approximately $250-$300.
- Concrete Blocks/Stones: Very durable but can leach minerals (though generally safe once weathered) and can be expensive.
- Recycled Materials: Pallets (check for chemical treatment stamps like « HT » for heat-treated), old tires (controversial due to potential chemical leaching).
- Filling Raised Beds: Don’t just fill with topsoil. Use a « Hugelkultur » approach (logs, branches, leaves, then compost, then topsoil) or a mixture of 60% good quality topsoil, 30% compost, and 10% perlite or vermiculite for drainage. A 4x8x1 ft raised bed requires about 32 cubic feet (or ~1.2 cubic yards) of soil mix, which can cost $100-$200 depending on your source.
- Material Options:
Step 4: Water Management & Irrigation
Efficient water management is critical for a self sufficient garden from scratch, especially in off-grid living where water resources might be limited.
- Rainwater Harvesting: This is my primary source of irrigation water. A 55-gallon rain barrel (e.g., EarthMark Rain Barrel, ~$120-$150) connected to a downspout can collect significant water. For larger needs, I use two 275-gallon IBC totes (Intermediate Bulk Containers, often available used for $100-$200 each from food-grade sources) connected in series. A 1,000 sq ft roof can collect approximately 620 gallons of water for every inch of rainfall. My 1,500 sq ft roof provides ample water for my 600 sq ft garden through multiple barrels and totes.
- Drip Irrigation: This is by far the most water-efficient method, delivering water directly to the plant’s root zone, minimizing evaporation and weed growth.
- Components: A typical drip system includes a pressure regulator (e.g., Rain Bird PRV-10, ~$15), a filter (Rain Bird RBY filter, ~$20), main tubing (1/2-inch poly tubing, 100ft ~$25), smaller feeder lines (1/4-inch tubing), and emitters (0.5 GPH or 1 GPH per plant).
- Kits: For beginners, a starter kit like the Rain Bird Drip Irrigation Garden Kit (model DDI-KIT-1P, ~$40-$60) is excellent for a small garden. For larger setups, I use Netafim Techline CV Drip Line (500ft roll, ~$150-$200), which has pressure-compensating emitters built-in, ensuring even watering across long runs.
- Automation: For true self-sufficiency, consider a battery-powered timer (e.g., Orbit B-Hyve Bluetooth Hose Faucet Timer, ~$50) or a solar-powered timer connected to a small 12V pump.
- Solar-Powered Pumps: For lifting water from a well, pond, or large storage tank to your garden, a solar pump is a game-changer. For a smaller drip system, a Shurflo 2088-594-152 Diaphragm Pump (12V, 3.5 GPM, ~$180) can be powered by a single 100W solar panel (e.g., Renogy 100W Monocrystalline Solar Panel, ~$100) and a small 12V battery (e.g., a 50Ah LiFePO4 battery like the Battle Born 50Ah, ~$450). For larger operations or deeper wells, more robust systems are needed. If you’re looking to build out a comprehensive off-grid power system to support your garden’s water needs, or indeed your entire homestead, you might want to explore resources like the Power Grid Generator complete system guide to understand the full scope of what’s possible in terms of energy independence.
Step 5: Seed Selection & Planting
The choice of seeds is crucial for a truly self sufficient garden from scratch.
- Choose Heirloom & Open-Pollinated Seeds: These varieties produce seeds that will grow true to type, meaning you can save seeds from your harvest year after year. F1 hybrids, while often vigorous, will not produce consistent offspring from saved seeds. Reputable seed companies include Baker Creek Heirloom Seeds, High Mowing Organic Seeds, and Seed Savers Exchange. Start with common, reliable varieties like ‘Black Krim’ tomatoes, ‘Provider’ bush beans, ‘Waltham Butternut’ squash, and ‘Black Seeded Simpson’ lettuce.
- Start Seeds Indoors (Optional but Recommended): For longer growing seasons or specific crops, starting seeds indoors gives you a head start. Use seed-starting mix (e.g., Espoma Organic Seed Starter Mix, ~$10 for 16qt bag) in seed trays (Jiffy Professional Greenhouse 72-cell kit, ~$15). Provide adequate light with LED grow lights (Barrina T5 2ft 4-pack LED Grow Lights, 20W each, ~$50) for 14-16 hours a day, positioned 2-4 inches above seedlings. Maintain consistent temperatures (65-75°F for most).
- Direct Sowing vs. Transplanting: Some crops (carrots, radishes, beans, corn) prefer direct sowing into the garden bed. Others (tomatoes, peppers, broccoli, kale) benefit from being started indoors and transplanted. Follow seed packet instructions for planting depths (e.g., lettuce seeds are often surface-sown or planted 1/8 inch deep, while beans are 1 inch deep) and spacing.
- Companion Planting: Strategically plant different species together to enhance growth, deter pests, and attract beneficial insects. For example, planting marigolds near tomatoes can deter nematodes, and basil improves tomato flavor. Nasturtiums can act as a trap crop for aphids.
- Succession Planting: For a continuous harvest, plant small batches of quick-growing crops (lettuce, radishes, cilantro) every 2-3 weeks. As one crop finishes, another is ready to take its place.
Step 6: Pest & Disease Management (Organic)
Maintaining a self sufficient garden from scratch means embracing organic pest and disease control.
- Integrated Pest Management (IPM): This holistic approach combines several strategies.
- Observation: Regularly inspect your plants for early signs of pests or disease. Catching issues early is key.
- Physical Barriers: Use row covers (e.g., Agribon AG-19 floating row cover, 10×20 ft, ~$20) to protect young plants from insect pests like cabbage worms and squash bugs. Install fences (e.g., 2×4 welded wire mesh, 4 ft tall, 50 ft roll ~$70) to keep out deer, rabbits, and other larger animals.
- Hand-Picking: For larger pests like tomato hornworms or squash bugs, simply pick them off and drop them into a bucket of soapy water.
- Companion Planting: As mentioned, certain plants repel pests. Marigolds, garlic, and onions are excellent deterrents.
- Attract Beneficial Insects: Plant flowers like dill, fennel, cosmos, and sweet alyssum to attract ladybugs, lacewings, and parasitic wasps, which prey on common garden pests.
- Organic Sprays & Treatments:
- Neem Oil: An excellent broad-spectrum organic insecticide and fungicide. Bonide Neem Oil Concentrate (16oz, ~$20) can be mixed at a rate of 1-2 tbsp per gallon of water and sprayed on affected plants.
- Insecticidal Soap: Effective against soft-bodied insects like aphids, whiteflies, and spider mites. Garden Safe Insecticidal Soap (24oz ready-to-use, ~$10).
- Bacillus thuringiensis (Bt): A naturally occurring soil bacterium that targets caterpillars and worms. Monterey BT Worm & Caterpillar Killer (16oz, ~$18) is highly effective and safe for beneficial insects.
- Copper or Sulfur Sprays: For fungal diseases like powdery mildew or blight, organic copper (e.g., Bonide Copper Fungicide, ~$15 for 1lb) or sulfur (e.g., Safer Brand Garden Fungicide, ~$10 for 16oz) can be used as a last resort.
Step 7: Harvesting & Seed Saving
The culmination of your efforts is the harvest, and seed saving closes the loop on self-sufficiency.
- Harvesting Techniques:
- Timing: Harvest vegetables at their peak ripeness for best flavor and nutritional value. For example, green beans should snap cleanly, cucumbers should be firm, and tomatoes should be fully colored.
- Frequency: Many crops, like zucchini, cucumbers, and bush beans, produce more if harvested frequently. Pick daily or every other day.
- Tools: Use clean, sharp pruners (e.g., Corona ClassicCUT Bypass Pruner BP 3180, ~$30) or a sharp knife for clean cuts, minimizing damage to the plant.
- Seed Saving: This is where the « self-sufficient » aspect truly shines.
- Selection: Only save seeds from your healthiest, most vigorous plants that show desired traits (disease resistance, good flavor, high yield).
- Isolation: To ensure true-to-type seeds, prevent cross-pollination. This can be challenging for open-pollinated crops that readily cross (e.g., squash, corn). For beginners, focus on self-pollinating plants like beans, peas, lettuce, and tomatoes.
- Processing:
- Dry Seeds (Beans, Peas, Lettuce, Grains): Allow pods/seed heads to dry completely on the plant. Harvest, shell, and clean the seeds, removing chaff.
- Wet Seeds (Tomatoes, Cucumbers, Squash): For tomatoes, ferment the seeds in water for a few days to remove the gel coating and inhibit disease. For cucumbers/squash, scrape out seeds, wash thoroughly, and dry.
- Drying: Spread seeds thinly on screens or paper plates in a cool, dry, well-ventilated area for 1-4 weeks. Ensure they are bone-dry before storage. I aim for less than 8% moisture content.
- Storage: Store seeds in airtight containers (glass jars with desiccant packets work well) in a cool, dark, dry place (ideally 40-50°F and 30-40% humidity). Label clearly with variety and date. Properly stored seeds can remain viable for 3-10 years or more.
Step 8: Season Extension & Winterizing
Extend your harvest and protect your garden for the off-season to truly maximize your self sufficient garden from scratch.
- Cold Frames: Simple structures with a transparent top (glass, polycarbonate, or old windows) that sit over garden beds. They trap solar heat, allowing you to grow cold-hardy crops (lettuce, spinach, kale, radishes) well into winter or start seeds earlier in spring. A basic cold frame can be built from 2×6 lumber and a sheet of polycarbonate for under $100.
- Hoop Houses/Low Tunnels: Larger structures made from flexible hoops (PVC pipe or EMT conduit) covered with greenhouse plastic. These provide more space and greater temperature moderation. A 10×20 ft DIY low tunnel kit can cost $200-$500, while a larger, more robust hoop house kit might be $1,000-$3,000. I use a 6×12 ft low tunnel made from 1/2-inch PVC hoops and 6mil greenhouse plastic, which extends my lettuce and spinach harvest by at least
Deciding between raised beds and in-ground beds depends on your soil, budget, and physical capabilities.
- In-Ground Beds: If you have excellent native soil and good drainage, in-ground beds are the most economical. Double-digging (loosening soil two shovel depths) can significantly improve drainage and aeration. For my main garden, I primarily use in-ground beds, but I focus on building up the soil over time with consistent compost additions and cover cropping. I aim for beds that are no wider than 3-4 feet so I can reach the center without stepping on the soil, compacting it.
- Raised Beds: Raised beds offer numerous advantages, especially for poor soil, heavy clay, or rocky areas. They provide better drainage, warm up faster in spring, reduce compaction, and make weeding and harvesting easier on your back.
- Material Options:
- Untreated Cedar: Naturally rot-resistant and chemical-free. A 4×8 ft bed, 12 inches deep, typically requires three 2x12x8 ft cedar boards, costing around $50-$60 per board (total ~$150-$180) plus corner brackets or screws. My first raised beds were cedar and are still going strong after 7 years.
- Galvanized Steel: Durable, long-lasting, and aesthetically pleasing. Brands like Vego Garden offer modular kits. A Vego Garden 17″ Tall 8-in-1 Metal Raised Garden Bed (can be configured to 4×8 ft) costs approximately $250-$300.
- Concrete Blocks/Stones: Very durable but can leach minerals (though generally safe once weathered) and can be expensive.
- Recycled Materials: Pallets (check for chemical treatment stamps like « HT » for heat-treated), old tires (controversial due to potential chemical leaching).
- Filling Raised Beds: Don’t just fill with topsoil. Use a « Hugelkultur » approach (logs, branches, leaves, then compost, then topsoil) or a mixture of 60% good quality topsoil, 30% compost, and 10% perlite or vermiculite for drainage. A 4x8x1 ft raised bed requires about 32 cubic feet (or ~1.2 cubic yards) of soil mix, which can cost $100-$200 depending on your source.
- Material Options:
Step 4: Water Management & Irrigation
Efficient water management is critical for a self sufficient garden from scratch, especially in off-grid living where water resources might be limited.
- Rainwater Harvesting: This is my primary source of irrigation water. A 55-gallon rain barrel (e.g., EarthMark Rain Barrel, ~$120-$150) connected to a downspout can collect significant water. For larger needs, I use two 275-gallon IBC totes (Intermediate Bulk Containers, often available used for $100-$200 each from food-grade sources) connected in series. A 1,000 sq ft roof can collect approximately 620 gallons of water for every inch of rainfall. My 1,500 sq ft roof provides ample water for my 600 sq ft garden through multiple barrels and totes.
- Drip Irrigation: This is by far the most water-efficient method, delivering water directly to the plant’s root zone, minimizing evaporation and weed growth.
- Components: A typical drip system includes a pressure regulator (e.g., Rain Bird PRV-10, ~$15), a filter (Rain Bird RBY filter, ~$20), main tubing (1/2-inch poly tubing, 100ft ~$25), smaller feeder lines (1/4-inch tubing), and emitters (0.5 GPH or 1 GPH per plant).
- Kits: For beginners, a starter kit like the Rain Bird Drip Irrigation Garden Kit (model DDI-KIT-1P, ~$40-$60) is excellent for a small garden. For larger setups, I use Netafim Techline CV Drip Line (500ft roll, ~$150-$200), which has pressure-compensating emitters built-in, ensuring even watering across long runs.
- Automation: For true self-sufficiency, consider a battery-powered timer (e.g., Orbit B-Hyve Bluetooth Hose Faucet Timer, ~$50) or a solar-powered timer connected to a small 12V pump.
- Solar-Powered Pumps: For lifting water from a well, pond, or large storage tank to your garden, a solar pump is a game-changer. For a smaller drip system, a Shurflo 2088-594-152 Diaphragm Pump (12V, 3.5 GPM, ~$180) can be powered by a single 100W solar panel (e.g., Renogy 100W Monocrystalline Solar Panel, ~$100) and a small 12V battery (e.g., a 50Ah LiFePO4 battery like the Battle Born 50Ah, ~$450). For larger operations or deeper wells, more robust systems are needed. If you’re looking to build out a comprehensive off-grid power system to support your garden’s water needs, or indeed your entire homestead, you might want to explore resources like the Power Grid Generator complete system guide to understand the full scope of what’s possible in terms of energy independence.
Step 5: Seed Selection & Planting
The choice of seeds is crucial for a truly self sufficient garden from scratch.
- Choose Heirloom & Open-Pollinated Seeds: These varieties produce seeds that will grow true to type, meaning you can save seeds from your harvest year after year. F1 hybrids, while often vigorous, will not produce consistent offspring from saved seeds. Reputable seed companies include Baker Creek Heirloom Seeds, High Mowing Organic Seeds, and Seed Savers Exchange. Start with common, reliable varieties like ‘Black Krim’ tomatoes, ‘Provider’ bush beans, ‘Waltham Butternut’ squash, and ‘Black Seeded Simpson’ lettuce.
- Start Seeds Indoors (Optional but Recommended): For longer growing seasons or specific crops, starting seeds indoors gives you a head start. Use seed-starting mix (e.g., Espoma Organic Seed Starter Mix, ~$10 for 16qt bag) in seed trays (Jiffy Professional Greenhouse 72-cell kit, ~$15). Provide adequate light with LED grow lights (Barrina T5 2ft 4-pack LED Grow Lights, 20W each, ~$50) for 14-16 hours a day, positioned 2-4 inches above seedlings. Maintain consistent temperatures (65-75°F for most).
- Direct Sowing vs. Transplanting: Some crops (carrots, radishes, beans, corn) prefer direct sowing into the garden bed. Others (tomatoes, peppers, broccoli, kale) benefit from being started indoors and transplanted. Follow seed packet instructions for planting depths (e.g., lettuce seeds are often surface-sown or planted 1/8 inch deep, while beans are 1 inch deep) and spacing.
- Companion Planting: Strategically plant different species together to enhance growth, deter pests, and attract beneficial insects. For example, planting marigolds near tomatoes can deter nematodes, and basil improves tomato flavor. Nasturtiums can act as a trap crop for aphids.
- Succession Planting: For a continuous harvest, plant small batches of quick-growing crops (lettuce, radishes, cilantro) every 2-3 weeks. As one crop finishes, another is ready to take its place.
Step 6: Pest & Disease Management (Organic)
Maintaining a self sufficient garden from scratch means embracing organic pest and disease control.
- Integrated Pest Management (IPM): This holistic approach combines several strategies.
- Observation: Regularly inspect your plants for early signs of pests or disease. Catching issues early is key.
- Physical Barriers: Use row covers (e.g., Agribon AG-19 floating row cover, 10×20 ft, ~$20) to protect young plants from insect pests like cabbage worms and squash bugs. Install fences (e.g., 2×4 welded wire mesh, 4 ft tall, 50 ft roll ~$70) to keep out deer, rabbits, and other larger animals.
- Hand-Picking: For larger pests like tomato hornworms or squash bugs, simply pick them off and drop them into a bucket of soapy water.
- Companion Planting: As mentioned, certain plants repel pests. Marigolds, garlic, and onions are excellent deterrents.
- Attract Beneficial Insects: Plant flowers like dill, fennel, cosmos, and sweet alyssum to attract ladybugs, lacewings, and parasitic wasps, which prey on common garden pests.
- Organic Sprays & Treatments:
- Neem Oil: An excellent broad-spectrum organic insecticide and fungicide. Bonide Neem Oil Concentrate (16oz, ~$20) can be mixed at a rate of 1-2 tbsp per gallon of water and sprayed on affected plants.
- Insecticidal Soap: Effective against soft-bodied insects like aphids, whiteflies, and spider mites. Garden Safe Insecticidal Soap (24oz ready-to-use, ~$10).
- Bacillus thuringiensis (Bt): A naturally occurring soil bacterium that targets caterpillars and worms. Monterey BT Worm & Caterpillar Killer (16oz, ~$18) is highly effective and safe for beneficial insects.
- Copper or Sulfur Sprays: For fungal diseases like powdery mildew or blight, organic copper (e.g., Bonide Copper Fungicide, ~$15 for 1lb) or sulfur (e.g., Safer Brand Garden Fungicide, ~$10 for 16oz) can be used as a last resort.
Step 7: Harvesting & Seed Saving
The culmination of your efforts is the harvest, and seed saving closes the loop on self-sufficiency.
- Harvesting Techniques:
- Timing: Harvest vegetables at their peak ripeness for best flavor and nutritional value. For example, green beans should snap cleanly, cucumbers should be firm, and tomatoes should be fully colored.
- Frequency: Many crops, like zucchini, cucumbers, and bush beans, produce more if harvested frequently. Pick daily or every other day.
- Tools: Use clean, sharp pruners (e.g., Corona ClassicCUT Bypass Pruner BP 3180, ~$30) or a sharp knife for clean cuts, minimizing damage to the plant.
- Seed Saving: This is where the « self-sufficient » aspect truly shines.
- Selection: Only save seeds from your healthiest, most vigorous plants that show desired traits (disease resistance, good flavor, high yield).
- Isolation: To ensure true-to-type seeds, prevent cross-pollination. This can be challenging for open-pollinated crops that readily cross (e.g., squash, corn). For beginners, focus on self-pollinating plants like beans, peas, lettuce, and tomatoes.
- Processing:
- Dry Seeds (Beans, Peas, Lettuce, Grains): Allow pods/seed heads to dry completely on the plant. Harvest, shell, and clean the seeds, removing chaff.
- Wet Seeds (Tomatoes, Cucumbers, Squash): For tomatoes, ferment the seeds in water for a few days to remove the gel coating and inhibit disease. For cucumbers/squash, scrape out seeds, wash thoroughly, and dry.
- Drying: Spread seeds thinly on screens or paper plates in a cool, dry, well-ventilated area for 1-4 weeks. Ensure they are bone-dry before storage. I aim for less than 8% moisture content.
- Storage: Store seeds in airtight containers (glass jars with desiccant packets work well) in a cool, dark, dry place (ideally 40-50°F and 30-40% humidity). Label clearly with variety and date. Properly stored seeds can remain viable for 3-10 years or more.
Step 8: Season Extension & Winterizing
Extend your harvest and protect your garden for the off-season to truly maximize your self sufficient garden from scratch.
- Cold Frames: Simple structures with a transparent top (glass, polycarbonate, or old windows) that sit over garden beds. They trap solar heat, allowing you to grow cold-hardy crops (lettuce, spinach, kale, radishes) well into winter or start seeds earlier in spring. A basic cold frame can be built from 2×6 lumber and a sheet of polycarbonate for under $100.
- Hoop Houses/Low Tunnels: Larger structures made from flexible hoops (PVC pipe or EMT conduit) covered with greenhouse plastic. These provide more space and greater temperature moderation. A 10×20 ft DIY low tunnel kit can cost $200-$500, while a larger, more robust hoop house kit might be $1,000-$3,000. I use a 6×12 ft low tunnel made from 1/2-inch PVC hoops and 6mil greenhouse plastic, which extends my lettuce and spinach harvest by at least
Healthy soil is the bedrock of a productive, self-sufficient garden. You can’t guess what your soil needs; you have to test it.
- Perform a Soil Test: A professional soil test will give you precise data on your soil’s pH, nutrient levels (N-P-K), and organic matter content. I recommend sending a sample to your local agricultural extension office; it typically costs $20-$50 and provides detailed recommendations. Alternatively, for a quick homeowner check, a Rapitest Soil Test Kit (40-test kit, model 1663, ~$20 on Amazon) provides a good baseline for pH, Nitrogen, Phosphorus, and Potash. Aim for a pH between 6.0 and 7.0 for most vegetables.
- Amend for pH Imbalance: If your soil is too acidic (below 6.0), add agricultural lime (dolomitic lime adds magnesium, calcitic lime adds calcium). Apply 5-10 lbs per 100 sq ft for a moderate adjustment. If it’s too alkaline (above 7.0), add elemental sulfur (e.g., Espoma Soil Acidifier, ~$15 for 6.75 lbs) or generous amounts of organic matter like peat moss or pine needles.
- Build Organic Matter: This is the single most important step for long-term soil health. Organic matter improves soil structure, water retention, drainage, and nutrient availability. Incorporate 2-4 inches of high-quality compost into your top 6-12 inches of soil annually. I make my own compost from kitchen scraps, garden waste, and shredded leaves, but you can purchase it. Local nurseries often sell bulk compost for $30-$50 per cubic yard. Aged manure (from chickens, cows, or horses – ensure it’s well-rotted to avoid burning plants) is also excellent.
- Address Nutrient Deficiencies: Based on your soil test, add specific organic amendments. If Nitrogen (N) is low, add blood meal (12-0-0, ~$20 for 3 lbs) or feather meal. For Phosphorus (P), use bone meal (3-15-0, ~$15 for 3 lbs) or rock phosphate. For Potassium (K), greensand (0-0-2.5, ~$25 for 5 lbs) or kelp meal are good choices. I rely heavily on Espoma Organic Garden-tone (5-3-3, ~$25 for an 8lb bag) as a balanced, all-purpose organic fertilizer during planting.
Step 3: Garden Bed Preparation
Deciding between raised beds and in-ground beds depends on your soil, budget, and physical capabilities.
- In-Ground Beds: If you have excellent native soil and good drainage, in-ground beds are the most economical. Double-digging (loosening soil two shovel depths) can significantly improve drainage and aeration. For my main garden, I primarily use in-ground beds, but I focus on building up the soil over time with consistent compost additions and cover cropping. I aim for beds that are no wider than 3-4 feet so I can reach the center without stepping on the soil, compacting it.
- Raised Beds: Raised beds offer numerous advantages, especially for poor soil, heavy clay, or rocky areas. They provide better drainage, warm up faster in spring, reduce compaction, and make weeding and harvesting easier on your back.
- Material Options:
- Untreated Cedar: Naturally rot-resistant and chemical-free. A 4×8 ft bed, 12 inches deep, typically requires three 2x12x8 ft cedar boards, costing around $50-$60 per board (total ~$150-$180) plus corner brackets or screws. My first raised beds were cedar and are still going strong after 7 years.
- Galvanized Steel: Durable, long-lasting, and aesthetically pleasing. Brands like Vego Garden offer modular kits. A Vego Garden 17″ Tall 8-in-1 Metal Raised Garden Bed (can be configured to 4×8 ft) costs approximately $250-$300.
- Concrete Blocks/Stones: Very durable but can leach minerals (though generally safe once weathered) and can be expensive.
- Recycled Materials: Pallets (check for chemical treatment stamps like « HT » for heat-treated), old tires (controversial due to potential chemical leaching).
- Filling Raised Beds: Don’t just fill with topsoil. Use a « Hugelkultur » approach (logs, branches, leaves, then compost, then topsoil) or a mixture of 60% good quality topsoil, 30% compost, and 10% perlite or vermiculite for drainage. A 4x8x1 ft raised bed requires about 32 cubic feet (or ~1.2 cubic yards) of soil mix, which can cost $100-$200 depending on your source.
- Material Options:
Step 4: Water Management & Irrigation
Efficient water management is critical for a self sufficient garden from scratch, especially in off-grid living where water resources might be limited.
- Rainwater Harvesting: This is my primary source of irrigation water. A 55-gallon rain barrel (e.g., EarthMark Rain Barrel, ~$120-$150) connected to a downspout can collect significant water. For larger needs, I use two 275-gallon IBC totes (Intermediate Bulk Containers, often available used for $100-$200 each from food-grade sources) connected in series. A 1,000 sq ft roof can collect approximately 620 gallons of water for every inch of rainfall. My 1,500 sq ft roof provides ample water for my 600 sq ft garden through multiple barrels and totes.
- Drip Irrigation: This is by far the most water-efficient method, delivering water directly to the plant’s root zone, minimizing evaporation and weed growth.
- Components: A typical drip system includes a pressure regulator (e.g., Rain Bird PRV-10, ~$15), a filter (Rain Bird RBY filter, ~$20), main tubing (1/2-inch poly tubing, 100ft ~$25), smaller feeder lines (1/4-inch tubing), and emitters (0.5 GPH or 1 GPH per plant).
- Kits: For beginners, a starter kit like the Rain Bird Drip Irrigation Garden Kit (model DDI-KIT-1P, ~$40-$60) is excellent for a small garden. For larger setups, I use Netafim Techline CV Drip Line (500ft roll, ~$150-$200), which has pressure-compensating emitters built-in, ensuring even watering across long runs.
- Automation: For true self-sufficiency, consider a battery-powered timer (e.g., Orbit B-Hyve Bluetooth Hose Faucet Timer, ~$50) or a solar-powered timer connected to a small 12V pump.
- Solar-Powered Pumps: For lifting water from a well, pond, or large storage tank to your garden, a solar pump is a game-changer. For a smaller drip system, a Shurflo 2088-594-152 Diaphragm Pump (12V, 3.5 GPM, ~$180) can be powered by a single 100W solar panel (e.g., Renogy 100W Monocrystalline Solar Panel, ~$100) and a small 12V battery (e.g., a 50Ah LiFePO4 battery like the Battle Born 50Ah, ~$450). For larger operations or deeper wells, more robust systems are needed. If you’re looking to build out a comprehensive off-grid power system to support your garden’s water needs, or indeed your entire homestead, you might want to explore resources like the Power Grid Generator complete system guide to understand the full scope of what’s possible in terms of energy independence.
Step 5: Seed Selection & Planting
The choice of seeds is crucial for a truly self sufficient garden from scratch.
- Choose Heirloom & Open-Pollinated Seeds: These varieties produce seeds that will grow true to type, meaning you can save seeds from your harvest year after year. F1 hybrids, while often vigorous, will not produce consistent offspring from saved seeds. Reputable seed companies include Baker Creek Heirloom Seeds, High Mowing Organic Seeds, and Seed Savers Exchange. Start with common, reliable varieties like ‘Black Krim’ tomatoes, ‘Provider’ bush beans, ‘Waltham Butternut’ squash, and ‘Black Seeded Simpson’ lettuce.
- Start Seeds Indoors (Optional but Recommended): For longer growing seasons or specific crops, starting seeds indoors gives you a head start. Use seed-starting mix (e.g., Espoma Organic Seed Starter Mix, ~$10 for 16qt bag) in seed trays (Jiffy Professional Greenhouse 72-cell kit, ~$15). Provide adequate light with LED grow lights (Barrina T5 2ft 4-pack LED Grow Lights, 20W each, ~$50) for 14-16 hours a day, positioned 2-4 inches above seedlings. Maintain consistent temperatures (65-75°F for most).
- Direct Sowing vs. Transplanting: Some crops (carrots, radishes, beans, corn) prefer direct sowing into the garden bed. Others (tomatoes, peppers, broccoli, kale) benefit from being started indoors and transplanted. Follow seed packet instructions for planting depths (e.g., lettuce seeds are often surface-sown or planted 1/8 inch deep, while beans are 1 inch deep) and spacing.
- Companion Planting: Strategically plant different species together to enhance growth, deter pests, and attract beneficial insects. For example, planting marigolds near tomatoes can deter nematodes, and basil improves tomato flavor. Nasturtiums can act as a trap crop for aphids.
- Succession Planting: For a continuous harvest, plant small batches of quick-growing crops (lettuce, radishes, cilantro) every 2-3 weeks. As one crop finishes, another is ready to take its place.
Step 6: Pest & Disease Management (Organic)
Maintaining a self sufficient garden from scratch means embracing organic pest and disease control.
- Integrated Pest Management (IPM): This holistic approach combines several strategies.
- Observation: Regularly inspect your plants for early signs of pests or disease. Catching issues early is key.
- Physical Barriers: Use row covers (e.g., Agribon AG-19 floating row cover, 10×20 ft, ~$20) to protect young plants from insect pests like cabbage worms and squash bugs. Install fences (e.g., 2×4 welded wire mesh, 4 ft tall, 50 ft roll ~$70) to keep out deer, rabbits, and other larger animals.
- Hand-Picking: For larger pests like tomato hornworms or squash bugs, simply pick them off and drop them into a bucket of soapy water.
- Companion Planting: As mentioned, certain plants repel pests. Marigolds, garlic, and onions are excellent deterrents.
- Attract Beneficial Insects: Plant flowers like dill, fennel, cosmos, and sweet alyssum to attract ladybugs, lacewings, and parasitic wasps, which prey on common garden pests.
- Organic Sprays & Treatments:
- Neem Oil: An excellent broad-spectrum organic insecticide and fungicide. Bonide Neem Oil Concentrate (16oz, ~$20) can be mixed at a rate of 1-2 tbsp per gallon of water and sprayed on affected plants.
- Insecticidal Soap: Effective against soft-bodied insects like aphids, whiteflies, and spider mites. Garden Safe Insecticidal Soap (24oz ready-to-use, ~$10).
- Bacillus thuringiensis (Bt): A naturally occurring soil bacterium that targets caterpillars and worms. Monterey BT Worm & Caterpillar Killer (16oz, ~$18) is highly effective and safe for beneficial insects.
- Copper or Sulfur Sprays: For fungal diseases like powdery mildew or blight, organic copper (e.g., Bonide Copper Fungicide, ~$15 for 1lb) or sulfur (e.g., Safer Brand Garden Fungicide, ~$10 for 16oz) can be used as a last resort.
Step 7: Harvesting & Seed Saving
The culmination of your efforts is the harvest, and seed saving closes the loop on self-sufficiency.
- Harvesting Techniques:
- Timing: Harvest vegetables at their peak ripeness for best flavor and nutritional value. For example, green beans should snap cleanly, cucumbers should be firm, and tomatoes should be fully colored.
- Frequency: Many crops, like zucchini, cucumbers, and bush beans, produce more if harvested frequently. Pick daily or every other day.
- Tools: Use clean, sharp pruners (e.g., Corona ClassicCUT Bypass Pruner BP 3180, ~$30) or a sharp knife for clean cuts, minimizing damage to the plant.
- Seed Saving: This is where the « self-sufficient » aspect truly shines.
- Selection: Only save seeds from your healthiest, most vigorous plants that show desired traits (disease resistance, good flavor, high yield).
- Isolation: To ensure true-to-type seeds, prevent cross-pollination. This can be challenging for open-pollinated crops that readily cross (e.g., squash, corn). For beginners, focus on self-pollinating plants like beans, peas, lettuce, and tomatoes.
- Processing:
- Dry Seeds (Beans, Peas, Lettuce, Grains): Allow pods/seed heads to dry completely on the plant. Harvest, shell, and clean the seeds, removing chaff.
- Wet Seeds (Tomatoes, Cucumbers, Squash): For tomatoes, ferment the seeds in water for a few days to remove the gel coating and inhibit disease. For cucumbers/squash, scrape out seeds, wash thoroughly, and dry.
- Drying: Spread seeds thinly on screens or paper plates in a cool, dry, well-ventilated area for 1-4 weeks. Ensure they are bone-dry before storage. I aim for less than 8% moisture content.
- Storage: Store seeds in airtight containers (glass jars with desiccant packets work well) in a cool, dark, dry place (ideally 40-50°F and 30-40% humidity). Label clearly with variety and date. Properly stored seeds can remain viable for 3-10 years or more.
Step 8: Season Extension & Winterizing
Extend your harvest and protect your garden for the off-season to truly maximize your self sufficient garden from scratch.
- Cold Frames: Simple structures with a transparent top (glass, polycarbonate, or old windows) that sit over garden beds. They trap solar heat, allowing you to grow cold-hardy crops (lettuce, spinach, kale, radishes) well into winter or start seeds earlier in spring. A basic cold frame can be built from 2×6 lumber and a sheet of polycarbonate for under $100.
- Hoop Houses/Low Tunnels: Larger structures made from flexible hoops (PVC pipe or EMT conduit) covered with greenhouse plastic. These provide more space and greater temperature moderation. A 10×20 ft DIY low tunnel kit can cost $200-$500, while a larger, more robust hoop house kit might be $1,000-$3,000. I use a 6×12 ft low tunnel made from 1/2-inch PVC hoops and 6mil greenhouse plastic, which extends my lettuce and spinach harvest by at least
Step 5: Seed Selection & Planting
The choice of seeds is crucial for a truly self sufficient garden from scratch.
- Choose Heirloom & Open-Pollinated Seeds: These varieties produce seeds that will grow true to type, meaning you can save seeds from your harvest year after year. F1 hybrids, while often vigorous, will not produce consistent offspring from saved seeds. Reputable seed companies include Baker Creek Heirloom Seeds, High Mowing Organic Seeds, and Seed Savers Exchange. Start with common, reliable varieties like ‘Black Krim’ tomatoes, ‘Provider’ bush beans, ‘Waltham Butternut’ squash, and ‘Black Seeded Simpson’ lettuce.
- Start Seeds Indoors (Optional but Recommended): For longer growing seasons or specific crops, starting seeds indoors gives you a head start. Use seed-starting mix (e.g., Espoma Organic Seed Starter Mix, ~$10 for 16qt bag) in seed trays (Jiffy Professional Greenhouse 72-cell kit, ~$15). Provide adequate light with LED grow lights (Barrina T5 2ft 4-pack LED Grow Lights, 20W each, ~$50) for 14-16 hours a day, positioned 2-4 inches above seedlings. Maintain consistent temperatures (65-75°F for most).
- Direct Sowing vs. Transplanting: Some crops (carrots, radishes, beans, corn) prefer direct sowing into the garden bed. Others (tomatoes, peppers, broccoli, kale) benefit from being started indoors and transplanted. Follow seed packet instructions for planting depths (e.g., lettuce seeds are often surface-sown or planted 1/8 inch deep, while beans are 1 inch deep) and spacing.
- Companion Planting: Strategically plant different species together to enhance growth, deter pests, and attract beneficial insects. For example, planting marigolds near tomatoes can deter nematodes, and basil improves tomato flavor. Nasturtiums can act as a trap crop for aphids.
- Succession Planting: For a continuous harvest, plant small batches of quick-growing crops (lettuce, radishes, cilantro) every 2-3 weeks. As one crop finishes, another is ready to take its place.
Step 6: Pest & Disease Management (Organic)
Maintaining a self sufficient garden from scratch means embracing organic pest and disease control.
- Integrated Pest Management (IPM): This holistic approach combines several strategies.
- Observation: Regularly inspect your plants for early signs of pests or disease. Catching issues early is key.
- Physical Barriers: Use row covers (e.g., Agribon AG-19 floating row cover, 10×20 ft, ~$20) to protect young plants from insect pests like cabbage worms and squash bugs. Install fences (e.g., 2×4 welded wire mesh, 4 ft tall, 50 ft roll ~$70) to keep out deer, rabbits, and other larger animals.
- Hand-Picking: For larger pests like tomato hornworms or squash bugs, simply pick them off and drop them into a bucket of soapy water.
- Companion Planting: As mentioned, certain plants repel pests. Marigolds, garlic, and onions are excellent deterrents.
- Attract Beneficial Insects: Plant flowers like dill, fennel, cosmos, and sweet alyssum to attract ladybugs, lacewings, and parasitic wasps, which prey on common garden pests.
- Organic Sprays & Treatments:
- Neem Oil: An excellent broad-spectrum organic insecticide and fungicide. Bonide Neem Oil Concentrate (16oz, ~$20) can be mixed at a rate of 1-2 tbsp per gallon of water and sprayed on affected plants.
- Insecticidal Soap: Effective against soft-bodied insects like aphids, whiteflies, and spider mites. Garden Safe Insecticidal Soap (24oz ready-to-use, ~$10).
- Bacillus thuringiensis (Bt): A naturally occurring soil bacterium that targets caterpillars and worms. Monterey BT Worm & Caterpillar Killer (16oz, ~$18) is highly effective and safe for beneficial insects.
- Copper or Sulfur Sprays: For fungal diseases like powdery mildew or blight, organic copper (e.g., Bonide Copper Fungicide, ~$15 for 1lb) or sulfur (e.g., Safer Brand Garden Fungicide, ~$10 for 16oz) can be used as a last resort.
Step 7: Harvesting & Seed Saving
The culmination of your efforts is the harvest, and seed saving closes the loop on self-sufficiency.
- Harvesting Techniques:
- Timing: Harvest vegetables at their peak ripeness for best flavor and nutritional value. For example, green beans should snap cleanly, cucumbers should be firm, and tomatoes should be fully colored.
- Frequency: Many crops, like zucchini, cucumbers, and bush beans, produce more if harvested frequently. Pick daily or every other day.
- Tools: Use clean, sharp pruners (e.g., Corona ClassicCUT Bypass Pruner BP 3180, ~$30) or a sharp knife for clean cuts, minimizing damage to the plant.
- Seed Saving: This is where the « self-sufficient » aspect truly shines.
- Selection: Only save seeds from your healthiest, most vigorous plants that show desired traits (disease resistance, good flavor, high yield).
- Isolation: To ensure true-to-type seeds, prevent cross-pollination. This can be challenging for open-pollinated crops that readily cross (e.g., squash, corn). For beginners, focus on self-pollinating plants like beans, peas, lettuce, and tomatoes.
- Processing:
- Dry Seeds (Beans, Peas, Lettuce, Grains): Allow pods/seed heads to dry completely on the plant. Harvest, shell, and clean the seeds, removing chaff.
- Wet Seeds (Tomatoes, Cucumbers, Squash): For tomatoes, ferment the seeds in water for a few days to remove the gel coating and inhibit disease. For cucumbers/squash, scrape out seeds, wash thoroughly, and dry.
- Drying: Spread seeds thinly on screens or paper plates in a cool, dry, well-ventilated area for 1-4 weeks. Ensure they are bone-dry before storage. I aim for less than 8% moisture content.
- Storage: Store seeds in airtight containers (glass jars with desiccant packets work well) in a cool, dark, dry place (ideally 40-50°F and 30-40% humidity). Label clearly with variety and date. Properly stored seeds can remain viable for 3-10 years or more.
Step 8: Season Extension & Winterizing
Extend your harvest and protect your garden for the off-season to truly maximize your self sufficient garden from scratch.
- Cold Frames: Simple structures with a transparent top (glass, polycarbonate, or old windows) that sit over garden beds. They trap solar heat, allowing you to grow cold-hardy crops (lettuce, spinach, kale, radishes) well into winter or start seeds earlier in spring. A basic cold frame can be built from 2×6 lumber and a sheet of polycarbonate for under $100.
- Hoop Houses/Low Tunnels: Larger structures made from flexible hoops (PVC pipe or EMT conduit) covered with greenhouse plastic. These provide more space and greater temperature moderation. A 10×20 ft DIY low tunnel kit can cost $200-$500, while a larger, more robust hoop house kit might be $1,000-$3,000. I use a 6×12 ft low tunnel made from 1/2-inch PVC hoops and 6mil greenhouse plastic, which extends my lettuce and spinach harvest by at least
Step 4: Water Management & Irrigation
Efficient water management is critical for a self sufficient garden from scratch, especially in off-grid living where water resources might be limited.
- Rainwater Harvesting: This is my primary source of irrigation water. A 55-gallon rain barrel (e.g., EarthMark Rain Barrel, ~$120-$150) connected to a downspout can collect significant water. For larger needs, I use two 275-gallon IBC totes (Intermediate Bulk Containers, often available used for $100-$200 each from food-grade sources) connected in series. A 1,000 sq ft roof can collect approximately 620 gallons of water for every inch of rainfall. My 1,500 sq ft roof provides ample water for my 600 sq ft garden through multiple barrels and totes.
- Drip Irrigation: This is by far the most water-efficient method, delivering water directly to the plant’s root zone, minimizing evaporation and weed growth.
- Components: A typical drip system includes a pressure regulator (e.g., Rain Bird PRV-10, ~$15), a filter (Rain Bird RBY filter, ~$20), main tubing (1/2-inch poly tubing, 100ft ~$25), smaller feeder lines (1/4-inch tubing), and emitters (0.5 GPH or 1 GPH per plant).
- Kits: For beginners, a starter kit like the Rain Bird Drip Irrigation Garden Kit (model DDI-KIT-1P, ~$40-$60) is excellent for a small garden. For larger setups, I use Netafim Techline CV Drip Line (500ft roll, ~$150-$200), which has pressure-compensating emitters built-in, ensuring even watering across long runs.
- Automation: For true self-sufficiency, consider a battery-powered timer (e.g., Orbit B-Hyve Bluetooth Hose Faucet Timer, ~$50) or a solar-powered timer connected to a small 12V pump.
- Solar-Powered Pumps: For lifting water from a well, pond, or large storage tank to your garden, a solar pump is a game-changer. For a smaller drip system, a Shurflo 2088-594-152 Diaphragm Pump (12V, 3.5 GPM, ~$180) can be powered by a single 100W solar panel (e.g., Renogy 100W Monocrystalline Solar Panel, ~$100) and a small 12V battery (e.g., a 50Ah LiFePO4 battery like the Battle Born 50Ah, ~$450). For larger operations or deeper wells, more robust systems are needed. If you’re looking to build out a comprehensive off-grid power system to support your garden’s water needs, or indeed your entire homestead, you might want to explore resources like the Power Grid Generator complete system guide to understand the full scope of what’s possible in terms of energy independence.
Step 5: Seed Selection & Planting
The choice of seeds is crucial for a truly self sufficient garden from scratch.
- Choose Heirloom & Open-Pollinated Seeds: These varieties produce seeds that will grow true to type, meaning you can save seeds from your harvest year after year. F1 hybrids, while often vigorous, will not produce consistent offspring from saved seeds. Reputable seed companies include Baker Creek Heirloom Seeds, High Mowing Organic Seeds, and Seed Savers Exchange. Start with common, reliable varieties like ‘Black Krim’ tomatoes, ‘Provider’ bush beans, ‘Waltham Butternut’ squash, and ‘Black Seeded Simpson’ lettuce.
- Start Seeds Indoors (Optional but Recommended): For longer growing seasons or specific crops, starting seeds indoors gives you a head start. Use seed-starting mix (e.g., Espoma Organic Seed Starter Mix, ~$10 for 16qt bag) in seed trays (Jiffy Professional Greenhouse 72-cell kit, ~$15). Provide adequate light with LED grow lights (Barrina T5 2ft 4-pack LED Grow Lights, 20W each, ~$50) for 14-16 hours a day, positioned 2-4 inches above seedlings. Maintain consistent temperatures (65-75°F for most).
- Direct Sowing vs. Transplanting: Some crops (carrots, radishes, beans, corn) prefer direct sowing into the garden bed. Others (tomatoes, peppers, broccoli, kale) benefit from being started indoors and transplanted. Follow seed packet instructions for planting depths (e.g., lettuce seeds are often surface-sown or planted 1/8 inch deep, while beans are 1 inch deep) and spacing.
- Companion Planting: Strategically plant different species together to enhance growth, deter pests, and attract beneficial insects. For example, planting marigolds near tomatoes can deter nematodes, and basil improves tomato flavor. Nasturtiums can act as a trap crop for aphids.
- Succession Planting: For a continuous harvest, plant small batches of quick-growing crops (lettuce, radishes, cilantro) every 2-3 weeks. As one crop finishes, another is ready to take its place.
Step 6: Pest & Disease Management (Organic)
Maintaining a self sufficient garden from scratch means embracing organic pest and disease control.
- Integrated Pest Management (IPM): This holistic approach combines several strategies.
- Observation: Regularly inspect your plants for early signs of pests or disease. Catching issues early is key.
- Physical Barriers: Use row covers (e.g., Agribon AG-19 floating row cover, 10×20 ft, ~$20) to protect young plants from insect pests like cabbage worms and squash bugs. Install fences (e.g., 2×4 welded wire mesh, 4 ft tall, 50 ft roll ~$70) to keep out deer, rabbits, and other larger animals.
- Hand-Picking: For larger pests like tomato hornworms or squash bugs, simply pick them off and drop them into a bucket of soapy water.
- Companion Planting: As mentioned, certain plants repel pests. Marigolds, garlic, and onions are excellent deterrents.
- Attract Beneficial Insects: Plant flowers like dill, fennel, cosmos, and sweet alyssum to attract ladybugs, lacewings, and parasitic wasps, which prey on common garden pests.
- Organic Sprays & Treatments:
- Neem Oil: An excellent broad-spectrum organic insecticide and fungicide. Bonide Neem Oil Concentrate (16oz, ~$20) can be mixed at a rate of 1-2 tbsp per gallon of water and sprayed on affected plants.
- Insecticidal Soap: Effective against soft-bodied insects like aphids, whiteflies, and spider mites. Garden Safe Insecticidal Soap (24oz ready-to-use, ~$10).
- Bacillus thuringiensis (Bt): A naturally occurring soil bacterium that targets caterpillars and worms. Monterey BT Worm & Caterpillar Killer (16oz, ~$18) is highly effective and safe for beneficial insects.
- Copper or Sulfur Sprays: For fungal diseases like powdery mildew or blight, organic copper (e.g., Bonide Copper Fungicide, ~$15 for 1lb) or sulfur (e.g., Safer Brand Garden Fungicide, ~$10 for 16oz) can be used as a last resort.
Step 7: Harvesting & Seed Saving
The culmination of your efforts is the harvest, and seed saving closes the loop on self-sufficiency.
- Harvesting Techniques:
- Timing: Harvest vegetables at their peak ripeness for best flavor and nutritional value. For example, green beans should snap cleanly, cucumbers should be firm, and tomatoes should be fully colored.
- Frequency: Many crops, like zucchini, cucumbers, and bush beans, produce more if harvested frequently. Pick daily or every other day.
- Tools: Use clean, sharp pruners (e.g., Corona ClassicCUT Bypass Pruner BP 3180, ~$30) or a sharp knife for clean cuts, minimizing damage to the plant.
- Seed Saving: This is where the « self-sufficient » aspect truly shines.
- Selection: Only save seeds from your healthiest, most vigorous plants that show desired traits (disease resistance, good flavor, high yield).
- Isolation: To ensure true-to-type seeds, prevent cross-pollination. This can be challenging for open-pollinated crops that readily cross (e.g., squash, corn). For beginners, focus on self-pollinating plants like beans, peas, lettuce, and tomatoes.
- Processing:
- Dry Seeds (Beans, Peas, Lettuce, Grains): Allow pods/seed heads to dry completely on the plant. Harvest, shell, and clean the seeds, removing chaff.
- Wet Seeds (Tomatoes, Cucumbers, Squash): For tomatoes, ferment the seeds in water for a few days to remove the gel coating and inhibit disease. For cucumbers/squash, scrape out seeds, wash thoroughly, and dry.
- Drying: Spread seeds thinly on screens or paper plates in a cool, dry, well-ventilated area for 1-4 weeks. Ensure they are bone-dry before storage. I aim for less than 8% moisture content.
- Storage: Store seeds in airtight containers (glass jars with desiccant packets work well) in a cool, dark, dry place (ideally 40-50°F and 30-40% humidity). Label clearly with variety and date. Properly stored seeds can remain viable for 3-10 years or more.
Step 8: Season Extension & Winterizing
Extend your harvest and protect your garden for the off-season to truly maximize your self sufficient garden from scratch.
- Cold Frames: Simple structures with a transparent top (glass, polycarbonate, or old windows) that sit over garden beds. They trap solar heat, allowing you to grow cold-hardy crops (lettuce, spinach, kale, radishes) well into winter or start seeds earlier in spring. A basic cold frame can be built from 2×6 lumber and a sheet of polycarbonate for under $100.
- Hoop Houses/Low Tunnels: Larger structures made from flexible hoops (PVC pipe or EMT conduit) covered with greenhouse plastic. These provide more space and greater temperature moderation. A 10×20 ft DIY low tunnel kit can cost $200-$500, while a larger, more robust hoop house kit might be $1,000-$3,000. I use a 6×12 ft low tunnel made from 1/2-inch PVC hoops and 6mil greenhouse plastic, which extends my lettuce and spinach harvest by at least
- In-Ground Beds: If you have excellent native soil and good drainage, in-ground beds are the most economical. Double-digging (loosening soil two shovel depths) can significantly improve drainage and aeration. For my main garden, I primarily use in-ground beds, but I focus on building up the soil over time with consistent compost additions and cover cropping. I aim for beds that are no wider than 3-4 feet so I can reach the center without stepping on the soil, compacting it.
- Raised Beds: Raised beds offer numerous advantages, especially for poor soil, heavy clay, or rocky areas. They provide better drainage, warm up faster in spring, reduce compaction, and make weeding and harvesting easier on your back.
- Material Options:
- Untreated Cedar: Naturally rot-resistant and chemical-free. A 4×8 ft bed, 12 inches deep, typically requires three 2x12x8 ft cedar boards, costing around $50-$60 per board (total ~$150-$180) plus corner brackets or screws. My first raised beds were cedar and are still going strong after 7 years.
- Galvanized Steel: Durable, long-lasting, and aesthetically pleasing. Brands like Vego Garden offer modular kits. A Vego Garden 17″ Tall 8-in-1 Metal Raised Garden Bed (can be configured to 4×8 ft) costs approximately $250-$300.
- Concrete Blocks/Stones: Very durable but can leach minerals (though generally safe once weathered) and can be expensive.
- Recycled Materials: Pallets (check for chemical treatment stamps like « HT » for heat-treated), old tires (controversial due to potential chemical leaching).
- Filling Raised Beds: Don’t just fill with topsoil. Use a « Hugelkultur » approach (logs, branches, leaves, then compost, then topsoil) or a mixture of 60% good quality topsoil, 30% compost, and 10% perlite or vermiculite for drainage. A 4x8x1 ft raised bed requires about 32 cubic feet (or ~1.2 cubic yards) of soil mix, which can cost $100-$200 depending on your source.
- Material Options:
Step 4: Water Management & Irrigation
Efficient water management is critical for a self sufficient garden from scratch, especially in off-grid living where water resources might be limited.
- Rainwater Harvesting: This is my primary source of irrigation water. A 55-gallon rain barrel (e.g., EarthMark Rain Barrel, ~$120-$150) connected to a downspout can collect significant water. For larger needs, I use two 275-gallon IBC totes (Intermediate Bulk Containers, often available used for $100-$200 each from food-grade sources) connected in series. A 1,000 sq ft roof can collect approximately 620 gallons of water for every inch of rainfall. My 1,500 sq ft roof provides ample water for my 600 sq ft garden through multiple barrels and totes.
- Drip Irrigation: This is by far the most water-efficient method, delivering water directly to the plant’s root zone, minimizing evaporation and weed growth.
- Components: A typical drip system includes a pressure regulator (e.g., Rain Bird PRV-10, ~$15), a filter (Rain Bird RBY filter, ~$20), main tubing (1/2-inch poly tubing, 100ft ~$25), smaller feeder lines (1/4-inch tubing), and emitters (0.5 GPH or 1 GPH per plant).
- Kits: For beginners, a starter kit like the Rain Bird Drip Irrigation Garden Kit (model DDI-KIT-1P, ~$40-$60) is excellent for a small garden. For larger setups, I use Netafim Techline CV Drip Line (500ft roll, ~$150-$200), which has pressure-compensating emitters built-in, ensuring even watering across long runs.
- Automation: For true self-sufficiency, consider a battery-powered timer (e.g., Orbit B-Hyve Bluetooth Hose Faucet Timer, ~$50) or a solar-powered timer connected to a small 12V pump.
- Solar-Powered Pumps: For lifting water from a well, pond, or large storage tank to your garden, a solar pump is a game-changer. For a smaller drip system, a Shurflo 2088-594-152 Diaphragm Pump (12V, 3.5 GPM, ~$180) can be powered by a single 100W solar panel (e.g., Renogy 100W Monocrystalline Solar Panel, ~$100) and a small 12V battery (e.g., a 50Ah LiFePO4 battery like the Battle Born 50Ah, ~$450). For larger operations or deeper wells, more robust systems are needed. If you’re looking to build out a comprehensive off-grid power system to support your garden’s water needs, or indeed your entire homestead, you might want to explore resources like the Power Grid Generator complete system guide to understand the full scope of what’s possible in terms of energy independence.
Step 5: Seed Selection & Planting
The choice of seeds is crucial for a truly self sufficient garden from scratch.
- Choose Heirloom & Open-Pollinated Seeds: These varieties produce seeds that will grow true to type, meaning you can save seeds from your harvest year after year. F1 hybrids, while often vigorous, will not produce consistent offspring from saved seeds. Reputable seed companies include Baker Creek Heirloom Seeds, High Mowing Organic Seeds, and Seed Savers Exchange. Start with common, reliable varieties like ‘Black Krim’ tomatoes, ‘Provider’ bush beans, ‘Waltham Butternut’ squash, and ‘Black Seeded Simpson’ lettuce.
- Start Seeds Indoors (Optional but Recommended): For longer growing seasons or specific crops, starting seeds indoors gives you a head start. Use seed-starting mix (e.g., Espoma Organic Seed Starter Mix, ~$10 for 16qt bag) in seed trays (Jiffy Professional Greenhouse 72-cell kit, ~$15). Provide adequate light with LED grow lights (Barrina T5 2ft 4-pack LED Grow Lights, 20W each, ~$50) for 14-16 hours a day, positioned 2-4 inches above seedlings. Maintain consistent temperatures (65-75°F for most).
- Direct Sowing vs. Transplanting: Some crops (carrots, radishes, beans, corn) prefer direct sowing into the garden bed. Others (tomatoes, peppers, broccoli, kale) benefit from being started indoors and transplanted. Follow seed packet instructions for planting depths (e.g., lettuce seeds are often surface-sown or planted 1/8 inch deep, while beans are 1 inch deep) and spacing.
- Companion Planting: Strategically plant different species together to enhance growth, deter pests, and attract beneficial insects. For example, planting marigolds near tomatoes can deter nematodes, and basil improves tomato flavor. Nasturtiums can act as a trap crop for aphids.
- Succession Planting: For a continuous harvest, plant small batches of quick-growing crops (lettuce, radishes, cilantro) every 2-3 weeks. As one crop finishes, another is ready to take its place.
Step 6: Pest & Disease Management (Organic)
Maintaining a self sufficient garden from scratch means embracing organic pest and disease control.
- Integrated Pest Management (IPM): This holistic approach combines several strategies.
- Observation: Regularly inspect your plants for early signs of pests or disease. Catching issues early is key.
- Physical Barriers: Use row covers (e.g., Agribon AG-19 floating row cover, 10×20 ft, ~$20) to protect young plants from insect pests like cabbage worms and squash bugs. Install fences (e.g., 2×4 welded wire mesh, 4 ft tall, 50 ft roll ~$70) to keep out deer, rabbits, and other larger animals.
- Hand-Picking: For larger pests like tomato hornworms or squash bugs, simply pick them off and drop them into a bucket of soapy water.
- Companion Planting: As mentioned, certain plants repel pests. Marigolds, garlic, and onions are excellent deterrents.
- Attract Beneficial Insects: Plant flowers like dill, fennel, cosmos, and sweet alyssum to attract ladybugs, lacewings, and parasitic wasps, which prey on common garden pests.
- Organic Sprays & Treatments:
- Neem Oil: An excellent broad-spectrum organic insecticide and fungicide. Bonide Neem Oil Concentrate (16oz, ~$20) can be mixed at a rate of 1-2 tbsp per gallon of water and sprayed on affected plants.
- Insecticidal Soap: Effective against soft-bodied insects like aphids, whiteflies, and spider mites. Garden Safe Insecticidal Soap (24oz ready-to-use, ~$10).
- Bacillus thuringiensis (Bt): A naturally occurring soil bacterium that targets caterpillars and worms. Monterey BT Worm & Caterpillar Killer (16oz, ~$18) is highly effective and safe for beneficial insects.
- Copper or Sulfur Sprays: For fungal diseases like powdery mildew or blight, organic copper (e.g., Bonide Copper Fungicide, ~$15 for 1lb) or sulfur (e.g., Safer Brand Garden Fungicide, ~$10 for 16oz) can be used as a last resort.
Step 7: Harvesting & Seed Saving
The culmination of your efforts is the harvest, and seed saving closes the loop on self-sufficiency.
- Harvesting Techniques:
- Timing: Harvest vegetables at their peak ripeness for best flavor and nutritional value. For example, green beans should snap cleanly, cucumbers should be firm, and tomatoes should be fully colored.
- Frequency: Many crops, like zucchini, cucumbers, and bush beans, produce more if harvested frequently. Pick daily or every other day.
- Tools: Use clean, sharp pruners (e.g., Corona ClassicCUT Bypass Pruner BP 3180, ~$30) or a sharp knife for clean cuts, minimizing damage to the plant.
- Seed Saving: This is where the « self-sufficient » aspect truly shines.
- Selection: Only save seeds from your healthiest, most vigorous plants that show desired traits (disease resistance, good flavor, high yield).
- Isolation: To ensure true-to-type seeds, prevent cross-pollination. This can be challenging for open-pollinated crops that readily cross (e.g., squash, corn). For beginners, focus on self-pollinating plants like beans, peas, lettuce, and tomatoes.
- Processing:
- Dry Seeds (Beans, Peas, Lettuce, Grains): Allow pods/seed heads to dry completely on the plant. Harvest, shell, and clean the seeds, removing chaff.
- Wet Seeds (Tomatoes, Cucumbers, Squash): For tomatoes, ferment the seeds in water for a few days to remove the gel coating and inhibit disease. For cucumbers/squash, scrape out seeds, wash thoroughly, and dry.
- Drying: Spread seeds thinly on screens or paper plates in a cool, dry, well-ventilated area for 1-4 weeks. Ensure they are bone-dry before storage. I aim for less than 8% moisture content.
- Storage: Store seeds in airtight containers (glass jars with desiccant packets work well) in a cool, dark, dry place (ideally 40-50°F and 30-40% humidity). Label clearly with variety and date. Properly stored seeds can remain viable for 3-10 years or more.
Step 8: Season Extension & Winterizing
Extend your harvest and protect your garden for the off-season to truly maximize your self sufficient garden from scratch.
- Cold Frames: Simple structures with a transparent top (glass, polycarbonate, or old windows) that sit over garden beds. They trap solar heat, allowing you to grow cold-hardy crops (lettuce, spinach, kale, radishes) well into winter or start seeds earlier in spring. A basic cold frame can be built from 2×6 lumber and a sheet of polycarbonate for under $100.
- Hoop Houses/Low Tunnels: Larger structures made from flexible hoops (PVC pipe or EMT conduit) covered with greenhouse plastic. These provide more space and greater temperature moderation. A 10×20 ft DIY low tunnel kit can cost $200-$500, while a larger, more robust hoop house kit might be $1,000-$3,000. I use a 6×12 ft low tunnel made from 1/2-inch PVC hoops and 6mil greenhouse plastic, which extends my lettuce and spinach harvest by at least
Deciding between raised beds and in-ground beds depends on your soil, budget, and physical capabilities.
- In-Ground Beds: If you have excellent native soil and good drainage, in-ground beds are the most economical. Double-digging (loosening soil two shovel depths) can significantly improve drainage and aeration. For my main garden, I primarily use in-ground beds, but I focus on building up the soil over time with consistent compost additions and cover cropping. I aim for beds that are no wider than 3-4 feet so I can reach the center without stepping on the soil, compacting it.
- Raised Beds: Raised beds offer numerous advantages, especially for poor soil, heavy clay, or rocky areas. They provide better drainage, warm up faster in spring, reduce compaction, and make weeding and harvesting easier on your back.
- Material Options:
- Untreated Cedar: Naturally rot-resistant and chemical-free. A 4×8 ft bed, 12 inches deep, typically requires three 2x12x8 ft cedar boards, costing around $50-$60 per board (total ~$150-$180) plus corner brackets or screws. My first raised beds were cedar and are still going strong after 7 years.
- Galvanized Steel: Durable, long-lasting, and aesthetically pleasing. Brands like Vego Garden offer modular kits. A Vego Garden 17″ Tall 8-in-1 Metal Raised Garden Bed (can be configured to 4×8 ft) costs approximately $250-$300.
- Concrete Blocks/Stones: Very durable but can leach minerals (though generally safe once weathered) and can be expensive.
- Recycled Materials: Pallets (check for chemical treatment stamps like « HT » for heat-treated), old tires (controversial due to potential chemical leaching).
- Filling Raised Beds: Don’t just fill with topsoil. Use a « Hugelkultur » approach (logs, branches, leaves, then compost, then topsoil) or a mixture of 60% good quality topsoil, 30% compost, and 10% perlite or vermiculite for drainage. A 4x8x1 ft raised bed requires about 32 cubic feet (or ~1.2 cubic yards) of soil mix, which can cost $100-$200 depending on your source.
- Material Options:
Step 4: Water Management & Irrigation
Efficient water management is critical for a self sufficient garden from scratch, especially in off-grid living where water resources might be limited.
- Rainwater Harvesting: This is my primary source of irrigation water. A 55-gallon rain barrel (e.g., EarthMark Rain Barrel, ~$120-$150) connected to a downspout can collect significant water. For larger needs, I use two 275-gallon IBC totes (Intermediate Bulk Containers, often available used for $100-$200 each from food-grade sources) connected in series. A 1,000 sq ft roof can collect approximately 620 gallons of water for every inch of rainfall. My 1,500 sq ft roof provides ample water for my 600 sq ft garden through multiple barrels and totes.
- Drip Irrigation: This is by far the most water-efficient method, delivering water directly to the plant’s root zone, minimizing evaporation and weed growth.
- Components: A typical drip system includes a pressure regulator (e.g., Rain Bird PRV-10, ~$15), a filter (Rain Bird RBY filter, ~$20), main tubing (1/2-inch poly tubing, 100ft ~$25), smaller feeder lines (1/4-inch tubing), and emitters (0.5 GPH or 1 GPH per plant).
- Kits: For beginners, a starter kit like the Rain Bird Drip Irrigation Garden Kit (model DDI-KIT-1P, ~$40-$60) is excellent for a small garden. For larger setups, I use Netafim Techline CV Drip Line (500ft roll, ~$150-$200), which has pressure-compensating emitters built-in, ensuring even watering across long runs.
- Automation: For true self-sufficiency, consider a battery-powered timer (e.g., Orbit B-Hyve Bluetooth Hose Faucet Timer, ~$50) or a solar-powered timer connected to a small 12V pump.
- Solar-Powered Pumps: For lifting water from a well, pond, or large storage tank to your garden, a solar pump is a game-changer. For a smaller drip system, a Shurflo 2088-594-152 Diaphragm Pump (12V, 3.5 GPM, ~$180) can be powered by a single 100W solar panel (e.g., Renogy 100W Monocrystalline Solar Panel, ~$100) and a small 12V battery (e.g., a 50Ah LiFePO4 battery like the Battle Born 50Ah, ~$450). For larger operations or deeper wells, more robust systems are needed. If you’re looking to build out a comprehensive off-grid power system to support your garden’s water needs, or indeed your entire homestead, you might want to explore resources like the Power Grid Generator complete system guide to understand the full scope of what’s possible in terms of energy independence.
Step 5: Seed Selection & Planting
The choice of seeds is crucial for a truly self sufficient garden from scratch.
- Choose Heirloom & Open-Pollinated Seeds: These varieties produce seeds that will grow true to type, meaning you can save seeds from your harvest year after year. F1 hybrids, while often vigorous, will not produce consistent offspring from saved seeds. Reputable seed companies include Baker Creek Heirloom Seeds, High Mowing Organic Seeds, and Seed Savers Exchange. Start with common, reliable varieties like ‘Black Krim’ tomatoes, ‘Provider’ bush beans, ‘Waltham Butternut’ squash, and ‘Black Seeded Simpson’ lettuce.
- Start Seeds Indoors (Optional but Recommended): For longer growing seasons or specific crops, starting seeds indoors gives you a head start. Use seed-starting mix (e.g., Espoma Organic Seed Starter Mix, ~$10 for 16qt bag) in seed trays (Jiffy Professional Greenhouse 72-cell kit, ~$15). Provide adequate light with LED grow lights (Barrina T5 2ft 4-pack LED Grow Lights, 20W each, ~$50) for 14-16 hours a day, positioned 2-4 inches above seedlings. Maintain consistent temperatures (65-75°F for most).
- Direct Sowing vs. Transplanting: Some crops (carrots, radishes, beans, corn) prefer direct sowing into the garden bed. Others (tomatoes, peppers, broccoli, kale) benefit from being started indoors and transplanted. Follow seed packet instructions for planting depths (e.g., lettuce seeds are often surface-sown or planted 1/8 inch deep, while beans are 1 inch deep) and spacing.
- Companion Planting: Strategically plant different species together to enhance growth, deter pests, and attract beneficial insects. For example, planting marigolds near tomatoes can deter nematodes, and basil improves tomato flavor. Nasturtiums can act as a trap crop for aphids.
- Succession Planting: For a continuous harvest, plant small batches of quick-growing crops (lettuce, radishes, cilantro) every 2-3 weeks. As one crop finishes, another is ready to take its place.
Step 6: Pest & Disease Management (Organic)
Maintaining a self sufficient garden from scratch means embracing organic pest and disease control.
- Integrated Pest Management (IPM): This holistic approach combines several strategies.
- Observation: Regularly inspect your plants for early signs of pests or disease. Catching issues early is key.
- Physical Barriers: Use row covers (e.g., Agribon AG-19 floating row cover, 10×20 ft, ~$20) to protect young plants from insect pests like cabbage worms and squash bugs. Install fences (e.g., 2×4 welded wire mesh, 4 ft tall, 50 ft roll ~$70) to keep out deer, rabbits, and other larger animals.
- Hand-Picking: For larger pests like tomato hornworms or squash bugs, simply pick them off and drop them into a bucket of soapy water.
- Companion Planting: As mentioned, certain plants repel pests. Marigolds, garlic, and onions are excellent deterrents.
- Attract Beneficial Insects: Plant flowers like dill, fennel, cosmos, and sweet alyssum to attract ladybugs, lacewings, and parasitic wasps, which prey on common garden pests.
- Organic Sprays & Treatments:
- Neem Oil: An excellent broad-spectrum organic insecticide and fungicide. Bonide Neem Oil Concentrate (16oz, ~$20) can be mixed at a rate of 1-2 tbsp per gallon of water and sprayed on affected plants.
- Insecticidal Soap: Effective against soft-bodied insects like aphids, whiteflies, and spider mites. Garden Safe Insecticidal Soap (24oz ready-to-use, ~$10).
- Bacillus thuringiensis (Bt): A naturally occurring soil bacterium that targets caterpillars and worms. Monterey BT Worm & Caterpillar Killer (16oz, ~$18) is highly effective and safe for beneficial insects.
- Copper or Sulfur Sprays: For fungal diseases like powdery mildew or blight, organic copper (e.g., Bonide Copper Fungicide, ~$15 for 1lb) or sulfur (e.g., Safer Brand Garden Fungicide, ~$10 for 16oz) can be used as a last resort.
Step 7: Harvesting & Seed Saving
The culmination of your efforts is the harvest, and seed saving closes the loop on self-sufficiency.
- Harvesting Techniques:
- Timing: Harvest vegetables at their peak ripeness for best flavor and nutritional value. For example, green beans should snap cleanly, cucumbers should be firm, and tomatoes should be fully colored.
- Frequency: Many crops, like zucchini, cucumbers, and bush beans, produce more if harvested frequently. Pick daily or every other day.
- Tools: Use clean, sharp pruners (e.g., Corona ClassicCUT Bypass Pruner BP 3180, ~$30) or a sharp knife for clean cuts, minimizing damage to the plant.
- Seed Saving: This is where the « self-sufficient » aspect truly shines.
- Selection: Only save seeds from your healthiest, most vigorous plants that show desired traits (disease resistance, good flavor, high yield).
- Isolation: To ensure true-to-type seeds, prevent cross-pollination. This can be challenging for open-pollinated crops that readily cross (e.g., squash, corn). For beginners, focus on self-pollinating plants like beans, peas, lettuce, and tomatoes.
- Processing:
- Dry Seeds (Beans, Peas, Lettuce, Grains): Allow pods/seed heads to dry completely on the plant. Harvest, shell, and clean the seeds, removing chaff.
- Wet Seeds (Tomatoes, Cucumbers, Squash): For tomatoes, ferment the seeds in water for a few days to remove the gel coating and inhibit disease. For cucumbers/squash, scrape out seeds, wash thoroughly, and dry.
- Drying: Spread seeds thinly on screens or paper plates in a cool, dry, well-ventilated area for 1-4 weeks. Ensure they are bone-dry before storage. I aim for less than 8% moisture content.
- Storage: Store seeds in airtight containers (glass jars with desiccant packets work well) in a cool, dark, dry place (ideally 40-50°F and 30-40% humidity). Label clearly with variety and date. Properly stored seeds can remain viable for 3-10 years or more.
Step 8: Season Extension & Winterizing
Extend your harvest and protect your garden for the off-season to truly maximize your self sufficient garden from scratch.
- Cold Frames: Simple structures with a transparent top (glass, polycarbonate, or old windows) that sit over garden beds. They trap solar heat, allowing you to grow cold-hardy crops (lettuce, spinach, kale, radishes) well into winter or start seeds earlier in spring. A basic cold frame can be built from 2×6 lumber and a sheet of polycarbonate for under $100.
- Hoop Houses/Low Tunnels: Larger structures made from flexible hoops (PVC pipe or EMT conduit) covered with greenhouse plastic. These provide more space and greater temperature moderation. A 10×20 ft DIY low tunnel kit can cost $200-$500, while a larger, more robust hoop house kit might be $1,000-$3,000. I use a 6×12 ft low tunnel made from 1/2-inch PVC hoops and 6mil greenhouse plastic, which extends my lettuce and spinach harvest by at least
Healthy soil is the bedrock of a productive, self-sufficient garden. You can’t guess what your soil needs; you have to test it.
- Perform a Soil Test: A professional soil test will give you precise data on your soil’s pH, nutrient levels (N-P-K), and organic matter content. I recommend sending a sample to your local agricultural extension office; it typically costs $20-$50 and provides detailed recommendations. Alternatively, for a quick homeowner check, a Rapitest Soil Test Kit (40-test kit, model 1663, ~$20 on Amazon) provides a good baseline for pH, Nitrogen, Phosphorus, and Potash. Aim for a pH between 6.0 and 7.0 for most vegetables.
- Amend for pH Imbalance: If your soil is too acidic (below 6.0), add agricultural lime (dolomitic lime adds magnesium, calcitic lime adds calcium). Apply 5-10 lbs per 100 sq ft for a moderate adjustment. If it’s too alkaline (above 7.0), add elemental sulfur (e.g., Espoma Soil Acidifier, ~$15 for 6.75 lbs) or generous amounts of organic matter like peat moss or pine needles.
- Build Organic Matter: This is the single most important step for long-term soil health. Organic matter improves soil structure, water retention, drainage, and nutrient availability. Incorporate 2-4 inches of high-quality compost into your top 6-12 inches of soil annually. I make my own compost from kitchen scraps, garden waste, and shredded leaves, but you can purchase it. Local nurseries often sell bulk compost for $30-$50 per cubic yard. Aged manure (from chickens, cows, or horses – ensure it’s well-rotted to avoid burning plants) is also excellent.
- Address Nutrient Deficiencies: Based on your soil test, add specific organic amendments. If Nitrogen (N) is low, add blood meal (12-0-0, ~$20 for 3 lbs) or feather meal. For Phosphorus (P), use bone meal (3-15-0, ~$15 for 3 lbs) or rock phosphate. For Potassium (K), greensand (0-0-2.5, ~$25 for 5 lbs) or kelp meal are good choices. I rely heavily on Espoma Organic Garden-tone (5-3-3, ~$25 for an 8lb bag) as a balanced, all-purpose organic fertilizer during planting.
Step 3: Garden Bed Preparation
Deciding between raised beds and in-ground beds depends on your soil, budget, and physical capabilities.
- In-Ground Beds: If you have excellent native soil and good drainage, in-ground beds are the most economical. Double-digging (loosening soil two shovel depths) can significantly improve drainage and aeration. For my main garden, I primarily use in-ground beds, but I focus on building up the soil over time with consistent compost additions and cover cropping. I aim for beds that are no wider than 3-4 feet so I can reach the center without stepping on the soil, compacting it.
- Raised Beds: Raised beds offer numerous advantages, especially for poor soil, heavy clay, or rocky areas. They provide better drainage, warm up faster in spring, reduce compaction, and make weeding and harvesting easier on your back.
- Material Options:
- Untreated Cedar: Naturally rot-resistant and chemical-free. A 4×8 ft bed, 12 inches deep, typically requires three 2x12x8 ft cedar boards, costing around $50-$60 per board (total ~$150-$180) plus corner brackets or screws. My first raised beds were cedar and are still going strong after 7 years.
- Galvanized Steel: Durable, long-lasting, and aesthetically pleasing. Brands like Vego Garden offer modular kits. A Vego Garden 17″ Tall 8-in-1 Metal Raised Garden Bed (can be configured to 4×8 ft) costs approximately $250-$300.
- Concrete Blocks/Stones: Very durable but can leach minerals (though generally safe once weathered) and can be expensive.
- Recycled Materials: Pallets (check for chemical treatment stamps like « HT » for heat-treated), old tires (controversial due to potential chemical leaching).
- Filling Raised Beds: Don’t just fill with topsoil. Use a « Hugelkultur » approach (logs, branches, leaves, then compost, then topsoil) or a mixture of 60% good quality topsoil, 30% compost, and 10% perlite or vermiculite for drainage. A 4x8x1 ft raised bed requires about 32 cubic feet (or ~1.2 cubic yards) of soil mix, which can cost $100-$200 depending on your source.
- Material Options:
Step 4: Water Management & Irrigation
Efficient water management is critical for a self sufficient garden from scratch, especially in off-grid living where water resources might be limited.
- Rainwater Harvesting: This is my primary source of irrigation water. A 55-gallon rain barrel (e.g., EarthMark Rain Barrel, ~$120-$150) connected to a downspout can collect significant water. For larger needs, I use two 275-gallon IBC totes (Intermediate Bulk Containers, often available used for $100-$200 each from food-grade sources) connected in series. A 1,000 sq ft roof can collect approximately 620 gallons of water for every inch of rainfall. My 1,500 sq ft roof provides ample water for my 600 sq ft garden through multiple barrels and totes.
- Drip Irrigation: This is by far the most water-efficient method, delivering water directly to the plant’s root zone, minimizing evaporation and weed growth.
- Components: A typical drip system includes a pressure regulator (e.g., Rain Bird PRV-10, ~$15), a filter (Rain Bird RBY filter, ~$20), main tubing (1/2-inch poly tubing, 100ft ~$25), smaller feeder lines (1/4-inch tubing), and emitters (0.5 GPH or 1 GPH per plant).
- Kits: For beginners, a starter kit like the Rain Bird Drip Irrigation Garden Kit (model DDI-KIT-1P, ~$40-$60) is excellent for a small garden. For larger setups, I use Netafim Techline CV Drip Line (500ft roll, ~$150-$200), which has pressure-compensating emitters built-in, ensuring even watering across long runs.
- Automation: For true self-sufficiency, consider a battery-powered timer (e.g., Orbit B-Hyve Bluetooth Hose Faucet Timer, ~$50) or a solar-powered timer connected to a small 12V pump.
- Solar-Powered Pumps: For lifting water from a well, pond, or large storage tank to your garden, a solar pump is a game-changer. For a smaller drip system, a Shurflo 2088-594-152 Diaphragm Pump (12V, 3.5 GPM, ~$180) can be powered by a single 100W solar panel (e.g., Renogy 100W Monocrystalline Solar Panel, ~$100) and a small 12V battery (e.g., a 50Ah LiFePO4 battery like the Battle Born 50Ah, ~$450). For larger operations or deeper wells, more robust systems are needed. If you’re looking to build out a comprehensive off-grid power system to support your garden’s water needs, or indeed your entire homestead, you might want to explore resources like the Power Grid Generator complete system guide to understand the full scope of what’s possible in terms of energy independence.
Step 5: Seed Selection & Planting
The choice of seeds is crucial for a truly self sufficient garden from scratch.
- Choose Heirloom & Open-Pollinated Seeds: These varieties produce seeds that will grow true to type, meaning you can save seeds from your harvest year after year. F1 hybrids, while often vigorous, will not produce consistent offspring from saved seeds. Reputable seed companies include Baker Creek Heirloom Seeds, High Mowing Organic Seeds, and Seed Savers Exchange. Start with common, reliable varieties like ‘Black Krim’ tomatoes, ‘Provider’ bush beans, ‘Waltham Butternut’ squash, and ‘Black Seeded Simpson’ lettuce.
- Start Seeds Indoors (Optional but Recommended): For longer growing seasons or specific crops, starting seeds indoors gives you a head start. Use seed-starting mix (e.g., Espoma Organic Seed Starter Mix, ~$10 for 16qt bag) in seed trays (Jiffy Professional Greenhouse 72-cell kit, ~$15). Provide adequate light with LED grow lights (Barrina T5 2ft 4-pack LED Grow Lights, 20W each, ~$50) for 14-16 hours a day, positioned 2-4 inches above seedlings. Maintain consistent temperatures (65-75°F for most).
- Direct Sowing vs. Transplanting: Some crops (carrots, radishes, beans, corn) prefer direct sowing into the garden bed. Others (tomatoes, peppers, broccoli, kale) benefit from being started indoors and transplanted. Follow seed packet instructions for planting depths (e.g., lettuce seeds are often surface-sown or planted 1/8 inch deep, while beans are 1 inch deep) and spacing.
- Companion Planting: Strategically plant different species together to enhance growth, deter pests, and attract beneficial insects. For example, planting marigolds near tomatoes can deter nematodes, and basil improves tomato flavor. Nasturtiums can act as a trap crop for aphids.
- Succession Planting: For a continuous harvest, plant small batches of quick-growing crops (lettuce, radishes, cilantro) every 2-3 weeks. As one crop finishes, another is ready to take its place.
Step 6: Pest & Disease Management (Organic)
Maintaining a self sufficient garden from scratch means embracing organic pest and disease control.
- Integrated Pest Management (IPM): This holistic approach combines several strategies.
- Observation: Regularly inspect your plants for early signs of pests or disease. Catching issues early is key.
- Physical Barriers: Use row covers (e.g., Agribon AG-19 floating row cover, 10×20 ft, ~$20) to protect young plants from insect pests like cabbage worms and squash bugs. Install fences (e.g., 2×4 welded wire mesh, 4 ft tall, 50 ft roll ~$70) to keep out deer, rabbits, and other larger animals.
- Hand-Picking: For larger pests like tomato hornworms or squash bugs, simply pick them off and drop them into a bucket of soapy water.
- Companion Planting: As mentioned, certain plants repel pests. Marigolds, garlic, and onions are excellent deterrents.
- Attract Beneficial Insects: Plant flowers like dill, fennel, cosmos, and sweet alyssum to attract ladybugs, lacewings, and parasitic wasps, which prey on common garden pests.
- Organic Sprays & Treatments:
- Neem Oil: An excellent broad-spectrum organic insecticide and fungicide. Bonide Neem Oil Concentrate (16oz, ~$20) can be mixed at a rate of 1-2 tbsp per gallon of water and sprayed on affected plants.
- Insecticidal Soap: Effective against soft-bodied insects like aphids, whiteflies, and spider mites. Garden Safe Insecticidal Soap (24oz ready-to-use, ~$10).
- Bacillus thuringiensis (Bt): A naturally occurring soil bacterium that targets caterpillars and worms. Monterey BT Worm & Caterpillar Killer (16oz, ~$18) is highly effective and safe for beneficial insects.
- Copper or Sulfur Sprays: For fungal diseases like powdery mildew or blight, organic copper (e.g., Bonide Copper Fungicide, ~$15 for 1lb) or sulfur (e.g., Safer Brand Garden Fungicide, ~$10 for 16oz) can be used as a last resort.
Step 7: Harvesting & Seed Saving
The culmination of your efforts is the harvest, and seed saving closes the loop on self-sufficiency.
- Harvesting Techniques:
- Timing: Harvest vegetables at their peak ripeness for best flavor and nutritional value. For example, green beans should snap cleanly, cucumbers should be firm, and tomatoes should be fully colored.
- Frequency: Many crops, like zucchini, cucumbers, and bush beans, produce more if harvested frequently. Pick daily or every other day.
- Tools: Use clean, sharp pruners (e.g., Corona ClassicCUT Bypass Pruner BP 3180, ~$30) or a sharp knife for clean cuts, minimizing damage to the plant.
- Seed Saving: This is where the « self-sufficient » aspect truly shines.
- Selection: Only save seeds from your healthiest, most vigorous plants that show desired traits (disease resistance, good flavor, high yield).
- Isolation: To ensure true-to-type seeds, prevent cross-pollination. This can be challenging for open-pollinated crops that readily cross (e.g., squash, corn). For beginners, focus on self-pollinating plants like beans, peas, lettuce, and tomatoes.
- Processing:
- Dry Seeds (Beans, Peas, Lettuce, Grains): Allow pods/seed heads to dry completely on the plant. Harvest, shell, and clean the seeds, removing chaff.
- Wet Seeds (Tomatoes, Cucumbers, Squash): For tomatoes, ferment the seeds in water for a few days to remove the gel coating and inhibit disease. For cucumbers/squash, scrape out seeds, wash thoroughly, and dry.
- Drying: Spread seeds thinly on screens or paper plates in a cool, dry, well-ventilated area for 1-4 weeks. Ensure they are bone-dry before storage. I aim for less than 8% moisture content.
- Storage: Store seeds in airtight containers (glass jars with desiccant packets work well) in a cool, dark, dry place (ideally 40-50°F and 30-40% humidity). Label clearly with variety and date. Properly stored seeds can remain viable for 3-10 years or more.
Step 8: Season Extension & Winterizing
Extend your harvest and protect your garden for the off-season to truly maximize your self sufficient garden from scratch.
- Cold Frames: Simple structures with a transparent top (glass, polycarbonate, or old windows) that sit over garden beds. They trap solar heat, allowing you to grow cold-hardy crops (lettuce, spinach, kale, radishes) well into winter or start seeds earlier in spring. A basic cold frame can be built from 2×6 lumber and a sheet of polycarbonate for under $100.
- Hoop Houses/Low Tunnels: Larger structures made from flexible hoops (PVC pipe or EMT conduit) covered with greenhouse plastic. These provide more space and greater temperature moderation. A 10×20 ft DIY low tunnel kit can cost $200-$500, while a larger, more robust hoop house kit might be $1,000-$3,000. I use a 6×12 ft low tunnel made from 1/2-inch PVC hoops and 6mil greenhouse plastic, which extends my lettuce and spinach harvest by at least
- Rainwater Harvesting: This is my primary source of irrigation water. A 55-gallon rain barrel (e.g., EarthMark Rain Barrel, ~$120-$150) connected to a downspout can collect significant water. For larger needs, I use two 275-gallon IBC totes (Intermediate Bulk Containers, often available used for $100-$200 each from food-grade sources) connected in series. A 1,000 sq ft roof can collect approximately 620 gallons of water for every inch of rainfall. My 1,500 sq ft roof provides ample water for my 600 sq ft garden through multiple barrels and totes.
- Drip Irrigation: This is by far the most water-efficient method, delivering water directly to the plant’s root zone, minimizing evaporation and weed growth.
- Components: A typical drip system includes a pressure regulator (e.g., Rain Bird PRV-10, ~$15), a filter (Rain Bird RBY filter, ~$20), main tubing (1/2-inch poly tubing, 100ft ~$25), smaller feeder lines (1/4-inch tubing), and emitters (0.5 GPH or 1 GPH per plant).
- Kits: For beginners, a starter kit like the Rain Bird Drip Irrigation Garden Kit (model DDI-KIT-1P, ~$40-$60) is excellent for a small garden. For larger setups, I use Netafim Techline CV Drip Line (500ft roll, ~$150-$200), which has pressure-compensating emitters built-in, ensuring even watering across long runs.
- Automation: For true self-sufficiency, consider a battery-powered timer (e.g., Orbit B-Hyve Bluetooth Hose Faucet Timer, ~$50) or a solar-powered timer connected to a small 12V pump.
- Solar-Powered Pumps: For lifting water from a well, pond, or large storage tank to your garden, a solar pump is a game-changer. For a smaller drip system, a Shurflo 2088-594-152 Diaphragm Pump (12V, 3.5 GPM, ~$180) can be powered by a single 100W solar panel (e.g., Renogy 100W Monocrystalline Solar Panel, ~$100) and a small 12V battery (e.g., a 50Ah LiFePO4 battery like the Battle Born 50Ah, ~$450). For larger operations or deeper wells, more robust systems are needed. If you’re looking to build out a comprehensive off-grid power system to support your garden’s water needs, or indeed your entire homestead, you might want to explore resources like the Power Grid Generator complete system guide to understand the full scope of what’s possible in terms of energy independence.
Step 5: Seed Selection & Planting
The choice of seeds is crucial for a truly self sufficient garden from scratch.
- Choose Heirloom & Open-Pollinated Seeds: These varieties produce seeds that will grow true to type, meaning you can save seeds from your harvest year after year. F1 hybrids, while often vigorous, will not produce consistent offspring from saved seeds. Reputable seed companies include Baker Creek Heirloom Seeds, High Mowing Organic Seeds, and Seed Savers Exchange. Start with common, reliable varieties like ‘Black Krim’ tomatoes, ‘Provider’ bush beans, ‘Waltham Butternut’ squash, and ‘Black Seeded Simpson’ lettuce.
- Start Seeds Indoors (Optional but Recommended): For longer growing seasons or specific crops, starting seeds indoors gives you a head start. Use seed-starting mix (e.g., Espoma Organic Seed Starter Mix, ~$10 for 16qt bag) in seed trays (Jiffy Professional Greenhouse 72-cell kit, ~$15). Provide adequate light with LED grow lights (Barrina T5 2ft 4-pack LED Grow Lights, 20W each, ~$50) for 14-16 hours a day, positioned 2-4 inches above seedlings. Maintain consistent temperatures (65-75°F for most).
- Direct Sowing vs. Transplanting: Some crops (carrots, radishes, beans, corn) prefer direct sowing into the garden bed. Others (tomatoes, peppers, broccoli, kale) benefit from being started indoors and transplanted. Follow seed packet instructions for planting depths (e.g., lettuce seeds are often surface-sown or planted 1/8 inch deep, while beans are 1 inch deep) and spacing.
- Companion Planting: Strategically plant different species together to enhance growth, deter pests, and attract beneficial insects. For example, planting marigolds near tomatoes can deter nematodes, and basil improves tomato flavor. Nasturtiums can act as a trap crop for aphids.
- Succession Planting: For a continuous harvest, plant small batches of quick-growing crops (lettuce, radishes, cilantro) every 2-3 weeks. As one crop finishes, another is ready to take its place.
Step 6: Pest & Disease Management (Organic)
Maintaining a self sufficient garden from scratch means embracing organic pest and disease control.
- Integrated Pest Management (IPM): This holistic approach combines several strategies.
- Observation: Regularly inspect your plants for early signs of pests or disease. Catching issues early is key.
- Physical Barriers: Use row covers (e.g., Agribon AG-19 floating row cover, 10×20 ft, ~$20) to protect young plants from insect pests like cabbage worms and squash bugs. Install fences (e.g., 2×4 welded wire mesh, 4 ft tall, 50 ft roll ~$70) to keep out deer, rabbits, and other larger animals.
- Hand-Picking: For larger pests like tomato hornworms or squash bugs, simply pick them off and drop them into a bucket of soapy water.
- Companion Planting: As mentioned, certain plants repel pests. Marigolds, garlic, and onions are excellent deterrents.
- Attract Beneficial Insects: Plant flowers like dill, fennel, cosmos, and sweet alyssum to attract ladybugs, lacewings, and parasitic wasps, which prey on common garden pests.
- Organic Sprays & Treatments:
- Neem Oil: An excellent broad-spectrum organic insecticide and fungicide. Bonide Neem Oil Concentrate (16oz, ~$20) can be mixed at a rate of 1-2 tbsp per gallon of water and sprayed on affected plants.
- Insecticidal Soap: Effective against soft-bodied insects like aphids, whiteflies, and spider mites. Garden Safe Insecticidal Soap (24oz ready-to-use, ~$10).
- Bacillus thuringiensis (Bt): A naturally occurring soil bacterium that targets caterpillars and worms. Monterey BT Worm & Caterpillar Killer (16oz, ~$18) is highly effective and safe for beneficial insects.
- Copper or Sulfur Sprays: For fungal diseases like powdery mildew or blight, organic copper (e.g., Bonide Copper Fungicide, ~$15 for 1lb) or sulfur (e.g., Safer Brand Garden Fungicide, ~$10 for 16oz) can be used as a last resort.
Step 7: Harvesting & Seed Saving
The culmination of your efforts is the harvest, and seed saving closes the loop on self-sufficiency.
- Harvesting Techniques:
- Timing: Harvest vegetables at their peak ripeness for best flavor and nutritional value. For example, green beans should snap cleanly, cucumbers should be firm, and tomatoes should be fully colored.
- Frequency: Many crops, like zucchini, cucumbers, and bush beans, produce more if harvested frequently. Pick daily or every other day.
- Tools: Use clean, sharp pruners (e.g., Corona ClassicCUT Bypass Pruner BP 3180, ~$30) or a sharp knife for clean cuts, minimizing damage to the plant.
- Seed Saving: This is where the « self-sufficient » aspect truly shines.
- Selection: Only save seeds from your healthiest, most vigorous plants that show desired traits (disease resistance, good flavor, high yield).
- Isolation: To ensure true-to-type seeds, prevent cross-pollination. This can be challenging for open-pollinated crops that readily cross (e.g., squash, corn). For beginners, focus on self-pollinating plants like beans, peas, lettuce, and tomatoes.
- Processing:
- Dry Seeds (Beans, Peas, Lettuce, Grains): Allow pods/seed heads to dry completely on the plant. Harvest, shell, and clean the seeds, removing chaff.
- Wet Seeds (Tomatoes, Cucumbers, Squash): For tomatoes, ferment the seeds in water for a few days to remove the gel coating and inhibit disease. For cucumbers/squash, scrape out seeds, wash thoroughly, and dry.
- Drying: Spread seeds thinly on screens or paper plates in a cool, dry, well-ventilated area for 1-4 weeks. Ensure they are bone-dry before storage. I aim for less than 8% moisture content.
- Storage: Store seeds in airtight containers (glass jars with desiccant packets work well) in a cool, dark, dry place (ideally 40-50°F and 30-40% humidity). Label clearly with variety and date. Properly stored seeds can remain viable for 3-10 years or more.
Step 8: Season Extension & Winterizing
Extend your harvest and protect your garden for the off-season to truly maximize your self sufficient garden from scratch.
- Cold Frames: Simple structures with a transparent top (glass, polycarbonate, or old windows) that sit over garden beds. They trap solar heat, allowing you to grow cold-hardy crops (lettuce, spinach, kale, radishes) well into winter or start seeds earlier in spring. A basic cold frame can be built from 2×6 lumber and a sheet of polycarbonate for under $100.
- Hoop Houses/Low Tunnels: Larger structures made from flexible hoops (PVC pipe or EMT conduit) covered with greenhouse plastic. These provide more space and greater temperature moderation. A 10×20 ft DIY low tunnel kit can cost $200-$500, while a larger, more robust hoop house kit might be $1,000-$3,000. I use a 6×12 ft low tunnel made from 1/2-inch PVC hoops and 6mil greenhouse plastic, which extends my lettuce and spinach harvest by at least
Step 4: Water Management & Irrigation
Efficient water management is critical for a self sufficient garden from scratch, especially in off-grid living where water resources might be limited.
- Rainwater Harvesting: This is my primary source of irrigation water. A 55-gallon rain barrel (e.g., EarthMark Rain Barrel, ~$120-$150) connected to a downspout can collect significant water. For larger needs, I use two 275-gallon IBC totes (Intermediate Bulk Containers, often available used for $100-$200 each from food-grade sources) connected in series. A 1,000 sq ft roof can collect approximately 620 gallons of water for every inch of rainfall. My 1,500 sq ft roof provides ample water for my 600 sq ft garden through multiple barrels and totes.
- Drip Irrigation: This is by far the most water-efficient method, delivering water directly to the plant’s root zone, minimizing evaporation and weed growth.
- Components: A typical drip system includes a pressure regulator (e.g., Rain Bird PRV-10, ~$15), a filter (Rain Bird RBY filter, ~$20), main tubing (1/2-inch poly tubing, 100ft ~$25), smaller feeder lines (1/4-inch tubing), and emitters (0.5 GPH or 1 GPH per plant).
- Kits: For beginners, a starter kit like the Rain Bird Drip Irrigation Garden Kit (model DDI-KIT-1P, ~$40-$60) is excellent for a small garden. For larger setups, I use Netafim Techline CV Drip Line (500ft roll, ~$150-$200), which has pressure-compensating emitters built-in, ensuring even watering across long runs.
- Automation: For true self-sufficiency, consider a battery-powered timer (e.g., Orbit B-Hyve Bluetooth Hose Faucet Timer, ~$50) or a solar-powered timer connected to a small 12V pump.
- Solar-Powered Pumps: For lifting water from a well, pond, or large storage tank to your garden, a solar pump is a game-changer. For a smaller drip system, a Shurflo 2088-594-152 Diaphragm Pump (12V, 3.5 GPM, ~$180) can be powered by a single 100W solar panel (e.g., Renogy 100W Monocrystalline Solar Panel, ~$100) and a small 12V battery (e.g., a 50Ah LiFePO4 battery like the Battle Born 50Ah, ~$450). For larger operations or deeper wells, more robust systems are needed. If you’re looking to build out a comprehensive off-grid power system to support your garden’s water needs, or indeed your entire homestead, you might want to explore resources like the Power Grid Generator complete system guide to understand the full scope of what’s possible in terms of energy independence.
Step 5: Seed Selection & Planting
The choice of seeds is crucial for a truly self sufficient garden from scratch.
- Choose Heirloom & Open-Pollinated Seeds: These varieties produce seeds that will grow true to type, meaning you can save seeds from your harvest year after year. F1 hybrids, while often vigorous, will not produce consistent offspring from saved seeds. Reputable seed companies include Baker Creek Heirloom Seeds, High Mowing Organic Seeds, and Seed Savers Exchange. Start with common, reliable varieties like ‘Black Krim’ tomatoes, ‘Provider’ bush beans, ‘Waltham Butternut’ squash, and ‘Black Seeded Simpson’ lettuce.
- Start Seeds Indoors (Optional but Recommended): For longer growing seasons or specific crops, starting seeds indoors gives you a head start. Use seed-starting mix (e.g., Espoma Organic Seed Starter Mix, ~$10 for 16qt bag) in seed trays (Jiffy Professional Greenhouse 72-cell kit, ~$15). Provide adequate light with LED grow lights (Barrina T5 2ft 4-pack LED Grow Lights, 20W each, ~$50) for 14-16 hours a day, positioned 2-4 inches above seedlings. Maintain consistent temperatures (65-75°F for most).
- Direct Sowing vs. Transplanting: Some crops (carrots, radishes, beans, corn) prefer direct sowing into the garden bed. Others (tomatoes, peppers, broccoli, kale) benefit from being started indoors and transplanted. Follow seed packet instructions for planting depths (e.g., lettuce seeds are often surface-sown or planted 1/8 inch deep, while beans are 1 inch deep) and spacing.
- Companion Planting: Strategically plant different species together to enhance growth, deter pests, and attract beneficial insects. For example, planting marigolds near tomatoes can deter nematodes, and basil improves tomato flavor. Nasturtiums can act as a trap crop for aphids.
- Succession Planting: For a continuous harvest, plant small batches of quick-growing crops (lettuce, radishes, cilantro) every 2-3 weeks. As one crop finishes, another is ready to take its place.
Step 6: Pest & Disease Management (Organic)
Maintaining a self sufficient garden from scratch means embracing organic pest and disease control.
- Integrated Pest Management (IPM): This holistic approach combines several strategies.
- Observation: Regularly inspect your plants for early signs of pests or disease. Catching issues early is key.
- Physical Barriers: Use row covers (e.g., Agribon AG-19 floating row cover, 10×20 ft, ~$20) to protect young plants from insect pests like cabbage worms and squash bugs. Install fences (e.g., 2×4 welded wire mesh, 4 ft tall, 50 ft roll ~$70) to keep out deer, rabbits, and other larger animals.
- Hand-Picking: For larger pests like tomato hornworms or squash bugs, simply pick them off and drop them into a bucket of soapy water.
- Companion Planting: As mentioned, certain plants repel pests. Marigolds, garlic, and onions are excellent deterrents.
- Attract Beneficial Insects: Plant flowers like dill, fennel, cosmos, and sweet alyssum to attract ladybugs, lacewings, and parasitic wasps, which prey on common garden pests.
- Organic Sprays & Treatments:
- Neem Oil: An excellent broad-spectrum organic insecticide and fungicide. Bonide Neem Oil Concentrate (16oz, ~$20) can be mixed at a rate of 1-2 tbsp per gallon of water and sprayed on affected plants.
- Insecticidal Soap: Effective against soft-bodied insects like aphids, whiteflies, and spider mites. Garden Safe Insecticidal Soap (24oz ready-to-use, ~$10).
- Bacillus thuringiensis (Bt): A naturally occurring soil bacterium that targets caterpillars and worms. Monterey BT Worm & Caterpillar Killer (16oz, ~$18) is highly effective and safe for beneficial insects.
- Copper or Sulfur Sprays: For fungal diseases like powdery mildew or blight, organic copper (e.g., Bonide Copper Fungicide, ~$15 for 1lb) or sulfur (e.g., Safer Brand Garden Fungicide, ~$10 for 16oz) can be used as a last resort.
Step 7: Harvesting & Seed Saving
The culmination of your efforts is the harvest, and seed saving closes the loop on self-sufficiency.
- Harvesting Techniques:
- Timing: Harvest vegetables at their peak ripeness for best flavor and nutritional value. For example, green beans should snap cleanly, cucumbers should be firm, and tomatoes should be fully colored.
- Frequency: Many crops, like zucchini, cucumbers, and bush beans, produce more if harvested frequently. Pick daily or every other day.
- Tools: Use clean, sharp pruners (e.g., Corona ClassicCUT Bypass Pruner BP 3180, ~$30) or a sharp knife for clean cuts, minimizing damage to the plant.
- Seed Saving: This is where the « self-sufficient » aspect truly shines.
- Selection: Only save seeds from your healthiest, most vigorous plants that show desired traits (disease resistance, good flavor, high yield).
- Isolation: To ensure true-to-type seeds, prevent cross-pollination. This can be challenging for open-pollinated crops that readily cross (e.g., squash, corn). For beginners, focus on self-pollinating plants like beans, peas, lettuce, and tomatoes.
- Processing:
- Dry Seeds (Beans, Peas, Lettuce, Grains): Allow pods/seed heads to dry completely on the plant. Harvest, shell, and clean the seeds, removing chaff.
- Wet Seeds (Tomatoes, Cucumbers, Squash): For tomatoes, ferment the seeds in water for a few days to remove the gel coating and inhibit disease. For cucumbers/squash, scrape out seeds, wash thoroughly, and dry.
- Drying: Spread seeds thinly on screens or paper plates in a cool, dry, well-ventilated area for 1-4 weeks. Ensure they are bone-dry before storage. I aim for less than 8% moisture content.
- Storage: Store seeds in airtight containers (glass jars with desiccant packets work well) in a cool, dark, dry place (ideally 40-50°F and 30-40% humidity). Label clearly with variety and date. Properly stored seeds can remain viable for 3-10 years or more.
Step 8: Season Extension & Winterizing
Extend your harvest and protect your garden for the off-season to truly maximize your self sufficient garden from scratch.
- Cold Frames: Simple structures with a transparent top (glass, polycarbonate, or old windows) that sit over garden beds. They trap solar heat, allowing you to grow cold-hardy crops (lettuce, spinach, kale, radishes) well into winter or start seeds earlier in spring. A basic cold frame can be built from 2×6 lumber and a sheet of polycarbonate for under $100.
- Hoop Houses/Low Tunnels: Larger structures made from flexible hoops (PVC pipe or EMT conduit) covered with greenhouse plastic. These provide more space and greater temperature moderation. A 10×20 ft DIY low tunnel kit can cost $200-$500, while a larger, more robust hoop house kit might be $1,000-$3,000. I use a 6×12 ft low tunnel made from 1/2-inch PVC hoops and 6mil greenhouse plastic, which extends my lettuce and spinach harvest by at least
- In-Ground Beds: If you have excellent native soil and good drainage, in-ground beds are the most economical. Double-digging (loosening soil two shovel depths) can significantly improve drainage and aeration. For my main garden, I primarily use in-ground beds, but I focus on building up the soil over time with consistent compost additions and cover cropping. I aim for beds that are no wider than 3-4 feet so I can reach the center without stepping on the soil, compacting it.
- Raised Beds: Raised beds offer numerous advantages, especially for poor soil, heavy clay, or rocky areas. They provide better drainage, warm up faster in spring, reduce compaction, and make weeding and harvesting easier on your back.
- Material Options:
- Untreated Cedar: Naturally rot-resistant and chemical-free. A 4×8 ft bed, 12 inches deep, typically requires three 2x12x8 ft cedar boards, costing around $50-$60 per board (total ~$150-$180) plus corner brackets or screws. My first raised beds were cedar and are still going strong after 7 years.
- Galvanized Steel: Durable, long-lasting, and aesthetically pleasing. Brands like Vego Garden offer modular kits. A Vego Garden 17″ Tall 8-in-1 Metal Raised Garden Bed (can be configured to 4×8 ft) costs approximately $250-$300.
- Concrete Blocks/Stones: Very durable but can leach minerals (though generally safe once weathered) and can be expensive.
- Recycled Materials: Pallets (check for chemical treatment stamps like « HT » for heat-treated), old tires (controversial due to potential chemical leaching).
- Filling Raised Beds: Don’t just fill with topsoil. Use a « Hugelkultur » approach (logs, branches, leaves, then compost, then topsoil) or a mixture of 60% good quality topsoil, 30% compost, and 10% perlite or vermiculite for drainage. A 4x8x1 ft raised bed requires about 32 cubic feet (or ~1.2 cubic yards) of soil mix, which can cost $100-$200 depending on your source.
- Material Options:
Step 4: Water Management & Irrigation
Efficient water management is critical for a self sufficient garden from scratch, especially in off-grid living where water resources might be limited.
- Rainwater Harvesting: This is my primary source of irrigation water. A 55-gallon rain barrel (e.g., EarthMark Rain Barrel, ~$120-$150) connected to a downspout can collect significant water. For larger needs, I use two 275-gallon IBC totes (Intermediate Bulk Containers, often available used for $100-$200 each from food-grade sources) connected in series. A 1,000 sq ft roof can collect approximately 620 gallons of water for every inch of rainfall. My 1,500 sq ft roof provides ample water for my 600 sq ft garden through multiple barrels and totes.
- Drip Irrigation: This is by far the most water-efficient method, delivering water directly to the plant’s root zone, minimizing evaporation and weed growth.
- Components: A typical drip system includes a pressure regulator (e.g., Rain Bird PRV-10, ~$15), a filter (Rain Bird RBY filter, ~$20), main tubing (1/2-inch poly tubing, 100ft ~$25), smaller feeder lines (1/4-inch tubing), and emitters (0.5 GPH or 1 GPH per plant).
- Kits: For beginners, a starter kit like the Rain Bird Drip Irrigation Garden Kit (model DDI-KIT-1P, ~$40-$60) is excellent for a small garden. For larger setups, I use Netafim Techline CV Drip Line (500ft roll, ~$150-$200), which has pressure-compensating emitters built-in, ensuring even watering across long runs.
- Automation: For true self-sufficiency, consider a battery-powered timer (e.g., Orbit B-Hyve Bluetooth Hose Faucet Timer, ~$50) or a solar-powered timer connected to a small 12V pump.
- Solar-Powered Pumps: For lifting water from a well, pond, or large storage tank to your garden, a solar pump is a game-changer. For a smaller drip system, a Shurflo 2088-594-152 Diaphragm Pump (12V, 3.5 GPM, ~$180) can be powered by a single 100W solar panel (e.g., Renogy 100W Monocrystalline Solar Panel, ~$100) and a small 12V battery (e.g., a 50Ah LiFePO4 battery like the Battle Born 50Ah, ~$450). For larger operations or deeper wells, more robust systems are needed. If you’re looking to build out a comprehensive off-grid power system to support your garden’s water needs, or indeed your entire homestead, you might want to explore resources like the Power Grid Generator complete system guide to understand the full scope of what’s possible in terms of energy independence.
Step 5: Seed Selection & Planting
The choice of seeds is crucial for a truly self sufficient garden from scratch.
- Choose Heirloom & Open-Pollinated Seeds: These varieties produce seeds that will grow true to type, meaning you can save seeds from your harvest year after year. F1 hybrids, while often vigorous, will not produce consistent offspring from saved seeds. Reputable seed companies include Baker Creek Heirloom Seeds, High Mowing Organic Seeds, and Seed Savers Exchange. Start with common, reliable varieties like ‘Black Krim’ tomatoes, ‘Provider’ bush beans, ‘Waltham Butternut’ squash, and ‘Black Seeded Simpson’ lettuce.
- Start Seeds Indoors (Optional but Recommended): For longer growing seasons or specific crops, starting seeds indoors gives you a head start. Use seed-starting mix (e.g., Espoma Organic Seed Starter Mix, ~$10 for 16qt bag) in seed trays (Jiffy Professional Greenhouse 72-cell kit, ~$15). Provide adequate light with LED grow lights (Barrina T5 2ft 4-pack LED Grow Lights, 20W each, ~$50) for 14-16 hours a day, positioned 2-4 inches above seedlings. Maintain consistent temperatures (65-75°F for most).
- Direct Sowing vs. Transplanting: Some crops (carrots, radishes, beans, corn) prefer direct sowing into the garden bed. Others (tomatoes, peppers, broccoli, kale) benefit from being started indoors and transplanted. Follow seed packet instructions for planting depths (e.g., lettuce seeds are often surface-sown or planted 1/8 inch deep, while beans are 1 inch deep) and spacing.
- Companion Planting: Strategically plant different species together to enhance growth, deter pests, and attract beneficial insects. For example, planting marigolds near tomatoes can deter nematodes, and basil improves tomato flavor. Nasturtiums can act as a trap crop for aphids.
- Succession Planting: For a continuous harvest, plant small batches of quick-growing crops (lettuce, radishes, cilantro) every 2-3 weeks. As one crop finishes, another is ready to take its place.
Step 6: Pest & Disease Management (Organic)
Maintaining a self sufficient garden from scratch means embracing organic pest and disease control.
- Integrated Pest Management (IPM): This holistic approach combines several strategies.
- Observation: Regularly inspect your plants for early signs of pests or disease. Catching issues early is key.
- Physical Barriers: Use row covers (e.g., Agribon AG-19 floating row cover, 10×20 ft, ~$20) to protect young plants from insect pests like cabbage worms and squash bugs. Install fences (e.g., 2×4 welded wire mesh, 4 ft tall, 50 ft roll ~$70) to keep out deer, rabbits, and other larger animals.
- Hand-Picking: For larger pests like tomato hornworms or squash bugs, simply pick them off and drop them into a bucket of soapy water.
- Companion Planting: As mentioned, certain plants repel pests. Marigolds, garlic, and onions are excellent deterrents.
- Attract Beneficial Insects: Plant flowers like dill, fennel, cosmos, and sweet alyssum to attract ladybugs, lacewings, and parasitic wasps, which prey on common garden pests.
- Organic Sprays & Treatments:
- Neem Oil: An excellent broad-spectrum organic insecticide and fungicide. Bonide Neem Oil Concentrate (16oz, ~$20) can be mixed at a rate of 1-2 tbsp per gallon of water and sprayed on affected plants.
- Insecticidal Soap: Effective against soft-bodied insects like aphids, whiteflies, and spider mites. Garden Safe Insecticidal Soap (24oz ready-to-use, ~$10).
- Bacillus thuringiensis (Bt): A naturally occurring soil bacterium that targets caterpillars and worms. Monterey BT Worm & Caterpillar Killer (16oz, ~$18) is highly effective and safe for beneficial insects.
- Copper or Sulfur Sprays: For fungal diseases like powdery mildew or blight, organic copper (e.g., Bonide Copper Fungicide, ~$15 for 1lb) or sulfur (e.g., Safer Brand Garden Fungicide, ~$10 for 16oz) can be used as a last resort.
Step 7: Harvesting & Seed Saving
The culmination of your efforts is the harvest, and seed saving closes the loop on self-sufficiency.
- Harvesting Techniques:
- Timing: Harvest vegetables at their peak ripeness for best flavor and nutritional value. For example, green beans should snap cleanly, cucumbers should be firm, and tomatoes should be fully colored.
- Frequency: Many crops, like zucchini, cucumbers, and bush beans, produce more if harvested frequently. Pick daily or every other day.
- Tools: Use clean, sharp pruners (e.g., Corona ClassicCUT Bypass Pruner BP 3180, ~$30) or a sharp knife for clean cuts, minimizing damage to the plant.
- Seed Saving: This is where the « self-sufficient » aspect truly shines.
- Selection: Only save seeds from your healthiest, most vigorous plants that show desired traits (disease resistance, good flavor, high yield).
- Isolation: To ensure true-to-type seeds, prevent cross-pollination. This can be challenging for open-pollinated crops that readily cross (e.g., squash, corn). For beginners, focus on self-pollinating plants like beans, peas, lettuce, and tomatoes.
- Processing:
- Dry Seeds (Beans, Peas, Lettuce, Grains): Allow pods/seed heads to dry completely on the plant. Harvest, shell, and clean the seeds, removing chaff.
- Wet Seeds (Tomatoes, Cucumbers, Squash): For tomatoes, ferment the seeds in water for a few days to remove the gel coating and inhibit disease. For cucumbers/squash, scrape out seeds, wash thoroughly, and dry.
- Drying: Spread seeds thinly on screens or paper plates in a cool, dry, well-ventilated area for 1-4 weeks. Ensure they are bone-dry before storage. I aim for less than 8% moisture content.
- Storage: Store seeds in airtight containers (glass jars with desiccant packets work well) in a cool, dark, dry place (ideally 40-50°F and 30-40% humidity). Label clearly with variety and date. Properly stored seeds can remain viable for 3-10 years or more.
Step 8: Season Extension & Winterizing
Extend your harvest and protect your garden for the off-season to truly maximize your self sufficient garden from scratch.
- Cold Frames: Simple structures with a transparent top (glass, polycarbonate, or old windows) that sit over garden beds. They trap solar heat, allowing you to grow cold-hardy crops (lettuce, spinach, kale, radishes) well into winter or start seeds earlier in spring. A basic cold frame can be built from 2×6 lumber and a sheet of polycarbonate for under $100.
- Hoop Houses/Low Tunnels: Larger structures made from flexible hoops (PVC pipe or EMT conduit) covered with greenhouse plastic. These provide more space and greater temperature moderation. A 10×20 ft DIY low tunnel kit can cost $200-$500, while a larger, more robust hoop house kit might be $1,000-$3,000. I use a 6×12 ft low tunnel made from 1/2-inch PVC hoops and 6mil greenhouse plastic, which extends my lettuce and spinach harvest by at least
Deciding between raised beds and in-ground beds depends on your soil, budget, and physical capabilities.
- In-Ground Beds: If you have excellent native soil and good drainage, in-ground beds are the most economical. Double-digging (loosening soil two shovel depths) can significantly improve drainage and aeration. For my main garden, I primarily use in-ground beds, but I focus on building up the soil over time with consistent compost additions and cover cropping. I aim for beds that are no wider than 3-4 feet so I can reach the center without stepping on the soil, compacting it.
- Raised Beds: Raised beds offer numerous advantages, especially for poor soil, heavy clay, or rocky areas. They provide better drainage, warm up faster in spring, reduce compaction, and make weeding and harvesting easier on your back.
- Material Options:
- Untreated Cedar: Naturally rot-resistant and chemical-free. A 4×8 ft bed, 12 inches deep, typically requires three 2x12x8 ft cedar boards, costing around $50-$60 per board (total ~$150-$180) plus corner brackets or screws. My first raised beds were cedar and are still going strong after 7 years.
- Galvanized Steel: Durable, long-lasting, and aesthetically pleasing. Brands like Vego Garden offer modular kits. A Vego Garden 17″ Tall 8-in-1 Metal Raised Garden Bed (can be configured to 4×8 ft) costs approximately $250-$300.
- Concrete Blocks/Stones: Very durable but can leach minerals (though generally safe once weathered) and can be expensive.
- Recycled Materials: Pallets (check for chemical treatment stamps like « HT » for heat-treated), old tires (controversial due to potential chemical leaching).
- Filling Raised Beds: Don’t just fill with topsoil. Use a « Hugelkultur » approach (logs, branches, leaves, then compost, then topsoil) or a mixture of 60% good quality topsoil, 30% compost, and 10% perlite or vermiculite for drainage. A 4x8x1 ft raised bed requires about 32 cubic feet (or ~1.2 cubic yards) of soil mix, which can cost $100-$200 depending on your source.
- Material Options:
Step 4: Water Management & Irrigation
Efficient water management is critical for a self sufficient garden from scratch, especially in off-grid living where water resources might be limited.
- Rainwater Harvesting: This is my primary source of irrigation water. A 55-gallon rain barrel (e.g., EarthMark Rain Barrel, ~$120-$150) connected to a downspout can collect significant water. For larger needs, I use two 275-gallon IBC totes (Intermediate Bulk Containers, often available used for $100-$200 each from food-grade sources) connected in series. A 1,000 sq ft roof can collect approximately 620 gallons of water for every inch of rainfall. My 1,500 sq ft roof provides ample water for my 600 sq ft garden through multiple barrels and totes.
- Drip Irrigation: This is by far the most water-efficient method, delivering water directly to the plant’s root zone, minimizing evaporation and weed growth.
- Components: A typical drip system includes a pressure regulator (e.g., Rain Bird PRV-10, ~$15), a filter (Rain Bird RBY filter, ~$20), main tubing (1/2-inch poly tubing, 100ft ~$25), smaller feeder lines (1/4-inch tubing), and emitters (0.5 GPH or 1 GPH per plant).
- Kits: For beginners, a starter kit like the Rain Bird Drip Irrigation Garden Kit (model DDI-KIT-1P, ~$40-$60) is excellent for a small garden. For larger setups, I use Netafim Techline CV Drip Line (500ft roll, ~$150-$200), which has pressure-compensating emitters built-in, ensuring even watering across long runs.
- Automation: For true self-sufficiency, consider a battery-powered timer (e.g., Orbit B-Hyve Bluetooth Hose Faucet Timer, ~$50) or a solar-powered timer connected to a small 12V pump.
- Solar-Powered Pumps: For lifting water from a well, pond, or large storage tank to your garden, a solar pump is a game-changer. For a smaller drip system, a Shurflo 2088-594-152 Diaphragm Pump (12V, 3.5 GPM, ~$180) can be powered by a single 100W solar panel (e.g., Renogy 100W Monocrystalline Solar Panel, ~$100) and a small 12V battery (e.g., a 50Ah LiFePO4 battery like the Battle Born 50Ah, ~$450). For larger operations or deeper wells, more robust systems are needed. If you’re looking to build out a comprehensive off-grid power system to support your garden’s water needs, or indeed your entire homestead, you might want to explore resources like the Power Grid Generator complete system guide to understand the full scope of what’s possible in terms of energy independence.
Step 5: Seed Selection & Planting
The choice of seeds is crucial for a truly self sufficient garden from scratch.
- Choose Heirloom & Open-Pollinated Seeds: These varieties produce seeds that will grow true to type, meaning you can save seeds from your harvest year after year. F1 hybrids, while often vigorous, will not produce consistent offspring from saved seeds. Reputable seed companies include Baker Creek Heirloom Seeds, High Mowing Organic Seeds, and Seed Savers Exchange. Start with common, reliable varieties like ‘Black Krim’ tomatoes, ‘Provider’ bush beans, ‘Waltham Butternut’ squash, and ‘Black Seeded Simpson’ lettuce.
- Start Seeds Indoors (Optional but Recommended): For longer growing seasons or specific crops, starting seeds indoors gives you a head start. Use seed-starting mix (e.g., Espoma Organic Seed Starter Mix, ~$10 for 16qt bag) in seed trays (Jiffy Professional Greenhouse 72-cell kit, ~$15). Provide adequate light with LED grow lights (Barrina T5 2ft 4-pack LED Grow Lights, 20W each, ~$50) for 14-16 hours a day, positioned 2-4 inches above seedlings. Maintain consistent temperatures (65-75°F for most).
- Direct Sowing vs. Transplanting: Some crops (carrots, radishes, beans, corn) prefer direct sowing into the garden bed. Others (tomatoes, peppers, broccoli, kale) benefit from being started indoors and transplanted. Follow seed packet instructions for planting depths (e.g., lettuce seeds are often surface-sown or planted 1/8 inch deep, while beans are 1 inch deep) and spacing.
- Companion Planting: Strategically plant different species together to enhance growth, deter pests, and attract beneficial insects. For example, planting marigolds near tomatoes can deter nematodes, and basil improves tomato flavor. Nasturtiums can act as a trap crop for aphids.
- Succession Planting: For a continuous harvest, plant small batches of quick-growing crops (lettuce, radishes, cilantro) every 2-3 weeks. As one crop finishes, another is ready to take its place.
Step 6: Pest & Disease Management (Organic)
Maintaining a self sufficient garden from scratch means embracing organic pest and disease control.
- Integrated Pest Management (IPM): This holistic approach combines several strategies.
- Observation: Regularly inspect your plants for early signs of pests or disease. Catching issues early is key.
- Physical Barriers: Use row covers (e.g., Agribon AG-19 floating row cover, 10×20 ft, ~$20) to protect young plants from insect pests like cabbage worms and squash bugs. Install fences (e.g., 2×4 welded wire mesh, 4 ft tall, 50 ft roll ~$70) to keep out deer, rabbits, and other larger animals.
- Hand-Picking: For larger pests like tomato hornworms or squash bugs, simply pick them off and drop them into a bucket of soapy water.
- Companion Planting: As mentioned, certain plants repel pests. Marigolds, garlic, and onions are excellent deterrents.
- Attract Beneficial Insects: Plant flowers like dill, fennel, cosmos, and sweet alyssum to attract ladybugs, lacewings, and parasitic wasps, which prey on common garden pests.
- Organic Sprays & Treatments:
- Neem Oil: An excellent broad-spectrum organic insecticide and fungicide. Bonide Neem Oil Concentrate (16oz, ~$20) can be mixed at a rate of 1-2 tbsp per gallon of water and sprayed on affected plants.
- Insecticidal Soap: Effective against soft-bodied insects like aphids, whiteflies, and spider mites. Garden Safe Insecticidal Soap (24oz ready-to-use, ~$10).
- Bacillus thuringiensis (Bt): A naturally occurring soil bacterium that targets caterpillars and worms. Monterey BT Worm & Caterpillar Killer (16oz, ~$18) is highly effective and safe for beneficial insects.
- Copper or Sulfur Sprays: For fungal diseases like powdery mildew or blight, organic copper (e.g., Bonide Copper Fungicide, ~$15 for 1lb) or sulfur (e.g., Safer Brand Garden Fungicide, ~$10 for 16oz) can be used as a last resort.
Step 7: Harvesting & Seed Saving
The culmination of your efforts is the harvest, and seed saving closes the loop on self-sufficiency.
- Harvesting Techniques:
- Timing: Harvest vegetables at their peak ripeness for best flavor and nutritional value. For example, green beans should snap cleanly, cucumbers should be firm, and tomatoes should be fully colored.
- Frequency: Many crops, like zucchini, cucumbers, and bush beans, produce more if harvested frequently. Pick daily or every other day.
- Tools: Use clean, sharp pruners (e.g., Corona ClassicCUT Bypass Pruner BP 3180, ~$30) or a sharp knife for clean cuts, minimizing damage to the plant.
- Seed Saving: This is where the « self-sufficient » aspect truly shines.
- Selection: Only save seeds from your healthiest, most vigorous plants that show desired traits (disease resistance, good flavor, high yield).
- Isolation: To ensure true-to-type seeds, prevent cross-pollination. This can be challenging for open-pollinated crops that readily cross (e.g., squash, corn). For beginners, focus on self-pollinating plants like beans, peas, lettuce, and tomatoes.
- Processing:
- Dry Seeds (Beans, Peas, Lettuce, Grains): Allow pods/seed heads to dry completely on the plant. Harvest, shell, and clean the seeds, removing chaff.
- Wet Seeds (Tomatoes, Cucumbers, Squash): For tomatoes, ferment the seeds in water for a few days to remove the gel coating and inhibit disease. For cucumbers/squash, scrape out seeds, wash thoroughly, and dry.
- Drying: Spread seeds thinly on screens or paper plates in a cool, dry, well-ventilated area for 1-4 weeks. Ensure they are bone-dry before storage. I aim for less than 8% moisture content.
- Storage: Store seeds in airtight containers (glass jars with desiccant packets work well) in a cool, dark, dry place (ideally 40-50°F and 30-40% humidity). Label clearly with variety and date. Properly stored seeds can remain viable for 3-10 years or more.
Step 8: Season Extension & Winterizing
Extend your harvest and protect your garden for the off-season to truly maximize your self sufficient garden from scratch.
- Cold Frames: Simple structures with a transparent top (glass, polycarbonate, or old windows) that sit over garden beds. They trap solar heat, allowing you to grow cold-hardy crops (lettuce, spinach, kale, radishes) well into winter or start seeds earlier in spring. A basic cold frame can be built from 2×6 lumber and a sheet of polycarbonate for under $100.
- Hoop Houses/Low Tunnels: Larger structures made from flexible hoops (PVC pipe or EMT conduit) covered with greenhouse plastic. These provide more space and greater temperature moderation. A 10×20 ft DIY low tunnel kit can cost $200-$500, while a larger, more robust hoop house kit might be $1,000-$3,000. I use a 6×12 ft low tunnel made from 1/2-inch PVC hoops and 6mil greenhouse plastic, which extends my lettuce and spinach harvest by at least
Healthy soil is the bedrock of a productive, self-sufficient garden. You can’t guess what your soil needs; you have to test it.
- Perform a Soil Test: A professional soil test will give you precise data on your soil’s pH, nutrient levels (N-P-K), and organic matter content. I recommend sending a sample to your local agricultural extension office; it typically costs $20-$50 and provides detailed recommendations. Alternatively, for a quick homeowner check, a Rapitest Soil Test Kit (40-test kit, model 1663, ~$20 on Amazon) provides a good baseline for pH, Nitrogen, Phosphorus, and Potash. Aim for a pH between 6.0 and 7.0 for most vegetables.
- Amend for pH Imbalance: If your soil is too acidic (below 6.0), add agricultural lime (dolomitic lime adds magnesium, calcitic lime adds calcium). Apply 5-10 lbs per 100 sq ft for a moderate adjustment. If it’s too alkaline (above 7.0), add elemental sulfur (e.g., Espoma Soil Acidifier, ~$15 for 6.75 lbs) or generous amounts of organic matter like peat moss or pine needles.
- Build Organic Matter: This is the single most important step for long-term soil health. Organic matter improves soil structure, water retention, drainage, and nutrient availability. Incorporate 2-4 inches of high-quality compost into your top 6-12 inches of soil annually. I make my own compost from kitchen scraps, garden waste, and shredded leaves, but you can purchase it. Local nurseries often sell bulk compost for $30-$50 per cubic yard. Aged manure (from chickens, cows, or horses – ensure it’s well-rotted to avoid burning plants) is also excellent.
- Address Nutrient Deficiencies: Based on your soil test, add specific organic amendments. If Nitrogen (N) is low, add blood meal (12-0-0, ~$20 for 3 lbs) or feather meal. For Phosphorus (P), use bone meal (3-15-0, ~$15 for 3 lbs) or rock phosphate. For Potassium (K), greensand (0-0-2.5, ~$25 for 5 lbs) or kelp meal are good choices. I rely heavily on Espoma Organic Garden-tone (5-3-3, ~$25 for an 8lb bag) as a balanced, all-purpose organic fertilizer during planting.
Step 3: Garden Bed Preparation
Deciding between raised beds and in-ground beds depends on your soil, budget, and physical capabilities.
- In-Ground Beds: If you have excellent native soil and good drainage, in-ground beds are the most economical. Double-digging (loosening soil two shovel depths) can significantly improve drainage and aeration. For my main garden, I primarily use in-ground beds, but I focus on building up the soil over time with consistent compost additions and cover cropping. I aim for beds that are no wider than 3-4 feet so I can reach the center without stepping on the soil, compacting it.
- Raised Beds: Raised beds offer numerous advantages, especially for poor soil, heavy clay, or rocky areas. They provide better drainage, warm up faster in spring, reduce compaction, and make weeding and harvesting easier on your back.
- Material Options:
- Untreated Cedar: Naturally rot-resistant and chemical-free. A 4×8 ft bed, 12 inches deep, typically requires three 2x12x8 ft cedar boards, costing around $50-$60 per board (total ~$150-$180) plus corner brackets or screws. My first raised beds were cedar and are still going strong after 7 years.
- Galvanized Steel: Durable, long-lasting, and aesthetically pleasing. Brands like Vego Garden offer modular kits. A Vego Garden 17″ Tall 8-in-1 Metal Raised Garden Bed (can be configured to 4×8 ft) costs approximately $250-$300.
- Concrete Blocks/Stones: Very durable but can leach minerals (though generally safe once weathered) and can be expensive.
- Recycled Materials: Pallets (check for chemical treatment stamps like « HT » for heat-treated), old tires (controversial due to potential chemical leaching).
- Filling Raised Beds: Don’t just fill with topsoil. Use a « Hugelkultur » approach (logs, branches, leaves, then compost, then topsoil) or a mixture of 60% good quality topsoil, 30% compost, and 10% perlite or vermiculite for drainage. A 4x8x1 ft raised bed requires about 32 cubic feet (or ~1.2 cubic yards) of soil mix, which can cost $100-$200 depending on your source.
- Material Options:
Step 4: Water Management & Irrigation
Efficient water management is critical for a self sufficient garden from scratch, especially in off-grid living where water resources might be limited.
- Rainwater Harvesting: This is my primary source of irrigation water. A 55-gallon rain barrel (e.g., EarthMark Rain Barrel, ~$120-$150) connected to a downspout can collect significant water. For larger needs, I use two 275-gallon IBC totes (Intermediate Bulk Containers, often available used for $100-$200 each from food-grade sources) connected in series. A 1,000 sq ft roof can collect approximately 620 gallons of water for every inch of rainfall. My 1,500 sq ft roof provides ample water for my 600 sq ft garden through multiple barrels and totes.
- Drip Irrigation: This is by far the most water-efficient method, delivering water directly to the plant’s root zone, minimizing evaporation and weed growth.
- Components: A typical drip system includes a pressure regulator (e.g., Rain Bird PRV-10, ~$15), a filter (Rain Bird RBY filter, ~$20), main tubing (1/2-inch poly tubing, 100ft ~$25), smaller feeder lines (1/4-inch tubing), and emitters (0.5 GPH or 1 GPH per plant).
- Kits: For beginners, a starter kit like the Rain Bird Drip Irrigation Garden Kit (model DDI-KIT-1P, ~$40-$60) is excellent for a small garden. For larger setups, I use Netafim Techline CV Drip Line (500ft roll, ~$150-$200), which has pressure-compensating emitters built-in, ensuring even watering across long runs.
- Automation: For true self-sufficiency, consider a battery-powered timer (e.g., Orbit B-Hyve Bluetooth Hose Faucet Timer, ~$50) or a solar-powered timer connected to a small 12V pump.
- Solar-Powered Pumps: For lifting water from a well, pond, or large storage tank to your garden, a solar pump is a game-changer. For a smaller drip system, a Shurflo 2088-594-152 Diaphragm Pump (12V, 3.5 GPM, ~$180) can be powered by a single 100W solar panel (e.g., Renogy 100W Monocrystalline Solar Panel, ~$100) and a small 12V battery (e.g., a 50Ah LiFePO4 battery like the Battle Born 50Ah, ~$450). For larger operations or deeper wells, more robust systems are needed. If you’re looking to build out a comprehensive off-grid power system to support your garden’s water needs, or indeed your entire homestead, you might want to explore resources like the Power Grid Generator complete system guide to understand the full scope of what’s possible in terms of energy independence.
Step 5: Seed Selection & Planting
The choice of seeds is crucial for a truly self sufficient garden from scratch.
- Choose Heirloom & Open-Pollinated Seeds: These varieties produce seeds that will grow true to type, meaning you can save seeds from your harvest year after year. F1 hybrids, while often vigorous, will not produce consistent offspring from saved seeds. Reputable seed companies include Baker Creek Heirloom Seeds, High Mowing Organic Seeds, and Seed Savers Exchange. Start with common, reliable varieties like ‘Black Krim’ tomatoes, ‘Provider’ bush beans, ‘Waltham Butternut’ squash, and ‘Black Seeded Simpson’ lettuce.
- Start Seeds Indoors (Optional but Recommended): For longer growing seasons or specific crops, starting seeds indoors gives you a head start. Use seed-starting mix (e.g., Espoma Organic Seed Starter Mix, ~$10 for 16qt bag) in seed trays (Jiffy Professional Greenhouse 72-cell kit, ~$15). Provide adequate light with LED grow lights (Barrina T5 2ft 4-pack LED Grow Lights, 20W each, ~$50) for 14-16 hours a day, positioned 2-4 inches above seedlings. Maintain consistent temperatures (65-75°F for most).
- Direct Sowing vs. Transplanting: Some crops (carrots, radishes, beans, corn) prefer direct sowing into the garden bed. Others (tomatoes, peppers, broccoli, kale) benefit from being started indoors and transplanted. Follow seed packet instructions for planting depths (e.g., lettuce seeds are often surface-sown or planted 1/8 inch deep, while beans are 1 inch deep) and spacing.
- Companion Planting: Strategically plant different species together to enhance growth, deter pests, and attract beneficial insects. For example, planting marigolds near tomatoes can deter nematodes, and basil improves tomato flavor. Nasturtiums can act as a trap crop for aphids.
- Succession Planting: For a continuous harvest, plant small batches of quick-growing crops (lettuce, radishes, cilantro) every 2-3 weeks. As one crop finishes, another is ready to take its place.
Step 6: Pest & Disease Management (Organic)
Maintaining a self sufficient garden from scratch means embracing organic pest and disease control.
- Integrated Pest Management (IPM): This holistic approach combines several strategies.
- Observation: Regularly inspect your plants for early signs of pests or disease. Catching issues early is key.
- Physical Barriers: Use row covers (e.g., Agribon AG-19 floating row cover, 10×20 ft, ~$20) to protect young plants from insect pests like cabbage worms and squash bugs. Install fences (e.g., 2×4 welded wire mesh, 4 ft tall, 50 ft roll ~$70) to keep out deer, rabbits, and other larger animals.
- Hand-Picking: For larger pests like tomato hornworms or squash bugs, simply pick them off and drop them into a bucket of soapy water.
- Companion Planting: As mentioned, certain plants repel pests. Marigolds, garlic, and onions are excellent deterrents.
- Attract Beneficial Insects: Plant flowers like dill, fennel, cosmos, and sweet alyssum to attract ladybugs, lacewings, and parasitic wasps, which prey on common garden pests.
- Organic Sprays & Treatments:
- Neem Oil: An excellent broad-spectrum organic insecticide and fungicide. Bonide Neem Oil Concentrate (16oz, ~$20) can be mixed at a rate of 1-2 tbsp per gallon of water and sprayed on affected plants.
- Insecticidal Soap: Effective against soft-bodied insects like aphids, whiteflies, and spider mites. Garden Safe Insecticidal Soap (24oz ready-to-use, ~$10).
- Bacillus thuringiensis (Bt): A naturally occurring soil bacterium that targets caterpillars and worms. Monterey BT Worm & Caterpillar Killer (16oz, ~$18) is highly effective and safe for beneficial insects.
- Copper or Sulfur Sprays: For fungal diseases like powdery mildew or blight, organic copper (e.g., Bonide Copper Fungicide, ~$15 for 1lb) or sulfur (e.g., Safer Brand Garden Fungicide, ~$10 for 16oz) can be used as a last resort.
Step 7: Harvesting & Seed Saving
The culmination of your efforts is the harvest, and seed saving closes the loop on self-sufficiency.
- Harvesting Techniques:
- Timing: Harvest vegetables at their peak ripeness for best flavor and nutritional value. For example, green beans should snap cleanly, cucumbers should be firm, and tomatoes should be fully colored.
- Frequency: Many crops, like zucchini, cucumbers, and bush beans, produce more if harvested frequently. Pick daily or every other day.
- Tools: Use clean, sharp pruners (e.g., Corona ClassicCUT Bypass Pruner BP 3180, ~$30) or a sharp knife for clean cuts, minimizing damage to the plant.
- Seed Saving: This is where the « self-sufficient » aspect truly shines.
- Selection: Only save seeds from your healthiest, most vigorous plants that show desired traits (disease resistance, good flavor, high yield).
- Isolation: To ensure true-to-type seeds, prevent cross-pollination. This can be challenging for open-pollinated crops that readily cross (e.g., squash, corn). For beginners, focus on self-pollinating plants like beans, peas, lettuce, and tomatoes.
- Processing:
- Dry Seeds (Beans, Peas, Lettuce, Grains): Allow pods/seed heads to dry completely on the plant. Harvest, shell, and clean the seeds, removing chaff.
- Wet Seeds (Tomatoes, Cucumbers, Squash): For tomatoes, ferment the seeds in water for a few days to remove the gel coating and inhibit disease. For cucumbers/squash, scrape out seeds, wash thoroughly, and dry.
- Drying: Spread seeds thinly on screens or paper plates in a cool, dry, well-ventilated area for 1-4 weeks. Ensure they are bone-dry before storage. I aim for less than 8% moisture content.
- Storage: Store seeds in airtight containers (glass jars with desiccant packets work well) in a cool, dark, dry place (ideally 40-50°F and 30-40% humidity). Label clearly with variety and date. Properly stored seeds can remain viable for 3-10 years or more.
Step 8: Season Extension & Winterizing
Extend your harvest and protect your garden for the off-season to truly maximize your self sufficient garden from scratch.
- Cold Frames: Simple structures with a transparent top (glass, polycarbonate, or old windows) that sit over garden beds. They trap solar heat, allowing you to grow cold-hardy crops (lettuce, spinach, kale, radishes) well into winter or start seeds earlier in spring. A basic cold frame can be built from 2×6 lumber and a sheet of polycarbonate for under $100.
- Hoop Houses/Low Tunnels: Larger structures made from flexible hoops (PVC pipe or EMT conduit) covered with greenhouse plastic. These provide more space and greater temperature moderation. A 10×20 ft DIY low tunnel kit can cost $200-$500, while a larger, more robust hoop house kit might be $1,000-$3,000. I use a 6×12 ft low tunnel made from 1/2-inch PVC hoops and 6mil greenhouse plastic, which extends my lettuce and spinach harvest by at least
Efficient water management is critical for a self sufficient garden from scratch, especially in off-grid living where water resources might be limited.
- Rainwater Harvesting: This is my primary source of irrigation water. A 55-gallon rain barrel (e.g., EarthMark Rain Barrel, ~$120-$150) connected to a downspout can collect significant water. For larger needs, I use two 275-gallon IBC totes (Intermediate Bulk Containers, often available used for $100-$200 each from food-grade sources) connected in series. A 1,000 sq ft roof can collect approximately 620 gallons of water for every inch of rainfall. My 1,500 sq ft roof provides ample water for my 600 sq ft garden through multiple barrels and totes.
- Drip Irrigation: This is by far the most water-efficient method, delivering water directly to the plant’s root zone, minimizing evaporation and weed growth.
- Components: A typical drip system includes a pressure regulator (e.g., Rain Bird PRV-10, ~$15), a filter (Rain Bird RBY filter, ~$20), main tubing (1/2-inch poly tubing, 100ft ~$25), smaller feeder lines (1/4-inch tubing), and emitters (0.5 GPH or 1 GPH per plant).
- Kits: For beginners, a starter kit like the Rain Bird Drip Irrigation Garden Kit (model DDI-KIT-1P, ~$40-$60) is excellent for a small garden. For larger setups, I use Netafim Techline CV Drip Line (500ft roll, ~$150-$200), which has pressure-compensating emitters built-in, ensuring even watering across long runs.
- Automation: For true self-sufficiency, consider a battery-powered timer (e.g., Orbit B-Hyve Bluetooth Hose Faucet Timer, ~$50) or a solar-powered timer connected to a small 12V pump.
- Solar-Powered Pumps: For lifting water from a well, pond, or large storage tank to your garden, a solar pump is a game-changer. For a smaller drip system, a Shurflo 2088-594-152 Diaphragm Pump (12V, 3.5 GPM, ~$180) can be powered by a single 100W solar panel (e.g., Renogy 100W Monocrystalline Solar Panel, ~$100) and a small 12V battery (e.g., a 50Ah LiFePO4 battery like the Battle Born 50Ah, ~$450). For larger operations or deeper wells, more robust systems are needed. If you’re looking to build out a comprehensive off-grid power system to support your garden’s water needs, or indeed your entire homestead, you might want to explore resources like the Power Grid Generator complete system guide to understand the full scope of what’s possible in terms of energy independence.
Step 5: Seed Selection & Planting
The choice of seeds is crucial for a truly self sufficient garden from scratch.
- Choose Heirloom & Open-Pollinated Seeds: These varieties produce seeds that will grow true to type, meaning you can save seeds from your harvest year after year. F1 hybrids, while often vigorous, will not produce consistent offspring from saved seeds. Reputable seed companies include Baker Creek Heirloom Seeds, High Mowing Organic Seeds, and Seed Savers Exchange. Start with common, reliable varieties like ‘Black Krim’ tomatoes, ‘Provider’ bush beans, ‘Waltham Butternut’ squash, and ‘Black Seeded Simpson’ lettuce.
- Start Seeds Indoors (Optional but Recommended): For longer growing seasons or specific crops, starting seeds indoors gives you a head start. Use seed-starting mix (e.g., Espoma Organic Seed Starter Mix, ~$10 for 16qt bag) in seed trays (Jiffy Professional Greenhouse 72-cell kit, ~$15). Provide adequate light with LED grow lights (Barrina T5 2ft 4-pack LED Grow Lights, 20W each, ~$50) for 14-16 hours a day, positioned 2-4 inches above seedlings. Maintain consistent temperatures (65-75°F for most).
- Direct Sowing vs. Transplanting: Some crops (carrots, radishes, beans, corn) prefer direct sowing into the garden bed. Others (tomatoes, peppers, broccoli, kale) benefit from being started indoors and transplanted. Follow seed packet instructions for planting depths (e.g., lettuce seeds are often surface-sown or planted 1/8 inch deep, while beans are 1 inch deep) and spacing.
- Companion Planting: Strategically plant different species together to enhance growth, deter pests, and attract beneficial insects. For example, planting marigolds near tomatoes can deter nematodes, and basil improves tomato flavor. Nasturtiums can act as a trap crop for aphids.
- Succession Planting: For a continuous harvest, plant small batches of quick-growing crops (lettuce, radishes, cilantro) every 2-3 weeks. As one crop finishes, another is ready to take its place.
Step 6: Pest & Disease Management (Organic)
Maintaining a self sufficient garden from scratch means embracing organic pest and disease control.
- Integrated Pest Management (IPM): This holistic approach combines several strategies.
- Observation: Regularly inspect your plants for early signs of pests or disease. Catching issues early is key.
- Physical Barriers: Use row covers (e.g., Agribon AG-19 floating row cover, 10×20 ft, ~$20) to protect young plants from insect pests like cabbage worms and squash bugs. Install fences (e.g., 2×4 welded wire mesh, 4 ft tall, 50 ft roll ~$70) to keep out deer, rabbits, and other larger animals.
- Hand-Picking: For larger pests like tomato hornworms or squash bugs, simply pick them off and drop them into a bucket of soapy water.
- Companion Planting: As mentioned, certain plants repel pests. Marigolds, garlic, and onions are excellent deterrents.
- Attract Beneficial Insects: Plant flowers like dill, fennel, cosmos, and sweet alyssum to attract ladybugs, lacewings, and parasitic wasps, which prey on common garden pests.
- Organic Sprays & Treatments:
- Neem Oil: An excellent broad-spectrum organic insecticide and fungicide. Bonide Neem Oil Concentrate (16oz, ~$20) can be mixed at a rate of 1-2 tbsp per gallon of water and sprayed on affected plants.
- Insecticidal Soap: Effective against soft-bodied insects like aphids, whiteflies, and spider mites. Garden Safe Insecticidal Soap (24oz ready-to-use, ~$10).
- Bacillus thuringiensis (Bt): A naturally occurring soil bacterium that targets caterpillars and worms. Monterey BT Worm & Caterpillar Killer (16oz, ~$18) is highly effective and safe for beneficial insects.
- Copper or Sulfur Sprays: For fungal diseases like powdery mildew or blight, organic copper (e.g., Bonide Copper Fungicide, ~$15 for 1lb) or sulfur (e.g., Safer Brand Garden Fungicide, ~$10 for 16oz) can be used as a last resort.
Step 7: Harvesting & Seed Saving
The culmination of your efforts is the harvest, and seed saving closes the loop on self-sufficiency.
- Harvesting Techniques:
- Timing: Harvest vegetables at their peak ripeness for best flavor and nutritional value. For example, green beans should snap cleanly, cucumbers should be firm, and tomatoes should be fully colored.
- Frequency: Many crops, like zucchini, cucumbers, and bush beans, produce more if harvested frequently. Pick daily or every other day.
- Tools: Use clean, sharp pruners (e.g., Corona ClassicCUT Bypass Pruner BP 3180, ~$30) or a sharp knife for clean cuts, minimizing damage to the plant.
- Seed Saving: This is where the « self-sufficient » aspect truly shines.
- Selection: Only save seeds from your healthiest, most vigorous plants that show desired traits (disease resistance, good flavor, high yield).
- Isolation: To ensure true-to-type seeds, prevent cross-pollination. This can be challenging for open-pollinated crops that readily cross (e.g., squash, corn). For beginners, focus on self-pollinating plants like beans, peas, lettuce, and tomatoes.
- Processing:
- Dry Seeds (Beans, Peas, Lettuce, Grains): Allow pods/seed heads to dry completely on the plant. Harvest, shell, and clean the seeds, removing chaff.
- Wet Seeds (Tomatoes, Cucumbers, Squash): For tomatoes, ferment the seeds in water for a few days to remove the gel coating and inhibit disease. For cucumbers/squash, scrape out seeds, wash thoroughly, and dry.
- Drying: Spread seeds thinly on screens or paper plates in a cool, dry, well-ventilated area for 1-4 weeks. Ensure they are bone-dry before storage. I aim for less than 8% moisture content.
- Storage: Store seeds in airtight containers (glass jars with desiccant packets work well) in a cool, dark, dry place (ideally 40-50°F and 30-40% humidity). Label clearly with variety and date. Properly stored seeds can remain viable for 3-10 years or more.
Step 8: Season Extension & Winterizing
Extend your harvest and protect your garden for the off-season to truly maximize your self sufficient garden from scratch.
- Cold Frames: Simple structures with a transparent top (glass, polycarbonate, or old windows) that sit over garden beds. They trap solar heat, allowing you to grow cold-hardy crops (lettuce, spinach, kale, radishes) well into winter or start seeds earlier in spring. A basic cold frame can be built from 2×6 lumber and a sheet of polycarbonate for under $100.
- Hoop Houses/Low Tunnels: Larger structures made from flexible hoops (PVC pipe or EMT conduit) covered with greenhouse plastic. These provide more space and greater temperature moderation. A 10×20 ft DIY low tunnel kit can cost $200-$500, while a larger, more robust hoop house kit might be $1,000-$3,000. I use a 6×12 ft low tunnel made from 1/2-inch PVC hoops and 6mil greenhouse plastic, which extends my lettuce and spinach harvest by at least
Step 4: Water Management & Irrigation
Efficient water management is critical for a self sufficient garden from scratch, especially in off-grid living where water resources might be limited.
- Rainwater Harvesting: This is my primary source of irrigation water. A 55-gallon rain barrel (e.g., EarthMark Rain Barrel, ~$120-$150) connected to a downspout can collect significant water. For larger needs, I use two 275-gallon IBC totes (Intermediate Bulk Containers, often available used for $100-$200 each from food-grade sources) connected in series. A 1,000 sq ft roof can collect approximately 620 gallons of water for every inch of rainfall. My 1,500 sq ft roof provides ample water for my 600 sq ft garden through multiple barrels and totes.
- Drip Irrigation: This is by far the most water-efficient method, delivering water directly to the plant’s root zone, minimizing evaporation and weed growth.
- Components: A typical drip system includes a pressure regulator (e.g., Rain Bird PRV-10, ~$15), a filter (Rain Bird RBY filter, ~$20), main tubing (1/2-inch poly tubing, 100ft ~$25), smaller feeder lines (1/4-inch tubing), and emitters (0.5 GPH or 1 GPH per plant).
- Kits: For beginners, a starter kit like the Rain Bird Drip Irrigation Garden Kit (model DDI-KIT-1P, ~$40-$60) is excellent for a small garden. For larger setups, I use Netafim Techline CV Drip Line (500ft roll, ~$150-$200), which has pressure-compensating emitters built-in, ensuring even watering across long runs.
- Automation: For true self-sufficiency, consider a battery-powered timer (e.g., Orbit B-Hyve Bluetooth Hose Faucet Timer, ~$50) or a solar-powered timer connected to a small 12V pump.
- Solar-Powered Pumps: For lifting water from a well, pond, or large storage tank to your garden, a solar pump is a game-changer. For a smaller drip system, a Shurflo 2088-594-152 Diaphragm Pump (12V, 3.5 GPM, ~$180) can be powered by a single 100W solar panel (e.g., Renogy 100W Monocrystalline Solar Panel, ~$100) and a small 12V battery (e.g., a 50Ah LiFePO4 battery like the Battle Born 50Ah, ~$450). For larger operations or deeper wells, more robust systems are needed. If you’re looking to build out a comprehensive off-grid power system to support your garden’s water needs, or indeed your entire homestead, you might want to explore resources like the Power Grid Generator complete system guide to understand the full scope of what’s possible in terms of energy independence.
Step 5: Seed Selection & Planting
The choice of seeds is crucial for a truly self sufficient garden from scratch.
- Choose Heirloom & Open-Pollinated Seeds: These varieties produce seeds that will grow true to type, meaning you can save seeds from your harvest year after year. F1 hybrids, while often vigorous, will not produce consistent offspring from saved seeds. Reputable seed companies include Baker Creek Heirloom Seeds, High Mowing Organic Seeds, and Seed Savers Exchange. Start with common, reliable varieties like ‘Black Krim’ tomatoes, ‘Provider’ bush beans, ‘Waltham Butternut’ squash, and ‘Black Seeded Simpson’ lettuce.
- Start Seeds Indoors (Optional but Recommended): For longer growing seasons or specific crops, starting seeds indoors gives you a head start. Use seed-starting mix (e.g., Espoma Organic Seed Starter Mix, ~$10 for 16qt bag) in seed trays (Jiffy Professional Greenhouse 72-cell kit, ~$15). Provide adequate light with LED grow lights (Barrina T5 2ft 4-pack LED Grow Lights, 20W each, ~$50) for 14-16 hours a day, positioned 2-4 inches above seedlings. Maintain consistent temperatures (65-75°F for most).
- Direct Sowing vs. Transplanting: Some crops (carrots, radishes, beans, corn) prefer direct sowing into the garden bed. Others (tomatoes, peppers, broccoli, kale) benefit from being started indoors and transplanted. Follow seed packet instructions for planting depths (e.g., lettuce seeds are often surface-sown or planted 1/8 inch deep, while beans are 1 inch deep) and spacing.
- Companion Planting: Strategically plant different species together to enhance growth, deter pests, and attract beneficial insects. For example, planting marigolds near tomatoes can deter nematodes, and basil improves tomato flavor. Nasturtiums can act as a trap crop for aphids.
- Succession Planting: For a continuous harvest, plant small batches of quick-growing crops (lettuce, radishes, cilantro) every 2-3 weeks. As one crop finishes, another is ready to take its place.
Step 6: Pest & Disease Management (Organic)
Maintaining a self sufficient garden from scratch means embracing organic pest and disease control.
- Integrated Pest Management (IPM): This holistic approach combines several strategies.
- Observation: Regularly inspect your plants for early signs of pests or disease. Catching issues early is key.
- Physical Barriers: Use row covers (e.g., Agribon AG-19 floating row cover, 10×20 ft, ~$20) to protect young plants from insect pests like cabbage worms and squash bugs. Install fences (e.g., 2×4 welded wire mesh, 4 ft tall, 50 ft roll ~$70) to keep out deer, rabbits, and other larger animals.
- Hand-Picking: For larger pests like tomato hornworms or squash bugs, simply pick them off and drop them into a bucket of soapy water.
- Companion Planting: As mentioned, certain plants repel pests. Marigolds, garlic, and onions are excellent deterrents.
- Attract Beneficial Insects: Plant flowers like dill, fennel, cosmos, and sweet alyssum to attract ladybugs, lacewings, and parasitic wasps, which prey on common garden pests.
- Organic Sprays & Treatments:
- Neem Oil: An excellent broad-spectrum organic insecticide and fungicide. Bonide Neem Oil Concentrate (16oz, ~$20) can be mixed at a rate of 1-2 tbsp per gallon of water and sprayed on affected plants.
- Insecticidal Soap: Effective against soft-bodied insects like aphids, whiteflies, and spider mites. Garden Safe Insecticidal Soap (24oz ready-to-use, ~$10).
- Bacillus thuringiensis (Bt): A naturally occurring soil bacterium that targets caterpillars and worms. Monterey BT Worm & Caterpillar Killer (16oz, ~$18) is highly effective and safe for beneficial insects.
- Copper or Sulfur Sprays: For fungal diseases like powdery mildew or blight, organic copper (e.g., Bonide Copper Fungicide, ~$15 for 1lb) or sulfur (e.g., Safer Brand Garden Fungicide, ~$10 for 16oz) can be used as a last resort.
Step 7: Harvesting & Seed Saving
The culmination of your efforts is the harvest, and seed saving closes the loop on self-sufficiency.
- Harvesting Techniques:
- Timing: Harvest vegetables at their peak ripeness for best flavor and nutritional value. For example, green beans should snap cleanly, cucumbers should be firm, and tomatoes should be fully colored.
- Frequency: Many crops, like zucchini, cucumbers, and bush beans, produce more if harvested frequently. Pick daily or every other day.
- Tools: Use clean, sharp pruners (e.g., Corona ClassicCUT Bypass Pruner BP 3180, ~$30) or a sharp knife for clean cuts, minimizing damage to the plant.
- Seed Saving: This is where the « self-sufficient » aspect truly shines.
- Selection: Only save seeds from your healthiest, most vigorous plants that show desired traits (disease resistance, good flavor, high yield).
- Isolation: To ensure true-to-type seeds, prevent cross-pollination. This can be challenging for open-pollinated crops that readily cross (e.g., squash, corn). For beginners, focus on self-pollinating plants like beans, peas, lettuce, and tomatoes.
- Processing:
- Dry Seeds (Beans, Peas, Lettuce, Grains): Allow pods/seed heads to dry completely on the plant. Harvest, shell, and clean the seeds, removing chaff.
- Wet Seeds (Tomatoes, Cucumbers, Squash): For tomatoes, ferment the seeds in water for a few days to remove the gel coating and inhibit disease. For cucumbers/squash, scrape out seeds, wash thoroughly, and dry.
- Drying: Spread seeds thinly on screens or paper plates in a cool, dry, well-ventilated area for 1-4 weeks. Ensure they are bone-dry before storage. I aim for less than 8% moisture content.
- Storage: Store seeds in airtight containers (glass jars with desiccant packets work well) in a cool, dark, dry place (ideally 40-50°F and 30-40% humidity). Label clearly with variety and date. Properly stored seeds can remain viable for 3-10 years or more.
Step 8: Season Extension & Winterizing
Extend your harvest and protect your garden for the off-season to truly maximize your self sufficient garden from scratch.
- Cold Frames: Simple structures with a transparent top (glass, polycarbonate, or old windows) that sit over garden beds. They trap solar heat, allowing you to grow cold-hardy crops (lettuce, spinach, kale, radishes) well into winter or start seeds earlier in spring. A basic cold frame can be built from 2×6 lumber and a sheet of polycarbonate for under $100.
- Hoop Houses/Low Tunnels: Larger structures made from flexible hoops (PVC pipe or EMT conduit) covered with greenhouse plastic. These provide more space and greater temperature moderation. A 10×20 ft DIY low tunnel kit can cost $200-$500, while a larger, more robust hoop house kit might be $1,000-$3,000. I use a 6×12 ft low tunnel made from 1/2-inch PVC hoops and 6mil greenhouse plastic, which extends my lettuce and spinach harvest by at least
- In-Ground Beds: If you have excellent native soil and good drainage, in-ground beds are the most economical. Double-digging (loosening soil two shovel depths) can significantly improve drainage and aeration. For my main garden, I primarily use in-ground beds, but I focus on building up the soil over time with consistent compost additions and cover cropping. I aim for beds that are no wider than 3-4 feet so I can reach the center without stepping on the soil, compacting it.
- Raised Beds: Raised beds offer numerous advantages, especially for poor soil, heavy clay, or rocky areas. They provide better drainage, warm up faster in spring, reduce compaction, and make weeding and harvesting easier on your back.
- Material Options:
- Untreated Cedar: Naturally rot-resistant and chemical-free. A 4×8 ft bed, 12 inches deep, typically requires three 2x12x8 ft cedar boards, costing around $50-$60 per board (total ~$150-$180) plus corner brackets or screws. My first raised beds were cedar and are still going strong after 7 years.
- Galvanized Steel: Durable, long-lasting, and aesthetically pleasing. Brands like Vego Garden offer modular kits. A Vego Garden 17″ Tall 8-in-1 Metal Raised Garden Bed (can be configured to 4×8 ft) costs approximately $250-$300.
- Concrete Blocks/Stones: Very durable but can leach minerals (though generally safe once weathered) and can be expensive.
- Recycled Materials: Pallets (check for chemical treatment stamps like « HT » for heat-treated), old tires (controversial due to potential chemical leaching).
- Filling Raised Beds: Don’t just fill with topsoil. Use a « Hugelkultur » approach (logs, branches, leaves, then compost, then topsoil) or a mixture of 60% good quality topsoil, 30% compost, and 10% perlite or vermiculite for drainage. A 4x8x1 ft raised bed requires about 32 cubic feet (or ~1.2 cubic yards) of soil mix, which can cost $100-$200 depending on your source.
- Material Options:
Step 4: Water Management & Irrigation
Efficient water management is critical for a self sufficient garden from scratch, especially in off-grid living where water resources might be limited.
- Rainwater Harvesting: This is my primary source of irrigation water. A 55-gallon rain barrel (e.g., EarthMark Rain Barrel, ~$120-$150) connected to a downspout can collect significant water. For larger needs, I use two 275-gallon IBC totes (Intermediate Bulk Containers, often available used for $100-$200 each from food-grade sources) connected in series. A 1,000 sq ft roof can collect approximately 620 gallons of water for every inch of rainfall. My 1,500 sq ft roof provides ample water for my 600 sq ft garden through multiple barrels and totes.
- Drip Irrigation: This is by far the most water-efficient method, delivering water directly to the plant’s root zone, minimizing evaporation and weed growth.
- Components: A typical drip system includes a pressure regulator (e.g., Rain Bird PRV-10, ~$15), a filter (Rain Bird RBY filter, ~$20), main tubing (1/2-inch poly tubing, 100ft ~$25), smaller feeder lines (1/4-inch tubing), and emitters (0.5 GPH or 1 GPH per plant).
- Kits: For beginners, a starter kit like the Rain Bird Drip Irrigation Garden Kit (model DDI-KIT-1P, ~$40-$60) is excellent for a small garden. For larger setups, I use Netafim Techline CV Drip Line (500ft roll, ~$150-$200), which has pressure-compensating emitters built-in, ensuring even watering across long runs.
- Automation: For true self-sufficiency, consider a battery-powered timer (e.g., Orbit B-Hyve Bluetooth Hose Faucet Timer, ~$50) or a solar-powered timer connected to a small 12V pump.
- Solar-Powered Pumps: For lifting water from a well, pond, or large storage tank to your garden, a solar pump is a game-changer. For a smaller drip system, a Shurflo 2088-594-152 Diaphragm Pump (12V, 3.5 GPM, ~$180) can be powered by a single 100W solar panel (e.g., Renogy 100W Monocrystalline Solar Panel, ~$100) and a small 12V battery (e.g., a 50Ah LiFePO4 battery like the Battle Born 50Ah, ~$450). For larger operations or deeper wells, more robust systems are needed. If you’re looking to build out a comprehensive off-grid power system to support your garden’s water needs, or indeed your entire homestead, you might want to explore resources like the Power Grid Generator complete system guide to understand the full scope of what’s possible in terms of energy independence.
Step 5: Seed Selection & Planting
The choice of seeds is crucial for a truly self sufficient garden from scratch.
- Choose Heirloom & Open-Pollinated Seeds: These varieties produce seeds that will grow true to type, meaning you can save seeds from your harvest year after year. F1 hybrids, while often vigorous, will not produce consistent offspring from saved seeds. Reputable seed companies include Baker Creek Heirloom Seeds, High Mowing Organic Seeds, and Seed Savers Exchange. Start with common, reliable varieties like ‘Black Krim’ tomatoes, ‘Provider’ bush beans, ‘Waltham Butternut’ squash, and ‘Black Seeded Simpson’ lettuce.
- Start Seeds Indoors (Optional but Recommended): For longer growing seasons or specific crops, starting seeds indoors gives you a head start. Use seed-starting mix (e.g., Espoma Organic Seed Starter Mix, ~$10 for 16qt bag) in seed trays (Jiffy Professional Greenhouse 72-cell kit, ~$15). Provide adequate light with LED grow lights (Barrina T5 2ft 4-pack LED Grow Lights, 20W each, ~$50) for 14-16 hours a day, positioned 2-4 inches above seedlings. Maintain consistent temperatures (65-75°F for most).
- Direct Sowing vs. Transplanting: Some crops (carrots, radishes, beans, corn) prefer direct sowing into the garden bed. Others (tomatoes, peppers, broccoli, kale) benefit from being started indoors and transplanted. Follow seed packet instructions for planting depths (e.g., lettuce seeds are often surface-sown or planted 1/8 inch deep, while beans are 1 inch deep) and spacing.
- Companion Planting: Strategically plant different species together to enhance growth, deter pests, and attract beneficial insects. For example, planting marigolds near tomatoes can deter nematodes, and basil improves tomato flavor. Nasturtiums can act as a trap crop for aphids.
- Succession Planting: For a continuous harvest, plant small batches of quick-growing crops (lettuce, radishes, cilantro) every 2-3 weeks. As one crop finishes, another is ready to take its place.
Step 6: Pest & Disease Management (Organic)
Maintaining a self sufficient garden from scratch means embracing organic pest and disease control.
- Integrated Pest Management (IPM): This holistic approach combines several strategies.
- Observation: Regularly inspect your plants for early signs of pests or disease. Catching issues early is key.
- Physical Barriers: Use row covers (e.g., Agribon AG-19 floating row cover, 10×20 ft, ~$20) to protect young plants from insect pests like cabbage worms and squash bugs. Install fences (e.g., 2×4 welded wire mesh, 4 ft tall, 50 ft roll ~$70) to keep out deer, rabbits, and other larger animals.
- Hand-Picking: For larger pests like tomato hornworms or squash bugs, simply pick them off and drop them into a bucket of soapy water.
- Companion Planting: As mentioned, certain plants repel pests. Marigolds, garlic, and onions are excellent deterrents.
- Attract Beneficial Insects: Plant flowers like dill, fennel, cosmos, and sweet alyssum to attract ladybugs, lacewings, and parasitic wasps, which prey on common garden pests.
- Organic Sprays & Treatments:
- Neem Oil: An excellent broad-spectrum organic insecticide and fungicide. Bonide Neem Oil Concentrate (16oz, ~$20) can be mixed at a rate of 1-2 tbsp per gallon of water and sprayed on affected plants.
- Insecticidal Soap: Effective against soft-bodied insects like aphids, whiteflies, and spider mites. Garden Safe Insecticidal Soap (24oz ready-to-use, ~$10).
- Bacillus thuringiensis (Bt): A naturally occurring soil bacterium that targets caterpillars and worms. Monterey BT Worm & Caterpillar Killer (16oz, ~$18) is highly effective and safe for beneficial insects.
- Copper or Sulfur Sprays: For fungal diseases like powdery mildew or blight, organic copper (e.g., Bonide Copper Fungicide, ~$15 for 1lb) or sulfur (e.g., Safer Brand Garden Fungicide, ~$10 for 16oz) can be used as a last resort.
Step 7: Harvesting & Seed Saving
The culmination of your efforts is the harvest, and seed saving closes the loop on self-sufficiency.
- Harvesting Techniques:
- Timing: Harvest vegetables at their peak ripeness for best flavor and nutritional value. For example, green beans should snap cleanly, cucumbers should be firm, and tomatoes should be fully colored.
- Frequency: Many crops, like zucchini, cucumbers, and bush beans, produce more if harvested frequently. Pick daily or every other day.
- Tools: Use clean, sharp pruners (e.g., Corona ClassicCUT Bypass Pruner BP 3180, ~$30) or a sharp knife for clean cuts, minimizing damage to the plant.
- Seed Saving: This is where the « self-sufficient » aspect truly shines.
- Selection: Only save seeds from your healthiest, most vigorous plants that show desired traits (disease resistance, good flavor, high yield).
- Isolation: To ensure true-to-type seeds, prevent cross-pollination. This can be challenging for open-pollinated crops that readily cross (e.g., squash, corn). For beginners, focus on self-pollinating plants like beans, peas, lettuce, and tomatoes.
- Processing:
- Dry Seeds (Beans, Peas, Lettuce, Grains): Allow pods/seed heads to dry completely on the plant. Harvest, shell, and clean the seeds, removing chaff.
- Wet Seeds (Tomatoes, Cucumbers, Squash): For tomatoes, ferment the seeds in water for a few days to remove the gel coating and inhibit disease. For cucumbers/squash, scrape out seeds, wash thoroughly, and dry.
- Drying: Spread seeds thinly on screens or paper plates in a cool, dry, well-ventilated area for 1-4 weeks. Ensure they are bone-dry before storage. I aim for less than 8% moisture content.
- Storage: Store seeds in airtight containers (glass jars with desiccant packets work well) in a cool, dark, dry place (ideally 40-50°F and 30-40% humidity). Label clearly with variety and date. Properly stored seeds can remain viable for 3-10 years or more.
Step 8: Season Extension & Winterizing
Extend your harvest and protect your garden for the off-season to truly maximize your self sufficient garden from scratch.
- Cold Frames: Simple structures with a transparent top (glass, polycarbonate, or old windows) that sit over garden beds. They trap solar heat, allowing you to grow cold-hardy crops (lettuce, spinach, kale, radishes) well into winter or start seeds earlier in spring. A basic cold frame can be built from 2×6 lumber and a sheet of polycarbonate for under $100.
- Hoop Houses/Low Tunnels: Larger structures made from flexible hoops (PVC pipe or EMT conduit) covered with greenhouse plastic. These provide more space and greater temperature moderation. A 10×20 ft DIY low tunnel kit can cost $200-$500, while a larger, more robust hoop house kit might be $1,000-$3,000. I use a 6×12 ft low tunnel made from 1/2-inch PVC hoops and 6mil greenhouse plastic, which extends my lettuce and spinach harvest by at least
Deciding between raised beds and in-ground beds depends on your soil, budget, and physical capabilities.
- In-Ground Beds: If you have excellent native soil and good drainage, in-ground beds are the most economical. Double-digging (loosening soil two shovel depths) can significantly improve drainage and aeration. For my main garden, I primarily use in-ground beds, but I focus on building up the soil over time with consistent compost additions and cover cropping. I aim for beds that are no wider than 3-4 feet so I can reach the center without stepping on the soil, compacting it.
- Raised Beds: Raised beds offer numerous advantages, especially for poor soil, heavy clay, or rocky areas. They provide better drainage, warm up faster in spring, reduce compaction, and make weeding and harvesting easier on your back.
- Material Options:
- Untreated Cedar: Naturally rot-resistant and chemical-free. A 4×8 ft bed, 12 inches deep, typically requires three 2x12x8 ft cedar boards, costing around $50-$60 per board (total ~$150-$180) plus corner brackets or screws. My first raised beds were cedar and are still going strong after 7 years.
- Galvanized Steel: Durable, long-lasting, and aesthetically pleasing. Brands like Vego Garden offer modular kits. A Vego Garden 17″ Tall 8-in-1 Metal Raised Garden Bed (can be configured to 4×8 ft) costs approximately $250-$300.
- Concrete Blocks/Stones: Very durable but can leach minerals (though generally safe once weathered) and can be expensive.
- Recycled Materials: Pallets (check for chemical treatment stamps like « HT » for heat-treated), old tires (controversial due to potential chemical leaching).
- Filling Raised Beds: Don’t just fill with topsoil. Use a « Hugelkultur » approach (logs, branches, leaves, then compost, then topsoil) or a mixture of 60% good quality topsoil, 30% compost, and 10% perlite or vermiculite for drainage. A 4x8x1 ft raised bed requires about 32 cubic feet (or ~1.2 cubic yards) of soil mix, which can cost $100-$200 depending on your source.
- Material Options:
Step 4: Water Management & Irrigation
Efficient water management is critical for a self sufficient garden from scratch, especially in off-grid living where water resources might be limited.
- Rainwater Harvesting: This is my primary source of irrigation water. A 55-gallon rain barrel (e.g., EarthMark Rain Barrel, ~$120-$150) connected to a downspout can collect significant water. For larger needs, I use two 275-gallon IBC totes (Intermediate Bulk Containers, often available used for $100-$200 each from food-grade sources) connected in series. A 1,000 sq ft roof can collect approximately 620 gallons of water for every inch of rainfall. My 1,500 sq ft roof provides ample water for my 600 sq ft garden through multiple barrels and totes.
- Drip Irrigation: This is by far the most water-efficient method, delivering water directly to the plant’s root zone, minimizing evaporation and weed growth.
- Components: A typical drip system includes a pressure regulator (e.g., Rain Bird PRV-10, ~$15), a filter (Rain Bird RBY filter, ~$20), main tubing (1/2-inch poly tubing, 100ft ~$25), smaller feeder lines (1/4-inch tubing), and emitters (0.5 GPH or 1 GPH per plant).
- Kits: For beginners, a starter kit like the Rain Bird Drip Irrigation Garden Kit (model DDI-KIT-1P, ~$40-$60) is excellent for a small garden. For larger setups, I use Netafim Techline CV Drip Line (500ft roll, ~$150-$200), which has pressure-compensating emitters built-in, ensuring even watering across long runs.
- Automation: For true self-sufficiency, consider a battery-powered timer (e.g., Orbit B-Hyve Bluetooth Hose Faucet Timer, ~$50) or a solar-powered timer connected to a small 12V pump.
- Solar-Powered Pumps: For lifting water from a well, pond, or large storage tank to your garden, a solar pump is a game-changer. For a smaller drip system, a Shurflo 2088-594-152 Diaphragm Pump (12V, 3.5 GPM, ~$180) can be powered by a single 100W solar panel (e.g., Renogy 100W Monocrystalline Solar Panel, ~$100) and a small 12V battery (e.g., a 50Ah LiFePO4 battery like the Battle Born 50Ah, ~$450). For larger operations or deeper wells, more robust systems are needed. If you’re looking to build out a comprehensive off-grid power system to support your garden’s water needs, or indeed your entire homestead, you might want to explore resources like the Power Grid Generator complete system guide to understand the full scope of what’s possible in terms of energy independence.
Step 5: Seed Selection & Planting
The choice of seeds is crucial for a truly self sufficient garden from scratch.
- Choose Heirloom & Open-Pollinated Seeds: These varieties produce seeds that will grow true to type, meaning you can save seeds from your harvest year after year. F1 hybrids, while often vigorous, will not produce consistent offspring from saved seeds. Reputable seed companies include Baker Creek Heirloom Seeds, High Mowing Organic Seeds, and Seed Savers Exchange. Start with common, reliable varieties like ‘Black Krim’ tomatoes, ‘Provider’ bush beans, ‘Waltham Butternut’ squash, and ‘Black Seeded Simpson’ lettuce.
- Start Seeds Indoors (Optional but Recommended): For longer growing seasons or specific crops, starting seeds indoors gives you a head start. Use seed-starting mix (e.g., Espoma Organic Seed Starter Mix, ~$10 for 16qt bag) in seed trays (Jiffy Professional Greenhouse 72-cell kit, ~$15). Provide adequate light with LED grow lights (Barrina T5 2ft 4-pack LED Grow Lights, 20W each, ~$50) for 14-16 hours a day, positioned 2-4 inches above seedlings. Maintain consistent temperatures (65-75°F for most).
- Direct Sowing vs. Transplanting: Some crops (carrots, radishes, beans, corn) prefer direct sowing into the garden bed. Others (tomatoes, peppers, broccoli, kale) benefit from being started indoors and transplanted. Follow seed packet instructions for planting depths (e.g., lettuce seeds are often surface-sown or planted 1/8 inch deep, while beans are 1 inch deep) and spacing.
- Companion Planting: Strategically plant different species together to enhance growth, deter pests, and attract beneficial insects. For example, planting marigolds near tomatoes can deter nematodes, and basil improves tomato flavor. Nasturtiums can act as a trap crop for aphids.
- Succession Planting: For a continuous harvest, plant small batches of quick-growing crops (lettuce, radishes, cilantro) every 2-3 weeks. As one crop finishes, another is ready to take its place.
Step 6: Pest & Disease Management (Organic)
Maintaining a self sufficient garden from scratch means embracing organic pest and disease control.
- Integrated Pest Management (IPM): This holistic approach combines several strategies.
- Observation: Regularly inspect your plants for early signs of pests or disease. Catching issues early is key.
- Physical Barriers: Use row covers (e.g., Agribon AG-19 floating row cover, 10×20 ft, ~$20) to protect young plants from insect pests like cabbage worms and squash bugs. Install fences (e.g., 2×4 welded wire mesh, 4 ft tall, 50 ft roll ~$70) to keep out deer, rabbits, and other larger animals.
- Hand-Picking: For larger pests like tomato hornworms or squash bugs, simply pick them off and drop them into a bucket of soapy water.
- Companion Planting: As mentioned, certain plants repel pests. Marigolds, garlic, and onions are excellent deterrents.
- Attract Beneficial Insects: Plant flowers like dill, fennel, cosmos, and sweet alyssum to attract ladybugs, lacewings, and parasitic wasps, which prey on common garden pests.
- Organic Sprays & Treatments:
- Neem Oil: An excellent broad-spectrum organic insecticide and fungicide. Bonide Neem Oil Concentrate (16oz, ~$20) can be mixed at a rate of 1-2 tbsp per gallon of water and sprayed on affected plants.
- Insecticidal Soap: Effective against soft-bodied insects like aphids, whiteflies, and spider mites. Garden Safe Insecticidal Soap (24oz ready-to-use, ~$10).
- Bacillus thuringiensis (Bt): A naturally occurring soil bacterium that targets caterpillars and worms. Monterey BT Worm & Caterpillar Killer (16oz, ~$18) is highly effective and safe for beneficial insects.
- Copper or Sulfur Sprays: For fungal diseases like powdery mildew or blight, organic copper (e.g., Bonide Copper Fungicide, ~$15 for 1lb) or sulfur (e.g., Safer Brand Garden Fungicide, ~$10 for 16oz) can be used as a last resort.
Step 7: Harvesting & Seed Saving
The culmination of your efforts is the harvest, and seed saving closes the loop on self-sufficiency.
- Harvesting Techniques:
- Timing: Harvest vegetables at their peak ripeness for best flavor and nutritional value. For example, green beans should snap cleanly, cucumbers should be firm, and tomatoes should be fully colored.
- Frequency: Many crops, like zucchini, cucumbers, and bush beans, produce more if harvested frequently. Pick daily or every other day.
- Tools: Use clean, sharp pruners (e.g., Corona ClassicCUT Bypass Pruner BP 3180, ~$30) or a sharp knife for clean cuts, minimizing damage to the plant.
- Seed Saving: This is where the « self-sufficient » aspect truly shines.
- Selection: Only save seeds from your healthiest, most vigorous plants that show desired traits (disease resistance, good flavor, high yield).
- Isolation: To ensure true-to-type seeds, prevent cross-pollination. This can be challenging for open-pollinated crops that readily cross (e.g., squash, corn). For beginners, focus on self-pollinating plants like beans, peas, lettuce, and tomatoes.
- Processing:
- Dry Seeds (Beans, Peas, Lettuce, Grains): Allow pods/seed heads to dry completely on the plant. Harvest, shell, and clean the seeds, removing chaff.
- Wet Seeds (Tomatoes, Cucumbers, Squash): For tomatoes, ferment the seeds in water for a few days to remove the gel coating and inhibit disease. For cucumbers/squash, scrape out seeds, wash thoroughly, and dry.
- Drying: Spread seeds thinly on screens or paper plates in a cool, dry, well-ventilated area for 1-4 weeks. Ensure they are bone-dry before storage. I aim for less than 8% moisture content.
- Storage: Store seeds in airtight containers (glass jars with desiccant packets work well) in a cool, dark, dry place (ideally 40-50°F and 30-40% humidity). Label clearly with variety and date. Properly stored seeds can remain viable for 3-10 years or more.
Step 8: Season Extension & Winterizing
Extend your harvest and protect your garden for the off-season to truly maximize your self sufficient garden from scratch.
- Cold Frames: Simple structures with a transparent top (glass, polycarbonate, or old windows) that sit over garden beds. They trap solar heat, allowing you to grow cold-hardy crops (lettuce, spinach, kale, radishes) well into winter or start seeds earlier in spring. A basic cold frame can be built from 2×6 lumber and a sheet of polycarbonate for under $100.
- Hoop Houses/Low Tunnels: Larger structures made from flexible hoops (PVC pipe or EMT conduit) covered with greenhouse plastic. These provide more space and greater temperature moderation. A 10×20 ft DIY low tunnel kit can cost $200-$500, while a larger, more robust hoop house kit might be $1,000-$3,000. I use a 6×12 ft low tunnel made from 1/2-inch PVC hoops and 6mil greenhouse plastic, which extends my lettuce and spinach harvest by at least
Healthy soil is the bedrock of a productive, self-sufficient garden. You can’t guess what your soil needs; you have to test it.
- Perform a Soil Test: A professional soil test will give you precise data on your soil’s pH, nutrient levels (N-P-K), and organic matter content. I recommend sending a sample to your local agricultural extension office; it typically costs $20-$50 and provides detailed recommendations. Alternatively, for a quick homeowner check, a Rapitest Soil Test Kit (40-test kit, model 1663, ~$20 on Amazon) provides a good baseline for pH, Nitrogen, Phosphorus, and Potash. Aim for a pH between 6.0 and 7.0 for most vegetables.
- Amend for pH Imbalance: If your soil is too acidic (below 6.0), add agricultural lime (dolomitic lime adds magnesium, calcitic lime adds calcium). Apply 5-10 lbs per 100 sq ft for a moderate adjustment. If it’s too alkaline (above 7.0), add elemental sulfur (e.g., Espoma Soil Acidifier, ~$15 for 6.75 lbs) or generous amounts of organic matter like peat moss or pine needles.
- Build Organic Matter: This is the single most important step for long-term soil health. Organic matter improves soil structure, water retention, drainage, and nutrient availability. Incorporate 2-4 inches of high-quality compost into your top 6-12 inches of soil annually. I make my own compost from kitchen scraps, garden waste, and shredded leaves, but you can purchase it. Local nurseries often sell bulk compost for $30-$50 per cubic yard. Aged manure (from chickens, cows, or horses – ensure it’s well-rotted to avoid burning plants) is also excellent.
- Address Nutrient Deficiencies: Based on your soil test, add specific organic amendments. If Nitrogen (N) is low, add blood meal (12-0-0, ~$20 for 3 lbs) or feather meal. For Phosphorus (P), use bone meal (3-15-0, ~$15 for 3 lbs) or rock phosphate. For Potassium (K), greensand (0-0-2.5, ~$25 for 5 lbs) or kelp meal are good choices. I rely heavily on Espoma Organic Garden-tone (5-3-3, ~$25 for an 8lb bag) as a balanced, all-purpose organic fertilizer during planting.
Step 3: Garden Bed Preparation
Deciding between raised beds and in-ground beds depends on your soil, budget, and physical capabilities.
- In-Ground Beds: If you have excellent native soil and good drainage, in-ground beds are the most economical. Double-digging (loosening soil two shovel depths) can significantly improve drainage and aeration. For my main garden, I primarily use in-ground beds, but I focus on building up the soil over time with consistent compost additions and cover cropping. I aim for beds that are no wider than 3-4 feet so I can reach the center without stepping on the soil, compacting it.
- Raised Beds: Raised beds offer numerous advantages, especially for poor soil, heavy clay, or rocky areas. They provide better drainage, warm up faster in spring, reduce compaction, and make weeding and harvesting easier on your back.
- Material Options:
- Untreated Cedar: Naturally rot-resistant and chemical-free. A 4×8 ft bed, 12 inches deep, typically requires three 2x12x8 ft cedar boards, costing around $50-$60 per board (total ~$150-$180) plus corner brackets or screws. My first raised beds were cedar and are still going strong after 7 years.
- Galvanized Steel: Durable, long-lasting, and aesthetically pleasing. Brands like Vego Garden offer modular kits. A Vego Garden 17″ Tall 8-in-1 Metal Raised Garden Bed (can be configured to 4×8 ft) costs approximately $250-$300.
- Concrete Blocks/Stones: Very durable but can leach minerals (though generally safe once weathered) and can be expensive.
- Recycled Materials: Pallets (check for chemical treatment stamps like « HT » for heat-treated), old tires (controversial due to potential chemical leaching).
- Filling Raised Beds: Don’t just fill with topsoil. Use a « Hugelkultur » approach (logs, branches, leaves, then compost, then topsoil) or a mixture of 60% good quality topsoil, 30% compost, and 10% perlite or vermiculite for drainage. A 4x8x1 ft raised bed requires about 32 cubic feet (or ~1.2 cubic yards) of soil mix, which can cost $100-$200 depending on your source.
- Material Options:
Step 4: Water Management & Irrigation
Efficient water management is critical for a self sufficient garden from scratch, especially in off-grid living where water resources might be limited.
- Rainwater Harvesting: This is my primary source of irrigation water. A 55-gallon rain barrel (e.g., EarthMark Rain Barrel, ~$120-$150) connected to a downspout can collect significant water. For larger needs, I use two 275-gallon IBC totes (Intermediate Bulk Containers, often available used for $100-$200 each from food-grade sources) connected in series. A 1,000 sq ft roof can collect approximately 620 gallons of water for every inch of rainfall. My 1,500 sq ft roof provides ample water for my 600 sq ft garden through multiple barrels and totes.
- Drip Irrigation: This is by far the most water-efficient method, delivering water directly to the plant’s root zone, minimizing evaporation and weed growth.
- Components: A typical drip system includes a pressure regulator (e.g., Rain Bird PRV-10, ~$15), a filter (Rain Bird RBY filter, ~$20), main tubing (1/2-inch poly tubing, 100ft ~$25), smaller feeder lines (1/4-inch tubing), and emitters (0.5 GPH or 1 GPH per plant).
- Kits: For beginners, a starter kit like the Rain Bird Drip Irrigation Garden Kit (model DDI-KIT-1P, ~$40-$60) is excellent for a small garden. For larger setups, I use Netafim Techline CV Drip Line (500ft roll, ~$150-$200), which has pressure-compensating emitters built-in, ensuring even watering across long runs.
- Automation: For true self-sufficiency, consider a battery-powered timer (e.g., Orbit B-Hyve Bluetooth Hose Faucet Timer, ~$50) or a solar-powered timer connected to a small 12V pump.
- Solar-Powered Pumps: For lifting water from a well, pond, or large storage tank to your garden, a solar pump is a game-changer. For a smaller drip system, a Shurflo 2088-594-152 Diaphragm Pump (12V, 3.5 GPM, ~$180) can be powered by a single 100W solar panel (e.g., Renogy 100W Monocrystalline Solar Panel, ~$100) and a small 12V battery (e.g., a 50Ah LiFePO4 battery like the Battle Born 50Ah, ~$450). For larger operations or deeper wells, more robust systems are needed. If you’re looking to build out a comprehensive off-grid power system to support your garden’s water needs, or indeed your entire homestead, you might want to explore resources like the Power Grid Generator complete system guide to understand the full scope of what’s possible in terms of energy independence.
Step 5: Seed Selection & Planting
The choice of seeds is crucial for a truly self sufficient garden from scratch.
- Choose Heirloom & Open-Pollinated Seeds: These varieties produce seeds that will grow true to type, meaning you can save seeds from your harvest year after year. F1 hybrids, while often vigorous, will not produce consistent offspring from saved seeds. Reputable seed companies include Baker Creek Heirloom Seeds, High Mowing Organic Seeds, and Seed Savers Exchange. Start with common, reliable varieties like ‘Black Krim’ tomatoes, ‘Provider’ bush beans, ‘Waltham Butternut’ squash, and ‘Black Seeded Simpson’ lettuce.
- Start Seeds Indoors (Optional but Recommended): For longer growing seasons or specific crops, starting seeds indoors gives you a head start. Use seed-starting mix (e.g., Espoma Organic Seed Starter Mix, ~$10 for 16qt bag) in seed trays (Jiffy Professional Greenhouse 72-cell kit, ~$15). Provide adequate light with LED grow lights (Barrina T5 2ft 4-pack LED Grow Lights, 20W each, ~$50) for 14-16 hours a day, positioned 2-4 inches above seedlings. Maintain consistent temperatures (65-75°F for most).
- Direct Sowing vs. Transplanting: Some crops (carrots, radishes, beans, corn) prefer direct sowing into the garden bed. Others (tomatoes, peppers, broccoli, kale) benefit from being started indoors and transplanted. Follow seed packet instructions for planting depths (e.g., lettuce seeds are often surface-sown or planted 1/8 inch deep, while beans are 1 inch deep) and spacing.
- Companion Planting: Strategically plant different species together to enhance growth, deter pests, and attract beneficial insects. For example, planting marigolds near tomatoes can deter nematodes, and basil improves tomato flavor. Nasturtiums can act as a trap crop for aphids.
- Succession Planting: For a continuous harvest, plant small batches of quick-growing crops (lettuce, radishes, cilantro) every 2-3 weeks. As one crop finishes, another is ready to take its place.
Step 6: Pest & Disease Management (Organic)
Maintaining a self sufficient garden from scratch means embracing organic pest and disease control.
- Integrated Pest Management (IPM): This holistic approach combines several strategies.
- Observation: Regularly inspect your plants for early signs of pests or disease. Catching issues early is key.
- Physical Barriers: Use row covers (e.g., Agribon AG-19 floating row cover, 10×20 ft, ~$20) to protect young plants from insect pests like cabbage worms and squash bugs. Install fences (e.g., 2×4 welded wire mesh, 4 ft tall, 50 ft roll ~$70) to keep out deer, rabbits, and other larger animals.
- Hand-Picking: For larger pests like tomato hornworms or squash bugs, simply pick them off and drop them into a bucket of soapy water.
- Companion Planting: As mentioned, certain plants repel pests. Marigolds, garlic, and onions are excellent deterrents.
- Attract Beneficial Insects: Plant flowers like dill, fennel, cosmos, and sweet alyssum to attract ladybugs, lacewings, and parasitic wasps, which prey on common garden pests.
- Organic Sprays & Treatments:
- Neem Oil: An excellent broad-spectrum organic insecticide and fungicide. Bonide Neem Oil Concentrate (16oz, ~$20) can be mixed at a rate of 1-2 tbsp per gallon of water and sprayed on affected plants.
- Insecticidal Soap: Effective against soft-bodied insects like aphids, whiteflies, and spider mites. Garden Safe Insecticidal Soap (24oz ready-to-use, ~$10).
- Bacillus thuringiensis (Bt): A naturally occurring soil bacterium that targets caterpillars and worms. Monterey BT Worm & Caterpillar Killer (16oz, ~$18) is highly effective and safe for beneficial insects.
- Copper or Sulfur Sprays: For fungal diseases like powdery mildew or blight, organic copper (e.g., Bonide Copper Fungicide, ~$15 for 1lb) or sulfur (e.g., Safer Brand Garden Fungicide, ~$10 for 16oz) can be used as a last resort.
Step 7: Harvesting & Seed Saving
The culmination of your efforts is the harvest, and seed saving closes the loop on self-sufficiency.
- Harvesting Techniques:
- Timing: Harvest vegetables at their peak ripeness for best flavor and nutritional value. For example, green beans should snap cleanly, cucumbers should be firm, and tomatoes should be fully colored.
- Frequency: Many crops, like zucchini, cucumbers, and bush beans, produce more if harvested frequently. Pick daily or every other day.
- Tools: Use clean, sharp pruners (e.g., Corona ClassicCUT Bypass Pruner BP 3180, ~$30) or a sharp knife for clean cuts, minimizing damage to the plant.
- Seed Saving: This is where the « self-sufficient » aspect truly shines.
- Selection: Only save seeds from your healthiest, most vigorous plants that show desired traits (disease resistance, good flavor, high yield).
- Isolation: To ensure true-to-type seeds, prevent cross-pollination. This can be challenging for open-pollinated crops that readily cross (e.g., squash, corn). For beginners, focus on self-pollinating plants like beans, peas, lettuce, and tomatoes.
- Processing:
- Dry Seeds (Beans, Peas, Lettuce, Grains): Allow pods/seed heads to dry completely on the plant. Harvest, shell, and clean the seeds, removing chaff.
- Wet Seeds (Tomatoes, Cucumbers, Squash): For tomatoes, ferment the seeds in water for a few days to remove the gel coating and inhibit disease. For cucumbers/squash, scrape out seeds, wash thoroughly, and dry.
- Drying: Spread seeds thinly on screens or paper plates in a cool, dry, well-ventilated area for 1-4 weeks. Ensure they are bone-dry before storage. I aim for less than 8% moisture content.
- Storage: Store seeds in airtight containers (glass jars with desiccant packets work well) in a cool, dark, dry place (ideally 40-50°F and 30-40% humidity). Label clearly with variety and date. Properly stored seeds can remain viable for 3-10 years or more.
Step 8: Season Extension & Winterizing
Extend your harvest and protect your garden for the off-season to truly maximize your self sufficient garden from scratch.
- Cold Frames: Simple structures with a transparent top (glass, polycarbonate, or old windows) that sit over garden beds. They trap solar heat, allowing you to grow cold-hardy crops (lettuce, spinach, kale, radishes) well into winter or start seeds earlier in spring. A basic cold frame can be built from 2×6 lumber and a sheet of polycarbonate for under $100.
- Hoop Houses/Low Tunnels: Larger structures made from flexible hoops (PVC pipe or EMT conduit) covered with greenhouse plastic. These provide more space and greater temperature moderation. A 10×20 ft DIY low tunnel kit can cost $200-$500, while a larger, more robust hoop house kit might be $1,000-$3,000. I use a 6×12 ft low tunnel made from 1/2-inch PVC hoops and 6mil greenhouse plastic, which extends my lettuce and spinach harvest by at least
- Harvesting Techniques:
- Timing: Harvest vegetables at their peak ripeness for best flavor and nutritional value. For example, green beans should snap cleanly, cucumbers should be firm, and tomatoes should be fully colored.
- Frequency: Many crops, like zucchini, cucumbers, and bush beans, produce more if harvested frequently. Pick daily or every other day.
- Tools: Use clean, sharp pruners (e.g., Corona ClassicCUT Bypass Pruner BP 3180, ~$30) or a sharp knife for clean cuts, minimizing damage to the plant.
- Seed Saving: This is where the « self-sufficient » aspect truly shines.
- Selection: Only save seeds from your healthiest, most vigorous plants that show desired traits (disease resistance, good flavor, high yield).
- Isolation: To ensure true-to-type seeds, prevent cross-pollination. This can be challenging for open-pollinated crops that readily cross (e.g., squash, corn). For beginners, focus on self-pollinating plants like beans, peas, lettuce, and tomatoes.
- Processing:
- Dry Seeds (Beans, Peas, Lettuce, Grains): Allow pods/seed heads to dry completely on the plant. Harvest, shell, and clean the seeds, removing chaff.
- Wet Seeds (Tomatoes, Cucumbers, Squash): For tomatoes, ferment the seeds in water for a few days to remove the gel coating and inhibit disease. For cucumbers/squash, scrape out seeds, wash thoroughly, and dry.
- Drying: Spread seeds thinly on screens or paper plates in a cool, dry, well-ventilated area for 1-4 weeks. Ensure they are bone-dry before storage. I aim for less than 8% moisture content.
- Storage: Store seeds in airtight containers (glass jars with desiccant packets work well) in a cool, dark, dry place (ideally 40-50°F and 30-40% humidity). Label clearly with variety and date. Properly stored seeds can remain viable for 3-10 years or more.
Step 8: Season Extension & Winterizing
Extend your harvest and protect your garden for the off-season to truly maximize your self sufficient garden from scratch.
- Cold Frames: Simple structures with a transparent top (glass, polycarbonate, or old windows) that sit over garden beds. They trap solar heat, allowing you to grow cold-hardy crops (lettuce, spinach, kale, radishes) well into winter or start seeds earlier in spring. A basic cold frame can be built from 2×6 lumber and a sheet of polycarbonate for under $100.
- Hoop Houses/Low Tunnels: Larger structures made from flexible hoops (PVC pipe or EMT conduit) covered with greenhouse plastic. These provide more space and greater temperature moderation. A 10×20 ft DIY low tunnel kit can cost $200-$500, while a larger, more robust hoop house kit might be $1,000-$3,000. I use a 6×12 ft low tunnel made from 1/2-inch PVC hoops and 6mil greenhouse plastic, which extends my lettuce and spinach harvest by at least
Efficient water management is critical for a self sufficient garden from scratch, especially in off-grid living where water resources might be limited.
- Rainwater Harvesting: This is my primary source of irrigation water. A 55-gallon rain barrel (e.g., EarthMark Rain Barrel, ~$120-$150) connected to a downspout can collect significant water. For larger needs, I use two 275-gallon IBC totes (Intermediate Bulk Containers, often available used for $100-$200 each from food-grade sources) connected in series. A 1,000 sq ft roof can collect approximately 620 gallons of water for every inch of rainfall. My 1,500 sq ft roof provides ample water for my 600 sq ft garden through multiple barrels and totes.
- Drip Irrigation: This is by far the most water-efficient method, delivering water directly to the plant’s root zone, minimizing evaporation and weed growth.
- Components: A typical drip system includes a pressure regulator (e.g., Rain Bird PRV-10, ~$15), a filter (Rain Bird RBY filter, ~$20), main tubing (1/2-inch poly tubing, 100ft ~$25), smaller feeder lines (1/4-inch tubing), and emitters (0.5 GPH or 1 GPH per plant).
- Kits: For beginners, a starter kit like the Rain Bird Drip Irrigation Garden Kit (model DDI-KIT-1P, ~$40-$60) is excellent for a small garden. For larger setups, I use Netafim Techline CV Drip Line (500ft roll, ~$150-$200), which has pressure-compensating emitters built-in, ensuring even watering across long runs.
- Automation: For true self-sufficiency, consider a battery-powered timer (e.g., Orbit B-Hyve Bluetooth Hose Faucet Timer, ~$50) or a solar-powered timer connected to a small 12V pump.
- Solar-Powered Pumps: For lifting water from a well, pond, or large storage tank to your garden, a solar pump is a game-changer. For a smaller drip system, a Shurflo 2088-594-152 Diaphragm Pump (12V, 3.5 GPM, ~$180) can be powered by a single 100W solar panel (e.g., Renogy 100W Monocrystalline Solar Panel, ~$100) and a small 12V battery (e.g., a 50Ah LiFePO4 battery like the Battle Born 50Ah, ~$450). For larger operations or deeper wells, more robust systems are needed. If you’re looking to build out a comprehensive off-grid power system to support your garden’s water needs, or indeed your entire homestead, you might want to explore resources like the Power Grid Generator complete system guide to understand the full scope of what’s possible in terms of energy independence.
Step 5: Seed Selection & Planting
The choice of seeds is crucial for a truly self sufficient garden from scratch.
- Choose Heirloom & Open-Pollinated Seeds: These varieties produce seeds that will grow true to type, meaning you can save seeds from your harvest year after year. F1 hybrids, while often vigorous, will not produce consistent offspring from saved seeds. Reputable seed companies include Baker Creek Heirloom Seeds, High Mowing Organic Seeds, and Seed Savers Exchange. Start with common, reliable varieties like ‘Black Krim’ tomatoes, ‘Provider’ bush beans, ‘Waltham Butternut’ squash, and ‘Black Seeded Simpson’ lettuce.
- Start Seeds Indoors (Optional but Recommended): For longer growing seasons or specific crops, starting seeds indoors gives you a head start. Use seed-starting mix (e.g., Espoma Organic Seed Starter Mix, ~$10 for 16qt bag) in seed trays (Jiffy Professional Greenhouse 72-cell kit, ~$15). Provide adequate light with LED grow lights (Barrina T5 2ft 4-pack LED Grow Lights, 20W each, ~$50) for 14-16 hours a day, positioned 2-4 inches above seedlings. Maintain consistent temperatures (65-75°F for most).
- Direct Sowing vs. Transplanting: Some crops (carrots, radishes, beans, corn) prefer direct sowing into the garden bed. Others (tomatoes, peppers, broccoli, kale) benefit from being started indoors and transplanted. Follow seed packet instructions for planting depths (e.g., lettuce seeds are often surface-sown or planted 1/8 inch deep, while beans are 1 inch deep) and spacing.
- Companion Planting: Strategically plant different species together to enhance growth, deter pests, and attract beneficial insects. For example, planting marigolds near tomatoes can deter nematodes, and basil improves tomato flavor. Nasturtiums can act as a trap crop for aphids.
- Succession Planting: For a continuous harvest, plant small batches of quick-growing crops (lettuce, radishes, cilantro) every 2-3 weeks. As one crop finishes, another is ready to take its place.
Step 6: Pest & Disease Management (Organic)
Maintaining a self sufficient garden from scratch means embracing organic pest and disease control.
- Integrated Pest Management (IPM): This holistic approach combines several strategies.
- Observation: Regularly inspect your plants for early signs of pests or disease. Catching issues early is key.
- Physical Barriers: Use row covers (e.g., Agribon AG-19 floating row cover, 10×20 ft, ~$20) to protect young plants from insect pests like cabbage worms and squash bugs. Install fences (e.g., 2×4 welded wire mesh, 4 ft tall, 50 ft roll ~$70) to keep out deer, rabbits, and other larger animals.
- Hand-Picking: For larger pests like tomato hornworms or squash bugs, simply pick them off and drop them into a bucket of soapy water.
- Companion Planting: As mentioned, certain plants repel pests. Marigolds, garlic, and onions are excellent deterrents.
- Attract Beneficial Insects: Plant flowers like dill, fennel, cosmos, and sweet alyssum to attract ladybugs, lacewings, and parasitic wasps, which prey on common garden pests.
- Organic Sprays & Treatments:
- Neem Oil: An excellent broad-spectrum organic insecticide and fungicide. Bonide Neem Oil Concentrate (16oz, ~$20) can be mixed at a rate of 1-2 tbsp per gallon of water and sprayed on affected plants.
- Insecticidal Soap: Effective against soft-bodied insects like aphids, whiteflies, and spider mites. Garden Safe Insecticidal Soap (24oz ready-to-use, ~$10).
- Bacillus thuringiensis (Bt): A naturally occurring soil bacterium that targets caterpillars and worms. Monterey BT Worm & Caterpillar Killer (16oz, ~$18) is highly effective and safe for beneficial insects.
- Copper or Sulfur Sprays: For fungal diseases like powdery mildew or blight, organic copper (e.g., Bonide Copper Fungicide, ~$15 for 1lb) or sulfur (e.g., Safer Brand Garden Fungicide, ~$10 for 16oz) can be used as a last resort.
Step 7: Harvesting & Seed Saving
The culmination of your efforts is the harvest, and seed saving closes the loop on self-sufficiency.
- Harvesting Techniques:
- Timing: Harvest vegetables at their peak ripeness for best flavor and nutritional value. For example, green beans should snap cleanly, cucumbers should be firm, and tomatoes should be fully colored.
- Frequency: Many crops, like zucchini, cucumbers, and bush beans, produce more if harvested frequently. Pick daily or every other day.
- Tools: Use clean, sharp pruners (e.g., Corona ClassicCUT Bypass Pruner BP 3180, ~$30) or a sharp knife for clean cuts, minimizing damage to the plant.
- Seed Saving: This is where the « self-sufficient » aspect truly shines.
- Selection: Only save seeds from your healthiest, most vigorous plants that show desired traits (disease resistance, good flavor, high yield).
- Isolation: To ensure true-to-type seeds, prevent cross-pollination. This can be challenging for open-pollinated crops that readily cross (e.g., squash, corn). For beginners, focus on self-pollinating plants like beans, peas, lettuce, and tomatoes.
- Processing:
- Dry Seeds (Beans, Peas, Lettuce, Grains): Allow pods/seed heads to dry completely on the plant. Harvest, shell, and clean the seeds, removing chaff.
- Wet Seeds (Tomatoes, Cucumbers, Squash): For tomatoes, ferment the seeds in water for a few days to remove the gel coating and inhibit disease. For cucumbers/squash, scrape out seeds, wash thoroughly, and dry.
- Drying: Spread seeds thinly on screens or paper plates in a cool, dry, well-ventilated area for 1-4 weeks. Ensure they are bone-dry before storage. I aim for less than 8% moisture content.
- Storage: Store seeds in airtight containers (glass jars with desiccant packets work well) in a cool, dark, dry place (ideally 40-50°F and 30-40% humidity). Label clearly with variety and date. Properly stored seeds can remain viable for 3-10 years or more.
Step 8: Season Extension & Winterizing
Extend your harvest and protect your garden for the off-season to truly maximize your self sufficient garden from scratch.
- Cold Frames: Simple structures with a transparent top (glass, polycarbonate, or old windows) that sit over garden beds. They trap solar heat, allowing you to grow cold-hardy crops (lettuce, spinach, kale, radishes) well into winter or start seeds earlier in spring. A basic cold frame can be built from 2×6 lumber and a sheet of polycarbonate for under $100.
- Hoop Houses/Low Tunnels: Larger structures made from flexible hoops (PVC pipe or EMT conduit) covered with greenhouse plastic. These provide more space and greater temperature moderation. A 10×20 ft DIY low tunnel kit can cost $200-$500, while a larger, more robust hoop house kit might be $1,000-$3,000. I use a 6×12 ft low tunnel made from 1/2-inch PVC hoops and 6mil greenhouse plastic, which extends my lettuce and spinach harvest by at least
Step 4: Water Management & Irrigation
Efficient water management is critical for a self sufficient garden from scratch, especially in off-grid living where water resources might be limited.
- Rainwater Harvesting: This is my primary source of irrigation water. A 55-gallon rain barrel (e.g., EarthMark Rain Barrel, ~$120-$150) connected to a downspout can collect significant water. For larger needs, I use two 275-gallon IBC totes (Intermediate Bulk Containers, often available used for $100-$200 each from food-grade sources) connected in series. A 1,000 sq ft roof can collect approximately 620 gallons of water for every inch of rainfall. My 1,500 sq ft roof provides ample water for my 600 sq ft garden through multiple barrels and totes.
- Drip Irrigation: This is by far the most water-efficient method, delivering water directly to the plant’s root zone, minimizing evaporation and weed growth.
- Components: A typical drip system includes a pressure regulator (e.g., Rain Bird PRV-10, ~$15), a filter (Rain Bird RBY filter, ~$20), main tubing (1/2-inch poly tubing, 100ft ~$25), smaller feeder lines (1/4-inch tubing), and emitters (0.5 GPH or 1 GPH per plant).
- Kits: For beginners, a starter kit like the Rain Bird Drip Irrigation Garden Kit (model DDI-KIT-1P, ~$40-$60) is excellent for a small garden. For larger setups, I use Netafim Techline CV Drip Line (500ft roll, ~$150-$200), which has pressure-compensating emitters built-in, ensuring even watering across long runs.
- Automation: For true self-sufficiency, consider a battery-powered timer (e.g., Orbit B-Hyve Bluetooth Hose Faucet Timer, ~$50) or a solar-powered timer connected to a small 12V pump.
- Solar-Powered Pumps: For lifting water from a well, pond, or large storage tank to your garden, a solar pump is a game-changer. For a smaller drip system, a Shurflo 2088-594-152 Diaphragm Pump (12V, 3.5 GPM, ~$180) can be powered by a single 100W solar panel (e.g., Renogy 100W Monocrystalline Solar Panel, ~$100) and a small 12V battery (e.g., a 50Ah LiFePO4 battery like the Battle Born 50Ah, ~$450). For larger operations or deeper wells, more robust systems are needed. If you’re looking to build out a comprehensive off-grid power system to support your garden’s water needs, or indeed your entire homestead, you might want to explore resources like the Power Grid Generator complete system guide to understand the full scope of what’s possible in terms of energy independence.
Step 5: Seed Selection & Planting
The choice of seeds is crucial for a truly self sufficient garden from scratch.
- Choose Heirloom & Open-Pollinated Seeds: These varieties produce seeds that will grow true to type, meaning you can save seeds from your harvest year after year. F1 hybrids, while often vigorous, will not produce consistent offspring from saved seeds. Reputable seed companies include Baker Creek Heirloom Seeds, High Mowing Organic Seeds, and Seed Savers Exchange. Start with common, reliable varieties like ‘Black Krim’ tomatoes, ‘Provider’ bush beans, ‘Waltham Butternut’ squash, and ‘Black Seeded Simpson’ lettuce.
- Start Seeds Indoors (Optional but Recommended): For longer growing seasons or specific crops, starting seeds indoors gives you a head start. Use seed-starting mix (e.g., Espoma Organic Seed Starter Mix, ~$10 for 16qt bag) in seed trays (Jiffy Professional Greenhouse 72-cell kit, ~$15). Provide adequate light with LED grow lights (Barrina T5 2ft 4-pack LED Grow Lights, 20W each, ~$50) for 14-16 hours a day, positioned 2-4 inches above seedlings. Maintain consistent temperatures (65-75°F for most).
- Direct Sowing vs. Transplanting: Some crops (carrots, radishes, beans, corn) prefer direct sowing into the garden bed. Others (tomatoes, peppers, broccoli, kale) benefit from being started indoors and transplanted. Follow seed packet instructions for planting depths (e.g., lettuce seeds are often surface-sown or planted 1/8 inch deep, while beans are 1 inch deep) and spacing.
- Companion Planting: Strategically plant different species together to enhance growth, deter pests, and attract beneficial insects. For example, planting marigolds near tomatoes can deter nematodes, and basil improves tomato flavor. Nasturtiums can act as a trap crop for aphids.
- Succession Planting: For a continuous harvest, plant small batches of quick-growing crops (lettuce, radishes, cilantro) every 2-3 weeks. As one crop finishes, another is ready to take its place.
Step 6: Pest & Disease Management (Organic)
Maintaining a self sufficient garden from scratch means embracing organic pest and disease control.
- Integrated Pest Management (IPM): This holistic approach combines several strategies.
- Observation: Regularly inspect your plants for early signs of pests or disease. Catching issues early is key.
- Physical Barriers: Use row covers (e.g., Agribon AG-19 floating row cover, 10×20 ft, ~$20) to protect young plants from insect pests like cabbage worms and squash bugs. Install fences (e.g., 2×4 welded wire mesh, 4 ft tall, 50 ft roll ~$70) to keep out deer, rabbits, and other larger animals.
- Hand-Picking: For larger pests like tomato hornworms or squash bugs, simply pick them off and drop them into a bucket of soapy water.
- Companion Planting: As mentioned, certain plants repel pests. Marigolds, garlic, and onions are excellent deterrents.
- Attract Beneficial Insects: Plant flowers like dill, fennel, cosmos, and sweet alyssum to attract ladybugs, lacewings, and parasitic wasps, which prey on common garden pests.
- Organic Sprays & Treatments:
- Neem Oil: An excellent broad-spectrum organic insecticide and fungicide. Bonide Neem Oil Concentrate (16oz, ~$20) can be mixed at a rate of 1-2 tbsp per gallon of water and sprayed on affected plants.
- Insecticidal Soap: Effective against soft-bodied insects like aphids, whiteflies, and spider mites. Garden Safe Insecticidal Soap (24oz ready-to-use, ~$10).
- Bacillus thuringiensis (Bt): A naturally occurring soil bacterium that targets caterpillars and worms. Monterey BT Worm & Caterpillar Killer (16oz, ~$18) is highly effective and safe for beneficial insects.
- Copper or Sulfur Sprays: For fungal diseases like powdery mildew or blight, organic copper (e.g., Bonide Copper Fungicide, ~$15 for 1lb) or sulfur (e.g., Safer Brand Garden Fungicide, ~$10 for 16oz) can be used as a last resort.
Step 7: Harvesting & Seed Saving
The culmination of your efforts is the harvest, and seed saving closes the loop on self-sufficiency.
- Harvesting Techniques:
- Timing: Harvest vegetables at their peak ripeness for best flavor and nutritional value. For example, green beans should snap cleanly, cucumbers should be firm, and tomatoes should be fully colored.
- Frequency: Many crops, like zucchini, cucumbers, and bush beans, produce more if harvested frequently. Pick daily or every other day.
- Tools: Use clean, sharp pruners (e.g., Corona ClassicCUT Bypass Pruner BP 3180, ~$30) or a sharp knife for clean cuts, minimizing damage to the plant.
- Seed Saving: This is where the « self-sufficient » aspect truly shines.
- Selection: Only save seeds from your healthiest, most vigorous plants that show desired traits (disease resistance, good flavor, high yield).
- Isolation: To ensure true-to-type seeds, prevent cross-pollination. This can be challenging for open-pollinated crops that readily cross (e.g., squash, corn). For beginners, focus on self-pollinating plants like beans, peas, lettuce, and tomatoes.
- Processing:
- Dry Seeds (Beans, Peas, Lettuce, Grains): Allow pods/seed heads to dry completely on the plant. Harvest, shell, and clean the seeds, removing chaff.
- Wet Seeds (Tomatoes, Cucumbers, Squash): For tomatoes, ferment the seeds in water for a few days to remove the gel coating and inhibit disease. For cucumbers/squash, scrape out seeds, wash thoroughly, and dry.
- Drying: Spread seeds thinly on screens or paper plates in a cool, dry, well-ventilated area for 1-4 weeks. Ensure they are bone-dry before storage. I aim for less than 8% moisture content.
- Storage: Store seeds in airtight containers (glass jars with desiccant packets work well) in a cool, dark, dry place (ideally 40-50°F and 30-40% humidity). Label clearly with variety and date. Properly stored seeds can remain viable for 3-10 years or more.
Step 8: Season Extension & Winterizing
Extend your harvest and protect your garden for the off-season to truly maximize your self sufficient garden from scratch.
- Cold Frames: Simple structures with a transparent top (glass, polycarbonate, or old windows) that sit over garden beds. They trap solar heat, allowing you to grow cold-hardy crops (lettuce, spinach, kale, radishes) well into winter or start seeds earlier in spring. A basic cold frame can be built from 2×6 lumber and a sheet of polycarbonate for under $100.
- Hoop Houses/Low Tunnels: Larger structures made from flexible hoops (PVC pipe or EMT conduit) covered with greenhouse plastic. These provide more space and greater temperature moderation. A 10×20 ft DIY low tunnel kit can cost $200-$500, while a larger, more robust hoop house kit might be $1,000-$3,000. I use a 6×12 ft low tunnel made from 1/2-inch PVC hoops and 6mil greenhouse plastic, which extends my lettuce and spinach harvest by at least
- In-Ground Beds: If you have excellent native soil and good drainage, in-ground beds are the most economical. Double-digging (loosening soil two shovel depths) can significantly improve drainage and aeration. For my main garden, I primarily use in-ground beds, but I focus on building up the soil over time with consistent compost additions and cover cropping. I aim for beds that are no wider than 3-4 feet so I can reach the center without stepping on the soil, compacting it.
- Raised Beds: Raised beds offer numerous advantages, especially for poor soil, heavy clay, or rocky areas. They provide better drainage, warm up faster in spring, reduce compaction, and make weeding and harvesting easier on your back.
- Material Options:
- Untreated Cedar: Naturally rot-resistant and chemical-free. A 4×8 ft bed, 12 inches deep, typically requires three 2x12x8 ft cedar boards, costing around $50-$60 per board (total ~$150-$180) plus corner brackets or screws. My first raised beds were cedar and are still going strong after 7 years.
- Galvanized Steel: Durable, long-lasting, and aesthetically pleasing. Brands like Vego Garden offer modular kits. A Vego Garden 17″ Tall 8-in-1 Metal Raised Garden Bed (can be configured to 4×8 ft) costs approximately $250-$300.
- Concrete Blocks/Stones: Very durable but can leach minerals (though generally safe once weathered) and can be expensive.
- Recycled Materials: Pallets (check for chemical treatment stamps like « HT » for heat-treated), old tires (controversial due to potential chemical leaching).
- Filling Raised Beds: Don’t just fill with topsoil. Use a « Hugelkultur » approach (logs, branches, leaves, then compost, then topsoil) or a mixture of 60% good quality topsoil, 30% compost, and 10% perlite or vermiculite for drainage. A 4x8x1 ft raised bed requires about 32 cubic feet (or ~1.2 cubic yards) of soil mix, which can cost $100-$200 depending on your source.
- Material Options:
Step 4: Water Management & Irrigation
Efficient water management is critical for a self sufficient garden from scratch, especially in off-grid living where water resources might be limited.
- Rainwater Harvesting: This is my primary source of irrigation water. A 55-gallon rain barrel (e.g., EarthMark Rain Barrel, ~$120-$150) connected to a downspout can collect significant water. For larger needs, I use two 275-gallon IBC totes (Intermediate Bulk Containers, often available used for $100-$200 each from food-grade sources) connected in series. A 1,000 sq ft roof can collect approximately 620 gallons of water for every inch of rainfall. My 1,500 sq ft roof provides ample water for my 600 sq ft garden through multiple barrels and totes.
- Drip Irrigation: This is by far the most water-efficient method, delivering water directly to the plant’s root zone, minimizing evaporation and weed growth.
- Components: A typical drip system includes a pressure regulator (e.g., Rain Bird PRV-10, ~$15), a filter (Rain Bird RBY filter, ~$20), main tubing (1/2-inch poly tubing, 100ft ~$25), smaller feeder lines (1/4-inch tubing), and emitters (0.5 GPH or 1 GPH per plant).
- Kits: For beginners, a starter kit like the Rain Bird Drip Irrigation Garden Kit (model DDI-KIT-1P, ~$40-$60) is excellent for a small garden. For larger setups, I use Netafim Techline CV Drip Line (500ft roll, ~$150-$200), which has pressure-compensating emitters built-in, ensuring even watering across long runs.
- Automation: For true self-sufficiency, consider a battery-powered timer (e.g., Orbit B-Hyve Bluetooth Hose Faucet Timer, ~$50) or a solar-powered timer connected to a small 12V pump.
- Solar-Powered Pumps: For lifting water from a well, pond, or large storage tank to your garden, a solar pump is a game-changer. For a smaller drip system, a Shurflo 2088-594-152 Diaphragm Pump (12V, 3.5 GPM, ~$180) can be powered by a single 100W solar panel (e.g., Renogy 100W Monocrystalline Solar Panel, ~$100) and a small 12V battery (e.g., a 50Ah LiFePO4 battery like the Battle Born 50Ah, ~$450). For larger operations or deeper wells, more robust systems are needed. If you’re looking to build out a comprehensive off-grid power system to support your garden’s water needs, or indeed your entire homestead, you might want to explore resources like the Power Grid Generator complete system guide to understand the full scope of what’s possible in terms of energy independence.
Step 5: Seed Selection & Planting
The choice of seeds is crucial for a truly self sufficient garden from scratch.
- Choose Heirloom & Open-Pollinated Seeds: These varieties produce seeds that will grow true to type, meaning you can save seeds from your harvest year after year. F1 hybrids, while often vigorous, will not produce consistent offspring from saved seeds. Reputable seed companies include Baker Creek Heirloom Seeds, High Mowing Organic Seeds, and Seed Savers Exchange. Start with common, reliable varieties like ‘Black Krim’ tomatoes, ‘Provider’ bush beans, ‘Waltham Butternut’ squash, and ‘Black Seeded Simpson’ lettuce.
- Start Seeds Indoors (Optional but Recommended): For longer growing seasons or specific crops, starting seeds indoors gives you a head start. Use seed-starting mix (e.g., Espoma Organic Seed Starter Mix, ~$10 for 16qt bag) in seed trays (Jiffy Professional Greenhouse 72-cell kit, ~$15). Provide adequate light with LED grow lights (Barrina T5 2ft 4-pack LED Grow Lights, 20W each, ~$50) for 14-16 hours a day, positioned 2-4 inches above seedlings. Maintain consistent temperatures (65-75°F for most).
- Direct Sowing vs. Transplanting: Some crops (carrots, radishes, beans, corn) prefer direct sowing into the garden bed. Others (tomatoes, peppers, broccoli, kale) benefit from being started indoors and transplanted. Follow seed packet instructions for planting depths (e.g., lettuce seeds are often surface-sown or planted 1/8 inch deep, while beans are 1 inch deep) and spacing.
- Companion Planting: Strategically plant different species together to enhance growth, deter pests, and attract beneficial insects. For example, planting marigolds near tomatoes can deter nematodes, and basil improves tomato flavor. Nasturtiums can act as a trap crop for aphids.
- Succession Planting: For a continuous harvest, plant small batches of quick-growing crops (lettuce, radishes, cilantro) every 2-3 weeks. As one crop finishes, another is ready to take its place.
Step 6: Pest & Disease Management (Organic)
Maintaining a self sufficient garden from scratch means embracing organic pest and disease control.
- Integrated Pest Management (IPM): This holistic approach combines several strategies.
- Observation: Regularly inspect your plants for early signs of pests or disease. Catching issues early is key.
- Physical Barriers: Use row covers (e.g., Agribon AG-19 floating row cover, 10×20 ft, ~$20) to protect young plants from insect pests like cabbage worms and squash bugs. Install fences (e.g., 2×4 welded wire mesh, 4 ft tall, 50 ft roll ~$70) to keep out deer, rabbits, and other larger animals.
- Hand-Picking: For larger pests like tomato hornworms or squash bugs, simply pick them off and drop them into a bucket of soapy water.
- Companion Planting: As mentioned, certain plants repel pests. Marigolds, garlic, and onions are excellent deterrents.
- Attract Beneficial Insects: Plant flowers like dill, fennel, cosmos, and sweet alyssum to attract ladybugs, lacewings, and parasitic wasps, which prey on common garden pests.
- Organic Sprays & Treatments:
- Neem Oil: An excellent broad-spectrum organic insecticide and fungicide. Bonide Neem Oil Concentrate (16oz, ~$20) can be mixed at a rate of 1-2 tbsp per gallon of water and sprayed on affected plants.
- Insecticidal Soap: Effective against soft-bodied insects like aphids, whiteflies, and spider mites. Garden Safe Insecticidal Soap (24oz ready-to-use, ~$10).
- Bacillus thuringiensis (Bt): A naturally occurring soil bacterium that targets caterpillars and worms. Monterey BT Worm & Caterpillar Killer (16oz, ~$18) is highly effective and safe for beneficial insects.
- Copper or Sulfur Sprays: For fungal diseases like powdery mildew or blight, organic copper (e.g., Bonide Copper Fungicide, ~$15 for 1lb) or sulfur (e.g., Safer Brand Garden Fungicide, ~$10 for 16oz) can be used as a last resort.
Step 7: Harvesting & Seed Saving
The culmination of your efforts is the harvest, and seed saving closes the loop on self-sufficiency.
- Harvesting Techniques:
- Timing: Harvest vegetables at their peak ripeness for best flavor and nutritional value. For example, green beans should snap cleanly, cucumbers should be firm, and tomatoes should be fully colored.
- Frequency: Many crops, like zucchini, cucumbers, and bush beans, produce more if harvested frequently. Pick daily or every other day.
- Tools: Use clean, sharp pruners (e.g., Corona ClassicCUT Bypass Pruner BP 3180, ~$30) or a sharp knife for clean cuts, minimizing damage to the plant.
- Seed Saving: This is where the « self-sufficient » aspect truly shines.
- Selection: Only save seeds from your healthiest, most vigorous plants that show desired traits (disease resistance, good flavor, high yield).
- Isolation: To ensure true-to-type seeds, prevent cross-pollination. This can be challenging for open-pollinated crops that readily cross (e.g., squash, corn). For beginners, focus on self-pollinating plants like beans, peas, lettuce, and tomatoes.
- Processing:
- Dry Seeds (Beans, Peas, Lettuce, Grains): Allow pods/seed heads to dry completely on the plant. Harvest, shell, and clean the seeds, removing chaff.
- Wet Seeds (Tomatoes, Cucumbers, Squash): For tomatoes, ferment the seeds in water for a few days to remove the gel coating and inhibit disease. For cucumbers/squash, scrape out seeds, wash thoroughly, and dry.
- Drying: Spread seeds thinly on screens or paper plates in a cool, dry, well-ventilated area for 1-4 weeks. Ensure they are bone-dry before storage. I aim for less than 8% moisture content.
- Storage: Store seeds in airtight containers (glass jars with desiccant packets work well) in a cool, dark, dry place (ideally 40-50°F and 30-40% humidity). Label clearly with variety and date. Properly stored seeds can remain viable for 3-10 years or more.
Step 8: Season Extension & Winterizing
Extend your harvest and protect your garden for the off-season to truly maximize your self sufficient garden from scratch.
- Cold Frames: Simple structures with a transparent top (glass, polycarbonate, or old windows) that sit over garden beds. They trap solar heat, allowing you to grow cold-hardy crops (lettuce, spinach, kale, radishes) well into winter or start seeds earlier in spring. A basic cold frame can be built from 2×6 lumber and a sheet of polycarbonate for under $100.
- Hoop Houses/Low Tunnels: Larger structures made from flexible hoops (PVC pipe or EMT conduit) covered with greenhouse plastic. These provide more space and greater temperature moderation. A 10×20 ft DIY low tunnel kit can cost $200-$500, while a larger, more robust hoop house kit might be $1,000-$3,000. I use a 6×12 ft low tunnel made from 1/2-inch PVC hoops and 6mil greenhouse plastic, which extends my lettuce and spinach harvest by at least
Deciding between raised beds and in-ground beds depends on your soil, budget, and physical capabilities.
- In-Ground Beds: If you have excellent native soil and good drainage, in-ground beds are the most economical. Double-digging (loosening soil two shovel depths) can significantly improve drainage and aeration. For my main garden, I primarily use in-ground beds, but I focus on building up the soil over time with consistent compost additions and cover cropping. I aim for beds that are no wider than 3-4 feet so I can reach the center without stepping on the soil, compacting it.
- Raised Beds: Raised beds offer numerous advantages, especially for poor soil, heavy clay, or rocky areas. They provide better drainage, warm up faster in spring, reduce compaction, and make weeding and harvesting easier on your back.
- Material Options:
- Untreated Cedar: Naturally rot-resistant and chemical-free. A 4×8 ft bed, 12 inches deep, typically requires three 2x12x8 ft cedar boards, costing around $50-$60 per board (total ~$150-$180) plus corner brackets or screws. My first raised beds were cedar and are still going strong after 7 years.
- Galvanized Steel: Durable, long-lasting, and aesthetically pleasing. Brands like Vego Garden offer modular kits. A Vego Garden 17″ Tall 8-in-1 Metal Raised Garden Bed (can be configured to 4×8 ft) costs approximately $250-$300.
- Concrete Blocks/Stones: Very durable but can leach minerals (though generally safe once weathered) and can be expensive.
- Recycled Materials: Pallets (check for chemical treatment stamps like « HT » for heat-treated), old tires (controversial due to potential chemical leaching).
- Filling Raised Beds: Don’t just fill with topsoil. Use a « Hugelkultur » approach (logs, branches, leaves, then compost, then topsoil) or a mixture of 60% good quality topsoil, 30% compost, and 10% perlite or vermiculite for drainage. A 4x8x1 ft raised bed requires about 32 cubic feet (or ~1.2 cubic yards) of soil mix, which can cost $100-$200 depending on your source.
- Material Options:
Step 4: Water Management & Irrigation
Efficient water management is critical for a self sufficient garden from scratch, especially in off-grid living where water resources might be limited.
- Rainwater Harvesting: This is my primary source of irrigation water. A 55-gallon rain barrel (e.g., EarthMark Rain Barrel, ~$120-$150) connected to a downspout can collect significant water. For larger needs, I use two 275-gallon IBC totes (Intermediate Bulk Containers, often available used for $100-$200 each from food-grade sources) connected in series. A 1,000 sq ft roof can collect approximately 620 gallons of water for every inch of rainfall. My 1,500 sq ft roof provides ample water for my 600 sq ft garden through multiple barrels and totes.
- Drip Irrigation: This is by far the most water-efficient method, delivering water directly to the plant’s root zone, minimizing evaporation and weed growth.
- Components: A typical drip system includes a pressure regulator (e.g., Rain Bird PRV-10, ~$15), a filter (Rain Bird RBY filter, ~$20), main tubing (1/2-inch poly tubing, 100ft ~$25), smaller feeder lines (1/4-inch tubing), and emitters (0.5 GPH or 1 GPH per plant).
- Kits: For beginners, a starter kit like the Rain Bird Drip Irrigation Garden Kit (model DDI-KIT-1P, ~$40-$60) is excellent for a small garden. For larger setups, I use Netafim Techline CV Drip Line (500ft roll, ~$150-$200), which has pressure-compensating emitters built-in, ensuring even watering across long runs.
- Automation: For true self-sufficiency, consider a battery-powered timer (e.g., Orbit B-Hyve Bluetooth Hose Faucet Timer, ~$50) or a solar-powered timer connected to a small 12V pump.
- Solar-Powered Pumps: For lifting water from a well, pond, or large storage tank to your garden, a solar pump is a game-changer. For a smaller drip system, a Shurflo 2088-594-152 Diaphragm Pump (12V, 3.5 GPM, ~$180) can be powered by a single 100W solar panel (e.g., Renogy 100W Monocrystalline Solar Panel, ~$100) and a small 12V battery (e.g., a 50Ah LiFePO4 battery like the Battle Born 50Ah, ~$450). For larger operations or deeper wells, more robust systems are needed. If you’re looking to build out a comprehensive off-grid power system to support your garden’s water needs, or indeed your entire homestead, you might want to explore resources like the Power Grid Generator complete system guide to understand the full scope of what’s possible in terms of energy independence.
Step 5: Seed Selection & Planting
The choice of seeds is crucial for a truly self sufficient garden from scratch.
- Choose Heirloom & Open-Pollinated Seeds: These varieties produce seeds that will grow true to type, meaning you can save seeds from your harvest year after year. F1 hybrids, while often vigorous, will not produce consistent offspring from saved seeds. Reputable seed companies include Baker Creek Heirloom Seeds, High Mowing Organic Seeds, and Seed Savers Exchange. Start with common, reliable varieties like ‘Black Krim’ tomatoes, ‘Provider’ bush beans, ‘Waltham Butternut’ squash, and ‘Black Seeded Simpson’ lettuce.
- Start Seeds Indoors (Optional but Recommended): For longer growing seasons or specific crops, starting seeds indoors gives you a head start. Use seed-starting mix (e.g., Espoma Organic Seed Starter Mix, ~$10 for 16qt bag) in seed trays (Jiffy Professional Greenhouse 72-cell kit, ~$15). Provide adequate light with LED grow lights (Barrina T5 2ft 4-pack LED Grow Lights, 20W each, ~$50) for 14-16 hours a day, positioned 2-4 inches above seedlings. Maintain consistent temperatures (65-75°F for most).
- Direct Sowing vs. Transplanting: Some crops (carrots, radishes, beans, corn) prefer direct sowing into the garden bed. Others (tomatoes, peppers, broccoli, kale) benefit from being started indoors and transplanted. Follow seed packet instructions for planting depths (e.g., lettuce seeds are often surface-sown or planted 1/8 inch deep, while beans are 1 inch deep) and spacing.
- Companion Planting: Strategically plant different species together to enhance growth, deter pests, and attract beneficial insects. For example, planting marigolds near tomatoes can deter nematodes, and basil improves tomato flavor. Nasturtiums can act as a trap crop for aphids.
- Succession Planting: For a continuous harvest, plant small batches of quick-growing crops (lettuce, radishes, cilantro) every 2-3 weeks. As one crop finishes, another is ready to take its place.
Step 6: Pest & Disease Management (Organic)
Maintaining a self sufficient garden from scratch means embracing organic pest and disease control.
- Integrated Pest Management (IPM): This holistic approach combines several strategies.
- Observation: Regularly inspect your plants for early signs of pests or disease. Catching issues early is key.
- Physical Barriers: Use row covers (e.g., Agribon AG-19 floating row cover, 10×20 ft, ~$20) to protect young plants from insect pests like cabbage worms and squash bugs. Install fences (e.g., 2×4 welded wire mesh, 4 ft tall, 50 ft roll ~$70) to keep out deer, rabbits, and other larger animals.
- Hand-Picking: For larger pests like tomato hornworms or squash bugs, simply pick them off and drop them into a bucket of soapy water.
- Companion Planting: As mentioned, certain plants repel pests. Marigolds, garlic, and onions are excellent deterrents.
- Attract Beneficial Insects: Plant flowers like dill, fennel, cosmos, and sweet alyssum to attract ladybugs, lacewings, and parasitic wasps, which prey on common garden pests.
- Organic Sprays & Treatments:
- Neem Oil: An excellent broad-spectrum organic insecticide and fungicide. Bonide Neem Oil Concentrate (16oz, ~$20) can be mixed at a rate of 1-2 tbsp per gallon of water and sprayed on affected plants.
- Insecticidal Soap: Effective against soft-bodied insects like aphids, whiteflies, and spider mites. Garden Safe Insecticidal Soap (24oz ready-to-use, ~$10).
- Bacillus thuringiensis (Bt): A naturally occurring soil bacterium that targets caterpillars and worms. Monterey BT Worm & Caterpillar Killer (16oz, ~$18) is highly effective and safe for beneficial insects.
- Copper or Sulfur Sprays: For fungal diseases like powdery mildew or blight, organic copper (e.g., Bonide Copper Fungicide, ~$15 for 1lb) or sulfur (e.g., Safer Brand Garden Fungicide, ~$10 for 16oz) can be used as a last resort.
Step 7: Harvesting & Seed Saving
The culmination of your efforts is the harvest, and seed saving closes the loop on self-sufficiency.
- Harvesting Techniques:
- Timing: Harvest vegetables at their peak ripeness for best flavor and nutritional value. For example, green beans should snap cleanly, cucumbers should be firm, and tomatoes should be fully colored.
- Frequency: Many crops, like zucchini, cucumbers, and bush beans, produce more if harvested frequently. Pick daily or every other day.
- Tools: Use clean, sharp pruners (e.g., Corona ClassicCUT Bypass Pruner BP 3180, ~$30) or a sharp knife for clean cuts, minimizing damage to the plant.
- Seed Saving: This is where the « self-sufficient » aspect truly shines.
- Selection: Only save seeds from your healthiest, most vigorous plants that show desired traits (disease resistance, good flavor, high yield).
- Isolation: To ensure true-to-type seeds, prevent cross-pollination. This can be challenging for open-pollinated crops that readily cross (e.g., squash, corn). For beginners, focus on self-pollinating plants like beans, peas, lettuce, and tomatoes.
- Processing:
- Dry Seeds (Beans, Peas, Lettuce, Grains): Allow pods/seed heads to dry completely on the plant. Harvest, shell, and clean the seeds, removing chaff.
- Wet Seeds (Tomatoes, Cucumbers, Squash): For tomatoes, ferment the seeds in water for a few days to remove the gel coating and inhibit disease. For cucumbers/squash, scrape out seeds, wash thoroughly, and dry.
- Drying: Spread seeds thinly on screens or paper plates in a cool, dry, well-ventilated area for 1-4 weeks. Ensure they are bone-dry before storage. I aim for less than 8% moisture content.
- Storage: Store seeds in airtight containers (glass jars with desiccant packets work well) in a cool, dark, dry place (ideally 40-50°F and 30-40% humidity). Label clearly with variety and date. Properly stored seeds can remain viable for 3-10 years or more.
Step 8: Season Extension & Winterizing
Extend your harvest and protect your garden for the off-season to truly maximize your self sufficient garden from scratch.
- Cold Frames: Simple structures with a transparent top (glass, polycarbonate, or old windows) that sit over garden beds. They trap solar heat, allowing you to grow cold-hardy crops (lettuce, spinach, kale, radishes) well into winter or start seeds earlier in spring. A basic cold frame can be built from 2×6 lumber and a sheet of polycarbonate for under $100.
- Hoop Houses/Low Tunnels: Larger structures made from flexible hoops (PVC pipe or EMT conduit) covered with greenhouse plastic. These provide more space and greater temperature moderation. A 10×20 ft DIY low tunnel kit can cost $200-$500, while a larger, more robust hoop house kit might be $1,000-$3,000. I use a 6×12 ft low tunnel made from 1/2-inch PVC hoops and 6mil greenhouse plastic, which extends my lettuce and spinach harvest by at least
Healthy soil is the bedrock of a productive, self-sufficient garden. You can’t guess what your soil needs; you have to test it.
- Perform a Soil Test: A professional soil test will give you precise data on your soil’s pH, nutrient levels (N-P-K), and organic matter content. I recommend sending a sample to your local agricultural extension office; it typically costs $20-$50 and provides detailed recommendations. Alternatively, for a quick homeowner check, a Rapitest Soil Test Kit (40-test kit, model 1663, ~$20 on Amazon) provides a good baseline for pH, Nitrogen, Phosphorus, and Potash. Aim for a pH between 6.0 and 7.0 for most vegetables.
- Amend for pH Imbalance: If your soil is too acidic (below 6.0), add agricultural lime (dolomitic lime adds magnesium, calcitic lime adds calcium). Apply 5-10 lbs per 100 sq ft for a moderate adjustment. If it’s too alkaline (above 7.0), add elemental sulfur (e.g., Espoma Soil Acidifier, ~$15 for 6.75 lbs) or generous amounts of organic matter like peat moss or pine needles.
- Build Organic Matter: This is the single most important step for long-term soil health. Organic matter improves soil structure, water retention, drainage, and nutrient availability. Incorporate 2-4 inches of high-quality compost into your top 6-12 inches of soil annually. I make my own compost from kitchen scraps, garden waste, and shredded leaves, but you can purchase it. Local nurseries often sell bulk compost for $30-$50 per cubic yard. Aged manure (from chickens, cows, or horses – ensure it’s well-rotted to avoid burning plants) is also excellent.
- Address Nutrient Deficiencies: Based on your soil test, add specific organic amendments. If Nitrogen (N) is low, add blood meal (12-0-0, ~$20 for 3 lbs) or feather meal. For Phosphorus (P), use bone meal (3-15-0, ~$15 for 3 lbs) or rock phosphate. For Potassium (K), greensand (0-0-2.5, ~$25 for 5 lbs) or kelp meal are good choices. I rely heavily on Espoma Organic Garden-tone (5-3-3, ~$25 for an 8lb bag) as a balanced, all-purpose organic fertilizer during planting.
Step 3: Garden Bed Preparation
Deciding between raised beds and in-ground beds depends on your soil, budget, and physical capabilities.
- In-Ground Beds: If you have excellent native soil and good drainage, in-ground beds are the most economical. Double-digging (loosening soil two shovel depths) can significantly improve drainage and aeration. For my main garden, I primarily use in-ground beds, but I focus on building up the soil over time with consistent compost additions and cover cropping. I aim for beds that are no wider than 3-4 feet so I can reach the center without stepping on the soil, compacting it.
- Raised Beds: Raised beds offer numerous advantages, especially for poor soil, heavy clay, or rocky areas. They provide better drainage, warm up faster in spring, reduce compaction, and make weeding and harvesting easier on your back.
- Material Options:
- Untreated Cedar: Naturally rot-resistant and chemical-free. A 4×8 ft bed, 12 inches deep, typically requires three 2x12x8 ft cedar boards, costing around $50-$60 per board (total ~$150-$180) plus corner brackets or screws. My first raised beds were cedar and are still going strong after 7 years.
- Galvanized Steel: Durable, long-lasting, and aesthetically pleasing. Brands like Vego Garden offer modular kits. A Vego Garden 17″ Tall 8-in-1 Metal Raised Garden Bed (can be configured to 4×8 ft) costs approximately $250-$300.
- Concrete Blocks/Stones: Very durable but can leach minerals (though generally safe once weathered) and can be expensive.
- Recycled Materials: Pallets (check for chemical treatment stamps like « HT » for heat-treated), old tires (controversial due to potential chemical leaching).
- Filling Raised Beds: Don’t just fill with topsoil. Use a « Hugelkultur » approach (logs, branches, leaves, then compost, then topsoil) or a mixture of 60% good quality topsoil, 30% compost, and 10% perlite or vermiculite for drainage. A 4x8x1 ft raised bed requires about 32 cubic feet (or ~1.2 cubic yards) of soil mix, which can cost $100-$200 depending on your source.
- Material Options:
Step 4: Water Management & Irrigation
Efficient water management is critical for a self sufficient garden from scratch, especially in off-grid living where water resources might be limited.
- Rainwater Harvesting: This is my primary source of irrigation water. A 55-gallon rain barrel (e.g., EarthMark Rain Barrel, ~$120-$150) connected to a downspout can collect significant water. For larger needs, I use two 275-gallon IBC totes (Intermediate Bulk Containers, often available used for $100-$200 each from food-grade sources) connected in series. A 1,000 sq ft roof can collect approximately 620 gallons of water for every inch of rainfall. My 1,500 sq ft roof provides ample water for my 600 sq ft garden through multiple barrels and totes.
- Drip Irrigation: This is by far the most water-efficient method, delivering water directly to the plant’s root zone, minimizing evaporation and weed growth.
- Components: A typical drip system includes a pressure regulator (e.g., Rain Bird PRV-10, ~$15), a filter (Rain Bird RBY filter, ~$20), main tubing (1/2-inch poly tubing, 100ft ~$25), smaller feeder lines (1/4-inch tubing), and emitters (0.5 GPH or 1 GPH per plant).
- Kits: For beginners, a starter kit like the Rain Bird Drip Irrigation Garden Kit (model DDI-KIT-1P, ~$40-$60) is excellent for a small garden. For larger setups, I use Netafim Techline CV Drip Line (500ft roll, ~$150-$200), which has pressure-compensating emitters built-in, ensuring even watering across long runs.
- Automation: For true self-sufficiency, consider a battery-powered timer (e.g., Orbit B-Hyve Bluetooth Hose Faucet Timer, ~$50) or a solar-powered timer connected to a small 12V pump.
- Solar-Powered Pumps: For lifting water from a well, pond, or large storage tank to your garden, a solar pump is a game-changer. For a smaller drip system, a Shurflo 2088-594-152 Diaphragm Pump (12V, 3.5 GPM, ~$180) can be powered by a single 100W solar panel (e.g., Renogy 100W Monocrystalline Solar Panel, ~$100) and a small 12V battery (e.g., a 50Ah LiFePO4 battery like the Battle Born 50Ah, ~$450). For larger operations or deeper wells, more robust systems are needed. If you’re looking to build out a comprehensive off-grid power system to support your garden’s water needs, or indeed your entire homestead, you might want to explore resources like the Power Grid Generator complete system guide to understand the full scope of what’s possible in terms of energy independence.
Step 5: Seed Selection & Planting
The choice of seeds is crucial for a truly self sufficient garden from scratch.
- Choose Heirloom & Open-Pollinated Seeds: These varieties produce seeds that will grow true to type, meaning you can save seeds from your harvest year after year. F1 hybrids, while often vigorous, will not produce consistent offspring from saved seeds. Reputable seed companies include Baker Creek Heirloom Seeds, High Mowing Organic Seeds, and Seed Savers Exchange. Start with common, reliable varieties like ‘Black Krim’ tomatoes, ‘Provider’ bush beans, ‘Waltham Butternut’ squash, and ‘Black Seeded Simpson’ lettuce.
- Start Seeds Indoors (Optional but Recommended): For longer growing seasons or specific crops, starting seeds indoors gives you a head start. Use seed-starting mix (e.g., Espoma Organic Seed Starter Mix, ~$10 for 16qt bag) in seed trays (Jiffy Professional Greenhouse 72-cell kit, ~$15). Provide adequate light with LED grow lights (Barrina T5 2ft 4-pack LED Grow Lights, 20W each, ~$50) for 14-16 hours a day, positioned 2-4 inches above seedlings. Maintain consistent temperatures (65-75°F for most).
- Direct Sowing vs. Transplanting: Some crops (carrots, radishes, beans, corn) prefer direct sowing into the garden bed. Others (tomatoes, peppers, broccoli, kale) benefit from being started indoors and transplanted. Follow seed packet instructions for planting depths (e.g., lettuce seeds are often surface-sown or planted 1/8 inch deep, while beans are 1 inch deep) and spacing.
- Companion Planting: Strategically plant different species together to enhance growth, deter pests, and attract beneficial insects. For example, planting marigolds near tomatoes can deter nematodes, and basil improves tomato flavor. Nasturtiums can act as a trap crop for aphids.
- Succession Planting: For a continuous harvest, plant small batches of quick-growing crops (lettuce, radishes, cilantro) every 2-3 weeks. As one crop finishes, another is ready to take its place.
Step 6: Pest & Disease Management (Organic)
Maintaining a self sufficient garden from scratch means embracing organic pest and disease control.
- Integrated Pest Management (IPM): This holistic approach combines several strategies.
- Observation: Regularly inspect your plants for early signs of pests or disease. Catching issues early is key.
- Physical Barriers: Use row covers (e.g., Agribon AG-19 floating row cover, 10×20 ft, ~$20) to protect young plants from insect pests like cabbage worms and squash bugs. Install fences (e.g., 2×4 welded wire mesh, 4 ft tall, 50 ft roll ~$70) to keep out deer, rabbits, and other larger animals.
- Hand-Picking: For larger pests like tomato hornworms or squash bugs, simply pick them off and drop them into a bucket of soapy water.
- Companion Planting: As mentioned, certain plants repel pests. Marigolds, garlic, and onions are excellent deterrents.
- Attract Beneficial Insects: Plant flowers like dill, fennel, cosmos, and sweet alyssum to attract ladybugs, lacewings, and parasitic wasps, which prey on common garden pests.
- Organic Sprays & Treatments:
- Neem Oil: An excellent broad-spectrum organic insecticide and fungicide. Bonide Neem Oil Concentrate (16oz, ~$20) can be mixed at a rate of 1-2 tbsp per gallon of water and sprayed on affected plants.
- Insecticidal Soap: Effective against soft-bodied insects like aphids, whiteflies, and spider mites. Garden Safe Insecticidal Soap (24oz ready-to-use, ~$10).
- Bacillus thuringiensis (Bt): A naturally occurring soil bacterium that targets caterpillars and worms. Monterey BT Worm & Caterpillar Killer (16oz, ~$18) is highly effective and safe for beneficial insects.
- Copper or Sulfur Sprays: For fungal diseases like powdery mildew or blight, organic copper (e.g., Bonide Copper Fungicide, ~$15 for 1lb) or sulfur (e.g., Safer Brand Garden Fungicide, ~$10 for 16oz) can be used as a last resort.
Step 7: Harvesting & Seed Saving
The culmination of your efforts is the harvest, and seed saving closes the loop on self-sufficiency.
- Harvesting Techniques:
- Timing: Harvest vegetables at their peak ripeness for best flavor and nutritional value. For example, green beans should snap cleanly, cucumbers should be firm, and tomatoes should be fully colored.
- Frequency: Many crops, like zucchini, cucumbers, and bush beans, produce more if harvested frequently. Pick daily or every other day.
- Tools: Use clean, sharp pruners (e.g., Corona ClassicCUT Bypass Pruner BP 3180, ~$30) or a sharp knife for clean cuts, minimizing damage to the plant.
- Seed Saving: This is where the « self-sufficient » aspect truly shines.
- Selection: Only save seeds from your healthiest, most vigorous plants that show desired traits (disease resistance, good flavor, high yield).
- Isolation: To ensure true-to-type seeds, prevent cross-pollination. This can be challenging for open-pollinated crops that readily cross (e.g., squash, corn). For beginners, focus on self-pollinating plants like beans, peas, lettuce, and tomatoes.
- Processing:
- Dry Seeds (Beans, Peas, Lettuce, Grains): Allow pods/seed heads to dry completely on the plant. Harvest, shell, and clean the seeds, removing chaff.
- Wet Seeds (Tomatoes, Cucumbers, Squash): For tomatoes, ferment the seeds in water for a few days to remove the gel coating and inhibit disease. For cucumbers/squash, scrape out seeds, wash thoroughly, and dry.
- Drying: Spread seeds thinly on screens or paper plates in a cool, dry, well-ventilated area for 1-4 weeks. Ensure they are bone-dry before storage. I aim for less than 8% moisture content.
- Storage: Store seeds in airtight containers (glass jars with desiccant packets work well) in a cool, dark, dry place (ideally 40-50°F and 30-40% humidity). Label clearly with variety and date. Properly stored seeds can remain viable for 3-10 years or more.
Step 8: Season Extension & Winterizing
Extend your harvest and protect your garden for the off-season to truly maximize your self sufficient garden from scratch.
- Cold Frames: Simple structures with a transparent top (glass, polycarbonate, or old windows) that sit over garden beds. They trap solar heat, allowing you to grow cold-hardy crops (lettuce, spinach, kale, radishes) well into winter or start seeds earlier in spring. A basic cold frame can be built from 2×6 lumber and a sheet of polycarbonate for under $100.
- Hoop Houses/Low Tunnels: Larger structures made from flexible hoops (PVC pipe or EMT conduit) covered with greenhouse plastic. These provide more space and greater temperature moderation. A 10×20 ft DIY low tunnel kit can cost $200-$500, while a larger, more robust hoop house kit might be $1,000-$3,000. I use a 6×12 ft low tunnel made from 1/2-inch PVC hoops and 6mil greenhouse plastic, which extends my lettuce and spinach harvest by at least
The culmination of your efforts is the harvest, and seed saving closes the loop on self-sufficiency.
- Harvesting Techniques:
- Timing: Harvest vegetables at their peak ripeness for best flavor and nutritional value. For example, green beans should snap cleanly, cucumbers should be firm, and tomatoes should be fully colored.
- Frequency: Many crops, like zucchini, cucumbers, and bush beans, produce more if harvested frequently. Pick daily or every other day.
- Tools: Use clean, sharp pruners (e.g., Corona ClassicCUT Bypass Pruner BP 3180, ~$30) or a sharp knife for clean cuts, minimizing damage to the plant.
- Seed Saving: This is where the « self-sufficient » aspect truly shines.
- Selection: Only save seeds from your healthiest, most vigorous plants that show desired traits (disease resistance, good flavor, high yield).
- Isolation: To ensure true-to-type seeds, prevent cross-pollination. This can be challenging for open-pollinated crops that readily cross (e.g., squash, corn). For beginners, focus on self-pollinating plants like beans, peas, lettuce, and tomatoes.
- Processing:
- Dry Seeds (Beans, Peas, Lettuce, Grains): Allow pods/seed heads to dry completely on the plant. Harvest, shell, and clean the seeds, removing chaff.
- Wet Seeds (Tomatoes, Cucumbers, Squash): For tomatoes, ferment the seeds in water for a few days to remove the gel coating and inhibit disease. For cucumbers/squash, scrape out seeds, wash thoroughly, and dry.
- Drying: Spread seeds thinly on screens or paper plates in a cool, dry, well-ventilated area for 1-4 weeks. Ensure they are bone-dry before storage. I aim for less than 8% moisture content.
- Storage: Store seeds in airtight containers (glass jars with desiccant packets work well) in a cool, dark, dry place (ideally 40-50°F and 30-40% humidity). Label clearly with variety and date. Properly stored seeds can remain viable for 3-10 years or more.
Step 8: Season Extension & Winterizing
Extend your harvest and protect your garden for the off-season to truly maximize your self sufficient garden from scratch.
- Cold Frames: Simple structures with a transparent top (glass, polycarbonate, or old windows) that sit over garden beds. They trap solar heat, allowing you to grow cold-hardy crops (lettuce, spinach, kale, radishes) well into winter or start seeds earlier in spring. A basic cold frame can be built from 2×6 lumber and a sheet of polycarbonate for under $100.
- Hoop Houses/Low Tunnels: Larger structures made from flexible hoops (PVC pipe or EMT conduit) covered with greenhouse plastic. These provide more space and greater temperature moderation. A 10×20 ft DIY low tunnel kit can cost $200-$500, while a larger, more robust hoop house kit might be $1,000-$3,000. I use a 6×12 ft low tunnel made from 1/2-inch PVC hoops and 6mil greenhouse plastic, which extends my lettuce and spinach harvest by at least
Efficient water management is critical for a self sufficient garden from scratch, especially in off-grid living where water resources might be limited.
- Rainwater Harvesting: This is my primary source of irrigation water. A 55-gallon rain barrel (e.g., EarthMark Rain Barrel, ~$120-$150) connected to a downspout can collect significant water. For larger needs, I use two 275-gallon IBC totes (Intermediate Bulk Containers, often available used for $100-$200 each from food-grade sources) connected in series. A 1,000 sq ft roof can collect approximately 620 gallons of water for every inch of rainfall. My 1,500 sq ft roof provides ample water for my 600 sq ft garden through multiple barrels and totes.
- Drip Irrigation: This is by far the most water-efficient method, delivering water directly to the plant’s root zone, minimizing evaporation and weed growth.
- Components: A typical drip system includes a pressure regulator (e.g., Rain Bird PRV-10, ~$15), a filter (Rain Bird RBY filter, ~$20), main tubing (1/2-inch poly tubing, 100ft ~$25), smaller feeder lines (1/4-inch tubing), and emitters (0.5 GPH or 1 GPH per plant).
- Kits: For beginners, a starter kit like the Rain Bird Drip Irrigation Garden Kit (model DDI-KIT-1P, ~$40-$60) is excellent for a small garden. For larger setups, I use Netafim Techline CV Drip Line (500ft roll, ~$150-$200), which has pressure-compensating emitters built-in, ensuring even watering across long runs.
- Automation: For true self-sufficiency, consider a battery-powered timer (e.g., Orbit B-Hyve Bluetooth Hose Faucet Timer, ~$50) or a solar-powered timer connected to a small 12V pump.
- Solar-Powered Pumps: For lifting water from a well, pond, or large storage tank to your garden, a solar pump is a game-changer. For a smaller drip system, a Shurflo 2088-594-152 Diaphragm Pump (12V, 3.5 GPM, ~$180) can be powered by a single 100W solar panel (e.g., Renogy 100W Monocrystalline Solar Panel, ~$100) and a small 12V battery (e.g., a 50Ah LiFePO4 battery like the Battle Born 50Ah, ~$450). For larger operations or deeper wells, more robust systems are needed. If you’re looking to build out a comprehensive off-grid power system to support your garden’s water needs, or indeed your entire homestead, you might want to explore resources like the Power Grid Generator complete system guide to understand the full scope of what’s possible in terms of energy independence.
Step 5: Seed Selection & Planting
The choice of seeds is crucial for a truly self sufficient garden from scratch.
- Choose Heirloom & Open-Pollinated Seeds: These varieties produce seeds that will grow true to type, meaning you can save seeds from your harvest year after year. F1 hybrids, while often vigorous, will not produce consistent offspring from saved seeds. Reputable seed companies include Baker Creek Heirloom Seeds, High Mowing Organic Seeds, and Seed Savers Exchange. Start with common, reliable varieties like ‘Black Krim’ tomatoes, ‘Provider’ bush beans, ‘Waltham Butternut’ squash, and ‘Black Seeded Simpson’ lettuce.
- Start Seeds Indoors (Optional but Recommended): For longer growing seasons or specific crops, starting seeds indoors gives you a head start. Use seed-starting mix (e.g., Espoma Organic Seed Starter Mix, ~$10 for 16qt bag) in seed trays (Jiffy Professional Greenhouse 72-cell kit, ~$15). Provide adequate light with LED grow lights (Barrina T5 2ft 4-pack LED Grow Lights, 20W each, ~$50) for 14-16 hours a day, positioned 2-4 inches above seedlings. Maintain consistent temperatures (65-75°F for most).
- Direct Sowing vs. Transplanting: Some crops (carrots, radishes, beans, corn) prefer direct sowing into the garden bed. Others (tomatoes, peppers, broccoli, kale) benefit from being started indoors and transplanted. Follow seed packet instructions for planting depths (e.g., lettuce seeds are often surface-sown or planted 1/8 inch deep, while beans are 1 inch deep) and spacing.
- Companion Planting: Strategically plant different species together to enhance growth, deter pests, and attract beneficial insects. For example, planting marigolds near tomatoes can deter nematodes, and basil improves tomato flavor. Nasturtiums can act as a trap crop for aphids.
- Succession Planting: For a continuous harvest, plant small batches of quick-growing crops (lettuce, radishes, cilantro) every 2-3 weeks. As one crop finishes, another is ready to take its place.
Step 6: Pest & Disease Management (Organic)
Maintaining a self sufficient garden from scratch means embracing organic pest and disease control.
- Integrated Pest Management (IPM): This holistic approach combines several strategies.
- Observation: Regularly inspect your plants for early signs of pests or disease. Catching issues early is key.
- Physical Barriers: Use row covers (e.g., Agribon AG-19 floating row cover, 10×20 ft, ~$20) to protect young plants from insect pests like cabbage worms and squash bugs. Install fences (e.g., 2×4 welded wire mesh, 4 ft tall, 50 ft roll ~$70) to keep out deer, rabbits, and other larger animals.
- Hand-Picking: For larger pests like tomato hornworms or squash bugs, simply pick them off and drop them into a bucket of soapy water.
- Companion Planting: As mentioned, certain plants repel pests. Marigolds, garlic, and onions are excellent deterrents.
- Attract Beneficial Insects: Plant flowers like dill, fennel, cosmos, and sweet alyssum to attract ladybugs, lacewings, and parasitic wasps, which prey on common garden pests.
- Organic Sprays & Treatments:
- Neem Oil: An excellent broad-spectrum organic insecticide and fungicide. Bonide Neem Oil Concentrate (16oz, ~$20) can be mixed at a rate of 1-2 tbsp per gallon of water and sprayed on affected plants.
- Insecticidal Soap: Effective against soft-bodied insects like aphids, whiteflies, and spider mites. Garden Safe Insecticidal Soap (24oz ready-to-use, ~$10).
- Bacillus thuringiensis (Bt): A naturally occurring soil bacterium that targets caterpillars and worms. Monterey BT Worm & Caterpillar Killer (16oz, ~$18) is highly effective and safe for beneficial insects.
- Copper or Sulfur Sprays: For fungal diseases like powdery mildew or blight, organic copper (e.g., Bonide Copper Fungicide, ~$15 for 1lb) or sulfur (e.g., Safer Brand Garden Fungicide, ~$10 for 16oz) can be used as a last resort.
Step 7: Harvesting & Seed Saving
The culmination of your efforts is the harvest, and seed saving closes the loop on self-sufficiency.
- Harvesting Techniques:
- Timing: Harvest vegetables at their peak ripeness for best flavor and nutritional value. For example, green beans should snap cleanly, cucumbers should be firm, and tomatoes should be fully colored.
- Frequency: Many crops, like zucchini, cucumbers, and bush beans, produce more if harvested frequently. Pick daily or every other day.
- Tools: Use clean, sharp pruners (e.g., Corona ClassicCUT Bypass Pruner BP 3180, ~$30) or a sharp knife for clean cuts, minimizing damage to the plant.
- Seed Saving: This is where the « self-sufficient » aspect truly shines.
- Selection: Only save seeds from your healthiest, most vigorous plants that show desired traits (disease resistance, good flavor, high yield).
- Isolation: To ensure true-to-type seeds, prevent cross-pollination. This can be challenging for open-pollinated crops that readily cross (e.g., squash, corn). For beginners, focus on self-pollinating plants like beans, peas, lettuce, and tomatoes.
- Processing:
- Dry Seeds (Beans, Peas, Lettuce, Grains): Allow pods/seed heads to dry completely on the plant. Harvest, shell, and clean the seeds, removing chaff.
- Wet Seeds (Tomatoes, Cucumbers, Squash): For tomatoes, ferment the seeds in water for a few days to remove the gel coating and inhibit disease. For cucumbers/squash, scrape out seeds, wash thoroughly, and dry.
- Drying: Spread seeds thinly on screens or paper plates in a cool, dry, well-ventilated area for 1-4 weeks. Ensure they are bone-dry before storage. I aim for less than 8% moisture content.
- Storage: Store seeds in airtight containers (glass jars with desiccant packets work well) in a cool, dark, dry place (ideally 40-50°F and 30-40% humidity). Label clearly with variety and date. Properly stored seeds can remain viable for 3-10 years or more.
Step 8: Season Extension & Winterizing
Extend your harvest and protect your garden for the off-season to truly maximize your self sufficient garden from scratch.
- Cold Frames: Simple structures with a transparent top (glass, polycarbonate, or old windows) that sit over garden beds. They trap solar heat, allowing you to grow cold-hardy crops (lettuce, spinach, kale, radishes) well into winter or start seeds earlier in spring. A basic cold frame can be built from 2×6 lumber and a sheet of polycarbonate for under $100.
- Hoop Houses/Low Tunnels: Larger structures made from flexible hoops (PVC pipe or EMT conduit) covered with greenhouse plastic. These provide more space and greater temperature moderation. A 10×20 ft DIY low tunnel kit can cost $200-$500, while a larger, more robust hoop house kit might be $1,000-$3,000. I use a 6×12 ft low tunnel made from 1/2-inch PVC hoops and 6mil greenhouse plastic, which extends my lettuce and spinach harvest by at least
Step 4: Water Management & Irrigation
Efficient water management is critical for a self sufficient garden from scratch, especially in off-grid living where water resources might be limited.
- Rainwater Harvesting: This is my primary source of irrigation water. A 55-gallon rain barrel (e.g., EarthMark Rain Barrel, ~$120-$150) connected to a downspout can collect significant water. For larger needs, I use two 275-gallon IBC totes (Intermediate Bulk Containers, often available used for $100-$200 each from food-grade sources) connected in series. A 1,000 sq ft roof can collect approximately 620 gallons of water for every inch of rainfall. My 1,500 sq ft roof provides ample water for my 600 sq ft garden through multiple barrels and totes.
- Drip Irrigation: This is by far the most water-efficient method, delivering water directly to the plant’s root zone, minimizing evaporation and weed growth.
- Components: A typical drip system includes a pressure regulator (e.g., Rain Bird PRV-10, ~$15), a filter (Rain Bird RBY filter, ~$20), main tubing (1/2-inch poly tubing, 100ft ~$25), smaller feeder lines (1/4-inch tubing), and emitters (0.5 GPH or 1 GPH per plant).
- Kits: For beginners, a starter kit like the Rain Bird Drip Irrigation Garden Kit (model DDI-KIT-1P, ~$40-$60) is excellent for a small garden. For larger setups, I use Netafim Techline CV Drip Line (500ft roll, ~$150-$200), which has pressure-compensating emitters built-in, ensuring even watering across long runs.
- Automation: For true self-sufficiency, consider a battery-powered timer (e.g., Orbit B-Hyve Bluetooth Hose Faucet Timer, ~$50) or a solar-powered timer connected to a small 12V pump.
- Solar-Powered Pumps: For lifting water from a well, pond, or large storage tank to your garden, a solar pump is a game-changer. For a smaller drip system, a Shurflo 2088-594-152 Diaphragm Pump (12V, 3.5 GPM, ~$180) can be powered by a single 100W solar panel (e.g., Renogy 100W Monocrystalline Solar Panel, ~$100) and a small 12V battery (e.g., a 50Ah LiFePO4 battery like the Battle Born 50Ah, ~$450). For larger operations or deeper wells, more robust systems are needed. If you’re looking to build out a comprehensive off-grid power system to support your garden’s water needs, or indeed your entire homestead, you might want to explore resources like the Power Grid Generator complete system guide to understand the full scope of what’s possible in terms of energy independence.
Step 5: Seed Selection & Planting
The choice of seeds is crucial for a truly self sufficient garden from scratch.
- Choose Heirloom & Open-Pollinated Seeds: These varieties produce seeds that will grow true to type, meaning you can save seeds from your harvest year after year. F1 hybrids, while often vigorous, will not produce consistent offspring from saved seeds. Reputable seed companies include Baker Creek Heirloom Seeds, High Mowing Organic Seeds, and Seed Savers Exchange. Start with common, reliable varieties like ‘Black Krim’ tomatoes, ‘Provider’ bush beans, ‘Waltham Butternut’ squash, and ‘Black Seeded Simpson’ lettuce.
- Start Seeds Indoors (Optional but Recommended): For longer growing seasons or specific crops, starting seeds indoors gives you a head start. Use seed-starting mix (e.g., Espoma Organic Seed Starter Mix, ~$10 for 16qt bag) in seed trays (Jiffy Professional Greenhouse 72-cell kit, ~$15). Provide adequate light with LED grow lights (Barrina T5 2ft 4-pack LED Grow Lights, 20W each, ~$50) for 14-16 hours a day, positioned 2-4 inches above seedlings. Maintain consistent temperatures (65-75°F for most).
- Direct Sowing vs. Transplanting: Some crops (carrots, radishes, beans, corn) prefer direct sowing into the garden bed. Others (tomatoes, peppers, broccoli, kale) benefit from being started indoors and transplanted. Follow seed packet instructions for planting depths (e.g., lettuce seeds are often surface-sown or planted 1/8 inch deep, while beans are 1 inch deep) and spacing.
- Companion Planting: Strategically plant different species together to enhance growth, deter pests, and attract beneficial insects. For example, planting marigolds near tomatoes can deter nematodes, and basil improves tomato flavor. Nasturtiums can act as a trap crop for aphids.
- Succession Planting: For a continuous harvest, plant small batches of quick-growing crops (lettuce, radishes, cilantro) every 2-3 weeks. As one crop finishes, another is ready to take its place.
Step 6: Pest & Disease Management (Organic)
Maintaining a self sufficient garden from scratch means embracing organic pest and disease control.
- Integrated Pest Management (IPM): This holistic approach combines several strategies.
- Observation: Regularly inspect your plants for early signs of pests or disease. Catching issues early is key.
- Physical Barriers: Use row covers (e.g., Agribon AG-19 floating row cover, 10×20 ft, ~$20) to protect young plants from insect pests like cabbage worms and squash bugs. Install fences (e.g., 2×4 welded wire mesh, 4 ft tall, 50 ft roll ~$70) to keep out deer, rabbits, and other larger animals.
- Hand-Picking: For larger pests like tomato hornworms or squash bugs, simply pick them off and drop them into a bucket of soapy water.
- Companion Planting: As mentioned, certain plants repel pests. Marigolds, garlic, and onions are excellent deterrents.
- Attract Beneficial Insects: Plant flowers like dill, fennel, cosmos, and sweet alyssum to attract ladybugs, lacewings, and parasitic wasps, which prey on common garden pests.
- Organic Sprays & Treatments:
- Neem Oil: An excellent broad-spectrum organic insecticide and fungicide. Bonide Neem Oil Concentrate (16oz, ~$20) can be mixed at a rate of 1-2 tbsp per gallon of water and sprayed on affected plants.
- Insecticidal Soap: Effective against soft-bodied insects like aphids, whiteflies, and spider mites. Garden Safe Insecticidal Soap (24oz ready-to-use, ~$10).
- Bacillus thuringiensis (Bt): A naturally occurring soil bacterium that targets caterpillars and worms. Monterey BT Worm & Caterpillar Killer (16oz, ~$18) is highly effective and safe for beneficial insects.
- Copper or Sulfur Sprays: For fungal diseases like powdery mildew or blight, organic copper (e.g., Bonide Copper Fungicide, ~$15 for 1lb) or sulfur (e.g., Safer Brand Garden Fungicide, ~$10 for 16oz) can be used as a last resort.
Step 7: Harvesting & Seed Saving
The culmination of your efforts is the harvest, and seed saving closes the loop on self-sufficiency.
- Harvesting Techniques:
- Timing: Harvest vegetables at their peak ripeness for best flavor and nutritional value. For example, green beans should snap cleanly, cucumbers should be firm, and tomatoes should be fully colored.
- Frequency: Many crops, like zucchini, cucumbers, and bush beans, produce more if harvested frequently. Pick daily or every other day.
- Tools: Use clean, sharp pruners (e.g., Corona ClassicCUT Bypass Pruner BP 3180, ~$30) or a sharp knife for clean cuts, minimizing damage to the plant.
- Seed Saving: This is where the « self-sufficient » aspect truly shines.
- Selection: Only save seeds from your healthiest, most vigorous plants that show desired traits (disease resistance, good flavor, high yield).
- Isolation: To ensure true-to-type seeds, prevent cross-pollination. This can be challenging for open-pollinated crops that readily cross (e.g., squash, corn). For beginners, focus on self-pollinating plants like beans, peas, lettuce, and tomatoes.
- Processing:
- Dry Seeds (Beans, Peas, Lettuce, Grains): Allow pods/seed heads to dry completely on the plant. Harvest, shell, and clean the seeds, removing chaff.
- Wet Seeds (Tomatoes, Cucumbers, Squash): For tomatoes, ferment the seeds in water for a few days to remove the gel coating and inhibit disease. For cucumbers/squash, scrape out seeds, wash thoroughly, and dry.
- Drying: Spread seeds thinly on screens or paper plates in a cool, dry, well-ventilated area for 1-4 weeks. Ensure they are bone-dry before storage. I aim for less than 8% moisture content.
- Storage: Store seeds in airtight containers (glass jars with desiccant packets work well) in a cool, dark, dry place (ideally 40-50°F and 30-40% humidity). Label clearly with variety and date. Properly stored seeds can remain viable for 3-10 years or more.
Step 8: Season Extension & Winterizing
Extend your harvest and protect your garden for the off-season to truly maximize your self sufficient garden from scratch.
- Cold Frames: Simple structures with a transparent top (glass, polycarbonate, or old windows) that sit over garden beds. They trap solar heat, allowing you to grow cold-hardy crops (lettuce, spinach, kale, radishes) well into winter or start seeds earlier in spring. A basic cold frame can be built from 2×6 lumber and a sheet of polycarbonate for under $100.
- Hoop Houses/Low Tunnels: Larger structures made from flexible hoops (PVC pipe or EMT conduit) covered with greenhouse plastic. These provide more space and greater temperature moderation. A 10×20 ft DIY low tunnel kit can cost $200-$500, while a larger, more robust hoop house kit might be $1,000-$3,000. I use a 6×12 ft low tunnel made from 1/2-inch PVC hoops and 6mil greenhouse plastic, which extends my lettuce and spinach harvest by at least
- In-Ground Beds: If you have excellent native soil and good drainage, in-ground beds are the most economical. Double-digging (loosening soil two shovel depths) can significantly improve drainage and aeration. For my main garden, I primarily use in-ground beds, but I focus on building up the soil over time with consistent compost additions and cover cropping. I aim for beds that are no wider than 3-4 feet so I can reach the center without stepping on the soil, compacting it.
- Raised Beds: Raised beds offer numerous advantages, especially for poor soil, heavy clay, or rocky areas. They provide better drainage, warm up faster in spring, reduce compaction, and make weeding and harvesting easier on your back.
- Material Options:
- Untreated Cedar: Naturally rot-resistant and chemical-free. A 4×8 ft bed, 12 inches deep, typically requires three 2x12x8 ft cedar boards, costing around $50-$60 per board (total ~$150-$180) plus corner brackets or screws. My first raised beds were cedar and are still going strong after 7 years.
- Galvanized Steel: Durable, long-lasting, and aesthetically pleasing. Brands like Vego Garden offer modular kits. A Vego Garden 17″ Tall 8-in-1 Metal Raised Garden Bed (can be configured to 4×8 ft) costs approximately $250-$300.
- Concrete Blocks/Stones: Very durable but can leach minerals (though generally safe once weathered) and can be expensive.
- Recycled Materials: Pallets (check for chemical treatment stamps like « HT » for heat-treated), old tires (controversial due to potential chemical leaching).
- Filling Raised Beds: Don’t just fill with topsoil. Use a « Hugelkultur » approach (logs, branches, leaves, then compost, then topsoil) or a mixture of 60% good quality topsoil, 30% compost, and 10% perlite or vermiculite for drainage. A 4x8x1 ft raised bed requires about 32 cubic feet (or ~1.2 cubic yards) of soil mix, which can cost $100-$200 depending on your source.
- Material Options:
Step 4: Water Management & Irrigation
Efficient water management is critical for a self sufficient garden from scratch, especially in off-grid living where water resources might be limited.
- Rainwater Harvesting: This is my primary source of irrigation water. A 55-gallon rain barrel (e.g., EarthMark Rain Barrel, ~$120-$150) connected to a downspout can collect significant water. For larger needs, I use two 275-gallon IBC totes (Intermediate Bulk Containers, often available used for $100-$200 each from food-grade sources) connected in series. A 1,000 sq ft roof can collect approximately 620 gallons of water for every inch of rainfall. My 1,500 sq ft roof provides ample water for my 600 sq ft garden through multiple barrels and totes.
- Drip Irrigation: This is by far the most water-efficient method, delivering water directly to the plant’s root zone, minimizing evaporation and weed growth.
- Components: A typical drip system includes a pressure regulator (e.g., Rain Bird PRV-10, ~$15), a filter (Rain Bird RBY filter, ~$20), main tubing (1/2-inch poly tubing, 100ft ~$25), smaller feeder lines (1/4-inch tubing), and emitters (0.5 GPH or 1 GPH per plant).
- Kits: For beginners, a starter kit like the Rain Bird Drip Irrigation Garden Kit (model DDI-KIT-1P, ~$40-$60) is excellent for a small garden. For larger setups, I use Netafim Techline CV Drip Line (500ft roll, ~$150-$200), which has pressure-compensating emitters built-in, ensuring even watering across long runs.
- Automation: For true self-sufficiency, consider a battery-powered timer (e.g., Orbit B-Hyve Bluetooth Hose Faucet Timer, ~$50) or a solar-powered timer connected to a small 12V pump.
- Solar-Powered Pumps: For lifting water from a well, pond, or large storage tank to your garden, a solar pump is a game-changer. For a smaller drip system, a Shurflo 2088-594-152 Diaphragm Pump (12V, 3.5 GPM, ~$180) can be powered by a single 100W solar panel (e.g., Renogy 100W Monocrystalline Solar Panel, ~$100) and a small 12V battery (e.g., a 50Ah LiFePO4 battery like the Battle Born 50Ah, ~$450). For larger operations or deeper wells, more robust systems are needed. If you’re looking to build out a comprehensive off-grid power system to support your garden’s water needs, or indeed your entire homestead, you might want to explore resources like the Power Grid Generator complete system guide to understand the full scope of what’s possible in terms of energy independence.
Step 5: Seed Selection & Planting
The choice of seeds is crucial for a truly self sufficient garden from scratch.
- Choose Heirloom & Open-Pollinated Seeds: These varieties produce seeds that will grow true to type, meaning you can save seeds from your harvest year after year. F1 hybrids, while often vigorous, will not produce consistent offspring from saved seeds. Reputable seed companies include Baker Creek Heirloom Seeds, High Mowing Organic Seeds, and Seed Savers Exchange. Start with common, reliable varieties like ‘Black Krim’ tomatoes, ‘Provider’ bush beans, ‘Waltham Butternut’ squash, and ‘Black Seeded Simpson’ lettuce.
- Start Seeds Indoors (Optional but Recommended): For longer growing seasons or specific crops, starting seeds indoors gives you a head start. Use seed-starting mix (e.g., Espoma Organic Seed Starter Mix, ~$10 for 16qt bag) in seed trays (Jiffy Professional Greenhouse 72-cell kit, ~$15). Provide adequate light with LED grow lights (Barrina T5 2ft 4-pack LED Grow Lights, 20W each, ~$50) for 14-16 hours a day, positioned 2-4 inches above seedlings. Maintain consistent temperatures (65-75°F for most).
- Direct Sowing vs. Transplanting: Some crops (carrots, radishes, beans, corn) prefer direct sowing into the garden bed. Others (tomatoes, peppers, broccoli, kale) benefit from being started indoors and transplanted. Follow seed packet instructions for planting depths (e.g., lettuce seeds are often surface-sown or planted 1/8 inch deep, while beans are 1 inch deep) and spacing.
- Companion Planting: Strategically plant different species together to enhance growth, deter pests, and attract beneficial insects. For example, planting marigolds near tomatoes can deter nematodes, and basil improves tomato flavor. Nasturtiums can act as a trap crop for aphids.
- Succession Planting: For a continuous harvest, plant small batches of quick-growing crops (lettuce, radishes, cilantro) every 2-3 weeks. As one crop finishes, another is ready to take its place.
Step 6: Pest & Disease Management (Organic)
Maintaining a self sufficient garden from scratch means embracing organic pest and disease control.
- Integrated Pest Management (IPM): This holistic approach combines several strategies.
- Observation: Regularly inspect your plants for early signs of pests or disease. Catching issues early is key.
- Physical Barriers: Use row covers (e.g., Agribon AG-19 floating row cover, 10×20 ft, ~$20) to protect young plants from insect pests like cabbage worms and squash bugs. Install fences (e.g., 2×4 welded wire mesh, 4 ft tall, 50 ft roll ~$70) to keep out deer, rabbits, and other larger animals.
- Hand-Picking: For larger pests like tomato hornworms or squash bugs, simply pick them off and drop them into a bucket of soapy water.
- Companion Planting: As mentioned, certain plants repel pests. Marigolds, garlic, and onions are excellent deterrents.
- Attract Beneficial Insects: Plant flowers like dill, fennel, cosmos, and sweet alyssum to attract ladybugs, lacewings, and parasitic wasps, which prey on common garden pests.
- Organic Sprays & Treatments:
- Neem Oil: An excellent broad-spectrum organic insecticide and fungicide. Bonide Neem Oil Concentrate (16oz, ~$20) can be mixed at a rate of 1-2 tbsp per gallon of water and sprayed on affected plants.
- Insecticidal Soap: Effective against soft-bodied insects like aphids, whiteflies, and spider mites. Garden Safe Insecticidal Soap (24oz ready-to-use, ~$10).
- Bacillus thuringiensis (Bt): A naturally occurring soil bacterium that targets caterpillars and worms. Monterey BT Worm & Caterpillar Killer (16oz, ~$18) is highly effective and safe for beneficial insects.
- Copper or Sulfur Sprays: For fungal diseases like powdery mildew or blight, organic copper (e.g., Bonide Copper Fungicide, ~$15 for 1lb) or sulfur (e.g., Safer Brand Garden Fungicide, ~$10 for 16oz) can be used as a last resort.
Step 7: Harvesting & Seed Saving
The culmination of your efforts is the harvest, and seed saving closes the loop on self-sufficiency.
- Harvesting Techniques:
- Timing: Harvest vegetables at their peak ripeness for best flavor and nutritional value. For example, green beans should snap cleanly, cucumbers should be firm, and tomatoes should be fully colored.
- Frequency: Many crops, like zucchini, cucumbers, and bush beans, produce more if harvested frequently. Pick daily or every other day.
- Tools: Use clean, sharp pruners (e.g., Corona ClassicCUT Bypass Pruner BP 3180, ~$30) or a sharp knife for clean cuts, minimizing damage to the plant.
- Seed Saving: This is where the « self-sufficient » aspect truly shines.
- Selection: Only save seeds from your healthiest, most vigorous plants that show desired traits (disease resistance, good flavor, high yield).
- Isolation: To ensure true-to-type seeds, prevent cross-pollination. This can be challenging for open-pollinated crops that readily cross (e.g., squash, corn). For beginners, focus on self-pollinating plants like beans, peas, lettuce, and tomatoes.
- Processing:
- Dry Seeds (Beans, Peas, Lettuce, Grains): Allow pods/seed heads to dry completely on the plant. Harvest, shell, and clean the seeds, removing chaff.
- Wet Seeds (Tomatoes, Cucumbers, Squash): For tomatoes, ferment the seeds in water for a few days to remove the gel coating and inhibit disease. For cucumbers/squash, scrape out seeds, wash thoroughly, and dry.
- Drying: Spread seeds thinly on screens or paper plates in a cool, dry, well-ventilated area for 1-4 weeks. Ensure they are bone-dry before storage. I aim for less than 8% moisture content.
- Storage: Store seeds in airtight containers (glass jars with desiccant packets work well) in a cool, dark, dry place (ideally 40-50°F and 30-40% humidity). Label clearly with variety and date. Properly stored seeds can remain viable for 3-10 years or more.
Step 8: Season Extension & Winterizing
Extend your harvest and protect your garden for the off-season to truly maximize your self sufficient garden from scratch.
- Cold Frames: Simple structures with a transparent top (glass, polycarbonate, or old windows) that sit over garden beds. They trap solar heat, allowing you to grow cold-hardy crops (lettuce, spinach, kale, radishes) well into winter or start seeds earlier in spring. A basic cold frame can be built from 2×6 lumber and a sheet of polycarbonate for under $100.
- Hoop Houses/Low Tunnels: Larger structures made from flexible hoops (PVC pipe or EMT conduit) covered with greenhouse plastic. These provide more space and greater temperature moderation. A 10×20 ft DIY low tunnel kit can cost $200-$500, while a larger, more robust hoop house kit might be $1,000-$3,000. I use a 6×12 ft low tunnel made from 1/2-inch PVC hoops and 6mil greenhouse plastic, which extends my lettuce and spinach harvest by at least
Deciding between raised beds and in-ground beds depends on your soil, budget, and physical capabilities.
- In-Ground Beds: If you have excellent native soil and good drainage, in-ground beds are the most economical. Double-digging (loosening soil two shovel depths) can significantly improve drainage and aeration. For my main garden, I primarily use in-ground beds, but I focus on building up the soil over time with consistent compost additions and cover cropping. I aim for beds that are no wider than 3-4 feet so I can reach the center without stepping on the soil, compacting it.
- Raised Beds: Raised beds offer numerous advantages, especially for poor soil, heavy clay, or rocky areas. They provide better drainage, warm up faster in spring, reduce compaction, and make weeding and harvesting easier on your back.
- Material Options:
- Untreated Cedar: Naturally rot-resistant and chemical-free. A 4×8 ft bed, 12 inches deep, typically requires three 2x12x8 ft cedar boards, costing around $50-$60 per board (total ~$150-$180) plus corner brackets or screws. My first raised beds were cedar and are still going strong after 7 years.
- Galvanized Steel: Durable, long-lasting, and aesthetically pleasing. Brands like Vego Garden offer modular kits. A Vego Garden 17″ Tall 8-in-1 Metal Raised Garden Bed (can be configured to 4×8 ft) costs approximately $250-$300.
- Concrete Blocks/Stones: Very durable but can leach minerals (though generally safe once weathered) and can be expensive.
- Recycled Materials: Pallets (check for chemical treatment stamps like « HT » for heat-treated), old tires (controversial due to potential chemical leaching).
- Filling Raised Beds: Don’t just fill with topsoil. Use a « Hugelkultur » approach (logs, branches, leaves, then compost, then topsoil) or a mixture of 60% good quality topsoil, 30% compost, and 10% perlite or vermiculite for drainage. A 4x8x1 ft raised bed requires about 32 cubic feet (or ~1.2 cubic yards) of soil mix, which can cost $100-$200 depending on your source.
- Material Options:
Step 4: Water Management & Irrigation
Efficient water management is critical for a self sufficient garden from scratch, especially in off-grid living where water resources might be limited.
- Rainwater Harvesting: This is my primary source of irrigation water. A 55-gallon rain barrel (e.g., EarthMark Rain Barrel, ~$120-$150) connected to a downspout can collect significant water. For larger needs, I use two 275-gallon IBC totes (Intermediate Bulk Containers, often available used for $100-$200 each from food-grade sources) connected in series. A 1,000 sq ft roof can collect approximately 620 gallons of water for every inch of rainfall. My 1,500 sq ft roof provides ample water for my 600 sq ft garden through multiple barrels and totes.
- Drip Irrigation: This is by far the most water-efficient method, delivering water directly to the plant’s root zone, minimizing evaporation and weed growth.
- Components: A typical drip system includes a pressure regulator (e.g., Rain Bird PRV-10, ~$15), a filter (Rain Bird RBY filter, ~$20), main tubing (1/2-inch poly tubing, 100ft ~$25), smaller feeder lines (1/4-inch tubing), and emitters (0.5 GPH or 1 GPH per plant).
- Kits: For beginners, a starter kit like the Rain Bird Drip Irrigation Garden Kit (model DDI-KIT-1P, ~$40-$60) is excellent for a small garden. For larger setups, I use Netafim Techline CV Drip Line (500ft roll, ~$150-$200), which has pressure-compensating emitters built-in, ensuring even watering across long runs.
- Automation: For true self-sufficiency, consider a battery-powered timer (e.g., Orbit B-Hyve Bluetooth Hose Faucet Timer, ~$50) or a solar-powered timer connected to a small 12V pump.
- Solar-Powered Pumps: For lifting water from a well, pond, or large storage tank to your garden, a solar pump is a game-changer. For a smaller drip system, a Shurflo 2088-594-152 Diaphragm Pump (12V, 3.5 GPM, ~$180) can be powered by a single 100W solar panel (e.g., Renogy 100W Monocrystalline Solar Panel, ~$100) and a small 12V battery (e.g., a 50Ah LiFePO4 battery like the Battle Born 50Ah, ~$450). For larger operations or deeper wells, more robust systems are needed. If you’re looking to build out a comprehensive off-grid power system to support your garden’s water needs, or indeed your entire homestead, you might want to explore resources like the Power Grid Generator complete system guide to understand the full scope of what’s possible in terms of energy independence.
Step 5: Seed Selection & Planting
The choice of seeds is crucial for a truly self sufficient garden from scratch.
- Choose Heirloom & Open-Pollinated Seeds: These varieties produce seeds that will grow true to type, meaning you can save seeds from your harvest year after year. F1 hybrids, while often vigorous, will not produce consistent offspring from saved seeds. Reputable seed companies include Baker Creek Heirloom Seeds, High Mowing Organic Seeds, and Seed Savers Exchange. Start with common, reliable varieties like ‘Black Krim’ tomatoes, ‘Provider’ bush beans, ‘Waltham Butternut’ squash, and ‘Black Seeded Simpson’ lettuce.
- Start Seeds Indoors (Optional but Recommended): For longer growing seasons or specific crops, starting seeds indoors gives you a head start. Use seed-starting mix (e.g., Espoma Organic Seed Starter Mix, ~$10 for 16qt bag) in seed trays (Jiffy Professional Greenhouse 72-cell kit, ~$15). Provide adequate light with LED grow lights (Barrina T5 2ft 4-pack LED Grow Lights, 20W each, ~$50) for 14-16 hours a day, positioned 2-4 inches above seedlings. Maintain consistent temperatures (65-75°F for most).
- Direct Sowing vs. Transplanting: Some crops (carrots, radishes, beans, corn) prefer direct sowing into the garden bed. Others (tomatoes, peppers, broccoli, kale) benefit from being started indoors and transplanted. Follow seed packet instructions for planting depths (e.g., lettuce seeds are often surface-sown or planted 1/8 inch deep, while beans are 1 inch deep) and spacing.
- Companion Planting: Strategically plant different species together to enhance growth, deter pests, and attract beneficial insects. For example, planting marigolds near tomatoes can deter nematodes, and basil improves tomato flavor. Nasturtiums can act as a trap crop for aphids.
- Succession Planting: For a continuous harvest, plant small batches of quick-growing crops (lettuce, radishes, cilantro) every 2-3 weeks. As one crop finishes, another is ready to take its place.
Step 6: Pest & Disease Management (Organic)
Maintaining a self sufficient garden from scratch means embracing organic pest and disease control.
- Integrated Pest Management (IPM): This holistic approach combines several strategies.
- Observation: Regularly inspect your plants for early signs of pests or disease. Catching issues early is key.
- Physical Barriers: Use row covers (e.g., Agribon AG-19 floating row cover, 10×20 ft, ~$20) to protect young plants from insect pests like cabbage worms and squash bugs. Install fences (e.g., 2×4 welded wire mesh, 4 ft tall, 50 ft roll ~$70) to keep out deer, rabbits, and other larger animals.
- Hand-Picking: For larger pests like tomato hornworms or squash bugs, simply pick them off and drop them into a bucket of soapy water.
- Companion Planting: As mentioned, certain plants repel pests. Marigolds, garlic, and onions are excellent deterrents.
- Attract Beneficial Insects: Plant flowers like dill, fennel, cosmos, and sweet alyssum to attract ladybugs, lacewings, and parasitic wasps, which prey on common garden pests.
- Organic Sprays & Treatments:
- Neem Oil: An excellent broad-spectrum organic insecticide and fungicide. Bonide Neem Oil Concentrate (16oz, ~$20) can be mixed at a rate of 1-2 tbsp per gallon of water and sprayed on affected plants.
- Insecticidal Soap: Effective against soft-bodied insects like aphids, whiteflies, and spider mites. Garden Safe Insecticidal Soap (24oz ready-to-use, ~$10).
- Bacillus thuringiensis (Bt): A naturally occurring soil bacterium that targets caterpillars and worms. Monterey BT Worm & Caterpillar Killer (16oz, ~$18) is highly effective and safe for beneficial insects.
- Copper or Sulfur Sprays: For fungal diseases like powdery mildew or blight, organic copper (e.g., Bonide Copper Fungicide, ~$15 for 1lb) or sulfur (e.g., Safer Brand Garden Fungicide, ~$10 for 16oz) can be used as a last resort.
Step 7: Harvesting & Seed Saving
The culmination of your efforts is the harvest, and seed saving closes the loop on self-sufficiency.
- Harvesting Techniques:
- Timing: Harvest vegetables at their peak ripeness for best flavor and nutritional value. For example, green beans should snap cleanly, cucumbers should be firm, and tomatoes should be fully colored.
- Frequency: Many crops, like zucchini, cucumbers, and bush beans, produce more if harvested frequently. Pick daily or every other day.
- Tools: Use clean, sharp pruners (e.g., Corona ClassicCUT Bypass Pruner BP 3180, ~$30) or a sharp knife for clean cuts, minimizing damage to the plant.
- Seed Saving: This is where the « self-sufficient » aspect truly shines.
- Selection: Only save seeds from your healthiest, most vigorous plants that show desired traits (disease resistance, good flavor, high yield).
- Isolation: To ensure true-to-type seeds, prevent cross-pollination. This can be challenging for open-pollinated crops that readily cross (e.g., squash, corn). For beginners, focus on self-pollinating plants like beans, peas, lettuce, and tomatoes.
- Processing:
- Dry Seeds (Beans, Peas, Lettuce, Grains): Allow pods/seed heads to dry completely on the plant. Harvest, shell, and clean the seeds, removing chaff.
- Wet Seeds (Tomatoes, Cucumbers, Squash): For tomatoes, ferment the seeds in water for a few days to remove the gel coating and inhibit disease. For cucumbers/squash, scrape out seeds, wash thoroughly, and dry.
- Drying: Spread seeds thinly on screens or paper plates in a cool, dry, well-ventilated area for 1-4 weeks. Ensure they are bone-dry before storage. I aim for less than 8% moisture content.
- Storage: Store seeds in airtight containers (glass jars with desiccant packets work well) in a cool, dark, dry place (ideally 40-50°F and 30-40% humidity). Label clearly with variety and date. Properly stored seeds can remain viable for 3-10 years or more.
Step 8: Season Extension & Winterizing
Extend your harvest and protect your garden for the off-season to truly maximize your self sufficient garden from scratch.
- Cold Frames: Simple structures with a transparent top (glass, polycarbonate, or old windows) that sit over garden beds. They trap solar heat, allowing you to grow cold-hardy crops (lettuce, spinach, kale, radishes) well into winter or start seeds earlier in spring. A basic cold frame can be built from 2×6 lumber and a sheet of polycarbonate for under $100.
- Hoop Houses/Low Tunnels: Larger structures made from flexible hoops (PVC pipe or EMT conduit) covered with greenhouse plastic. These provide more space and greater temperature moderation. A 10×20 ft DIY low tunnel kit can cost $200-$500, while a larger, more robust hoop house kit might be $1,000-$3,000. I use a 6×12 ft low tunnel made from 1/2-inch PVC hoops and 6mil greenhouse plastic, which extends my lettuce and spinach harvest by at least
Healthy soil is the bedrock of a productive, self-sufficient garden. You can’t guess what your soil needs; you have to test it.
- Perform a Soil Test: A professional soil test will give you precise data on your soil’s pH, nutrient levels (N-P-K), and organic matter content. I recommend sending a sample to your local agricultural extension office; it typically costs $20-$50 and provides detailed recommendations. Alternatively, for a quick homeowner check, a Rapitest Soil Test Kit (40-test kit, model 1663, ~$20 on Amazon) provides a good baseline for pH, Nitrogen, Phosphorus, and Potash. Aim for a pH between 6.0 and 7.0 for most vegetables.
- Amend for pH Imbalance: If your soil is too acidic (below 6.0), add agricultural lime (dolomitic lime adds magnesium, calcitic lime adds calcium). Apply 5-10 lbs per 100 sq ft for a moderate adjustment. If it’s too alkaline (above 7.0), add elemental sulfur (e.g., Espoma Soil Acidifier, ~$15 for 6.75 lbs) or generous amounts of organic matter like peat moss or pine needles.
- Build Organic Matter: This is the single most important step for long-term soil health. Organic matter improves soil structure, water retention, drainage, and nutrient availability. Incorporate 2-4 inches of high-quality compost into your top 6-12 inches of soil annually. I make my own compost from kitchen scraps, garden waste, and shredded leaves, but you can purchase it. Local nurseries often sell bulk compost for $30-$50 per cubic yard. Aged manure (from chickens, cows, or horses – ensure it’s well-rotted to avoid burning plants) is also excellent.
- Address Nutrient Deficiencies: Based on your soil test, add specific organic amendments. If Nitrogen (N) is low, add blood meal (12-0-0, ~$20 for 3 lbs) or feather meal. For Phosphorus (P), use bone meal (3-15-0, ~$15 for 3 lbs) or rock phosphate. For Potassium (K), greensand (0-0-2.5, ~$25 for 5 lbs) or kelp meal are good choices. I rely heavily on Espoma Organic Garden-tone (5-3-3, ~$25 for an 8lb bag) as a balanced, all-purpose organic fertilizer during planting.
Step 3: Garden Bed Preparation
Deciding between raised beds and in-ground beds depends on your soil, budget, and physical capabilities.
- In-Ground Beds: If you have excellent native soil and good drainage, in-ground beds are the most economical. Double-digging (loosening soil two shovel depths) can significantly improve drainage and aeration. For my main garden, I primarily use in-ground beds, but I focus on building up the soil over time with consistent compost additions and cover cropping. I aim for beds that are no wider than 3-4 feet so I can reach the center without stepping on the soil, compacting it.
- Raised Beds: Raised beds offer numerous advantages, especially for poor soil, heavy clay, or rocky areas. They provide better drainage, warm up faster in spring, reduce compaction, and make weeding and harvesting easier on your back.
- Material Options:
- Untreated Cedar: Naturally rot-resistant and chemical-free. A 4×8 ft bed, 12 inches deep, typically requires three 2x12x8 ft cedar boards, costing around $50-$60 per board (total ~$150-$180) plus corner brackets or screws. My first raised beds were cedar and are still going strong after 7 years.
- Galvanized Steel: Durable, long-lasting, and aesthetically pleasing. Brands like Vego Garden offer modular kits. A Vego Garden 17″ Tall 8-in-1 Metal Raised Garden Bed (can be configured to 4×8 ft) costs approximately $250-$300.
- Concrete Blocks/Stones: Very durable but can leach minerals (though generally safe once weathered) and can be expensive.
- Recycled Materials: Pallets (check for chemical treatment stamps like « HT » for heat-treated), old tires (controversial due to potential chemical leaching).
- Filling Raised Beds: Don’t just fill with topsoil. Use a « Hugelkultur » approach (logs, branches, leaves, then compost, then topsoil) or a mixture of 60% good quality topsoil, 30% compost, and 10% perlite or vermiculite for drainage. A 4x8x1 ft raised bed requires about 32 cubic feet (or ~1.2 cubic yards) of soil mix, which can cost $100-$200 depending on your source.
- Material Options:
Step 4: Water Management & Irrigation
Efficient water management is critical for a self sufficient garden from scratch, especially in off-grid living where water resources might be limited.
- Rainwater Harvesting: This is my primary source of irrigation water. A 55-gallon rain barrel (e.g., EarthMark Rain Barrel, ~$120-$150) connected to a downspout can collect significant water. For larger needs, I use two 275-gallon IBC totes (Intermediate Bulk Containers, often available used for $100-$200 each from food-grade sources) connected in series. A 1,000 sq ft roof can collect approximately 620 gallons of water for every inch of rainfall. My 1,500 sq ft roof provides ample water for my 600 sq ft garden through multiple barrels and totes.
- Drip Irrigation: This is by far the most water-efficient method, delivering water directly to the plant’s root zone, minimizing evaporation and weed growth.
- Components: A typical drip system includes a pressure regulator (e.g., Rain Bird PRV-10, ~$15), a filter (Rain Bird RBY filter, ~$20), main tubing (1/2-inch poly tubing, 100ft ~$25), smaller feeder lines (1/4-inch tubing), and emitters (0.5 GPH or 1 GPH per plant).
- Kits: For beginners, a starter kit like the Rain Bird Drip Irrigation Garden Kit (model DDI-KIT-1P, ~$40-$60) is excellent for a small garden. For larger setups, I use Netafim Techline CV Drip Line (500ft roll, ~$150-$200), which has pressure-compensating emitters built-in, ensuring even watering across long runs.
- Automation: For true self-sufficiency, consider a battery-powered timer (e.g., Orbit B-Hyve Bluetooth Hose Faucet Timer, ~$50) or a solar-powered timer connected to a small 12V pump.
- Solar-Powered Pumps: For lifting water from a well, pond, or large storage tank to your garden, a solar pump is a game-changer. For a smaller drip system, a Shurflo 2088-594-152 Diaphragm Pump (12V, 3.5 GPM, ~$180) can be powered by a single 100W solar panel (e.g., Renogy 100W Monocrystalline Solar Panel, ~$100) and a small 12V battery (e.g., a 50Ah LiFePO4 battery like the Battle Born 50Ah, ~$450). For larger operations or deeper wells, more robust systems are needed. If you’re looking to build out a comprehensive off-grid power system to support your garden’s water needs, or indeed your entire homestead, you might want to explore resources like the Power Grid Generator complete system guide to understand the full scope of what’s possible in terms of energy independence.
Step 5: Seed Selection & Planting
The choice of seeds is crucial for a truly self sufficient garden from scratch.
- Choose Heirloom & Open-Pollinated Seeds: These varieties produce seeds that will grow true to type, meaning you can save seeds from your harvest year after year. F1 hybrids, while often vigorous, will not produce consistent offspring from saved seeds. Reputable seed companies include Baker Creek Heirloom Seeds, High Mowing Organic Seeds, and Seed Savers Exchange. Start with common, reliable varieties like ‘Black Krim’ tomatoes, ‘Provider’ bush beans, ‘Waltham Butternut’ squash, and ‘Black Seeded Simpson’ lettuce.
- Start Seeds Indoors (Optional but Recommended): For longer growing seasons or specific crops, starting seeds indoors gives you a head start. Use seed-starting mix (e.g., Espoma Organic Seed Starter Mix, ~$10 for 16qt bag) in seed trays (Jiffy Professional Greenhouse 72-cell kit, ~$15). Provide adequate light with LED grow lights (Barrina T5 2ft 4-pack LED Grow Lights, 20W each, ~$50) for 14-16 hours a day, positioned 2-4 inches above seedlings. Maintain consistent temperatures (65-75°F for most).
- Direct Sowing vs. Transplanting: Some crops (carrots, radishes, beans, corn) prefer direct sowing into the garden bed. Others (tomatoes, peppers, broccoli, kale) benefit from being started indoors and transplanted. Follow seed packet instructions for planting depths (e.g., lettuce seeds are often surface-sown or planted 1/8 inch deep, while beans are 1 inch deep) and spacing.
- Companion Planting: Strategically plant different species together to enhance growth, deter pests, and attract beneficial insects. For example, planting marigolds near tomatoes can deter nematodes, and basil improves tomato flavor. Nasturtiums can act as a trap crop for aphids.
- Succession Planting: For a continuous harvest, plant small batches of quick-growing crops (lettuce, radishes, cilantro) every 2-3 weeks. As one crop finishes, another is ready to take its place.
Step 6: Pest & Disease Management (Organic)
Maintaining a self sufficient garden from scratch means embracing organic pest and disease control.
- Integrated Pest Management (IPM): This holistic approach combines several strategies.
- Observation: Regularly inspect your plants for early signs of pests or disease. Catching issues early is key.
- Physical Barriers: Use row covers (e.g., Agribon AG-19 floating row cover, 10×20 ft, ~$20) to protect young plants from insect pests like cabbage worms and squash bugs. Install fences (e.g., 2×4 welded wire mesh, 4 ft tall, 50 ft roll ~$70) to keep out deer, rabbits, and other larger animals.
- Hand-Picking: For larger pests like tomato hornworms or squash bugs, simply pick them off and drop them into a bucket of soapy water.
- Companion Planting: As mentioned, certain plants repel pests. Marigolds, garlic, and onions are excellent deterrents.
- Attract Beneficial Insects: Plant flowers like dill, fennel, cosmos, and sweet alyssum to attract ladybugs, lacewings, and parasitic wasps, which prey on common garden pests.
- Organic Sprays & Treatments:
- Neem Oil: An excellent broad-spectrum organic insecticide and fungicide. Bonide Neem Oil Concentrate (16oz, ~$20) can be mixed at a rate of 1-2 tbsp per gallon of water and sprayed on affected plants.
- Insecticidal Soap: Effective against soft-bodied insects like aphids, whiteflies, and spider mites. Garden Safe Insecticidal Soap (24oz ready-to-use, ~$10).
- Bacillus thuringiensis (Bt): A naturally occurring soil bacterium that targets caterpillars and worms. Monterey BT Worm & Caterpillar Killer (16oz, ~$18) is highly effective and safe for beneficial insects.
- Copper or Sulfur Sprays: For fungal diseases like powdery mildew or blight, organic copper (e.g., Bonide Copper Fungicide, ~$15 for 1lb) or sulfur (e.g., Safer Brand Garden Fungicide, ~$10 for 16oz) can be used as a last resort.
Step 7: Harvesting & Seed Saving
The culmination of your efforts is the harvest, and seed saving closes the loop on self-sufficiency.
- Harvesting Techniques:
- Timing: Harvest vegetables at their peak ripeness for best flavor and nutritional value. For example, green beans should snap cleanly, cucumbers should be firm, and tomatoes should be fully colored.
- Frequency: Many crops, like zucchini, cucumbers, and bush beans, produce more if harvested frequently. Pick daily or every other day.
- Tools: Use clean, sharp pruners (e.g., Corona ClassicCUT Bypass Pruner BP 3180, ~$30) or a sharp knife for clean cuts, minimizing damage to the plant.
- Seed Saving: This is where the « self-sufficient » aspect truly shines.
- Selection: Only save seeds from your healthiest, most vigorous plants that show desired traits (disease resistance, good flavor, high yield).
- Isolation: To ensure true-to-type seeds, prevent cross-pollination. This can be challenging for open-pollinated crops that readily cross (e.g., squash, corn). For beginners, focus on self-pollinating plants like beans, peas, lettuce, and tomatoes.
- Processing:
- Dry Seeds (Beans, Peas, Lettuce, Grains): Allow pods/seed heads to dry completely on the plant. Harvest, shell, and clean the seeds, removing chaff.
- Wet Seeds (Tomatoes, Cucumbers, Squash): For tomatoes, ferment the seeds in water for a few days to remove the gel coating and inhibit disease. For cucumbers/squash, scrape out seeds, wash thoroughly, and dry.
- Drying: Spread seeds thinly on screens or paper plates in a cool, dry, well-ventilated area for 1-4 weeks. Ensure they are bone-dry before storage. I aim for less than 8% moisture content.
- Storage: Store seeds in airtight containers (glass jars with desiccant packets work well) in a cool, dark, dry place (ideally 40-50°F and 30-40% humidity). Label clearly with variety and date. Properly stored seeds can remain viable for 3-10 years or more.
Step 8: Season Extension & Winterizing
Extend your harvest and protect your garden for the off-season to truly maximize your self sufficient garden from scratch.
- Cold Frames: Simple structures with a transparent top (glass, polycarbonate, or old windows) that sit over garden beds. They trap solar heat, allowing you to grow cold-hardy crops (lettuce, spinach, kale, radishes) well into winter or start seeds earlier in spring. A basic cold frame can be built from 2×6 lumber and a sheet of polycarbonate for under $100.
- Hoop Houses/Low Tunnels: Larger structures made from flexible hoops (PVC pipe or EMT conduit) covered with greenhouse plastic. These provide more space and greater temperature moderation. A 10×20 ft DIY low tunnel kit can cost $200-$500, while a larger, more robust hoop house kit might be $1,000-$3,000. I use a 6×12 ft low tunnel made from 1/2-inch PVC hoops and 6mil greenhouse plastic, which extends my lettuce and spinach harvest by at least
Step 7: Harvesting & Seed Saving
The culmination of your efforts is the harvest, and seed saving closes the loop on self-sufficiency.
- Harvesting Techniques:
- Timing: Harvest vegetables at their peak ripeness for best flavor and nutritional value. For example, green beans should snap cleanly, cucumbers should be firm, and tomatoes should be fully colored.
- Frequency: Many crops, like zucchini, cucumbers, and bush beans, produce more if harvested frequently. Pick daily or every other day.
- Tools: Use clean, sharp pruners (e.g., Corona ClassicCUT Bypass Pruner BP 3180, ~$30) or a sharp knife for clean cuts, minimizing damage to the plant.
- Seed Saving: This is where the « self-sufficient » aspect truly shines.
- Selection: Only save seeds from your healthiest, most vigorous plants that show desired traits (disease resistance, good flavor, high yield).
- Isolation: To ensure true-to-type seeds, prevent cross-pollination. This can be challenging for open-pollinated crops that readily cross (e.g., squash, corn). For beginners, focus on self-pollinating plants like beans, peas, lettuce, and tomatoes.
- Processing:
- Dry Seeds (Beans, Peas, Lettuce, Grains): Allow pods/seed heads to dry completely on the plant. Harvest, shell, and clean the seeds, removing chaff.
- Wet Seeds (Tomatoes, Cucumbers, Squash): For tomatoes, ferment the seeds in water for a few days to remove the gel coating and inhibit disease. For cucumbers/squash, scrape out seeds, wash thoroughly, and dry.
- Drying: Spread seeds thinly on screens or paper plates in a cool, dry, well-ventilated area for 1-4 weeks. Ensure they are bone-dry before storage. I aim for less than 8% moisture content.
- Storage: Store seeds in airtight containers (glass jars with desiccant packets work well) in a cool, dark, dry place (ideally 40-50°F and 30-40% humidity). Label clearly with variety and date. Properly stored seeds can remain viable for 3-10 years or more.
Step 8: Season Extension & Winterizing
Extend your harvest and protect your garden for the off-season to truly maximize your self sufficient garden from scratch.
- Cold Frames: Simple structures with a transparent top (glass, polycarbonate, or old windows) that sit over garden beds. They trap solar heat, allowing you to grow cold-hardy crops (lettuce, spinach, kale, radishes) well into winter or start seeds earlier in spring. A basic cold frame can be built from 2×6 lumber and a sheet of polycarbonate for under $100.
- Hoop Houses/Low Tunnels: Larger structures made from flexible hoops (PVC pipe or EMT conduit) covered with greenhouse plastic. These provide more space and greater temperature moderation. A 10×20 ft DIY low tunnel kit can cost $200-$500, while a larger, more robust hoop house kit might be $1,000-$3,000. I use a 6×12 ft low tunnel made from 1/2-inch PVC hoops and 6mil greenhouse plastic, which extends my lettuce and spinach harvest by at least
Efficient water management is critical for a self sufficient garden from scratch, especially in off-grid living where water resources might be limited.
- Rainwater Harvesting: This is my primary source of irrigation water. A 55-gallon rain barrel (e.g., EarthMark Rain Barrel, ~$120-$150) connected to a downspout can collect significant water. For larger needs, I use two 275-gallon IBC totes (Intermediate Bulk Containers, often available used for $100-$200 each from food-grade sources) connected in series. A 1,000 sq ft roof can collect approximately 620 gallons of water for every inch of rainfall. My 1,500 sq ft roof provides ample water for my 600 sq ft garden through multiple barrels and totes.
- Drip Irrigation: This is by far the most water-efficient method, delivering water directly to the plant’s root zone, minimizing evaporation and weed growth.
- Components: A typical drip system includes a pressure regulator (e.g., Rain Bird PRV-10, ~$15), a filter (Rain Bird RBY filter, ~$20), main tubing (1/2-inch poly tubing, 100ft ~$25), smaller feeder lines (1/4-inch tubing), and emitters (0.5 GPH or 1 GPH per plant).
- Kits: For beginners, a starter kit like the Rain Bird Drip Irrigation Garden Kit (model DDI-KIT-1P, ~$40-$60) is excellent for a small garden. For larger setups, I use Netafim Techline CV Drip Line (500ft roll, ~$150-$200), which has pressure-compensating emitters built-in, ensuring even watering across long runs.
- Automation: For true self-sufficiency, consider a battery-powered timer (e.g., Orbit B-Hyve Bluetooth Hose Faucet Timer, ~$50) or a solar-powered timer connected to a small 12V pump.
- Solar-Powered Pumps: For lifting water from a well, pond, or large storage tank to your garden, a solar pump is a game-changer. For a smaller drip system, a Shurflo 2088-594-152 Diaphragm Pump (12V, 3.5 GPM, ~$180) can be powered by a single 100W solar panel (e.g., Renogy 100W Monocrystalline Solar Panel, ~$100) and a small 12V battery (e.g., a 50Ah LiFePO4 battery like the Battle Born 50Ah, ~$450). For larger operations or deeper wells, more robust systems are needed. If you’re looking to build out a comprehensive off-grid power system to support your garden’s water needs, or indeed your entire homestead, you might want to explore resources like the Power Grid Generator complete system guide to understand the full scope of what’s possible in terms of energy independence.
Step 5: Seed Selection & Planting
The choice of seeds is crucial for a truly self sufficient garden from scratch.
- Choose Heirloom & Open-Pollinated Seeds: These varieties produce seeds that will grow true to type, meaning you can save seeds from your harvest year after year. F1 hybrids, while often vigorous, will not produce consistent offspring from saved seeds. Reputable seed companies include Baker Creek Heirloom Seeds, High Mowing Organic Seeds, and Seed Savers Exchange. Start with common, reliable varieties like ‘Black Krim’ tomatoes, ‘Provider’ bush beans, ‘Waltham Butternut’ squash, and ‘Black Seeded Simpson’ lettuce.
- Start Seeds Indoors (Optional but Recommended): For longer growing seasons or specific crops, starting seeds indoors gives you a head start. Use seed-starting mix (e.g., Espoma Organic Seed Starter Mix, ~$10 for 16qt bag) in seed trays (Jiffy Professional Greenhouse 72-cell kit, ~$15). Provide adequate light with LED grow lights (Barrina T5 2ft 4-pack LED Grow Lights, 20W each, ~$50) for 14-16 hours a day, positioned 2-4 inches above seedlings. Maintain consistent temperatures (65-75°F for most).
- Direct Sowing vs. Transplanting: Some crops (carrots, radishes, beans, corn) prefer direct sowing into the garden bed. Others (tomatoes, peppers, broccoli, kale) benefit from being started indoors and transplanted. Follow seed packet instructions for planting depths (e.g., lettuce seeds are often surface-sown or planted 1/8 inch deep, while beans are 1 inch deep) and spacing.
- Companion Planting: Strategically plant different species together to enhance growth, deter pests, and attract beneficial insects. For example, planting marigolds near tomatoes can deter nematodes, and basil improves tomato flavor. Nasturtiums can act as a trap crop for aphids.
- Succession Planting: For a continuous harvest, plant small batches of quick-growing crops (lettuce, radishes, cilantro) every 2-3 weeks. As one crop finishes, another is ready to take its place.
Step 6: Pest & Disease Management (Organic)
Maintaining a self sufficient garden from scratch means embracing organic pest and disease control.
- Integrated Pest Management (IPM): This holistic approach combines several strategies.
- Observation: Regularly inspect your plants for early signs of pests or disease. Catching issues early is key.
- Physical Barriers: Use row covers (e.g., Agribon AG-19 floating row cover, 10×20 ft, ~$20) to protect young plants from insect pests like cabbage worms and squash bugs. Install fences (e.g., 2×4 welded wire mesh, 4 ft tall, 50 ft roll ~$70) to keep out deer, rabbits, and other larger animals.
- Hand-Picking: For larger pests like tomato hornworms or squash bugs, simply pick them off and drop them into a bucket of soapy water.
- Companion Planting: As mentioned, certain plants repel pests. Marigolds, garlic, and onions are excellent deterrents.
- Attract Beneficial Insects: Plant flowers like dill, fennel, cosmos, and sweet alyssum to attract ladybugs, lacewings, and parasitic wasps, which prey on common garden pests.
- Organic Sprays & Treatments:
- Neem Oil: An excellent broad-spectrum organic insecticide and fungicide. Bonide Neem Oil Concentrate (16oz, ~$20) can be mixed at a rate of 1-2 tbsp per gallon of water and sprayed on affected plants.
- Insecticidal Soap: Effective against soft-bodied insects like aphids, whiteflies, and spider mites. Garden Safe Insecticidal Soap (24oz ready-to-use, ~$10).
- Bacillus thuringiensis (Bt): A naturally occurring soil bacterium that targets caterpillars and worms. Monterey BT Worm & Caterpillar Killer (16oz, ~$18) is highly effective and safe for beneficial insects.
- Copper or Sulfur Sprays: For fungal diseases like powdery mildew or blight, organic copper (e.g., Bonide Copper Fungicide, ~$15 for 1lb) or sulfur (e.g., Safer Brand Garden Fungicide, ~$10 for 16oz) can be used as a last resort.
Step 7: Harvesting & Seed Saving
The culmination of your efforts is the harvest, and seed saving closes the loop on self-sufficiency.
- Harvesting Techniques:
- Timing: Harvest vegetables at their peak ripeness for best flavor and nutritional value. For example, green beans should snap cleanly, cucumbers should be firm, and tomatoes should be fully colored.
- Frequency: Many crops, like zucchini, cucumbers, and bush beans, produce more if harvested frequently. Pick daily or every other day.
- Tools: Use clean, sharp pruners (e.g., Corona ClassicCUT Bypass Pruner BP 3180, ~$30) or a sharp knife for clean cuts, minimizing damage to the plant.
- Seed Saving: This is where the « self-sufficient » aspect truly shines.
- Selection: Only save seeds from your healthiest, most vigorous plants that show desired traits (disease resistance, good flavor, high yield).
- Isolation: To ensure true-to-type seeds, prevent cross-pollination. This can be challenging for open-pollinated crops that readily cross (e.g., squash, corn). For beginners, focus on self-pollinating plants like beans, peas, lettuce, and tomatoes.
- Processing:
- Dry Seeds (Beans, Peas, Lettuce, Grains): Allow pods/seed heads to dry completely on the plant. Harvest, shell, and clean the seeds, removing chaff.
- Wet Seeds (Tomatoes, Cucumbers, Squash): For tomatoes, ferment the seeds in water for a few days to remove the gel coating and inhibit disease. For cucumbers/squash, scrape out seeds, wash thoroughly, and dry.
- Drying: Spread seeds thinly on screens or paper plates in a cool, dry, well-ventilated area for 1-4 weeks. Ensure they are bone-dry before storage. I aim for less than 8% moisture content.
- Storage: Store seeds in airtight containers (glass jars with desiccant packets work well) in a cool, dark, dry place (ideally 40-50°F and 30-40% humidity). Label clearly with variety and date. Properly stored seeds can remain viable for 3-10 years or more.
Step 8: Season Extension & Winterizing
Extend your harvest and protect your garden for the off-season to truly maximize your self sufficient garden from scratch.
- Cold Frames: Simple structures with a transparent top (glass, polycarbonate, or old windows) that sit over garden beds. They trap solar heat, allowing you to grow cold-hardy crops (lettuce, spinach, kale, radishes) well into winter or start seeds earlier in spring. A basic cold frame can be built from 2×6 lumber and a sheet of polycarbonate for under $100.
- Hoop Houses/Low Tunnels: Larger structures made from flexible hoops (PVC pipe or EMT conduit) covered with greenhouse plastic. These provide more space and greater temperature moderation. A 10×20 ft DIY low tunnel kit can cost $200-$500, while a larger, more robust hoop house kit might be $1,000-$3,000. I use a 6×12 ft low tunnel made from 1/2-inch PVC hoops and 6mil greenhouse plastic, which extends my lettuce and spinach harvest by at least
Step 4: Water Management & Irrigation
Efficient water management is critical for a self sufficient garden from scratch, especially in off-grid living where water resources might be limited.
- Rainwater Harvesting: This is my primary source of irrigation water. A 55-gallon rain barrel (e.g., EarthMark Rain Barrel, ~$120-$150) connected to a downspout can collect significant water. For larger needs, I use two 275-gallon IBC totes (Intermediate Bulk Containers, often available used for $100-$200 each from food-grade sources) connected in series. A 1,000 sq ft roof can collect approximately 620 gallons of water for every inch of rainfall. My 1,500 sq ft roof provides ample water for my 600 sq ft garden through multiple barrels and totes.
- Drip Irrigation: This is by far the most water-efficient method, delivering water directly to the plant’s root zone, minimizing evaporation and weed growth.
- Components: A typical drip system includes a pressure regulator (e.g., Rain Bird PRV-10, ~$15), a filter (Rain Bird RBY filter, ~$20), main tubing (1/2-inch poly tubing, 100ft ~$25), smaller feeder lines (1/4-inch tubing), and emitters (0.5 GPH or 1 GPH per plant).
- Kits: For beginners, a starter kit like the Rain Bird Drip Irrigation Garden Kit (model DDI-KIT-1P, ~$40-$60) is excellent for a small garden. For larger setups, I use Netafim Techline CV Drip Line (500ft roll, ~$150-$200), which has pressure-compensating emitters built-in, ensuring even watering across long runs.
- Automation: For true self-sufficiency, consider a battery-powered timer (e.g., Orbit B-Hyve Bluetooth Hose Faucet Timer, ~$50) or a solar-powered timer connected to a small 12V pump.
- Solar-Powered Pumps: For lifting water from a well, pond, or large storage tank to your garden, a solar pump is a game-changer. For a smaller drip system, a Shurflo 2088-594-152 Diaphragm Pump (12V, 3.5 GPM, ~$180) can be powered by a single 100W solar panel (e.g., Renogy 100W Monocrystalline Solar Panel, ~$100) and a small 12V battery (e.g., a 50Ah LiFePO4 battery like the Battle Born 50Ah, ~$450). For larger operations or deeper wells, more robust systems are needed. If you’re looking to build out a comprehensive off-grid power system to support your garden’s water needs, or indeed your entire homestead, you might want to explore resources like the Power Grid Generator complete system guide to understand the full scope of what’s possible in terms of energy independence.
Step 5: Seed Selection & Planting
The choice of seeds is crucial for a truly self sufficient garden from scratch.
- Choose Heirloom & Open-Pollinated Seeds: These varieties produce seeds that will grow true to type, meaning you can save seeds from your harvest year after year. F1 hybrids, while often vigorous, will not produce consistent offspring from saved seeds. Reputable seed companies include Baker Creek Heirloom Seeds, High Mowing Organic Seeds, and Seed Savers Exchange. Start with common, reliable varieties like ‘Black Krim’ tomatoes, ‘Provider’ bush beans, ‘Waltham Butternut’ squash, and ‘Black Seeded Simpson’ lettuce.
- Start Seeds Indoors (Optional but Recommended): For longer growing seasons or specific crops, starting seeds indoors gives you a head start. Use seed-starting mix (e.g., Espoma Organic Seed Starter Mix, ~$10 for 16qt bag) in seed trays (Jiffy Professional Greenhouse 72-cell kit, ~$15). Provide adequate light with LED grow lights (Barrina T5 2ft 4-pack LED Grow Lights, 20W each, ~$50) for 14-16 hours a day, positioned 2-4 inches above seedlings. Maintain consistent temperatures (65-75°F for most).
- Direct Sowing vs. Transplanting: Some crops (carrots, radishes, beans, corn) prefer direct sowing into the garden bed. Others (tomatoes, peppers, broccoli, kale) benefit from being started indoors and transplanted. Follow seed packet instructions for planting depths (e.g., lettuce seeds are often surface-sown or planted 1/8 inch deep, while beans are 1 inch deep) and spacing.
- Companion Planting: Strategically plant different species together to enhance growth, deter pests, and attract beneficial insects. For example, planting marigolds near tomatoes can deter nematodes, and basil improves tomato flavor. Nasturtiums can act as a trap crop for aphids.
- Succession Planting: For a continuous harvest, plant small batches of quick-growing crops (lettuce, radishes, cilantro) every 2-3 weeks. As one crop finishes, another is ready to take its place.
Step 6: Pest & Disease Management (Organic)
Maintaining a self sufficient garden from scratch means embracing organic pest and disease control.
- Integrated Pest Management (IPM): This holistic approach combines several strategies.
- Observation: Regularly inspect your plants for early signs of pests or disease. Catching issues early is key.
- Physical Barriers: Use row covers (e.g., Agribon AG-19 floating row cover, 10×20 ft, ~$20) to protect young plants from insect pests like cabbage worms and squash bugs. Install fences (e.g., 2×4 welded wire mesh, 4 ft tall, 50 ft roll ~$70) to keep out deer, rabbits, and other larger animals.
- Hand-Picking: For larger pests like tomato hornworms or squash bugs, simply pick them off and drop them into a bucket of soapy water.
- Companion Planting: As mentioned, certain plants repel pests. Marigolds, garlic, and onions are excellent deterrents.
- Attract Beneficial Insects: Plant flowers like dill, fennel, cosmos, and sweet alyssum to attract ladybugs, lacewings, and parasitic wasps, which prey on common garden pests.
- Organic Sprays & Treatments:
- Neem Oil: An excellent broad-spectrum organic insecticide and fungicide. Bonide Neem Oil Concentrate (16oz, ~$20) can be mixed at a rate of 1-2 tbsp per gallon of water and sprayed on affected plants.
- Insecticidal Soap: Effective against soft-bodied insects like aphids, whiteflies, and spider mites. Garden Safe Insecticidal Soap (24oz ready-to-use, ~$10).
- Bacillus thuringiensis (Bt): A naturally occurring soil bacterium that targets caterpillars and worms. Monterey BT Worm & Caterpillar Killer (16oz, ~$18) is highly effective and safe for beneficial insects.
- Copper or Sulfur Sprays: For fungal diseases like powdery mildew or blight, organic copper (e.g., Bonide Copper Fungicide, ~$15 for 1lb) or sulfur (e.g., Safer Brand Garden Fungicide, ~$10 for 16oz) can be used as a last resort.
Step 7: Harvesting & Seed Saving
The culmination of your efforts is the harvest, and seed saving closes the loop on self-sufficiency.
- Harvesting Techniques:
- Timing: Harvest vegetables at their peak ripeness for best flavor and nutritional value. For example, green beans should snap cleanly, cucumbers should be firm, and tomatoes should be fully colored.
- Frequency: Many crops, like zucchini, cucumbers, and bush beans, produce more if harvested frequently. Pick daily or every other day.
- Tools: Use clean, sharp pruners (e.g., Corona ClassicCUT Bypass Pruner BP 3180, ~$30) or a sharp knife for clean cuts, minimizing damage to the plant.
- Seed Saving: This is where the « self-sufficient » aspect truly shines.
- Selection: Only save seeds from your healthiest, most vigorous plants that show desired traits (disease resistance, good flavor, high yield).
- Isolation: To ensure true-to-type seeds, prevent cross-pollination. This can be challenging for open-pollinated crops that readily cross (e.g., squash, corn). For beginners, focus on self-pollinating plants like beans, peas, lettuce, and tomatoes.
- Processing:
- Dry Seeds (Beans, Peas, Lettuce, Grains): Allow pods/seed heads to dry completely on the plant. Harvest, shell, and clean the seeds, removing chaff.
- Wet Seeds (Tomatoes, Cucumbers, Squash): For tomatoes, ferment the seeds in water for a few days to remove the gel coating and inhibit disease. For cucumbers/squash, scrape out seeds, wash thoroughly, and dry.
- Drying: Spread seeds thinly on screens or paper plates in a cool, dry, well-ventilated area for 1-4 weeks. Ensure they are bone-dry before storage. I aim for less than 8% moisture content.
- Storage: Store seeds in airtight containers (glass jars with desiccant packets work well) in a cool, dark, dry place (ideally 40-50°F and 30-40% humidity). Label clearly with variety and date. Properly stored seeds can remain viable for 3-10 years or more.
Step 8: Season Extension & Winterizing
Extend your harvest and protect your garden for the off-season to truly maximize your self sufficient garden from scratch.
- Cold Frames: Simple structures with a transparent top (glass, polycarbonate, or old windows) that sit over garden beds. They trap solar heat, allowing you to grow cold-hardy crops (lettuce, spinach, kale, radishes) well into winter or start seeds earlier in spring. A basic cold frame can be built from 2×6 lumber and a sheet of polycarbonate for under $100.
- Hoop Houses/Low Tunnels: Larger structures made from flexible hoops (PVC pipe or EMT conduit) covered with greenhouse plastic. These provide more space and greater temperature moderation. A 10×20 ft DIY low tunnel kit can cost $200-$500, while a larger, more robust hoop house kit might be $1,000-$3,000. I use a 6×12 ft low tunnel made from 1/2-inch PVC hoops and 6mil greenhouse plastic, which extends my lettuce and spinach harvest by at least
- In-Ground Beds: If you have excellent native soil and good drainage, in-ground beds are the most economical. Double-digging (loosening soil two shovel depths) can significantly improve drainage and aeration. For my main garden, I primarily use in-ground beds, but I focus on building up the soil over time with consistent compost additions and cover cropping. I aim for beds that are no wider than 3-4 feet so I can reach the center without stepping on the soil, compacting it.
- Raised Beds: Raised beds offer numerous advantages, especially for poor soil, heavy clay, or rocky areas. They provide better drainage, warm up faster in spring, reduce compaction, and make weeding and harvesting easier on your back.
- Material Options:
- Untreated Cedar: Naturally rot-resistant and chemical-free. A 4×8 ft bed, 12 inches deep, typically requires three 2x12x8 ft cedar boards, costing around $50-$60 per board (total ~$150-$180) plus corner brackets or screws. My first raised beds were cedar and are still going strong after 7 years.
- Galvanized Steel: Durable, long-lasting, and aesthetically pleasing. Brands like Vego Garden offer modular kits. A Vego Garden 17″ Tall 8-in-1 Metal Raised Garden Bed (can be configured to 4×8 ft) costs approximately $250-$300.
- Concrete Blocks/Stones: Very durable but can leach minerals (though generally safe once weathered) and can be expensive.
- Recycled Materials: Pallets (check for chemical treatment stamps like « HT » for heat-treated), old tires (controversial due to potential chemical leaching).
- Filling Raised Beds: Don’t just fill with topsoil. Use a « Hugelkultur » approach (logs, branches, leaves, then compost, then topsoil) or a mixture of 60% good quality topsoil, 30% compost, and 10% perlite or vermiculite for drainage. A 4x8x1 ft raised bed requires about 32 cubic feet (or ~1.2 cubic yards) of soil mix, which can cost $100-$200 depending on your source.
- Material Options:
Step 4: Water Management & Irrigation
Efficient water management is critical for a self sufficient garden from scratch, especially in off-grid living where water resources might be limited.
- Rainwater Harvesting: This is my primary source of irrigation water. A 55-gallon rain barrel (e.g., EarthMark Rain Barrel, ~$120-$150) connected to a downspout can collect significant water. For larger needs, I use two 275-gallon IBC totes (Intermediate Bulk Containers, often available used for $100-$200 each from food-grade sources) connected in series. A 1,000 sq ft roof can collect approximately 620 gallons of water for every inch of rainfall. My 1,500 sq ft roof provides ample water for my 600 sq ft garden through multiple barrels and totes.
- Drip Irrigation: This is by far the most water-efficient method, delivering water directly to the plant’s root zone, minimizing evaporation and weed growth.
- Components: A typical drip system includes a pressure regulator (e.g., Rain Bird PRV-10, ~$15), a filter (Rain Bird RBY filter, ~$20), main tubing (1/2-inch poly tubing, 100ft ~$25), smaller feeder lines (1/4-inch tubing), and emitters (0.5 GPH or 1 GPH per plant).
- Kits: For beginners, a starter kit like the Rain Bird Drip Irrigation Garden Kit (model DDI-KIT-1P, ~$40-$60) is excellent for a small garden. For larger setups, I use Netafim Techline CV Drip Line (500ft roll, ~$150-$200), which has pressure-compensating emitters built-in, ensuring even watering across long runs.
- Automation: For true self-sufficiency, consider a battery-powered timer (e.g., Orbit B-Hyve Bluetooth Hose Faucet Timer, ~$50) or a solar-powered timer connected to a small 12V pump.
- Solar-Powered Pumps: For lifting water from a well, pond, or large storage tank to your garden, a solar pump is a game-changer. For a smaller drip system, a Shurflo 2088-594-152 Diaphragm Pump (12V, 3.5 GPM, ~$180) can be powered by a single 100W solar panel (e.g., Renogy 100W Monocrystalline Solar Panel, ~$100) and a small 12V battery (e.g., a 50Ah LiFePO4 battery like the Battle Born 50Ah, ~$450). For larger operations or deeper wells, more robust systems are needed. If you’re looking to build out a comprehensive off-grid power system to support your garden’s water needs, or indeed your entire homestead, you might want to explore resources like the Power Grid Generator complete system guide to understand the full scope of what’s possible in terms of energy independence.
Step 5: Seed Selection & Planting
The choice of seeds is crucial for a truly self sufficient garden from scratch.
- Choose Heirloom & Open-Pollinated Seeds: These varieties produce seeds that will grow true to type, meaning you can save seeds from your harvest year after year. F1 hybrids, while often vigorous, will not produce consistent offspring from saved seeds. Reputable seed companies include Baker Creek Heirloom Seeds, High Mowing Organic Seeds, and Seed Savers Exchange. Start with common, reliable varieties like ‘Black Krim’ tomatoes, ‘Provider’ bush beans, ‘Waltham Butternut’ squash, and ‘Black Seeded Simpson’ lettuce.
- Start Seeds Indoors (Optional but Recommended): For longer growing seasons or specific crops, starting seeds indoors gives you a head start. Use seed-starting mix (e.g., Espoma Organic Seed Starter Mix, ~$10 for 16qt bag) in seed trays (Jiffy Professional Greenhouse 72-cell kit, ~$15). Provide adequate light with LED grow lights (Barrina T5 2ft 4-pack LED Grow Lights, 20W each, ~$50) for 14-16 hours a day, positioned 2-4 inches above seedlings. Maintain consistent temperatures (65-75°F for most).
- Direct Sowing vs. Transplanting: Some crops (carrots, radishes, beans, corn) prefer direct sowing into the garden bed. Others (tomatoes, peppers, broccoli, kale) benefit from being started indoors and transplanted. Follow seed packet instructions for planting depths (e.g., lettuce seeds are often surface-sown or planted 1/8 inch deep, while beans are 1 inch deep) and spacing.
- Companion Planting: Strategically plant different species together to enhance growth, deter pests, and attract beneficial insects. For example, planting marigolds near tomatoes can deter nematodes, and basil improves tomato flavor. Nasturtiums can act as a trap crop for aphids.
- Succession Planting: For a continuous harvest, plant small batches of quick-growing crops (lettuce, radishes, cilantro) every 2-3 weeks. As one crop finishes, another is ready to take its place.
Step 6: Pest & Disease Management (Organic)
Maintaining a self sufficient garden from scratch means embracing organic pest and disease control.
- Integrated Pest Management (IPM): This holistic approach combines several strategies.
- Observation: Regularly inspect your plants for early signs of pests or disease. Catching issues early is key.
- Physical Barriers: Use row covers (e.g., Agribon AG-19 floating row cover, 10×20 ft, ~$20) to protect young plants from insect pests like cabbage worms and squash bugs. Install fences (e.g., 2×4 welded wire mesh, 4 ft tall, 50 ft roll ~$70) to keep out deer, rabbits, and other larger animals.
- Hand-Picking: For larger pests like tomato hornworms or squash bugs, simply pick them off and drop them into a bucket of soapy water.
- Companion Planting: As mentioned, certain plants repel pests. Marigolds, garlic, and onions are excellent deterrents.
- Attract Beneficial Insects: Plant flowers like dill, fennel, cosmos, and sweet alyssum to attract ladybugs, lacewings, and parasitic wasps, which prey on common garden pests.
- Organic Sprays & Treatments:
- Neem Oil: An excellent broad-spectrum organic insecticide and fungicide. Bonide Neem Oil Concentrate (16oz, ~$20) can be mixed at a rate of 1-2 tbsp per gallon of water and sprayed on affected plants.
- Insecticidal Soap: Effective against soft-bodied insects like aphids, whiteflies, and spider mites. Garden Safe Insecticidal Soap (24oz ready-to-use, ~$10).
- Bacillus thuringiensis (Bt): A naturally occurring soil bacterium that targets caterpillars and worms. Monterey BT Worm & Caterpillar Killer (16oz, ~$18) is highly effective and safe for beneficial insects.
- Copper or Sulfur Sprays: For fungal diseases like powdery mildew or blight, organic copper (e.g., Bonide Copper Fungicide, ~$15 for 1lb) or sulfur (e.g., Safer Brand Garden Fungicide, ~$10 for 16oz) can be used as a last resort.
Step 7: Harvesting & Seed Saving
The culmination of your efforts is the harvest, and seed saving closes the loop on self-sufficiency.
- Harvesting Techniques:
- Timing: Harvest vegetables at their peak ripeness for best flavor and nutritional value. For example, green beans should snap cleanly, cucumbers should be firm, and tomatoes should be fully colored.
- Frequency: Many crops, like zucchini, cucumbers, and bush beans, produce more if harvested frequently. Pick daily or every other day.
- Tools: Use clean, sharp pruners (e.g., Corona ClassicCUT Bypass Pruner BP 3180, ~$30) or a sharp knife for clean cuts, minimizing damage to the plant.
- Seed Saving: This is where the « self-sufficient » aspect truly shines.
- Selection: Only save seeds from your healthiest, most vigorous plants that show desired traits (disease resistance, good flavor, high yield).
- Isolation: To ensure true-to-type seeds, prevent cross-pollination. This can be challenging for open-pollinated crops that readily cross (e.g., squash, corn). For beginners, focus on self-pollinating plants like beans, peas, lettuce, and tomatoes.
- Processing:
- Dry Seeds (Beans, Peas, Lettuce, Grains): Allow pods/seed heads to dry completely on the plant. Harvest, shell, and clean the seeds, removing chaff.
- Wet Seeds (Tomatoes, Cucumbers, Squash): For tomatoes, ferment the seeds in water for a few days to remove the gel coating and inhibit disease. For cucumbers/squash, scrape out seeds, wash thoroughly, and dry.
- Drying: Spread seeds thinly on screens or paper plates in a cool, dry, well-ventilated area for 1-4 weeks. Ensure they are bone-dry before storage. I aim for less than 8% moisture content.
- Storage: Store seeds in airtight containers (glass jars with desiccant packets work well) in a cool, dark, dry place (ideally 40-50°F and 30-40% humidity). Label clearly with variety and date. Properly stored seeds can remain viable for 3-10 years or more.
Step 8: Season Extension & Winterizing
Extend your harvest and protect your garden for the off-season to truly maximize your self sufficient garden from scratch.
- Cold Frames: Simple structures with a transparent top (glass, polycarbonate, or old windows) that sit over garden beds. They trap solar heat, allowing you to grow cold-hardy crops (lettuce, spinach, kale, radishes) well into winter or start seeds earlier in spring. A basic cold frame can be built from 2×6 lumber and a sheet of polycarbonate for under $100.
- Hoop Houses/Low Tunnels: Larger structures made from flexible hoops (PVC pipe or EMT conduit) covered with greenhouse plastic. These provide more space and greater temperature moderation. A 10×20 ft DIY low tunnel kit can cost $200-$500, while a larger, more robust hoop house kit might be $1,000-$3,000. I use a 6×12 ft low tunnel made from 1/2-inch PVC hoops and 6mil greenhouse plastic, which extends my lettuce and spinach harvest by at least
Deciding between raised beds and in-ground beds depends on your soil, budget, and physical capabilities.
- In-Ground Beds: If you have excellent native soil and good drainage, in-ground beds are the most economical. Double-digging (loosening soil two shovel depths) can significantly improve drainage and aeration. For my main garden, I primarily use in-ground beds, but I focus on building up the soil over time with consistent compost additions and cover cropping. I aim for beds that are no wider than 3-4 feet so I can reach the center without stepping on the soil, compacting it.
- Raised Beds: Raised beds offer numerous advantages, especially for poor soil, heavy clay, or rocky areas. They provide better drainage, warm up faster in spring, reduce compaction, and make weeding and harvesting easier on your back.
- Material Options:
- Untreated Cedar: Naturally rot-resistant and chemical-free. A 4×8 ft bed, 12 inches deep, typically requires three 2x12x8 ft cedar boards, costing around $50-$60 per board (total ~$150-$180) plus corner brackets or screws. My first raised beds were cedar and are still going strong after 7 years.
- Galvanized Steel: Durable, long-lasting, and aesthetically pleasing. Brands like Vego Garden offer modular kits. A Vego Garden 17″ Tall 8-in-1 Metal Raised Garden Bed (can be configured to 4×8 ft) costs approximately $250-$300.
- Concrete Blocks/Stones: Very durable but can leach minerals (though generally safe once weathered) and can be expensive.
- Recycled Materials: Pallets (check for chemical treatment stamps like « HT » for heat-treated), old tires (controversial due to potential chemical leaching).
- Filling Raised Beds: Don’t just fill with topsoil. Use a « Hugelkultur » approach (logs, branches, leaves, then compost, then topsoil) or a mixture of 60% good quality topsoil, 30% compost, and 10% perlite or vermiculite for drainage. A 4x8x1 ft raised bed requires about 32 cubic feet (or ~1.2 cubic yards) of soil mix, which can cost $100-$200 depending on your source.
- Material Options:
Step 4: Water Management & Irrigation
Efficient water management is critical for a self sufficient garden from scratch, especially in off-grid living where water resources might be limited.
- Rainwater Harvesting: This is my primary source of irrigation water. A 55-gallon rain barrel (e.g., EarthMark Rain Barrel, ~$120-$150) connected to a downspout can collect significant water. For larger needs, I use two 275-gallon IBC totes (Intermediate Bulk Containers, often available used for $100-$200 each from food-grade sources) connected in series. A 1,000 sq ft roof can collect approximately 620 gallons of water for every inch of rainfall. My 1,500 sq ft roof provides ample water for my 600 sq ft garden through multiple barrels and totes.
- Drip Irrigation: This is by far the most water-efficient method, delivering water directly to the plant’s root zone, minimizing evaporation and weed growth.
- Components: A typical drip system includes a pressure regulator (e.g., Rain Bird PRV-10, ~$15), a filter (Rain Bird RBY filter, ~$20), main tubing (1/2-inch poly tubing, 100ft ~$25), smaller feeder lines (1/4-inch tubing), and emitters (0.5 GPH or 1 GPH per plant).
- Kits: For beginners, a starter kit like the Rain Bird Drip Irrigation Garden Kit (model DDI-KIT-1P, ~$40-$60) is excellent for a small garden. For larger setups, I use Netafim Techline CV Drip Line (500ft roll, ~$150-$200), which has pressure-compensating emitters built-in, ensuring even watering across long runs.
- Automation: For true self-sufficiency, consider a battery-powered timer (e.g., Orbit B-Hyve Bluetooth Hose Faucet Timer, ~$50) or a solar-powered timer connected to a small 12V pump.
- Solar-Powered Pumps: For lifting water from a well, pond, or large storage tank to your garden, a solar pump is a game-changer. For a smaller drip system, a Shurflo 2088-594-152 Diaphragm Pump (12V, 3.5 GPM, ~$180) can be powered by a single 100W solar panel (e.g., Renogy 100W Monocrystalline Solar Panel, ~$100) and a small 12V battery (e.g., a 50Ah LiFePO4 battery like the Battle Born 50Ah, ~$450). For larger operations or deeper wells, more robust systems are needed. If you’re looking to build out a comprehensive off-grid power system to support your garden’s water needs, or indeed your entire homestead, you might want to explore resources like the Power Grid Generator complete system guide to understand the full scope of what’s possible in terms of energy independence.
Step 5: Seed Selection & Planting
The choice of seeds is crucial for a truly self sufficient garden from scratch.
- Choose Heirloom & Open-Pollinated Seeds: These varieties produce seeds that will grow true to type, meaning you can save seeds from your harvest year after year. F1 hybrids, while often vigorous, will not produce consistent offspring from saved seeds. Reputable seed companies include Baker Creek Heirloom Seeds, High Mowing Organic Seeds, and Seed Savers Exchange. Start with common, reliable varieties like ‘Black Krim’ tomatoes, ‘Provider’ bush beans, ‘Waltham Butternut’ squash, and ‘Black Seeded Simpson’ lettuce.
- Start Seeds Indoors (Optional but Recommended): For longer growing seasons or specific crops, starting seeds indoors gives you a head start. Use seed-starting mix (e.g., Espoma Organic Seed Starter Mix, ~$10 for 16qt bag) in seed trays (Jiffy Professional Greenhouse 72-cell kit, ~$15). Provide adequate light with LED grow lights (Barrina T5 2ft 4-pack LED Grow Lights, 20W each, ~$50) for 14-16 hours a day, positioned 2-4 inches above seedlings. Maintain consistent temperatures (65-75°F for most).
- Direct Sowing vs. Transplanting: Some crops (carrots, radishes, beans, corn) prefer direct sowing into the garden bed. Others (tomatoes, peppers, broccoli, kale) benefit from being started indoors and transplanted. Follow seed packet instructions for planting depths (e.g., lettuce seeds are often surface-sown or planted 1/8 inch deep, while beans are 1 inch deep) and spacing.
- Companion Planting: Strategically plant different species together to enhance growth, deter pests, and attract beneficial insects. For example, planting marigolds near tomatoes can deter nematodes, and basil improves tomato flavor. Nasturtiums can act as a trap crop for aphids.
- Succession Planting: For a continuous harvest, plant small batches of quick-growing crops (lettuce, radishes, cilantro) every 2-3 weeks. As one crop finishes, another is ready to take its place.
Step 6: Pest & Disease Management (Organic)
Maintaining a self sufficient garden from scratch means embracing organic pest and disease control.
- Integrated Pest Management (IPM): This holistic approach combines several strategies.
- Observation: Regularly inspect your plants for early signs of pests or disease. Catching issues early is key.
- Physical Barriers: Use row covers (e.g., Agribon AG-19 floating row cover, 10×20 ft, ~$20) to protect young plants from insect pests like cabbage worms and squash bugs. Install fences (e.g., 2×4 welded wire mesh, 4 ft tall, 50 ft roll ~$70) to keep out deer, rabbits, and other larger animals.
- Hand-Picking: For larger pests like tomato hornworms or squash bugs, simply pick them off and drop them into a bucket of soapy water.
- Companion Planting: As mentioned, certain plants repel pests. Marigolds, garlic, and onions are excellent deterrents.
- Attract Beneficial Insects: Plant flowers like dill, fennel, cosmos, and sweet alyssum to attract ladybugs, lacewings, and parasitic wasps, which prey on common garden pests.
- Organic Sprays & Treatments:
- Neem Oil: An excellent broad-spectrum organic insecticide and fungicide. Bonide Neem Oil Concentrate (16oz, ~$20) can be mixed at a rate of 1-2 tbsp per gallon of water and sprayed on affected plants.
- Insecticidal Soap: Effective against soft-bodied insects like aphids, whiteflies, and spider mites. Garden Safe Insecticidal Soap (24oz ready-to-use, ~$10).
- Bacillus thuringiensis (Bt): A naturally occurring soil bacterium that targets caterpillars and worms. Monterey BT Worm & Caterpillar Killer (16oz, ~$18) is highly effective and safe for beneficial insects.
- Copper or Sulfur Sprays: For fungal diseases like powdery mildew or blight, organic copper (e.g., Bonide Copper Fungicide, ~$15 for 1lb) or sulfur (e.g., Safer Brand Garden Fungicide, ~$10 for 16oz) can be used as a last resort.
Step 7: Harvesting & Seed Saving
The culmination of your efforts is the harvest, and seed saving closes the loop on self-sufficiency.
- Harvesting Techniques:
- Timing: Harvest vegetables at their peak ripeness for best flavor and nutritional value. For example, green beans should snap cleanly, cucumbers should be firm, and tomatoes should be fully colored.
- Frequency: Many crops, like zucchini, cucumbers, and bush beans, produce more if harvested frequently. Pick daily or every other day.
- Tools: Use clean, sharp pruners (e.g., Corona ClassicCUT Bypass Pruner BP 3180, ~$30) or a sharp knife for clean cuts, minimizing damage to the plant.
- Seed Saving: This is where the « self-sufficient » aspect truly shines.
- Selection: Only save seeds from your healthiest, most vigorous plants that show desired traits (disease resistance, good flavor, high yield).
- Isolation: To ensure true-to-type seeds, prevent cross-pollination. This can be challenging for open-pollinated crops that readily cross (e.g., squash, corn). For beginners, focus on self-pollinating plants like beans, peas, lettuce, and tomatoes.
- Processing:
- Dry Seeds (Beans, Peas, Lettuce, Grains): Allow pods/seed heads to dry completely on the plant. Harvest, shell, and clean the seeds, removing chaff.
- Wet Seeds (Tomatoes, Cucumbers, Squash): For tomatoes, ferment the seeds in water for a few days to remove the gel coating and inhibit disease. For cucumbers/squash, scrape out seeds, wash thoroughly, and dry.
- Drying: Spread seeds thinly on screens or paper plates in a cool, dry, well-ventilated area for 1-4 weeks. Ensure they are bone-dry before storage. I aim for less than 8% moisture content.
- Storage: Store seeds in airtight containers (glass jars with desiccant packets work well) in a cool, dark, dry place (ideally 40-50°F and 30-40% humidity). Label clearly with variety and date. Properly stored seeds can remain viable for 3-10 years or more.
Step 8: Season Extension & Winterizing
Extend your harvest and protect your garden for the off-season to truly maximize your self sufficient garden from scratch.
- Cold Frames: Simple structures with a transparent top (glass, polycarbonate, or old windows) that sit over garden beds. They trap solar heat, allowing you to grow cold-hardy crops (lettuce, spinach, kale, radishes) well into winter or start seeds earlier in spring. A basic cold frame can be built from 2×6 lumber and a sheet of polycarbonate for under $100.
- Hoop Houses/Low Tunnels: Larger structures made from flexible hoops (PVC pipe or EMT conduit) covered with greenhouse plastic. These provide more space and greater temperature moderation. A 10×20 ft DIY low tunnel kit can cost $200-$500, while a larger, more robust hoop house kit might be $1,000-$3,000. I use a 6×12 ft low tunnel made from 1/2-inch PVC hoops and 6mil greenhouse plastic, which extends my lettuce and spinach harvest by at least
Healthy soil is the bedrock of a productive, self-sufficient garden. You can’t guess what your soil needs; you have to test it.
- Perform a Soil Test: A professional soil test will give you precise data on your soil’s pH, nutrient levels (N-P-K), and organic matter content. I recommend sending a sample to your local agricultural extension office; it typically costs $20-$50 and provides detailed recommendations. Alternatively, for a quick homeowner check, a Rapitest Soil Test Kit (40-test kit, model 1663, ~$20 on Amazon) provides a good baseline for pH, Nitrogen, Phosphorus, and Potash. Aim for a pH between 6.0 and 7.0 for most vegetables.
- Amend for pH Imbalance: If your soil is too acidic (below 6.0), add agricultural lime (dolomitic lime adds magnesium, calcitic lime adds calcium). Apply 5-10 lbs per 100 sq ft for a moderate adjustment. If it’s too alkaline (above 7.0), add elemental sulfur (e.g., Espoma Soil Acidifier, ~$15 for 6.75 lbs) or generous amounts of organic matter like peat moss or pine needles.
- Build Organic Matter: This is the single most important step for long-term soil health. Organic matter improves soil structure, water retention, drainage, and nutrient availability. Incorporate 2-4 inches of high-quality compost into your top 6-12 inches of soil annually. I make my own compost from kitchen scraps, garden waste, and shredded leaves, but you can purchase it. Local nurseries often sell bulk compost for $30-$50 per cubic yard. Aged manure (from chickens, cows, or horses – ensure it’s well-rotted to avoid burning plants) is also excellent.
- Address Nutrient Deficiencies: Based on your soil test, add specific organic amendments. If Nitrogen (N) is low, add blood meal (12-0-0, ~$20 for 3 lbs) or feather meal. For Phosphorus (P), use bone meal (3-15-0, ~$15 for 3 lbs) or rock phosphate. For Potassium (K), greensand (0-0-2.5, ~$25 for 5 lbs) or kelp meal are good choices. I rely heavily on Espoma Organic Garden-tone (5-3-3, ~$25 for an 8lb bag) as a balanced, all-purpose organic fertilizer during planting.
Step 3: Garden Bed Preparation
Deciding between raised beds and in-ground beds depends on your soil, budget, and physical capabilities.
- In-Ground Beds: If you have excellent native soil and good drainage, in-ground beds are the most economical. Double-digging (loosening soil two shovel depths) can significantly improve drainage and aeration. For my main garden, I primarily use in-ground beds, but I focus on building up the soil over time with consistent compost additions and cover cropping. I aim for beds that are no wider than 3-4 feet so I can reach the center without stepping on the soil, compacting it.
- Raised Beds: Raised beds offer numerous advantages, especially for poor soil, heavy clay, or rocky areas. They provide better drainage, warm up faster in spring, reduce compaction, and make weeding and harvesting easier on your back.
- Material Options:
- Untreated Cedar: Naturally rot-resistant and chemical-free. A 4×8 ft bed, 12 inches deep, typically requires three 2x12x8 ft cedar boards, costing around $50-$60 per board (total ~$150-$180) plus corner brackets or screws. My first raised beds were cedar and are still going strong after 7 years.
- Galvanized Steel: Durable, long-lasting, and aesthetically pleasing. Brands like Vego Garden offer modular kits. A Vego Garden 17″ Tall 8-in-1 Metal Raised Garden Bed (can be configured to 4×8 ft) costs approximately $250-$300.
- Concrete Blocks/Stones: Very durable but can leach minerals (though generally safe once weathered) and can be expensive.
- Recycled Materials: Pallets (check for chemical treatment stamps like « HT » for heat-treated), old tires (controversial due to potential chemical leaching).
- Filling Raised Beds: Don’t just fill with topsoil. Use a « Hugelkultur » approach (logs, branches, leaves, then compost, then topsoil) or a mixture of 60% good quality topsoil, 30% compost, and 10% perlite or vermiculite for drainage. A 4x8x1 ft raised bed requires about 32 cubic feet (or ~1.2 cubic yards) of soil mix, which can cost $100-$200 depending on your source.
- Material Options:
Step 4: Water Management & Irrigation
Efficient water management is critical for a self sufficient garden from scratch, especially in off-grid living where water resources might be limited.
- Rainwater Harvesting: This is my primary source of irrigation water. A 55-gallon rain barrel (e.g., EarthMark Rain Barrel, ~$120-$150) connected to a downspout can collect significant water. For larger needs, I use two 275-gallon IBC totes (Intermediate Bulk Containers, often available used for $100-$200 each from food-grade sources) connected in series. A 1,000 sq ft roof can collect approximately 620 gallons of water for every inch of rainfall. My 1,500 sq ft roof provides ample water for my 600 sq ft garden through multiple barrels and totes.
- Drip Irrigation: This is by far the most water-efficient method, delivering water directly to the plant’s root zone, minimizing evaporation and weed growth.
- Components: A typical drip system includes a pressure regulator (e.g., Rain Bird PRV-10, ~$15), a filter (Rain Bird RBY filter, ~$20), main tubing (1/2-inch poly tubing, 100ft ~$25), smaller feeder lines (1/4-inch tubing), and emitters (0.5 GPH or 1 GPH per plant).
- Kits: For beginners, a starter kit like the Rain Bird Drip Irrigation Garden Kit (model DDI-KIT-1P, ~$40-$60) is excellent for a small garden. For larger setups, I use Netafim Techline CV Drip Line (500ft roll, ~$150-$200), which has pressure-compensating emitters built-in, ensuring even watering across long runs.
- Automation: For true self-sufficiency, consider a battery-powered timer (e.g., Orbit B-Hyve Bluetooth Hose Faucet Timer, ~$50) or a solar-powered timer connected to a small 12V pump.
- Solar-Powered Pumps: For lifting water from a well, pond, or large storage tank to your garden, a solar pump is a game-changer. For a smaller drip system, a Shurflo 2088-594-152 Diaphragm Pump (12V, 3.5 GPM, ~$180) can be powered by a single 100W solar panel (e.g., Renogy 100W Monocrystalline Solar Panel, ~$100) and a small 12V battery (e.g., a 50Ah LiFePO4 battery like the Battle Born 50Ah, ~$450). For larger operations or deeper wells, more robust systems are needed. If you’re looking to build out a comprehensive off-grid power system to support your garden’s water needs, or indeed your entire homestead, you might want to explore resources like the Power Grid Generator complete system guide to understand the full scope of what’s possible in terms of energy independence.
Step 5: Seed Selection & Planting
The choice of seeds is crucial for a truly self sufficient garden from scratch.
- Choose Heirloom & Open-Pollinated Seeds: These varieties produce seeds that will grow true to type, meaning you can save seeds from your harvest year after year. F1 hybrids, while often vigorous, will not produce consistent offspring from saved seeds. Reputable seed companies include Baker Creek Heirloom Seeds, High Mowing Organic Seeds, and Seed Savers Exchange. Start with common, reliable varieties like ‘Black Krim’ tomatoes, ‘Provider’ bush beans, ‘Waltham Butternut’ squash, and ‘Black Seeded Simpson’ lettuce.
- Start Seeds Indoors (Optional but Recommended): For longer growing seasons or specific crops, starting seeds indoors gives you a head start. Use seed-starting mix (e.g., Espoma Organic Seed Starter Mix, ~$10 for 16qt bag) in seed trays (Jiffy Professional Greenhouse 72-cell kit, ~$15). Provide adequate light with LED grow lights (Barrina T5 2ft 4-pack LED Grow Lights, 20W each, ~$50) for 14-16 hours a day, positioned 2-4 inches above seedlings. Maintain consistent temperatures (65-75°F for most).
- Direct Sowing vs. Transplanting: Some crops (carrots, radishes, beans, corn) prefer direct sowing into the garden bed. Others (tomatoes, peppers, broccoli, kale) benefit from being started indoors and transplanted. Follow seed packet instructions for planting depths (e.g., lettuce seeds are often surface-sown or planted 1/8 inch deep, while beans are 1 inch deep) and spacing.
- Companion Planting: Strategically plant different species together to enhance growth, deter pests, and attract beneficial insects. For example, planting marigolds near tomatoes can deter nematodes, and basil improves tomato flavor. Nasturtiums can act as a trap crop for aphids.
- Succession Planting: For a continuous harvest, plant small batches of quick-growing crops (lettuce, radishes, cilantro) every 2-3 weeks. As one crop finishes, another is ready to take its place.
Step 6: Pest & Disease Management (Organic)
Maintaining a self sufficient garden from scratch means embracing organic pest and disease control.
- Integrated Pest Management (IPM): This holistic approach combines several strategies.
- Observation: Regularly inspect your plants for early signs of pests or disease. Catching issues early is key.
- Physical Barriers: Use row covers (e.g., Agribon AG-19 floating row cover, 10×20 ft, ~$20) to protect young plants from insect pests like cabbage worms and squash bugs. Install fences (e.g., 2×4 welded wire mesh, 4 ft tall, 50 ft roll ~$70) to keep out deer, rabbits, and other larger animals.
- Hand-Picking: For larger pests like tomato hornworms or squash bugs, simply pick them off and drop them into a bucket of soapy water.
- Companion Planting: As mentioned, certain plants repel pests. Marigolds, garlic, and onions are excellent deterrents.
- Attract Beneficial Insects: Plant flowers like dill, fennel, cosmos, and sweet alyssum to attract ladybugs, lacewings, and parasitic wasps, which prey on common garden pests.
- Organic Sprays & Treatments:
- Neem Oil: An excellent broad-spectrum organic insecticide and fungicide. Bonide Neem Oil Concentrate (16oz, ~$20) can be mixed at a rate of 1-2 tbsp per gallon of water and sprayed on affected plants.
- Insecticidal Soap: Effective against soft-bodied insects like aphids, whiteflies, and spider mites. Garden Safe Insecticidal Soap (24oz ready-to-use, ~$10).
- Bacillus thuringiensis (Bt): A naturally occurring soil bacterium that targets caterpillars and worms. Monterey BT Worm & Caterpillar Killer (16oz, ~$18) is highly effective and safe for beneficial insects.
- Copper or Sulfur Sprays: For fungal diseases like powdery mildew or blight, organic copper (e.g., Bonide Copper Fungicide, ~$15 for 1lb) or sulfur (e.g., Safer Brand Garden Fungicide, ~$10 for 16oz) can be used as a last resort.
Step 7: Harvesting & Seed Saving
The culmination of your efforts is the harvest, and seed saving closes the loop on self-sufficiency.
- Harvesting Techniques:
- Timing: Harvest vegetables at their peak ripeness for best flavor and nutritional value. For example, green beans should snap cleanly, cucumbers should be firm, and tomatoes should be fully colored.
- Frequency: Many crops, like zucchini, cucumbers, and bush beans, produce more if harvested frequently. Pick daily or every other day.
- Tools: Use clean, sharp pruners (e.g., Corona ClassicCUT Bypass Pruner BP 3180, ~$30) or a sharp knife for clean cuts, minimizing damage to the plant.
- Seed Saving: This is where the « self-sufficient » aspect truly shines.
- Selection: Only save seeds from your healthiest, most vigorous plants that show desired traits (disease resistance, good flavor, high yield).
- Isolation: To ensure true-to-type seeds, prevent cross-pollination. This can be challenging for open-pollinated crops that readily cross (e.g., squash, corn). For beginners, focus on self-pollinating plants like beans, peas, lettuce, and tomatoes.
- Processing:
- Dry Seeds (Beans, Peas, Lettuce, Grains): Allow pods/seed heads to dry completely on the plant. Harvest, shell, and clean the seeds, removing chaff.
- Wet Seeds (Tomatoes, Cucumbers, Squash): For tomatoes, ferment the seeds in water for a few days to remove the gel coating and inhibit disease. For cucumbers/squash, scrape out seeds, wash thoroughly, and dry.
- Drying: Spread seeds thinly on screens or paper plates in a cool, dry, well-ventilated area for 1-4 weeks. Ensure they are bone-dry before storage. I aim for less than 8% moisture content.
- Storage: Store seeds in airtight containers (glass jars with desiccant packets work well) in a cool, dark, dry place (ideally 40-50°F and 30-40% humidity). Label clearly with variety and date. Properly stored seeds can remain viable for 3-10 years or more.
Step 8: Season Extension & Winterizing
Extend your harvest and protect your garden for the off-season to truly maximize your self sufficient garden from scratch.
- Cold Frames: Simple structures with a transparent top (glass, polycarbonate, or old windows) that sit over garden beds. They trap solar heat, allowing you to grow cold-hardy crops (lettuce, spinach, kale, radishes) well into winter or start seeds earlier in spring. A basic cold frame can be built from 2×6 lumber and a sheet of polycarbonate for under $100.
- Hoop Houses/Low Tunnels: Larger structures made from flexible hoops (PVC pipe or EMT conduit) covered with greenhouse plastic. These provide more space and greater temperature moderation. A 10×20 ft DIY low tunnel kit can cost $200-$500, while a larger, more robust hoop house kit might be $1,000-$3,000. I use a 6×12 ft low tunnel made from 1/2-inch PVC hoops and 6mil greenhouse plastic, which extends my lettuce and spinach harvest by at least
- Integrated Pest Management (IPM): This holistic approach combines several strategies.
- Observation: Regularly inspect your plants for early signs of pests or disease. Catching issues early is key.
- Physical Barriers: Use row covers (e.g., Agribon AG-19 floating row cover, 10×20 ft, ~$20) to protect young plants from insect pests like cabbage worms and squash bugs. Install fences (e.g., 2×4 welded wire mesh, 4 ft tall, 50 ft roll ~$70) to keep out deer, rabbits, and other larger animals.
- Hand-Picking: For larger pests like tomato hornworms or squash bugs, simply pick them off and drop them into a bucket of soapy water.
- Companion Planting: As mentioned, certain plants repel pests. Marigolds, garlic, and onions are excellent deterrents.
- Attract Beneficial Insects: Plant flowers like dill, fennel, cosmos, and sweet alyssum to attract ladybugs, lacewings, and parasitic wasps, which prey on common garden pests.
- Organic Sprays & Treatments:
- Neem Oil: An excellent broad-spectrum organic insecticide and fungicide. Bonide Neem Oil Concentrate (16oz, ~$20) can be mixed at a rate of 1-2 tbsp per gallon of water and sprayed on affected plants.
- Insecticidal Soap: Effective against soft-bodied insects like aphids, whiteflies, and spider mites. Garden Safe Insecticidal Soap (24oz ready-to-use, ~$10).
- Bacillus thuringiensis (Bt): A naturally occurring soil bacterium that targets caterpillars and worms. Monterey BT Worm & Caterpillar Killer (16oz, ~$18) is highly effective and safe for beneficial insects.
- Copper or Sulfur Sprays: For fungal diseases like powdery mildew or blight, organic copper (e.g., Bonide Copper Fungicide, ~$15 for 1lb) or sulfur (e.g., Safer Brand Garden Fungicide, ~$10 for 16oz) can be used as a last resort.
Step 7: Harvesting & Seed Saving
The culmination of your efforts is the harvest, and seed saving closes the loop on self-sufficiency.
- Harvesting Techniques:
- Timing: Harvest vegetables at their peak ripeness for best flavor and nutritional value. For example, green beans should snap cleanly, cucumbers should be firm, and tomatoes should be fully colored.
- Frequency: Many crops, like zucchini, cucumbers, and bush beans, produce more if harvested frequently. Pick daily or every other day.
- Tools: Use clean, sharp pruners (e.g., Corona ClassicCUT Bypass Pruner BP 3180, ~$30) or a sharp knife for clean cuts, minimizing damage to the plant.
- Seed Saving: This is where the « self-sufficient » aspect truly shines.
- Selection: Only save seeds from your healthiest, most vigorous plants that show desired traits (disease resistance, good flavor, high yield).
- Isolation: To ensure true-to-type seeds, prevent cross-pollination. This can be challenging for open-pollinated crops that readily cross (e.g., squash, corn). For beginners, focus on self-pollinating plants like beans, peas, lettuce, and tomatoes.
- Processing:
- Dry Seeds (Beans, Peas, Lettuce, Grains): Allow pods/seed heads to dry completely on the plant. Harvest, shell, and clean the seeds, removing chaff.
- Wet Seeds (Tomatoes, Cucumbers, Squash): For tomatoes, ferment the seeds in water for a few days to remove the gel coating and inhibit disease. For cucumbers/squash, scrape out seeds, wash thoroughly, and dry.
- Drying: Spread seeds thinly on screens or paper plates in a cool, dry, well-ventilated area for 1-4 weeks. Ensure they are bone-dry before storage. I aim for less than 8% moisture content.
- Storage: Store seeds in airtight containers (glass jars with desiccant packets work well) in a cool, dark, dry place (ideally 40-50°F and 30-40% humidity). Label clearly with variety and date. Properly stored seeds can remain viable for 3-10 years or more.
Step 8: Season Extension & Winterizing
Extend your harvest and protect your garden for the off-season to truly maximize your self sufficient garden from scratch.
- Cold Frames: Simple structures with a transparent top (glass, polycarbonate, or old windows) that sit over garden beds. They trap solar heat, allowing you to grow cold-hardy crops (lettuce, spinach, kale, radishes) well into winter or start seeds earlier in spring. A basic cold frame can be built from 2×6 lumber and a sheet of polycarbonate for under $100.
- Hoop Houses/Low Tunnels: Larger structures made from flexible hoops (PVC pipe or EMT conduit) covered with greenhouse plastic. These provide more space and greater temperature moderation. A 10×20 ft DIY low tunnel kit can cost $200-$500, while a larger, more robust hoop house kit might be $1,000-$3,000. I use a 6×12 ft low tunnel made from 1/2-inch PVC hoops and 6mil greenhouse plastic, which extends my lettuce and spinach harvest by at least
Efficient water management is critical for a self sufficient garden from scratch, especially in off-grid living where water resources might be limited.
- Rainwater Harvesting: This is my primary source of irrigation water. A 55-gallon rain barrel (e.g., EarthMark Rain Barrel, ~$120-$150) connected to a downspout can collect significant water. For larger needs, I use two 275-gallon IBC totes (Intermediate Bulk Containers, often available used for $100-$200 each from food-grade sources) connected in series. A 1,000 sq ft roof can collect approximately 620 gallons of water for every inch of rainfall. My 1,500 sq ft roof provides ample water for my 600 sq ft garden through multiple barrels and totes.
- Drip Irrigation: This is by far the most water-efficient method, delivering water directly to the plant’s root zone, minimizing evaporation and weed growth.
- Components: A typical drip system includes a pressure regulator (e.g., Rain Bird PRV-10, ~$15), a filter (Rain Bird RBY filter, ~$20), main tubing (1/2-inch poly tubing, 100ft ~$25), smaller feeder lines (1/4-inch tubing), and emitters (0.5 GPH or 1 GPH per plant).
- Kits: For beginners, a starter kit like the Rain Bird Drip Irrigation Garden Kit (model DDI-KIT-1P, ~$40-$60) is excellent for a small garden. For larger setups, I use Netafim Techline CV Drip Line (500ft roll, ~$150-$200), which has pressure-compensating emitters built-in, ensuring even watering across long runs.
- Automation: For true self-sufficiency, consider a battery-powered timer (e.g., Orbit B-Hyve Bluetooth Hose Faucet Timer, ~$50) or a solar-powered timer connected to a small 12V pump.
- Solar-Powered Pumps: For lifting water from a well, pond, or large storage tank to your garden, a solar pump is a game-changer. For a smaller drip system, a Shurflo 2088-594-152 Diaphragm Pump (12V, 3.5 GPM, ~$180) can be powered by a single 100W solar panel (e.g., Renogy 100W Monocrystalline Solar Panel, ~$100) and a small 12V battery (e.g., a 50Ah LiFePO4 battery like the Battle Born 50Ah, ~$450). For larger operations or deeper wells, more robust systems are needed. If you’re looking to build out a comprehensive off-grid power system to support your garden’s water needs, or indeed your entire homestead, you might want to explore resources like the Power Grid Generator complete system guide to understand the full scope of what’s possible in terms of energy independence.
Step 5: Seed Selection & Planting
The choice of seeds is crucial for a truly self sufficient garden from scratch.
- Choose Heirloom & Open-Pollinated Seeds: These varieties produce seeds that will grow true to type, meaning you can save seeds from your harvest year after year. F1 hybrids, while often vigorous, will not produce consistent offspring from saved seeds. Reputable seed companies include Baker Creek Heirloom Seeds, High Mowing Organic Seeds, and Seed Savers Exchange. Start with common, reliable varieties like ‘Black Krim’ tomatoes, ‘Provider’ bush beans, ‘Waltham Butternut’ squash, and ‘Black Seeded Simpson’ lettuce.
- Start Seeds Indoors (Optional but Recommended): For longer growing seasons or specific crops, starting seeds indoors gives you a head start. Use seed-starting mix (e.g., Espoma Organic Seed Starter Mix, ~$10 for 16qt bag) in seed trays (Jiffy Professional Greenhouse 72-cell kit, ~$15). Provide adequate light with LED grow lights (Barrina T5 2ft 4-pack LED Grow Lights, 20W each, ~$50) for 14-16 hours a day, positioned 2-4 inches above seedlings. Maintain consistent temperatures (65-75°F for most).
- Direct Sowing vs. Transplanting: Some crops (carrots, radishes, beans, corn) prefer direct sowing into the garden bed. Others (tomatoes, peppers, broccoli, kale) benefit from being started indoors and transplanted. Follow seed packet instructions for planting depths (e.g., lettuce seeds are often surface-sown or planted 1/8 inch deep, while beans are 1 inch deep) and spacing.
- Companion Planting: Strategically plant different species together to enhance growth, deter pests, and attract beneficial insects. For example, planting marigolds near tomatoes can deter nematodes, and basil improves tomato flavor. Nasturtiums can act as a trap crop for aphids.
- Succession Planting: For a continuous harvest, plant small batches of quick-growing crops (lettuce, radishes, cilantro) every 2-3 weeks. As one crop finishes, another is ready to take its place.
Step 6: Pest & Disease Management (Organic)
Maintaining a self sufficient garden from scratch means embracing organic pest and disease control.
- Integrated Pest Management (IPM): This holistic approach combines several strategies.
- Observation: Regularly inspect your plants for early signs of pests or disease. Catching issues early is key.
- Physical Barriers: Use row covers (e.g., Agribon AG-19 floating row cover, 10×20 ft, ~$20) to protect young plants from insect pests like cabbage worms and squash bugs. Install fences (e.g., 2×4 welded wire mesh, 4 ft tall, 50 ft roll ~$70) to keep out deer, rabbits, and other larger animals.
- Hand-Picking: For larger pests like tomato hornworms or squash bugs, simply pick them off and drop them into a bucket of soapy water.
- Companion Planting: As mentioned, certain plants repel pests. Marigolds, garlic, and onions are excellent deterrents.
- Attract Beneficial Insects: Plant flowers like dill, fennel, cosmos, and sweet alyssum to attract ladybugs, lacewings, and parasitic wasps, which prey on common garden pests.
- Organic Sprays & Treatments:
- Neem Oil: An excellent broad-spectrum organic insecticide and fungicide. Bonide Neem Oil Concentrate (16oz, ~$20) can be mixed at a rate of 1-2 tbsp per gallon of water and sprayed on affected plants.
- Insecticidal Soap: Effective against soft-bodied insects like aphids, whiteflies, and spider mites. Garden Safe Insecticidal Soap (24oz ready-to-use, ~$10).
- Bacillus thuringiensis (Bt): A naturally occurring soil bacterium that targets caterpillars and worms. Monterey BT Worm & Caterpillar Killer (16oz, ~$18) is highly effective and safe for beneficial insects.
- Copper or Sulfur Sprays: For fungal diseases like powdery mildew or blight, organic copper (e.g., Bonide Copper Fungicide, ~$15 for 1lb) or sulfur (e.g., Safer Brand Garden Fungicide, ~$10 for 16oz) can be used as a last resort.
Step 7: Harvesting & Seed Saving
The culmination of your efforts is the harvest, and seed saving closes the loop on self-sufficiency.
- Harvesting Techniques:
- Timing: Harvest vegetables at their peak ripeness for best flavor and nutritional value. For example, green beans should snap cleanly, cucumbers should be firm, and tomatoes should be fully colored.
- Frequency: Many crops, like zucchini, cucumbers, and bush beans, produce more if harvested frequently. Pick daily or every other day.
- Tools: Use clean, sharp pruners (e.g., Corona ClassicCUT Bypass Pruner BP 3180, ~$30) or a sharp knife for clean cuts, minimizing damage to the plant.
- Seed Saving: This is where the « self-sufficient » aspect truly shines.
- Selection: Only save seeds from your healthiest, most vigorous plants that show desired traits (disease resistance, good flavor, high yield).
- Isolation: To ensure true-to-type seeds, prevent cross-pollination. This can be challenging for open-pollinated crops that readily cross (e.g., squash, corn). For beginners, focus on self-pollinating plants like beans, peas, lettuce, and tomatoes.
- Processing:
- Dry Seeds (Beans, Peas, Lettuce, Grains): Allow pods/seed heads to dry completely on the plant. Harvest, shell, and clean the seeds, removing chaff.
- Wet Seeds (Tomatoes, Cucumbers, Squash): For tomatoes, ferment the seeds in water for a few days to remove the gel coating and inhibit disease. For cucumbers/squash, scrape out seeds, wash thoroughly, and dry.
- Drying: Spread seeds thinly on screens or paper plates in a cool, dry, well-ventilated area for 1-4 weeks. Ensure they are bone-dry before storage. I aim for less than 8% moisture content.
- Storage: Store seeds in airtight containers (glass jars with desiccant packets work well) in a cool, dark, dry place (ideally 40-50°F and 30-40% humidity). Label clearly with variety and date. Properly stored seeds can remain viable for 3-10 years or more.
Step 8: Season Extension & Winterizing
Extend your harvest and protect your garden for the off-season to truly maximize your self sufficient garden from scratch.
- Cold Frames: Simple structures with a transparent top (glass, polycarbonate, or old windows) that sit over garden beds. They trap solar heat, allowing you to grow cold-hardy crops (lettuce, spinach, kale, radishes) well into winter or start seeds earlier in spring. A basic cold frame can be built from 2×6 lumber and a sheet of polycarbonate for under $100.
- Hoop Houses/Low Tunnels: Larger structures made from flexible hoops (PVC pipe or EMT conduit) covered with greenhouse plastic. These provide more space and greater temperature moderation. A 10×20 ft DIY low tunnel kit can cost $200-$500, while a larger, more robust hoop house kit might be $1,000-$3,000. I use a 6×12 ft low tunnel made from 1/2-inch PVC hoops and 6mil greenhouse plastic, which extends my lettuce and spinach harvest by at least
Step 4: Water Management & Irrigation
Efficient water management is critical for a self sufficient garden from scratch, especially in off-grid living where water resources might be limited.
- Rainwater Harvesting: This is my primary source of irrigation water. A 55-gallon rain barrel (e.g., EarthMark Rain Barrel, ~$120-$150) connected to a downspout can collect significant water. For larger needs, I use two 275-gallon IBC totes (Intermediate Bulk Containers, often available used for $100-$200 each from food-grade sources) connected in series. A 1,000 sq ft roof can collect approximately 620 gallons of water for every inch of rainfall. My 1,500 sq ft roof provides ample water for my 600 sq ft garden through multiple barrels and totes.
- Drip Irrigation: This is by far the most water-efficient method, delivering water directly to the plant’s root zone, minimizing evaporation and weed growth.
- Components: A typical drip system includes a pressure regulator (e.g., Rain Bird PRV-10, ~$15), a filter (Rain Bird RBY filter, ~$20), main tubing (1/2-inch poly tubing, 100ft ~$25), smaller feeder lines (1/4-inch tubing), and emitters (0.5 GPH or 1 GPH per plant).
- Kits: For beginners, a starter kit like the Rain Bird Drip Irrigation Garden Kit (model DDI-KIT-1P, ~$40-$60) is excellent for a small garden. For larger setups, I use Netafim Techline CV Drip Line (500ft roll, ~$150-$200), which has pressure-compensating emitters built-in, ensuring even watering across long runs.
- Automation: For true self-sufficiency, consider a battery-powered timer (e.g., Orbit B-Hyve Bluetooth Hose Faucet Timer, ~$50) or a solar-powered timer connected to a small 12V pump.
- Solar-Powered Pumps: For lifting water from a well, pond, or large storage tank to your garden, a solar pump is a game-changer. For a smaller drip system, a Shurflo 2088-594-152 Diaphragm Pump (12V, 3.5 GPM, ~$180) can be powered by a single 100W solar panel (e.g., Renogy 100W Monocrystalline Solar Panel, ~$100) and a small 12V battery (e.g., a 50Ah LiFePO4 battery like the Battle Born 50Ah, ~$450). For larger operations or deeper wells, more robust systems are needed. If you’re looking to build out a comprehensive off-grid power system to support your garden’s water needs, or indeed your entire homestead, you might want to explore resources like the Power Grid Generator complete system guide to understand the full scope of what’s possible in terms of energy independence.
Step 5: Seed Selection & Planting
The choice of seeds is crucial for a truly self sufficient garden from scratch.
- Choose Heirloom & Open-Pollinated Seeds: These varieties produce seeds that will grow true to type, meaning you can save seeds from your harvest year after year. F1 hybrids, while often vigorous, will not produce consistent offspring from saved seeds. Reputable seed companies include Baker Creek Heirloom Seeds, High Mowing Organic Seeds, and Seed Savers Exchange. Start with common, reliable varieties like ‘Black Krim’ tomatoes, ‘Provider’ bush beans, ‘Waltham Butternut’ squash, and ‘Black Seeded Simpson’ lettuce.
- Start Seeds Indoors (Optional but Recommended): For longer growing seasons or specific crops, starting seeds indoors gives you a head start. Use seed-starting mix (e.g., Espoma Organic Seed Starter Mix, ~$10 for 16qt bag) in seed trays (Jiffy Professional Greenhouse 72-cell kit, ~$15). Provide adequate light with LED grow lights (Barrina T5 2ft 4-pack LED Grow Lights, 20W each, ~$50) for 14-16 hours a day, positioned 2-4 inches above seedlings. Maintain consistent temperatures (65-75°F for most).
- Direct Sowing vs. Transplanting: Some crops (carrots, radishes, beans, corn) prefer direct sowing into the garden bed. Others (tomatoes, peppers, broccoli, kale) benefit from being started indoors and transplanted. Follow seed packet instructions for planting depths (e.g., lettuce seeds are often surface-sown or planted 1/8 inch deep, while beans are 1 inch deep) and spacing.
- Companion Planting: Strategically plant different species together to enhance growth, deter pests, and attract beneficial insects. For example, planting marigolds near tomatoes can deter nematodes, and basil improves tomato flavor. Nasturtiums can act as a trap crop for aphids.
- Succession Planting: For a continuous harvest, plant small batches of quick-growing crops (lettuce, radishes, cilantro) every 2-3 weeks. As one crop finishes, another is ready to take its place.
Step 6: Pest & Disease Management (Organic)
Maintaining a self sufficient garden from scratch means embracing organic pest and disease control.
- Integrated Pest Management (IPM): This holistic approach combines several strategies.
- Observation: Regularly inspect your plants for early signs of pests or disease. Catching issues early is key.
- Physical Barriers: Use row covers (e.g., Agribon AG-19 floating row cover, 10×20 ft, ~$20) to protect young plants from insect pests like cabbage worms and squash bugs. Install fences (e.g., 2×4 welded wire mesh, 4 ft tall, 50 ft roll ~$70) to keep out deer, rabbits, and other larger animals.
- Hand-Picking: For larger pests like tomato hornworms or squash bugs, simply pick them off and drop them into a bucket of soapy water.
- Companion Planting: As mentioned, certain plants repel pests. Marigolds, garlic, and onions are excellent deterrents.
- Attract Beneficial Insects: Plant flowers like dill, fennel, cosmos, and sweet alyssum to attract ladybugs, lacewings, and parasitic wasps, which prey on common garden pests.
- Organic Sprays & Treatments:
- Neem Oil: An excellent broad-spectrum organic insecticide and fungicide. Bonide Neem Oil Concentrate (16oz, ~$20) can be mixed at a rate of 1-2 tbsp per gallon of water and sprayed on affected plants.
- Insecticidal Soap: Effective against soft-bodied insects like aphids, whiteflies, and spider mites. Garden Safe Insecticidal Soap (24oz ready-to-use, ~$10).
- Bacillus thuringiensis (Bt): A naturally occurring soil bacterium that targets caterpillars and worms. Monterey BT Worm & Caterpillar Killer (16oz, ~$18) is highly effective and safe for beneficial insects.
- Copper or Sulfur Sprays: For fungal diseases like powdery mildew or blight, organic copper (e.g., Bonide Copper Fungicide, ~$15 for 1lb) or sulfur (e.g., Safer Brand Garden Fungicide, ~$10 for 16oz) can be used as a last resort.
Step 7: Harvesting & Seed Saving
The culmination of your efforts is the harvest, and seed saving closes the loop on self-sufficiency.
- Harvesting Techniques:
- Timing: Harvest vegetables at their peak ripeness for best flavor and nutritional value. For example, green beans should snap cleanly, cucumbers should be firm, and tomatoes should be fully colored.
- Frequency: Many crops, like zucchini, cucumbers, and bush beans, produce more if harvested frequently. Pick daily or every other day.
- Tools: Use clean, sharp pruners (e.g., Corona ClassicCUT Bypass Pruner BP 3180, ~$30) or a sharp knife for clean cuts, minimizing damage to the plant.
- Seed Saving: This is where the « self-sufficient » aspect truly shines.
- Selection: Only save seeds from your healthiest, most vigorous plants that show desired traits (disease resistance, good flavor, high yield).
- Isolation: To ensure true-to-type seeds, prevent cross-pollination. This can be challenging for open-pollinated crops that readily cross (e.g., squash, corn). For beginners, focus on self-pollinating plants like beans, peas, lettuce, and tomatoes.
- Processing:
- Dry Seeds (Beans, Peas, Lettuce, Grains): Allow pods/seed heads to dry completely on the plant. Harvest, shell, and clean the seeds, removing chaff.
- Wet Seeds (Tomatoes, Cucumbers, Squash): For tomatoes, ferment the seeds in water for a few days to remove the gel coating and inhibit disease. For cucumbers/squash, scrape out seeds, wash thoroughly, and dry.
- Drying: Spread seeds thinly on screens or paper plates in a cool, dry, well-ventilated area for 1-4 weeks. Ensure they are bone-dry before storage. I aim for less than 8% moisture content.
- Storage: Store seeds in airtight containers (glass jars with desiccant packets work well) in a cool, dark, dry place (ideally 40-50°F and 30-40% humidity). Label clearly with variety and date. Properly stored seeds can remain viable for 3-10 years or more.
Step 8: Season Extension & Winterizing
Extend your harvest and protect your garden for the off-season to truly maximize your self sufficient garden from scratch.
- Cold Frames: Simple structures with a transparent top (glass, polycarbonate, or old windows) that sit over garden beds. They trap solar heat, allowing you to grow cold-hardy crops (lettuce, spinach, kale, radishes) well into winter or start seeds earlier in spring. A basic cold frame can be built from 2×6 lumber and a sheet of polycarbonate for under $100.
- Hoop Houses/Low Tunnels: Larger structures made from flexible hoops (PVC pipe or EMT conduit) covered with greenhouse plastic. These provide more space and greater temperature moderation. A 10×20 ft DIY low tunnel kit can cost $200-$500, while a larger, more robust hoop house kit might be $1,000-$3,000. I use a 6×12 ft low tunnel made from 1/2-inch PVC hoops and 6mil greenhouse plastic, which extends my lettuce and spinach harvest by at least
- In-Ground Beds: If you have excellent native soil and good drainage, in-ground beds are the most economical. Double-digging (loosening soil two shovel depths) can significantly improve drainage and aeration. For my main garden, I primarily use in-ground beds, but I focus on building up the soil over time with consistent compost additions and cover cropping. I aim for beds that are no wider than 3-4 feet so I can reach the center without stepping on the soil, compacting it.
- Raised Beds: Raised beds offer numerous advantages, especially for poor soil, heavy clay, or rocky areas. They provide better drainage, warm up faster in spring, reduce compaction, and make weeding and harvesting easier on your back.
- Material Options:
- Untreated Cedar: Naturally rot-resistant and chemical-free. A 4×8 ft bed, 12 inches deep, typically requires three 2x12x8 ft cedar boards, costing around $50-$60 per board (total ~$150-$180) plus corner brackets or screws. My first raised beds were cedar and are still going strong after 7 years.
- Galvanized Steel: Durable, long-lasting, and aesthetically pleasing. Brands like Vego Garden offer modular kits. A Vego Garden 17″ Tall 8-in-1 Metal Raised Garden Bed (can be configured to 4×8 ft) costs approximately $250-$300.
- Concrete Blocks/Stones: Very durable but can leach minerals (though generally safe once weathered) and can be expensive.
- Recycled Materials: Pallets (check for chemical treatment stamps like « HT » for heat-treated), old tires (controversial due to potential chemical leaching).
- Filling Raised Beds: Don’t just fill with topsoil. Use a « Hugelkultur » approach (logs, branches, leaves, then compost, then topsoil) or a mixture of 60% good quality topsoil, 30% compost, and 10% perlite or vermiculite for drainage. A 4x8x1 ft raised bed requires about 32 cubic feet (or ~1.2 cubic yards) of soil mix, which can cost $100-$200 depending on your source.
- Material Options:
Step 4: Water Management & Irrigation
Efficient water management is critical for a self sufficient garden from scratch, especially in off-grid living where water resources might be limited.
- Rainwater Harvesting: This is my primary source of irrigation water. A 55-gallon rain barrel (e.g., EarthMark Rain Barrel, ~$120-$150) connected to a downspout can collect significant water. For larger needs, I use two 275-gallon IBC totes (Intermediate Bulk Containers, often available used for $100-$200 each from food-grade sources) connected in series. A 1,000 sq ft roof can collect approximately 620 gallons of water for every inch of rainfall. My 1,500 sq ft roof provides ample water for my 600 sq ft garden through multiple barrels and totes.
- Drip Irrigation: This is by far the most water-efficient method, delivering water directly to the plant’s root zone, minimizing evaporation and weed growth.
- Components: A typical drip system includes a pressure regulator (e.g., Rain Bird PRV-10, ~$15), a filter (Rain Bird RBY filter, ~$20), main tubing (1/2-inch poly tubing, 100ft ~$25), smaller feeder lines (1/4-inch tubing), and emitters (0.5 GPH or 1 GPH per plant).
- Kits: For beginners, a starter kit like the Rain Bird Drip Irrigation Garden Kit (model DDI-KIT-1P, ~$40-$60) is excellent for a small garden. For larger setups, I use Netafim Techline CV Drip Line (500ft roll, ~$150-$200), which has pressure-compensating emitters built-in, ensuring even watering across long runs.
- Automation: For true self-sufficiency, consider a battery-powered timer (e.g., Orbit B-Hyve Bluetooth Hose Faucet Timer, ~$50) or a solar-powered timer connected to a small 12V pump.
- Solar-Powered Pumps: For lifting water from a well, pond, or large storage tank to your garden, a solar pump is a game-changer. For a smaller drip system, a Shurflo 2088-594-152 Diaphragm Pump (12V, 3.5 GPM, ~$180) can be powered by a single 100W solar panel (e.g., Renogy 100W Monocrystalline Solar Panel, ~$100) and a small 12V battery (e.g., a 50Ah LiFePO4 battery like the Battle Born 50Ah, ~$450). For larger operations or deeper wells, more robust systems are needed. If you’re looking to build out a comprehensive off-grid power system to support your garden’s water needs, or indeed your entire homestead, you might want to explore resources like the Power Grid Generator complete system guide to understand the full scope of what’s possible in terms of energy independence.
Step 5: Seed Selection & Planting
The choice of seeds is crucial for a truly self sufficient garden from scratch.
- Choose Heirloom & Open-Pollinated Seeds: These varieties produce seeds that will grow true to type, meaning you can save seeds from your harvest year after year. F1 hybrids, while often vigorous, will not produce consistent offspring from saved seeds. Reputable seed companies include Baker Creek Heirloom Seeds, High Mowing Organic Seeds, and Seed Savers Exchange. Start with common, reliable varieties like ‘Black Krim’ tomatoes, ‘Provider’ bush beans, ‘Waltham Butternut’ squash, and ‘Black Seeded Simpson’ lettuce.
- Start Seeds Indoors (Optional but Recommended): For longer growing seasons or specific crops, starting seeds indoors gives you a head start. Use seed-starting mix (e.g., Espoma Organic Seed Starter Mix, ~$10 for 16qt bag) in seed trays (Jiffy Professional Greenhouse 72-cell kit, ~$15). Provide adequate light with LED grow lights (Barrina T5 2ft 4-pack LED Grow Lights, 20W each, ~$50) for 14-16 hours a day, positioned 2-4 inches above seedlings. Maintain consistent temperatures (65-75°F for most).
- Direct Sowing vs. Transplanting: Some crops (carrots, radishes, beans, corn) prefer direct sowing into the garden bed. Others (tomatoes, peppers, broccoli, kale) benefit from being started indoors and transplanted. Follow seed packet instructions for planting depths (e.g., lettuce seeds are often surface-sown or planted 1/8 inch deep, while beans are 1 inch deep) and spacing.
- Companion Planting: Strategically plant different species together to enhance growth, deter pests, and attract beneficial insects. For example, planting marigolds near tomatoes can deter nematodes, and basil improves tomato flavor. Nasturtiums can act as a trap crop for aphids.
- Succession Planting: For a continuous harvest, plant small batches of quick-growing crops (lettuce, radishes, cilantro) every 2-3 weeks. As one crop finishes, another is ready to take its place.
Step 6: Pest & Disease Management (Organic)
Maintaining a self sufficient garden from scratch means embracing organic pest and disease control.
- Integrated Pest Management (IPM): This holistic approach combines several strategies.
- Observation: Regularly inspect your plants for early signs of pests or disease. Catching issues early is key.
- Physical Barriers: Use row covers (e.g., Agribon AG-19 floating row cover, 10×20 ft, ~$20) to protect young plants from insect pests like cabbage worms and squash bugs. Install fences (e.g., 2×4 welded wire mesh, 4 ft tall, 50 ft roll ~$70) to keep out deer, rabbits, and other larger animals.
- Hand-Picking: For larger pests like tomato hornworms or squash bugs, simply pick them off and drop them into a bucket of soapy water.
- Companion Planting: As mentioned, certain plants repel pests. Marigolds, garlic, and onions are excellent deterrents.
- Attract Beneficial Insects: Plant flowers like dill, fennel, cosmos, and sweet alyssum to attract ladybugs, lacewings, and parasitic wasps, which prey on common garden pests.
- Organic Sprays & Treatments:
- Neem Oil: An excellent broad-spectrum organic insecticide and fungicide. Bonide Neem Oil Concentrate (16oz, ~$20) can be mixed at a rate of 1-2 tbsp per gallon of water and sprayed on affected plants.
- Insecticidal Soap: Effective against soft-bodied insects like aphids, whiteflies, and spider mites. Garden Safe Insecticidal Soap (24oz ready-to-use, ~$10).
- Bacillus thuringiensis (Bt): A naturally occurring soil bacterium that targets caterpillars and worms. Monterey BT Worm & Caterpillar Killer (16oz, ~$18) is highly effective and safe for beneficial insects.
- Copper or Sulfur Sprays: For fungal diseases like powdery mildew or blight, organic copper (e.g., Bonide Copper Fungicide, ~$15 for 1lb) or sulfur (e.g., Safer Brand Garden Fungicide, ~$10 for 16oz) can be used as a last resort.
Step 7: Harvesting & Seed Saving
The culmination of your efforts is the harvest, and seed saving closes the loop on self-sufficiency.
- Harvesting Techniques:
- Timing: Harvest vegetables at their peak ripeness for best flavor and nutritional value. For example, green beans should snap cleanly, cucumbers should be firm, and tomatoes should be fully colored.
- Frequency: Many crops, like zucchini, cucumbers, and bush beans, produce more if harvested frequently. Pick daily or every other day.
- Tools: Use clean, sharp pruners (e.g., Corona ClassicCUT Bypass Pruner BP 3180, ~$30) or a sharp knife for clean cuts, minimizing damage to the plant.
- Seed Saving: This is where the « self-sufficient » aspect truly shines.
- Selection: Only save seeds from your healthiest, most vigorous plants that show desired traits (disease resistance, good flavor, high yield).
- Isolation: To ensure true-to-type seeds, prevent cross-pollination. This can be challenging for open-pollinated crops that readily cross (e.g., squash, corn). For beginners, focus on self-pollinating plants like beans, peas, lettuce, and tomatoes.
- Processing:
- Dry Seeds (Beans, Peas, Lettuce, Grains): Allow pods/seed heads to dry completely on the plant. Harvest, shell, and clean the seeds, removing chaff.
- Wet Seeds (Tomatoes, Cucumbers, Squash): For tomatoes, ferment the seeds in water for a few days to remove the gel coating and inhibit disease. For cucumbers/squash, scrape out seeds, wash thoroughly, and dry.
- Drying: Spread seeds thinly on screens or paper plates in a cool, dry, well-ventilated area for 1-4 weeks. Ensure they are bone-dry before storage. I aim for less than 8% moisture content.
- Storage: Store seeds in airtight containers (glass jars with desiccant packets work well) in a cool, dark, dry place (ideally 40-50°F and 30-40% humidity). Label clearly with variety and date. Properly stored seeds can remain viable for 3-10 years or more.
Step 8: Season Extension & Winterizing
Extend your harvest and protect your garden for the off-season to truly maximize your self sufficient garden from scratch.
- Cold Frames: Simple structures with a transparent top (glass, polycarbonate, or old windows) that sit over garden beds. They trap solar heat, allowing you to grow cold-hardy crops (lettuce, spinach, kale, radishes) well into winter or start seeds earlier in spring. A basic cold frame can be built from 2×6 lumber and a sheet of polycarbonate for under $100.
- Hoop Houses/Low Tunnels: Larger structures made from flexible hoops (PVC pipe or EMT conduit) covered with greenhouse plastic. These provide more space and greater temperature moderation. A 10×20 ft DIY low tunnel kit can cost $200-$500, while a larger, more robust hoop house kit might be $1,000-$3,000. I use a 6×12 ft low tunnel made from 1/2-inch PVC hoops and 6mil greenhouse plastic, which extends my lettuce and spinach harvest by at least
Deciding between raised beds and in-ground beds depends on your soil, budget, and physical capabilities.
- In-Ground Beds: If you have excellent native soil and good drainage, in-ground beds are the most economical. Double-digging (loosening soil two shovel depths) can significantly improve drainage and aeration. For my main garden, I primarily use in-ground beds, but I focus on building up the soil over time with consistent compost additions and cover cropping. I aim for beds that are no wider than 3-4 feet so I can reach the center without stepping on the soil, compacting it.
- Raised Beds: Raised beds offer numerous advantages, especially for poor soil, heavy clay, or rocky areas. They provide better drainage, warm up faster in spring, reduce compaction, and make weeding and harvesting easier on your back.
- Material Options:
- Untreated Cedar: Naturally rot-resistant and chemical-free. A 4×8 ft bed, 12 inches deep, typically requires three 2x12x8 ft cedar boards, costing around $50-$60 per board (total ~$150-$180) plus corner brackets or screws. My first raised beds were cedar and are still going strong after 7 years.
- Galvanized Steel: Durable, long-lasting, and aesthetically pleasing. Brands like Vego Garden offer modular kits. A Vego Garden 17″ Tall 8-in-1 Metal Raised Garden Bed (can be configured to 4×8 ft) costs approximately $250-$300.
- Concrete Blocks/Stones: Very durable but can leach minerals (though generally safe once weathered) and can be expensive.
- Recycled Materials: Pallets (check for chemical treatment stamps like « HT » for heat-treated), old tires (controversial due to potential chemical leaching).
- Filling Raised Beds: Don’t just fill with topsoil. Use a « Hugelkultur » approach (logs, branches, leaves, then compost, then topsoil) or a mixture of 60% good quality topsoil, 30% compost, and 10% perlite or vermiculite for drainage. A 4x8x1 ft raised bed requires about 32 cubic feet (or ~1.2 cubic yards) of soil mix, which can cost $100-$200 depending on your source.
- Material Options:
Step 4: Water Management & Irrigation
Efficient water management is critical for a self sufficient garden from scratch, especially in off-grid living where water resources might be limited.
- Rainwater Harvesting: This is my primary source of irrigation water. A 55-gallon rain barrel (e.g., EarthMark Rain Barrel, ~$120-$150) connected to a downspout can collect significant water. For larger needs, I use two 275-gallon IBC totes (Intermediate Bulk Containers, often available used for $100-$200 each from food-grade sources) connected in series. A 1,000 sq ft roof can collect approximately 620 gallons of water for every inch of rainfall. My 1,500 sq ft roof provides ample water for my 600 sq ft garden through multiple barrels and totes.
- Drip Irrigation: This is by far the most water-efficient method, delivering water directly to the plant’s root zone, minimizing evaporation and weed growth.
- Components: A typical drip system includes a pressure regulator (e.g., Rain Bird PRV-10, ~$15), a filter (Rain Bird RBY filter, ~$20), main tubing (1/2-inch poly tubing, 100ft ~$25), smaller feeder lines (1/4-inch tubing), and emitters (0.5 GPH or 1 GPH per plant).
- Kits: For beginners, a starter kit like the Rain Bird Drip Irrigation Garden Kit (model DDI-KIT-1P, ~$40-$60) is excellent for a small garden. For larger setups, I use Netafim Techline CV Drip Line (500ft roll, ~$150-$200), which has pressure-compensating emitters built-in, ensuring even watering across long runs.
- Automation: For true self-sufficiency, consider a battery-powered timer (e.g., Orbit B-Hyve Bluetooth Hose Faucet Timer, ~$50) or a solar-powered timer connected to a small 12V pump.
- Solar-Powered Pumps: For lifting water from a well, pond, or large storage tank to your garden, a solar pump is a game-changer. For a smaller drip system, a Shurflo 2088-594-152 Diaphragm Pump (12V, 3.5 GPM, ~$180) can be powered by a single 100W solar panel (e.g., Renogy 100W Monocrystalline Solar Panel, ~$100) and a small 12V battery (e.g., a 50Ah LiFePO4 battery like the Battle Born 50Ah, ~$450). For larger operations or deeper wells, more robust systems are needed. If you’re looking to build out a comprehensive off-grid power system to support your garden’s water needs, or indeed your entire homestead, you might want to explore resources like the Power Grid Generator complete system guide to understand the full scope of what’s possible in terms of energy independence.
Step 5: Seed Selection & Planting
The choice of seeds is crucial for a truly self sufficient garden from scratch.
- Choose Heirloom & Open-Pollinated Seeds: These varieties produce seeds that will grow true to type, meaning you can save seeds from your harvest year after year. F1 hybrids, while often vigorous, will not produce consistent offspring from saved seeds. Reputable seed companies include Baker Creek Heirloom Seeds, High Mowing Organic Seeds, and Seed Savers Exchange. Start with common, reliable varieties like ‘Black Krim’ tomatoes, ‘Provider’ bush beans, ‘Waltham Butternut’ squash, and ‘Black Seeded Simpson’ lettuce.
- Start Seeds Indoors (Optional but Recommended): For longer growing seasons or specific crops, starting seeds indoors gives you a head start. Use seed-starting mix (e.g., Espoma Organic Seed Starter Mix, ~$10 for 16qt bag) in seed trays (Jiffy Professional Greenhouse 72-cell kit, ~$15). Provide adequate light with LED grow lights (Barrina T5 2ft 4-pack LED Grow Lights, 20W each, ~$50) for 14-16 hours a day, positioned 2-4 inches above seedlings. Maintain consistent temperatures (65-75°F for most).
- Direct Sowing vs. Transplanting: Some crops (carrots, radishes, beans, corn) prefer direct sowing into the garden bed. Others (tomatoes, peppers, broccoli, kale) benefit from being started indoors and transplanted. Follow seed packet instructions for planting depths (e.g., lettuce seeds are often surface-sown or planted 1/8 inch deep, while beans are 1 inch deep) and spacing.
- Companion Planting: Strategically plant different species together to enhance growth, deter pests, and attract beneficial insects. For example, planting marigolds near tomatoes can deter nematodes, and basil improves tomato flavor. Nasturtiums can act as a trap crop for aphids.
- Succession Planting: For a continuous harvest, plant small batches of quick-growing crops (lettuce, radishes, cilantro) every 2-3 weeks. As one crop finishes, another is ready to take its place.
Step 6: Pest & Disease Management (Organic)
Maintaining a self sufficient garden from scratch means embracing organic pest and disease control.
- Integrated Pest Management (IPM): This holistic approach combines several strategies.
- Observation: Regularly inspect your plants for early signs of pests or disease. Catching issues early is key.
- Physical Barriers: Use row covers (e.g., Agribon AG-19 floating row cover, 10×20 ft, ~$20) to protect young plants from insect pests like cabbage worms and squash bugs. Install fences (e.g., 2×4 welded wire mesh, 4 ft tall, 50 ft roll ~$70) to keep out deer, rabbits, and other larger animals.
- Hand-Picking: For larger pests like tomato hornworms or squash bugs, simply pick them off and drop them into a bucket of soapy water.
- Companion Planting: As mentioned, certain plants repel pests. Marigolds, garlic, and onions are excellent deterrents.
- Attract Beneficial Insects: Plant flowers like dill, fennel, cosmos, and sweet alyssum to attract ladybugs, lacewings, and parasitic wasps, which prey on common garden pests.
- Organic Sprays & Treatments:
- Neem Oil: An excellent broad-spectrum organic insecticide and fungicide. Bonide Neem Oil Concentrate (16oz, ~$20) can be mixed at a rate of 1-2 tbsp per gallon of water and sprayed on affected plants.
- Insecticidal Soap: Effective against soft-bodied insects like aphids, whiteflies, and spider mites. Garden Safe Insecticidal Soap (24oz ready-to-use, ~$10).
- Bacillus thuringiensis (Bt): A naturally occurring soil bacterium that targets caterpillars and worms. Monterey BT Worm & Caterpillar Killer (16oz, ~$18) is highly effective and safe for beneficial insects.
- Copper or Sulfur Sprays: For fungal diseases like powdery mildew or blight, organic copper (e.g., Bonide Copper Fungicide, ~$15 for 1lb) or sulfur (e.g., Safer Brand Garden Fungicide, ~$10 for 16oz) can be used as a last resort.
Step 7: Harvesting & Seed Saving
The culmination of your efforts is the harvest, and seed saving closes the loop on self-sufficiency.
- Harvesting Techniques:
- Timing: Harvest vegetables at their peak ripeness for best flavor and nutritional value. For example, green beans should snap cleanly, cucumbers should be firm, and tomatoes should be fully colored.
- Frequency: Many crops, like zucchini, cucumbers, and bush beans, produce more if harvested frequently. Pick daily or every other day.
- Tools: Use clean, sharp pruners (e.g., Corona ClassicCUT Bypass Pruner BP 3180, ~$30) or a sharp knife for clean cuts, minimizing damage to the plant.
- Seed Saving: This is where the « self-sufficient » aspect truly shines.
- Selection: Only save seeds from your healthiest, most vigorous plants that show desired traits (disease resistance, good flavor, high yield).
- Isolation: To ensure true-to-type seeds, prevent cross-pollination. This can be challenging for open-pollinated crops that readily cross (e.g., squash, corn). For beginners, focus on self-pollinating plants like beans, peas, lettuce, and tomatoes.
- Processing:
- Dry Seeds (Beans, Peas, Lettuce, Grains): Allow pods/seed heads to dry completely on the plant. Harvest, shell, and clean the seeds, removing chaff.
- Wet Seeds (Tomatoes, Cucumbers, Squash): For tomatoes, ferment the seeds in water for a few days to remove the gel coating and inhibit disease. For cucumbers/squash, scrape out seeds, wash thoroughly, and dry.
- Drying: Spread seeds thinly on screens or paper plates in a cool, dry, well-ventilated area for 1-4 weeks. Ensure they are bone-dry before storage. I aim for less than 8% moisture content.
- Storage: Store seeds in airtight containers (glass jars with desiccant packets work well) in a cool, dark, dry place (ideally 40-50°F and 30-40% humidity). Label clearly with variety and date. Properly stored seeds can remain viable for 3-10 years or more.
Step 8: Season Extension & Winterizing
Extend your harvest and protect your garden for the off-season to truly maximize your self sufficient garden from scratch.
- Cold Frames: Simple structures with a transparent top (glass, polycarbonate, or old windows) that sit over garden beds. They trap solar heat, allowing you to grow cold-hardy crops (lettuce, spinach, kale, radishes) well into winter or start seeds earlier in spring. A basic cold frame can be built from 2×6 lumber and a sheet of polycarbonate for under $100.
- Hoop Houses/Low Tunnels: Larger structures made from flexible hoops (PVC pipe or EMT conduit) covered with greenhouse plastic. These provide more space and greater temperature moderation. A 10×20 ft DIY low tunnel kit can cost $200-$500, while a larger, more robust hoop house kit might be $1,000-$3,000. I use a 6×12 ft low tunnel made from 1/2-inch PVC hoops and 6mil greenhouse plastic, which extends my lettuce and spinach harvest by at least
Healthy soil is the bedrock of a productive, self-sufficient garden. You can’t guess what your soil needs; you have to test it.
- Perform a Soil Test: A professional soil test will give you precise data on your soil’s pH, nutrient levels (N-P-K), and organic matter content. I recommend sending a sample to your local agricultural extension office; it typically costs $20-$50 and provides detailed recommendations. Alternatively, for a quick homeowner check, a Rapitest Soil Test Kit (40-test kit, model 1663, ~$20 on Amazon) provides a good baseline for pH, Nitrogen, Phosphorus, and Potash. Aim for a pH between 6.0 and 7.0 for most vegetables.
- Amend for pH Imbalance: If your soil is too acidic (below 6.0), add agricultural lime (dolomitic lime adds magnesium, calcitic lime adds calcium). Apply 5-10 lbs per 100 sq ft for a moderate adjustment. If it’s too alkaline (above 7.0), add elemental sulfur (e.g., Espoma Soil Acidifier, ~$15 for 6.75 lbs) or generous amounts of organic matter like peat moss or pine needles.
- Build Organic Matter: This is the single most important step for long-term soil health. Organic matter improves soil structure, water retention, drainage, and nutrient availability. Incorporate 2-4 inches of high-quality compost into your top 6-12 inches of soil annually. I make my own compost from kitchen scraps, garden waste, and shredded leaves, but you can purchase it. Local nurseries often sell bulk compost for $30-$50 per cubic yard. Aged manure (from chickens, cows, or horses – ensure it’s well-rotted to avoid burning plants) is also excellent.
- Address Nutrient Deficiencies: Based on your soil test, add specific organic amendments. If Nitrogen (N) is low, add blood meal (12-0-0, ~$20 for 3 lbs) or feather meal. For Phosphorus (P), use bone meal (3-15-0, ~$15 for 3 lbs) or rock phosphate. For Potassium (K), greensand (0-0-2.5, ~$25 for 5 lbs) or kelp meal are good choices. I rely heavily on Espoma Organic Garden-tone (5-3-3, ~$25 for an 8lb bag) as a balanced, all-purpose organic fertilizer during planting.
Step 3: Garden Bed Preparation
Deciding between raised beds and in-ground beds depends on your soil, budget, and physical capabilities.
- In-Ground Beds: If you have excellent native soil and good drainage, in-ground beds are the most economical. Double-digging (loosening soil two shovel depths) can significantly improve drainage and aeration. For my main garden, I primarily use in-ground beds, but I focus on building up the soil over time with consistent compost additions and cover cropping. I aim for beds that are no wider than 3-4 feet so I can reach the center without stepping on the soil, compacting it.
- Raised Beds: Raised beds offer numerous advantages, especially for poor soil, heavy clay, or rocky areas. They provide better drainage, warm up faster in spring, reduce compaction, and make weeding and harvesting easier on your back.
- Material Options:
- Untreated Cedar: Naturally rot-resistant and chemical-free. A 4×8 ft bed, 12 inches deep, typically requires three 2x12x8 ft cedar boards, costing around $50-$60 per board (total ~$150-$180) plus corner brackets or screws. My first raised beds were cedar and are still going strong after 7 years.
- Galvanized Steel: Durable, long-lasting, and aesthetically pleasing. Brands like Vego Garden offer modular kits. A Vego Garden 17″ Tall 8-in-1 Metal Raised Garden Bed (can be configured to 4×8 ft) costs approximately $250-$300.
- Concrete Blocks/Stones: Very durable but can leach minerals (though generally safe once weathered) and can be expensive.
- Recycled Materials: Pallets (check for chemical treatment stamps like « HT » for heat-treated), old tires (controversial due to potential chemical leaching).
- Filling Raised Beds: Don’t just fill with topsoil. Use a « Hugelkultur » approach (logs, branches, leaves, then compost, then topsoil) or a mixture of 60% good quality topsoil, 30% compost, and 10% perlite or vermiculite for drainage. A 4x8x1 ft raised bed requires about 32 cubic feet (or ~1.2 cubic yards) of soil mix, which can cost $100-$200 depending on your source.
- Material Options:
Step 4: Water Management & Irrigation
Efficient water management is critical for a self sufficient garden from scratch, especially in off-grid living where water resources might be limited.
- Rainwater Harvesting: This is my primary source of irrigation water. A 55-gallon rain barrel (e.g., EarthMark Rain Barrel, ~$120-$150) connected to a downspout can collect significant water. For larger needs, I use two 275-gallon IBC totes (Intermediate Bulk Containers, often available used for $100-$200 each from food-grade sources) connected in series. A 1,000 sq ft roof can collect approximately 620 gallons of water for every inch of rainfall. My 1,500 sq ft roof provides ample water for my 600 sq ft garden through multiple barrels and totes.
- Drip Irrigation: This is by far the most water-efficient method, delivering water directly to the plant’s root zone, minimizing evaporation and weed growth.
- Components: A typical drip system includes a pressure regulator (e.g., Rain Bird PRV-10, ~$15), a filter (Rain Bird RBY filter, ~$20), main tubing (1/2-inch poly tubing, 100ft ~$25), smaller feeder lines (1/4-inch tubing), and emitters (0.5 GPH or 1 GPH per plant).
- Kits: For beginners, a starter kit like the Rain Bird Drip Irrigation Garden Kit (model DDI-KIT-1P, ~$40-$60) is excellent for a small garden. For larger setups, I use Netafim Techline CV Drip Line (500ft roll, ~$150-$200), which has pressure-compensating emitters built-in, ensuring even watering across long runs.
- Automation: For true self-sufficiency, consider a battery-powered timer (e.g., Orbit B-Hyve Bluetooth Hose Faucet Timer, ~$50) or a solar-powered timer connected to a small 12V pump.
- Solar-Powered Pumps: For lifting water from a well, pond, or large storage tank to your garden, a solar pump is a game-changer. For a smaller drip system, a Shurflo 2088-594-152 Diaphragm Pump (12V, 3.5 GPM, ~$180) can be powered by a single 100W solar panel (e.g., Renogy 100W Monocrystalline Solar Panel, ~$100) and a small 12V battery (e.g., a 50Ah LiFePO4 battery like the Battle Born 50Ah, ~$450). For larger operations or deeper wells, more robust systems are needed. If you’re looking to build out a comprehensive off-grid power system to support your garden’s water needs, or indeed your entire homestead, you might want to explore resources like the Power Grid Generator complete system guide to understand the full scope of what’s possible in terms of energy independence.
Step 5: Seed Selection & Planting
The choice of seeds is crucial for a truly self sufficient garden from scratch.
- Choose Heirloom & Open-Pollinated Seeds: These varieties produce seeds that will grow true to type, meaning you can save seeds from your harvest year after year. F1 hybrids, while often vigorous, will not produce consistent offspring from saved seeds. Reputable seed companies include Baker Creek Heirloom Seeds, High Mowing Organic Seeds, and Seed Savers Exchange. Start with common, reliable varieties like ‘Black Krim’ tomatoes, ‘Provider’ bush beans, ‘Waltham Butternut’ squash, and ‘Black Seeded Simpson’ lettuce.
- Start Seeds Indoors (Optional but Recommended): For longer growing seasons or specific crops, starting seeds indoors gives you a head start. Use seed-starting mix (e.g., Espoma Organic Seed Starter Mix, ~$10 for 16qt bag) in seed trays (Jiffy Professional Greenhouse 72-cell kit, ~$15). Provide adequate light with LED grow lights (Barrina T5 2ft 4-pack LED Grow Lights, 20W each, ~$50) for 14-16 hours a day, positioned 2-4 inches above seedlings. Maintain consistent temperatures (65-75°F for most).
- Direct Sowing vs. Transplanting: Some crops (carrots, radishes, beans, corn) prefer direct sowing into the garden bed. Others (tomatoes, peppers, broccoli, kale) benefit from being started indoors and transplanted. Follow seed packet instructions for planting depths (e.g., lettuce seeds are often surface-sown or planted 1/8 inch deep, while beans are 1 inch deep) and spacing.
- Companion Planting: Strategically plant different species together to enhance growth, deter pests, and attract beneficial insects. For example, planting marigolds near tomatoes can deter nematodes, and basil improves tomato flavor. Nasturtiums can act as a trap crop for aphids.
- Succession Planting: For a continuous harvest, plant small batches of quick-growing crops (lettuce, radishes, cilantro) every 2-3 weeks. As one crop finishes, another is ready to take its place.
Step 6: Pest & Disease Management (Organic)
Maintaining a self sufficient garden from scratch means embracing organic pest and disease control.
- Integrated Pest Management (IPM): This holistic approach combines several strategies.
- Observation: Regularly inspect your plants for early signs of pests or disease. Catching issues early is key.
- Physical Barriers: Use row covers (e.g., Agribon AG-19 floating row cover, 10×20 ft, ~$20) to protect young plants from insect pests like cabbage worms and squash bugs. Install fences (e.g., 2×4 welded wire mesh, 4 ft tall, 50 ft roll ~$70) to keep out deer, rabbits, and other larger animals.
- Hand-Picking: For larger pests like tomato hornworms or squash bugs, simply pick them off and drop them into a bucket of soapy water.
- Companion Planting: As mentioned, certain plants repel pests. Marigolds, garlic, and onions are excellent deterrents.
- Attract Beneficial Insects: Plant flowers like dill, fennel, cosmos, and sweet alyssum to attract ladybugs, lacewings, and parasitic wasps, which prey on common garden pests.
- Organic Sprays & Treatments:
- Neem Oil: An excellent broad-spectrum organic insecticide and fungicide. Bonide Neem Oil Concentrate (16oz, ~$20) can be mixed at a rate of 1-2 tbsp per gallon of water and sprayed on affected plants.
- Insecticidal Soap: Effective against soft-bodied insects like aphids, whiteflies, and spider mites. Garden Safe Insecticidal Soap (24oz ready-to-use, ~$10).
- Bacillus thuringiensis (Bt): A naturally occurring soil bacterium that targets caterpillars and worms. Monterey BT Worm & Caterpillar Killer (16oz, ~$18) is highly effective and safe for beneficial insects.
- Copper or Sulfur Sprays: For fungal diseases like powdery mildew or blight, organic copper (e.g., Bonide Copper Fungicide, ~$15 for 1lb) or sulfur (e.g., Safer Brand Garden Fungicide, ~$10 for 16oz) can be used as a last resort.
Step 7: Harvesting & Seed Saving
The culmination of your efforts is the harvest, and seed saving closes the loop on self-sufficiency.
- Harvesting Techniques:
- Timing: Harvest vegetables at their peak ripeness for best flavor and nutritional value. For example, green beans should snap cleanly, cucumbers should be firm, and tomatoes should be fully colored.
- Frequency: Many crops, like zucchini, cucumbers, and bush beans, produce more if harvested frequently. Pick daily or every other day.
- Tools: Use clean, sharp pruners (e.g., Corona ClassicCUT Bypass Pruner BP 3180, ~$30) or a sharp knife for clean cuts, minimizing damage to the plant.
- Seed Saving: This is where the « self-sufficient » aspect truly shines.
- Selection: Only save seeds from your healthiest, most vigorous plants that show desired traits (disease resistance, good flavor, high yield).
- Isolation: To ensure true-to-type seeds, prevent cross-pollination. This can be challenging for open-pollinated crops that readily cross (e.g., squash, corn). For beginners, focus on self-pollinating plants like beans, peas, lettuce, and tomatoes.
- Processing:
- Dry Seeds (Beans, Peas, Lettuce, Grains): Allow pods/seed heads to dry completely on the plant. Harvest, shell, and clean the seeds, removing chaff.
- Wet Seeds (Tomatoes, Cucumbers, Squash): For tomatoes, ferment the seeds in water for a few days to remove the gel coating and inhibit disease. For cucumbers/squash, scrape out seeds, wash thoroughly, and dry.
- Drying: Spread seeds thinly on screens or paper plates in a cool, dry, well-ventilated area for 1-4 weeks. Ensure they are bone-dry before storage. I aim for less than 8% moisture content.
- Storage: Store seeds in airtight containers (glass jars with desiccant packets work well) in a cool, dark, dry place (ideally 40-50°F and 30-40% humidity). Label clearly with variety and date. Properly stored seeds can remain viable for 3-10 years or more.
Step 8: Season Extension & Winterizing
Extend your harvest and protect your garden for the off-season to truly maximize your self sufficient garden from scratch.
- Cold Frames: Simple structures with a transparent top (glass, polycarbonate, or old windows) that sit over garden beds. They trap solar heat, allowing you to grow cold-hardy crops (lettuce, spinach, kale, radishes) well into winter or start seeds earlier in spring. A basic cold frame can be built from 2×6 lumber and a sheet of polycarbonate for under $100.
- Hoop Houses/Low Tunnels: Larger structures made from flexible hoops (PVC pipe or EMT conduit) covered with greenhouse plastic. These provide more space and greater temperature moderation. A 10×20 ft DIY low tunnel kit can cost $200-$500, while a larger, more robust hoop house kit might be $1,000-$3,000. I use a 6×12 ft low tunnel made from 1/2-inch PVC hoops and 6mil greenhouse plastic, which extends my lettuce and spinach harvest by at least
Maintaining a self sufficient garden from scratch means embracing organic pest and disease control.
- Integrated Pest Management (IPM): This holistic approach combines several strategies.
- Observation: Regularly inspect your plants for early signs of pests or disease. Catching issues early is key.
- Physical Barriers: Use row covers (e.g., Agribon AG-19 floating row cover, 10×20 ft, ~$20) to protect young plants from insect pests like cabbage worms and squash bugs. Install fences (e.g., 2×4 welded wire mesh, 4 ft tall, 50 ft roll ~$70) to keep out deer, rabbits, and other larger animals.
- Hand-Picking: For larger pests like tomato hornworms or squash bugs, simply pick them off and drop them into a bucket of soapy water.
- Companion Planting: As mentioned, certain plants repel pests. Marigolds, garlic, and onions are excellent deterrents.
- Attract Beneficial Insects: Plant flowers like dill, fennel, cosmos, and sweet alyssum to attract ladybugs, lacewings, and parasitic wasps, which prey on common garden pests.
- Organic Sprays & Treatments:
- Neem Oil: An excellent broad-spectrum organic insecticide and fungicide. Bonide Neem Oil Concentrate (16oz, ~$20) can be mixed at a rate of 1-2 tbsp per gallon of water and sprayed on affected plants.
- Insecticidal Soap: Effective against soft-bodied insects like aphids, whiteflies, and spider mites. Garden Safe Insecticidal Soap (24oz ready-to-use, ~$10).
- Bacillus thuringiensis (Bt): A naturally occurring soil bacterium that targets caterpillars and worms. Monterey BT Worm & Caterpillar Killer (16oz, ~$18) is highly effective and safe for beneficial insects.
- Copper or Sulfur Sprays: For fungal diseases like powdery mildew or blight, organic copper (e.g., Bonide Copper Fungicide, ~$15 for 1lb) or sulfur (e.g., Safer Brand Garden Fungicide, ~$10 for 16oz) can be used as a last resort.
Step 7: Harvesting & Seed Saving
The culmination of your efforts is the harvest, and seed saving closes the loop on self-sufficiency.
- Harvesting Techniques:
- Timing: Harvest vegetables at their peak ripeness for best flavor and nutritional value. For example, green beans should snap cleanly, cucumbers should be firm, and tomatoes should be fully colored.
- Frequency: Many crops, like zucchini, cucumbers, and bush beans, produce more if harvested frequently. Pick daily or every other day.
- Tools: Use clean, sharp pruners (e.g., Corona ClassicCUT Bypass Pruner BP 3180, ~$30) or a sharp knife for clean cuts, minimizing damage to the plant.
- Seed Saving: This is where the « self-sufficient » aspect truly shines.
- Selection: Only save seeds from your healthiest, most vigorous plants that show desired traits (disease resistance, good flavor, high yield).
- Isolation: To ensure true-to-type seeds, prevent cross-pollination. This can be challenging for open-pollinated crops that readily cross (e.g., squash, corn). For beginners, focus on self-pollinating plants like beans, peas, lettuce, and tomatoes.
- Processing:
- Dry Seeds (Beans, Peas, Lettuce, Grains): Allow pods/seed heads to dry completely on the plant. Harvest, shell, and clean the seeds, removing chaff.
- Wet Seeds (Tomatoes, Cucumbers, Squash): For tomatoes, ferment the seeds in water for a few days to remove the gel coating and inhibit disease. For cucumbers/squash, scrape out seeds, wash thoroughly, and dry.
- Drying: Spread seeds thinly on screens or paper plates in a cool, dry, well-ventilated area for 1-4 weeks. Ensure they are bone-dry before storage. I aim for less than 8% moisture content.
- Storage: Store seeds in airtight containers (glass jars with desiccant packets work well) in a cool, dark, dry place (ideally 40-50°F and 30-40% humidity). Label clearly with variety and date. Properly stored seeds can remain viable for 3-10 years or more.
Step 8: Season Extension & Winterizing
Extend your harvest and protect your garden for the off-season to truly maximize your self sufficient garden from scratch.
- Cold Frames: Simple structures with a transparent top (glass, polycarbonate, or old windows) that sit over garden beds. They trap solar heat, allowing you to grow cold-hardy crops (lettuce, spinach, kale, radishes) well into winter or start seeds earlier in spring. A basic cold frame can be built from 2×6 lumber and a sheet of polycarbonate for under $100.
- Hoop Houses/Low Tunnels: Larger structures made from flexible hoops (PVC pipe or EMT conduit) covered with greenhouse plastic. These provide more space and greater temperature moderation. A 10×20 ft DIY low tunnel kit can cost $200-$500, while a larger, more robust hoop house kit might be $1,000-$3,000. I use a 6×12 ft low tunnel made from 1/2-inch PVC hoops and 6mil greenhouse plastic, which extends my lettuce and spinach harvest by at least
Efficient water management is critical for a self sufficient garden from scratch, especially in off-grid living where water resources might be limited.
- Rainwater Harvesting: This is my primary source of irrigation water. A 55-gallon rain barrel (e.g., EarthMark Rain Barrel, ~$120-$150) connected to a downspout can collect significant water. For larger needs, I use two 275-gallon IBC totes (Intermediate Bulk Containers, often available used for $100-$200 each from food-grade sources) connected in series. A 1,000 sq ft roof can collect approximately 620 gallons of water for every inch of rainfall. My 1,500 sq ft roof provides ample water for my 600 sq ft garden through multiple barrels and totes.
- Drip Irrigation: This is by far the most water-efficient method, delivering water directly to the plant’s root zone, minimizing evaporation and weed growth.
- Components: A typical drip system includes a pressure regulator (e.g., Rain Bird PRV-10, ~$15), a filter (Rain Bird RBY filter, ~$20), main tubing (1/2-inch poly tubing, 100ft ~$25), smaller feeder lines (1/4-inch tubing), and emitters (0.5 GPH or 1 GPH per plant).
- Kits: For beginners, a starter kit like the Rain Bird Drip Irrigation Garden Kit (model DDI-KIT-1P, ~$40-$60) is excellent for a small garden. For larger setups, I use Netafim Techline CV Drip Line (500ft roll, ~$150-$200), which has pressure-compensating emitters built-in, ensuring even watering across long runs.
- Automation: For true self-sufficiency, consider a battery-powered timer (e.g., Orbit B-Hyve Bluetooth Hose Faucet Timer, ~$50) or a solar-powered timer connected to a small 12V pump.
- Solar-Powered Pumps: For lifting water from a well, pond, or large storage tank to your garden, a solar pump is a game-changer. For a smaller drip system, a Shurflo 2088-594-152 Diaphragm Pump (12V, 3.5 GPM, ~$180) can be powered by a single 100W solar panel (e.g., Renogy 100W Monocrystalline Solar Panel, ~$100) and a small 12V battery (e.g., a 50Ah LiFePO4 battery like the Battle Born 50Ah, ~$450). For larger operations or deeper wells, more robust systems are needed. If you’re looking to build out a comprehensive off-grid power system to support your garden’s water needs, or indeed your entire homestead, you might want to explore resources like the Power Grid Generator complete system guide to understand the full scope of what’s possible in terms of energy independence.
Step 5: Seed Selection & Planting
The choice of seeds is crucial for a truly self sufficient garden from scratch.
- Choose Heirloom & Open-Pollinated Seeds: These varieties produce seeds that will grow true to type, meaning you can save seeds from your harvest year after year. F1 hybrids, while often vigorous, will not produce consistent offspring from saved seeds. Reputable seed companies include Baker Creek Heirloom Seeds, High Mowing Organic Seeds, and Seed Savers Exchange. Start with common, reliable varieties like ‘Black Krim’ tomatoes, ‘Provider’ bush beans, ‘Waltham Butternut’ squash, and ‘Black Seeded Simpson’ lettuce.
- Start Seeds Indoors (Optional but Recommended): For longer growing seasons or specific crops, starting seeds indoors gives you a head start. Use seed-starting mix (e.g., Espoma Organic Seed Starter Mix, ~$10 for 16qt bag) in seed trays (Jiffy Professional Greenhouse 72-cell kit, ~$15). Provide adequate light with LED grow lights (Barrina T5 2ft 4-pack LED Grow Lights, 20W each, ~$50) for 14-16 hours a day, positioned 2-4 inches above seedlings. Maintain consistent temperatures (65-75°F for most).
- Direct Sowing vs. Transplanting: Some crops (carrots, radishes, beans, corn) prefer direct sowing into the garden bed. Others (tomatoes, peppers, broccoli, kale) benefit from being started indoors and transplanted. Follow seed packet instructions for planting depths (e.g., lettuce seeds are often surface-sown or planted 1/8 inch deep, while beans are 1 inch deep) and spacing.
- Companion Planting: Strategically plant different species together to enhance growth, deter pests, and attract beneficial insects. For example, planting marigolds near tomatoes can deter nematodes, and basil improves tomato flavor. Nasturtiums can act as a trap crop for aphids.
- Succession Planting: For a continuous harvest, plant small batches of quick-growing crops (lettuce, radishes, cilantro) every 2-3 weeks. As one crop finishes, another is ready to take its place.
Step 6: Pest & Disease Management (Organic)
Maintaining a self sufficient garden from scratch means embracing organic pest and disease control.
- Integrated Pest Management (IPM): This holistic approach combines several strategies.
- Observation: Regularly inspect your plants for early signs of pests or disease. Catching issues early is key.
- Physical Barriers: Use row covers (e.g., Agribon AG-19 floating row cover, 10×20 ft, ~$20) to protect young plants from insect pests like cabbage worms and squash bugs. Install fences (e.g., 2×4 welded wire mesh, 4 ft tall, 50 ft roll ~$70) to keep out deer, rabbits, and other larger animals.
- Hand-Picking: For larger pests like tomato hornworms or squash bugs, simply pick them off and drop them into a bucket of soapy water.
- Companion Planting: As mentioned, certain plants repel pests. Marigolds, garlic, and onions are excellent deterrents.
- Attract Beneficial Insects: Plant flowers like dill, fennel, cosmos, and sweet alyssum to attract ladybugs, lacewings, and parasitic wasps, which prey on common garden pests.
- Organic Sprays & Treatments:
- Neem Oil: An excellent broad-spectrum organic insecticide and fungicide. Bonide Neem Oil Concentrate (16oz, ~$20) can be mixed at a rate of 1-2 tbsp per gallon of water and sprayed on affected plants.
- Insecticidal Soap: Effective against soft-bodied insects like aphids, whiteflies, and spider mites. Garden Safe Insecticidal Soap (24oz ready-to-use, ~$10).
- Bacillus thuringiensis (Bt): A naturally occurring soil bacterium that targets caterpillars and worms. Monterey BT Worm & Caterpillar Killer (16oz, ~$18) is highly effective and safe for beneficial insects.
- Copper or Sulfur Sprays: For fungal diseases like powdery mildew or blight, organic copper (e.g., Bonide Copper Fungicide, ~$15 for 1lb) or sulfur (e.g., Safer Brand Garden Fungicide, ~$10 for 16oz) can be used as a last resort.
Step 7: Harvesting & Seed Saving
The culmination of your efforts is the harvest, and seed saving closes the loop on self-sufficiency.
- Harvesting Techniques:
- Timing: Harvest vegetables at their peak ripeness for best flavor and nutritional value. For example, green beans should snap cleanly, cucumbers should be firm, and tomatoes should be fully colored.
- Frequency: Many crops, like zucchini, cucumbers, and bush beans, produce more if harvested frequently. Pick daily or every other day.
- Tools: Use clean, sharp pruners (e.g., Corona ClassicCUT Bypass Pruner BP 3180, ~$30) or a sharp knife for clean cuts, minimizing damage to the plant.
- Seed Saving: This is where the « self-sufficient » aspect truly shines.
- Selection: Only save seeds from your healthiest, most vigorous plants that show desired traits (disease resistance, good flavor, high yield).
- Isolation: To ensure true-to-type seeds, prevent cross-pollination. This can be challenging for open-pollinated crops that readily cross (e.g., squash, corn). For beginners, focus on self-pollinating plants like beans, peas, lettuce, and tomatoes.
- Processing:
- Dry Seeds (Beans, Peas, Lettuce, Grains): Allow pods/seed heads to dry completely on the plant. Harvest, shell, and clean the seeds, removing chaff.
- Wet Seeds (Tomatoes, Cucumbers, Squash): For tomatoes, ferment the seeds in water for a few days to remove the gel coating and inhibit disease. For cucumbers/squash, scrape out seeds, wash thoroughly, and dry.
- Drying: Spread seeds thinly on screens or paper plates in a cool, dry, well-ventilated area for 1-4 weeks. Ensure they are bone-dry before storage. I aim for less than 8% moisture content.
- Storage: Store seeds in airtight containers (glass jars with desiccant packets work well) in a cool, dark, dry place (ideally 40-50°F and 30-40% humidity). Label clearly with variety and date. Properly stored seeds can remain viable for 3-10 years or more.
Step 8: Season Extension & Winterizing
Extend your harvest and protect your garden for the off-season to truly maximize your self sufficient garden from scratch.
- Cold Frames: Simple structures with a transparent top (glass, polycarbonate, or old windows) that sit over garden beds. They trap solar heat, allowing you to grow cold-hardy crops (lettuce, spinach, kale, radishes) well into winter or start seeds earlier in spring. A basic cold frame can be built from 2×6 lumber and a sheet of polycarbonate for under $100.
- Hoop Houses/Low Tunnels: Larger structures made from flexible hoops (PVC pipe or EMT conduit) covered with greenhouse plastic. These provide more space and greater temperature moderation. A 10×20 ft DIY low tunnel kit can cost $200-$500, while a larger, more robust hoop house kit might be $1,000-$3,000. I use a 6×12 ft low tunnel made from 1/2-inch PVC hoops and 6mil greenhouse plastic, which extends my lettuce and spinach harvest by at least
Step 4: Water Management & Irrigation
Efficient water management is critical for a self sufficient garden from scratch, especially in off-grid living where water resources might be limited.
- Rainwater Harvesting: This is my primary source of irrigation water. A 55-gallon rain barrel (e.g., EarthMark Rain Barrel, ~$120-$150) connected to a downspout can collect significant water. For larger needs, I use two 275-gallon IBC totes (Intermediate Bulk Containers, often available used for $100-$200 each from food-grade sources) connected in series. A 1,000 sq ft roof can collect approximately 620 gallons of water for every inch of rainfall. My 1,500 sq ft roof provides ample water for my 600 sq ft garden through multiple barrels and totes.
- Drip Irrigation: This is by far the most water-efficient method, delivering water directly to the plant’s root zone, minimizing evaporation and weed growth.
- Components: A typical drip system includes a pressure regulator (e.g., Rain Bird PRV-10, ~$15), a filter (Rain Bird RBY filter, ~$20), main tubing (1/2-inch poly tubing, 100ft ~$25), smaller feeder lines (1/4-inch tubing), and emitters (0.5 GPH or 1 GPH per plant).
- Kits: For beginners, a starter kit like the Rain Bird Drip Irrigation Garden Kit (model DDI-KIT-1P, ~$40-$60) is excellent for a small garden. For larger setups, I use Netafim Techline CV Drip Line (500ft roll, ~$150-$200), which has pressure-compensating emitters built-in, ensuring even watering across long runs.
- Automation: For true self-sufficiency, consider a battery-powered timer (e.g., Orbit B-Hyve Bluetooth Hose Faucet Timer, ~$50) or a solar-powered timer connected to a small 12V pump.
- Solar-Powered Pumps: For lifting water from a well, pond, or large storage tank to your garden, a solar pump is a game-changer. For a smaller drip system, a Shurflo 2088-594-152 Diaphragm Pump (12V, 3.5 GPM, ~$180) can be powered by a single 100W solar panel (e.g., Renogy 100W Monocrystalline Solar Panel, ~$100) and a small 12V battery (e.g., a 50Ah LiFePO4 battery like the Battle Born 50Ah, ~$450). For larger operations or deeper wells, more robust systems are needed. If you’re looking to build out a comprehensive off-grid power system to support your garden’s water needs, or indeed your entire homestead, you might want to explore resources like the Power Grid Generator complete system guide to understand the full scope of what’s possible in terms of energy independence.
Step 5: Seed Selection & Planting
The choice of seeds is crucial for a truly self sufficient garden from scratch.
- Choose Heirloom & Open-Pollinated Seeds: These varieties produce seeds that will grow true to type, meaning you can save seeds from your harvest year after year. F1 hybrids, while often vigorous, will not produce consistent offspring from saved seeds. Reputable seed companies include Baker Creek Heirloom Seeds, High Mowing Organic Seeds, and Seed Savers Exchange. Start with common, reliable varieties like ‘Black Krim’ tomatoes, ‘Provider’ bush beans, ‘Waltham Butternut’ squash, and ‘Black Seeded Simpson’ lettuce.
- Start Seeds Indoors (Optional but Recommended): For longer growing seasons or specific crops, starting seeds indoors gives you a head start. Use seed-starting mix (e.g., Espoma Organic Seed Starter Mix, ~$10 for 16qt bag) in seed trays (Jiffy Professional Greenhouse 72-cell kit, ~$15). Provide adequate light with LED grow lights (Barrina T5 2ft 4-pack LED Grow Lights, 20W each, ~$50) for 14-16 hours a day, positioned 2-4 inches above seedlings. Maintain consistent temperatures (65-75°F for most).
- Direct Sowing vs. Transplanting: Some crops (carrots, radishes, beans, corn) prefer direct sowing into the garden bed. Others (tomatoes, peppers, broccoli, kale) benefit from being started indoors and transplanted. Follow seed packet instructions for planting depths (e.g., lettuce seeds are often surface-sown or planted 1/8 inch deep, while beans are 1 inch deep) and spacing.
- Companion Planting: Strategically plant different species together to enhance growth, deter pests, and attract beneficial insects. For example, planting marigolds near tomatoes can deter nematodes, and basil improves tomato flavor. Nasturtiums can act as a trap crop for aphids.
- Succession Planting: For a continuous harvest, plant small batches of quick-growing crops (lettuce, radishes, cilantro) every 2-3 weeks. As one crop finishes, another is ready to take its place.
Step 6: Pest & Disease Management (Organic)
Maintaining a self sufficient garden from scratch means embracing organic pest and disease control.
- Integrated Pest Management (IPM): This holistic approach combines several strategies.
- Observation: Regularly inspect your plants for early signs of pests or disease. Catching issues early is key.
- Physical Barriers: Use row covers (e.g., Agribon AG-19 floating row cover, 10×20 ft, ~$20) to protect young plants from insect pests like cabbage worms and squash bugs. Install fences (e.g., 2×4 welded wire mesh, 4 ft tall, 50 ft roll ~$70) to keep out deer, rabbits, and other larger animals.
- Hand-Picking: For larger pests like tomato hornworms or squash bugs, simply pick them off and drop them into a bucket of soapy water.
- Companion Planting: As mentioned, certain plants repel pests. Marigolds, garlic, and onions are excellent deterrents.
- Attract Beneficial Insects: Plant flowers like dill, fennel, cosmos, and sweet alyssum to attract ladybugs, lacewings, and parasitic wasps, which prey on common garden pests.
- Organic Sprays & Treatments:
- Neem Oil: An excellent broad-spectrum organic insecticide and fungicide. Bonide Neem Oil Concentrate (16oz, ~$20) can be mixed at a rate of 1-2 tbsp per gallon of water and sprayed on affected plants.
- Insecticidal Soap: Effective against soft-bodied insects like aphids, whiteflies, and spider mites. Garden Safe Insecticidal Soap (24oz ready-to-use, ~$10).
- Bacillus thuringiensis (Bt): A naturally occurring soil bacterium that targets caterpillars and worms. Monterey BT Worm & Caterpillar Killer (16oz, ~$18) is highly effective and safe for beneficial insects.
- Copper or Sulfur Sprays: For fungal diseases like powdery mildew or blight, organic copper (e.g., Bonide Copper Fungicide, ~$15 for 1lb) or sulfur (e.g., Safer Brand Garden Fungicide, ~$10 for 16oz) can be used as a last resort.
Step 7: Harvesting & Seed Saving
The culmination of your efforts is the harvest, and seed saving closes the loop on self-sufficiency.
- Harvesting Techniques:
- Timing: Harvest vegetables at their peak ripeness for best flavor and nutritional value. For example, green beans should snap cleanly, cucumbers should be firm, and tomatoes should be fully colored.
- Frequency: Many crops, like zucchini, cucumbers, and bush beans, produce more if harvested frequently. Pick daily or every other day.
- Tools: Use clean, sharp pruners (e.g., Corona ClassicCUT Bypass Pruner BP 3180, ~$30) or a sharp knife for clean cuts, minimizing damage to the plant.
- Seed Saving: This is where the « self-sufficient » aspect truly shines.
- Selection: Only save seeds from your healthiest, most vigorous plants that show desired traits (disease resistance, good flavor, high yield).
- Isolation: To ensure true-to-type seeds, prevent cross-pollination. This can be challenging for open-pollinated crops that readily cross (e.g., squash, corn). For beginners, focus on self-pollinating plants like beans, peas, lettuce, and tomatoes.
- Processing:
- Dry Seeds (Beans, Peas, Lettuce, Grains): Allow pods/seed heads to dry completely on the plant. Harvest, shell, and clean the seeds, removing chaff.
- Wet Seeds (Tomatoes, Cucumbers, Squash): For tomatoes, ferment the seeds in water for a few days to remove the gel coating and inhibit disease. For cucumbers/squash, scrape out seeds, wash thoroughly, and dry.
- Drying: Spread seeds thinly on screens or paper plates in a cool, dry, well-ventilated area for 1-4 weeks. Ensure they are bone-dry before storage. I aim for less than 8% moisture content.
- Storage: Store seeds in airtight containers (glass jars with desiccant packets work well) in a cool, dark, dry place (ideally 40-50°F and 30-40% humidity). Label clearly with variety and date. Properly stored seeds can remain viable for 3-10 years or more.
Step 8: Season Extension & Winterizing
Extend your harvest and protect your garden for the off-season to truly maximize your self sufficient garden from scratch.
- Cold Frames: Simple structures with a transparent top (glass, polycarbonate, or old windows) that sit over garden beds. They trap solar heat, allowing you to grow cold-hardy crops (lettuce, spinach, kale, radishes) well into winter or start seeds earlier in spring. A basic cold frame can be built from 2×6 lumber and a sheet of polycarbonate for under $100.
- Hoop Houses/Low Tunnels: Larger structures made from flexible hoops (PVC pipe or EMT conduit) covered with greenhouse plastic. These provide more space and greater temperature moderation. A 10×20 ft DIY low tunnel kit can cost $200-$500, while a larger, more robust hoop house kit might be $1,000-$3,000. I use a 6×12 ft low tunnel made from 1/2-inch PVC hoops and 6mil greenhouse plastic, which extends my lettuce and spinach harvest by at least
- In-Ground Beds: If you have excellent native soil and good drainage, in-ground beds are the most economical. Double-digging (loosening soil two shovel depths) can significantly improve drainage and aeration. For my main garden, I primarily use in-ground beds, but I focus on building up the soil over time with consistent compost additions and cover cropping. I aim for beds that are no wider than 3-4 feet so I can reach the center without stepping on the soil, compacting it.
- Raised Beds: Raised beds offer numerous advantages, especially for poor soil, heavy clay, or rocky areas. They provide better drainage, warm up faster in spring, reduce compaction, and make weeding and harvesting easier on your back.
- Material Options:
- Untreated Cedar: Naturally rot-resistant and chemical-free. A 4×8 ft bed, 12 inches deep, typically requires three 2x12x8 ft cedar boards, costing around $50-$60 per board (total ~$150-$180) plus corner brackets or screws. My first raised beds were cedar and are still going strong after 7 years.
- Galvanized Steel: Durable, long-lasting, and aesthetically pleasing. Brands like Vego Garden offer modular kits. A Vego Garden 17″ Tall 8-in-1 Metal Raised Garden Bed (can be configured to 4×8 ft) costs approximately $250-$300.
- Concrete Blocks/Stones: Very durable but can leach minerals (though generally safe once weathered) and can be expensive.
- Recycled Materials: Pallets (check for chemical treatment stamps like « HT » for heat-treated), old tires (controversial due to potential chemical leaching).
- Filling Raised Beds: Don’t just fill with topsoil. Use a « Hugelkultur » approach (logs, branches, leaves, then compost, then topsoil) or a mixture of 60% good quality topsoil, 30% compost, and 10% perlite or vermiculite for drainage. A 4x8x1 ft raised bed requires about 32 cubic feet (or ~1.2 cubic yards) of soil mix, which can cost $100-$200 depending on your source.
- Material Options:
Step 4: Water Management & Irrigation
Efficient water management is critical for a self sufficient garden from scratch, especially in off-grid living where water resources might be limited.
- Rainwater Harvesting: This is my primary source of irrigation water. A 55-gallon rain barrel (e.g., EarthMark Rain Barrel, ~$120-$150) connected to a downspout can collect significant water. For larger needs, I use two 275-gallon IBC totes (Intermediate Bulk Containers, often available used for $100-$200 each from food-grade sources) connected in series. A 1,000 sq ft roof can collect approximately 620 gallons of water for every inch of rainfall. My 1,500 sq ft roof provides ample water for my 600 sq ft garden through multiple barrels and totes.
- Drip Irrigation: This is by far the most water-efficient method, delivering water directly to the plant’s root zone, minimizing evaporation and weed growth.
- Components: A typical drip system includes a pressure regulator (e.g., Rain Bird PRV-10, ~$15), a filter (Rain Bird RBY filter, ~$20), main tubing (1/2-inch poly tubing, 100ft ~$25), smaller feeder lines (1/4-inch tubing), and emitters (0.5 GPH or 1 GPH per plant).
- Kits: For beginners, a starter kit like the Rain Bird Drip Irrigation Garden Kit (model DDI-KIT-1P, ~$40-$60) is excellent for a small garden. For larger setups, I use Netafim Techline CV Drip Line (500ft roll, ~$150-$200), which has pressure-compensating emitters built-in, ensuring even watering across long runs.
- Automation: For true self-sufficiency, consider a battery-powered timer (e.g., Orbit B-Hyve Bluetooth Hose Faucet Timer, ~$50) or a solar-powered timer connected to a small 12V pump.
- Solar-Powered Pumps: For lifting water from a well, pond, or large storage tank to your garden, a solar pump is a game-changer. For a smaller drip system, a Shurflo 2088-594-152 Diaphragm Pump (12V, 3.5 GPM, ~$180) can be powered by a single 100W solar panel (e.g., Renogy 100W Monocrystalline Solar Panel, ~$100) and a small 12V battery (e.g., a 50Ah LiFePO4 battery like the Battle Born 50Ah, ~$450). For larger operations or deeper wells, more robust systems are needed. If you’re looking to build out a comprehensive off-grid power system to support your garden’s water needs, or indeed your entire homestead, you might want to explore resources like the Power Grid Generator complete system guide to understand the full scope of what’s possible in terms of energy independence.
Step 5: Seed Selection & Planting
The choice of seeds is crucial for a truly self sufficient garden from scratch.
- Choose Heirloom & Open-Pollinated Seeds: These varieties produce seeds that will grow true to type, meaning you can save seeds from your harvest year after year. F1 hybrids, while often vigorous, will not produce consistent offspring from saved seeds. Reputable seed companies include Baker Creek Heirloom Seeds, High Mowing Organic Seeds, and Seed Savers Exchange. Start with common, reliable varieties like ‘Black Krim’ tomatoes, ‘Provider’ bush beans, ‘Waltham Butternut’ squash, and ‘Black Seeded Simpson’ lettuce.
- Start Seeds Indoors (Optional but Recommended): For longer growing seasons or specific crops, starting seeds indoors gives you a head start. Use seed-starting mix (e.g., Espoma Organic Seed Starter Mix, ~$10 for 16qt bag) in seed trays (Jiffy Professional Greenhouse 72-cell kit, ~$15). Provide adequate light with LED grow lights (Barrina T5 2ft 4-pack LED Grow Lights, 20W each, ~$50) for 14-16 hours a day, positioned 2-4 inches above seedlings. Maintain consistent temperatures (65-75°F for most).
- Direct Sowing vs. Transplanting: Some crops (carrots, radishes, beans, corn) prefer direct sowing into the garden bed. Others (tomatoes, peppers, broccoli, kale) benefit from being started indoors and transplanted. Follow seed packet instructions for planting depths (e.g., lettuce seeds are often surface-sown or planted 1/8 inch deep, while beans are 1 inch deep) and spacing.
- Companion Planting: Strategically plant different species together to enhance growth, deter pests, and attract beneficial insects. For example, planting marigolds near tomatoes can deter nematodes, and basil improves tomato flavor. Nasturtiums can act as a trap crop for aphids.
- Succession Planting: For a continuous harvest, plant small batches of quick-growing crops (lettuce, radishes, cilantro) every 2-3 weeks. As one crop finishes, another is ready to take its place.
Step 6: Pest & Disease Management (Organic)
Maintaining a self sufficient garden from scratch means embracing organic pest and disease control.
- Integrated Pest Management (IPM): This holistic approach combines several strategies.
- Observation: Regularly inspect your plants for early signs of pests or disease. Catching issues early is key.
- Physical Barriers: Use row covers (e.g., Agribon AG-19 floating row cover, 10×20 ft, ~$20) to protect young plants from insect pests like cabbage worms and squash bugs. Install fences (e.g., 2×4 welded wire mesh, 4 ft tall, 50 ft roll ~$70) to keep out deer, rabbits, and other larger animals.
- Hand-Picking: For larger pests like tomato hornworms or squash bugs, simply pick them off and drop them into a bucket of soapy water.
- Companion Planting: As mentioned, certain plants repel pests. Marigolds, garlic, and onions are excellent deterrents.
- Attract Beneficial Insects: Plant flowers like dill, fennel, cosmos, and sweet alyssum to attract ladybugs, lacewings, and parasitic wasps, which prey on common garden pests.
- Organic Sprays & Treatments:
- Neem Oil: An excellent broad-spectrum organic insecticide and fungicide. Bonide Neem Oil Concentrate (16oz, ~$20) can be mixed at a rate of 1-2 tbsp per gallon of water and sprayed on affected plants.
- Insecticidal Soap: Effective against soft-bodied insects like aphids, whiteflies, and spider mites. Garden Safe Insecticidal Soap (24oz ready-to-use, ~$10).
- Bacillus thuringiensis (Bt): A naturally occurring soil bacterium that targets caterpillars and worms. Monterey BT Worm & Caterpillar Killer (16oz, ~$18) is highly effective and safe for beneficial insects.
- Copper or Sulfur Sprays: For fungal diseases like powdery mildew or blight, organic copper (e.g., Bonide Copper Fungicide, ~$15 for 1lb) or sulfur (e.g., Safer Brand Garden Fungicide, ~$10 for 16oz) can be used as a last resort.
Step 7: Harvesting & Seed Saving
The culmination of your efforts is the harvest, and seed saving closes the loop on self-sufficiency.
- Harvesting Techniques:
- Timing: Harvest vegetables at their peak ripeness for best flavor and nutritional value. For example, green beans should snap cleanly, cucumbers should be firm, and tomatoes should be fully colored.
- Frequency: Many crops, like zucchini, cucumbers, and bush beans, produce more if harvested frequently. Pick daily or every other day.
- Tools: Use clean, sharp pruners (e.g., Corona ClassicCUT Bypass Pruner BP 3180, ~$30) or a sharp knife for clean cuts, minimizing damage to the plant.
- Seed Saving: This is where the « self-sufficient » aspect truly shines.
- Selection: Only save seeds from your healthiest, most vigorous plants that show desired traits (disease resistance, good flavor, high yield).
- Isolation: To ensure true-to-type seeds, prevent cross-pollination. This can be challenging for open-pollinated crops that readily cross (e.g., squash, corn). For beginners, focus on self-pollinating plants like beans, peas, lettuce, and tomatoes.
- Processing:
- Dry Seeds (Beans, Peas, Lettuce, Grains): Allow pods/seed heads to dry completely on the plant. Harvest, shell, and clean the seeds, removing chaff.
- Wet Seeds (Tomatoes, Cucumbers, Squash): For tomatoes, ferment the seeds in water for a few days to remove the gel coating and inhibit disease. For cucumbers/squash, scrape out seeds, wash thoroughly, and dry.
- Drying: Spread seeds thinly on screens or paper plates in a cool, dry, well-ventilated area for 1-4 weeks. Ensure they are bone-dry before storage. I aim for less than 8% moisture content.
- Storage: Store seeds in airtight containers (glass jars with desiccant packets work well) in a cool, dark, dry place (ideally 40-50°F and 30-40% humidity). Label clearly with variety and date. Properly stored seeds can remain viable for 3-10 years or more.
Step 8: Season Extension & Winterizing
Extend your harvest and protect your garden for the off-season to truly maximize your self sufficient garden from scratch.
- Cold Frames: Simple structures with a transparent top (glass, polycarbonate, or old windows) that sit over garden beds. They trap solar heat, allowing you to grow cold-hardy crops (lettuce, spinach, kale, radishes) well into winter or start seeds earlier in spring. A basic cold frame can be built from 2×6 lumber and a sheet of polycarbonate for under $100.
- Hoop Houses/Low Tunnels: Larger structures made from flexible hoops (PVC pipe or EMT conduit) covered with greenhouse plastic. These provide more space and greater temperature moderation. A 10×20 ft DIY low tunnel kit can cost $200-$500, while a larger, more robust hoop house kit might be $1,000-$3,000. I use a 6×12 ft low tunnel made from 1/2-inch PVC hoops and 6mil greenhouse plastic, which extends my lettuce and spinach harvest by at least
Deciding between raised beds and in-ground beds depends on your soil, budget, and physical capabilities.
- In-Ground Beds: If you have excellent native soil and good drainage, in-ground beds are the most economical. Double-digging (loosening soil two shovel depths) can significantly improve drainage and aeration. For my main garden, I primarily use in-ground beds, but I focus on building up the soil over time with consistent compost additions and cover cropping. I aim for beds that are no wider than 3-4 feet so I can reach the center without stepping on the soil, compacting it.
- Raised Beds: Raised beds offer numerous advantages, especially for poor soil, heavy clay, or rocky areas. They provide better drainage, warm up faster in spring, reduce compaction, and make weeding and harvesting easier on your back.
- Material Options:
- Untreated Cedar: Naturally rot-resistant and chemical-free. A 4×8 ft bed, 12 inches deep, typically requires three 2x12x8 ft cedar boards, costing around $50-$60 per board (total ~$150-$180) plus corner brackets or screws. My first raised beds were cedar and are still going strong after 7 years.
- Galvanized Steel: Durable, long-lasting, and aesthetically pleasing. Brands like Vego Garden offer modular kits. A Vego Garden 17″ Tall 8-in-1 Metal Raised Garden Bed (can be configured to 4×8 ft) costs approximately $250-$300.
- Concrete Blocks/Stones: Very durable but can leach minerals (though generally safe once weathered) and can be expensive.
- Recycled Materials: Pallets (check for chemical treatment stamps like « HT » for heat-treated), old tires (controversial due to potential chemical leaching).
- Filling Raised Beds: Don’t just fill with topsoil. Use a « Hugelkultur » approach (logs, branches, leaves, then compost, then topsoil) or a mixture of 60% good quality topsoil, 30% compost, and 10% perlite or vermiculite for drainage. A 4x8x1 ft raised bed requires about 32 cubic feet (or ~1.2 cubic yards) of soil mix, which can cost $100-$200 depending on your source.
- Material Options:
Step 4: Water Management & Irrigation
Efficient water management is critical for a self sufficient garden from scratch, especially in off-grid living where water resources might be limited.
- Rainwater Harvesting: This is my primary source of irrigation water. A 55-gallon rain barrel (e.g., EarthMark Rain Barrel, ~$120-$150) connected to a downspout can collect significant water. For larger needs, I use two 275-gallon IBC totes (Intermediate Bulk Containers, often available used for $100-$200 each from food-grade sources) connected in series. A 1,000 sq ft roof can collect approximately 620 gallons of water for every inch of rainfall. My 1,500 sq ft roof provides ample water for my 600 sq ft garden through multiple barrels and totes.
- Drip Irrigation: This is by far the most water-efficient method, delivering water directly to the plant’s root zone, minimizing evaporation and weed growth.
- Components: A typical drip system includes a pressure regulator (e.g., Rain Bird PRV-10, ~$15), a filter (Rain Bird RBY filter, ~$20), main tubing (1/2-inch poly tubing, 100ft ~$25), smaller feeder lines (1/4-inch tubing), and emitters (0.5 GPH or 1 GPH per plant).
- Kits: For beginners, a starter kit like the Rain Bird Drip Irrigation Garden Kit (model DDI-KIT-1P, ~$40-$60) is excellent for a small garden. For larger setups, I use Netafim Techline CV Drip Line (500ft roll, ~$150-$200), which has pressure-compensating emitters built-in, ensuring even watering across long runs.
- Automation: For true self-sufficiency, consider a battery-powered timer (e.g., Orbit B-Hyve Bluetooth Hose Faucet Timer, ~$50) or a solar-powered timer connected to a small 12V pump.
- Solar-Powered Pumps: For lifting water from a well, pond, or large storage tank to your garden, a solar pump is a game-changer. For a smaller drip system, a Shurflo 2088-594-152 Diaphragm Pump (12V, 3.5 GPM, ~$180) can be powered by a single 100W solar panel (e.g., Renogy 100W Monocrystalline Solar Panel, ~$100) and a small 12V battery (e.g., a 50Ah LiFePO4 battery like the Battle Born 50Ah, ~$450). For larger operations or deeper wells, more robust systems are needed. If you’re looking to build out a comprehensive off-grid power system to support your garden’s water needs, or indeed your entire homestead, you might want to explore resources like the Power Grid Generator complete system guide to understand the full scope of what’s possible in terms of energy independence.
Step 5: Seed Selection & Planting
The choice of seeds is crucial for a truly self sufficient garden from scratch.
- Choose Heirloom & Open-Pollinated Seeds: These varieties produce seeds that will grow true to type, meaning you can save seeds from your harvest year after year. F1 hybrids, while often vigorous, will not produce consistent offspring from saved seeds. Reputable seed companies include Baker Creek Heirloom Seeds, High Mowing Organic Seeds, and Seed Savers Exchange. Start with common, reliable varieties like ‘Black Krim’ tomatoes, ‘Provider’ bush beans, ‘Waltham Butternut’ squash, and ‘Black Seeded Simpson’ lettuce.
- Start Seeds Indoors (Optional but Recommended): For longer growing seasons or specific crops, starting seeds indoors gives you a head start. Use seed-starting mix (e.g., Espoma Organic Seed Starter Mix, ~$10 for 16qt bag) in seed trays (Jiffy Professional Greenhouse 72-cell kit, ~$15). Provide adequate light with LED grow lights (Barrina T5 2ft 4-pack LED Grow Lights, 20W each, ~$50) for 14-16 hours a day, positioned 2-4 inches above seedlings. Maintain consistent temperatures (65-75°F for most).
- Direct Sowing vs. Transplanting: Some crops (carrots, radishes, beans, corn) prefer direct sowing into the garden bed. Others (tomatoes, peppers, broccoli, kale) benefit from being started indoors and transplanted. Follow seed packet instructions for planting depths (e.g., lettuce seeds are often surface-sown or planted 1/8 inch deep, while beans are 1 inch deep) and spacing.
- Companion Planting: Strategically plant different species together to enhance growth, deter pests, and attract beneficial insects. For example, planting marigolds near tomatoes can deter nematodes, and basil improves tomato flavor. Nasturtiums can act as a trap crop for aphids.
- Succession Planting: For a continuous harvest, plant small batches of quick-growing crops (lettuce, radishes, cilantro) every 2-3 weeks. As one crop finishes, another is ready to take its place.
Step 6: Pest & Disease Management (Organic)
Maintaining a self sufficient garden from scratch means embracing organic pest and disease control.
- Integrated Pest Management (IPM): This holistic approach combines several strategies.
- Observation: Regularly inspect your plants for early signs of pests or disease. Catching issues early is key.
- Physical Barriers: Use row covers (e.g., Agribon AG-19 floating row cover, 10×20 ft, ~$20) to protect young plants from insect pests like cabbage worms and squash bugs. Install fences (e.g., 2×4 welded wire mesh, 4 ft tall, 50 ft roll ~$70) to keep out deer, rabbits, and other larger animals.
- Hand-Picking: For larger pests like tomato hornworms or squash bugs, simply pick them off and drop them into a bucket of soapy water.
- Companion Planting: As mentioned, certain plants repel pests. Marigolds, garlic, and onions are excellent deterrents.
- Attract Beneficial Insects: Plant flowers like dill, fennel, cosmos, and sweet alyssum to attract ladybugs, lacewings, and parasitic wasps, which prey on common garden pests.
- Organic Sprays & Treatments:
- Neem Oil: An excellent broad-spectrum organic insecticide and fungicide. Bonide Neem Oil Concentrate (16oz, ~$20) can be mixed at a rate of 1-2 tbsp per gallon of water and sprayed on affected plants.
- Insecticidal Soap: Effective against soft-bodied insects like aphids, whiteflies, and spider mites. Garden Safe Insecticidal Soap (24oz ready-to-use, ~$10).
- Bacillus thuringiensis (Bt): A naturally occurring soil bacterium that targets caterpillars and worms. Monterey BT Worm & Caterpillar Killer (16oz, ~$18) is highly effective and safe for beneficial insects.
- Copper or Sulfur Sprays: For fungal diseases like powdery mildew or blight, organic copper (e.g., Bonide Copper Fungicide, ~$15 for 1lb) or sulfur (e.g., Safer Brand Garden Fungicide, ~$10 for 16oz) can be used as a last resort.
Step 7: Harvesting & Seed Saving
The culmination of your efforts is the harvest, and seed saving closes the loop on self-sufficiency.
- Harvesting Techniques:
- Timing: Harvest vegetables at their peak ripeness for best flavor and nutritional value. For example, green beans should snap cleanly, cucumbers should be firm, and tomatoes should be fully colored.
- Frequency: Many crops, like zucchini, cucumbers, and bush beans, produce more if harvested frequently. Pick daily or every other day.
- Tools: Use clean, sharp pruners (e.g., Corona ClassicCUT Bypass Pruner BP 3180, ~$30) or a sharp knife for clean cuts, minimizing damage to the plant.
- Seed Saving: This is where the « self-sufficient » aspect truly shines.
- Selection: Only save seeds from your healthiest, most vigorous plants that show desired traits (disease resistance, good flavor, high yield).
- Isolation: To ensure true-to-type seeds, prevent cross-pollination. This can be challenging for open-pollinated crops that readily cross (e.g., squash, corn). For beginners, focus on self-pollinating plants like beans, peas, lettuce, and tomatoes.
- Processing:
- Dry Seeds (Beans, Peas, Lettuce, Grains): Allow pods/seed heads to dry completely on the plant. Harvest, shell, and clean the seeds, removing chaff.
- Wet Seeds (Tomatoes, Cucumbers, Squash): For tomatoes, ferment the seeds in water for a few days to remove the gel coating and inhibit disease. For cucumbers/squash, scrape out seeds, wash thoroughly, and dry.
- Drying: Spread seeds thinly on screens or paper plates in a cool, dry, well-ventilated area for 1-4 weeks. Ensure they are bone-dry before storage. I aim for less than 8% moisture content.
- Storage: Store seeds in airtight containers (glass jars with desiccant packets work well) in a cool, dark, dry place (ideally 40-50°F and 30-40% humidity). Label clearly with variety and date. Properly stored seeds can remain viable for 3-10 years or more.
Step 8: Season Extension & Winterizing
Extend your harvest and protect your garden for the off-season to truly maximize your self sufficient garden from scratch.
- Cold Frames: Simple structures with a transparent top (glass, polycarbonate, or old windows) that sit over garden beds. They trap solar heat, allowing you to grow cold-hardy crops (lettuce, spinach, kale, radishes) well into winter or start seeds earlier in spring. A basic cold frame can be built from 2×6 lumber and a sheet of polycarbonate for under $100.
- Hoop Houses/Low Tunnels: Larger structures made from flexible hoops (PVC pipe or EMT conduit) covered with greenhouse plastic. These provide more space and greater temperature moderation. A 10×20 ft DIY low tunnel kit can cost $200-$500, while a larger, more robust hoop house kit might be $1,000-$3,000. I use a 6×12 ft low tunnel made from 1/2-inch PVC hoops and 6mil greenhouse plastic, which extends my lettuce and spinach harvest by at least
Healthy soil is the bedrock of a productive, self-sufficient garden. You can’t guess what your soil needs; you have to test it.
- Perform a Soil Test: A professional soil test will give you precise data on your soil’s pH, nutrient levels (N-P-K), and organic matter content. I recommend sending a sample to your local agricultural extension office; it typically costs $20-$50 and provides detailed recommendations. Alternatively, for a quick homeowner check, a Rapitest Soil Test Kit (40-test kit, model 1663, ~$20 on Amazon) provides a good baseline for pH, Nitrogen, Phosphorus, and Potash. Aim for a pH between 6.0 and 7.0 for most vegetables.
- Amend for pH Imbalance: If your soil is too acidic (below 6.0), add agricultural lime (dolomitic lime adds magnesium, calcitic lime adds calcium). Apply 5-10 lbs per 100 sq ft for a moderate adjustment. If it’s too alkaline (above 7.0), add elemental sulfur (e.g., Espoma Soil Acidifier, ~$15 for 6.75 lbs) or generous amounts of organic matter like peat moss or pine needles.
- Build Organic Matter: This is the single most important step for long-term soil health. Organic matter improves soil structure, water retention, drainage, and nutrient availability. Incorporate 2-4 inches of high-quality compost into your top 6-12 inches of soil annually. I make my own compost from kitchen scraps, garden waste, and shredded leaves, but you can purchase it. Local nurseries often sell bulk compost for $30-$50 per cubic yard. Aged manure (from chickens, cows, or horses – ensure it’s well-rotted to avoid burning plants) is also excellent.
- Address Nutrient Deficiencies: Based on your soil test, add specific organic amendments. If Nitrogen (N) is low, add blood meal (12-0-0, ~$20 for 3 lbs) or feather meal. For Phosphorus (P), use bone meal (3-15-0, ~$15 for 3 lbs) or rock phosphate. For Potassium (K), greensand (0-0-2.5, ~$25 for 5 lbs) or kelp meal are good choices. I rely heavily on Espoma Organic Garden-tone (5-3-3, ~$25 for an 8lb bag) as a balanced, all-purpose organic fertilizer during planting.
Step 3: Garden Bed Preparation
Deciding between raised beds and in-ground beds depends on your soil, budget, and physical capabilities.
- In-Ground Beds: If you have excellent native soil and good drainage, in-ground beds are the most economical. Double-digging (loosening soil two shovel depths) can significantly improve drainage and aeration. For my main garden, I primarily use in-ground beds, but I focus on building up the soil over time with consistent compost additions and cover cropping. I aim for beds that are no wider than 3-4 feet so I can reach the center without stepping on the soil, compacting it.
- Raised Beds: Raised beds offer numerous advantages, especially for poor soil, heavy clay, or rocky areas. They provide better drainage, warm up faster in spring, reduce compaction, and make weeding and harvesting easier on your back.
- Material Options:
- Untreated Cedar: Naturally rot-resistant and chemical-free. A 4×8 ft bed, 12 inches deep, typically requires three 2x12x8 ft cedar boards, costing around $50-$60 per board (total ~$150-$180) plus corner brackets or screws. My first raised beds were cedar and are still going strong after 7 years.
- Galvanized Steel: Durable, long-lasting, and aesthetically pleasing. Brands like Vego Garden offer modular kits. A Vego Garden 17″ Tall 8-in-1 Metal Raised Garden Bed (can be configured to 4×8 ft) costs approximately $250-$300.
- Concrete Blocks/Stones: Very durable but can leach minerals (though generally safe once weathered) and can be expensive.
- Recycled Materials: Pallets (check for chemical treatment stamps like « HT » for heat-treated), old tires (controversial due to potential chemical leaching).
- Filling Raised Beds: Don’t just fill with topsoil. Use a « Hugelkultur » approach (logs, branches, leaves, then compost, then topsoil) or a mixture of 60% good quality topsoil, 30% compost, and 10% perlite or vermiculite for drainage. A 4x8x1 ft raised bed requires about 32 cubic feet (or ~1.2 cubic yards) of soil mix, which can cost $100-$200 depending on your source.
- Material Options:
Step 4: Water Management & Irrigation
Efficient water management is critical for a self sufficient garden from scratch, especially in off-grid living where water resources might be limited.
- Rainwater Harvesting: This is my primary source of irrigation water. A 55-gallon rain barrel (e.g., EarthMark Rain Barrel, ~$120-$150) connected to a downspout can collect significant water. For larger needs, I use two 275-gallon IBC totes (Intermediate Bulk Containers, often available used for $100-$200 each from food-grade sources) connected in series. A 1,000 sq ft roof can collect approximately 620 gallons of water for every inch of rainfall. My 1,500 sq ft roof provides ample water for my 600 sq ft garden through multiple barrels and totes.
- Drip Irrigation: This is by far the most water-efficient method, delivering water directly to the plant’s root zone, minimizing evaporation and weed growth.
- Components: A typical drip system includes a pressure regulator (e.g., Rain Bird PRV-10, ~$15), a filter (Rain Bird RBY filter, ~$20), main tubing (1/2-inch poly tubing, 100ft ~$25), smaller feeder lines (1/4-inch tubing), and emitters (0.5 GPH or 1 GPH per plant).
- Kits: For beginners, a starter kit like the Rain Bird Drip Irrigation Garden Kit (model DDI-KIT-1P, ~$40-$60) is excellent for a small garden. For larger setups, I use Netafim Techline CV Drip Line (500ft roll, ~$150-$200), which has pressure-compensating emitters built-in, ensuring even watering across long runs.
- Automation: For true self-sufficiency, consider a battery-powered timer (e.g., Orbit B-Hyve Bluetooth Hose Faucet Timer, ~$50) or a solar-powered timer connected to a small 12V pump.
- Solar-Powered Pumps: For lifting water from a well, pond, or large storage tank to your garden, a solar pump is a game-changer. For a smaller drip system, a Shurflo 2088-594-152 Diaphragm Pump (12V, 3.5 GPM, ~$180) can be powered by a single 100W solar panel (e.g., Renogy 100W Monocrystalline Solar Panel, ~$100) and a small 12V battery (e.g., a 50Ah LiFePO4 battery like the Battle Born 50Ah, ~$450). For larger operations or deeper wells, more robust systems are needed. If you’re looking to build out a comprehensive off-grid power system to support your garden’s water needs, or indeed your entire homestead, you might want to explore resources like the Power Grid Generator complete system guide to understand the full scope of what’s possible in terms of energy independence.
Step 5: Seed Selection & Planting
The choice of seeds is crucial for a truly self sufficient garden from scratch.
- Choose Heirloom & Open-Pollinated Seeds: These varieties produce seeds that will grow true to type, meaning you can save seeds from your harvest year after year. F1 hybrids, while often vigorous, will not produce consistent offspring from saved seeds. Reputable seed companies include Baker Creek Heirloom Seeds, High Mowing Organic Seeds, and Seed Savers Exchange. Start with common, reliable varieties like ‘Black Krim’ tomatoes, ‘Provider’ bush beans, ‘Waltham Butternut’ squash, and ‘Black Seeded Simpson’ lettuce.
- Start Seeds Indoors (Optional but Recommended): For longer growing seasons or specific crops, starting seeds indoors gives you a head start. Use seed-starting mix (e.g., Espoma Organic Seed Starter Mix, ~$10 for 16qt bag) in seed trays (Jiffy Professional Greenhouse 72-cell kit, ~$15). Provide adequate light with LED grow lights (Barrina T5 2ft 4-pack LED Grow Lights, 20W each, ~$50) for 14-16 hours a day, positioned 2-4 inches above seedlings. Maintain consistent temperatures (65-75°F for most).
- Direct Sowing vs. Transplanting: Some crops (carrots, radishes, beans, corn) prefer direct sowing into the garden bed. Others (tomatoes, peppers, broccoli, kale) benefit from being started indoors and transplanted. Follow seed packet instructions for planting depths (e.g., lettuce seeds are often surface-sown or planted 1/8 inch deep, while beans are 1 inch deep) and spacing.
- Companion Planting: Strategically plant different species together to enhance growth, deter pests, and attract beneficial insects. For example, planting marigolds near tomatoes can deter nematodes, and basil improves tomato flavor. Nasturtiums can act as a trap crop for aphids.
- Succession Planting: For a continuous harvest, plant small batches of quick-growing crops (lettuce, radishes, cilantro) every 2-3 weeks. As one crop finishes, another is ready to take its place.
Step 6: Pest & Disease Management (Organic)
Maintaining a self sufficient garden from scratch means embracing organic pest and disease control.
- Integrated Pest Management (IPM): This holistic approach combines several strategies.
- Observation: Regularly inspect your plants for early signs of pests or disease. Catching issues early is key.
- Physical Barriers: Use row covers (e.g., Agribon AG-19 floating row cover, 10×20 ft, ~$20) to protect young plants from insect pests like cabbage worms and squash bugs. Install fences (e.g., 2×4 welded wire mesh, 4 ft tall, 50 ft roll ~$70) to keep out deer, rabbits, and other larger animals.
- Hand-Picking: For larger pests like tomato hornworms or squash bugs, simply pick them off and drop them into a bucket of soapy water.
- Companion Planting: As mentioned, certain plants repel pests. Marigolds, garlic, and onions are excellent deterrents.
- Attract Beneficial Insects: Plant flowers like dill, fennel, cosmos, and sweet alyssum to attract ladybugs, lacewings, and parasitic wasps, which prey on common garden pests.
- Organic Sprays & Treatments:
- Neem Oil: An excellent broad-spectrum organic insecticide and fungicide. Bonide Neem Oil Concentrate (16oz, ~$20) can be mixed at a rate of 1-2 tbsp per gallon of water and sprayed on affected plants.
- Insecticidal Soap: Effective against soft-bodied insects like aphids, whiteflies, and spider mites. Garden Safe Insecticidal Soap (24oz ready-to-use, ~$10).
- Bacillus thuringiensis (Bt): A naturally occurring soil bacterium that targets caterpillars and worms. Monterey BT Worm & Caterpillar Killer (16oz, ~$18) is highly effective and safe for beneficial insects.
- Copper or Sulfur Sprays: For fungal diseases like powdery mildew or blight, organic copper (e.g., Bonide Copper Fungicide, ~$15 for 1lb) or sulfur (e.g., Safer Brand Garden Fungicide, ~$10 for 16oz) can be used as a last resort.
Step 7: Harvesting & Seed Saving
The culmination of your efforts is the harvest, and seed saving closes the loop on self-sufficiency.
- Harvesting Techniques:
- Timing: Harvest vegetables at their peak ripeness for best flavor and nutritional value. For example, green beans should snap cleanly, cucumbers should be firm, and tomatoes should be fully colored.
- Frequency: Many crops, like zucchini, cucumbers, and bush beans, produce more if harvested frequently. Pick daily or every other day.
- Tools: Use clean, sharp pruners (e.g., Corona ClassicCUT Bypass Pruner BP 3180, ~$30) or a sharp knife for clean cuts, minimizing damage to the plant.
- Seed Saving: This is where the « self-sufficient » aspect truly shines.
- Selection: Only save seeds from your healthiest, most vigorous plants that show desired traits (disease resistance, good flavor, high yield).
- Isolation: To ensure true-to-type seeds, prevent cross-pollination. This can be challenging for open-pollinated crops that readily cross (e.g., squash, corn). For beginners, focus on self-pollinating plants like beans, peas, lettuce, and tomatoes.
- Processing:
- Dry Seeds (Beans, Peas, Lettuce, Grains): Allow pods/seed heads to dry completely on the plant. Harvest, shell, and clean the seeds, removing chaff.
- Wet Seeds (Tomatoes, Cucumbers, Squash): For tomatoes, ferment the seeds in water for a few days to remove the gel coating and inhibit disease. For cucumbers/squash, scrape out seeds, wash thoroughly, and dry.
- Drying: Spread seeds thinly on screens or paper plates in a cool, dry, well-ventilated area for 1-4 weeks. Ensure they are bone-dry before storage. I aim for less than 8% moisture content.
- Storage: Store seeds in airtight containers (glass jars with desiccant packets work well) in a cool, dark, dry place (ideally 40-50°F and 30-40% humidity). Label clearly with variety and date. Properly stored seeds can remain viable for 3-10 years or more.
Step 8: Season Extension & Winterizing
Extend your harvest and protect your garden for the off-season to truly maximize your self sufficient garden from scratch.
- Cold Frames: Simple structures with a transparent top (glass, polycarbonate, or old windows) that sit over garden beds. They trap solar heat, allowing you to grow cold-hardy crops (lettuce, spinach, kale, radishes) well into winter or start seeds earlier in spring. A basic cold frame can be built from 2×6 lumber and a sheet of polycarbonate for under $100.
- Hoop Houses/Low Tunnels: Larger structures made from flexible hoops (PVC pipe or EMT conduit) covered with greenhouse plastic. These provide more space and greater temperature moderation. A 10×20 ft DIY low tunnel kit can cost $200-$500, while a larger, more robust hoop house kit might be $1,000-$3,000. I use a 6×12 ft low tunnel made from 1/2-inch PVC hoops and 6mil greenhouse plastic, which extends my lettuce and spinach harvest by at least
Step 6: Pest & Disease Management (Organic)
Maintaining a self sufficient garden from scratch means embracing organic pest and disease control.
- Integrated Pest Management (IPM): This holistic approach combines several strategies.
- Observation: Regularly inspect your plants for early signs of pests or disease. Catching issues early is key.
- Physical Barriers: Use row covers (e.g., Agribon AG-19 floating row cover, 10×20 ft, ~$20) to protect young plants from insect pests like cabbage worms and squash bugs. Install fences (e.g., 2×4 welded wire mesh, 4 ft tall, 50 ft roll ~$70) to keep out deer, rabbits, and other larger animals.
- Hand-Picking: For larger pests like tomato hornworms or squash bugs, simply pick them off and drop them into a bucket of soapy water.
- Companion Planting: As mentioned, certain plants repel pests. Marigolds, garlic, and onions are excellent deterrents.
- Attract Beneficial Insects: Plant flowers like dill, fennel, cosmos, and sweet alyssum to attract ladybugs, lacewings, and parasitic wasps, which prey on common garden pests.
- Organic Sprays & Treatments:
- Neem Oil: An excellent broad-spectrum organic insecticide and fungicide. Bonide Neem Oil Concentrate (16oz, ~$20) can be mixed at a rate of 1-2 tbsp per gallon of water and sprayed on affected plants.
- Insecticidal Soap: Effective against soft-bodied insects like aphids, whiteflies, and spider mites. Garden Safe Insecticidal Soap (24oz ready-to-use, ~$10).
- Bacillus thuringiensis (Bt): A naturally occurring soil bacterium that targets caterpillars and worms. Monterey BT Worm & Caterpillar Killer (16oz, ~$18) is highly effective and safe for beneficial insects.
- Copper or Sulfur Sprays: For fungal diseases like powdery mildew or blight, organic copper (e.g., Bonide Copper Fungicide, ~$15 for 1lb) or sulfur (e.g., Safer Brand Garden Fungicide, ~$10 for 16oz) can be used as a last resort.
Step 7: Harvesting & Seed Saving
The culmination of your efforts is the harvest, and seed saving closes the loop on self-sufficiency.
- Harvesting Techniques:
- Timing: Harvest vegetables at their peak ripeness for best flavor and nutritional value. For example, green beans should snap cleanly, cucumbers should be firm, and tomatoes should be fully colored.
- Frequency: Many crops, like zucchini, cucumbers, and bush beans, produce more if harvested frequently. Pick daily or every other day.
- Tools: Use clean, sharp pruners (e.g., Corona ClassicCUT Bypass Pruner BP 3180, ~$30) or a sharp knife for clean cuts, minimizing damage to the plant.
- Seed Saving: This is where the « self-sufficient » aspect truly shines.
- Selection: Only save seeds from your healthiest, most vigorous plants that show desired traits (disease resistance, good flavor, high yield).
- Isolation: To ensure true-to-type seeds, prevent cross-pollination. This can be challenging for open-pollinated crops that readily cross (e.g., squash, corn). For beginners, focus on self-pollinating plants like beans, peas, lettuce, and tomatoes.
- Processing:
- Dry Seeds (Beans, Peas, Lettuce, Grains): Allow pods/seed heads to dry completely on the plant. Harvest, shell, and clean the seeds, removing chaff.
- Wet Seeds (Tomatoes, Cucumbers, Squash): For tomatoes, ferment the seeds in water for a few days to remove the gel coating and inhibit disease. For cucumbers/squash, scrape out seeds, wash thoroughly, and dry.
- Drying: Spread seeds thinly on screens or paper plates in a cool, dry, well-ventilated area for 1-4 weeks. Ensure they are bone-dry before storage. I aim for less than 8% moisture content.
- Storage: Store seeds in airtight containers (glass jars with desiccant packets work well) in a cool, dark, dry place (ideally 40-50°F and 30-40% humidity). Label clearly with variety and date. Properly stored seeds can remain viable for 3-10 years or more.
Step 8: Season Extension & Winterizing
Extend your harvest and protect your garden for the off-season to truly maximize your self sufficient garden from scratch.
- Cold Frames: Simple structures with a transparent top (glass, polycarbonate, or old windows) that sit over garden beds. They trap solar heat, allowing you to grow cold-hardy crops (lettuce, spinach, kale, radishes) well into winter or start seeds earlier in spring. A basic cold frame can be built from 2×6 lumber and a sheet of polycarbonate for under $100.
- Hoop Houses/Low Tunnels: Larger structures made from flexible hoops (PVC pipe or EMT conduit) covered with greenhouse plastic. These provide more space and greater temperature moderation. A 10×20 ft DIY low tunnel kit can cost $200-$500, while a larger, more robust hoop house kit might be $1,000-$3,000. I use a 6×12 ft low tunnel made from 1/2-inch PVC hoops and 6mil greenhouse plastic, which extends my lettuce and spinach harvest by at least
Efficient water management is critical for a self sufficient garden from scratch, especially in off-grid living where water resources might be limited.
- Rainwater Harvesting: This is my primary source of irrigation water. A 55-gallon rain barrel (e.g., EarthMark Rain Barrel, ~$120-$150) connected to a downspout can collect significant water. For larger needs, I use two 275-gallon IBC totes (Intermediate Bulk Containers, often available used for $100-$200 each from food-grade sources) connected in series. A 1,000 sq ft roof can collect approximately 620 gallons of water for every inch of rainfall. My 1,500 sq ft roof provides ample water for my 600 sq ft garden through multiple barrels and totes.
- Drip Irrigation: This is by far the most water-efficient method, delivering water directly to the plant’s root zone, minimizing evaporation and weed growth.
- Components: A typical drip system includes a pressure regulator (e.g., Rain Bird PRV-10, ~$15), a filter (Rain Bird RBY filter, ~$20), main tubing (1/2-inch poly tubing, 100ft ~$25), smaller feeder lines (1/4-inch tubing), and emitters (0.5 GPH or 1 GPH per plant).
- Kits: For beginners, a starter kit like the Rain Bird Drip Irrigation Garden Kit (model DDI-KIT-1P, ~$40-$60) is excellent for a small garden. For larger setups, I use Netafim Techline CV Drip Line (500ft roll, ~$150-$200), which has pressure-compensating emitters built-in, ensuring even watering across long runs.
- Automation: For true self-sufficiency, consider a battery-powered timer (e.g., Orbit B-Hyve Bluetooth Hose Faucet Timer, ~$50) or a solar-powered timer connected to a small 12V pump.
- Solar-Powered Pumps: For lifting water from a well, pond, or large storage tank to your garden, a solar pump is a game-changer. For a smaller drip system, a Shurflo 2088-594-152 Diaphragm Pump (12V, 3.5 GPM, ~$180) can be powered by a single 100W solar panel (e.g., Renogy 100W Monocrystalline Solar Panel, ~$100) and a small 12V battery (e.g., a 50Ah LiFePO4 battery like the Battle Born 50Ah, ~$450). For larger operations or deeper wells, more robust systems are needed. If you’re looking to build out a comprehensive off-grid power system to support your garden’s water needs, or indeed your entire homestead, you might want to explore resources like the Power Grid Generator complete system guide to understand the full scope of what’s possible in terms of energy independence.
Step 5: Seed Selection & Planting
The choice of seeds is crucial for a truly self sufficient garden from scratch.
- Choose Heirloom & Open-Pollinated Seeds: These varieties produce seeds that will grow true to type, meaning you can save seeds from your harvest year after year. F1 hybrids, while often vigorous, will not produce consistent offspring from saved seeds. Reputable seed companies include Baker Creek Heirloom Seeds, High Mowing Organic Seeds, and Seed Savers Exchange. Start with common, reliable varieties like ‘Black Krim’ tomatoes, ‘Provider’ bush beans, ‘Waltham Butternut’ squash, and ‘Black Seeded Simpson’ lettuce.
- Start Seeds Indoors (Optional but Recommended): For longer growing seasons or specific crops, starting seeds indoors gives you a head start. Use seed-starting mix (e.g., Espoma Organic Seed Starter Mix, ~$10 for 16qt bag) in seed trays (Jiffy Professional Greenhouse 72-cell kit, ~$15). Provide adequate light with LED grow lights (Barrina T5 2ft 4-pack LED Grow Lights, 20W each, ~$50) for 14-16 hours a day, positioned 2-4 inches above seedlings. Maintain consistent temperatures (65-75°F for most).
- Direct Sowing vs. Transplanting: Some crops (carrots, radishes, beans, corn) prefer direct sowing into the garden bed. Others (tomatoes, peppers, broccoli, kale) benefit from being started indoors and transplanted. Follow seed packet instructions for planting depths (e.g., lettuce seeds are often surface-sown or planted 1/8 inch deep, while beans are 1 inch deep) and spacing.
- Companion Planting: Strategically plant different species together to enhance growth, deter pests, and attract beneficial insects. For example, planting marigolds near tomatoes can deter nematodes, and basil improves tomato flavor. Nasturtiums can act as a trap crop for aphids.
- Succession Planting: For a continuous harvest, plant small batches of quick-growing crops (lettuce, radishes, cilantro) every 2-3 weeks. As one crop finishes, another is ready to take its place.
Step 6: Pest & Disease Management (Organic)
Maintaining a self sufficient garden from scratch means embracing organic pest and disease control.
- Integrated Pest Management (IPM): This holistic approach combines several strategies.
- Observation: Regularly inspect your plants for early signs of pests or disease. Catching issues early is key.
- Physical Barriers: Use row covers (e.g., Agribon AG-19 floating row cover, 10×20 ft, ~$20) to protect young plants from insect pests like cabbage worms and squash bugs. Install fences (e.g., 2×4 welded wire mesh, 4 ft tall, 50 ft roll ~$70) to keep out deer, rabbits, and other larger animals.
- Hand-Picking: For larger pests like tomato hornworms or squash bugs, simply pick them off and drop them into a bucket of soapy water.
- Companion Planting: As mentioned, certain plants repel pests. Marigolds, garlic, and onions are excellent deterrents.
- Attract Beneficial Insects: Plant flowers like dill, fennel, cosmos, and sweet alyssum to attract ladybugs, lacewings, and parasitic wasps, which prey on common garden pests.
- Organic Sprays & Treatments:
- Neem Oil: An excellent broad-spectrum organic insecticide and fungicide. Bonide Neem Oil Concentrate (16oz, ~$20) can be mixed at a rate of 1-2 tbsp per gallon of water and sprayed on affected plants.
- Insecticidal Soap: Effective against soft-bodied insects like aphids, whiteflies, and spider mites. Garden Safe Insecticidal Soap (24oz ready-to-use, ~$10).
- Bacillus thuringiensis (Bt): A naturally occurring soil bacterium that targets caterpillars and worms. Monterey BT Worm & Caterpillar Killer (16oz, ~$18) is highly effective and safe for beneficial insects.
- Copper or Sulfur Sprays: For fungal diseases like powdery mildew or blight, organic copper (e.g., Bonide Copper Fungicide, ~$15 for 1lb) or sulfur (e.g., Safer Brand Garden Fungicide, ~$10 for 16oz) can be used as a last resort.
Step 7: Harvesting & Seed Saving
The culmination of your efforts is the harvest, and seed saving closes the loop on self-sufficiency.
- Harvesting Techniques:
- Timing: Harvest vegetables at their peak ripeness for best flavor and nutritional value. For example, green beans should snap cleanly, cucumbers should be firm, and tomatoes should be fully colored.
- Frequency: Many crops, like zucchini, cucumbers, and bush beans, produce more if harvested frequently. Pick daily or every other day.
- Tools: Use clean, sharp pruners (e.g., Corona ClassicCUT Bypass Pruner BP 3180, ~$30) or a sharp knife for clean cuts, minimizing damage to the plant.
- Seed Saving: This is where the « self-sufficient » aspect truly shines.
- Selection: Only save seeds from your healthiest, most vigorous plants that show desired traits (disease resistance, good flavor, high yield).
- Isolation: To ensure true-to-type seeds, prevent cross-pollination. This can be challenging for open-pollinated crops that readily cross (e.g., squash, corn). For beginners, focus on self-pollinating plants like beans, peas, lettuce, and tomatoes.
- Processing:
- Dry Seeds (Beans, Peas, Lettuce, Grains): Allow pods/seed heads to dry completely on the plant. Harvest, shell, and clean the seeds, removing chaff.
- Wet Seeds (Tomatoes, Cucumbers, Squash): For tomatoes, ferment the seeds in water for a few days to remove the gel coating and inhibit disease. For cucumbers/squash, scrape out seeds, wash thoroughly, and dry.
- Drying: Spread seeds thinly on screens or paper plates in a cool, dry, well-ventilated area for 1-4 weeks. Ensure they are bone-dry before storage. I aim for less than 8% moisture content.
- Storage: Store seeds in airtight containers (glass jars with desiccant packets work well) in a cool, dark, dry place (ideally 40-50°F and 30-40% humidity). Label clearly with variety and date. Properly stored seeds can remain viable for 3-10 years or more.
Step 8: Season Extension & Winterizing
Extend your harvest and protect your garden for the off-season to truly maximize your self sufficient garden from scratch.
- Cold Frames: Simple structures with a transparent top (glass, polycarbonate, or old windows) that sit over garden beds. They trap solar heat, allowing you to grow cold-hardy crops (lettuce, spinach, kale, radishes) well into winter or start seeds earlier in spring. A basic cold frame can be built from 2×6 lumber and a sheet of polycarbonate for under $100.
- Hoop Houses/Low Tunnels: Larger structures made from flexible hoops (PVC pipe or EMT conduit) covered with greenhouse plastic. These provide more space and greater temperature moderation. A 10×20 ft DIY low tunnel kit can cost $200-$500, while a larger, more robust hoop house kit might be $1,000-$3,000. I use a 6×12 ft low tunnel made from 1/2-inch PVC hoops and 6mil greenhouse plastic, which extends my lettuce and spinach harvest by at least
Step 4: Water Management & Irrigation
Efficient water management is critical for a self sufficient garden from scratch, especially in off-grid living where water resources might be limited.
- Rainwater Harvesting: This is my primary source of irrigation water. A 55-gallon rain barrel (e.g., EarthMark Rain Barrel, ~$120-$150) connected to a downspout can collect significant water. For larger needs, I use two 275-gallon IBC totes (Intermediate Bulk Containers, often available used for $100-$200 each from food-grade sources) connected in series. A 1,000 sq ft roof can collect approximately 620 gallons of water for every inch of rainfall. My 1,500 sq ft roof provides ample water for my 600 sq ft garden through multiple barrels and totes.
- Drip Irrigation: This is by far the most water-efficient method, delivering water directly to the plant’s root zone, minimizing evaporation and weed growth.
- Components: A typical drip system includes a pressure regulator (e.g., Rain Bird PRV-10, ~$15), a filter (Rain Bird RBY filter, ~$20), main tubing (1/2-inch poly tubing, 100ft ~$25), smaller feeder lines (1/4-inch tubing), and emitters (0.5 GPH or 1 GPH per plant).
- Kits: For beginners, a starter kit like the Rain Bird Drip Irrigation Garden Kit (model DDI-KIT-1P, ~$40-$60) is excellent for a small garden. For larger setups, I use Netafim Techline CV Drip Line (500ft roll, ~$150-$200), which has pressure-compensating emitters built-in, ensuring even watering across long runs.
- Automation: For true self-sufficiency, consider a battery-powered timer (e.g., Orbit B-Hyve Bluetooth Hose Faucet Timer, ~$50) or a solar-powered timer connected to a small 12V pump.
- Solar-Powered Pumps: For lifting water from a well, pond, or large storage tank to your garden, a solar pump is a game-changer. For a smaller drip system, a Shurflo 2088-594-152 Diaphragm Pump (12V, 3.5 GPM, ~$180) can be powered by a single 100W solar panel (e.g., Renogy 100W Monocrystalline Solar Panel, ~$100) and a small 12V battery (e.g., a 50Ah LiFePO4 battery like the Battle Born 50Ah, ~$450). For larger operations or deeper wells, more robust systems are needed. If you’re looking to build out a comprehensive off-grid power system to support your garden’s water needs, or indeed your entire homestead, you might want to explore resources like the Power Grid Generator complete system guide to understand the full scope of what’s possible in terms of energy independence.
Step 5: Seed Selection & Planting
The choice of seeds is crucial for a truly self sufficient garden from scratch.
- Choose Heirloom & Open-Pollinated Seeds: These varieties produce seeds that will grow true to type, meaning you can save seeds from your harvest year after year. F1 hybrids, while often vigorous, will not produce consistent offspring from saved seeds. Reputable seed companies include Baker Creek Heirloom Seeds, High Mowing Organic Seeds, and Seed Savers Exchange. Start with common, reliable varieties like ‘Black Krim’ tomatoes, ‘Provider’ bush beans, ‘Waltham Butternut’ squash, and ‘Black Seeded Simpson’ lettuce.
- Start Seeds Indoors (Optional but Recommended): For longer growing seasons or specific crops, starting seeds indoors gives you a head start. Use seed-starting mix (e.g., Espoma Organic Seed Starter Mix, ~$10 for 16qt bag) in seed trays (Jiffy Professional Greenhouse 72-cell kit, ~$15). Provide adequate light with LED grow lights (Barrina T5 2ft 4-pack LED Grow Lights, 20W each, ~$50) for 14-16 hours a day, positioned 2-4 inches above seedlings. Maintain consistent temperatures (65-75°F for most).
- Direct Sowing vs. Transplanting: Some crops (carrots, radishes, beans, corn) prefer direct sowing into the garden bed. Others (tomatoes, peppers, broccoli, kale) benefit from being started indoors and transplanted. Follow seed packet instructions for planting depths (e.g., lettuce seeds are often surface-sown or planted 1/8 inch deep, while beans are 1 inch deep) and spacing.
- Companion Planting: Strategically plant different species together to enhance growth, deter pests, and attract beneficial insects. For example, planting marigolds near tomatoes can deter nematodes, and basil improves tomato flavor. Nasturtiums can act as a trap crop for aphids.
- Succession Planting: For a continuous harvest, plant small batches of quick-growing crops (lettuce, radishes, cilantro) every 2-3 weeks. As one crop finishes, another is ready to take its place.
Step 6: Pest & Disease Management (Organic)
Maintaining a self sufficient garden from scratch means embracing organic pest and disease control.
- Integrated Pest Management (IPM): This holistic approach combines several strategies.
- Observation: Regularly inspect your plants for early signs of pests or disease. Catching issues early is key.
- Physical Barriers: Use row covers (e.g., Agribon AG-19 floating row cover, 10×20 ft, ~$20) to protect young plants from insect pests like cabbage worms and squash bugs. Install fences (e.g., 2×4 welded wire mesh, 4 ft tall, 50 ft roll ~$70) to keep out deer, rabbits, and other larger animals.
- Hand-Picking: For larger pests like tomato hornworms or squash bugs, simply pick them off and drop them into a bucket of soapy water.
- Companion Planting: As mentioned, certain plants repel pests. Marigolds, garlic, and onions are excellent deterrents.
- Attract Beneficial Insects: Plant flowers like dill, fennel, cosmos, and sweet alyssum to attract ladybugs, lacewings, and parasitic wasps, which prey on common garden pests.
- Organic Sprays & Treatments:
- Neem Oil: An excellent broad-spectrum organic insecticide and fungicide. Bonide Neem Oil Concentrate (16oz, ~$20) can be mixed at a rate of 1-2 tbsp per gallon of water and sprayed on affected plants.
- Insecticidal Soap: Effective against soft-bodied insects like aphids, whiteflies, and spider mites. Garden Safe Insecticidal Soap (24oz ready-to-use, ~$10).
- Bacillus thuringiensis (Bt): A naturally occurring soil bacterium that targets caterpillars and worms. Monterey BT Worm & Caterpillar Killer (16oz, ~$18) is highly effective and safe for beneficial insects.
- Copper or Sulfur Sprays: For fungal diseases like powdery mildew or blight, organic copper (e.g., Bonide Copper Fungicide, ~$15 for 1lb) or sulfur (e.g., Safer Brand Garden Fungicide, ~$10 for 16oz) can be used as a last resort.
Step 7: Harvesting & Seed Saving
The culmination of your efforts is the harvest, and seed saving closes the loop on self-sufficiency.
- Harvesting Techniques:
- Timing: Harvest vegetables at their peak ripeness for best flavor and nutritional value. For example, green beans should snap cleanly, cucumbers should be firm, and tomatoes should be fully colored.
- Frequency: Many crops, like zucchini, cucumbers, and bush beans, produce more if harvested frequently. Pick daily or every other day.
- Tools: Use clean, sharp pruners (e.g., Corona ClassicCUT Bypass Pruner BP 3180, ~$30) or a sharp knife for clean cuts, minimizing damage to the plant.
- Seed Saving: This is where the « self-sufficient » aspect truly shines.
- Selection: Only save seeds from your healthiest, most vigorous plants that show desired traits (disease resistance, good flavor, high yield).
- Isolation: To ensure true-to-type seeds, prevent cross-pollination. This can be challenging for open-pollinated crops that readily cross (e.g., squash, corn). For beginners, focus on self-pollinating plants like beans, peas, lettuce, and tomatoes.
- Processing:
- Dry Seeds (Beans, Peas, Lettuce, Grains): Allow pods/seed heads to dry completely on the plant. Harvest, shell, and clean the seeds, removing chaff.
- Wet Seeds (Tomatoes, Cucumbers, Squash): For tomatoes, ferment the seeds in water for a few days to remove the gel coating and inhibit disease. For cucumbers/squash, scrape out seeds, wash thoroughly, and dry.
- Drying: Spread seeds thinly on screens or paper plates in a cool, dry, well-ventilated area for 1-4 weeks. Ensure they are bone-dry before storage. I aim for less than 8% moisture content.
- Storage: Store seeds in airtight containers (glass jars with desiccant packets work well) in a cool, dark, dry place (ideally 40-50°F and 30-40% humidity). Label clearly with variety and date. Properly stored seeds can remain viable for 3-10 years or more.
Step 8: Season Extension & Winterizing
Extend your harvest and protect your garden for the off-season to truly maximize your self sufficient garden from scratch.
- Cold Frames: Simple structures with a transparent top (glass, polycarbonate, or old windows) that sit over garden beds. They trap solar heat, allowing you to grow cold-hardy crops (lettuce, spinach, kale, radishes) well into winter or start seeds earlier in spring. A basic cold frame can be built from 2×6 lumber and a sheet of polycarbonate for under $100.
- Hoop Houses/Low Tunnels: Larger structures made from flexible hoops (PVC pipe or EMT conduit) covered with greenhouse plastic. These provide more space and greater temperature moderation. A 10×20 ft DIY low tunnel kit can cost $200-$500, while a larger, more robust hoop house kit might be $1,000-$3,000. I use a 6×12 ft low tunnel made from 1/2-inch PVC hoops and 6mil greenhouse plastic, which extends my lettuce and spinach harvest by at least
- In-Ground Beds: If you have excellent native soil and good drainage, in-ground beds are the most economical. Double-digging (loosening soil two shovel depths) can significantly improve drainage and aeration. For my main garden, I primarily use in-ground beds, but I focus on building up the soil over time with consistent compost additions and cover cropping. I aim for beds that are no wider than 3-4 feet so I can reach the center without stepping on the soil, compacting it.
- Raised Beds: Raised beds offer numerous advantages, especially for poor soil, heavy clay, or rocky areas. They provide better drainage, warm up faster in spring, reduce compaction, and make weeding and harvesting easier on your back.
- Material Options:
- Untreated Cedar: Naturally rot-resistant and chemical-free. A 4×8 ft bed, 12 inches deep, typically requires three 2x12x8 ft cedar boards, costing around $50-$60 per board (total ~$150-$180) plus corner brackets or screws. My first raised beds were cedar and are still going strong after 7 years.
- Galvanized Steel: Durable, long-lasting, and aesthetically pleasing. Brands like Vego Garden offer modular kits. A Vego Garden 17″ Tall 8-in-1 Metal Raised Garden Bed (can be configured to 4×8 ft) costs approximately $250-$300.
- Concrete Blocks/Stones: Very durable but can leach minerals (though generally safe once weathered) and can be expensive.
- Recycled Materials: Pallets (check for chemical treatment stamps like « HT » for heat-treated), old tires (controversial due to potential chemical leaching).
- Filling Raised Beds: Don’t just fill with topsoil. Use a « Hugelkultur » approach (logs, branches, leaves, then compost, then topsoil) or a mixture of 60% good quality topsoil, 30% compost, and 10% perlite or vermiculite for drainage. A 4x8x1 ft raised bed requires about 32 cubic feet (or ~1.2 cubic yards) of soil mix, which can cost $100-$200 depending on your source.
- Material Options:
Step 4: Water Management & Irrigation
Efficient water management is critical for a self sufficient garden from scratch, especially in off-grid living where water resources might be limited.
- Rainwater Harvesting: This is my primary source of irrigation water. A 55-gallon rain barrel (e.g., EarthMark Rain Barrel, ~$120-$150) connected to a downspout can collect significant water. For larger needs, I use two 275-gallon IBC totes (Intermediate Bulk Containers, often available used for $100-$200 each from food-grade sources) connected in series. A 1,000 sq ft roof can collect approximately 620 gallons of water for every inch of rainfall. My 1,500 sq ft roof provides ample water for my 600 sq ft garden through multiple barrels and totes.
- Drip Irrigation: This is by far the most water-efficient method, delivering water directly to the plant’s root zone, minimizing evaporation and weed growth.
- Components: A typical drip system includes a pressure regulator (e.g., Rain Bird PRV-10, ~$15), a filter (Rain Bird RBY filter, ~$20), main tubing (1/2-inch poly tubing, 100ft ~$25), smaller feeder lines (1/4-inch tubing), and emitters (0.5 GPH or 1 GPH per plant).
- Kits: For beginners, a starter kit like the Rain Bird Drip Irrigation Garden Kit (model DDI-KIT-1P, ~$40-$60) is excellent for a small garden. For larger setups, I use Netafim Techline CV Drip Line (500ft roll, ~$150-$200), which has pressure-compensating emitters built-in, ensuring even watering across long runs.
- Automation: For true self-sufficiency, consider a battery-powered timer (e.g., Orbit B-Hyve Bluetooth Hose Faucet Timer, ~$50) or a solar-powered timer connected to a small 12V pump.
- Solar-Powered Pumps: For lifting water from a well, pond, or large storage tank to your garden, a solar pump is a game-changer. For a smaller drip system, a Shurflo 2088-594-152 Diaphragm Pump (12V, 3.5 GPM, ~$180) can be powered by a single 100W solar panel (e.g., Renogy 100W Monocrystalline Solar Panel, ~$100) and a small 12V battery (e.g., a 50Ah LiFePO4 battery like the Battle Born 50Ah, ~$450). For larger operations or deeper wells, more robust systems are needed. If you’re looking to build out a comprehensive off-grid power system to support your garden’s water needs, or indeed your entire homestead, you might want to explore resources like the Power Grid Generator complete system guide to understand the full scope of what’s possible in terms of energy independence.
Step 5: Seed Selection & Planting
The choice of seeds is crucial for a truly self sufficient garden from scratch.
- Choose Heirloom & Open-Pollinated Seeds: These varieties produce seeds that will grow true to type, meaning you can save seeds from your harvest year after year. F1 hybrids, while often vigorous, will not produce consistent offspring from saved seeds. Reputable seed companies include Baker Creek Heirloom Seeds, High Mowing Organic Seeds, and Seed Savers Exchange. Start with common, reliable varieties like ‘Black Krim’ tomatoes, ‘Provider’ bush beans, ‘Waltham Butternut’ squash, and ‘Black Seeded Simpson’ lettuce.
- Start Seeds Indoors (Optional but Recommended): For longer growing seasons or specific crops, starting seeds indoors gives you a head start. Use seed-starting mix (e.g., Espoma Organic Seed Starter Mix, ~$10 for 16qt bag) in seed trays (Jiffy Professional Greenhouse 72-cell kit, ~$15). Provide adequate light with LED grow lights (Barrina T5 2ft 4-pack LED Grow Lights, 20W each, ~$50) for 14-16 hours a day, positioned 2-4 inches above seedlings. Maintain consistent temperatures (65-75°F for most).
- Direct Sowing vs. Transplanting: Some crops (carrots, radishes, beans, corn) prefer direct sowing into the garden bed. Others (tomatoes, peppers, broccoli, kale) benefit from being started indoors and transplanted. Follow seed packet instructions for planting depths (e.g., lettuce seeds are often surface-sown or planted 1/8 inch deep, while beans are 1 inch deep) and spacing.
- Companion Planting: Strategically plant different species together to enhance growth, deter pests, and attract beneficial insects. For example, planting marigolds near tomatoes can deter nematodes, and basil improves tomato flavor. Nasturtiums can act as a trap crop for aphids.
- Succession Planting: For a continuous harvest, plant small batches of quick-growing crops (lettuce, radishes, cilantro) every 2-3 weeks. As one crop finishes, another is ready to take its place.
Step 6: Pest & Disease Management (Organic)
Maintaining a self sufficient garden from scratch means embracing organic pest and disease control.
- Integrated Pest Management (IPM): This holistic approach combines several strategies.
- Observation: Regularly inspect your plants for early signs of pests or disease. Catching issues early is key.
- Physical Barriers: Use row covers (e.g., Agribon AG-19 floating row cover, 10×20 ft, ~$20) to protect young plants from insect pests like cabbage worms and squash bugs. Install fences (e.g., 2×4 welded wire mesh, 4 ft tall, 50 ft roll ~$70) to keep out deer, rabbits, and other larger animals.
- Hand-Picking: For larger pests like tomato hornworms or squash bugs, simply pick them off and drop them into a bucket of soapy water.
- Companion Planting: As mentioned, certain plants repel pests. Marigolds, garlic, and onions are excellent deterrents.
- Attract Beneficial Insects: Plant flowers like dill, fennel, cosmos, and sweet alyssum to attract ladybugs, lacewings, and parasitic wasps, which prey on common garden pests.
- Organic Sprays & Treatments:
- Neem Oil: An excellent broad-spectrum organic insecticide and fungicide. Bonide Neem Oil Concentrate (16oz, ~$20) can be mixed at a rate of 1-2 tbsp per gallon of water and sprayed on affected plants.
- Insecticidal Soap: Effective against soft-bodied insects like aphids, whiteflies, and spider mites. Garden Safe Insecticidal Soap (24oz ready-to-use, ~$10).
- Bacillus thuringiensis (Bt): A naturally occurring soil bacterium that targets caterpillars and worms. Monterey BT Worm & Caterpillar Killer (16oz, ~$18) is highly effective and safe for beneficial insects.
- Copper or Sulfur Sprays: For fungal diseases like powdery mildew or blight, organic copper (e.g., Bonide Copper Fungicide, ~$15 for 1lb) or sulfur (e.g., Safer Brand Garden Fungicide, ~$10 for 16oz) can be used as a last resort.
Step 7: Harvesting & Seed Saving
The culmination of your efforts is the harvest, and seed saving closes the loop on self-sufficiency.
- Harvesting Techniques:
- Timing: Harvest vegetables at their peak ripeness for best flavor and nutritional value. For example, green beans should snap cleanly, cucumbers should be firm, and tomatoes should be fully colored.
- Frequency: Many crops, like zucchini, cucumbers, and bush beans, produce more if harvested frequently. Pick daily or every other day.
- Tools: Use clean, sharp pruners (e.g., Corona ClassicCUT Bypass Pruner BP 3180, ~$30) or a sharp knife for clean cuts, minimizing damage to the plant.
- Seed Saving: This is where the « self-sufficient » aspect truly shines.
- Selection: Only save seeds from your healthiest, most vigorous plants that show desired traits (disease resistance, good flavor, high yield).
- Isolation: To ensure true-to-type seeds, prevent cross-pollination. This can be challenging for open-pollinated crops that readily cross (e.g., squash, corn). For beginners, focus on self-pollinating plants like beans, peas, lettuce, and tomatoes.
- Processing:
- Dry Seeds (Beans, Peas, Lettuce, Grains): Allow pods/seed heads to dry completely on the plant. Harvest, shell, and clean the seeds, removing chaff.
- Wet Seeds (Tomatoes, Cucumbers, Squash): For tomatoes, ferment the seeds in water for a few days to remove the gel coating and inhibit disease. For cucumbers/squash, scrape out seeds, wash thoroughly, and dry.
- Drying: Spread seeds thinly on screens or paper plates in a cool, dry, well-ventilated area for 1-4 weeks. Ensure they are bone-dry before storage. I aim for less than 8% moisture content.
- Storage: Store seeds in airtight containers (glass jars with desiccant packets work well) in a cool, dark, dry place (ideally 40-50°F and 30-40% humidity). Label clearly with variety and date. Properly stored seeds can remain viable for 3-10 years or more.
Step 8: Season Extension & Winterizing
Extend your harvest and protect your garden for the off-season to truly maximize your self sufficient garden from scratch.
- Cold Frames: Simple structures with a transparent top (glass, polycarbonate, or old windows) that sit over garden beds. They trap solar heat, allowing you to grow cold-hardy crops (lettuce, spinach, kale, radishes) well into winter or start seeds earlier in spring. A basic cold frame can be built from 2×6 lumber and a sheet of polycarbonate for under $100.
- Hoop Houses/Low Tunnels: Larger structures made from flexible hoops (PVC pipe or EMT conduit) covered with greenhouse plastic. These provide more space and greater temperature moderation. A 10×20 ft DIY low tunnel kit can cost $200-$500, while a larger, more robust hoop house kit might be $1,000-$3,000. I use a 6×12 ft low tunnel made from 1/2-inch PVC hoops and 6mil greenhouse plastic, which extends my lettuce and spinach harvest by at least
Deciding between raised beds and in-ground beds depends on your soil, budget, and physical capabilities.
- In-Ground Beds: If you have excellent native soil and good drainage, in-ground beds are the most economical. Double-digging (loosening soil two shovel depths) can significantly improve drainage and aeration. For my main garden, I primarily use in-ground beds, but I focus on building up the soil over time with consistent compost additions and cover cropping. I aim for beds that are no wider than 3-4 feet so I can reach the center without stepping on the soil, compacting it.
- Raised Beds: Raised beds offer numerous advantages, especially for poor soil, heavy clay, or rocky areas. They provide better drainage, warm up faster in spring, reduce compaction, and make weeding and harvesting easier on your back.
- Material Options:
- Untreated Cedar: Naturally rot-resistant and chemical-free. A 4×8 ft bed, 12 inches deep, typically requires three 2x12x8 ft cedar boards, costing around $50-$60 per board (total ~$150-$180) plus corner brackets or screws. My first raised beds were cedar and are still going strong after 7 years.
- Galvanized Steel: Durable, long-lasting, and aesthetically pleasing. Brands like Vego Garden offer modular kits. A Vego Garden 17″ Tall 8-in-1 Metal Raised Garden Bed (can be configured to 4×8 ft) costs approximately $250-$300.
- Concrete Blocks/Stones: Very durable but can leach minerals (though generally safe once weathered) and can be expensive.
- Recycled Materials: Pallets (check for chemical treatment stamps like « HT » for heat-treated), old tires (controversial due to potential chemical leaching).
- Filling Raised Beds: Don’t just fill with topsoil. Use a « Hugelkultur » approach (logs, branches, leaves, then compost, then topsoil) or a mixture of 60% good quality topsoil, 30% compost, and 10% perlite or vermiculite for drainage. A 4x8x1 ft raised bed requires about 32 cubic feet (or ~1.2 cubic yards) of soil mix, which can cost $100-$200 depending on your source.
- Material Options:
Step 4: Water Management & Irrigation
Efficient water management is critical for a self sufficient garden from scratch, especially in off-grid living where water resources might be limited.
- Rainwater Harvesting: This is my primary source of irrigation water. A 55-gallon rain barrel (e.g., EarthMark Rain Barrel, ~$120-$150) connected to a downspout can collect significant water. For larger needs, I use two 275-gallon IBC totes (Intermediate Bulk Containers, often available used for $100-$200 each from food-grade sources) connected in series. A 1,000 sq ft roof can collect approximately 620 gallons of water for every inch of rainfall. My 1,500 sq ft roof provides ample water for my 600 sq ft garden through multiple barrels and totes.
- Drip Irrigation: This is by far the most water-efficient method, delivering water directly to the plant’s root zone, minimizing evaporation and weed growth.
- Components: A typical drip system includes a pressure regulator (e.g., Rain Bird PRV-10, ~$15), a filter (Rain Bird RBY filter, ~$20), main tubing (1/2-inch poly tubing, 100ft ~$25), smaller feeder lines (1/4-inch tubing), and emitters (0.5 GPH or 1 GPH per plant).
- Kits: For beginners, a starter kit like the Rain Bird Drip Irrigation Garden Kit (model DDI-KIT-1P, ~$40-$60) is excellent for a small garden. For larger setups, I use Netafim Techline CV Drip Line (500ft roll, ~$150-$200), which has pressure-compensating emitters built-in, ensuring even watering across long runs.
- Automation: For true self-sufficiency, consider a battery-powered timer (e.g., Orbit B-Hyve Bluetooth Hose Faucet Timer, ~$50) or a solar-powered timer connected to a small 12V pump.
- Solar-Powered Pumps: For lifting water from a well, pond, or large storage tank to your garden, a solar pump is a game-changer. For a smaller drip system, a Shurflo 2088-594-152 Diaphragm Pump (12V, 3.5 GPM, ~$180) can be powered by a single 100W solar panel (e.g., Renogy 100W Monocrystalline Solar Panel, ~$100) and a small 12V battery (e.g., a 50Ah LiFePO4 battery like the Battle Born 50Ah, ~$450). For larger operations or deeper wells, more robust systems are needed. If you’re looking to build out a comprehensive off-grid power system to support your garden’s water needs, or indeed your entire homestead, you might want to explore resources like the Power Grid Generator complete system guide to understand the full scope of what’s possible in terms of energy independence.
Step 5: Seed Selection & Planting
The choice of seeds is crucial for a truly self sufficient garden from scratch.
- Choose Heirloom & Open-Pollinated Seeds: These varieties produce seeds that will grow true to type, meaning you can save seeds from your harvest year after year. F1 hybrids, while often vigorous, will not produce consistent offspring from saved seeds. Reputable seed companies include Baker Creek Heirloom Seeds, High Mowing Organic Seeds, and Seed Savers Exchange. Start with common, reliable varieties like ‘Black Krim’ tomatoes, ‘Provider’ bush beans, ‘Waltham Butternut’ squash, and ‘Black Seeded Simpson’ lettuce.
- Start Seeds Indoors (Optional but Recommended): For longer growing seasons or specific crops, starting seeds indoors gives you a head start. Use seed-starting mix (e.g., Espoma Organic Seed Starter Mix, ~$10 for 16qt bag) in seed trays (Jiffy Professional Greenhouse 72-cell kit, ~$15). Provide adequate light with LED grow lights (Barrina T5 2ft 4-pack LED Grow Lights, 20W each, ~$50) for 14-16 hours a day, positioned 2-4 inches above seedlings. Maintain consistent temperatures (65-75°F for most).
- Direct Sowing vs. Transplanting: Some crops (carrots, radishes, beans, corn) prefer direct sowing into the garden bed. Others (tomatoes, peppers, broccoli, kale) benefit from being started indoors and transplanted. Follow seed packet instructions for planting depths (e.g., lettuce seeds are often surface-sown or planted 1/8 inch deep, while beans are 1 inch deep) and spacing.
- Companion Planting: Strategically plant different species together to enhance growth, deter pests, and attract beneficial insects. For example, planting marigolds near tomatoes can deter nematodes, and basil improves tomato flavor. Nasturtiums can act as a trap crop for aphids.
- Succession Planting: For a continuous harvest, plant small batches of quick-growing crops (lettuce, radishes, cilantro) every 2-3 weeks. As one crop finishes, another is ready to take its place.
Step 6: Pest & Disease Management (Organic)
Maintaining a self sufficient garden from scratch means embracing organic pest and disease control.
- Integrated Pest Management (IPM): This holistic approach combines several strategies.
- Observation: Regularly inspect your plants for early signs of pests or disease. Catching issues early is key.
- Physical Barriers: Use row covers (e.g., Agribon AG-19 floating row cover, 10×20 ft, ~$20) to protect young plants from insect pests like cabbage worms and squash bugs. Install fences (e.g., 2×4 welded wire mesh, 4 ft tall, 50 ft roll ~$70) to keep out deer, rabbits, and other larger animals.
- Hand-Picking: For larger pests like tomato hornworms or squash bugs, simply pick them off and drop them into a bucket of soapy water.
- Companion Planting: As mentioned, certain plants repel pests. Marigolds, garlic, and onions are excellent deterrents.
- Attract Beneficial Insects: Plant flowers like dill, fennel, cosmos, and sweet alyssum to attract ladybugs, lacewings, and parasitic wasps, which prey on common garden pests.
- Organic Sprays & Treatments:
- Neem Oil: An excellent broad-spectrum organic insecticide and fungicide. Bonide Neem Oil Concentrate (16oz, ~$20) can be mixed at a rate of 1-2 tbsp per gallon of water and sprayed on affected plants.
- Insecticidal Soap: Effective against soft-bodied insects like aphids, whiteflies, and spider mites. Garden Safe Insecticidal Soap (24oz ready-to-use, ~$10).
- Bacillus thuringiensis (Bt): A naturally occurring soil bacterium that targets caterpillars and worms. Monterey BT Worm & Caterpillar Killer (16oz, ~$18) is highly effective and safe for beneficial insects.
- Copper or Sulfur Sprays: For fungal diseases like powdery mildew or blight, organic copper (e.g., Bonide Copper Fungicide, ~$15 for 1lb) or sulfur (e.g., Safer Brand Garden Fungicide, ~$10 for 16oz) can be used as a last resort.
Step 7: Harvesting & Seed Saving
The culmination of your efforts is the harvest, and seed saving closes the loop on self-sufficiency.
- Harvesting Techniques:
- Timing: Harvest vegetables at their peak ripeness for best flavor and nutritional value. For example, green beans should snap cleanly, cucumbers should be firm, and tomatoes should be fully colored.
- Frequency: Many crops, like zucchini, cucumbers, and bush beans, produce more if harvested frequently. Pick daily or every other day.
- Tools: Use clean, sharp pruners (e.g., Corona ClassicCUT Bypass Pruner BP 3180, ~$30) or a sharp knife for clean cuts, minimizing damage to the plant.
- Seed Saving: This is where the « self-sufficient » aspect truly shines.
- Selection: Only save seeds from your healthiest, most vigorous plants that show desired traits (disease resistance, good flavor, high yield).
- Isolation: To ensure true-to-type seeds, prevent cross-pollination. This can be challenging for open-pollinated crops that readily cross (e.g., squash, corn). For beginners, focus on self-pollinating plants like beans, peas, lettuce, and tomatoes.
- Processing:
- Dry Seeds (Beans, Peas, Lettuce, Grains): Allow pods/seed heads to dry completely on the plant. Harvest, shell, and clean the seeds, removing chaff.
- Wet Seeds (Tomatoes, Cucumbers, Squash): For tomatoes, ferment the seeds in water for a few days to remove the gel coating and inhibit disease. For cucumbers/squash, scrape out seeds, wash thoroughly, and dry.
- Drying: Spread seeds thinly on screens or paper plates in a cool, dry, well-ventilated area for 1-4 weeks. Ensure they are bone-dry before storage. I aim for less than 8% moisture content.
- Storage: Store seeds in airtight containers (glass jars with desiccant packets work well) in a cool, dark, dry place (ideally 40-50°F and 30-40% humidity). Label clearly with variety and date. Properly stored seeds can remain viable for 3-10 years or more.
Step 8: Season Extension & Winterizing
Extend your harvest and protect your garden for the off-season to truly maximize your self sufficient garden from scratch.
- Cold Frames: Simple structures with a transparent top (glass, polycarbonate, or old windows) that sit over garden beds. They trap solar heat, allowing you to grow cold-hardy crops (lettuce, spinach, kale, radishes) well into winter or start seeds earlier in spring. A basic cold frame can be built from 2×6 lumber and a sheet of polycarbonate for under $100.
- Hoop Houses/Low Tunnels: Larger structures made from flexible hoops (PVC pipe or EMT conduit) covered with greenhouse plastic. These provide more space and greater temperature moderation. A 10×20 ft DIY low tunnel kit can cost $200-$500, while a larger, more robust hoop house kit might be $1,000-$3,000. I use a 6×12 ft low tunnel made from 1/2-inch PVC hoops and 6mil greenhouse plastic, which extends my lettuce and spinach harvest by at least
Healthy soil is the bedrock of a productive, self-sufficient garden. You can’t guess what your soil needs; you have to test it.
- Perform a Soil Test: A professional soil test will give you precise data on your soil’s pH, nutrient levels (N-P-K), and organic matter content. I recommend sending a sample to your local agricultural extension office; it typically costs $20-$50 and provides detailed recommendations. Alternatively, for a quick homeowner check, a Rapitest Soil Test Kit (40-test kit, model 1663, ~$20 on Amazon) provides a good baseline for pH, Nitrogen, Phosphorus, and Potash. Aim for a pH between 6.0 and 7.0 for most vegetables.
- Amend for pH Imbalance: If your soil is too acidic (below 6.0), add agricultural lime (dolomitic lime adds magnesium, calcitic lime adds calcium). Apply 5-10 lbs per 100 sq ft for a moderate adjustment. If it’s too alkaline (above 7.0), add elemental sulfur (e.g., Espoma Soil Acidifier, ~$15 for 6.75 lbs) or generous amounts of organic matter like peat moss or pine needles.
- Build Organic Matter: This is the single most important step for long-term soil health. Organic matter improves soil structure, water retention, drainage, and nutrient availability. Incorporate 2-4 inches of high-quality compost into your top 6-12 inches of soil annually. I make my own compost from kitchen scraps, garden waste, and shredded leaves, but you can purchase it. Local nurseries often sell bulk compost for $30-$50 per cubic yard. Aged manure (from chickens, cows, or horses – ensure it’s well-rotted to avoid burning plants) is also excellent.
- Address Nutrient Deficiencies: Based on your soil test, add specific organic amendments. If Nitrogen (N) is low, add blood meal (12-0-0, ~$20 for 3 lbs) or feather meal. For Phosphorus (P), use bone meal (3-15-0, ~$15 for 3 lbs) or rock phosphate. For Potassium (K), greensand (0-0-2.5, ~$25 for 5 lbs) or kelp meal are good choices. I rely heavily on Espoma Organic Garden-tone (5-3-3, ~$25 for an 8lb bag) as a balanced, all-purpose organic fertilizer during planting.
Step 3: Garden Bed Preparation
Deciding between raised beds and in-ground beds depends on your soil, budget, and physical capabilities.
- In-Ground Beds: If you have excellent native soil and good drainage, in-ground beds are the most economical. Double-digging (loosening soil two shovel depths) can significantly improve drainage and aeration. For my main garden, I primarily use in-ground beds, but I focus on building up the soil over time with consistent compost additions and cover cropping. I aim for beds that are no wider than 3-4 feet so I can reach the center without stepping on the soil, compacting it.
- Raised Beds: Raised beds offer numerous advantages, especially for poor soil, heavy clay, or rocky areas. They provide better drainage, warm up faster in spring, reduce compaction, and make weeding and harvesting easier on your back.
- Material Options:
- Untreated Cedar: Naturally rot-resistant and chemical-free. A 4×8 ft bed, 12 inches deep, typically requires three 2x12x8 ft cedar boards, costing around $50-$60 per board (total ~$150-$180) plus corner brackets or screws. My first raised beds were cedar and are still going strong after 7 years.
- Galvanized Steel: Durable, long-lasting, and aesthetically pleasing. Brands like Vego Garden offer modular kits. A Vego Garden 17″ Tall 8-in-1 Metal Raised Garden Bed (can be configured to 4×8 ft) costs approximately $250-$300.
- Concrete Blocks/Stones: Very durable but can leach minerals (though generally safe once weathered) and can be expensive.
- Recycled Materials: Pallets (check for chemical treatment stamps like « HT » for heat-treated), old tires (controversial due to potential chemical leaching).
- Filling Raised Beds: Don’t just fill with topsoil. Use a « Hugelkultur » approach (logs, branches, leaves, then compost, then topsoil) or a mixture of 60% good quality topsoil, 30% compost, and 10% perlite or vermiculite for drainage. A 4x8x1 ft raised bed requires about 32 cubic feet (or ~1.2 cubic yards) of soil mix, which can cost $100-$200 depending on your source.
- Material Options:
Step 4: Water Management & Irrigation
Efficient water management is critical for a self sufficient garden from scratch, especially in off-grid living where water resources might be limited.
- Rainwater Harvesting: This is my primary source of irrigation water. A 55-gallon rain barrel (e.g., EarthMark Rain Barrel, ~$120-$150) connected to a downspout can collect significant water. For larger needs, I use two 275-gallon IBC totes (Intermediate Bulk Containers, often available used for $100-$200 each from food-grade sources) connected in series. A 1,000 sq ft roof can collect approximately 620 gallons of water for every inch of rainfall. My 1,500 sq ft roof provides ample water for my 600 sq ft garden through multiple barrels and totes.
- Drip Irrigation: This is by far the most water-efficient method, delivering water directly to the plant’s root zone, minimizing evaporation and weed growth.
- Components: A typical drip system includes a pressure regulator (e.g., Rain Bird PRV-10, ~$15), a filter (Rain Bird RBY filter, ~$20), main tubing (1/2-inch poly tubing, 100ft ~$25), smaller feeder lines (1/4-inch tubing), and emitters (0.5 GPH or 1 GPH per plant).
- Kits: For beginners, a starter kit like the Rain Bird Drip Irrigation Garden Kit (model DDI-KIT-1P, ~$40-$60) is excellent for a small garden. For larger setups, I use Netafim Techline CV Drip Line (500ft roll, ~$150-$200), which has pressure-compensating emitters built-in, ensuring even watering across long runs.
- Automation: For true self-sufficiency, consider a battery-powered timer (e.g., Orbit B-Hyve Bluetooth Hose Faucet Timer, ~$50) or a solar-powered timer connected to a small 12V pump.
- Solar-Powered Pumps: For lifting water from a well, pond, or large storage tank to your garden, a solar pump is a game-changer. For a smaller drip system, a Shurflo 2088-594-152 Diaphragm Pump (12V, 3.5 GPM, ~$180) can be powered by a single 100W solar panel (e.g., Renogy 100W Monocrystalline Solar Panel, ~$100) and a small 12V battery (e.g., a 50Ah LiFePO4 battery like the Battle Born 50Ah, ~$450). For larger operations or deeper wells, more robust systems are needed. If you’re looking to build out a comprehensive off-grid power system to support your garden’s water needs, or indeed your entire homestead, you might want to explore resources like the Power Grid Generator complete system guide to understand the full scope of what’s possible in terms of energy independence.
Step 5: Seed Selection & Planting
The choice of seeds is crucial for a truly self sufficient garden from scratch.
- Choose Heirloom & Open-Pollinated Seeds: These varieties produce seeds that will grow true to type, meaning you can save seeds from your harvest year after year. F1 hybrids, while often vigorous, will not produce consistent offspring from saved seeds. Reputable seed companies include Baker Creek Heirloom Seeds, High Mowing Organic Seeds, and Seed Savers Exchange. Start with common, reliable varieties like ‘Black Krim’ tomatoes, ‘Provider’ bush beans, ‘Waltham Butternut’ squash, and ‘Black Seeded Simpson’ lettuce.
- Start Seeds Indoors (Optional but Recommended): For longer growing seasons or specific crops, starting seeds indoors gives you a head start. Use seed-starting mix (e.g., Espoma Organic Seed Starter Mix, ~$10 for 16qt bag) in seed trays (Jiffy Professional Greenhouse 72-cell kit, ~$15). Provide adequate light with LED grow lights (Barrina T5 2ft 4-pack LED Grow Lights, 20W each, ~$50) for 14-16 hours a day, positioned 2-4 inches above seedlings. Maintain consistent temperatures (65-75°F for most).
- Direct Sowing vs. Transplanting: Some crops (carrots, radishes, beans, corn) prefer direct sowing into the garden bed. Others (tomatoes, peppers, broccoli, kale) benefit from being started indoors and transplanted. Follow seed packet instructions for planting depths (e.g., lettuce seeds are often surface-sown or planted 1/8 inch deep, while beans are 1 inch deep) and spacing.
- Companion Planting: Strategically plant different species together to enhance growth, deter pests, and attract beneficial insects. For example, planting marigolds near tomatoes can deter nematodes, and basil improves tomato flavor. Nasturtiums can act as a trap crop for aphids.
- Succession Planting: For a continuous harvest, plant small batches of quick-growing crops (lettuce, radishes, cilantro) every 2-3 weeks. As one crop finishes, another is ready to take its place.
Step 6: Pest & Disease Management (Organic)
Maintaining a self sufficient garden from scratch means embracing organic pest and disease control.
- Integrated Pest Management (IPM): This holistic approach combines several strategies.
- Observation: Regularly inspect your plants for early signs of pests or disease. Catching issues early is key.
- Physical Barriers: Use row covers (e.g., Agribon AG-19 floating row cover, 10×20 ft, ~$20) to protect young plants from insect pests like cabbage worms and squash bugs. Install fences (e.g., 2×4 welded wire mesh, 4 ft tall, 50 ft roll ~$70) to keep out deer, rabbits, and other larger animals.
- Hand-Picking: For larger pests like tomato hornworms or squash bugs, simply pick them off and drop them into a bucket of soapy water.
- Companion Planting: As mentioned, certain plants repel pests. Marigolds, garlic, and onions are excellent deterrents.
- Attract Beneficial Insects: Plant flowers like dill, fennel, cosmos, and sweet alyssum to attract ladybugs, lacewings, and parasitic wasps, which prey on common garden pests.
- Organic Sprays & Treatments:
- Neem Oil: An excellent broad-spectrum organic insecticide and fungicide. Bonide Neem Oil Concentrate (16oz, ~$20) can be mixed at a rate of 1-2 tbsp per gallon of water and sprayed on affected plants.
- Insecticidal Soap: Effective against soft-bodied insects like aphids, whiteflies, and spider mites. Garden Safe Insecticidal Soap (24oz ready-to-use, ~$10).
- Bacillus thuringiensis (Bt): A naturally occurring soil bacterium that targets caterpillars and worms. Monterey BT Worm & Caterpillar Killer (16oz, ~$18) is highly effective and safe for beneficial insects.
- Copper or Sulfur Sprays: For fungal diseases like powdery mildew or blight, organic copper (e.g., Bonide Copper Fungicide, ~$15 for 1lb) or sulfur (e.g., Safer Brand Garden Fungicide, ~$10 for 16oz) can be used as a last resort.
Step 7: Harvesting & Seed Saving
The culmination of your efforts is the harvest, and seed saving closes the loop on self-sufficiency.
- Harvesting Techniques:
- Timing: Harvest vegetables at their peak ripeness for best flavor and nutritional value. For example, green beans should snap cleanly, cucumbers should be firm, and tomatoes should be fully colored.
- Frequency: Many crops, like zucchini, cucumbers, and bush beans, produce more if harvested frequently. Pick daily or every other day.
- Tools: Use clean, sharp pruners (e.g., Corona ClassicCUT Bypass Pruner BP 3180, ~$30) or a sharp knife for clean cuts, minimizing damage to the plant.
- Seed Saving: This is where the « self-sufficient » aspect truly shines.
- Selection: Only save seeds from your healthiest, most vigorous plants that show desired traits (disease resistance, good flavor, high yield).
- Isolation: To ensure true-to-type seeds, prevent cross-pollination. This can be challenging for open-pollinated crops that readily cross (e.g., squash, corn). For beginners, focus on self-pollinating plants like beans, peas, lettuce, and tomatoes.
- Processing:
- Dry Seeds (Beans, Peas, Lettuce, Grains): Allow pods/seed heads to dry completely on the plant. Harvest, shell, and clean the seeds, removing chaff.
- Wet Seeds (Tomatoes, Cucumbers, Squash): For tomatoes, ferment the seeds in water for a few days to remove the gel coating and inhibit disease. For cucumbers/squash, scrape out seeds, wash thoroughly, and dry.
- Drying: Spread seeds thinly on screens or paper plates in a cool, dry, well-ventilated area for 1-4 weeks. Ensure they are bone-dry before storage. I aim for less than 8% moisture content.
- Storage: Store seeds in airtight containers (glass jars with desiccant packets work well) in a cool, dark, dry place (ideally 40-50°F and 30-40% humidity). Label clearly with variety and date. Properly stored seeds can remain viable for 3-10 years or more.
Step 8: Season Extension & Winterizing
Extend your harvest and protect your garden for the off-season to truly maximize your self sufficient garden from scratch.
- Cold Frames: Simple structures with a transparent top (glass, polycarbonate, or old windows) that sit over garden beds. They trap solar heat, allowing you to grow cold-hardy crops (lettuce, spinach, kale, radishes) well into winter or start seeds earlier in spring. A basic cold frame can be built from 2×6 lumber and a sheet of polycarbonate for under $100.
- Hoop Houses/Low Tunnels: Larger structures made from flexible hoops (PVC pipe or EMT conduit) covered with greenhouse plastic. These provide more space and greater temperature moderation. A 10×20 ft DIY low tunnel kit can cost $200-$500, while a larger, more robust hoop house kit might be $1,000-$3,000. I use a 6×12 ft low tunnel made from 1/2-inch PVC hoops and 6mil greenhouse plastic, which extends my lettuce and spinach harvest by at least
- Choose Heirloom & Open-Pollinated Seeds: These varieties produce seeds that will grow true to type, meaning you can save seeds from your harvest year after year. F1 hybrids, while often vigorous, will not produce consistent offspring from saved seeds. Reputable seed companies include Baker Creek Heirloom Seeds, High Mowing Organic Seeds, and Seed Savers Exchange. Start with common, reliable varieties like ‘Black Krim’ tomatoes, ‘Provider’ bush beans, ‘Waltham Butternut’ squash, and ‘Black Seeded Simpson’ lettuce.
- Start Seeds Indoors (Optional but Recommended): For longer growing seasons or specific crops, starting seeds indoors gives you a head start. Use seed-starting mix (e.g., Espoma Organic Seed Starter Mix, ~$10 for 16qt bag) in seed trays (Jiffy Professional Greenhouse 72-cell kit, ~$15). Provide adequate light with LED grow lights (Barrina T5 2ft 4-pack LED Grow Lights, 20W each, ~$50) for 14-16 hours a day, positioned 2-4 inches above seedlings. Maintain consistent temperatures (65-75°F for most).
- Direct Sowing vs. Transplanting: Some crops (carrots, radishes, beans, corn) prefer direct sowing into the garden bed. Others (tomatoes, peppers, broccoli, kale) benefit from being started indoors and transplanted. Follow seed packet instructions for planting depths (e.g., lettuce seeds are often surface-sown or planted 1/8 inch deep, while beans are 1 inch deep) and spacing.
- Companion Planting: Strategically plant different species together to enhance growth, deter pests, and attract beneficial insects. For example, planting marigolds near tomatoes can deter nematodes, and basil improves tomato flavor. Nasturtiums can act as a trap crop for aphids.
- Succession Planting: For a continuous harvest, plant small batches of quick-growing crops (lettuce, radishes, cilantro) every 2-3 weeks. As one crop finishes, another is ready to take its place.
Step 6: Pest & Disease Management (Organic)
Maintaining a self sufficient garden from scratch means embracing organic pest and disease control.
- Integrated Pest Management (IPM): This holistic approach combines several strategies.
- Observation: Regularly inspect your plants for early signs of pests or disease. Catching issues early is key.
- Physical Barriers: Use row covers (e.g., Agribon AG-19 floating row cover, 10×20 ft, ~$20) to protect young plants from insect pests like cabbage worms and squash bugs. Install fences (e.g., 2×4 welded wire mesh, 4 ft tall, 50 ft roll ~$70) to keep out deer, rabbits, and other larger animals.
- Hand-Picking: For larger pests like tomato hornworms or squash bugs, simply pick them off and drop them into a bucket of soapy water.
- Companion Planting: As mentioned, certain plants repel pests. Marigolds, garlic, and onions are excellent deterrents.
- Attract Beneficial Insects: Plant flowers like dill, fennel, cosmos, and sweet alyssum to attract ladybugs, lacewings, and parasitic wasps, which prey on common garden pests.
- Organic Sprays & Treatments:
- Neem Oil: An excellent broad-spectrum organic insecticide and fungicide. Bonide Neem Oil Concentrate (16oz, ~$20) can be mixed at a rate of 1-2 tbsp per gallon of water and sprayed on affected plants.
- Insecticidal Soap: Effective against soft-bodied insects like aphids, whiteflies, and spider mites. Garden Safe Insecticidal Soap (24oz ready-to-use, ~$10).
- Bacillus thuringiensis (Bt): A naturally occurring soil bacterium that targets caterpillars and worms. Monterey BT Worm & Caterpillar Killer (16oz, ~$18) is highly effective and safe for beneficial insects.
- Copper or Sulfur Sprays: For fungal diseases like powdery mildew or blight, organic copper (e.g., Bonide Copper Fungicide, ~$15 for 1lb) or sulfur (e.g., Safer Brand Garden Fungicide, ~$10 for 16oz) can be used as a last resort.
Step 7: Harvesting & Seed Saving
The culmination of your efforts is the harvest, and seed saving closes the loop on self-sufficiency.
- Harvesting Techniques:
- Timing: Harvest vegetables at their peak ripeness for best flavor and nutritional value. For example, green beans should snap cleanly, cucumbers should be firm, and tomatoes should be fully colored.
- Frequency: Many crops, like zucchini, cucumbers, and bush beans, produce more if harvested frequently. Pick daily or every other day.
- Tools: Use clean, sharp pruners (e.g., Corona ClassicCUT Bypass Pruner BP 3180, ~$30) or a sharp knife for clean cuts, minimizing damage to the plant.
- Seed Saving: This is where the « self-sufficient » aspect truly shines.
- Selection: Only save seeds from your healthiest, most vigorous plants that show desired traits (disease resistance, good flavor, high yield).
- Isolation: To ensure true-to-type seeds, prevent cross-pollination. This can be challenging for open-pollinated crops that readily cross (e.g., squash, corn). For beginners, focus on self-pollinating plants like beans, peas, lettuce, and tomatoes.
- Processing:
- Dry Seeds (Beans, Peas, Lettuce, Grains): Allow pods/seed heads to dry completely on the plant. Harvest, shell, and clean the seeds, removing chaff.
- Wet Seeds (Tomatoes, Cucumbers, Squash): For tomatoes, ferment the seeds in water for a few days to remove the gel coating and inhibit disease. For cucumbers/squash, scrape out seeds, wash thoroughly, and dry.
- Drying: Spread seeds thinly on screens or paper plates in a cool, dry, well-ventilated area for 1-4 weeks. Ensure they are bone-dry before storage. I aim for less than 8% moisture content.
- Storage: Store seeds in airtight containers (glass jars with desiccant packets work well) in a cool, dark, dry place (ideally 40-50°F and 30-40% humidity). Label clearly with variety and date. Properly stored seeds can remain viable for 3-10 years or more.
Step 8: Season Extension & Winterizing
Extend your harvest and protect your garden for the off-season to truly maximize your self sufficient garden from scratch.
- Cold Frames: Simple structures with a transparent top (glass, polycarbonate, or old windows) that sit over garden beds. They trap solar heat, allowing you to grow cold-hardy crops (lettuce, spinach, kale, radishes) well into winter or start seeds earlier in spring. A basic cold frame can be built from 2×6 lumber and a sheet of polycarbonate for under $100.
- Hoop Houses/Low Tunnels: Larger structures made from flexible hoops (PVC pipe or EMT conduit) covered with greenhouse plastic. These provide more space and greater temperature moderation. A 10×20 ft DIY low tunnel kit can cost $200-$500, while a larger, more robust hoop house kit might be $1,000-$3,000. I use a 6×12 ft low tunnel made from 1/2-inch PVC hoops and 6mil greenhouse plastic, which extends my lettuce and spinach harvest by at least
Efficient water management is critical for a self sufficient garden from scratch, especially in off-grid living where water resources might be limited.
- Rainwater Harvesting: This is my primary source of irrigation water. A 55-gallon rain barrel (e.g., EarthMark Rain Barrel, ~$120-$150) connected to a downspout can collect significant water. For larger needs, I use two 275-gallon IBC totes (Intermediate Bulk Containers, often available used for $100-$200 each from food-grade sources) connected in series. A 1,000 sq ft roof can collect approximately 620 gallons of water for every inch of rainfall. My 1,500 sq ft roof provides ample water for my 600 sq ft garden through multiple barrels and totes.
- Drip Irrigation: This is by far the most water-efficient method, delivering water directly to the plant’s root zone, minimizing evaporation and weed growth.
- Components: A typical drip system includes a pressure regulator (e.g., Rain Bird PRV-10, ~$15), a filter (Rain Bird RBY filter, ~$20), main tubing (1/2-inch poly tubing, 100ft ~$25), smaller feeder lines (1/4-inch tubing), and emitters (0.5 GPH or 1 GPH per plant).
- Kits: For beginners, a starter kit like the Rain Bird Drip Irrigation Garden Kit (model DDI-KIT-1P, ~$40-$60) is excellent for a small garden. For larger setups, I use Netafim Techline CV Drip Line (500ft roll, ~$150-$200), which has pressure-compensating emitters built-in, ensuring even watering across long runs.
- Automation: For true self-sufficiency, consider a battery-powered timer (e.g., Orbit B-Hyve Bluetooth Hose Faucet Timer, ~$50) or a solar-powered timer connected to a small 12V pump.
- Solar-Powered Pumps: For lifting water from a well, pond, or large storage tank to your garden, a solar pump is a game-changer. For a smaller drip system, a Shurflo 2088-594-152 Diaphragm Pump (12V, 3.5 GPM, ~$180) can be powered by a single 100W solar panel (e.g., Renogy 100W Monocrystalline Solar Panel, ~$100) and a small 12V battery (e.g., a 50Ah LiFePO4 battery like the Battle Born 50Ah, ~$450). For larger operations or deeper wells, more robust systems are needed. If you’re looking to build out a comprehensive off-grid power system to support your garden’s water needs, or indeed your entire homestead, you might want to explore resources like the Power Grid Generator complete system guide to understand the full scope of what’s possible in terms of energy independence.
Step 5: Seed Selection & Planting
The choice of seeds is crucial for a truly self sufficient garden from scratch.
- Choose Heirloom & Open-Pollinated Seeds: These varieties produce seeds that will grow true to type, meaning you can save seeds from your harvest year after year. F1 hybrids, while often vigorous, will not produce consistent offspring from saved seeds. Reputable seed companies include Baker Creek Heirloom Seeds, High Mowing Organic Seeds, and Seed Savers Exchange. Start with common, reliable varieties like ‘Black Krim’ tomatoes, ‘Provider’ bush beans, ‘Waltham Butternut’ squash, and ‘Black Seeded Simpson’ lettuce.
- Start Seeds Indoors (Optional but Recommended): For longer growing seasons or specific crops, starting seeds indoors gives you a head start. Use seed-starting mix (e.g., Espoma Organic Seed Starter Mix, ~$10 for 16qt bag) in seed trays (Jiffy Professional Greenhouse 72-cell kit, ~$15). Provide adequate light with LED grow lights (Barrina T5 2ft 4-pack LED Grow Lights, 20W each, ~$50) for 14-16 hours a day, positioned 2-4 inches above seedlings. Maintain consistent temperatures (65-75°F for most).
- Direct Sowing vs. Transplanting: Some crops (carrots, radishes, beans, corn) prefer direct sowing into the garden bed. Others (tomatoes, peppers, broccoli, kale) benefit from being started indoors and transplanted. Follow seed packet instructions for planting depths (e.g., lettuce seeds are often surface-sown or planted 1/8 inch deep, while beans are 1 inch deep) and spacing.
- Companion Planting: Strategically plant different species together to enhance growth, deter pests, and attract beneficial insects. For example, planting marigolds near tomatoes can deter nematodes, and basil improves tomato flavor. Nasturtiums can act as a trap crop for aphids.
- Succession Planting: For a continuous harvest, plant small batches of quick-growing crops (lettuce, radishes, cilantro) every 2-3 weeks. As one crop finishes, another is ready to take its place.
Step 6: Pest & Disease Management (Organic)
Maintaining a self sufficient garden from scratch means embracing organic pest and disease control.
- Integrated Pest Management (IPM): This holistic approach combines several strategies.
- Observation: Regularly inspect your plants for early signs of pests or disease. Catching issues early is key.
- Physical Barriers: Use row covers (e.g., Agribon AG-19 floating row cover, 10×20 ft, ~$20) to protect young plants from insect pests like cabbage worms and squash bugs. Install fences (e.g., 2×4 welded wire mesh, 4 ft tall, 50 ft roll ~$70) to keep out deer, rabbits, and other larger animals.
- Hand-Picking: For larger pests like tomato hornworms or squash bugs, simply pick them off and drop them into a bucket of soapy water.
- Companion Planting: As mentioned, certain plants repel pests. Marigolds, garlic, and onions are excellent deterrents.
- Attract Beneficial Insects: Plant flowers like dill, fennel, cosmos, and sweet alyssum to attract ladybugs, lacewings, and parasitic wasps, which prey on common garden pests.
- Organic Sprays & Treatments:
- Neem Oil: An excellent broad-spectrum organic insecticide and fungicide. Bonide Neem Oil Concentrate (16oz, ~$20) can be mixed at a rate of 1-2 tbsp per gallon of water and sprayed on affected plants.
- Insecticidal Soap: Effective against soft-bodied insects like aphids, whiteflies, and spider mites. Garden Safe Insecticidal Soap (24oz ready-to-use, ~$10).
- Bacillus thuringiensis (Bt): A naturally occurring soil bacterium that targets caterpillars and worms. Monterey BT Worm & Caterpillar Killer (16oz, ~$18) is highly effective and safe for beneficial insects.
- Copper or Sulfur Sprays: For fungal diseases like powdery mildew or blight, organic copper (e.g., Bonide Copper Fungicide, ~$15 for 1lb) or sulfur (e.g., Safer Brand Garden Fungicide, ~$10 for 16oz) can be used as a last resort.
Step 7: Harvesting & Seed Saving
The culmination of your efforts is the harvest, and seed saving closes the loop on self-sufficiency.
- Harvesting Techniques:
- Timing: Harvest vegetables at their peak ripeness for best flavor and nutritional value. For example, green beans should snap cleanly, cucumbers should be firm, and tomatoes should be fully colored.
- Frequency: Many crops, like zucchini, cucumbers, and bush beans, produce more if harvested frequently. Pick daily or every other day.
- Tools: Use clean, sharp pruners (e.g., Corona ClassicCUT Bypass Pruner BP 3180, ~$30) or a sharp knife for clean cuts, minimizing damage to the plant.
- Seed Saving: This is where the « self-sufficient » aspect truly shines.
- Selection: Only save seeds from your healthiest, most vigorous plants that show desired traits (disease resistance, good flavor, high yield).
- Isolation: To ensure true-to-type seeds, prevent cross-pollination. This can be challenging for open-pollinated crops that readily cross (e.g., squash, corn). For beginners, focus on self-pollinating plants like beans, peas, lettuce, and tomatoes.
- Processing:
- Dry Seeds (Beans, Peas, Lettuce, Grains): Allow pods/seed heads to dry completely on the plant. Harvest, shell, and clean the seeds, removing chaff.
- Wet Seeds (Tomatoes, Cucumbers, Squash): For tomatoes, ferment the seeds in water for a few days to remove the gel coating and inhibit disease. For cucumbers/squash, scrape out seeds, wash thoroughly, and dry.
- Drying: Spread seeds thinly on screens or paper plates in a cool, dry, well-ventilated area for 1-4 weeks. Ensure they are bone-dry before storage. I aim for less than 8% moisture content.
- Storage: Store seeds in airtight containers (glass jars with desiccant packets work well) in a cool, dark, dry place (ideally 40-50°F and 30-40% humidity). Label clearly with variety and date. Properly stored seeds can remain viable for 3-10 years or more.
Step 8: Season Extension & Winterizing
Extend your harvest and protect your garden for the off-season to truly maximize your self sufficient garden from scratch.
- Cold Frames: Simple structures with a transparent top (glass, polycarbonate, or old windows) that sit over garden beds. They trap solar heat, allowing you to grow cold-hardy crops (lettuce, spinach, kale, radishes) well into winter or start seeds earlier in spring. A basic cold frame can be built from 2×6 lumber and a sheet of polycarbonate for under $100.
- Hoop Houses/Low Tunnels: Larger structures made from flexible hoops (PVC pipe or EMT conduit) covered with greenhouse plastic. These provide more space and greater temperature moderation. A 10×20 ft DIY low tunnel kit can cost $200-$500, while a larger, more robust hoop house kit might be $1,000-$3,000. I use a 6×12 ft low tunnel made from 1/2-inch PVC hoops and 6mil greenhouse plastic, which extends my lettuce and spinach harvest by at least
Step 4: Water Management & Irrigation
Efficient water management is critical for a self sufficient garden from scratch, especially in off-grid living where water resources might be limited.
- Rainwater Harvesting: This is my primary source of irrigation water. A 55-gallon rain barrel (e.g., EarthMark Rain Barrel, ~$120-$150) connected to a downspout can collect significant water. For larger needs, I use two 275-gallon IBC totes (Intermediate Bulk Containers, often available used for $100-$200 each from food-grade sources) connected in series. A 1,000 sq ft roof can collect approximately 620 gallons of water for every inch of rainfall. My 1,500 sq ft roof provides ample water for my 600 sq ft garden through multiple barrels and totes.
- Drip Irrigation: This is by far the most water-efficient method, delivering water directly to the plant’s root zone, minimizing evaporation and weed growth.
- Components: A typical drip system includes a pressure regulator (e.g., Rain Bird PRV-10, ~$15), a filter (Rain Bird RBY filter, ~$20), main tubing (1/2-inch poly tubing, 100ft ~$25), smaller feeder lines (1/4-inch tubing), and emitters (0.5 GPH or 1 GPH per plant).
- Kits: For beginners, a starter kit like the Rain Bird Drip Irrigation Garden Kit (model DDI-KIT-1P, ~$40-$60) is excellent for a small garden. For larger setups, I use Netafim Techline CV Drip Line (500ft roll, ~$150-$200), which has pressure-compensating emitters built-in, ensuring even watering across long runs.
- Automation: For true self-sufficiency, consider a battery-powered timer (e.g., Orbit B-Hyve Bluetooth Hose Faucet Timer, ~$50) or a solar-powered timer connected to a small 12V pump.
- Solar-Powered Pumps: For lifting water from a well, pond, or large storage tank to your garden, a solar pump is a game-changer. For a smaller drip system, a Shurflo 2088-594-152 Diaphragm Pump (12V, 3.5 GPM, ~$180) can be powered by a single 100W solar panel (e.g., Renogy 100W Monocrystalline Solar Panel, ~$100) and a small 12V battery (e.g., a 50Ah LiFePO4 battery like the Battle Born 50Ah, ~$450). For larger operations or deeper wells, more robust systems are needed. If you’re looking to build out a comprehensive off-grid power system to support your garden’s water needs, or indeed your entire homestead, you might want to explore resources like the Power Grid Generator complete system guide to understand the full scope of what’s possible in terms of energy independence.
Step 5: Seed Selection & Planting
The choice of seeds is crucial for a truly self sufficient garden from scratch.
- Choose Heirloom & Open-Pollinated Seeds: These varieties produce seeds that will grow true to type, meaning you can save seeds from your harvest year after year. F1 hybrids, while often vigorous, will not produce consistent offspring from saved seeds. Reputable seed companies include Baker Creek Heirloom Seeds, High Mowing Organic Seeds, and Seed Savers Exchange. Start with common, reliable varieties like ‘Black Krim’ tomatoes, ‘Provider’ bush beans, ‘Waltham Butternut’ squash, and ‘Black Seeded Simpson’ lettuce.
- Start Seeds Indoors (Optional but Recommended): For longer growing seasons or specific crops, starting seeds indoors gives you a head start. Use seed-starting mix (e.g., Espoma Organic Seed Starter Mix, ~$10 for 16qt bag) in seed trays (Jiffy Professional Greenhouse 72-cell kit, ~$15). Provide adequate light with LED grow lights (Barrina T5 2ft 4-pack LED Grow Lights, 20W each, ~$50) for 14-16 hours a day, positioned 2-4 inches above seedlings. Maintain consistent temperatures (65-75°F for most).
- Direct Sowing vs. Transplanting: Some crops (carrots, radishes, beans, corn) prefer direct sowing into the garden bed. Others (tomatoes, peppers, broccoli, kale) benefit from being started indoors and transplanted. Follow seed packet instructions for planting depths (e.g., lettuce seeds are often surface-sown or planted 1/8 inch deep, while beans are 1 inch deep) and spacing.
- Companion Planting: Strategically plant different species together to enhance growth, deter pests, and attract beneficial insects. For example, planting marigolds near tomatoes can deter nematodes, and basil improves tomato flavor. Nasturtiums can act as a trap crop for aphids.
- Succession Planting: For a continuous harvest, plant small batches of quick-growing crops (lettuce, radishes, cilantro) every 2-3 weeks. As one crop finishes, another is ready to take its place.
Step 6: Pest & Disease Management (Organic)
Maintaining a self sufficient garden from scratch means embracing organic pest and disease control.
- Integrated Pest Management (IPM): This holistic approach combines several strategies.
- Observation: Regularly inspect your plants for early signs of pests or disease. Catching issues early is key.
- Physical Barriers: Use row covers (e.g., Agribon AG-19 floating row cover, 10×20 ft, ~$20) to protect young plants from insect pests like cabbage worms and squash bugs. Install fences (e.g., 2×4 welded wire mesh, 4 ft tall, 50 ft roll ~$70) to keep out deer, rabbits, and other larger animals.
- Hand-Picking: For larger pests like tomato hornworms or squash bugs, simply pick them off and drop them into a bucket of soapy water.
- Companion Planting: As mentioned, certain plants repel pests. Marigolds, garlic, and onions are excellent deterrents.
- Attract Beneficial Insects: Plant flowers like dill, fennel, cosmos, and sweet alyssum to attract ladybugs, lacewings, and parasitic wasps, which prey on common garden pests.
- Organic Sprays & Treatments:
- Neem Oil: An excellent broad-spectrum organic insecticide and fungicide. Bonide Neem Oil Concentrate (16oz, ~$20) can be mixed at a rate of 1-2 tbsp per gallon of water and sprayed on affected plants.
- Insecticidal Soap: Effective against soft-bodied insects like aphids, whiteflies, and spider mites. Garden Safe Insecticidal Soap (24oz ready-to-use, ~$10).
- Bacillus thuringiensis (Bt): A naturally occurring soil bacterium that targets caterpillars and worms. Monterey BT Worm & Caterpillar Killer (16oz, ~$18) is highly effective and safe for beneficial insects.
- Copper or Sulfur Sprays: For fungal diseases like powdery mildew or blight, organic copper (e.g., Bonide Copper Fungicide, ~$15 for 1lb) or sulfur (e.g., Safer Brand Garden Fungicide, ~$10 for 16oz) can be used as a last resort.
Step 7: Harvesting & Seed Saving
The culmination of your efforts is the harvest, and seed saving closes the loop on self-sufficiency.
- Harvesting Techniques:
- Timing: Harvest vegetables at their peak ripeness for best flavor and nutritional value. For example, green beans should snap cleanly, cucumbers should be firm, and tomatoes should be fully colored.
- Frequency: Many crops, like zucchini, cucumbers, and bush beans, produce more if harvested frequently. Pick daily or every other day.
- Tools: Use clean, sharp pruners (e.g., Corona ClassicCUT Bypass Pruner BP 3180, ~$30) or a sharp knife for clean cuts, minimizing damage to the plant.
- Seed Saving: This is where the « self-sufficient » aspect truly shines.
- Selection: Only save seeds from your healthiest, most vigorous plants that show desired traits (disease resistance, good flavor, high yield).
- Isolation: To ensure true-to-type seeds, prevent cross-pollination. This can be challenging for open-pollinated crops that readily cross (e.g., squash, corn). For beginners, focus on self-pollinating plants like beans, peas, lettuce, and tomatoes.
- Processing:
- Dry Seeds (Beans, Peas, Lettuce, Grains): Allow pods/seed heads to dry completely on the plant. Harvest, shell, and clean the seeds, removing chaff.
- Wet Seeds (Tomatoes, Cucumbers, Squash): For tomatoes, ferment the seeds in water for a few days to remove the gel coating and inhibit disease. For cucumbers/squash, scrape out seeds, wash thoroughly, and dry.
- Drying: Spread seeds thinly on screens or paper plates in a cool, dry, well-ventilated area for 1-4 weeks. Ensure they are bone-dry before storage. I aim for less than 8% moisture content.
- Storage: Store seeds in airtight containers (glass jars with desiccant packets work well) in a cool, dark, dry place (ideally 40-50°F and 30-40% humidity). Label clearly with variety and date. Properly stored seeds can remain viable for 3-10 years or more.
Step 8: Season Extension & Winterizing
Extend your harvest and protect your garden for the off-season to truly maximize your self sufficient garden from scratch.
- Cold Frames: Simple structures with a transparent top (glass, polycarbonate, or old windows) that sit over garden beds. They trap solar heat, allowing you to grow cold-hardy crops (lettuce, spinach, kale, radishes) well into winter or start seeds earlier in spring. A basic cold frame can be built from 2×6 lumber and a sheet of polycarbonate for under $100.
- Hoop Houses/Low Tunnels: Larger structures made from flexible hoops (PVC pipe or EMT conduit) covered with greenhouse plastic. These provide more space and greater temperature moderation. A 10×20 ft DIY low tunnel kit can cost $200-$500, while a larger, more robust hoop house kit might be $1,000-$3,000. I use a 6×12 ft low tunnel made from 1/2-inch PVC hoops and 6mil greenhouse plastic, which extends my lettuce and spinach harvest by at least
- In-Ground Beds: If you have excellent native soil and good drainage, in-ground beds are the most economical. Double-digging (loosening soil two shovel depths) can significantly improve drainage and aeration. For my main garden, I primarily use in-ground beds, but I focus on building up the soil over time with consistent compost additions and cover cropping. I aim for beds that are no wider than 3-4 feet so I can reach the center without stepping on the soil, compacting it.
- Raised Beds: Raised beds offer numerous advantages, especially for poor soil, heavy clay, or rocky areas. They provide better drainage, warm up faster in spring, reduce compaction, and make weeding and harvesting easier on your back.
- Material Options:
- Untreated Cedar: Naturally rot-resistant and chemical-free. A 4×8 ft bed, 12 inches deep, typically requires three 2x12x8 ft cedar boards, costing around $50-$60 per board (total ~$150-$180) plus corner brackets or screws. My first raised beds were cedar and are still going strong after 7 years.
- Galvanized Steel: Durable, long-lasting, and aesthetically pleasing. Brands like Vego Garden offer modular kits. A Vego Garden 17″ Tall 8-in-1 Metal Raised Garden Bed (can be configured to 4×8 ft) costs approximately $250-$300.
- Concrete Blocks/Stones: Very durable but can leach minerals (though generally safe once weathered) and can be expensive.
- Recycled Materials: Pallets (check for chemical treatment stamps like « HT » for heat-treated), old tires (controversial due to potential chemical leaching).
- Filling Raised Beds: Don’t just fill with topsoil. Use a « Hugelkultur » approach (logs, branches, leaves, then compost, then topsoil) or a mixture of 60% good quality topsoil, 30% compost, and 10% perlite or vermiculite for drainage. A 4x8x1 ft raised bed requires about 32 cubic feet (or ~1.2 cubic yards) of soil mix, which can cost $100-$200 depending on your source.
- Material Options:
Step 4: Water Management & Irrigation
Efficient water management is critical for a self sufficient garden from scratch, especially in off-grid living where water resources might be limited.
- Rainwater Harvesting: This is my primary source of irrigation water. A 55-gallon rain barrel (e.g., EarthMark Rain Barrel, ~$120-$150) connected to a downspout can collect significant water. For larger needs, I use two 275-gallon IBC totes (Intermediate Bulk Containers, often available used for $100-$200 each from food-grade sources) connected in series. A 1,000 sq ft roof can collect approximately 620 gallons of water for every inch of rainfall. My 1,500 sq ft roof provides ample water for my 600 sq ft garden through multiple barrels and totes.
- Drip Irrigation: This is by far the most water-efficient method, delivering water directly to the plant’s root zone, minimizing evaporation and weed growth.
- Components: A typical drip system includes a pressure regulator (e.g., Rain Bird PRV-10, ~$15), a filter (Rain Bird RBY filter, ~$20), main tubing (1/2-inch poly tubing, 100ft ~$25), smaller feeder lines (1/4-inch tubing), and emitters (0.5 GPH or 1 GPH per plant).
- Kits: For beginners, a starter kit like the Rain Bird Drip Irrigation Garden Kit (model DDI-KIT-1P, ~$40-$60) is excellent for a small garden. For larger setups, I use Netafim Techline CV Drip Line (500ft roll, ~$150-$200), which has pressure-compensating emitters built-in, ensuring even watering across long runs.
- Automation: For true self-sufficiency, consider a battery-powered timer (e.g., Orbit B-Hyve Bluetooth Hose Faucet Timer, ~$50) or a solar-powered timer connected to a small 12V pump.
- Solar-Powered Pumps: For lifting water from a well, pond, or large storage tank to your garden, a solar pump is a game-changer. For a smaller drip system, a Shurflo 2088-594-152 Diaphragm Pump (12V, 3.5 GPM, ~$180) can be powered by a single 100W solar panel (e.g., Renogy 100W Monocrystalline Solar Panel, ~$100) and a small 12V battery (e.g., a 50Ah LiFePO4 battery like the Battle Born 50Ah, ~$450). For larger operations or deeper wells, more robust systems are needed. If you’re looking to build out a comprehensive off-grid power system to support your garden’s water needs, or indeed your entire homestead, you might want to explore resources like the Power Grid Generator complete system guide to understand the full scope of what’s possible in terms of energy independence.
Step 5: Seed Selection & Planting
The choice of seeds is crucial for a truly self sufficient garden from scratch.
- Choose Heirloom & Open-Pollinated Seeds: These varieties produce seeds that will grow true to type, meaning you can save seeds from your harvest year after year. F1 hybrids, while often vigorous, will not produce consistent offspring from saved seeds. Reputable seed companies include Baker Creek Heirloom Seeds, High Mowing Organic Seeds, and Seed Savers Exchange. Start with common, reliable varieties like ‘Black Krim’ tomatoes, ‘Provider’ bush beans, ‘Waltham Butternut’ squash, and ‘Black Seeded Simpson’ lettuce.
- Start Seeds Indoors (Optional but Recommended): For longer growing seasons or specific crops, starting seeds indoors gives you a head start. Use seed-starting mix (e.g., Espoma Organic Seed Starter Mix, ~$10 for 16qt bag) in seed trays (Jiffy Professional Greenhouse 72-cell kit, ~$15). Provide adequate light with LED grow lights (Barrina T5 2ft 4-pack LED Grow Lights, 20W each, ~$50) for 14-16 hours a day, positioned 2-4 inches above seedlings. Maintain consistent temperatures (65-75°F for most).
- Direct Sowing vs. Transplanting: Some crops (carrots, radishes, beans, corn) prefer direct sowing into the garden bed. Others (tomatoes, peppers, broccoli, kale) benefit from being started indoors and transplanted. Follow seed packet instructions for planting depths (e.g., lettuce seeds are often surface-sown or planted 1/8 inch deep, while beans are 1 inch deep) and spacing.
- Companion Planting: Strategically plant different species together to enhance growth, deter pests, and attract beneficial insects. For example, planting marigolds near tomatoes can deter nematodes, and basil improves tomato flavor. Nasturtiums can act as a trap crop for aphids.
- Succession Planting: For a continuous harvest, plant small batches of quick-growing crops (lettuce, radishes, cilantro) every 2-3 weeks. As one crop finishes, another is ready to take its place.
Step 6: Pest & Disease Management (Organic)
Maintaining a self sufficient garden from scratch means embracing organic pest and disease control.
- Integrated Pest Management (IPM): This holistic approach combines several strategies.
- Observation: Regularly inspect your plants for early signs of pests or disease. Catching issues early is key.
- Physical Barriers: Use row covers (e.g., Agribon AG-19 floating row cover, 10×20 ft, ~$20) to protect young plants from insect pests like cabbage worms and squash bugs. Install fences (e.g., 2×4 welded wire mesh, 4 ft tall, 50 ft roll ~$70) to keep out deer, rabbits, and other larger animals.
- Hand-Picking: For larger pests like tomato hornworms or squash bugs, simply pick them off and drop them into a bucket of soapy water.
- Companion Planting: As mentioned, certain plants repel pests. Marigolds, garlic, and onions are excellent deterrents.
- Attract Beneficial Insects: Plant flowers like dill, fennel, cosmos, and sweet alyssum to attract ladybugs, lacewings, and parasitic wasps, which prey on common garden pests.
- Organic Sprays & Treatments:
- Neem Oil: An excellent broad-spectrum organic insecticide and fungicide. Bonide Neem Oil Concentrate (16oz, ~$20) can be mixed at a rate of 1-2 tbsp per gallon of water and sprayed on affected plants.
- Insecticidal Soap: Effective against soft-bodied insects like aphids, whiteflies, and spider mites. Garden Safe Insecticidal Soap (24oz ready-to-use, ~$10).
- Bacillus thuringiensis (Bt): A naturally occurring soil bacterium that targets caterpillars and worms. Monterey BT Worm & Caterpillar Killer (16oz, ~$18) is highly effective and safe for beneficial insects.
- Copper or Sulfur Sprays: For fungal diseases like powdery mildew or blight, organic copper (e.g., Bonide Copper Fungicide, ~$15 for 1lb) or sulfur (e.g., Safer Brand Garden Fungicide, ~$10 for 16oz) can be used as a last resort.
Step 7: Harvesting & Seed Saving
The culmination of your efforts is the harvest, and seed saving closes the loop on self-sufficiency.
- Harvesting Techniques:
- Timing: Harvest vegetables at their peak ripeness for best flavor and nutritional value. For example, green beans should snap cleanly, cucumbers should be firm, and tomatoes should be fully colored.
- Frequency: Many crops, like zucchini, cucumbers, and bush beans, produce more if harvested frequently. Pick daily or every other day.
- Tools: Use clean, sharp pruners (e.g., Corona ClassicCUT Bypass Pruner BP 3180, ~$30) or a sharp knife for clean cuts, minimizing damage to the plant.
- Seed Saving: This is where the « self-sufficient » aspect truly shines.
- Selection: Only save seeds from your healthiest, most vigorous plants that show desired traits (disease resistance, good flavor, high yield).
- Isolation: To ensure true-to-type seeds, prevent cross-pollination. This can be challenging for open-pollinated crops that readily cross (e.g., squash, corn). For beginners, focus on self-pollinating plants like beans, peas, lettuce, and tomatoes.
- Processing:
- Dry Seeds (Beans, Peas, Lettuce, Grains): Allow pods/seed heads to dry completely on the plant. Harvest, shell, and clean the seeds, removing chaff.
- Wet Seeds (Tomatoes, Cucumbers, Squash): For tomatoes, ferment the seeds in water for a few days to remove the gel coating and inhibit disease. For cucumbers/squash, scrape out seeds, wash thoroughly, and dry.
- Drying: Spread seeds thinly on screens or paper plates in a cool, dry, well-ventilated area for 1-4 weeks. Ensure they are bone-dry before storage. I aim for less than 8% moisture content.
- Storage: Store seeds in airtight containers (glass jars with desiccant packets work well) in a cool, dark, dry place (ideally 40-50°F and 30-40% humidity). Label clearly with variety and date. Properly stored seeds can remain viable for 3-10 years or more.
Step 8: Season Extension & Winterizing
Extend your harvest and protect your garden for the off-season to truly maximize your self sufficient garden from scratch.
- Cold Frames: Simple structures with a transparent top (glass, polycarbonate, or old windows) that sit over garden beds. They trap solar heat, allowing you to grow cold-hardy crops (lettuce, spinach, kale, radishes) well into winter or start seeds earlier in spring. A basic cold frame can be built from 2×6 lumber and a sheet of polycarbonate for under $100.
- Hoop Houses/Low Tunnels: Larger structures made from flexible hoops (PVC pipe or EMT conduit) covered with greenhouse plastic. These provide more space and greater temperature moderation. A 10×20 ft DIY low tunnel kit can cost $200-$500, while a larger, more robust hoop house kit might be $1,000-$3,000. I use a 6×12 ft low tunnel made from 1/2-inch PVC hoops and 6mil greenhouse plastic, which extends my lettuce and spinach harvest by at least
Deciding between raised beds and in-ground beds depends on your soil, budget, and physical capabilities.
- In-Ground Beds: If you have excellent native soil and good drainage, in-ground beds are the most economical. Double-digging (loosening soil two shovel depths) can significantly improve drainage and aeration. For my main garden, I primarily use in-ground beds, but I focus on building up the soil over time with consistent compost additions and cover cropping. I aim for beds that are no wider than 3-4 feet so I can reach the center without stepping on the soil, compacting it.
- Raised Beds: Raised beds offer numerous advantages, especially for poor soil, heavy clay, or rocky areas. They provide better drainage, warm up faster in spring, reduce compaction, and make weeding and harvesting easier on your back.
- Material Options:
- Untreated Cedar: Naturally rot-resistant and chemical-free. A 4×8 ft bed, 12 inches deep, typically requires three 2x12x8 ft cedar boards, costing around $50-$60 per board (total ~$150-$180) plus corner brackets or screws. My first raised beds were cedar and are still going strong after 7 years.
- Galvanized Steel: Durable, long-lasting, and aesthetically pleasing. Brands like Vego Garden offer modular kits. A Vego Garden 17″ Tall 8-in-1 Metal Raised Garden Bed (can be configured to 4×8 ft) costs approximately $250-$300.
- Concrete Blocks/Stones: Very durable but can leach minerals (though generally safe once weathered) and can be expensive.
- Recycled Materials: Pallets (check for chemical treatment stamps like « HT » for heat-treated), old tires (controversial due to potential chemical leaching).
- Filling Raised Beds: Don’t just fill with topsoil. Use a « Hugelkultur » approach (logs, branches, leaves, then compost, then topsoil) or a mixture of 60% good quality topsoil, 30% compost, and 10% perlite or vermiculite for drainage. A 4x8x1 ft raised bed requires about 32 cubic feet (or ~1.2 cubic yards) of soil mix, which can cost $100-$200 depending on your source.
- Material Options:
Step 4: Water Management & Irrigation
Efficient water management is critical for a self sufficient garden from scratch, especially in off-grid living where water resources might be limited.
- Rainwater Harvesting: This is my primary source of irrigation water. A 55-gallon rain barrel (e.g., EarthMark Rain Barrel, ~$120-$150) connected to a downspout can collect significant water. For larger needs, I use two 275-gallon IBC totes (Intermediate Bulk Containers, often available used for $100-$200 each from food-grade sources) connected in series. A 1,000 sq ft roof can collect approximately 620 gallons of water for every inch of rainfall. My 1,500 sq ft roof provides ample water for my 600 sq ft garden through multiple barrels and totes.
- Drip Irrigation: This is by far the most water-efficient method, delivering water directly to the plant’s root zone, minimizing evaporation and weed growth.
- Components: A typical drip system includes a pressure regulator (e.g., Rain Bird PRV-10, ~$15), a filter (Rain Bird RBY filter, ~$20), main tubing (1/2-inch poly tubing, 100ft ~$25), smaller feeder lines (1/4-inch tubing), and emitters (0.5 GPH or 1 GPH per plant).
- Kits: For beginners, a starter kit like the Rain Bird Drip Irrigation Garden Kit (model DDI-KIT-1P, ~$40-$60) is excellent for a small garden. For larger setups, I use Netafim Techline CV Drip Line (500ft roll, ~$150-$200), which has pressure-compensating emitters built-in, ensuring even watering across long runs.
- Automation: For true self-sufficiency, consider a battery-powered timer (e.g., Orbit B-Hyve Bluetooth Hose Faucet Timer, ~$50) or a solar-powered timer connected to a small 12V pump.
- Solar-Powered Pumps: For lifting water from a well, pond, or large storage tank to your garden, a solar pump is a game-changer. For a smaller drip system, a Shurflo 2088-594-152 Diaphragm Pump (12V, 3.5 GPM, ~$180) can be powered by a single 100W solar panel (e.g., Renogy 100W Monocrystalline Solar Panel, ~$100) and a small 12V battery (e.g., a 50Ah LiFePO4 battery like the Battle Born 50Ah, ~$450). For larger operations or deeper wells, more robust systems are needed. If you’re looking to build out a comprehensive off-grid power system to support your garden’s water needs, or indeed your entire homestead, you might want to explore resources like the Power Grid Generator complete system guide to understand the full scope of what’s possible in terms of energy independence.
Step 5: Seed Selection & Planting
The choice of seeds is crucial for a truly self sufficient garden from scratch.
- Choose Heirloom & Open-Pollinated Seeds: These varieties produce seeds that will grow true to type, meaning you can save seeds from your harvest year after year. F1 hybrids, while often vigorous, will not produce consistent offspring from saved seeds. Reputable seed companies include Baker Creek Heirloom Seeds, High Mowing Organic Seeds, and Seed Savers Exchange. Start with common, reliable varieties like ‘Black Krim’ tomatoes, ‘Provider’ bush beans, ‘Waltham Butternut’ squash, and ‘Black Seeded Simpson’ lettuce.
- Start Seeds Indoors (Optional but Recommended): For longer growing seasons or specific crops, starting seeds indoors gives you a head start. Use seed-starting mix (e.g., Espoma Organic Seed Starter Mix, ~$10 for 16qt bag) in seed trays (Jiffy Professional Greenhouse 72-cell kit, ~$15). Provide adequate light with LED grow lights (Barrina T5 2ft 4-pack LED Grow Lights, 20W each, ~$50) for 14-16 hours a day, positioned 2-4 inches above seedlings. Maintain consistent temperatures (65-75°F for most).
- Direct Sowing vs. Transplanting: Some crops (carrots, radishes, beans, corn) prefer direct sowing into the garden bed. Others (tomatoes, peppers, broccoli, kale) benefit from being started indoors and transplanted. Follow seed packet instructions for planting depths (e.g., lettuce seeds are often surface-sown or planted 1/8 inch deep, while beans are 1 inch deep) and spacing.
- Companion Planting: Strategically plant different species together to enhance growth, deter pests, and attract beneficial insects. For example, planting marigolds near tomatoes can deter nematodes, and basil improves tomato flavor. Nasturtiums can act as a trap crop for aphids.
- Succession Planting: For a continuous harvest, plant small batches of quick-growing crops (lettuce, radishes, cilantro) every 2-3 weeks. As one crop finishes, another is ready to take its place.
Step 6: Pest & Disease Management (Organic)
Maintaining a self sufficient garden from scratch means embracing organic pest and disease control.
- Integrated Pest Management (IPM): This holistic approach combines several strategies.
- Observation: Regularly inspect your plants for early signs of pests or disease. Catching issues early is key.
- Physical Barriers: Use row covers (e.g., Agribon AG-19 floating row cover, 10×20 ft, ~$20) to protect young plants from insect pests like cabbage worms and squash bugs. Install fences (e.g., 2×4 welded wire mesh, 4 ft tall, 50 ft roll ~$70) to keep out deer, rabbits, and other larger animals.
- Hand-Picking: For larger pests like tomato hornworms or squash bugs, simply pick them off and drop them into a bucket of soapy water.
- Companion Planting: As mentioned, certain plants repel pests. Marigolds, garlic, and onions are excellent deterrents.
- Attract Beneficial Insects: Plant flowers like dill, fennel, cosmos, and sweet alyssum to attract ladybugs, lacewings, and parasitic wasps, which prey on common garden pests.
- Organic Sprays & Treatments:
- Neem Oil: An excellent broad-spectrum organic insecticide and fungicide. Bonide Neem Oil Concentrate (16oz, ~$20) can be mixed at a rate of 1-2 tbsp per gallon of water and sprayed on affected plants.
- Insecticidal Soap: Effective against soft-bodied insects like aphids, whiteflies, and spider mites. Garden Safe Insecticidal Soap (24oz ready-to-use, ~$10).
- Bacillus thuringiensis (Bt): A naturally occurring soil bacterium that targets caterpillars and worms. Monterey BT Worm & Caterpillar Killer (16oz, ~$18) is highly effective and safe for beneficial insects.
- Copper or Sulfur Sprays: For fungal diseases like powdery mildew or blight, organic copper (e.g., Bonide Copper Fungicide, ~$15 for 1lb) or sulfur (e.g., Safer Brand Garden Fungicide, ~$10 for 16oz) can be used as a last resort.
Step 7: Harvesting & Seed Saving
The culmination of your efforts is the harvest, and seed saving closes the loop on self-sufficiency.
- Harvesting Techniques:
- Timing: Harvest vegetables at their peak ripeness for best flavor and nutritional value. For example, green beans should snap cleanly, cucumbers should be firm, and tomatoes should be fully colored.
- Frequency: Many crops, like zucchini, cucumbers, and bush beans, produce more if harvested frequently. Pick daily or every other day.
- Tools: Use clean, sharp pruners (e.g., Corona ClassicCUT Bypass Pruner BP 3180, ~$30) or a sharp knife for clean cuts, minimizing damage to the plant.
- Seed Saving: This is where the « self-sufficient » aspect truly shines.
- Selection: Only save seeds from your healthiest, most vigorous plants that show desired traits (disease resistance, good flavor, high yield).
- Isolation: To ensure true-to-type seeds, prevent cross-pollination. This can be challenging for open-pollinated crops that readily cross (e.g., squash, corn). For beginners, focus on self-pollinating plants like beans, peas, lettuce, and tomatoes.
- Processing:
- Dry Seeds (Beans, Peas, Lettuce, Grains): Allow pods/seed heads to dry completely on the plant. Harvest, shell, and clean the seeds, removing chaff.
- Wet Seeds (Tomatoes, Cucumbers, Squash): For tomatoes, ferment the seeds in water for a few days to remove the gel coating and inhibit disease. For cucumbers/squash, scrape out seeds, wash thoroughly, and dry.
- Drying: Spread seeds thinly on screens or paper plates in a cool, dry, well-ventilated area for 1-4 weeks. Ensure they are bone-dry before storage. I aim for less than 8% moisture content.
- Storage: Store seeds in airtight containers (glass jars with desiccant packets work well) in a cool, dark, dry place (ideally 40-50°F and 30-40% humidity). Label clearly with variety and date. Properly stored seeds can remain viable for 3-10 years or more.
Step 8: Season Extension & Winterizing
Extend your harvest and protect your garden for the off-season to truly maximize your self sufficient garden from scratch.
- Cold Frames: Simple structures with a transparent top (glass, polycarbonate, or old windows) that sit over garden beds. They trap solar heat, allowing you to grow cold-hardy crops (lettuce, spinach, kale, radishes) well into winter or start seeds earlier in spring. A basic cold frame can be built from 2×6 lumber and a sheet of polycarbonate for under $100.
- Hoop Houses/Low Tunnels: Larger structures made from flexible hoops (PVC pipe or EMT conduit) covered with greenhouse plastic. These provide more space and greater temperature moderation. A 10×20 ft DIY low tunnel kit can cost $200-$500, while a larger, more robust hoop house kit might be $1,000-$3,000. I use a 6×12 ft low tunnel made from 1/2-inch PVC hoops and 6mil greenhouse plastic, which extends my lettuce and spinach harvest by at least
Healthy soil is the bedrock of a productive, self-sufficient garden. You can’t guess what your soil needs; you have to test it.
- Perform a Soil Test: A professional soil test will give you precise data on your soil’s pH, nutrient levels (N-P-K), and organic matter content. I recommend sending a sample to your local agricultural extension office; it typically costs $20-$50 and provides detailed recommendations. Alternatively, for a quick homeowner check, a Rapitest Soil Test Kit (40-test kit, model 1663, ~$20 on Amazon) provides a good baseline for pH, Nitrogen, Phosphorus, and Potash. Aim for a pH between 6.0 and 7.0 for most vegetables.
- Amend for pH Imbalance: If your soil is too acidic (below 6.0), add agricultural lime (dolomitic lime adds magnesium, calcitic lime adds calcium). Apply 5-10 lbs per 100 sq ft for a moderate adjustment. If it’s too alkaline (above 7.0), add elemental sulfur (e.g., Espoma Soil Acidifier, ~$15 for 6.75 lbs) or generous amounts of organic matter like peat moss or pine needles.
- Build Organic Matter: This is the single most important step for long-term soil health. Organic matter improves soil structure, water retention, drainage, and nutrient availability. Incorporate 2-4 inches of high-quality compost into your top 6-12 inches of soil annually. I make my own compost from kitchen scraps, garden waste, and shredded leaves, but you can purchase it. Local nurseries often sell bulk compost for $30-$50 per cubic yard. Aged manure (from chickens, cows, or horses – ensure it’s well-rotted to avoid burning plants) is also excellent.
- Address Nutrient Deficiencies: Based on your soil test, add specific organic amendments. If Nitrogen (N) is low, add blood meal (12-0-0, ~$20 for 3 lbs) or feather meal. For Phosphorus (P), use bone meal (3-15-0, ~$15 for 3 lbs) or rock phosphate. For Potassium (K), greensand (0-0-2.5, ~$25 for 5 lbs) or kelp meal are good choices. I rely heavily on Espoma Organic Garden-tone (5-3-3, ~$25 for an 8lb bag) as a balanced, all-purpose organic fertilizer during planting.
Step 3: Garden Bed Preparation
Deciding between raised beds and in-ground beds depends on your soil, budget, and physical capabilities.
- In-Ground Beds: If you have excellent native soil and good drainage, in-ground beds are the most economical. Double-digging (loosening soil two shovel depths) can significantly improve drainage and aeration. For my main garden, I primarily use in-ground beds, but I focus on building up the soil over time with consistent compost additions and cover cropping. I aim for beds that are no wider than 3-4 feet so I can reach the center without stepping on the soil, compacting it.
- Raised Beds: Raised beds offer numerous advantages, especially for poor soil, heavy clay, or rocky areas. They provide better drainage, warm up faster in spring, reduce compaction, and make weeding and harvesting easier on your back.
- Material Options:
- Untreated Cedar: Naturally rot-resistant and chemical-free. A 4×8 ft bed, 12 inches deep, typically requires three 2x12x8 ft cedar boards, costing around $50-$60 per board (total ~$150-$180) plus corner brackets or screws. My first raised beds were cedar and are still going strong after 7 years.
- Galvanized Steel: Durable, long-lasting, and aesthetically pleasing. Brands like Vego Garden offer modular kits. A Vego Garden 17″ Tall 8-in-1 Metal Raised Garden Bed (can be configured to 4×8 ft) costs approximately $250-$300.
- Concrete Blocks/Stones: Very durable but can leach minerals (though generally safe once weathered) and can be expensive.
- Recycled Materials: Pallets (check for chemical treatment stamps like « HT » for heat-treated), old tires (controversial due to potential chemical leaching).
- Filling Raised Beds: Don’t just fill with topsoil. Use a « Hugelkultur » approach (logs, branches, leaves, then compost, then topsoil) or a mixture of 60% good quality topsoil, 30% compost, and 10% perlite or vermiculite for drainage. A 4x8x1 ft raised bed requires about 32 cubic feet (or ~1.2 cubic yards) of soil mix, which can cost $100-$200 depending on your source.
- Material Options:
Step 4: Water Management & Irrigation
Efficient water management is critical for a self sufficient garden from scratch, especially in off-grid living where water resources might be limited.
- Rainwater Harvesting: This is my primary source of irrigation water. A 55-gallon rain barrel (e.g., EarthMark Rain Barrel, ~$120-$150) connected to a downspout can collect significant water. For larger needs, I use two 275-gallon IBC totes (Intermediate Bulk Containers, often available used for $100-$200 each from food-grade sources) connected in series. A 1,000 sq ft roof can collect approximately 620 gallons of water for every inch of rainfall. My 1,500 sq ft roof provides ample water for my 600 sq ft garden through multiple barrels and totes.
- Drip Irrigation: This is by far the most water-efficient method, delivering water directly to the plant’s root zone, minimizing evaporation and weed growth.
- Components: A typical drip system includes a pressure regulator (e.g., Rain Bird PRV-10, ~$15), a filter (Rain Bird RBY filter, ~$20), main tubing (1/2-inch poly tubing, 100ft ~$25), smaller feeder lines (1/4-inch tubing), and emitters (0.5 GPH or 1 GPH per plant).
- Kits: For beginners, a starter kit like the Rain Bird Drip Irrigation Garden Kit (model DDI-KIT-1P, ~$40-$60) is excellent for a small garden. For larger setups, I use Netafim Techline CV Drip Line (500ft roll, ~$150-$200), which has pressure-compensating emitters built-in, ensuring even watering across long runs.
- Automation: For true self-sufficiency, consider a battery-powered timer (e.g., Orbit B-Hyve Bluetooth Hose Faucet Timer, ~$50) or a solar-powered timer connected to a small 12V pump.
- Solar-Powered Pumps: For lifting water from a well, pond, or large storage tank to your garden, a solar pump is a game-changer. For a smaller drip system, a Shurflo 2088-594-152 Diaphragm Pump (12V, 3.5 GPM, ~$180) can be powered by a single 100W solar panel (e.g., Renogy 100W Monocrystalline Solar Panel, ~$100) and a small 12V battery (e.g., a 50Ah LiFePO4 battery like the Battle Born 50Ah, ~$450). For larger operations or deeper wells, more robust systems are needed. If you’re looking to build out a comprehensive off-grid power system to support your garden’s water needs, or indeed your entire homestead, you might want to explore resources like the Power Grid Generator complete system guide to understand the full scope of what’s possible in terms of energy independence.
Step 5: Seed Selection & Planting
The choice of seeds is crucial for a truly self sufficient garden from scratch.
- Choose Heirloom & Open-Pollinated Seeds: These varieties produce seeds that will grow true to type, meaning you can save seeds from your harvest year after year. F1 hybrids, while often vigorous, will not produce consistent offspring from saved seeds. Reputable seed companies include Baker Creek Heirloom Seeds, High Mowing Organic Seeds, and Seed Savers Exchange. Start with common, reliable varieties like ‘Black Krim’ tomatoes, ‘Provider’ bush beans, ‘Waltham Butternut’ squash, and ‘Black Seeded Simpson’ lettuce.
- Start Seeds Indoors (Optional but Recommended): For longer growing seasons or specific crops, starting seeds indoors gives you a head start. Use seed-starting mix (e.g., Espoma Organic Seed Starter Mix, ~$10 for 16qt bag) in seed trays (Jiffy Professional Greenhouse 72-cell kit, ~$15). Provide adequate light with LED grow lights (Barrina T5 2ft 4-pack LED Grow Lights, 20W each, ~$50) for 14-16 hours a day, positioned 2-4 inches above seedlings. Maintain consistent temperatures (65-75°F for most).
- Direct Sowing vs. Transplanting: Some crops (carrots, radishes, beans, corn) prefer direct sowing into the garden bed. Others (tomatoes, peppers, broccoli, kale) benefit from being started indoors and transplanted. Follow seed packet instructions for planting depths (e.g., lettuce seeds are often surface-sown or planted 1/8 inch deep, while beans are 1 inch deep) and spacing.
- Companion Planting: Strategically plant different species together to enhance growth, deter pests, and attract beneficial insects. For example, planting marigolds near tomatoes can deter nematodes, and basil improves tomato flavor. Nasturtiums can act as a trap crop for aphids.
- Succession Planting: For a continuous harvest, plant small batches of quick-growing crops (lettuce, radishes, cilantro) every 2-3 weeks. As one crop finishes, another is ready to take its place.
Step 6: Pest & Disease Management (Organic)
Maintaining a self sufficient garden from scratch means embracing organic pest and disease control.
- Integrated Pest Management (IPM): This holistic approach combines several strategies.
- Observation: Regularly inspect your plants for early signs of pests or disease. Catching issues early is key.
- Physical Barriers: Use row covers (e.g., Agribon AG-19 floating row cover, 10×20 ft, ~$20) to protect young plants from insect pests like cabbage worms and squash bugs. Install fences (e.g., 2×4 welded wire mesh, 4 ft tall, 50 ft roll ~$70) to keep out deer, rabbits, and other larger animals.
- Hand-Picking: For larger pests like tomato hornworms or squash bugs, simply pick them off and drop them into a bucket of soapy water.
- Companion Planting: As mentioned, certain plants repel pests. Marigolds, garlic, and onions are excellent deterrents.
- Attract Beneficial Insects: Plant flowers like dill, fennel, cosmos, and sweet alyssum to attract ladybugs, lacewings, and parasitic wasps, which prey on common garden pests.
- Organic Sprays & Treatments:
- Neem Oil: An excellent broad-spectrum organic insecticide and fungicide. Bonide Neem Oil Concentrate (16oz, ~$20) can be mixed at a rate of 1-2 tbsp per gallon of water and sprayed on affected plants.
- Insecticidal Soap: Effective against soft-bodied insects like aphids, whiteflies, and spider mites. Garden Safe Insecticidal Soap (24oz ready-to-use, ~$10).
- Bacillus thuringiensis (Bt): A naturally occurring soil bacterium that targets caterpillars and worms. Monterey BT Worm & Caterpillar Killer (16oz, ~$18) is highly effective and safe for beneficial insects.
- Copper or Sulfur Sprays: For fungal diseases like powdery mildew or blight, organic copper (e.g., Bonide Copper Fungicide, ~$15 for 1lb) or sulfur (e.g., Safer Brand Garden Fungicide, ~$10 for 16oz) can be used as a last resort.
Step 7: Harvesting & Seed Saving
The culmination of your efforts is the harvest, and seed saving closes the loop on self-sufficiency.
- Harvesting Techniques:
- Timing: Harvest vegetables at their peak ripeness for best flavor and nutritional value. For example, green beans should snap cleanly, cucumbers should be firm, and tomatoes should be fully colored.
- Frequency: Many crops, like zucchini, cucumbers, and bush beans, produce more if harvested frequently. Pick daily or every other day.
- Tools: Use clean, sharp pruners (e.g., Corona ClassicCUT Bypass Pruner BP 3180, ~$30) or a sharp knife for clean cuts, minimizing damage to the plant.
- Seed Saving: This is where the « self-sufficient » aspect truly shines.
- Selection: Only save seeds from your healthiest, most vigorous plants that show desired traits (disease resistance, good flavor, high yield).
- Isolation: To ensure true-to-type seeds, prevent cross-pollination. This can be challenging for open-pollinated crops that readily cross (e.g., squash, corn). For beginners, focus on self-pollinating plants like beans, peas, lettuce, and tomatoes.
- Processing:
- Dry Seeds (Beans, Peas, Lettuce, Grains): Allow pods/seed heads to dry completely on the plant. Harvest, shell, and clean the seeds, removing chaff.
- Wet Seeds (Tomatoes, Cucumbers, Squash): For tomatoes, ferment the seeds in water for a few days to remove the gel coating and inhibit disease. For cucumbers/squash, scrape out seeds, wash thoroughly, and dry.
- Drying: Spread seeds thinly on screens or paper plates in a cool, dry, well-ventilated area for 1-4 weeks. Ensure they are bone-dry before storage. I aim for less than 8% moisture content.
- Storage: Store seeds in airtight containers (glass jars with desiccant packets work well) in a cool, dark, dry place (ideally 40-50°F and 30-40% humidity). Label clearly with variety and date. Properly stored seeds can remain viable for 3-10 years or more.
Step 8: Season Extension & Winterizing
Extend your harvest and protect your garden for the off-season to truly maximize your self sufficient garden from scratch.
- Cold Frames: Simple structures with a transparent top (glass, polycarbonate, or old windows) that sit over garden beds. They trap solar heat, allowing you to grow cold-hardy crops (lettuce, spinach, kale, radishes) well into winter or start seeds earlier in spring. A basic cold frame can be built from 2×6 lumber and a sheet of polycarbonate for under $100.
- Hoop Houses/Low Tunnels: Larger structures made from flexible hoops (PVC pipe or EMT conduit) covered with greenhouse plastic. These provide more space and greater temperature moderation. A 10×20 ft DIY low tunnel kit can cost $200-$500, while a larger, more robust hoop house kit might be $1,000-$3,000. I use a 6×12 ft low tunnel made from 1/2-inch PVC hoops and 6mil greenhouse plastic, which extends my lettuce and spinach harvest by at least
The choice of seeds is crucial for a truly self sufficient garden from scratch.
- Choose Heirloom & Open-Pollinated Seeds: These varieties produce seeds that will grow true to type, meaning you can save seeds from your harvest year after year. F1 hybrids, while often vigorous, will not produce consistent offspring from saved seeds. Reputable seed companies include Baker Creek Heirloom Seeds, High Mowing Organic Seeds, and Seed Savers Exchange. Start with common, reliable varieties like ‘Black Krim’ tomatoes, ‘Provider’ bush beans, ‘Waltham Butternut’ squash, and ‘Black Seeded Simpson’ lettuce.
- Start Seeds Indoors (Optional but Recommended): For longer growing seasons or specific crops, starting seeds indoors gives you a head start. Use seed-starting mix (e.g., Espoma Organic Seed Starter Mix, ~$10 for 16qt bag) in seed trays (Jiffy Professional Greenhouse 72-cell kit, ~$15). Provide adequate light with LED grow lights (Barrina T5 2ft 4-pack LED Grow Lights, 20W each, ~$50) for 14-16 hours a day, positioned 2-4 inches above seedlings. Maintain consistent temperatures (65-75°F for most).
- Direct Sowing vs. Transplanting: Some crops (carrots, radishes, beans, corn) prefer direct sowing into the garden bed. Others (tomatoes, peppers, broccoli, kale) benefit from being started indoors and transplanted. Follow seed packet instructions for planting depths (e.g., lettuce seeds are often surface-sown or planted 1/8 inch deep, while beans are 1 inch deep) and spacing.
- Companion Planting: Strategically plant different species together to enhance growth, deter pests, and attract beneficial insects. For example, planting marigolds near tomatoes can deter nematodes, and basil improves tomato flavor. Nasturtiums can act as a trap crop for aphids.
- Succession Planting: For a continuous harvest, plant small batches of quick-growing crops (lettuce, radishes, cilantro) every 2-3 weeks. As one crop finishes, another is ready to take its place.
Step 6: Pest & Disease Management (Organic)
Maintaining a self sufficient garden from scratch means embracing organic pest and disease control.
- Integrated Pest Management (IPM): This holistic approach combines several strategies.
- Observation: Regularly inspect your plants for early signs of pests or disease. Catching issues early is key.
- Physical Barriers: Use row covers (e.g., Agribon AG-19 floating row cover, 10×20 ft, ~$20) to protect young plants from insect pests like cabbage worms and squash bugs. Install fences (e.g., 2×4 welded wire mesh, 4 ft tall, 50 ft roll ~$70) to keep out deer, rabbits, and other larger animals.
- Hand-Picking: For larger pests like tomato hornworms or squash bugs, simply pick them off and drop them into a bucket of soapy water.
- Companion Planting: As mentioned, certain plants repel pests. Marigolds, garlic, and onions are excellent deterrents.
- Attract Beneficial Insects: Plant flowers like dill, fennel, cosmos, and sweet alyssum to attract ladybugs, lacewings, and parasitic wasps, which prey on common garden pests.
- Organic Sprays & Treatments:
- Neem Oil: An excellent broad-spectrum organic insecticide and fungicide. Bonide Neem Oil Concentrate (16oz, ~$20) can be mixed at a rate of 1-2 tbsp per gallon of water and sprayed on affected plants.
- Insecticidal Soap: Effective against soft-bodied insects like aphids, whiteflies, and spider mites. Garden Safe Insecticidal Soap (24oz ready-to-use, ~$10).
- Bacillus thuringiensis (Bt): A naturally occurring soil bacterium that targets caterpillars and worms. Monterey BT Worm & Caterpillar Killer (16oz, ~$18) is highly effective and safe for beneficial insects.
- Copper or Sulfur Sprays: For fungal diseases like powdery mildew or blight, organic copper (e.g., Bonide Copper Fungicide, ~$15 for 1lb) or sulfur (e.g., Safer Brand Garden Fungicide, ~$10 for 16oz) can be used as a last resort.
Step 7: Harvesting & Seed Saving
The culmination of your efforts is the harvest, and seed saving closes the loop on self-sufficiency.
- Harvesting Techniques:
- Timing: Harvest vegetables at their peak ripeness for best flavor and nutritional value. For example, green beans should snap cleanly, cucumbers should be firm, and tomatoes should be fully colored.
- Frequency: Many crops, like zucchini, cucumbers, and bush beans, produce more if harvested frequently. Pick daily or every other day.
- Tools: Use clean, sharp pruners (e.g., Corona ClassicCUT Bypass Pruner BP 3180, ~$30) or a sharp knife for clean cuts, minimizing damage to the plant.
- Seed Saving: This is where the « self-sufficient » aspect truly shines.
- Selection: Only save seeds from your healthiest, most vigorous plants that show desired traits (disease resistance, good flavor, high yield).
- Isolation: To ensure true-to-type seeds, prevent cross-pollination. This can be challenging for open-pollinated crops that readily cross (e.g., squash, corn). For beginners, focus on self-pollinating plants like beans, peas, lettuce, and tomatoes.
- Processing:
- Dry Seeds (Beans, Peas, Lettuce, Grains): Allow pods/seed heads to dry completely on the plant. Harvest, shell, and clean the seeds, removing chaff.
- Wet Seeds (Tomatoes, Cucumbers, Squash): For tomatoes, ferment the seeds in water for a few days to remove the gel coating and inhibit disease. For cucumbers/squash, scrape out seeds, wash thoroughly, and dry.
- Drying: Spread seeds thinly on screens or paper plates in a cool, dry, well-ventilated area for 1-4 weeks. Ensure they are bone-dry before storage. I aim for less than 8% moisture content.
- Storage: Store seeds in airtight containers (glass jars with desiccant packets work well) in a cool, dark, dry place (ideally 40-50°F and 30-40% humidity). Label clearly with variety and date. Properly stored seeds can remain viable for 3-10 years or more.
Step 8: Season Extension & Winterizing
Extend your harvest and protect your garden for the off-season to truly maximize your self sufficient garden from scratch.
- Cold Frames: Simple structures with a transparent top (glass, polycarbonate, or old windows) that sit over garden beds. They trap solar heat, allowing you to grow cold-hardy crops (lettuce, spinach, kale, radishes) well into winter or start seeds earlier in spring. A basic cold frame can be built from 2×6 lumber and a sheet of polycarbonate for under $100.
- Hoop Houses/Low Tunnels: Larger structures made from flexible hoops (PVC pipe or EMT conduit) covered with greenhouse plastic. These provide more space and greater temperature moderation. A 10×20 ft DIY low tunnel kit can cost $200-$500, while a larger, more robust hoop house kit might be $1,000-$3,000. I use a 6×12 ft low tunnel made from 1/2-inch PVC hoops and 6mil greenhouse plastic, which extends my lettuce and spinach harvest by at least
Efficient water management is critical for a self sufficient garden from scratch, especially in off-grid living where water resources might be limited.
- Rainwater Harvesting: This is my primary source of irrigation water. A 55-gallon rain barrel (e.g., EarthMark Rain Barrel, ~$120-$150) connected to a downspout can collect significant water. For larger needs, I use two 275-gallon IBC totes (Intermediate Bulk Containers, often available used for $100-$200 each from food-grade sources) connected in series. A 1,000 sq ft roof can collect approximately 620 gallons of water for every inch of rainfall. My 1,500 sq ft roof provides ample water for my 600 sq ft garden through multiple barrels and totes.
- Drip Irrigation: This is by far the most water-efficient method, delivering water directly to the plant’s root zone, minimizing evaporation and weed growth.
- Components: A typical drip system includes a pressure regulator (e.g., Rain Bird PRV-10, ~$15), a filter (Rain Bird RBY filter, ~$20), main tubing (1/2-inch poly tubing, 100ft ~$25), smaller feeder lines (1/4-inch tubing), and emitters (0.5 GPH or 1 GPH per plant).
- Kits: For beginners, a starter kit like the Rain Bird Drip Irrigation Garden Kit (model DDI-KIT-1P, ~$40-$60) is excellent for a small garden. For larger setups, I use Netafim Techline CV Drip Line (500ft roll, ~$150-$200), which has pressure-compensating emitters built-in, ensuring even watering across long runs.
- Automation: For true self-sufficiency, consider a battery-powered timer (e.g., Orbit B-Hyve Bluetooth Hose Faucet Timer, ~$50) or a solar-powered timer connected to a small 12V pump.
- Solar-Powered Pumps: For lifting water from a well, pond, or large storage tank to your garden, a solar pump is a game-changer. For a smaller drip system, a Shurflo 2088-594-152 Diaphragm Pump (12V, 3.5 GPM, ~$180) can be powered by a single 100W solar panel (e.g., Renogy 100W Monocrystalline Solar Panel, ~$100) and a small 12V battery (e.g., a 50Ah LiFePO4 battery like the Battle Born 50Ah, ~$450). For larger operations or deeper wells, more robust systems are needed. If you’re looking to build out a comprehensive off-grid power system to support your garden’s water needs, or indeed your entire homestead, you might want to explore resources like the Power Grid Generator complete system guide to understand the full scope of what’s possible in terms of energy independence.
Step 5: Seed Selection & Planting
The choice of seeds is crucial for a truly self sufficient garden from scratch.
- Choose Heirloom & Open-Pollinated Seeds: These varieties produce seeds that will grow true to type, meaning you can save seeds from your harvest year after year. F1 hybrids, while often vigorous, will not produce consistent offspring from saved seeds. Reputable seed companies include Baker Creek Heirloom Seeds, High Mowing Organic Seeds, and Seed Savers Exchange. Start with common, reliable varieties like ‘Black Krim’ tomatoes, ‘Provider’ bush beans, ‘Waltham Butternut’ squash, and ‘Black Seeded Simpson’ lettuce.
- Start Seeds Indoors (Optional but Recommended): For longer growing seasons or specific crops, starting seeds indoors gives you a head start. Use seed-starting mix (e.g., Espoma Organic Seed Starter Mix, ~$10 for 16qt bag) in seed trays (Jiffy Professional Greenhouse 72-cell kit, ~$15). Provide adequate light with LED grow lights (Barrina T5 2ft 4-pack LED Grow Lights, 20W each, ~$50) for 14-16 hours a day, positioned 2-4 inches above seedlings. Maintain consistent temperatures (65-75°F for most).
- Direct Sowing vs. Transplanting: Some crops (carrots, radishes, beans, corn) prefer direct sowing into the garden bed. Others (tomatoes, peppers, broccoli, kale) benefit from being started indoors and transplanted. Follow seed packet instructions for planting depths (e.g., lettuce seeds are often surface-sown or planted 1/8 inch deep, while beans are 1 inch deep) and spacing.
- Companion Planting: Strategically plant different species together to enhance growth, deter pests, and attract beneficial insects. For example, planting marigolds near tomatoes can deter nematodes, and basil improves tomato flavor. Nasturtiums can act as a trap crop for aphids.
- Succession Planting: For a continuous harvest, plant small batches of quick-growing crops (lettuce, radishes, cilantro) every 2-3 weeks. As one crop finishes, another is ready to take its place.
Step 6: Pest & Disease Management (Organic)
Maintaining a self sufficient garden from scratch means embracing organic pest and disease control.
- Integrated Pest Management (IPM): This holistic approach combines several strategies.
- Observation: Regularly inspect your plants for early signs of pests or disease. Catching issues early is key.
- Physical Barriers: Use row covers (e.g., Agribon AG-19 floating row cover, 10×20 ft, ~$20) to protect young plants from insect pests like cabbage worms and squash bugs. Install fences (e.g., 2×4 welded wire mesh, 4 ft tall, 50 ft roll ~$70) to keep out deer, rabbits, and other larger animals.
- Hand-Picking: For larger pests like tomato hornworms or squash bugs, simply pick them off and drop them into a bucket of soapy water.
- Companion Planting: As mentioned, certain plants repel pests. Marigolds, garlic, and onions are excellent deterrents.
- Attract Beneficial Insects: Plant flowers like dill, fennel, cosmos, and sweet alyssum to attract ladybugs, lacewings, and parasitic wasps, which prey on common garden pests.
- Organic Sprays & Treatments:
- Neem Oil: An excellent broad-spectrum organic insecticide and fungicide. Bonide Neem Oil Concentrate (16oz, ~$20) can be mixed at a rate of 1-2 tbsp per gallon of water and sprayed on affected plants.
- Insecticidal Soap: Effective against soft-bodied insects like aphids, whiteflies, and spider mites. Garden Safe Insecticidal Soap (24oz ready-to-use, ~$10).
- Bacillus thuringiensis (Bt): A naturally occurring soil bacterium that targets caterpillars and worms. Monterey BT Worm & Caterpillar Killer (16oz, ~$18) is highly effective and safe for beneficial insects.
- Copper or Sulfur Sprays: For fungal diseases like powdery mildew or blight, organic copper (e.g., Bonide Copper Fungicide, ~$15 for 1lb) or sulfur (e.g., Safer Brand Garden Fungicide, ~$10 for 16oz) can be used as a last resort.
Step 7: Harvesting & Seed Saving
The culmination of your efforts is the harvest, and seed saving closes the loop on self-sufficiency.
- Harvesting Techniques:
- Timing: Harvest vegetables at their peak ripeness for best flavor and nutritional value. For example, green beans should snap cleanly, cucumbers should be firm, and tomatoes should be fully colored.
- Frequency: Many crops, like zucchini, cucumbers, and bush beans, produce more if harvested frequently. Pick daily or every other day.
- Tools: Use clean, sharp pruners (e.g., Corona ClassicCUT Bypass Pruner BP 3180, ~$30) or a sharp knife for clean cuts, minimizing damage to the plant.
- Seed Saving: This is where the « self-sufficient » aspect truly shines.
- Selection: Only save seeds from your healthiest, most vigorous plants that show desired traits (disease resistance, good flavor, high yield).
- Isolation: To ensure true-to-type seeds, prevent cross-pollination. This can be challenging for open-pollinated crops that readily cross (e.g., squash, corn). For beginners, focus on self-pollinating plants like beans, peas, lettuce, and tomatoes.
- Processing:
- Dry Seeds (Beans, Peas, Lettuce, Grains): Allow pods/seed heads to dry completely on the plant. Harvest, shell, and clean the seeds, removing chaff.
- Wet Seeds (Tomatoes, Cucumbers, Squash): For tomatoes, ferment the seeds in water for a few days to remove the gel coating and inhibit disease. For cucumbers/squash, scrape out seeds, wash thoroughly, and dry.
- Drying: Spread seeds thinly on screens or paper plates in a cool, dry, well-ventilated area for 1-4 weeks. Ensure they are bone-dry before storage. I aim for less than 8% moisture content.
- Storage: Store seeds in airtight containers (glass jars with desiccant packets work well) in a cool, dark, dry place (ideally 40-50°F and 30-40% humidity). Label clearly with variety and date. Properly stored seeds can remain viable for 3-10 years or more.
Step 8: Season Extension & Winterizing
Extend your harvest and protect your garden for the off-season to truly maximize your self sufficient garden from scratch.
- Cold Frames: Simple structures with a transparent top (glass, polycarbonate, or old windows) that sit over garden beds. They trap solar heat, allowing you to grow cold-hardy crops (lettuce, spinach, kale, radishes) well into winter or start seeds earlier in spring. A basic cold frame can be built from 2×6 lumber and a sheet of polycarbonate for under $100.
- Hoop Houses/Low Tunnels: Larger structures made from flexible hoops (PVC pipe or EMT conduit) covered with greenhouse plastic. These provide more space and greater temperature moderation. A 10×20 ft DIY low tunnel kit can cost $200-$500, while a larger, more robust hoop house kit might be $1,000-$3,000. I use a 6×12 ft low tunnel made from 1/2-inch PVC hoops and 6mil greenhouse plastic, which extends my lettuce and spinach harvest by at least
Step 4: Water Management & Irrigation
Efficient water management is critical for a self sufficient garden from scratch, especially in off-grid living where water resources might be limited.
- Rainwater Harvesting: This is my primary source of irrigation water. A 55-gallon rain barrel (e.g., EarthMark Rain Barrel, ~$120-$150) connected to a downspout can collect significant water. For larger needs, I use two 275-gallon IBC totes (Intermediate Bulk Containers, often available used for $100-$200 each from food-grade sources) connected in series. A 1,000 sq ft roof can collect approximately 620 gallons of water for every inch of rainfall. My 1,500 sq ft roof provides ample water for my 600 sq ft garden through multiple barrels and totes.
- Drip Irrigation: This is by far the most water-efficient method, delivering water directly to the plant’s root zone, minimizing evaporation and weed growth.
- Components: A typical drip system includes a pressure regulator (e.g., Rain Bird PRV-10, ~$15), a filter (Rain Bird RBY filter, ~$20), main tubing (1/2-inch poly tubing, 100ft ~$25), smaller feeder lines (1/4-inch tubing), and emitters (0.5 GPH or 1 GPH per plant).
- Kits: For beginners, a starter kit like the Rain Bird Drip Irrigation Garden Kit (model DDI-KIT-1P, ~$40-$60) is excellent for a small garden. For larger setups, I use Netafim Techline CV Drip Line (500ft roll, ~$150-$200), which has pressure-compensating emitters built-in, ensuring even watering across long runs.
- Automation: For true self-sufficiency, consider a battery-powered timer (e.g., Orbit B-Hyve Bluetooth Hose Faucet Timer, ~$50) or a solar-powered timer connected to a small 12V pump.
- Solar-Powered Pumps: For lifting water from a well, pond, or large storage tank to your garden, a solar pump is a game-changer. For a smaller drip system, a Shurflo 2088-594-152 Diaphragm Pump (12V, 3.5 GPM, ~$180) can be powered by a single 100W solar panel (e.g., Renogy 100W Monocrystalline Solar Panel, ~$100) and a small 12V battery (e.g., a 50Ah LiFePO4 battery like the Battle Born 50Ah, ~$450). For larger operations or deeper wells, more robust systems are needed. If you’re looking to build out a comprehensive off-grid power system to support your garden’s water needs, or indeed your entire homestead, you might want to explore resources like the Power Grid Generator complete system guide to understand the full scope of what’s possible in terms of energy independence.
Step 5: Seed Selection & Planting
The choice of seeds is crucial for a truly self sufficient garden from scratch.
- Choose Heirloom & Open-Pollinated Seeds: These varieties produce seeds that will grow true to type, meaning you can save seeds from your harvest year after year. F1 hybrids, while often vigorous, will not produce consistent offspring from saved seeds. Reputable seed companies include Baker Creek Heirloom Seeds, High Mowing Organic Seeds, and Seed Savers Exchange. Start with common, reliable varieties like ‘Black Krim’ tomatoes, ‘Provider’ bush beans, ‘Waltham Butternut’ squash, and ‘Black Seeded Simpson’ lettuce.
- Start Seeds Indoors (Optional but Recommended): For longer growing seasons or specific crops, starting seeds indoors gives you a head start. Use seed-starting mix (e.g., Espoma Organic Seed Starter Mix, ~$10 for 16qt bag) in seed trays (Jiffy Professional Greenhouse 72-cell kit, ~$15). Provide adequate light with LED grow lights (Barrina T5 2ft 4-pack LED Grow Lights, 20W each, ~$50) for 14-16 hours a day, positioned 2-4 inches above seedlings. Maintain consistent temperatures (65-75°F for most).
- Direct Sowing vs. Transplanting: Some crops (carrots, radishes, beans, corn) prefer direct sowing into the garden bed. Others (tomatoes, peppers, broccoli, kale) benefit from being started indoors and transplanted. Follow seed packet instructions for planting depths (e.g., lettuce seeds are often surface-sown or planted 1/8 inch deep, while beans are 1 inch deep) and spacing.
- Companion Planting: Strategically plant different species together to enhance growth, deter pests, and attract beneficial insects. For example, planting marigolds near tomatoes can deter nematodes, and basil improves tomato flavor. Nasturtiums can act as a trap crop for aphids.
- Succession Planting: For a continuous harvest, plant small batches of quick-growing crops (lettuce, radishes, cilantro) every 2-3 weeks. As one crop finishes, another is ready to take its place.
Step 6: Pest & Disease Management (Organic)
Maintaining a self sufficient garden from scratch means embracing organic pest and disease control.
- Integrated Pest Management (IPM): This holistic approach combines several strategies.
- Observation: Regularly inspect your plants for early signs of pests or disease. Catching issues early is key.
- Physical Barriers: Use row covers (e.g., Agribon AG-19 floating row cover, 10×20 ft, ~$20) to protect young plants from insect pests like cabbage worms and squash bugs. Install fences (e.g., 2×4 welded wire mesh, 4 ft tall, 50 ft roll ~$70) to keep out deer, rabbits, and other larger animals.
- Hand-Picking: For larger pests like tomato hornworms or squash bugs, simply pick them off and drop them into a bucket of soapy water.
- Companion Planting: As mentioned, certain plants repel pests. Marigolds, garlic, and onions are excellent deterrents.
- Attract Beneficial Insects: Plant flowers like dill, fennel, cosmos, and sweet alyssum to attract ladybugs, lacewings, and parasitic wasps, which prey on common garden pests.
- Organic Sprays & Treatments:
- Neem Oil: An excellent broad-spectrum organic insecticide and fungicide. Bonide Neem Oil Concentrate (16oz, ~$20) can be mixed at a rate of 1-2 tbsp per gallon of water and sprayed on affected plants.
- Insecticidal Soap: Effective against soft-bodied insects like aphids, whiteflies, and spider mites. Garden Safe Insecticidal Soap (24oz ready-to-use, ~$10).
- Bacillus thuringiensis (Bt): A naturally occurring soil bacterium that targets caterpillars and worms. Monterey BT Worm & Caterpillar Killer (16oz, ~$18) is highly effective and safe for beneficial insects.
- Copper or Sulfur Sprays: For fungal diseases like powdery mildew or blight, organic copper (e.g., Bonide Copper Fungicide, ~$15 for 1lb) or sulfur (e.g., Safer Brand Garden Fungicide, ~$10 for 16oz) can be used as a last resort.
Step 7: Harvesting & Seed Saving
The culmination of your efforts is the harvest, and seed saving closes the loop on self-sufficiency.
- Harvesting Techniques:
- Timing: Harvest vegetables at their peak ripeness for best flavor and nutritional value. For example, green beans should snap cleanly, cucumbers should be firm, and tomatoes should be fully colored.
- Frequency: Many crops, like zucchini, cucumbers, and bush beans, produce more if harvested frequently. Pick daily or every other day.
- Tools: Use clean, sharp pruners (e.g., Corona ClassicCUT Bypass Pruner BP 3180, ~$30) or a sharp knife for clean cuts, minimizing damage to the plant.
- Seed Saving: This is where the « self-sufficient » aspect truly shines.
- Selection: Only save seeds from your healthiest, most vigorous plants that show desired traits (disease resistance, good flavor, high yield).
- Isolation: To ensure true-to-type seeds, prevent cross-pollination. This can be challenging for open-pollinated crops that readily cross (e.g., squash, corn). For beginners, focus on self-pollinating plants like beans, peas, lettuce, and tomatoes.
- Processing:
- Dry Seeds (Beans, Peas, Lettuce, Grains): Allow pods/seed heads to dry completely on the plant. Harvest, shell, and clean the seeds, removing chaff.
- Wet Seeds (Tomatoes, Cucumbers, Squash): For tomatoes, ferment the seeds in water for a few days to remove the gel coating and inhibit disease. For cucumbers/squash, scrape out seeds, wash thoroughly, and dry.
- Drying: Spread seeds thinly on screens or paper plates in a cool, dry, well-ventilated area for 1-4 weeks. Ensure they are bone-dry before storage. I aim for less than 8% moisture content.
- Storage: Store seeds in airtight containers (glass jars with desiccant packets work well) in a cool, dark, dry place (ideally 40-50°F and 30-40% humidity). Label clearly with variety and date. Properly stored seeds can remain viable for 3-10 years or more.
Step 8: Season Extension & Winterizing
Extend your harvest and protect your garden for the off-season to truly maximize your self sufficient garden from scratch.
- Cold Frames: Simple structures with a transparent top (glass, polycarbonate, or old windows) that sit over garden beds. They trap solar heat, allowing you to grow cold-hardy crops (lettuce, spinach, kale, radishes) well into winter or start seeds earlier in spring. A basic cold frame can be built from 2×6 lumber and a sheet of polycarbonate for under $100.
- Hoop Houses/Low Tunnels: Larger structures made from flexible hoops (PVC pipe or EMT conduit) covered with greenhouse plastic. These provide more space and greater temperature moderation. A 10×20 ft DIY low tunnel kit can cost $200-$500, while a larger, more robust hoop house kit might be $1,000-$3,000. I use a 6×12 ft low tunnel made from 1/2-inch PVC hoops and 6mil greenhouse plastic, which extends my lettuce and spinach harvest by at least
- In-Ground Beds: If you have excellent native soil and good drainage, in-ground beds are the most economical. Double-digging (loosening soil two shovel depths) can significantly improve drainage and aeration. For my main garden, I primarily use in-ground beds, but I focus on building up the soil over time with consistent compost additions and cover cropping. I aim for beds that are no wider than 3-4 feet so I can reach the center without stepping on the soil, compacting it.
- Raised Beds: Raised beds offer numerous advantages, especially for poor soil, heavy clay, or rocky areas. They provide better drainage, warm up faster in spring, reduce compaction, and make weeding and harvesting easier on your back.
- Material Options:
- Untreated Cedar: Naturally rot-resistant and chemical-free. A 4×8 ft bed, 12 inches deep, typically requires three 2x12x8 ft cedar boards, costing around $50-$60 per board (total ~$150-$180) plus corner brackets or screws. My first raised beds were cedar and are still going strong after 7 years.
- Galvanized Steel: Durable, long-lasting, and aesthetically pleasing. Brands like Vego Garden offer modular kits. A Vego Garden 17″ Tall 8-in-1 Metal Raised Garden Bed (can be configured to 4×8 ft) costs approximately $250-$300.
- Concrete Blocks/Stones: Very durable but can leach minerals (though generally safe once weathered) and can be expensive.
- Recycled Materials: Pallets (check for chemical treatment stamps like « HT » for heat-treated), old tires (controversial due to potential chemical leaching).
- Filling Raised Beds: Don’t just fill with topsoil. Use a « Hugelkultur » approach (logs, branches, leaves, then compost, then topsoil) or a mixture of 60% good quality topsoil, 30% compost, and 10% perlite or vermiculite for drainage. A 4x8x1 ft raised bed requires about 32 cubic feet (or ~1.2 cubic yards) of soil mix, which can cost $100-$200 depending on your source.
- Material Options:
Step 4: Water Management & Irrigation
Efficient water management is critical for a self sufficient garden from scratch, especially in off-grid living where water resources might be limited.
- Rainwater Harvesting: This is my primary source of irrigation water. A 55-gallon rain barrel (e.g., EarthMark Rain Barrel, ~$120-$150) connected to a downspout can collect significant water. For larger needs, I use two 275-gallon IBC totes (Intermediate Bulk Containers, often available used for $100-$200 each from food-grade sources) connected in series. A 1,000 sq ft roof can collect approximately 620 gallons of water for every inch of rainfall. My 1,500 sq ft roof provides ample water for my 600 sq ft garden through multiple barrels and totes.
- Drip Irrigation: This is by far the most water-efficient method, delivering water directly to the plant’s root zone, minimizing evaporation and weed growth.
- Components: A typical drip system includes a pressure regulator (e.g., Rain Bird PRV-10, ~$15), a filter (Rain Bird RBY filter, ~$20), main tubing (1/2-inch poly tubing, 100ft ~$25), smaller feeder lines (1/4-inch tubing), and emitters (0.5 GPH or 1 GPH per plant).
- Kits: For beginners, a starter kit like the Rain Bird Drip Irrigation Garden Kit (model DDI-KIT-1P, ~$40-$60) is excellent for a small garden. For larger setups, I use Netafim Techline CV Drip Line (500ft roll, ~$150-$200), which has pressure-compensating emitters built-in, ensuring even watering across long runs.
- Automation: For true self-sufficiency, consider a battery-powered timer (e.g., Orbit B-Hyve Bluetooth Hose Faucet Timer, ~$50) or a solar-powered timer connected to a small 12V pump.
- Solar-Powered Pumps: For lifting water from a well, pond, or large storage tank to your garden, a solar pump is a game-changer. For a smaller drip system, a Shurflo 2088-594-152 Diaphragm Pump (12V, 3.5 GPM, ~$180) can be powered by a single 100W solar panel (e.g., Renogy 100W Monocrystalline Solar Panel, ~$100) and a small 12V battery (e.g., a 50Ah LiFePO4 battery like the Battle Born 50Ah, ~$450). For larger operations or deeper wells, more robust systems are needed. If you’re looking to build out a comprehensive off-grid power system to support your garden’s water needs, or indeed your entire homestead, you might want to explore resources like the Power Grid Generator complete system guide to understand the full scope of what’s possible in terms of energy independence.
Step 5: Seed Selection & Planting
The choice of seeds is crucial for a truly self sufficient garden from scratch.
- Choose Heirloom & Open-Pollinated Seeds: These varieties produce seeds that will grow true to type, meaning you can save seeds from your harvest year after year. F1 hybrids, while often vigorous, will not produce consistent offspring from saved seeds. Reputable seed companies include Baker Creek Heirloom Seeds, High Mowing Organic Seeds, and Seed Savers Exchange. Start with common, reliable varieties like ‘Black Krim’ tomatoes, ‘Provider’ bush beans, ‘Waltham Butternut’ squash, and ‘Black Seeded Simpson’ lettuce.
- Start Seeds Indoors (Optional but Recommended): For longer growing seasons or specific crops, starting seeds indoors gives you a head start. Use seed-starting mix (e.g., Espoma Organic Seed Starter Mix, ~$10 for 16qt bag) in seed trays (Jiffy Professional Greenhouse 72-cell kit, ~$15). Provide adequate light with LED grow lights (Barrina T5 2ft 4-pack LED Grow Lights, 20W each, ~$50) for 14-16 hours a day, positioned 2-4 inches above seedlings. Maintain consistent temperatures (65-75°F for most).
- Direct Sowing vs. Transplanting: Some crops (carrots, radishes, beans, corn) prefer direct sowing into the garden bed. Others (tomatoes, peppers, broccoli, kale) benefit from being started indoors and transplanted. Follow seed packet instructions for planting depths (e.g., lettuce seeds are often surface-sown or planted 1/8 inch deep, while beans are 1 inch deep) and spacing.
- Companion Planting: Strategically plant different species together to enhance growth, deter pests, and attract beneficial insects. For example, planting marigolds near tomatoes can deter nematodes, and basil improves tomato flavor. Nasturtiums can act as a trap crop for aphids.
- Succession Planting: For a continuous harvest, plant small batches of quick-growing crops (lettuce, radishes, cilantro) every 2-3 weeks. As one crop finishes, another is ready to take its place.
Step 6: Pest & Disease Management (Organic)
Maintaining a self sufficient garden from scratch means embracing organic pest and disease control.
- Integrated Pest Management (IPM): This holistic approach combines several strategies.
- Observation: Regularly inspect your plants for early signs of pests or disease. Catching issues early is key.
- Physical Barriers: Use row covers (e.g., Agribon AG-19 floating row cover, 10×20 ft, ~$20) to protect young plants from insect pests like cabbage worms and squash bugs. Install fences (e.g., 2×4 welded wire mesh, 4 ft tall, 50 ft roll ~$70) to keep out deer, rabbits, and other larger animals.
- Hand-Picking: For larger pests like tomato hornworms or squash bugs, simply pick them off and drop them into a bucket of soapy water.
- Companion Planting: As mentioned, certain plants repel pests. Marigolds, garlic, and onions are excellent deterrents.
- Attract Beneficial Insects: Plant flowers like dill, fennel, cosmos, and sweet alyssum to attract ladybugs, lacewings, and parasitic wasps, which prey on common garden pests.
- Organic Sprays & Treatments:
- Neem Oil: An excellent broad-spectrum organic insecticide and fungicide. Bonide Neem Oil Concentrate (16oz, ~$20) can be mixed at a rate of 1-2 tbsp per gallon of water and sprayed on affected plants.
- Insecticidal Soap: Effective against soft-bodied insects like aphids, whiteflies, and spider mites. Garden Safe Insecticidal Soap (24oz ready-to-use, ~$10).
- Bacillus thuringiensis (Bt): A naturally occurring soil bacterium that targets caterpillars and worms. Monterey BT Worm & Caterpillar Killer (16oz, ~$18) is highly effective and safe for beneficial insects.
- Copper or Sulfur Sprays: For fungal diseases like powdery mildew or blight, organic copper (e.g., Bonide Copper Fungicide, ~$15 for 1lb) or sulfur (e.g., Safer Brand Garden Fungicide, ~$10 for 16oz) can be used as a last resort.
Step 7: Harvesting & Seed Saving
The culmination of your efforts is the harvest, and seed saving closes the loop on self-sufficiency.
- Harvesting Techniques:
- Timing: Harvest vegetables at their peak ripeness for best flavor and nutritional value. For example, green beans should snap cleanly, cucumbers should be firm, and tomatoes should be fully colored.
- Frequency: Many crops, like zucchini, cucumbers, and bush beans, produce more if harvested frequently. Pick daily or every other day.
- Tools: Use clean, sharp pruners (e.g., Corona ClassicCUT Bypass Pruner BP 3180, ~$30) or a sharp knife for clean cuts, minimizing damage to the plant.
- Seed Saving: This is where the « self-sufficient » aspect truly shines.
- Selection: Only save seeds from your healthiest, most vigorous plants that show desired traits (disease resistance, good flavor, high yield).
- Isolation: To ensure true-to-type seeds, prevent cross-pollination. This can be challenging for open-pollinated crops that readily cross (e.g., squash, corn). For beginners, focus on self-pollinating plants like beans, peas, lettuce, and tomatoes.
- Processing:
- Dry Seeds (Beans, Peas, Lettuce, Grains): Allow pods/seed heads to dry completely on the plant. Harvest, shell, and clean the seeds, removing chaff.
- Wet Seeds (Tomatoes, Cucumbers, Squash): For tomatoes, ferment the seeds in water for a few days to remove the gel coating and inhibit disease. For cucumbers/squash, scrape out seeds, wash thoroughly, and dry.
- Drying: Spread seeds thinly on screens or paper plates in a cool, dry, well-ventilated area for 1-4 weeks. Ensure they are bone-dry before storage. I aim for less than 8% moisture content.
- Storage: Store seeds in airtight containers (glass jars with desiccant packets work well) in a cool, dark, dry place (ideally 40-50°F and 30-40% humidity). Label clearly with variety and date. Properly stored seeds can remain viable for 3-10 years or more.
Step 8: Season Extension & Winterizing
Extend your harvest and protect your garden for the off-season to truly maximize your self sufficient garden from scratch.
- Cold Frames: Simple structures with a transparent top (glass, polycarbonate, or old windows) that sit over garden beds. They trap solar heat, allowing you to grow cold-hardy crops (lettuce, spinach, kale, radishes) well into winter or start seeds earlier in spring. A basic cold frame can be built from 2×6 lumber and a sheet of polycarbonate for under $100.
- Hoop Houses/Low Tunnels: Larger structures made from flexible hoops (PVC pipe or EMT conduit) covered with greenhouse plastic. These provide more space and greater temperature moderation. A 10×20 ft DIY low tunnel kit can cost $200-$500, while a larger, more robust hoop house kit might be $1,000-$3,000. I use a 6×12 ft low tunnel made from 1/2-inch PVC hoops and 6mil greenhouse plastic, which extends my lettuce and spinach harvest by at least
Deciding between raised beds and in-ground beds depends on your soil, budget, and physical capabilities.
- In-Ground Beds: If you have excellent native soil and good drainage, in-ground beds are the most economical. Double-digging (loosening soil two shovel depths) can significantly improve drainage and aeration. For my main garden, I primarily use in-ground beds, but I focus on building up the soil over time with consistent compost additions and cover cropping. I aim for beds that are no wider than 3-4 feet so I can reach the center without stepping on the soil, compacting it.
- Raised Beds: Raised beds offer numerous advantages, especially for poor soil, heavy clay, or rocky areas. They provide better drainage, warm up faster in spring, reduce compaction, and make weeding and harvesting easier on your back.
- Material Options:
- Untreated Cedar: Naturally rot-resistant and chemical-free. A 4×8 ft bed, 12 inches deep, typically requires three 2x12x8 ft cedar boards, costing around $50-$60 per board (total ~$150-$180) plus corner brackets or screws. My first raised beds were cedar and are still going strong after 7 years.
- Galvanized Steel: Durable, long-lasting, and aesthetically pleasing. Brands like Vego Garden offer modular kits. A Vego Garden 17″ Tall 8-in-1 Metal Raised Garden Bed (can be configured to 4×8 ft) costs approximately $250-$300.
- Concrete Blocks/Stones: Very durable but can leach minerals (though generally safe once weathered) and can be expensive.
- Recycled Materials: Pallets (check for chemical treatment stamps like « HT » for heat-treated), old tires (controversial due to potential chemical leaching).
- Filling Raised Beds: Don’t just fill with topsoil. Use a « Hugelkultur » approach (logs, branches, leaves, then compost, then topsoil) or a mixture of 60% good quality topsoil, 30% compost, and 10% perlite or vermiculite for drainage. A 4x8x1 ft raised bed requires about 32 cubic feet (or ~1.2 cubic yards) of soil mix, which can cost $100-$200 depending on your source.
- Material Options:
Step 4: Water Management & Irrigation
Efficient water management is critical for a self sufficient garden from scratch, especially in off-grid living where water resources might be limited.
- Rainwater Harvesting: This is my primary source of irrigation water. A 55-gallon rain barrel (e.g., EarthMark Rain Barrel, ~$120-$150) connected to a downspout can collect significant water. For larger needs, I use two 275-gallon IBC totes (Intermediate Bulk Containers, often available used for $100-$200 each from food-grade sources) connected in series. A 1,000 sq ft roof can collect approximately 620 gallons of water for every inch of rainfall. My 1,500 sq ft roof provides ample water for my 600 sq ft garden through multiple barrels and totes.
- Drip Irrigation: This is by far the most water-efficient method, delivering water directly to the plant’s root zone, minimizing evaporation and weed growth.
- Components: A typical drip system includes a pressure regulator (e.g., Rain Bird PRV-10, ~$15), a filter (Rain Bird RBY filter, ~$20), main tubing (1/2-inch poly tubing, 100ft ~$25), smaller feeder lines (1/4-inch tubing), and emitters (0.5 GPH or 1 GPH per plant).
- Kits: For beginners, a starter kit like the Rain Bird Drip Irrigation Garden Kit (model DDI-KIT-1P, ~$40-$60) is excellent for a small garden. For larger setups, I use Netafim Techline CV Drip Line (500ft roll, ~$150-$200), which has pressure-compensating emitters built-in, ensuring even watering across long runs.
- Automation: For true self-sufficiency, consider a battery-powered timer (e.g., Orbit B-Hyve Bluetooth Hose Faucet Timer, ~$50) or a solar-powered timer connected to a small 12V pump.
- Solar-Powered Pumps: For lifting water from a well, pond, or large storage tank to your garden, a solar pump is a game-changer. For a smaller drip system, a Shurflo 2088-594-152 Diaphragm Pump (12V, 3.5 GPM, ~$180) can be powered by a single 100W solar panel (e.g., Renogy 100W Monocrystalline Solar Panel, ~$100) and a small 12V battery (e.g., a 50Ah LiFePO4 battery like the Battle Born 50Ah, ~$450). For larger operations or deeper wells, more robust systems are needed. If you’re looking to build out a comprehensive off-grid power system to support your garden’s water needs, or indeed your entire homestead, you might want to explore resources like the Power Grid Generator complete system guide to understand the full scope of what’s possible in terms of energy independence.
Step 5: Seed Selection & Planting
The choice of seeds is crucial for a truly self sufficient garden from scratch.
- Choose Heirloom & Open-Pollinated Seeds: These varieties produce seeds that will grow true to type, meaning you can save seeds from your harvest year after year. F1 hybrids, while often vigorous, will not produce consistent offspring from saved seeds. Reputable seed companies include Baker Creek Heirloom Seeds, High Mowing Organic Seeds, and Seed Savers Exchange. Start with common, reliable varieties like ‘Black Krim’ tomatoes, ‘Provider’ bush beans, ‘Waltham Butternut’ squash, and ‘Black Seeded Simpson’ lettuce.
- Start Seeds Indoors (Optional but Recommended): For longer growing seasons or specific crops, starting seeds indoors gives you a head start. Use seed-starting mix (e.g., Espoma Organic Seed Starter Mix, ~$10 for 16qt bag) in seed trays (Jiffy Professional Greenhouse 72-cell kit, ~$15). Provide adequate light with LED grow lights (Barrina T5 2ft 4-pack LED Grow Lights, 20W each, ~$50) for 14-16 hours a day, positioned 2-4 inches above seedlings. Maintain consistent temperatures (65-75°F for most).
- Direct Sowing vs. Transplanting: Some crops (carrots, radishes, beans, corn) prefer direct sowing into the garden bed. Others (tomatoes, peppers, broccoli, kale) benefit from being started indoors and transplanted. Follow seed packet instructions for planting depths (e.g., lettuce seeds are often surface-sown or planted 1/8 inch deep, while beans are 1 inch deep) and spacing.
- Companion Planting: Strategically plant different species together to enhance growth, deter pests, and attract beneficial insects. For example, planting marigolds near tomatoes can deter nematodes, and basil improves tomato flavor. Nasturtiums can act as a trap crop for aphids.
- Succession Planting: For a continuous harvest, plant small batches of quick-growing crops (lettuce, radishes, cilantro) every 2-3 weeks. As one crop finishes, another is ready to take its place.
Step 6: Pest & Disease Management (Organic)
Maintaining a self sufficient garden from scratch means embracing organic pest and disease control.
- Integrated Pest Management (IPM): This holistic approach combines several strategies.
- Observation: Regularly inspect your plants for early signs of pests or disease. Catching issues early is key.
- Physical Barriers: Use row covers (e.g., Agribon AG-19 floating row cover, 10×20 ft, ~$20) to protect young plants from insect pests like cabbage worms and squash bugs. Install fences (e.g., 2×4 welded wire mesh, 4 ft tall, 50 ft roll ~$70) to keep out deer, rabbits, and other larger animals.
- Hand-Picking: For larger pests like tomato hornworms or squash bugs, simply pick them off and drop them into a bucket of soapy water.
- Companion Planting: As mentioned, certain plants repel pests. Marigolds, garlic, and onions are excellent deterrents.
- Attract Beneficial Insects: Plant flowers like dill, fennel, cosmos, and sweet alyssum to attract ladybugs, lacewings, and parasitic wasps, which prey on common garden pests.
- Organic Sprays & Treatments:
- Neem Oil: An excellent broad-spectrum organic insecticide and fungicide. Bonide Neem Oil Concentrate (16oz, ~$20) can be mixed at a rate of 1-2 tbsp per gallon of water and sprayed on affected plants.
- Insecticidal Soap: Effective against soft-bodied insects like aphids, whiteflies, and spider mites. Garden Safe Insecticidal Soap (24oz ready-to-use, ~$10).
- Bacillus thuringiensis (Bt): A naturally occurring soil bacterium that targets caterpillars and worms. Monterey BT Worm & Caterpillar Killer (16oz, ~$18) is highly effective and safe for beneficial insects.
- Copper or Sulfur Sprays: For fungal diseases like powdery mildew or blight, organic copper (e.g., Bonide Copper Fungicide, ~$15 for 1lb) or sulfur (e.g., Safer Brand Garden Fungicide, ~$10 for 16oz) can be used as a last resort.
Step 7: Harvesting & Seed Saving
The culmination of your efforts is the harvest, and seed saving closes the loop on self-sufficiency.
- Harvesting Techniques:
- Timing: Harvest vegetables at their peak ripeness for best flavor and nutritional value. For example, green beans should snap cleanly, cucumbers should be firm, and tomatoes should be fully colored.
- Frequency: Many crops, like zucchini, cucumbers, and bush beans, produce more if harvested frequently. Pick daily or every other day.
- Tools: Use clean, sharp pruners (e.g., Corona ClassicCUT Bypass Pruner BP 3180, ~$30) or a sharp knife for clean cuts, minimizing damage to the plant.
- Seed Saving: This is where the « self-sufficient » aspect truly shines.
- Selection: Only save seeds from your healthiest, most vigorous plants that show desired traits (disease resistance, good flavor, high yield).
- Isolation: To ensure true-to-type seeds, prevent cross-pollination. This can be challenging for open-pollinated crops that readily cross (e.g., squash, corn). For beginners, focus on self-pollinating plants like beans, peas, lettuce, and tomatoes.
- Processing:
- Dry Seeds (Beans, Peas, Lettuce, Grains): Allow pods/seed heads to dry completely on the plant. Harvest, shell, and clean the seeds, removing chaff.
- Wet Seeds (Tomatoes, Cucumbers, Squash): For tomatoes, ferment the seeds in water for a few days to remove the gel coating and inhibit disease. For cucumbers/squash, scrape out seeds, wash thoroughly, and dry.
- Drying: Spread seeds thinly on screens or paper plates in a cool, dry, well-ventilated area for 1-4 weeks. Ensure they are bone-dry before storage. I aim for less than 8% moisture content.
- Storage: Store seeds in airtight containers (glass jars with desiccant packets work well) in a cool, dark, dry place (ideally 40-50°F and 30-40% humidity). Label clearly with variety and date. Properly stored seeds can remain viable for 3-10 years or more.
Step 8: Season Extension & Winterizing
Extend your harvest and protect your garden for the off-season to truly maximize your self sufficient garden from scratch.
- Cold Frames: Simple structures with a transparent top (glass, polycarbonate, or old windows) that sit over garden beds. They trap solar heat, allowing you to grow cold-hardy crops (lettuce, spinach, kale, radishes) well into winter or start seeds earlier in spring. A basic cold frame can be built from 2×6 lumber and a sheet of polycarbonate for under $100.
- Hoop Houses/Low Tunnels: Larger structures made from flexible hoops (PVC pipe or EMT conduit) covered with greenhouse plastic. These provide more space and greater temperature moderation. A 10×20 ft DIY low tunnel kit can cost $200-$500, while a larger, more robust hoop house kit might be $1,000-$3,000. I use a 6×12 ft low tunnel made from 1/2-inch PVC hoops and 6mil greenhouse plastic, which extends my lettuce and spinach harvest by at least
Healthy soil is the bedrock of a productive, self-sufficient garden. You can’t guess what your soil needs; you have to test it.
- Perform a Soil Test: A professional soil test will give you precise data on your soil’s pH, nutrient levels (N-P-K), and organic matter content. I recommend sending a sample to your local agricultural extension office; it typically costs $20-$50 and provides detailed recommendations. Alternatively, for a quick homeowner check, a Rapitest Soil Test Kit (40-test kit, model 1663, ~$20 on Amazon) provides a good baseline for pH, Nitrogen, Phosphorus, and Potash. Aim for a pH between 6.0 and 7.0 for most vegetables.
- Amend for pH Imbalance: If your soil is too acidic (below 6.0), add agricultural lime (dolomitic lime adds magnesium, calcitic lime adds calcium). Apply 5-10 lbs per 100 sq ft for a moderate adjustment. If it’s too alkaline (above 7.0), add elemental sulfur (e.g., Espoma Soil Acidifier, ~$15 for 6.75 lbs) or generous amounts of organic matter like peat moss or pine needles.
- Build Organic Matter: This is the single most important step for long-term soil health. Organic matter improves soil structure, water retention, drainage, and nutrient availability. Incorporate 2-4 inches of high-quality compost into your top 6-12 inches of soil annually. I make my own compost from kitchen scraps, garden waste, and shredded leaves, but you can purchase it. Local nurseries often sell bulk compost for $30-$50 per cubic yard. Aged manure (from chickens, cows, or horses – ensure it’s well-rotted to avoid burning plants) is also excellent.
- Address Nutrient Deficiencies: Based on your soil test, add specific organic amendments. If Nitrogen (N) is low, add blood meal (12-0-0, ~$20 for 3 lbs) or feather meal. For Phosphorus (P), use bone meal (3-15-0, ~$15 for 3 lbs) or rock phosphate. For Potassium (K), greensand (0-0-2.5, ~$25 for 5 lbs) or kelp meal are good choices. I rely heavily on Espoma Organic Garden-tone (5-3-3, ~$25 for an 8lb bag) as a balanced, all-purpose organic fertilizer during planting.
Step 3: Garden Bed Preparation
Deciding between raised beds and in-ground beds depends on your soil, budget, and physical capabilities.
- In-Ground Beds: If you have excellent native soil and good drainage, in-ground beds are the most economical. Double-digging (loosening soil two shovel depths) can significantly improve drainage and aeration. For my main garden, I primarily use in-ground beds, but I focus on building up the soil over time with consistent compost additions and cover cropping. I aim for beds that are no wider than 3-4 feet so I can reach the center without stepping on the soil, compacting it.
- Raised Beds: Raised beds offer numerous advantages, especially for poor soil, heavy clay, or rocky areas. They provide better drainage, warm up faster in spring, reduce compaction, and make weeding and harvesting easier on your back.
- Material Options:
- Untreated Cedar: Naturally rot-resistant and chemical-free. A 4×8 ft bed, 12 inches deep, typically requires three 2x12x8 ft cedar boards, costing around $50-$60 per board (total ~$150-$180) plus corner brackets or screws. My first raised beds were cedar and are still going strong after 7 years.
- Galvanized Steel: Durable, long-lasting, and aesthetically pleasing. Brands like Vego Garden offer modular kits. A Vego Garden 17″ Tall 8-in-1 Metal Raised Garden Bed (can be configured to 4×8 ft) costs approximately $250-$300.
- Concrete Blocks/Stones: Very durable but can leach minerals (though generally safe once weathered) and can be expensive.
- Recycled Materials: Pallets (check for chemical treatment stamps like « HT » for heat-treated), old tires (controversial due to potential chemical leaching).
- Filling Raised Beds: Don’t just fill with topsoil. Use a « Hugelkultur » approach (logs, branches, leaves, then compost, then topsoil) or a mixture of 60% good quality topsoil, 30% compost, and 10% perlite or vermiculite for drainage. A 4x8x1 ft raised bed requires about 32 cubic feet (or ~1.2 cubic yards) of soil mix, which can cost $100-$200 depending on your source.
- Material Options:
Step 4: Water Management & Irrigation
Efficient water management is critical for a self sufficient garden from scratch, especially in off-grid living where water resources might be limited.
- Rainwater Harvesting: This is my primary source of irrigation water. A 55-gallon rain barrel (e.g., EarthMark Rain Barrel, ~$120-$150) connected to a downspout can collect significant water. For larger needs, I use two 275-gallon IBC totes (Intermediate Bulk Containers, often available used for $100-$200 each from food-grade sources) connected in series. A 1,000 sq ft roof can collect approximately 620 gallons of water for every inch of rainfall. My 1,500 sq ft roof provides ample water for my 600 sq ft garden through multiple barrels and totes.
- Drip Irrigation: This is by far the most water-efficient method, delivering water directly to the plant’s root zone, minimizing evaporation and weed growth.
- Components: A typical drip system includes a pressure regulator (e.g., Rain Bird PRV-10, ~$15), a filter (Rain Bird RBY filter, ~$20), main tubing (1/2-inch poly tubing, 100ft ~$25), smaller feeder lines (1/4-inch tubing), and emitters (0.5 GPH or 1 GPH per plant).
- Kits: For beginners, a starter kit like the Rain Bird Drip Irrigation Garden Kit (model DDI-KIT-1P, ~$40-$60) is excellent for a small garden. For larger setups, I use Netafim Techline CV Drip Line (500ft roll, ~$150-$200), which has pressure-compensating emitters built-in, ensuring even watering across long runs.
- Automation: For true self-sufficiency, consider a battery-powered timer (e.g., Orbit B-Hyve Bluetooth Hose Faucet Timer, ~$50) or a solar-powered timer connected to a small 12V pump.
- Solar-Powered Pumps: For lifting water from a well, pond, or large storage tank to your garden, a solar pump is a game-changer. For a smaller drip system, a Shurflo 2088-594-152 Diaphragm Pump (12V, 3.5 GPM, ~$180) can be powered by a single 100W solar panel (e.g., Renogy 100W Monocrystalline Solar Panel, ~$100) and a small 12V battery (e.g., a 50Ah LiFePO4 battery like the Battle Born 50Ah, ~$450). For larger operations or deeper wells, more robust systems are needed. If you’re looking to build out a comprehensive off-grid power system to support your garden’s water needs, or indeed your entire homestead, you might want to explore resources like the Power Grid Generator complete system guide to understand the full scope of what’s possible in terms of energy independence.
Step 5: Seed Selection & Planting
The choice of seeds is crucial for a truly self sufficient garden from scratch.
- Choose Heirloom & Open-Pollinated Seeds: These varieties produce seeds that will grow true to type, meaning you can save seeds from your harvest year after year. F1 hybrids, while often vigorous, will not produce consistent offspring from saved seeds. Reputable seed companies include Baker Creek Heirloom Seeds, High Mowing Organic Seeds, and Seed Savers Exchange. Start with common, reliable varieties like ‘Black Krim’ tomatoes, ‘Provider’ bush beans, ‘Waltham Butternut’ squash, and ‘Black Seeded Simpson’ lettuce.
- Start Seeds Indoors (Optional but Recommended): For longer growing seasons or specific crops, starting seeds indoors gives you a head start. Use seed-starting mix (e.g., Espoma Organic Seed Starter Mix, ~$10 for 16qt bag) in seed trays (Jiffy Professional Greenhouse 72-cell kit, ~$15). Provide adequate light with LED grow lights (Barrina T5 2ft 4-pack LED Grow Lights, 20W each, ~$50) for 14-16 hours a day, positioned 2-4 inches above seedlings. Maintain consistent temperatures (65-75°F for most).
- Direct Sowing vs. Transplanting: Some crops (carrots, radishes, beans, corn) prefer direct sowing into the garden bed. Others (tomatoes, peppers, broccoli, kale) benefit from being started indoors and transplanted. Follow seed packet instructions for planting depths (e.g., lettuce seeds are often surface-sown or planted 1/8 inch deep, while beans are 1 inch deep) and spacing.
- Companion Planting: Strategically plant different species together to enhance growth, deter pests, and attract beneficial insects. For example, planting marigolds near tomatoes can deter nematodes, and basil improves tomato flavor. Nasturtiums can act as a trap crop for aphids.
- Succession Planting: For a continuous harvest, plant small batches of quick-growing crops (lettuce, radishes, cilantro) every 2-3 weeks. As one crop finishes, another is ready to take its place.
Step 6: Pest & Disease Management (Organic)
Maintaining a self sufficient garden from scratch means embracing organic pest and disease control.
- Integrated Pest Management (IPM): This holistic approach combines several strategies.
- Observation: Regularly inspect your plants for early signs of pests or disease. Catching issues early is key.
- Physical Barriers: Use row covers (e.g., Agribon AG-19 floating row cover, 10×20 ft, ~$20) to protect young plants from insect pests like cabbage worms and squash bugs. Install fences (e.g., 2×4 welded wire mesh, 4 ft tall, 50 ft roll ~$70) to keep out deer, rabbits, and other larger animals.
- Hand-Picking: For larger pests like tomato hornworms or squash bugs, simply pick them off and drop them into a bucket of soapy water.
- Companion Planting: As mentioned, certain plants repel pests. Marigolds, garlic, and onions are excellent deterrents.
- Attract Beneficial Insects: Plant flowers like dill, fennel, cosmos, and sweet alyssum to attract ladybugs, lacewings, and parasitic wasps, which prey on common garden pests.
- Organic Sprays & Treatments:
- Neem Oil: An excellent broad-spectrum organic insecticide and fungicide. Bonide Neem Oil Concentrate (16oz, ~$20) can be mixed at a rate of 1-2 tbsp per gallon of water and sprayed on affected plants.
- Insecticidal Soap: Effective against soft-bodied insects like aphids, whiteflies, and spider mites. Garden Safe Insecticidal Soap (24oz ready-to-use, ~$10).
- Bacillus thuringiensis (Bt): A naturally occurring soil bacterium that targets caterpillars and worms. Monterey BT Worm & Caterpillar Killer (16oz, ~$18) is highly effective and safe for beneficial insects.
- Copper or Sulfur Sprays: For fungal diseases like powdery mildew or blight, organic copper (e.g., Bonide Copper Fungicide, ~$15 for 1lb) or sulfur (e.g., Safer Brand Garden Fungicide, ~$10 for 16oz) can be used as a last resort.
Step 7: Harvesting & Seed Saving
The culmination of your efforts is the harvest, and seed saving closes the loop on self-sufficiency.
- Harvesting Techniques:
- Timing: Harvest vegetables at their peak ripeness for best flavor and nutritional value. For example, green beans should snap cleanly, cucumbers should be firm, and tomatoes should be fully colored.
- Frequency: Many crops, like zucchini, cucumbers, and bush beans, produce more if harvested frequently. Pick daily or every other day.
- Tools: Use clean, sharp pruners (e.g., Corona ClassicCUT Bypass Pruner BP 3180, ~$30) or a sharp knife for clean cuts, minimizing damage to the plant.
- Seed Saving: This is where the « self-sufficient » aspect truly shines.
- Selection: Only save seeds from your healthiest, most vigorous plants that show desired traits (disease resistance, good flavor, high yield).
- Isolation: To ensure true-to-type seeds, prevent cross-pollination. This can be challenging for open-pollinated crops that readily cross (e.g., squash, corn). For beginners, focus on self-pollinating plants like beans, peas, lettuce, and tomatoes.
- Processing:
- Dry Seeds (Beans, Peas, Lettuce, Grains): Allow pods/seed heads to dry completely on the plant. Harvest, shell, and clean the seeds, removing chaff.
- Wet Seeds (Tomatoes, Cucumbers, Squash): For tomatoes, ferment the seeds in water for a few days to remove the gel coating and inhibit disease. For cucumbers/squash, scrape out seeds, wash thoroughly, and dry.
- Drying: Spread seeds thinly on screens or paper plates in a cool, dry, well-ventilated area for 1-4 weeks. Ensure they are bone-dry before storage. I aim for less than 8% moisture content.
- Storage: Store seeds in airtight containers (glass jars with desiccant packets work well) in a cool, dark, dry place (ideally 40-50°F and 30-40% humidity). Label clearly with variety and date. Properly stored seeds can remain viable for 3-10 years or more.
Step 8: Season Extension & Winterizing
Extend your harvest and protect your garden for the off-season to truly maximize your self sufficient garden from scratch.
- Cold Frames: Simple structures with a transparent top (glass, polycarbonate, or old windows) that sit over garden beds. They trap solar heat, allowing you to grow cold-hardy crops (lettuce, spinach, kale, radishes) well into winter or start seeds earlier in spring. A basic cold frame can be built from 2×6 lumber and a sheet of polycarbonate for under $100.
- Hoop Houses/Low Tunnels: Larger structures made from flexible hoops (PVC pipe or EMT conduit) covered with greenhouse plastic. These provide more space and greater temperature moderation. A 10×20 ft DIY low tunnel kit can cost $200-$500, while a larger, more robust hoop house kit might be $1,000-$3,000. I use a 6×12 ft low tunnel made from 1/2-inch PVC hoops and 6mil greenhouse plastic, which extends my lettuce and spinach harvest by at least
Step 5: Seed Selection & Planting
The choice of seeds is crucial for a truly self sufficient garden from scratch.
- Choose Heirloom & Open-Pollinated Seeds: These varieties produce seeds that will grow true to type, meaning you can save seeds from your harvest year after year. F1 hybrids, while often vigorous, will not produce consistent offspring from saved seeds. Reputable seed companies include Baker Creek Heirloom Seeds, High Mowing Organic Seeds, and Seed Savers Exchange. Start with common, reliable varieties like ‘Black Krim’ tomatoes, ‘Provider’ bush beans, ‘Waltham Butternut’ squash, and ‘Black Seeded Simpson’ lettuce.
- Start Seeds Indoors (Optional but Recommended): For longer growing seasons or specific crops, starting seeds indoors gives you a head start. Use seed-starting mix (e.g., Espoma Organic Seed Starter Mix, ~$10 for 16qt bag) in seed trays (Jiffy Professional Greenhouse 72-cell kit, ~$15). Provide adequate light with LED grow lights (Barrina T5 2ft 4-pack LED Grow Lights, 20W each, ~$50) for 14-16 hours a day, positioned 2-4 inches above seedlings. Maintain consistent temperatures (65-75°F for most).
- Direct Sowing vs. Transplanting: Some crops (carrots, radishes, beans, corn) prefer direct sowing into the garden bed. Others (tomatoes, peppers, broccoli, kale) benefit from being started indoors and transplanted. Follow seed packet instructions for planting depths (e.g., lettuce seeds are often surface-sown or planted 1/8 inch deep, while beans are 1 inch deep) and spacing.
- Companion Planting: Strategically plant different species together to enhance growth, deter pests, and attract beneficial insects. For example, planting marigolds near tomatoes can deter nematodes, and basil improves tomato flavor. Nasturtiums can act as a trap crop for aphids.
- Succession Planting: For a continuous harvest, plant small batches of quick-growing crops (lettuce, radishes, cilantro) every 2-3 weeks. As one crop finishes, another is ready to take its place.
Step 6: Pest & Disease Management (Organic)
Maintaining a self sufficient garden from scratch means embracing organic pest and disease control.
- Integrated Pest Management (IPM): This holistic approach combines several strategies.
- Observation: Regularly inspect your plants for early signs of pests or disease. Catching issues early is key.
- Physical Barriers: Use row covers (e.g., Agribon AG-19 floating row cover, 10×20 ft, ~$20) to protect young plants from insect pests like cabbage worms and squash bugs. Install fences (e.g., 2×4 welded wire mesh, 4 ft tall, 50 ft roll ~$70) to keep out deer, rabbits, and other larger animals.
- Hand-Picking: For larger pests like tomato hornworms or squash bugs, simply pick them off and drop them into a bucket of soapy water.
- Companion Planting: As mentioned, certain plants repel pests. Marigolds, garlic, and onions are excellent deterrents.
- Attract Beneficial Insects: Plant flowers like dill, fennel, cosmos, and sweet alyssum to attract ladybugs, lacewings, and parasitic wasps, which prey on common garden pests.
- Organic Sprays & Treatments:
- Neem Oil: An excellent broad-spectrum organic insecticide and fungicide. Bonide Neem Oil Concentrate (16oz, ~$20) can be mixed at a rate of 1-2 tbsp per gallon of water and sprayed on affected plants.
- Insecticidal Soap: Effective against soft-bodied insects like aphids, whiteflies, and spider mites. Garden Safe Insecticidal Soap (24oz ready-to-use, ~$10).
- Bacillus thuringiensis (Bt): A naturally occurring soil bacterium that targets caterpillars and worms. Monterey BT Worm & Caterpillar Killer (16oz, ~$18) is highly effective and safe for beneficial insects.
- Copper or Sulfur Sprays: For fungal diseases like powdery mildew or blight, organic copper (e.g., Bonide Copper Fungicide, ~$15 for 1lb) or sulfur (e.g., Safer Brand Garden Fungicide, ~$10 for 16oz) can be used as a last resort.
Step 7: Harvesting & Seed Saving
The culmination of your efforts is the harvest, and seed saving closes the loop on self-sufficiency.
- Harvesting Techniques:
- Timing: Harvest vegetables at their peak ripeness for best flavor and nutritional value. For example, green beans should snap cleanly, cucumbers should be firm, and tomatoes should be fully colored.
- Frequency: Many crops, like zucchini, cucumbers, and bush beans, produce more if harvested frequently. Pick daily or every other day.
- Tools: Use clean, sharp pruners (e.g., Corona ClassicCUT Bypass Pruner BP 3180, ~$30) or a sharp knife for clean cuts, minimizing damage to the plant.
- Seed Saving: This is where the « self-sufficient » aspect truly shines.
- Selection: Only save seeds from your healthiest, most vigorous plants that show desired traits (disease resistance, good flavor, high yield).
- Isolation: To ensure true-to-type seeds, prevent cross-pollination. This can be challenging for open-pollinated crops that readily cross (e.g., squash, corn). For beginners, focus on self-pollinating plants like beans, peas, lettuce, and tomatoes.
- Processing:
- Dry Seeds (Beans, Peas, Lettuce, Grains): Allow pods/seed heads to dry completely on the plant. Harvest, shell, and clean the seeds, removing chaff.
- Wet Seeds (Tomatoes, Cucumbers, Squash): For tomatoes, ferment the seeds in water for a few days to remove the gel coating and inhibit disease. For cucumbers/squash, scrape out seeds, wash thoroughly, and dry.
- Drying: Spread seeds thinly on screens or paper plates in a cool, dry, well-ventilated area for 1-4 weeks. Ensure they are bone-dry before storage. I aim for less than 8% moisture content.
- Storage: Store seeds in airtight containers (glass jars with desiccant packets work well) in a cool, dark, dry place (ideally 40-50°F and 30-40% humidity). Label clearly with variety and date. Properly stored seeds can remain viable for 3-10 years or more.
Step 8: Season Extension & Winterizing
Extend your harvest and protect your garden for the off-season to truly maximize your self sufficient garden from scratch.
- Cold Frames: Simple structures with a transparent top (glass, polycarbonate, or old windows) that sit over garden beds. They trap solar heat, allowing you to grow cold-hardy crops (lettuce, spinach, kale, radishes) well into winter or start seeds earlier in spring. A basic cold frame can be built from 2×6 lumber and a sheet of polycarbonate for under $100.
- Hoop Houses/Low Tunnels: Larger structures made from flexible hoops (PVC pipe or EMT conduit) covered with greenhouse plastic. These provide more space and greater temperature moderation. A 10×20 ft DIY low tunnel kit can cost $200-$500, while a larger, more robust hoop house kit might be $1,000-$3,000. I use a 6×12 ft low tunnel made from 1/2-inch PVC hoops and 6mil greenhouse plastic, which extends my lettuce and spinach harvest by at least
Efficient water management is critical for a self sufficient garden from scratch, especially in off-grid living where water resources might be limited.
- Rainwater Harvesting: This is my primary source of irrigation water. A 55-gallon rain barrel (e.g., EarthMark Rain Barrel, ~$120-$150) connected to a downspout can collect significant water. For larger needs, I use two 275-gallon IBC totes (Intermediate Bulk Containers, often available used for $100-$200 each from food-grade sources) connected in series. A 1,000 sq ft roof can collect approximately 620 gallons of water for every inch of rainfall. My 1,500 sq ft roof provides ample water for my 600 sq ft garden through multiple barrels and totes.
- Drip Irrigation: This is by far the most water-efficient method, delivering water directly to the plant’s root zone, minimizing evaporation and weed growth.
- Components: A typical drip system includes a pressure regulator (e.g., Rain Bird PRV-10, ~$15), a filter (Rain Bird RBY filter, ~$20), main tubing (1/2-inch poly tubing, 100ft ~$25), smaller feeder lines (1/4-inch tubing), and emitters (0.5 GPH or 1 GPH per plant).
- Kits: For beginners, a starter kit like the Rain Bird Drip Irrigation Garden Kit (model DDI-KIT-1P, ~$40-$60) is excellent for a small garden. For larger setups, I use Netafim Techline CV Drip Line (500ft roll, ~$150-$200), which has pressure-compensating emitters built-in, ensuring even watering across long runs.
- Automation: For true self-sufficiency, consider a battery-powered timer (e.g., Orbit B-Hyve Bluetooth Hose Faucet Timer, ~$50) or a solar-powered timer connected to a small 12V pump.
- Solar-Powered Pumps: For lifting water from a well, pond, or large storage tank to your garden, a solar pump is a game-changer. For a smaller drip system, a Shurflo 2088-594-152 Diaphragm Pump (12V, 3.5 GPM, ~$180) can be powered by a single 100W solar panel (e.g., Renogy 100W Monocrystalline Solar Panel, ~$100) and a small 12V battery (e.g., a 50Ah LiFePO4 battery like the Battle Born 50Ah, ~$450). For larger operations or deeper wells, more robust systems are needed. If you’re looking to build out a comprehensive off-grid power system to support your garden’s water needs, or indeed your entire homestead, you might want to explore resources like the Power Grid Generator complete system guide to understand the full scope of what’s possible in terms of energy independence.
Step 5: Seed Selection & Planting
The choice of seeds is crucial for a truly self sufficient garden from scratch.
- Choose Heirloom & Open-Pollinated Seeds: These varieties produce seeds that will grow true to type, meaning you can save seeds from your harvest year after year. F1 hybrids, while often vigorous, will not produce consistent offspring from saved seeds. Reputable seed companies include Baker Creek Heirloom Seeds, High Mowing Organic Seeds, and Seed Savers Exchange. Start with common, reliable varieties like ‘Black Krim’ tomatoes, ‘Provider’ bush beans, ‘Waltham Butternut’ squash, and ‘Black Seeded Simpson’ lettuce.
- Start Seeds Indoors (Optional but Recommended): For longer growing seasons or specific crops, starting seeds indoors gives you a head start. Use seed-starting mix (e.g., Espoma Organic Seed Starter Mix, ~$10 for 16qt bag) in seed trays (Jiffy Professional Greenhouse 72-cell kit, ~$15). Provide adequate light with LED grow lights (Barrina T5 2ft 4-pack LED Grow Lights, 20W each, ~$50) for 14-16 hours a day, positioned 2-4 inches above seedlings. Maintain consistent temperatures (65-75°F for most).
- Direct Sowing vs. Transplanting: Some crops (carrots, radishes, beans, corn) prefer direct sowing into the garden bed. Others (tomatoes, peppers, broccoli, kale) benefit from being started indoors and transplanted. Follow seed packet instructions for planting depths (e.g., lettuce seeds are often surface-sown or planted 1/8 inch deep, while beans are 1 inch deep) and spacing.
- Companion Planting: Strategically plant different species together to enhance growth, deter pests, and attract beneficial insects. For example, planting marigolds near tomatoes can deter nematodes, and basil improves tomato flavor. Nasturtiums can act as a trap crop for aphids.
- Succession Planting: For a continuous harvest, plant small batches of quick-growing crops (lettuce, radishes, cilantro) every 2-3 weeks. As one crop finishes, another is ready to take its place.
Step 6: Pest & Disease Management (Organic)
Maintaining a self sufficient garden from scratch means embracing organic pest and disease control.
- Integrated Pest Management (IPM): This holistic approach combines several strategies.
- Observation: Regularly inspect your plants for early signs of pests or disease. Catching issues early is key.
- Physical Barriers: Use row covers (e.g., Agribon AG-19 floating row cover, 10×20 ft, ~$20) to protect young plants from insect pests like cabbage worms and squash bugs. Install fences (e.g., 2×4 welded wire mesh, 4 ft tall, 50 ft roll ~$70) to keep out deer, rabbits, and other larger animals.
- Hand-Picking: For larger pests like tomato hornworms or squash bugs, simply pick them off and drop them into a bucket of soapy water.
- Companion Planting: As mentioned, certain plants repel pests. Marigolds, garlic, and onions are excellent deterrents.
- Attract Beneficial Insects: Plant flowers like dill, fennel, cosmos, and sweet alyssum to attract ladybugs, lacewings, and parasitic wasps, which prey on common garden pests.
- Organic Sprays & Treatments:
- Neem Oil: An excellent broad-spectrum organic insecticide and fungicide. Bonide Neem Oil Concentrate (16oz, ~$20) can be mixed at a rate of 1-2 tbsp per gallon of water and sprayed on affected plants.
- Insecticidal Soap: Effective against soft-bodied insects like aphids, whiteflies, and spider mites. Garden Safe Insecticidal Soap (24oz ready-to-use, ~$10).
- Bacillus thuringiensis (Bt): A naturally occurring soil bacterium that targets caterpillars and worms. Monterey BT Worm & Caterpillar Killer (16oz, ~$18) is highly effective and safe for beneficial insects.
- Copper or Sulfur Sprays: For fungal diseases like powdery mildew or blight, organic copper (e.g., Bonide Copper Fungicide, ~$15 for 1lb) or sulfur (e.g., Safer Brand Garden Fungicide, ~$10 for 16oz) can be used as a last resort.
Step 7: Harvesting & Seed Saving
The culmination of your efforts is the harvest, and seed saving closes the loop on self-sufficiency.
- Harvesting Techniques:
- Timing: Harvest vegetables at their peak ripeness for best flavor and nutritional value. For example, green beans should snap cleanly, cucumbers should be firm, and tomatoes should be fully colored.
- Frequency: Many crops, like zucchini, cucumbers, and bush beans, produce more if harvested frequently. Pick daily or every other day.
- Tools: Use clean, sharp pruners (e.g., Corona ClassicCUT Bypass Pruner BP 3180, ~$30) or a sharp knife for clean cuts, minimizing damage to the plant.
- Seed Saving: This is where the « self-sufficient » aspect truly shines.
- Selection: Only save seeds from your healthiest, most vigorous plants that show desired traits (disease resistance, good flavor, high yield).
- Isolation: To ensure true-to-type seeds, prevent cross-pollination. This can be challenging for open-pollinated crops that readily cross (e.g., squash, corn). For beginners, focus on self-pollinating plants like beans, peas, lettuce, and tomatoes.
- Processing:
- Dry Seeds (Beans, Peas, Lettuce, Grains): Allow pods/seed heads to dry completely on the plant. Harvest, shell, and clean the seeds, removing chaff.
- Wet Seeds (Tomatoes, Cucumbers, Squash): For tomatoes, ferment the seeds in water for a few days to remove the gel coating and inhibit disease. For cucumbers/squash, scrape out seeds, wash thoroughly, and dry.
- Drying: Spread seeds thinly on screens or paper plates in a cool, dry, well-ventilated area for 1-4 weeks. Ensure they are bone-dry before storage. I aim for less than 8% moisture content.
- Storage: Store seeds in airtight containers (glass jars with desiccant packets work well) in a cool, dark, dry place (ideally 40-50°F and 30-40% humidity). Label clearly with variety and date. Properly stored seeds can remain viable for 3-10 years or more.
Step 8: Season Extension & Winterizing
Extend your harvest and protect your garden for the off-season to truly maximize your self sufficient garden from scratch.
- Cold Frames: Simple structures with a transparent top (glass, polycarbonate, or old windows) that sit over garden beds. They trap solar heat, allowing you to grow cold-hardy crops (lettuce, spinach, kale, radishes) well into winter or start seeds earlier in spring. A basic cold frame can be built from 2×6 lumber and a sheet of polycarbonate for under $100.
- Hoop Houses/Low Tunnels: Larger structures made from flexible hoops (PVC pipe or EMT conduit) covered with greenhouse plastic. These provide more space and greater temperature moderation. A 10×20 ft DIY low tunnel kit can cost $200-$500, while a larger, more robust hoop house kit might be $1,000-$3,000. I use a 6×12 ft low tunnel made from 1/2-inch PVC hoops and 6mil greenhouse plastic, which extends my lettuce and spinach harvest by at least
Step 4: Water Management & Irrigation
Efficient water management is critical for a self sufficient garden from scratch, especially in off-grid living where water resources might be limited.
- Rainwater Harvesting: This is my primary source of irrigation water. A 55-gallon rain barrel (e.g., EarthMark Rain Barrel, ~$120-$150) connected to a downspout can collect significant water. For larger needs, I use two 275-gallon IBC totes (Intermediate Bulk Containers, often available used for $100-$200 each from food-grade sources) connected in series. A 1,000 sq ft roof can collect approximately 620 gallons of water for every inch of rainfall. My 1,500 sq ft roof provides ample water for my 600 sq ft garden through multiple barrels and totes.
- Drip Irrigation: This is by far the most water-efficient method, delivering water directly to the plant’s root zone, minimizing evaporation and weed growth.
- Components: A typical drip system includes a pressure regulator (e.g., Rain Bird PRV-10, ~$15), a filter (Rain Bird RBY filter, ~$20), main tubing (1/2-inch poly tubing, 100ft ~$25), smaller feeder lines (1/4-inch tubing), and emitters (0.5 GPH or 1 GPH per plant).
- Kits: For beginners, a starter kit like the Rain Bird Drip Irrigation Garden Kit (model DDI-KIT-1P, ~$40-$60) is excellent for a small garden. For larger setups, I use Netafim Techline CV Drip Line (500ft roll, ~$150-$200), which has pressure-compensating emitters built-in, ensuring even watering across long runs.
- Automation: For true self-sufficiency, consider a battery-powered timer (e.g., Orbit B-Hyve Bluetooth Hose Faucet Timer, ~$50) or a solar-powered timer connected to a small 12V pump.
- Solar-Powered Pumps: For lifting water from a well, pond, or large storage tank to your garden, a solar pump is a game-changer. For a smaller drip system, a Shurflo 2088-594-152 Diaphragm Pump (12V, 3.5 GPM, ~$180) can be powered by a single 100W solar panel (e.g., Renogy 100W Monocrystalline Solar Panel, ~$100) and a small 12V battery (e.g., a 50Ah LiFePO4 battery like the Battle Born 50Ah, ~$450). For larger operations or deeper wells, more robust systems are needed. If you’re looking to build out a comprehensive off-grid power system to support your garden’s water needs, or indeed your entire homestead, you might want to explore resources like the Power Grid Generator complete system guide to understand the full scope of what’s possible in terms of energy independence.
Step 5: Seed Selection & Planting
The choice of seeds is crucial for a truly self sufficient garden from scratch.
- Choose Heirloom & Open-Pollinated Seeds: These varieties produce seeds that will grow true to type, meaning you can save seeds from your harvest year after year. F1 hybrids, while often vigorous, will not produce consistent offspring from saved seeds. Reputable seed companies include Baker Creek Heirloom Seeds, High Mowing Organic Seeds, and Seed Savers Exchange. Start with common, reliable varieties like ‘Black Krim’ tomatoes, ‘Provider’ bush beans, ‘Waltham Butternut’ squash, and ‘Black Seeded Simpson’ lettuce.
- Start Seeds Indoors (Optional but Recommended): For longer growing seasons or specific crops, starting seeds indoors gives you a head start. Use seed-starting mix (e.g., Espoma Organic Seed Starter Mix, ~$10 for 16qt bag) in seed trays (Jiffy Professional Greenhouse 72-cell kit, ~$15). Provide adequate light with LED grow lights (Barrina T5 2ft 4-pack LED Grow Lights, 20W each, ~$50) for 14-16 hours a day, positioned 2-4 inches above seedlings. Maintain consistent temperatures (65-75°F for most).
- Direct Sowing vs. Transplanting: Some crops (carrots, radishes, beans, corn) prefer direct sowing into the garden bed. Others (tomatoes, peppers, broccoli, kale) benefit from being started indoors and transplanted. Follow seed packet instructions for planting depths (e.g., lettuce seeds are often surface-sown or planted 1/8 inch deep, while beans are 1 inch deep) and spacing.
- Companion Planting: Strategically plant different species together to enhance growth, deter pests, and attract beneficial insects. For example, planting marigolds near tomatoes can deter nematodes, and basil improves tomato flavor. Nasturtiums can act as a trap crop for aphids.
- Succession Planting: For a continuous harvest, plant small batches of quick-growing crops (lettuce, radishes, cilantro) every 2-3 weeks. As one crop finishes, another is ready to take its place.
Step 6: Pest & Disease Management (Organic)
Maintaining a self sufficient garden from scratch means embracing organic pest and disease control.
- Integrated Pest Management (IPM): This holistic approach combines several strategies.
- Observation: Regularly inspect your plants for early signs of pests or disease. Catching issues early is key.
- Physical Barriers: Use row covers (e.g., Agribon AG-19 floating row cover, 10×20 ft, ~$20) to protect young plants from insect pests like cabbage worms and squash bugs. Install fences (e.g., 2×4 welded wire mesh, 4 ft tall, 50 ft roll ~$70) to keep out deer, rabbits, and other larger animals.
- Hand-Picking: For larger pests like tomato hornworms or squash bugs, simply pick them off and drop them into a bucket of soapy water.
- Companion Planting: As mentioned, certain plants repel pests. Marigolds, garlic, and onions are excellent deterrents.
- Attract Beneficial Insects: Plant flowers like dill, fennel, cosmos, and sweet alyssum to attract ladybugs, lacewings, and parasitic wasps, which prey on common garden pests.
- Organic Sprays & Treatments:
- Neem Oil: An excellent broad-spectrum organic insecticide and fungicide. Bonide Neem Oil Concentrate (16oz, ~$20) can be mixed at a rate of 1-2 tbsp per gallon of water and sprayed on affected plants.
- Insecticidal Soap: Effective against soft-bodied insects like aphids, whiteflies, and spider mites. Garden Safe Insecticidal Soap (24oz ready-to-use, ~$10).
- Bacillus thuringiensis (Bt): A naturally occurring soil bacterium that targets caterpillars and worms. Monterey BT Worm & Caterpillar Killer (16oz, ~$18) is highly effective and safe for beneficial insects.
- Copper or Sulfur Sprays: For fungal diseases like powdery mildew or blight, organic copper (e.g., Bonide Copper Fungicide, ~$15 for 1lb) or sulfur (e.g., Safer Brand Garden Fungicide, ~$10 for 16oz) can be used as a last resort.
Step 7: Harvesting & Seed Saving
The culmination of your efforts is the harvest, and seed saving closes the loop on self-sufficiency.
- Harvesting Techniques:
- Timing: Harvest vegetables at their peak ripeness for best flavor and nutritional value. For example, green beans should snap cleanly, cucumbers should be firm, and tomatoes should be fully colored.
- Frequency: Many crops, like zucchini, cucumbers, and bush beans, produce more if harvested frequently. Pick daily or every other day.
- Tools: Use clean, sharp pruners (e.g., Corona ClassicCUT Bypass Pruner BP 3180, ~$30) or a sharp knife for clean cuts, minimizing damage to the plant.
- Seed Saving: This is where the « self-sufficient » aspect truly shines.
- Selection: Only save seeds from your healthiest, most vigorous plants that show desired traits (disease resistance, good flavor, high yield).
- Isolation: To ensure true-to-type seeds, prevent cross-pollination. This can be challenging for open-pollinated crops that readily cross (e.g., squash, corn). For beginners, focus on self-pollinating plants like beans, peas, lettuce, and tomatoes.
- Processing:
- Dry Seeds (Beans, Peas, Lettuce, Grains): Allow pods/seed heads to dry completely on the plant. Harvest, shell, and clean the seeds, removing chaff.
- Wet Seeds (Tomatoes, Cucumbers, Squash): For tomatoes, ferment the seeds in water for a few days to remove the gel coating and inhibit disease. For cucumbers/squash, scrape out seeds, wash thoroughly, and dry.
- Drying: Spread seeds thinly on screens or paper plates in a cool, dry, well-ventilated area for 1-4 weeks. Ensure they are bone-dry before storage. I aim for less than 8% moisture content.
- Storage: Store seeds in airtight containers (glass jars with desiccant packets work well) in a cool, dark, dry place (ideally 40-50°F and 30-40% humidity). Label clearly with variety and date. Properly stored seeds can remain viable for 3-10 years or more.
Step 8: Season Extension & Winterizing
Extend your harvest and protect your garden for the off-season to truly maximize your self sufficient garden from scratch.
- Cold Frames: Simple structures with a transparent top (glass, polycarbonate, or old windows) that sit over garden beds. They trap solar heat, allowing you to grow cold-hardy crops (lettuce, spinach, kale, radishes) well into winter or start seeds earlier in spring. A basic cold frame can be built from 2×6 lumber and a sheet of polycarbonate for under $100.
- Hoop Houses/Low Tunnels: Larger structures made from flexible hoops (PVC pipe or EMT conduit) covered with greenhouse plastic. These provide more space and greater temperature moderation. A 10×20 ft DIY low tunnel kit can cost $200-$500, while a larger, more robust hoop house kit might be $1,000-$3,000. I use a 6×12 ft low tunnel made from 1/2-inch PVC hoops and 6mil greenhouse plastic, which extends my lettuce and spinach harvest by at least
- In-Ground Beds: If you have excellent native soil and good drainage, in-ground beds are the most economical. Double-digging (loosening soil two shovel depths) can significantly improve drainage and aeration. For my main garden, I primarily use in-ground beds, but I focus on building up the soil over time with consistent compost additions and cover cropping. I aim for beds that are no wider than 3-4 feet so I can reach the center without stepping on the soil, compacting it.
- Raised Beds: Raised beds offer numerous advantages, especially for poor soil, heavy clay, or rocky areas. They provide better drainage, warm up faster in spring, reduce compaction, and make weeding and harvesting easier on your back.
- Material Options:
- Untreated Cedar: Naturally rot-resistant and chemical-free. A 4×8 ft bed, 12 inches deep, typically requires three 2x12x8 ft cedar boards, costing around $50-$60 per board (total ~$150-$180) plus corner brackets or screws. My first raised beds were cedar and are still going strong after 7 years.
- Galvanized Steel: Durable, long-lasting, and aesthetically pleasing. Brands like Vego Garden offer modular kits. A Vego Garden 17″ Tall 8-in-1 Metal Raised Garden Bed (can be configured to 4×8 ft) costs approximately $250-$300.
- Concrete Blocks/Stones: Very durable but can leach minerals (though generally safe once weathered) and can be expensive.
- Recycled Materials: Pallets (check for chemical treatment stamps like « HT » for heat-treated), old tires (controversial due to potential chemical leaching).
- Filling Raised Beds: Don’t just fill with topsoil. Use a « Hugelkultur » approach (logs, branches, leaves, then compost, then topsoil) or a mixture of 60% good quality topsoil, 30% compost, and 10% perlite or vermiculite for drainage. A 4x8x1 ft raised bed requires about 32 cubic feet (or ~1.2 cubic yards) of soil mix, which can cost $100-$200 depending on your source.
- Material Options:
Step 4: Water Management & Irrigation
Efficient water management is critical for a self sufficient garden from scratch, especially in off-grid living where water resources might be limited.
- Rainwater Harvesting: This is my primary source of irrigation water. A 55-gallon rain barrel (e.g., EarthMark Rain Barrel, ~$120-$150) connected to a downspout can collect significant water. For larger needs, I use two 275-gallon IBC totes (Intermediate Bulk Containers, often available used for $100-$200 each from food-grade sources) connected in series. A 1,000 sq ft roof can collect approximately 620 gallons of water for every inch of rainfall. My 1,500 sq ft roof provides ample water for my 600 sq ft garden through multiple barrels and totes.
- Drip Irrigation: This is by far the most water-efficient method, delivering water directly to the plant’s root zone, minimizing evaporation and weed growth.
- Components: A typical drip system includes a pressure regulator (e.g., Rain Bird PRV-10, ~$15), a filter (Rain Bird RBY filter, ~$20), main tubing (1/2-inch poly tubing, 100ft ~$25), smaller feeder lines (1/4-inch tubing), and emitters (0.5 GPH or 1 GPH per plant).
- Kits: For beginners, a starter kit like the Rain Bird Drip Irrigation Garden Kit (model DDI-KIT-1P, ~$40-$60) is excellent for a small garden. For larger setups, I use Netafim Techline CV Drip Line (500ft roll, ~$150-$200), which has pressure-compensating emitters built-in, ensuring even watering across long runs.
- Automation: For true self-sufficiency, consider a battery-powered timer (e.g., Orbit B-Hyve Bluetooth Hose Faucet Timer, ~$50) or a solar-powered timer connected to a small 12V pump.
- Solar-Powered Pumps: For lifting water from a well, pond, or large storage tank to your garden, a solar pump is a game-changer. For a smaller drip system, a Shurflo 2088-594-152 Diaphragm Pump (12V, 3.5 GPM, ~$180) can be powered by a single 100W solar panel (e.g., Renogy 100W Monocrystalline Solar Panel, ~$100) and a small 12V battery (e.g., a 50Ah LiFePO4 battery like the Battle Born 50Ah, ~$450). For larger operations or deeper wells, more robust systems are needed. If you’re looking to build out a comprehensive off-grid power system to support your garden’s water needs, or indeed your entire homestead, you might want to explore resources like the Power Grid Generator complete system guide to understand the full scope of what’s possible in terms of energy independence.
Step 5: Seed Selection & Planting
The choice of seeds is crucial for a truly self sufficient garden from scratch.
- Choose Heirloom & Open-Pollinated Seeds: These varieties produce seeds that will grow true to type, meaning you can save seeds from your harvest year after year. F1 hybrids, while often vigorous, will not produce consistent offspring from saved seeds. Reputable seed companies include Baker Creek Heirloom Seeds, High Mowing Organic Seeds, and Seed Savers Exchange. Start with common, reliable varieties like ‘Black Krim’ tomatoes, ‘Provider’ bush beans, ‘Waltham Butternut’ squash, and ‘Black Seeded Simpson’ lettuce.
- Start Seeds Indoors (Optional but Recommended): For longer growing seasons or specific crops, starting seeds indoors gives you a head start. Use seed-starting mix (e.g., Espoma Organic Seed Starter Mix, ~$10 for 16qt bag) in seed trays (Jiffy Professional Greenhouse 72-cell kit, ~$15). Provide adequate light with LED grow lights (Barrina T5 2ft 4-pack LED Grow Lights, 20W each, ~$50) for 14-16 hours a day, positioned 2-4 inches above seedlings. Maintain consistent temperatures (65-75°F for most).
- Direct Sowing vs. Transplanting: Some crops (carrots, radishes, beans, corn) prefer direct sowing into the garden bed. Others (tomatoes, peppers, broccoli, kale) benefit from being started indoors and transplanted. Follow seed packet instructions for planting depths (e.g., lettuce seeds are often surface-sown or planted 1/8 inch deep, while beans are 1 inch deep) and spacing.
- Companion Planting: Strategically plant different species together to enhance growth, deter pests, and attract beneficial insects. For example, planting marigolds near tomatoes can deter nematodes, and basil improves tomato flavor. Nasturtiums can act as a trap crop for aphids.
- Succession Planting: For a continuous harvest, plant small batches of quick-growing crops (lettuce, radishes, cilantro) every 2-3 weeks. As one crop finishes, another is ready to take its place.
Step 6: Pest & Disease Management (Organic)
Maintaining a self sufficient garden from scratch means embracing organic pest and disease control.
- Integrated Pest Management (IPM): This holistic approach combines several strategies.
- Observation: Regularly inspect your plants for early signs of pests or disease. Catching issues early is key.
- Physical Barriers: Use row covers (e.g., Agribon AG-19 floating row cover, 10×20 ft, ~$20) to protect young plants from insect pests like cabbage worms and squash bugs. Install fences (e.g., 2×4 welded wire mesh, 4 ft tall, 50 ft roll ~$70) to keep out deer, rabbits, and other larger animals.
- Hand-Picking: For larger pests like tomato hornworms or squash bugs, simply pick them off and drop them into a bucket of soapy water.
- Companion Planting: As mentioned, certain plants repel pests. Marigolds, garlic, and onions are excellent deterrents.
- Attract Beneficial Insects: Plant flowers like dill, fennel, cosmos, and sweet alyssum to attract ladybugs, lacewings, and parasitic wasps, which prey on common garden pests.
- Organic Sprays & Treatments:
- Neem Oil: An excellent broad-spectrum organic insecticide and fungicide. Bonide Neem Oil Concentrate (16oz, ~$20) can be mixed at a rate of 1-2 tbsp per gallon of water and sprayed on affected plants.
- Insecticidal Soap: Effective against soft-bodied insects like aphids, whiteflies, and spider mites. Garden Safe Insecticidal Soap (24oz ready-to-use, ~$10).
- Bacillus thuringiensis (Bt): A naturally occurring soil bacterium that targets caterpillars and worms. Monterey BT Worm & Caterpillar Killer (16oz, ~$18) is highly effective and safe for beneficial insects.
- Copper or Sulfur Sprays: For fungal diseases like powdery mildew or blight, organic copper (e.g., Bonide Copper Fungicide, ~$15 for 1lb) or sulfur (e.g., Safer Brand Garden Fungicide, ~$10 for 16oz) can be used as a last resort.
Step 7: Harvesting & Seed Saving
The culmination of your efforts is the harvest, and seed saving closes the loop on self-sufficiency.
- Harvesting Techniques:
- Timing: Harvest vegetables at their peak ripeness for best flavor and nutritional value. For example, green beans should snap cleanly, cucumbers should be firm, and tomatoes should be fully colored.
- Frequency: Many crops, like zucchini, cucumbers, and bush beans, produce more if harvested frequently. Pick daily or every other day.
- Tools: Use clean, sharp pruners (e.g., Corona ClassicCUT Bypass Pruner BP 3180, ~$30) or a sharp knife for clean cuts, minimizing damage to the plant.
- Seed Saving: This is where the « self-sufficient » aspect truly shines.
- Selection: Only save seeds from your healthiest, most vigorous plants that show desired traits (disease resistance, good flavor, high yield).
- Isolation: To ensure true-to-type seeds, prevent cross-pollination. This can be challenging for open-pollinated crops that readily cross (e.g., squash, corn). For beginners, focus on self-pollinating plants like beans, peas, lettuce, and tomatoes.
- Processing:
- Dry Seeds (Beans, Peas, Lettuce, Grains): Allow pods/seed heads to dry completely on the plant. Harvest, shell, and clean the seeds, removing chaff.
- Wet Seeds (Tomatoes, Cucumbers, Squash): For tomatoes, ferment the seeds in water for a few days to remove the gel coating and inhibit disease. For cucumbers/squash, scrape out seeds, wash thoroughly, and dry.
- Drying: Spread seeds thinly on screens or paper plates in a cool, dry, well-ventilated area for 1-4 weeks. Ensure they are bone-dry before storage. I aim for less than 8% moisture content.
- Storage: Store seeds in airtight containers (glass jars with desiccant packets work well) in a cool, dark, dry place (ideally 40-50°F and 30-40% humidity). Label clearly with variety and date. Properly stored seeds can remain viable for 3-10 years or more.
Step 8: Season Extension & Winterizing
Extend your harvest and protect your garden for the off-season to truly maximize your self sufficient garden from scratch.
- Cold Frames: Simple structures with a transparent top (glass, polycarbonate, or old windows) that sit over garden beds. They trap solar heat, allowing you to grow cold-hardy crops (lettuce, spinach, kale, radishes) well into winter or start seeds earlier in spring. A basic cold frame can be built from 2×6 lumber and a sheet of polycarbonate for under $100.
- Hoop Houses/Low Tunnels: Larger structures made from flexible hoops (PVC pipe or EMT conduit) covered with greenhouse plastic. These provide more space and greater temperature moderation. A 10×20 ft DIY low tunnel kit can cost $200-$500, while a larger, more robust hoop house kit might be $1,000-$3,000. I use a 6×12 ft low tunnel made from 1/2-inch PVC hoops and 6mil greenhouse plastic, which extends my lettuce and spinach harvest by at least
Deciding between raised beds and in-ground beds depends on your soil, budget, and physical capabilities.
- In-Ground Beds: If you have excellent native soil and good drainage, in-ground beds are the most economical. Double-digging (loosening soil two shovel depths) can significantly improve drainage and aeration. For my main garden, I primarily use in-ground beds, but I focus on building up the soil over time with consistent compost additions and cover cropping. I aim for beds that are no wider than 3-4 feet so I can reach the center without stepping on the soil, compacting it.
- Raised Beds: Raised beds offer numerous advantages, especially for poor soil, heavy clay, or rocky areas. They provide better drainage, warm up faster in spring, reduce compaction, and make weeding and harvesting easier on your back.
- Material Options:
- Untreated Cedar: Naturally rot-resistant and chemical-free. A 4×8 ft bed, 12 inches deep, typically requires three 2x12x8 ft cedar boards, costing around $50-$60 per board (total ~$150-$180) plus corner brackets or screws. My first raised beds were cedar and are still going strong after 7 years.
- Galvanized Steel: Durable, long-lasting, and aesthetically pleasing. Brands like Vego Garden offer modular kits. A Vego Garden 17″ Tall 8-in-1 Metal Raised Garden Bed (can be configured to 4×8 ft) costs approximately $250-$300.
- Concrete Blocks/Stones: Very durable but can leach minerals (though generally safe once weathered) and can be expensive.
- Recycled Materials: Pallets (check for chemical treatment stamps like « HT » for heat-treated), old tires (controversial due to potential chemical leaching).
- Filling Raised Beds: Don’t just fill with topsoil. Use a « Hugelkultur » approach (logs, branches, leaves, then compost, then topsoil) or a mixture of 60% good quality topsoil, 30% compost, and 10% perlite or vermiculite for drainage. A 4x8x1 ft raised bed requires about 32 cubic feet (or ~1.2 cubic yards) of soil mix, which can cost $100-$200 depending on your source.
- Material Options:
Step 4: Water Management & Irrigation
Efficient water management is critical for a self sufficient garden from scratch, especially in off-grid living where water resources might be limited.
- Rainwater Harvesting: This is my primary source of irrigation water. A 55-gallon rain barrel (e.g., EarthMark Rain Barrel, ~$120-$150) connected to a downspout can collect significant water. For larger needs, I use two 275-gallon IBC totes (Intermediate Bulk Containers, often available used for $100-$200 each from food-grade sources) connected in series. A 1,000 sq ft roof can collect approximately 620 gallons of water for every inch of rainfall. My 1,500 sq ft roof provides ample water for my 600 sq ft garden through multiple barrels and totes.
- Drip Irrigation: This is by far the most water-efficient method, delivering water directly to the plant’s root zone, minimizing evaporation and weed growth.
- Components: A typical drip system includes a pressure regulator (e.g., Rain Bird PRV-10, ~$15), a filter (Rain Bird RBY filter, ~$20), main tubing (1/2-inch poly tubing, 100ft ~$25), smaller feeder lines (1/4-inch tubing), and emitters (0.5 GPH or 1 GPH per plant).
- Kits: For beginners, a starter kit like the Rain Bird Drip Irrigation Garden Kit (model DDI-KIT-1P, ~$40-$60) is excellent for a small garden. For larger setups, I use Netafim Techline CV Drip Line (500ft roll, ~$150-$200), which has pressure-compensating emitters built-in, ensuring even watering across long runs.
- Automation: For true self-sufficiency, consider a battery-powered timer (e.g., Orbit B-Hyve Bluetooth Hose Faucet Timer, ~$50) or a solar-powered timer connected to a small 12V pump.
- Solar-Powered Pumps: For lifting water from a well, pond, or large storage tank to your garden, a solar pump is a game-changer. For a smaller drip system, a Shurflo 2088-594-152 Diaphragm Pump (12V, 3.5 GPM, ~$180) can be powered by a single 100W solar panel (e.g., Renogy 100W Monocrystalline Solar Panel, ~$100) and a small 12V battery (e.g., a 50Ah LiFePO4 battery like the Battle Born 50Ah, ~$450). For larger operations or deeper wells, more robust systems are needed. If you’re looking to build out a comprehensive off-grid power system to support your garden’s water needs, or indeed your entire homestead, you might want to explore resources like the Power Grid Generator complete system guide to understand the full scope of what’s possible in terms of energy independence.
Step 5: Seed Selection & Planting
The choice of seeds is crucial for a truly self sufficient garden from scratch.
- Choose Heirloom & Open-Pollinated Seeds: These varieties produce seeds that will grow true to type, meaning you can save seeds from your harvest year after year. F1 hybrids, while often vigorous, will not produce consistent offspring from saved seeds. Reputable seed companies include Baker Creek Heirloom Seeds, High Mowing Organic Seeds, and Seed Savers Exchange. Start with common, reliable varieties like ‘Black Krim’ tomatoes, ‘Provider’ bush beans, ‘Waltham Butternut’ squash, and ‘Black Seeded Simpson’ lettuce.
- Start Seeds Indoors (Optional but Recommended): For longer growing seasons or specific crops, starting seeds indoors gives you a head start. Use seed-starting mix (e.g., Espoma Organic Seed Starter Mix, ~$10 for 16qt bag) in seed trays (Jiffy Professional Greenhouse 72-cell kit, ~$15). Provide adequate light with LED grow lights (Barrina T5 2ft 4-pack LED Grow Lights, 20W each, ~$50) for 14-16 hours a day, positioned 2-4 inches above seedlings. Maintain consistent temperatures (65-75°F for most).
- Direct Sowing vs. Transplanting: Some crops (carrots, radishes, beans, corn) prefer direct sowing into the garden bed. Others (tomatoes, peppers, broccoli, kale) benefit from being started indoors and transplanted. Follow seed packet instructions for planting depths (e.g., lettuce seeds are often surface-sown or planted 1/8 inch deep, while beans are 1 inch deep) and spacing.
- Companion Planting: Strategically plant different species together to enhance growth, deter pests, and attract beneficial insects. For example, planting marigolds near tomatoes can deter nematodes, and basil improves tomato flavor. Nasturtiums can act as a trap crop for aphids.
- Succession Planting: For a continuous harvest, plant small batches of quick-growing crops (lettuce, radishes, cilantro) every 2-3 weeks. As one crop finishes, another is ready to take its place.
Step 6: Pest & Disease Management (Organic)
Maintaining a self sufficient garden from scratch means embracing organic pest and disease control.
- Integrated Pest Management (IPM): This holistic approach combines several strategies.
- Observation: Regularly inspect your plants for early signs of pests or disease. Catching issues early is key.
- Physical Barriers: Use row covers (e.g., Agribon AG-19 floating row cover, 10×20 ft, ~$20) to protect young plants from insect pests like cabbage worms and squash bugs. Install fences (e.g., 2×4 welded wire mesh, 4 ft tall, 50 ft roll ~$70) to keep out deer, rabbits, and other larger animals.
- Hand-Picking: For larger pests like tomato hornworms or squash bugs, simply pick them off and drop them into a bucket of soapy water.
- Companion Planting: As mentioned, certain plants repel pests. Marigolds, garlic, and onions are excellent deterrents.
- Attract Beneficial Insects: Plant flowers like dill, fennel, cosmos, and sweet alyssum to attract ladybugs, lacewings, and parasitic wasps, which prey on common garden pests.
- Organic Sprays & Treatments:
- Neem Oil: An excellent broad-spectrum organic insecticide and fungicide. Bonide Neem Oil Concentrate (16oz, ~$20) can be mixed at a rate of 1-2 tbsp per gallon of water and sprayed on affected plants.
- Insecticidal Soap: Effective against soft-bodied insects like aphids, whiteflies, and spider mites. Garden Safe Insecticidal Soap (24oz ready-to-use, ~$10).
- Bacillus thuringiensis (Bt): A naturally occurring soil bacterium that targets caterpillars and worms. Monterey BT Worm & Caterpillar Killer (16oz, ~$18) is highly effective and safe for beneficial insects.
- Copper or Sulfur Sprays: For fungal diseases like powdery mildew or blight, organic copper (e.g., Bonide Copper Fungicide, ~$15 for 1lb) or sulfur (e.g., Safer Brand Garden Fungicide, ~$10 for 16oz) can be used as a last resort.
Step 7: Harvesting & Seed Saving
The culmination of your efforts is the harvest, and seed saving closes the loop on self-sufficiency.
- Harvesting Techniques:
- Timing: Harvest vegetables at their peak ripeness for best flavor and nutritional value. For example, green beans should snap cleanly, cucumbers should be firm, and tomatoes should be fully colored.
- Frequency: Many crops, like zucchini, cucumbers, and bush beans, produce more if harvested frequently. Pick daily or every other day.
- Tools: Use clean, sharp pruners (e.g., Corona ClassicCUT Bypass Pruner BP 3180, ~$30) or a sharp knife for clean cuts, minimizing damage to the plant.
- Seed Saving: This is where the « self-sufficient » aspect truly shines.
- Selection: Only save seeds from your healthiest, most vigorous plants that show desired traits (disease resistance, good flavor, high yield).
- Isolation: To ensure true-to-type seeds, prevent cross-pollination. This can be challenging for open-pollinated crops that readily cross (e.g., squash, corn). For beginners, focus on self-pollinating plants like beans, peas, lettuce, and tomatoes.
- Processing:
- Dry Seeds (Beans, Peas, Lettuce, Grains): Allow pods/seed heads to dry completely on the plant. Harvest, shell, and clean the seeds, removing chaff.
- Wet Seeds (Tomatoes, Cucumbers, Squash): For tomatoes, ferment the seeds in water for a few days to remove the gel coating and inhibit disease. For cucumbers/squash, scrape out seeds, wash thoroughly, and dry.
- Drying: Spread seeds thinly on screens or paper plates in a cool, dry, well-ventilated area for 1-4 weeks. Ensure they are bone-dry before storage. I aim for less than 8% moisture content.
- Storage: Store seeds in airtight containers (glass jars with desiccant packets work well) in a cool, dark, dry place (ideally 40-50°F and 30-40% humidity). Label clearly with variety and date. Properly stored seeds can remain viable for 3-10 years or more.
Step 8: Season Extension & Winterizing
Extend your harvest and protect your garden for the off-season to truly maximize your self sufficient garden from scratch.
- Cold Frames: Simple structures with a transparent top (glass, polycarbonate, or old windows) that sit over garden beds. They trap solar heat, allowing you to grow cold-hardy crops (lettuce, spinach, kale, radishes) well into winter or start seeds earlier in spring. A basic cold frame can be built from 2×6 lumber and a sheet of polycarbonate for under $100.
- Hoop Houses/Low Tunnels: Larger structures made from flexible hoops (PVC pipe or EMT conduit) covered with greenhouse plastic. These provide more space and greater temperature moderation. A 10×20 ft DIY low tunnel kit can cost $200-$500, while a larger, more robust hoop house kit might be $1,000-$3,000. I use a 6×12 ft low tunnel made from 1/2-inch PVC hoops and 6mil greenhouse plastic, which extends my lettuce and spinach harvest by at least
Healthy soil is the bedrock of a productive, self-sufficient garden. You can’t guess what your soil needs; you have to test it.
- Perform a Soil Test: A professional soil test will give you precise data on your soil’s pH, nutrient levels (N-P-K), and organic matter content. I recommend sending a sample to your local agricultural extension office; it typically costs $20-$50 and provides detailed recommendations. Alternatively, for a quick homeowner check, a Rapitest Soil Test Kit (40-test kit, model 1663, ~$20 on Amazon) provides a good baseline for pH, Nitrogen, Phosphorus, and Potash. Aim for a pH between 6.0 and 7.0 for most vegetables.
- Amend for pH Imbalance: If your soil is too acidic (below 6.0), add agricultural lime (dolomitic lime adds magnesium, calcitic lime adds calcium). Apply 5-10 lbs per 100 sq ft for a moderate adjustment. If it’s too alkaline (above 7.0), add elemental sulfur (e.g., Espoma Soil Acidifier, ~$15 for 6.75 lbs) or generous amounts of organic matter like peat moss or pine needles.
- Build Organic Matter: This is the single most important step for long-term soil health. Organic matter improves soil structure, water retention, drainage, and nutrient availability. Incorporate 2-4 inches of high-quality compost into your top 6-12 inches of soil annually. I make my own compost from kitchen scraps, garden waste, and shredded leaves, but you can purchase it. Local nurseries often sell bulk compost for $30-$50 per cubic yard. Aged manure (from chickens, cows, or horses – ensure it’s well-rotted to avoid burning plants) is also excellent.
- Address Nutrient Deficiencies: Based on your soil test, add specific organic amendments. If Nitrogen (N) is low, add blood meal (12-0-0, ~$20 for 3 lbs) or feather meal. For Phosphorus (P), use bone meal (3-15-0, ~$15 for 3 lbs) or rock phosphate. For Potassium (K), greensand (0-0-2.5, ~$25 for 5 lbs) or kelp meal are good choices. I rely heavily on Espoma Organic Garden-tone (5-3-3, ~$25 for an 8lb bag) as a balanced, all-purpose organic fertilizer during planting.
Step 3: Garden Bed Preparation
Deciding between raised beds and in-ground beds depends on your soil, budget, and physical capabilities.
- In-Ground Beds: If you have excellent native soil and good drainage, in-ground beds are the most economical. Double-digging (loosening soil two shovel depths) can significantly improve drainage and aeration. For my main garden, I primarily use in-ground beds, but I focus on building up the soil over time with consistent compost additions and cover cropping. I aim for beds that are no wider than 3-4 feet so I can reach the center without stepping on the soil, compacting it.
- Raised Beds: Raised beds offer numerous advantages, especially for poor soil, heavy clay, or rocky areas. They provide better drainage, warm up faster in spring, reduce compaction, and make weeding and harvesting easier on your back.
- Material Options:
- Untreated Cedar: Naturally rot-resistant and chemical-free. A 4×8 ft bed, 12 inches deep, typically requires three 2x12x8 ft cedar boards, costing around $50-$60 per board (total ~$150-$180) plus corner brackets or screws. My first raised beds were cedar and are still going strong after 7 years.
- Galvanized Steel: Durable, long-lasting, and aesthetically pleasing. Brands like Vego Garden offer modular kits. A Vego Garden 17″ Tall 8-in-1 Metal Raised Garden Bed (can be configured to 4×8 ft) costs approximately $250-$300.
- Concrete Blocks/Stones: Very durable but can leach minerals (though generally safe once weathered) and can be expensive.
- Recycled Materials: Pallets (check for chemical treatment stamps like « HT » for heat-treated), old tires (controversial due to potential chemical leaching).
- Filling Raised Beds: Don’t just fill with topsoil. Use a « Hugelkultur » approach (logs, branches, leaves, then compost, then topsoil) or a mixture of 60% good quality topsoil, 30% compost, and 10% perlite or vermiculite for drainage. A 4x8x1 ft raised bed requires about 32 cubic feet (or ~1.2 cubic yards) of soil mix, which can cost $100-$200 depending on your source.
- Material Options:
Step 4: Water Management & Irrigation
Efficient water management is critical for a self sufficient garden from scratch, especially in off-grid living where water resources might be limited.
- Rainwater Harvesting: This is my primary source of irrigation water. A 55-gallon rain barrel (e.g., EarthMark Rain Barrel, ~$120-$150) connected to a downspout can collect significant water. For larger needs, I use two 275-gallon IBC totes (Intermediate Bulk Containers, often available used for $100-$200 each from food-grade sources) connected in series. A 1,000 sq ft roof can collect approximately 620 gallons of water for every inch of rainfall. My 1,500 sq ft roof provides ample water for my 600 sq ft garden through multiple barrels and totes.
- Drip Irrigation: This is by far the most water-efficient method, delivering water directly to the plant’s root zone, minimizing evaporation and weed growth.
- Components: A typical drip system includes a pressure regulator (e.g., Rain Bird PRV-10, ~$15), a filter (Rain Bird RBY filter, ~$20), main tubing (1/2-inch poly tubing, 100ft ~$25), smaller feeder lines (1/4-inch tubing), and emitters (0.5 GPH or 1 GPH per plant).
- Kits: For beginners, a starter kit like the Rain Bird Drip Irrigation Garden Kit (model DDI-KIT-1P, ~$40-$60) is excellent for a small garden. For larger setups, I use Netafim Techline CV Drip Line (500ft roll, ~$150-$200), which has pressure-compensating emitters built-in, ensuring even watering across long runs.
- Automation: For true self-sufficiency, consider a battery-powered timer (e.g., Orbit B-Hyve Bluetooth Hose Faucet Timer, ~$50) or a solar-powered timer connected to a small 12V pump.
- Solar-Powered Pumps: For lifting water from a well, pond, or large storage tank to your garden, a solar pump is a game-changer. For a smaller drip system, a Shurflo 2088-594-152 Diaphragm Pump (12V, 3.5 GPM, ~$180) can be powered by a single 100W solar panel (e.g., Renogy 100W Monocrystalline Solar Panel, ~$100) and a small 12V battery (e.g., a 50Ah LiFePO4 battery like the Battle Born 50Ah, ~$450). For larger operations or deeper wells, more robust systems are needed. If you’re looking to build out a comprehensive off-grid power system to support your garden’s water needs, or indeed your entire homestead, you might want to explore resources like the Power Grid Generator complete system guide to understand the full scope of what’s possible in terms of energy independence.
Step 5: Seed Selection & Planting
The choice of seeds is crucial for a truly self sufficient garden from scratch.
- Choose Heirloom & Open-Pollinated Seeds: These varieties produce seeds that will grow true to type, meaning you can save seeds from your harvest year after year. F1 hybrids, while often vigorous, will not produce consistent offspring from saved seeds. Reputable seed companies include Baker Creek Heirloom Seeds, High Mowing Organic Seeds, and Seed Savers Exchange. Start with common, reliable varieties like ‘Black Krim’ tomatoes, ‘Provider’ bush beans, ‘Waltham Butternut’ squash, and ‘Black Seeded Simpson’ lettuce.
- Start Seeds Indoors (Optional but Recommended): For longer growing seasons or specific crops, starting seeds indoors gives you a head start. Use seed-starting mix (e.g., Espoma Organic Seed Starter Mix, ~$10 for 16qt bag) in seed trays (Jiffy Professional Greenhouse 72-cell kit, ~$15). Provide adequate light with LED grow lights (Barrina T5 2ft 4-pack LED Grow Lights, 20W each, ~$50) for 14-16 hours a day, positioned 2-4 inches above seedlings. Maintain consistent temperatures (65-75°F for most).
- Direct Sowing vs. Transplanting: Some crops (carrots, radishes, beans, corn) prefer direct sowing into the garden bed. Others (tomatoes, peppers, broccoli, kale) benefit from being started indoors and transplanted. Follow seed packet instructions for planting depths (e.g., lettuce seeds are often surface-sown or planted 1/8 inch deep, while beans are 1 inch deep) and spacing.
- Companion Planting: Strategically plant different species together to enhance growth, deter pests, and attract beneficial insects. For example, planting marigolds near tomatoes can deter nematodes, and basil improves tomato flavor. Nasturtiums can act as a trap crop for aphids.
- Succession Planting: For a continuous harvest, plant small batches of quick-growing crops (lettuce, radishes, cilantro) every 2-3 weeks. As one crop finishes, another is ready to take its place.
Step 6: Pest & Disease Management (Organic)
Maintaining a self sufficient garden from scratch means embracing organic pest and disease control.
- Integrated Pest Management (IPM): This holistic approach combines several strategies.
- Observation: Regularly inspect your plants for early signs of pests or disease. Catching issues early is key.
- Physical Barriers: Use row covers (e.g., Agribon AG-19 floating row cover, 10×20 ft, ~$20) to protect young plants from insect pests like cabbage worms and squash bugs. Install fences (e.g., 2×4 welded wire mesh, 4 ft tall, 50 ft roll ~$70) to keep out deer, rabbits, and other larger animals.
- Hand-Picking: For larger pests like tomato hornworms or squash bugs, simply pick them off and drop them into a bucket of soapy water.
- Companion Planting: As mentioned, certain plants repel pests. Marigolds, garlic, and onions are excellent deterrents.
- Attract Beneficial Insects: Plant flowers like dill, fennel, cosmos, and sweet alyssum to attract ladybugs, lacewings, and parasitic wasps, which prey on common garden pests.
- Organic Sprays & Treatments:
- Neem Oil: An excellent broad-spectrum organic insecticide and fungicide. Bonide Neem Oil Concentrate (16oz, ~$20) can be mixed at a rate of 1-2 tbsp per gallon of water and sprayed on affected plants.
- Insecticidal Soap: Effective against soft-bodied insects like aphids, whiteflies, and spider mites. Garden Safe Insecticidal Soap (24oz ready-to-use, ~$10).
- Bacillus thuringiensis (Bt): A naturally occurring soil bacterium that targets caterpillars and worms. Monterey BT Worm & Caterpillar Killer (16oz, ~$18) is highly effective and safe for beneficial insects.
- Copper or Sulfur Sprays: For fungal diseases like powdery mildew or blight, organic copper (e.g., Bonide Copper Fungicide, ~$15 for 1lb) or sulfur (e.g., Safer Brand Garden Fungicide, ~$10 for 16oz) can be used as a last resort.
Step 7: Harvesting & Seed Saving
The culmination of your efforts is the harvest, and seed saving closes the loop on self-sufficiency.
- Harvesting Techniques:
- Timing: Harvest vegetables at their peak ripeness for best flavor and nutritional value. For example, green beans should snap cleanly, cucumbers should be firm, and tomatoes should be fully colored.
- Frequency: Many crops, like zucchini, cucumbers, and bush beans, produce more if harvested frequently. Pick daily or every other day.
- Tools: Use clean, sharp pruners (e.g., Corona ClassicCUT Bypass Pruner BP 3180, ~$30) or a sharp knife for clean cuts, minimizing damage to the plant.
- Seed Saving: This is where the « self-sufficient » aspect truly shines.
- Selection: Only save seeds from your healthiest, most vigorous plants that show desired traits (disease resistance, good flavor, high yield).
- Isolation: To ensure true-to-type seeds, prevent cross-pollination. This can be challenging for open-pollinated crops that readily cross (e.g., squash, corn). For beginners, focus on self-pollinating plants like beans, peas, lettuce, and tomatoes.
- Processing:
- Dry Seeds (Beans, Peas, Lettuce, Grains): Allow pods/seed heads to dry completely on the plant. Harvest, shell, and clean the seeds, removing chaff.
- Wet Seeds (Tomatoes, Cucumbers, Squash): For tomatoes, ferment the seeds in water for a few days to remove the gel coating and inhibit disease. For cucumbers/squash, scrape out seeds, wash thoroughly, and dry.
- Drying: Spread seeds thinly on screens or paper plates in a cool, dry, well-ventilated area for 1-4 weeks. Ensure they are bone-dry before storage. I aim for less than 8% moisture content.
- Storage: Store seeds in airtight containers (glass jars with desiccant packets work well) in a cool, dark, dry place (ideally 40-50°F and 30-40% humidity). Label clearly with variety and date. Properly stored seeds can remain viable for 3-10 years or more.
Step 8: Season Extension & Winterizing
Extend your harvest and protect your garden for the off-season to truly maximize your self sufficient garden from scratch.
- Cold Frames: Simple structures with a transparent top (glass, polycarbonate, or old windows) that sit over garden beds. They trap solar heat, allowing you to grow cold-hardy crops (lettuce, spinach, kale, radishes) well into winter or start seeds earlier in spring. A basic cold frame can be built from 2×6 lumber and a sheet of polycarbonate for under $100.
- Hoop Houses/Low Tunnels: Larger structures made from flexible hoops (PVC pipe or EMT conduit) covered with greenhouse plastic. These provide more space and greater temperature moderation. A 10×20 ft DIY low tunnel kit can cost $200-$500, while a larger, more robust hoop house kit might be $1,000-$3,000. I use a 6×12 ft low tunnel made from 1/2-inch PVC hoops and 6mil greenhouse plastic, which extends my lettuce and spinach harvest by at least
- Rainwater Harvesting: This is my primary source of irrigation water. A 55-gallon rain barrel (e.g., EarthMark Rain Barrel, ~$120-$150) connected to a downspout can collect significant water. For larger needs, I use two 275-gallon IBC totes (Intermediate Bulk Containers, often available used for $100-$200 each from food-grade sources) connected in series. A 1,000 sq ft roof can collect approximately 620 gallons of water for every inch of rainfall. My 1,500 sq ft roof provides ample water for my 600 sq ft garden through multiple barrels and totes.
- Drip Irrigation: This is by far the most water-efficient method, delivering water directly to the plant’s root zone, minimizing evaporation and weed growth.
- Components: A typical drip system includes a pressure regulator (e.g., Rain Bird PRV-10, ~$15), a filter (Rain Bird RBY filter, ~$20), main tubing (1/2-inch poly tubing, 100ft ~$25), smaller feeder lines (1/4-inch tubing), and emitters (0.5 GPH or 1 GPH per plant).
- Kits: For beginners, a starter kit like the Rain Bird Drip Irrigation Garden Kit (model DDI-KIT-1P, ~$40-$60) is excellent for a small garden. For larger setups, I use Netafim Techline CV Drip Line (500ft roll, ~$150-$200), which has pressure-compensating emitters built-in, ensuring even watering across long runs.
- Automation: For true self-sufficiency, consider a battery-powered timer (e.g., Orbit B-Hyve Bluetooth Hose Faucet Timer, ~$50) or a solar-powered timer connected to a small 12V pump.
- Solar-Powered Pumps: For lifting water from a well, pond, or large storage tank to your garden, a solar pump is a game-changer. For a smaller drip system, a Shurflo 2088-594-152 Diaphragm Pump (12V, 3.5 GPM, ~$180) can be powered by a single 100W solar panel (e.g., Renogy 100W Monocrystalline Solar Panel, ~$100) and a small 12V battery (e.g., a 50Ah LiFePO4 battery like the Battle Born 50Ah, ~$450). For larger operations or deeper wells, more robust systems are needed. If you’re looking to build out a comprehensive off-grid power system to support your garden’s water needs, or indeed your entire homestead, you might want to explore resources like the Power Grid Generator complete system guide to understand the full scope of what’s possible in terms of energy independence.
Step 5: Seed Selection & Planting
The choice of seeds is crucial for a truly self sufficient garden from scratch.
- Choose Heirloom & Open-Pollinated Seeds: These varieties produce seeds that will grow true to type, meaning you can save seeds from your harvest year after year. F1 hybrids, while often vigorous, will not produce consistent offspring from saved seeds. Reputable seed companies include Baker Creek Heirloom Seeds, High Mowing Organic Seeds, and Seed Savers Exchange. Start with common, reliable varieties like ‘Black Krim’ tomatoes, ‘Provider’ bush beans, ‘Waltham Butternut’ squash, and ‘Black Seeded Simpson’ lettuce.
- Start Seeds Indoors (Optional but Recommended): For longer growing seasons or specific crops, starting seeds indoors gives you a head start. Use seed-starting mix (e.g., Espoma Organic Seed Starter Mix, ~$10 for 16qt bag) in seed trays (Jiffy Professional Greenhouse 72-cell kit, ~$15). Provide adequate light with LED grow lights (Barrina T5 2ft 4-pack LED Grow Lights, 20W each, ~$50) for 14-16 hours a day, positioned 2-4 inches above seedlings. Maintain consistent temperatures (65-75°F for most).
- Direct Sowing vs. Transplanting: Some crops (carrots, radishes, beans, corn) prefer direct sowing into the garden bed. Others (tomatoes, peppers, broccoli, kale) benefit from being started indoors and transplanted. Follow seed packet instructions for planting depths (e.g., lettuce seeds are often surface-sown or planted 1/8 inch deep, while beans are 1 inch deep) and spacing.
- Companion Planting: Strategically plant different species together to enhance growth, deter pests, and attract beneficial insects. For example, planting marigolds near tomatoes can deter nematodes, and basil improves tomato flavor. Nasturtiums can act as a trap crop for aphids.
- Succession Planting: For a continuous harvest, plant small batches of quick-growing crops (lettuce, radishes, cilantro) every 2-3 weeks. As one crop finishes, another is ready to take its place.
Step 6: Pest & Disease Management (Organic)
Maintaining a self sufficient garden from scratch means embracing organic pest and disease control.
- Integrated Pest Management (IPM): This holistic approach combines several strategies.
- Observation: Regularly inspect your plants for early signs of pests or disease. Catching issues early is key.
- Physical Barriers: Use row covers (e.g., Agribon AG-19 floating row cover, 10×20 ft, ~$20) to protect young plants from insect pests like cabbage worms and squash bugs. Install fences (e.g., 2×4 welded wire mesh, 4 ft tall, 50 ft roll ~$70) to keep out deer, rabbits, and other larger animals.
- Hand-Picking: For larger pests like tomato hornworms or squash bugs, simply pick them off and drop them into a bucket of soapy water.
- Companion Planting: As mentioned, certain plants repel pests. Marigolds, garlic, and onions are excellent deterrents.
- Attract Beneficial Insects: Plant flowers like dill, fennel, cosmos, and sweet alyssum to attract ladybugs, lacewings, and parasitic wasps, which prey on common garden pests.
- Organic Sprays & Treatments:
- Neem Oil: An excellent broad-spectrum organic insecticide and fungicide. Bonide Neem Oil Concentrate (16oz, ~$20) can be mixed at a rate of 1-2 tbsp per gallon of water and sprayed on affected plants.
- Insecticidal Soap: Effective against soft-bodied insects like aphids, whiteflies, and spider mites. Garden Safe Insecticidal Soap (24oz ready-to-use, ~$10).
- Bacillus thuringiensis (Bt): A naturally occurring soil bacterium that targets caterpillars and worms. Monterey BT Worm & Caterpillar Killer (16oz, ~$18) is highly effective and safe for beneficial insects.
- Copper or Sulfur Sprays: For fungal diseases like powdery mildew or blight, organic copper (e.g., Bonide Copper Fungicide, ~$15 for 1lb) or sulfur (e.g., Safer Brand Garden Fungicide, ~$10 for 16oz) can be used as a last resort.
Step 7: Harvesting & Seed Saving
The culmination of your efforts is the harvest, and seed saving closes the loop on self-sufficiency.
- Harvesting Techniques:
- Timing: Harvest vegetables at their peak ripeness for best flavor and nutritional value. For example, green beans should snap cleanly, cucumbers should be firm, and tomatoes should be fully colored.
- Frequency: Many crops, like zucchini, cucumbers, and bush beans, produce more if harvested frequently. Pick daily or every other day.
- Tools: Use clean, sharp pruners (e.g., Corona ClassicCUT Bypass Pruner BP 3180, ~$30) or a sharp knife for clean cuts, minimizing damage to the plant.
- Seed Saving: This is where the « self-sufficient » aspect truly shines.
- Selection: Only save seeds from your healthiest, most vigorous plants that show desired traits (disease resistance, good flavor, high yield).
- Isolation: To ensure true-to-type seeds, prevent cross-pollination. This can be challenging for open-pollinated crops that readily cross (e.g., squash, corn). For beginners, focus on self-pollinating plants like beans, peas, lettuce, and tomatoes.
- Processing:
- Dry Seeds (Beans, Peas, Lettuce, Grains): Allow pods/seed heads to dry completely on the plant. Harvest, shell, and clean the seeds, removing chaff.
- Wet Seeds (Tomatoes, Cucumbers, Squash): For tomatoes, ferment the seeds in water for a few days to remove the gel coating and inhibit disease. For cucumbers/squash, scrape out seeds, wash thoroughly, and dry.
- Drying: Spread seeds thinly on screens or paper plates in a cool, dry, well-ventilated area for 1-4 weeks. Ensure they are bone-dry before storage. I aim for less than 8% moisture content.
- Storage: Store seeds in airtight containers (glass jars with desiccant packets work well) in a cool, dark, dry place (ideally 40-50°F and 30-40% humidity). Label clearly with variety and date. Properly stored seeds can remain viable for 3-10 years or more.
Step 8: Season Extension & Winterizing
Extend your harvest and protect your garden for the off-season to truly maximize your self sufficient garden from scratch.
- Cold Frames: Simple structures with a transparent top (glass, polycarbonate, or old windows) that sit over garden beds. They trap solar heat, allowing you to grow cold-hardy crops (lettuce, spinach, kale, radishes) well into winter or start seeds earlier in spring. A basic cold frame can be built from 2×6 lumber and a sheet of polycarbonate for under $100.
- Hoop Houses/Low Tunnels: Larger structures made from flexible hoops (PVC pipe or EMT conduit) covered with greenhouse plastic. These provide more space and greater temperature moderation. A 10×20 ft DIY low tunnel kit can cost $200-$500, while a larger, more robust hoop house kit might be $1,000-$3,000. I use a 6×12 ft low tunnel made from 1/2-inch PVC hoops and 6mil greenhouse plastic, which extends my lettuce and spinach harvest by at least
Efficient water management is critical for a self sufficient garden from scratch, especially in off-grid living where water resources might be limited.
- Rainwater Harvesting: This is my primary source of irrigation water. A 55-gallon rain barrel (e.g., EarthMark Rain Barrel, ~$120-$150) connected to a downspout can collect significant water. For larger needs, I use two 275-gallon IBC totes (Intermediate Bulk Containers, often available used for $100-$200 each from food-grade sources) connected in series. A 1,000 sq ft roof can collect approximately 620 gallons of water for every inch of rainfall. My 1,500 sq ft roof provides ample water for my 600 sq ft garden through multiple barrels and totes.
- Drip Irrigation: This is by far the most water-efficient method, delivering water directly to the plant’s root zone, minimizing evaporation and weed growth.
- Components: A typical drip system includes a pressure regulator (e.g., Rain Bird PRV-10, ~$15), a filter (Rain Bird RBY filter, ~$20), main tubing (1/2-inch poly tubing, 100ft ~$25), smaller feeder lines (1/4-inch tubing), and emitters (0.5 GPH or 1 GPH per plant).
- Kits: For beginners, a starter kit like the Rain Bird Drip Irrigation Garden Kit (model DDI-KIT-1P, ~$40-$60) is excellent for a small garden. For larger setups, I use Netafim Techline CV Drip Line (500ft roll, ~$150-$200), which has pressure-compensating emitters built-in, ensuring even watering across long runs.
- Automation: For true self-sufficiency, consider a battery-powered timer (e.g., Orbit B-Hyve Bluetooth Hose Faucet Timer, ~$50) or a solar-powered timer connected to a small 12V pump.
- Solar-Powered Pumps: For lifting water from a well, pond, or large storage tank to your garden, a solar pump is a game-changer. For a smaller drip system, a Shurflo 2088-594-152 Diaphragm Pump (12V, 3.5 GPM, ~$180) can be powered by a single 100W solar panel (e.g., Renogy 100W Monocrystalline Solar Panel, ~$100) and a small 12V battery (e.g., a 50Ah LiFePO4 battery like the Battle Born 50Ah, ~$450). For larger operations or deeper wells, more robust systems are needed. If you’re looking to build out a comprehensive off-grid power system to support your garden’s water needs, or indeed your entire homestead, you might want to explore resources like the Power Grid Generator complete system guide to understand the full scope of what’s possible in terms of energy independence.
Step 5: Seed Selection & Planting
The choice of seeds is crucial for a truly self sufficient garden from scratch.
- Choose Heirloom & Open-Pollinated Seeds: These varieties produce seeds that will grow true to type, meaning you can save seeds from your harvest year after year. F1 hybrids, while often vigorous, will not produce consistent offspring from saved seeds. Reputable seed companies include Baker Creek Heirloom Seeds, High Mowing Organic Seeds, and Seed Savers Exchange. Start with common, reliable varieties like ‘Black Krim’ tomatoes, ‘Provider’ bush beans, ‘Waltham Butternut’ squash, and ‘Black Seeded Simpson’ lettuce.
- Start Seeds Indoors (Optional but Recommended): For longer growing seasons or specific crops, starting seeds indoors gives you a head start. Use seed-starting mix (e.g., Espoma Organic Seed Starter Mix, ~$10 for 16qt bag) in seed trays (Jiffy Professional Greenhouse 72-cell kit, ~$15). Provide adequate light with LED grow lights (Barrina T5 2ft 4-pack LED Grow Lights, 20W each, ~$50) for 14-16 hours a day, positioned 2-4 inches above seedlings. Maintain consistent temperatures (65-75°F for most).
- Direct Sowing vs. Transplanting: Some crops (carrots, radishes, beans, corn) prefer direct sowing into the garden bed. Others (tomatoes, peppers, broccoli, kale) benefit from being started indoors and transplanted. Follow seed packet instructions for planting depths (e.g., lettuce seeds are often surface-sown or planted 1/8 inch deep, while beans are 1 inch deep) and spacing.
- Companion Planting: Strategically plant different species together to enhance growth, deter pests, and attract beneficial insects. For example, planting marigolds near tomatoes can deter nematodes, and basil improves tomato flavor. Nasturtiums can act as a trap crop for aphids.
- Succession Planting: For a continuous harvest, plant small batches of quick-growing crops (lettuce, radishes, cilantro) every 2-3 weeks. As one crop finishes, another is ready to take its place.
Step 6: Pest & Disease Management (Organic)
Maintaining a self sufficient garden from scratch means embracing organic pest and disease control.
- Integrated Pest Management (IPM): This holistic approach combines several strategies.
- Observation: Regularly inspect your plants for early signs of pests or disease. Catching issues early is key.
- Physical Barriers: Use row covers (e.g., Agribon AG-19 floating row cover, 10×20 ft, ~$20) to protect young plants from insect pests like cabbage worms and squash bugs. Install fences (e.g., 2×4 welded wire mesh, 4 ft tall, 50 ft roll ~$70) to keep out deer, rabbits, and other larger animals.
- Hand-Picking: For larger pests like tomato hornworms or squash bugs, simply pick them off and drop them into a bucket of soapy water.
- Companion Planting: As mentioned, certain plants repel pests. Marigolds, garlic, and onions are excellent deterrents.
- Attract Beneficial Insects: Plant flowers like dill, fennel, cosmos, and sweet alyssum to attract ladybugs, lacewings, and parasitic wasps, which prey on common garden pests.
- Organic Sprays & Treatments:
- Neem Oil: An excellent broad-spectrum organic insecticide and fungicide. Bonide Neem Oil Concentrate (16oz, ~$20) can be mixed at a rate of 1-2 tbsp per gallon of water and sprayed on affected plants.
- Insecticidal Soap: Effective against soft-bodied insects like aphids, whiteflies, and spider mites. Garden Safe Insecticidal Soap (24oz ready-to-use, ~$10).
- Bacillus thuringiensis (Bt): A naturally occurring soil bacterium that targets caterpillars and worms. Monterey BT Worm & Caterpillar Killer (16oz, ~$18) is highly effective and safe for beneficial insects.
- Copper or Sulfur Sprays: For fungal diseases like powdery mildew or blight, organic copper (e.g., Bonide Copper Fungicide, ~$15 for 1lb) or sulfur (e.g., Safer Brand Garden Fungicide, ~$10 for 16oz) can be used as a last resort.
Step 7: Harvesting & Seed Saving
The culmination of your efforts is the harvest, and seed saving closes the loop on self-sufficiency.
- Harvesting Techniques:
- Timing: Harvest vegetables at their peak ripeness for best flavor and nutritional value. For example, green beans should snap cleanly, cucumbers should be firm, and tomatoes should be fully colored.
- Frequency: Many crops, like zucchini, cucumbers, and bush beans, produce more if harvested frequently. Pick daily or every other day.
- Tools: Use clean, sharp pruners (e.g., Corona ClassicCUT Bypass Pruner BP 3180, ~$30) or a sharp knife for clean cuts, minimizing damage to the plant.
- Seed Saving: This is where the « self-sufficient » aspect truly shines.
- Selection: Only save seeds from your healthiest, most vigorous plants that show desired traits (disease resistance, good flavor, high yield).
- Isolation: To ensure true-to-type seeds, prevent cross-pollination. This can be challenging for open-pollinated crops that readily cross (e.g., squash, corn). For beginners, focus on self-pollinating plants like beans, peas, lettuce, and tomatoes.
- Processing:
- Dry Seeds (Beans, Peas, Lettuce, Grains): Allow pods/seed heads to dry completely on the plant. Harvest, shell, and clean the seeds, removing chaff.
- Wet Seeds (Tomatoes, Cucumbers, Squash): For tomatoes, ferment the seeds in water for a few days to remove the gel coating and inhibit disease. For cucumbers/squash, scrape out seeds, wash thoroughly, and dry.
- Drying: Spread seeds thinly on screens or paper plates in a cool, dry, well-ventilated area for 1-4 weeks. Ensure they are bone-dry before storage. I aim for less than 8% moisture content.
- Storage: Store seeds in airtight containers (glass jars with desiccant packets work well) in a cool, dark, dry place (ideally 40-50°F and 30-40% humidity). Label clearly with variety and date. Properly stored seeds can remain viable for 3-10 years or more.
Step 8: Season Extension & Winterizing
Extend your harvest and protect your garden for the off-season to truly maximize your self sufficient garden from scratch.
- Cold Frames: Simple structures with a transparent top (glass, polycarbonate, or old windows) that sit over garden beds. They trap solar heat, allowing you to grow cold-hardy crops (lettuce, spinach, kale, radishes) well into winter or start seeds earlier in spring. A basic cold frame can be built from 2×6 lumber and a sheet of polycarbonate for under $100.
- Hoop Houses/Low Tunnels: Larger structures made from flexible hoops (PVC pipe or EMT conduit) covered with greenhouse plastic. These provide more space and greater temperature moderation. A 10×20 ft DIY low tunnel kit can cost $200-$500, while a larger, more robust hoop house kit might be $1,000-$3,000. I use a 6×12 ft low tunnel made from 1/2-inch PVC hoops and 6mil greenhouse plastic, which extends my lettuce and spinach harvest by at least
Step 4: Water Management & Irrigation
Efficient water management is critical for a self sufficient garden from scratch, especially in off-grid living where water resources might be limited.
- Rainwater Harvesting: This is my primary source of irrigation water. A 55-gallon rain barrel (e.g., EarthMark Rain Barrel, ~$120-$150) connected to a downspout can collect significant water. For larger needs, I use two 275-gallon IBC totes (Intermediate Bulk Containers, often available used for $100-$200 each from food-grade sources) connected in series. A 1,000 sq ft roof can collect approximately 620 gallons of water for every inch of rainfall. My 1,500 sq ft roof provides ample water for my 600 sq ft garden through multiple barrels and totes.
- Drip Irrigation: This is by far the most water-efficient method, delivering water directly to the plant’s root zone, minimizing evaporation and weed growth.
- Components: A typical drip system includes a pressure regulator (e.g., Rain Bird PRV-10, ~$15), a filter (Rain Bird RBY filter, ~$20), main tubing (1/2-inch poly tubing, 100ft ~$25), smaller feeder lines (1/4-inch tubing), and emitters (0.5 GPH or 1 GPH per plant).
- Kits: For beginners, a starter kit like the Rain Bird Drip Irrigation Garden Kit (model DDI-KIT-1P, ~$40-$60) is excellent for a small garden. For larger setups, I use Netafim Techline CV Drip Line (500ft roll, ~$150-$200), which has pressure-compensating emitters built-in, ensuring even watering across long runs.
- Automation: For true self-sufficiency, consider a battery-powered timer (e.g., Orbit B-Hyve Bluetooth Hose Faucet Timer, ~$50) or a solar-powered timer connected to a small 12V pump.
- Solar-Powered Pumps: For lifting water from a well, pond, or large storage tank to your garden, a solar pump is a game-changer. For a smaller drip system, a Shurflo 2088-594-152 Diaphragm Pump (12V, 3.5 GPM, ~$180) can be powered by a single 100W solar panel (e.g., Renogy 100W Monocrystalline Solar Panel, ~$100) and a small 12V battery (e.g., a 50Ah LiFePO4 battery like the Battle Born 50Ah, ~$450). For larger operations or deeper wells, more robust systems are needed. If you’re looking to build out a comprehensive off-grid power system to support your garden’s water needs, or indeed your entire homestead, you might want to explore resources like the Power Grid Generator complete system guide to understand the full scope of what’s possible in terms of energy independence.
Step 5: Seed Selection & Planting
The choice of seeds is crucial for a truly self sufficient garden from scratch.
- Choose Heirloom & Open-Pollinated Seeds: These varieties produce seeds that will grow true to type, meaning you can save seeds from your harvest year after year. F1 hybrids, while often vigorous, will not produce consistent offspring from saved seeds. Reputable seed companies include Baker Creek Heirloom Seeds, High Mowing Organic Seeds, and Seed Savers Exchange. Start with common, reliable varieties like ‘Black Krim’ tomatoes, ‘Provider’ bush beans, ‘Waltham Butternut’ squash, and ‘Black Seeded Simpson’ lettuce.
- Start Seeds Indoors (Optional but Recommended): For longer growing seasons or specific crops, starting seeds indoors gives you a head start. Use seed-starting mix (e.g., Espoma Organic Seed Starter Mix, ~$10 for 16qt bag) in seed trays (Jiffy Professional Greenhouse 72-cell kit, ~$15). Provide adequate light with LED grow lights (Barrina T5 2ft 4-pack LED Grow Lights, 20W each, ~$50) for 14-16 hours a day, positioned 2-4 inches above seedlings. Maintain consistent temperatures (65-75°F for most).
- Direct Sowing vs. Transplanting: Some crops (carrots, radishes, beans, corn) prefer direct sowing into the garden bed. Others (tomatoes, peppers, broccoli, kale) benefit from being started indoors and transplanted. Follow seed packet instructions for planting depths (e.g., lettuce seeds are often surface-sown or planted 1/8 inch deep, while beans are 1 inch deep) and spacing.
- Companion Planting: Strategically plant different species together to enhance growth, deter pests, and attract beneficial insects. For example, planting marigolds near tomatoes can deter nematodes, and basil improves tomato flavor. Nasturtiums can act as a trap crop for aphids.
- Succession Planting: For a continuous harvest, plant small batches of quick-growing crops (lettuce, radishes, cilantro) every 2-3 weeks. As one crop finishes, another is ready to take its place.
Step 6: Pest & Disease Management (Organic)
Maintaining a self sufficient garden from scratch means embracing organic pest and disease control.
- Integrated Pest Management (IPM): This holistic approach combines several strategies.
- Observation: Regularly inspect your plants for early signs of pests or disease. Catching issues early is key.
- Physical Barriers: Use row covers (e.g., Agribon AG-19 floating row cover, 10×20 ft, ~$20) to protect young plants from insect pests like cabbage worms and squash bugs. Install fences (e.g., 2×4 welded wire mesh, 4 ft tall, 50 ft roll ~$70) to keep out deer, rabbits, and other larger animals.
- Hand-Picking: For larger pests like tomato hornworms or squash bugs, simply pick them off and drop them into a bucket of soapy water.
- Companion Planting: As mentioned, certain plants repel pests. Marigolds, garlic, and onions are excellent deterrents.
- Attract Beneficial Insects: Plant flowers like dill, fennel, cosmos, and sweet alyssum to attract ladybugs, lacewings, and parasitic wasps, which prey on common garden pests.
- Organic Sprays & Treatments:
- Neem Oil: An excellent broad-spectrum organic insecticide and fungicide. Bonide Neem Oil Concentrate (16oz, ~$20) can be mixed at a rate of 1-2 tbsp per gallon of water and sprayed on affected plants.
- Insecticidal Soap: Effective against soft-bodied insects like aphids, whiteflies, and spider mites. Garden Safe Insecticidal Soap (24oz ready-to-use, ~$10).
- Bacillus thuringiensis (Bt): A naturally occurring soil bacterium that targets caterpillars and worms. Monterey BT Worm & Caterpillar Killer (16oz, ~$18) is highly effective and safe for beneficial insects.
- Copper or Sulfur Sprays: For fungal diseases like powdery mildew or blight, organic copper (e.g., Bonide Copper Fungicide, ~$15 for 1lb) or sulfur (e.g., Safer Brand Garden Fungicide, ~$10 for 16oz) can be used as a last resort.
Step 7: Harvesting & Seed Saving
The culmination of your efforts is the harvest, and seed saving closes the loop on self-sufficiency.
- Harvesting Techniques:
- Timing: Harvest vegetables at their peak ripeness for best flavor and nutritional value. For example, green beans should snap cleanly, cucumbers should be firm, and tomatoes should be fully colored.
- Frequency: Many crops, like zucchini, cucumbers, and bush beans, produce more if harvested frequently. Pick daily or every other day.
- Tools: Use clean, sharp pruners (e.g., Corona ClassicCUT Bypass Pruner BP 3180, ~$30) or a sharp knife for clean cuts, minimizing damage to the plant.
- Seed Saving: This is where the « self-sufficient » aspect truly shines.
- Selection: Only save seeds from your healthiest, most vigorous plants that show desired traits (disease resistance, good flavor, high yield).
- Isolation: To ensure true-to-type seeds, prevent cross-pollination. This can be challenging for open-pollinated crops that readily cross (e.g., squash, corn). For beginners, focus on self-pollinating plants like beans, peas, lettuce, and tomatoes.
- Processing:
- Dry Seeds (Beans, Peas, Lettuce, Grains): Allow pods/seed heads to dry completely on the plant. Harvest, shell, and clean the seeds, removing chaff.
- Wet Seeds (Tomatoes, Cucumbers, Squash): For tomatoes, ferment the seeds in water for a few days to remove the gel coating and inhibit disease. For cucumbers/squash, scrape out seeds, wash thoroughly, and dry.
- Drying: Spread seeds thinly on screens or paper plates in a cool, dry, well-ventilated area for 1-4 weeks. Ensure they are bone-dry before storage. I aim for less than 8% moisture content.
- Storage: Store seeds in airtight containers (glass jars with desiccant packets work well) in a cool, dark, dry place (ideally 40-50°F and 30-40% humidity). Label clearly with variety and date. Properly stored seeds can remain viable for 3-10 years or more.
Step 8: Season Extension & Winterizing
Extend your harvest and protect your garden for the off-season to truly maximize your self sufficient garden from scratch.
- Cold Frames: Simple structures with a transparent top (glass, polycarbonate, or old windows) that sit over garden beds. They trap solar heat, allowing you to grow cold-hardy crops (lettuce, spinach, kale, radishes) well into winter or start seeds earlier in spring. A basic cold frame can be built from 2×6 lumber and a sheet of polycarbonate for under $100.
- Hoop Houses/Low Tunnels: Larger structures made from flexible hoops (PVC pipe or EMT conduit) covered with greenhouse plastic. These provide more space and greater temperature moderation. A 10×20 ft DIY low tunnel kit can cost $200-$500, while a larger, more robust hoop house kit might be $1,000-$3,000. I use a 6×12 ft low tunnel made from 1/2-inch PVC hoops and 6mil greenhouse plastic, which extends my lettuce and spinach harvest by at least
- In-Ground Beds: If you have excellent native soil and good drainage, in-ground beds are the most economical. Double-digging (loosening soil two shovel depths) can significantly improve drainage and aeration. For my main garden, I primarily use in-ground beds, but I focus on building up the soil over time with consistent compost additions and cover cropping. I aim for beds that are no wider than 3-4 feet so I can reach the center without stepping on the soil, compacting it.
- Raised Beds: Raised beds offer numerous advantages, especially for poor soil, heavy clay, or rocky areas. They provide better drainage, warm up faster in spring, reduce compaction, and make weeding and harvesting easier on your back.
- Material Options:
- Untreated Cedar: Naturally rot-resistant and chemical-free. A 4×8 ft bed, 12 inches deep, typically requires three 2x12x8 ft cedar boards, costing around $50-$60 per board (total ~$150-$180) plus corner brackets or screws. My first raised beds were cedar and are still going strong after 7 years.
- Galvanized Steel: Durable, long-lasting, and aesthetically pleasing. Brands like Vego Garden offer modular kits. A Vego Garden 17″ Tall 8-in-1 Metal Raised Garden Bed (can be configured to 4×8 ft) costs approximately $250-$300.
- Concrete Blocks/Stones: Very durable but can leach minerals (though generally safe once weathered) and can be expensive.
- Recycled Materials: Pallets (check for chemical treatment stamps like « HT » for heat-treated), old tires (controversial due to potential chemical leaching).
- Filling Raised Beds: Don’t just fill with topsoil. Use a « Hugelkultur » approach (logs, branches, leaves, then compost, then topsoil) or a mixture of 60% good quality topsoil, 30% compost, and 10% perlite or vermiculite for drainage. A 4x8x1 ft raised bed requires about 32 cubic feet (or ~1.2 cubic yards) of soil mix, which can cost $100-$200 depending on your source.
- Material Options:
Step 4: Water Management & Irrigation
Efficient water management is critical for a self sufficient garden from scratch, especially in off-grid living where water resources might be limited.
- Rainwater Harvesting: This is my primary source of irrigation water. A 55-gallon rain barrel (e.g., EarthMark Rain Barrel, ~$120-$150) connected to a downspout can collect significant water. For larger needs, I use two 275-gallon IBC totes (Intermediate Bulk Containers, often available used for $100-$200 each from food-grade sources) connected in series. A 1,000 sq ft roof can collect approximately 620 gallons of water for every inch of rainfall. My 1,500 sq ft roof provides ample water for my 600 sq ft garden through multiple barrels and totes.
- Drip Irrigation: This is by far the most water-efficient method, delivering water directly to the plant’s root zone, minimizing evaporation and weed growth.
- Components: A typical drip system includes a pressure regulator (e.g., Rain Bird PRV-10, ~$15), a filter (Rain Bird RBY filter, ~$20), main tubing (1/2-inch poly tubing, 100ft ~$25), smaller feeder lines (1/4-inch tubing), and emitters (0.5 GPH or 1 GPH per plant).
- Kits: For beginners, a starter kit like the Rain Bird Drip Irrigation Garden Kit (model DDI-KIT-1P, ~$40-$60) is excellent for a small garden. For larger setups, I use Netafim Techline CV Drip Line (500ft roll, ~$150-$200), which has pressure-compensating emitters built-in, ensuring even watering across long runs.
- Automation: For true self-sufficiency, consider a battery-powered timer (e.g., Orbit B-Hyve Bluetooth Hose Faucet Timer, ~$50) or a solar-powered timer connected to a small 12V pump.
- Solar-Powered Pumps: For lifting water from a well, pond, or large storage tank to your garden, a solar pump is a game-changer. For a smaller drip system, a Shurflo 2088-594-152 Diaphragm Pump (12V, 3.5 GPM, ~$180) can be powered by a single 100W solar panel (e.g., Renogy 100W Monocrystalline Solar Panel, ~$100) and a small 12V battery (e.g., a 50Ah LiFePO4 battery like the Battle Born 50Ah, ~$450). For larger operations or deeper wells, more robust systems are needed. If you’re looking to build out a comprehensive off-grid power system to support your garden’s water needs, or indeed your entire homestead, you might want to explore resources like the Power Grid Generator complete system guide to understand the full scope of what’s possible in terms of energy independence.
Step 5: Seed Selection & Planting
The choice of seeds is crucial for a truly self sufficient garden from scratch.
- Choose Heirloom & Open-Pollinated Seeds: These varieties produce seeds that will grow true to type, meaning you can save seeds from your harvest year after year. F1 hybrids, while often vigorous, will not produce consistent offspring from saved seeds. Reputable seed companies include Baker Creek Heirloom Seeds, High Mowing Organic Seeds, and Seed Savers Exchange. Start with common, reliable varieties like ‘Black Krim’ tomatoes, ‘Provider’ bush beans, ‘Waltham Butternut’ squash, and ‘Black Seeded Simpson’ lettuce.
- Start Seeds Indoors (Optional but Recommended): For longer growing seasons or specific crops, starting seeds indoors gives you a head start. Use seed-starting mix (e.g., Espoma Organic Seed Starter Mix, ~$10 for 16qt bag) in seed trays (Jiffy Professional Greenhouse 72-cell kit, ~$15). Provide adequate light with LED grow lights (Barrina T5 2ft 4-pack LED Grow Lights, 20W each, ~$50) for 14-16 hours a day, positioned 2-4 inches above seedlings. Maintain consistent temperatures (65-75°F for most).
- Direct Sowing vs. Transplanting: Some crops (carrots, radishes, beans, corn) prefer direct sowing into the garden bed. Others (tomatoes, peppers, broccoli, kale) benefit from being started indoors and transplanted. Follow seed packet instructions for planting depths (e.g., lettuce seeds are often surface-sown or planted 1/8 inch deep, while beans are 1 inch deep) and spacing.
- Companion Planting: Strategically plant different species together to enhance growth, deter pests, and attract beneficial insects. For example, planting marigolds near tomatoes can deter nematodes, and basil improves tomato flavor. Nasturtiums can act as a trap crop for aphids.
- Succession Planting: For a continuous harvest, plant small batches of quick-growing crops (lettuce, radishes, cilantro) every 2-3 weeks. As one crop finishes, another is ready to take its place.
Step 6: Pest & Disease Management (Organic)
Maintaining a self sufficient garden from scratch means embracing organic pest and disease control.
- Integrated Pest Management (IPM): This holistic approach combines several strategies.
- Observation: Regularly inspect your plants for early signs of pests or disease. Catching issues early is key.
- Physical Barriers: Use row covers (e.g., Agribon AG-19 floating row cover, 10×20 ft, ~$20) to protect young plants from insect pests like cabbage worms and squash bugs. Install fences (e.g., 2×4 welded wire mesh, 4 ft tall, 50 ft roll ~$70) to keep out deer, rabbits, and other larger animals.
- Hand-Picking: For larger pests like tomato hornworms or squash bugs, simply pick them off and drop them into a bucket of soapy water.
- Companion Planting: As mentioned, certain plants repel pests. Marigolds, garlic, and onions are excellent deterrents.
- Attract Beneficial Insects: Plant flowers like dill, fennel, cosmos, and sweet alyssum to attract ladybugs, lacewings, and parasitic wasps, which prey on common garden pests.
- Organic Sprays & Treatments:
- Neem Oil: An excellent broad-spectrum organic insecticide and fungicide. Bonide Neem Oil Concentrate (16oz, ~$20) can be mixed at a rate of 1-2 tbsp per gallon of water and sprayed on affected plants.
- Insecticidal Soap: Effective against soft-bodied insects like aphids, whiteflies, and spider mites. Garden Safe Insecticidal Soap (24oz ready-to-use, ~$10).
- Bacillus thuringiensis (Bt): A naturally occurring soil bacterium that targets caterpillars and worms. Monterey BT Worm & Caterpillar Killer (16oz, ~$18) is highly effective and safe for beneficial insects.
- Copper or Sulfur Sprays: For fungal diseases like powdery mildew or blight, organic copper (e.g., Bonide Copper Fungicide, ~$15 for 1lb) or sulfur (e.g., Safer Brand Garden Fungicide, ~$10 for 16oz) can be used as a last resort.
Step 7: Harvesting & Seed Saving
The culmination of your efforts is the harvest, and seed saving closes the loop on self-sufficiency.
- Harvesting Techniques:
- Timing: Harvest vegetables at their peak ripeness for best flavor and nutritional value. For example, green beans should snap cleanly, cucumbers should be firm, and tomatoes should be fully colored.
- Frequency: Many crops, like zucchini, cucumbers, and bush beans, produce more if harvested frequently. Pick daily or every other day.
- Tools: Use clean, sharp pruners (e.g., Corona ClassicCUT Bypass Pruner BP 3180, ~$30) or a sharp knife for clean cuts, minimizing damage to the plant.
- Seed Saving: This is where the « self-sufficient » aspect truly shines.
- Selection: Only save seeds from your healthiest, most vigorous plants that show desired traits (disease resistance, good flavor, high yield).
- Isolation: To ensure true-to-type seeds, prevent cross-pollination. This can be challenging for open-pollinated crops that readily cross (e.g., squash, corn). For beginners, focus on self-pollinating plants like beans, peas, lettuce, and tomatoes.
- Processing:
- Dry Seeds (Beans, Peas, Lettuce, Grains): Allow pods/seed heads to dry completely on the plant. Harvest, shell, and clean the seeds, removing chaff.
- Wet Seeds (Tomatoes, Cucumbers, Squash): For tomatoes, ferment the seeds in water for a few days to remove the gel coating and inhibit disease. For cucumbers/squash, scrape out seeds, wash thoroughly, and dry.
- Drying: Spread seeds thinly on screens or paper plates in a cool, dry, well-ventilated area for 1-4 weeks. Ensure they are bone-dry before storage. I aim for less than 8% moisture content.
- Storage: Store seeds in airtight containers (glass jars with desiccant packets work well) in a cool, dark, dry place (ideally 40-50°F and 30-40% humidity). Label clearly with variety and date. Properly stored seeds can remain viable for 3-10 years or more.
Step 8: Season Extension & Winterizing
Extend your harvest and protect your garden for the off-season to truly maximize your self sufficient garden from scratch.
- Cold Frames: Simple structures with a transparent top (glass, polycarbonate, or old windows) that sit over garden beds. They trap solar heat, allowing you to grow cold-hardy crops (lettuce, spinach, kale, radishes) well into winter or start seeds earlier in spring. A basic cold frame can be built from 2×6 lumber and a sheet of polycarbonate for under $100.
- Hoop Houses/Low Tunnels: Larger structures made from flexible hoops (PVC pipe or EMT conduit) covered with greenhouse plastic. These provide more space and greater temperature moderation. A 10×20 ft DIY low tunnel kit can cost $200-$500, while a larger, more robust hoop house kit might be $1,000-$3,000. I use a 6×12 ft low tunnel made from 1/2-inch PVC hoops and 6mil greenhouse plastic, which extends my lettuce and spinach harvest by at least
Deciding between raised beds and in-ground beds depends on your soil, budget, and physical capabilities.
- In-Ground Beds: If you have excellent native soil and good drainage, in-ground beds are the most economical. Double-digging (loosening soil two shovel depths) can significantly improve drainage and aeration. For my main garden, I primarily use in-ground beds, but I focus on building up the soil over time with consistent compost additions and cover cropping. I aim for beds that are no wider than 3-4 feet so I can reach the center without stepping on the soil, compacting it.
- Raised Beds: Raised beds offer numerous advantages, especially for poor soil, heavy clay, or rocky areas. They provide better drainage, warm up faster in spring, reduce compaction, and make weeding and harvesting easier on your back.
- Material Options:
- Untreated Cedar: Naturally rot-resistant and chemical-free. A 4×8 ft bed, 12 inches deep, typically requires three 2x12x8 ft cedar boards, costing around $50-$60 per board (total ~$150-$180) plus corner brackets or screws. My first raised beds were cedar and are still going strong after 7 years.
- Galvanized Steel: Durable, long-lasting, and aesthetically pleasing. Brands like Vego Garden offer modular kits. A Vego Garden 17″ Tall 8-in-1 Metal Raised Garden Bed (can be configured to 4×8 ft) costs approximately $250-$300.
- Concrete Blocks/Stones: Very durable but can leach minerals (though generally safe once weathered) and can be expensive.
- Recycled Materials: Pallets (check for chemical treatment stamps like « HT » for heat-treated), old tires (controversial due to potential chemical leaching).
- Filling Raised Beds: Don’t just fill with topsoil. Use a « Hugelkultur » approach (logs, branches, leaves, then compost, then topsoil) or a mixture of 60% good quality topsoil, 30% compost, and 10% perlite or vermiculite for drainage. A 4x8x1 ft raised bed requires about 32 cubic feet (or ~1.2 cubic yards) of soil mix, which can cost $100-$200 depending on your source.
- Material Options:
Step 4: Water Management & Irrigation
Efficient water management is critical for a self sufficient garden from scratch, especially in off-grid living where water resources might be limited.
- Rainwater Harvesting: This is my primary source of irrigation water. A 55-gallon rain barrel (e.g., EarthMark Rain Barrel, ~$120-$150) connected to a downspout can collect significant water. For larger needs, I use two 275-gallon IBC totes (Intermediate Bulk Containers, often available used for $100-$200 each from food-grade sources) connected in series. A 1,000 sq ft roof can collect approximately 620 gallons of water for every inch of rainfall. My 1,500 sq ft roof provides ample water for my 600 sq ft garden through multiple barrels and totes.
- Drip Irrigation: This is by far the most water-efficient method, delivering water directly to the plant’s root zone, minimizing evaporation and weed growth.
- Components: A typical drip system includes a pressure regulator (e.g., Rain Bird PRV-10, ~$15), a filter (Rain Bird RBY filter, ~$20), main tubing (1/2-inch poly tubing, 100ft ~$25), smaller feeder lines (1/4-inch tubing), and emitters (0.5 GPH or 1 GPH per plant).
- Kits: For beginners, a starter kit like the Rain Bird Drip Irrigation Garden Kit (model DDI-KIT-1P, ~$40-$60) is excellent for a small garden. For larger setups, I use Netafim Techline CV Drip Line (500ft roll, ~$150-$200), which has pressure-compensating emitters built-in, ensuring even watering across long runs.
- Automation: For true self-sufficiency, consider a battery-powered timer (e.g., Orbit B-Hyve Bluetooth Hose Faucet Timer, ~$50) or a solar-powered timer connected to a small 12V pump.
- Solar-Powered Pumps: For lifting water from a well, pond, or large storage tank to your garden, a solar pump is a game-changer. For a smaller drip system, a Shurflo 2088-594-152 Diaphragm Pump (12V, 3.5 GPM, ~$180) can be powered by a single 100W solar panel (e.g., Renogy 100W Monocrystalline Solar Panel, ~$100) and a small 12V battery (e.g., a 50Ah LiFePO4 battery like the Battle Born 50Ah, ~$450). For larger operations or deeper wells, more robust systems are needed. If you’re looking to build out a comprehensive off-grid power system to support your garden’s water needs, or indeed your entire homestead, you might want to explore resources like the Power Grid Generator complete system guide to understand the full scope of what’s possible in terms of energy independence.
Step 5: Seed Selection & Planting
The choice of seeds is crucial for a truly self sufficient garden from scratch.
- Choose Heirloom & Open-Pollinated Seeds: These varieties produce seeds that will grow true to type, meaning you can save seeds from your harvest year after year. F1 hybrids, while often vigorous, will not produce consistent offspring from saved seeds. Reputable seed companies include Baker Creek Heirloom Seeds, High Mowing Organic Seeds, and Seed Savers Exchange. Start with common, reliable varieties like ‘Black Krim’ tomatoes, ‘Provider’ bush beans, ‘Waltham Butternut’ squash, and ‘Black Seeded Simpson’ lettuce.
- Start Seeds Indoors (Optional but Recommended): For longer growing seasons or specific crops, starting seeds indoors gives you a head start. Use seed-starting mix (e.g., Espoma Organic Seed Starter Mix, ~$10 for 16qt bag) in seed trays (Jiffy Professional Greenhouse 72-cell kit, ~$15). Provide adequate light with LED grow lights (Barrina T5 2ft 4-pack LED Grow Lights, 20W each, ~$50) for 14-16 hours a day, positioned 2-4 inches above seedlings. Maintain consistent temperatures (65-75°F for most).
- Direct Sowing vs. Transplanting: Some crops (carrots, radishes, beans, corn) prefer direct sowing into the garden bed. Others (tomatoes, peppers, broccoli, kale) benefit from being started indoors and transplanted. Follow seed packet instructions for planting depths (e.g., lettuce seeds are often surface-sown or planted 1/8 inch deep, while beans are 1 inch deep) and spacing.
- Companion Planting: Strategically plant different species together to enhance growth, deter pests, and attract beneficial insects. For example, planting marigolds near tomatoes can deter nematodes, and basil improves tomato flavor. Nasturtiums can act as a trap crop for aphids.
- Succession Planting: For a continuous harvest, plant small batches of quick-growing crops (lettuce, radishes, cilantro) every 2-3 weeks. As one crop finishes, another is ready to take its place.
Step 6: Pest & Disease Management (Organic)
Maintaining a self sufficient garden from scratch means embracing organic pest and disease control.
- Integrated Pest Management (IPM): This holistic approach combines several strategies.
- Observation: Regularly inspect your plants for early signs of pests or disease. Catching issues early is key.
- Physical Barriers: Use row covers (e.g., Agribon AG-19 floating row cover, 10×20 ft, ~$20) to protect young plants from insect pests like cabbage worms and squash bugs. Install fences (e.g., 2×4 welded wire mesh, 4 ft tall, 50 ft roll ~$70) to keep out deer, rabbits, and other larger animals.
- Hand-Picking: For larger pests like tomato hornworms or squash bugs, simply pick them off and drop them into a bucket of soapy water.
- Companion Planting: As mentioned, certain plants repel pests. Marigolds, garlic, and onions are excellent deterrents.
- Attract Beneficial Insects: Plant flowers like dill, fennel, cosmos, and sweet alyssum to attract ladybugs, lacewings, and parasitic wasps, which prey on common garden pests.
- Organic Sprays & Treatments:
- Neem Oil: An excellent broad-spectrum organic insecticide and fungicide. Bonide Neem Oil Concentrate (16oz, ~$20) can be mixed at a rate of 1-2 tbsp per gallon of water and sprayed on affected plants.
- Insecticidal Soap: Effective against soft-bodied insects like aphids, whiteflies, and spider mites. Garden Safe Insecticidal Soap (24oz ready-to-use, ~$10).
- Bacillus thuringiensis (Bt): A naturally occurring soil bacterium that targets caterpillars and worms. Monterey BT Worm & Caterpillar Killer (16oz, ~$18) is highly effective and safe for beneficial insects.
- Copper or Sulfur Sprays: For fungal diseases like powdery mildew or blight, organic copper (e.g., Bonide Copper Fungicide, ~$15 for 1lb) or sulfur (e.g., Safer Brand Garden Fungicide, ~$10 for 16oz) can be used as a last resort.
Step 7: Harvesting & Seed Saving
The culmination of your efforts is the harvest, and seed saving closes the loop on self-sufficiency.
- Harvesting Techniques:
- Timing: Harvest vegetables at their peak ripeness for best flavor and nutritional value. For example, green beans should snap cleanly, cucumbers should be firm, and tomatoes should be fully colored.
- Frequency: Many crops, like zucchini, cucumbers, and bush beans, produce more if harvested frequently. Pick daily or every other day.
- Tools: Use clean, sharp pruners (e.g., Corona ClassicCUT Bypass Pruner BP 3180, ~$30) or a sharp knife for clean cuts, minimizing damage to the plant.
- Seed Saving: This is where the « self-sufficient » aspect truly shines.
- Selection: Only save seeds from your healthiest, most vigorous plants that show desired traits (disease resistance, good flavor, high yield).
- Isolation: To ensure true-to-type seeds, prevent cross-pollination. This can be challenging for open-pollinated crops that readily cross (e.g., squash, corn). For beginners, focus on self-pollinating plants like beans, peas, lettuce, and tomatoes.
- Processing:
- Dry Seeds (Beans, Peas, Lettuce, Grains): Allow pods/seed heads to dry completely on the plant. Harvest, shell, and clean the seeds, removing chaff.
- Wet Seeds (Tomatoes, Cucumbers, Squash): For tomatoes, ferment the seeds in water for a few days to remove the gel coating and inhibit disease. For cucumbers/squash, scrape out seeds, wash thoroughly, and dry.
- Drying: Spread seeds thinly on screens or paper plates in a cool, dry, well-ventilated area for 1-4 weeks. Ensure they are bone-dry before storage. I aim for less than 8% moisture content.
- Storage: Store seeds in airtight containers (glass jars with desiccant packets work well) in a cool, dark, dry place (ideally 40-50°F and 30-40% humidity). Label clearly with variety and date. Properly stored seeds can remain viable for 3-10 years or more.
Step 8: Season Extension & Winterizing
Extend your harvest and protect your garden for the off-season to truly maximize your self sufficient garden from scratch.
- Cold Frames: Simple structures with a transparent top (glass, polycarbonate, or old windows) that sit over garden beds. They trap solar heat, allowing you to grow cold-hardy crops (lettuce, spinach, kale, radishes) well into winter or start seeds earlier in spring. A basic cold frame can be built from 2×6 lumber and a sheet of polycarbonate for under $100.
- Hoop Houses/Low Tunnels: Larger structures made from flexible hoops (PVC pipe or EMT conduit) covered with greenhouse plastic. These provide more space and greater temperature moderation. A 10×20 ft DIY low tunnel kit can cost $200-$500, while a larger, more robust hoop house kit might be $1,000-$3,000. I use a 6×12 ft low tunnel made from 1/2-inch PVC hoops and 6mil greenhouse plastic, which extends my lettuce and spinach harvest by at least
Healthy soil is the bedrock of a productive, self-sufficient garden. You can’t guess what your soil needs; you have to test it.
- Perform a Soil Test: A professional soil test will give you precise data on your soil’s pH, nutrient levels (N-P-K), and organic matter content. I recommend sending a sample to your local agricultural extension office; it typically costs $20-$50 and provides detailed recommendations. Alternatively, for a quick homeowner check, a Rapitest Soil Test Kit (40-test kit, model 1663, ~$20 on Amazon) provides a good baseline for pH, Nitrogen, Phosphorus, and Potash. Aim for a pH between 6.0 and 7.0 for most vegetables.
- Amend for pH Imbalance: If your soil is too acidic (below 6.0), add agricultural lime (dolomitic lime adds magnesium, calcitic lime adds calcium). Apply 5-10 lbs per 100 sq ft for a moderate adjustment. If it’s too alkaline (above 7.0), add elemental sulfur (e.g., Espoma Soil Acidifier, ~$15 for 6.75 lbs) or generous amounts of organic matter like peat moss or pine needles.
- Build Organic Matter: This is the single most important step for long-term soil health. Organic matter improves soil structure, water retention, drainage, and nutrient availability. Incorporate 2-4 inches of high-quality compost into your top 6-12 inches of soil annually. I make my own compost from kitchen scraps, garden waste, and shredded leaves, but you can purchase it. Local nurseries often sell bulk compost for $30-$50 per cubic yard. Aged manure (from chickens, cows, or horses – ensure it’s well-rotted to avoid burning plants) is also excellent.
- Address Nutrient Deficiencies: Based on your soil test, add specific organic amendments. If Nitrogen (N) is low, add blood meal (12-0-0, ~$20 for 3 lbs) or feather meal. For Phosphorus (P), use bone meal (3-15-0, ~$15 for 3 lbs) or rock phosphate. For Potassium (K), greensand (0-0-2.5, ~$25 for 5 lbs) or kelp meal are good choices. I rely heavily on Espoma Organic Garden-tone (5-3-3, ~$25 for an 8lb bag) as a balanced, all-purpose organic fertilizer during planting.
Step 3: Garden Bed Preparation
Deciding between raised beds and in-ground beds depends on your soil, budget, and physical capabilities.
- In-Ground Beds: If you have excellent native soil and good drainage, in-ground beds are the most economical. Double-digging (loosening soil two shovel depths) can significantly improve drainage and aeration. For my main garden, I primarily use in-ground beds, but I focus on building up the soil over time with consistent compost additions and cover cropping. I aim for beds that are no wider than 3-4 feet so I can reach the center without stepping on the soil, compacting it.
- Raised Beds: Raised beds offer numerous advantages, especially for poor soil, heavy clay, or rocky areas. They provide better drainage, warm up faster in spring, reduce compaction, and make weeding and harvesting easier on your back.
- Material Options:
- Untreated Cedar: Naturally rot-resistant and chemical-free. A 4×8 ft bed, 12 inches deep, typically requires three 2x12x8 ft cedar boards, costing around $50-$60 per board (total ~$150-$180) plus corner brackets or screws. My first raised beds were cedar and are still going strong after 7 years.
- Galvanized Steel: Durable, long-lasting, and aesthetically pleasing. Brands like Vego Garden offer modular kits. A Vego Garden 17″ Tall 8-in-1 Metal Raised Garden Bed (can be configured to 4×8 ft) costs approximately $250-$300.
- Concrete Blocks/Stones: Very durable but can leach minerals (though generally safe once weathered) and can be expensive.
- Recycled Materials: Pallets (check for chemical treatment stamps like « HT » for heat-treated), old tires (controversial due to potential chemical leaching).
- Filling Raised Beds: Don’t just fill with topsoil. Use a « Hugelkultur » approach (logs, branches, leaves, then compost, then topsoil) or a mixture of 60% good quality topsoil, 30% compost, and 10% perlite or vermiculite for drainage. A 4x8x1 ft raised bed requires about 32 cubic feet (or ~1.2 cubic yards) of soil mix, which can cost $100-$200 depending on your source.
- Material Options:
Step 4: Water Management & Irrigation
Efficient water management is critical for a self sufficient garden from scratch, especially in off-grid living where water resources might be limited.
- Rainwater Harvesting: This is my primary source of irrigation water. A 55-gallon rain barrel (e.g., EarthMark Rain Barrel, ~$120-$150) connected to a downspout can collect significant water. For larger needs, I use two 275-gallon IBC totes (Intermediate Bulk Containers, often available used for $100-$200 each from food-grade sources) connected in series. A 1,000 sq ft roof can collect approximately 620 gallons of water for every inch of rainfall. My 1,500 sq ft roof provides ample water for my 600 sq ft garden through multiple barrels and totes.
- Drip Irrigation: This is by far the most water-efficient method, delivering water directly to the plant’s root zone, minimizing evaporation and weed growth.
- Components: A typical drip system includes a pressure regulator (e.g., Rain Bird PRV-10, ~$15), a filter (Rain Bird RBY filter, ~$20), main tubing (1/2-inch poly tubing, 100ft ~$25), smaller feeder lines (1/4-inch tubing), and emitters (0.5 GPH or 1 GPH per plant).
- Kits: For beginners, a starter kit like the Rain Bird Drip Irrigation Garden Kit (model DDI-KIT-1P, ~$40-$60) is excellent for a small garden. For larger setups, I use Netafim Techline CV Drip Line (500ft roll, ~$150-$200), which has pressure-compensating emitters built-in, ensuring even watering across long runs.
- Automation: For true self-sufficiency, consider a battery-powered timer (e.g., Orbit B-Hyve Bluetooth Hose Faucet Timer, ~$50) or a solar-powered timer connected to a small 12V pump.
- Solar-Powered Pumps: For lifting water from a well, pond, or large storage tank to your garden, a solar pump is a game-changer. For a smaller drip system, a Shurflo 2088-594-152 Diaphragm Pump (12V, 3.5 GPM, ~$180) can be powered by a single 100W solar panel (e.g., Renogy 100W Monocrystalline Solar Panel, ~$100) and a small 12V battery (e.g., a 50Ah LiFePO4 battery like the Battle Born 50Ah, ~$450). For larger operations or deeper wells, more robust systems are needed. If you’re looking to build out a comprehensive off-grid power system to support your garden’s water needs, or indeed your entire homestead, you might want to explore resources like the Power Grid Generator complete system guide to understand the full scope of what’s possible in terms of energy independence.
Step 5: Seed Selection & Planting
The choice of seeds is crucial for a truly self sufficient garden from scratch.
- Choose Heirloom & Open-Pollinated Seeds: These varieties produce seeds that will grow true to type, meaning you can save seeds from your harvest year after year. F1 hybrids, while often vigorous, will not produce consistent offspring from saved seeds. Reputable seed companies include Baker Creek Heirloom Seeds, High Mowing Organic Seeds, and Seed Savers Exchange. Start with common, reliable varieties like ‘Black Krim’ tomatoes, ‘Provider’ bush beans, ‘Waltham Butternut’ squash, and ‘Black Seeded Simpson’ lettuce.
- Start Seeds Indoors (Optional but Recommended): For longer growing seasons or specific crops, starting seeds indoors gives you a head start. Use seed-starting mix (e.g., Espoma Organic Seed Starter Mix, ~$10 for 16qt bag) in seed trays (Jiffy Professional Greenhouse 72-cell kit, ~$15). Provide adequate light with LED grow lights (Barrina T5 2ft 4-pack LED Grow Lights, 20W each, ~$50) for 14-16 hours a day, positioned 2-4 inches above seedlings. Maintain consistent temperatures (65-75°F for most).
- Direct Sowing vs. Transplanting: Some crops (carrots, radishes, beans, corn) prefer direct sowing into the garden bed. Others (tomatoes, peppers, broccoli, kale) benefit from being started indoors and transplanted. Follow seed packet instructions for planting depths (e.g., lettuce seeds are often surface-sown or planted 1/8 inch deep, while beans are 1 inch deep) and spacing.
- Companion Planting: Strategically plant different species together to enhance growth, deter pests, and attract beneficial insects. For example, planting marigolds near tomatoes can deter nematodes, and basil improves tomato flavor. Nasturtiums can act as a trap crop for aphids.
- Succession Planting: For a continuous harvest, plant small batches of quick-growing crops (lettuce, radishes, cilantro) every 2-3 weeks. As one crop finishes, another is ready to take its place.
Step 6: Pest & Disease Management (Organic)
Maintaining a self sufficient garden from scratch means embracing organic pest and disease control.
- Integrated Pest Management (IPM): This holistic approach combines several strategies.
- Observation: Regularly inspect your plants for early signs of pests or disease. Catching issues early is key.
- Physical Barriers: Use row covers (e.g., Agribon AG-19 floating row cover, 10×20 ft, ~$20) to protect young plants from insect pests like cabbage worms and squash bugs. Install fences (e.g., 2×4 welded wire mesh, 4 ft tall, 50 ft roll ~$70) to keep out deer, rabbits, and other larger animals.
- Hand-Picking: For larger pests like tomato hornworms or squash bugs, simply pick them off and drop them into a bucket of soapy water.
- Companion Planting: As mentioned, certain plants repel pests. Marigolds, garlic, and onions are excellent deterrents.
- Attract Beneficial Insects: Plant flowers like dill, fennel, cosmos, and sweet alyssum to attract ladybugs, lacewings, and parasitic wasps, which prey on common garden pests.
- Organic Sprays & Treatments:
- Neem Oil: An excellent broad-spectrum organic insecticide and fungicide. Bonide Neem Oil Concentrate (16oz, ~$20) can be mixed at a rate of 1-2 tbsp per gallon of water and sprayed on affected plants.
- Insecticidal Soap: Effective against soft-bodied insects like aphids, whiteflies, and spider mites. Garden Safe Insecticidal Soap (24oz ready-to-use, ~$10).
- Bacillus thuringiensis (Bt): A naturally occurring soil bacterium that targets caterpillars and worms. Monterey BT Worm & Caterpillar Killer (16oz, ~$18) is highly effective and safe for beneficial insects.
- Copper or Sulfur Sprays: For fungal diseases like powdery mildew or blight, organic copper (e.g., Bonide Copper Fungicide, ~$15 for 1lb) or sulfur (e.g., Safer Brand Garden Fungicide, ~$10 for 16oz) can be used as a last resort.
Step 7: Harvesting & Seed Saving
The culmination of your efforts is the harvest, and seed saving closes the loop on self-sufficiency.
- Harvesting Techniques:
- Timing: Harvest vegetables at their peak ripeness for best flavor and nutritional value. For example, green beans should snap cleanly, cucumbers should be firm, and tomatoes should be fully colored.
- Frequency: Many crops, like zucchini, cucumbers, and bush beans, produce more if harvested frequently. Pick daily or every other day.
- Tools: Use clean, sharp pruners (e.g., Corona ClassicCUT Bypass Pruner BP 3180, ~$30) or a sharp knife for clean cuts, minimizing damage to the plant.
- Seed Saving: This is where the « self-sufficient » aspect truly shines.
- Selection: Only save seeds from your healthiest, most vigorous plants that show desired traits (disease resistance, good flavor, high yield).
- Isolation: To ensure true-to-type seeds, prevent cross-pollination. This can be challenging for open-pollinated crops that readily cross (e.g., squash, corn). For beginners, focus on self-pollinating plants like beans, peas, lettuce, and tomatoes.
- Processing:
- Dry Seeds (Beans, Peas, Lettuce, Grains): Allow pods/seed heads to dry completely on the plant. Harvest, shell, and clean the seeds, removing chaff.
- Wet Seeds (Tomatoes, Cucumbers, Squash): For tomatoes, ferment the seeds in water for a few days to remove the gel coating and inhibit disease. For cucumbers/squash, scrape out seeds, wash thoroughly, and dry.
- Drying: Spread seeds thinly on screens or paper plates in a cool, dry, well-ventilated area for 1-4 weeks. Ensure they are bone-dry before storage. I aim for less than 8% moisture content.
- Storage: Store seeds in airtight containers (glass jars with desiccant packets work well) in a cool, dark, dry place (ideally 40-50°F and 30-40% humidity). Label clearly with variety and date. Properly stored seeds can remain viable for 3-10 years or more.
Step 8: Season Extension & Winterizing
Extend your harvest and protect your garden for the off-season to truly maximize your self sufficient garden from scratch.
- Cold Frames: Simple structures with a transparent top (glass, polycarbonate, or old windows) that sit over garden beds. They trap solar heat, allowing you to grow cold-hardy crops (lettuce, spinach, kale, radishes) well into winter or start seeds earlier in spring. A basic cold frame can be built from 2×6 lumber and a sheet of polycarbonate for under $100.
- Hoop Houses/Low Tunnels: Larger structures made from flexible hoops (PVC pipe or EMT conduit) covered with greenhouse plastic. These provide more space and greater temperature moderation. A 10×20 ft DIY low tunnel kit can cost $200-$500, while a larger, more robust hoop house kit might be $1,000-$3,000. I use a 6×12 ft low tunnel made from 1/2-inch PVC hoops and 6mil greenhouse plastic, which extends my lettuce and spinach harvest by at least
- Harvesting Techniques:
- Timing: Harvest vegetables at their peak ripeness for best flavor and nutritional value. For example, green beans should snap cleanly, cucumbers should be firm, and tomatoes should be fully colored.
- Frequency: Many crops, like zucchini, cucumbers, and bush beans, produce more if harvested frequently. Pick daily or every other day.
- Tools: Use clean, sharp pruners (e.g., Corona ClassicCUT Bypass Pruner BP 3180, ~$30) or a sharp knife for clean cuts, minimizing damage to the plant.
- Seed Saving: This is where the « self-sufficient » aspect truly shines.
- Selection: Only save seeds from your healthiest, most vigorous plants that show desired traits (disease resistance, good flavor, high yield).
- Isolation: To ensure true-to-type seeds, prevent cross-pollination. This can be challenging for open-pollinated crops that readily cross (e.g., squash, corn). For beginners, focus on self-pollinating plants like beans, peas, lettuce, and tomatoes.
- Processing:
- Dry Seeds (Beans, Peas, Lettuce, Grains): Allow pods/seed heads to dry completely on the plant. Harvest, shell, and clean the seeds, removing chaff.
- Wet Seeds (Tomatoes, Cucumbers, Squash): For tomatoes, ferment the seeds in water for a few days to remove the gel coating and inhibit disease. For cucumbers/squash, scrape out seeds, wash thoroughly, and dry.
- Drying: Spread seeds thinly on screens or paper plates in a cool, dry, well-ventilated area for 1-4 weeks. Ensure they are bone-dry before storage. I aim for less than 8% moisture content.
- Storage: Store seeds in airtight containers (glass jars with desiccant packets work well) in a cool, dark, dry place (ideally 40-50°F and 30-40% humidity). Label clearly with variety and date. Properly stored seeds can remain viable for 3-10 years or more.
Step 8: Season Extension & Winterizing
Extend your harvest and protect your garden for the off-season to truly maximize your self sufficient garden from scratch.
- Cold Frames: Simple structures with a transparent top (glass, polycarbonate, or old windows) that sit over garden beds. They trap solar heat, allowing you to grow cold-hardy crops (lettuce, spinach, kale, radishes) well into winter or start seeds earlier in spring. A basic cold frame can be built from 2×6 lumber and a sheet of polycarbonate for under $100.
- Hoop Houses/Low Tunnels: Larger structures made from flexible hoops (PVC pipe or EMT conduit) covered with greenhouse plastic. These provide more space and greater temperature moderation. A 10×20 ft DIY low tunnel kit can cost $200-$500, while a larger, more robust hoop house kit might be $1,000-$3,000. I use a 6×12 ft low tunnel made from 1/2-inch PVC hoops and 6mil greenhouse plastic, which extends my lettuce and spinach harvest by at least
- Rainwater Harvesting: This is my primary source of irrigation water. A 55-gallon rain barrel (e.g., EarthMark Rain Barrel, ~$120-$150) connected to a downspout can collect significant water. For larger needs, I use two 275-gallon IBC totes (Intermediate Bulk Containers, often available used for $100-$200 each from food-grade sources) connected in series. A 1,000 sq ft roof can collect approximately 620 gallons of water for every inch of rainfall. My 1,500 sq ft roof provides ample water for my 600 sq ft garden through multiple barrels and totes.
- Drip Irrigation: This is by far the most water-efficient method, delivering water directly to the plant’s root zone, minimizing evaporation and weed growth.
- Components: A typical drip system includes a pressure regulator (e.g., Rain Bird PRV-10, ~$15), a filter (Rain Bird RBY filter, ~$20), main tubing (1/2-inch poly tubing, 100ft ~$25), smaller feeder lines (1/4-inch tubing), and emitters (0.5 GPH or 1 GPH per plant).
- Kits: For beginners, a starter kit like the Rain Bird Drip Irrigation Garden Kit (model DDI-KIT-1P, ~$40-$60) is excellent for a small garden. For larger setups, I use Netafim Techline CV Drip Line (500ft roll, ~$150-$200), which has pressure-compensating emitters built-in, ensuring even watering across long runs.
- Automation: For true self-sufficiency, consider a battery-powered timer (e.g., Orbit B-Hyve Bluetooth Hose Faucet Timer, ~$50) or a solar-powered timer connected to a small 12V pump.
- Solar-Powered Pumps: For lifting water from a well, pond, or large storage tank to your garden, a solar pump is a game-changer. For a smaller drip system, a Shurflo 2088-594-152 Diaphragm Pump (12V, 3.5 GPM, ~$180) can be powered by a single 100W solar panel (e.g., Renogy 100W Monocrystalline Solar Panel, ~$100) and a small 12V battery (e.g., a 50Ah LiFePO4 battery like the Battle Born 50Ah, ~$450). For larger operations or deeper wells, more robust systems are needed. If you’re looking to build out a comprehensive off-grid power system to support your garden’s water needs, or indeed your entire homestead, you might want to explore resources like the Power Grid Generator complete system guide to understand the full scope of what’s possible in terms of energy independence.
Step 5: Seed Selection & Planting
The choice of seeds is crucial for a truly self sufficient garden from scratch.
- Choose Heirloom & Open-Pollinated Seeds: These varieties produce seeds that will grow true to type, meaning you can save seeds from your harvest year after year. F1 hybrids, while often vigorous, will not produce consistent offspring from saved seeds. Reputable seed companies include Baker Creek Heirloom Seeds, High Mowing Organic Seeds, and Seed Savers Exchange. Start with common, reliable varieties like ‘Black Krim’ tomatoes, ‘Provider’ bush beans, ‘Waltham Butternut’ squash, and ‘Black Seeded Simpson’ lettuce.
- Start Seeds Indoors (Optional but Recommended): For longer growing seasons or specific crops, starting seeds indoors gives you a head start. Use seed-starting mix (e.g., Espoma Organic Seed Starter Mix, ~$10 for 16qt bag) in seed trays (Jiffy Professional Greenhouse 72-cell kit, ~$15). Provide adequate light with LED grow lights (Barrina T5 2ft 4-pack LED Grow Lights, 20W each, ~$50) for 14-16 hours a day, positioned 2-4 inches above seedlings. Maintain consistent temperatures (65-75°F for most).
- Direct Sowing vs. Transplanting: Some crops (carrots, radishes, beans, corn) prefer direct sowing into the garden bed. Others (tomatoes, peppers, broccoli, kale) benefit from being started indoors and transplanted. Follow seed packet instructions for planting depths (e.g., lettuce seeds are often surface-sown or planted 1/8 inch deep, while beans are 1 inch deep) and spacing.
- Companion Planting: Strategically plant different species together to enhance growth, deter pests, and attract beneficial insects. For example, planting marigolds near tomatoes can deter nematodes, and basil improves tomato flavor. Nasturtiums can act as a trap crop for aphids.
- Succession Planting: For a continuous harvest, plant small batches of quick-growing crops (lettuce, radishes, cilantro) every 2-3 weeks. As one crop finishes, another is ready to take its place.
Step 6: Pest & Disease Management (Organic)
Maintaining a self sufficient garden from scratch means embracing organic pest and disease control.
- Integrated Pest Management (IPM): This holistic approach combines several strategies.
- Observation: Regularly inspect your plants for early signs of pests or disease. Catching issues early is key.
- Physical Barriers: Use row covers (e.g., Agribon AG-19 floating row cover, 10×20 ft, ~$20) to protect young plants from insect pests like cabbage worms and squash bugs. Install fences (e.g., 2×4 welded wire mesh, 4 ft tall, 50 ft roll ~$70) to keep out deer, rabbits, and other larger animals.
- Hand-Picking: For larger pests like tomato hornworms or squash bugs, simply pick them off and drop them into a bucket of soapy water.
- Companion Planting: As mentioned, certain plants repel pests. Marigolds, garlic, and onions are excellent deterrents.
- Attract Beneficial Insects: Plant flowers like dill, fennel, cosmos, and sweet alyssum to attract ladybugs, lacewings, and parasitic wasps, which prey on common garden pests.
- Organic Sprays & Treatments:
- Neem Oil: An excellent broad-spectrum organic insecticide and fungicide. Bonide Neem Oil Concentrate (16oz, ~$20) can be mixed at a rate of 1-2 tbsp per gallon of water and sprayed on affected plants.
- Insecticidal Soap: Effective against soft-bodied insects like aphids, whiteflies, and spider mites. Garden Safe Insecticidal Soap (24oz ready-to-use, ~$10).
- Bacillus thuringiensis (Bt): A naturally occurring soil bacterium that targets caterpillars and worms. Monterey BT Worm & Caterpillar Killer (16oz, ~$18) is highly effective and safe for beneficial insects.
- Copper or Sulfur Sprays: For fungal diseases like powdery mildew or blight, organic copper (e.g., Bonide Copper Fungicide, ~$15 for 1lb) or sulfur (e.g., Safer Brand Garden Fungicide, ~$10 for 16oz) can be used as a last resort.
Step 7: Harvesting & Seed Saving
The culmination of your efforts is the harvest, and seed saving closes the loop on self-sufficiency.
- Harvesting Techniques:
- Timing: Harvest vegetables at their peak ripeness for best flavor and nutritional value. For example, green beans should snap cleanly, cucumbers should be firm, and tomatoes should be fully colored.
- Frequency: Many crops, like zucchini, cucumbers, and bush beans, produce more if harvested frequently. Pick daily or every other day.
- Tools: Use clean, sharp pruners (e.g., Corona ClassicCUT Bypass Pruner BP 3180, ~$30) or a sharp knife for clean cuts, minimizing damage to the plant.
- Seed Saving: This is where the « self-sufficient » aspect truly shines.
- Selection: Only save seeds from your healthiest, most vigorous plants that show desired traits (disease resistance, good flavor, high yield).
- Isolation: To ensure true-to-type seeds, prevent cross-pollination. This can be challenging for open-pollinated crops that readily cross (e.g., squash, corn). For beginners, focus on self-pollinating plants like beans, peas, lettuce, and tomatoes.
- Processing:
- Dry Seeds (Beans, Peas, Lettuce, Grains): Allow pods/seed heads to dry completely on the plant. Harvest, shell, and clean the seeds, removing chaff.
- Wet Seeds (Tomatoes, Cucumbers, Squash): For tomatoes, ferment the seeds in water for a few days to remove the gel coating and inhibit disease. For cucumbers/squash, scrape out seeds, wash thoroughly, and dry.
- Drying: Spread seeds thinly on screens or paper plates in a cool, dry, well-ventilated area for 1-4 weeks. Ensure they are bone-dry before storage. I aim for less than 8% moisture content.
- Storage: Store seeds in airtight containers (glass jars with desiccant packets work well) in a cool, dark, dry place (ideally 40-50°F and 30-40% humidity). Label clearly with variety and date. Properly stored seeds can remain viable for 3-10 years or more.
Step 8: Season Extension & Winterizing
Extend your harvest and protect your garden for the off-season to truly maximize your self sufficient garden from scratch.
- Cold Frames: Simple structures with a transparent top (glass, polycarbonate, or old windows) that sit over garden beds. They trap solar heat, allowing you to grow cold-hardy crops (lettuce, spinach, kale, radishes) well into winter or start seeds earlier in spring. A basic cold frame can be built from 2×6 lumber and a sheet of polycarbonate for under $100.
- Hoop Houses/Low Tunnels: Larger structures made from flexible hoops (PVC pipe or EMT conduit) covered with greenhouse plastic. These provide more space and greater temperature moderation. A 10×20 ft DIY low tunnel kit can cost $200-$500, while a larger, more robust hoop house kit might be $1,000-$3,000. I use a 6×12 ft low tunnel made from 1/2-inch PVC hoops and 6mil greenhouse plastic, which extends my lettuce and spinach harvest by at least
Efficient water management is critical for a self sufficient garden from scratch, especially in off-grid living where water resources might be limited.
- Rainwater Harvesting: This is my primary source of irrigation water. A 55-gallon rain barrel (e.g., EarthMark Rain Barrel, ~$120-$150) connected to a downspout can collect significant water. For larger needs, I use two 275-gallon IBC totes (Intermediate Bulk Containers, often available used for $100-$200 each from food-grade sources) connected in series. A 1,000 sq ft roof can collect approximately 620 gallons of water for every inch of rainfall. My 1,500 sq ft roof provides ample water for my 600 sq ft garden through multiple barrels and totes.
- Drip Irrigation: This is by far the most water-efficient method, delivering water directly to the plant’s root zone, minimizing evaporation and weed growth.
- Components: A typical drip system includes a pressure regulator (e.g., Rain Bird PRV-10, ~$15), a filter (Rain Bird RBY filter, ~$20), main tubing (1/2-inch poly tubing, 100ft ~$25), smaller feeder lines (1/4-inch tubing), and emitters (0.5 GPH or 1 GPH per plant).
- Kits: For beginners, a starter kit like the Rain Bird Drip Irrigation Garden Kit (model DDI-KIT-1P, ~$40-$60) is excellent for a small garden. For larger setups, I use Netafim Techline CV Drip Line (500ft roll, ~$150-$200), which has pressure-compensating emitters built-in, ensuring even watering across long runs.
- Automation: For true self-sufficiency, consider a battery-powered timer (e.g., Orbit B-Hyve Bluetooth Hose Faucet Timer, ~$50) or a solar-powered timer connected to a small 12V pump.
- Solar-Powered Pumps: For lifting water from a well, pond, or large storage tank to your garden, a solar pump is a game-changer. For a smaller drip system, a Shurflo 2088-594-152 Diaphragm Pump (12V, 3.5 GPM, ~$180) can be powered by a single 100W solar panel (e.g., Renogy 100W Monocrystalline Solar Panel, ~$100) and a small 12V battery (e.g., a 50Ah LiFePO4 battery like the Battle Born 50Ah, ~$450). For larger operations or deeper wells, more robust systems are needed. If you’re looking to build out a comprehensive off-grid power system to support your garden’s water needs, or indeed your entire homestead, you might want to explore resources like the Power Grid Generator complete system guide to understand the full scope of what’s possible in terms of energy independence.
Step 5: Seed Selection & Planting
The choice of seeds is crucial for a truly self sufficient garden from scratch.
- Choose Heirloom & Open-Pollinated Seeds: These varieties produce seeds that will grow true to type, meaning you can save seeds from your harvest year after year. F1 hybrids, while often vigorous, will not produce consistent offspring from saved seeds. Reputable seed companies include Baker Creek Heirloom Seeds, High Mowing Organic Seeds, and Seed Savers Exchange. Start with common, reliable varieties like ‘Black Krim’ tomatoes, ‘Provider’ bush beans, ‘Waltham Butternut’ squash, and ‘Black Seeded Simpson’ lettuce.
- Start Seeds Indoors (Optional but Recommended): For longer growing seasons or specific crops, starting seeds indoors gives you a head start. Use seed-starting mix (e.g., Espoma Organic Seed Starter Mix, ~$10 for 16qt bag) in seed trays (Jiffy Professional Greenhouse 72-cell kit, ~$15). Provide adequate light with LED grow lights (Barrina T5 2ft 4-pack LED Grow Lights, 20W each, ~$50) for 14-16 hours a day, positioned 2-4 inches above seedlings. Maintain consistent temperatures (65-75°F for most).
- Direct Sowing vs. Transplanting: Some crops (carrots, radishes, beans, corn) prefer direct sowing into the garden bed. Others (tomatoes, peppers, broccoli, kale) benefit from being started indoors and transplanted. Follow seed packet instructions for planting depths (e.g., lettuce seeds are often surface-sown or planted 1/8 inch deep, while beans are 1 inch deep) and spacing.
- Companion Planting: Strategically plant different species together to enhance growth, deter pests, and attract beneficial insects. For example, planting marigolds near tomatoes can deter nematodes, and basil improves tomato flavor. Nasturtiums can act as a trap crop for aphids.
- Succession Planting: For a continuous harvest, plant small batches of quick-growing crops (lettuce, radishes, cilantro) every 2-3 weeks. As one crop finishes, another is ready to take its place.
Step 6: Pest & Disease Management (Organic)
Maintaining a self sufficient garden from scratch means embracing organic pest and disease control.
- Integrated Pest Management (IPM): This holistic approach combines several strategies.
- Observation: Regularly inspect your plants for early signs of pests or disease. Catching issues early is key.
- Physical Barriers: Use row covers (e.g., Agribon AG-19 floating row cover, 10×20 ft, ~$20) to protect young plants from insect pests like cabbage worms and squash bugs. Install fences (e.g., 2×4 welded wire mesh, 4 ft tall, 50 ft roll ~$70) to keep out deer, rabbits, and other larger animals.
- Hand-Picking: For larger pests like tomato hornworms or squash bugs, simply pick them off and drop them into a bucket of soapy water.
- Companion Planting: As mentioned, certain plants repel pests. Marigolds, garlic, and onions are excellent deterrents.
- Attract Beneficial Insects: Plant flowers like dill, fennel, cosmos, and sweet alyssum to attract ladybugs, lacewings, and parasitic wasps, which prey on common garden pests.
- Organic Sprays & Treatments:
- Neem Oil: An excellent broad-spectrum organic insecticide and fungicide. Bonide Neem Oil Concentrate (16oz, ~$20) can be mixed at a rate of 1-2 tbsp per gallon of water and sprayed on affected plants.
- Insecticidal Soap: Effective against soft-bodied insects like aphids, whiteflies, and spider mites. Garden Safe Insecticidal Soap (24oz ready-to-use, ~$10).
- Bacillus thuringiensis (Bt): A naturally occurring soil bacterium that targets caterpillars and worms. Monterey BT Worm & Caterpillar Killer (16oz, ~$18) is highly effective and safe for beneficial insects.
- Copper or Sulfur Sprays: For fungal diseases like powdery mildew or blight, organic copper (e.g., Bonide Copper Fungicide, ~$15 for 1lb) or sulfur (e.g., Safer Brand Garden Fungicide, ~$10 for 16oz) can be used as a last resort.
Step 7: Harvesting & Seed Saving
The culmination of your efforts is the harvest, and seed saving closes the loop on self-sufficiency.
- Harvesting Techniques:
- Timing: Harvest vegetables at their peak ripeness for best flavor and nutritional value. For example, green beans should snap cleanly, cucumbers should be firm, and tomatoes should be fully colored.
- Frequency: Many crops, like zucchini, cucumbers, and bush beans, produce more if harvested frequently. Pick daily or every other day.
- Tools: Use clean, sharp pruners (e.g., Corona ClassicCUT Bypass Pruner BP 3180, ~$30) or a sharp knife for clean cuts, minimizing damage to the plant.
- Seed Saving: This is where the « self-sufficient » aspect truly shines.
- Selection: Only save seeds from your healthiest, most vigorous plants that show desired traits (disease resistance, good flavor, high yield).
- Isolation: To ensure true-to-type seeds, prevent cross-pollination. This can be challenging for open-pollinated crops that readily cross (e.g., squash, corn). For beginners, focus on self-pollinating plants like beans, peas, lettuce, and tomatoes.
- Processing:
- Dry Seeds (Beans, Peas, Lettuce, Grains): Allow pods/seed heads to dry completely on the plant. Harvest, shell, and clean the seeds, removing chaff.
- Wet Seeds (Tomatoes, Cucumbers, Squash): For tomatoes, ferment the seeds in water for a few days to remove the gel coating and inhibit disease. For cucumbers/squash, scrape out seeds, wash thoroughly, and dry.
- Drying: Spread seeds thinly on screens or paper plates in a cool, dry, well-ventilated area for 1-4 weeks. Ensure they are bone-dry before storage. I aim for less than 8% moisture content.
- Storage: Store seeds in airtight containers (glass jars with desiccant packets work well) in a cool, dark, dry place (ideally 40-50°F and 30-40% humidity). Label clearly with variety and date. Properly stored seeds can remain viable for 3-10 years or more.
Step 8: Season Extension & Winterizing
Extend your harvest and protect your garden for the off-season to truly maximize your self sufficient garden from scratch.
- Cold Frames: Simple structures with a transparent top (glass, polycarbonate, or old windows) that sit over garden beds. They trap solar heat, allowing you to grow cold-hardy crops (lettuce, spinach, kale, radishes) well into winter or start seeds earlier in spring. A basic cold frame can be built from 2×6 lumber and a sheet of polycarbonate for under $100.
- Hoop Houses/Low Tunnels: Larger structures made from flexible hoops (PVC pipe or EMT conduit) covered with greenhouse plastic. These provide more space and greater temperature moderation. A 10×20 ft DIY low tunnel kit can cost $200-$500, while a larger, more robust hoop house kit might be $1,000-$3,000. I use a 6×12 ft low tunnel made from 1/2-inch PVC hoops and 6mil greenhouse plastic, which extends my lettuce and spinach harvest by at least
Step 4: Water Management & Irrigation
Efficient water management is critical for a self sufficient garden from scratch, especially in off-grid living where water resources might be limited.
- Rainwater Harvesting: This is my primary source of irrigation water. A 55-gallon rain barrel (e.g., EarthMark Rain Barrel, ~$120-$150) connected to a downspout can collect significant water. For larger needs, I use two 275-gallon IBC totes (Intermediate Bulk Containers, often available used for $100-$200 each from food-grade sources) connected in series. A 1,000 sq ft roof can collect approximately 620 gallons of water for every inch of rainfall. My 1,500 sq ft roof provides ample water for my 600 sq ft garden through multiple barrels and totes.
- Drip Irrigation: This is by far the most water-efficient method, delivering water directly to the plant’s root zone, minimizing evaporation and weed growth.
- Components: A typical drip system includes a pressure regulator (e.g., Rain Bird PRV-10, ~$15), a filter (Rain Bird RBY filter, ~$20), main tubing (1/2-inch poly tubing, 100ft ~$25), smaller feeder lines (1/4-inch tubing), and emitters (0.5 GPH or 1 GPH per plant).
- Kits: For beginners, a starter kit like the Rain Bird Drip Irrigation Garden Kit (model DDI-KIT-1P, ~$40-$60) is excellent for a small garden. For larger setups, I use Netafim Techline CV Drip Line (500ft roll, ~$150-$200), which has pressure-compensating emitters built-in, ensuring even watering across long runs.
- Automation: For true self-sufficiency, consider a battery-powered timer (e.g., Orbit B-Hyve Bluetooth Hose Faucet Timer, ~$50) or a solar-powered timer connected to a small 12V pump.
- Solar-Powered Pumps: For lifting water from a well, pond, or large storage tank to your garden, a solar pump is a game-changer. For a smaller drip system, a Shurflo 2088-594-152 Diaphragm Pump (12V, 3.5 GPM, ~$180) can be powered by a single 100W solar panel (e.g., Renogy 100W Monocrystalline Solar Panel, ~$100) and a small 12V battery (e.g., a 50Ah LiFePO4 battery like the Battle Born 50Ah, ~$450). For larger operations or deeper wells, more robust systems are needed. If you’re looking to build out a comprehensive off-grid power system to support your garden’s water needs, or indeed your entire homestead, you might want to explore resources like the Power Grid Generator complete system guide to understand the full scope of what’s possible in terms of energy independence.
Step 5: Seed Selection & Planting
The choice of seeds is crucial for a truly self sufficient garden from scratch.
- Choose Heirloom & Open-Pollinated Seeds: These varieties produce seeds that will grow true to type, meaning you can save seeds from your harvest year after year. F1 hybrids, while often vigorous, will not produce consistent offspring from saved seeds. Reputable seed companies include Baker Creek Heirloom Seeds, High Mowing Organic Seeds, and Seed Savers Exchange. Start with common, reliable varieties like ‘Black Krim’ tomatoes, ‘Provider’ bush beans, ‘Waltham Butternut’ squash, and ‘Black Seeded Simpson’ lettuce.
- Start Seeds Indoors (Optional but Recommended): For longer growing seasons or specific crops, starting seeds indoors gives you a head start. Use seed-starting mix (e.g., Espoma Organic Seed Starter Mix, ~$10 for 16qt bag) in seed trays (Jiffy Professional Greenhouse 72-cell kit, ~$15). Provide adequate light with LED grow lights (Barrina T5 2ft 4-pack LED Grow Lights, 20W each, ~$50) for 14-16 hours a day, positioned 2-4 inches above seedlings. Maintain consistent temperatures (65-75°F for most).
- Direct Sowing vs. Transplanting: Some crops (carrots, radishes, beans, corn) prefer direct sowing into the garden bed. Others (tomatoes, peppers, broccoli, kale) benefit from being started indoors and transplanted. Follow seed packet instructions for planting depths (e.g., lettuce seeds are often surface-sown or planted 1/8 inch deep, while beans are 1 inch deep) and spacing.
- Companion Planting: Strategically plant different species together to enhance growth, deter pests, and attract beneficial insects. For example, planting marigolds near tomatoes can deter nematodes, and basil improves tomato flavor. Nasturtiums can act as a trap crop for aphids.
- Succession Planting: For a continuous harvest, plant small batches of quick-growing crops (lettuce, radishes, cilantro) every 2-3 weeks. As one crop finishes, another is ready to take its place.
Step 6: Pest & Disease Management (Organic)
Maintaining a self sufficient garden from scratch means embracing organic pest and disease control.
- Integrated Pest Management (IPM): This holistic approach combines several strategies.
- Observation: Regularly inspect your plants for early signs of pests or disease. Catching issues early is key.
- Physical Barriers: Use row covers (e.g., Agribon AG-19 floating row cover, 10×20 ft, ~$20) to protect young plants from insect pests like cabbage worms and squash bugs. Install fences (e.g., 2×4 welded wire mesh, 4 ft tall, 50 ft roll ~$70) to keep out deer, rabbits, and other larger animals.
- Hand-Picking: For larger pests like tomato hornworms or squash bugs, simply pick them off and drop them into a bucket of soapy water.
- Companion Planting: As mentioned, certain plants repel pests. Marigolds, garlic, and onions are excellent deterrents.
- Attract Beneficial Insects: Plant flowers like dill, fennel, cosmos, and sweet alyssum to attract ladybugs, lacewings, and parasitic wasps, which prey on common garden pests.
- Organic Sprays & Treatments:
- Neem Oil: An excellent broad-spectrum organic insecticide and fungicide. Bonide Neem Oil Concentrate (16oz, ~$20) can be mixed at a rate of 1-2 tbsp per gallon of water and sprayed on affected plants.
- Insecticidal Soap: Effective against soft-bodied insects like aphids, whiteflies, and spider mites. Garden Safe Insecticidal Soap (24oz ready-to-use, ~$10).
- Bacillus thuringiensis (Bt): A naturally occurring soil bacterium that targets caterpillars and worms. Monterey BT Worm & Caterpillar Killer (16oz, ~$18) is highly effective and safe for beneficial insects.
- Copper or Sulfur Sprays: For fungal diseases like powdery mildew or blight, organic copper (e.g., Bonide Copper Fungicide, ~$15 for 1lb) or sulfur (e.g., Safer Brand Garden Fungicide, ~$10 for 16oz) can be used as a last resort.
Step 7: Harvesting & Seed Saving
The culmination of your efforts is the harvest, and seed saving closes the loop on self-sufficiency.
- Harvesting Techniques:
- Timing: Harvest vegetables at their peak ripeness for best flavor and nutritional value. For example, green beans should snap cleanly, cucumbers should be firm, and tomatoes should be fully colored.
- Frequency: Many crops, like zucchini, cucumbers, and bush beans, produce more if harvested frequently. Pick daily or every other day.
- Tools: Use clean, sharp pruners (e.g., Corona ClassicCUT Bypass Pruner BP 3180, ~$30) or a sharp knife for clean cuts, minimizing damage to the plant.
- Seed Saving: This is where the « self-sufficient » aspect truly shines.
- Selection: Only save seeds from your healthiest, most vigorous plants that show desired traits (disease resistance, good flavor, high yield).
- Isolation: To ensure true-to-type seeds, prevent cross-pollination. This can be challenging for open-pollinated crops that readily cross (e.g., squash, corn). For beginners, focus on self-pollinating plants like beans, peas, lettuce, and tomatoes.
- Processing:
- Dry Seeds (Beans, Peas, Lettuce, Grains): Allow pods/seed heads to dry completely on the plant. Harvest, shell, and clean the seeds, removing chaff.
- Wet Seeds (Tomatoes, Cucumbers, Squash): For tomatoes, ferment the seeds in water for a few days to remove the gel coating and inhibit disease. For cucumbers/squash, scrape out seeds, wash thoroughly, and dry.
- Drying: Spread seeds thinly on screens or paper plates in a cool, dry, well-ventilated area for 1-4 weeks. Ensure they are bone-dry before storage. I aim for less than 8% moisture content.
- Storage: Store seeds in airtight containers (glass jars with desiccant packets work well) in a cool, dark, dry place (ideally 40-50°F and 30-40% humidity). Label clearly with variety and date. Properly stored seeds can remain viable for 3-10 years or more.
Step 8: Season Extension & Winterizing
Extend your harvest and protect your garden for the off-season to truly maximize your self sufficient garden from scratch.
- Cold Frames: Simple structures with a transparent top (glass, polycarbonate, or old windows) that sit over garden beds. They trap solar heat, allowing you to grow cold-hardy crops (lettuce, spinach, kale, radishes) well into winter or start seeds earlier in spring. A basic cold frame can be built from 2×6 lumber and a sheet of polycarbonate for under $100.
- Hoop Houses/Low Tunnels: Larger structures made from flexible hoops (PVC pipe or EMT conduit) covered with greenhouse plastic. These provide more space and greater temperature moderation. A 10×20 ft DIY low tunnel kit can cost $200-$500, while a larger, more robust hoop house kit might be $1,000-$3,000. I use a 6×12 ft low tunnel made from 1/2-inch PVC hoops and 6mil greenhouse plastic, which extends my lettuce and spinach harvest by at least
- In-Ground Beds: If you have excellent native soil and good drainage, in-ground beds are the most economical. Double-digging (loosening soil two shovel depths) can significantly improve drainage and aeration. For my main garden, I primarily use in-ground beds, but I focus on building up the soil over time with consistent compost additions and cover cropping. I aim for beds that are no wider than 3-4 feet so I can reach the center without stepping on the soil, compacting it.
- Raised Beds: Raised beds offer numerous advantages, especially for poor soil, heavy clay, or rocky areas. They provide better drainage, warm up faster in spring, reduce compaction, and make weeding and harvesting easier on your back.
- Material Options:
- Untreated Cedar: Naturally rot-resistant and chemical-free. A 4×8 ft bed, 12 inches deep, typically requires three 2x12x8 ft cedar boards, costing around $50-$60 per board (total ~$150-$180) plus corner brackets or screws. My first raised beds were cedar and are still going strong after 7 years.
- Galvanized Steel: Durable, long-lasting, and aesthetically pleasing. Brands like Vego Garden offer modular kits. A Vego Garden 17″ Tall 8-in-1 Metal Raised Garden Bed (can be configured to 4×8 ft) costs approximately $250-$300.
- Concrete Blocks/Stones: Very durable but can leach minerals (though generally safe once weathered) and can be expensive.
- Recycled Materials: Pallets (check for chemical treatment stamps like « HT » for heat-treated), old tires (controversial due to potential chemical leaching).
- Filling Raised Beds: Don’t just fill with topsoil. Use a « Hugelkultur » approach (logs, branches, leaves, then compost, then topsoil) or a mixture of 60% good quality topsoil, 30% compost, and 10% perlite or vermiculite for drainage. A 4x8x1 ft raised bed requires about 32 cubic feet (or ~1.2 cubic yards) of soil mix, which can cost $100-$200 depending on your source.
- Material Options:
Step 4: Water Management & Irrigation
Efficient water management is critical for a self sufficient garden from scratch, especially in off-grid living where water resources might be limited.
- Rainwater Harvesting: This is my primary source of irrigation water. A 55-gallon rain barrel (e.g., EarthMark Rain Barrel, ~$120-$150) connected to a downspout can collect significant water. For larger needs, I use two 275-gallon IBC totes (Intermediate Bulk Containers, often available used for $100-$200 each from food-grade sources) connected in series. A 1,000 sq ft roof can collect approximately 620 gallons of water for every inch of rainfall. My 1,500 sq ft roof provides ample water for my 600 sq ft garden through multiple barrels and totes.
- Drip Irrigation: This is by far the most water-efficient method, delivering water directly to the plant’s root zone, minimizing evaporation and weed growth.
- Components: A typical drip system includes a pressure regulator (e.g., Rain Bird PRV-10, ~$15), a filter (Rain Bird RBY filter, ~$20), main tubing (1/2-inch poly tubing, 100ft ~$25), smaller feeder lines (1/4-inch tubing), and emitters (0.5 GPH or 1 GPH per plant).
- Kits: For beginners, a starter kit like the Rain Bird Drip Irrigation Garden Kit (model DDI-KIT-1P, ~$40-$60) is excellent for a small garden. For larger setups, I use Netafim Techline CV Drip Line (500ft roll, ~$150-$200), which has pressure-compensating emitters built-in, ensuring even watering across long runs.
- Automation: For true self-sufficiency, consider a battery-powered timer (e.g., Orbit B-Hyve Bluetooth Hose Faucet Timer, ~$50) or a solar-powered timer connected to a small 12V pump.
- Solar-Powered Pumps: For lifting water from a well, pond, or large storage tank to your garden, a solar pump is a game-changer. For a smaller drip system, a Shurflo 2088-594-152 Diaphragm Pump (12V, 3.5 GPM, ~$180) can be powered by a single 100W solar panel (e.g., Renogy 100W Monocrystalline Solar Panel, ~$100) and a small 12V battery (e.g., a 50Ah LiFePO4 battery like the Battle Born 50Ah, ~$450). For larger operations or deeper wells, more robust systems are needed. If you’re looking to build out a comprehensive off-grid power system to support your garden’s water needs, or indeed your entire homestead, you might want to explore resources like the Power Grid Generator complete system guide to understand the full scope of what’s possible in terms of energy independence.
Step 5: Seed Selection & Planting
The choice of seeds is crucial for a truly self sufficient garden from scratch.
- Choose Heirloom & Open-Pollinated Seeds: These varieties produce seeds that will grow true to type, meaning you can save seeds from your harvest year after year. F1 hybrids, while often vigorous, will not produce consistent offspring from saved seeds. Reputable seed companies include Baker Creek Heirloom Seeds, High Mowing Organic Seeds, and Seed Savers Exchange. Start with common, reliable varieties like ‘Black Krim’ tomatoes, ‘Provider’ bush beans, ‘Waltham Butternut’ squash, and ‘Black Seeded Simpson’ lettuce.
- Start Seeds Indoors (Optional but Recommended): For longer growing seasons or specific crops, starting seeds indoors gives you a head start. Use seed-starting mix (e.g., Espoma Organic Seed Starter Mix, ~$10 for 16qt bag) in seed trays (Jiffy Professional Greenhouse 72-cell kit, ~$15). Provide adequate light with LED grow lights (Barrina T5 2ft 4-pack LED Grow Lights, 20W each, ~$50) for 14-16 hours a day, positioned 2-4 inches above seedlings. Maintain consistent temperatures (65-75°F for most).
- Direct Sowing vs. Transplanting: Some crops (carrots, radishes, beans, corn) prefer direct sowing into the garden bed. Others (tomatoes, peppers, broccoli, kale) benefit from being started indoors and transplanted. Follow seed packet instructions for planting depths (e.g., lettuce seeds are often surface-sown or planted 1/8 inch deep, while beans are 1 inch deep) and spacing.
- Companion Planting: Strategically plant different species together to enhance growth, deter pests, and attract beneficial insects. For example, planting marigolds near tomatoes can deter nematodes, and basil improves tomato flavor. Nasturtiums can act as a trap crop for aphids.
- Succession Planting: For a continuous harvest, plant small batches of quick-growing crops (lettuce, radishes, cilantro) every 2-3 weeks. As one crop finishes, another is ready to take its place.
Step 6: Pest & Disease Management (Organic)
Maintaining a self sufficient garden from scratch means embracing organic pest and disease control.
- Integrated Pest Management (IPM): This holistic approach combines several strategies.
- Observation: Regularly inspect your plants for early signs of pests or disease. Catching issues early is key.
- Physical Barriers: Use row covers (e.g., Agribon AG-19 floating row cover, 10×20 ft, ~$20) to protect young plants from insect pests like cabbage worms and squash bugs. Install fences (e.g., 2×4 welded wire mesh, 4 ft tall, 50 ft roll ~$70) to keep out deer, rabbits, and other larger animals.
- Hand-Picking: For larger pests like tomato hornworms or squash bugs, simply pick them off and drop them into a bucket of soapy water.
- Companion Planting: As mentioned, certain plants repel pests. Marigolds, garlic, and onions are excellent deterrents.
- Attract Beneficial Insects: Plant flowers like dill, fennel, cosmos, and sweet alyssum to attract ladybugs, lacewings, and parasitic wasps, which prey on common garden pests.
- Organic Sprays & Treatments:
- Neem Oil: An excellent broad-spectrum organic insecticide and fungicide. Bonide Neem Oil Concentrate (16oz, ~$20) can be mixed at a rate of 1-2 tbsp per gallon of water and sprayed on affected plants.
- Insecticidal Soap: Effective against soft-bodied insects like aphids, whiteflies, and spider mites. Garden Safe Insecticidal Soap (24oz ready-to-use, ~$10).
- Bacillus thuringiensis (Bt): A naturally occurring soil bacterium that targets caterpillars and worms. Monterey BT Worm & Caterpillar Killer (16oz, ~$18) is highly effective and safe for beneficial insects.
- Copper or Sulfur Sprays: For fungal diseases like powdery mildew or blight, organic copper (e.g., Bonide Copper Fungicide, ~$15 for 1lb) or sulfur (e.g., Safer Brand Garden Fungicide, ~$10 for 16oz) can be used as a last resort.
Step 7: Harvesting & Seed Saving
The culmination of your efforts is the harvest, and seed saving closes the loop on self-sufficiency.
- Harvesting Techniques:
- Timing: Harvest vegetables at their peak ripeness for best flavor and nutritional value. For example, green beans should snap cleanly, cucumbers should be firm, and tomatoes should be fully colored.
- Frequency: Many crops, like zucchini, cucumbers, and bush beans, produce more if harvested frequently. Pick daily or every other day.
- Tools: Use clean, sharp pruners (e.g., Corona ClassicCUT Bypass Pruner BP 3180, ~$30) or a sharp knife for clean cuts, minimizing damage to the plant.
- Seed Saving: This is where the « self-sufficient » aspect truly shines.
- Selection: Only save seeds from your healthiest, most vigorous plants that show desired traits (disease resistance, good flavor, high yield).
- Isolation: To ensure true-to-type seeds, prevent cross-pollination. This can be challenging for open-pollinated crops that readily cross (e.g., squash, corn). For beginners, focus on self-pollinating plants like beans, peas, lettuce, and tomatoes.
- Processing:
- Dry Seeds (Beans, Peas, Lettuce, Grains): Allow pods/seed heads to dry completely on the plant. Harvest, shell, and clean the seeds, removing chaff.
- Wet Seeds (Tomatoes, Cucumbers, Squash): For tomatoes, ferment the seeds in water for a few days to remove the gel coating and inhibit disease. For cucumbers/squash, scrape out seeds, wash thoroughly, and dry.
- Drying: Spread seeds thinly on screens or paper plates in a cool, dry, well-ventilated area for 1-4 weeks. Ensure they are bone-dry before storage. I aim for less than 8% moisture content.
- Storage: Store seeds in airtight containers (glass jars with desiccant packets work well) in a cool, dark, dry place (ideally 40-50°F and 30-40% humidity). Label clearly with variety and date. Properly stored seeds can remain viable for 3-10 years or more.
Step 8: Season Extension & Winterizing
Extend your harvest and protect your garden for the off-season to truly maximize your self sufficient garden from scratch.
- Cold Frames: Simple structures with a transparent top (glass, polycarbonate, or old windows) that sit over garden beds. They trap solar heat, allowing you to grow cold-hardy crops (lettuce, spinach, kale, radishes) well into winter or start seeds earlier in spring. A basic cold frame can be built from 2×6 lumber and a sheet of polycarbonate for under $100.
- Hoop Houses/Low Tunnels: Larger structures made from flexible hoops (PVC pipe or EMT conduit) covered with greenhouse plastic. These provide more space and greater temperature moderation. A 10×20 ft DIY low tunnel kit can cost $200-$500, while a larger, more robust hoop house kit might be $1,000-$3,000. I use a 6×12 ft low tunnel made from 1/2-inch PVC hoops and 6mil greenhouse plastic, which extends my lettuce and spinach harvest by at least
Deciding between raised beds and in-ground beds depends on your soil, budget, and physical capabilities.
- In-Ground Beds: If you have excellent native soil and good drainage, in-ground beds are the most economical. Double-digging (loosening soil two shovel depths) can significantly improve drainage and aeration. For my main garden, I primarily use in-ground beds, but I focus on building up the soil over time with consistent compost additions and cover cropping. I aim for beds that are no wider than 3-4 feet so I can reach the center without stepping on the soil, compacting it.
- Raised Beds: Raised beds offer numerous advantages, especially for poor soil, heavy clay, or rocky areas. They provide better drainage, warm up faster in spring, reduce compaction, and make weeding and harvesting easier on your back.
- Material Options:
- Untreated Cedar: Naturally rot-resistant and chemical-free. A 4×8 ft bed, 12 inches deep, typically requires three 2x12x8 ft cedar boards, costing around $50-$60 per board (total ~$150-$180) plus corner brackets or screws. My first raised beds were cedar and are still going strong after 7 years.
- Galvanized Steel: Durable, long-lasting, and aesthetically pleasing. Brands like Vego Garden offer modular kits. A Vego Garden 17″ Tall 8-in-1 Metal Raised Garden Bed (can be configured to 4×8 ft) costs approximately $250-$300.
- Concrete Blocks/Stones: Very durable but can leach minerals (though generally safe once weathered) and can be expensive.
- Recycled Materials: Pallets (check for chemical treatment stamps like « HT » for heat-treated), old tires (controversial due to potential chemical leaching).
- Filling Raised Beds: Don’t just fill with topsoil. Use a « Hugelkultur » approach (logs, branches, leaves, then compost, then topsoil) or a mixture of 60% good quality topsoil, 30% compost, and 10% perlite or vermiculite for drainage. A 4x8x1 ft raised bed requires about 32 cubic feet (or ~1.2 cubic yards) of soil mix, which can cost $100-$200 depending on your source.
- Material Options:
Step 4: Water Management & Irrigation
Efficient water management is critical for a self sufficient garden from scratch, especially in off-grid living where water resources might be limited.
- Rainwater Harvesting: This is my primary source of irrigation water. A 55-gallon rain barrel (e.g., EarthMark Rain Barrel, ~$120-$150) connected to a downspout can collect significant water. For larger needs, I use two 275-gallon IBC totes (Intermediate Bulk Containers, often available used for $100-$200 each from food-grade sources) connected in series. A 1,000 sq ft roof can collect approximately 620 gallons of water for every inch of rainfall. My 1,500 sq ft roof provides ample water for my 600 sq ft garden through multiple barrels and totes.
- Drip Irrigation: This is by far the most water-efficient method, delivering water directly to the plant’s root zone, minimizing evaporation and weed growth.
- Components: A typical drip system includes a pressure regulator (e.g., Rain Bird PRV-10, ~$15), a filter (Rain Bird RBY filter, ~$20), main tubing (1/2-inch poly tubing, 100ft ~$25), smaller feeder lines (1/4-inch tubing), and emitters (0.5 GPH or 1 GPH per plant).
- Kits: For beginners, a starter kit like the Rain Bird Drip Irrigation Garden Kit (model DDI-KIT-1P, ~$40-$60) is excellent for a small garden. For larger setups, I use Netafim Techline CV Drip Line (500ft roll, ~$150-$200), which has pressure-compensating emitters built-in, ensuring even watering across long runs.
- Automation: For true self-sufficiency, consider a battery-powered timer (e.g., Orbit B-Hyve Bluetooth Hose Faucet Timer, ~$50) or a solar-powered timer connected to a small 12V pump.
- Solar-Powered Pumps: For lifting water from a well, pond, or large storage tank to your garden, a solar pump is a game-changer. For a smaller drip system, a Shurflo 2088-594-152 Diaphragm Pump (12V, 3.5 GPM, ~$180) can be powered by a single 100W solar panel (e.g., Renogy 100W Monocrystalline Solar Panel, ~$100) and a small 12V battery (e.g., a 50Ah LiFePO4 battery like the Battle Born 50Ah, ~$450). For larger operations or deeper wells, more robust systems are needed. If you’re looking to build out a comprehensive off-grid power system to support your garden’s water needs, or indeed your entire homestead, you might want to explore resources like the Power Grid Generator complete system guide to understand the full scope of what’s possible in terms of energy independence.
Step 5: Seed Selection & Planting
The choice of seeds is crucial for a truly self sufficient garden from scratch.
- Choose Heirloom & Open-Pollinated Seeds: These varieties produce seeds that will grow true to type, meaning you can save seeds from your harvest year after year. F1 hybrids, while often vigorous, will not produce consistent offspring from saved seeds. Reputable seed companies include Baker Creek Heirloom Seeds, High Mowing Organic Seeds, and Seed Savers Exchange. Start with common, reliable varieties like ‘Black Krim’ tomatoes, ‘Provider’ bush beans, ‘Waltham Butternut’ squash, and ‘Black Seeded Simpson’ lettuce.
- Start Seeds Indoors (Optional but Recommended): For longer growing seasons or specific crops, starting seeds indoors gives you a head start. Use seed-starting mix (e.g., Espoma Organic Seed Starter Mix, ~$10 for 16qt bag) in seed trays (Jiffy Professional Greenhouse 72-cell kit, ~$15). Provide adequate light with LED grow lights (Barrina T5 2ft 4-pack LED Grow Lights, 20W each, ~$50) for 14-16 hours a day, positioned 2-4 inches above seedlings. Maintain consistent temperatures (65-75°F for most).
- Direct Sowing vs. Transplanting: Some crops (carrots, radishes, beans, corn) prefer direct sowing into the garden bed. Others (tomatoes, peppers, broccoli, kale) benefit from being started indoors and transplanted. Follow seed packet instructions for planting depths (e.g., lettuce seeds are often surface-sown or planted 1/8 inch deep, while beans are 1 inch deep) and spacing.
- Companion Planting: Strategically plant different species together to enhance growth, deter pests, and attract beneficial insects. For example, planting marigolds near tomatoes can deter nematodes, and basil improves tomato flavor. Nasturtiums can act as a trap crop for aphids.
- Succession Planting: For a continuous harvest, plant small batches of quick-growing crops (lettuce, radishes, cilantro) every 2-3 weeks. As one crop finishes, another is ready to take its place.
Step 6: Pest & Disease Management (Organic)
Maintaining a self sufficient garden from scratch means embracing organic pest and disease control.
- Integrated Pest Management (IPM): This holistic approach combines several strategies.
- Observation: Regularly inspect your plants for early signs of pests or disease. Catching issues early is key.
- Physical Barriers: Use row covers (e.g., Agribon AG-19 floating row cover, 10×20 ft, ~$20) to protect young plants from insect pests like cabbage worms and squash bugs. Install fences (e.g., 2×4 welded wire mesh, 4 ft tall, 50 ft roll ~$70) to keep out deer, rabbits, and other larger animals.
- Hand-Picking: For larger pests like tomato hornworms or squash bugs, simply pick them off and drop them into a bucket of soapy water.
- Companion Planting: As mentioned, certain plants repel pests. Marigolds, garlic, and onions are excellent deterrents.
- Attract Beneficial Insects: Plant flowers like dill, fennel, cosmos, and sweet alyssum to attract ladybugs, lacewings, and parasitic wasps, which prey on common garden pests.
- Organic Sprays & Treatments:
- Neem Oil: An excellent broad-spectrum organic insecticide and fungicide. Bonide Neem Oil Concentrate (16oz, ~$20) can be mixed at a rate of 1-2 tbsp per gallon of water and sprayed on affected plants.
- Insecticidal Soap: Effective against soft-bodied insects like aphids, whiteflies, and spider mites. Garden Safe Insecticidal Soap (24oz ready-to-use, ~$10).
- Bacillus thuringiensis (Bt): A naturally occurring soil bacterium that targets caterpillars and worms. Monterey BT Worm & Caterpillar Killer (16oz, ~$18) is highly effective and safe for beneficial insects.
- Copper or Sulfur Sprays: For fungal diseases like powdery mildew or blight, organic copper (e.g., Bonide Copper Fungicide, ~$15 for 1lb) or sulfur (e.g., Safer Brand Garden Fungicide, ~$10 for 16oz) can be used as a last resort.
Step 7: Harvesting & Seed Saving
The culmination of your efforts is the harvest, and seed saving closes the loop on self-sufficiency.
- Harvesting Techniques:
- Timing: Harvest vegetables at their peak ripeness for best flavor and nutritional value. For example, green beans should snap cleanly, cucumbers should be firm, and tomatoes should be fully colored.
- Frequency: Many crops, like zucchini, cucumbers, and bush beans, produce more if harvested frequently. Pick daily or every other day.
- Tools: Use clean, sharp pruners (e.g., Corona ClassicCUT Bypass Pruner BP 3180, ~$30) or a sharp knife for clean cuts, minimizing damage to the plant.
- Seed Saving: This is where the « self-sufficient » aspect truly shines.
- Selection: Only save seeds from your healthiest, most vigorous plants that show desired traits (disease resistance, good flavor, high yield).
- Isolation: To ensure true-to-type seeds, prevent cross-pollination. This can be challenging for open-pollinated crops that readily cross (e.g., squash, corn). For beginners, focus on self-pollinating plants like beans, peas, lettuce, and tomatoes.
- Processing:
- Dry Seeds (Beans, Peas, Lettuce, Grains): Allow pods/seed heads to dry completely on the plant. Harvest, shell, and clean the seeds, removing chaff.
- Wet Seeds (Tomatoes, Cucumbers, Squash): For tomatoes, ferment the seeds in water for a few days to remove the gel coating and inhibit disease. For cucumbers/squash, scrape out seeds, wash thoroughly, and dry.
- Drying: Spread seeds thinly on screens or paper plates in a cool, dry, well-ventilated area for 1-4 weeks. Ensure they are bone-dry before storage. I aim for less than 8% moisture content.
- Storage: Store seeds in airtight containers (glass jars with desiccant packets work well) in a cool, dark, dry place (ideally 40-50°F and 30-40% humidity). Label clearly with variety and date. Properly stored seeds can remain viable for 3-10 years or more.
Step 8: Season Extension & Winterizing
Extend your harvest and protect your garden for the off-season to truly maximize your self sufficient garden from scratch.
- Cold Frames: Simple structures with a transparent top (glass, polycarbonate, or old windows) that sit over garden beds. They trap solar heat, allowing you to grow cold-hardy crops (lettuce, spinach, kale, radishes) well into winter or start seeds earlier in spring. A basic cold frame can be built from 2×6 lumber and a sheet of polycarbonate for under $100.
- Hoop Houses/Low Tunnels: Larger structures made from flexible hoops (PVC pipe or EMT conduit) covered with greenhouse plastic. These provide more space and greater temperature moderation. A 10×20 ft DIY low tunnel kit can cost $200-$500, while a larger, more robust hoop house kit might be $1,000-$3,000. I use a 6×12 ft low tunnel made from 1/2-inch PVC hoops and 6mil greenhouse plastic, which extends my lettuce and spinach harvest by at least
Healthy soil is the bedrock of a productive, self-sufficient garden. You can’t guess what your soil needs; you have to test it.
- Perform a Soil Test: A professional soil test will give you precise data on your soil’s pH, nutrient levels (N-P-K), and organic matter content. I recommend sending a sample to your local agricultural extension office; it typically costs $20-$50 and provides detailed recommendations. Alternatively, for a quick homeowner check, a Rapitest Soil Test Kit (40-test kit, model 1663, ~$20 on Amazon) provides a good baseline for pH, Nitrogen, Phosphorus, and Potash. Aim for a pH between 6.0 and 7.0 for most vegetables.
- Amend for pH Imbalance: If your soil is too acidic (below 6.0), add agricultural lime (dolomitic lime adds magnesium, calcitic lime adds calcium). Apply 5-10 lbs per 100 sq ft for a moderate adjustment. If it’s too alkaline (above 7.0), add elemental sulfur (e.g., Espoma Soil Acidifier, ~$15 for 6.75 lbs) or generous amounts of organic matter like peat moss or pine needles.
- Build Organic Matter: This is the single most important step for long-term soil health. Organic matter improves soil structure, water retention, drainage, and nutrient availability. Incorporate 2-4 inches of high-quality compost into your top 6-12 inches of soil annually. I make my own compost from kitchen scraps, garden waste, and shredded leaves, but you can purchase it. Local nurseries often sell bulk compost for $30-$50 per cubic yard. Aged manure (from chickens, cows, or horses – ensure it’s well-rotted to avoid burning plants) is also excellent.
- Address Nutrient Deficiencies: Based on your soil test, add specific organic amendments. If Nitrogen (N) is low, add blood meal (12-0-0, ~$20 for 3 lbs) or feather meal. For Phosphorus (P), use bone meal (3-15-0, ~$15 for 3 lbs) or rock phosphate. For Potassium (K), greensand (0-0-2.5, ~$25 for 5 lbs) or kelp meal are good choices. I rely heavily on Espoma Organic Garden-tone (5-3-3, ~$25 for an 8lb bag) as a balanced, all-purpose organic fertilizer during planting.
Step 3: Garden Bed Preparation
Deciding between raised beds and in-ground beds depends on your soil, budget, and physical capabilities.
- In-Ground Beds: If you have excellent native soil and good drainage, in-ground beds are the most economical. Double-digging (loosening soil two shovel depths) can significantly improve drainage and aeration. For my main garden, I primarily use in-ground beds, but I focus on building up the soil over time with consistent compost additions and cover cropping. I aim for beds that are no wider than 3-4 feet so I can reach the center without stepping on the soil, compacting it.
- Raised Beds: Raised beds offer numerous advantages, especially for poor soil, heavy clay, or rocky areas. They provide better drainage, warm up faster in spring, reduce compaction, and make weeding and harvesting easier on your back.
- Material Options:
- Untreated Cedar: Naturally rot-resistant and chemical-free. A 4×8 ft bed, 12 inches deep, typically requires three 2x12x8 ft cedar boards, costing around $50-$60 per board (total ~$150-$180) plus corner brackets or screws. My first raised beds were cedar and are still going strong after 7 years.
- Galvanized Steel: Durable, long-lasting, and aesthetically pleasing. Brands like Vego Garden offer modular kits. A Vego Garden 17″ Tall 8-in-1 Metal Raised Garden Bed (can be configured to 4×8 ft) costs approximately $250-$300.
- Concrete Blocks/Stones: Very durable but can leach minerals (though generally safe once weathered) and can be expensive.
- Recycled Materials: Pallets (check for chemical treatment stamps like « HT » for heat-treated), old tires (controversial due to potential chemical leaching).
- Filling Raised Beds: Don’t just fill with topsoil. Use a « Hugelkultur » approach (logs, branches, leaves, then compost, then topsoil) or a mixture of 60% good quality topsoil, 30% compost, and 10% perlite or vermiculite for drainage. A 4x8x1 ft raised bed requires about 32 cubic feet (or ~1.2 cubic yards) of soil mix, which can cost $100-$200 depending on your source.
- Material Options:
Step 4: Water Management & Irrigation
Efficient water management is critical for a self sufficient garden from scratch, especially in off-grid living where water resources might be limited.
- Rainwater Harvesting: This is my primary source of irrigation water. A 55-gallon rain barrel (e.g., EarthMark Rain Barrel, ~$120-$150) connected to a downspout can collect significant water. For larger needs, I use two 275-gallon IBC totes (Intermediate Bulk Containers, often available used for $100-$200 each from food-grade sources) connected in series. A 1,000 sq ft roof can collect approximately 620 gallons of water for every inch of rainfall. My 1,500 sq ft roof provides ample water for my 600 sq ft garden through multiple barrels and totes.
- Drip Irrigation: This is by far the most water-efficient method, delivering water directly to the plant’s root zone, minimizing evaporation and weed growth.
- Components: A typical drip system includes a pressure regulator (e.g., Rain Bird PRV-10, ~$15), a filter (Rain Bird RBY filter, ~$20), main tubing (1/2-inch poly tubing, 100ft ~$25), smaller feeder lines (1/4-inch tubing), and emitters (0.5 GPH or 1 GPH per plant).
- Kits: For beginners, a starter kit like the Rain Bird Drip Irrigation Garden Kit (model DDI-KIT-1P, ~$40-$60) is excellent for a small garden. For larger setups, I use Netafim Techline CV Drip Line (500ft roll, ~$150-$200), which has pressure-compensating emitters built-in, ensuring even watering across long runs.
- Automation: For true self-sufficiency, consider a battery-powered timer (e.g., Orbit B-Hyve Bluetooth Hose Faucet Timer, ~$50) or a solar-powered timer connected to a small 12V pump.
- Solar-Powered Pumps: For lifting water from a well, pond, or large storage tank to your garden, a solar pump is a game-changer. For a smaller drip system, a Shurflo 2088-594-152 Diaphragm Pump (12V, 3.5 GPM, ~$180) can be powered by a single 100W solar panel (e.g., Renogy 100W Monocrystalline Solar Panel, ~$100) and a small 12V battery (e.g., a 50Ah LiFePO4 battery like the Battle Born 50Ah, ~$450). For larger operations or deeper wells, more robust systems are needed. If you’re looking to build out a comprehensive off-grid power system to support your garden’s water needs, or indeed your entire homestead, you might want to explore resources like the Power Grid Generator complete system guide to understand the full scope of what’s possible in terms of energy independence.
Step 5: Seed Selection & Planting
The choice of seeds is crucial for a truly self sufficient garden from scratch.
- Choose Heirloom & Open-Pollinated Seeds: These varieties produce seeds that will grow true to type, meaning you can save seeds from your harvest year after year. F1 hybrids, while often vigorous, will not produce consistent offspring from saved seeds. Reputable seed companies include Baker Creek Heirloom Seeds, High Mowing Organic Seeds, and Seed Savers Exchange. Start with common, reliable varieties like ‘Black Krim’ tomatoes, ‘Provider’ bush beans, ‘Waltham Butternut’ squash, and ‘Black Seeded Simpson’ lettuce.
- Start Seeds Indoors (Optional but Recommended): For longer growing seasons or specific crops, starting seeds indoors gives you a head start. Use seed-starting mix (e.g., Espoma Organic Seed Starter Mix, ~$10 for 16qt bag) in seed trays (Jiffy Professional Greenhouse 72-cell kit, ~$15). Provide adequate light with LED grow lights (Barrina T5 2ft 4-pack LED Grow Lights, 20W each, ~$50) for 14-16 hours a day, positioned 2-4 inches above seedlings. Maintain consistent temperatures (65-75°F for most).
- Direct Sowing vs. Transplanting: Some crops (carrots, radishes, beans, corn) prefer direct sowing into the garden bed. Others (tomatoes, peppers, broccoli, kale) benefit from being started indoors and transplanted. Follow seed packet instructions for planting depths (e.g., lettuce seeds are often surface-sown or planted 1/8 inch deep, while beans are 1 inch deep) and spacing.
- Companion Planting: Strategically plant different species together to enhance growth, deter pests, and attract beneficial insects. For example, planting marigolds near tomatoes can deter nematodes, and basil improves tomato flavor. Nasturtiums can act as a trap crop for aphids.
- Succession Planting: For a continuous harvest, plant small batches of quick-growing crops (lettuce, radishes, cilantro) every 2-3 weeks. As one crop finishes, another is ready to take its place.
Step 6: Pest & Disease Management (Organic)
Maintaining a self sufficient garden from scratch means embracing organic pest and disease control.
- Integrated Pest Management (IPM): This holistic approach combines several strategies.
- Observation: Regularly inspect your plants for early signs of pests or disease. Catching issues early is key.
- Physical Barriers: Use row covers (e.g., Agribon AG-19 floating row cover, 10×20 ft, ~$20) to protect young plants from insect pests like cabbage worms and squash bugs. Install fences (e.g., 2×4 welded wire mesh, 4 ft tall, 50 ft roll ~$70) to keep out deer, rabbits, and other larger animals.
- Hand-Picking: For larger pests like tomato hornworms or squash bugs, simply pick them off and drop them into a bucket of soapy water.
- Companion Planting: As mentioned, certain plants repel pests. Marigolds, garlic, and onions are excellent deterrents.
- Attract Beneficial Insects: Plant flowers like dill, fennel, cosmos, and sweet alyssum to attract ladybugs, lacewings, and parasitic wasps, which prey on common garden pests.
- Organic Sprays & Treatments:
- Neem Oil: An excellent broad-spectrum organic insecticide and fungicide. Bonide Neem Oil Concentrate (16oz, ~$20) can be mixed at a rate of 1-2 tbsp per gallon of water and sprayed on affected plants.
- Insecticidal Soap: Effective against soft-bodied insects like aphids, whiteflies, and spider mites. Garden Safe Insecticidal Soap (24oz ready-to-use, ~$10).
- Bacillus thuringiensis (Bt): A naturally occurring soil bacterium that targets caterpillars and worms. Monterey BT Worm & Caterpillar Killer (16oz, ~$18) is highly effective and safe for beneficial insects.
- Copper or Sulfur Sprays: For fungal diseases like powdery mildew or blight, organic copper (e.g., Bonide Copper Fungicide, ~$15 for 1lb) or sulfur (e.g., Safer Brand Garden Fungicide, ~$10 for 16oz) can be used as a last resort.
Step 7: Harvesting & Seed Saving
The culmination of your efforts is the harvest, and seed saving closes the loop on self-sufficiency.
- Harvesting Techniques:
- Timing: Harvest vegetables at their peak ripeness for best flavor and nutritional value. For example, green beans should snap cleanly, cucumbers should be firm, and tomatoes should be fully colored.
- Frequency: Many crops, like zucchini, cucumbers, and bush beans, produce more if harvested frequently. Pick daily or every other day.
- Tools: Use clean, sharp pruners (e.g., Corona ClassicCUT Bypass Pruner BP 3180, ~$30) or a sharp knife for clean cuts, minimizing damage to the plant.
- Seed Saving: This is where the « self-sufficient » aspect truly shines.
- Selection: Only save seeds from your healthiest, most vigorous plants that show desired traits (disease resistance, good flavor, high yield).
- Isolation: To ensure true-to-type seeds, prevent cross-pollination. This can be challenging for open-pollinated crops that readily cross (e.g., squash, corn). For beginners, focus on self-pollinating plants like beans, peas, lettuce, and tomatoes.
- Processing:
- Dry Seeds (Beans, Peas, Lettuce, Grains): Allow pods/seed heads to dry completely on the plant. Harvest, shell, and clean the seeds, removing chaff.
- Wet Seeds (Tomatoes, Cucumbers, Squash): For tomatoes, ferment the seeds in water for a few days to remove the gel coating and inhibit disease. For cucumbers/squash, scrape out seeds, wash thoroughly, and dry.
- Drying: Spread seeds thinly on screens or paper plates in a cool, dry, well-ventilated area for 1-4 weeks. Ensure they are bone-dry before storage. I aim for less than 8% moisture content.
- Storage: Store seeds in airtight containers (glass jars with desiccant packets work well) in a cool, dark, dry place (ideally 40-50°F and 30-40% humidity). Label clearly with variety and date. Properly stored seeds can remain viable for 3-10 years or more.
Step 8: Season Extension & Winterizing
Extend your harvest and protect your garden for the off-season to truly maximize your self sufficient garden from scratch.
- Cold Frames: Simple structures with a transparent top (glass, polycarbonate, or old windows) that sit over garden beds. They trap solar heat, allowing you to grow cold-hardy crops (lettuce, spinach, kale, radishes) well into winter or start seeds earlier in spring. A basic cold frame can be built from 2×6 lumber and a sheet of polycarbonate for under $100.
- Hoop Houses/Low Tunnels: Larger structures made from flexible hoops (PVC pipe or EMT conduit) covered with greenhouse plastic. These provide more space and greater temperature moderation. A 10×20 ft DIY low tunnel kit can cost $200-$500, while a larger, more robust hoop house kit might be $1,000-$3,000. I use a 6×12 ft low tunnel made from 1/2-inch PVC hoops and 6mil greenhouse plastic, which extends my lettuce and spinach harvest by at least
The culmination of your efforts is the harvest, and seed saving closes the loop on self-sufficiency.
- Harvesting Techniques:
- Timing: Harvest vegetables at their peak ripeness for best flavor and nutritional value. For example, green beans should snap cleanly, cucumbers should be firm, and tomatoes should be fully colored.
- Frequency: Many crops, like zucchini, cucumbers, and bush beans, produce more if harvested frequently. Pick daily or every other day.
- Tools: Use clean, sharp pruners (e.g., Corona ClassicCUT Bypass Pruner BP 3180, ~$30) or a sharp knife for clean cuts, minimizing damage to the plant.
- Seed Saving: This is where the « self-sufficient » aspect truly shines.
- Selection: Only save seeds from your healthiest, most vigorous plants that show desired traits (disease resistance, good flavor, high yield).
- Isolation: To ensure true-to-type seeds, prevent cross-pollination. This can be challenging for open-pollinated crops that readily cross (e.g., squash, corn). For beginners, focus on self-pollinating plants like beans, peas, lettuce, and tomatoes.
- Processing:
- Dry Seeds (Beans, Peas, Lettuce, Grains): Allow pods/seed heads to dry completely on the plant. Harvest, shell, and clean the seeds, removing chaff.
- Wet Seeds (Tomatoes, Cucumbers, Squash): For tomatoes, ferment the seeds in water for a few days to remove the gel coating and inhibit disease. For cucumbers/squash, scrape out seeds, wash thoroughly, and dry.
- Drying: Spread seeds thinly on screens or paper plates in a cool, dry, well-ventilated area for 1-4 weeks. Ensure they are bone-dry before storage. I aim for less than 8% moisture content.
- Storage: Store seeds in airtight containers (glass jars with desiccant packets work well) in a cool, dark, dry place (ideally 40-50°F and 30-40% humidity). Label clearly with variety and date. Properly stored seeds can remain viable for 3-10 years or more.
Step 8: Season Extension & Winterizing
Extend your harvest and protect your garden for the off-season to truly maximize your self sufficient garden from scratch.
- Cold Frames: Simple structures with a transparent top (glass, polycarbonate, or old windows) that sit over garden beds. They trap solar heat, allowing you to grow cold-hardy crops (lettuce, spinach, kale, radishes) well into winter or start seeds earlier in spring. A basic cold frame can be built from 2×6 lumber and a sheet of polycarbonate for under $100.
- Hoop Houses/Low Tunnels: Larger structures made from flexible hoops (PVC pipe or EMT conduit) covered with greenhouse plastic. These provide more space and greater temperature moderation. A 10×20 ft DIY low tunnel kit can cost $200-$500, while a larger, more robust hoop house kit might be $1,000-$3,000. I use a 6×12 ft low tunnel made from 1/2-inch PVC hoops and 6mil greenhouse plastic, which extends my lettuce and spinach harvest by at least
- Rainwater Harvesting: This is my primary source of irrigation water. A 55-gallon rain barrel (e.g., EarthMark Rain Barrel, ~$120-$150) connected to a downspout can collect significant water. For larger needs, I use two 275-gallon IBC totes (Intermediate Bulk Containers, often available used for $100-$200 each from food-grade sources) connected in series. A 1,000 sq ft roof can collect approximately 620 gallons of water for every inch of rainfall. My 1,500 sq ft roof provides ample water for my 600 sq ft garden through multiple barrels and totes.
- Drip Irrigation: This is by far the most water-efficient method, delivering water directly to the plant’s root zone, minimizing evaporation and weed growth.
- Components: A typical drip system includes a pressure regulator (e.g., Rain Bird PRV-10, ~$15), a filter (Rain Bird RBY filter, ~$20), main tubing (1/2-inch poly tubing, 100ft ~$25), smaller feeder lines (1/4-inch tubing), and emitters (0.5 GPH or 1 GPH per plant).
- Kits: For beginners, a starter kit like the Rain Bird Drip Irrigation Garden Kit (model DDI-KIT-1P, ~$40-$60) is excellent for a small garden. For larger setups, I use Netafim Techline CV Drip Line (500ft roll, ~$150-$200), which has pressure-compensating emitters built-in, ensuring even watering across long runs.
- Automation: For true self-sufficiency, consider a battery-powered timer (e.g., Orbit B-Hyve Bluetooth Hose Faucet Timer, ~$50) or a solar-powered timer connected to a small 12V pump.
- Solar-Powered Pumps: For lifting water from a well, pond, or large storage tank to your garden, a solar pump is a game-changer. For a smaller drip system, a Shurflo 2088-594-152 Diaphragm Pump (12V, 3.5 GPM, ~$180) can be powered by a single 100W solar panel (e.g., Renogy 100W Monocrystalline Solar Panel, ~$100) and a small 12V battery (e.g., a 50Ah LiFePO4 battery like the Battle Born 50Ah, ~$450). For larger operations or deeper wells, more robust systems are needed. If you’re looking to build out a comprehensive off-grid power system to support your garden’s water needs, or indeed your entire homestead, you might want to explore resources like the Power Grid Generator complete system guide to understand the full scope of what’s possible in terms of energy independence.
Step 5: Seed Selection & Planting
The choice of seeds is crucial for a truly self sufficient garden from scratch.
- Choose Heirloom & Open-Pollinated Seeds: These varieties produce seeds that will grow true to type, meaning you can save seeds from your harvest year after year. F1 hybrids, while often vigorous, will not produce consistent offspring from saved seeds. Reputable seed companies include Baker Creek Heirloom Seeds, High Mowing Organic Seeds, and Seed Savers Exchange. Start with common, reliable varieties like ‘Black Krim’ tomatoes, ‘Provider’ bush beans, ‘Waltham Butternut’ squash, and ‘Black Seeded Simpson’ lettuce.
- Start Seeds Indoors (Optional but Recommended): For longer growing seasons or specific crops, starting seeds indoors gives you a head start. Use seed-starting mix (e.g., Espoma Organic Seed Starter Mix, ~$10 for 16qt bag) in seed trays (Jiffy Professional Greenhouse 72-cell kit, ~$15). Provide adequate light with LED grow lights (Barrina T5 2ft 4-pack LED Grow Lights, 20W each, ~$50) for 14-16 hours a day, positioned 2-4 inches above seedlings. Maintain consistent temperatures (65-75°F for most).
- Direct Sowing vs. Transplanting: Some crops (carrots, radishes, beans, corn) prefer direct sowing into the garden bed. Others (tomatoes, peppers, broccoli, kale) benefit from being started indoors and transplanted. Follow seed packet instructions for planting depths (e.g., lettuce seeds are often surface-sown or planted 1/8 inch deep, while beans are 1 inch deep) and spacing.
- Companion Planting: Strategically plant different species together to enhance growth, deter pests, and attract beneficial insects. For example, planting marigolds near tomatoes can deter nematodes, and basil improves tomato flavor. Nasturtiums can act as a trap crop for aphids.
- Succession Planting: For a continuous harvest, plant small batches of quick-growing crops (lettuce, radishes, cilantro) every 2-3 weeks. As one crop finishes, another is ready to take its place.
Step 6: Pest & Disease Management (Organic)
Maintaining a self sufficient garden from scratch means embracing organic pest and disease control.
- Integrated Pest Management (IPM): This holistic approach combines several strategies.
- Observation: Regularly inspect your plants for early signs of pests or disease. Catching issues early is key.
- Physical Barriers: Use row covers (e.g., Agribon AG-19 floating row cover, 10×20 ft, ~$20) to protect young plants from insect pests like cabbage worms and squash bugs. Install fences (e.g., 2×4 welded wire mesh, 4 ft tall, 50 ft roll ~$70) to keep out deer, rabbits, and other larger animals.
- Hand-Picking: For larger pests like tomato hornworms or squash bugs, simply pick them off and drop them into a bucket of soapy water.
- Companion Planting: As mentioned, certain plants repel pests. Marigolds, garlic, and onions are excellent deterrents.
- Attract Beneficial Insects: Plant flowers like dill, fennel, cosmos, and sweet alyssum to attract ladybugs, lacewings, and parasitic wasps, which prey on common garden pests.
- Organic Sprays & Treatments:
- Neem Oil: An excellent broad-spectrum organic insecticide and fungicide. Bonide Neem Oil Concentrate (16oz, ~$20) can be mixed at a rate of 1-2 tbsp per gallon of water and sprayed on affected plants.
- Insecticidal Soap: Effective against soft-bodied insects like aphids, whiteflies, and spider mites. Garden Safe Insecticidal Soap (24oz ready-to-use, ~$10).
- Bacillus thuringiensis (Bt): A naturally occurring soil bacterium that targets caterpillars and worms. Monterey BT Worm & Caterpillar Killer (16oz, ~$18) is highly effective and safe for beneficial insects.
- Copper or Sulfur Sprays: For fungal diseases like powdery mildew or blight, organic copper (e.g., Bonide Copper Fungicide, ~$15 for 1lb) or sulfur (e.g., Safer Brand Garden Fungicide, ~$10 for 16oz) can be used as a last resort.
Step 7: Harvesting & Seed Saving
The culmination of your efforts is the harvest, and seed saving closes the loop on self-sufficiency.
- Harvesting Techniques:
- Timing: Harvest vegetables at their peak ripeness for best flavor and nutritional value. For example, green beans should snap cleanly, cucumbers should be firm, and tomatoes should be fully colored.
- Frequency: Many crops, like zucchini, cucumbers, and bush beans, produce more if harvested frequently. Pick daily or every other day.
- Tools: Use clean, sharp pruners (e.g., Corona ClassicCUT Bypass Pruner BP 3180, ~$30) or a sharp knife for clean cuts, minimizing damage to the plant.
- Seed Saving: This is where the « self-sufficient » aspect truly shines.
- Selection: Only save seeds from your healthiest, most vigorous plants that show desired traits (disease resistance, good flavor, high yield).
- Isolation: To ensure true-to-type seeds, prevent cross-pollination. This can be challenging for open-pollinated crops that readily cross (e.g., squash, corn). For beginners, focus on self-pollinating plants like beans, peas, lettuce, and tomatoes.
- Processing:
- Dry Seeds (Beans, Peas, Lettuce, Grains): Allow pods/seed heads to dry completely on the plant. Harvest, shell, and clean the seeds, removing chaff.
- Wet Seeds (Tomatoes, Cucumbers, Squash): For tomatoes, ferment the seeds in water for a few days to remove the gel coating and inhibit disease. For cucumbers/squash, scrape out seeds, wash thoroughly, and dry.
- Drying: Spread seeds thinly on screens or paper plates in a cool, dry, well-ventilated area for 1-4 weeks. Ensure they are bone-dry before storage. I aim for less than 8% moisture content.
- Storage: Store seeds in airtight containers (glass jars with desiccant packets work well) in a cool, dark, dry place (ideally 40-50°F and 30-40% humidity). Label clearly with variety and date. Properly stored seeds can remain viable for 3-10 years or more.
Step 8: Season Extension & Winterizing
Extend your harvest and protect your garden for the off-season to truly maximize your self sufficient garden from scratch.
- Cold Frames: Simple structures with a transparent top (glass, polycarbonate, or old windows) that sit over garden beds. They trap solar heat, allowing you to grow cold-hardy crops (lettuce, spinach, kale, radishes) well into winter or start seeds earlier in spring. A basic cold frame can be built from 2×6 lumber and a sheet of polycarbonate for under $100.
- Hoop Houses/Low Tunnels: Larger structures made from flexible hoops (PVC pipe or EMT conduit) covered with greenhouse plastic. These provide more space and greater temperature moderation. A 10×20 ft DIY low tunnel kit can cost $200-$500, while a larger, more robust hoop house kit might be $1,000-$3,000. I use a 6×12 ft low tunnel made from 1/2-inch PVC hoops and 6mil greenhouse plastic, which extends my lettuce and spinach harvest by at least
Efficient water management is critical for a self sufficient garden from scratch, especially in off-grid living where water resources might be limited.
- Rainwater Harvesting: This is my primary source of irrigation water. A 55-gallon rain barrel (e.g., EarthMark Rain Barrel, ~$120-$150) connected to a downspout can collect significant water. For larger needs, I use two 275-gallon IBC totes (Intermediate Bulk Containers, often available used for $100-$200 each from food-grade sources) connected in series. A 1,000 sq ft roof can collect approximately 620 gallons of water for every inch of rainfall. My 1,500 sq ft roof provides ample water for my 600 sq ft garden through multiple barrels and totes.
- Drip Irrigation: This is by far the most water-efficient method, delivering water directly to the plant’s root zone, minimizing evaporation and weed growth.
- Components: A typical drip system includes a pressure regulator (e.g., Rain Bird PRV-10, ~$15), a filter (Rain Bird RBY filter, ~$20), main tubing (1/2-inch poly tubing, 100ft ~$25), smaller feeder lines (1/4-inch tubing), and emitters (0.5 GPH or 1 GPH per plant).
- Kits: For beginners, a starter kit like the Rain Bird Drip Irrigation Garden Kit (model DDI-KIT-1P, ~$40-$60) is excellent for a small garden. For larger setups, I use Netafim Techline CV Drip Line (500ft roll, ~$150-$200), which has pressure-compensating emitters built-in, ensuring even watering across long runs.
- Automation: For true self-sufficiency, consider a battery-powered timer (e.g., Orbit B-Hyve Bluetooth Hose Faucet Timer, ~$50) or a solar-powered timer connected to a small 12V pump.
- Solar-Powered Pumps: For lifting water from a well, pond, or large storage tank to your garden, a solar pump is a game-changer. For a smaller drip system, a Shurflo 2088-594-152 Diaphragm Pump (12V, 3.5 GPM, ~$180) can be powered by a single 100W solar panel (e.g., Renogy 100W Monocrystalline Solar Panel, ~$100) and a small 12V battery (e.g., a 50Ah LiFePO4 battery like the Battle Born 50Ah, ~$450). For larger operations or deeper wells, more robust systems are needed. If you’re looking to build out a comprehensive off-grid power system to support your garden’s water needs, or indeed your entire homestead, you might want to explore resources like the Power Grid Generator complete system guide to understand the full scope of what’s possible in terms of energy independence.
Step 5: Seed Selection & Planting
The choice of seeds is crucial for a truly self sufficient garden from scratch.
- Choose Heirloom & Open-Pollinated Seeds: These varieties produce seeds that will grow true to type, meaning you can save seeds from your harvest year after year. F1 hybrids, while often vigorous, will not produce consistent offspring from saved seeds. Reputable seed companies include Baker Creek Heirloom Seeds, High Mowing Organic Seeds, and Seed Savers Exchange. Start with common, reliable varieties like ‘Black Krim’ tomatoes, ‘Provider’ bush beans, ‘Waltham Butternut’ squash, and ‘Black Seeded Simpson’ lettuce.
- Start Seeds Indoors (Optional but Recommended): For longer growing seasons or specific crops, starting seeds indoors gives you a head start. Use seed-starting mix (e.g., Espoma Organic Seed Starter Mix, ~$10 for 16qt bag) in seed trays (Jiffy Professional Greenhouse 72-cell kit, ~$15). Provide adequate light with LED grow lights (Barrina T5 2ft 4-pack LED Grow Lights, 20W each, ~$50) for 14-16 hours a day, positioned 2-4 inches above seedlings. Maintain consistent temperatures (65-75°F for most).
- Direct Sowing vs. Transplanting: Some crops (carrots, radishes, beans, corn) prefer direct sowing into the garden bed. Others (tomatoes, peppers, broccoli, kale) benefit from being started indoors and transplanted. Follow seed packet instructions for planting depths (e.g., lettuce seeds are often surface-sown or planted 1/8 inch deep, while beans are 1 inch deep) and spacing.
- Companion Planting: Strategically plant different species together to enhance growth, deter pests, and attract beneficial insects. For example, planting marigolds near tomatoes can deter nematodes, and basil improves tomato flavor. Nasturtiums can act as a trap crop for aphids.
- Succession Planting: For a continuous harvest, plant small batches of quick-growing crops (lettuce, radishes, cilantro) every 2-3 weeks. As one crop finishes, another is ready to take its place.
Step 6: Pest & Disease Management (Organic)
Maintaining a self sufficient garden from scratch means embracing organic pest and disease control.
- Integrated Pest Management (IPM): This holistic approach combines several strategies.
- Observation: Regularly inspect your plants for early signs of pests or disease. Catching issues early is key.
- Physical Barriers: Use row covers (e.g., Agribon AG-19 floating row cover, 10×20 ft, ~$20) to protect young plants from insect pests like cabbage worms and squash bugs. Install fences (e.g., 2×4 welded wire mesh, 4 ft tall, 50 ft roll ~$70) to keep out deer, rabbits, and other larger animals.
- Hand-Picking: For larger pests like tomato hornworms or squash bugs, simply pick them off and drop them into a bucket of soapy water.
- Companion Planting: As mentioned, certain plants repel pests. Marigolds, garlic, and onions are excellent deterrents.
- Attract Beneficial Insects: Plant flowers like dill, fennel, cosmos, and sweet alyssum to attract ladybugs, lacewings, and parasitic wasps, which prey on common garden pests.
- Organic Sprays & Treatments:
- Neem Oil: An excellent broad-spectrum organic insecticide and fungicide. Bonide Neem Oil Concentrate (16oz, ~$20) can be mixed at a rate of 1-2 tbsp per gallon of water and sprayed on affected plants.
- Insecticidal Soap: Effective against soft-bodied insects like aphids, whiteflies, and spider mites. Garden Safe Insecticidal Soap (24oz ready-to-use, ~$10).
- Bacillus thuringiensis (Bt): A naturally occurring soil bacterium that targets caterpillars and worms. Monterey BT Worm & Caterpillar Killer (16oz, ~$18) is highly effective and safe for beneficial insects.
- Copper or Sulfur Sprays: For fungal diseases like powdery mildew or blight, organic copper (e.g., Bonide Copper Fungicide, ~$15 for 1lb) or sulfur (e.g., Safer Brand Garden Fungicide, ~$10 for 16oz) can be used as a last resort.
Step 7: Harvesting & Seed Saving
The culmination of your efforts is the harvest, and seed saving closes the loop on self-sufficiency.
- Harvesting Techniques:
- Timing: Harvest vegetables at their peak ripeness for best flavor and nutritional value. For example, green beans should snap cleanly, cucumbers should be firm, and tomatoes should be fully colored.
- Frequency: Many crops, like zucchini, cucumbers, and bush beans, produce more if harvested frequently. Pick daily or every other day.
- Tools: Use clean, sharp pruners (e.g., Corona ClassicCUT Bypass Pruner BP 3180, ~$30) or a sharp knife for clean cuts, minimizing damage to the plant.
- Seed Saving: This is where the « self-sufficient » aspect truly shines.
- Selection: Only save seeds from your healthiest, most vigorous plants that show desired traits (disease resistance, good flavor, high yield).
- Isolation: To ensure true-to-type seeds, prevent cross-pollination. This can be challenging for open-pollinated crops that readily cross (e.g., squash, corn). For beginners, focus on self-pollinating plants like beans, peas, lettuce, and tomatoes.
- Processing:
- Dry Seeds (Beans, Peas, Lettuce, Grains): Allow pods/seed heads to dry completely on the plant. Harvest, shell, and clean the seeds, removing chaff.
- Wet Seeds (Tomatoes, Cucumbers, Squash): For tomatoes, ferment the seeds in water for a few days to remove the gel coating and inhibit disease. For cucumbers/squash, scrape out seeds, wash thoroughly, and dry.
- Drying: Spread seeds thinly on screens or paper plates in a cool, dry, well-ventilated area for 1-4 weeks. Ensure they are bone-dry before storage. I aim for less than 8% moisture content.
- Storage: Store seeds in airtight containers (glass jars with desiccant packets work well) in a cool, dark, dry place (ideally 40-50°F and 30-40% humidity). Label clearly with variety and date. Properly stored seeds can remain viable for 3-10 years or more.
Step 8: Season Extension & Winterizing
Extend your harvest and protect your garden for the off-season to truly maximize your self sufficient garden from scratch.
- Cold Frames: Simple structures with a transparent top (glass, polycarbonate, or old windows) that sit over garden beds. They trap solar heat, allowing you to grow cold-hardy crops (lettuce, spinach, kale, radishes) well into winter or start seeds earlier in spring. A basic cold frame can be built from 2×6 lumber and a sheet of polycarbonate for under $100.
- Hoop Houses/Low Tunnels: Larger structures made from flexible hoops (PVC pipe or EMT conduit) covered with greenhouse plastic. These provide more space and greater temperature moderation. A 10×20 ft DIY low tunnel kit can cost $200-$500, while a larger, more robust hoop house kit might be $1,000-$3,000. I use a 6×12 ft low tunnel made from 1/2-inch PVC hoops and 6mil greenhouse plastic, which extends my lettuce and spinach harvest by at least
Step 4: Water Management & Irrigation
Efficient water management is critical for a self sufficient garden from scratch, especially in off-grid living where water resources might be limited.
- Rainwater Harvesting: This is my primary source of irrigation water. A 55-gallon rain barrel (e.g., EarthMark Rain Barrel, ~$120-$150) connected to a downspout can collect significant water. For larger needs, I use two 275-gallon IBC totes (Intermediate Bulk Containers, often available used for $100-$200 each from food-grade sources) connected in series. A 1,000 sq ft roof can collect approximately 620 gallons of water for every inch of rainfall. My 1,500 sq ft roof provides ample water for my 600 sq ft garden through multiple barrels and totes.
- Drip Irrigation: This is by far the most water-efficient method, delivering water directly to the plant’s root zone, minimizing evaporation and weed growth.
- Components: A typical drip system includes a pressure regulator (e.g., Rain Bird PRV-10, ~$15), a filter (Rain Bird RBY filter, ~$20), main tubing (1/2-inch poly tubing, 100ft ~$25), smaller feeder lines (1/4-inch tubing), and emitters (0.5 GPH or 1 GPH per plant).
- Kits: For beginners, a starter kit like the Rain Bird Drip Irrigation Garden Kit (model DDI-KIT-1P, ~$40-$60) is excellent for a small garden. For larger setups, I use Netafim Techline CV Drip Line (500ft roll, ~$150-$200), which has pressure-compensating emitters built-in, ensuring even watering across long runs.
- Automation: For true self-sufficiency, consider a battery-powered timer (e.g., Orbit B-Hyve Bluetooth Hose Faucet Timer, ~$50) or a solar-powered timer connected to a small 12V pump.
- Solar-Powered Pumps: For lifting water from a well, pond, or large storage tank to your garden, a solar pump is a game-changer. For a smaller drip system, a Shurflo 2088-594-152 Diaphragm Pump (12V, 3.5 GPM, ~$180) can be powered by a single 100W solar panel (e.g., Renogy 100W Monocrystalline Solar Panel, ~$100) and a small 12V battery (e.g., a 50Ah LiFePO4 battery like the Battle Born 50Ah, ~$450). For larger operations or deeper wells, more robust systems are needed. If you’re looking to build out a comprehensive off-grid power system to support your garden’s water needs, or indeed your entire homestead, you might want to explore resources like the Power Grid Generator complete system guide to understand the full scope of what’s possible in terms of energy independence.
Step 5: Seed Selection & Planting
The choice of seeds is crucial for a truly self sufficient garden from scratch.
- Choose Heirloom & Open-Pollinated Seeds: These varieties produce seeds that will grow true to type, meaning you can save seeds from your harvest year after year. F1 hybrids, while often vigorous, will not produce consistent offspring from saved seeds. Reputable seed companies include Baker Creek Heirloom Seeds, High Mowing Organic Seeds, and Seed Savers Exchange. Start with common, reliable varieties like ‘Black Krim’ tomatoes, ‘Provider’ bush beans, ‘Waltham Butternut’ squash, and ‘Black Seeded Simpson’ lettuce.
- Start Seeds Indoors (Optional but Recommended): For longer growing seasons or specific crops, starting seeds indoors gives you a head start. Use seed-starting mix (e.g., Espoma Organic Seed Starter Mix, ~$10 for 16qt bag) in seed trays (Jiffy Professional Greenhouse 72-cell kit, ~$15). Provide adequate light with LED grow lights (Barrina T5 2ft 4-pack LED Grow Lights, 20W each, ~$50) for 14-16 hours a day, positioned 2-4 inches above seedlings. Maintain consistent temperatures (65-75°F for most).
- Direct Sowing vs. Transplanting: Some crops (carrots, radishes, beans, corn) prefer direct sowing into the garden bed. Others (tomatoes, peppers, broccoli, kale) benefit from being started indoors and transplanted. Follow seed packet instructions for planting depths (e.g., lettuce seeds are often surface-sown or planted 1/8 inch deep, while beans are 1 inch deep) and spacing.
- Companion Planting: Strategically plant different species together to enhance growth, deter pests, and attract beneficial insects. For example, planting marigolds near tomatoes can deter nematodes, and basil improves tomato flavor. Nasturtiums can act as a trap crop for aphids.
- Succession Planting: For a continuous harvest, plant small batches of quick-growing crops (lettuce, radishes, cilantro) every 2-3 weeks. As one crop finishes, another is ready to take its place.
Step 6: Pest & Disease Management (Organic)
Maintaining a self sufficient garden from scratch means embracing organic pest and disease control.
- Integrated Pest Management (IPM): This holistic approach combines several strategies.
- Observation: Regularly inspect your plants for early signs of pests or disease. Catching issues early is key.
- Physical Barriers: Use row covers (e.g., Agribon AG-19 floating row cover, 10×20 ft, ~$20) to protect young plants from insect pests like cabbage worms and squash bugs. Install fences (e.g., 2×4 welded wire mesh, 4 ft tall, 50 ft roll ~$70) to keep out deer, rabbits, and other larger animals.
- Hand-Picking: For larger pests like tomato hornworms or squash bugs, simply pick them off and drop them into a bucket of soapy water.
- Companion Planting: As mentioned, certain plants repel pests. Marigolds, garlic, and onions are excellent deterrents.
- Attract Beneficial Insects: Plant flowers like dill, fennel, cosmos, and sweet alyssum to attract ladybugs, lacewings, and parasitic wasps, which prey on common garden pests.
- Organic Sprays & Treatments:
- Neem Oil: An excellent broad-spectrum organic insecticide and fungicide. Bonide Neem Oil Concentrate (16oz, ~$20) can be mixed at a rate of 1-2 tbsp per gallon of water and sprayed on affected plants.
- Insecticidal Soap: Effective against soft-bodied insects like aphids, whiteflies, and spider mites. Garden Safe Insecticidal Soap (24oz ready-to-use, ~$10).
- Bacillus thuringiensis (Bt): A naturally occurring soil bacterium that targets caterpillars and worms. Monterey BT Worm & Caterpillar Killer (16oz, ~$18) is highly effective and safe for beneficial insects.
- Copper or Sulfur Sprays: For fungal diseases like powdery mildew or blight, organic copper (e.g., Bonide Copper Fungicide, ~$15 for 1lb) or sulfur (e.g., Safer Brand Garden Fungicide, ~$10 for 16oz) can be used as a last resort.
Step 7: Harvesting & Seed Saving
The culmination of your efforts is the harvest, and seed saving closes the loop on self-sufficiency.
- Harvesting Techniques:
- Timing: Harvest vegetables at their peak ripeness for best flavor and nutritional value. For example, green beans should snap cleanly, cucumbers should be firm, and tomatoes should be fully colored.
- Frequency: Many crops, like zucchini, cucumbers, and bush beans, produce more if harvested frequently. Pick daily or every other day.
- Tools: Use clean, sharp pruners (e.g., Corona ClassicCUT Bypass Pruner BP 3180, ~$30) or a sharp knife for clean cuts, minimizing damage to the plant.
- Seed Saving: This is where the « self-sufficient » aspect truly shines.
- Selection: Only save seeds from your healthiest, most vigorous plants that show desired traits (disease resistance, good flavor, high yield).
- Isolation: To ensure true-to-type seeds, prevent cross-pollination. This can be challenging for open-pollinated crops that readily cross (e.g., squash, corn). For beginners, focus on self-pollinating plants like beans, peas, lettuce, and tomatoes.
- Processing:
- Dry Seeds (Beans, Peas, Lettuce, Grains): Allow pods/seed heads to dry completely on the plant. Harvest, shell, and clean the seeds, removing chaff.
- Wet Seeds (Tomatoes, Cucumbers, Squash): For tomatoes, ferment the seeds in water for a few days to remove the gel coating and inhibit disease. For cucumbers/squash, scrape out seeds, wash thoroughly, and dry.
- Drying: Spread seeds thinly on screens or paper plates in a cool, dry, well-ventilated area for 1-4 weeks. Ensure they are bone-dry before storage. I aim for less than 8% moisture content.
- Storage: Store seeds in airtight containers (glass jars with desiccant packets work well) in a cool, dark, dry place (ideally 40-50°F and 30-40% humidity). Label clearly with variety and date. Properly stored seeds can remain viable for 3-10 years or more.
Step 8: Season Extension & Winterizing
Extend your harvest and protect your garden for the off-season to truly maximize your self sufficient garden from scratch.
- Cold Frames: Simple structures with a transparent top (glass, polycarbonate, or old windows) that sit over garden beds. They trap solar heat, allowing you to grow cold-hardy crops (lettuce, spinach, kale, radishes) well into winter or start seeds earlier in spring. A basic cold frame can be built from 2×6 lumber and a sheet of polycarbonate for under $100.
- Hoop Houses/Low Tunnels: Larger structures made from flexible hoops (PVC pipe or EMT conduit) covered with greenhouse plastic. These provide more space and greater temperature moderation. A 10×20 ft DIY low tunnel kit can cost $200-$500, while a larger, more robust hoop house kit might be $1,000-$3,000. I use a 6×12 ft low tunnel made from 1/2-inch PVC hoops and 6mil greenhouse plastic, which extends my lettuce and spinach harvest by at least
- In-Ground Beds: If you have excellent native soil and good drainage, in-ground beds are the most economical. Double-digging (loosening soil two shovel depths) can significantly improve drainage and aeration. For my main garden, I primarily use in-ground beds, but I focus on building up the soil over time with consistent compost additions and cover cropping. I aim for beds that are no wider than 3-4 feet so I can reach the center without stepping on the soil, compacting it.
- Raised Beds: Raised beds offer numerous advantages, especially for poor soil, heavy clay, or rocky areas. They provide better drainage, warm up faster in spring, reduce compaction, and make weeding and harvesting easier on your back.
- Material Options:
- Untreated Cedar: Naturally rot-resistant and chemical-free. A 4×8 ft bed, 12 inches deep, typically requires three 2x12x8 ft cedar boards, costing around $50-$60 per board (total ~$150-$180) plus corner brackets or screws. My first raised beds were cedar and are still going strong after 7 years.
- Galvanized Steel: Durable, long-lasting, and aesthetically pleasing. Brands like Vego Garden offer modular kits. A Vego Garden 17″ Tall 8-in-1 Metal Raised Garden Bed (can be configured to 4×8 ft) costs approximately $250-$300.
- Concrete Blocks/Stones: Very durable but can leach minerals (though generally safe once weathered) and can be expensive.
- Recycled Materials: Pallets (check for chemical treatment stamps like « HT » for heat-treated), old tires (controversial due to potential chemical leaching).
- Filling Raised Beds: Don’t just fill with topsoil. Use a « Hugelkultur » approach (logs, branches, leaves, then compost, then topsoil) or a mixture of 60% good quality topsoil, 30% compost, and 10% perlite or vermiculite for drainage. A 4x8x1 ft raised bed requires about 32 cubic feet (or ~1.2 cubic yards) of soil mix, which can cost $100-$200 depending on your source.
- Material Options:
Step 4: Water Management & Irrigation
Efficient water management is critical for a self sufficient garden from scratch, especially in off-grid living where water resources might be limited.
- Rainwater Harvesting: This is my primary source of irrigation water. A 55-gallon rain barrel (e.g., EarthMark Rain Barrel, ~$120-$150) connected to a downspout can collect significant water. For larger needs, I use two 275-gallon IBC totes (Intermediate Bulk Containers, often available used for $100-$200 each from food-grade sources) connected in series. A 1,000 sq ft roof can collect approximately 620 gallons of water for every inch of rainfall. My 1,500 sq ft roof provides ample water for my 600 sq ft garden through multiple barrels and totes.
- Drip Irrigation: This is by far the most water-efficient method, delivering water directly to the plant’s root zone, minimizing evaporation and weed growth.
- Components: A typical drip system includes a pressure regulator (e.g., Rain Bird PRV-10, ~$15), a filter (Rain Bird RBY filter, ~$20), main tubing (1/2-inch poly tubing, 100ft ~$25), smaller feeder lines (1/4-inch tubing), and emitters (0.5 GPH or 1 GPH per plant).
- Kits: For beginners, a starter kit like the Rain Bird Drip Irrigation Garden Kit (model DDI-KIT-1P, ~$40-$60) is excellent for a small garden. For larger setups, I use Netafim Techline CV Drip Line (500ft roll, ~$150-$200), which has pressure-compensating emitters built-in, ensuring even watering across long runs.
- Automation: For true self-sufficiency, consider a battery-powered timer (e.g., Orbit B-Hyve Bluetooth Hose Faucet Timer, ~$50) or a solar-powered timer connected to a small 12V pump.
- Solar-Powered Pumps: For lifting water from a well, pond, or large storage tank to your garden, a solar pump is a game-changer. For a smaller drip system, a Shurflo 2088-594-152 Diaphragm Pump (12V, 3.5 GPM, ~$180) can be powered by a single 100W solar panel (e.g., Renogy 100W Monocrystalline Solar Panel, ~$100) and a small 12V battery (e.g., a 50Ah LiFePO4 battery like the Battle Born 50Ah, ~$450). For larger operations or deeper wells, more robust systems are needed. If you’re looking to build out a comprehensive off-grid power system to support your garden’s water needs, or indeed your entire homestead, you might want to explore resources like the Power Grid Generator complete system guide to understand the full scope of what’s possible in terms of energy independence.
Step 5: Seed Selection & Planting
The choice of seeds is crucial for a truly self sufficient garden from scratch.
- Choose Heirloom & Open-Pollinated Seeds: These varieties produce seeds that will grow true to type, meaning you can save seeds from your harvest year after year. F1 hybrids, while often vigorous, will not produce consistent offspring from saved seeds. Reputable seed companies include Baker Creek Heirloom Seeds, High Mowing Organic Seeds, and Seed Savers Exchange. Start with common, reliable varieties like ‘Black Krim’ tomatoes, ‘Provider’ bush beans, ‘Waltham Butternut’ squash, and ‘Black Seeded Simpson’ lettuce.
- Start Seeds Indoors (Optional but Recommended): For longer growing seasons or specific crops, starting seeds indoors gives you a head start. Use seed-starting mix (e.g., Espoma Organic Seed Starter Mix, ~$10 for 16qt bag) in seed trays (Jiffy Professional Greenhouse 72-cell kit, ~$15). Provide adequate light with LED grow lights (Barrina T5 2ft 4-pack LED Grow Lights, 20W each, ~$50) for 14-16 hours a day, positioned 2-4 inches above seedlings. Maintain consistent temperatures (65-75°F for most).
- Direct Sowing vs. Transplanting: Some crops (carrots, radishes, beans, corn) prefer direct sowing into the garden bed. Others (tomatoes, peppers, broccoli, kale) benefit from being started indoors and transplanted. Follow seed packet instructions for planting depths (e.g., lettuce seeds are often surface-sown or planted 1/8 inch deep, while beans are 1 inch deep) and spacing.
- Companion Planting: Strategically plant different species together to enhance growth, deter pests, and attract beneficial insects. For example, planting marigolds near tomatoes can deter nematodes, and basil improves tomato flavor. Nasturtiums can act as a trap crop for aphids.
- Succession Planting: For a continuous harvest, plant small batches of quick-growing crops (lettuce, radishes, cilantro) every 2-3 weeks. As one crop finishes, another is ready to take its place.
Step 6: Pest & Disease Management (Organic)
Maintaining a self sufficient garden from scratch means embracing organic pest and disease control.
- Integrated Pest Management (IPM): This holistic approach combines several strategies.
- Observation: Regularly inspect your plants for early signs of pests or disease. Catching issues early is key.
- Physical Barriers: Use row covers (e.g., Agribon AG-19 floating row cover, 10×20 ft, ~$20) to protect young plants from insect pests like cabbage worms and squash bugs. Install fences (e.g., 2×4 welded wire mesh, 4 ft tall, 50 ft roll ~$70) to keep out deer, rabbits, and other larger animals.
- Hand-Picking: For larger pests like tomato hornworms or squash bugs, simply pick them off and drop them into a bucket of soapy water.
- Companion Planting: As mentioned, certain plants repel pests. Marigolds, garlic, and onions are excellent deterrents.
- Attract Beneficial Insects: Plant flowers like dill, fennel, cosmos, and sweet alyssum to attract ladybugs, lacewings, and parasitic wasps, which prey on common garden pests.
- Organic Sprays & Treatments:
- Neem Oil: An excellent broad-spectrum organic insecticide and fungicide. Bonide Neem Oil Concentrate (16oz, ~$20) can be mixed at a rate of 1-2 tbsp per gallon of water and sprayed on affected plants.
- Insecticidal Soap: Effective against soft-bodied insects like aphids, whiteflies, and spider mites. Garden Safe Insecticidal Soap (24oz ready-to-use, ~$10).
- Bacillus thuringiensis (Bt): A naturally occurring soil bacterium that targets caterpillars and worms. Monterey BT Worm & Caterpillar Killer (16oz, ~$18) is highly effective and safe for beneficial insects.
- Copper or Sulfur Sprays: For fungal diseases like powdery mildew or blight, organic copper (e.g., Bonide Copper Fungicide, ~$15 for 1lb) or sulfur (e.g., Safer Brand Garden Fungicide, ~$10 for 16oz) can be used as a last resort.
Step 7: Harvesting & Seed Saving
The culmination of your efforts is the harvest, and seed saving closes the loop on self-sufficiency.
- Harvesting Techniques:
- Timing: Harvest vegetables at their peak ripeness for best flavor and nutritional value. For example, green beans should snap cleanly, cucumbers should be firm, and tomatoes should be fully colored.
- Frequency: Many crops, like zucchini, cucumbers, and bush beans, produce more if harvested frequently. Pick daily or every other day.
- Tools: Use clean, sharp pruners (e.g., Corona ClassicCUT Bypass Pruner BP 3180, ~$30) or a sharp knife for clean cuts, minimizing damage to the plant.
- Seed Saving: This is where the « self-sufficient » aspect truly shines.
- Selection: Only save seeds from your healthiest, most vigorous plants that show desired traits (disease resistance, good flavor, high yield).
- Isolation: To ensure true-to-type seeds, prevent cross-pollination. This can be challenging for open-pollinated crops that readily cross (e.g., squash, corn). For beginners, focus on self-pollinating plants like beans, peas, lettuce, and tomatoes.
- Processing:
- Dry Seeds (Beans, Peas, Lettuce, Grains): Allow pods/seed heads to dry completely on the plant. Harvest, shell, and clean the seeds, removing chaff.
- Wet Seeds (Tomatoes, Cucumbers, Squash): For tomatoes, ferment the seeds in water for a few days to remove the gel coating and inhibit disease. For cucumbers/squash, scrape out seeds, wash thoroughly, and dry.
- Drying: Spread seeds thinly on screens or paper plates in a cool, dry, well-ventilated area for 1-4 weeks. Ensure they are bone-dry before storage. I aim for less than 8% moisture content.
- Storage: Store seeds in airtight containers (glass jars with desiccant packets work well) in a cool, dark, dry place (ideally 40-50°F and 30-40% humidity). Label clearly with variety and date. Properly stored seeds can remain viable for 3-10 years or more.
Step 8: Season Extension & Winterizing
Extend your harvest and protect your garden for the off-season to truly maximize your self sufficient garden from scratch.
- Cold Frames: Simple structures with a transparent top (glass, polycarbonate, or old windows) that sit over garden beds. They trap solar heat, allowing you to grow cold-hardy crops (lettuce, spinach, kale, radishes) well into winter or start seeds earlier in spring. A basic cold frame can be built from 2×6 lumber and a sheet of polycarbonate for under $100.
- Hoop Houses/Low Tunnels: Larger structures made from flexible hoops (PVC pipe or EMT conduit) covered with greenhouse plastic. These provide more space and greater temperature moderation. A 10×20 ft DIY low tunnel kit can cost $200-$500, while a larger, more robust hoop house kit might be $1,000-$3,000. I use a 6×12 ft low tunnel made from 1/2-inch PVC hoops and 6mil greenhouse plastic, which extends my lettuce and spinach harvest by at least
Deciding between raised beds and in-ground beds depends on your soil, budget, and physical capabilities.
- In-Ground Beds: If you have excellent native soil and good drainage, in-ground beds are the most economical. Double-digging (loosening soil two shovel depths) can significantly improve drainage and aeration. For my main garden, I primarily use in-ground beds, but I focus on building up the soil over time with consistent compost additions and cover cropping. I aim for beds that are no wider than 3-4 feet so I can reach the center without stepping on the soil, compacting it.
- Raised Beds: Raised beds offer numerous advantages, especially for poor soil, heavy clay, or rocky areas. They provide better drainage, warm up faster in spring, reduce compaction, and make weeding and harvesting easier on your back.
- Material Options:
- Untreated Cedar: Naturally rot-resistant and chemical-free. A 4×8 ft bed, 12 inches deep, typically requires three 2x12x8 ft cedar boards, costing around $50-$60 per board (total ~$150-$180) plus corner brackets or screws. My first raised beds were cedar and are still going strong after 7 years.
- Galvanized Steel: Durable, long-lasting, and aesthetically pleasing. Brands like Vego Garden offer modular kits. A Vego Garden 17″ Tall 8-in-1 Metal Raised Garden Bed (can be configured to 4×8 ft) costs approximately $250-$300.
- Concrete Blocks/Stones: Very durable but can leach minerals (though generally safe once weathered) and can be expensive.
- Recycled Materials: Pallets (check for chemical treatment stamps like « HT » for heat-treated), old tires (controversial due to potential chemical leaching).
- Filling Raised Beds: Don’t just fill with topsoil. Use a « Hugelkultur » approach (logs, branches, leaves, then compost, then topsoil) or a mixture of 60% good quality topsoil, 30% compost, and 10% perlite or vermiculite for drainage. A 4x8x1 ft raised bed requires about 32 cubic feet (or ~1.2 cubic yards) of soil mix, which can cost $100-$200 depending on your source.
- Material Options:
Step 4: Water Management & Irrigation
Efficient water management is critical for a self sufficient garden from scratch, especially in off-grid living where water resources might be limited.
- Rainwater Harvesting: This is my primary source of irrigation water. A 55-gallon rain barrel (e.g., EarthMark Rain Barrel, ~$120-$150) connected to a downspout can collect significant water. For larger needs, I use two 275-gallon IBC totes (Intermediate Bulk Containers, often available used for $100-$200 each from food-grade sources) connected in series. A 1,000 sq ft roof can collect approximately 620 gallons of water for every inch of rainfall. My 1,500 sq ft roof provides ample water for my 600 sq ft garden through multiple barrels and totes.
- Drip Irrigation: This is by far the most water-efficient method, delivering water directly to the plant’s root zone, minimizing evaporation and weed growth.
- Components: A typical drip system includes a pressure regulator (e.g., Rain Bird PRV-10, ~$15), a filter (Rain Bird RBY filter, ~$20), main tubing (1/2-inch poly tubing, 100ft ~$25), smaller feeder lines (1/4-inch tubing), and emitters (0.5 GPH or 1 GPH per plant).
- Kits: For beginners, a starter kit like the Rain Bird Drip Irrigation Garden Kit (model DDI-KIT-1P, ~$40-$60) is excellent for a small garden. For larger setups, I use Netafim Techline CV Drip Line (500ft roll, ~$150-$200), which has pressure-compensating emitters built-in, ensuring even watering across long runs.
- Automation: For true self-sufficiency, consider a battery-powered timer (e.g., Orbit B-Hyve Bluetooth Hose Faucet Timer, ~$50) or a solar-powered timer connected to a small 12V pump.
- Solar-Powered Pumps: For lifting water from a well, pond, or large storage tank to your garden, a solar pump is a game-changer. For a smaller drip system, a Shurflo 2088-594-152 Diaphragm Pump (12V, 3.5 GPM, ~$180) can be powered by a single 100W solar panel (e.g., Renogy 100W Monocrystalline Solar Panel, ~$100) and a small 12V battery (e.g., a 50Ah LiFePO4 battery like the Battle Born 50Ah, ~$450). For larger operations or deeper wells, more robust systems are needed. If you’re looking to build out a comprehensive off-grid power system to support your garden’s water needs, or indeed your entire homestead, you might want to explore resources like the Power Grid Generator complete system guide to understand the full scope of what’s possible in terms of energy independence.
Step 5: Seed Selection & Planting
The choice of seeds is crucial for a truly self sufficient garden from scratch.
- Choose Heirloom & Open-Pollinated Seeds: These varieties produce seeds that will grow true to type, meaning you can save seeds from your harvest year after year. F1 hybrids, while often vigorous, will not produce consistent offspring from saved seeds. Reputable seed companies include Baker Creek Heirloom Seeds, High Mowing Organic Seeds, and Seed Savers Exchange. Start with common, reliable varieties like ‘Black Krim’ tomatoes, ‘Provider’ bush beans, ‘Waltham Butternut’ squash, and ‘Black Seeded Simpson’ lettuce.
- Start Seeds Indoors (Optional but Recommended): For longer growing seasons or specific crops, starting seeds indoors gives you a head start. Use seed-starting mix (e.g., Espoma Organic Seed Starter Mix, ~$10 for 16qt bag) in seed trays (Jiffy Professional Greenhouse 72-cell kit, ~$15). Provide adequate light with LED grow lights (Barrina T5 2ft 4-pack LED Grow Lights, 20W each, ~$50) for 14-16 hours a day, positioned 2-4 inches above seedlings. Maintain consistent temperatures (65-75°F for most).
- Direct Sowing vs. Transplanting: Some crops (carrots, radishes, beans, corn) prefer direct sowing into the garden bed. Others (tomatoes, peppers, broccoli, kale) benefit from being started indoors and transplanted. Follow seed packet instructions for planting depths (e.g., lettuce seeds are often surface-sown or planted 1/8 inch deep, while beans are 1 inch deep) and spacing.
- Companion Planting: Strategically plant different species together to enhance growth, deter pests, and attract beneficial insects. For example, planting marigolds near tomatoes can deter nematodes, and basil improves tomato flavor. Nasturtiums can act as a trap crop for aphids.
- Succession Planting: For a continuous harvest, plant small batches of quick-growing crops (lettuce, radishes, cilantro) every 2-3 weeks. As one crop finishes, another is ready to take its place.
Step 6: Pest & Disease Management (Organic)
Maintaining a self sufficient garden from scratch means embracing organic pest and disease control.
- Integrated Pest Management (IPM): This holistic approach combines several strategies.
- Observation: Regularly inspect your plants for early signs of pests or disease. Catching issues early is key.
- Physical Barriers: Use row covers (e.g., Agribon AG-19 floating row cover, 10×20 ft, ~$20) to protect young plants from insect pests like cabbage worms and squash bugs. Install fences (e.g., 2×4 welded wire mesh, 4 ft tall, 50 ft roll ~$70) to keep out deer, rabbits, and other larger animals.
- Hand-Picking: For larger pests like tomato hornworms or squash bugs, simply pick them off and drop them into a bucket of soapy water.
- Companion Planting: As mentioned, certain plants repel pests. Marigolds, garlic, and onions are excellent deterrents.
- Attract Beneficial Insects: Plant flowers like dill, fennel, cosmos, and sweet alyssum to attract ladybugs, lacewings, and parasitic wasps, which prey on common garden pests.
- Organic Sprays & Treatments:
- Neem Oil: An excellent broad-spectrum organic insecticide and fungicide. Bonide Neem Oil Concentrate (16oz, ~$20) can be mixed at a rate of 1-2 tbsp per gallon of water and sprayed on affected plants.
- Insecticidal Soap: Effective against soft-bodied insects like aphids, whiteflies, and spider mites. Garden Safe Insecticidal Soap (24oz ready-to-use, ~$10).
- Bacillus thuringiensis (Bt): A naturally occurring soil bacterium that targets caterpillars and worms. Monterey BT Worm & Caterpillar Killer (16oz, ~$18) is highly effective and safe for beneficial insects.
- Copper or Sulfur Sprays: For fungal diseases like powdery mildew or blight, organic copper (e.g., Bonide Copper Fungicide, ~$15 for 1lb) or sulfur (e.g., Safer Brand Garden Fungicide, ~$10 for 16oz) can be used as a last resort.
Step 7: Harvesting & Seed Saving
The culmination of your efforts is the harvest, and seed saving closes the loop on self-sufficiency.
- Harvesting Techniques:
- Timing: Harvest vegetables at their peak ripeness for best flavor and nutritional value. For example, green beans should snap cleanly, cucumbers should be firm, and tomatoes should be fully colored.
- Frequency: Many crops, like zucchini, cucumbers, and bush beans, produce more if harvested frequently. Pick daily or every other day.
- Tools: Use clean, sharp pruners (e.g., Corona ClassicCUT Bypass Pruner BP 3180, ~$30) or a sharp knife for clean cuts, minimizing damage to the plant.
- Seed Saving: This is where the « self-sufficient » aspect truly shines.
- Selection: Only save seeds from your healthiest, most vigorous plants that show desired traits (disease resistance, good flavor, high yield).
- Isolation: To ensure true-to-type seeds, prevent cross-pollination. This can be challenging for open-pollinated crops that readily cross (e.g., squash, corn). For beginners, focus on self-pollinating plants like beans, peas, lettuce, and tomatoes.
- Processing:
- Dry Seeds (Beans, Peas, Lettuce, Grains): Allow pods/seed heads to dry completely on the plant. Harvest, shell, and clean the seeds, removing chaff.
- Wet Seeds (Tomatoes, Cucumbers, Squash): For tomatoes, ferment the seeds in water for a few days to remove the gel coating and inhibit disease. For cucumbers/squash, scrape out seeds, wash thoroughly, and dry.
- Drying: Spread seeds thinly on screens or paper plates in a cool, dry, well-ventilated area for 1-4 weeks. Ensure they are bone-dry before storage. I aim for less than 8% moisture content.
- Storage: Store seeds in airtight containers (glass jars with desiccant packets work well) in a cool, dark, dry place (ideally 40-50°F and 30-40% humidity). Label clearly with variety and date. Properly stored seeds can remain viable for 3-10 years or more.
Step 8: Season Extension & Winterizing
Extend your harvest and protect your garden for the off-season to truly maximize your self sufficient garden from scratch.
- Cold Frames: Simple structures with a transparent top (glass, polycarbonate, or old windows) that sit over garden beds. They trap solar heat, allowing you to grow cold-hardy crops (lettuce, spinach, kale, radishes) well into winter or start seeds earlier in spring. A basic cold frame can be built from 2×6 lumber and a sheet of polycarbonate for under $100.
- Hoop Houses/Low Tunnels: Larger structures made from flexible hoops (PVC pipe or EMT conduit) covered with greenhouse plastic. These provide more space and greater temperature moderation. A 10×20 ft DIY low tunnel kit can cost $200-$500, while a larger, more robust hoop house kit might be $1,000-$3,000. I use a 6×12 ft low tunnel made from 1/2-inch PVC hoops and 6mil greenhouse plastic, which extends my lettuce and spinach harvest by at least
Healthy soil is the bedrock of a productive, self-sufficient garden. You can’t guess what your soil needs; you have to test it.
- Perform a Soil Test: A professional soil test will give you precise data on your soil’s pH, nutrient levels (N-P-K), and organic matter content. I recommend sending a sample to your local agricultural extension office; it typically costs $20-$50 and provides detailed recommendations. Alternatively, for a quick homeowner check, a Rapitest Soil Test Kit (40-test kit, model 1663, ~$20 on Amazon) provides a good baseline for pH, Nitrogen, Phosphorus, and Potash. Aim for a pH between 6.0 and 7.0 for most vegetables.
- Amend for pH Imbalance: If your soil is too acidic (below 6.0), add agricultural lime (dolomitic lime adds magnesium, calcitic lime adds calcium). Apply 5-10 lbs per 100 sq ft for a moderate adjustment. If it’s too alkaline (above 7.0), add elemental sulfur (e.g., Espoma Soil Acidifier, ~$15 for 6.75 lbs) or generous amounts of organic matter like peat moss or pine needles.
- Build Organic Matter: This is the single most important step for long-term soil health. Organic matter improves soil structure, water retention, drainage, and nutrient availability. Incorporate 2-4 inches of high-quality compost into your top 6-12 inches of soil annually. I make my own compost from kitchen scraps, garden waste, and shredded leaves, but you can purchase it. Local nurseries often sell bulk compost for $30-$50 per cubic yard. Aged manure (from chickens, cows, or horses – ensure it’s well-rotted to avoid burning plants) is also excellent.
- Address Nutrient Deficiencies: Based on your soil test, add specific organic amendments. If Nitrogen (N) is low, add blood meal (12-0-0, ~$20 for 3 lbs) or feather meal. For Phosphorus (P), use bone meal (3-15-0, ~$15 for 3 lbs) or rock phosphate. For Potassium (K), greensand (0-0-2.5, ~$25 for 5 lbs) or kelp meal are good choices. I rely heavily on Espoma Organic Garden-tone (5-3-3, ~$25 for an 8lb bag) as a balanced, all-purpose organic fertilizer during planting.
Step 3: Garden Bed Preparation
Deciding between raised beds and in-ground beds depends on your soil, budget, and physical capabilities.
- In-Ground Beds: If you have excellent native soil and good drainage, in-ground beds are the most economical. Double-digging (loosening soil two shovel depths) can significantly improve drainage and aeration. For my main garden, I primarily use in-ground beds, but I focus on building up the soil over time with consistent compost additions and cover cropping. I aim for beds that are no wider than 3-4 feet so I can reach the center without stepping on the soil, compacting it.
- Raised Beds: Raised beds offer numerous advantages, especially for poor soil, heavy clay, or rocky areas. They provide better drainage, warm up faster in spring, reduce compaction, and make weeding and harvesting easier on your back.
- Material Options:
- Untreated Cedar: Naturally rot-resistant and chemical-free. A 4×8 ft bed, 12 inches deep, typically requires three 2x12x8 ft cedar boards, costing around $50-$60 per board (total ~$150-$180) plus corner brackets or screws. My first raised beds were cedar and are still going strong after 7 years.
- Galvanized Steel: Durable, long-lasting, and aesthetically pleasing. Brands like Vego Garden offer modular kits. A Vego Garden 17″ Tall 8-in-1 Metal Raised Garden Bed (can be configured to 4×8 ft) costs approximately $250-$300.
- Concrete Blocks/Stones: Very durable but can leach minerals (though generally safe once weathered) and can be expensive.
- Recycled Materials: Pallets (check for chemical treatment stamps like « HT » for heat-treated), old tires (controversial due to potential chemical leaching).
- Filling Raised Beds: Don’t just fill with topsoil. Use a « Hugelkultur » approach (logs, branches, leaves, then compost, then topsoil) or a mixture of 60% good quality topsoil, 30% compost, and 10% perlite or vermiculite for drainage. A 4x8x1 ft raised bed requires about 32 cubic feet (or ~1.2 cubic yards) of soil mix, which can cost $100-$200 depending on your source.
- Material Options:
Step 4: Water Management & Irrigation
Efficient water management is critical for a self sufficient garden from scratch, especially in off-grid living where water resources might be limited.
- Rainwater Harvesting: This is my primary source of irrigation water. A 55-gallon rain barrel (e.g., EarthMark Rain Barrel, ~$120-$150) connected to a downspout can collect significant water. For larger needs, I use two 275-gallon IBC totes (Intermediate Bulk Containers, often available used for $100-$200 each from food-grade sources) connected in series. A 1,000 sq ft roof can collect approximately 620 gallons of water for every inch of rainfall. My 1,500 sq ft roof provides ample water for my 600 sq ft garden through multiple barrels and totes.
- Drip Irrigation: This is by far the most water-efficient method, delivering water directly to the plant’s root zone, minimizing evaporation and weed growth.
- Components: A typical drip system includes a pressure regulator (e.g., Rain Bird PRV-10, ~$15), a filter (Rain Bird RBY filter, ~$20), main tubing (1/2-inch poly tubing, 100ft ~$25), smaller feeder lines (1/4-inch tubing), and emitters (0.5 GPH or 1 GPH per plant).
- Kits: For beginners, a starter kit like the Rain Bird Drip Irrigation Garden Kit (model DDI-KIT-1P, ~$40-$60) is excellent for a small garden. For larger setups, I use Netafim Techline CV Drip Line (500ft roll, ~$150-$200), which has pressure-compensating emitters built-in, ensuring even watering across long runs.
- Automation: For true self-sufficiency, consider a battery-powered timer (e.g., Orbit B-Hyve Bluetooth Hose Faucet Timer, ~$50) or a solar-powered timer connected to a small 12V pump.
- Solar-Powered Pumps: For lifting water from a well, pond, or large storage tank to your garden, a solar pump is a game-changer. For a smaller drip system, a Shurflo 2088-594-152 Diaphragm Pump (12V, 3.5 GPM, ~$180) can be powered by a single 100W solar panel (e.g., Renogy 100W Monocrystalline Solar Panel, ~$100) and a small 12V battery (e.g., a 50Ah LiFePO4 battery like the Battle Born 50Ah, ~$450). For larger operations or deeper wells, more robust systems are needed. If you’re looking to build out a comprehensive off-grid power system to support your garden’s water needs, or indeed your entire homestead, you might want to explore resources like the Power Grid Generator complete system guide to understand the full scope of what’s possible in terms of energy independence.
Step 5: Seed Selection & Planting
The choice of seeds is crucial for a truly self sufficient garden from scratch.
- Choose Heirloom & Open-Pollinated Seeds: These varieties produce seeds that will grow true to type, meaning you can save seeds from your harvest year after year. F1 hybrids, while often vigorous, will not produce consistent offspring from saved seeds. Reputable seed companies include Baker Creek Heirloom Seeds, High Mowing Organic Seeds, and Seed Savers Exchange. Start with common, reliable varieties like ‘Black Krim’ tomatoes, ‘Provider’ bush beans, ‘Waltham Butternut’ squash, and ‘Black Seeded Simpson’ lettuce.
- Start Seeds Indoors (Optional but Recommended): For longer growing seasons or specific crops, starting seeds indoors gives you a head start. Use seed-starting mix (e.g., Espoma Organic Seed Starter Mix, ~$10 for 16qt bag) in seed trays (Jiffy Professional Greenhouse 72-cell kit, ~$15). Provide adequate light with LED grow lights (Barrina T5 2ft 4-pack LED Grow Lights, 20W each, ~$50) for 14-16 hours a day, positioned 2-4 inches above seedlings. Maintain consistent temperatures (65-75°F for most).
- Direct Sowing vs. Transplanting: Some crops (carrots, radishes, beans, corn) prefer direct sowing into the garden bed. Others (tomatoes, peppers, broccoli, kale) benefit from being started indoors and transplanted. Follow seed packet instructions for planting depths (e.g., lettuce seeds are often surface-sown or planted 1/8 inch deep, while beans are 1 inch deep) and spacing.
- Companion Planting: Strategically plant different species together to enhance growth, deter pests, and attract beneficial insects. For example, planting marigolds near tomatoes can deter nematodes, and basil improves tomato flavor. Nasturtiums can act as a trap crop for aphids.
- Succession Planting: For a continuous harvest, plant small batches of quick-growing crops (lettuce, radishes, cilantro) every 2-3 weeks. As one crop finishes, another is ready to take its place.
Step 6: Pest & Disease Management (Organic)
Maintaining a self sufficient garden from scratch means embracing organic pest and disease control.
- Integrated Pest Management (IPM): This holistic approach combines several strategies.
- Observation: Regularly inspect your plants for early signs of pests or disease. Catching issues early is key.
- Physical Barriers: Use row covers (e.g., Agribon AG-19 floating row cover, 10×20 ft, ~$20) to protect young plants from insect pests like cabbage worms and squash bugs. Install fences (e.g., 2×4 welded wire mesh, 4 ft tall, 50 ft roll ~$70) to keep out deer, rabbits, and other larger animals.
- Hand-Picking: For larger pests like tomato hornworms or squash bugs, simply pick them off and drop them into a bucket of soapy water.
- Companion Planting: As mentioned, certain plants repel pests. Marigolds, garlic, and onions are excellent deterrents.
- Attract Beneficial Insects: Plant flowers like dill, fennel, cosmos, and sweet alyssum to attract ladybugs, lacewings, and parasitic wasps, which prey on common garden pests.
- Organic Sprays & Treatments:
- Neem Oil: An excellent broad-spectrum organic insecticide and fungicide. Bonide Neem Oil Concentrate (16oz, ~$20) can be mixed at a rate of 1-2 tbsp per gallon of water and sprayed on affected plants.
- Insecticidal Soap: Effective against soft-bodied insects like aphids, whiteflies, and spider mites. Garden Safe Insecticidal Soap (24oz ready-to-use, ~$10).
- Bacillus thuringiensis (Bt): A naturally occurring soil bacterium that targets caterpillars and worms. Monterey BT Worm & Caterpillar Killer (16oz, ~$18) is highly effective and safe for beneficial insects.
- Copper or Sulfur Sprays: For fungal diseases like powdery mildew or blight, organic copper (e.g., Bonide Copper Fungicide, ~$15 for 1lb) or sulfur (e.g., Safer Brand Garden Fungicide, ~$10 for 16oz) can be used as a last resort.
Step 7: Harvesting & Seed Saving
The culmination of your efforts is the harvest, and seed saving closes the loop on self-sufficiency.
- Harvesting Techniques:
- Timing: Harvest vegetables at their peak ripeness for best flavor and nutritional value. For example, green beans should snap cleanly, cucumbers should be firm, and tomatoes should be fully colored.
- Frequency: Many crops, like zucchini, cucumbers, and bush beans, produce more if harvested frequently. Pick daily or every other day.
- Tools: Use clean, sharp pruners (e.g., Corona ClassicCUT Bypass Pruner BP 3180, ~$30) or a sharp knife for clean cuts, minimizing damage to the plant.
- Seed Saving: This is where the « self-sufficient » aspect truly shines.
- Selection: Only save seeds from your healthiest, most vigorous plants that show desired traits (disease resistance, good flavor, high yield).
- Isolation: To ensure true-to-type seeds, prevent cross-pollination. This can be challenging for open-pollinated crops that readily cross (e.g., squash, corn). For beginners, focus on self-pollinating plants like beans, peas, lettuce, and tomatoes.
- Processing:
- Dry Seeds (Beans, Peas, Lettuce, Grains): Allow pods/seed heads to dry completely on the plant. Harvest, shell, and clean the seeds, removing chaff.
- Wet Seeds (Tomatoes, Cucumbers, Squash): For tomatoes, ferment the seeds in water for a few days to remove the gel coating and inhibit disease. For cucumbers/squash, scrape out seeds, wash thoroughly, and dry.
- Drying: Spread seeds thinly on screens or paper plates in a cool, dry, well-ventilated area for 1-4 weeks. Ensure they are bone-dry before storage. I aim for less than 8% moisture content.
- Storage: Store seeds in airtight containers (glass jars with desiccant packets work well) in a cool, dark, dry place (ideally 40-50°F and 30-40% humidity). Label clearly with variety and date. Properly stored seeds can remain viable for 3-10 years or more.
Step 8: Season Extension & Winterizing
Extend your harvest and protect your garden for the off-season to truly maximize your self sufficient garden from scratch.
- Cold Frames: Simple structures with a transparent top (glass, polycarbonate, or old windows) that sit over garden beds. They trap solar heat, allowing you to grow cold-hardy crops (lettuce, spinach, kale, radishes) well into winter or start seeds earlier in spring. A basic cold frame can be built from 2×6 lumber and a sheet of polycarbonate for under $100.
- Hoop Houses/Low Tunnels: Larger structures made from flexible hoops (PVC pipe or EMT conduit) covered with greenhouse plastic. These provide more space and greater temperature moderation. A 10×20 ft DIY low tunnel kit can cost $200-$500, while a larger, more robust hoop house kit might be $1,000-$3,000. I use a 6×12 ft low tunnel made from 1/2-inch PVC hoops and 6mil greenhouse plastic, which extends my lettuce and spinach harvest by at least
Step 7: Harvesting & Seed Saving
The culmination of your efforts is the harvest, and seed saving closes the loop on self-sufficiency.
- Harvesting Techniques:
- Timing: Harvest vegetables at their peak ripeness for best flavor and nutritional value. For example, green beans should snap cleanly, cucumbers should be firm, and tomatoes should be fully colored.
- Frequency: Many crops, like zucchini, cucumbers, and bush beans, produce more if harvested frequently. Pick daily or every other day.
- Tools: Use clean, sharp pruners (e.g., Corona ClassicCUT Bypass Pruner BP 3180, ~$30) or a sharp knife for clean cuts, minimizing damage to the plant.
- Seed Saving: This is where the « self-sufficient » aspect truly shines.
- Selection: Only save seeds from your healthiest, most vigorous plants that show desired traits (disease resistance, good flavor, high yield).
- Isolation: To ensure true-to-type seeds, prevent cross-pollination. This can be challenging for open-pollinated crops that readily cross (e.g., squash, corn). For beginners, focus on self-pollinating plants like beans, peas, lettuce, and tomatoes.
- Processing:
- Dry Seeds (Beans, Peas, Lettuce, Grains): Allow pods/seed heads to dry completely on the plant. Harvest, shell, and clean the seeds, removing chaff.
- Wet Seeds (Tomatoes, Cucumbers, Squash): For tomatoes, ferment the seeds in water for a few days to remove the gel coating and inhibit disease. For cucumbers/squash, scrape out seeds, wash thoroughly, and dry.
- Drying: Spread seeds thinly on screens or paper plates in a cool, dry, well-ventilated area for 1-4 weeks. Ensure they are bone-dry before storage. I aim for less than 8% moisture content.
- Storage: Store seeds in airtight containers (glass jars with desiccant packets work well) in a cool, dark, dry place (ideally 40-50°F and 30-40% humidity). Label clearly with variety and date. Properly stored seeds can remain viable for 3-10 years or more.
Step 8: Season Extension & Winterizing
Extend your harvest and protect your garden for the off-season to truly maximize your self sufficient garden from scratch.
- Cold Frames: Simple structures with a transparent top (glass, polycarbonate, or old windows) that sit over garden beds. They trap solar heat, allowing you to grow cold-hardy crops (lettuce, spinach, kale, radishes) well into winter or start seeds earlier in spring. A basic cold frame can be built from 2×6 lumber and a sheet of polycarbonate for under $100.
- Hoop Houses/Low Tunnels: Larger structures made from flexible hoops (PVC pipe or EMT conduit) covered with greenhouse plastic. These provide more space and greater temperature moderation. A 10×20 ft DIY low tunnel kit can cost $200-$500, while a larger, more robust hoop house kit might be $1,000-$3,000. I use a 6×12 ft low tunnel made from 1/2-inch PVC hoops and 6mil greenhouse plastic, which extends my lettuce and spinach harvest by at least
- Rainwater Harvesting: This is my primary source of irrigation water. A 55-gallon rain barrel (e.g., EarthMark Rain Barrel, ~$120-$150) connected to a downspout can collect significant water. For larger needs, I use two 275-gallon IBC totes (Intermediate Bulk Containers, often available used for $100-$200 each from food-grade sources) connected in series. A 1,000 sq ft roof can collect approximately 620 gallons of water for every inch of rainfall. My 1,500 sq ft roof provides ample water for my 600 sq ft garden through multiple barrels and totes.
- Drip Irrigation: This is by far the most water-efficient method, delivering water directly to the plant’s root zone, minimizing evaporation and weed growth.
- Components: A typical drip system includes a pressure regulator (e.g., Rain Bird PRV-10, ~$15), a filter (Rain Bird RBY filter, ~$20), main tubing (1/2-inch poly tubing, 100ft ~$25), smaller feeder lines (1/4-inch tubing), and emitters (0.5 GPH or 1 GPH per plant).
- Kits: For beginners, a starter kit like the Rain Bird Drip Irrigation Garden Kit (model DDI-KIT-1P, ~$40-$60) is excellent for a small garden. For larger setups, I use Netafim Techline CV Drip Line (500ft roll, ~$150-$200), which has pressure-compensating emitters built-in, ensuring even watering across long runs.
- Automation: For true self-sufficiency, consider a battery-powered timer (e.g., Orbit B-Hyve Bluetooth Hose Faucet Timer, ~$50) or a solar-powered timer connected to a small 12V pump.
- Solar-Powered Pumps: For lifting water from a well, pond, or large storage tank to your garden, a solar pump is a game-changer. For a smaller drip system, a Shurflo 2088-594-152 Diaphragm Pump (12V, 3.5 GPM, ~$180) can be powered by a single 100W solar panel (e.g., Renogy 100W Monocrystalline Solar Panel, ~$100) and a small 12V battery (e.g., a 50Ah LiFePO4 battery like the Battle Born 50Ah, ~$450). For larger operations or deeper wells, more robust systems are needed. If you’re looking to build out a comprehensive off-grid power system to support your garden’s water needs, or indeed your entire homestead, you might want to explore resources like the Power Grid Generator complete system guide to understand the full scope of what’s possible in terms of energy independence.
Step 5: Seed Selection & Planting
The choice of seeds is crucial for a truly self sufficient garden from scratch.
- Choose Heirloom & Open-Pollinated Seeds: These varieties produce seeds that will grow true to type, meaning you can save seeds from your harvest year after year. F1 hybrids, while often vigorous, will not produce consistent offspring from saved seeds. Reputable seed companies include Baker Creek Heirloom Seeds, High Mowing Organic Seeds, and Seed Savers Exchange. Start with common, reliable varieties like ‘Black Krim’ tomatoes, ‘Provider’ bush beans, ‘Waltham Butternut’ squash, and ‘Black Seeded Simpson’ lettuce.
- Start Seeds Indoors (Optional but Recommended): For longer growing seasons or specific crops, starting seeds indoors gives you a head start. Use seed-starting mix (e.g., Espoma Organic Seed Starter Mix, ~$10 for 16qt bag) in seed trays (Jiffy Professional Greenhouse 72-cell kit, ~$15). Provide adequate light with LED grow lights (Barrina T5 2ft 4-pack LED Grow Lights, 20W each, ~$50) for 14-16 hours a day, positioned 2-4 inches above seedlings. Maintain consistent temperatures (65-75°F for most).
- Direct Sowing vs. Transplanting: Some crops (carrots, radishes, beans, corn) prefer direct sowing into the garden bed. Others (tomatoes, peppers, broccoli, kale) benefit from being started indoors and transplanted. Follow seed packet instructions for planting depths (e.g., lettuce seeds are often surface-sown or planted 1/8 inch deep, while beans are 1 inch deep) and spacing.
- Companion Planting: Strategically plant different species together to enhance growth, deter pests, and attract beneficial insects. For example, planting marigolds near tomatoes can deter nematodes, and basil improves tomato flavor. Nasturtiums can act as a trap crop for aphids.
- Succession Planting: For a continuous harvest, plant small batches of quick-growing crops (lettuce, radishes, cilantro) every 2-3 weeks. As one crop finishes, another is ready to take its place.
Step 6: Pest & Disease Management (Organic)
Maintaining a self sufficient garden from scratch means embracing organic pest and disease control.
- Integrated Pest Management (IPM): This holistic approach combines several strategies.
- Observation: Regularly inspect your plants for early signs of pests or disease. Catching issues early is key.
- Physical Barriers: Use row covers (e.g., Agribon AG-19 floating row cover, 10×20 ft, ~$20) to protect young plants from insect pests like cabbage worms and squash bugs. Install fences (e.g., 2×4 welded wire mesh, 4 ft tall, 50 ft roll ~$70) to keep out deer, rabbits, and other larger animals.
- Hand-Picking: For larger pests like tomato hornworms or squash bugs, simply pick them off and drop them into a bucket of soapy water.
- Companion Planting: As mentioned, certain plants repel pests. Marigolds, garlic, and onions are excellent deterrents.
- Attract Beneficial Insects: Plant flowers like dill, fennel, cosmos, and sweet alyssum to attract ladybugs, lacewings, and parasitic wasps, which prey on common garden pests.
- Organic Sprays & Treatments:
- Neem Oil: An excellent broad-spectrum organic insecticide and fungicide. Bonide Neem Oil Concentrate (16oz, ~$20) can be mixed at a rate of 1-2 tbsp per gallon of water and sprayed on affected plants.
- Insecticidal Soap: Effective against soft-bodied insects like aphids, whiteflies, and spider mites. Garden Safe Insecticidal Soap (24oz ready-to-use, ~$10).
- Bacillus thuringiensis (Bt): A naturally occurring soil bacterium that targets caterpillars and worms. Monterey BT Worm & Caterpillar Killer (16oz, ~$18) is highly effective and safe for beneficial insects.
- Copper or Sulfur Sprays: For fungal diseases like powdery mildew or blight, organic copper (e.g., Bonide Copper Fungicide, ~$15 for 1lb) or sulfur (e.g., Safer Brand Garden Fungicide, ~$10 for 16oz) can be used as a last resort.
Step 7: Harvesting & Seed Saving
The culmination of your efforts is the harvest, and seed saving closes the loop on self-sufficiency.
- Harvesting Techniques:
- Timing: Harvest vegetables at their peak ripeness for best flavor and nutritional value. For example, green beans should snap cleanly, cucumbers should be firm, and tomatoes should be fully colored.
- Frequency: Many crops, like zucchini, cucumbers, and bush beans, produce more if harvested frequently. Pick daily or every other day.
- Tools: Use clean, sharp pruners (e.g., Corona ClassicCUT Bypass Pruner BP 3180, ~$30) or a sharp knife for clean cuts, minimizing damage to the plant.
- Seed Saving: This is where the « self-sufficient » aspect truly shines.
- Selection: Only save seeds from your healthiest, most vigorous plants that show desired traits (disease resistance, good flavor, high yield).
- Isolation: To ensure true-to-type seeds, prevent cross-pollination. This can be challenging for open-pollinated crops that readily cross (e.g., squash, corn). For beginners, focus on self-pollinating plants like beans, peas, lettuce, and tomatoes.
- Processing:
- Dry Seeds (Beans, Peas, Lettuce, Grains): Allow pods/seed heads to dry completely on the plant. Harvest, shell, and clean the seeds, removing chaff.
- Wet Seeds (Tomatoes, Cucumbers, Squash): For tomatoes, ferment the seeds in water for a few days to remove the gel coating and inhibit disease. For cucumbers/squash, scrape out seeds, wash thoroughly, and dry.
- Drying: Spread seeds thinly on screens or paper plates in a cool, dry, well-ventilated area for 1-4 weeks. Ensure they are bone-dry before storage. I aim for less than 8% moisture content.
- Storage: Store seeds in airtight containers (glass jars with desiccant packets work well) in a cool, dark, dry place (ideally 40-50°F and 30-40% humidity). Label clearly with variety and date. Properly stored seeds can remain viable for 3-10 years or more.
Step 8: Season Extension & Winterizing
Extend your harvest and protect your garden for the off-season to truly maximize your self sufficient garden from scratch.
- Cold Frames: Simple structures with a transparent top (glass, polycarbonate, or old windows) that sit over garden beds. They trap solar heat, allowing you to grow cold-hardy crops (lettuce, spinach, kale, radishes) well into winter or start seeds earlier in spring. A basic cold frame can be built from 2×6 lumber and a sheet of polycarbonate for under $100.
- Hoop Houses/Low Tunnels: Larger structures made from flexible hoops (PVC pipe or EMT conduit) covered with greenhouse plastic. These provide more space and greater temperature moderation. A 10×20 ft DIY low tunnel kit can cost $200-$500, while a larger, more robust hoop house kit might be $1,000-$3,000. I use a 6×12 ft low tunnel made from 1/2-inch PVC hoops and 6mil greenhouse plastic, which extends my lettuce and spinach harvest by at least
Efficient water management is critical for a self sufficient garden from scratch, especially in off-grid living where water resources might be limited.
- Rainwater Harvesting: This is my primary source of irrigation water. A 55-gallon rain barrel (e.g., EarthMark Rain Barrel, ~$120-$150) connected to a downspout can collect significant water. For larger needs, I use two 275-gallon IBC totes (Intermediate Bulk Containers, often available used for $100-$200 each from food-grade sources) connected in series. A 1,000 sq ft roof can collect approximately 620 gallons of water for every inch of rainfall. My 1,500 sq ft roof provides ample water for my 600 sq ft garden through multiple barrels and totes.
- Drip Irrigation: This is by far the most water-efficient method, delivering water directly to the plant’s root zone, minimizing evaporation and weed growth.
- Components: A typical drip system includes a pressure regulator (e.g., Rain Bird PRV-10, ~$15), a filter (Rain Bird RBY filter, ~$20), main tubing (1/2-inch poly tubing, 100ft ~$25), smaller feeder lines (1/4-inch tubing), and emitters (0.5 GPH or 1 GPH per plant).
- Kits: For beginners, a starter kit like the Rain Bird Drip Irrigation Garden Kit (model DDI-KIT-1P, ~$40-$60) is excellent for a small garden. For larger setups, I use Netafim Techline CV Drip Line (500ft roll, ~$150-$200), which has pressure-compensating emitters built-in, ensuring even watering across long runs.
- Automation: For true self-sufficiency, consider a battery-powered timer (e.g., Orbit B-Hyve Bluetooth Hose Faucet Timer, ~$50) or a solar-powered timer connected to a small 12V pump.
- Solar-Powered Pumps: For lifting water from a well, pond, or large storage tank to your garden, a solar pump is a game-changer. For a smaller drip system, a Shurflo 2088-594-152 Diaphragm Pump (12V, 3.5 GPM, ~$180) can be powered by a single 100W solar panel (e.g., Renogy 100W Monocrystalline Solar Panel, ~$100) and a small 12V battery (e.g., a 50Ah LiFePO4 battery like the Battle Born 50Ah, ~$450). For larger operations or deeper wells, more robust systems are needed. If you’re looking to build out a comprehensive off-grid power system to support your garden’s water needs, or indeed your entire homestead, you might want to explore resources like the Power Grid Generator complete system guide to understand the full scope of what’s possible in terms of energy independence.
Step 5: Seed Selection & Planting
The choice of seeds is crucial for a truly self sufficient garden from scratch.
- Choose Heirloom & Open-Pollinated Seeds: These varieties produce seeds that will grow true to type, meaning you can save seeds from your harvest year after year. F1 hybrids, while often vigorous, will not produce consistent offspring from saved seeds. Reputable seed companies include Baker Creek Heirloom Seeds, High Mowing Organic Seeds, and Seed Savers Exchange. Start with common, reliable varieties like ‘Black Krim’ tomatoes, ‘Provider’ bush beans, ‘Waltham Butternut’ squash, and ‘Black Seeded Simpson’ lettuce.
- Start Seeds Indoors (Optional but Recommended): For longer growing seasons or specific crops, starting seeds indoors gives you a head start. Use seed-starting mix (e.g., Espoma Organic Seed Starter Mix, ~$10 for 16qt bag) in seed trays (Jiffy Professional Greenhouse 72-cell kit, ~$15). Provide adequate light with LED grow lights (Barrina T5 2ft 4-pack LED Grow Lights, 20W each, ~$50) for 14-16 hours a day, positioned 2-4 inches above seedlings. Maintain consistent temperatures (65-75°F for most).
- Direct Sowing vs. Transplanting: Some crops (carrots, radishes, beans, corn) prefer direct sowing into the garden bed. Others (tomatoes, peppers, broccoli, kale) benefit from being started indoors and transplanted. Follow seed packet instructions for planting depths (e.g., lettuce seeds are often surface-sown or planted 1/8 inch deep, while beans are 1 inch deep) and spacing.
- Companion Planting: Strategically plant different species together to enhance growth, deter pests, and attract beneficial insects. For example, planting marigolds near tomatoes can deter nematodes, and basil improves tomato flavor. Nasturtiums can act as a trap crop for aphids.
- Succession Planting: For a continuous harvest, plant small batches of quick-growing crops (lettuce, radishes, cilantro) every 2-3 weeks. As one crop finishes, another is ready to take its place.
Step 6: Pest & Disease Management (Organic)
Maintaining a self sufficient garden from scratch means embracing organic pest and disease control.
- Integrated Pest Management (IPM): This holistic approach combines several strategies.
- Observation: Regularly inspect your plants for early signs of pests or disease. Catching issues early is key.
- Physical Barriers: Use row covers (e.g., Agribon AG-19 floating row cover, 10×20 ft, ~$20) to protect young plants from insect pests like cabbage worms and squash bugs. Install fences (e.g., 2×4 welded wire mesh, 4 ft tall, 50 ft roll ~$70) to keep out deer, rabbits, and other larger animals.
- Hand-Picking: For larger pests like tomato hornworms or squash bugs, simply pick them off and drop them into a bucket of soapy water.
- Companion Planting: As mentioned, certain plants repel pests. Marigolds, garlic, and onions are excellent deterrents.
- Attract Beneficial Insects: Plant flowers like dill, fennel, cosmos, and sweet alyssum to attract ladybugs, lacewings, and parasitic wasps, which prey on common garden pests.
- Organic Sprays & Treatments:
- Neem Oil: An excellent broad-spectrum organic insecticide and fungicide. Bonide Neem Oil Concentrate (16oz, ~$20) can be mixed at a rate of 1-2 tbsp per gallon of water and sprayed on affected plants.
- Insecticidal Soap: Effective against soft-bodied insects like aphids, whiteflies, and spider mites. Garden Safe Insecticidal Soap (24oz ready-to-use, ~$10).
- Bacillus thuringiensis (Bt): A naturally occurring soil bacterium that targets caterpillars and worms. Monterey BT Worm & Caterpillar Killer (16oz, ~$18) is highly effective and safe for beneficial insects.
- Copper or Sulfur Sprays: For fungal diseases like powdery mildew or blight, organic copper (e.g., Bonide Copper Fungicide, ~$15 for 1lb) or sulfur (e.g., Safer Brand Garden Fungicide, ~$10 for 16oz) can be used as a last resort.
Step 7: Harvesting & Seed Saving
The culmination of your efforts is the harvest, and seed saving closes the loop on self-sufficiency.
- Harvesting Techniques:
- Timing: Harvest vegetables at their peak ripeness for best flavor and nutritional value. For example, green beans should snap cleanly, cucumbers should be firm, and tomatoes should be fully colored.
- Frequency: Many crops, like zucchini, cucumbers, and bush beans, produce more if harvested frequently. Pick daily or every other day.
- Tools: Use clean, sharp pruners (e.g., Corona ClassicCUT Bypass Pruner BP 3180, ~$30) or a sharp knife for clean cuts, minimizing damage to the plant.
- Seed Saving: This is where the « self-sufficient » aspect truly shines.
- Selection: Only save seeds from your healthiest, most vigorous plants that show desired traits (disease resistance, good flavor, high yield).
- Isolation: To ensure true-to-type seeds, prevent cross-pollination. This can be challenging for open-pollinated crops that readily cross (e.g., squash, corn). For beginners, focus on self-pollinating plants like beans, peas, lettuce, and tomatoes.
- Processing:
- Dry Seeds (Beans, Peas, Lettuce, Grains): Allow pods/seed heads to dry completely on the plant. Harvest, shell, and clean the seeds, removing chaff.
- Wet Seeds (Tomatoes, Cucumbers, Squash): For tomatoes, ferment the seeds in water for a few days to remove the gel coating and inhibit disease. For cucumbers/squash, scrape out seeds, wash thoroughly, and dry.
- Drying: Spread seeds thinly on screens or paper plates in a cool, dry, well-ventilated area for 1-4 weeks. Ensure they are bone-dry before storage. I aim for less than 8% moisture content.
- Storage: Store seeds in airtight containers (glass jars with desiccant packets work well) in a cool, dark, dry place (ideally 40-50°F and 30-40% humidity). Label clearly with variety and date. Properly stored seeds can remain viable for 3-10 years or more.
Step 8: Season Extension & Winterizing
Extend your harvest and protect your garden for the off-season to truly maximize your self sufficient garden from scratch.
- Cold Frames: Simple structures with a transparent top (glass, polycarbonate, or old windows) that sit over garden beds. They trap solar heat, allowing you to grow cold-hardy crops (lettuce, spinach, kale, radishes) well into winter or start seeds earlier in spring. A basic cold frame can be built from 2×6 lumber and a sheet of polycarbonate for under $100.
- Hoop Houses/Low Tunnels: Larger structures made from flexible hoops (PVC pipe or EMT conduit) covered with greenhouse plastic. These provide more space and greater temperature moderation. A 10×20 ft DIY low tunnel kit can cost $200-$500, while a larger, more robust hoop house kit might be $1,000-$3,000. I use a 6×12 ft low tunnel made from 1/2-inch PVC hoops and 6mil greenhouse plastic, which extends my lettuce and spinach harvest by at least
Step 4: Water Management & Irrigation
Efficient water management is critical for a self sufficient garden from scratch, especially in off-grid living where water resources might be limited.
- Rainwater Harvesting: This is my primary source of irrigation water. A 55-gallon rain barrel (e.g., EarthMark Rain Barrel, ~$120-$150) connected to a downspout can collect significant water. For larger needs, I use two 275-gallon IBC totes (Intermediate Bulk Containers, often available used for $100-$200 each from food-grade sources) connected in series. A 1,000 sq ft roof can collect approximately 620 gallons of water for every inch of rainfall. My 1,500 sq ft roof provides ample water for my 600 sq ft garden through multiple barrels and totes.
- Drip Irrigation: This is by far the most water-efficient method, delivering water directly to the plant’s root zone, minimizing evaporation and weed growth.
- Components: A typical drip system includes a pressure regulator (e.g., Rain Bird PRV-10, ~$15), a filter (Rain Bird RBY filter, ~$20), main tubing (1/2-inch poly tubing, 100ft ~$25), smaller feeder lines (1/4-inch tubing), and emitters (0.5 GPH or 1 GPH per plant).
- Kits: For beginners, a starter kit like the Rain Bird Drip Irrigation Garden Kit (model DDI-KIT-1P, ~$40-$60) is excellent for a small garden. For larger setups, I use Netafim Techline CV Drip Line (500ft roll, ~$150-$200), which has pressure-compensating emitters built-in, ensuring even watering across long runs.
- Automation: For true self-sufficiency, consider a battery-powered timer (e.g., Orbit B-Hyve Bluetooth Hose Faucet Timer, ~$50) or a solar-powered timer connected to a small 12V pump.
- Solar-Powered Pumps: For lifting water from a well, pond, or large storage tank to your garden, a solar pump is a game-changer. For a smaller drip system, a Shurflo 2088-594-152 Diaphragm Pump (12V, 3.5 GPM, ~$180) can be powered by a single 100W solar panel (e.g., Renogy 100W Monocrystalline Solar Panel, ~$100) and a small 12V battery (e.g., a 50Ah LiFePO4 battery like the Battle Born 50Ah, ~$450). For larger operations or deeper wells, more robust systems are needed. If you’re looking to build out a comprehensive off-grid power system to support your garden’s water needs, or indeed your entire homestead, you might want to explore resources like the Power Grid Generator complete system guide to understand the full scope of what’s possible in terms of energy independence.
Step 5: Seed Selection & Planting
The choice of seeds is crucial for a truly self sufficient garden from scratch.
- Choose Heirloom & Open-Pollinated Seeds: These varieties produce seeds that will grow true to type, meaning you can save seeds from your harvest year after year. F1 hybrids, while often vigorous, will not produce consistent offspring from saved seeds. Reputable seed companies include Baker Creek Heirloom Seeds, High Mowing Organic Seeds, and Seed Savers Exchange. Start with common, reliable varieties like ‘Black Krim’ tomatoes, ‘Provider’ bush beans, ‘Waltham Butternut’ squash, and ‘Black Seeded Simpson’ lettuce.
- Start Seeds Indoors (Optional but Recommended): For longer growing seasons or specific crops, starting seeds indoors gives you a head start. Use seed-starting mix (e.g., Espoma Organic Seed Starter Mix, ~$10 for 16qt bag) in seed trays (Jiffy Professional Greenhouse 72-cell kit, ~$15). Provide adequate light with LED grow lights (Barrina T5 2ft 4-pack LED Grow Lights, 20W each, ~$50) for 14-16 hours a day, positioned 2-4 inches above seedlings. Maintain consistent temperatures (65-75°F for most).
- Direct Sowing vs. Transplanting: Some crops (carrots, radishes, beans, corn) prefer direct sowing into the garden bed. Others (tomatoes, peppers, broccoli, kale) benefit from being started indoors and transplanted. Follow seed packet instructions for planting depths (e.g., lettuce seeds are often surface-sown or planted 1/8 inch deep, while beans are 1 inch deep) and spacing.
- Companion Planting: Strategically plant different species together to enhance growth, deter pests, and attract beneficial insects. For example, planting marigolds near tomatoes can deter nematodes, and basil improves tomato flavor. Nasturtiums can act as a trap crop for aphids.
- Succession Planting: For a continuous harvest, plant small batches of quick-growing crops (lettuce, radishes, cilantro) every 2-3 weeks. As one crop finishes, another is ready to take its place.
Step 6: Pest & Disease Management (Organic)
Maintaining a self sufficient garden from scratch means embracing organic pest and disease control.
- Integrated Pest Management (IPM): This holistic approach combines several strategies.
- Observation: Regularly inspect your plants for early signs of pests or disease. Catching issues early is key.
- Physical Barriers: Use row covers (e.g., Agribon AG-19 floating row cover, 10×20 ft, ~$20) to protect young plants from insect pests like cabbage worms and squash bugs. Install fences (e.g., 2×4 welded wire mesh, 4 ft tall, 50 ft roll ~$70) to keep out deer, rabbits, and other larger animals.
- Hand-Picking: For larger pests like tomato hornworms or squash bugs, simply pick them off and drop them into a bucket of soapy water.
- Companion Planting: As mentioned, certain plants repel pests. Marigolds, garlic, and onions are excellent deterrents.
- Attract Beneficial Insects: Plant flowers like dill, fennel, cosmos, and sweet alyssum to attract ladybugs, lacewings, and parasitic wasps, which prey on common garden pests.
- Organic Sprays & Treatments:
- Neem Oil: An excellent broad-spectrum organic insecticide and fungicide. Bonide Neem Oil Concentrate (16oz, ~$20) can be mixed at a rate of 1-2 tbsp per gallon of water and sprayed on affected plants.
- Insecticidal Soap: Effective against soft-bodied insects like aphids, whiteflies, and spider mites. Garden Safe Insecticidal Soap (24oz ready-to-use, ~$10).
- Bacillus thuringiensis (Bt): A naturally occurring soil bacterium that targets caterpillars and worms. Monterey BT Worm & Caterpillar Killer (16oz, ~$18) is highly effective and safe for beneficial insects.
- Copper or Sulfur Sprays: For fungal diseases like powdery mildew or blight, organic copper (e.g., Bonide Copper Fungicide, ~$15 for 1lb) or sulfur (e.g., Safer Brand Garden Fungicide, ~$10 for 16oz) can be used as a last resort.
Step 7: Harvesting & Seed Saving
The culmination of your efforts is the harvest, and seed saving closes the loop on self-sufficiency.
- Harvesting Techniques:
- Timing: Harvest vegetables at their peak ripeness for best flavor and nutritional value. For example, green beans should snap cleanly, cucumbers should be firm, and tomatoes should be fully colored.
- Frequency: Many crops, like zucchini, cucumbers, and bush beans, produce more if harvested frequently. Pick daily or every other day.
- Tools: Use clean, sharp pruners (e.g., Corona ClassicCUT Bypass Pruner BP 3180, ~$30) or a sharp knife for clean cuts, minimizing damage to the plant.
- Seed Saving: This is where the « self-sufficient » aspect truly shines.
- Selection: Only save seeds from your healthiest, most vigorous plants that show desired traits (disease resistance, good flavor, high yield).
- Isolation: To ensure true-to-type seeds, prevent cross-pollination. This can be challenging for open-pollinated crops that readily cross (e.g., squash, corn). For beginners, focus on self-pollinating plants like beans, peas, lettuce, and tomatoes.
- Processing:
- Dry Seeds (Beans, Peas, Lettuce, Grains): Allow pods/seed heads to dry completely on the plant. Harvest, shell, and clean the seeds, removing chaff.
- Wet Seeds (Tomatoes, Cucumbers, Squash): For tomatoes, ferment the seeds in water for a few days to remove the gel coating and inhibit disease. For cucumbers/squash, scrape out seeds, wash thoroughly, and dry.
- Drying: Spread seeds thinly on screens or paper plates in a cool, dry, well-ventilated area for 1-4 weeks. Ensure they are bone-dry before storage. I aim for less than 8% moisture content.
- Storage: Store seeds in airtight containers (glass jars with desiccant packets work well) in a cool, dark, dry place (ideally 40-50°F and 30-40% humidity). Label clearly with variety and date. Properly stored seeds can remain viable for 3-10 years or more.
Step 8: Season Extension & Winterizing
Extend your harvest and protect your garden for the off-season to truly maximize your self sufficient garden from scratch.
- Cold Frames: Simple structures with a transparent top (glass, polycarbonate, or old windows) that sit over garden beds. They trap solar heat, allowing you to grow cold-hardy crops (lettuce, spinach, kale, radishes) well into winter or start seeds earlier in spring. A basic cold frame can be built from 2×6 lumber and a sheet of polycarbonate for under $100.
- Hoop Houses/Low Tunnels: Larger structures made from flexible hoops (PVC pipe or EMT conduit) covered with greenhouse plastic. These provide more space and greater temperature moderation. A 10×20 ft DIY low tunnel kit can cost $200-$500, while a larger, more robust hoop house kit might be $1,000-$3,000. I use a 6×12 ft low tunnel made from 1/2-inch PVC hoops and 6mil greenhouse plastic, which extends my lettuce and spinach harvest by at least
- In-Ground Beds: If you have excellent native soil and good drainage, in-ground beds are the most economical. Double-digging (loosening soil two shovel depths) can significantly improve drainage and aeration. For my main garden, I primarily use in-ground beds, but I focus on building up the soil over time with consistent compost additions and cover cropping. I aim for beds that are no wider than 3-4 feet so I can reach the center without stepping on the soil, compacting it.
- Raised Beds: Raised beds offer numerous advantages, especially for poor soil, heavy clay, or rocky areas. They provide better drainage, warm up faster in spring, reduce compaction, and make weeding and harvesting easier on your back.
- Material Options:
- Untreated Cedar: Naturally rot-resistant and chemical-free. A 4×8 ft bed, 12 inches deep, typically requires three 2x12x8 ft cedar boards, costing around $50-$60 per board (total ~$150-$180) plus corner brackets or screws. My first raised beds were cedar and are still going strong after 7 years.
- Galvanized Steel: Durable, long-lasting, and aesthetically pleasing. Brands like Vego Garden offer modular kits. A Vego Garden 17″ Tall 8-in-1 Metal Raised Garden Bed (can be configured to 4×8 ft) costs approximately $250-$300.
- Concrete Blocks/Stones: Very durable but can leach minerals (though generally safe once weathered) and can be expensive.
- Recycled Materials: Pallets (check for chemical treatment stamps like « HT » for heat-treated), old tires (controversial due to potential chemical leaching).
- Filling Raised Beds: Don’t just fill with topsoil. Use a « Hugelkultur » approach (logs, branches, leaves, then compost, then topsoil) or a mixture of 60% good quality topsoil, 30% compost, and 10% perlite or vermiculite for drainage. A 4x8x1 ft raised bed requires about 32 cubic feet (or ~1.2 cubic yards) of soil mix, which can cost $100-$200 depending on your source.
- Material Options:
Step 4: Water Management & Irrigation
Efficient water management is critical for a self sufficient garden from scratch, especially in off-grid living where water resources might be limited.
- Rainwater Harvesting: This is my primary source of irrigation water. A 55-gallon rain barrel (e.g., EarthMark Rain Barrel, ~$120-$150) connected to a downspout can collect significant water. For larger needs, I use two 275-gallon IBC totes (Intermediate Bulk Containers, often available used for $100-$200 each from food-grade sources) connected in series. A 1,000 sq ft roof can collect approximately 620 gallons of water for every inch of rainfall. My 1,500 sq ft roof provides ample water for my 600 sq ft garden through multiple barrels and totes.
- Drip Irrigation: This is by far the most water-efficient method, delivering water directly to the plant’s root zone, minimizing evaporation and weed growth.
- Components: A typical drip system includes a pressure regulator (e.g., Rain Bird PRV-10, ~$15), a filter (Rain Bird RBY filter, ~$20), main tubing (1/2-inch poly tubing, 100ft ~$25), smaller feeder lines (1/4-inch tubing), and emitters (0.5 GPH or 1 GPH per plant).
- Kits: For beginners, a starter kit like the Rain Bird Drip Irrigation Garden Kit (model DDI-KIT-1P, ~$40-$60) is excellent for a small garden. For larger setups, I use Netafim Techline CV Drip Line (500ft roll, ~$150-$200), which has pressure-compensating emitters built-in, ensuring even watering across long runs.
- Automation: For true self-sufficiency, consider a battery-powered timer (e.g., Orbit B-Hyve Bluetooth Hose Faucet Timer, ~$50) or a solar-powered timer connected to a small 12V pump.
- Solar-Powered Pumps: For lifting water from a well, pond, or large storage tank to your garden, a solar pump is a game-changer. For a smaller drip system, a Shurflo 2088-594-152 Diaphragm Pump (12V, 3.5 GPM, ~$180) can be powered by a single 100W solar panel (e.g., Renogy 100W Monocrystalline Solar Panel, ~$100) and a small 12V battery (e.g., a 50Ah LiFePO4 battery like the Battle Born 50Ah, ~$450). For larger operations or deeper wells, more robust systems are needed. If you’re looking to build out a comprehensive off-grid power system to support your garden’s water needs, or indeed your entire homestead, you might want to explore resources like the Power Grid Generator complete system guide to understand the full scope of what’s possible in terms of energy independence.
Step 5: Seed Selection & Planting
The choice of seeds is crucial for a truly self sufficient garden from scratch.
- Choose Heirloom & Open-Pollinated Seeds: These varieties produce seeds that will grow true to type, meaning you can save seeds from your harvest year after year. F1 hybrids, while often vigorous, will not produce consistent offspring from saved seeds. Reputable seed companies include Baker Creek Heirloom Seeds, High Mowing Organic Seeds, and Seed Savers Exchange. Start with common, reliable varieties like ‘Black Krim’ tomatoes, ‘Provider’ bush beans, ‘Waltham Butternut’ squash, and ‘Black Seeded Simpson’ lettuce.
- Start Seeds Indoors (Optional but Recommended): For longer growing seasons or specific crops, starting seeds indoors gives you a head start. Use seed-starting mix (e.g., Espoma Organic Seed Starter Mix, ~$10 for 16qt bag) in seed trays (Jiffy Professional Greenhouse 72-cell kit, ~$15). Provide adequate light with LED grow lights (Barrina T5 2ft 4-pack LED Grow Lights, 20W each, ~$50) for 14-16 hours a day, positioned 2-4 inches above seedlings. Maintain consistent temperatures (65-75°F for most).
- Direct Sowing vs. Transplanting: Some crops (carrots, radishes, beans, corn) prefer direct sowing into the garden bed. Others (tomatoes, peppers, broccoli, kale) benefit from being started indoors and transplanted. Follow seed packet instructions for planting depths (e.g., lettuce seeds are often surface-sown or planted 1/8 inch deep, while beans are 1 inch deep) and spacing.
- Companion Planting: Strategically plant different species together to enhance growth, deter pests, and attract beneficial insects. For example, planting marigolds near tomatoes can deter nematodes, and basil improves tomato flavor. Nasturtiums can act as a trap crop for aphids.
- Succession Planting: For a continuous harvest, plant small batches of quick-growing crops (lettuce, radishes, cilantro) every 2-3 weeks. As one crop finishes, another is ready to take its place.
Step 6: Pest & Disease Management (Organic)
Maintaining a self sufficient garden from scratch means embracing organic pest and disease control.
- Integrated Pest Management (IPM): This holistic approach combines several strategies.
- Observation: Regularly inspect your plants for early signs of pests or disease. Catching issues early is key.
- Physical Barriers: Use row covers (e.g., Agribon AG-19 floating row cover, 10×20 ft, ~$20) to protect young plants from insect pests like cabbage worms and squash bugs. Install fences (e.g., 2×4 welded wire mesh, 4 ft tall, 50 ft roll ~$70) to keep out deer, rabbits, and other larger animals.
- Hand-Picking: For larger pests like tomato hornworms or squash bugs, simply pick them off and drop them into a bucket of soapy water.
- Companion Planting: As mentioned, certain plants repel pests. Marigolds, garlic, and onions are excellent deterrents.
- Attract Beneficial Insects: Plant flowers like dill, fennel, cosmos, and sweet alyssum to attract ladybugs, lacewings, and parasitic wasps, which prey on common garden pests.
- Organic Sprays & Treatments:
- Neem Oil: An excellent broad-spectrum organic insecticide and fungicide. Bonide Neem Oil Concentrate (16oz, ~$20) can be mixed at a rate of 1-2 tbsp per gallon of water and sprayed on affected plants.
- Insecticidal Soap: Effective against soft-bodied insects like aphids, whiteflies, and spider mites. Garden Safe Insecticidal Soap (24oz ready-to-use, ~$10).
- Bacillus thuringiensis (Bt): A naturally occurring soil bacterium that targets caterpillars and worms. Monterey BT Worm & Caterpillar Killer (16oz, ~$18) is highly effective and safe for beneficial insects.
- Copper or Sulfur Sprays: For fungal diseases like powdery mildew or blight, organic copper (e.g., Bonide Copper Fungicide, ~$15 for 1lb) or sulfur (e.g., Safer Brand Garden Fungicide, ~$10 for 16oz) can be used as a last resort.
Step 7: Harvesting & Seed Saving
The culmination of your efforts is the harvest, and seed saving closes the loop on self-sufficiency.
- Harvesting Techniques:
- Timing: Harvest vegetables at their peak ripeness for best flavor and nutritional value. For example, green beans should snap cleanly, cucumbers should be firm, and tomatoes should be fully colored.
- Frequency: Many crops, like zucchini, cucumbers, and bush beans, produce more if harvested frequently. Pick daily or every other day.
- Tools: Use clean, sharp pruners (e.g., Corona ClassicCUT Bypass Pruner BP 3180, ~$30) or a sharp knife for clean cuts, minimizing damage to the plant.
- Seed Saving: This is where the « self-sufficient » aspect truly shines.
- Selection: Only save seeds from your healthiest, most vigorous plants that show desired traits (disease resistance, good flavor, high yield).
- Isolation: To ensure true-to-type seeds, prevent cross-pollination. This can be challenging for open-pollinated crops that readily cross (e.g., squash, corn). For beginners, focus on self-pollinating plants like beans, peas, lettuce, and tomatoes.
- Processing:
- Dry Seeds (Beans, Peas, Lettuce, Grains): Allow pods/seed heads to dry completely on the plant. Harvest, shell, and clean the seeds, removing chaff.
- Wet Seeds (Tomatoes, Cucumbers, Squash): For tomatoes, ferment the seeds in water for a few days to remove the gel coating and inhibit disease. For cucumbers/squash, scrape out seeds, wash thoroughly, and dry.
- Drying: Spread seeds thinly on screens or paper plates in a cool, dry, well-ventilated area for 1-4 weeks. Ensure they are bone-dry before storage. I aim for less than 8% moisture content.
- Storage: Store seeds in airtight containers (glass jars with desiccant packets work well) in a cool, dark, dry place (ideally 40-50°F and 30-40% humidity). Label clearly with variety and date. Properly stored seeds can remain viable for 3-10 years or more.
Step 8: Season Extension & Winterizing
Extend your harvest and protect your garden for the off-season to truly maximize your self sufficient garden from scratch.
- Cold Frames: Simple structures with a transparent top (glass, polycarbonate, or old windows) that sit over garden beds. They trap solar heat, allowing you to grow cold-hardy crops (lettuce, spinach, kale, radishes) well into winter or start seeds earlier in spring. A basic cold frame can be built from 2×6 lumber and a sheet of polycarbonate for under $100.
- Hoop Houses/Low Tunnels: Larger structures made from flexible hoops (PVC pipe or EMT conduit) covered with greenhouse plastic. These provide more space and greater temperature moderation. A 10×20 ft DIY low tunnel kit can cost $200-$500, while a larger, more robust hoop house kit might be $1,000-$3,000. I use a 6×12 ft low tunnel made from 1/2-inch PVC hoops and 6mil greenhouse plastic, which extends my lettuce and spinach harvest by at least
Deciding between raised beds and in-ground beds depends on your soil, budget, and physical capabilities.
- In-Ground Beds: If you have excellent native soil and good drainage, in-ground beds are the most economical. Double-digging (loosening soil two shovel depths) can significantly improve drainage and aeration. For my main garden, I primarily use in-ground beds, but I focus on building up the soil over time with consistent compost additions and cover cropping. I aim for beds that are no wider than 3-4 feet so I can reach the center without stepping on the soil, compacting it.
- Raised Beds: Raised beds offer numerous advantages, especially for poor soil, heavy clay, or rocky areas. They provide better drainage, warm up faster in spring, reduce compaction, and make weeding and harvesting easier on your back.
- Material Options:
- Untreated Cedar: Naturally rot-resistant and chemical-free. A 4×8 ft bed, 12 inches deep, typically requires three 2x12x8 ft cedar boards, costing around $50-$60 per board (total ~$150-$180) plus corner brackets or screws. My first raised beds were cedar and are still going strong after 7 years.
- Galvanized Steel: Durable, long-lasting, and aesthetically pleasing. Brands like Vego Garden offer modular kits. A Vego Garden 17″ Tall 8-in-1 Metal Raised Garden Bed (can be configured to 4×8 ft) costs approximately $250-$300.
- Concrete Blocks/Stones: Very durable but can leach minerals (though generally safe once weathered) and can be expensive.
- Recycled Materials: Pallets (check for chemical treatment stamps like « HT » for heat-treated), old tires (controversial due to potential chemical leaching).
- Filling Raised Beds: Don’t just fill with topsoil. Use a « Hugelkultur » approach (logs, branches, leaves, then compost, then topsoil) or a mixture of 60% good quality topsoil, 30% compost, and 10% perlite or vermiculite for drainage. A 4x8x1 ft raised bed requires about 32 cubic feet (or ~1.2 cubic yards) of soil mix, which can cost $100-$200 depending on your source.
- Material Options:
Step 4: Water Management & Irrigation
Efficient water management is critical for a self sufficient garden from scratch, especially in off-grid living where water resources might be limited.
- Rainwater Harvesting: This is my primary source of irrigation water. A 55-gallon rain barrel (e.g., EarthMark Rain Barrel, ~$120-$150) connected to a downspout can collect significant water. For larger needs, I use two 275-gallon IBC totes (Intermediate Bulk Containers, often available used for $100-$200 each from food-grade sources) connected in series. A 1,000 sq ft roof can collect approximately 620 gallons of water for every inch of rainfall. My 1,500 sq ft roof provides ample water for my 600 sq ft garden through multiple barrels and totes.
- Drip Irrigation: This is by far the most water-efficient method, delivering water directly to the plant’s root zone, minimizing evaporation and weed growth.
- Components: A typical drip system includes a pressure regulator (e.g., Rain Bird PRV-10, ~$15), a filter (Rain Bird RBY filter, ~$20), main tubing (1/2-inch poly tubing, 100ft ~$25), smaller feeder lines (1/4-inch tubing), and emitters (0.5 GPH or 1 GPH per plant).
- Kits: For beginners, a starter kit like the Rain Bird Drip Irrigation Garden Kit (model DDI-KIT-1P, ~$40-$60) is excellent for a small garden. For larger setups, I use Netafim Techline CV Drip Line (500ft roll, ~$150-$200), which has pressure-compensating emitters built-in, ensuring even watering across long runs.
- Automation: For true self-sufficiency, consider a battery-powered timer (e.g., Orbit B-Hyve Bluetooth Hose Faucet Timer, ~$50) or a solar-powered timer connected to a small 12V pump.
- Solar-Powered Pumps: For lifting water from a well, pond, or large storage tank to your garden, a solar pump is a game-changer. For a smaller drip system, a Shurflo 2088-594-152 Diaphragm Pump (12V, 3.5 GPM, ~$180) can be powered by a single 100W solar panel (e.g., Renogy 100W Monocrystalline Solar Panel, ~$100) and a small 12V battery (e.g., a 50Ah LiFePO4 battery like the Battle Born 50Ah, ~$450). For larger operations or deeper wells, more robust systems are needed. If you’re looking to build out a comprehensive off-grid power system to support your garden’s water needs, or indeed your entire homestead, you might want to explore resources like the Power Grid Generator complete system guide to understand the full scope of what’s possible in terms of energy independence.
Step 5: Seed Selection & Planting
The choice of seeds is crucial for a truly self sufficient garden from scratch.
- Choose Heirloom & Open-Pollinated Seeds: These varieties produce seeds that will grow true to type, meaning you can save seeds from your harvest year after year. F1 hybrids, while often vigorous, will not produce consistent offspring from saved seeds. Reputable seed companies include Baker Creek Heirloom Seeds, High Mowing Organic Seeds, and Seed Savers Exchange. Start with common, reliable varieties like ‘Black Krim’ tomatoes, ‘Provider’ bush beans, ‘Waltham Butternut’ squash, and ‘Black Seeded Simpson’ lettuce.
- Start Seeds Indoors (Optional but Recommended): For longer growing seasons or specific crops, starting seeds indoors gives you a head start. Use seed-starting mix (e.g., Espoma Organic Seed Starter Mix, ~$10 for 16qt bag) in seed trays (Jiffy Professional Greenhouse 72-cell kit, ~$15). Provide adequate light with LED grow lights (Barrina T5 2ft 4-pack LED Grow Lights, 20W each, ~$50) for 14-16 hours a day, positioned 2-4 inches above seedlings. Maintain consistent temperatures (65-75°F for most).
- Direct Sowing vs. Transplanting: Some crops (carrots, radishes, beans, corn) prefer direct sowing into the garden bed. Others (tomatoes, peppers, broccoli, kale) benefit from being started indoors and transplanted. Follow seed packet instructions for planting depths (e.g., lettuce seeds are often surface-sown or planted 1/8 inch deep, while beans are 1 inch deep) and spacing.
- Companion Planting: Strategically plant different species together to enhance growth, deter pests, and attract beneficial insects. For example, planting marigolds near tomatoes can deter nematodes, and basil improves tomato flavor. Nasturtiums can act as a trap crop for aphids.
- Succession Planting: For a continuous harvest, plant small batches of quick-growing crops (lettuce, radishes, cilantro) every 2-3 weeks. As one crop finishes, another is ready to take its place.
Step 6: Pest & Disease Management (Organic)
Maintaining a self sufficient garden from scratch means embracing organic pest and disease control.
- Integrated Pest Management (IPM): This holistic approach combines several strategies.
- Observation: Regularly inspect your plants for early signs of pests or disease. Catching issues early is key.
- Physical Barriers: Use row covers (e.g., Agribon AG-19 floating row cover, 10×20 ft, ~$20) to protect young plants from insect pests like cabbage worms and squash bugs. Install fences (e.g., 2×4 welded wire mesh, 4 ft tall, 50 ft roll ~$70) to keep out deer, rabbits, and other larger animals.
- Hand-Picking: For larger pests like tomato hornworms or squash bugs, simply pick them off and drop them into a bucket of soapy water.
- Companion Planting: As mentioned, certain plants repel pests. Marigolds, garlic, and onions are excellent deterrents.
- Attract Beneficial Insects: Plant flowers like dill, fennel, cosmos, and sweet alyssum to attract ladybugs, lacewings, and parasitic wasps, which prey on common garden pests.
- Organic Sprays & Treatments:
- Neem Oil: An excellent broad-spectrum organic insecticide and fungicide. Bonide Neem Oil Concentrate (16oz, ~$20) can be mixed at a rate of 1-2 tbsp per gallon of water and sprayed on affected plants.
- Insecticidal Soap: Effective against soft-bodied insects like aphids, whiteflies, and spider mites. Garden Safe Insecticidal Soap (24oz ready-to-use, ~$10).
- Bacillus thuringiensis (Bt): A naturally occurring soil bacterium that targets caterpillars and worms. Monterey BT Worm & Caterpillar Killer (16oz, ~$18) is highly effective and safe for beneficial insects.
- Copper or Sulfur Sprays: For fungal diseases like powdery mildew or blight, organic copper (e.g., Bonide Copper Fungicide, ~$15 for 1lb) or sulfur (e.g., Safer Brand Garden Fungicide, ~$10 for 16oz) can be used as a last resort.
Step 7: Harvesting & Seed Saving
The culmination of your efforts is the harvest, and seed saving closes the loop on self-sufficiency.
- Harvesting Techniques:
- Timing: Harvest vegetables at their peak ripeness for best flavor and nutritional value. For example, green beans should snap cleanly, cucumbers should be firm, and tomatoes should be fully colored.
- Frequency: Many crops, like zucchini, cucumbers, and bush beans, produce more if harvested frequently. Pick daily or every other day.
- Tools: Use clean, sharp pruners (e.g., Corona ClassicCUT Bypass Pruner BP 3180, ~$30) or a sharp knife for clean cuts, minimizing damage to the plant.
- Seed Saving: This is where the « self-sufficient » aspect truly shines.
- Selection: Only save seeds from your healthiest, most vigorous plants that show desired traits (disease resistance, good flavor, high yield).
- Isolation: To ensure true-to-type seeds, prevent cross-pollination. This can be challenging for open-pollinated crops that readily cross (e.g., squash, corn). For beginners, focus on self-pollinating plants like beans, peas, lettuce, and tomatoes.
- Processing:
- Dry Seeds (Beans, Peas, Lettuce, Grains): Allow pods/seed heads to dry completely on the plant. Harvest, shell, and clean the seeds, removing chaff.
- Wet Seeds (Tomatoes, Cucumbers, Squash): For tomatoes, ferment the seeds in water for a few days to remove the gel coating and inhibit disease. For cucumbers/squash, scrape out seeds, wash thoroughly, and dry.
- Drying: Spread seeds thinly on screens or paper plates in a cool, dry, well-ventilated area for 1-4 weeks. Ensure they are bone-dry before storage. I aim for less than 8% moisture content.
- Storage: Store seeds in airtight containers (glass jars with desiccant packets work well) in a cool, dark, dry place (ideally 40-50°F and 30-40% humidity). Label clearly with variety and date. Properly stored seeds can remain viable for 3-10 years or more.
Step 8: Season Extension & Winterizing
Extend your harvest and protect your garden for the off-season to truly maximize your self sufficient garden from scratch.
- Cold Frames: Simple structures with a transparent top (glass, polycarbonate, or old windows) that sit over garden beds. They trap solar heat, allowing you to grow cold-hardy crops (lettuce, spinach, kale, radishes) well into winter or start seeds earlier in spring. A basic cold frame can be built from 2×6 lumber and a sheet of polycarbonate for under $100.
- Hoop Houses/Low Tunnels: Larger structures made from flexible hoops (PVC pipe or EMT conduit) covered with greenhouse plastic. These provide more space and greater temperature moderation. A 10×20 ft DIY low tunnel kit can cost $200-$500, while a larger, more robust hoop house kit might be $1,000-$3,000. I use a 6×12 ft low tunnel made from 1/2-inch PVC hoops and 6mil greenhouse plastic, which extends my lettuce and spinach harvest by at least
Healthy soil is the bedrock of a productive, self-sufficient garden. You can’t guess what your soil needs; you have to test it.
- Perform a Soil Test: A professional soil test will give you precise data on your soil’s pH, nutrient levels (N-P-K), and organic matter content. I recommend sending a sample to your local agricultural extension office; it typically costs $20-$50 and provides detailed recommendations. Alternatively, for a quick homeowner check, a Rapitest Soil Test Kit (40-test kit, model 1663, ~$20 on Amazon) provides a good baseline for pH, Nitrogen, Phosphorus, and Potash. Aim for a pH between 6.0 and 7.0 for most vegetables.
- Amend for pH Imbalance: If your soil is too acidic (below 6.0), add agricultural lime (dolomitic lime adds magnesium, calcitic lime adds calcium). Apply 5-10 lbs per 100 sq ft for a moderate adjustment. If it’s too alkaline (above 7.0), add elemental sulfur (e.g., Espoma Soil Acidifier, ~$15 for 6.75 lbs) or generous amounts of organic matter like peat moss or pine needles.
- Build Organic Matter: This is the single most important step for long-term soil health. Organic matter improves soil structure, water retention, drainage, and nutrient availability. Incorporate 2-4 inches of high-quality compost into your top 6-12 inches of soil annually. I make my own compost from kitchen scraps, garden waste, and shredded leaves, but you can purchase it. Local nurseries often sell bulk compost for $30-$50 per cubic yard. Aged manure (from chickens, cows, or horses – ensure it’s well-rotted to avoid burning plants) is also excellent.
- Address Nutrient Deficiencies: Based on your soil test, add specific organic amendments. If Nitrogen (N) is low, add blood meal (12-0-0, ~$20 for 3 lbs) or feather meal. For Phosphorus (P), use bone meal (3-15-0, ~$15 for 3 lbs) or rock phosphate. For Potassium (K), greensand (0-0-2.5, ~$25 for 5 lbs) or kelp meal are good choices. I rely heavily on Espoma Organic Garden-tone (5-3-3, ~$25 for an 8lb bag) as a balanced, all-purpose organic fertilizer during planting.
Step 3: Garden Bed Preparation
Deciding between raised beds and in-ground beds depends on your soil, budget, and physical capabilities.
- In-Ground Beds: If you have excellent native soil and good drainage, in-ground beds are the most economical. Double-digging (loosening soil two shovel depths) can significantly improve drainage and aeration. For my main garden, I primarily use in-ground beds, but I focus on building up the soil over time with consistent compost additions and cover cropping. I aim for beds that are no wider than 3-4 feet so I can reach the center without stepping on the soil, compacting it.
- Raised Beds: Raised beds offer numerous advantages, especially for poor soil, heavy clay, or rocky areas. They provide better drainage, warm up faster in spring, reduce compaction, and make weeding and harvesting easier on your back.
- Material Options:
- Untreated Cedar: Naturally rot-resistant and chemical-free. A 4×8 ft bed, 12 inches deep, typically requires three 2x12x8 ft cedar boards, costing around $50-$60 per board (total ~$150-$180) plus corner brackets or screws. My first raised beds were cedar and are still going strong after 7 years.
- Galvanized Steel: Durable, long-lasting, and aesthetically pleasing. Brands like Vego Garden offer modular kits. A Vego Garden 17″ Tall 8-in-1 Metal Raised Garden Bed (can be configured to 4×8 ft) costs approximately $250-$300.
- Concrete Blocks/Stones: Very durable but can leach minerals (though generally safe once weathered) and can be expensive.
- Recycled Materials: Pallets (check for chemical treatment stamps like « HT » for heat-treated), old tires (controversial due to potential chemical leaching).
- Filling Raised Beds: Don’t just fill with topsoil. Use a « Hugelkultur » approach (logs, branches, leaves, then compost, then topsoil) or a mixture of 60% good quality topsoil, 30% compost, and 10% perlite or vermiculite for drainage. A 4x8x1 ft raised bed requires about 32 cubic feet (or ~1.2 cubic yards) of soil mix, which can cost $100-$200 depending on your source.
- Material Options:
Step 4: Water Management & Irrigation
Efficient water management is critical for a self sufficient garden from scratch, especially in off-grid living where water resources might be limited.
- Rainwater Harvesting: This is my primary source of irrigation water. A 55-gallon rain barrel (e.g., EarthMark Rain Barrel, ~$120-$150) connected to a downspout can collect significant water. For larger needs, I use two 275-gallon IBC totes (Intermediate Bulk Containers, often available used for $100-$200 each from food-grade sources) connected in series. A 1,000 sq ft roof can collect approximately 620 gallons of water for every inch of rainfall. My 1,500 sq ft roof provides ample water for my 600 sq ft garden through multiple barrels and totes.
- Drip Irrigation: This is by far the most water-efficient method, delivering water directly to the plant’s root zone, minimizing evaporation and weed growth.
- Components: A typical drip system includes a pressure regulator (e.g., Rain Bird PRV-10, ~$15), a filter (Rain Bird RBY filter, ~$20), main tubing (1/2-inch poly tubing, 100ft ~$25), smaller feeder lines (1/4-inch tubing), and emitters (0.5 GPH or 1 GPH per plant).
- Kits: For beginners, a starter kit like the Rain Bird Drip Irrigation Garden Kit (model DDI-KIT-1P, ~$40-$60) is excellent for a small garden. For larger setups, I use Netafim Techline CV Drip Line (500ft roll, ~$150-$200), which has pressure-compensating emitters built-in, ensuring even watering across long runs.
- Automation: For true self-sufficiency, consider a battery-powered timer (e.g., Orbit B-Hyve Bluetooth Hose Faucet Timer, ~$50) or a solar-powered timer connected to a small 12V pump.
- Solar-Powered Pumps: For lifting water from a well, pond, or large storage tank to your garden, a solar pump is a game-changer. For a smaller drip system, a Shurflo 2088-594-152 Diaphragm Pump (12V, 3.5 GPM, ~$180) can be powered by a single 100W solar panel (e.g., Renogy 100W Monocrystalline Solar Panel, ~$100) and a small 12V battery (e.g., a 50Ah LiFePO4 battery like the Battle Born 50Ah, ~$450). For larger operations or deeper wells, more robust systems are needed. If you’re looking to build out a comprehensive off-grid power system to support your garden’s water needs, or indeed your entire homestead, you might want to explore resources like the Power Grid Generator complete system guide to understand the full scope of what’s possible in terms of energy independence.
Step 5: Seed Selection & Planting
The choice of seeds is crucial for a truly self sufficient garden from scratch.
- Choose Heirloom & Open-Pollinated Seeds: These varieties produce seeds that will grow true to type, meaning you can save seeds from your harvest year after year. F1 hybrids, while often vigorous, will not produce consistent offspring from saved seeds. Reputable seed companies include Baker Creek Heirloom Seeds, High Mowing Organic Seeds, and Seed Savers Exchange. Start with common, reliable varieties like ‘Black Krim’ tomatoes, ‘Provider’ bush beans, ‘Waltham Butternut’ squash, and ‘Black Seeded Simpson’ lettuce.
- Start Seeds Indoors (Optional but Recommended): For longer growing seasons or specific crops, starting seeds indoors gives you a head start. Use seed-starting mix (e.g., Espoma Organic Seed Starter Mix, ~$10 for 16qt bag) in seed trays (Jiffy Professional Greenhouse 72-cell kit, ~$15). Provide adequate light with LED grow lights (Barrina T5 2ft 4-pack LED Grow Lights, 20W each, ~$50) for 14-16 hours a day, positioned 2-4 inches above seedlings. Maintain consistent temperatures (65-75°F for most).
- Direct Sowing vs. Transplanting: Some crops (carrots, radishes, beans, corn) prefer direct sowing into the garden bed. Others (tomatoes, peppers, broccoli, kale) benefit from being started indoors and transplanted. Follow seed packet instructions for planting depths (e.g., lettuce seeds are often surface-sown or planted 1/8 inch deep, while beans are 1 inch deep) and spacing.
- Companion Planting: Strategically plant different species together to enhance growth, deter pests, and attract beneficial insects. For example, planting marigolds near tomatoes can deter nematodes, and basil improves tomato flavor. Nasturtiums can act as a trap crop for aphids.
- Succession Planting: For a continuous harvest, plant small batches of quick-growing crops (lettuce, radishes, cilantro) every 2-3 weeks. As one crop finishes, another is ready to take its place.
Step 6: Pest & Disease Management (Organic)
Maintaining a self sufficient garden from scratch means embracing organic pest and disease control.
- Integrated Pest Management (IPM): This holistic approach combines several strategies.
- Observation: Regularly inspect your plants for early signs of pests or disease. Catching issues early is key.
- Physical Barriers: Use row covers (e.g., Agribon AG-19 floating row cover, 10×20 ft, ~$20) to protect young plants from insect pests like cabbage worms and squash bugs. Install fences (e.g., 2×4 welded wire mesh, 4 ft tall, 50 ft roll ~$70) to keep out deer, rabbits, and other larger animals.
- Hand-Picking: For larger pests like tomato hornworms or squash bugs, simply pick them off and drop them into a bucket of soapy water.
- Companion Planting: As mentioned, certain plants repel pests. Marigolds, garlic, and onions are excellent deterrents.
- Attract Beneficial Insects: Plant flowers like dill, fennel, cosmos, and sweet alyssum to attract ladybugs, lacewings, and parasitic wasps, which prey on common garden pests.
- Organic Sprays & Treatments:
- Neem Oil: An excellent broad-spectrum organic insecticide and fungicide. Bonide Neem Oil Concentrate (16oz, ~$20) can be mixed at a rate of 1-2 tbsp per gallon of water and sprayed on affected plants.
- Insecticidal Soap: Effective against soft-bodied insects like aphids, whiteflies, and spider mites. Garden Safe Insecticidal Soap (24oz ready-to-use, ~$10).
- Bacillus thuringiensis (Bt): A naturally occurring soil bacterium that targets caterpillars and worms. Monterey BT Worm & Caterpillar Killer (16oz, ~$18) is highly effective and safe for beneficial insects.
- Copper or Sulfur Sprays: For fungal diseases like powdery mildew or blight, organic copper (e.g., Bonide Copper Fungicide, ~$15 for 1lb) or sulfur (e.g., Safer Brand Garden Fungicide, ~$10 for 16oz) can be used as a last resort.
Step 7: Harvesting & Seed Saving
The culmination of your efforts is the harvest, and seed saving closes the loop on self-sufficiency.
- Harvesting Techniques:
- Timing: Harvest vegetables at their peak ripeness for best flavor and nutritional value. For example, green beans should snap cleanly, cucumbers should be firm, and tomatoes should be fully colored.
- Frequency: Many crops, like zucchini, cucumbers, and bush beans, produce more if harvested frequently. Pick daily or every other day.
- Tools: Use clean, sharp pruners (e.g., Corona ClassicCUT Bypass Pruner BP 3180, ~$30) or a sharp knife for clean cuts, minimizing damage to the plant.
- Seed Saving: This is where the « self-sufficient » aspect truly shines.
- Selection: Only save seeds from your healthiest, most vigorous plants that show desired traits (disease resistance, good flavor, high yield).
- Isolation: To ensure true-to-type seeds, prevent cross-pollination. This can be challenging for open-pollinated crops that readily cross (e.g., squash, corn). For beginners, focus on self-pollinating plants like beans, peas, lettuce, and tomatoes.
- Processing:
- Dry Seeds (Beans, Peas, Lettuce, Grains): Allow pods/seed heads to dry completely on the plant. Harvest, shell, and clean the seeds, removing chaff.
- Wet Seeds (Tomatoes, Cucumbers, Squash): For tomatoes, ferment the seeds in water for a few days to remove the gel coating and inhibit disease. For cucumbers/squash, scrape out seeds, wash thoroughly, and dry.
- Drying: Spread seeds thinly on screens or paper plates in a cool, dry, well-ventilated area for 1-4 weeks. Ensure they are bone-dry before storage. I aim for less than 8% moisture content.
- Storage: Store seeds in airtight containers (glass jars with desiccant packets work well) in a cool, dark, dry place (ideally 40-50°F and 30-40% humidity). Label clearly with variety and date. Properly stored seeds can remain viable for 3-10 years or more.
Step 8: Season Extension & Winterizing
Extend your harvest and protect your garden for the off-season to truly maximize your self sufficient garden from scratch.
- Cold Frames: Simple structures with a transparent top (glass, polycarbonate, or old windows) that sit over garden beds. They trap solar heat, allowing you to grow cold-hardy crops (lettuce, spinach, kale, radishes) well into winter or start seeds earlier in spring. A basic cold frame can be built from 2×6 lumber and a sheet of polycarbonate for under $100.
- Hoop Houses/Low Tunnels: Larger structures made from flexible hoops (PVC pipe or EMT conduit) covered with greenhouse plastic. These provide more space and greater temperature moderation. A 10×20 ft DIY low tunnel kit can cost $200-$500, while a larger, more robust hoop house kit might be $1,000-$3,000. I use a 6×12 ft low tunnel made from 1/2-inch PVC hoops and 6mil greenhouse plastic, which extends my lettuce and spinach harvest by at least
- Integrated Pest Management (IPM): This holistic approach combines several strategies.
- Observation: Regularly inspect your plants for early signs of pests or disease. Catching issues early is key.
- Physical Barriers: Use row covers (e.g., Agribon AG-19 floating row cover, 10×20 ft, ~$20) to protect young plants from insect pests like cabbage worms and squash bugs. Install fences (e.g., 2×4 welded wire mesh, 4 ft tall, 50 ft roll ~$70) to keep out deer, rabbits, and other larger animals.
- Hand-Picking: For larger pests like tomato hornworms or squash bugs, simply pick them off and drop them into a bucket of soapy water.
- Companion Planting: As mentioned, certain plants repel pests. Marigolds, garlic, and onions are excellent deterrents.
- Attract Beneficial Insects: Plant flowers like dill, fennel, cosmos, and sweet alyssum to attract ladybugs, lacewings, and parasitic wasps, which prey on common garden pests.
- Organic Sprays & Treatments:
- Neem Oil: An excellent broad-spectrum organic insecticide and fungicide. Bonide Neem Oil Concentrate (16oz, ~$20) can be mixed at a rate of 1-2 tbsp per gallon of water and sprayed on affected plants.
- Insecticidal Soap: Effective against soft-bodied insects like aphids, whiteflies, and spider mites. Garden Safe Insecticidal Soap (24oz ready-to-use, ~$10).
- Bacillus thuringiensis (Bt): A naturally occurring soil bacterium that targets caterpillars and worms. Monterey BT Worm & Caterpillar Killer (16oz, ~$18) is highly effective and safe for beneficial insects.
- Copper or Sulfur Sprays: For fungal diseases like powdery mildew or blight, organic copper (e.g., Bonide Copper Fungicide, ~$15 for 1lb) or sulfur (e.g., Safer Brand Garden Fungicide, ~$10 for 16oz) can be used as a last resort.
Step 7: Harvesting & Seed Saving
The culmination of your efforts is the harvest, and seed saving closes the loop on self-sufficiency.
- Harvesting Techniques:
- Timing: Harvest vegetables at their peak ripeness for best flavor and nutritional value. For example, green beans should snap cleanly, cucumbers should be firm, and tomatoes should be fully colored.
- Frequency: Many crops, like zucchini, cucumbers, and bush beans, produce more if harvested frequently. Pick daily or every other day.
- Tools: Use clean, sharp pruners (e.g., Corona ClassicCUT Bypass Pruner BP 3180, ~$30) or a sharp knife for clean cuts, minimizing damage to the plant.
- Seed Saving: This is where the « self-sufficient » aspect truly shines.
- Selection: Only save seeds from your healthiest, most vigorous plants that show desired traits (disease resistance, good flavor, high yield).
- Isolation: To ensure true-to-type seeds, prevent cross-pollination. This can be challenging for open-pollinated crops that readily cross (e.g., squash, corn). For beginners, focus on self-pollinating plants like beans, peas, lettuce, and tomatoes.
- Processing:
- Dry Seeds (Beans, Peas, Lettuce, Grains): Allow pods/seed heads to dry completely on the plant. Harvest, shell, and clean the seeds, removing chaff.
- Wet Seeds (Tomatoes, Cucumbers, Squash): For tomatoes, ferment the seeds in water for a few days to remove the gel coating and inhibit disease. For cucumbers/squash, scrape out seeds, wash thoroughly, and dry.
- Drying: Spread seeds thinly on screens or paper plates in a cool, dry, well-ventilated area for 1-4 weeks. Ensure they are bone-dry before storage. I aim for less than 8% moisture content.
- Storage: Store seeds in airtight containers (glass jars with desiccant packets work well) in a cool, dark, dry place (ideally 40-50°F and 30-40% humidity). Label clearly with variety and date. Properly stored seeds can remain viable for 3-10 years or more.
Step 8: Season Extension & Winterizing
Extend your harvest and protect your garden for the off-season to truly maximize your self sufficient garden from scratch.
- Cold Frames: Simple structures with a transparent top (glass, polycarbonate, or old windows) that sit over garden beds. They trap solar heat, allowing you to grow cold-hardy crops (lettuce, spinach, kale, radishes) well into winter or start seeds earlier in spring. A basic cold frame can be built from 2×6 lumber and a sheet of polycarbonate for under $100.
- Hoop Houses/Low Tunnels: Larger structures made from flexible hoops (PVC pipe or EMT conduit) covered with greenhouse plastic. These provide more space and greater temperature moderation. A 10×20 ft DIY low tunnel kit can cost $200-$500, while a larger, more robust hoop house kit might be $1,000-$3,000. I use a 6×12 ft low tunnel made from 1/2-inch PVC hoops and 6mil greenhouse plastic, which extends my lettuce and spinach harvest by at least
- Rainwater Harvesting: This is my primary source of irrigation water. A 55-gallon rain barrel (e.g., EarthMark Rain Barrel, ~$120-$150) connected to a downspout can collect significant water. For larger needs, I use two 275-gallon IBC totes (Intermediate Bulk Containers, often available used for $100-$200 each from food-grade sources) connected in series. A 1,000 sq ft roof can collect approximately 620 gallons of water for every inch of rainfall. My 1,500 sq ft roof provides ample water for my 600 sq ft garden through multiple barrels and totes.
- Drip Irrigation: This is by far the most water-efficient method, delivering water directly to the plant’s root zone, minimizing evaporation and weed growth.
- Components: A typical drip system includes a pressure regulator (e.g., Rain Bird PRV-10, ~$15), a filter (Rain Bird RBY filter, ~$20), main tubing (1/2-inch poly tubing, 100ft ~$25), smaller feeder lines (1/4-inch tubing), and emitters (0.5 GPH or 1 GPH per plant).
- Kits: For beginners, a starter kit like the Rain Bird Drip Irrigation Garden Kit (model DDI-KIT-1P, ~$40-$60) is excellent for a small garden. For larger setups, I use Netafim Techline CV Drip Line (500ft roll, ~$150-$200), which has pressure-compensating emitters built-in, ensuring even watering across long runs.
- Automation: For true self-sufficiency, consider a battery-powered timer (e.g., Orbit B-Hyve Bluetooth Hose Faucet Timer, ~$50) or a solar-powered timer connected to a small 12V pump.
- Solar-Powered Pumps: For lifting water from a well, pond, or large storage tank to your garden, a solar pump is a game-changer. For a smaller drip system, a Shurflo 2088-594-152 Diaphragm Pump (12V, 3.5 GPM, ~$180) can be powered by a single 100W solar panel (e.g., Renogy 100W Monocrystalline Solar Panel, ~$100) and a small 12V battery (e.g., a 50Ah LiFePO4 battery like the Battle Born 50Ah, ~$450). For larger operations or deeper wells, more robust systems are needed. If you’re looking to build out a comprehensive off-grid power system to support your garden’s water needs, or indeed your entire homestead, you might want to explore resources like the Power Grid Generator complete system guide to understand the full scope of what’s possible in terms of energy independence.
Step 5: Seed Selection & Planting
The choice of seeds is crucial for a truly self sufficient garden from scratch.
- Choose Heirloom & Open-Pollinated Seeds: These varieties produce seeds that will grow true to type, meaning you can save seeds from your harvest year after year. F1 hybrids, while often vigorous, will not produce consistent offspring from saved seeds. Reputable seed companies include Baker Creek Heirloom Seeds, High Mowing Organic Seeds, and Seed Savers Exchange. Start with common, reliable varieties like ‘Black Krim’ tomatoes, ‘Provider’ bush beans, ‘Waltham Butternut’ squash, and ‘Black Seeded Simpson’ lettuce.
- Start Seeds Indoors (Optional but Recommended): For longer growing seasons or specific crops, starting seeds indoors gives you a head start. Use seed-starting mix (e.g., Espoma Organic Seed Starter Mix, ~$10 for 16qt bag) in seed trays (Jiffy Professional Greenhouse 72-cell kit, ~$15). Provide adequate light with LED grow lights (Barrina T5 2ft 4-pack LED Grow Lights, 20W each, ~$50) for 14-16 hours a day, positioned 2-4 inches above seedlings. Maintain consistent temperatures (65-75°F for most).
- Direct Sowing vs. Transplanting: Some crops (carrots, radishes, beans, corn) prefer direct sowing into the garden bed. Others (tomatoes, peppers, broccoli, kale) benefit from being started indoors and transplanted. Follow seed packet instructions for planting depths (e.g., lettuce seeds are often surface-sown or planted 1/8 inch deep, while beans are 1 inch deep) and spacing.
- Companion Planting: Strategically plant different species together to enhance growth, deter pests, and attract beneficial insects. For example, planting marigolds near tomatoes can deter nematodes, and basil improves tomato flavor. Nasturtiums can act as a trap crop for aphids.
- Succession Planting: For a continuous harvest, plant small batches of quick-growing crops (lettuce, radishes, cilantro) every 2-3 weeks. As one crop finishes, another is ready to take its place.
Step 6: Pest & Disease Management (Organic)
Maintaining a self sufficient garden from scratch means embracing organic pest and disease control.
- Integrated Pest Management (IPM): This holistic approach combines several strategies.
- Observation: Regularly inspect your plants for early signs of pests or disease. Catching issues early is key.
- Physical Barriers: Use row covers (e.g., Agribon AG-19 floating row cover, 10×20 ft, ~$20) to protect young plants from insect pests like cabbage worms and squash bugs. Install fences (e.g., 2×4 welded wire mesh, 4 ft tall, 50 ft roll ~$70) to keep out deer, rabbits, and other larger animals.
- Hand-Picking: For larger pests like tomato hornworms or squash bugs, simply pick them off and drop them into a bucket of soapy water.
- Companion Planting: As mentioned, certain plants repel pests. Marigolds, garlic, and onions are excellent deterrents.
- Attract Beneficial Insects: Plant flowers like dill, fennel, cosmos, and sweet alyssum to attract ladybugs, lacewings, and parasitic wasps, which prey on common garden pests.
- Organic Sprays & Treatments:
- Neem Oil: An excellent broad-spectrum organic insecticide and fungicide. Bonide Neem Oil Concentrate (16oz, ~$20) can be mixed at a rate of 1-2 tbsp per gallon of water and sprayed on affected plants.
- Insecticidal Soap: Effective against soft-bodied insects like aphids, whiteflies, and spider mites. Garden Safe Insecticidal Soap (24oz ready-to-use, ~$10).
- Bacillus thuringiensis (Bt): A naturally occurring soil bacterium that targets caterpillars and worms. Monterey BT Worm & Caterpillar Killer (16oz, ~$18) is highly effective and safe for beneficial insects.
- Copper or Sulfur Sprays: For fungal diseases like powdery mildew or blight, organic copper (e.g., Bonide Copper Fungicide, ~$15 for 1lb) or sulfur (e.g., Safer Brand Garden Fungicide, ~$10 for 16oz) can be used as a last resort.
Step 7: Harvesting & Seed Saving
The culmination of your efforts is the harvest, and seed saving closes the loop on self-sufficiency.
- Harvesting Techniques:
- Timing: Harvest vegetables at their peak ripeness for best flavor and nutritional value. For example, green beans should snap cleanly, cucumbers should be firm, and tomatoes should be fully colored.
- Frequency: Many crops, like zucchini, cucumbers, and bush beans, produce more if harvested frequently. Pick daily or every other day.
- Tools: Use clean, sharp pruners (e.g., Corona ClassicCUT Bypass Pruner BP 3180, ~$30) or a sharp knife for clean cuts, minimizing damage to the plant.
- Seed Saving: This is where the « self-sufficient » aspect truly shines.
- Selection: Only save seeds from your healthiest, most vigorous plants that show desired traits (disease resistance, good flavor, high yield).
- Isolation: To ensure true-to-type seeds, prevent cross-pollination. This can be challenging for open-pollinated crops that readily cross (e.g., squash, corn). For beginners, focus on self-pollinating plants like beans, peas, lettuce, and tomatoes.
- Processing:
- Dry Seeds (Beans, Peas, Lettuce, Grains): Allow pods/seed heads to dry completely on the plant. Harvest, shell, and clean the seeds, removing chaff.
- Wet Seeds (Tomatoes, Cucumbers, Squash): For tomatoes, ferment the seeds in water for a few days to remove the gel coating and inhibit disease. For cucumbers/squash, scrape out seeds, wash thoroughly, and dry.
- Drying: Spread seeds thinly on screens or paper plates in a cool, dry, well-ventilated area for 1-4 weeks. Ensure they are bone-dry before storage. I aim for less than 8% moisture content.
- Storage: Store seeds in airtight containers (glass jars with desiccant packets work well) in a cool, dark, dry place (ideally 40-50°F and 30-40% humidity). Label clearly with variety and date. Properly stored seeds can remain viable for 3-10 years or more.
Step 8: Season Extension & Winterizing
Extend your harvest and protect your garden for the off-season to truly maximize your self sufficient garden from scratch.
- Cold Frames: Simple structures with a transparent top (glass, polycarbonate, or old windows) that sit over garden beds. They trap solar heat, allowing you to grow cold-hardy crops (lettuce, spinach, kale, radishes) well into winter or start seeds earlier in spring. A basic cold frame can be built from 2×6 lumber and a sheet of polycarbonate for under $100.
- Hoop Houses/Low Tunnels: Larger structures made from flexible hoops (PVC pipe or EMT conduit) covered with greenhouse plastic. These provide more space and greater temperature moderation. A 10×20 ft DIY low tunnel kit can cost $200-$500, while a larger, more robust hoop house kit might be $1,000-$3,000. I use a 6×12 ft low tunnel made from 1/2-inch PVC hoops and 6mil greenhouse plastic, which extends my lettuce and spinach harvest by at least
Efficient water management is critical for a self sufficient garden from scratch, especially in off-grid living where water resources might be limited.
- Rainwater Harvesting: This is my primary source of irrigation water. A 55-gallon rain barrel (e.g., EarthMark Rain Barrel, ~$120-$150) connected to a downspout can collect significant water. For larger needs, I use two 275-gallon IBC totes (Intermediate Bulk Containers, often available used for $100-$200 each from food-grade sources) connected in series. A 1,000 sq ft roof can collect approximately 620 gallons of water for every inch of rainfall. My 1,500 sq ft roof provides ample water for my 600 sq ft garden through multiple barrels and totes.
- Drip Irrigation: This is by far the most water-efficient method, delivering water directly to the plant’s root zone, minimizing evaporation and weed growth.
- Components: A typical drip system includes a pressure regulator (e.g., Rain Bird PRV-10, ~$15), a filter (Rain Bird RBY filter, ~$20), main tubing (1/2-inch poly tubing, 100ft ~$25), smaller feeder lines (1/4-inch tubing), and emitters (0.5 GPH or 1 GPH per plant).
- Kits: For beginners, a starter kit like the Rain Bird Drip Irrigation Garden Kit (model DDI-KIT-1P, ~$40-$60) is excellent for a small garden. For larger setups, I use Netafim Techline CV Drip Line (500ft roll, ~$150-$200), which has pressure-compensating emitters built-in, ensuring even watering across long runs.
- Automation: For true self-sufficiency, consider a battery-powered timer (e.g., Orbit B-Hyve Bluetooth Hose Faucet Timer, ~$50) or a solar-powered timer connected to a small 12V pump.
- Solar-Powered Pumps: For lifting water from a well, pond, or large storage tank to your garden, a solar pump is a game-changer. For a smaller drip system, a Shurflo 2088-594-152 Diaphragm Pump (12V, 3.5 GPM, ~$180) can be powered by a single 100W solar panel (e.g., Renogy 100W Monocrystalline Solar Panel, ~$100) and a small 12V battery (e.g., a 50Ah LiFePO4 battery like the Battle Born 50Ah, ~$450). For larger operations or deeper wells, more robust systems are needed. If you’re looking to build out a comprehensive off-grid power system to support your garden’s water needs, or indeed your entire homestead, you might want to explore resources like the Power Grid Generator complete system guide to understand the full scope of what’s possible in terms of energy independence.
Step 5: Seed Selection & Planting
The choice of seeds is crucial for a truly self sufficient garden from scratch.
- Choose Heirloom & Open-Pollinated Seeds: These varieties produce seeds that will grow true to type, meaning you can save seeds from your harvest year after year. F1 hybrids, while often vigorous, will not produce consistent offspring from saved seeds. Reputable seed companies include Baker Creek Heirloom Seeds, High Mowing Organic Seeds, and Seed Savers Exchange. Start with common, reliable varieties like ‘Black Krim’ tomatoes, ‘Provider’ bush beans, ‘Waltham Butternut’ squash, and ‘Black Seeded Simpson’ lettuce.
- Start Seeds Indoors (Optional but Recommended): For longer growing seasons or specific crops, starting seeds indoors gives you a head start. Use seed-starting mix (e.g., Espoma Organic Seed Starter Mix, ~$10 for 16qt bag) in seed trays (Jiffy Professional Greenhouse 72-cell kit, ~$15). Provide adequate light with LED grow lights (Barrina T5 2ft 4-pack LED Grow Lights, 20W each, ~$50) for 14-16 hours a day, positioned 2-4 inches above seedlings. Maintain consistent temperatures (65-75°F for most).
- Direct Sowing vs. Transplanting: Some crops (carrots, radishes, beans, corn) prefer direct sowing into the garden bed. Others (tomatoes, peppers, broccoli, kale) benefit from being started indoors and transplanted. Follow seed packet instructions for planting depths (e.g., lettuce seeds are often surface-sown or planted 1/8 inch deep, while beans are 1 inch deep) and spacing.
- Companion Planting: Strategically plant different species together to enhance growth, deter pests, and attract beneficial insects. For example, planting marigolds near tomatoes can deter nematodes, and basil improves tomato flavor. Nasturtiums can act as a trap crop for aphids.
- Succession Planting: For a continuous harvest, plant small batches of quick-growing crops (lettuce, radishes, cilantro) every 2-3 weeks. As one crop finishes, another is ready to take its place.
Step 6: Pest & Disease Management (Organic)
Maintaining a self sufficient garden from scratch means embracing organic pest and disease control.
- Integrated Pest Management (IPM): This holistic approach combines several strategies.
- Observation: Regularly inspect your plants for early signs of pests or disease. Catching issues early is key.
- Physical Barriers: Use row covers (e.g., Agribon AG-19 floating row cover, 10×20 ft, ~$20) to protect young plants from insect pests like cabbage worms and squash bugs. Install fences (e.g., 2×4 welded wire mesh, 4 ft tall, 50 ft roll ~$70) to keep out deer, rabbits, and other larger animals.
- Hand-Picking: For larger pests like tomato hornworms or squash bugs, simply pick them off and drop them into a bucket of soapy water.
- Companion Planting: As mentioned, certain plants repel pests. Marigolds, garlic, and onions are excellent deterrents.
- Attract Beneficial Insects: Plant flowers like dill, fennel, cosmos, and sweet alyssum to attract ladybugs, lacewings, and parasitic wasps, which prey on common garden pests.
- Organic Sprays & Treatments:
- Neem Oil: An excellent broad-spectrum organic insecticide and fungicide. Bonide Neem Oil Concentrate (16oz, ~$20) can be mixed at a rate of 1-2 tbsp per gallon of water and sprayed on affected plants.
- Insecticidal Soap: Effective against soft-bodied insects like aphids, whiteflies, and spider mites. Garden Safe Insecticidal Soap (24oz ready-to-use, ~$10).
- Bacillus thuringiensis (Bt): A naturally occurring soil bacterium that targets caterpillars and worms. Monterey BT Worm & Caterpillar Killer (16oz, ~$18) is highly effective and safe for beneficial insects.
- Copper or Sulfur Sprays: For fungal diseases like powdery mildew or blight, organic copper (e.g., Bonide Copper Fungicide, ~$15 for 1lb) or sulfur (e.g., Safer Brand Garden Fungicide, ~$10 for 16oz) can be used as a last resort.
Step 7: Harvesting & Seed Saving
The culmination of your efforts is the harvest, and seed saving closes the loop on self-sufficiency.
- Harvesting Techniques:
- Timing: Harvest vegetables at their peak ripeness for best flavor and nutritional value. For example, green beans should snap cleanly, cucumbers should be firm, and tomatoes should be fully colored.
- Frequency: Many crops, like zucchini, cucumbers, and bush beans, produce more if harvested frequently. Pick daily or every other day.
- Tools: Use clean, sharp pruners (e.g., Corona ClassicCUT Bypass Pruner BP 3180, ~$30) or a sharp knife for clean cuts, minimizing damage to the plant.
- Seed Saving: This is where the « self-sufficient » aspect truly shines.
- Selection: Only save seeds from your healthiest, most vigorous plants that show desired traits (disease resistance, good flavor, high yield).
- Isolation: To ensure true-to-type seeds, prevent cross-pollination. This can be challenging for open-pollinated crops that readily cross (e.g., squash, corn). For beginners, focus on self-pollinating plants like beans, peas, lettuce, and tomatoes.
- Processing:
- Dry Seeds (Beans, Peas, Lettuce, Grains): Allow pods/seed heads to dry completely on the plant. Harvest, shell, and clean the seeds, removing chaff.
- Wet Seeds (Tomatoes, Cucumbers, Squash): For tomatoes, ferment the seeds in water for a few days to remove the gel coating and inhibit disease. For cucumbers/squash, scrape out seeds, wash thoroughly, and dry.
- Drying: Spread seeds thinly on screens or paper plates in a cool, dry, well-ventilated area for 1-4 weeks. Ensure they are bone-dry before storage. I aim for less than 8% moisture content.
- Storage: Store seeds in airtight containers (glass jars with desiccant packets work well) in a cool, dark, dry place (ideally 40-50°F and 30-40% humidity). Label clearly with variety and date. Properly stored seeds can remain viable for 3-10 years or more.
Step 8: Season Extension & Winterizing
Extend your harvest and protect your garden for the off-season to truly maximize your self sufficient garden from scratch.
- Cold Frames: Simple structures with a transparent top (glass, polycarbonate, or old windows) that sit over garden beds. They trap solar heat, allowing you to grow cold-hardy crops (lettuce, spinach, kale, radishes) well into winter or start seeds earlier in spring. A basic cold frame can be built from 2×6 lumber and a sheet of polycarbonate for under $100.
- Hoop Houses/Low Tunnels: Larger structures made from flexible hoops (PVC pipe or EMT conduit) covered with greenhouse plastic. These provide more space and greater temperature moderation. A 10×20 ft DIY low tunnel kit can cost $200-$500, while a larger, more robust hoop house kit might be $1,000-$3,000. I use a 6×12 ft low tunnel made from 1/2-inch PVC hoops and 6mil greenhouse plastic, which extends my lettuce and spinach harvest by at least
Step 4: Water Management & Irrigation
Efficient water management is critical for a self sufficient garden from scratch, especially in off-grid living where water resources might be limited.
- Rainwater Harvesting: This is my primary source of irrigation water. A 55-gallon rain barrel (e.g., EarthMark Rain Barrel, ~$120-$150) connected to a downspout can collect significant water. For larger needs, I use two 275-gallon IBC totes (Intermediate Bulk Containers, often available used for $100-$200 each from food-grade sources) connected in series. A 1,000 sq ft roof can collect approximately 620 gallons of water for every inch of rainfall. My 1,500 sq ft roof provides ample water for my 600 sq ft garden through multiple barrels and totes.
- Drip Irrigation: This is by far the most water-efficient method, delivering water directly to the plant’s root zone, minimizing evaporation and weed growth.
- Components: A typical drip system includes a pressure regulator (e.g., Rain Bird PRV-10, ~$15), a filter (Rain Bird RBY filter, ~$20), main tubing (1/2-inch poly tubing, 100ft ~$25), smaller feeder lines (1/4-inch tubing), and emitters (0.5 GPH or 1 GPH per plant).
- Kits: For beginners, a starter kit like the Rain Bird Drip Irrigation Garden Kit (model DDI-KIT-1P, ~$40-$60) is excellent for a small garden. For larger setups, I use Netafim Techline CV Drip Line (500ft roll, ~$150-$200), which has pressure-compensating emitters built-in, ensuring even watering across long runs.
- Automation: For true self-sufficiency, consider a battery-powered timer (e.g., Orbit B-Hyve Bluetooth Hose Faucet Timer, ~$50) or a solar-powered timer connected to a small 12V pump.
- Solar-Powered Pumps: For lifting water from a well, pond, or large storage tank to your garden, a solar pump is a game-changer. For a smaller drip system, a Shurflo 2088-594-152 Diaphragm Pump (12V, 3.5 GPM, ~$180) can be powered by a single 100W solar panel (e.g., Renogy 100W Monocrystalline Solar Panel, ~$100) and a small 12V battery (e.g., a 50Ah LiFePO4 battery like the Battle Born 50Ah, ~$450). For larger operations or deeper wells, more robust systems are needed. If you’re looking to build out a comprehensive off-grid power system to support your garden’s water needs, or indeed your entire homestead, you might want to explore resources like the Power Grid Generator complete system guide to understand the full scope of what’s possible in terms of energy independence.
Step 5: Seed Selection & Planting
The choice of seeds is crucial for a truly self sufficient garden from scratch.
- Choose Heirloom & Open-Pollinated Seeds: These varieties produce seeds that will grow true to type, meaning you can save seeds from your harvest year after year. F1 hybrids, while often vigorous, will not produce consistent offspring from saved seeds. Reputable seed companies include Baker Creek Heirloom Seeds, High Mowing Organic Seeds, and Seed Savers Exchange. Start with common, reliable varieties like ‘Black Krim’ tomatoes, ‘Provider’ bush beans, ‘Waltham Butternut’ squash, and ‘Black Seeded Simpson’ lettuce.
- Start Seeds Indoors (Optional but Recommended): For longer growing seasons or specific crops, starting seeds indoors gives you a head start. Use seed-starting mix (e.g., Espoma Organic Seed Starter Mix, ~$10 for 16qt bag) in seed trays (Jiffy Professional Greenhouse 72-cell kit, ~$15). Provide adequate light with LED grow lights (Barrina T5 2ft 4-pack LED Grow Lights, 20W each, ~$50) for 14-16 hours a day, positioned 2-4 inches above seedlings. Maintain consistent temperatures (65-75°F for most).
- Direct Sowing vs. Transplanting: Some crops (carrots, radishes, beans, corn) prefer direct sowing into the garden bed. Others (tomatoes, peppers, broccoli, kale) benefit from being started indoors and transplanted. Follow seed packet instructions for planting depths (e.g., lettuce seeds are often surface-sown or planted 1/8 inch deep, while beans are 1 inch deep) and spacing.
- Companion Planting: Strategically plant different species together to enhance growth, deter pests, and attract beneficial insects. For example, planting marigolds near tomatoes can deter nematodes, and basil improves tomato flavor. Nasturtiums can act as a trap crop for aphids.
- Succession Planting: For a continuous harvest, plant small batches of quick-growing crops (lettuce, radishes, cilantro) every 2-3 weeks. As one crop finishes, another is ready to take its place.
Step 6: Pest & Disease Management (Organic)
Maintaining a self sufficient garden from scratch means embracing organic pest and disease control.
- Integrated Pest Management (IPM): This holistic approach combines several strategies.
- Observation: Regularly inspect your plants for early signs of pests or disease. Catching issues early is key.
- Physical Barriers: Use row covers (e.g., Agribon AG-19 floating row cover, 10×20 ft, ~$20) to protect young plants from insect pests like cabbage worms and squash bugs. Install fences (e.g., 2×4 welded wire mesh, 4 ft tall, 50 ft roll ~$70) to keep out deer, rabbits, and other larger animals.
- Hand-Picking: For larger pests like tomato hornworms or squash bugs, simply pick them off and drop them into a bucket of soapy water.
- Companion Planting: As mentioned, certain plants repel pests. Marigolds, garlic, and onions are excellent deterrents.
- Attract Beneficial Insects: Plant flowers like dill, fennel, cosmos, and sweet alyssum to attract ladybugs, lacewings, and parasitic wasps, which prey on common garden pests.
- Organic Sprays & Treatments:
- Neem Oil: An excellent broad-spectrum organic insecticide and fungicide. Bonide Neem Oil Concentrate (16oz, ~$20) can be mixed at a rate of 1-2 tbsp per gallon of water and sprayed on affected plants.
- Insecticidal Soap: Effective against soft-bodied insects like aphids, whiteflies, and spider mites. Garden Safe Insecticidal Soap (24oz ready-to-use, ~$10).
- Bacillus thuringiensis (Bt): A naturally occurring soil bacterium that targets caterpillars and worms. Monterey BT Worm & Caterpillar Killer (16oz, ~$18) is highly effective and safe for beneficial insects.
- Copper or Sulfur Sprays: For fungal diseases like powdery mildew or blight, organic copper (e.g., Bonide Copper Fungicide, ~$15 for 1lb) or sulfur (e.g., Safer Brand Garden Fungicide, ~$10 for 16oz) can be used as a last resort.
Step 7: Harvesting & Seed Saving
The culmination of your efforts is the harvest, and seed saving closes the loop on self-sufficiency.
- Harvesting Techniques:
- Timing: Harvest vegetables at their peak ripeness for best flavor and nutritional value. For example, green beans should snap cleanly, cucumbers should be firm, and tomatoes should be fully colored.
- Frequency: Many crops, like zucchini, cucumbers, and bush beans, produce more if harvested frequently. Pick daily or every other day.
- Tools: Use clean, sharp pruners (e.g., Corona ClassicCUT Bypass Pruner BP 3180, ~$30) or a sharp knife for clean cuts, minimizing damage to the plant.
- Seed Saving: This is where the « self-sufficient » aspect truly shines.
- Selection: Only save seeds from your healthiest, most vigorous plants that show desired traits (disease resistance, good flavor, high yield).
- Isolation: To ensure true-to-type seeds, prevent cross-pollination. This can be challenging for open-pollinated crops that readily cross (e.g., squash, corn). For beginners, focus on self-pollinating plants like beans, peas, lettuce, and tomatoes.
- Processing:
- Dry Seeds (Beans, Peas, Lettuce, Grains): Allow pods/seed heads to dry completely on the plant. Harvest, shell, and clean the seeds, removing chaff.
- Wet Seeds (Tomatoes, Cucumbers, Squash): For tomatoes, ferment the seeds in water for a few days to remove the gel coating and inhibit disease. For cucumbers/squash, scrape out seeds, wash thoroughly, and dry.
- Drying: Spread seeds thinly on screens or paper plates in a cool, dry, well-ventilated area for 1-4 weeks. Ensure they are bone-dry before storage. I aim for less than 8% moisture content.
- Storage: Store seeds in airtight containers (glass jars with desiccant packets work well) in a cool, dark, dry place (ideally 40-50°F and 30-40% humidity). Label clearly with variety and date. Properly stored seeds can remain viable for 3-10 years or more.
Step 8: Season Extension & Winterizing
Extend your harvest and protect your garden for the off-season to truly maximize your self sufficient garden from scratch.
- Cold Frames: Simple structures with a transparent top (glass, polycarbonate, or old windows) that sit over garden beds. They trap solar heat, allowing you to grow cold-hardy crops (lettuce, spinach, kale, radishes) well into winter or start seeds earlier in spring. A basic cold frame can be built from 2×6 lumber and a sheet of polycarbonate for under $100.
- Hoop Houses/Low Tunnels: Larger structures made from flexible hoops (PVC pipe or EMT conduit) covered with greenhouse plastic. These provide more space and greater temperature moderation. A 10×20 ft DIY low tunnel kit can cost $200-$500, while a larger, more robust hoop house kit might be $1,000-$3,000. I use a 6×12 ft low tunnel made from 1/2-inch PVC hoops and 6mil greenhouse plastic, which extends my lettuce and spinach harvest by at least
- In-Ground Beds: If you have excellent native soil and good drainage, in-ground beds are the most economical. Double-digging (loosening soil two shovel depths) can significantly improve drainage and aeration. For my main garden, I primarily use in-ground beds, but I focus on building up the soil over time with consistent compost additions and cover cropping. I aim for beds that are no wider than 3-4 feet so I can reach the center without stepping on the soil, compacting it.
- Raised Beds: Raised beds offer numerous advantages, especially for poor soil, heavy clay, or rocky areas. They provide better drainage, warm up faster in spring, reduce compaction, and make weeding and harvesting easier on your back.
- Material Options:
- Untreated Cedar: Naturally rot-resistant and chemical-free. A 4×8 ft bed, 12 inches deep, typically requires three 2x12x8 ft cedar boards, costing around $50-$60 per board (total ~$150-$180) plus corner brackets or screws. My first raised beds were cedar and are still going strong after 7 years.
- Galvanized Steel: Durable, long-lasting, and aesthetically pleasing. Brands like Vego Garden offer modular kits. A Vego Garden 17″ Tall 8-in-1 Metal Raised Garden Bed (can be configured to 4×8 ft) costs approximately $250-$300.
- Concrete Blocks/Stones: Very durable but can leach minerals (though generally safe once weathered) and can be expensive.
- Recycled Materials: Pallets (check for chemical treatment stamps like « HT » for heat-treated), old tires (controversial due to potential chemical leaching).
- Filling Raised Beds: Don’t just fill with topsoil. Use a « Hugelkultur » approach (logs, branches, leaves, then compost, then topsoil) or a mixture of 60% good quality topsoil, 30% compost, and 10% perlite or vermiculite for drainage. A 4x8x1 ft raised bed requires about 32 cubic feet (or ~1.2 cubic yards) of soil mix, which can cost $100-$200 depending on your source.
- Material Options:
Step 4: Water Management & Irrigation
Efficient water management is critical for a self sufficient garden from scratch, especially in off-grid living where water resources might be limited.
- Rainwater Harvesting: This is my primary source of irrigation water. A 55-gallon rain barrel (e.g., EarthMark Rain Barrel, ~$120-$150) connected to a downspout can collect significant water. For larger needs, I use two 275-gallon IBC totes (Intermediate Bulk Containers, often available used for $100-$200 each from food-grade sources) connected in series. A 1,000 sq ft roof can collect approximately 620 gallons of water for every inch of rainfall. My 1,500 sq ft roof provides ample water for my 600 sq ft garden through multiple barrels and totes.
- Drip Irrigation: This is by far the most water-efficient method, delivering water directly to the plant’s root zone, minimizing evaporation and weed growth.
- Components: A typical drip system includes a pressure regulator (e.g., Rain Bird PRV-10, ~$15), a filter (Rain Bird RBY filter, ~$20), main tubing (1/2-inch poly tubing, 100ft ~$25), smaller feeder lines (1/4-inch tubing), and emitters (0.5 GPH or 1 GPH per plant).
- Kits: For beginners, a starter kit like the Rain Bird Drip Irrigation Garden Kit (model DDI-KIT-1P, ~$40-$60) is excellent for a small garden. For larger setups, I use Netafim Techline CV Drip Line (500ft roll, ~$150-$200), which has pressure-compensating emitters built-in, ensuring even watering across long runs.
- Automation: For true self-sufficiency, consider a battery-powered timer (e.g., Orbit B-Hyve Bluetooth Hose Faucet Timer, ~$50) or a solar-powered timer connected to a small 12V pump.
- Solar-Powered Pumps: For lifting water from a well, pond, or large storage tank to your garden, a solar pump is a game-changer. For a smaller drip system, a Shurflo 2088-594-152 Diaphragm Pump (12V, 3.5 GPM, ~$180) can be powered by a single 100W solar panel (e.g., Renogy 100W Monocrystalline Solar Panel, ~$100) and a small 12V battery (e.g., a 50Ah LiFePO4 battery like the Battle Born 50Ah, ~$450). For larger operations or deeper wells, more robust systems are needed. If you’re looking to build out a comprehensive off-grid power system to support your garden’s water needs, or indeed your entire homestead, you might want to explore resources like the Power Grid Generator complete system guide to understand the full scope of what’s possible in terms of energy independence.
Step 5: Seed Selection & Planting
The choice of seeds is crucial for a truly self sufficient garden from scratch.
- Choose Heirloom & Open-Pollinated Seeds: These varieties produce seeds that will grow true to type, meaning you can save seeds from your harvest year after year. F1 hybrids, while often vigorous, will not produce consistent offspring from saved seeds. Reputable seed companies include Baker Creek Heirloom Seeds, High Mowing Organic Seeds, and Seed Savers Exchange. Start with common, reliable varieties like ‘Black Krim’ tomatoes, ‘Provider’ bush beans, ‘Waltham Butternut’ squash, and ‘Black Seeded Simpson’ lettuce.
- Start Seeds Indoors (Optional but Recommended): For longer growing seasons or specific crops, starting seeds indoors gives you a head start. Use seed-starting mix (e.g., Espoma Organic Seed Starter Mix, ~$10 for 16qt bag) in seed trays (Jiffy Professional Greenhouse 72-cell kit, ~$15). Provide adequate light with LED grow lights (Barrina T5 2ft 4-pack LED Grow Lights, 20W each, ~$50) for 14-16 hours a day, positioned 2-4 inches above seedlings. Maintain consistent temperatures (65-75°F for most).
- Direct Sowing vs. Transplanting: Some crops (carrots, radishes, beans, corn) prefer direct sowing into the garden bed. Others (tomatoes, peppers, broccoli, kale) benefit from being started indoors and transplanted. Follow seed packet instructions for planting depths (e.g., lettuce seeds are often surface-sown or planted 1/8 inch deep, while beans are 1 inch deep) and spacing.
- Companion Planting: Strategically plant different species together to enhance growth, deter pests, and attract beneficial insects. For example, planting marigolds near tomatoes can deter nematodes, and basil improves tomato flavor. Nasturtiums can act as a trap crop for aphids.
- Succession Planting: For a continuous harvest, plant small batches of quick-growing crops (lettuce, radishes, cilantro) every 2-3 weeks. As one crop finishes, another is ready to take its place.
Step 6: Pest & Disease Management (Organic)
Maintaining a self sufficient garden from scratch means embracing organic pest and disease control.
- Integrated Pest Management (IPM): This holistic approach combines several strategies.
- Observation: Regularly inspect your plants for early signs of pests or disease. Catching issues early is key.
- Physical Barriers: Use row covers (e.g., Agribon AG-19 floating row cover, 10×20 ft, ~$20) to protect young plants from insect pests like cabbage worms and squash bugs. Install fences (e.g., 2×4 welded wire mesh, 4 ft tall, 50 ft roll ~$70) to keep out deer, rabbits, and other larger animals.
- Hand-Picking: For larger pests like tomato hornworms or squash bugs, simply pick them off and drop them into a bucket of soapy water.
- Companion Planting: As mentioned, certain plants repel pests. Marigolds, garlic, and onions are excellent deterrents.
- Attract Beneficial Insects: Plant flowers like dill, fennel, cosmos, and sweet alyssum to attract ladybugs, lacewings, and parasitic wasps, which prey on common garden pests.
- Organic Sprays & Treatments:
- Neem Oil: An excellent broad-spectrum organic insecticide and fungicide. Bonide Neem Oil Concentrate (16oz, ~$20) can be mixed at a rate of 1-2 tbsp per gallon of water and sprayed on affected plants.
- Insecticidal Soap: Effective against soft-bodied insects like aphids, whiteflies, and spider mites. Garden Safe Insecticidal Soap (24oz ready-to-use, ~$10).
- Bacillus thuringiensis (Bt): A naturally occurring soil bacterium that targets caterpillars and worms. Monterey BT Worm & Caterpillar Killer (16oz, ~$18) is highly effective and safe for beneficial insects.
- Copper or Sulfur Sprays: For fungal diseases like powdery mildew or blight, organic copper (e.g., Bonide Copper Fungicide, ~$15 for 1lb) or sulfur (e.g., Safer Brand Garden Fungicide, ~$10 for 16oz) can be used as a last resort.
Step 7: Harvesting & Seed Saving
The culmination of your efforts is the harvest, and seed saving closes the loop on self-sufficiency.
- Harvesting Techniques:
- Timing: Harvest vegetables at their peak ripeness for best flavor and nutritional value. For example, green beans should snap cleanly, cucumbers should be firm, and tomatoes should be fully colored.
- Frequency: Many crops, like zucchini, cucumbers, and bush beans, produce more if harvested frequently. Pick daily or every other day.
- Tools: Use clean, sharp pruners (e.g., Corona ClassicCUT Bypass Pruner BP 3180, ~$30) or a sharp knife for clean cuts, minimizing damage to the plant.
- Seed Saving: This is where the « self-sufficient » aspect truly shines.
- Selection: Only save seeds from your healthiest, most vigorous plants that show desired traits (disease resistance, good flavor, high yield).
- Isolation: To ensure true-to-type seeds, prevent cross-pollination. This can be challenging for open-pollinated crops that readily cross (e.g., squash, corn). For beginners, focus on self-pollinating plants like beans, peas, lettuce, and tomatoes.
- Processing:
- Dry Seeds (Beans, Peas, Lettuce, Grains): Allow pods/seed heads to dry completely on the plant. Harvest, shell, and clean the seeds, removing chaff.
- Wet Seeds (Tomatoes, Cucumbers, Squash): For tomatoes, ferment the seeds in water for a few days to remove the gel coating and inhibit disease. For cucumbers/squash, scrape out seeds, wash thoroughly, and dry.
- Drying: Spread seeds thinly on screens or paper plates in a cool, dry, well-ventilated area for 1-4 weeks. Ensure they are bone-dry before storage. I aim for less than 8% moisture content.
- Storage: Store seeds in airtight containers (glass jars with desiccant packets work well) in a cool, dark, dry place (ideally 40-50°F and 30-40% humidity). Label clearly with variety and date. Properly stored seeds can remain viable for 3-10 years or more.
Step 8: Season Extension & Winterizing
Extend your harvest and protect your garden for the off-season to truly maximize your self sufficient garden from scratch.
- Cold Frames: Simple structures with a transparent top (glass, polycarbonate, or old windows) that sit over garden beds. They trap solar heat, allowing you to grow cold-hardy crops (lettuce, spinach, kale, radishes) well into winter or start seeds earlier in spring. A basic cold frame can be built from 2×6 lumber and a sheet of polycarbonate for under $100.
- Hoop Houses/Low Tunnels: Larger structures made from flexible hoops (PVC pipe or EMT conduit) covered with greenhouse plastic. These provide more space and greater temperature moderation. A 10×20 ft DIY low tunnel kit can cost $200-$500, while a larger, more robust hoop house kit might be $1,000-$3,000. I use a 6×12 ft low tunnel made from 1/2-inch PVC hoops and 6mil greenhouse plastic, which extends my lettuce and spinach harvest by at least
Deciding between raised beds and in-ground beds depends on your soil, budget, and physical capabilities.
- In-Ground Beds: If you have excellent native soil and good drainage, in-ground beds are the most economical. Double-digging (loosening soil two shovel depths) can significantly improve drainage and aeration. For my main garden, I primarily use in-ground beds, but I focus on building up the soil over time with consistent compost additions and cover cropping. I aim for beds that are no wider than 3-4 feet so I can reach the center without stepping on the soil, compacting it.
- Raised Beds: Raised beds offer numerous advantages, especially for poor soil, heavy clay, or rocky areas. They provide better drainage, warm up faster in spring, reduce compaction, and make weeding and harvesting easier on your back.
- Material Options:
- Untreated Cedar: Naturally rot-resistant and chemical-free. A 4×8 ft bed, 12 inches deep, typically requires three 2x12x8 ft cedar boards, costing around $50-$60 per board (total ~$150-$180) plus corner brackets or screws. My first raised beds were cedar and are still going strong after 7 years.
- Galvanized Steel: Durable, long-lasting, and aesthetically pleasing. Brands like Vego Garden offer modular kits. A Vego Garden 17″ Tall 8-in-1 Metal Raised Garden Bed (can be configured to 4×8 ft) costs approximately $250-$300.
- Concrete Blocks/Stones: Very durable but can leach minerals (though generally safe once weathered) and can be expensive.
- Recycled Materials: Pallets (check for chemical treatment stamps like « HT » for heat-treated), old tires (controversial due to potential chemical leaching).
- Filling Raised Beds: Don’t just fill with topsoil. Use a « Hugelkultur » approach (logs, branches, leaves, then compost, then topsoil) or a mixture of 60% good quality topsoil, 30% compost, and 10% perlite or vermiculite for drainage. A 4x8x1 ft raised bed requires about 32 cubic feet (or ~1.2 cubic yards) of soil mix, which can cost $100-$200 depending on your source.
- Material Options:
Step 4: Water Management & Irrigation
Efficient water management is critical for a self sufficient garden from scratch, especially in off-grid living where water resources might be limited.
- Rainwater Harvesting: This is my primary source of irrigation water. A 55-gallon rain barrel (e.g., EarthMark Rain Barrel, ~$120-$150) connected to a downspout can collect significant water. For larger needs, I use two 275-gallon IBC totes (Intermediate Bulk Containers, often available used for $100-$200 each from food-grade sources) connected in series. A 1,000 sq ft roof can collect approximately 620 gallons of water for every inch of rainfall. My 1,500 sq ft roof provides ample water for my 600 sq ft garden through multiple barrels and totes.
- Drip Irrigation: This is by far the most water-efficient method, delivering water directly to the plant’s root zone, minimizing evaporation and weed growth.
- Components: A typical drip system includes a pressure regulator (e.g., Rain Bird PRV-10, ~$15), a filter (Rain Bird RBY filter, ~$20), main tubing (1/2-inch poly tubing, 100ft ~$25), smaller feeder lines (1/4-inch tubing), and emitters (0.5 GPH or 1 GPH per plant).
- Kits: For beginners, a starter kit like the Rain Bird Drip Irrigation Garden Kit (model DDI-KIT-1P, ~$40-$60) is excellent for a small garden. For larger setups, I use Netafim Techline CV Drip Line (500ft roll, ~$150-$200), which has pressure-compensating emitters built-in, ensuring even watering across long runs.
- Automation: For true self-sufficiency, consider a battery-powered timer (e.g., Orbit B-Hyve Bluetooth Hose Faucet Timer, ~$50) or a solar-powered timer connected to a small 12V pump.
- Solar-Powered Pumps: For lifting water from a well, pond, or large storage tank to your garden, a solar pump is a game-changer. For a smaller drip system, a Shurflo 2088-594-152 Diaphragm Pump (12V, 3.5 GPM, ~$180) can be powered by a single 100W solar panel (e.g., Renogy 100W Monocrystalline Solar Panel, ~$100) and a small 12V battery (e.g., a 50Ah LiFePO4 battery like the Battle Born 50Ah, ~$450). For larger operations or deeper wells, more robust systems are needed. If you’re looking to build out a comprehensive off-grid power system to support your garden’s water needs, or indeed your entire homestead, you might want to explore resources like the Power Grid Generator complete system guide to understand the full scope of what’s possible in terms of energy independence.
Step 5: Seed Selection & Planting
The choice of seeds is crucial for a truly self sufficient garden from scratch.
- Choose Heirloom & Open-Pollinated Seeds: These varieties produce seeds that will grow true to type, meaning you can save seeds from your harvest year after year. F1 hybrids, while often vigorous, will not produce consistent offspring from saved seeds. Reputable seed companies include Baker Creek Heirloom Seeds, High Mowing Organic Seeds, and Seed Savers Exchange. Start with common, reliable varieties like ‘Black Krim’ tomatoes, ‘Provider’ bush beans, ‘Waltham Butternut’ squash, and ‘Black Seeded Simpson’ lettuce.
- Start Seeds Indoors (Optional but Recommended): For longer growing seasons or specific crops, starting seeds indoors gives you a head start. Use seed-starting mix (e.g., Espoma Organic Seed Starter Mix, ~$10 for 16qt bag) in seed trays (Jiffy Professional Greenhouse 72-cell kit, ~$15). Provide adequate light with LED grow lights (Barrina T5 2ft 4-pack LED Grow Lights, 20W each, ~$50) for 14-16 hours a day, positioned 2-4 inches above seedlings. Maintain consistent temperatures (65-75°F for most).
- Direct Sowing vs. Transplanting: Some crops (carrots, radishes, beans, corn) prefer direct sowing into the garden bed. Others (tomatoes, peppers, broccoli, kale) benefit from being started indoors and transplanted. Follow seed packet instructions for planting depths (e.g., lettuce seeds are often surface-sown or planted 1/8 inch deep, while beans are 1 inch deep) and spacing.
- Companion Planting: Strategically plant different species together to enhance growth, deter pests, and attract beneficial insects. For example, planting marigolds near tomatoes can deter nematodes, and basil improves tomato flavor. Nasturtiums can act as a trap crop for aphids.
- Succession Planting: For a continuous harvest, plant small batches of quick-growing crops (lettuce, radishes, cilantro) every 2-3 weeks. As one crop finishes, another is ready to take its place.
Step 6: Pest & Disease Management (Organic)
Maintaining a self sufficient garden from scratch means embracing organic pest and disease control.
- Integrated Pest Management (IPM): This holistic approach combines several strategies.
- Observation: Regularly inspect your plants for early signs of pests or disease. Catching issues early is key.
- Physical Barriers: Use row covers (e.g., Agribon AG-19 floating row cover, 10×20 ft, ~$20) to protect young plants from insect pests like cabbage worms and squash bugs. Install fences (e.g., 2×4 welded wire mesh, 4 ft tall, 50 ft roll ~$70) to keep out deer, rabbits, and other larger animals.
- Hand-Picking: For larger pests like tomato hornworms or squash bugs, simply pick them off and drop them into a bucket of soapy water.
- Companion Planting: As mentioned, certain plants repel pests. Marigolds, garlic, and onions are excellent deterrents.
- Attract Beneficial Insects: Plant flowers like dill, fennel, cosmos, and sweet alyssum to attract ladybugs, lacewings, and parasitic wasps, which prey on common garden pests.
- Organic Sprays & Treatments:
- Neem Oil: An excellent broad-spectrum organic insecticide and fungicide. Bonide Neem Oil Concentrate (16oz, ~$20) can be mixed at a rate of 1-2 tbsp per gallon of water and sprayed on affected plants.
- Insecticidal Soap: Effective against soft-bodied insects like aphids, whiteflies, and spider mites. Garden Safe Insecticidal Soap (24oz ready-to-use, ~$10).
- Bacillus thuringiensis (Bt): A naturally occurring soil bacterium that targets caterpillars and worms. Monterey BT Worm & Caterpillar Killer (16oz, ~$18) is highly effective and safe for beneficial insects.
- Copper or Sulfur Sprays: For fungal diseases like powdery mildew or blight, organic copper (e.g., Bonide Copper Fungicide, ~$15 for 1lb) or sulfur (e.g., Safer Brand Garden Fungicide, ~$10 for 16oz) can be used as a last resort.
Step 7: Harvesting & Seed Saving
The culmination of your efforts is the harvest, and seed saving closes the loop on self-sufficiency.
- Harvesting Techniques:
- Timing: Harvest vegetables at their peak ripeness for best flavor and nutritional value. For example, green beans should snap cleanly, cucumbers should be firm, and tomatoes should be fully colored.
- Frequency: Many crops, like zucchini, cucumbers, and bush beans, produce more if harvested frequently. Pick daily or every other day.
- Tools: Use clean, sharp pruners (e.g., Corona ClassicCUT Bypass Pruner BP 3180, ~$30) or a sharp knife for clean cuts, minimizing damage to the plant.
- Seed Saving: This is where the « self-sufficient » aspect truly shines.
- Selection: Only save seeds from your healthiest, most vigorous plants that show desired traits (disease resistance, good flavor, high yield).
- Isolation: To ensure true-to-type seeds, prevent cross-pollination. This can be challenging for open-pollinated crops that readily cross (e.g., squash, corn). For beginners, focus on self-pollinating plants like beans, peas, lettuce, and tomatoes.
- Processing:
- Dry Seeds (Beans, Peas, Lettuce, Grains): Allow pods/seed heads to dry completely on the plant. Harvest, shell, and clean the seeds, removing chaff.
- Wet Seeds (Tomatoes, Cucumbers, Squash): For tomatoes, ferment the seeds in water for a few days to remove the gel coating and inhibit disease. For cucumbers/squash, scrape out seeds, wash thoroughly, and dry.
- Drying: Spread seeds thinly on screens or paper plates in a cool, dry, well-ventilated area for 1-4 weeks. Ensure they are bone-dry before storage. I aim for less than 8% moisture content.
- Storage: Store seeds in airtight containers (glass jars with desiccant packets work well) in a cool, dark, dry place (ideally 40-50°F and 30-40% humidity). Label clearly with variety and date. Properly stored seeds can remain viable for 3-10 years or more.
Step 8: Season Extension & Winterizing
Extend your harvest and protect your garden for the off-season to truly maximize your self sufficient garden from scratch.
- Cold Frames: Simple structures with a transparent top (glass, polycarbonate, or old windows) that sit over garden beds. They trap solar heat, allowing you to grow cold-hardy crops (lettuce, spinach, kale, radishes) well into winter or start seeds earlier in spring. A basic cold frame can be built from 2×6 lumber and a sheet of polycarbonate for under $100.
- Hoop Houses/Low Tunnels: Larger structures made from flexible hoops (PVC pipe or EMT conduit) covered with greenhouse plastic. These provide more space and greater temperature moderation. A 10×20 ft DIY low tunnel kit can cost $200-$500, while a larger, more robust hoop house kit might be $1,000-$3,000. I use a 6×12 ft low tunnel made from 1/2-inch PVC hoops and 6mil greenhouse plastic, which extends my lettuce and spinach harvest by at least
Healthy soil is the bedrock of a productive, self-sufficient garden. You can’t guess what your soil needs; you have to test it.
- Perform a Soil Test: A professional soil test will give you precise data on your soil’s pH, nutrient levels (N-P-K), and organic matter content. I recommend sending a sample to your local agricultural extension office; it typically costs $20-$50 and provides detailed recommendations. Alternatively, for a quick homeowner check, a Rapitest Soil Test Kit (40-test kit, model 1663, ~$20 on Amazon) provides a good baseline for pH, Nitrogen, Phosphorus, and Potash. Aim for a pH between 6.0 and 7.0 for most vegetables.
- Amend for pH Imbalance: If your soil is too acidic (below 6.0), add agricultural lime (dolomitic lime adds magnesium, calcitic lime adds calcium). Apply 5-10 lbs per 100 sq ft for a moderate adjustment. If it’s too alkaline (above 7.0), add elemental sulfur (e.g., Espoma Soil Acidifier, ~$15 for 6.75 lbs) or generous amounts of organic matter like peat moss or pine needles.
- Build Organic Matter: This is the single most important step for long-term soil health. Organic matter improves soil structure, water retention, drainage, and nutrient availability. Incorporate 2-4 inches of high-quality compost into your top 6-12 inches of soil annually. I make my own compost from kitchen scraps, garden waste, and shredded leaves, but you can purchase it. Local nurseries often sell bulk compost for $30-$50 per cubic yard. Aged manure (from chickens, cows, or horses – ensure it’s well-rotted to avoid burning plants) is also excellent.
- Address Nutrient Deficiencies: Based on your soil test, add specific organic amendments. If Nitrogen (N) is low, add blood meal (12-0-0, ~$20 for 3 lbs) or feather meal. For Phosphorus (P), use bone meal (3-15-0, ~$15 for 3 lbs) or rock phosphate. For Potassium (K), greensand (0-0-2.5, ~$25 for 5 lbs) or kelp meal are good choices. I rely heavily on Espoma Organic Garden-tone (5-3-3, ~$25 for an 8lb bag) as a balanced, all-purpose organic fertilizer during planting.
Step 3: Garden Bed Preparation
Deciding between raised beds and in-ground beds depends on your soil, budget, and physical capabilities.
- In-Ground Beds: If you have excellent native soil and good drainage, in-ground beds are the most economical. Double-digging (loosening soil two shovel depths) can significantly improve drainage and aeration. For my main garden, I primarily use in-ground beds, but I focus on building up the soil over time with consistent compost additions and cover cropping. I aim for beds that are no wider than 3-4 feet so I can reach the center without stepping on the soil, compacting it.
- Raised Beds: Raised beds offer numerous advantages, especially for poor soil, heavy clay, or rocky areas. They provide better drainage, warm up faster in spring, reduce compaction, and make weeding and harvesting easier on your back.
- Material Options:
- Untreated Cedar: Naturally rot-resistant and chemical-free. A 4×8 ft bed, 12 inches deep, typically requires three 2x12x8 ft cedar boards, costing around $50-$60 per board (total ~$150-$180) plus corner brackets or screws. My first raised beds were cedar and are still going strong after 7 years.
- Galvanized Steel: Durable, long-lasting, and aesthetically pleasing. Brands like Vego Garden offer modular kits. A Vego Garden 17″ Tall 8-in-1 Metal Raised Garden Bed (can be configured to 4×8 ft) costs approximately $250-$300.
- Concrete Blocks/Stones: Very durable but can leach minerals (though generally safe once weathered) and can be expensive.
- Recycled Materials: Pallets (check for chemical treatment stamps like « HT » for heat-treated), old tires (controversial due to potential chemical leaching).
- Filling Raised Beds: Don’t just fill with topsoil. Use a « Hugelkultur » approach (logs, branches, leaves, then compost, then topsoil) or a mixture of 60% good quality topsoil, 30% compost, and 10% perlite or vermiculite for drainage. A 4x8x1 ft raised bed requires about 32 cubic feet (or ~1.2 cubic yards) of soil mix, which can cost $100-$200 depending on your source.
- Material Options:
Step 4: Water Management & Irrigation
Efficient water management is critical for a self sufficient garden from scratch, especially in off-grid living where water resources might be limited.
- Rainwater Harvesting: This is my primary source of irrigation water. A 55-gallon rain barrel (e.g., EarthMark Rain Barrel, ~$120-$150) connected to a downspout can collect significant water. For larger needs, I use two 275-gallon IBC totes (Intermediate Bulk Containers, often available used for $100-$200 each from food-grade sources) connected in series. A 1,000 sq ft roof can collect approximately 620 gallons of water for every inch of rainfall. My 1,500 sq ft roof provides ample water for my 600 sq ft garden through multiple barrels and totes.
- Drip Irrigation: This is by far the most water-efficient method, delivering water directly to the plant’s root zone, minimizing evaporation and weed growth.
- Components: A typical drip system includes a pressure regulator (e.g., Rain Bird PRV-10, ~$15), a filter (Rain Bird RBY filter, ~$20), main tubing (1/2-inch poly tubing, 100ft ~$25), smaller feeder lines (1/4-inch tubing), and emitters (0.5 GPH or 1 GPH per plant).
- Kits: For beginners, a starter kit like the Rain Bird Drip Irrigation Garden Kit (model DDI-KIT-1P, ~$40-$60) is excellent for a small garden. For larger setups, I use Netafim Techline CV Drip Line (500ft roll, ~$150-$200), which has pressure-compensating emitters built-in, ensuring even watering across long runs.
- Automation: For true self-sufficiency, consider a battery-powered timer (e.g., Orbit B-Hyve Bluetooth Hose Faucet Timer, ~$50) or a solar-powered timer connected to a small 12V pump.
- Solar-Powered Pumps: For lifting water from a well, pond, or large storage tank to your garden, a solar pump is a game-changer. For a smaller drip system, a Shurflo 2088-594-152 Diaphragm Pump (12V, 3.5 GPM, ~$180) can be powered by a single 100W solar panel (e.g., Renogy 100W Monocrystalline Solar Panel, ~$100) and a small 12V battery (e.g., a 50Ah LiFePO4 battery like the Battle Born 50Ah, ~$450). For larger operations or deeper wells, more robust systems are needed. If you’re looking to build out a comprehensive off-grid power system to support your garden’s water needs, or indeed your entire homestead, you might want to explore resources like the Power Grid Generator complete system guide to understand the full scope of what’s possible in terms of energy independence.
Step 5: Seed Selection & Planting
The choice of seeds is crucial for a truly self sufficient garden from scratch.
- Choose Heirloom & Open-Pollinated Seeds: These varieties produce seeds that will grow true to type, meaning you can save seeds from your harvest year after year. F1 hybrids, while often vigorous, will not produce consistent offspring from saved seeds. Reputable seed companies include Baker Creek Heirloom Seeds, High Mowing Organic Seeds, and Seed Savers Exchange. Start with common, reliable varieties like ‘Black Krim’ tomatoes, ‘Provider’ bush beans, ‘Waltham Butternut’ squash, and ‘Black Seeded Simpson’ lettuce.
- Start Seeds Indoors (Optional but Recommended): For longer growing seasons or specific crops, starting seeds indoors gives you a head start. Use seed-starting mix (e.g., Espoma Organic Seed Starter Mix, ~$10 for 16qt bag) in seed trays (Jiffy Professional Greenhouse 72-cell kit, ~$15). Provide adequate light with LED grow lights (Barrina T5 2ft 4-pack LED Grow Lights, 20W each, ~$50) for 14-16 hours a day, positioned 2-4 inches above seedlings. Maintain consistent temperatures (65-75°F for most).
- Direct Sowing vs. Transplanting: Some crops (carrots, radishes, beans, corn) prefer direct sowing into the garden bed. Others (tomatoes, peppers, broccoli, kale) benefit from being started indoors and transplanted. Follow seed packet instructions for planting depths (e.g., lettuce seeds are often surface-sown or planted 1/8 inch deep, while beans are 1 inch deep) and spacing.
- Companion Planting: Strategically plant different species together to enhance growth, deter pests, and attract beneficial insects. For example, planting marigolds near tomatoes can deter nematodes, and basil improves tomato flavor. Nasturtiums can act as a trap crop for aphids.
- Succession Planting: For a continuous harvest, plant small batches of quick-growing crops (lettuce, radishes, cilantro) every 2-3 weeks. As one crop finishes, another is ready to take its place.
Step 6: Pest & Disease Management (Organic)
Maintaining a self sufficient garden from scratch means embracing organic pest and disease control.
- Integrated Pest Management (IPM): This holistic approach combines several strategies.
- Observation: Regularly inspect your plants for early signs of pests or disease. Catching issues early is key.
- Physical Barriers: Use row covers (e.g., Agribon AG-19 floating row cover, 10×20 ft, ~$20) to protect young plants from insect pests like cabbage worms and squash bugs. Install fences (e.g., 2×4 welded wire mesh, 4 ft tall, 50 ft roll ~$70) to keep out deer, rabbits, and other larger animals.
- Hand-Picking: For larger pests like tomato hornworms or squash bugs, simply pick them off and drop them into a bucket of soapy water.
- Companion Planting: As mentioned, certain plants repel pests. Marigolds, garlic, and onions are excellent deterrents.
- Attract Beneficial Insects: Plant flowers like dill, fennel, cosmos, and sweet alyssum to attract ladybugs, lacewings, and parasitic wasps, which prey on common garden pests.
- Organic Sprays & Treatments:
- Neem Oil: An excellent broad-spectrum organic insecticide and fungicide. Bonide Neem Oil Concentrate (16oz, ~$20) can be mixed at a rate of 1-2 tbsp per gallon of water and sprayed on affected plants.
- Insecticidal Soap: Effective against soft-bodied insects like aphids, whiteflies, and spider mites. Garden Safe Insecticidal Soap (24oz ready-to-use, ~$10).
- Bacillus thuringiensis (Bt): A naturally occurring soil bacterium that targets caterpillars and worms. Monterey BT Worm & Caterpillar Killer (16oz, ~$18) is highly effective and safe for beneficial insects.
- Copper or Sulfur Sprays: For fungal diseases like powdery mildew or blight, organic copper (e.g., Bonide Copper Fungicide, ~$15 for 1lb) or sulfur (e.g., Safer Brand Garden Fungicide, ~$10 for 16oz) can be used as a last resort.
Step 7: Harvesting & Seed Saving
The culmination of your efforts is the harvest, and seed saving closes the loop on self-sufficiency.
- Harvesting Techniques:
- Timing: Harvest vegetables at their peak ripeness for best flavor and nutritional value. For example, green beans should snap cleanly, cucumbers should be firm, and tomatoes should be fully colored.
- Frequency: Many crops, like zucchini, cucumbers, and bush beans, produce more if harvested frequently. Pick daily or every other day.
- Tools: Use clean, sharp pruners (e.g., Corona ClassicCUT Bypass Pruner BP 3180, ~$30) or a sharp knife for clean cuts, minimizing damage to the plant.
- Seed Saving: This is where the « self-sufficient » aspect truly shines.
- Selection: Only save seeds from your healthiest, most vigorous plants that show desired traits (disease resistance, good flavor, high yield).
- Isolation: To ensure true-to-type seeds, prevent cross-pollination. This can be challenging for open-pollinated crops that readily cross (e.g., squash, corn). For beginners, focus on self-pollinating plants like beans, peas, lettuce, and tomatoes.
- Processing:
- Dry Seeds (Beans, Peas, Lettuce, Grains): Allow pods/seed heads to dry completely on the plant. Harvest, shell, and clean the seeds, removing chaff.
- Wet Seeds (Tomatoes, Cucumbers, Squash): For tomatoes, ferment the seeds in water for a few days to remove the gel coating and inhibit disease. For cucumbers/squash, scrape out seeds, wash thoroughly, and dry.
- Drying: Spread seeds thinly on screens or paper plates in a cool, dry, well-ventilated area for 1-4 weeks. Ensure they are bone-dry before storage. I aim for less than 8% moisture content.
- Storage: Store seeds in airtight containers (glass jars with desiccant packets work well) in a cool, dark, dry place (ideally 40-50°F and 30-40% humidity). Label clearly with variety and date. Properly stored seeds can remain viable for 3-10 years or more.
Step 8: Season Extension & Winterizing
Extend your harvest and protect your garden for the off-season to truly maximize your self sufficient garden from scratch.
- Cold Frames: Simple structures with a transparent top (glass, polycarbonate, or old windows) that sit over garden beds. They trap solar heat, allowing you to grow cold-hardy crops (lettuce, spinach, kale, radishes) well into winter or start seeds earlier in spring. A basic cold frame can be built from 2×6 lumber and a sheet of polycarbonate for under $100.
- Hoop Houses/Low Tunnels: Larger structures made from flexible hoops (PVC pipe or EMT conduit) covered with greenhouse plastic. These provide more space and greater temperature moderation. A 10×20 ft DIY low tunnel kit can cost $200-$500, while a larger, more robust hoop house kit might be $1,000-$3,000. I use a 6×12 ft low tunnel made from 1/2-inch PVC hoops and 6mil greenhouse plastic, which extends my lettuce and spinach harvest by at least
Maintaining a self sufficient garden from scratch means embracing organic pest and disease control.
- Integrated Pest Management (IPM): This holistic approach combines several strategies.
- Observation: Regularly inspect your plants for early signs of pests or disease. Catching issues early is key.
- Physical Barriers: Use row covers (e.g., Agribon AG-19 floating row cover, 10×20 ft, ~$20) to protect young plants from insect pests like cabbage worms and squash bugs. Install fences (e.g., 2×4 welded wire mesh, 4 ft tall, 50 ft roll ~$70) to keep out deer, rabbits, and other larger animals.
- Hand-Picking: For larger pests like tomato hornworms or squash bugs, simply pick them off and drop them into a bucket of soapy water.
- Companion Planting: As mentioned, certain plants repel pests. Marigolds, garlic, and onions are excellent deterrents.
- Attract Beneficial Insects: Plant flowers like dill, fennel, cosmos, and sweet alyssum to attract ladybugs, lacewings, and parasitic wasps, which prey on common garden pests.
- Organic Sprays & Treatments:
- Neem Oil: An excellent broad-spectrum organic insecticide and fungicide. Bonide Neem Oil Concentrate (16oz, ~$20) can be mixed at a rate of 1-2 tbsp per gallon of water and sprayed on affected plants.
- Insecticidal Soap: Effective against soft-bodied insects like aphids, whiteflies, and spider mites. Garden Safe Insecticidal Soap (24oz ready-to-use, ~$10).
- Bacillus thuringiensis (Bt): A naturally occurring soil bacterium that targets caterpillars and worms. Monterey BT Worm & Caterpillar Killer (16oz, ~$18) is highly effective and safe for beneficial insects.
- Copper or Sulfur Sprays: For fungal diseases like powdery mildew or blight, organic copper (e.g., Bonide Copper Fungicide, ~$15 for 1lb) or sulfur (e.g., Safer Brand Garden Fungicide, ~$10 for 16oz) can be used as a last resort.
Step 7: Harvesting & Seed Saving
The culmination of your efforts is the harvest, and seed saving closes the loop on self-sufficiency.
- Harvesting Techniques:
- Timing: Harvest vegetables at their peak ripeness for best flavor and nutritional value. For example, green beans should snap cleanly, cucumbers should be firm, and tomatoes should be fully colored.
- Frequency: Many crops, like zucchini, cucumbers, and bush beans, produce more if harvested frequently. Pick daily or every other day.
- Tools: Use clean, sharp pruners (e.g., Corona ClassicCUT Bypass Pruner BP 3180, ~$30) or a sharp knife for clean cuts, minimizing damage to the plant.
- Seed Saving: This is where the « self-sufficient » aspect truly shines.
- Selection: Only save seeds from your healthiest, most vigorous plants that show desired traits (disease resistance, good flavor, high yield).
- Isolation: To ensure true-to-type seeds, prevent cross-pollination. This can be challenging for open-pollinated crops that readily cross (e.g., squash, corn). For beginners, focus on self-pollinating plants like beans, peas, lettuce, and tomatoes.
- Processing:
- Dry Seeds (Beans, Peas, Lettuce, Grains): Allow pods/seed heads to dry completely on the plant. Harvest, shell, and clean the seeds, removing chaff.
- Wet Seeds (Tomatoes, Cucumbers, Squash): For tomatoes, ferment the seeds in water for a few days to remove the gel coating and inhibit disease. For cucumbers/squash, scrape out seeds, wash thoroughly, and dry.
- Drying: Spread seeds thinly on screens or paper plates in a cool, dry, well-ventilated area for 1-4 weeks. Ensure they are bone-dry before storage. I aim for less than 8% moisture content.
- Storage: Store seeds in airtight containers (glass jars with desiccant packets work well) in a cool, dark, dry place (ideally 40-50°F and 30-40% humidity). Label clearly with variety and date. Properly stored seeds can remain viable for 3-10 years or more.
Step 8: Season Extension & Winterizing
Extend your harvest and protect your garden for the off-season to truly maximize your self sufficient garden from scratch.
- Cold Frames: Simple structures with a transparent top (glass, polycarbonate, or old windows) that sit over garden beds. They trap solar heat, allowing you to grow cold-hardy crops (lettuce, spinach, kale, radishes) well into winter or start seeds earlier in spring. A basic cold frame can be built from 2×6 lumber and a sheet of polycarbonate for under $100.
- Hoop Houses/Low Tunnels: Larger structures made from flexible hoops (PVC pipe or EMT conduit) covered with greenhouse plastic. These provide more space and greater temperature moderation. A 10×20 ft DIY low tunnel kit can cost $200-$500, while a larger, more robust hoop house kit might be $1,000-$3,000. I use a 6×12 ft low tunnel made from 1/2-inch PVC hoops and 6mil greenhouse plastic, which extends my lettuce and spinach harvest by at least
- Rainwater Harvesting: This is my primary source of irrigation water. A 55-gallon rain barrel (e.g., EarthMark Rain Barrel, ~$120-$150) connected to a downspout can collect significant water. For larger needs, I use two 275-gallon IBC totes (Intermediate Bulk Containers, often available used for $100-$200 each from food-grade sources) connected in series. A 1,000 sq ft roof can collect approximately 620 gallons of water for every inch of rainfall. My 1,500 sq ft roof provides ample water for my 600 sq ft garden through multiple barrels and totes.
- Drip Irrigation: This is by far the most water-efficient method, delivering water directly to the plant’s root zone, minimizing evaporation and weed growth.
- Components: A typical drip system includes a pressure regulator (e.g., Rain Bird PRV-10, ~$15), a filter (Rain Bird RBY filter, ~$20), main tubing (1/2-inch poly tubing, 100ft ~$25), smaller feeder lines (1/4-inch tubing), and emitters (0.5 GPH or 1 GPH per plant).
- Kits: For beginners, a starter kit like the Rain Bird Drip Irrigation Garden Kit (model DDI-KIT-1P, ~$40-$60) is excellent for a small garden. For larger setups, I use Netafim Techline CV Drip Line (500ft roll, ~$150-$200), which has pressure-compensating emitters built-in, ensuring even watering across long runs.
- Automation: For true self-sufficiency, consider a battery-powered timer (e.g., Orbit B-Hyve Bluetooth Hose Faucet Timer, ~$50) or a solar-powered timer connected to a small 12V pump.
- Solar-Powered Pumps: For lifting water from a well, pond, or large storage tank to your garden, a solar pump is a game-changer. For a smaller drip system, a Shurflo 2088-594-152 Diaphragm Pump (12V, 3.5 GPM, ~$180) can be powered by a single 100W solar panel (e.g., Renogy 100W Monocrystalline Solar Panel, ~$100) and a small 12V battery (e.g., a 50Ah LiFePO4 battery like the Battle Born 50Ah, ~$450). For larger operations or deeper wells, more robust systems are needed. If you’re looking to build out a comprehensive off-grid power system to support your garden’s water needs, or indeed your entire homestead, you might want to explore resources like the Power Grid Generator complete system guide to understand the full scope of what’s possible in terms of energy independence.
Step 5: Seed Selection & Planting
The choice of seeds is crucial for a truly self sufficient garden from scratch.
- Choose Heirloom & Open-Pollinated Seeds: These varieties produce seeds that will grow true to type, meaning you can save seeds from your harvest year after year. F1 hybrids, while often vigorous, will not produce consistent offspring from saved seeds. Reputable seed companies include Baker Creek Heirloom Seeds, High Mowing Organic Seeds, and Seed Savers Exchange. Start with common, reliable varieties like ‘Black Krim’ tomatoes, ‘Provider’ bush beans, ‘Waltham Butternut’ squash, and ‘Black Seeded Simpson’ lettuce.
- Start Seeds Indoors (Optional but Recommended): For longer growing seasons or specific crops, starting seeds indoors gives you a head start. Use seed-starting mix (e.g., Espoma Organic Seed Starter Mix, ~$10 for 16qt bag) in seed trays (Jiffy Professional Greenhouse 72-cell kit, ~$15). Provide adequate light with LED grow lights (Barrina T5 2ft 4-pack LED Grow Lights, 20W each, ~$50) for 14-16 hours a day, positioned 2-4 inches above seedlings. Maintain consistent temperatures (65-75°F for most).
- Direct Sowing vs. Transplanting: Some crops (carrots, radishes, beans, corn) prefer direct sowing into the garden bed. Others (tomatoes, peppers, broccoli, kale) benefit from being started indoors and transplanted. Follow seed packet instructions for planting depths (e.g., lettuce seeds are often surface-sown or planted 1/8 inch deep, while beans are 1 inch deep) and spacing.
- Companion Planting: Strategically plant different species together to enhance growth, deter pests, and attract beneficial insects. For example, planting marigolds near tomatoes can deter nematodes, and basil improves tomato flavor. Nasturtiums can act as a trap crop for aphids.
- Succession Planting: For a continuous harvest, plant small batches of quick-growing crops (lettuce, radishes, cilantro) every 2-3 weeks. As one crop finishes, another is ready to take its place.
Step 6: Pest & Disease Management (Organic)
Maintaining a self sufficient garden from scratch means embracing organic pest and disease control.
- Integrated Pest Management (IPM): This holistic approach combines several strategies.
- Observation: Regularly inspect your plants for early signs of pests or disease. Catching issues early is key.
- Physical Barriers: Use row covers (e.g., Agribon AG-19 floating row cover, 10×20 ft, ~$20) to protect young plants from insect pests like cabbage worms and squash bugs. Install fences (e.g., 2×4 welded wire mesh, 4 ft tall, 50 ft roll ~$70) to keep out deer, rabbits, and other larger animals.
- Hand-Picking: For larger pests like tomato hornworms or squash bugs, simply pick them off and drop them into a bucket of soapy water.
- Companion Planting: As mentioned, certain plants repel pests. Marigolds, garlic, and onions are excellent deterrents.
- Attract Beneficial Insects: Plant flowers like dill, fennel, cosmos, and sweet alyssum to attract ladybugs, lacewings, and parasitic wasps, which prey on common garden pests.
- Organic Sprays & Treatments:
- Neem Oil: An excellent broad-spectrum organic insecticide and fungicide. Bonide Neem Oil Concentrate (16oz, ~$20) can be mixed at a rate of 1-2 tbsp per gallon of water and sprayed on affected plants.
- Insecticidal Soap: Effective against soft-bodied insects like aphids, whiteflies, and spider mites. Garden Safe Insecticidal Soap (24oz ready-to-use, ~$10).
- Bacillus thuringiensis (Bt): A naturally occurring soil bacterium that targets caterpillars and worms. Monterey BT Worm & Caterpillar Killer (16oz, ~$18) is highly effective and safe for beneficial insects.
- Copper or Sulfur Sprays: For fungal diseases like powdery mildew or blight, organic copper (e.g., Bonide Copper Fungicide, ~$15 for 1lb) or sulfur (e.g., Safer Brand Garden Fungicide, ~$10 for 16oz) can be used as a last resort.
Step 7: Harvesting & Seed Saving
The culmination of your efforts is the harvest, and seed saving closes the loop on self-sufficiency.
- Harvesting Techniques:
- Timing: Harvest vegetables at their peak ripeness for best flavor and nutritional value. For example, green beans should snap cleanly, cucumbers should be firm, and tomatoes should be fully colored.
- Frequency: Many crops, like zucchini, cucumbers, and bush beans, produce more if harvested frequently. Pick daily or every other day.
- Tools: Use clean, sharp pruners (e.g., Corona ClassicCUT Bypass Pruner BP 3180, ~$30) or a sharp knife for clean cuts, minimizing damage to the plant.
- Seed Saving: This is where the « self-sufficient » aspect truly shines.
- Selection: Only save seeds from your healthiest, most vigorous plants that show desired traits (disease resistance, good flavor, high yield).
- Isolation: To ensure true-to-type seeds, prevent cross-pollination. This can be challenging for open-pollinated crops that readily cross (e.g., squash, corn). For beginners, focus on self-pollinating plants like beans, peas, lettuce, and tomatoes.
- Processing:
- Dry Seeds (Beans, Peas, Lettuce, Grains): Allow pods/seed heads to dry completely on the plant. Harvest, shell, and clean the seeds, removing chaff.
- Wet Seeds (Tomatoes, Cucumbers, Squash): For tomatoes, ferment the seeds in water for a few days to remove the gel coating and inhibit disease. For cucumbers/squash, scrape out seeds, wash thoroughly, and dry.
- Drying: Spread seeds thinly on screens or paper plates in a cool, dry, well-ventilated area for 1-4 weeks. Ensure they are bone-dry before storage. I aim for less than 8% moisture content.
- Storage: Store seeds in airtight containers (glass jars with desiccant packets work well) in a cool, dark, dry place (ideally 40-50°F and 30-40% humidity). Label clearly with variety and date. Properly stored seeds can remain viable for 3-10 years or more.
Step 8: Season Extension & Winterizing
Extend your harvest and protect your garden for the off-season to truly maximize your self sufficient garden from scratch.
- Cold Frames: Simple structures with a transparent top (glass, polycarbonate, or old windows) that sit over garden beds. They trap solar heat, allowing you to grow cold-hardy crops (lettuce, spinach, kale, radishes) well into winter or start seeds earlier in spring. A basic cold frame can be built from 2×6 lumber and a sheet of polycarbonate for under $100.
- Hoop Houses/Low Tunnels: Larger structures made from flexible hoops (PVC pipe or EMT conduit) covered with greenhouse plastic. These provide more space and greater temperature moderation. A 10×20 ft DIY low tunnel kit can cost $200-$500, while a larger, more robust hoop house kit might be $1,000-$3,000. I use a 6×12 ft low tunnel made from 1/2-inch PVC hoops and 6mil greenhouse plastic, which extends my lettuce and spinach harvest by at least
Efficient water management is critical for a self sufficient garden from scratch, especially in off-grid living where water resources might be limited.
- Rainwater Harvesting: This is my primary source of irrigation water. A 55-gallon rain barrel (e.g., EarthMark Rain Barrel, ~$120-$150) connected to a downspout can collect significant water. For larger needs, I use two 275-gallon IBC totes (Intermediate Bulk Containers, often available used for $100-$200 each from food-grade sources) connected in series. A 1,000 sq ft roof can collect approximately 620 gallons of water for every inch of rainfall. My 1,500 sq ft roof provides ample water for my 600 sq ft garden through multiple barrels and totes.
- Drip Irrigation: This is by far the most water-efficient method, delivering water directly to the plant’s root zone, minimizing evaporation and weed growth.
- Components: A typical drip system includes a pressure regulator (e.g., Rain Bird PRV-10, ~$15), a filter (Rain Bird RBY filter, ~$20), main tubing (1/2-inch poly tubing, 100ft ~$25), smaller feeder lines (1/4-inch tubing), and emitters (0.5 GPH or 1 GPH per plant).
- Kits: For beginners, a starter kit like the Rain Bird Drip Irrigation Garden Kit (model DDI-KIT-1P, ~$40-$60) is excellent for a small garden. For larger setups, I use Netafim Techline CV Drip Line (500ft roll, ~$150-$200), which has pressure-compensating emitters built-in, ensuring even watering across long runs.
- Automation: For true self-sufficiency, consider a battery-powered timer (e.g., Orbit B-Hyve Bluetooth Hose Faucet Timer, ~$50) or a solar-powered timer connected to a small 12V pump.
- Solar-Powered Pumps: For lifting water from a well, pond, or large storage tank to your garden, a solar pump is a game-changer. For a smaller drip system, a Shurflo 2088-594-152 Diaphragm Pump (12V, 3.5 GPM, ~$180) can be powered by a single 100W solar panel (e.g., Renogy 100W Monocrystalline Solar Panel, ~$100) and a small 12V battery (e.g., a 50Ah LiFePO4 battery like the Battle Born 50Ah, ~$450). For larger operations or deeper wells, more robust systems are needed. If you’re looking to build out a comprehensive off-grid power system to support your garden’s water needs, or indeed your entire homestead, you might want to explore resources like the Power Grid Generator complete system guide to understand the full scope of what’s possible in terms of energy independence.
Step 5: Seed Selection & Planting
The choice of seeds is crucial for a truly self sufficient garden from scratch.
- Choose Heirloom & Open-Pollinated Seeds: These varieties produce seeds that will grow true to type, meaning you can save seeds from your harvest year after year. F1 hybrids, while often vigorous, will not produce consistent offspring from saved seeds. Reputable seed companies include Baker Creek Heirloom Seeds, High Mowing Organic Seeds, and Seed Savers Exchange. Start with common, reliable varieties like ‘Black Krim’ tomatoes, ‘Provider’ bush beans, ‘Waltham Butternut’ squash, and ‘Black Seeded Simpson’ lettuce.
- Start Seeds Indoors (Optional but Recommended): For longer growing seasons or specific crops, starting seeds indoors gives you a head start. Use seed-starting mix (e.g., Espoma Organic Seed Starter Mix, ~$10 for 16qt bag) in seed trays (Jiffy Professional Greenhouse 72-cell kit, ~$15). Provide adequate light with LED grow lights (Barrina T5 2ft 4-pack LED Grow Lights, 20W each, ~$50) for 14-16 hours a day, positioned 2-4 inches above seedlings. Maintain consistent temperatures (65-75°F for most).
- Direct Sowing vs. Transplanting: Some crops (carrots, radishes, beans, corn) prefer direct sowing into the garden bed. Others (tomatoes, peppers, broccoli, kale) benefit from being started indoors and transplanted. Follow seed packet instructions for planting depths (e.g., lettuce seeds are often surface-sown or planted 1/8 inch deep, while beans are 1 inch deep) and spacing.
- Companion Planting: Strategically plant different species together to enhance growth, deter pests, and attract beneficial insects. For example, planting marigolds near tomatoes can deter nematodes, and basil improves tomato flavor. Nasturtiums can act as a trap crop for aphids.
- Succession Planting: For a continuous harvest, plant small batches of quick-growing crops (lettuce, radishes, cilantro) every 2-3 weeks. As one crop finishes, another is ready to take its place.
Step 6: Pest & Disease Management (Organic)
Maintaining a self sufficient garden from scratch means embracing organic pest and disease control.
- Integrated Pest Management (IPM): This holistic approach combines several strategies.
- Observation: Regularly inspect your plants for early signs of pests or disease. Catching issues early is key.
- Physical Barriers: Use row covers (e.g., Agribon AG-19 floating row cover, 10×20 ft, ~$20) to protect young plants from insect pests like cabbage worms and squash bugs. Install fences (e.g., 2×4 welded wire mesh, 4 ft tall, 50 ft roll ~$70) to keep out deer, rabbits, and other larger animals.
- Hand-Picking: For larger pests like tomato hornworms or squash bugs, simply pick them off and drop them into a bucket of soapy water.
- Companion Planting: As mentioned, certain plants repel pests. Marigolds, garlic, and onions are excellent deterrents.
- Attract Beneficial Insects: Plant flowers like dill, fennel, cosmos, and sweet alyssum to attract ladybugs, lacewings, and parasitic wasps, which prey on common garden pests.
- Organic Sprays & Treatments:
- Neem Oil: An excellent broad-spectrum organic insecticide and fungicide. Bonide Neem Oil Concentrate (16oz, ~$20) can be mixed at a rate of 1-2 tbsp per gallon of water and sprayed on affected plants.
- Insecticidal Soap: Effective against soft-bodied insects like aphids, whiteflies, and spider mites. Garden Safe Insecticidal Soap (24oz ready-to-use, ~$10).
- Bacillus thuringiensis (Bt): A naturally occurring soil bacterium that targets caterpillars and worms. Monterey BT Worm & Caterpillar Killer (16oz, ~$18) is highly effective and safe for beneficial insects.
- Copper or Sulfur Sprays: For fungal diseases like powdery mildew or blight, organic copper (e.g., Bonide Copper Fungicide, ~$15 for 1lb) or sulfur (e.g., Safer Brand Garden Fungicide, ~$10 for 16oz) can be used as a last resort.
Step 7: Harvesting & Seed Saving
The culmination of your efforts is the harvest, and seed saving closes the loop on self-sufficiency.
- Harvesting Techniques:
- Timing: Harvest vegetables at their peak ripeness for best flavor and nutritional value. For example, green beans should snap cleanly, cucumbers should be firm, and tomatoes should be fully colored.
- Frequency: Many crops, like zucchini, cucumbers, and bush beans, produce more if harvested frequently. Pick daily or every other day.
- Tools: Use clean, sharp pruners (e.g., Corona ClassicCUT Bypass Pruner BP 3180, ~$30) or a sharp knife for clean cuts, minimizing damage to the plant.
- Seed Saving: This is where the « self-sufficient » aspect truly shines.
- Selection: Only save seeds from your healthiest, most vigorous plants that show desired traits (disease resistance, good flavor, high yield).
- Isolation: To ensure true-to-type seeds, prevent cross-pollination. This can be challenging for open-pollinated crops that readily cross (e.g., squash, corn). For beginners, focus on self-pollinating plants like beans, peas, lettuce, and tomatoes.
- Processing:
- Dry Seeds (Beans, Peas, Lettuce, Grains): Allow pods/seed heads to dry completely on the plant. Harvest, shell, and clean the seeds, removing chaff.
- Wet Seeds (Tomatoes, Cucumbers, Squash): For tomatoes, ferment the seeds in water for a few days to remove the gel coating and inhibit disease. For cucumbers/squash, scrape out seeds, wash thoroughly, and dry.
- Drying: Spread seeds thinly on screens or paper plates in a cool, dry, well-ventilated area for 1-4 weeks. Ensure they are bone-dry before storage. I aim for less than 8% moisture content.
- Storage: Store seeds in airtight containers (glass jars with desiccant packets work well) in a cool, dark, dry place (ideally 40-50°F and 30-40% humidity). Label clearly with variety and date. Properly stored seeds can remain viable for 3-10 years or more.
Step 8: Season Extension & Winterizing
Extend your harvest and protect your garden for the off-season to truly maximize your self sufficient garden from scratch.
- Cold Frames: Simple structures with a transparent top (glass, polycarbonate, or old windows) that sit over garden beds. They trap solar heat, allowing you to grow cold-hardy crops (lettuce, spinach, kale, radishes) well into winter or start seeds earlier in spring. A basic cold frame can be built from 2×6 lumber and a sheet of polycarbonate for under $100.
- Hoop Houses/Low Tunnels: Larger structures made from flexible hoops (PVC pipe or EMT conduit) covered with greenhouse plastic. These provide more space and greater temperature moderation. A 10×20 ft DIY low tunnel kit can cost $200-$500, while a larger, more robust hoop house kit might be $1,000-$3,000. I use a 6×12 ft low tunnel made from 1/2-inch PVC hoops and 6mil greenhouse plastic, which extends my lettuce and spinach harvest by at least
Step 4: Water Management & Irrigation
Efficient water management is critical for a self sufficient garden from scratch, especially in off-grid living where water resources might be limited.
- Rainwater Harvesting: This is my primary source of irrigation water. A 55-gallon rain barrel (e.g., EarthMark Rain Barrel, ~$120-$150) connected to a downspout can collect significant water. For larger needs, I use two 275-gallon IBC totes (Intermediate Bulk Containers, often available used for $100-$200 each from food-grade sources) connected in series. A 1,000 sq ft roof can collect approximately 620 gallons of water for every inch of rainfall. My 1,500 sq ft roof provides ample water for my 600 sq ft garden through multiple barrels and totes.
- Drip Irrigation: This is by far the most water-efficient method, delivering water directly to the plant’s root zone, minimizing evaporation and weed growth.
- Components: A typical drip system includes a pressure regulator (e.g., Rain Bird PRV-10, ~$15), a filter (Rain Bird RBY filter, ~$20), main tubing (1/2-inch poly tubing, 100ft ~$25), smaller feeder lines (1/4-inch tubing), and emitters (0.5 GPH or 1 GPH per plant).
- Kits: For beginners, a starter kit like the Rain Bird Drip Irrigation Garden Kit (model DDI-KIT-1P, ~$40-$60) is excellent for a small garden. For larger setups, I use Netafim Techline CV Drip Line (500ft roll, ~$150-$200), which has pressure-compensating emitters built-in, ensuring even watering across long runs.
- Automation: For true self-sufficiency, consider a battery-powered timer (e.g., Orbit B-Hyve Bluetooth Hose Faucet Timer, ~$50) or a solar-powered timer connected to a small 12V pump.
- Solar-Powered Pumps: For lifting water from a well, pond, or large storage tank to your garden, a solar pump is a game-changer. For a smaller drip system, a Shurflo 2088-594-152 Diaphragm Pump (12V, 3.5 GPM, ~$180) can be powered by a single 100W solar panel (e.g., Renogy 100W Monocrystalline Solar Panel, ~$100) and a small 12V battery (e.g., a 50Ah LiFePO4 battery like the Battle Born 50Ah, ~$450). For larger operations or deeper wells, more robust systems are needed. If you’re looking to build out a comprehensive off-grid power system to support your garden’s water needs, or indeed your entire homestead, you might want to explore resources like the Power Grid Generator complete system guide to understand the full scope of what’s possible in terms of energy independence.
Step 5: Seed Selection & Planting
The choice of seeds is crucial for a truly self sufficient garden from scratch.
- Choose Heirloom & Open-Pollinated Seeds: These varieties produce seeds that will grow true to type, meaning you can save seeds from your harvest year after year. F1 hybrids, while often vigorous, will not produce consistent offspring from saved seeds. Reputable seed companies include Baker Creek Heirloom Seeds, High Mowing Organic Seeds, and Seed Savers Exchange. Start with common, reliable varieties like ‘Black Krim’ tomatoes, ‘Provider’ bush beans, ‘Waltham Butternut’ squash, and ‘Black Seeded Simpson’ lettuce.
- Start Seeds Indoors (Optional but Recommended): For longer growing seasons or specific crops, starting seeds indoors gives you a head start. Use seed-starting mix (e.g., Espoma Organic Seed Starter Mix, ~$10 for 16qt bag) in seed trays (Jiffy Professional Greenhouse 72-cell kit, ~$15). Provide adequate light with LED grow lights (Barrina T5 2ft 4-pack LED Grow Lights, 20W each, ~$50) for 14-16 hours a day, positioned 2-4 inches above seedlings. Maintain consistent temperatures (65-75°F for most).
- Direct Sowing vs. Transplanting: Some crops (carrots, radishes, beans, corn) prefer direct sowing into the garden bed. Others (tomatoes, peppers, broccoli, kale) benefit from being started indoors and transplanted. Follow seed packet instructions for planting depths (e.g., lettuce seeds are often surface-sown or planted 1/8 inch deep, while beans are 1 inch deep) and spacing.
- Companion Planting: Strategically plant different species together to enhance growth, deter pests, and attract beneficial insects. For example, planting marigolds near tomatoes can deter nematodes, and basil improves tomato flavor. Nasturtiums can act as a trap crop for aphids.
- Succession Planting: For a continuous harvest, plant small batches of quick-growing crops (lettuce, radishes, cilantro) every 2-3 weeks. As one crop finishes, another is ready to take its place.
Step 6: Pest & Disease Management (Organic)
Maintaining a self sufficient garden from scratch means embracing organic pest and disease control.
- Integrated Pest Management (IPM): This holistic approach combines several strategies.
- Observation: Regularly inspect your plants for early signs of pests or disease. Catching issues early is key.
- Physical Barriers: Use row covers (e.g., Agribon AG-19 floating row cover, 10×20 ft, ~$20) to protect young plants from insect pests like cabbage worms and squash bugs. Install fences (e.g., 2×4 welded wire mesh, 4 ft tall, 50 ft roll ~$70) to keep out deer, rabbits, and other larger animals.
- Hand-Picking: For larger pests like tomato hornworms or squash bugs, simply pick them off and drop them into a bucket of soapy water.
- Companion Planting: As mentioned, certain plants repel pests. Marigolds, garlic, and onions are excellent deterrents.
- Attract Beneficial Insects: Plant flowers like dill, fennel, cosmos, and sweet alyssum to attract ladybugs, lacewings, and parasitic wasps, which prey on common garden pests.
- Organic Sprays & Treatments:
- Neem Oil: An excellent broad-spectrum organic insecticide and fungicide. Bonide Neem Oil Concentrate (16oz, ~$20) can be mixed at a rate of 1-2 tbsp per gallon of water and sprayed on affected plants.
- Insecticidal Soap: Effective against soft-bodied insects like aphids, whiteflies, and spider mites. Garden Safe Insecticidal Soap (24oz ready-to-use, ~$10).
- Bacillus thuringiensis (Bt): A naturally occurring soil bacterium that targets caterpillars and worms. Monterey BT Worm & Caterpillar Killer (16oz, ~$18) is highly effective and safe for beneficial insects.
- Copper or Sulfur Sprays: For fungal diseases like powdery mildew or blight, organic copper (e.g., Bonide Copper Fungicide, ~$15 for 1lb) or sulfur (e.g., Safer Brand Garden Fungicide, ~$10 for 16oz) can be used as a last resort.
Step 7: Harvesting & Seed Saving
The culmination of your efforts is the harvest, and seed saving closes the loop on self-sufficiency.
- Harvesting Techniques:
- Timing: Harvest vegetables at their peak ripeness for best flavor and nutritional value. For example, green beans should snap cleanly, cucumbers should be firm, and tomatoes should be fully colored.
- Frequency: Many crops, like zucchini, cucumbers, and bush beans, produce more if harvested frequently. Pick daily or every other day.
- Tools: Use clean, sharp pruners (e.g., Corona ClassicCUT Bypass Pruner BP 3180, ~$30) or a sharp knife for clean cuts, minimizing damage to the plant.
- Seed Saving: This is where the « self-sufficient » aspect truly shines.
- Selection: Only save seeds from your healthiest, most vigorous plants that show desired traits (disease resistance, good flavor, high yield).
- Isolation: To ensure true-to-type seeds, prevent cross-pollination. This can be challenging for open-pollinated crops that readily cross (e.g., squash, corn). For beginners, focus on self-pollinating plants like beans, peas, lettuce, and tomatoes.
- Processing:
- Dry Seeds (Beans, Peas, Lettuce, Grains): Allow pods/seed heads to dry completely on the plant. Harvest, shell, and clean the seeds, removing chaff.
- Wet Seeds (Tomatoes, Cucumbers, Squash): For tomatoes, ferment the seeds in water for a few days to remove the gel coating and inhibit disease. For cucumbers/squash, scrape out seeds, wash thoroughly, and dry.
- Drying: Spread seeds thinly on screens or paper plates in a cool, dry, well-ventilated area for 1-4 weeks. Ensure they are bone-dry before storage. I aim for less than 8% moisture content.
- Storage: Store seeds in airtight containers (glass jars with desiccant packets work well) in a cool, dark, dry place (ideally 40-50°F and 30-40% humidity). Label clearly with variety and date. Properly stored seeds can remain viable for 3-10 years or more.
Step 8: Season Extension & Winterizing
Extend your harvest and protect your garden for the off-season to truly maximize your self sufficient garden from scratch.
- Cold Frames: Simple structures with a transparent top (glass, polycarbonate, or old windows) that sit over garden beds. They trap solar heat, allowing you to grow cold-hardy crops (lettuce, spinach, kale, radishes) well into winter or start seeds earlier in spring. A basic cold frame can be built from 2×6 lumber and a sheet of polycarbonate for under $100.
- Hoop Houses/Low Tunnels: Larger structures made from flexible hoops (PVC pipe or EMT conduit) covered with greenhouse plastic. These provide more space and greater temperature moderation. A 10×20 ft DIY low tunnel kit can cost $200-$500, while a larger, more robust hoop house kit might be $1,000-$3,000. I use a 6×12 ft low tunnel made from 1/2-inch PVC hoops and 6mil greenhouse plastic, which extends my lettuce and spinach harvest by at least
- In-Ground Beds: If you have excellent native soil and good drainage, in-ground beds are the most economical. Double-digging (loosening soil two shovel depths) can significantly improve drainage and aeration. For my main garden, I primarily use in-ground beds, but I focus on building up the soil over time with consistent compost additions and cover cropping. I aim for beds that are no wider than 3-4 feet so I can reach the center without stepping on the soil, compacting it.
- Raised Beds: Raised beds offer numerous advantages, especially for poor soil, heavy clay, or rocky areas. They provide better drainage, warm up faster in spring, reduce compaction, and make weeding and harvesting easier on your back.
- Material Options:
- Untreated Cedar: Naturally rot-resistant and chemical-free. A 4×8 ft bed, 12 inches deep, typically requires three 2x12x8 ft cedar boards, costing around $50-$60 per board (total ~$150-$180) plus corner brackets or screws. My first raised beds were cedar and are still going strong after 7 years.
- Galvanized Steel: Durable, long-lasting, and aesthetically pleasing. Brands like Vego Garden offer modular kits. A Vego Garden 17″ Tall 8-in-1 Metal Raised Garden Bed (can be configured to 4×8 ft) costs approximately $250-$300.
- Concrete Blocks/Stones: Very durable but can leach minerals (though generally safe once weathered) and can be expensive.
- Recycled Materials: Pallets (check for chemical treatment stamps like « HT » for heat-treated), old tires (controversial due to potential chemical leaching).
- Filling Raised Beds: Don’t just fill with topsoil. Use a « Hugelkultur » approach (logs, branches, leaves, then compost, then topsoil) or a mixture of 60% good quality topsoil, 30% compost, and 10% perlite or vermiculite for drainage. A 4x8x1 ft raised bed requires about 32 cubic feet (or ~1.2 cubic yards) of soil mix, which can cost $100-$200 depending on your source.
- Material Options:
Step 4: Water Management & Irrigation
Efficient water management is critical for a self sufficient garden from scratch, especially in off-grid living where water resources might be limited.
- Rainwater Harvesting: This is my primary source of irrigation water. A 55-gallon rain barrel (e.g., EarthMark Rain Barrel, ~$120-$150) connected to a downspout can collect significant water. For larger needs, I use two 275-gallon IBC totes (Intermediate Bulk Containers, often available used for $100-$200 each from food-grade sources) connected in series. A 1,000 sq ft roof can collect approximately 620 gallons of water for every inch of rainfall. My 1,500 sq ft roof provides ample water for my 600 sq ft garden through multiple barrels and totes.
- Drip Irrigation: This is by far the most water-efficient method, delivering water directly to the plant’s root zone, minimizing evaporation and weed growth.
- Components: A typical drip system includes a pressure regulator (e.g., Rain Bird PRV-10, ~$15), a filter (Rain Bird RBY filter, ~$20), main tubing (1/2-inch poly tubing, 100ft ~$25), smaller feeder lines (1/4-inch tubing), and emitters (0.5 GPH or 1 GPH per plant).
- Kits: For beginners, a starter kit like the Rain Bird Drip Irrigation Garden Kit (model DDI-KIT-1P, ~$40-$60) is excellent for a small garden. For larger setups, I use Netafim Techline CV Drip Line (500ft roll, ~$150-$200), which has pressure-compensating emitters built-in, ensuring even watering across long runs.
- Automation: For true self-sufficiency, consider a battery-powered timer (e.g., Orbit B-Hyve Bluetooth Hose Faucet Timer, ~$50) or a solar-powered timer connected to a small 12V pump.
- Solar-Powered Pumps: For lifting water from a well, pond, or large storage tank to your garden, a solar pump is a game-changer. For a smaller drip system, a Shurflo 2088-594-152 Diaphragm Pump (12V, 3.5 GPM, ~$180) can be powered by a single 100W solar panel (e.g., Renogy 100W Monocrystalline Solar Panel, ~$100) and a small 12V battery (e.g., a 50Ah LiFePO4 battery like the Battle Born 50Ah, ~$450). For larger operations or deeper wells, more robust systems are needed. If you’re looking to build out a comprehensive off-grid power system to support your garden’s water needs, or indeed your entire homestead, you might want to explore resources like the Power Grid Generator complete system guide to understand the full scope of what’s possible in terms of energy independence.
Step 5: Seed Selection & Planting
The choice of seeds is crucial for a truly self sufficient garden from scratch.
- Choose Heirloom & Open-Pollinated Seeds: These varieties produce seeds that will grow true to type, meaning you can save seeds from your harvest year after year. F1 hybrids, while often vigorous, will not produce consistent offspring from saved seeds. Reputable seed companies include Baker Creek Heirloom Seeds, High Mowing Organic Seeds, and Seed Savers Exchange. Start with common, reliable varieties like ‘Black Krim’ tomatoes, ‘Provider’ bush beans, ‘Waltham Butternut’ squash, and ‘Black Seeded Simpson’ lettuce.
- Start Seeds Indoors (Optional but Recommended): For longer growing seasons or specific crops, starting seeds indoors gives you a head start. Use seed-starting mix (e.g., Espoma Organic Seed Starter Mix, ~$10 for 16qt bag) in seed trays (Jiffy Professional Greenhouse 72-cell kit, ~$15). Provide adequate light with LED grow lights (Barrina T5 2ft 4-pack LED Grow Lights, 20W each, ~$50) for 14-16 hours a day, positioned 2-4 inches above seedlings. Maintain consistent temperatures (65-75°F for most).
- Direct Sowing vs. Transplanting: Some crops (carrots, radishes, beans, corn) prefer direct sowing into the garden bed. Others (tomatoes, peppers, broccoli, kale) benefit from being started indoors and transplanted. Follow seed packet instructions for planting depths (e.g., lettuce seeds are often surface-sown or planted 1/8 inch deep, while beans are 1 inch deep) and spacing.
- Companion Planting: Strategically plant different species together to enhance growth, deter pests, and attract beneficial insects. For example, planting marigolds near tomatoes can deter nematodes, and basil improves tomato flavor. Nasturtiums can act as a trap crop for aphids.
- Succession Planting: For a continuous harvest, plant small batches of quick-growing crops (lettuce, radishes, cilantro) every 2-3 weeks. As one crop finishes, another is ready to take its place.
Step 6: Pest & Disease Management (Organic)
Maintaining a self sufficient garden from scratch means embracing organic pest and disease control.
- Integrated Pest Management (IPM): This holistic approach combines several strategies.
- Observation: Regularly inspect your plants for early signs of pests or disease. Catching issues early is key.
- Physical Barriers: Use row covers (e.g., Agribon AG-19 floating row cover, 10×20 ft, ~$20) to protect young plants from insect pests like cabbage worms and squash bugs. Install fences (e.g., 2×4 welded wire mesh, 4 ft tall, 50 ft roll ~$70) to keep out deer, rabbits, and other larger animals.
- Hand-Picking: For larger pests like tomato hornworms or squash bugs, simply pick them off and drop them into a bucket of soapy water.
- Companion Planting: As mentioned, certain plants repel pests. Marigolds, garlic, and onions are excellent deterrents.
- Attract Beneficial Insects: Plant flowers like dill, fennel, cosmos, and sweet alyssum to attract ladybugs, lacewings, and parasitic wasps, which prey on common garden pests.
- Organic Sprays & Treatments:
- Neem Oil: An excellent broad-spectrum organic insecticide and fungicide. Bonide Neem Oil Concentrate (16oz, ~$20) can be mixed at a rate of 1-2 tbsp per gallon of water and sprayed on affected plants.
- Insecticidal Soap: Effective against soft-bodied insects like aphids, whiteflies, and spider mites. Garden Safe Insecticidal Soap (24oz ready-to-use, ~$10).
- Bacillus thuringiensis (Bt): A naturally occurring soil bacterium that targets caterpillars and worms. Monterey BT Worm & Caterpillar Killer (16oz, ~$18) is highly effective and safe for beneficial insects.
- Copper or Sulfur Sprays: For fungal diseases like powdery mildew or blight, organic copper (e.g., Bonide Copper Fungicide, ~$15 for 1lb) or sulfur (e.g., Safer Brand Garden Fungicide, ~$10 for 16oz) can be used as a last resort.
Step 7: Harvesting & Seed Saving
The culmination of your efforts is the harvest, and seed saving closes the loop on self-sufficiency.
- Harvesting Techniques:
- Timing: Harvest vegetables at their peak ripeness for best flavor and nutritional value. For example, green beans should snap cleanly, cucumbers should be firm, and tomatoes should be fully colored.
- Frequency: Many crops, like zucchini, cucumbers, and bush beans, produce more if harvested frequently. Pick daily or every other day.
- Tools: Use clean, sharp pruners (e.g., Corona ClassicCUT Bypass Pruner BP 3180, ~$30) or a sharp knife for clean cuts, minimizing damage to the plant.
- Seed Saving: This is where the « self-sufficient » aspect truly shines.
- Selection: Only save seeds from your healthiest, most vigorous plants that show desired traits (disease resistance, good flavor, high yield).
- Isolation: To ensure true-to-type seeds, prevent cross-pollination. This can be challenging for open-pollinated crops that readily cross (e.g., squash, corn). For beginners, focus on self-pollinating plants like beans, peas, lettuce, and tomatoes.
- Processing:
- Dry Seeds (Beans, Peas, Lettuce, Grains): Allow pods/seed heads to dry completely on the plant. Harvest, shell, and clean the seeds, removing chaff.
- Wet Seeds (Tomatoes, Cucumbers, Squash): For tomatoes, ferment the seeds in water for a few days to remove the gel coating and inhibit disease. For cucumbers/squash, scrape out seeds, wash thoroughly, and dry.
- Drying: Spread seeds thinly on screens or paper plates in a cool, dry, well-ventilated area for 1-4 weeks. Ensure they are bone-dry before storage. I aim for less than 8% moisture content.
- Storage: Store seeds in airtight containers (glass jars with desiccant packets work well) in a cool, dark, dry place (ideally 40-50°F and 30-40% humidity). Label clearly with variety and date. Properly stored seeds can remain viable for 3-10 years or more.
Step 8: Season Extension & Winterizing
Extend your harvest and protect your garden for the off-season to truly maximize your self sufficient garden from scratch.
- Cold Frames: Simple structures with a transparent top (glass, polycarbonate, or old windows) that sit over garden beds. They trap solar heat, allowing you to grow cold-hardy crops (lettuce, spinach, kale, radishes) well into winter or start seeds earlier in spring. A basic cold frame can be built from 2×6 lumber and a sheet of polycarbonate for under $100.
- Hoop Houses/Low Tunnels: Larger structures made from flexible hoops (PVC pipe or EMT conduit) covered with greenhouse plastic. These provide more space and greater temperature moderation. A 10×20 ft DIY low tunnel kit can cost $200-$500, while a larger, more robust hoop house kit might be $1,000-$3,000. I use a 6×12 ft low tunnel made from 1/2-inch PVC hoops and 6mil greenhouse plastic, which extends my lettuce and spinach harvest by at least
Deciding between raised beds and in-ground beds depends on your soil, budget, and physical capabilities.
- In-Ground Beds: If you have excellent native soil and good drainage, in-ground beds are the most economical. Double-digging (loosening soil two shovel depths) can significantly improve drainage and aeration. For my main garden, I primarily use in-ground beds, but I focus on building up the soil over time with consistent compost additions and cover cropping. I aim for beds that are no wider than 3-4 feet so I can reach the center without stepping on the soil, compacting it.
- Raised Beds: Raised beds offer numerous advantages, especially for poor soil, heavy clay, or rocky areas. They provide better drainage, warm up faster in spring, reduce compaction, and make weeding and harvesting easier on your back.
- Material Options:
- Untreated Cedar: Naturally rot-resistant and chemical-free. A 4×8 ft bed, 12 inches deep, typically requires three 2x12x8 ft cedar boards, costing around $50-$60 per board (total ~$150-$180) plus corner brackets or screws. My first raised beds were cedar and are still going strong after 7 years.
- Galvanized Steel: Durable, long-lasting, and aesthetically pleasing. Brands like Vego Garden offer modular kits. A Vego Garden 17″ Tall 8-in-1 Metal Raised Garden Bed (can be configured to 4×8 ft) costs approximately $250-$300.
- Concrete Blocks/Stones: Very durable but can leach minerals (though generally safe once weathered) and can be expensive.
- Recycled Materials: Pallets (check for chemical treatment stamps like « HT » for heat-treated), old tires (controversial due to potential chemical leaching).
- Filling Raised Beds: Don’t just fill with topsoil. Use a « Hugelkultur » approach (logs, branches, leaves, then compost, then topsoil) or a mixture of 60% good quality topsoil, 30% compost, and 10% perlite or vermiculite for drainage. A 4x8x1 ft raised bed requires about 32 cubic feet (or ~1.2 cubic yards) of soil mix, which can cost $100-$200 depending on your source.
- Material Options:
Step 4: Water Management & Irrigation
Efficient water management is critical for a self sufficient garden from scratch, especially in off-grid living where water resources might be limited.
- Rainwater Harvesting: This is my primary source of irrigation water. A 55-gallon rain barrel (e.g., EarthMark Rain Barrel, ~$120-$150) connected to a downspout can collect significant water. For larger needs, I use two 275-gallon IBC totes (Intermediate Bulk Containers, often available used for $100-$200 each from food-grade sources) connected in series. A 1,000 sq ft roof can collect approximately 620 gallons of water for every inch of rainfall. My 1,500 sq ft roof provides ample water for my 600 sq ft garden through multiple barrels and totes.
- Drip Irrigation: This is by far the most water-efficient method, delivering water directly to the plant’s root zone, minimizing evaporation and weed growth.
- Components: A typical drip system includes a pressure regulator (e.g., Rain Bird PRV-10, ~$15), a filter (Rain Bird RBY filter, ~$20), main tubing (1/2-inch poly tubing, 100ft ~$25), smaller feeder lines (1/4-inch tubing), and emitters (0.5 GPH or 1 GPH per plant).
- Kits: For beginners, a starter kit like the Rain Bird Drip Irrigation Garden Kit (model DDI-KIT-1P, ~$40-$60) is excellent for a small garden. For larger setups, I use Netafim Techline CV Drip Line (500ft roll, ~$150-$200), which has pressure-compensating emitters built-in, ensuring even watering across long runs.
- Automation: For true self-sufficiency, consider a battery-powered timer (e.g., Orbit B-Hyve Bluetooth Hose Faucet Timer, ~$50) or a solar-powered timer connected to a small 12V pump.
- Solar-Powered Pumps: For lifting water from a well, pond, or large storage tank to your garden, a solar pump is a game-changer. For a smaller drip system, a Shurflo 2088-594-152 Diaphragm Pump (12V, 3.5 GPM, ~$180) can be powered by a single 100W solar panel (e.g., Renogy 100W Monocrystalline Solar Panel, ~$100) and a small 12V battery (e.g., a 50Ah LiFePO4 battery like the Battle Born 50Ah, ~$450). For larger operations or deeper wells, more robust systems are needed. If you’re looking to build out a comprehensive off-grid power system to support your garden’s water needs, or indeed your entire homestead, you might want to explore resources like the Power Grid Generator complete system guide to understand the full scope of what’s possible in terms of energy independence.
Step 5: Seed Selection & Planting
The choice of seeds is crucial for a truly self sufficient garden from scratch.
- Choose Heirloom & Open-Pollinated Seeds: These varieties produce seeds that will grow true to type, meaning you can save seeds from your harvest year after year. F1 hybrids, while often vigorous, will not produce consistent offspring from saved seeds. Reputable seed companies include Baker Creek Heirloom Seeds, High Mowing Organic Seeds, and Seed Savers Exchange. Start with common, reliable varieties like ‘Black Krim’ tomatoes, ‘Provider’ bush beans, ‘Waltham Butternut’ squash, and ‘Black Seeded Simpson’ lettuce.
- Start Seeds Indoors (Optional but Recommended): For longer growing seasons or specific crops, starting seeds indoors gives you a head start. Use seed-starting mix (e.g., Espoma Organic Seed Starter Mix, ~$10 for 16qt bag) in seed trays (Jiffy Professional Greenhouse 72-cell kit, ~$15). Provide adequate light with LED grow lights (Barrina T5 2ft 4-pack LED Grow Lights, 20W each, ~$50) for 14-16 hours a day, positioned 2-4 inches above seedlings. Maintain consistent temperatures (65-75°F for most).
- Direct Sowing vs. Transplanting: Some crops (carrots, radishes, beans, corn) prefer direct sowing into the garden bed. Others (tomatoes, peppers, broccoli, kale) benefit from being started indoors and transplanted. Follow seed packet instructions for planting depths (e.g., lettuce seeds are often surface-sown or planted 1/8 inch deep, while beans are 1 inch deep) and spacing.
- Companion Planting: Strategically plant different species together to enhance growth, deter pests, and attract beneficial insects. For example, planting marigolds near tomatoes can deter nematodes, and basil improves tomato flavor. Nasturtiums can act as a trap crop for aphids.
- Succession Planting: For a continuous harvest, plant small batches of quick-growing crops (lettuce, radishes, cilantro) every 2-3 weeks. As one crop finishes, another is ready to take its place.
Step 6: Pest & Disease Management (Organic)
Maintaining a self sufficient garden from scratch means embracing organic pest and disease control.
- Integrated Pest Management (IPM): This holistic approach combines several strategies.
- Observation: Regularly inspect your plants for early signs of pests or disease. Catching issues early is key.
- Physical Barriers: Use row covers (e.g., Agribon AG-19 floating row cover, 10×20 ft, ~$20) to protect young plants from insect pests like cabbage worms and squash bugs. Install fences (e.g., 2×4 welded wire mesh, 4 ft tall, 50 ft roll ~$70) to keep out deer, rabbits, and other larger animals.
- Hand-Picking: For larger pests like tomato hornworms or squash bugs, simply pick them off and drop them into a bucket of soapy water.
- Companion Planting: As mentioned, certain plants repel pests. Marigolds, garlic, and onions are excellent deterrents.
- Attract Beneficial Insects: Plant flowers like dill, fennel, cosmos, and sweet alyssum to attract ladybugs, lacewings, and parasitic wasps, which prey on common garden pests.
- Organic Sprays & Treatments:
- Neem Oil: An excellent broad-spectrum organic insecticide and fungicide. Bonide Neem Oil Concentrate (16oz, ~$20) can be mixed at a rate of 1-2 tbsp per gallon of water and sprayed on affected plants.
- Insecticidal Soap: Effective against soft-bodied insects like aphids, whiteflies, and spider mites. Garden Safe Insecticidal Soap (24oz ready-to-use, ~$10).
- Bacillus thuringiensis (Bt): A naturally occurring soil bacterium that targets caterpillars and worms. Monterey BT Worm & Caterpillar Killer (16oz, ~$18) is highly effective and safe for beneficial insects.
- Copper or Sulfur Sprays: For fungal diseases like powdery mildew or blight, organic copper (e.g., Bonide Copper Fungicide, ~$15 for 1lb) or sulfur (e.g., Safer Brand Garden Fungicide, ~$10 for 16oz) can be used as a last resort.
Step 7: Harvesting & Seed Saving
The culmination of your efforts is the harvest, and seed saving closes the loop on self-sufficiency.
- Harvesting Techniques:
- Timing: Harvest vegetables at their peak ripeness for best flavor and nutritional value. For example, green beans should snap cleanly, cucumbers should be firm, and tomatoes should be fully colored.
- Frequency: Many crops, like zucchini, cucumbers, and bush beans, produce more if harvested frequently. Pick daily or every other day.
- Tools: Use clean, sharp pruners (e.g., Corona ClassicCUT Bypass Pruner BP 3180, ~$30) or a sharp knife for clean cuts, minimizing damage to the plant.
- Seed Saving: This is where the « self-sufficient » aspect truly shines.
- Selection: Only save seeds from your healthiest, most vigorous plants that show desired traits (disease resistance, good flavor, high yield).
- Isolation: To ensure true-to-type seeds, prevent cross-pollination. This can be challenging for open-pollinated crops that readily cross (e.g., squash, corn). For beginners, focus on self-pollinating plants like beans, peas, lettuce, and tomatoes.
- Processing:
- Dry Seeds (Beans, Peas, Lettuce, Grains): Allow pods/seed heads to dry completely on the plant. Harvest, shell, and clean the seeds, removing chaff.
- Wet Seeds (Tomatoes, Cucumbers, Squash): For tomatoes, ferment the seeds in water for a few days to remove the gel coating and inhibit disease. For cucumbers/squash, scrape out seeds, wash thoroughly, and dry.
- Drying: Spread seeds thinly on screens or paper plates in a cool, dry, well-ventilated area for 1-4 weeks. Ensure they are bone-dry before storage. I aim for less than 8% moisture content.
- Storage: Store seeds in airtight containers (glass jars with desiccant packets work well) in a cool, dark, dry place (ideally 40-50°F and 30-40% humidity). Label clearly with variety and date. Properly stored seeds can remain viable for 3-10 years or more.
Step 8: Season Extension & Winterizing
Extend your harvest and protect your garden for the off-season to truly maximize your self sufficient garden from scratch.
- Cold Frames: Simple structures with a transparent top (glass, polycarbonate, or old windows) that sit over garden beds. They trap solar heat, allowing you to grow cold-hardy crops (lettuce, spinach, kale, radishes) well into winter or start seeds earlier in spring. A basic cold frame can be built from 2×6 lumber and a sheet of polycarbonate for under $100.
- Hoop Houses/Low Tunnels: Larger structures made from flexible hoops (PVC pipe or EMT conduit) covered with greenhouse plastic. These provide more space and greater temperature moderation. A 10×20 ft DIY low tunnel kit can cost $200-$500, while a larger, more robust hoop house kit might be $1,000-$3,000. I use a 6×12 ft low tunnel made from 1/2-inch PVC hoops and 6mil greenhouse plastic, which extends my lettuce and spinach harvest by at least
Healthy soil is the bedrock of a productive, self-sufficient garden. You can’t guess what your soil needs; you have to test it.
- Perform a Soil Test: A professional soil test will give you precise data on your soil’s pH, nutrient levels (N-P-K), and organic matter content. I recommend sending a sample to your local agricultural extension office; it typically costs $20-$50 and provides detailed recommendations. Alternatively, for a quick homeowner check, a Rapitest Soil Test Kit (40-test kit, model 1663, ~$20 on Amazon) provides a good baseline for pH, Nitrogen, Phosphorus, and Potash. Aim for a pH between 6.0 and 7.0 for most vegetables.
- Amend for pH Imbalance: If your soil is too acidic (below 6.0), add agricultural lime (dolomitic lime adds magnesium, calcitic lime adds calcium). Apply 5-10 lbs per 100 sq ft for a moderate adjustment. If it’s too alkaline (above 7.0), add elemental sulfur (e.g., Espoma Soil Acidifier, ~$15 for 6.75 lbs) or generous amounts of organic matter like peat moss or pine needles.
- Build Organic Matter: This is the single most important step for long-term soil health. Organic matter improves soil structure, water retention, drainage, and nutrient availability. Incorporate 2-4 inches of high-quality compost into your top 6-12 inches of soil annually. I make my own compost from kitchen scraps, garden waste, and shredded leaves, but you can purchase it. Local nurseries often sell bulk compost for $30-$50 per cubic yard. Aged manure (from chickens, cows, or horses – ensure it’s well-rotted to avoid burning plants) is also excellent.
- Address Nutrient Deficiencies: Based on your soil test, add specific organic amendments. If Nitrogen (N) is low, add blood meal (12-0-0, ~$20 for 3 lbs) or feather meal. For Phosphorus (P), use bone meal (3-15-0, ~$15 for 3 lbs) or rock phosphate. For Potassium (K), greensand (0-0-2.5, ~$25 for 5 lbs) or kelp meal are good choices. I rely heavily on Espoma Organic Garden-tone (5-3-3, ~$25 for an 8lb bag) as a balanced, all-purpose organic fertilizer during planting.
Step 3: Garden Bed Preparation
Deciding between raised beds and in-ground beds depends on your soil, budget, and physical capabilities.
- In-Ground Beds: If you have excellent native soil and good drainage, in-ground beds are the most economical. Double-digging (loosening soil two shovel depths) can significantly improve drainage and aeration. For my main garden, I primarily use in-ground beds, but I focus on building up the soil over time with consistent compost additions and cover cropping. I aim for beds that are no wider than 3-4 feet so I can reach the center without stepping on the soil, compacting it.
- Raised Beds: Raised beds offer numerous advantages, especially for poor soil, heavy clay, or rocky areas. They provide better drainage, warm up faster in spring, reduce compaction, and make weeding and harvesting easier on your back.
- Material Options:
- Untreated Cedar: Naturally rot-resistant and chemical-free. A 4×8 ft bed, 12 inches deep, typically requires three 2x12x8 ft cedar boards, costing around $50-$60 per board (total ~$150-$180) plus corner brackets or screws. My first raised beds were cedar and are still going strong after 7 years.
- Galvanized Steel: Durable, long-lasting, and aesthetically pleasing. Brands like Vego Garden offer modular kits. A Vego Garden 17″ Tall 8-in-1 Metal Raised Garden Bed (can be configured to 4×8 ft) costs approximately $250-$300.
- Concrete Blocks/Stones: Very durable but can leach minerals (though generally safe once weathered) and can be expensive.
- Recycled Materials: Pallets (check for chemical treatment stamps like « HT » for heat-treated), old tires (controversial due to potential chemical leaching).
- Filling Raised Beds: Don’t just fill with topsoil. Use a « Hugelkultur » approach (logs, branches, leaves, then compost, then topsoil) or a mixture of 60% good quality topsoil, 30% compost, and 10% perlite or vermiculite for drainage. A 4x8x1 ft raised bed requires about 32 cubic feet (or ~1.2 cubic yards) of soil mix, which can cost $100-$200 depending on your source.
- Material Options:
Step 4: Water Management & Irrigation
Efficient water management is critical for a self sufficient garden from scratch, especially in off-grid living where water resources might be limited.
- Rainwater Harvesting: This is my primary source of irrigation water. A 55-gallon rain barrel (e.g., EarthMark Rain Barrel, ~$120-$150) connected to a downspout can collect significant water. For larger needs, I use two 275-gallon IBC totes (Intermediate Bulk Containers, often available used for $100-$200 each from food-grade sources) connected in series. A 1,000 sq ft roof can collect approximately 620 gallons of water for every inch of rainfall. My 1,500 sq ft roof provides ample water for my 600 sq ft garden through multiple barrels and totes.
- Drip Irrigation: This is by far the most water-efficient method, delivering water directly to the plant’s root zone, minimizing evaporation and weed growth.
- Components: A typical drip system includes a pressure regulator (e.g., Rain Bird PRV-10, ~$15), a filter (Rain Bird RBY filter, ~$20), main tubing (1/2-inch poly tubing, 100ft ~$25), smaller feeder lines (1/4-inch tubing), and emitters (0.5 GPH or 1 GPH per plant).
- Kits: For beginners, a starter kit like the Rain Bird Drip Irrigation Garden Kit (model DDI-KIT-1P, ~$40-$60) is excellent for a small garden. For larger setups, I use Netafim Techline CV Drip Line (500ft roll, ~$150-$200), which has pressure-compensating emitters built-in, ensuring even watering across long runs.
- Automation: For true self-sufficiency, consider a battery-powered timer (e.g., Orbit B-Hyve Bluetooth Hose Faucet Timer, ~$50) or a solar-powered timer connected to a small 12V pump.
- Solar-Powered Pumps: For lifting water from a well, pond, or large storage tank to your garden, a solar pump is a game-changer. For a smaller drip system, a Shurflo 2088-594-152 Diaphragm Pump (12V, 3.5 GPM, ~$180) can be powered by a single 100W solar panel (e.g., Renogy 100W Monocrystalline Solar Panel, ~$100) and a small 12V battery (e.g., a 50Ah LiFePO4 battery like the Battle Born 50Ah, ~$450). For larger operations or deeper wells, more robust systems are needed. If you’re looking to build out a comprehensive off-grid power system to support your garden’s water needs, or indeed your entire homestead, you might want to explore resources like the Power Grid Generator complete system guide to understand the full scope of what’s possible in terms of energy independence.
Step 5: Seed Selection & Planting
The choice of seeds is crucial for a truly self sufficient garden from scratch.
- Choose Heirloom & Open-Pollinated Seeds: These varieties produce seeds that will grow true to type, meaning you can save seeds from your harvest year after year. F1 hybrids, while often vigorous, will not produce consistent offspring from saved seeds. Reputable seed companies include Baker Creek Heirloom Seeds, High Mowing Organic Seeds, and Seed Savers Exchange. Start with common, reliable varieties like ‘Black Krim’ tomatoes, ‘Provider’ bush beans, ‘Waltham Butternut’ squash, and ‘Black Seeded Simpson’ lettuce.
- Start Seeds Indoors (Optional but Recommended): For longer growing seasons or specific crops, starting seeds indoors gives you a head start. Use seed-starting mix (e.g., Espoma Organic Seed Starter Mix, ~$10 for 16qt bag) in seed trays (Jiffy Professional Greenhouse 72-cell kit, ~$15). Provide adequate light with LED grow lights (Barrina T5 2ft 4-pack LED Grow Lights, 20W each, ~$50) for 14-16 hours a day, positioned 2-4 inches above seedlings. Maintain consistent temperatures (65-75°F for most).
- Direct Sowing vs. Transplanting: Some crops (carrots, radishes, beans, corn) prefer direct sowing into the garden bed. Others (tomatoes, peppers, broccoli, kale) benefit from being started indoors and transplanted. Follow seed packet instructions for planting depths (e.g., lettuce seeds are often surface-sown or planted 1/8 inch deep, while beans are 1 inch deep) and spacing.
- Companion Planting: Strategically plant different species together to enhance growth, deter pests, and attract beneficial insects. For example, planting marigolds near tomatoes can deter nematodes, and basil improves tomato flavor. Nasturtiums can act as a trap crop for aphids.
- Succession Planting: For a continuous harvest, plant small batches of quick-growing crops (lettuce, radishes, cilantro) every 2-3 weeks. As one crop finishes, another is ready to take its place.
Step 6: Pest & Disease Management (Organic)
Maintaining a self sufficient garden from scratch means embracing organic pest and disease control.
- Integrated Pest Management (IPM): This holistic approach combines several strategies.
- Observation: Regularly inspect your plants for early signs of pests or disease. Catching issues early is key.
- Physical Barriers: Use row covers (e.g., Agribon AG-19 floating row cover, 10×20 ft, ~$20) to protect young plants from insect pests like cabbage worms and squash bugs. Install fences (e.g., 2×4 welded wire mesh, 4 ft tall, 50 ft roll ~$70) to keep out deer, rabbits, and other larger animals.
- Hand-Picking: For larger pests like tomato hornworms or squash bugs, simply pick them off and drop them into a bucket of soapy water.
- Companion Planting: As mentioned, certain plants repel pests. Marigolds, garlic, and onions are excellent deterrents.
- Attract Beneficial Insects: Plant flowers like dill, fennel, cosmos, and sweet alyssum to attract ladybugs, lacewings, and parasitic wasps, which prey on common garden pests.
- Organic Sprays & Treatments:
- Neem Oil: An excellent broad-spectrum organic insecticide and fungicide. Bonide Neem Oil Concentrate (16oz, ~$20) can be mixed at a rate of 1-2 tbsp per gallon of water and sprayed on affected plants.
- Insecticidal Soap: Effective against soft-bodied insects like aphids, whiteflies, and spider mites. Garden Safe Insecticidal Soap (24oz ready-to-use, ~$10).
- Bacillus thuringiensis (Bt): A naturally occurring soil bacterium that targets caterpillars and worms. Monterey BT Worm & Caterpillar Killer (16oz, ~$18) is highly effective and safe for beneficial insects.
- Copper or Sulfur Sprays: For fungal diseases like powdery mildew or blight, organic copper (e.g., Bonide Copper Fungicide, ~$15 for 1lb) or sulfur (e.g., Safer Brand Garden Fungicide, ~$10 for 16oz) can be used as a last resort.
Step 7: Harvesting & Seed Saving
The culmination of your efforts is the harvest, and seed saving closes the loop on self-sufficiency.
- Harvesting Techniques:
- Timing: Harvest vegetables at their peak ripeness for best flavor and nutritional value. For example, green beans should snap cleanly, cucumbers should be firm, and tomatoes should be fully colored.
- Frequency: Many crops, like zucchini, cucumbers, and bush beans, produce more if harvested frequently. Pick daily or every other day.
- Tools: Use clean, sharp pruners (e.g., Corona ClassicCUT Bypass Pruner BP 3180, ~$30) or a sharp knife for clean cuts, minimizing damage to the plant.
- Seed Saving: This is where the « self-sufficient » aspect truly shines.
- Selection: Only save seeds from your healthiest, most vigorous plants that show desired traits (disease resistance, good flavor, high yield).
- Isolation: To ensure true-to-type seeds, prevent cross-pollination. This can be challenging for open-pollinated crops that readily cross (e.g., squash, corn). For beginners, focus on self-pollinating plants like beans, peas, lettuce, and tomatoes.
- Processing:
- Dry Seeds (Beans, Peas, Lettuce, Grains): Allow pods/seed heads to dry completely on the plant. Harvest, shell, and clean the seeds, removing chaff.
- Wet Seeds (Tomatoes, Cucumbers, Squash): For tomatoes, ferment the seeds in water for a few days to remove the gel coating and inhibit disease. For cucumbers/squash, scrape out seeds, wash thoroughly, and dry.
- Drying: Spread seeds thinly on screens or paper plates in a cool, dry, well-ventilated area for 1-4 weeks. Ensure they are bone-dry before storage. I aim for less than 8% moisture content.
- Storage: Store seeds in airtight containers (glass jars with desiccant packets work well) in a cool, dark, dry place (ideally 40-50°F and 30-40% humidity). Label clearly with variety and date. Properly stored seeds can remain viable for 3-10 years or more.
Step 8: Season Extension & Winterizing
Extend your harvest and protect your garden for the off-season to truly maximize your self sufficient garden from scratch.
- Cold Frames: Simple structures with a transparent top (glass, polycarbonate, or old windows) that sit over garden beds. They trap solar heat, allowing you to grow cold-hardy crops (lettuce, spinach, kale, radishes) well into winter or start seeds earlier in spring. A basic cold frame can be built from 2×6 lumber and a sheet of polycarbonate for under $100.
- Hoop Houses/Low Tunnels: Larger structures made from flexible hoops (PVC pipe or EMT conduit) covered with greenhouse plastic. These provide more space and greater temperature moderation. A 10×20 ft DIY low tunnel kit can cost $200-$500, while a larger, more robust hoop house kit might be $1,000-$3,000. I use a 6×12 ft low tunnel made from 1/2-inch PVC hoops and 6mil greenhouse plastic, which extends my lettuce and spinach harvest by at least
Step 6: Pest & Disease Management (Organic)
Maintaining a self sufficient garden from scratch means embracing organic pest and disease control.
- Integrated Pest Management (IPM): This holistic approach combines several strategies.
- Observation: Regularly inspect your plants for early signs of pests or disease. Catching issues early is key.
- Physical Barriers: Use row covers (e.g., Agribon AG-19 floating row cover, 10×20 ft, ~$20) to protect young plants from insect pests like cabbage worms and squash bugs. Install fences (e.g., 2×4 welded wire mesh, 4 ft tall, 50 ft roll ~$70) to keep out deer, rabbits, and other larger animals.
- Hand-Picking: For larger pests like tomato hornworms or squash bugs, simply pick them off and drop them into a bucket of soapy water.
- Companion Planting: As mentioned, certain plants repel pests. Marigolds, garlic, and onions are excellent deterrents.
- Attract Beneficial Insects: Plant flowers like dill, fennel, cosmos, and sweet alyssum to attract ladybugs, lacewings, and parasitic wasps, which prey on common garden pests.
- Organic Sprays & Treatments:
- Neem Oil: An excellent broad-spectrum organic insecticide and fungicide. Bonide Neem Oil Concentrate (16oz, ~$20) can be mixed at a rate of 1-2 tbsp per gallon of water and sprayed on affected plants.
- Insecticidal Soap: Effective against soft-bodied insects like aphids, whiteflies, and spider mites. Garden Safe Insecticidal Soap (24oz ready-to-use, ~$10).
- Bacillus thuringiensis (Bt): A naturally occurring soil bacterium that targets caterpillars and worms. Monterey BT Worm & Caterpillar Killer (16oz, ~$18) is highly effective and safe for beneficial insects.
- Copper or Sulfur Sprays: For fungal diseases like powdery mildew or blight, organic copper (e.g., Bonide Copper Fungicide, ~$15 for 1lb) or sulfur (e.g., Safer Brand Garden Fungicide, ~$10 for 16oz) can be used as a last resort.
Step 7: Harvesting & Seed Saving
The culmination of your efforts is the harvest, and seed saving closes the loop on self-sufficiency.
- Harvesting Techniques:
- Timing: Harvest vegetables at their peak ripeness for best flavor and nutritional value. For example, green beans should snap cleanly, cucumbers should be firm, and tomatoes should be fully colored.
- Frequency: Many crops, like zucchini, cucumbers, and bush beans, produce more if harvested frequently. Pick daily or every other day.
- Tools: Use clean, sharp pruners (e.g., Corona ClassicCUT Bypass Pruner BP 3180, ~$30) or a sharp knife for clean cuts, minimizing damage to the plant.
- Seed Saving: This is where the « self-sufficient » aspect truly shines.
- Selection: Only save seeds from your healthiest, most vigorous plants that show desired traits (disease resistance, good flavor, high yield).
- Isolation: To ensure true-to-type seeds, prevent cross-pollination. This can be challenging for open-pollinated crops that readily cross (e.g., squash, corn). For beginners, focus on self-pollinating plants like beans, peas, lettuce, and tomatoes.
- Processing:
- Dry Seeds (Beans, Peas, Lettuce, Grains): Allow pods/seed heads to dry completely on the plant. Harvest, shell, and clean the seeds, removing chaff.
- Wet Seeds (Tomatoes, Cucumbers, Squash): For tomatoes, ferment the seeds in water for a few days to remove the gel coating and inhibit disease. For cucumbers/squash, scrape out seeds, wash thoroughly, and dry.
- Drying: Spread seeds thinly on screens or paper plates in a cool, dry, well-ventilated area for 1-4 weeks. Ensure they are bone-dry before storage. I aim for less than 8% moisture content.
- Storage: Store seeds in airtight containers (glass jars with desiccant packets work well) in a cool, dark, dry place (ideally 40-50°F and 30-40% humidity). Label clearly with variety and date. Properly stored seeds can remain viable for 3-10 years or more.
Step 8: Season Extension & Winterizing
Extend your harvest and protect your garden for the off-season to truly maximize your self sufficient garden from scratch.
- Cold Frames: Simple structures with a transparent top (glass, polycarbonate, or old windows) that sit over garden beds. They trap solar heat, allowing you to grow cold-hardy crops (lettuce, spinach, kale, radishes) well into winter or start seeds earlier in spring. A basic cold frame can be built from 2×6 lumber and a sheet of polycarbonate for under $100.
- Hoop Houses/Low Tunnels: Larger structures made from flexible hoops (PVC pipe or EMT conduit) covered with greenhouse plastic. These provide more space and greater temperature moderation. A 10×20 ft DIY low tunnel kit can cost $200-$500, while a larger, more robust hoop house kit might be $1,000-$3,000. I use a 6×12 ft low tunnel made from 1/2-inch PVC hoops and 6mil greenhouse plastic, which extends my lettuce and spinach harvest by at least
- Rainwater Harvesting: This is my primary source of irrigation water. A 55-gallon rain barrel (e.g., EarthMark Rain Barrel, ~$120-$150) connected to a downspout can collect significant water. For larger needs, I use two 275-gallon IBC totes (Intermediate Bulk Containers, often available used for $100-$200 each from food-grade sources) connected in series. A 1,000 sq ft roof can collect approximately 620 gallons of water for every inch of rainfall. My 1,500 sq ft roof provides ample water for my 600 sq ft garden through multiple barrels and totes.
- Drip Irrigation: This is by far the most water-efficient method, delivering water directly to the plant’s root zone, minimizing evaporation and weed growth.
- Components: A typical drip system includes a pressure regulator (e.g., Rain Bird PRV-10, ~$15), a filter (Rain Bird RBY filter, ~$20), main tubing (1/2-inch poly tubing, 100ft ~$25), smaller feeder lines (1/4-inch tubing), and emitters (0.5 GPH or 1 GPH per plant).
- Kits: For beginners, a starter kit like the Rain Bird Drip Irrigation Garden Kit (model DDI-KIT-1P, ~$40-$60) is excellent for a small garden. For larger setups, I use Netafim Techline CV Drip Line (500ft roll, ~$150-$200), which has pressure-compensating emitters built-in, ensuring even watering across long runs.
- Automation: For true self-sufficiency, consider a battery-powered timer (e.g., Orbit B-Hyve Bluetooth Hose Faucet Timer, ~$50) or a solar-powered timer connected to a small 12V pump.
- Solar-Powered Pumps: For lifting water from a well, pond, or large storage tank to your garden, a solar pump is a game-changer. For a smaller drip system, a Shurflo 2088-594-152 Diaphragm Pump (12V, 3.5 GPM, ~$180) can be powered by a single 100W solar panel (e.g., Renogy 100W Monocrystalline Solar Panel, ~$100) and a small 12V battery (e.g., a 50Ah LiFePO4 battery like the Battle Born 50Ah, ~$450). For larger operations or deeper wells, more robust systems are needed. If you’re looking to build out a comprehensive off-grid power system to support your garden’s water needs, or indeed your entire homestead, you might want to explore resources like the Power Grid Generator complete system guide to understand the full scope of what’s possible in terms of energy independence.
Step 5: Seed Selection & Planting
The choice of seeds is crucial for a truly self sufficient garden from scratch.
- Choose Heirloom & Open-Pollinated Seeds: These varieties produce seeds that will grow true to type, meaning you can save seeds from your harvest year after year. F1 hybrids, while often vigorous, will not produce consistent offspring from saved seeds. Reputable seed companies include Baker Creek Heirloom Seeds, High Mowing Organic Seeds, and Seed Savers Exchange. Start with common, reliable varieties like ‘Black Krim’ tomatoes, ‘Provider’ bush beans, ‘Waltham Butternut’ squash, and ‘Black Seeded Simpson’ lettuce.
- Start Seeds Indoors (Optional but Recommended): For longer growing seasons or specific crops, starting seeds indoors gives you a head start. Use seed-starting mix (e.g., Espoma Organic Seed Starter Mix, ~$10 for 16qt bag) in seed trays (Jiffy Professional Greenhouse 72-cell kit, ~$15). Provide adequate light with LED grow lights (Barrina T5 2ft 4-pack LED Grow Lights, 20W each, ~$50) for 14-16 hours a day, positioned 2-4 inches above seedlings. Maintain consistent temperatures (65-75°F for most).
- Direct Sowing vs. Transplanting: Some crops (carrots, radishes, beans, corn) prefer direct sowing into the garden bed. Others (tomatoes, peppers, broccoli, kale) benefit from being started indoors and transplanted. Follow seed packet instructions for planting depths (e.g., lettuce seeds are often surface-sown or planted 1/8 inch deep, while beans are 1 inch deep) and spacing.
- Companion Planting: Strategically plant different species together to enhance growth, deter pests, and attract beneficial insects. For example, planting marigolds near tomatoes can deter nematodes, and basil improves tomato flavor. Nasturtiums can act as a trap crop for aphids.
- Succession Planting: For a continuous harvest, plant small batches of quick-growing crops (lettuce, radishes, cilantro) every 2-3 weeks. As one crop finishes, another is ready to take its place.
Step 6: Pest & Disease Management (Organic)
Maintaining a self sufficient garden from scratch means embracing organic pest and disease control.
- Integrated Pest Management (IPM): This holistic approach combines several strategies.
- Observation: Regularly inspect your plants for early signs of pests or disease. Catching issues early is key.
- Physical Barriers: Use row covers (e.g., Agribon AG-19 floating row cover, 10×20 ft, ~$20) to protect young plants from insect pests like cabbage worms and squash bugs. Install fences (e.g., 2×4 welded wire mesh, 4 ft tall, 50 ft roll ~$70) to keep out deer, rabbits, and other larger animals.
- Hand-Picking: For larger pests like tomato hornworms or squash bugs, simply pick them off and drop them into a bucket of soapy water.
- Companion Planting: As mentioned, certain plants repel pests. Marigolds, garlic, and onions are excellent deterrents.
- Attract Beneficial Insects: Plant flowers like dill, fennel, cosmos, and sweet alyssum to attract ladybugs, lacewings, and parasitic wasps, which prey on common garden pests.
- Organic Sprays & Treatments:
- Neem Oil: An excellent broad-spectrum organic insecticide and fungicide. Bonide Neem Oil Concentrate (16oz, ~$20) can be mixed at a rate of 1-2 tbsp per gallon of water and sprayed on affected plants.
- Insecticidal Soap: Effective against soft-bodied insects like aphids, whiteflies, and spider mites. Garden Safe Insecticidal Soap (24oz ready-to-use, ~$10).
- Bacillus thuringiensis (Bt): A naturally occurring soil bacterium that targets caterpillars and worms. Monterey BT Worm & Caterpillar Killer (16oz, ~$18) is highly effective and safe for beneficial insects.
- Copper or Sulfur Sprays: For fungal diseases like powdery mildew or blight, organic copper (e.g., Bonide Copper Fungicide, ~$15 for 1lb) or sulfur (e.g., Safer Brand Garden Fungicide, ~$10 for 16oz) can be used as a last resort.
Step 7: Harvesting & Seed Saving
The culmination of your efforts is the harvest, and seed saving closes the loop on self-sufficiency.
- Harvesting Techniques:
- Timing: Harvest vegetables at their peak ripeness for best flavor and nutritional value. For example, green beans should snap cleanly, cucumbers should be firm, and tomatoes should be fully colored.
- Frequency: Many crops, like zucchini, cucumbers, and bush beans, produce more if harvested frequently. Pick daily or every other day.
- Tools: Use clean, sharp pruners (e.g., Corona ClassicCUT Bypass Pruner BP 3180, ~$30) or a sharp knife for clean cuts, minimizing damage to the plant.
- Seed Saving: This is where the « self-sufficient » aspect truly shines.
- Selection: Only save seeds from your healthiest, most vigorous plants that show desired traits (disease resistance, good flavor, high yield).
- Isolation: To ensure true-to-type seeds, prevent cross-pollination. This can be challenging for open-pollinated crops that readily cross (e.g., squash, corn). For beginners, focus on self-pollinating plants like beans, peas, lettuce, and tomatoes.
- Processing:
- Dry Seeds (Beans, Peas, Lettuce, Grains): Allow pods/seed heads to dry completely on the plant. Harvest, shell, and clean the seeds, removing chaff.
- Wet Seeds (Tomatoes, Cucumbers, Squash): For tomatoes, ferment the seeds in water for a few days to remove the gel coating and inhibit disease. For cucumbers/squash, scrape out seeds, wash thoroughly, and dry.
- Drying: Spread seeds thinly on screens or paper plates in a cool, dry, well-ventilated area for 1-4 weeks. Ensure they are bone-dry before storage. I aim for less than 8% moisture content.
- Storage: Store seeds in airtight containers (glass jars with desiccant packets work well) in a cool, dark, dry place (ideally 40-50°F and 30-40% humidity). Label clearly with variety and date. Properly stored seeds can remain viable for 3-10 years or more.
Step 8: Season Extension & Winterizing
Extend your harvest and protect your garden for the off-season to truly maximize your self sufficient garden from scratch.
- Cold Frames: Simple structures with a transparent top (glass, polycarbonate, or old windows) that sit over garden beds. They trap solar heat, allowing you to grow cold-hardy crops (lettuce, spinach, kale, radishes) well into winter or start seeds earlier in spring. A basic cold frame can be built from 2×6 lumber and a sheet of polycarbonate for under $100.
- Hoop Houses/Low Tunnels: Larger structures made from flexible hoops (PVC pipe or EMT conduit) covered with greenhouse plastic. These provide more space and greater temperature moderation. A 10×20 ft DIY low tunnel kit can cost $200-$500, while a larger, more robust hoop house kit might be $1,000-$3,000. I use a 6×12 ft low tunnel made from 1/2-inch PVC hoops and 6mil greenhouse plastic, which extends my lettuce and spinach harvest by at least
Efficient water management is critical for a self sufficient garden from scratch, especially in off-grid living where water resources might be limited.
- Rainwater Harvesting: This is my primary source of irrigation water. A 55-gallon rain barrel (e.g., EarthMark Rain Barrel, ~$120-$150) connected to a downspout can collect significant water. For larger needs, I use two 275-gallon IBC totes (Intermediate Bulk Containers, often available used for $100-$200 each from food-grade sources) connected in series. A 1,000 sq ft roof can collect approximately 620 gallons of water for every inch of rainfall. My 1,500 sq ft roof provides ample water for my 600 sq ft garden through multiple barrels and totes.
- Drip Irrigation: This is by far the most water-efficient method, delivering water directly to the plant’s root zone, minimizing evaporation and weed growth.
- Components: A typical drip system includes a pressure regulator (e.g., Rain Bird PRV-10, ~$15), a filter (Rain Bird RBY filter, ~$20), main tubing (1/2-inch poly tubing, 100ft ~$25), smaller feeder lines (1/4-inch tubing), and emitters (0.5 GPH or 1 GPH per plant).
- Kits: For beginners, a starter kit like the Rain Bird Drip Irrigation Garden Kit (model DDI-KIT-1P, ~$40-$60) is excellent for a small garden. For larger setups, I use Netafim Techline CV Drip Line (500ft roll, ~$150-$200), which has pressure-compensating emitters built-in, ensuring even watering across long runs.
- Automation: For true self-sufficiency, consider a battery-powered timer (e.g., Orbit B-Hyve Bluetooth Hose Faucet Timer, ~$50) or a solar-powered timer connected to a small 12V pump.
- Solar-Powered Pumps: For lifting water from a well, pond, or large storage tank to your garden, a solar pump is a game-changer. For a smaller drip system, a Shurflo 2088-594-152 Diaphragm Pump (12V, 3.5 GPM, ~$180) can be powered by a single 100W solar panel (e.g., Renogy 100W Monocrystalline Solar Panel, ~$100) and a small 12V battery (e.g., a 50Ah LiFePO4 battery like the Battle Born 50Ah, ~$450). For larger operations or deeper wells, more robust systems are needed. If you’re looking to build out a comprehensive off-grid power system to support your garden’s water needs, or indeed your entire homestead, you might want to explore resources like the Power Grid Generator complete system guide to understand the full scope of what’s possible in terms of energy independence.
Step 5: Seed Selection & Planting
The choice of seeds is crucial for a truly self sufficient garden from scratch.
- Choose Heirloom & Open-Pollinated Seeds: These varieties produce seeds that will grow true to type, meaning you can save seeds from your harvest year after year. F1 hybrids, while often vigorous, will not produce consistent offspring from saved seeds. Reputable seed companies include Baker Creek Heirloom Seeds, High Mowing Organic Seeds, and Seed Savers Exchange. Start with common, reliable varieties like ‘Black Krim’ tomatoes, ‘Provider’ bush beans, ‘Waltham Butternut’ squash, and ‘Black Seeded Simpson’ lettuce.
- Start Seeds Indoors (Optional but Recommended): For longer growing seasons or specific crops, starting seeds indoors gives you a head start. Use seed-starting mix (e.g., Espoma Organic Seed Starter Mix, ~$10 for 16qt bag) in seed trays (Jiffy Professional Greenhouse 72-cell kit, ~$15). Provide adequate light with LED grow lights (Barrina T5 2ft 4-pack LED Grow Lights, 20W each, ~$50) for 14-16 hours a day, positioned 2-4 inches above seedlings. Maintain consistent temperatures (65-75°F for most).
- Direct Sowing vs. Transplanting: Some crops (carrots, radishes, beans, corn) prefer direct sowing into the garden bed. Others (tomatoes, peppers, broccoli, kale) benefit from being started indoors and transplanted. Follow seed packet instructions for planting depths (e.g., lettuce seeds are often surface-sown or planted 1/8 inch deep, while beans are 1 inch deep) and spacing.
- Companion Planting: Strategically plant different species together to enhance growth, deter pests, and attract beneficial insects. For example, planting marigolds near tomatoes can deter nematodes, and basil improves tomato flavor. Nasturtiums can act as a trap crop for aphids.
- Succession Planting: For a continuous harvest, plant small batches of quick-growing crops (lettuce, radishes, cilantro) every 2-3 weeks. As one crop finishes, another is ready to take its place.
Step 6: Pest & Disease Management (Organic)
Maintaining a self sufficient garden from scratch means embracing organic pest and disease control.
- Integrated Pest Management (IPM): This holistic approach combines several strategies.
- Observation: Regularly inspect your plants for early signs of pests or disease. Catching issues early is key.
- Physical Barriers: Use row covers (e.g., Agribon AG-19 floating row cover, 10×20 ft, ~$20) to protect young plants from insect pests like cabbage worms and squash bugs. Install fences (e.g., 2×4 welded wire mesh, 4 ft tall, 50 ft roll ~$70) to keep out deer, rabbits, and other larger animals.
- Hand-Picking: For larger pests like tomato hornworms or squash bugs, simply pick them off and drop them into a bucket of soapy water.
- Companion Planting: As mentioned, certain plants repel pests. Marigolds, garlic, and onions are excellent deterrents.
- Attract Beneficial Insects: Plant flowers like dill, fennel, cosmos, and sweet alyssum to attract ladybugs, lacewings, and parasitic wasps, which prey on common garden pests.
- Organic Sprays & Treatments:
- Neem Oil: An excellent broad-spectrum organic insecticide and fungicide. Bonide Neem Oil Concentrate (16oz, ~$20) can be mixed at a rate of 1-2 tbsp per gallon of water and sprayed on affected plants.
- Insecticidal Soap: Effective against soft-bodied insects like aphids, whiteflies, and spider mites. Garden Safe Insecticidal Soap (24oz ready-to-use, ~$10).
- Bacillus thuringiensis (Bt): A naturally occurring soil bacterium that targets caterpillars and worms. Monterey BT Worm & Caterpillar Killer (16oz, ~$18) is highly effective and safe for beneficial insects.
- Copper or Sulfur Sprays: For fungal diseases like powdery mildew or blight, organic copper (e.g., Bonide Copper Fungicide, ~$15 for 1lb) or sulfur (e.g., Safer Brand Garden Fungicide, ~$10 for 16oz) can be used as a last resort.
Step 7: Harvesting & Seed Saving
The culmination of your efforts is the harvest, and seed saving closes the loop on self-sufficiency.
- Harvesting Techniques:
- Timing: Harvest vegetables at their peak ripeness for best flavor and nutritional value. For example, green beans should snap cleanly, cucumbers should be firm, and tomatoes should be fully colored.
- Frequency: Many crops, like zucchini, cucumbers, and bush beans, produce more if harvested frequently. Pick daily or every other day.
- Tools: Use clean, sharp pruners (e.g., Corona ClassicCUT Bypass Pruner BP 3180, ~$30) or a sharp knife for clean cuts, minimizing damage to the plant.
- Seed Saving: This is where the « self-sufficient » aspect truly shines.
- Selection: Only save seeds from your healthiest, most vigorous plants that show desired traits (disease resistance, good flavor, high yield).
- Isolation: To ensure true-to-type seeds, prevent cross-pollination. This can be challenging for open-pollinated crops that readily cross (e.g., squash, corn). For beginners, focus on self-pollinating plants like beans, peas, lettuce, and tomatoes.
- Processing:
- Dry Seeds (Beans, Peas, Lettuce, Grains): Allow pods/seed heads to dry completely on the plant. Harvest, shell, and clean the seeds, removing chaff.
- Wet Seeds (Tomatoes, Cucumbers, Squash): For tomatoes, ferment the seeds in water for a few days to remove the gel coating and inhibit disease. For cucumbers/squash, scrape out seeds, wash thoroughly, and dry.
- Drying: Spread seeds thinly on screens or paper plates in a cool, dry, well-ventilated area for 1-4 weeks. Ensure they are bone-dry before storage. I aim for less than 8% moisture content.
- Storage: Store seeds in airtight containers (glass jars with desiccant packets work well) in a cool, dark, dry place (ideally 40-50°F and 30-40% humidity). Label clearly with variety and date. Properly stored seeds can remain viable for 3-10 years or more.
Step 8: Season Extension & Winterizing
Extend your harvest and protect your garden for the off-season to truly maximize your self sufficient garden from scratch.
- Cold Frames: Simple structures with a transparent top (glass, polycarbonate, or old windows) that sit over garden beds. They trap solar heat, allowing you to grow cold-hardy crops (lettuce, spinach, kale, radishes) well into winter or start seeds earlier in spring. A basic cold frame can be built from 2×6 lumber and a sheet of polycarbonate for under $100.
- Hoop Houses/Low Tunnels: Larger structures made from flexible hoops (PVC pipe or EMT conduit) covered with greenhouse plastic. These provide more space and greater temperature moderation. A 10×20 ft DIY low tunnel kit can cost $200-$500, while a larger, more robust hoop house kit might be $1,000-$3,000. I use a 6×12 ft low tunnel made from 1/2-inch PVC hoops and 6mil greenhouse plastic, which extends my lettuce and spinach harvest by at least
Step 4: Water Management & Irrigation
Efficient water management is critical for a self sufficient garden from scratch, especially in off-grid living where water resources might be limited.
- Rainwater Harvesting: This is my primary source of irrigation water. A 55-gallon rain barrel (e.g., EarthMark Rain Barrel, ~$120-$150) connected to a downspout can collect significant water. For larger needs, I use two 275-gallon IBC totes (Intermediate Bulk Containers, often available used for $100-$200 each from food-grade sources) connected in series. A 1,000 sq ft roof can collect approximately 620 gallons of water for every inch of rainfall. My 1,500 sq ft roof provides ample water for my 600 sq ft garden through multiple barrels and totes.
- Drip Irrigation: This is by far the most water-efficient method, delivering water directly to the plant’s root zone, minimizing evaporation and weed growth.
- Components: A typical drip system includes a pressure regulator (e.g., Rain Bird PRV-10, ~$15), a filter (Rain Bird RBY filter, ~$20), main tubing (1/2-inch poly tubing, 100ft ~$25), smaller feeder lines (1/4-inch tubing), and emitters (0.5 GPH or 1 GPH per plant).
- Kits: For beginners, a starter kit like the Rain Bird Drip Irrigation Garden Kit (model DDI-KIT-1P, ~$40-$60) is excellent for a small garden. For larger setups, I use Netafim Techline CV Drip Line (500ft roll, ~$150-$200), which has pressure-compensating emitters built-in, ensuring even watering across long runs.
- Automation: For true self-sufficiency, consider a battery-powered timer (e.g., Orbit B-Hyve Bluetooth Hose Faucet Timer, ~$50) or a solar-powered timer connected to a small 12V pump.
- Solar-Powered Pumps: For lifting water from a well, pond, or large storage tank to your garden, a solar pump is a game-changer. For a smaller drip system, a Shurflo 2088-594-152 Diaphragm Pump (12V, 3.5 GPM, ~$180) can be powered by a single 100W solar panel (e.g., Renogy 100W Monocrystalline Solar Panel, ~$100) and a small 12V battery (e.g., a 50Ah LiFePO4 battery like the Battle Born 50Ah, ~$450). For larger operations or deeper wells, more robust systems are needed. If you’re looking to build out a comprehensive off-grid power system to support your garden’s water needs, or indeed your entire homestead, you might want to explore resources like the Power Grid Generator complete system guide to understand the full scope of what’s possible in terms of energy independence.
Step 5: Seed Selection & Planting
The choice of seeds is crucial for a truly self sufficient garden from scratch.
- Choose Heirloom & Open-Pollinated Seeds: These varieties produce seeds that will grow true to type, meaning you can save seeds from your harvest year after year. F1 hybrids, while often vigorous, will not produce consistent offspring from saved seeds. Reputable seed companies include Baker Creek Heirloom Seeds, High Mowing Organic Seeds, and Seed Savers Exchange. Start with common, reliable varieties like ‘Black Krim’ tomatoes, ‘Provider’ bush beans, ‘Waltham Butternut’ squash, and ‘Black Seeded Simpson’ lettuce.
- Start Seeds Indoors (Optional but Recommended): For longer growing seasons or specific crops, starting seeds indoors gives you a head start. Use seed-starting mix (e.g., Espoma Organic Seed Starter Mix, ~$10 for 16qt bag) in seed trays (Jiffy Professional Greenhouse 72-cell kit, ~$15). Provide adequate light with LED grow lights (Barrina T5 2ft 4-pack LED Grow Lights, 20W each, ~$50) for 14-16 hours a day, positioned 2-4 inches above seedlings. Maintain consistent temperatures (65-75°F for most).
- Direct Sowing vs. Transplanting: Some crops (carrots, radishes, beans, corn) prefer direct sowing into the garden bed. Others (tomatoes, peppers, broccoli, kale) benefit from being started indoors and transplanted. Follow seed packet instructions for planting depths (e.g., lettuce seeds are often surface-sown or planted 1/8 inch deep, while beans are 1 inch deep) and spacing.
- Companion Planting: Strategically plant different species together to enhance growth, deter pests, and attract beneficial insects. For example, planting marigolds near tomatoes can deter nematodes, and basil improves tomato flavor. Nasturtiums can act as a trap crop for aphids.
- Succession Planting: For a continuous harvest, plant small batches of quick-growing crops (lettuce, radishes, cilantro) every 2-3 weeks. As one crop finishes, another is ready to take its place.
Step 6: Pest & Disease Management (Organic)
Maintaining a self sufficient garden from scratch means embracing organic pest and disease control.
- Integrated Pest Management (IPM): This holistic approach combines several strategies.
- Observation: Regularly inspect your plants for early signs of pests or disease. Catching issues early is key.
- Physical Barriers: Use row covers (e.g., Agribon AG-19 floating row cover, 10×20 ft, ~$20) to protect young plants from insect pests like cabbage worms and squash bugs. Install fences (e.g., 2×4 welded wire mesh, 4 ft tall, 50 ft roll ~$70) to keep out deer, rabbits, and other larger animals.
- Hand-Picking: For larger pests like tomato hornworms or squash bugs, simply pick them off and drop them into a bucket of soapy water.
- Companion Planting: As mentioned, certain plants repel pests. Marigolds, garlic, and onions are excellent deterrents.
- Attract Beneficial Insects: Plant flowers like dill, fennel, cosmos, and sweet alyssum to attract ladybugs, lacewings, and parasitic wasps, which prey on common garden pests.
- Organic Sprays & Treatments:
- Neem Oil: An excellent broad-spectrum organic insecticide and fungicide. Bonide Neem Oil Concentrate (16oz, ~$20) can be mixed at a rate of 1-2 tbsp per gallon of water and sprayed on affected plants.
- Insecticidal Soap: Effective against soft-bodied insects like aphids, whiteflies, and spider mites. Garden Safe Insecticidal Soap (24oz ready-to-use, ~$10).
- Bacillus thuringiensis (Bt): A naturally occurring soil bacterium that targets caterpillars and worms. Monterey BT Worm & Caterpillar Killer (16oz, ~$18) is highly effective and safe for beneficial insects.
- Copper or Sulfur Sprays: For fungal diseases like powdery mildew or blight, organic copper (e.g., Bonide Copper Fungicide, ~$15 for 1lb) or sulfur (e.g., Safer Brand Garden Fungicide, ~$10 for 16oz) can be used as a last resort.
Step 7: Harvesting & Seed Saving
The culmination of your efforts is the harvest, and seed saving closes the loop on self-sufficiency.
- Harvesting Techniques:
- Timing: Harvest vegetables at their peak ripeness for best flavor and nutritional value. For example, green beans should snap cleanly, cucumbers should be firm, and tomatoes should be fully colored.
- Frequency: Many crops, like zucchini, cucumbers, and bush beans, produce more if harvested frequently. Pick daily or every other day.
- Tools: Use clean, sharp pruners (e.g., Corona ClassicCUT Bypass Pruner BP 3180, ~$30) or a sharp knife for clean cuts, minimizing damage to the plant.
- Seed Saving: This is where the « self-sufficient » aspect truly shines.
- Selection: Only save seeds from your healthiest, most vigorous plants that show desired traits (disease resistance, good flavor, high yield).
- Isolation: To ensure true-to-type seeds, prevent cross-pollination. This can be challenging for open-pollinated crops that readily cross (e.g., squash, corn). For beginners, focus on self-pollinating plants like beans, peas, lettuce, and tomatoes.
- Processing:
- Dry Seeds (Beans, Peas, Lettuce, Grains): Allow pods/seed heads to dry completely on the plant. Harvest, shell, and clean the seeds, removing chaff.
- Wet Seeds (Tomatoes, Cucumbers, Squash): For tomatoes, ferment the seeds in water for a few days to remove the gel coating and inhibit disease. For cucumbers/squash, scrape out seeds, wash thoroughly, and dry.
- Drying: Spread seeds thinly on screens or paper plates in a cool, dry, well-ventilated area for 1-4 weeks. Ensure they are bone-dry before storage. I aim for less than 8% moisture content.
- Storage: Store seeds in airtight containers (glass jars with desiccant packets work well) in a cool, dark, dry place (ideally 40-50°F and 30-40% humidity). Label clearly with variety and date. Properly stored seeds can remain viable for 3-10 years or more.
Step 8: Season Extension & Winterizing
Extend your harvest and protect your garden for the off-season to truly maximize your self sufficient garden from scratch.
- Cold Frames: Simple structures with a transparent top (glass, polycarbonate, or old windows) that sit over garden beds. They trap solar heat, allowing you to grow cold-hardy crops (lettuce, spinach, kale, radishes) well into winter or start seeds earlier in spring. A basic cold frame can be built from 2×6 lumber and a sheet of polycarbonate for under $100.
- Hoop Houses/Low Tunnels: Larger structures made from flexible hoops (PVC pipe or EMT conduit) covered with greenhouse plastic. These provide more space and greater temperature moderation. A 10×20 ft DIY low tunnel kit can cost $200-$500, while a larger, more robust hoop house kit might be $1,000-$3,000. I use a 6×12 ft low tunnel made from 1/2-inch PVC hoops and 6mil greenhouse plastic, which extends my lettuce and spinach harvest by at least
- In-Ground Beds: If you have excellent native soil and good drainage, in-ground beds are the most economical. Double-digging (loosening soil two shovel depths) can significantly improve drainage and aeration. For my main garden, I primarily use in-ground beds, but I focus on building up the soil over time with consistent compost additions and cover cropping. I aim for beds that are no wider than 3-4 feet so I can reach the center without stepping on the soil, compacting it.
- Raised Beds: Raised beds offer numerous advantages, especially for poor soil, heavy clay, or rocky areas. They provide better drainage, warm up faster in spring, reduce compaction, and make weeding and harvesting easier on your back.
- Material Options:
- Untreated Cedar: Naturally rot-resistant and chemical-free. A 4×8 ft bed, 12 inches deep, typically requires three 2x12x8 ft cedar boards, costing around $50-$60 per board (total ~$150-$180) plus corner brackets or screws. My first raised beds were cedar and are still going strong after 7 years.
- Galvanized Steel: Durable, long-lasting, and aesthetically pleasing. Brands like Vego Garden offer modular kits. A Vego Garden 17″ Tall 8-in-1 Metal Raised Garden Bed (can be configured to 4×8 ft) costs approximately $250-$300.
- Concrete Blocks/Stones: Very durable but can leach minerals (though generally safe once weathered) and can be expensive.
- Recycled Materials: Pallets (check for chemical treatment stamps like « HT » for heat-treated), old tires (controversial due to potential chemical leaching).
- Filling Raised Beds: Don’t just fill with topsoil. Use a « Hugelkultur » approach (logs, branches, leaves, then compost, then topsoil) or a mixture of 60% good quality topsoil, 30% compost, and 10% perlite or vermiculite for drainage. A 4x8x1 ft raised bed requires about 32 cubic feet (or ~1.2 cubic yards) of soil mix, which can cost $100-$200 depending on your source.
- Material Options:
Step 4: Water Management & Irrigation
Efficient water management is critical for a self sufficient garden from scratch, especially in off-grid living where water resources might be limited.
- Rainwater Harvesting: This is my primary source of irrigation water. A 55-gallon rain barrel (e.g., EarthMark Rain Barrel, ~$120-$150) connected to a downspout can collect significant water. For larger needs, I use two 275-gallon IBC totes (Intermediate Bulk Containers, often available used for $100-$200 each from food-grade sources) connected in series. A 1,000 sq ft roof can collect approximately 620 gallons of water for every inch of rainfall. My 1,500 sq ft roof provides ample water for my 600 sq ft garden through multiple barrels and totes.
- Drip Irrigation: This is by far the most water-efficient method, delivering water directly to the plant’s root zone, minimizing evaporation and weed growth.
- Components: A typical drip system includes a pressure regulator (e.g., Rain Bird PRV-10, ~$15), a filter (Rain Bird RBY filter, ~$20), main tubing (1/2-inch poly tubing, 100ft ~$25), smaller feeder lines (1/4-inch tubing), and emitters (0.5 GPH or 1 GPH per plant).
- Kits: For beginners, a starter kit like the Rain Bird Drip Irrigation Garden Kit (model DDI-KIT-1P, ~$40-$60) is excellent for a small garden. For larger setups, I use Netafim Techline CV Drip Line (500ft roll, ~$150-$200), which has pressure-compensating emitters built-in, ensuring even watering across long runs.
- Automation: For true self-sufficiency, consider a battery-powered timer (e.g., Orbit B-Hyve Bluetooth Hose Faucet Timer, ~$50) or a solar-powered timer connected to a small 12V pump.
- Solar-Powered Pumps: For lifting water from a well, pond, or large storage tank to your garden, a solar pump is a game-changer. For a smaller drip system, a Shurflo 2088-594-152 Diaphragm Pump (12V, 3.5 GPM, ~$180) can be powered by a single 100W solar panel (e.g., Renogy 100W Monocrystalline Solar Panel, ~$100) and a small 12V battery (e.g., a 50Ah LiFePO4 battery like the Battle Born 50Ah, ~$450). For larger operations or deeper wells, more robust systems are needed. If you’re looking to build out a comprehensive off-grid power system to support your garden’s water needs, or indeed your entire homestead, you might want to explore resources like the Power Grid Generator complete system guide to understand the full scope of what’s possible in terms of energy independence.
Step 5: Seed Selection & Planting
The choice of seeds is crucial for a truly self sufficient garden from scratch.
- Choose Heirloom & Open-Pollinated Seeds: These varieties produce seeds that will grow true to type, meaning you can save seeds from your harvest year after year. F1 hybrids, while often vigorous, will not produce consistent offspring from saved seeds. Reputable seed companies include Baker Creek Heirloom Seeds, High Mowing Organic Seeds, and Seed Savers Exchange. Start with common, reliable varieties like ‘Black Krim’ tomatoes, ‘Provider’ bush beans, ‘Waltham Butternut’ squash, and ‘Black Seeded Simpson’ lettuce.
- Start Seeds Indoors (Optional but Recommended): For longer growing seasons or specific crops, starting seeds indoors gives you a head start. Use seed-starting mix (e.g., Espoma Organic Seed Starter Mix, ~$10 for 16qt bag) in seed trays (Jiffy Professional Greenhouse 72-cell kit, ~$15). Provide adequate light with LED grow lights (Barrina T5 2ft 4-pack LED Grow Lights, 20W each, ~$50) for 14-16 hours a day, positioned 2-4 inches above seedlings. Maintain consistent temperatures (65-75°F for most).
- Direct Sowing vs. Transplanting: Some crops (carrots, radishes, beans, corn) prefer direct sowing into the garden bed. Others (tomatoes, peppers, broccoli, kale) benefit from being started indoors and transplanted. Follow seed packet instructions for planting depths (e.g., lettuce seeds are often surface-sown or planted 1/8 inch deep, while beans are 1 inch deep) and spacing.
- Companion Planting: Strategically plant different species together to enhance growth, deter pests, and attract beneficial insects. For example, planting marigolds near tomatoes can deter nematodes, and basil improves tomato flavor. Nasturtiums can act as a trap crop for aphids.
- Succession Planting: For a continuous harvest, plant small batches of quick-growing crops (lettuce, radishes, cilantro) every 2-3 weeks. As one crop finishes, another is ready to take its place.
Step 6: Pest & Disease Management (Organic)
Maintaining a self sufficient garden from scratch means embracing organic pest and disease control.
- Integrated Pest Management (IPM): This holistic approach combines several strategies.
- Observation: Regularly inspect your plants for early signs of pests or disease. Catching issues early is key.
- Physical Barriers: Use row covers (e.g., Agribon AG-19 floating row cover, 10×20 ft, ~$20) to protect young plants from insect pests like cabbage worms and squash bugs. Install fences (e.g., 2×4 welded wire mesh, 4 ft tall, 50 ft roll ~$70) to keep out deer, rabbits, and other larger animals.
- Hand-Picking: For larger pests like tomato hornworms or squash bugs, simply pick them off and drop them into a bucket of soapy water.
- Companion Planting: As mentioned, certain plants repel pests. Marigolds, garlic, and onions are excellent deterrents.
- Attract Beneficial Insects: Plant flowers like dill, fennel, cosmos, and sweet alyssum to attract ladybugs, lacewings, and parasitic wasps, which prey on common garden pests.
- Organic Sprays & Treatments:
- Neem Oil: An excellent broad-spectrum organic insecticide and fungicide. Bonide Neem Oil Concentrate (16oz, ~$20) can be mixed at a rate of 1-2 tbsp per gallon of water and sprayed on affected plants.
- Insecticidal Soap: Effective against soft-bodied insects like aphids, whiteflies, and spider mites. Garden Safe Insecticidal Soap (24oz ready-to-use, ~$10).
- Bacillus thuringiensis (Bt): A naturally occurring soil bacterium that targets caterpillars and worms. Monterey BT Worm & Caterpillar Killer (16oz, ~$18) is highly effective and safe for beneficial insects.
- Copper or Sulfur Sprays: For fungal diseases like powdery mildew or blight, organic copper (e.g., Bonide Copper Fungicide, ~$15 for 1lb) or sulfur (e.g., Safer Brand Garden Fungicide, ~$10 for 16oz) can be used as a last resort.
Step 7: Harvesting & Seed Saving
The culmination of your efforts is the harvest, and seed saving closes the loop on self-sufficiency.
- Harvesting Techniques:
- Timing: Harvest vegetables at their peak ripeness for best flavor and nutritional value. For example, green beans should snap cleanly, cucumbers should be firm, and tomatoes should be fully colored.
- Frequency: Many crops, like zucchini, cucumbers, and bush beans, produce more if harvested frequently. Pick daily or every other day.
- Tools: Use clean, sharp pruners (e.g., Corona ClassicCUT Bypass Pruner BP 3180, ~$30) or a sharp knife for clean cuts, minimizing damage to the plant.
- Seed Saving: This is where the « self-sufficient » aspect truly shines.
- Selection: Only save seeds from your healthiest, most vigorous plants that show desired traits (disease resistance, good flavor, high yield).
- Isolation: To ensure true-to-type seeds, prevent cross-pollination. This can be challenging for open-pollinated crops that readily cross (e.g., squash, corn). For beginners, focus on self-pollinating plants like beans, peas, lettuce, and tomatoes.
- Processing:
- Dry Seeds (Beans, Peas, Lettuce, Grains): Allow pods/seed heads to dry completely on the plant. Harvest, shell, and clean the seeds, removing chaff.
- Wet Seeds (Tomatoes, Cucumbers, Squash): For tomatoes, ferment the seeds in water for a few days to remove the gel coating and inhibit disease. For cucumbers/squash, scrape out seeds, wash thoroughly, and dry.
- Drying: Spread seeds thinly on screens or paper plates in a cool, dry, well-ventilated area for 1-4 weeks. Ensure they are bone-dry before storage. I aim for less than 8% moisture content.
- Storage: Store seeds in airtight containers (glass jars with desiccant packets work well) in a cool, dark, dry place (ideally 40-50°F and 30-40% humidity). Label clearly with variety and date. Properly stored seeds can remain viable for 3-10 years or more.
Step 8: Season Extension & Winterizing
Extend your harvest and protect your garden for the off-season to truly maximize your self sufficient garden from scratch.
- Cold Frames: Simple structures with a transparent top (glass, polycarbonate, or old windows) that sit over garden beds. They trap solar heat, allowing you to grow cold-hardy crops (lettuce, spinach, kale, radishes) well into winter or start seeds earlier in spring. A basic cold frame can be built from 2×6 lumber and a sheet of polycarbonate for under $100.
- Hoop Houses/Low Tunnels: Larger structures made from flexible hoops (PVC pipe or EMT conduit) covered with greenhouse plastic. These provide more space and greater temperature moderation. A 10×20 ft DIY low tunnel kit can cost $200-$500, while a larger, more robust hoop house kit might be $1,000-$3,000. I use a 6×12 ft low tunnel made from 1/2-inch PVC hoops and 6mil greenhouse plastic, which extends my lettuce and spinach harvest by at least
Deciding between raised beds and in-ground beds depends on your soil, budget, and physical capabilities.
- In-Ground Beds: If you have excellent native soil and good drainage, in-ground beds are the most economical. Double-digging (loosening soil two shovel depths) can significantly improve drainage and aeration. For my main garden, I primarily use in-ground beds, but I focus on building up the soil over time with consistent compost additions and cover cropping. I aim for beds that are no wider than 3-4 feet so I can reach the center without stepping on the soil, compacting it.
- Raised Beds: Raised beds offer numerous advantages, especially for poor soil, heavy clay, or rocky areas. They provide better drainage, warm up faster in spring, reduce compaction, and make weeding and harvesting easier on your back.
- Material Options:
- Untreated Cedar: Naturally rot-resistant and chemical-free. A 4×8 ft bed, 12 inches deep, typically requires three 2x12x8 ft cedar boards, costing around $50-$60 per board (total ~$150-$180) plus corner brackets or screws. My first raised beds were cedar and are still going strong after 7 years.
- Galvanized Steel: Durable, long-lasting, and aesthetically pleasing. Brands like Vego Garden offer modular kits. A Vego Garden 17″ Tall 8-in-1 Metal Raised Garden Bed (can be configured to 4×8 ft) costs approximately $250-$300.
- Concrete Blocks/Stones: Very durable but can leach minerals (though generally safe once weathered) and can be expensive.
- Recycled Materials: Pallets (check for chemical treatment stamps like « HT » for heat-treated), old tires (controversial due to potential chemical leaching).
- Filling Raised Beds: Don’t just fill with topsoil. Use a « Hugelkultur » approach (logs, branches, leaves, then compost, then topsoil) or a mixture of 60% good quality topsoil, 30% compost, and 10% perlite or vermiculite for drainage. A 4x8x1 ft raised bed requires about 32 cubic feet (or ~1.2 cubic yards) of soil mix, which can cost $100-$200 depending on your source.
- Material Options:
Step 4: Water Management & Irrigation
Efficient water management is critical for a self sufficient garden from scratch, especially in off-grid living where water resources might be limited.
- Rainwater Harvesting: This is my primary source of irrigation water. A 55-gallon rain barrel (e.g., EarthMark Rain Barrel, ~$120-$150) connected to a downspout can collect significant water. For larger needs, I use two 275-gallon IBC totes (Intermediate Bulk Containers, often available used for $100-$200 each from food-grade sources) connected in series. A 1,000 sq ft roof can collect approximately 620 gallons of water for every inch of rainfall. My 1,500 sq ft roof provides ample water for my 600 sq ft garden through multiple barrels and totes.
- Drip Irrigation: This is by far the most water-efficient method, delivering water directly to the plant’s root zone, minimizing evaporation and weed growth.
- Components: A typical drip system includes a pressure regulator (e.g., Rain Bird PRV-10, ~$15), a filter (Rain Bird RBY filter, ~$20), main tubing (1/2-inch poly tubing, 100ft ~$25), smaller feeder lines (1/4-inch tubing), and emitters (0.5 GPH or 1 GPH per plant).
- Kits: For beginners, a starter kit like the Rain Bird Drip Irrigation Garden Kit (model DDI-KIT-1P, ~$40-$60) is excellent for a small garden. For larger setups, I use Netafim Techline CV Drip Line (500ft roll, ~$150-$200), which has pressure-compensating emitters built-in, ensuring even watering across long runs.
- Automation: For true self-sufficiency, consider a battery-powered timer (e.g., Orbit B-Hyve Bluetooth Hose Faucet Timer, ~$50) or a solar-powered timer connected to a small 12V pump.
- Solar-Powered Pumps: For lifting water from a well, pond, or large storage tank to your garden, a solar pump is a game-changer. For a smaller drip system, a Shurflo 2088-594-152 Diaphragm Pump (12V, 3.5 GPM, ~$180) can be powered by a single 100W solar panel (e.g., Renogy 100W Monocrystalline Solar Panel, ~$100) and a small 12V battery (e.g., a 50Ah LiFePO4 battery like the Battle Born 50Ah, ~$450). For larger operations or deeper wells, more robust systems are needed. If you’re looking to build out a comprehensive off-grid power system to support your garden’s water needs, or indeed your entire homestead, you might want to explore resources like the Power Grid Generator complete system guide to understand the full scope of what’s possible in terms of energy independence.
Step 5: Seed Selection & Planting
The choice of seeds is crucial for a truly self sufficient garden from scratch.
- Choose Heirloom & Open-Pollinated Seeds: These varieties produce seeds that will grow true to type, meaning you can save seeds from your harvest year after year. F1 hybrids, while often vigorous, will not produce consistent offspring from saved seeds. Reputable seed companies include Baker Creek Heirloom Seeds, High Mowing Organic Seeds, and Seed Savers Exchange. Start with common, reliable varieties like ‘Black Krim’ tomatoes, ‘Provider’ bush beans, ‘Waltham Butternut’ squash, and ‘Black Seeded Simpson’ lettuce.
- Start Seeds Indoors (Optional but Recommended): For longer growing seasons or specific crops, starting seeds indoors gives you a head start. Use seed-starting mix (e.g., Espoma Organic Seed Starter Mix, ~$10 for 16qt bag) in seed trays (Jiffy Professional Greenhouse 72-cell kit, ~$15). Provide adequate light with LED grow lights (Barrina T5 2ft 4-pack LED Grow Lights, 20W each, ~$50) for 14-16 hours a day, positioned 2-4 inches above seedlings. Maintain consistent temperatures (65-75°F for most).
- Direct Sowing vs. Transplanting: Some crops (carrots, radishes, beans, corn) prefer direct sowing into the garden bed. Others (tomatoes, peppers, broccoli, kale) benefit from being started indoors and transplanted. Follow seed packet instructions for planting depths (e.g., lettuce seeds are often surface-sown or planted 1/8 inch deep, while beans are 1 inch deep) and spacing.
- Companion Planting: Strategically plant different species together to enhance growth, deter pests, and attract beneficial insects. For example, planting marigolds near tomatoes can deter nematodes, and basil improves tomato flavor. Nasturtiums can act as a trap crop for aphids.
- Succession Planting: For a continuous harvest, plant small batches of quick-growing crops (lettuce, radishes, cilantro) every 2-3 weeks. As one crop finishes, another is ready to take its place.
Step 6: Pest & Disease Management (Organic)
Maintaining a self sufficient garden from scratch means embracing organic pest and disease control.
- Integrated Pest Management (IPM): This holistic approach combines several strategies.
- Observation: Regularly inspect your plants for early signs of pests or disease. Catching issues early is key.
- Physical Barriers: Use row covers (e.g., Agribon AG-19 floating row cover, 10×20 ft, ~$20) to protect young plants from insect pests like cabbage worms and squash bugs. Install fences (e.g., 2×4 welded wire mesh, 4 ft tall, 50 ft roll ~$70) to keep out deer, rabbits, and other larger animals.
- Hand-Picking: For larger pests like tomato hornworms or squash bugs, simply pick them off and drop them into a bucket of soapy water.
- Companion Planting: As mentioned, certain plants repel pests. Marigolds, garlic, and onions are excellent deterrents.
- Attract Beneficial Insects: Plant flowers like dill, fennel, cosmos, and sweet alyssum to attract ladybugs, lacewings, and parasitic wasps, which prey on common garden pests.
- Organic Sprays & Treatments:
- Neem Oil: An excellent broad-spectrum organic insecticide and fungicide. Bonide Neem Oil Concentrate (16oz, ~$20) can be mixed at a rate of 1-2 tbsp per gallon of water and sprayed on affected plants.
- Insecticidal Soap: Effective against soft-bodied insects like aphids, whiteflies, and spider mites. Garden Safe Insecticidal Soap (24oz ready-to-use, ~$10).
- Bacillus thuringiensis (Bt): A naturally occurring soil bacterium that targets caterpillars and worms. Monterey BT Worm & Caterpillar Killer (16oz, ~$18) is highly effective and safe for beneficial insects.
- Copper or Sulfur Sprays: For fungal diseases like powdery mildew or blight, organic copper (e.g., Bonide Copper Fungicide, ~$15 for 1lb) or sulfur (e.g., Safer Brand Garden Fungicide, ~$10 for 16oz) can be used as a last resort.
Step 7: Harvesting & Seed Saving
The culmination of your efforts is the harvest, and seed saving closes the loop on self-sufficiency.
- Harvesting Techniques:
- Timing: Harvest vegetables at their peak ripeness for best flavor and nutritional value. For example, green beans should snap cleanly, cucumbers should be firm, and tomatoes should be fully colored.
- Frequency: Many crops, like zucchini, cucumbers, and bush beans, produce more if harvested frequently. Pick daily or every other day.
- Tools: Use clean, sharp pruners (e.g., Corona ClassicCUT Bypass Pruner BP 3180, ~$30) or a sharp knife for clean cuts, minimizing damage to the plant.
- Seed Saving: This is where the « self-sufficient » aspect truly shines.
- Selection: Only save seeds from your healthiest, most vigorous plants that show desired traits (disease resistance, good flavor, high yield).
- Isolation: To ensure true-to-type seeds, prevent cross-pollination. This can be challenging for open-pollinated crops that readily cross (e.g., squash, corn). For beginners, focus on self-pollinating plants like beans, peas, lettuce, and tomatoes.
- Processing:
- Dry Seeds (Beans, Peas, Lettuce, Grains): Allow pods/seed heads to dry completely on the plant. Harvest, shell, and clean the seeds, removing chaff.
- Wet Seeds (Tomatoes, Cucumbers, Squash): For tomatoes, ferment the seeds in water for a few days to remove the gel coating and inhibit disease. For cucumbers/squash, scrape out seeds, wash thoroughly, and dry.
- Drying: Spread seeds thinly on screens or paper plates in a cool, dry, well-ventilated area for 1-4 weeks. Ensure they are bone-dry before storage. I aim for less than 8% moisture content.
- Storage: Store seeds in airtight containers (glass jars with desiccant packets work well) in a cool, dark, dry place (ideally 40-50°F and 30-40% humidity). Label clearly with variety and date. Properly stored seeds can remain viable for 3-10 years or more.
Step 8: Season Extension & Winterizing
Extend your harvest and protect your garden for the off-season to truly maximize your self sufficient garden from scratch.
- Cold Frames: Simple structures with a transparent top (glass, polycarbonate, or old windows) that sit over garden beds. They trap solar heat, allowing you to grow cold-hardy crops (lettuce, spinach, kale, radishes) well into winter or start seeds earlier in spring. A basic cold frame can be built from 2×6 lumber and a sheet of polycarbonate for under $100.
- Hoop Houses/Low Tunnels: Larger structures made from flexible hoops (PVC pipe or EMT conduit) covered with greenhouse plastic. These provide more space and greater temperature moderation. A 10×20 ft DIY low tunnel kit can cost $200-$500, while a larger, more robust hoop house kit might be $1,000-$3,000. I use a 6×12 ft low tunnel made from 1/2-inch PVC hoops and 6mil greenhouse plastic, which extends my lettuce and spinach harvest by at least
Healthy soil is the bedrock of a productive, self-sufficient garden. You can’t guess what your soil needs; you have to test it.
- Perform a Soil Test: A professional soil test will give you precise data on your soil’s pH, nutrient levels (N-P-K), and organic matter content. I recommend sending a sample to your local agricultural extension office; it typically costs $20-$50 and provides detailed recommendations. Alternatively, for a quick homeowner check, a Rapitest Soil Test Kit (40-test kit, model 1663, ~$20 on Amazon) provides a good baseline for pH, Nitrogen, Phosphorus, and Potash. Aim for a pH between 6.0 and 7.0 for most vegetables.
- Amend for pH Imbalance: If your soil is too acidic (below 6.0), add agricultural lime (dolomitic lime adds magnesium, calcitic lime adds calcium). Apply 5-10 lbs per 100 sq ft for a moderate adjustment. If it’s too alkaline (above 7.0), add elemental sulfur (e.g., Espoma Soil Acidifier, ~$15 for 6.75 lbs) or generous amounts of organic matter like peat moss or pine needles.
- Build Organic Matter: This is the single most important step for long-term soil health. Organic matter improves soil structure, water retention, drainage, and nutrient availability. Incorporate 2-4 inches of high-quality compost into your top 6-12 inches of soil annually. I make my own compost from kitchen scraps, garden waste, and shredded leaves, but you can purchase it. Local nurseries often sell bulk compost for $30-$50 per cubic yard. Aged manure (from chickens, cows, or horses – ensure it’s well-rotted to avoid burning plants) is also excellent.
- Address Nutrient Deficiencies: Based on your soil test, add specific organic amendments. If Nitrogen (N) is low, add blood meal (12-0-0, ~$20 for 3 lbs) or feather meal. For Phosphorus (P), use bone meal (3-15-0, ~$15 for 3 lbs) or rock phosphate. For Potassium (K), greensand (0-0-2.5, ~$25 for 5 lbs) or kelp meal are good choices. I rely heavily on Espoma Organic Garden-tone (5-3-3, ~$25 for an 8lb bag) as a balanced, all-purpose organic fertilizer during planting.
Step 3: Garden Bed Preparation
Deciding between raised beds and in-ground beds depends on your soil, budget, and physical capabilities.
- In-Ground Beds: If you have excellent native soil and good drainage, in-ground beds are the most economical. Double-digging (loosening soil two shovel depths) can significantly improve drainage and aeration. For my main garden, I primarily use in-ground beds, but I focus on building up the soil over time with consistent compost additions and cover cropping. I aim for beds that are no wider than 3-4 feet so I can reach the center without stepping on the soil, compacting it.
- Raised Beds: Raised beds offer numerous advantages, especially for poor soil, heavy clay, or rocky areas. They provide better drainage, warm up faster in spring, reduce compaction, and make weeding and harvesting easier on your back.
- Material Options:
- Untreated Cedar: Naturally rot-resistant and chemical-free. A 4×8 ft bed, 12 inches deep, typically requires three 2x12x8 ft cedar boards, costing around $50-$60 per board (total ~$150-$180) plus corner brackets or screws. My first raised beds were cedar and are still going strong after 7 years.
- Galvanized Steel: Durable, long-lasting, and aesthetically pleasing. Brands like Vego Garden offer modular kits. A Vego Garden 17″ Tall 8-in-1 Metal Raised Garden Bed (can be configured to 4×8 ft) costs approximately $250-$300.
- Concrete Blocks/Stones: Very durable but can leach minerals (though generally safe once weathered) and can be expensive.
- Recycled Materials: Pallets (check for chemical treatment stamps like « HT » for heat-treated), old tires (controversial due to potential chemical leaching).
- Filling Raised Beds: Don’t just fill with topsoil. Use a « Hugelkultur » approach (logs, branches, leaves, then compost, then topsoil) or a mixture of 60% good quality topsoil, 30% compost, and 10% perlite or vermiculite for drainage. A 4x8x1 ft raised bed requires about 32 cubic feet (or ~1.2 cubic yards) of soil mix, which can cost $100-$200 depending on your source.
- Material Options:
Step 4: Water Management & Irrigation
Efficient water management is critical for a self sufficient garden from scratch, especially in off-grid living where water resources might be limited.
- Rainwater Harvesting: This is my primary source of irrigation water. A 55-gallon rain barrel (e.g., EarthMark Rain Barrel, ~$120-$150) connected to a downspout can collect significant water. For larger needs, I use two 275-gallon IBC totes (Intermediate Bulk Containers, often available used for $100-$200 each from food-grade sources) connected in series. A 1,000 sq ft roof can collect approximately 620 gallons of water for every inch of rainfall. My 1,500 sq ft roof provides ample water for my 600 sq ft garden through multiple barrels and totes.
- Drip Irrigation: This is by far the most water-efficient method, delivering water directly to the plant’s root zone, minimizing evaporation and weed growth.
- Components: A typical drip system includes a pressure regulator (e.g., Rain Bird PRV-10, ~$15), a filter (Rain Bird RBY filter, ~$20), main tubing (1/2-inch poly tubing, 100ft ~$25), smaller feeder lines (1/4-inch tubing), and emitters (0.5 GPH or 1 GPH per plant).
- Kits: For beginners, a starter kit like the Rain Bird Drip Irrigation Garden Kit (model DDI-KIT-1P, ~$40-$60) is excellent for a small garden. For larger setups, I use Netafim Techline CV Drip Line (500ft roll, ~$150-$200), which has pressure-compensating emitters built-in, ensuring even watering across long runs.
- Automation: For true self-sufficiency, consider a battery-powered timer (e.g., Orbit B-Hyve Bluetooth Hose Faucet Timer, ~$50) or a solar-powered timer connected to a small 12V pump.
- Solar-Powered Pumps: For lifting water from a well, pond, or large storage tank to your garden, a solar pump is a game-changer. For a smaller drip system, a Shurflo 2088-594-152 Diaphragm Pump (12V, 3.5 GPM, ~$180) can be powered by a single 100W solar panel (e.g., Renogy 100W Monocrystalline Solar Panel, ~$100) and a small 12V battery (e.g., a 50Ah LiFePO4 battery like the Battle Born 50Ah, ~$450). For larger operations or deeper wells, more robust systems are needed. If you’re looking to build out a comprehensive off-grid power system to support your garden’s water needs, or indeed your entire homestead, you might want to explore resources like the Power Grid Generator complete system guide to understand the full scope of what’s possible in terms of energy independence.
Step 5: Seed Selection & Planting
The choice of seeds is crucial for a truly self sufficient garden from scratch.
- Choose Heirloom & Open-Pollinated Seeds: These varieties produce seeds that will grow true to type, meaning you can save seeds from your harvest year after year. F1 hybrids, while often vigorous, will not produce consistent offspring from saved seeds. Reputable seed companies include Baker Creek Heirloom Seeds, High Mowing Organic Seeds, and Seed Savers Exchange. Start with common, reliable varieties like ‘Black Krim’ tomatoes, ‘Provider’ bush beans, ‘Waltham Butternut’ squash, and ‘Black Seeded Simpson’ lettuce.
- Start Seeds Indoors (Optional but Recommended): For longer growing seasons or specific crops, starting seeds indoors gives you a head start. Use seed-starting mix (e.g., Espoma Organic Seed Starter Mix, ~$10 for 16qt bag) in seed trays (Jiffy Professional Greenhouse 72-cell kit, ~$15). Provide adequate light with LED grow lights (Barrina T5 2ft 4-pack LED Grow Lights, 20W each, ~$50) for 14-16 hours a day, positioned 2-4 inches above seedlings. Maintain consistent temperatures (65-75°F for most).
- Direct Sowing vs. Transplanting: Some crops (carrots, radishes, beans, corn) prefer direct sowing into the garden bed. Others (tomatoes, peppers, broccoli, kale) benefit from being started indoors and transplanted. Follow seed packet instructions for planting depths (e.g., lettuce seeds are often surface-sown or planted 1/8 inch deep, while beans are 1 inch deep) and spacing.
- Companion Planting: Strategically plant different species together to enhance growth, deter pests, and attract beneficial insects. For example, planting marigolds near tomatoes can deter nematodes, and basil improves tomato flavor. Nasturtiums can act as a trap crop for aphids.
- Succession Planting: For a continuous harvest, plant small batches of quick-growing crops (lettuce, radishes, cilantro) every 2-3 weeks. As one crop finishes, another is ready to take its place.
Step 6: Pest & Disease Management (Organic)
Maintaining a self sufficient garden from scratch means embracing organic pest and disease control.
- Integrated Pest Management (IPM): This holistic approach combines several strategies.
- Observation: Regularly inspect your plants for early signs of pests or disease. Catching issues early is key.
- Physical Barriers: Use row covers (e.g., Agribon AG-19 floating row cover, 10×20 ft, ~$20) to protect young plants from insect pests like cabbage worms and squash bugs. Install fences (e.g., 2×4 welded wire mesh, 4 ft tall, 50 ft roll ~$70) to keep out deer, rabbits, and other larger animals.
- Hand-Picking: For larger pests like tomato hornworms or squash bugs, simply pick them off and drop them into a bucket of soapy water.
- Companion Planting: As mentioned, certain plants repel pests. Marigolds, garlic, and onions are excellent deterrents.
- Attract Beneficial Insects: Plant flowers like dill, fennel, cosmos, and sweet alyssum to attract ladybugs, lacewings, and parasitic wasps, which prey on common garden pests.
- Organic Sprays & Treatments:
- Neem Oil: An excellent broad-spectrum organic insecticide and fungicide. Bonide Neem Oil Concentrate (16oz, ~$20) can be mixed at a rate of 1-2 tbsp per gallon of water and sprayed on affected plants.
- Insecticidal Soap: Effective against soft-bodied insects like aphids, whiteflies, and spider mites. Garden Safe Insecticidal Soap (24oz ready-to-use, ~$10).
- Bacillus thuringiensis (Bt): A naturally occurring soil bacterium that targets caterpillars and worms. Monterey BT Worm & Caterpillar Killer (16oz, ~$18) is highly effective and safe for beneficial insects.
- Copper or Sulfur Sprays: For fungal diseases like powdery mildew or blight, organic copper (e.g., Bonide Copper Fungicide, ~$15 for 1lb) or sulfur (e.g., Safer Brand Garden Fungicide, ~$10 for 16oz) can be used as a last resort.
Step 7: Harvesting & Seed Saving
The culmination of your efforts is the harvest, and seed saving closes the loop on self-sufficiency.
- Harvesting Techniques:
- Timing: Harvest vegetables at their peak ripeness for best flavor and nutritional value. For example, green beans should snap cleanly, cucumbers should be firm, and tomatoes should be fully colored.
- Frequency: Many crops, like zucchini, cucumbers, and bush beans, produce more if harvested frequently. Pick daily or every other day.
- Tools: Use clean, sharp pruners (e.g., Corona ClassicCUT Bypass Pruner BP 3180, ~$30) or a sharp knife for clean cuts, minimizing damage to the plant.
- Seed Saving: This is where the « self-sufficient » aspect truly shines.
- Selection: Only save seeds from your healthiest, most vigorous plants that show desired traits (disease resistance, good flavor, high yield).
- Isolation: To ensure true-to-type seeds, prevent cross-pollination. This can be challenging for open-pollinated crops that readily cross (e.g., squash, corn). For beginners, focus on self-pollinating plants like beans, peas, lettuce, and tomatoes.
- Processing:
- Dry Seeds (Beans, Peas, Lettuce, Grains): Allow pods/seed heads to dry completely on the plant. Harvest, shell, and clean the seeds, removing chaff.
- Wet Seeds (Tomatoes, Cucumbers, Squash): For tomatoes, ferment the seeds in water for a few days to remove the gel coating and inhibit disease. For cucumbers/squash, scrape out seeds, wash thoroughly, and dry.
- Drying: Spread seeds thinly on screens or paper plates in a cool, dry, well-ventilated area for 1-4 weeks. Ensure they are bone-dry before storage. I aim for less than 8% moisture content.
- Storage: Store seeds in airtight containers (glass jars with desiccant packets work well) in a cool, dark, dry place (ideally 40-50°F and 30-40% humidity). Label clearly with variety and date. Properly stored seeds can remain viable for 3-10 years or more.
Step 8: Season Extension & Winterizing
Extend your harvest and protect your garden for the off-season to truly maximize your self sufficient garden from scratch.
- Cold Frames: Simple structures with a transparent top (glass, polycarbonate, or old windows) that sit over garden beds. They trap solar heat, allowing you to grow cold-hardy crops (lettuce, spinach, kale, radishes) well into winter or start seeds earlier in spring. A basic cold frame can be built from 2×6 lumber and a sheet of polycarbonate for under $100.
- Hoop Houses/Low Tunnels: Larger structures made from flexible hoops (PVC pipe or EMT conduit) covered with greenhouse plastic. These provide more space and greater temperature moderation. A 10×20 ft DIY low tunnel kit can cost $200-$500, while a larger, more robust hoop house kit might be $1,000-$3,000. I use a 6×12 ft low tunnel made from 1/2-inch PVC hoops and 6mil greenhouse plastic, which extends my lettuce and spinach harvest by at least
- Choose Heirloom & Open-Pollinated Seeds: These varieties produce seeds that will grow true to type, meaning you can save seeds from your harvest year after year. F1 hybrids, while often vigorous, will not produce consistent offspring from saved seeds. Reputable seed companies include Baker Creek Heirloom Seeds, High Mowing Organic Seeds, and Seed Savers Exchange. Start with common, reliable varieties like ‘Black Krim’ tomatoes, ‘Provider’ bush beans, ‘Waltham Butternut’ squash, and ‘Black Seeded Simpson’ lettuce.
- Start Seeds Indoors (Optional but Recommended): For longer growing seasons or specific crops, starting seeds indoors gives you a head start. Use seed-starting mix (e.g., Espoma Organic Seed Starter Mix, ~$10 for 16qt bag) in seed trays (Jiffy Professional Greenhouse 72-cell kit, ~$15). Provide adequate light with LED grow lights (Barrina T5 2ft 4-pack LED Grow Lights, 20W each, ~$50) for 14-16 hours a day, positioned 2-4 inches above seedlings. Maintain consistent temperatures (65-75°F for most).
- Direct Sowing vs. Transplanting: Some crops (carrots, radishes, beans, corn) prefer direct sowing into the garden bed. Others (tomatoes, peppers, broccoli, kale) benefit from being started indoors and transplanted. Follow seed packet instructions for planting depths (e.g., lettuce seeds are often surface-sown or planted 1/8 inch deep, while beans are 1 inch deep) and spacing.
- Companion Planting: Strategically plant different species together to enhance growth, deter pests, and attract beneficial insects. For example, planting marigolds near tomatoes can deter nematodes, and basil improves tomato flavor. Nasturtiums can act as a trap crop for aphids.
- Succession Planting: For a continuous harvest, plant small batches of quick-growing crops (lettuce, radishes, cilantro) every 2-3 weeks. As one crop finishes, another is ready to take its place.
Step 6: Pest & Disease Management (Organic)
Maintaining a self sufficient garden from scratch means embracing organic pest and disease control.
- Integrated Pest Management (IPM): This holistic approach combines several strategies.
- Observation: Regularly inspect your plants for early signs of pests or disease. Catching issues early is key.
- Physical Barriers: Use row covers (e.g., Agribon AG-19 floating row cover, 10×20 ft, ~$20) to protect young plants from insect pests like cabbage worms and squash bugs. Install fences (e.g., 2×4 welded wire mesh, 4 ft tall, 50 ft roll ~$70) to keep out deer, rabbits, and other larger animals.
- Hand-Picking: For larger pests like tomato hornworms or squash bugs, simply pick them off and drop them into a bucket of soapy water.
- Companion Planting: As mentioned, certain plants repel pests. Marigolds, garlic, and onions are excellent deterrents.
- Attract Beneficial Insects: Plant flowers like dill, fennel, cosmos, and sweet alyssum to attract ladybugs, lacewings, and parasitic wasps, which prey on common garden pests.
- Organic Sprays & Treatments:
- Neem Oil: An excellent broad-spectrum organic insecticide and fungicide. Bonide Neem Oil Concentrate (16oz, ~$20) can be mixed at a rate of 1-2 tbsp per gallon of water and sprayed on affected plants.
- Insecticidal Soap: Effective against soft-bodied insects like aphids, whiteflies, and spider mites. Garden Safe Insecticidal Soap (24oz ready-to-use, ~$10).
- Bacillus thuringiensis (Bt): A naturally occurring soil bacterium that targets caterpillars and worms. Monterey BT Worm & Caterpillar Killer (16oz, ~$18) is highly effective and safe for beneficial insects.
- Copper or Sulfur Sprays: For fungal diseases like powdery mildew or blight, organic copper (e.g., Bonide Copper Fungicide, ~$15 for 1lb) or sulfur (e.g., Safer Brand Garden Fungicide, ~$10 for 16oz) can be used as a last resort.
Step 7: Harvesting & Seed Saving
The culmination of your efforts is the harvest, and seed saving closes the loop on self-sufficiency.
- Harvesting Techniques:
- Timing: Harvest vegetables at their peak ripeness for best flavor and nutritional value. For example, green beans should snap cleanly, cucumbers should be firm, and tomatoes should be fully colored.
- Frequency: Many crops, like zucchini, cucumbers, and bush beans, produce more if harvested frequently. Pick daily or every other day.
- Tools: Use clean, sharp pruners (e.g., Corona ClassicCUT Bypass Pruner BP 3180, ~$30) or a sharp knife for clean cuts, minimizing damage to the plant.
- Seed Saving: This is where the « self-sufficient » aspect truly shines.
- Selection: Only save seeds from your healthiest, most vigorous plants that show desired traits (disease resistance, good flavor, high yield).
- Isolation: To ensure true-to-type seeds, prevent cross-pollination. This can be challenging for open-pollinated crops that readily cross (e.g., squash, corn). For beginners, focus on self-pollinating plants like beans, peas, lettuce, and tomatoes.
- Processing:
- Dry Seeds (Beans, Peas, Lettuce, Grains): Allow pods/seed heads to dry completely on the plant. Harvest, shell, and clean the seeds, removing chaff.
- Wet Seeds (Tomatoes, Cucumbers, Squash): For tomatoes, ferment the seeds in water for a few days to remove the gel coating and inhibit disease. For cucumbers/squash, scrape out seeds, wash thoroughly, and dry.
- Drying: Spread seeds thinly on screens or paper plates in a cool, dry, well-ventilated area for 1-4 weeks. Ensure they are bone-dry before storage. I aim for less than 8% moisture content.
- Storage: Store seeds in airtight containers (glass jars with desiccant packets work well) in a cool, dark, dry place (ideally 40-50°F and 30-40% humidity). Label clearly with variety and date. Properly stored seeds can remain viable for 3-10 years or more.
Step 8: Season Extension & Winterizing
Extend your harvest and protect your garden for the off-season to truly maximize your self sufficient garden from scratch.
- Cold Frames: Simple structures with a transparent top (glass, polycarbonate, or old windows) that sit over garden beds. They trap solar heat, allowing you to grow cold-hardy crops (lettuce, spinach, kale, radishes) well into winter or start seeds earlier in spring. A basic cold frame can be built from 2×6 lumber and a sheet of polycarbonate for under $100.
- Hoop Houses/Low Tunnels: Larger structures made from flexible hoops (PVC pipe or EMT conduit) covered with greenhouse plastic. These provide more space and greater temperature moderation. A 10×20 ft DIY low tunnel kit can cost $200-$500, while a larger, more robust hoop house kit might be $1,000-$3,000. I use a 6×12 ft low tunnel made from 1/2-inch PVC hoops and 6mil greenhouse plastic, which extends my lettuce and spinach harvest by at least
- Rainwater Harvesting: This is my primary source of irrigation water. A 55-gallon rain barrel (e.g., EarthMark Rain Barrel, ~$120-$150) connected to a downspout can collect significant water. For larger needs, I use two 275-gallon IBC totes (Intermediate Bulk Containers, often available used for $100-$200 each from food-grade sources) connected in series. A 1,000 sq ft roof can collect approximately 620 gallons of water for every inch of rainfall. My 1,500 sq ft roof provides ample water for my 600 sq ft garden through multiple barrels and totes.
- Drip Irrigation: This is by far the most water-efficient method, delivering water directly to the plant’s root zone, minimizing evaporation and weed growth.
- Components: A typical drip system includes a pressure regulator (e.g., Rain Bird PRV-10, ~$15), a filter (Rain Bird RBY filter, ~$20), main tubing (1/2-inch poly tubing, 100ft ~$25), smaller feeder lines (1/4-inch tubing), and emitters (0.5 GPH or 1 GPH per plant).
- Kits: For beginners, a starter kit like the Rain Bird Drip Irrigation Garden Kit (model DDI-KIT-1P, ~$40-$60) is excellent for a small garden. For larger setups, I use Netafim Techline CV Drip Line (500ft roll, ~$150-$200), which has pressure-compensating emitters built-in, ensuring even watering across long runs.
- Automation: For true self-sufficiency, consider a battery-powered timer (e.g., Orbit B-Hyve Bluetooth Hose Faucet Timer, ~$50) or a solar-powered timer connected to a small 12V pump.
- Solar-Powered Pumps: For lifting water from a well, pond, or large storage tank to your garden, a solar pump is a game-changer. For a smaller drip system, a Shurflo 2088-594-152 Diaphragm Pump (12V, 3.5 GPM, ~$180) can be powered by a single 100W solar panel (e.g., Renogy 100W Monocrystalline Solar Panel, ~$100) and a small 12V battery (e.g., a 50Ah LiFePO4 battery like the Battle Born 50Ah, ~$450). For larger operations or deeper wells, more robust systems are needed. If you’re looking to build out a comprehensive off-grid power system to support your garden’s water needs, or indeed your entire homestead, you might want to explore resources like the Power Grid Generator complete system guide to understand the full scope of what’s possible in terms of energy independence.
Step 5: Seed Selection & Planting
The choice of seeds is crucial for a truly self sufficient garden from scratch.
- Choose Heirloom & Open-Pollinated Seeds: These varieties produce seeds that will grow true to type, meaning you can save seeds from your harvest year after year. F1 hybrids, while often vigorous, will not produce consistent offspring from saved seeds. Reputable seed companies include Baker Creek Heirloom Seeds, High Mowing Organic Seeds, and Seed Savers Exchange. Start with common, reliable varieties like ‘Black Krim’ tomatoes, ‘Provider’ bush beans, ‘Waltham Butternut’ squash, and ‘Black Seeded Simpson’ lettuce.
- Start Seeds Indoors (Optional but Recommended): For longer growing seasons or specific crops, starting seeds indoors gives you a head start. Use seed-starting mix (e.g., Espoma Organic Seed Starter Mix, ~$10 for 16qt bag) in seed trays (Jiffy Professional Greenhouse 72-cell kit, ~$15). Provide adequate light with LED grow lights (Barrina T5 2ft 4-pack LED Grow Lights, 20W each, ~$50) for 14-16 hours a day, positioned 2-4 inches above seedlings. Maintain consistent temperatures (65-75°F for most).
- Direct Sowing vs. Transplanting: Some crops (carrots, radishes, beans, corn) prefer direct sowing into the garden bed. Others (tomatoes, peppers, broccoli, kale) benefit from being started indoors and transplanted. Follow seed packet instructions for planting depths (e.g., lettuce seeds are often surface-sown or planted 1/8 inch deep, while beans are 1 inch deep) and spacing.
- Companion Planting: Strategically plant different species together to enhance growth, deter pests, and attract beneficial insects. For example, planting marigolds near tomatoes can deter nematodes, and basil improves tomato flavor. Nasturtiums can act as a trap crop for aphids.
- Succession Planting: For a continuous harvest, plant small batches of quick-growing crops (lettuce, radishes, cilantro) every 2-3 weeks. As one crop finishes, another is ready to take its place.
Step 6: Pest & Disease Management (Organic)
Maintaining a self sufficient garden from scratch means embracing organic pest and disease control.
- Integrated Pest Management (IPM): This holistic approach combines several strategies.
- Observation: Regularly inspect your plants for early signs of pests or disease. Catching issues early is key.
- Physical Barriers: Use row covers (e.g., Agribon AG-19 floating row cover, 10×20 ft, ~$20) to protect young plants from insect pests like cabbage worms and squash bugs. Install fences (e.g., 2×4 welded wire mesh, 4 ft tall, 50 ft roll ~$70) to keep out deer, rabbits, and other larger animals.
- Hand-Picking: For larger pests like tomato hornworms or squash bugs, simply pick them off and drop them into a bucket of soapy water.
- Companion Planting: As mentioned, certain plants repel pests. Marigolds, garlic, and onions are excellent deterrents.
- Attract Beneficial Insects: Plant flowers like dill, fennel, cosmos, and sweet alyssum to attract ladybugs, lacewings, and parasitic wasps, which prey on common garden pests.
- Organic Sprays & Treatments:
- Neem Oil: An excellent broad-spectrum organic insecticide and fungicide. Bonide Neem Oil Concentrate (16oz, ~$20) can be mixed at a rate of 1-2 tbsp per gallon of water and sprayed on affected plants.
- Insecticidal Soap: Effective against soft-bodied insects like aphids, whiteflies, and spider mites. Garden Safe Insecticidal Soap (24oz ready-to-use, ~$10).
- Bacillus thuringiensis (Bt): A naturally occurring soil bacterium that targets caterpillars and worms. Monterey BT Worm & Caterpillar Killer (16oz, ~$18) is highly effective and safe for beneficial insects.
- Copper or Sulfur Sprays: For fungal diseases like powdery mildew or blight, organic copper (e.g., Bonide Copper Fungicide, ~$15 for 1lb) or sulfur (e.g., Safer Brand Garden Fungicide, ~$10 for 16oz) can be used as a last resort.
Step 7: Harvesting & Seed Saving
The culmination of your efforts is the harvest, and seed saving closes the loop on self-sufficiency.
- Harvesting Techniques:
- Timing: Harvest vegetables at their peak ripeness for best flavor and nutritional value. For example, green beans should snap cleanly, cucumbers should be firm, and tomatoes should be fully colored.
- Frequency: Many crops, like zucchini, cucumbers, and bush beans, produce more if harvested frequently. Pick daily or every other day.
- Tools: Use clean, sharp pruners (e.g., Corona ClassicCUT Bypass Pruner BP 3180, ~$30) or a sharp knife for clean cuts, minimizing damage to the plant.
- Seed Saving: This is where the « self-sufficient » aspect truly shines.
- Selection: Only save seeds from your healthiest, most vigorous plants that show desired traits (disease resistance, good flavor, high yield).
- Isolation: To ensure true-to-type seeds, prevent cross-pollination. This can be challenging for open-pollinated crops that readily cross (e.g., squash, corn). For beginners, focus on self-pollinating plants like beans, peas, lettuce, and tomatoes.
- Processing:
- Dry Seeds (Beans, Peas, Lettuce, Grains): Allow pods/seed heads to dry completely on the plant. Harvest, shell, and clean the seeds, removing chaff.
- Wet Seeds (Tomatoes, Cucumbers, Squash): For tomatoes, ferment the seeds in water for a few days to remove the gel coating and inhibit disease. For cucumbers/squash, scrape out seeds, wash thoroughly, and dry.
- Drying: Spread seeds thinly on screens or paper plates in a cool, dry, well-ventilated area for 1-4 weeks. Ensure they are bone-dry before storage. I aim for less than 8% moisture content.
- Storage: Store seeds in airtight containers (glass jars with desiccant packets work well) in a cool, dark, dry place (ideally 40-50°F and 30-40% humidity). Label clearly with variety and date. Properly stored seeds can remain viable for 3-10 years or more.
Step 8: Season Extension & Winterizing
Extend your harvest and protect your garden for the off-season to truly maximize your self sufficient garden from scratch.
- Cold Frames: Simple structures with a transparent top (glass, polycarbonate, or old windows) that sit over garden beds. They trap solar heat, allowing you to grow cold-hardy crops (lettuce, spinach, kale, radishes) well into winter or start seeds earlier in spring. A basic cold frame can be built from 2×6 lumber and a sheet of polycarbonate for under $100.
- Hoop Houses/Low Tunnels: Larger structures made from flexible hoops (PVC pipe or EMT conduit) covered with greenhouse plastic. These provide more space and greater temperature moderation. A 10×20 ft DIY low tunnel kit can cost $200-$500, while a larger, more robust hoop house kit might be $1,000-$3,000. I use a 6×12 ft low tunnel made from 1/2-inch PVC hoops and 6mil greenhouse plastic, which extends my lettuce and spinach harvest by at least
Efficient water management is critical for a self sufficient garden from scratch, especially in off-grid living where water resources might be limited.
- Rainwater Harvesting: This is my primary source of irrigation water. A 55-gallon rain barrel (e.g., EarthMark Rain Barrel, ~$120-$150) connected to a downspout can collect significant water. For larger needs, I use two 275-gallon IBC totes (Intermediate Bulk Containers, often available used for $100-$200 each from food-grade sources) connected in series. A 1,000 sq ft roof can collect approximately 620 gallons of water for every inch of rainfall. My 1,500 sq ft roof provides ample water for my 600 sq ft garden through multiple barrels and totes.
- Drip Irrigation: This is by far the most water-efficient method, delivering water directly to the plant’s root zone, minimizing evaporation and weed growth.
- Components: A typical drip system includes a pressure regulator (e.g., Rain Bird PRV-10, ~$15), a filter (Rain Bird RBY filter, ~$20), main tubing (1/2-inch poly tubing, 100ft ~$25), smaller feeder lines (1/4-inch tubing), and emitters (0.5 GPH or 1 GPH per plant).
- Kits: For beginners, a starter kit like the Rain Bird Drip Irrigation Garden Kit (model DDI-KIT-1P, ~$40-$60) is excellent for a small garden. For larger setups, I use Netafim Techline CV Drip Line (500ft roll, ~$150-$200), which has pressure-compensating emitters built-in, ensuring even watering across long runs.
- Automation: For true self-sufficiency, consider a battery-powered timer (e.g., Orbit B-Hyve Bluetooth Hose Faucet Timer, ~$50) or a solar-powered timer connected to a small 12V pump.
- Solar-Powered Pumps: For lifting water from a well, pond, or large storage tank to your garden, a solar pump is a game-changer. For a smaller drip system, a Shurflo 2088-594-152 Diaphragm Pump (12V, 3.5 GPM, ~$180) can be powered by a single 100W solar panel (e.g., Renogy 100W Monocrystalline Solar Panel, ~$100) and a small 12V battery (e.g., a 50Ah LiFePO4 battery like the Battle Born 50Ah, ~$450). For larger operations or deeper wells, more robust systems are needed. If you’re looking to build out a comprehensive off-grid power system to support your garden’s water needs, or indeed your entire homestead, you might want to explore resources like the Power Grid Generator complete system guide to understand the full scope of what’s possible in terms of energy independence.
Step 5: Seed Selection & Planting
The choice of seeds is crucial for a truly self sufficient garden from scratch.
- Choose Heirloom & Open-Pollinated Seeds: These varieties produce seeds that will grow true to type, meaning you can save seeds from your harvest year after year. F1 hybrids, while often vigorous, will not produce consistent offspring from saved seeds. Reputable seed companies include Baker Creek Heirloom Seeds, High Mowing Organic Seeds, and Seed Savers Exchange. Start with common, reliable varieties like ‘Black Krim’ tomatoes, ‘Provider’ bush beans, ‘Waltham Butternut’ squash, and ‘Black Seeded Simpson’ lettuce.
- Start Seeds Indoors (Optional but Recommended): For longer growing seasons or specific crops, starting seeds indoors gives you a head start. Use seed-starting mix (e.g., Espoma Organic Seed Starter Mix, ~$10 for 16qt bag) in seed trays (Jiffy Professional Greenhouse 72-cell kit, ~$15). Provide adequate light with LED grow lights (Barrina T5 2ft 4-pack LED Grow Lights, 20W each, ~$50) for 14-16 hours a day, positioned 2-4 inches above seedlings. Maintain consistent temperatures (65-75°F for most).
- Direct Sowing vs. Transplanting: Some crops (carrots, radishes, beans, corn) prefer direct sowing into the garden bed. Others (tomatoes, peppers, broccoli, kale) benefit from being started indoors and transplanted. Follow seed packet instructions for planting depths (e.g., lettuce seeds are often surface-sown or planted 1/8 inch deep, while beans are 1 inch deep) and spacing.
- Companion Planting: Strategically plant different species together to enhance growth, deter pests, and attract beneficial insects. For example, planting marigolds near tomatoes can deter nematodes, and basil improves tomato flavor. Nasturtiums can act as a trap crop for aphids.
- Succession Planting: For a continuous harvest, plant small batches of quick-growing crops (lettuce, radishes, cilantro) every 2-3 weeks. As one crop finishes, another is ready to take its place.
Step 6: Pest & Disease Management (Organic)
Maintaining a self sufficient garden from scratch means embracing organic pest and disease control.
- Integrated Pest Management (IPM): This holistic approach combines several strategies.
- Observation: Regularly inspect your plants for early signs of pests or disease. Catching issues early is key.
- Physical Barriers: Use row covers (e.g., Agribon AG-19 floating row cover, 10×20 ft, ~$20) to protect young plants from insect pests like cabbage worms and squash bugs. Install fences (e.g., 2×4 welded wire mesh, 4 ft tall, 50 ft roll ~$70) to keep out deer, rabbits, and other larger animals.
- Hand-Picking: For larger pests like tomato hornworms or squash bugs, simply pick them off and drop them into a bucket of soapy water.
- Companion Planting: As mentioned, certain plants repel pests. Marigolds, garlic, and onions are excellent deterrents.
- Attract Beneficial Insects: Plant flowers like dill, fennel, cosmos, and sweet alyssum to attract ladybugs, lacewings, and parasitic wasps, which prey on common garden pests.
- Organic Sprays & Treatments:
- Neem Oil: An excellent broad-spectrum organic insecticide and fungicide. Bonide Neem Oil Concentrate (16oz, ~$20) can be mixed at a rate of 1-2 tbsp per gallon of water and sprayed on affected plants.
- Insecticidal Soap: Effective against soft-bodied insects like aphids, whiteflies, and spider mites. Garden Safe Insecticidal Soap (24oz ready-to-use, ~$10).
- Bacillus thuringiensis (Bt): A naturally occurring soil bacterium that targets caterpillars and worms. Monterey BT Worm & Caterpillar Killer (16oz, ~$18) is highly effective and safe for beneficial insects.
- Copper or Sulfur Sprays: For fungal diseases like powdery mildew or blight, organic copper (e.g., Bonide Copper Fungicide, ~$15 for 1lb) or sulfur (e.g., Safer Brand Garden Fungicide, ~$10 for 16oz) can be used as a last resort.
Step 7: Harvesting & Seed Saving
The culmination of your efforts is the harvest, and seed saving closes the loop on self-sufficiency.
- Harvesting Techniques:
- Timing: Harvest vegetables at their peak ripeness for best flavor and nutritional value. For example, green beans should snap cleanly, cucumbers should be firm, and tomatoes should be fully colored.
- Frequency: Many crops, like zucchini, cucumbers, and bush beans, produce more if harvested frequently. Pick daily or every other day.
- Tools: Use clean, sharp pruners (e.g., Corona ClassicCUT Bypass Pruner BP 3180, ~$30) or a sharp knife for clean cuts, minimizing damage to the plant.
- Seed Saving: This is where the « self-sufficient » aspect truly shines.
- Selection: Only save seeds from your healthiest, most vigorous plants that show desired traits (disease resistance, good flavor, high yield).
- Isolation: To ensure true-to-type seeds, prevent cross-pollination. This can be challenging for open-pollinated crops that readily cross (e.g., squash, corn). For beginners, focus on self-pollinating plants like beans, peas, lettuce, and tomatoes.
- Processing:
- Dry Seeds (Beans, Peas, Lettuce, Grains): Allow pods/seed heads to dry completely on the plant. Harvest, shell, and clean the seeds, removing chaff.
- Wet Seeds (Tomatoes, Cucumbers, Squash): For tomatoes, ferment the seeds in water for a few days to remove the gel coating and inhibit disease. For cucumbers/squash, scrape out seeds, wash thoroughly, and dry.
- Drying: Spread seeds thinly on screens or paper plates in a cool, dry, well-ventilated area for 1-4 weeks. Ensure they are bone-dry before storage. I aim for less than 8% moisture content.
- Storage: Store seeds in airtight containers (glass jars with desiccant packets work well) in a cool, dark, dry place (ideally 40-50°F and 30-40% humidity). Label clearly with variety and date. Properly stored seeds can remain viable for 3-10 years or more.
Step 8: Season Extension & Winterizing
Extend your harvest and protect your garden for the off-season to truly maximize your self sufficient garden from scratch.
- Cold Frames: Simple structures with a transparent top (glass, polycarbonate, or old windows) that sit over garden beds. They trap solar heat, allowing you to grow cold-hardy crops (lettuce, spinach, kale, radishes) well into winter or start seeds earlier in spring. A basic cold frame can be built from 2×6 lumber and a sheet of polycarbonate for under $100.
- Hoop Houses/Low Tunnels: Larger structures made from flexible hoops (PVC pipe or EMT conduit) covered with greenhouse plastic. These provide more space and greater temperature moderation. A 10×20 ft DIY low tunnel kit can cost $200-$500, while a larger, more robust hoop house kit might be $1,000-$3,000. I use a 6×12 ft low tunnel made from 1/2-inch PVC hoops and 6mil greenhouse plastic, which extends my lettuce and spinach harvest by at least
Step 4: Water Management & Irrigation
Efficient water management is critical for a self sufficient garden from scratch, especially in off-grid living where water resources might be limited.
- Rainwater Harvesting: This is my primary source of irrigation water. A 55-gallon rain barrel (e.g., EarthMark Rain Barrel, ~$120-$150) connected to a downspout can collect significant water. For larger needs, I use two 275-gallon IBC totes (Intermediate Bulk Containers, often available used for $100-$200 each from food-grade sources) connected in series. A 1,000 sq ft roof can collect approximately 620 gallons of water for every inch of rainfall. My 1,500 sq ft roof provides ample water for my 600 sq ft garden through multiple barrels and totes.
- Drip Irrigation: This is by far the most water-efficient method, delivering water directly to the plant’s root zone, minimizing evaporation and weed growth.
- Components: A typical drip system includes a pressure regulator (e.g., Rain Bird PRV-10, ~$15), a filter (Rain Bird RBY filter, ~$20), main tubing (1/2-inch poly tubing, 100ft ~$25), smaller feeder lines (1/4-inch tubing), and emitters (0.5 GPH or 1 GPH per plant).
- Kits: For beginners, a starter kit like the Rain Bird Drip Irrigation Garden Kit (model DDI-KIT-1P, ~$40-$60) is excellent for a small garden. For larger setups, I use Netafim Techline CV Drip Line (500ft roll, ~$150-$200), which has pressure-compensating emitters built-in, ensuring even watering across long runs.
- Automation: For true self-sufficiency, consider a battery-powered timer (e.g., Orbit B-Hyve Bluetooth Hose Faucet Timer, ~$50) or a solar-powered timer connected to a small 12V pump.
- Solar-Powered Pumps: For lifting water from a well, pond, or large storage tank to your garden, a solar pump is a game-changer. For a smaller drip system, a Shurflo 2088-594-152 Diaphragm Pump (12V, 3.5 GPM, ~$180) can be powered by a single 100W solar panel (e.g., Renogy 100W Monocrystalline Solar Panel, ~$100) and a small 12V battery (e.g., a 50Ah LiFePO4 battery like the Battle Born 50Ah, ~$450). For larger operations or deeper wells, more robust systems are needed. If you’re looking to build out a comprehensive off-grid power system to support your garden’s water needs, or indeed your entire homestead, you might want to explore resources like the Power Grid Generator complete system guide to understand the full scope of what’s possible in terms of energy independence.
Step 5: Seed Selection & Planting
The choice of seeds is crucial for a truly self sufficient garden from scratch.
- Choose Heirloom & Open-Pollinated Seeds: These varieties produce seeds that will grow true to type, meaning you can save seeds from your harvest year after year. F1 hybrids, while often vigorous, will not produce consistent offspring from saved seeds. Reputable seed companies include Baker Creek Heirloom Seeds, High Mowing Organic Seeds, and Seed Savers Exchange. Start with common, reliable varieties like ‘Black Krim’ tomatoes, ‘Provider’ bush beans, ‘Waltham Butternut’ squash, and ‘Black Seeded Simpson’ lettuce.
- Start Seeds Indoors (Optional but Recommended): For longer growing seasons or specific crops, starting seeds indoors gives you a head start. Use seed-starting mix (e.g., Espoma Organic Seed Starter Mix, ~$10 for 16qt bag) in seed trays (Jiffy Professional Greenhouse 72-cell kit, ~$15). Provide adequate light with LED grow lights (Barrina T5 2ft 4-pack LED Grow Lights, 20W each, ~$50) for 14-16 hours a day, positioned 2-4 inches above seedlings. Maintain consistent temperatures (65-75°F for most).
- Direct Sowing vs. Transplanting: Some crops (carrots, radishes, beans, corn) prefer direct sowing into the garden bed. Others (tomatoes, peppers, broccoli, kale) benefit from being started indoors and transplanted. Follow seed packet instructions for planting depths (e.g., lettuce seeds are often surface-sown or planted 1/8 inch deep, while beans are 1 inch deep) and spacing.
- Companion Planting: Strategically plant different species together to enhance growth, deter pests, and attract beneficial insects. For example, planting marigolds near tomatoes can deter nematodes, and basil improves tomato flavor. Nasturtiums can act as a trap crop for aphids.
- Succession Planting: For a continuous harvest, plant small batches of quick-growing crops (lettuce, radishes, cilantro) every 2-3 weeks. As one crop finishes, another is ready to take its place.
Step 6: Pest & Disease Management (Organic)
Maintaining a self sufficient garden from scratch means embracing organic pest and disease control.
- Integrated Pest Management (IPM): This holistic approach combines several strategies.
- Observation: Regularly inspect your plants for early signs of pests or disease. Catching issues early is key.
- Physical Barriers: Use row covers (e.g., Agribon AG-19 floating row cover, 10×20 ft, ~$20) to protect young plants from insect pests like cabbage worms and squash bugs. Install fences (e.g., 2×4 welded wire mesh, 4 ft tall, 50 ft roll ~$70) to keep out deer, rabbits, and other larger animals.
- Hand-Picking: For larger pests like tomato hornworms or squash bugs, simply pick them off and drop them into a bucket of soapy water.
- Companion Planting: As mentioned, certain plants repel pests. Marigolds, garlic, and onions are excellent deterrents.
- Attract Beneficial Insects: Plant flowers like dill, fennel, cosmos, and sweet alyssum to attract ladybugs, lacewings, and parasitic wasps, which prey on common garden pests.
- Organic Sprays & Treatments:
- Neem Oil: An excellent broad-spectrum organic insecticide and fungicide. Bonide Neem Oil Concentrate (16oz, ~$20) can be mixed at a rate of 1-2 tbsp per gallon of water and sprayed on affected plants.
- Insecticidal Soap: Effective against soft-bodied insects like aphids, whiteflies, and spider mites. Garden Safe Insecticidal Soap (24oz ready-to-use, ~$10).
- Bacillus thuringiensis (Bt): A naturally occurring soil bacterium that targets caterpillars and worms. Monterey BT Worm & Caterpillar Killer (16oz, ~$18) is highly effective and safe for beneficial insects.
- Copper or Sulfur Sprays: For fungal diseases like powdery mildew or blight, organic copper (e.g., Bonide Copper Fungicide, ~$15 for 1lb) or sulfur (e.g., Safer Brand Garden Fungicide, ~$10 for 16oz) can be used as a last resort.
Step 7: Harvesting & Seed Saving
The culmination of your efforts is the harvest, and seed saving closes the loop on self-sufficiency.
- Harvesting Techniques:
- Timing: Harvest vegetables at their peak ripeness for best flavor and nutritional value. For example, green beans should snap cleanly, cucumbers should be firm, and tomatoes should be fully colored.
- Frequency: Many crops, like zucchini, cucumbers, and bush beans, produce more if harvested frequently. Pick daily or every other day.
- Tools: Use clean, sharp pruners (e.g., Corona ClassicCUT Bypass Pruner BP 3180, ~$30) or a sharp knife for clean cuts, minimizing damage to the plant.
- Seed Saving: This is where the « self-sufficient » aspect truly shines.
- Selection: Only save seeds from your healthiest, most vigorous plants that show desired traits (disease resistance, good flavor, high yield).
- Isolation: To ensure true-to-type seeds, prevent cross-pollination. This can be challenging for open-pollinated crops that readily cross (e.g., squash, corn). For beginners, focus on self-pollinating plants like beans, peas, lettuce, and tomatoes.
- Processing:
- Dry Seeds (Beans, Peas, Lettuce, Grains): Allow pods/seed heads to dry completely on the plant. Harvest, shell, and clean the seeds, removing chaff.
- Wet Seeds (Tomatoes, Cucumbers, Squash): For tomatoes, ferment the seeds in water for a few days to remove the gel coating and inhibit disease. For cucumbers/squash, scrape out seeds, wash thoroughly, and dry.
- Drying: Spread seeds thinly on screens or paper plates in a cool, dry, well-ventilated area for 1-4 weeks. Ensure they are bone-dry before storage. I aim for less than 8% moisture content.
- Storage: Store seeds in airtight containers (glass jars with desiccant packets work well) in a cool, dark, dry place (ideally 40-50°F and 30-40% humidity). Label clearly with variety and date. Properly stored seeds can remain viable for 3-10 years or more.
Step 8: Season Extension & Winterizing
Extend your harvest and protect your garden for the off-season to truly maximize your self sufficient garden from scratch.
- Cold Frames: Simple structures with a transparent top (glass, polycarbonate, or old windows) that sit over garden beds. They trap solar heat, allowing you to grow cold-hardy crops (lettuce, spinach, kale, radishes) well into winter or start seeds earlier in spring. A basic cold frame can be built from 2×6 lumber and a sheet of polycarbonate for under $100.
- Hoop Houses/Low Tunnels: Larger structures made from flexible hoops (PVC pipe or EMT conduit) covered with greenhouse plastic. These provide more space and greater temperature moderation. A 10×20 ft DIY low tunnel kit can cost $200-$500, while a larger, more robust hoop house kit might be $1,000-$3,000. I use a 6×12 ft low tunnel made from 1/2-inch PVC hoops and 6mil greenhouse plastic, which extends my lettuce and spinach harvest by at least
- In-Ground Beds: If you have excellent native soil and good drainage, in-ground beds are the most economical. Double-digging (loosening soil two shovel depths) can significantly improve drainage and aeration. For my main garden, I primarily use in-ground beds, but I focus on building up the soil over time with consistent compost additions and cover cropping. I aim for beds that are no wider than 3-4 feet so I can reach the center without stepping on the soil, compacting it.
- Raised Beds: Raised beds offer numerous advantages, especially for poor soil, heavy clay, or rocky areas. They provide better drainage, warm up faster in spring, reduce compaction, and make weeding and harvesting easier on your back.
- Material Options:
- Untreated Cedar: Naturally rot-resistant and chemical-free. A 4×8 ft bed, 12 inches deep, typically requires three 2x12x8 ft cedar boards, costing around $50-$60 per board (total ~$150-$180) plus corner brackets or screws. My first raised beds were cedar and are still going strong after 7 years.
- Galvanized Steel: Durable, long-lasting, and aesthetically pleasing. Brands like Vego Garden offer modular kits. A Vego Garden 17″ Tall 8-in-1 Metal Raised Garden Bed (can be configured to 4×8 ft) costs approximately $250-$300.
- Concrete Blocks/Stones: Very durable but can leach minerals (though generally safe once weathered) and can be expensive.
- Recycled Materials: Pallets (check for chemical treatment stamps like « HT » for heat-treated), old tires (controversial due to potential chemical leaching).
- Filling Raised Beds: Don’t just fill with topsoil. Use a « Hugelkultur » approach (logs, branches, leaves, then compost, then topsoil) or a mixture of 60% good quality topsoil, 30% compost, and 10% perlite or vermiculite for drainage. A 4x8x1 ft raised bed requires about 32 cubic feet (or ~1.2 cubic yards) of soil mix, which can cost $100-$200 depending on your source.
- Material Options:
Step 4: Water Management & Irrigation
Efficient water management is critical for a self sufficient garden from scratch, especially in off-grid living where water resources might be limited.
- Rainwater Harvesting: This is my primary source of irrigation water. A 55-gallon rain barrel (e.g., EarthMark Rain Barrel, ~$120-$150) connected to a downspout can collect significant water. For larger needs, I use two 275-gallon IBC totes (Intermediate Bulk Containers, often available used for $100-$200 each from food-grade sources) connected in series. A 1,000 sq ft roof can collect approximately 620 gallons of water for every inch of rainfall. My 1,500 sq ft roof provides ample water for my 600 sq ft garden through multiple barrels and totes.
- Drip Irrigation: This is by far the most water-efficient method, delivering water directly to the plant’s root zone, minimizing evaporation and weed growth.
- Components: A typical drip system includes a pressure regulator (e.g., Rain Bird PRV-10, ~$15), a filter (Rain Bird RBY filter, ~$20), main tubing (1/2-inch poly tubing, 100ft ~$25), smaller feeder lines (1/4-inch tubing), and emitters (0.5 GPH or 1 GPH per plant).
- Kits: For beginners, a starter kit like the Rain Bird Drip Irrigation Garden Kit (model DDI-KIT-1P, ~$40-$60) is excellent for a small garden. For larger setups, I use Netafim Techline CV Drip Line (500ft roll, ~$150-$200), which has pressure-compensating emitters built-in, ensuring even watering across long runs.
- Automation: For true self-sufficiency, consider a battery-powered timer (e.g., Orbit B-Hyve Bluetooth Hose Faucet Timer, ~$50) or a solar-powered timer connected to a small 12V pump.
- Solar-Powered Pumps: For lifting water from a well, pond, or large storage tank to your garden, a solar pump is a game-changer. For a smaller drip system, a Shurflo 2088-594-152 Diaphragm Pump (12V, 3.5 GPM, ~$180) can be powered by a single 100W solar panel (e.g., Renogy 100W Monocrystalline Solar Panel, ~$100) and a small 12V battery (e.g., a 50Ah LiFePO4 battery like the Battle Born 50Ah, ~$450). For larger operations or deeper wells, more robust systems are needed. If you’re looking to build out a comprehensive off-grid power system to support your garden’s water needs, or indeed your entire homestead, you might want to explore resources like the Power Grid Generator complete system guide to understand the full scope of what’s possible in terms of energy independence.
Step 5: Seed Selection & Planting
The choice of seeds is crucial for a truly self sufficient garden from scratch.
- Choose Heirloom & Open-Pollinated Seeds: These varieties produce seeds that will grow true to type, meaning you can save seeds from your harvest year after year. F1 hybrids, while often vigorous, will not produce consistent offspring from saved seeds. Reputable seed companies include Baker Creek Heirloom Seeds, High Mowing Organic Seeds, and Seed Savers Exchange. Start with common, reliable varieties like ‘Black Krim’ tomatoes, ‘Provider’ bush beans, ‘Waltham Butternut’ squash, and ‘Black Seeded Simpson’ lettuce.
- Start Seeds Indoors (Optional but Recommended): For longer growing seasons or specific crops, starting seeds indoors gives you a head start. Use seed-starting mix (e.g., Espoma Organic Seed Starter Mix, ~$10 for 16qt bag) in seed trays (Jiffy Professional Greenhouse 72-cell kit, ~$15). Provide adequate light with LED grow lights (Barrina T5 2ft 4-pack LED Grow Lights, 20W each, ~$50) for 14-16 hours a day, positioned 2-4 inches above seedlings. Maintain consistent temperatures (65-75°F for most).
- Direct Sowing vs. Transplanting: Some crops (carrots, radishes, beans, corn) prefer direct sowing into the garden bed. Others (tomatoes, peppers, broccoli, kale) benefit from being started indoors and transplanted. Follow seed packet instructions for planting depths (e.g., lettuce seeds are often surface-sown or planted 1/8 inch deep, while beans are 1 inch deep) and spacing.
- Companion Planting: Strategically plant different species together to enhance growth, deter pests, and attract beneficial insects. For example, planting marigolds near tomatoes can deter nematodes, and basil improves tomato flavor. Nasturtiums can act as a trap crop for aphids.
- Succession Planting: For a continuous harvest, plant small batches of quick-growing crops (lettuce, radishes, cilantro) every 2-3 weeks. As one crop finishes, another is ready to take its place.
Step 6: Pest & Disease Management (Organic)
Maintaining a self sufficient garden from scratch means embracing organic pest and disease control.
- Integrated Pest Management (IPM): This holistic approach combines several strategies.
- Observation: Regularly inspect your plants for early signs of pests or disease. Catching issues early is key.
- Physical Barriers: Use row covers (e.g., Agribon AG-19 floating row cover, 10×20 ft, ~$20) to protect young plants from insect pests like cabbage worms and squash bugs. Install fences (e.g., 2×4 welded wire mesh, 4 ft tall, 50 ft roll ~$70) to keep out deer, rabbits, and other larger animals.
- Hand-Picking: For larger pests like tomato hornworms or squash bugs, simply pick them off and drop them into a bucket of soapy water.
- Companion Planting: As mentioned, certain plants repel pests. Marigolds, garlic, and onions are excellent deterrents.
- Attract Beneficial Insects: Plant flowers like dill, fennel, cosmos, and sweet alyssum to attract ladybugs, lacewings, and parasitic wasps, which prey on common garden pests.
- Organic Sprays & Treatments:
- Neem Oil: An excellent broad-spectrum organic insecticide and fungicide. Bonide Neem Oil Concentrate (16oz, ~$20) can be mixed at a rate of 1-2 tbsp per gallon of water and sprayed on affected plants.
- Insecticidal Soap: Effective against soft-bodied insects like aphids, whiteflies, and spider mites. Garden Safe Insecticidal Soap (24oz ready-to-use, ~$10).
- Bacillus thuringiensis (Bt): A naturally occurring soil bacterium that targets caterpillars and worms. Monterey BT Worm & Caterpillar Killer (16oz, ~$18) is highly effective and safe for beneficial insects.
- Copper or Sulfur Sprays: For fungal diseases like powdery mildew or blight, organic copper (e.g., Bonide Copper Fungicide, ~$15 for 1lb) or sulfur (e.g., Safer Brand Garden Fungicide, ~$10 for 16oz) can be used as a last resort.
Step 7: Harvesting & Seed Saving
The culmination of your efforts is the harvest, and seed saving closes the loop on self-sufficiency.
- Harvesting Techniques:
- Timing: Harvest vegetables at their peak ripeness for best flavor and nutritional value. For example, green beans should snap cleanly, cucumbers should be firm, and tomatoes should be fully colored.
- Frequency: Many crops, like zucchini, cucumbers, and bush beans, produce more if harvested frequently. Pick daily or every other day.
- Tools: Use clean, sharp pruners (e.g., Corona ClassicCUT Bypass Pruner BP 3180, ~$30) or a sharp knife for clean cuts, minimizing damage to the plant.
- Seed Saving: This is where the « self-sufficient » aspect truly shines.
- Selection: Only save seeds from your healthiest, most vigorous plants that show desired traits (disease resistance, good flavor, high yield).
- Isolation: To ensure true-to-type seeds, prevent cross-pollination. This can be challenging for open-pollinated crops that readily cross (e.g., squash, corn). For beginners, focus on self-pollinating plants like beans, peas, lettuce, and tomatoes.
- Processing:
- Dry Seeds (Beans, Peas, Lettuce, Grains): Allow pods/seed heads to dry completely on the plant. Harvest, shell, and clean the seeds, removing chaff.
- Wet Seeds (Tomatoes, Cucumbers, Squash): For tomatoes, ferment the seeds in water for a few days to remove the gel coating and inhibit disease. For cucumbers/squash, scrape out seeds, wash thoroughly, and dry.
- Drying: Spread seeds thinly on screens or paper plates in a cool, dry, well-ventilated area for 1-4 weeks. Ensure they are bone-dry before storage. I aim for less than 8% moisture content.
- Storage: Store seeds in airtight containers (glass jars with desiccant packets work well) in a cool, dark, dry place (ideally 40-50°F and 30-40% humidity). Label clearly with variety and date. Properly stored seeds can remain viable for 3-10 years or more.
Step 8: Season Extension & Winterizing
Extend your harvest and protect your garden for the off-season to truly maximize your self sufficient garden from scratch.
- Cold Frames: Simple structures with a transparent top (glass, polycarbonate, or old windows) that sit over garden beds. They trap solar heat, allowing you to grow cold-hardy crops (lettuce, spinach, kale, radishes) well into winter or start seeds earlier in spring. A basic cold frame can be built from 2×6 lumber and a sheet of polycarbonate for under $100.
- Hoop Houses/Low Tunnels: Larger structures made from flexible hoops (PVC pipe or EMT conduit) covered with greenhouse plastic. These provide more space and greater temperature moderation. A 10×20 ft DIY low tunnel kit can cost $200-$500, while a larger, more robust hoop house kit might be $1,000-$3,000. I use a 6×12 ft low tunnel made from 1/2-inch PVC hoops and 6mil greenhouse plastic, which extends my lettuce and spinach harvest by at least
Deciding between raised beds and in-ground beds depends on your soil, budget, and physical capabilities.
- In-Ground Beds: If you have excellent native soil and good drainage, in-ground beds are the most economical. Double-digging (loosening soil two shovel depths) can significantly improve drainage and aeration. For my main garden, I primarily use in-ground beds, but I focus on building up the soil over time with consistent compost additions and cover cropping. I aim for beds that are no wider than 3-4 feet so I can reach the center without stepping on the soil, compacting it.
- Raised Beds: Raised beds offer numerous advantages, especially for poor soil, heavy clay, or rocky areas. They provide better drainage, warm up faster in spring, reduce compaction, and make weeding and harvesting easier on your back.
- Material Options:
- Untreated Cedar: Naturally rot-resistant and chemical-free. A 4×8 ft bed, 12 inches deep, typically requires three 2x12x8 ft cedar boards, costing around $50-$60 per board (total ~$150-$180) plus corner brackets or screws. My first raised beds were cedar and are still going strong after 7 years.
- Galvanized Steel: Durable, long-lasting, and aesthetically pleasing. Brands like Vego Garden offer modular kits. A Vego Garden 17″ Tall 8-in-1 Metal Raised Garden Bed (can be configured to 4×8 ft) costs approximately $250-$300.
- Concrete Blocks/Stones: Very durable but can leach minerals (though generally safe once weathered) and can be expensive.
- Recycled Materials: Pallets (check for chemical treatment stamps like « HT » for heat-treated), old tires (controversial due to potential chemical leaching).
- Filling Raised Beds: Don’t just fill with topsoil. Use a « Hugelkultur » approach (logs, branches, leaves, then compost, then topsoil) or a mixture of 60% good quality topsoil, 30% compost, and 10% perlite or vermiculite for drainage. A 4x8x1 ft raised bed requires about 32 cubic feet (or ~1.2 cubic yards) of soil mix, which can cost $100-$200 depending on your source.
- Material Options:
Step 4: Water Management & Irrigation
Efficient water management is critical for a self sufficient garden from scratch, especially in off-grid living where water resources might be limited.
- Rainwater Harvesting: This is my primary source of irrigation water. A 55-gallon rain barrel (e.g., EarthMark Rain Barrel, ~$120-$150) connected to a downspout can collect significant water. For larger needs, I use two 275-gallon IBC totes (Intermediate Bulk Containers, often available used for $100-$200 each from food-grade sources) connected in series. A 1,000 sq ft roof can collect approximately 620 gallons of water for every inch of rainfall. My 1,500 sq ft roof provides ample water for my 600 sq ft garden through multiple barrels and totes.
- Drip Irrigation: This is by far the most water-efficient method, delivering water directly to the plant’s root zone, minimizing evaporation and weed growth.
- Components: A typical drip system includes a pressure regulator (e.g., Rain Bird PRV-10, ~$15), a filter (Rain Bird RBY filter, ~$20), main tubing (1/2-inch poly tubing, 100ft ~$25), smaller feeder lines (1/4-inch tubing), and emitters (0.5 GPH or 1 GPH per plant).
- Kits: For beginners, a starter kit like the Rain Bird Drip Irrigation Garden Kit (model DDI-KIT-1P, ~$40-$60) is excellent for a small garden. For larger setups, I use Netafim Techline CV Drip Line (500ft roll, ~$150-$200), which has pressure-compensating emitters built-in, ensuring even watering across long runs.
- Automation: For true self-sufficiency, consider a battery-powered timer (e.g., Orbit B-Hyve Bluetooth Hose Faucet Timer, ~$50) or a solar-powered timer connected to a small 12V pump.
- Solar-Powered Pumps: For lifting water from a well, pond, or large storage tank to your garden, a solar pump is a game-changer. For a smaller drip system, a Shurflo 2088-594-152 Diaphragm Pump (12V, 3.5 GPM, ~$180) can be powered by a single 100W solar panel (e.g., Renogy 100W Monocrystalline Solar Panel, ~$100) and a small 12V battery (e.g., a 50Ah LiFePO4 battery like the Battle Born 50Ah, ~$450). For larger operations or deeper wells, more robust systems are needed. If you’re looking to build out a comprehensive off-grid power system to support your garden’s water needs, or indeed your entire homestead, you might want to explore resources like the Power Grid Generator complete system guide to understand the full scope of what’s possible in terms of energy independence.
Step 5: Seed Selection & Planting
The choice of seeds is crucial for a truly self sufficient garden from scratch.
- Choose Heirloom & Open-Pollinated Seeds: These varieties produce seeds that will grow true to type, meaning you can save seeds from your harvest year after year. F1 hybrids, while often vigorous, will not produce consistent offspring from saved seeds. Reputable seed companies include Baker Creek Heirloom Seeds, High Mowing Organic Seeds, and Seed Savers Exchange. Start with common, reliable varieties like ‘Black Krim’ tomatoes, ‘Provider’ bush beans, ‘Waltham Butternut’ squash, and ‘Black Seeded Simpson’ lettuce.
- Start Seeds Indoors (Optional but Recommended): For longer growing seasons or specific crops, starting seeds indoors gives you a head start. Use seed-starting mix (e.g., Espoma Organic Seed Starter Mix, ~$10 for 16qt bag) in seed trays (Jiffy Professional Greenhouse 72-cell kit, ~$15). Provide adequate light with LED grow lights (Barrina T5 2ft 4-pack LED Grow Lights, 20W each, ~$50) for 14-16 hours a day, positioned 2-4 inches above seedlings. Maintain consistent temperatures (65-75°F for most).
- Direct Sowing vs. Transplanting: Some crops (carrots, radishes, beans, corn) prefer direct sowing into the garden bed. Others (tomatoes, peppers, broccoli, kale) benefit from being started indoors and transplanted. Follow seed packet instructions for planting depths (e.g., lettuce seeds are often surface-sown or planted 1/8 inch deep, while beans are 1 inch deep) and spacing.
- Companion Planting: Strategically plant different species together to enhance growth, deter pests, and attract beneficial insects. For example, planting marigolds near tomatoes can deter nematodes, and basil improves tomato flavor. Nasturtiums can act as a trap crop for aphids.
- Succession Planting: For a continuous harvest, plant small batches of quick-growing crops (lettuce, radishes, cilantro) every 2-3 weeks. As one crop finishes, another is ready to take its place.
Step 6: Pest & Disease Management (Organic)
Maintaining a self sufficient garden from scratch means embracing organic pest and disease control.
- Integrated Pest Management (IPM): This holistic approach combines several strategies.
- Observation: Regularly inspect your plants for early signs of pests or disease. Catching issues early is key.
- Physical Barriers: Use row covers (e.g., Agribon AG-19 floating row cover, 10×20 ft, ~$20) to protect young plants from insect pests like cabbage worms and squash bugs. Install fences (e.g., 2×4 welded wire mesh, 4 ft tall, 50 ft roll ~$70) to keep out deer, rabbits, and other larger animals.
- Hand-Picking: For larger pests like tomato hornworms or squash bugs, simply pick them off and drop them into a bucket of soapy water.
- Companion Planting: As mentioned, certain plants repel pests. Marigolds, garlic, and onions are excellent deterrents.
- Attract Beneficial Insects: Plant flowers like dill, fennel, cosmos, and sweet alyssum to attract ladybugs, lacewings, and parasitic wasps, which prey on common garden pests.
- Organic Sprays & Treatments:
- Neem Oil: An excellent broad-spectrum organic insecticide and fungicide. Bonide Neem Oil Concentrate (16oz, ~$20) can be mixed at a rate of 1-2 tbsp per gallon of water and sprayed on affected plants.
- Insecticidal Soap: Effective against soft-bodied insects like aphids, whiteflies, and spider mites. Garden Safe Insecticidal Soap (24oz ready-to-use, ~$10).
- Bacillus thuringiensis (Bt): A naturally occurring soil bacterium that targets caterpillars and worms. Monterey BT Worm & Caterpillar Killer (16oz, ~$18) is highly effective and safe for beneficial insects.
- Copper or Sulfur Sprays: For fungal diseases like powdery mildew or blight, organic copper (e.g., Bonide Copper Fungicide, ~$15 for 1lb) or sulfur (e.g., Safer Brand Garden Fungicide, ~$10 for 16oz) can be used as a last resort.
Step 7: Harvesting & Seed Saving
The culmination of your efforts is the harvest, and seed saving closes the loop on self-sufficiency.
- Harvesting Techniques:
- Timing: Harvest vegetables at their peak ripeness for best flavor and nutritional value. For example, green beans should snap cleanly, cucumbers should be firm, and tomatoes should be fully colored.
- Frequency: Many crops, like zucchini, cucumbers, and bush beans, produce more if harvested frequently. Pick daily or every other day.
- Tools: Use clean, sharp pruners (e.g., Corona ClassicCUT Bypass Pruner BP 3180, ~$30) or a sharp knife for clean cuts, minimizing damage to the plant.
- Seed Saving: This is where the « self-sufficient » aspect truly shines.
- Selection: Only save seeds from your healthiest, most vigorous plants that show desired traits (disease resistance, good flavor, high yield).
- Isolation: To ensure true-to-type seeds, prevent cross-pollination. This can be challenging for open-pollinated crops that readily cross (e.g., squash, corn). For beginners, focus on self-pollinating plants like beans, peas, lettuce, and tomatoes.
- Processing:
- Dry Seeds (Beans, Peas, Lettuce, Grains): Allow pods/seed heads to dry completely on the plant. Harvest, shell, and clean the seeds, removing chaff.
- Wet Seeds (Tomatoes, Cucumbers, Squash): For tomatoes, ferment the seeds in water for a few days to remove the gel coating and inhibit disease. For cucumbers/squash, scrape out seeds, wash thoroughly, and dry.
- Drying: Spread seeds thinly on screens or paper plates in a cool, dry, well-ventilated area for 1-4 weeks. Ensure they are bone-dry before storage. I aim for less than 8% moisture content.
- Storage: Store seeds in airtight containers (glass jars with desiccant packets work well) in a cool, dark, dry place (ideally 40-50°F and 30-40% humidity). Label clearly with variety and date. Properly stored seeds can remain viable for 3-10 years or more.
Step 8: Season Extension & Winterizing
Extend your harvest and protect your garden for the off-season to truly maximize your self sufficient garden from scratch.
- Cold Frames: Simple structures with a transparent top (glass, polycarbonate, or old windows) that sit over garden beds. They trap solar heat, allowing you to grow cold-hardy crops (lettuce, spinach, kale, radishes) well into winter or start seeds earlier in spring. A basic cold frame can be built from 2×6 lumber and a sheet of polycarbonate for under $100.
- Hoop Houses/Low Tunnels: Larger structures made from flexible hoops (PVC pipe or EMT conduit) covered with greenhouse plastic. These provide more space and greater temperature moderation. A 10×20 ft DIY low tunnel kit can cost $200-$500, while a larger, more robust hoop house kit might be $1,000-$3,000. I use a 6×12 ft low tunnel made from 1/2-inch PVC hoops and 6mil greenhouse plastic, which extends my lettuce and spinach harvest by at least
Healthy soil is the bedrock of a productive, self-sufficient garden. You can’t guess what your soil needs; you have to test it.
- Perform a Soil Test: A professional soil test will give you precise data on your soil’s pH, nutrient levels (N-P-K), and organic matter content. I recommend sending a sample to your local agricultural extension office; it typically costs $20-$50 and provides detailed recommendations. Alternatively, for a quick homeowner check, a Rapitest Soil Test Kit (40-test kit, model 1663, ~$20 on Amazon) provides a good baseline for pH, Nitrogen, Phosphorus, and Potash. Aim for a pH between 6.0 and 7.0 for most vegetables.
- Amend for pH Imbalance: If your soil is too acidic (below 6.0), add agricultural lime (dolomitic lime adds magnesium, calcitic lime adds calcium). Apply 5-10 lbs per 100 sq ft for a moderate adjustment. If it’s too alkaline (above 7.0), add elemental sulfur (e.g., Espoma Soil Acidifier, ~$15 for 6.75 lbs) or generous amounts of organic matter like peat moss or pine needles.
- Build Organic Matter: This is the single most important step for long-term soil health. Organic matter improves soil structure, water retention, drainage, and nutrient availability. Incorporate 2-4 inches of high-quality compost into your top 6-12 inches of soil annually. I make my own compost from kitchen scraps, garden waste, and shredded leaves, but you can purchase it. Local nurseries often sell bulk compost for $30-$50 per cubic yard. Aged manure (from chickens, cows, or horses – ensure it’s well-rotted to avoid burning plants) is also excellent.
- Address Nutrient Deficiencies: Based on your soil test, add specific organic amendments. If Nitrogen (N) is low, add blood meal (12-0-0, ~$20 for 3 lbs) or feather meal. For Phosphorus (P), use bone meal (3-15-0, ~$15 for 3 lbs) or rock phosphate. For Potassium (K), greensand (0-0-2.5, ~$25 for 5 lbs) or kelp meal are good choices. I rely heavily on Espoma Organic Garden-tone (5-3-3, ~$25 for an 8lb bag) as a balanced, all-purpose organic fertilizer during planting.
Step 3: Garden Bed Preparation
Deciding between raised beds and in-ground beds depends on your soil, budget, and physical capabilities.
- In-Ground Beds: If you have excellent native soil and good drainage, in-ground beds are the most economical. Double-digging (loosening soil two shovel depths) can significantly improve drainage and aeration. For my main garden, I primarily use in-ground beds, but I focus on building up the soil over time with consistent compost additions and cover cropping. I aim for beds that are no wider than 3-4 feet so I can reach the center without stepping on the soil, compacting it.
- Raised Beds: Raised beds offer numerous advantages, especially for poor soil, heavy clay, or rocky areas. They provide better drainage, warm up faster in spring, reduce compaction, and make weeding and harvesting easier on your back.
- Material Options:
- Untreated Cedar: Naturally rot-resistant and chemical-free. A 4×8 ft bed, 12 inches deep, typically requires three 2x12x8 ft cedar boards, costing around $50-$60 per board (total ~$150-$180) plus corner brackets or screws. My first raised beds were cedar and are still going strong after 7 years.
- Galvanized Steel: Durable, long-lasting, and aesthetically pleasing. Brands like Vego Garden offer modular kits. A Vego Garden 17″ Tall 8-in-1 Metal Raised Garden Bed (can be configured to 4×8 ft) costs approximately $250-$300.
- Concrete Blocks/Stones: Very durable but can leach minerals (though generally safe once weathered) and can be expensive.
- Recycled Materials: Pallets (check for chemical treatment stamps like « HT » for heat-treated), old tires (controversial due to potential chemical leaching).
- Filling Raised Beds: Don’t just fill with topsoil. Use a « Hugelkultur » approach (logs, branches, leaves, then compost, then topsoil) or a mixture of 60% good quality topsoil, 30% compost, and 10% perlite or vermiculite for drainage. A 4x8x1 ft raised bed requires about 32 cubic feet (or ~1.2 cubic yards) of soil mix, which can cost $100-$200 depending on your source.
- Material Options:
Step 4: Water Management & Irrigation
Efficient water management is critical for a self sufficient garden from scratch, especially in off-grid living where water resources might be limited.
- Rainwater Harvesting: This is my primary source of irrigation water. A 55-gallon rain barrel (e.g., EarthMark Rain Barrel, ~$120-$150) connected to a downspout can collect significant water. For larger needs, I use two 275-gallon IBC totes (Intermediate Bulk Containers, often available used for $100-$200 each from food-grade sources) connected in series. A 1,000 sq ft roof can collect approximately 620 gallons of water for every inch of rainfall. My 1,500 sq ft roof provides ample water for my 600 sq ft garden through multiple barrels and totes.
- Drip Irrigation: This is by far the most water-efficient method, delivering water directly to the plant’s root zone, minimizing evaporation and weed growth.
- Components: A typical drip system includes a pressure regulator (e.g., Rain Bird PRV-10, ~$15), a filter (Rain Bird RBY filter, ~$20), main tubing (1/2-inch poly tubing, 100ft ~$25), smaller feeder lines (1/4-inch tubing), and emitters (0.5 GPH or 1 GPH per plant).
- Kits: For beginners, a starter kit like the Rain Bird Drip Irrigation Garden Kit (model DDI-KIT-1P, ~$40-$60) is excellent for a small garden. For larger setups, I use Netafim Techline CV Drip Line (500ft roll, ~$150-$200), which has pressure-compensating emitters built-in, ensuring even watering across long runs.
- Automation: For true self-sufficiency, consider a battery-powered timer (e.g., Orbit B-Hyve Bluetooth Hose Faucet Timer, ~$50) or a solar-powered timer connected to a small 12V pump.
- Solar-Powered Pumps: For lifting water from a well, pond, or large storage tank to your garden, a solar pump is a game-changer. For a smaller drip system, a Shurflo 2088-594-152 Diaphragm Pump (12V, 3.5 GPM, ~$180) can be powered by a single 100W solar panel (e.g., Renogy 100W Monocrystalline Solar Panel, ~$100) and a small 12V battery (e.g., a 50Ah LiFePO4 battery like the Battle Born 50Ah, ~$450). For larger operations or deeper wells, more robust systems are needed. If you’re looking to build out a comprehensive off-grid power system to support your garden’s water needs, or indeed your entire homestead, you might want to explore resources like the Power Grid Generator complete system guide to understand the full scope of what’s possible in terms of energy independence.
Step 5: Seed Selection & Planting
The choice of seeds is crucial for a truly self sufficient garden from scratch.
- Choose Heirloom & Open-Pollinated Seeds: These varieties produce seeds that will grow true to type, meaning you can save seeds from your harvest year after year. F1 hybrids, while often vigorous, will not produce consistent offspring from saved seeds. Reputable seed companies include Baker Creek Heirloom Seeds, High Mowing Organic Seeds, and Seed Savers Exchange. Start with common, reliable varieties like ‘Black Krim’ tomatoes, ‘Provider’ bush beans, ‘Waltham Butternut’ squash, and ‘Black Seeded Simpson’ lettuce.
- Start Seeds Indoors (Optional but Recommended): For longer growing seasons or specific crops, starting seeds indoors gives you a head start. Use seed-starting mix (e.g., Espoma Organic Seed Starter Mix, ~$10 for 16qt bag) in seed trays (Jiffy Professional Greenhouse 72-cell kit, ~$15). Provide adequate light with LED grow lights (Barrina T5 2ft 4-pack LED Grow Lights, 20W each, ~$50) for 14-16 hours a day, positioned 2-4 inches above seedlings. Maintain consistent temperatures (65-75°F for most).
- Direct Sowing vs. Transplanting: Some crops (carrots, radishes, beans, corn) prefer direct sowing into the garden bed. Others (tomatoes, peppers, broccoli, kale) benefit from being started indoors and transplanted. Follow seed packet instructions for planting depths (e.g., lettuce seeds are often surface-sown or planted 1/8 inch deep, while beans are 1 inch deep) and spacing.
- Companion Planting: Strategically plant different species together to enhance growth, deter pests, and attract beneficial insects. For example, planting marigolds near tomatoes can deter nematodes, and basil improves tomato flavor. Nasturtiums can act as a trap crop for aphids.
- Succession Planting: For a continuous harvest, plant small batches of quick-growing crops (lettuce, radishes, cilantro) every 2-3 weeks. As one crop finishes, another is ready to take its place.
Step 6: Pest & Disease Management (Organic)
Maintaining a self sufficient garden from scratch means embracing organic pest and disease control.
- Integrated Pest Management (IPM): This holistic approach combines several strategies.
- Observation: Regularly inspect your plants for early signs of pests or disease. Catching issues early is key.
- Physical Barriers: Use row covers (e.g., Agribon AG-19 floating row cover, 10×20 ft, ~$20) to protect young plants from insect pests like cabbage worms and squash bugs. Install fences (e.g., 2×4 welded wire mesh, 4 ft tall, 50 ft roll ~$70) to keep out deer, rabbits, and other larger animals.
- Hand-Picking: For larger pests like tomato hornworms or squash bugs, simply pick them off and drop them into a bucket of soapy water.
- Companion Planting: As mentioned, certain plants repel pests. Marigolds, garlic, and onions are excellent deterrents.
- Attract Beneficial Insects: Plant flowers like dill, fennel, cosmos, and sweet alyssum to attract ladybugs, lacewings, and parasitic wasps, which prey on common garden pests.
- Organic Sprays & Treatments:
- Neem Oil: An excellent broad-spectrum organic insecticide and fungicide. Bonide Neem Oil Concentrate (16oz, ~$20) can be mixed at a rate of 1-2 tbsp per gallon of water and sprayed on affected plants.
- Insecticidal Soap: Effective against soft-bodied insects like aphids, whiteflies, and spider mites. Garden Safe Insecticidal Soap (24oz ready-to-use, ~$10).
- Bacillus thuringiensis (Bt): A naturally occurring soil bacterium that targets caterpillars and worms. Monterey BT Worm & Caterpillar Killer (16oz, ~$18) is highly effective and safe for beneficial insects.
- Copper or Sulfur Sprays: For fungal diseases like powdery mildew or blight, organic copper (e.g., Bonide Copper Fungicide, ~$15 for 1lb) or sulfur (e.g., Safer Brand Garden Fungicide, ~$10 for 16oz) can be used as a last resort.
Step 7: Harvesting & Seed Saving
The culmination of your efforts is the harvest, and seed saving closes the loop on self-sufficiency.
- Harvesting Techniques:
- Timing: Harvest vegetables at their peak ripeness for best flavor and nutritional value. For example, green beans should snap cleanly, cucumbers should be firm, and tomatoes should be fully colored.
- Frequency: Many crops, like zucchini, cucumbers, and bush beans, produce more if harvested frequently. Pick daily or every other day.
- Tools: Use clean, sharp pruners (e.g., Corona ClassicCUT Bypass Pruner BP 3180, ~$30) or a sharp knife for clean cuts, minimizing damage to the plant.
- Seed Saving: This is where the « self-sufficient » aspect truly shines.
- Selection: Only save seeds from your healthiest, most vigorous plants that show desired traits (disease resistance, good flavor, high yield).
- Isolation: To ensure true-to-type seeds, prevent cross-pollination. This can be challenging for open-pollinated crops that readily cross (e.g., squash, corn). For beginners, focus on self-pollinating plants like beans, peas, lettuce, and tomatoes.
- Processing:
- Dry Seeds (Beans, Peas, Lettuce, Grains): Allow pods/seed heads to dry completely on the plant. Harvest, shell, and clean the seeds, removing chaff.
- Wet Seeds (Tomatoes, Cucumbers, Squash): For tomatoes, ferment the seeds in water for a few days to remove the gel coating and inhibit disease. For cucumbers/squash, scrape out seeds, wash thoroughly, and dry.
- Drying: Spread seeds thinly on screens or paper plates in a cool, dry, well-ventilated area for 1-4 weeks. Ensure they are bone-dry before storage. I aim for less than 8% moisture content.
- Storage: Store seeds in airtight containers (glass jars with desiccant packets work well) in a cool, dark, dry place (ideally 40-50°F and 30-40% humidity). Label clearly with variety and date. Properly stored seeds can remain viable for 3-10 years or more.
Step 8: Season Extension & Winterizing
Extend your harvest and protect your garden for the off-season to truly maximize your self sufficient garden from scratch.
- Cold Frames: Simple structures with a transparent top (glass, polycarbonate, or old windows) that sit over garden beds. They trap solar heat, allowing you to grow cold-hardy crops (lettuce, spinach, kale, radishes) well into winter or start seeds earlier in spring. A basic cold frame can be built from 2×6 lumber and a sheet of polycarbonate for under $100.
- Hoop Houses/Low Tunnels: Larger structures made from flexible hoops (PVC pipe or EMT conduit) covered with greenhouse plastic. These provide more space and greater temperature moderation. A 10×20 ft DIY low tunnel kit can cost $200-$500, while a larger, more robust hoop house kit might be $1,000-$3,000. I use a 6×12 ft low tunnel made from 1/2-inch PVC hoops and 6mil greenhouse plastic, which extends my lettuce and spinach harvest by at least
The choice of seeds is crucial for a truly self sufficient garden from scratch.
- Choose Heirloom & Open-Pollinated Seeds: These varieties produce seeds that will grow true to type, meaning you can save seeds from your harvest year after year. F1 hybrids, while often vigorous, will not produce consistent offspring from saved seeds. Reputable seed companies include Baker Creek Heirloom Seeds, High Mowing Organic Seeds, and Seed Savers Exchange. Start with common, reliable varieties like ‘Black Krim’ tomatoes, ‘Provider’ bush beans, ‘Waltham Butternut’ squash, and ‘Black Seeded Simpson’ lettuce.
- Start Seeds Indoors (Optional but Recommended): For longer growing seasons or specific crops, starting seeds indoors gives you a head start. Use seed-starting mix (e.g., Espoma Organic Seed Starter Mix, ~$10 for 16qt bag) in seed trays (Jiffy Professional Greenhouse 72-cell kit, ~$15). Provide adequate light with LED grow lights (Barrina T5 2ft 4-pack LED Grow Lights, 20W each, ~$50) for 14-16 hours a day, positioned 2-4 inches above seedlings. Maintain consistent temperatures (65-75°F for most).
- Direct Sowing vs. Transplanting: Some crops (carrots, radishes, beans, corn) prefer direct sowing into the garden bed. Others (tomatoes, peppers, broccoli, kale) benefit from being started indoors and transplanted. Follow seed packet instructions for planting depths (e.g., lettuce seeds are often surface-sown or planted 1/8 inch deep, while beans are 1 inch deep) and spacing.
- Companion Planting: Strategically plant different species together to enhance growth, deter pests, and attract beneficial insects. For example, planting marigolds near tomatoes can deter nematodes, and basil improves tomato flavor. Nasturtiums can act as a trap crop for aphids.
- Succession Planting: For a continuous harvest, plant small batches of quick-growing crops (lettuce, radishes, cilantro) every 2-3 weeks. As one crop finishes, another is ready to take its place.
Step 6: Pest & Disease Management (Organic)
Maintaining a self sufficient garden from scratch means embracing organic pest and disease control.
- Integrated Pest Management (IPM): This holistic approach combines several strategies.
- Observation: Regularly inspect your plants for early signs of pests or disease. Catching issues early is key.
- Physical Barriers: Use row covers (e.g., Agribon AG-19 floating row cover, 10×20 ft, ~$20) to protect young plants from insect pests like cabbage worms and squash bugs. Install fences (e.g., 2×4 welded wire mesh, 4 ft tall, 50 ft roll ~$70) to keep out deer, rabbits, and other larger animals.
- Hand-Picking: For larger pests like tomato hornworms or squash bugs, simply pick them off and drop them into a bucket of soapy water.
- Companion Planting: As mentioned, certain plants repel pests. Marigolds, garlic, and onions are excellent deterrents.
- Attract Beneficial Insects: Plant flowers like dill, fennel, cosmos, and sweet alyssum to attract ladybugs, lacewings, and parasitic wasps, which prey on common garden pests.
- Organic Sprays & Treatments:
- Neem Oil: An excellent broad-spectrum organic insecticide and fungicide. Bonide Neem Oil Concentrate (16oz, ~$20) can be mixed at a rate of 1-2 tbsp per gallon of water and sprayed on affected plants.
- Insecticidal Soap: Effective against soft-bodied insects like aphids, whiteflies, and spider mites. Garden Safe Insecticidal Soap (24oz ready-to-use, ~$10).
- Bacillus thuringiensis (Bt): A naturally occurring soil bacterium that targets caterpillars and worms. Monterey BT Worm & Caterpillar Killer (16oz, ~$18) is highly effective and safe for beneficial insects.
- Copper or Sulfur Sprays: For fungal diseases like powdery mildew or blight, organic copper (e.g., Bonide Copper Fungicide, ~$15 for 1lb) or sulfur (e.g., Safer Brand Garden Fungicide, ~$10 for 16oz) can be used as a last resort.
Step 7: Harvesting & Seed Saving
The culmination of your efforts is the harvest, and seed saving closes the loop on self-sufficiency.
- Harvesting Techniques:
- Timing: Harvest vegetables at their peak ripeness for best flavor and nutritional value. For example, green beans should snap cleanly, cucumbers should be firm, and tomatoes should be fully colored.
- Frequency: Many crops, like zucchini, cucumbers, and bush beans, produce more if harvested frequently. Pick daily or every other day.
- Tools: Use clean, sharp pruners (e.g., Corona ClassicCUT Bypass Pruner BP 3180, ~$30) or a sharp knife for clean cuts, minimizing damage to the plant.
- Seed Saving: This is where the « self-sufficient » aspect truly shines.
- Selection: Only save seeds from your healthiest, most vigorous plants that show desired traits (disease resistance, good flavor, high yield).
- Isolation: To ensure true-to-type seeds, prevent cross-pollination. This can be challenging for open-pollinated crops that readily cross (e.g., squash, corn). For beginners, focus on self-pollinating plants like beans, peas, lettuce, and tomatoes.
- Processing:
- Dry Seeds (Beans, Peas, Lettuce, Grains): Allow pods/seed heads to dry completely on the plant. Harvest, shell, and clean the seeds, removing chaff.
- Wet Seeds (Tomatoes, Cucumbers, Squash): For tomatoes, ferment the seeds in water for a few days to remove the gel coating and inhibit disease. For cucumbers/squash, scrape out seeds, wash thoroughly, and dry.
- Drying: Spread seeds thinly on screens or paper plates in a cool, dry, well-ventilated area for 1-4 weeks. Ensure they are bone-dry before storage. I aim for less than 8% moisture content.
- Storage: Store seeds in airtight containers (glass jars with desiccant packets work well) in a cool, dark, dry place (ideally 40-50°F and 30-40% humidity). Label clearly with variety and date. Properly stored seeds can remain viable for 3-10 years or more.
Step 8: Season Extension & Winterizing
Extend your harvest and protect your garden for the off-season to truly maximize your self sufficient garden from scratch.
- Cold Frames: Simple structures with a transparent top (glass, polycarbonate, or old windows) that sit over garden beds. They trap solar heat, allowing you to grow cold-hardy crops (lettuce, spinach, kale, radishes) well into winter or start seeds earlier in spring. A basic cold frame can be built from 2×6 lumber and a sheet of polycarbonate for under $100.
- Hoop Houses/Low Tunnels: Larger structures made from flexible hoops (PVC pipe or EMT conduit) covered with greenhouse plastic. These provide more space and greater temperature moderation. A 10×20 ft DIY low tunnel kit can cost $200-$500, while a larger, more robust hoop house kit might be $1,000-$3,000. I use a 6×12 ft low tunnel made from 1/2-inch PVC hoops and 6mil greenhouse plastic, which extends my lettuce and spinach harvest by at least
- Rainwater Harvesting: This is my primary source of irrigation water. A 55-gallon rain barrel (e.g., EarthMark Rain Barrel, ~$120-$150) connected to a downspout can collect significant water. For larger needs, I use two 275-gallon IBC totes (Intermediate Bulk Containers, often available used for $100-$200 each from food-grade sources) connected in series. A 1,000 sq ft roof can collect approximately 620 gallons of water for every inch of rainfall. My 1,500 sq ft roof provides ample water for my 600 sq ft garden through multiple barrels and totes.
- Drip Irrigation: This is by far the most water-efficient method, delivering water directly to the plant’s root zone, minimizing evaporation and weed growth.
- Components: A typical drip system includes a pressure regulator (e.g., Rain Bird PRV-10, ~$15), a filter (Rain Bird RBY filter, ~$20), main tubing (1/2-inch poly tubing, 100ft ~$25), smaller feeder lines (1/4-inch tubing), and emitters (0.5 GPH or 1 GPH per plant).
- Kits: For beginners, a starter kit like the Rain Bird Drip Irrigation Garden Kit (model DDI-KIT-1P, ~$40-$60) is excellent for a small garden. For larger setups, I use Netafim Techline CV Drip Line (500ft roll, ~$150-$200), which has pressure-compensating emitters built-in, ensuring even watering across long runs.
- Automation: For true self-sufficiency, consider a battery-powered timer (e.g., Orbit B-Hyve Bluetooth Hose Faucet Timer, ~$50) or a solar-powered timer connected to a small 12V pump.
- Solar-Powered Pumps: For lifting water from a well, pond, or large storage tank to your garden, a solar pump is a game-changer. For a smaller drip system, a Shurflo 2088-594-152 Diaphragm Pump (12V, 3.5 GPM, ~$180) can be powered by a single 100W solar panel (e.g., Renogy 100W Monocrystalline Solar Panel, ~$100) and a small 12V battery (e.g., a 50Ah LiFePO4 battery like the Battle Born 50Ah, ~$450). For larger operations or deeper wells, more robust systems are needed. If you’re looking to build out a comprehensive off-grid power system to support your garden’s water needs, or indeed your entire homestead, you might want to explore resources like the Power Grid Generator complete system guide to understand the full scope of what’s possible in terms of energy independence.
Step 5: Seed Selection & Planting
The choice of seeds is crucial for a truly self sufficient garden from scratch.
- Choose Heirloom & Open-Pollinated Seeds: These varieties produce seeds that will grow true to type, meaning you can save seeds from your harvest year after year. F1 hybrids, while often vigorous, will not produce consistent offspring from saved seeds. Reputable seed companies include Baker Creek Heirloom Seeds, High Mowing Organic Seeds, and Seed Savers Exchange. Start with common, reliable varieties like ‘Black Krim’ tomatoes, ‘Provider’ bush beans, ‘Waltham Butternut’ squash, and ‘Black Seeded Simpson’ lettuce.
- Start Seeds Indoors (Optional but Recommended): For longer growing seasons or specific crops, starting seeds indoors gives you a head start. Use seed-starting mix (e.g., Espoma Organic Seed Starter Mix, ~$10 for 16qt bag) in seed trays (Jiffy Professional Greenhouse 72-cell kit, ~$15). Provide adequate light with LED grow lights (Barrina T5 2ft 4-pack LED Grow Lights, 20W each, ~$50) for 14-16 hours a day, positioned 2-4 inches above seedlings. Maintain consistent temperatures (65-75°F for most).
- Direct Sowing vs. Transplanting: Some crops (carrots, radishes, beans, corn) prefer direct sowing into the garden bed. Others (tomatoes, peppers, broccoli, kale) benefit from being started indoors and transplanted. Follow seed packet instructions for planting depths (e.g., lettuce seeds are often surface-sown or planted 1/8 inch deep, while beans are 1 inch deep) and spacing.
- Companion Planting: Strategically plant different species together to enhance growth, deter pests, and attract beneficial insects. For example, planting marigolds near tomatoes can deter nematodes, and basil improves tomato flavor. Nasturtiums can act as a trap crop for aphids.
- Succession Planting: For a continuous harvest, plant small batches of quick-growing crops (lettuce, radishes, cilantro) every 2-3 weeks. As one crop finishes, another is ready to take its place.
Step 6: Pest & Disease Management (Organic)
Maintaining a self sufficient garden from scratch means embracing organic pest and disease control.
- Integrated Pest Management (IPM): This holistic approach combines several strategies.
- Observation: Regularly inspect your plants for early signs of pests or disease. Catching issues early is key.
- Physical Barriers: Use row covers (e.g., Agribon AG-19 floating row cover, 10×20 ft, ~$20) to protect young plants from insect pests like cabbage worms and squash bugs. Install fences (e.g., 2×4 welded wire mesh, 4 ft tall, 50 ft roll ~$70) to keep out deer, rabbits, and other larger animals.
- Hand-Picking: For larger pests like tomato hornworms or squash bugs, simply pick them off and drop them into a bucket of soapy water.
- Companion Planting: As mentioned, certain plants repel pests. Marigolds, garlic, and onions are excellent deterrents.
- Attract Beneficial Insects: Plant flowers like dill, fennel, cosmos, and sweet alyssum to attract ladybugs, lacewings, and parasitic wasps, which prey on common garden pests.
- Organic Sprays & Treatments:
- Neem Oil: An excellent broad-spectrum organic insecticide and fungicide. Bonide Neem Oil Concentrate (16oz, ~$20) can be mixed at a rate of 1-2 tbsp per gallon of water and sprayed on affected plants.
- Insecticidal Soap: Effective against soft-bodied insects like aphids, whiteflies, and spider mites. Garden Safe Insecticidal Soap (24oz ready-to-use, ~$10).
- Bacillus thuringiensis (Bt): A naturally occurring soil bacterium that targets caterpillars and worms. Monterey BT Worm & Caterpillar Killer (16oz, ~$18) is highly effective and safe for beneficial insects.
- Copper or Sulfur Sprays: For fungal diseases like powdery mildew or blight, organic copper (e.g., Bonide Copper Fungicide, ~$15 for 1lb) or sulfur (e.g., Safer Brand Garden Fungicide, ~$10 for 16oz) can be used as a last resort.
Step 7: Harvesting & Seed Saving
The culmination of your efforts is the harvest, and seed saving closes the loop on self-sufficiency.
- Harvesting Techniques:
- Timing: Harvest vegetables at their peak ripeness for best flavor and nutritional value. For example, green beans should snap cleanly, cucumbers should be firm, and tomatoes should be fully colored.
- Frequency: Many crops, like zucchini, cucumbers, and bush beans, produce more if harvested frequently. Pick daily or every other day.
- Tools: Use clean, sharp pruners (e.g., Corona ClassicCUT Bypass Pruner BP 3180, ~$30) or a sharp knife for clean cuts, minimizing damage to the plant.
- Seed Saving: This is where the « self-sufficient » aspect truly shines.
- Selection: Only save seeds from your healthiest, most vigorous plants that show desired traits (disease resistance, good flavor, high yield).
- Isolation: To ensure true-to-type seeds, prevent cross-pollination. This can be challenging for open-pollinated crops that readily cross (e.g., squash, corn). For beginners, focus on self-pollinating plants like beans, peas, lettuce, and tomatoes.
- Processing:
- Dry Seeds (Beans, Peas, Lettuce, Grains): Allow pods/seed heads to dry completely on the plant. Harvest, shell, and clean the seeds, removing chaff.
- Wet Seeds (Tomatoes, Cucumbers, Squash): For tomatoes, ferment the seeds in water for a few days to remove the gel coating and inhibit disease. For cucumbers/squash, scrape out seeds, wash thoroughly, and dry.
- Drying: Spread seeds thinly on screens or paper plates in a cool, dry, well-ventilated area for 1-4 weeks. Ensure they are bone-dry before storage. I aim for less than 8% moisture content.
- Storage: Store seeds in airtight containers (glass jars with desiccant packets work well) in a cool, dark, dry place (ideally 40-50°F and 30-40% humidity). Label clearly with variety and date. Properly stored seeds can remain viable for 3-10 years or more.
Step 8: Season Extension & Winterizing
Extend your harvest and protect your garden for the off-season to truly maximize your self sufficient garden from scratch.
- Cold Frames: Simple structures with a transparent top (glass, polycarbonate, or old windows) that sit over garden beds. They trap solar heat, allowing you to grow cold-hardy crops (lettuce, spinach, kale, radishes) well into winter or start seeds earlier in spring. A basic cold frame can be built from 2×6 lumber and a sheet of polycarbonate for under $100.
- Hoop Houses/Low Tunnels: Larger structures made from flexible hoops (PVC pipe or EMT conduit) covered with greenhouse plastic. These provide more space and greater temperature moderation. A 10×20 ft DIY low tunnel kit can cost $200-$500, while a larger, more robust hoop house kit might be $1,000-$3,000. I use a 6×12 ft low tunnel made from 1/2-inch PVC hoops and 6mil greenhouse plastic, which extends my lettuce and spinach harvest by at least
Efficient water management is critical for a self sufficient garden from scratch, especially in off-grid living where water resources might be limited.
- Rainwater Harvesting: This is my primary source of irrigation water. A 55-gallon rain barrel (e.g., EarthMark Rain Barrel, ~$120-$150) connected to a downspout can collect significant water. For larger needs, I use two 275-gallon IBC totes (Intermediate Bulk Containers, often available used for $100-$200 each from food-grade sources) connected in series. A 1,000 sq ft roof can collect approximately 620 gallons of water for every inch of rainfall. My 1,500 sq ft roof provides ample water for my 600 sq ft garden through multiple barrels and totes.
- Drip Irrigation: This is by far the most water-efficient method, delivering water directly to the plant’s root zone, minimizing evaporation and weed growth.
- Components: A typical drip system includes a pressure regulator (e.g., Rain Bird PRV-10, ~$15), a filter (Rain Bird RBY filter, ~$20), main tubing (1/2-inch poly tubing, 100ft ~$25), smaller feeder lines (1/4-inch tubing), and emitters (0.5 GPH or 1 GPH per plant).
- Kits: For beginners, a starter kit like the Rain Bird Drip Irrigation Garden Kit (model DDI-KIT-1P, ~$40-$60) is excellent for a small garden. For larger setups, I use Netafim Techline CV Drip Line (500ft roll, ~$150-$200), which has pressure-compensating emitters built-in, ensuring even watering across long runs.
- Automation: For true self-sufficiency, consider a battery-powered timer (e.g., Orbit B-Hyve Bluetooth Hose Faucet Timer, ~$50) or a solar-powered timer connected to a small 12V pump.
- Solar-Powered Pumps: For lifting water from a well, pond, or large storage tank to your garden, a solar pump is a game-changer. For a smaller drip system, a Shurflo 2088-594-152 Diaphragm Pump (12V, 3.5 GPM, ~$180) can be powered by a single 100W solar panel (e.g., Renogy 100W Monocrystalline Solar Panel, ~$100) and a small 12V battery (e.g., a 50Ah LiFePO4 battery like the Battle Born 50Ah, ~$450). For larger operations or deeper wells, more robust systems are needed. If you’re looking to build out a comprehensive off-grid power system to support your garden’s water needs, or indeed your entire homestead, you might want to explore resources like the Power Grid Generator complete system guide to understand the full scope of what’s possible in terms of energy independence.
Step 5: Seed Selection & Planting
The choice of seeds is crucial for a truly self sufficient garden from scratch.
- Choose Heirloom & Open-Pollinated Seeds: These varieties produce seeds that will grow true to type, meaning you can save seeds from your harvest year after year. F1 hybrids, while often vigorous, will not produce consistent offspring from saved seeds. Reputable seed companies include Baker Creek Heirloom Seeds, High Mowing Organic Seeds, and Seed Savers Exchange. Start with common, reliable varieties like ‘Black Krim’ tomatoes, ‘Provider’ bush beans, ‘Waltham Butternut’ squash, and ‘Black Seeded Simpson’ lettuce.
- Start Seeds Indoors (Optional but Recommended): For longer growing seasons or specific crops, starting seeds indoors gives you a head start. Use seed-starting mix (e.g., Espoma Organic Seed Starter Mix, ~$10 for 16qt bag) in seed trays (Jiffy Professional Greenhouse 72-cell kit, ~$15). Provide adequate light with LED grow lights (Barrina T5 2ft 4-pack LED Grow Lights, 20W each, ~$50) for 14-16 hours a day, positioned 2-4 inches above seedlings. Maintain consistent temperatures (65-75°F for most).
- Direct Sowing vs. Transplanting: Some crops (carrots, radishes, beans, corn) prefer direct sowing into the garden bed. Others (tomatoes, peppers, broccoli, kale) benefit from being started indoors and transplanted. Follow seed packet instructions for planting depths (e.g., lettuce seeds are often surface-sown or planted 1/8 inch deep, while beans are 1 inch deep) and spacing.
- Companion Planting: Strategically plant different species together to enhance growth, deter pests, and attract beneficial insects. For example, planting marigolds near tomatoes can deter nematodes, and basil improves tomato flavor. Nasturtiums can act as a trap crop for aphids.
- Succession Planting: For a continuous harvest, plant small batches of quick-growing crops (lettuce, radishes, cilantro) every 2-3 weeks. As one crop finishes, another is ready to take its place.
Step 6: Pest & Disease Management (Organic)
Maintaining a self sufficient garden from scratch means embracing organic pest and disease control.
- Integrated Pest Management (IPM): This holistic approach combines several strategies.
- Observation: Regularly inspect your plants for early signs of pests or disease. Catching issues early is key.
- Physical Barriers: Use row covers (e.g., Agribon AG-19 floating row cover, 10×20 ft, ~$20) to protect young plants from insect pests like cabbage worms and squash bugs. Install fences (e.g., 2×4 welded wire mesh, 4 ft tall, 50 ft roll ~$70) to keep out deer, rabbits, and other larger animals.
- Hand-Picking: For larger pests like tomato hornworms or squash bugs, simply pick them off and drop them into a bucket of soapy water.
- Companion Planting: As mentioned, certain plants repel pests. Marigolds, garlic, and onions are excellent deterrents.
- Attract Beneficial Insects: Plant flowers like dill, fennel, cosmos, and sweet alyssum to attract ladybugs, lacewings, and parasitic wasps, which prey on common garden pests.
- Organic Sprays & Treatments:
- Neem Oil: An excellent broad-spectrum organic insecticide and fungicide. Bonide Neem Oil Concentrate (16oz, ~$20) can be mixed at a rate of 1-2 tbsp per gallon of water and sprayed on affected plants.
- Insecticidal Soap: Effective against soft-bodied insects like aphids, whiteflies, and spider mites. Garden Safe Insecticidal Soap (24oz ready-to-use, ~$10).
- Bacillus thuringiensis (Bt): A naturally occurring soil bacterium that targets caterpillars and worms. Monterey BT Worm & Caterpillar Killer (16oz, ~$18) is highly effective and safe for beneficial insects.
- Copper or Sulfur Sprays: For fungal diseases like powdery mildew or blight, organic copper (e.g., Bonide Copper Fungicide, ~$15 for 1lb) or sulfur (e.g., Safer Brand Garden Fungicide, ~$10 for 16oz) can be used as a last resort.
Step 7: Harvesting & Seed Saving
The culmination of your efforts is the harvest, and seed saving closes the loop on self-sufficiency.
- Harvesting Techniques:
- Timing: Harvest vegetables at their peak ripeness for best flavor and nutritional value. For example, green beans should snap cleanly, cucumbers should be firm, and tomatoes should be fully colored.
- Frequency: Many crops, like zucchini, cucumbers, and bush beans, produce more if harvested frequently. Pick daily or every other day.
- Tools: Use clean, sharp pruners (e.g., Corona ClassicCUT Bypass Pruner BP 3180, ~$30) or a sharp knife for clean cuts, minimizing damage to the plant.
- Seed Saving: This is where the « self-sufficient » aspect truly shines.
- Selection: Only save seeds from your healthiest, most vigorous plants that show desired traits (disease resistance, good flavor, high yield).
- Isolation: To ensure true-to-type seeds, prevent cross-pollination. This can be challenging for open-pollinated crops that readily cross (e.g., squash, corn). For beginners, focus on self-pollinating plants like beans, peas, lettuce, and tomatoes.
- Processing:
- Dry Seeds (Beans, Peas, Lettuce, Grains): Allow pods/seed heads to dry completely on the plant. Harvest, shell, and clean the seeds, removing chaff.
- Wet Seeds (Tomatoes, Cucumbers, Squash): For tomatoes, ferment the seeds in water for a few days to remove the gel coating and inhibit disease. For cucumbers/squash, scrape out seeds, wash thoroughly, and dry.
- Drying: Spread seeds thinly on screens or paper plates in a cool, dry, well-ventilated area for 1-4 weeks. Ensure they are bone-dry before storage. I aim for less than 8% moisture content.
- Storage: Store seeds in airtight containers (glass jars with desiccant packets work well) in a cool, dark, dry place (ideally 40-50°F and 30-40% humidity). Label clearly with variety and date. Properly stored seeds can remain viable for 3-10 years or more.
Step 8: Season Extension & Winterizing
Extend your harvest and protect your garden for the off-season to truly maximize your self sufficient garden from scratch.
- Cold Frames: Simple structures with a transparent top (glass, polycarbonate, or old windows) that sit over garden beds. They trap solar heat, allowing you to grow cold-hardy crops (lettuce, spinach, kale, radishes) well into winter or start seeds earlier in spring. A basic cold frame can be built from 2×6 lumber and a sheet of polycarbonate for under $100.
- Hoop Houses/Low Tunnels: Larger structures made from flexible hoops (PVC pipe or EMT conduit) covered with greenhouse plastic. These provide more space and greater temperature moderation. A 10×20 ft DIY low tunnel kit can cost $200-$500, while a larger, more robust hoop house kit might be $1,000-$3,000. I use a 6×12 ft low tunnel made from 1/2-inch PVC hoops and 6mil greenhouse plastic, which extends my lettuce and spinach harvest by at least
Step 4: Water Management & Irrigation
Efficient water management is critical for a self sufficient garden from scratch, especially in off-grid living where water resources might be limited.
- Rainwater Harvesting: This is my primary source of irrigation water. A 55-gallon rain barrel (e.g., EarthMark Rain Barrel, ~$120-$150) connected to a downspout can collect significant water. For larger needs, I use two 275-gallon IBC totes (Intermediate Bulk Containers, often available used for $100-$200 each from food-grade sources) connected in series. A 1,000 sq ft roof can collect approximately 620 gallons of water for every inch of rainfall. My 1,500 sq ft roof provides ample water for my 600 sq ft garden through multiple barrels and totes.
- Drip Irrigation: This is by far the most water-efficient method, delivering water directly to the plant’s root zone, minimizing evaporation and weed growth.
- Components: A typical drip system includes a pressure regulator (e.g., Rain Bird PRV-10, ~$15), a filter (Rain Bird RBY filter, ~$20), main tubing (1/2-inch poly tubing, 100ft ~$25), smaller feeder lines (1/4-inch tubing), and emitters (0.5 GPH or 1 GPH per plant).
- Kits: For beginners, a starter kit like the Rain Bird Drip Irrigation Garden Kit (model DDI-KIT-1P, ~$40-$60) is excellent for a small garden. For larger setups, I use Netafim Techline CV Drip Line (500ft roll, ~$150-$200), which has pressure-compensating emitters built-in, ensuring even watering across long runs.
- Automation: For true self-sufficiency, consider a battery-powered timer (e.g., Orbit B-Hyve Bluetooth Hose Faucet Timer, ~$50) or a solar-powered timer connected to a small 12V pump.
- Solar-Powered Pumps: For lifting water from a well, pond, or large storage tank to your garden, a solar pump is a game-changer. For a smaller drip system, a Shurflo 2088-594-152 Diaphragm Pump (12V, 3.5 GPM, ~$180) can be powered by a single 100W solar panel (e.g., Renogy 100W Monocrystalline Solar Panel, ~$100) and a small 12V battery (e.g., a 50Ah LiFePO4 battery like the Battle Born 50Ah, ~$450). For larger operations or deeper wells, more robust systems are needed. If you’re looking to build out a comprehensive off-grid power system to support your garden’s water needs, or indeed your entire homestead, you might want to explore resources like the Power Grid Generator complete system guide to understand the full scope of what’s possible in terms of energy independence.
Step 5: Seed Selection & Planting
The choice of seeds is crucial for a truly self sufficient garden from scratch.
- Choose Heirloom & Open-Pollinated Seeds: These varieties produce seeds that will grow true to type, meaning you can save seeds from your harvest year after year. F1 hybrids, while often vigorous, will not produce consistent offspring from saved seeds. Reputable seed companies include Baker Creek Heirloom Seeds, High Mowing Organic Seeds, and Seed Savers Exchange. Start with common, reliable varieties like ‘Black Krim’ tomatoes, ‘Provider’ bush beans, ‘Waltham Butternut’ squash, and ‘Black Seeded Simpson’ lettuce.
- Start Seeds Indoors (Optional but Recommended): For longer growing seasons or specific crops, starting seeds indoors gives you a head start. Use seed-starting mix (e.g., Espoma Organic Seed Starter Mix, ~$10 for 16qt bag) in seed trays (Jiffy Professional Greenhouse 72-cell kit, ~$15). Provide adequate light with LED grow lights (Barrina T5 2ft 4-pack LED Grow Lights, 20W each, ~$50) for 14-16 hours a day, positioned 2-4 inches above seedlings. Maintain consistent temperatures (65-75°F for most).
- Direct Sowing vs. Transplanting: Some crops (carrots, radishes, beans, corn) prefer direct sowing into the garden bed. Others (tomatoes, peppers, broccoli, kale) benefit from being started indoors and transplanted. Follow seed packet instructions for planting depths (e.g., lettuce seeds are often surface-sown or planted 1/8 inch deep, while beans are 1 inch deep) and spacing.
- Companion Planting: Strategically plant different species together to enhance growth, deter pests, and attract beneficial insects. For example, planting marigolds near tomatoes can deter nematodes, and basil improves tomato flavor. Nasturtiums can act as a trap crop for aphids.
- Succession Planting: For a continuous harvest, plant small batches of quick-growing crops (lettuce, radishes, cilantro) every 2-3 weeks. As one crop finishes, another is ready to take its place.
Step 6: Pest & Disease Management (Organic)
Maintaining a self sufficient garden from scratch means embracing organic pest and disease control.
- Integrated Pest Management (IPM): This holistic approach combines several strategies.
- Observation: Regularly inspect your plants for early signs of pests or disease. Catching issues early is key.
- Physical Barriers: Use row covers (e.g., Agribon AG-19 floating row cover, 10×20 ft, ~$20) to protect young plants from insect pests like cabbage worms and squash bugs. Install fences (e.g., 2×4 welded wire mesh, 4 ft tall, 50 ft roll ~$70) to keep out deer, rabbits, and other larger animals.
- Hand-Picking: For larger pests like tomato hornworms or squash bugs, simply pick them off and drop them into a bucket of soapy water.
- Companion Planting: As mentioned, certain plants repel pests. Marigolds, garlic, and onions are excellent deterrents.
- Attract Beneficial Insects: Plant flowers like dill, fennel, cosmos, and sweet alyssum to attract ladybugs, lacewings, and parasitic wasps, which prey on common garden pests.
- Organic Sprays & Treatments:
- Neem Oil: An excellent broad-spectrum organic insecticide and fungicide. Bonide Neem Oil Concentrate (16oz, ~$20) can be mixed at a rate of 1-2 tbsp per gallon of water and sprayed on affected plants.
- Insecticidal Soap: Effective against soft-bodied insects like aphids, whiteflies, and spider mites. Garden Safe Insecticidal Soap (24oz ready-to-use, ~$10).
- Bacillus thuringiensis (Bt): A naturally occurring soil bacterium that targets caterpillars and worms. Monterey BT Worm & Caterpillar Killer (16oz, ~$18) is highly effective and safe for beneficial insects.
- Copper or Sulfur Sprays: For fungal diseases like powdery mildew or blight, organic copper (e.g., Bonide Copper Fungicide, ~$15 for 1lb) or sulfur (e.g., Safer Brand Garden Fungicide, ~$10 for 16oz) can be used as a last resort.
Step 7: Harvesting & Seed Saving
The culmination of your efforts is the harvest, and seed saving closes the loop on self-sufficiency.
- Harvesting Techniques:
- Timing: Harvest vegetables at their peak ripeness for best flavor and nutritional value. For example, green beans should snap cleanly, cucumbers should be firm, and tomatoes should be fully colored.
- Frequency: Many crops, like zucchini, cucumbers, and bush beans, produce more if harvested frequently. Pick daily or every other day.
- Tools: Use clean, sharp pruners (e.g., Corona ClassicCUT Bypass Pruner BP 3180, ~$30) or a sharp knife for clean cuts, minimizing damage to the plant.
- Seed Saving: This is where the « self-sufficient » aspect truly shines.
- Selection: Only save seeds from your healthiest, most vigorous plants that show desired traits (disease resistance, good flavor, high yield).
- Isolation: To ensure true-to-type seeds, prevent cross-pollination. This can be challenging for open-pollinated crops that readily cross (e.g., squash, corn). For beginners, focus on self-pollinating plants like beans, peas, lettuce, and tomatoes.
- Processing:
- Dry Seeds (Beans, Peas, Lettuce, Grains): Allow pods/seed heads to dry completely on the plant. Harvest, shell, and clean the seeds, removing chaff.
- Wet Seeds (Tomatoes, Cucumbers, Squash): For tomatoes, ferment the seeds in water for a few days to remove the gel coating and inhibit disease. For cucumbers/squash, scrape out seeds, wash thoroughly, and dry.
- Drying: Spread seeds thinly on screens or paper plates in a cool, dry, well-ventilated area for 1-4 weeks. Ensure they are bone-dry before storage. I aim for less than 8% moisture content.
- Storage: Store seeds in airtight containers (glass jars with desiccant packets work well) in a cool, dark, dry place (ideally 40-50°F and 30-40% humidity). Label clearly with variety and date. Properly stored seeds can remain viable for 3-10 years or more.
Step 8: Season Extension & Winterizing
Extend your harvest and protect your garden for the off-season to truly maximize your self sufficient garden from scratch.
- Cold Frames: Simple structures with a transparent top (glass, polycarbonate, or old windows) that sit over garden beds. They trap solar heat, allowing you to grow cold-hardy crops (lettuce, spinach, kale, radishes) well into winter or start seeds earlier in spring. A basic cold frame can be built from 2×6 lumber and a sheet of polycarbonate for under $100.
- Hoop Houses/Low Tunnels: Larger structures made from flexible hoops (PVC pipe or EMT conduit) covered with greenhouse plastic. These provide more space and greater temperature moderation. A 10×20 ft DIY low tunnel kit can cost $200-$500, while a larger, more robust hoop house kit might be $1,000-$3,000. I use a 6×12 ft low tunnel made from 1/2-inch PVC hoops and 6mil greenhouse plastic, which extends my lettuce and spinach harvest by at least
- In-Ground Beds: If you have excellent native soil and good drainage, in-ground beds are the most economical. Double-digging (loosening soil two shovel depths) can significantly improve drainage and aeration. For my main garden, I primarily use in-ground beds, but I focus on building up the soil over time with consistent compost additions and cover cropping. I aim for beds that are no wider than 3-4 feet so I can reach the center without stepping on the soil, compacting it.
- Raised Beds: Raised beds offer numerous advantages, especially for poor soil, heavy clay, or rocky areas. They provide better drainage, warm up faster in spring, reduce compaction, and make weeding and harvesting easier on your back.
- Material Options:
- Untreated Cedar: Naturally rot-resistant and chemical-free. A 4×8 ft bed, 12 inches deep, typically requires three 2x12x8 ft cedar boards, costing around $50-$60 per board (total ~$150-$180) plus corner brackets or screws. My first raised beds were cedar and are still going strong after 7 years.
- Galvanized Steel: Durable, long-lasting, and aesthetically pleasing. Brands like Vego Garden offer modular kits. A Vego Garden 17″ Tall 8-in-1 Metal Raised Garden Bed (can be configured to 4×8 ft) costs approximately $250-$300.
- Concrete Blocks/Stones: Very durable but can leach minerals (though generally safe once weathered) and can be expensive.
- Recycled Materials: Pallets (check for chemical treatment stamps like « HT » for heat-treated), old tires (controversial due to potential chemical leaching).
- Filling Raised Beds: Don’t just fill with topsoil. Use a « Hugelkultur » approach (logs, branches, leaves, then compost, then topsoil) or a mixture of 60% good quality topsoil, 30% compost, and 10% perlite or vermiculite for drainage. A 4x8x1 ft raised bed requires about 32 cubic feet (or ~1.2 cubic yards) of soil mix, which can cost $100-$200 depending on your source.
- Material Options:
Step 4: Water Management & Irrigation
Efficient water management is critical for a self sufficient garden from scratch, especially in off-grid living where water resources might be limited.
- Rainwater Harvesting: This is my primary source of irrigation water. A 55-gallon rain barrel (e.g., EarthMark Rain Barrel, ~$120-$150) connected to a downspout can collect significant water. For larger needs, I use two 275-gallon IBC totes (Intermediate Bulk Containers, often available used for $100-$200 each from food-grade sources) connected in series. A 1,000 sq ft roof can collect approximately 620 gallons of water for every inch of rainfall. My 1,500 sq ft roof provides ample water for my 600 sq ft garden through multiple barrels and totes.
- Drip Irrigation: This is by far the most water-efficient method, delivering water directly to the plant’s root zone, minimizing evaporation and weed growth.
- Components: A typical drip system includes a pressure regulator (e.g., Rain Bird PRV-10, ~$15), a filter (Rain Bird RBY filter, ~$20), main tubing (1/2-inch poly tubing, 100ft ~$25), smaller feeder lines (1/4-inch tubing), and emitters (0.5 GPH or 1 GPH per plant).
- Kits: For beginners, a starter kit like the Rain Bird Drip Irrigation Garden Kit (model DDI-KIT-1P, ~$40-$60) is excellent for a small garden. For larger setups, I use Netafim Techline CV Drip Line (500ft roll, ~$150-$200), which has pressure-compensating emitters built-in, ensuring even watering across long runs.
- Automation: For true self-sufficiency, consider a battery-powered timer (e.g., Orbit B-Hyve Bluetooth Hose Faucet Timer, ~$50) or a solar-powered timer connected to a small 12V pump.
- Solar-Powered Pumps: For lifting water from a well, pond, or large storage tank to your garden, a solar pump is a game-changer. For a smaller drip system, a Shurflo 2088-594-152 Diaphragm Pump (12V, 3.5 GPM, ~$180) can be powered by a single 100W solar panel (e.g., Renogy 100W Monocrystalline Solar Panel, ~$100) and a small 12V battery (e.g., a 50Ah LiFePO4 battery like the Battle Born 50Ah, ~$450). For larger operations or deeper wells, more robust systems are needed. If you’re looking to build out a comprehensive off-grid power system to support your garden’s water needs, or indeed your entire homestead, you might want to explore resources like the Power Grid Generator complete system guide to understand the full scope of what’s possible in terms of energy independence.
Step 5: Seed Selection & Planting
The choice of seeds is crucial for a truly self sufficient garden from scratch.
- Choose Heirloom & Open-Pollinated Seeds: These varieties produce seeds that will grow true to type, meaning you can save seeds from your harvest year after year. F1 hybrids, while often vigorous, will not produce consistent offspring from saved seeds. Reputable seed companies include Baker Creek Heirloom Seeds, High Mowing Organic Seeds, and Seed Savers Exchange. Start with common, reliable varieties like ‘Black Krim’ tomatoes, ‘Provider’ bush beans, ‘Waltham Butternut’ squash, and ‘Black Seeded Simpson’ lettuce.
- Start Seeds Indoors (Optional but Recommended): For longer growing seasons or specific crops, starting seeds indoors gives you a head start. Use seed-starting mix (e.g., Espoma Organic Seed Starter Mix, ~$10 for 16qt bag) in seed trays (Jiffy Professional Greenhouse 72-cell kit, ~$15). Provide adequate light with LED grow lights (Barrina T5 2ft 4-pack LED Grow Lights, 20W each, ~$50) for 14-16 hours a day, positioned 2-4 inches above seedlings. Maintain consistent temperatures (65-75°F for most).
- Direct Sowing vs. Transplanting: Some crops (carrots, radishes, beans, corn) prefer direct sowing into the garden bed. Others (tomatoes, peppers, broccoli, kale) benefit from being started indoors and transplanted. Follow seed packet instructions for planting depths (e.g., lettuce seeds are often surface-sown or planted 1/8 inch deep, while beans are 1 inch deep) and spacing.
- Companion Planting: Strategically plant different species together to enhance growth, deter pests, and attract beneficial insects. For example, planting marigolds near tomatoes can deter nematodes, and basil improves tomato flavor. Nasturtiums can act as a trap crop for aphids.
- Succession Planting: For a continuous harvest, plant small batches of quick-growing crops (lettuce, radishes, cilantro) every 2-3 weeks. As one crop finishes, another is ready to take its place.
Step 6: Pest & Disease Management (Organic)
Maintaining a self sufficient garden from scratch means embracing organic pest and disease control.
- Integrated Pest Management (IPM): This holistic approach combines several strategies.
- Observation: Regularly inspect your plants for early signs of pests or disease. Catching issues early is key.
- Physical Barriers: Use row covers (e.g., Agribon AG-19 floating row cover, 10×20 ft, ~$20) to protect young plants from insect pests like cabbage worms and squash bugs. Install fences (e.g., 2×4 welded wire mesh, 4 ft tall, 50 ft roll ~$70) to keep out deer, rabbits, and other larger animals.
- Hand-Picking: For larger pests like tomato hornworms or squash bugs, simply pick them off and drop them into a bucket of soapy water.
- Companion Planting: As mentioned, certain plants repel pests. Marigolds, garlic, and onions are excellent deterrents.
- Attract Beneficial Insects: Plant flowers like dill, fennel, cosmos, and sweet alyssum to attract ladybugs, lacewings, and parasitic wasps, which prey on common garden pests.
- Organic Sprays & Treatments:
- Neem Oil: An excellent broad-spectrum organic insecticide and fungicide. Bonide Neem Oil Concentrate (16oz, ~$20) can be mixed at a rate of 1-2 tbsp per gallon of water and sprayed on affected plants.
- Insecticidal Soap: Effective against soft-bodied insects like aphids, whiteflies, and spider mites. Garden Safe Insecticidal Soap (24oz ready-to-use, ~$10).
- Bacillus thuringiensis (Bt): A naturally occurring soil bacterium that targets caterpillars and worms. Monterey BT Worm & Caterpillar Killer (16oz, ~$18) is highly effective and safe for beneficial insects.
- Copper or Sulfur Sprays: For fungal diseases like powdery mildew or blight, organic copper (e.g., Bonide Copper Fungicide, ~$15 for 1lb) or sulfur (e.g., Safer Brand Garden Fungicide, ~$10 for 16oz) can be used as a last resort.
Step 7: Harvesting & Seed Saving
The culmination of your efforts is the harvest, and seed saving closes the loop on self-sufficiency.
- Harvesting Techniques:
- Timing: Harvest vegetables at their peak ripeness for best flavor and nutritional value. For example, green beans should snap cleanly, cucumbers should be firm, and tomatoes should be fully colored.
- Frequency: Many crops, like zucchini, cucumbers, and bush beans, produce more if harvested frequently. Pick daily or every other day.
- Tools: Use clean, sharp pruners (e.g., Corona ClassicCUT Bypass Pruner BP 3180, ~$30) or a sharp knife for clean cuts, minimizing damage to the plant.
- Seed Saving: This is where the « self-sufficient » aspect truly shines.
- Selection: Only save seeds from your healthiest, most vigorous plants that show desired traits (disease resistance, good flavor, high yield).
- Isolation: To ensure true-to-type seeds, prevent cross-pollination. This can be challenging for open-pollinated crops that readily cross (e.g., squash, corn). For beginners, focus on self-pollinating plants like beans, peas, lettuce, and tomatoes.
- Processing:
- Dry Seeds (Beans, Peas, Lettuce, Grains): Allow pods/seed heads to dry completely on the plant. Harvest, shell, and clean the seeds, removing chaff.
- Wet Seeds (Tomatoes, Cucumbers, Squash): For tomatoes, ferment the seeds in water for a few days to remove the gel coating and inhibit disease. For cucumbers/squash, scrape out seeds, wash thoroughly, and dry.
- Drying: Spread seeds thinly on screens or paper plates in a cool, dry, well-ventilated area for 1-4 weeks. Ensure they are bone-dry before storage. I aim for less than 8% moisture content.
- Storage: Store seeds in airtight containers (glass jars with desiccant packets work well) in a cool, dark, dry place (ideally 40-50°F and 30-40% humidity). Label clearly with variety and date. Properly stored seeds can remain viable for 3-10 years or more.
Step 8: Season Extension & Winterizing
Extend your harvest and protect your garden for the off-season to truly maximize your self sufficient garden from scratch.
- Cold Frames: Simple structures with a transparent top (glass, polycarbonate, or old windows) that sit over garden beds. They trap solar heat, allowing you to grow cold-hardy crops (lettuce, spinach, kale, radishes) well into winter or start seeds earlier in spring. A basic cold frame can be built from 2×6 lumber and a sheet of polycarbonate for under $100.
- Hoop Houses/Low Tunnels: Larger structures made from flexible hoops (PVC pipe or EMT conduit) covered with greenhouse plastic. These provide more space and greater temperature moderation. A 10×20 ft DIY low tunnel kit can cost $200-$500, while a larger, more robust hoop house kit might be $1,000-$3,000. I use a 6×12 ft low tunnel made from 1/2-inch PVC hoops and 6mil greenhouse plastic, which extends my lettuce and spinach harvest by at least
Deciding between raised beds and in-ground beds depends on your soil, budget, and physical capabilities.
- In-Ground Beds: If you have excellent native soil and good drainage, in-ground beds are the most economical. Double-digging (loosening soil two shovel depths) can significantly improve drainage and aeration. For my main garden, I primarily use in-ground beds, but I focus on building up the soil over time with consistent compost additions and cover cropping. I aim for beds that are no wider than 3-4 feet so I can reach the center without stepping on the soil, compacting it.
- Raised Beds: Raised beds offer numerous advantages, especially for poor soil, heavy clay, or rocky areas. They provide better drainage, warm up faster in spring, reduce compaction, and make weeding and harvesting easier on your back.
- Material Options:
- Untreated Cedar: Naturally rot-resistant and chemical-free. A 4×8 ft bed, 12 inches deep, typically requires three 2x12x8 ft cedar boards, costing around $50-$60 per board (total ~$150-$180) plus corner brackets or screws. My first raised beds were cedar and are still going strong after 7 years.
- Galvanized Steel: Durable, long-lasting, and aesthetically pleasing. Brands like Vego Garden offer modular kits. A Vego Garden 17″ Tall 8-in-1 Metal Raised Garden Bed (can be configured to 4×8 ft) costs approximately $250-$300.
- Concrete Blocks/Stones: Very durable but can leach minerals (though generally safe once weathered) and can be expensive.
- Recycled Materials: Pallets (check for chemical treatment stamps like « HT » for heat-treated), old tires (controversial due to potential chemical leaching).
- Filling Raised Beds: Don’t just fill with topsoil. Use a « Hugelkultur » approach (logs, branches, leaves, then compost, then topsoil) or a mixture of 60% good quality topsoil, 30% compost, and 10% perlite or vermiculite for drainage. A 4x8x1 ft raised bed requires about 32 cubic feet (or ~1.2 cubic yards) of soil mix, which can cost $100-$200 depending on your source.
- Material Options:
Step 4: Water Management & Irrigation
Efficient water management is critical for a self sufficient garden from scratch, especially in off-grid living where water resources might be limited.
- Rainwater Harvesting: This is my primary source of irrigation water. A 55-gallon rain barrel (e.g., EarthMark Rain Barrel, ~$120-$150) connected to a downspout can collect significant water. For larger needs, I use two 275-gallon IBC totes (Intermediate Bulk Containers, often available used for $100-$200 each from food-grade sources) connected in series. A 1,000 sq ft roof can collect approximately 620 gallons of water for every inch of rainfall. My 1,500 sq ft roof provides ample water for my 600 sq ft garden through multiple barrels and totes.
- Drip Irrigation: This is by far the most water-efficient method, delivering water directly to the plant’s root zone, minimizing evaporation and weed growth.
- Components: A typical drip system includes a pressure regulator (e.g., Rain Bird PRV-10, ~$15), a filter (Rain Bird RBY filter, ~$20), main tubing (1/2-inch poly tubing, 100ft ~$25), smaller feeder lines (1/4-inch tubing), and emitters (0.5 GPH or 1 GPH per plant).
- Kits: For beginners, a starter kit like the Rain Bird Drip Irrigation Garden Kit (model DDI-KIT-1P, ~$40-$60) is excellent for a small garden. For larger setups, I use Netafim Techline CV Drip Line (500ft roll, ~$150-$200), which has pressure-compensating emitters built-in, ensuring even watering across long runs.
- Automation: For true self-sufficiency, consider a battery-powered timer (e.g., Orbit B-Hyve Bluetooth Hose Faucet Timer, ~$50) or a solar-powered timer connected to a small 12V pump.
- Solar-Powered Pumps: For lifting water from a well, pond, or large storage tank to your garden, a solar pump is a game-changer. For a smaller drip system, a Shurflo 2088-594-152 Diaphragm Pump (12V, 3.5 GPM, ~$180) can be powered by a single 100W solar panel (e.g., Renogy 100W Monocrystalline Solar Panel, ~$100) and a small 12V battery (e.g., a 50Ah LiFePO4 battery like the Battle Born 50Ah, ~$450). For larger operations or deeper wells, more robust systems are needed. If you’re looking to build out a comprehensive off-grid power system to support your garden’s water needs, or indeed your entire homestead, you might want to explore resources like the Power Grid Generator complete system guide to understand the full scope of what’s possible in terms of energy independence.
Step 5: Seed Selection & Planting
The choice of seeds is crucial for a truly self sufficient garden from scratch.
- Choose Heirloom & Open-Pollinated Seeds: These varieties produce seeds that will grow true to type, meaning you can save seeds from your harvest year after year. F1 hybrids, while often vigorous, will not produce consistent offspring from saved seeds. Reputable seed companies include Baker Creek Heirloom Seeds, High Mowing Organic Seeds, and Seed Savers Exchange. Start with common, reliable varieties like ‘Black Krim’ tomatoes, ‘Provider’ bush beans, ‘Waltham Butternut’ squash, and ‘Black Seeded Simpson’ lettuce.
- Start Seeds Indoors (Optional but Recommended): For longer growing seasons or specific crops, starting seeds indoors gives you a head start. Use seed-starting mix (e.g., Espoma Organic Seed Starter Mix, ~$10 for 16qt bag) in seed trays (Jiffy Professional Greenhouse 72-cell kit, ~$15). Provide adequate light with LED grow lights (Barrina T5 2ft 4-pack LED Grow Lights, 20W each, ~$50) for 14-16 hours a day, positioned 2-4 inches above seedlings. Maintain consistent temperatures (65-75°F for most).
- Direct Sowing vs. Transplanting: Some crops (carrots, radishes, beans, corn) prefer direct sowing into the garden bed. Others (tomatoes, peppers, broccoli, kale) benefit from being started indoors and transplanted. Follow seed packet instructions for planting depths (e.g., lettuce seeds are often surface-sown or planted 1/8 inch deep, while beans are 1 inch deep) and spacing.
- Companion Planting: Strategically plant different species together to enhance growth, deter pests, and attract beneficial insects. For example, planting marigolds near tomatoes can deter nematodes, and basil improves tomato flavor. Nasturtiums can act as a trap crop for aphids.
- Succession Planting: For a continuous harvest, plant small batches of quick-growing crops (lettuce, radishes, cilantro) every 2-3 weeks. As one crop finishes, another is ready to take its place.
Step 6: Pest & Disease Management (Organic)
Maintaining a self sufficient garden from scratch means embracing organic pest and disease control.
- Integrated Pest Management (IPM): This holistic approach combines several strategies.
- Observation: Regularly inspect your plants for early signs of pests or disease. Catching issues early is key.
- Physical Barriers: Use row covers (e.g., Agribon AG-19 floating row cover, 10×20 ft, ~$20) to protect young plants from insect pests like cabbage worms and squash bugs. Install fences (e.g., 2×4 welded wire mesh, 4 ft tall, 50 ft roll ~$70) to keep out deer, rabbits, and other larger animals.
- Hand-Picking: For larger pests like tomato hornworms or squash bugs, simply pick them off and drop them into a bucket of soapy water.
- Companion Planting: As mentioned, certain plants repel pests. Marigolds, garlic, and onions are excellent deterrents.
- Attract Beneficial Insects: Plant flowers like dill, fennel, cosmos, and sweet alyssum to attract ladybugs, lacewings, and parasitic wasps, which prey on common garden pests.
- Organic Sprays & Treatments:
- Neem Oil: An excellent broad-spectrum organic insecticide and fungicide. Bonide Neem Oil Concentrate (16oz, ~$20) can be mixed at a rate of 1-2 tbsp per gallon of water and sprayed on affected plants.
- Insecticidal Soap: Effective against soft-bodied insects like aphids, whiteflies, and spider mites. Garden Safe Insecticidal Soap (24oz ready-to-use, ~$10).
- Bacillus thuringiensis (Bt): A naturally occurring soil bacterium that targets caterpillars and worms. Monterey BT Worm & Caterpillar Killer (16oz, ~$18) is highly effective and safe for beneficial insects.
- Copper or Sulfur Sprays: For fungal diseases like powdery mildew or blight, organic copper (e.g., Bonide Copper Fungicide, ~$15 for 1lb) or sulfur (e.g., Safer Brand Garden Fungicide, ~$10 for 16oz) can be used as a last resort.
Step 7: Harvesting & Seed Saving
The culmination of your efforts is the harvest, and seed saving closes the loop on self-sufficiency.
- Harvesting Techniques:
- Timing: Harvest vegetables at their peak ripeness for best flavor and nutritional value. For example, green beans should snap cleanly, cucumbers should be firm, and tomatoes should be fully colored.
- Frequency: Many crops, like zucchini, cucumbers, and bush beans, produce more if harvested frequently. Pick daily or every other day.
- Tools: Use clean, sharp pruners (e.g., Corona ClassicCUT Bypass Pruner BP 3180, ~$30) or a sharp knife for clean cuts, minimizing damage to the plant.
- Seed Saving: This is where the « self-sufficient » aspect truly shines.
- Selection: Only save seeds from your healthiest, most vigorous plants that show desired traits (disease resistance, good flavor, high yield).
- Isolation: To ensure true-to-type seeds, prevent cross-pollination. This can be challenging for open-pollinated crops that readily cross (e.g., squash, corn). For beginners, focus on self-pollinating plants like beans, peas, lettuce, and tomatoes.
- Processing:
- Dry Seeds (Beans, Peas, Lettuce, Grains): Allow pods/seed heads to dry completely on the plant. Harvest, shell, and clean the seeds, removing chaff.
- Wet Seeds (Tomatoes, Cucumbers, Squash): For tomatoes, ferment the seeds in water for a few days to remove the gel coating and inhibit disease. For cucumbers/squash, scrape out seeds, wash thoroughly, and dry.
- Drying: Spread seeds thinly on screens or paper plates in a cool, dry, well-ventilated area for 1-4 weeks. Ensure they are bone-dry before storage. I aim for less than 8% moisture content.
- Storage: Store seeds in airtight containers (glass jars with desiccant packets work well) in a cool, dark, dry place (ideally 40-50°F and 30-40% humidity). Label clearly with variety and date. Properly stored seeds can remain viable for 3-10 years or more.
Step 8: Season Extension & Winterizing
Extend your harvest and protect your garden for the off-season to truly maximize your self sufficient garden from scratch.
- Cold Frames: Simple structures with a transparent top (glass, polycarbonate, or old windows) that sit over garden beds. They trap solar heat, allowing you to grow cold-hardy crops (lettuce, spinach, kale, radishes) well into winter or start seeds earlier in spring. A basic cold frame can be built from 2×6 lumber and a sheet of polycarbonate for under $100.
- Hoop Houses/Low Tunnels: Larger structures made from flexible hoops (PVC pipe or EMT conduit) covered with greenhouse plastic. These provide more space and greater temperature moderation. A 10×20 ft DIY low tunnel kit can cost $200-$500, while a larger, more robust hoop house kit might be $1,000-$3,000. I use a 6×12 ft low tunnel made from 1/2-inch PVC hoops and 6mil greenhouse plastic, which extends my lettuce and spinach harvest by at least
Healthy soil is the bedrock of a productive, self-sufficient garden. You can’t guess what your soil needs; you have to test it.
- Perform a Soil Test: A professional soil test will give you precise data on your soil’s pH, nutrient levels (N-P-K), and organic matter content. I recommend sending a sample to your local agricultural extension office; it typically costs $20-$50 and provides detailed recommendations. Alternatively, for a quick homeowner check, a Rapitest Soil Test Kit (40-test kit, model 1663, ~$20 on Amazon) provides a good baseline for pH, Nitrogen, Phosphorus, and Potash. Aim for a pH between 6.0 and 7.0 for most vegetables.
- Amend for pH Imbalance: If your soil is too acidic (below 6.0), add agricultural lime (dolomitic lime adds magnesium, calcitic lime adds calcium). Apply 5-10 lbs per 100 sq ft for a moderate adjustment. If it’s too alkaline (above 7.0), add elemental sulfur (e.g., Espoma Soil Acidifier, ~$15 for 6.75 lbs) or generous amounts of organic matter like peat moss or pine needles.
- Build Organic Matter: This is the single most important step for long-term soil health. Organic matter improves soil structure, water retention, drainage, and nutrient availability. Incorporate 2-4 inches of high-quality compost into your top 6-12 inches of soil annually. I make my own compost from kitchen scraps, garden waste, and shredded leaves, but you can purchase it. Local nurseries often sell bulk compost for $30-$50 per cubic yard. Aged manure (from chickens, cows, or horses – ensure it’s well-rotted to avoid burning plants) is also excellent.
- Address Nutrient Deficiencies: Based on your soil test, add specific organic amendments. If Nitrogen (N) is low, add blood meal (12-0-0, ~$20 for 3 lbs) or feather meal. For Phosphorus (P), use bone meal (3-15-0, ~$15 for 3 lbs) or rock phosphate. For Potassium (K), greensand (0-0-2.5, ~$25 for 5 lbs) or kelp meal are good choices. I rely heavily on Espoma Organic Garden-tone (5-3-3, ~$25 for an 8lb bag) as a balanced, all-purpose organic fertilizer during planting.
Step 3: Garden Bed Preparation
Deciding between raised beds and in-ground beds depends on your soil, budget, and physical capabilities.
- In-Ground Beds: If you have excellent native soil and good drainage, in-ground beds are the most economical. Double-digging (loosening soil two shovel depths) can significantly improve drainage and aeration. For my main garden, I primarily use in-ground beds, but I focus on building up the soil over time with consistent compost additions and cover cropping. I aim for beds that are no wider than 3-4 feet so I can reach the center without stepping on the soil, compacting it.
- Raised Beds: Raised beds offer numerous advantages, especially for poor soil, heavy clay, or rocky areas. They provide better drainage, warm up faster in spring, reduce compaction, and make weeding and harvesting easier on your back.
- Material Options:
- Untreated Cedar: Naturally rot-resistant and chemical-free. A 4×8 ft bed, 12 inches deep, typically requires three 2x12x8 ft cedar boards, costing around $50-$60 per board (total ~$150-$180) plus corner brackets or screws. My first raised beds were cedar and are still going strong after 7 years.
- Galvanized Steel: Durable, long-lasting, and aesthetically pleasing. Brands like Vego Garden offer modular kits. A Vego Garden 17″ Tall 8-in-1 Metal Raised Garden Bed (can be configured to 4×8 ft) costs approximately $250-$300.
- Concrete Blocks/Stones: Very durable but can leach minerals (though generally safe once weathered) and can be expensive.
- Recycled Materials: Pallets (check for chemical treatment stamps like « HT » for heat-treated), old tires (controversial due to potential chemical leaching).
- Filling Raised Beds: Don’t just fill with topsoil. Use a « Hugelkultur » approach (logs, branches, leaves, then compost, then topsoil) or a mixture of 60% good quality topsoil, 30% compost, and 10% perlite or vermiculite for drainage. A 4x8x1 ft raised bed requires about 32 cubic feet (or ~1.2 cubic yards) of soil mix, which can cost $100-$200 depending on your source.
- Material Options:
Step 4: Water Management & Irrigation
Efficient water management is critical for a self sufficient garden from scratch, especially in off-grid living where water resources might be limited.
- Rainwater Harvesting: This is my primary source of irrigation water. A 55-gallon rain barrel (e.g., EarthMark Rain Barrel, ~$120-$150) connected to a downspout can collect significant water. For larger needs, I use two 275-gallon IBC totes (Intermediate Bulk Containers, often available used for $100-$200 each from food-grade sources) connected in series. A 1,000 sq ft roof can collect approximately 620 gallons of water for every inch of rainfall. My 1,500 sq ft roof provides ample water for my 600 sq ft garden through multiple barrels and totes.
- Drip Irrigation: This is by far the most water-efficient method, delivering water directly to the plant’s root zone, minimizing evaporation and weed growth.
- Components: A typical drip system includes a pressure regulator (e.g., Rain Bird PRV-10, ~$15), a filter (Rain Bird RBY filter, ~$20), main tubing (1/2-inch poly tubing, 100ft ~$25), smaller feeder lines (1/4-inch tubing), and emitters (0.5 GPH or 1 GPH per plant).
- Kits: For beginners, a starter kit like the Rain Bird Drip Irrigation Garden Kit (model DDI-KIT-1P, ~$40-$60) is excellent for a small garden. For larger setups, I use Netafim Techline CV Drip Line (500ft roll, ~$150-$200), which has pressure-compensating emitters built-in, ensuring even watering across long runs.
- Automation: For true self-sufficiency, consider a battery-powered timer (e.g., Orbit B-Hyve Bluetooth Hose Faucet Timer, ~$50) or a solar-powered timer connected to a small 12V pump.
- Solar-Powered Pumps: For lifting water from a well, pond, or large storage tank to your garden, a solar pump is a game-changer. For a smaller drip system, a Shurflo 2088-594-152 Diaphragm Pump (12V, 3.5 GPM, ~$180) can be powered by a single 100W solar panel (e.g., Renogy 100W Monocrystalline Solar Panel, ~$100) and a small 12V battery (e.g., a 50Ah LiFePO4 battery like the Battle Born 50Ah, ~$450). For larger operations or deeper wells, more robust systems are needed. If you’re looking to build out a comprehensive off-grid power system to support your garden’s water needs, or indeed your entire homestead, you might want to explore resources like the Power Grid Generator complete system guide to understand the full scope of what’s possible in terms of energy independence.
Step 5: Seed Selection & Planting
The choice of seeds is crucial for a truly self sufficient garden from scratch.
- Choose Heirloom & Open-Pollinated Seeds: These varieties produce seeds that will grow true to type, meaning you can save seeds from your harvest year after year. F1 hybrids, while often vigorous, will not produce consistent offspring from saved seeds. Reputable seed companies include Baker Creek Heirloom Seeds, High Mowing Organic Seeds, and Seed Savers Exchange. Start with common, reliable varieties like ‘Black Krim’ tomatoes, ‘Provider’ bush beans, ‘Waltham Butternut’ squash, and ‘Black Seeded Simpson’ lettuce.
- Start Seeds Indoors (Optional but Recommended): For longer growing seasons or specific crops, starting seeds indoors gives you a head start. Use seed-starting mix (e.g., Espoma Organic Seed Starter Mix, ~$10 for 16qt bag) in seed trays (Jiffy Professional Greenhouse 72-cell kit, ~$15). Provide adequate light with LED grow lights (Barrina T5 2ft 4-pack LED Grow Lights, 20W each, ~$50) for 14-16 hours a day, positioned 2-4 inches above seedlings. Maintain consistent temperatures (65-75°F for most).
- Direct Sowing vs. Transplanting: Some crops (carrots, radishes, beans, corn) prefer direct sowing into the garden bed. Others (tomatoes, peppers, broccoli, kale) benefit from being started indoors and transplanted. Follow seed packet instructions for planting depths (e.g., lettuce seeds are often surface-sown or planted 1/8 inch deep, while beans are 1 inch deep) and spacing.
- Companion Planting: Strategically plant different species together to enhance growth, deter pests, and attract beneficial insects. For example, planting marigolds near tomatoes can deter nematodes, and basil improves tomato flavor. Nasturtiums can act as a trap crop for aphids.
- Succession Planting: For a continuous harvest, plant small batches of quick-growing crops (lettuce, radishes, cilantro) every 2-3 weeks. As one crop finishes, another is ready to take its place.
Step 6: Pest & Disease Management (Organic)
Maintaining a self sufficient garden from scratch means embracing organic pest and disease control.
- Integrated Pest Management (IPM): This holistic approach combines several strategies.
- Observation: Regularly inspect your plants for early signs of pests or disease. Catching issues early is key.
- Physical Barriers: Use row covers (e.g., Agribon AG-19 floating row cover, 10×20 ft, ~$20) to protect young plants from insect pests like cabbage worms and squash bugs. Install fences (e.g., 2×4 welded wire mesh, 4 ft tall, 50 ft roll ~$70) to keep out deer, rabbits, and other larger animals.
- Hand-Picking: For larger pests like tomato hornworms or squash bugs, simply pick them off and drop them into a bucket of soapy water.
- Companion Planting: As mentioned, certain plants repel pests. Marigolds, garlic, and onions are excellent deterrents.
- Attract Beneficial Insects: Plant flowers like dill, fennel, cosmos, and sweet alyssum to attract ladybugs, lacewings, and parasitic wasps, which prey on common garden pests.
- Organic Sprays & Treatments:
- Neem Oil: An excellent broad-spectrum organic insecticide and fungicide. Bonide Neem Oil Concentrate (16oz, ~$20) can be mixed at a rate of 1-2 tbsp per gallon of water and sprayed on affected plants.
- Insecticidal Soap: Effective against soft-bodied insects like aphids, whiteflies, and spider mites. Garden Safe Insecticidal Soap (24oz ready-to-use, ~$10).
- Bacillus thuringiensis (Bt): A naturally occurring soil bacterium that targets caterpillars and worms. Monterey BT Worm & Caterpillar Killer (16oz, ~$18) is highly effective and safe for beneficial insects.
- Copper or Sulfur Sprays: For fungal diseases like powdery mildew or blight, organic copper (e.g., Bonide Copper Fungicide, ~$15 for 1lb) or sulfur (e.g., Safer Brand Garden Fungicide, ~$10 for 16oz) can be used as a last resort.
Step 7: Harvesting & Seed Saving
The culmination of your efforts is the harvest, and seed saving closes the loop on self-sufficiency.
- Harvesting Techniques:
- Timing: Harvest vegetables at their peak ripeness for best flavor and nutritional value. For example, green beans should snap cleanly, cucumbers should be firm, and tomatoes should be fully colored.
- Frequency: Many crops, like zucchini, cucumbers, and bush beans, produce more if harvested frequently. Pick daily or every other day.
- Tools: Use clean, sharp pruners (e.g., Corona ClassicCUT Bypass Pruner BP 3180, ~$30) or a sharp knife for clean cuts, minimizing damage to the plant.
- Seed Saving: This is where the « self-sufficient » aspect truly shines.
- Selection: Only save seeds from your healthiest, most vigorous plants that show desired traits (disease resistance, good flavor, high yield).
- Isolation: To ensure true-to-type seeds, prevent cross-pollination. This can be challenging for open-pollinated crops that readily cross (e.g., squash, corn). For beginners, focus on self-pollinating plants like beans, peas, lettuce, and tomatoes.
- Processing:
- Dry Seeds (Beans, Peas, Lettuce, Grains): Allow pods/seed heads to dry completely on the plant. Harvest, shell, and clean the seeds, removing chaff.
- Wet Seeds (Tomatoes, Cucumbers, Squash): For tomatoes, ferment the seeds in water for a few days to remove the gel coating and inhibit disease. For cucumbers/squash, scrape out seeds, wash thoroughly, and dry.
- Drying: Spread seeds thinly on screens or paper plates in a cool, dry, well-ventilated area for 1-4 weeks. Ensure they are bone-dry before storage. I aim for less than 8% moisture content.
- Storage: Store seeds in airtight containers (glass jars with desiccant packets work well) in a cool, dark, dry place (ideally 40-50°F and 30-40% humidity). Label clearly with variety and date. Properly stored seeds can remain viable for 3-10 years or more.
Step 8: Season Extension & Winterizing
Extend your harvest and protect your garden for the off-season to truly maximize your self sufficient garden from scratch.
- Cold Frames: Simple structures with a transparent top (glass, polycarbonate, or old windows) that sit over garden beds. They trap solar heat, allowing you to grow cold-hardy crops (lettuce, spinach, kale, radishes) well into winter or start seeds earlier in spring. A basic cold frame can be built from 2×6 lumber and a sheet of polycarbonate for under $100.
- Hoop Houses/Low Tunnels: Larger structures made from flexible hoops (PVC pipe or EMT conduit) covered with greenhouse plastic. These provide more space and greater temperature moderation. A 10×20 ft DIY low tunnel kit can cost $200-$500, while a larger, more robust hoop house kit might be $1,000-$3,000. I use a 6×12 ft low tunnel made from 1/2-inch PVC hoops and 6mil greenhouse plastic, which extends my lettuce and spinach harvest by at least
Step 5: Seed Selection & Planting
The choice of seeds is crucial for a truly self sufficient garden from scratch.
- Choose Heirloom & Open-Pollinated Seeds: These varieties produce seeds that will grow true to type, meaning you can save seeds from your harvest year after year. F1 hybrids, while often vigorous, will not produce consistent offspring from saved seeds. Reputable seed companies include Baker Creek Heirloom Seeds, High Mowing Organic Seeds, and Seed Savers Exchange. Start with common, reliable varieties like ‘Black Krim’ tomatoes, ‘Provider’ bush beans, ‘Waltham Butternut’ squash, and ‘Black Seeded Simpson’ lettuce.
- Start Seeds Indoors (Optional but Recommended): For longer growing seasons or specific crops, starting seeds indoors gives you a head start. Use seed-starting mix (e.g., Espoma Organic Seed Starter Mix, ~$10 for 16qt bag) in seed trays (Jiffy Professional Greenhouse 72-cell kit, ~$15). Provide adequate light with LED grow lights (Barrina T5 2ft 4-pack LED Grow Lights, 20W each, ~$50) for 14-16 hours a day, positioned 2-4 inches above seedlings. Maintain consistent temperatures (65-75°F for most).
- Direct Sowing vs. Transplanting: Some crops (carrots, radishes, beans, corn) prefer direct sowing into the garden bed. Others (tomatoes, peppers, broccoli, kale) benefit from being started indoors and transplanted. Follow seed packet instructions for planting depths (e.g., lettuce seeds are often surface-sown or planted 1/8 inch deep, while beans are 1 inch deep) and spacing.
- Companion Planting: Strategically plant different species together to enhance growth, deter pests, and attract beneficial insects. For example, planting marigolds near tomatoes can deter nematodes, and basil improves tomato flavor. Nasturtiums can act as a trap crop for aphids.
- Succession Planting: For a continuous harvest, plant small batches of quick-growing crops (lettuce, radishes, cilantro) every 2-3 weeks. As one crop finishes, another is ready to take its place.
Step 6: Pest & Disease Management (Organic)
Maintaining a self sufficient garden from scratch means embracing organic pest and disease control.
- Integrated Pest Management (IPM): This holistic approach combines several strategies.
- Observation: Regularly inspect your plants for early signs of pests or disease. Catching issues early is key.
- Physical Barriers: Use row covers (e.g., Agribon AG-19 floating row cover, 10×20 ft, ~$20) to protect young plants from insect pests like cabbage worms and squash bugs. Install fences (e.g., 2×4 welded wire mesh, 4 ft tall, 50 ft roll ~$70) to keep out deer, rabbits, and other larger animals.
- Hand-Picking: For larger pests like tomato hornworms or squash bugs, simply pick them off and drop them into a bucket of soapy water.
- Companion Planting: As mentioned, certain plants repel pests. Marigolds, garlic, and onions are excellent deterrents.
- Attract Beneficial Insects: Plant flowers like dill, fennel, cosmos, and sweet alyssum to attract ladybugs, lacewings, and parasitic wasps, which prey on common garden pests.
- Organic Sprays & Treatments:
- Neem Oil: An excellent broad-spectrum organic insecticide and fungicide. Bonide Neem Oil Concentrate (16oz, ~$20) can be mixed at a rate of 1-2 tbsp per gallon of water and sprayed on affected plants.
- Insecticidal Soap: Effective against soft-bodied insects like aphids, whiteflies, and spider mites. Garden Safe Insecticidal Soap (24oz ready-to-use, ~$10).
- Bacillus thuringiensis (Bt): A naturally occurring soil bacterium that targets caterpillars and worms. Monterey BT Worm & Caterpillar Killer (16oz, ~$18) is highly effective and safe for beneficial insects.
- Copper or Sulfur Sprays: For fungal diseases like powdery mildew or blight, organic copper (e.g., Bonide Copper Fungicide, ~$15 for 1lb) or sulfur (e.g., Safer Brand Garden Fungicide, ~$10 for 16oz) can be used as a last resort.
Step 7: Harvesting & Seed Saving
The culmination of your efforts is the harvest, and seed saving closes the loop on self-sufficiency.
- Harvesting Techniques:
- Timing: Harvest vegetables at their peak ripeness for best flavor and nutritional value. For example, green beans should snap cleanly, cucumbers should be firm, and tomatoes should be fully colored.
- Frequency: Many crops, like zucchini, cucumbers, and bush beans, produce more if harvested frequently. Pick daily or every other day.
- Tools: Use clean, sharp pruners (e.g., Corona ClassicCUT Bypass Pruner BP 3180, ~$30) or a sharp knife for clean cuts, minimizing damage to the plant.
- Seed Saving: This is where the « self-sufficient » aspect truly shines.
- Selection: Only save seeds from your healthiest, most vigorous plants that show desired traits (disease resistance, good flavor, high yield).
- Isolation: To ensure true-to-type seeds, prevent cross-pollination. This can be challenging for open-pollinated crops that readily cross (e.g., squash, corn). For beginners, focus on self-pollinating plants like beans, peas, lettuce, and tomatoes.
- Processing:
- Dry Seeds (Beans, Peas, Lettuce, Grains): Allow pods/seed heads to dry completely on the plant. Harvest, shell, and clean the seeds, removing chaff.
- Wet Seeds (Tomatoes, Cucumbers, Squash): For tomatoes, ferment the seeds in water for a few days to remove the gel coating and inhibit disease. For cucumbers/squash, scrape out seeds, wash thoroughly, and dry.
- Drying: Spread seeds thinly on screens or paper plates in a cool, dry, well-ventilated area for 1-4 weeks. Ensure they are bone-dry before storage. I aim for less than 8% moisture content.
- Storage: Store seeds in airtight containers (glass jars with desiccant packets work well) in a cool, dark, dry place (ideally 40-50°F and 30-40% humidity). Label clearly with variety and date. Properly stored seeds can remain viable for 3-10 years or more.
Step 8: Season Extension & Winterizing
Extend your harvest and protect your garden for the off-season to truly maximize your self sufficient garden from scratch.
- Cold Frames: Simple structures with a transparent top (glass, polycarbonate, or old windows) that sit over garden beds. They trap solar heat, allowing you to grow cold-hardy crops (lettuce, spinach, kale, radishes) well into winter or start seeds earlier in spring. A basic cold frame can be built from 2×6 lumber and a sheet of polycarbonate for under $100.
- Hoop Houses/Low Tunnels: Larger structures made from flexible hoops (PVC pipe or EMT conduit) covered with greenhouse plastic. These provide more space and greater temperature moderation. A 10×20 ft DIY low tunnel kit can cost $200-$500, while a larger, more robust hoop house kit might be $1,000-$3,000. I use a 6×12 ft low tunnel made from 1/2-inch PVC hoops and 6mil greenhouse plastic, which extends my lettuce and spinach harvest by at least
- Rainwater Harvesting: This is my primary source of irrigation water. A 55-gallon rain barrel (e.g., EarthMark Rain Barrel, ~$120-$150) connected to a downspout can collect significant water. For larger needs, I use two 275-gallon IBC totes (Intermediate Bulk Containers, often available used for $100-$200 each from food-grade sources) connected in series. A 1,000 sq ft roof can collect approximately 620 gallons of water for every inch of rainfall. My 1,500 sq ft roof provides ample water for my 600 sq ft garden through multiple barrels and totes.
- Drip Irrigation: This is by far the most water-efficient method, delivering water directly to the plant’s root zone, minimizing evaporation and weed growth.
- Components: A typical drip system includes a pressure regulator (e.g., Rain Bird PRV-10, ~$15), a filter (Rain Bird RBY filter, ~$20), main tubing (1/2-inch poly tubing, 100ft ~$25), smaller feeder lines (1/4-inch tubing), and emitters (0.5 GPH or 1 GPH per plant).
- Kits: For beginners, a starter kit like the Rain Bird Drip Irrigation Garden Kit (model DDI-KIT-1P, ~$40-$60) is excellent for a small garden. For larger setups, I use Netafim Techline CV Drip Line (500ft roll, ~$150-$200), which has pressure-compensating emitters built-in, ensuring even watering across long runs.
- Automation: For true self-sufficiency, consider a battery-powered timer (e.g., Orbit B-Hyve Bluetooth Hose Faucet Timer, ~$50) or a solar-powered timer connected to a small 12V pump.
- Solar-Powered Pumps: For lifting water from a well, pond, or large storage tank to your garden, a solar pump is a game-changer. For a smaller drip system, a Shurflo 2088-594-152 Diaphragm Pump (12V, 3.5 GPM, ~$180) can be powered by a single 100W solar panel (e.g., Renogy 100W Monocrystalline Solar Panel, ~$100) and a small 12V battery (e.g., a 50Ah LiFePO4 battery like the Battle Born 50Ah, ~$450). For larger operations or deeper wells, more robust systems are needed. If you’re looking to build out a comprehensive off-grid power system to support your garden’s water needs, or indeed your entire homestead, you might want to explore resources like the Power Grid Generator complete system guide to understand the full scope of what’s possible in terms of energy independence.
Step 5: Seed Selection & Planting
The choice of seeds is crucial for a truly self sufficient garden from scratch.
- Choose Heirloom & Open-Pollinated Seeds: These varieties produce seeds that will grow true to type, meaning you can save seeds from your harvest year after year. F1 hybrids, while often vigorous, will not produce consistent offspring from saved seeds. Reputable seed companies include Baker Creek Heirloom Seeds, High Mowing Organic Seeds, and Seed Savers Exchange. Start with common, reliable varieties like ‘Black Krim’ tomatoes, ‘Provider’ bush beans, ‘Waltham Butternut’ squash, and ‘Black Seeded Simpson’ lettuce.
- Start Seeds Indoors (Optional but Recommended): For longer growing seasons or specific crops, starting seeds indoors gives you a head start. Use seed-starting mix (e.g., Espoma Organic Seed Starter Mix, ~$10 for 16qt bag) in seed trays (Jiffy Professional Greenhouse 72-cell kit, ~$15). Provide adequate light with LED grow lights (Barrina T5 2ft 4-pack LED Grow Lights, 20W each, ~$50) for 14-16 hours a day, positioned 2-4 inches above seedlings. Maintain consistent temperatures (65-75°F for most).
- Direct Sowing vs. Transplanting: Some crops (carrots, radishes, beans, corn) prefer direct sowing into the garden bed. Others (tomatoes, peppers, broccoli, kale) benefit from being started indoors and transplanted. Follow seed packet instructions for planting depths (e.g., lettuce seeds are often surface-sown or planted 1/8 inch deep, while beans are 1 inch deep) and spacing.
- Companion Planting: Strategically plant different species together to enhance growth, deter pests, and attract beneficial insects. For example, planting marigolds near tomatoes can deter nematodes, and basil improves tomato flavor. Nasturtiums can act as a trap crop for aphids.
- Succession Planting: For a continuous harvest, plant small batches of quick-growing crops (lettuce, radishes, cilantro) every 2-3 weeks. As one crop finishes, another is ready to take its place.
Step 6: Pest & Disease Management (Organic)
Maintaining a self sufficient garden from scratch means embracing organic pest and disease control.
- Integrated Pest Management (IPM): This holistic approach combines several strategies.
- Observation: Regularly inspect your plants for early signs of pests or disease. Catching issues early is key.
- Physical Barriers: Use row covers (e.g., Agribon AG-19 floating row cover, 10×20 ft, ~$20) to protect young plants from insect pests like cabbage worms and squash bugs. Install fences (e.g., 2×4 welded wire mesh, 4 ft tall, 50 ft roll ~$70) to keep out deer, rabbits, and other larger animals.
- Hand-Picking: For larger pests like tomato hornworms or squash bugs, simply pick them off and drop them into a bucket of soapy water.
- Companion Planting: As mentioned, certain plants repel pests. Marigolds, garlic, and onions are excellent deterrents.
- Attract Beneficial Insects: Plant flowers like dill, fennel, cosmos, and sweet alyssum to attract ladybugs, lacewings, and parasitic wasps, which prey on common garden pests.
- Organic Sprays & Treatments:
- Neem Oil: An excellent broad-spectrum organic insecticide and fungicide. Bonide Neem Oil Concentrate (16oz, ~$20) can be mixed at a rate of 1-2 tbsp per gallon of water and sprayed on affected plants.
- Insecticidal Soap: Effective against soft-bodied insects like aphids, whiteflies, and spider mites. Garden Safe Insecticidal Soap (24oz ready-to-use, ~$10).
- Bacillus thuringiensis (Bt): A naturally occurring soil bacterium that targets caterpillars and worms. Monterey BT Worm & Caterpillar Killer (16oz, ~$18) is highly effective and safe for beneficial insects.
- Copper or Sulfur Sprays: For fungal diseases like powdery mildew or blight, organic copper (e.g., Bonide Copper Fungicide, ~$15 for 1lb) or sulfur (e.g., Safer Brand Garden Fungicide, ~$10 for 16oz) can be used as a last resort.
Step 7: Harvesting & Seed Saving
The culmination of your efforts is the harvest, and seed saving closes the loop on self-sufficiency.
- Harvesting Techniques:
- Timing: Harvest vegetables at their peak ripeness for best flavor and nutritional value. For example, green beans should snap cleanly, cucumbers should be firm, and tomatoes should be fully colored.
- Frequency: Many crops, like zucchini, cucumbers, and bush beans, produce more if harvested frequently. Pick daily or every other day.
- Tools: Use clean, sharp pruners (e.g., Corona ClassicCUT Bypass Pruner BP 3180, ~$30) or a sharp knife for clean cuts, minimizing damage to the plant.
- Seed Saving: This is where the « self-sufficient » aspect truly shines.
- Selection: Only save seeds from your healthiest, most vigorous plants that show desired traits (disease resistance, good flavor, high yield).
- Isolation: To ensure true-to-type seeds, prevent cross-pollination. This can be challenging for open-pollinated crops that readily cross (e.g., squash, corn). For beginners, focus on self-pollinating plants like beans, peas, lettuce, and tomatoes.
- Processing:
- Dry Seeds (Beans, Peas, Lettuce, Grains): Allow pods/seed heads to dry completely on the plant. Harvest, shell, and clean the seeds, removing chaff.
- Wet Seeds (Tomatoes, Cucumbers, Squash): For tomatoes, ferment the seeds in water for a few days to remove the gel coating and inhibit disease. For cucumbers/squash, scrape out seeds, wash thoroughly, and dry.
- Drying: Spread seeds thinly on screens or paper plates in a cool, dry, well-ventilated area for 1-4 weeks. Ensure they are bone-dry before storage. I aim for less than 8% moisture content.
- Storage: Store seeds in airtight containers (glass jars with desiccant packets work well) in a cool, dark, dry place (ideally 40-50°F and 30-40% humidity). Label clearly with variety and date. Properly stored seeds can remain viable for 3-10 years or more.
Step 8: Season Extension & Winterizing
Extend your harvest and protect your garden for the off-season to truly maximize your self sufficient garden from scratch.
- Cold Frames: Simple structures with a transparent top (glass, polycarbonate, or old windows) that sit over garden beds. They trap solar heat, allowing you to grow cold-hardy crops (lettuce, spinach, kale, radishes) well into winter or start seeds earlier in spring. A basic cold frame can be built from 2×6 lumber and a sheet of polycarbonate for under $100.
- Hoop Houses/Low Tunnels: Larger structures made from flexible hoops (PVC pipe or EMT conduit) covered with greenhouse plastic. These provide more space and greater temperature moderation. A 10×20 ft DIY low tunnel kit can cost $200-$500, while a larger, more robust hoop house kit might be $1,000-$3,000. I use a 6×12 ft low tunnel made from 1/2-inch PVC hoops and 6mil greenhouse plastic, which extends my lettuce and spinach harvest by at least
Efficient water management is critical for a self sufficient garden from scratch, especially in off-grid living where water resources might be limited.
- Rainwater Harvesting: This is my primary source of irrigation water. A 55-gallon rain barrel (e.g., EarthMark Rain Barrel, ~$120-$150) connected to a downspout can collect significant water. For larger needs, I use two 275-gallon IBC totes (Intermediate Bulk Containers, often available used for $100-$200 each from food-grade sources) connected in series. A 1,000 sq ft roof can collect approximately 620 gallons of water for every inch of rainfall. My 1,500 sq ft roof provides ample water for my 600 sq ft garden through multiple barrels and totes.
- Drip Irrigation: This is by far the most water-efficient method, delivering water directly to the plant’s root zone, minimizing evaporation and weed growth.
- Components: A typical drip system includes a pressure regulator (e.g., Rain Bird PRV-10, ~$15), a filter (Rain Bird RBY filter, ~$20), main tubing (1/2-inch poly tubing, 100ft ~$25), smaller feeder lines (1/4-inch tubing), and emitters (0.5 GPH or 1 GPH per plant).
- Kits: For beginners, a starter kit like the Rain Bird Drip Irrigation Garden Kit (model DDI-KIT-1P, ~$40-$60) is excellent for a small garden. For larger setups, I use Netafim Techline CV Drip Line (500ft roll, ~$150-$200), which has pressure-compensating emitters built-in, ensuring even watering across long runs.
- Automation: For true self-sufficiency, consider a battery-powered timer (e.g., Orbit B-Hyve Bluetooth Hose Faucet Timer, ~$50) or a solar-powered timer connected to a small 12V pump.
- Solar-Powered Pumps: For lifting water from a well, pond, or large storage tank to your garden, a solar pump is a game-changer. For a smaller drip system, a Shurflo 2088-594-152 Diaphragm Pump (12V, 3.5 GPM, ~$180) can be powered by a single 100W solar panel (e.g., Renogy 100W Monocrystalline Solar Panel, ~$100) and a small 12V battery (e.g., a 50Ah LiFePO4 battery like the Battle Born 50Ah, ~$450). For larger operations or deeper wells, more robust systems are needed. If you’re looking to build out a comprehensive off-grid power system to support your garden’s water needs, or indeed your entire homestead, you might want to explore resources like the Power Grid Generator complete system guide to understand the full scope of what’s possible in terms of energy independence.
Step 5: Seed Selection & Planting
The choice of seeds is crucial for a truly self sufficient garden from scratch.
- Choose Heirloom & Open-Pollinated Seeds: These varieties produce seeds that will grow true to type, meaning you can save seeds from your harvest year after year. F1 hybrids, while often vigorous, will not produce consistent offspring from saved seeds. Reputable seed companies include Baker Creek Heirloom Seeds, High Mowing Organic Seeds, and Seed Savers Exchange. Start with common, reliable varieties like ‘Black Krim’ tomatoes, ‘Provider’ bush beans, ‘Waltham Butternut’ squash, and ‘Black Seeded Simpson’ lettuce.
- Start Seeds Indoors (Optional but Recommended): For longer growing seasons or specific crops, starting seeds indoors gives you a head start. Use seed-starting mix (e.g., Espoma Organic Seed Starter Mix, ~$10 for 16qt bag) in seed trays (Jiffy Professional Greenhouse 72-cell kit, ~$15). Provide adequate light with LED grow lights (Barrina T5 2ft 4-pack LED Grow Lights, 20W each, ~$50) for 14-16 hours a day, positioned 2-4 inches above seedlings. Maintain consistent temperatures (65-75°F for most).
- Direct Sowing vs. Transplanting: Some crops (carrots, radishes, beans, corn) prefer direct sowing into the garden bed. Others (tomatoes, peppers, broccoli, kale) benefit from being started indoors and transplanted. Follow seed packet instructions for planting depths (e.g., lettuce seeds are often surface-sown or planted 1/8 inch deep, while beans are 1 inch deep) and spacing.
- Companion Planting: Strategically plant different species together to enhance growth, deter pests, and attract beneficial insects. For example, planting marigolds near tomatoes can deter nematodes, and basil improves tomato flavor. Nasturtiums can act as a trap crop for aphids.
- Succession Planting: For a continuous harvest, plant small batches of quick-growing crops (lettuce, radishes, cilantro) every 2-3 weeks. As one crop finishes, another is ready to take its place.
Step 6: Pest & Disease Management (Organic)
Maintaining a self sufficient garden from scratch means embracing organic pest and disease control.
- Integrated Pest Management (IPM): This holistic approach combines several strategies.
- Observation: Regularly inspect your plants for early signs of pests or disease. Catching issues early is key.
- Physical Barriers: Use row covers (e.g., Agribon AG-19 floating row cover, 10×20 ft, ~$20) to protect young plants from insect pests like cabbage worms and squash bugs. Install fences (e.g., 2×4 welded wire mesh, 4 ft tall, 50 ft roll ~$70) to keep out deer, rabbits, and other larger animals.
- Hand-Picking: For larger pests like tomato hornworms or squash bugs, simply pick them off and drop them into a bucket of soapy water.
- Companion Planting: As mentioned, certain plants repel pests. Marigolds, garlic, and onions are excellent deterrents.
- Attract Beneficial Insects: Plant flowers like dill, fennel, cosmos, and sweet alyssum to attract ladybugs, lacewings, and parasitic wasps, which prey on common garden pests.
- Organic Sprays & Treatments:
- Neem Oil: An excellent broad-spectrum organic insecticide and fungicide. Bonide Neem Oil Concentrate (16oz, ~$20) can be mixed at a rate of 1-2 tbsp per gallon of water and sprayed on affected plants.
- Insecticidal Soap: Effective against soft-bodied insects like aphids, whiteflies, and spider mites. Garden Safe Insecticidal Soap (24oz ready-to-use, ~$10).
- Bacillus thuringiensis (Bt): A naturally occurring soil bacterium that targets caterpillars and worms. Monterey BT Worm & Caterpillar Killer (16oz, ~$18) is highly effective and safe for beneficial insects.
- Copper or Sulfur Sprays: For fungal diseases like powdery mildew or blight, organic copper (e.g., Bonide Copper Fungicide, ~$15 for 1lb) or sulfur (e.g., Safer Brand Garden Fungicide, ~$10 for 16oz) can be used as a last resort.
Step 7: Harvesting & Seed Saving
The culmination of your efforts is the harvest, and seed saving closes the loop on self-sufficiency.
- Harvesting Techniques:
- Timing: Harvest vegetables at their peak ripeness for best flavor and nutritional value. For example, green beans should snap cleanly, cucumbers should be firm, and tomatoes should be fully colored.
- Frequency: Many crops, like zucchini, cucumbers, and bush beans, produce more if harvested frequently. Pick daily or every other day.
- Tools: Use clean, sharp pruners (e.g., Corona ClassicCUT Bypass Pruner BP 3180, ~$30) or a sharp knife for clean cuts, minimizing damage to the plant.
- Seed Saving: This is where the « self-sufficient » aspect truly shines.
- Selection: Only save seeds from your healthiest, most vigorous plants that show desired traits (disease resistance, good flavor, high yield).
- Isolation: To ensure true-to-type seeds, prevent cross-pollination. This can be challenging for open-pollinated crops that readily cross (e.g., squash, corn). For beginners, focus on self-pollinating plants like beans, peas, lettuce, and tomatoes.
- Processing:
- Dry Seeds (Beans, Peas, Lettuce, Grains): Allow pods/seed heads to dry completely on the plant. Harvest, shell, and clean the seeds, removing chaff.
- Wet Seeds (Tomatoes, Cucumbers, Squash): For tomatoes, ferment the seeds in water for a few days to remove the gel coating and inhibit disease. For cucumbers/squash, scrape out seeds, wash thoroughly, and dry.
- Drying: Spread seeds thinly on screens or paper plates in a cool, dry, well-ventilated area for 1-4 weeks. Ensure they are bone-dry before storage. I aim for less than 8% moisture content.
- Storage: Store seeds in airtight containers (glass jars with desiccant packets work well) in a cool, dark, dry place (ideally 40-50°F and 30-40% humidity). Label clearly with variety and date. Properly stored seeds can remain viable for 3-10 years or more.
Step 8: Season Extension & Winterizing
Extend your harvest and protect your garden for the off-season to truly maximize your self sufficient garden from scratch.
- Cold Frames: Simple structures with a transparent top (glass, polycarbonate, or old windows) that sit over garden beds. They trap solar heat, allowing you to grow cold-hardy crops (lettuce, spinach, kale, radishes) well into winter or start seeds earlier in spring. A basic cold frame can be built from 2×6 lumber and a sheet of polycarbonate for under $100.
- Hoop Houses/Low Tunnels: Larger structures made from flexible hoops (PVC pipe or EMT conduit) covered with greenhouse plastic. These provide more space and greater temperature moderation. A 10×20 ft DIY low tunnel kit can cost $200-$500, while a larger, more robust hoop house kit might be $1,000-$3,000. I use a 6×12 ft low tunnel made from 1/2-inch PVC hoops and 6mil greenhouse plastic, which extends my lettuce and spinach harvest by at least
Step 4: Water Management & Irrigation
Efficient water management is critical for a self sufficient garden from scratch, especially in off-grid living where water resources might be limited.
- Rainwater Harvesting: This is my primary source of irrigation water. A 55-gallon rain barrel (e.g., EarthMark Rain Barrel, ~$120-$150) connected to a downspout can collect significant water. For larger needs, I use two 275-gallon IBC totes (Intermediate Bulk Containers, often available used for $100-$200 each from food-grade sources) connected in series. A 1,000 sq ft roof can collect approximately 620 gallons of water for every inch of rainfall. My 1,500 sq ft roof provides ample water for my 600 sq ft garden through multiple barrels and totes.
- Drip Irrigation: This is by far the most water-efficient method, delivering water directly to the plant’s root zone, minimizing evaporation and weed growth.
- Components: A typical drip system includes a pressure regulator (e.g., Rain Bird PRV-10, ~$15), a filter (Rain Bird RBY filter, ~$20), main tubing (1/2-inch poly tubing, 100ft ~$25), smaller feeder lines (1/4-inch tubing), and emitters (0.5 GPH or 1 GPH per plant).
- Kits: For beginners, a starter kit like the Rain Bird Drip Irrigation Garden Kit (model DDI-KIT-1P, ~$40-$60) is excellent for a small garden. For larger setups, I use Netafim Techline CV Drip Line (500ft roll, ~$150-$200), which has pressure-compensating emitters built-in, ensuring even watering across long runs.
- Automation: For true self-sufficiency, consider a battery-powered timer (e.g., Orbit B-Hyve Bluetooth Hose Faucet Timer, ~$50) or a solar-powered timer connected to a small 12V pump.
- Solar-Powered Pumps: For lifting water from a well, pond, or large storage tank to your garden, a solar pump is a game-changer. For a smaller drip system, a Shurflo 2088-594-152 Diaphragm Pump (12V, 3.5 GPM, ~$180) can be powered by a single 100W solar panel (e.g., Renogy 100W Monocrystalline Solar Panel, ~$100) and a small 12V battery (e.g., a 50Ah LiFePO4 battery like the Battle Born 50Ah, ~$450). For larger operations or deeper wells, more robust systems are needed. If you’re looking to build out a comprehensive off-grid power system to support your garden’s water needs, or indeed your entire homestead, you might want to explore resources like the Power Grid Generator complete system guide to understand the full scope of what’s possible in terms of energy independence.
Step 5: Seed Selection & Planting
The choice of seeds is crucial for a truly self sufficient garden from scratch.
- Choose Heirloom & Open-Pollinated Seeds: These varieties produce seeds that will grow true to type, meaning you can save seeds from your harvest year after year. F1 hybrids, while often vigorous, will not produce consistent offspring from saved seeds. Reputable seed companies include Baker Creek Heirloom Seeds, High Mowing Organic Seeds, and Seed Savers Exchange. Start with common, reliable varieties like ‘Black Krim’ tomatoes, ‘Provider’ bush beans, ‘Waltham Butternut’ squash, and ‘Black Seeded Simpson’ lettuce.
- Start Seeds Indoors (Optional but Recommended): For longer growing seasons or specific crops, starting seeds indoors gives you a head start. Use seed-starting mix (e.g., Espoma Organic Seed Starter Mix, ~$10 for 16qt bag) in seed trays (Jiffy Professional Greenhouse 72-cell kit, ~$15). Provide adequate light with LED grow lights (Barrina T5 2ft 4-pack LED Grow Lights, 20W each, ~$50) for 14-16 hours a day, positioned 2-4 inches above seedlings. Maintain consistent temperatures (65-75°F for most).
- Direct Sowing vs. Transplanting: Some crops (carrots, radishes, beans, corn) prefer direct sowing into the garden bed. Others (tomatoes, peppers, broccoli, kale) benefit from being started indoors and transplanted. Follow seed packet instructions for planting depths (e.g., lettuce seeds are often surface-sown or planted 1/8 inch deep, while beans are 1 inch deep) and spacing.
- Companion Planting: Strategically plant different species together to enhance growth, deter pests, and attract beneficial insects. For example, planting marigolds near tomatoes can deter nematodes, and basil improves tomato flavor. Nasturtiums can act as a trap crop for aphids.
- Succession Planting: For a continuous harvest, plant small batches of quick-growing crops (lettuce, radishes, cilantro) every 2-3 weeks. As one crop finishes, another is ready to take its place.
Step 6: Pest & Disease Management (Organic)
Maintaining a self sufficient garden from scratch means embracing organic pest and disease control.
- Integrated Pest Management (IPM): This holistic approach combines several strategies.
- Observation: Regularly inspect your plants for early signs of pests or disease. Catching issues early is key.
- Physical Barriers: Use row covers (e.g., Agribon AG-19 floating row cover, 10×20 ft, ~$20) to protect young plants from insect pests like cabbage worms and squash bugs. Install fences (e.g., 2×4 welded wire mesh, 4 ft tall, 50 ft roll ~$70) to keep out deer, rabbits, and other larger animals.
- Hand-Picking: For larger pests like tomato hornworms or squash bugs, simply pick them off and drop them into a bucket of soapy water.
- Companion Planting: As mentioned, certain plants repel pests. Marigolds, garlic, and onions are excellent deterrents.
- Attract Beneficial Insects: Plant flowers like dill, fennel, cosmos, and sweet alyssum to attract ladybugs, lacewings, and parasitic wasps, which prey on common garden pests.
- Organic Sprays & Treatments:
- Neem Oil: An excellent broad-spectrum organic insecticide and fungicide. Bonide Neem Oil Concentrate (16oz, ~$20) can be mixed at a rate of 1-2 tbsp per gallon of water and sprayed on affected plants.
- Insecticidal Soap: Effective against soft-bodied insects like aphids, whiteflies, and spider mites. Garden Safe Insecticidal Soap (24oz ready-to-use, ~$10).
- Bacillus thuringiensis (Bt): A naturally occurring soil bacterium that targets caterpillars and worms. Monterey BT Worm & Caterpillar Killer (16oz, ~$18) is highly effective and safe for beneficial insects.
- Copper or Sulfur Sprays: For fungal diseases like powdery mildew or blight, organic copper (e.g., Bonide Copper Fungicide, ~$15 for 1lb) or sulfur (e.g., Safer Brand Garden Fungicide, ~$10 for 16oz) can be used as a last resort.
Step 7: Harvesting & Seed Saving
The culmination of your efforts is the harvest, and seed saving closes the loop on self-sufficiency.
- Harvesting Techniques:
- Timing: Harvest vegetables at their peak ripeness for best flavor and nutritional value. For example, green beans should snap cleanly, cucumbers should be firm, and tomatoes should be fully colored.
- Frequency: Many crops, like zucchini, cucumbers, and bush beans, produce more if harvested frequently. Pick daily or every other day.
- Tools: Use clean, sharp pruners (e.g., Corona ClassicCUT Bypass Pruner BP 3180, ~$30) or a sharp knife for clean cuts, minimizing damage to the plant.
- Seed Saving: This is where the « self-sufficient » aspect truly shines.
- Selection: Only save seeds from your healthiest, most vigorous plants that show desired traits (disease resistance, good flavor, high yield).
- Isolation: To ensure true-to-type seeds, prevent cross-pollination. This can be challenging for open-pollinated crops that readily cross (e.g., squash, corn). For beginners, focus on self-pollinating plants like beans, peas, lettuce, and tomatoes.
- Processing:
- Dry Seeds (Beans, Peas, Lettuce, Grains): Allow pods/seed heads to dry completely on the plant. Harvest, shell, and clean the seeds, removing chaff.
- Wet Seeds (Tomatoes, Cucumbers, Squash): For tomatoes, ferment the seeds in water for a few days to remove the gel coating and inhibit disease. For cucumbers/squash, scrape out seeds, wash thoroughly, and dry.
- Drying: Spread seeds thinly on screens or paper plates in a cool, dry, well-ventilated area for 1-4 weeks. Ensure they are bone-dry before storage. I aim for less than 8% moisture content.
- Storage: Store seeds in airtight containers (glass jars with desiccant packets work well) in a cool, dark, dry place (ideally 40-50°F and 30-40% humidity). Label clearly with variety and date. Properly stored seeds can remain viable for 3-10 years or more.
Step 8: Season Extension & Winterizing
Extend your harvest and protect your garden for the off-season to truly maximize your self sufficient garden from scratch.
- Cold Frames: Simple structures with a transparent top (glass, polycarbonate, or old windows) that sit over garden beds. They trap solar heat, allowing you to grow cold-hardy crops (lettuce, spinach, kale, radishes) well into winter or start seeds earlier in spring. A basic cold frame can be built from 2×6 lumber and a sheet of polycarbonate for under $100.
- Hoop Houses/Low Tunnels: Larger structures made from flexible hoops (PVC pipe or EMT conduit) covered with greenhouse plastic. These provide more space and greater temperature moderation. A 10×20 ft DIY low tunnel kit can cost $200-$500, while a larger, more robust hoop house kit might be $1,000-$3,000. I use a 6×12 ft low tunnel made from 1/2-inch PVC hoops and 6mil greenhouse plastic, which extends my lettuce and spinach harvest by at least
- In-Ground Beds: If you have excellent native soil and good drainage, in-ground beds are the most economical. Double-digging (loosening soil two shovel depths) can significantly improve drainage and aeration. For my main garden, I primarily use in-ground beds, but I focus on building up the soil over time with consistent compost additions and cover cropping. I aim for beds that are no wider than 3-4 feet so I can reach the center without stepping on the soil, compacting it.
- Raised Beds: Raised beds offer numerous advantages, especially for poor soil, heavy clay, or rocky areas. They provide better drainage, warm up faster in spring, reduce compaction, and make weeding and harvesting easier on your back.
- Material Options:
- Untreated Cedar: Naturally rot-resistant and chemical-free. A 4×8 ft bed, 12 inches deep, typically requires three 2x12x8 ft cedar boards, costing around $50-$60 per board (total ~$150-$180) plus corner brackets or screws. My first raised beds were cedar and are still going strong after 7 years.
- Galvanized Steel: Durable, long-lasting, and aesthetically pleasing. Brands like Vego Garden offer modular kits. A Vego Garden 17″ Tall 8-in-1 Metal Raised Garden Bed (can be configured to 4×8 ft) costs approximately $250-$300.
- Concrete Blocks/Stones: Very durable but can leach minerals (though generally safe once weathered) and can be expensive.
- Recycled Materials: Pallets (check for chemical treatment stamps like « HT » for heat-treated), old tires (controversial due to potential chemical leaching).
- Filling Raised Beds: Don’t just fill with topsoil. Use a « Hugelkultur » approach (logs, branches, leaves, then compost, then topsoil) or a mixture of 60% good quality topsoil, 30% compost, and 10% perlite or vermiculite for drainage. A 4x8x1 ft raised bed requires about 32 cubic feet (or ~1.2 cubic yards) of soil mix, which can cost $100-$200 depending on your source.
- Material Options:
Step 4: Water Management & Irrigation
Efficient water management is critical for a self sufficient garden from scratch, especially in off-grid living where water resources might be limited.
- Rainwater Harvesting: This is my primary source of irrigation water. A 55-gallon rain barrel (e.g., EarthMark Rain Barrel, ~$120-$150) connected to a downspout can collect significant water. For larger needs, I use two 275-gallon IBC totes (Intermediate Bulk Containers, often available used for $100-$200 each from food-grade sources) connected in series. A 1,000 sq ft roof can collect approximately 620 gallons of water for every inch of rainfall. My 1,500 sq ft roof provides ample water for my 600 sq ft garden through multiple barrels and totes.
- Drip Irrigation: This is by far the most water-efficient method, delivering water directly to the plant’s root zone, minimizing evaporation and weed growth.
- Components: A typical drip system includes a pressure regulator (e.g., Rain Bird PRV-10, ~$15), a filter (Rain Bird RBY filter, ~$20), main tubing (1/2-inch poly tubing, 100ft ~$25), smaller feeder lines (1/4-inch tubing), and emitters (0.5 GPH or 1 GPH per plant).
- Kits: For beginners, a starter kit like the Rain Bird Drip Irrigation Garden Kit (model DDI-KIT-1P, ~$40-$60) is excellent for a small garden. For larger setups, I use Netafim Techline CV Drip Line (500ft roll, ~$150-$200), which has pressure-compensating emitters built-in, ensuring even watering across long runs.
- Automation: For true self-sufficiency, consider a battery-powered timer (e.g., Orbit B-Hyve Bluetooth Hose Faucet Timer, ~$50) or a solar-powered timer connected to a small 12V pump.
- Solar-Powered Pumps: For lifting water from a well, pond, or large storage tank to your garden, a solar pump is a game-changer. For a smaller drip system, a Shurflo 2088-594-152 Diaphragm Pump (12V, 3.5 GPM, ~$180) can be powered by a single 100W solar panel (e.g., Renogy 100W Monocrystalline Solar Panel, ~$100) and a small 12V battery (e.g., a 50Ah LiFePO4 battery like the Battle Born 50Ah, ~$450). For larger operations or deeper wells, more robust systems are needed. If you’re looking to build out a comprehensive off-grid power system to support your garden’s water needs, or indeed your entire homestead, you might want to explore resources like the Power Grid Generator complete system guide to understand the full scope of what’s possible in terms of energy independence.
Step 5: Seed Selection & Planting
The choice of seeds is crucial for a truly self sufficient garden from scratch.
- Choose Heirloom & Open-Pollinated Seeds: These varieties produce seeds that will grow true to type, meaning you can save seeds from your harvest year after year. F1 hybrids, while often vigorous, will not produce consistent offspring from saved seeds. Reputable seed companies include Baker Creek Heirloom Seeds, High Mowing Organic Seeds, and Seed Savers Exchange. Start with common, reliable varieties like ‘Black Krim’ tomatoes, ‘Provider’ bush beans, ‘Waltham Butternut’ squash, and ‘Black Seeded Simpson’ lettuce.
- Start Seeds Indoors (Optional but Recommended): For longer growing seasons or specific crops, starting seeds indoors gives you a head start. Use seed-starting mix (e.g., Espoma Organic Seed Starter Mix, ~$10 for 16qt bag) in seed trays (Jiffy Professional Greenhouse 72-cell kit, ~$15). Provide adequate light with LED grow lights (Barrina T5 2ft 4-pack LED Grow Lights, 20W each, ~$50) for 14-16 hours a day, positioned 2-4 inches above seedlings. Maintain consistent temperatures (65-75°F for most).
- Direct Sowing vs. Transplanting: Some crops (carrots, radishes, beans, corn) prefer direct sowing into the garden bed. Others (tomatoes, peppers, broccoli, kale) benefit from being started indoors and transplanted. Follow seed packet instructions for planting depths (e.g., lettuce seeds are often surface-sown or planted 1/8 inch deep, while beans are 1 inch deep) and spacing.
- Companion Planting: Strategically plant different species together to enhance growth, deter pests, and attract beneficial insects. For example, planting marigolds near tomatoes can deter nematodes, and basil improves tomato flavor. Nasturtiums can act as a trap crop for aphids.
- Succession Planting: For a continuous harvest, plant small batches of quick-growing crops (lettuce, radishes, cilantro) every 2-3 weeks. As one crop finishes, another is ready to take its place.
Step 6: Pest & Disease Management (Organic)
Maintaining a self sufficient garden from scratch means embracing organic pest and disease control.
- Integrated Pest Management (IPM): This holistic approach combines several strategies.
- Observation: Regularly inspect your plants for early signs of pests or disease. Catching issues early is key.
- Physical Barriers: Use row covers (e.g., Agribon AG-19 floating row cover, 10×20 ft, ~$20) to protect young plants from insect pests like cabbage worms and squash bugs. Install fences (e.g., 2×4 welded wire mesh, 4 ft tall, 50 ft roll ~$70) to keep out deer, rabbits, and other larger animals.
- Hand-Picking: For larger pests like tomato hornworms or squash bugs, simply pick them off and drop them into a bucket of soapy water.
- Companion Planting: As mentioned, certain plants repel pests. Marigolds, garlic, and onions are excellent deterrents.
- Attract Beneficial Insects: Plant flowers like dill, fennel, cosmos, and sweet alyssum to attract ladybugs, lacewings, and parasitic wasps, which prey on common garden pests.
- Organic Sprays & Treatments:
- Neem Oil: An excellent broad-spectrum organic insecticide and fungicide. Bonide Neem Oil Concentrate (16oz, ~$20) can be mixed at a rate of 1-2 tbsp per gallon of water and sprayed on affected plants.
- Insecticidal Soap: Effective against soft-bodied insects like aphids, whiteflies, and spider mites. Garden Safe Insecticidal Soap (24oz ready-to-use, ~$10).
- Bacillus thuringiensis (Bt): A naturally occurring soil bacterium that targets caterpillars and worms. Monterey BT Worm & Caterpillar Killer (16oz, ~$18) is highly effective and safe for beneficial insects.
- Copper or Sulfur Sprays: For fungal diseases like powdery mildew or blight, organic copper (e.g., Bonide Copper Fungicide, ~$15 for 1lb) or sulfur (e.g., Safer Brand Garden Fungicide, ~$10 for 16oz) can be used as a last resort.
Step 7: Harvesting & Seed Saving
The culmination of your efforts is the harvest, and seed saving closes the loop on self-sufficiency.
- Harvesting Techniques:
- Timing: Harvest vegetables at their peak ripeness for best flavor and nutritional value. For example, green beans should snap cleanly, cucumbers should be firm, and tomatoes should be fully colored.
- Frequency: Many crops, like zucchini, cucumbers, and bush beans, produce more if harvested frequently. Pick daily or every other day.
- Tools: Use clean, sharp pruners (e.g., Corona ClassicCUT Bypass Pruner BP 3180, ~$30) or a sharp knife for clean cuts, minimizing damage to the plant.
- Seed Saving: This is where the « self-sufficient » aspect truly shines.
- Selection: Only save seeds from your healthiest, most vigorous plants that show desired traits (disease resistance, good flavor, high yield).
- Isolation: To ensure true-to-type seeds, prevent cross-pollination. This can be challenging for open-pollinated crops that readily cross (e.g., squash, corn). For beginners, focus on self-pollinating plants like beans, peas, lettuce, and tomatoes.
- Processing:
- Dry Seeds (Beans, Peas, Lettuce, Grains): Allow pods/seed heads to dry completely on the plant. Harvest, shell, and clean the seeds, removing chaff.
- Wet Seeds (Tomatoes, Cucumbers, Squash): For tomatoes, ferment the seeds in water for a few days to remove the gel coating and inhibit disease. For cucumbers/squash, scrape out seeds, wash thoroughly, and dry.
- Drying: Spread seeds thinly on screens or paper plates in a cool, dry, well-ventilated area for 1-4 weeks. Ensure they are bone-dry before storage. I aim for less than 8% moisture content.
- Storage: Store seeds in airtight containers (glass jars with desiccant packets work well) in a cool, dark, dry place (ideally 40-50°F and 30-40% humidity). Label clearly with variety and date. Properly stored seeds can remain viable for 3-10 years or more.
Step 8: Season Extension & Winterizing
Extend your harvest and protect your garden for the off-season to truly maximize your self sufficient garden from scratch.
- Cold Frames: Simple structures with a transparent top (glass, polycarbonate, or old windows) that sit over garden beds. They trap solar heat, allowing you to grow cold-hardy crops (lettuce, spinach, kale, radishes) well into winter or start seeds earlier in spring. A basic cold frame can be built from 2×6 lumber and a sheet of polycarbonate for under $100.
- Hoop Houses/Low Tunnels: Larger structures made from flexible hoops (PVC pipe or EMT conduit) covered with greenhouse plastic. These provide more space and greater temperature moderation. A 10×20 ft DIY low tunnel kit can cost $200-$500, while a larger, more robust hoop house kit might be $1,000-$3,000. I use a 6×12 ft low tunnel made from 1/2-inch PVC hoops and 6mil greenhouse plastic, which extends my lettuce and spinach harvest by at least
Deciding between raised beds and in-ground beds depends on your soil, budget, and physical capabilities.
- In-Ground Beds: If you have excellent native soil and good drainage, in-ground beds are the most economical. Double-digging (loosening soil two shovel depths) can significantly improve drainage and aeration. For my main garden, I primarily use in-ground beds, but I focus on building up the soil over time with consistent compost additions and cover cropping. I aim for beds that are no wider than 3-4 feet so I can reach the center without stepping on the soil, compacting it.
- Raised Beds: Raised beds offer numerous advantages, especially for poor soil, heavy clay, or rocky areas. They provide better drainage, warm up faster in spring, reduce compaction, and make weeding and harvesting easier on your back.
- Material Options:
- Untreated Cedar: Naturally rot-resistant and chemical-free. A 4×8 ft bed, 12 inches deep, typically requires three 2x12x8 ft cedar boards, costing around $50-$60 per board (total ~$150-$180) plus corner brackets or screws. My first raised beds were cedar and are still going strong after 7 years.
- Galvanized Steel: Durable, long-lasting, and aesthetically pleasing. Brands like Vego Garden offer modular kits. A Vego Garden 17″ Tall 8-in-1 Metal Raised Garden Bed (can be configured to 4×8 ft) costs approximately $250-$300.
- Concrete Blocks/Stones: Very durable but can leach minerals (though generally safe once weathered) and can be expensive.
- Recycled Materials: Pallets (check for chemical treatment stamps like « HT » for heat-treated), old tires (controversial due to potential chemical leaching).
- Filling Raised Beds: Don’t just fill with topsoil. Use a « Hugelkultur » approach (logs, branches, leaves, then compost, then topsoil) or a mixture of 60% good quality topsoil, 30% compost, and 10% perlite or vermiculite for drainage. A 4x8x1 ft raised bed requires about 32 cubic feet (or ~1.2 cubic yards) of soil mix, which can cost $100-$200 depending on your source.
- Material Options:
Step 4: Water Management & Irrigation
Efficient water management is critical for a self sufficient garden from scratch, especially in off-grid living where water resources might be limited.
- Rainwater Harvesting: This is my primary source of irrigation water. A 55-gallon rain barrel (e.g., EarthMark Rain Barrel, ~$120-$150) connected to a downspout can collect significant water. For larger needs, I use two 275-gallon IBC totes (Intermediate Bulk Containers, often available used for $100-$200 each from food-grade sources) connected in series. A 1,000 sq ft roof can collect approximately 620 gallons of water for every inch of rainfall. My 1,500 sq ft roof provides ample water for my 600 sq ft garden through multiple barrels and totes.
- Drip Irrigation: This is by far the most water-efficient method, delivering water directly to the plant’s root zone, minimizing evaporation and weed growth.
- Components: A typical drip system includes a pressure regulator (e.g., Rain Bird PRV-10, ~$15), a filter (Rain Bird RBY filter, ~$20), main tubing (1/2-inch poly tubing, 100ft ~$25), smaller feeder lines (1/4-inch tubing), and emitters (0.5 GPH or 1 GPH per plant).
- Kits: For beginners, a starter kit like the Rain Bird Drip Irrigation Garden Kit (model DDI-KIT-1P, ~$40-$60) is excellent for a small garden. For larger setups, I use Netafim Techline CV Drip Line (500ft roll, ~$150-$200), which has pressure-compensating emitters built-in, ensuring even watering across long runs.
- Automation: For true self-sufficiency, consider a battery-powered timer (e.g., Orbit B-Hyve Bluetooth Hose Faucet Timer, ~$50) or a solar-powered timer connected to a small 12V pump.
- Solar-Powered Pumps: For lifting water from a well, pond, or large storage tank to your garden, a solar pump is a game-changer. For a smaller drip system, a Shurflo 2088-594-152 Diaphragm Pump (12V, 3.5 GPM, ~$180) can be powered by a single 100W solar panel (e.g., Renogy 100W Monocrystalline Solar Panel, ~$100) and a small 12V battery (e.g., a 50Ah LiFePO4 battery like the Battle Born 50Ah, ~$450). For larger operations or deeper wells, more robust systems are needed. If you’re looking to build out a comprehensive off-grid power system to support your garden’s water needs, or indeed your entire homestead, you might want to explore resources like the Power Grid Generator complete system guide to understand the full scope of what’s possible in terms of energy independence.
Step 5: Seed Selection & Planting
The choice of seeds is crucial for a truly self sufficient garden from scratch.
- Choose Heirloom & Open-Pollinated Seeds: These varieties produce seeds that will grow true to type, meaning you can save seeds from your harvest year after year. F1 hybrids, while often vigorous, will not produce consistent offspring from saved seeds. Reputable seed companies include Baker Creek Heirloom Seeds, High Mowing Organic Seeds, and Seed Savers Exchange. Start with common, reliable varieties like ‘Black Krim’ tomatoes, ‘Provider’ bush beans, ‘Waltham Butternut’ squash, and ‘Black Seeded Simpson’ lettuce.
- Start Seeds Indoors (Optional but Recommended): For longer growing seasons or specific crops, starting seeds indoors gives you a head start. Use seed-starting mix (e.g., Espoma Organic Seed Starter Mix, ~$10 for 16qt bag) in seed trays (Jiffy Professional Greenhouse 72-cell kit, ~$15). Provide adequate light with LED grow lights (Barrina T5 2ft 4-pack LED Grow Lights, 20W each, ~$50) for 14-16 hours a day, positioned 2-4 inches above seedlings. Maintain consistent temperatures (65-75°F for most).
- Direct Sowing vs. Transplanting: Some crops (carrots, radishes, beans, corn) prefer direct sowing into the garden bed. Others (tomatoes, peppers, broccoli, kale) benefit from being started indoors and transplanted. Follow seed packet instructions for planting depths (e.g., lettuce seeds are often surface-sown or planted 1/8 inch deep, while beans are 1 inch deep) and spacing.
- Companion Planting: Strategically plant different species together to enhance growth, deter pests, and attract beneficial insects. For example, planting marigolds near tomatoes can deter nematodes, and basil improves tomato flavor. Nasturtiums can act as a trap crop for aphids.
- Succession Planting: For a continuous harvest, plant small batches of quick-growing crops (lettuce, radishes, cilantro) every 2-3 weeks. As one crop finishes, another is ready to take its place.
Step 6: Pest & Disease Management (Organic)
Maintaining a self sufficient garden from scratch means embracing organic pest and disease control.
- Integrated Pest Management (IPM): This holistic approach combines several strategies.
- Observation: Regularly inspect your plants for early signs of pests or disease. Catching issues early is key.
- Physical Barriers: Use row covers (e.g., Agribon AG-19 floating row cover, 10×20 ft, ~$20) to protect young plants from insect pests like cabbage worms and squash bugs. Install fences (e.g., 2×4 welded wire mesh, 4 ft tall, 50 ft roll ~$70) to keep out deer, rabbits, and other larger animals.
- Hand-Picking: For larger pests like tomato hornworms or squash bugs, simply pick them off and drop them into a bucket of soapy water.
- Companion Planting: As mentioned, certain plants repel pests. Marigolds, garlic, and onions are excellent deterrents.
- Attract Beneficial Insects: Plant flowers like dill, fennel, cosmos, and sweet alyssum to attract ladybugs, lacewings, and parasitic wasps, which prey on common garden pests.
- Organic Sprays & Treatments:
- Neem Oil: An excellent broad-spectrum organic insecticide and fungicide. Bonide Neem Oil Concentrate (16oz, ~$20) can be mixed at a rate of 1-2 tbsp per gallon of water and sprayed on affected plants.
- Insecticidal Soap: Effective against soft-bodied insects like aphids, whiteflies, and spider mites. Garden Safe Insecticidal Soap (24oz ready-to-use, ~$10).
- Bacillus thuringiensis (Bt): A naturally occurring soil bacterium that targets caterpillars and worms. Monterey BT Worm & Caterpillar Killer (16oz, ~$18) is highly effective and safe for beneficial insects.
- Copper or Sulfur Sprays: For fungal diseases like powdery mildew or blight, organic copper (e.g., Bonide Copper Fungicide, ~$15 for 1lb) or sulfur (e.g., Safer Brand Garden Fungicide, ~$10 for 16oz) can be used as a last resort.
Step 7: Harvesting & Seed Saving
The culmination of your efforts is the harvest, and seed saving closes the loop on self-sufficiency.
- Harvesting Techniques:
- Timing: Harvest vegetables at their peak ripeness for best flavor and nutritional value. For example, green beans should snap cleanly, cucumbers should be firm, and tomatoes should be fully colored.
- Frequency: Many crops, like zucchini, cucumbers, and bush beans, produce more if harvested frequently. Pick daily or every other day.
- Tools: Use clean, sharp pruners (e.g., Corona ClassicCUT Bypass Pruner BP 3180, ~$30) or a sharp knife for clean cuts, minimizing damage to the plant.
- Seed Saving: This is where the « self-sufficient » aspect truly shines.
- Selection: Only save seeds from your healthiest, most vigorous plants that show desired traits (disease resistance, good flavor, high yield).
- Isolation: To ensure true-to-type seeds, prevent cross-pollination. This can be challenging for open-pollinated crops that readily cross (e.g., squash, corn). For beginners, focus on self-pollinating plants like beans, peas, lettuce, and tomatoes.
- Processing:
- Dry Seeds (Beans, Peas, Lettuce, Grains): Allow pods/seed heads to dry completely on the plant. Harvest, shell, and clean the seeds, removing chaff.
- Wet Seeds (Tomatoes, Cucumbers, Squash): For tomatoes, ferment the seeds in water for a few days to remove the gel coating and inhibit disease. For cucumbers/squash, scrape out seeds, wash thoroughly, and dry.
- Drying: Spread seeds thinly on screens or paper plates in a cool, dry, well-ventilated area for 1-4 weeks. Ensure they are bone-dry before storage. I aim for less than 8% moisture content.
- Storage: Store seeds in airtight containers (glass jars with desiccant packets work well) in a cool, dark, dry place (ideally 40-50°F and 30-40% humidity). Label clearly with variety and date. Properly stored seeds can remain viable for 3-10 years or more.
Step 8: Season Extension & Winterizing
Extend your harvest and protect your garden for the off-season to truly maximize your self sufficient garden from scratch.
- Cold Frames: Simple structures with a transparent top (glass, polycarbonate, or old windows) that sit over garden beds. They trap solar heat, allowing you to grow cold-hardy crops (lettuce, spinach, kale, radishes) well into winter or start seeds earlier in spring. A basic cold frame can be built from 2×6 lumber and a sheet of polycarbonate for under $100.
- Hoop Houses/Low Tunnels: Larger structures made from flexible hoops (PVC pipe or EMT conduit) covered with greenhouse plastic. These provide more space and greater temperature moderation. A 10×20 ft DIY low tunnel kit can cost $200-$500, while a larger, more robust hoop house kit might be $1,000-$3,000. I use a 6×12 ft low tunnel made from 1/2-inch PVC hoops and 6mil greenhouse plastic, which extends my lettuce and spinach harvest by at least
Healthy soil is the bedrock of a productive, self-sufficient garden. You can’t guess what your soil needs; you have to test it.
- Perform a Soil Test: A professional soil test will give you precise data on your soil’s pH, nutrient levels (N-P-K), and organic matter content. I recommend sending a sample to your local agricultural extension office; it typically costs $20-$50 and provides detailed recommendations. Alternatively, for a quick homeowner check, a Rapitest Soil Test Kit (40-test kit, model 1663, ~$20 on Amazon) provides a good baseline for pH, Nitrogen, Phosphorus, and Potash. Aim for a pH between 6.0 and 7.0 for most vegetables.
- Amend for pH Imbalance: If your soil is too acidic (below 6.0), add agricultural lime (dolomitic lime adds magnesium, calcitic lime adds calcium). Apply 5-10 lbs per 100 sq ft for a moderate adjustment. If it’s too alkaline (above 7.0), add elemental sulfur (e.g., Espoma Soil Acidifier, ~$15 for 6.75 lbs) or generous amounts of organic matter like peat moss or pine needles.
- Build Organic Matter: This is the single most important step for long-term soil health. Organic matter improves soil structure, water retention, drainage, and nutrient availability. Incorporate 2-4 inches of high-quality compost into your top 6-12 inches of soil annually. I make my own compost from kitchen scraps, garden waste, and shredded leaves, but you can purchase it. Local nurseries often sell bulk compost for $30-$50 per cubic yard. Aged manure (from chickens, cows, or horses – ensure it’s well-rotted to avoid burning plants) is also excellent.
- Address Nutrient Deficiencies: Based on your soil test, add specific organic amendments. If Nitrogen (N) is low, add blood meal (12-0-0, ~$20 for 3 lbs) or feather meal. For Phosphorus (P), use bone meal (3-15-0, ~$15 for 3 lbs) or rock phosphate. For Potassium (K), greensand (0-0-2.5, ~$25 for 5 lbs) or kelp meal are good choices. I rely heavily on Espoma Organic Garden-tone (5-3-3, ~$25 for an 8lb bag) as a balanced, all-purpose organic fertilizer during planting.
Step 3: Garden Bed Preparation
Deciding between raised beds and in-ground beds depends on your soil, budget, and physical capabilities.
- In-Ground Beds: If you have excellent native soil and good drainage, in-ground beds are the most economical. Double-digging (loosening soil two shovel depths) can significantly improve drainage and aeration. For my main garden, I primarily use in-ground beds, but I focus on building up the soil over time with consistent compost additions and cover cropping. I aim for beds that are no wider than 3-4 feet so I can reach the center without stepping on the soil, compacting it.
- Raised Beds: Raised beds offer numerous advantages, especially for poor soil, heavy clay, or rocky areas. They provide better drainage, warm up faster in spring, reduce compaction, and make weeding and harvesting easier on your back.
- Material Options:
- Untreated Cedar: Naturally rot-resistant and chemical-free. A 4×8 ft bed, 12 inches deep, typically requires three 2x12x8 ft cedar boards, costing around $50-$60 per board (total ~$150-$180) plus corner brackets or screws. My first raised beds were cedar and are still going strong after 7 years.
- Galvanized Steel: Durable, long-lasting, and aesthetically pleasing. Brands like Vego Garden offer modular kits. A Vego Garden 17″ Tall 8-in-1 Metal Raised Garden Bed (can be configured to 4×8 ft) costs approximately $250-$300.
- Concrete Blocks/Stones: Very durable but can leach minerals (though generally safe once weathered) and can be expensive.
- Recycled Materials: Pallets (check for chemical treatment stamps like « HT » for heat-treated), old tires (controversial due to potential chemical leaching).
- Filling Raised Beds: Don’t just fill with topsoil. Use a « Hugelkultur » approach (logs, branches, leaves, then compost, then topsoil) or a mixture of 60% good quality topsoil, 30% compost, and 10% perlite or vermiculite for drainage. A 4x8x1 ft raised bed requires about 32 cubic feet (or ~1.2 cubic yards) of soil mix, which can cost $100-$200 depending on your source.
- Material Options:
Step 4: Water Management & Irrigation
Efficient water management is critical for a self sufficient garden from scratch, especially in off-grid living where water resources might be limited.
- Rainwater Harvesting: This is my primary source of irrigation water. A 55-gallon rain barrel (e.g., EarthMark Rain Barrel, ~$120-$150) connected to a downspout can collect significant water. For larger needs, I use two 275-gallon IBC totes (Intermediate Bulk Containers, often available used for $100-$200 each from food-grade sources) connected in series. A 1,000 sq ft roof can collect approximately 620 gallons of water for every inch of rainfall. My 1,500 sq ft roof provides ample water for my 600 sq ft garden through multiple barrels and totes.
- Drip Irrigation: This is by far the most water-efficient method, delivering water directly to the plant’s root zone, minimizing evaporation and weed growth.
- Components: A typical drip system includes a pressure regulator (e.g., Rain Bird PRV-10, ~$15), a filter (Rain Bird RBY filter, ~$20), main tubing (1/2-inch poly tubing, 100ft ~$25), smaller feeder lines (1/4-inch tubing), and emitters (0.5 GPH or 1 GPH per plant).
- Kits: For beginners, a starter kit like the Rain Bird Drip Irrigation Garden Kit (model DDI-KIT-1P, ~$40-$60) is excellent for a small garden. For larger setups, I use Netafim Techline CV Drip Line (500ft roll, ~$150-$200), which has pressure-compensating emitters built-in, ensuring even watering across long runs.
- Automation: For true self-sufficiency, consider a battery-powered timer (e.g., Orbit B-Hyve Bluetooth Hose Faucet Timer, ~$50) or a solar-powered timer connected to a small 12V pump.
- Solar-Powered Pumps: For lifting water from a well, pond, or large storage tank to your garden, a solar pump is a game-changer. For a smaller drip system, a Shurflo 2088-594-152 Diaphragm Pump (12V, 3.5 GPM, ~$180) can be powered by a single 100W solar panel (e.g., Renogy 100W Monocrystalline Solar Panel, ~$100) and a small 12V battery (e.g., a 50Ah LiFePO4 battery like the Battle Born 50Ah, ~$450). For larger operations or deeper wells, more robust systems are needed. If you’re looking to build out a comprehensive off-grid power system to support your garden’s water needs, or indeed your entire homestead, you might want to explore resources like the Power Grid Generator complete system guide to understand the full scope of what’s possible in terms of energy independence.
Step 5: Seed Selection & Planting
The choice of seeds is crucial for a truly self sufficient garden from scratch.
- Choose Heirloom & Open-Pollinated Seeds: These varieties produce seeds that will grow true to type, meaning you can save seeds from your harvest year after year. F1 hybrids, while often vigorous, will not produce consistent offspring from saved seeds. Reputable seed companies include Baker Creek Heirloom Seeds, High Mowing Organic Seeds, and Seed Savers Exchange. Start with common, reliable varieties like ‘Black Krim’ tomatoes, ‘Provider’ bush beans, ‘Waltham Butternut’ squash, and ‘Black Seeded Simpson’ lettuce.
- Start Seeds Indoors (Optional but Recommended): For longer growing seasons or specific crops, starting seeds indoors gives you a head start. Use seed-starting mix (e.g., Espoma Organic Seed Starter Mix, ~$10 for 16qt bag) in seed trays (Jiffy Professional Greenhouse 72-cell kit, ~$15). Provide adequate light with LED grow lights (Barrina T5 2ft 4-pack LED Grow Lights, 20W each, ~$50) for 14-16 hours a day, positioned 2-4 inches above seedlings. Maintain consistent temperatures (65-75°F for most).
- Direct Sowing vs. Transplanting: Some crops (carrots, radishes, beans, corn) prefer direct sowing into the garden bed. Others (tomatoes, peppers, broccoli, kale) benefit from being started indoors and transplanted. Follow seed packet instructions for planting depths (e.g., lettuce seeds are often surface-sown or planted 1/8 inch deep, while beans are 1 inch deep) and spacing.
- Companion Planting: Strategically plant different species together to enhance growth, deter pests, and attract beneficial insects. For example, planting marigolds near tomatoes can deter nematodes, and basil improves tomato flavor. Nasturtiums can act as a trap crop for aphids.
- Succession Planting: For a continuous harvest, plant small batches of quick-growing crops (lettuce, radishes, cilantro) every 2-3 weeks. As one crop finishes, another is ready to take its place.
Step 6: Pest & Disease Management (Organic)
Maintaining a self sufficient garden from scratch means embracing organic pest and disease control.
- Integrated Pest Management (IPM): This holistic approach combines several strategies.
- Observation: Regularly inspect your plants for early signs of pests or disease. Catching issues early is key.
- Physical Barriers: Use row covers (e.g., Agribon AG-19 floating row cover, 10×20 ft, ~$20) to protect young plants from insect pests like cabbage worms and squash bugs. Install fences (e.g., 2×4 welded wire mesh, 4 ft tall, 50 ft roll ~$70) to keep out deer, rabbits, and other larger animals.
- Hand-Picking: For larger pests like tomato hornworms or squash bugs, simply pick them off and drop them into a bucket of soapy water.
- Companion Planting: As mentioned, certain plants repel pests. Marigolds, garlic, and onions are excellent deterrents.
- Attract Beneficial Insects: Plant flowers like dill, fennel, cosmos, and sweet alyssum to attract ladybugs, lacewings, and parasitic wasps, which prey on common garden pests.
- Organic Sprays & Treatments:
- Neem Oil: An excellent broad-spectrum organic insecticide and fungicide. Bonide Neem Oil Concentrate (16oz, ~$20) can be mixed at a rate of 1-2 tbsp per gallon of water and sprayed on affected plants.
- Insecticidal Soap: Effective against soft-bodied insects like aphids, whiteflies, and spider mites. Garden Safe Insecticidal Soap (24oz ready-to-use, ~$10).
- Bacillus thuringiensis (Bt): A naturally occurring soil bacterium that targets caterpillars and worms. Monterey BT Worm & Caterpillar Killer (16oz, ~$18) is highly effective and safe for beneficial insects.
- Copper or Sulfur Sprays: For fungal diseases like powdery mildew or blight, organic copper (e.g., Bonide Copper Fungicide, ~$15 for 1lb) or sulfur (e.g., Safer Brand Garden Fungicide, ~$10 for 16oz) can be used as a last resort.
Step 7: Harvesting & Seed Saving
The culmination of your efforts is the harvest, and seed saving closes the loop on self-sufficiency.
- Harvesting Techniques:
- Timing: Harvest vegetables at their peak ripeness for best flavor and nutritional value. For example, green beans should snap cleanly, cucumbers should be firm, and tomatoes should be fully colored.
- Frequency: Many crops, like zucchini, cucumbers, and bush beans, produce more if harvested frequently. Pick daily or every other day.
- Tools: Use clean, sharp pruners (e.g., Corona ClassicCUT Bypass Pruner BP 3180, ~$30) or a sharp knife for clean cuts, minimizing damage to the plant.
- Seed Saving: This is where the « self-sufficient » aspect truly shines.
- Selection: Only save seeds from your healthiest, most vigorous plants that show desired traits (disease resistance, good flavor, high yield).
- Isolation: To ensure true-to-type seeds, prevent cross-pollination. This can be challenging for open-pollinated crops that readily cross (e.g., squash, corn). For beginners, focus on self-pollinating plants like beans, peas, lettuce, and tomatoes.
- Processing:
- Dry Seeds (Beans, Peas, Lettuce, Grains): Allow pods/seed heads to dry completely on the plant. Harvest, shell, and clean the seeds, removing chaff.
- Wet Seeds (Tomatoes, Cucumbers, Squash): For tomatoes, ferment the seeds in water for a few days to remove the gel coating and inhibit disease. For cucumbers/squash, scrape out seeds, wash thoroughly, and dry.
- Drying: Spread seeds thinly on screens or paper plates in a cool, dry, well-ventilated area for 1-4 weeks. Ensure they are bone-dry before storage. I aim for less than 8% moisture content.
- Storage: Store seeds in airtight containers (glass jars with desiccant packets work well) in a cool, dark, dry place (ideally 40-50°F and 30-40% humidity). Label clearly with variety and date. Properly stored seeds can remain viable for 3-10 years or more.
Step 8: Season Extension & Winterizing
Extend your harvest and protect your garden for the off-season to truly maximize your self sufficient garden from scratch.
- Cold Frames: Simple structures with a transparent top (glass, polycarbonate, or old windows) that sit over garden beds. They trap solar heat, allowing you to grow cold-hardy crops (lettuce, spinach, kale, radishes) well into winter or start seeds earlier in spring. A basic cold frame can be built from 2×6 lumber and a sheet of polycarbonate for under $100.
- Hoop Houses/Low Tunnels: Larger structures made from flexible hoops (PVC pipe or EMT conduit) covered with greenhouse plastic. These provide more space and greater temperature moderation. A 10×20 ft DIY low tunnel kit can cost $200-$500, while a larger, more robust hoop house kit might be $1,000-$3,000. I use a 6×12 ft low tunnel made from 1/2-inch PVC hoops and 6mil greenhouse plastic, which extends my lettuce and spinach harvest by at least
- Harvesting Techniques:
- Timing: Harvest vegetables at their peak ripeness for best flavor and nutritional value. For example, green beans should snap cleanly, cucumbers should be firm, and tomatoes should be fully colored.
- Frequency: Many crops, like zucchini, cucumbers, and bush beans, produce more if harvested frequently. Pick daily or every other day.
- Tools: Use clean, sharp pruners (e.g., Corona ClassicCUT Bypass Pruner BP 3180, ~$30) or a sharp knife for clean cuts, minimizing damage to the plant.
- Seed Saving: This is where the « self-sufficient » aspect truly shines.
- Selection: Only save seeds from your healthiest, most vigorous plants that show desired traits (disease resistance, good flavor, high yield).
- Isolation: To ensure true-to-type seeds, prevent cross-pollination. This can be challenging for open-pollinated crops that readily cross (e.g., squash, corn). For beginners, focus on self-pollinating plants like beans, peas, lettuce, and tomatoes.
- Processing:
- Dry Seeds (Beans, Peas, Lettuce, Grains): Allow pods/seed heads to dry completely on the plant. Harvest, shell, and clean the seeds, removing chaff.
- Wet Seeds (Tomatoes, Cucumbers, Squash): For tomatoes, ferment the seeds in water for a few days to remove the gel coating and inhibit disease. For cucumbers/squash, scrape out seeds, wash thoroughly, and dry.
- Drying: Spread seeds thinly on screens or paper plates in a cool, dry, well-ventilated area for 1-4 weeks. Ensure they are bone-dry before storage. I aim for less than 8% moisture content.
- Storage: Store seeds in airtight containers (glass jars with desiccant packets work well) in a cool, dark, dry place (ideally 40-50°F and 30-40% humidity). Label clearly with variety and date. Properly stored seeds can remain viable for 3-10 years or more.
Step 8: Season Extension & Winterizing
Extend your harvest and protect your garden for the off-season to truly maximize your self sufficient garden from scratch.
- Cold Frames: Simple structures with a transparent top (glass, polycarbonate, or old windows) that sit over garden beds. They trap solar heat, allowing you to grow cold-hardy crops (lettuce, spinach, kale, radishes) well into winter or start seeds earlier in spring. A basic cold frame can be built from 2×6 lumber and a sheet of polycarbonate for under $100.
- Hoop Houses/Low Tunnels: Larger structures made from flexible hoops (PVC pipe or EMT conduit) covered with greenhouse plastic. These provide more space and greater temperature moderation. A 10×20 ft DIY low tunnel kit can cost $200-$500, while a larger, more robust hoop house kit might be $1,000-$3,000. I use a 6×12 ft low tunnel made from 1/2-inch PVC hoops and 6mil greenhouse plastic, which extends my lettuce and spinach harvest by at least
Step 5: Seed Selection & Planting
The choice of seeds is crucial for a truly self sufficient garden from scratch.
- Choose Heirloom & Open-Pollinated Seeds: These varieties produce seeds that will grow true to type, meaning you can save seeds from your harvest year after year. F1 hybrids, while often vigorous, will not produce consistent offspring from saved seeds. Reputable seed companies include Baker Creek Heirloom Seeds, High Mowing Organic Seeds, and Seed Savers Exchange. Start with common, reliable varieties like ‘Black Krim’ tomatoes, ‘Provider’ bush beans, ‘Waltham Butternut’ squash, and ‘Black Seeded Simpson’ lettuce.
- Start Seeds Indoors (Optional but Recommended): For longer growing seasons or specific crops, starting seeds indoors gives you a head start. Use seed-starting mix (e.g., Espoma Organic Seed Starter Mix, ~$10 for 16qt bag) in seed trays (Jiffy Professional Greenhouse 72-cell kit, ~$15). Provide adequate light with LED grow lights (Barrina T5 2ft 4-pack LED Grow Lights, 20W each, ~$50) for 14-16 hours a day, positioned 2-4 inches above seedlings. Maintain consistent temperatures (65-75°F for most).
- Direct Sowing vs. Transplanting: Some crops (carrots, radishes, beans, corn) prefer direct sowing into the garden bed. Others (tomatoes, peppers, broccoli, kale) benefit from being started indoors and transplanted. Follow seed packet instructions for planting depths (e.g., lettuce seeds are often surface-sown or planted 1/8 inch deep, while beans are 1 inch deep) and spacing.
- Companion Planting: Strategically plant different species together to enhance growth, deter pests, and attract beneficial insects. For example, planting marigolds near tomatoes can deter nematodes, and basil improves tomato flavor. Nasturtiums can act as a trap crop for aphids.
- Succession Planting: For a continuous harvest, plant small batches of quick-growing crops (lettuce, radishes, cilantro) every 2-3 weeks. As one crop finishes, another is ready to take its place.
Step 6: Pest & Disease Management (Organic)
Maintaining a self sufficient garden from scratch means embracing organic pest and disease control.
- Integrated Pest Management (IPM): This holistic approach combines several strategies.
- Observation: Regularly inspect your plants for early signs of pests or disease. Catching issues early is key.
- Physical Barriers: Use row covers (e.g., Agribon AG-19 floating row cover, 10×20 ft, ~$20) to protect young plants from insect pests like cabbage worms and squash bugs. Install fences (e.g., 2×4 welded wire mesh, 4 ft tall, 50 ft roll ~$70) to keep out deer, rabbits, and other larger animals.
- Hand-Picking: For larger pests like tomato hornworms or squash bugs, simply pick them off and drop them into a bucket of soapy water.
- Companion Planting: As mentioned, certain plants repel pests. Marigolds, garlic, and onions are excellent deterrents.
- Attract Beneficial Insects: Plant flowers like dill, fennel, cosmos, and sweet alyssum to attract ladybugs, lacewings, and parasitic wasps, which prey on common garden pests.
- Organic Sprays & Treatments:
- Neem Oil: An excellent broad-spectrum organic insecticide and fungicide. Bonide Neem Oil Concentrate (16oz, ~$20) can be mixed at a rate of 1-2 tbsp per gallon of water and sprayed on affected plants.
- Insecticidal Soap: Effective against soft-bodied insects like aphids, whiteflies, and spider mites. Garden Safe Insecticidal Soap (24oz ready-to-use, ~$10).
- Bacillus thuringiensis (Bt): A naturally occurring soil bacterium that targets caterpillars and worms. Monterey BT Worm & Caterpillar Killer (16oz, ~$18) is highly effective and safe for beneficial insects.
- Copper or Sulfur Sprays: For fungal diseases like powdery mildew or blight, organic copper (e.g., Bonide Copper Fungicide, ~$15 for 1lb) or sulfur (e.g., Safer Brand Garden Fungicide, ~$10 for 16oz) can be used as a last resort.
Step 7: Harvesting & Seed Saving
The culmination of your efforts is the harvest, and seed saving closes the loop on self-sufficiency.
- Harvesting Techniques:
- Timing: Harvest vegetables at their peak ripeness for best flavor and nutritional value. For example, green beans should snap cleanly, cucumbers should be firm, and tomatoes should be fully colored.
- Frequency: Many crops, like zucchini, cucumbers, and bush beans, produce more if harvested frequently. Pick daily or every other day.
- Tools: Use clean, sharp pruners (e.g., Corona ClassicCUT Bypass Pruner BP 3180, ~$30) or a sharp knife for clean cuts, minimizing damage to the plant.
- Seed Saving: This is where the « self-sufficient » aspect truly shines.
- Selection: Only save seeds from your healthiest, most vigorous plants that show desired traits (disease resistance, good flavor, high yield).
- Isolation: To ensure true-to-type seeds, prevent cross-pollination. This can be challenging for open-pollinated crops that readily cross (e.g., squash, corn). For beginners, focus on self-pollinating plants like beans, peas, lettuce, and tomatoes.
- Processing:
- Dry Seeds (Beans, Peas, Lettuce, Grains): Allow pods/seed heads to dry completely on the plant. Harvest, shell, and clean the seeds, removing chaff.
- Wet Seeds (Tomatoes, Cucumbers, Squash): For tomatoes, ferment the seeds in water for a few days to remove the gel coating and inhibit disease. For cucumbers/squash, scrape out seeds, wash thoroughly, and dry.
- Drying: Spread seeds thinly on screens or paper plates in a cool, dry, well-ventilated area for 1-4 weeks. Ensure they are bone-dry before storage. I aim for less than 8% moisture content.
- Storage: Store seeds in airtight containers (glass jars with desiccant packets work well) in a cool, dark, dry place (ideally 40-50°F and 30-40% humidity). Label clearly with variety and date. Properly stored seeds can remain viable for 3-10 years or more.
Step 8: Season Extension & Winterizing
Extend your harvest and protect your garden for the off-season to truly maximize your self sufficient garden from scratch.
- Cold Frames: Simple structures with a transparent top (glass, polycarbonate, or old windows) that sit over garden beds. They trap solar heat, allowing you to grow cold-hardy crops (lettuce, spinach, kale, radishes) well into winter or start seeds earlier in spring. A basic cold frame can be built from 2×6 lumber and a sheet of polycarbonate for under $100.
- Hoop Houses/Low Tunnels: Larger structures made from flexible hoops (PVC pipe or EMT conduit) covered with greenhouse plastic. These provide more space and greater temperature moderation. A 10×20 ft DIY low tunnel kit can cost $200-$500, while a larger, more robust hoop house kit might be $1,000-$3,000. I use a 6×12 ft low tunnel made from 1/2-inch PVC hoops and 6mil greenhouse plastic, which extends my lettuce and spinach harvest by at least
- Rainwater Harvesting: This is my primary source of irrigation water. A 55-gallon rain barrel (e.g., EarthMark Rain Barrel, ~$120-$150) connected to a downspout can collect significant water. For larger needs, I use two 275-gallon IBC totes (Intermediate Bulk Containers, often available used for $100-$200 each from food-grade sources) connected in series. A 1,000 sq ft roof can collect approximately 620 gallons of water for every inch of rainfall. My 1,500 sq ft roof provides ample water for my 600 sq ft garden through multiple barrels and totes.
- Drip Irrigation: This is by far the most water-efficient method, delivering water directly to the plant’s root zone, minimizing evaporation and weed growth.
- Components: A typical drip system includes a pressure regulator (e.g., Rain Bird PRV-10, ~$15), a filter (Rain Bird RBY filter, ~$20), main tubing (1/2-inch poly tubing, 100ft ~$25), smaller feeder lines (1/4-inch tubing), and emitters (0.5 GPH or 1 GPH per plant).
- Kits: For beginners, a starter kit like the Rain Bird Drip Irrigation Garden Kit (model DDI-KIT-1P, ~$40-$60) is excellent for a small garden. For larger setups, I use Netafim Techline CV Drip Line (500ft roll, ~$150-$200), which has pressure-compensating emitters built-in, ensuring even watering across long runs.
- Automation: For true self-sufficiency, consider a battery-powered timer (e.g., Orbit B-Hyve Bluetooth Hose Faucet Timer, ~$50) or a solar-powered timer connected to a small 12V pump.
- Solar-Powered Pumps: For lifting water from a well, pond, or large storage tank to your garden, a solar pump is a game-changer. For a smaller drip system, a Shurflo 2088-594-152 Diaphragm Pump (12V, 3.5 GPM, ~$180) can be powered by a single 100W solar panel (e.g., Renogy 100W Monocrystalline Solar Panel, ~$100) and a small 12V battery (e.g., a 50Ah LiFePO4 battery like the Battle Born 50Ah, ~$450). For larger operations or deeper wells, more robust systems are needed. If you’re looking to build out a comprehensive off-grid power system to support your garden’s water needs, or indeed your entire homestead, you might want to explore resources like the Power Grid Generator complete system guide to understand the full scope of what’s possible in terms of energy independence.
Step 5: Seed Selection & Planting
The choice of seeds is crucial for a truly self sufficient garden from scratch.
- Choose Heirloom & Open-Pollinated Seeds: These varieties produce seeds that will grow true to type, meaning you can save seeds from your harvest year after year. F1 hybrids, while often vigorous, will not produce consistent offspring from saved seeds. Reputable seed companies include Baker Creek Heirloom Seeds, High Mowing Organic Seeds, and Seed Savers Exchange. Start with common, reliable varieties like ‘Black Krim’ tomatoes, ‘Provider’ bush beans, ‘Waltham Butternut’ squash, and ‘Black Seeded Simpson’ lettuce.
- Start Seeds Indoors (Optional but Recommended): For longer growing seasons or specific crops, starting seeds indoors gives you a head start. Use seed-starting mix (e.g., Espoma Organic Seed Starter Mix, ~$10 for 16qt bag) in seed trays (Jiffy Professional Greenhouse 72-cell kit, ~$15). Provide adequate light with LED grow lights (Barrina T5 2ft 4-pack LED Grow Lights, 20W each, ~$50) for 14-16 hours a day, positioned 2-4 inches above seedlings. Maintain consistent temperatures (65-75°F for most).
- Direct Sowing vs. Transplanting: Some crops (carrots, radishes, beans, corn) prefer direct sowing into the garden bed. Others (tomatoes, peppers, broccoli, kale) benefit from being started indoors and transplanted. Follow seed packet instructions for planting depths (e.g., lettuce seeds are often surface-sown or planted 1/8 inch deep, while beans are 1 inch deep) and spacing.
- Companion Planting: Strategically plant different species together to enhance growth, deter pests, and attract beneficial insects. For example, planting marigolds near tomatoes can deter nematodes, and basil improves tomato flavor. Nasturtiums can act as a trap crop for aphids.
- Succession Planting: For a continuous harvest, plant small batches of quick-growing crops (lettuce, radishes, cilantro) every 2-3 weeks. As one crop finishes, another is ready to take its place.
Step 6: Pest & Disease Management (Organic)
Maintaining a self sufficient garden from scratch means embracing organic pest and disease control.
- Integrated Pest Management (IPM): This holistic approach combines several strategies.
- Observation: Regularly inspect your plants for early signs of pests or disease. Catching issues early is key.
- Physical Barriers: Use row covers (e.g., Agribon AG-19 floating row cover, 10×20 ft, ~$20) to protect young plants from insect pests like cabbage worms and squash bugs. Install fences (e.g., 2×4 welded wire mesh, 4 ft tall, 50 ft roll ~$70) to keep out deer, rabbits, and other larger animals.
- Hand-Picking: For larger pests like tomato hornworms or squash bugs, simply pick them off and drop them into a bucket of soapy water.
- Companion Planting: As mentioned, certain plants repel pests. Marigolds, garlic, and onions are excellent deterrents.
- Attract Beneficial Insects: Plant flowers like dill, fennel, cosmos, and sweet alyssum to attract ladybugs, lacewings, and parasitic wasps, which prey on common garden pests.
- Organic Sprays & Treatments:
- Neem Oil: An excellent broad-spectrum organic insecticide and fungicide. Bonide Neem Oil Concentrate (16oz, ~$20) can be mixed at a rate of 1-2 tbsp per gallon of water and sprayed on affected plants.
- Insecticidal Soap: Effective against soft-bodied insects like aphids, whiteflies, and spider mites. Garden Safe Insecticidal Soap (24oz ready-to-use, ~$10).
- Bacillus thuringiensis (Bt): A naturally occurring soil bacterium that targets caterpillars and worms. Monterey BT Worm & Caterpillar Killer (16oz, ~$18) is highly effective and safe for beneficial insects.
- Copper or Sulfur Sprays: For fungal diseases like powdery mildew or blight, organic copper (e.g., Bonide Copper Fungicide, ~$15 for 1lb) or sulfur (e.g., Safer Brand Garden Fungicide, ~$10 for 16oz) can be used as a last resort.
Step 7: Harvesting & Seed Saving
The culmination of your efforts is the harvest, and seed saving closes the loop on self-sufficiency.
- Harvesting Techniques:
- Timing: Harvest vegetables at their peak ripeness for best flavor and nutritional value. For example, green beans should snap cleanly, cucumbers should be firm, and tomatoes should be fully colored.
- Frequency: Many crops, like zucchini, cucumbers, and bush beans, produce more if harvested frequently. Pick daily or every other day.
- Tools: Use clean, sharp pruners (e.g., Corona ClassicCUT Bypass Pruner BP 3180, ~$30) or a sharp knife for clean cuts, minimizing damage to the plant.
- Seed Saving: This is where the « self-sufficient » aspect truly shines.
- Selection: Only save seeds from your healthiest, most vigorous plants that show desired traits (disease resistance, good flavor, high yield).
- Isolation: To ensure true-to-type seeds, prevent cross-pollination. This can be challenging for open-pollinated crops that readily cross (e.g., squash, corn). For beginners, focus on self-pollinating plants like beans, peas, lettuce, and tomatoes.
- Processing:
- Dry Seeds (Beans, Peas, Lettuce, Grains): Allow pods/seed heads to dry completely on the plant. Harvest, shell, and clean the seeds, removing chaff.
- Wet Seeds (Tomatoes, Cucumbers, Squash): For tomatoes, ferment the seeds in water for a few days to remove the gel coating and inhibit disease. For cucumbers/squash, scrape out seeds, wash thoroughly, and dry.
- Drying: Spread seeds thinly on screens or paper plates in a cool, dry, well-ventilated area for 1-4 weeks. Ensure they are bone-dry before storage. I aim for less than 8% moisture content.
- Storage: Store seeds in airtight containers (glass jars with desiccant packets work well) in a cool, dark, dry place (ideally 40-50°F and 30-40% humidity). Label clearly with variety and date. Properly stored seeds can remain viable for 3-10 years or more.
Step 8: Season Extension & Winterizing
Extend your harvest and protect your garden for the off-season to truly maximize your self sufficient garden from scratch.
- Cold Frames: Simple structures with a transparent top (glass, polycarbonate, or old windows) that sit over garden beds. They trap solar heat, allowing you to grow cold-hardy crops (lettuce, spinach, kale, radishes) well into winter or start seeds earlier in spring. A basic cold frame can be built from 2×6 lumber and a sheet of polycarbonate for under $100.
- Hoop Houses/Low Tunnels: Larger structures made from flexible hoops (PVC pipe or EMT conduit) covered with greenhouse plastic. These provide more space and greater temperature moderation. A 10×20 ft DIY low tunnel kit can cost $200-$500, while a larger, more robust hoop house kit might be $1,000-$3,000. I use a 6×12 ft low tunnel made from 1/2-inch PVC hoops and 6mil greenhouse plastic, which extends my lettuce and spinach harvest by at least
Efficient water management is critical for a self sufficient garden from scratch, especially in off-grid living where water resources might be limited.
- Rainwater Harvesting: This is my primary source of irrigation water. A 55-gallon rain barrel (e.g., EarthMark Rain Barrel, ~$120-$150) connected to a downspout can collect significant water. For larger needs, I use two 275-gallon IBC totes (Intermediate Bulk Containers, often available used for $100-$200 each from food-grade sources) connected in series. A 1,000 sq ft roof can collect approximately 620 gallons of water for every inch of rainfall. My 1,500 sq ft roof provides ample water for my 600 sq ft garden through multiple barrels and totes.
- Drip Irrigation: This is by far the most water-efficient method, delivering water directly to the plant’s root zone, minimizing evaporation and weed growth.
- Components: A typical drip system includes a pressure regulator (e.g., Rain Bird PRV-10, ~$15), a filter (Rain Bird RBY filter, ~$20), main tubing (1/2-inch poly tubing, 100ft ~$25), smaller feeder lines (1/4-inch tubing), and emitters (0.5 GPH or 1 GPH per plant).
- Kits: For beginners, a starter kit like the Rain Bird Drip Irrigation Garden Kit (model DDI-KIT-1P, ~$40-$60) is excellent for a small garden. For larger setups, I use Netafim Techline CV Drip Line (500ft roll, ~$150-$200), which has pressure-compensating emitters built-in, ensuring even watering across long runs.
- Automation: For true self-sufficiency, consider a battery-powered timer (e.g., Orbit B-Hyve Bluetooth Hose Faucet Timer, ~$50) or a solar-powered timer connected to a small 12V pump.
- Solar-Powered Pumps: For lifting water from a well, pond, or large storage tank to your garden, a solar pump is a game-changer. For a smaller drip system, a Shurflo 2088-594-152 Diaphragm Pump (12V, 3.5 GPM, ~$180) can be powered by a single 100W solar panel (e.g., Renogy 100W Monocrystalline Solar Panel, ~$100) and a small 12V battery (e.g., a 50Ah LiFePO4 battery like the Battle Born 50Ah, ~$450). For larger operations or deeper wells, more robust systems are needed. If you’re looking to build out a comprehensive off-grid power system to support your garden’s water needs, or indeed your entire homestead, you might want to explore resources like the Power Grid Generator complete system guide to understand the full scope of what’s possible in terms of energy independence.
Step 5: Seed Selection & Planting
The choice of seeds is crucial for a truly self sufficient garden from scratch.
- Choose Heirloom & Open-Pollinated Seeds: These varieties produce seeds that will grow true to type, meaning you can save seeds from your harvest year after year. F1 hybrids, while often vigorous, will not produce consistent offspring from saved seeds. Reputable seed companies include Baker Creek Heirloom Seeds, High Mowing Organic Seeds, and Seed Savers Exchange. Start with common, reliable varieties like ‘Black Krim’ tomatoes, ‘Provider’ bush beans, ‘Waltham Butternut’ squash, and ‘Black Seeded Simpson’ lettuce.
- Start Seeds Indoors (Optional but Recommended): For longer growing seasons or specific crops, starting seeds indoors gives you a head start. Use seed-starting mix (e.g., Espoma Organic Seed Starter Mix, ~$10 for 16qt bag) in seed trays (Jiffy Professional Greenhouse 72-cell kit, ~$15). Provide adequate light with LED grow lights (Barrina T5 2ft 4-pack LED Grow Lights, 20W each, ~$50) for 14-16 hours a day, positioned 2-4 inches above seedlings. Maintain consistent temperatures (65-75°F for most).
- Direct Sowing vs. Transplanting: Some crops (carrots, radishes, beans, corn) prefer direct sowing into the garden bed. Others (tomatoes, peppers, broccoli, kale) benefit from being started indoors and transplanted. Follow seed packet instructions for planting depths (e.g., lettuce seeds are often surface-sown or planted 1/8 inch deep, while beans are 1 inch deep) and spacing.
- Companion Planting: Strategically plant different species together to enhance growth, deter pests, and attract beneficial insects. For example, planting marigolds near tomatoes can deter nematodes, and basil improves tomato flavor. Nasturtiums can act as a trap crop for aphids.
- Succession Planting: For a continuous harvest, plant small batches of quick-growing crops (lettuce, radishes, cilantro) every 2-3 weeks. As one crop finishes, another is ready to take its place.
Step 6: Pest & Disease Management (Organic)
Maintaining a self sufficient garden from scratch means embracing organic pest and disease control.
- Integrated Pest Management (IPM): This holistic approach combines several strategies.
- Observation: Regularly inspect your plants for early signs of pests or disease. Catching issues early is key.
- Physical Barriers: Use row covers (e.g., Agribon AG-19 floating row cover, 10×20 ft, ~$20) to protect young plants from insect pests like cabbage worms and squash bugs. Install fences (e.g., 2×4 welded wire mesh, 4 ft tall, 50 ft roll ~$70) to keep out deer, rabbits, and other larger animals.
- Hand-Picking: For larger pests like tomato hornworms or squash bugs, simply pick them off and drop them into a bucket of soapy water.
- Companion Planting: As mentioned, certain plants repel pests. Marigolds, garlic, and onions are excellent deterrents.
- Attract Beneficial Insects: Plant flowers like dill, fennel, cosmos, and sweet alyssum to attract ladybugs, lacewings, and parasitic wasps, which prey on common garden pests.
- Organic Sprays & Treatments:
- Neem Oil: An excellent broad-spectrum organic insecticide and fungicide. Bonide Neem Oil Concentrate (16oz, ~$20) can be mixed at a rate of 1-2 tbsp per gallon of water and sprayed on affected plants.
- Insecticidal Soap: Effective against soft-bodied insects like aphids, whiteflies, and spider mites. Garden Safe Insecticidal Soap (24oz ready-to-use, ~$10).
- Bacillus thuringiensis (Bt): A naturally occurring soil bacterium that targets caterpillars and worms. Monterey BT Worm & Caterpillar Killer (16oz, ~$18) is highly effective and safe for beneficial insects.
- Copper or Sulfur Sprays: For fungal diseases like powdery mildew or blight, organic copper (e.g., Bonide Copper Fungicide, ~$15 for 1lb) or sulfur (e.g., Safer Brand Garden Fungicide, ~$10 for 16oz) can be used as a last resort.
Step 7: Harvesting & Seed Saving
The culmination of your efforts is the harvest, and seed saving closes the loop on self-sufficiency.
- Harvesting Techniques:
- Timing: Harvest vegetables at their peak ripeness for best flavor and nutritional value. For example, green beans should snap cleanly, cucumbers should be firm, and tomatoes should be fully colored.
- Frequency: Many crops, like zucchini, cucumbers, and bush beans, produce more if harvested frequently. Pick daily or every other day.
- Tools: Use clean, sharp pruners (e.g., Corona ClassicCUT Bypass Pruner BP 3180, ~$30) or a sharp knife for clean cuts, minimizing damage to the plant.
- Seed Saving: This is where the « self-sufficient » aspect truly shines.
- Selection: Only save seeds from your healthiest, most vigorous plants that show desired traits (disease resistance, good flavor, high yield).
- Isolation: To ensure true-to-type seeds, prevent cross-pollination. This can be challenging for open-pollinated crops that readily cross (e.g., squash, corn). For beginners, focus on self-pollinating plants like beans, peas, lettuce, and tomatoes.
- Processing:
- Dry Seeds (Beans, Peas, Lettuce, Grains): Allow pods/seed heads to dry completely on the plant. Harvest, shell, and clean the seeds, removing chaff.
- Wet Seeds (Tomatoes, Cucumbers, Squash): For tomatoes, ferment the seeds in water for a few days to remove the gel coating and inhibit disease. For cucumbers/squash, scrape out seeds, wash thoroughly, and dry.
- Drying: Spread seeds thinly on screens or paper plates in a cool, dry, well-ventilated area for 1-4 weeks. Ensure they are bone-dry before storage. I aim for less than 8% moisture content.
- Storage: Store seeds in airtight containers (glass jars with desiccant packets work well) in a cool, dark, dry place (ideally 40-50°F and 30-40% humidity). Label clearly with variety and date. Properly stored seeds can remain viable for 3-10 years or more.
Step 8: Season Extension & Winterizing
Extend your harvest and protect your garden for the off-season to truly maximize your self sufficient garden from scratch.
- Cold Frames: Simple structures with a transparent top (glass, polycarbonate, or old windows) that sit over garden beds. They trap solar heat, allowing you to grow cold-hardy crops (lettuce, spinach, kale, radishes) well into winter or start seeds earlier in spring. A basic cold frame can be built from 2×6 lumber and a sheet of polycarbonate for under $100.
- Hoop Houses/Low Tunnels: Larger structures made from flexible hoops (PVC pipe or EMT conduit) covered with greenhouse plastic. These provide more space and greater temperature moderation. A 10×20 ft DIY low tunnel kit can cost $200-$500, while a larger, more robust hoop house kit might be $1,000-$3,000. I use a 6×12 ft low tunnel made from 1/2-inch PVC hoops and 6mil greenhouse plastic, which extends my lettuce and spinach harvest by at least
Step 4: Water Management & Irrigation
Efficient water management is critical for a self sufficient garden from scratch, especially in off-grid living where water resources might be limited.
- Rainwater Harvesting: This is my primary source of irrigation water. A 55-gallon rain barrel (e.g., EarthMark Rain Barrel, ~$120-$150) connected to a downspout can collect significant water. For larger needs, I use two 275-gallon IBC totes (Intermediate Bulk Containers, often available used for $100-$200 each from food-grade sources) connected in series. A 1,000 sq ft roof can collect approximately 620 gallons of water for every inch of rainfall. My 1,500 sq ft roof provides ample water for my 600 sq ft garden through multiple barrels and totes.
- Drip Irrigation: This is by far the most water-efficient method, delivering water directly to the plant’s root zone, minimizing evaporation and weed growth.
- Components: A typical drip system includes a pressure regulator (e.g., Rain Bird PRV-10, ~$15), a filter (Rain Bird RBY filter, ~$20), main tubing (1/2-inch poly tubing, 100ft ~$25), smaller feeder lines (1/4-inch tubing), and emitters (0.5 GPH or 1 GPH per plant).
- Kits: For beginners, a starter kit like the Rain Bird Drip Irrigation Garden Kit (model DDI-KIT-1P, ~$40-$60) is excellent for a small garden. For larger setups, I use Netafim Techline CV Drip Line (500ft roll, ~$150-$200), which has pressure-compensating emitters built-in, ensuring even watering across long runs.
- Automation: For true self-sufficiency, consider a battery-powered timer (e.g., Orbit B-Hyve Bluetooth Hose Faucet Timer, ~$50) or a solar-powered timer connected to a small 12V pump.
- Solar-Powered Pumps: For lifting water from a well, pond, or large storage tank to your garden, a solar pump is a game-changer. For a smaller drip system, a Shurflo 2088-594-152 Diaphragm Pump (12V, 3.5 GPM, ~$180) can be powered by a single 100W solar panel (e.g., Renogy 100W Monocrystalline Solar Panel, ~$100) and a small 12V battery (e.g., a 50Ah LiFePO4 battery like the Battle Born 50Ah, ~$450). For larger operations or deeper wells, more robust systems are needed. If you’re looking to build out a comprehensive off-grid power system to support your garden’s water needs, or indeed your entire homestead, you might want to explore resources like the Power Grid Generator complete system guide to understand the full scope of what’s possible in terms of energy independence.
Step 5: Seed Selection & Planting
The choice of seeds is crucial for a truly self sufficient garden from scratch.
- Choose Heirloom & Open-Pollinated Seeds: These varieties produce seeds that will grow true to type, meaning you can save seeds from your harvest year after year. F1 hybrids, while often vigorous, will not produce consistent offspring from saved seeds. Reputable seed companies include Baker Creek Heirloom Seeds, High Mowing Organic Seeds, and Seed Savers Exchange. Start with common, reliable varieties like ‘Black Krim’ tomatoes, ‘Provider’ bush beans, ‘Waltham Butternut’ squash, and ‘Black Seeded Simpson’ lettuce.
- Start Seeds Indoors (Optional but Recommended): For longer growing seasons or specific crops, starting seeds indoors gives you a head start. Use seed-starting mix (e.g., Espoma Organic Seed Starter Mix, ~$10 for 16qt bag) in seed trays (Jiffy Professional Greenhouse 72-cell kit, ~$15). Provide adequate light with LED grow lights (Barrina T5 2ft 4-pack LED Grow Lights, 20W each, ~$50) for 14-16 hours a day, positioned 2-4 inches above seedlings. Maintain consistent temperatures (65-75°F for most).
- Direct Sowing vs. Transplanting: Some crops (carrots, radishes, beans, corn) prefer direct sowing into the garden bed. Others (tomatoes, peppers, broccoli, kale) benefit from being started indoors and transplanted. Follow seed packet instructions for planting depths (e.g., lettuce seeds are often surface-sown or planted 1/8 inch deep, while beans are 1 inch deep) and spacing.
- Companion Planting: Strategically plant different species together to enhance growth, deter pests, and attract beneficial insects. For example, planting marigolds near tomatoes can deter nematodes, and basil improves tomato flavor. Nasturtiums can act as a trap crop for aphids.
- Succession Planting: For a continuous harvest, plant small batches of quick-growing crops (lettuce, radishes, cilantro) every 2-3 weeks. As one crop finishes, another is ready to take its place.
Step 6: Pest & Disease Management (Organic)
Maintaining a self sufficient garden from scratch means embracing organic pest and disease control.
- Integrated Pest Management (IPM): This holistic approach combines several strategies.
- Observation: Regularly inspect your plants for early signs of pests or disease. Catching issues early is key.
- Physical Barriers: Use row covers (e.g., Agribon AG-19 floating row cover, 10×20 ft, ~$20) to protect young plants from insect pests like cabbage worms and squash bugs. Install fences (e.g., 2×4 welded wire mesh, 4 ft tall, 50 ft roll ~$70) to keep out deer, rabbits, and other larger animals.
- Hand-Picking: For larger pests like tomato hornworms or squash bugs, simply pick them off and drop them into a bucket of soapy water.
- Companion Planting: As mentioned, certain plants repel pests. Marigolds, garlic, and onions are excellent deterrents.
- Attract Beneficial Insects: Plant flowers like dill, fennel, cosmos, and sweet alyssum to attract ladybugs, lacewings, and parasitic wasps, which prey on common garden pests.
- Organic Sprays & Treatments:
- Neem Oil: An excellent broad-spectrum organic insecticide and fungicide. Bonide Neem Oil Concentrate (16oz, ~$20) can be mixed at a rate of 1-2 tbsp per gallon of water and sprayed on affected plants.
- Insecticidal Soap: Effective against soft-bodied insects like aphids, whiteflies, and spider mites. Garden Safe Insecticidal Soap (24oz ready-to-use, ~$10).
- Bacillus thuringiensis (Bt): A naturally occurring soil bacterium that targets caterpillars and worms. Monterey BT Worm & Caterpillar Killer (16oz, ~$18) is highly effective and safe for beneficial insects.
- Copper or Sulfur Sprays: For fungal diseases like powdery mildew or blight, organic copper (e.g., Bonide Copper Fungicide, ~$15 for 1lb) or sulfur (e.g., Safer Brand Garden Fungicide, ~$10 for 16oz) can be used as a last resort.
Step 7: Harvesting & Seed Saving
The culmination of your efforts is the harvest, and seed saving closes the loop on self-sufficiency.
- Harvesting Techniques:
- Timing: Harvest vegetables at their peak ripeness for best flavor and nutritional value. For example, green beans should snap cleanly, cucumbers should be firm, and tomatoes should be fully colored.
- Frequency: Many crops, like zucchini, cucumbers, and bush beans, produce more if harvested frequently. Pick daily or every other day.
- Tools: Use clean, sharp pruners (e.g., Corona ClassicCUT Bypass Pruner BP 3180, ~$30) or a sharp knife for clean cuts, minimizing damage to the plant.
- Seed Saving: This is where the « self-sufficient » aspect truly shines.
- Selection: Only save seeds from your healthiest, most vigorous plants that show desired traits (disease resistance, good flavor, high yield).
- Isolation: To ensure true-to-type seeds, prevent cross-pollination. This can be challenging for open-pollinated crops that readily cross (e.g., squash, corn). For beginners, focus on self-pollinating plants like beans, peas, lettuce, and tomatoes.
- Processing:
- Dry Seeds (Beans, Peas, Lettuce, Grains): Allow pods/seed heads to dry completely on the plant. Harvest, shell, and clean the seeds, removing chaff.
- Wet Seeds (Tomatoes, Cucumbers, Squash): For tomatoes, ferment the seeds in water for a few days to remove the gel coating and inhibit disease. For cucumbers/squash, scrape out seeds, wash thoroughly, and dry.
- Drying: Spread seeds thinly on screens or paper plates in a cool, dry, well-ventilated area for 1-4 weeks. Ensure they are bone-dry before storage. I aim for less than 8% moisture content.
- Storage: Store seeds in airtight containers (glass jars with desiccant packets work well) in a cool, dark, dry place (ideally 40-50°F and 30-40% humidity). Label clearly with variety and date. Properly stored seeds can remain viable for 3-10 years or more.
Step 8: Season Extension & Winterizing
Extend your harvest and protect your garden for the off-season to truly maximize your self sufficient garden from scratch.
- Cold Frames: Simple structures with a transparent top (glass, polycarbonate, or old windows) that sit over garden beds. They trap solar heat, allowing you to grow cold-hardy crops (lettuce, spinach, kale, radishes) well into winter or start seeds earlier in spring. A basic cold frame can be built from 2×6 lumber and a sheet of polycarbonate for under $100.
- Hoop Houses/Low Tunnels: Larger structures made from flexible hoops (PVC pipe or EMT conduit) covered with greenhouse plastic. These provide more space and greater temperature moderation. A 10×20 ft DIY low tunnel kit can cost $200-$500, while a larger, more robust hoop house kit might be $1,000-$3,000. I use a 6×12 ft low tunnel made from 1/2-inch PVC hoops and 6mil greenhouse plastic, which extends my lettuce and spinach harvest by at least
- In-Ground Beds: If you have excellent native soil and good drainage, in-ground beds are the most economical. Double-digging (loosening soil two shovel depths) can significantly improve drainage and aeration. For my main garden, I primarily use in-ground beds, but I focus on building up the soil over time with consistent compost additions and cover cropping. I aim for beds that are no wider than 3-4 feet so I can reach the center without stepping on the soil, compacting it.
- Raised Beds: Raised beds offer numerous advantages, especially for poor soil, heavy clay, or rocky areas. They provide better drainage, warm up faster in spring, reduce compaction, and make weeding and harvesting easier on your back.
- Material Options:
- Untreated Cedar: Naturally rot-resistant and chemical-free. A 4×8 ft bed, 12 inches deep, typically requires three 2x12x8 ft cedar boards, costing around $50-$60 per board (total ~$150-$180) plus corner brackets or screws. My first raised beds were cedar and are still going strong after 7 years.
- Galvanized Steel: Durable, long-lasting, and aesthetically pleasing. Brands like Vego Garden offer modular kits. A Vego Garden 17″ Tall 8-in-1 Metal Raised Garden Bed (can be configured to 4×8 ft) costs approximately $250-$300.
- Concrete Blocks/Stones: Very durable but can leach minerals (though generally safe once weathered) and can be expensive.
- Recycled Materials: Pallets (check for chemical treatment stamps like « HT » for heat-treated), old tires (controversial due to potential chemical leaching).
- Filling Raised Beds: Don’t just fill with topsoil. Use a « Hugelkultur » approach (logs, branches, leaves, then compost, then topsoil) or a mixture of 60% good quality topsoil, 30% compost, and 10% perlite or vermiculite for drainage. A 4x8x1 ft raised bed requires about 32 cubic feet (or ~1.2 cubic yards) of soil mix, which can cost $100-$200 depending on your source.
- Material Options:
Step 4: Water Management & Irrigation
Efficient water management is critical for a self sufficient garden from scratch, especially in off-grid living where water resources might be limited.
- Rainwater Harvesting: This is my primary source of irrigation water. A 55-gallon rain barrel (e.g., EarthMark Rain Barrel, ~$120-$150) connected to a downspout can collect significant water. For larger needs, I use two 275-gallon IBC totes (Intermediate Bulk Containers, often available used for $100-$200 each from food-grade sources) connected in series. A 1,000 sq ft roof can collect approximately 620 gallons of water for every inch of rainfall. My 1,500 sq ft roof provides ample water for my 600 sq ft garden through multiple barrels and totes.
- Drip Irrigation: This is by far the most water-efficient method, delivering water directly to the plant’s root zone, minimizing evaporation and weed growth.
- Components: A typical drip system includes a pressure regulator (e.g., Rain Bird PRV-10, ~$15), a filter (Rain Bird RBY filter, ~$20), main tubing (1/2-inch poly tubing, 100ft ~$25), smaller feeder lines (1/4-inch tubing), and emitters (0.5 GPH or 1 GPH per plant).
- Kits: For beginners, a starter kit like the Rain Bird Drip Irrigation Garden Kit (model DDI-KIT-1P, ~$40-$60) is excellent for a small garden. For larger setups, I use Netafim Techline CV Drip Line (500ft roll, ~$150-$200), which has pressure-compensating emitters built-in, ensuring even watering across long runs.
- Automation: For true self-sufficiency, consider a battery-powered timer (e.g., Orbit B-Hyve Bluetooth Hose Faucet Timer, ~$50) or a solar-powered timer connected to a small 12V pump.
- Solar-Powered Pumps: For lifting water from a well, pond, or large storage tank to your garden, a solar pump is a game-changer. For a smaller drip system, a Shurflo 2088-594-152 Diaphragm Pump (12V, 3.5 GPM, ~$180) can be powered by a single 100W solar panel (e.g., Renogy 100W Monocrystalline Solar Panel, ~$100) and a small 12V battery (e.g., a 50Ah LiFePO4 battery like the Battle Born 50Ah, ~$450). For larger operations or deeper wells, more robust systems are needed. If you’re looking to build out a comprehensive off-grid power system to support your garden’s water needs, or indeed your entire homestead, you might want to explore resources like the Power Grid Generator complete system guide to understand the full scope of what’s possible in terms of energy independence.
Step 5: Seed Selection & Planting
The choice of seeds is crucial for a truly self sufficient garden from scratch.
- Choose Heirloom & Open-Pollinated Seeds: These varieties produce seeds that will grow true to type, meaning you can save seeds from your harvest year after year. F1 hybrids, while often vigorous, will not produce consistent offspring from saved seeds. Reputable seed companies include Baker Creek Heirloom Seeds, High Mowing Organic Seeds, and Seed Savers Exchange. Start with common, reliable varieties like ‘Black Krim’ tomatoes, ‘Provider’ bush beans, ‘Waltham Butternut’ squash, and ‘Black Seeded Simpson’ lettuce.
- Start Seeds Indoors (Optional but Recommended): For longer growing seasons or specific crops, starting seeds indoors gives you a head start. Use seed-starting mix (e.g., Espoma Organic Seed Starter Mix, ~$10 for 16qt bag) in seed trays (Jiffy Professional Greenhouse 72-cell kit, ~$15). Provide adequate light with LED grow lights (Barrina T5 2ft 4-pack LED Grow Lights, 20W each, ~$50) for 14-16 hours a day, positioned 2-4 inches above seedlings. Maintain consistent temperatures (65-75°F for most).
- Direct Sowing vs. Transplanting: Some crops (carrots, radishes, beans, corn) prefer direct sowing into the garden bed. Others (tomatoes, peppers, broccoli, kale) benefit from being started indoors and transplanted. Follow seed packet instructions for planting depths (e.g., lettuce seeds are often surface-sown or planted 1/8 inch deep, while beans are 1 inch deep) and spacing.
- Companion Planting: Strategically plant different species together to enhance growth, deter pests, and attract beneficial insects. For example, planting marigolds near tomatoes can deter nematodes, and basil improves tomato flavor. Nasturtiums can act as a trap crop for aphids.
- Succession Planting: For a continuous harvest, plant small batches of quick-growing crops (lettuce, radishes, cilantro) every 2-3 weeks. As one crop finishes, another is ready to take its place.
Step 6: Pest & Disease Management (Organic)
Maintaining a self sufficient garden from scratch means embracing organic pest and disease control.
- Integrated Pest Management (IPM): This holistic approach combines several strategies.
- Observation: Regularly inspect your plants for early signs of pests or disease. Catching issues early is key.
- Physical Barriers: Use row covers (e.g., Agribon AG-19 floating row cover, 10×20 ft, ~$20) to protect young plants from insect pests like cabbage worms and squash bugs. Install fences (e.g., 2×4 welded wire mesh, 4 ft tall, 50 ft roll ~$70) to keep out deer, rabbits, and other larger animals.
- Hand-Picking: For larger pests like tomato hornworms or squash bugs, simply pick them off and drop them into a bucket of soapy water.
- Companion Planting: As mentioned, certain plants repel pests. Marigolds, garlic, and onions are excellent deterrents.
- Attract Beneficial Insects: Plant flowers like dill, fennel, cosmos, and sweet alyssum to attract ladybugs, lacewings, and parasitic wasps, which prey on common garden pests.
- Organic Sprays & Treatments:
- Neem Oil: An excellent broad-spectrum organic insecticide and fungicide. Bonide Neem Oil Concentrate (16oz, ~$20) can be mixed at a rate of 1-2 tbsp per gallon of water and sprayed on affected plants.
- Insecticidal Soap: Effective against soft-bodied insects like aphids, whiteflies, and spider mites. Garden Safe Insecticidal Soap (24oz ready-to-use, ~$10).
- Bacillus thuringiensis (Bt): A naturally occurring soil bacterium that targets caterpillars and worms. Monterey BT Worm & Caterpillar Killer (16oz, ~$18) is highly effective and safe for beneficial insects.
- Copper or Sulfur Sprays: For fungal diseases like powdery mildew or blight, organic copper (e.g., Bonide Copper Fungicide, ~$15 for 1lb) or sulfur (e.g., Safer Brand Garden Fungicide, ~$10 for 16oz) can be used as a last resort.
Step 7: Harvesting & Seed Saving
The culmination of your efforts is the harvest, and seed saving closes the loop on self-sufficiency.
- Harvesting Techniques:
- Timing: Harvest vegetables at their peak ripeness for best flavor and nutritional value. For example, green beans should snap cleanly, cucumbers should be firm, and tomatoes should be fully colored.
- Frequency: Many crops, like zucchini, cucumbers, and bush beans, produce more if harvested frequently. Pick daily or every other day.
- Tools: Use clean, sharp pruners (e.g., Corona ClassicCUT Bypass Pruner BP 3180, ~$30) or a sharp knife for clean cuts, minimizing damage to the plant.
- Seed Saving: This is where the « self-sufficient » aspect truly shines.
- Selection: Only save seeds from your healthiest, most vigorous plants that show desired traits (disease resistance, good flavor, high yield).
- Isolation: To ensure true-to-type seeds, prevent cross-pollination. This can be challenging for open-pollinated crops that readily cross (e.g., squash, corn). For beginners, focus on self-pollinating plants like beans, peas, lettuce, and tomatoes.
- Processing:
- Dry Seeds (Beans, Peas, Lettuce, Grains): Allow pods/seed heads to dry completely on the plant. Harvest, shell, and clean the seeds, removing chaff.
- Wet Seeds (Tomatoes, Cucumbers, Squash): For tomatoes, ferment the seeds in water for a few days to remove the gel coating and inhibit disease. For cucumbers/squash, scrape out seeds, wash thoroughly, and dry.
- Drying: Spread seeds thinly on screens or paper plates in a cool, dry, well-ventilated area for 1-4 weeks. Ensure they are bone-dry before storage. I aim for less than 8% moisture content.
- Storage: Store seeds in airtight containers (glass jars with desiccant packets work well) in a cool, dark, dry place (ideally 40-50°F and 30-40% humidity). Label clearly with variety and date. Properly stored seeds can remain viable for 3-10 years or more.
Step 8: Season Extension & Winterizing
Extend your harvest and protect your garden for the off-season to truly maximize your self sufficient garden from scratch.
- Cold Frames: Simple structures with a transparent top (glass, polycarbonate, or old windows) that sit over garden beds. They trap solar heat, allowing you to grow cold-hardy crops (lettuce, spinach, kale, radishes) well into winter or start seeds earlier in spring. A basic cold frame can be built from 2×6 lumber and a sheet of polycarbonate for under $100.
- Hoop Houses/Low Tunnels: Larger structures made from flexible hoops (PVC pipe or EMT conduit) covered with greenhouse plastic. These provide more space and greater temperature moderation. A 10×20 ft DIY low tunnel kit can cost $200-$500, while a larger, more robust hoop house kit might be $1,000-$3,000. I use a 6×12 ft low tunnel made from 1/2-inch PVC hoops and 6mil greenhouse plastic, which extends my lettuce and spinach harvest by at least
Deciding between raised beds and in-ground beds depends on your soil, budget, and physical capabilities.
- In-Ground Beds: If you have excellent native soil and good drainage, in-ground beds are the most economical. Double-digging (loosening soil two shovel depths) can significantly improve drainage and aeration. For my main garden, I primarily use in-ground beds, but I focus on building up the soil over time with consistent compost additions and cover cropping. I aim for beds that are no wider than 3-4 feet so I can reach the center without stepping on the soil, compacting it.
- Raised Beds: Raised beds offer numerous advantages, especially for poor soil, heavy clay, or rocky areas. They provide better drainage, warm up faster in spring, reduce compaction, and make weeding and harvesting easier on your back.
- Material Options:
- Untreated Cedar: Naturally rot-resistant and chemical-free. A 4×8 ft bed, 12 inches deep, typically requires three 2x12x8 ft cedar boards, costing around $50-$60 per board (total ~$150-$180) plus corner brackets or screws. My first raised beds were cedar and are still going strong after 7 years.
- Galvanized Steel: Durable, long-lasting, and aesthetically pleasing. Brands like Vego Garden offer modular kits. A Vego Garden 17″ Tall 8-in-1 Metal Raised Garden Bed (can be configured to 4×8 ft) costs approximately $250-$300.
- Concrete Blocks/Stones: Very durable but can leach minerals (though generally safe once weathered) and can be expensive.
- Recycled Materials: Pallets (check for chemical treatment stamps like « HT » for heat-treated), old tires (controversial due to potential chemical leaching).
- Filling Raised Beds: Don’t just fill with topsoil. Use a « Hugelkultur » approach (logs, branches, leaves, then compost, then topsoil) or a mixture of 60% good quality topsoil, 30% compost, and 10% perlite or vermiculite for drainage. A 4x8x1 ft raised bed requires about 32 cubic feet (or ~1.2 cubic yards) of soil mix, which can cost $100-$200 depending on your source.
- Material Options:
Step 4: Water Management & Irrigation
Efficient water management is critical for a self sufficient garden from scratch, especially in off-grid living where water resources might be limited.
- Rainwater Harvesting: This is my primary source of irrigation water. A 55-gallon rain barrel (e.g., EarthMark Rain Barrel, ~$120-$150) connected to a downspout can collect significant water. For larger needs, I use two 275-gallon IBC totes (Intermediate Bulk Containers, often available used for $100-$200 each from food-grade sources) connected in series. A 1,000 sq ft roof can collect approximately 620 gallons of water for every inch of rainfall. My 1,500 sq ft roof provides ample water for my 600 sq ft garden through multiple barrels and totes.
- Drip Irrigation: This is by far the most water-efficient method, delivering water directly to the plant’s root zone, minimizing evaporation and weed growth.
- Components: A typical drip system includes a pressure regulator (e.g., Rain Bird PRV-10, ~$15), a filter (Rain Bird RBY filter, ~$20), main tubing (1/2-inch poly tubing, 100ft ~$25), smaller feeder lines (1/4-inch tubing), and emitters (0.5 GPH or 1 GPH per plant).
- Kits: For beginners, a starter kit like the Rain Bird Drip Irrigation Garden Kit (model DDI-KIT-1P, ~$40-$60) is excellent for a small garden. For larger setups, I use Netafim Techline CV Drip Line (500ft roll, ~$150-$200), which has pressure-compensating emitters built-in, ensuring even watering across long runs.
- Automation: For true self-sufficiency, consider a battery-powered timer (e.g., Orbit B-Hyve Bluetooth Hose Faucet Timer, ~$50) or a solar-powered timer connected to a small 12V pump.
- Solar-Powered Pumps: For lifting water from a well, pond, or large storage tank to your garden, a solar pump is a game-changer. For a smaller drip system, a Shurflo 2088-594-152 Diaphragm Pump (12V, 3.5 GPM, ~$180) can be powered by a single 100W solar panel (e.g., Renogy 100W Monocrystalline Solar Panel, ~$100) and a small 12V battery (e.g., a 50Ah LiFePO4 battery like the Battle Born 50Ah, ~$450). For larger operations or deeper wells, more robust systems are needed. If you’re looking to build out a comprehensive off-grid power system to support your garden’s water needs, or indeed your entire homestead, you might want to explore resources like the Power Grid Generator complete system guide to understand the full scope of what’s possible in terms of energy independence.
Step 5: Seed Selection & Planting
The choice of seeds is crucial for a truly self sufficient garden from scratch.
- Choose Heirloom & Open-Pollinated Seeds: These varieties produce seeds that will grow true to type, meaning you can save seeds from your harvest year after year. F1 hybrids, while often vigorous, will not produce consistent offspring from saved seeds. Reputable seed companies include Baker Creek Heirloom Seeds, High Mowing Organic Seeds, and Seed Savers Exchange. Start with common, reliable varieties like ‘Black Krim’ tomatoes, ‘Provider’ bush beans, ‘Waltham Butternut’ squash, and ‘Black Seeded Simpson’ lettuce.
- Start Seeds Indoors (Optional but Recommended): For longer growing seasons or specific crops, starting seeds indoors gives you a head start. Use seed-starting mix (e.g., Espoma Organic Seed Starter Mix, ~$10 for 16qt bag) in seed trays (Jiffy Professional Greenhouse 72-cell kit, ~$15). Provide adequate light with LED grow lights (Barrina T5 2ft 4-pack LED Grow Lights, 20W each, ~$50) for 14-16 hours a day, positioned 2-4 inches above seedlings. Maintain consistent temperatures (65-75°F for most).
- Direct Sowing vs. Transplanting: Some crops (carrots, radishes, beans, corn) prefer direct sowing into the garden bed. Others (tomatoes, peppers, broccoli, kale) benefit from being started indoors and transplanted. Follow seed packet instructions for planting depths (e.g., lettuce seeds are often surface-sown or planted 1/8 inch deep, while beans are 1 inch deep) and spacing.
- Companion Planting: Strategically plant different species together to enhance growth, deter pests, and attract beneficial insects. For example, planting marigolds near tomatoes can deter nematodes, and basil improves tomato flavor. Nasturtiums can act as a trap crop for aphids.
- Succession Planting: For a continuous harvest, plant small batches of quick-growing crops (lettuce, radishes, cilantro) every 2-3 weeks. As one crop finishes, another is ready to take its place.
Step 6: Pest & Disease Management (Organic)
Maintaining a self sufficient garden from scratch means embracing organic pest and disease control.
- Integrated Pest Management (IPM): This holistic approach combines several strategies.
- Observation: Regularly inspect your plants for early signs of pests or disease. Catching issues early is key.
- Physical Barriers: Use row covers (e.g., Agribon AG-19 floating row cover, 10×20 ft, ~$20) to protect young plants from insect pests like cabbage worms and squash bugs. Install fences (e.g., 2×4 welded wire mesh, 4 ft tall, 50 ft roll ~$70) to keep out deer, rabbits, and other larger animals.
- Hand-Picking: For larger pests like tomato hornworms or squash bugs, simply pick them off and drop them into a bucket of soapy water.
- Companion Planting: As mentioned, certain plants repel pests. Marigolds, garlic, and onions are excellent deterrents.
- Attract Beneficial Insects: Plant flowers like dill, fennel, cosmos, and sweet alyssum to attract ladybugs, lacewings, and parasitic wasps, which prey on common garden pests.
- Organic Sprays & Treatments:
- Neem Oil: An excellent broad-spectrum organic insecticide and fungicide. Bonide Neem Oil Concentrate (16oz, ~$20) can be mixed at a rate of 1-2 tbsp per gallon of water and sprayed on affected plants.
- Insecticidal Soap: Effective against soft-bodied insects like aphids, whiteflies, and spider mites. Garden Safe Insecticidal Soap (24oz ready-to-use, ~$10).
- Bacillus thuringiensis (Bt): A naturally occurring soil bacterium that targets caterpillars and worms. Monterey BT Worm & Caterpillar Killer (16oz, ~$18) is highly effective and safe for beneficial insects.
- Copper or Sulfur Sprays: For fungal diseases like powdery mildew or blight, organic copper (e.g., Bonide Copper Fungicide, ~$15 for 1lb) or sulfur (e.g., Safer Brand Garden Fungicide, ~$10 for 16oz) can be used as a last resort.
Step 7: Harvesting & Seed Saving
The culmination of your efforts is the harvest, and seed saving closes the loop on self-sufficiency.
- Harvesting Techniques:
- Timing: Harvest vegetables at their peak ripeness for best flavor and nutritional value. For example, green beans should snap cleanly, cucumbers should be firm, and tomatoes should be fully colored.
- Frequency: Many crops, like zucchini, cucumbers, and bush beans, produce more if harvested frequently. Pick daily or every other day.
- Tools: Use clean, sharp pruners (e.g., Corona ClassicCUT Bypass Pruner BP 3180, ~$30) or a sharp knife for clean cuts, minimizing damage to the plant.
- Seed Saving: This is where the « self-sufficient » aspect truly shines.
- Selection: Only save seeds from your healthiest, most vigorous plants that show desired traits (disease resistance, good flavor, high yield).
- Isolation: To ensure true-to-type seeds, prevent cross-pollination. This can be challenging for open-pollinated crops that readily cross (e.g., squash, corn). For beginners, focus on self-pollinating plants like beans, peas, lettuce, and tomatoes.
- Processing:
- Dry Seeds (Beans, Peas, Lettuce, Grains): Allow pods/seed heads to dry completely on the plant. Harvest, shell, and clean the seeds, removing chaff.
- Wet Seeds (Tomatoes, Cucumbers, Squash): For tomatoes, ferment the seeds in water for a few days to remove the gel coating and inhibit disease. For cucumbers/squash, scrape out seeds, wash thoroughly, and dry.
- Drying: Spread seeds thinly on screens or paper plates in a cool, dry, well-ventilated area for 1-4 weeks. Ensure they are bone-dry before storage. I aim for less than 8% moisture content.
- Storage: Store seeds in airtight containers (glass jars with desiccant packets work well) in a cool, dark, dry place (ideally 40-50°F and 30-40% humidity). Label clearly with variety and date. Properly stored seeds can remain viable for 3-10 years or more.
Step 8: Season Extension & Winterizing
Extend your harvest and protect your garden for the off-season to truly maximize your self sufficient garden from scratch.
- Cold Frames: Simple structures with a transparent top (glass, polycarbonate, or old windows) that sit over garden beds. They trap solar heat, allowing you to grow cold-hardy crops (lettuce, spinach, kale, radishes) well into winter or start seeds earlier in spring. A basic cold frame can be built from 2×6 lumber and a sheet of polycarbonate for under $100.
- Hoop Houses/Low Tunnels: Larger structures made from flexible hoops (PVC pipe or EMT conduit) covered with greenhouse plastic. These provide more space and greater temperature moderation. A 10×20 ft DIY low tunnel kit can cost $200-$500, while a larger, more robust hoop house kit might be $1,000-$3,000. I use a 6×12 ft low tunnel made from 1/2-inch PVC hoops and 6mil greenhouse plastic, which extends my lettuce and spinach harvest by at least
Healthy soil is the bedrock of a productive, self-sufficient garden. You can’t guess what your soil needs; you have to test it.
- Perform a Soil Test: A professional soil test will give you precise data on your soil’s pH, nutrient levels (N-P-K), and organic matter content. I recommend sending a sample to your local agricultural extension office; it typically costs $20-$50 and provides detailed recommendations. Alternatively, for a quick homeowner check, a Rapitest Soil Test Kit (40-test kit, model 1663, ~$20 on Amazon) provides a good baseline for pH, Nitrogen, Phosphorus, and Potash. Aim for a pH between 6.0 and 7.0 for most vegetables.
- Amend for pH Imbalance: If your soil is too acidic (below 6.0), add agricultural lime (dolomitic lime adds magnesium, calcitic lime adds calcium). Apply 5-10 lbs per 100 sq ft for a moderate adjustment. If it’s too alkaline (above 7.0), add elemental sulfur (e.g., Espoma Soil Acidifier, ~$15 for 6.75 lbs) or generous amounts of organic matter like peat moss or pine needles.
- Build Organic Matter: This is the single most important step for long-term soil health. Organic matter improves soil structure, water retention, drainage, and nutrient availability. Incorporate 2-4 inches of high-quality compost into your top 6-12 inches of soil annually. I make my own compost from kitchen scraps, garden waste, and shredded leaves, but you can purchase it. Local nurseries often sell bulk compost for $30-$50 per cubic yard. Aged manure (from chickens, cows, or horses – ensure it’s well-rotted to avoid burning plants) is also excellent.
- Address Nutrient Deficiencies: Based on your soil test, add specific organic amendments. If Nitrogen (N) is low, add blood meal (12-0-0, ~$20 for 3 lbs) or feather meal. For Phosphorus (P), use bone meal (3-15-0, ~$15 for 3 lbs) or rock phosphate. For Potassium (K), greensand (0-0-2.5, ~$25 for 5 lbs) or kelp meal are good choices. I rely heavily on Espoma Organic Garden-tone (5-3-3, ~$25 for an 8lb bag) as a balanced, all-purpose organic fertilizer during planting.
Step 3: Garden Bed Preparation
Deciding between raised beds and in-ground beds depends on your soil, budget, and physical capabilities.
- In-Ground Beds: If you have excellent native soil and good drainage, in-ground beds are the most economical. Double-digging (loosening soil two shovel depths) can significantly improve drainage and aeration. For my main garden, I primarily use in-ground beds, but I focus on building up the soil over time with consistent compost additions and cover cropping. I aim for beds that are no wider than 3-4 feet so I can reach the center without stepping on the soil, compacting it.
- Raised Beds: Raised beds offer numerous advantages, especially for poor soil, heavy clay, or rocky areas. They provide better drainage, warm up faster in spring, reduce compaction, and make weeding and harvesting easier on your back.
- Material Options:
- Untreated Cedar: Naturally rot-resistant and chemical-free. A 4×8 ft bed, 12 inches deep, typically requires three 2x12x8 ft cedar boards, costing around $50-$60 per board (total ~$150-$180) plus corner brackets or screws. My first raised beds were cedar and are still going strong after 7 years.
- Galvanized Steel: Durable, long-lasting, and aesthetically pleasing. Brands like Vego Garden offer modular kits. A Vego Garden 17″ Tall 8-in-1 Metal Raised Garden Bed (can be configured to 4×8 ft) costs approximately $250-$300.
- Concrete Blocks/Stones: Very durable but can leach minerals (though generally safe once weathered) and can be expensive.
- Recycled Materials: Pallets (check for chemical treatment stamps like « HT » for heat-treated), old tires (controversial due to potential chemical leaching).
- Filling Raised Beds: Don’t just fill with topsoil. Use a « Hugelkultur » approach (logs, branches, leaves, then compost, then topsoil) or a mixture of 60% good quality topsoil, 30% compost, and 10% perlite or vermiculite for drainage. A 4x8x1 ft raised bed requires about 32 cubic feet (or ~1.2 cubic yards) of soil mix, which can cost $100-$200 depending on your source.
- Material Options:
Step 4: Water Management & Irrigation
Efficient water management is critical for a self sufficient garden from scratch, especially in off-grid living where water resources might be limited.
- Rainwater Harvesting: This is my primary source of irrigation water. A 55-gallon rain barrel (e.g., EarthMark Rain Barrel, ~$120-$150) connected to a downspout can collect significant water. For larger needs, I use two 275-gallon IBC totes (Intermediate Bulk Containers, often available used for $100-$200 each from food-grade sources) connected in series. A 1,000 sq ft roof can collect approximately 620 gallons of water for every inch of rainfall. My 1,500 sq ft roof provides ample water for my 600 sq ft garden through multiple barrels and totes.
- Drip Irrigation: This is by far the most water-efficient method, delivering water directly to the plant’s root zone, minimizing evaporation and weed growth.
- Components: A typical drip system includes a pressure regulator (e.g., Rain Bird PRV-10, ~$15), a filter (Rain Bird RBY filter, ~$20), main tubing (1/2-inch poly tubing, 100ft ~$25), smaller feeder lines (1/4-inch tubing), and emitters (0.5 GPH or 1 GPH per plant).
- Kits: For beginners, a starter kit like the Rain Bird Drip Irrigation Garden Kit (model DDI-KIT-1P, ~$40-$60) is excellent for a small garden. For larger setups, I use Netafim Techline CV Drip Line (500ft roll, ~$150-$200), which has pressure-compensating emitters built-in, ensuring even watering across long runs.
- Automation: For true self-sufficiency, consider a battery-powered timer (e.g., Orbit B-Hyve Bluetooth Hose Faucet Timer, ~$50) or a solar-powered timer connected to a small 12V pump.
- Solar-Powered Pumps: For lifting water from a well, pond, or large storage tank to your garden, a solar pump is a game-changer. For a smaller drip system, a Shurflo 2088-594-152 Diaphragm Pump (12V, 3.5 GPM, ~$180) can be powered by a single 100W solar panel (e.g., Renogy 100W Monocrystalline Solar Panel, ~$100) and a small 12V battery (e.g., a 50Ah LiFePO4 battery like the Battle Born 50Ah, ~$450). For larger operations or deeper wells, more robust systems are needed. If you’re looking to build out a comprehensive off-grid power system to support your garden’s water needs, or indeed your entire homestead, you might want to explore resources like the Power Grid Generator complete system guide to understand the full scope of what’s possible in terms of energy independence.
Step 5: Seed Selection & Planting
The choice of seeds is crucial for a truly self sufficient garden from scratch.
- Choose Heirloom & Open-Pollinated Seeds: These varieties produce seeds that will grow true to type, meaning you can save seeds from your harvest year after year. F1 hybrids, while often vigorous, will not produce consistent offspring from saved seeds. Reputable seed companies include Baker Creek Heirloom Seeds, High Mowing Organic Seeds, and Seed Savers Exchange. Start with common, reliable varieties like ‘Black Krim’ tomatoes, ‘Provider’ bush beans, ‘Waltham Butternut’ squash, and ‘Black Seeded Simpson’ lettuce.
- Start Seeds Indoors (Optional but Recommended): For longer growing seasons or specific crops, starting seeds indoors gives you a head start. Use seed-starting mix (e.g., Espoma Organic Seed Starter Mix, ~$10 for 16qt bag) in seed trays (Jiffy Professional Greenhouse 72-cell kit, ~$15). Provide adequate light with LED grow lights (Barrina T5 2ft 4-pack LED Grow Lights, 20W each, ~$50) for 14-16 hours a day, positioned 2-4 inches above seedlings. Maintain consistent temperatures (65-75°F for most).
- Direct Sowing vs. Transplanting: Some crops (carrots, radishes, beans, corn) prefer direct sowing into the garden bed. Others (tomatoes, peppers, broccoli, kale) benefit from being started indoors and transplanted. Follow seed packet instructions for planting depths (e.g., lettuce seeds are often surface-sown or planted 1/8 inch deep, while beans are 1 inch deep) and spacing.
- Companion Planting: Strategically plant different species together to enhance growth, deter pests, and attract beneficial insects. For example, planting marigolds near tomatoes can deter nematodes, and basil improves tomato flavor. Nasturtiums can act as a trap crop for aphids.
- Succession Planting: For a continuous harvest, plant small batches of quick-growing crops (lettuce, radishes, cilantro) every 2-3 weeks. As one crop finishes, another is ready to take its place.
Step 6: Pest & Disease Management (Organic)
Maintaining a self sufficient garden from scratch means embracing organic pest and disease control.
- Integrated Pest Management (IPM): This holistic approach combines several strategies.
- Observation: Regularly inspect your plants for early signs of pests or disease. Catching issues early is key.
- Physical Barriers: Use row covers (e.g., Agribon AG-19 floating row cover, 10×20 ft, ~$20) to protect young plants from insect pests like cabbage worms and squash bugs. Install fences (e.g., 2×4 welded wire mesh, 4 ft tall, 50 ft roll ~$70) to keep out deer, rabbits, and other larger animals.
- Hand-Picking: For larger pests like tomato hornworms or squash bugs, simply pick them off and drop them into a bucket of soapy water.
- Companion Planting: As mentioned, certain plants repel pests. Marigolds, garlic, and onions are excellent deterrents.
- Attract Beneficial Insects: Plant flowers like dill, fennel, cosmos, and sweet alyssum to attract ladybugs, lacewings, and parasitic wasps, which prey on common garden pests.
- Organic Sprays & Treatments:
- Neem Oil: An excellent broad-spectrum organic insecticide and fungicide. Bonide Neem Oil Concentrate (16oz, ~$20) can be mixed at a rate of 1-2 tbsp per gallon of water and sprayed on affected plants.
- Insecticidal Soap: Effective against soft-bodied insects like aphids, whiteflies, and spider mites. Garden Safe Insecticidal Soap (24oz ready-to-use, ~$10).
- Bacillus thuringiensis (Bt): A naturally occurring soil bacterium that targets caterpillars and worms. Monterey BT Worm & Caterpillar Killer (16oz, ~$18) is highly effective and safe for beneficial insects.
- Copper or Sulfur Sprays: For fungal diseases like powdery mildew or blight, organic copper (e.g., Bonide Copper Fungicide, ~$15 for 1lb) or sulfur (e.g., Safer Brand Garden Fungicide, ~$10 for 16oz) can be used as a last resort.
Step 7: Harvesting & Seed Saving
The culmination of your efforts is the harvest, and seed saving closes the loop on self-sufficiency.
- Harvesting Techniques:
- Timing: Harvest vegetables at their peak ripeness for best flavor and nutritional value. For example, green beans should snap cleanly, cucumbers should be firm, and tomatoes should be fully colored.
- Frequency: Many crops, like zucchini, cucumbers, and bush beans, produce more if harvested frequently. Pick daily or every other day.
- Tools: Use clean, sharp pruners (e.g., Corona ClassicCUT Bypass Pruner BP 3180, ~$30) or a sharp knife for clean cuts, minimizing damage to the plant.
- Seed Saving: This is where the « self-sufficient » aspect truly shines.
- Selection: Only save seeds from your healthiest, most vigorous plants that show desired traits (disease resistance, good flavor, high yield).
- Isolation: To ensure true-to-type seeds, prevent cross-pollination. This can be challenging for open-pollinated crops that readily cross (e.g., squash, corn). For beginners, focus on self-pollinating plants like beans, peas, lettuce, and tomatoes.
- Processing:
- Dry Seeds (Beans, Peas, Lettuce, Grains): Allow pods/seed heads to dry completely on the plant. Harvest, shell, and clean the seeds, removing chaff.
- Wet Seeds (Tomatoes, Cucumbers, Squash): For tomatoes, ferment the seeds in water for a few days to remove the gel coating and inhibit disease. For cucumbers/squash, scrape out seeds, wash thoroughly, and dry.
- Drying: Spread seeds thinly on screens or paper plates in a cool, dry, well-ventilated area for 1-4 weeks. Ensure they are bone-dry before storage. I aim for less than 8% moisture content.
- Storage: Store seeds in airtight containers (glass jars with desiccant packets work well) in a cool, dark, dry place (ideally 40-50°F and 30-40% humidity). Label clearly with variety and date. Properly stored seeds can remain viable for 3-10 years or more.
Step 8: Season Extension & Winterizing
Extend your harvest and protect your garden for the off-season to truly maximize your self sufficient garden from scratch.
- Cold Frames: Simple structures with a transparent top (glass, polycarbonate, or old windows) that sit over garden beds. They trap solar heat, allowing you to grow cold-hardy crops (lettuce, spinach, kale, radishes) well into winter or start seeds earlier in spring. A basic cold frame can be built from 2×6 lumber and a sheet of polycarbonate for under $100.
- Hoop Houses/Low Tunnels: Larger structures made from flexible hoops (PVC pipe or EMT conduit) covered with greenhouse plastic. These provide more space and greater temperature moderation. A 10×20 ft DIY low tunnel kit can cost $200-$500, while a larger, more robust hoop house kit might be $1,000-$3,000. I use a 6×12 ft low tunnel made from 1/2-inch PVC hoops and 6mil greenhouse plastic, which extends my lettuce and spinach harvest by at least
The culmination of your efforts is the harvest, and seed saving closes the loop on self-sufficiency.
- Harvesting Techniques:
- Timing: Harvest vegetables at their peak ripeness for best flavor and nutritional value. For example, green beans should snap cleanly, cucumbers should be firm, and tomatoes should be fully colored.
- Frequency: Many crops, like zucchini, cucumbers, and bush beans, produce more if harvested frequently. Pick daily or every other day.
- Tools: Use clean, sharp pruners (e.g., Corona ClassicCUT Bypass Pruner BP 3180, ~$30) or a sharp knife for clean cuts, minimizing damage to the plant.
- Seed Saving: This is where the « self-sufficient » aspect truly shines.
- Selection: Only save seeds from your healthiest, most vigorous plants that show desired traits (disease resistance, good flavor, high yield).
- Isolation: To ensure true-to-type seeds, prevent cross-pollination. This can be challenging for open-pollinated crops that readily cross (e.g., squash, corn). For beginners, focus on self-pollinating plants like beans, peas, lettuce, and tomatoes.
- Processing:
- Dry Seeds (Beans, Peas, Lettuce, Grains): Allow pods/seed heads to dry completely on the plant. Harvest, shell, and clean the seeds, removing chaff.
- Wet Seeds (Tomatoes, Cucumbers, Squash): For tomatoes, ferment the seeds in water for a few days to remove the gel coating and inhibit disease. For cucumbers/squash, scrape out seeds, wash thoroughly, and dry.
- Drying: Spread seeds thinly on screens or paper plates in a cool, dry, well-ventilated area for 1-4 weeks. Ensure they are bone-dry before storage. I aim for less than 8% moisture content.
- Storage: Store seeds in airtight containers (glass jars with desiccant packets work well) in a cool, dark, dry place (ideally 40-50°F and 30-40% humidity). Label clearly with variety and date. Properly stored seeds can remain viable for 3-10 years or more.
Step 8: Season Extension & Winterizing
Extend your harvest and protect your garden for the off-season to truly maximize your self sufficient garden from scratch.
- Cold Frames: Simple structures with a transparent top (glass, polycarbonate, or old windows) that sit over garden beds. They trap solar heat, allowing you to grow cold-hardy crops (lettuce, spinach, kale, radishes) well into winter or start seeds earlier in spring. A basic cold frame can be built from 2×6 lumber and a sheet of polycarbonate for under $100.
- Hoop Houses/Low Tunnels: Larger structures made from flexible hoops (PVC pipe or EMT conduit) covered with greenhouse plastic. These provide more space and greater temperature moderation. A 10×20 ft DIY low tunnel kit can cost $200-$500, while a larger, more robust hoop house kit might be $1,000-$3,000. I use a 6×12 ft low tunnel made from 1/2-inch PVC hoops and 6mil greenhouse plastic, which extends my lettuce and spinach harvest by at least
Step 5: Seed Selection & Planting
The choice of seeds is crucial for a truly self sufficient garden from scratch.
- Choose Heirloom & Open-Pollinated Seeds: These varieties produce seeds that will grow true to type, meaning you can save seeds from your harvest year after year. F1 hybrids, while often vigorous, will not produce consistent offspring from saved seeds. Reputable seed companies include Baker Creek Heirloom Seeds, High Mowing Organic Seeds, and Seed Savers Exchange. Start with common, reliable varieties like ‘Black Krim’ tomatoes, ‘Provider’ bush beans, ‘Waltham Butternut’ squash, and ‘Black Seeded Simpson’ lettuce.
- Start Seeds Indoors (Optional but Recommended): For longer growing seasons or specific crops, starting seeds indoors gives you a head start. Use seed-starting mix (e.g., Espoma Organic Seed Starter Mix, ~$10 for 16qt bag) in seed trays (Jiffy Professional Greenhouse 72-cell kit, ~$15). Provide adequate light with LED grow lights (Barrina T5 2ft 4-pack LED Grow Lights, 20W each, ~$50) for 14-16 hours a day, positioned 2-4 inches above seedlings. Maintain consistent temperatures (65-75°F for most).
- Direct Sowing vs. Transplanting: Some crops (carrots, radishes, beans, corn) prefer direct sowing into the garden bed. Others (tomatoes, peppers, broccoli, kale) benefit from being started indoors and transplanted. Follow seed packet instructions for planting depths (e.g., lettuce seeds are often surface-sown or planted 1/8 inch deep, while beans are 1 inch deep) and spacing.
- Companion Planting: Strategically plant different species together to enhance growth, deter pests, and attract beneficial insects. For example, planting marigolds near tomatoes can deter nematodes, and basil improves tomato flavor. Nasturtiums can act as a trap crop for aphids.
- Succession Planting: For a continuous harvest, plant small batches of quick-growing crops (lettuce, radishes, cilantro) every 2-3 weeks. As one crop finishes, another is ready to take its place.
Step 6: Pest & Disease Management (Organic)
Maintaining a self sufficient garden from scratch means embracing organic pest and disease control.
- Integrated Pest Management (IPM): This holistic approach combines several strategies.
- Observation: Regularly inspect your plants for early signs of pests or disease. Catching issues early is key.
- Physical Barriers: Use row covers (e.g., Agribon AG-19 floating row cover, 10×20 ft, ~$20) to protect young plants from insect pests like cabbage worms and squash bugs. Install fences (e.g., 2×4 welded wire mesh, 4 ft tall, 50 ft roll ~$70) to keep out deer, rabbits, and other larger animals.
- Hand-Picking: For larger pests like tomato hornworms or squash bugs, simply pick them off and drop them into a bucket of soapy water.
- Companion Planting: As mentioned, certain plants repel pests. Marigolds, garlic, and onions are excellent deterrents.
- Attract Beneficial Insects: Plant flowers like dill, fennel, cosmos, and sweet alyssum to attract ladybugs, lacewings, and parasitic wasps, which prey on common garden pests.
- Organic Sprays & Treatments:
- Neem Oil: An excellent broad-spectrum organic insecticide and fungicide. Bonide Neem Oil Concentrate (16oz, ~$20) can be mixed at a rate of 1-2 tbsp per gallon of water and sprayed on affected plants.
- Insecticidal Soap: Effective against soft-bodied insects like aphids, whiteflies, and spider mites. Garden Safe Insecticidal Soap (24oz ready-to-use, ~$10).
- Bacillus thuringiensis (Bt): A naturally occurring soil bacterium that targets caterpillars and worms. Monterey BT Worm & Caterpillar Killer (16oz, ~$18) is highly effective and safe for beneficial insects.
- Copper or Sulfur Sprays: For fungal diseases like powdery mildew or blight, organic copper (e.g., Bonide Copper Fungicide, ~$15 for 1lb) or sulfur (e.g., Safer Brand Garden Fungicide, ~$10 for 16oz) can be used as a last resort.
Step 7: Harvesting & Seed Saving
The culmination of your efforts is the harvest, and seed saving closes the loop on self-sufficiency.
- Harvesting Techniques:
- Timing: Harvest vegetables at their peak ripeness for best flavor and nutritional value. For example, green beans should snap cleanly, cucumbers should be firm, and tomatoes should be fully colored.
- Frequency: Many crops, like zucchini, cucumbers, and bush beans, produce more if harvested frequently. Pick daily or every other day.
- Tools: Use clean, sharp pruners (e.g., Corona ClassicCUT Bypass Pruner BP 3180, ~$30) or a sharp knife for clean cuts, minimizing damage to the plant.
- Seed Saving: This is where the « self-sufficient » aspect truly shines.
- Selection: Only save seeds from your healthiest, most vigorous plants that show desired traits (disease resistance, good flavor, high yield).
- Isolation: To ensure true-to-type seeds, prevent cross-pollination. This can be challenging for open-pollinated crops that readily cross (e.g., squash, corn). For beginners, focus on self-pollinating plants like beans, peas, lettuce, and tomatoes.
- Processing:
- Dry Seeds (Beans, Peas, Lettuce, Grains): Allow pods/seed heads to dry completely on the plant. Harvest, shell, and clean the seeds, removing chaff.
- Wet Seeds (Tomatoes, Cucumbers, Squash): For tomatoes, ferment the seeds in water for a few days to remove the gel coating and inhibit disease. For cucumbers/squash, scrape out seeds, wash thoroughly, and dry.
- Drying: Spread seeds thinly on screens or paper plates in a cool, dry, well-ventilated area for 1-4 weeks. Ensure they are bone-dry before storage. I aim for less than 8% moisture content.
- Storage: Store seeds in airtight containers (glass jars with desiccant packets work well) in a cool, dark, dry place (ideally 40-50°F and 30-40% humidity). Label clearly with variety and date. Properly stored seeds can remain viable for 3-10 years or more.
Step 8: Season Extension & Winterizing
Extend your harvest and protect your garden for the off-season to truly maximize your self sufficient garden from scratch.
- Cold Frames: Simple structures with a transparent top (glass, polycarbonate, or old windows) that sit over garden beds. They trap solar heat, allowing you to grow cold-hardy crops (lettuce, spinach, kale, radishes) well into winter or start seeds earlier in spring. A basic cold frame can be built from 2×6 lumber and a sheet of polycarbonate for under $100.
- Hoop Houses/Low Tunnels: Larger structures made from flexible hoops (PVC pipe or EMT conduit) covered with greenhouse plastic. These provide more space and greater temperature moderation. A 10×20 ft DIY low tunnel kit can cost $200-$500, while a larger, more robust hoop house kit might be $1,000-$3,000. I use a 6×12 ft low tunnel made from 1/2-inch PVC hoops and 6mil greenhouse plastic, which extends my lettuce and spinach harvest by at least
- Rainwater Harvesting: This is my primary source of irrigation water. A 55-gallon rain barrel (e.g., EarthMark Rain Barrel, ~$120-$150) connected to a downspout can collect significant water. For larger needs, I use two 275-gallon IBC totes (Intermediate Bulk Containers, often available used for $100-$200 each from food-grade sources) connected in series. A 1,000 sq ft roof can collect approximately 620 gallons of water for every inch of rainfall. My 1,500 sq ft roof provides ample water for my 600 sq ft garden through multiple barrels and totes.
- Drip Irrigation: This is by far the most water-efficient method, delivering water directly to the plant’s root zone, minimizing evaporation and weed growth.
- Components: A typical drip system includes a pressure regulator (e.g., Rain Bird PRV-10, ~$15), a filter (Rain Bird RBY filter, ~$20), main tubing (1/2-inch poly tubing, 100ft ~$25), smaller feeder lines (1/4-inch tubing), and emitters (0.5 GPH or 1 GPH per plant).
- Kits: For beginners, a starter kit like the Rain Bird Drip Irrigation Garden Kit (model DDI-KIT-1P, ~$40-$60) is excellent for a small garden. For larger setups, I use Netafim Techline CV Drip Line (500ft roll, ~$150-$200), which has pressure-compensating emitters built-in, ensuring even watering across long runs.
- Automation: For true self-sufficiency, consider a battery-powered timer (e.g., Orbit B-Hyve Bluetooth Hose Faucet Timer, ~$50) or a solar-powered timer connected to a small 12V pump.
- Solar-Powered Pumps: For lifting water from a well, pond, or large storage tank to your garden, a solar pump is a game-changer. For a smaller drip system, a Shurflo 2088-594-152 Diaphragm Pump (12V, 3.5 GPM, ~$180) can be powered by a single 100W solar panel (e.g., Renogy 100W Monocrystalline Solar Panel, ~$100) and a small 12V battery (e.g., a 50Ah LiFePO4 battery like the Battle Born 50Ah, ~$450). For larger operations or deeper wells, more robust systems are needed. If you’re looking to build out a comprehensive off-grid power system to support your garden’s water needs, or indeed your entire homestead, you might want to explore resources like the Power Grid Generator complete system guide to understand the full scope of what’s possible in terms of energy independence.
Step 5: Seed Selection & Planting
The choice of seeds is crucial for a truly self sufficient garden from scratch.
- Choose Heirloom & Open-Pollinated Seeds: These varieties produce seeds that will grow true to type, meaning you can save seeds from your harvest year after year. F1 hybrids, while often vigorous, will not produce consistent offspring from saved seeds. Reputable seed companies include Baker Creek Heirloom Seeds, High Mowing Organic Seeds, and Seed Savers Exchange. Start with common, reliable varieties like ‘Black Krim’ tomatoes, ‘Provider’ bush beans, ‘Waltham Butternut’ squash, and ‘Black Seeded Simpson’ lettuce.
- Start Seeds Indoors (Optional but Recommended): For longer growing seasons or specific crops, starting seeds indoors gives you a head start. Use seed-starting mix (e.g., Espoma Organic Seed Starter Mix, ~$10 for 16qt bag) in seed trays (Jiffy Professional Greenhouse 72-cell kit, ~$15). Provide adequate light with LED grow lights (Barrina T5 2ft 4-pack LED Grow Lights, 20W each, ~$50) for 14-16 hours a day, positioned 2-4 inches above seedlings. Maintain consistent temperatures (65-75°F for most).
- Direct Sowing vs. Transplanting: Some crops (carrots, radishes, beans, corn) prefer direct sowing into the garden bed. Others (tomatoes, peppers, broccoli, kale) benefit from being started indoors and transplanted. Follow seed packet instructions for planting depths (e.g., lettuce seeds are often surface-sown or planted 1/8 inch deep, while beans are 1 inch deep) and spacing.
- Companion Planting: Strategically plant different species together to enhance growth, deter pests, and attract beneficial insects. For example, planting marigolds near tomatoes can deter nematodes, and basil improves tomato flavor. Nasturtiums can act as a trap crop for aphids.
- Succession Planting: For a continuous harvest, plant small batches of quick-growing crops (lettuce, radishes, cilantro) every 2-3 weeks. As one crop finishes, another is ready to take its place.
Step 6: Pest & Disease Management (Organic)
Maintaining a self sufficient garden from scratch means embracing organic pest and disease control.
- Integrated Pest Management (IPM): This holistic approach combines several strategies.
- Observation: Regularly inspect your plants for early signs of pests or disease. Catching issues early is key.
- Physical Barriers: Use row covers (e.g., Agribon AG-19 floating row cover, 10×20 ft, ~$20) to protect young plants from insect pests like cabbage worms and squash bugs. Install fences (e.g., 2×4 welded wire mesh, 4 ft tall, 50 ft roll ~$70) to keep out deer, rabbits, and other larger animals.
- Hand-Picking: For larger pests like tomato hornworms or squash bugs, simply pick them off and drop them into a bucket of soapy water.
- Companion Planting: As mentioned, certain plants repel pests. Marigolds, garlic, and onions are excellent deterrents.
- Attract Beneficial Insects: Plant flowers like dill, fennel, cosmos, and sweet alyssum to attract ladybugs, lacewings, and parasitic wasps, which prey on common garden pests.
- Organic Sprays & Treatments:
- Neem Oil: An excellent broad-spectrum organic insecticide and fungicide. Bonide Neem Oil Concentrate (16oz, ~$20) can be mixed at a rate of 1-2 tbsp per gallon of water and sprayed on affected plants.
- Insecticidal Soap: Effective against soft-bodied insects like aphids, whiteflies, and spider mites. Garden Safe Insecticidal Soap (24oz ready-to-use, ~$10).
- Bacillus thuringiensis (Bt): A naturally occurring soil bacterium that targets caterpillars and worms. Monterey BT Worm & Caterpillar Killer (16oz, ~$18) is highly effective and safe for beneficial insects.
- Copper or Sulfur Sprays: For fungal diseases like powdery mildew or blight, organic copper (e.g., Bonide Copper Fungicide, ~$15 for 1lb) or sulfur (e.g., Safer Brand Garden Fungicide, ~$10 for 16oz) can be used as a last resort.
Step 7: Harvesting & Seed Saving
The culmination of your efforts is the harvest, and seed saving closes the loop on self-sufficiency.
- Harvesting Techniques:
- Timing: Harvest vegetables at their peak ripeness for best flavor and nutritional value. For example, green beans should snap cleanly, cucumbers should be firm, and tomatoes should be fully colored.
- Frequency: Many crops, like zucchini, cucumbers, and bush beans, produce more if harvested frequently. Pick daily or every other day.
- Tools: Use clean, sharp pruners (e.g., Corona ClassicCUT Bypass Pruner BP 3180, ~$30) or a sharp knife for clean cuts, minimizing damage to the plant.
- Seed Saving: This is where the « self-sufficient » aspect truly shines.
- Selection: Only save seeds from your healthiest, most vigorous plants that show desired traits (disease resistance, good flavor, high yield).
- Isolation: To ensure true-to-type seeds, prevent cross-pollination. This can be challenging for open-pollinated crops that readily cross (e.g., squash, corn). For beginners, focus on self-pollinating plants like beans, peas, lettuce, and tomatoes.
- Processing:
- Dry Seeds (Beans, Peas, Lettuce, Grains): Allow pods/seed heads to dry completely on the plant. Harvest, shell, and clean the seeds, removing chaff.
- Wet Seeds (Tomatoes, Cucumbers, Squash): For tomatoes, ferment the seeds in water for a few days to remove the gel coating and inhibit disease. For cucumbers/squash, scrape out seeds, wash thoroughly, and dry.
- Drying: Spread seeds thinly on screens or paper plates in a cool, dry, well-ventilated area for 1-4 weeks. Ensure they are bone-dry before storage. I aim for less than 8% moisture content.
- Storage: Store seeds in airtight containers (glass jars with desiccant packets work well) in a cool, dark, dry place (ideally 40-50°F and 30-40% humidity). Label clearly with variety and date. Properly stored seeds can remain viable for 3-10 years or more.
Step 8: Season Extension & Winterizing
Extend your harvest and protect your garden for the off-season to truly maximize your self sufficient garden from scratch.
- Cold Frames: Simple structures with a transparent top (glass, polycarbonate, or old windows) that sit over garden beds. They trap solar heat, allowing you to grow cold-hardy crops (lettuce, spinach, kale, radishes) well into winter or start seeds earlier in spring. A basic cold frame can be built from 2×6 lumber and a sheet of polycarbonate for under $100.
- Hoop Houses/Low Tunnels: Larger structures made from flexible hoops (PVC pipe or EMT conduit) covered with greenhouse plastic. These provide more space and greater temperature moderation. A 10×20 ft DIY low tunnel kit can cost $200-$500, while a larger, more robust hoop house kit might be $1,000-$3,000. I use a 6×12 ft low tunnel made from 1/2-inch PVC hoops and 6mil greenhouse plastic, which extends my lettuce and spinach harvest by at least
Efficient water management is critical for a self sufficient garden from scratch, especially in off-grid living where water resources might be limited.
- Rainwater Harvesting: This is my primary source of irrigation water. A 55-gallon rain barrel (e.g., EarthMark Rain Barrel, ~$120-$150) connected to a downspout can collect significant water. For larger needs, I use two 275-gallon IBC totes (Intermediate Bulk Containers, often available used for $100-$200 each from food-grade sources) connected in series. A 1,000 sq ft roof can collect approximately 620 gallons of water for every inch of rainfall. My 1,500 sq ft roof provides ample water for my 600 sq ft garden through multiple barrels and totes.
- Drip Irrigation: This is by far the most water-efficient method, delivering water directly to the plant’s root zone, minimizing evaporation and weed growth.
- Components: A typical drip system includes a pressure regulator (e.g., Rain Bird PRV-10, ~$15), a filter (Rain Bird RBY filter, ~$20), main tubing (1/2-inch poly tubing, 100ft ~$25), smaller feeder lines (1/4-inch tubing), and emitters (0.5 GPH or 1 GPH per plant).
- Kits: For beginners, a starter kit like the Rain Bird Drip Irrigation Garden Kit (model DDI-KIT-1P, ~$40-$60) is excellent for a small garden. For larger setups, I use Netafim Techline CV Drip Line (500ft roll, ~$150-$200), which has pressure-compensating emitters built-in, ensuring even watering across long runs.
- Automation: For true self-sufficiency, consider a battery-powered timer (e.g., Orbit B-Hyve Bluetooth Hose Faucet Timer, ~$50) or a solar-powered timer connected to a small 12V pump.
- Solar-Powered Pumps: For lifting water from a well, pond, or large storage tank to your garden, a solar pump is a game-changer. For a smaller drip system, a Shurflo 2088-594-152 Diaphragm Pump (12V, 3.5 GPM, ~$180) can be powered by a single 100W solar panel (e.g., Renogy 100W Monocrystalline Solar Panel, ~$100) and a small 12V battery (e.g., a 50Ah LiFePO4 battery like the Battle Born 50Ah, ~$450). For larger operations or deeper wells, more robust systems are needed. If you’re looking to build out a comprehensive off-grid power system to support your garden’s water needs, or indeed your entire homestead, you might want to explore resources like the Power Grid Generator complete system guide to understand the full scope of what’s possible in terms of energy independence.
Step 5: Seed Selection & Planting
The choice of seeds is crucial for a truly self sufficient garden from scratch.
- Choose Heirloom & Open-Pollinated Seeds: These varieties produce seeds that will grow true to type, meaning you can save seeds from your harvest year after year. F1 hybrids, while often vigorous, will not produce consistent offspring from saved seeds. Reputable seed companies include Baker Creek Heirloom Seeds, High Mowing Organic Seeds, and Seed Savers Exchange. Start with common, reliable varieties like ‘Black Krim’ tomatoes, ‘Provider’ bush beans, ‘Waltham Butternut’ squash, and ‘Black Seeded Simpson’ lettuce.
- Start Seeds Indoors (Optional but Recommended): For longer growing seasons or specific crops, starting seeds indoors gives you a head start. Use seed-starting mix (e.g., Espoma Organic Seed Starter Mix, ~$10 for 16qt bag) in seed trays (Jiffy Professional Greenhouse 72-cell kit, ~$15). Provide adequate light with LED grow lights (Barrina T5 2ft 4-pack LED Grow Lights, 20W each, ~$50) for 14-16 hours a day, positioned 2-4 inches above seedlings. Maintain consistent temperatures (65-75°F for most).
- Direct Sowing vs. Transplanting: Some crops (carrots, radishes, beans, corn) prefer direct sowing into the garden bed. Others (tomatoes, peppers, broccoli, kale) benefit from being started indoors and transplanted. Follow seed packet instructions for planting depths (e.g., lettuce seeds are often surface-sown or planted 1/8 inch deep, while beans are 1 inch deep) and spacing.
- Companion Planting: Strategically plant different species together to enhance growth, deter pests, and attract beneficial insects. For example, planting marigolds near tomatoes can deter nematodes, and basil improves tomato flavor. Nasturtiums can act as a trap crop for aphids.
- Succession Planting: For a continuous harvest, plant small batches of quick-growing crops (lettuce, radishes, cilantro) every 2-3 weeks. As one crop finishes, another is ready to take its place.
Step 6: Pest & Disease Management (Organic)
Maintaining a self sufficient garden from scratch means embracing organic pest and disease control.
- Integrated Pest Management (IPM): This holistic approach combines several strategies.
- Observation: Regularly inspect your plants for early signs of pests or disease. Catching issues early is key.
- Physical Barriers: Use row covers (e.g., Agribon AG-19 floating row cover, 10×20 ft, ~$20) to protect young plants from insect pests like cabbage worms and squash bugs. Install fences (e.g., 2×4 welded wire mesh, 4 ft tall, 50 ft roll ~$70) to keep out deer, rabbits, and other larger animals.
- Hand-Picking: For larger pests like tomato hornworms or squash bugs, simply pick them off and drop them into a bucket of soapy water.
- Companion Planting: As mentioned, certain plants repel pests. Marigolds, garlic, and onions are excellent deterrents.
- Attract Beneficial Insects: Plant flowers like dill, fennel, cosmos, and sweet alyssum to attract ladybugs, lacewings, and parasitic wasps, which prey on common garden pests.
- Organic Sprays & Treatments:
- Neem Oil: An excellent broad-spectrum organic insecticide and fungicide. Bonide Neem Oil Concentrate (16oz, ~$20) can be mixed at a rate of 1-2 tbsp per gallon of water and sprayed on affected plants.
- Insecticidal Soap: Effective against soft-bodied insects like aphids, whiteflies, and spider mites. Garden Safe Insecticidal Soap (24oz ready-to-use, ~$10).
- Bacillus thuringiensis (Bt): A naturally occurring soil bacterium that targets caterpillars and worms. Monterey BT Worm & Caterpillar Killer (16oz, ~$18) is highly effective and safe for beneficial insects.
- Copper or Sulfur Sprays: For fungal diseases like powdery mildew or blight, organic copper (e.g., Bonide Copper Fungicide, ~$15 for 1lb) or sulfur (e.g., Safer Brand Garden Fungicide, ~$10 for 16oz) can be used as a last resort.
Step 7: Harvesting & Seed Saving
The culmination of your efforts is the harvest, and seed saving closes the loop on self-sufficiency.
- Harvesting Techniques:
- Timing: Harvest vegetables at their peak ripeness for best flavor and nutritional value. For example, green beans should snap cleanly, cucumbers should be firm, and tomatoes should be fully colored.
- Frequency: Many crops, like zucchini, cucumbers, and bush beans, produce more if harvested frequently. Pick daily or every other day.
- Tools: Use clean, sharp pruners (e.g., Corona ClassicCUT Bypass Pruner BP 3180, ~$30) or a sharp knife for clean cuts, minimizing damage to the plant.
- Seed Saving: This is where the « self-sufficient » aspect truly shines.
- Selection: Only save seeds from your healthiest, most vigorous plants that show desired traits (disease resistance, good flavor, high yield).
- Isolation: To ensure true-to-type seeds, prevent cross-pollination. This can be challenging for open-pollinated crops that readily cross (e.g., squash, corn). For beginners, focus on self-pollinating plants like beans, peas, lettuce, and tomatoes.
- Processing:
- Dry Seeds (Beans, Peas, Lettuce, Grains): Allow pods/seed heads to dry completely on the plant. Harvest, shell, and clean the seeds, removing chaff.
- Wet Seeds (Tomatoes, Cucumbers, Squash): For tomatoes, ferment the seeds in water for a few days to remove the gel coating and inhibit disease. For cucumbers/squash, scrape out seeds, wash thoroughly, and dry.
- Drying: Spread seeds thinly on screens or paper plates in a cool, dry, well-ventilated area for 1-4 weeks. Ensure they are bone-dry before storage. I aim for less than 8% moisture content.
- Storage: Store seeds in airtight containers (glass jars with desiccant packets work well) in a cool, dark, dry place (ideally 40-50°F and 30-40% humidity). Label clearly with variety and date. Properly stored seeds can remain viable for 3-10 years or more.
Step 8: Season Extension & Winterizing
Extend your harvest and protect your garden for the off-season to truly maximize your self sufficient garden from scratch.
- Cold Frames: Simple structures with a transparent top (glass, polycarbonate, or old windows) that sit over garden beds. They trap solar heat, allowing you to grow cold-hardy crops (lettuce, spinach, kale, radishes) well into winter or start seeds earlier in spring. A basic cold frame can be built from 2×6 lumber and a sheet of polycarbonate for under $100.
- Hoop Houses/Low Tunnels: Larger structures made from flexible hoops (PVC pipe or EMT conduit) covered with greenhouse plastic. These provide more space and greater temperature moderation. A 10×20 ft DIY low tunnel kit can cost $200-$500, while a larger, more robust hoop house kit might be $1,000-$3,000. I use a 6×12 ft low tunnel made from 1/2-inch PVC hoops and 6mil greenhouse plastic, which extends my lettuce and spinach harvest by at least
Step 4: Water Management & Irrigation
Efficient water management is critical for a self sufficient garden from scratch, especially in off-grid living where water resources might be limited.
- Rainwater Harvesting: This is my primary source of irrigation water. A 55-gallon rain barrel (e.g., EarthMark Rain Barrel, ~$120-$150) connected to a downspout can collect significant water. For larger needs, I use two 275-gallon IBC totes (Intermediate Bulk Containers, often available used for $100-$200 each from food-grade sources) connected in series. A 1,000 sq ft roof can collect approximately 620 gallons of water for every inch of rainfall. My 1,500 sq ft roof provides ample water for my 600 sq ft garden through multiple barrels and totes.
- Drip Irrigation: This is by far the most water-efficient method, delivering water directly to the plant’s root zone, minimizing evaporation and weed growth.
- Components: A typical drip system includes a pressure regulator (e.g., Rain Bird PRV-10, ~$15), a filter (Rain Bird RBY filter, ~$20), main tubing (1/2-inch poly tubing, 100ft ~$25), smaller feeder lines (1/4-inch tubing), and emitters (0.5 GPH or 1 GPH per plant).
- Kits: For beginners, a starter kit like the Rain Bird Drip Irrigation Garden Kit (model DDI-KIT-1P, ~$40-$60) is excellent for a small garden. For larger setups, I use Netafim Techline CV Drip Line (500ft roll, ~$150-$200), which has pressure-compensating emitters built-in, ensuring even watering across long runs.
- Automation: For true self-sufficiency, consider a battery-powered timer (e.g., Orbit B-Hyve Bluetooth Hose Faucet Timer, ~$50) or a solar-powered timer connected to a small 12V pump.
- Solar-Powered Pumps: For lifting water from a well, pond, or large storage tank to your garden, a solar pump is a game-changer. For a smaller drip system, a Shurflo 2088-594-152 Diaphragm Pump (12V, 3.5 GPM, ~$180) can be powered by a single 100W solar panel (e.g., Renogy 100W Monocrystalline Solar Panel, ~$100) and a small 12V battery (e.g., a 50Ah LiFePO4 battery like the Battle Born 50Ah, ~$450). For larger operations or deeper wells, more robust systems are needed. If you’re looking to build out a comprehensive off-grid power system to support your garden’s water needs, or indeed your entire homestead, you might want to explore resources like the Power Grid Generator complete system guide to understand the full scope of what’s possible in terms of energy independence.
Step 5: Seed Selection & Planting
The choice of seeds is crucial for a truly self sufficient garden from scratch.
- Choose Heirloom & Open-Pollinated Seeds: These varieties produce seeds that will grow true to type, meaning you can save seeds from your harvest year after year. F1 hybrids, while often vigorous, will not produce consistent offspring from saved seeds. Reputable seed companies include Baker Creek Heirloom Seeds, High Mowing Organic Seeds, and Seed Savers Exchange. Start with common, reliable varieties like ‘Black Krim’ tomatoes, ‘Provider’ bush beans, ‘Waltham Butternut’ squash, and ‘Black Seeded Simpson’ lettuce.
- Start Seeds Indoors (Optional but Recommended): For longer growing seasons or specific crops, starting seeds indoors gives you a head start. Use seed-starting mix (e.g., Espoma Organic Seed Starter Mix, ~$10 for 16qt bag) in seed trays (Jiffy Professional Greenhouse 72-cell kit, ~$15). Provide adequate light with LED grow lights (Barrina T5 2ft 4-pack LED Grow Lights, 20W each, ~$50) for 14-16 hours a day, positioned 2-4 inches above seedlings. Maintain consistent temperatures (65-75°F for most).
- Direct Sowing vs. Transplanting: Some crops (carrots, radishes, beans, corn) prefer direct sowing into the garden bed. Others (tomatoes, peppers, broccoli, kale) benefit from being started indoors and transplanted. Follow seed packet instructions for planting depths (e.g., lettuce seeds are often surface-sown or planted 1/8 inch deep, while beans are 1 inch deep) and spacing.
- Companion Planting: Strategically plant different species together to enhance growth, deter pests, and attract beneficial insects. For example, planting marigolds near tomatoes can deter nematodes, and basil improves tomato flavor. Nasturtiums can act as a trap crop for aphids.
- Succession Planting: For a continuous harvest, plant small batches of quick-growing crops (lettuce, radishes, cilantro) every 2-3 weeks. As one crop finishes, another is ready to take its place.
Step 6: Pest & Disease Management (Organic)
Maintaining a self sufficient garden from scratch means embracing organic pest and disease control.
- Integrated Pest Management (IPM): This holistic approach combines several strategies.
- Observation: Regularly inspect your plants for early signs of pests or disease. Catching issues early is key.
- Physical Barriers: Use row covers (e.g., Agribon AG-19 floating row cover, 10×20 ft, ~$20) to protect young plants from insect pests like cabbage worms and squash bugs. Install fences (e.g., 2×4 welded wire mesh, 4 ft tall, 50 ft roll ~$70) to keep out deer, rabbits, and other larger animals.
- Hand-Picking: For larger pests like tomato hornworms or squash bugs, simply pick them off and drop them into a bucket of soapy water.
- Companion Planting: As mentioned, certain plants repel pests. Marigolds, garlic, and onions are excellent deterrents.
- Attract Beneficial Insects: Plant flowers like dill, fennel, cosmos, and sweet alyssum to attract ladybugs, lacewings, and parasitic wasps, which prey on common garden pests.
- Organic Sprays & Treatments:
- Neem Oil: An excellent broad-spectrum organic insecticide and fungicide. Bonide Neem Oil Concentrate (16oz, ~$20) can be mixed at a rate of 1-2 tbsp per gallon of water and sprayed on affected plants.
- Insecticidal Soap: Effective against soft-bodied insects like aphids, whiteflies, and spider mites. Garden Safe Insecticidal Soap (24oz ready-to-use, ~$10).
- Bacillus thuringiensis (Bt): A naturally occurring soil bacterium that targets caterpillars and worms. Monterey BT Worm & Caterpillar Killer (16oz, ~$18) is highly effective and safe for beneficial insects.
- Copper or Sulfur Sprays: For fungal diseases like powdery mildew or blight, organic copper (e.g., Bonide Copper Fungicide, ~$15 for 1lb) or sulfur (e.g., Safer Brand Garden Fungicide, ~$10 for 16oz) can be used as a last resort.
Step 7: Harvesting & Seed Saving
The culmination of your efforts is the harvest, and seed saving closes the loop on self-sufficiency.
- Harvesting Techniques:
- Timing: Harvest vegetables at their peak ripeness for best flavor and nutritional value. For example, green beans should snap cleanly, cucumbers should be firm, and tomatoes should be fully colored.
- Frequency: Many crops, like zucchini, cucumbers, and bush beans, produce more if harvested frequently. Pick daily or every other day.
- Tools: Use clean, sharp pruners (e.g., Corona ClassicCUT Bypass Pruner BP 3180, ~$30) or a sharp knife for clean cuts, minimizing damage to the plant.
- Seed Saving: This is where the « self-sufficient » aspect truly shines.
- Selection: Only save seeds from your healthiest, most vigorous plants that show desired traits (disease resistance, good flavor, high yield).
- Isolation: To ensure true-to-type seeds, prevent cross-pollination. This can be challenging for open-pollinated crops that readily cross (e.g., squash, corn). For beginners, focus on self-pollinating plants like beans, peas, lettuce, and tomatoes.
- Processing:
- Dry Seeds (Beans, Peas, Lettuce, Grains): Allow pods/seed heads to dry completely on the plant. Harvest, shell, and clean the seeds, removing chaff.
- Wet Seeds (Tomatoes, Cucumbers, Squash): For tomatoes, ferment the seeds in water for a few days to remove the gel coating and inhibit disease. For cucumbers/squash, scrape out seeds, wash thoroughly, and dry.
- Drying: Spread seeds thinly on screens or paper plates in a cool, dry, well-ventilated area for 1-4 weeks. Ensure they are bone-dry before storage. I aim for less than 8% moisture content.
- Storage: Store seeds in airtight containers (glass jars with desiccant packets work well) in a cool, dark, dry place (ideally 40-50°F and 30-40% humidity). Label clearly with variety and date. Properly stored seeds can remain viable for 3-10 years or more.
Step 8: Season Extension & Winterizing
Extend your harvest and protect your garden for the off-season to truly maximize your self sufficient garden from scratch.
- Cold Frames: Simple structures with a transparent top (glass, polycarbonate, or old windows) that sit over garden beds. They trap solar heat, allowing you to grow cold-hardy crops (lettuce, spinach, kale, radishes) well into winter or start seeds earlier in spring. A basic cold frame can be built from 2×6 lumber and a sheet of polycarbonate for under $100.
- Hoop Houses/Low Tunnels: Larger structures made from flexible hoops (PVC pipe or EMT conduit) covered with greenhouse plastic. These provide more space and greater temperature moderation. A 10×20 ft DIY low tunnel kit can cost $200-$500, while a larger, more robust hoop house kit might be $1,000-$3,000. I use a 6×12 ft low tunnel made from 1/2-inch PVC hoops and 6mil greenhouse plastic, which extends my lettuce and spinach harvest by at least
- In-Ground Beds: If you have excellent native soil and good drainage, in-ground beds are the most economical. Double-digging (loosening soil two shovel depths) can significantly improve drainage and aeration. For my main garden, I primarily use in-ground beds, but I focus on building up the soil over time with consistent compost additions and cover cropping. I aim for beds that are no wider than 3-4 feet so I can reach the center without stepping on the soil, compacting it.
- Raised Beds: Raised beds offer numerous advantages, especially for poor soil, heavy clay, or rocky areas. They provide better drainage, warm up faster in spring, reduce compaction, and make weeding and harvesting easier on your back.
- Material Options:
- Untreated Cedar: Naturally rot-resistant and chemical-free. A 4×8 ft bed, 12 inches deep, typically requires three 2x12x8 ft cedar boards, costing around $50-$60 per board (total ~$150-$180) plus corner brackets or screws. My first raised beds were cedar and are still going strong after 7 years.
- Galvanized Steel: Durable, long-lasting, and aesthetically pleasing. Brands like Vego Garden offer modular kits. A Vego Garden 17″ Tall 8-in-1 Metal Raised Garden Bed (can be configured to 4×8 ft) costs approximately $250-$300.
- Concrete Blocks/Stones: Very durable but can leach minerals (though generally safe once weathered) and can be expensive.
- Recycled Materials: Pallets (check for chemical treatment stamps like « HT » for heat-treated), old tires (controversial due to potential chemical leaching).
- Filling Raised Beds: Don’t just fill with topsoil. Use a « Hugelkultur » approach (logs, branches, leaves, then compost, then topsoil) or a mixture of 60% good quality topsoil, 30% compost, and 10% perlite or vermiculite for drainage. A 4x8x1 ft raised bed requires about 32 cubic feet (or ~1.2 cubic yards) of soil mix, which can cost $100-$200 depending on your source.
- Material Options:
Step 4: Water Management & Irrigation
Efficient water management is critical for a self sufficient garden from scratch, especially in off-grid living where water resources might be limited.
- Rainwater Harvesting: This is my primary source of irrigation water. A 55-gallon rain barrel (e.g., EarthMark Rain Barrel, ~$120-$150) connected to a downspout can collect significant water. For larger needs, I use two 275-gallon IBC totes (Intermediate Bulk Containers, often available used for $100-$200 each from food-grade sources) connected in series. A 1,000 sq ft roof can collect approximately 620 gallons of water for every inch of rainfall. My 1,500 sq ft roof provides ample water for my 600 sq ft garden through multiple barrels and totes.
- Drip Irrigation: This is by far the most water-efficient method, delivering water directly to the plant’s root zone, minimizing evaporation and weed growth.
- Components: A typical drip system includes a pressure regulator (e.g., Rain Bird PRV-10, ~$15), a filter (Rain Bird RBY filter, ~$20), main tubing (1/2-inch poly tubing, 100ft ~$25), smaller feeder lines (1/4-inch tubing), and emitters (0.5 GPH or 1 GPH per plant).
- Kits: For beginners, a starter kit like the Rain Bird Drip Irrigation Garden Kit (model DDI-KIT-1P, ~$40-$60) is excellent for a small garden. For larger setups, I use Netafim Techline CV Drip Line (500ft roll, ~$150-$200), which has pressure-compensating emitters built-in, ensuring even watering across long runs.
- Automation: For true self-sufficiency, consider a battery-powered timer (e.g., Orbit B-Hyve Bluetooth Hose Faucet Timer, ~$50) or a solar-powered timer connected to a small 12V pump.
- Solar-Powered Pumps: For lifting water from a well, pond, or large storage tank to your garden, a solar pump is a game-changer. For a smaller drip system, a Shurflo 2088-594-152 Diaphragm Pump (12V, 3.5 GPM, ~$180) can be powered by a single 100W solar panel (e.g., Renogy 100W Monocrystalline Solar Panel, ~$100) and a small 12V battery (e.g., a 50Ah LiFePO4 battery like the Battle Born 50Ah, ~$450). For larger operations or deeper wells, more robust systems are needed. If you’re looking to build out a comprehensive off-grid power system to support your garden’s water needs, or indeed your entire homestead, you might want to explore resources like the Power Grid Generator complete system guide to understand the full scope of what’s possible in terms of energy independence.
Step 5: Seed Selection & Planting
The choice of seeds is crucial for a truly self sufficient garden from scratch.
- Choose Heirloom & Open-Pollinated Seeds: These varieties produce seeds that will grow true to type, meaning you can save seeds from your harvest year after year. F1 hybrids, while often vigorous, will not produce consistent offspring from saved seeds. Reputable seed companies include Baker Creek Heirloom Seeds, High Mowing Organic Seeds, and Seed Savers Exchange. Start with common, reliable varieties like ‘Black Krim’ tomatoes, ‘Provider’ bush beans, ‘Waltham Butternut’ squash, and ‘Black Seeded Simpson’ lettuce.
- Start Seeds Indoors (Optional but Recommended): For longer growing seasons or specific crops, starting seeds indoors gives you a head start. Use seed-starting mix (e.g., Espoma Organic Seed Starter Mix, ~$10 for 16qt bag) in seed trays (Jiffy Professional Greenhouse 72-cell kit, ~$15). Provide adequate light with LED grow lights (Barrina T5 2ft 4-pack LED Grow Lights, 20W each, ~$50) for 14-16 hours a day, positioned 2-4 inches above seedlings. Maintain consistent temperatures (65-75°F for most).
- Direct Sowing vs. Transplanting: Some crops (carrots, radishes, beans, corn) prefer direct sowing into the garden bed. Others (tomatoes, peppers, broccoli, kale) benefit from being started indoors and transplanted. Follow seed packet instructions for planting depths (e.g., lettuce seeds are often surface-sown or planted 1/8 inch deep, while beans are 1 inch deep) and spacing.
- Companion Planting: Strategically plant different species together to enhance growth, deter pests, and attract beneficial insects. For example, planting marigolds near tomatoes can deter nematodes, and basil improves tomato flavor. Nasturtiums can act as a trap crop for aphids.
- Succession Planting: For a continuous harvest, plant small batches of quick-growing crops (lettuce, radishes, cilantro) every 2-3 weeks. As one crop finishes, another is ready to take its place.
Step 6: Pest & Disease Management (Organic)
Maintaining a self sufficient garden from scratch means embracing organic pest and disease control.
- Integrated Pest Management (IPM): This holistic approach combines several strategies.
- Observation: Regularly inspect your plants for early signs of pests or disease. Catching issues early is key.
- Physical Barriers: Use row covers (e.g., Agribon AG-19 floating row cover, 10×20 ft, ~$20) to protect young plants from insect pests like cabbage worms and squash bugs. Install fences (e.g., 2×4 welded wire mesh, 4 ft tall, 50 ft roll ~$70) to keep out deer, rabbits, and other larger animals.
- Hand-Picking: For larger pests like tomato hornworms or squash bugs, simply pick them off and drop them into a bucket of soapy water.
- Companion Planting: As mentioned, certain plants repel pests. Marigolds, garlic, and onions are excellent deterrents.
- Attract Beneficial Insects: Plant flowers like dill, fennel, cosmos, and sweet alyssum to attract ladybugs, lacewings, and parasitic wasps, which prey on common garden pests.
- Organic Sprays & Treatments:
- Neem Oil: An excellent broad-spectrum organic insecticide and fungicide. Bonide Neem Oil Concentrate (16oz, ~$20) can be mixed at a rate of 1-2 tbsp per gallon of water and sprayed on affected plants.
- Insecticidal Soap: Effective against soft-bodied insects like aphids, whiteflies, and spider mites. Garden Safe Insecticidal Soap (24oz ready-to-use, ~$10).
- Bacillus thuringiensis (Bt): A naturally occurring soil bacterium that targets caterpillars and worms. Monterey BT Worm & Caterpillar Killer (16oz, ~$18) is highly effective and safe for beneficial insects.
- Copper or Sulfur Sprays: For fungal diseases like powdery mildew or blight, organic copper (e.g., Bonide Copper Fungicide, ~$15 for 1lb) or sulfur (e.g., Safer Brand Garden Fungicide, ~$10 for 16oz) can be used as a last resort.
Step 7: Harvesting & Seed Saving
The culmination of your efforts is the harvest, and seed saving closes the loop on self-sufficiency.
- Harvesting Techniques:
- Timing: Harvest vegetables at their peak ripeness for best flavor and nutritional value. For example, green beans should snap cleanly, cucumbers should be firm, and tomatoes should be fully colored.
- Frequency: Many crops, like zucchini, cucumbers, and bush beans, produce more if harvested frequently. Pick daily or every other day.
- Tools: Use clean, sharp pruners (e.g., Corona ClassicCUT Bypass Pruner BP 3180, ~$30) or a sharp knife for clean cuts, minimizing damage to the plant.
- Seed Saving: This is where the « self-sufficient » aspect truly shines.
- Selection: Only save seeds from your healthiest, most vigorous plants that show desired traits (disease resistance, good flavor, high yield).
- Isolation: To ensure true-to-type seeds, prevent cross-pollination. This can be challenging for open-pollinated crops that readily cross (e.g., squash, corn). For beginners, focus on self-pollinating plants like beans, peas, lettuce, and tomatoes.
- Processing:
- Dry Seeds (Beans, Peas, Lettuce, Grains): Allow pods/seed heads to dry completely on the plant. Harvest, shell, and clean the seeds, removing chaff.
- Wet Seeds (Tomatoes, Cucumbers, Squash): For tomatoes, ferment the seeds in water for a few days to remove the gel coating and inhibit disease. For cucumbers/squash, scrape out seeds, wash thoroughly, and dry.
- Drying: Spread seeds thinly on screens or paper plates in a cool, dry, well-ventilated area for 1-4 weeks. Ensure they are bone-dry before storage. I aim for less than 8% moisture content.
- Storage: Store seeds in airtight containers (glass jars with desiccant packets work well) in a cool, dark, dry place (ideally 40-50°F and 30-40% humidity). Label clearly with variety and date. Properly stored seeds can remain viable for 3-10 years or more.
Step 8: Season Extension & Winterizing
Extend your harvest and protect your garden for the off-season to truly maximize your self sufficient garden from scratch.
- Cold Frames: Simple structures with a transparent top (glass, polycarbonate, or old windows) that sit over garden beds. They trap solar heat, allowing you to grow cold-hardy crops (lettuce, spinach, kale, radishes) well into winter or start seeds earlier in spring. A basic cold frame can be built from 2×6 lumber and a sheet of polycarbonate for under $100.
- Hoop Houses/Low Tunnels: Larger structures made from flexible hoops (PVC pipe or EMT conduit) covered with greenhouse plastic. These provide more space and greater temperature moderation. A 10×20 ft DIY low tunnel kit can cost $200-$500, while a larger, more robust hoop house kit might be $1,000-$3,000. I use a 6×12 ft low tunnel made from 1/2-inch PVC hoops and 6mil greenhouse plastic, which extends my lettuce and spinach harvest by at least
Deciding between raised beds and in-ground beds depends on your soil, budget, and physical capabilities.
- In-Ground Beds: If you have excellent native soil and good drainage, in-ground beds are the most economical. Double-digging (loosening soil two shovel depths) can significantly improve drainage and aeration. For my main garden, I primarily use in-ground beds, but I focus on building up the soil over time with consistent compost additions and cover cropping. I aim for beds that are no wider than 3-4 feet so I can reach the center without stepping on the soil, compacting it.
- Raised Beds: Raised beds offer numerous advantages, especially for poor soil, heavy clay, or rocky areas. They provide better drainage, warm up faster in spring, reduce compaction, and make weeding and harvesting easier on your back.
- Material Options:
- Untreated Cedar: Naturally rot-resistant and chemical-free. A 4×8 ft bed, 12 inches deep, typically requires three 2x12x8 ft cedar boards, costing around $50-$60 per board (total ~$150-$180) plus corner brackets or screws. My first raised beds were cedar and are still going strong after 7 years.
- Galvanized Steel: Durable, long-lasting, and aesthetically pleasing. Brands like Vego Garden offer modular kits. A Vego Garden 17″ Tall 8-in-1 Metal Raised Garden Bed (can be configured to 4×8 ft) costs approximately $250-$300.
- Concrete Blocks/Stones: Very durable but can leach minerals (though generally safe once weathered) and can be expensive.
- Recycled Materials: Pallets (check for chemical treatment stamps like « HT » for heat-treated), old tires (controversial due to potential chemical leaching).
- Filling Raised Beds: Don’t just fill with topsoil. Use a « Hugelkultur » approach (logs, branches, leaves, then compost, then topsoil) or a mixture of 60% good quality topsoil, 30% compost, and 10% perlite or vermiculite for drainage. A 4x8x1 ft raised bed requires about 32 cubic feet (or ~1.2 cubic yards) of soil mix, which can cost $100-$200 depending on your source.
- Material Options:
Step 4: Water Management & Irrigation
Efficient water management is critical for a self sufficient garden from scratch, especially in off-grid living where water resources might be limited.
- Rainwater Harvesting: This is my primary source of irrigation water. A 55-gallon rain barrel (e.g., EarthMark Rain Barrel, ~$120-$150) connected to a downspout can collect significant water. For larger needs, I use two 275-gallon IBC totes (Intermediate Bulk Containers, often available used for $100-$200 each from food-grade sources) connected in series. A 1,000 sq ft roof can collect approximately 620 gallons of water for every inch of rainfall. My 1,500 sq ft roof provides ample water for my 600 sq ft garden through multiple barrels and totes.
- Drip Irrigation: This is by far the most water-efficient method, delivering water directly to the plant’s root zone, minimizing evaporation and weed growth.
- Components: A typical drip system includes a pressure regulator (e.g., Rain Bird PRV-10, ~$15), a filter (Rain Bird RBY filter, ~$20), main tubing (1/2-inch poly tubing, 100ft ~$25), smaller feeder lines (1/4-inch tubing), and emitters (0.5 GPH or 1 GPH per plant).
- Kits: For beginners, a starter kit like the Rain Bird Drip Irrigation Garden Kit (model DDI-KIT-1P, ~$40-$60) is excellent for a small garden. For larger setups, I use Netafim Techline CV Drip Line (500ft roll, ~$150-$200), which has pressure-compensating emitters built-in, ensuring even watering across long runs.
- Automation: For true self-sufficiency, consider a battery-powered timer (e.g., Orbit B-Hyve Bluetooth Hose Faucet Timer, ~$50) or a solar-powered timer connected to a small 12V pump.
- Solar-Powered Pumps: For lifting water from a well, pond, or large storage tank to your garden, a solar pump is a game-changer. For a smaller drip system, a Shurflo 2088-594-152 Diaphragm Pump (12V, 3.5 GPM, ~$180) can be powered by a single 100W solar panel (e.g., Renogy 100W Monocrystalline Solar Panel, ~$100) and a small 12V battery (e.g., a 50Ah LiFePO4 battery like the Battle Born 50Ah, ~$450). For larger operations or deeper wells, more robust systems are needed. If you’re looking to build out a comprehensive off-grid power system to support your garden’s water needs, or indeed your entire homestead, you might want to explore resources like the Power Grid Generator complete system guide to understand the full scope of what’s possible in terms of energy independence.
Step 5: Seed Selection & Planting
The choice of seeds is crucial for a truly self sufficient garden from scratch.
- Choose Heirloom & Open-Pollinated Seeds: These varieties produce seeds that will grow true to type, meaning you can save seeds from your harvest year after year. F1 hybrids, while often vigorous, will not produce consistent offspring from saved seeds. Reputable seed companies include Baker Creek Heirloom Seeds, High Mowing Organic Seeds, and Seed Savers Exchange. Start with common, reliable varieties like ‘Black Krim’ tomatoes, ‘Provider’ bush beans, ‘Waltham Butternut’ squash, and ‘Black Seeded Simpson’ lettuce.
- Start Seeds Indoors (Optional but Recommended): For longer growing seasons or specific crops, starting seeds indoors gives you a head start. Use seed-starting mix (e.g., Espoma Organic Seed Starter Mix, ~$10 for 16qt bag) in seed trays (Jiffy Professional Greenhouse 72-cell kit, ~$15). Provide adequate light with LED grow lights (Barrina T5 2ft 4-pack LED Grow Lights, 20W each, ~$50) for 14-16 hours a day, positioned 2-4 inches above seedlings. Maintain consistent temperatures (65-75°F for most).
- Direct Sowing vs. Transplanting: Some crops (carrots, radishes, beans, corn) prefer direct sowing into the garden bed. Others (tomatoes, peppers, broccoli, kale) benefit from being started indoors and transplanted. Follow seed packet instructions for planting depths (e.g., lettuce seeds are often surface-sown or planted 1/8 inch deep, while beans are 1 inch deep) and spacing.
- Companion Planting: Strategically plant different species together to enhance growth, deter pests, and attract beneficial insects. For example, planting marigolds near tomatoes can deter nematodes, and basil improves tomato flavor. Nasturtiums can act as a trap crop for aphids.
- Succession Planting: For a continuous harvest, plant small batches of quick-growing crops (lettuce, radishes, cilantro) every 2-3 weeks. As one crop finishes, another is ready to take its place.
Step 6: Pest & Disease Management (Organic)
Maintaining a self sufficient garden from scratch means embracing organic pest and disease control.
- Integrated Pest Management (IPM): This holistic approach combines several strategies.
- Observation: Regularly inspect your plants for early signs of pests or disease. Catching issues early is key.
- Physical Barriers: Use row covers (e.g., Agribon AG-19 floating row cover, 10×20 ft, ~$20) to protect young plants from insect pests like cabbage worms and squash bugs. Install fences (e.g., 2×4 welded wire mesh, 4 ft tall, 50 ft roll ~$70) to keep out deer, rabbits, and other larger animals.
- Hand-Picking: For larger pests like tomato hornworms or squash bugs, simply pick them off and drop them into a bucket of soapy water.
- Companion Planting: As mentioned, certain plants repel pests. Marigolds, garlic, and onions are excellent deterrents.
- Attract Beneficial Insects: Plant flowers like dill, fennel, cosmos, and sweet alyssum to attract ladybugs, lacewings, and parasitic wasps, which prey on common garden pests.
- Organic Sprays & Treatments:
- Neem Oil: An excellent broad-spectrum organic insecticide and fungicide. Bonide Neem Oil Concentrate (16oz, ~$20) can be mixed at a rate of 1-2 tbsp per gallon of water and sprayed on affected plants.
- Insecticidal Soap: Effective against soft-bodied insects like aphids, whiteflies, and spider mites. Garden Safe Insecticidal Soap (24oz ready-to-use, ~$10).
- Bacillus thuringiensis (Bt): A naturally occurring soil bacterium that targets caterpillars and worms. Monterey BT Worm & Caterpillar Killer (16oz, ~$18) is highly effective and safe for beneficial insects.
- Copper or Sulfur Sprays: For fungal diseases like powdery mildew or blight, organic copper (e.g., Bonide Copper Fungicide, ~$15 for 1lb) or sulfur (e.g., Safer Brand Garden Fungicide, ~$10 for 16oz) can be used as a last resort.
Step 7: Harvesting & Seed Saving
The culmination of your efforts is the harvest, and seed saving closes the loop on self-sufficiency.
- Harvesting Techniques:
- Timing: Harvest vegetables at their peak ripeness for best flavor and nutritional value. For example, green beans should snap cleanly, cucumbers should be firm, and tomatoes should be fully colored.
- Frequency: Many crops, like zucchini, cucumbers, and bush beans, produce more if harvested frequently. Pick daily or every other day.
- Tools: Use clean, sharp pruners (e.g., Corona ClassicCUT Bypass Pruner BP 3180, ~$30) or a sharp knife for clean cuts, minimizing damage to the plant.
- Seed Saving: This is where the « self-sufficient » aspect truly shines.
- Selection: Only save seeds from your healthiest, most vigorous plants that show desired traits (disease resistance, good flavor, high yield).
- Isolation: To ensure true-to-type seeds, prevent cross-pollination. This can be challenging for open-pollinated crops that readily cross (e.g., squash, corn). For beginners, focus on self-pollinating plants like beans, peas, lettuce, and tomatoes.
- Processing:
- Dry Seeds (Beans, Peas, Lettuce, Grains): Allow pods/seed heads to dry completely on the plant. Harvest, shell, and clean the seeds, removing chaff.
- Wet Seeds (Tomatoes, Cucumbers, Squash): For tomatoes, ferment the seeds in water for a few days to remove the gel coating and inhibit disease. For cucumbers/squash, scrape out seeds, wash thoroughly, and dry.
- Drying: Spread seeds thinly on screens or paper plates in a cool, dry, well-ventilated area for 1-4 weeks. Ensure they are bone-dry before storage. I aim for less than 8% moisture content.
- Storage: Store seeds in airtight containers (glass jars with desiccant packets work well) in a cool, dark, dry place (ideally 40-50°F and 30-40% humidity). Label clearly with variety and date. Properly stored seeds can remain viable for 3-10 years or more.
Step 8: Season Extension & Winterizing
Extend your harvest and protect your garden for the off-season to truly maximize your self sufficient garden from scratch.
- Cold Frames: Simple structures with a transparent top (glass, polycarbonate, or old windows) that sit over garden beds. They trap solar heat, allowing you to grow cold-hardy crops (lettuce, spinach, kale, radishes) well into winter or start seeds earlier in spring. A basic cold frame can be built from 2×6 lumber and a sheet of polycarbonate for under $100.
- Hoop Houses/Low Tunnels: Larger structures made from flexible hoops (PVC pipe or EMT conduit) covered with greenhouse plastic. These provide more space and greater temperature moderation. A 10×20 ft DIY low tunnel kit can cost $200-$500, while a larger, more robust hoop house kit might be $1,000-$3,000. I use a 6×12 ft low tunnel made from 1/2-inch PVC hoops and 6mil greenhouse plastic, which extends my lettuce and spinach harvest by at least
Healthy soil is the bedrock of a productive, self-sufficient garden. You can’t guess what your soil needs; you have to test it.
- Perform a Soil Test: A professional soil test will give you precise data on your soil’s pH, nutrient levels (N-P-K), and organic matter content. I recommend sending a sample to your local agricultural extension office; it typically costs $20-$50 and provides detailed recommendations. Alternatively, for a quick homeowner check, a Rapitest Soil Test Kit (40-test kit, model 1663, ~$20 on Amazon) provides a good baseline for pH, Nitrogen, Phosphorus, and Potash. Aim for a pH between 6.0 and 7.0 for most vegetables.
- Amend for pH Imbalance: If your soil is too acidic (below 6.0), add agricultural lime (dolomitic lime adds magnesium, calcitic lime adds calcium). Apply 5-10 lbs per 100 sq ft for a moderate adjustment. If it’s too alkaline (above 7.0), add elemental sulfur (e.g., Espoma Soil Acidifier, ~$15 for 6.75 lbs) or generous amounts of organic matter like peat moss or pine needles.
- Build Organic Matter: This is the single most important step for long-term soil health. Organic matter improves soil structure, water retention, drainage, and nutrient availability. Incorporate 2-4 inches of high-quality compost into your top 6-12 inches of soil annually. I make my own compost from kitchen scraps, garden waste, and shredded leaves, but you can purchase it. Local nurseries often sell bulk compost for $30-$50 per cubic yard. Aged manure (from chickens, cows, or horses – ensure it’s well-rotted to avoid burning plants) is also excellent.
- Address Nutrient Deficiencies: Based on your soil test, add specific organic amendments. If Nitrogen (N) is low, add blood meal (12-0-0, ~$20 for 3 lbs) or feather meal. For Phosphorus (P), use bone meal (3-15-0, ~$15 for 3 lbs) or rock phosphate. For Potassium (K), greensand (0-0-2.5, ~$25 for 5 lbs) or kelp meal are good choices. I rely heavily on Espoma Organic Garden-tone (5-3-3, ~$25 for an 8lb bag) as a balanced, all-purpose organic fertilizer during planting.
Step 3: Garden Bed Preparation
Deciding between raised beds and in-ground beds depends on your soil, budget, and physical capabilities.
- In-Ground Beds: If you have excellent native soil and good drainage, in-ground beds are the most economical. Double-digging (loosening soil two shovel depths) can significantly improve drainage and aeration. For my main garden, I primarily use in-ground beds, but I focus on building up the soil over time with consistent compost additions and cover cropping. I aim for beds that are no wider than 3-4 feet so I can reach the center without stepping on the soil, compacting it.
- Raised Beds: Raised beds offer numerous advantages, especially for poor soil, heavy clay, or rocky areas. They provide better drainage, warm up faster in spring, reduce compaction, and make weeding and harvesting easier on your back.
- Material Options:
- Untreated Cedar: Naturally rot-resistant and chemical-free. A 4×8 ft bed, 12 inches deep, typically requires three 2x12x8 ft cedar boards, costing around $50-$60 per board (total ~$150-$180) plus corner brackets or screws. My first raised beds were cedar and are still going strong after 7 years.
- Galvanized Steel: Durable, long-lasting, and aesthetically pleasing. Brands like Vego Garden offer modular kits. A Vego Garden 17″ Tall 8-in-1 Metal Raised Garden Bed (can be configured to 4×8 ft) costs approximately $250-$300.
- Concrete Blocks/Stones: Very durable but can leach minerals (though generally safe once weathered) and can be expensive.
- Recycled Materials: Pallets (check for chemical treatment stamps like « HT » for heat-treated), old tires (controversial due to potential chemical leaching).
- Filling Raised Beds: Don’t just fill with topsoil. Use a « Hugelkultur » approach (logs, branches, leaves, then compost, then topsoil) or a mixture of 60% good quality topsoil, 30% compost, and 10% perlite or vermiculite for drainage. A 4x8x1 ft raised bed requires about 32 cubic feet (or ~1.2 cubic yards) of soil mix, which can cost $100-$200 depending on your source.
- Material Options:
Step 4: Water Management & Irrigation
Efficient water management is critical for a self sufficient garden from scratch, especially in off-grid living where water resources might be limited.
- Rainwater Harvesting: This is my primary source of irrigation water. A 55-gallon rain barrel (e.g., EarthMark Rain Barrel, ~$120-$150) connected to a downspout can collect significant water. For larger needs, I use two 275-gallon IBC totes (Intermediate Bulk Containers, often available used for $100-$200 each from food-grade sources) connected in series. A 1,000 sq ft roof can collect approximately 620 gallons of water for every inch of rainfall. My 1,500 sq ft roof provides ample water for my 600 sq ft garden through multiple barrels and totes.
- Drip Irrigation: This is by far the most water-efficient method, delivering water directly to the plant’s root zone, minimizing evaporation and weed growth.
- Components: A typical drip system includes a pressure regulator (e.g., Rain Bird PRV-10, ~$15), a filter (Rain Bird RBY filter, ~$20), main tubing (1/2-inch poly tubing, 100ft ~$25), smaller feeder lines (1/4-inch tubing), and emitters (0.5 GPH or 1 GPH per plant).
- Kits: For beginners, a starter kit like the Rain Bird Drip Irrigation Garden Kit (model DDI-KIT-1P, ~$40-$60) is excellent for a small garden. For larger setups, I use Netafim Techline CV Drip Line (500ft roll, ~$150-$200), which has pressure-compensating emitters built-in, ensuring even watering across long runs.
- Automation: For true self-sufficiency, consider a battery-powered timer (e.g., Orbit B-Hyve Bluetooth Hose Faucet Timer, ~$50) or a solar-powered timer connected to a small 12V pump.
- Solar-Powered Pumps: For lifting water from a well, pond, or large storage tank to your garden, a solar pump is a game-changer. For a smaller drip system, a Shurflo 2088-594-152 Diaphragm Pump (12V, 3.5 GPM, ~$180) can be powered by a single 100W solar panel (e.g., Renogy 100W Monocrystalline Solar Panel, ~$100) and a small 12V battery (e.g., a 50Ah LiFePO4 battery like the Battle Born 50Ah, ~$450). For larger operations or deeper wells, more robust systems are needed. If you’re looking to build out a comprehensive off-grid power system to support your garden’s water needs, or indeed your entire homestead, you might want to explore resources like the Power Grid Generator complete system guide to understand the full scope of what’s possible in terms of energy independence.
Step 5: Seed Selection & Planting
The choice of seeds is crucial for a truly self sufficient garden from scratch.
- Choose Heirloom & Open-Pollinated Seeds: These varieties produce seeds that will grow true to type, meaning you can save seeds from your harvest year after year. F1 hybrids, while often vigorous, will not produce consistent offspring from saved seeds. Reputable seed companies include Baker Creek Heirloom Seeds, High Mowing Organic Seeds, and Seed Savers Exchange. Start with common, reliable varieties like ‘Black Krim’ tomatoes, ‘Provider’ bush beans, ‘Waltham Butternut’ squash, and ‘Black Seeded Simpson’ lettuce.
- Start Seeds Indoors (Optional but Recommended): For longer growing seasons or specific crops, starting seeds indoors gives you a head start. Use seed-starting mix (e.g., Espoma Organic Seed Starter Mix, ~$10 for 16qt bag) in seed trays (Jiffy Professional Greenhouse 72-cell kit, ~$15). Provide adequate light with LED grow lights (Barrina T5 2ft 4-pack LED Grow Lights, 20W each, ~$50) for 14-16 hours a day, positioned 2-4 inches above seedlings. Maintain consistent temperatures (65-75°F for most).
- Direct Sowing vs. Transplanting: Some crops (carrots, radishes, beans, corn) prefer direct sowing into the garden bed. Others (tomatoes, peppers, broccoli, kale) benefit from being started indoors and transplanted. Follow seed packet instructions for planting depths (e.g., lettuce seeds are often surface-sown or planted 1/8 inch deep, while beans are 1 inch deep) and spacing.
- Companion Planting: Strategically plant different species together to enhance growth, deter pests, and attract beneficial insects. For example, planting marigolds near tomatoes can deter nematodes, and basil improves tomato flavor. Nasturtiums can act as a trap crop for aphids.
- Succession Planting: For a continuous harvest, plant small batches of quick-growing crops (lettuce, radishes, cilantro) every 2-3 weeks. As one crop finishes, another is ready to take its place.
Step 6: Pest & Disease Management (Organic)
Maintaining a self sufficient garden from scratch means embracing organic pest and disease control.
- Integrated Pest Management (IPM): This holistic approach combines several strategies.
- Observation: Regularly inspect your plants for early signs of pests or disease. Catching issues early is key.
- Physical Barriers: Use row covers (e.g., Agribon AG-19 floating row cover, 10×20 ft, ~$20) to protect young plants from insect pests like cabbage worms and squash bugs. Install fences (e.g., 2×4 welded wire mesh, 4 ft tall, 50 ft roll ~$70) to keep out deer, rabbits, and other larger animals.
- Hand-Picking: For larger pests like tomato hornworms or squash bugs, simply pick them off and drop them into a bucket of soapy water.
- Companion Planting: As mentioned, certain plants repel pests. Marigolds, garlic, and onions are excellent deterrents.
- Attract Beneficial Insects: Plant flowers like dill, fennel, cosmos, and sweet alyssum to attract ladybugs, lacewings, and parasitic wasps, which prey on common garden pests.
- Organic Sprays & Treatments:
- Neem Oil: An excellent broad-spectrum organic insecticide and fungicide. Bonide Neem Oil Concentrate (16oz, ~$20) can be mixed at a rate of 1-2 tbsp per gallon of water and sprayed on affected plants.
- Insecticidal Soap: Effective against soft-bodied insects like aphids, whiteflies, and spider mites. Garden Safe Insecticidal Soap (24oz ready-to-use, ~$10).
- Bacillus thuringiensis (Bt): A naturally occurring soil bacterium that targets caterpillars and worms. Monterey BT Worm & Caterpillar Killer (16oz, ~$18) is highly effective and safe for beneficial insects.
- Copper or Sulfur Sprays: For fungal diseases like powdery mildew or blight, organic copper (e.g., Bonide Copper Fungicide, ~$15 for 1lb) or sulfur (e.g., Safer Brand Garden Fungicide, ~$10 for 16oz) can be used as a last resort.
Step 7: Harvesting & Seed Saving
The culmination of your efforts is the harvest, and seed saving closes the loop on self-sufficiency.
- Harvesting Techniques:
- Timing: Harvest vegetables at their peak ripeness for best flavor and nutritional value. For example, green beans should snap cleanly, cucumbers should be firm, and tomatoes should be fully colored.
- Frequency: Many crops, like zucchini, cucumbers, and bush beans, produce more if harvested frequently. Pick daily or every other day.
- Tools: Use clean, sharp pruners (e.g., Corona ClassicCUT Bypass Pruner BP 3180, ~$30) or a sharp knife for clean cuts, minimizing damage to the plant.
- Seed Saving: This is where the « self-sufficient » aspect truly shines.
- Selection: Only save seeds from your healthiest, most vigorous plants that show desired traits (disease resistance, good flavor, high yield).
- Isolation: To ensure true-to-type seeds, prevent cross-pollination. This can be challenging for open-pollinated crops that readily cross (e.g., squash, corn). For beginners, focus on self-pollinating plants like beans, peas, lettuce, and tomatoes.
- Processing:
- Dry Seeds (Beans, Peas, Lettuce, Grains): Allow pods/seed heads to dry completely on the plant. Harvest, shell, and clean the seeds, removing chaff.
- Wet Seeds (Tomatoes, Cucumbers, Squash): For tomatoes, ferment the seeds in water for a few days to remove the gel coating and inhibit disease. For cucumbers/squash, scrape out seeds, wash thoroughly, and dry.
- Drying: Spread seeds thinly on screens or paper plates in a cool, dry, well-ventilated area for 1-4 weeks. Ensure they are bone-dry before storage. I aim for less than 8% moisture content.
- Storage: Store seeds in airtight containers (glass jars with desiccant packets work well) in a cool, dark, dry place (ideally 40-50°F and 30-40% humidity). Label clearly with variety and date. Properly stored seeds can remain viable for 3-10 years or more.
Step 8: Season Extension & Winterizing
Extend your harvest and protect your garden for the off-season to truly maximize your self sufficient garden from scratch.
- Cold Frames: Simple structures with a transparent top (glass, polycarbonate, or old windows) that sit over garden beds. They trap solar heat, allowing you to grow cold-hardy crops (lettuce, spinach, kale, radishes) well into winter or start seeds earlier in spring. A basic cold frame can be built from 2×6 lumber and a sheet of polycarbonate for under $100.
- Hoop Houses/Low Tunnels: Larger structures made from flexible hoops (PVC pipe or EMT conduit) covered with greenhouse plastic. These provide more space and greater temperature moderation. A 10×20 ft DIY low tunnel kit can cost $200-$500, while a larger, more robust hoop house kit might be $1,000-$3,000. I use a 6×12 ft low tunnel made from 1/2-inch PVC hoops and 6mil greenhouse plastic, which extends my lettuce and spinach harvest by at least
Step 7: Harvesting & Seed Saving
The culmination of your efforts is the harvest, and seed saving closes the loop on self-sufficiency.
- Harvesting Techniques:
- Timing: Harvest vegetables at their peak ripeness for best flavor and nutritional value. For example, green beans should snap cleanly, cucumbers should be firm, and tomatoes should be fully colored.
- Frequency: Many crops, like zucchini, cucumbers, and bush beans, produce more if harvested frequently. Pick daily or every other day.
- Tools: Use clean, sharp pruners (e.g., Corona ClassicCUT Bypass Pruner BP 3180, ~$30) or a sharp knife for clean cuts, minimizing damage to the plant.
- Seed Saving: This is where the « self-sufficient » aspect truly shines.
- Selection: Only save seeds from your healthiest, most vigorous plants that show desired traits (disease resistance, good flavor, high yield).
- Isolation: To ensure true-to-type seeds, prevent cross-pollination. This can be challenging for open-pollinated crops that readily cross (e.g., squash, corn). For beginners, focus on self-pollinating plants like beans, peas, lettuce, and tomatoes.
- Processing:
- Dry Seeds (Beans, Peas, Lettuce, Grains): Allow pods/seed heads to dry completely on the plant. Harvest, shell, and clean the seeds, removing chaff.
- Wet Seeds (Tomatoes, Cucumbers, Squash): For tomatoes, ferment the seeds in water for a few days to remove the gel coating and inhibit disease. For cucumbers/squash, scrape out seeds, wash thoroughly, and dry.
- Drying: Spread seeds thinly on screens or paper plates in a cool, dry, well-ventilated area for 1-4 weeks. Ensure they are bone-dry before storage. I aim for less than 8% moisture content.
- Storage: Store seeds in airtight containers (glass jars with desiccant packets work well) in a cool, dark, dry place (ideally 40-50°F and 30-40% humidity). Label clearly with variety and date. Properly stored seeds can remain viable for 3-10 years or more.
Step 8: Season Extension & Winterizing
Extend your harvest and protect your garden for the off-season to truly maximize your self sufficient garden from scratch.
- Cold Frames: Simple structures with a transparent top (glass, polycarbonate, or old windows) that sit over garden beds. They trap solar heat, allowing you to grow cold-hardy crops (lettuce, spinach, kale, radishes) well into winter or start seeds earlier in spring. A basic cold frame can be built from 2×6 lumber and a sheet of polycarbonate for under $100.
- Hoop Houses/Low Tunnels: Larger structures made from flexible hoops (PVC pipe or EMT conduit) covered with greenhouse plastic. These provide more space and greater temperature moderation. A 10×20 ft DIY low tunnel kit can cost $200-$500, while a larger, more robust hoop house kit might be $1,000-$3,000. I use a 6×12 ft low tunnel made from 1/2-inch PVC hoops and 6mil greenhouse plastic, which extends my lettuce and spinach harvest by at least
Step 5: Seed Selection & Planting
The choice of seeds is crucial for a truly self sufficient garden from scratch.
- Choose Heirloom & Open-Pollinated Seeds: These varieties produce seeds that will grow true to type, meaning you can save seeds from your harvest year after year. F1 hybrids, while often vigorous, will not produce consistent offspring from saved seeds. Reputable seed companies include Baker Creek Heirloom Seeds, High Mowing Organic Seeds, and Seed Savers Exchange. Start with common, reliable varieties like ‘Black Krim’ tomatoes, ‘Provider’ bush beans, ‘Waltham Butternut’ squash, and ‘Black Seeded Simpson’ lettuce.
- Start Seeds Indoors (Optional but Recommended): For longer growing seasons or specific crops, starting seeds indoors gives you a head start. Use seed-starting mix (e.g., Espoma Organic Seed Starter Mix, ~$10 for 16qt bag) in seed trays (Jiffy Professional Greenhouse 72-cell kit, ~$15). Provide adequate light with LED grow lights (Barrina T5 2ft 4-pack LED Grow Lights, 20W each, ~$50) for 14-16 hours a day, positioned 2-4 inches above seedlings. Maintain consistent temperatures (65-75°F for most).
- Direct Sowing vs. Transplanting: Some crops (carrots, radishes, beans, corn) prefer direct sowing into the garden bed. Others (tomatoes, peppers, broccoli, kale) benefit from being started indoors and transplanted. Follow seed packet instructions for planting depths (e.g., lettuce seeds are often surface-sown or planted 1/8 inch deep, while beans are 1 inch deep) and spacing.
- Companion Planting: Strategically plant different species together to enhance growth, deter pests, and attract beneficial insects. For example, planting marigolds near tomatoes can deter nematodes, and basil improves tomato flavor. Nasturtiums can act as a trap crop for aphids.
- Succession Planting: For a continuous harvest, plant small batches of quick-growing crops (lettuce, radishes, cilantro) every 2-3 weeks. As one crop finishes, another is ready to take its place.
Step 6: Pest & Disease Management (Organic)
Maintaining a self sufficient garden from scratch means embracing organic pest and disease control.
- Integrated Pest Management (IPM): This holistic approach combines several strategies.
- Observation: Regularly inspect your plants for early signs of pests or disease. Catching issues early is key.
- Physical Barriers: Use row covers (e.g., Agribon AG-19 floating row cover, 10×20 ft, ~$20) to protect young plants from insect pests like cabbage worms and squash bugs. Install fences (e.g., 2×4 welded wire mesh, 4 ft tall, 50 ft roll ~$70) to keep out deer, rabbits, and other larger animals.
- Hand-Picking: For larger pests like tomato hornworms or squash bugs, simply pick them off and drop them into a bucket of soapy water.
- Companion Planting: As mentioned, certain plants repel pests. Marigolds, garlic, and onions are excellent deterrents.
- Attract Beneficial Insects: Plant flowers like dill, fennel, cosmos, and sweet alyssum to attract ladybugs, lacewings, and parasitic wasps, which prey on common garden pests.
- Organic Sprays & Treatments:
- Neem Oil: An excellent broad-spectrum organic insecticide and fungicide. Bonide Neem Oil Concentrate (16oz, ~$20) can be mixed at a rate of 1-2 tbsp per gallon of water and sprayed on affected plants.
- Insecticidal Soap: Effective against soft-bodied insects like aphids, whiteflies, and spider mites. Garden Safe Insecticidal Soap (24oz ready-to-use, ~$10).
- Bacillus thuringiensis (Bt): A naturally occurring soil bacterium that targets caterpillars and worms. Monterey BT Worm & Caterpillar Killer (16oz, ~$18) is highly effective and safe for beneficial insects.
- Copper or Sulfur Sprays: For fungal diseases like powdery mildew or blight, organic copper (e.g., Bonide Copper Fungicide, ~$15 for 1lb) or sulfur (e.g., Safer Brand Garden Fungicide, ~$10 for 16oz) can be used as a last resort.
Step 7: Harvesting & Seed Saving
The culmination of your efforts is the harvest, and seed saving closes the loop on self-sufficiency.
- Harvesting Techniques:
- Timing: Harvest vegetables at their peak ripeness for best flavor and nutritional value. For example, green beans should snap cleanly, cucumbers should be firm, and tomatoes should be fully colored.
- Frequency: Many crops, like zucchini, cucumbers, and bush beans, produce more if harvested frequently. Pick daily or every other day.
- Tools: Use clean, sharp pruners (e.g., Corona ClassicCUT Bypass Pruner BP 3180, ~$30) or a sharp knife for clean cuts, minimizing damage to the plant.
- Seed Saving: This is where the « self-sufficient » aspect truly shines.
- Selection: Only save seeds from your healthiest, most vigorous plants that show desired traits (disease resistance, good flavor, high yield).
- Isolation: To ensure true-to-type seeds, prevent cross-pollination. This can be challenging for open-pollinated crops that readily cross (e.g., squash, corn). For beginners, focus on self-pollinating plants like beans, peas, lettuce, and tomatoes.
- Processing:
- Dry Seeds (Beans, Peas, Lettuce, Grains): Allow pods/seed heads to dry completely on the plant. Harvest, shell, and clean the seeds, removing chaff.
- Wet Seeds (Tomatoes, Cucumbers, Squash): For tomatoes, ferment the seeds in water for a few days to remove the gel coating and inhibit disease. For cucumbers/squash, scrape out seeds, wash thoroughly, and dry.
- Drying: Spread seeds thinly on screens or paper plates in a cool, dry, well-ventilated area for 1-4 weeks. Ensure they are bone-dry before storage. I aim for less than 8% moisture content.
- Storage: Store seeds in airtight containers (glass jars with desiccant packets work well) in a cool, dark, dry place (ideally 40-50°F and 30-40% humidity). Label clearly with variety and date. Properly stored seeds can remain viable for 3-10 years or more.
Step 8: Season Extension & Winterizing
Extend your harvest and protect your garden for the off-season to truly maximize your self sufficient garden from scratch.
- Cold Frames: Simple structures with a transparent top (glass, polycarbonate, or old windows) that sit over garden beds. They trap solar heat, allowing you to grow cold-hardy crops (lettuce, spinach, kale, radishes) well into winter or start seeds earlier in spring. A basic cold frame can be built from 2×6 lumber and a sheet of polycarbonate for under $100.
- Hoop Houses/Low Tunnels: Larger structures made from flexible hoops (PVC pipe or EMT conduit) covered with greenhouse plastic. These provide more space and greater temperature moderation. A 10×20 ft DIY low tunnel kit can cost $200-$500, while a larger, more robust hoop house kit might be $1,000-$3,000. I use a 6×12 ft low tunnel made from 1/2-inch PVC hoops and 6mil greenhouse plastic, which extends my lettuce and spinach harvest by at least
- Rainwater Harvesting: This is my primary source of irrigation water. A 55-gallon rain barrel (e.g., EarthMark Rain Barrel, ~$120-$150) connected to a downspout can collect significant water. For larger needs, I use two 275-gallon IBC totes (Intermediate Bulk Containers, often available used for $100-$200 each from food-grade sources) connected in series. A 1,000 sq ft roof can collect approximately 620 gallons of water for every inch of rainfall. My 1,500 sq ft roof provides ample water for my 600 sq ft garden through multiple barrels and totes.
- Drip Irrigation: This is by far the most water-efficient method, delivering water directly to the plant’s root zone, minimizing evaporation and weed growth.
- Components: A typical drip system includes a pressure regulator (e.g., Rain Bird PRV-10, ~$15), a filter (Rain Bird RBY filter, ~$20), main tubing (1/2-inch poly tubing, 100ft ~$25), smaller feeder lines (1/4-inch tubing), and emitters (0.5 GPH or 1 GPH per plant).
- Kits: For beginners, a starter kit like the Rain Bird Drip Irrigation Garden Kit (model DDI-KIT-1P, ~$40-$60) is excellent for a small garden. For larger setups, I use Netafim Techline CV Drip Line (500ft roll, ~$150-$200), which has pressure-compensating emitters built-in, ensuring even watering across long runs.
- Automation: For true self-sufficiency, consider a battery-powered timer (e.g., Orbit B-Hyve Bluetooth Hose Faucet Timer, ~$50) or a solar-powered timer connected to a small 12V pump.
- Solar-Powered Pumps: For lifting water from a well, pond, or large storage tank to your garden, a solar pump is a game-changer. For a smaller drip system, a Shurflo 2088-594-152 Diaphragm Pump (12V, 3.5 GPM, ~$180) can be powered by a single 100W solar panel (e.g., Renogy 100W Monocrystalline Solar Panel, ~$100) and a small 12V battery (e.g., a 50Ah LiFePO4 battery like the Battle Born 50Ah, ~$450). For larger operations or deeper wells, more robust systems are needed. If you’re looking to build out a comprehensive off-grid power system to support your garden’s water needs, or indeed your entire homestead, you might want to explore resources like the Power Grid Generator complete system guide to understand the full scope of what’s possible in terms of energy independence.
Step 5: Seed Selection & Planting
The choice of seeds is crucial for a truly self sufficient garden from scratch.
- Choose Heirloom & Open-Pollinated Seeds: These varieties produce seeds that will grow true to type, meaning you can save seeds from your harvest year after year. F1 hybrids, while often vigorous, will not produce consistent offspring from saved seeds. Reputable seed companies include Baker Creek Heirloom Seeds, High Mowing Organic Seeds, and Seed Savers Exchange. Start with common, reliable varieties like ‘Black Krim’ tomatoes, ‘Provider’ bush beans, ‘Waltham Butternut’ squash, and ‘Black Seeded Simpson’ lettuce.
- Start Seeds Indoors (Optional but Recommended): For longer growing seasons or specific crops, starting seeds indoors gives you a head start. Use seed-starting mix (e.g., Espoma Organic Seed Starter Mix, ~$10 for 16qt bag) in seed trays (Jiffy Professional Greenhouse 72-cell kit, ~$15). Provide adequate light with LED grow lights (Barrina T5 2ft 4-pack LED Grow Lights, 20W each, ~$50) for 14-16 hours a day, positioned 2-4 inches above seedlings. Maintain consistent temperatures (65-75°F for most).
- Direct Sowing vs. Transplanting: Some crops (carrots, radishes, beans, corn) prefer direct sowing into the garden bed. Others (tomatoes, peppers, broccoli, kale) benefit from being started indoors and transplanted. Follow seed packet instructions for planting depths (e.g., lettuce seeds are often surface-sown or planted 1/8 inch deep, while beans are 1 inch deep) and spacing.
- Companion Planting: Strategically plant different species together to enhance growth, deter pests, and attract beneficial insects. For example, planting marigolds near tomatoes can deter nematodes, and basil improves tomato flavor. Nasturtiums can act as a trap crop for aphids.
- Succession Planting: For a continuous harvest, plant small batches of quick-growing crops (lettuce, radishes, cilantro) every 2-3 weeks. As one crop finishes, another is ready to take its place.
Step 6: Pest & Disease Management (Organic)
Maintaining a self sufficient garden from scratch means embracing organic pest and disease control.
- Integrated Pest Management (IPM): This holistic approach combines several strategies.
- Observation: Regularly inspect your plants for early signs of pests or disease. Catching issues early is key.
- Physical Barriers: Use row covers (e.g., Agribon AG-19 floating row cover, 10×20 ft, ~$20) to protect young plants from insect pests like cabbage worms and squash bugs. Install fences (e.g., 2×4 welded wire mesh, 4 ft tall, 50 ft roll ~$70) to keep out deer, rabbits, and other larger animals.
- Hand-Picking: For larger pests like tomato hornworms or squash bugs, simply pick them off and drop them into a bucket of soapy water.
- Companion Planting: As mentioned, certain plants repel pests. Marigolds, garlic, and onions are excellent deterrents.
- Attract Beneficial Insects: Plant flowers like dill, fennel, cosmos, and sweet alyssum to attract ladybugs, lacewings, and parasitic wasps, which prey on common garden pests.
- Organic Sprays & Treatments:
- Neem Oil: An excellent broad-spectrum organic insecticide and fungicide. Bonide Neem Oil Concentrate (16oz, ~$20) can be mixed at a rate of 1-2 tbsp per gallon of water and sprayed on affected plants.
- Insecticidal Soap: Effective against soft-bodied insects like aphids, whiteflies, and spider mites. Garden Safe Insecticidal Soap (24oz ready-to-use, ~$10).
- Bacillus thuringiensis (Bt): A naturally occurring soil bacterium that targets caterpillars and worms. Monterey BT Worm & Caterpillar Killer (16oz, ~$18) is highly effective and safe for beneficial insects.
- Copper or Sulfur Sprays: For fungal diseases like powdery mildew or blight, organic copper (e.g., Bonide Copper Fungicide, ~$15 for 1lb) or sulfur (e.g., Safer Brand Garden Fungicide, ~$10 for 16oz) can be used as a last resort.
Step 7: Harvesting & Seed Saving
The culmination of your efforts is the harvest, and seed saving closes the loop on self-sufficiency.
- Harvesting Techniques:
- Timing: Harvest vegetables at their peak ripeness for best flavor and nutritional value. For example, green beans should snap cleanly, cucumbers should be firm, and tomatoes should be fully colored.
- Frequency: Many crops, like zucchini, cucumbers, and bush beans, produce more if harvested frequently. Pick daily or every other day.
- Tools: Use clean, sharp pruners (e.g., Corona ClassicCUT Bypass Pruner BP 3180, ~$30) or a sharp knife for clean cuts, minimizing damage to the plant.
- Seed Saving: This is where the « self-sufficient » aspect truly shines.
- Selection: Only save seeds from your healthiest, most vigorous plants that show desired traits (disease resistance, good flavor, high yield).
- Isolation: To ensure true-to-type seeds, prevent cross-pollination. This can be challenging for open-pollinated crops that readily cross (e.g., squash, corn). For beginners, focus on self-pollinating plants like beans, peas, lettuce, and tomatoes.
- Processing:
- Dry Seeds (Beans, Peas, Lettuce, Grains): Allow pods/seed heads to dry completely on the plant. Harvest, shell, and clean the seeds, removing chaff.
- Wet Seeds (Tomatoes, Cucumbers, Squash): For tomatoes, ferment the seeds in water for a few days to remove the gel coating and inhibit disease. For cucumbers/squash, scrape out seeds, wash thoroughly, and dry.
- Drying: Spread seeds thinly on screens or paper plates in a cool, dry, well-ventilated area for 1-4 weeks. Ensure they are bone-dry before storage. I aim for less than 8% moisture content.
- Storage: Store seeds in airtight containers (glass jars with desiccant packets work well) in a cool, dark, dry place (ideally 40-50°F and 30-40% humidity). Label clearly with variety and date. Properly stored seeds can remain viable for 3-10 years or more.
Step 8: Season Extension & Winterizing
Extend your harvest and protect your garden for the off-season to truly maximize your self sufficient garden from scratch.
- Cold Frames: Simple structures with a transparent top (glass, polycarbonate, or old windows) that sit over garden beds. They trap solar heat, allowing you to grow cold-hardy crops (lettuce, spinach, kale, radishes) well into winter or start seeds earlier in spring. A basic cold frame can be built from 2×6 lumber and a sheet of polycarbonate for under $100.
- Hoop Houses/Low Tunnels: Larger structures made from flexible hoops (PVC pipe or EMT conduit) covered with greenhouse plastic. These provide more space and greater temperature moderation. A 10×20 ft DIY low tunnel kit can cost $200-$500, while a larger, more robust hoop house kit might be $1,000-$3,000. I use a 6×12 ft low tunnel made from 1/2-inch PVC hoops and 6mil greenhouse plastic, which extends my lettuce and spinach harvest by at least
Efficient water management is critical for a self sufficient garden from scratch, especially in off-grid living where water resources might be limited.
- Rainwater Harvesting: This is my primary source of irrigation water. A 55-gallon rain barrel (e.g., EarthMark Rain Barrel, ~$120-$150) connected to a downspout can collect significant water. For larger needs, I use two 275-gallon IBC totes (Intermediate Bulk Containers, often available used for $100-$200 each from food-grade sources) connected in series. A 1,000 sq ft roof can collect approximately 620 gallons of water for every inch of rainfall. My 1,500 sq ft roof provides ample water for my 600 sq ft garden through multiple barrels and totes.
- Drip Irrigation: This is by far the most water-efficient method, delivering water directly to the plant’s root zone, minimizing evaporation and weed growth.
- Components: A typical drip system includes a pressure regulator (e.g., Rain Bird PRV-10, ~$15), a filter (Rain Bird RBY filter, ~$20), main tubing (1/2-inch poly tubing, 100ft ~$25), smaller feeder lines (1/4-inch tubing), and emitters (0.5 GPH or 1 GPH per plant).
- Kits: For beginners, a starter kit like the Rain Bird Drip Irrigation Garden Kit (model DDI-KIT-1P, ~$40-$60) is excellent for a small garden. For larger setups, I use Netafim Techline CV Drip Line (500ft roll, ~$150-$200), which has pressure-compensating emitters built-in, ensuring even watering across long runs.
- Automation: For true self-sufficiency, consider a battery-powered timer (e.g., Orbit B-Hyve Bluetooth Hose Faucet Timer, ~$50) or a solar-powered timer connected to a small 12V pump.
- Solar-Powered Pumps: For lifting water from a well, pond, or large storage tank to your garden, a solar pump is a game-changer. For a smaller drip system, a Shurflo 2088-594-152 Diaphragm Pump (12V, 3.5 GPM, ~$180) can be powered by a single 100W solar panel (e.g., Renogy 100W Monocrystalline Solar Panel, ~$100) and a small 12V battery (e.g., a 50Ah LiFePO4 battery like the Battle Born 50Ah, ~$450). For larger operations or deeper wells, more robust systems are needed. If you’re looking to build out a comprehensive off-grid power system to support your garden’s water needs, or indeed your entire homestead, you might want to explore resources like the Power Grid Generator complete system guide to understand the full scope of what’s possible in terms of energy independence.
Step 5: Seed Selection & Planting
The choice of seeds is crucial for a truly self sufficient garden from scratch.
- Choose Heirloom & Open-Pollinated Seeds: These varieties produce seeds that will grow true to type, meaning you can save seeds from your harvest year after year. F1 hybrids, while often vigorous, will not produce consistent offspring from saved seeds. Reputable seed companies include Baker Creek Heirloom Seeds, High Mowing Organic Seeds, and Seed Savers Exchange. Start with common, reliable varieties like ‘Black Krim’ tomatoes, ‘Provider’ bush beans, ‘Waltham Butternut’ squash, and ‘Black Seeded Simpson’ lettuce.
- Start Seeds Indoors (Optional but Recommended): For longer growing seasons or specific crops, starting seeds indoors gives you a head start. Use seed-starting mix (e.g., Espoma Organic Seed Starter Mix, ~$10 for 16qt bag) in seed trays (Jiffy Professional Greenhouse 72-cell kit, ~$15). Provide adequate light with LED grow lights (Barrina T5 2ft 4-pack LED Grow Lights, 20W each, ~$50) for 14-16 hours a day, positioned 2-4 inches above seedlings. Maintain consistent temperatures (65-75°F for most).
- Direct Sowing vs. Transplanting: Some crops (carrots, radishes, beans, corn) prefer direct sowing into the garden bed. Others (tomatoes, peppers, broccoli, kale) benefit from being started indoors and transplanted. Follow seed packet instructions for planting depths (e.g., lettuce seeds are often surface-sown or planted 1/8 inch deep, while beans are 1 inch deep) and spacing.
- Companion Planting: Strategically plant different species together to enhance growth, deter pests, and attract beneficial insects. For example, planting marigolds near tomatoes can deter nematodes, and basil improves tomato flavor. Nasturtiums can act as a trap crop for aphids.
- Succession Planting: For a continuous harvest, plant small batches of quick-growing crops (lettuce, radishes, cilantro) every 2-3 weeks. As one crop finishes, another is ready to take its place.
Step 6: Pest & Disease Management (Organic)
Maintaining a self sufficient garden from scratch means embracing organic pest and disease control.
- Integrated Pest Management (IPM): This holistic approach combines several strategies.
- Observation: Regularly inspect your plants for early signs of pests or disease. Catching issues early is key.
- Physical Barriers: Use row covers (e.g., Agribon AG-19 floating row cover, 10×20 ft, ~$20) to protect young plants from insect pests like cabbage worms and squash bugs. Install fences (e.g., 2×4 welded wire mesh, 4 ft tall, 50 ft roll ~$70) to keep out deer, rabbits, and other larger animals.
- Hand-Picking: For larger pests like tomato hornworms or squash bugs, simply pick them off and drop them into a bucket of soapy water.
- Companion Planting: As mentioned, certain plants repel pests. Marigolds, garlic, and onions are excellent deterrents.
- Attract Beneficial Insects: Plant flowers like dill, fennel, cosmos, and sweet alyssum to attract ladybugs, lacewings, and parasitic wasps, which prey on common garden pests.
- Organic Sprays & Treatments:
- Neem Oil: An excellent broad-spectrum organic insecticide and fungicide. Bonide Neem Oil Concentrate (16oz, ~$20) can be mixed at a rate of 1-2 tbsp per gallon of water and sprayed on affected plants.
- Insecticidal Soap: Effective against soft-bodied insects like aphids, whiteflies, and spider mites. Garden Safe Insecticidal Soap (24oz ready-to-use, ~$10).
- Bacillus thuringiensis (Bt): A naturally occurring soil bacterium that targets caterpillars and worms. Monterey BT Worm & Caterpillar Killer (16oz, ~$18) is highly effective and safe for beneficial insects.
- Copper or Sulfur Sprays: For fungal diseases like powdery mildew or blight, organic copper (e.g., Bonide Copper Fungicide, ~$15 for 1lb) or sulfur (e.g., Safer Brand Garden Fungicide, ~$10 for 16oz) can be used as a last resort.
Step 7: Harvesting & Seed Saving
The culmination of your efforts is the harvest, and seed saving closes the loop on self-sufficiency.
- Harvesting Techniques:
- Timing: Harvest vegetables at their peak ripeness for best flavor and nutritional value. For example, green beans should snap cleanly, cucumbers should be firm, and tomatoes should be fully colored.
- Frequency: Many crops, like zucchini, cucumbers, and bush beans, produce more if harvested frequently. Pick daily or every other day.
- Tools: Use clean, sharp pruners (e.g., Corona ClassicCUT Bypass Pruner BP 3180, ~$30) or a sharp knife for clean cuts, minimizing damage to the plant.
- Seed Saving: This is where the « self-sufficient » aspect truly shines.
- Selection: Only save seeds from your healthiest, most vigorous plants that show desired traits (disease resistance, good flavor, high yield).
- Isolation: To ensure true-to-type seeds, prevent cross-pollination. This can be challenging for open-pollinated crops that readily cross (e.g., squash, corn). For beginners, focus on self-pollinating plants like beans, peas, lettuce, and tomatoes.
- Processing:
- Dry Seeds (Beans, Peas, Lettuce, Grains): Allow pods/seed heads to dry completely on the plant. Harvest, shell, and clean the seeds, removing chaff.
- Wet Seeds (Tomatoes, Cucumbers, Squash): For tomatoes, ferment the seeds in water for a few days to remove the gel coating and inhibit disease. For cucumbers/squash, scrape out seeds, wash thoroughly, and dry.
- Drying: Spread seeds thinly on screens or paper plates in a cool, dry, well-ventilated area for 1-4 weeks. Ensure they are bone-dry before storage. I aim for less than 8% moisture content.
- Storage: Store seeds in airtight containers (glass jars with desiccant packets work well) in a cool, dark, dry place (ideally 40-50°F and 30-40% humidity). Label clearly with variety and date. Properly stored seeds can remain viable for 3-10 years or more.
Step 8: Season Extension & Winterizing
Extend your harvest and protect your garden for the off-season to truly maximize your self sufficient garden from scratch.
- Cold Frames: Simple structures with a transparent top (glass, polycarbonate, or old windows) that sit over garden beds. They trap solar heat, allowing you to grow cold-hardy crops (lettuce, spinach, kale, radishes) well into winter or start seeds earlier in spring. A basic cold frame can be built from 2×6 lumber and a sheet of polycarbonate for under $100.
- Hoop Houses/Low Tunnels: Larger structures made from flexible hoops (PVC pipe or EMT conduit) covered with greenhouse plastic. These provide more space and greater temperature moderation. A 10×20 ft DIY low tunnel kit can cost $200-$500, while a larger, more robust hoop house kit might be $1,000-$3,000. I use a 6×12 ft low tunnel made from 1/2-inch PVC hoops and 6mil greenhouse plastic, which extends my lettuce and spinach harvest by at least
Step 4: Water Management & Irrigation
Efficient water management is critical for a self sufficient garden from scratch, especially in off-grid living where water resources might be limited.
- Rainwater Harvesting: This is my primary source of irrigation water. A 55-gallon rain barrel (e.g., EarthMark Rain Barrel, ~$120-$150) connected to a downspout can collect significant water. For larger needs, I use two 275-gallon IBC totes (Intermediate Bulk Containers, often available used for $100-$200 each from food-grade sources) connected in series. A 1,000 sq ft roof can collect approximately 620 gallons of water for every inch of rainfall. My 1,500 sq ft roof provides ample water for my 600 sq ft garden through multiple barrels and totes.
- Drip Irrigation: This is by far the most water-efficient method, delivering water directly to the plant’s root zone, minimizing evaporation and weed growth.
- Components: A typical drip system includes a pressure regulator (e.g., Rain Bird PRV-10, ~$15), a filter (Rain Bird RBY filter, ~$20), main tubing (1/2-inch poly tubing, 100ft ~$25), smaller feeder lines (1/4-inch tubing), and emitters (0.5 GPH or 1 GPH per plant).
- Kits: For beginners, a starter kit like the Rain Bird Drip Irrigation Garden Kit (model DDI-KIT-1P, ~$40-$60) is excellent for a small garden. For larger setups, I use Netafim Techline CV Drip Line (500ft roll, ~$150-$200), which has pressure-compensating emitters built-in, ensuring even watering across long runs.
- Automation: For true self-sufficiency, consider a battery-powered timer (e.g., Orbit B-Hyve Bluetooth Hose Faucet Timer, ~$50) or a solar-powered timer connected to a small 12V pump.
- Solar-Powered Pumps: For lifting water from a well, pond, or large storage tank to your garden, a solar pump is a game-changer. For a smaller drip system, a Shurflo 2088-594-152 Diaphragm Pump (12V, 3.5 GPM, ~$180) can be powered by a single 100W solar panel (e.g., Renogy 100W Monocrystalline Solar Panel, ~$100) and a small 12V battery (e.g., a 50Ah LiFePO4 battery like the Battle Born 50Ah, ~$450). For larger operations or deeper wells, more robust systems are needed. If you’re looking to build out a comprehensive off-grid power system to support your garden’s water needs, or indeed your entire homestead, you might want to explore resources like the Power Grid Generator complete system guide to understand the full scope of what’s possible in terms of energy independence.
Step 5: Seed Selection & Planting
The choice of seeds is crucial for a truly self sufficient garden from scratch.
- Choose Heirloom & Open-Pollinated Seeds: These varieties produce seeds that will grow true to type, meaning you can save seeds from your harvest year after year. F1 hybrids, while often vigorous, will not produce consistent offspring from saved seeds. Reputable seed companies include Baker Creek Heirloom Seeds, High Mowing Organic Seeds, and Seed Savers Exchange. Start with common, reliable varieties like ‘Black Krim’ tomatoes, ‘Provider’ bush beans, ‘Waltham Butternut’ squash, and ‘Black Seeded Simpson’ lettuce.
- Start Seeds Indoors (Optional but Recommended): For longer growing seasons or specific crops, starting seeds indoors gives you a head start. Use seed-starting mix (e.g., Espoma Organic Seed Starter Mix, ~$10 for 16qt bag) in seed trays (Jiffy Professional Greenhouse 72-cell kit, ~$15). Provide adequate light with LED grow lights (Barrina T5 2ft 4-pack LED Grow Lights, 20W each, ~$50) for 14-16 hours a day, positioned 2-4 inches above seedlings. Maintain consistent temperatures (65-75°F for most).
- Direct Sowing vs. Transplanting: Some crops (carrots, radishes, beans, corn) prefer direct sowing into the garden bed. Others (tomatoes, peppers, broccoli, kale) benefit from being started indoors and transplanted. Follow seed packet instructions for planting depths (e.g., lettuce seeds are often surface-sown or planted 1/8 inch deep, while beans are 1 inch deep) and spacing.
- Companion Planting: Strategically plant different species together to enhance growth, deter pests, and attract beneficial insects. For example, planting marigolds near tomatoes can deter nematodes, and basil improves tomato flavor. Nasturtiums can act as a trap crop for aphids.
- Succession Planting: For a continuous harvest, plant small batches of quick-growing crops (lettuce, radishes, cilantro) every 2-3 weeks. As one crop finishes, another is ready to take its place.
Step 6: Pest & Disease Management (Organic)
Maintaining a self sufficient garden from scratch means embracing organic pest and disease control.
- Integrated Pest Management (IPM): This holistic approach combines several strategies.
- Observation: Regularly inspect your plants for early signs of pests or disease. Catching issues early is key.
- Physical Barriers: Use row covers (e.g., Agribon AG-19 floating row cover, 10×20 ft, ~$20) to protect young plants from insect pests like cabbage worms and squash bugs. Install fences (e.g., 2×4 welded wire mesh, 4 ft tall, 50 ft roll ~$70) to keep out deer, rabbits, and other larger animals.
- Hand-Picking: For larger pests like tomato hornworms or squash bugs, simply pick them off and drop them into a bucket of soapy water.
- Companion Planting: As mentioned, certain plants repel pests. Marigolds, garlic, and onions are excellent deterrents.
- Attract Beneficial Insects: Plant flowers like dill, fennel, cosmos, and sweet alyssum to attract ladybugs, lacewings, and parasitic wasps, which prey on common garden pests.
- Organic Sprays & Treatments:
- Neem Oil: An excellent broad-spectrum organic insecticide and fungicide. Bonide Neem Oil Concentrate (16oz, ~$20) can be mixed at a rate of 1-2 tbsp per gallon of water and sprayed on affected plants.
- Insecticidal Soap: Effective against soft-bodied insects like aphids, whiteflies, and spider mites. Garden Safe Insecticidal Soap (24oz ready-to-use, ~$10).
- Bacillus thuringiensis (Bt): A naturally occurring soil bacterium that targets caterpillars and worms. Monterey BT Worm & Caterpillar Killer (16oz, ~$18) is highly effective and safe for beneficial insects.
- Copper or Sulfur Sprays: For fungal diseases like powdery mildew or blight, organic copper (e.g., Bonide Copper Fungicide, ~$15 for 1lb) or sulfur (e.g., Safer Brand Garden Fungicide, ~$10 for 16oz) can be used as a last resort.
Step 7: Harvesting & Seed Saving
The culmination of your efforts is the harvest, and seed saving closes the loop on self-sufficiency.
- Harvesting Techniques:
- Timing: Harvest vegetables at their peak ripeness for best flavor and nutritional value. For example, green beans should snap cleanly, cucumbers should be firm, and tomatoes should be fully colored.
- Frequency: Many crops, like zucchini, cucumbers, and bush beans, produce more if harvested frequently. Pick daily or every other day.
- Tools: Use clean, sharp pruners (e.g., Corona ClassicCUT Bypass Pruner BP 3180, ~$30) or a sharp knife for clean cuts, minimizing damage to the plant.
- Seed Saving: This is where the « self-sufficient » aspect truly shines.
- Selection: Only save seeds from your healthiest, most vigorous plants that show desired traits (disease resistance, good flavor, high yield).
- Isolation: To ensure true-to-type seeds, prevent cross-pollination. This can be challenging for open-pollinated crops that readily cross (e.g., squash, corn). For beginners, focus on self-pollinating plants like beans, peas, lettuce, and tomatoes.
- Processing:
- Dry Seeds (Beans, Peas, Lettuce, Grains): Allow pods/seed heads to dry completely on the plant. Harvest, shell, and clean the seeds, removing chaff.
- Wet Seeds (Tomatoes, Cucumbers, Squash): For tomatoes, ferment the seeds in water for a few days to remove the gel coating and inhibit disease. For cucumbers/squash, scrape out seeds, wash thoroughly, and dry.
- Drying: Spread seeds thinly on screens or paper plates in a cool, dry, well-ventilated area for 1-4 weeks. Ensure they are bone-dry before storage. I aim for less than 8% moisture content.
- Storage: Store seeds in airtight containers (glass jars with desiccant packets work well) in a cool, dark, dry place (ideally 40-50°F and 30-40% humidity). Label clearly with variety and date. Properly stored seeds can remain viable for 3-10 years or more.
Step 8: Season Extension & Winterizing
Extend your harvest and protect your garden for the off-season to truly maximize your self sufficient garden from scratch.
- Cold Frames: Simple structures with a transparent top (glass, polycarbonate, or old windows) that sit over garden beds. They trap solar heat, allowing you to grow cold-hardy crops (lettuce, spinach, kale, radishes) well into winter or start seeds earlier in spring. A basic cold frame can be built from 2×6 lumber and a sheet of polycarbonate for under $100.
- Hoop Houses/Low Tunnels: Larger structures made from flexible hoops (PVC pipe or EMT conduit) covered with greenhouse plastic. These provide more space and greater temperature moderation. A 10×20 ft DIY low tunnel kit can cost $200-$500, while a larger, more robust hoop house kit might be $1,000-$3,000. I use a 6×12 ft low tunnel made from 1/2-inch PVC hoops and 6mil greenhouse plastic, which extends my lettuce and spinach harvest by at least
- In-Ground Beds: If you have excellent native soil and good drainage, in-ground beds are the most economical. Double-digging (loosening soil two shovel depths) can significantly improve drainage and aeration. For my main garden, I primarily use in-ground beds, but I focus on building up the soil over time with consistent compost additions and cover cropping. I aim for beds that are no wider than 3-4 feet so I can reach the center without stepping on the soil, compacting it.
- Raised Beds: Raised beds offer numerous advantages, especially for poor soil, heavy clay, or rocky areas. They provide better drainage, warm up faster in spring, reduce compaction, and make weeding and harvesting easier on your back.
- Material Options:
- Untreated Cedar: Naturally rot-resistant and chemical-free. A 4×8 ft bed, 12 inches deep, typically requires three 2x12x8 ft cedar boards, costing around $50-$60 per board (total ~$150-$180) plus corner brackets or screws. My first raised beds were cedar and are still going strong after 7 years.
- Galvanized Steel: Durable, long-lasting, and aesthetically pleasing. Brands like Vego Garden offer modular kits. A Vego Garden 17″ Tall 8-in-1 Metal Raised Garden Bed (can be configured to 4×8 ft) costs approximately $250-$300.
- Concrete Blocks/Stones: Very durable but can leach minerals (though generally safe once weathered) and can be expensive.
- Recycled Materials: Pallets (check for chemical treatment stamps like « HT » for heat-treated), old tires (controversial due to potential chemical leaching).
- Filling Raised Beds: Don’t just fill with topsoil. Use a « Hugelkultur » approach (logs, branches, leaves, then compost, then topsoil) or a mixture of 60% good quality topsoil, 30% compost, and 10% perlite or vermiculite for drainage. A 4x8x1 ft raised bed requires about 32 cubic feet (or ~1.2 cubic yards) of soil mix, which can cost $100-$200 depending on your source.
- Material Options:
Step 4: Water Management & Irrigation
Efficient water management is critical for a self sufficient garden from scratch, especially in off-grid living where water resources might be limited.
- Rainwater Harvesting: This is my primary source of irrigation water. A 55-gallon rain barrel (e.g., EarthMark Rain Barrel, ~$120-$150) connected to a downspout can collect significant water. For larger needs, I use two 275-gallon IBC totes (Intermediate Bulk Containers, often available used for $100-$200 each from food-grade sources) connected in series. A 1,000 sq ft roof can collect approximately 620 gallons of water for every inch of rainfall. My 1,500 sq ft roof provides ample water for my 600 sq ft garden through multiple barrels and totes.
- Drip Irrigation: This is by far the most water-efficient method, delivering water directly to the plant’s root zone, minimizing evaporation and weed growth.
- Components: A typical drip system includes a pressure regulator (e.g., Rain Bird PRV-10, ~$15), a filter (Rain Bird RBY filter, ~$20), main tubing (1/2-inch poly tubing, 100ft ~$25), smaller feeder lines (1/4-inch tubing), and emitters (0.5 GPH or 1 GPH per plant).
- Kits: For beginners, a starter kit like the Rain Bird Drip Irrigation Garden Kit (model DDI-KIT-1P, ~$40-$60) is excellent for a small garden. For larger setups, I use Netafim Techline CV Drip Line (500ft roll, ~$150-$200), which has pressure-compensating emitters built-in, ensuring even watering across long runs.
- Automation: For true self-sufficiency, consider a battery-powered timer (e.g., Orbit B-Hyve Bluetooth Hose Faucet Timer, ~$50) or a solar-powered timer connected to a small 12V pump.
- Solar-Powered Pumps: For lifting water from a well, pond, or large storage tank to your garden, a solar pump is a game-changer. For a smaller drip system, a Shurflo 2088-594-152 Diaphragm Pump (12V, 3.5 GPM, ~$180) can be powered by a single 100W solar panel (e.g., Renogy 100W Monocrystalline Solar Panel, ~$100) and a small 12V battery (e.g., a 50Ah LiFePO4 battery like the Battle Born 50Ah, ~$450). For larger operations or deeper wells, more robust systems are needed. If you’re looking to build out a comprehensive off-grid power system to support your garden’s water needs, or indeed your entire homestead, you might want to explore resources like the Power Grid Generator complete system guide to understand the full scope of what’s possible in terms of energy independence.
Step 5: Seed Selection & Planting
The choice of seeds is crucial for a truly self sufficient garden from scratch.
- Choose Heirloom & Open-Pollinated Seeds: These varieties produce seeds that will grow true to type, meaning you can save seeds from your harvest year after year. F1 hybrids, while often vigorous, will not produce consistent offspring from saved seeds. Reputable seed companies include Baker Creek Heirloom Seeds, High Mowing Organic Seeds, and Seed Savers Exchange. Start with common, reliable varieties like ‘Black Krim’ tomatoes, ‘Provider’ bush beans, ‘Waltham Butternut’ squash, and ‘Black Seeded Simpson’ lettuce.
- Start Seeds Indoors (Optional but Recommended): For longer growing seasons or specific crops, starting seeds indoors gives you a head start. Use seed-starting mix (e.g., Espoma Organic Seed Starter Mix, ~$10 for 16qt bag) in seed trays (Jiffy Professional Greenhouse 72-cell kit, ~$15). Provide adequate light with LED grow lights (Barrina T5 2ft 4-pack LED Grow Lights, 20W each, ~$50) for 14-16 hours a day, positioned 2-4 inches above seedlings. Maintain consistent temperatures (65-75°F for most).
- Direct Sowing vs. Transplanting: Some crops (carrots, radishes, beans, corn) prefer direct sowing into the garden bed. Others (tomatoes, peppers, broccoli, kale) benefit from being started indoors and transplanted. Follow seed packet instructions for planting depths (e.g., lettuce seeds are often surface-sown or planted 1/8 inch deep, while beans are 1 inch deep) and spacing.
- Companion Planting: Strategically plant different species together to enhance growth, deter pests, and attract beneficial insects. For example, planting marigolds near tomatoes can deter nematodes, and basil improves tomato flavor. Nasturtiums can act as a trap crop for aphids.
- Succession Planting: For a continuous harvest, plant small batches of quick-growing crops (lettuce, radishes, cilantro) every 2-3 weeks. As one crop finishes, another is ready to take its place.
Step 6: Pest & Disease Management (Organic)
Maintaining a self sufficient garden from scratch means embracing organic pest and disease control.
- Integrated Pest Management (IPM): This holistic approach combines several strategies.
- Observation: Regularly inspect your plants for early signs of pests or disease. Catching issues early is key.
- Physical Barriers: Use row covers (e.g., Agribon AG-19 floating row cover, 10×20 ft, ~$20) to protect young plants from insect pests like cabbage worms and squash bugs. Install fences (e.g., 2×4 welded wire mesh, 4 ft tall, 50 ft roll ~$70) to keep out deer, rabbits, and other larger animals.
- Hand-Picking: For larger pests like tomato hornworms or squash bugs, simply pick them off and drop them into a bucket of soapy water.
- Companion Planting: As mentioned, certain plants repel pests. Marigolds, garlic, and onions are excellent deterrents.
- Attract Beneficial Insects: Plant flowers like dill, fennel, cosmos, and sweet alyssum to attract ladybugs, lacewings, and parasitic wasps, which prey on common garden pests.
- Organic Sprays & Treatments:
- Neem Oil: An excellent broad-spectrum organic insecticide and fungicide. Bonide Neem Oil Concentrate (16oz, ~$20) can be mixed at a rate of 1-2 tbsp per gallon of water and sprayed on affected plants.
- Insecticidal Soap: Effective against soft-bodied insects like aphids, whiteflies, and spider mites. Garden Safe Insecticidal Soap (24oz ready-to-use, ~$10).
- Bacillus thuringiensis (Bt): A naturally occurring soil bacterium that targets caterpillars and worms. Monterey BT Worm & Caterpillar Killer (16oz, ~$18) is highly effective and safe for beneficial insects.
- Copper or Sulfur Sprays: For fungal diseases like powdery mildew or blight, organic copper (e.g., Bonide Copper Fungicide, ~$15 for 1lb) or sulfur (e.g., Safer Brand Garden Fungicide, ~$10 for 16oz) can be used as a last resort.
Step 7: Harvesting & Seed Saving
The culmination of your efforts is the harvest, and seed saving closes the loop on self-sufficiency.
- Harvesting Techniques:
- Timing: Harvest vegetables at their peak ripeness for best flavor and nutritional value. For example, green beans should snap cleanly, cucumbers should be firm, and tomatoes should be fully colored.
- Frequency: Many crops, like zucchini, cucumbers, and bush beans, produce more if harvested frequently. Pick daily or every other day.
- Tools: Use clean, sharp pruners (e.g., Corona ClassicCUT Bypass Pruner BP 3180, ~$30) or a sharp knife for clean cuts, minimizing damage to the plant.
- Seed Saving: This is where the « self-sufficient » aspect truly shines.
- Selection: Only save seeds from your healthiest, most vigorous plants that show desired traits (disease resistance, good flavor, high yield).
- Isolation: To ensure true-to-type seeds, prevent cross-pollination. This can be challenging for open-pollinated crops that readily cross (e.g., squash, corn). For beginners, focus on self-pollinating plants like beans, peas, lettuce, and tomatoes.
- Processing:
- Dry Seeds (Beans, Peas, Lettuce, Grains): Allow pods/seed heads to dry completely on the plant. Harvest, shell, and clean the seeds, removing chaff.
- Wet Seeds (Tomatoes, Cucumbers, Squash): For tomatoes, ferment the seeds in water for a few days to remove the gel coating and inhibit disease. For cucumbers/squash, scrape out seeds, wash thoroughly, and dry.
- Drying: Spread seeds thinly on screens or paper plates in a cool, dry, well-ventilated area for 1-4 weeks. Ensure they are bone-dry before storage. I aim for less than 8% moisture content.
- Storage: Store seeds in airtight containers (glass jars with desiccant packets work well) in a cool, dark, dry place (ideally 40-50°F and 30-40% humidity). Label clearly with variety and date. Properly stored seeds can remain viable for 3-10 years or more.
Step 8: Season Extension & Winterizing
Extend your harvest and protect your garden for the off-season to truly maximize your self sufficient garden from scratch.
- Cold Frames: Simple structures with a transparent top (glass, polycarbonate, or old windows) that sit over garden beds. They trap solar heat, allowing you to grow cold-hardy crops (lettuce, spinach, kale, radishes) well into winter or start seeds earlier in spring. A basic cold frame can be built from 2×6 lumber and a sheet of polycarbonate for under $100.
- Hoop Houses/Low Tunnels: Larger structures made from flexible hoops (PVC pipe or EMT conduit) covered with greenhouse plastic. These provide more space and greater temperature moderation. A 10×20 ft DIY low tunnel kit can cost $200-$500, while a larger, more robust hoop house kit might be $1,000-$3,000. I use a 6×12 ft low tunnel made from 1/2-inch PVC hoops and 6mil greenhouse plastic, which extends my lettuce and spinach harvest by at least
Deciding between raised beds and in-ground beds depends on your soil, budget, and physical capabilities.
- In-Ground Beds: If you have excellent native soil and good drainage, in-ground beds are the most economical. Double-digging (loosening soil two shovel depths) can significantly improve drainage and aeration. For my main garden, I primarily use in-ground beds, but I focus on building up the soil over time with consistent compost additions and cover cropping. I aim for beds that are no wider than 3-4 feet so I can reach the center without stepping on the soil, compacting it.
- Raised Beds: Raised beds offer numerous advantages, especially for poor soil, heavy clay, or rocky areas. They provide better drainage, warm up faster in spring, reduce compaction, and make weeding and harvesting easier on your back.
- Material Options:
- Untreated Cedar: Naturally rot-resistant and chemical-free. A 4×8 ft bed, 12 inches deep, typically requires three 2x12x8 ft cedar boards, costing around $50-$60 per board (total ~$150-$180) plus corner brackets or screws. My first raised beds were cedar and are still going strong after 7 years.
- Galvanized Steel: Durable, long-lasting, and aesthetically pleasing. Brands like Vego Garden offer modular kits. A Vego Garden 17″ Tall 8-in-1 Metal Raised Garden Bed (can be configured to 4×8 ft) costs approximately $250-$300.
- Concrete Blocks/Stones: Very durable but can leach minerals (though generally safe once weathered) and can be expensive.
- Recycled Materials: Pallets (check for chemical treatment stamps like « HT » for heat-treated), old tires (controversial due to potential chemical leaching).
- Filling Raised Beds: Don’t just fill with topsoil. Use a « Hugelkultur » approach (logs, branches, leaves, then compost, then topsoil) or a mixture of 60% good quality topsoil, 30% compost, and 10% perlite or vermiculite for drainage. A 4x8x1 ft raised bed requires about 32 cubic feet (or ~1.2 cubic yards) of soil mix, which can cost $100-$200 depending on your source.
- Material Options:
Step 4: Water Management & Irrigation
Efficient water management is critical for a self sufficient garden from scratch, especially in off-grid living where water resources might be limited.
- Rainwater Harvesting: This is my primary source of irrigation water. A 55-gallon rain barrel (e.g., EarthMark Rain Barrel, ~$120-$150) connected to a downspout can collect significant water. For larger needs, I use two 275-gallon IBC totes (Intermediate Bulk Containers, often available used for $100-$200 each from food-grade sources) connected in series. A 1,000 sq ft roof can collect approximately 620 gallons of water for every inch of rainfall. My 1,500 sq ft roof provides ample water for my 600 sq ft garden through multiple barrels and totes.
- Drip Irrigation: This is by far the most water-efficient method, delivering water directly to the plant’s root zone, minimizing evaporation and weed growth.
- Components: A typical drip system includes a pressure regulator (e.g., Rain Bird PRV-10, ~$15), a filter (Rain Bird RBY filter, ~$20), main tubing (1/2-inch poly tubing, 100ft ~$25), smaller feeder lines (1/4-inch tubing), and emitters (0.5 GPH or 1 GPH per plant).
- Kits: For beginners, a starter kit like the Rain Bird Drip Irrigation Garden Kit (model DDI-KIT-1P, ~$40-$60) is excellent for a small garden. For larger setups, I use Netafim Techline CV Drip Line (500ft roll, ~$150-$200), which has pressure-compensating emitters built-in, ensuring even watering across long runs.
- Automation: For true self-sufficiency, consider a battery-powered timer (e.g., Orbit B-Hyve Bluetooth Hose Faucet Timer, ~$50) or a solar-powered timer connected to a small 12V pump.
- Solar-Powered Pumps: For lifting water from a well, pond, or large storage tank to your garden, a solar pump is a game-changer. For a smaller drip system, a Shurflo 2088-594-152 Diaphragm Pump (12V, 3.5 GPM, ~$180) can be powered by a single 100W solar panel (e.g., Renogy 100W Monocrystalline Solar Panel, ~$100) and a small 12V battery (e.g., a 50Ah LiFePO4 battery like the Battle Born 50Ah, ~$450). For larger operations or deeper wells, more robust systems are needed. If you’re looking to build out a comprehensive off-grid power system to support your garden’s water needs, or indeed your entire homestead, you might want to explore resources like the Power Grid Generator complete system guide to understand the full scope of what’s possible in terms of energy independence.
Step 5: Seed Selection & Planting
The choice of seeds is crucial for a truly self sufficient garden from scratch.
- Choose Heirloom & Open-Pollinated Seeds: These varieties produce seeds that will grow true to type, meaning you can save seeds from your harvest year after year. F1 hybrids, while often vigorous, will not produce consistent offspring from saved seeds. Reputable seed companies include Baker Creek Heirloom Seeds, High Mowing Organic Seeds, and Seed Savers Exchange. Start with common, reliable varieties like ‘Black Krim’ tomatoes, ‘Provider’ bush beans, ‘Waltham Butternut’ squash, and ‘Black Seeded Simpson’ lettuce.
- Start Seeds Indoors (Optional but Recommended): For longer growing seasons or specific crops, starting seeds indoors gives you a head start. Use seed-starting mix (e.g., Espoma Organic Seed Starter Mix, ~$10 for 16qt bag) in seed trays (Jiffy Professional Greenhouse 72-cell kit, ~$15). Provide adequate light with LED grow lights (Barrina T5 2ft 4-pack LED Grow Lights, 20W each, ~$50) for 14-16 hours a day, positioned 2-4 inches above seedlings. Maintain consistent temperatures (65-75°F for most).
- Direct Sowing vs. Transplanting: Some crops (carrots, radishes, beans, corn) prefer direct sowing into the garden bed. Others (tomatoes, peppers, broccoli, kale) benefit from being started indoors and transplanted. Follow seed packet instructions for planting depths (e.g., lettuce seeds are often surface-sown or planted 1/8 inch deep, while beans are 1 inch deep) and spacing.
- Companion Planting: Strategically plant different species together to enhance growth, deter pests, and attract beneficial insects. For example, planting marigolds near tomatoes can deter nematodes, and basil improves tomato flavor. Nasturtiums can act as a trap crop for aphids.
- Succession Planting: For a continuous harvest, plant small batches of quick-growing crops (lettuce, radishes, cilantro) every 2-3 weeks. As one crop finishes, another is ready to take its place.
Step 6: Pest & Disease Management (Organic)
Maintaining a self sufficient garden from scratch means embracing organic pest and disease control.
- Integrated Pest Management (IPM): This holistic approach combines several strategies.
- Observation: Regularly inspect your plants for early signs of pests or disease. Catching issues early is key.
- Physical Barriers: Use row covers (e.g., Agribon AG-19 floating row cover, 10×20 ft, ~$20) to protect young plants from insect pests like cabbage worms and squash bugs. Install fences (e.g., 2×4 welded wire mesh, 4 ft tall, 50 ft roll ~$70) to keep out deer, rabbits, and other larger animals.
- Hand-Picking: For larger pests like tomato hornworms or squash bugs, simply pick them off and drop them into a bucket of soapy water.
- Companion Planting: As mentioned, certain plants repel pests. Marigolds, garlic, and onions are excellent deterrents.
- Attract Beneficial Insects: Plant flowers like dill, fennel, cosmos, and sweet alyssum to attract ladybugs, lacewings, and parasitic wasps, which prey on common garden pests.
- Organic Sprays & Treatments:
- Neem Oil: An excellent broad-spectrum organic insecticide and fungicide. Bonide Neem Oil Concentrate (16oz, ~$20) can be mixed at a rate of 1-2 tbsp per gallon of water and sprayed on affected plants.
- Insecticidal Soap: Effective against soft-bodied insects like aphids, whiteflies, and spider mites. Garden Safe Insecticidal Soap (24oz ready-to-use, ~$10).
- Bacillus thuringiensis (Bt): A naturally occurring soil bacterium that targets caterpillars and worms. Monterey BT Worm & Caterpillar Killer (16oz, ~$18) is highly effective and safe for beneficial insects.
- Copper or Sulfur Sprays: For fungal diseases like powdery mildew or blight, organic copper (e.g., Bonide Copper Fungicide, ~$15 for 1lb) or sulfur (e.g., Safer Brand Garden Fungicide, ~$10 for 16oz) can be used as a last resort.
Step 7: Harvesting & Seed Saving
The culmination of your efforts is the harvest, and seed saving closes the loop on self-sufficiency.
- Harvesting Techniques:
- Timing: Harvest vegetables at their peak ripeness for best flavor and nutritional value. For example, green beans should snap cleanly, cucumbers should be firm, and tomatoes should be fully colored.
- Frequency: Many crops, like zucchini, cucumbers, and bush beans, produce more if harvested frequently. Pick daily or every other day.
- Tools: Use clean, sharp pruners (e.g., Corona ClassicCUT Bypass Pruner BP 3180, ~$30) or a sharp knife for clean cuts, minimizing damage to the plant.
- Seed Saving: This is where the « self-sufficient » aspect truly shines.
- Selection: Only save seeds from your healthiest, most vigorous plants that show desired traits (disease resistance, good flavor, high yield).
- Isolation: To ensure true-to-type seeds, prevent cross-pollination. This can be challenging for open-pollinated crops that readily cross (e.g., squash, corn). For beginners, focus on self-pollinating plants like beans, peas, lettuce, and tomatoes.
- Processing:
- Dry Seeds (Beans, Peas, Lettuce, Grains): Allow pods/seed heads to dry completely on the plant. Harvest, shell, and clean the seeds, removing chaff.
- Wet Seeds (Tomatoes, Cucumbers, Squash): For tomatoes, ferment the seeds in water for a few days to remove the gel coating and inhibit disease. For cucumbers/squash, scrape out seeds, wash thoroughly, and dry.
- Drying: Spread seeds thinly on screens or paper plates in a cool, dry, well-ventilated area for 1-4 weeks. Ensure they are bone-dry before storage. I aim for less than 8% moisture content.
- Storage: Store seeds in airtight containers (glass jars with desiccant packets work well) in a cool, dark, dry place (ideally 40-50°F and 30-40% humidity). Label clearly with variety and date. Properly stored seeds can remain viable for 3-10 years or more.
Step 8: Season Extension & Winterizing
Extend your harvest and protect your garden for the off-season to truly maximize your self sufficient garden from scratch.
- Cold Frames: Simple structures with a transparent top (glass, polycarbonate, or old windows) that sit over garden beds. They trap solar heat, allowing you to grow cold-hardy crops (lettuce, spinach, kale, radishes) well into winter or start seeds earlier in spring. A basic cold frame can be built from 2×6 lumber and a sheet of polycarbonate for under $100.
- Hoop Houses/Low Tunnels: Larger structures made from flexible hoops (PVC pipe or EMT conduit) covered with greenhouse plastic. These provide more space and greater temperature moderation. A 10×20 ft DIY low tunnel kit can cost $200-$500, while a larger, more robust hoop house kit might be $1,000-$3,000. I use a 6×12 ft low tunnel made from 1/2-inch PVC hoops and 6mil greenhouse plastic, which extends my lettuce and spinach harvest by at least
Healthy soil is the bedrock of a productive, self-sufficient garden. You can’t guess what your soil needs; you have to test it.
- Perform a Soil Test: A professional soil test will give you precise data on your soil’s pH, nutrient levels (N-P-K), and organic matter content. I recommend sending a sample to your local agricultural extension office; it typically costs $20-$50 and provides detailed recommendations. Alternatively, for a quick homeowner check, a Rapitest Soil Test Kit (40-test kit, model 1663, ~$20 on Amazon) provides a good baseline for pH, Nitrogen, Phosphorus, and Potash. Aim for a pH between 6.0 and 7.0 for most vegetables.
- Amend for pH Imbalance: If your soil is too acidic (below 6.0), add agricultural lime (dolomitic lime adds magnesium, calcitic lime adds calcium). Apply 5-10 lbs per 100 sq ft for a moderate adjustment. If it’s too alkaline (above 7.0), add elemental sulfur (e.g., Espoma Soil Acidifier, ~$15 for 6.75 lbs) or generous amounts of organic matter like peat moss or pine needles.
- Build Organic Matter: This is the single most important step for long-term soil health. Organic matter improves soil structure, water retention, drainage, and nutrient availability. Incorporate 2-4 inches of high-quality compost into your top 6-12 inches of soil annually. I make my own compost from kitchen scraps, garden waste, and shredded leaves, but you can purchase it. Local nurseries often sell bulk compost for $30-$50 per cubic yard. Aged manure (from chickens, cows, or horses – ensure it’s well-rotted to avoid burning plants) is also excellent.
- Address Nutrient Deficiencies: Based on your soil test, add specific organic amendments. If Nitrogen (N) is low, add blood meal (12-0-0, ~$20 for 3 lbs) or feather meal. For Phosphorus (P), use bone meal (3-15-0, ~$15 for 3 lbs) or rock phosphate. For Potassium (K), greensand (0-0-2.5, ~$25 for 5 lbs) or kelp meal are good choices. I rely heavily on Espoma Organic Garden-tone (5-3-3, ~$25 for an 8lb bag) as a balanced, all-purpose organic fertilizer during planting.
Step 3: Garden Bed Preparation
Deciding between raised beds and in-ground beds depends on your soil, budget, and physical capabilities.
- In-Ground Beds: If you have excellent native soil and good drainage, in-ground beds are the most economical. Double-digging (loosening soil two shovel depths) can significantly improve drainage and aeration. For my main garden, I primarily use in-ground beds, but I focus on building up the soil over time with consistent compost additions and cover cropping. I aim for beds that are no wider than 3-4 feet so I can reach the center without stepping on the soil, compacting it.
- Raised Beds: Raised beds offer numerous advantages, especially for poor soil, heavy clay, or rocky areas. They provide better drainage, warm up faster in spring, reduce compaction, and make weeding and harvesting easier on your back.
- Material Options:
- Untreated Cedar: Naturally rot-resistant and chemical-free. A 4×8 ft bed, 12 inches deep, typically requires three 2x12x8 ft cedar boards, costing around $50-$60 per board (total ~$150-$180) plus corner brackets or screws. My first raised beds were cedar and are still going strong after 7 years.
- Galvanized Steel: Durable, long-lasting, and aesthetically pleasing. Brands like Vego Garden offer modular kits. A Vego Garden 17″ Tall 8-in-1 Metal Raised Garden Bed (can be configured to 4×8 ft) costs approximately $250-$300.
- Concrete Blocks/Stones: Very durable but can leach minerals (though generally safe once weathered) and can be expensive.
- Recycled Materials: Pallets (check for chemical treatment stamps like « HT » for heat-treated), old tires (controversial due to potential chemical leaching).
- Filling Raised Beds: Don’t just fill with topsoil. Use a « Hugelkultur » approach (logs, branches, leaves, then compost, then topsoil) or a mixture of 60% good quality topsoil, 30% compost, and 10% perlite or vermiculite for drainage. A 4x8x1 ft raised bed requires about 32 cubic feet (or ~1.2 cubic yards) of soil mix, which can cost $100-$200 depending on your source.
- Material Options:
Step 4: Water Management & Irrigation
Efficient water management is critical for a self sufficient garden from scratch, especially in off-grid living where water resources might be limited.
- Rainwater Harvesting: This is my primary source of irrigation water. A 55-gallon rain barrel (e.g., EarthMark Rain Barrel, ~$120-$150) connected to a downspout can collect significant water. For larger needs, I use two 275-gallon IBC totes (Intermediate Bulk Containers, often available used for $100-$200 each from food-grade sources) connected in series. A 1,000 sq ft roof can collect approximately 620 gallons of water for every inch of rainfall. My 1,500 sq ft roof provides ample water for my 600 sq ft garden through multiple barrels and totes.
- Drip Irrigation: This is by far the most water-efficient method, delivering water directly to the plant’s root zone, minimizing evaporation and weed growth.
- Components: A typical drip system includes a pressure regulator (e.g., Rain Bird PRV-10, ~$15), a filter (Rain Bird RBY filter, ~$20), main tubing (1/2-inch poly tubing, 100ft ~$25), smaller feeder lines (1/4-inch tubing), and emitters (0.5 GPH or 1 GPH per plant).
- Kits: For beginners, a starter kit like the Rain Bird Drip Irrigation Garden Kit (model DDI-KIT-1P, ~$40-$60) is excellent for a small garden. For larger setups, I use Netafim Techline CV Drip Line (500ft roll, ~$150-$200), which has pressure-compensating emitters built-in, ensuring even watering across long runs.
- Automation: For true self-sufficiency, consider a battery-powered timer (e.g., Orbit B-Hyve Bluetooth Hose Faucet Timer, ~$50) or a solar-powered timer connected to a small 12V pump.
- Solar-Powered Pumps: For lifting water from a well, pond, or large storage tank to your garden, a solar pump is a game-changer. For a smaller drip system, a Shurflo 2088-594-152 Diaphragm Pump (12V, 3.5 GPM, ~$180) can be powered by a single 100W solar panel (e.g., Renogy 100W Monocrystalline Solar Panel, ~$100) and a small 12V battery (e.g., a 50Ah LiFePO4 battery like the Battle Born 50Ah, ~$450). For larger operations or deeper wells, more robust systems are needed. If you’re looking to build out a comprehensive off-grid power system to support your garden’s water needs, or indeed your entire homestead, you might want to explore resources like the Power Grid Generator complete system guide to understand the full scope of what’s possible in terms of energy independence.
Step 5: Seed Selection & Planting
The choice of seeds is crucial for a truly self sufficient garden from scratch.
- Choose Heirloom & Open-Pollinated Seeds: These varieties produce seeds that will grow true to type, meaning you can save seeds from your harvest year after year. F1 hybrids, while often vigorous, will not produce consistent offspring from saved seeds. Reputable seed companies include Baker Creek Heirloom Seeds, High Mowing Organic Seeds, and Seed Savers Exchange. Start with common, reliable varieties like ‘Black Krim’ tomatoes, ‘Provider’ bush beans, ‘Waltham Butternut’ squash, and ‘Black Seeded Simpson’ lettuce.
- Start Seeds Indoors (Optional but Recommended): For longer growing seasons or specific crops, starting seeds indoors gives you a head start. Use seed-starting mix (e.g., Espoma Organic Seed Starter Mix, ~$10 for 16qt bag) in seed trays (Jiffy Professional Greenhouse 72-cell kit, ~$15). Provide adequate light with LED grow lights (Barrina T5 2ft 4-pack LED Grow Lights, 20W each, ~$50) for 14-16 hours a day, positioned 2-4 inches above seedlings. Maintain consistent temperatures (65-75°F for most).
- Direct Sowing vs. Transplanting: Some crops (carrots, radishes, beans, corn) prefer direct sowing into the garden bed. Others (tomatoes, peppers, broccoli, kale) benefit from being started indoors and transplanted. Follow seed packet instructions for planting depths (e.g., lettuce seeds are often surface-sown or planted 1/8 inch deep, while beans are 1 inch deep) and spacing.
- Companion Planting: Strategically plant different species together to enhance growth, deter pests, and attract beneficial insects. For example, planting marigolds near tomatoes can deter nematodes, and basil improves tomato flavor. Nasturtiums can act as a trap crop for aphids.
- Succession Planting: For a continuous harvest, plant small batches of quick-growing crops (lettuce, radishes, cilantro) every 2-3 weeks. As one crop finishes, another is ready to take its place.
Step 6: Pest & Disease Management (Organic)
Maintaining a self sufficient garden from scratch means embracing organic pest and disease control.
- Integrated Pest Management (IPM): This holistic approach combines several strategies.
- Observation: Regularly inspect your plants for early signs of pests or disease. Catching issues early is key.
- Physical Barriers: Use row covers (e.g., Agribon AG-19 floating row cover, 10×20 ft, ~$20) to protect young plants from insect pests like cabbage worms and squash bugs. Install fences (e.g., 2×4 welded wire mesh, 4 ft tall, 50 ft roll ~$70) to keep out deer, rabbits, and other larger animals.
- Hand-Picking: For larger pests like tomato hornworms or squash bugs, simply pick them off and drop them into a bucket of soapy water.
- Companion Planting: As mentioned, certain plants repel pests. Marigolds, garlic, and onions are excellent deterrents.
- Attract Beneficial Insects: Plant flowers like dill, fennel, cosmos, and sweet alyssum to attract ladybugs, lacewings, and parasitic wasps, which prey on common garden pests.
- Organic Sprays & Treatments:
- Neem Oil: An excellent broad-spectrum organic insecticide and fungicide. Bonide Neem Oil Concentrate (16oz, ~$20) can be mixed at a rate of 1-2 tbsp per gallon of water and sprayed on affected plants.
- Insecticidal Soap: Effective against soft-bodied insects like aphids, whiteflies, and spider mites. Garden Safe Insecticidal Soap (24oz ready-to-use, ~$10).
- Bacillus thuringiensis (Bt): A naturally occurring soil bacterium that targets caterpillars and worms. Monterey BT Worm & Caterpillar Killer (16oz, ~$18) is highly effective and safe for beneficial insects.
- Copper or Sulfur Sprays: For fungal diseases like powdery mildew or blight, organic copper (e.g., Bonide Copper Fungicide, ~$15 for 1lb) or sulfur (e.g., Safer Brand Garden Fungicide, ~$10 for 16oz) can be used as a last resort.
Step 7: Harvesting & Seed Saving
The culmination of your efforts is the harvest, and seed saving closes the loop on self-sufficiency.
- Harvesting Techniques:
- Timing: Harvest vegetables at their peak ripeness for best flavor and nutritional value. For example, green beans should snap cleanly, cucumbers should be firm, and tomatoes should be fully colored.
- Frequency: Many crops, like zucchini, cucumbers, and bush beans, produce more if harvested frequently. Pick daily or every other day.
- Tools: Use clean, sharp pruners (e.g., Corona ClassicCUT Bypass Pruner BP 3180, ~$30) or a sharp knife for clean cuts, minimizing damage to the plant.
- Seed Saving: This is where the « self-sufficient » aspect truly shines.
- Selection: Only save seeds from your healthiest, most vigorous plants that show desired traits (disease resistance, good flavor, high yield).
- Isolation: To ensure true-to-type seeds, prevent cross-pollination. This can be challenging for open-pollinated crops that readily cross (e.g., squash, corn). For beginners, focus on self-pollinating plants like beans, peas, lettuce, and tomatoes.
- Processing:
- Dry Seeds (Beans, Peas, Lettuce, Grains): Allow pods/seed heads to dry completely on the plant. Harvest, shell, and clean the seeds, removing chaff.
- Wet Seeds (Tomatoes, Cucumbers, Squash): For tomatoes, ferment the seeds in water for a few days to remove the gel coating and inhibit disease. For cucumbers/squash, scrape out seeds, wash thoroughly, and dry.
- Drying: Spread seeds thinly on screens or paper plates in a cool, dry, well-ventilated area for 1-4 weeks. Ensure they are bone-dry before storage. I aim for less than 8% moisture content.
- Storage: Store seeds in airtight containers (glass jars with desiccant packets work well) in a cool, dark, dry place (ideally 40-50°F and 30-40% humidity). Label clearly with variety and date. Properly stored seeds can remain viable for 3-10 years or more.
Step 8: Season Extension & Winterizing
Extend your harvest and protect your garden for the off-season to truly maximize your self sufficient garden from scratch.
- Cold Frames: Simple structures with a transparent top (glass, polycarbonate, or old windows) that sit over garden beds. They trap solar heat, allowing you to grow cold-hardy crops (lettuce, spinach, kale, radishes) well into winter or start seeds earlier in spring. A basic cold frame can be built from 2×6 lumber and a sheet of polycarbonate for under $100.
- Hoop Houses/Low Tunnels: Larger structures made from flexible hoops (PVC pipe or EMT conduit) covered with greenhouse plastic. These provide more space and greater temperature moderation. A 10×20 ft DIY low tunnel kit can cost $200-$500, while a larger, more robust hoop house kit might be $1,000-$3,000. I use a 6×12 ft low tunnel made from 1/2-inch PVC hoops and 6mil greenhouse plastic, which extends my lettuce and spinach harvest by at least
- Integrated Pest Management (IPM): This holistic approach combines several strategies.
- Observation: Regularly inspect your plants for early signs of pests or disease. Catching issues early is key.
- Physical Barriers: Use row covers (e.g., Agribon AG-19 floating row cover, 10×20 ft, ~$20) to protect young plants from insect pests like cabbage worms and squash bugs. Install fences (e.g., 2×4 welded wire mesh, 4 ft tall, 50 ft roll ~$70) to keep out deer, rabbits, and other larger animals.
- Hand-Picking: For larger pests like tomato hornworms or squash bugs, simply pick them off and drop them into a bucket of soapy water.
- Companion Planting: As mentioned, certain plants repel pests. Marigolds, garlic, and onions are excellent deterrents.
- Attract Beneficial Insects: Plant flowers like dill, fennel, cosmos, and sweet alyssum to attract ladybugs, lacewings, and parasitic wasps, which prey on common garden pests.
- Organic Sprays & Treatments:
- Neem Oil: An excellent broad-spectrum organic insecticide and fungicide. Bonide Neem Oil Concentrate (16oz, ~$20) can be mixed at a rate of 1-2 tbsp per gallon of water and sprayed on affected plants.
- Insecticidal Soap: Effective against soft-bodied insects like aphids, whiteflies, and spider mites. Garden Safe Insecticidal Soap (24oz ready-to-use, ~$10).
- Bacillus thuringiensis (Bt): A naturally occurring soil bacterium that targets caterpillars and worms. Monterey BT Worm & Caterpillar Killer (16oz, ~$18) is highly effective and safe for beneficial insects.
- Copper or Sulfur Sprays: For fungal diseases like powdery mildew or blight, organic copper (e.g., Bonide Copper Fungicide, ~$15 for 1lb) or sulfur (e.g., Safer Brand Garden Fungicide, ~$10 for 16oz) can be used as a last resort.
Step 7: Harvesting & Seed Saving
The culmination of your efforts is the harvest, and seed saving closes the loop on self-sufficiency.
- Harvesting Techniques:
- Timing: Harvest vegetables at their peak ripeness for best flavor and nutritional value. For example, green beans should snap cleanly, cucumbers should be firm, and tomatoes should be fully colored.
- Frequency: Many crops, like zucchini, cucumbers, and bush beans, produce more if harvested frequently. Pick daily or every other day.
- Tools: Use clean, sharp pruners (e.g., Corona ClassicCUT Bypass Pruner BP 3180, ~$30) or a sharp knife for clean cuts, minimizing damage to the plant.
- Seed Saving: This is where the « self-sufficient » aspect truly shines.
- Selection: Only save seeds from your healthiest, most vigorous plants that show desired traits (disease resistance, good flavor, high yield).
- Isolation: To ensure true-to-type seeds, prevent cross-pollination. This can be challenging for open-pollinated crops that readily cross (e.g., squash, corn). For beginners, focus on self-pollinating plants like beans, peas, lettuce, and tomatoes.
- Processing:
- Dry Seeds (Beans, Peas, Lettuce, Grains): Allow pods/seed heads to dry completely on the plant. Harvest, shell, and clean the seeds, removing chaff.
- Wet Seeds (Tomatoes, Cucumbers, Squash): For tomatoes, ferment the seeds in water for a few days to remove the gel coating and inhibit disease. For cucumbers/squash, scrape out seeds, wash thoroughly, and dry.
- Drying: Spread seeds thinly on screens or paper plates in a cool, dry, well-ventilated area for 1-4 weeks. Ensure they are bone-dry before storage. I aim for less than 8% moisture content.
- Storage: Store seeds in airtight containers (glass jars with desiccant packets work well) in a cool, dark, dry place (ideally 40-50°F and 30-40% humidity). Label clearly with variety and date. Properly stored seeds can remain viable for 3-10 years or more.
Step 8: Season Extension & Winterizing
Extend your harvest and protect your garden for the off-season to truly maximize your self sufficient garden from scratch.
- Cold Frames: Simple structures with a transparent top (glass, polycarbonate, or old windows) that sit over garden beds. They trap solar heat, allowing you to grow cold-hardy crops (lettuce, spinach, kale, radishes) well into winter or start seeds earlier in spring. A basic cold frame can be built from 2×6 lumber and a sheet of polycarbonate for under $100.
- Hoop Houses/Low Tunnels: Larger structures made from flexible hoops (PVC pipe or EMT conduit) covered with greenhouse plastic. These provide more space and greater temperature moderation. A 10×20 ft DIY low tunnel kit can cost $200-$500, while a larger, more robust hoop house kit might be $1,000-$3,000. I use a 6×12 ft low tunnel made from 1/2-inch PVC hoops and 6mil greenhouse plastic, which extends my lettuce and spinach harvest by at least
Step 5: Seed Selection & Planting
The choice of seeds is crucial for a truly self sufficient garden from scratch.
- Choose Heirloom & Open-Pollinated Seeds: These varieties produce seeds that will grow true to type, meaning you can save seeds from your harvest year after year. F1 hybrids, while often vigorous, will not produce consistent offspring from saved seeds. Reputable seed companies include Baker Creek Heirloom Seeds, High Mowing Organic Seeds, and Seed Savers Exchange. Start with common, reliable varieties like ‘Black Krim’ tomatoes, ‘Provider’ bush beans, ‘Waltham Butternut’ squash, and ‘Black Seeded Simpson’ lettuce.
- Start Seeds Indoors (Optional but Recommended): For longer growing seasons or specific crops, starting seeds indoors gives you a head start. Use seed-starting mix (e.g., Espoma Organic Seed Starter Mix, ~$10 for 16qt bag) in seed trays (Jiffy Professional Greenhouse 72-cell kit, ~$15). Provide adequate light with LED grow lights (Barrina T5 2ft 4-pack LED Grow Lights, 20W each, ~$50) for 14-16 hours a day, positioned 2-4 inches above seedlings. Maintain consistent temperatures (65-75°F for most).
- Direct Sowing vs. Transplanting: Some crops (carrots, radishes, beans, corn) prefer direct sowing into the garden bed. Others (tomatoes, peppers, broccoli, kale) benefit from being started indoors and transplanted. Follow seed packet instructions for planting depths (e.g., lettuce seeds are often surface-sown or planted 1/8 inch deep, while beans are 1 inch deep) and spacing.
- Companion Planting: Strategically plant different species together to enhance growth, deter pests, and attract beneficial insects. For example, planting marigolds near tomatoes can deter nematodes, and basil improves tomato flavor. Nasturtiums can act as a trap crop for aphids.
- Succession Planting: For a continuous harvest, plant small batches of quick-growing crops (lettuce, radishes, cilantro) every 2-3 weeks. As one crop finishes, another is ready to take its place.
Step 6: Pest & Disease Management (Organic)
Maintaining a self sufficient garden from scratch means embracing organic pest and disease control.
- Integrated Pest Management (IPM): This holistic approach combines several strategies.
- Observation: Regularly inspect your plants for early signs of pests or disease. Catching issues early is key.
- Physical Barriers: Use row covers (e.g., Agribon AG-19 floating row cover, 10×20 ft, ~$20) to protect young plants from insect pests like cabbage worms and squash bugs. Install fences (e.g., 2×4 welded wire mesh, 4 ft tall, 50 ft roll ~$70) to keep out deer, rabbits, and other larger animals.
- Hand-Picking: For larger pests like tomato hornworms or squash bugs, simply pick them off and drop them into a bucket of soapy water.
- Companion Planting: As mentioned, certain plants repel pests. Marigolds, garlic, and onions are excellent deterrents.
- Attract Beneficial Insects: Plant flowers like dill, fennel, cosmos, and sweet alyssum to attract ladybugs, lacewings, and parasitic wasps, which prey on common garden pests.
- Organic Sprays & Treatments:
- Neem Oil: An excellent broad-spectrum organic insecticide and fungicide. Bonide Neem Oil Concentrate (16oz, ~$20) can be mixed at a rate of 1-2 tbsp per gallon of water and sprayed on affected plants.
- Insecticidal Soap: Effective against soft-bodied insects like aphids, whiteflies, and spider mites. Garden Safe Insecticidal Soap (24oz ready-to-use, ~$10).
- Bacillus thuringiensis (Bt): A naturally occurring soil bacterium that targets caterpillars and worms. Monterey BT Worm & Caterpillar Killer (16oz, ~$18) is highly effective and safe for beneficial insects.
- Copper or Sulfur Sprays: For fungal diseases like powdery mildew or blight, organic copper (e.g., Bonide Copper Fungicide, ~$15 for 1lb) or sulfur (e.g., Safer Brand Garden Fungicide, ~$10 for 16oz) can be used as a last resort.
Step 7: Harvesting & Seed Saving
The culmination of your efforts is the harvest, and seed saving closes the loop on self-sufficiency.
- Harvesting Techniques:
- Timing: Harvest vegetables at their peak ripeness for best flavor and nutritional value. For example, green beans should snap cleanly, cucumbers should be firm, and tomatoes should be fully colored.
- Frequency: Many crops, like zucchini, cucumbers, and bush beans, produce more if harvested frequently. Pick daily or every other day.
- Tools: Use clean, sharp pruners (e.g., Corona ClassicCUT Bypass Pruner BP 3180, ~$30) or a sharp knife for clean cuts, minimizing damage to the plant.
- Seed Saving: This is where the « self-sufficient » aspect truly shines.
- Selection: Only save seeds from your healthiest, most vigorous plants that show desired traits (disease resistance, good flavor, high yield).
- Isolation: To ensure true-to-type seeds, prevent cross-pollination. This can be challenging for open-pollinated crops that readily cross (e.g., squash, corn). For beginners, focus on self-pollinating plants like beans, peas, lettuce, and tomatoes.
- Processing:
- Dry Seeds (Beans, Peas, Lettuce, Grains): Allow pods/seed heads to dry completely on the plant. Harvest, shell, and clean the seeds, removing chaff.
- Wet Seeds (Tomatoes, Cucumbers, Squash): For tomatoes, ferment the seeds in water for a few days to remove the gel coating and inhibit disease. For cucumbers/squash, scrape out seeds, wash thoroughly, and dry.
- Drying: Spread seeds thinly on screens or paper plates in a cool, dry, well-ventilated area for 1-4 weeks. Ensure they are bone-dry before storage. I aim for less than 8% moisture content.
- Storage: Store seeds in airtight containers (glass jars with desiccant packets work well) in a cool, dark, dry place (ideally 40-50°F and 30-40% humidity). Label clearly with variety and date. Properly stored seeds can remain viable for 3-10 years or more.
Step 8: Season Extension & Winterizing
Extend your harvest and protect your garden for the off-season to truly maximize your self sufficient garden from scratch.
- Cold Frames: Simple structures with a transparent top (glass, polycarbonate, or old windows) that sit over garden beds. They trap solar heat, allowing you to grow cold-hardy crops (lettuce, spinach, kale, radishes) well into winter or start seeds earlier in spring. A basic cold frame can be built from 2×6 lumber and a sheet of polycarbonate for under $100.
- Hoop Houses/Low Tunnels: Larger structures made from flexible hoops (PVC pipe or EMT conduit) covered with greenhouse plastic. These provide more space and greater temperature moderation. A 10×20 ft DIY low tunnel kit can cost $200-$500, while a larger, more robust hoop house kit might be $1,000-$3,000. I use a 6×12 ft low tunnel made from 1/2-inch PVC hoops and 6mil greenhouse plastic, which extends my lettuce and spinach harvest by at least
- Rainwater Harvesting: This is my primary source of irrigation water. A 55-gallon rain barrel (e.g., EarthMark Rain Barrel, ~$120-$150) connected to a downspout can collect significant water. For larger needs, I use two 275-gallon IBC totes (Intermediate Bulk Containers, often available used for $100-$200 each from food-grade sources) connected in series. A 1,000 sq ft roof can collect approximately 620 gallons of water for every inch of rainfall. My 1,500 sq ft roof provides ample water for my 600 sq ft garden through multiple barrels and totes.
- Drip Irrigation: This is by far the most water-efficient method, delivering water directly to the plant’s root zone, minimizing evaporation and weed growth.
- Components: A typical drip system includes a pressure regulator (e.g., Rain Bird PRV-10, ~$15), a filter (Rain Bird RBY filter, ~$20), main tubing (1/2-inch poly tubing, 100ft ~$25), smaller feeder lines (1/4-inch tubing), and emitters (0.5 GPH or 1 GPH per plant).
- Kits: For beginners, a starter kit like the Rain Bird Drip Irrigation Garden Kit (model DDI-KIT-1P, ~$40-$60) is excellent for a small garden. For larger setups, I use Netafim Techline CV Drip Line (500ft roll, ~$150-$200), which has pressure-compensating emitters built-in, ensuring even watering across long runs.
- Automation: For true self-sufficiency, consider a battery-powered timer (e.g., Orbit B-Hyve Bluetooth Hose Faucet Timer, ~$50) or a solar-powered timer connected to a small 12V pump.
- Solar-Powered Pumps: For lifting water from a well, pond, or large storage tank to your garden, a solar pump is a game-changer. For a smaller drip system, a Shurflo 2088-594-152 Diaphragm Pump (12V, 3.5 GPM, ~$180) can be powered by a single 100W solar panel (e.g., Renogy 100W Monocrystalline Solar Panel, ~$100) and a small 12V battery (e.g., a 50Ah LiFePO4 battery like the Battle Born 50Ah, ~$450). For larger operations or deeper wells, more robust systems are needed. If you’re looking to build out a comprehensive off-grid power system to support your garden’s water needs, or indeed your entire homestead, you might want to explore resources like the Power Grid Generator complete system guide to understand the full scope of what’s possible in terms of energy independence.
Step 5: Seed Selection & Planting
The choice of seeds is crucial for a truly self sufficient garden from scratch.
- Choose Heirloom & Open-Pollinated Seeds: These varieties produce seeds that will grow true to type, meaning you can save seeds from your harvest year after year. F1 hybrids, while often vigorous, will not produce consistent offspring from saved seeds. Reputable seed companies include Baker Creek Heirloom Seeds, High Mowing Organic Seeds, and Seed Savers Exchange. Start with common, reliable varieties like ‘Black Krim’ tomatoes, ‘Provider’ bush beans, ‘Waltham Butternut’ squash, and ‘Black Seeded Simpson’ lettuce.
- Start Seeds Indoors (Optional but Recommended): For longer growing seasons or specific crops, starting seeds indoors gives you a head start. Use seed-starting mix (e.g., Espoma Organic Seed Starter Mix, ~$10 for 16qt bag) in seed trays (Jiffy Professional Greenhouse 72-cell kit, ~$15). Provide adequate light with LED grow lights (Barrina T5 2ft 4-pack LED Grow Lights, 20W each, ~$50) for 14-16 hours a day, positioned 2-4 inches above seedlings. Maintain consistent temperatures (65-75°F for most).
- Direct Sowing vs. Transplanting: Some crops (carrots, radishes, beans, corn) prefer direct sowing into the garden bed. Others (tomatoes, peppers, broccoli, kale) benefit from being started indoors and transplanted. Follow seed packet instructions for planting depths (e.g., lettuce seeds are often surface-sown or planted 1/8 inch deep, while beans are 1 inch deep) and spacing.
- Companion Planting: Strategically plant different species together to enhance growth, deter pests, and attract beneficial insects. For example, planting marigolds near tomatoes can deter nematodes, and basil improves tomato flavor. Nasturtiums can act as a trap crop for aphids.
- Succession Planting: For a continuous harvest, plant small batches of quick-growing crops (lettuce, radishes, cilantro) every 2-3 weeks. As one crop finishes, another is ready to take its place.
Step 6: Pest & Disease Management (Organic)
Maintaining a self sufficient garden from scratch means embracing organic pest and disease control.
- Integrated Pest Management (IPM): This holistic approach combines several strategies.
- Observation: Regularly inspect your plants for early signs of pests or disease. Catching issues early is key.
- Physical Barriers: Use row covers (e.g., Agribon AG-19 floating row cover, 10×20 ft, ~$20) to protect young plants from insect pests like cabbage worms and squash bugs. Install fences (e.g., 2×4 welded wire mesh, 4 ft tall, 50 ft roll ~$70) to keep out deer, rabbits, and other larger animals.
- Hand-Picking: For larger pests like tomato hornworms or squash bugs, simply pick them off and drop them into a bucket of soapy water.
- Companion Planting: As mentioned, certain plants repel pests. Marigolds, garlic, and onions are excellent deterrents.
- Attract Beneficial Insects: Plant flowers like dill, fennel, cosmos, and sweet alyssum to attract ladybugs, lacewings, and parasitic wasps, which prey on common garden pests.
- Organic Sprays & Treatments:
- Neem Oil: An excellent broad-spectrum organic insecticide and fungicide. Bonide Neem Oil Concentrate (16oz, ~$20) can be mixed at a rate of 1-2 tbsp per gallon of water and sprayed on affected plants.
- Insecticidal Soap: Effective against soft-bodied insects like aphids, whiteflies, and spider mites. Garden Safe Insecticidal Soap (24oz ready-to-use, ~$10).
- Bacillus thuringiensis (Bt): A naturally occurring soil bacterium that targets caterpillars and worms. Monterey BT Worm & Caterpillar Killer (16oz, ~$18) is highly effective and safe for beneficial insects.
- Copper or Sulfur Sprays: For fungal diseases like powdery mildew or blight, organic copper (e.g., Bonide Copper Fungicide, ~$15 for 1lb) or sulfur (e.g., Safer Brand Garden Fungicide, ~$10 for 16oz) can be used as a last resort.
Step 7: Harvesting & Seed Saving
The culmination of your efforts is the harvest, and seed saving closes the loop on self-sufficiency.
- Harvesting Techniques:
- Timing: Harvest vegetables at their peak ripeness for best flavor and nutritional value. For example, green beans should snap cleanly, cucumbers should be firm, and tomatoes should be fully colored.
- Frequency: Many crops, like zucchini, cucumbers, and bush beans, produce more if harvested frequently. Pick daily or every other day.
- Tools: Use clean, sharp pruners (e.g., Corona ClassicCUT Bypass Pruner BP 3180, ~$30) or a sharp knife for clean cuts, minimizing damage to the plant.
- Seed Saving: This is where the « self-sufficient » aspect truly shines.
- Selection: Only save seeds from your healthiest, most vigorous plants that show desired traits (disease resistance, good flavor, high yield).
- Isolation: To ensure true-to-type seeds, prevent cross-pollination. This can be challenging for open-pollinated crops that readily cross (e.g., squash, corn). For beginners, focus on self-pollinating plants like beans, peas, lettuce, and tomatoes.
- Processing:
- Dry Seeds (Beans, Peas, Lettuce, Grains): Allow pods/seed heads to dry completely on the plant. Harvest, shell, and clean the seeds, removing chaff.
- Wet Seeds (Tomatoes, Cucumbers, Squash): For tomatoes, ferment the seeds in water for a few days to remove the gel coating and inhibit disease. For cucumbers/squash, scrape out seeds, wash thoroughly, and dry.
- Drying: Spread seeds thinly on screens or paper plates in a cool, dry, well-ventilated area for 1-4 weeks. Ensure they are bone-dry before storage. I aim for less than 8% moisture content.
- Storage: Store seeds in airtight containers (glass jars with desiccant packets work well) in a cool, dark, dry place (ideally 40-50°F and 30-40% humidity). Label clearly with variety and date. Properly stored seeds can remain viable for 3-10 years or more.
Step 8: Season Extension & Winterizing
Extend your harvest and protect your garden for the off-season to truly maximize your self sufficient garden from scratch.
- Cold Frames: Simple structures with a transparent top (glass, polycarbonate, or old windows) that sit over garden beds. They trap solar heat, allowing you to grow cold-hardy crops (lettuce, spinach, kale, radishes) well into winter or start seeds earlier in spring. A basic cold frame can be built from 2×6 lumber and a sheet of polycarbonate for under $100.
- Hoop Houses/Low Tunnels: Larger structures made from flexible hoops (PVC pipe or EMT conduit) covered with greenhouse plastic. These provide more space and greater temperature moderation. A 10×20 ft DIY low tunnel kit can cost $200-$500, while a larger, more robust hoop house kit might be $1,000-$3,000. I use a 6×12 ft low tunnel made from 1/2-inch PVC hoops and 6mil greenhouse plastic, which extends my lettuce and spinach harvest by at least
Efficient water management is critical for a self sufficient garden from scratch, especially in off-grid living where water resources might be limited.
- Rainwater Harvesting: This is my primary source of irrigation water. A 55-gallon rain barrel (e.g., EarthMark Rain Barrel, ~$120-$150) connected to a downspout can collect significant water. For larger needs, I use two 275-gallon IBC totes (Intermediate Bulk Containers, often available used for $100-$200 each from food-grade sources) connected in series. A 1,000 sq ft roof can collect approximately 620 gallons of water for every inch of rainfall. My 1,500 sq ft roof provides ample water for my 600 sq ft garden through multiple barrels and totes.
- Drip Irrigation: This is by far the most water-efficient method, delivering water directly to the plant’s root zone, minimizing evaporation and weed growth.
- Components: A typical drip system includes a pressure regulator (e.g., Rain Bird PRV-10, ~$15), a filter (Rain Bird RBY filter, ~$20), main tubing (1/2-inch poly tubing, 100ft ~$25), smaller feeder lines (1/4-inch tubing), and emitters (0.5 GPH or 1 GPH per plant).
- Kits: For beginners, a starter kit like the Rain Bird Drip Irrigation Garden Kit (model DDI-KIT-1P, ~$40-$60) is excellent for a small garden. For larger setups, I use Netafim Techline CV Drip Line (500ft roll, ~$150-$200), which has pressure-compensating emitters built-in, ensuring even watering across long runs.
- Automation: For true self-sufficiency, consider a battery-powered timer (e.g., Orbit B-Hyve Bluetooth Hose Faucet Timer, ~$50) or a solar-powered timer connected to a small 12V pump.
- Solar-Powered Pumps: For lifting water from a well, pond, or large storage tank to your garden, a solar pump is a game-changer. For a smaller drip system, a Shurflo 2088-594-152 Diaphragm Pump (12V, 3.5 GPM, ~$180) can be powered by a single 100W solar panel (e.g., Renogy 100W Monocrystalline Solar Panel, ~$100) and a small 12V battery (e.g., a 50Ah LiFePO4 battery like the Battle Born 50Ah, ~$450). For larger operations or deeper wells, more robust systems are needed. If you’re looking to build out a comprehensive off-grid power system to support your garden’s water needs, or indeed your entire homestead, you might want to explore resources like the Power Grid Generator complete system guide to understand the full scope of what’s possible in terms of energy independence.
Step 5: Seed Selection & Planting
The choice of seeds is crucial for a truly self sufficient garden from scratch.
- Choose Heirloom & Open-Pollinated Seeds: These varieties produce seeds that will grow true to type, meaning you can save seeds from your harvest year after year. F1 hybrids, while often vigorous, will not produce consistent offspring from saved seeds. Reputable seed companies include Baker Creek Heirloom Seeds, High Mowing Organic Seeds, and Seed Savers Exchange. Start with common, reliable varieties like ‘Black Krim’ tomatoes, ‘Provider’ bush beans, ‘Waltham Butternut’ squash, and ‘Black Seeded Simpson’ lettuce.
- Start Seeds Indoors (Optional but Recommended): For longer growing seasons or specific crops, starting seeds indoors gives you a head start. Use seed-starting mix (e.g., Espoma Organic Seed Starter Mix, ~$10 for 16qt bag) in seed trays (Jiffy Professional Greenhouse 72-cell kit, ~$15). Provide adequate light with LED grow lights (Barrina T5 2ft 4-pack LED Grow Lights, 20W each, ~$50) for 14-16 hours a day, positioned 2-4 inches above seedlings. Maintain consistent temperatures (65-75°F for most).
- Direct Sowing vs. Transplanting: Some crops (carrots, radishes, beans, corn) prefer direct sowing into the garden bed. Others (tomatoes, peppers, broccoli, kale) benefit from being started indoors and transplanted. Follow seed packet instructions for planting depths (e.g., lettuce seeds are often surface-sown or planted 1/8 inch deep, while beans are 1 inch deep) and spacing.
- Companion Planting: Strategically plant different species together to enhance growth, deter pests, and attract beneficial insects. For example, planting marigolds near tomatoes can deter nematodes, and basil improves tomato flavor. Nasturtiums can act as a trap crop for aphids.
- Succession Planting: For a continuous harvest, plant small batches of quick-growing crops (lettuce, radishes, cilantro) every 2-3 weeks. As one crop finishes, another is ready to take its place.
Step 6: Pest & Disease Management (Organic)
Maintaining a self sufficient garden from scratch means embracing organic pest and disease control.
- Integrated Pest Management (IPM): This holistic approach combines several strategies.
- Observation: Regularly inspect your plants for early signs of pests or disease. Catching issues early is key.
- Physical Barriers: Use row covers (e.g., Agribon AG-19 floating row cover, 10×20 ft, ~$20) to protect young plants from insect pests like cabbage worms and squash bugs. Install fences (e.g., 2×4 welded wire mesh, 4 ft tall, 50 ft roll ~$70) to keep out deer, rabbits, and other larger animals.
- Hand-Picking: For larger pests like tomato hornworms or squash bugs, simply pick them off and drop them into a bucket of soapy water.
- Companion Planting: As mentioned, certain plants repel pests. Marigolds, garlic, and onions are excellent deterrents.
- Attract Beneficial Insects: Plant flowers like dill, fennel, cosmos, and sweet alyssum to attract ladybugs, lacewings, and parasitic wasps, which prey on common garden pests.
- Organic Sprays & Treatments:
- Neem Oil: An excellent broad-spectrum organic insecticide and fungicide. Bonide Neem Oil Concentrate (16oz, ~$20) can be mixed at a rate of 1-2 tbsp per gallon of water and sprayed on affected plants.
- Insecticidal Soap: Effective against soft-bodied insects like aphids, whiteflies, and spider mites. Garden Safe Insecticidal Soap (24oz ready-to-use, ~$10).
- Bacillus thuringiensis (Bt): A naturally occurring soil bacterium that targets caterpillars and worms. Monterey BT Worm & Caterpillar Killer (16oz, ~$18) is highly effective and safe for beneficial insects.
- Copper or Sulfur Sprays: For fungal diseases like powdery mildew or blight, organic copper (e.g., Bonide Copper Fungicide, ~$15 for 1lb) or sulfur (e.g., Safer Brand Garden Fungicide, ~$10 for 16oz) can be used as a last resort.
Step 7: Harvesting & Seed Saving
The culmination of your efforts is the harvest, and seed saving closes the loop on self-sufficiency.
- Harvesting Techniques:
- Timing: Harvest vegetables at their peak ripeness for best flavor and nutritional value. For example, green beans should snap cleanly, cucumbers should be firm, and tomatoes should be fully colored.
- Frequency: Many crops, like zucchini, cucumbers, and bush beans, produce more if harvested frequently. Pick daily or every other day.
- Tools: Use clean, sharp pruners (e.g., Corona ClassicCUT Bypass Pruner BP 3180, ~$30) or a sharp knife for clean cuts, minimizing damage to the plant.
- Seed Saving: This is where the « self-sufficient » aspect truly shines.
- Selection: Only save seeds from your healthiest, most vigorous plants that show desired traits (disease resistance, good flavor, high yield).
- Isolation: To ensure true-to-type seeds, prevent cross-pollination. This can be challenging for open-pollinated crops that readily cross (e.g., squash, corn). For beginners, focus on self-pollinating plants like beans, peas, lettuce, and tomatoes.
- Processing:
- Dry Seeds (Beans, Peas, Lettuce, Grains): Allow pods/seed heads to dry completely on the plant. Harvest, shell, and clean the seeds, removing chaff.
- Wet Seeds (Tomatoes, Cucumbers, Squash): For tomatoes, ferment the seeds in water for a few days to remove the gel coating and inhibit disease. For cucumbers/squash, scrape out seeds, wash thoroughly, and dry.
- Drying: Spread seeds thinly on screens or paper plates in a cool, dry, well-ventilated area for 1-4 weeks. Ensure they are bone-dry before storage. I aim for less than 8% moisture content.
- Storage: Store seeds in airtight containers (glass jars with desiccant packets work well) in a cool, dark, dry place (ideally 40-50°F and 30-40% humidity). Label clearly with variety and date. Properly stored seeds can remain viable for 3-10 years or more.
Step 8: Season Extension & Winterizing
Extend your harvest and protect your garden for the off-season to truly maximize your self sufficient garden from scratch.
- Cold Frames: Simple structures with a transparent top (glass, polycarbonate, or old windows) that sit over garden beds. They trap solar heat, allowing you to grow cold-hardy crops (lettuce, spinach, kale, radishes) well into winter or start seeds earlier in spring. A basic cold frame can be built from 2×6 lumber and a sheet of polycarbonate for under $100.
- Hoop Houses/Low Tunnels: Larger structures made from flexible hoops (PVC pipe or EMT conduit) covered with greenhouse plastic. These provide more space and greater temperature moderation. A 10×20 ft DIY low tunnel kit can cost $200-$500, while a larger, more robust hoop house kit might be $1,000-$3,000. I use a 6×12 ft low tunnel made from 1/2-inch PVC hoops and 6mil greenhouse plastic, which extends my lettuce and spinach harvest by at least
Step 4: Water Management & Irrigation
Efficient water management is critical for a self sufficient garden from scratch, especially in off-grid living where water resources might be limited.
- Rainwater Harvesting: This is my primary source of irrigation water. A 55-gallon rain barrel (e.g., EarthMark Rain Barrel, ~$120-$150) connected to a downspout can collect significant water. For larger needs, I use two 275-gallon IBC totes (Intermediate Bulk Containers, often available used for $100-$200 each from food-grade sources) connected in series. A 1,000 sq ft roof can collect approximately 620 gallons of water for every inch of rainfall. My 1,500 sq ft roof provides ample water for my 600 sq ft garden through multiple barrels and totes.
- Drip Irrigation: This is by far the most water-efficient method, delivering water directly to the plant’s root zone, minimizing evaporation and weed growth.
- Components: A typical drip system includes a pressure regulator (e.g., Rain Bird PRV-10, ~$15), a filter (Rain Bird RBY filter, ~$20), main tubing (1/2-inch poly tubing, 100ft ~$25), smaller feeder lines (1/4-inch tubing), and emitters (0.5 GPH or 1 GPH per plant).
- Kits: For beginners, a starter kit like the Rain Bird Drip Irrigation Garden Kit (model DDI-KIT-1P, ~$40-$60) is excellent for a small garden. For larger setups, I use Netafim Techline CV Drip Line (500ft roll, ~$150-$200), which has pressure-compensating emitters built-in, ensuring even watering across long runs.
- Automation: For true self-sufficiency, consider a battery-powered timer (e.g., Orbit B-Hyve Bluetooth Hose Faucet Timer, ~$50) or a solar-powered timer connected to a small 12V pump.
- Solar-Powered Pumps: For lifting water from a well, pond, or large storage tank to your garden, a solar pump is a game-changer. For a smaller drip system, a Shurflo 2088-594-152 Diaphragm Pump (12V, 3.5 GPM, ~$180) can be powered by a single 100W solar panel (e.g., Renogy 100W Monocrystalline Solar Panel, ~$100) and a small 12V battery (e.g., a 50Ah LiFePO4 battery like the Battle Born 50Ah, ~$450). For larger operations or deeper wells, more robust systems are needed. If you’re looking to build out a comprehensive off-grid power system to support your garden’s water needs, or indeed your entire homestead, you might want to explore resources like the Power Grid Generator complete system guide to understand the full scope of what’s possible in terms of energy independence.
Step 5: Seed Selection & Planting
The choice of seeds is crucial for a truly self sufficient garden from scratch.
- Choose Heirloom & Open-Pollinated Seeds: These varieties produce seeds that will grow true to type, meaning you can save seeds from your harvest year after year. F1 hybrids, while often vigorous, will not produce consistent offspring from saved seeds. Reputable seed companies include Baker Creek Heirloom Seeds, High Mowing Organic Seeds, and Seed Savers Exchange. Start with common, reliable varieties like ‘Black Krim’ tomatoes, ‘Provider’ bush beans, ‘Waltham Butternut’ squash, and ‘Black Seeded Simpson’ lettuce.
- Start Seeds Indoors (Optional but Recommended): For longer growing seasons or specific crops, starting seeds indoors gives you a head start. Use seed-starting mix (e.g., Espoma Organic Seed Starter Mix, ~$10 for 16qt bag) in seed trays (Jiffy Professional Greenhouse 72-cell kit, ~$15). Provide adequate light with LED grow lights (Barrina T5 2ft 4-pack LED Grow Lights, 20W each, ~$50) for 14-16 hours a day, positioned 2-4 inches above seedlings. Maintain consistent temperatures (65-75°F for most).
- Direct Sowing vs. Transplanting: Some crops (carrots, radishes, beans, corn) prefer direct sowing into the garden bed. Others (tomatoes, peppers, broccoli, kale) benefit from being started indoors and transplanted. Follow seed packet instructions for planting depths (e.g., lettuce seeds are often surface-sown or planted 1/8 inch deep, while beans are 1 inch deep) and spacing.
- Companion Planting: Strategically plant different species together to enhance growth, deter pests, and attract beneficial insects. For example, planting marigolds near tomatoes can deter nematodes, and basil improves tomato flavor. Nasturtiums can act as a trap crop for aphids.
- Succession Planting: For a continuous harvest, plant small batches of quick-growing crops (lettuce, radishes, cilantro) every 2-3 weeks. As one crop finishes, another is ready to take its place.
Step 6: Pest & Disease Management (Organic)
Maintaining a self sufficient garden from scratch means embracing organic pest and disease control.
- Integrated Pest Management (IPM): This holistic approach combines several strategies.
- Observation: Regularly inspect your plants for early signs of pests or disease. Catching issues early is key.
- Physical Barriers: Use row covers (e.g., Agribon AG-19 floating row cover, 10×20 ft, ~$20) to protect young plants from insect pests like cabbage worms and squash bugs. Install fences (e.g., 2×4 welded wire mesh, 4 ft tall, 50 ft roll ~$70) to keep out deer, rabbits, and other larger animals.
- Hand-Picking: For larger pests like tomato hornworms or squash bugs, simply pick them off and drop them into a bucket of soapy water.
- Companion Planting: As mentioned, certain plants repel pests. Marigolds, garlic, and onions are excellent deterrents.
- Attract Beneficial Insects: Plant flowers like dill, fennel, cosmos, and sweet alyssum to attract ladybugs, lacewings, and parasitic wasps, which prey on common garden pests.
- Organic Sprays & Treatments:
- Neem Oil: An excellent broad-spectrum organic insecticide and fungicide. Bonide Neem Oil Concentrate (16oz, ~$20) can be mixed at a rate of 1-2 tbsp per gallon of water and sprayed on affected plants.
- Insecticidal Soap: Effective against soft-bodied insects like aphids, whiteflies, and spider mites. Garden Safe Insecticidal Soap (24oz ready-to-use, ~$10).
- Bacillus thuringiensis (Bt): A naturally occurring soil bacterium that targets caterpillars and worms. Monterey BT Worm & Caterpillar Killer (16oz, ~$18) is highly effective and safe for beneficial insects.
- Copper or Sulfur Sprays: For fungal diseases like powdery mildew or blight, organic copper (e.g., Bonide Copper Fungicide, ~$15 for 1lb) or sulfur (e.g., Safer Brand Garden Fungicide, ~$10 for 16oz) can be used as a last resort.
Step 7: Harvesting & Seed Saving
The culmination of your efforts is the harvest, and seed saving closes the loop on self-sufficiency.
- Harvesting Techniques:
- Timing: Harvest vegetables at their peak ripeness for best flavor and nutritional value. For example, green beans should snap cleanly, cucumbers should be firm, and tomatoes should be fully colored.
- Frequency: Many crops, like zucchini, cucumbers, and bush beans, produce more if harvested frequently. Pick daily or every other day.
- Tools: Use clean, sharp pruners (e.g., Corona ClassicCUT Bypass Pruner BP 3180, ~$30) or a sharp knife for clean cuts, minimizing damage to the plant.
- Seed Saving: This is where the « self-sufficient » aspect truly shines.
- Selection: Only save seeds from your healthiest, most vigorous plants that show desired traits (disease resistance, good flavor, high yield).
- Isolation: To ensure true-to-type seeds, prevent cross-pollination. This can be challenging for open-pollinated crops that readily cross (e.g., squash, corn). For beginners, focus on self-pollinating plants like beans, peas, lettuce, and tomatoes.
- Processing:
- Dry Seeds (Beans, Peas, Lettuce, Grains): Allow pods/seed heads to dry completely on the plant. Harvest, shell, and clean the seeds, removing chaff.
- Wet Seeds (Tomatoes, Cucumbers, Squash): For tomatoes, ferment the seeds in water for a few days to remove the gel coating and inhibit disease. For cucumbers/squash, scrape out seeds, wash thoroughly, and dry.
- Drying: Spread seeds thinly on screens or paper plates in a cool, dry, well-ventilated area for 1-4 weeks. Ensure they are bone-dry before storage. I aim for less than 8% moisture content.
- Storage: Store seeds in airtight containers (glass jars with desiccant packets work well) in a cool, dark, dry place (ideally 40-50°F and 30-40% humidity). Label clearly with variety and date. Properly stored seeds can remain viable for 3-10 years or more.
Step 8: Season Extension & Winterizing
Extend your harvest and protect your garden for the off-season to truly maximize your self sufficient garden from scratch.
- Cold Frames: Simple structures with a transparent top (glass, polycarbonate, or old windows) that sit over garden beds. They trap solar heat, allowing you to grow cold-hardy crops (lettuce, spinach, kale, radishes) well into winter or start seeds earlier in spring. A basic cold frame can be built from 2×6 lumber and a sheet of polycarbonate for under $100.
- Hoop Houses/Low Tunnels: Larger structures made from flexible hoops (PVC pipe or EMT conduit) covered with greenhouse plastic. These provide more space and greater temperature moderation. A 10×20 ft DIY low tunnel kit can cost $200-$500, while a larger, more robust hoop house kit might be $1,000-$3,000. I use a 6×12 ft low tunnel made from 1/2-inch PVC hoops and 6mil greenhouse plastic, which extends my lettuce and spinach harvest by at least
- In-Ground Beds: If you have excellent native soil and good drainage, in-ground beds are the most economical. Double-digging (loosening soil two shovel depths) can significantly improve drainage and aeration. For my main garden, I primarily use in-ground beds, but I focus on building up the soil over time with consistent compost additions and cover cropping. I aim for beds that are no wider than 3-4 feet so I can reach the center without stepping on the soil, compacting it.
- Raised Beds: Raised beds offer numerous advantages, especially for poor soil, heavy clay, or rocky areas. They provide better drainage, warm up faster in spring, reduce compaction, and make weeding and harvesting easier on your back.
- Material Options:
- Untreated Cedar: Naturally rot-resistant and chemical-free. A 4×8 ft bed, 12 inches deep, typically requires three 2x12x8 ft cedar boards, costing around $50-$60 per board (total ~$150-$180) plus corner brackets or screws. My first raised beds were cedar and are still going strong after 7 years.
- Galvanized Steel: Durable, long-lasting, and aesthetically pleasing. Brands like Vego Garden offer modular kits. A Vego Garden 17″ Tall 8-in-1 Metal Raised Garden Bed (can be configured to 4×8 ft) costs approximately $250-$300.
- Concrete Blocks/Stones: Very durable but can leach minerals (though generally safe once weathered) and can be expensive.
- Recycled Materials: Pallets (check for chemical treatment stamps like « HT » for heat-treated), old tires (controversial due to potential chemical leaching).
- Filling Raised Beds: Don’t just fill with topsoil. Use a « Hugelkultur » approach (logs, branches, leaves, then compost, then topsoil) or a mixture of 60% good quality topsoil, 30% compost, and 10% perlite or vermiculite for drainage. A 4x8x1 ft raised bed requires about 32 cubic feet (or ~1.2 cubic yards) of soil mix, which can cost $100-$200 depending on your source.
- Material Options:
Step 4: Water Management & Irrigation
Efficient water management is critical for a self sufficient garden from scratch, especially in off-grid living where water resources might be limited.
- Rainwater Harvesting: This is my primary source of irrigation water. A 55-gallon rain barrel (e.g., EarthMark Rain Barrel, ~$120-$150) connected to a downspout can collect significant water. For larger needs, I use two 275-gallon IBC totes (Intermediate Bulk Containers, often available used for $100-$200 each from food-grade sources) connected in series. A 1,000 sq ft roof can collect approximately 620 gallons of water for every inch of rainfall. My 1,500 sq ft roof provides ample water for my 600 sq ft garden through multiple barrels and totes.
- Drip Irrigation: This is by far the most water-efficient method, delivering water directly to the plant’s root zone, minimizing evaporation and weed growth.
- Components: A typical drip system includes a pressure regulator (e.g., Rain Bird PRV-10, ~$15), a filter (Rain Bird RBY filter, ~$20), main tubing (1/2-inch poly tubing, 100ft ~$25), smaller feeder lines (1/4-inch tubing), and emitters (0.5 GPH or 1 GPH per plant).
- Kits: For beginners, a starter kit like the Rain Bird Drip Irrigation Garden Kit (model DDI-KIT-1P, ~$40-$60) is excellent for a small garden. For larger setups, I use Netafim Techline CV Drip Line (500ft roll, ~$150-$200), which has pressure-compensating emitters built-in, ensuring even watering across long runs.
- Automation: For true self-sufficiency, consider a battery-powered timer (e.g., Orbit B-Hyve Bluetooth Hose Faucet Timer, ~$50) or a solar-powered timer connected to a small 12V pump.
- Solar-Powered Pumps: For lifting water from a well, pond, or large storage tank to your garden, a solar pump is a game-changer. For a smaller drip system, a Shurflo 2088-594-152 Diaphragm Pump (12V, 3.5 GPM, ~$180) can be powered by a single 100W solar panel (e.g., Renogy 100W Monocrystalline Solar Panel, ~$100) and a small 12V battery (e.g., a 50Ah LiFePO4 battery like the Battle Born 50Ah, ~$450). For larger operations or deeper wells, more robust systems are needed. If you’re looking to build out a comprehensive off-grid power system to support your garden’s water needs, or indeed your entire homestead, you might want to explore resources like the Power Grid Generator complete system guide to understand the full scope of what’s possible in terms of energy independence.
Step 5: Seed Selection & Planting
The choice of seeds is crucial for a truly self sufficient garden from scratch.
- Choose Heirloom & Open-Pollinated Seeds: These varieties produce seeds that will grow true to type, meaning you can save seeds from your harvest year after year. F1 hybrids, while often vigorous, will not produce consistent offspring from saved seeds. Reputable seed companies include Baker Creek Heirloom Seeds, High Mowing Organic Seeds, and Seed Savers Exchange. Start with common, reliable varieties like ‘Black Krim’ tomatoes, ‘Provider’ bush beans, ‘Waltham Butternut’ squash, and ‘Black Seeded Simpson’ lettuce.
- Start Seeds Indoors (Optional but Recommended): For longer growing seasons or specific crops, starting seeds indoors gives you a head start. Use seed-starting mix (e.g., Espoma Organic Seed Starter Mix, ~$10 for 16qt bag) in seed trays (Jiffy Professional Greenhouse 72-cell kit, ~$15). Provide adequate light with LED grow lights (Barrina T5 2ft 4-pack LED Grow Lights, 20W each, ~$50) for 14-16 hours a day, positioned 2-4 inches above seedlings. Maintain consistent temperatures (65-75°F for most).
- Direct Sowing vs. Transplanting: Some crops (carrots, radishes, beans, corn) prefer direct sowing into the garden bed. Others (tomatoes, peppers, broccoli, kale) benefit from being started indoors and transplanted. Follow seed packet instructions for planting depths (e.g., lettuce seeds are often surface-sown or planted 1/8 inch deep, while beans are 1 inch deep) and spacing.
- Companion Planting: Strategically plant different species together to enhance growth, deter pests, and attract beneficial insects. For example, planting marigolds near tomatoes can deter nematodes, and basil improves tomato flavor. Nasturtiums can act as a trap crop for aphids.
- Succession Planting: For a continuous harvest, plant small batches of quick-growing crops (lettuce, radishes, cilantro) every 2-3 weeks. As one crop finishes, another is ready to take its place.
Step 6: Pest & Disease Management (Organic)
Maintaining a self sufficient garden from scratch means embracing organic pest and disease control.
- Integrated Pest Management (IPM): This holistic approach combines several strategies.
- Observation: Regularly inspect your plants for early signs of pests or disease. Catching issues early is key.
- Physical Barriers: Use row covers (e.g., Agribon AG-19 floating row cover, 10×20 ft, ~$20) to protect young plants from insect pests like cabbage worms and squash bugs. Install fences (e.g., 2×4 welded wire mesh, 4 ft tall, 50 ft roll ~$70) to keep out deer, rabbits, and other larger animals.
- Hand-Picking: For larger pests like tomato hornworms or squash bugs, simply pick them off and drop them into a bucket of soapy water.
- Companion Planting: As mentioned, certain plants repel pests. Marigolds, garlic, and onions are excellent deterrents.
- Attract Beneficial Insects: Plant flowers like dill, fennel, cosmos, and sweet alyssum to attract ladybugs, lacewings, and parasitic wasps, which prey on common garden pests.
- Organic Sprays & Treatments:
- Neem Oil: An excellent broad-spectrum organic insecticide and fungicide. Bonide Neem Oil Concentrate (16oz, ~$20) can be mixed at a rate of 1-2 tbsp per gallon of water and sprayed on affected plants.
- Insecticidal Soap: Effective against soft-bodied insects like aphids, whiteflies, and spider mites. Garden Safe Insecticidal Soap (24oz ready-to-use, ~$10).
- Bacillus thuringiensis (Bt): A naturally occurring soil bacterium that targets caterpillars and worms. Monterey BT Worm & Caterpillar Killer (16oz, ~$18) is highly effective and safe for beneficial insects.
- Copper or Sulfur Sprays: For fungal diseases like powdery mildew or blight, organic copper (e.g., Bonide Copper Fungicide, ~$15 for 1lb) or sulfur (e.g., Safer Brand Garden Fungicide, ~$10 for 16oz) can be used as a last resort.
Step 7: Harvesting & Seed Saving
The culmination of your efforts is the harvest, and seed saving closes the loop on self-sufficiency.
- Harvesting Techniques:
- Timing: Harvest vegetables at their peak ripeness for best flavor and nutritional value. For example, green beans should snap cleanly, cucumbers should be firm, and tomatoes should be fully colored.
- Frequency: Many crops, like zucchini, cucumbers, and bush beans, produce more if harvested frequently. Pick daily or every other day.
- Tools: Use clean, sharp pruners (e.g., Corona ClassicCUT Bypass Pruner BP 3180, ~$30) or a sharp knife for clean cuts, minimizing damage to the plant.
- Seed Saving: This is where the « self-sufficient » aspect truly shines.
- Selection: Only save seeds from your healthiest, most vigorous plants that show desired traits (disease resistance, good flavor, high yield).
- Isolation: To ensure true-to-type seeds, prevent cross-pollination. This can be challenging for open-pollinated crops that readily cross (e.g., squash, corn). For beginners, focus on self-pollinating plants like beans, peas, lettuce, and tomatoes.
- Processing:
- Dry Seeds (Beans, Peas, Lettuce, Grains): Allow pods/seed heads to dry completely on the plant. Harvest, shell, and clean the seeds, removing chaff.
- Wet Seeds (Tomatoes, Cucumbers, Squash): For tomatoes, ferment the seeds in water for a few days to remove the gel coating and inhibit disease. For cucumbers/squash, scrape out seeds, wash thoroughly, and dry.
- Drying: Spread seeds thinly on screens or paper plates in a cool, dry, well-ventilated area for 1-4 weeks. Ensure they are bone-dry before storage. I aim for less than 8% moisture content.
- Storage: Store seeds in airtight containers (glass jars with desiccant packets work well) in a cool, dark, dry place (ideally 40-50°F and 30-40% humidity). Label clearly with variety and date. Properly stored seeds can remain viable for 3-10 years or more.
Step 8: Season Extension & Winterizing
Extend your harvest and protect your garden for the off-season to truly maximize your self sufficient garden from scratch.
- Cold Frames: Simple structures with a transparent top (glass, polycarbonate, or old windows) that sit over garden beds. They trap solar heat, allowing you to grow cold-hardy crops (lettuce, spinach, kale, radishes) well into winter or start seeds earlier in spring. A basic cold frame can be built from 2×6 lumber and a sheet of polycarbonate for under $100.
- Hoop Houses/Low Tunnels: Larger structures made from flexible hoops (PVC pipe or EMT conduit) covered with greenhouse plastic. These provide more space and greater temperature moderation. A 10×20 ft DIY low tunnel kit can cost $200-$500, while a larger, more robust hoop house kit might be $1,000-$3,000. I use a 6×12 ft low tunnel made from 1/2-inch PVC hoops and 6mil greenhouse plastic, which extends my lettuce and spinach harvest by at least
Deciding between raised beds and in-ground beds depends on your soil, budget, and physical capabilities.
- In-Ground Beds: If you have excellent native soil and good drainage, in-ground beds are the most economical. Double-digging (loosening soil two shovel depths) can significantly improve drainage and aeration. For my main garden, I primarily use in-ground beds, but I focus on building up the soil over time with consistent compost additions and cover cropping. I aim for beds that are no wider than 3-4 feet so I can reach the center without stepping on the soil, compacting it.
- Raised Beds: Raised beds offer numerous advantages, especially for poor soil, heavy clay, or rocky areas. They provide better drainage, warm up faster in spring, reduce compaction, and make weeding and harvesting easier on your back.
- Material Options:
- Untreated Cedar: Naturally rot-resistant and chemical-free. A 4×8 ft bed, 12 inches deep, typically requires three 2x12x8 ft cedar boards, costing around $50-$60 per board (total ~$150-$180) plus corner brackets or screws. My first raised beds were cedar and are still going strong after 7 years.
- Galvanized Steel: Durable, long-lasting, and aesthetically pleasing. Brands like Vego Garden offer modular kits. A Vego Garden 17″ Tall 8-in-1 Metal Raised Garden Bed (can be configured to 4×8 ft) costs approximately $250-$300.
- Concrete Blocks/Stones: Very durable but can leach minerals (though generally safe once weathered) and can be expensive.
- Recycled Materials: Pallets (check for chemical treatment stamps like « HT » for heat-treated), old tires (controversial due to potential chemical leaching).
- Filling Raised Beds: Don’t just fill with topsoil. Use a « Hugelkultur » approach (logs, branches, leaves, then compost, then topsoil) or a mixture of 60% good quality topsoil, 30% compost, and 10% perlite or vermiculite for drainage. A 4x8x1 ft raised bed requires about 32 cubic feet (or ~1.2 cubic yards) of soil mix, which can cost $100-$200 depending on your source.
- Material Options:
Step 4: Water Management & Irrigation
Efficient water management is critical for a self sufficient garden from scratch, especially in off-grid living where water resources might be limited.
- Rainwater Harvesting: This is my primary source of irrigation water. A 55-gallon rain barrel (e.g., EarthMark Rain Barrel, ~$120-$150) connected to a downspout can collect significant water. For larger needs, I use two 275-gallon IBC totes (Intermediate Bulk Containers, often available used for $100-$200 each from food-grade sources) connected in series. A 1,000 sq ft roof can collect approximately 620 gallons of water for every inch of rainfall. My 1,500 sq ft roof provides ample water for my 600 sq ft garden through multiple barrels and totes.
- Drip Irrigation: This is by far the most water-efficient method, delivering water directly to the plant’s root zone, minimizing evaporation and weed growth.
- Components: A typical drip system includes a pressure regulator (e.g., Rain Bird PRV-10, ~$15), a filter (Rain Bird RBY filter, ~$20), main tubing (1/2-inch poly tubing, 100ft ~$25), smaller feeder lines (1/4-inch tubing), and emitters (0.5 GPH or 1 GPH per plant).
- Kits: For beginners, a starter kit like the Rain Bird Drip Irrigation Garden Kit (model DDI-KIT-1P, ~$40-$60) is excellent for a small garden. For larger setups, I use Netafim Techline CV Drip Line (500ft roll, ~$150-$200), which has pressure-compensating emitters built-in, ensuring even watering across long runs.
- Automation: For true self-sufficiency, consider a battery-powered timer (e.g., Orbit B-Hyve Bluetooth Hose Faucet Timer, ~$50) or a solar-powered timer connected to a small 12V pump.
- Solar-Powered Pumps: For lifting water from a well, pond, or large storage tank to your garden, a solar pump is a game-changer. For a smaller drip system, a Shurflo 2088-594-152 Diaphragm Pump (12V, 3.5 GPM, ~$180) can be powered by a single 100W solar panel (e.g., Renogy 100W Monocrystalline Solar Panel, ~$100) and a small 12V battery (e.g., a 50Ah LiFePO4 battery like the Battle Born 50Ah, ~$450). For larger operations or deeper wells, more robust systems are needed. If you’re looking to build out a comprehensive off-grid power system to support your garden’s water needs, or indeed your entire homestead, you might want to explore resources like the Power Grid Generator complete system guide to understand the full scope of what’s possible in terms of energy independence.
Step 5: Seed Selection & Planting
The choice of seeds is crucial for a truly self sufficient garden from scratch.
- Choose Heirloom & Open-Pollinated Seeds: These varieties produce seeds that will grow true to type, meaning you can save seeds from your harvest year after year. F1 hybrids, while often vigorous, will not produce consistent offspring from saved seeds. Reputable seed companies include Baker Creek Heirloom Seeds, High Mowing Organic Seeds, and Seed Savers Exchange. Start with common, reliable varieties like ‘Black Krim’ tomatoes, ‘Provider’ bush beans, ‘Waltham Butternut’ squash, and ‘Black Seeded Simpson’ lettuce.
- Start Seeds Indoors (Optional but Recommended): For longer growing seasons or specific crops, starting seeds indoors gives you a head start. Use seed-starting mix (e.g., Espoma Organic Seed Starter Mix, ~$10 for 16qt bag) in seed trays (Jiffy Professional Greenhouse 72-cell kit, ~$15). Provide adequate light with LED grow lights (Barrina T5 2ft 4-pack LED Grow Lights, 20W each, ~$50) for 14-16 hours a day, positioned 2-4 inches above seedlings. Maintain consistent temperatures (65-75°F for most).
- Direct Sowing vs. Transplanting: Some crops (carrots, radishes, beans, corn) prefer direct sowing into the garden bed. Others (tomatoes, peppers, broccoli, kale) benefit from being started indoors and transplanted. Follow seed packet instructions for planting depths (e.g., lettuce seeds are often surface-sown or planted 1/8 inch deep, while beans are 1 inch deep) and spacing.
- Companion Planting: Strategically plant different species together to enhance growth, deter pests, and attract beneficial insects. For example, planting marigolds near tomatoes can deter nematodes, and basil improves tomato flavor. Nasturtiums can act as a trap crop for aphids.
- Succession Planting: For a continuous harvest, plant small batches of quick-growing crops (lettuce, radishes, cilantro) every 2-3 weeks. As one crop finishes, another is ready to take its place.
Step 6: Pest & Disease Management (Organic)
Maintaining a self sufficient garden from scratch means embracing organic pest and disease control.
- Integrated Pest Management (IPM): This holistic approach combines several strategies.
- Observation: Regularly inspect your plants for early signs of pests or disease. Catching issues early is key.
- Physical Barriers: Use row covers (e.g., Agribon AG-19 floating row cover, 10×20 ft, ~$20) to protect young plants from insect pests like cabbage worms and squash bugs. Install fences (e.g., 2×4 welded wire mesh, 4 ft tall, 50 ft roll ~$70) to keep out deer, rabbits, and other larger animals.
- Hand-Picking: For larger pests like tomato hornworms or squash bugs, simply pick them off and drop them into a bucket of soapy water.
- Companion Planting: As mentioned, certain plants repel pests. Marigolds, garlic, and onions are excellent deterrents.
- Attract Beneficial Insects: Plant flowers like dill, fennel, cosmos, and sweet alyssum to attract ladybugs, lacewings, and parasitic wasps, which prey on common garden pests.
- Organic Sprays & Treatments:
- Neem Oil: An excellent broad-spectrum organic insecticide and fungicide. Bonide Neem Oil Concentrate (16oz, ~$20) can be mixed at a rate of 1-2 tbsp per gallon of water and sprayed on affected plants.
- Insecticidal Soap: Effective against soft-bodied insects like aphids, whiteflies, and spider mites. Garden Safe Insecticidal Soap (24oz ready-to-use, ~$10).
- Bacillus thuringiensis (Bt): A naturally occurring soil bacterium that targets caterpillars and worms. Monterey BT Worm & Caterpillar Killer (16oz, ~$18) is highly effective and safe for beneficial insects.
- Copper or Sulfur Sprays: For fungal diseases like powdery mildew or blight, organic copper (e.g., Bonide Copper Fungicide, ~$15 for 1lb) or sulfur (e.g., Safer Brand Garden Fungicide, ~$10 for 16oz) can be used as a last resort.
Step 7: Harvesting & Seed Saving
The culmination of your efforts is the harvest, and seed saving closes the loop on self-sufficiency.
- Harvesting Techniques:
- Timing: Harvest vegetables at their peak ripeness for best flavor and nutritional value. For example, green beans should snap cleanly, cucumbers should be firm, and tomatoes should be fully colored.
- Frequency: Many crops, like zucchini, cucumbers, and bush beans, produce more if harvested frequently. Pick daily or every other day.
- Tools: Use clean, sharp pruners (e.g., Corona ClassicCUT Bypass Pruner BP 3180, ~$30) or a sharp knife for clean cuts, minimizing damage to the plant.
- Seed Saving: This is where the « self-sufficient » aspect truly shines.
- Selection: Only save seeds from your healthiest, most vigorous plants that show desired traits (disease resistance, good flavor, high yield).
- Isolation: To ensure true-to-type seeds, prevent cross-pollination. This can be challenging for open-pollinated crops that readily cross (e.g., squash, corn). For beginners, focus on self-pollinating plants like beans, peas, lettuce, and tomatoes.
- Processing:
- Dry Seeds (Beans, Peas, Lettuce, Grains): Allow pods/seed heads to dry completely on the plant. Harvest, shell, and clean the seeds, removing chaff.
- Wet Seeds (Tomatoes, Cucumbers, Squash): For tomatoes, ferment the seeds in water for a few days to remove the gel coating and inhibit disease. For cucumbers/squash, scrape out seeds, wash thoroughly, and dry.
- Drying: Spread seeds thinly on screens or paper plates in a cool, dry, well-ventilated area for 1-4 weeks. Ensure they are bone-dry before storage. I aim for less than 8% moisture content.
- Storage: Store seeds in airtight containers (glass jars with desiccant packets work well) in a cool, dark, dry place (ideally 40-50°F and 30-40% humidity). Label clearly with variety and date. Properly stored seeds can remain viable for 3-10 years or more.
Step 8: Season Extension & Winterizing
Extend your harvest and protect your garden for the off-season to truly maximize your self sufficient garden from scratch.
- Cold Frames: Simple structures with a transparent top (glass, polycarbonate, or old windows) that sit over garden beds. They trap solar heat, allowing you to grow cold-hardy crops (lettuce, spinach, kale, radishes) well into winter or start seeds earlier in spring. A basic cold frame can be built from 2×6 lumber and a sheet of polycarbonate for under $100.
- Hoop Houses/Low Tunnels: Larger structures made from flexible hoops (PVC pipe or EMT conduit) covered with greenhouse plastic. These provide more space and greater temperature moderation. A 10×20 ft DIY low tunnel kit can cost $200-$500, while a larger, more robust hoop house kit might be $1,000-$3,000. I use a 6×12 ft low tunnel made from 1/2-inch PVC hoops and 6mil greenhouse plastic, which extends my lettuce and spinach harvest by at least
Healthy soil is the bedrock of a productive, self-sufficient garden. You can’t guess what your soil needs; you have to test it.
- Perform a Soil Test: A professional soil test will give you precise data on your soil’s pH, nutrient levels (N-P-K), and organic matter content. I recommend sending a sample to your local agricultural extension office; it typically costs $20-$50 and provides detailed recommendations. Alternatively, for a quick homeowner check, a Rapitest Soil Test Kit (40-test kit, model 1663, ~$20 on Amazon) provides a good baseline for pH, Nitrogen, Phosphorus, and Potash. Aim for a pH between 6.0 and 7.0 for most vegetables.
- Amend for pH Imbalance: If your soil is too acidic (below 6.0), add agricultural lime (dolomitic lime adds magnesium, calcitic lime adds calcium). Apply 5-10 lbs per 100 sq ft for a moderate adjustment. If it’s too alkaline (above 7.0), add elemental sulfur (e.g., Espoma Soil Acidifier, ~$15 for 6.75 lbs) or generous amounts of organic matter like peat moss or pine needles.
- Build Organic Matter: This is the single most important step for long-term soil health. Organic matter improves soil structure, water retention, drainage, and nutrient availability. Incorporate 2-4 inches of high-quality compost into your top 6-12 inches of soil annually. I make my own compost from kitchen scraps, garden waste, and shredded leaves, but you can purchase it. Local nurseries often sell bulk compost for $30-$50 per cubic yard. Aged manure (from chickens, cows, or horses – ensure it’s well-rotted to avoid burning plants) is also excellent.
- Address Nutrient Deficiencies: Based on your soil test, add specific organic amendments. If Nitrogen (N) is low, add blood meal (12-0-0, ~$20 for 3 lbs) or feather meal. For Phosphorus (P), use bone meal (3-15-0, ~$15 for 3 lbs) or rock phosphate. For Potassium (K), greensand (0-0-2.5, ~$25 for 5 lbs) or kelp meal are good choices. I rely heavily on Espoma Organic Garden-tone (5-3-3, ~$25 for an 8lb bag) as a balanced, all-purpose organic fertilizer during planting.
Step 3: Garden Bed Preparation
Deciding between raised beds and in-ground beds depends on your soil, budget, and physical capabilities.
- In-Ground Beds: If you have excellent native soil and good drainage, in-ground beds are the most economical. Double-digging (loosening soil two shovel depths) can significantly improve drainage and aeration. For my main garden, I primarily use in-ground beds, but I focus on building up the soil over time with consistent compost additions and cover cropping. I aim for beds that are no wider than 3-4 feet so I can reach the center without stepping on the soil, compacting it.
- Raised Beds: Raised beds offer numerous advantages, especially for poor soil, heavy clay, or rocky areas. They provide better drainage, warm up faster in spring, reduce compaction, and make weeding and harvesting easier on your back.
- Material Options:
- Untreated Cedar: Naturally rot-resistant and chemical-free. A 4×8 ft bed, 12 inches deep, typically requires three 2x12x8 ft cedar boards, costing around $50-$60 per board (total ~$150-$180) plus corner brackets or screws. My first raised beds were cedar and are still going strong after 7 years.
- Galvanized Steel: Durable, long-lasting, and aesthetically pleasing. Brands like Vego Garden offer modular kits. A Vego Garden 17″ Tall 8-in-1 Metal Raised Garden Bed (can be configured to 4×8 ft) costs approximately $250-$300.
- Concrete Blocks/Stones: Very durable but can leach minerals (though generally safe once weathered) and can be expensive.
- Recycled Materials: Pallets (check for chemical treatment stamps like « HT » for heat-treated), old tires (controversial due to potential chemical leaching).
- Filling Raised Beds: Don’t just fill with topsoil. Use a « Hugelkultur » approach (logs, branches, leaves, then compost, then topsoil) or a mixture of 60% good quality topsoil, 30% compost, and 10% perlite or vermiculite for drainage. A 4x8x1 ft raised bed requires about 32 cubic feet (or ~1.2 cubic yards) of soil mix, which can cost $100-$200 depending on your source.
- Material Options:
Step 4: Water Management & Irrigation
Efficient water management is critical for a self sufficient garden from scratch, especially in off-grid living where water resources might be limited.
- Rainwater Harvesting: This is my primary source of irrigation water. A 55-gallon rain barrel (e.g., EarthMark Rain Barrel, ~$120-$150) connected to a downspout can collect significant water. For larger needs, I use two 275-gallon IBC totes (Intermediate Bulk Containers, often available used for $100-$200 each from food-grade sources) connected in series. A 1,000 sq ft roof can collect approximately 620 gallons of water for every inch of rainfall. My 1,500 sq ft roof provides ample water for my 600 sq ft garden through multiple barrels and totes.
- Drip Irrigation: This is by far the most water-efficient method, delivering water directly to the plant’s root zone, minimizing evaporation and weed growth.
- Components: A typical drip system includes a pressure regulator (e.g., Rain Bird PRV-10, ~$15), a filter (Rain Bird RBY filter, ~$20), main tubing (1/2-inch poly tubing, 100ft ~$25), smaller feeder lines (1/4-inch tubing), and emitters (0.5 GPH or 1 GPH per plant).
- Kits: For beginners, a starter kit like the Rain Bird Drip Irrigation Garden Kit (model DDI-KIT-1P, ~$40-$60) is excellent for a small garden. For larger setups, I use Netafim Techline CV Drip Line (500ft roll, ~$150-$200), which has pressure-compensating emitters built-in, ensuring even watering across long runs.
- Automation: For true self-sufficiency, consider a battery-powered timer (e.g., Orbit B-Hyve Bluetooth Hose Faucet Timer, ~$50) or a solar-powered timer connected to a small 12V pump.
- Solar-Powered Pumps: For lifting water from a well, pond, or large storage tank to your garden, a solar pump is a game-changer. For a smaller drip system, a Shurflo 2088-594-152 Diaphragm Pump (12V, 3.5 GPM, ~$180) can be powered by a single 100W solar panel (e.g., Renogy 100W Monocrystalline Solar Panel, ~$100) and a small 12V battery (e.g., a 50Ah LiFePO4 battery like the Battle Born 50Ah, ~$450). For larger operations or deeper wells, more robust systems are needed. If you’re looking to build out a comprehensive off-grid power system to support your garden’s water needs, or indeed your entire homestead, you might want to explore resources like the Power Grid Generator complete system guide to understand the full scope of what’s possible in terms of energy independence.
Step 5: Seed Selection & Planting
The choice of seeds is crucial for a truly self sufficient garden from scratch.
- Choose Heirloom & Open-Pollinated Seeds: These varieties produce seeds that will grow true to type, meaning you can save seeds from your harvest year after year. F1 hybrids, while often vigorous, will not produce consistent offspring from saved seeds. Reputable seed companies include Baker Creek Heirloom Seeds, High Mowing Organic Seeds, and Seed Savers Exchange. Start with common, reliable varieties like ‘Black Krim’ tomatoes, ‘Provider’ bush beans, ‘Waltham Butternut’ squash, and ‘Black Seeded Simpson’ lettuce.
- Start Seeds Indoors (Optional but Recommended): For longer growing seasons or specific crops, starting seeds indoors gives you a head start. Use seed-starting mix (e.g., Espoma Organic Seed Starter Mix, ~$10 for 16qt bag) in seed trays (Jiffy Professional Greenhouse 72-cell kit, ~$15). Provide adequate light with LED grow lights (Barrina T5 2ft 4-pack LED Grow Lights, 20W each, ~$50) for 14-16 hours a day, positioned 2-4 inches above seedlings. Maintain consistent temperatures (65-75°F for most).
- Direct Sowing vs. Transplanting: Some crops (carrots, radishes, beans, corn) prefer direct sowing into the garden bed. Others (tomatoes, peppers, broccoli, kale) benefit from being started indoors and transplanted. Follow seed packet instructions for planting depths (e.g., lettuce seeds are often surface-sown or planted 1/8 inch deep, while beans are 1 inch deep) and spacing.
- Companion Planting: Strategically plant different species together to enhance growth, deter pests, and attract beneficial insects. For example, planting marigolds near tomatoes can deter nematodes, and basil improves tomato flavor. Nasturtiums can act as a trap crop for aphids.
- Succession Planting: For a continuous harvest, plant small batches of quick-growing crops (lettuce, radishes, cilantro) every 2-3 weeks. As one crop finishes, another is ready to take its place.
Step 6: Pest & Disease Management (Organic)
Maintaining a self sufficient garden from scratch means embracing organic pest and disease control.
- Integrated Pest Management (IPM): This holistic approach combines several strategies.
- Observation: Regularly inspect your plants for early signs of pests or disease. Catching issues early is key.
- Physical Barriers: Use row covers (e.g., Agribon AG-19 floating row cover, 10×20 ft, ~$20) to protect young plants from insect pests like cabbage worms and squash bugs. Install fences (e.g., 2×4 welded wire mesh, 4 ft tall, 50 ft roll ~$70) to keep out deer, rabbits, and other larger animals.
- Hand-Picking: For larger pests like tomato hornworms or squash bugs, simply pick them off and drop them into a bucket of soapy water.
- Companion Planting: As mentioned, certain plants repel pests. Marigolds, garlic, and onions are excellent deterrents.
- Attract Beneficial Insects: Plant flowers like dill, fennel, cosmos, and sweet alyssum to attract ladybugs, lacewings, and parasitic wasps, which prey on common garden pests.
- Organic Sprays & Treatments:
- Neem Oil: An excellent broad-spectrum organic insecticide and fungicide. Bonide Neem Oil Concentrate (16oz, ~$20) can be mixed at a rate of 1-2 tbsp per gallon of water and sprayed on affected plants.
- Insecticidal Soap: Effective against soft-bodied insects like aphids, whiteflies, and spider mites. Garden Safe Insecticidal Soap (24oz ready-to-use, ~$10).
- Bacillus thuringiensis (Bt): A naturally occurring soil bacterium that targets caterpillars and worms. Monterey BT Worm & Caterpillar Killer (16oz, ~$18) is highly effective and safe for beneficial insects.
- Copper or Sulfur Sprays: For fungal diseases like powdery mildew or blight, organic copper (e.g., Bonide Copper Fungicide, ~$15 for 1lb) or sulfur (e.g., Safer Brand Garden Fungicide, ~$10 for 16oz) can be used as a last resort.
Step 7: Harvesting & Seed Saving
The culmination of your efforts is the harvest, and seed saving closes the loop on self-sufficiency.
- Harvesting Techniques:
- Timing: Harvest vegetables at their peak ripeness for best flavor and nutritional value. For example, green beans should snap cleanly, cucumbers should be firm, and tomatoes should be fully colored.
- Frequency: Many crops, like zucchini, cucumbers, and bush beans, produce more if harvested frequently. Pick daily or every other day.
- Tools: Use clean, sharp pruners (e.g., Corona ClassicCUT Bypass Pruner BP 3180, ~$30) or a sharp knife for clean cuts, minimizing damage to the plant.
- Seed Saving: This is where the « self-sufficient » aspect truly shines.
- Selection: Only save seeds from your healthiest, most vigorous plants that show desired traits (disease resistance, good flavor, high yield).
- Isolation: To ensure true-to-type seeds, prevent cross-pollination. This can be challenging for open-pollinated crops that readily cross (e.g., squash, corn). For beginners, focus on self-pollinating plants like beans, peas, lettuce, and tomatoes.
- Processing:
- Dry Seeds (Beans, Peas, Lettuce, Grains): Allow pods/seed heads to dry completely on the plant. Harvest, shell, and clean the seeds, removing chaff.
- Wet Seeds (Tomatoes, Cucumbers, Squash): For tomatoes, ferment the seeds in water for a few days to remove the gel coating and inhibit disease. For cucumbers/squash, scrape out seeds, wash thoroughly, and dry.
- Drying: Spread seeds thinly on screens or paper plates in a cool, dry, well-ventilated area for 1-4 weeks. Ensure they are bone-dry before storage. I aim for less than 8% moisture content.
- Storage: Store seeds in airtight containers (glass jars with desiccant packets work well) in a cool, dark, dry place (ideally 40-50°F and 30-40% humidity). Label clearly with variety and date. Properly stored seeds can remain viable for 3-10 years or more.
Step 8: Season Extension & Winterizing
Extend your harvest and protect your garden for the off-season to truly maximize your self sufficient garden from scratch.
- Cold Frames: Simple structures with a transparent top (glass, polycarbonate, or old windows) that sit over garden beds. They trap solar heat, allowing you to grow cold-hardy crops (lettuce, spinach, kale, radishes) well into winter or start seeds earlier in spring. A basic cold frame can be built from 2×6 lumber and a sheet of polycarbonate for under $100.
- Hoop Houses/Low Tunnels: Larger structures made from flexible hoops (PVC pipe or EMT conduit) covered with greenhouse plastic. These provide more space and greater temperature moderation. A 10×20 ft DIY low tunnel kit can cost $200-$500, while a larger, more robust hoop house kit might be $1,000-$3,000. I use a 6×12 ft low tunnel made from 1/2-inch PVC hoops and 6mil greenhouse plastic, which extends my lettuce and spinach harvest by at least
Maintaining a self sufficient garden from scratch means embracing organic pest and disease control.
- Integrated Pest Management (IPM): This holistic approach combines several strategies.
- Observation: Regularly inspect your plants for early signs of pests or disease. Catching issues early is key.
- Physical Barriers: Use row covers (e.g., Agribon AG-19 floating row cover, 10×20 ft, ~$20) to protect young plants from insect pests like cabbage worms and squash bugs. Install fences (e.g., 2×4 welded wire mesh, 4 ft tall, 50 ft roll ~$70) to keep out deer, rabbits, and other larger animals.
- Hand-Picking: For larger pests like tomato hornworms or squash bugs, simply pick them off and drop them into a bucket of soapy water.
- Companion Planting: As mentioned, certain plants repel pests. Marigolds, garlic, and onions are excellent deterrents.
- Attract Beneficial Insects: Plant flowers like dill, fennel, cosmos, and sweet alyssum to attract ladybugs, lacewings, and parasitic wasps, which prey on common garden pests.
- Organic Sprays & Treatments:
- Neem Oil: An excellent broad-spectrum organic insecticide and fungicide. Bonide Neem Oil Concentrate (16oz, ~$20) can be mixed at a rate of 1-2 tbsp per gallon of water and sprayed on affected plants.
- Insecticidal Soap: Effective against soft-bodied insects like aphids, whiteflies, and spider mites. Garden Safe Insecticidal Soap (24oz ready-to-use, ~$10).
- Bacillus thuringiensis (Bt): A naturally occurring soil bacterium that targets caterpillars and worms. Monterey BT Worm & Caterpillar Killer (16oz, ~$18) is highly effective and safe for beneficial insects.
- Copper or Sulfur Sprays: For fungal diseases like powdery mildew or blight, organic copper (e.g., Bonide Copper Fungicide, ~$15 for 1lb) or sulfur (e.g., Safer Brand Garden Fungicide, ~$10 for 16oz) can be used as a last resort.
Step 7: Harvesting & Seed Saving
The culmination of your efforts is the harvest, and seed saving closes the loop on self-sufficiency.
- Harvesting Techniques:
- Timing: Harvest vegetables at their peak ripeness for best flavor and nutritional value. For example, green beans should snap cleanly, cucumbers should be firm, and tomatoes should be fully colored.
- Frequency: Many crops, like zucchini, cucumbers, and bush beans, produce more if harvested frequently. Pick daily or every other day.
- Tools: Use clean, sharp pruners (e.g., Corona ClassicCUT Bypass Pruner BP 3180, ~$30) or a sharp knife for clean cuts, minimizing damage to the plant.
- Seed Saving: This is where the « self-sufficient » aspect truly shines.
- Selection: Only save seeds from your healthiest, most vigorous plants that show desired traits (disease resistance, good flavor, high yield).
- Isolation: To ensure true-to-type seeds, prevent cross-pollination. This can be challenging for open-pollinated crops that readily cross (e.g., squash, corn). For beginners, focus on self-pollinating plants like beans, peas, lettuce, and tomatoes.
- Processing:
- Dry Seeds (Beans, Peas, Lettuce, Grains): Allow pods/seed heads to dry completely on the plant. Harvest, shell, and clean the seeds, removing chaff.
- Wet Seeds (Tomatoes, Cucumbers, Squash): For tomatoes, ferment the seeds in water for a few days to remove the gel coating and inhibit disease. For cucumbers/squash, scrape out seeds, wash thoroughly, and dry.
- Drying: Spread seeds thinly on screens or paper plates in a cool, dry, well-ventilated area for 1-4 weeks. Ensure they are bone-dry before storage. I aim for less than 8% moisture content.
- Storage: Store seeds in airtight containers (glass jars with desiccant packets work well) in a cool, dark, dry place (ideally 40-50°F and 30-40% humidity). Label clearly with variety and date. Properly stored seeds can remain viable for 3-10 years or more.
Step 8: Season Extension & Winterizing
Extend your harvest and protect your garden for the off-season to truly maximize your self sufficient garden from scratch.
- Cold Frames: Simple structures with a transparent top (glass, polycarbonate, or old windows) that sit over garden beds. They trap solar heat, allowing you to grow cold-hardy crops (lettuce, spinach, kale, radishes) well into winter or start seeds earlier in spring. A basic cold frame can be built from 2×6 lumber and a sheet of polycarbonate for under $100.
- Hoop Houses/Low Tunnels: Larger structures made from flexible hoops (PVC pipe or EMT conduit) covered with greenhouse plastic. These provide more space and greater temperature moderation. A 10×20 ft DIY low tunnel kit can cost $200-$500, while a larger, more robust hoop house kit might be $1,000-$3,000. I use a 6×12 ft low tunnel made from 1/2-inch PVC hoops and 6mil greenhouse plastic, which extends my lettuce and spinach harvest by at least
Step 5: Seed Selection & Planting
The choice of seeds is crucial for a truly self sufficient garden from scratch.
- Choose Heirloom & Open-Pollinated Seeds: These varieties produce seeds that will grow true to type, meaning you can save seeds from your harvest year after year. F1 hybrids, while often vigorous, will not produce consistent offspring from saved seeds. Reputable seed companies include Baker Creek Heirloom Seeds, High Mowing Organic Seeds, and Seed Savers Exchange. Start with common, reliable varieties like ‘Black Krim’ tomatoes, ‘Provider’ bush beans, ‘Waltham Butternut’ squash, and ‘Black Seeded Simpson’ lettuce.
- Start Seeds Indoors (Optional but Recommended): For longer growing seasons or specific crops, starting seeds indoors gives you a head start. Use seed-starting mix (e.g., Espoma Organic Seed Starter Mix, ~$10 for 16qt bag) in seed trays (Jiffy Professional Greenhouse 72-cell kit, ~$15). Provide adequate light with LED grow lights (Barrina T5 2ft 4-pack LED Grow Lights, 20W each, ~$50) for 14-16 hours a day, positioned 2-4 inches above seedlings. Maintain consistent temperatures (65-75°F for most).
- Direct Sowing vs. Transplanting: Some crops (carrots, radishes, beans, corn) prefer direct sowing into the garden bed. Others (tomatoes, peppers, broccoli, kale) benefit from being started indoors and transplanted. Follow seed packet instructions for planting depths (e.g., lettuce seeds are often surface-sown or planted 1/8 inch deep, while beans are 1 inch deep) and spacing.
- Companion Planting: Strategically plant different species together to enhance growth, deter pests, and attract beneficial insects. For example, planting marigolds near tomatoes can deter nematodes, and basil improves tomato flavor. Nasturtiums can act as a trap crop for aphids.
- Succession Planting: For a continuous harvest, plant small batches of quick-growing crops (lettuce, radishes, cilantro) every 2-3 weeks. As one crop finishes, another is ready to take its place.
Step 6: Pest & Disease Management (Organic)
Maintaining a self sufficient garden from scratch means embracing organic pest and disease control.
- Integrated Pest Management (IPM): This holistic approach combines several strategies.
- Observation: Regularly inspect your plants for early signs of pests or disease. Catching issues early is key.
- Physical Barriers: Use row covers (e.g., Agribon AG-19 floating row cover, 10×20 ft, ~$20) to protect young plants from insect pests like cabbage worms and squash bugs. Install fences (e.g., 2×4 welded wire mesh, 4 ft tall, 50 ft roll ~$70) to keep out deer, rabbits, and other larger animals.
- Hand-Picking: For larger pests like tomato hornworms or squash bugs, simply pick them off and drop them into a bucket of soapy water.
- Companion Planting: As mentioned, certain plants repel pests. Marigolds, garlic, and onions are excellent deterrents.
- Attract Beneficial Insects: Plant flowers like dill, fennel, cosmos, and sweet alyssum to attract ladybugs, lacewings, and parasitic wasps, which prey on common garden pests.
- Organic Sprays & Treatments:
- Neem Oil: An excellent broad-spectrum organic insecticide and fungicide. Bonide Neem Oil Concentrate (16oz, ~$20) can be mixed at a rate of 1-2 tbsp per gallon of water and sprayed on affected plants.
- Insecticidal Soap: Effective against soft-bodied insects like aphids, whiteflies, and spider mites. Garden Safe Insecticidal Soap (24oz ready-to-use, ~$10).
- Bacillus thuringiensis (Bt): A naturally occurring soil bacterium that targets caterpillars and worms. Monterey BT Worm & Caterpillar Killer (16oz, ~$18) is highly effective and safe for beneficial insects.
- Copper or Sulfur Sprays: For fungal diseases like powdery mildew or blight, organic copper (e.g., Bonide Copper Fungicide, ~$15 for 1lb) or sulfur (e.g., Safer Brand Garden Fungicide, ~$10 for 16oz) can be used as a last resort.
Step 7: Harvesting & Seed Saving
The culmination of your efforts is the harvest, and seed saving closes the loop on self-sufficiency.
- Harvesting Techniques:
- Timing: Harvest vegetables at their peak ripeness for best flavor and nutritional value. For example, green beans should snap cleanly, cucumbers should be firm, and tomatoes should be fully colored.
- Frequency: Many crops, like zucchini, cucumbers, and bush beans, produce more if harvested frequently. Pick daily or every other day.
- Tools: Use clean, sharp pruners (e.g., Corona ClassicCUT Bypass Pruner BP 3180, ~$30) or a sharp knife for clean cuts, minimizing damage to the plant.
- Seed Saving: This is where the « self-sufficient » aspect truly shines.
- Selection: Only save seeds from your healthiest, most vigorous plants that show desired traits (disease resistance, good flavor, high yield).
- Isolation: To ensure true-to-type seeds, prevent cross-pollination. This can be challenging for open-pollinated crops that readily cross (e.g., squash, corn). For beginners, focus on self-pollinating plants like beans, peas, lettuce, and tomatoes.
- Processing:
- Dry Seeds (Beans, Peas, Lettuce, Grains): Allow pods/seed heads to dry completely on the plant. Harvest, shell, and clean the seeds, removing chaff.
- Wet Seeds (Tomatoes, Cucumbers, Squash): For tomatoes, ferment the seeds in water for a few days to remove the gel coating and inhibit disease. For cucumbers/squash, scrape out seeds, wash thoroughly, and dry.
- Drying: Spread seeds thinly on screens or paper plates in a cool, dry, well-ventilated area for 1-4 weeks. Ensure they are bone-dry before storage. I aim for less than 8% moisture content.
- Storage: Store seeds in airtight containers (glass jars with desiccant packets work well) in a cool, dark, dry place (ideally 40-50°F and 30-40% humidity). Label clearly with variety and date. Properly stored seeds can remain viable for 3-10 years or more.
Step 8: Season Extension & Winterizing
Extend your harvest and protect your garden for the off-season to truly maximize your self sufficient garden from scratch.
- Cold Frames: Simple structures with a transparent top (glass, polycarbonate, or old windows) that sit over garden beds. They trap solar heat, allowing you to grow cold-hardy crops (lettuce, spinach, kale, radishes) well into winter or start seeds earlier in spring. A basic cold frame can be built from 2×6 lumber and a sheet of polycarbonate for under $100.
- Hoop Houses/Low Tunnels: Larger structures made from flexible hoops (PVC pipe or EMT conduit) covered with greenhouse plastic. These provide more space and greater temperature moderation. A 10×20 ft DIY low tunnel kit can cost $200-$500, while a larger, more robust hoop house kit might be $1,000-$3,000. I use a 6×12 ft low tunnel made from 1/2-inch PVC hoops and 6mil greenhouse plastic, which extends my lettuce and spinach harvest by at least
- Rainwater Harvesting: This is my primary source of irrigation water. A 55-gallon rain barrel (e.g., EarthMark Rain Barrel, ~$120-$150) connected to a downspout can collect significant water. For larger needs, I use two 275-gallon IBC totes (Intermediate Bulk Containers, often available used for $100-$200 each from food-grade sources) connected in series. A 1,000 sq ft roof can collect approximately 620 gallons of water for every inch of rainfall. My 1,500 sq ft roof provides ample water for my 600 sq ft garden through multiple barrels and totes.
- Drip Irrigation: This is by far the most water-efficient method, delivering water directly to the plant’s root zone, minimizing evaporation and weed growth.
- Components: A typical drip system includes a pressure regulator (e.g., Rain Bird PRV-10, ~$15), a filter (Rain Bird RBY filter, ~$20), main tubing (1/2-inch poly tubing, 100ft ~$25), smaller feeder lines (1/4-inch tubing), and emitters (0.5 GPH or 1 GPH per plant).
- Kits: For beginners, a starter kit like the Rain Bird Drip Irrigation Garden Kit (model DDI-KIT-1P, ~$40-$60) is excellent for a small garden. For larger setups, I use Netafim Techline CV Drip Line (500ft roll, ~$150-$200), which has pressure-compensating emitters built-in, ensuring even watering across long runs.
- Automation: For true self-sufficiency, consider a battery-powered timer (e.g., Orbit B-Hyve Bluetooth Hose Faucet Timer, ~$50) or a solar-powered timer connected to a small 12V pump.
- Solar-Powered Pumps: For lifting water from a well, pond, or large storage tank to your garden, a solar pump is a game-changer. For a smaller drip system, a Shurflo 2088-594-152 Diaphragm Pump (12V, 3.5 GPM, ~$180) can be powered by a single 100W solar panel (e.g., Renogy 100W Monocrystalline Solar Panel, ~$100) and a small 12V battery (e.g., a 50Ah LiFePO4 battery like the Battle Born 50Ah, ~$450). For larger operations or deeper wells, more robust systems are needed. If you’re looking to build out a comprehensive off-grid power system to support your garden’s water needs, or indeed your entire homestead, you might want to explore resources like the Power Grid Generator complete system guide to understand the full scope of what’s possible in terms of energy independence.
Step 5: Seed Selection & Planting
The choice of seeds is crucial for a truly self sufficient garden from scratch.
- Choose Heirloom & Open-Pollinated Seeds: These varieties produce seeds that will grow true to type, meaning you can save seeds from your harvest year after year. F1 hybrids, while often vigorous, will not produce consistent offspring from saved seeds. Reputable seed companies include Baker Creek Heirloom Seeds, High Mowing Organic Seeds, and Seed Savers Exchange. Start with common, reliable varieties like ‘Black Krim’ tomatoes, ‘Provider’ bush beans, ‘Waltham Butternut’ squash, and ‘Black Seeded Simpson’ lettuce.
- Start Seeds Indoors (Optional but Recommended): For longer growing seasons or specific crops, starting seeds indoors gives you a head start. Use seed-starting mix (e.g., Espoma Organic Seed Starter Mix, ~$10 for 16qt bag) in seed trays (Jiffy Professional Greenhouse 72-cell kit, ~$15). Provide adequate light with LED grow lights (Barrina T5 2ft 4-pack LED Grow Lights, 20W each, ~$50) for 14-16 hours a day, positioned 2-4 inches above seedlings. Maintain consistent temperatures (65-75°F for most).
- Direct Sowing vs. Transplanting: Some crops (carrots, radishes, beans, corn) prefer direct sowing into the garden bed. Others (tomatoes, peppers, broccoli, kale) benefit from being started indoors and transplanted. Follow seed packet instructions for planting depths (e.g., lettuce seeds are often surface-sown or planted 1/8 inch deep, while beans are 1 inch deep) and spacing.
- Companion Planting: Strategically plant different species together to enhance growth, deter pests, and attract beneficial insects. For example, planting marigolds near tomatoes can deter nematodes, and basil improves tomato flavor. Nasturtiums can act as a trap crop for aphids.
- Succession Planting: For a continuous harvest, plant small batches of quick-growing crops (lettuce, radishes, cilantro) every 2-3 weeks. As one crop finishes, another is ready to take its place.
Step 6: Pest & Disease Management (Organic)
Maintaining a self sufficient garden from scratch means embracing organic pest and disease control.
- Integrated Pest Management (IPM): This holistic approach combines several strategies.
- Observation: Regularly inspect your plants for early signs of pests or disease. Catching issues early is key.
- Physical Barriers: Use row covers (e.g., Agribon AG-19 floating row cover, 10×20 ft, ~$20) to protect young plants from insect pests like cabbage worms and squash bugs. Install fences (e.g., 2×4 welded wire mesh, 4 ft tall, 50 ft roll ~$70) to keep out deer, rabbits, and other larger animals.
- Hand-Picking: For larger pests like tomato hornworms or squash bugs, simply pick them off and drop them into a bucket of soapy water.
- Companion Planting: As mentioned, certain plants repel pests. Marigolds, garlic, and onions are excellent deterrents.
- Attract Beneficial Insects: Plant flowers like dill, fennel, cosmos, and sweet alyssum to attract ladybugs, lacewings, and parasitic wasps, which prey on common garden pests.
- Organic Sprays & Treatments:
- Neem Oil: An excellent broad-spectrum organic insecticide and fungicide. Bonide Neem Oil Concentrate (16oz, ~$20) can be mixed at a rate of 1-2 tbsp per gallon of water and sprayed on affected plants.
- Insecticidal Soap: Effective against soft-bodied insects like aphids, whiteflies, and spider mites. Garden Safe Insecticidal Soap (24oz ready-to-use, ~$10).
- Bacillus thuringiensis (Bt): A naturally occurring soil bacterium that targets caterpillars and worms. Monterey BT Worm & Caterpillar Killer (16oz, ~$18) is highly effective and safe for beneficial insects.
- Copper or Sulfur Sprays: For fungal diseases like powdery mildew or blight, organic copper (e.g., Bonide Copper Fungicide, ~$15 for 1lb) or sulfur (e.g., Safer Brand Garden Fungicide, ~$10 for 16oz) can be used as a last resort.
Step 7: Harvesting & Seed Saving
The culmination of your efforts is the harvest, and seed saving closes the loop on self-sufficiency.
- Harvesting Techniques:
- Timing: Harvest vegetables at their peak ripeness for best flavor and nutritional value. For example, green beans should snap cleanly, cucumbers should be firm, and tomatoes should be fully colored.
- Frequency: Many crops, like zucchini, cucumbers, and bush beans, produce more if harvested frequently. Pick daily or every other day.
- Tools: Use clean, sharp pruners (e.g., Corona ClassicCUT Bypass Pruner BP 3180, ~$30) or a sharp knife for clean cuts, minimizing damage to the plant.
- Seed Saving: This is where the « self-sufficient » aspect truly shines.
- Selection: Only save seeds from your healthiest, most vigorous plants that show desired traits (disease resistance, good flavor, high yield).
- Isolation: To ensure true-to-type seeds, prevent cross-pollination. This can be challenging for open-pollinated crops that readily cross (e.g., squash, corn). For beginners, focus on self-pollinating plants like beans, peas, lettuce, and tomatoes.
- Processing:
- Dry Seeds (Beans, Peas, Lettuce, Grains): Allow pods/seed heads to dry completely on the plant. Harvest, shell, and clean the seeds, removing chaff.
- Wet Seeds (Tomatoes, Cucumbers, Squash): For tomatoes, ferment the seeds in water for a few days to remove the gel coating and inhibit disease. For cucumbers/squash, scrape out seeds, wash thoroughly, and dry.
- Drying: Spread seeds thinly on screens or paper plates in a cool, dry, well-ventilated area for 1-4 weeks. Ensure they are bone-dry before storage. I aim for less than 8% moisture content.
- Storage: Store seeds in airtight containers (glass jars with desiccant packets work well) in a cool, dark, dry place (ideally 40-50°F and 30-40% humidity). Label clearly with variety and date. Properly stored seeds can remain viable for 3-10 years or more.
Step 8: Season Extension & Winterizing
Extend your harvest and protect your garden for the off-season to truly maximize your self sufficient garden from scratch.
- Cold Frames: Simple structures with a transparent top (glass, polycarbonate, or old windows) that sit over garden beds. They trap solar heat, allowing you to grow cold-hardy crops (lettuce, spinach, kale, radishes) well into winter or start seeds earlier in spring. A basic cold frame can be built from 2×6 lumber and a sheet of polycarbonate for under $100.
- Hoop Houses/Low Tunnels: Larger structures made from flexible hoops (PVC pipe or EMT conduit) covered with greenhouse plastic. These provide more space and greater temperature moderation. A 10×20 ft DIY low tunnel kit can cost $200-$500, while a larger, more robust hoop house kit might be $1,000-$3,000. I use a 6×12 ft low tunnel made from 1/2-inch PVC hoops and 6mil greenhouse plastic, which extends my lettuce and spinach harvest by at least
Efficient water management is critical for a self sufficient garden from scratch, especially in off-grid living where water resources might be limited.
- Rainwater Harvesting: This is my primary source of irrigation water. A 55-gallon rain barrel (e.g., EarthMark Rain Barrel, ~$120-$150) connected to a downspout can collect significant water. For larger needs, I use two 275-gallon IBC totes (Intermediate Bulk Containers, often available used for $100-$200 each from food-grade sources) connected in series. A 1,000 sq ft roof can collect approximately 620 gallons of water for every inch of rainfall. My 1,500 sq ft roof provides ample water for my 600 sq ft garden through multiple barrels and totes.
- Drip Irrigation: This is by far the most water-efficient method, delivering water directly to the plant’s root zone, minimizing evaporation and weed growth.
- Components: A typical drip system includes a pressure regulator (e.g., Rain Bird PRV-10, ~$15), a filter (Rain Bird RBY filter, ~$20), main tubing (1/2-inch poly tubing, 100ft ~$25), smaller feeder lines (1/4-inch tubing), and emitters (0.5 GPH or 1 GPH per plant).
- Kits: For beginners, a starter kit like the Rain Bird Drip Irrigation Garden Kit (model DDI-KIT-1P, ~$40-$60) is excellent for a small garden. For larger setups, I use Netafim Techline CV Drip Line (500ft roll, ~$150-$200), which has pressure-compensating emitters built-in, ensuring even watering across long runs.
- Automation: For true self-sufficiency, consider a battery-powered timer (e.g., Orbit B-Hyve Bluetooth Hose Faucet Timer, ~$50) or a solar-powered timer connected to a small 12V pump.
- Solar-Powered Pumps: For lifting water from a well, pond, or large storage tank to your garden, a solar pump is a game-changer. For a smaller drip system, a Shurflo 2088-594-152 Diaphragm Pump (12V, 3.5 GPM, ~$180) can be powered by a single 100W solar panel (e.g., Renogy 100W Monocrystalline Solar Panel, ~$100) and a small 12V battery (e.g., a 50Ah LiFePO4 battery like the Battle Born 50Ah, ~$450). For larger operations or deeper wells, more robust systems are needed. If you’re looking to build out a comprehensive off-grid power system to support your garden’s water needs, or indeed your entire homestead, you might want to explore resources like the Power Grid Generator complete system guide to understand the full scope of what’s possible in terms of energy independence.
Step 5: Seed Selection & Planting
The choice of seeds is crucial for a truly self sufficient garden from scratch.
- Choose Heirloom & Open-Pollinated Seeds: These varieties produce seeds that will grow true to type, meaning you can save seeds from your harvest year after year. F1 hybrids, while often vigorous, will not produce consistent offspring from saved seeds. Reputable seed companies include Baker Creek Heirloom Seeds, High Mowing Organic Seeds, and Seed Savers Exchange. Start with common, reliable varieties like ‘Black Krim’ tomatoes, ‘Provider’ bush beans, ‘Waltham Butternut’ squash, and ‘Black Seeded Simpson’ lettuce.
- Start Seeds Indoors (Optional but Recommended): For longer growing seasons or specific crops, starting seeds indoors gives you a head start. Use seed-starting mix (e.g., Espoma Organic Seed Starter Mix, ~$10 for 16qt bag) in seed trays (Jiffy Professional Greenhouse 72-cell kit, ~$15). Provide adequate light with LED grow lights (Barrina T5 2ft 4-pack LED Grow Lights, 20W each, ~$50) for 14-16 hours a day, positioned 2-4 inches above seedlings. Maintain consistent temperatures (65-75°F for most).
- Direct Sowing vs. Transplanting: Some crops (carrots, radishes, beans, corn) prefer direct sowing into the garden bed. Others (tomatoes, peppers, broccoli, kale) benefit from being started indoors and transplanted. Follow seed packet instructions for planting depths (e.g., lettuce seeds are often surface-sown or planted 1/8 inch deep, while beans are 1 inch deep) and spacing.
- Companion Planting: Strategically plant different species together to enhance growth, deter pests, and attract beneficial insects. For example, planting marigolds near tomatoes can deter nematodes, and basil improves tomato flavor. Nasturtiums can act as a trap crop for aphids.
- Succession Planting: For a continuous harvest, plant small batches of quick-growing crops (lettuce, radishes, cilantro) every 2-3 weeks. As one crop finishes, another is ready to take its place.
Step 6: Pest & Disease Management (Organic)
Maintaining a self sufficient garden from scratch means embracing organic pest and disease control.
- Integrated Pest Management (IPM): This holistic approach combines several strategies.
- Observation: Regularly inspect your plants for early signs of pests or disease. Catching issues early is key.
- Physical Barriers: Use row covers (e.g., Agribon AG-19 floating row cover, 10×20 ft, ~$20) to protect young plants from insect pests like cabbage worms and squash bugs. Install fences (e.g., 2×4 welded wire mesh, 4 ft tall, 50 ft roll ~$70) to keep out deer, rabbits, and other larger animals.
- Hand-Picking: For larger pests like tomato hornworms or squash bugs, simply pick them off and drop them into a bucket of soapy water.
- Companion Planting: As mentioned, certain plants repel pests. Marigolds, garlic, and onions are excellent deterrents.
- Attract Beneficial Insects: Plant flowers like dill, fennel, cosmos, and sweet alyssum to attract ladybugs, lacewings, and parasitic wasps, which prey on common garden pests.
- Organic Sprays & Treatments:
- Neem Oil: An excellent broad-spectrum organic insecticide and fungicide. Bonide Neem Oil Concentrate (16oz, ~$20) can be mixed at a rate of 1-2 tbsp per gallon of water and sprayed on affected plants.
- Insecticidal Soap: Effective against soft-bodied insects like aphids, whiteflies, and spider mites. Garden Safe Insecticidal Soap (24oz ready-to-use, ~$10).
- Bacillus thuringiensis (Bt): A naturally occurring soil bacterium that targets caterpillars and worms. Monterey BT Worm & Caterpillar Killer (16oz, ~$18) is highly effective and safe for beneficial insects.
- Copper or Sulfur Sprays: For fungal diseases like powdery mildew or blight, organic copper (e.g., Bonide Copper Fungicide, ~$15 for 1lb) or sulfur (e.g., Safer Brand Garden Fungicide, ~$10 for 16oz) can be used as a last resort.
Step 7: Harvesting & Seed Saving
The culmination of your efforts is the harvest, and seed saving closes the loop on self-sufficiency.
- Harvesting Techniques:
- Timing: Harvest vegetables at their peak ripeness for best flavor and nutritional value. For example, green beans should snap cleanly, cucumbers should be firm, and tomatoes should be fully colored.
- Frequency: Many crops, like zucchini, cucumbers, and bush beans, produce more if harvested frequently. Pick daily or every other day.
- Tools: Use clean, sharp pruners (e.g., Corona ClassicCUT Bypass Pruner BP 3180, ~$30) or a sharp knife for clean cuts, minimizing damage to the plant.
- Seed Saving: This is where the « self-sufficient » aspect truly shines.
- Selection: Only save seeds from your healthiest, most vigorous plants that show desired traits (disease resistance, good flavor, high yield).
- Isolation: To ensure true-to-type seeds, prevent cross-pollination. This can be challenging for open-pollinated crops that readily cross (e.g., squash, corn). For beginners, focus on self-pollinating plants like beans, peas, lettuce, and tomatoes.
- Processing:
- Dry Seeds (Beans, Peas, Lettuce, Grains): Allow pods/seed heads to dry completely on the plant. Harvest, shell, and clean the seeds, removing chaff.
- Wet Seeds (Tomatoes, Cucumbers, Squash): For tomatoes, ferment the seeds in water for a few days to remove the gel coating and inhibit disease. For cucumbers/squash, scrape out seeds, wash thoroughly, and dry.
- Drying: Spread seeds thinly on screens or paper plates in a cool, dry, well-ventilated area for 1-4 weeks. Ensure they are bone-dry before storage. I aim for less than 8% moisture content.
- Storage: Store seeds in airtight containers (glass jars with desiccant packets work well) in a cool, dark, dry place (ideally 40-50°F and 30-40% humidity). Label clearly with variety and date. Properly stored seeds can remain viable for 3-10 years or more.
Step 8: Season Extension & Winterizing
Extend your harvest and protect your garden for the off-season to truly maximize your self sufficient garden from scratch.
- Cold Frames: Simple structures with a transparent top (glass, polycarbonate, or old windows) that sit over garden beds. They trap solar heat, allowing you to grow cold-hardy crops (lettuce, spinach, kale, radishes) well into winter or start seeds earlier in spring. A basic cold frame can be built from 2×6 lumber and a sheet of polycarbonate for under $100.
- Hoop Houses/Low Tunnels: Larger structures made from flexible hoops (PVC pipe or EMT conduit) covered with greenhouse plastic. These provide more space and greater temperature moderation. A 10×20 ft DIY low tunnel kit can cost $200-$500, while a larger, more robust hoop house kit might be $1,000-$3,000. I use a 6×12 ft low tunnel made from 1/2-inch PVC hoops and 6mil greenhouse plastic, which extends my lettuce and spinach harvest by at least
Step 4: Water Management & Irrigation
Efficient water management is critical for a self sufficient garden from scratch, especially in off-grid living where water resources might be limited.
- Rainwater Harvesting: This is my primary source of irrigation water. A 55-gallon rain barrel (e.g., EarthMark Rain Barrel, ~$120-$150) connected to a downspout can collect significant water. For larger needs, I use two 275-gallon IBC totes (Intermediate Bulk Containers, often available used for $100-$200 each from food-grade sources) connected in series. A 1,000 sq ft roof can collect approximately 620 gallons of water for every inch of rainfall. My 1,500 sq ft roof provides ample water for my 600 sq ft garden through multiple barrels and totes.
- Drip Irrigation: This is by far the most water-efficient method, delivering water directly to the plant’s root zone, minimizing evaporation and weed growth.
- Components: A typical drip system includes a pressure regulator (e.g., Rain Bird PRV-10, ~$15), a filter (Rain Bird RBY filter, ~$20), main tubing (1/2-inch poly tubing, 100ft ~$25), smaller feeder lines (1/4-inch tubing), and emitters (0.5 GPH or 1 GPH per plant).
- Kits: For beginners, a starter kit like the Rain Bird Drip Irrigation Garden Kit (model DDI-KIT-1P, ~$40-$60) is excellent for a small garden. For larger setups, I use Netafim Techline CV Drip Line (500ft roll, ~$150-$200), which has pressure-compensating emitters built-in, ensuring even watering across long runs.
- Automation: For true self-sufficiency, consider a battery-powered timer (e.g., Orbit B-Hyve Bluetooth Hose Faucet Timer, ~$50) or a solar-powered timer connected to a small 12V pump.
- Solar-Powered Pumps: For lifting water from a well, pond, or large storage tank to your garden, a solar pump is a game-changer. For a smaller drip system, a Shurflo 2088-594-152 Diaphragm Pump (12V, 3.5 GPM, ~$180) can be powered by a single 100W solar panel (e.g., Renogy 100W Monocrystalline Solar Panel, ~$100) and a small 12V battery (e.g., a 50Ah LiFePO4 battery like the Battle Born 50Ah, ~$450). For larger operations or deeper wells, more robust systems are needed. If you’re looking to build out a comprehensive off-grid power system to support your garden’s water needs, or indeed your entire homestead, you might want to explore resources like the Power Grid Generator complete system guide to understand the full scope of what’s possible in terms of energy independence.
Step 5: Seed Selection & Planting
The choice of seeds is crucial for a truly self sufficient garden from scratch.
- Choose Heirloom & Open-Pollinated Seeds: These varieties produce seeds that will grow true to type, meaning you can save seeds from your harvest year after year. F1 hybrids, while often vigorous, will not produce consistent offspring from saved seeds. Reputable seed companies include Baker Creek Heirloom Seeds, High Mowing Organic Seeds, and Seed Savers Exchange. Start with common, reliable varieties like ‘Black Krim’ tomatoes, ‘Provider’ bush beans, ‘Waltham Butternut’ squash, and ‘Black Seeded Simpson’ lettuce.
- Start Seeds Indoors (Optional but Recommended): For longer growing seasons or specific crops, starting seeds indoors gives you a head start. Use seed-starting mix (e.g., Espoma Organic Seed Starter Mix, ~$10 for 16qt bag) in seed trays (Jiffy Professional Greenhouse 72-cell kit, ~$15). Provide adequate light with LED grow lights (Barrina T5 2ft 4-pack LED Grow Lights, 20W each, ~$50) for 14-16 hours a day, positioned 2-4 inches above seedlings. Maintain consistent temperatures (65-75°F for most).
- Direct Sowing vs. Transplanting: Some crops (carrots, radishes, beans, corn) prefer direct sowing into the garden bed. Others (tomatoes, peppers, broccoli, kale) benefit from being started indoors and transplanted. Follow seed packet instructions for planting depths (e.g., lettuce seeds are often surface-sown or planted 1/8 inch deep, while beans are 1 inch deep) and spacing.
- Companion Planting: Strategically plant different species together to enhance growth, deter pests, and attract beneficial insects. For example, planting marigolds near tomatoes can deter nematodes, and basil improves tomato flavor. Nasturtiums can act as a trap crop for aphids.
- Succession Planting: For a continuous harvest, plant small batches of quick-growing crops (lettuce, radishes, cilantro) every 2-3 weeks. As one crop finishes, another is ready to take its place.
Step 6: Pest & Disease Management (Organic)
Maintaining a self sufficient garden from scratch means embracing organic pest and disease control.
- Integrated Pest Management (IPM): This holistic approach combines several strategies.
- Observation: Regularly inspect your plants for early signs of pests or disease. Catching issues early is key.
- Physical Barriers: Use row covers (e.g., Agribon AG-19 floating row cover, 10×20 ft, ~$20) to protect young plants from insect pests like cabbage worms and squash bugs. Install fences (e.g., 2×4 welded wire mesh, 4 ft tall, 50 ft roll ~$70) to keep out deer, rabbits, and other larger animals.
- Hand-Picking: For larger pests like tomato hornworms or squash bugs, simply pick them off and drop them into a bucket of soapy water.
- Companion Planting: As mentioned, certain plants repel pests. Marigolds, garlic, and onions are excellent deterrents.
- Attract Beneficial Insects: Plant flowers like dill, fennel, cosmos, and sweet alyssum to attract ladybugs, lacewings, and parasitic wasps, which prey on common garden pests.
- Organic Sprays & Treatments:
- Neem Oil: An excellent broad-spectrum organic insecticide and fungicide. Bonide Neem Oil Concentrate (16oz, ~$20) can be mixed at a rate of 1-2 tbsp per gallon of water and sprayed on affected plants.
- Insecticidal Soap: Effective against soft-bodied insects like aphids, whiteflies, and spider mites. Garden Safe Insecticidal Soap (24oz ready-to-use, ~$10).
- Bacillus thuringiensis (Bt): A naturally occurring soil bacterium that targets caterpillars and worms. Monterey BT Worm & Caterpillar Killer (16oz, ~$18) is highly effective and safe for beneficial insects.
- Copper or Sulfur Sprays: For fungal diseases like powdery mildew or blight, organic copper (e.g., Bonide Copper Fungicide, ~$15 for 1lb) or sulfur (e.g., Safer Brand Garden Fungicide, ~$10 for 16oz) can be used as a last resort.
Step 7: Harvesting & Seed Saving
The culmination of your efforts is the harvest, and seed saving closes the loop on self-sufficiency.
- Harvesting Techniques:
- Timing: Harvest vegetables at their peak ripeness for best flavor and nutritional value. For example, green beans should snap cleanly, cucumbers should be firm, and tomatoes should be fully colored.
- Frequency: Many crops, like zucchini, cucumbers, and bush beans, produce more if harvested frequently. Pick daily or every other day.
- Tools: Use clean, sharp pruners (e.g., Corona ClassicCUT Bypass Pruner BP 3180, ~$30) or a sharp knife for clean cuts, minimizing damage to the plant.
- Seed Saving: This is where the « self-sufficient » aspect truly shines.
- Selection: Only save seeds from your healthiest, most vigorous plants that show desired traits (disease resistance, good flavor, high yield).
- Isolation: To ensure true-to-type seeds, prevent cross-pollination. This can be challenging for open-pollinated crops that readily cross (e.g., squash, corn). For beginners, focus on self-pollinating plants like beans, peas, lettuce, and tomatoes.
- Processing:
- Dry Seeds (Beans, Peas, Lettuce, Grains): Allow pods/seed heads to dry completely on the plant. Harvest, shell, and clean the seeds, removing chaff.
- Wet Seeds (Tomatoes, Cucumbers, Squash): For tomatoes, ferment the seeds in water for a few days to remove the gel coating and inhibit disease. For cucumbers/squash, scrape out seeds, wash thoroughly, and dry.
- Drying: Spread seeds thinly on screens or paper plates in a cool, dry, well-ventilated area for 1-4 weeks. Ensure they are bone-dry before storage. I aim for less than 8% moisture content.
- Storage: Store seeds in airtight containers (glass jars with desiccant packets work well) in a cool, dark, dry place (ideally 40-50°F and 30-40% humidity). Label clearly with variety and date. Properly stored seeds can remain viable for 3-10 years or more.
Step 8: Season Extension & Winterizing
Extend your harvest and protect your garden for the off-season to truly maximize your self sufficient garden from scratch.
- Cold Frames: Simple structures with a transparent top (glass, polycarbonate, or old windows) that sit over garden beds. They trap solar heat, allowing you to grow cold-hardy crops (lettuce, spinach, kale, radishes) well into winter or start seeds earlier in spring. A basic cold frame can be built from 2×6 lumber and a sheet of polycarbonate for under $100.
- Hoop Houses/Low Tunnels: Larger structures made from flexible hoops (PVC pipe or EMT conduit) covered with greenhouse plastic. These provide more space and greater temperature moderation. A 10×20 ft DIY low tunnel kit can cost $200-$500, while a larger, more robust hoop house kit might be $1,000-$3,000. I use a 6×12 ft low tunnel made from 1/2-inch PVC hoops and 6mil greenhouse plastic, which extends my lettuce and spinach harvest by at least
- In-Ground Beds: If you have excellent native soil and good drainage, in-ground beds are the most economical. Double-digging (loosening soil two shovel depths) can significantly improve drainage and aeration. For my main garden, I primarily use in-ground beds, but I focus on building up the soil over time with consistent compost additions and cover cropping. I aim for beds that are no wider than 3-4 feet so I can reach the center without stepping on the soil, compacting it.
- Raised Beds: Raised beds offer numerous advantages, especially for poor soil, heavy clay, or rocky areas. They provide better drainage, warm up faster in spring, reduce compaction, and make weeding and harvesting easier on your back.
- Material Options:
- Untreated Cedar: Naturally rot-resistant and chemical-free. A 4×8 ft bed, 12 inches deep, typically requires three 2x12x8 ft cedar boards, costing around $50-$60 per board (total ~$150-$180) plus corner brackets or screws. My first raised beds were cedar and are still going strong after 7 years.
- Galvanized Steel: Durable, long-lasting, and aesthetically pleasing. Brands like Vego Garden offer modular kits. A Vego Garden 17″ Tall 8-in-1 Metal Raised Garden Bed (can be configured to 4×8 ft) costs approximately $250-$300.
- Concrete Blocks/Stones: Very durable but can leach minerals (though generally safe once weathered) and can be expensive.
- Recycled Materials: Pallets (check for chemical treatment stamps like « HT » for heat-treated), old tires (controversial due to potential chemical leaching).
- Filling Raised Beds: Don’t just fill with topsoil. Use a « Hugelkultur » approach (logs, branches, leaves, then compost, then topsoil) or a mixture of 60% good quality topsoil, 30% compost, and 10% perlite or vermiculite for drainage. A 4x8x1 ft raised bed requires about 32 cubic feet (or ~1.2 cubic yards) of soil mix, which can cost $100-$200 depending on your source.
- Material Options:
Step 4: Water Management & Irrigation
Efficient water management is critical for a self sufficient garden from scratch, especially in off-grid living where water resources might be limited.
- Rainwater Harvesting: This is my primary source of irrigation water. A 55-gallon rain barrel (e.g., EarthMark Rain Barrel, ~$120-$150) connected to a downspout can collect significant water. For larger needs, I use two 275-gallon IBC totes (Intermediate Bulk Containers, often available used for $100-$200 each from food-grade sources) connected in series. A 1,000 sq ft roof can collect approximately 620 gallons of water for every inch of rainfall. My 1,500 sq ft roof provides ample water for my 600 sq ft garden through multiple barrels and totes.
- Drip Irrigation: This is by far the most water-efficient method, delivering water directly to the plant’s root zone, minimizing evaporation and weed growth.
- Components: A typical drip system includes a pressure regulator (e.g., Rain Bird PRV-10, ~$15), a filter (Rain Bird RBY filter, ~$20), main tubing (1/2-inch poly tubing, 100ft ~$25), smaller feeder lines (1/4-inch tubing), and emitters (0.5 GPH or 1 GPH per plant).
- Kits: For beginners, a starter kit like the Rain Bird Drip Irrigation Garden Kit (model DDI-KIT-1P, ~$40-$60) is excellent for a small garden. For larger setups, I use Netafim Techline CV Drip Line (500ft roll, ~$150-$200), which has pressure-compensating emitters built-in, ensuring even watering across long runs.
- Automation: For true self-sufficiency, consider a battery-powered timer (e.g., Orbit B-Hyve Bluetooth Hose Faucet Timer, ~$50) or a solar-powered timer connected to a small 12V pump.
- Solar-Powered Pumps: For lifting water from a well, pond, or large storage tank to your garden, a solar pump is a game-changer. For a smaller drip system, a Shurflo 2088-594-152 Diaphragm Pump (12V, 3.5 GPM, ~$180) can be powered by a single 100W solar panel (e.g., Renogy 100W Monocrystalline Solar Panel, ~$100) and a small 12V battery (e.g., a 50Ah LiFePO4 battery like the Battle Born 50Ah, ~$450). For larger operations or deeper wells, more robust systems are needed. If you’re looking to build out a comprehensive off-grid power system to support your garden’s water needs, or indeed your entire homestead, you might want to explore resources like the Power Grid Generator complete system guide to understand the full scope of what’s possible in terms of energy independence.
Step 5: Seed Selection & Planting
The choice of seeds is crucial for a truly self sufficient garden from scratch.
- Choose Heirloom & Open-Pollinated Seeds: These varieties produce seeds that will grow true to type, meaning you can save seeds from your harvest year after year. F1 hybrids, while often vigorous, will not produce consistent offspring from saved seeds. Reputable seed companies include Baker Creek Heirloom Seeds, High Mowing Organic Seeds, and Seed Savers Exchange. Start with common, reliable varieties like ‘Black Krim’ tomatoes, ‘Provider’ bush beans, ‘Waltham Butternut’ squash, and ‘Black Seeded Simpson’ lettuce.
- Start Seeds Indoors (Optional but Recommended): For longer growing seasons or specific crops, starting seeds indoors gives you a head start. Use seed-starting mix (e.g., Espoma Organic Seed Starter Mix, ~$10 for 16qt bag) in seed trays (Jiffy Professional Greenhouse 72-cell kit, ~$15). Provide adequate light with LED grow lights (Barrina T5 2ft 4-pack LED Grow Lights, 20W each, ~$50) for 14-16 hours a day, positioned 2-4 inches above seedlings. Maintain consistent temperatures (65-75°F for most).
- Direct Sowing vs. Transplanting: Some crops (carrots, radishes, beans, corn) prefer direct sowing into the garden bed. Others (tomatoes, peppers, broccoli, kale) benefit from being started indoors and transplanted. Follow seed packet instructions for planting depths (e.g., lettuce seeds are often surface-sown or planted 1/8 inch deep, while beans are 1 inch deep) and spacing.
- Companion Planting: Strategically plant different species together to enhance growth, deter pests, and attract beneficial insects. For example, planting marigolds near tomatoes can deter nematodes, and basil improves tomato flavor. Nasturtiums can act as a trap crop for aphids.
- Succession Planting: For a continuous harvest, plant small batches of quick-growing crops (lettuce, radishes, cilantro) every 2-3 weeks. As one crop finishes, another is ready to take its place.
Step 6: Pest & Disease Management (Organic)
Maintaining a self sufficient garden from scratch means embracing organic pest and disease control.
- Integrated Pest Management (IPM): This holistic approach combines several strategies.
- Observation: Regularly inspect your plants for early signs of pests or disease. Catching issues early is key.
- Physical Barriers: Use row covers (e.g., Agribon AG-19 floating row cover, 10×20 ft, ~$20) to protect young plants from insect pests like cabbage worms and squash bugs. Install fences (e.g., 2×4 welded wire mesh, 4 ft tall, 50 ft roll ~$70) to keep out deer, rabbits, and other larger animals.
- Hand-Picking: For larger pests like tomato hornworms or squash bugs, simply pick them off and drop them into a bucket of soapy water.
- Companion Planting: As mentioned, certain plants repel pests. Marigolds, garlic, and onions are excellent deterrents.
- Attract Beneficial Insects: Plant flowers like dill, fennel, cosmos, and sweet alyssum to attract ladybugs, lacewings, and parasitic wasps, which prey on common garden pests.
- Organic Sprays & Treatments:
- Neem Oil: An excellent broad-spectrum organic insecticide and fungicide. Bonide Neem Oil Concentrate (16oz, ~$20) can be mixed at a rate of 1-2 tbsp per gallon of water and sprayed on affected plants.
- Insecticidal Soap: Effective against soft-bodied insects like aphids, whiteflies, and spider mites. Garden Safe Insecticidal Soap (24oz ready-to-use, ~$10).
- Bacillus thuringiensis (Bt): A naturally occurring soil bacterium that targets caterpillars and worms. Monterey BT Worm & Caterpillar Killer (16oz, ~$18) is highly effective and safe for beneficial insects.
- Copper or Sulfur Sprays: For fungal diseases like powdery mildew or blight, organic copper (e.g., Bonide Copper Fungicide, ~$15 for 1lb) or sulfur (e.g., Safer Brand Garden Fungicide, ~$10 for 16oz) can be used as a last resort.
Step 7: Harvesting & Seed Saving
The culmination of your efforts is the harvest, and seed saving closes the loop on self-sufficiency.
- Harvesting Techniques:
- Timing: Harvest vegetables at their peak ripeness for best flavor and nutritional value. For example, green beans should snap cleanly, cucumbers should be firm, and tomatoes should be fully colored.
- Frequency: Many crops, like zucchini, cucumbers, and bush beans, produce more if harvested frequently. Pick daily or every other day.
- Tools: Use clean, sharp pruners (e.g., Corona ClassicCUT Bypass Pruner BP 3180, ~$30) or a sharp knife for clean cuts, minimizing damage to the plant.
- Seed Saving: This is where the « self-sufficient » aspect truly shines.
- Selection: Only save seeds from your healthiest, most vigorous plants that show desired traits (disease resistance, good flavor, high yield).
- Isolation: To ensure true-to-type seeds, prevent cross-pollination. This can be challenging for open-pollinated crops that readily cross (e.g., squash, corn). For beginners, focus on self-pollinating plants like beans, peas, lettuce, and tomatoes.
- Processing:
- Dry Seeds (Beans, Peas, Lettuce, Grains): Allow pods/seed heads to dry completely on the plant. Harvest, shell, and clean the seeds, removing chaff.
- Wet Seeds (Tomatoes, Cucumbers, Squash): For tomatoes, ferment the seeds in water for a few days to remove the gel coating and inhibit disease. For cucumbers/squash, scrape out seeds, wash thoroughly, and dry.
- Drying: Spread seeds thinly on screens or paper plates in a cool, dry, well-ventilated area for 1-4 weeks. Ensure they are bone-dry before storage. I aim for less than 8% moisture content.
- Storage: Store seeds in airtight containers (glass jars with desiccant packets work well) in a cool, dark, dry place (ideally 40-50°F and 30-40% humidity). Label clearly with variety and date. Properly stored seeds can remain viable for 3-10 years or more.
Step 8: Season Extension & Winterizing
Extend your harvest and protect your garden for the off-season to truly maximize your self sufficient garden from scratch.
- Cold Frames: Simple structures with a transparent top (glass, polycarbonate, or old windows) that sit over garden beds. They trap solar heat, allowing you to grow cold-hardy crops (lettuce, spinach, kale, radishes) well into winter or start seeds earlier in spring. A basic cold frame can be built from 2×6 lumber and a sheet of polycarbonate for under $100.
- Hoop Houses/Low Tunnels: Larger structures made from flexible hoops (PVC pipe or EMT conduit) covered with greenhouse plastic. These provide more space and greater temperature moderation. A 10×20 ft DIY low tunnel kit can cost $200-$500, while a larger, more robust hoop house kit might be $1,000-$3,000. I use a 6×12 ft low tunnel made from 1/2-inch PVC hoops and 6mil greenhouse plastic, which extends my lettuce and spinach harvest by at least
Deciding between raised beds and in-ground beds depends on your soil, budget, and physical capabilities.
- In-Ground Beds: If you have excellent native soil and good drainage, in-ground beds are the most economical. Double-digging (loosening soil two shovel depths) can significantly improve drainage and aeration. For my main garden, I primarily use in-ground beds, but I focus on building up the soil over time with consistent compost additions and cover cropping. I aim for beds that are no wider than 3-4 feet so I can reach the center without stepping on the soil, compacting it.
- Raised Beds: Raised beds offer numerous advantages, especially for poor soil, heavy clay, or rocky areas. They provide better drainage, warm up faster in spring, reduce compaction, and make weeding and harvesting easier on your back.
- Material Options:
- Untreated Cedar: Naturally rot-resistant and chemical-free. A 4×8 ft bed, 12 inches deep, typically requires three 2x12x8 ft cedar boards, costing around $50-$60 per board (total ~$150-$180) plus corner brackets or screws. My first raised beds were cedar and are still going strong after 7 years.
- Galvanized Steel: Durable, long-lasting, and aesthetically pleasing. Brands like Vego Garden offer modular kits. A Vego Garden 17″ Tall 8-in-1 Metal Raised Garden Bed (can be configured to 4×8 ft) costs approximately $250-$300.
- Concrete Blocks/Stones: Very durable but can leach minerals (though generally safe once weathered) and can be expensive.
- Recycled Materials: Pallets (check for chemical treatment stamps like « HT » for heat-treated), old tires (controversial due to potential chemical leaching).
- Filling Raised Beds: Don’t just fill with topsoil. Use a « Hugelkultur » approach (logs, branches, leaves, then compost, then topsoil) or a mixture of 60% good quality topsoil, 30% compost, and 10% perlite or vermiculite for drainage. A 4x8x1 ft raised bed requires about 32 cubic feet (or ~1.2 cubic yards) of soil mix, which can cost $100-$200 depending on your source.
- Material Options:
Step 4: Water Management & Irrigation
Efficient water management is critical for a self sufficient garden from scratch, especially in off-grid living where water resources might be limited.
- Rainwater Harvesting: This is my primary source of irrigation water. A 55-gallon rain barrel (e.g., EarthMark Rain Barrel, ~$120-$150) connected to a downspout can collect significant water. For larger needs, I use two 275-gallon IBC totes (Intermediate Bulk Containers, often available used for $100-$200 each from food-grade sources) connected in series. A 1,000 sq ft roof can collect approximately 620 gallons of water for every inch of rainfall. My 1,500 sq ft roof provides ample water for my 600 sq ft garden through multiple barrels and totes.
- Drip Irrigation: This is by far the most water-efficient method, delivering water directly to the plant’s root zone, minimizing evaporation and weed growth.
- Components: A typical drip system includes a pressure regulator (e.g., Rain Bird PRV-10, ~$15), a filter (Rain Bird RBY filter, ~$20), main tubing (1/2-inch poly tubing, 100ft ~$25), smaller feeder lines (1/4-inch tubing), and emitters (0.5 GPH or 1 GPH per plant).
- Kits: For beginners, a starter kit like the Rain Bird Drip Irrigation Garden Kit (model DDI-KIT-1P, ~$40-$60) is excellent for a small garden. For larger setups, I use Netafim Techline CV Drip Line (500ft roll, ~$150-$200), which has pressure-compensating emitters built-in, ensuring even watering across long runs.
- Automation: For true self-sufficiency, consider a battery-powered timer (e.g., Orbit B-Hyve Bluetooth Hose Faucet Timer, ~$50) or a solar-powered timer connected to a small 12V pump.
- Solar-Powered Pumps: For lifting water from a well, pond, or large storage tank to your garden, a solar pump is a game-changer. For a smaller drip system, a Shurflo 2088-594-152 Diaphragm Pump (12V, 3.5 GPM, ~$180) can be powered by a single 100W solar panel (e.g., Renogy 100W Monocrystalline Solar Panel, ~$100) and a small 12V battery (e.g., a 50Ah LiFePO4 battery like the Battle Born 50Ah, ~$450). For larger operations or deeper wells, more robust systems are needed. If you’re looking to build out a comprehensive off-grid power system to support your garden’s water needs, or indeed your entire homestead, you might want to explore resources like the Power Grid Generator complete system guide to understand the full scope of what’s possible in terms of energy independence.
Step 5: Seed Selection & Planting
The choice of seeds is crucial for a truly self sufficient garden from scratch.
- Choose Heirloom & Open-Pollinated Seeds: These varieties produce seeds that will grow true to type, meaning you can save seeds from your harvest year after year. F1 hybrids, while often vigorous, will not produce consistent offspring from saved seeds. Reputable seed companies include Baker Creek Heirloom Seeds, High Mowing Organic Seeds, and Seed Savers Exchange. Start with common, reliable varieties like ‘Black Krim’ tomatoes, ‘Provider’ bush beans, ‘Waltham Butternut’ squash, and ‘Black Seeded Simpson’ lettuce.
- Start Seeds Indoors (Optional but Recommended): For longer growing seasons or specific crops, starting seeds indoors gives you a head start. Use seed-starting mix (e.g., Espoma Organic Seed Starter Mix, ~$10 for 16qt bag) in seed trays (Jiffy Professional Greenhouse 72-cell kit, ~$15). Provide adequate light with LED grow lights (Barrina T5 2ft 4-pack LED Grow Lights, 20W each, ~$50) for 14-16 hours a day, positioned 2-4 inches above seedlings. Maintain consistent temperatures (65-75°F for most).
- Direct Sowing vs. Transplanting: Some crops (carrots, radishes, beans, corn) prefer direct sowing into the garden bed. Others (tomatoes, peppers, broccoli, kale) benefit from being started indoors and transplanted. Follow seed packet instructions for planting depths (e.g., lettuce seeds are often surface-sown or planted 1/8 inch deep, while beans are 1 inch deep) and spacing.
- Companion Planting: Strategically plant different species together to enhance growth, deter pests, and attract beneficial insects. For example, planting marigolds near tomatoes can deter nematodes, and basil improves tomato flavor. Nasturtiums can act as a trap crop for aphids.
- Succession Planting: For a continuous harvest, plant small batches of quick-growing crops (lettuce, radishes, cilantro) every 2-3 weeks. As one crop finishes, another is ready to take its place.
Step 6: Pest & Disease Management (Organic)
Maintaining a self sufficient garden from scratch means embracing organic pest and disease control.
- Integrated Pest Management (IPM): This holistic approach combines several strategies.
- Observation: Regularly inspect your plants for early signs of pests or disease. Catching issues early is key.
- Physical Barriers: Use row covers (e.g., Agribon AG-19 floating row cover, 10×20 ft, ~$20) to protect young plants from insect pests like cabbage worms and squash bugs. Install fences (e.g., 2×4 welded wire mesh, 4 ft tall, 50 ft roll ~$70) to keep out deer, rabbits, and other larger animals.
- Hand-Picking: For larger pests like tomato hornworms or squash bugs, simply pick them off and drop them into a bucket of soapy water.
- Companion Planting: As mentioned, certain plants repel pests. Marigolds, garlic, and onions are excellent deterrents.
- Attract Beneficial Insects: Plant flowers like dill, fennel, cosmos, and sweet alyssum to attract ladybugs, lacewings, and parasitic wasps, which prey on common garden pests.
- Organic Sprays & Treatments:
- Neem Oil: An excellent broad-spectrum organic insecticide and fungicide. Bonide Neem Oil Concentrate (16oz, ~$20) can be mixed at a rate of 1-2 tbsp per gallon of water and sprayed on affected plants.
- Insecticidal Soap: Effective against soft-bodied insects like aphids, whiteflies, and spider mites. Garden Safe Insecticidal Soap (24oz ready-to-use, ~$10).
- Bacillus thuringiensis (Bt): A naturally occurring soil bacterium that targets caterpillars and worms. Monterey BT Worm & Caterpillar Killer (16oz, ~$18) is highly effective and safe for beneficial insects.
- Copper or Sulfur Sprays: For fungal diseases like powdery mildew or blight, organic copper (e.g., Bonide Copper Fungicide, ~$15 for 1lb) or sulfur (e.g., Safer Brand Garden Fungicide, ~$10 for 16oz) can be used as a last resort.
Step 7: Harvesting & Seed Saving
The culmination of your efforts is the harvest, and seed saving closes the loop on self-sufficiency.
- Harvesting Techniques:
- Timing: Harvest vegetables at their peak ripeness for best flavor and nutritional value. For example, green beans should snap cleanly, cucumbers should be firm, and tomatoes should be fully colored.
- Frequency: Many crops, like zucchini, cucumbers, and bush beans, produce more if harvested frequently. Pick daily or every other day.
- Tools: Use clean, sharp pruners (e.g., Corona ClassicCUT Bypass Pruner BP 3180, ~$30) or a sharp knife for clean cuts, minimizing damage to the plant.
- Seed Saving: This is where the « self-sufficient » aspect truly shines.
- Selection: Only save seeds from your healthiest, most vigorous plants that show desired traits (disease resistance, good flavor, high yield).
- Isolation: To ensure true-to-type seeds, prevent cross-pollination. This can be challenging for open-pollinated crops that readily cross (e.g., squash, corn). For beginners, focus on self-pollinating plants like beans, peas, lettuce, and tomatoes.
- Processing:
- Dry Seeds (Beans, Peas, Lettuce, Grains): Allow pods/seed heads to dry completely on the plant. Harvest, shell, and clean the seeds, removing chaff.
- Wet Seeds (Tomatoes, Cucumbers, Squash): For tomatoes, ferment the seeds in water for a few days to remove the gel coating and inhibit disease. For cucumbers/squash, scrape out seeds, wash thoroughly, and dry.
- Drying: Spread seeds thinly on screens or paper plates in a cool, dry, well-ventilated area for 1-4 weeks. Ensure they are bone-dry before storage. I aim for less than 8% moisture content.
- Storage: Store seeds in airtight containers (glass jars with desiccant packets work well) in a cool, dark, dry place (ideally 40-50°F and 30-40% humidity). Label clearly with variety and date. Properly stored seeds can remain viable for 3-10 years or more.
Step 8: Season Extension & Winterizing
Extend your harvest and protect your garden for the off-season to truly maximize your self sufficient garden from scratch.
- Cold Frames: Simple structures with a transparent top (glass, polycarbonate, or old windows) that sit over garden beds. They trap solar heat, allowing you to grow cold-hardy crops (lettuce, spinach, kale, radishes) well into winter or start seeds earlier in spring. A basic cold frame can be built from 2×6 lumber and a sheet of polycarbonate for under $100.
- Hoop Houses/Low Tunnels: Larger structures made from flexible hoops (PVC pipe or EMT conduit) covered with greenhouse plastic. These provide more space and greater temperature moderation. A 10×20 ft DIY low tunnel kit can cost $200-$500, while a larger, more robust hoop house kit might be $1,000-$3,000. I use a 6×12 ft low tunnel made from 1/2-inch PVC hoops and 6mil greenhouse plastic, which extends my lettuce and spinach harvest by at least
Healthy soil is the bedrock of a productive, self-sufficient garden. You can’t guess what your soil needs; you have to test it.
- Perform a Soil Test: A professional soil test will give you precise data on your soil’s pH, nutrient levels (N-P-K), and organic matter content. I recommend sending a sample to your local agricultural extension office; it typically costs $20-$50 and provides detailed recommendations. Alternatively, for a quick homeowner check, a Rapitest Soil Test Kit (40-test kit, model 1663, ~$20 on Amazon) provides a good baseline for pH, Nitrogen, Phosphorus, and Potash. Aim for a pH between 6.0 and 7.0 for most vegetables.
- Amend for pH Imbalance: If your soil is too acidic (below 6.0), add agricultural lime (dolomitic lime adds magnesium, calcitic lime adds calcium). Apply 5-10 lbs per 100 sq ft for a moderate adjustment. If it’s too alkaline (above 7.0), add elemental sulfur (e.g., Espoma Soil Acidifier, ~$15 for 6.75 lbs) or generous amounts of organic matter like peat moss or pine needles.
- Build Organic Matter: This is the single most important step for long-term soil health. Organic matter improves soil structure, water retention, drainage, and nutrient availability. Incorporate 2-4 inches of high-quality compost into your top 6-12 inches of soil annually. I make my own compost from kitchen scraps, garden waste, and shredded leaves, but you can purchase it. Local nurseries often sell bulk compost for $30-$50 per cubic yard. Aged manure (from chickens, cows, or horses – ensure it’s well-rotted to avoid burning plants) is also excellent.
- Address Nutrient Deficiencies: Based on your soil test, add specific organic amendments. If Nitrogen (N) is low, add blood meal (12-0-0, ~$20 for 3 lbs) or feather meal. For Phosphorus (P), use bone meal (3-15-0, ~$15 for 3 lbs) or rock phosphate. For Potassium (K), greensand (0-0-2.5, ~$25 for 5 lbs) or kelp meal are good choices. I rely heavily on Espoma Organic Garden-tone (5-3-3, ~$25 for an 8lb bag) as a balanced, all-purpose organic fertilizer during planting.
Step 3: Garden Bed Preparation
Deciding between raised beds and in-ground beds depends on your soil, budget, and physical capabilities.
- In-Ground Beds: If you have excellent native soil and good drainage, in-ground beds are the most economical. Double-digging (loosening soil two shovel depths) can significantly improve drainage and aeration. For my main garden, I primarily use in-ground beds, but I focus on building up the soil over time with consistent compost additions and cover cropping. I aim for beds that are no wider than 3-4 feet so I can reach the center without stepping on the soil, compacting it.
- Raised Beds: Raised beds offer numerous advantages, especially for poor soil, heavy clay, or rocky areas. They provide better drainage, warm up faster in spring, reduce compaction, and make weeding and harvesting easier on your back.
- Material Options:
- Untreated Cedar: Naturally rot-resistant and chemical-free. A 4×8 ft bed, 12 inches deep, typically requires three 2x12x8 ft cedar boards, costing around $50-$60 per board (total ~$150-$180) plus corner brackets or screws. My first raised beds were cedar and are still going strong after 7 years.
- Galvanized Steel: Durable, long-lasting, and aesthetically pleasing. Brands like Vego Garden offer modular kits. A Vego Garden 17″ Tall 8-in-1 Metal Raised Garden Bed (can be configured to 4×8 ft) costs approximately $250-$300.
- Concrete Blocks/Stones: Very durable but can leach minerals (though generally safe once weathered) and can be expensive.
- Recycled Materials: Pallets (check for chemical treatment stamps like « HT » for heat-treated), old tires (controversial due to potential chemical leaching).
- Filling Raised Beds: Don’t just fill with topsoil. Use a « Hugelkultur » approach (logs, branches, leaves, then compost, then topsoil) or a mixture of 60% good quality topsoil, 30% compost, and 10% perlite or vermiculite for drainage. A 4x8x1 ft raised bed requires about 32 cubic feet (or ~1.2 cubic yards) of soil mix, which can cost $100-$200 depending on your source.
- Material Options:
Step 4: Water Management & Irrigation
Efficient water management is critical for a self sufficient garden from scratch, especially in off-grid living where water resources might be limited.
- Rainwater Harvesting: This is my primary source of irrigation water. A 55-gallon rain barrel (e.g., EarthMark Rain Barrel, ~$120-$150) connected to a downspout can collect significant water. For larger needs, I use two 275-gallon IBC totes (Intermediate Bulk Containers, often available used for $100-$200 each from food-grade sources) connected in series. A 1,000 sq ft roof can collect approximately 620 gallons of water for every inch of rainfall. My 1,500 sq ft roof provides ample water for my 600 sq ft garden through multiple barrels and totes.
- Drip Irrigation: This is by far the most water-efficient method, delivering water directly to the plant’s root zone, minimizing evaporation and weed growth.
- Components: A typical drip system includes a pressure regulator (e.g., Rain Bird PRV-10, ~$15), a filter (Rain Bird RBY filter, ~$20), main tubing (1/2-inch poly tubing, 100ft ~$25), smaller feeder lines (1/4-inch tubing), and emitters (0.5 GPH or 1 GPH per plant).
- Kits: For beginners, a starter kit like the Rain Bird Drip Irrigation Garden Kit (model DDI-KIT-1P, ~$40-$60) is excellent for a small garden. For larger setups, I use Netafim Techline CV Drip Line (500ft roll, ~$150-$200), which has pressure-compensating emitters built-in, ensuring even watering across long runs.
- Automation: For true self-sufficiency, consider a battery-powered timer (e.g., Orbit B-Hyve Bluetooth Hose Faucet Timer, ~$50) or a solar-powered timer connected to a small 12V pump.
- Solar-Powered Pumps: For lifting water from a well, pond, or large storage tank to your garden, a solar pump is a game-changer. For a smaller drip system, a Shurflo 2088-594-152 Diaphragm Pump (12V, 3.5 GPM, ~$180) can be powered by a single 100W solar panel (e.g., Renogy 100W Monocrystalline Solar Panel, ~$100) and a small 12V battery (e.g., a 50Ah LiFePO4 battery like the Battle Born 50Ah, ~$450). For larger operations or deeper wells, more robust systems are needed. If you’re looking to build out a comprehensive off-grid power system to support your garden’s water needs, or indeed your entire homestead, you might want to explore resources like the Power Grid Generator complete system guide to understand the full scope of what’s possible in terms of energy independence.
Step 5: Seed Selection & Planting
The choice of seeds is crucial for a truly self sufficient garden from scratch.
- Choose Heirloom & Open-Pollinated Seeds: These varieties produce seeds that will grow true to type, meaning you can save seeds from your harvest year after year. F1 hybrids, while often vigorous, will not produce consistent offspring from saved seeds. Reputable seed companies include Baker Creek Heirloom Seeds, High Mowing Organic Seeds, and Seed Savers Exchange. Start with common, reliable varieties like ‘Black Krim’ tomatoes, ‘Provider’ bush beans, ‘Waltham Butternut’ squash, and ‘Black Seeded Simpson’ lettuce.
- Start Seeds Indoors (Optional but Recommended): For longer growing seasons or specific crops, starting seeds indoors gives you a head start. Use seed-starting mix (e.g., Espoma Organic Seed Starter Mix, ~$10 for 16qt bag) in seed trays (Jiffy Professional Greenhouse 72-cell kit, ~$15). Provide adequate light with LED grow lights (Barrina T5 2ft 4-pack LED Grow Lights, 20W each, ~$50) for 14-16 hours a day, positioned 2-4 inches above seedlings. Maintain consistent temperatures (65-75°F for most).
- Direct Sowing vs. Transplanting: Some crops (carrots, radishes, beans, corn) prefer direct sowing into the garden bed. Others (tomatoes, peppers, broccoli, kale) benefit from being started indoors and transplanted. Follow seed packet instructions for planting depths (e.g., lettuce seeds are often surface-sown or planted 1/8 inch deep, while beans are 1 inch deep) and spacing.
- Companion Planting: Strategically plant different species together to enhance growth, deter pests, and attract beneficial insects. For example, planting marigolds near tomatoes can deter nematodes, and basil improves tomato flavor. Nasturtiums can act as a trap crop for aphids.
- Succession Planting: For a continuous harvest, plant small batches of quick-growing crops (lettuce, radishes, cilantro) every 2-3 weeks. As one crop finishes, another is ready to take its place.
Step 6: Pest & Disease Management (Organic)
Maintaining a self sufficient garden from scratch means embracing organic pest and disease control.
- Integrated Pest Management (IPM): This holistic approach combines several strategies.
- Observation: Regularly inspect your plants for early signs of pests or disease. Catching issues early is key.
- Physical Barriers: Use row covers (e.g., Agribon AG-19 floating row cover, 10×20 ft, ~$20) to protect young plants from insect pests like cabbage worms and squash bugs. Install fences (e.g., 2×4 welded wire mesh, 4 ft tall, 50 ft roll ~$70) to keep out deer, rabbits, and other larger animals.
- Hand-Picking: For larger pests like tomato hornworms or squash bugs, simply pick them off and drop them into a bucket of soapy water.
- Companion Planting: As mentioned, certain plants repel pests. Marigolds, garlic, and onions are excellent deterrents.
- Attract Beneficial Insects: Plant flowers like dill, fennel, cosmos, and sweet alyssum to attract ladybugs, lacewings, and parasitic wasps, which prey on common garden pests.
- Organic Sprays & Treatments:
- Neem Oil: An excellent broad-spectrum organic insecticide and fungicide. Bonide Neem Oil Concentrate (16oz, ~$20) can be mixed at a rate of 1-2 tbsp per gallon of water and sprayed on affected plants.
- Insecticidal Soap: Effective against soft-bodied insects like aphids, whiteflies, and spider mites. Garden Safe Insecticidal Soap (24oz ready-to-use, ~$10).
- Bacillus thuringiensis (Bt): A naturally occurring soil bacterium that targets caterpillars and worms. Monterey BT Worm & Caterpillar Killer (16oz, ~$18) is highly effective and safe for beneficial insects.
- Copper or Sulfur Sprays: For fungal diseases like powdery mildew or blight, organic copper (e.g., Bonide Copper Fungicide, ~$15 for 1lb) or sulfur (e.g., Safer Brand Garden Fungicide, ~$10 for 16oz) can be used as a last resort.
Step 7: Harvesting & Seed Saving
The culmination of your efforts is the harvest, and seed saving closes the loop on self-sufficiency.
- Harvesting Techniques:
- Timing: Harvest vegetables at their peak ripeness for best flavor and nutritional value. For example, green beans should snap cleanly, cucumbers should be firm, and tomatoes should be fully colored.
- Frequency: Many crops, like zucchini, cucumbers, and bush beans, produce more if harvested frequently. Pick daily or every other day.
- Tools: Use clean, sharp pruners (e.g., Corona ClassicCUT Bypass Pruner BP 3180, ~$30) or a sharp knife for clean cuts, minimizing damage to the plant.
- Seed Saving: This is where the « self-sufficient » aspect truly shines.
- Selection: Only save seeds from your healthiest, most vigorous plants that show desired traits (disease resistance, good flavor, high yield).
- Isolation: To ensure true-to-type seeds, prevent cross-pollination. This can be challenging for open-pollinated crops that readily cross (e.g., squash, corn). For beginners, focus on self-pollinating plants like beans, peas, lettuce, and tomatoes.
- Processing:
- Dry Seeds (Beans, Peas, Lettuce, Grains): Allow pods/seed heads to dry completely on the plant. Harvest, shell, and clean the seeds, removing chaff.
- Wet Seeds (Tomatoes, Cucumbers, Squash): For tomatoes, ferment the seeds in water for a few days to remove the gel coating and inhibit disease. For cucumbers/squash, scrape out seeds, wash thoroughly, and dry.
- Drying: Spread seeds thinly on screens or paper plates in a cool, dry, well-ventilated area for 1-4 weeks. Ensure they are bone-dry before storage. I aim for less than 8% moisture content.
- Storage: Store seeds in airtight containers (glass jars with desiccant packets work well) in a cool, dark, dry place (ideally 40-50°F and 30-40% humidity). Label clearly with variety and date. Properly stored seeds can remain viable for 3-10 years or more.
Step 8: Season Extension & Winterizing
Extend your harvest and protect your garden for the off-season to truly maximize your self sufficient garden from scratch.
- Cold Frames: Simple structures with a transparent top (glass, polycarbonate, or old windows) that sit over garden beds. They trap solar heat, allowing you to grow cold-hardy crops (lettuce, spinach, kale, radishes) well into winter or start seeds earlier in spring. A basic cold frame can be built from 2×6 lumber and a sheet of polycarbonate for under $100.
- Hoop Houses/Low Tunnels: Larger structures made from flexible hoops (PVC pipe or EMT conduit) covered with greenhouse plastic. These provide more space and greater temperature moderation. A 10×20 ft DIY low tunnel kit can cost $200-$500, while a larger, more robust hoop house kit might be $1,000-$3,000. I use a 6×12 ft low tunnel made from 1/2-inch PVC hoops and 6mil greenhouse plastic, which extends my lettuce and spinach harvest by at least
Step 6: Pest & Disease Management (Organic)
Maintaining a self sufficient garden from scratch means embracing organic pest and disease control.
- Integrated Pest Management (IPM): This holistic approach combines several strategies.
- Observation: Regularly inspect your plants for early signs of pests or disease. Catching issues early is key.
- Physical Barriers: Use row covers (e.g., Agribon AG-19 floating row cover, 10×20 ft, ~$20) to protect young plants from insect pests like cabbage worms and squash bugs. Install fences (e.g., 2×4 welded wire mesh, 4 ft tall, 50 ft roll ~$70) to keep out deer, rabbits, and other larger animals.
- Hand-Picking: For larger pests like tomato hornworms or squash bugs, simply pick them off and drop them into a bucket of soapy water.
- Companion Planting: As mentioned, certain plants repel pests. Marigolds, garlic, and onions are excellent deterrents.
- Attract Beneficial Insects: Plant flowers like dill, fennel, cosmos, and sweet alyssum to attract ladybugs, lacewings, and parasitic wasps, which prey on common garden pests.
- Organic Sprays & Treatments:
- Neem Oil: An excellent broad-spectrum organic insecticide and fungicide. Bonide Neem Oil Concentrate (16oz, ~$20) can be mixed at a rate of 1-2 tbsp per gallon of water and sprayed on affected plants.
- Insecticidal Soap: Effective against soft-bodied insects like aphids, whiteflies, and spider mites. Garden Safe Insecticidal Soap (24oz ready-to-use, ~$10).
- Bacillus thuringiensis (Bt): A naturally occurring soil bacterium that targets caterpillars and worms. Monterey BT Worm & Caterpillar Killer (16oz, ~$18) is highly effective and safe for beneficial insects.
- Copper or Sulfur Sprays: For fungal diseases like powdery mildew or blight, organic copper (e.g., Bonide Copper Fungicide, ~$15 for 1lb) or sulfur (e.g., Safer Brand Garden Fungicide, ~$10 for 16oz) can be used as a last resort.
Step 7: Harvesting & Seed Saving
The culmination of your efforts is the harvest, and seed saving closes the loop on self-sufficiency.
- Harvesting Techniques:
- Timing: Harvest vegetables at their peak ripeness for best flavor and nutritional value. For example, green beans should snap cleanly, cucumbers should be firm, and tomatoes should be fully colored.
- Frequency: Many crops, like zucchini, cucumbers, and bush beans, produce more if harvested frequently. Pick daily or every other day.
- Tools: Use clean, sharp pruners (e.g., Corona ClassicCUT Bypass Pruner BP 3180, ~$30) or a sharp knife for clean cuts, minimizing damage to the plant.
- Seed Saving: This is where the « self-sufficient » aspect truly shines.
- Selection: Only save seeds from your healthiest, most vigorous plants that show desired traits (disease resistance, good flavor, high yield).
- Isolation: To ensure true-to-type seeds, prevent cross-pollination. This can be challenging for open-pollinated crops that readily cross (e.g., squash, corn). For beginners, focus on self-pollinating plants like beans, peas, lettuce, and tomatoes.
- Processing:
- Dry Seeds (Beans, Peas, Lettuce, Grains): Allow pods/seed heads to dry completely on the plant. Harvest, shell, and clean the seeds, removing chaff.
- Wet Seeds (Tomatoes, Cucumbers, Squash): For tomatoes, ferment the seeds in water for a few days to remove the gel coating and inhibit disease. For cucumbers/squash, scrape out seeds, wash thoroughly, and dry.
- Drying: Spread seeds thinly on screens or paper plates in a cool, dry, well-ventilated area for 1-4 weeks. Ensure they are bone-dry before storage. I aim for less than 8% moisture content.
- Storage: Store seeds in airtight containers (glass jars with desiccant packets work well) in a cool, dark, dry place (ideally 40-50°F and 30-40% humidity). Label clearly with variety and date. Properly stored seeds can remain viable for 3-10 years or more.
Step 8: Season Extension & Winterizing
Extend your harvest and protect your garden for the off-season to truly maximize your self sufficient garden from scratch.
- Cold Frames: Simple structures with a transparent top (glass, polycarbonate, or old windows) that sit over garden beds. They trap solar heat, allowing you to grow cold-hardy crops (lettuce, spinach, kale, radishes) well into winter or start seeds earlier in spring. A basic cold frame can be built from 2×6 lumber and a sheet of polycarbonate for under $100.
- Hoop Houses/Low Tunnels: Larger structures made from flexible hoops (PVC pipe or EMT conduit) covered with greenhouse plastic. These provide more space and greater temperature moderation. A 10×20 ft DIY low tunnel kit can cost $200-$500, while a larger, more robust hoop house kit might be $1,000-$3,000. I use a 6×12 ft low tunnel made from 1/2-inch PVC hoops and 6mil greenhouse plastic, which extends my lettuce and spinach harvest by at least
Step 5: Seed Selection & Planting
The choice of seeds is crucial for a truly self sufficient garden from scratch.
- Choose Heirloom & Open-Pollinated Seeds: These varieties produce seeds that will grow true to type, meaning you can save seeds from your harvest year after year. F1 hybrids, while often vigorous, will not produce consistent offspring from saved seeds. Reputable seed companies include Baker Creek Heirloom Seeds, High Mowing Organic Seeds, and Seed Savers Exchange. Start with common, reliable varieties like ‘Black Krim’ tomatoes, ‘Provider’ bush beans, ‘Waltham Butternut’ squash, and ‘Black Seeded Simpson’ lettuce.
- Start Seeds Indoors (Optional but Recommended): For longer growing seasons or specific crops, starting seeds indoors gives you a head start. Use seed-starting mix (e.g., Espoma Organic Seed Starter Mix, ~$10 for 16qt bag) in seed trays (Jiffy Professional Greenhouse 72-cell kit, ~$15). Provide adequate light with LED grow lights (Barrina T5 2ft 4-pack LED Grow Lights, 20W each, ~$50) for 14-16 hours a day, positioned 2-4 inches above seedlings. Maintain consistent temperatures (65-75°F for most).
- Direct Sowing vs. Transplanting: Some crops (carrots, radishes, beans, corn) prefer direct sowing into the garden bed. Others (tomatoes, peppers, broccoli, kale) benefit from being started indoors and transplanted. Follow seed packet instructions for planting depths (e.g., lettuce seeds are often surface-sown or planted 1/8 inch deep, while beans are 1 inch deep) and spacing.
- Companion Planting: Strategically plant different species together to enhance growth, deter pests, and attract beneficial insects. For example, planting marigolds near tomatoes can deter nematodes, and basil improves tomato flavor. Nasturtiums can act as a trap crop for aphids.
- Succession Planting: For a continuous harvest, plant small batches of quick-growing crops (lettuce, radishes, cilantro) every 2-3 weeks. As one crop finishes, another is ready to take its place.
Step 6: Pest & Disease Management (Organic)
Maintaining a self sufficient garden from scratch means embracing organic pest and disease control.
- Integrated Pest Management (IPM): This holistic approach combines several strategies.
- Observation: Regularly inspect your plants for early signs of pests or disease. Catching issues early is key.
- Physical Barriers: Use row covers (e.g., Agribon AG-19 floating row cover, 10×20 ft, ~$20) to protect young plants from insect pests like cabbage worms and squash bugs. Install fences (e.g., 2×4 welded wire mesh, 4 ft tall, 50 ft roll ~$70) to keep out deer, rabbits, and other larger animals.
- Hand-Picking: For larger pests like tomato hornworms or squash bugs, simply pick them off and drop them into a bucket of soapy water.
- Companion Planting: As mentioned, certain plants repel pests. Marigolds, garlic, and onions are excellent deterrents.
- Attract Beneficial Insects: Plant flowers like dill, fennel, cosmos, and sweet alyssum to attract ladybugs, lacewings, and parasitic wasps, which prey on common garden pests.
- Organic Sprays & Treatments:
- Neem Oil: An excellent broad-spectrum organic insecticide and fungicide. Bonide Neem Oil Concentrate (16oz, ~$20) can be mixed at a rate of 1-2 tbsp per gallon of water and sprayed on affected plants.
- Insecticidal Soap: Effective against soft-bodied insects like aphids, whiteflies, and spider mites. Garden Safe Insecticidal Soap (24oz ready-to-use, ~$10).
- Bacillus thuringiensis (Bt): A naturally occurring soil bacterium that targets caterpillars and worms. Monterey BT Worm & Caterpillar Killer (16oz, ~$18) is highly effective and safe for beneficial insects.
- Copper or Sulfur Sprays: For fungal diseases like powdery mildew or blight, organic copper (e.g., Bonide Copper Fungicide, ~$15 for 1lb) or sulfur (e.g., Safer Brand Garden Fungicide, ~$10 for 16oz) can be used as a last resort.
Step 7: Harvesting & Seed Saving
The culmination of your efforts is the harvest, and seed saving closes the loop on self-sufficiency.
- Harvesting Techniques:
- Timing: Harvest vegetables at their peak ripeness for best flavor and nutritional value. For example, green beans should snap cleanly, cucumbers should be firm, and tomatoes should be fully colored.
- Frequency: Many crops, like zucchini, cucumbers, and bush beans, produce more if harvested frequently. Pick daily or every other day.
- Tools: Use clean, sharp pruners (e.g., Corona ClassicCUT Bypass Pruner BP 3180, ~$30) or a sharp knife for clean cuts, minimizing damage to the plant.
- Seed Saving: This is where the « self-sufficient » aspect truly shines.
- Selection: Only save seeds from your healthiest, most vigorous plants that show desired traits (disease resistance, good flavor, high yield).
- Isolation: To ensure true-to-type seeds, prevent cross-pollination. This can be challenging for open-pollinated crops that readily cross (e.g., squash, corn). For beginners, focus on self-pollinating plants like beans, peas, lettuce, and tomatoes.
- Processing:
- Dry Seeds (Beans, Peas, Lettuce, Grains): Allow pods/seed heads to dry completely on the plant. Harvest, shell, and clean the seeds, removing chaff.
- Wet Seeds (Tomatoes, Cucumbers, Squash): For tomatoes, ferment the seeds in water for a few days to remove the gel coating and inhibit disease. For cucumbers/squash, scrape out seeds, wash thoroughly, and dry.
- Drying: Spread seeds thinly on screens or paper plates in a cool, dry, well-ventilated area for 1-4 weeks. Ensure they are bone-dry before storage. I aim for less than 8% moisture content.
- Storage: Store seeds in airtight containers (glass jars with desiccant packets work well) in a cool, dark, dry place (ideally 40-50°F and 30-40% humidity). Label clearly with variety and date. Properly stored seeds can remain viable for 3-10 years or more.
Step 8: Season Extension & Winterizing
Extend your harvest and protect your garden for the off-season to truly maximize your self sufficient garden from scratch.
- Cold Frames: Simple structures with a transparent top (glass, polycarbonate, or old windows) that sit over garden beds. They trap solar heat, allowing you to grow cold-hardy crops (lettuce, spinach, kale, radishes) well into winter or start seeds earlier in spring. A basic cold frame can be built from 2×6 lumber and a sheet of polycarbonate for under $100.
- Hoop Houses/Low Tunnels: Larger structures made from flexible hoops (PVC pipe or EMT conduit) covered with greenhouse plastic. These provide more space and greater temperature moderation. A 10×20 ft DIY low tunnel kit can cost $200-$500, while a larger, more robust hoop house kit might be $1,000-$3,000. I use a 6×12 ft low tunnel made from 1/2-inch PVC hoops and 6mil greenhouse plastic, which extends my lettuce and spinach harvest by at least
- Rainwater Harvesting: This is my primary source of irrigation water. A 55-gallon rain barrel (e.g., EarthMark Rain Barrel, ~$120-$150) connected to a downspout can collect significant water. For larger needs, I use two 275-gallon IBC totes (Intermediate Bulk Containers, often available used for $100-$200 each from food-grade sources) connected in series. A 1,000 sq ft roof can collect approximately 620 gallons of water for every inch of rainfall. My 1,500 sq ft roof provides ample water for my 600 sq ft garden through multiple barrels and totes.
- Drip Irrigation: This is by far the most water-efficient method, delivering water directly to the plant’s root zone, minimizing evaporation and weed growth.
- Components: A typical drip system includes a pressure regulator (e.g., Rain Bird PRV-10, ~$15), a filter (Rain Bird RBY filter, ~$20), main tubing (1/2-inch poly tubing, 100ft ~$25), smaller feeder lines (1/4-inch tubing), and emitters (0.5 GPH or 1 GPH per plant).
- Kits: For beginners, a starter kit like the Rain Bird Drip Irrigation Garden Kit (model DDI-KIT-1P, ~$40-$60) is excellent for a small garden. For larger setups, I use Netafim Techline CV Drip Line (500ft roll, ~$150-$200), which has pressure-compensating emitters built-in, ensuring even watering across long runs.
- Automation: For true self-sufficiency, consider a battery-powered timer (e.g., Orbit B-Hyve Bluetooth Hose Faucet Timer, ~$50) or a solar-powered timer connected to a small 12V pump.
- Solar-Powered Pumps: For lifting water from a well, pond, or large storage tank to your garden, a solar pump is a game-changer. For a smaller drip system, a Shurflo 2088-594-152 Diaphragm Pump (12V, 3.5 GPM, ~$180) can be powered by a single 100W solar panel (e.g., Renogy 100W Monocrystalline Solar Panel, ~$100) and a small 12V battery (e.g., a 50Ah LiFePO4 battery like the Battle Born 50Ah, ~$450). For larger operations or deeper wells, more robust systems are needed. If you’re looking to build out a comprehensive off-grid power system to support your garden’s water needs, or indeed your entire homestead, you might want to explore resources like the Power Grid Generator complete system guide to understand the full scope of what’s possible in terms of energy independence.
Step 5: Seed Selection & Planting
The choice of seeds is crucial for a truly self sufficient garden from scratch.
- Choose Heirloom & Open-Pollinated Seeds: These varieties produce seeds that will grow true to type, meaning you can save seeds from your harvest year after year. F1 hybrids, while often vigorous, will not produce consistent offspring from saved seeds. Reputable seed companies include Baker Creek Heirloom Seeds, High Mowing Organic Seeds, and Seed Savers Exchange. Start with common, reliable varieties like ‘Black Krim’ tomatoes, ‘Provider’ bush beans, ‘Waltham Butternut’ squash, and ‘Black Seeded Simpson’ lettuce.
- Start Seeds Indoors (Optional but Recommended): For longer growing seasons or specific crops, starting seeds indoors gives you a head start. Use seed-starting mix (e.g., Espoma Organic Seed Starter Mix, ~$10 for 16qt bag) in seed trays (Jiffy Professional Greenhouse 72-cell kit, ~$15). Provide adequate light with LED grow lights (Barrina T5 2ft 4-pack LED Grow Lights, 20W each, ~$50) for 14-16 hours a day, positioned 2-4 inches above seedlings. Maintain consistent temperatures (65-75°F for most).
- Direct Sowing vs. Transplanting: Some crops (carrots, radishes, beans, corn) prefer direct sowing into the garden bed. Others (tomatoes, peppers, broccoli, kale) benefit from being started indoors and transplanted. Follow seed packet instructions for planting depths (e.g., lettuce seeds are often surface-sown or planted 1/8 inch deep, while beans are 1 inch deep) and spacing.
- Companion Planting: Strategically plant different species together to enhance growth, deter pests, and attract beneficial insects. For example, planting marigolds near tomatoes can deter nematodes, and basil improves tomato flavor. Nasturtiums can act as a trap crop for aphids.
- Succession Planting: For a continuous harvest, plant small batches of quick-growing crops (lettuce, radishes, cilantro) every 2-3 weeks. As one crop finishes, another is ready to take its place.
Step 6: Pest & Disease Management (Organic)
Maintaining a self sufficient garden from scratch means embracing organic pest and disease control.
- Integrated Pest Management (IPM): This holistic approach combines several strategies.
- Observation: Regularly inspect your plants for early signs of pests or disease. Catching issues early is key.
- Physical Barriers: Use row covers (e.g., Agribon AG-19 floating row cover, 10×20 ft, ~$20) to protect young plants from insect pests like cabbage worms and squash bugs. Install fences (e.g., 2×4 welded wire mesh, 4 ft tall, 50 ft roll ~$70) to keep out deer, rabbits, and other larger animals.
- Hand-Picking: For larger pests like tomato hornworms or squash bugs, simply pick them off and drop them into a bucket of soapy water.
- Companion Planting: As mentioned, certain plants repel pests. Marigolds, garlic, and onions are excellent deterrents.
- Attract Beneficial Insects: Plant flowers like dill, fennel, cosmos, and sweet alyssum to attract ladybugs, lacewings, and parasitic wasps, which prey on common garden pests.
- Organic Sprays & Treatments:
- Neem Oil: An excellent broad-spectrum organic insecticide and fungicide. Bonide Neem Oil Concentrate (16oz, ~$20) can be mixed at a rate of 1-2 tbsp per gallon of water and sprayed on affected plants.
- Insecticidal Soap: Effective against soft-bodied insects like aphids, whiteflies, and spider mites. Garden Safe Insecticidal Soap (24oz ready-to-use, ~$10).
- Bacillus thuringiensis (Bt): A naturally occurring soil bacterium that targets caterpillars and worms. Monterey BT Worm & Caterpillar Killer (16oz, ~$18) is highly effective and safe for beneficial insects.
- Copper or Sulfur Sprays: For fungal diseases like powdery mildew or blight, organic copper (e.g., Bonide Copper Fungicide, ~$15 for 1lb) or sulfur (e.g., Safer Brand Garden Fungicide, ~$10 for 16oz) can be used as a last resort.
Step 7: Harvesting & Seed Saving
The culmination of your efforts is the harvest, and seed saving closes the loop on self-sufficiency.
- Harvesting Techniques:
- Timing: Harvest vegetables at their peak ripeness for best flavor and nutritional value. For example, green beans should snap cleanly, cucumbers should be firm, and tomatoes should be fully colored.
- Frequency: Many crops, like zucchini, cucumbers, and bush beans, produce more if harvested frequently. Pick daily or every other day.
- Tools: Use clean, sharp pruners (e.g., Corona ClassicCUT Bypass Pruner BP 3180, ~$30) or a sharp knife for clean cuts, minimizing damage to the plant.
- Seed Saving: This is where the « self-sufficient » aspect truly shines.
- Selection: Only save seeds from your healthiest, most vigorous plants that show desired traits (disease resistance, good flavor, high yield).
- Isolation: To ensure true-to-type seeds, prevent cross-pollination. This can be challenging for open-pollinated crops that readily cross (e.g., squash, corn). For beginners, focus on self-pollinating plants like beans, peas, lettuce, and tomatoes.
- Processing:
- Dry Seeds (Beans, Peas, Lettuce, Grains): Allow pods/seed heads to dry completely on the plant. Harvest, shell, and clean the seeds, removing chaff.
- Wet Seeds (Tomatoes, Cucumbers, Squash): For tomatoes, ferment the seeds in water for a few days to remove the gel coating and inhibit disease. For cucumbers/squash, scrape out seeds, wash thoroughly, and dry.
- Drying: Spread seeds thinly on screens or paper plates in a cool, dry, well-ventilated area for 1-4 weeks. Ensure they are bone-dry before storage. I aim for less than 8% moisture content.
- Storage: Store seeds in airtight containers (glass jars with desiccant packets work well) in a cool, dark, dry place (ideally 40-50°F and 30-40% humidity). Label clearly with variety and date. Properly stored seeds can remain viable for 3-10 years or more.
Step 8: Season Extension & Winterizing
Extend your harvest and protect your garden for the off-season to truly maximize your self sufficient garden from scratch.
- Cold Frames: Simple structures with a transparent top (glass, polycarbonate, or old windows) that sit over garden beds. They trap solar heat, allowing you to grow cold-hardy crops (lettuce, spinach, kale, radishes) well into winter or start seeds earlier in spring. A basic cold frame can be built from 2×6 lumber and a sheet of polycarbonate for under $100.
- Hoop Houses/Low Tunnels: Larger structures made from flexible hoops (PVC pipe or EMT conduit) covered with greenhouse plastic. These provide more space and greater temperature moderation. A 10×20 ft DIY low tunnel kit can cost $200-$500, while a larger, more robust hoop house kit might be $1,000-$3,000. I use a 6×12 ft low tunnel made from 1/2-inch PVC hoops and 6mil greenhouse plastic, which extends my lettuce and spinach harvest by at least
Efficient water management is critical for a self sufficient garden from scratch, especially in off-grid living where water resources might be limited.
- Rainwater Harvesting: This is my primary source of irrigation water. A 55-gallon rain barrel (e.g., EarthMark Rain Barrel, ~$120-$150) connected to a downspout can collect significant water. For larger needs, I use two 275-gallon IBC totes (Intermediate Bulk Containers, often available used for $100-$200 each from food-grade sources) connected in series. A 1,000 sq ft roof can collect approximately 620 gallons of water for every inch of rainfall. My 1,500 sq ft roof provides ample water for my 600 sq ft garden through multiple barrels and totes.
- Drip Irrigation: This is by far the most water-efficient method, delivering water directly to the plant’s root zone, minimizing evaporation and weed growth.
- Components: A typical drip system includes a pressure regulator (e.g., Rain Bird PRV-10, ~$15), a filter (Rain Bird RBY filter, ~$20), main tubing (1/2-inch poly tubing, 100ft ~$25), smaller feeder lines (1/4-inch tubing), and emitters (0.5 GPH or 1 GPH per plant).
- Kits: For beginners, a starter kit like the Rain Bird Drip Irrigation Garden Kit (model DDI-KIT-1P, ~$40-$60) is excellent for a small garden. For larger setups, I use Netafim Techline CV Drip Line (500ft roll, ~$150-$200), which has pressure-compensating emitters built-in, ensuring even watering across long runs.
- Automation: For true self-sufficiency, consider a battery-powered timer (e.g., Orbit B-Hyve Bluetooth Hose Faucet Timer, ~$50) or a solar-powered timer connected to a small 12V pump.
- Solar-Powered Pumps: For lifting water from a well, pond, or large storage tank to your garden, a solar pump is a game-changer. For a smaller drip system, a Shurflo 2088-594-152 Diaphragm Pump (12V, 3.5 GPM, ~$180) can be powered by a single 100W solar panel (e.g., Renogy 100W Monocrystalline Solar Panel, ~$100) and a small 12V battery (e.g., a 50Ah LiFePO4 battery like the Battle Born 50Ah, ~$450). For larger operations or deeper wells, more robust systems are needed. If you’re looking to build out a comprehensive off-grid power system to support your garden’s water needs, or indeed your entire homestead, you might want to explore resources like the Power Grid Generator complete system guide to understand the full scope of what’s possible in terms of energy independence.
Step 5: Seed Selection & Planting
The choice of seeds is crucial for a truly self sufficient garden from scratch.
- Choose Heirloom & Open-Pollinated Seeds: These varieties produce seeds that will grow true to type, meaning you can save seeds from your harvest year after year. F1 hybrids, while often vigorous, will not produce consistent offspring from saved seeds. Reputable seed companies include Baker Creek Heirloom Seeds, High Mowing Organic Seeds, and Seed Savers Exchange. Start with common, reliable varieties like ‘Black Krim’ tomatoes, ‘Provider’ bush beans, ‘Waltham Butternut’ squash, and ‘Black Seeded Simpson’ lettuce.
- Start Seeds Indoors (Optional but Recommended): For longer growing seasons or specific crops, starting seeds indoors gives you a head start. Use seed-starting mix (e.g., Espoma Organic Seed Starter Mix, ~$10 for 16qt bag) in seed trays (Jiffy Professional Greenhouse 72-cell kit, ~$15). Provide adequate light with LED grow lights (Barrina T5 2ft 4-pack LED Grow Lights, 20W each, ~$50) for 14-16 hours a day, positioned 2-4 inches above seedlings. Maintain consistent temperatures (65-75°F for most).
- Direct Sowing vs. Transplanting: Some crops (carrots, radishes, beans, corn) prefer direct sowing into the garden bed. Others (tomatoes, peppers, broccoli, kale) benefit from being started indoors and transplanted. Follow seed packet instructions for planting depths (e.g., lettuce seeds are often surface-sown or planted 1/8 inch deep, while beans are 1 inch deep) and spacing.
- Companion Planting: Strategically plant different species together to enhance growth, deter pests, and attract beneficial insects. For example, planting marigolds near tomatoes can deter nematodes, and basil improves tomato flavor. Nasturtiums can act as a trap crop for aphids.
- Succession Planting: For a continuous harvest, plant small batches of quick-growing crops (lettuce, radishes, cilantro) every 2-3 weeks. As one crop finishes, another is ready to take its place.
Step 6: Pest & Disease Management (Organic)
Maintaining a self sufficient garden from scratch means embracing organic pest and disease control.
- Integrated Pest Management (IPM): This holistic approach combines several strategies.
- Observation: Regularly inspect your plants for early signs of pests or disease. Catching issues early is key.
- Physical Barriers: Use row covers (e.g., Agribon AG-19 floating row cover, 10×20 ft, ~$20) to protect young plants from insect pests like cabbage worms and squash bugs. Install fences (e.g., 2×4 welded wire mesh, 4 ft tall, 50 ft roll ~$70) to keep out deer, rabbits, and other larger animals.
- Hand-Picking: For larger pests like tomato hornworms or squash bugs, simply pick them off and drop them into a bucket of soapy water.
- Companion Planting: As mentioned, certain plants repel pests. Marigolds, garlic, and onions are excellent deterrents.
- Attract Beneficial Insects: Plant flowers like dill, fennel, cosmos, and sweet alyssum to attract ladybugs, lacewings, and parasitic wasps, which prey on common garden pests.
- Organic Sprays & Treatments:
- Neem Oil: An excellent broad-spectrum organic insecticide and fungicide. Bonide Neem Oil Concentrate (16oz, ~$20) can be mixed at a rate of 1-2 tbsp per gallon of water and sprayed on affected plants.
- Insecticidal Soap: Effective against soft-bodied insects like aphids, whiteflies, and spider mites. Garden Safe Insecticidal Soap (24oz ready-to-use, ~$10).
- Bacillus thuringiensis (Bt): A naturally occurring soil bacterium that targets caterpillars and worms. Monterey BT Worm & Caterpillar Killer (16oz, ~$18) is highly effective and safe for beneficial insects.
- Copper or Sulfur Sprays: For fungal diseases like powdery mildew or blight, organic copper (e.g., Bonide Copper Fungicide, ~$15 for 1lb) or sulfur (e.g., Safer Brand Garden Fungicide, ~$10 for 16oz) can be used as a last resort.
Step 7: Harvesting & Seed Saving
The culmination of your efforts is the harvest, and seed saving closes the loop on self-sufficiency.
- Harvesting Techniques:
- Timing: Harvest vegetables at their peak ripeness for best flavor and nutritional value. For example, green beans should snap cleanly, cucumbers should be firm, and tomatoes should be fully colored.
- Frequency: Many crops, like zucchini, cucumbers, and bush beans, produce more if harvested frequently. Pick daily or every other day.
- Tools: Use clean, sharp pruners (e.g., Corona ClassicCUT Bypass Pruner BP 3180, ~$30) or a sharp knife for clean cuts, minimizing damage to the plant.
- Seed Saving: This is where the « self-sufficient » aspect truly shines.
- Selection: Only save seeds from your healthiest, most vigorous plants that show desired traits (disease resistance, good flavor, high yield).
- Isolation: To ensure true-to-type seeds, prevent cross-pollination. This can be challenging for open-pollinated crops that readily cross (e.g., squash, corn). For beginners, focus on self-pollinating plants like beans, peas, lettuce, and tomatoes.
- Processing:
- Dry Seeds (Beans, Peas, Lettuce, Grains): Allow pods/seed heads to dry completely on the plant. Harvest, shell, and clean the seeds, removing chaff.
- Wet Seeds (Tomatoes, Cucumbers, Squash): For tomatoes, ferment the seeds in water for a few days to remove the gel coating and inhibit disease. For cucumbers/squash, scrape out seeds, wash thoroughly, and dry.
- Drying: Spread seeds thinly on screens or paper plates in a cool, dry, well-ventilated area for 1-4 weeks. Ensure they are bone-dry before storage. I aim for less than 8% moisture content.
- Storage: Store seeds in airtight containers (glass jars with desiccant packets work well) in a cool, dark, dry place (ideally 40-50°F and 30-40% humidity). Label clearly with variety and date. Properly stored seeds can remain viable for 3-10 years or more.
Step 8: Season Extension & Winterizing
Extend your harvest and protect your garden for the off-season to truly maximize your self sufficient garden from scratch.
- Cold Frames: Simple structures with a transparent top (glass, polycarbonate, or old windows) that sit over garden beds. They trap solar heat, allowing you to grow cold-hardy crops (lettuce, spinach, kale, radishes) well into winter or start seeds earlier in spring. A basic cold frame can be built from 2×6 lumber and a sheet of polycarbonate for under $100.
- Hoop Houses/Low Tunnels: Larger structures made from flexible hoops (PVC pipe or EMT conduit) covered with greenhouse plastic. These provide more space and greater temperature moderation. A 10×20 ft DIY low tunnel kit can cost $200-$500, while a larger, more robust hoop house kit might be $1,000-$3,000. I use a 6×12 ft low tunnel made from 1/2-inch PVC hoops and 6mil greenhouse plastic, which extends my lettuce and spinach harvest by at least
Step 4: Water Management & Irrigation
Efficient water management is critical for a self sufficient garden from scratch, especially in off-grid living where water resources might be limited.
- Rainwater Harvesting: This is my primary source of irrigation water. A 55-gallon rain barrel (e.g., EarthMark Rain Barrel, ~$120-$150) connected to a downspout can collect significant water. For larger needs, I use two 275-gallon IBC totes (Intermediate Bulk Containers, often available used for $100-$200 each from food-grade sources) connected in series. A 1,000 sq ft roof can collect approximately 620 gallons of water for every inch of rainfall. My 1,500 sq ft roof provides ample water for my 600 sq ft garden through multiple barrels and totes.
- Drip Irrigation: This is by far the most water-efficient method, delivering water directly to the plant’s root zone, minimizing evaporation and weed growth.
- Components: A typical drip system includes a pressure regulator (e.g., Rain Bird PRV-10, ~$15), a filter (Rain Bird RBY filter, ~$20), main tubing (1/2-inch poly tubing, 100ft ~$25), smaller feeder lines (1/4-inch tubing), and emitters (0.5 GPH or 1 GPH per plant).
- Kits: For beginners, a starter kit like the Rain Bird Drip Irrigation Garden Kit (model DDI-KIT-1P, ~$40-$60) is excellent for a small garden. For larger setups, I use Netafim Techline CV Drip Line (500ft roll, ~$150-$200), which has pressure-compensating emitters built-in, ensuring even watering across long runs.
- Automation: For true self-sufficiency, consider a battery-powered timer (e.g., Orbit B-Hyve Bluetooth Hose Faucet Timer, ~$50) or a solar-powered timer connected to a small 12V pump.
- Solar-Powered Pumps: For lifting water from a well, pond, or large storage tank to your garden, a solar pump is a game-changer. For a smaller drip system, a Shurflo 2088-594-152 Diaphragm Pump (12V, 3.5 GPM, ~$180) can be powered by a single 100W solar panel (e.g., Renogy 100W Monocrystalline Solar Panel, ~$100) and a small 12V battery (e.g., a 50Ah LiFePO4 battery like the Battle Born 50Ah, ~$450). For larger operations or deeper wells, more robust systems are needed. If you’re looking to build out a comprehensive off-grid power system to support your garden’s water needs, or indeed your entire homestead, you might want to explore resources like the Power Grid Generator complete system guide to understand the full scope of what’s possible in terms of energy independence.
Step 5: Seed Selection & Planting
The choice of seeds is crucial for a truly self sufficient garden from scratch.
- Choose Heirloom & Open-Pollinated Seeds: These varieties produce seeds that will grow true to type, meaning you can save seeds from your harvest year after year. F1 hybrids, while often vigorous, will not produce consistent offspring from saved seeds. Reputable seed companies include Baker Creek Heirloom Seeds, High Mowing Organic Seeds, and Seed Savers Exchange. Start with common, reliable varieties like ‘Black Krim’ tomatoes, ‘Provider’ bush beans, ‘Waltham Butternut’ squash, and ‘Black Seeded Simpson’ lettuce.
- Start Seeds Indoors (Optional but Recommended): For longer growing seasons or specific crops, starting seeds indoors gives you a head start. Use seed-starting mix (e.g., Espoma Organic Seed Starter Mix, ~$10 for 16qt bag) in seed trays (Jiffy Professional Greenhouse 72-cell kit, ~$15). Provide adequate light with LED grow lights (Barrina T5 2ft 4-pack LED Grow Lights, 20W each, ~$50) for 14-16 hours a day, positioned 2-4 inches above seedlings. Maintain consistent temperatures (65-75°F for most).
- Direct Sowing vs. Transplanting: Some crops (carrots, radishes, beans, corn) prefer direct sowing into the garden bed. Others (tomatoes, peppers, broccoli, kale) benefit from being started indoors and transplanted. Follow seed packet instructions for planting depths (e.g., lettuce seeds are often surface-sown or planted 1/8 inch deep, while beans are 1 inch deep) and spacing.
- Companion Planting: Strategically plant different species together to enhance growth, deter pests, and attract beneficial insects. For example, planting marigolds near tomatoes can deter nematodes, and basil improves tomato flavor. Nasturtiums can act as a trap crop for aphids.
- Succession Planting: For a continuous harvest, plant small batches of quick-growing crops (lettuce, radishes, cilantro) every 2-3 weeks. As one crop finishes, another is ready to take its place.
Step 6: Pest & Disease Management (Organic)
Maintaining a self sufficient garden from scratch means embracing organic pest and disease control.
- Integrated Pest Management (IPM): This holistic approach combines several strategies.
- Observation: Regularly inspect your plants for early signs of pests or disease. Catching issues early is key.
- Physical Barriers: Use row covers (e.g., Agribon AG-19 floating row cover, 10×20 ft, ~$20) to protect young plants from insect pests like cabbage worms and squash bugs. Install fences (e.g., 2×4 welded wire mesh, 4 ft tall, 50 ft roll ~$70) to keep out deer, rabbits, and other larger animals.
- Hand-Picking: For larger pests like tomato hornworms or squash bugs, simply pick them off and drop them into a bucket of soapy water.
- Companion Planting: As mentioned, certain plants repel pests. Marigolds, garlic, and onions are excellent deterrents.
- Attract Beneficial Insects: Plant flowers like dill, fennel, cosmos, and sweet alyssum to attract ladybugs, lacewings, and parasitic wasps, which prey on common garden pests.
- Organic Sprays & Treatments:
- Neem Oil: An excellent broad-spectrum organic insecticide and fungicide. Bonide Neem Oil Concentrate (16oz, ~$20) can be mixed at a rate of 1-2 tbsp per gallon of water and sprayed on affected plants.
- Insecticidal Soap: Effective against soft-bodied insects like aphids, whiteflies, and spider mites. Garden Safe Insecticidal Soap (24oz ready-to-use, ~$10).
- Bacillus thuringiensis (Bt): A naturally occurring soil bacterium that targets caterpillars and worms. Monterey BT Worm & Caterpillar Killer (16oz, ~$18) is highly effective and safe for beneficial insects.
- Copper or Sulfur Sprays: For fungal diseases like powdery mildew or blight, organic copper (e.g., Bonide Copper Fungicide, ~$15 for 1lb) or sulfur (e.g., Safer Brand Garden Fungicide, ~$10 for 16oz) can be used as a last resort.
Step 7: Harvesting & Seed Saving
The culmination of your efforts is the harvest, and seed saving closes the loop on self-sufficiency.
- Harvesting Techniques:
- Timing: Harvest vegetables at their peak ripeness for best flavor and nutritional value. For example, green beans should snap cleanly, cucumbers should be firm, and tomatoes should be fully colored.
- Frequency: Many crops, like zucchini, cucumbers, and bush beans, produce more if harvested frequently. Pick daily or every other day.
- Tools: Use clean, sharp pruners (e.g., Corona ClassicCUT Bypass Pruner BP 3180, ~$30) or a sharp knife for clean cuts, minimizing damage to the plant.
- Seed Saving: This is where the « self-sufficient » aspect truly shines.
- Selection: Only save seeds from your healthiest, most vigorous plants that show desired traits (disease resistance, good flavor, high yield).
- Isolation: To ensure true-to-type seeds, prevent cross-pollination. This can be challenging for open-pollinated crops that readily cross (e.g., squash, corn). For beginners, focus on self-pollinating plants like beans, peas, lettuce, and tomatoes.
- Processing:
- Dry Seeds (Beans, Peas, Lettuce, Grains): Allow pods/seed heads to dry completely on the plant. Harvest, shell, and clean the seeds, removing chaff.
- Wet Seeds (Tomatoes, Cucumbers, Squash): For tomatoes, ferment the seeds in water for a few days to remove the gel coating and inhibit disease. For cucumbers/squash, scrape out seeds, wash thoroughly, and dry.
- Drying: Spread seeds thinly on screens or paper plates in a cool, dry, well-ventilated area for 1-4 weeks. Ensure they are bone-dry before storage. I aim for less than 8% moisture content.
- Storage: Store seeds in airtight containers (glass jars with desiccant packets work well) in a cool, dark, dry place (ideally 40-50°F and 30-40% humidity). Label clearly with variety and date. Properly stored seeds can remain viable for 3-10 years or more.
Step 8: Season Extension & Winterizing
Extend your harvest and protect your garden for the off-season to truly maximize your self sufficient garden from scratch.
- Cold Frames: Simple structures with a transparent top (glass, polycarbonate, or old windows) that sit over garden beds. They trap solar heat, allowing you to grow cold-hardy crops (lettuce, spinach, kale, radishes) well into winter or start seeds earlier in spring. A basic cold frame can be built from 2×6 lumber and a sheet of polycarbonate for under $100.
- Hoop Houses/Low Tunnels: Larger structures made from flexible hoops (PVC pipe or EMT conduit) covered with greenhouse plastic. These provide more space and greater temperature moderation. A 10×20 ft DIY low tunnel kit can cost $200-$500, while a larger, more robust hoop house kit might be $1,000-$3,000. I use a 6×12 ft low tunnel made from 1/2-inch PVC hoops and 6mil greenhouse plastic, which extends my lettuce and spinach harvest by at least
- In-Ground Beds: If you have excellent native soil and good drainage, in-ground beds are the most economical. Double-digging (loosening soil two shovel depths) can significantly improve drainage and aeration. For my main garden, I primarily use in-ground beds, but I focus on building up the soil over time with consistent compost additions and cover cropping. I aim for beds that are no wider than 3-4 feet so I can reach the center without stepping on the soil, compacting it.
- Raised Beds: Raised beds offer numerous advantages, especially for poor soil, heavy clay, or rocky areas. They provide better drainage, warm up faster in spring, reduce compaction, and make weeding and harvesting easier on your back.
- Material Options:
- Untreated Cedar: Naturally rot-resistant and chemical-free. A 4×8 ft bed, 12 inches deep, typically requires three 2x12x8 ft cedar boards, costing around $50-$60 per board (total ~$150-$180) plus corner brackets or screws. My first raised beds were cedar and are still going strong after 7 years.
- Galvanized Steel: Durable, long-lasting, and aesthetically pleasing. Brands like Vego Garden offer modular kits. A Vego Garden 17″ Tall 8-in-1 Metal Raised Garden Bed (can be configured to 4×8 ft) costs approximately $250-$300.
- Concrete Blocks/Stones: Very durable but can leach minerals (though generally safe once weathered) and can be expensive.
- Recycled Materials: Pallets (check for chemical treatment stamps like « HT » for heat-treated), old tires (controversial due to potential chemical leaching).
- Filling Raised Beds: Don’t just fill with topsoil. Use a « Hugelkultur » approach (logs, branches, leaves, then compost, then topsoil) or a mixture of 60% good quality topsoil, 30% compost, and 10% perlite or vermiculite for drainage. A 4x8x1 ft raised bed requires about 32 cubic feet (or ~1.2 cubic yards) of soil mix, which can cost $100-$200 depending on your source.
- Material Options:
Step 4: Water Management & Irrigation
Efficient water management is critical for a self sufficient garden from scratch, especially in off-grid living where water resources might be limited.
- Rainwater Harvesting: This is my primary source of irrigation water. A 55-gallon rain barrel (e.g., EarthMark Rain Barrel, ~$120-$150) connected to a downspout can collect significant water. For larger needs, I use two 275-gallon IBC totes (Intermediate Bulk Containers, often available used for $100-$200 each from food-grade sources) connected in series. A 1,000 sq ft roof can collect approximately 620 gallons of water for every inch of rainfall. My 1,500 sq ft roof provides ample water for my 600 sq ft garden through multiple barrels and totes.
- Drip Irrigation: This is by far the most water-efficient method, delivering water directly to the plant’s root zone, minimizing evaporation and weed growth.
- Components: A typical drip system includes a pressure regulator (e.g., Rain Bird PRV-10, ~$15), a filter (Rain Bird RBY filter, ~$20), main tubing (1/2-inch poly tubing, 100ft ~$25), smaller feeder lines (1/4-inch tubing), and emitters (0.5 GPH or 1 GPH per plant).
- Kits: For beginners, a starter kit like the Rain Bird Drip Irrigation Garden Kit (model DDI-KIT-1P, ~$40-$60) is excellent for a small garden. For larger setups, I use Netafim Techline CV Drip Line (500ft roll, ~$150-$200), which has pressure-compensating emitters built-in, ensuring even watering across long runs.
- Automation: For true self-sufficiency, consider a battery-powered timer (e.g., Orbit B-Hyve Bluetooth Hose Faucet Timer, ~$50) or a solar-powered timer connected to a small 12V pump.
- Solar-Powered Pumps: For lifting water from a well, pond, or large storage tank to your garden, a solar pump is a game-changer. For a smaller drip system, a Shurflo 2088-594-152 Diaphragm Pump (12V, 3.5 GPM, ~$180) can be powered by a single 100W solar panel (e.g., Renogy 100W Monocrystalline Solar Panel, ~$100) and a small 12V battery (e.g., a 50Ah LiFePO4 battery like the Battle Born 50Ah, ~$450). For larger operations or deeper wells, more robust systems are needed. If you’re looking to build out a comprehensive off-grid power system to support your garden’s water needs, or indeed your entire homestead, you might want to explore resources like the Power Grid Generator complete system guide to understand the full scope of what’s possible in terms of energy independence.
Step 5: Seed Selection & Planting
The choice of seeds is crucial for a truly self sufficient garden from scratch.
- Choose Heirloom & Open-Pollinated Seeds: These varieties produce seeds that will grow true to type, meaning you can save seeds from your harvest year after year. F1 hybrids, while often vigorous, will not produce consistent offspring from saved seeds. Reputable seed companies include Baker Creek Heirloom Seeds, High Mowing Organic Seeds, and Seed Savers Exchange. Start with common, reliable varieties like ‘Black Krim’ tomatoes, ‘Provider’ bush beans, ‘Waltham Butternut’ squash, and ‘Black Seeded Simpson’ lettuce.
- Start Seeds Indoors (Optional but Recommended): For longer growing seasons or specific crops, starting seeds indoors gives you a head start. Use seed-starting mix (e.g., Espoma Organic Seed Starter Mix, ~$10 for 16qt bag) in seed trays (Jiffy Professional Greenhouse 72-cell kit, ~$15). Provide adequate light with LED grow lights (Barrina T5 2ft 4-pack LED Grow Lights, 20W each, ~$50) for 14-16 hours a day, positioned 2-4 inches above seedlings. Maintain consistent temperatures (65-75°F for most).
- Direct Sowing vs. Transplanting: Some crops (carrots, radishes, beans, corn) prefer direct sowing into the garden bed. Others (tomatoes, peppers, broccoli, kale) benefit from being started indoors and transplanted. Follow seed packet instructions for planting depths (e.g., lettuce seeds are often surface-sown or planted 1/8 inch deep, while beans are 1 inch deep) and spacing.
- Companion Planting: Strategically plant different species together to enhance growth, deter pests, and attract beneficial insects. For example, planting marigolds near tomatoes can deter nematodes, and basil improves tomato flavor. Nasturtiums can act as a trap crop for aphids.
- Succession Planting: For a continuous harvest, plant small batches of quick-growing crops (lettuce, radishes, cilantro) every 2-3 weeks. As one crop finishes, another is ready to take its place.
Step 6: Pest & Disease Management (Organic)
Maintaining a self sufficient garden from scratch means embracing organic pest and disease control.
- Integrated Pest Management (IPM): This holistic approach combines several strategies.
- Observation: Regularly inspect your plants for early signs of pests or disease. Catching issues early is key.
- Physical Barriers: Use row covers (e.g., Agribon AG-19 floating row cover, 10×20 ft, ~$20) to protect young plants from insect pests like cabbage worms and squash bugs. Install fences (e.g., 2×4 welded wire mesh, 4 ft tall, 50 ft roll ~$70) to keep out deer, rabbits, and other larger animals.
- Hand-Picking: For larger pests like tomato hornworms or squash bugs, simply pick them off and drop them into a bucket of soapy water.
- Companion Planting: As mentioned, certain plants repel pests. Marigolds, garlic, and onions are excellent deterrents.
- Attract Beneficial Insects: Plant flowers like dill, fennel, cosmos, and sweet alyssum to attract ladybugs, lacewings, and parasitic wasps, which prey on common garden pests.
- Organic Sprays & Treatments:
- Neem Oil: An excellent broad-spectrum organic insecticide and fungicide. Bonide Neem Oil Concentrate (16oz, ~$20) can be mixed at a rate of 1-2 tbsp per gallon of water and sprayed on affected plants.
- Insecticidal Soap: Effective against soft-bodied insects like aphids, whiteflies, and spider mites. Garden Safe Insecticidal Soap (24oz ready-to-use, ~$10).
- Bacillus thuringiensis (Bt): A naturally occurring soil bacterium that targets caterpillars and worms. Monterey BT Worm & Caterpillar Killer (16oz, ~$18) is highly effective and safe for beneficial insects.
- Copper or Sulfur Sprays: For fungal diseases like powdery mildew or blight, organic copper (e.g., Bonide Copper Fungicide, ~$15 for 1lb) or sulfur (e.g., Safer Brand Garden Fungicide, ~$10 for 16oz) can be used as a last resort.
Step 7: Harvesting & Seed Saving
The culmination of your efforts is the harvest, and seed saving closes the loop on self-sufficiency.
- Harvesting Techniques:
- Timing: Harvest vegetables at their peak ripeness for best flavor and nutritional value. For example, green beans should snap cleanly, cucumbers should be firm, and tomatoes should be fully colored.
- Frequency: Many crops, like zucchini, cucumbers, and bush beans, produce more if harvested frequently. Pick daily or every other day.
- Tools: Use clean, sharp pruners (e.g., Corona ClassicCUT Bypass Pruner BP 3180, ~$30) or a sharp knife for clean cuts, minimizing damage to the plant.
- Seed Saving: This is where the « self-sufficient » aspect truly shines.
- Selection: Only save seeds from your healthiest, most vigorous plants that show desired traits (disease resistance, good flavor, high yield).
- Isolation: To ensure true-to-type seeds, prevent cross-pollination. This can be challenging for open-pollinated crops that readily cross (e.g., squash, corn). For beginners, focus on self-pollinating plants like beans, peas, lettuce, and tomatoes.
- Processing:
- Dry Seeds (Beans, Peas, Lettuce, Grains): Allow pods/seed heads to dry completely on the plant. Harvest, shell, and clean the seeds, removing chaff.
- Wet Seeds (Tomatoes, Cucumbers, Squash): For tomatoes, ferment the seeds in water for a few days to remove the gel coating and inhibit disease. For cucumbers/squash, scrape out seeds, wash thoroughly, and dry.
- Drying: Spread seeds thinly on screens or paper plates in a cool, dry, well-ventilated area for 1-4 weeks. Ensure they are bone-dry before storage. I aim for less than 8% moisture content.
- Storage: Store seeds in airtight containers (glass jars with desiccant packets work well) in a cool, dark, dry place (ideally 40-50°F and 30-40% humidity). Label clearly with variety and date. Properly stored seeds can remain viable for 3-10 years or more.
Step 8: Season Extension & Winterizing
Extend your harvest and protect your garden for the off-season to truly maximize your self sufficient garden from scratch.
- Cold Frames: Simple structures with a transparent top (glass, polycarbonate, or old windows) that sit over garden beds. They trap solar heat, allowing you to grow cold-hardy crops (lettuce, spinach, kale, radishes) well into winter or start seeds earlier in spring. A basic cold frame can be built from 2×6 lumber and a sheet of polycarbonate for under $100.
- Hoop Houses/Low Tunnels: Larger structures made from flexible hoops (PVC pipe or EMT conduit) covered with greenhouse plastic. These provide more space and greater temperature moderation. A 10×20 ft DIY low tunnel kit can cost $200-$500, while a larger, more robust hoop house kit might be $1,000-$3,000. I use a 6×12 ft low tunnel made from 1/2-inch PVC hoops and 6mil greenhouse plastic, which extends my lettuce and spinach harvest by at least
Deciding between raised beds and in-ground beds depends on your soil, budget, and physical capabilities.
- In-Ground Beds: If you have excellent native soil and good drainage, in-ground beds are the most economical. Double-digging (loosening soil two shovel depths) can significantly improve drainage and aeration. For my main garden, I primarily use in-ground beds, but I focus on building up the soil over time with consistent compost additions and cover cropping. I aim for beds that are no wider than 3-4 feet so I can reach the center without stepping on the soil, compacting it.
- Raised Beds: Raised beds offer numerous advantages, especially for poor soil, heavy clay, or rocky areas. They provide better drainage, warm up faster in spring, reduce compaction, and make weeding and harvesting easier on your back.
- Material Options:
- Untreated Cedar: Naturally rot-resistant and chemical-free. A 4×8 ft bed, 12 inches deep, typically requires three 2x12x8 ft cedar boards, costing around $50-$60 per board (total ~$150-$180) plus corner brackets or screws. My first raised beds were cedar and are still going strong after 7 years.
- Galvanized Steel: Durable, long-lasting, and aesthetically pleasing. Brands like Vego Garden offer modular kits. A Vego Garden 17″ Tall 8-in-1 Metal Raised Garden Bed (can be configured to 4×8 ft) costs approximately $250-$300.
- Concrete Blocks/Stones: Very durable but can leach minerals (though generally safe once weathered) and can be expensive.
- Recycled Materials: Pallets (check for chemical treatment stamps like « HT » for heat-treated), old tires (controversial due to potential chemical leaching).
- Filling Raised Beds: Don’t just fill with topsoil. Use a « Hugelkultur » approach (logs, branches, leaves, then compost, then topsoil) or a mixture of 60% good quality topsoil, 30% compost, and 10% perlite or vermiculite for drainage. A 4x8x1 ft raised bed requires about 32 cubic feet (or ~1.2 cubic yards) of soil mix, which can cost $100-$200 depending on your source.
- Material Options:
Step 4: Water Management & Irrigation
Efficient water management is critical for a self sufficient garden from scratch, especially in off-grid living where water resources might be limited.
- Rainwater Harvesting: This is my primary source of irrigation water. A 55-gallon rain barrel (e.g., EarthMark Rain Barrel, ~$120-$150) connected to a downspout can collect significant water. For larger needs, I use two 275-gallon IBC totes (Intermediate Bulk Containers, often available used for $100-$200 each from food-grade sources) connected in series. A 1,000 sq ft roof can collect approximately 620 gallons of water for every inch of rainfall. My 1,500 sq ft roof provides ample water for my 600 sq ft garden through multiple barrels and totes.
- Drip Irrigation: This is by far the most water-efficient method, delivering water directly to the plant’s root zone, minimizing evaporation and weed growth.
- Components: A typical drip system includes a pressure regulator (e.g., Rain Bird PRV-10, ~$15), a filter (Rain Bird RBY filter, ~$20), main tubing (1/2-inch poly tubing, 100ft ~$25), smaller feeder lines (1/4-inch tubing), and emitters (0.5 GPH or 1 GPH per plant).
- Kits: For beginners, a starter kit like the Rain Bird Drip Irrigation Garden Kit (model DDI-KIT-1P, ~$40-$60) is excellent for a small garden. For larger setups, I use Netafim Techline CV Drip Line (500ft roll, ~$150-$200), which has pressure-compensating emitters built-in, ensuring even watering across long runs.
- Automation: For true self-sufficiency, consider a battery-powered timer (e.g., Orbit B-Hyve Bluetooth Hose Faucet Timer, ~$50) or a solar-powered timer connected to a small 12V pump.
- Solar-Powered Pumps: For lifting water from a well, pond, or large storage tank to your garden, a solar pump is a game-changer. For a smaller drip system, a Shurflo 2088-594-152 Diaphragm Pump (12V, 3.5 GPM, ~$180) can be powered by a single 100W solar panel (e.g., Renogy 100W Monocrystalline Solar Panel, ~$100) and a small 12V battery (e.g., a 50Ah LiFePO4 battery like the Battle Born 50Ah, ~$450). For larger operations or deeper wells, more robust systems are needed. If you’re looking to build out a comprehensive off-grid power system to support your garden’s water needs, or indeed your entire homestead, you might want to explore resources like the Power Grid Generator complete system guide to understand the full scope of what’s possible in terms of energy independence.
Step 5: Seed Selection & Planting
The choice of seeds is crucial for a truly self sufficient garden from scratch.
- Choose Heirloom & Open-Pollinated Seeds: These varieties produce seeds that will grow true to type, meaning you can save seeds from your harvest year after year. F1 hybrids, while often vigorous, will not produce consistent offspring from saved seeds. Reputable seed companies include Baker Creek Heirloom Seeds, High Mowing Organic Seeds, and Seed Savers Exchange. Start with common, reliable varieties like ‘Black Krim’ tomatoes, ‘Provider’ bush beans, ‘Waltham Butternut’ squash, and ‘Black Seeded Simpson’ lettuce.
- Start Seeds Indoors (Optional but Recommended): For longer growing seasons or specific crops, starting seeds indoors gives you a head start. Use seed-starting mix (e.g., Espoma Organic Seed Starter Mix, ~$10 for 16qt bag) in seed trays (Jiffy Professional Greenhouse 72-cell kit, ~$15). Provide adequate light with LED grow lights (Barrina T5 2ft 4-pack LED Grow Lights, 20W each, ~$50) for 14-16 hours a day, positioned 2-4 inches above seedlings. Maintain consistent temperatures (65-75°F for most).
- Direct Sowing vs. Transplanting: Some crops (carrots, radishes, beans, corn) prefer direct sowing into the garden bed. Others (tomatoes, peppers, broccoli, kale) benefit from being started indoors and transplanted. Follow seed packet instructions for planting depths (e.g., lettuce seeds are often surface-sown or planted 1/8 inch deep, while beans are 1 inch deep) and spacing.
- Companion Planting: Strategically plant different species together to enhance growth, deter pests, and attract beneficial insects. For example, planting marigolds near tomatoes can deter nematodes, and basil improves tomato flavor. Nasturtiums can act as a trap crop for aphids.
- Succession Planting: For a continuous harvest, plant small batches of quick-growing crops (lettuce, radishes, cilantro) every 2-3 weeks. As one crop finishes, another is ready to take its place.
Step 6: Pest & Disease Management (Organic)
Maintaining a self sufficient garden from scratch means embracing organic pest and disease control.
- Integrated Pest Management (IPM): This holistic approach combines several strategies.
- Observation: Regularly inspect your plants for early signs of pests or disease. Catching issues early is key.
- Physical Barriers: Use row covers (e.g., Agribon AG-19 floating row cover, 10×20 ft, ~$20) to protect young plants from insect pests like cabbage worms and squash bugs. Install fences (e.g., 2×4 welded wire mesh, 4 ft tall, 50 ft roll ~$70) to keep out deer, rabbits, and other larger animals.
- Hand-Picking: For larger pests like tomato hornworms or squash bugs, simply pick them off and drop them into a bucket of soapy water.
- Companion Planting: As mentioned, certain plants repel pests. Marigolds, garlic, and onions are excellent deterrents.
- Attract Beneficial Insects: Plant flowers like dill, fennel, cosmos, and sweet alyssum to attract ladybugs, lacewings, and parasitic wasps, which prey on common garden pests.
- Organic Sprays & Treatments:
- Neem Oil: An excellent broad-spectrum organic insecticide and fungicide. Bonide Neem Oil Concentrate (16oz, ~$20) can be mixed at a rate of 1-2 tbsp per gallon of water and sprayed on affected plants.
- Insecticidal Soap: Effective against soft-bodied insects like aphids, whiteflies, and spider mites. Garden Safe Insecticidal Soap (24oz ready-to-use, ~$10).
- Bacillus thuringiensis (Bt): A naturally occurring soil bacterium that targets caterpillars and worms. Monterey BT Worm & Caterpillar Killer (16oz, ~$18) is highly effective and safe for beneficial insects.
- Copper or Sulfur Sprays: For fungal diseases like powdery mildew or blight, organic copper (e.g., Bonide Copper Fungicide, ~$15 for 1lb) or sulfur (e.g., Safer Brand Garden Fungicide, ~$10 for 16oz) can be used as a last resort.
Step 7: Harvesting & Seed Saving
The culmination of your efforts is the harvest, and seed saving closes the loop on self-sufficiency.
- Harvesting Techniques:
- Timing: Harvest vegetables at their peak ripeness for best flavor and nutritional value. For example, green beans should snap cleanly, cucumbers should be firm, and tomatoes should be fully colored.
- Frequency: Many crops, like zucchini, cucumbers, and bush beans, produce more if harvested frequently. Pick daily or every other day.
- Tools: Use clean, sharp pruners (e.g., Corona ClassicCUT Bypass Pruner BP 3180, ~$30) or a sharp knife for clean cuts, minimizing damage to the plant.
- Seed Saving: This is where the « self-sufficient » aspect truly shines.
- Selection: Only save seeds from your healthiest, most vigorous plants that show desired traits (disease resistance, good flavor, high yield).
- Isolation: To ensure true-to-type seeds, prevent cross-pollination. This can be challenging for open-pollinated crops that readily cross (e.g., squash, corn). For beginners, focus on self-pollinating plants like beans, peas, lettuce, and tomatoes.
- Processing:
- Dry Seeds (Beans, Peas, Lettuce, Grains): Allow pods/seed heads to dry completely on the plant. Harvest, shell, and clean the seeds, removing chaff.
- Wet Seeds (Tomatoes, Cucumbers, Squash): For tomatoes, ferment the seeds in water for a few days to remove the gel coating and inhibit disease. For cucumbers/squash, scrape out seeds, wash thoroughly, and dry.
- Drying: Spread seeds thinly on screens or paper plates in a cool, dry, well-ventilated area for 1-4 weeks. Ensure they are bone-dry before storage. I aim for less than 8% moisture content.
- Storage: Store seeds in airtight containers (glass jars with desiccant packets work well) in a cool, dark, dry place (ideally 40-50°F and 30-40% humidity). Label clearly with variety and date. Properly stored seeds can remain viable for 3-10 years or more.
Step 8: Season Extension & Winterizing
Extend your harvest and protect your garden for the off-season to truly maximize your self sufficient garden from scratch.
- Cold Frames: Simple structures with a transparent top (glass, polycarbonate, or old windows) that sit over garden beds. They trap solar heat, allowing you to grow cold-hardy crops (lettuce, spinach, kale, radishes) well into winter or start seeds earlier in spring. A basic cold frame can be built from 2×6 lumber and a sheet of polycarbonate for under $100.
- Hoop Houses/Low Tunnels: Larger structures made from flexible hoops (PVC pipe or EMT conduit) covered with greenhouse plastic. These provide more space and greater temperature moderation. A 10×20 ft DIY low tunnel kit can cost $200-$500, while a larger, more robust hoop house kit might be $1,000-$3,000. I use a 6×12 ft low tunnel made from 1/2-inch PVC hoops and 6mil greenhouse plastic, which extends my lettuce and spinach harvest by at least
Healthy soil is the bedrock of a productive, self-sufficient garden. You can’t guess what your soil needs; you have to test it.
- Perform a Soil Test: A professional soil test will give you precise data on your soil’s pH, nutrient levels (N-P-K), and organic matter content. I recommend sending a sample to your local agricultural extension office; it typically costs $20-$50 and provides detailed recommendations. Alternatively, for a quick homeowner check, a Rapitest Soil Test Kit (40-test kit, model 1663, ~$20 on Amazon) provides a good baseline for pH, Nitrogen, Phosphorus, and Potash. Aim for a pH between 6.0 and 7.0 for most vegetables.
- Amend for pH Imbalance: If your soil is too acidic (below 6.0), add agricultural lime (dolomitic lime adds magnesium, calcitic lime adds calcium). Apply 5-10 lbs per 100 sq ft for a moderate adjustment. If it’s too alkaline (above 7.0), add elemental sulfur (e.g., Espoma Soil Acidifier, ~$15 for 6.75 lbs) or generous amounts of organic matter like peat moss or pine needles.
- Build Organic Matter: This is the single most important step for long-term soil health. Organic matter improves soil structure, water retention, drainage, and nutrient availability. Incorporate 2-4 inches of high-quality compost into your top 6-12 inches of soil annually. I make my own compost from kitchen scraps, garden waste, and shredded leaves, but you can purchase it. Local nurseries often sell bulk compost for $30-$50 per cubic yard. Aged manure (from chickens, cows, or horses – ensure it’s well-rotted to avoid burning plants) is also excellent.
- Address Nutrient Deficiencies: Based on your soil test, add specific organic amendments. If Nitrogen (N) is low, add blood meal (12-0-0, ~$20 for 3 lbs) or feather meal. For Phosphorus (P), use bone meal (3-15-0, ~$15 for 3 lbs) or rock phosphate. For Potassium (K), greensand (0-0-2.5, ~$25 for 5 lbs) or kelp meal are good choices. I rely heavily on Espoma Organic Garden-tone (5-3-3, ~$25 for an 8lb bag) as a balanced, all-purpose organic fertilizer during planting.
Step 3: Garden Bed Preparation
Deciding between raised beds and in-ground beds depends on your soil, budget, and physical capabilities.
- In-Ground Beds: If you have excellent native soil and good drainage, in-ground beds are the most economical. Double-digging (loosening soil two shovel depths) can significantly improve drainage and aeration. For my main garden, I primarily use in-ground beds, but I focus on building up the soil over time with consistent compost additions and cover cropping. I aim for beds that are no wider than 3-4 feet so I can reach the center without stepping on the soil, compacting it.
- Raised Beds: Raised beds offer numerous advantages, especially for poor soil, heavy clay, or rocky areas. They provide better drainage, warm up faster in spring, reduce compaction, and make weeding and harvesting easier on your back.
- Material Options:
- Untreated Cedar: Naturally rot-resistant and chemical-free. A 4×8 ft bed, 12 inches deep, typically requires three 2x12x8 ft cedar boards, costing around $50-$60 per board (total ~$150-$180) plus corner brackets or screws. My first raised beds were cedar and are still going strong after 7 years.
- Galvanized Steel: Durable, long-lasting, and aesthetically pleasing. Brands like Vego Garden offer modular kits. A Vego Garden 17″ Tall 8-in-1 Metal Raised Garden Bed (can be configured to 4×8 ft) costs approximately $250-$300.
- Concrete Blocks/Stones: Very durable but can leach minerals (though generally safe once weathered) and can be expensive.
- Recycled Materials: Pallets (check for chemical treatment stamps like « HT » for heat-treated), old tires (controversial due to potential chemical leaching).
- Filling Raised Beds: Don’t just fill with topsoil. Use a « Hugelkultur » approach (logs, branches, leaves, then compost, then topsoil) or a mixture of 60% good quality topsoil, 30% compost, and 10% perlite or vermiculite for drainage. A 4x8x1 ft raised bed requires about 32 cubic feet (or ~1.2 cubic yards) of soil mix, which can cost $100-$200 depending on your source.
- Material Options:
Step 4: Water Management & Irrigation
Efficient water management is critical for a self sufficient garden from scratch, especially in off-grid living where water resources might be limited.
- Rainwater Harvesting: This is my primary source of irrigation water. A 55-gallon rain barrel (e.g., EarthMark Rain Barrel, ~$120-$150) connected to a downspout can collect significant water. For larger needs, I use two 275-gallon IBC totes (Intermediate Bulk Containers, often available used for $100-$200 each from food-grade sources) connected in series. A 1,000 sq ft roof can collect approximately 620 gallons of water for every inch of rainfall. My 1,500 sq ft roof provides ample water for my 600 sq ft garden through multiple barrels and totes.
- Drip Irrigation: This is by far the most water-efficient method, delivering water directly to the plant’s root zone, minimizing evaporation and weed growth.
- Components: A typical drip system includes a pressure regulator (e.g., Rain Bird PRV-10, ~$15), a filter (Rain Bird RBY filter, ~$20), main tubing (1/2-inch poly tubing, 100ft ~$25), smaller feeder lines (1/4-inch tubing), and emitters (0.5 GPH or 1 GPH per plant).
- Kits: For beginners, a starter kit like the Rain Bird Drip Irrigation Garden Kit (model DDI-KIT-1P, ~$40-$60) is excellent for a small garden. For larger setups, I use Netafim Techline CV Drip Line (500ft roll, ~$150-$200), which has pressure-compensating emitters built-in, ensuring even watering across long runs.
- Automation: For true self-sufficiency, consider a battery-powered timer (e.g., Orbit B-Hyve Bluetooth Hose Faucet Timer, ~$50) or a solar-powered timer connected to a small 12V pump.
- Solar-Powered Pumps: For lifting water from a well, pond, or large storage tank to your garden, a solar pump is a game-changer. For a smaller drip system, a Shurflo 2088-594-152 Diaphragm Pump (12V, 3.5 GPM, ~$180) can be powered by a single 100W solar panel (e.g., Renogy 100W Monocrystalline Solar Panel, ~$100) and a small 12V battery (e.g., a 50Ah LiFePO4 battery like the Battle Born 50Ah, ~$450). For larger operations or deeper wells, more robust systems are needed. If you’re looking to build out a comprehensive off-grid power system to support your garden’s water needs, or indeed your entire homestead, you might want to explore resources like the Power Grid Generator complete system guide to understand the full scope of what’s possible in terms of energy independence.
Step 5: Seed Selection & Planting
The choice of seeds is crucial for a truly self sufficient garden from scratch.
- Choose Heirloom & Open-Pollinated Seeds: These varieties produce seeds that will grow true to type, meaning you can save seeds from your harvest year after year. F1 hybrids, while often vigorous, will not produce consistent offspring from saved seeds. Reputable seed companies include Baker Creek Heirloom Seeds, High Mowing Organic Seeds, and Seed Savers Exchange. Start with common, reliable varieties like ‘Black Krim’ tomatoes, ‘Provider’ bush beans, ‘Waltham Butternut’ squash, and ‘Black Seeded Simpson’ lettuce.
- Start Seeds Indoors (Optional but Recommended): For longer growing seasons or specific crops, starting seeds indoors gives you a head start. Use seed-starting mix (e.g., Espoma Organic Seed Starter Mix, ~$10 for 16qt bag) in seed trays (Jiffy Professional Greenhouse 72-cell kit, ~$15). Provide adequate light with LED grow lights (Barrina T5 2ft 4-pack LED Grow Lights, 20W each, ~$50) for 14-16 hours a day, positioned 2-4 inches above seedlings. Maintain consistent temperatures (65-75°F for most).
- Direct Sowing vs. Transplanting: Some crops (carrots, radishes, beans, corn) prefer direct sowing into the garden bed. Others (tomatoes, peppers, broccoli, kale) benefit from being started indoors and transplanted. Follow seed packet instructions for planting depths (e.g., lettuce seeds are often surface-sown or planted 1/8 inch deep, while beans are 1 inch deep) and spacing.
- Companion Planting: Strategically plant different species together to enhance growth, deter pests, and attract beneficial insects. For example, planting marigolds near tomatoes can deter nematodes, and basil improves tomato flavor. Nasturtiums can act as a trap crop for aphids.
- Succession Planting: For a continuous harvest, plant small batches of quick-growing crops (lettuce, radishes, cilantro) every 2-3 weeks. As one crop finishes, another is ready to take its place.
Step 6: Pest & Disease Management (Organic)
Maintaining a self sufficient garden from scratch means embracing organic pest and disease control.
- Integrated Pest Management (IPM): This holistic approach combines several strategies.
- Observation: Regularly inspect your plants for early signs of pests or disease. Catching issues early is key.
- Physical Barriers: Use row covers (e.g., Agribon AG-19 floating row cover, 10×20 ft, ~$20) to protect young plants from insect pests like cabbage worms and squash bugs. Install fences (e.g., 2×4 welded wire mesh, 4 ft tall, 50 ft roll ~$70) to keep out deer, rabbits, and other larger animals.
- Hand-Picking: For larger pests like tomato hornworms or squash bugs, simply pick them off and drop them into a bucket of soapy water.
- Companion Planting: As mentioned, certain plants repel pests. Marigolds, garlic, and onions are excellent deterrents.
- Attract Beneficial Insects: Plant flowers like dill, fennel, cosmos, and sweet alyssum to attract ladybugs, lacewings, and parasitic wasps, which prey on common garden pests.
- Organic Sprays & Treatments:
- Neem Oil: An excellent broad-spectrum organic insecticide and fungicide. Bonide Neem Oil Concentrate (16oz, ~$20) can be mixed at a rate of 1-2 tbsp per gallon of water and sprayed on affected plants.
- Insecticidal Soap: Effective against soft-bodied insects like aphids, whiteflies, and spider mites. Garden Safe Insecticidal Soap (24oz ready-to-use, ~$10).
- Bacillus thuringiensis (Bt): A naturally occurring soil bacterium that targets caterpillars and worms. Monterey BT Worm & Caterpillar Killer (16oz, ~$18) is highly effective and safe for beneficial insects.
- Copper or Sulfur Sprays: For fungal diseases like powdery mildew or blight, organic copper (e.g., Bonide Copper Fungicide, ~$15 for 1lb) or sulfur (e.g., Safer Brand Garden Fungicide, ~$10 for 16oz) can be used as a last resort.
Step 7: Harvesting & Seed Saving
The culmination of your efforts is the harvest, and seed saving closes the loop on self-sufficiency.
- Harvesting Techniques:
- Timing: Harvest vegetables at their peak ripeness for best flavor and nutritional value. For example, green beans should snap cleanly, cucumbers should be firm, and tomatoes should be fully colored.
- Frequency: Many crops, like zucchini, cucumbers, and bush beans, produce more if harvested frequently. Pick daily or every other day.
- Tools: Use clean, sharp pruners (e.g., Corona ClassicCUT Bypass Pruner BP 3180, ~$30) or a sharp knife for clean cuts, minimizing damage to the plant.
- Seed Saving: This is where the « self-sufficient » aspect truly shines.
- Selection: Only save seeds from your healthiest, most vigorous plants that show desired traits (disease resistance, good flavor, high yield).
- Isolation: To ensure true-to-type seeds, prevent cross-pollination. This can be challenging for open-pollinated crops that readily cross (e.g., squash, corn). For beginners, focus on self-pollinating plants like beans, peas, lettuce, and tomatoes.
- Processing:
- Dry Seeds (Beans, Peas, Lettuce, Grains): Allow pods/seed heads to dry completely on the plant. Harvest, shell, and clean the seeds, removing chaff.
- Wet Seeds (Tomatoes, Cucumbers, Squash): For tomatoes, ferment the seeds in water for a few days to remove the gel coating and inhibit disease. For cucumbers/squash, scrape out seeds, wash thoroughly, and dry.
- Drying: Spread seeds thinly on screens or paper plates in a cool, dry, well-ventilated area for 1-4 weeks. Ensure they are bone-dry before storage. I aim for less than 8% moisture content.
- Storage: Store seeds in airtight containers (glass jars with desiccant packets work well) in a cool, dark, dry place (ideally 40-50°F and 30-40% humidity). Label clearly with variety and date. Properly stored seeds can remain viable for 3-10 years or more.
Step 8: Season Extension & Winterizing
Extend your harvest and protect your garden for the off-season to truly maximize your self sufficient garden from scratch.
- Cold Frames: Simple structures with a transparent top (glass, polycarbonate, or old windows) that sit over garden beds. They trap solar heat, allowing you to grow cold-hardy crops (lettuce, spinach, kale, radishes) well into winter or start seeds earlier in spring. A basic cold frame can be built from 2×6 lumber and a sheet of polycarbonate for under $100.
- Hoop Houses/Low Tunnels: Larger structures made from flexible hoops (PVC pipe or EMT conduit) covered with greenhouse plastic. These provide more space and greater temperature moderation. A 10×20 ft DIY low tunnel kit can cost $200-$500, while a larger, more robust hoop house kit might be $1,000-$3,000. I use a 6×12 ft low tunnel made from 1/2-inch PVC hoops and 6mil greenhouse plastic, which extends my lettuce and spinach harvest by at least
- Choose Heirloom & Open-Pollinated Seeds: These varieties produce seeds that will grow true to type, meaning you can save seeds from your harvest year after year. F1 hybrids, while often vigorous, will not produce consistent offspring from saved seeds. Reputable seed companies include Baker Creek Heirloom Seeds, High Mowing Organic Seeds, and Seed Savers Exchange. Start with common, reliable varieties like ‘Black Krim’ tomatoes, ‘Provider’ bush beans, ‘Waltham Butternut’ squash, and ‘Black Seeded Simpson’ lettuce.
- Start Seeds Indoors (Optional but Recommended): For longer growing seasons or specific crops, starting seeds indoors gives you a head start. Use seed-starting mix (e.g., Espoma Organic Seed Starter Mix, ~$10 for 16qt bag) in seed trays (Jiffy Professional Greenhouse 72-cell kit, ~$15). Provide adequate light with LED grow lights (Barrina T5 2ft 4-pack LED Grow Lights, 20W each, ~$50) for 14-16 hours a day, positioned 2-4 inches above seedlings. Maintain consistent temperatures (65-75°F for most).
- Direct Sowing vs. Transplanting: Some crops (carrots, radishes, beans, corn) prefer direct sowing into the garden bed. Others (tomatoes, peppers, broccoli, kale) benefit from being started indoors and transplanted. Follow seed packet instructions for planting depths (e.g., lettuce seeds are often surface-sown or planted 1/8 inch deep, while beans are 1 inch deep) and spacing.
- Companion Planting: Strategically plant different species together to enhance growth, deter pests, and attract beneficial insects. For example, planting marigolds near tomatoes can deter nematodes, and basil improves tomato flavor. Nasturtiums can act as a trap crop for aphids.
- Succession Planting: For a continuous harvest, plant small batches of quick-growing crops (lettuce, radishes, cilantro) every 2-3 weeks. As one crop finishes, another is ready to take its place.
Step 6: Pest & Disease Management (Organic)
Maintaining a self sufficient garden from scratch means embracing organic pest and disease control.
- Integrated Pest Management (IPM): This holistic approach combines several strategies.
- Observation: Regularly inspect your plants for early signs of pests or disease. Catching issues early is key.
- Physical Barriers: Use row covers (e.g., Agribon AG-19 floating row cover, 10×20 ft, ~$20) to protect young plants from insect pests like cabbage worms and squash bugs. Install fences (e.g., 2×4 welded wire mesh, 4 ft tall, 50 ft roll ~$70) to keep out deer, rabbits, and other larger animals.
- Hand-Picking: For larger pests like tomato hornworms or squash bugs, simply pick them off and drop them into a bucket of soapy water.
- Companion Planting: As mentioned, certain plants repel pests. Marigolds, garlic, and onions are excellent deterrents.
- Attract Beneficial Insects: Plant flowers like dill, fennel, cosmos, and sweet alyssum to attract ladybugs, lacewings, and parasitic wasps, which prey on common garden pests.
- Organic Sprays & Treatments:
- Neem Oil: An excellent broad-spectrum organic insecticide and fungicide. Bonide Neem Oil Concentrate (16oz, ~$20) can be mixed at a rate of 1-2 tbsp per gallon of water and sprayed on affected plants.
- Insecticidal Soap: Effective against soft-bodied insects like aphids, whiteflies, and spider mites. Garden Safe Insecticidal Soap (24oz ready-to-use, ~$10).
- Bacillus thuringiensis (Bt): A naturally occurring soil bacterium that targets caterpillars and worms. Monterey BT Worm & Caterpillar Killer (16oz, ~$18) is highly effective and safe for beneficial insects.
- Copper or Sulfur Sprays: For fungal diseases like powdery mildew or blight, organic copper (e.g., Bonide Copper Fungicide, ~$15 for 1lb) or sulfur (e.g., Safer Brand Garden Fungicide, ~$10 for 16oz) can be used as a last resort.
Step 7: Harvesting & Seed Saving
The culmination of your efforts is the harvest, and seed saving closes the loop on self-sufficiency.
- Harvesting Techniques:
- Timing: Harvest vegetables at their peak ripeness for best flavor and nutritional value. For example, green beans should snap cleanly, cucumbers should be firm, and tomatoes should be fully colored.
- Frequency: Many crops, like zucchini, cucumbers, and bush beans, produce more if harvested frequently. Pick daily or every other day.
- Tools: Use clean, sharp pruners (e.g., Corona ClassicCUT Bypass Pruner BP 3180, ~$30) or a sharp knife for clean cuts, minimizing damage to the plant.
- Seed Saving: This is where the « self-sufficient » aspect truly shines.
- Selection: Only save seeds from your healthiest, most vigorous plants that show desired traits (disease resistance, good flavor, high yield).
- Isolation: To ensure true-to-type seeds, prevent cross-pollination. This can be challenging for open-pollinated crops that readily cross (e.g., squash, corn). For beginners, focus on self-pollinating plants like beans, peas, lettuce, and tomatoes.
- Processing:
- Dry Seeds (Beans, Peas, Lettuce, Grains): Allow pods/seed heads to dry completely on the plant. Harvest, shell, and clean the seeds, removing chaff.
- Wet Seeds (Tomatoes, Cucumbers, Squash): For tomatoes, ferment the seeds in water for a few days to remove the gel coating and inhibit disease. For cucumbers/squash, scrape out seeds, wash thoroughly, and dry.
- Drying: Spread seeds thinly on screens or paper plates in a cool, dry, well-ventilated area for 1-4 weeks. Ensure they are bone-dry before storage. I aim for less than 8% moisture content.
- Storage: Store seeds in airtight containers (glass jars with desiccant packets work well) in a cool, dark, dry place (ideally 40-50°F and 30-40% humidity). Label clearly with variety and date. Properly stored seeds can remain viable for 3-10 years or more.
Step 8: Season Extension & Winterizing
Extend your harvest and protect your garden for the off-season to truly maximize your self sufficient garden from scratch.
- Cold Frames: Simple structures with a transparent top (glass, polycarbonate, or old windows) that sit over garden beds. They trap solar heat, allowing you to grow cold-hardy crops (lettuce, spinach, kale, radishes) well into winter or start seeds earlier in spring. A basic cold frame can be built from 2×6 lumber and a sheet of polycarbonate for under $100.
- Hoop Houses/Low Tunnels: Larger structures made from flexible hoops (PVC pipe or EMT conduit) covered with greenhouse plastic. These provide more space and greater temperature moderation. A 10×20 ft DIY low tunnel kit can cost $200-$500, while a larger, more robust hoop house kit might be $1,000-$3,000. I use a 6×12 ft low tunnel made from 1/2-inch PVC hoops and 6mil greenhouse plastic, which extends my lettuce and spinach harvest by at least
Step 5: Seed Selection & Planting
The choice of seeds is crucial for a truly self sufficient garden from scratch.
- Choose Heirloom & Open-Pollinated Seeds: These varieties produce seeds that will grow true to type, meaning you can save seeds from your harvest year after year. F1 hybrids, while often vigorous, will not produce consistent offspring from saved seeds. Reputable seed companies include Baker Creek Heirloom Seeds, High Mowing Organic Seeds, and Seed Savers Exchange. Start with common, reliable varieties like ‘Black Krim’ tomatoes, ‘Provider’ bush beans, ‘Waltham Butternut’ squash, and ‘Black Seeded Simpson’ lettuce.
- Start Seeds Indoors (Optional but Recommended): For longer growing seasons or specific crops, starting seeds indoors gives you a head start. Use seed-starting mix (e.g., Espoma Organic Seed Starter Mix, ~$10 for 16qt bag) in seed trays (Jiffy Professional Greenhouse 72-cell kit, ~$15). Provide adequate light with LED grow lights (Barrina T5 2ft 4-pack LED Grow Lights, 20W each, ~$50) for 14-16 hours a day, positioned 2-4 inches above seedlings. Maintain consistent temperatures (65-75°F for most).
- Direct Sowing vs. Transplanting: Some crops (carrots, radishes, beans, corn) prefer direct sowing into the garden bed. Others (tomatoes, peppers, broccoli, kale) benefit from being started indoors and transplanted. Follow seed packet instructions for planting depths (e.g., lettuce seeds are often surface-sown or planted 1/8 inch deep, while beans are 1 inch deep) and spacing.
- Companion Planting: Strategically plant different species together to enhance growth, deter pests, and attract beneficial insects. For example, planting marigolds near tomatoes can deter nematodes, and basil improves tomato flavor. Nasturtiums can act as a trap crop for aphids.
- Succession Planting: For a continuous harvest, plant small batches of quick-growing crops (lettuce, radishes, cilantro) every 2-3 weeks. As one crop finishes, another is ready to take its place.
Step 6: Pest & Disease Management (Organic)
Maintaining a self sufficient garden from scratch means embracing organic pest and disease control.
- Integrated Pest Management (IPM): This holistic approach combines several strategies.
- Observation: Regularly inspect your plants for early signs of pests or disease. Catching issues early is key.
- Physical Barriers: Use row covers (e.g., Agribon AG-19 floating row cover, 10×20 ft, ~$20) to protect young plants from insect pests like cabbage worms and squash bugs. Install fences (e.g., 2×4 welded wire mesh, 4 ft tall, 50 ft roll ~$70) to keep out deer, rabbits, and other larger animals.
- Hand-Picking: For larger pests like tomato hornworms or squash bugs, simply pick them off and drop them into a bucket of soapy water.
- Companion Planting: As mentioned, certain plants repel pests. Marigolds, garlic, and onions are excellent deterrents.
- Attract Beneficial Insects: Plant flowers like dill, fennel, cosmos, and sweet alyssum to attract ladybugs, lacewings, and parasitic wasps, which prey on common garden pests.
- Organic Sprays & Treatments:
- Neem Oil: An excellent broad-spectrum organic insecticide and fungicide. Bonide Neem Oil Concentrate (16oz, ~$20) can be mixed at a rate of 1-2 tbsp per gallon of water and sprayed on affected plants.
- Insecticidal Soap: Effective against soft-bodied insects like aphids, whiteflies, and spider mites. Garden Safe Insecticidal Soap (24oz ready-to-use, ~$10).
- Bacillus thuringiensis (Bt): A naturally occurring soil bacterium that targets caterpillars and worms. Monterey BT Worm & Caterpillar Killer (16oz, ~$18) is highly effective and safe for beneficial insects.
- Copper or Sulfur Sprays: For fungal diseases like powdery mildew or blight, organic copper (e.g., Bonide Copper Fungicide, ~$15 for 1lb) or sulfur (e.g., Safer Brand Garden Fungicide, ~$10 for 16oz) can be used as a last resort.
Step 7: Harvesting & Seed Saving
The culmination of your efforts is the harvest, and seed saving closes the loop on self-sufficiency.
- Harvesting Techniques:
- Timing: Harvest vegetables at their peak ripeness for best flavor and nutritional value. For example, green beans should snap cleanly, cucumbers should be firm, and tomatoes should be fully colored.
- Frequency: Many crops, like zucchini, cucumbers, and bush beans, produce more if harvested frequently. Pick daily or every other day.
- Tools: Use clean, sharp pruners (e.g., Corona ClassicCUT Bypass Pruner BP 3180, ~$30) or a sharp knife for clean cuts, minimizing damage to the plant.
- Seed Saving: This is where the « self-sufficient » aspect truly shines.
- Selection: Only save seeds from your healthiest, most vigorous plants that show desired traits (disease resistance, good flavor, high yield).
- Isolation: To ensure true-to-type seeds, prevent cross-pollination. This can be challenging for open-pollinated crops that readily cross (e.g., squash, corn). For beginners, focus on self-pollinating plants like beans, peas, lettuce, and tomatoes.
- Processing:
- Dry Seeds (Beans, Peas, Lettuce, Grains): Allow pods/seed heads to dry completely on the plant. Harvest, shell, and clean the seeds, removing chaff.
- Wet Seeds (Tomatoes, Cucumbers, Squash): For tomatoes, ferment the seeds in water for a few days to remove the gel coating and inhibit disease. For cucumbers/squash, scrape out seeds, wash thoroughly, and dry.
- Drying: Spread seeds thinly on screens or paper plates in a cool, dry, well-ventilated area for 1-4 weeks. Ensure they are bone-dry before storage. I aim for less than 8% moisture content.
- Storage: Store seeds in airtight containers (glass jars with desiccant packets work well) in a cool, dark, dry place (ideally 40-50°F and 30-40% humidity). Label clearly with variety and date. Properly stored seeds can remain viable for 3-10 years or more.
Step 8: Season Extension & Winterizing
Extend your harvest and protect your garden for the off-season to truly maximize your self sufficient garden from scratch.
- Cold Frames: Simple structures with a transparent top (glass, polycarbonate, or old windows) that sit over garden beds. They trap solar heat, allowing you to grow cold-hardy crops (lettuce, spinach, kale, radishes) well into winter or start seeds earlier in spring. A basic cold frame can be built from 2×6 lumber and a sheet of polycarbonate for under $100.
- Hoop Houses/Low Tunnels: Larger structures made from flexible hoops (PVC pipe or EMT conduit) covered with greenhouse plastic. These provide more space and greater temperature moderation. A 10×20 ft DIY low tunnel kit can cost $200-$500, while a larger, more robust hoop house kit might be $1,000-$3,000. I use a 6×12 ft low tunnel made from 1/2-inch PVC hoops and 6mil greenhouse plastic, which extends my lettuce and spinach harvest by at least
- Rainwater Harvesting: This is my primary source of irrigation water. A 55-gallon rain barrel (e.g., EarthMark Rain Barrel, ~$120-$150) connected to a downspout can collect significant water. For larger needs, I use two 275-gallon IBC totes (Intermediate Bulk Containers, often available used for $100-$200 each from food-grade sources) connected in series. A 1,000 sq ft roof can collect approximately 620 gallons of water for every inch of rainfall. My 1,500 sq ft roof provides ample water for my 600 sq ft garden through multiple barrels and totes.
- Drip Irrigation: This is by far the most water-efficient method, delivering water directly to the plant’s root zone, minimizing evaporation and weed growth.
- Components: A typical drip system includes a pressure regulator (e.g., Rain Bird PRV-10, ~$15), a filter (Rain Bird RBY filter, ~$20), main tubing (1/2-inch poly tubing, 100ft ~$25), smaller feeder lines (1/4-inch tubing), and emitters (0.5 GPH or 1 GPH per plant).
- Kits: For beginners, a starter kit like the Rain Bird Drip Irrigation Garden Kit (model DDI-KIT-1P, ~$40-$60) is excellent for a small garden. For larger setups, I use Netafim Techline CV Drip Line (500ft roll, ~$150-$200), which has pressure-compensating emitters built-in, ensuring even watering across long runs.
- Automation: For true self-sufficiency, consider a battery-powered timer (e.g., Orbit B-Hyve Bluetooth Hose Faucet Timer, ~$50) or a solar-powered timer connected to a small 12V pump.
- Solar-Powered Pumps: For lifting water from a well, pond, or large storage tank to your garden, a solar pump is a game-changer. For a smaller drip system, a Shurflo 2088-594-152 Diaphragm Pump (12V, 3.5 GPM, ~$180) can be powered by a single 100W solar panel (e.g., Renogy 100W Monocrystalline Solar Panel, ~$100) and a small 12V battery (e.g., a 50Ah LiFePO4 battery like the Battle Born 50Ah, ~$450). For larger operations or deeper wells, more robust systems are needed. If you’re looking to build out a comprehensive off-grid power system to support your garden’s water needs, or indeed your entire homestead, you might want to explore resources like the Power Grid Generator complete system guide to understand the full scope of what’s possible in terms of energy independence.
Step 5: Seed Selection & Planting
The choice of seeds is crucial for a truly self sufficient garden from scratch.
- Choose Heirloom & Open-Pollinated Seeds: These varieties produce seeds that will grow true to type, meaning you can save seeds from your harvest year after year. F1 hybrids, while often vigorous, will not produce consistent offspring from saved seeds. Reputable seed companies include Baker Creek Heirloom Seeds, High Mowing Organic Seeds, and Seed Savers Exchange. Start with common, reliable varieties like ‘Black Krim’ tomatoes, ‘Provider’ bush beans, ‘Waltham Butternut’ squash, and ‘Black Seeded Simpson’ lettuce.
- Start Seeds Indoors (Optional but Recommended): For longer growing seasons or specific crops, starting seeds indoors gives you a head start. Use seed-starting mix (e.g., Espoma Organic Seed Starter Mix, ~$10 for 16qt bag) in seed trays (Jiffy Professional Greenhouse 72-cell kit, ~$15). Provide adequate light with LED grow lights (Barrina T5 2ft 4-pack LED Grow Lights, 20W each, ~$50) for 14-16 hours a day, positioned 2-4 inches above seedlings. Maintain consistent temperatures (65-75°F for most).
- Direct Sowing vs. Transplanting: Some crops (carrots, radishes, beans, corn) prefer direct sowing into the garden bed. Others (tomatoes, peppers, broccoli, kale) benefit from being started indoors and transplanted. Follow seed packet instructions for planting depths (e.g., lettuce seeds are often surface-sown or planted 1/8 inch deep, while beans are 1 inch deep) and spacing.
- Companion Planting: Strategically plant different species together to enhance growth, deter pests, and attract beneficial insects. For example, planting marigolds near tomatoes can deter nematodes, and basil improves tomato flavor. Nasturtiums can act as a trap crop for aphids.
- Succession Planting: For a continuous harvest, plant small batches of quick-growing crops (lettuce, radishes, cilantro) every 2-3 weeks. As one crop finishes, another is ready to take its place.
Step 6: Pest & Disease Management (Organic)
Maintaining a self sufficient garden from scratch means embracing organic pest and disease control.
- Integrated Pest Management (IPM): This holistic approach combines several strategies.
- Observation: Regularly inspect your plants for early signs of pests or disease. Catching issues early is key.
- Physical Barriers: Use row covers (e.g., Agribon AG-19 floating row cover, 10×20 ft, ~$20) to protect young plants from insect pests like cabbage worms and squash bugs. Install fences (e.g., 2×4 welded wire mesh, 4 ft tall, 50 ft roll ~$70) to keep out deer, rabbits, and other larger animals.
- Hand-Picking: For larger pests like tomato hornworms or squash bugs, simply pick them off and drop them into a bucket of soapy water.
- Companion Planting: As mentioned, certain plants repel pests. Marigolds, garlic, and onions are excellent deterrents.
- Attract Beneficial Insects: Plant flowers like dill, fennel, cosmos, and sweet alyssum to attract ladybugs, lacewings, and parasitic wasps, which prey on common garden pests.
- Organic Sprays & Treatments:
- Neem Oil: An excellent broad-spectrum organic insecticide and fungicide. Bonide Neem Oil Concentrate (16oz, ~$20) can be mixed at a rate of 1-2 tbsp per gallon of water and sprayed on affected plants.
- Insecticidal Soap: Effective against soft-bodied insects like aphids, whiteflies, and spider mites. Garden Safe Insecticidal Soap (24oz ready-to-use, ~$10).
- Bacillus thuringiensis (Bt): A naturally occurring soil bacterium that targets caterpillars and worms. Monterey BT Worm & Caterpillar Killer (16oz, ~$18) is highly effective and safe for beneficial insects.
- Copper or Sulfur Sprays: For fungal diseases like powdery mildew or blight, organic copper (e.g., Bonide Copper Fungicide, ~$15 for 1lb) or sulfur (e.g., Safer Brand Garden Fungicide, ~$10 for 16oz) can be used as a last resort.
Step 7: Harvesting & Seed Saving
The culmination of your efforts is the harvest, and seed saving closes the loop on self-sufficiency.
- Harvesting Techniques:
- Timing: Harvest vegetables at their peak ripeness for best flavor and nutritional value. For example, green beans should snap cleanly, cucumbers should be firm, and tomatoes should be fully colored.
- Frequency: Many crops, like zucchini, cucumbers, and bush beans, produce more if harvested frequently. Pick daily or every other day.
- Tools: Use clean, sharp pruners (e.g., Corona ClassicCUT Bypass Pruner BP 3180, ~$30) or a sharp knife for clean cuts, minimizing damage to the plant.
- Seed Saving: This is where the « self-sufficient » aspect truly shines.
- Selection: Only save seeds from your healthiest, most vigorous plants that show desired traits (disease resistance, good flavor, high yield).
- Isolation: To ensure true-to-type seeds, prevent cross-pollination. This can be challenging for open-pollinated crops that readily cross (e.g., squash, corn). For beginners, focus on self-pollinating plants like beans, peas, lettuce, and tomatoes.
- Processing:
- Dry Seeds (Beans, Peas, Lettuce, Grains): Allow pods/seed heads to dry completely on the plant. Harvest, shell, and clean the seeds, removing chaff.
- Wet Seeds (Tomatoes, Cucumbers, Squash): For tomatoes, ferment the seeds in water for a few days to remove the gel coating and inhibit disease. For cucumbers/squash, scrape out seeds, wash thoroughly, and dry.
- Drying: Spread seeds thinly on screens or paper plates in a cool, dry, well-ventilated area for 1-4 weeks. Ensure they are bone-dry before storage. I aim for less than 8% moisture content.
- Storage: Store seeds in airtight containers (glass jars with desiccant packets work well) in a cool, dark, dry place (ideally 40-50°F and 30-40% humidity). Label clearly with variety and date. Properly stored seeds can remain viable for 3-10 years or more.
Step 8: Season Extension & Winterizing
Extend your harvest and protect your garden for the off-season to truly maximize your self sufficient garden from scratch.
- Cold Frames: Simple structures with a transparent top (glass, polycarbonate, or old windows) that sit over garden beds. They trap solar heat, allowing you to grow cold-hardy crops (lettuce, spinach, kale, radishes) well into winter or start seeds earlier in spring. A basic cold frame can be built from 2×6 lumber and a sheet of polycarbonate for under $100.
- Hoop Houses/Low Tunnels: Larger structures made from flexible hoops (PVC pipe or EMT conduit) covered with greenhouse plastic. These provide more space and greater temperature moderation. A 10×20 ft DIY low tunnel kit can cost $200-$500, while a larger, more robust hoop house kit might be $1,000-$3,000. I use a 6×12 ft low tunnel made from 1/2-inch PVC hoops and 6mil greenhouse plastic, which extends my lettuce and spinach harvest by at least
Efficient water management is critical for a self sufficient garden from scratch, especially in off-grid living where water resources might be limited.
- Rainwater Harvesting: This is my primary source of irrigation water. A 55-gallon rain barrel (e.g., EarthMark Rain Barrel, ~$120-$150) connected to a downspout can collect significant water. For larger needs, I use two 275-gallon IBC totes (Intermediate Bulk Containers, often available used for $100-$200 each from food-grade sources) connected in series. A 1,000 sq ft roof can collect approximately 620 gallons of water for every inch of rainfall. My 1,500 sq ft roof provides ample water for my 600 sq ft garden through multiple barrels and totes.
- Drip Irrigation: This is by far the most water-efficient method, delivering water directly to the plant’s root zone, minimizing evaporation and weed growth.
- Components: A typical drip system includes a pressure regulator (e.g., Rain Bird PRV-10, ~$15), a filter (Rain Bird RBY filter, ~$20), main tubing (1/2-inch poly tubing, 100ft ~$25), smaller feeder lines (1/4-inch tubing), and emitters (0.5 GPH or 1 GPH per plant).
- Kits: For beginners, a starter kit like the Rain Bird Drip Irrigation Garden Kit (model DDI-KIT-1P, ~$40-$60) is excellent for a small garden. For larger setups, I use Netafim Techline CV Drip Line (500ft roll, ~$150-$200), which has pressure-compensating emitters built-in, ensuring even watering across long runs.
- Automation: For true self-sufficiency, consider a battery-powered timer (e.g., Orbit B-Hyve Bluetooth Hose Faucet Timer, ~$50) or a solar-powered timer connected to a small 12V pump.
- Solar-Powered Pumps: For lifting water from a well, pond, or large storage tank to your garden, a solar pump is a game-changer. For a smaller drip system, a Shurflo 2088-594-152 Diaphragm Pump (12V, 3.5 GPM, ~$180) can be powered by a single 100W solar panel (e.g., Renogy 100W Monocrystalline Solar Panel, ~$100) and a small 12V battery (e.g., a 50Ah LiFePO4 battery like the Battle Born 50Ah, ~$450). For larger operations or deeper wells, more robust systems are needed. If you’re looking to build out a comprehensive off-grid power system to support your garden’s water needs, or indeed your entire homestead, you might want to explore resources like the Power Grid Generator complete system guide to understand the full scope of what’s possible in terms of energy independence.
Step 5: Seed Selection & Planting
The choice of seeds is crucial for a truly self sufficient garden from scratch.
- Choose Heirloom & Open-Pollinated Seeds: These varieties produce seeds that will grow true to type, meaning you can save seeds from your harvest year after year. F1 hybrids, while often vigorous, will not produce consistent offspring from saved seeds. Reputable seed companies include Baker Creek Heirloom Seeds, High Mowing Organic Seeds, and Seed Savers Exchange. Start with common, reliable varieties like ‘Black Krim’ tomatoes, ‘Provider’ bush beans, ‘Waltham Butternut’ squash, and ‘Black Seeded Simpson’ lettuce.
- Start Seeds Indoors (Optional but Recommended): For longer growing seasons or specific crops, starting seeds indoors gives you a head start. Use seed-starting mix (e.g., Espoma Organic Seed Starter Mix, ~$10 for 16qt bag) in seed trays (Jiffy Professional Greenhouse 72-cell kit, ~$15). Provide adequate light with LED grow lights (Barrina T5 2ft 4-pack LED Grow Lights, 20W each, ~$50) for 14-16 hours a day, positioned 2-4 inches above seedlings. Maintain consistent temperatures (65-75°F for most).
- Direct Sowing vs. Transplanting: Some crops (carrots, radishes, beans, corn) prefer direct sowing into the garden bed. Others (tomatoes, peppers, broccoli, kale) benefit from being started indoors and transplanted. Follow seed packet instructions for planting depths (e.g., lettuce seeds are often surface-sown or planted 1/8 inch deep, while beans are 1 inch deep) and spacing.
- Companion Planting: Strategically plant different species together to enhance growth, deter pests, and attract beneficial insects. For example, planting marigolds near tomatoes can deter nematodes, and basil improves tomato flavor. Nasturtiums can act as a trap crop for aphids.
- Succession Planting: For a continuous harvest, plant small batches of quick-growing crops (lettuce, radishes, cilantro) every 2-3 weeks. As one crop finishes, another is ready to take its place.
Step 6: Pest & Disease Management (Organic)
Maintaining a self sufficient garden from scratch means embracing organic pest and disease control.
- Integrated Pest Management (IPM): This holistic approach combines several strategies.
- Observation: Regularly inspect your plants for early signs of pests or disease. Catching issues early is key.
- Physical Barriers: Use row covers (e.g., Agribon AG-19 floating row cover, 10×20 ft, ~$20) to protect young plants from insect pests like cabbage worms and squash bugs. Install fences (e.g., 2×4 welded wire mesh, 4 ft tall, 50 ft roll ~$70) to keep out deer, rabbits, and other larger animals.
- Hand-Picking: For larger pests like tomato hornworms or squash bugs, simply pick them off and drop them into a bucket of soapy water.
- Companion Planting: As mentioned, certain plants repel pests. Marigolds, garlic, and onions are excellent deterrents.
- Attract Beneficial Insects: Plant flowers like dill, fennel, cosmos, and sweet alyssum to attract ladybugs, lacewings, and parasitic wasps, which prey on common garden pests.
- Organic Sprays & Treatments:
- Neem Oil: An excellent broad-spectrum organic insecticide and fungicide. Bonide Neem Oil Concentrate (16oz, ~$20) can be mixed at a rate of 1-2 tbsp per gallon of water and sprayed on affected plants.
- Insecticidal Soap: Effective against soft-bodied insects like aphids, whiteflies, and spider mites. Garden Safe Insecticidal Soap (24oz ready-to-use, ~$10).
- Bacillus thuringiensis (Bt): A naturally occurring soil bacterium that targets caterpillars and worms. Monterey BT Worm & Caterpillar Killer (16oz, ~$18) is highly effective and safe for beneficial insects.
- Copper or Sulfur Sprays: For fungal diseases like powdery mildew or blight, organic copper (e.g., Bonide Copper Fungicide, ~$15 for 1lb) or sulfur (e.g., Safer Brand Garden Fungicide, ~$10 for 16oz) can be used as a last resort.
Step 7: Harvesting & Seed Saving
The culmination of your efforts is the harvest, and seed saving closes the loop on self-sufficiency.
- Harvesting Techniques:
- Timing: Harvest vegetables at their peak ripeness for best flavor and nutritional value. For example, green beans should snap cleanly, cucumbers should be firm, and tomatoes should be fully colored.
- Frequency: Many crops, like zucchini, cucumbers, and bush beans, produce more if harvested frequently. Pick daily or every other day.
- Tools: Use clean, sharp pruners (e.g., Corona ClassicCUT Bypass Pruner BP 3180, ~$30) or a sharp knife for clean cuts, minimizing damage to the plant.
- Seed Saving: This is where the « self-sufficient » aspect truly shines.
- Selection: Only save seeds from your healthiest, most vigorous plants that show desired traits (disease resistance, good flavor, high yield).
- Isolation: To ensure true-to-type seeds, prevent cross-pollination. This can be challenging for open-pollinated crops that readily cross (e.g., squash, corn). For beginners, focus on self-pollinating plants like beans, peas, lettuce, and tomatoes.
- Processing:
- Dry Seeds (Beans, Peas, Lettuce, Grains): Allow pods/seed heads to dry completely on the plant. Harvest, shell, and clean the seeds, removing chaff.
- Wet Seeds (Tomatoes, Cucumbers, Squash): For tomatoes, ferment the seeds in water for a few days to remove the gel coating and inhibit disease. For cucumbers/squash, scrape out seeds, wash thoroughly, and dry.
- Drying: Spread seeds thinly on screens or paper plates in a cool, dry, well-ventilated area for 1-4 weeks. Ensure they are bone-dry before storage. I aim for less than 8% moisture content.
- Storage: Store seeds in airtight containers (glass jars with desiccant packets work well) in a cool, dark, dry place (ideally 40-50°F and 30-40% humidity). Label clearly with variety and date. Properly stored seeds can remain viable for 3-10 years or more.
Step 8: Season Extension & Winterizing
Extend your harvest and protect your garden for the off-season to truly maximize your self sufficient garden from scratch.
- Cold Frames: Simple structures with a transparent top (glass, polycarbonate, or old windows) that sit over garden beds. They trap solar heat, allowing you to grow cold-hardy crops (lettuce, spinach, kale, radishes) well into winter or start seeds earlier in spring. A basic cold frame can be built from 2×6 lumber and a sheet of polycarbonate for under $100.
- Hoop Houses/Low Tunnels: Larger structures made from flexible hoops (PVC pipe or EMT conduit) covered with greenhouse plastic. These provide more space and greater temperature moderation. A 10×20 ft DIY low tunnel kit can cost $200-$500, while a larger, more robust hoop house kit might be $1,000-$3,000. I use a 6×12 ft low tunnel made from 1/2-inch PVC hoops and 6mil greenhouse plastic, which extends my lettuce and spinach harvest by at least
Step 4: Water Management & Irrigation
Efficient water management is critical for a self sufficient garden from scratch, especially in off-grid living where water resources might be limited.
- Rainwater Harvesting: This is my primary source of irrigation water. A 55-gallon rain barrel (e.g., EarthMark Rain Barrel, ~$120-$150) connected to a downspout can collect significant water. For larger needs, I use two 275-gallon IBC totes (Intermediate Bulk Containers, often available used for $100-$200 each from food-grade sources) connected in series. A 1,000 sq ft roof can collect approximately 620 gallons of water for every inch of rainfall. My 1,500 sq ft roof provides ample water for my 600 sq ft garden through multiple barrels and totes.
- Drip Irrigation: This is by far the most water-efficient method, delivering water directly to the plant’s root zone, minimizing evaporation and weed growth.
- Components: A typical drip system includes a pressure regulator (e.g., Rain Bird PRV-10, ~$15), a filter (Rain Bird RBY filter, ~$20), main tubing (1/2-inch poly tubing, 100ft ~$25), smaller feeder lines (1/4-inch tubing), and emitters (0.5 GPH or 1 GPH per plant).
- Kits: For beginners, a starter kit like the Rain Bird Drip Irrigation Garden Kit (model DDI-KIT-1P, ~$40-$60) is excellent for a small garden. For larger setups, I use Netafim Techline CV Drip Line (500ft roll, ~$150-$200), which has pressure-compensating emitters built-in, ensuring even watering across long runs.
- Automation: For true self-sufficiency, consider a battery-powered timer (e.g., Orbit B-Hyve Bluetooth Hose Faucet Timer, ~$50) or a solar-powered timer connected to a small 12V pump.
- Solar-Powered Pumps: For lifting water from a well, pond, or large storage tank to your garden, a solar pump is a game-changer. For a smaller drip system, a Shurflo 2088-594-152 Diaphragm Pump (12V, 3.5 GPM, ~$180) can be powered by a single 100W solar panel (e.g., Renogy 100W Monocrystalline Solar Panel, ~$100) and a small 12V battery (e.g., a 50Ah LiFePO4 battery like the Battle Born 50Ah, ~$450). For larger operations or deeper wells, more robust systems are needed. If you’re looking to build out a comprehensive off-grid power system to support your garden’s water needs, or indeed your entire homestead, you might want to explore resources like the Power Grid Generator complete system guide to understand the full scope of what’s possible in terms of energy independence.
Step 5: Seed Selection & Planting
The choice of seeds is crucial for a truly self sufficient garden from scratch.
- Choose Heirloom & Open-Pollinated Seeds: These varieties produce seeds that will grow true to type, meaning you can save seeds from your harvest year after year. F1 hybrids, while often vigorous, will not produce consistent offspring from saved seeds. Reputable seed companies include Baker Creek Heirloom Seeds, High Mowing Organic Seeds, and Seed Savers Exchange. Start with common, reliable varieties like ‘Black Krim’ tomatoes, ‘Provider’ bush beans, ‘Waltham Butternut’ squash, and ‘Black Seeded Simpson’ lettuce.
- Start Seeds Indoors (Optional but Recommended): For longer growing seasons or specific crops, starting seeds indoors gives you a head start. Use seed-starting mix (e.g., Espoma Organic Seed Starter Mix, ~$10 for 16qt bag) in seed trays (Jiffy Professional Greenhouse 72-cell kit, ~$15). Provide adequate light with LED grow lights (Barrina T5 2ft 4-pack LED Grow Lights, 20W each, ~$50) for 14-16 hours a day, positioned 2-4 inches above seedlings. Maintain consistent temperatures (65-75°F for most).
- Direct Sowing vs. Transplanting: Some crops (carrots, radishes, beans, corn) prefer direct sowing into the garden bed. Others (tomatoes, peppers, broccoli, kale) benefit from being started indoors and transplanted. Follow seed packet instructions for planting depths (e.g., lettuce seeds are often surface-sown or planted 1/8 inch deep, while beans are 1 inch deep) and spacing.
- Companion Planting: Strategically plant different species together to enhance growth, deter pests, and attract beneficial insects. For example, planting marigolds near tomatoes can deter nematodes, and basil improves tomato flavor. Nasturtiums can act as a trap crop for aphids.
- Succession Planting: For a continuous harvest, plant small batches of quick-growing crops (lettuce, radishes, cilantro) every 2-3 weeks. As one crop finishes, another is ready to take its place.
Step 6: Pest & Disease Management (Organic)
Maintaining a self sufficient garden from scratch means embracing organic pest and disease control.
- Integrated Pest Management (IPM): This holistic approach combines several strategies.
- Observation: Regularly inspect your plants for early signs of pests or disease. Catching issues early is key.
- Physical Barriers: Use row covers (e.g., Agribon AG-19 floating row cover, 10×20 ft, ~$20) to protect young plants from insect pests like cabbage worms and squash bugs. Install fences (e.g., 2×4 welded wire mesh, 4 ft tall, 50 ft roll ~$70) to keep out deer, rabbits, and other larger animals.
- Hand-Picking: For larger pests like tomato hornworms or squash bugs, simply pick them off and drop them into a bucket of soapy water.
- Companion Planting: As mentioned, certain plants repel pests. Marigolds, garlic, and onions are excellent deterrents.
- Attract Beneficial Insects: Plant flowers like dill, fennel, cosmos, and sweet alyssum to attract ladybugs, lacewings, and parasitic wasps, which prey on common garden pests.
- Organic Sprays & Treatments:
- Neem Oil: An excellent broad-spectrum organic insecticide and fungicide. Bonide Neem Oil Concentrate (16oz, ~$20) can be mixed at a rate of 1-2 tbsp per gallon of water and sprayed on affected plants.
- Insecticidal Soap: Effective against soft-bodied insects like aphids, whiteflies, and spider mites. Garden Safe Insecticidal Soap (24oz ready-to-use, ~$10).
- Bacillus thuringiensis (Bt): A naturally occurring soil bacterium that targets caterpillars and worms. Monterey BT Worm & Caterpillar Killer (16oz, ~$18) is highly effective and safe for beneficial insects.
- Copper or Sulfur Sprays: For fungal diseases like powdery mildew or blight, organic copper (e.g., Bonide Copper Fungicide, ~$15 for 1lb) or sulfur (e.g., Safer Brand Garden Fungicide, ~$10 for 16oz) can be used as a last resort.
Step 7: Harvesting & Seed Saving
The culmination of your efforts is the harvest, and seed saving closes the loop on self-sufficiency.
- Harvesting Techniques:
- Timing: Harvest vegetables at their peak ripeness for best flavor and nutritional value. For example, green beans should snap cleanly, cucumbers should be firm, and tomatoes should be fully colored.
- Frequency: Many crops, like zucchini, cucumbers, and bush beans, produce more if harvested frequently. Pick daily or every other day.
- Tools: Use clean, sharp pruners (e.g., Corona ClassicCUT Bypass Pruner BP 3180, ~$30) or a sharp knife for clean cuts, minimizing damage to the plant.
- Seed Saving: This is where the « self-sufficient » aspect truly shines.
- Selection: Only save seeds from your healthiest, most vigorous plants that show desired traits (disease resistance, good flavor, high yield).
- Isolation: To ensure true-to-type seeds, prevent cross-pollination. This can be challenging for open-pollinated crops that readily cross (e.g., squash, corn). For beginners, focus on self-pollinating plants like beans, peas, lettuce, and tomatoes.
- Processing:
- Dry Seeds (Beans, Peas, Lettuce, Grains): Allow pods/seed heads to dry completely on the plant. Harvest, shell, and clean the seeds, removing chaff.
- Wet Seeds (Tomatoes, Cucumbers, Squash): For tomatoes, ferment the seeds in water for a few days to remove the gel coating and inhibit disease. For cucumbers/squash, scrape out seeds, wash thoroughly, and dry.
- Drying: Spread seeds thinly on screens or paper plates in a cool, dry, well-ventilated area for 1-4 weeks. Ensure they are bone-dry before storage. I aim for less than 8% moisture content.
- Storage: Store seeds in airtight containers (glass jars with desiccant packets work well) in a cool, dark, dry place (ideally 40-50°F and 30-40% humidity). Label clearly with variety and date. Properly stored seeds can remain viable for 3-10 years or more.
Step 8: Season Extension & Winterizing
Extend your harvest and protect your garden for the off-season to truly maximize your self sufficient garden from scratch.
- Cold Frames: Simple structures with a transparent top (glass, polycarbonate, or old windows) that sit over garden beds. They trap solar heat, allowing you to grow cold-hardy crops (lettuce, spinach, kale, radishes) well into winter or start seeds earlier in spring. A basic cold frame can be built from 2×6 lumber and a sheet of polycarbonate for under $100.
- Hoop Houses/Low Tunnels: Larger structures made from flexible hoops (PVC pipe or EMT conduit) covered with greenhouse plastic. These provide more space and greater temperature moderation. A 10×20 ft DIY low tunnel kit can cost $200-$500, while a larger, more robust hoop house kit might be $1,000-$3,000. I use a 6×12 ft low tunnel made from 1/2-inch PVC hoops and 6mil greenhouse plastic, which extends my lettuce and spinach harvest by at least
- In-Ground Beds: If you have excellent native soil and good drainage, in-ground beds are the most economical. Double-digging (loosening soil two shovel depths) can significantly improve drainage and aeration. For my main garden, I primarily use in-ground beds, but I focus on building up the soil over time with consistent compost additions and cover cropping. I aim for beds that are no wider than 3-4 feet so I can reach the center without stepping on the soil, compacting it.
- Raised Beds: Raised beds offer numerous advantages, especially for poor soil, heavy clay, or rocky areas. They provide better drainage, warm up faster in spring, reduce compaction, and make weeding and harvesting easier on your back.
- Material Options:
- Untreated Cedar: Naturally rot-resistant and chemical-free. A 4×8 ft bed, 12 inches deep, typically requires three 2x12x8 ft cedar boards, costing around $50-$60 per board (total ~$150-$180) plus corner brackets or screws. My first raised beds were cedar and are still going strong after 7 years.
- Galvanized Steel: Durable, long-lasting, and aesthetically pleasing. Brands like Vego Garden offer modular kits. A Vego Garden 17″ Tall 8-in-1 Metal Raised Garden Bed (can be configured to 4×8 ft) costs approximately $250-$300.
- Concrete Blocks/Stones: Very durable but can leach minerals (though generally safe once weathered) and can be expensive.
- Recycled Materials: Pallets (check for chemical treatment stamps like « HT » for heat-treated), old tires (controversial due to potential chemical leaching).
- Filling Raised Beds: Don’t just fill with topsoil. Use a « Hugelkultur » approach (logs, branches, leaves, then compost, then topsoil) or a mixture of 60% good quality topsoil, 30% compost, and 10% perlite or vermiculite for drainage. A 4x8x1 ft raised bed requires about 32 cubic feet (or ~1.2 cubic yards) of soil mix, which can cost $100-$200 depending on your source.
- Material Options:
Step 4: Water Management & Irrigation
Efficient water management is critical for a self sufficient garden from scratch, especially in off-grid living where water resources might be limited.
- Rainwater Harvesting: This is my primary source of irrigation water. A 55-gallon rain barrel (e.g., EarthMark Rain Barrel, ~$120-$150) connected to a downspout can collect significant water. For larger needs, I use two 275-gallon IBC totes (Intermediate Bulk Containers, often available used for $100-$200 each from food-grade sources) connected in series. A 1,000 sq ft roof can collect approximately 620 gallons of water for every inch of rainfall. My 1,500 sq ft roof provides ample water for my 600 sq ft garden through multiple barrels and totes.
- Drip Irrigation: This is by far the most water-efficient method, delivering water directly to the plant’s root zone, minimizing evaporation and weed growth.
- Components: A typical drip system includes a pressure regulator (e.g., Rain Bird PRV-10, ~$15), a filter (Rain Bird RBY filter, ~$20), main tubing (1/2-inch poly tubing, 100ft ~$25), smaller feeder lines (1/4-inch tubing), and emitters (0.5 GPH or 1 GPH per plant).
- Kits: For beginners, a starter kit like the Rain Bird Drip Irrigation Garden Kit (model DDI-KIT-1P, ~$40-$60) is excellent for a small garden. For larger setups, I use Netafim Techline CV Drip Line (500ft roll, ~$150-$200), which has pressure-compensating emitters built-in, ensuring even watering across long runs.
- Automation: For true self-sufficiency, consider a battery-powered timer (e.g., Orbit B-Hyve Bluetooth Hose Faucet Timer, ~$50) or a solar-powered timer connected to a small 12V pump.
- Solar-Powered Pumps: For lifting water from a well, pond, or large storage tank to your garden, a solar pump is a game-changer. For a smaller drip system, a Shurflo 2088-594-152 Diaphragm Pump (12V, 3.5 GPM, ~$180) can be powered by a single 100W solar panel (e.g., Renogy 100W Monocrystalline Solar Panel, ~$100) and a small 12V battery (e.g., a 50Ah LiFePO4 battery like the Battle Born 50Ah, ~$450). For larger operations or deeper wells, more robust systems are needed. If you’re looking to build out a comprehensive off-grid power system to support your garden’s water needs, or indeed your entire homestead, you might want to explore resources like the Power Grid Generator complete system guide to understand the full scope of what’s possible in terms of energy independence.
Step 5: Seed Selection & Planting
The choice of seeds is crucial for a truly self sufficient garden from scratch.
- Choose Heirloom & Open-Pollinated Seeds: These varieties produce seeds that will grow true to type, meaning you can save seeds from your harvest year after year. F1 hybrids, while often vigorous, will not produce consistent offspring from saved seeds. Reputable seed companies include Baker Creek Heirloom Seeds, High Mowing Organic Seeds, and Seed Savers Exchange. Start with common, reliable varieties like ‘Black Krim’ tomatoes, ‘Provider’ bush beans, ‘Waltham Butternut’ squash, and ‘Black Seeded Simpson’ lettuce.
- Start Seeds Indoors (Optional but Recommended): For longer growing seasons or specific crops, starting seeds indoors gives you a head start. Use seed-starting mix (e.g., Espoma Organic Seed Starter Mix, ~$10 for 16qt bag) in seed trays (Jiffy Professional Greenhouse 72-cell kit, ~$15). Provide adequate light with LED grow lights (Barrina T5 2ft 4-pack LED Grow Lights, 20W each, ~$50) for 14-16 hours a day, positioned 2-4 inches above seedlings. Maintain consistent temperatures (65-75°F for most).
- Direct Sowing vs. Transplanting: Some crops (carrots, radishes, beans, corn) prefer direct sowing into the garden bed. Others (tomatoes, peppers, broccoli, kale) benefit from being started indoors and transplanted. Follow seed packet instructions for planting depths (e.g., lettuce seeds are often surface-sown or planted 1/8 inch deep, while beans are 1 inch deep) and spacing.
- Companion Planting: Strategically plant different species together to enhance growth, deter pests, and attract beneficial insects. For example, planting marigolds near tomatoes can deter nematodes, and basil improves tomato flavor. Nasturtiums can act as a trap crop for aphids.
- Succession Planting: For a continuous harvest, plant small batches of quick-growing crops (lettuce, radishes, cilantro) every 2-3 weeks. As one crop finishes, another is ready to take its place.
Step 6: Pest & Disease Management (Organic)
Maintaining a self sufficient garden from scratch means embracing organic pest and disease control.
- Integrated Pest Management (IPM): This holistic approach combines several strategies.
- Observation: Regularly inspect your plants for early signs of pests or disease. Catching issues early is key.
- Physical Barriers: Use row covers (e.g., Agribon AG-19 floating row cover, 10×20 ft, ~$20) to protect young plants from insect pests like cabbage worms and squash bugs. Install fences (e.g., 2×4 welded wire mesh, 4 ft tall, 50 ft roll ~$70) to keep out deer, rabbits, and other larger animals.
- Hand-Picking: For larger pests like tomato hornworms or squash bugs, simply pick them off and drop them into a bucket of soapy water.
- Companion Planting: As mentioned, certain plants repel pests. Marigolds, garlic, and onions are excellent deterrents.
- Attract Beneficial Insects: Plant flowers like dill, fennel, cosmos, and sweet alyssum to attract ladybugs, lacewings, and parasitic wasps, which prey on common garden pests.
- Organic Sprays & Treatments:
- Neem Oil: An excellent broad-spectrum organic insecticide and fungicide. Bonide Neem Oil Concentrate (16oz, ~$20) can be mixed at a rate of 1-2 tbsp per gallon of water and sprayed on affected plants.
- Insecticidal Soap: Effective against soft-bodied insects like aphids, whiteflies, and spider mites. Garden Safe Insecticidal Soap (24oz ready-to-use, ~$10).
- Bacillus thuringiensis (Bt): A naturally occurring soil bacterium that targets caterpillars and worms. Monterey BT Worm & Caterpillar Killer (16oz, ~$18) is highly effective and safe for beneficial insects.
- Copper or Sulfur Sprays: For fungal diseases like powdery mildew or blight, organic copper (e.g., Bonide Copper Fungicide, ~$15 for 1lb) or sulfur (e.g., Safer Brand Garden Fungicide, ~$10 for 16oz) can be used as a last resort.
Step 7: Harvesting & Seed Saving
The culmination of your efforts is the harvest, and seed saving closes the loop on self-sufficiency.
- Harvesting Techniques:
- Timing: Harvest vegetables at their peak ripeness for best flavor and nutritional value. For example, green beans should snap cleanly, cucumbers should be firm, and tomatoes should be fully colored.
- Frequency: Many crops, like zucchini, cucumbers, and bush beans, produce more if harvested frequently. Pick daily or every other day.
- Tools: Use clean, sharp pruners (e.g., Corona ClassicCUT Bypass Pruner BP 3180, ~$30) or a sharp knife for clean cuts, minimizing damage to the plant.
- Seed Saving: This is where the « self-sufficient » aspect truly shines.
- Selection: Only save seeds from your healthiest, most vigorous plants that show desired traits (disease resistance, good flavor, high yield).
- Isolation: To ensure true-to-type seeds, prevent cross-pollination. This can be challenging for open-pollinated crops that readily cross (e.g., squash, corn). For beginners, focus on self-pollinating plants like beans, peas, lettuce, and tomatoes.
- Processing:
- Dry Seeds (Beans, Peas, Lettuce, Grains): Allow pods/seed heads to dry completely on the plant. Harvest, shell, and clean the seeds, removing chaff.
- Wet Seeds (Tomatoes, Cucumbers, Squash): For tomatoes, ferment the seeds in water for a few days to remove the gel coating and inhibit disease. For cucumbers/squash, scrape out seeds, wash thoroughly, and dry.
- Drying: Spread seeds thinly on screens or paper plates in a cool, dry, well-ventilated area for 1-4 weeks. Ensure they are bone-dry before storage. I aim for less than 8% moisture content.
- Storage: Store seeds in airtight containers (glass jars with desiccant packets work well) in a cool, dark, dry place (ideally 40-50°F and 30-40% humidity). Label clearly with variety and date. Properly stored seeds can remain viable for 3-10 years or more.
Step 8: Season Extension & Winterizing
Extend your harvest and protect your garden for the off-season to truly maximize your self sufficient garden from scratch.
- Cold Frames: Simple structures with a transparent top (glass, polycarbonate, or old windows) that sit over garden beds. They trap solar heat, allowing you to grow cold-hardy crops (lettuce, spinach, kale, radishes) well into winter or start seeds earlier in spring. A basic cold frame can be built from 2×6 lumber and a sheet of polycarbonate for under $100.
- Hoop Houses/Low Tunnels: Larger structures made from flexible hoops (PVC pipe or EMT conduit) covered with greenhouse plastic. These provide more space and greater temperature moderation. A 10×20 ft DIY low tunnel kit can cost $200-$500, while a larger, more robust hoop house kit might be $1,000-$3,000. I use a 6×12 ft low tunnel made from 1/2-inch PVC hoops and 6mil greenhouse plastic, which extends my lettuce and spinach harvest by at least
Deciding between raised beds and in-ground beds depends on your soil, budget, and physical capabilities.
- In-Ground Beds: If you have excellent native soil and good drainage, in-ground beds are the most economical. Double-digging (loosening soil two shovel depths) can significantly improve drainage and aeration. For my main garden, I primarily use in-ground beds, but I focus on building up the soil over time with consistent compost additions and cover cropping. I aim for beds that are no wider than 3-4 feet so I can reach the center without stepping on the soil, compacting it.
- Raised Beds: Raised beds offer numerous advantages, especially for poor soil, heavy clay, or rocky areas. They provide better drainage, warm up faster in spring, reduce compaction, and make weeding and harvesting easier on your back.
- Material Options:
- Untreated Cedar: Naturally rot-resistant and chemical-free. A 4×8 ft bed, 12 inches deep, typically requires three 2x12x8 ft cedar boards, costing around $50-$60 per board (total ~$150-$180) plus corner brackets or screws. My first raised beds were cedar and are still going strong after 7 years.
- Galvanized Steel: Durable, long-lasting, and aesthetically pleasing. Brands like Vego Garden offer modular kits. A Vego Garden 17″ Tall 8-in-1 Metal Raised Garden Bed (can be configured to 4×8 ft) costs approximately $250-$300.
- Concrete Blocks/Stones: Very durable but can leach minerals (though generally safe once weathered) and can be expensive.
- Recycled Materials: Pallets (check for chemical treatment stamps like « HT » for heat-treated), old tires (controversial due to potential chemical leaching).
- Filling Raised Beds: Don’t just fill with topsoil. Use a « Hugelkultur » approach (logs, branches, leaves, then compost, then topsoil) or a mixture of 60% good quality topsoil, 30% compost, and 10% perlite or vermiculite for drainage. A 4x8x1 ft raised bed requires about 32 cubic feet (or ~1.2 cubic yards) of soil mix, which can cost $100-$200 depending on your source.
- Material Options:
Step 4: Water Management & Irrigation
Efficient water management is critical for a self sufficient garden from scratch, especially in off-grid living where water resources might be limited.
- Rainwater Harvesting: This is my primary source of irrigation water. A 55-gallon rain barrel (e.g., EarthMark Rain Barrel, ~$120-$150) connected to a downspout can collect significant water. For larger needs, I use two 275-gallon IBC totes (Intermediate Bulk Containers, often available used for $100-$200 each from food-grade sources) connected in series. A 1,000 sq ft roof can collect approximately 620 gallons of water for every inch of rainfall. My 1,500 sq ft roof provides ample water for my 600 sq ft garden through multiple barrels and totes.
- Drip Irrigation: This is by far the most water-efficient method, delivering water directly to the plant’s root zone, minimizing evaporation and weed growth.
- Components: A typical drip system includes a pressure regulator (e.g., Rain Bird PRV-10, ~$15), a filter (Rain Bird RBY filter, ~$20), main tubing (1/2-inch poly tubing, 100ft ~$25), smaller feeder lines (1/4-inch tubing), and emitters (0.5 GPH or 1 GPH per plant).
- Kits: For beginners, a starter kit like the Rain Bird Drip Irrigation Garden Kit (model DDI-KIT-1P, ~$40-$60) is excellent for a small garden. For larger setups, I use Netafim Techline CV Drip Line (500ft roll, ~$150-$200), which has pressure-compensating emitters built-in, ensuring even watering across long runs.
- Automation: For true self-sufficiency, consider a battery-powered timer (e.g., Orbit B-Hyve Bluetooth Hose Faucet Timer, ~$50) or a solar-powered timer connected to a small 12V pump.
- Solar-Powered Pumps: For lifting water from a well, pond, or large storage tank to your garden, a solar pump is a game-changer. For a smaller drip system, a Shurflo 2088-594-152 Diaphragm Pump (12V, 3.5 GPM, ~$180) can be powered by a single 100W solar panel (e.g., Renogy 100W Monocrystalline Solar Panel, ~$100) and a small 12V battery (e.g., a 50Ah LiFePO4 battery like the Battle Born 50Ah, ~$450). For larger operations or deeper wells, more robust systems are needed. If you’re looking to build out a comprehensive off-grid power system to support your garden’s water needs, or indeed your entire homestead, you might want to explore resources like the Power Grid Generator complete system guide to understand the full scope of what’s possible in terms of energy independence.
Step 5: Seed Selection & Planting
The choice of seeds is crucial for a truly self sufficient garden from scratch.
- Choose Heirloom & Open-Pollinated Seeds: These varieties produce seeds that will grow true to type, meaning you can save seeds from your harvest year after year. F1 hybrids, while often vigorous, will not produce consistent offspring from saved seeds. Reputable seed companies include Baker Creek Heirloom Seeds, High Mowing Organic Seeds, and Seed Savers Exchange. Start with common, reliable varieties like ‘Black Krim’ tomatoes, ‘Provider’ bush beans, ‘Waltham Butternut’ squash, and ‘Black Seeded Simpson’ lettuce.
- Start Seeds Indoors (Optional but Recommended): For longer growing seasons or specific crops, starting seeds indoors gives you a head start. Use seed-starting mix (e.g., Espoma Organic Seed Starter Mix, ~$10 for 16qt bag) in seed trays (Jiffy Professional Greenhouse 72-cell kit, ~$15). Provide adequate light with LED grow lights (Barrina T5 2ft 4-pack LED Grow Lights, 20W each, ~$50) for 14-16 hours a day, positioned 2-4 inches above seedlings. Maintain consistent temperatures (65-75°F for most).
- Direct Sowing vs. Transplanting: Some crops (carrots, radishes, beans, corn) prefer direct sowing into the garden bed. Others (tomatoes, peppers, broccoli, kale) benefit from being started indoors and transplanted. Follow seed packet instructions for planting depths (e.g., lettuce seeds are often surface-sown or planted 1/8 inch deep, while beans are 1 inch deep) and spacing.
- Companion Planting: Strategically plant different species together to enhance growth, deter pests, and attract beneficial insects. For example, planting marigolds near tomatoes can deter nematodes, and basil improves tomato flavor. Nasturtiums can act as a trap crop for aphids.
- Succession Planting: For a continuous harvest, plant small batches of quick-growing crops (lettuce, radishes, cilantro) every 2-3 weeks. As one crop finishes, another is ready to take its place.
Step 6: Pest & Disease Management (Organic)
Maintaining a self sufficient garden from scratch means embracing organic pest and disease control.
- Integrated Pest Management (IPM): This holistic approach combines several strategies.
- Observation: Regularly inspect your plants for early signs of pests or disease. Catching issues early is key.
- Physical Barriers: Use row covers (e.g., Agribon AG-19 floating row cover, 10×20 ft, ~$20) to protect young plants from insect pests like cabbage worms and squash bugs. Install fences (e.g., 2×4 welded wire mesh, 4 ft tall, 50 ft roll ~$70) to keep out deer, rabbits, and other larger animals.
- Hand-Picking: For larger pests like tomato hornworms or squash bugs, simply pick them off and drop them into a bucket of soapy water.
- Companion Planting: As mentioned, certain plants repel pests. Marigolds, garlic, and onions are excellent deterrents.
- Attract Beneficial Insects: Plant flowers like dill, fennel, cosmos, and sweet alyssum to attract ladybugs, lacewings, and parasitic wasps, which prey on common garden pests.
- Organic Sprays & Treatments:
- Neem Oil: An excellent broad-spectrum organic insecticide and fungicide. Bonide Neem Oil Concentrate (16oz, ~$20) can be mixed at a rate of 1-2 tbsp per gallon of water and sprayed on affected plants.
- Insecticidal Soap: Effective against soft-bodied insects like aphids, whiteflies, and spider mites. Garden Safe Insecticidal Soap (24oz ready-to-use, ~$10).
- Bacillus thuringiensis (Bt): A naturally occurring soil bacterium that targets caterpillars and worms. Monterey BT Worm & Caterpillar Killer (16oz, ~$18) is highly effective and safe for beneficial insects.
- Copper or Sulfur Sprays: For fungal diseases like powdery mildew or blight, organic copper (e.g., Bonide Copper Fungicide, ~$15 for 1lb) or sulfur (e.g., Safer Brand Garden Fungicide, ~$10 for 16oz) can be used as a last resort.
Step 7: Harvesting & Seed Saving
The culmination of your efforts is the harvest, and seed saving closes the loop on self-sufficiency.
- Harvesting Techniques:
- Timing: Harvest vegetables at their peak ripeness for best flavor and nutritional value. For example, green beans should snap cleanly, cucumbers should be firm, and tomatoes should be fully colored.
- Frequency: Many crops, like zucchini, cucumbers, and bush beans, produce more if harvested frequently. Pick daily or every other day.
- Tools: Use clean, sharp pruners (e.g., Corona ClassicCUT Bypass Pruner BP 3180, ~$30) or a sharp knife for clean cuts, minimizing damage to the plant.
- Seed Saving: This is where the « self-sufficient » aspect truly shines.
- Selection: Only save seeds from your healthiest, most vigorous plants that show desired traits (disease resistance, good flavor, high yield).
- Isolation: To ensure true-to-type seeds, prevent cross-pollination. This can be challenging for open-pollinated crops that readily cross (e.g., squash, corn). For beginners, focus on self-pollinating plants like beans, peas, lettuce, and tomatoes.
- Processing:
- Dry Seeds (Beans, Peas, Lettuce, Grains): Allow pods/seed heads to dry completely on the plant. Harvest, shell, and clean the seeds, removing chaff.
- Wet Seeds (Tomatoes, Cucumbers, Squash): For tomatoes, ferment the seeds in water for a few days to remove the gel coating and inhibit disease. For cucumbers/squash, scrape out seeds, wash thoroughly, and dry.
- Drying: Spread seeds thinly on screens or paper plates in a cool, dry, well-ventilated area for 1-4 weeks. Ensure they are bone-dry before storage. I aim for less than 8% moisture content.
- Storage: Store seeds in airtight containers (glass jars with desiccant packets work well) in a cool, dark, dry place (ideally 40-50°F and 30-40% humidity). Label clearly with variety and date. Properly stored seeds can remain viable for 3-10 years or more.
Step 8: Season Extension & Winterizing
Extend your harvest and protect your garden for the off-season to truly maximize your self sufficient garden from scratch.
- Cold Frames: Simple structures with a transparent top (glass, polycarbonate, or old windows) that sit over garden beds. They trap solar heat, allowing you to grow cold-hardy crops (lettuce, spinach, kale, radishes) well into winter or start seeds earlier in spring. A basic cold frame can be built from 2×6 lumber and a sheet of polycarbonate for under $100.
- Hoop Houses/Low Tunnels: Larger structures made from flexible hoops (PVC pipe or EMT conduit) covered with greenhouse plastic. These provide more space and greater temperature moderation. A 10×20 ft DIY low tunnel kit can cost $200-$500, while a larger, more robust hoop house kit might be $1,000-$3,000. I use a 6×12 ft low tunnel made from 1/2-inch PVC hoops and 6mil greenhouse plastic, which extends my lettuce and spinach harvest by at least
Healthy soil is the bedrock of a productive, self-sufficient garden. You can’t guess what your soil needs; you have to test it.
- Perform a Soil Test: A professional soil test will give you precise data on your soil’s pH, nutrient levels (N-P-K), and organic matter content. I recommend sending a sample to your local agricultural extension office; it typically costs $20-$50 and provides detailed recommendations. Alternatively, for a quick homeowner check, a Rapitest Soil Test Kit (40-test kit, model 1663, ~$20 on Amazon) provides a good baseline for pH, Nitrogen, Phosphorus, and Potash. Aim for a pH between 6.0 and 7.0 for most vegetables.
- Amend for pH Imbalance: If your soil is too acidic (below 6.0), add agricultural lime (dolomitic lime adds magnesium, calcitic lime adds calcium). Apply 5-10 lbs per 100 sq ft for a moderate adjustment. If it’s too alkaline (above 7.0), add elemental sulfur (e.g., Espoma Soil Acidifier, ~$15 for 6.75 lbs) or generous amounts of organic matter like peat moss or pine needles.
- Build Organic Matter: This is the single most important step for long-term soil health. Organic matter improves soil structure, water retention, drainage, and nutrient availability. Incorporate 2-4 inches of high-quality compost into your top 6-12 inches of soil annually. I make my own compost from kitchen scraps, garden waste, and shredded leaves, but you can purchase it. Local nurseries often sell bulk compost for $30-$50 per cubic yard. Aged manure (from chickens, cows, or horses – ensure it’s well-rotted to avoid burning plants) is also excellent.
- Address Nutrient Deficiencies: Based on your soil test, add specific organic amendments. If Nitrogen (N) is low, add blood meal (12-0-0, ~$20 for 3 lbs) or feather meal. For Phosphorus (P), use bone meal (3-15-0, ~$15 for 3 lbs) or rock phosphate. For Potassium (K), greensand (0-0-2.5, ~$25 for 5 lbs) or kelp meal are good choices. I rely heavily on Espoma Organic Garden-tone (5-3-3, ~$25 for an 8lb bag) as a balanced, all-purpose organic fertilizer during planting.
Step 3: Garden Bed Preparation
Deciding between raised beds and in-ground beds depends on your soil, budget, and physical capabilities.
- In-Ground Beds: If you have excellent native soil and good drainage, in-ground beds are the most economical. Double-digging (loosening soil two shovel depths) can significantly improve drainage and aeration. For my main garden, I primarily use in-ground beds, but I focus on building up the soil over time with consistent compost additions and cover cropping. I aim for beds that are no wider than 3-4 feet so I can reach the center without stepping on the soil, compacting it.
- Raised Beds: Raised beds offer numerous advantages, especially for poor soil, heavy clay, or rocky areas. They provide better drainage, warm up faster in spring, reduce compaction, and make weeding and harvesting easier on your back.
- Material Options:
- Untreated Cedar: Naturally rot-resistant and chemical-free. A 4×8 ft bed, 12 inches deep, typically requires three 2x12x8 ft cedar boards, costing around $50-$60 per board (total ~$150-$180) plus corner brackets or screws. My first raised beds were cedar and are still going strong after 7 years.
- Galvanized Steel: Durable, long-lasting, and aesthetically pleasing. Brands like Vego Garden offer modular kits. A Vego Garden 17″ Tall 8-in-1 Metal Raised Garden Bed (can be configured to 4×8 ft) costs approximately $250-$300.
- Concrete Blocks/Stones: Very durable but can leach minerals (though generally safe once weathered) and can be expensive.
- Recycled Materials: Pallets (check for chemical treatment stamps like « HT » for heat-treated), old tires (controversial due to potential chemical leaching).
- Filling Raised Beds: Don’t just fill with topsoil. Use a « Hugelkultur » approach (logs, branches, leaves, then compost, then topsoil) or a mixture of 60% good quality topsoil, 30% compost, and 10% perlite or vermiculite for drainage. A 4x8x1 ft raised bed requires about 32 cubic feet (or ~1.2 cubic yards) of soil mix, which can cost $100-$200 depending on your source.
- Material Options:
Step 4: Water Management & Irrigation
Efficient water management is critical for a self sufficient garden from scratch, especially in off-grid living where water resources might be limited.
- Rainwater Harvesting: This is my primary source of irrigation water. A 55-gallon rain barrel (e.g., EarthMark Rain Barrel, ~$120-$150) connected to a downspout can collect significant water. For larger needs, I use two 275-gallon IBC totes (Intermediate Bulk Containers, often available used for $100-$200 each from food-grade sources) connected in series. A 1,000 sq ft roof can collect approximately 620 gallons of water for every inch of rainfall. My 1,500 sq ft roof provides ample water for my 600 sq ft garden through multiple barrels and totes.
- Drip Irrigation: This is by far the most water-efficient method, delivering water directly to the plant’s root zone, minimizing evaporation and weed growth.
- Components: A typical drip system includes a pressure regulator (e.g., Rain Bird PRV-10, ~$15), a filter (Rain Bird RBY filter, ~$20), main tubing (1/2-inch poly tubing, 100ft ~$25), smaller feeder lines (1/4-inch tubing), and emitters (0.5 GPH or 1 GPH per plant).
- Kits: For beginners, a starter kit like the Rain Bird Drip Irrigation Garden Kit (model DDI-KIT-1P, ~$40-$60) is excellent for a small garden. For larger setups, I use Netafim Techline CV Drip Line (500ft roll, ~$150-$200), which has pressure-compensating emitters built-in, ensuring even watering across long runs.
- Automation: For true self-sufficiency, consider a battery-powered timer (e.g., Orbit B-Hyve Bluetooth Hose Faucet Timer, ~$50) or a solar-powered timer connected to a small 12V pump.
- Solar-Powered Pumps: For lifting water from a well, pond, or large storage tank to your garden, a solar pump is a game-changer. For a smaller drip system, a Shurflo 2088-594-152 Diaphragm Pump (12V, 3.5 GPM, ~$180) can be powered by a single 100W solar panel (e.g., Renogy 100W Monocrystalline Solar Panel, ~$100) and a small 12V battery (e.g., a 50Ah LiFePO4 battery like the Battle Born 50Ah, ~$450). For larger operations or deeper wells, more robust systems are needed. If you’re looking to build out a comprehensive off-grid power system to support your garden’s water needs, or indeed your entire homestead, you might want to explore resources like the Power Grid Generator complete system guide to understand the full scope of what’s possible in terms of energy independence.
Step 5: Seed Selection & Planting
The choice of seeds is crucial for a truly self sufficient garden from scratch.
- Choose Heirloom & Open-Pollinated Seeds: These varieties produce seeds that will grow true to type, meaning you can save seeds from your harvest year after year. F1 hybrids, while often vigorous, will not produce consistent offspring from saved seeds. Reputable seed companies include Baker Creek Heirloom Seeds, High Mowing Organic Seeds, and Seed Savers Exchange. Start with common, reliable varieties like ‘Black Krim’ tomatoes, ‘Provider’ bush beans, ‘Waltham Butternut’ squash, and ‘Black Seeded Simpson’ lettuce.
- Start Seeds Indoors (Optional but Recommended): For longer growing seasons or specific crops, starting seeds indoors gives you a head start. Use seed-starting mix (e.g., Espoma Organic Seed Starter Mix, ~$10 for 16qt bag) in seed trays (Jiffy Professional Greenhouse 72-cell kit, ~$15). Provide adequate light with LED grow lights (Barrina T5 2ft 4-pack LED Grow Lights, 20W each, ~$50) for 14-16 hours a day, positioned 2-4 inches above seedlings. Maintain consistent temperatures (65-75°F for most).
- Direct Sowing vs. Transplanting: Some crops (carrots, radishes, beans, corn) prefer direct sowing into the garden bed. Others (tomatoes, peppers, broccoli, kale) benefit from being started indoors and transplanted. Follow seed packet instructions for planting depths (e.g., lettuce seeds are often surface-sown or planted 1/8 inch deep, while beans are 1 inch deep) and spacing.
- Companion Planting: Strategically plant different species together to enhance growth, deter pests, and attract beneficial insects. For example, planting marigolds near tomatoes can deter nematodes, and basil improves tomato flavor. Nasturtiums can act as a trap crop for aphids.
- Succession Planting: For a continuous harvest, plant small batches of quick-growing crops (lettuce, radishes, cilantro) every 2-3 weeks. As one crop finishes, another is ready to take its place.
Step 6: Pest & Disease Management (Organic)
Maintaining a self sufficient garden from scratch means embracing organic pest and disease control.
- Integrated Pest Management (IPM): This holistic approach combines several strategies.
- Observation: Regularly inspect your plants for early signs of pests or disease. Catching issues early is key.
- Physical Barriers: Use row covers (e.g., Agribon AG-19 floating row cover, 10×20 ft, ~$20) to protect young plants from insect pests like cabbage worms and squash bugs. Install fences (e.g., 2×4 welded wire mesh, 4 ft tall, 50 ft roll ~$70) to keep out deer, rabbits, and other larger animals.
- Hand-Picking: For larger pests like tomato hornworms or squash bugs, simply pick them off and drop them into a bucket of soapy water.
- Companion Planting: As mentioned, certain plants repel pests. Marigolds, garlic, and onions are excellent deterrents.
- Attract Beneficial Insects: Plant flowers like dill, fennel, cosmos, and sweet alyssum to attract ladybugs, lacewings, and parasitic wasps, which prey on common garden pests.
- Organic Sprays & Treatments:
- Neem Oil: An excellent broad-spectrum organic insecticide and fungicide. Bonide Neem Oil Concentrate (16oz, ~$20) can be mixed at a rate of 1-2 tbsp per gallon of water and sprayed on affected plants.
- Insecticidal Soap: Effective against soft-bodied insects like aphids, whiteflies, and spider mites. Garden Safe Insecticidal Soap (24oz ready-to-use, ~$10).
- Bacillus thuringiensis (Bt): A naturally occurring soil bacterium that targets caterpillars and worms. Monterey BT Worm & Caterpillar Killer (16oz, ~$18) is highly effective and safe for beneficial insects.
- Copper or Sulfur Sprays: For fungal diseases like powdery mildew or blight, organic copper (e.g., Bonide Copper Fungicide, ~$15 for 1lb) or sulfur (e.g., Safer Brand Garden Fungicide, ~$10 for 16oz) can be used as a last resort.
Step 7: Harvesting & Seed Saving
The culmination of your efforts is the harvest, and seed saving closes the loop on self-sufficiency.
- Harvesting Techniques:
- Timing: Harvest vegetables at their peak ripeness for best flavor and nutritional value. For example, green beans should snap cleanly, cucumbers should be firm, and tomatoes should be fully colored.
- Frequency: Many crops, like zucchini, cucumbers, and bush beans, produce more if harvested frequently. Pick daily or every other day.
- Tools: Use clean, sharp pruners (e.g., Corona ClassicCUT Bypass Pruner BP 3180, ~$30) or a sharp knife for clean cuts, minimizing damage to the plant.
- Seed Saving: This is where the « self-sufficient » aspect truly shines.
- Selection: Only save seeds from your healthiest, most vigorous plants that show desired traits (disease resistance, good flavor, high yield).
- Isolation: To ensure true-to-type seeds, prevent cross-pollination. This can be challenging for open-pollinated crops that readily cross (e.g., squash, corn). For beginners, focus on self-pollinating plants like beans, peas, lettuce, and tomatoes.
- Processing:
- Dry Seeds (Beans, Peas, Lettuce, Grains): Allow pods/seed heads to dry completely on the plant. Harvest, shell, and clean the seeds, removing chaff.
- Wet Seeds (Tomatoes, Cucumbers, Squash): For tomatoes, ferment the seeds in water for a few days to remove the gel coating and inhibit disease. For cucumbers/squash, scrape out seeds, wash thoroughly, and dry.
- Drying: Spread seeds thinly on screens or paper plates in a cool, dry, well-ventilated area for 1-4 weeks. Ensure they are bone-dry before storage. I aim for less than 8% moisture content.
- Storage: Store seeds in airtight containers (glass jars with desiccant packets work well) in a cool, dark, dry place (ideally 40-50°F and 30-40% humidity). Label clearly with variety and date. Properly stored seeds can remain viable for 3-10 years or more.
Step 8: Season Extension & Winterizing
Extend your harvest and protect your garden for the off-season to truly maximize your self sufficient garden from scratch.
- Cold Frames: Simple structures with a transparent top (glass, polycarbonate, or old windows) that sit over garden beds. They trap solar heat, allowing you to grow cold-hardy crops (lettuce, spinach, kale, radishes) well into winter or start seeds earlier in spring. A basic cold frame can be built from 2×6 lumber and a sheet of polycarbonate for under $100.
- Hoop Houses/Low Tunnels: Larger structures made from flexible hoops (PVC pipe or EMT conduit) covered with greenhouse plastic. These provide more space and greater temperature moderation. A 10×20 ft DIY low tunnel kit can cost $200-$500, while a larger, more robust hoop house kit might be $1,000-$3,000. I use a 6×12 ft low tunnel made from 1/2-inch PVC hoops and 6mil greenhouse plastic, which extends my lettuce and spinach harvest by at least
The choice of seeds is crucial for a truly self sufficient garden from scratch.
- Choose Heirloom & Open-Pollinated Seeds: These varieties produce seeds that will grow true to type, meaning you can save seeds from your harvest year after year. F1 hybrids, while often vigorous, will not produce consistent offspring from saved seeds. Reputable seed companies include Baker Creek Heirloom Seeds, High Mowing Organic Seeds, and Seed Savers Exchange. Start with common, reliable varieties like ‘Black Krim’ tomatoes, ‘Provider’ bush beans, ‘Waltham Butternut’ squash, and ‘Black Seeded Simpson’ lettuce.
- Start Seeds Indoors (Optional but Recommended): For longer growing seasons or specific crops, starting seeds indoors gives you a head start. Use seed-starting mix (e.g., Espoma Organic Seed Starter Mix, ~$10 for 16qt bag) in seed trays (Jiffy Professional Greenhouse 72-cell kit, ~$15). Provide adequate light with LED grow lights (Barrina T5 2ft 4-pack LED Grow Lights, 20W each, ~$50) for 14-16 hours a day, positioned 2-4 inches above seedlings. Maintain consistent temperatures (65-75°F for most).
- Direct Sowing vs. Transplanting: Some crops (carrots, radishes, beans, corn) prefer direct sowing into the garden bed. Others (tomatoes, peppers, broccoli, kale) benefit from being started indoors and transplanted. Follow seed packet instructions for planting depths (e.g., lettuce seeds are often surface-sown or planted 1/8 inch deep, while beans are 1 inch deep) and spacing.
- Companion Planting: Strategically plant different species together to enhance growth, deter pests, and attract beneficial insects. For example, planting marigolds near tomatoes can deter nematodes, and basil improves tomato flavor. Nasturtiums can act as a trap crop for aphids.
- Succession Planting: For a continuous harvest, plant small batches of quick-growing crops (lettuce, radishes, cilantro) every 2-3 weeks. As one crop finishes, another is ready to take its place.
Step 6: Pest & Disease Management (Organic)
Maintaining a self sufficient garden from scratch means embracing organic pest and disease control.
- Integrated Pest Management (IPM): This holistic approach combines several strategies.
- Observation: Regularly inspect your plants for early signs of pests or disease. Catching issues early is key.
- Physical Barriers: Use row covers (e.g., Agribon AG-19 floating row cover, 10×20 ft, ~$20) to protect young plants from insect pests like cabbage worms and squash bugs. Install fences (e.g., 2×4 welded wire mesh, 4 ft tall, 50 ft roll ~$70) to keep out deer, rabbits, and other larger animals.
- Hand-Picking: For larger pests like tomato hornworms or squash bugs, simply pick them off and drop them into a bucket of soapy water.
- Companion Planting: As mentioned, certain plants repel pests. Marigolds, garlic, and onions are excellent deterrents.
- Attract Beneficial Insects: Plant flowers like dill, fennel, cosmos, and sweet alyssum to attract ladybugs, lacewings, and parasitic wasps, which prey on common garden pests.
- Organic Sprays & Treatments:
- Neem Oil: An excellent broad-spectrum organic insecticide and fungicide. Bonide Neem Oil Concentrate (16oz, ~$20) can be mixed at a rate of 1-2 tbsp per gallon of water and sprayed on affected plants.
- Insecticidal Soap: Effective against soft-bodied insects like aphids, whiteflies, and spider mites. Garden Safe Insecticidal Soap (24oz ready-to-use, ~$10).
- Bacillus thuringiensis (Bt): A naturally occurring soil bacterium that targets caterpillars and worms. Monterey BT Worm & Caterpillar Killer (16oz, ~$18) is highly effective and safe for beneficial insects.
- Copper or Sulfur Sprays: For fungal diseases like powdery mildew or blight, organic copper (e.g., Bonide Copper Fungicide, ~$15 for 1lb) or sulfur (e.g., Safer Brand Garden Fungicide, ~$10 for 16oz) can be used as a last resort.
Step 7: Harvesting & Seed Saving
The culmination of your efforts is the harvest, and seed saving closes the loop on self-sufficiency.
- Harvesting Techniques:
- Timing: Harvest vegetables at their peak ripeness for best flavor and nutritional value. For example, green beans should snap cleanly, cucumbers should be firm, and tomatoes should be fully colored.
- Frequency: Many crops, like zucchini, cucumbers, and bush beans, produce more if harvested frequently. Pick daily or every other day.
- Tools: Use clean, sharp pruners (e.g., Corona ClassicCUT Bypass Pruner BP 3180, ~$30) or a sharp knife for clean cuts, minimizing damage to the plant.
- Seed Saving: This is where the « self-sufficient » aspect truly shines.
- Selection: Only save seeds from your healthiest, most vigorous plants that show desired traits (disease resistance, good flavor, high yield).
- Isolation: To ensure true-to-type seeds, prevent cross-pollination. This can be challenging for open-pollinated crops that readily cross (e.g., squash, corn). For beginners, focus on self-pollinating plants like beans, peas, lettuce, and tomatoes.
- Processing:
- Dry Seeds (Beans, Peas, Lettuce, Grains): Allow pods/seed heads to dry completely on the plant. Harvest, shell, and clean the seeds, removing chaff.
- Wet Seeds (Tomatoes, Cucumbers, Squash): For tomatoes, ferment the seeds in water for a few days to remove the gel coating and inhibit disease. For cucumbers/squash, scrape out seeds, wash thoroughly, and dry.
- Drying: Spread seeds thinly on screens or paper plates in a cool, dry, well-ventilated area for 1-4 weeks. Ensure they are bone-dry before storage. I aim for less than 8% moisture content.
- Storage: Store seeds in airtight containers (glass jars with desiccant packets work well) in a cool, dark, dry place (ideally 40-50°F and 30-40% humidity). Label clearly with variety and date. Properly stored seeds can remain viable for 3-10 years or more.
Step 8: Season Extension & Winterizing
Extend your harvest and protect your garden for the off-season to truly maximize your self sufficient garden from scratch.
- Cold Frames: Simple structures with a transparent top (glass, polycarbonate, or old windows) that sit over garden beds. They trap solar heat, allowing you to grow cold-hardy crops (lettuce, spinach, kale, radishes) well into winter or start seeds earlier in spring. A basic cold frame can be built from 2×6 lumber and a sheet of polycarbonate for under $100.
- Hoop Houses/Low Tunnels: Larger structures made from flexible hoops (PVC pipe or EMT conduit) covered with greenhouse plastic. These provide more space and greater temperature moderation. A 10×20 ft DIY low tunnel kit can cost $200-$500, while a larger, more robust hoop house kit might be $1,000-$3,000. I use a 6×12 ft low tunnel made from 1/2-inch PVC hoops and 6mil greenhouse plastic, which extends my lettuce and spinach harvest by at least
Step 5: Seed Selection & Planting
The choice of seeds is crucial for a truly self sufficient garden from scratch.
- Choose Heirloom & Open-Pollinated Seeds: These varieties produce seeds that will grow true to type, meaning you can save seeds from your harvest year after year. F1 hybrids, while often vigorous, will not produce consistent offspring from saved seeds. Reputable seed companies include Baker Creek Heirloom Seeds, High Mowing Organic Seeds, and Seed Savers Exchange. Start with common, reliable varieties like ‘Black Krim’ tomatoes, ‘Provider’ bush beans, ‘Waltham Butternut’ squash, and ‘Black Seeded Simpson’ lettuce.
- Start Seeds Indoors (Optional but Recommended): For longer growing seasons or specific crops, starting seeds indoors gives you a head start. Use seed-starting mix (e.g., Espoma Organic Seed Starter Mix, ~$10 for 16qt bag) in seed trays (Jiffy Professional Greenhouse 72-cell kit, ~$15). Provide adequate light with LED grow lights (Barrina T5 2ft 4-pack LED Grow Lights, 20W each, ~$50) for 14-16 hours a day, positioned 2-4 inches above seedlings. Maintain consistent temperatures (65-75°F for most).
- Direct Sowing vs. Transplanting: Some crops (carrots, radishes, beans, corn) prefer direct sowing into the garden bed. Others (tomatoes, peppers, broccoli, kale) benefit from being started indoors and transplanted. Follow seed packet instructions for planting depths (e.g., lettuce seeds are often surface-sown or planted 1/8 inch deep, while beans are 1 inch deep) and spacing.
- Companion Planting: Strategically plant different species together to enhance growth, deter pests, and attract beneficial insects. For example, planting marigolds near tomatoes can deter nematodes, and basil improves tomato flavor. Nasturtiums can act as a trap crop for aphids.
- Succession Planting: For a continuous harvest, plant small batches of quick-growing crops (lettuce, radishes, cilantro) every 2-3 weeks. As one crop finishes, another is ready to take its place.
Step 6: Pest & Disease Management (Organic)
Maintaining a self sufficient garden from scratch means embracing organic pest and disease control.
- Integrated Pest Management (IPM): This holistic approach combines several strategies.
- Observation: Regularly inspect your plants for early signs of pests or disease. Catching issues early is key.
- Physical Barriers: Use row covers (e.g., Agribon AG-19 floating row cover, 10×20 ft, ~$20) to protect young plants from insect pests like cabbage worms and squash bugs. Install fences (e.g., 2×4 welded wire mesh, 4 ft tall, 50 ft roll ~$70) to keep out deer, rabbits, and other larger animals.
- Hand-Picking: For larger pests like tomato hornworms or squash bugs, simply pick them off and drop them into a bucket of soapy water.
- Companion Planting: As mentioned, certain plants repel pests. Marigolds, garlic, and onions are excellent deterrents.
- Attract Beneficial Insects: Plant flowers like dill, fennel, cosmos, and sweet alyssum to attract ladybugs, lacewings, and parasitic wasps, which prey on common garden pests.
- Organic Sprays & Treatments:
- Neem Oil: An excellent broad-spectrum organic insecticide and fungicide. Bonide Neem Oil Concentrate (16oz, ~$20) can be mixed at a rate of 1-2 tbsp per gallon of water and sprayed on affected plants.
- Insecticidal Soap: Effective against soft-bodied insects like aphids, whiteflies, and spider mites. Garden Safe Insecticidal Soap (24oz ready-to-use, ~$10).
- Bacillus thuringiensis (Bt): A naturally occurring soil bacterium that targets caterpillars and worms. Monterey BT Worm & Caterpillar Killer (16oz, ~$18) is highly effective and safe for beneficial insects.
- Copper or Sulfur Sprays: For fungal diseases like powdery mildew or blight, organic copper (e.g., Bonide Copper Fungicide, ~$15 for 1lb) or sulfur (e.g., Safer Brand Garden Fungicide, ~$10 for 16oz) can be used as a last resort.
Step 7: Harvesting & Seed Saving
The culmination of your efforts is the harvest, and seed saving closes the loop on self-sufficiency.
- Harvesting Techniques:
- Timing: Harvest vegetables at their peak ripeness for best flavor and nutritional value. For example, green beans should snap cleanly, cucumbers should be firm, and tomatoes should be fully colored.
- Frequency: Many crops, like zucchini, cucumbers, and bush beans, produce more if harvested frequently. Pick daily or every other day.
- Tools: Use clean, sharp pruners (e.g., Corona ClassicCUT Bypass Pruner BP 3180, ~$30) or a sharp knife for clean cuts, minimizing damage to the plant.
- Seed Saving: This is where the « self-sufficient » aspect truly shines.
- Selection: Only save seeds from your healthiest, most vigorous plants that show desired traits (disease resistance, good flavor, high yield).
- Isolation: To ensure true-to-type seeds, prevent cross-pollination. This can be challenging for open-pollinated crops that readily cross (e.g., squash, corn). For beginners, focus on self-pollinating plants like beans, peas, lettuce, and tomatoes.
- Processing:
- Dry Seeds (Beans, Peas, Lettuce, Grains): Allow pods/seed heads to dry completely on the plant. Harvest, shell, and clean the seeds, removing chaff.
- Wet Seeds (Tomatoes, Cucumbers, Squash): For tomatoes, ferment the seeds in water for a few days to remove the gel coating and inhibit disease. For cucumbers/squash, scrape out seeds, wash thoroughly, and dry.
- Drying: Spread seeds thinly on screens or paper plates in a cool, dry, well-ventilated area for 1-4 weeks. Ensure they are bone-dry before storage. I aim for less than 8% moisture content.
- Storage: Store seeds in airtight containers (glass jars with desiccant packets work well) in a cool, dark, dry place (ideally 40-50°F and 30-40% humidity). Label clearly with variety and date. Properly stored seeds can remain viable for 3-10 years or more.
Step 8: Season Extension & Winterizing
Extend your harvest and protect your garden for the off-season to truly maximize your self sufficient garden from scratch.
- Cold Frames: Simple structures with a transparent top (glass, polycarbonate, or old windows) that sit over garden beds. They trap solar heat, allowing you to grow cold-hardy crops (lettuce, spinach, kale, radishes) well into winter or start seeds earlier in spring. A basic cold frame can be built from 2×6 lumber and a sheet of polycarbonate for under $100.
- Hoop Houses/Low Tunnels: Larger structures made from flexible hoops (PVC pipe or EMT conduit) covered with greenhouse plastic. These provide more space and greater temperature moderation. A 10×20 ft DIY low tunnel kit can cost $200-$500, while a larger, more robust hoop house kit might be $1,000-$3,000. I use a 6×12 ft low tunnel made from 1/2-inch PVC hoops and 6mil greenhouse plastic, which extends my lettuce and spinach harvest by at least
- Rainwater Harvesting: This is my primary source of irrigation water. A 55-gallon rain barrel (e.g., EarthMark Rain Barrel, ~$120-$150) connected to a downspout can collect significant water. For larger needs, I use two 275-gallon IBC totes (Intermediate Bulk Containers, often available used for $100-$200 each from food-grade sources) connected in series. A 1,000 sq ft roof can collect approximately 620 gallons of water for every inch of rainfall. My 1,500 sq ft roof provides ample water for my 600 sq ft garden through multiple barrels and totes.
- Drip Irrigation: This is by far the most water-efficient method, delivering water directly to the plant’s root zone, minimizing evaporation and weed growth.
- Components: A typical drip system includes a pressure regulator (e.g., Rain Bird PRV-10, ~$15), a filter (Rain Bird RBY filter, ~$20), main tubing (1/2-inch poly tubing, 100ft ~$25), smaller feeder lines (1/4-inch tubing), and emitters (0.5 GPH or 1 GPH per plant).
- Kits: For beginners, a starter kit like the Rain Bird Drip Irrigation Garden Kit (model DDI-KIT-1P, ~$40-$60) is excellent for a small garden. For larger setups, I use Netafim Techline CV Drip Line (500ft roll, ~$150-$200), which has pressure-compensating emitters built-in, ensuring even watering across long runs.
- Automation: For true self-sufficiency, consider a battery-powered timer (e.g., Orbit B-Hyve Bluetooth Hose Faucet Timer, ~$50) or a solar-powered timer connected to a small 12V pump.
- Solar-Powered Pumps: For lifting water from a well, pond, or large storage tank to your garden, a solar pump is a game-changer. For a smaller drip system, a Shurflo 2088-594-152 Diaphragm Pump (12V, 3.5 GPM, ~$180) can be powered by a single 100W solar panel (e.g., Renogy 100W Monocrystalline Solar Panel, ~$100) and a small 12V battery (e.g., a 50Ah LiFePO4 battery like the Battle Born 50Ah, ~$450). For larger operations or deeper wells, more robust systems are needed. If you’re looking to build out a comprehensive off-grid power system to support your garden’s water needs, or indeed your entire homestead, you might want to explore resources like the Power Grid Generator complete system guide to understand the full scope of what’s possible in terms of energy independence.
Step 5: Seed Selection & Planting
The choice of seeds is crucial for a truly self sufficient garden from scratch.
- Choose Heirloom & Open-Pollinated Seeds: These varieties produce seeds that will grow true to type, meaning you can save seeds from your harvest year after year. F1 hybrids, while often vigorous, will not produce consistent offspring from saved seeds. Reputable seed companies include Baker Creek Heirloom Seeds, High Mowing Organic Seeds, and Seed Savers Exchange. Start with common, reliable varieties like ‘Black Krim’ tomatoes, ‘Provider’ bush beans, ‘Waltham Butternut’ squash, and ‘Black Seeded Simpson’ lettuce.
- Start Seeds Indoors (Optional but Recommended): For longer growing seasons or specific crops, starting seeds indoors gives you a head start. Use seed-starting mix (e.g., Espoma Organic Seed Starter Mix, ~$10 for 16qt bag) in seed trays (Jiffy Professional Greenhouse 72-cell kit, ~$15). Provide adequate light with LED grow lights (Barrina T5 2ft 4-pack LED Grow Lights, 20W each, ~$50) for 14-16 hours a day, positioned 2-4 inches above seedlings. Maintain consistent temperatures (65-75°F for most).
- Direct Sowing vs. Transplanting: Some crops (carrots, radishes, beans, corn) prefer direct sowing into the garden bed. Others (tomatoes, peppers, broccoli, kale) benefit from being started indoors and transplanted. Follow seed packet instructions for planting depths (e.g., lettuce seeds are often surface-sown or planted 1/8 inch deep, while beans are 1 inch deep) and spacing.
- Companion Planting: Strategically plant different species together to enhance growth, deter pests, and attract beneficial insects. For example, planting marigolds near tomatoes can deter nematodes, and basil improves tomato flavor. Nasturtiums can act as a trap crop for aphids.
- Succession Planting: For a continuous harvest, plant small batches of quick-growing crops (lettuce, radishes, cilantro) every 2-3 weeks. As one crop finishes, another is ready to take its place.
Step 6: Pest & Disease Management (Organic)
Maintaining a self sufficient garden from scratch means embracing organic pest and disease control.
- Integrated Pest Management (IPM): This holistic approach combines several strategies.
- Observation: Regularly inspect your plants for early signs of pests or disease. Catching issues early is key.
- Physical Barriers: Use row covers (e.g., Agribon AG-19 floating row cover, 10×20 ft, ~$20) to protect young plants from insect pests like cabbage worms and squash bugs. Install fences (e.g., 2×4 welded wire mesh, 4 ft tall, 50 ft roll ~$70) to keep out deer, rabbits, and other larger animals.
- Hand-Picking: For larger pests like tomato hornworms or squash bugs, simply pick them off and drop them into a bucket of soapy water.
- Companion Planting: As mentioned, certain plants repel pests. Marigolds, garlic, and onions are excellent deterrents.
- Attract Beneficial Insects: Plant flowers like dill, fennel, cosmos, and sweet alyssum to attract ladybugs, lacewings, and parasitic wasps, which prey on common garden pests.
- Organic Sprays & Treatments:
- Neem Oil: An excellent broad-spectrum organic insecticide and fungicide. Bonide Neem Oil Concentrate (16oz, ~$20) can be mixed at a rate of 1-2 tbsp per gallon of water and sprayed on affected plants.
- Insecticidal Soap: Effective against soft-bodied insects like aphids, whiteflies, and spider mites. Garden Safe Insecticidal Soap (24oz ready-to-use, ~$10).
- Bacillus thuringiensis (Bt): A naturally occurring soil bacterium that targets caterpillars and worms. Monterey BT Worm & Caterpillar Killer (16oz, ~$18) is highly effective and safe for beneficial insects.
- Copper or Sulfur Sprays: For fungal diseases like powdery mildew or blight, organic copper (e.g., Bonide Copper Fungicide, ~$15 for 1lb) or sulfur (e.g., Safer Brand Garden Fungicide, ~$10 for 16oz) can be used as a last resort.
Step 7: Harvesting & Seed Saving
The culmination of your efforts is the harvest, and seed saving closes the loop on self-sufficiency.
- Harvesting Techniques:
- Timing: Harvest vegetables at their peak ripeness for best flavor and nutritional value. For example, green beans should snap cleanly, cucumbers should be firm, and tomatoes should be fully colored.
- Frequency: Many crops, like zucchini, cucumbers, and bush beans, produce more if harvested frequently. Pick daily or every other day.
- Tools: Use clean, sharp pruners (e.g., Corona ClassicCUT Bypass Pruner BP 3180, ~$30) or a sharp knife for clean cuts, minimizing damage to the plant.
- Seed Saving: This is where the « self-sufficient » aspect truly shines.
- Selection: Only save seeds from your healthiest, most vigorous plants that show desired traits (disease resistance, good flavor, high yield).
- Isolation: To ensure true-to-type seeds, prevent cross-pollination. This can be challenging for open-pollinated crops that readily cross (e.g., squash, corn). For beginners, focus on self-pollinating plants like beans, peas, lettuce, and tomatoes.
- Processing:
- Dry Seeds (Beans, Peas, Lettuce, Grains): Allow pods/seed heads to dry completely on the plant. Harvest, shell, and clean the seeds, removing chaff.
- Wet Seeds (Tomatoes, Cucumbers, Squash): For tomatoes, ferment the seeds in water for a few days to remove the gel coating and inhibit disease. For cucumbers/squash, scrape out seeds, wash thoroughly, and dry.
- Drying: Spread seeds thinly on screens or paper plates in a cool, dry, well-ventilated area for 1-4 weeks. Ensure they are bone-dry before storage. I aim for less than 8% moisture content.
- Storage: Store seeds in airtight containers (glass jars with desiccant packets work well) in a cool, dark, dry place (ideally 40-50°F and 30-40% humidity). Label clearly with variety and date. Properly stored seeds can remain viable for 3-10 years or more.
Step 8: Season Extension & Winterizing
Extend your harvest and protect your garden for the off-season to truly maximize your self sufficient garden from scratch.
- Cold Frames: Simple structures with a transparent top (glass, polycarbonate, or old windows) that sit over garden beds. They trap solar heat, allowing you to grow cold-hardy crops (lettuce, spinach, kale, radishes) well into winter or start seeds earlier in spring. A basic cold frame can be built from 2×6 lumber and a sheet of polycarbonate for under $100.
- Hoop Houses/Low Tunnels: Larger structures made from flexible hoops (PVC pipe or EMT conduit) covered with greenhouse plastic. These provide more space and greater temperature moderation. A 10×20 ft DIY low tunnel kit can cost $200-$500, while a larger, more robust hoop house kit might be $1,000-$3,000. I use a 6×12 ft low tunnel made from 1/2-inch PVC hoops and 6mil greenhouse plastic, which extends my lettuce and spinach harvest by at least
Efficient water management is critical for a self sufficient garden from scratch, especially in off-grid living where water resources might be limited.
- Rainwater Harvesting: This is my primary source of irrigation water. A 55-gallon rain barrel (e.g., EarthMark Rain Barrel, ~$120-$150) connected to a downspout can collect significant water. For larger needs, I use two 275-gallon IBC totes (Intermediate Bulk Containers, often available used for $100-$200 each from food-grade sources) connected in series. A 1,000 sq ft roof can collect approximately 620 gallons of water for every inch of rainfall. My 1,500 sq ft roof provides ample water for my 600 sq ft garden through multiple barrels and totes.
- Drip Irrigation: This is by far the most water-efficient method, delivering water directly to the plant’s root zone, minimizing evaporation and weed growth.
- Components: A typical drip system includes a pressure regulator (e.g., Rain Bird PRV-10, ~$15), a filter (Rain Bird RBY filter, ~$20), main tubing (1/2-inch poly tubing, 100ft ~$25), smaller feeder lines (1/4-inch tubing), and emitters (0.5 GPH or 1 GPH per plant).
- Kits: For beginners, a starter kit like the Rain Bird Drip Irrigation Garden Kit (model DDI-KIT-1P, ~$40-$60) is excellent for a small garden. For larger setups, I use Netafim Techline CV Drip Line (500ft roll, ~$150-$200), which has pressure-compensating emitters built-in, ensuring even watering across long runs.
- Automation: For true self-sufficiency, consider a battery-powered timer (e.g., Orbit B-Hyve Bluetooth Hose Faucet Timer, ~$50) or a solar-powered timer connected to a small 12V pump.
- Solar-Powered Pumps: For lifting water from a well, pond, or large storage tank to your garden, a solar pump is a game-changer. For a smaller drip system, a Shurflo 2088-594-152 Diaphragm Pump (12V, 3.5 GPM, ~$180) can be powered by a single 100W solar panel (e.g., Renogy 100W Monocrystalline Solar Panel, ~$100) and a small 12V battery (e.g., a 50Ah LiFePO4 battery like the Battle Born 50Ah, ~$450). For larger operations or deeper wells, more robust systems are needed. If you’re looking to build out a comprehensive off-grid power system to support your garden’s water needs, or indeed your entire homestead, you might want to explore resources like the Power Grid Generator complete system guide to understand the full scope of what’s possible in terms of energy independence.
Step 5: Seed Selection & Planting
The choice of seeds is crucial for a truly self sufficient garden from scratch.
- Choose Heirloom & Open-Pollinated Seeds: These varieties produce seeds that will grow true to type, meaning you can save seeds from your harvest year after year. F1 hybrids, while often vigorous, will not produce consistent offspring from saved seeds. Reputable seed companies include Baker Creek Heirloom Seeds, High Mowing Organic Seeds, and Seed Savers Exchange. Start with common, reliable varieties like ‘Black Krim’ tomatoes, ‘Provider’ bush beans, ‘Waltham Butternut’ squash, and ‘Black Seeded Simpson’ lettuce.
- Start Seeds Indoors (Optional but Recommended): For longer growing seasons or specific crops, starting seeds indoors gives you a head start. Use seed-starting mix (e.g., Espoma Organic Seed Starter Mix, ~$10 for 16qt bag) in seed trays (Jiffy Professional Greenhouse 72-cell kit, ~$15). Provide adequate light with LED grow lights (Barrina T5 2ft 4-pack LED Grow Lights, 20W each, ~$50) for 14-16 hours a day, positioned 2-4 inches above seedlings. Maintain consistent temperatures (65-75°F for most).
- Direct Sowing vs. Transplanting: Some crops (carrots, radishes, beans, corn) prefer direct sowing into the garden bed. Others (tomatoes, peppers, broccoli, kale) benefit from being started indoors and transplanted. Follow seed packet instructions for planting depths (e.g., lettuce seeds are often surface-sown or planted 1/8 inch deep, while beans are 1 inch deep) and spacing.
- Companion Planting: Strategically plant different species together to enhance growth, deter pests, and attract beneficial insects. For example, planting marigolds near tomatoes can deter nematodes, and basil improves tomato flavor. Nasturtiums can act as a trap crop for aphids.
- Succession Planting: For a continuous harvest, plant small batches of quick-growing crops (lettuce, radishes, cilantro) every 2-3 weeks. As one crop finishes, another is ready to take its place.
Step 6: Pest & Disease Management (Organic)
Maintaining a self sufficient garden from scratch means embracing organic pest and disease control.
- Integrated Pest Management (IPM): This holistic approach combines several strategies.
- Observation: Regularly inspect your plants for early signs of pests or disease. Catching issues early is key.
- Physical Barriers: Use row covers (e.g., Agribon AG-19 floating row cover, 10×20 ft, ~$20) to protect young plants from insect pests like cabbage worms and squash bugs. Install fences (e.g., 2×4 welded wire mesh, 4 ft tall, 50 ft roll ~$70) to keep out deer, rabbits, and other larger animals.
- Hand-Picking: For larger pests like tomato hornworms or squash bugs, simply pick them off and drop them into a bucket of soapy water.
- Companion Planting: As mentioned, certain plants repel pests. Marigolds, garlic, and onions are excellent deterrents.
- Attract Beneficial Insects: Plant flowers like dill, fennel, cosmos, and sweet alyssum to attract ladybugs, lacewings, and parasitic wasps, which prey on common garden pests.
- Organic Sprays & Treatments:
- Neem Oil: An excellent broad-spectrum organic insecticide and fungicide. Bonide Neem Oil Concentrate (16oz, ~$20) can be mixed at a rate of 1-2 tbsp per gallon of water and sprayed on affected plants.
- Insecticidal Soap: Effective against soft-bodied insects like aphids, whiteflies, and spider mites. Garden Safe Insecticidal Soap (24oz ready-to-use, ~$10).
- Bacillus thuringiensis (Bt): A naturally occurring soil bacterium that targets caterpillars and worms. Monterey BT Worm & Caterpillar Killer (16oz, ~$18) is highly effective and safe for beneficial insects.
- Copper or Sulfur Sprays: For fungal diseases like powdery mildew or blight, organic copper (e.g., Bonide Copper Fungicide, ~$15 for 1lb) or sulfur (e.g., Safer Brand Garden Fungicide, ~$10 for 16oz) can be used as a last resort.
Step 7: Harvesting & Seed Saving
The culmination of your efforts is the harvest, and seed saving closes the loop on self-sufficiency.
- Harvesting Techniques:
- Timing: Harvest vegetables at their peak ripeness for best flavor and nutritional value. For example, green beans should snap cleanly, cucumbers should be firm, and tomatoes should be fully colored.
- Frequency: Many crops, like zucchini, cucumbers, and bush beans, produce more if harvested frequently. Pick daily or every other day.
- Tools: Use clean, sharp pruners (e.g., Corona ClassicCUT Bypass Pruner BP 3180, ~$30) or a sharp knife for clean cuts, minimizing damage to the plant.
- Seed Saving: This is where the « self-sufficient » aspect truly shines.
- Selection: Only save seeds from your healthiest, most vigorous plants that show desired traits (disease resistance, good flavor, high yield).
- Isolation: To ensure true-to-type seeds, prevent cross-pollination. This can be challenging for open-pollinated crops that readily cross (e.g., squash, corn). For beginners, focus on self-pollinating plants like beans, peas, lettuce, and tomatoes.
- Processing:
- Dry Seeds (Beans, Peas, Lettuce, Grains): Allow pods/seed heads to dry completely on the plant. Harvest, shell, and clean the seeds, removing chaff.
- Wet Seeds (Tomatoes, Cucumbers, Squash): For tomatoes, ferment the seeds in water for a few days to remove the gel coating and inhibit disease. For cucumbers/squash, scrape out seeds, wash thoroughly, and dry.
- Drying: Spread seeds thinly on screens or paper plates in a cool, dry, well-ventilated area for 1-4 weeks. Ensure they are bone-dry before storage. I aim for less than 8% moisture content.
- Storage: Store seeds in airtight containers (glass jars with desiccant packets work well) in a cool, dark, dry place (ideally 40-50°F and 30-40% humidity). Label clearly with variety and date. Properly stored seeds can remain viable for 3-10 years or more.
Step 8: Season Extension & Winterizing
Extend your harvest and protect your garden for the off-season to truly maximize your self sufficient garden from scratch.
- Cold Frames: Simple structures with a transparent top (glass, polycarbonate, or old windows) that sit over garden beds. They trap solar heat, allowing you to grow cold-hardy crops (lettuce, spinach, kale, radishes) well into winter or start seeds earlier in spring. A basic cold frame can be built from 2×6 lumber and a sheet of polycarbonate for under $100.
- Hoop Houses/Low Tunnels: Larger structures made from flexible hoops (PVC pipe or EMT conduit) covered with greenhouse plastic. These provide more space and greater temperature moderation. A 10×20 ft DIY low tunnel kit can cost $200-$500, while a larger, more robust hoop house kit might be $1,000-$3,000. I use a 6×12 ft low tunnel made from 1/2-inch PVC hoops and 6mil greenhouse plastic, which extends my lettuce and spinach harvest by at least
Step 4: Water Management & Irrigation
Efficient water management is critical for a self sufficient garden from scratch, especially in off-grid living where water resources might be limited.
- Rainwater Harvesting: This is my primary source of irrigation water. A 55-gallon rain barrel (e.g., EarthMark Rain Barrel, ~$120-$150) connected to a downspout can collect significant water. For larger needs, I use two 275-gallon IBC totes (Intermediate Bulk Containers, often available used for $100-$200 each from food-grade sources) connected in series. A 1,000 sq ft roof can collect approximately 620 gallons of water for every inch of rainfall. My 1,500 sq ft roof provides ample water for my 600 sq ft garden through multiple barrels and totes.
- Drip Irrigation: This is by far the most water-efficient method, delivering water directly to the plant’s root zone, minimizing evaporation and weed growth.
- Components: A typical drip system includes a pressure regulator (e.g., Rain Bird PRV-10, ~$15), a filter (Rain Bird RBY filter, ~$20), main tubing (1/2-inch poly tubing, 100ft ~$25), smaller feeder lines (1/4-inch tubing), and emitters (0.5 GPH or 1 GPH per plant).
- Kits: For beginners, a starter kit like the Rain Bird Drip Irrigation Garden Kit (model DDI-KIT-1P, ~$40-$60) is excellent for a small garden. For larger setups, I use Netafim Techline CV Drip Line (500ft roll, ~$150-$200), which has pressure-compensating emitters built-in, ensuring even watering across long runs.
- Automation: For true self-sufficiency, consider a battery-powered timer (e.g., Orbit B-Hyve Bluetooth Hose Faucet Timer, ~$50) or a solar-powered timer connected to a small 12V pump.
- Solar-Powered Pumps: For lifting water from a well, pond, or large storage tank to your garden, a solar pump is a game-changer. For a smaller drip system, a Shurflo 2088-594-152 Diaphragm Pump (12V, 3.5 GPM, ~$180) can be powered by a single 100W solar panel (e.g., Renogy 100W Monocrystalline Solar Panel, ~$100) and a small 12V battery (e.g., a 50Ah LiFePO4 battery like the Battle Born 50Ah, ~$450). For larger operations or deeper wells, more robust systems are needed. If you’re looking to build out a comprehensive off-grid power system to support your garden’s water needs, or indeed your entire homestead, you might want to explore resources like the Power Grid Generator complete system guide to understand the full scope of what’s possible in terms of energy independence.
Step 5: Seed Selection & Planting
The choice of seeds is crucial for a truly self sufficient garden from scratch.
- Choose Heirloom & Open-Pollinated Seeds: These varieties produce seeds that will grow true to type, meaning you can save seeds from your harvest year after year. F1 hybrids, while often vigorous, will not produce consistent offspring from saved seeds. Reputable seed companies include Baker Creek Heirloom Seeds, High Mowing Organic Seeds, and Seed Savers Exchange. Start with common, reliable varieties like ‘Black Krim’ tomatoes, ‘Provider’ bush beans, ‘Waltham Butternut’ squash, and ‘Black Seeded Simpson’ lettuce.
- Start Seeds Indoors (Optional but Recommended): For longer growing seasons or specific crops, starting seeds indoors gives you a head start. Use seed-starting mix (e.g., Espoma Organic Seed Starter Mix, ~$10 for 16qt bag) in seed trays (Jiffy Professional Greenhouse 72-cell kit, ~$15). Provide adequate light with LED grow lights (Barrina T5 2ft 4-pack LED Grow Lights, 20W each, ~$50) for 14-16 hours a day, positioned 2-4 inches above seedlings. Maintain consistent temperatures (65-75°F for most).
- Direct Sowing vs. Transplanting: Some crops (carrots, radishes, beans, corn) prefer direct sowing into the garden bed. Others (tomatoes, peppers, broccoli, kale) benefit from being started indoors and transplanted. Follow seed packet instructions for planting depths (e.g., lettuce seeds are often surface-sown or planted 1/8 inch deep, while beans are 1 inch deep) and spacing.
- Companion Planting: Strategically plant different species together to enhance growth, deter pests, and attract beneficial insects. For example, planting marigolds near tomatoes can deter nematodes, and basil improves tomato flavor. Nasturtiums can act as a trap crop for aphids.
- Succession Planting: For a continuous harvest, plant small batches of quick-growing crops (lettuce, radishes, cilantro) every 2-3 weeks. As one crop finishes, another is ready to take its place.
Step 6: Pest & Disease Management (Organic)
Maintaining a self sufficient garden from scratch means embracing organic pest and disease control.
- Integrated Pest Management (IPM): This holistic approach combines several strategies.
- Observation: Regularly inspect your plants for early signs of pests or disease. Catching issues early is key.
- Physical Barriers: Use row covers (e.g., Agribon AG-19 floating row cover, 10×20 ft, ~$20) to protect young plants from insect pests like cabbage worms and squash bugs. Install fences (e.g., 2×4 welded wire mesh, 4 ft tall, 50 ft roll ~$70) to keep out deer, rabbits, and other larger animals.
- Hand-Picking: For larger pests like tomato hornworms or squash bugs, simply pick them off and drop them into a bucket of soapy water.
- Companion Planting: As mentioned, certain plants repel pests. Marigolds, garlic, and onions are excellent deterrents.
- Attract Beneficial Insects: Plant flowers like dill, fennel, cosmos, and sweet alyssum to attract ladybugs, lacewings, and parasitic wasps, which prey on common garden pests.
- Organic Sprays & Treatments:
- Neem Oil: An excellent broad-spectrum organic insecticide and fungicide. Bonide Neem Oil Concentrate (16oz, ~$20) can be mixed at a rate of 1-2 tbsp per gallon of water and sprayed on affected plants.
- Insecticidal Soap: Effective against soft-bodied insects like aphids, whiteflies, and spider mites. Garden Safe Insecticidal Soap (24oz ready-to-use, ~$10).
- Bacillus thuringiensis (Bt): A naturally occurring soil bacterium that targets caterpillars and worms. Monterey BT Worm & Caterpillar Killer (16oz, ~$18) is highly effective and safe for beneficial insects.
- Copper or Sulfur Sprays: For fungal diseases like powdery mildew or blight, organic copper (e.g., Bonide Copper Fungicide, ~$15 for 1lb) or sulfur (e.g., Safer Brand Garden Fungicide, ~$10 for 16oz) can be used as a last resort.
Step 7: Harvesting & Seed Saving
The culmination of your efforts is the harvest, and seed saving closes the loop on self-sufficiency.
- Harvesting Techniques:
- Timing: Harvest vegetables at their peak ripeness for best flavor and nutritional value. For example, green beans should snap cleanly, cucumbers should be firm, and tomatoes should be fully colored.
- Frequency: Many crops, like zucchini, cucumbers, and bush beans, produce more if harvested frequently. Pick daily or every other day.
- Tools: Use clean, sharp pruners (e.g., Corona ClassicCUT Bypass Pruner BP 3180, ~$30) or a sharp knife for clean cuts, minimizing damage to the plant.
- Seed Saving: This is where the « self-sufficient » aspect truly shines.
- Selection: Only save seeds from your healthiest, most vigorous plants that show desired traits (disease resistance, good flavor, high yield).
- Isolation: To ensure true-to-type seeds, prevent cross-pollination. This can be challenging for open-pollinated crops that readily cross (e.g., squash, corn). For beginners, focus on self-pollinating plants like beans, peas, lettuce, and tomatoes.
- Processing:
- Dry Seeds (Beans, Peas, Lettuce, Grains): Allow pods/seed heads to dry completely on the plant. Harvest, shell, and clean the seeds, removing chaff.
- Wet Seeds (Tomatoes, Cucumbers, Squash): For tomatoes, ferment the seeds in water for a few days to remove the gel coating and inhibit disease. For cucumbers/squash, scrape out seeds, wash thoroughly, and dry.
- Drying: Spread seeds thinly on screens or paper plates in a cool, dry, well-ventilated area for 1-4 weeks. Ensure they are bone-dry before storage. I aim for less than 8% moisture content.
- Storage: Store seeds in airtight containers (glass jars with desiccant packets work well) in a cool, dark, dry place (ideally 40-50°F and 30-40% humidity). Label clearly with variety and date. Properly stored seeds can remain viable for 3-10 years or more.
Step 8: Season Extension & Winterizing
Extend your harvest and protect your garden for the off-season to truly maximize your self sufficient garden from scratch.
- Cold Frames: Simple structures with a transparent top (glass, polycarbonate, or old windows) that sit over garden beds. They trap solar heat, allowing you to grow cold-hardy crops (lettuce, spinach, kale, radishes) well into winter or start seeds earlier in spring. A basic cold frame can be built from 2×6 lumber and a sheet of polycarbonate for under $100.
- Hoop Houses/Low Tunnels: Larger structures made from flexible hoops (PVC pipe or EMT conduit) covered with greenhouse plastic. These provide more space and greater temperature moderation. A 10×20 ft DIY low tunnel kit can cost $200-$500, while a larger, more robust hoop house kit might be $1,000-$3,000. I use a 6×12 ft low tunnel made from 1/2-inch PVC hoops and 6mil greenhouse plastic, which extends my lettuce and spinach harvest by at least
- In-Ground Beds: If you have excellent native soil and good drainage, in-ground beds are the most economical. Double-digging (loosening soil two shovel depths) can significantly improve drainage and aeration. For my main garden, I primarily use in-ground beds, but I focus on building up the soil over time with consistent compost additions and cover cropping. I aim for beds that are no wider than 3-4 feet so I can reach the center without stepping on the soil, compacting it.
- Raised Beds: Raised beds offer numerous advantages, especially for poor soil, heavy clay, or rocky areas. They provide better drainage, warm up faster in spring, reduce compaction, and make weeding and harvesting easier on your back.
- Material Options:
- Untreated Cedar: Naturally rot-resistant and chemical-free. A 4×8 ft bed, 12 inches deep, typically requires three 2x12x8 ft cedar boards, costing around $50-$60 per board (total ~$150-$180) plus corner brackets or screws. My first raised beds were cedar and are still going strong after 7 years.
- Galvanized Steel: Durable, long-lasting, and aesthetically pleasing. Brands like Vego Garden offer modular kits. A Vego Garden 17″ Tall 8-in-1 Metal Raised Garden Bed (can be configured to 4×8 ft) costs approximately $250-$300.
- Concrete Blocks/Stones: Very durable but can leach minerals (though generally safe once weathered) and can be expensive.
- Recycled Materials: Pallets (check for chemical treatment stamps like « HT » for heat-treated), old tires (controversial due to potential chemical leaching).
- Filling Raised Beds: Don’t just fill with topsoil. Use a « Hugelkultur » approach (logs, branches, leaves, then compost, then topsoil) or a mixture of 60% good quality topsoil, 30% compost, and 10% perlite or vermiculite for drainage. A 4x8x1 ft raised bed requires about 32 cubic feet (or ~1.2 cubic yards) of soil mix, which can cost $100-$200 depending on your source.
- Material Options:
Step 4: Water Management & Irrigation
Efficient water management is critical for a self sufficient garden from scratch, especially in off-grid living where water resources might be limited.
- Rainwater Harvesting: This is my primary source of irrigation water. A 55-gallon rain barrel (e.g., EarthMark Rain Barrel, ~$120-$150) connected to a downspout can collect significant water. For larger needs, I use two 275-gallon IBC totes (Intermediate Bulk Containers, often available used for $100-$200 each from food-grade sources) connected in series. A 1,000 sq ft roof can collect approximately 620 gallons of water for every inch of rainfall. My 1,500 sq ft roof provides ample water for my 600 sq ft garden through multiple barrels and totes.
- Drip Irrigation: This is by far the most water-efficient method, delivering water directly to the plant’s root zone, minimizing evaporation and weed growth.
- Components: A typical drip system includes a pressure regulator (e.g., Rain Bird PRV-10, ~$15), a filter (Rain Bird RBY filter, ~$20), main tubing (1/2-inch poly tubing, 100ft ~$25), smaller feeder lines (1/4-inch tubing), and emitters (0.5 GPH or 1 GPH per plant).
- Kits: For beginners, a starter kit like the Rain Bird Drip Irrigation Garden Kit (model DDI-KIT-1P, ~$40-$60) is excellent for a small garden. For larger setups, I use Netafim Techline CV Drip Line (500ft roll, ~$150-$200), which has pressure-compensating emitters built-in, ensuring even watering across long runs.
- Automation: For true self-sufficiency, consider a battery-powered timer (e.g., Orbit B-Hyve Bluetooth Hose Faucet Timer, ~$50) or a solar-powered timer connected to a small 12V pump.
- Solar-Powered Pumps: For lifting water from a well, pond, or large storage tank to your garden, a solar pump is a game-changer. For a smaller drip system, a Shurflo 2088-594-152 Diaphragm Pump (12V, 3.5 GPM, ~$180) can be powered by a single 100W solar panel (e.g., Renogy 100W Monocrystalline Solar Panel, ~$100) and a small 12V battery (e.g., a 50Ah LiFePO4 battery like the Battle Born 50Ah, ~$450). For larger operations or deeper wells, more robust systems are needed. If you’re looking to build out a comprehensive off-grid power system to support your garden’s water needs, or indeed your entire homestead, you might want to explore resources like the Power Grid Generator complete system guide to understand the full scope of what’s possible in terms of energy independence.
Step 5: Seed Selection & Planting
The choice of seeds is crucial for a truly self sufficient garden from scratch.
- Choose Heirloom & Open-Pollinated Seeds: These varieties produce seeds that will grow true to type, meaning you can save seeds from your harvest year after year. F1 hybrids, while often vigorous, will not produce consistent offspring from saved seeds. Reputable seed companies include Baker Creek Heirloom Seeds, High Mowing Organic Seeds, and Seed Savers Exchange. Start with common, reliable varieties like ‘Black Krim’ tomatoes, ‘Provider’ bush beans, ‘Waltham Butternut’ squash, and ‘Black Seeded Simpson’ lettuce.
- Start Seeds Indoors (Optional but Recommended): For longer growing seasons or specific crops, starting seeds indoors gives you a head start. Use seed-starting mix (e.g., Espoma Organic Seed Starter Mix, ~$10 for 16qt bag) in seed trays (Jiffy Professional Greenhouse 72-cell kit, ~$15). Provide adequate light with LED grow lights (Barrina T5 2ft 4-pack LED Grow Lights, 20W each, ~$50) for 14-16 hours a day, positioned 2-4 inches above seedlings. Maintain consistent temperatures (65-75°F for most).
- Direct Sowing vs. Transplanting: Some crops (carrots, radishes, beans, corn) prefer direct sowing into the garden bed. Others (tomatoes, peppers, broccoli, kale) benefit from being started indoors and transplanted. Follow seed packet instructions for planting depths (e.g., lettuce seeds are often surface-sown or planted 1/8 inch deep, while beans are 1 inch deep) and spacing.
- Companion Planting: Strategically plant different species together to enhance growth, deter pests, and attract beneficial insects. For example, planting marigolds near tomatoes can deter nematodes, and basil improves tomato flavor. Nasturtiums can act as a trap crop for aphids.
- Succession Planting: For a continuous harvest, plant small batches of quick-growing crops (lettuce, radishes, cilantro) every 2-3 weeks. As one crop finishes, another is ready to take its place.
Step 6: Pest & Disease Management (Organic)
Maintaining a self sufficient garden from scratch means embracing organic pest and disease control.
- Integrated Pest Management (IPM): This holistic approach combines several strategies.
- Observation: Regularly inspect your plants for early signs of pests or disease. Catching issues early is key.
- Physical Barriers: Use row covers (e.g., Agribon AG-19 floating row cover, 10×20 ft, ~$20) to protect young plants from insect pests like cabbage worms and squash bugs. Install fences (e.g., 2×4 welded wire mesh, 4 ft tall, 50 ft roll ~$70) to keep out deer, rabbits, and other larger animals.
- Hand-Picking: For larger pests like tomato hornworms or squash bugs, simply pick them off and drop them into a bucket of soapy water.
- Companion Planting: As mentioned, certain plants repel pests. Marigolds, garlic, and onions are excellent deterrents.
- Attract Beneficial Insects: Plant flowers like dill, fennel, cosmos, and sweet alyssum to attract ladybugs, lacewings, and parasitic wasps, which prey on common garden pests.
- Organic Sprays & Treatments:
- Neem Oil: An excellent broad-spectrum organic insecticide and fungicide. Bonide Neem Oil Concentrate (16oz, ~$20) can be mixed at a rate of 1-2 tbsp per gallon of water and sprayed on affected plants.
- Insecticidal Soap: Effective against soft-bodied insects like aphids, whiteflies, and spider mites. Garden Safe Insecticidal Soap (24oz ready-to-use, ~$10).
- Bacillus thuringiensis (Bt): A naturally occurring soil bacterium that targets caterpillars and worms. Monterey BT Worm & Caterpillar Killer (16oz, ~$18) is highly effective and safe for beneficial insects.
- Copper or Sulfur Sprays: For fungal diseases like powdery mildew or blight, organic copper (e.g., Bonide Copper Fungicide, ~$15 for 1lb) or sulfur (e.g., Safer Brand Garden Fungicide, ~$10 for 16oz) can be used as a last resort.
Step 7: Harvesting & Seed Saving
The culmination of your efforts is the harvest, and seed saving closes the loop on self-sufficiency.
- Harvesting Techniques:
- Timing: Harvest vegetables at their peak ripeness for best flavor and nutritional value. For example, green beans should snap cleanly, cucumbers should be firm, and tomatoes should be fully colored.
- Frequency: Many crops, like zucchini, cucumbers, and bush beans, produce more if harvested frequently. Pick daily or every other day.
- Tools: Use clean, sharp pruners (e.g., Corona ClassicCUT Bypass Pruner BP 3180, ~$30) or a sharp knife for clean cuts, minimizing damage to the plant.
- Seed Saving: This is where the « self-sufficient » aspect truly shines.
- Selection: Only save seeds from your healthiest, most vigorous plants that show desired traits (disease resistance, good flavor, high yield).
- Isolation: To ensure true-to-type seeds, prevent cross-pollination. This can be challenging for open-pollinated crops that readily cross (e.g., squash, corn). For beginners, focus on self-pollinating plants like beans, peas, lettuce, and tomatoes.
- Processing:
- Dry Seeds (Beans, Peas, Lettuce, Grains): Allow pods/seed heads to dry completely on the plant. Harvest, shell, and clean the seeds, removing chaff.
- Wet Seeds (Tomatoes, Cucumbers, Squash): For tomatoes, ferment the seeds in water for a few days to remove the gel coating and inhibit disease. For cucumbers/squash, scrape out seeds, wash thoroughly, and dry.
- Drying: Spread seeds thinly on screens or paper plates in a cool, dry, well-ventilated area for 1-4 weeks. Ensure they are bone-dry before storage. I aim for less than 8% moisture content.
- Storage: Store seeds in airtight containers (glass jars with desiccant packets work well) in a cool, dark, dry place (ideally 40-50°F and 30-40% humidity). Label clearly with variety and date. Properly stored seeds can remain viable for 3-10 years or more.
Step 8: Season Extension & Winterizing
Extend your harvest and protect your garden for the off-season to truly maximize your self sufficient garden from scratch.
- Cold Frames: Simple structures with a transparent top (glass, polycarbonate, or old windows) that sit over garden beds. They trap solar heat, allowing you to grow cold-hardy crops (lettuce, spinach, kale, radishes) well into winter or start seeds earlier in spring. A basic cold frame can be built from 2×6 lumber and a sheet of polycarbonate for under $100.
- Hoop Houses/Low Tunnels: Larger structures made from flexible hoops (PVC pipe or EMT conduit) covered with greenhouse plastic. These provide more space and greater temperature moderation. A 10×20 ft DIY low tunnel kit can cost $200-$500, while a larger, more robust hoop house kit might be $1,000-$3,000. I use a 6×12 ft low tunnel made from 1/2-inch PVC hoops and 6mil greenhouse plastic, which extends my lettuce and spinach harvest by at least
Deciding between raised beds and in-ground beds depends on your soil, budget, and physical capabilities.
- In-Ground Beds: If you have excellent native soil and good drainage, in-ground beds are the most economical. Double-digging (loosening soil two shovel depths) can significantly improve drainage and aeration. For my main garden, I primarily use in-ground beds, but I focus on building up the soil over time with consistent compost additions and cover cropping. I aim for beds that are no wider than 3-4 feet so I can reach the center without stepping on the soil, compacting it.
- Raised Beds: Raised beds offer numerous advantages, especially for poor soil, heavy clay, or rocky areas. They provide better drainage, warm up faster in spring, reduce compaction, and make weeding and harvesting easier on your back.
- Material Options:
- Untreated Cedar: Naturally rot-resistant and chemical-free. A 4×8 ft bed, 12 inches deep, typically requires three 2x12x8 ft cedar boards, costing around $50-$60 per board (total ~$150-$180) plus corner brackets or screws. My first raised beds were cedar and are still going strong after 7 years.
- Galvanized Steel: Durable, long-lasting, and aesthetically pleasing. Brands like Vego Garden offer modular kits. A Vego Garden 17″ Tall 8-in-1 Metal Raised Garden Bed (can be configured to 4×8 ft) costs approximately $250-$300.
- Concrete Blocks/Stones: Very durable but can leach minerals (though generally safe once weathered) and can be expensive.
- Recycled Materials: Pallets (check for chemical treatment stamps like « HT » for heat-treated), old tires (controversial due to potential chemical leaching).
- Filling Raised Beds: Don’t just fill with topsoil. Use a « Hugelkultur » approach (logs, branches, leaves, then compost, then topsoil) or a mixture of 60% good quality topsoil, 30% compost, and 10% perlite or vermiculite for drainage. A 4x8x1 ft raised bed requires about 32 cubic feet (or ~1.2 cubic yards) of soil mix, which can cost $100-$200 depending on your source.
- Material Options:
Step 4: Water Management & Irrigation
Efficient water management is critical for a self sufficient garden from scratch, especially in off-grid living where water resources might be limited.
- Rainwater Harvesting: This is my primary source of irrigation water. A 55-gallon rain barrel (e.g., EarthMark Rain Barrel, ~$120-$150) connected to a downspout can collect significant water. For larger needs, I use two 275-gallon IBC totes (Intermediate Bulk Containers, often available used for $100-$200 each from food-grade sources) connected in series. A 1,000 sq ft roof can collect approximately 620 gallons of water for every inch of rainfall. My 1,500 sq ft roof provides ample water for my 600 sq ft garden through multiple barrels and totes.
- Drip Irrigation: This is by far the most water-efficient method, delivering water directly to the plant’s root zone, minimizing evaporation and weed growth.
- Components: A typical drip system includes a pressure regulator (e.g., Rain Bird PRV-10, ~$15), a filter (Rain Bird RBY filter, ~$20), main tubing (1/2-inch poly tubing, 100ft ~$25), smaller feeder lines (1/4-inch tubing), and emitters (0.5 GPH or 1 GPH per plant).
- Kits: For beginners, a starter kit like the Rain Bird Drip Irrigation Garden Kit (model DDI-KIT-1P, ~$40-$60) is excellent for a small garden. For larger setups, I use Netafim Techline CV Drip Line (500ft roll, ~$150-$200), which has pressure-compensating emitters built-in, ensuring even watering across long runs.
- Automation: For true self-sufficiency, consider a battery-powered timer (e.g., Orbit B-Hyve Bluetooth Hose Faucet Timer, ~$50) or a solar-powered timer connected to a small 12V pump.
- Solar-Powered Pumps: For lifting water from a well, pond, or large storage tank to your garden, a solar pump is a game-changer. For a smaller drip system, a Shurflo 2088-594-152 Diaphragm Pump (12V, 3.5 GPM, ~$180) can be powered by a single 100W solar panel (e.g., Renogy 100W Monocrystalline Solar Panel, ~$100) and a small 12V battery (e.g., a 50Ah LiFePO4 battery like the Battle Born 50Ah, ~$450). For larger operations or deeper wells, more robust systems are needed. If you’re looking to build out a comprehensive off-grid power system to support your garden’s water needs, or indeed your entire homestead, you might want to explore resources like the Power Grid Generator complete system guide to understand the full scope of what’s possible in terms of energy independence.
Step 5: Seed Selection & Planting
The choice of seeds is crucial for a truly self sufficient garden from scratch.
- Choose Heirloom & Open-Pollinated Seeds: These varieties produce seeds that will grow true to type, meaning you can save seeds from your harvest year after year. F1 hybrids, while often vigorous, will not produce consistent offspring from saved seeds. Reputable seed companies include Baker Creek Heirloom Seeds, High Mowing Organic Seeds, and Seed Savers Exchange. Start with common, reliable varieties like ‘Black Krim’ tomatoes, ‘Provider’ bush beans, ‘Waltham Butternut’ squash, and ‘Black Seeded Simpson’ lettuce.
- Start Seeds Indoors (Optional but Recommended): For longer growing seasons or specific crops, starting seeds indoors gives you a head start. Use seed-starting mix (e.g., Espoma Organic Seed Starter Mix, ~$10 for 16qt bag) in seed trays (Jiffy Professional Greenhouse 72-cell kit, ~$15). Provide adequate light with LED grow lights (Barrina T5 2ft 4-pack LED Grow Lights, 20W each, ~$50) for 14-16 hours a day, positioned 2-4 inches above seedlings. Maintain consistent temperatures (65-75°F for most).
- Direct Sowing vs. Transplanting: Some crops (carrots, radishes, beans, corn) prefer direct sowing into the garden bed. Others (tomatoes, peppers, broccoli, kale) benefit from being started indoors and transplanted. Follow seed packet instructions for planting depths (e.g., lettuce seeds are often surface-sown or planted 1/8 inch deep, while beans are 1 inch deep) and spacing.
- Companion Planting: Strategically plant different species together to enhance growth, deter pests, and attract beneficial insects. For example, planting marigolds near tomatoes can deter nematodes, and basil improves tomato flavor. Nasturtiums can act as a trap crop for aphids.
- Succession Planting: For a continuous harvest, plant small batches of quick-growing crops (lettuce, radishes, cilantro) every 2-3 weeks. As one crop finishes, another is ready to take its place.
Step 6: Pest & Disease Management (Organic)
Maintaining a self sufficient garden from scratch means embracing organic pest and disease control.
- Integrated Pest Management (IPM): This holistic approach combines several strategies.
- Observation: Regularly inspect your plants for early signs of pests or disease. Catching issues early is key.
- Physical Barriers: Use row covers (e.g., Agribon AG-19 floating row cover, 10×20 ft, ~$20) to protect young plants from insect pests like cabbage worms and squash bugs. Install fences (e.g., 2×4 welded wire mesh, 4 ft tall, 50 ft roll ~$70) to keep out deer, rabbits, and other larger animals.
- Hand-Picking: For larger pests like tomato hornworms or squash bugs, simply pick them off and drop them into a bucket of soapy water.
- Companion Planting: As mentioned, certain plants repel pests. Marigolds, garlic, and onions are excellent deterrents.
- Attract Beneficial Insects: Plant flowers like dill, fennel, cosmos, and sweet alyssum to attract ladybugs, lacewings, and parasitic wasps, which prey on common garden pests.
- Organic Sprays & Treatments:
- Neem Oil: An excellent broad-spectrum organic insecticide and fungicide. Bonide Neem Oil Concentrate (16oz, ~$20) can be mixed at a rate of 1-2 tbsp per gallon of water and sprayed on affected plants.
- Insecticidal Soap: Effective against soft-bodied insects like aphids, whiteflies, and spider mites. Garden Safe Insecticidal Soap (24oz ready-to-use, ~$10).
- Bacillus thuringiensis (Bt): A naturally occurring soil bacterium that targets caterpillars and worms. Monterey BT Worm & Caterpillar Killer (16oz, ~$18) is highly effective and safe for beneficial insects.
- Copper or Sulfur Sprays: For fungal diseases like powdery mildew or blight, organic copper (e.g., Bonide Copper Fungicide, ~$15 for 1lb) or sulfur (e.g., Safer Brand Garden Fungicide, ~$10 for 16oz) can be used as a last resort.
Step 7: Harvesting & Seed Saving
The culmination of your efforts is the harvest, and seed saving closes the loop on self-sufficiency.
- Harvesting Techniques:
- Timing: Harvest vegetables at their peak ripeness for best flavor and nutritional value. For example, green beans should snap cleanly, cucumbers should be firm, and tomatoes should be fully colored.
- Frequency: Many crops, like zucchini, cucumbers, and bush beans, produce more if harvested frequently. Pick daily or every other day.
- Tools: Use clean, sharp pruners (e.g., Corona ClassicCUT Bypass Pruner BP 3180, ~$30) or a sharp knife for clean cuts, minimizing damage to the plant.
- Seed Saving: This is where the « self-sufficient » aspect truly shines.
- Selection: Only save seeds from your healthiest, most vigorous plants that show desired traits (disease resistance, good flavor, high yield).
- Isolation: To ensure true-to-type seeds, prevent cross-pollination. This can be challenging for open-pollinated crops that readily cross (e.g., squash, corn). For beginners, focus on self-pollinating plants like beans, peas, lettuce, and tomatoes.
- Processing:
- Dry Seeds (Beans, Peas, Lettuce, Grains): Allow pods/seed heads to dry completely on the plant. Harvest, shell, and clean the seeds, removing chaff.
- Wet Seeds (Tomatoes, Cucumbers, Squash): For tomatoes, ferment the seeds in water for a few days to remove the gel coating and inhibit disease. For cucumbers/squash, scrape out seeds, wash thoroughly, and dry.
- Drying: Spread seeds thinly on screens or paper plates in a cool, dry, well-ventilated area for 1-4 weeks. Ensure they are bone-dry before storage. I aim for less than 8% moisture content.
- Storage: Store seeds in airtight containers (glass jars with desiccant packets work well) in a cool, dark, dry place (ideally 40-50°F and 30-40% humidity). Label clearly with variety and date. Properly stored seeds can remain viable for 3-10 years or more.
Step 8: Season Extension & Winterizing
Extend your harvest and protect your garden for the off-season to truly maximize your self sufficient garden from scratch.
- Cold Frames: Simple structures with a transparent top (glass, polycarbonate, or old windows) that sit over garden beds. They trap solar heat, allowing you to grow cold-hardy crops (lettuce, spinach, kale, radishes) well into winter or start seeds earlier in spring. A basic cold frame can be built from 2×6 lumber and a sheet of polycarbonate for under $100.
- Hoop Houses/Low Tunnels: Larger structures made from flexible hoops (PVC pipe or EMT conduit) covered with greenhouse plastic. These provide more space and greater temperature moderation. A 10×20 ft DIY low tunnel kit can cost $200-$500, while a larger, more robust hoop house kit might be $1,000-$3,000. I use a 6×12 ft low tunnel made from 1/2-inch PVC hoops and 6mil greenhouse plastic, which extends my lettuce and spinach harvest by at least
Healthy soil is the bedrock of a productive, self-sufficient garden. You can’t guess what your soil needs; you have to test it.
- Perform a Soil Test: A professional soil test will give you precise data on your soil’s pH, nutrient levels (N-P-K), and organic matter content. I recommend sending a sample to your local agricultural extension office; it typically costs $20-$50 and provides detailed recommendations. Alternatively, for a quick homeowner check, a Rapitest Soil Test Kit (40-test kit, model 1663, ~$20 on Amazon) provides a good baseline for pH, Nitrogen, Phosphorus, and Potash. Aim for a pH between 6.0 and 7.0 for most vegetables.
- Amend for pH Imbalance: If your soil is too acidic (below 6.0), add agricultural lime (dolomitic lime adds magnesium, calcitic lime adds calcium). Apply 5-10 lbs per 100 sq ft for a moderate adjustment. If it’s too alkaline (above 7.0), add elemental sulfur (e.g., Espoma Soil Acidifier, ~$15 for 6.75 lbs) or generous amounts of organic matter like peat moss or pine needles.
- Build Organic Matter: This is the single most important step for long-term soil health. Organic matter improves soil structure, water retention, drainage, and nutrient availability. Incorporate 2-4 inches of high-quality compost into your top 6-12 inches of soil annually. I make my own compost from kitchen scraps, garden waste, and shredded leaves, but you can purchase it. Local nurseries often sell bulk compost for $30-$50 per cubic yard. Aged manure (from chickens, cows, or horses – ensure it’s well-rotted to avoid burning plants) is also excellent.
- Address Nutrient Deficiencies: Based on your soil test, add specific organic amendments. If Nitrogen (N) is low, add blood meal (12-0-0, ~$20 for 3 lbs) or feather meal. For Phosphorus (P), use bone meal (3-15-0, ~$15 for 3 lbs) or rock phosphate. For Potassium (K), greensand (0-0-2.5, ~$25 for 5 lbs) or kelp meal are good choices. I rely heavily on Espoma Organic Garden-tone (5-3-3, ~$25 for an 8lb bag) as a balanced, all-purpose organic fertilizer during planting.
Step 3: Garden Bed Preparation
Deciding between raised beds and in-ground beds depends on your soil, budget, and physical capabilities.
- In-Ground Beds: If you have excellent native soil and good drainage, in-ground beds are the most economical. Double-digging (loosening soil two shovel depths) can significantly improve drainage and aeration. For my main garden, I primarily use in-ground beds, but I focus on building up the soil over time with consistent compost additions and cover cropping. I aim for beds that are no wider than 3-4 feet so I can reach the center without stepping on the soil, compacting it.
- Raised Beds: Raised beds offer numerous advantages, especially for poor soil, heavy clay, or rocky areas. They provide better drainage, warm up faster in spring, reduce compaction, and make weeding and harvesting easier on your back.
- Material Options:
- Untreated Cedar: Naturally rot-resistant and chemical-free. A 4×8 ft bed, 12 inches deep, typically requires three 2x12x8 ft cedar boards, costing around $50-$60 per board (total ~$150-$180) plus corner brackets or screws. My first raised beds were cedar and are still going strong after 7 years.
- Galvanized Steel: Durable, long-lasting, and aesthetically pleasing. Brands like Vego Garden offer modular kits. A Vego Garden 17″ Tall 8-in-1 Metal Raised Garden Bed (can be configured to 4×8 ft) costs approximately $250-$300.
- Concrete Blocks/Stones: Very durable but can leach minerals (though generally safe once weathered) and can be expensive.
- Recycled Materials: Pallets (check for chemical treatment stamps like « HT » for heat-treated), old tires (controversial due to potential chemical leaching).
- Filling Raised Beds: Don’t just fill with topsoil. Use a « Hugelkultur » approach (logs, branches, leaves, then compost, then topsoil) or a mixture of 60% good quality topsoil, 30% compost, and 10% perlite or vermiculite for drainage. A 4x8x1 ft raised bed requires about 32 cubic feet (or ~1.2 cubic yards) of soil mix, which can cost $100-$200 depending on your source.
- Material Options:
Step 4: Water Management & Irrigation
Efficient water management is critical for a self sufficient garden from scratch, especially in off-grid living where water resources might be limited.
- Rainwater Harvesting: This is my primary source of irrigation water. A 55-gallon rain barrel (e.g., EarthMark Rain Barrel, ~$120-$150) connected to a downspout can collect significant water. For larger needs, I use two 275-gallon IBC totes (Intermediate Bulk Containers, often available used for $100-$200 each from food-grade sources) connected in series. A 1,000 sq ft roof can collect approximately 620 gallons of water for every inch of rainfall. My 1,500 sq ft roof provides ample water for my 600 sq ft garden through multiple barrels and totes.
- Drip Irrigation: This is by far the most water-efficient method, delivering water directly to the plant’s root zone, minimizing evaporation and weed growth.
- Components: A typical drip system includes a pressure regulator (e.g., Rain Bird PRV-10, ~$15), a filter (Rain Bird RBY filter, ~$20), main tubing (1/2-inch poly tubing, 100ft ~$25), smaller feeder lines (1/4-inch tubing), and emitters (0.5 GPH or 1 GPH per plant).
- Kits: For beginners, a starter kit like the Rain Bird Drip Irrigation Garden Kit (model DDI-KIT-1P, ~$40-$60) is excellent for a small garden. For larger setups, I use Netafim Techline CV Drip Line (500ft roll, ~$150-$200), which has pressure-compensating emitters built-in, ensuring even watering across long runs.
- Automation: For true self-sufficiency, consider a battery-powered timer (e.g., Orbit B-Hyve Bluetooth Hose Faucet Timer, ~$50) or a solar-powered timer connected to a small 12V pump.
- Solar-Powered Pumps: For lifting water from a well, pond, or large storage tank to your garden, a solar pump is a game-changer. For a smaller drip system, a Shurflo 2088-594-152 Diaphragm Pump (12V, 3.5 GPM, ~$180) can be powered by a single 100W solar panel (e.g., Renogy 100W Monocrystalline Solar Panel, ~$100) and a small 12V battery (e.g., a 50Ah LiFePO4 battery like the Battle Born 50Ah, ~$450). For larger operations or deeper wells, more robust systems are needed. If you’re looking to build out a comprehensive off-grid power system to support your garden’s water needs, or indeed your entire homestead, you might want to explore resources like the Power Grid Generator complete system guide to understand the full scope of what’s possible in terms of energy independence.
Step 5: Seed Selection & Planting
The choice of seeds is crucial for a truly self sufficient garden from scratch.
- Choose Heirloom & Open-Pollinated Seeds: These varieties produce seeds that will grow true to type, meaning you can save seeds from your harvest year after year. F1 hybrids, while often vigorous, will not produce consistent offspring from saved seeds. Reputable seed companies include Baker Creek Heirloom Seeds, High Mowing Organic Seeds, and Seed Savers Exchange. Start with common, reliable varieties like ‘Black Krim’ tomatoes, ‘Provider’ bush beans, ‘Waltham Butternut’ squash, and ‘Black Seeded Simpson’ lettuce.
- Start Seeds Indoors (Optional but Recommended): For longer growing seasons or specific crops, starting seeds indoors gives you a head start. Use seed-starting mix (e.g., Espoma Organic Seed Starter Mix, ~$10 for 16qt bag) in seed trays (Jiffy Professional Greenhouse 72-cell kit, ~$15). Provide adequate light with LED grow lights (Barrina T5 2ft 4-pack LED Grow Lights, 20W each, ~$50) for 14-16 hours a day, positioned 2-4 inches above seedlings. Maintain consistent temperatures (65-75°F for most).
- Direct Sowing vs. Transplanting: Some crops (carrots, radishes, beans, corn) prefer direct sowing into the garden bed. Others (tomatoes, peppers, broccoli, kale) benefit from being started indoors and transplanted. Follow seed packet instructions for planting depths (e.g., lettuce seeds are often surface-sown or planted 1/8 inch deep, while beans are 1 inch deep) and spacing.
- Companion Planting: Strategically plant different species together to enhance growth, deter pests, and attract beneficial insects. For example, planting marigolds near tomatoes can deter nematodes, and basil improves tomato flavor. Nasturtiums can act as a trap crop for aphids.
- Succession Planting: For a continuous harvest, plant small batches of quick-growing crops (lettuce, radishes, cilantro) every 2-3 weeks. As one crop finishes, another is ready to take its place.
Step 6: Pest & Disease Management (Organic)
Maintaining a self sufficient garden from scratch means embracing organic pest and disease control.
- Integrated Pest Management (IPM): This holistic approach combines several strategies.
- Observation: Regularly inspect your plants for early signs of pests or disease. Catching issues early is key.
- Physical Barriers: Use row covers (e.g., Agribon AG-19 floating row cover, 10×20 ft, ~$20) to protect young plants from insect pests like cabbage worms and squash bugs. Install fences (e.g., 2×4 welded wire mesh, 4 ft tall, 50 ft roll ~$70) to keep out deer, rabbits, and other larger animals.
- Hand-Picking: For larger pests like tomato hornworms or squash bugs, simply pick them off and drop them into a bucket of soapy water.
- Companion Planting: As mentioned, certain plants repel pests. Marigolds, garlic, and onions are excellent deterrents.
- Attract Beneficial Insects: Plant flowers like dill, fennel, cosmos, and sweet alyssum to attract ladybugs, lacewings, and parasitic wasps, which prey on common garden pests.
- Organic Sprays & Treatments:
- Neem Oil: An excellent broad-spectrum organic insecticide and fungicide. Bonide Neem Oil Concentrate (16oz, ~$20) can be mixed at a rate of 1-2 tbsp per gallon of water and sprayed on affected plants.
- Insecticidal Soap: Effective against soft-bodied insects like aphids, whiteflies, and spider mites. Garden Safe Insecticidal Soap (24oz ready-to-use, ~$10).
- Bacillus thuringiensis (Bt): A naturally occurring soil bacterium that targets caterpillars and worms. Monterey BT Worm & Caterpillar Killer (16oz, ~$18) is highly effective and safe for beneficial insects.
- Copper or Sulfur Sprays: For fungal diseases like powdery mildew or blight, organic copper (e.g., Bonide Copper Fungicide, ~$15 for 1lb) or sulfur (e.g., Safer Brand Garden Fungicide, ~$10 for 16oz) can be used as a last resort.
Step 7: Harvesting & Seed Saving
The culmination of your efforts is the harvest, and seed saving closes the loop on self-sufficiency.
- Harvesting Techniques:
- Timing: Harvest vegetables at their peak ripeness for best flavor and nutritional value. For example, green beans should snap cleanly, cucumbers should be firm, and tomatoes should be fully colored.
- Frequency: Many crops, like zucchini, cucumbers, and bush beans, produce more if harvested frequently. Pick daily or every other day.
- Tools: Use clean, sharp pruners (e.g., Corona ClassicCUT Bypass Pruner BP 3180, ~$30) or a sharp knife for clean cuts, minimizing damage to the plant.
- Seed Saving: This is where the « self-sufficient » aspect truly shines.
- Selection: Only save seeds from your healthiest, most vigorous plants that show desired traits (disease resistance, good flavor, high yield).
- Isolation: To ensure true-to-type seeds, prevent cross-pollination. This can be challenging for open-pollinated crops that readily cross (e.g., squash, corn). For beginners, focus on self-pollinating plants like beans, peas, lettuce, and tomatoes.
- Processing:
- Dry Seeds (Beans, Peas, Lettuce, Grains): Allow pods/seed heads to dry completely on the plant. Harvest, shell, and clean the seeds, removing chaff.
- Wet Seeds (Tomatoes, Cucumbers, Squash): For tomatoes, ferment the seeds in water for a few days to remove the gel coating and inhibit disease. For cucumbers/squash, scrape out seeds, wash thoroughly, and dry.
- Drying: Spread seeds thinly on screens or paper plates in a cool, dry, well-ventilated area for 1-4 weeks. Ensure they are bone-dry before storage. I aim for less than 8% moisture content.
- Storage: Store seeds in airtight containers (glass jars with desiccant packets work well) in a cool, dark, dry place (ideally 40-50°F and 30-40% humidity). Label clearly with variety and date. Properly stored seeds can remain viable for 3-10 years or more.
Step 8: Season Extension & Winterizing
Extend your harvest and protect your garden for the off-season to truly maximize your self sufficient garden from scratch.
- Cold Frames: Simple structures with a transparent top (glass, polycarbonate, or old windows) that sit over garden beds. They trap solar heat, allowing you to grow cold-hardy crops (lettuce, spinach, kale, radishes) well into winter or start seeds earlier in spring. A basic cold frame can be built from 2×6 lumber and a sheet of polycarbonate for under $100.
- Hoop Houses/Low Tunnels: Larger structures made from flexible hoops (PVC pipe or EMT conduit) covered with greenhouse plastic. These provide more space and greater temperature moderation. A 10×20 ft DIY low tunnel kit can cost $200-$500, while a larger, more robust hoop house kit might be $1,000-$3,000. I use a 6×12 ft low tunnel made from 1/2-inch PVC hoops and 6mil greenhouse plastic, which extends my lettuce and spinach harvest by at least
- Harvesting Techniques:
- Timing: Harvest vegetables at their peak ripeness for best flavor and nutritional value. For example, green beans should snap cleanly, cucumbers should be firm, and tomatoes should be fully colored.
- Frequency: Many crops, like zucchini, cucumbers, and bush beans, produce more if harvested frequently. Pick daily or every other day.
- Tools: Use clean, sharp pruners (e.g., Corona ClassicCUT Bypass Pruner BP 3180, ~$30) or a sharp knife for clean cuts, minimizing damage to the plant.
- Seed Saving: This is where the « self-sufficient » aspect truly shines.
- Selection: Only save seeds from your healthiest, most vigorous plants that show desired traits (disease resistance, good flavor, high yield).
- Isolation: To ensure true-to-type seeds, prevent cross-pollination. This can be challenging for open-pollinated crops that readily cross (e.g., squash, corn). For beginners, focus on self-pollinating plants like beans, peas, lettuce, and tomatoes.
- Processing:
- Dry Seeds (Beans, Peas, Lettuce, Grains): Allow pods/seed heads to dry completely on the plant. Harvest, shell, and clean the seeds, removing chaff.
- Wet Seeds (Tomatoes, Cucumbers, Squash): For tomatoes, ferment the seeds in water for a few days to remove the gel coating and inhibit disease. For cucumbers/squash, scrape out seeds, wash thoroughly, and dry.
- Drying: Spread seeds thinly on screens or paper plates in a cool, dry, well-ventilated area for 1-4 weeks. Ensure they are bone-dry before storage. I aim for less than 8% moisture content.
- Storage: Store seeds in airtight containers (glass jars with desiccant packets work well) in a cool, dark, dry place (ideally 40-50°F and 30-40% humidity). Label clearly with variety and date. Properly stored seeds can remain viable for 3-10 years or more.
Step 8: Season Extension & Winterizing
Extend your harvest and protect your garden for the off-season to truly maximize your self sufficient garden from scratch.
- Cold Frames: Simple structures with a transparent top (glass, polycarbonate, or old windows) that sit over garden beds. They trap solar heat, allowing you to grow cold-hardy crops (lettuce, spinach, kale, radishes) well into winter or start seeds earlier in spring. A basic cold frame can be built from 2×6 lumber and a sheet of polycarbonate for under $100.
- Hoop Houses/Low Tunnels: Larger structures made from flexible hoops (PVC pipe or EMT conduit) covered with greenhouse plastic. These provide more space and greater temperature moderation. A 10×20 ft DIY low tunnel kit can cost $200-$500, while a larger, more robust hoop house kit might be $1,000-$3,000. I use a 6×12 ft low tunnel made from 1/2-inch PVC hoops and 6mil greenhouse plastic, which extends my lettuce and spinach harvest by at least
The choice of seeds is crucial for a truly self sufficient garden from scratch.
- Choose Heirloom & Open-Pollinated Seeds: These varieties produce seeds that will grow true to type, meaning you can save seeds from your harvest year after year. F1 hybrids, while often vigorous, will not produce consistent offspring from saved seeds. Reputable seed companies include Baker Creek Heirloom Seeds, High Mowing Organic Seeds, and Seed Savers Exchange. Start with common, reliable varieties like ‘Black Krim’ tomatoes, ‘Provider’ bush beans, ‘Waltham Butternut’ squash, and ‘Black Seeded Simpson’ lettuce.
- Start Seeds Indoors (Optional but Recommended): For longer growing seasons or specific crops, starting seeds indoors gives you a head start. Use seed-starting mix (e.g., Espoma Organic Seed Starter Mix, ~$10 for 16qt bag) in seed trays (Jiffy Professional Greenhouse 72-cell kit, ~$15). Provide adequate light with LED grow lights (Barrina T5 2ft 4-pack LED Grow Lights, 20W each, ~$50) for 14-16 hours a day, positioned 2-4 inches above seedlings. Maintain consistent temperatures (65-75°F for most).
- Direct Sowing vs. Transplanting: Some crops (carrots, radishes, beans, corn) prefer direct sowing into the garden bed. Others (tomatoes, peppers, broccoli, kale) benefit from being started indoors and transplanted. Follow seed packet instructions for planting depths (e.g., lettuce seeds are often surface-sown or planted 1/8 inch deep, while beans are 1 inch deep) and spacing.
- Companion Planting: Strategically plant different species together to enhance growth, deter pests, and attract beneficial insects. For example, planting marigolds near tomatoes can deter nematodes, and basil improves tomato flavor. Nasturtiums can act as a trap crop for aphids.
- Succession Planting: For a continuous harvest, plant small batches of quick-growing crops (lettuce, radishes, cilantro) every 2-3 weeks. As one crop finishes, another is ready to take its place.
Step 6: Pest & Disease Management (Organic)
Maintaining a self sufficient garden from scratch means embracing organic pest and disease control.
- Integrated Pest Management (IPM): This holistic approach combines several strategies.
- Observation: Regularly inspect your plants for early signs of pests or disease. Catching issues early is key.
- Physical Barriers: Use row covers (e.g., Agribon AG-19 floating row cover, 10×20 ft, ~$20) to protect young plants from insect pests like cabbage worms and squash bugs. Install fences (e.g., 2×4 welded wire mesh, 4 ft tall, 50 ft roll ~$70) to keep out deer, rabbits, and other larger animals.
- Hand-Picking: For larger pests like tomato hornworms or squash bugs, simply pick them off and drop them into a bucket of soapy water.
- Companion Planting: As mentioned, certain plants repel pests. Marigolds, garlic, and onions are excellent deterrents.
- Attract Beneficial Insects: Plant flowers like dill, fennel, cosmos, and sweet alyssum to attract ladybugs, lacewings, and parasitic wasps, which prey on common garden pests.
- Organic Sprays & Treatments:
- Neem Oil: An excellent broad-spectrum organic insecticide and fungicide. Bonide Neem Oil Concentrate (16oz, ~$20) can be mixed at a rate of 1-2 tbsp per gallon of water and sprayed on affected plants.
- Insecticidal Soap: Effective against soft-bodied insects like aphids, whiteflies, and spider mites. Garden Safe Insecticidal Soap (24oz ready-to-use, ~$10).
- Bacillus thuringiensis (Bt): A naturally occurring soil bacterium that targets caterpillars and worms. Monterey BT Worm & Caterpillar Killer (16oz, ~$18) is highly effective and safe for beneficial insects.
- Copper or Sulfur Sprays: For fungal diseases like powdery mildew or blight, organic copper (e.g., Bonide Copper Fungicide, ~$15 for 1lb) or sulfur (e.g., Safer Brand Garden Fungicide, ~$10 for 16oz) can be used as a last resort.
Step 7: Harvesting & Seed Saving
The culmination of your efforts is the harvest, and seed saving closes the loop on self-sufficiency.
- Harvesting Techniques:
- Timing: Harvest vegetables at their peak ripeness for best flavor and nutritional value. For example, green beans should snap cleanly, cucumbers should be firm, and tomatoes should be fully colored.
- Frequency: Many crops, like zucchini, cucumbers, and bush beans, produce more if harvested frequently. Pick daily or every other day.
- Tools: Use clean, sharp pruners (e.g., Corona ClassicCUT Bypass Pruner BP 3180, ~$30) or a sharp knife for clean cuts, minimizing damage to the plant.
- Seed Saving: This is where the « self-sufficient » aspect truly shines.
- Selection: Only save seeds from your healthiest, most vigorous plants that show desired traits (disease resistance, good flavor, high yield).
- Isolation: To ensure true-to-type seeds, prevent cross-pollination. This can be challenging for open-pollinated crops that readily cross (e.g., squash, corn). For beginners, focus on self-pollinating plants like beans, peas, lettuce, and tomatoes.
- Processing:
- Dry Seeds (Beans, Peas, Lettuce, Grains): Allow pods/seed heads to dry completely on the plant. Harvest, shell, and clean the seeds, removing chaff.
- Wet Seeds (Tomatoes, Cucumbers, Squash): For tomatoes, ferment the seeds in water for a few days to remove the gel coating and inhibit disease. For cucumbers/squash, scrape out seeds, wash thoroughly, and dry.
- Drying: Spread seeds thinly on screens or paper plates in a cool, dry, well-ventilated area for 1-4 weeks. Ensure they are bone-dry before storage. I aim for less than 8% moisture content.
- Storage: Store seeds in airtight containers (glass jars with desiccant packets work well) in a cool, dark, dry place (ideally 40-50°F and 30-40% humidity). Label clearly with variety and date. Properly stored seeds can remain viable for 3-10 years or more.
Step 8: Season Extension & Winterizing
Extend your harvest and protect your garden for the off-season to truly maximize your self sufficient garden from scratch.
- Cold Frames: Simple structures with a transparent top (glass, polycarbonate, or old windows) that sit over garden beds. They trap solar heat, allowing you to grow cold-hardy crops (lettuce, spinach, kale, radishes) well into winter or start seeds earlier in spring. A basic cold frame can be built from 2×6 lumber and a sheet of polycarbonate for under $100.
- Hoop Houses/Low Tunnels: Larger structures made from flexible hoops (PVC pipe or EMT conduit) covered with greenhouse plastic. These provide more space and greater temperature moderation. A 10×20 ft DIY low tunnel kit can cost $200-$500, while a larger, more robust hoop house kit might be $1,000-$3,000. I use a 6×12 ft low tunnel made from 1/2-inch PVC hoops and 6mil greenhouse plastic, which extends my lettuce and spinach harvest by at least
Step 5: Seed Selection & Planting
The choice of seeds is crucial for a truly self sufficient garden from scratch.
- Choose Heirloom & Open-Pollinated Seeds: These varieties produce seeds that will grow true to type, meaning you can save seeds from your harvest year after year. F1 hybrids, while often vigorous, will not produce consistent offspring from saved seeds. Reputable seed companies include Baker Creek Heirloom Seeds, High Mowing Organic Seeds, and Seed Savers Exchange. Start with common, reliable varieties like ‘Black Krim’ tomatoes, ‘Provider’ bush beans, ‘Waltham Butternut’ squash, and ‘Black Seeded Simpson’ lettuce.
- Start Seeds Indoors (Optional but Recommended): For longer growing seasons or specific crops, starting seeds indoors gives you a head start. Use seed-starting mix (e.g., Espoma Organic Seed Starter Mix, ~$10 for 16qt bag) in seed trays (Jiffy Professional Greenhouse 72-cell kit, ~$15). Provide adequate light with LED grow lights (Barrina T5 2ft 4-pack LED Grow Lights, 20W each, ~$50) for 14-16 hours a day, positioned 2-4 inches above seedlings. Maintain consistent temperatures (65-75°F for most).
- Direct Sowing vs. Transplanting: Some crops (carrots, radishes, beans, corn) prefer direct sowing into the garden bed. Others (tomatoes, peppers, broccoli, kale) benefit from being started indoors and transplanted. Follow seed packet instructions for planting depths (e.g., lettuce seeds are often surface-sown or planted 1/8 inch deep, while beans are 1 inch deep) and spacing.
- Companion Planting: Strategically plant different species together to enhance growth, deter pests, and attract beneficial insects. For example, planting marigolds near tomatoes can deter nematodes, and basil improves tomato flavor. Nasturtiums can act as a trap crop for aphids.
- Succession Planting: For a continuous harvest, plant small batches of quick-growing crops (lettuce, radishes, cilantro) every 2-3 weeks. As one crop finishes, another is ready to take its place.
Step 6: Pest & Disease Management (Organic)
Maintaining a self sufficient garden from scratch means embracing organic pest and disease control.
- Integrated Pest Management (IPM): This holistic approach combines several strategies.
- Observation: Regularly inspect your plants for early signs of pests or disease. Catching issues early is key.
- Physical Barriers: Use row covers (e.g., Agribon AG-19 floating row cover, 10×20 ft, ~$20) to protect young plants from insect pests like cabbage worms and squash bugs. Install fences (e.g., 2×4 welded wire mesh, 4 ft tall, 50 ft roll ~$70) to keep out deer, rabbits, and other larger animals.
- Hand-Picking: For larger pests like tomato hornworms or squash bugs, simply pick them off and drop them into a bucket of soapy water.
- Companion Planting: As mentioned, certain plants repel pests. Marigolds, garlic, and onions are excellent deterrents.
- Attract Beneficial Insects: Plant flowers like dill, fennel, cosmos, and sweet alyssum to attract ladybugs, lacewings, and parasitic wasps, which prey on common garden pests.
- Organic Sprays & Treatments:
- Neem Oil: An excellent broad-spectrum organic insecticide and fungicide. Bonide Neem Oil Concentrate (16oz, ~$20) can be mixed at a rate of 1-2 tbsp per gallon of water and sprayed on affected plants.
- Insecticidal Soap: Effective against soft-bodied insects like aphids, whiteflies, and spider mites. Garden Safe Insecticidal Soap (24oz ready-to-use, ~$10).
- Bacillus thuringiensis (Bt): A naturally occurring soil bacterium that targets caterpillars and worms. Monterey BT Worm & Caterpillar Killer (16oz, ~$18) is highly effective and safe for beneficial insects.
- Copper or Sulfur Sprays: For fungal diseases like powdery mildew or blight, organic copper (e.g., Bonide Copper Fungicide, ~$15 for 1lb) or sulfur (e.g., Safer Brand Garden Fungicide, ~$10 for 16oz) can be used as a last resort.
Step 7: Harvesting & Seed Saving
The culmination of your efforts is the harvest, and seed saving closes the loop on self-sufficiency.
- Harvesting Techniques:
- Timing: Harvest vegetables at their peak ripeness for best flavor and nutritional value. For example, green beans should snap cleanly, cucumbers should be firm, and tomatoes should be fully colored.
- Frequency: Many crops, like zucchini, cucumbers, and bush beans, produce more if harvested frequently. Pick daily or every other day.
- Tools: Use clean, sharp pruners (e.g., Corona ClassicCUT Bypass Pruner BP 3180, ~$30) or a sharp knife for clean cuts, minimizing damage to the plant.
- Seed Saving: This is where the « self-sufficient » aspect truly shines.
- Selection: Only save seeds from your healthiest, most vigorous plants that show desired traits (disease resistance, good flavor, high yield).
- Isolation: To ensure true-to-type seeds, prevent cross-pollination. This can be challenging for open-pollinated crops that readily cross (e.g., squash, corn). For beginners, focus on self-pollinating plants like beans, peas, lettuce, and tomatoes.
- Processing:
- Dry Seeds (Beans, Peas, Lettuce, Grains): Allow pods/seed heads to dry completely on the plant. Harvest, shell, and clean the seeds, removing chaff.
- Wet Seeds (Tomatoes, Cucumbers, Squash): For tomatoes, ferment the seeds in water for a few days to remove the gel coating and inhibit disease. For cucumbers/squash, scrape out seeds, wash thoroughly, and dry.
- Drying: Spread seeds thinly on screens or paper plates in a cool, dry, well-ventilated area for 1-4 weeks. Ensure they are bone-dry before storage. I aim for less than 8% moisture content.
- Storage: Store seeds in airtight containers (glass jars with desiccant packets work well) in a cool, dark, dry place (ideally 40-50°F and 30-40% humidity). Label clearly with variety and date. Properly stored seeds can remain viable for 3-10 years or more.
Step 8: Season Extension & Winterizing
Extend your harvest and protect your garden for the off-season to truly maximize your self sufficient garden from scratch.
- Cold Frames: Simple structures with a transparent top (glass, polycarbonate, or old windows) that sit over garden beds. They trap solar heat, allowing you to grow cold-hardy crops (lettuce, spinach, kale, radishes) well into winter or start seeds earlier in spring. A basic cold frame can be built from 2×6 lumber and a sheet of polycarbonate for under $100.
- Hoop Houses/Low Tunnels: Larger structures made from flexible hoops (PVC pipe or EMT conduit) covered with greenhouse plastic. These provide more space and greater temperature moderation. A 10×20 ft DIY low tunnel kit can cost $200-$500, while a larger, more robust hoop house kit might be $1,000-$3,000. I use a 6×12 ft low tunnel made from 1/2-inch PVC hoops and 6mil greenhouse plastic, which extends my lettuce and spinach harvest by at least
- Rainwater Harvesting: This is my primary source of irrigation water. A 55-gallon rain barrel (e.g., EarthMark Rain Barrel, ~$120-$150) connected to a downspout can collect significant water. For larger needs, I use two 275-gallon IBC totes (Intermediate Bulk Containers, often available used for $100-$200 each from food-grade sources) connected in series. A 1,000 sq ft roof can collect approximately 620 gallons of water for every inch of rainfall. My 1,500 sq ft roof provides ample water for my 600 sq ft garden through multiple barrels and totes.
- Drip Irrigation: This is by far the most water-efficient method, delivering water directly to the plant’s root zone, minimizing evaporation and weed growth.
- Components: A typical drip system includes a pressure regulator (e.g., Rain Bird PRV-10, ~$15), a filter (Rain Bird RBY filter, ~$20), main tubing (1/2-inch poly tubing, 100ft ~$25), smaller feeder lines (1/4-inch tubing), and emitters (0.5 GPH or 1 GPH per plant).
- Kits: For beginners, a starter kit like the Rain Bird Drip Irrigation Garden Kit (model DDI-KIT-1P, ~$40-$60) is excellent for a small garden. For larger setups, I use Netafim Techline CV Drip Line (500ft roll, ~$150-$200), which has pressure-compensating emitters built-in, ensuring even watering across long runs.
- Automation: For true self-sufficiency, consider a battery-powered timer (e.g., Orbit B-Hyve Bluetooth Hose Faucet Timer, ~$50) or a solar-powered timer connected to a small 12V pump.
- Solar-Powered Pumps: For lifting water from a well, pond, or large storage tank to your garden, a solar pump is a game-changer. For a smaller drip system, a Shurflo 2088-594-152 Diaphragm Pump (12V, 3.5 GPM, ~$180) can be powered by a single 100W solar panel (e.g., Renogy 100W Monocrystalline Solar Panel, ~$100) and a small 12V battery (e.g., a 50Ah LiFePO4 battery like the Battle Born 50Ah, ~$450). For larger operations or deeper wells, more robust systems are needed. If you’re looking to build out a comprehensive off-grid power system to support your garden’s water needs, or indeed your entire homestead, you might want to explore resources like the Power Grid Generator complete system guide to understand the full scope of what’s possible in terms of energy independence.
Step 5: Seed Selection & Planting
The choice of seeds is crucial for a truly self sufficient garden from scratch.
- Choose Heirloom & Open-Pollinated Seeds: These varieties produce seeds that will grow true to type, meaning you can save seeds from your harvest year after year. F1 hybrids, while often vigorous, will not produce consistent offspring from saved seeds. Reputable seed companies include Baker Creek Heirloom Seeds, High Mowing Organic Seeds, and Seed Savers Exchange. Start with common, reliable varieties like ‘Black Krim’ tomatoes, ‘Provider’ bush beans, ‘Waltham Butternut’ squash, and ‘Black Seeded Simpson’ lettuce.
- Start Seeds Indoors (Optional but Recommended): For longer growing seasons or specific crops, starting seeds indoors gives you a head start. Use seed-starting mix (e.g., Espoma Organic Seed Starter Mix, ~$10 for 16qt bag) in seed trays (Jiffy Professional Greenhouse 72-cell kit, ~$15). Provide adequate light with LED grow lights (Barrina T5 2ft 4-pack LED Grow Lights, 20W each, ~$50) for 14-16 hours a day, positioned 2-4 inches above seedlings. Maintain consistent temperatures (65-75°F for most).
- Direct Sowing vs. Transplanting: Some crops (carrots, radishes, beans, corn) prefer direct sowing into the garden bed. Others (tomatoes, peppers, broccoli, kale) benefit from being started indoors and transplanted. Follow seed packet instructions for planting depths (e.g., lettuce seeds are often surface-sown or planted 1/8 inch deep, while beans are 1 inch deep) and spacing.
- Companion Planting: Strategically plant different species together to enhance growth, deter pests, and attract beneficial insects. For example, planting marigolds near tomatoes can deter nematodes, and basil improves tomato flavor. Nasturtiums can act as a trap crop for aphids.
- Succession Planting: For a continuous harvest, plant small batches of quick-growing crops (lettuce, radishes, cilantro) every 2-3 weeks. As one crop finishes, another is ready to take its place.
Step 6: Pest & Disease Management (Organic)
Maintaining a self sufficient garden from scratch means embracing organic pest and disease control.
- Integrated Pest Management (IPM): This holistic approach combines several strategies.
- Observation: Regularly inspect your plants for early signs of pests or disease. Catching issues early is key.
- Physical Barriers: Use row covers (e.g., Agribon AG-19 floating row cover, 10×20 ft, ~$20) to protect young plants from insect pests like cabbage worms and squash bugs. Install fences (e.g., 2×4 welded wire mesh, 4 ft tall, 50 ft roll ~$70) to keep out deer, rabbits, and other larger animals.
- Hand-Picking: For larger pests like tomato hornworms or squash bugs, simply pick them off and drop them into a bucket of soapy water.
- Companion Planting: As mentioned, certain plants repel pests. Marigolds, garlic, and onions are excellent deterrents.
- Attract Beneficial Insects: Plant flowers like dill, fennel, cosmos, and sweet alyssum to attract ladybugs, lacewings, and parasitic wasps, which prey on common garden pests.
- Organic Sprays & Treatments:
- Neem Oil: An excellent broad-spectrum organic insecticide and fungicide. Bonide Neem Oil Concentrate (16oz, ~$20) can be mixed at a rate of 1-2 tbsp per gallon of water and sprayed on affected plants.
- Insecticidal Soap: Effective against soft-bodied insects like aphids, whiteflies, and spider mites. Garden Safe Insecticidal Soap (24oz ready-to-use, ~$10).
- Bacillus thuringiensis (Bt): A naturally occurring soil bacterium that targets caterpillars and worms. Monterey BT Worm & Caterpillar Killer (16oz, ~$18) is highly effective and safe for beneficial insects.
- Copper or Sulfur Sprays: For fungal diseases like powdery mildew or blight, organic copper (e.g., Bonide Copper Fungicide, ~$15 for 1lb) or sulfur (e.g., Safer Brand Garden Fungicide, ~$10 for 16oz) can be used as a last resort.
Step 7: Harvesting & Seed Saving
The culmination of your efforts is the harvest, and seed saving closes the loop on self-sufficiency.
- Harvesting Techniques:
- Timing: Harvest vegetables at their peak ripeness for best flavor and nutritional value. For example, green beans should snap cleanly, cucumbers should be firm, and tomatoes should be fully colored.
- Frequency: Many crops, like zucchini, cucumbers, and bush beans, produce more if harvested frequently. Pick daily or every other day.
- Tools: Use clean, sharp pruners (e.g., Corona ClassicCUT Bypass Pruner BP 3180, ~$30) or a sharp knife for clean cuts, minimizing damage to the plant.
- Seed Saving: This is where the « self-sufficient » aspect truly shines.
- Selection: Only save seeds from your healthiest, most vigorous plants that show desired traits (disease resistance, good flavor, high yield).
- Isolation: To ensure true-to-type seeds, prevent cross-pollination. This can be challenging for open-pollinated crops that readily cross (e.g., squash, corn). For beginners, focus on self-pollinating plants like beans, peas, lettuce, and tomatoes.
- Processing:
- Dry Seeds (Beans, Peas, Lettuce, Grains): Allow pods/seed heads to dry completely on the plant. Harvest, shell, and clean the seeds, removing chaff.
- Wet Seeds (Tomatoes, Cucumbers, Squash): For tomatoes, ferment the seeds in water for a few days to remove the gel coating and inhibit disease. For cucumbers/squash, scrape out seeds, wash thoroughly, and dry.
- Drying: Spread seeds thinly on screens or paper plates in a cool, dry, well-ventilated area for 1-4 weeks. Ensure they are bone-dry before storage. I aim for less than 8% moisture content.
- Storage: Store seeds in airtight containers (glass jars with desiccant packets work well) in a cool, dark, dry place (ideally 40-50°F and 30-40% humidity). Label clearly with variety and date. Properly stored seeds can remain viable for 3-10 years or more.
Step 8: Season Extension & Winterizing
Extend your harvest and protect your garden for the off-season to truly maximize your self sufficient garden from scratch.
- Cold Frames: Simple structures with a transparent top (glass, polycarbonate, or old windows) that sit over garden beds. They trap solar heat, allowing you to grow cold-hardy crops (lettuce, spinach, kale, radishes) well into winter or start seeds earlier in spring. A basic cold frame can be built from 2×6 lumber and a sheet of polycarbonate for under $100.
- Hoop Houses/Low Tunnels: Larger structures made from flexible hoops (PVC pipe or EMT conduit) covered with greenhouse plastic. These provide more space and greater temperature moderation. A 10×20 ft DIY low tunnel kit can cost $200-$500, while a larger, more robust hoop house kit might be $1,000-$3,000. I use a 6×12 ft low tunnel made from 1/2-inch PVC hoops and 6mil greenhouse plastic, which extends my lettuce and spinach harvest by at least
Efficient water management is critical for a self sufficient garden from scratch, especially in off-grid living where water resources might be limited.
- Rainwater Harvesting: This is my primary source of irrigation water. A 55-gallon rain barrel (e.g., EarthMark Rain Barrel, ~$120-$150) connected to a downspout can collect significant water. For larger needs, I use two 275-gallon IBC totes (Intermediate Bulk Containers, often available used for $100-$200 each from food-grade sources) connected in series. A 1,000 sq ft roof can collect approximately 620 gallons of water for every inch of rainfall. My 1,500 sq ft roof provides ample water for my 600 sq ft garden through multiple barrels and totes.
- Drip Irrigation: This is by far the most water-efficient method, delivering water directly to the plant’s root zone, minimizing evaporation and weed growth.
- Components: A typical drip system includes a pressure regulator (e.g., Rain Bird PRV-10, ~$15), a filter (Rain Bird RBY filter, ~$20), main tubing (1/2-inch poly tubing, 100ft ~$25), smaller feeder lines (1/4-inch tubing), and emitters (0.5 GPH or 1 GPH per plant).
- Kits: For beginners, a starter kit like the Rain Bird Drip Irrigation Garden Kit (model DDI-KIT-1P, ~$40-$60) is excellent for a small garden. For larger setups, I use Netafim Techline CV Drip Line (500ft roll, ~$150-$200), which has pressure-compensating emitters built-in, ensuring even watering across long runs.
- Automation: For true self-sufficiency, consider a battery-powered timer (e.g., Orbit B-Hyve Bluetooth Hose Faucet Timer, ~$50) or a solar-powered timer connected to a small 12V pump.
- Solar-Powered Pumps: For lifting water from a well, pond, or large storage tank to your garden, a solar pump is a game-changer. For a smaller drip system, a Shurflo 2088-594-152 Diaphragm Pump (12V, 3.5 GPM, ~$180) can be powered by a single 100W solar panel (e.g., Renogy 100W Monocrystalline Solar Panel, ~$100) and a small 12V battery (e.g., a 50Ah LiFePO4 battery like the Battle Born 50Ah, ~$450). For larger operations or deeper wells, more robust systems are needed. If you’re looking to build out a comprehensive off-grid power system to support your garden’s water needs, or indeed your entire homestead, you might want to explore resources like the Power Grid Generator complete system guide to understand the full scope of what’s possible in terms of energy independence.
Step 5: Seed Selection & Planting
The choice of seeds is crucial for a truly self sufficient garden from scratch.
- Choose Heirloom & Open-Pollinated Seeds: These varieties produce seeds that will grow true to type, meaning you can save seeds from your harvest year after year. F1 hybrids, while often vigorous, will not produce consistent offspring from saved seeds. Reputable seed companies include Baker Creek Heirloom Seeds, High Mowing Organic Seeds, and Seed Savers Exchange. Start with common, reliable varieties like ‘Black Krim’ tomatoes, ‘Provider’ bush beans, ‘Waltham Butternut’ squash, and ‘Black Seeded Simpson’ lettuce.
- Start Seeds Indoors (Optional but Recommended): For longer growing seasons or specific crops, starting seeds indoors gives you a head start. Use seed-starting mix (e.g., Espoma Organic Seed Starter Mix, ~$10 for 16qt bag) in seed trays (Jiffy Professional Greenhouse 72-cell kit, ~$15). Provide adequate light with LED grow lights (Barrina T5 2ft 4-pack LED Grow Lights, 20W each, ~$50) for 14-16 hours a day, positioned 2-4 inches above seedlings. Maintain consistent temperatures (65-75°F for most).
- Direct Sowing vs. Transplanting: Some crops (carrots, radishes, beans, corn) prefer direct sowing into the garden bed. Others (tomatoes, peppers, broccoli, kale) benefit from being started indoors and transplanted. Follow seed packet instructions for planting depths (e.g., lettuce seeds are often surface-sown or planted 1/8 inch deep, while beans are 1 inch deep) and spacing.
- Companion Planting: Strategically plant different species together to enhance growth, deter pests, and attract beneficial insects. For example, planting marigolds near tomatoes can deter nematodes, and basil improves tomato flavor. Nasturtiums can act as a trap crop for aphids.
- Succession Planting: For a continuous harvest, plant small batches of quick-growing crops (lettuce, radishes, cilantro) every 2-3 weeks. As one crop finishes, another is ready to take its place.
Step 6: Pest & Disease Management (Organic)
Maintaining a self sufficient garden from scratch means embracing organic pest and disease control.
- Integrated Pest Management (IPM): This holistic approach combines several strategies.
- Observation: Regularly inspect your plants for early signs of pests or disease. Catching issues early is key.
- Physical Barriers: Use row covers (e.g., Agribon AG-19 floating row cover, 10×20 ft, ~$20) to protect young plants from insect pests like cabbage worms and squash bugs. Install fences (e.g., 2×4 welded wire mesh, 4 ft tall, 50 ft roll ~$70) to keep out deer, rabbits, and other larger animals.
- Hand-Picking: For larger pests like tomato hornworms or squash bugs, simply pick them off and drop them into a bucket of soapy water.
- Companion Planting: As mentioned, certain plants repel pests. Marigolds, garlic, and onions are excellent deterrents.
- Attract Beneficial Insects: Plant flowers like dill, fennel, cosmos, and sweet alyssum to attract ladybugs, lacewings, and parasitic wasps, which prey on common garden pests.
- Organic Sprays & Treatments:
- Neem Oil: An excellent broad-spectrum organic insecticide and fungicide. Bonide Neem Oil Concentrate (16oz, ~$20) can be mixed at a rate of 1-2 tbsp per gallon of water and sprayed on affected plants.
- Insecticidal Soap: Effective against soft-bodied insects like aphids, whiteflies, and spider mites. Garden Safe Insecticidal Soap (24oz ready-to-use, ~$10).
- Bacillus thuringiensis (Bt): A naturally occurring soil bacterium that targets caterpillars and worms. Monterey BT Worm & Caterpillar Killer (16oz, ~$18) is highly effective and safe for beneficial insects.
- Copper or Sulfur Sprays: For fungal diseases like powdery mildew or blight, organic copper (e.g., Bonide Copper Fungicide, ~$15 for 1lb) or sulfur (e.g., Safer Brand Garden Fungicide, ~$10 for 16oz) can be used as a last resort.
Step 7: Harvesting & Seed Saving
The culmination of your efforts is the harvest, and seed saving closes the loop on self-sufficiency.
- Harvesting Techniques:
- Timing: Harvest vegetables at their peak ripeness for best flavor and nutritional value. For example, green beans should snap cleanly, cucumbers should be firm, and tomatoes should be fully colored.
- Frequency: Many crops, like zucchini, cucumbers, and bush beans, produce more if harvested frequently. Pick daily or every other day.
- Tools: Use clean, sharp pruners (e.g., Corona ClassicCUT Bypass Pruner BP 3180, ~$30) or a sharp knife for clean cuts, minimizing damage to the plant.
- Seed Saving: This is where the « self-sufficient » aspect truly shines.
- Selection: Only save seeds from your healthiest, most vigorous plants that show desired traits (disease resistance, good flavor, high yield).
- Isolation: To ensure true-to-type seeds, prevent cross-pollination. This can be challenging for open-pollinated crops that readily cross (e.g., squash, corn). For beginners, focus on self-pollinating plants like beans, peas, lettuce, and tomatoes.
- Processing:
- Dry Seeds (Beans, Peas, Lettuce, Grains): Allow pods/seed heads to dry completely on the plant. Harvest, shell, and clean the seeds, removing chaff.
- Wet Seeds (Tomatoes, Cucumbers, Squash): For tomatoes, ferment the seeds in water for a few days to remove the gel coating and inhibit disease. For cucumbers/squash, scrape out seeds, wash thoroughly, and dry.
- Drying: Spread seeds thinly on screens or paper plates in a cool, dry, well-ventilated area for 1-4 weeks. Ensure they are bone-dry before storage. I aim for less than 8% moisture content.
- Storage: Store seeds in airtight containers (glass jars with desiccant packets work well) in a cool, dark, dry place (ideally 40-50°F and 30-40% humidity). Label clearly with variety and date. Properly stored seeds can remain viable for 3-10 years or more.
Step 8: Season Extension & Winterizing
Extend your harvest and protect your garden for the off-season to truly maximize your self sufficient garden from scratch.
- Cold Frames: Simple structures with a transparent top (glass, polycarbonate, or old windows) that sit over garden beds. They trap solar heat, allowing you to grow cold-hardy crops (lettuce, spinach, kale, radishes) well into winter or start seeds earlier in spring. A basic cold frame can be built from 2×6 lumber and a sheet of polycarbonate for under $100.
- Hoop Houses/Low Tunnels: Larger structures made from flexible hoops (PVC pipe or EMT conduit) covered with greenhouse plastic. These provide more space and greater temperature moderation. A 10×20 ft DIY low tunnel kit can cost $200-$500, while a larger, more robust hoop house kit might be $1,000-$3,000. I use a 6×12 ft low tunnel made from 1/2-inch PVC hoops and 6mil greenhouse plastic, which extends my lettuce and spinach harvest by at least
Step 4: Water Management & Irrigation
Efficient water management is critical for a self sufficient garden from scratch, especially in off-grid living where water resources might be limited.
- Rainwater Harvesting: This is my primary source of irrigation water. A 55-gallon rain barrel (e.g., EarthMark Rain Barrel, ~$120-$150) connected to a downspout can collect significant water. For larger needs, I use two 275-gallon IBC totes (Intermediate Bulk Containers, often available used for $100-$200 each from food-grade sources) connected in series. A 1,000 sq ft roof can collect approximately 620 gallons of water for every inch of rainfall. My 1,500 sq ft roof provides ample water for my 600 sq ft garden through multiple barrels and totes.
- Drip Irrigation: This is by far the most water-efficient method, delivering water directly to the plant’s root zone, minimizing evaporation and weed growth.
- Components: A typical drip system includes a pressure regulator (e.g., Rain Bird PRV-10, ~$15), a filter (Rain Bird RBY filter, ~$20), main tubing (1/2-inch poly tubing, 100ft ~$25), smaller feeder lines (1/4-inch tubing), and emitters (0.5 GPH or 1 GPH per plant).
- Kits: For beginners, a starter kit like the Rain Bird Drip Irrigation Garden Kit (model DDI-KIT-1P, ~$40-$60) is excellent for a small garden. For larger setups, I use Netafim Techline CV Drip Line (500ft roll, ~$150-$200), which has pressure-compensating emitters built-in, ensuring even watering across long runs.
- Automation: For true self-sufficiency, consider a battery-powered timer (e.g., Orbit B-Hyve Bluetooth Hose Faucet Timer, ~$50) or a solar-powered timer connected to a small 12V pump.
- Solar-Powered Pumps: For lifting water from a well, pond, or large storage tank to your garden, a solar pump is a game-changer. For a smaller drip system, a Shurflo 2088-594-152 Diaphragm Pump (12V, 3.5 GPM, ~$180) can be powered by a single 100W solar panel (e.g., Renogy 100W Monocrystalline Solar Panel, ~$100) and a small 12V battery (e.g., a 50Ah LiFePO4 battery like the Battle Born 50Ah, ~$450). For larger operations or deeper wells, more robust systems are needed. If you’re looking to build out a comprehensive off-grid power system to support your garden’s water needs, or indeed your entire homestead, you might want to explore resources like the Power Grid Generator complete system guide to understand the full scope of what’s possible in terms of energy independence.
Step 5: Seed Selection & Planting
The choice of seeds is crucial for a truly self sufficient garden from scratch.
- Choose Heirloom & Open-Pollinated Seeds: These varieties produce seeds that will grow true to type, meaning you can save seeds from your harvest year after year. F1 hybrids, while often vigorous, will not produce consistent offspring from saved seeds. Reputable seed companies include Baker Creek Heirloom Seeds, High Mowing Organic Seeds, and Seed Savers Exchange. Start with common, reliable varieties like ‘Black Krim’ tomatoes, ‘Provider’ bush beans, ‘Waltham Butternut’ squash, and ‘Black Seeded Simpson’ lettuce.
- Start Seeds Indoors (Optional but Recommended): For longer growing seasons or specific crops, starting seeds indoors gives you a head start. Use seed-starting mix (e.g., Espoma Organic Seed Starter Mix, ~$10 for 16qt bag) in seed trays (Jiffy Professional Greenhouse 72-cell kit, ~$15). Provide adequate light with LED grow lights (Barrina T5 2ft 4-pack LED Grow Lights, 20W each, ~$50) for 14-16 hours a day, positioned 2-4 inches above seedlings. Maintain consistent temperatures (65-75°F for most).
- Direct Sowing vs. Transplanting: Some crops (carrots, radishes, beans, corn) prefer direct sowing into the garden bed. Others (tomatoes, peppers, broccoli, kale) benefit from being started indoors and transplanted. Follow seed packet instructions for planting depths (e.g., lettuce seeds are often surface-sown or planted 1/8 inch deep, while beans are 1 inch deep) and spacing.
- Companion Planting: Strategically plant different species together to enhance growth, deter pests, and attract beneficial insects. For example, planting marigolds near tomatoes can deter nematodes, and basil improves tomato flavor. Nasturtiums can act as a trap crop for aphids.
- Succession Planting: For a continuous harvest, plant small batches of quick-growing crops (lettuce, radishes, cilantro) every 2-3 weeks. As one crop finishes, another is ready to take its place.
Step 6: Pest & Disease Management (Organic)
Maintaining a self sufficient garden from scratch means embracing organic pest and disease control.
- Integrated Pest Management (IPM): This holistic approach combines several strategies.
- Observation: Regularly inspect your plants for early signs of pests or disease. Catching issues early is key.
- Physical Barriers: Use row covers (e.g., Agribon AG-19 floating row cover, 10×20 ft, ~$20) to protect young plants from insect pests like cabbage worms and squash bugs. Install fences (e.g., 2×4 welded wire mesh, 4 ft tall, 50 ft roll ~$70) to keep out deer, rabbits, and other larger animals.
- Hand-Picking: For larger pests like tomato hornworms or squash bugs, simply pick them off and drop them into a bucket of soapy water.
- Companion Planting: As mentioned, certain plants repel pests. Marigolds, garlic, and onions are excellent deterrents.
- Attract Beneficial Insects: Plant flowers like dill, fennel, cosmos, and sweet alyssum to attract ladybugs, lacewings, and parasitic wasps, which prey on common garden pests.
- Organic Sprays & Treatments:
- Neem Oil: An excellent broad-spectrum organic insecticide and fungicide. Bonide Neem Oil Concentrate (16oz, ~$20) can be mixed at a rate of 1-2 tbsp per gallon of water and sprayed on affected plants.
- Insecticidal Soap: Effective against soft-bodied insects like aphids, whiteflies, and spider mites. Garden Safe Insecticidal Soap (24oz ready-to-use, ~$10).
- Bacillus thuringiensis (Bt): A naturally occurring soil bacterium that targets caterpillars and worms. Monterey BT Worm & Caterpillar Killer (16oz, ~$18) is highly effective and safe for beneficial insects.
- Copper or Sulfur Sprays: For fungal diseases like powdery mildew or blight, organic copper (e.g., Bonide Copper Fungicide, ~$15 for 1lb) or sulfur (e.g., Safer Brand Garden Fungicide, ~$10 for 16oz) can be used as a last resort.
Step 7: Harvesting & Seed Saving
The culmination of your efforts is the harvest, and seed saving closes the loop on self-sufficiency.
- Harvesting Techniques:
- Timing: Harvest vegetables at their peak ripeness for best flavor and nutritional value. For example, green beans should snap cleanly, cucumbers should be firm, and tomatoes should be fully colored.
- Frequency: Many crops, like zucchini, cucumbers, and bush beans, produce more if harvested frequently. Pick daily or every other day.
- Tools: Use clean, sharp pruners (e.g., Corona ClassicCUT Bypass Pruner BP 3180, ~$30) or a sharp knife for clean cuts, minimizing damage to the plant.
- Seed Saving: This is where the « self-sufficient » aspect truly shines.
- Selection: Only save seeds from your healthiest, most vigorous plants that show desired traits (disease resistance, good flavor, high yield).
- Isolation: To ensure true-to-type seeds, prevent cross-pollination. This can be challenging for open-pollinated crops that readily cross (e.g., squash, corn). For beginners, focus on self-pollinating plants like beans, peas, lettuce, and tomatoes.
- Processing:
- Dry Seeds (Beans, Peas, Lettuce, Grains): Allow pods/seed heads to dry completely on the plant. Harvest, shell, and clean the seeds, removing chaff.
- Wet Seeds (Tomatoes, Cucumbers, Squash): For tomatoes, ferment the seeds in water for a few days to remove the gel coating and inhibit disease. For cucumbers/squash, scrape out seeds, wash thoroughly, and dry.
- Drying: Spread seeds thinly on screens or paper plates in a cool, dry, well-ventilated area for 1-4 weeks. Ensure they are bone-dry before storage. I aim for less than 8% moisture content.
- Storage: Store seeds in airtight containers (glass jars with desiccant packets work well) in a cool, dark, dry place (ideally 40-50°F and 30-40% humidity). Label clearly with variety and date. Properly stored seeds can remain viable for 3-10 years or more.
Step 8: Season Extension & Winterizing
Extend your harvest and protect your garden for the off-season to truly maximize your self sufficient garden from scratch.
- Cold Frames: Simple structures with a transparent top (glass, polycarbonate, or old windows) that sit over garden beds. They trap solar heat, allowing you to grow cold-hardy crops (lettuce, spinach, kale, radishes) well into winter or start seeds earlier in spring. A basic cold frame can be built from 2×6 lumber and a sheet of polycarbonate for under $100.
- Hoop Houses/Low Tunnels: Larger structures made from flexible hoops (PVC pipe or EMT conduit) covered with greenhouse plastic. These provide more space and greater temperature moderation. A 10×20 ft DIY low tunnel kit can cost $200-$500, while a larger, more robust hoop house kit might be $1,000-$3,000. I use a 6×12 ft low tunnel made from 1/2-inch PVC hoops and 6mil greenhouse plastic, which extends my lettuce and spinach harvest by at least
- In-Ground Beds: If you have excellent native soil and good drainage, in-ground beds are the most economical. Double-digging (loosening soil two shovel depths) can significantly improve drainage and aeration. For my main garden, I primarily use in-ground beds, but I focus on building up the soil over time with consistent compost additions and cover cropping. I aim for beds that are no wider than 3-4 feet so I can reach the center without stepping on the soil, compacting it.
- Raised Beds: Raised beds offer numerous advantages, especially for poor soil, heavy clay, or rocky areas. They provide better drainage, warm up faster in spring, reduce compaction, and make weeding and harvesting easier on your back.
- Material Options:
- Untreated Cedar: Naturally rot-resistant and chemical-free. A 4×8 ft bed, 12 inches deep, typically requires three 2x12x8 ft cedar boards, costing around $50-$60 per board (total ~$150-$180) plus corner brackets or screws. My first raised beds were cedar and are still going strong after 7 years.
- Galvanized Steel: Durable, long-lasting, and aesthetically pleasing. Brands like Vego Garden offer modular kits. A Vego Garden 17″ Tall 8-in-1 Metal Raised Garden Bed (can be configured to 4×8 ft) costs approximately $250-$300.
- Concrete Blocks/Stones: Very durable but can leach minerals (though generally safe once weathered) and can be expensive.
- Recycled Materials: Pallets (check for chemical treatment stamps like « HT » for heat-treated), old tires (controversial due to potential chemical leaching).
- Filling Raised Beds: Don’t just fill with topsoil. Use a « Hugelkultur » approach (logs, branches, leaves, then compost, then topsoil) or a mixture of 60% good quality topsoil, 30% compost, and 10% perlite or vermiculite for drainage. A 4x8x1 ft raised bed requires about 32 cubic feet (or ~1.2 cubic yards) of soil mix, which can cost $100-$200 depending on your source.
- Material Options:
Step 4: Water Management & Irrigation
Efficient water management is critical for a self sufficient garden from scratch, especially in off-grid living where water resources might be limited.
- Rainwater Harvesting: This is my primary source of irrigation water. A 55-gallon rain barrel (e.g., EarthMark Rain Barrel, ~$120-$150) connected to a downspout can collect significant water. For larger needs, I use two 275-gallon IBC totes (Intermediate Bulk Containers, often available used for $100-$200 each from food-grade sources) connected in series. A 1,000 sq ft roof can collect approximately 620 gallons of water for every inch of rainfall. My 1,500 sq ft roof provides ample water for my 600 sq ft garden through multiple barrels and totes.
- Drip Irrigation: This is by far the most water-efficient method, delivering water directly to the plant’s root zone, minimizing evaporation and weed growth.
- Components: A typical drip system includes a pressure regulator (e.g., Rain Bird PRV-10, ~$15), a filter (Rain Bird RBY filter, ~$20), main tubing (1/2-inch poly tubing, 100ft ~$25), smaller feeder lines (1/4-inch tubing), and emitters (0.5 GPH or 1 GPH per plant).
- Kits: For beginners, a starter kit like the Rain Bird Drip Irrigation Garden Kit (model DDI-KIT-1P, ~$40-$60) is excellent for a small garden. For larger setups, I use Netafim Techline CV Drip Line (500ft roll, ~$150-$200), which has pressure-compensating emitters built-in, ensuring even watering across long runs.
- Automation: For true self-sufficiency, consider a battery-powered timer (e.g., Orbit B-Hyve Bluetooth Hose Faucet Timer, ~$50) or a solar-powered timer connected to a small 12V pump.
- Solar-Powered Pumps: For lifting water from a well, pond, or large storage tank to your garden, a solar pump is a game-changer. For a smaller drip system, a Shurflo 2088-594-152 Diaphragm Pump (12V, 3.5 GPM, ~$180) can be powered by a single 100W solar panel (e.g., Renogy 100W Monocrystalline Solar Panel, ~$100) and a small 12V battery (e.g., a 50Ah LiFePO4 battery like the Battle Born 50Ah, ~$450). For larger operations or deeper wells, more robust systems are needed. If you’re looking to build out a comprehensive off-grid power system to support your garden’s water needs, or indeed your entire homestead, you might want to explore resources like the Power Grid Generator complete system guide to understand the full scope of what’s possible in terms of energy independence.
Step 5: Seed Selection & Planting
The choice of seeds is crucial for a truly self sufficient garden from scratch.
- Choose Heirloom & Open-Pollinated Seeds: These varieties produce seeds that will grow true to type, meaning you can save seeds from your harvest year after year. F1 hybrids, while often vigorous, will not produce consistent offspring from saved seeds. Reputable seed companies include Baker Creek Heirloom Seeds, High Mowing Organic Seeds, and Seed Savers Exchange. Start with common, reliable varieties like ‘Black Krim’ tomatoes, ‘Provider’ bush beans, ‘Waltham Butternut’ squash, and ‘Black Seeded Simpson’ lettuce.
- Start Seeds Indoors (Optional but Recommended): For longer growing seasons or specific crops, starting seeds indoors gives you a head start. Use seed-starting mix (e.g., Espoma Organic Seed Starter Mix, ~$10 for 16qt bag) in seed trays (Jiffy Professional Greenhouse 72-cell kit, ~$15). Provide adequate light with LED grow lights (Barrina T5 2ft 4-pack LED Grow Lights, 20W each, ~$50) for 14-16 hours a day, positioned 2-4 inches above seedlings. Maintain consistent temperatures (65-75°F for most).
- Direct Sowing vs. Transplanting: Some crops (carrots, radishes, beans, corn) prefer direct sowing into the garden bed. Others (tomatoes, peppers, broccoli, kale) benefit from being started indoors and transplanted. Follow seed packet instructions for planting depths (e.g., lettuce seeds are often surface-sown or planted 1/8 inch deep, while beans are 1 inch deep) and spacing.
- Companion Planting: Strategically plant different species together to enhance growth, deter pests, and attract beneficial insects. For example, planting marigolds near tomatoes can deter nematodes, and basil improves tomato flavor. Nasturtiums can act as a trap crop for aphids.
- Succession Planting: For a continuous harvest, plant small batches of quick-growing crops (lettuce, radishes, cilantro) every 2-3 weeks. As one crop finishes, another is ready to take its place.
Step 6: Pest & Disease Management (Organic)
Maintaining a self sufficient garden from scratch means embracing organic pest and disease control.
- Integrated Pest Management (IPM): This holistic approach combines several strategies.
- Observation: Regularly inspect your plants for early signs of pests or disease. Catching issues early is key.
- Physical Barriers: Use row covers (e.g., Agribon AG-19 floating row cover, 10×20 ft, ~$20) to protect young plants from insect pests like cabbage worms and squash bugs. Install fences (e.g., 2×4 welded wire mesh, 4 ft tall, 50 ft roll ~$70) to keep out deer, rabbits, and other larger animals.
- Hand-Picking: For larger pests like tomato hornworms or squash bugs, simply pick them off and drop them into a bucket of soapy water.
- Companion Planting: As mentioned, certain plants repel pests. Marigolds, garlic, and onions are excellent deterrents.
- Attract Beneficial Insects: Plant flowers like dill, fennel, cosmos, and sweet alyssum to attract ladybugs, lacewings, and parasitic wasps, which prey on common garden pests.
- Organic Sprays & Treatments:
- Neem Oil: An excellent broad-spectrum organic insecticide and fungicide. Bonide Neem Oil Concentrate (16oz, ~$20) can be mixed at a rate of 1-2 tbsp per gallon of water and sprayed on affected plants.
- Insecticidal Soap: Effective against soft-bodied insects like aphids, whiteflies, and spider mites. Garden Safe Insecticidal Soap (24oz ready-to-use, ~$10).
- Bacillus thuringiensis (Bt): A naturally occurring soil bacterium that targets caterpillars and worms. Monterey BT Worm & Caterpillar Killer (16oz, ~$18) is highly effective and safe for beneficial insects.
- Copper or Sulfur Sprays: For fungal diseases like powdery mildew or blight, organic copper (e.g., Bonide Copper Fungicide, ~$15 for 1lb) or sulfur (e.g., Safer Brand Garden Fungicide, ~$10 for 16oz) can be used as a last resort.
Step 7: Harvesting & Seed Saving
The culmination of your efforts is the harvest, and seed saving closes the loop on self-sufficiency.
- Harvesting Techniques:
- Timing: Harvest vegetables at their peak ripeness for best flavor and nutritional value. For example, green beans should snap cleanly, cucumbers should be firm, and tomatoes should be fully colored.
- Frequency: Many crops, like zucchini, cucumbers, and bush beans, produce more if harvested frequently. Pick daily or every other day.
- Tools: Use clean, sharp pruners (e.g., Corona ClassicCUT Bypass Pruner BP 3180, ~$30) or a sharp knife for clean cuts, minimizing damage to the plant.
- Seed Saving: This is where the « self-sufficient » aspect truly shines.
- Selection: Only save seeds from your healthiest, most vigorous plants that show desired traits (disease resistance, good flavor, high yield).
- Isolation: To ensure true-to-type seeds, prevent cross-pollination. This can be challenging for open-pollinated crops that readily cross (e.g., squash, corn). For beginners, focus on self-pollinating plants like beans, peas, lettuce, and tomatoes.
- Processing:
- Dry Seeds (Beans, Peas, Lettuce, Grains): Allow pods/seed heads to dry completely on the plant. Harvest, shell, and clean the seeds, removing chaff.
- Wet Seeds (Tomatoes, Cucumbers, Squash): For tomatoes, ferment the seeds in water for a few days to remove the gel coating and inhibit disease. For cucumbers/squash, scrape out seeds, wash thoroughly, and dry.
- Drying: Spread seeds thinly on screens or paper plates in a cool, dry, well-ventilated area for 1-4 weeks. Ensure they are bone-dry before storage. I aim for less than 8% moisture content.
- Storage: Store seeds in airtight containers (glass jars with desiccant packets work well) in a cool, dark, dry place (ideally 40-50°F and 30-40% humidity). Label clearly with variety and date. Properly stored seeds can remain viable for 3-10 years or more.
Step 8: Season Extension & Winterizing
Extend your harvest and protect your garden for the off-season to truly maximize your self sufficient garden from scratch.
- Cold Frames: Simple structures with a transparent top (glass, polycarbonate, or old windows) that sit over garden beds. They trap solar heat, allowing you to grow cold-hardy crops (lettuce, spinach, kale, radishes) well into winter or start seeds earlier in spring. A basic cold frame can be built from 2×6 lumber and a sheet of polycarbonate for under $100.
- Hoop Houses/Low Tunnels: Larger structures made from flexible hoops (PVC pipe or EMT conduit) covered with greenhouse plastic. These provide more space and greater temperature moderation. A 10×20 ft DIY low tunnel kit can cost $200-$500, while a larger, more robust hoop house kit might be $1,000-$3,000. I use a 6×12 ft low tunnel made from 1/2-inch PVC hoops and 6mil greenhouse plastic, which extends my lettuce and spinach harvest by at least
Deciding between raised beds and in-ground beds depends on your soil, budget, and physical capabilities.
- In-Ground Beds: If you have excellent native soil and good drainage, in-ground beds are the most economical. Double-digging (loosening soil two shovel depths) can significantly improve drainage and aeration. For my main garden, I primarily use in-ground beds, but I focus on building up the soil over time with consistent compost additions and cover cropping. I aim for beds that are no wider than 3-4 feet so I can reach the center without stepping on the soil, compacting it.
- Raised Beds: Raised beds offer numerous advantages, especially for poor soil, heavy clay, or rocky areas. They provide better drainage, warm up faster in spring, reduce compaction, and make weeding and harvesting easier on your back.
- Material Options:
- Untreated Cedar: Naturally rot-resistant and chemical-free. A 4×8 ft bed, 12 inches deep, typically requires three 2x12x8 ft cedar boards, costing around $50-$60 per board (total ~$150-$180) plus corner brackets or screws. My first raised beds were cedar and are still going strong after 7 years.
- Galvanized Steel: Durable, long-lasting, and aesthetically pleasing. Brands like Vego Garden offer modular kits. A Vego Garden 17″ Tall 8-in-1 Metal Raised Garden Bed (can be configured to 4×8 ft) costs approximately $250-$300.
- Concrete Blocks/Stones: Very durable but can leach minerals (though generally safe once weathered) and can be expensive.
- Recycled Materials: Pallets (check for chemical treatment stamps like « HT » for heat-treated), old tires (controversial due to potential chemical leaching).
- Filling Raised Beds: Don’t just fill with topsoil. Use a « Hugelkultur » approach (logs, branches, leaves, then compost, then topsoil) or a mixture of 60% good quality topsoil, 30% compost, and 10% perlite or vermiculite for drainage. A 4x8x1 ft raised bed requires about 32 cubic feet (or ~1.2 cubic yards) of soil mix, which can cost $100-$200 depending on your source.
- Material Options:
Step 4: Water Management & Irrigation
Efficient water management is critical for a self sufficient garden from scratch, especially in off-grid living where water resources might be limited.
- Rainwater Harvesting: This is my primary source of irrigation water. A 55-gallon rain barrel (e.g., EarthMark Rain Barrel, ~$120-$150) connected to a downspout can collect significant water. For larger needs, I use two 275-gallon IBC totes (Intermediate Bulk Containers, often available used for $100-$200 each from food-grade sources) connected in series. A 1,000 sq ft roof can collect approximately 620 gallons of water for every inch of rainfall. My 1,500 sq ft roof provides ample water for my 600 sq ft garden through multiple barrels and totes.
- Drip Irrigation: This is by far the most water-efficient method, delivering water directly to the plant’s root zone, minimizing evaporation and weed growth.
- Components: A typical drip system includes a pressure regulator (e.g., Rain Bird PRV-10, ~$15), a filter (Rain Bird RBY filter, ~$20), main tubing (1/2-inch poly tubing, 100ft ~$25), smaller feeder lines (1/4-inch tubing), and emitters (0.5 GPH or 1 GPH per plant).
- Kits: For beginners, a starter kit like the Rain Bird Drip Irrigation Garden Kit (model DDI-KIT-1P, ~$40-$60) is excellent for a small garden. For larger setups, I use Netafim Techline CV Drip Line (500ft roll, ~$150-$200), which has pressure-compensating emitters built-in, ensuring even watering across long runs.
- Automation: For true self-sufficiency, consider a battery-powered timer (e.g., Orbit B-Hyve Bluetooth Hose Faucet Timer, ~$50) or a solar-powered timer connected to a small 12V pump.
- Solar-Powered Pumps: For lifting water from a well, pond, or large storage tank to your garden, a solar pump is a game-changer. For a smaller drip system, a Shurflo 2088-594-152 Diaphragm Pump (12V, 3.5 GPM, ~$180) can be powered by a single 100W solar panel (e.g., Renogy 100W Monocrystalline Solar Panel, ~$100) and a small 12V battery (e.g., a 50Ah LiFePO4 battery like the Battle Born 50Ah, ~$450). For larger operations or deeper wells, more robust systems are needed. If you’re looking to build out a comprehensive off-grid power system to support your garden’s water needs, or indeed your entire homestead, you might want to explore resources like the Power Grid Generator complete system guide to understand the full scope of what’s possible in terms of energy independence.
Step 5: Seed Selection & Planting
The choice of seeds is crucial for a truly self sufficient garden from scratch.
- Choose Heirloom & Open-Pollinated Seeds: These varieties produce seeds that will grow true to type, meaning you can save seeds from your harvest year after year. F1 hybrids, while often vigorous, will not produce consistent offspring from saved seeds. Reputable seed companies include Baker Creek Heirloom Seeds, High Mowing Organic Seeds, and Seed Savers Exchange. Start with common, reliable varieties like ‘Black Krim’ tomatoes, ‘Provider’ bush beans, ‘Waltham Butternut’ squash, and ‘Black Seeded Simpson’ lettuce.
- Start Seeds Indoors (Optional but Recommended): For longer growing seasons or specific crops, starting seeds indoors gives you a head start. Use seed-starting mix (e.g., Espoma Organic Seed Starter Mix, ~$10 for 16qt bag) in seed trays (Jiffy Professional Greenhouse 72-cell kit, ~$15). Provide adequate light with LED grow lights (Barrina T5 2ft 4-pack LED Grow Lights, 20W each, ~$50) for 14-16 hours a day, positioned 2-4 inches above seedlings. Maintain consistent temperatures (65-75°F for most).
- Direct Sowing vs. Transplanting: Some crops (carrots, radishes, beans, corn) prefer direct sowing into the garden bed. Others (tomatoes, peppers, broccoli, kale) benefit from being started indoors and transplanted. Follow seed packet instructions for planting depths (e.g., lettuce seeds are often surface-sown or planted 1/8 inch deep, while beans are 1 inch deep) and spacing.
- Companion Planting: Strategically plant different species together to enhance growth, deter pests, and attract beneficial insects. For example, planting marigolds near tomatoes can deter nematodes, and basil improves tomato flavor. Nasturtiums can act as a trap crop for aphids.
- Succession Planting: For a continuous harvest, plant small batches of quick-growing crops (lettuce, radishes, cilantro) every 2-3 weeks. As one crop finishes, another is ready to take its place.
Step 6: Pest & Disease Management (Organic)
Maintaining a self sufficient garden from scratch means embracing organic pest and disease control.
- Integrated Pest Management (IPM): This holistic approach combines several strategies.
- Observation: Regularly inspect your plants for early signs of pests or disease. Catching issues early is key.
- Physical Barriers: Use row covers (e.g., Agribon AG-19 floating row cover, 10×20 ft, ~$20) to protect young plants from insect pests like cabbage worms and squash bugs. Install fences (e.g., 2×4 welded wire mesh, 4 ft tall, 50 ft roll ~$70) to keep out deer, rabbits, and other larger animals.
- Hand-Picking: For larger pests like tomato hornworms or squash bugs, simply pick them off and drop them into a bucket of soapy water.
- Companion Planting: As mentioned, certain plants repel pests. Marigolds, garlic, and onions are excellent deterrents.
- Attract Beneficial Insects: Plant flowers like dill, fennel, cosmos, and sweet alyssum to attract ladybugs, lacewings, and parasitic wasps, which prey on common garden pests.
- Organic Sprays & Treatments:
- Neem Oil: An excellent broad-spectrum organic insecticide and fungicide. Bonide Neem Oil Concentrate (16oz, ~$20) can be mixed at a rate of 1-2 tbsp per gallon of water and sprayed on affected plants.
- Insecticidal Soap: Effective against soft-bodied insects like aphids, whiteflies, and spider mites. Garden Safe Insecticidal Soap (24oz ready-to-use, ~$10).
- Bacillus thuringiensis (Bt): A naturally occurring soil bacterium that targets caterpillars and worms. Monterey BT Worm & Caterpillar Killer (16oz, ~$18) is highly effective and safe for beneficial insects.
- Copper or Sulfur Sprays: For fungal diseases like powdery mildew or blight, organic copper (e.g., Bonide Copper Fungicide, ~$15 for 1lb) or sulfur (e.g., Safer Brand Garden Fungicide, ~$10 for 16oz) can be used as a last resort.
Step 7: Harvesting & Seed Saving
The culmination of your efforts is the harvest, and seed saving closes the loop on self-sufficiency.
- Harvesting Techniques:
- Timing: Harvest vegetables at their peak ripeness for best flavor and nutritional value. For example, green beans should snap cleanly, cucumbers should be firm, and tomatoes should be fully colored.
- Frequency: Many crops, like zucchini, cucumbers, and bush beans, produce more if harvested frequently. Pick daily or every other day.
- Tools: Use clean, sharp pruners (e.g., Corona ClassicCUT Bypass Pruner BP 3180, ~$30) or a sharp knife for clean cuts, minimizing damage to the plant.
- Seed Saving: This is where the « self-sufficient » aspect truly shines.
- Selection: Only save seeds from your healthiest, most vigorous plants that show desired traits (disease resistance, good flavor, high yield).
- Isolation: To ensure true-to-type seeds, prevent cross-pollination. This can be challenging for open-pollinated crops that readily cross (e.g., squash, corn). For beginners, focus on self-pollinating plants like beans, peas, lettuce, and tomatoes.
- Processing:
- Dry Seeds (Beans, Peas, Lettuce, Grains): Allow pods/seed heads to dry completely on the plant. Harvest, shell, and clean the seeds, removing chaff.
- Wet Seeds (Tomatoes, Cucumbers, Squash): For tomatoes, ferment the seeds in water for a few days to remove the gel coating and inhibit disease. For cucumbers/squash, scrape out seeds, wash thoroughly, and dry.
- Drying: Spread seeds thinly on screens or paper plates in a cool, dry, well-ventilated area for 1-4 weeks. Ensure they are bone-dry before storage. I aim for less than 8% moisture content.
- Storage: Store seeds in airtight containers (glass jars with desiccant packets work well) in a cool, dark, dry place (ideally 40-50°F and 30-40% humidity). Label clearly with variety and date. Properly stored seeds can remain viable for 3-10 years or more.
Step 8: Season Extension & Winterizing
Extend your harvest and protect your garden for the off-season to truly maximize your self sufficient garden from scratch.
- Cold Frames: Simple structures with a transparent top (glass, polycarbonate, or old windows) that sit over garden beds. They trap solar heat, allowing you to grow cold-hardy crops (lettuce, spinach, kale, radishes) well into winter or start seeds earlier in spring. A basic cold frame can be built from 2×6 lumber and a sheet of polycarbonate for under $100.
- Hoop Houses/Low Tunnels: Larger structures made from flexible hoops (PVC pipe or EMT conduit) covered with greenhouse plastic. These provide more space and greater temperature moderation. A 10×20 ft DIY low tunnel kit can cost $200-$500, while a larger, more robust hoop house kit might be $1,000-$3,000. I use a 6×12 ft low tunnel made from 1/2-inch PVC hoops and 6mil greenhouse plastic, which extends my lettuce and spinach harvest by at least
Healthy soil is the bedrock of a productive, self-sufficient garden. You can’t guess what your soil needs; you have to test it.
- Perform a Soil Test: A professional soil test will give you precise data on your soil’s pH, nutrient levels (N-P-K), and organic matter content. I recommend sending a sample to your local agricultural extension office; it typically costs $20-$50 and provides detailed recommendations. Alternatively, for a quick homeowner check, a Rapitest Soil Test Kit (40-test kit, model 1663, ~$20 on Amazon) provides a good baseline for pH, Nitrogen, Phosphorus, and Potash. Aim for a pH between 6.0 and 7.0 for most vegetables.
- Amend for pH Imbalance: If your soil is too acidic (below 6.0), add agricultural lime (dolomitic lime adds magnesium, calcitic lime adds calcium). Apply 5-10 lbs per 100 sq ft for a moderate adjustment. If it’s too alkaline (above 7.0), add elemental sulfur (e.g., Espoma Soil Acidifier, ~$15 for 6.75 lbs) or generous amounts of organic matter like peat moss or pine needles.
- Build Organic Matter: This is the single most important step for long-term soil health. Organic matter improves soil structure, water retention, drainage, and nutrient availability. Incorporate 2-4 inches of high-quality compost into your top 6-12 inches of soil annually. I make my own compost from kitchen scraps, garden waste, and shredded leaves, but you can purchase it. Local nurseries often sell bulk compost for $30-$50 per cubic yard. Aged manure (from chickens, cows, or horses – ensure it’s well-rotted to avoid burning plants) is also excellent.
- Address Nutrient Deficiencies: Based on your soil test, add specific organic amendments. If Nitrogen (N) is low, add blood meal (12-0-0, ~$20 for 3 lbs) or feather meal. For Phosphorus (P), use bone meal (3-15-0, ~$15 for 3 lbs) or rock phosphate. For Potassium (K), greensand (0-0-2.5, ~$25 for 5 lbs) or kelp meal are good choices. I rely heavily on Espoma Organic Garden-tone (5-3-3, ~$25 for an 8lb bag) as a balanced, all-purpose organic fertilizer during planting.
Step 3: Garden Bed Preparation
Deciding between raised beds and in-ground beds depends on your soil, budget, and physical capabilities.
- In-Ground Beds: If you have excellent native soil and good drainage, in-ground beds are the most economical. Double-digging (loosening soil two shovel depths) can significantly improve drainage and aeration. For my main garden, I primarily use in-ground beds, but I focus on building up the soil over time with consistent compost additions and cover cropping. I aim for beds that are no wider than 3-4 feet so I can reach the center without stepping on the soil, compacting it.
- Raised Beds: Raised beds offer numerous advantages, especially for poor soil, heavy clay, or rocky areas. They provide better drainage, warm up faster in spring, reduce compaction, and make weeding and harvesting easier on your back.
- Material Options:
- Untreated Cedar: Naturally rot-resistant and chemical-free. A 4×8 ft bed, 12 inches deep, typically requires three 2x12x8 ft cedar boards, costing around $50-$60 per board (total ~$150-$180) plus corner brackets or screws. My first raised beds were cedar and are still going strong after 7 years.
- Galvanized Steel: Durable, long-lasting, and aesthetically pleasing. Brands like Vego Garden offer modular kits. A Vego Garden 17″ Tall 8-in-1 Metal Raised Garden Bed (can be configured to 4×8 ft) costs approximately $250-$300.
- Concrete Blocks/Stones: Very durable but can leach minerals (though generally safe once weathered) and can be expensive.
- Recycled Materials: Pallets (check for chemical treatment stamps like « HT » for heat-treated), old tires (controversial due to potential chemical leaching).
- Filling Raised Beds: Don’t just fill with topsoil. Use a « Hugelkultur » approach (logs, branches, leaves, then compost, then topsoil) or a mixture of 60% good quality topsoil, 30% compost, and 10% perlite or vermiculite for drainage. A 4x8x1 ft raised bed requires about 32 cubic feet (or ~1.2 cubic yards) of soil mix, which can cost $100-$200 depending on your source.
- Material Options:
Step 4: Water Management & Irrigation
Efficient water management is critical for a self sufficient garden from scratch, especially in off-grid living where water resources might be limited.
- Rainwater Harvesting: This is my primary source of irrigation water. A 55-gallon rain barrel (e.g., EarthMark Rain Barrel, ~$120-$150) connected to a downspout can collect significant water. For larger needs, I use two 275-gallon IBC totes (Intermediate Bulk Containers, often available used for $100-$200 each from food-grade sources) connected in series. A 1,000 sq ft roof can collect approximately 620 gallons of water for every inch of rainfall. My 1,500 sq ft roof provides ample water for my 600 sq ft garden through multiple barrels and totes.
- Drip Irrigation: This is by far the most water-efficient method, delivering water directly to the plant’s root zone, minimizing evaporation and weed growth.
- Components: A typical drip system includes a pressure regulator (e.g., Rain Bird PRV-10, ~$15), a filter (Rain Bird RBY filter, ~$20), main tubing (1/2-inch poly tubing, 100ft ~$25), smaller feeder lines (1/4-inch tubing), and emitters (0.5 GPH or 1 GPH per plant).
- Kits: For beginners, a starter kit like the Rain Bird Drip Irrigation Garden Kit (model DDI-KIT-1P, ~$40-$60) is excellent for a small garden. For larger setups, I use Netafim Techline CV Drip Line (500ft roll, ~$150-$200), which has pressure-compensating emitters built-in, ensuring even watering across long runs.
- Automation: For true self-sufficiency, consider a battery-powered timer (e.g., Orbit B-Hyve Bluetooth Hose Faucet Timer, ~$50) or a solar-powered timer connected to a small 12V pump.
- Solar-Powered Pumps: For lifting water from a well, pond, or large storage tank to your garden, a solar pump is a game-changer. For a smaller drip system, a Shurflo 2088-594-152 Diaphragm Pump (12V, 3.5 GPM, ~$180) can be powered by a single 100W solar panel (e.g., Renogy 100W Monocrystalline Solar Panel, ~$100) and a small 12V battery (e.g., a 50Ah LiFePO4 battery like the Battle Born 50Ah, ~$450). For larger operations or deeper wells, more robust systems are needed. If you’re looking to build out a comprehensive off-grid power system to support your garden’s water needs, or indeed your entire homestead, you might want to explore resources like the Power Grid Generator complete system guide to understand the full scope of what’s possible in terms of energy independence.
Step 5: Seed Selection & Planting
The choice of seeds is crucial for a truly self sufficient garden from scratch.
- Choose Heirloom & Open-Pollinated Seeds: These varieties produce seeds that will grow true to type, meaning you can save seeds from your harvest year after year. F1 hybrids, while often vigorous, will not produce consistent offspring from saved seeds. Reputable seed companies include Baker Creek Heirloom Seeds, High Mowing Organic Seeds, and Seed Savers Exchange. Start with common, reliable varieties like ‘Black Krim’ tomatoes, ‘Provider’ bush beans, ‘Waltham Butternut’ squash, and ‘Black Seeded Simpson’ lettuce.
- Start Seeds Indoors (Optional but Recommended): For longer growing seasons or specific crops, starting seeds indoors gives you a head start. Use seed-starting mix (e.g., Espoma Organic Seed Starter Mix, ~$10 for 16qt bag) in seed trays (Jiffy Professional Greenhouse 72-cell kit, ~$15). Provide adequate light with LED grow lights (Barrina T5 2ft 4-pack LED Grow Lights, 20W each, ~$50) for 14-16 hours a day, positioned 2-4 inches above seedlings. Maintain consistent temperatures (65-75°F for most).
- Direct Sowing vs. Transplanting: Some crops (carrots, radishes, beans, corn) prefer direct sowing into the garden bed. Others (tomatoes, peppers, broccoli, kale) benefit from being started indoors and transplanted. Follow seed packet instructions for planting depths (e.g., lettuce seeds are often surface-sown or planted 1/8 inch deep, while beans are 1 inch deep) and spacing.
- Companion Planting: Strategically plant different species together to enhance growth, deter pests, and attract beneficial insects. For example, planting marigolds near tomatoes can deter nematodes, and basil improves tomato flavor. Nasturtiums can act as a trap crop for aphids.
- Succession Planting: For a continuous harvest, plant small batches of quick-growing crops (lettuce, radishes, cilantro) every 2-3 weeks. As one crop finishes, another is ready to take its place.
Step 6: Pest & Disease Management (Organic)
Maintaining a self sufficient garden from scratch means embracing organic pest and disease control.
- Integrated Pest Management (IPM): This holistic approach combines several strategies.
- Observation: Regularly inspect your plants for early signs of pests or disease. Catching issues early is key.
- Physical Barriers: Use row covers (e.g., Agribon AG-19 floating row cover, 10×20 ft, ~$20) to protect young plants from insect pests like cabbage worms and squash bugs. Install fences (e.g., 2×4 welded wire mesh, 4 ft tall, 50 ft roll ~$70) to keep out deer, rabbits, and other larger animals.
- Hand-Picking: For larger pests like tomato hornworms or squash bugs, simply pick them off and drop them into a bucket of soapy water.
- Companion Planting: As mentioned, certain plants repel pests. Marigolds, garlic, and onions are excellent deterrents.
- Attract Beneficial Insects: Plant flowers like dill, fennel, cosmos, and sweet alyssum to attract ladybugs, lacewings, and parasitic wasps, which prey on common garden pests.
- Organic Sprays & Treatments:
- Neem Oil: An excellent broad-spectrum organic insecticide and fungicide. Bonide Neem Oil Concentrate (16oz, ~$20) can be mixed at a rate of 1-2 tbsp per gallon of water and sprayed on affected plants.
- Insecticidal Soap: Effective against soft-bodied insects like aphids, whiteflies, and spider mites. Garden Safe Insecticidal Soap (24oz ready-to-use, ~$10).
- Bacillus thuringiensis (Bt): A naturally occurring soil bacterium that targets caterpillars and worms. Monterey BT Worm & Caterpillar Killer (16oz, ~$18) is highly effective and safe for beneficial insects.
- Copper or Sulfur Sprays: For fungal diseases like powdery mildew or blight, organic copper (e.g., Bonide Copper Fungicide, ~$15 for 1lb) or sulfur (e.g., Safer Brand Garden Fungicide, ~$10 for 16oz) can be used as a last resort.
Step 7: Harvesting & Seed Saving
The culmination of your efforts is the harvest, and seed saving closes the loop on self-sufficiency.
- Harvesting Techniques:
- Timing: Harvest vegetables at their peak ripeness for best flavor and nutritional value. For example, green beans should snap cleanly, cucumbers should be firm, and tomatoes should be fully colored.
- Frequency: Many crops, like zucchini, cucumbers, and bush beans, produce more if harvested frequently. Pick daily or every other day.
- Tools: Use clean, sharp pruners (e.g., Corona ClassicCUT Bypass Pruner BP 3180, ~$30) or a sharp knife for clean cuts, minimizing damage to the plant.
- Seed Saving: This is where the « self-sufficient » aspect truly shines.
- Selection: Only save seeds from your healthiest, most vigorous plants that show desired traits (disease resistance, good flavor, high yield).
- Isolation: To ensure true-to-type seeds, prevent cross-pollination. This can be challenging for open-pollinated crops that readily cross (e.g., squash, corn). For beginners, focus on self-pollinating plants like beans, peas, lettuce, and tomatoes.
- Processing:
- Dry Seeds (Beans, Peas, Lettuce, Grains): Allow pods/seed heads to dry completely on the plant. Harvest, shell, and clean the seeds, removing chaff.
- Wet Seeds (Tomatoes, Cucumbers, Squash): For tomatoes, ferment the seeds in water for a few days to remove the gel coating and inhibit disease. For cucumbers/squash, scrape out seeds, wash thoroughly, and dry.
- Drying: Spread seeds thinly on screens or paper plates in a cool, dry, well-ventilated area for 1-4 weeks. Ensure they are bone-dry before storage. I aim for less than 8% moisture content.
- Storage: Store seeds in airtight containers (glass jars with desiccant packets work well) in a cool, dark, dry place (ideally 40-50°F and 30-40% humidity). Label clearly with variety and date. Properly stored seeds can remain viable for 3-10 years or more.
Step 8: Season Extension & Winterizing
Extend your harvest and protect your garden for the off-season to truly maximize your self sufficient garden from scratch.
- Cold Frames: Simple structures with a transparent top (glass, polycarbonate, or old windows) that sit over garden beds. They trap solar heat, allowing you to grow cold-hardy crops (lettuce, spinach, kale, radishes) well into winter or start seeds earlier in spring. A basic cold frame can be built from 2×6 lumber and a sheet of polycarbonate for under $100.
- Hoop Houses/Low Tunnels: Larger structures made from flexible hoops (PVC pipe or EMT conduit) covered with greenhouse plastic. These provide more space and greater temperature moderation. A 10×20 ft DIY low tunnel kit can cost $200-$500, while a larger, more robust hoop house kit might be $1,000-$3,000. I use a 6×12 ft low tunnel made from 1/2-inch PVC hoops and 6mil greenhouse plastic, which extends my lettuce and spinach harvest by at least
The culmination of your efforts is the harvest, and seed saving closes the loop on self-sufficiency.
- Harvesting Techniques:
- Timing: Harvest vegetables at their peak ripeness for best flavor and nutritional value. For example, green beans should snap cleanly, cucumbers should be firm, and tomatoes should be fully colored.
- Frequency: Many crops, like zucchini, cucumbers, and bush beans, produce more if harvested frequently. Pick daily or every other day.
- Tools: Use clean, sharp pruners (e.g., Corona ClassicCUT Bypass Pruner BP 3180, ~$30) or a sharp knife for clean cuts, minimizing damage to the plant.
- Seed Saving: This is where the « self-sufficient » aspect truly shines.
- Selection: Only save seeds from your healthiest, most vigorous plants that show desired traits (disease resistance, good flavor, high yield).
- Isolation: To ensure true-to-type seeds, prevent cross-pollination. This can be challenging for open-pollinated crops that readily cross (e.g., squash, corn). For beginners, focus on self-pollinating plants like beans, peas, lettuce, and tomatoes.
- Processing:
- Dry Seeds (Beans, Peas, Lettuce, Grains): Allow pods/seed heads to dry completely on the plant. Harvest, shell, and clean the seeds, removing chaff.
- Wet Seeds (Tomatoes, Cucumbers, Squash): For tomatoes, ferment the seeds in water for a few days to remove the gel coating and inhibit disease. For cucumbers/squash, scrape out seeds, wash thoroughly, and dry.
- Drying: Spread seeds thinly on screens or paper plates in a cool, dry, well-ventilated area for 1-4 weeks. Ensure they are bone-dry before storage. I aim for less than 8% moisture content.
- Storage: Store seeds in airtight containers (glass jars with desiccant packets work well) in a cool, dark, dry place (ideally 40-50°F and 30-40% humidity). Label clearly with variety and date. Properly stored seeds can remain viable for 3-10 years or more.
Step 8: Season Extension & Winterizing
Extend your harvest and protect your garden for the off-season to truly maximize your self sufficient garden from scratch.
- Cold Frames: Simple structures with a transparent top (glass, polycarbonate, or old windows) that sit over garden beds. They trap solar heat, allowing you to grow cold-hardy crops (lettuce, spinach, kale, radishes) well into winter or start seeds earlier in spring. A basic cold frame can be built from 2×6 lumber and a sheet of polycarbonate for under $100.
- Hoop Houses/Low Tunnels: Larger structures made from flexible hoops (PVC pipe or EMT conduit) covered with greenhouse plastic. These provide more space and greater temperature moderation. A 10×20 ft DIY low tunnel kit can cost $200-$500, while a larger, more robust hoop house kit might be $1,000-$3,000. I use a 6×12 ft low tunnel made from 1/2-inch PVC hoops and 6mil greenhouse plastic, which extends my lettuce and spinach harvest by at least
The choice of seeds is crucial for a truly self sufficient garden from scratch.
- Choose Heirloom & Open-Pollinated Seeds: These varieties produce seeds that will grow true to type, meaning you can save seeds from your harvest year after year. F1 hybrids, while often vigorous, will not produce consistent offspring from saved seeds. Reputable seed companies include Baker Creek Heirloom Seeds, High Mowing Organic Seeds, and Seed Savers Exchange. Start with common, reliable varieties like ‘Black Krim’ tomatoes, ‘Provider’ bush beans, ‘Waltham Butternut’ squash, and ‘Black Seeded Simpson’ lettuce.
- Start Seeds Indoors (Optional but Recommended): For longer growing seasons or specific crops, starting seeds indoors gives you a head start. Use seed-starting mix (e.g., Espoma Organic Seed Starter Mix, ~$10 for 16qt bag) in seed trays (Jiffy Professional Greenhouse 72-cell kit, ~$15). Provide adequate light with LED grow lights (Barrina T5 2ft 4-pack LED Grow Lights, 20W each, ~$50) for 14-16 hours a day, positioned 2-4 inches above seedlings. Maintain consistent temperatures (65-75°F for most).
- Direct Sowing vs. Transplanting: Some crops (carrots, radishes, beans, corn) prefer direct sowing into the garden bed. Others (tomatoes, peppers, broccoli, kale) benefit from being started indoors and transplanted. Follow seed packet instructions for planting depths (e.g., lettuce seeds are often surface-sown or planted 1/8 inch deep, while beans are 1 inch deep) and spacing.
- Companion Planting: Strategically plant different species together to enhance growth, deter pests, and attract beneficial insects. For example, planting marigolds near tomatoes can deter nematodes, and basil improves tomato flavor. Nasturtiums can act as a trap crop for aphids.
- Succession Planting: For a continuous harvest, plant small batches of quick-growing crops (lettuce, radishes, cilantro) every 2-3 weeks. As one crop finishes, another is ready to take its place.
Step 6: Pest & Disease Management (Organic)
Maintaining a self sufficient garden from scratch means embracing organic pest and disease control.
- Integrated Pest Management (IPM): This holistic approach combines several strategies.
- Observation: Regularly inspect your plants for early signs of pests or disease. Catching issues early is key.
- Physical Barriers: Use row covers (e.g., Agribon AG-19 floating row cover, 10×20 ft, ~$20) to protect young plants from insect pests like cabbage worms and squash bugs. Install fences (e.g., 2×4 welded wire mesh, 4 ft tall, 50 ft roll ~$70) to keep out deer, rabbits, and other larger animals.
- Hand-Picking: For larger pests like tomato hornworms or squash bugs, simply pick them off and drop them into a bucket of soapy water.
- Companion Planting: As mentioned, certain plants repel pests. Marigolds, garlic, and onions are excellent deterrents.
- Attract Beneficial Insects: Plant flowers like dill, fennel, cosmos, and sweet alyssum to attract ladybugs, lacewings, and parasitic wasps, which prey on common garden pests.
- Organic Sprays & Treatments:
- Neem Oil: An excellent broad-spectrum organic insecticide and fungicide. Bonide Neem Oil Concentrate (16oz, ~$20) can be mixed at a rate of 1-2 tbsp per gallon of water and sprayed on affected plants.
- Insecticidal Soap: Effective against soft-bodied insects like aphids, whiteflies, and spider mites. Garden Safe Insecticidal Soap (24oz ready-to-use, ~$10).
- Bacillus thuringiensis (Bt): A naturally occurring soil bacterium that targets caterpillars and worms. Monterey BT Worm & Caterpillar Killer (16oz, ~$18) is highly effective and safe for beneficial insects.
- Copper or Sulfur Sprays: For fungal diseases like powdery mildew or blight, organic copper (e.g., Bonide Copper Fungicide, ~$15 for 1lb) or sulfur (e.g., Safer Brand Garden Fungicide, ~$10 for 16oz) can be used as a last resort.
Step 7: Harvesting & Seed Saving
The culmination of your efforts is the harvest, and seed saving closes the loop on self-sufficiency.
- Harvesting Techniques:
- Timing: Harvest vegetables at their peak ripeness for best flavor and nutritional value. For example, green beans should snap cleanly, cucumbers should be firm, and tomatoes should be fully colored.
- Frequency: Many crops, like zucchini, cucumbers, and bush beans, produce more if harvested frequently. Pick daily or every other day.
- Tools: Use clean, sharp pruners (e.g., Corona ClassicCUT Bypass Pruner BP 3180, ~$30) or a sharp knife for clean cuts, minimizing damage to the plant.
- Seed Saving: This is where the « self-sufficient » aspect truly shines.
- Selection: Only save seeds from your healthiest, most vigorous plants that show desired traits (disease resistance, good flavor, high yield).
- Isolation: To ensure true-to-type seeds, prevent cross-pollination. This can be challenging for open-pollinated crops that readily cross (e.g., squash, corn). For beginners, focus on self-pollinating plants like beans, peas, lettuce, and tomatoes.
- Processing:
- Dry Seeds (Beans, Peas, Lettuce, Grains): Allow pods/seed heads to dry completely on the plant. Harvest, shell, and clean the seeds, removing chaff.
- Wet Seeds (Tomatoes, Cucumbers, Squash): For tomatoes, ferment the seeds in water for a few days to remove the gel coating and inhibit disease. For cucumbers/squash, scrape out seeds, wash thoroughly, and dry.
- Drying: Spread seeds thinly on screens or paper plates in a cool, dry, well-ventilated area for 1-4 weeks. Ensure they are bone-dry before storage. I aim for less than 8% moisture content.
- Storage: Store seeds in airtight containers (glass jars with desiccant packets work well) in a cool, dark, dry place (ideally 40-50°F and 30-40% humidity). Label clearly with variety and date. Properly stored seeds can remain viable for 3-10 years or more.
Step 8: Season Extension & Winterizing
Extend your harvest and protect your garden for the off-season to truly maximize your self sufficient garden from scratch.
- Cold Frames: Simple structures with a transparent top (glass, polycarbonate, or old windows) that sit over garden beds. They trap solar heat, allowing you to grow cold-hardy crops (lettuce, spinach, kale, radishes) well into winter or start seeds earlier in spring. A basic cold frame can be built from 2×6 lumber and a sheet of polycarbonate for under $100.
- Hoop Houses/Low Tunnels: Larger structures made from flexible hoops (PVC pipe or EMT conduit) covered with greenhouse plastic. These provide more space and greater temperature moderation. A 10×20 ft DIY low tunnel kit can cost $200-$500, while a larger, more robust hoop house kit might be $1,000-$3,000. I use a 6×12 ft low tunnel made from 1/2-inch PVC hoops and 6mil greenhouse plastic, which extends my lettuce and spinach harvest by at least
Step 5: Seed Selection & Planting
The choice of seeds is crucial for a truly self sufficient garden from scratch.
- Choose Heirloom & Open-Pollinated Seeds: These varieties produce seeds that will grow true to type, meaning you can save seeds from your harvest year after year. F1 hybrids, while often vigorous, will not produce consistent offspring from saved seeds. Reputable seed companies include Baker Creek Heirloom Seeds, High Mowing Organic Seeds, and Seed Savers Exchange. Start with common, reliable varieties like ‘Black Krim’ tomatoes, ‘Provider’ bush beans, ‘Waltham Butternut’ squash, and ‘Black Seeded Simpson’ lettuce.
- Start Seeds Indoors (Optional but Recommended): For longer growing seasons or specific crops, starting seeds indoors gives you a head start. Use seed-starting mix (e.g., Espoma Organic Seed Starter Mix, ~$10 for 16qt bag) in seed trays (Jiffy Professional Greenhouse 72-cell kit, ~$15). Provide adequate light with LED grow lights (Barrina T5 2ft 4-pack LED Grow Lights, 20W each, ~$50) for 14-16 hours a day, positioned 2-4 inches above seedlings. Maintain consistent temperatures (65-75°F for most).
- Direct Sowing vs. Transplanting: Some crops (carrots, radishes, beans, corn) prefer direct sowing into the garden bed. Others (tomatoes, peppers, broccoli, kale) benefit from being started indoors and transplanted. Follow seed packet instructions for planting depths (e.g., lettuce seeds are often surface-sown or planted 1/8 inch deep, while beans are 1 inch deep) and spacing.
- Companion Planting: Strategically plant different species together to enhance growth, deter pests, and attract beneficial insects. For example, planting marigolds near tomatoes can deter nematodes, and basil improves tomato flavor. Nasturtiums can act as a trap crop for aphids.
- Succession Planting: For a continuous harvest, plant small batches of quick-growing crops (lettuce, radishes, cilantro) every 2-3 weeks. As one crop finishes, another is ready to take its place.
Step 6: Pest & Disease Management (Organic)
Maintaining a self sufficient garden from scratch means embracing organic pest and disease control.
- Integrated Pest Management (IPM): This holistic approach combines several strategies.
- Observation: Regularly inspect your plants for early signs of pests or disease. Catching issues early is key.
- Physical Barriers: Use row covers (e.g., Agribon AG-19 floating row cover, 10×20 ft, ~$20) to protect young plants from insect pests like cabbage worms and squash bugs. Install fences (e.g., 2×4 welded wire mesh, 4 ft tall, 50 ft roll ~$70) to keep out deer, rabbits, and other larger animals.
- Hand-Picking: For larger pests like tomato hornworms or squash bugs, simply pick them off and drop them into a bucket of soapy water.
- Companion Planting: As mentioned, certain plants repel pests. Marigolds, garlic, and onions are excellent deterrents.
- Attract Beneficial Insects: Plant flowers like dill, fennel, cosmos, and sweet alyssum to attract ladybugs, lacewings, and parasitic wasps, which prey on common garden pests.
- Organic Sprays & Treatments:
- Neem Oil: An excellent broad-spectrum organic insecticide and fungicide. Bonide Neem Oil Concentrate (16oz, ~$20) can be mixed at a rate of 1-2 tbsp per gallon of water and sprayed on affected plants.
- Insecticidal Soap: Effective against soft-bodied insects like aphids, whiteflies, and spider mites. Garden Safe Insecticidal Soap (24oz ready-to-use, ~$10).
- Bacillus thuringiensis (Bt): A naturally occurring soil bacterium that targets caterpillars and worms. Monterey BT Worm & Caterpillar Killer (16oz, ~$18) is highly effective and safe for beneficial insects.
- Copper or Sulfur Sprays: For fungal diseases like powdery mildew or blight, organic copper (e.g., Bonide Copper Fungicide, ~$15 for 1lb) or sulfur (e.g., Safer Brand Garden Fungicide, ~$10 for 16oz) can be used as a last resort.
Step 7: Harvesting & Seed Saving
The culmination of your efforts is the harvest, and seed saving closes the loop on self-sufficiency.
- Harvesting Techniques:
- Timing: Harvest vegetables at their peak ripeness for best flavor and nutritional value. For example, green beans should snap cleanly, cucumbers should be firm, and tomatoes should be fully colored.
- Frequency: Many crops, like zucchini, cucumbers, and bush beans, produce more if harvested frequently. Pick daily or every other day.
- Tools: Use clean, sharp pruners (e.g., Corona ClassicCUT Bypass Pruner BP 3180, ~$30) or a sharp knife for clean cuts, minimizing damage to the plant.
- Seed Saving: This is where the « self-sufficient » aspect truly shines.
- Selection: Only save seeds from your healthiest, most vigorous plants that show desired traits (disease resistance, good flavor, high yield).
- Isolation: To ensure true-to-type seeds, prevent cross-pollination. This can be challenging for open-pollinated crops that readily cross (e.g., squash, corn). For beginners, focus on self-pollinating plants like beans, peas, lettuce, and tomatoes.
- Processing:
- Dry Seeds (Beans, Peas, Lettuce, Grains): Allow pods/seed heads to dry completely on the plant. Harvest, shell, and clean the seeds, removing chaff.
- Wet Seeds (Tomatoes, Cucumbers, Squash): For tomatoes, ferment the seeds in water for a few days to remove the gel coating and inhibit disease. For cucumbers/squash, scrape out seeds, wash thoroughly, and dry.
- Drying: Spread seeds thinly on screens or paper plates in a cool, dry, well-ventilated area for 1-4 weeks. Ensure they are bone-dry before storage. I aim for less than 8% moisture content.
- Storage: Store seeds in airtight containers (glass jars with desiccant packets work well) in a cool, dark, dry place (ideally 40-50°F and 30-40% humidity). Label clearly with variety and date. Properly stored seeds can remain viable for 3-10 years or more.
Step 8: Season Extension & Winterizing
Extend your harvest and protect your garden for the off-season to truly maximize your self sufficient garden from scratch.
- Cold Frames: Simple structures with a transparent top (glass, polycarbonate, or old windows) that sit over garden beds. They trap solar heat, allowing you to grow cold-hardy crops (lettuce, spinach, kale, radishes) well into winter or start seeds earlier in spring. A basic cold frame can be built from 2×6 lumber and a sheet of polycarbonate for under $100.
- Hoop Houses/Low Tunnels: Larger structures made from flexible hoops (PVC pipe or EMT conduit) covered with greenhouse plastic. These provide more space and greater temperature moderation. A 10×20 ft DIY low tunnel kit can cost $200-$500, while a larger, more robust hoop house kit might be $1,000-$3,000. I use a 6×12 ft low tunnel made from 1/2-inch PVC hoops and 6mil greenhouse plastic, which extends my lettuce and spinach harvest by at least
- Rainwater Harvesting: This is my primary source of irrigation water. A 55-gallon rain barrel (e.g., EarthMark Rain Barrel, ~$120-$150) connected to a downspout can collect significant water. For larger needs, I use two 275-gallon IBC totes (Intermediate Bulk Containers, often available used for $100-$200 each from food-grade sources) connected in series. A 1,000 sq ft roof can collect approximately 620 gallons of water for every inch of rainfall. My 1,500 sq ft roof provides ample water for my 600 sq ft garden through multiple barrels and totes.
- Drip Irrigation: This is by far the most water-efficient method, delivering water directly to the plant’s root zone, minimizing evaporation and weed growth.
- Components: A typical drip system includes a pressure regulator (e.g., Rain Bird PRV-10, ~$15), a filter (Rain Bird RBY filter, ~$20), main tubing (1/2-inch poly tubing, 100ft ~$25), smaller feeder lines (1/4-inch tubing), and emitters (0.5 GPH or 1 GPH per plant).
- Kits: For beginners, a starter kit like the Rain Bird Drip Irrigation Garden Kit (model DDI-KIT-1P, ~$40-$60) is excellent for a small garden. For larger setups, I use Netafim Techline CV Drip Line (500ft roll, ~$150-$200), which has pressure-compensating emitters built-in, ensuring even watering across long runs.
- Automation: For true self-sufficiency, consider a battery-powered timer (e.g., Orbit B-Hyve Bluetooth Hose Faucet Timer, ~$50) or a solar-powered timer connected to a small 12V pump.
- Solar-Powered Pumps: For lifting water from a well, pond, or large storage tank to your garden, a solar pump is a game-changer. For a smaller drip system, a Shurflo 2088-594-152 Diaphragm Pump (12V, 3.5 GPM, ~$180) can be powered by a single 100W solar panel (e.g., Renogy 100W Monocrystalline Solar Panel, ~$100) and a small 12V battery (e.g., a 50Ah LiFePO4 battery like the Battle Born 50Ah, ~$450). For larger operations or deeper wells, more robust systems are needed. If you’re looking to build out a comprehensive off-grid power system to support your garden’s water needs, or indeed your entire homestead, you might want to explore resources like the Power Grid Generator complete system guide to understand the full scope of what’s possible in terms of energy independence.
Step 5: Seed Selection & Planting
The choice of seeds is crucial for a truly self sufficient garden from scratch.
- Choose Heirloom & Open-Pollinated Seeds: These varieties produce seeds that will grow true to type, meaning you can save seeds from your harvest year after year. F1 hybrids, while often vigorous, will not produce consistent offspring from saved seeds. Reputable seed companies include Baker Creek Heirloom Seeds, High Mowing Organic Seeds, and Seed Savers Exchange. Start with common, reliable varieties like ‘Black Krim’ tomatoes, ‘Provider’ bush beans, ‘Waltham Butternut’ squash, and ‘Black Seeded Simpson’ lettuce.
- Start Seeds Indoors (Optional but Recommended): For longer growing seasons or specific crops, starting seeds indoors gives you a head start. Use seed-starting mix (e.g., Espoma Organic Seed Starter Mix, ~$10 for 16qt bag) in seed trays (Jiffy Professional Greenhouse 72-cell kit, ~$15). Provide adequate light with LED grow lights (Barrina T5 2ft 4-pack LED Grow Lights, 20W each, ~$50) for 14-16 hours a day, positioned 2-4 inches above seedlings. Maintain consistent temperatures (65-75°F for most).
- Direct Sowing vs. Transplanting: Some crops (carrots, radishes, beans, corn) prefer direct sowing into the garden bed. Others (tomatoes, peppers, broccoli, kale) benefit from being started indoors and transplanted. Follow seed packet instructions for planting depths (e.g., lettuce seeds are often surface-sown or planted 1/8 inch deep, while beans are 1 inch deep) and spacing.
- Companion Planting: Strategically plant different species together to enhance growth, deter pests, and attract beneficial insects. For example, planting marigolds near tomatoes can deter nematodes, and basil improves tomato flavor. Nasturtiums can act as a trap crop for aphids.
- Succession Planting: For a continuous harvest, plant small batches of quick-growing crops (lettuce, radishes, cilantro) every 2-3 weeks. As one crop finishes, another is ready to take its place.
Step 6: Pest & Disease Management (Organic)
Maintaining a self sufficient garden from scratch means embracing organic pest and disease control.
- Integrated Pest Management (IPM): This holistic approach combines several strategies.
- Observation: Regularly inspect your plants for early signs of pests or disease. Catching issues early is key.
- Physical Barriers: Use row covers (e.g., Agribon AG-19 floating row cover, 10×20 ft, ~$20) to protect young plants from insect pests like cabbage worms and squash bugs. Install fences (e.g., 2×4 welded wire mesh, 4 ft tall, 50 ft roll ~$70) to keep out deer, rabbits, and other larger animals.
- Hand-Picking: For larger pests like tomato hornworms or squash bugs, simply pick them off and drop them into a bucket of soapy water.
- Companion Planting: As mentioned, certain plants repel pests. Marigolds, garlic, and onions are excellent deterrents.
- Attract Beneficial Insects: Plant flowers like dill, fennel, cosmos, and sweet alyssum to attract ladybugs, lacewings, and parasitic wasps, which prey on common garden pests.
- Organic Sprays & Treatments:
- Neem Oil: An excellent broad-spectrum organic insecticide and fungicide. Bonide Neem Oil Concentrate (16oz, ~$20) can be mixed at a rate of 1-2 tbsp per gallon of water and sprayed on affected plants.
- Insecticidal Soap: Effective against soft-bodied insects like aphids, whiteflies, and spider mites. Garden Safe Insecticidal Soap (24oz ready-to-use, ~$10).
- Bacillus thuringiensis (Bt): A naturally occurring soil bacterium that targets caterpillars and worms. Monterey BT Worm & Caterpillar Killer (16oz, ~$18) is highly effective and safe for beneficial insects.
- Copper or Sulfur Sprays: For fungal diseases like powdery mildew or blight, organic copper (e.g., Bonide Copper Fungicide, ~$15 for 1lb) or sulfur (e.g., Safer Brand Garden Fungicide, ~$10 for 16oz) can be used as a last resort.
Step 7: Harvesting & Seed Saving
The culmination of your efforts is the harvest, and seed saving closes the loop on self-sufficiency.
- Harvesting Techniques:
- Timing: Harvest vegetables at their peak ripeness for best flavor and nutritional value. For example, green beans should snap cleanly, cucumbers should be firm, and tomatoes should be fully colored.
- Frequency: Many crops, like zucchini, cucumbers, and bush beans, produce more if harvested frequently. Pick daily or every other day.
- Tools: Use clean, sharp pruners (e.g., Corona ClassicCUT Bypass Pruner BP 3180, ~$30) or a sharp knife for clean cuts, minimizing damage to the plant.
- Seed Saving: This is where the « self-sufficient » aspect truly shines.
- Selection: Only save seeds from your healthiest, most vigorous plants that show desired traits (disease resistance, good flavor, high yield).
- Isolation: To ensure true-to-type seeds, prevent cross-pollination. This can be challenging for open-pollinated crops that readily cross (e.g., squash, corn). For beginners, focus on self-pollinating plants like beans, peas, lettuce, and tomatoes.
- Processing:
- Dry Seeds (Beans, Peas, Lettuce, Grains): Allow pods/seed heads to dry completely on the plant. Harvest, shell, and clean the seeds, removing chaff.
- Wet Seeds (Tomatoes, Cucumbers, Squash): For tomatoes, ferment the seeds in water for a few days to remove the gel coating and inhibit disease. For cucumbers/squash, scrape out seeds, wash thoroughly, and dry.
- Drying: Spread seeds thinly on screens or paper plates in a cool, dry, well-ventilated area for 1-4 weeks. Ensure they are bone-dry before storage. I aim for less than 8% moisture content.
- Storage: Store seeds in airtight containers (glass jars with desiccant packets work well) in a cool, dark, dry place (ideally 40-50°F and 30-40% humidity). Label clearly with variety and date. Properly stored seeds can remain viable for 3-10 years or more.
Step 8: Season Extension & Winterizing
Extend your harvest and protect your garden for the off-season to truly maximize your self sufficient garden from scratch.
- Cold Frames: Simple structures with a transparent top (glass, polycarbonate, or old windows) that sit over garden beds. They trap solar heat, allowing you to grow cold-hardy crops (lettuce, spinach, kale, radishes) well into winter or start seeds earlier in spring. A basic cold frame can be built from 2×6 lumber and a sheet of polycarbonate for under $100.
- Hoop Houses/Low Tunnels: Larger structures made from flexible hoops (PVC pipe or EMT conduit) covered with greenhouse plastic. These provide more space and greater temperature moderation. A 10×20 ft DIY low tunnel kit can cost $200-$500, while a larger, more robust hoop house kit might be $1,000-$3,000. I use a 6×12 ft low tunnel made from 1/2-inch PVC hoops and 6mil greenhouse plastic, which extends my lettuce and spinach harvest by at least
Efficient water management is critical for a self sufficient garden from scratch, especially in off-grid living where water resources might be limited.
- Rainwater Harvesting: This is my primary source of irrigation water. A 55-gallon rain barrel (e.g., EarthMark Rain Barrel, ~$120-$150) connected to a downspout can collect significant water. For larger needs, I use two 275-gallon IBC totes (Intermediate Bulk Containers, often available used for $100-$200 each from food-grade sources) connected in series. A 1,000 sq ft roof can collect approximately 620 gallons of water for every inch of rainfall. My 1,500 sq ft roof provides ample water for my 600 sq ft garden through multiple barrels and totes.
- Drip Irrigation: This is by far the most water-efficient method, delivering water directly to the plant’s root zone, minimizing evaporation and weed growth.
- Components: A typical drip system includes a pressure regulator (e.g., Rain Bird PRV-10, ~$15), a filter (Rain Bird RBY filter, ~$20), main tubing (1/2-inch poly tubing, 100ft ~$25), smaller feeder lines (1/4-inch tubing), and emitters (0.5 GPH or 1 GPH per plant).
- Kits: For beginners, a starter kit like the Rain Bird Drip Irrigation Garden Kit (model DDI-KIT-1P, ~$40-$60) is excellent for a small garden. For larger setups, I use Netafim Techline CV Drip Line (500ft roll, ~$150-$200), which has pressure-compensating emitters built-in, ensuring even watering across long runs.
- Automation: For true self-sufficiency, consider a battery-powered timer (e.g., Orbit B-Hyve Bluetooth Hose Faucet Timer, ~$50) or a solar-powered timer connected to a small 12V pump.
- Solar-Powered Pumps: For lifting water from a well, pond, or large storage tank to your garden, a solar pump is a game-changer. For a smaller drip system, a Shurflo 2088-594-152 Diaphragm Pump (12V, 3.5 GPM, ~$180) can be powered by a single 100W solar panel (e.g., Renogy 100W Monocrystalline Solar Panel, ~$100) and a small 12V battery (e.g., a 50Ah LiFePO4 battery like the Battle Born 50Ah, ~$450). For larger operations or deeper wells, more robust systems are needed. If you’re looking to build out a comprehensive off-grid power system to support your garden’s water needs, or indeed your entire homestead, you might want to explore resources like the Power Grid Generator complete system guide to understand the full scope of what’s possible in terms of energy independence.
Step 5: Seed Selection & Planting
The choice of seeds is crucial for a truly self sufficient garden from scratch.
- Choose Heirloom & Open-Pollinated Seeds: These varieties produce seeds that will grow true to type, meaning you can save seeds from your harvest year after year. F1 hybrids, while often vigorous, will not produce consistent offspring from saved seeds. Reputable seed companies include Baker Creek Heirloom Seeds, High Mowing Organic Seeds, and Seed Savers Exchange. Start with common, reliable varieties like ‘Black Krim’ tomatoes, ‘Provider’ bush beans, ‘Waltham Butternut’ squash, and ‘Black Seeded Simpson’ lettuce.
- Start Seeds Indoors (Optional but Recommended): For longer growing seasons or specific crops, starting seeds indoors gives you a head start. Use seed-starting mix (e.g., Espoma Organic Seed Starter Mix, ~$10 for 16qt bag) in seed trays (Jiffy Professional Greenhouse 72-cell kit, ~$15). Provide adequate light with LED grow lights (Barrina T5 2ft 4-pack LED Grow Lights, 20W each, ~$50) for 14-16 hours a day, positioned 2-4 inches above seedlings. Maintain consistent temperatures (65-75°F for most).
- Direct Sowing vs. Transplanting: Some crops (carrots, radishes, beans, corn) prefer direct sowing into the garden bed. Others (tomatoes, peppers, broccoli, kale) benefit from being started indoors and transplanted. Follow seed packet instructions for planting depths (e.g., lettuce seeds are often surface-sown or planted 1/8 inch deep, while beans are 1 inch deep) and spacing.
- Companion Planting: Strategically plant different species together to enhance growth, deter pests, and attract beneficial insects. For example, planting marigolds near tomatoes can deter nematodes, and basil improves tomato flavor. Nasturtiums can act as a trap crop for aphids.
- Succession Planting: For a continuous harvest, plant small batches of quick-growing crops (lettuce, radishes, cilantro) every 2-3 weeks. As one crop finishes, another is ready to take its place.
Step 6: Pest & Disease Management (Organic)
Maintaining a self sufficient garden from scratch means embracing organic pest and disease control.
- Integrated Pest Management (IPM): This holistic approach combines several strategies.
- Observation: Regularly inspect your plants for early signs of pests or disease. Catching issues early is key.
- Physical Barriers: Use row covers (e.g., Agribon AG-19 floating row cover, 10×20 ft, ~$20) to protect young plants from insect pests like cabbage worms and squash bugs. Install fences (e.g., 2×4 welded wire mesh, 4 ft tall, 50 ft roll ~$70) to keep out deer, rabbits, and other larger animals.
- Hand-Picking: For larger pests like tomato hornworms or squash bugs, simply pick them off and drop them into a bucket of soapy water.
- Companion Planting: As mentioned, certain plants repel pests. Marigolds, garlic, and onions are excellent deterrents.
- Attract Beneficial Insects: Plant flowers like dill, fennel, cosmos, and sweet alyssum to attract ladybugs, lacewings, and parasitic wasps, which prey on common garden pests.
- Organic Sprays & Treatments:
- Neem Oil: An excellent broad-spectrum organic insecticide and fungicide. Bonide Neem Oil Concentrate (16oz, ~$20) can be mixed at a rate of 1-2 tbsp per gallon of water and sprayed on affected plants.
- Insecticidal Soap: Effective against soft-bodied insects like aphids, whiteflies, and spider mites. Garden Safe Insecticidal Soap (24oz ready-to-use, ~$10).
- Bacillus thuringiensis (Bt): A naturally occurring soil bacterium that targets caterpillars and worms. Monterey BT Worm & Caterpillar Killer (16oz, ~$18) is highly effective and safe for beneficial insects.
- Copper or Sulfur Sprays: For fungal diseases like powdery mildew or blight, organic copper (e.g., Bonide Copper Fungicide, ~$15 for 1lb) or sulfur (e.g., Safer Brand Garden Fungicide, ~$10 for 16oz) can be used as a last resort.
Step 7: Harvesting & Seed Saving
The culmination of your efforts is the harvest, and seed saving closes the loop on self-sufficiency.
- Harvesting Techniques:
- Timing: Harvest vegetables at their peak ripeness for best flavor and nutritional value. For example, green beans should snap cleanly, cucumbers should be firm, and tomatoes should be fully colored.
- Frequency: Many crops, like zucchini, cucumbers, and bush beans, produce more if harvested frequently. Pick daily or every other day.
- Tools: Use clean, sharp pruners (e.g., Corona ClassicCUT Bypass Pruner BP 3180, ~$30) or a sharp knife for clean cuts, minimizing damage to the plant.
- Seed Saving: This is where the « self-sufficient » aspect truly shines.
- Selection: Only save seeds from your healthiest, most vigorous plants that show desired traits (disease resistance, good flavor, high yield).
- Isolation: To ensure true-to-type seeds, prevent cross-pollination. This can be challenging for open-pollinated crops that readily cross (e.g., squash, corn). For beginners, focus on self-pollinating plants like beans, peas, lettuce, and tomatoes.
- Processing:
- Dry Seeds (Beans, Peas, Lettuce, Grains): Allow pods/seed heads to dry completely on the plant. Harvest, shell, and clean the seeds, removing chaff.
- Wet Seeds (Tomatoes, Cucumbers, Squash): For tomatoes, ferment the seeds in water for a few days to remove the gel coating and inhibit disease. For cucumbers/squash, scrape out seeds, wash thoroughly, and dry.
- Drying: Spread seeds thinly on screens or paper plates in a cool, dry, well-ventilated area for 1-4 weeks. Ensure they are bone-dry before storage. I aim for less than 8% moisture content.
- Storage: Store seeds in airtight containers (glass jars with desiccant packets work well) in a cool, dark, dry place (ideally 40-50°F and 30-40% humidity). Label clearly with variety and date. Properly stored seeds can remain viable for 3-10 years or more.
Step 8: Season Extension & Winterizing
Extend your harvest and protect your garden for the off-season to truly maximize your self sufficient garden from scratch.
- Cold Frames: Simple structures with a transparent top (glass, polycarbonate, or old windows) that sit over garden beds. They trap solar heat, allowing you to grow cold-hardy crops (lettuce, spinach, kale, radishes) well into winter or start seeds earlier in spring. A basic cold frame can be built from 2×6 lumber and a sheet of polycarbonate for under $100.
- Hoop Houses/Low Tunnels: Larger structures made from flexible hoops (PVC pipe or EMT conduit) covered with greenhouse plastic. These provide more space and greater temperature moderation. A 10×20 ft DIY low tunnel kit can cost $200-$500, while a larger, more robust hoop house kit might be $1,000-$3,000. I use a 6×12 ft low tunnel made from 1/2-inch PVC hoops and 6mil greenhouse plastic, which extends my lettuce and spinach harvest by at least
Step 4: Water Management & Irrigation
Efficient water management is critical for a self sufficient garden from scratch, especially in off-grid living where water resources might be limited.
- Rainwater Harvesting: This is my primary source of irrigation water. A 55-gallon rain barrel (e.g., EarthMark Rain Barrel, ~$120-$150) connected to a downspout can collect significant water. For larger needs, I use two 275-gallon IBC totes (Intermediate Bulk Containers, often available used for $100-$200 each from food-grade sources) connected in series. A 1,000 sq ft roof can collect approximately 620 gallons of water for every inch of rainfall. My 1,500 sq ft roof provides ample water for my 600 sq ft garden through multiple barrels and totes.
- Drip Irrigation: This is by far the most water-efficient method, delivering water directly to the plant’s root zone, minimizing evaporation and weed growth.
- Components: A typical drip system includes a pressure regulator (e.g., Rain Bird PRV-10, ~$15), a filter (Rain Bird RBY filter, ~$20), main tubing (1/2-inch poly tubing, 100ft ~$25), smaller feeder lines (1/4-inch tubing), and emitters (0.5 GPH or 1 GPH per plant).
- Kits: For beginners, a starter kit like the Rain Bird Drip Irrigation Garden Kit (model DDI-KIT-1P, ~$40-$60) is excellent for a small garden. For larger setups, I use Netafim Techline CV Drip Line (500ft roll, ~$150-$200), which has pressure-compensating emitters built-in, ensuring even watering across long runs.
- Automation: For true self-sufficiency, consider a battery-powered timer (e.g., Orbit B-Hyve Bluetooth Hose Faucet Timer, ~$50) or a solar-powered timer connected to a small 12V pump.
- Solar-Powered Pumps: For lifting water from a well, pond, or large storage tank to your garden, a solar pump is a game-changer. For a smaller drip system, a Shurflo 2088-594-152 Diaphragm Pump (12V, 3.5 GPM, ~$180) can be powered by a single 100W solar panel (e.g., Renogy 100W Monocrystalline Solar Panel, ~$100) and a small 12V battery (e.g., a 50Ah LiFePO4 battery like the Battle Born 50Ah, ~$450). For larger operations or deeper wells, more robust systems are needed. If you’re looking to build out a comprehensive off-grid power system to support your garden’s water needs, or indeed your entire homestead, you might want to explore resources like the Power Grid Generator complete system guide to understand the full scope of what’s possible in terms of energy independence.
Step 5: Seed Selection & Planting
The choice of seeds is crucial for a truly self sufficient garden from scratch.
- Choose Heirloom & Open-Pollinated Seeds: These varieties produce seeds that will grow true to type, meaning you can save seeds from your harvest year after year. F1 hybrids, while often vigorous, will not produce consistent offspring from saved seeds. Reputable seed companies include Baker Creek Heirloom Seeds, High Mowing Organic Seeds, and Seed Savers Exchange. Start with common, reliable varieties like ‘Black Krim’ tomatoes, ‘Provider’ bush beans, ‘Waltham Butternut’ squash, and ‘Black Seeded Simpson’ lettuce.
- Start Seeds Indoors (Optional but Recommended): For longer growing seasons or specific crops, starting seeds indoors gives you a head start. Use seed-starting mix (e.g., Espoma Organic Seed Starter Mix, ~$10 for 16qt bag) in seed trays (Jiffy Professional Greenhouse 72-cell kit, ~$15). Provide adequate light with LED grow lights (Barrina T5 2ft 4-pack LED Grow Lights, 20W each, ~$50) for 14-16 hours a day, positioned 2-4 inches above seedlings. Maintain consistent temperatures (65-75°F for most).
- Direct Sowing vs. Transplanting: Some crops (carrots, radishes, beans, corn) prefer direct sowing into the garden bed. Others (tomatoes, peppers, broccoli, kale) benefit from being started indoors and transplanted. Follow seed packet instructions for planting depths (e.g., lettuce seeds are often surface-sown or planted 1/8 inch deep, while beans are 1 inch deep) and spacing.
- Companion Planting: Strategically plant different species together to enhance growth, deter pests, and attract beneficial insects. For example, planting marigolds near tomatoes can deter nematodes, and basil improves tomato flavor. Nasturtiums can act as a trap crop for aphids.
- Succession Planting: For a continuous harvest, plant small batches of quick-growing crops (lettuce, radishes, cilantro) every 2-3 weeks. As one crop finishes, another is ready to take its place.
Step 6: Pest & Disease Management (Organic)
Maintaining a self sufficient garden from scratch means embracing organic pest and disease control.
- Integrated Pest Management (IPM): This holistic approach combines several strategies.
- Observation: Regularly inspect your plants for early signs of pests or disease. Catching issues early is key.
- Physical Barriers: Use row covers (e.g., Agribon AG-19 floating row cover, 10×20 ft, ~$20) to protect young plants from insect pests like cabbage worms and squash bugs. Install fences (e.g., 2×4 welded wire mesh, 4 ft tall, 50 ft roll ~$70) to keep out deer, rabbits, and other larger animals.
- Hand-Picking: For larger pests like tomato hornworms or squash bugs, simply pick them off and drop them into a bucket of soapy water.
- Companion Planting: As mentioned, certain plants repel pests. Marigolds, garlic, and onions are excellent deterrents.
- Attract Beneficial Insects: Plant flowers like dill, fennel, cosmos, and sweet alyssum to attract ladybugs, lacewings, and parasitic wasps, which prey on common garden pests.
- Organic Sprays & Treatments:
- Neem Oil: An excellent broad-spectrum organic insecticide and fungicide. Bonide Neem Oil Concentrate (16oz, ~$20) can be mixed at a rate of 1-2 tbsp per gallon of water and sprayed on affected plants.
- Insecticidal Soap: Effective against soft-bodied insects like aphids, whiteflies, and spider mites. Garden Safe Insecticidal Soap (24oz ready-to-use, ~$10).
- Bacillus thuringiensis (Bt): A naturally occurring soil bacterium that targets caterpillars and worms. Monterey BT Worm & Caterpillar Killer (16oz, ~$18) is highly effective and safe for beneficial insects.
- Copper or Sulfur Sprays: For fungal diseases like powdery mildew or blight, organic copper (e.g., Bonide Copper Fungicide, ~$15 for 1lb) or sulfur (e.g., Safer Brand Garden Fungicide, ~$10 for 16oz) can be used as a last resort.
Step 7: Harvesting & Seed Saving
The culmination of your efforts is the harvest, and seed saving closes the loop on self-sufficiency.
- Harvesting Techniques:
- Timing: Harvest vegetables at their peak ripeness for best flavor and nutritional value. For example, green beans should snap cleanly, cucumbers should be firm, and tomatoes should be fully colored.
- Frequency: Many crops, like zucchini, cucumbers, and bush beans, produce more if harvested frequently. Pick daily or every other day.
- Tools: Use clean, sharp pruners (e.g., Corona ClassicCUT Bypass Pruner BP 3180, ~$30) or a sharp knife for clean cuts, minimizing damage to the plant.
- Seed Saving: This is where the « self-sufficient » aspect truly shines.
- Selection: Only save seeds from your healthiest, most vigorous plants that show desired traits (disease resistance, good flavor, high yield).
- Isolation: To ensure true-to-type seeds, prevent cross-pollination. This can be challenging for open-pollinated crops that readily cross (e.g., squash, corn). For beginners, focus on self-pollinating plants like beans, peas, lettuce, and tomatoes.
- Processing:
- Dry Seeds (Beans, Peas, Lettuce, Grains): Allow pods/seed heads to dry completely on the plant. Harvest, shell, and clean the seeds, removing chaff.
- Wet Seeds (Tomatoes, Cucumbers, Squash): For tomatoes, ferment the seeds in water for a few days to remove the gel coating and inhibit disease. For cucumbers/squash, scrape out seeds, wash thoroughly, and dry.
- Drying: Spread seeds thinly on screens or paper plates in a cool, dry, well-ventilated area for 1-4 weeks. Ensure they are bone-dry before storage. I aim for less than 8% moisture content.
- Storage: Store seeds in airtight containers (glass jars with desiccant packets work well) in a cool, dark, dry place (ideally 40-50°F and 30-40% humidity). Label clearly with variety and date. Properly stored seeds can remain viable for 3-10 years or more.
Step 8: Season Extension & Winterizing
Extend your harvest and protect your garden for the off-season to truly maximize your self sufficient garden from scratch.
- Cold Frames: Simple structures with a transparent top (glass, polycarbonate, or old windows) that sit over garden beds. They trap solar heat, allowing you to grow cold-hardy crops (lettuce, spinach, kale, radishes) well into winter or start seeds earlier in spring. A basic cold frame can be built from 2×6 lumber and a sheet of polycarbonate for under $100.
- Hoop Houses/Low Tunnels: Larger structures made from flexible hoops (PVC pipe or EMT conduit) covered with greenhouse plastic. These provide more space and greater temperature moderation. A 10×20 ft DIY low tunnel kit can cost $200-$500, while a larger, more robust hoop house kit might be $1,000-$3,000. I use a 6×12 ft low tunnel made from 1/2-inch PVC hoops and 6mil greenhouse plastic, which extends my lettuce and spinach harvest by at least
- In-Ground Beds: If you have excellent native soil and good drainage, in-ground beds are the most economical. Double-digging (loosening soil two shovel depths) can significantly improve drainage and aeration. For my main garden, I primarily use in-ground beds, but I focus on building up the soil over time with consistent compost additions and cover cropping. I aim for beds that are no wider than 3-4 feet so I can reach the center without stepping on the soil, compacting it.
- Raised Beds: Raised beds offer numerous advantages, especially for poor soil, heavy clay, or rocky areas. They provide better drainage, warm up faster in spring, reduce compaction, and make weeding and harvesting easier on your back.
- Material Options:
- Untreated Cedar: Naturally rot-resistant and chemical-free. A 4×8 ft bed, 12 inches deep, typically requires three 2x12x8 ft cedar boards, costing around $50-$60 per board (total ~$150-$180) plus corner brackets or screws. My first raised beds were cedar and are still going strong after 7 years.
- Galvanized Steel: Durable, long-lasting, and aesthetically pleasing. Brands like Vego Garden offer modular kits. A Vego Garden 17″ Tall 8-in-1 Metal Raised Garden Bed (can be configured to 4×8 ft) costs approximately $250-$300.
- Concrete Blocks/Stones: Very durable but can leach minerals (though generally safe once weathered) and can be expensive.
- Recycled Materials: Pallets (check for chemical treatment stamps like « HT » for heat-treated), old tires (controversial due to potential chemical leaching).
- Filling Raised Beds: Don’t just fill with topsoil. Use a « Hugelkultur » approach (logs, branches, leaves, then compost, then topsoil) or a mixture of 60% good quality topsoil, 30% compost, and 10% perlite or vermiculite for drainage. A 4x8x1 ft raised bed requires about 32 cubic feet (or ~1.2 cubic yards) of soil mix, which can cost $100-$200 depending on your source.
- Material Options:
Step 4: Water Management & Irrigation
Efficient water management is critical for a self sufficient garden from scratch, especially in off-grid living where water resources might be limited.
- Rainwater Harvesting: This is my primary source of irrigation water. A 55-gallon rain barrel (e.g., EarthMark Rain Barrel, ~$120-$150) connected to a downspout can collect significant water. For larger needs, I use two 275-gallon IBC totes (Intermediate Bulk Containers, often available used for $100-$200 each from food-grade sources) connected in series. A 1,000 sq ft roof can collect approximately 620 gallons of water for every inch of rainfall. My 1,500 sq ft roof provides ample water for my 600 sq ft garden through multiple barrels and totes.
- Drip Irrigation: This is by far the most water-efficient method, delivering water directly to the plant’s root zone, minimizing evaporation and weed growth.
- Components: A typical drip system includes a pressure regulator (e.g., Rain Bird PRV-10, ~$15), a filter (Rain Bird RBY filter, ~$20), main tubing (1/2-inch poly tubing, 100ft ~$25), smaller feeder lines (1/4-inch tubing), and emitters (0.5 GPH or 1 GPH per plant).
- Kits: For beginners, a starter kit like the Rain Bird Drip Irrigation Garden Kit (model DDI-KIT-1P, ~$40-$60) is excellent for a small garden. For larger setups, I use Netafim Techline CV Drip Line (500ft roll, ~$150-$200), which has pressure-compensating emitters built-in, ensuring even watering across long runs.
- Automation: For true self-sufficiency, consider a battery-powered timer (e.g., Orbit B-Hyve Bluetooth Hose Faucet Timer, ~$50) or a solar-powered timer connected to a small 12V pump.
- Solar-Powered Pumps: For lifting water from a well, pond, or large storage tank to your garden, a solar pump is a game-changer. For a smaller drip system, a Shurflo 2088-594-152 Diaphragm Pump (12V, 3.5 GPM, ~$180) can be powered by a single 100W solar panel (e.g., Renogy 100W Monocrystalline Solar Panel, ~$100) and a small 12V battery (e.g., a 50Ah LiFePO4 battery like the Battle Born 50Ah, ~$450). For larger operations or deeper wells, more robust systems are needed. If you’re looking to build out a comprehensive off-grid power system to support your garden’s water needs, or indeed your entire homestead, you might want to explore resources like the Power Grid Generator complete system guide to understand the full scope of what’s possible in terms of energy independence.
Step 5: Seed Selection & Planting
The choice of seeds is crucial for a truly self sufficient garden from scratch.
- Choose Heirloom & Open-Pollinated Seeds: These varieties produce seeds that will grow true to type, meaning you can save seeds from your harvest year after year. F1 hybrids, while often vigorous, will not produce consistent offspring from saved seeds. Reputable seed companies include Baker Creek Heirloom Seeds, High Mowing Organic Seeds, and Seed Savers Exchange. Start with common, reliable varieties like ‘Black Krim’ tomatoes, ‘Provider’ bush beans, ‘Waltham Butternut’ squash, and ‘Black Seeded Simpson’ lettuce.
- Start Seeds Indoors (Optional but Recommended): For longer growing seasons or specific crops, starting seeds indoors gives you a head start. Use seed-starting mix (e.g., Espoma Organic Seed Starter Mix, ~$10 for 16qt bag) in seed trays (Jiffy Professional Greenhouse 72-cell kit, ~$15). Provide adequate light with LED grow lights (Barrina T5 2ft 4-pack LED Grow Lights, 20W each, ~$50) for 14-16 hours a day, positioned 2-4 inches above seedlings. Maintain consistent temperatures (65-75°F for most).
- Direct Sowing vs. Transplanting: Some crops (carrots, radishes, beans, corn) prefer direct sowing into the garden bed. Others (tomatoes, peppers, broccoli, kale) benefit from being started indoors and transplanted. Follow seed packet instructions for planting depths (e.g., lettuce seeds are often surface-sown or planted 1/8 inch deep, while beans are 1 inch deep) and spacing.
- Companion Planting: Strategically plant different species together to enhance growth, deter pests, and attract beneficial insects. For example, planting marigolds near tomatoes can deter nematodes, and basil improves tomato flavor. Nasturtiums can act as a trap crop for aphids.
- Succession Planting: For a continuous harvest, plant small batches of quick-growing crops (lettuce, radishes, cilantro) every 2-3 weeks. As one crop finishes, another is ready to take its place.
Step 6: Pest & Disease Management (Organic)
Maintaining a self sufficient garden from scratch means embracing organic pest and disease control.
- Integrated Pest Management (IPM): This holistic approach combines several strategies.
- Observation: Regularly inspect your plants for early signs of pests or disease. Catching issues early is key.
- Physical Barriers: Use row covers (e.g., Agribon AG-19 floating row cover, 10×20 ft, ~$20) to protect young plants from insect pests like cabbage worms and squash bugs. Install fences (e.g., 2×4 welded wire mesh, 4 ft tall, 50 ft roll ~$70) to keep out deer, rabbits, and other larger animals.
- Hand-Picking: For larger pests like tomato hornworms or squash bugs, simply pick them off and drop them into a bucket of soapy water.
- Companion Planting: As mentioned, certain plants repel pests. Marigolds, garlic, and onions are excellent deterrents.
- Attract Beneficial Insects: Plant flowers like dill, fennel, cosmos, and sweet alyssum to attract ladybugs, lacewings, and parasitic wasps, which prey on common garden pests.
- Organic Sprays & Treatments:
- Neem Oil: An excellent broad-spectrum organic insecticide and fungicide. Bonide Neem Oil Concentrate (16oz, ~$20) can be mixed at a rate of 1-2 tbsp per gallon of water and sprayed on affected plants.
- Insecticidal Soap: Effective against soft-bodied insects like aphids, whiteflies, and spider mites. Garden Safe Insecticidal Soap (24oz ready-to-use, ~$10).
- Bacillus thuringiensis (Bt): A naturally occurring soil bacterium that targets caterpillars and worms. Monterey BT Worm & Caterpillar Killer (16oz, ~$18) is highly effective and safe for beneficial insects.
- Copper or Sulfur Sprays: For fungal diseases like powdery mildew or blight, organic copper (e.g., Bonide Copper Fungicide, ~$15 for 1lb) or sulfur (e.g., Safer Brand Garden Fungicide, ~$10 for 16oz) can be used as a last resort.
Step 7: Harvesting & Seed Saving
The culmination of your efforts is the harvest, and seed saving closes the loop on self-sufficiency.
- Harvesting Techniques:
- Timing: Harvest vegetables at their peak ripeness for best flavor and nutritional value. For example, green beans should snap cleanly, cucumbers should be firm, and tomatoes should be fully colored.
- Frequency: Many crops, like zucchini, cucumbers, and bush beans, produce more if harvested frequently. Pick daily or every other day.
- Tools: Use clean, sharp pruners (e.g., Corona ClassicCUT Bypass Pruner BP 3180, ~$30) or a sharp knife for clean cuts, minimizing damage to the plant.
- Seed Saving: This is where the « self-sufficient » aspect truly shines.
- Selection: Only save seeds from your healthiest, most vigorous plants that show desired traits (disease resistance, good flavor, high yield).
- Isolation: To ensure true-to-type seeds, prevent cross-pollination. This can be challenging for open-pollinated crops that readily cross (e.g., squash, corn). For beginners, focus on self-pollinating plants like beans, peas, lettuce, and tomatoes.
- Processing:
- Dry Seeds (Beans, Peas, Lettuce, Grains): Allow pods/seed heads to dry completely on the plant. Harvest, shell, and clean the seeds, removing chaff.
- Wet Seeds (Tomatoes, Cucumbers, Squash): For tomatoes, ferment the seeds in water for a few days to remove the gel coating and inhibit disease. For cucumbers/squash, scrape out seeds, wash thoroughly, and dry.
- Drying: Spread seeds thinly on screens or paper plates in a cool, dry, well-ventilated area for 1-4 weeks. Ensure they are bone-dry before storage. I aim for less than 8% moisture content.
- Storage: Store seeds in airtight containers (glass jars with desiccant packets work well) in a cool, dark, dry place (ideally 40-50°F and 30-40% humidity). Label clearly with variety and date. Properly stored seeds can remain viable for 3-10 years or more.
Step 8: Season Extension & Winterizing
Extend your harvest and protect your garden for the off-season to truly maximize your self sufficient garden from scratch.
- Cold Frames: Simple structures with a transparent top (glass, polycarbonate, or old windows) that sit over garden beds. They trap solar heat, allowing you to grow cold-hardy crops (lettuce, spinach, kale, radishes) well into winter or start seeds earlier in spring. A basic cold frame can be built from 2×6 lumber and a sheet of polycarbonate for under $100.
- Hoop Houses/Low Tunnels: Larger structures made from flexible hoops (PVC pipe or EMT conduit) covered with greenhouse plastic. These provide more space and greater temperature moderation. A 10×20 ft DIY low tunnel kit can cost $200-$500, while a larger, more robust hoop house kit might be $1,000-$3,000. I use a 6×12 ft low tunnel made from 1/2-inch PVC hoops and 6mil greenhouse plastic, which extends my lettuce and spinach harvest by at least
Deciding between raised beds and in-ground beds depends on your soil, budget, and physical capabilities.
- In-Ground Beds: If you have excellent native soil and good drainage, in-ground beds are the most economical. Double-digging (loosening soil two shovel depths) can significantly improve drainage and aeration. For my main garden, I primarily use in-ground beds, but I focus on building up the soil over time with consistent compost additions and cover cropping. I aim for beds that are no wider than 3-4 feet so I can reach the center without stepping on the soil, compacting it.
- Raised Beds: Raised beds offer numerous advantages, especially for poor soil, heavy clay, or rocky areas. They provide better drainage, warm up faster in spring, reduce compaction, and make weeding and harvesting easier on your back.
- Material Options:
- Untreated Cedar: Naturally rot-resistant and chemical-free. A 4×8 ft bed, 12 inches deep, typically requires three 2x12x8 ft cedar boards, costing around $50-$60 per board (total ~$150-$180) plus corner brackets or screws. My first raised beds were cedar and are still going strong after 7 years.
- Galvanized Steel: Durable, long-lasting, and aesthetically pleasing. Brands like Vego Garden offer modular kits. A Vego Garden 17″ Tall 8-in-1 Metal Raised Garden Bed (can be configured to 4×8 ft) costs approximately $250-$300.
- Concrete Blocks/Stones: Very durable but can leach minerals (though generally safe once weathered) and can be expensive.
- Recycled Materials: Pallets (check for chemical treatment stamps like « HT » for heat-treated), old tires (controversial due to potential chemical leaching).
- Filling Raised Beds: Don’t just fill with topsoil. Use a « Hugelkultur » approach (logs, branches, leaves, then compost, then topsoil) or a mixture of 60% good quality topsoil, 30% compost, and 10% perlite or vermiculite for drainage. A 4x8x1 ft raised bed requires about 32 cubic feet (or ~1.2 cubic yards) of soil mix, which can cost $100-$200 depending on your source.
- Material Options:
Step 4: Water Management & Irrigation
Efficient water management is critical for a self sufficient garden from scratch, especially in off-grid living where water resources might be limited.
- Rainwater Harvesting: This is my primary source of irrigation water. A 55-gallon rain barrel (e.g., EarthMark Rain Barrel, ~$120-$150) connected to a downspout can collect significant water. For larger needs, I use two 275-gallon IBC totes (Intermediate Bulk Containers, often available used for $100-$200 each from food-grade sources) connected in series. A 1,000 sq ft roof can collect approximately 620 gallons of water for every inch of rainfall. My 1,500 sq ft roof provides ample water for my 600 sq ft garden through multiple barrels and totes.
- Drip Irrigation: This is by far the most water-efficient method, delivering water directly to the plant’s root zone, minimizing evaporation and weed growth.
- Components: A typical drip system includes a pressure regulator (e.g., Rain Bird PRV-10, ~$15), a filter (Rain Bird RBY filter, ~$20), main tubing (1/2-inch poly tubing, 100ft ~$25), smaller feeder lines (1/4-inch tubing), and emitters (0.5 GPH or 1 GPH per plant).
- Kits: For beginners, a starter kit like the Rain Bird Drip Irrigation Garden Kit (model DDI-KIT-1P, ~$40-$60) is excellent for a small garden. For larger setups, I use Netafim Techline CV Drip Line (500ft roll, ~$150-$200), which has pressure-compensating emitters built-in, ensuring even watering across long runs.
- Automation: For true self-sufficiency, consider a battery-powered timer (e.g., Orbit B-Hyve Bluetooth Hose Faucet Timer, ~$50) or a solar-powered timer connected to a small 12V pump.
- Solar-Powered Pumps: For lifting water from a well, pond, or large storage tank to your garden, a solar pump is a game-changer. For a smaller drip system, a Shurflo 2088-594-152 Diaphragm Pump (12V, 3.5 GPM, ~$180) can be powered by a single 100W solar panel (e.g., Renogy 100W Monocrystalline Solar Panel, ~$100) and a small 12V battery (e.g., a 50Ah LiFePO4 battery like the Battle Born 50Ah, ~$450). For larger operations or deeper wells, more robust systems are needed. If you’re looking to build out a comprehensive off-grid power system to support your garden’s water needs, or indeed your entire homestead, you might want to explore resources like the Power Grid Generator complete system guide to understand the full scope of what’s possible in terms of energy independence.
Step 5: Seed Selection & Planting
The choice of seeds is crucial for a truly self sufficient garden from scratch.
- Choose Heirloom & Open-Pollinated Seeds: These varieties produce seeds that will grow true to type, meaning you can save seeds from your harvest year after year. F1 hybrids, while often vigorous, will not produce consistent offspring from saved seeds. Reputable seed companies include Baker Creek Heirloom Seeds, High Mowing Organic Seeds, and Seed Savers Exchange. Start with common, reliable varieties like ‘Black Krim’ tomatoes, ‘Provider’ bush beans, ‘Waltham Butternut’ squash, and ‘Black Seeded Simpson’ lettuce.
- Start Seeds Indoors (Optional but Recommended): For longer growing seasons or specific crops, starting seeds indoors gives you a head start. Use seed-starting mix (e.g., Espoma Organic Seed Starter Mix, ~$10 for 16qt bag) in seed trays (Jiffy Professional Greenhouse 72-cell kit, ~$15). Provide adequate light with LED grow lights (Barrina T5 2ft 4-pack LED Grow Lights, 20W each, ~$50) for 14-16 hours a day, positioned 2-4 inches above seedlings. Maintain consistent temperatures (65-75°F for most).
- Direct Sowing vs. Transplanting: Some crops (carrots, radishes, beans, corn) prefer direct sowing into the garden bed. Others (tomatoes, peppers, broccoli, kale) benefit from being started indoors and transplanted. Follow seed packet instructions for planting depths (e.g., lettuce seeds are often surface-sown or planted 1/8 inch deep, while beans are 1 inch deep) and spacing.
- Companion Planting: Strategically plant different species together to enhance growth, deter pests, and attract beneficial insects. For example, planting marigolds near tomatoes can deter nematodes, and basil improves tomato flavor. Nasturtiums can act as a trap crop for aphids.
- Succession Planting: For a continuous harvest, plant small batches of quick-growing crops (lettuce, radishes, cilantro) every 2-3 weeks. As one crop finishes, another is ready to take its place.
Step 6: Pest & Disease Management (Organic)
Maintaining a self sufficient garden from scratch means embracing organic pest and disease control.
- Integrated Pest Management (IPM): This holistic approach combines several strategies.
- Observation: Regularly inspect your plants for early signs of pests or disease. Catching issues early is key.
- Physical Barriers: Use row covers (e.g., Agribon AG-19 floating row cover, 10×20 ft, ~$20) to protect young plants from insect pests like cabbage worms and squash bugs. Install fences (e.g., 2×4 welded wire mesh, 4 ft tall, 50 ft roll ~$70) to keep out deer, rabbits, and other larger animals.
- Hand-Picking: For larger pests like tomato hornworms or squash bugs, simply pick them off and drop them into a bucket of soapy water.
- Companion Planting: As mentioned, certain plants repel pests. Marigolds, garlic, and onions are excellent deterrents.
- Attract Beneficial Insects: Plant flowers like dill, fennel, cosmos, and sweet alyssum to attract ladybugs, lacewings, and parasitic wasps, which prey on common garden pests.
- Organic Sprays & Treatments:
- Neem Oil: An excellent broad-spectrum organic insecticide and fungicide. Bonide Neem Oil Concentrate (16oz, ~$20) can be mixed at a rate of 1-2 tbsp per gallon of water and sprayed on affected plants.
- Insecticidal Soap: Effective against soft-bodied insects like aphids, whiteflies, and spider mites. Garden Safe Insecticidal Soap (24oz ready-to-use, ~$10).
- Bacillus thuringiensis (Bt): A naturally occurring soil bacterium that targets caterpillars and worms. Monterey BT Worm & Caterpillar Killer (16oz, ~$18) is highly effective and safe for beneficial insects.
- Copper or Sulfur Sprays: For fungal diseases like powdery mildew or blight, organic copper (e.g., Bonide Copper Fungicide, ~$15 for 1lb) or sulfur (e.g., Safer Brand Garden Fungicide, ~$10 for 16oz) can be used as a last resort.
Step 7: Harvesting & Seed Saving
The culmination of your efforts is the harvest, and seed saving closes the loop on self-sufficiency.
- Harvesting Techniques:
- Timing: Harvest vegetables at their peak ripeness for best flavor and nutritional value. For example, green beans should snap cleanly, cucumbers should be firm, and tomatoes should be fully colored.
- Frequency: Many crops, like zucchini, cucumbers, and bush beans, produce more if harvested frequently. Pick daily or every other day.
- Tools: Use clean, sharp pruners (e.g., Corona ClassicCUT Bypass Pruner BP 3180, ~$30) or a sharp knife for clean cuts, minimizing damage to the plant.
- Seed Saving: This is where the « self-sufficient » aspect truly shines.
- Selection: Only save seeds from your healthiest, most vigorous plants that show desired traits (disease resistance, good flavor, high yield).
- Isolation: To ensure true-to-type seeds, prevent cross-pollination. This can be challenging for open-pollinated crops that readily cross (e.g., squash, corn). For beginners, focus on self-pollinating plants like beans, peas, lettuce, and tomatoes.
- Processing:
- Dry Seeds (Beans, Peas, Lettuce, Grains): Allow pods/seed heads to dry completely on the plant. Harvest, shell, and clean the seeds, removing chaff.
- Wet Seeds (Tomatoes, Cucumbers, Squash): For tomatoes, ferment the seeds in water for a few days to remove the gel coating and inhibit disease. For cucumbers/squash, scrape out seeds, wash thoroughly, and dry.
- Drying: Spread seeds thinly on screens or paper plates in a cool, dry, well-ventilated area for 1-4 weeks. Ensure they are bone-dry before storage. I aim for less than 8% moisture content.
- Storage: Store seeds in airtight containers (glass jars with desiccant packets work well) in a cool, dark, dry place (ideally 40-50°F and 30-40% humidity). Label clearly with variety and date. Properly stored seeds can remain viable for 3-10 years or more.
Step 8: Season Extension & Winterizing
Extend your harvest and protect your garden for the off-season to truly maximize your self sufficient garden from scratch.
- Cold Frames: Simple structures with a transparent top (glass, polycarbonate, or old windows) that sit over garden beds. They trap solar heat, allowing you to grow cold-hardy crops (lettuce, spinach, kale, radishes) well into winter or start seeds earlier in spring. A basic cold frame can be built from 2×6 lumber and a sheet of polycarbonate for under $100.
- Hoop Houses/Low Tunnels: Larger structures made from flexible hoops (PVC pipe or EMT conduit) covered with greenhouse plastic. These provide more space and greater temperature moderation. A 10×20 ft DIY low tunnel kit can cost $200-$500, while a larger, more robust hoop house kit might be $1,000-$3,000. I use a 6×12 ft low tunnel made from 1/2-inch PVC hoops and 6mil greenhouse plastic, which extends my lettuce and spinach harvest by at least
Healthy soil is the bedrock of a productive, self-sufficient garden. You can’t guess what your soil needs; you have to test it.
- Perform a Soil Test: A professional soil test will give you precise data on your soil’s pH, nutrient levels (N-P-K), and organic matter content. I recommend sending a sample to your local agricultural extension office; it typically costs $20-$50 and provides detailed recommendations. Alternatively, for a quick homeowner check, a Rapitest Soil Test Kit (40-test kit, model 1663, ~$20 on Amazon) provides a good baseline for pH, Nitrogen, Phosphorus, and Potash. Aim for a pH between 6.0 and 7.0 for most vegetables.
- Amend for pH Imbalance: If your soil is too acidic (below 6.0), add agricultural lime (dolomitic lime adds magnesium, calcitic lime adds calcium). Apply 5-10 lbs per 100 sq ft for a moderate adjustment. If it’s too alkaline (above 7.0), add elemental sulfur (e.g., Espoma Soil Acidifier, ~$15 for 6.75 lbs) or generous amounts of organic matter like peat moss or pine needles.
- Build Organic Matter: This is the single most important step for long-term soil health. Organic matter improves soil structure, water retention, drainage, and nutrient availability. Incorporate 2-4 inches of high-quality compost into your top 6-12 inches of soil annually. I make my own compost from kitchen scraps, garden waste, and shredded leaves, but you can purchase it. Local nurseries often sell bulk compost for $30-$50 per cubic yard. Aged manure (from chickens, cows, or horses – ensure it’s well-rotted to avoid burning plants) is also excellent.
- Address Nutrient Deficiencies: Based on your soil test, add specific organic amendments. If Nitrogen (N) is low, add blood meal (12-0-0, ~$20 for 3 lbs) or feather meal. For Phosphorus (P), use bone meal (3-15-0, ~$15 for 3 lbs) or rock phosphate. For Potassium (K), greensand (0-0-2.5, ~$25 for 5 lbs) or kelp meal are good choices. I rely heavily on Espoma Organic Garden-tone (5-3-3, ~$25 for an 8lb bag) as a balanced, all-purpose organic fertilizer during planting.
Step 3: Garden Bed Preparation
Deciding between raised beds and in-ground beds depends on your soil, budget, and physical capabilities.
- In-Ground Beds: If you have excellent native soil and good drainage, in-ground beds are the most economical. Double-digging (loosening soil two shovel depths) can significantly improve drainage and aeration. For my main garden, I primarily use in-ground beds, but I focus on building up the soil over time with consistent compost additions and cover cropping. I aim for beds that are no wider than 3-4 feet so I can reach the center without stepping on the soil, compacting it.
- Raised Beds: Raised beds offer numerous advantages, especially for poor soil, heavy clay, or rocky areas. They provide better drainage, warm up faster in spring, reduce compaction, and make weeding and harvesting easier on your back.
- Material Options:
- Untreated Cedar: Naturally rot-resistant and chemical-free. A 4×8 ft bed, 12 inches deep, typically requires three 2x12x8 ft cedar boards, costing around $50-$60 per board (total ~$150-$180) plus corner brackets or screws. My first raised beds were cedar and are still going strong after 7 years.
- Galvanized Steel: Durable, long-lasting, and aesthetically pleasing. Brands like Vego Garden offer modular kits. A Vego Garden 17″ Tall 8-in-1 Metal Raised Garden Bed (can be configured to 4×8 ft) costs approximately $250-$300.
- Concrete Blocks/Stones: Very durable but can leach minerals (though generally safe once weathered) and can be expensive.
- Recycled Materials: Pallets (check for chemical treatment stamps like « HT » for heat-treated), old tires (controversial due to potential chemical leaching).
- Filling Raised Beds: Don’t just fill with topsoil. Use a « Hugelkultur » approach (logs, branches, leaves, then compost, then topsoil) or a mixture of 60% good quality topsoil, 30% compost, and 10% perlite or vermiculite for drainage. A 4x8x1 ft raised bed requires about 32 cubic feet (or ~1.2 cubic yards) of soil mix, which can cost $100-$200 depending on your source.
- Material Options:
Step 4: Water Management & Irrigation
Efficient water management is critical for a self sufficient garden from scratch, especially in off-grid living where water resources might be limited.
- Rainwater Harvesting: This is my primary source of irrigation water. A 55-gallon rain barrel (e.g., EarthMark Rain Barrel, ~$120-$150) connected to a downspout can collect significant water. For larger needs, I use two 275-gallon IBC totes (Intermediate Bulk Containers, often available used for $100-$200 each from food-grade sources) connected in series. A 1,000 sq ft roof can collect approximately 620 gallons of water for every inch of rainfall. My 1,500 sq ft roof provides ample water for my 600 sq ft garden through multiple barrels and totes.
- Drip Irrigation: This is by far the most water-efficient method, delivering water directly to the plant’s root zone, minimizing evaporation and weed growth.
- Components: A typical drip system includes a pressure regulator (e.g., Rain Bird PRV-10, ~$15), a filter (Rain Bird RBY filter, ~$20), main tubing (1/2-inch poly tubing, 100ft ~$25), smaller feeder lines (1/4-inch tubing), and emitters (0.5 GPH or 1 GPH per plant).
- Kits: For beginners, a starter kit like the Rain Bird Drip Irrigation Garden Kit (model DDI-KIT-1P, ~$40-$60) is excellent for a small garden. For larger setups, I use Netafim Techline CV Drip Line (500ft roll, ~$150-$200), which has pressure-compensating emitters built-in, ensuring even watering across long runs.
- Automation: For true self-sufficiency, consider a battery-powered timer (e.g., Orbit B-Hyve Bluetooth Hose Faucet Timer, ~$50) or a solar-powered timer connected to a small 12V pump.
- Solar-Powered Pumps: For lifting water from a well, pond, or large storage tank to your garden, a solar pump is a game-changer. For a smaller drip system, a Shurflo 2088-594-152 Diaphragm Pump (12V, 3.5 GPM, ~$180) can be powered by a single 100W solar panel (e.g., Renogy 100W Monocrystalline Solar Panel, ~$100) and a small 12V battery (e.g., a 50Ah LiFePO4 battery like the Battle Born 50Ah, ~$450). For larger operations or deeper wells, more robust systems are needed. If you’re looking to build out a comprehensive off-grid power system to support your garden’s water needs, or indeed your entire homestead, you might want to explore resources like the Power Grid Generator complete system guide to understand the full scope of what’s possible in terms of energy independence.
Step 5: Seed Selection & Planting
The choice of seeds is crucial for a truly self sufficient garden from scratch.
- Choose Heirloom & Open-Pollinated Seeds: These varieties produce seeds that will grow true to type, meaning you can save seeds from your harvest year after year. F1 hybrids, while often vigorous, will not produce consistent offspring from saved seeds. Reputable seed companies include Baker Creek Heirloom Seeds, High Mowing Organic Seeds, and Seed Savers Exchange. Start with common, reliable varieties like ‘Black Krim’ tomatoes, ‘Provider’ bush beans, ‘Waltham Butternut’ squash, and ‘Black Seeded Simpson’ lettuce.
- Start Seeds Indoors (Optional but Recommended): For longer growing seasons or specific crops, starting seeds indoors gives you a head start. Use seed-starting mix (e.g., Espoma Organic Seed Starter Mix, ~$10 for 16qt bag) in seed trays (Jiffy Professional Greenhouse 72-cell kit, ~$15). Provide adequate light with LED grow lights (Barrina T5 2ft 4-pack LED Grow Lights, 20W each, ~$50) for 14-16 hours a day, positioned 2-4 inches above seedlings. Maintain consistent temperatures (65-75°F for most).
- Direct Sowing vs. Transplanting: Some crops (carrots, radishes, beans, corn) prefer direct sowing into the garden bed. Others (tomatoes, peppers, broccoli, kale) benefit from being started indoors and transplanted. Follow seed packet instructions for planting depths (e.g., lettuce seeds are often surface-sown or planted 1/8 inch deep, while beans are 1 inch deep) and spacing.
- Companion Planting: Strategically plant different species together to enhance growth, deter pests, and attract beneficial insects. For example, planting marigolds near tomatoes can deter nematodes, and basil improves tomato flavor. Nasturtiums can act as a trap crop for aphids.
- Succession Planting: For a continuous harvest, plant small batches of quick-growing crops (lettuce, radishes, cilantro) every 2-3 weeks. As one crop finishes, another is ready to take its place.
Step 6: Pest & Disease Management (Organic)
Maintaining a self sufficient garden from scratch means embracing organic pest and disease control.
- Integrated Pest Management (IPM): This holistic approach combines several strategies.
- Observation: Regularly inspect your plants for early signs of pests or disease. Catching issues early is key.
- Physical Barriers: Use row covers (e.g., Agribon AG-19 floating row cover, 10×20 ft, ~$20) to protect young plants from insect pests like cabbage worms and squash bugs. Install fences (e.g., 2×4 welded wire mesh, 4 ft tall, 50 ft roll ~$70) to keep out deer, rabbits, and other larger animals.
- Hand-Picking: For larger pests like tomato hornworms or squash bugs, simply pick them off and drop them into a bucket of soapy water.
- Companion Planting: As mentioned, certain plants repel pests. Marigolds, garlic, and onions are excellent deterrents.
- Attract Beneficial Insects: Plant flowers like dill, fennel, cosmos, and sweet alyssum to attract ladybugs, lacewings, and parasitic wasps, which prey on common garden pests.
- Organic Sprays & Treatments:
- Neem Oil: An excellent broad-spectrum organic insecticide and fungicide. Bonide Neem Oil Concentrate (16oz, ~$20) can be mixed at a rate of 1-2 tbsp per gallon of water and sprayed on affected plants.
- Insecticidal Soap: Effective against soft-bodied insects like aphids, whiteflies, and spider mites. Garden Safe Insecticidal Soap (24oz ready-to-use, ~$10).
- Bacillus thuringiensis (Bt): A naturally occurring soil bacterium that targets caterpillars and worms. Monterey BT Worm & Caterpillar Killer (16oz, ~$18) is highly effective and safe for beneficial insects.
- Copper or Sulfur Sprays: For fungal diseases like powdery mildew or blight, organic copper (e.g., Bonide Copper Fungicide, ~$15 for 1lb) or sulfur (e.g., Safer Brand Garden Fungicide, ~$10 for 16oz) can be used as a last resort.
Step 7: Harvesting & Seed Saving
The culmination of your efforts is the harvest, and seed saving closes the loop on self-sufficiency.
- Harvesting Techniques:
- Timing: Harvest vegetables at their peak ripeness for best flavor and nutritional value. For example, green beans should snap cleanly, cucumbers should be firm, and tomatoes should be fully colored.
- Frequency: Many crops, like zucchini, cucumbers, and bush beans, produce more if harvested frequently. Pick daily or every other day.
- Tools: Use clean, sharp pruners (e.g., Corona ClassicCUT Bypass Pruner BP 3180, ~$30) or a sharp knife for clean cuts, minimizing damage to the plant.
- Seed Saving: This is where the « self-sufficient » aspect truly shines.
- Selection: Only save seeds from your healthiest, most vigorous plants that show desired traits (disease resistance, good flavor, high yield).
- Isolation: To ensure true-to-type seeds, prevent cross-pollination. This can be challenging for open-pollinated crops that readily cross (e.g., squash, corn). For beginners, focus on self-pollinating plants like beans, peas, lettuce, and tomatoes.
- Processing:
- Dry Seeds (Beans, Peas, Lettuce, Grains): Allow pods/seed heads to dry completely on the plant. Harvest, shell, and clean the seeds, removing chaff.
- Wet Seeds (Tomatoes, Cucumbers, Squash): For tomatoes, ferment the seeds in water for a few days to remove the gel coating and inhibit disease. For cucumbers/squash, scrape out seeds, wash thoroughly, and dry.
- Drying: Spread seeds thinly on screens or paper plates in a cool, dry, well-ventilated area for 1-4 weeks. Ensure they are bone-dry before storage. I aim for less than 8% moisture content.
- Storage: Store seeds in airtight containers (glass jars with desiccant packets work well) in a cool, dark, dry place (ideally 40-50°F and 30-40% humidity). Label clearly with variety and date. Properly stored seeds can remain viable for 3-10 years or more.
Step 8: Season Extension & Winterizing
Extend your harvest and protect your garden for the off-season to truly maximize your self sufficient garden from scratch.
- Cold Frames: Simple structures with a transparent top (glass, polycarbonate, or old windows) that sit over garden beds. They trap solar heat, allowing you to grow cold-hardy crops (lettuce, spinach, kale, radishes) well into winter or start seeds earlier in spring. A basic cold frame can be built from 2×6 lumber and a sheet of polycarbonate for under $100.
- Hoop Houses/Low Tunnels: Larger structures made from flexible hoops (PVC pipe or EMT conduit) covered with greenhouse plastic. These provide more space and greater temperature moderation. A 10×20 ft DIY low tunnel kit can cost $200-$500, while a larger, more robust hoop house kit might be $1,000-$3,000. I use a 6×12 ft low tunnel made from 1/2-inch PVC hoops and 6mil greenhouse plastic, which extends my lettuce and spinach harvest by at least
Step 7: Harvesting & Seed Saving
The culmination of your efforts is the harvest, and seed saving closes the loop on self-sufficiency.
- Harvesting Techniques:
- Timing: Harvest vegetables at their peak ripeness for best flavor and nutritional value. For example, green beans should snap cleanly, cucumbers should be firm, and tomatoes should be fully colored.
- Frequency: Many crops, like zucchini, cucumbers, and bush beans, produce more if harvested frequently. Pick daily or every other day.
- Tools: Use clean, sharp pruners (e.g., Corona ClassicCUT Bypass Pruner BP 3180, ~$30) or a sharp knife for clean cuts, minimizing damage to the plant.
- Seed Saving: This is where the « self-sufficient » aspect truly shines.
- Selection: Only save seeds from your healthiest, most vigorous plants that show desired traits (disease resistance, good flavor, high yield).
- Isolation: To ensure true-to-type seeds, prevent cross-pollination. This can be challenging for open-pollinated crops that readily cross (e.g., squash, corn). For beginners, focus on self-pollinating plants like beans, peas, lettuce, and tomatoes.
- Processing:
- Dry Seeds (Beans, Peas, Lettuce, Grains): Allow pods/seed heads to dry completely on the plant. Harvest, shell, and clean the seeds, removing chaff.
- Wet Seeds (Tomatoes, Cucumbers, Squash): For tomatoes, ferment the seeds in water for a few days to remove the gel coating and inhibit disease. For cucumbers/squash, scrape out seeds, wash thoroughly, and dry.
- Drying: Spread seeds thinly on screens or paper plates in a cool, dry, well-ventilated area for 1-4 weeks. Ensure they are bone-dry before storage. I aim for less than 8% moisture content.
- Storage: Store seeds in airtight containers (glass jars with desiccant packets work well) in a cool, dark, dry place (ideally 40-50°F and 30-40% humidity). Label clearly with variety and date. Properly stored seeds can remain viable for 3-10 years or more.
Step 8: Season Extension & Winterizing
Extend your harvest and protect your garden for the off-season to truly maximize your self sufficient garden from scratch.
- Cold Frames: Simple structures with a transparent top (glass, polycarbonate, or old windows) that sit over garden beds. They trap solar heat, allowing you to grow cold-hardy crops (lettuce, spinach, kale, radishes) well into winter or start seeds earlier in spring. A basic cold frame can be built from 2×6 lumber and a sheet of polycarbonate for under $100.
- Hoop Houses/Low Tunnels: Larger structures made from flexible hoops (PVC pipe or EMT conduit) covered with greenhouse plastic. These provide more space and greater temperature moderation. A 10×20 ft DIY low tunnel kit can cost $200-$500, while a larger, more robust hoop house kit might be $1,000-$3,000. I use a 6×12 ft low tunnel made from 1/2-inch PVC hoops and 6mil greenhouse plastic, which extends my lettuce and spinach harvest by at least
The choice of seeds is crucial for a truly self sufficient garden from scratch.
- Choose Heirloom & Open-Pollinated Seeds: These varieties produce seeds that will grow true to type, meaning you can save seeds from your harvest year after year. F1 hybrids, while often vigorous, will not produce consistent offspring from saved seeds. Reputable seed companies include Baker Creek Heirloom Seeds, High Mowing Organic Seeds, and Seed Savers Exchange. Start with common, reliable varieties like ‘Black Krim’ tomatoes, ‘Provider’ bush beans, ‘Waltham Butternut’ squash, and ‘Black Seeded Simpson’ lettuce.
- Start Seeds Indoors (Optional but Recommended): For longer growing seasons or specific crops, starting seeds indoors gives you a head start. Use seed-starting mix (e.g., Espoma Organic Seed Starter Mix, ~$10 for 16qt bag) in seed trays (Jiffy Professional Greenhouse 72-cell kit, ~$15). Provide adequate light with LED grow lights (Barrina T5 2ft 4-pack LED Grow Lights, 20W each, ~$50) for 14-16 hours a day, positioned 2-4 inches above seedlings. Maintain consistent temperatures (65-75°F for most).
- Direct Sowing vs. Transplanting: Some crops (carrots, radishes, beans, corn) prefer direct sowing into the garden bed. Others (tomatoes, peppers, broccoli, kale) benefit from being started indoors and transplanted. Follow seed packet instructions for planting depths (e.g., lettuce seeds are often surface-sown or planted 1/8 inch deep, while beans are 1 inch deep) and spacing.
- Companion Planting: Strategically plant different species together to enhance growth, deter pests, and attract beneficial insects. For example, planting marigolds near tomatoes can deter nematodes, and basil improves tomato flavor. Nasturtiums can act as a trap crop for aphids.
- Succession Planting: For a continuous harvest, plant small batches of quick-growing crops (lettuce, radishes, cilantro) every 2-3 weeks. As one crop finishes, another is ready to take its place.
Step 6: Pest & Disease Management (Organic)
Maintaining a self sufficient garden from scratch means embracing organic pest and disease control.
- Integrated Pest Management (IPM): This holistic approach combines several strategies.
- Observation: Regularly inspect your plants for early signs of pests or disease. Catching issues early is key.
- Physical Barriers: Use row covers (e.g., Agribon AG-19 floating row cover, 10×20 ft, ~$20) to protect young plants from insect pests like cabbage worms and squash bugs. Install fences (e.g., 2×4 welded wire mesh, 4 ft tall, 50 ft roll ~$70) to keep out deer, rabbits, and other larger animals.
- Hand-Picking: For larger pests like tomato hornworms or squash bugs, simply pick them off and drop them into a bucket of soapy water.
- Companion Planting: As mentioned, certain plants repel pests. Marigolds, garlic, and onions are excellent deterrents.
- Attract Beneficial Insects: Plant flowers like dill, fennel, cosmos, and sweet alyssum to attract ladybugs, lacewings, and parasitic wasps, which prey on common garden pests.
- Organic Sprays & Treatments:
- Neem Oil: An excellent broad-spectrum organic insecticide and fungicide. Bonide Neem Oil Concentrate (16oz, ~$20) can be mixed at a rate of 1-2 tbsp per gallon of water and sprayed on affected plants.
- Insecticidal Soap: Effective against soft-bodied insects like aphids, whiteflies, and spider mites. Garden Safe Insecticidal Soap (24oz ready-to-use, ~$10).
- Bacillus thuringiensis (Bt): A naturally occurring soil bacterium that targets caterpillars and worms. Monterey BT Worm & Caterpillar Killer (16oz, ~$18) is highly effective and safe for beneficial insects.
- Copper or Sulfur Sprays: For fungal diseases like powdery mildew or blight, organic copper (e.g., Bonide Copper Fungicide, ~$15 for 1lb) or sulfur (e.g., Safer Brand Garden Fungicide, ~$10 for 16oz) can be used as a last resort.
Step 7: Harvesting & Seed Saving
The culmination of your efforts is the harvest, and seed saving closes the loop on self-sufficiency.
- Harvesting Techniques:
- Timing: Harvest vegetables at their peak ripeness for best flavor and nutritional value. For example, green beans should snap cleanly, cucumbers should be firm, and tomatoes should be fully colored.
- Frequency: Many crops, like zucchini, cucumbers, and bush beans, produce more if harvested frequently. Pick daily or every other day.
- Tools: Use clean, sharp pruners (e.g., Corona ClassicCUT Bypass Pruner BP 3180, ~$30) or a sharp knife for clean cuts, minimizing damage to the plant.
- Seed Saving: This is where the « self-sufficient » aspect truly shines.
- Selection: Only save seeds from your healthiest, most vigorous plants that show desired traits (disease resistance, good flavor, high yield).
- Isolation: To ensure true-to-type seeds, prevent cross-pollination. This can be challenging for open-pollinated crops that readily cross (e.g., squash, corn). For beginners, focus on self-pollinating plants like beans, peas, lettuce, and tomatoes.
- Processing:
- Dry Seeds (Beans, Peas, Lettuce, Grains): Allow pods/seed heads to dry completely on the plant. Harvest, shell, and clean the seeds, removing chaff.
- Wet Seeds (Tomatoes, Cucumbers, Squash): For tomatoes, ferment the seeds in water for a few days to remove the gel coating and inhibit disease. For cucumbers/squash, scrape out seeds, wash thoroughly, and dry.
- Drying: Spread seeds thinly on screens or paper plates in a cool, dry, well-ventilated area for 1-4 weeks. Ensure they are bone-dry before storage. I aim for less than 8% moisture content.
- Storage: Store seeds in airtight containers (glass jars with desiccant packets work well) in a cool, dark, dry place (ideally 40-50°F and 30-40% humidity). Label clearly with variety and date. Properly stored seeds can remain viable for 3-10 years or more.
Step 8: Season Extension & Winterizing
Extend your harvest and protect your garden for the off-season to truly maximize your self sufficient garden from scratch.
- Cold Frames: Simple structures with a transparent top (glass, polycarbonate, or old windows) that sit over garden beds. They trap solar heat, allowing you to grow cold-hardy crops (lettuce, spinach, kale, radishes) well into winter or start seeds earlier in spring. A basic cold frame can be built from 2×6 lumber and a sheet of polycarbonate for under $100.
- Hoop Houses/Low Tunnels: Larger structures made from flexible hoops (PVC pipe or EMT conduit) covered with greenhouse plastic. These provide more space and greater temperature moderation. A 10×20 ft DIY low tunnel kit can cost $200-$500, while a larger, more robust hoop house kit might be $1,000-$3,000. I use a 6×12 ft low tunnel made from 1/2-inch PVC hoops and 6mil greenhouse plastic, which extends my lettuce and spinach harvest by at least
Step 5: Seed Selection & Planting
The choice of seeds is crucial for a truly self sufficient garden from scratch.
- Choose Heirloom & Open-Pollinated Seeds: These varieties produce seeds that will grow true to type, meaning you can save seeds from your harvest year after year. F1 hybrids, while often vigorous, will not produce consistent offspring from saved seeds. Reputable seed companies include Baker Creek Heirloom Seeds, High Mowing Organic Seeds, and Seed Savers Exchange. Start with common, reliable varieties like ‘Black Krim’ tomatoes, ‘Provider’ bush beans, ‘Waltham Butternut’ squash, and ‘Black Seeded Simpson’ lettuce.
- Start Seeds Indoors (Optional but Recommended): For longer growing seasons or specific crops, starting seeds indoors gives you a head start. Use seed-starting mix (e.g., Espoma Organic Seed Starter Mix, ~$10 for 16qt bag) in seed trays (Jiffy Professional Greenhouse 72-cell kit, ~$15). Provide adequate light with LED grow lights (Barrina T5 2ft 4-pack LED Grow Lights, 20W each, ~$50) for 14-16 hours a day, positioned 2-4 inches above seedlings. Maintain consistent temperatures (65-75°F for most).
- Direct Sowing vs. Transplanting: Some crops (carrots, radishes, beans, corn) prefer direct sowing into the garden bed. Others (tomatoes, peppers, broccoli, kale) benefit from being started indoors and transplanted. Follow seed packet instructions for planting depths (e.g., lettuce seeds are often surface-sown or planted 1/8 inch deep, while beans are 1 inch deep) and spacing.
- Companion Planting: Strategically plant different species together to enhance growth, deter pests, and attract beneficial insects. For example, planting marigolds near tomatoes can deter nematodes, and basil improves tomato flavor. Nasturtiums can act as a trap crop for aphids.
- Succession Planting: For a continuous harvest, plant small batches of quick-growing crops (lettuce, radishes, cilantro) every 2-3 weeks. As one crop finishes, another is ready to take its place.
Step 6: Pest & Disease Management (Organic)
Maintaining a self sufficient garden from scratch means embracing organic pest and disease control.
- Integrated Pest Management (IPM): This holistic approach combines several strategies.
- Observation: Regularly inspect your plants for early signs of pests or disease. Catching issues early is key.
- Physical Barriers: Use row covers (e.g., Agribon AG-19 floating row cover, 10×20 ft, ~$20) to protect young plants from insect pests like cabbage worms and squash bugs. Install fences (e.g., 2×4 welded wire mesh, 4 ft tall, 50 ft roll ~$70) to keep out deer, rabbits, and other larger animals.
- Hand-Picking: For larger pests like tomato hornworms or squash bugs, simply pick them off and drop them into a bucket of soapy water.
- Companion Planting: As mentioned, certain plants repel pests. Marigolds, garlic, and onions are excellent deterrents.
- Attract Beneficial Insects: Plant flowers like dill, fennel, cosmos, and sweet alyssum to attract ladybugs, lacewings, and parasitic wasps, which prey on common garden pests.
- Organic Sprays & Treatments:
- Neem Oil: An excellent broad-spectrum organic insecticide and fungicide. Bonide Neem Oil Concentrate (16oz, ~$20) can be mixed at a rate of 1-2 tbsp per gallon of water and sprayed on affected plants.
- Insecticidal Soap: Effective against soft-bodied insects like aphids, whiteflies, and spider mites. Garden Safe Insecticidal Soap (24oz ready-to-use, ~$10).
- Bacillus thuringiensis (Bt): A naturally occurring soil bacterium that targets caterpillars and worms. Monterey BT Worm & Caterpillar Killer (16oz, ~$18) is highly effective and safe for beneficial insects.
- Copper or Sulfur Sprays: For fungal diseases like powdery mildew or blight, organic copper (e.g., Bonide Copper Fungicide, ~$15 for 1lb) or sulfur (e.g., Safer Brand Garden Fungicide, ~$10 for 16oz) can be used as a last resort.
Step 7: Harvesting & Seed Saving
The culmination of your efforts is the harvest, and seed saving closes the loop on self-sufficiency.
- Harvesting Techniques:
- Timing: Harvest vegetables at their peak ripeness for best flavor and nutritional value. For example, green beans should snap cleanly, cucumbers should be firm, and tomatoes should be fully colored.
- Frequency: Many crops, like zucchini, cucumbers, and bush beans, produce more if harvested frequently. Pick daily or every other day.
- Tools: Use clean, sharp pruners (e.g., Corona ClassicCUT Bypass Pruner BP 3180, ~$30) or a sharp knife for clean cuts, minimizing damage to the plant.
- Seed Saving: This is where the « self-sufficient » aspect truly shines.
- Selection: Only save seeds from your healthiest, most vigorous plants that show desired traits (disease resistance, good flavor, high yield).
- Isolation: To ensure true-to-type seeds, prevent cross-pollination. This can be challenging for open-pollinated crops that readily cross (e.g., squash, corn). For beginners, focus on self-pollinating plants like beans, peas, lettuce, and tomatoes.
- Processing:
- Dry Seeds (Beans, Peas, Lettuce, Grains): Allow pods/seed heads to dry completely on the plant. Harvest, shell, and clean the seeds, removing chaff.
- Wet Seeds (Tomatoes, Cucumbers, Squash): For tomatoes, ferment the seeds in water for a few days to remove the gel coating and inhibit disease. For cucumbers/squash, scrape out seeds, wash thoroughly, and dry.
- Drying: Spread seeds thinly on screens or paper plates in a cool, dry, well-ventilated area for 1-4 weeks. Ensure they are bone-dry before storage. I aim for less than 8% moisture content.
- Storage: Store seeds in airtight containers (glass jars with desiccant packets work well) in a cool, dark, dry place (ideally 40-50°F and 30-40% humidity). Label clearly with variety and date. Properly stored seeds can remain viable for 3-10 years or more.
Step 8: Season Extension & Winterizing
Extend your harvest and protect your garden for the off-season to truly maximize your self sufficient garden from scratch.
- Cold Frames: Simple structures with a transparent top (glass, polycarbonate, or old windows) that sit over garden beds. They trap solar heat, allowing you to grow cold-hardy crops (lettuce, spinach, kale, radishes) well into winter or start seeds earlier in spring. A basic cold frame can be built from 2×6 lumber and a sheet of polycarbonate for under $100.
- Hoop Houses/Low Tunnels: Larger structures made from flexible hoops (PVC pipe or EMT conduit) covered with greenhouse plastic. These provide more space and greater temperature moderation. A 10×20 ft DIY low tunnel kit can cost $200-$500, while a larger, more robust hoop house kit might be $1,000-$3,000. I use a 6×12 ft low tunnel made from 1/2-inch PVC hoops and 6mil greenhouse plastic, which extends my lettuce and spinach harvest by at least
- Rainwater Harvesting: This is my primary source of irrigation water. A 55-gallon rain barrel (e.g., EarthMark Rain Barrel, ~$120-$150) connected to a downspout can collect significant water. For larger needs, I use two 275-gallon IBC totes (Intermediate Bulk Containers, often available used for $100-$200 each from food-grade sources) connected in series. A 1,000 sq ft roof can collect approximately 620 gallons of water for every inch of rainfall. My 1,500 sq ft roof provides ample water for my 600 sq ft garden through multiple barrels and totes.
- Drip Irrigation: This is by far the most water-efficient method, delivering water directly to the plant’s root zone, minimizing evaporation and weed growth.
- Components: A typical drip system includes a pressure regulator (e.g., Rain Bird PRV-10, ~$15), a filter (Rain Bird RBY filter, ~$20), main tubing (1/2-inch poly tubing, 100ft ~$25), smaller feeder lines (1/4-inch tubing), and emitters (0.5 GPH or 1 GPH per plant).
- Kits: For beginners, a starter kit like the Rain Bird Drip Irrigation Garden Kit (model DDI-KIT-1P, ~$40-$60) is excellent for a small garden. For larger setups, I use Netafim Techline CV Drip Line (500ft roll, ~$150-$200), which has pressure-compensating emitters built-in, ensuring even watering across long runs.
- Automation: For true self-sufficiency, consider a battery-powered timer (e.g., Orbit B-Hyve Bluetooth Hose Faucet Timer, ~$50) or a solar-powered timer connected to a small 12V pump.
- Solar-Powered Pumps: For lifting water from a well, pond, or large storage tank to your garden, a solar pump is a game-changer. For a smaller drip system, a Shurflo 2088-594-152 Diaphragm Pump (12V, 3.5 GPM, ~$180) can be powered by a single 100W solar panel (e.g., Renogy 100W Monocrystalline Solar Panel, ~$100) and a small 12V battery (e.g., a 50Ah LiFePO4 battery like the Battle Born 50Ah, ~$450). For larger operations or deeper wells, more robust systems are needed. If you’re looking to build out a comprehensive off-grid power system to support your garden’s water needs, or indeed your entire homestead, you might want to explore resources like the Power Grid Generator complete system guide to understand the full scope of what’s possible in terms of energy independence.
Step 5: Seed Selection & Planting
The choice of seeds is crucial for a truly self sufficient garden from scratch.
- Choose Heirloom & Open-Pollinated Seeds: These varieties produce seeds that will grow true to type, meaning you can save seeds from your harvest year after year. F1 hybrids, while often vigorous, will not produce consistent offspring from saved seeds. Reputable seed companies include Baker Creek Heirloom Seeds, High Mowing Organic Seeds, and Seed Savers Exchange. Start with common, reliable varieties like ‘Black Krim’ tomatoes, ‘Provider’ bush beans, ‘Waltham Butternut’ squash, and ‘Black Seeded Simpson’ lettuce.
- Start Seeds Indoors (Optional but Recommended): For longer growing seasons or specific crops, starting seeds indoors gives you a head start. Use seed-starting mix (e.g., Espoma Organic Seed Starter Mix, ~$10 for 16qt bag) in seed trays (Jiffy Professional Greenhouse 72-cell kit, ~$15). Provide adequate light with LED grow lights (Barrina T5 2ft 4-pack LED Grow Lights, 20W each, ~$50) for 14-16 hours a day, positioned 2-4 inches above seedlings. Maintain consistent temperatures (65-75°F for most).
- Direct Sowing vs. Transplanting: Some crops (carrots, radishes, beans, corn) prefer direct sowing into the garden bed. Others (tomatoes, peppers, broccoli, kale) benefit from being started indoors and transplanted. Follow seed packet instructions for planting depths (e.g., lettuce seeds are often surface-sown or planted 1/8 inch deep, while beans are 1 inch deep) and spacing.
- Companion Planting: Strategically plant different species together to enhance growth, deter pests, and attract beneficial insects. For example, planting marigolds near tomatoes can deter nematodes, and basil improves tomato flavor. Nasturtiums can act as a trap crop for aphids.
- Succession Planting: For a continuous harvest, plant small batches of quick-growing crops (lettuce, radishes, cilantro) every 2-3 weeks. As one crop finishes, another is ready to take its place.
Step 6: Pest & Disease Management (Organic)
Maintaining a self sufficient garden from scratch means embracing organic pest and disease control.
- Integrated Pest Management (IPM): This holistic approach combines several strategies.
- Observation: Regularly inspect your plants for early signs of pests or disease. Catching issues early is key.
- Physical Barriers: Use row covers (e.g., Agribon AG-19 floating row cover, 10×20 ft, ~$20) to protect young plants from insect pests like cabbage worms and squash bugs. Install fences (e.g., 2×4 welded wire mesh, 4 ft tall, 50 ft roll ~$70) to keep out deer, rabbits, and other larger animals.
- Hand-Picking: For larger pests like tomato hornworms or squash bugs, simply pick them off and drop them into a bucket of soapy water.
- Companion Planting: As mentioned, certain plants repel pests. Marigolds, garlic, and onions are excellent deterrents.
- Attract Beneficial Insects: Plant flowers like dill, fennel, cosmos, and sweet alyssum to attract ladybugs, lacewings, and parasitic wasps, which prey on common garden pests.
- Organic Sprays & Treatments:
- Neem Oil: An excellent broad-spectrum organic insecticide and fungicide. Bonide Neem Oil Concentrate (16oz, ~$20) can be mixed at a rate of 1-2 tbsp per gallon of water and sprayed on affected plants.
- Insecticidal Soap: Effective against soft-bodied insects like aphids, whiteflies, and spider mites. Garden Safe Insecticidal Soap (24oz ready-to-use, ~$10).
- Bacillus thuringiensis (Bt): A naturally occurring soil bacterium that targets caterpillars and worms. Monterey BT Worm & Caterpillar Killer (16oz, ~$18) is highly effective and safe for beneficial insects.
- Copper or Sulfur Sprays: For fungal diseases like powdery mildew or blight, organic copper (e.g., Bonide Copper Fungicide, ~$15 for 1lb) or sulfur (e.g., Safer Brand Garden Fungicide, ~$10 for 16oz) can be used as a last resort.
Step 7: Harvesting & Seed Saving
The culmination of your efforts is the harvest, and seed saving closes the loop on self-sufficiency.
- Harvesting Techniques:
- Timing: Harvest vegetables at their peak ripeness for best flavor and nutritional value. For example, green beans should snap cleanly, cucumbers should be firm, and tomatoes should be fully colored.
- Frequency: Many crops, like zucchini, cucumbers, and bush beans, produce more if harvested frequently. Pick daily or every other day.
- Tools: Use clean, sharp pruners (e.g., Corona ClassicCUT Bypass Pruner BP 3180, ~$30) or a sharp knife for clean cuts, minimizing damage to the plant.
- Seed Saving: This is where the « self-sufficient » aspect truly shines.
- Selection: Only save seeds from your healthiest, most vigorous plants that show desired traits (disease resistance, good flavor, high yield).
- Isolation: To ensure true-to-type seeds, prevent cross-pollination. This can be challenging for open-pollinated crops that readily cross (e.g., squash, corn). For beginners, focus on self-pollinating plants like beans, peas, lettuce, and tomatoes.
- Processing:
- Dry Seeds (Beans, Peas, Lettuce, Grains): Allow pods/seed heads to dry completely on the plant. Harvest, shell, and clean the seeds, removing chaff.
- Wet Seeds (Tomatoes, Cucumbers, Squash): For tomatoes, ferment the seeds in water for a few days to remove the gel coating and inhibit disease. For cucumbers/squash, scrape out seeds, wash thoroughly, and dry.
- Drying: Spread seeds thinly on screens or paper plates in a cool, dry, well-ventilated area for 1-4 weeks. Ensure they are bone-dry before storage. I aim for less than 8% moisture content.
- Storage: Store seeds in airtight containers (glass jars with desiccant packets work well) in a cool, dark, dry place (ideally 40-50°F and 30-40% humidity). Label clearly with variety and date. Properly stored seeds can remain viable for 3-10 years or more.
Step 8: Season Extension & Winterizing
Extend your harvest and protect your garden for the off-season to truly maximize your self sufficient garden from scratch.
- Cold Frames: Simple structures with a transparent top (glass, polycarbonate, or old windows) that sit over garden beds. They trap solar heat, allowing you to grow cold-hardy crops (lettuce, spinach, kale, radishes) well into winter or start seeds earlier in spring. A basic cold frame can be built from 2×6 lumber and a sheet of polycarbonate for under $100.
- Hoop Houses/Low Tunnels: Larger structures made from flexible hoops (PVC pipe or EMT conduit) covered with greenhouse plastic. These provide more space and greater temperature moderation. A 10×20 ft DIY low tunnel kit can cost $200-$500, while a larger, more robust hoop house kit might be $1,000-$3,000. I use a 6×12 ft low tunnel made from 1/2-inch PVC hoops and 6mil greenhouse plastic, which extends my lettuce and spinach harvest by at least
Efficient water management is critical for a self sufficient garden from scratch, especially in off-grid living where water resources might be limited.
- Rainwater Harvesting: This is my primary source of irrigation water. A 55-gallon rain barrel (e.g., EarthMark Rain Barrel, ~$120-$150) connected to a downspout can collect significant water. For larger needs, I use two 275-gallon IBC totes (Intermediate Bulk Containers, often available used for $100-$200 each from food-grade sources) connected in series. A 1,000 sq ft roof can collect approximately 620 gallons of water for every inch of rainfall. My 1,500 sq ft roof provides ample water for my 600 sq ft garden through multiple barrels and totes.
- Drip Irrigation: This is by far the most water-efficient method, delivering water directly to the plant’s root zone, minimizing evaporation and weed growth.
- Components: A typical drip system includes a pressure regulator (e.g., Rain Bird PRV-10, ~$15), a filter (Rain Bird RBY filter, ~$20), main tubing (1/2-inch poly tubing, 100ft ~$25), smaller feeder lines (1/4-inch tubing), and emitters (0.5 GPH or 1 GPH per plant).
- Kits: For beginners, a starter kit like the Rain Bird Drip Irrigation Garden Kit (model DDI-KIT-1P, ~$40-$60) is excellent for a small garden. For larger setups, I use Netafim Techline CV Drip Line (500ft roll, ~$150-$200), which has pressure-compensating emitters built-in, ensuring even watering across long runs.
- Automation: For true self-sufficiency, consider a battery-powered timer (e.g., Orbit B-Hyve Bluetooth Hose Faucet Timer, ~$50) or a solar-powered timer connected to a small 12V pump.
- Solar-Powered Pumps: For lifting water from a well, pond, or large storage tank to your garden, a solar pump is a game-changer. For a smaller drip system, a Shurflo 2088-594-152 Diaphragm Pump (12V, 3.5 GPM, ~$180) can be powered by a single 100W solar panel (e.g., Renogy 100W Monocrystalline Solar Panel, ~$100) and a small 12V battery (e.g., a 50Ah LiFePO4 battery like the Battle Born 50Ah, ~$450). For larger operations or deeper wells, more robust systems are needed. If you’re looking to build out a comprehensive off-grid power system to support your garden’s water needs, or indeed your entire homestead, you might want to explore resources like the Power Grid Generator complete system guide to understand the full scope of what’s possible in terms of energy independence.
Step 5: Seed Selection & Planting
The choice of seeds is crucial for a truly self sufficient garden from scratch.
- Choose Heirloom & Open-Pollinated Seeds: These varieties produce seeds that will grow true to type, meaning you can save seeds from your harvest year after year. F1 hybrids, while often vigorous, will not produce consistent offspring from saved seeds. Reputable seed companies include Baker Creek Heirloom Seeds, High Mowing Organic Seeds, and Seed Savers Exchange. Start with common, reliable varieties like ‘Black Krim’ tomatoes, ‘Provider’ bush beans, ‘Waltham Butternut’ squash, and ‘Black Seeded Simpson’ lettuce.
- Start Seeds Indoors (Optional but Recommended): For longer growing seasons or specific crops, starting seeds indoors gives you a head start. Use seed-starting mix (e.g., Espoma Organic Seed Starter Mix, ~$10 for 16qt bag) in seed trays (Jiffy Professional Greenhouse 72-cell kit, ~$15). Provide adequate light with LED grow lights (Barrina T5 2ft 4-pack LED Grow Lights, 20W each, ~$50) for 14-16 hours a day, positioned 2-4 inches above seedlings. Maintain consistent temperatures (65-75°F for most).
- Direct Sowing vs. Transplanting: Some crops (carrots, radishes, beans, corn) prefer direct sowing into the garden bed. Others (tomatoes, peppers, broccoli, kale) benefit from being started indoors and transplanted. Follow seed packet instructions for planting depths (e.g., lettuce seeds are often surface-sown or planted 1/8 inch deep, while beans are 1 inch deep) and spacing.
- Companion Planting: Strategically plant different species together to enhance growth, deter pests, and attract beneficial insects. For example, planting marigolds near tomatoes can deter nematodes, and basil improves tomato flavor. Nasturtiums can act as a trap crop for aphids.
- Succession Planting: For a continuous harvest, plant small batches of quick-growing crops (lettuce, radishes, cilantro) every 2-3 weeks. As one crop finishes, another is ready to take its place.
Step 6: Pest & Disease Management (Organic)
Maintaining a self sufficient garden from scratch means embracing organic pest and disease control.
- Integrated Pest Management (IPM): This holistic approach combines several strategies.
- Observation: Regularly inspect your plants for early signs of pests or disease. Catching issues early is key.
- Physical Barriers: Use row covers (e.g., Agribon AG-19 floating row cover, 10×20 ft, ~$20) to protect young plants from insect pests like cabbage worms and squash bugs. Install fences (e.g., 2×4 welded wire mesh, 4 ft tall, 50 ft roll ~$70) to keep out deer, rabbits, and other larger animals.
- Hand-Picking: For larger pests like tomato hornworms or squash bugs, simply pick them off and drop them into a bucket of soapy water.
- Companion Planting: As mentioned, certain plants repel pests. Marigolds, garlic, and onions are excellent deterrents.
- Attract Beneficial Insects: Plant flowers like dill, fennel, cosmos, and sweet alyssum to attract ladybugs, lacewings, and parasitic wasps, which prey on common garden pests.
- Organic Sprays & Treatments:
- Neem Oil: An excellent broad-spectrum organic insecticide and fungicide. Bonide Neem Oil Concentrate (16oz, ~$20) can be mixed at a rate of 1-2 tbsp per gallon of water and sprayed on affected plants.
- Insecticidal Soap: Effective against soft-bodied insects like aphids, whiteflies, and spider mites. Garden Safe Insecticidal Soap (24oz ready-to-use, ~$10).
- Bacillus thuringiensis (Bt): A naturally occurring soil bacterium that targets caterpillars and worms. Monterey BT Worm & Caterpillar Killer (16oz, ~$18) is highly effective and safe for beneficial insects.
- Copper or Sulfur Sprays: For fungal diseases like powdery mildew or blight, organic copper (e.g., Bonide Copper Fungicide, ~$15 for 1lb) or sulfur (e.g., Safer Brand Garden Fungicide, ~$10 for 16oz) can be used as a last resort.
Step 7: Harvesting & Seed Saving
The culmination of your efforts is the harvest, and seed saving closes the loop on self-sufficiency.
- Harvesting Techniques:
- Timing: Harvest vegetables at their peak ripeness for best flavor and nutritional value. For example, green beans should snap cleanly, cucumbers should be firm, and tomatoes should be fully colored.
- Frequency: Many crops, like zucchini, cucumbers, and bush beans, produce more if harvested frequently. Pick daily or every other day.
- Tools: Use clean, sharp pruners (e.g., Corona ClassicCUT Bypass Pruner BP 3180, ~$30) or a sharp knife for clean cuts, minimizing damage to the plant.
- Seed Saving: This is where the « self-sufficient » aspect truly shines.
- Selection: Only save seeds from your healthiest, most vigorous plants that show desired traits (disease resistance, good flavor, high yield).
- Isolation: To ensure true-to-type seeds, prevent cross-pollination. This can be challenging for open-pollinated crops that readily cross (e.g., squash, corn). For beginners, focus on self-pollinating plants like beans, peas, lettuce, and tomatoes.
- Processing:
- Dry Seeds (Beans, Peas, Lettuce, Grains): Allow pods/seed heads to dry completely on the plant. Harvest, shell, and clean the seeds, removing chaff.
- Wet Seeds (Tomatoes, Cucumbers, Squash): For tomatoes, ferment the seeds in water for a few days to remove the gel coating and inhibit disease. For cucumbers/squash, scrape out seeds, wash thoroughly, and dry.
- Drying: Spread seeds thinly on screens or paper plates in a cool, dry, well-ventilated area for 1-4 weeks. Ensure they are bone-dry before storage. I aim for less than 8% moisture content.
- Storage: Store seeds in airtight containers (glass jars with desiccant packets work well) in a cool, dark, dry place (ideally 40-50°F and 30-40% humidity). Label clearly with variety and date. Properly stored seeds can remain viable for 3-10 years or more.
Step 8: Season Extension & Winterizing
Extend your harvest and protect your garden for the off-season to truly maximize your self sufficient garden from scratch.
- Cold Frames: Simple structures with a transparent top (glass, polycarbonate, or old windows) that sit over garden beds. They trap solar heat, allowing you to grow cold-hardy crops (lettuce, spinach, kale, radishes) well into winter or start seeds earlier in spring. A basic cold frame can be built from 2×6 lumber and a sheet of polycarbonate for under $100.
- Hoop Houses/Low Tunnels: Larger structures made from flexible hoops (PVC pipe or EMT conduit) covered with greenhouse plastic. These provide more space and greater temperature moderation. A 10×20 ft DIY low tunnel kit can cost $200-$500, while a larger, more robust hoop house kit might be $1,000-$3,000. I use a 6×12 ft low tunnel made from 1/2-inch PVC hoops and 6mil greenhouse plastic, which extends my lettuce and spinach harvest by at least
Step 4: Water Management & Irrigation
Efficient water management is critical for a self sufficient garden from scratch, especially in off-grid living where water resources might be limited.
- Rainwater Harvesting: This is my primary source of irrigation water. A 55-gallon rain barrel (e.g., EarthMark Rain Barrel, ~$120-$150) connected to a downspout can collect significant water. For larger needs, I use two 275-gallon IBC totes (Intermediate Bulk Containers, often available used for $100-$200 each from food-grade sources) connected in series. A 1,000 sq ft roof can collect approximately 620 gallons of water for every inch of rainfall. My 1,500 sq ft roof provides ample water for my 600 sq ft garden through multiple barrels and totes.
- Drip Irrigation: This is by far the most water-efficient method, delivering water directly to the plant’s root zone, minimizing evaporation and weed growth.
- Components: A typical drip system includes a pressure regulator (e.g., Rain Bird PRV-10, ~$15), a filter (Rain Bird RBY filter, ~$20), main tubing (1/2-inch poly tubing, 100ft ~$25), smaller feeder lines (1/4-inch tubing), and emitters (0.5 GPH or 1 GPH per plant).
- Kits: For beginners, a starter kit like the Rain Bird Drip Irrigation Garden Kit (model DDI-KIT-1P, ~$40-$60) is excellent for a small garden. For larger setups, I use Netafim Techline CV Drip Line (500ft roll, ~$150-$200), which has pressure-compensating emitters built-in, ensuring even watering across long runs.
- Automation: For true self-sufficiency, consider a battery-powered timer (e.g., Orbit B-Hyve Bluetooth Hose Faucet Timer, ~$50) or a solar-powered timer connected to a small 12V pump.
- Solar-Powered Pumps: For lifting water from a well, pond, or large storage tank to your garden, a solar pump is a game-changer. For a smaller drip system, a Shurflo 2088-594-152 Diaphragm Pump (12V, 3.5 GPM, ~$180) can be powered by a single 100W solar panel (e.g., Renogy 100W Monocrystalline Solar Panel, ~$100) and a small 12V battery (e.g., a 50Ah LiFePO4 battery like the Battle Born 50Ah, ~$450). For larger operations or deeper wells, more robust systems are needed. If you’re looking to build out a comprehensive off-grid power system to support your garden’s water needs, or indeed your entire homestead, you might want to explore resources like the Power Grid Generator complete system guide to understand the full scope of what’s possible in terms of energy independence.
Step 5: Seed Selection & Planting
The choice of seeds is crucial for a truly self sufficient garden from scratch.
- Choose Heirloom & Open-Pollinated Seeds: These varieties produce seeds that will grow true to type, meaning you can save seeds from your harvest year after year. F1 hybrids, while often vigorous, will not produce consistent offspring from saved seeds. Reputable seed companies include Baker Creek Heirloom Seeds, High Mowing Organic Seeds, and Seed Savers Exchange. Start with common, reliable varieties like ‘Black Krim’ tomatoes, ‘Provider’ bush beans, ‘Waltham Butternut’ squash, and ‘Black Seeded Simpson’ lettuce.
- Start Seeds Indoors (Optional but Recommended): For longer growing seasons or specific crops, starting seeds indoors gives you a head start. Use seed-starting mix (e.g., Espoma Organic Seed Starter Mix, ~$10 for 16qt bag) in seed trays (Jiffy Professional Greenhouse 72-cell kit, ~$15). Provide adequate light with LED grow lights (Barrina T5 2ft 4-pack LED Grow Lights, 20W each, ~$50) for 14-16 hours a day, positioned 2-4 inches above seedlings. Maintain consistent temperatures (65-75°F for most).
- Direct Sowing vs. Transplanting: Some crops (carrots, radishes, beans, corn) prefer direct sowing into the garden bed. Others (tomatoes, peppers, broccoli, kale) benefit from being started indoors and transplanted. Follow seed packet instructions for planting depths (e.g., lettuce seeds are often surface-sown or planted 1/8 inch deep, while beans are 1 inch deep) and spacing.
- Companion Planting: Strategically plant different species together to enhance growth, deter pests, and attract beneficial insects. For example, planting marigolds near tomatoes can deter nematodes, and basil improves tomato flavor. Nasturtiums can act as a trap crop for aphids.
- Succession Planting: For a continuous harvest, plant small batches of quick-growing crops (lettuce, radishes, cilantro) every 2-3 weeks. As one crop finishes, another is ready to take its place.
Step 6: Pest & Disease Management (Organic)
Maintaining a self sufficient garden from scratch means embracing organic pest and disease control.
- Integrated Pest Management (IPM): This holistic approach combines several strategies.
- Observation: Regularly inspect your plants for early signs of pests or disease. Catching issues early is key.
- Physical Barriers: Use row covers (e.g., Agribon AG-19 floating row cover, 10×20 ft, ~$20) to protect young plants from insect pests like cabbage worms and squash bugs. Install fences (e.g., 2×4 welded wire mesh, 4 ft tall, 50 ft roll ~$70) to keep out deer, rabbits, and other larger animals.
- Hand-Picking: For larger pests like tomato hornworms or squash bugs, simply pick them off and drop them into a bucket of soapy water.
- Companion Planting: As mentioned, certain plants repel pests. Marigolds, garlic, and onions are excellent deterrents.
- Attract Beneficial Insects: Plant flowers like dill, fennel, cosmos, and sweet alyssum to attract ladybugs, lacewings, and parasitic wasps, which prey on common garden pests.
- Organic Sprays & Treatments:
- Neem Oil: An excellent broad-spectrum organic insecticide and fungicide. Bonide Neem Oil Concentrate (16oz, ~$20) can be mixed at a rate of 1-2 tbsp per gallon of water and sprayed on affected plants.
- Insecticidal Soap: Effective against soft-bodied insects like aphids, whiteflies, and spider mites. Garden Safe Insecticidal Soap (24oz ready-to-use, ~$10).
- Bacillus thuringiensis (Bt): A naturally occurring soil bacterium that targets caterpillars and worms. Monterey BT Worm & Caterpillar Killer (16oz, ~$18) is highly effective and safe for beneficial insects.
- Copper or Sulfur Sprays: For fungal diseases like powdery mildew or blight, organic copper (e.g., Bonide Copper Fungicide, ~$15 for 1lb) or sulfur (e.g., Safer Brand Garden Fungicide, ~$10 for 16oz) can be used as a last resort.
Step 7: Harvesting & Seed Saving
The culmination of your efforts is the harvest, and seed saving closes the loop on self-sufficiency.
- Harvesting Techniques:
- Timing: Harvest vegetables at their peak ripeness for best flavor and nutritional value. For example, green beans should snap cleanly, cucumbers should be firm, and tomatoes should be fully colored.
- Frequency: Many crops, like zucchini, cucumbers, and bush beans, produce more if harvested frequently. Pick daily or every other day.
- Tools: Use clean, sharp pruners (e.g., Corona ClassicCUT Bypass Pruner BP 3180, ~$30) or a sharp knife for clean cuts, minimizing damage to the plant.
- Seed Saving: This is where the « self-sufficient » aspect truly shines.
- Selection: Only save seeds from your healthiest, most vigorous plants that show desired traits (disease resistance, good flavor, high yield).
- Isolation: To ensure true-to-type seeds, prevent cross-pollination. This can be challenging for open-pollinated crops that readily cross (e.g., squash, corn). For beginners, focus on self-pollinating plants like beans, peas, lettuce, and tomatoes.
- Processing:
- Dry Seeds (Beans, Peas, Lettuce, Grains): Allow pods/seed heads to dry completely on the plant. Harvest, shell, and clean the seeds, removing chaff.
- Wet Seeds (Tomatoes, Cucumbers, Squash): For tomatoes, ferment the seeds in water for a few days to remove the gel coating and inhibit disease. For cucumbers/squash, scrape out seeds, wash thoroughly, and dry.
- Drying: Spread seeds thinly on screens or paper plates in a cool, dry, well-ventilated area for 1-4 weeks. Ensure they are bone-dry before storage. I aim for less than 8% moisture content.
- Storage: Store seeds in airtight containers (glass jars with desiccant packets work well) in a cool, dark, dry place (ideally 40-50°F and 30-40% humidity). Label clearly with variety and date. Properly stored seeds can remain viable for 3-10 years or more.
Step 8: Season Extension & Winterizing
Extend your harvest and protect your garden for the off-season to truly maximize your self sufficient garden from scratch.
- Cold Frames: Simple structures with a transparent top (glass, polycarbonate, or old windows) that sit over garden beds. They trap solar heat, allowing you to grow cold-hardy crops (lettuce, spinach, kale, radishes) well into winter or start seeds earlier in spring. A basic cold frame can be built from 2×6 lumber and a sheet of polycarbonate for under $100.
- Hoop Houses/Low Tunnels: Larger structures made from flexible hoops (PVC pipe or EMT conduit) covered with greenhouse plastic. These provide more space and greater temperature moderation. A 10×20 ft DIY low tunnel kit can cost $200-$500, while a larger, more robust hoop house kit might be $1,000-$3,000. I use a 6×12 ft low tunnel made from 1/2-inch PVC hoops and 6mil greenhouse plastic, which extends my lettuce and spinach harvest by at least
- In-Ground Beds: If you have excellent native soil and good drainage, in-ground beds are the most economical. Double-digging (loosening soil two shovel depths) can significantly improve drainage and aeration. For my main garden, I primarily use in-ground beds, but I focus on building up the soil over time with consistent compost additions and cover cropping. I aim for beds that are no wider than 3-4 feet so I can reach the center without stepping on the soil, compacting it.
- Raised Beds: Raised beds offer numerous advantages, especially for poor soil, heavy clay, or rocky areas. They provide better drainage, warm up faster in spring, reduce compaction, and make weeding and harvesting easier on your back.
- Material Options:
- Untreated Cedar: Naturally rot-resistant and chemical-free. A 4×8 ft bed, 12 inches deep, typically requires three 2x12x8 ft cedar boards, costing around $50-$60 per board (total ~$150-$180) plus corner brackets or screws. My first raised beds were cedar and are still going strong after 7 years.
- Galvanized Steel: Durable, long-lasting, and aesthetically pleasing. Brands like Vego Garden offer modular kits. A Vego Garden 17″ Tall 8-in-1 Metal Raised Garden Bed (can be configured to 4×8 ft) costs approximately $250-$300.
- Concrete Blocks/Stones: Very durable but can leach minerals (though generally safe once weathered) and can be expensive.
- Recycled Materials: Pallets (check for chemical treatment stamps like « HT » for heat-treated), old tires (controversial due to potential chemical leaching).
- Filling Raised Beds: Don’t just fill with topsoil. Use a « Hugelkultur » approach (logs, branches, leaves, then compost, then topsoil) or a mixture of 60% good quality topsoil, 30% compost, and 10% perlite or vermiculite for drainage. A 4x8x1 ft raised bed requires about 32 cubic feet (or ~1.2 cubic yards) of soil mix, which can cost $100-$200 depending on your source.
- Material Options:
Step 4: Water Management & Irrigation
Efficient water management is critical for a self sufficient garden from scratch, especially in off-grid living where water resources might be limited.
- Rainwater Harvesting: This is my primary source of irrigation water. A 55-gallon rain barrel (e.g., EarthMark Rain Barrel, ~$120-$150) connected to a downspout can collect significant water. For larger needs, I use two 275-gallon IBC totes (Intermediate Bulk Containers, often available used for $100-$200 each from food-grade sources) connected in series. A 1,000 sq ft roof can collect approximately 620 gallons of water for every inch of rainfall. My 1,500 sq ft roof provides ample water for my 600 sq ft garden through multiple barrels and totes.
- Drip Irrigation: This is by far the most water-efficient method, delivering water directly to the plant’s root zone, minimizing evaporation and weed growth.
- Components: A typical drip system includes a pressure regulator (e.g., Rain Bird PRV-10, ~$15), a filter (Rain Bird RBY filter, ~$20), main tubing (1/2-inch poly tubing, 100ft ~$25), smaller feeder lines (1/4-inch tubing), and emitters (0.5 GPH or 1 GPH per plant).
- Kits: For beginners, a starter kit like the Rain Bird Drip Irrigation Garden Kit (model DDI-KIT-1P, ~$40-$60) is excellent for a small garden. For larger setups, I use Netafim Techline CV Drip Line (500ft roll, ~$150-$200), which has pressure-compensating emitters built-in, ensuring even watering across long runs.
- Automation: For true self-sufficiency, consider a battery-powered timer (e.g., Orbit B-Hyve Bluetooth Hose Faucet Timer, ~$50) or a solar-powered timer connected to a small 12V pump.
- Solar-Powered Pumps: For lifting water from a well, pond, or large storage tank to your garden, a solar pump is a game-changer. For a smaller drip system, a Shurflo 2088-594-152 Diaphragm Pump (12V, 3.5 GPM, ~$180) can be powered by a single 100W solar panel (e.g., Renogy 100W Monocrystalline Solar Panel, ~$100) and a small 12V battery (e.g., a 50Ah LiFePO4 battery like the Battle Born 50Ah, ~$450). For larger operations or deeper wells, more robust systems are needed. If you’re looking to build out a comprehensive off-grid power system to support your garden’s water needs, or indeed your entire homestead, you might want to explore resources like the Power Grid Generator complete system guide to understand the full scope of what’s possible in terms of energy independence.
Step 5: Seed Selection & Planting
The choice of seeds is crucial for a truly self sufficient garden from scratch.
- Choose Heirloom & Open-Pollinated Seeds: These varieties produce seeds that will grow true to type, meaning you can save seeds from your harvest year after year. F1 hybrids, while often vigorous, will not produce consistent offspring from saved seeds. Reputable seed companies include Baker Creek Heirloom Seeds, High Mowing Organic Seeds, and Seed Savers Exchange. Start with common, reliable varieties like ‘Black Krim’ tomatoes, ‘Provider’ bush beans, ‘Waltham Butternut’ squash, and ‘Black Seeded Simpson’ lettuce.
- Start Seeds Indoors (Optional but Recommended): For longer growing seasons or specific crops, starting seeds indoors gives you a head start. Use seed-starting mix (e.g., Espoma Organic Seed Starter Mix, ~$10 for 16qt bag) in seed trays (Jiffy Professional Greenhouse 72-cell kit, ~$15). Provide adequate light with LED grow lights (Barrina T5 2ft 4-pack LED Grow Lights, 20W each, ~$50) for 14-16 hours a day, positioned 2-4 inches above seedlings. Maintain consistent temperatures (65-75°F for most).
- Direct Sowing vs. Transplanting: Some crops (carrots, radishes, beans, corn) prefer direct sowing into the garden bed. Others (tomatoes, peppers, broccoli, kale) benefit from being started indoors and transplanted. Follow seed packet instructions for planting depths (e.g., lettuce seeds are often surface-sown or planted 1/8 inch deep, while beans are 1 inch deep) and spacing.
- Companion Planting: Strategically plant different species together to enhance growth, deter pests, and attract beneficial insects. For example, planting marigolds near tomatoes can deter nematodes, and basil improves tomato flavor. Nasturtiums can act as a trap crop for aphids.
- Succession Planting: For a continuous harvest, plant small batches of quick-growing crops (lettuce, radishes, cilantro) every 2-3 weeks. As one crop finishes, another is ready to take its place.
Step 6: Pest & Disease Management (Organic)
Maintaining a self sufficient garden from scratch means embracing organic pest and disease control.
- Integrated Pest Management (IPM): This holistic approach combines several strategies.
- Observation: Regularly inspect your plants for early signs of pests or disease. Catching issues early is key.
- Physical Barriers: Use row covers (e.g., Agribon AG-19 floating row cover, 10×20 ft, ~$20) to protect young plants from insect pests like cabbage worms and squash bugs. Install fences (e.g., 2×4 welded wire mesh, 4 ft tall, 50 ft roll ~$70) to keep out deer, rabbits, and other larger animals.
- Hand-Picking: For larger pests like tomato hornworms or squash bugs, simply pick them off and drop them into a bucket of soapy water.
- Companion Planting: As mentioned, certain plants repel pests. Marigolds, garlic, and onions are excellent deterrents.
- Attract Beneficial Insects: Plant flowers like dill, fennel, cosmos, and sweet alyssum to attract ladybugs, lacewings, and parasitic wasps, which prey on common garden pests.
- Organic Sprays & Treatments:
- Neem Oil: An excellent broad-spectrum organic insecticide and fungicide. Bonide Neem Oil Concentrate (16oz, ~$20) can be mixed at a rate of 1-2 tbsp per gallon of water and sprayed on affected plants.
- Insecticidal Soap: Effective against soft-bodied insects like aphids, whiteflies, and spider mites. Garden Safe Insecticidal Soap (24oz ready-to-use, ~$10).
- Bacillus thuringiensis (Bt): A naturally occurring soil bacterium that targets caterpillars and worms. Monterey BT Worm & Caterpillar Killer (16oz, ~$18) is highly effective and safe for beneficial insects.
- Copper or Sulfur Sprays: For fungal diseases like powdery mildew or blight, organic copper (e.g., Bonide Copper Fungicide, ~$15 for 1lb) or sulfur (e.g., Safer Brand Garden Fungicide, ~$10 for 16oz) can be used as a last resort.
Step 7: Harvesting & Seed Saving
The culmination of your efforts is the harvest, and seed saving closes the loop on self-sufficiency.
- Harvesting Techniques:
- Timing: Harvest vegetables at their peak ripeness for best flavor and nutritional value. For example, green beans should snap cleanly, cucumbers should be firm, and tomatoes should be fully colored.
- Frequency: Many crops, like zucchini, cucumbers, and bush beans, produce more if harvested frequently. Pick daily or every other day.
- Tools: Use clean, sharp pruners (e.g., Corona ClassicCUT Bypass Pruner BP 3180, ~$30) or a sharp knife for clean cuts, minimizing damage to the plant.
- Seed Saving: This is where the « self-sufficient » aspect truly shines.
- Selection: Only save seeds from your healthiest, most vigorous plants that show desired traits (disease resistance, good flavor, high yield).
- Isolation: To ensure true-to-type seeds, prevent cross-pollination. This can be challenging for open-pollinated crops that readily cross (e.g., squash, corn). For beginners, focus on self-pollinating plants like beans, peas, lettuce, and tomatoes.
- Processing:
- Dry Seeds (Beans, Peas, Lettuce, Grains): Allow pods/seed heads to dry completely on the plant. Harvest, shell, and clean the seeds, removing chaff.
- Wet Seeds (Tomatoes, Cucumbers, Squash): For tomatoes, ferment the seeds in water for a few days to remove the gel coating and inhibit disease. For cucumbers/squash, scrape out seeds, wash thoroughly, and dry.
- Drying: Spread seeds thinly on screens or paper plates in a cool, dry, well-ventilated area for 1-4 weeks. Ensure they are bone-dry before storage. I aim for less than 8% moisture content.
- Storage: Store seeds in airtight containers (glass jars with desiccant packets work well) in a cool, dark, dry place (ideally 40-50°F and 30-40% humidity). Label clearly with variety and date. Properly stored seeds can remain viable for 3-10 years or more.
Step 8: Season Extension & Winterizing
Extend your harvest and protect your garden for the off-season to truly maximize your self sufficient garden from scratch.
- Cold Frames: Simple structures with a transparent top (glass, polycarbonate, or old windows) that sit over garden beds. They trap solar heat, allowing you to grow cold-hardy crops (lettuce, spinach, kale, radishes) well into winter or start seeds earlier in spring. A basic cold frame can be built from 2×6 lumber and a sheet of polycarbonate for under $100.
- Hoop Houses/Low Tunnels: Larger structures made from flexible hoops (PVC pipe or EMT conduit) covered with greenhouse plastic. These provide more space and greater temperature moderation. A 10×20 ft DIY low tunnel kit can cost $200-$500, while a larger, more robust hoop house kit might be $1,000-$3,000. I use a 6×12 ft low tunnel made from 1/2-inch PVC hoops and 6mil greenhouse plastic, which extends my lettuce and spinach harvest by at least
Deciding between raised beds and in-ground beds depends on your soil, budget, and physical capabilities.
- In-Ground Beds: If you have excellent native soil and good drainage, in-ground beds are the most economical. Double-digging (loosening soil two shovel depths) can significantly improve drainage and aeration. For my main garden, I primarily use in-ground beds, but I focus on building up the soil over time with consistent compost additions and cover cropping. I aim for beds that are no wider than 3-4 feet so I can reach the center without stepping on the soil, compacting it.
- Raised Beds: Raised beds offer numerous advantages, especially for poor soil, heavy clay, or rocky areas. They provide better drainage, warm up faster in spring, reduce compaction, and make weeding and harvesting easier on your back.
- Material Options:
- Untreated Cedar: Naturally rot-resistant and chemical-free. A 4×8 ft bed, 12 inches deep, typically requires three 2x12x8 ft cedar boards, costing around $50-$60 per board (total ~$150-$180) plus corner brackets or screws. My first raised beds were cedar and are still going strong after 7 years.
- Galvanized Steel: Durable, long-lasting, and aesthetically pleasing. Brands like Vego Garden offer modular kits. A Vego Garden 17″ Tall 8-in-1 Metal Raised Garden Bed (can be configured to 4×8 ft) costs approximately $250-$300.
- Concrete Blocks/Stones: Very durable but can leach minerals (though generally safe once weathered) and can be expensive.
- Recycled Materials: Pallets (check for chemical treatment stamps like « HT » for heat-treated), old tires (controversial due to potential chemical leaching).
- Filling Raised Beds: Don’t just fill with topsoil. Use a « Hugelkultur » approach (logs, branches, leaves, then compost, then topsoil) or a mixture of 60% good quality topsoil, 30% compost, and 10% perlite or vermiculite for drainage. A 4x8x1 ft raised bed requires about 32 cubic feet (or ~1.2 cubic yards) of soil mix, which can cost $100-$200 depending on your source.
- Material Options:
Step 4: Water Management & Irrigation
Efficient water management is critical for a self sufficient garden from scratch, especially in off-grid living where water resources might be limited.
- Rainwater Harvesting: This is my primary source of irrigation water. A 55-gallon rain barrel (e.g., EarthMark Rain Barrel, ~$120-$150) connected to a downspout can collect significant water. For larger needs, I use two 275-gallon IBC totes (Intermediate Bulk Containers, often available used for $100-$200 each from food-grade sources) connected in series. A 1,000 sq ft roof can collect approximately 620 gallons of water for every inch of rainfall. My 1,500 sq ft roof provides ample water for my 600 sq ft garden through multiple barrels and totes.
- Drip Irrigation: This is by far the most water-efficient method, delivering water directly to the plant’s root zone, minimizing evaporation and weed growth.
- Components: A typical drip system includes a pressure regulator (e.g., Rain Bird PRV-10, ~$15), a filter (Rain Bird RBY filter, ~$20), main tubing (1/2-inch poly tubing, 100ft ~$25), smaller feeder lines (1/4-inch tubing), and emitters (0.5 GPH or 1 GPH per plant).
- Kits: For beginners, a starter kit like the Rain Bird Drip Irrigation Garden Kit (model DDI-KIT-1P, ~$40-$60) is excellent for a small garden. For larger setups, I use Netafim Techline CV Drip Line (500ft roll, ~$150-$200), which has pressure-compensating emitters built-in, ensuring even watering across long runs.
- Automation: For true self-sufficiency, consider a battery-powered timer (e.g., Orbit B-Hyve Bluetooth Hose Faucet Timer, ~$50) or a solar-powered timer connected to a small 12V pump.
- Solar-Powered Pumps: For lifting water from a well, pond, or large storage tank to your garden, a solar pump is a game-changer. For a smaller drip system, a Shurflo 2088-594-152 Diaphragm Pump (12V, 3.5 GPM, ~$180) can be powered by a single 100W solar panel (e.g., Renogy 100W Monocrystalline Solar Panel, ~$100) and a small 12V battery (e.g., a 50Ah LiFePO4 battery like the Battle Born 50Ah, ~$450). For larger operations or deeper wells, more robust systems are needed. If you’re looking to build out a comprehensive off-grid power system to support your garden’s water needs, or indeed your entire homestead, you might want to explore resources like the Power Grid Generator complete system guide to understand the full scope of what’s possible in terms of energy independence.
Step 5: Seed Selection & Planting
The choice of seeds is crucial for a truly self sufficient garden from scratch.
- Choose Heirloom & Open-Pollinated Seeds: These varieties produce seeds that will grow true to type, meaning you can save seeds from your harvest year after year. F1 hybrids, while often vigorous, will not produce consistent offspring from saved seeds. Reputable seed companies include Baker Creek Heirloom Seeds, High Mowing Organic Seeds, and Seed Savers Exchange. Start with common, reliable varieties like ‘Black Krim’ tomatoes, ‘Provider’ bush beans, ‘Waltham Butternut’ squash, and ‘Black Seeded Simpson’ lettuce.
- Start Seeds Indoors (Optional but Recommended): For longer growing seasons or specific crops, starting seeds indoors gives you a head start. Use seed-starting mix (e.g., Espoma Organic Seed Starter Mix, ~$10 for 16qt bag) in seed trays (Jiffy Professional Greenhouse 72-cell kit, ~$15). Provide adequate light with LED grow lights (Barrina T5 2ft 4-pack LED Grow Lights, 20W each, ~$50) for 14-16 hours a day, positioned 2-4 inches above seedlings. Maintain consistent temperatures (65-75°F for most).
- Direct Sowing vs. Transplanting: Some crops (carrots, radishes, beans, corn) prefer direct sowing into the garden bed. Others (tomatoes, peppers, broccoli, kale) benefit from being started indoors and transplanted. Follow seed packet instructions for planting depths (e.g., lettuce seeds are often surface-sown or planted 1/8 inch deep, while beans are 1 inch deep) and spacing.
- Companion Planting: Strategically plant different species together to enhance growth, deter pests, and attract beneficial insects. For example, planting marigolds near tomatoes can deter nematodes, and basil improves tomato flavor. Nasturtiums can act as a trap crop for aphids.
- Succession Planting: For a continuous harvest, plant small batches of quick-growing crops (lettuce, radishes, cilantro) every 2-3 weeks. As one crop finishes, another is ready to take its place.
Step 6: Pest & Disease Management (Organic)
Maintaining a self sufficient garden from scratch means embracing organic pest and disease control.
- Integrated Pest Management (IPM): This holistic approach combines several strategies.
- Observation: Regularly inspect your plants for early signs of pests or disease. Catching issues early is key.
- Physical Barriers: Use row covers (e.g., Agribon AG-19 floating row cover, 10×20 ft, ~$20) to protect young plants from insect pests like cabbage worms and squash bugs. Install fences (e.g., 2×4 welded wire mesh, 4 ft tall, 50 ft roll ~$70) to keep out deer, rabbits, and other larger animals.
- Hand-Picking: For larger pests like tomato hornworms or squash bugs, simply pick them off and drop them into a bucket of soapy water.
- Companion Planting: As mentioned, certain plants repel pests. Marigolds, garlic, and onions are excellent deterrents.
- Attract Beneficial Insects: Plant flowers like dill, fennel, cosmos, and sweet alyssum to attract ladybugs, lacewings, and parasitic wasps, which prey on common garden pests.
- Organic Sprays & Treatments:
- Neem Oil: An excellent broad-spectrum organic insecticide and fungicide. Bonide Neem Oil Concentrate (16oz, ~$20) can be mixed at a rate of 1-2 tbsp per gallon of water and sprayed on affected plants.
- Insecticidal Soap: Effective against soft-bodied insects like aphids, whiteflies, and spider mites. Garden Safe Insecticidal Soap (24oz ready-to-use, ~$10).
- Bacillus thuringiensis (Bt): A naturally occurring soil bacterium that targets caterpillars and worms. Monterey BT Worm & Caterpillar Killer (16oz, ~$18) is highly effective and safe for beneficial insects.
- Copper or Sulfur Sprays: For fungal diseases like powdery mildew or blight, organic copper (e.g., Bonide Copper Fungicide, ~$15 for 1lb) or sulfur (e.g., Safer Brand Garden Fungicide, ~$10 for 16oz) can be used as a last resort.
Step 7: Harvesting & Seed Saving
The culmination of your efforts is the harvest, and seed saving closes the loop on self-sufficiency.
- Harvesting Techniques:
- Timing: Harvest vegetables at their peak ripeness for best flavor and nutritional value. For example, green beans should snap cleanly, cucumbers should be firm, and tomatoes should be fully colored.
- Frequency: Many crops, like zucchini, cucumbers, and bush beans, produce more if harvested frequently. Pick daily or every other day.
- Tools: Use clean, sharp pruners (e.g., Corona ClassicCUT Bypass Pruner BP 3180, ~$30) or a sharp knife for clean cuts, minimizing damage to the plant.
- Seed Saving: This is where the « self-sufficient » aspect truly shines.
- Selection: Only save seeds from your healthiest, most vigorous plants that show desired traits (disease resistance, good flavor, high yield).
- Isolation: To ensure true-to-type seeds, prevent cross-pollination. This can be challenging for open-pollinated crops that readily cross (e.g., squash, corn). For beginners, focus on self-pollinating plants like beans, peas, lettuce, and tomatoes.
- Processing:
- Dry Seeds (Beans, Peas, Lettuce, Grains): Allow pods/seed heads to dry completely on the plant. Harvest, shell, and clean the seeds, removing chaff.
- Wet Seeds (Tomatoes, Cucumbers, Squash): For tomatoes, ferment the seeds in water for a few days to remove the gel coating and inhibit disease. For cucumbers/squash, scrape out seeds, wash thoroughly, and dry.
- Drying: Spread seeds thinly on screens or paper plates in a cool, dry, well-ventilated area for 1-4 weeks. Ensure they are bone-dry before storage. I aim for less than 8% moisture content.
- Storage: Store seeds in airtight containers (glass jars with desiccant packets work well) in a cool, dark, dry place (ideally 40-50°F and 30-40% humidity). Label clearly with variety and date. Properly stored seeds can remain viable for 3-10 years or more.
Step 8: Season Extension & Winterizing
Extend your harvest and protect your garden for the off-season to truly maximize your self sufficient garden from scratch.
- Cold Frames: Simple structures with a transparent top (glass, polycarbonate, or old windows) that sit over garden beds. They trap solar heat, allowing you to grow cold-hardy crops (lettuce, spinach, kale, radishes) well into winter or start seeds earlier in spring. A basic cold frame can be built from 2×6 lumber and a sheet of polycarbonate for under $100.
- Hoop Houses/Low Tunnels: Larger structures made from flexible hoops (PVC pipe or EMT conduit) covered with greenhouse plastic. These provide more space and greater temperature moderation. A 10×20 ft DIY low tunnel kit can cost $200-$500, while a larger, more robust hoop house kit might be $1,000-$3,000. I use a 6×12 ft low tunnel made from 1/2-inch PVC hoops and 6mil greenhouse plastic, which extends my lettuce and spinach harvest by at least
Healthy soil is the bedrock of a productive, self-sufficient garden. You can’t guess what your soil needs; you have to test it.
- Perform a Soil Test: A professional soil test will give you precise data on your soil’s pH, nutrient levels (N-P-K), and organic matter content. I recommend sending a sample to your local agricultural extension office; it typically costs $20-$50 and provides detailed recommendations. Alternatively, for a quick homeowner check, a Rapitest Soil Test Kit (40-test kit, model 1663, ~$20 on Amazon) provides a good baseline for pH, Nitrogen, Phosphorus, and Potash. Aim for a pH between 6.0 and 7.0 for most vegetables.
- Amend for pH Imbalance: If your soil is too acidic (below 6.0), add agricultural lime (dolomitic lime adds magnesium, calcitic lime adds calcium). Apply 5-10 lbs per 100 sq ft for a moderate adjustment. If it’s too alkaline (above 7.0), add elemental sulfur (e.g., Espoma Soil Acidifier, ~$15 for 6.75 lbs) or generous amounts of organic matter like peat moss or pine needles.
- Build Organic Matter: This is the single most important step for long-term soil health. Organic matter improves soil structure, water retention, drainage, and nutrient availability. Incorporate 2-4 inches of high-quality compost into your top 6-12 inches of soil annually. I make my own compost from kitchen scraps, garden waste, and shredded leaves, but you can purchase it. Local nurseries often sell bulk compost for $30-$50 per cubic yard. Aged manure (from chickens, cows, or horses – ensure it’s well-rotted to avoid burning plants) is also excellent.
- Address Nutrient Deficiencies: Based on your soil test, add specific organic amendments. If Nitrogen (N) is low, add blood meal (12-0-0, ~$20 for 3 lbs) or feather meal. For Phosphorus (P), use bone meal (3-15-0, ~$15 for 3 lbs) or rock phosphate. For Potassium (K), greensand (0-0-2.5, ~$25 for 5 lbs) or kelp meal are good choices. I rely heavily on Espoma Organic Garden-tone (5-3-3, ~$25 for an 8lb bag) as a balanced, all-purpose organic fertilizer during planting.
Step 3: Garden Bed Preparation
Deciding between raised beds and in-ground beds depends on your soil, budget, and physical capabilities.
- In-Ground Beds: If you have excellent native soil and good drainage, in-ground beds are the most economical. Double-digging (loosening soil two shovel depths) can significantly improve drainage and aeration. For my main garden, I primarily use in-ground beds, but I focus on building up the soil over time with consistent compost additions and cover cropping. I aim for beds that are no wider than 3-4 feet so I can reach the center without stepping on the soil, compacting it.
- Raised Beds: Raised beds offer numerous advantages, especially for poor soil, heavy clay, or rocky areas. They provide better drainage, warm up faster in spring, reduce compaction, and make weeding and harvesting easier on your back.
- Material Options:
- Untreated Cedar: Naturally rot-resistant and chemical-free. A 4×8 ft bed, 12 inches deep, typically requires three 2x12x8 ft cedar boards, costing around $50-$60 per board (total ~$150-$180) plus corner brackets or screws. My first raised beds were cedar and are still going strong after 7 years.
- Galvanized Steel: Durable, long-lasting, and aesthetically pleasing. Brands like Vego Garden offer modular kits. A Vego Garden 17″ Tall 8-in-1 Metal Raised Garden Bed (can be configured to 4×8 ft) costs approximately $250-$300.
- Concrete Blocks/Stones: Very durable but can leach minerals (though generally safe once weathered) and can be expensive.
- Recycled Materials: Pallets (check for chemical treatment stamps like « HT » for heat-treated), old tires (controversial due to potential chemical leaching).
- Filling Raised Beds: Don’t just fill with topsoil. Use a « Hugelkultur » approach (logs, branches, leaves, then compost, then topsoil) or a mixture of 60% good quality topsoil, 30% compost, and 10% perlite or vermiculite for drainage. A 4x8x1 ft raised bed requires about 32 cubic feet (or ~1.2 cubic yards) of soil mix, which can cost $100-$200 depending on your source.
- Material Options:
Step 4: Water Management & Irrigation
Efficient water management is critical for a self sufficient garden from scratch, especially in off-grid living where water resources might be limited.
- Rainwater Harvesting: This is my primary source of irrigation water. A 55-gallon rain barrel (e.g., EarthMark Rain Barrel, ~$120-$150) connected to a downspout can collect significant water. For larger needs, I use two 275-gallon IBC totes (Intermediate Bulk Containers, often available used for $100-$200 each from food-grade sources) connected in series. A 1,000 sq ft roof can collect approximately 620 gallons of water for every inch of rainfall. My 1,500 sq ft roof provides ample water for my 600 sq ft garden through multiple barrels and totes.
- Drip Irrigation: This is by far the most water-efficient method, delivering water directly to the plant’s root zone, minimizing evaporation and weed growth.
- Components: A typical drip system includes a pressure regulator (e.g., Rain Bird PRV-10, ~$15), a filter (Rain Bird RBY filter, ~$20), main tubing (1/2-inch poly tubing, 100ft ~$25), smaller feeder lines (1/4-inch tubing), and emitters (0.5 GPH or 1 GPH per plant).
- Kits: For beginners, a starter kit like the Rain Bird Drip Irrigation Garden Kit (model DDI-KIT-1P, ~$40-$60) is excellent for a small garden. For larger setups, I use Netafim Techline CV Drip Line (500ft roll, ~$150-$200), which has pressure-compensating emitters built-in, ensuring even watering across long runs.
- Automation: For true self-sufficiency, consider a battery-powered timer (e.g., Orbit B-Hyve Bluetooth Hose Faucet Timer, ~$50) or a solar-powered timer connected to a small 12V pump.
- Solar-Powered Pumps: For lifting water from a well, pond, or large storage tank to your garden, a solar pump is a game-changer. For a smaller drip system, a Shurflo 2088-594-152 Diaphragm Pump (12V, 3.5 GPM, ~$180) can be powered by a single 100W solar panel (e.g., Renogy 100W Monocrystalline Solar Panel, ~$100) and a small 12V battery (e.g., a 50Ah LiFePO4 battery like the Battle Born 50Ah, ~$450). For larger operations or deeper wells, more robust systems are needed. If you’re looking to build out a comprehensive off-grid power system to support your garden’s water needs, or indeed your entire homestead, you might want to explore resources like the Power Grid Generator complete system guide to understand the full scope of what’s possible in terms of energy independence.
Step 5: Seed Selection & Planting
The choice of seeds is crucial for a truly self sufficient garden from scratch.
- Choose Heirloom & Open-Pollinated Seeds: These varieties produce seeds that will grow true to type, meaning you can save seeds from your harvest year after year. F1 hybrids, while often vigorous, will not produce consistent offspring from saved seeds. Reputable seed companies include Baker Creek Heirloom Seeds, High Mowing Organic Seeds, and Seed Savers Exchange. Start with common, reliable varieties like ‘Black Krim’ tomatoes, ‘Provider’ bush beans, ‘Waltham Butternut’ squash, and ‘Black Seeded Simpson’ lettuce.
- Start Seeds Indoors (Optional but Recommended): For longer growing seasons or specific crops, starting seeds indoors gives you a head start. Use seed-starting mix (e.g., Espoma Organic Seed Starter Mix, ~$10 for 16qt bag) in seed trays (Jiffy Professional Greenhouse 72-cell kit, ~$15). Provide adequate light with LED grow lights (Barrina T5 2ft 4-pack LED Grow Lights, 20W each, ~$50) for 14-16 hours a day, positioned 2-4 inches above seedlings. Maintain consistent temperatures (65-75°F for most).
- Direct Sowing vs. Transplanting: Some crops (carrots, radishes, beans, corn) prefer direct sowing into the garden bed. Others (tomatoes, peppers, broccoli, kale) benefit from being started indoors and transplanted. Follow seed packet instructions for planting depths (e.g., lettuce seeds are often surface-sown or planted 1/8 inch deep, while beans are 1 inch deep) and spacing.
- Companion Planting: Strategically plant different species together to enhance growth, deter pests, and attract beneficial insects. For example, planting marigolds near tomatoes can deter nematodes, and basil improves tomato flavor. Nasturtiums can act as a trap crop for aphids.
- Succession Planting: For a continuous harvest, plant small batches of quick-growing crops (lettuce, radishes, cilantro) every 2-3 weeks. As one crop finishes, another is ready to take its place.
Step 6: Pest & Disease Management (Organic)
Maintaining a self sufficient garden from scratch means embracing organic pest and disease control.
- Integrated Pest Management (IPM): This holistic approach combines several strategies.
- Observation: Regularly inspect your plants for early signs of pests or disease. Catching issues early is key.
- Physical Barriers: Use row covers (e.g., Agribon AG-19 floating row cover, 10×20 ft, ~$20) to protect young plants from insect pests like cabbage worms and squash bugs. Install fences (e.g., 2×4 welded wire mesh, 4 ft tall, 50 ft roll ~$70) to keep out deer, rabbits, and other larger animals.
- Hand-Picking: For larger pests like tomato hornworms or squash bugs, simply pick them off and drop them into a bucket of soapy water.
- Companion Planting: As mentioned, certain plants repel pests. Marigolds, garlic, and onions are excellent deterrents.
- Attract Beneficial Insects: Plant flowers like dill, fennel, cosmos, and sweet alyssum to attract ladybugs, lacewings, and parasitic wasps, which prey on common garden pests.
- Organic Sprays & Treatments:
- Neem Oil: An excellent broad-spectrum organic insecticide and fungicide. Bonide Neem Oil Concentrate (16oz, ~$20) can be mixed at a rate of 1-2 tbsp per gallon of water and sprayed on affected plants.
- Insecticidal Soap: Effective against soft-bodied insects like aphids, whiteflies, and spider mites. Garden Safe Insecticidal Soap (24oz ready-to-use, ~$10).
- Bacillus thuringiensis (Bt): A naturally occurring soil bacterium that targets caterpillars and worms. Monterey BT Worm & Caterpillar Killer (16oz, ~$18) is highly effective and safe for beneficial insects.
- Copper or Sulfur Sprays: For fungal diseases like powdery mildew or blight, organic copper (e.g., Bonide Copper Fungicide, ~$15 for 1lb) or sulfur (e.g., Safer Brand Garden Fungicide, ~$10 for 16oz) can be used as a last resort.
Step 7: Harvesting & Seed Saving
The culmination of your efforts is the harvest, and seed saving closes the loop on self-sufficiency.
- Harvesting Techniques:
- Timing: Harvest vegetables at their peak ripeness for best flavor and nutritional value. For example, green beans should snap cleanly, cucumbers should be firm, and tomatoes should be fully colored.
- Frequency: Many crops, like zucchini, cucumbers, and bush beans, produce more if harvested frequently. Pick daily or every other day.
- Tools: Use clean, sharp pruners (e.g., Corona ClassicCUT Bypass Pruner BP 3180, ~$30) or a sharp knife for clean cuts, minimizing damage to the plant.
- Seed Saving: This is where the « self-sufficient » aspect truly shines.
- Selection: Only save seeds from your healthiest, most vigorous plants that show desired traits (disease resistance, good flavor, high yield).
- Isolation: To ensure true-to-type seeds, prevent cross-pollination. This can be challenging for open-pollinated crops that readily cross (e.g., squash, corn). For beginners, focus on self-pollinating plants like beans, peas, lettuce, and tomatoes.
- Processing:
- Dry Seeds (Beans, Peas, Lettuce, Grains): Allow pods/seed heads to dry completely on the plant. Harvest, shell, and clean the seeds, removing chaff.
- Wet Seeds (Tomatoes, Cucumbers, Squash): For tomatoes, ferment the seeds in water for a few days to remove the gel coating and inhibit disease. For cucumbers/squash, scrape out seeds, wash thoroughly, and dry.
- Drying: Spread seeds thinly on screens or paper plates in a cool, dry, well-ventilated area for 1-4 weeks. Ensure they are bone-dry before storage. I aim for less than 8% moisture content.
- Storage: Store seeds in airtight containers (glass jars with desiccant packets work well) in a cool, dark, dry place (ideally 40-50°F and 30-40% humidity). Label clearly with variety and date. Properly stored seeds can remain viable for 3-10 years or more.
Step 8: Season Extension & Winterizing
Extend your harvest and protect your garden for the off-season to truly maximize your self sufficient garden from scratch.
- Cold Frames: Simple structures with a transparent top (glass, polycarbonate, or old windows) that sit over garden beds. They trap solar heat, allowing you to grow cold-hardy crops (lettuce, spinach, kale, radishes) well into winter or start seeds earlier in spring. A basic cold frame can be built from 2×6 lumber and a sheet of polycarbonate for under $100.
- Hoop Houses/Low Tunnels: Larger structures made from flexible hoops (PVC pipe or EMT conduit) covered with greenhouse plastic. These provide more space and greater temperature moderation. A 10×20 ft DIY low tunnel kit can cost $200-$500, while a larger, more robust hoop house kit might be $1,000-$3,000. I use a 6×12 ft low tunnel made from 1/2-inch PVC hoops and 6mil greenhouse plastic, which extends my lettuce and spinach harvest by at least
- Integrated Pest Management (IPM): This holistic approach combines several strategies.
- Observation: Regularly inspect your plants for early signs of pests or disease. Catching issues early is key.
- Physical Barriers: Use row covers (e.g., Agribon AG-19 floating row cover, 10×20 ft, ~$20) to protect young plants from insect pests like cabbage worms and squash bugs. Install fences (e.g., 2×4 welded wire mesh, 4 ft tall, 50 ft roll ~$70) to keep out deer, rabbits, and other larger animals.
- Hand-Picking: For larger pests like tomato hornworms or squash bugs, simply pick them off and drop them into a bucket of soapy water.
- Companion Planting: As mentioned, certain plants repel pests. Marigolds, garlic, and onions are excellent deterrents.
- Attract Beneficial Insects: Plant flowers like dill, fennel, cosmos, and sweet alyssum to attract ladybugs, lacewings, and parasitic wasps, which prey on common garden pests.
- Organic Sprays & Treatments:
- Neem Oil: An excellent broad-spectrum organic insecticide and fungicide. Bonide Neem Oil Concentrate (16oz, ~$20) can be mixed at a rate of 1-2 tbsp per gallon of water and sprayed on affected plants.
- Insecticidal Soap: Effective against soft-bodied insects like aphids, whiteflies, and spider mites. Garden Safe Insecticidal Soap (24oz ready-to-use, ~$10).
- Bacillus thuringiensis (Bt): A naturally occurring soil bacterium that targets caterpillars and worms. Monterey BT Worm & Caterpillar Killer (16oz, ~$18) is highly effective and safe for beneficial insects.
- Copper or Sulfur Sprays: For fungal diseases like powdery mildew or blight, organic copper (e.g., Bonide Copper Fungicide, ~$15 for 1lb) or sulfur (e.g., Safer Brand Garden Fungicide, ~$10 for 16oz) can be used as a last resort.
Step 7: Harvesting & Seed Saving
The culmination of your efforts is the harvest, and seed saving closes the loop on self-sufficiency.
- Harvesting Techniques:
- Timing: Harvest vegetables at their peak ripeness for best flavor and nutritional value. For example, green beans should snap cleanly, cucumbers should be firm, and tomatoes should be fully colored.
- Frequency: Many crops, like zucchini, cucumbers, and bush beans, produce more if harvested frequently. Pick daily or every other day.
- Tools: Use clean, sharp pruners (e.g., Corona ClassicCUT Bypass Pruner BP 3180, ~$30) or a sharp knife for clean cuts, minimizing damage to the plant.
- Seed Saving: This is where the « self-sufficient » aspect truly shines.
- Selection: Only save seeds from your healthiest, most vigorous plants that show desired traits (disease resistance, good flavor, high yield).
- Isolation: To ensure true-to-type seeds, prevent cross-pollination. This can be challenging for open-pollinated crops that readily cross (e.g., squash, corn). For beginners, focus on self-pollinating plants like beans, peas, lettuce, and tomatoes.
- Processing:
- Dry Seeds (Beans, Peas, Lettuce, Grains): Allow pods/seed heads to dry completely on the plant. Harvest, shell, and clean the seeds, removing chaff.
- Wet Seeds (Tomatoes, Cucumbers, Squash): For tomatoes, ferment the seeds in water for a few days to remove the gel coating and inhibit disease. For cucumbers/squash, scrape out seeds, wash thoroughly, and dry.
- Drying: Spread seeds thinly on screens or paper plates in a cool, dry, well-ventilated area for 1-4 weeks. Ensure they are bone-dry before storage. I aim for less than 8% moisture content.
- Storage: Store seeds in airtight containers (glass jars with desiccant packets work well) in a cool, dark, dry place (ideally 40-50°F and 30-40% humidity). Label clearly with variety and date. Properly stored seeds can remain viable for 3-10 years or more.
Step 8: Season Extension & Winterizing
Extend your harvest and protect your garden for the off-season to truly maximize your self sufficient garden from scratch.
- Cold Frames: Simple structures with a transparent top (glass, polycarbonate, or old windows) that sit over garden beds. They trap solar heat, allowing you to grow cold-hardy crops (lettuce, spinach, kale, radishes) well into winter or start seeds earlier in spring. A basic cold frame can be built from 2×6 lumber and a sheet of polycarbonate for under $100.
- Hoop Houses/Low Tunnels: Larger structures made from flexible hoops (PVC pipe or EMT conduit) covered with greenhouse plastic. These provide more space and greater temperature moderation. A 10×20 ft DIY low tunnel kit can cost $200-$500, while a larger, more robust hoop house kit might be $1,000-$3,000. I use a 6×12 ft low tunnel made from 1/2-inch PVC hoops and 6mil greenhouse plastic, which extends my lettuce and spinach harvest by at least
The choice of seeds is crucial for a truly self sufficient garden from scratch.
- Choose Heirloom & Open-Pollinated Seeds: These varieties produce seeds that will grow true to type, meaning you can save seeds from your harvest year after year. F1 hybrids, while often vigorous, will not produce consistent offspring from saved seeds. Reputable seed companies include Baker Creek Heirloom Seeds, High Mowing Organic Seeds, and Seed Savers Exchange. Start with common, reliable varieties like ‘Black Krim’ tomatoes, ‘Provider’ bush beans, ‘Waltham Butternut’ squash, and ‘Black Seeded Simpson’ lettuce.
- Start Seeds Indoors (Optional but Recommended): For longer growing seasons or specific crops, starting seeds indoors gives you a head start. Use seed-starting mix (e.g., Espoma Organic Seed Starter Mix, ~$10 for 16qt bag) in seed trays (Jiffy Professional Greenhouse 72-cell kit, ~$15). Provide adequate light with LED grow lights (Barrina T5 2ft 4-pack LED Grow Lights, 20W each, ~$50) for 14-16 hours a day, positioned 2-4 inches above seedlings. Maintain consistent temperatures (65-75°F for most).
- Direct Sowing vs. Transplanting: Some crops (carrots, radishes, beans, corn) prefer direct sowing into the garden bed. Others (tomatoes, peppers, broccoli, kale) benefit from being started indoors and transplanted. Follow seed packet instructions for planting depths (e.g., lettuce seeds are often surface-sown or planted 1/8 inch deep, while beans are 1 inch deep) and spacing.
- Companion Planting: Strategically plant different species together to enhance growth, deter pests, and attract beneficial insects. For example, planting marigolds near tomatoes can deter nematodes, and basil improves tomato flavor. Nasturtiums can act as a trap crop for aphids.
- Succession Planting: For a continuous harvest, plant small batches of quick-growing crops (lettuce, radishes, cilantro) every 2-3 weeks. As one crop finishes, another is ready to take its place.
Step 6: Pest & Disease Management (Organic)
Maintaining a self sufficient garden from scratch means embracing organic pest and disease control.
- Integrated Pest Management (IPM): This holistic approach combines several strategies.
- Observation: Regularly inspect your plants for early signs of pests or disease. Catching issues early is key.
- Physical Barriers: Use row covers (e.g., Agribon AG-19 floating row cover, 10×20 ft, ~$20) to protect young plants from insect pests like cabbage worms and squash bugs. Install fences (e.g., 2×4 welded wire mesh, 4 ft tall, 50 ft roll ~$70) to keep out deer, rabbits, and other larger animals.
- Hand-Picking: For larger pests like tomato hornworms or squash bugs, simply pick them off and drop them into a bucket of soapy water.
- Companion Planting: As mentioned, certain plants repel pests. Marigolds, garlic, and onions are excellent deterrents.
- Attract Beneficial Insects: Plant flowers like dill, fennel, cosmos, and sweet alyssum to attract ladybugs, lacewings, and parasitic wasps, which prey on common garden pests.
- Organic Sprays & Treatments:
- Neem Oil: An excellent broad-spectrum organic insecticide and fungicide. Bonide Neem Oil Concentrate (16oz, ~$20) can be mixed at a rate of 1-2 tbsp per gallon of water and sprayed on affected plants.
- Insecticidal Soap: Effective against soft-bodied insects like aphids, whiteflies, and spider mites. Garden Safe Insecticidal Soap (24oz ready-to-use, ~$10).
- Bacillus thuringiensis (Bt): A naturally occurring soil bacterium that targets caterpillars and worms. Monterey BT Worm & Caterpillar Killer (16oz, ~$18) is highly effective and safe for beneficial insects.
- Copper or Sulfur Sprays: For fungal diseases like powdery mildew or blight, organic copper (e.g., Bonide Copper Fungicide, ~$15 for 1lb) or sulfur (e.g., Safer Brand Garden Fungicide, ~$10 for 16oz) can be used as a last resort.
Step 7: Harvesting & Seed Saving
The culmination of your efforts is the harvest, and seed saving closes the loop on self-sufficiency.
- Harvesting Techniques:
- Timing: Harvest vegetables at their peak ripeness for best flavor and nutritional value. For example, green beans should snap cleanly, cucumbers should be firm, and tomatoes should be fully colored.
- Frequency: Many crops, like zucchini, cucumbers, and bush beans, produce more if harvested frequently. Pick daily or every other day.
- Tools: Use clean, sharp pruners (e.g., Corona ClassicCUT Bypass Pruner BP 3180, ~$30) or a sharp knife for clean cuts, minimizing damage to the plant.
- Seed Saving: This is where the « self-sufficient » aspect truly shines.
- Selection: Only save seeds from your healthiest, most vigorous plants that show desired traits (disease resistance, good flavor, high yield).
- Isolation: To ensure true-to-type seeds, prevent cross-pollination. This can be challenging for open-pollinated crops that readily cross (e.g., squash, corn). For beginners, focus on self-pollinating plants like beans, peas, lettuce, and tomatoes.
- Processing:
- Dry Seeds (Beans, Peas, Lettuce, Grains): Allow pods/seed heads to dry completely on the plant. Harvest, shell, and clean the seeds, removing chaff.
- Wet Seeds (Tomatoes, Cucumbers, Squash): For tomatoes, ferment the seeds in water for a few days to remove the gel coating and inhibit disease. For cucumbers/squash, scrape out seeds, wash thoroughly, and dry.
- Drying: Spread seeds thinly on screens or paper plates in a cool, dry, well-ventilated area for 1-4 weeks. Ensure they are bone-dry before storage. I aim for less than 8% moisture content.
- Storage: Store seeds in airtight containers (glass jars with desiccant packets work well) in a cool, dark, dry place (ideally 40-50°F and 30-40% humidity). Label clearly with variety and date. Properly stored seeds can remain viable for 3-10 years or more.
Step 8: Season Extension & Winterizing
Extend your harvest and protect your garden for the off-season to truly maximize your self sufficient garden from scratch.
- Cold Frames: Simple structures with a transparent top (glass, polycarbonate, or old windows) that sit over garden beds. They trap solar heat, allowing you to grow cold-hardy crops (lettuce, spinach, kale, radishes) well into winter or start seeds earlier in spring. A basic cold frame can be built from 2×6 lumber and a sheet of polycarbonate for under $100.
- Hoop Houses/Low Tunnels: Larger structures made from flexible hoops (PVC pipe or EMT conduit) covered with greenhouse plastic. These provide more space and greater temperature moderation. A 10×20 ft DIY low tunnel kit can cost $200-$500, while a larger, more robust hoop house kit might be $1,000-$3,000. I use a 6×12 ft low tunnel made from 1/2-inch PVC hoops and 6mil greenhouse plastic, which extends my lettuce and spinach harvest by at least
Step 5: Seed Selection & Planting
The choice of seeds is crucial for a truly self sufficient garden from scratch.
- Choose Heirloom & Open-Pollinated Seeds: These varieties produce seeds that will grow true to type, meaning you can save seeds from your harvest year after year. F1 hybrids, while often vigorous, will not produce consistent offspring from saved seeds. Reputable seed companies include Baker Creek Heirloom Seeds, High Mowing Organic Seeds, and Seed Savers Exchange. Start with common, reliable varieties like ‘Black Krim’ tomatoes, ‘Provider’ bush beans, ‘Waltham Butternut’ squash, and ‘Black Seeded Simpson’ lettuce.
- Start Seeds Indoors (Optional but Recommended): For longer growing seasons or specific crops, starting seeds indoors gives you a head start. Use seed-starting mix (e.g., Espoma Organic Seed Starter Mix, ~$10 for 16qt bag) in seed trays (Jiffy Professional Greenhouse 72-cell kit, ~$15). Provide adequate light with LED grow lights (Barrina T5 2ft 4-pack LED Grow Lights, 20W each, ~$50) for 14-16 hours a day, positioned 2-4 inches above seedlings. Maintain consistent temperatures (65-75°F for most).
- Direct Sowing vs. Transplanting: Some crops (carrots, radishes, beans, corn) prefer direct sowing into the garden bed. Others (tomatoes, peppers, broccoli, kale) benefit from being started indoors and transplanted. Follow seed packet instructions for planting depths (e.g., lettuce seeds are often surface-sown or planted 1/8 inch deep, while beans are 1 inch deep) and spacing.
- Companion Planting: Strategically plant different species together to enhance growth, deter pests, and attract beneficial insects. For example, planting marigolds near tomatoes can deter nematodes, and basil improves tomato flavor. Nasturtiums can act as a trap crop for aphids.
- Succession Planting: For a continuous harvest, plant small batches of quick-growing crops (lettuce, radishes, cilantro) every 2-3 weeks. As one crop finishes, another is ready to take its place.
Step 6: Pest & Disease Management (Organic)
Maintaining a self sufficient garden from scratch means embracing organic pest and disease control.
- Integrated Pest Management (IPM): This holistic approach combines several strategies.
- Observation: Regularly inspect your plants for early signs of pests or disease. Catching issues early is key.
- Physical Barriers: Use row covers (e.g., Agribon AG-19 floating row cover, 10×20 ft, ~$20) to protect young plants from insect pests like cabbage worms and squash bugs. Install fences (e.g., 2×4 welded wire mesh, 4 ft tall, 50 ft roll ~$70) to keep out deer, rabbits, and other larger animals.
- Hand-Picking: For larger pests like tomato hornworms or squash bugs, simply pick them off and drop them into a bucket of soapy water.
- Companion Planting: As mentioned, certain plants repel pests. Marigolds, garlic, and onions are excellent deterrents.
- Attract Beneficial Insects: Plant flowers like dill, fennel, cosmos, and sweet alyssum to attract ladybugs, lacewings, and parasitic wasps, which prey on common garden pests.
- Organic Sprays & Treatments:
- Neem Oil: An excellent broad-spectrum organic insecticide and fungicide. Bonide Neem Oil Concentrate (16oz, ~$20) can be mixed at a rate of 1-2 tbsp per gallon of water and sprayed on affected plants.
- Insecticidal Soap: Effective against soft-bodied insects like aphids, whiteflies, and spider mites. Garden Safe Insecticidal Soap (24oz ready-to-use, ~$10).
- Bacillus thuringiensis (Bt): A naturally occurring soil bacterium that targets caterpillars and worms. Monterey BT Worm & Caterpillar Killer (16oz, ~$18) is highly effective and safe for beneficial insects.
- Copper or Sulfur Sprays: For fungal diseases like powdery mildew or blight, organic copper (e.g., Bonide Copper Fungicide, ~$15 for 1lb) or sulfur (e.g., Safer Brand Garden Fungicide, ~$10 for 16oz) can be used as a last resort.
Step 7: Harvesting & Seed Saving
The culmination of your efforts is the harvest, and seed saving closes the loop on self-sufficiency.
- Harvesting Techniques:
- Timing: Harvest vegetables at their peak ripeness for best flavor and nutritional value. For example, green beans should snap cleanly, cucumbers should be firm, and tomatoes should be fully colored.
- Frequency: Many crops, like zucchini, cucumbers, and bush beans, produce more if harvested frequently. Pick daily or every other day.
- Tools: Use clean, sharp pruners (e.g., Corona ClassicCUT Bypass Pruner BP 3180, ~$30) or a sharp knife for clean cuts, minimizing damage to the plant.
- Seed Saving: This is where the « self-sufficient » aspect truly shines.
- Selection: Only save seeds from your healthiest, most vigorous plants that show desired traits (disease resistance, good flavor, high yield).
- Isolation: To ensure true-to-type seeds, prevent cross-pollination. This can be challenging for open-pollinated crops that readily cross (e.g., squash, corn). For beginners, focus on self-pollinating plants like beans, peas, lettuce, and tomatoes.
- Processing:
- Dry Seeds (Beans, Peas, Lettuce, Grains): Allow pods/seed heads to dry completely on the plant. Harvest, shell, and clean the seeds, removing chaff.
- Wet Seeds (Tomatoes, Cucumbers, Squash): For tomatoes, ferment the seeds in water for a few days to remove the gel coating and inhibit disease. For cucumbers/squash, scrape out seeds, wash thoroughly, and dry.
- Drying: Spread seeds thinly on screens or paper plates in a cool, dry, well-ventilated area for 1-4 weeks. Ensure they are bone-dry before storage. I aim for less than 8% moisture content.
- Storage: Store seeds in airtight containers (glass jars with desiccant packets work well) in a cool, dark, dry place (ideally 40-50°F and 30-40% humidity). Label clearly with variety and date. Properly stored seeds can remain viable for 3-10 years or more.
Step 8: Season Extension & Winterizing
Extend your harvest and protect your garden for the off-season to truly maximize your self sufficient garden from scratch.
- Cold Frames: Simple structures with a transparent top (glass, polycarbonate, or old windows) that sit over garden beds. They trap solar heat, allowing you to grow cold-hardy crops (lettuce, spinach, kale, radishes) well into winter or start seeds earlier in spring. A basic cold frame can be built from 2×6 lumber and a sheet of polycarbonate for under $100.
- Hoop Houses/Low Tunnels: Larger structures made from flexible hoops (PVC pipe or EMT conduit) covered with greenhouse plastic. These provide more space and greater temperature moderation. A 10×20 ft DIY low tunnel kit can cost $200-$500, while a larger, more robust hoop house kit might be $1,000-$3,000. I use a 6×12 ft low tunnel made from 1/2-inch PVC hoops and 6mil greenhouse plastic, which extends my lettuce and spinach harvest by at least
- Rainwater Harvesting: This is my primary source of irrigation water. A 55-gallon rain barrel (e.g., EarthMark Rain Barrel, ~$120-$150) connected to a downspout can collect significant water. For larger needs, I use two 275-gallon IBC totes (Intermediate Bulk Containers, often available used for $100-$200 each from food-grade sources) connected in series. A 1,000 sq ft roof can collect approximately 620 gallons of water for every inch of rainfall. My 1,500 sq ft roof provides ample water for my 600 sq ft garden through multiple barrels and totes.
- Drip Irrigation: This is by far the most water-efficient method, delivering water directly to the plant’s root zone, minimizing evaporation and weed growth.
- Components: A typical drip system includes a pressure regulator (e.g., Rain Bird PRV-10, ~$15), a filter (Rain Bird RBY filter, ~$20), main tubing (1/2-inch poly tubing, 100ft ~$25), smaller feeder lines (1/4-inch tubing), and emitters (0.5 GPH or 1 GPH per plant).
- Kits: For beginners, a starter kit like the Rain Bird Drip Irrigation Garden Kit (model DDI-KIT-1P, ~$40-$60) is excellent for a small garden. For larger setups, I use Netafim Techline CV Drip Line (500ft roll, ~$150-$200), which has pressure-compensating emitters built-in, ensuring even watering across long runs.
- Automation: For true self-sufficiency, consider a battery-powered timer (e.g., Orbit B-Hyve Bluetooth Hose Faucet Timer, ~$50) or a solar-powered timer connected to a small 12V pump.
- Solar-Powered Pumps: For lifting water from a well, pond, or large storage tank to your garden, a solar pump is a game-changer. For a smaller drip system, a Shurflo 2088-594-152 Diaphragm Pump (12V, 3.5 GPM, ~$180) can be powered by a single 100W solar panel (e.g., Renogy 100W Monocrystalline Solar Panel, ~$100) and a small 12V battery (e.g., a 50Ah LiFePO4 battery like the Battle Born 50Ah, ~$450). For larger operations or deeper wells, more robust systems are needed. If you’re looking to build out a comprehensive off-grid power system to support your garden’s water needs, or indeed your entire homestead, you might want to explore resources like the Power Grid Generator complete system guide to understand the full scope of what’s possible in terms of energy independence.
Step 5: Seed Selection & Planting
The choice of seeds is crucial for a truly self sufficient garden from scratch.
- Choose Heirloom & Open-Pollinated Seeds: These varieties produce seeds that will grow true to type, meaning you can save seeds from your harvest year after year. F1 hybrids, while often vigorous, will not produce consistent offspring from saved seeds. Reputable seed companies include Baker Creek Heirloom Seeds, High Mowing Organic Seeds, and Seed Savers Exchange. Start with common, reliable varieties like ‘Black Krim’ tomatoes, ‘Provider’ bush beans, ‘Waltham Butternut’ squash, and ‘Black Seeded Simpson’ lettuce.
- Start Seeds Indoors (Optional but Recommended): For longer growing seasons or specific crops, starting seeds indoors gives you a head start. Use seed-starting mix (e.g., Espoma Organic Seed Starter Mix, ~$10 for 16qt bag) in seed trays (Jiffy Professional Greenhouse 72-cell kit, ~$15). Provide adequate light with LED grow lights (Barrina T5 2ft 4-pack LED Grow Lights, 20W each, ~$50) for 14-16 hours a day, positioned 2-4 inches above seedlings. Maintain consistent temperatures (65-75°F for most).
- Direct Sowing vs. Transplanting: Some crops (carrots, radishes, beans, corn) prefer direct sowing into the garden bed. Others (tomatoes, peppers, broccoli, kale) benefit from being started indoors and transplanted. Follow seed packet instructions for planting depths (e.g., lettuce seeds are often surface-sown or planted 1/8 inch deep, while beans are 1 inch deep) and spacing.
- Companion Planting: Strategically plant different species together to enhance growth, deter pests, and attract beneficial insects. For example, planting marigolds near tomatoes can deter nematodes, and basil improves tomato flavor. Nasturtiums can act as a trap crop for aphids.
- Succession Planting: For a continuous harvest, plant small batches of quick-growing crops (lettuce, radishes, cilantro) every 2-3 weeks. As one crop finishes, another is ready to take its place.
Step 6: Pest & Disease Management (Organic)
Maintaining a self sufficient garden from scratch means embracing organic pest and disease control.
- Integrated Pest Management (IPM): This holistic approach combines several strategies.
- Observation: Regularly inspect your plants for early signs of pests or disease. Catching issues early is key.
- Physical Barriers: Use row covers (e.g., Agribon AG-19 floating row cover, 10×20 ft, ~$20) to protect young plants from insect pests like cabbage worms and squash bugs. Install fences (e.g., 2×4 welded wire mesh, 4 ft tall, 50 ft roll ~$70) to keep out deer, rabbits, and other larger animals.
- Hand-Picking: For larger pests like tomato hornworms or squash bugs, simply pick them off and drop them into a bucket of soapy water.
- Companion Planting: As mentioned, certain plants repel pests. Marigolds, garlic, and onions are excellent deterrents.
- Attract Beneficial Insects: Plant flowers like dill, fennel, cosmos, and sweet alyssum to attract ladybugs, lacewings, and parasitic wasps, which prey on common garden pests.
- Organic Sprays & Treatments:
- Neem Oil: An excellent broad-spectrum organic insecticide and fungicide. Bonide Neem Oil Concentrate (16oz, ~$20) can be mixed at a rate of 1-2 tbsp per gallon of water and sprayed on affected plants.
- Insecticidal Soap: Effective against soft-bodied insects like aphids, whiteflies, and spider mites. Garden Safe Insecticidal Soap (24oz ready-to-use, ~$10).
- Bacillus thuringiensis (Bt): A naturally occurring soil bacterium that targets caterpillars and worms. Monterey BT Worm & Caterpillar Killer (16oz, ~$18) is highly effective and safe for beneficial insects.
- Copper or Sulfur Sprays: For fungal diseases like powdery mildew or blight, organic copper (e.g., Bonide Copper Fungicide, ~$15 for 1lb) or sulfur (e.g., Safer Brand Garden Fungicide, ~$10 for 16oz) can be used as a last resort.
Step 7: Harvesting & Seed Saving
The culmination of your efforts is the harvest, and seed saving closes the loop on self-sufficiency.
- Harvesting Techniques:
- Timing: Harvest vegetables at their peak ripeness for best flavor and nutritional value. For example, green beans should snap cleanly, cucumbers should be firm, and tomatoes should be fully colored.
- Frequency: Many crops, like zucchini, cucumbers, and bush beans, produce more if harvested frequently. Pick daily or every other day.
- Tools: Use clean, sharp pruners (e.g., Corona ClassicCUT Bypass Pruner BP 3180, ~$30) or a sharp knife for clean cuts, minimizing damage to the plant.
- Seed Saving: This is where the « self-sufficient » aspect truly shines.
- Selection: Only save seeds from your healthiest, most vigorous plants that show desired traits (disease resistance, good flavor, high yield).
- Isolation: To ensure true-to-type seeds, prevent cross-pollination. This can be challenging for open-pollinated crops that readily cross (e.g., squash, corn). For beginners, focus on self-pollinating plants like beans, peas, lettuce, and tomatoes.
- Processing:
- Dry Seeds (Beans, Peas, Lettuce, Grains): Allow pods/seed heads to dry completely on the plant. Harvest, shell, and clean the seeds, removing chaff.
- Wet Seeds (Tomatoes, Cucumbers, Squash): For tomatoes, ferment the seeds in water for a few days to remove the gel coating and inhibit disease. For cucumbers/squash, scrape out seeds, wash thoroughly, and dry.
- Drying: Spread seeds thinly on screens or paper plates in a cool, dry, well-ventilated area for 1-4 weeks. Ensure they are bone-dry before storage. I aim for less than 8% moisture content.
- Storage: Store seeds in airtight containers (glass jars with desiccant packets work well) in a cool, dark, dry place (ideally 40-50°F and 30-40% humidity). Label clearly with variety and date. Properly stored seeds can remain viable for 3-10 years or more.
Step 8: Season Extension & Winterizing
Extend your harvest and protect your garden for the off-season to truly maximize your self sufficient garden from scratch.
- Cold Frames: Simple structures with a transparent top (glass, polycarbonate, or old windows) that sit over garden beds. They trap solar heat, allowing you to grow cold-hardy crops (lettuce, spinach, kale, radishes) well into winter or start seeds earlier in spring. A basic cold frame can be built from 2×6 lumber and a sheet of polycarbonate for under $100.
- Hoop Houses/Low Tunnels: Larger structures made from flexible hoops (PVC pipe or EMT conduit) covered with greenhouse plastic. These provide more space and greater temperature moderation. A 10×20 ft DIY low tunnel kit can cost $200-$500, while a larger, more robust hoop house kit might be $1,000-$3,000. I use a 6×12 ft low tunnel made from 1/2-inch PVC hoops and 6mil greenhouse plastic, which extends my lettuce and spinach harvest by at least
Efficient water management is critical for a self sufficient garden from scratch, especially in off-grid living where water resources might be limited.
- Rainwater Harvesting: This is my primary source of irrigation water. A 55-gallon rain barrel (e.g., EarthMark Rain Barrel, ~$120-$150) connected to a downspout can collect significant water. For larger needs, I use two 275-gallon IBC totes (Intermediate Bulk Containers, often available used for $100-$200 each from food-grade sources) connected in series. A 1,000 sq ft roof can collect approximately 620 gallons of water for every inch of rainfall. My 1,500 sq ft roof provides ample water for my 600 sq ft garden through multiple barrels and totes.
- Drip Irrigation: This is by far the most water-efficient method, delivering water directly to the plant’s root zone, minimizing evaporation and weed growth.
- Components: A typical drip system includes a pressure regulator (e.g., Rain Bird PRV-10, ~$15), a filter (Rain Bird RBY filter, ~$20), main tubing (1/2-inch poly tubing, 100ft ~$25), smaller feeder lines (1/4-inch tubing), and emitters (0.5 GPH or 1 GPH per plant).
- Kits: For beginners, a starter kit like the Rain Bird Drip Irrigation Garden Kit (model DDI-KIT-1P, ~$40-$60) is excellent for a small garden. For larger setups, I use Netafim Techline CV Drip Line (500ft roll, ~$150-$200), which has pressure-compensating emitters built-in, ensuring even watering across long runs.
- Automation: For true self-sufficiency, consider a battery-powered timer (e.g., Orbit B-Hyve Bluetooth Hose Faucet Timer, ~$50) or a solar-powered timer connected to a small 12V pump.
- Solar-Powered Pumps: For lifting water from a well, pond, or large storage tank to your garden, a solar pump is a game-changer. For a smaller drip system, a Shurflo 2088-594-152 Diaphragm Pump (12V, 3.5 GPM, ~$180) can be powered by a single 100W solar panel (e.g., Renogy 100W Monocrystalline Solar Panel, ~$100) and a small 12V battery (e.g., a 50Ah LiFePO4 battery like the Battle Born 50Ah, ~$450). For larger operations or deeper wells, more robust systems are needed. If you’re looking to build out a comprehensive off-grid power system to support your garden’s water needs, or indeed your entire homestead, you might want to explore resources like the Power Grid Generator complete system guide to understand the full scope of what’s possible in terms of energy independence.
Step 5: Seed Selection & Planting
The choice of seeds is crucial for a truly self sufficient garden from scratch.
- Choose Heirloom & Open-Pollinated Seeds: These varieties produce seeds that will grow true to type, meaning you can save seeds from your harvest year after year. F1 hybrids, while often vigorous, will not produce consistent offspring from saved seeds. Reputable seed companies include Baker Creek Heirloom Seeds, High Mowing Organic Seeds, and Seed Savers Exchange. Start with common, reliable varieties like ‘Black Krim’ tomatoes, ‘Provider’ bush beans, ‘Waltham Butternut’ squash, and ‘Black Seeded Simpson’ lettuce.
- Start Seeds Indoors (Optional but Recommended): For longer growing seasons or specific crops, starting seeds indoors gives you a head start. Use seed-starting mix (e.g., Espoma Organic Seed Starter Mix, ~$10 for 16qt bag) in seed trays (Jiffy Professional Greenhouse 72-cell kit, ~$15). Provide adequate light with LED grow lights (Barrina T5 2ft 4-pack LED Grow Lights, 20W each, ~$50) for 14-16 hours a day, positioned 2-4 inches above seedlings. Maintain consistent temperatures (65-75°F for most).
- Direct Sowing vs. Transplanting: Some crops (carrots, radishes, beans, corn) prefer direct sowing into the garden bed. Others (tomatoes, peppers, broccoli, kale) benefit from being started indoors and transplanted. Follow seed packet instructions for planting depths (e.g., lettuce seeds are often surface-sown or planted 1/8 inch deep, while beans are 1 inch deep) and spacing.
- Companion Planting: Strategically plant different species together to enhance growth, deter pests, and attract beneficial insects. For example, planting marigolds near tomatoes can deter nematodes, and basil improves tomato flavor. Nasturtiums can act as a trap crop for aphids.
- Succession Planting: For a continuous harvest, plant small batches of quick-growing crops (lettuce, radishes, cilantro) every 2-3 weeks. As one crop finishes, another is ready to take its place.
Step 6: Pest & Disease Management (Organic)
Maintaining a self sufficient garden from scratch means embracing organic pest and disease control.
- Integrated Pest Management (IPM): This holistic approach combines several strategies.
- Observation: Regularly inspect your plants for early signs of pests or disease. Catching issues early is key.
- Physical Barriers: Use row covers (e.g., Agribon AG-19 floating row cover, 10×20 ft, ~$20) to protect young plants from insect pests like cabbage worms and squash bugs. Install fences (e.g., 2×4 welded wire mesh, 4 ft tall, 50 ft roll ~$70) to keep out deer, rabbits, and other larger animals.
- Hand-Picking: For larger pests like tomato hornworms or squash bugs, simply pick them off and drop them into a bucket of soapy water.
- Companion Planting: As mentioned, certain plants repel pests. Marigolds, garlic, and onions are excellent deterrents.
- Attract Beneficial Insects: Plant flowers like dill, fennel, cosmos, and sweet alyssum to attract ladybugs, lacewings, and parasitic wasps, which prey on common garden pests.
- Organic Sprays & Treatments:
- Neem Oil: An excellent broad-spectrum organic insecticide and fungicide. Bonide Neem Oil Concentrate (16oz, ~$20) can be mixed at a rate of 1-2 tbsp per gallon of water and sprayed on affected plants.
- Insecticidal Soap: Effective against soft-bodied insects like aphids, whiteflies, and spider mites. Garden Safe Insecticidal Soap (24oz ready-to-use, ~$10).
- Bacillus thuringiensis (Bt): A naturally occurring soil bacterium that targets caterpillars and worms. Monterey BT Worm & Caterpillar Killer (16oz, ~$18) is highly effective and safe for beneficial insects.
- Copper or Sulfur Sprays: For fungal diseases like powdery mildew or blight, organic copper (e.g., Bonide Copper Fungicide, ~$15 for 1lb) or sulfur (e.g., Safer Brand Garden Fungicide, ~$10 for 16oz) can be used as a last resort.
Step 7: Harvesting & Seed Saving
The culmination of your efforts is the harvest, and seed saving closes the loop on self-sufficiency.
- Harvesting Techniques:
- Timing: Harvest vegetables at their peak ripeness for best flavor and nutritional value. For example, green beans should snap cleanly, cucumbers should be firm, and tomatoes should be fully colored.
- Frequency: Many crops, like zucchini, cucumbers, and bush beans, produce more if harvested frequently. Pick daily or every other day.
- Tools: Use clean, sharp pruners (e.g., Corona ClassicCUT Bypass Pruner BP 3180, ~$30) or a sharp knife for clean cuts, minimizing damage to the plant.
- Seed Saving: This is where the « self-sufficient » aspect truly shines.
- Selection: Only save seeds from your healthiest, most vigorous plants that show desired traits (disease resistance, good flavor, high yield).
- Isolation: To ensure true-to-type seeds, prevent cross-pollination. This can be challenging for open-pollinated crops that readily cross (e.g., squash, corn). For beginners, focus on self-pollinating plants like beans, peas, lettuce, and tomatoes.
- Processing:
- Dry Seeds (Beans, Peas, Lettuce, Grains): Allow pods/seed heads to dry completely on the plant. Harvest, shell, and clean the seeds, removing chaff.
- Wet Seeds (Tomatoes, Cucumbers, Squash): For tomatoes, ferment the seeds in water for a few days to remove the gel coating and inhibit disease. For cucumbers/squash, scrape out seeds, wash thoroughly, and dry.
- Drying: Spread seeds thinly on screens or paper plates in a cool, dry, well-ventilated area for 1-4 weeks. Ensure they are bone-dry before storage. I aim for less than 8% moisture content.
- Storage: Store seeds in airtight containers (glass jars with desiccant packets work well) in a cool, dark, dry place (ideally 40-50°F and 30-40% humidity). Label clearly with variety and date. Properly stored seeds can remain viable for 3-10 years or more.
Step 8: Season Extension & Winterizing
Extend your harvest and protect your garden for the off-season to truly maximize your self sufficient garden from scratch.
- Cold Frames: Simple structures with a transparent top (glass, polycarbonate, or old windows) that sit over garden beds. They trap solar heat, allowing you to grow cold-hardy crops (lettuce, spinach, kale, radishes) well into winter or start seeds earlier in spring. A basic cold frame can be built from 2×6 lumber and a sheet of polycarbonate for under $100.
- Hoop Houses/Low Tunnels: Larger structures made from flexible hoops (PVC pipe or EMT conduit) covered with greenhouse plastic. These provide more space and greater temperature moderation. A 10×20 ft DIY low tunnel kit can cost $200-$500, while a larger, more robust hoop house kit might be $1,000-$3,000. I use a 6×12 ft low tunnel made from 1/2-inch PVC hoops and 6mil greenhouse plastic, which extends my lettuce and spinach harvest by at least
Step 4: Water Management & Irrigation
Efficient water management is critical for a self sufficient garden from scratch, especially in off-grid living where water resources might be limited.
- Rainwater Harvesting: This is my primary source of irrigation water. A 55-gallon rain barrel (e.g., EarthMark Rain Barrel, ~$120-$150) connected to a downspout can collect significant water. For larger needs, I use two 275-gallon IBC totes (Intermediate Bulk Containers, often available used for $100-$200 each from food-grade sources) connected in series. A 1,000 sq ft roof can collect approximately 620 gallons of water for every inch of rainfall. My 1,500 sq ft roof provides ample water for my 600 sq ft garden through multiple barrels and totes.
- Drip Irrigation: This is by far the most water-efficient method, delivering water directly to the plant’s root zone, minimizing evaporation and weed growth.
- Components: A typical drip system includes a pressure regulator (e.g., Rain Bird PRV-10, ~$15), a filter (Rain Bird RBY filter, ~$20), main tubing (1/2-inch poly tubing, 100ft ~$25), smaller feeder lines (1/4-inch tubing), and emitters (0.5 GPH or 1 GPH per plant).
- Kits: For beginners, a starter kit like the Rain Bird Drip Irrigation Garden Kit (model DDI-KIT-1P, ~$40-$60) is excellent for a small garden. For larger setups, I use Netafim Techline CV Drip Line (500ft roll, ~$150-$200), which has pressure-compensating emitters built-in, ensuring even watering across long runs.
- Automation: For true self-sufficiency, consider a battery-powered timer (e.g., Orbit B-Hyve Bluetooth Hose Faucet Timer, ~$50) or a solar-powered timer connected to a small 12V pump.
- Solar-Powered Pumps: For lifting water from a well, pond, or large storage tank to your garden, a solar pump is a game-changer. For a smaller drip system, a Shurflo 2088-594-152 Diaphragm Pump (12V, 3.5 GPM, ~$180) can be powered by a single 100W solar panel (e.g., Renogy 100W Monocrystalline Solar Panel, ~$100) and a small 12V battery (e.g., a 50Ah LiFePO4 battery like the Battle Born 50Ah, ~$450). For larger operations or deeper wells, more robust systems are needed. If you’re looking to build out a comprehensive off-grid power system to support your garden’s water needs, or indeed your entire homestead, you might want to explore resources like the Power Grid Generator complete system guide to understand the full scope of what’s possible in terms of energy independence.
Step 5: Seed Selection & Planting
The choice of seeds is crucial for a truly self sufficient garden from scratch.
- Choose Heirloom & Open-Pollinated Seeds: These varieties produce seeds that will grow true to type, meaning you can save seeds from your harvest year after year. F1 hybrids, while often vigorous, will not produce consistent offspring from saved seeds. Reputable seed companies include Baker Creek Heirloom Seeds, High Mowing Organic Seeds, and Seed Savers Exchange. Start with common, reliable varieties like ‘Black Krim’ tomatoes, ‘Provider’ bush beans, ‘Waltham Butternut’ squash, and ‘Black Seeded Simpson’ lettuce.
- Start Seeds Indoors (Optional but Recommended): For longer growing seasons or specific crops, starting seeds indoors gives you a head start. Use seed-starting mix (e.g., Espoma Organic Seed Starter Mix, ~$10 for 16qt bag) in seed trays (Jiffy Professional Greenhouse 72-cell kit, ~$15). Provide adequate light with LED grow lights (Barrina T5 2ft 4-pack LED Grow Lights, 20W each, ~$50) for 14-16 hours a day, positioned 2-4 inches above seedlings. Maintain consistent temperatures (65-75°F for most).
- Direct Sowing vs. Transplanting: Some crops (carrots, radishes, beans, corn) prefer direct sowing into the garden bed. Others (tomatoes, peppers, broccoli, kale) benefit from being started indoors and transplanted. Follow seed packet instructions for planting depths (e.g., lettuce seeds are often surface-sown or planted 1/8 inch deep, while beans are 1 inch deep) and spacing.
- Companion Planting: Strategically plant different species together to enhance growth, deter pests, and attract beneficial insects. For example, planting marigolds near tomatoes can deter nematodes, and basil improves tomato flavor. Nasturtiums can act as a trap crop for aphids.
- Succession Planting: For a continuous harvest, plant small batches of quick-growing crops (lettuce, radishes, cilantro) every 2-3 weeks. As one crop finishes, another is ready to take its place.
Step 6: Pest & Disease Management (Organic)
Maintaining a self sufficient garden from scratch means embracing organic pest and disease control.
- Integrated Pest Management (IPM): This holistic approach combines several strategies.
- Observation: Regularly inspect your plants for early signs of pests or disease. Catching issues early is key.
- Physical Barriers: Use row covers (e.g., Agribon AG-19 floating row cover, 10×20 ft, ~$20) to protect young plants from insect pests like cabbage worms and squash bugs. Install fences (e.g., 2×4 welded wire mesh, 4 ft tall, 50 ft roll ~$70) to keep out deer, rabbits, and other larger animals.
- Hand-Picking: For larger pests like tomato hornworms or squash bugs, simply pick them off and drop them into a bucket of soapy water.
- Companion Planting: As mentioned, certain plants repel pests. Marigolds, garlic, and onions are excellent deterrents.
- Attract Beneficial Insects: Plant flowers like dill, fennel, cosmos, and sweet alyssum to attract ladybugs, lacewings, and parasitic wasps, which prey on common garden pests.
- Organic Sprays & Treatments:
- Neem Oil: An excellent broad-spectrum organic insecticide and fungicide. Bonide Neem Oil Concentrate (16oz, ~$20) can be mixed at a rate of 1-2 tbsp per gallon of water and sprayed on affected plants.
- Insecticidal Soap: Effective against soft-bodied insects like aphids, whiteflies, and spider mites. Garden Safe Insecticidal Soap (24oz ready-to-use, ~$10).
- Bacillus thuringiensis (Bt): A naturally occurring soil bacterium that targets caterpillars and worms. Monterey BT Worm & Caterpillar Killer (16oz, ~$18) is highly effective and safe for beneficial insects.
- Copper or Sulfur Sprays: For fungal diseases like powdery mildew or blight, organic copper (e.g., Bonide Copper Fungicide, ~$15 for 1lb) or sulfur (e.g., Safer Brand Garden Fungicide, ~$10 for 16oz) can be used as a last resort.
Step 7: Harvesting & Seed Saving
The culmination of your efforts is the harvest, and seed saving closes the loop on self-sufficiency.
- Harvesting Techniques:
- Timing: Harvest vegetables at their peak ripeness for best flavor and nutritional value. For example, green beans should snap cleanly, cucumbers should be firm, and tomatoes should be fully colored.
- Frequency: Many crops, like zucchini, cucumbers, and bush beans, produce more if harvested frequently. Pick daily or every other day.
- Tools: Use clean, sharp pruners (e.g., Corona ClassicCUT Bypass Pruner BP 3180, ~$30) or a sharp knife for clean cuts, minimizing damage to the plant.
- Seed Saving: This is where the « self-sufficient » aspect truly shines.
- Selection: Only save seeds from your healthiest, most vigorous plants that show desired traits (disease resistance, good flavor, high yield).
- Isolation: To ensure true-to-type seeds, prevent cross-pollination. This can be challenging for open-pollinated crops that readily cross (e.g., squash, corn). For beginners, focus on self-pollinating plants like beans, peas, lettuce, and tomatoes.
- Processing:
- Dry Seeds (Beans, Peas, Lettuce, Grains): Allow pods/seed heads to dry completely on the plant. Harvest, shell, and clean the seeds, removing chaff.
- Wet Seeds (Tomatoes, Cucumbers, Squash): For tomatoes, ferment the seeds in water for a few days to remove the gel coating and inhibit disease. For cucumbers/squash, scrape out seeds, wash thoroughly, and dry.
- Drying: Spread seeds thinly on screens or paper plates in a cool, dry, well-ventilated area for 1-4 weeks. Ensure they are bone-dry before storage. I aim for less than 8% moisture content.
- Storage: Store seeds in airtight containers (glass jars with desiccant packets work well) in a cool, dark, dry place (ideally 40-50°F and 30-40% humidity). Label clearly with variety and date. Properly stored seeds can remain viable for 3-10 years or more.
Step 8: Season Extension & Winterizing
Extend your harvest and protect your garden for the off-season to truly maximize your self sufficient garden from scratch.
- Cold Frames: Simple structures with a transparent top (glass, polycarbonate, or old windows) that sit over garden beds. They trap solar heat, allowing you to grow cold-hardy crops (lettuce, spinach, kale, radishes) well into winter or start seeds earlier in spring. A basic cold frame can be built from 2×6 lumber and a sheet of polycarbonate for under $100.
- Hoop Houses/Low Tunnels: Larger structures made from flexible hoops (PVC pipe or EMT conduit) covered with greenhouse plastic. These provide more space and greater temperature moderation. A 10×20 ft DIY low tunnel kit can cost $200-$500, while a larger, more robust hoop house kit might be $1,000-$3,000. I use a 6×12 ft low tunnel made from 1/2-inch PVC hoops and 6mil greenhouse plastic, which extends my lettuce and spinach harvest by at least
- In-Ground Beds: If you have excellent native soil and good drainage, in-ground beds are the most economical. Double-digging (loosening soil two shovel depths) can significantly improve drainage and aeration. For my main garden, I primarily use in-ground beds, but I focus on building up the soil over time with consistent compost additions and cover cropping. I aim for beds that are no wider than 3-4 feet so I can reach the center without stepping on the soil, compacting it.
- Raised Beds: Raised beds offer numerous advantages, especially for poor soil, heavy clay, or rocky areas. They provide better drainage, warm up faster in spring, reduce compaction, and make weeding and harvesting easier on your back.
- Material Options:
- Untreated Cedar: Naturally rot-resistant and chemical-free. A 4×8 ft bed, 12 inches deep, typically requires three 2x12x8 ft cedar boards, costing around $50-$60 per board (total ~$150-$180) plus corner brackets or screws. My first raised beds were cedar and are still going strong after 7 years.
- Galvanized Steel: Durable, long-lasting, and aesthetically pleasing. Brands like Vego Garden offer modular kits. A Vego Garden 17″ Tall 8-in-1 Metal Raised Garden Bed (can be configured to 4×8 ft) costs approximately $250-$300.
- Concrete Blocks/Stones: Very durable but can leach minerals (though generally safe once weathered) and can be expensive.
- Recycled Materials: Pallets (check for chemical treatment stamps like « HT » for heat-treated), old tires (controversial due to potential chemical leaching).
- Filling Raised Beds: Don’t just fill with topsoil. Use a « Hugelkultur » approach (logs, branches, leaves, then compost, then topsoil) or a mixture of 60% good quality topsoil, 30% compost, and 10% perlite or vermiculite for drainage. A 4x8x1 ft raised bed requires about 32 cubic feet (or ~1.2 cubic yards) of soil mix, which can cost $100-$200 depending on your source.
- Material Options:
Step 4: Water Management & Irrigation
Efficient water management is critical for a self sufficient garden from scratch, especially in off-grid living where water resources might be limited.
- Rainwater Harvesting: This is my primary source of irrigation water. A 55-gallon rain barrel (e.g., EarthMark Rain Barrel, ~$120-$150) connected to a downspout can collect significant water. For larger needs, I use two 275-gallon IBC totes (Intermediate Bulk Containers, often available used for $100-$200 each from food-grade sources) connected in series. A 1,000 sq ft roof can collect approximately 620 gallons of water for every inch of rainfall. My 1,500 sq ft roof provides ample water for my 600 sq ft garden through multiple barrels and totes.
- Drip Irrigation: This is by far the most water-efficient method, delivering water directly to the plant’s root zone, minimizing evaporation and weed growth.
- Components: A typical drip system includes a pressure regulator (e.g., Rain Bird PRV-10, ~$15), a filter (Rain Bird RBY filter, ~$20), main tubing (1/2-inch poly tubing, 100ft ~$25), smaller feeder lines (1/4-inch tubing), and emitters (0.5 GPH or 1 GPH per plant).
- Kits: For beginners, a starter kit like the Rain Bird Drip Irrigation Garden Kit (model DDI-KIT-1P, ~$40-$60) is excellent for a small garden. For larger setups, I use Netafim Techline CV Drip Line (500ft roll, ~$150-$200), which has pressure-compensating emitters built-in, ensuring even watering across long runs.
- Automation: For true self-sufficiency, consider a battery-powered timer (e.g., Orbit B-Hyve Bluetooth Hose Faucet Timer, ~$50) or a solar-powered timer connected to a small 12V pump.
- Solar-Powered Pumps: For lifting water from a well, pond, or large storage tank to your garden, a solar pump is a game-changer. For a smaller drip system, a Shurflo 2088-594-152 Diaphragm Pump (12V, 3.5 GPM, ~$180) can be powered by a single 100W solar panel (e.g., Renogy 100W Monocrystalline Solar Panel, ~$100) and a small 12V battery (e.g., a 50Ah LiFePO4 battery like the Battle Born 50Ah, ~$450). For larger operations or deeper wells, more robust systems are needed. If you’re looking to build out a comprehensive off-grid power system to support your garden’s water needs, or indeed your entire homestead, you might want to explore resources like the Power Grid Generator complete system guide to understand the full scope of what’s possible in terms of energy independence.
Step 5: Seed Selection & Planting
The choice of seeds is crucial for a truly self sufficient garden from scratch.
- Choose Heirloom & Open-Pollinated Seeds: These varieties produce seeds that will grow true to type, meaning you can save seeds from your harvest year after year. F1 hybrids, while often vigorous, will not produce consistent offspring from saved seeds. Reputable seed companies include Baker Creek Heirloom Seeds, High Mowing Organic Seeds, and Seed Savers Exchange. Start with common, reliable varieties like ‘Black Krim’ tomatoes, ‘Provider’ bush beans, ‘Waltham Butternut’ squash, and ‘Black Seeded Simpson’ lettuce.
- Start Seeds Indoors (Optional but Recommended): For longer growing seasons or specific crops, starting seeds indoors gives you a head start. Use seed-starting mix (e.g., Espoma Organic Seed Starter Mix, ~$10 for 16qt bag) in seed trays (Jiffy Professional Greenhouse 72-cell kit, ~$15). Provide adequate light with LED grow lights (Barrina T5 2ft 4-pack LED Grow Lights, 20W each, ~$50) for 14-16 hours a day, positioned 2-4 inches above seedlings. Maintain consistent temperatures (65-75°F for most).
- Direct Sowing vs. Transplanting: Some crops (carrots, radishes, beans, corn) prefer direct sowing into the garden bed. Others (tomatoes, peppers, broccoli, kale) benefit from being started indoors and transplanted. Follow seed packet instructions for planting depths (e.g., lettuce seeds are often surface-sown or planted 1/8 inch deep, while beans are 1 inch deep) and spacing.
- Companion Planting: Strategically plant different species together to enhance growth, deter pests, and attract beneficial insects. For example, planting marigolds near tomatoes can deter nematodes, and basil improves tomato flavor. Nasturtiums can act as a trap crop for aphids.
- Succession Planting: For a continuous harvest, plant small batches of quick-growing crops (lettuce, radishes, cilantro) every 2-3 weeks. As one crop finishes, another is ready to take its place.
Step 6: Pest & Disease Management (Organic)
Maintaining a self sufficient garden from scratch means embracing organic pest and disease control.
- Integrated Pest Management (IPM): This holistic approach combines several strategies.
- Observation: Regularly inspect your plants for early signs of pests or disease. Catching issues early is key.
- Physical Barriers: Use row covers (e.g., Agribon AG-19 floating row cover, 10×20 ft, ~$20) to protect young plants from insect pests like cabbage worms and squash bugs. Install fences (e.g., 2×4 welded wire mesh, 4 ft tall, 50 ft roll ~$70) to keep out deer, rabbits, and other larger animals.
- Hand-Picking: For larger pests like tomato hornworms or squash bugs, simply pick them off and drop them into a bucket of soapy water.
- Companion Planting: As mentioned, certain plants repel pests. Marigolds, garlic, and onions are excellent deterrents.
- Attract Beneficial Insects: Plant flowers like dill, fennel, cosmos, and sweet alyssum to attract ladybugs, lacewings, and parasitic wasps, which prey on common garden pests.
- Organic Sprays & Treatments:
- Neem Oil: An excellent broad-spectrum organic insecticide and fungicide. Bonide Neem Oil Concentrate (16oz, ~$20) can be mixed at a rate of 1-2 tbsp per gallon of water and sprayed on affected plants.
- Insecticidal Soap: Effective against soft-bodied insects like aphids, whiteflies, and spider mites. Garden Safe Insecticidal Soap (24oz ready-to-use, ~$10).
- Bacillus thuringiensis (Bt): A naturally occurring soil bacterium that targets caterpillars and worms. Monterey BT Worm & Caterpillar Killer (16oz, ~$18) is highly effective and safe for beneficial insects.
- Copper or Sulfur Sprays: For fungal diseases like powdery mildew or blight, organic copper (e.g., Bonide Copper Fungicide, ~$15 for 1lb) or sulfur (e.g., Safer Brand Garden Fungicide, ~$10 for 16oz) can be used as a last resort.
Step 7: Harvesting & Seed Saving
The culmination of your efforts is the harvest, and seed saving closes the loop on self-sufficiency.
- Harvesting Techniques:
- Timing: Harvest vegetables at their peak ripeness for best flavor and nutritional value. For example, green beans should snap cleanly, cucumbers should be firm, and tomatoes should be fully colored.
- Frequency: Many crops, like zucchini, cucumbers, and bush beans, produce more if harvested frequently. Pick daily or every other day.
- Tools: Use clean, sharp pruners (e.g., Corona ClassicCUT Bypass Pruner BP 3180, ~$30) or a sharp knife for clean cuts, minimizing damage to the plant.
- Seed Saving: This is where the « self-sufficient » aspect truly shines.
- Selection: Only save seeds from your healthiest, most vigorous plants that show desired traits (disease resistance, good flavor, high yield).
- Isolation: To ensure true-to-type seeds, prevent cross-pollination. This can be challenging for open-pollinated crops that readily cross (e.g., squash, corn). For beginners, focus on self-pollinating plants like beans, peas, lettuce, and tomatoes.
- Processing:
- Dry Seeds (Beans, Peas, Lettuce, Grains): Allow pods/seed heads to dry completely on the plant. Harvest, shell, and clean the seeds, removing chaff.
- Wet Seeds (Tomatoes, Cucumbers, Squash): For tomatoes, ferment the seeds in water for a few days to remove the gel coating and inhibit disease. For cucumbers/squash, scrape out seeds, wash thoroughly, and dry.
- Drying: Spread seeds thinly on screens or paper plates in a cool, dry, well-ventilated area for 1-4 weeks. Ensure they are bone-dry before storage. I aim for less than 8% moisture content.
- Storage: Store seeds in airtight containers (glass jars with desiccant packets work well) in a cool, dark, dry place (ideally 40-50°F and 30-40% humidity). Label clearly with variety and date. Properly stored seeds can remain viable for 3-10 years or more.
Step 8: Season Extension & Winterizing
Extend your harvest and protect your garden for the off-season to truly maximize your self sufficient garden from scratch.
- Cold Frames: Simple structures with a transparent top (glass, polycarbonate, or old windows) that sit over garden beds. They trap solar heat, allowing you to grow cold-hardy crops (lettuce, spinach, kale, radishes) well into winter or start seeds earlier in spring. A basic cold frame can be built from 2×6 lumber and a sheet of polycarbonate for under $100.
- Hoop Houses/Low Tunnels: Larger structures made from flexible hoops (PVC pipe or EMT conduit) covered with greenhouse plastic. These provide more space and greater temperature moderation. A 10×20 ft DIY low tunnel kit can cost $200-$500, while a larger, more robust hoop house kit might be $1,000-$3,000. I use a 6×12 ft low tunnel made from 1/2-inch PVC hoops and 6mil greenhouse plastic, which extends my lettuce and spinach harvest by at least
Deciding between raised beds and in-ground beds depends on your soil, budget, and physical capabilities.
- In-Ground Beds: If you have excellent native soil and good drainage, in-ground beds are the most economical. Double-digging (loosening soil two shovel depths) can significantly improve drainage and aeration. For my main garden, I primarily use in-ground beds, but I focus on building up the soil over time with consistent compost additions and cover cropping. I aim for beds that are no wider than 3-4 feet so I can reach the center without stepping on the soil, compacting it.
- Raised Beds: Raised beds offer numerous advantages, especially for poor soil, heavy clay, or rocky areas. They provide better drainage, warm up faster in spring, reduce compaction, and make weeding and harvesting easier on your back.
- Material Options:
- Untreated Cedar: Naturally rot-resistant and chemical-free. A 4×8 ft bed, 12 inches deep, typically requires three 2x12x8 ft cedar boards, costing around $50-$60 per board (total ~$150-$180) plus corner brackets or screws. My first raised beds were cedar and are still going strong after 7 years.
- Galvanized Steel: Durable, long-lasting, and aesthetically pleasing. Brands like Vego Garden offer modular kits. A Vego Garden 17″ Tall 8-in-1 Metal Raised Garden Bed (can be configured to 4×8 ft) costs approximately $250-$300.
- Concrete Blocks/Stones: Very durable but can leach minerals (though generally safe once weathered) and can be expensive.
- Recycled Materials: Pallets (check for chemical treatment stamps like « HT » for heat-treated), old tires (controversial due to potential chemical leaching).
- Filling Raised Beds: Don’t just fill with topsoil. Use a « Hugelkultur » approach (logs, branches, leaves, then compost, then topsoil) or a mixture of 60% good quality topsoil, 30% compost, and 10% perlite or vermiculite for drainage. A 4x8x1 ft raised bed requires about 32 cubic feet (or ~1.2 cubic yards) of soil mix, which can cost $100-$200 depending on your source.
- Material Options:
Step 4: Water Management & Irrigation
Efficient water management is critical for a self sufficient garden from scratch, especially in off-grid living where water resources might be limited.
- Rainwater Harvesting: This is my primary source of irrigation water. A 55-gallon rain barrel (e.g., EarthMark Rain Barrel, ~$120-$150) connected to a downspout can collect significant water. For larger needs, I use two 275-gallon IBC totes (Intermediate Bulk Containers, often available used for $100-$200 each from food-grade sources) connected in series. A 1,000 sq ft roof can collect approximately 620 gallons of water for every inch of rainfall. My 1,500 sq ft roof provides ample water for my 600 sq ft garden through multiple barrels and totes.
- Drip Irrigation: This is by far the most water-efficient method, delivering water directly to the plant’s root zone, minimizing evaporation and weed growth.
- Components: A typical drip system includes a pressure regulator (e.g., Rain Bird PRV-10, ~$15), a filter (Rain Bird RBY filter, ~$20), main tubing (1/2-inch poly tubing, 100ft ~$25), smaller feeder lines (1/4-inch tubing), and emitters (0.5 GPH or 1 GPH per plant).
- Kits: For beginners, a starter kit like the Rain Bird Drip Irrigation Garden Kit (model DDI-KIT-1P, ~$40-$60) is excellent for a small garden. For larger setups, I use Netafim Techline CV Drip Line (500ft roll, ~$150-$200), which has pressure-compensating emitters built-in, ensuring even watering across long runs.
- Automation: For true self-sufficiency, consider a battery-powered timer (e.g., Orbit B-Hyve Bluetooth Hose Faucet Timer, ~$50) or a solar-powered timer connected to a small 12V pump.
- Solar-Powered Pumps: For lifting water from a well, pond, or large storage tank to your garden, a solar pump is a game-changer. For a smaller drip system, a Shurflo 2088-594-152 Diaphragm Pump (12V, 3.5 GPM, ~$180) can be powered by a single 100W solar panel (e.g., Renogy 100W Monocrystalline Solar Panel, ~$100) and a small 12V battery (e.g., a 50Ah LiFePO4 battery like the Battle Born 50Ah, ~$450). For larger operations or deeper wells, more robust systems are needed. If you’re looking to build out a comprehensive off-grid power system to support your garden’s water needs, or indeed your entire homestead, you might want to explore resources like the Power Grid Generator complete system guide to understand the full scope of what’s possible in terms of energy independence.
Step 5: Seed Selection & Planting
The choice of seeds is crucial for a truly self sufficient garden from scratch.
- Choose Heirloom & Open-Pollinated Seeds: These varieties produce seeds that will grow true to type, meaning you can save seeds from your harvest year after year. F1 hybrids, while often vigorous, will not produce consistent offspring from saved seeds. Reputable seed companies include Baker Creek Heirloom Seeds, High Mowing Organic Seeds, and Seed Savers Exchange. Start with common, reliable varieties like ‘Black Krim’ tomatoes, ‘Provider’ bush beans, ‘Waltham Butternut’ squash, and ‘Black Seeded Simpson’ lettuce.
- Start Seeds Indoors (Optional but Recommended): For longer growing seasons or specific crops, starting seeds indoors gives you a head start. Use seed-starting mix (e.g., Espoma Organic Seed Starter Mix, ~$10 for 16qt bag) in seed trays (Jiffy Professional Greenhouse 72-cell kit, ~$15). Provide adequate light with LED grow lights (Barrina T5 2ft 4-pack LED Grow Lights, 20W each, ~$50) for 14-16 hours a day, positioned 2-4 inches above seedlings. Maintain consistent temperatures (65-75°F for most).
- Direct Sowing vs. Transplanting: Some crops (carrots, radishes, beans, corn) prefer direct sowing into the garden bed. Others (tomatoes, peppers, broccoli, kale) benefit from being started indoors and transplanted. Follow seed packet instructions for planting depths (e.g., lettuce seeds are often surface-sown or planted 1/8 inch deep, while beans are 1 inch deep) and spacing.
- Companion Planting: Strategically plant different species together to enhance growth, deter pests, and attract beneficial insects. For example, planting marigolds near tomatoes can deter nematodes, and basil improves tomato flavor. Nasturtiums can act as a trap crop for aphids.
- Succession Planting: For a continuous harvest, plant small batches of quick-growing crops (lettuce, radishes, cilantro) every 2-3 weeks. As one crop finishes, another is ready to take its place.
Step 6: Pest & Disease Management (Organic)
Maintaining a self sufficient garden from scratch means embracing organic pest and disease control.
- Integrated Pest Management (IPM): This holistic approach combines several strategies.
- Observation: Regularly inspect your plants for early signs of pests or disease. Catching issues early is key.
- Physical Barriers: Use row covers (e.g., Agribon AG-19 floating row cover, 10×20 ft, ~$20) to protect young plants from insect pests like cabbage worms and squash bugs. Install fences (e.g., 2×4 welded wire mesh, 4 ft tall, 50 ft roll ~$70) to keep out deer, rabbits, and other larger animals.
- Hand-Picking: For larger pests like tomato hornworms or squash bugs, simply pick them off and drop them into a bucket of soapy water.
- Companion Planting: As mentioned, certain plants repel pests. Marigolds, garlic, and onions are excellent deterrents.
- Attract Beneficial Insects: Plant flowers like dill, fennel, cosmos, and sweet alyssum to attract ladybugs, lacewings, and parasitic wasps, which prey on common garden pests.
- Organic Sprays & Treatments:
- Neem Oil: An excellent broad-spectrum organic insecticide and fungicide. Bonide Neem Oil Concentrate (16oz, ~$20) can be mixed at a rate of 1-2 tbsp per gallon of water and sprayed on affected plants.
- Insecticidal Soap: Effective against soft-bodied insects like aphids, whiteflies, and spider mites. Garden Safe Insecticidal Soap (24oz ready-to-use, ~$10).
- Bacillus thuringiensis (Bt): A naturally occurring soil bacterium that targets caterpillars and worms. Monterey BT Worm & Caterpillar Killer (16oz, ~$18) is highly effective and safe for beneficial insects.
- Copper or Sulfur Sprays: For fungal diseases like powdery mildew or blight, organic copper (e.g., Bonide Copper Fungicide, ~$15 for 1lb) or sulfur (e.g., Safer Brand Garden Fungicide, ~$10 for 16oz) can be used as a last resort.
Step 7: Harvesting & Seed Saving
The culmination of your efforts is the harvest, and seed saving closes the loop on self-sufficiency.
- Harvesting Techniques:
- Timing: Harvest vegetables at their peak ripeness for best flavor and nutritional value. For example, green beans should snap cleanly, cucumbers should be firm, and tomatoes should be fully colored.
- Frequency: Many crops, like zucchini, cucumbers, and bush beans, produce more if harvested frequently. Pick daily or every other day.
- Tools: Use clean, sharp pruners (e.g., Corona ClassicCUT Bypass Pruner BP 3180, ~$30) or a sharp knife for clean cuts, minimizing damage to the plant.
- Seed Saving: This is where the « self-sufficient » aspect truly shines.
- Selection: Only save seeds from your healthiest, most vigorous plants that show desired traits (disease resistance, good flavor, high yield).
- Isolation: To ensure true-to-type seeds, prevent cross-pollination. This can be challenging for open-pollinated crops that readily cross (e.g., squash, corn). For beginners, focus on self-pollinating plants like beans, peas, lettuce, and tomatoes.
- Processing:
- Dry Seeds (Beans, Peas, Lettuce, Grains): Allow pods/seed heads to dry completely on the plant. Harvest, shell, and clean the seeds, removing chaff.
- Wet Seeds (Tomatoes, Cucumbers, Squash): For tomatoes, ferment the seeds in water for a few days to remove the gel coating and inhibit disease. For cucumbers/squash, scrape out seeds, wash thoroughly, and dry.
- Drying: Spread seeds thinly on screens or paper plates in a cool, dry, well-ventilated area for 1-4 weeks. Ensure they are bone-dry before storage. I aim for less than 8% moisture content.
- Storage: Store seeds in airtight containers (glass jars with desiccant packets work well) in a cool, dark, dry place (ideally 40-50°F and 30-40% humidity). Label clearly with variety and date. Properly stored seeds can remain viable for 3-10 years or more.
Step 8: Season Extension & Winterizing
Extend your harvest and protect your garden for the off-season to truly maximize your self sufficient garden from scratch.
- Cold Frames: Simple structures with a transparent top (glass, polycarbonate, or old windows) that sit over garden beds. They trap solar heat, allowing you to grow cold-hardy crops (lettuce, spinach, kale, radishes) well into winter or start seeds earlier in spring. A basic cold frame can be built from 2×6 lumber and a sheet of polycarbonate for under $100.
- Hoop Houses/Low Tunnels: Larger structures made from flexible hoops (PVC pipe or EMT conduit) covered with greenhouse plastic. These provide more space and greater temperature moderation. A 10×20 ft DIY low tunnel kit can cost $200-$500, while a larger, more robust hoop house kit might be $1,000-$3,000. I use a 6×12 ft low tunnel made from 1/2-inch PVC hoops and 6mil greenhouse plastic, which extends my lettuce and spinach harvest by at least
Healthy soil is the bedrock of a productive, self-sufficient garden. You can’t guess what your soil needs; you have to test it.
- Perform a Soil Test: A professional soil test will give you precise data on your soil’s pH, nutrient levels (N-P-K), and organic matter content. I recommend sending a sample to your local agricultural extension office; it typically costs $20-$50 and provides detailed recommendations. Alternatively, for a quick homeowner check, a Rapitest Soil Test Kit (40-test kit, model 1663, ~$20 on Amazon) provides a good baseline for pH, Nitrogen, Phosphorus, and Potash. Aim for a pH between 6.0 and 7.0 for most vegetables.
- Amend for pH Imbalance: If your soil is too acidic (below 6.0), add agricultural lime (dolomitic lime adds magnesium, calcitic lime adds calcium). Apply 5-10 lbs per 100 sq ft for a moderate adjustment. If it’s too alkaline (above 7.0), add elemental sulfur (e.g., Espoma Soil Acidifier, ~$15 for 6.75 lbs) or generous amounts of organic matter like peat moss or pine needles.
- Build Organic Matter: This is the single most important step for long-term soil health. Organic matter improves soil structure, water retention, drainage, and nutrient availability. Incorporate 2-4 inches of high-quality compost into your top 6-12 inches of soil annually. I make my own compost from kitchen scraps, garden waste, and shredded leaves, but you can purchase it. Local nurseries often sell bulk compost for $30-$50 per cubic yard. Aged manure (from chickens, cows, or horses – ensure it’s well-rotted to avoid burning plants) is also excellent.
- Address Nutrient Deficiencies: Based on your soil test, add specific organic amendments. If Nitrogen (N) is low, add blood meal (12-0-0, ~$20 for 3 lbs) or feather meal. For Phosphorus (P), use bone meal (3-15-0, ~$15 for 3 lbs) or rock phosphate. For Potassium (K), greensand (0-0-2.5, ~$25 for 5 lbs) or kelp meal are good choices. I rely heavily on Espoma Organic Garden-tone (5-3-3, ~$25 for an 8lb bag) as a balanced, all-purpose organic fertilizer during planting.
Step 3: Garden Bed Preparation
Deciding between raised beds and in-ground beds depends on your soil, budget, and physical capabilities.
- In-Ground Beds: If you have excellent native soil and good drainage, in-ground beds are the most economical. Double-digging (loosening soil two shovel depths) can significantly improve drainage and aeration. For my main garden, I primarily use in-ground beds, but I focus on building up the soil over time with consistent compost additions and cover cropping. I aim for beds that are no wider than 3-4 feet so I can reach the center without stepping on the soil, compacting it.
- Raised Beds: Raised beds offer numerous advantages, especially for poor soil, heavy clay, or rocky areas. They provide better drainage, warm up faster in spring, reduce compaction, and make weeding and harvesting easier on your back.
- Material Options:
- Untreated Cedar: Naturally rot-resistant and chemical-free. A 4×8 ft bed, 12 inches deep, typically requires three 2x12x8 ft cedar boards, costing around $50-$60 per board (total ~$150-$180) plus corner brackets or screws. My first raised beds were cedar and are still going strong after 7 years.
- Galvanized Steel: Durable, long-lasting, and aesthetically pleasing. Brands like Vego Garden offer modular kits. A Vego Garden 17″ Tall 8-in-1 Metal Raised Garden Bed (can be configured to 4×8 ft) costs approximately $250-$300.
- Concrete Blocks/Stones: Very durable but can leach minerals (though generally safe once weathered) and can be expensive.
- Recycled Materials: Pallets (check for chemical treatment stamps like « HT » for heat-treated), old tires (controversial due to potential chemical leaching).
- Filling Raised Beds: Don’t just fill with topsoil. Use a « Hugelkultur » approach (logs, branches, leaves, then compost, then topsoil) or a mixture of 60% good quality topsoil, 30% compost, and 10% perlite or vermiculite for drainage. A 4x8x1 ft raised bed requires about 32 cubic feet (or ~1.2 cubic yards) of soil mix, which can cost $100-$200 depending on your source.
- Material Options:
Step 4: Water Management & Irrigation
Efficient water management is critical for a self sufficient garden from scratch, especially in off-grid living where water resources might be limited.
- Rainwater Harvesting: This is my primary source of irrigation water. A 55-gallon rain barrel (e.g., EarthMark Rain Barrel, ~$120-$150) connected to a downspout can collect significant water. For larger needs, I use two 275-gallon IBC totes (Intermediate Bulk Containers, often available used for $100-$200 each from food-grade sources) connected in series. A 1,000 sq ft roof can collect approximately 620 gallons of water for every inch of rainfall. My 1,500 sq ft roof provides ample water for my 600 sq ft garden through multiple barrels and totes.
- Drip Irrigation: This is by far the most water-efficient method, delivering water directly to the plant’s root zone, minimizing evaporation and weed growth.
- Components: A typical drip system includes a pressure regulator (e.g., Rain Bird PRV-10, ~$15), a filter (Rain Bird RBY filter, ~$20), main tubing (1/2-inch poly tubing, 100ft ~$25), smaller feeder lines (1/4-inch tubing), and emitters (0.5 GPH or 1 GPH per plant).
- Kits: For beginners, a starter kit like the Rain Bird Drip Irrigation Garden Kit (model DDI-KIT-1P, ~$40-$60) is excellent for a small garden. For larger setups, I use Netafim Techline CV Drip Line (500ft roll, ~$150-$200), which has pressure-compensating emitters built-in, ensuring even watering across long runs.
- Automation: For true self-sufficiency, consider a battery-powered timer (e.g., Orbit B-Hyve Bluetooth Hose Faucet Timer, ~$50) or a solar-powered timer connected to a small 12V pump.
- Solar-Powered Pumps: For lifting water from a well, pond, or large storage tank to your garden, a solar pump is a game-changer. For a smaller drip system, a Shurflo 2088-594-152 Diaphragm Pump (12V, 3.5 GPM, ~$180) can be powered by a single 100W solar panel (e.g., Renogy 100W Monocrystalline Solar Panel, ~$100) and a small 12V battery (e.g., a 50Ah LiFePO4 battery like the Battle Born 50Ah, ~$450). For larger operations or deeper wells, more robust systems are needed. If you’re looking to build out a comprehensive off-grid power system to support your garden’s water needs, or indeed your entire homestead, you might want to explore resources like the Power Grid Generator complete system guide to understand the full scope of what’s possible in terms of energy independence.
Step 5: Seed Selection & Planting
The choice of seeds is crucial for a truly self sufficient garden from scratch.
- Choose Heirloom & Open-Pollinated Seeds: These varieties produce seeds that will grow true to type, meaning you can save seeds from your harvest year after year. F1 hybrids, while often vigorous, will not produce consistent offspring from saved seeds. Reputable seed companies include Baker Creek Heirloom Seeds, High Mowing Organic Seeds, and Seed Savers Exchange. Start with common, reliable varieties like ‘Black Krim’ tomatoes, ‘Provider’ bush beans, ‘Waltham Butternut’ squash, and ‘Black Seeded Simpson’ lettuce.
- Start Seeds Indoors (Optional but Recommended): For longer growing seasons or specific crops, starting seeds indoors gives you a head start. Use seed-starting mix (e.g., Espoma Organic Seed Starter Mix, ~$10 for 16qt bag) in seed trays (Jiffy Professional Greenhouse 72-cell kit, ~$15). Provide adequate light with LED grow lights (Barrina T5 2ft 4-pack LED Grow Lights, 20W each, ~$50) for 14-16 hours a day, positioned 2-4 inches above seedlings. Maintain consistent temperatures (65-75°F for most).
- Direct Sowing vs. Transplanting: Some crops (carrots, radishes, beans, corn) prefer direct sowing into the garden bed. Others (tomatoes, peppers, broccoli, kale) benefit from being started indoors and transplanted. Follow seed packet instructions for planting depths (e.g., lettuce seeds are often surface-sown or planted 1/8 inch deep, while beans are 1 inch deep) and spacing.
- Companion Planting: Strategically plant different species together to enhance growth, deter pests, and attract beneficial insects. For example, planting marigolds near tomatoes can deter nematodes, and basil improves tomato flavor. Nasturtiums can act as a trap crop for aphids.
- Succession Planting: For a continuous harvest, plant small batches of quick-growing crops (lettuce, radishes, cilantro) every 2-3 weeks. As one crop finishes, another is ready to take its place.
Step 6: Pest & Disease Management (Organic)
Maintaining a self sufficient garden from scratch means embracing organic pest and disease control.
- Integrated Pest Management (IPM): This holistic approach combines several strategies.
- Observation: Regularly inspect your plants for early signs of pests or disease. Catching issues early is key.
- Physical Barriers: Use row covers (e.g., Agribon AG-19 floating row cover, 10×20 ft, ~$20) to protect young plants from insect pests like cabbage worms and squash bugs. Install fences (e.g., 2×4 welded wire mesh, 4 ft tall, 50 ft roll ~$70) to keep out deer, rabbits, and other larger animals.
- Hand-Picking: For larger pests like tomato hornworms or squash bugs, simply pick them off and drop them into a bucket of soapy water.
- Companion Planting: As mentioned, certain plants repel pests. Marigolds, garlic, and onions are excellent deterrents.
- Attract Beneficial Insects: Plant flowers like dill, fennel, cosmos, and sweet alyssum to attract ladybugs, lacewings, and parasitic wasps, which prey on common garden pests.
- Organic Sprays & Treatments:
- Neem Oil: An excellent broad-spectrum organic insecticide and fungicide. Bonide Neem Oil Concentrate (16oz, ~$20) can be mixed at a rate of 1-2 tbsp per gallon of water and sprayed on affected plants.
- Insecticidal Soap: Effective against soft-bodied insects like aphids, whiteflies, and spider mites. Garden Safe Insecticidal Soap (24oz ready-to-use, ~$10).
- Bacillus thuringiensis (Bt): A naturally occurring soil bacterium that targets caterpillars and worms. Monterey BT Worm & Caterpillar Killer (16oz, ~$18) is highly effective and safe for beneficial insects.
- Copper or Sulfur Sprays: For fungal diseases like powdery mildew or blight, organic copper (e.g., Bonide Copper Fungicide, ~$15 for 1lb) or sulfur (e.g., Safer Brand Garden Fungicide, ~$10 for 16oz) can be used as a last resort.
Step 7: Harvesting & Seed Saving
The culmination of your efforts is the harvest, and seed saving closes the loop on self-sufficiency.
- Harvesting Techniques:
- Timing: Harvest vegetables at their peak ripeness for best flavor and nutritional value. For example, green beans should snap cleanly, cucumbers should be firm, and tomatoes should be fully colored.
- Frequency: Many crops, like zucchini, cucumbers, and bush beans, produce more if harvested frequently. Pick daily or every other day.
- Tools: Use clean, sharp pruners (e.g., Corona ClassicCUT Bypass Pruner BP 3180, ~$30) or a sharp knife for clean cuts, minimizing damage to the plant.
- Seed Saving: This is where the « self-sufficient » aspect truly shines.
- Selection: Only save seeds from your healthiest, most vigorous plants that show desired traits (disease resistance, good flavor, high yield).
- Isolation: To ensure true-to-type seeds, prevent cross-pollination. This can be challenging for open-pollinated crops that readily cross (e.g., squash, corn). For beginners, focus on self-pollinating plants like beans, peas, lettuce, and tomatoes.
- Processing:
- Dry Seeds (Beans, Peas, Lettuce, Grains): Allow pods/seed heads to dry completely on the plant. Harvest, shell, and clean the seeds, removing chaff.
- Wet Seeds (Tomatoes, Cucumbers, Squash): For tomatoes, ferment the seeds in water for a few days to remove the gel coating and inhibit disease. For cucumbers/squash, scrape out seeds, wash thoroughly, and dry.
- Drying: Spread seeds thinly on screens or paper plates in a cool, dry, well-ventilated area for 1-4 weeks. Ensure they are bone-dry before storage. I aim for less than 8% moisture content.
- Storage: Store seeds in airtight containers (glass jars with desiccant packets work well) in a cool, dark, dry place (ideally 40-50°F and 30-40% humidity). Label clearly with variety and date. Properly stored seeds can remain viable for 3-10 years or more.
Step 8: Season Extension & Winterizing
Extend your harvest and protect your garden for the off-season to truly maximize your self sufficient garden from scratch.
- Cold Frames: Simple structures with a transparent top (glass, polycarbonate, or old windows) that sit over garden beds. They trap solar heat, allowing you to grow cold-hardy crops (lettuce, spinach, kale, radishes) well into winter or start seeds earlier in spring. A basic cold frame can be built from 2×6 lumber and a sheet of polycarbonate for under $100.
- Hoop Houses/Low Tunnels: Larger structures made from flexible hoops (PVC pipe or EMT conduit) covered with greenhouse plastic. These provide more space and greater temperature moderation. A 10×20 ft DIY low tunnel kit can cost $200-$500, while a larger, more robust hoop house kit might be $1,000-$3,000. I use a 6×12 ft low tunnel made from 1/2-inch PVC hoops and 6mil greenhouse plastic, which extends my lettuce and spinach harvest by at least
Maintaining a self sufficient garden from scratch means embracing organic pest and disease control.
- Integrated Pest Management (IPM): This holistic approach combines several strategies.
- Observation: Regularly inspect your plants for early signs of pests or disease. Catching issues early is key.
- Physical Barriers: Use row covers (e.g., Agribon AG-19 floating row cover, 10×20 ft, ~$20) to protect young plants from insect pests like cabbage worms and squash bugs. Install fences (e.g., 2×4 welded wire mesh, 4 ft tall, 50 ft roll ~$70) to keep out deer, rabbits, and other larger animals.
- Hand-Picking: For larger pests like tomato hornworms or squash bugs, simply pick them off and drop them into a bucket of soapy water.
- Companion Planting: As mentioned, certain plants repel pests. Marigolds, garlic, and onions are excellent deterrents.
- Attract Beneficial Insects: Plant flowers like dill, fennel, cosmos, and sweet alyssum to attract ladybugs, lacewings, and parasitic wasps, which prey on common garden pests.
- Organic Sprays & Treatments:
- Neem Oil: An excellent broad-spectrum organic insecticide and fungicide. Bonide Neem Oil Concentrate (16oz, ~$20) can be mixed at a rate of 1-2 tbsp per gallon of water and sprayed on affected plants.
- Insecticidal Soap: Effective against soft-bodied insects like aphids, whiteflies, and spider mites. Garden Safe Insecticidal Soap (24oz ready-to-use, ~$10).
- Bacillus thuringiensis (Bt): A naturally occurring soil bacterium that targets caterpillars and worms. Monterey BT Worm & Caterpillar Killer (16oz, ~$18) is highly effective and safe for beneficial insects.
- Copper or Sulfur Sprays: For fungal diseases like powdery mildew or blight, organic copper (e.g., Bonide Copper Fungicide, ~$15 for 1lb) or sulfur (e.g., Safer Brand Garden Fungicide, ~$10 for 16oz) can be used as a last resort.
Step 7: Harvesting & Seed Saving
The culmination of your efforts is the harvest, and seed saving closes the loop on self-sufficiency.
- Harvesting Techniques:
- Timing: Harvest vegetables at their peak ripeness for best flavor and nutritional value. For example, green beans should snap cleanly, cucumbers should be firm, and tomatoes should be fully colored.
- Frequency: Many crops, like zucchini, cucumbers, and bush beans, produce more if harvested frequently. Pick daily or every other day.
- Tools: Use clean, sharp pruners (e.g., Corona ClassicCUT Bypass Pruner BP 3180, ~$30) or a sharp knife for clean cuts, minimizing damage to the plant.
- Seed Saving: This is where the « self-sufficient » aspect truly shines.
- Selection: Only save seeds from your healthiest, most vigorous plants that show desired traits (disease resistance, good flavor, high yield).
- Isolation: To ensure true-to-type seeds, prevent cross-pollination. This can be challenging for open-pollinated crops that readily cross (e.g., squash, corn). For beginners, focus on self-pollinating plants like beans, peas, lettuce, and tomatoes.
- Processing:
- Dry Seeds (Beans, Peas, Lettuce, Grains): Allow pods/seed heads to dry completely on the plant. Harvest, shell, and clean the seeds, removing chaff.
- Wet Seeds (Tomatoes, Cucumbers, Squash): For tomatoes, ferment the seeds in water for a few days to remove the gel coating and inhibit disease. For cucumbers/squash, scrape out seeds, wash thoroughly, and dry.
- Drying: Spread seeds thinly on screens or paper plates in a cool, dry, well-ventilated area for 1-4 weeks. Ensure they are bone-dry before storage. I aim for less than 8% moisture content.
- Storage: Store seeds in airtight containers (glass jars with desiccant packets work well) in a cool, dark, dry place (ideally 40-50°F and 30-40% humidity). Label clearly with variety and date. Properly stored seeds can remain viable for 3-10 years or more.
Step 8: Season Extension & Winterizing
Extend your harvest and protect your garden for the off-season to truly maximize your self sufficient garden from scratch.
- Cold Frames: Simple structures with a transparent top (glass, polycarbonate, or old windows) that sit over garden beds. They trap solar heat, allowing you to grow cold-hardy crops (lettuce, spinach, kale, radishes) well into winter or start seeds earlier in spring. A basic cold frame can be built from 2×6 lumber and a sheet of polycarbonate for under $100.
- Hoop Houses/Low Tunnels: Larger structures made from flexible hoops (PVC pipe or EMT conduit) covered with greenhouse plastic. These provide more space and greater temperature moderation. A 10×20 ft DIY low tunnel kit can cost $200-$500, while a larger, more robust hoop house kit might be $1,000-$3,000. I use a 6×12 ft low tunnel made from 1/2-inch PVC hoops and 6mil greenhouse plastic, which extends my lettuce and spinach harvest by at least
The choice of seeds is crucial for a truly self sufficient garden from scratch.
- Choose Heirloom & Open-Pollinated Seeds: These varieties produce seeds that will grow true to type, meaning you can save seeds from your harvest year after year. F1 hybrids, while often vigorous, will not produce consistent offspring from saved seeds. Reputable seed companies include Baker Creek Heirloom Seeds, High Mowing Organic Seeds, and Seed Savers Exchange. Start with common, reliable varieties like ‘Black Krim’ tomatoes, ‘Provider’ bush beans, ‘Waltham Butternut’ squash, and ‘Black Seeded Simpson’ lettuce.
- Start Seeds Indoors (Optional but Recommended): For longer growing seasons or specific crops, starting seeds indoors gives you a head start. Use seed-starting mix (e.g., Espoma Organic Seed Starter Mix, ~$10 for 16qt bag) in seed trays (Jiffy Professional Greenhouse 72-cell kit, ~$15). Provide adequate light with LED grow lights (Barrina T5 2ft 4-pack LED Grow Lights, 20W each, ~$50) for 14-16 hours a day, positioned 2-4 inches above seedlings. Maintain consistent temperatures (65-75°F for most).
- Direct Sowing vs. Transplanting: Some crops (carrots, radishes, beans, corn) prefer direct sowing into the garden bed. Others (tomatoes, peppers, broccoli, kale) benefit from being started indoors and transplanted. Follow seed packet instructions for planting depths (e.g., lettuce seeds are often surface-sown or planted 1/8 inch deep, while beans are 1 inch deep) and spacing.
- Companion Planting: Strategically plant different species together to enhance growth, deter pests, and attract beneficial insects. For example, planting marigolds near tomatoes can deter nematodes, and basil improves tomato flavor. Nasturtiums can act as a trap crop for aphids.
- Succession Planting: For a continuous harvest, plant small batches of quick-growing crops (lettuce, radishes, cilantro) every 2-3 weeks. As one crop finishes, another is ready to take its place.
Step 6: Pest & Disease Management (Organic)
Maintaining a self sufficient garden from scratch means embracing organic pest and disease control.
- Integrated Pest Management (IPM): This holistic approach combines several strategies.
- Observation: Regularly inspect your plants for early signs of pests or disease. Catching issues early is key.
- Physical Barriers: Use row covers (e.g., Agribon AG-19 floating row cover, 10×20 ft, ~$20) to protect young plants from insect pests like cabbage worms and squash bugs. Install fences (e.g., 2×4 welded wire mesh, 4 ft tall, 50 ft roll ~$70) to keep out deer, rabbits, and other larger animals.
- Hand-Picking: For larger pests like tomato hornworms or squash bugs, simply pick them off and drop them into a bucket of soapy water.
- Companion Planting: As mentioned, certain plants repel pests. Marigolds, garlic, and onions are excellent deterrents.
- Attract Beneficial Insects: Plant flowers like dill, fennel, cosmos, and sweet alyssum to attract ladybugs, lacewings, and parasitic wasps, which prey on common garden pests.
- Organic Sprays & Treatments:
- Neem Oil: An excellent broad-spectrum organic insecticide and fungicide. Bonide Neem Oil Concentrate (16oz, ~$20) can be mixed at a rate of 1-2 tbsp per gallon of water and sprayed on affected plants.
- Insecticidal Soap: Effective against soft-bodied insects like aphids, whiteflies, and spider mites. Garden Safe Insecticidal Soap (24oz ready-to-use, ~$10).
- Bacillus thuringiensis (Bt): A naturally occurring soil bacterium that targets caterpillars and worms. Monterey BT Worm & Caterpillar Killer (16oz, ~$18) is highly effective and safe for beneficial insects.
- Copper or Sulfur Sprays: For fungal diseases like powdery mildew or blight, organic copper (e.g., Bonide Copper Fungicide, ~$15 for 1lb) or sulfur (e.g., Safer Brand Garden Fungicide, ~$10 for 16oz) can be used as a last resort.
Step 7: Harvesting & Seed Saving
The culmination of your efforts is the harvest, and seed saving closes the loop on self-sufficiency.
- Harvesting Techniques:
- Timing: Harvest vegetables at their peak ripeness for best flavor and nutritional value. For example, green beans should snap cleanly, cucumbers should be firm, and tomatoes should be fully colored.
- Frequency: Many crops, like zucchini, cucumbers, and bush beans, produce more if harvested frequently. Pick daily or every other day.
- Tools: Use clean, sharp pruners (e.g., Corona ClassicCUT Bypass Pruner BP 3180, ~$30) or a sharp knife for clean cuts, minimizing damage to the plant.
- Seed Saving: This is where the « self-sufficient » aspect truly shines.
- Selection: Only save seeds from your healthiest, most vigorous plants that show desired traits (disease resistance, good flavor, high yield).
- Isolation: To ensure true-to-type seeds, prevent cross-pollination. This can be challenging for open-pollinated crops that readily cross (e.g., squash, corn). For beginners, focus on self-pollinating plants like beans, peas, lettuce, and tomatoes.
- Processing:
- Dry Seeds (Beans, Peas, Lettuce, Grains): Allow pods/seed heads to dry completely on the plant. Harvest, shell, and clean the seeds, removing chaff.
- Wet Seeds (Tomatoes, Cucumbers, Squash): For tomatoes, ferment the seeds in water for a few days to remove the gel coating and inhibit disease. For cucumbers/squash, scrape out seeds, wash thoroughly, and dry.
- Drying: Spread seeds thinly on screens or paper plates in a cool, dry, well-ventilated area for 1-4 weeks. Ensure they are bone-dry before storage. I aim for less than 8% moisture content.
- Storage: Store seeds in airtight containers (glass jars with desiccant packets work well) in a cool, dark, dry place (ideally 40-50°F and 30-40% humidity). Label clearly with variety and date. Properly stored seeds can remain viable for 3-10 years or more.
Step 8: Season Extension & Winterizing
Extend your harvest and protect your garden for the off-season to truly maximize your self sufficient garden from scratch.
- Cold Frames: Simple structures with a transparent top (glass, polycarbonate, or old windows) that sit over garden beds. They trap solar heat, allowing you to grow cold-hardy crops (lettuce, spinach, kale, radishes) well into winter or start seeds earlier in spring. A basic cold frame can be built from 2×6 lumber and a sheet of polycarbonate for under $100.
- Hoop Houses/Low Tunnels: Larger structures made from flexible hoops (PVC pipe or EMT conduit) covered with greenhouse plastic. These provide more space and greater temperature moderation. A 10×20 ft DIY low tunnel kit can cost $200-$500, while a larger, more robust hoop house kit might be $1,000-$3,000. I use a 6×12 ft low tunnel made from 1/2-inch PVC hoops and 6mil greenhouse plastic, which extends my lettuce and spinach harvest by at least
Step 5: Seed Selection & Planting
The choice of seeds is crucial for a truly self sufficient garden from scratch.
- Choose Heirloom & Open-Pollinated Seeds: These varieties produce seeds that will grow true to type, meaning you can save seeds from your harvest year after year. F1 hybrids, while often vigorous, will not produce consistent offspring from saved seeds. Reputable seed companies include Baker Creek Heirloom Seeds, High Mowing Organic Seeds, and Seed Savers Exchange. Start with common, reliable varieties like ‘Black Krim’ tomatoes, ‘Provider’ bush beans, ‘Waltham Butternut’ squash, and ‘Black Seeded Simpson’ lettuce.
- Start Seeds Indoors (Optional but Recommended): For longer growing seasons or specific crops, starting seeds indoors gives you a head start. Use seed-starting mix (e.g., Espoma Organic Seed Starter Mix, ~$10 for 16qt bag) in seed trays (Jiffy Professional Greenhouse 72-cell kit, ~$15). Provide adequate light with LED grow lights (Barrina T5 2ft 4-pack LED Grow Lights, 20W each, ~$50) for 14-16 hours a day, positioned 2-4 inches above seedlings. Maintain consistent temperatures (65-75°F for most).
- Direct Sowing vs. Transplanting: Some crops (carrots, radishes, beans, corn) prefer direct sowing into the garden bed. Others (tomatoes, peppers, broccoli, kale) benefit from being started indoors and transplanted. Follow seed packet instructions for planting depths (e.g., lettuce seeds are often surface-sown or planted 1/8 inch deep, while beans are 1 inch deep) and spacing.
- Companion Planting: Strategically plant different species together to enhance growth, deter pests, and attract beneficial insects. For example, planting marigolds near tomatoes can deter nematodes, and basil improves tomato flavor. Nasturtiums can act as a trap crop for aphids.
- Succession Planting: For a continuous harvest, plant small batches of quick-growing crops (lettuce, radishes, cilantro) every 2-3 weeks. As one crop finishes, another is ready to take its place.
Step 6: Pest & Disease Management (Organic)
Maintaining a self sufficient garden from scratch means embracing organic pest and disease control.
- Integrated Pest Management (IPM): This holistic approach combines several strategies.
- Observation: Regularly inspect your plants for early signs of pests or disease. Catching issues early is key.
- Physical Barriers: Use row covers (e.g., Agribon AG-19 floating row cover, 10×20 ft, ~$20) to protect young plants from insect pests like cabbage worms and squash bugs. Install fences (e.g., 2×4 welded wire mesh, 4 ft tall, 50 ft roll ~$70) to keep out deer, rabbits, and other larger animals.
- Hand-Picking: For larger pests like tomato hornworms or squash bugs, simply pick them off and drop them into a bucket of soapy water.
- Companion Planting: As mentioned, certain plants repel pests. Marigolds, garlic, and onions are excellent deterrents.
- Attract Beneficial Insects: Plant flowers like dill, fennel, cosmos, and sweet alyssum to attract ladybugs, lacewings, and parasitic wasps, which prey on common garden pests.
- Organic Sprays & Treatments:
- Neem Oil: An excellent broad-spectrum organic insecticide and fungicide. Bonide Neem Oil Concentrate (16oz, ~$20) can be mixed at a rate of 1-2 tbsp per gallon of water and sprayed on affected plants.
- Insecticidal Soap: Effective against soft-bodied insects like aphids, whiteflies, and spider mites. Garden Safe Insecticidal Soap (24oz ready-to-use, ~$10).
- Bacillus thuringiensis (Bt): A naturally occurring soil bacterium that targets caterpillars and worms. Monterey BT Worm & Caterpillar Killer (16oz, ~$18) is highly effective and safe for beneficial insects.
- Copper or Sulfur Sprays: For fungal diseases like powdery mildew or blight, organic copper (e.g., Bonide Copper Fungicide, ~$15 for 1lb) or sulfur (e.g., Safer Brand Garden Fungicide, ~$10 for 16oz) can be used as a last resort.
Step 7: Harvesting & Seed Saving
The culmination of your efforts is the harvest, and seed saving closes the loop on self-sufficiency.
- Harvesting Techniques:
- Timing: Harvest vegetables at their peak ripeness for best flavor and nutritional value. For example, green beans should snap cleanly, cucumbers should be firm, and tomatoes should be fully colored.
- Frequency: Many crops, like zucchini, cucumbers, and bush beans, produce more if harvested frequently. Pick daily or every other day.
- Tools: Use clean, sharp pruners (e.g., Corona ClassicCUT Bypass Pruner BP 3180, ~$30) or a sharp knife for clean cuts, minimizing damage to the plant.
- Seed Saving: This is where the « self-sufficient » aspect truly shines.
- Selection: Only save seeds from your healthiest, most vigorous plants that show desired traits (disease resistance, good flavor, high yield).
- Isolation: To ensure true-to-type seeds, prevent cross-pollination. This can be challenging for open-pollinated crops that readily cross (e.g., squash, corn). For beginners, focus on self-pollinating plants like beans, peas, lettuce, and tomatoes.
- Processing:
- Dry Seeds (Beans, Peas, Lettuce, Grains): Allow pods/seed heads to dry completely on the plant. Harvest, shell, and clean the seeds, removing chaff.
- Wet Seeds (Tomatoes, Cucumbers, Squash): For tomatoes, ferment the seeds in water for a few days to remove the gel coating and inhibit disease. For cucumbers/squash, scrape out seeds, wash thoroughly, and dry.
- Drying: Spread seeds thinly on screens or paper plates in a cool, dry, well-ventilated area for 1-4 weeks. Ensure they are bone-dry before storage. I aim for less than 8% moisture content.
- Storage: Store seeds in airtight containers (glass jars with desiccant packets work well) in a cool, dark, dry place (ideally 40-50°F and 30-40% humidity). Label clearly with variety and date. Properly stored seeds can remain viable for 3-10 years or more.
Step 8: Season Extension & Winterizing
Extend your harvest and protect your garden for the off-season to truly maximize your self sufficient garden from scratch.
- Cold Frames: Simple structures with a transparent top (glass, polycarbonate, or old windows) that sit over garden beds. They trap solar heat, allowing you to grow cold-hardy crops (lettuce, spinach, kale, radishes) well into winter or start seeds earlier in spring. A basic cold frame can be built from 2×6 lumber and a sheet of polycarbonate for under $100.
- Hoop Houses/Low Tunnels: Larger structures made from flexible hoops (PVC pipe or EMT conduit) covered with greenhouse plastic. These provide more space and greater temperature moderation. A 10×20 ft DIY low tunnel kit can cost $200-$500, while a larger, more robust hoop house kit might be $1,000-$3,000. I use a 6×12 ft low tunnel made from 1/2-inch PVC hoops and 6mil greenhouse plastic, which extends my lettuce and spinach harvest by at least
- Rainwater Harvesting: This is my primary source of irrigation water. A 55-gallon rain barrel (e.g., EarthMark Rain Barrel, ~$120-$150) connected to a downspout can collect significant water. For larger needs, I use two 275-gallon IBC totes (Intermediate Bulk Containers, often available used for $100-$200 each from food-grade sources) connected in series. A 1,000 sq ft roof can collect approximately 620 gallons of water for every inch of rainfall. My 1,500 sq ft roof provides ample water for my 600 sq ft garden through multiple barrels and totes.
- Drip Irrigation: This is by far the most water-efficient method, delivering water directly to the plant’s root zone, minimizing evaporation and weed growth.
- Components: A typical drip system includes a pressure regulator (e.g., Rain Bird PRV-10, ~$15), a filter (Rain Bird RBY filter, ~$20), main tubing (1/2-inch poly tubing, 100ft ~$25), smaller feeder lines (1/4-inch tubing), and emitters (0.5 GPH or 1 GPH per plant).
- Kits: For beginners, a starter kit like the Rain Bird Drip Irrigation Garden Kit (model DDI-KIT-1P, ~$40-$60) is excellent for a small garden. For larger setups, I use Netafim Techline CV Drip Line (500ft roll, ~$150-$200), which has pressure-compensating emitters built-in, ensuring even watering across long runs.
- Automation: For true self-sufficiency, consider a battery-powered timer (e.g., Orbit B-Hyve Bluetooth Hose Faucet Timer, ~$50) or a solar-powered timer connected to a small 12V pump.
- Solar-Powered Pumps: For lifting water from a well, pond, or large storage tank to your garden, a solar pump is a game-changer. For a smaller drip system, a Shurflo 2088-594-152 Diaphragm Pump (12V, 3.5 GPM, ~$180) can be powered by a single 100W solar panel (e.g., Renogy 100W Monocrystalline Solar Panel, ~$100) and a small 12V battery (e.g., a 50Ah LiFePO4 battery like the Battle Born 50Ah, ~$450). For larger operations or deeper wells, more robust systems are needed. If you’re looking to build out a comprehensive off-grid power system to support your garden’s water needs, or indeed your entire homestead, you might want to explore resources like the Power Grid Generator complete system guide to understand the full scope of what’s possible in terms of energy independence.
Step 5: Seed Selection & Planting
The choice of seeds is crucial for a truly self sufficient garden from scratch.
- Choose Heirloom & Open-Pollinated Seeds: These varieties produce seeds that will grow true to type, meaning you can save seeds from your harvest year after year. F1 hybrids, while often vigorous, will not produce consistent offspring from saved seeds. Reputable seed companies include Baker Creek Heirloom Seeds, High Mowing Organic Seeds, and Seed Savers Exchange. Start with common, reliable varieties like ‘Black Krim’ tomatoes, ‘Provider’ bush beans, ‘Waltham Butternut’ squash, and ‘Black Seeded Simpson’ lettuce.
- Start Seeds Indoors (Optional but Recommended): For longer growing seasons or specific crops, starting seeds indoors gives you a head start. Use seed-starting mix (e.g., Espoma Organic Seed Starter Mix, ~$10 for 16qt bag) in seed trays (Jiffy Professional Greenhouse 72-cell kit, ~$15). Provide adequate light with LED grow lights (Barrina T5 2ft 4-pack LED Grow Lights, 20W each, ~$50) for 14-16 hours a day, positioned 2-4 inches above seedlings. Maintain consistent temperatures (65-75°F for most).
- Direct Sowing vs. Transplanting: Some crops (carrots, radishes, beans, corn) prefer direct sowing into the garden bed. Others (tomatoes, peppers, broccoli, kale) benefit from being started indoors and transplanted. Follow seed packet instructions for planting depths (e.g., lettuce seeds are often surface-sown or planted 1/8 inch deep, while beans are 1 inch deep) and spacing.
- Companion Planting: Strategically plant different species together to enhance growth, deter pests, and attract beneficial insects. For example, planting marigolds near tomatoes can deter nematodes, and basil improves tomato flavor. Nasturtiums can act as a trap crop for aphids.
- Succession Planting: For a continuous harvest, plant small batches of quick-growing crops (lettuce, radishes, cilantro) every 2-3 weeks. As one crop finishes, another is ready to take its place.
Step 6: Pest & Disease Management (Organic)
Maintaining a self sufficient garden from scratch means embracing organic pest and disease control.
- Integrated Pest Management (IPM): This holistic approach combines several strategies.
- Observation: Regularly inspect your plants for early signs of pests or disease. Catching issues early is key.
- Physical Barriers: Use row covers (e.g., Agribon AG-19 floating row cover, 10×20 ft, ~$20) to protect young plants from insect pests like cabbage worms and squash bugs. Install fences (e.g., 2×4 welded wire mesh, 4 ft tall, 50 ft roll ~$70) to keep out deer, rabbits, and other larger animals.
- Hand-Picking: For larger pests like tomato hornworms or squash bugs, simply pick them off and drop them into a bucket of soapy water.
- Companion Planting: As mentioned, certain plants repel pests. Marigolds, garlic, and onions are excellent deterrents.
- Attract Beneficial Insects: Plant flowers like dill, fennel, cosmos, and sweet alyssum to attract ladybugs, lacewings, and parasitic wasps, which prey on common garden pests.
- Organic Sprays & Treatments:
- Neem Oil: An excellent broad-spectrum organic insecticide and fungicide. Bonide Neem Oil Concentrate (16oz, ~$20) can be mixed at a rate of 1-2 tbsp per gallon of water and sprayed on affected plants.
- Insecticidal Soap: Effective against soft-bodied insects like aphids, whiteflies, and spider mites. Garden Safe Insecticidal Soap (24oz ready-to-use, ~$10).
- Bacillus thuringiensis (Bt): A naturally occurring soil bacterium that targets caterpillars and worms. Monterey BT Worm & Caterpillar Killer (16oz, ~$18) is highly effective and safe for beneficial insects.
- Copper or Sulfur Sprays: For fungal diseases like powdery mildew or blight, organic copper (e.g., Bonide Copper Fungicide, ~$15 for 1lb) or sulfur (e.g., Safer Brand Garden Fungicide, ~$10 for 16oz) can be used as a last resort.
Step 7: Harvesting & Seed Saving
The culmination of your efforts is the harvest, and seed saving closes the loop on self-sufficiency.
- Harvesting Techniques:
- Timing: Harvest vegetables at their peak ripeness for best flavor and nutritional value. For example, green beans should snap cleanly, cucumbers should be firm, and tomatoes should be fully colored.
- Frequency: Many crops, like zucchini, cucumbers, and bush beans, produce more if harvested frequently. Pick daily or every other day.
- Tools: Use clean, sharp pruners (e.g., Corona ClassicCUT Bypass Pruner BP 3180, ~$30) or a sharp knife for clean cuts, minimizing damage to the plant.
- Seed Saving: This is where the « self-sufficient » aspect truly shines.
- Selection: Only save seeds from your healthiest, most vigorous plants that show desired traits (disease resistance, good flavor, high yield).
- Isolation: To ensure true-to-type seeds, prevent cross-pollination. This can be challenging for open-pollinated crops that readily cross (e.g., squash, corn). For beginners, focus on self-pollinating plants like beans, peas, lettuce, and tomatoes.
- Processing:
- Dry Seeds (Beans, Peas, Lettuce, Grains): Allow pods/seed heads to dry completely on the plant. Harvest, shell, and clean the seeds, removing chaff.
- Wet Seeds (Tomatoes, Cucumbers, Squash): For tomatoes, ferment the seeds in water for a few days to remove the gel coating and inhibit disease. For cucumbers/squash, scrape out seeds, wash thoroughly, and dry.
- Drying: Spread seeds thinly on screens or paper plates in a cool, dry, well-ventilated area for 1-4 weeks. Ensure they are bone-dry before storage. I aim for less than 8% moisture content.
- Storage: Store seeds in airtight containers (glass jars with desiccant packets work well) in a cool, dark, dry place (ideally 40-50°F and 30-40% humidity). Label clearly with variety and date. Properly stored seeds can remain viable for 3-10 years or more.
Step 8: Season Extension & Winterizing
Extend your harvest and protect your garden for the off-season to truly maximize your self sufficient garden from scratch.
- Cold Frames: Simple structures with a transparent top (glass, polycarbonate, or old windows) that sit over garden beds. They trap solar heat, allowing you to grow cold-hardy crops (lettuce, spinach, kale, radishes) well into winter or start seeds earlier in spring. A basic cold frame can be built from 2×6 lumber and a sheet of polycarbonate for under $100.
- Hoop Houses/Low Tunnels: Larger structures made from flexible hoops (PVC pipe or EMT conduit) covered with greenhouse plastic. These provide more space and greater temperature moderation. A 10×20 ft DIY low tunnel kit can cost $200-$500, while a larger, more robust hoop house kit might be $1,000-$3,000. I use a 6×12 ft low tunnel made from 1/2-inch PVC hoops and 6mil greenhouse plastic, which extends my lettuce and spinach harvest by at least
Efficient water management is critical for a self sufficient garden from scratch, especially in off-grid living where water resources might be limited.
- Rainwater Harvesting: This is my primary source of irrigation water. A 55-gallon rain barrel (e.g., EarthMark Rain Barrel, ~$120-$150) connected to a downspout can collect significant water. For larger needs, I use two 275-gallon IBC totes (Intermediate Bulk Containers, often available used for $100-$200 each from food-grade sources) connected in series. A 1,000 sq ft roof can collect approximately 620 gallons of water for every inch of rainfall. My 1,500 sq ft roof provides ample water for my 600 sq ft garden through multiple barrels and totes.
- Drip Irrigation: This is by far the most water-efficient method, delivering water directly to the plant’s root zone, minimizing evaporation and weed growth.
- Components: A typical drip system includes a pressure regulator (e.g., Rain Bird PRV-10, ~$15), a filter (Rain Bird RBY filter, ~$20), main tubing (1/2-inch poly tubing, 100ft ~$25), smaller feeder lines (1/4-inch tubing), and emitters (0.5 GPH or 1 GPH per plant).
- Kits: For beginners, a starter kit like the Rain Bird Drip Irrigation Garden Kit (model DDI-KIT-1P, ~$40-$60) is excellent for a small garden. For larger setups, I use Netafim Techline CV Drip Line (500ft roll, ~$150-$200), which has pressure-compensating emitters built-in, ensuring even watering across long runs.
- Automation: For true self-sufficiency, consider a battery-powered timer (e.g., Orbit B-Hyve Bluetooth Hose Faucet Timer, ~$50) or a solar-powered timer connected to a small 12V pump.
- Solar-Powered Pumps: For lifting water from a well, pond, or large storage tank to your garden, a solar pump is a game-changer. For a smaller drip system, a Shurflo 2088-594-152 Diaphragm Pump (12V, 3.5 GPM, ~$180) can be powered by a single 100W solar panel (e.g., Renogy 100W Monocrystalline Solar Panel, ~$100) and a small 12V battery (e.g., a 50Ah LiFePO4 battery like the Battle Born 50Ah, ~$450). For larger operations or deeper wells, more robust systems are needed. If you’re looking to build out a comprehensive off-grid power system to support your garden’s water needs, or indeed your entire homestead, you might want to explore resources like the Power Grid Generator complete system guide to understand the full scope of what’s possible in terms of energy independence.
Step 5: Seed Selection & Planting
The choice of seeds is crucial for a truly self sufficient garden from scratch.
- Choose Heirloom & Open-Pollinated Seeds: These varieties produce seeds that will grow true to type, meaning you can save seeds from your harvest year after year. F1 hybrids, while often vigorous, will not produce consistent offspring from saved seeds. Reputable seed companies include Baker Creek Heirloom Seeds, High Mowing Organic Seeds, and Seed Savers Exchange. Start with common, reliable varieties like ‘Black Krim’ tomatoes, ‘Provider’ bush beans, ‘Waltham Butternut’ squash, and ‘Black Seeded Simpson’ lettuce.
- Start Seeds Indoors (Optional but Recommended): For longer growing seasons or specific crops, starting seeds indoors gives you a head start. Use seed-starting mix (e.g., Espoma Organic Seed Starter Mix, ~$10 for 16qt bag) in seed trays (Jiffy Professional Greenhouse 72-cell kit, ~$15). Provide adequate light with LED grow lights (Barrina T5 2ft 4-pack LED Grow Lights, 20W each, ~$50) for 14-16 hours a day, positioned 2-4 inches above seedlings. Maintain consistent temperatures (65-75°F for most).
- Direct Sowing vs. Transplanting: Some crops (carrots, radishes, beans, corn) prefer direct sowing into the garden bed. Others (tomatoes, peppers, broccoli, kale) benefit from being started indoors and transplanted. Follow seed packet instructions for planting depths (e.g., lettuce seeds are often surface-sown or planted 1/8 inch deep, while beans are 1 inch deep) and spacing.
- Companion Planting: Strategically plant different species together to enhance growth, deter pests, and attract beneficial insects. For example, planting marigolds near tomatoes can deter nematodes, and basil improves tomato flavor. Nasturtiums can act as a trap crop for aphids.
- Succession Planting: For a continuous harvest, plant small batches of quick-growing crops (lettuce, radishes, cilantro) every 2-3 weeks. As one crop finishes, another is ready to take its place.
Step 6: Pest & Disease Management (Organic)
Maintaining a self sufficient garden from scratch means embracing organic pest and disease control.
- Integrated Pest Management (IPM): This holistic approach combines several strategies.
- Observation: Regularly inspect your plants for early signs of pests or disease. Catching issues early is key.
- Physical Barriers: Use row covers (e.g., Agribon AG-19 floating row cover, 10×20 ft, ~$20) to protect young plants from insect pests like cabbage worms and squash bugs. Install fences (e.g., 2×4 welded wire mesh, 4 ft tall, 50 ft roll ~$70) to keep out deer, rabbits, and other larger animals.
- Hand-Picking: For larger pests like tomato hornworms or squash bugs, simply pick them off and drop them into a bucket of soapy water.
- Companion Planting: As mentioned, certain plants repel pests. Marigolds, garlic, and onions are excellent deterrents.
- Attract Beneficial Insects: Plant flowers like dill, fennel, cosmos, and sweet alyssum to attract ladybugs, lacewings, and parasitic wasps, which prey on common garden pests.
- Organic Sprays & Treatments:
- Neem Oil: An excellent broad-spectrum organic insecticide and fungicide. Bonide Neem Oil Concentrate (16oz, ~$20) can be mixed at a rate of 1-2 tbsp per gallon of water and sprayed on affected plants.
- Insecticidal Soap: Effective against soft-bodied insects like aphids, whiteflies, and spider mites. Garden Safe Insecticidal Soap (24oz ready-to-use, ~$10).
- Bacillus thuringiensis (Bt): A naturally occurring soil bacterium that targets caterpillars and worms. Monterey BT Worm & Caterpillar Killer (16oz, ~$18) is highly effective and safe for beneficial insects.
- Copper or Sulfur Sprays: For fungal diseases like powdery mildew or blight, organic copper (e.g., Bonide Copper Fungicide, ~$15 for 1lb) or sulfur (e.g., Safer Brand Garden Fungicide, ~$10 for 16oz) can be used as a last resort.
Step 7: Harvesting & Seed Saving
The culmination of your efforts is the harvest, and seed saving closes the loop on self-sufficiency.
- Harvesting Techniques:
- Timing: Harvest vegetables at their peak ripeness for best flavor and nutritional value. For example, green beans should snap cleanly, cucumbers should be firm, and tomatoes should be fully colored.
- Frequency: Many crops, like zucchini, cucumbers, and bush beans, produce more if harvested frequently. Pick daily or every other day.
- Tools: Use clean, sharp pruners (e.g., Corona ClassicCUT Bypass Pruner BP 3180, ~$30) or a sharp knife for clean cuts, minimizing damage to the plant.
- Seed Saving: This is where the « self-sufficient » aspect truly shines.
- Selection: Only save seeds from your healthiest, most vigorous plants that show desired traits (disease resistance, good flavor, high yield).
- Isolation: To ensure true-to-type seeds, prevent cross-pollination. This can be challenging for open-pollinated crops that readily cross (e.g., squash, corn). For beginners, focus on self-pollinating plants like beans, peas, lettuce, and tomatoes.
- Processing:
- Dry Seeds (Beans, Peas, Lettuce, Grains): Allow pods/seed heads to dry completely on the plant. Harvest, shell, and clean the seeds, removing chaff.
- Wet Seeds (Tomatoes, Cucumbers, Squash): For tomatoes, ferment the seeds in water for a few days to remove the gel coating and inhibit disease. For cucumbers/squash, scrape out seeds, wash thoroughly, and dry.
- Drying: Spread seeds thinly on screens or paper plates in a cool, dry, well-ventilated area for 1-4 weeks. Ensure they are bone-dry before storage. I aim for less than 8% moisture content.
- Storage: Store seeds in airtight containers (glass jars with desiccant packets work well) in a cool, dark, dry place (ideally 40-50°F and 30-40% humidity). Label clearly with variety and date. Properly stored seeds can remain viable for 3-10 years or more.
Step 8: Season Extension & Winterizing
Extend your harvest and protect your garden for the off-season to truly maximize your self sufficient garden from scratch.
- Cold Frames: Simple structures with a transparent top (glass, polycarbonate, or old windows) that sit over garden beds. They trap solar heat, allowing you to grow cold-hardy crops (lettuce, spinach, kale, radishes) well into winter or start seeds earlier in spring. A basic cold frame can be built from 2×6 lumber and a sheet of polycarbonate for under $100.
- Hoop Houses/Low Tunnels: Larger structures made from flexible hoops (PVC pipe or EMT conduit) covered with greenhouse plastic. These provide more space and greater temperature moderation. A 10×20 ft DIY low tunnel kit can cost $200-$500, while a larger, more robust hoop house kit might be $1,000-$3,000. I use a 6×12 ft low tunnel made from 1/2-inch PVC hoops and 6mil greenhouse plastic, which extends my lettuce and spinach harvest by at least
Step 4: Water Management & Irrigation
Efficient water management is critical for a self sufficient garden from scratch, especially in off-grid living where water resources might be limited.
- Rainwater Harvesting: This is my primary source of irrigation water. A 55-gallon rain barrel (e.g., EarthMark Rain Barrel, ~$120-$150) connected to a downspout can collect significant water. For larger needs, I use two 275-gallon IBC totes (Intermediate Bulk Containers, often available used for $100-$200 each from food-grade sources) connected in series. A 1,000 sq ft roof can collect approximately 620 gallons of water for every inch of rainfall. My 1,500 sq ft roof provides ample water for my 600 sq ft garden through multiple barrels and totes.
- Drip Irrigation: This is by far the most water-efficient method, delivering water directly to the plant’s root zone, minimizing evaporation and weed growth.
- Components: A typical drip system includes a pressure regulator (e.g., Rain Bird PRV-10, ~$15), a filter (Rain Bird RBY filter, ~$20), main tubing (1/2-inch poly tubing, 100ft ~$25), smaller feeder lines (1/4-inch tubing), and emitters (0.5 GPH or 1 GPH per plant).
- Kits: For beginners, a starter kit like the Rain Bird Drip Irrigation Garden Kit (model DDI-KIT-1P, ~$40-$60) is excellent for a small garden. For larger setups, I use Netafim Techline CV Drip Line (500ft roll, ~$150-$200), which has pressure-compensating emitters built-in, ensuring even watering across long runs.
- Automation: For true self-sufficiency, consider a battery-powered timer (e.g., Orbit B-Hyve Bluetooth Hose Faucet Timer, ~$50) or a solar-powered timer connected to a small 12V pump.
- Solar-Powered Pumps: For lifting water from a well, pond, or large storage tank to your garden, a solar pump is a game-changer. For a smaller drip system, a Shurflo 2088-594-152 Diaphragm Pump (12V, 3.5 GPM, ~$180) can be powered by a single 100W solar panel (e.g., Renogy 100W Monocrystalline Solar Panel, ~$100) and a small 12V battery (e.g., a 50Ah LiFePO4 battery like the Battle Born 50Ah, ~$450). For larger operations or deeper wells, more robust systems are needed. If you’re looking to build out a comprehensive off-grid power system to support your garden’s water needs, or indeed your entire homestead, you might want to explore resources like the Power Grid Generator complete system guide to understand the full scope of what’s possible in terms of energy independence.
Step 5: Seed Selection & Planting
The choice of seeds is crucial for a truly self sufficient garden from scratch.
- Choose Heirloom & Open-Pollinated Seeds: These varieties produce seeds that will grow true to type, meaning you can save seeds from your harvest year after year. F1 hybrids, while often vigorous, will not produce consistent offspring from saved seeds. Reputable seed companies include Baker Creek Heirloom Seeds, High Mowing Organic Seeds, and Seed Savers Exchange. Start with common, reliable varieties like ‘Black Krim’ tomatoes, ‘Provider’ bush beans, ‘Waltham Butternut’ squash, and ‘Black Seeded Simpson’ lettuce.
- Start Seeds Indoors (Optional but Recommended): For longer growing seasons or specific crops, starting seeds indoors gives you a head start. Use seed-starting mix (e.g., Espoma Organic Seed Starter Mix, ~$10 for 16qt bag) in seed trays (Jiffy Professional Greenhouse 72-cell kit, ~$15). Provide adequate light with LED grow lights (Barrina T5 2ft 4-pack LED Grow Lights, 20W each, ~$50) for 14-16 hours a day, positioned 2-4 inches above seedlings. Maintain consistent temperatures (65-75°F for most).
- Direct Sowing vs. Transplanting: Some crops (carrots, radishes, beans, corn) prefer direct sowing into the garden bed. Others (tomatoes, peppers, broccoli, kale) benefit from being started indoors and transplanted. Follow seed packet instructions for planting depths (e.g., lettuce seeds are often surface-sown or planted 1/8 inch deep, while beans are 1 inch deep) and spacing.
- Companion Planting: Strategically plant different species together to enhance growth, deter pests, and attract beneficial insects. For example, planting marigolds near tomatoes can deter nematodes, and basil improves tomato flavor. Nasturtiums can act as a trap crop for aphids.
- Succession Planting: For a continuous harvest, plant small batches of quick-growing crops (lettuce, radishes, cilantro) every 2-3 weeks. As one crop finishes, another is ready to take its place.
Step 6: Pest & Disease Management (Organic)
Maintaining a self sufficient garden from scratch means embracing organic pest and disease control.
- Integrated Pest Management (IPM): This holistic approach combines several strategies.
- Observation: Regularly inspect your plants for early signs of pests or disease. Catching issues early is key.
- Physical Barriers: Use row covers (e.g., Agribon AG-19 floating row cover, 10×20 ft, ~$20) to protect young plants from insect pests like cabbage worms and squash bugs. Install fences (e.g., 2×4 welded wire mesh, 4 ft tall, 50 ft roll ~$70) to keep out deer, rabbits, and other larger animals.
- Hand-Picking: For larger pests like tomato hornworms or squash bugs, simply pick them off and drop them into a bucket of soapy water.
- Companion Planting: As mentioned, certain plants repel pests. Marigolds, garlic, and onions are excellent deterrents.
- Attract Beneficial Insects: Plant flowers like dill, fennel, cosmos, and sweet alyssum to attract ladybugs, lacewings, and parasitic wasps, which prey on common garden pests.
- Organic Sprays & Treatments:
- Neem Oil: An excellent broad-spectrum organic insecticide and fungicide. Bonide Neem Oil Concentrate (16oz, ~$20) can be mixed at a rate of 1-2 tbsp per gallon of water and sprayed on affected plants.
- Insecticidal Soap: Effective against soft-bodied insects like aphids, whiteflies, and spider mites. Garden Safe Insecticidal Soap (24oz ready-to-use, ~$10).
- Bacillus thuringiensis (Bt): A naturally occurring soil bacterium that targets caterpillars and worms. Monterey BT Worm & Caterpillar Killer (16oz, ~$18) is highly effective and safe for beneficial insects.
- Copper or Sulfur Sprays: For fungal diseases like powdery mildew or blight, organic copper (e.g., Bonide Copper Fungicide, ~$15 for 1lb) or sulfur (e.g., Safer Brand Garden Fungicide, ~$10 for 16oz) can be used as a last resort.
Step 7: Harvesting & Seed Saving
The culmination of your efforts is the harvest, and seed saving closes the loop on self-sufficiency.
- Harvesting Techniques:
- Timing: Harvest vegetables at their peak ripeness for best flavor and nutritional value. For example, green beans should snap cleanly, cucumbers should be firm, and tomatoes should be fully colored.
- Frequency: Many crops, like zucchini, cucumbers, and bush beans, produce more if harvested frequently. Pick daily or every other day.
- Tools: Use clean, sharp pruners (e.g., Corona ClassicCUT Bypass Pruner BP 3180, ~$30) or a sharp knife for clean cuts, minimizing damage to the plant.
- Seed Saving: This is where the « self-sufficient » aspect truly shines.
- Selection: Only save seeds from your healthiest, most vigorous plants that show desired traits (disease resistance, good flavor, high yield).
- Isolation: To ensure true-to-type seeds, prevent cross-pollination. This can be challenging for open-pollinated crops that readily cross (e.g., squash, corn). For beginners, focus on self-pollinating plants like beans, peas, lettuce, and tomatoes.
- Processing:
- Dry Seeds (Beans, Peas, Lettuce, Grains): Allow pods/seed heads to dry completely on the plant. Harvest, shell, and clean the seeds, removing chaff.
- Wet Seeds (Tomatoes, Cucumbers, Squash): For tomatoes, ferment the seeds in water for a few days to remove the gel coating and inhibit disease. For cucumbers/squash, scrape out seeds, wash thoroughly, and dry.
- Drying: Spread seeds thinly on screens or paper plates in a cool, dry, well-ventilated area for 1-4 weeks. Ensure they are bone-dry before storage. I aim for less than 8% moisture content.
- Storage: Store seeds in airtight containers (glass jars with desiccant packets work well) in a cool, dark, dry place (ideally 40-50°F and 30-40% humidity). Label clearly with variety and date. Properly stored seeds can remain viable for 3-10 years or more.
Step 8: Season Extension & Winterizing
Extend your harvest and protect your garden for the off-season to truly maximize your self sufficient garden from scratch.
- Cold Frames: Simple structures with a transparent top (glass, polycarbonate, or old windows) that sit over garden beds. They trap solar heat, allowing you to grow cold-hardy crops (lettuce, spinach, kale, radishes) well into winter or start seeds earlier in spring. A basic cold frame can be built from 2×6 lumber and a sheet of polycarbonate for under $100.
- Hoop Houses/Low Tunnels: Larger structures made from flexible hoops (PVC pipe or EMT conduit) covered with greenhouse plastic. These provide more space and greater temperature moderation. A 10×20 ft DIY low tunnel kit can cost $200-$500, while a larger, more robust hoop house kit might be $1,000-$3,000. I use a 6×12 ft low tunnel made from 1/2-inch PVC hoops and 6mil greenhouse plastic, which extends my lettuce and spinach harvest by at least
- In-Ground Beds: If you have excellent native soil and good drainage, in-ground beds are the most economical. Double-digging (loosening soil two shovel depths) can significantly improve drainage and aeration. For my main garden, I primarily use in-ground beds, but I focus on building up the soil over time with consistent compost additions and cover cropping. I aim for beds that are no wider than 3-4 feet so I can reach the center without stepping on the soil, compacting it.
- Raised Beds: Raised beds offer numerous advantages, especially for poor soil, heavy clay, or rocky areas. They provide better drainage, warm up faster in spring, reduce compaction, and make weeding and harvesting easier on your back.
- Material Options:
- Untreated Cedar: Naturally rot-resistant and chemical-free. A 4×8 ft bed, 12 inches deep, typically requires three 2x12x8 ft cedar boards, costing around $50-$60 per board (total ~$150-$180) plus corner brackets or screws. My first raised beds were cedar and are still going strong after 7 years.
- Galvanized Steel: Durable, long-lasting, and aesthetically pleasing. Brands like Vego Garden offer modular kits. A Vego Garden 17″ Tall 8-in-1 Metal Raised Garden Bed (can be configured to 4×8 ft) costs approximately $250-$300.
- Concrete Blocks/Stones: Very durable but can leach minerals (though generally safe once weathered) and can be expensive.
- Recycled Materials: Pallets (check for chemical treatment stamps like « HT » for heat-treated), old tires (controversial due to potential chemical leaching).
- Filling Raised Beds: Don’t just fill with topsoil. Use a « Hugelkultur » approach (logs, branches, leaves, then compost, then topsoil) or a mixture of 60% good quality topsoil, 30% compost, and 10% perlite or vermiculite for drainage. A 4x8x1 ft raised bed requires about 32 cubic feet (or ~1.2 cubic yards) of soil mix, which can cost $100-$200 depending on your source.
- Material Options:
Step 4: Water Management & Irrigation
Efficient water management is critical for a self sufficient garden from scratch, especially in off-grid living where water resources might be limited.
- Rainwater Harvesting: This is my primary source of irrigation water. A 55-gallon rain barrel (e.g., EarthMark Rain Barrel, ~$120-$150) connected to a downspout can collect significant water. For larger needs, I use two 275-gallon IBC totes (Intermediate Bulk Containers, often available used for $100-$200 each from food-grade sources) connected in series. A 1,000 sq ft roof can collect approximately 620 gallons of water for every inch of rainfall. My 1,500 sq ft roof provides ample water for my 600 sq ft garden through multiple barrels and totes.
- Drip Irrigation: This is by far the most water-efficient method, delivering water directly to the plant’s root zone, minimizing evaporation and weed growth.
- Components: A typical drip system includes a pressure regulator (e.g., Rain Bird PRV-10, ~$15), a filter (Rain Bird RBY filter, ~$20), main tubing (1/2-inch poly tubing, 100ft ~$25), smaller feeder lines (1/4-inch tubing), and emitters (0.5 GPH or 1 GPH per plant).
- Kits: For beginners, a starter kit like the Rain Bird Drip Irrigation Garden Kit (model DDI-KIT-1P, ~$40-$60) is excellent for a small garden. For larger setups, I use Netafim Techline CV Drip Line (500ft roll, ~$150-$200), which has pressure-compensating emitters built-in, ensuring even watering across long runs.
- Automation: For true self-sufficiency, consider a battery-powered timer (e.g., Orbit B-Hyve Bluetooth Hose Faucet Timer, ~$50) or a solar-powered timer connected to a small 12V pump.
- Solar-Powered Pumps: For lifting water from a well, pond, or large storage tank to your garden, a solar pump is a game-changer. For a smaller drip system, a Shurflo 2088-594-152 Diaphragm Pump (12V, 3.5 GPM, ~$180) can be powered by a single 100W solar panel (e.g., Renogy 100W Monocrystalline Solar Panel, ~$100) and a small 12V battery (e.g., a 50Ah LiFePO4 battery like the Battle Born 50Ah, ~$450). For larger operations or deeper wells, more robust systems are needed. If you’re looking to build out a comprehensive off-grid power system to support your garden’s water needs, or indeed your entire homestead, you might want to explore resources like the Power Grid Generator complete system guide to understand the full scope of what’s possible in terms of energy independence.
Step 5: Seed Selection & Planting
The choice of seeds is crucial for a truly self sufficient garden from scratch.
- Choose Heirloom & Open-Pollinated Seeds: These varieties produce seeds that will grow true to type, meaning you can save seeds from your harvest year after year. F1 hybrids, while often vigorous, will not produce consistent offspring from saved seeds. Reputable seed companies include Baker Creek Heirloom Seeds, High Mowing Organic Seeds, and Seed Savers Exchange. Start with common, reliable varieties like ‘Black Krim’ tomatoes, ‘Provider’ bush beans, ‘Waltham Butternut’ squash, and ‘Black Seeded Simpson’ lettuce.
- Start Seeds Indoors (Optional but Recommended): For longer growing seasons or specific crops, starting seeds indoors gives you a head start. Use seed-starting mix (e.g., Espoma Organic Seed Starter Mix, ~$10 for 16qt bag) in seed trays (Jiffy Professional Greenhouse 72-cell kit, ~$15). Provide adequate light with LED grow lights (Barrina T5 2ft 4-pack LED Grow Lights, 20W each, ~$50) for 14-16 hours a day, positioned 2-4 inches above seedlings. Maintain consistent temperatures (65-75°F for most).
- Direct Sowing vs. Transplanting: Some crops (carrots, radishes, beans, corn) prefer direct sowing into the garden bed. Others (tomatoes, peppers, broccoli, kale) benefit from being started indoors and transplanted. Follow seed packet instructions for planting depths (e.g., lettuce seeds are often surface-sown or planted 1/8 inch deep, while beans are 1 inch deep) and spacing.
- Companion Planting: Strategically plant different species together to enhance growth, deter pests, and attract beneficial insects. For example, planting marigolds near tomatoes can deter nematodes, and basil improves tomato flavor. Nasturtiums can act as a trap crop for aphids.
- Succession Planting: For a continuous harvest, plant small batches of quick-growing crops (lettuce, radishes, cilantro) every 2-3 weeks. As one crop finishes, another is ready to take its place.
Step 6: Pest & Disease Management (Organic)
Maintaining a self sufficient garden from scratch means embracing organic pest and disease control.
- Integrated Pest Management (IPM): This holistic approach combines several strategies.
- Observation: Regularly inspect your plants for early signs of pests or disease. Catching issues early is key.
- Physical Barriers: Use row covers (e.g., Agribon AG-19 floating row cover, 10×20 ft, ~$20) to protect young plants from insect pests like cabbage worms and squash bugs. Install fences (e.g., 2×4 welded wire mesh, 4 ft tall, 50 ft roll ~$70) to keep out deer, rabbits, and other larger animals.
- Hand-Picking: For larger pests like tomato hornworms or squash bugs, simply pick them off and drop them into a bucket of soapy water.
- Companion Planting: As mentioned, certain plants repel pests. Marigolds, garlic, and onions are excellent deterrents.
- Attract Beneficial Insects: Plant flowers like dill, fennel, cosmos, and sweet alyssum to attract ladybugs, lacewings, and parasitic wasps, which prey on common garden pests.
- Organic Sprays & Treatments:
- Neem Oil: An excellent broad-spectrum organic insecticide and fungicide. Bonide Neem Oil Concentrate (16oz, ~$20) can be mixed at a rate of 1-2 tbsp per gallon of water and sprayed on affected plants.
- Insecticidal Soap: Effective against soft-bodied insects like aphids, whiteflies, and spider mites. Garden Safe Insecticidal Soap (24oz ready-to-use, ~$10).
- Bacillus thuringiensis (Bt): A naturally occurring soil bacterium that targets caterpillars and worms. Monterey BT Worm & Caterpillar Killer (16oz, ~$18) is highly effective and safe for beneficial insects.
- Copper or Sulfur Sprays: For fungal diseases like powdery mildew or blight, organic copper (e.g., Bonide Copper Fungicide, ~$15 for 1lb) or sulfur (e.g., Safer Brand Garden Fungicide, ~$10 for 16oz) can be used as a last resort.
Step 7: Harvesting & Seed Saving
The culmination of your efforts is the harvest, and seed saving closes the loop on self-sufficiency.
- Harvesting Techniques:
- Timing: Harvest vegetables at their peak ripeness for best flavor and nutritional value. For example, green beans should snap cleanly, cucumbers should be firm, and tomatoes should be fully colored.
- Frequency: Many crops, like zucchini, cucumbers, and bush beans, produce more if harvested frequently. Pick daily or every other day.
- Tools: Use clean, sharp pruners (e.g., Corona ClassicCUT Bypass Pruner BP 3180, ~$30) or a sharp knife for clean cuts, minimizing damage to the plant.
- Seed Saving: This is where the « self-sufficient » aspect truly shines.
- Selection: Only save seeds from your healthiest, most vigorous plants that show desired traits (disease resistance, good flavor, high yield).
- Isolation: To ensure true-to-type seeds, prevent cross-pollination. This can be challenging for open-pollinated crops that readily cross (e.g., squash, corn). For beginners, focus on self-pollinating plants like beans, peas, lettuce, and tomatoes.
- Processing:
- Dry Seeds (Beans, Peas, Lettuce, Grains): Allow pods/seed heads to dry completely on the plant. Harvest, shell, and clean the seeds, removing chaff.
- Wet Seeds (Tomatoes, Cucumbers, Squash): For tomatoes, ferment the seeds in water for a few days to remove the gel coating and inhibit disease. For cucumbers/squash, scrape out seeds, wash thoroughly, and dry.
- Drying: Spread seeds thinly on screens or paper plates in a cool, dry, well-ventilated area for 1-4 weeks. Ensure they are bone-dry before storage. I aim for less than 8% moisture content.
- Storage: Store seeds in airtight containers (glass jars with desiccant packets work well) in a cool, dark, dry place (ideally 40-50°F and 30-40% humidity). Label clearly with variety and date. Properly stored seeds can remain viable for 3-10 years or more.
Step 8: Season Extension & Winterizing
Extend your harvest and protect your garden for the off-season to truly maximize your self sufficient garden from scratch.
- Cold Frames: Simple structures with a transparent top (glass, polycarbonate, or old windows) that sit over garden beds. They trap solar heat, allowing you to grow cold-hardy crops (lettuce, spinach, kale, radishes) well into winter or start seeds earlier in spring. A basic cold frame can be built from 2×6 lumber and a sheet of polycarbonate for under $100.
- Hoop Houses/Low Tunnels: Larger structures made from flexible hoops (PVC pipe or EMT conduit) covered with greenhouse plastic. These provide more space and greater temperature moderation. A 10×20 ft DIY low tunnel kit can cost $200-$500, while a larger, more robust hoop house kit might be $1,000-$3,000. I use a 6×12 ft low tunnel made from 1/2-inch PVC hoops and 6mil greenhouse plastic, which extends my lettuce and spinach harvest by at least
Deciding between raised beds and in-ground beds depends on your soil, budget, and physical capabilities.
- In-Ground Beds: If you have excellent native soil and good drainage, in-ground beds are the most economical. Double-digging (loosening soil two shovel depths) can significantly improve drainage and aeration. For my main garden, I primarily use in-ground beds, but I focus on building up the soil over time with consistent compost additions and cover cropping. I aim for beds that are no wider than 3-4 feet so I can reach the center without stepping on the soil, compacting it.
- Raised Beds: Raised beds offer numerous advantages, especially for poor soil, heavy clay, or rocky areas. They provide better drainage, warm up faster in spring, reduce compaction, and make weeding and harvesting easier on your back.
- Material Options:
- Untreated Cedar: Naturally rot-resistant and chemical-free. A 4×8 ft bed, 12 inches deep, typically requires three 2x12x8 ft cedar boards, costing around $50-$60 per board (total ~$150-$180) plus corner brackets or screws. My first raised beds were cedar and are still going strong after 7 years.
- Galvanized Steel: Durable, long-lasting, and aesthetically pleasing. Brands like Vego Garden offer modular kits. A Vego Garden 17″ Tall 8-in-1 Metal Raised Garden Bed (can be configured to 4×8 ft) costs approximately $250-$300.
- Concrete Blocks/Stones: Very durable but can leach minerals (though generally safe once weathered) and can be expensive.
- Recycled Materials: Pallets (check for chemical treatment stamps like « HT » for heat-treated), old tires (controversial due to potential chemical leaching).
- Filling Raised Beds: Don’t just fill with topsoil. Use a « Hugelkultur » approach (logs, branches, leaves, then compost, then topsoil) or a mixture of 60% good quality topsoil, 30% compost, and 10% perlite or vermiculite for drainage. A 4x8x1 ft raised bed requires about 32 cubic feet (or ~1.2 cubic yards) of soil mix, which can cost $100-$200 depending on your source.
- Material Options:
Step 4: Water Management & Irrigation
Efficient water management is critical for a self sufficient garden from scratch, especially in off-grid living where water resources might be limited.
- Rainwater Harvesting: This is my primary source of irrigation water. A 55-gallon rain barrel (e.g., EarthMark Rain Barrel, ~$120-$150) connected to a downspout can collect significant water. For larger needs, I use two 275-gallon IBC totes (Intermediate Bulk Containers, often available used for $100-$200 each from food-grade sources) connected in series. A 1,000 sq ft roof can collect approximately 620 gallons of water for every inch of rainfall. My 1,500 sq ft roof provides ample water for my 600 sq ft garden through multiple barrels and totes.
- Drip Irrigation: This is by far the most water-efficient method, delivering water directly to the plant’s root zone, minimizing evaporation and weed growth.
- Components: A typical drip system includes a pressure regulator (e.g., Rain Bird PRV-10, ~$15), a filter (Rain Bird RBY filter, ~$20), main tubing (1/2-inch poly tubing, 100ft ~$25), smaller feeder lines (1/4-inch tubing), and emitters (0.5 GPH or 1 GPH per plant).
- Kits: For beginners, a starter kit like the Rain Bird Drip Irrigation Garden Kit (model DDI-KIT-1P, ~$40-$60) is excellent for a small garden. For larger setups, I use Netafim Techline CV Drip Line (500ft roll, ~$150-$200), which has pressure-compensating emitters built-in, ensuring even watering across long runs.
- Automation: For true self-sufficiency, consider a battery-powered timer (e.g., Orbit B-Hyve Bluetooth Hose Faucet Timer, ~$50) or a solar-powered timer connected to a small 12V pump.
- Solar-Powered Pumps: For lifting water from a well, pond, or large storage tank to your garden, a solar pump is a game-changer. For a smaller drip system, a Shurflo 2088-594-152 Diaphragm Pump (12V, 3.5 GPM, ~$180) can be powered by a single 100W solar panel (e.g., Renogy 100W Monocrystalline Solar Panel, ~$100) and a small 12V battery (e.g., a 50Ah LiFePO4 battery like the Battle Born 50Ah, ~$450). For larger operations or deeper wells, more robust systems are needed. If you’re looking to build out a comprehensive off-grid power system to support your garden’s water needs, or indeed your entire homestead, you might want to explore resources like the Power Grid Generator complete system guide to understand the full scope of what’s possible in terms of energy independence.
Step 5: Seed Selection & Planting
The choice of seeds is crucial for a truly self sufficient garden from scratch.
- Choose Heirloom & Open-Pollinated Seeds: These varieties produce seeds that will grow true to type, meaning you can save seeds from your harvest year after year. F1 hybrids, while often vigorous, will not produce consistent offspring from saved seeds. Reputable seed companies include Baker Creek Heirloom Seeds, High Mowing Organic Seeds, and Seed Savers Exchange. Start with common, reliable varieties like ‘Black Krim’ tomatoes, ‘Provider’ bush beans, ‘Waltham Butternut’ squash, and ‘Black Seeded Simpson’ lettuce.
- Start Seeds Indoors (Optional but Recommended): For longer growing seasons or specific crops, starting seeds indoors gives you a head start. Use seed-starting mix (e.g., Espoma Organic Seed Starter Mix, ~$10 for 16qt bag) in seed trays (Jiffy Professional Greenhouse 72-cell kit, ~$15). Provide adequate light with LED grow lights (Barrina T5 2ft 4-pack LED Grow Lights, 20W each, ~$50) for 14-16 hours a day, positioned 2-4 inches above seedlings. Maintain consistent temperatures (65-75°F for most).
- Direct Sowing vs. Transplanting: Some crops (carrots, radishes, beans, corn) prefer direct sowing into the garden bed. Others (tomatoes, peppers, broccoli, kale) benefit from being started indoors and transplanted. Follow seed packet instructions for planting depths (e.g., lettuce seeds are often surface-sown or planted 1/8 inch deep, while beans are 1 inch deep) and spacing.
- Companion Planting: Strategically plant different species together to enhance growth, deter pests, and attract beneficial insects. For example, planting marigolds near tomatoes can deter nematodes, and basil improves tomato flavor. Nasturtiums can act as a trap crop for aphids.
- Succession Planting: For a continuous harvest, plant small batches of quick-growing crops (lettuce, radishes, cilantro) every 2-3 weeks. As one crop finishes, another is ready to take its place.
Step 6: Pest & Disease Management (Organic)
Maintaining a self sufficient garden from scratch means embracing organic pest and disease control.
- Integrated Pest Management (IPM): This holistic approach combines several strategies.
- Observation: Regularly inspect your plants for early signs of pests or disease. Catching issues early is key.
- Physical Barriers: Use row covers (e.g., Agribon AG-19 floating row cover, 10×20 ft, ~$20) to protect young plants from insect pests like cabbage worms and squash bugs. Install fences (e.g., 2×4 welded wire mesh, 4 ft tall, 50 ft roll ~$70) to keep out deer, rabbits, and other larger animals.
- Hand-Picking: For larger pests like tomato hornworms or squash bugs, simply pick them off and drop them into a bucket of soapy water.
- Companion Planting: As mentioned, certain plants repel pests. Marigolds, garlic, and onions are excellent deterrents.
- Attract Beneficial Insects: Plant flowers like dill, fennel, cosmos, and sweet alyssum to attract ladybugs, lacewings, and parasitic wasps, which prey on common garden pests.
- Organic Sprays & Treatments:
- Neem Oil: An excellent broad-spectrum organic insecticide and fungicide. Bonide Neem Oil Concentrate (16oz, ~$20) can be mixed at a rate of 1-2 tbsp per gallon of water and sprayed on affected plants.
- Insecticidal Soap: Effective against soft-bodied insects like aphids, whiteflies, and spider mites. Garden Safe Insecticidal Soap (24oz ready-to-use, ~$10).
- Bacillus thuringiensis (Bt): A naturally occurring soil bacterium that targets caterpillars and worms. Monterey BT Worm & Caterpillar Killer (16oz, ~$18) is highly effective and safe for beneficial insects.
- Copper or Sulfur Sprays: For fungal diseases like powdery mildew or blight, organic copper (e.g., Bonide Copper Fungicide, ~$15 for 1lb) or sulfur (e.g., Safer Brand Garden Fungicide, ~$10 for 16oz) can be used as a last resort.
Step 7: Harvesting & Seed Saving
The culmination of your efforts is the harvest, and seed saving closes the loop on self-sufficiency.
- Harvesting Techniques:
- Timing: Harvest vegetables at their peak ripeness for best flavor and nutritional value. For example, green beans should snap cleanly, cucumbers should be firm, and tomatoes should be fully colored.
- Frequency: Many crops, like zucchini, cucumbers, and bush beans, produce more if harvested frequently. Pick daily or every other day.
- Tools: Use clean, sharp pruners (e.g., Corona ClassicCUT Bypass Pruner BP 3180, ~$30) or a sharp knife for clean cuts, minimizing damage to the plant.
- Seed Saving: This is where the « self-sufficient » aspect truly shines.
- Selection: Only save seeds from your healthiest, most vigorous plants that show desired traits (disease resistance, good flavor, high yield).
- Isolation: To ensure true-to-type seeds, prevent cross-pollination. This can be challenging for open-pollinated crops that readily cross (e.g., squash, corn). For beginners, focus on self-pollinating plants like beans, peas, lettuce, and tomatoes.
- Processing:
- Dry Seeds (Beans, Peas, Lettuce, Grains): Allow pods/seed heads to dry completely on the plant. Harvest, shell, and clean the seeds, removing chaff.
- Wet Seeds (Tomatoes, Cucumbers, Squash): For tomatoes, ferment the seeds in water for a few days to remove the gel coating and inhibit disease. For cucumbers/squash, scrape out seeds, wash thoroughly, and dry.
- Drying: Spread seeds thinly on screens or paper plates in a cool, dry, well-ventilated area for 1-4 weeks. Ensure they are bone-dry before storage. I aim for less than 8% moisture content.
- Storage: Store seeds in airtight containers (glass jars with desiccant packets work well) in a cool, dark, dry place (ideally 40-50°F and 30-40% humidity). Label clearly with variety and date. Properly stored seeds can remain viable for 3-10 years or more.
Step 8: Season Extension & Winterizing
Extend your harvest and protect your garden for the off-season to truly maximize your self sufficient garden from scratch.
- Cold Frames: Simple structures with a transparent top (glass, polycarbonate, or old windows) that sit over garden beds. They trap solar heat, allowing you to grow cold-hardy crops (lettuce, spinach, kale, radishes) well into winter or start seeds earlier in spring. A basic cold frame can be built from 2×6 lumber and a sheet of polycarbonate for under $100.
- Hoop Houses/Low Tunnels: Larger structures made from flexible hoops (PVC pipe or EMT conduit) covered with greenhouse plastic. These provide more space and greater temperature moderation. A 10×20 ft DIY low tunnel kit can cost $200-$500, while a larger, more robust hoop house kit might be $1,000-$3,000. I use a 6×12 ft low tunnel made from 1/2-inch PVC hoops and 6mil greenhouse plastic, which extends my lettuce and spinach harvest by at least
Healthy soil is the bedrock of a productive, self-sufficient garden. You can’t guess what your soil needs; you have to test it.
- Perform a Soil Test: A professional soil test will give you precise data on your soil’s pH, nutrient levels (N-P-K), and organic matter content. I recommend sending a sample to your local agricultural extension office; it typically costs $20-$50 and provides detailed recommendations. Alternatively, for a quick homeowner check, a Rapitest Soil Test Kit (40-test kit, model 1663, ~$20 on Amazon) provides a good baseline for pH, Nitrogen, Phosphorus, and Potash. Aim for a pH between 6.0 and 7.0 for most vegetables.
- Amend for pH Imbalance: If your soil is too acidic (below 6.0), add agricultural lime (dolomitic lime adds magnesium, calcitic lime adds calcium). Apply 5-10 lbs per 100 sq ft for a moderate adjustment. If it’s too alkaline (above 7.0), add elemental sulfur (e.g., Espoma Soil Acidifier, ~$15 for 6.75 lbs) or generous amounts of organic matter like peat moss or pine needles.
- Build Organic Matter: This is the single most important step for long-term soil health. Organic matter improves soil structure, water retention, drainage, and nutrient availability. Incorporate 2-4 inches of high-quality compost into your top 6-12 inches of soil annually. I make my own compost from kitchen scraps, garden waste, and shredded leaves, but you can purchase it. Local nurseries often sell bulk compost for $30-$50 per cubic yard. Aged manure (from chickens, cows, or horses – ensure it’s well-rotted to avoid burning plants) is also excellent.
- Address Nutrient Deficiencies: Based on your soil test, add specific organic amendments. If Nitrogen (N) is low, add blood meal (12-0-0, ~$20 for 3 lbs) or feather meal. For Phosphorus (P), use bone meal (3-15-0, ~$15 for 3 lbs) or rock phosphate. For Potassium (K), greensand (0-0-2.5, ~$25 for 5 lbs) or kelp meal are good choices. I rely heavily on Espoma Organic Garden-tone (5-3-3, ~$25 for an 8lb bag) as a balanced, all-purpose organic fertilizer during planting.
Step 3: Garden Bed Preparation
Deciding between raised beds and in-ground beds depends on your soil, budget, and physical capabilities.
- In-Ground Beds: If you have excellent native soil and good drainage, in-ground beds are the most economical. Double-digging (loosening soil two shovel depths) can significantly improve drainage and aeration. For my main garden, I primarily use in-ground beds, but I focus on building up the soil over time with consistent compost additions and cover cropping. I aim for beds that are no wider than 3-4 feet so I can reach the center without stepping on the soil, compacting it.
- Raised Beds: Raised beds offer numerous advantages, especially for poor soil, heavy clay, or rocky areas. They provide better drainage, warm up faster in spring, reduce compaction, and make weeding and harvesting easier on your back.
- Material Options:
- Untreated Cedar: Naturally rot-resistant and chemical-free. A 4×8 ft bed, 12 inches deep, typically requires three 2x12x8 ft cedar boards, costing around $50-$60 per board (total ~$150-$180) plus corner brackets or screws. My first raised beds were cedar and are still going strong after 7 years.
- Galvanized Steel: Durable, long-lasting, and aesthetically pleasing. Brands like Vego Garden offer modular kits. A Vego Garden 17″ Tall 8-in-1 Metal Raised Garden Bed (can be configured to 4×8 ft) costs approximately $250-$300.
- Concrete Blocks/Stones: Very durable but can leach minerals (though generally safe once weathered) and can be expensive.
- Recycled Materials: Pallets (check for chemical treatment stamps like « HT » for heat-treated), old tires (controversial due to potential chemical leaching).
- Filling Raised Beds: Don’t just fill with topsoil. Use a « Hugelkultur » approach (logs, branches, leaves, then compost, then topsoil) or a mixture of 60% good quality topsoil, 30% compost, and 10% perlite or vermiculite for drainage. A 4x8x1 ft raised bed requires about 32 cubic feet (or ~1.2 cubic yards) of soil mix, which can cost $100-$200 depending on your source.
- Material Options:
Step 4: Water Management & Irrigation
Efficient water management is critical for a self sufficient garden from scratch, especially in off-grid living where water resources might be limited.
- Rainwater Harvesting: This is my primary source of irrigation water. A 55-gallon rain barrel (e.g., EarthMark Rain Barrel, ~$120-$150) connected to a downspout can collect significant water. For larger needs, I use two 275-gallon IBC totes (Intermediate Bulk Containers, often available used for $100-$200 each from food-grade sources) connected in series. A 1,000 sq ft roof can collect approximately 620 gallons of water for every inch of rainfall. My 1,500 sq ft roof provides ample water for my 600 sq ft garden through multiple barrels and totes.
- Drip Irrigation: This is by far the most water-efficient method, delivering water directly to the plant’s root zone, minimizing evaporation and weed growth.
- Components: A typical drip system includes a pressure regulator (e.g., Rain Bird PRV-10, ~$15), a filter (Rain Bird RBY filter, ~$20), main tubing (1/2-inch poly tubing, 100ft ~$25), smaller feeder lines (1/4-inch tubing), and emitters (0.5 GPH or 1 GPH per plant).
- Kits: For beginners, a starter kit like the Rain Bird Drip Irrigation Garden Kit (model DDI-KIT-1P, ~$40-$60) is excellent for a small garden. For larger setups, I use Netafim Techline CV Drip Line (500ft roll, ~$150-$200), which has pressure-compensating emitters built-in, ensuring even watering across long runs.
- Automation: For true self-sufficiency, consider a battery-powered timer (e.g., Orbit B-Hyve Bluetooth Hose Faucet Timer, ~$50) or a solar-powered timer connected to a small 12V pump.
- Solar-Powered Pumps: For lifting water from a well, pond, or large storage tank to your garden, a solar pump is a game-changer. For a smaller drip system, a Shurflo 2088-594-152 Diaphragm Pump (12V, 3.5 GPM, ~$180) can be powered by a single 100W solar panel (e.g., Renogy 100W Monocrystalline Solar Panel, ~$100) and a small 12V battery (e.g., a 50Ah LiFePO4 battery like the Battle Born 50Ah, ~$450). For larger operations or deeper wells, more robust systems are needed. If you’re looking to build out a comprehensive off-grid power system to support your garden’s water needs, or indeed your entire homestead, you might want to explore resources like the Power Grid Generator complete system guide to understand the full scope of what’s possible in terms of energy independence.
Step 5: Seed Selection & Planting
The choice of seeds is crucial for a truly self sufficient garden from scratch.
- Choose Heirloom & Open-Pollinated Seeds: These varieties produce seeds that will grow true to type, meaning you can save seeds from your harvest year after year. F1 hybrids, while often vigorous, will not produce consistent offspring from saved seeds. Reputable seed companies include Baker Creek Heirloom Seeds, High Mowing Organic Seeds, and Seed Savers Exchange. Start with common, reliable varieties like ‘Black Krim’ tomatoes, ‘Provider’ bush beans, ‘Waltham Butternut’ squash, and ‘Black Seeded Simpson’ lettuce.
- Start Seeds Indoors (Optional but Recommended): For longer growing seasons or specific crops, starting seeds indoors gives you a head start. Use seed-starting mix (e.g., Espoma Organic Seed Starter Mix, ~$10 for 16qt bag) in seed trays (Jiffy Professional Greenhouse 72-cell kit, ~$15). Provide adequate light with LED grow lights (Barrina T5 2ft 4-pack LED Grow Lights, 20W each, ~$50) for 14-16 hours a day, positioned 2-4 inches above seedlings. Maintain consistent temperatures (65-75°F for most).
- Direct Sowing vs. Transplanting: Some crops (carrots, radishes, beans, corn) prefer direct sowing into the garden bed. Others (tomatoes, peppers, broccoli, kale) benefit from being started indoors and transplanted. Follow seed packet instructions for planting depths (e.g., lettuce seeds are often surface-sown or planted 1/8 inch deep, while beans are 1 inch deep) and spacing.
- Companion Planting: Strategically plant different species together to enhance growth, deter pests, and attract beneficial insects. For example, planting marigolds near tomatoes can deter nematodes, and basil improves tomato flavor. Nasturtiums can act as a trap crop for aphids.
- Succession Planting: For a continuous harvest, plant small batches of quick-growing crops (lettuce, radishes, cilantro) every 2-3 weeks. As one crop finishes, another is ready to take its place.
Step 6: Pest & Disease Management (Organic)
Maintaining a self sufficient garden from scratch means embracing organic pest and disease control.
- Integrated Pest Management (IPM): This holistic approach combines several strategies.
- Observation: Regularly inspect your plants for early signs of pests or disease. Catching issues early is key.
- Physical Barriers: Use row covers (e.g., Agribon AG-19 floating row cover, 10×20 ft, ~$20) to protect young plants from insect pests like cabbage worms and squash bugs. Install fences (e.g., 2×4 welded wire mesh, 4 ft tall, 50 ft roll ~$70) to keep out deer, rabbits, and other larger animals.
- Hand-Picking: For larger pests like tomato hornworms or squash bugs, simply pick them off and drop them into a bucket of soapy water.
- Companion Planting: As mentioned, certain plants repel pests. Marigolds, garlic, and onions are excellent deterrents.
- Attract Beneficial Insects: Plant flowers like dill, fennel, cosmos, and sweet alyssum to attract ladybugs, lacewings, and parasitic wasps, which prey on common garden pests.
- Organic Sprays & Treatments:
- Neem Oil: An excellent broad-spectrum organic insecticide and fungicide. Bonide Neem Oil Concentrate (16oz, ~$20) can be mixed at a rate of 1-2 tbsp per gallon of water and sprayed on affected plants.
- Insecticidal Soap: Effective against soft-bodied insects like aphids, whiteflies, and spider mites. Garden Safe Insecticidal Soap (24oz ready-to-use, ~$10).
- Bacillus thuringiensis (Bt): A naturally occurring soil bacterium that targets caterpillars and worms. Monterey BT Worm & Caterpillar Killer (16oz, ~$18) is highly effective and safe for beneficial insects.
- Copper or Sulfur Sprays: For fungal diseases like powdery mildew or blight, organic copper (e.g., Bonide Copper Fungicide, ~$15 for 1lb) or sulfur (e.g., Safer Brand Garden Fungicide, ~$10 for 16oz) can be used as a last resort.
Step 7: Harvesting & Seed Saving
The culmination of your efforts is the harvest, and seed saving closes the loop on self-sufficiency.
- Harvesting Techniques:
- Timing: Harvest vegetables at their peak ripeness for best flavor and nutritional value. For example, green beans should snap cleanly, cucumbers should be firm, and tomatoes should be fully colored.
- Frequency: Many crops, like zucchini, cucumbers, and bush beans, produce more if harvested frequently. Pick daily or every other day.
- Tools: Use clean, sharp pruners (e.g., Corona ClassicCUT Bypass Pruner BP 3180, ~$30) or a sharp knife for clean cuts, minimizing damage to the plant.
- Seed Saving: This is where the « self-sufficient » aspect truly shines.
- Selection: Only save seeds from your healthiest, most vigorous plants that show desired traits (disease resistance, good flavor, high yield).
- Isolation: To ensure true-to-type seeds, prevent cross-pollination. This can be challenging for open-pollinated crops that readily cross (e.g., squash, corn). For beginners, focus on self-pollinating plants like beans, peas, lettuce, and tomatoes.
- Processing:
- Dry Seeds (Beans, Peas, Lettuce, Grains): Allow pods/seed heads to dry completely on the plant. Harvest, shell, and clean the seeds, removing chaff.
- Wet Seeds (Tomatoes, Cucumbers, Squash): For tomatoes, ferment the seeds in water for a few days to remove the gel coating and inhibit disease. For cucumbers/squash, scrape out seeds, wash thoroughly, and dry.
- Drying: Spread seeds thinly on screens or paper plates in a cool, dry, well-ventilated area for 1-4 weeks. Ensure they are bone-dry before storage. I aim for less than 8% moisture content.
- Storage: Store seeds in airtight containers (glass jars with desiccant packets work well) in a cool, dark, dry place (ideally 40-50°F and 30-40% humidity). Label clearly with variety and date. Properly stored seeds can remain viable for 3-10 years or more.
Step 8: Season Extension & Winterizing
Extend your harvest and protect your garden for the off-season to truly maximize your self sufficient garden from scratch.
- Cold Frames: Simple structures with a transparent top (glass, polycarbonate, or old windows) that sit over garden beds. They trap solar heat, allowing you to grow cold-hardy crops (lettuce, spinach, kale, radishes) well into winter or start seeds earlier in spring. A basic cold frame can be built from 2×6 lumber and a sheet of polycarbonate for under $100.
- Hoop Houses/Low Tunnels: Larger structures made from flexible hoops (PVC pipe or EMT conduit) covered with greenhouse plastic. These provide more space and greater temperature moderation. A 10×20 ft DIY low tunnel kit can cost $200-$500, while a larger, more robust hoop house kit might be $1,000-$3,000. I use a 6×12 ft low tunnel made from 1/2-inch PVC hoops and 6mil greenhouse plastic, which extends my lettuce and spinach harvest by at least
Step 6: Pest & Disease Management (Organic)
Maintaining a self sufficient garden from scratch means embracing organic pest and disease control.
- Integrated Pest Management (IPM): This holistic approach combines several strategies.
- Observation: Regularly inspect your plants for early signs of pests or disease. Catching issues early is key.
- Physical Barriers: Use row covers (e.g., Agribon AG-19 floating row cover, 10×20 ft, ~$20) to protect young plants from insect pests like cabbage worms and squash bugs. Install fences (e.g., 2×4 welded wire mesh, 4 ft tall, 50 ft roll ~$70) to keep out deer, rabbits, and other larger animals.
- Hand-Picking: For larger pests like tomato hornworms or squash bugs, simply pick them off and drop them into a bucket of soapy water.
- Companion Planting: As mentioned, certain plants repel pests. Marigolds, garlic, and onions are excellent deterrents.
- Attract Beneficial Insects: Plant flowers like dill, fennel, cosmos, and sweet alyssum to attract ladybugs, lacewings, and parasitic wasps, which prey on common garden pests.
- Organic Sprays & Treatments:
- Neem Oil: An excellent broad-spectrum organic insecticide and fungicide. Bonide Neem Oil Concentrate (16oz, ~$20) can be mixed at a rate of 1-2 tbsp per gallon of water and sprayed on affected plants.
- Insecticidal Soap: Effective against soft-bodied insects like aphids, whiteflies, and spider mites. Garden Safe Insecticidal Soap (24oz ready-to-use, ~$10).
- Bacillus thuringiensis (Bt): A naturally occurring soil bacterium that targets caterpillars and worms. Monterey BT Worm & Caterpillar Killer (16oz, ~$18) is highly effective and safe for beneficial insects.
- Copper or Sulfur Sprays: For fungal diseases like powdery mildew or blight, organic copper (e.g., Bonide Copper Fungicide, ~$15 for 1lb) or sulfur (e.g., Safer Brand Garden Fungicide, ~$10 for 16oz) can be used as a last resort.
Step 7: Harvesting & Seed Saving
The culmination of your efforts is the harvest, and seed saving closes the loop on self-sufficiency.
- Harvesting Techniques:
- Timing: Harvest vegetables at their peak ripeness for best flavor and nutritional value. For example, green beans should snap cleanly, cucumbers should be firm, and tomatoes should be fully colored.
- Frequency: Many crops, like zucchini, cucumbers, and bush beans, produce more if harvested frequently. Pick daily or every other day.
- Tools: Use clean, sharp pruners (e.g., Corona ClassicCUT Bypass Pruner BP 3180, ~$30) or a sharp knife for clean cuts, minimizing damage to the plant.
- Seed Saving: This is where the « self-sufficient » aspect truly shines.
- Selection: Only save seeds from your healthiest, most vigorous plants that show desired traits (disease resistance, good flavor, high yield).
- Isolation: To ensure true-to-type seeds, prevent cross-pollination. This can be challenging for open-pollinated crops that readily cross (e.g., squash, corn). For beginners, focus on self-pollinating plants like beans, peas, lettuce, and tomatoes.
- Processing:
- Dry Seeds (Beans, Peas, Lettuce, Grains): Allow pods/seed heads to dry completely on the plant. Harvest, shell, and clean the seeds, removing chaff.
- Wet Seeds (Tomatoes, Cucumbers, Squash): For tomatoes, ferment the seeds in water for a few days to remove the gel coating and inhibit disease. For cucumbers/squash, scrape out seeds, wash thoroughly, and dry.
- Drying: Spread seeds thinly on screens or paper plates in a cool, dry, well-ventilated area for 1-4 weeks. Ensure they are bone-dry before storage. I aim for less than 8% moisture content.
- Storage: Store seeds in airtight containers (glass jars with desiccant packets work well) in a cool, dark, dry place (ideally 40-50°F and 30-40% humidity). Label clearly with variety and date. Properly stored seeds can remain viable for 3-10 years or more.
Step 8: Season Extension & Winterizing
Extend your harvest and protect your garden for the off-season to truly maximize your self sufficient garden from scratch.
- Cold Frames: Simple structures with a transparent top (glass, polycarbonate, or old windows) that sit over garden beds. They trap solar heat, allowing you to grow cold-hardy crops (lettuce, spinach, kale, radishes) well into winter or start seeds earlier in spring. A basic cold frame can be built from 2×6 lumber and a sheet of polycarbonate for under $100.
- Hoop Houses/Low Tunnels: Larger structures made from flexible hoops (PVC pipe or EMT conduit) covered with greenhouse plastic. These provide more space and greater temperature moderation. A 10×20 ft DIY low tunnel kit can cost $200-$500, while a larger, more robust hoop house kit might be $1,000-$3,000. I use a 6×12 ft low tunnel made from 1/2-inch PVC hoops and 6mil greenhouse plastic, which extends my lettuce and spinach harvest by at least
The choice of seeds is crucial for a truly self sufficient garden from scratch.
- Choose Heirloom & Open-Pollinated Seeds: These varieties produce seeds that will grow true to type, meaning you can save seeds from your harvest year after year. F1 hybrids, while often vigorous, will not produce consistent offspring from saved seeds. Reputable seed companies include Baker Creek Heirloom Seeds, High Mowing Organic Seeds, and Seed Savers Exchange. Start with common, reliable varieties like ‘Black Krim’ tomatoes, ‘Provider’ bush beans, ‘Waltham Butternut’ squash, and ‘Black Seeded Simpson’ lettuce.
- Start Seeds Indoors (Optional but Recommended): For longer growing seasons or specific crops, starting seeds indoors gives you a head start. Use seed-starting mix (e.g., Espoma Organic Seed Starter Mix, ~$10 for 16qt bag) in seed trays (Jiffy Professional Greenhouse 72-cell kit, ~$15). Provide adequate light with LED grow lights (Barrina T5 2ft 4-pack LED Grow Lights, 20W each, ~$50) for 14-16 hours a day, positioned 2-4 inches above seedlings. Maintain consistent temperatures (65-75°F for most).
- Direct Sowing vs. Transplanting: Some crops (carrots, radishes, beans, corn) prefer direct sowing into the garden bed. Others (tomatoes, peppers, broccoli, kale) benefit from being started indoors and transplanted. Follow seed packet instructions for planting depths (e.g., lettuce seeds are often surface-sown or planted 1/8 inch deep, while beans are 1 inch deep) and spacing.
- Companion Planting: Strategically plant different species together to enhance growth, deter pests, and attract beneficial insects. For example, planting marigolds near tomatoes can deter nematodes, and basil improves tomato flavor. Nasturtiums can act as a trap crop for aphids.
- Succession Planting: For a continuous harvest, plant small batches of quick-growing crops (lettuce, radishes, cilantro) every 2-3 weeks. As one crop finishes, another is ready to take its place.
Step 6: Pest & Disease Management (Organic)
Maintaining a self sufficient garden from scratch means embracing organic pest and disease control.
- Integrated Pest Management (IPM): This holistic approach combines several strategies.
- Observation: Regularly inspect your plants for early signs of pests or disease. Catching issues early is key.
- Physical Barriers: Use row covers (e.g., Agribon AG-19 floating row cover, 10×20 ft, ~$20) to protect young plants from insect pests like cabbage worms and squash bugs. Install fences (e.g., 2×4 welded wire mesh, 4 ft tall, 50 ft roll ~$70) to keep out deer, rabbits, and other larger animals.
- Hand-Picking: For larger pests like tomato hornworms or squash bugs, simply pick them off and drop them into a bucket of soapy water.
- Companion Planting: As mentioned, certain plants repel pests. Marigolds, garlic, and onions are excellent deterrents.
- Attract Beneficial Insects: Plant flowers like dill, fennel, cosmos, and sweet alyssum to attract ladybugs, lacewings, and parasitic wasps, which prey on common garden pests.
- Organic Sprays & Treatments:
- Neem Oil: An excellent broad-spectrum organic insecticide and fungicide. Bonide Neem Oil Concentrate (16oz, ~$20) can be mixed at a rate of 1-2 tbsp per gallon of water and sprayed on affected plants.
- Insecticidal Soap: Effective against soft-bodied insects like aphids, whiteflies, and spider mites. Garden Safe Insecticidal Soap (24oz ready-to-use, ~$10).
- Bacillus thuringiensis (Bt): A naturally occurring soil bacterium that targets caterpillars and worms. Monterey BT Worm & Caterpillar Killer (16oz, ~$18) is highly effective and safe for beneficial insects.
- Copper or Sulfur Sprays: For fungal diseases like powdery mildew or blight, organic copper (e.g., Bonide Copper Fungicide, ~$15 for 1lb) or sulfur (e.g., Safer Brand Garden Fungicide, ~$10 for 16oz) can be used as a last resort.
Step 7: Harvesting & Seed Saving
The culmination of your efforts is the harvest, and seed saving closes the loop on self-sufficiency.
- Harvesting Techniques:
- Timing: Harvest vegetables at their peak ripeness for best flavor and nutritional value. For example, green beans should snap cleanly, cucumbers should be firm, and tomatoes should be fully colored.
- Frequency: Many crops, like zucchini, cucumbers, and bush beans, produce more if harvested frequently. Pick daily or every other day.
- Tools: Use clean, sharp pruners (e.g., Corona ClassicCUT Bypass Pruner BP 3180, ~$30) or a sharp knife for clean cuts, minimizing damage to the plant.
- Seed Saving: This is where the « self-sufficient » aspect truly shines.
- Selection: Only save seeds from your healthiest, most vigorous plants that show desired traits (disease resistance, good flavor, high yield).
- Isolation: To ensure true-to-type seeds, prevent cross-pollination. This can be challenging for open-pollinated crops that readily cross (e.g., squash, corn). For beginners, focus on self-pollinating plants like beans, peas, lettuce, and tomatoes.
- Processing:
- Dry Seeds (Beans, Peas, Lettuce, Grains): Allow pods/seed heads to dry completely on the plant. Harvest, shell, and clean the seeds, removing chaff.
- Wet Seeds (Tomatoes, Cucumbers, Squash): For tomatoes, ferment the seeds in water for a few days to remove the gel coating and inhibit disease. For cucumbers/squash, scrape out seeds, wash thoroughly, and dry.
- Drying: Spread seeds thinly on screens or paper plates in a cool, dry, well-ventilated area for 1-4 weeks. Ensure they are bone-dry before storage. I aim for less than 8% moisture content.
- Storage: Store seeds in airtight containers (glass jars with desiccant packets work well) in a cool, dark, dry place (ideally 40-50°F and 30-40% humidity). Label clearly with variety and date. Properly stored seeds can remain viable for 3-10 years or more.
Step 8: Season Extension & Winterizing
Extend your harvest and protect your garden for the off-season to truly maximize your self sufficient garden from scratch.
- Cold Frames: Simple structures with a transparent top (glass, polycarbonate, or old windows) that sit over garden beds. They trap solar heat, allowing you to grow cold-hardy crops (lettuce, spinach, kale, radishes) well into winter or start seeds earlier in spring. A basic cold frame can be built from 2×6 lumber and a sheet of polycarbonate for under $100.
- Hoop Houses/Low Tunnels: Larger structures made from flexible hoops (PVC pipe or EMT conduit) covered with greenhouse plastic. These provide more space and greater temperature moderation. A 10×20 ft DIY low tunnel kit can cost $200-$500, while a larger, more robust hoop house kit might be $1,000-$3,000. I use a 6×12 ft low tunnel made from 1/2-inch PVC hoops and 6mil greenhouse plastic, which extends my lettuce and spinach harvest by at least
Step 5: Seed Selection & Planting
The choice of seeds is crucial for a truly self sufficient garden from scratch.
- Choose Heirloom & Open-Pollinated Seeds: These varieties produce seeds that will grow true to type, meaning you can save seeds from your harvest year after year. F1 hybrids, while often vigorous, will not produce consistent offspring from saved seeds. Reputable seed companies include Baker Creek Heirloom Seeds, High Mowing Organic Seeds, and Seed Savers Exchange. Start with common, reliable varieties like ‘Black Krim’ tomatoes, ‘Provider’ bush beans, ‘Waltham Butternut’ squash, and ‘Black Seeded Simpson’ lettuce.
- Start Seeds Indoors (Optional but Recommended): For longer growing seasons or specific crops, starting seeds indoors gives you a head start. Use seed-starting mix (e.g., Espoma Organic Seed Starter Mix, ~$10 for 16qt bag) in seed trays (Jiffy Professional Greenhouse 72-cell kit, ~$15). Provide adequate light with LED grow lights (Barrina T5 2ft 4-pack LED Grow Lights, 20W each, ~$50) for 14-16 hours a day, positioned 2-4 inches above seedlings. Maintain consistent temperatures (65-75°F for most).
- Direct Sowing vs. Transplanting: Some crops (carrots, radishes, beans, corn) prefer direct sowing into the garden bed. Others (tomatoes, peppers, broccoli, kale) benefit from being started indoors and transplanted. Follow seed packet instructions for planting depths (e.g., lettuce seeds are often surface-sown or planted 1/8 inch deep, while beans are 1 inch deep) and spacing.
- Companion Planting: Strategically plant different species together to enhance growth, deter pests, and attract beneficial insects. For example, planting marigolds near tomatoes can deter nematodes, and basil improves tomato flavor. Nasturtiums can act as a trap crop for aphids.
- Succession Planting: For a continuous harvest, plant small batches of quick-growing crops (lettuce, radishes, cilantro) every 2-3 weeks. As one crop finishes, another is ready to take its place.
Step 6: Pest & Disease Management (Organic)
Maintaining a self sufficient garden from scratch means embracing organic pest and disease control.
- Integrated Pest Management (IPM): This holistic approach combines several strategies.
- Observation: Regularly inspect your plants for early signs of pests or disease. Catching issues early is key.
- Physical Barriers: Use row covers (e.g., Agribon AG-19 floating row cover, 10×20 ft, ~$20) to protect young plants from insect pests like cabbage worms and squash bugs. Install fences (e.g., 2×4 welded wire mesh, 4 ft tall, 50 ft roll ~$70) to keep out deer, rabbits, and other larger animals.
- Hand-Picking: For larger pests like tomato hornworms or squash bugs, simply pick them off and drop them into a bucket of soapy water.
- Companion Planting: As mentioned, certain plants repel pests. Marigolds, garlic, and onions are excellent deterrents.
- Attract Beneficial Insects: Plant flowers like dill, fennel, cosmos, and sweet alyssum to attract ladybugs, lacewings, and parasitic wasps, which prey on common garden pests.
- Organic Sprays & Treatments:
- Neem Oil: An excellent broad-spectrum organic insecticide and fungicide. Bonide Neem Oil Concentrate (16oz, ~$20) can be mixed at a rate of 1-2 tbsp per gallon of water and sprayed on affected plants.
- Insecticidal Soap: Effective against soft-bodied insects like aphids, whiteflies, and spider mites. Garden Safe Insecticidal Soap (24oz ready-to-use, ~$10).
- Bacillus thuringiensis (Bt): A naturally occurring soil bacterium that targets caterpillars and worms. Monterey BT Worm & Caterpillar Killer (16oz, ~$18) is highly effective and safe for beneficial insects.
- Copper or Sulfur Sprays: For fungal diseases like powdery mildew or blight, organic copper (e.g., Bonide Copper Fungicide, ~$15 for 1lb) or sulfur (e.g., Safer Brand Garden Fungicide, ~$10 for 16oz) can be used as a last resort.
Step 7: Harvesting & Seed Saving
The culmination of your efforts is the harvest, and seed saving closes the loop on self-sufficiency.
- Harvesting Techniques:
- Timing: Harvest vegetables at their peak ripeness for best flavor and nutritional value. For example, green beans should snap cleanly, cucumbers should be firm, and tomatoes should be fully colored.
- Frequency: Many crops, like zucchini, cucumbers, and bush beans, produce more if harvested frequently. Pick daily or every other day.
- Tools: Use clean, sharp pruners (e.g., Corona ClassicCUT Bypass Pruner BP 3180, ~$30) or a sharp knife for clean cuts, minimizing damage to the plant.
- Seed Saving: This is where the « self-sufficient » aspect truly shines.
- Selection: Only save seeds from your healthiest, most vigorous plants that show desired traits (disease resistance, good flavor, high yield).
- Isolation: To ensure true-to-type seeds, prevent cross-pollination. This can be challenging for open-pollinated crops that readily cross (e.g., squash, corn). For beginners, focus on self-pollinating plants like beans, peas, lettuce, and tomatoes.
- Processing:
- Dry Seeds (Beans, Peas, Lettuce, Grains): Allow pods/seed heads to dry completely on the plant. Harvest, shell, and clean the seeds, removing chaff.
- Wet Seeds (Tomatoes, Cucumbers, Squash): For tomatoes, ferment the seeds in water for a few days to remove the gel coating and inhibit disease. For cucumbers/squash, scrape out seeds, wash thoroughly, and dry.
- Drying: Spread seeds thinly on screens or paper plates in a cool, dry, well-ventilated area for 1-4 weeks. Ensure they are bone-dry before storage. I aim for less than 8% moisture content.
- Storage: Store seeds in airtight containers (glass jars with desiccant packets work well) in a cool, dark, dry place (ideally 40-50°F and 30-40% humidity). Label clearly with variety and date. Properly stored seeds can remain viable for 3-10 years or more.
Step 8: Season Extension & Winterizing
Extend your harvest and protect your garden for the off-season to truly maximize your self sufficient garden from scratch.
- Cold Frames: Simple structures with a transparent top (glass, polycarbonate, or old windows) that sit over garden beds. They trap solar heat, allowing you to grow cold-hardy crops (lettuce, spinach, kale, radishes) well into winter or start seeds earlier in spring. A basic cold frame can be built from 2×6 lumber and a sheet of polycarbonate for under $100.
- Hoop Houses/Low Tunnels: Larger structures made from flexible hoops (PVC pipe or EMT conduit) covered with greenhouse plastic. These provide more space and greater temperature moderation. A 10×20 ft DIY low tunnel kit can cost $200-$500, while a larger, more robust hoop house kit might be $1,000-$3,000. I use a 6×12 ft low tunnel made from 1/2-inch PVC hoops and 6mil greenhouse plastic, which extends my lettuce and spinach harvest by at least
- Rainwater Harvesting: This is my primary source of irrigation water. A 55-gallon rain barrel (e.g., EarthMark Rain Barrel, ~$120-$150) connected to a downspout can collect significant water. For larger needs, I use two 275-gallon IBC totes (Intermediate Bulk Containers, often available used for $100-$200 each from food-grade sources) connected in series. A 1,000 sq ft roof can collect approximately 620 gallons of water for every inch of rainfall. My 1,500 sq ft roof provides ample water for my 600 sq ft garden through multiple barrels and totes.
- Drip Irrigation: This is by far the most water-efficient method, delivering water directly to the plant’s root zone, minimizing evaporation and weed growth.
- Components: A typical drip system includes a pressure regulator (e.g., Rain Bird PRV-10, ~$15), a filter (Rain Bird RBY filter, ~$20), main tubing (1/2-inch poly tubing, 100ft ~$25), smaller feeder lines (1/4-inch tubing), and emitters (0.5 GPH or 1 GPH per plant).
- Kits: For beginners, a starter kit like the Rain Bird Drip Irrigation Garden Kit (model DDI-KIT-1P, ~$40-$60) is excellent for a small garden. For larger setups, I use Netafim Techline CV Drip Line (500ft roll, ~$150-$200), which has pressure-compensating emitters built-in, ensuring even watering across long runs.
- Automation: For true self-sufficiency, consider a battery-powered timer (e.g., Orbit B-Hyve Bluetooth Hose Faucet Timer, ~$50) or a solar-powered timer connected to a small 12V pump.
- Solar-Powered Pumps: For lifting water from a well, pond, or large storage tank to your garden, a solar pump is a game-changer. For a smaller drip system, a Shurflo 2088-594-152 Diaphragm Pump (12V, 3.5 GPM, ~$180) can be powered by a single 100W solar panel (e.g., Renogy 100W Monocrystalline Solar Panel, ~$100) and a small 12V battery (e.g., a 50Ah LiFePO4 battery like the Battle Born 50Ah, ~$450). For larger operations or deeper wells, more robust systems are needed. If you’re looking to build out a comprehensive off-grid power system to support your garden’s water needs, or indeed your entire homestead, you might want to explore resources like the Power Grid Generator complete system guide to understand the full scope of what’s possible in terms of energy independence.
Step 5: Seed Selection & Planting
The choice of seeds is crucial for a truly self sufficient garden from scratch.
- Choose Heirloom & Open-Pollinated Seeds: These varieties produce seeds that will grow true to type, meaning you can save seeds from your harvest year after year. F1 hybrids, while often vigorous, will not produce consistent offspring from saved seeds. Reputable seed companies include Baker Creek Heirloom Seeds, High Mowing Organic Seeds, and Seed Savers Exchange. Start with common, reliable varieties like ‘Black Krim’ tomatoes, ‘Provider’ bush beans, ‘Waltham Butternut’ squash, and ‘Black Seeded Simpson’ lettuce.
- Start Seeds Indoors (Optional but Recommended): For longer growing seasons or specific crops, starting seeds indoors gives you a head start. Use seed-starting mix (e.g., Espoma Organic Seed Starter Mix, ~$10 for 16qt bag) in seed trays (Jiffy Professional Greenhouse 72-cell kit, ~$15). Provide adequate light with LED grow lights (Barrina T5 2ft 4-pack LED Grow Lights, 20W each, ~$50) for 14-16 hours a day, positioned 2-4 inches above seedlings. Maintain consistent temperatures (65-75°F for most).
- Direct Sowing vs. Transplanting: Some crops (carrots, radishes, beans, corn) prefer direct sowing into the garden bed. Others (tomatoes, peppers, broccoli, kale) benefit from being started indoors and transplanted. Follow seed packet instructions for planting depths (e.g., lettuce seeds are often surface-sown or planted 1/8 inch deep, while beans are 1 inch deep) and spacing.
- Companion Planting: Strategically plant different species together to enhance growth, deter pests, and attract beneficial insects. For example, planting marigolds near tomatoes can deter nematodes, and basil improves tomato flavor. Nasturtiums can act as a trap crop for aphids.
- Succession Planting: For a continuous harvest, plant small batches of quick-growing crops (lettuce, radishes, cilantro) every 2-3 weeks. As one crop finishes, another is ready to take its place.
Step 6: Pest & Disease Management (Organic)
Maintaining a self sufficient garden from scratch means embracing organic pest and disease control.
- Integrated Pest Management (IPM): This holistic approach combines several strategies.
- Observation: Regularly inspect your plants for early signs of pests or disease. Catching issues early is key.
- Physical Barriers: Use row covers (e.g., Agribon AG-19 floating row cover, 10×20 ft, ~$20) to protect young plants from insect pests like cabbage worms and squash bugs. Install fences (e.g., 2×4 welded wire mesh, 4 ft tall, 50 ft roll ~$70) to keep out deer, rabbits, and other larger animals.
- Hand-Picking: For larger pests like tomato hornworms or squash bugs, simply pick them off and drop them into a bucket of soapy water.
- Companion Planting: As mentioned, certain plants repel pests. Marigolds, garlic, and onions are excellent deterrents.
- Attract Beneficial Insects: Plant flowers like dill, fennel, cosmos, and sweet alyssum to attract ladybugs, lacewings, and parasitic wasps, which prey on common garden pests.
- Organic Sprays & Treatments:
- Neem Oil: An excellent broad-spectrum organic insecticide and fungicide. Bonide Neem Oil Concentrate (16oz, ~$20) can be mixed at a rate of 1-2 tbsp per gallon of water and sprayed on affected plants.
- Insecticidal Soap: Effective against soft-bodied insects like aphids, whiteflies, and spider mites. Garden Safe Insecticidal Soap (24oz ready-to-use, ~$10).
- Bacillus thuringiensis (Bt): A naturally occurring soil bacterium that targets caterpillars and worms. Monterey BT Worm & Caterpillar Killer (16oz, ~$18) is highly effective and safe for beneficial insects.
- Copper or Sulfur Sprays: For fungal diseases like powdery mildew or blight, organic copper (e.g., Bonide Copper Fungicide, ~$15 for 1lb) or sulfur (e.g., Safer Brand Garden Fungicide, ~$10 for 16oz) can be used as a last resort.
Step 7: Harvesting & Seed Saving
The culmination of your efforts is the harvest, and seed saving closes the loop on self-sufficiency.
- Harvesting Techniques:
- Timing: Harvest vegetables at their peak ripeness for best flavor and nutritional value. For example, green beans should snap cleanly, cucumbers should be firm, and tomatoes should be fully colored.
- Frequency: Many crops, like zucchini, cucumbers, and bush beans, produce more if harvested frequently. Pick daily or every other day.
- Tools: Use clean, sharp pruners (e.g., Corona ClassicCUT Bypass Pruner BP 3180, ~$30) or a sharp knife for clean cuts, minimizing damage to the plant.
- Seed Saving: This is where the « self-sufficient » aspect truly shines.
- Selection: Only save seeds from your healthiest, most vigorous plants that show desired traits (disease resistance, good flavor, high yield).
- Isolation: To ensure true-to-type seeds, prevent cross-pollination. This can be challenging for open-pollinated crops that readily cross (e.g., squash, corn). For beginners, focus on self-pollinating plants like beans, peas, lettuce, and tomatoes.
- Processing:
- Dry Seeds (Beans, Peas, Lettuce, Grains): Allow pods/seed heads to dry completely on the plant. Harvest, shell, and clean the seeds, removing chaff.
- Wet Seeds (Tomatoes, Cucumbers, Squash): For tomatoes, ferment the seeds in water for a few days to remove the gel coating and inhibit disease. For cucumbers/squash, scrape out seeds, wash thoroughly, and dry.
- Drying: Spread seeds thinly on screens or paper plates in a cool, dry, well-ventilated area for 1-4 weeks. Ensure they are bone-dry before storage. I aim for less than 8% moisture content.
- Storage: Store seeds in airtight containers (glass jars with desiccant packets work well) in a cool, dark, dry place (ideally 40-50°F and 30-40% humidity). Label clearly with variety and date. Properly stored seeds can remain viable for 3-10 years or more.
Step 8: Season Extension & Winterizing
Extend your harvest and protect your garden for the off-season to truly maximize your self sufficient garden from scratch.
- Cold Frames: Simple structures with a transparent top (glass, polycarbonate, or old windows) that sit over garden beds. They trap solar heat, allowing you to grow cold-hardy crops (lettuce, spinach, kale, radishes) well into winter or start seeds earlier in spring. A basic cold frame can be built from 2×6 lumber and a sheet of polycarbonate for under $100.
- Hoop Houses/Low Tunnels: Larger structures made from flexible hoops (PVC pipe or EMT conduit) covered with greenhouse plastic. These provide more space and greater temperature moderation. A 10×20 ft DIY low tunnel kit can cost $200-$500, while a larger, more robust hoop house kit might be $1,000-$3,000. I use a 6×12 ft low tunnel made from 1/2-inch PVC hoops and 6mil greenhouse plastic, which extends my lettuce and spinach harvest by at least
Efficient water management is critical for a self sufficient garden from scratch, especially in off-grid living where water resources might be limited.
- Rainwater Harvesting: This is my primary source of irrigation water. A 55-gallon rain barrel (e.g., EarthMark Rain Barrel, ~$120-$150) connected to a downspout can collect significant water. For larger needs, I use two 275-gallon IBC totes (Intermediate Bulk Containers, often available used for $100-$200 each from food-grade sources) connected in series. A 1,000 sq ft roof can collect approximately 620 gallons of water for every inch of rainfall. My 1,500 sq ft roof provides ample water for my 600 sq ft garden through multiple barrels and totes.
- Drip Irrigation: This is by far the most water-efficient method, delivering water directly to the plant’s root zone, minimizing evaporation and weed growth.
- Components: A typical drip system includes a pressure regulator (e.g., Rain Bird PRV-10, ~$15), a filter (Rain Bird RBY filter, ~$20), main tubing (1/2-inch poly tubing, 100ft ~$25), smaller feeder lines (1/4-inch tubing), and emitters (0.5 GPH or 1 GPH per plant).
- Kits: For beginners, a starter kit like the Rain Bird Drip Irrigation Garden Kit (model DDI-KIT-1P, ~$40-$60) is excellent for a small garden. For larger setups, I use Netafim Techline CV Drip Line (500ft roll, ~$150-$200), which has pressure-compensating emitters built-in, ensuring even watering across long runs.
- Automation: For true self-sufficiency, consider a battery-powered timer (e.g., Orbit B-Hyve Bluetooth Hose Faucet Timer, ~$50) or a solar-powered timer connected to a small 12V pump.
- Solar-Powered Pumps: For lifting water from a well, pond, or large storage tank to your garden, a solar pump is a game-changer. For a smaller drip system, a Shurflo 2088-594-152 Diaphragm Pump (12V, 3.5 GPM, ~$180) can be powered by a single 100W solar panel (e.g., Renogy 100W Monocrystalline Solar Panel, ~$100) and a small 12V battery (e.g., a 50Ah LiFePO4 battery like the Battle Born 50Ah, ~$450). For larger operations or deeper wells, more robust systems are needed. If you’re looking to build out a comprehensive off-grid power system to support your garden’s water needs, or indeed your entire homestead, you might want to explore resources like the Power Grid Generator complete system guide to understand the full scope of what’s possible in terms of energy independence.
Step 5: Seed Selection & Planting
The choice of seeds is crucial for a truly self sufficient garden from scratch.
- Choose Heirloom & Open-Pollinated Seeds: These varieties produce seeds that will grow true to type, meaning you can save seeds from your harvest year after year. F1 hybrids, while often vigorous, will not produce consistent offspring from saved seeds. Reputable seed companies include Baker Creek Heirloom Seeds, High Mowing Organic Seeds, and Seed Savers Exchange. Start with common, reliable varieties like ‘Black Krim’ tomatoes, ‘Provider’ bush beans, ‘Waltham Butternut’ squash, and ‘Black Seeded Simpson’ lettuce.
- Start Seeds Indoors (Optional but Recommended): For longer growing seasons or specific crops, starting seeds indoors gives you a head start. Use seed-starting mix (e.g., Espoma Organic Seed Starter Mix, ~$10 for 16qt bag) in seed trays (Jiffy Professional Greenhouse 72-cell kit, ~$15). Provide adequate light with LED grow lights (Barrina T5 2ft 4-pack LED Grow Lights, 20W each, ~$50) for 14-16 hours a day, positioned 2-4 inches above seedlings. Maintain consistent temperatures (65-75°F for most).
- Direct Sowing vs. Transplanting: Some crops (carrots, radishes, beans, corn) prefer direct sowing into the garden bed. Others (tomatoes, peppers, broccoli, kale) benefit from being started indoors and transplanted. Follow seed packet instructions for planting depths (e.g., lettuce seeds are often surface-sown or planted 1/8 inch deep, while beans are 1 inch deep) and spacing.
- Companion Planting: Strategically plant different species together to enhance growth, deter pests, and attract beneficial insects. For example, planting marigolds near tomatoes can deter nematodes, and basil improves tomato flavor. Nasturtiums can act as a trap crop for aphids.
- Succession Planting: For a continuous harvest, plant small batches of quick-growing crops (lettuce, radishes, cilantro) every 2-3 weeks. As one crop finishes, another is ready to take its place.
Step 6: Pest & Disease Management (Organic)
Maintaining a self sufficient garden from scratch means embracing organic pest and disease control.
- Integrated Pest Management (IPM): This holistic approach combines several strategies.
- Observation: Regularly inspect your plants for early signs of pests or disease. Catching issues early is key.
- Physical Barriers: Use row covers (e.g., Agribon AG-19 floating row cover, 10×20 ft, ~$20) to protect young plants from insect pests like cabbage worms and squash bugs. Install fences (e.g., 2×4 welded wire mesh, 4 ft tall, 50 ft roll ~$70) to keep out deer, rabbits, and other larger animals.
- Hand-Picking: For larger pests like tomato hornworms or squash bugs, simply pick them off and drop them into a bucket of soapy water.
- Companion Planting: As mentioned, certain plants repel pests. Marigolds, garlic, and onions are excellent deterrents.
- Attract Beneficial Insects: Plant flowers like dill, fennel, cosmos, and sweet alyssum to attract ladybugs, lacewings, and parasitic wasps, which prey on common garden pests.
- Organic Sprays & Treatments:
- Neem Oil: An excellent broad-spectrum organic insecticide and fungicide. Bonide Neem Oil Concentrate (16oz, ~$20) can be mixed at a rate of 1-2 tbsp per gallon of water and sprayed on affected plants.
- Insecticidal Soap: Effective against soft-bodied insects like aphids, whiteflies, and spider mites. Garden Safe Insecticidal Soap (24oz ready-to-use, ~$10).
- Bacillus thuringiensis (Bt): A naturally occurring soil bacterium that targets caterpillars and worms. Monterey BT Worm & Caterpillar Killer (16oz, ~$18) is highly effective and safe for beneficial insects.
- Copper or Sulfur Sprays: For fungal diseases like powdery mildew or blight, organic copper (e.g., Bonide Copper Fungicide, ~$15 for 1lb) or sulfur (e.g., Safer Brand Garden Fungicide, ~$10 for 16oz) can be used as a last resort.
Step 7: Harvesting & Seed Saving
The culmination of your efforts is the harvest, and seed saving closes the loop on self-sufficiency.
- Harvesting Techniques:
- Timing: Harvest vegetables at their peak ripeness for best flavor and nutritional value. For example, green beans should snap cleanly, cucumbers should be firm, and tomatoes should be fully colored.
- Frequency: Many crops, like zucchini, cucumbers, and bush beans, produce more if harvested frequently. Pick daily or every other day.
- Tools: Use clean, sharp pruners (e.g., Corona ClassicCUT Bypass Pruner BP 3180, ~$30) or a sharp knife for clean cuts, minimizing damage to the plant.
- Seed Saving: This is where the « self-sufficient » aspect truly shines.
- Selection: Only save seeds from your healthiest, most vigorous plants that show desired traits (disease resistance, good flavor, high yield).
- Isolation: To ensure true-to-type seeds, prevent cross-pollination. This can be challenging for open-pollinated crops that readily cross (e.g., squash, corn). For beginners, focus on self-pollinating plants like beans, peas, lettuce, and tomatoes.
- Processing:
- Dry Seeds (Beans, Peas, Lettuce, Grains): Allow pods/seed heads to dry completely on the plant. Harvest, shell, and clean the seeds, removing chaff.
- Wet Seeds (Tomatoes, Cucumbers, Squash): For tomatoes, ferment the seeds in water for a few days to remove the gel coating and inhibit disease. For cucumbers/squash, scrape out seeds, wash thoroughly, and dry.
- Drying: Spread seeds thinly on screens or paper plates in a cool, dry, well-ventilated area for 1-4 weeks. Ensure they are bone-dry before storage. I aim for less than 8% moisture content.
- Storage: Store seeds in airtight containers (glass jars with desiccant packets work well) in a cool, dark, dry place (ideally 40-50°F and 30-40% humidity). Label clearly with variety and date. Properly stored seeds can remain viable for 3-10 years or more.
Step 8: Season Extension & Winterizing
Extend your harvest and protect your garden for the off-season to truly maximize your self sufficient garden from scratch.
- Cold Frames: Simple structures with a transparent top (glass, polycarbonate, or old windows) that sit over garden beds. They trap solar heat, allowing you to grow cold-hardy crops (lettuce, spinach, kale, radishes) well into winter or start seeds earlier in spring. A basic cold frame can be built from 2×6 lumber and a sheet of polycarbonate for under $100.
- Hoop Houses/Low Tunnels: Larger structures made from flexible hoops (PVC pipe or EMT conduit) covered with greenhouse plastic. These provide more space and greater temperature moderation. A 10×20 ft DIY low tunnel kit can cost $200-$500, while a larger, more robust hoop house kit might be $1,000-$3,000. I use a 6×12 ft low tunnel made from 1/2-inch PVC hoops and 6mil greenhouse plastic, which extends my lettuce and spinach harvest by at least
Step 4: Water Management & Irrigation
Efficient water management is critical for a self sufficient garden from scratch, especially in off-grid living where water resources might be limited.
- Rainwater Harvesting: This is my primary source of irrigation water. A 55-gallon rain barrel (e.g., EarthMark Rain Barrel, ~$120-$150) connected to a downspout can collect significant water. For larger needs, I use two 275-gallon IBC totes (Intermediate Bulk Containers, often available used for $100-$200 each from food-grade sources) connected in series. A 1,000 sq ft roof can collect approximately 620 gallons of water for every inch of rainfall. My 1,500 sq ft roof provides ample water for my 600 sq ft garden through multiple barrels and totes.
- Drip Irrigation: This is by far the most water-efficient method, delivering water directly to the plant’s root zone, minimizing evaporation and weed growth.
- Components: A typical drip system includes a pressure regulator (e.g., Rain Bird PRV-10, ~$15), a filter (Rain Bird RBY filter, ~$20), main tubing (1/2-inch poly tubing, 100ft ~$25), smaller feeder lines (1/4-inch tubing), and emitters (0.5 GPH or 1 GPH per plant).
- Kits: For beginners, a starter kit like the Rain Bird Drip Irrigation Garden Kit (model DDI-KIT-1P, ~$40-$60) is excellent for a small garden. For larger setups, I use Netafim Techline CV Drip Line (500ft roll, ~$150-$200), which has pressure-compensating emitters built-in, ensuring even watering across long runs.
- Automation: For true self-sufficiency, consider a battery-powered timer (e.g., Orbit B-Hyve Bluetooth Hose Faucet Timer, ~$50) or a solar-powered timer connected to a small 12V pump.
- Solar-Powered Pumps: For lifting water from a well, pond, or large storage tank to your garden, a solar pump is a game-changer. For a smaller drip system, a Shurflo 2088-594-152 Diaphragm Pump (12V, 3.5 GPM, ~$180) can be powered by a single 100W solar panel (e.g., Renogy 100W Monocrystalline Solar Panel, ~$100) and a small 12V battery (e.g., a 50Ah LiFePO4 battery like the Battle Born 50Ah, ~$450). For larger operations or deeper wells, more robust systems are needed. If you’re looking to build out a comprehensive off-grid power system to support your garden’s water needs, or indeed your entire homestead, you might want to explore resources like the Power Grid Generator complete system guide to understand the full scope of what’s possible in terms of energy independence.
Step 5: Seed Selection & Planting
The choice of seeds is crucial for a truly self sufficient garden from scratch.
- Choose Heirloom & Open-Pollinated Seeds: These varieties produce seeds that will grow true to type, meaning you can save seeds from your harvest year after year. F1 hybrids, while often vigorous, will not produce consistent offspring from saved seeds. Reputable seed companies include Baker Creek Heirloom Seeds, High Mowing Organic Seeds, and Seed Savers Exchange. Start with common, reliable varieties like ‘Black Krim’ tomatoes, ‘Provider’ bush beans, ‘Waltham Butternut’ squash, and ‘Black Seeded Simpson’ lettuce.
- Start Seeds Indoors (Optional but Recommended): For longer growing seasons or specific crops, starting seeds indoors gives you a head start. Use seed-starting mix (e.g., Espoma Organic Seed Starter Mix, ~$10 for 16qt bag) in seed trays (Jiffy Professional Greenhouse 72-cell kit, ~$15). Provide adequate light with LED grow lights (Barrina T5 2ft 4-pack LED Grow Lights, 20W each, ~$50) for 14-16 hours a day, positioned 2-4 inches above seedlings. Maintain consistent temperatures (65-75°F for most).
- Direct Sowing vs. Transplanting: Some crops (carrots, radishes, beans, corn) prefer direct sowing into the garden bed. Others (tomatoes, peppers, broccoli, kale) benefit from being started indoors and transplanted. Follow seed packet instructions for planting depths (e.g., lettuce seeds are often surface-sown or planted 1/8 inch deep, while beans are 1 inch deep) and spacing.
- Companion Planting: Strategically plant different species together to enhance growth, deter pests, and attract beneficial insects. For example, planting marigolds near tomatoes can deter nematodes, and basil improves tomato flavor. Nasturtiums can act as a trap crop for aphids.
- Succession Planting: For a continuous harvest, plant small batches of quick-growing crops (lettuce, radishes, cilantro) every 2-3 weeks. As one crop finishes, another is ready to take its place.
Step 6: Pest & Disease Management (Organic)
Maintaining a self sufficient garden from scratch means embracing organic pest and disease control.
- Integrated Pest Management (IPM): This holistic approach combines several strategies.
- Observation: Regularly inspect your plants for early signs of pests or disease. Catching issues early is key.
- Physical Barriers: Use row covers (e.g., Agribon AG-19 floating row cover, 10×20 ft, ~$20) to protect young plants from insect pests like cabbage worms and squash bugs. Install fences (e.g., 2×4 welded wire mesh, 4 ft tall, 50 ft roll ~$70) to keep out deer, rabbits, and other larger animals.
- Hand-Picking: For larger pests like tomato hornworms or squash bugs, simply pick them off and drop them into a bucket of soapy water.
- Companion Planting: As mentioned, certain plants repel pests. Marigolds, garlic, and onions are excellent deterrents.
- Attract Beneficial Insects: Plant flowers like dill, fennel, cosmos, and sweet alyssum to attract ladybugs, lacewings, and parasitic wasps, which prey on common garden pests.
- Organic Sprays & Treatments:
- Neem Oil: An excellent broad-spectrum organic insecticide and fungicide. Bonide Neem Oil Concentrate (16oz, ~$20) can be mixed at a rate of 1-2 tbsp per gallon of water and sprayed on affected plants.
- Insecticidal Soap: Effective against soft-bodied insects like aphids, whiteflies, and spider mites. Garden Safe Insecticidal Soap (24oz ready-to-use, ~$10).
- Bacillus thuringiensis (Bt): A naturally occurring soil bacterium that targets caterpillars and worms. Monterey BT Worm & Caterpillar Killer (16oz, ~$18) is highly effective and safe for beneficial insects.
- Copper or Sulfur Sprays: For fungal diseases like powdery mildew or blight, organic copper (e.g., Bonide Copper Fungicide, ~$15 for 1lb) or sulfur (e.g., Safer Brand Garden Fungicide, ~$10 for 16oz) can be used as a last resort.
Step 7: Harvesting & Seed Saving
The culmination of your efforts is the harvest, and seed saving closes the loop on self-sufficiency.
- Harvesting Techniques:
- Timing: Harvest vegetables at their peak ripeness for best flavor and nutritional value. For example, green beans should snap cleanly, cucumbers should be firm, and tomatoes should be fully colored.
- Frequency: Many crops, like zucchini, cucumbers, and bush beans, produce more if harvested frequently. Pick daily or every other day.
- Tools: Use clean, sharp pruners (e.g., Corona ClassicCUT Bypass Pruner BP 3180, ~$30) or a sharp knife for clean cuts, minimizing damage to the plant.
- Seed Saving: This is where the « self-sufficient » aspect truly shines.
- Selection: Only save seeds from your healthiest, most vigorous plants that show desired traits (disease resistance, good flavor, high yield).
- Isolation: To ensure true-to-type seeds, prevent cross-pollination. This can be challenging for open-pollinated crops that readily cross (e.g., squash, corn). For beginners, focus on self-pollinating plants like beans, peas, lettuce, and tomatoes.
- Processing:
- Dry Seeds (Beans, Peas, Lettuce, Grains): Allow pods/seed heads to dry completely on the plant. Harvest, shell, and clean the seeds, removing chaff.
- Wet Seeds (Tomatoes, Cucumbers, Squash): For tomatoes, ferment the seeds in water for a few days to remove the gel coating and inhibit disease. For cucumbers/squash, scrape out seeds, wash thoroughly, and dry.
- Drying: Spread seeds thinly on screens or paper plates in a cool, dry, well-ventilated area for 1-4 weeks. Ensure they are bone-dry before storage. I aim for less than 8% moisture content.
- Storage: Store seeds in airtight containers (glass jars with desiccant packets work well) in a cool, dark, dry place (ideally 40-50°F and 30-40% humidity). Label clearly with variety and date. Properly stored seeds can remain viable for 3-10 years or more.
Step 8: Season Extension & Winterizing
Extend your harvest and protect your garden for the off-season to truly maximize your self sufficient garden from scratch.
- Cold Frames: Simple structures with a transparent top (glass, polycarbonate, or old windows) that sit over garden beds. They trap solar heat, allowing you to grow cold-hardy crops (lettuce, spinach, kale, radishes) well into winter or start seeds earlier in spring. A basic cold frame can be built from 2×6 lumber and a sheet of polycarbonate for under $100.
- Hoop Houses/Low Tunnels: Larger structures made from flexible hoops (PVC pipe or EMT conduit) covered with greenhouse plastic. These provide more space and greater temperature moderation. A 10×20 ft DIY low tunnel kit can cost $200-$500, while a larger, more robust hoop house kit might be $1,000-$3,000. I use a 6×12 ft low tunnel made from 1/2-inch PVC hoops and 6mil greenhouse plastic, which extends my lettuce and spinach harvest by at least
- In-Ground Beds: If you have excellent native soil and good drainage, in-ground beds are the most economical. Double-digging (loosening soil two shovel depths) can significantly improve drainage and aeration. For my main garden, I primarily use in-ground beds, but I focus on building up the soil over time with consistent compost additions and cover cropping. I aim for beds that are no wider than 3-4 feet so I can reach the center without stepping on the soil, compacting it.
- Raised Beds: Raised beds offer numerous advantages, especially for poor soil, heavy clay, or rocky areas. They provide better drainage, warm up faster in spring, reduce compaction, and make weeding and harvesting easier on your back.
- Material Options:
- Untreated Cedar: Naturally rot-resistant and chemical-free. A 4×8 ft bed, 12 inches deep, typically requires three 2x12x8 ft cedar boards, costing around $50-$60 per board (total ~$150-$180) plus corner brackets or screws. My first raised beds were cedar and are still going strong after 7 years.
- Galvanized Steel: Durable, long-lasting, and aesthetically pleasing. Brands like Vego Garden offer modular kits. A Vego Garden 17″ Tall 8-in-1 Metal Raised Garden Bed (can be configured to 4×8 ft) costs approximately $250-$300.
- Concrete Blocks/Stones: Very durable but can leach minerals (though generally safe once weathered) and can be expensive.
- Recycled Materials: Pallets (check for chemical treatment stamps like « HT » for heat-treated), old tires (controversial due to potential chemical leaching).
- Filling Raised Beds: Don’t just fill with topsoil. Use a « Hugelkultur » approach (logs, branches, leaves, then compost, then topsoil) or a mixture of 60% good quality topsoil, 30% compost, and 10% perlite or vermiculite for drainage. A 4x8x1 ft raised bed requires about 32 cubic feet (or ~1.2 cubic yards) of soil mix, which can cost $100-$200 depending on your source.
- Material Options:
Step 4: Water Management & Irrigation
Efficient water management is critical for a self sufficient garden from scratch, especially in off-grid living where water resources might be limited.
- Rainwater Harvesting: This is my primary source of irrigation water. A 55-gallon rain barrel (e.g., EarthMark Rain Barrel, ~$120-$150) connected to a downspout can collect significant water. For larger needs, I use two 275-gallon IBC totes (Intermediate Bulk Containers, often available used for $100-$200 each from food-grade sources) connected in series. A 1,000 sq ft roof can collect approximately 620 gallons of water for every inch of rainfall. My 1,500 sq ft roof provides ample water for my 600 sq ft garden through multiple barrels and totes.
- Drip Irrigation: This is by far the most water-efficient method, delivering water directly to the plant’s root zone, minimizing evaporation and weed growth.
- Components: A typical drip system includes a pressure regulator (e.g., Rain Bird PRV-10, ~$15), a filter (Rain Bird RBY filter, ~$20), main tubing (1/2-inch poly tubing, 100ft ~$25), smaller feeder lines (1/4-inch tubing), and emitters (0.5 GPH or 1 GPH per plant).
- Kits: For beginners, a starter kit like the Rain Bird Drip Irrigation Garden Kit (model DDI-KIT-1P, ~$40-$60) is excellent for a small garden. For larger setups, I use Netafim Techline CV Drip Line (500ft roll, ~$150-$200), which has pressure-compensating emitters built-in, ensuring even watering across long runs.
- Automation: For true self-sufficiency, consider a battery-powered timer (e.g., Orbit B-Hyve Bluetooth Hose Faucet Timer, ~$50) or a solar-powered timer connected to a small 12V pump.
- Solar-Powered Pumps: For lifting water from a well, pond, or large storage tank to your garden, a solar pump is a game-changer. For a smaller drip system, a Shurflo 2088-594-152 Diaphragm Pump (12V, 3.5 GPM, ~$180) can be powered by a single 100W solar panel (e.g., Renogy 100W Monocrystalline Solar Panel, ~$100) and a small 12V battery (e.g., a 50Ah LiFePO4 battery like the Battle Born 50Ah, ~$450). For larger operations or deeper wells, more robust systems are needed. If you’re looking to build out a comprehensive off-grid power system to support your garden’s water needs, or indeed your entire homestead, you might want to explore resources like the Power Grid Generator complete system guide to understand the full scope of what’s possible in terms of energy independence.
Step 5: Seed Selection & Planting
The choice of seeds is crucial for a truly self sufficient garden from scratch.
- Choose Heirloom & Open-Pollinated Seeds: These varieties produce seeds that will grow true to type, meaning you can save seeds from your harvest year after year. F1 hybrids, while often vigorous, will not produce consistent offspring from saved seeds. Reputable seed companies include Baker Creek Heirloom Seeds, High Mowing Organic Seeds, and Seed Savers Exchange. Start with common, reliable varieties like ‘Black Krim’ tomatoes, ‘Provider’ bush beans, ‘Waltham Butternut’ squash, and ‘Black Seeded Simpson’ lettuce.
- Start Seeds Indoors (Optional but Recommended): For longer growing seasons or specific crops, starting seeds indoors gives you a head start. Use seed-starting mix (e.g., Espoma Organic Seed Starter Mix, ~$10 for 16qt bag) in seed trays (Jiffy Professional Greenhouse 72-cell kit, ~$15). Provide adequate light with LED grow lights (Barrina T5 2ft 4-pack LED Grow Lights, 20W each, ~$50) for 14-16 hours a day, positioned 2-4 inches above seedlings. Maintain consistent temperatures (65-75°F for most).
- Direct Sowing vs. Transplanting: Some crops (carrots, radishes, beans, corn) prefer direct sowing into the garden bed. Others (tomatoes, peppers, broccoli, kale) benefit from being started indoors and transplanted. Follow seed packet instructions for planting depths (e.g., lettuce seeds are often surface-sown or planted 1/8 inch deep, while beans are 1 inch deep) and spacing.
- Companion Planting: Strategically plant different species together to enhance growth, deter pests, and attract beneficial insects. For example, planting marigolds near tomatoes can deter nematodes, and basil improves tomato flavor. Nasturtiums can act as a trap crop for aphids.
- Succession Planting: For a continuous harvest, plant small batches of quick-growing crops (lettuce, radishes, cilantro) every 2-3 weeks. As one crop finishes, another is ready to take its place.
Step 6: Pest & Disease Management (Organic)
Maintaining a self sufficient garden from scratch means embracing organic pest and disease control.
- Integrated Pest Management (IPM): This holistic approach combines several strategies.
- Observation: Regularly inspect your plants for early signs of pests or disease. Catching issues early is key.
- Physical Barriers: Use row covers (e.g., Agribon AG-19 floating row cover, 10×20 ft, ~$20) to protect young plants from insect pests like cabbage worms and squash bugs. Install fences (e.g., 2×4 welded wire mesh, 4 ft tall, 50 ft roll ~$70) to keep out deer, rabbits, and other larger animals.
- Hand-Picking: For larger pests like tomato hornworms or squash bugs, simply pick them off and drop them into a bucket of soapy water.
- Companion Planting: As mentioned, certain plants repel pests. Marigolds, garlic, and onions are excellent deterrents.
- Attract Beneficial Insects: Plant flowers like dill, fennel, cosmos, and sweet alyssum to attract ladybugs, lacewings, and parasitic wasps, which prey on common garden pests.
- Organic Sprays & Treatments:
- Neem Oil: An excellent broad-spectrum organic insecticide and fungicide. Bonide Neem Oil Concentrate (16oz, ~$20) can be mixed at a rate of 1-2 tbsp per gallon of water and sprayed on affected plants.
- Insecticidal Soap: Effective against soft-bodied insects like aphids, whiteflies, and spider mites. Garden Safe Insecticidal Soap (24oz ready-to-use, ~$10).
- Bacillus thuringiensis (Bt): A naturally occurring soil bacterium that targets caterpillars and worms. Monterey BT Worm & Caterpillar Killer (16oz, ~$18) is highly effective and safe for beneficial insects.
- Copper or Sulfur Sprays: For fungal diseases like powdery mildew or blight, organic copper (e.g., Bonide Copper Fungicide, ~$15 for 1lb) or sulfur (e.g., Safer Brand Garden Fungicide, ~$10 for 16oz) can be used as a last resort.
Step 7: Harvesting & Seed Saving
The culmination of your efforts is the harvest, and seed saving closes the loop on self-sufficiency.
- Harvesting Techniques:
- Timing: Harvest vegetables at their peak ripeness for best flavor and nutritional value. For example, green beans should snap cleanly, cucumbers should be firm, and tomatoes should be fully colored.
- Frequency: Many crops, like zucchini, cucumbers, and bush beans, produce more if harvested frequently. Pick daily or every other day.
- Tools: Use clean, sharp pruners (e.g., Corona ClassicCUT Bypass Pruner BP 3180, ~$30) or a sharp knife for clean cuts, minimizing damage to the plant.
- Seed Saving: This is where the « self-sufficient » aspect truly shines.
- Selection: Only save seeds from your healthiest, most vigorous plants that show desired traits (disease resistance, good flavor, high yield).
- Isolation: To ensure true-to-type seeds, prevent cross-pollination. This can be challenging for open-pollinated crops that readily cross (e.g., squash, corn). For beginners, focus on self-pollinating plants like beans, peas, lettuce, and tomatoes.
- Processing:
- Dry Seeds (Beans, Peas, Lettuce, Grains): Allow pods/seed heads to dry completely on the plant. Harvest, shell, and clean the seeds, removing chaff.
- Wet Seeds (Tomatoes, Cucumbers, Squash): For tomatoes, ferment the seeds in water for a few days to remove the gel coating and inhibit disease. For cucumbers/squash, scrape out seeds, wash thoroughly, and dry.
- Drying: Spread seeds thinly on screens or paper plates in a cool, dry, well-ventilated area for 1-4 weeks. Ensure they are bone-dry before storage. I aim for less than 8% moisture content.
- Storage: Store seeds in airtight containers (glass jars with desiccant packets work well) in a cool, dark, dry place (ideally 40-50°F and 30-40% humidity). Label clearly with variety and date. Properly stored seeds can remain viable for 3-10 years or more.
Step 8: Season Extension & Winterizing
Extend your harvest and protect your garden for the off-season to truly maximize your self sufficient garden from scratch.
- Cold Frames: Simple structures with a transparent top (glass, polycarbonate, or old windows) that sit over garden beds. They trap solar heat, allowing you to grow cold-hardy crops (lettuce, spinach, kale, radishes) well into winter or start seeds earlier in spring. A basic cold frame can be built from 2×6 lumber and a sheet of polycarbonate for under $100.
- Hoop Houses/Low Tunnels: Larger structures made from flexible hoops (PVC pipe or EMT conduit) covered with greenhouse plastic. These provide more space and greater temperature moderation. A 10×20 ft DIY low tunnel kit can cost $200-$500, while a larger, more robust hoop house kit might be $1,000-$3,000. I use a 6×12 ft low tunnel made from 1/2-inch PVC hoops and 6mil greenhouse plastic, which extends my lettuce and spinach harvest by at least
Deciding between raised beds and in-ground beds depends on your soil, budget, and physical capabilities.
- In-Ground Beds: If you have excellent native soil and good drainage, in-ground beds are the most economical. Double-digging (loosening soil two shovel depths) can significantly improve drainage and aeration. For my main garden, I primarily use in-ground beds, but I focus on building up the soil over time with consistent compost additions and cover cropping. I aim for beds that are no wider than 3-4 feet so I can reach the center without stepping on the soil, compacting it.
- Raised Beds: Raised beds offer numerous advantages, especially for poor soil, heavy clay, or rocky areas. They provide better drainage, warm up faster in spring, reduce compaction, and make weeding and harvesting easier on your back.
- Material Options:
- Untreated Cedar: Naturally rot-resistant and chemical-free. A 4×8 ft bed, 12 inches deep, typically requires three 2x12x8 ft cedar boards, costing around $50-$60 per board (total ~$150-$180) plus corner brackets or screws. My first raised beds were cedar and are still going strong after 7 years.
- Galvanized Steel: Durable, long-lasting, and aesthetically pleasing. Brands like Vego Garden offer modular kits. A Vego Garden 17″ Tall 8-in-1 Metal Raised Garden Bed (can be configured to 4×8 ft) costs approximately $250-$300.
- Concrete Blocks/Stones: Very durable but can leach minerals (though generally safe once weathered) and can be expensive.
- Recycled Materials: Pallets (check for chemical treatment stamps like « HT » for heat-treated), old tires (controversial due to potential chemical leaching).
- Filling Raised Beds: Don’t just fill with topsoil. Use a « Hugelkultur » approach (logs, branches, leaves, then compost, then topsoil) or a mixture of 60% good quality topsoil, 30% compost, and 10% perlite or vermiculite for drainage. A 4x8x1 ft raised bed requires about 32 cubic feet (or ~1.2 cubic yards) of soil mix, which can cost $100-$200 depending on your source.
- Material Options:
Step 4: Water Management & Irrigation
Efficient water management is critical for a self sufficient garden from scratch, especially in off-grid living where water resources might be limited.
- Rainwater Harvesting: This is my primary source of irrigation water. A 55-gallon rain barrel (e.g., EarthMark Rain Barrel, ~$120-$150) connected to a downspout can collect significant water. For larger needs, I use two 275-gallon IBC totes (Intermediate Bulk Containers, often available used for $100-$200 each from food-grade sources) connected in series. A 1,000 sq ft roof can collect approximately 620 gallons of water for every inch of rainfall. My 1,500 sq ft roof provides ample water for my 600 sq ft garden through multiple barrels and totes.
- Drip Irrigation: This is by far the most water-efficient method, delivering water directly to the plant’s root zone, minimizing evaporation and weed growth.
- Components: A typical drip system includes a pressure regulator (e.g., Rain Bird PRV-10, ~$15), a filter (Rain Bird RBY filter, ~$20), main tubing (1/2-inch poly tubing, 100ft ~$25), smaller feeder lines (1/4-inch tubing), and emitters (0.5 GPH or 1 GPH per plant).
- Kits: For beginners, a starter kit like the Rain Bird Drip Irrigation Garden Kit (model DDI-KIT-1P, ~$40-$60) is excellent for a small garden. For larger setups, I use Netafim Techline CV Drip Line (500ft roll, ~$150-$200), which has pressure-compensating emitters built-in, ensuring even watering across long runs.
- Automation: For true self-sufficiency, consider a battery-powered timer (e.g., Orbit B-Hyve Bluetooth Hose Faucet Timer, ~$50) or a solar-powered timer connected to a small 12V pump.
- Solar-Powered Pumps: For lifting water from a well, pond, or large storage tank to your garden, a solar pump is a game-changer. For a smaller drip system, a Shurflo 2088-594-152 Diaphragm Pump (12V, 3.5 GPM, ~$180) can be powered by a single 100W solar panel (e.g., Renogy 100W Monocrystalline Solar Panel, ~$100) and a small 12V battery (e.g., a 50Ah LiFePO4 battery like the Battle Born 50Ah, ~$450). For larger operations or deeper wells, more robust systems are needed. If you’re looking to build out a comprehensive off-grid power system to support your garden’s water needs, or indeed your entire homestead, you might want to explore resources like the Power Grid Generator complete system guide to understand the full scope of what’s possible in terms of energy independence.
Step 5: Seed Selection & Planting
The choice of seeds is crucial for a truly self sufficient garden from scratch.
- Choose Heirloom & Open-Pollinated Seeds: These varieties produce seeds that will grow true to type, meaning you can save seeds from your harvest year after year. F1 hybrids, while often vigorous, will not produce consistent offspring from saved seeds. Reputable seed companies include Baker Creek Heirloom Seeds, High Mowing Organic Seeds, and Seed Savers Exchange. Start with common, reliable varieties like ‘Black Krim’ tomatoes, ‘Provider’ bush beans, ‘Waltham Butternut’ squash, and ‘Black Seeded Simpson’ lettuce.
- Start Seeds Indoors (Optional but Recommended): For longer growing seasons or specific crops, starting seeds indoors gives you a head start. Use seed-starting mix (e.g., Espoma Organic Seed Starter Mix, ~$10 for 16qt bag) in seed trays (Jiffy Professional Greenhouse 72-cell kit, ~$15). Provide adequate light with LED grow lights (Barrina T5 2ft 4-pack LED Grow Lights, 20W each, ~$50) for 14-16 hours a day, positioned 2-4 inches above seedlings. Maintain consistent temperatures (65-75°F for most).
- Direct Sowing vs. Transplanting: Some crops (carrots, radishes, beans, corn) prefer direct sowing into the garden bed. Others (tomatoes, peppers, broccoli, kale) benefit from being started indoors and transplanted. Follow seed packet instructions for planting depths (e.g., lettuce seeds are often surface-sown or planted 1/8 inch deep, while beans are 1 inch deep) and spacing.
- Companion Planting: Strategically plant different species together to enhance growth, deter pests, and attract beneficial insects. For example, planting marigolds near tomatoes can deter nematodes, and basil improves tomato flavor. Nasturtiums can act as a trap crop for aphids.
- Succession Planting: For a continuous harvest, plant small batches of quick-growing crops (lettuce, radishes, cilantro) every 2-3 weeks. As one crop finishes, another is ready to take its place.
Step 6: Pest & Disease Management (Organic)
Maintaining a self sufficient garden from scratch means embracing organic pest and disease control.
- Integrated Pest Management (IPM): This holistic approach combines several strategies.
- Observation: Regularly inspect your plants for early signs of pests or disease. Catching issues early is key.
- Physical Barriers: Use row covers (e.g., Agribon AG-19 floating row cover, 10×20 ft, ~$20) to protect young plants from insect pests like cabbage worms and squash bugs. Install fences (e.g., 2×4 welded wire mesh, 4 ft tall, 50 ft roll ~$70) to keep out deer, rabbits, and other larger animals.
- Hand-Picking: For larger pests like tomato hornworms or squash bugs, simply pick them off and drop them into a bucket of soapy water.
- Companion Planting: As mentioned, certain plants repel pests. Marigolds, garlic, and onions are excellent deterrents.
- Attract Beneficial Insects: Plant flowers like dill, fennel, cosmos, and sweet alyssum to attract ladybugs, lacewings, and parasitic wasps, which prey on common garden pests.
- Organic Sprays & Treatments:
- Neem Oil: An excellent broad-spectrum organic insecticide and fungicide. Bonide Neem Oil Concentrate (16oz, ~$20) can be mixed at a rate of 1-2 tbsp per gallon of water and sprayed on affected plants.
- Insecticidal Soap: Effective against soft-bodied insects like aphids, whiteflies, and spider mites. Garden Safe Insecticidal Soap (24oz ready-to-use, ~$10).
- Bacillus thuringiensis (Bt): A naturally occurring soil bacterium that targets caterpillars and worms. Monterey BT Worm & Caterpillar Killer (16oz, ~$18) is highly effective and safe for beneficial insects.
- Copper or Sulfur Sprays: For fungal diseases like powdery mildew or blight, organic copper (e.g., Bonide Copper Fungicide, ~$15 for 1lb) or sulfur (e.g., Safer Brand Garden Fungicide, ~$10 for 16oz) can be used as a last resort.
Step 7: Harvesting & Seed Saving
The culmination of your efforts is the harvest, and seed saving closes the loop on self-sufficiency.
- Harvesting Techniques:
- Timing: Harvest vegetables at their peak ripeness for best flavor and nutritional value. For example, green beans should snap cleanly, cucumbers should be firm, and tomatoes should be fully colored.
- Frequency: Many crops, like zucchini, cucumbers, and bush beans, produce more if harvested frequently. Pick daily or every other day.
- Tools: Use clean, sharp pruners (e.g., Corona ClassicCUT Bypass Pruner BP 3180, ~$30) or a sharp knife for clean cuts, minimizing damage to the plant.
- Seed Saving: This is where the « self-sufficient » aspect truly shines.
- Selection: Only save seeds from your healthiest, most vigorous plants that show desired traits (disease resistance, good flavor, high yield).
- Isolation: To ensure true-to-type seeds, prevent cross-pollination. This can be challenging for open-pollinated crops that readily cross (e.g., squash, corn). For beginners, focus on self-pollinating plants like beans, peas, lettuce, and tomatoes.
- Processing:
- Dry Seeds (Beans, Peas, Lettuce, Grains): Allow pods/seed heads to dry completely on the plant. Harvest, shell, and clean the seeds, removing chaff.
- Wet Seeds (Tomatoes, Cucumbers, Squash): For tomatoes, ferment the seeds in water for a few days to remove the gel coating and inhibit disease. For cucumbers/squash, scrape out seeds, wash thoroughly, and dry.
- Drying: Spread seeds thinly on screens or paper plates in a cool, dry, well-ventilated area for 1-4 weeks. Ensure they are bone-dry before storage. I aim for less than 8% moisture content.
- Storage: Store seeds in airtight containers (glass jars with desiccant packets work well) in a cool, dark, dry place (ideally 40-50°F and 30-40% humidity). Label clearly with variety and date. Properly stored seeds can remain viable for 3-10 years or more.
Step 8: Season Extension & Winterizing
Extend your harvest and protect your garden for the off-season to truly maximize your self sufficient garden from scratch.
- Cold Frames: Simple structures with a transparent top (glass, polycarbonate, or old windows) that sit over garden beds. They trap solar heat, allowing you to grow cold-hardy crops (lettuce, spinach, kale, radishes) well into winter or start seeds earlier in spring. A basic cold frame can be built from 2×6 lumber and a sheet of polycarbonate for under $100.
- Hoop Houses/Low Tunnels: Larger structures made from flexible hoops (PVC pipe or EMT conduit) covered with greenhouse plastic. These provide more space and greater temperature moderation. A 10×20 ft DIY low tunnel kit can cost $200-$500, while a larger, more robust hoop house kit might be $1,000-$3,000. I use a 6×12 ft low tunnel made from 1/2-inch PVC hoops and 6mil greenhouse plastic, which extends my lettuce and spinach harvest by at least
Healthy soil is the bedrock of a productive, self-sufficient garden. You can’t guess what your soil needs; you have to test it.
- Perform a Soil Test: A professional soil test will give you precise data on your soil’s pH, nutrient levels (N-P-K), and organic matter content. I recommend sending a sample to your local agricultural extension office; it typically costs $20-$50 and provides detailed recommendations. Alternatively, for a quick homeowner check, a Rapitest Soil Test Kit (40-test kit, model 1663, ~$20 on Amazon) provides a good baseline for pH, Nitrogen, Phosphorus, and Potash. Aim for a pH between 6.0 and 7.0 for most vegetables.
- Amend for pH Imbalance: If your soil is too acidic (below 6.0), add agricultural lime (dolomitic lime adds magnesium, calcitic lime adds calcium). Apply 5-10 lbs per 100 sq ft for a moderate adjustment. If it’s too alkaline (above 7.0), add elemental sulfur (e.g., Espoma Soil Acidifier, ~$15 for 6.75 lbs) or generous amounts of organic matter like peat moss or pine needles.
- Build Organic Matter: This is the single most important step for long-term soil health. Organic matter improves soil structure, water retention, drainage, and nutrient availability. Incorporate 2-4 inches of high-quality compost into your top 6-12 inches of soil annually. I make my own compost from kitchen scraps, garden waste, and shredded leaves, but you can purchase it. Local nurseries often sell bulk compost for $30-$50 per cubic yard. Aged manure (from chickens, cows, or horses – ensure it’s well-rotted to avoid burning plants) is also excellent.
- Address Nutrient Deficiencies: Based on your soil test, add specific organic amendments. If Nitrogen (N) is low, add blood meal (12-0-0, ~$20 for 3 lbs) or feather meal. For Phosphorus (P), use bone meal (3-15-0, ~$15 for 3 lbs) or rock phosphate. For Potassium (K), greensand (0-0-2.5, ~$25 for 5 lbs) or kelp meal are good choices. I rely heavily on Espoma Organic Garden-tone (5-3-3, ~$25 for an 8lb bag) as a balanced, all-purpose organic fertilizer during planting.
Step 3: Garden Bed Preparation
Deciding between raised beds and in-ground beds depends on your soil, budget, and physical capabilities.
- In-Ground Beds: If you have excellent native soil and good drainage, in-ground beds are the most economical. Double-digging (loosening soil two shovel depths) can significantly improve drainage and aeration. For my main garden, I primarily use in-ground beds, but I focus on building up the soil over time with consistent compost additions and cover cropping. I aim for beds that are no wider than 3-4 feet so I can reach the center without stepping on the soil, compacting it.
- Raised Beds: Raised beds offer numerous advantages, especially for poor soil, heavy clay, or rocky areas. They provide better drainage, warm up faster in spring, reduce compaction, and make weeding and harvesting easier on your back.
- Material Options:
- Untreated Cedar: Naturally rot-resistant and chemical-free. A 4×8 ft bed, 12 inches deep, typically requires three 2x12x8 ft cedar boards, costing around $50-$60 per board (total ~$150-$180) plus corner brackets or screws. My first raised beds were cedar and are still going strong after 7 years.
- Galvanized Steel: Durable, long-lasting, and aesthetically pleasing. Brands like Vego Garden offer modular kits. A Vego Garden 17″ Tall 8-in-1 Metal Raised Garden Bed (can be configured to 4×8 ft) costs approximately $250-$300.
- Concrete Blocks/Stones: Very durable but can leach minerals (though generally safe once weathered) and can be expensive.
- Recycled Materials: Pallets (check for chemical treatment stamps like « HT » for heat-treated), old tires (controversial due to potential chemical leaching).
- Filling Raised Beds: Don’t just fill with topsoil. Use a « Hugelkultur » approach (logs, branches, leaves, then compost, then topsoil) or a mixture of 60% good quality topsoil, 30% compost, and 10% perlite or vermiculite for drainage. A 4x8x1 ft raised bed requires about 32 cubic feet (or ~1.2 cubic yards) of soil mix, which can cost $100-$200 depending on your source.
- Material Options:
Step 4: Water Management & Irrigation
Efficient water management is critical for a self sufficient garden from scratch, especially in off-grid living where water resources might be limited.
- Rainwater Harvesting: This is my primary source of irrigation water. A 55-gallon rain barrel (e.g., EarthMark Rain Barrel, ~$120-$150) connected to a downspout can collect significant water. For larger needs, I use two 275-gallon IBC totes (Intermediate Bulk Containers, often available used for $100-$200 each from food-grade sources) connected in series. A 1,000 sq ft roof can collect approximately 620 gallons of water for every inch of rainfall. My 1,500 sq ft roof provides ample water for my 600 sq ft garden through multiple barrels and totes.
- Drip Irrigation: This is by far the most water-efficient method, delivering water directly to the plant’s root zone, minimizing evaporation and weed growth.
- Components: A typical drip system includes a pressure regulator (e.g., Rain Bird PRV-10, ~$15), a filter (Rain Bird RBY filter, ~$20), main tubing (1/2-inch poly tubing, 100ft ~$25), smaller feeder lines (1/4-inch tubing), and emitters (0.5 GPH or 1 GPH per plant).
- Kits: For beginners, a starter kit like the Rain Bird Drip Irrigation Garden Kit (model DDI-KIT-1P, ~$40-$60) is excellent for a small garden. For larger setups, I use Netafim Techline CV Drip Line (500ft roll, ~$150-$200), which has pressure-compensating emitters built-in, ensuring even watering across long runs.
- Automation: For true self-sufficiency, consider a battery-powered timer (e.g., Orbit B-Hyve Bluetooth Hose Faucet Timer, ~$50) or a solar-powered timer connected to a small 12V pump.
- Solar-Powered Pumps: For lifting water from a well, pond, or large storage tank to your garden, a solar pump is a game-changer. For a smaller drip system, a Shurflo 2088-594-152 Diaphragm Pump (12V, 3.5 GPM, ~$180) can be powered by a single 100W solar panel (e.g., Renogy 100W Monocrystalline Solar Panel, ~$100) and a small 12V battery (e.g., a 50Ah LiFePO4 battery like the Battle Born 50Ah, ~$450). For larger operations or deeper wells, more robust systems are needed. If you’re looking to build out a comprehensive off-grid power system to support your garden’s water needs, or indeed your entire homestead, you might want to explore resources like the Power Grid Generator complete system guide to understand the full scope of what’s possible in terms of energy independence.
Step 5: Seed Selection & Planting
The choice of seeds is crucial for a truly self sufficient garden from scratch.
- Choose Heirloom & Open-Pollinated Seeds: These varieties produce seeds that will grow true to type, meaning you can save seeds from your harvest year after year. F1 hybrids, while often vigorous, will not produce consistent offspring from saved seeds. Reputable seed companies include Baker Creek Heirloom Seeds, High Mowing Organic Seeds, and Seed Savers Exchange. Start with common, reliable varieties like ‘Black Krim’ tomatoes, ‘Provider’ bush beans, ‘Waltham Butternut’ squash, and ‘Black Seeded Simpson’ lettuce.
- Start Seeds Indoors (Optional but Recommended): For longer growing seasons or specific crops, starting seeds indoors gives you a head start. Use seed-starting mix (e.g., Espoma Organic Seed Starter Mix, ~$10 for 16qt bag) in seed trays (Jiffy Professional Greenhouse 72-cell kit, ~$15). Provide adequate light with LED grow lights (Barrina T5 2ft 4-pack LED Grow Lights, 20W each, ~$50) for 14-16 hours a day, positioned 2-4 inches above seedlings. Maintain consistent temperatures (65-75°F for most).
- Direct Sowing vs. Transplanting: Some crops (carrots, radishes, beans, corn) prefer direct sowing into the garden bed. Others (tomatoes, peppers, broccoli, kale) benefit from being started indoors and transplanted. Follow seed packet instructions for planting depths (e.g., lettuce seeds are often surface-sown or planted 1/8 inch deep, while beans are 1 inch deep) and spacing.
- Companion Planting: Strategically plant different species together to enhance growth, deter pests, and attract beneficial insects. For example, planting marigolds near tomatoes can deter nematodes, and basil improves tomato flavor. Nasturtiums can act as a trap crop for aphids.
- Succession Planting: For a continuous harvest, plant small batches of quick-growing crops (lettuce, radishes, cilantro) every 2-3 weeks. As one crop finishes, another is ready to take its place.
Step 6: Pest & Disease Management (Organic)
Maintaining a self sufficient garden from scratch means embracing organic pest and disease control.
- Integrated Pest Management (IPM): This holistic approach combines several strategies.
- Observation: Regularly inspect your plants for early signs of pests or disease. Catching issues early is key.
- Physical Barriers: Use row covers (e.g., Agribon AG-19 floating row cover, 10×20 ft, ~$20) to protect young plants from insect pests like cabbage worms and squash bugs. Install fences (e.g., 2×4 welded wire mesh, 4 ft tall, 50 ft roll ~$70) to keep out deer, rabbits, and other larger animals.
- Hand-Picking: For larger pests like tomato hornworms or squash bugs, simply pick them off and drop them into a bucket of soapy water.
- Companion Planting: As mentioned, certain plants repel pests. Marigolds, garlic, and onions are excellent deterrents.
- Attract Beneficial Insects: Plant flowers like dill, fennel, cosmos, and sweet alyssum to attract ladybugs, lacewings, and parasitic wasps, which prey on common garden pests.
- Organic Sprays & Treatments:
- Neem Oil: An excellent broad-spectrum organic insecticide and fungicide. Bonide Neem Oil Concentrate (16oz, ~$20) can be mixed at a rate of 1-2 tbsp per gallon of water and sprayed on affected plants.
- Insecticidal Soap: Effective against soft-bodied insects like aphids, whiteflies, and spider mites. Garden Safe Insecticidal Soap (24oz ready-to-use, ~$10).
- Bacillus thuringiensis (Bt): A naturally occurring soil bacterium that targets caterpillars and worms. Monterey BT Worm & Caterpillar Killer (16oz, ~$18) is highly effective and safe for beneficial insects.
- Copper or Sulfur Sprays: For fungal diseases like powdery mildew or blight, organic copper (e.g., Bonide Copper Fungicide, ~$15 for 1lb) or sulfur (e.g., Safer Brand Garden Fungicide, ~$10 for 16oz) can be used as a last resort.
Step 7: Harvesting & Seed Saving
The culmination of your efforts is the harvest, and seed saving closes the loop on self-sufficiency.
- Harvesting Techniques:
- Timing: Harvest vegetables at their peak ripeness for best flavor and nutritional value. For example, green beans should snap cleanly, cucumbers should be firm, and tomatoes should be fully colored.
- Frequency: Many crops, like zucchini, cucumbers, and bush beans, produce more if harvested frequently. Pick daily or every other day.
- Tools: Use clean, sharp pruners (e.g., Corona ClassicCUT Bypass Pruner BP 3180, ~$30) or a sharp knife for clean cuts, minimizing damage to the plant.
- Seed Saving: This is where the « self-sufficient » aspect truly shines.
- Selection: Only save seeds from your healthiest, most vigorous plants that show desired traits (disease resistance, good flavor, high yield).
- Isolation: To ensure true-to-type seeds, prevent cross-pollination. This can be challenging for open-pollinated crops that readily cross (e.g., squash, corn). For beginners, focus on self-pollinating plants like beans, peas, lettuce, and tomatoes.
- Processing:
- Dry Seeds (Beans, Peas, Lettuce, Grains): Allow pods/seed heads to dry completely on the plant. Harvest, shell, and clean the seeds, removing chaff.
- Wet Seeds (Tomatoes, Cucumbers, Squash): For tomatoes, ferment the seeds in water for a few days to remove the gel coating and inhibit disease. For cucumbers/squash, scrape out seeds, wash thoroughly, and dry.
- Drying: Spread seeds thinly on screens or paper plates in a cool, dry, well-ventilated area for 1-4 weeks. Ensure they are bone-dry before storage. I aim for less than 8% moisture content.
- Storage: Store seeds in airtight containers (glass jars with desiccant packets work well) in a cool, dark, dry place (ideally 40-50°F and 30-40% humidity). Label clearly with variety and date. Properly stored seeds can remain viable for 3-10 years or more.
Step 8: Season Extension & Winterizing
Extend your harvest and protect your garden for the off-season to truly maximize your self sufficient garden from scratch.
- Cold Frames: Simple structures with a transparent top (glass, polycarbonate, or old windows) that sit over garden beds. They trap solar heat, allowing you to grow cold-hardy crops (lettuce, spinach, kale, radishes) well into winter or start seeds earlier in spring. A basic cold frame can be built from 2×6 lumber and a sheet of polycarbonate for under $100.
- Hoop Houses/Low Tunnels: Larger structures made from flexible hoops (PVC pipe or EMT conduit) covered with greenhouse plastic. These provide more space and greater temperature moderation. A 10×20 ft DIY low tunnel kit can cost $200-$500, while a larger, more robust hoop house kit might be $1,000-$3,000. I use a 6×12 ft low tunnel made from 1/2-inch PVC hoops and 6mil greenhouse plastic, which extends my lettuce and spinach harvest by at least
- Choose Heirloom & Open-Pollinated Seeds: These varieties produce seeds that will grow true to type, meaning you can save seeds from your harvest year after year. F1 hybrids, while often vigorous, will not produce consistent offspring from saved seeds. Reputable seed companies include Baker Creek Heirloom Seeds, High Mowing Organic Seeds, and Seed Savers Exchange. Start with common, reliable varieties like ‘Black Krim’ tomatoes, ‘Provider’ bush beans, ‘Waltham Butternut’ squash, and ‘Black Seeded Simpson’ lettuce.
- Start Seeds Indoors (Optional but Recommended): For longer growing seasons or specific crops, starting seeds indoors gives you a head start. Use seed-starting mix (e.g., Espoma Organic Seed Starter Mix, ~$10 for 16qt bag) in seed trays (Jiffy Professional Greenhouse 72-cell kit, ~$15). Provide adequate light with LED grow lights (Barrina T5 2ft 4-pack LED Grow Lights, 20W each, ~$50) for 14-16 hours a day, positioned 2-4 inches above seedlings. Maintain consistent temperatures (65-75°F for most).
- Direct Sowing vs. Transplanting: Some crops (carrots, radishes, beans, corn) prefer direct sowing into the garden bed. Others (tomatoes, peppers, broccoli, kale) benefit from being started indoors and transplanted. Follow seed packet instructions for planting depths (e.g., lettuce seeds are often surface-sown or planted 1/8 inch deep, while beans are 1 inch deep) and spacing.
- Companion Planting: Strategically plant different species together to enhance growth, deter pests, and attract beneficial insects. For example, planting marigolds near tomatoes can deter nematodes, and basil improves tomato flavor. Nasturtiums can act as a trap crop for aphids.
- Succession Planting: For a continuous harvest, plant small batches of quick-growing crops (lettuce, radishes, cilantro) every 2-3 weeks. As one crop finishes, another is ready to take its place.
Step 6: Pest & Disease Management (Organic)
Maintaining a self sufficient garden from scratch means embracing organic pest and disease control.
- Integrated Pest Management (IPM): This holistic approach combines several strategies.
- Observation: Regularly inspect your plants for early signs of pests or disease. Catching issues early is key.
- Physical Barriers: Use row covers (e.g., Agribon AG-19 floating row cover, 10×20 ft, ~$20) to protect young plants from insect pests like cabbage worms and squash bugs. Install fences (e.g., 2×4 welded wire mesh, 4 ft tall, 50 ft roll ~$70) to keep out deer, rabbits, and other larger animals.
- Hand-Picking: For larger pests like tomato hornworms or squash bugs, simply pick them off and drop them into a bucket of soapy water.
- Companion Planting: As mentioned, certain plants repel pests. Marigolds, garlic, and onions are excellent deterrents.
- Attract Beneficial Insects: Plant flowers like dill, fennel, cosmos, and sweet alyssum to attract ladybugs, lacewings, and parasitic wasps, which prey on common garden pests.
- Organic Sprays & Treatments:
- Neem Oil: An excellent broad-spectrum organic insecticide and fungicide. Bonide Neem Oil Concentrate (16oz, ~$20) can be mixed at a rate of 1-2 tbsp per gallon of water and sprayed on affected plants.
- Insecticidal Soap: Effective against soft-bodied insects like aphids, whiteflies, and spider mites. Garden Safe Insecticidal Soap (24oz ready-to-use, ~$10).
- Bacillus thuringiensis (Bt): A naturally occurring soil bacterium that targets caterpillars and worms. Monterey BT Worm & Caterpillar Killer (16oz, ~$18) is highly effective and safe for beneficial insects.
- Copper or Sulfur Sprays: For fungal diseases like powdery mildew or blight, organic copper (e.g., Bonide Copper Fungicide, ~$15 for 1lb) or sulfur (e.g., Safer Brand Garden Fungicide, ~$10 for 16oz) can be used as a last resort.
Step 7: Harvesting & Seed Saving
The culmination of your efforts is the harvest, and seed saving closes the loop on self-sufficiency.
- Harvesting Techniques:
- Timing: Harvest vegetables at their peak ripeness for best flavor and nutritional value. For example, green beans should snap cleanly, cucumbers should be firm, and tomatoes should be fully colored.
- Frequency: Many crops, like zucchini, cucumbers, and bush beans, produce more if harvested frequently. Pick daily or every other day.
- Tools: Use clean, sharp pruners (e.g., Corona ClassicCUT Bypass Pruner BP 3180, ~$30) or a sharp knife for clean cuts, minimizing damage to the plant.
- Seed Saving: This is where the « self-sufficient » aspect truly shines.
- Selection: Only save seeds from your healthiest, most vigorous plants that show desired traits (disease resistance, good flavor, high yield).
- Isolation: To ensure true-to-type seeds, prevent cross-pollination. This can be challenging for open-pollinated crops that readily cross (e.g., squash, corn). For beginners, focus on self-pollinating plants like beans, peas, lettuce, and tomatoes.
- Processing:
- Dry Seeds (Beans, Peas, Lettuce, Grains): Allow pods/seed heads to dry completely on the plant. Harvest, shell, and clean the seeds, removing chaff.
- Wet Seeds (Tomatoes, Cucumbers, Squash): For tomatoes, ferment the seeds in water for a few days to remove the gel coating and inhibit disease. For cucumbers/squash, scrape out seeds, wash thoroughly, and dry.
- Drying: Spread seeds thinly on screens or paper plates in a cool, dry, well-ventilated area for 1-4 weeks. Ensure they are bone-dry before storage. I aim for less than 8% moisture content.
- Storage: Store seeds in airtight containers (glass jars with desiccant packets work well) in a cool, dark, dry place (ideally 40-50°F and 30-40% humidity). Label clearly with variety and date. Properly stored seeds can remain viable for 3-10 years or more.
Step 8: Season Extension & Winterizing
Extend your harvest and protect your garden for the off-season to truly maximize your self sufficient garden from scratch.
- Cold Frames: Simple structures with a transparent top (glass, polycarbonate, or old windows) that sit over garden beds. They trap solar heat, allowing you to grow cold-hardy crops (lettuce, spinach, kale, radishes) well into winter or start seeds earlier in spring. A basic cold frame can be built from 2×6 lumber and a sheet of polycarbonate for under $100.
- Hoop Houses/Low Tunnels: Larger structures made from flexible hoops (PVC pipe or EMT conduit) covered with greenhouse plastic. These provide more space and greater temperature moderation. A 10×20 ft DIY low tunnel kit can cost $200-$500, while a larger, more robust hoop house kit might be $1,000-$3,000. I use a 6×12 ft low tunnel made from 1/2-inch PVC hoops and 6mil greenhouse plastic, which extends my lettuce and spinach harvest by at least
The choice of seeds is crucial for a truly self sufficient garden from scratch.
- Choose Heirloom & Open-Pollinated Seeds: These varieties produce seeds that will grow true to type, meaning you can save seeds from your harvest year after year. F1 hybrids, while often vigorous, will not produce consistent offspring from saved seeds. Reputable seed companies include Baker Creek Heirloom Seeds, High Mowing Organic Seeds, and Seed Savers Exchange. Start with common, reliable varieties like ‘Black Krim’ tomatoes, ‘Provider’ bush beans, ‘Waltham Butternut’ squash, and ‘Black Seeded Simpson’ lettuce.
- Start Seeds Indoors (Optional but Recommended): For longer growing seasons or specific crops, starting seeds indoors gives you a head start. Use seed-starting mix (e.g., Espoma Organic Seed Starter Mix, ~$10 for 16qt bag) in seed trays (Jiffy Professional Greenhouse 72-cell kit, ~$15). Provide adequate light with LED grow lights (Barrina T5 2ft 4-pack LED Grow Lights, 20W each, ~$50) for 14-16 hours a day, positioned 2-4 inches above seedlings. Maintain consistent temperatures (65-75°F for most).
- Direct Sowing vs. Transplanting: Some crops (carrots, radishes, beans, corn) prefer direct sowing into the garden bed. Others (tomatoes, peppers, broccoli, kale) benefit from being started indoors and transplanted. Follow seed packet instructions for planting depths (e.g., lettuce seeds are often surface-sown or planted 1/8 inch deep, while beans are 1 inch deep) and spacing.
- Companion Planting: Strategically plant different species together to enhance growth, deter pests, and attract beneficial insects. For example, planting marigolds near tomatoes can deter nematodes, and basil improves tomato flavor. Nasturtiums can act as a trap crop for aphids.
- Succession Planting: For a continuous harvest, plant small batches of quick-growing crops (lettuce, radishes, cilantro) every 2-3 weeks. As one crop finishes, another is ready to take its place.
Step 6: Pest & Disease Management (Organic)
Maintaining a self sufficient garden from scratch means embracing organic pest and disease control.
- Integrated Pest Management (IPM): This holistic approach combines several strategies.
- Observation: Regularly inspect your plants for early signs of pests or disease. Catching issues early is key.
- Physical Barriers: Use row covers (e.g., Agribon AG-19 floating row cover, 10×20 ft, ~$20) to protect young plants from insect pests like cabbage worms and squash bugs. Install fences (e.g., 2×4 welded wire mesh, 4 ft tall, 50 ft roll ~$70) to keep out deer, rabbits, and other larger animals.
- Hand-Picking: For larger pests like tomato hornworms or squash bugs, simply pick them off and drop them into a bucket of soapy water.
- Companion Planting: As mentioned, certain plants repel pests. Marigolds, garlic, and onions are excellent deterrents.
- Attract Beneficial Insects: Plant flowers like dill, fennel, cosmos, and sweet alyssum to attract ladybugs, lacewings, and parasitic wasps, which prey on common garden pests.
- Organic Sprays & Treatments:
- Neem Oil: An excellent broad-spectrum organic insecticide and fungicide. Bonide Neem Oil Concentrate (16oz, ~$20) can be mixed at a rate of 1-2 tbsp per gallon of water and sprayed on affected plants.
- Insecticidal Soap: Effective against soft-bodied insects like aphids, whiteflies, and spider mites. Garden Safe Insecticidal Soap (24oz ready-to-use, ~$10).
- Bacillus thuringiensis (Bt): A naturally occurring soil bacterium that targets caterpillars and worms. Monterey BT Worm & Caterpillar Killer (16oz, ~$18) is highly effective and safe for beneficial insects.
- Copper or Sulfur Sprays: For fungal diseases like powdery mildew or blight, organic copper (e.g., Bonide Copper Fungicide, ~$15 for 1lb) or sulfur (e.g., Safer Brand Garden Fungicide, ~$10 for 16oz) can be used as a last resort.
Step 7: Harvesting & Seed Saving
The culmination of your efforts is the harvest, and seed saving closes the loop on self-sufficiency.
- Harvesting Techniques:
- Timing: Harvest vegetables at their peak ripeness for best flavor and nutritional value. For example, green beans should snap cleanly, cucumbers should be firm, and tomatoes should be fully colored.
- Frequency: Many crops, like zucchini, cucumbers, and bush beans, produce more if harvested frequently. Pick daily or every other day.
- Tools: Use clean, sharp pruners (e.g., Corona ClassicCUT Bypass Pruner BP 3180, ~$30) or a sharp knife for clean cuts, minimizing damage to the plant.
- Seed Saving: This is where the « self-sufficient » aspect truly shines.
- Selection: Only save seeds from your healthiest, most vigorous plants that show desired traits (disease resistance, good flavor, high yield).
- Isolation: To ensure true-to-type seeds, prevent cross-pollination. This can be challenging for open-pollinated crops that readily cross (e.g., squash, corn). For beginners, focus on self-pollinating plants like beans, peas, lettuce, and tomatoes.
- Processing:
- Dry Seeds (Beans, Peas, Lettuce, Grains): Allow pods/seed heads to dry completely on the plant. Harvest, shell, and clean the seeds, removing chaff.
- Wet Seeds (Tomatoes, Cucumbers, Squash): For tomatoes, ferment the seeds in water for a few days to remove the gel coating and inhibit disease. For cucumbers/squash, scrape out seeds, wash thoroughly, and dry.
- Drying: Spread seeds thinly on screens or paper plates in a cool, dry, well-ventilated area for 1-4 weeks. Ensure they are bone-dry before storage. I aim for less than 8% moisture content.
- Storage: Store seeds in airtight containers (glass jars with desiccant packets work well) in a cool, dark, dry place (ideally 40-50°F and 30-40% humidity). Label clearly with variety and date. Properly stored seeds can remain viable for 3-10 years or more.
Step 8: Season Extension & Winterizing
Extend your harvest and protect your garden for the off-season to truly maximize your self sufficient garden from scratch.
- Cold Frames: Simple structures with a transparent top (glass, polycarbonate, or old windows) that sit over garden beds. They trap solar heat, allowing you to grow cold-hardy crops (lettuce, spinach, kale, radishes) well into winter or start seeds earlier in spring. A basic cold frame can be built from 2×6 lumber and a sheet of polycarbonate for under $100.
- Hoop Houses/Low Tunnels: Larger structures made from flexible hoops (PVC pipe or EMT conduit) covered with greenhouse plastic. These provide more space and greater temperature moderation. A 10×20 ft DIY low tunnel kit can cost $200-$500, while a larger, more robust hoop house kit might be $1,000-$3,000. I use a 6×12 ft low tunnel made from 1/2-inch PVC hoops and 6mil greenhouse plastic, which extends my lettuce and spinach harvest by at least
Step 5: Seed Selection & Planting
The choice of seeds is crucial for a truly self sufficient garden from scratch.
- Choose Heirloom & Open-Pollinated Seeds: These varieties produce seeds that will grow true to type, meaning you can save seeds from your harvest year after year. F1 hybrids, while often vigorous, will not produce consistent offspring from saved seeds. Reputable seed companies include Baker Creek Heirloom Seeds, High Mowing Organic Seeds, and Seed Savers Exchange. Start with common, reliable varieties like ‘Black Krim’ tomatoes, ‘Provider’ bush beans, ‘Waltham Butternut’ squash, and ‘Black Seeded Simpson’ lettuce.
- Start Seeds Indoors (Optional but Recommended): For longer growing seasons or specific crops, starting seeds indoors gives you a head start. Use seed-starting mix (e.g., Espoma Organic Seed Starter Mix, ~$10 for 16qt bag) in seed trays (Jiffy Professional Greenhouse 72-cell kit, ~$15). Provide adequate light with LED grow lights (Barrina T5 2ft 4-pack LED Grow Lights, 20W each, ~$50) for 14-16 hours a day, positioned 2-4 inches above seedlings. Maintain consistent temperatures (65-75°F for most).
- Direct Sowing vs. Transplanting: Some crops (carrots, radishes, beans, corn) prefer direct sowing into the garden bed. Others (tomatoes, peppers, broccoli, kale) benefit from being started indoors and transplanted. Follow seed packet instructions for planting depths (e.g., lettuce seeds are often surface-sown or planted 1/8 inch deep, while beans are 1 inch deep) and spacing.
- Companion Planting: Strategically plant different species together to enhance growth, deter pests, and attract beneficial insects. For example, planting marigolds near tomatoes can deter nematodes, and basil improves tomato flavor. Nasturtiums can act as a trap crop for aphids.
- Succession Planting: For a continuous harvest, plant small batches of quick-growing crops (lettuce, radishes, cilantro) every 2-3 weeks. As one crop finishes, another is ready to take its place.
Step 6: Pest & Disease Management (Organic)
Maintaining a self sufficient garden from scratch means embracing organic pest and disease control.
- Integrated Pest Management (IPM): This holistic approach combines several strategies.
- Observation: Regularly inspect your plants for early signs of pests or disease. Catching issues early is key.
- Physical Barriers: Use row covers (e.g., Agribon AG-19 floating row cover, 10×20 ft, ~$20) to protect young plants from insect pests like cabbage worms and squash bugs. Install fences (e.g., 2×4 welded wire mesh, 4 ft tall, 50 ft roll ~$70) to keep out deer, rabbits, and other larger animals.
- Hand-Picking: For larger pests like tomato hornworms or squash bugs, simply pick them off and drop them into a bucket of soapy water.
- Companion Planting: As mentioned, certain plants repel pests. Marigolds, garlic, and onions are excellent deterrents.
- Attract Beneficial Insects: Plant flowers like dill, fennel, cosmos, and sweet alyssum to attract ladybugs, lacewings, and parasitic wasps, which prey on common garden pests.
- Organic Sprays & Treatments:
- Neem Oil: An excellent broad-spectrum organic insecticide and fungicide. Bonide Neem Oil Concentrate (16oz, ~$20) can be mixed at a rate of 1-2 tbsp per gallon of water and sprayed on affected plants.
- Insecticidal Soap: Effective against soft-bodied insects like aphids, whiteflies, and spider mites. Garden Safe Insecticidal Soap (24oz ready-to-use, ~$10).
- Bacillus thuringiensis (Bt): A naturally occurring soil bacterium that targets caterpillars and worms. Monterey BT Worm & Caterpillar Killer (16oz, ~$18) is highly effective and safe for beneficial insects.
- Copper or Sulfur Sprays: For fungal diseases like powdery mildew or blight, organic copper (e.g., Bonide Copper Fungicide, ~$15 for 1lb) or sulfur (e.g., Safer Brand Garden Fungicide, ~$10 for 16oz) can be used as a last resort.
Step 7: Harvesting & Seed Saving
The culmination of your efforts is the harvest, and seed saving closes the loop on self-sufficiency.
- Harvesting Techniques:
- Timing: Harvest vegetables at their peak ripeness for best flavor and nutritional value. For example, green beans should snap cleanly, cucumbers should be firm, and tomatoes should be fully colored.
- Frequency: Many crops, like zucchini, cucumbers, and bush beans, produce more if harvested frequently. Pick daily or every other day.
- Tools: Use clean, sharp pruners (e.g., Corona ClassicCUT Bypass Pruner BP 3180, ~$30) or a sharp knife for clean cuts, minimizing damage to the plant.
- Seed Saving: This is where the « self-sufficient » aspect truly shines.
- Selection: Only save seeds from your healthiest, most vigorous plants that show desired traits (disease resistance, good flavor, high yield).
- Isolation: To ensure true-to-type seeds, prevent cross-pollination. This can be challenging for open-pollinated crops that readily cross (e.g., squash, corn). For beginners, focus on self-pollinating plants like beans, peas, lettuce, and tomatoes.
- Processing:
- Dry Seeds (Beans, Peas, Lettuce, Grains): Allow pods/seed heads to dry completely on the plant. Harvest, shell, and clean the seeds, removing chaff.
- Wet Seeds (Tomatoes, Cucumbers, Squash): For tomatoes, ferment the seeds in water for a few days to remove the gel coating and inhibit disease. For cucumbers/squash, scrape out seeds, wash thoroughly, and dry.
- Drying: Spread seeds thinly on screens or paper plates in a cool, dry, well-ventilated area for 1-4 weeks. Ensure they are bone-dry before storage. I aim for less than 8% moisture content.
- Storage: Store seeds in airtight containers (glass jars with desiccant packets work well) in a cool, dark, dry place (ideally 40-50°F and 30-40% humidity). Label clearly with variety and date. Properly stored seeds can remain viable for 3-10 years or more.
Step 8: Season Extension & Winterizing
Extend your harvest and protect your garden for the off-season to truly maximize your self sufficient garden from scratch.
- Cold Frames: Simple structures with a transparent top (glass, polycarbonate, or old windows) that sit over garden beds. They trap solar heat, allowing you to grow cold-hardy crops (lettuce, spinach, kale, radishes) well into winter or start seeds earlier in spring. A basic cold frame can be built from 2×6 lumber and a sheet of polycarbonate for under $100.
- Hoop Houses/Low Tunnels: Larger structures made from flexible hoops (PVC pipe or EMT conduit) covered with greenhouse plastic. These provide more space and greater temperature moderation. A 10×20 ft DIY low tunnel kit can cost $200-$500, while a larger, more robust hoop house kit might be $1,000-$3,000. I use a 6×12 ft low tunnel made from 1/2-inch PVC hoops and 6mil greenhouse plastic, which extends my lettuce and spinach harvest by at least
- Rainwater Harvesting: This is my primary source of irrigation water. A 55-gallon rain barrel (e.g., EarthMark Rain Barrel, ~$120-$150) connected to a downspout can collect significant water. For larger needs, I use two 275-gallon IBC totes (Intermediate Bulk Containers, often available used for $100-$200 each from food-grade sources) connected in series. A 1,000 sq ft roof can collect approximately 620 gallons of water for every inch of rainfall. My 1,500 sq ft roof provides ample water for my 600 sq ft garden through multiple barrels and totes.
- Drip Irrigation: This is by far the most water-efficient method, delivering water directly to the plant’s root zone, minimizing evaporation and weed growth.
- Components: A typical drip system includes a pressure regulator (e.g., Rain Bird PRV-10, ~$15), a filter (Rain Bird RBY filter, ~$20), main tubing (1/2-inch poly tubing, 100ft ~$25), smaller feeder lines (1/4-inch tubing), and emitters (0.5 GPH or 1 GPH per plant).
- Kits: For beginners, a starter kit like the Rain Bird Drip Irrigation Garden Kit (model DDI-KIT-1P, ~$40-$60) is excellent for a small garden. For larger setups, I use Netafim Techline CV Drip Line (500ft roll, ~$150-$200), which has pressure-compensating emitters built-in, ensuring even watering across long runs.
- Automation: For true self-sufficiency, consider a battery-powered timer (e.g., Orbit B-Hyve Bluetooth Hose Faucet Timer, ~$50) or a solar-powered timer connected to a small 12V pump.
- Solar-Powered Pumps: For lifting water from a well, pond, or large storage tank to your garden, a solar pump is a game-changer. For a smaller drip system, a Shurflo 2088-594-152 Diaphragm Pump (12V, 3.5 GPM, ~$180) can be powered by a single 100W solar panel (e.g., Renogy 100W Monocrystalline Solar Panel, ~$100) and a small 12V battery (e.g., a 50Ah LiFePO4 battery like the Battle Born 50Ah, ~$450). For larger operations or deeper wells, more robust systems are needed. If you’re looking to build out a comprehensive off-grid power system to support your garden’s water needs, or indeed your entire homestead, you might want to explore resources like the Power Grid Generator complete system guide to understand the full scope of what’s possible in terms of energy independence.
Step 5: Seed Selection & Planting
The choice of seeds is crucial for a truly self sufficient garden from scratch.
- Choose Heirloom & Open-Pollinated Seeds: These varieties produce seeds that will grow true to type, meaning you can save seeds from your harvest year after year. F1 hybrids, while often vigorous, will not produce consistent offspring from saved seeds. Reputable seed companies include Baker Creek Heirloom Seeds, High Mowing Organic Seeds, and Seed Savers Exchange. Start with common, reliable varieties like ‘Black Krim’ tomatoes, ‘Provider’ bush beans, ‘Waltham Butternut’ squash, and ‘Black Seeded Simpson’ lettuce.
- Start Seeds Indoors (Optional but Recommended): For longer growing seasons or specific crops, starting seeds indoors gives you a head start. Use seed-starting mix (e.g., Espoma Organic Seed Starter Mix, ~$10 for 16qt bag) in seed trays (Jiffy Professional Greenhouse 72-cell kit, ~$15). Provide adequate light with LED grow lights (Barrina T5 2ft 4-pack LED Grow Lights, 20W each, ~$50) for 14-16 hours a day, positioned 2-4 inches above seedlings. Maintain consistent temperatures (65-75°F for most).
- Direct Sowing vs. Transplanting: Some crops (carrots, radishes, beans, corn) prefer direct sowing into the garden bed. Others (tomatoes, peppers, broccoli, kale) benefit from being started indoors and transplanted. Follow seed packet instructions for planting depths (e.g., lettuce seeds are often surface-sown or planted 1/8 inch deep, while beans are 1 inch deep) and spacing.
- Companion Planting: Strategically plant different species together to enhance growth, deter pests, and attract beneficial insects. For example, planting marigolds near tomatoes can deter nematodes, and basil improves tomato flavor. Nasturtiums can act as a trap crop for aphids.
- Succession Planting: For a continuous harvest, plant small batches of quick-growing crops (lettuce, radishes, cilantro) every 2-3 weeks. As one crop finishes, another is ready to take its place.
Step 6: Pest & Disease Management (Organic)
Maintaining a self sufficient garden from scratch means embracing organic pest and disease control.
- Integrated Pest Management (IPM): This holistic approach combines several strategies.
- Observation: Regularly inspect your plants for early signs of pests or disease. Catching issues early is key.
- Physical Barriers: Use row covers (e.g., Agribon AG-19 floating row cover, 10×20 ft, ~$20) to protect young plants from insect pests like cabbage worms and squash bugs. Install fences (e.g., 2×4 welded wire mesh, 4 ft tall, 50 ft roll ~$70) to keep out deer, rabbits, and other larger animals.
- Hand-Picking: For larger pests like tomato hornworms or squash bugs, simply pick them off and drop them into a bucket of soapy water.
- Companion Planting: As mentioned, certain plants repel pests. Marigolds, garlic, and onions are excellent deterrents.
- Attract Beneficial Insects: Plant flowers like dill, fennel, cosmos, and sweet alyssum to attract ladybugs, lacewings, and parasitic wasps, which prey on common garden pests.
- Organic Sprays & Treatments:
- Neem Oil: An excellent broad-spectrum organic insecticide and fungicide. Bonide Neem Oil Concentrate (16oz, ~$20) can be mixed at a rate of 1-2 tbsp per gallon of water and sprayed on affected plants.
- Insecticidal Soap: Effective against soft-bodied insects like aphids, whiteflies, and spider mites. Garden Safe Insecticidal Soap (24oz ready-to-use, ~$10).
- Bacillus thuringiensis (Bt): A naturally occurring soil bacterium that targets caterpillars and worms. Monterey BT Worm & Caterpillar Killer (16oz, ~$18) is highly effective and safe for beneficial insects.
- Copper or Sulfur Sprays: For fungal diseases like powdery mildew or blight, organic copper (e.g., Bonide Copper Fungicide, ~$15 for 1lb) or sulfur (e.g., Safer Brand Garden Fungicide, ~$10 for 16oz) can be used as a last resort.
Step 7: Harvesting & Seed Saving
The culmination of your efforts is the harvest, and seed saving closes the loop on self-sufficiency.
- Harvesting Techniques:
- Timing: Harvest vegetables at their peak ripeness for best flavor and nutritional value. For example, green beans should snap cleanly, cucumbers should be firm, and tomatoes should be fully colored.
- Frequency: Many crops, like zucchini, cucumbers, and bush beans, produce more if harvested frequently. Pick daily or every other day.
- Tools: Use clean, sharp pruners (e.g., Corona ClassicCUT Bypass Pruner BP 3180, ~$30) or a sharp knife for clean cuts, minimizing damage to the plant.
- Seed Saving: This is where the « self-sufficient » aspect truly shines.
- Selection: Only save seeds from your healthiest, most vigorous plants that show desired traits (disease resistance, good flavor, high yield).
- Isolation: To ensure true-to-type seeds, prevent cross-pollination. This can be challenging for open-pollinated crops that readily cross (e.g., squash, corn). For beginners, focus on self-pollinating plants like beans, peas, lettuce, and tomatoes.
- Processing:
- Dry Seeds (Beans, Peas, Lettuce, Grains): Allow pods/seed heads to dry completely on the plant. Harvest, shell, and clean the seeds, removing chaff.
- Wet Seeds (Tomatoes, Cucumbers, Squash): For tomatoes, ferment the seeds in water for a few days to remove the gel coating and inhibit disease. For cucumbers/squash, scrape out seeds, wash thoroughly, and dry.
- Drying: Spread seeds thinly on screens or paper plates in a cool, dry, well-ventilated area for 1-4 weeks. Ensure they are bone-dry before storage. I aim for less than 8% moisture content.
- Storage: Store seeds in airtight containers (glass jars with desiccant packets work well) in a cool, dark, dry place (ideally 40-50°F and 30-40% humidity). Label clearly with variety and date. Properly stored seeds can remain viable for 3-10 years or more.
Step 8: Season Extension & Winterizing
Extend your harvest and protect your garden for the off-season to truly maximize your self sufficient garden from scratch.
- Cold Frames: Simple structures with a transparent top (glass, polycarbonate, or old windows) that sit over garden beds. They trap solar heat, allowing you to grow cold-hardy crops (lettuce, spinach, kale, radishes) well into winter or start seeds earlier in spring. A basic cold frame can be built from 2×6 lumber and a sheet of polycarbonate for under $100.
- Hoop Houses/Low Tunnels: Larger structures made from flexible hoops (PVC pipe or EMT conduit) covered with greenhouse plastic. These provide more space and greater temperature moderation. A 10×20 ft DIY low tunnel kit can cost $200-$500, while a larger, more robust hoop house kit might be $1,000-$3,000. I use a 6×12 ft low tunnel made from 1/2-inch PVC hoops and 6mil greenhouse plastic, which extends my lettuce and spinach harvest by at least
Efficient water management is critical for a self sufficient garden from scratch, especially in off-grid living where water resources might be limited.
- Rainwater Harvesting: This is my primary source of irrigation water. A 55-gallon rain barrel (e.g., EarthMark Rain Barrel, ~$120-$150) connected to a downspout can collect significant water. For larger needs, I use two 275-gallon IBC totes (Intermediate Bulk Containers, often available used for $100-$200 each from food-grade sources) connected in series. A 1,000 sq ft roof can collect approximately 620 gallons of water for every inch of rainfall. My 1,500 sq ft roof provides ample water for my 600 sq ft garden through multiple barrels and totes.
- Drip Irrigation: This is by far the most water-efficient method, delivering water directly to the plant’s root zone, minimizing evaporation and weed growth.
- Components: A typical drip system includes a pressure regulator (e.g., Rain Bird PRV-10, ~$15), a filter (Rain Bird RBY filter, ~$20), main tubing (1/2-inch poly tubing, 100ft ~$25), smaller feeder lines (1/4-inch tubing), and emitters (0.5 GPH or 1 GPH per plant).
- Kits: For beginners, a starter kit like the Rain Bird Drip Irrigation Garden Kit (model DDI-KIT-1P, ~$40-$60) is excellent for a small garden. For larger setups, I use Netafim Techline CV Drip Line (500ft roll, ~$150-$200), which has pressure-compensating emitters built-in, ensuring even watering across long runs.
- Automation: For true self-sufficiency, consider a battery-powered timer (e.g., Orbit B-Hyve Bluetooth Hose Faucet Timer, ~$50) or a solar-powered timer connected to a small 12V pump.
- Solar-Powered Pumps: For lifting water from a well, pond, or large storage tank to your garden, a solar pump is a game-changer. For a smaller drip system, a Shurflo 2088-594-152 Diaphragm Pump (12V, 3.5 GPM, ~$180) can be powered by a single 100W solar panel (e.g., Renogy 100W Monocrystalline Solar Panel, ~$100) and a small 12V battery (e.g., a 50Ah LiFePO4 battery like the Battle Born 50Ah, ~$450). For larger operations or deeper wells, more robust systems are needed. If you’re looking to build out a comprehensive off-grid power system to support your garden’s water needs, or indeed your entire homestead, you might want to explore resources like the Power Grid Generator complete system guide to understand the full scope of what’s possible in terms of energy independence.
Step 5: Seed Selection & Planting
The choice of seeds is crucial for a truly self sufficient garden from scratch.
- Choose Heirloom & Open-Pollinated Seeds: These varieties produce seeds that will grow true to type, meaning you can save seeds from your harvest year after year. F1 hybrids, while often vigorous, will not produce consistent offspring from saved seeds. Reputable seed companies include Baker Creek Heirloom Seeds, High Mowing Organic Seeds, and Seed Savers Exchange. Start with common, reliable varieties like ‘Black Krim’ tomatoes, ‘Provider’ bush beans, ‘Waltham Butternut’ squash, and ‘Black Seeded Simpson’ lettuce.
- Start Seeds Indoors (Optional but Recommended): For longer growing seasons or specific crops, starting seeds indoors gives you a head start. Use seed-starting mix (e.g., Espoma Organic Seed Starter Mix, ~$10 for 16qt bag) in seed trays (Jiffy Professional Greenhouse 72-cell kit, ~$15). Provide adequate light with LED grow lights (Barrina T5 2ft 4-pack LED Grow Lights, 20W each, ~$50) for 14-16 hours a day, positioned 2-4 inches above seedlings. Maintain consistent temperatures (65-75°F for most).
- Direct Sowing vs. Transplanting: Some crops (carrots, radishes, beans, corn) prefer direct sowing into the garden bed. Others (tomatoes, peppers, broccoli, kale) benefit from being started indoors and transplanted. Follow seed packet instructions for planting depths (e.g., lettuce seeds are often surface-sown or planted 1/8 inch deep, while beans are 1 inch deep) and spacing.
- Companion Planting: Strategically plant different species together to enhance growth, deter pests, and attract beneficial insects. For example, planting marigolds near tomatoes can deter nematodes, and basil improves tomato flavor. Nasturtiums can act as a trap crop for aphids.
- Succession Planting: For a continuous harvest, plant small batches of quick-growing crops (lettuce, radishes, cilantro) every 2-3 weeks. As one crop finishes, another is ready to take its place.
Step 6: Pest & Disease Management (Organic)
Maintaining a self sufficient garden from scratch means embracing organic pest and disease control.
- Integrated Pest Management (IPM): This holistic approach combines several strategies.
- Observation: Regularly inspect your plants for early signs of pests or disease. Catching issues early is key.
- Physical Barriers: Use row covers (e.g., Agribon AG-19 floating row cover, 10×20 ft, ~$20) to protect young plants from insect pests like cabbage worms and squash bugs. Install fences (e.g., 2×4 welded wire mesh, 4 ft tall, 50 ft roll ~$70) to keep out deer, rabbits, and other larger animals.
- Hand-Picking: For larger pests like tomato hornworms or squash bugs, simply pick them off and drop them into a bucket of soapy water.
- Companion Planting: As mentioned, certain plants repel pests. Marigolds, garlic, and onions are excellent deterrents.
- Attract Beneficial Insects: Plant flowers like dill, fennel, cosmos, and sweet alyssum to attract ladybugs, lacewings, and parasitic wasps, which prey on common garden pests.
- Organic Sprays & Treatments:
- Neem Oil: An excellent broad-spectrum organic insecticide and fungicide. Bonide Neem Oil Concentrate (16oz, ~$20) can be mixed at a rate of 1-2 tbsp per gallon of water and sprayed on affected plants.
- Insecticidal Soap: Effective against soft-bodied insects like aphids, whiteflies, and spider mites. Garden Safe Insecticidal Soap (24oz ready-to-use, ~$10).
- Bacillus thuringiensis (Bt): A naturally occurring soil bacterium that targets caterpillars and worms. Monterey BT Worm & Caterpillar Killer (16oz, ~$18) is highly effective and safe for beneficial insects.
- Copper or Sulfur Sprays: For fungal diseases like powdery mildew or blight, organic copper (e.g., Bonide Copper Fungicide, ~$15 for 1lb) or sulfur (e.g., Safer Brand Garden Fungicide, ~$10 for 16oz) can be used as a last resort.
Step 7: Harvesting & Seed Saving
The culmination of your efforts is the harvest, and seed saving closes the loop on self-sufficiency.
- Harvesting Techniques:
- Timing: Harvest vegetables at their peak ripeness for best flavor and nutritional value. For example, green beans should snap cleanly, cucumbers should be firm, and tomatoes should be fully colored.
- Frequency: Many crops, like zucchini, cucumbers, and bush beans, produce more if harvested frequently. Pick daily or every other day.
- Tools: Use clean, sharp pruners (e.g., Corona ClassicCUT Bypass Pruner BP 3180, ~$30) or a sharp knife for clean cuts, minimizing damage to the plant.
- Seed Saving: This is where the « self-sufficient » aspect truly shines.
- Selection: Only save seeds from your healthiest, most vigorous plants that show desired traits (disease resistance, good flavor, high yield).
- Isolation: To ensure true-to-type seeds, prevent cross-pollination. This can be challenging for open-pollinated crops that readily cross (e.g., squash, corn). For beginners, focus on self-pollinating plants like beans, peas, lettuce, and tomatoes.
- Processing:
- Dry Seeds (Beans, Peas, Lettuce, Grains): Allow pods/seed heads to dry completely on the plant. Harvest, shell, and clean the seeds, removing chaff.
- Wet Seeds (Tomatoes, Cucumbers, Squash): For tomatoes, ferment the seeds in water for a few days to remove the gel coating and inhibit disease. For cucumbers/squash, scrape out seeds, wash thoroughly, and dry.
- Drying: Spread seeds thinly on screens or paper plates in a cool, dry, well-ventilated area for 1-4 weeks. Ensure they are bone-dry before storage. I aim for less than 8% moisture content.
- Storage: Store seeds in airtight containers (glass jars with desiccant packets work well) in a cool, dark, dry place (ideally 40-50°F and 30-40% humidity). Label clearly with variety and date. Properly stored seeds can remain viable for 3-10 years or more.
Step 8: Season Extension & Winterizing
Extend your harvest and protect your garden for the off-season to truly maximize your self sufficient garden from scratch.
- Cold Frames: Simple structures with a transparent top (glass, polycarbonate, or old windows) that sit over garden beds. They trap solar heat, allowing you to grow cold-hardy crops (lettuce, spinach, kale, radishes) well into winter or start seeds earlier in spring. A basic cold frame can be built from 2×6 lumber and a sheet of polycarbonate for under $100.
- Hoop Houses/Low Tunnels: Larger structures made from flexible hoops (PVC pipe or EMT conduit) covered with greenhouse plastic. These provide more space and greater temperature moderation. A 10×20 ft DIY low tunnel kit can cost $200-$500, while a larger, more robust hoop house kit might be $1,000-$3,000. I use a 6×12 ft low tunnel made from 1/2-inch PVC hoops and 6mil greenhouse plastic, which extends my lettuce and spinach harvest by at least
Step 4: Water Management & Irrigation
Efficient water management is critical for a self sufficient garden from scratch, especially in off-grid living where water resources might be limited.
- Rainwater Harvesting: This is my primary source of irrigation water. A 55-gallon rain barrel (e.g., EarthMark Rain Barrel, ~$120-$150) connected to a downspout can collect significant water. For larger needs, I use two 275-gallon IBC totes (Intermediate Bulk Containers, often available used for $100-$200 each from food-grade sources) connected in series. A 1,000 sq ft roof can collect approximately 620 gallons of water for every inch of rainfall. My 1,500 sq ft roof provides ample water for my 600 sq ft garden through multiple barrels and totes.
- Drip Irrigation: This is by far the most water-efficient method, delivering water directly to the plant’s root zone, minimizing evaporation and weed growth.
- Components: A typical drip system includes a pressure regulator (e.g., Rain Bird PRV-10, ~$15), a filter (Rain Bird RBY filter, ~$20), main tubing (1/2-inch poly tubing, 100ft ~$25), smaller feeder lines (1/4-inch tubing), and emitters (0.5 GPH or 1 GPH per plant).
- Kits: For beginners, a starter kit like the Rain Bird Drip Irrigation Garden Kit (model DDI-KIT-1P, ~$40-$60) is excellent for a small garden. For larger setups, I use Netafim Techline CV Drip Line (500ft roll, ~$150-$200), which has pressure-compensating emitters built-in, ensuring even watering across long runs.
- Automation: For true self-sufficiency, consider a battery-powered timer (e.g., Orbit B-Hyve Bluetooth Hose Faucet Timer, ~$50) or a solar-powered timer connected to a small 12V pump.
- Solar-Powered Pumps: For lifting water from a well, pond, or large storage tank to your garden, a solar pump is a game-changer. For a smaller drip system, a Shurflo 2088-594-152 Diaphragm Pump (12V, 3.5 GPM, ~$180) can be powered by a single 100W solar panel (e.g., Renogy 100W Monocrystalline Solar Panel, ~$100) and a small 12V battery (e.g., a 50Ah LiFePO4 battery like the Battle Born 50Ah, ~$450). For larger operations or deeper wells, more robust systems are needed. If you’re looking to build out a comprehensive off-grid power system to support your garden’s water needs, or indeed your entire homestead, you might want to explore resources like the Power Grid Generator complete system guide to understand the full scope of what’s possible in terms of energy independence.
Step 5: Seed Selection & Planting
The choice of seeds is crucial for a truly self sufficient garden from scratch.
- Choose Heirloom & Open-Pollinated Seeds: These varieties produce seeds that will grow true to type, meaning you can save seeds from your harvest year after year. F1 hybrids, while often vigorous, will not produce consistent offspring from saved seeds. Reputable seed companies include Baker Creek Heirloom Seeds, High Mowing Organic Seeds, and Seed Savers Exchange. Start with common, reliable varieties like ‘Black Krim’ tomatoes, ‘Provider’ bush beans, ‘Waltham Butternut’ squash, and ‘Black Seeded Simpson’ lettuce.
- Start Seeds Indoors (Optional but Recommended): For longer growing seasons or specific crops, starting seeds indoors gives you a head start. Use seed-starting mix (e.g., Espoma Organic Seed Starter Mix, ~$10 for 16qt bag) in seed trays (Jiffy Professional Greenhouse 72-cell kit, ~$15). Provide adequate light with LED grow lights (Barrina T5 2ft 4-pack LED Grow Lights, 20W each, ~$50) for 14-16 hours a day, positioned 2-4 inches above seedlings. Maintain consistent temperatures (65-75°F for most).
- Direct Sowing vs. Transplanting: Some crops (carrots, radishes, beans, corn) prefer direct sowing into the garden bed. Others (tomatoes, peppers, broccoli, kale) benefit from being started indoors and transplanted. Follow seed packet instructions for planting depths (e.g., lettuce seeds are often surface-sown or planted 1/8 inch deep, while beans are 1 inch deep) and spacing.
- Companion Planting: Strategically plant different species together to enhance growth, deter pests, and attract beneficial insects. For example, planting marigolds near tomatoes can deter nematodes, and basil improves tomato flavor. Nasturtiums can act as a trap crop for aphids.
- Succession Planting: For a continuous harvest, plant small batches of quick-growing crops (lettuce, radishes, cilantro) every 2-3 weeks. As one crop finishes, another is ready to take its place.
Step 6: Pest & Disease Management (Organic)
Maintaining a self sufficient garden from scratch means embracing organic pest and disease control.
- Integrated Pest Management (IPM): This holistic approach combines several strategies.
- Observation: Regularly inspect your plants for early signs of pests or disease. Catching issues early is key.
- Physical Barriers: Use row covers (e.g., Agribon AG-19 floating row cover, 10×20 ft, ~$20) to protect young plants from insect pests like cabbage worms and squash bugs. Install fences (e.g., 2×4 welded wire mesh, 4 ft tall, 50 ft roll ~$70) to keep out deer, rabbits, and other larger animals.
- Hand-Picking: For larger pests like tomato hornworms or squash bugs, simply pick them off and drop them into a bucket of soapy water.
- Companion Planting: As mentioned, certain plants repel pests. Marigolds, garlic, and onions are excellent deterrents.
- Attract Beneficial Insects: Plant flowers like dill, fennel, cosmos, and sweet alyssum to attract ladybugs, lacewings, and parasitic wasps, which prey on common garden pests.
- Organic Sprays & Treatments:
- Neem Oil: An excellent broad-spectrum organic insecticide and fungicide. Bonide Neem Oil Concentrate (16oz, ~$20) can be mixed at a rate of 1-2 tbsp per gallon of water and sprayed on affected plants.
- Insecticidal Soap: Effective against soft-bodied insects like aphids, whiteflies, and spider mites. Garden Safe Insecticidal Soap (24oz ready-to-use, ~$10).
- Bacillus thuringiensis (Bt): A naturally occurring soil bacterium that targets caterpillars and worms. Monterey BT Worm & Caterpillar Killer (16oz, ~$18) is highly effective and safe for beneficial insects.
- Copper or Sulfur Sprays: For fungal diseases like powdery mildew or blight, organic copper (e.g., Bonide Copper Fungicide, ~$15 for 1lb) or sulfur (e.g., Safer Brand Garden Fungicide, ~$10 for 16oz) can be used as a last resort.
Step 7: Harvesting & Seed Saving
The culmination of your efforts is the harvest, and seed saving closes the loop on self-sufficiency.
- Harvesting Techniques:
- Timing: Harvest vegetables at their peak ripeness for best flavor and nutritional value. For example, green beans should snap cleanly, cucumbers should be firm, and tomatoes should be fully colored.
- Frequency: Many crops, like zucchini, cucumbers, and bush beans, produce more if harvested frequently. Pick daily or every other day.
- Tools: Use clean, sharp pruners (e.g., Corona ClassicCUT Bypass Pruner BP 3180, ~$30) or a sharp knife for clean cuts, minimizing damage to the plant.
- Seed Saving: This is where the « self-sufficient » aspect truly shines.
- Selection: Only save seeds from your healthiest, most vigorous plants that show desired traits (disease resistance, good flavor, high yield).
- Isolation: To ensure true-to-type seeds, prevent cross-pollination. This can be challenging for open-pollinated crops that readily cross (e.g., squash, corn). For beginners, focus on self-pollinating plants like beans, peas, lettuce, and tomatoes.
- Processing:
- Dry Seeds (Beans, Peas, Lettuce, Grains): Allow pods/seed heads to dry completely on the plant. Harvest, shell, and clean the seeds, removing chaff.
- Wet Seeds (Tomatoes, Cucumbers, Squash): For tomatoes, ferment the seeds in water for a few days to remove the gel coating and inhibit disease. For cucumbers/squash, scrape out seeds, wash thoroughly, and dry.
- Drying: Spread seeds thinly on screens or paper plates in a cool, dry, well-ventilated area for 1-4 weeks. Ensure they are bone-dry before storage. I aim for less than 8% moisture content.
- Storage: Store seeds in airtight containers (glass jars with desiccant packets work well) in a cool, dark, dry place (ideally 40-50°F and 30-40% humidity). Label clearly with variety and date. Properly stored seeds can remain viable for 3-10 years or more.
Step 8: Season Extension & Winterizing
Extend your harvest and protect your garden for the off-season to truly maximize your self sufficient garden from scratch.
- Cold Frames: Simple structures with a transparent top (glass, polycarbonate, or old windows) that sit over garden beds. They trap solar heat, allowing you to grow cold-hardy crops (lettuce, spinach, kale, radishes) well into winter or start seeds earlier in spring. A basic cold frame can be built from 2×6 lumber and a sheet of polycarbonate for under $100.
- Hoop Houses/Low Tunnels: Larger structures made from flexible hoops (PVC pipe or EMT conduit) covered with greenhouse plastic. These provide more space and greater temperature moderation. A 10×20 ft DIY low tunnel kit can cost $200-$500, while a larger, more robust hoop house kit might be $1,000-$3,000. I use a 6×12 ft low tunnel made from 1/2-inch PVC hoops and 6mil greenhouse plastic, which extends my lettuce and spinach harvest by at least
- In-Ground Beds: If you have excellent native soil and good drainage, in-ground beds are the most economical. Double-digging (loosening soil two shovel depths) can significantly improve drainage and aeration. For my main garden, I primarily use in-ground beds, but I focus on building up the soil over time with consistent compost additions and cover cropping. I aim for beds that are no wider than 3-4 feet so I can reach the center without stepping on the soil, compacting it.
- Raised Beds: Raised beds offer numerous advantages, especially for poor soil, heavy clay, or rocky areas. They provide better drainage, warm up faster in spring, reduce compaction, and make weeding and harvesting easier on your back.
- Material Options:
- Untreated Cedar: Naturally rot-resistant and chemical-free. A 4×8 ft bed, 12 inches deep, typically requires three 2x12x8 ft cedar boards, costing around $50-$60 per board (total ~$150-$180) plus corner brackets or screws. My first raised beds were cedar and are still going strong after 7 years.
- Galvanized Steel: Durable, long-lasting, and aesthetically pleasing. Brands like Vego Garden offer modular kits. A Vego Garden 17″ Tall 8-in-1 Metal Raised Garden Bed (can be configured to 4×8 ft) costs approximately $250-$300.
- Concrete Blocks/Stones: Very durable but can leach minerals (though generally safe once weathered) and can be expensive.
- Recycled Materials: Pallets (check for chemical treatment stamps like « HT » for heat-treated), old tires (controversial due to potential chemical leaching).
- Filling Raised Beds: Don’t just fill with topsoil. Use a « Hugelkultur » approach (logs, branches, leaves, then compost, then topsoil) or a mixture of 60% good quality topsoil, 30% compost, and 10% perlite or vermiculite for drainage. A 4x8x1 ft raised bed requires about 32 cubic feet (or ~1.2 cubic yards) of soil mix, which can cost $100-$200 depending on your source.
- Material Options:
Step 4: Water Management & Irrigation
Efficient water management is critical for a self sufficient garden from scratch, especially in off-grid living where water resources might be limited.
- Rainwater Harvesting: This is my primary source of irrigation water. A 55-gallon rain barrel (e.g., EarthMark Rain Barrel, ~$120-$150) connected to a downspout can collect significant water. For larger needs, I use two 275-gallon IBC totes (Intermediate Bulk Containers, often available used for $100-$200 each from food-grade sources) connected in series. A 1,000 sq ft roof can collect approximately 620 gallons of water for every inch of rainfall. My 1,500 sq ft roof provides ample water for my 600 sq ft garden through multiple barrels and totes.
- Drip Irrigation: This is by far the most water-efficient method, delivering water directly to the plant’s root zone, minimizing evaporation and weed growth.
- Components: A typical drip system includes a pressure regulator (e.g., Rain Bird PRV-10, ~$15), a filter (Rain Bird RBY filter, ~$20), main tubing (1/2-inch poly tubing, 100ft ~$25), smaller feeder lines (1/4-inch tubing), and emitters (0.5 GPH or 1 GPH per plant).
- Kits: For beginners, a starter kit like the Rain Bird Drip Irrigation Garden Kit (model DDI-KIT-1P, ~$40-$60) is excellent for a small garden. For larger setups, I use Netafim Techline CV Drip Line (500ft roll, ~$150-$200), which has pressure-compensating emitters built-in, ensuring even watering across long runs.
- Automation: For true self-sufficiency, consider a battery-powered timer (e.g., Orbit B-Hyve Bluetooth Hose Faucet Timer, ~$50) or a solar-powered timer connected to a small 12V pump.
- Solar-Powered Pumps: For lifting water from a well, pond, or large storage tank to your garden, a solar pump is a game-changer. For a smaller drip system, a Shurflo 2088-594-152 Diaphragm Pump (12V, 3.5 GPM, ~$180) can be powered by a single 100W solar panel (e.g., Renogy 100W Monocrystalline Solar Panel, ~$100) and a small 12V battery (e.g., a 50Ah LiFePO4 battery like the Battle Born 50Ah, ~$450). For larger operations or deeper wells, more robust systems are needed. If you’re looking to build out a comprehensive off-grid power system to support your garden’s water needs, or indeed your entire homestead, you might want to explore resources like the Power Grid Generator complete system guide to understand the full scope of what’s possible in terms of energy independence.
Step 5: Seed Selection & Planting
The choice of seeds is crucial for a truly self sufficient garden from scratch.
- Choose Heirloom & Open-Pollinated Seeds: These varieties produce seeds that will grow true to type, meaning you can save seeds from your harvest year after year. F1 hybrids, while often vigorous, will not produce consistent offspring from saved seeds. Reputable seed companies include Baker Creek Heirloom Seeds, High Mowing Organic Seeds, and Seed Savers Exchange. Start with common, reliable varieties like ‘Black Krim’ tomatoes, ‘Provider’ bush beans, ‘Waltham Butternut’ squash, and ‘Black Seeded Simpson’ lettuce.
- Start Seeds Indoors (Optional but Recommended): For longer growing seasons or specific crops, starting seeds indoors gives you a head start. Use seed-starting mix (e.g., Espoma Organic Seed Starter Mix, ~$10 for 16qt bag) in seed trays (Jiffy Professional Greenhouse 72-cell kit, ~$15). Provide adequate light with LED grow lights (Barrina T5 2ft 4-pack LED Grow Lights, 20W each, ~$50) for 14-16 hours a day, positioned 2-4 inches above seedlings. Maintain consistent temperatures (65-75°F for most).
- Direct Sowing vs. Transplanting: Some crops (carrots, radishes, beans, corn) prefer direct sowing into the garden bed. Others (tomatoes, peppers, broccoli, kale) benefit from being started indoors and transplanted. Follow seed packet instructions for planting depths (e.g., lettuce seeds are often surface-sown or planted 1/8 inch deep, while beans are 1 inch deep) and spacing.
- Companion Planting: Strategically plant different species together to enhance growth, deter pests, and attract beneficial insects. For example, planting marigolds near tomatoes can deter nematodes, and basil improves tomato flavor. Nasturtiums can act as a trap crop for aphids.
- Succession Planting: For a continuous harvest, plant small batches of quick-growing crops (lettuce, radishes, cilantro) every 2-3 weeks. As one crop finishes, another is ready to take its place.
Step 6: Pest & Disease Management (Organic)
Maintaining a self sufficient garden from scratch means embracing organic pest and disease control.
- Integrated Pest Management (IPM): This holistic approach combines several strategies.
- Observation: Regularly inspect your plants for early signs of pests or disease. Catching issues early is key.
- Physical Barriers: Use row covers (e.g., Agribon AG-19 floating row cover, 10×20 ft, ~$20) to protect young plants from insect pests like cabbage worms and squash bugs. Install fences (e.g., 2×4 welded wire mesh, 4 ft tall, 50 ft roll ~$70) to keep out deer, rabbits, and other larger animals.
- Hand-Picking: For larger pests like tomato hornworms or squash bugs, simply pick them off and drop them into a bucket of soapy water.
- Companion Planting: As mentioned, certain plants repel pests. Marigolds, garlic, and onions are excellent deterrents.
- Attract Beneficial Insects: Plant flowers like dill, fennel, cosmos, and sweet alyssum to attract ladybugs, lacewings, and parasitic wasps, which prey on common garden pests.
- Organic Sprays & Treatments:
- Neem Oil: An excellent broad-spectrum organic insecticide and fungicide. Bonide Neem Oil Concentrate (16oz, ~$20) can be mixed at a rate of 1-2 tbsp per gallon of water and sprayed on affected plants.
- Insecticidal Soap: Effective against soft-bodied insects like aphids, whiteflies, and spider mites. Garden Safe Insecticidal Soap (24oz ready-to-use, ~$10).
- Bacillus thuringiensis (Bt): A naturally occurring soil bacterium that targets caterpillars and worms. Monterey BT Worm & Caterpillar Killer (16oz, ~$18) is highly effective and safe for beneficial insects.
- Copper or Sulfur Sprays: For fungal diseases like powdery mildew or blight, organic copper (e.g., Bonide Copper Fungicide, ~$15 for 1lb) or sulfur (e.g., Safer Brand Garden Fungicide, ~$10 for 16oz) can be used as a last resort.
Step 7: Harvesting & Seed Saving
The culmination of your efforts is the harvest, and seed saving closes the loop on self-sufficiency.
- Harvesting Techniques:
- Timing: Harvest vegetables at their peak ripeness for best flavor and nutritional value. For example, green beans should snap cleanly, cucumbers should be firm, and tomatoes should be fully colored.
- Frequency: Many crops, like zucchini, cucumbers, and bush beans, produce more if harvested frequently. Pick daily or every other day.
- Tools: Use clean, sharp pruners (e.g., Corona ClassicCUT Bypass Pruner BP 3180, ~$30) or a sharp knife for clean cuts, minimizing damage to the plant.
- Seed Saving: This is where the « self-sufficient » aspect truly shines.
- Selection: Only save seeds from your healthiest, most vigorous plants that show desired traits (disease resistance, good flavor, high yield).
- Isolation: To ensure true-to-type seeds, prevent cross-pollination. This can be challenging for open-pollinated crops that readily cross (e.g., squash, corn). For beginners, focus on self-pollinating plants like beans, peas, lettuce, and tomatoes.
- Processing:
- Dry Seeds (Beans, Peas, Lettuce, Grains): Allow pods/seed heads to dry completely on the plant. Harvest, shell, and clean the seeds, removing chaff.
- Wet Seeds (Tomatoes, Cucumbers, Squash): For tomatoes, ferment the seeds in water for a few days to remove the gel coating and inhibit disease. For cucumbers/squash, scrape out seeds, wash thoroughly, and dry.
- Drying: Spread seeds thinly on screens or paper plates in a cool, dry, well-ventilated area for 1-4 weeks. Ensure they are bone-dry before storage. I aim for less than 8% moisture content.
- Storage: Store seeds in airtight containers (glass jars with desiccant packets work well) in a cool, dark, dry place (ideally 40-50°F and 30-40% humidity). Label clearly with variety and date. Properly stored seeds can remain viable for 3-10 years or more.
Step 8: Season Extension & Winterizing
Extend your harvest and protect your garden for the off-season to truly maximize your self sufficient garden from scratch.
- Cold Frames: Simple structures with a transparent top (glass, polycarbonate, or old windows) that sit over garden beds. They trap solar heat, allowing you to grow cold-hardy crops (lettuce, spinach, kale, radishes) well into winter or start seeds earlier in spring. A basic cold frame can be built from 2×6 lumber and a sheet of polycarbonate for under $100.
- Hoop Houses/Low Tunnels: Larger structures made from flexible hoops (PVC pipe or EMT conduit) covered with greenhouse plastic. These provide more space and greater temperature moderation. A 10×20 ft DIY low tunnel kit can cost $200-$500, while a larger, more robust hoop house kit might be $1,000-$3,000. I use a 6×12 ft low tunnel made from 1/2-inch PVC hoops and 6mil greenhouse plastic, which extends my lettuce and spinach harvest by at least
Deciding between raised beds and in-ground beds depends on your soil, budget, and physical capabilities.
- In-Ground Beds: If you have excellent native soil and good drainage, in-ground beds are the most economical. Double-digging (loosening soil two shovel depths) can significantly improve drainage and aeration. For my main garden, I primarily use in-ground beds, but I focus on building up the soil over time with consistent compost additions and cover cropping. I aim for beds that are no wider than 3-4 feet so I can reach the center without stepping on the soil, compacting it.
- Raised Beds: Raised beds offer numerous advantages, especially for poor soil, heavy clay, or rocky areas. They provide better drainage, warm up faster in spring, reduce compaction, and make weeding and harvesting easier on your back.
- Material Options:
- Untreated Cedar: Naturally rot-resistant and chemical-free. A 4×8 ft bed, 12 inches deep, typically requires three 2x12x8 ft cedar boards, costing around $50-$60 per board (total ~$150-$180) plus corner brackets or screws. My first raised beds were cedar and are still going strong after 7 years.
- Galvanized Steel: Durable, long-lasting, and aesthetically pleasing. Brands like Vego Garden offer modular kits. A Vego Garden 17″ Tall 8-in-1 Metal Raised Garden Bed (can be configured to 4×8 ft) costs approximately $250-$300.
- Concrete Blocks/Stones: Very durable but can leach minerals (though generally safe once weathered) and can be expensive.
- Recycled Materials: Pallets (check for chemical treatment stamps like « HT » for heat-treated), old tires (controversial due to potential chemical leaching).
- Filling Raised Beds: Don’t just fill with topsoil. Use a « Hugelkultur » approach (logs, branches, leaves, then compost, then topsoil) or a mixture of 60% good quality topsoil, 30% compost, and 10% perlite or vermiculite for drainage. A 4x8x1 ft raised bed requires about 32 cubic feet (or ~1.2 cubic yards) of soil mix, which can cost $100-$200 depending on your source.
- Material Options:
Step 4: Water Management & Irrigation
Efficient water management is critical for a self sufficient garden from scratch, especially in off-grid living where water resources might be limited.
- Rainwater Harvesting: This is my primary source of irrigation water. A 55-gallon rain barrel (e.g., EarthMark Rain Barrel, ~$120-$150) connected to a downspout can collect significant water. For larger needs, I use two 275-gallon IBC totes (Intermediate Bulk Containers, often available used for $100-$200 each from food-grade sources) connected in series. A 1,000 sq ft roof can collect approximately 620 gallons of water for every inch of rainfall. My 1,500 sq ft roof provides ample water for my 600 sq ft garden through multiple barrels and totes.
- Drip Irrigation: This is by far the most water-efficient method, delivering water directly to the plant’s root zone, minimizing evaporation and weed growth.
- Components: A typical drip system includes a pressure regulator (e.g., Rain Bird PRV-10, ~$15), a filter (Rain Bird RBY filter, ~$20), main tubing (1/2-inch poly tubing, 100ft ~$25), smaller feeder lines (1/4-inch tubing), and emitters (0.5 GPH or 1 GPH per plant).
- Kits: For beginners, a starter kit like the Rain Bird Drip Irrigation Garden Kit (model DDI-KIT-1P, ~$40-$60) is excellent for a small garden. For larger setups, I use Netafim Techline CV Drip Line (500ft roll, ~$150-$200), which has pressure-compensating emitters built-in, ensuring even watering across long runs.
- Automation: For true self-sufficiency, consider a battery-powered timer (e.g., Orbit B-Hyve Bluetooth Hose Faucet Timer, ~$50) or a solar-powered timer connected to a small 12V pump.
- Solar-Powered Pumps: For lifting water from a well, pond, or large storage tank to your garden, a solar pump is a game-changer. For a smaller drip system, a Shurflo 2088-594-152 Diaphragm Pump (12V, 3.5 GPM, ~$180) can be powered by a single 100W solar panel (e.g., Renogy 100W Monocrystalline Solar Panel, ~$100) and a small 12V battery (e.g., a 50Ah LiFePO4 battery like the Battle Born 50Ah, ~$450). For larger operations or deeper wells, more robust systems are needed. If you’re looking to build out a comprehensive off-grid power system to support your garden’s water needs, or indeed your entire homestead, you might want to explore resources like the Power Grid Generator complete system guide to understand the full scope of what’s possible in terms of energy independence.
Step 5: Seed Selection & Planting
The choice of seeds is crucial for a truly self sufficient garden from scratch.
- Choose Heirloom & Open-Pollinated Seeds: These varieties produce seeds that will grow true to type, meaning you can save seeds from your harvest year after year. F1 hybrids, while often vigorous, will not produce consistent offspring from saved seeds. Reputable seed companies include Baker Creek Heirloom Seeds, High Mowing Organic Seeds, and Seed Savers Exchange. Start with common, reliable varieties like ‘Black Krim’ tomatoes, ‘Provider’ bush beans, ‘Waltham Butternut’ squash, and ‘Black Seeded Simpson’ lettuce.
- Start Seeds Indoors (Optional but Recommended): For longer growing seasons or specific crops, starting seeds indoors gives you a head start. Use seed-starting mix (e.g., Espoma Organic Seed Starter Mix, ~$10 for 16qt bag) in seed trays (Jiffy Professional Greenhouse 72-cell kit, ~$15). Provide adequate light with LED grow lights (Barrina T5 2ft 4-pack LED Grow Lights, 20W each, ~$50) for 14-16 hours a day, positioned 2-4 inches above seedlings. Maintain consistent temperatures (65-75°F for most).
- Direct Sowing vs. Transplanting: Some crops (carrots, radishes, beans, corn) prefer direct sowing into the garden bed. Others (tomatoes, peppers, broccoli, kale) benefit from being started indoors and transplanted. Follow seed packet instructions for planting depths (e.g., lettuce seeds are often surface-sown or planted 1/8 inch deep, while beans are 1 inch deep) and spacing.
- Companion Planting: Strategically plant different species together to enhance growth, deter pests, and attract beneficial insects. For example, planting marigolds near tomatoes can deter nematodes, and basil improves tomato flavor. Nasturtiums can act as a trap crop for aphids.
- Succession Planting: For a continuous harvest, plant small batches of quick-growing crops (lettuce, radishes, cilantro) every 2-3 weeks. As one crop finishes, another is ready to take its place.
Step 6: Pest & Disease Management (Organic)
Maintaining a self sufficient garden from scratch means embracing organic pest and disease control.
- Integrated Pest Management (IPM): This holistic approach combines several strategies.
- Observation: Regularly inspect your plants for early signs of pests or disease. Catching issues early is key.
- Physical Barriers: Use row covers (e.g., Agribon AG-19 floating row cover, 10×20 ft, ~$20) to protect young plants from insect pests like cabbage worms and squash bugs. Install fences (e.g., 2×4 welded wire mesh, 4 ft tall, 50 ft roll ~$70) to keep out deer, rabbits, and other larger animals.
- Hand-Picking: For larger pests like tomato hornworms or squash bugs, simply pick them off and drop them into a bucket of soapy water.
- Companion Planting: As mentioned, certain plants repel pests. Marigolds, garlic, and onions are excellent deterrents.
- Attract Beneficial Insects: Plant flowers like dill, fennel, cosmos, and sweet alyssum to attract ladybugs, lacewings, and parasitic wasps, which prey on common garden pests.
- Organic Sprays & Treatments:
- Neem Oil: An excellent broad-spectrum organic insecticide and fungicide. Bonide Neem Oil Concentrate (16oz, ~$20) can be mixed at a rate of 1-2 tbsp per gallon of water and sprayed on affected plants.
- Insecticidal Soap: Effective against soft-bodied insects like aphids, whiteflies, and spider mites. Garden Safe Insecticidal Soap (24oz ready-to-use, ~$10).
- Bacillus thuringiensis (Bt): A naturally occurring soil bacterium that targets caterpillars and worms. Monterey BT Worm & Caterpillar Killer (16oz, ~$18) is highly effective and safe for beneficial insects.
- Copper or Sulfur Sprays: For fungal diseases like powdery mildew or blight, organic copper (e.g., Bonide Copper Fungicide, ~$15 for 1lb) or sulfur (e.g., Safer Brand Garden Fungicide, ~$10 for 16oz) can be used as a last resort.
Step 7: Harvesting & Seed Saving
The culmination of your efforts is the harvest, and seed saving closes the loop on self-sufficiency.
- Harvesting Techniques:
- Timing: Harvest vegetables at their peak ripeness for best flavor and nutritional value. For example, green beans should snap cleanly, cucumbers should be firm, and tomatoes should be fully colored.
- Frequency: Many crops, like zucchini, cucumbers, and bush beans, produce more if harvested frequently. Pick daily or every other day.
- Tools: Use clean, sharp pruners (e.g., Corona ClassicCUT Bypass Pruner BP 3180, ~$30) or a sharp knife for clean cuts, minimizing damage to the plant.
- Seed Saving: This is where the « self-sufficient » aspect truly shines.
- Selection: Only save seeds from your healthiest, most vigorous plants that show desired traits (disease resistance, good flavor, high yield).
- Isolation: To ensure true-to-type seeds, prevent cross-pollination. This can be challenging for open-pollinated crops that readily cross (e.g., squash, corn). For beginners, focus on self-pollinating plants like beans, peas, lettuce, and tomatoes.
- Processing:
- Dry Seeds (Beans, Peas, Lettuce, Grains): Allow pods/seed heads to dry completely on the plant. Harvest, shell, and clean the seeds, removing chaff.
- Wet Seeds (Tomatoes, Cucumbers, Squash): For tomatoes, ferment the seeds in water for a few days to remove the gel coating and inhibit disease. For cucumbers/squash, scrape out seeds, wash thoroughly, and dry.
- Drying: Spread seeds thinly on screens or paper plates in a cool, dry, well-ventilated area for 1-4 weeks. Ensure they are bone-dry before storage. I aim for less than 8% moisture content.
- Storage: Store seeds in airtight containers (glass jars with desiccant packets work well) in a cool, dark, dry place (ideally 40-50°F and 30-40% humidity). Label clearly with variety and date. Properly stored seeds can remain viable for 3-10 years or more.
Step 8: Season Extension & Winterizing
Extend your harvest and protect your garden for the off-season to truly maximize your self sufficient garden from scratch.
- Cold Frames: Simple structures with a transparent top (glass, polycarbonate, or old windows) that sit over garden beds. They trap solar heat, allowing you to grow cold-hardy crops (lettuce, spinach, kale, radishes) well into winter or start seeds earlier in spring. A basic cold frame can be built from 2×6 lumber and a sheet of polycarbonate for under $100.
- Hoop Houses/Low Tunnels: Larger structures made from flexible hoops (PVC pipe or EMT conduit) covered with greenhouse plastic. These provide more space and greater temperature moderation. A 10×20 ft DIY low tunnel kit can cost $200-$500, while a larger, more robust hoop house kit might be $1,000-$3,000. I use a 6×12 ft low tunnel made from 1/2-inch PVC hoops and 6mil greenhouse plastic, which extends my lettuce and spinach harvest by at least
Healthy soil is the bedrock of a productive, self-sufficient garden. You can’t guess what your soil needs; you have to test it.
- Perform a Soil Test: A professional soil test will give you precise data on your soil’s pH, nutrient levels (N-P-K), and organic matter content. I recommend sending a sample to your local agricultural extension office; it typically costs $20-$50 and provides detailed recommendations. Alternatively, for a quick homeowner check, a Rapitest Soil Test Kit (40-test kit, model 1663, ~$20 on Amazon) provides a good baseline for pH, Nitrogen, Phosphorus, and Potash. Aim for a pH between 6.0 and 7.0 for most vegetables.
- Amend for pH Imbalance: If your soil is too acidic (below 6.0), add agricultural lime (dolomitic lime adds magnesium, calcitic lime adds calcium). Apply 5-10 lbs per 100 sq ft for a moderate adjustment. If it’s too alkaline (above 7.0), add elemental sulfur (e.g., Espoma Soil Acidifier, ~$15 for 6.75 lbs) or generous amounts of organic matter like peat moss or pine needles.
- Build Organic Matter: This is the single most important step for long-term soil health. Organic matter improves soil structure, water retention, drainage, and nutrient availability. Incorporate 2-4 inches of high-quality compost into your top 6-12 inches of soil annually. I make my own compost from kitchen scraps, garden waste, and shredded leaves, but you can purchase it. Local nurseries often sell bulk compost for $30-$50 per cubic yard. Aged manure (from chickens, cows, or horses – ensure it’s well-rotted to avoid burning plants) is also excellent.
- Address Nutrient Deficiencies: Based on your soil test, add specific organic amendments. If Nitrogen (N) is low, add blood meal (12-0-0, ~$20 for 3 lbs) or feather meal. For Phosphorus (P), use bone meal (3-15-0, ~$15 for 3 lbs) or rock phosphate. For Potassium (K), greensand (0-0-2.5, ~$25 for 5 lbs) or kelp meal are good choices. I rely heavily on Espoma Organic Garden-tone (5-3-3, ~$25 for an 8lb bag) as a balanced, all-purpose organic fertilizer during planting.
Step 3: Garden Bed Preparation
Deciding between raised beds and in-ground beds depends on your soil, budget, and physical capabilities.
- In-Ground Beds: If you have excellent native soil and good drainage, in-ground beds are the most economical. Double-digging (loosening soil two shovel depths) can significantly improve drainage and aeration. For my main garden, I primarily use in-ground beds, but I focus on building up the soil over time with consistent compost additions and cover cropping. I aim for beds that are no wider than 3-4 feet so I can reach the center without stepping on the soil, compacting it.
- Raised Beds: Raised beds offer numerous advantages, especially for poor soil, heavy clay, or rocky areas. They provide better drainage, warm up faster in spring, reduce compaction, and make weeding and harvesting easier on your back.
- Material Options:
- Untreated Cedar: Naturally rot-resistant and chemical-free. A 4×8 ft bed, 12 inches deep, typically requires three 2x12x8 ft cedar boards, costing around $50-$60 per board (total ~$150-$180) plus corner brackets or screws. My first raised beds were cedar and are still going strong after 7 years.
- Galvanized Steel: Durable, long-lasting, and aesthetically pleasing. Brands like Vego Garden offer modular kits. A Vego Garden 17″ Tall 8-in-1 Metal Raised Garden Bed (can be configured to 4×8 ft) costs approximately $250-$300.
- Concrete Blocks/Stones: Very durable but can leach minerals (though generally safe once weathered) and can be expensive.
- Recycled Materials: Pallets (check for chemical treatment stamps like « HT » for heat-treated), old tires (controversial due to potential chemical leaching).
- Filling Raised Beds: Don’t just fill with topsoil. Use a « Hugelkultur » approach (logs, branches, leaves, then compost, then topsoil) or a mixture of 60% good quality topsoil, 30% compost, and 10% perlite or vermiculite for drainage. A 4x8x1 ft raised bed requires about 32 cubic feet (or ~1.2 cubic yards) of soil mix, which can cost $100-$200 depending on your source.
- Material Options:
Step 4: Water Management & Irrigation
Efficient water management is critical for a self sufficient garden from scratch, especially in off-grid living where water resources might be limited.
- Rainwater Harvesting: This is my primary source of irrigation water. A 55-gallon rain barrel (e.g., EarthMark Rain Barrel, ~$120-$150) connected to a downspout can collect significant water. For larger needs, I use two 275-gallon IBC totes (Intermediate Bulk Containers, often available used for $100-$200 each from food-grade sources) connected in series. A 1,000 sq ft roof can collect approximately 620 gallons of water for every inch of rainfall. My 1,500 sq ft roof provides ample water for my 600 sq ft garden through multiple barrels and totes.
- Drip Irrigation: This is by far the most water-efficient method, delivering water directly to the plant’s root zone, minimizing evaporation and weed growth.
- Components: A typical drip system includes a pressure regulator (e.g., Rain Bird PRV-10, ~$15), a filter (Rain Bird RBY filter, ~$20), main tubing (1/2-inch poly tubing, 100ft ~$25), smaller feeder lines (1/4-inch tubing), and emitters (0.5 GPH or 1 GPH per plant).
- Kits: For beginners, a starter kit like the Rain Bird Drip Irrigation Garden Kit (model DDI-KIT-1P, ~$40-$60) is excellent for a small garden. For larger setups, I use Netafim Techline CV Drip Line (500ft roll, ~$150-$200), which has pressure-compensating emitters built-in, ensuring even watering across long runs.
- Automation: For true self-sufficiency, consider a battery-powered timer (e.g., Orbit B-Hyve Bluetooth Hose Faucet Timer, ~$50) or a solar-powered timer connected to a small 12V pump.
- Solar-Powered Pumps: For lifting water from a well, pond, or large storage tank to your garden, a solar pump is a game-changer. For a smaller drip system, a Shurflo 2088-594-152 Diaphragm Pump (12V, 3.5 GPM, ~$180) can be powered by a single 100W solar panel (e.g., Renogy 100W Monocrystalline Solar Panel, ~$100) and a small 12V battery (e.g., a 50Ah LiFePO4 battery like the Battle Born 50Ah, ~$450). For larger operations or deeper wells, more robust systems are needed. If you’re looking to build out a comprehensive off-grid power system to support your garden’s water needs, or indeed your entire homestead, you might want to explore resources like the Power Grid Generator complete system guide to understand the full scope of what’s possible in terms of energy independence.
Step 5: Seed Selection & Planting
The choice of seeds is crucial for a truly self sufficient garden from scratch.
- Choose Heirloom & Open-Pollinated Seeds: These varieties produce seeds that will grow true to type, meaning you can save seeds from your harvest year after year. F1 hybrids, while often vigorous, will not produce consistent offspring from saved seeds. Reputable seed companies include Baker Creek Heirloom Seeds, High Mowing Organic Seeds, and Seed Savers Exchange. Start with common, reliable varieties like ‘Black Krim’ tomatoes, ‘Provider’ bush beans, ‘Waltham Butternut’ squash, and ‘Black Seeded Simpson’ lettuce.
- Start Seeds Indoors (Optional but Recommended): For longer growing seasons or specific crops, starting seeds indoors gives you a head start. Use seed-starting mix (e.g., Espoma Organic Seed Starter Mix, ~$10 for 16qt bag) in seed trays (Jiffy Professional Greenhouse 72-cell kit, ~$15). Provide adequate light with LED grow lights (Barrina T5 2ft 4-pack LED Grow Lights, 20W each, ~$50) for 14-16 hours a day, positioned 2-4 inches above seedlings. Maintain consistent temperatures (65-75°F for most).
- Direct Sowing vs. Transplanting: Some crops (carrots, radishes, beans, corn) prefer direct sowing into the garden bed. Others (tomatoes, peppers, broccoli, kale) benefit from being started indoors and transplanted. Follow seed packet instructions for planting depths (e.g., lettuce seeds are often surface-sown or planted 1/8 inch deep, while beans are 1 inch deep) and spacing.
- Companion Planting: Strategically plant different species together to enhance growth, deter pests, and attract beneficial insects. For example, planting marigolds near tomatoes can deter nematodes, and basil improves tomato flavor. Nasturtiums can act as a trap crop for aphids.
- Succession Planting: For a continuous harvest, plant small batches of quick-growing crops (lettuce, radishes, cilantro) every 2-3 weeks. As one crop finishes, another is ready to take its place.
Step 6: Pest & Disease Management (Organic)
Maintaining a self sufficient garden from scratch means embracing organic pest and disease control.
- Integrated Pest Management (IPM): This holistic approach combines several strategies.
- Observation: Regularly inspect your plants for early signs of pests or disease. Catching issues early is key.
- Physical Barriers: Use row covers (e.g., Agribon AG-19 floating row cover, 10×20 ft, ~$20) to protect young plants from insect pests like cabbage worms and squash bugs. Install fences (e.g., 2×4 welded wire mesh, 4 ft tall, 50 ft roll ~$70) to keep out deer, rabbits, and other larger animals.
- Hand-Picking: For larger pests like tomato hornworms or squash bugs, simply pick them off and drop them into a bucket of soapy water.
- Companion Planting: As mentioned, certain plants repel pests. Marigolds, garlic, and onions are excellent deterrents.
- Attract Beneficial Insects: Plant flowers like dill, fennel, cosmos, and sweet alyssum to attract ladybugs, lacewings, and parasitic wasps, which prey on common garden pests.
- Organic Sprays & Treatments:
- Neem Oil: An excellent broad-spectrum organic insecticide and fungicide. Bonide Neem Oil Concentrate (16oz, ~$20) can be mixed at a rate of 1-2 tbsp per gallon of water and sprayed on affected plants.
- Insecticidal Soap: Effective against soft-bodied insects like aphids, whiteflies, and spider mites. Garden Safe Insecticidal Soap (24oz ready-to-use, ~$10).
- Bacillus thuringiensis (Bt): A naturally occurring soil bacterium that targets caterpillars and worms. Monterey BT Worm & Caterpillar Killer (16oz, ~$18) is highly effective and safe for beneficial insects.
- Copper or Sulfur Sprays: For fungal diseases like powdery mildew or blight, organic copper (e.g., Bonide Copper Fungicide, ~$15 for 1lb) or sulfur (e.g., Safer Brand Garden Fungicide, ~$10 for 16oz) can be used as a last resort.
Step 7: Harvesting & Seed Saving
The culmination of your efforts is the harvest, and seed saving closes the loop on self-sufficiency.
- Harvesting Techniques:
- Timing: Harvest vegetables at their peak ripeness for best flavor and nutritional value. For example, green beans should snap cleanly, cucumbers should be firm, and tomatoes should be fully colored.
- Frequency: Many crops, like zucchini, cucumbers, and bush beans, produce more if harvested frequently. Pick daily or every other day.
- Tools: Use clean, sharp pruners (e.g., Corona ClassicCUT Bypass Pruner BP 3180, ~$30) or a sharp knife for clean cuts, minimizing damage to the plant.
- Seed Saving: This is where the « self-sufficient » aspect truly shines.
- Selection: Only save seeds from your healthiest, most vigorous plants that show desired traits (disease resistance, good flavor, high yield).
- Isolation: To ensure true-to-type seeds, prevent cross-pollination. This can be challenging for open-pollinated crops that readily cross (e.g., squash, corn). For beginners, focus on self-pollinating plants like beans, peas, lettuce, and tomatoes.
- Processing:
- Dry Seeds (Beans, Peas, Lettuce, Grains): Allow pods/seed heads to dry completely on the plant. Harvest, shell, and clean the seeds, removing chaff.
- Wet Seeds (Tomatoes, Cucumbers, Squash): For tomatoes, ferment the seeds in water for a few days to remove the gel coating and inhibit disease. For cucumbers/squash, scrape out seeds, wash thoroughly, and dry.
- Drying: Spread seeds thinly on screens or paper plates in a cool, dry, well-ventilated area for 1-4 weeks. Ensure they are bone-dry before storage. I aim for less than 8% moisture content.
- Storage: Store seeds in airtight containers (glass jars with desiccant packets work well) in a cool, dark, dry place (ideally 40-50°F and 30-40% humidity). Label clearly with variety and date. Properly stored seeds can remain viable for 3-10 years or more.
Step 8: Season Extension & Winterizing
Extend your harvest and protect your garden for the off-season to truly maximize your self sufficient garden from scratch.
- Cold Frames: Simple structures with a transparent top (glass, polycarbonate, or old windows) that sit over garden beds. They trap solar heat, allowing you to grow cold-hardy crops (lettuce, spinach, kale, radishes) well into winter or start seeds earlier in spring. A basic cold frame can be built from 2×6 lumber and a sheet of polycarbonate for under $100.
- Hoop Houses/Low Tunnels: Larger structures made from flexible hoops (PVC pipe or EMT conduit) covered with greenhouse plastic. These provide more space and greater temperature moderation. A 10×20 ft DIY low tunnel kit can cost $200-$500, while a larger, more robust hoop house kit might be $1,000-$3,000. I use a 6×12 ft low tunnel made from 1/2-inch PVC hoops and 6mil greenhouse plastic, which extends my lettuce and spinach harvest by at least
- Harvesting Techniques:
- Timing: Harvest vegetables at their peak ripeness for best flavor and nutritional value. For example, green beans should snap cleanly, cucumbers should be firm, and tomatoes should be fully colored.
- Frequency: Many crops, like zucchini, cucumbers, and bush beans, produce more if harvested frequently. Pick daily or every other day.
- Tools: Use clean, sharp pruners (e.g., Corona ClassicCUT Bypass Pruner BP 3180, ~$30) or a sharp knife for clean cuts, minimizing damage to the plant.
- Seed Saving: This is where the « self-sufficient » aspect truly shines.
- Selection: Only save seeds from your healthiest, most vigorous plants that show desired traits (disease resistance, good flavor, high yield).
- Isolation: To ensure true-to-type seeds, prevent cross-pollination. This can be challenging for open-pollinated crops that readily cross (e.g., squash, corn). For beginners, focus on self-pollinating plants like beans, peas, lettuce, and tomatoes.
- Processing:
- Dry Seeds (Beans, Peas, Lettuce, Grains): Allow pods/seed heads to dry completely on the plant. Harvest, shell, and clean the seeds, removing chaff.
- Wet Seeds (Tomatoes, Cucumbers, Squash): For tomatoes, ferment the seeds in water for a few days to remove the gel coating and inhibit disease. For cucumbers/squash, scrape out seeds, wash thoroughly, and dry.
- Drying: Spread seeds thinly on screens or paper plates in a cool, dry, well-ventilated area for 1-4 weeks. Ensure they are bone-dry before storage. I aim for less than 8% moisture content.
- Storage: Store seeds in airtight containers (glass jars with desiccant packets work well) in a cool, dark, dry place (ideally 40-50°F and 30-40% humidity). Label clearly with variety and date. Properly stored seeds can remain viable for 3-10 years or more.
Step 8: Season Extension & Winterizing
Extend your harvest and protect your garden for the off-season to truly maximize your self sufficient garden from scratch.
- Cold Frames: Simple structures with a transparent top (glass, polycarbonate, or old windows) that sit over garden beds. They trap solar heat, allowing you to grow cold-hardy crops (lettuce, spinach, kale, radishes) well into winter or start seeds earlier in spring. A basic cold frame can be built from 2×6 lumber and a sheet of polycarbonate for under $100.
- Hoop Houses/Low Tunnels: Larger structures made from flexible hoops (PVC pipe or EMT conduit) covered with greenhouse plastic. These provide more space and greater temperature moderation. A 10×20 ft DIY low tunnel kit can cost $200-$500, while a larger, more robust hoop house kit might be $1,000-$3,000. I use a 6×12 ft low tunnel made from 1/2-inch PVC hoops and 6mil greenhouse plastic, which extends my lettuce and spinach harvest by at least
- Choose Heirloom & Open-Pollinated Seeds: These varieties produce seeds that will grow true to type, meaning you can save seeds from your harvest year after year. F1 hybrids, while often vigorous, will not produce consistent offspring from saved seeds. Reputable seed companies include Baker Creek Heirloom Seeds, High Mowing Organic Seeds, and Seed Savers Exchange. Start with common, reliable varieties like ‘Black Krim’ tomatoes, ‘Provider’ bush beans, ‘Waltham Butternut’ squash, and ‘Black Seeded Simpson’ lettuce.
- Start Seeds Indoors (Optional but Recommended): For longer growing seasons or specific crops, starting seeds indoors gives you a head start. Use seed-starting mix (e.g., Espoma Organic Seed Starter Mix, ~$10 for 16qt bag) in seed trays (Jiffy Professional Greenhouse 72-cell kit, ~$15). Provide adequate light with LED grow lights (Barrina T5 2ft 4-pack LED Grow Lights, 20W each, ~$50) for 14-16 hours a day, positioned 2-4 inches above seedlings. Maintain consistent temperatures (65-75°F for most).
- Direct Sowing vs. Transplanting: Some crops (carrots, radishes, beans, corn) prefer direct sowing into the garden bed. Others (tomatoes, peppers, broccoli, kale) benefit from being started indoors and transplanted. Follow seed packet instructions for planting depths (e.g., lettuce seeds are often surface-sown or planted 1/8 inch deep, while beans are 1 inch deep) and spacing.
- Companion Planting: Strategically plant different species together to enhance growth, deter pests, and attract beneficial insects. For example, planting marigolds near tomatoes can deter nematodes, and basil improves tomato flavor. Nasturtiums can act as a trap crop for aphids.
- Succession Planting: For a continuous harvest, plant small batches of quick-growing crops (lettuce, radishes, cilantro) every 2-3 weeks. As one crop finishes, another is ready to take its place.
Step 6: Pest & Disease Management (Organic)
Maintaining a self sufficient garden from scratch means embracing organic pest and disease control.
- Integrated Pest Management (IPM): This holistic approach combines several strategies.
- Observation: Regularly inspect your plants for early signs of pests or disease. Catching issues early is key.
- Physical Barriers: Use row covers (e.g., Agribon AG-19 floating row cover, 10×20 ft, ~$20) to protect young plants from insect pests like cabbage worms and squash bugs. Install fences (e.g., 2×4 welded wire mesh, 4 ft tall, 50 ft roll ~$70) to keep out deer, rabbits, and other larger animals.
- Hand-Picking: For larger pests like tomato hornworms or squash bugs, simply pick them off and drop them into a bucket of soapy water.
- Companion Planting: As mentioned, certain plants repel pests. Marigolds, garlic, and onions are excellent deterrents.
- Attract Beneficial Insects: Plant flowers like dill, fennel, cosmos, and sweet alyssum to attract ladybugs, lacewings, and parasitic wasps, which prey on common garden pests.
- Organic Sprays & Treatments:
- Neem Oil: An excellent broad-spectrum organic insecticide and fungicide. Bonide Neem Oil Concentrate (16oz, ~$20) can be mixed at a rate of 1-2 tbsp per gallon of water and sprayed on affected plants.
- Insecticidal Soap: Effective against soft-bodied insects like aphids, whiteflies, and spider mites. Garden Safe Insecticidal Soap (24oz ready-to-use, ~$10).
- Bacillus thuringiensis (Bt): A naturally occurring soil bacterium that targets caterpillars and worms. Monterey BT Worm & Caterpillar Killer (16oz, ~$18) is highly effective and safe for beneficial insects.
- Copper or Sulfur Sprays: For fungal diseases like powdery mildew or blight, organic copper (e.g., Bonide Copper Fungicide, ~$15 for 1lb) or sulfur (e.g., Safer Brand Garden Fungicide, ~$10 for 16oz) can be used as a last resort.
Step 7: Harvesting & Seed Saving
The culmination of your efforts is the harvest, and seed saving closes the loop on self-sufficiency.
- Harvesting Techniques:
- Timing: Harvest vegetables at their peak ripeness for best flavor and nutritional value. For example, green beans should snap cleanly, cucumbers should be firm, and tomatoes should be fully colored.
- Frequency: Many crops, like zucchini, cucumbers, and bush beans, produce more if harvested frequently. Pick daily or every other day.
- Tools: Use clean, sharp pruners (e.g., Corona ClassicCUT Bypass Pruner BP 3180, ~$30) or a sharp knife for clean cuts, minimizing damage to the plant.
- Seed Saving: This is where the « self-sufficient » aspect truly shines.
- Selection: Only save seeds from your healthiest, most vigorous plants that show desired traits (disease resistance, good flavor, high yield).
- Isolation: To ensure true-to-type seeds, prevent cross-pollination. This can be challenging for open-pollinated crops that readily cross (e.g., squash, corn). For beginners, focus on self-pollinating plants like beans, peas, lettuce, and tomatoes.
- Processing:
- Dry Seeds (Beans, Peas, Lettuce, Grains): Allow pods/seed heads to dry completely on the plant. Harvest, shell, and clean the seeds, removing chaff.
- Wet Seeds (Tomatoes, Cucumbers, Squash): For tomatoes, ferment the seeds in water for a few days to remove the gel coating and inhibit disease. For cucumbers/squash, scrape out seeds, wash thoroughly, and dry.
- Drying: Spread seeds thinly on screens or paper plates in a cool, dry, well-ventilated area for 1-4 weeks. Ensure they are bone-dry before storage. I aim for less than 8% moisture content.
- Storage: Store seeds in airtight containers (glass jars with desiccant packets work well) in a cool, dark, dry place (ideally 40-50°F and 30-40% humidity). Label clearly with variety and date. Properly stored seeds can remain viable for 3-10 years or more.
Step 8: Season Extension & Winterizing
Extend your harvest and protect your garden for the off-season to truly maximize your self sufficient garden from scratch.
- Cold Frames: Simple structures with a transparent top (glass, polycarbonate, or old windows) that sit over garden beds. They trap solar heat, allowing you to grow cold-hardy crops (lettuce, spinach, kale, radishes) well into winter or start seeds earlier in spring. A basic cold frame can be built from 2×6 lumber and a sheet of polycarbonate for under $100.
- Hoop Houses/Low Tunnels: Larger structures made from flexible hoops (PVC pipe or EMT conduit) covered with greenhouse plastic. These provide more space and greater temperature moderation. A 10×20 ft DIY low tunnel kit can cost $200-$500, while a larger, more robust hoop house kit might be $1,000-$3,000. I use a 6×12 ft low tunnel made from 1/2-inch PVC hoops and 6mil greenhouse plastic, which extends my lettuce and spinach harvest by at least
The choice of seeds is crucial for a truly self sufficient garden from scratch.
- Choose Heirloom & Open-Pollinated Seeds: These varieties produce seeds that will grow true to type, meaning you can save seeds from your harvest year after year. F1 hybrids, while often vigorous, will not produce consistent offspring from saved seeds. Reputable seed companies include Baker Creek Heirloom Seeds, High Mowing Organic Seeds, and Seed Savers Exchange. Start with common, reliable varieties like ‘Black Krim’ tomatoes, ‘Provider’ bush beans, ‘Waltham Butternut’ squash, and ‘Black Seeded Simpson’ lettuce.
- Start Seeds Indoors (Optional but Recommended): For longer growing seasons or specific crops, starting seeds indoors gives you a head start. Use seed-starting mix (e.g., Espoma Organic Seed Starter Mix, ~$10 for 16qt bag) in seed trays (Jiffy Professional Greenhouse 72-cell kit, ~$15). Provide adequate light with LED grow lights (Barrina T5 2ft 4-pack LED Grow Lights, 20W each, ~$50) for 14-16 hours a day, positioned 2-4 inches above seedlings. Maintain consistent temperatures (65-75°F for most).
- Direct Sowing vs. Transplanting: Some crops (carrots, radishes, beans, corn) prefer direct sowing into the garden bed. Others (tomatoes, peppers, broccoli, kale) benefit from being started indoors and transplanted. Follow seed packet instructions for planting depths (e.g., lettuce seeds are often surface-sown or planted 1/8 inch deep, while beans are 1 inch deep) and spacing.
- Companion Planting: Strategically plant different species together to enhance growth, deter pests, and attract beneficial insects. For example, planting marigolds near tomatoes can deter nematodes, and basil improves tomato flavor. Nasturtiums can act as a trap crop for aphids.
- Succession Planting: For a continuous harvest, plant small batches of quick-growing crops (lettuce, radishes, cilantro) every 2-3 weeks. As one crop finishes, another is ready to take its place.
Step 6: Pest & Disease Management (Organic)
Maintaining a self sufficient garden from scratch means embracing organic pest and disease control.
- Integrated Pest Management (IPM): This holistic approach combines several strategies.
- Observation: Regularly inspect your plants for early signs of pests or disease. Catching issues early is key.
- Physical Barriers: Use row covers (e.g., Agribon AG-19 floating row cover, 10×20 ft, ~$20) to protect young plants from insect pests like cabbage worms and squash bugs. Install fences (e.g., 2×4 welded wire mesh, 4 ft tall, 50 ft roll ~$70) to keep out deer, rabbits, and other larger animals.
- Hand-Picking: For larger pests like tomato hornworms or squash bugs, simply pick them off and drop them into a bucket of soapy water.
- Companion Planting: As mentioned, certain plants repel pests. Marigolds, garlic, and onions are excellent deterrents.
- Attract Beneficial Insects: Plant flowers like dill, fennel, cosmos, and sweet alyssum to attract ladybugs, lacewings, and parasitic wasps, which prey on common garden pests.
- Organic Sprays & Treatments:
- Neem Oil: An excellent broad-spectrum organic insecticide and fungicide. Bonide Neem Oil Concentrate (16oz, ~$20) can be mixed at a rate of 1-2 tbsp per gallon of water and sprayed on affected plants.
- Insecticidal Soap: Effective against soft-bodied insects like aphids, whiteflies, and spider mites. Garden Safe Insecticidal Soap (24oz ready-to-use, ~$10).
- Bacillus thuringiensis (Bt): A naturally occurring soil bacterium that targets caterpillars and worms. Monterey BT Worm & Caterpillar Killer (16oz, ~$18) is highly effective and safe for beneficial insects.
- Copper or Sulfur Sprays: For fungal diseases like powdery mildew or blight, organic copper (e.g., Bonide Copper Fungicide, ~$15 for 1lb) or sulfur (e.g., Safer Brand Garden Fungicide, ~$10 for 16oz) can be used as a last resort.
Step 7: Harvesting & Seed Saving
The culmination of your efforts is the harvest, and seed saving closes the loop on self-sufficiency.
- Harvesting Techniques:
- Timing: Harvest vegetables at their peak ripeness for best flavor and nutritional value. For example, green beans should snap cleanly, cucumbers should be firm, and tomatoes should be fully colored.
- Frequency: Many crops, like zucchini, cucumbers, and bush beans, produce more if harvested frequently. Pick daily or every other day.
- Tools: Use clean, sharp pruners (e.g., Corona ClassicCUT Bypass Pruner BP 3180, ~$30) or a sharp knife for clean cuts, minimizing damage to the plant.
- Seed Saving: This is where the « self-sufficient » aspect truly shines.
- Selection: Only save seeds from your healthiest, most vigorous plants that show desired traits (disease resistance, good flavor, high yield).
- Isolation: To ensure true-to-type seeds, prevent cross-pollination. This can be challenging for open-pollinated crops that readily cross (e.g., squash, corn). For beginners, focus on self-pollinating plants like beans, peas, lettuce, and tomatoes.
- Processing:
- Dry Seeds (Beans, Peas, Lettuce, Grains): Allow pods/seed heads to dry completely on the plant. Harvest, shell, and clean the seeds, removing chaff.
- Wet Seeds (Tomatoes, Cucumbers, Squash): For tomatoes, ferment the seeds in water for a few days to remove the gel coating and inhibit disease. For cucumbers/squash, scrape out seeds, wash thoroughly, and dry.
- Drying: Spread seeds thinly on screens or paper plates in a cool, dry, well-ventilated area for 1-4 weeks. Ensure they are bone-dry before storage. I aim for less than 8% moisture content.
- Storage: Store seeds in airtight containers (glass jars with desiccant packets work well) in a cool, dark, dry place (ideally 40-50°F and 30-40% humidity). Label clearly with variety and date. Properly stored seeds can remain viable for 3-10 years or more.
Step 8: Season Extension & Winterizing
Extend your harvest and protect your garden for the off-season to truly maximize your self sufficient garden from scratch.
- Cold Frames: Simple structures with a transparent top (glass, polycarbonate, or old windows) that sit over garden beds. They trap solar heat, allowing you to grow cold-hardy crops (lettuce, spinach, kale, radishes) well into winter or start seeds earlier in spring. A basic cold frame can be built from 2×6 lumber and a sheet of polycarbonate for under $100.
- Hoop Houses/Low Tunnels: Larger structures made from flexible hoops (PVC pipe or EMT conduit) covered with greenhouse plastic. These provide more space and greater temperature moderation. A 10×20 ft DIY low tunnel kit can cost $200-$500, while a larger, more robust hoop house kit might be $1,000-$3,000. I use a 6×12 ft low tunnel made from 1/2-inch PVC hoops and 6mil greenhouse plastic, which extends my lettuce and spinach harvest by at least
Step 5: Seed Selection & Planting
The choice of seeds is crucial for a truly self sufficient garden from scratch.
- Choose Heirloom & Open-Pollinated Seeds: These varieties produce seeds that will grow true to type, meaning you can save seeds from your harvest year after year. F1 hybrids, while often vigorous, will not produce consistent offspring from saved seeds. Reputable seed companies include Baker Creek Heirloom Seeds, High Mowing Organic Seeds, and Seed Savers Exchange. Start with common, reliable varieties like ‘Black Krim’ tomatoes, ‘Provider’ bush beans, ‘Waltham Butternut’ squash, and ‘Black Seeded Simpson’ lettuce.
- Start Seeds Indoors (Optional but Recommended): For longer growing seasons or specific crops, starting seeds indoors gives you a head start. Use seed-starting mix (e.g., Espoma Organic Seed Starter Mix, ~$10 for 16qt bag) in seed trays (Jiffy Professional Greenhouse 72-cell kit, ~$15). Provide adequate light with LED grow lights (Barrina T5 2ft 4-pack LED Grow Lights, 20W each, ~$50) for 14-16 hours a day, positioned 2-4 inches above seedlings. Maintain consistent temperatures (65-75°F for most).
- Direct Sowing vs. Transplanting: Some crops (carrots, radishes, beans, corn) prefer direct sowing into the garden bed. Others (tomatoes, peppers, broccoli, kale) benefit from being started indoors and transplanted. Follow seed packet instructions for planting depths (e.g., lettuce seeds are often surface-sown or planted 1/8 inch deep, while beans are 1 inch deep) and spacing.
- Companion Planting: Strategically plant different species together to enhance growth, deter pests, and attract beneficial insects. For example, planting marigolds near tomatoes can deter nematodes, and basil improves tomato flavor. Nasturtiums can act as a trap crop for aphids.
- Succession Planting: For a continuous harvest, plant small batches of quick-growing crops (lettuce, radishes, cilantro) every 2-3 weeks. As one crop finishes, another is ready to take its place.
Step 6: Pest & Disease Management (Organic)
Maintaining a self sufficient garden from scratch means embracing organic pest and disease control.
- Integrated Pest Management (IPM): This holistic approach combines several strategies.
- Observation: Regularly inspect your plants for early signs of pests or disease. Catching issues early is key.
- Physical Barriers: Use row covers (e.g., Agribon AG-19 floating row cover, 10×20 ft, ~$20) to protect young plants from insect pests like cabbage worms and squash bugs. Install fences (e.g., 2×4 welded wire mesh, 4 ft tall, 50 ft roll ~$70) to keep out deer, rabbits, and other larger animals.
- Hand-Picking: For larger pests like tomato hornworms or squash bugs, simply pick them off and drop them into a bucket of soapy water.
- Companion Planting: As mentioned, certain plants repel pests. Marigolds, garlic, and onions are excellent deterrents.
- Attract Beneficial Insects: Plant flowers like dill, fennel, cosmos, and sweet alyssum to attract ladybugs, lacewings, and parasitic wasps, which prey on common garden pests.
- Organic Sprays & Treatments:
- Neem Oil: An excellent broad-spectrum organic insecticide and fungicide. Bonide Neem Oil Concentrate (16oz, ~$20) can be mixed at a rate of 1-2 tbsp per gallon of water and sprayed on affected plants.
- Insecticidal Soap: Effective against soft-bodied insects like aphids, whiteflies, and spider mites. Garden Safe Insecticidal Soap (24oz ready-to-use, ~$10).
- Bacillus thuringiensis (Bt): A naturally occurring soil bacterium that targets caterpillars and worms. Monterey BT Worm & Caterpillar Killer (16oz, ~$18) is highly effective and safe for beneficial insects.
- Copper or Sulfur Sprays: For fungal diseases like powdery mildew or blight, organic copper (e.g., Bonide Copper Fungicide, ~$15 for 1lb) or sulfur (e.g., Safer Brand Garden Fungicide, ~$10 for 16oz) can be used as a last resort.
Step 7: Harvesting & Seed Saving
The culmination of your efforts is the harvest, and seed saving closes the loop on self-sufficiency.
- Harvesting Techniques:
- Timing: Harvest vegetables at their peak ripeness for best flavor and nutritional value. For example, green beans should snap cleanly, cucumbers should be firm, and tomatoes should be fully colored.
- Frequency: Many crops, like zucchini, cucumbers, and bush beans, produce more if harvested frequently. Pick daily or every other day.
- Tools: Use clean, sharp pruners (e.g., Corona ClassicCUT Bypass Pruner BP 3180, ~$30) or a sharp knife for clean cuts, minimizing damage to the plant.
- Seed Saving: This is where the « self-sufficient » aspect truly shines.
- Selection: Only save seeds from your healthiest, most vigorous plants that show desired traits (disease resistance, good flavor, high yield).
- Isolation: To ensure true-to-type seeds, prevent cross-pollination. This can be challenging for open-pollinated crops that readily cross (e.g., squash, corn). For beginners, focus on self-pollinating plants like beans, peas, lettuce, and tomatoes.
- Processing:
- Dry Seeds (Beans, Peas, Lettuce, Grains): Allow pods/seed heads to dry completely on the plant. Harvest, shell, and clean the seeds, removing chaff.
- Wet Seeds (Tomatoes, Cucumbers, Squash): For tomatoes, ferment the seeds in water for a few days to remove the gel coating and inhibit disease. For cucumbers/squash, scrape out seeds, wash thoroughly, and dry.
- Drying: Spread seeds thinly on screens or paper plates in a cool, dry, well-ventilated area for 1-4 weeks. Ensure they are bone-dry before storage. I aim for less than 8% moisture content.
- Storage: Store seeds in airtight containers (glass jars with desiccant packets work well) in a cool, dark, dry place (ideally 40-50°F and 30-40% humidity). Label clearly with variety and date. Properly stored seeds can remain viable for 3-10 years or more.
Step 8: Season Extension & Winterizing
Extend your harvest and protect your garden for the off-season to truly maximize your self sufficient garden from scratch.
- Cold Frames: Simple structures with a transparent top (glass, polycarbonate, or old windows) that sit over garden beds. They trap solar heat, allowing you to grow cold-hardy crops (lettuce, spinach, kale, radishes) well into winter or start seeds earlier in spring. A basic cold frame can be built from 2×6 lumber and a sheet of polycarbonate for under $100.
- Hoop Houses/Low Tunnels: Larger structures made from flexible hoops (PVC pipe or EMT conduit) covered with greenhouse plastic. These provide more space and greater temperature moderation. A 10×20 ft DIY low tunnel kit can cost $200-$500, while a larger, more robust hoop house kit might be $1,000-$3,000. I use a 6×12 ft low tunnel made from 1/2-inch PVC hoops and 6mil greenhouse plastic, which extends my lettuce and spinach harvest by at least
- Rainwater Harvesting: This is my primary source of irrigation water. A 55-gallon rain barrel (e.g., EarthMark Rain Barrel, ~$120-$150) connected to a downspout can collect significant water. For larger needs, I use two 275-gallon IBC totes (Intermediate Bulk Containers, often available used for $100-$200 each from food-grade sources) connected in series. A 1,000 sq ft roof can collect approximately 620 gallons of water for every inch of rainfall. My 1,500 sq ft roof provides ample water for my 600 sq ft garden through multiple barrels and totes.
- Drip Irrigation: This is by far the most water-efficient method, delivering water directly to the plant’s root zone, minimizing evaporation and weed growth.
- Components: A typical drip system includes a pressure regulator (e.g., Rain Bird PRV-10, ~$15), a filter (Rain Bird RBY filter, ~$20), main tubing (1/2-inch poly tubing, 100ft ~$25), smaller feeder lines (1/4-inch tubing), and emitters (0.5 GPH or 1 GPH per plant).
- Kits: For beginners, a starter kit like the Rain Bird Drip Irrigation Garden Kit (model DDI-KIT-1P, ~$40-$60) is excellent for a small garden. For larger setups, I use Netafim Techline CV Drip Line (500ft roll, ~$150-$200), which has pressure-compensating emitters built-in, ensuring even watering across long runs.
- Automation: For true self-sufficiency, consider a battery-powered timer (e.g., Orbit B-Hyve Bluetooth Hose Faucet Timer, ~$50) or a solar-powered timer connected to a small 12V pump.
- Solar-Powered Pumps: For lifting water from a well, pond, or large storage tank to your garden, a solar pump is a game-changer. For a smaller drip system, a Shurflo 2088-594-152 Diaphragm Pump (12V, 3.5 GPM, ~$180) can be powered by a single 100W solar panel (e.g., Renogy 100W Monocrystalline Solar Panel, ~$100) and a small 12V battery (e.g., a 50Ah LiFePO4 battery like the Battle Born 50Ah, ~$450). For larger operations or deeper wells, more robust systems are needed. If you’re looking to build out a comprehensive off-grid power system to support your garden’s water needs, or indeed your entire homestead, you might want to explore resources like the Power Grid Generator complete system guide to understand the full scope of what’s possible in terms of energy independence.
Step 5: Seed Selection & Planting
The choice of seeds is crucial for a truly self sufficient garden from scratch.
- Choose Heirloom & Open-Pollinated Seeds: These varieties produce seeds that will grow true to type, meaning you can save seeds from your harvest year after year. F1 hybrids, while often vigorous, will not produce consistent offspring from saved seeds. Reputable seed companies include Baker Creek Heirloom Seeds, High Mowing Organic Seeds, and Seed Savers Exchange. Start with common, reliable varieties like ‘Black Krim’ tomatoes, ‘Provider’ bush beans, ‘Waltham Butternut’ squash, and ‘Black Seeded Simpson’ lettuce.
- Start Seeds Indoors (Optional but Recommended): For longer growing seasons or specific crops, starting seeds indoors gives you a head start. Use seed-starting mix (e.g., Espoma Organic Seed Starter Mix, ~$10 for 16qt bag) in seed trays (Jiffy Professional Greenhouse 72-cell kit, ~$15). Provide adequate light with LED grow lights (Barrina T5 2ft 4-pack LED Grow Lights, 20W each, ~$50) for 14-16 hours a day, positioned 2-4 inches above seedlings. Maintain consistent temperatures (65-75°F for most).
- Direct Sowing vs. Transplanting: Some crops (carrots, radishes, beans, corn) prefer direct sowing into the garden bed. Others (tomatoes, peppers, broccoli, kale) benefit from being started indoors and transplanted. Follow seed packet instructions for planting depths (e.g., lettuce seeds are often surface-sown or planted 1/8 inch deep, while beans are 1 inch deep) and spacing.
- Companion Planting: Strategically plant different species together to enhance growth, deter pests, and attract beneficial insects. For example, planting marigolds near tomatoes can deter nematodes, and basil improves tomato flavor. Nasturtiums can act as a trap crop for aphids.
- Succession Planting: For a continuous harvest, plant small batches of quick-growing crops (lettuce, radishes, cilantro) every 2-3 weeks. As one crop finishes, another is ready to take its place.
Step 6: Pest & Disease Management (Organic)
Maintaining a self sufficient garden from scratch means embracing organic pest and disease control.
- Integrated Pest Management (IPM): This holistic approach combines several strategies.
- Observation: Regularly inspect your plants for early signs of pests or disease. Catching issues early is key.
- Physical Barriers: Use row covers (e.g., Agribon AG-19 floating row cover, 10×20 ft, ~$20) to protect young plants from insect pests like cabbage worms and squash bugs. Install fences (e.g., 2×4 welded wire mesh, 4 ft tall, 50 ft roll ~$70) to keep out deer, rabbits, and other larger animals.
- Hand-Picking: For larger pests like tomato hornworms or squash bugs, simply pick them off and drop them into a bucket of soapy water.
- Companion Planting: As mentioned, certain plants repel pests. Marigolds, garlic, and onions are excellent deterrents.
- Attract Beneficial Insects: Plant flowers like dill, fennel, cosmos, and sweet alyssum to attract ladybugs, lacewings, and parasitic wasps, which prey on common garden pests.
- Organic Sprays & Treatments:
- Neem Oil: An excellent broad-spectrum organic insecticide and fungicide. Bonide Neem Oil Concentrate (16oz, ~$20) can be mixed at a rate of 1-2 tbsp per gallon of water and sprayed on affected plants.
- Insecticidal Soap: Effective against soft-bodied insects like aphids, whiteflies, and spider mites. Garden Safe Insecticidal Soap (24oz ready-to-use, ~$10).
- Bacillus thuringiensis (Bt): A naturally occurring soil bacterium that targets caterpillars and worms. Monterey BT Worm & Caterpillar Killer (16oz, ~$18) is highly effective and safe for beneficial insects.
- Copper or Sulfur Sprays: For fungal diseases like powdery mildew or blight, organic copper (e.g., Bonide Copper Fungicide, ~$15 for 1lb) or sulfur (e.g., Safer Brand Garden Fungicide, ~$10 for 16oz) can be used as a last resort.
Step 7: Harvesting & Seed Saving
The culmination of your efforts is the harvest, and seed saving closes the loop on self-sufficiency.
- Harvesting Techniques:
- Timing: Harvest vegetables at their peak ripeness for best flavor and nutritional value. For example, green beans should snap cleanly, cucumbers should be firm, and tomatoes should be fully colored.
- Frequency: Many crops, like zucchini, cucumbers, and bush beans, produce more if harvested frequently. Pick daily or every other day.
- Tools: Use clean, sharp pruners (e.g., Corona ClassicCUT Bypass Pruner BP 3180, ~$30) or a sharp knife for clean cuts, minimizing damage to the plant.
- Seed Saving: This is where the « self-sufficient » aspect truly shines.
- Selection: Only save seeds from your healthiest, most vigorous plants that show desired traits (disease resistance, good flavor, high yield).
- Isolation: To ensure true-to-type seeds, prevent cross-pollination. This can be challenging for open-pollinated crops that readily cross (e.g., squash, corn). For beginners, focus on self-pollinating plants like beans, peas, lettuce, and tomatoes.
- Processing:
- Dry Seeds (Beans, Peas, Lettuce, Grains): Allow pods/seed heads to dry completely on the plant. Harvest, shell, and clean the seeds, removing chaff.
- Wet Seeds (Tomatoes, Cucumbers, Squash): For tomatoes, ferment the seeds in water for a few days to remove the gel coating and inhibit disease. For cucumbers/squash, scrape out seeds, wash thoroughly, and dry.
- Drying: Spread seeds thinly on screens or paper plates in a cool, dry, well-ventilated area for 1-4 weeks. Ensure they are bone-dry before storage. I aim for less than 8% moisture content.
- Storage: Store seeds in airtight containers (glass jars with desiccant packets work well) in a cool, dark, dry place (ideally 40-50°F and 30-40% humidity). Label clearly with variety and date. Properly stored seeds can remain viable for 3-10 years or more.
Step 8: Season Extension & Winterizing
Extend your harvest and protect your garden for the off-season to truly maximize your self sufficient garden from scratch.
- Cold Frames: Simple structures with a transparent top (glass, polycarbonate, or old windows) that sit over garden beds. They trap solar heat, allowing you to grow cold-hardy crops (lettuce, spinach, kale, radishes) well into winter or start seeds earlier in spring. A basic cold frame can be built from 2×6 lumber and a sheet of polycarbonate for under $100.
- Hoop Houses/Low Tunnels: Larger structures made from flexible hoops (PVC pipe or EMT conduit) covered with greenhouse plastic. These provide more space and greater temperature moderation. A 10×20 ft DIY low tunnel kit can cost $200-$500, while a larger, more robust hoop house kit might be $1,000-$3,000. I use a 6×12 ft low tunnel made from 1/2-inch PVC hoops and 6mil greenhouse plastic, which extends my lettuce and spinach harvest by at least
Efficient water management is critical for a self sufficient garden from scratch, especially in off-grid living where water resources might be limited.
- Rainwater Harvesting: This is my primary source of irrigation water. A 55-gallon rain barrel (e.g., EarthMark Rain Barrel, ~$120-$150) connected to a downspout can collect significant water. For larger needs, I use two 275-gallon IBC totes (Intermediate Bulk Containers, often available used for $100-$200 each from food-grade sources) connected in series. A 1,000 sq ft roof can collect approximately 620 gallons of water for every inch of rainfall. My 1,500 sq ft roof provides ample water for my 600 sq ft garden through multiple barrels and totes.
- Drip Irrigation: This is by far the most water-efficient method, delivering water directly to the plant’s root zone, minimizing evaporation and weed growth.
- Components: A typical drip system includes a pressure regulator (e.g., Rain Bird PRV-10, ~$15), a filter (Rain Bird RBY filter, ~$20), main tubing (1/2-inch poly tubing, 100ft ~$25), smaller feeder lines (1/4-inch tubing), and emitters (0.5 GPH or 1 GPH per plant).
- Kits: For beginners, a starter kit like the Rain Bird Drip Irrigation Garden Kit (model DDI-KIT-1P, ~$40-$60) is excellent for a small garden. For larger setups, I use Netafim Techline CV Drip Line (500ft roll, ~$150-$200), which has pressure-compensating emitters built-in, ensuring even watering across long runs.
- Automation: For true self-sufficiency, consider a battery-powered timer (e.g., Orbit B-Hyve Bluetooth Hose Faucet Timer, ~$50) or a solar-powered timer connected to a small 12V pump.
- Solar-Powered Pumps: For lifting water from a well, pond, or large storage tank to your garden, a solar pump is a game-changer. For a smaller drip system, a Shurflo 2088-594-152 Diaphragm Pump (12V, 3.5 GPM, ~$180) can be powered by a single 100W solar panel (e.g., Renogy 100W Monocrystalline Solar Panel, ~$100) and a small 12V battery (e.g., a 50Ah LiFePO4 battery like the Battle Born 50Ah, ~$450). For larger operations or deeper wells, more robust systems are needed. If you’re looking to build out a comprehensive off-grid power system to support your garden’s water needs, or indeed your entire homestead, you might want to explore resources like the Power Grid Generator complete system guide to understand the full scope of what’s possible in terms of energy independence.
Step 5: Seed Selection & Planting
The choice of seeds is crucial for a truly self sufficient garden from scratch.
- Choose Heirloom & Open-Pollinated Seeds: These varieties produce seeds that will grow true to type, meaning you can save seeds from your harvest year after year. F1 hybrids, while often vigorous, will not produce consistent offspring from saved seeds. Reputable seed companies include Baker Creek Heirloom Seeds, High Mowing Organic Seeds, and Seed Savers Exchange. Start with common, reliable varieties like ‘Black Krim’ tomatoes, ‘Provider’ bush beans, ‘Waltham Butternut’ squash, and ‘Black Seeded Simpson’ lettuce.
- Start Seeds Indoors (Optional but Recommended): For longer growing seasons or specific crops, starting seeds indoors gives you a head start. Use seed-starting mix (e.g., Espoma Organic Seed Starter Mix, ~$10 for 16qt bag) in seed trays (Jiffy Professional Greenhouse 72-cell kit, ~$15). Provide adequate light with LED grow lights (Barrina T5 2ft 4-pack LED Grow Lights, 20W each, ~$50) for 14-16 hours a day, positioned 2-4 inches above seedlings. Maintain consistent temperatures (65-75°F for most).
- Direct Sowing vs. Transplanting: Some crops (carrots, radishes, beans, corn) prefer direct sowing into the garden bed. Others (tomatoes, peppers, broccoli, kale) benefit from being started indoors and transplanted. Follow seed packet instructions for planting depths (e.g., lettuce seeds are often surface-sown or planted 1/8 inch deep, while beans are 1 inch deep) and spacing.
- Companion Planting: Strategically plant different species together to enhance growth, deter pests, and attract beneficial insects. For example, planting marigolds near tomatoes can deter nematodes, and basil improves tomato flavor. Nasturtiums can act as a trap crop for aphids.
- Succession Planting: For a continuous harvest, plant small batches of quick-growing crops (lettuce, radishes, cilantro) every 2-3 weeks. As one crop finishes, another is ready to take its place.
Step 6: Pest & Disease Management (Organic)
Maintaining a self sufficient garden from scratch means embracing organic pest and disease control.
- Integrated Pest Management (IPM): This holistic approach combines several strategies.
- Observation: Regularly inspect your plants for early signs of pests or disease. Catching issues early is key.
- Physical Barriers: Use row covers (e.g., Agribon AG-19 floating row cover, 10×20 ft, ~$20) to protect young plants from insect pests like cabbage worms and squash bugs. Install fences (e.g., 2×4 welded wire mesh, 4 ft tall, 50 ft roll ~$70) to keep out deer, rabbits, and other larger animals.
- Hand-Picking: For larger pests like tomato hornworms or squash bugs, simply pick them off and drop them into a bucket of soapy water.
- Companion Planting: As mentioned, certain plants repel pests. Marigolds, garlic, and onions are excellent deterrents.
- Attract Beneficial Insects: Plant flowers like dill, fennel, cosmos, and sweet alyssum to attract ladybugs, lacewings, and parasitic wasps, which prey on common garden pests.
- Organic Sprays & Treatments:
- Neem Oil: An excellent broad-spectrum organic insecticide and fungicide. Bonide Neem Oil Concentrate (16oz, ~$20) can be mixed at a rate of 1-2 tbsp per gallon of water and sprayed on affected plants.
- Insecticidal Soap: Effective against soft-bodied insects like aphids, whiteflies, and spider mites. Garden Safe Insecticidal Soap (24oz ready-to-use, ~$10).
- Bacillus thuringiensis (Bt): A naturally occurring soil bacterium that targets caterpillars and worms. Monterey BT Worm & Caterpillar Killer (16oz, ~$18) is highly effective and safe for beneficial insects.
- Copper or Sulfur Sprays: For fungal diseases like powdery mildew or blight, organic copper (e.g., Bonide Copper Fungicide, ~$15 for 1lb) or sulfur (e.g., Safer Brand Garden Fungicide, ~$10 for 16oz) can be used as a last resort.
Step 7: Harvesting & Seed Saving
The culmination of your efforts is the harvest, and seed saving closes the loop on self-sufficiency.
- Harvesting Techniques:
- Timing: Harvest vegetables at their peak ripeness for best flavor and nutritional value. For example, green beans should snap cleanly, cucumbers should be firm, and tomatoes should be fully colored.
- Frequency: Many crops, like zucchini, cucumbers, and bush beans, produce more if harvested frequently. Pick daily or every other day.
- Tools: Use clean, sharp pruners (e.g., Corona ClassicCUT Bypass Pruner BP 3180, ~$30) or a sharp knife for clean cuts, minimizing damage to the plant.
- Seed Saving: This is where the « self-sufficient » aspect truly shines.
- Selection: Only save seeds from your healthiest, most vigorous plants that show desired traits (disease resistance, good flavor, high yield).
- Isolation: To ensure true-to-type seeds, prevent cross-pollination. This can be challenging for open-pollinated crops that readily cross (e.g., squash, corn). For beginners, focus on self-pollinating plants like beans, peas, lettuce, and tomatoes.
- Processing:
- Dry Seeds (Beans, Peas, Lettuce, Grains): Allow pods/seed heads to dry completely on the plant. Harvest, shell, and clean the seeds, removing chaff.
- Wet Seeds (Tomatoes, Cucumbers, Squash): For tomatoes, ferment the seeds in water for a few days to remove the gel coating and inhibit disease. For cucumbers/squash, scrape out seeds, wash thoroughly, and dry.
- Drying: Spread seeds thinly on screens or paper plates in a cool, dry, well-ventilated area for 1-4 weeks. Ensure they are bone-dry before storage. I aim for less than 8% moisture content.
- Storage: Store seeds in airtight containers (glass jars with desiccant packets work well) in a cool, dark, dry place (ideally 40-50°F and 30-40% humidity). Label clearly with variety and date. Properly stored seeds can remain viable for 3-10 years or more.
Step 8: Season Extension & Winterizing
Extend your harvest and protect your garden for the off-season to truly maximize your self sufficient garden from scratch.
- Cold Frames: Simple structures with a transparent top (glass, polycarbonate, or old windows) that sit over garden beds. They trap solar heat, allowing you to grow cold-hardy crops (lettuce, spinach, kale, radishes) well into winter or start seeds earlier in spring. A basic cold frame can be built from 2×6 lumber and a sheet of polycarbonate for under $100.
- Hoop Houses/Low Tunnels: Larger structures made from flexible hoops (PVC pipe or EMT conduit) covered with greenhouse plastic. These provide more space and greater temperature moderation. A 10×20 ft DIY low tunnel kit can cost $200-$500, while a larger, more robust hoop house kit might be $1,000-$3,000. I use a 6×12 ft low tunnel made from 1/2-inch PVC hoops and 6mil greenhouse plastic, which extends my lettuce and spinach harvest by at least
Step 4: Water Management & Irrigation
Efficient water management is critical for a self sufficient garden from scratch, especially in off-grid living where water resources might be limited.
- Rainwater Harvesting: This is my primary source of irrigation water. A 55-gallon rain barrel (e.g., EarthMark Rain Barrel, ~$120-$150) connected to a downspout can collect significant water. For larger needs, I use two 275-gallon IBC totes (Intermediate Bulk Containers, often available used for $100-$200 each from food-grade sources) connected in series. A 1,000 sq ft roof can collect approximately 620 gallons of water for every inch of rainfall. My 1,500 sq ft roof provides ample water for my 600 sq ft garden through multiple barrels and totes.
- Drip Irrigation: This is by far the most water-efficient method, delivering water directly to the plant’s root zone, minimizing evaporation and weed growth.
- Components: A typical drip system includes a pressure regulator (e.g., Rain Bird PRV-10, ~$15), a filter (Rain Bird RBY filter, ~$20), main tubing (1/2-inch poly tubing, 100ft ~$25), smaller feeder lines (1/4-inch tubing), and emitters (0.5 GPH or 1 GPH per plant).
- Kits: For beginners, a starter kit like the Rain Bird Drip Irrigation Garden Kit (model DDI-KIT-1P, ~$40-$60) is excellent for a small garden. For larger setups, I use Netafim Techline CV Drip Line (500ft roll, ~$150-$200), which has pressure-compensating emitters built-in, ensuring even watering across long runs.
- Automation: For true self-sufficiency, consider a battery-powered timer (e.g., Orbit B-Hyve Bluetooth Hose Faucet Timer, ~$50) or a solar-powered timer connected to a small 12V pump.
- Solar-Powered Pumps: For lifting water from a well, pond, or large storage tank to your garden, a solar pump is a game-changer. For a smaller drip system, a Shurflo 2088-594-152 Diaphragm Pump (12V, 3.5 GPM, ~$180) can be powered by a single 100W solar panel (e.g., Renogy 100W Monocrystalline Solar Panel, ~$100) and a small 12V battery (e.g., a 50Ah LiFePO4 battery like the Battle Born 50Ah, ~$450). For larger operations or deeper wells, more robust systems are needed. If you’re looking to build out a comprehensive off-grid power system to support your garden’s water needs, or indeed your entire homestead, you might want to explore resources like the Power Grid Generator complete system guide to understand the full scope of what’s possible in terms of energy independence.
Step 5: Seed Selection & Planting
The choice of seeds is crucial for a truly self sufficient garden from scratch.
- Choose Heirloom & Open-Pollinated Seeds: These varieties produce seeds that will grow true to type, meaning you can save seeds from your harvest year after year. F1 hybrids, while often vigorous, will not produce consistent offspring from saved seeds. Reputable seed companies include Baker Creek Heirloom Seeds, High Mowing Organic Seeds, and Seed Savers Exchange. Start with common, reliable varieties like ‘Black Krim’ tomatoes, ‘Provider’ bush beans, ‘Waltham Butternut’ squash, and ‘Black Seeded Simpson’ lettuce.
- Start Seeds Indoors (Optional but Recommended): For longer growing seasons or specific crops, starting seeds indoors gives you a head start. Use seed-starting mix (e.g., Espoma Organic Seed Starter Mix, ~$10 for 16qt bag) in seed trays (Jiffy Professional Greenhouse 72-cell kit, ~$15). Provide adequate light with LED grow lights (Barrina T5 2ft 4-pack LED Grow Lights, 20W each, ~$50) for 14-16 hours a day, positioned 2-4 inches above seedlings. Maintain consistent temperatures (65-75°F for most).
- Direct Sowing vs. Transplanting: Some crops (carrots, radishes, beans, corn) prefer direct sowing into the garden bed. Others (tomatoes, peppers, broccoli, kale) benefit from being started indoors and transplanted. Follow seed packet instructions for planting depths (e.g., lettuce seeds are often surface-sown or planted 1/8 inch deep, while beans are 1 inch deep) and spacing.
- Companion Planting: Strategically plant different species together to enhance growth, deter pests, and attract beneficial insects. For example, planting marigolds near tomatoes can deter nematodes, and basil improves tomato flavor. Nasturtiums can act as a trap crop for aphids.
- Succession Planting: For a continuous harvest, plant small batches of quick-growing crops (lettuce, radishes, cilantro) every 2-3 weeks. As one crop finishes, another is ready to take its place.
Step 6: Pest & Disease Management (Organic)
Maintaining a self sufficient garden from scratch means embracing organic pest and disease control.
- Integrated Pest Management (IPM): This holistic approach combines several strategies.
- Observation: Regularly inspect your plants for early signs of pests or disease. Catching issues early is key.
- Physical Barriers: Use row covers (e.g., Agribon AG-19 floating row cover, 10×20 ft, ~$20) to protect young plants from insect pests like cabbage worms and squash bugs. Install fences (e.g., 2×4 welded wire mesh, 4 ft tall, 50 ft roll ~$70) to keep out deer, rabbits, and other larger animals.
- Hand-Picking: For larger pests like tomato hornworms or squash bugs, simply pick them off and drop them into a bucket of soapy water.
- Companion Planting: As mentioned, certain plants repel pests. Marigolds, garlic, and onions are excellent deterrents.
- Attract Beneficial Insects: Plant flowers like dill, fennel, cosmos, and sweet alyssum to attract ladybugs, lacewings, and parasitic wasps, which prey on common garden pests.
- Organic Sprays & Treatments:
- Neem Oil: An excellent broad-spectrum organic insecticide and fungicide. Bonide Neem Oil Concentrate (16oz, ~$20) can be mixed at a rate of 1-2 tbsp per gallon of water and sprayed on affected plants.
- Insecticidal Soap: Effective against soft-bodied insects like aphids, whiteflies, and spider mites. Garden Safe Insecticidal Soap (24oz ready-to-use, ~$10).
- Bacillus thuringiensis (Bt): A naturally occurring soil bacterium that targets caterpillars and worms. Monterey BT Worm & Caterpillar Killer (16oz, ~$18) is highly effective and safe for beneficial insects.
- Copper or Sulfur Sprays: For fungal diseases like powdery mildew or blight, organic copper (e.g., Bonide Copper Fungicide, ~$15 for 1lb) or sulfur (e.g., Safer Brand Garden Fungicide, ~$10 for 16oz) can be used as a last resort.
Step 7: Harvesting & Seed Saving
The culmination of your efforts is the harvest, and seed saving closes the loop on self-sufficiency.
- Harvesting Techniques:
- Timing: Harvest vegetables at their peak ripeness for best flavor and nutritional value. For example, green beans should snap cleanly, cucumbers should be firm, and tomatoes should be fully colored.
- Frequency: Many crops, like zucchini, cucumbers, and bush beans, produce more if harvested frequently. Pick daily or every other day.
- Tools: Use clean, sharp pruners (e.g., Corona ClassicCUT Bypass Pruner BP 3180, ~$30) or a sharp knife for clean cuts, minimizing damage to the plant.
- Seed Saving: This is where the « self-sufficient » aspect truly shines.
- Selection: Only save seeds from your healthiest, most vigorous plants that show desired traits (disease resistance, good flavor, high yield).
- Isolation: To ensure true-to-type seeds, prevent cross-pollination. This can be challenging for open-pollinated crops that readily cross (e.g., squash, corn). For beginners, focus on self-pollinating plants like beans, peas, lettuce, and tomatoes.
- Processing:
- Dry Seeds (Beans, Peas, Lettuce, Grains): Allow pods/seed heads to dry completely on the plant. Harvest, shell, and clean the seeds, removing chaff.
- Wet Seeds (Tomatoes, Cucumbers, Squash): For tomatoes, ferment the seeds in water for a few days to remove the gel coating and inhibit disease. For cucumbers/squash, scrape out seeds, wash thoroughly, and dry.
- Drying: Spread seeds thinly on screens or paper plates in a cool, dry, well-ventilated area for 1-4 weeks. Ensure they are bone-dry before storage. I aim for less than 8% moisture content.
- Storage: Store seeds in airtight containers (glass jars with desiccant packets work well) in a cool, dark, dry place (ideally 40-50°F and 30-40% humidity). Label clearly with variety and date. Properly stored seeds can remain viable for 3-10 years or more.
Step 8: Season Extension & Winterizing
Extend your harvest and protect your garden for the off-season to truly maximize your self sufficient garden from scratch.
- Cold Frames: Simple structures with a transparent top (glass, polycarbonate, or old windows) that sit over garden beds. They trap solar heat, allowing you to grow cold-hardy crops (lettuce, spinach, kale, radishes) well into winter or start seeds earlier in spring. A basic cold frame can be built from 2×6 lumber and a sheet of polycarbonate for under $100.
- Hoop Houses/Low Tunnels: Larger structures made from flexible hoops (PVC pipe or EMT conduit) covered with greenhouse plastic. These provide more space and greater temperature moderation. A 10×20 ft DIY low tunnel kit can cost $200-$500, while a larger, more robust hoop house kit might be $1,000-$3,000. I use a 6×12 ft low tunnel made from 1/2-inch PVC hoops and 6mil greenhouse plastic, which extends my lettuce and spinach harvest by at least
- In-Ground Beds: If you have excellent native soil and good drainage, in-ground beds are the most economical. Double-digging (loosening soil two shovel depths) can significantly improve drainage and aeration. For my main garden, I primarily use in-ground beds, but I focus on building up the soil over time with consistent compost additions and cover cropping. I aim for beds that are no wider than 3-4 feet so I can reach the center without stepping on the soil, compacting it.
- Raised Beds: Raised beds offer numerous advantages, especially for poor soil, heavy clay, or rocky areas. They provide better drainage, warm up faster in spring, reduce compaction, and make weeding and harvesting easier on your back.
- Material Options:
- Untreated Cedar: Naturally rot-resistant and chemical-free. A 4×8 ft bed, 12 inches deep, typically requires three 2x12x8 ft cedar boards, costing around $50-$60 per board (total ~$150-$180) plus corner brackets or screws. My first raised beds were cedar and are still going strong after 7 years.
- Galvanized Steel: Durable, long-lasting, and aesthetically pleasing. Brands like Vego Garden offer modular kits. A Vego Garden 17″ Tall 8-in-1 Metal Raised Garden Bed (can be configured to 4×8 ft) costs approximately $250-$300.
- Concrete Blocks/Stones: Very durable but can leach minerals (though generally safe once weathered) and can be expensive.
- Recycled Materials: Pallets (check for chemical treatment stamps like « HT » for heat-treated), old tires (controversial due to potential chemical leaching).
- Filling Raised Beds: Don’t just fill with topsoil. Use a « Hugelkultur » approach (logs, branches, leaves, then compost, then topsoil) or a mixture of 60% good quality topsoil, 30% compost, and 10% perlite or vermiculite for drainage. A 4x8x1 ft raised bed requires about 32 cubic feet (or ~1.2 cubic yards) of soil mix, which can cost $100-$200 depending on your source.
- Material Options:
Step 4: Water Management & Irrigation
Efficient water management is critical for a self sufficient garden from scratch, especially in off-grid living where water resources might be limited.
- Rainwater Harvesting: This is my primary source of irrigation water. A 55-gallon rain barrel (e.g., EarthMark Rain Barrel, ~$120-$150) connected to a downspout can collect significant water. For larger needs, I use two 275-gallon IBC totes (Intermediate Bulk Containers, often available used for $100-$200 each from food-grade sources) connected in series. A 1,000 sq ft roof can collect approximately 620 gallons of water for every inch of rainfall. My 1,500 sq ft roof provides ample water for my 600 sq ft garden through multiple barrels and totes.
- Drip Irrigation: This is by far the most water-efficient method, delivering water directly to the plant’s root zone, minimizing evaporation and weed growth.
- Components: A typical drip system includes a pressure regulator (e.g., Rain Bird PRV-10, ~$15), a filter (Rain Bird RBY filter, ~$20), main tubing (1/2-inch poly tubing, 100ft ~$25), smaller feeder lines (1/4-inch tubing), and emitters (0.5 GPH or 1 GPH per plant).
- Kits: For beginners, a starter kit like the Rain Bird Drip Irrigation Garden Kit (model DDI-KIT-1P, ~$40-$60) is excellent for a small garden. For larger setups, I use Netafim Techline CV Drip Line (500ft roll, ~$150-$200), which has pressure-compensating emitters built-in, ensuring even watering across long runs.
- Automation: For true self-sufficiency, consider a battery-powered timer (e.g., Orbit B-Hyve Bluetooth Hose Faucet Timer, ~$50) or a solar-powered timer connected to a small 12V pump.
- Solar-Powered Pumps: For lifting water from a well, pond, or large storage tank to your garden, a solar pump is a game-changer. For a smaller drip system, a Shurflo 2088-594-152 Diaphragm Pump (12V, 3.5 GPM, ~$180) can be powered by a single 100W solar panel (e.g., Renogy 100W Monocrystalline Solar Panel, ~$100) and a small 12V battery (e.g., a 50Ah LiFePO4 battery like the Battle Born 50Ah, ~$450). For larger operations or deeper wells, more robust systems are needed. If you’re looking to build out a comprehensive off-grid power system to support your garden’s water needs, or indeed your entire homestead, you might want to explore resources like the Power Grid Generator complete system guide to understand the full scope of what’s possible in terms of energy independence.
Step 5: Seed Selection & Planting
The choice of seeds is crucial for a truly self sufficient garden from scratch.
- Choose Heirloom & Open-Pollinated Seeds: These varieties produce seeds that will grow true to type, meaning you can save seeds from your harvest year after year. F1 hybrids, while often vigorous, will not produce consistent offspring from saved seeds. Reputable seed companies include Baker Creek Heirloom Seeds, High Mowing Organic Seeds, and Seed Savers Exchange. Start with common, reliable varieties like ‘Black Krim’ tomatoes, ‘Provider’ bush beans, ‘Waltham Butternut’ squash, and ‘Black Seeded Simpson’ lettuce.
- Start Seeds Indoors (Optional but Recommended): For longer growing seasons or specific crops, starting seeds indoors gives you a head start. Use seed-starting mix (e.g., Espoma Organic Seed Starter Mix, ~$10 for 16qt bag) in seed trays (Jiffy Professional Greenhouse 72-cell kit, ~$15). Provide adequate light with LED grow lights (Barrina T5 2ft 4-pack LED Grow Lights, 20W each, ~$50) for 14-16 hours a day, positioned 2-4 inches above seedlings. Maintain consistent temperatures (65-75°F for most).
- Direct Sowing vs. Transplanting: Some crops (carrots, radishes, beans, corn) prefer direct sowing into the garden bed. Others (tomatoes, peppers, broccoli, kale) benefit from being started indoors and transplanted. Follow seed packet instructions for planting depths (e.g., lettuce seeds are often surface-sown or planted 1/8 inch deep, while beans are 1 inch deep) and spacing.
- Companion Planting: Strategically plant different species together to enhance growth, deter pests, and attract beneficial insects. For example, planting marigolds near tomatoes can deter nematodes, and basil improves tomato flavor. Nasturtiums can act as a trap crop for aphids.
- Succession Planting: For a continuous harvest, plant small batches of quick-growing crops (lettuce, radishes, cilantro) every 2-3 weeks. As one crop finishes, another is ready to take its place.
Step 6: Pest & Disease Management (Organic)
Maintaining a self sufficient garden from scratch means embracing organic pest and disease control.
- Integrated Pest Management (IPM): This holistic approach combines several strategies.
- Observation: Regularly inspect your plants for early signs of pests or disease. Catching issues early is key.
- Physical Barriers: Use row covers (e.g., Agribon AG-19 floating row cover, 10×20 ft, ~$20) to protect young plants from insect pests like cabbage worms and squash bugs. Install fences (e.g., 2×4 welded wire mesh, 4 ft tall, 50 ft roll ~$70) to keep out deer, rabbits, and other larger animals.
- Hand-Picking: For larger pests like tomato hornworms or squash bugs, simply pick them off and drop them into a bucket of soapy water.
- Companion Planting: As mentioned, certain plants repel pests. Marigolds, garlic, and onions are excellent deterrents.
- Attract Beneficial Insects: Plant flowers like dill, fennel, cosmos, and sweet alyssum to attract ladybugs, lacewings, and parasitic wasps, which prey on common garden pests.
- Organic Sprays & Treatments:
- Neem Oil: An excellent broad-spectrum organic insecticide and fungicide. Bonide Neem Oil Concentrate (16oz, ~$20) can be mixed at a rate of 1-2 tbsp per gallon of water and sprayed on affected plants.
- Insecticidal Soap: Effective against soft-bodied insects like aphids, whiteflies, and spider mites. Garden Safe Insecticidal Soap (24oz ready-to-use, ~$10).
- Bacillus thuringiensis (Bt): A naturally occurring soil bacterium that targets caterpillars and worms. Monterey BT Worm & Caterpillar Killer (16oz, ~$18) is highly effective and safe for beneficial insects.
- Copper or Sulfur Sprays: For fungal diseases like powdery mildew or blight, organic copper (e.g., Bonide Copper Fungicide, ~$15 for 1lb) or sulfur (e.g., Safer Brand Garden Fungicide, ~$10 for 16oz) can be used as a last resort.
Step 7: Harvesting & Seed Saving
The culmination of your efforts is the harvest, and seed saving closes the loop on self-sufficiency.
- Harvesting Techniques:
- Timing: Harvest vegetables at their peak ripeness for best flavor and nutritional value. For example, green beans should snap cleanly, cucumbers should be firm, and tomatoes should be fully colored.
- Frequency: Many crops, like zucchini, cucumbers, and bush beans, produce more if harvested frequently. Pick daily or every other day.
- Tools: Use clean, sharp pruners (e.g., Corona ClassicCUT Bypass Pruner BP 3180, ~$30) or a sharp knife for clean cuts, minimizing damage to the plant.
- Seed Saving: This is where the « self-sufficient » aspect truly shines.
- Selection: Only save seeds from your healthiest, most vigorous plants that show desired traits (disease resistance, good flavor, high yield).
- Isolation: To ensure true-to-type seeds, prevent cross-pollination. This can be challenging for open-pollinated crops that readily cross (e.g., squash, corn). For beginners, focus on self-pollinating plants like beans, peas, lettuce, and tomatoes.
- Processing:
- Dry Seeds (Beans, Peas, Lettuce, Grains): Allow pods/seed heads to dry completely on the plant. Harvest, shell, and clean the seeds, removing chaff.
- Wet Seeds (Tomatoes, Cucumbers, Squash): For tomatoes, ferment the seeds in water for a few days to remove the gel coating and inhibit disease. For cucumbers/squash, scrape out seeds, wash thoroughly, and dry.
- Drying: Spread seeds thinly on screens or paper plates in a cool, dry, well-ventilated area for 1-4 weeks. Ensure they are bone-dry before storage. I aim for less than 8% moisture content.
- Storage: Store seeds in airtight containers (glass jars with desiccant packets work well) in a cool, dark, dry place (ideally 40-50°F and 30-40% humidity). Label clearly with variety and date. Properly stored seeds can remain viable for 3-10 years or more.
Step 8: Season Extension & Winterizing
Extend your harvest and protect your garden for the off-season to truly maximize your self sufficient garden from scratch.
- Cold Frames: Simple structures with a transparent top (glass, polycarbonate, or old windows) that sit over garden beds. They trap solar heat, allowing you to grow cold-hardy crops (lettuce, spinach, kale, radishes) well into winter or start seeds earlier in spring. A basic cold frame can be built from 2×6 lumber and a sheet of polycarbonate for under $100.
- Hoop Houses/Low Tunnels: Larger structures made from flexible hoops (PVC pipe or EMT conduit) covered with greenhouse plastic. These provide more space and greater temperature moderation. A 10×20 ft DIY low tunnel kit can cost $200-$500, while a larger, more robust hoop house kit might be $1,000-$3,000. I use a 6×12 ft low tunnel made from 1/2-inch PVC hoops and 6mil greenhouse plastic, which extends my lettuce and spinach harvest by at least
Deciding between raised beds and in-ground beds depends on your soil, budget, and physical capabilities.
- In-Ground Beds: If you have excellent native soil and good drainage, in-ground beds are the most economical. Double-digging (loosening soil two shovel depths) can significantly improve drainage and aeration. For my main garden, I primarily use in-ground beds, but I focus on building up the soil over time with consistent compost additions and cover cropping. I aim for beds that are no wider than 3-4 feet so I can reach the center without stepping on the soil, compacting it.
- Raised Beds: Raised beds offer numerous advantages, especially for poor soil, heavy clay, or rocky areas. They provide better drainage, warm up faster in spring, reduce compaction, and make weeding and harvesting easier on your back.
- Material Options:
- Untreated Cedar: Naturally rot-resistant and chemical-free. A 4×8 ft bed, 12 inches deep, typically requires three 2x12x8 ft cedar boards, costing around $50-$60 per board (total ~$150-$180) plus corner brackets or screws. My first raised beds were cedar and are still going strong after 7 years.
- Galvanized Steel: Durable, long-lasting, and aesthetically pleasing. Brands like Vego Garden offer modular kits. A Vego Garden 17″ Tall 8-in-1 Metal Raised Garden Bed (can be configured to 4×8 ft) costs approximately $250-$300.
- Concrete Blocks/Stones: Very durable but can leach minerals (though generally safe once weathered) and can be expensive.
- Recycled Materials: Pallets (check for chemical treatment stamps like « HT » for heat-treated), old tires (controversial due to potential chemical leaching).
- Filling Raised Beds: Don’t just fill with topsoil. Use a « Hugelkultur » approach (logs, branches, leaves, then compost, then topsoil) or a mixture of 60% good quality topsoil, 30% compost, and 10% perlite or vermiculite for drainage. A 4x8x1 ft raised bed requires about 32 cubic feet (or ~1.2 cubic yards) of soil mix, which can cost $100-$200 depending on your source.
- Material Options:
Step 4: Water Management & Irrigation
Efficient water management is critical for a self sufficient garden from scratch, especially in off-grid living where water resources might be limited.
- Rainwater Harvesting: This is my primary source of irrigation water. A 55-gallon rain barrel (e.g., EarthMark Rain Barrel, ~$120-$150) connected to a downspout can collect significant water. For larger needs, I use two 275-gallon IBC totes (Intermediate Bulk Containers, often available used for $100-$200 each from food-grade sources) connected in series. A 1,000 sq ft roof can collect approximately 620 gallons of water for every inch of rainfall. My 1,500 sq ft roof provides ample water for my 600 sq ft garden through multiple barrels and totes.
- Drip Irrigation: This is by far the most water-efficient method, delivering water directly to the plant’s root zone, minimizing evaporation and weed growth.
- Components: A typical drip system includes a pressure regulator (e.g., Rain Bird PRV-10, ~$15), a filter (Rain Bird RBY filter, ~$20), main tubing (1/2-inch poly tubing, 100ft ~$25), smaller feeder lines (1/4-inch tubing), and emitters (0.5 GPH or 1 GPH per plant).
- Kits: For beginners, a starter kit like the Rain Bird Drip Irrigation Garden Kit (model DDI-KIT-1P, ~$40-$60) is excellent for a small garden. For larger setups, I use Netafim Techline CV Drip Line (500ft roll, ~$150-$200), which has pressure-compensating emitters built-in, ensuring even watering across long runs.
- Automation: For true self-sufficiency, consider a battery-powered timer (e.g., Orbit B-Hyve Bluetooth Hose Faucet Timer, ~$50) or a solar-powered timer connected to a small 12V pump.
- Solar-Powered Pumps: For lifting water from a well, pond, or large storage tank to your garden, a solar pump is a game-changer. For a smaller drip system, a Shurflo 2088-594-152 Diaphragm Pump (12V, 3.5 GPM, ~$180) can be powered by a single 100W solar panel (e.g., Renogy 100W Monocrystalline Solar Panel, ~$100) and a small 12V battery (e.g., a 50Ah LiFePO4 battery like the Battle Born 50Ah, ~$450). For larger operations or deeper wells, more robust systems are needed. If you’re looking to build out a comprehensive off-grid power system to support your garden’s water needs, or indeed your entire homestead, you might want to explore resources like the Power Grid Generator complete system guide to understand the full scope of what’s possible in terms of energy independence.
Step 5: Seed Selection & Planting
The choice of seeds is crucial for a truly self sufficient garden from scratch.
- Choose Heirloom & Open-Pollinated Seeds: These varieties produce seeds that will grow true to type, meaning you can save seeds from your harvest year after year. F1 hybrids, while often vigorous, will not produce consistent offspring from saved seeds. Reputable seed companies include Baker Creek Heirloom Seeds, High Mowing Organic Seeds, and Seed Savers Exchange. Start with common, reliable varieties like ‘Black Krim’ tomatoes, ‘Provider’ bush beans, ‘Waltham Butternut’ squash, and ‘Black Seeded Simpson’ lettuce.
- Start Seeds Indoors (Optional but Recommended): For longer growing seasons or specific crops, starting seeds indoors gives you a head start. Use seed-starting mix (e.g., Espoma Organic Seed Starter Mix, ~$10 for 16qt bag) in seed trays (Jiffy Professional Greenhouse 72-cell kit, ~$15). Provide adequate light with LED grow lights (Barrina T5 2ft 4-pack LED Grow Lights, 20W each, ~$50) for 14-16 hours a day, positioned 2-4 inches above seedlings. Maintain consistent temperatures (65-75°F for most).
- Direct Sowing vs. Transplanting: Some crops (carrots, radishes, beans, corn) prefer direct sowing into the garden bed. Others (tomatoes, peppers, broccoli, kale) benefit from being started indoors and transplanted. Follow seed packet instructions for planting depths (e.g., lettuce seeds are often surface-sown or planted 1/8 inch deep, while beans are 1 inch deep) and spacing.
- Companion Planting: Strategically plant different species together to enhance growth, deter pests, and attract beneficial insects. For example, planting marigolds near tomatoes can deter nematodes, and basil improves tomato flavor. Nasturtiums can act as a trap crop for aphids.
- Succession Planting: For a continuous harvest, plant small batches of quick-growing crops (lettuce, radishes, cilantro) every 2-3 weeks. As one crop finishes, another is ready to take its place.
Step 6: Pest & Disease Management (Organic)
Maintaining a self sufficient garden from scratch means embracing organic pest and disease control.
- Integrated Pest Management (IPM): This holistic approach combines several strategies.
- Observation: Regularly inspect your plants for early signs of pests or disease. Catching issues early is key.
- Physical Barriers: Use row covers (e.g., Agribon AG-19 floating row cover, 10×20 ft, ~$20) to protect young plants from insect pests like cabbage worms and squash bugs. Install fences (e.g., 2×4 welded wire mesh, 4 ft tall, 50 ft roll ~$70) to keep out deer, rabbits, and other larger animals.
- Hand-Picking: For larger pests like tomato hornworms or squash bugs, simply pick them off and drop them into a bucket of soapy water.
- Companion Planting: As mentioned, certain plants repel pests. Marigolds, garlic, and onions are excellent deterrents.
- Attract Beneficial Insects: Plant flowers like dill, fennel, cosmos, and sweet alyssum to attract ladybugs, lacewings, and parasitic wasps, which prey on common garden pests.
- Organic Sprays & Treatments:
- Neem Oil: An excellent broad-spectrum organic insecticide and fungicide. Bonide Neem Oil Concentrate (16oz, ~$20) can be mixed at a rate of 1-2 tbsp per gallon of water and sprayed on affected plants.
- Insecticidal Soap: Effective against soft-bodied insects like aphids, whiteflies, and spider mites. Garden Safe Insecticidal Soap (24oz ready-to-use, ~$10).
- Bacillus thuringiensis (Bt): A naturally occurring soil bacterium that targets caterpillars and worms. Monterey BT Worm & Caterpillar Killer (16oz, ~$18) is highly effective and safe for beneficial insects.
- Copper or Sulfur Sprays: For fungal diseases like powdery mildew or blight, organic copper (e.g., Bonide Copper Fungicide, ~$15 for 1lb) or sulfur (e.g., Safer Brand Garden Fungicide, ~$10 for 16oz) can be used as a last resort.
Step 7: Harvesting & Seed Saving
The culmination of your efforts is the harvest, and seed saving closes the loop on self-sufficiency.
- Harvesting Techniques:
- Timing: Harvest vegetables at their peak ripeness for best flavor and nutritional value. For example, green beans should snap cleanly, cucumbers should be firm, and tomatoes should be fully colored.
- Frequency: Many crops, like zucchini, cucumbers, and bush beans, produce more if harvested frequently. Pick daily or every other day.
- Tools: Use clean, sharp pruners (e.g., Corona ClassicCUT Bypass Pruner BP 3180, ~$30) or a sharp knife for clean cuts, minimizing damage to the plant.
- Seed Saving: This is where the « self-sufficient » aspect truly shines.
- Selection: Only save seeds from your healthiest, most vigorous plants that show desired traits (disease resistance, good flavor, high yield).
- Isolation: To ensure true-to-type seeds, prevent cross-pollination. This can be challenging for open-pollinated crops that readily cross (e.g., squash, corn). For beginners, focus on self-pollinating plants like beans, peas, lettuce, and tomatoes.
- Processing:
- Dry Seeds (Beans, Peas, Lettuce, Grains): Allow pods/seed heads to dry completely on the plant. Harvest, shell, and clean the seeds, removing chaff.
- Wet Seeds (Tomatoes, Cucumbers, Squash): For tomatoes, ferment the seeds in water for a few days to remove the gel coating and inhibit disease. For cucumbers/squash, scrape out seeds, wash thoroughly, and dry.
- Drying: Spread seeds thinly on screens or paper plates in a cool, dry, well-ventilated area for 1-4 weeks. Ensure they are bone-dry before storage. I aim for less than 8% moisture content.
- Storage: Store seeds in airtight containers (glass jars with desiccant packets work well) in a cool, dark, dry place (ideally 40-50°F and 30-40% humidity). Label clearly with variety and date. Properly stored seeds can remain viable for 3-10 years or more.
Step 8: Season Extension & Winterizing
Extend your harvest and protect your garden for the off-season to truly maximize your self sufficient garden from scratch.
- Cold Frames: Simple structures with a transparent top (glass, polycarbonate, or old windows) that sit over garden beds. They trap solar heat, allowing you to grow cold-hardy crops (lettuce, spinach, kale, radishes) well into winter or start seeds earlier in spring. A basic cold frame can be built from 2×6 lumber and a sheet of polycarbonate for under $100.
- Hoop Houses/Low Tunnels: Larger structures made from flexible hoops (PVC pipe or EMT conduit) covered with greenhouse plastic. These provide more space and greater temperature moderation. A 10×20 ft DIY low tunnel kit can cost $200-$500, while a larger, more robust hoop house kit might be $1,000-$3,000. I use a 6×12 ft low tunnel made from 1/2-inch PVC hoops and 6mil greenhouse plastic, which extends my lettuce and spinach harvest by at least
Healthy soil is the bedrock of a productive, self-sufficient garden. You can’t guess what your soil needs; you have to test it.
- Perform a Soil Test: A professional soil test will give you precise data on your soil’s pH, nutrient levels (N-P-K), and organic matter content. I recommend sending a sample to your local agricultural extension office; it typically costs $20-$50 and provides detailed recommendations. Alternatively, for a quick homeowner check, a Rapitest Soil Test Kit (40-test kit, model 1663, ~$20 on Amazon) provides a good baseline for pH, Nitrogen, Phosphorus, and Potash. Aim for a pH between 6.0 and 7.0 for most vegetables.
- Amend for pH Imbalance: If your soil is too acidic (below 6.0), add agricultural lime (dolomitic lime adds magnesium, calcitic lime adds calcium). Apply 5-10 lbs per 100 sq ft for a moderate adjustment. If it’s too alkaline (above 7.0), add elemental sulfur (e.g., Espoma Soil Acidifier, ~$15 for 6.75 lbs) or generous amounts of organic matter like peat moss or pine needles.
- Build Organic Matter: This is the single most important step for long-term soil health. Organic matter improves soil structure, water retention, drainage, and nutrient availability. Incorporate 2-4 inches of high-quality compost into your top 6-12 inches of soil annually. I make my own compost from kitchen scraps, garden waste, and shredded leaves, but you can purchase it. Local nurseries often sell bulk compost for $30-$50 per cubic yard. Aged manure (from chickens, cows, or horses – ensure it’s well-rotted to avoid burning plants) is also excellent.
- Address Nutrient Deficiencies: Based on your soil test, add specific organic amendments. If Nitrogen (N) is low, add blood meal (12-0-0, ~$20 for 3 lbs) or feather meal. For Phosphorus (P), use bone meal (3-15-0, ~$15 for 3 lbs) or rock phosphate. For Potassium (K), greensand (0-0-2.5, ~$25 for 5 lbs) or kelp meal are good choices. I rely heavily on Espoma Organic Garden-tone (5-3-3, ~$25 for an 8lb bag) as a balanced, all-purpose organic fertilizer during planting.
Step 3: Garden Bed Preparation
Deciding between raised beds and in-ground beds depends on your soil, budget, and physical capabilities.
- In-Ground Beds: If you have excellent native soil and good drainage, in-ground beds are the most economical. Double-digging (loosening soil two shovel depths) can significantly improve drainage and aeration. For my main garden, I primarily use in-ground beds, but I focus on building up the soil over time with consistent compost additions and cover cropping. I aim for beds that are no wider than 3-4 feet so I can reach the center without stepping on the soil, compacting it.
- Raised Beds: Raised beds offer numerous advantages, especially for poor soil, heavy clay, or rocky areas. They provide better drainage, warm up faster in spring, reduce compaction, and make weeding and harvesting easier on your back.
- Material Options:
- Untreated Cedar: Naturally rot-resistant and chemical-free. A 4×8 ft bed, 12 inches deep, typically requires three 2x12x8 ft cedar boards, costing around $50-$60 per board (total ~$150-$180) plus corner brackets or screws. My first raised beds were cedar and are still going strong after 7 years.
- Galvanized Steel: Durable, long-lasting, and aesthetically pleasing. Brands like Vego Garden offer modular kits. A Vego Garden 17″ Tall 8-in-1 Metal Raised Garden Bed (can be configured to 4×8 ft) costs approximately $250-$300.
- Concrete Blocks/Stones: Very durable but can leach minerals (though generally safe once weathered) and can be expensive.
- Recycled Materials: Pallets (check for chemical treatment stamps like « HT » for heat-treated), old tires (controversial due to potential chemical leaching).
- Filling Raised Beds: Don’t just fill with topsoil. Use a « Hugelkultur » approach (logs, branches, leaves, then compost, then topsoil) or a mixture of 60% good quality topsoil, 30% compost, and 10% perlite or vermiculite for drainage. A 4x8x1 ft raised bed requires about 32 cubic feet (or ~1.2 cubic yards) of soil mix, which can cost $100-$200 depending on your source.
- Material Options:
Step 4: Water Management & Irrigation
Efficient water management is critical for a self sufficient garden from scratch, especially in off-grid living where water resources might be limited.
- Rainwater Harvesting: This is my primary source of irrigation water. A 55-gallon rain barrel (e.g., EarthMark Rain Barrel, ~$120-$150) connected to a downspout can collect significant water. For larger needs, I use two 275-gallon IBC totes (Intermediate Bulk Containers, often available used for $100-$200 each from food-grade sources) connected in series. A 1,000 sq ft roof can collect approximately 620 gallons of water for every inch of rainfall. My 1,500 sq ft roof provides ample water for my 600 sq ft garden through multiple barrels and totes.
- Drip Irrigation: This is by far the most water-efficient method, delivering water directly to the plant’s root zone, minimizing evaporation and weed growth.
- Components: A typical drip system includes a pressure regulator (e.g., Rain Bird PRV-10, ~$15), a filter (Rain Bird RBY filter, ~$20), main tubing (1/2-inch poly tubing, 100ft ~$25), smaller feeder lines (1/4-inch tubing), and emitters (0.5 GPH or 1 GPH per plant).
- Kits: For beginners, a starter kit like the Rain Bird Drip Irrigation Garden Kit (model DDI-KIT-1P, ~$40-$60) is excellent for a small garden. For larger setups, I use Netafim Techline CV Drip Line (500ft roll, ~$150-$200), which has pressure-compensating emitters built-in, ensuring even watering across long runs.
- Automation: For true self-sufficiency, consider a battery-powered timer (e.g., Orbit B-Hyve Bluetooth Hose Faucet Timer, ~$50) or a solar-powered timer connected to a small 12V pump.
- Solar-Powered Pumps: For lifting water from a well, pond, or large storage tank to your garden, a solar pump is a game-changer. For a smaller drip system, a Shurflo 2088-594-152 Diaphragm Pump (12V, 3.5 GPM, ~$180) can be powered by a single 100W solar panel (e.g., Renogy 100W Monocrystalline Solar Panel, ~$100) and a small 12V battery (e.g., a 50Ah LiFePO4 battery like the Battle Born 50Ah, ~$450). For larger operations or deeper wells, more robust systems are needed. If you’re looking to build out a comprehensive off-grid power system to support your garden’s water needs, or indeed your entire homestead, you might want to explore resources like the Power Grid Generator complete system guide to understand the full scope of what’s possible in terms of energy independence.
Step 5: Seed Selection & Planting
The choice of seeds is crucial for a truly self sufficient garden from scratch.
- Choose Heirloom & Open-Pollinated Seeds: These varieties produce seeds that will grow true to type, meaning you can save seeds from your harvest year after year. F1 hybrids, while often vigorous, will not produce consistent offspring from saved seeds. Reputable seed companies include Baker Creek Heirloom Seeds, High Mowing Organic Seeds, and Seed Savers Exchange. Start with common, reliable varieties like ‘Black Krim’ tomatoes, ‘Provider’ bush beans, ‘Waltham Butternut’ squash, and ‘Black Seeded Simpson’ lettuce.
- Start Seeds Indoors (Optional but Recommended): For longer growing seasons or specific crops, starting seeds indoors gives you a head start. Use seed-starting mix (e.g., Espoma Organic Seed Starter Mix, ~$10 for 16qt bag) in seed trays (Jiffy Professional Greenhouse 72-cell kit, ~$15). Provide adequate light with LED grow lights (Barrina T5 2ft 4-pack LED Grow Lights, 20W each, ~$50) for 14-16 hours a day, positioned 2-4 inches above seedlings. Maintain consistent temperatures (65-75°F for most).
- Direct Sowing vs. Transplanting: Some crops (carrots, radishes, beans, corn) prefer direct sowing into the garden bed. Others (tomatoes, peppers, broccoli, kale) benefit from being started indoors and transplanted. Follow seed packet instructions for planting depths (e.g., lettuce seeds are often surface-sown or planted 1/8 inch deep, while beans are 1 inch deep) and spacing.
- Companion Planting: Strategically plant different species together to enhance growth, deter pests, and attract beneficial insects. For example, planting marigolds near tomatoes can deter nematodes, and basil improves tomato flavor. Nasturtiums can act as a trap crop for aphids.
- Succession Planting: For a continuous harvest, plant small batches of quick-growing crops (lettuce, radishes, cilantro) every 2-3 weeks. As one crop finishes, another is ready to take its place.
Step 6: Pest & Disease Management (Organic)
Maintaining a self sufficient garden from scratch means embracing organic pest and disease control.
- Integrated Pest Management (IPM): This holistic approach combines several strategies.
- Observation: Regularly inspect your plants for early signs of pests or disease. Catching issues early is key.
- Physical Barriers: Use row covers (e.g., Agribon AG-19 floating row cover, 10×20 ft, ~$20) to protect young plants from insect pests like cabbage worms and squash bugs. Install fences (e.g., 2×4 welded wire mesh, 4 ft tall, 50 ft roll ~$70) to keep out deer, rabbits, and other larger animals.
- Hand-Picking: For larger pests like tomato hornworms or squash bugs, simply pick them off and drop them into a bucket of soapy water.
- Companion Planting: As mentioned, certain plants repel pests. Marigolds, garlic, and onions are excellent deterrents.
- Attract Beneficial Insects: Plant flowers like dill, fennel, cosmos, and sweet alyssum to attract ladybugs, lacewings, and parasitic wasps, which prey on common garden pests.
- Organic Sprays & Treatments:
- Neem Oil: An excellent broad-spectrum organic insecticide and fungicide. Bonide Neem Oil Concentrate (16oz, ~$20) can be mixed at a rate of 1-2 tbsp per gallon of water and sprayed on affected plants.
- Insecticidal Soap: Effective against soft-bodied insects like aphids, whiteflies, and spider mites. Garden Safe Insecticidal Soap (24oz ready-to-use, ~$10).
- Bacillus thuringiensis (Bt): A naturally occurring soil bacterium that targets caterpillars and worms. Monterey BT Worm & Caterpillar Killer (16oz, ~$18) is highly effective and safe for beneficial insects.
- Copper or Sulfur Sprays: For fungal diseases like powdery mildew or blight, organic copper (e.g., Bonide Copper Fungicide, ~$15 for 1lb) or sulfur (e.g., Safer Brand Garden Fungicide, ~$10 for 16oz) can be used as a last resort.
Step 7: Harvesting & Seed Saving
The culmination of your efforts is the harvest, and seed saving closes the loop on self-sufficiency.
- Harvesting Techniques:
- Timing: Harvest vegetables at their peak ripeness for best flavor and nutritional value. For example, green beans should snap cleanly, cucumbers should be firm, and tomatoes should be fully colored.
- Frequency: Many crops, like zucchini, cucumbers, and bush beans, produce more if harvested frequently. Pick daily or every other day.
- Tools: Use clean, sharp pruners (e.g., Corona ClassicCUT Bypass Pruner BP 3180, ~$30) or a sharp knife for clean cuts, minimizing damage to the plant.
- Seed Saving: This is where the « self-sufficient » aspect truly shines.
- Selection: Only save seeds from your healthiest, most vigorous plants that show desired traits (disease resistance, good flavor, high yield).
- Isolation: To ensure true-to-type seeds, prevent cross-pollination. This can be challenging for open-pollinated crops that readily cross (e.g., squash, corn). For beginners, focus on self-pollinating plants like beans, peas, lettuce, and tomatoes.
- Processing:
- Dry Seeds (Beans, Peas, Lettuce, Grains): Allow pods/seed heads to dry completely on the plant. Harvest, shell, and clean the seeds, removing chaff.
- Wet Seeds (Tomatoes, Cucumbers, Squash): For tomatoes, ferment the seeds in water for a few days to remove the gel coating and inhibit disease. For cucumbers/squash, scrape out seeds, wash thoroughly, and dry.
- Drying: Spread seeds thinly on screens or paper plates in a cool, dry, well-ventilated area for 1-4 weeks. Ensure they are bone-dry before storage. I aim for less than 8% moisture content.
- Storage: Store seeds in airtight containers (glass jars with desiccant packets work well) in a cool, dark, dry place (ideally 40-50°F and 30-40% humidity). Label clearly with variety and date. Properly stored seeds can remain viable for 3-10 years or more.
Step 8: Season Extension & Winterizing
Extend your harvest and protect your garden for the off-season to truly maximize your self sufficient garden from scratch.
- Cold Frames: Simple structures with a transparent top (glass, polycarbonate, or old windows) that sit over garden beds. They trap solar heat, allowing you to grow cold-hardy crops (lettuce, spinach, kale, radishes) well into winter or start seeds earlier in spring. A basic cold frame can be built from 2×6 lumber and a sheet of polycarbonate for under $100.
- Hoop Houses/Low Tunnels: Larger structures made from flexible hoops (PVC pipe or EMT conduit) covered with greenhouse plastic. These provide more space and greater temperature moderation. A 10×20 ft DIY low tunnel kit can cost $200-$500, while a larger, more robust hoop house kit might be $1,000-$3,000. I use a 6×12 ft low tunnel made from 1/2-inch PVC hoops and 6mil greenhouse plastic, which extends my lettuce and spinach harvest by at least
The culmination of your efforts is the harvest, and seed saving closes the loop on self-sufficiency.
- Harvesting Techniques:
- Timing: Harvest vegetables at their peak ripeness for best flavor and nutritional value. For example, green beans should snap cleanly, cucumbers should be firm, and tomatoes should be fully colored.
- Frequency: Many crops, like zucchini, cucumbers, and bush beans, produce more if harvested frequently. Pick daily or every other day.
- Tools: Use clean, sharp pruners (e.g., Corona ClassicCUT Bypass Pruner BP 3180, ~$30) or a sharp knife for clean cuts, minimizing damage to the plant.
- Seed Saving: This is where the « self-sufficient » aspect truly shines.
- Selection: Only save seeds from your healthiest, most vigorous plants that show desired traits (disease resistance, good flavor, high yield).
- Isolation: To ensure true-to-type seeds, prevent cross-pollination. This can be challenging for open-pollinated crops that readily cross (e.g., squash, corn). For beginners, focus on self-pollinating plants like beans, peas, lettuce, and tomatoes.
- Processing:
- Dry Seeds (Beans, Peas, Lettuce, Grains): Allow pods/seed heads to dry completely on the plant. Harvest, shell, and clean the seeds, removing chaff.
- Wet Seeds (Tomatoes, Cucumbers, Squash): For tomatoes, ferment the seeds in water for a few days to remove the gel coating and inhibit disease. For cucumbers/squash, scrape out seeds, wash thoroughly, and dry.
- Drying: Spread seeds thinly on screens or paper plates in a cool, dry, well-ventilated area for 1-4 weeks. Ensure they are bone-dry before storage. I aim for less than 8% moisture content.
- Storage: Store seeds in airtight containers (glass jars with desiccant packets work well) in a cool, dark, dry place (ideally 40-50°F and 30-40% humidity). Label clearly with variety and date. Properly stored seeds can remain viable for 3-10 years or more.
Step 8: Season Extension & Winterizing
Extend your harvest and protect your garden for the off-season to truly maximize your self sufficient garden from scratch.
- Cold Frames: Simple structures with a transparent top (glass, polycarbonate, or old windows) that sit over garden beds. They trap solar heat, allowing you to grow cold-hardy crops (lettuce, spinach, kale, radishes) well into winter or start seeds earlier in spring. A basic cold frame can be built from 2×6 lumber and a sheet of polycarbonate for under $100.
- Hoop Houses/Low Tunnels: Larger structures made from flexible hoops (PVC pipe or EMT conduit) covered with greenhouse plastic. These provide more space and greater temperature moderation. A 10×20 ft DIY low tunnel kit can cost $200-$500, while a larger, more robust hoop house kit might be $1,000-$3,000. I use a 6×12 ft low tunnel made from 1/2-inch PVC hoops and 6mil greenhouse plastic, which extends my lettuce and spinach harvest by at least
- Choose Heirloom & Open-Pollinated Seeds: These varieties produce seeds that will grow true to type, meaning you can save seeds from your harvest year after year. F1 hybrids, while often vigorous, will not produce consistent offspring from saved seeds. Reputable seed companies include Baker Creek Heirloom Seeds, High Mowing Organic Seeds, and Seed Savers Exchange. Start with common, reliable varieties like ‘Black Krim’ tomatoes, ‘Provider’ bush beans, ‘Waltham Butternut’ squash, and ‘Black Seeded Simpson’ lettuce.
- Start Seeds Indoors (Optional but Recommended): For longer growing seasons or specific crops, starting seeds indoors gives you a head start. Use seed-starting mix (e.g., Espoma Organic Seed Starter Mix, ~$10 for 16qt bag) in seed trays (Jiffy Professional Greenhouse 72-cell kit, ~$15). Provide adequate light with LED grow lights (Barrina T5 2ft 4-pack LED Grow Lights, 20W each, ~$50) for 14-16 hours a day, positioned 2-4 inches above seedlings. Maintain consistent temperatures (65-75°F for most).
- Direct Sowing vs. Transplanting: Some crops (carrots, radishes, beans, corn) prefer direct sowing into the garden bed. Others (tomatoes, peppers, broccoli, kale) benefit from being started indoors and transplanted. Follow seed packet instructions for planting depths (e.g., lettuce seeds are often surface-sown or planted 1/8 inch deep, while beans are 1 inch deep) and spacing.
- Companion Planting: Strategically plant different species together to enhance growth, deter pests, and attract beneficial insects. For example, planting marigolds near tomatoes can deter nematodes, and basil improves tomato flavor. Nasturtiums can act as a trap crop for aphids.
- Succession Planting: For a continuous harvest, plant small batches of quick-growing crops (lettuce, radishes, cilantro) every 2-3 weeks. As one crop finishes, another is ready to take its place.
Step 6: Pest & Disease Management (Organic)
Maintaining a self sufficient garden from scratch means embracing organic pest and disease control.
- Integrated Pest Management (IPM): This holistic approach combines several strategies.
- Observation: Regularly inspect your plants for early signs of pests or disease. Catching issues early is key.
- Physical Barriers: Use row covers (e.g., Agribon AG-19 floating row cover, 10×20 ft, ~$20) to protect young plants from insect pests like cabbage worms and squash bugs. Install fences (e.g., 2×4 welded wire mesh, 4 ft tall, 50 ft roll ~$70) to keep out deer, rabbits, and other larger animals.
- Hand-Picking: For larger pests like tomato hornworms or squash bugs, simply pick them off and drop them into a bucket of soapy water.
- Companion Planting: As mentioned, certain plants repel pests. Marigolds, garlic, and onions are excellent deterrents.
- Attract Beneficial Insects: Plant flowers like dill, fennel, cosmos, and sweet alyssum to attract ladybugs, lacewings, and parasitic wasps, which prey on common garden pests.
- Organic Sprays & Treatments:
- Neem Oil: An excellent broad-spectrum organic insecticide and fungicide. Bonide Neem Oil Concentrate (16oz, ~$20) can be mixed at a rate of 1-2 tbsp per gallon of water and sprayed on affected plants.
- Insecticidal Soap: Effective against soft-bodied insects like aphids, whiteflies, and spider mites. Garden Safe Insecticidal Soap (24oz ready-to-use, ~$10).
- Bacillus thuringiensis (Bt): A naturally occurring soil bacterium that targets caterpillars and worms. Monterey BT Worm & Caterpillar Killer (16oz, ~$18) is highly effective and safe for beneficial insects.
- Copper or Sulfur Sprays: For fungal diseases like powdery mildew or blight, organic copper (e.g., Bonide Copper Fungicide, ~$15 for 1lb) or sulfur (e.g., Safer Brand Garden Fungicide, ~$10 for 16oz) can be used as a last resort.
Step 7: Harvesting & Seed Saving
The culmination of your efforts is the harvest, and seed saving closes the loop on self-sufficiency.
- Harvesting Techniques:
- Timing: Harvest vegetables at their peak ripeness for best flavor and nutritional value. For example, green beans should snap cleanly, cucumbers should be firm, and tomatoes should be fully colored.
- Frequency: Many crops, like zucchini, cucumbers, and bush beans, produce more if harvested frequently. Pick daily or every other day.
- Tools: Use clean, sharp pruners (e.g., Corona ClassicCUT Bypass Pruner BP 3180, ~$30) or a sharp knife for clean cuts, minimizing damage to the plant.
- Seed Saving: This is where the « self-sufficient » aspect truly shines.
- Selection: Only save seeds from your healthiest, most vigorous plants that show desired traits (disease resistance, good flavor, high yield).
- Isolation: To ensure true-to-type seeds, prevent cross-pollination. This can be challenging for open-pollinated crops that readily cross (e.g., squash, corn). For beginners, focus on self-pollinating plants like beans, peas, lettuce, and tomatoes.
- Processing:
- Dry Seeds (Beans, Peas, Lettuce, Grains): Allow pods/seed heads to dry completely on the plant. Harvest, shell, and clean the seeds, removing chaff.
- Wet Seeds (Tomatoes, Cucumbers, Squash): For tomatoes, ferment the seeds in water for a few days to remove the gel coating and inhibit disease. For cucumbers/squash, scrape out seeds, wash thoroughly, and dry.
- Drying: Spread seeds thinly on screens or paper plates in a cool, dry, well-ventilated area for 1-4 weeks. Ensure they are bone-dry before storage. I aim for less than 8% moisture content.
- Storage: Store seeds in airtight containers (glass jars with desiccant packets work well) in a cool, dark, dry place (ideally 40-50°F and 30-40% humidity). Label clearly with variety and date. Properly stored seeds can remain viable for 3-10 years or more.
Step 8: Season Extension & Winterizing
Extend your harvest and protect your garden for the off-season to truly maximize your self sufficient garden from scratch.
- Cold Frames: Simple structures with a transparent top (glass, polycarbonate, or old windows) that sit over garden beds. They trap solar heat, allowing you to grow cold-hardy crops (lettuce, spinach, kale, radishes) well into winter or start seeds earlier in spring. A basic cold frame can be built from 2×6 lumber and a sheet of polycarbonate for under $100.
- Hoop Houses/Low Tunnels: Larger structures made from flexible hoops (PVC pipe or EMT conduit) covered with greenhouse plastic. These provide more space and greater temperature moderation. A 10×20 ft DIY low tunnel kit can cost $200-$500, while a larger, more robust hoop house kit might be $1,000-$3,000. I use a 6×12 ft low tunnel made from 1/2-inch PVC hoops and 6mil greenhouse plastic, which extends my lettuce and spinach harvest by at least
The choice of seeds is crucial for a truly self sufficient garden from scratch.
- Choose Heirloom & Open-Pollinated Seeds: These varieties produce seeds that will grow true to type, meaning you can save seeds from your harvest year after year. F1 hybrids, while often vigorous, will not produce consistent offspring from saved seeds. Reputable seed companies include Baker Creek Heirloom Seeds, High Mowing Organic Seeds, and Seed Savers Exchange. Start with common, reliable varieties like ‘Black Krim’ tomatoes, ‘Provider’ bush beans, ‘Waltham Butternut’ squash, and ‘Black Seeded Simpson’ lettuce.
- Start Seeds Indoors (Optional but Recommended): For longer growing seasons or specific crops, starting seeds indoors gives you a head start. Use seed-starting mix (e.g., Espoma Organic Seed Starter Mix, ~$10 for 16qt bag) in seed trays (Jiffy Professional Greenhouse 72-cell kit, ~$15). Provide adequate light with LED grow lights (Barrina T5 2ft 4-pack LED Grow Lights, 20W each, ~$50) for 14-16 hours a day, positioned 2-4 inches above seedlings. Maintain consistent temperatures (65-75°F for most).
- Direct Sowing vs. Transplanting: Some crops (carrots, radishes, beans, corn) prefer direct sowing into the garden bed. Others (tomatoes, peppers, broccoli, kale) benefit from being started indoors and transplanted. Follow seed packet instructions for planting depths (e.g., lettuce seeds are often surface-sown or planted 1/8 inch deep, while beans are 1 inch deep) and spacing.
- Companion Planting: Strategically plant different species together to enhance growth, deter pests, and attract beneficial insects. For example, planting marigolds near tomatoes can deter nematodes, and basil improves tomato flavor. Nasturtiums can act as a trap crop for aphids.
- Succession Planting: For a continuous harvest, plant small batches of quick-growing crops (lettuce, radishes, cilantro) every 2-3 weeks. As one crop finishes, another is ready to take its place.
Step 6: Pest & Disease Management (Organic)
Maintaining a self sufficient garden from scratch means embracing organic pest and disease control.
- Integrated Pest Management (IPM): This holistic approach combines several strategies.
- Observation: Regularly inspect your plants for early signs of pests or disease. Catching issues early is key.
- Physical Barriers: Use row covers (e.g., Agribon AG-19 floating row cover, 10×20 ft, ~$20) to protect young plants from insect pests like cabbage worms and squash bugs. Install fences (e.g., 2×4 welded wire mesh, 4 ft tall, 50 ft roll ~$70) to keep out deer, rabbits, and other larger animals.
- Hand-Picking: For larger pests like tomato hornworms or squash bugs, simply pick them off and drop them into a bucket of soapy water.
- Companion Planting: As mentioned, certain plants repel pests. Marigolds, garlic, and onions are excellent deterrents.
- Attract Beneficial Insects: Plant flowers like dill, fennel, cosmos, and sweet alyssum to attract ladybugs, lacewings, and parasitic wasps, which prey on common garden pests.
- Organic Sprays & Treatments:
- Neem Oil: An excellent broad-spectrum organic insecticide and fungicide. Bonide Neem Oil Concentrate (16oz, ~$20) can be mixed at a rate of 1-2 tbsp per gallon of water and sprayed on affected plants.
- Insecticidal Soap: Effective against soft-bodied insects like aphids, whiteflies, and spider mites. Garden Safe Insecticidal Soap (24oz ready-to-use, ~$10).
- Bacillus thuringiensis (Bt): A naturally occurring soil bacterium that targets caterpillars and worms. Monterey BT Worm & Caterpillar Killer (16oz, ~$18) is highly effective and safe for beneficial insects.
- Copper or Sulfur Sprays: For fungal diseases like powdery mildew or blight, organic copper (e.g., Bonide Copper Fungicide, ~$15 for 1lb) or sulfur (e.g., Safer Brand Garden Fungicide, ~$10 for 16oz) can be used as a last resort.
Step 7: Harvesting & Seed Saving
The culmination of your efforts is the harvest, and seed saving closes the loop on self-sufficiency.
- Harvesting Techniques:
- Timing: Harvest vegetables at their peak ripeness for best flavor and nutritional value. For example, green beans should snap cleanly, cucumbers should be firm, and tomatoes should be fully colored.
- Frequency: Many crops, like zucchini, cucumbers, and bush beans, produce more if harvested frequently. Pick daily or every other day.
- Tools: Use clean, sharp pruners (e.g., Corona ClassicCUT Bypass Pruner BP 3180, ~$30) or a sharp knife for clean cuts, minimizing damage to the plant.
- Seed Saving: This is where the « self-sufficient » aspect truly shines.
- Selection: Only save seeds from your healthiest, most vigorous plants that show desired traits (disease resistance, good flavor, high yield).
- Isolation: To ensure true-to-type seeds, prevent cross-pollination. This can be challenging for open-pollinated crops that readily cross (e.g., squash, corn). For beginners, focus on self-pollinating plants like beans, peas, lettuce, and tomatoes.
- Processing:
- Dry Seeds (Beans, Peas, Lettuce, Grains): Allow pods/seed heads to dry completely on the plant. Harvest, shell, and clean the seeds, removing chaff.
- Wet Seeds (Tomatoes, Cucumbers, Squash): For tomatoes, ferment the seeds in water for a few days to remove the gel coating and inhibit disease. For cucumbers/squash, scrape out seeds, wash thoroughly, and dry.
- Drying: Spread seeds thinly on screens or paper plates in a cool, dry, well-ventilated area for 1-4 weeks. Ensure they are bone-dry before storage. I aim for less than 8% moisture content.
- Storage: Store seeds in airtight containers (glass jars with desiccant packets work well) in a cool, dark, dry place (ideally 40-50°F and 30-40% humidity). Label clearly with variety and date. Properly stored seeds can remain viable for 3-10 years or more.
Step 8: Season Extension & Winterizing
Extend your harvest and protect your garden for the off-season to truly maximize your self sufficient garden from scratch.
- Cold Frames: Simple structures with a transparent top (glass, polycarbonate, or old windows) that sit over garden beds. They trap solar heat, allowing you to grow cold-hardy crops (lettuce, spinach, kale, radishes) well into winter or start seeds earlier in spring. A basic cold frame can be built from 2×6 lumber and a sheet of polycarbonate for under $100.
- Hoop Houses/Low Tunnels: Larger structures made from flexible hoops (PVC pipe or EMT conduit) covered with greenhouse plastic. These provide more space and greater temperature moderation. A 10×20 ft DIY low tunnel kit can cost $200-$500, while a larger, more robust hoop house kit might be $1,000-$3,000. I use a 6×12 ft low tunnel made from 1/2-inch PVC hoops and 6mil greenhouse plastic, which extends my lettuce and spinach harvest by at least
Step 5: Seed Selection & Planting
The choice of seeds is crucial for a truly self sufficient garden from scratch.
- Choose Heirloom & Open-Pollinated Seeds: These varieties produce seeds that will grow true to type, meaning you can save seeds from your harvest year after year. F1 hybrids, while often vigorous, will not produce consistent offspring from saved seeds. Reputable seed companies include Baker Creek Heirloom Seeds, High Mowing Organic Seeds, and Seed Savers Exchange. Start with common, reliable varieties like ‘Black Krim’ tomatoes, ‘Provider’ bush beans, ‘Waltham Butternut’ squash, and ‘Black Seeded Simpson’ lettuce.
- Start Seeds Indoors (Optional but Recommended): For longer growing seasons or specific crops, starting seeds indoors gives you a head start. Use seed-starting mix (e.g., Espoma Organic Seed Starter Mix, ~$10 for 16qt bag) in seed trays (Jiffy Professional Greenhouse 72-cell kit, ~$15). Provide adequate light with LED grow lights (Barrina T5 2ft 4-pack LED Grow Lights, 20W each, ~$50) for 14-16 hours a day, positioned 2-4 inches above seedlings. Maintain consistent temperatures (65-75°F for most).
- Direct Sowing vs. Transplanting: Some crops (carrots, radishes, beans, corn) prefer direct sowing into the garden bed. Others (tomatoes, peppers, broccoli, kale) benefit from being started indoors and transplanted. Follow seed packet instructions for planting depths (e.g., lettuce seeds are often surface-sown or planted 1/8 inch deep, while beans are 1 inch deep) and spacing.
- Companion Planting: Strategically plant different species together to enhance growth, deter pests, and attract beneficial insects. For example, planting marigolds near tomatoes can deter nematodes, and basil improves tomato flavor. Nasturtiums can act as a trap crop for aphids.
- Succession Planting: For a continuous harvest, plant small batches of quick-growing crops (lettuce, radishes, cilantro) every 2-3 weeks. As one crop finishes, another is ready to take its place.
Step 6: Pest & Disease Management (Organic)
Maintaining a self sufficient garden from scratch means embracing organic pest and disease control.
- Integrated Pest Management (IPM): This holistic approach combines several strategies.
- Observation: Regularly inspect your plants for early signs of pests or disease. Catching issues early is key.
- Physical Barriers: Use row covers (e.g., Agribon AG-19 floating row cover, 10×20 ft, ~$20) to protect young plants from insect pests like cabbage worms and squash bugs. Install fences (e.g., 2×4 welded wire mesh, 4 ft tall, 50 ft roll ~$70) to keep out deer, rabbits, and other larger animals.
- Hand-Picking: For larger pests like tomato hornworms or squash bugs, simply pick them off and drop them into a bucket of soapy water.
- Companion Planting: As mentioned, certain plants repel pests. Marigolds, garlic, and onions are excellent deterrents.
- Attract Beneficial Insects: Plant flowers like dill, fennel, cosmos, and sweet alyssum to attract ladybugs, lacewings, and parasitic wasps, which prey on common garden pests.
- Organic Sprays & Treatments:
- Neem Oil: An excellent broad-spectrum organic insecticide and fungicide. Bonide Neem Oil Concentrate (16oz, ~$20) can be mixed at a rate of 1-2 tbsp per gallon of water and sprayed on affected plants.
- Insecticidal Soap: Effective against soft-bodied insects like aphids, whiteflies, and spider mites. Garden Safe Insecticidal Soap (24oz ready-to-use, ~$10).
- Bacillus thuringiensis (Bt): A naturally occurring soil bacterium that targets caterpillars and worms. Monterey BT Worm & Caterpillar Killer (16oz, ~$18) is highly effective and safe for beneficial insects.
- Copper or Sulfur Sprays: For fungal diseases like powdery mildew or blight, organic copper (e.g., Bonide Copper Fungicide, ~$15 for 1lb) or sulfur (e.g., Safer Brand Garden Fungicide, ~$10 for 16oz) can be used as a last resort.
Step 7: Harvesting & Seed Saving
The culmination of your efforts is the harvest, and seed saving closes the loop on self-sufficiency.
- Harvesting Techniques:
- Timing: Harvest vegetables at their peak ripeness for best flavor and nutritional value. For example, green beans should snap cleanly, cucumbers should be firm, and tomatoes should be fully colored.
- Frequency: Many crops, like zucchini, cucumbers, and bush beans, produce more if harvested frequently. Pick daily or every other day.
- Tools: Use clean, sharp pruners (e.g., Corona ClassicCUT Bypass Pruner BP 3180, ~$30) or a sharp knife for clean cuts, minimizing damage to the plant.
- Seed Saving: This is where the « self-sufficient » aspect truly shines.
- Selection: Only save seeds from your healthiest, most vigorous plants that show desired traits (disease resistance, good flavor, high yield).
- Isolation: To ensure true-to-type seeds, prevent cross-pollination. This can be challenging for open-pollinated crops that readily cross (e.g., squash, corn). For beginners, focus on self-pollinating plants like beans, peas, lettuce, and tomatoes.
- Processing:
- Dry Seeds (Beans, Peas, Lettuce, Grains): Allow pods/seed heads to dry completely on the plant. Harvest, shell, and clean the seeds, removing chaff.
- Wet Seeds (Tomatoes, Cucumbers, Squash): For tomatoes, ferment the seeds in water for a few days to remove the gel coating and inhibit disease. For cucumbers/squash, scrape out seeds, wash thoroughly, and dry.
- Drying: Spread seeds thinly on screens or paper plates in a cool, dry, well-ventilated area for 1-4 weeks. Ensure they are bone-dry before storage. I aim for less than 8% moisture content.
- Storage: Store seeds in airtight containers (glass jars with desiccant packets work well) in a cool, dark, dry place (ideally 40-50°F and 30-40% humidity). Label clearly with variety and date. Properly stored seeds can remain viable for 3-10 years or more.
Step 8: Season Extension & Winterizing
Extend your harvest and protect your garden for the off-season to truly maximize your self sufficient garden from scratch.
- Cold Frames: Simple structures with a transparent top (glass, polycarbonate, or old windows) that sit over garden beds. They trap solar heat, allowing you to grow cold-hardy crops (lettuce, spinach, kale, radishes) well into winter or start seeds earlier in spring. A basic cold frame can be built from 2×6 lumber and a sheet of polycarbonate for under $100.
- Hoop Houses/Low Tunnels: Larger structures made from flexible hoops (PVC pipe or EMT conduit) covered with greenhouse plastic. These provide more space and greater temperature moderation. A 10×20 ft DIY low tunnel kit can cost $200-$500, while a larger, more robust hoop house kit might be $1,000-$3,000. I use a 6×12 ft low tunnel made from 1/2-inch PVC hoops and 6mil greenhouse plastic, which extends my lettuce and spinach harvest by at least
- Rainwater Harvesting: This is my primary source of irrigation water. A 55-gallon rain barrel (e.g., EarthMark Rain Barrel, ~$120-$150) connected to a downspout can collect significant water. For larger needs, I use two 275-gallon IBC totes (Intermediate Bulk Containers, often available used for $100-$200 each from food-grade sources) connected in series. A 1,000 sq ft roof can collect approximately 620 gallons of water for every inch of rainfall. My 1,500 sq ft roof provides ample water for my 600 sq ft garden through multiple barrels and totes.
- Drip Irrigation: This is by far the most water-efficient method, delivering water directly to the plant’s root zone, minimizing evaporation and weed growth.
- Components: A typical drip system includes a pressure regulator (e.g., Rain Bird PRV-10, ~$15), a filter (Rain Bird RBY filter, ~$20), main tubing (1/2-inch poly tubing, 100ft ~$25), smaller feeder lines (1/4-inch tubing), and emitters (0.5 GPH or 1 GPH per plant).
- Kits: For beginners, a starter kit like the Rain Bird Drip Irrigation Garden Kit (model DDI-KIT-1P, ~$40-$60) is excellent for a small garden. For larger setups, I use Netafim Techline CV Drip Line (500ft roll, ~$150-$200), which has pressure-compensating emitters built-in, ensuring even watering across long runs.
- Automation: For true self-sufficiency, consider a battery-powered timer (e.g., Orbit B-Hyve Bluetooth Hose Faucet Timer, ~$50) or a solar-powered timer connected to a small 12V pump.
- Solar-Powered Pumps: For lifting water from a well, pond, or large storage tank to your garden, a solar pump is a game-changer. For a smaller drip system, a Shurflo 2088-594-152 Diaphragm Pump (12V, 3.5 GPM, ~$180) can be powered by a single 100W solar panel (e.g., Renogy 100W Monocrystalline Solar Panel, ~$100) and a small 12V battery (e.g., a 50Ah LiFePO4 battery like the Battle Born 50Ah, ~$450). For larger operations or deeper wells, more robust systems are needed. If you’re looking to build out a comprehensive off-grid power system to support your garden’s water needs, or indeed your entire homestead, you might want to explore resources like the Power Grid Generator complete system guide to understand the full scope of what’s possible in terms of energy independence.
Step 5: Seed Selection & Planting
The choice of seeds is crucial for a truly self sufficient garden from scratch.
- Choose Heirloom & Open-Pollinated Seeds: These varieties produce seeds that will grow true to type, meaning you can save seeds from your harvest year after year. F1 hybrids, while often vigorous, will not produce consistent offspring from saved seeds. Reputable seed companies include Baker Creek Heirloom Seeds, High Mowing Organic Seeds, and Seed Savers Exchange. Start with common, reliable varieties like ‘Black Krim’ tomatoes, ‘Provider’ bush beans, ‘Waltham Butternut’ squash, and ‘Black Seeded Simpson’ lettuce.
- Start Seeds Indoors (Optional but Recommended): For longer growing seasons or specific crops, starting seeds indoors gives you a head start. Use seed-starting mix (e.g., Espoma Organic Seed Starter Mix, ~$10 for 16qt bag) in seed trays (Jiffy Professional Greenhouse 72-cell kit, ~$15). Provide adequate light with LED grow lights (Barrina T5 2ft 4-pack LED Grow Lights, 20W each, ~$50) for 14-16 hours a day, positioned 2-4 inches above seedlings. Maintain consistent temperatures (65-75°F for most).
- Direct Sowing vs. Transplanting: Some crops (carrots, radishes, beans, corn) prefer direct sowing into the garden bed. Others (tomatoes, peppers, broccoli, kale) benefit from being started indoors and transplanted. Follow seed packet instructions for planting depths (e.g., lettuce seeds are often surface-sown or planted 1/8 inch deep, while beans are 1 inch deep) and spacing.
- Companion Planting: Strategically plant different species together to enhance growth, deter pests, and attract beneficial insects. For example, planting marigolds near tomatoes can deter nematodes, and basil improves tomato flavor. Nasturtiums can act as a trap crop for aphids.
- Succession Planting: For a continuous harvest, plant small batches of quick-growing crops (lettuce, radishes, cilantro) every 2-3 weeks. As one crop finishes, another is ready to take its place.
Step 6: Pest & Disease Management (Organic)
Maintaining a self sufficient garden from scratch means embracing organic pest and disease control.
- Integrated Pest Management (IPM): This holistic approach combines several strategies.
- Observation: Regularly inspect your plants for early signs of pests or disease. Catching issues early is key.
- Physical Barriers: Use row covers (e.g., Agribon AG-19 floating row cover, 10×20 ft, ~$20) to protect young plants from insect pests like cabbage worms and squash bugs. Install fences (e.g., 2×4 welded wire mesh, 4 ft tall, 50 ft roll ~$70) to keep out deer, rabbits, and other larger animals.
- Hand-Picking: For larger pests like tomato hornworms or squash bugs, simply pick them off and drop them into a bucket of soapy water.
- Companion Planting: As mentioned, certain plants repel pests. Marigolds, garlic, and onions are excellent deterrents.
- Attract Beneficial Insects: Plant flowers like dill, fennel, cosmos, and sweet alyssum to attract ladybugs, lacewings, and parasitic wasps, which prey on common garden pests.
- Organic Sprays & Treatments:
- Neem Oil: An excellent broad-spectrum organic insecticide and fungicide. Bonide Neem Oil Concentrate (16oz, ~$20) can be mixed at a rate of 1-2 tbsp per gallon of water and sprayed on affected plants.
- Insecticidal Soap: Effective against soft-bodied insects like aphids, whiteflies, and spider mites. Garden Safe Insecticidal Soap (24oz ready-to-use, ~$10).
- Bacillus thuringiensis (Bt): A naturally occurring soil bacterium that targets caterpillars and worms. Monterey BT Worm & Caterpillar Killer (16oz, ~$18) is highly effective and safe for beneficial insects.
- Copper or Sulfur Sprays: For fungal diseases like powdery mildew or blight, organic copper (e.g., Bonide Copper Fungicide, ~$15 for 1lb) or sulfur (e.g., Safer Brand Garden Fungicide, ~$10 for 16oz) can be used as a last resort.
Step 7: Harvesting & Seed Saving
The culmination of your efforts is the harvest, and seed saving closes the loop on self-sufficiency.
- Harvesting Techniques:
- Timing: Harvest vegetables at their peak ripeness for best flavor and nutritional value. For example, green beans should snap cleanly, cucumbers should be firm, and tomatoes should be fully colored.
- Frequency: Many crops, like zucchini, cucumbers, and bush beans, produce more if harvested frequently. Pick daily or every other day.
- Tools: Use clean, sharp pruners (e.g., Corona ClassicCUT Bypass Pruner BP 3180, ~$30) or a sharp knife for clean cuts, minimizing damage to the plant.
- Seed Saving: This is where the « self-sufficient » aspect truly shines.
- Selection: Only save seeds from your healthiest, most vigorous plants that show desired traits (disease resistance, good flavor, high yield).
- Isolation: To ensure true-to-type seeds, prevent cross-pollination. This can be challenging for open-pollinated crops that readily cross (e.g., squash, corn). For beginners, focus on self-pollinating plants like beans, peas, lettuce, and tomatoes.
- Processing:
- Dry Seeds (Beans, Peas, Lettuce, Grains): Allow pods/seed heads to dry completely on the plant. Harvest, shell, and clean the seeds, removing chaff.
- Wet Seeds (Tomatoes, Cucumbers, Squash): For tomatoes, ferment the seeds in water for a few days to remove the gel coating and inhibit disease. For cucumbers/squash, scrape out seeds, wash thoroughly, and dry.
- Drying: Spread seeds thinly on screens or paper plates in a cool, dry, well-ventilated area for 1-4 weeks. Ensure they are bone-dry before storage. I aim for less than 8% moisture content.
- Storage: Store seeds in airtight containers (glass jars with desiccant packets work well) in a cool, dark, dry place (ideally 40-50°F and 30-40% humidity). Label clearly with variety and date. Properly stored seeds can remain viable for 3-10 years or more.
Step 8: Season Extension & Winterizing
Extend your harvest and protect your garden for the off-season to truly maximize your self sufficient garden from scratch.
- Cold Frames: Simple structures with a transparent top (glass, polycarbonate, or old windows) that sit over garden beds. They trap solar heat, allowing you to grow cold-hardy crops (lettuce, spinach, kale, radishes) well into winter or start seeds earlier in spring. A basic cold frame can be built from 2×6 lumber and a sheet of polycarbonate for under $100.
- Hoop Houses/Low Tunnels: Larger structures made from flexible hoops (PVC pipe or EMT conduit) covered with greenhouse plastic. These provide more space and greater temperature moderation. A 10×20 ft DIY low tunnel kit can cost $200-$500, while a larger, more robust hoop house kit might be $1,000-$3,000. I use a 6×12 ft low tunnel made from 1/2-inch PVC hoops and 6mil greenhouse plastic, which extends my lettuce and spinach harvest by at least
Efficient water management is critical for a self sufficient garden from scratch, especially in off-grid living where water resources might be limited.
- Rainwater Harvesting: This is my primary source of irrigation water. A 55-gallon rain barrel (e.g., EarthMark Rain Barrel, ~$120-$150) connected to a downspout can collect significant water. For larger needs, I use two 275-gallon IBC totes (Intermediate Bulk Containers, often available used for $100-$200 each from food-grade sources) connected in series. A 1,000 sq ft roof can collect approximately 620 gallons of water for every inch of rainfall. My 1,500 sq ft roof provides ample water for my 600 sq ft garden through multiple barrels and totes.
- Drip Irrigation: This is by far the most water-efficient method, delivering water directly to the plant’s root zone, minimizing evaporation and weed growth.
- Components: A typical drip system includes a pressure regulator (e.g., Rain Bird PRV-10, ~$15), a filter (Rain Bird RBY filter, ~$20), main tubing (1/2-inch poly tubing, 100ft ~$25), smaller feeder lines (1/4-inch tubing), and emitters (0.5 GPH or 1 GPH per plant).
- Kits: For beginners, a starter kit like the Rain Bird Drip Irrigation Garden Kit (model DDI-KIT-1P, ~$40-$60) is excellent for a small garden. For larger setups, I use Netafim Techline CV Drip Line (500ft roll, ~$150-$200), which has pressure-compensating emitters built-in, ensuring even watering across long runs.
- Automation: For true self-sufficiency, consider a battery-powered timer (e.g., Orbit B-Hyve Bluetooth Hose Faucet Timer, ~$50) or a solar-powered timer connected to a small 12V pump.
- Solar-Powered Pumps: For lifting water from a well, pond, or large storage tank to your garden, a solar pump is a game-changer. For a smaller drip system, a Shurflo 2088-594-152 Diaphragm Pump (12V, 3.5 GPM, ~$180) can be powered by a single 100W solar panel (e.g., Renogy 100W Monocrystalline Solar Panel, ~$100) and a small 12V battery (e.g., a 50Ah LiFePO4 battery like the Battle Born 50Ah, ~$450). For larger operations or deeper wells, more robust systems are needed. If you’re looking to build out a comprehensive off-grid power system to support your garden’s water needs, or indeed your entire homestead, you might want to explore resources like the Power Grid Generator complete system guide to understand the full scope of what’s possible in terms of energy independence.
Step 5: Seed Selection & Planting
The choice of seeds is crucial for a truly self sufficient garden from scratch.
- Choose Heirloom & Open-Pollinated Seeds: These varieties produce seeds that will grow true to type, meaning you can save seeds from your harvest year after year. F1 hybrids, while often vigorous, will not produce consistent offspring from saved seeds. Reputable seed companies include Baker Creek Heirloom Seeds, High Mowing Organic Seeds, and Seed Savers Exchange. Start with common, reliable varieties like ‘Black Krim’ tomatoes, ‘Provider’ bush beans, ‘Waltham Butternut’ squash, and ‘Black Seeded Simpson’ lettuce.
- Start Seeds Indoors (Optional but Recommended): For longer growing seasons or specific crops, starting seeds indoors gives you a head start. Use seed-starting mix (e.g., Espoma Organic Seed Starter Mix, ~$10 for 16qt bag) in seed trays (Jiffy Professional Greenhouse 72-cell kit, ~$15). Provide adequate light with LED grow lights (Barrina T5 2ft 4-pack LED Grow Lights, 20W each, ~$50) for 14-16 hours a day, positioned 2-4 inches above seedlings. Maintain consistent temperatures (65-75°F for most).
- Direct Sowing vs. Transplanting: Some crops (carrots, radishes, beans, corn) prefer direct sowing into the garden bed. Others (tomatoes, peppers, broccoli, kale) benefit from being started indoors and transplanted. Follow seed packet instructions for planting depths (e.g., lettuce seeds are often surface-sown or planted 1/8 inch deep, while beans are 1 inch deep) and spacing.
- Companion Planting: Strategically plant different species together to enhance growth, deter pests, and attract beneficial insects. For example, planting marigolds near tomatoes can deter nematodes, and basil improves tomato flavor. Nasturtiums can act as a trap crop for aphids.
- Succession Planting: For a continuous harvest, plant small batches of quick-growing crops (lettuce, radishes, cilantro) every 2-3 weeks. As one crop finishes, another is ready to take its place.
Step 6: Pest & Disease Management (Organic)
Maintaining a self sufficient garden from scratch means embracing organic pest and disease control.
- Integrated Pest Management (IPM): This holistic approach combines several strategies.
- Observation: Regularly inspect your plants for early signs of pests or disease. Catching issues early is key.
- Physical Barriers: Use row covers (e.g., Agribon AG-19 floating row cover, 10×20 ft, ~$20) to protect young plants from insect pests like cabbage worms and squash bugs. Install fences (e.g., 2×4 welded wire mesh, 4 ft tall, 50 ft roll ~$70) to keep out deer, rabbits, and other larger animals.
- Hand-Picking: For larger pests like tomato hornworms or squash bugs, simply pick them off and drop them into a bucket of soapy water.
- Companion Planting: As mentioned, certain plants repel pests. Marigolds, garlic, and onions are excellent deterrents.
- Attract Beneficial Insects: Plant flowers like dill, fennel, cosmos, and sweet alyssum to attract ladybugs, lacewings, and parasitic wasps, which prey on common garden pests.
- Organic Sprays & Treatments:
- Neem Oil: An excellent broad-spectrum organic insecticide and fungicide. Bonide Neem Oil Concentrate (16oz, ~$20) can be mixed at a rate of 1-2 tbsp per gallon of water and sprayed on affected plants.
- Insecticidal Soap: Effective against soft-bodied insects like aphids, whiteflies, and spider mites. Garden Safe Insecticidal Soap (24oz ready-to-use, ~$10).
- Bacillus thuringiensis (Bt): A naturally occurring soil bacterium that targets caterpillars and worms. Monterey BT Worm & Caterpillar Killer (16oz, ~$18) is highly effective and safe for beneficial insects.
- Copper or Sulfur Sprays: For fungal diseases like powdery mildew or blight, organic copper (e.g., Bonide Copper Fungicide, ~$15 for 1lb) or sulfur (e.g., Safer Brand Garden Fungicide, ~$10 for 16oz) can be used as a last resort.
Step 7: Harvesting & Seed Saving
The culmination of your efforts is the harvest, and seed saving closes the loop on self-sufficiency.
- Harvesting Techniques:
- Timing: Harvest vegetables at their peak ripeness for best flavor and nutritional value. For example, green beans should snap cleanly, cucumbers should be firm, and tomatoes should be fully colored.
- Frequency: Many crops, like zucchini, cucumbers, and bush beans, produce more if harvested frequently. Pick daily or every other day.
- Tools: Use clean, sharp pruners (e.g., Corona ClassicCUT Bypass Pruner BP 3180, ~$30) or a sharp knife for clean cuts, minimizing damage to the plant.
- Seed Saving: This is where the « self-sufficient » aspect truly shines.
- Selection: Only save seeds from your healthiest, most vigorous plants that show desired traits (disease resistance, good flavor, high yield).
- Isolation: To ensure true-to-type seeds, prevent cross-pollination. This can be challenging for open-pollinated crops that readily cross (e.g., squash, corn). For beginners, focus on self-pollinating plants like beans, peas, lettuce, and tomatoes.
- Processing:
- Dry Seeds (Beans, Peas, Lettuce, Grains): Allow pods/seed heads to dry completely on the plant. Harvest, shell, and clean the seeds, removing chaff.
- Wet Seeds (Tomatoes, Cucumbers, Squash): For tomatoes, ferment the seeds in water for a few days to remove the gel coating and inhibit disease. For cucumbers/squash, scrape out seeds, wash thoroughly, and dry.
- Drying: Spread seeds thinly on screens or paper plates in a cool, dry, well-ventilated area for 1-4 weeks. Ensure they are bone-dry before storage. I aim for less than 8% moisture content.
- Storage: Store seeds in airtight containers (glass jars with desiccant packets work well) in a cool, dark, dry place (ideally 40-50°F and 30-40% humidity). Label clearly with variety and date. Properly stored seeds can remain viable for 3-10 years or more.
Step 8: Season Extension & Winterizing
Extend your harvest and protect your garden for the off-season to truly maximize your self sufficient garden from scratch.
- Cold Frames: Simple structures with a transparent top (glass, polycarbonate, or old windows) that sit over garden beds. They trap solar heat, allowing you to grow cold-hardy crops (lettuce, spinach, kale, radishes) well into winter or start seeds earlier in spring. A basic cold frame can be built from 2×6 lumber and a sheet of polycarbonate for under $100.
- Hoop Houses/Low Tunnels: Larger structures made from flexible hoops (PVC pipe or EMT conduit) covered with greenhouse plastic. These provide more space and greater temperature moderation. A 10×20 ft DIY low tunnel kit can cost $200-$500, while a larger, more robust hoop house kit might be $1,000-$3,000. I use a 6×12 ft low tunnel made from 1/2-inch PVC hoops and 6mil greenhouse plastic, which extends my lettuce and spinach harvest by at least
Step 4: Water Management & Irrigation
Efficient water management is critical for a self sufficient garden from scratch, especially in off-grid living where water resources might be limited.
- Rainwater Harvesting: This is my primary source of irrigation water. A 55-gallon rain barrel (e.g., EarthMark Rain Barrel, ~$120-$150) connected to a downspout can collect significant water. For larger needs, I use two 275-gallon IBC totes (Intermediate Bulk Containers, often available used for $100-$200 each from food-grade sources) connected in series. A 1,000 sq ft roof can collect approximately 620 gallons of water for every inch of rainfall. My 1,500 sq ft roof provides ample water for my 600 sq ft garden through multiple barrels and totes.
- Drip Irrigation: This is by far the most water-efficient method, delivering water directly to the plant’s root zone, minimizing evaporation and weed growth.
- Components: A typical drip system includes a pressure regulator (e.g., Rain Bird PRV-10, ~$15), a filter (Rain Bird RBY filter, ~$20), main tubing (1/2-inch poly tubing, 100ft ~$25), smaller feeder lines (1/4-inch tubing), and emitters (0.5 GPH or 1 GPH per plant).
- Kits: For beginners, a starter kit like the Rain Bird Drip Irrigation Garden Kit (model DDI-KIT-1P, ~$40-$60) is excellent for a small garden. For larger setups, I use Netafim Techline CV Drip Line (500ft roll, ~$150-$200), which has pressure-compensating emitters built-in, ensuring even watering across long runs.
- Automation: For true self-sufficiency, consider a battery-powered timer (e.g., Orbit B-Hyve Bluetooth Hose Faucet Timer, ~$50) or a solar-powered timer connected to a small 12V pump.
- Solar-Powered Pumps: For lifting water from a well, pond, or large storage tank to your garden, a solar pump is a game-changer. For a smaller drip system, a Shurflo 2088-594-152 Diaphragm Pump (12V, 3.5 GPM, ~$180) can be powered by a single 100W solar panel (e.g., Renogy 100W Monocrystalline Solar Panel, ~$100) and a small 12V battery (e.g., a 50Ah LiFePO4 battery like the Battle Born 50Ah, ~$450). For larger operations or deeper wells, more robust systems are needed. If you’re looking to build out a comprehensive off-grid power system to support your garden’s water needs, or indeed your entire homestead, you might want to explore resources like the Power Grid Generator complete system guide to understand the full scope of what’s possible in terms of energy independence.
Step 5: Seed Selection & Planting
The choice of seeds is crucial for a truly self sufficient garden from scratch.
- Choose Heirloom & Open-Pollinated Seeds: These varieties produce seeds that will grow true to type, meaning you can save seeds from your harvest year after year. F1 hybrids, while often vigorous, will not produce consistent offspring from saved seeds. Reputable seed companies include Baker Creek Heirloom Seeds, High Mowing Organic Seeds, and Seed Savers Exchange. Start with common, reliable varieties like ‘Black Krim’ tomatoes, ‘Provider’ bush beans, ‘Waltham Butternut’ squash, and ‘Black Seeded Simpson’ lettuce.
- Start Seeds Indoors (Optional but Recommended): For longer growing seasons or specific crops, starting seeds indoors gives you a head start. Use seed-starting mix (e.g., Espoma Organic Seed Starter Mix, ~$10 for 16qt bag) in seed trays (Jiffy Professional Greenhouse 72-cell kit, ~$15). Provide adequate light with LED grow lights (Barrina T5 2ft 4-pack LED Grow Lights, 20W each, ~$50) for 14-16 hours a day, positioned 2-4 inches above seedlings. Maintain consistent temperatures (65-75°F for most).
- Direct Sowing vs. Transplanting: Some crops (carrots, radishes, beans, corn) prefer direct sowing into the garden bed. Others (tomatoes, peppers, broccoli, kale) benefit from being started indoors and transplanted. Follow seed packet instructions for planting depths (e.g., lettuce seeds are often surface-sown or planted 1/8 inch deep, while beans are 1 inch deep) and spacing.
- Companion Planting: Strategically plant different species together to enhance growth, deter pests, and attract beneficial insects. For example, planting marigolds near tomatoes can deter nematodes, and basil improves tomato flavor. Nasturtiums can act as a trap crop for aphids.
- Succession Planting: For a continuous harvest, plant small batches of quick-growing crops (lettuce, radishes, cilantro) every 2-3 weeks. As one crop finishes, another is ready to take its place.
Step 6: Pest & Disease Management (Organic)
Maintaining a self sufficient garden from scratch means embracing organic pest and disease control.
- Integrated Pest Management (IPM): This holistic approach combines several strategies.
- Observation: Regularly inspect your plants for early signs of pests or disease. Catching issues early is key.
- Physical Barriers: Use row covers (e.g., Agribon AG-19 floating row cover, 10×20 ft, ~$20) to protect young plants from insect pests like cabbage worms and squash bugs. Install fences (e.g., 2×4 welded wire mesh, 4 ft tall, 50 ft roll ~$70) to keep out deer, rabbits, and other larger animals.
- Hand-Picking: For larger pests like tomato hornworms or squash bugs, simply pick them off and drop them into a bucket of soapy water.
- Companion Planting: As mentioned, certain plants repel pests. Marigolds, garlic, and onions are excellent deterrents.
- Attract Beneficial Insects: Plant flowers like dill, fennel, cosmos, and sweet alyssum to attract ladybugs, lacewings, and parasitic wasps, which prey on common garden pests.
- Organic Sprays & Treatments:
- Neem Oil: An excellent broad-spectrum organic insecticide and fungicide. Bonide Neem Oil Concentrate (16oz, ~$20) can be mixed at a rate of 1-2 tbsp per gallon of water and sprayed on affected plants.
- Insecticidal Soap: Effective against soft-bodied insects like aphids, whiteflies, and spider mites. Garden Safe Insecticidal Soap (24oz ready-to-use, ~$10).
- Bacillus thuringiensis (Bt): A naturally occurring soil bacterium that targets caterpillars and worms. Monterey BT Worm & Caterpillar Killer (16oz, ~$18) is highly effective and safe for beneficial insects.
- Copper or Sulfur Sprays: For fungal diseases like powdery mildew or blight, organic copper (e.g., Bonide Copper Fungicide, ~$15 for 1lb) or sulfur (e.g., Safer Brand Garden Fungicide, ~$10 for 16oz) can be used as a last resort.
Step 7: Harvesting & Seed Saving
The culmination of your efforts is the harvest, and seed saving closes the loop on self-sufficiency.
- Harvesting Techniques:
- Timing: Harvest vegetables at their peak ripeness for best flavor and nutritional value. For example, green beans should snap cleanly, cucumbers should be firm, and tomatoes should be fully colored.
- Frequency: Many crops, like zucchini, cucumbers, and bush beans, produce more if harvested frequently. Pick daily or every other day.
- Tools: Use clean, sharp pruners (e.g., Corona ClassicCUT Bypass Pruner BP 3180, ~$30) or a sharp knife for clean cuts, minimizing damage to the plant.
- Seed Saving: This is where the « self-sufficient » aspect truly shines.
- Selection: Only save seeds from your healthiest, most vigorous plants that show desired traits (disease resistance, good flavor, high yield).
- Isolation: To ensure true-to-type seeds, prevent cross-pollination. This can be challenging for open-pollinated crops that readily cross (e.g., squash, corn). For beginners, focus on self-pollinating plants like beans, peas, lettuce, and tomatoes.
- Processing:
- Dry Seeds (Beans, Peas, Lettuce, Grains): Allow pods/seed heads to dry completely on the plant. Harvest, shell, and clean the seeds, removing chaff.
- Wet Seeds (Tomatoes, Cucumbers, Squash): For tomatoes, ferment the seeds in water for a few days to remove the gel coating and inhibit disease. For cucumbers/squash, scrape out seeds, wash thoroughly, and dry.
- Drying: Spread seeds thinly on screens or paper plates in a cool, dry, well-ventilated area for 1-4 weeks. Ensure they are bone-dry before storage. I aim for less than 8% moisture content.
- Storage: Store seeds in airtight containers (glass jars with desiccant packets work well) in a cool, dark, dry place (ideally 40-50°F and 30-40% humidity). Label clearly with variety and date. Properly stored seeds can remain viable for 3-10 years or more.
Step 8: Season Extension & Winterizing
Extend your harvest and protect your garden for the off-season to truly maximize your self sufficient garden from scratch.
- Cold Frames: Simple structures with a transparent top (glass, polycarbonate, or old windows) that sit over garden beds. They trap solar heat, allowing you to grow cold-hardy crops (lettuce, spinach, kale, radishes) well into winter or start seeds earlier in spring. A basic cold frame can be built from 2×6 lumber and a sheet of polycarbonate for under $100.
- Hoop Houses/Low Tunnels: Larger structures made from flexible hoops (PVC pipe or EMT conduit) covered with greenhouse plastic. These provide more space and greater temperature moderation. A 10×20 ft DIY low tunnel kit can cost $200-$500, while a larger, more robust hoop house kit might be $1,000-$3,000. I use a 6×12 ft low tunnel made from 1/2-inch PVC hoops and 6mil greenhouse plastic, which extends my lettuce and spinach harvest by at least
- In-Ground Beds: If you have excellent native soil and good drainage, in-ground beds are the most economical. Double-digging (loosening soil two shovel depths) can significantly improve drainage and aeration. For my main garden, I primarily use in-ground beds, but I focus on building up the soil over time with consistent compost additions and cover cropping. I aim for beds that are no wider than 3-4 feet so I can reach the center without stepping on the soil, compacting it.
- Raised Beds: Raised beds offer numerous advantages, especially for poor soil, heavy clay, or rocky areas. They provide better drainage, warm up faster in spring, reduce compaction, and make weeding and harvesting easier on your back.
- Material Options:
- Untreated Cedar: Naturally rot-resistant and chemical-free. A 4×8 ft bed, 12 inches deep, typically requires three 2x12x8 ft cedar boards, costing around $50-$60 per board (total ~$150-$180) plus corner brackets or screws. My first raised beds were cedar and are still going strong after 7 years.
- Galvanized Steel: Durable, long-lasting, and aesthetically pleasing. Brands like Vego Garden offer modular kits. A Vego Garden 17″ Tall 8-in-1 Metal Raised Garden Bed (can be configured to 4×8 ft) costs approximately $250-$300.
- Concrete Blocks/Stones: Very durable but can leach minerals (though generally safe once weathered) and can be expensive.
- Recycled Materials: Pallets (check for chemical treatment stamps like « HT » for heat-treated), old tires (controversial due to potential chemical leaching).
- Filling Raised Beds: Don’t just fill with topsoil. Use a « Hugelkultur » approach (logs, branches, leaves, then compost, then topsoil) or a mixture of 60% good quality topsoil, 30% compost, and 10% perlite or vermiculite for drainage. A 4x8x1 ft raised bed requires about 32 cubic feet (or ~1.2 cubic yards) of soil mix, which can cost $100-$200 depending on your source.
- Material Options:
Step 4: Water Management & Irrigation
Efficient water management is critical for a self sufficient garden from scratch, especially in off-grid living where water resources might be limited.
- Rainwater Harvesting: This is my primary source of irrigation water. A 55-gallon rain barrel (e.g., EarthMark Rain Barrel, ~$120-$150) connected to a downspout can collect significant water. For larger needs, I use two 275-gallon IBC totes (Intermediate Bulk Containers, often available used for $100-$200 each from food-grade sources) connected in series. A 1,000 sq ft roof can collect approximately 620 gallons of water for every inch of rainfall. My 1,500 sq ft roof provides ample water for my 600 sq ft garden through multiple barrels and totes.
- Drip Irrigation: This is by far the most water-efficient method, delivering water directly to the plant’s root zone, minimizing evaporation and weed growth.
- Components: A typical drip system includes a pressure regulator (e.g., Rain Bird PRV-10, ~$15), a filter (Rain Bird RBY filter, ~$20), main tubing (1/2-inch poly tubing, 100ft ~$25), smaller feeder lines (1/4-inch tubing), and emitters (0.5 GPH or 1 GPH per plant).
- Kits: For beginners, a starter kit like the Rain Bird Drip Irrigation Garden Kit (model DDI-KIT-1P, ~$40-$60) is excellent for a small garden. For larger setups, I use Netafim Techline CV Drip Line (500ft roll, ~$150-$200), which has pressure-compensating emitters built-in, ensuring even watering across long runs.
- Automation: For true self-sufficiency, consider a battery-powered timer (e.g., Orbit B-Hyve Bluetooth Hose Faucet Timer, ~$50) or a solar-powered timer connected to a small 12V pump.
- Solar-Powered Pumps: For lifting water from a well, pond, or large storage tank to your garden, a solar pump is a game-changer. For a smaller drip system, a Shurflo 2088-594-152 Diaphragm Pump (12V, 3.5 GPM, ~$180) can be powered by a single 100W solar panel (e.g., Renogy 100W Monocrystalline Solar Panel, ~$100) and a small 12V battery (e.g., a 50Ah LiFePO4 battery like the Battle Born 50Ah, ~$450). For larger operations or deeper wells, more robust systems are needed. If you’re looking to build out a comprehensive off-grid power system to support your garden’s water needs, or indeed your entire homestead, you might want to explore resources like the Power Grid Generator complete system guide to understand the full scope of what’s possible in terms of energy independence.
Step 5: Seed Selection & Planting
The choice of seeds is crucial for a truly self sufficient garden from scratch.
- Choose Heirloom & Open-Pollinated Seeds: These varieties produce seeds that will grow true to type, meaning you can save seeds from your harvest year after year. F1 hybrids, while often vigorous, will not produce consistent offspring from saved seeds. Reputable seed companies include Baker Creek Heirloom Seeds, High Mowing Organic Seeds, and Seed Savers Exchange. Start with common, reliable varieties like ‘Black Krim’ tomatoes, ‘Provider’ bush beans, ‘Waltham Butternut’ squash, and ‘Black Seeded Simpson’ lettuce.
- Start Seeds Indoors (Optional but Recommended): For longer growing seasons or specific crops, starting seeds indoors gives you a head start. Use seed-starting mix (e.g., Espoma Organic Seed Starter Mix, ~$10 for 16qt bag) in seed trays (Jiffy Professional Greenhouse 72-cell kit, ~$15). Provide adequate light with LED grow lights (Barrina T5 2ft 4-pack LED Grow Lights, 20W each, ~$50) for 14-16 hours a day, positioned 2-4 inches above seedlings. Maintain consistent temperatures (65-75°F for most).
- Direct Sowing vs. Transplanting: Some crops (carrots, radishes, beans, corn) prefer direct sowing into the garden bed. Others (tomatoes, peppers, broccoli, kale) benefit from being started indoors and transplanted. Follow seed packet instructions for planting depths (e.g., lettuce seeds are often surface-sown or planted 1/8 inch deep, while beans are 1 inch deep) and spacing.
- Companion Planting: Strategically plant different species together to enhance growth, deter pests, and attract beneficial insects. For example, planting marigolds near tomatoes can deter nematodes, and basil improves tomato flavor. Nasturtiums can act as a trap crop for aphids.
- Succession Planting: For a continuous harvest, plant small batches of quick-growing crops (lettuce, radishes, cilantro) every 2-3 weeks. As one crop finishes, another is ready to take its place.
Step 6: Pest & Disease Management (Organic)
Maintaining a self sufficient garden from scratch means embracing organic pest and disease control.
- Integrated Pest Management (IPM): This holistic approach combines several strategies.
- Observation: Regularly inspect your plants for early signs of pests or disease. Catching issues early is key.
- Physical Barriers: Use row covers (e.g., Agribon AG-19 floating row cover, 10×20 ft, ~$20) to protect young plants from insect pests like cabbage worms and squash bugs. Install fences (e.g., 2×4 welded wire mesh, 4 ft tall, 50 ft roll ~$70) to keep out deer, rabbits, and other larger animals.
- Hand-Picking: For larger pests like tomato hornworms or squash bugs, simply pick them off and drop them into a bucket of soapy water.
- Companion Planting: As mentioned, certain plants repel pests. Marigolds, garlic, and onions are excellent deterrents.
- Attract Beneficial Insects: Plant flowers like dill, fennel, cosmos, and sweet alyssum to attract ladybugs, lacewings, and parasitic wasps, which prey on common garden pests.
- Organic Sprays & Treatments:
- Neem Oil: An excellent broad-spectrum organic insecticide and fungicide. Bonide Neem Oil Concentrate (16oz, ~$20) can be mixed at a rate of 1-2 tbsp per gallon of water and sprayed on affected plants.
- Insecticidal Soap: Effective against soft-bodied insects like aphids, whiteflies, and spider mites. Garden Safe Insecticidal Soap (24oz ready-to-use, ~$10).
- Bacillus thuringiensis (Bt): A naturally occurring soil bacterium that targets caterpillars and worms. Monterey BT Worm & Caterpillar Killer (16oz, ~$18) is highly effective and safe for beneficial insects.
- Copper or Sulfur Sprays: For fungal diseases like powdery mildew or blight, organic copper (e.g., Bonide Copper Fungicide, ~$15 for 1lb) or sulfur (e.g., Safer Brand Garden Fungicide, ~$10 for 16oz) can be used as a last resort.
Step 7: Harvesting & Seed Saving
The culmination of your efforts is the harvest, and seed saving closes the loop on self-sufficiency.
- Harvesting Techniques:
- Timing: Harvest vegetables at their peak ripeness for best flavor and nutritional value. For example, green beans should snap cleanly, cucumbers should be firm, and tomatoes should be fully colored.
- Frequency: Many crops, like zucchini, cucumbers, and bush beans, produce more if harvested frequently. Pick daily or every other day.
- Tools: Use clean, sharp pruners (e.g., Corona ClassicCUT Bypass Pruner BP 3180, ~$30) or a sharp knife for clean cuts, minimizing damage to the plant.
- Seed Saving: This is where the « self-sufficient » aspect truly shines.
- Selection: Only save seeds from your healthiest, most vigorous plants that show desired traits (disease resistance, good flavor, high yield).
- Isolation: To ensure true-to-type seeds, prevent cross-pollination. This can be challenging for open-pollinated crops that readily cross (e.g., squash, corn). For beginners, focus on self-pollinating plants like beans, peas, lettuce, and tomatoes.
- Processing:
- Dry Seeds (Beans, Peas, Lettuce, Grains): Allow pods/seed heads to dry completely on the plant. Harvest, shell, and clean the seeds, removing chaff.
- Wet Seeds (Tomatoes, Cucumbers, Squash): For tomatoes, ferment the seeds in water for a few days to remove the gel coating and inhibit disease. For cucumbers/squash, scrape out seeds, wash thoroughly, and dry.
- Drying: Spread seeds thinly on screens or paper plates in a cool, dry, well-ventilated area for 1-4 weeks. Ensure they are bone-dry before storage. I aim for less than 8% moisture content.
- Storage: Store seeds in airtight containers (glass jars with desiccant packets work well) in a cool, dark, dry place (ideally 40-50°F and 30-40% humidity). Label clearly with variety and date. Properly stored seeds can remain viable for 3-10 years or more.
Step 8: Season Extension & Winterizing
Extend your harvest and protect your garden for the off-season to truly maximize your self sufficient garden from scratch.
- Cold Frames: Simple structures with a transparent top (glass, polycarbonate, or old windows) that sit over garden beds. They trap solar heat, allowing you to grow cold-hardy crops (lettuce, spinach, kale, radishes) well into winter or start seeds earlier in spring. A basic cold frame can be built from 2×6 lumber and a sheet of polycarbonate for under $100.
- Hoop Houses/Low Tunnels: Larger structures made from flexible hoops (PVC pipe or EMT conduit) covered with greenhouse plastic. These provide more space and greater temperature moderation. A 10×20 ft DIY low tunnel kit can cost $200-$500, while a larger, more robust hoop house kit might be $1,000-$3,000. I use a 6×12 ft low tunnel made from 1/2-inch PVC hoops and 6mil greenhouse plastic, which extends my lettuce and spinach harvest by at least
Deciding between raised beds and in-ground beds depends on your soil, budget, and physical capabilities.
- In-Ground Beds: If you have excellent native soil and good drainage, in-ground beds are the most economical. Double-digging (loosening soil two shovel depths) can significantly improve drainage and aeration. For my main garden, I primarily use in-ground beds, but I focus on building up the soil over time with consistent compost additions and cover cropping. I aim for beds that are no wider than 3-4 feet so I can reach the center without stepping on the soil, compacting it.
- Raised Beds: Raised beds offer numerous advantages, especially for poor soil, heavy clay, or rocky areas. They provide better drainage, warm up faster in spring, reduce compaction, and make weeding and harvesting easier on your back.
- Material Options:
- Untreated Cedar: Naturally rot-resistant and chemical-free. A 4×8 ft bed, 12 inches deep, typically requires three 2x12x8 ft cedar boards, costing around $50-$60 per board (total ~$150-$180) plus corner brackets or screws. My first raised beds were cedar and are still going strong after 7 years.
- Galvanized Steel: Durable, long-lasting, and aesthetically pleasing. Brands like Vego Garden offer modular kits. A Vego Garden 17″ Tall 8-in-1 Metal Raised Garden Bed (can be configured to 4×8 ft) costs approximately $250-$300.
- Concrete Blocks/Stones: Very durable but can leach minerals (though generally safe once weathered) and can be expensive.
- Recycled Materials: Pallets (check for chemical treatment stamps like « HT » for heat-treated), old tires (controversial due to potential chemical leaching).
- Filling Raised Beds: Don’t just fill with topsoil. Use a « Hugelkultur » approach (logs, branches, leaves, then compost, then topsoil) or a mixture of 60% good quality topsoil, 30% compost, and 10% perlite or vermiculite for drainage. A 4x8x1 ft raised bed requires about 32 cubic feet (or ~1.2 cubic yards) of soil mix, which can cost $100-$200 depending on your source.
- Material Options:
Step 4: Water Management & Irrigation
Efficient water management is critical for a self sufficient garden from scratch, especially in off-grid living where water resources might be limited.
- Rainwater Harvesting: This is my primary source of irrigation water. A 55-gallon rain barrel (e.g., EarthMark Rain Barrel, ~$120-$150) connected to a downspout can collect significant water. For larger needs, I use two 275-gallon IBC totes (Intermediate Bulk Containers, often available used for $100-$200 each from food-grade sources) connected in series. A 1,000 sq ft roof can collect approximately 620 gallons of water for every inch of rainfall. My 1,500 sq ft roof provides ample water for my 600 sq ft garden through multiple barrels and totes.
- Drip Irrigation: This is by far the most water-efficient method, delivering water directly to the plant’s root zone, minimizing evaporation and weed growth.
- Components: A typical drip system includes a pressure regulator (e.g., Rain Bird PRV-10, ~$15), a filter (Rain Bird RBY filter, ~$20), main tubing (1/2-inch poly tubing, 100ft ~$25), smaller feeder lines (1/4-inch tubing), and emitters (0.5 GPH or 1 GPH per plant).
- Kits: For beginners, a starter kit like the Rain Bird Drip Irrigation Garden Kit (model DDI-KIT-1P, ~$40-$60) is excellent for a small garden. For larger setups, I use Netafim Techline CV Drip Line (500ft roll, ~$150-$200), which has pressure-compensating emitters built-in, ensuring even watering across long runs.
- Automation: For true self-sufficiency, consider a battery-powered timer (e.g., Orbit B-Hyve Bluetooth Hose Faucet Timer, ~$50) or a solar-powered timer connected to a small 12V pump.
- Solar-Powered Pumps: For lifting water from a well, pond, or large storage tank to your garden, a solar pump is a game-changer. For a smaller drip system, a Shurflo 2088-594-152 Diaphragm Pump (12V, 3.5 GPM, ~$180) can be powered by a single 100W solar panel (e.g., Renogy 100W Monocrystalline Solar Panel, ~$100) and a small 12V battery (e.g., a 50Ah LiFePO4 battery like the Battle Born 50Ah, ~$450). For larger operations or deeper wells, more robust systems are needed. If you’re looking to build out a comprehensive off-grid power system to support your garden’s water needs, or indeed your entire homestead, you might want to explore resources like the Power Grid Generator complete system guide to understand the full scope of what’s possible in terms of energy independence.
Step 5: Seed Selection & Planting
The choice of seeds is crucial for a truly self sufficient garden from scratch.
- Choose Heirloom & Open-Pollinated Seeds: These varieties produce seeds that will grow true to type, meaning you can save seeds from your harvest year after year. F1 hybrids, while often vigorous, will not produce consistent offspring from saved seeds. Reputable seed companies include Baker Creek Heirloom Seeds, High Mowing Organic Seeds, and Seed Savers Exchange. Start with common, reliable varieties like ‘Black Krim’ tomatoes, ‘Provider’ bush beans, ‘Waltham Butternut’ squash, and ‘Black Seeded Simpson’ lettuce.
- Start Seeds Indoors (Optional but Recommended): For longer growing seasons or specific crops, starting seeds indoors gives you a head start. Use seed-starting mix (e.g., Espoma Organic Seed Starter Mix, ~$10 for 16qt bag) in seed trays (Jiffy Professional Greenhouse 72-cell kit, ~$15). Provide adequate light with LED grow lights (Barrina T5 2ft 4-pack LED Grow Lights, 20W each, ~$50) for 14-16 hours a day, positioned 2-4 inches above seedlings. Maintain consistent temperatures (65-75°F for most).
- Direct Sowing vs. Transplanting: Some crops (carrots, radishes, beans, corn) prefer direct sowing into the garden bed. Others (tomatoes, peppers, broccoli, kale) benefit from being started indoors and transplanted. Follow seed packet instructions for planting depths (e.g., lettuce seeds are often surface-sown or planted 1/8 inch deep, while beans are 1 inch deep) and spacing.
- Companion Planting: Strategically plant different species together to enhance growth, deter pests, and attract beneficial insects. For example, planting marigolds near tomatoes can deter nematodes, and basil improves tomato flavor. Nasturtiums can act as a trap crop for aphids.
- Succession Planting: For a continuous harvest, plant small batches of quick-growing crops (lettuce, radishes, cilantro) every 2-3 weeks. As one crop finishes, another is ready to take its place.
Step 6: Pest & Disease Management (Organic)
Maintaining a self sufficient garden from scratch means embracing organic pest and disease control.
- Integrated Pest Management (IPM): This holistic approach combines several strategies.
- Observation: Regularly inspect your plants for early signs of pests or disease. Catching issues early is key.
- Physical Barriers: Use row covers (e.g., Agribon AG-19 floating row cover, 10×20 ft, ~$20) to protect young plants from insect pests like cabbage worms and squash bugs. Install fences (e.g., 2×4 welded wire mesh, 4 ft tall, 50 ft roll ~$70) to keep out deer, rabbits, and other larger animals.
- Hand-Picking: For larger pests like tomato hornworms or squash bugs, simply pick them off and drop them into a bucket of soapy water.
- Companion Planting: As mentioned, certain plants repel pests. Marigolds, garlic, and onions are excellent deterrents.
- Attract Beneficial Insects: Plant flowers like dill, fennel, cosmos, and sweet alyssum to attract ladybugs, lacewings, and parasitic wasps, which prey on common garden pests.
- Organic Sprays & Treatments:
- Neem Oil: An excellent broad-spectrum organic insecticide and fungicide. Bonide Neem Oil Concentrate (16oz, ~$20) can be mixed at a rate of 1-2 tbsp per gallon of water and sprayed on affected plants.
- Insecticidal Soap: Effective against soft-bodied insects like aphids, whiteflies, and spider mites. Garden Safe Insecticidal Soap (24oz ready-to-use, ~$10).
- Bacillus thuringiensis (Bt): A naturally occurring soil bacterium that targets caterpillars and worms. Monterey BT Worm & Caterpillar Killer (16oz, ~$18) is highly effective and safe for beneficial insects.
- Copper or Sulfur Sprays: For fungal diseases like powdery mildew or blight, organic copper (e.g., Bonide Copper Fungicide, ~$15 for 1lb) or sulfur (e.g., Safer Brand Garden Fungicide, ~$10 for 16oz) can be used as a last resort.
Step 7: Harvesting & Seed Saving
The culmination of your efforts is the harvest, and seed saving closes the loop on self-sufficiency.
- Harvesting Techniques:
- Timing: Harvest vegetables at their peak ripeness for best flavor and nutritional value. For example, green beans should snap cleanly, cucumbers should be firm, and tomatoes should be fully colored.
- Frequency: Many crops, like zucchini, cucumbers, and bush beans, produce more if harvested frequently. Pick daily or every other day.
- Tools: Use clean, sharp pruners (e.g., Corona ClassicCUT Bypass Pruner BP 3180, ~$30) or a sharp knife for clean cuts, minimizing damage to the plant.
- Seed Saving: This is where the « self-sufficient » aspect truly shines.
- Selection: Only save seeds from your healthiest, most vigorous plants that show desired traits (disease resistance, good flavor, high yield).
- Isolation: To ensure true-to-type seeds, prevent cross-pollination. This can be challenging for open-pollinated crops that readily cross (e.g., squash, corn). For beginners, focus on self-pollinating plants like beans, peas, lettuce, and tomatoes.
- Processing:
- Dry Seeds (Beans, Peas, Lettuce, Grains): Allow pods/seed heads to dry completely on the plant. Harvest, shell, and clean the seeds, removing chaff.
- Wet Seeds (Tomatoes, Cucumbers, Squash): For tomatoes, ferment the seeds in water for a few days to remove the gel coating and inhibit disease. For cucumbers/squash, scrape out seeds, wash thoroughly, and dry.
- Drying: Spread seeds thinly on screens or paper plates in a cool, dry, well-ventilated area for 1-4 weeks. Ensure they are bone-dry before storage. I aim for less than 8% moisture content.
- Storage: Store seeds in airtight containers (glass jars with desiccant packets work well) in a cool, dark, dry place (ideally 40-50°F and 30-40% humidity). Label clearly with variety and date. Properly stored seeds can remain viable for 3-10 years or more.
Step 8: Season Extension & Winterizing
Extend your harvest and protect your garden for the off-season to truly maximize your self sufficient garden from scratch.
- Cold Frames: Simple structures with a transparent top (glass, polycarbonate, or old windows) that sit over garden beds. They trap solar heat, allowing you to grow cold-hardy crops (lettuce, spinach, kale, radishes) well into winter or start seeds earlier in spring. A basic cold frame can be built from 2×6 lumber and a sheet of polycarbonate for under $100.
- Hoop Houses/Low Tunnels: Larger structures made from flexible hoops (PVC pipe or EMT conduit) covered with greenhouse plastic. These provide more space and greater temperature moderation. A 10×20 ft DIY low tunnel kit can cost $200-$500, while a larger, more robust hoop house kit might be $1,000-$3,000. I use a 6×12 ft low tunnel made from 1/2-inch PVC hoops and 6mil greenhouse plastic, which extends my lettuce and spinach harvest by at least
Healthy soil is the bedrock of a productive, self-sufficient garden. You can’t guess what your soil needs; you have to test it.
- Perform a Soil Test: A professional soil test will give you precise data on your soil’s pH, nutrient levels (N-P-K), and organic matter content. I recommend sending a sample to your local agricultural extension office; it typically costs $20-$50 and provides detailed recommendations. Alternatively, for a quick homeowner check, a Rapitest Soil Test Kit (40-test kit, model 1663, ~$20 on Amazon) provides a good baseline for pH, Nitrogen, Phosphorus, and Potash. Aim for a pH between 6.0 and 7.0 for most vegetables.
- Amend for pH Imbalance: If your soil is too acidic (below 6.0), add agricultural lime (dolomitic lime adds magnesium, calcitic lime adds calcium). Apply 5-10 lbs per 100 sq ft for a moderate adjustment. If it’s too alkaline (above 7.0), add elemental sulfur (e.g., Espoma Soil Acidifier, ~$15 for 6.75 lbs) or generous amounts of organic matter like peat moss or pine needles.
- Build Organic Matter: This is the single most important step for long-term soil health. Organic matter improves soil structure, water retention, drainage, and nutrient availability. Incorporate 2-4 inches of high-quality compost into your top 6-12 inches of soil annually. I make my own compost from kitchen scraps, garden waste, and shredded leaves, but you can purchase it. Local nurseries often sell bulk compost for $30-$50 per cubic yard. Aged manure (from chickens, cows, or horses – ensure it’s well-rotted to avoid burning plants) is also excellent.
- Address Nutrient Deficiencies: Based on your soil test, add specific organic amendments. If Nitrogen (N) is low, add blood meal (12-0-0, ~$20 for 3 lbs) or feather meal. For Phosphorus (P), use bone meal (3-15-0, ~$15 for 3 lbs) or rock phosphate. For Potassium (K), greensand (0-0-2.5, ~$25 for 5 lbs) or kelp meal are good choices. I rely heavily on Espoma Organic Garden-tone (5-3-3, ~$25 for an 8lb bag) as a balanced, all-purpose organic fertilizer during planting.
Step 3: Garden Bed Preparation
Deciding between raised beds and in-ground beds depends on your soil, budget, and physical capabilities.
- In-Ground Beds: If you have excellent native soil and good drainage, in-ground beds are the most economical. Double-digging (loosening soil two shovel depths) can significantly improve drainage and aeration. For my main garden, I primarily use in-ground beds, but I focus on building up the soil over time with consistent compost additions and cover cropping. I aim for beds that are no wider than 3-4 feet so I can reach the center without stepping on the soil, compacting it.
- Raised Beds: Raised beds offer numerous advantages, especially for poor soil, heavy clay, or rocky areas. They provide better drainage, warm up faster in spring, reduce compaction, and make weeding and harvesting easier on your back.
- Material Options:
- Untreated Cedar: Naturally rot-resistant and chemical-free. A 4×8 ft bed, 12 inches deep, typically requires three 2x12x8 ft cedar boards, costing around $50-$60 per board (total ~$150-$180) plus corner brackets or screws. My first raised beds were cedar and are still going strong after 7 years.
- Galvanized Steel: Durable, long-lasting, and aesthetically pleasing. Brands like Vego Garden offer modular kits. A Vego Garden 17″ Tall 8-in-1 Metal Raised Garden Bed (can be configured to 4×8 ft) costs approximately $250-$300.
- Concrete Blocks/Stones: Very durable but can leach minerals (though generally safe once weathered) and can be expensive.
- Recycled Materials: Pallets (check for chemical treatment stamps like « HT » for heat-treated), old tires (controversial due to potential chemical leaching).
- Filling Raised Beds: Don’t just fill with topsoil. Use a « Hugelkultur » approach (logs, branches, leaves, then compost, then topsoil) or a mixture of 60% good quality topsoil, 30% compost, and 10% perlite or vermiculite for drainage. A 4x8x1 ft raised bed requires about 32 cubic feet (or ~1.2 cubic yards) of soil mix, which can cost $100-$200 depending on your source.
- Material Options:
Step 4: Water Management & Irrigation
Efficient water management is critical for a self sufficient garden from scratch, especially in off-grid living where water resources might be limited.
- Rainwater Harvesting: This is my primary source of irrigation water. A 55-gallon rain barrel (e.g., EarthMark Rain Barrel, ~$120-$150) connected to a downspout can collect significant water. For larger needs, I use two 275-gallon IBC totes (Intermediate Bulk Containers, often available used for $100-$200 each from food-grade sources) connected in series. A 1,000 sq ft roof can collect approximately 620 gallons of water for every inch of rainfall. My 1,500 sq ft roof provides ample water for my 600 sq ft garden through multiple barrels and totes.
- Drip Irrigation: This is by far the most water-efficient method, delivering water directly to the plant’s root zone, minimizing evaporation and weed growth.
- Components: A typical drip system includes a pressure regulator (e.g., Rain Bird PRV-10, ~$15), a filter (Rain Bird RBY filter, ~$20), main tubing (1/2-inch poly tubing, 100ft ~$25), smaller feeder lines (1/4-inch tubing), and emitters (0.5 GPH or 1 GPH per plant).
- Kits: For beginners, a starter kit like the Rain Bird Drip Irrigation Garden Kit (model DDI-KIT-1P, ~$40-$60) is excellent for a small garden. For larger setups, I use Netafim Techline CV Drip Line (500ft roll, ~$150-$200), which has pressure-compensating emitters built-in, ensuring even watering across long runs.
- Automation: For true self-sufficiency, consider a battery-powered timer (e.g., Orbit B-Hyve Bluetooth Hose Faucet Timer, ~$50) or a solar-powered timer connected to a small 12V pump.
- Solar-Powered Pumps: For lifting water from a well, pond, or large storage tank to your garden, a solar pump is a game-changer. For a smaller drip system, a Shurflo 2088-594-152 Diaphragm Pump (12V, 3.5 GPM, ~$180) can be powered by a single 100W solar panel (e.g., Renogy 100W Monocrystalline Solar Panel, ~$100) and a small 12V battery (e.g., a 50Ah LiFePO4 battery like the Battle Born 50Ah, ~$450). For larger operations or deeper wells, more robust systems are needed. If you’re looking to build out a comprehensive off-grid power system to support your garden’s water needs, or indeed your entire homestead, you might want to explore resources like the Power Grid Generator complete system guide to understand the full scope of what’s possible in terms of energy independence.
Step 5: Seed Selection & Planting
The choice of seeds is crucial for a truly self sufficient garden from scratch.
- Choose Heirloom & Open-Pollinated Seeds: These varieties produce seeds that will grow true to type, meaning you can save seeds from your harvest year after year. F1 hybrids, while often vigorous, will not produce consistent offspring from saved seeds. Reputable seed companies include Baker Creek Heirloom Seeds, High Mowing Organic Seeds, and Seed Savers Exchange. Start with common, reliable varieties like ‘Black Krim’ tomatoes, ‘Provider’ bush beans, ‘Waltham Butternut’ squash, and ‘Black Seeded Simpson’ lettuce.
- Start Seeds Indoors (Optional but Recommended): For longer growing seasons or specific crops, starting seeds indoors gives you a head start. Use seed-starting mix (e.g., Espoma Organic Seed Starter Mix, ~$10 for 16qt bag) in seed trays (Jiffy Professional Greenhouse 72-cell kit, ~$15). Provide adequate light with LED grow lights (Barrina T5 2ft 4-pack LED Grow Lights, 20W each, ~$50) for 14-16 hours a day, positioned 2-4 inches above seedlings. Maintain consistent temperatures (65-75°F for most).
- Direct Sowing vs. Transplanting: Some crops (carrots, radishes, beans, corn) prefer direct sowing into the garden bed. Others (tomatoes, peppers, broccoli, kale) benefit from being started indoors and transplanted. Follow seed packet instructions for planting depths (e.g., lettuce seeds are often surface-sown or planted 1/8 inch deep, while beans are 1 inch deep) and spacing.
- Companion Planting: Strategically plant different species together to enhance growth, deter pests, and attract beneficial insects. For example, planting marigolds near tomatoes can deter nematodes, and basil improves tomato flavor. Nasturtiums can act as a trap crop for aphids.
- Succession Planting: For a continuous harvest, plant small batches of quick-growing crops (lettuce, radishes, cilantro) every 2-3 weeks. As one crop finishes, another is ready to take its place.
Step 6: Pest & Disease Management (Organic)
Maintaining a self sufficient garden from scratch means embracing organic pest and disease control.
- Integrated Pest Management (IPM): This holistic approach combines several strategies.
- Observation: Regularly inspect your plants for early signs of pests or disease. Catching issues early is key.
- Physical Barriers: Use row covers (e.g., Agribon AG-19 floating row cover, 10×20 ft, ~$20) to protect young plants from insect pests like cabbage worms and squash bugs. Install fences (e.g., 2×4 welded wire mesh, 4 ft tall, 50 ft roll ~$70) to keep out deer, rabbits, and other larger animals.
- Hand-Picking: For larger pests like tomato hornworms or squash bugs, simply pick them off and drop them into a bucket of soapy water.
- Companion Planting: As mentioned, certain plants repel pests. Marigolds, garlic, and onions are excellent deterrents.
- Attract Beneficial Insects: Plant flowers like dill, fennel, cosmos, and sweet alyssum to attract ladybugs, lacewings, and parasitic wasps, which prey on common garden pests.
- Organic Sprays & Treatments:
- Neem Oil: An excellent broad-spectrum organic insecticide and fungicide. Bonide Neem Oil Concentrate (16oz, ~$20) can be mixed at a rate of 1-2 tbsp per gallon of water and sprayed on affected plants.
- Insecticidal Soap: Effective against soft-bodied insects like aphids, whiteflies, and spider mites. Garden Safe Insecticidal Soap (24oz ready-to-use, ~$10).
- Bacillus thuringiensis (Bt): A naturally occurring soil bacterium that targets caterpillars and worms. Monterey BT Worm & Caterpillar Killer (16oz, ~$18) is highly effective and safe for beneficial insects.
- Copper or Sulfur Sprays: For fungal diseases like powdery mildew or blight, organic copper (e.g., Bonide Copper Fungicide, ~$15 for 1lb) or sulfur (e.g., Safer Brand Garden Fungicide, ~$10 for 16oz) can be used as a last resort.
Step 7: Harvesting & Seed Saving
The culmination of your efforts is the harvest, and seed saving closes the loop on self-sufficiency.
- Harvesting Techniques:
- Timing: Harvest vegetables at their peak ripeness for best flavor and nutritional value. For example, green beans should snap cleanly, cucumbers should be firm, and tomatoes should be fully colored.
- Frequency: Many crops, like zucchini, cucumbers, and bush beans, produce more if harvested frequently. Pick daily or every other day.
- Tools: Use clean, sharp pruners (e.g., Corona ClassicCUT Bypass Pruner BP 3180, ~$30) or a sharp knife for clean cuts, minimizing damage to the plant.
- Seed Saving: This is where the « self-sufficient » aspect truly shines.
- Selection: Only save seeds from your healthiest, most vigorous plants that show desired traits (disease resistance, good flavor, high yield).
- Isolation: To ensure true-to-type seeds, prevent cross-pollination. This can be challenging for open-pollinated crops that readily cross (e.g., squash, corn). For beginners, focus on self-pollinating plants like beans, peas, lettuce, and tomatoes.
- Processing:
- Dry Seeds (Beans, Peas, Lettuce, Grains): Allow pods/seed heads to dry completely on the plant. Harvest, shell, and clean the seeds, removing chaff.
- Wet Seeds (Tomatoes, Cucumbers, Squash): For tomatoes, ferment the seeds in water for a few days to remove the gel coating and inhibit disease. For cucumbers/squash, scrape out seeds, wash thoroughly, and dry.
- Drying: Spread seeds thinly on screens or paper plates in a cool, dry, well-ventilated area for 1-4 weeks. Ensure they are bone-dry before storage. I aim for less than 8% moisture content.
- Storage: Store seeds in airtight containers (glass jars with desiccant packets work well) in a cool, dark, dry place (ideally 40-50°F and 30-40% humidity). Label clearly with variety and date. Properly stored seeds can remain viable for 3-10 years or more.
Step 8: Season Extension & Winterizing
Extend your harvest and protect your garden for the off-season to truly maximize your self sufficient garden from scratch.
- Cold Frames: Simple structures with a transparent top (glass, polycarbonate, or old windows) that sit over garden beds. They trap solar heat, allowing you to grow cold-hardy crops (lettuce, spinach, kale, radishes) well into winter or start seeds earlier in spring. A basic cold frame can be built from 2×6 lumber and a sheet of polycarbonate for under $100.
- Hoop Houses/Low Tunnels: Larger structures made from flexible hoops (PVC pipe or EMT conduit) covered with greenhouse plastic. These provide more space and greater temperature moderation. A 10×20 ft DIY low tunnel kit can cost $200-$500, while a larger, more robust hoop house kit might be $1,000-$3,000. I use a 6×12 ft low tunnel made from 1/2-inch PVC hoops and 6mil greenhouse plastic, which extends my lettuce and spinach harvest by at least
Step 7: Harvesting & Seed Saving
The culmination of your efforts is the harvest, and seed saving closes the loop on self-sufficiency.
- Harvesting Techniques:
- Timing: Harvest vegetables at their peak ripeness for best flavor and nutritional value. For example, green beans should snap cleanly, cucumbers should be firm, and tomatoes should be fully colored.
- Frequency: Many crops, like zucchini, cucumbers, and bush beans, produce more if harvested frequently. Pick daily or every other day.
- Tools: Use clean, sharp pruners (e.g., Corona ClassicCUT Bypass Pruner BP 3180, ~$30) or a sharp knife for clean cuts, minimizing damage to the plant.
- Seed Saving: This is where the « self-sufficient » aspect truly shines.
- Selection: Only save seeds from your healthiest, most vigorous plants that show desired traits (disease resistance, good flavor, high yield).
- Isolation: To ensure true-to-type seeds, prevent cross-pollination. This can be challenging for open-pollinated crops that readily cross (e.g., squash, corn). For beginners, focus on self-pollinating plants like beans, peas, lettuce, and tomatoes.
- Processing:
- Dry Seeds (Beans, Peas, Lettuce, Grains): Allow pods/seed heads to dry completely on the plant. Harvest, shell, and clean the seeds, removing chaff.
- Wet Seeds (Tomatoes, Cucumbers, Squash): For tomatoes, ferment the seeds in water for a few days to remove the gel coating and inhibit disease. For cucumbers/squash, scrape out seeds, wash thoroughly, and dry.
- Drying: Spread seeds thinly on screens or paper plates in a cool, dry, well-ventilated area for 1-4 weeks. Ensure they are bone-dry before storage. I aim for less than 8% moisture content.
- Storage: Store seeds in airtight containers (glass jars with desiccant packets work well) in a cool, dark, dry place (ideally 40-50°F and 30-40% humidity). Label clearly with variety and date. Properly stored seeds can remain viable for 3-10 years or more.
Step 8: Season Extension & Winterizing
Extend your harvest and protect your garden for the off-season to truly maximize your self sufficient garden from scratch.
- Cold Frames: Simple structures with a transparent top (glass, polycarbonate, or old windows) that sit over garden beds. They trap solar heat, allowing you to grow cold-hardy crops (lettuce, spinach, kale, radishes) well into winter or start seeds earlier in spring. A basic cold frame can be built from 2×6 lumber and a sheet of polycarbonate for under $100.
- Hoop Houses/Low Tunnels: Larger structures made from flexible hoops (PVC pipe or EMT conduit) covered with greenhouse plastic. These provide more space and greater temperature moderation. A 10×20 ft DIY low tunnel kit can cost $200-$500, while a larger, more robust hoop house kit might be $1,000-$3,000. I use a 6×12 ft low tunnel made from 1/2-inch PVC hoops and 6mil greenhouse plastic, which extends my lettuce and spinach harvest by at least
- Choose Heirloom & Open-Pollinated Seeds: These varieties produce seeds that will grow true to type, meaning you can save seeds from your harvest year after year. F1 hybrids, while often vigorous, will not produce consistent offspring from saved seeds. Reputable seed companies include Baker Creek Heirloom Seeds, High Mowing Organic Seeds, and Seed Savers Exchange. Start with common, reliable varieties like ‘Black Krim’ tomatoes, ‘Provider’ bush beans, ‘Waltham Butternut’ squash, and ‘Black Seeded Simpson’ lettuce.
- Start Seeds Indoors (Optional but Recommended): For longer growing seasons or specific crops, starting seeds indoors gives you a head start. Use seed-starting mix (e.g., Espoma Organic Seed Starter Mix, ~$10 for 16qt bag) in seed trays (Jiffy Professional Greenhouse 72-cell kit, ~$15). Provide adequate light with LED grow lights (Barrina T5 2ft 4-pack LED Grow Lights, 20W each, ~$50) for 14-16 hours a day, positioned 2-4 inches above seedlings. Maintain consistent temperatures (65-75°F for most).
- Direct Sowing vs. Transplanting: Some crops (carrots, radishes, beans, corn) prefer direct sowing into the garden bed. Others (tomatoes, peppers, broccoli, kale) benefit from being started indoors and transplanted. Follow seed packet instructions for planting depths (e.g., lettuce seeds are often surface-sown or planted 1/8 inch deep, while beans are 1 inch deep) and spacing.
- Companion Planting: Strategically plant different species together to enhance growth, deter pests, and attract beneficial insects. For example, planting marigolds near tomatoes can deter nematodes, and basil improves tomato flavor. Nasturtiums can act as a trap crop for aphids.
- Succession Planting: For a continuous harvest, plant small batches of quick-growing crops (lettuce, radishes, cilantro) every 2-3 weeks. As one crop finishes, another is ready to take its place.
Step 6: Pest & Disease Management (Organic)
Maintaining a self sufficient garden from scratch means embracing organic pest and disease control.
- Integrated Pest Management (IPM): This holistic approach combines several strategies.
- Observation: Regularly inspect your plants for early signs of pests or disease. Catching issues early is key.
- Physical Barriers: Use row covers (e.g., Agribon AG-19 floating row cover, 10×20 ft, ~$20) to protect young plants from insect pests like cabbage worms and squash bugs. Install fences (e.g., 2×4 welded wire mesh, 4 ft tall, 50 ft roll ~$70) to keep out deer, rabbits, and other larger animals.
- Hand-Picking: For larger pests like tomato hornworms or squash bugs, simply pick them off and drop them into a bucket of soapy water.
- Companion Planting: As mentioned, certain plants repel pests. Marigolds, garlic, and onions are excellent deterrents.
- Attract Beneficial Insects: Plant flowers like dill, fennel, cosmos, and sweet alyssum to attract ladybugs, lacewings, and parasitic wasps, which prey on common garden pests.
- Organic Sprays & Treatments:
- Neem Oil: An excellent broad-spectrum organic insecticide and fungicide. Bonide Neem Oil Concentrate (16oz, ~$20) can be mixed at a rate of 1-2 tbsp per gallon of water and sprayed on affected plants.
- Insecticidal Soap: Effective against soft-bodied insects like aphids, whiteflies, and spider mites. Garden Safe Insecticidal Soap (24oz ready-to-use, ~$10).
- Bacillus thuringiensis (Bt): A naturally occurring soil bacterium that targets caterpillars and worms. Monterey BT Worm & Caterpillar Killer (16oz, ~$18) is highly effective and safe for beneficial insects.
- Copper or Sulfur Sprays: For fungal diseases like powdery mildew or blight, organic copper (e.g., Bonide Copper Fungicide, ~$15 for 1lb) or sulfur (e.g., Safer Brand Garden Fungicide, ~$10 for 16oz) can be used as a last resort.
Step 7: Harvesting & Seed Saving
The culmination of your efforts is the harvest, and seed saving closes the loop on self-sufficiency.
- Harvesting Techniques:
- Timing: Harvest vegetables at their peak ripeness for best flavor and nutritional value. For example, green beans should snap cleanly, cucumbers should be firm, and tomatoes should be fully colored.
- Frequency: Many crops, like zucchini, cucumbers, and bush beans, produce more if harvested frequently. Pick daily or every other day.
- Tools: Use clean, sharp pruners (e.g., Corona ClassicCUT Bypass Pruner BP 3180, ~$30) or a sharp knife for clean cuts, minimizing damage to the plant.
- Seed Saving: This is where the « self-sufficient » aspect truly shines.
- Selection: Only save seeds from your healthiest, most vigorous plants that show desired traits (disease resistance, good flavor, high yield).
- Isolation: To ensure true-to-type seeds, prevent cross-pollination. This can be challenging for open-pollinated crops that readily cross (e.g., squash, corn). For beginners, focus on self-pollinating plants like beans, peas, lettuce, and tomatoes.
- Processing:
- Dry Seeds (Beans, Peas, Lettuce, Grains): Allow pods/seed heads to dry completely on the plant. Harvest, shell, and clean the seeds, removing chaff.
- Wet Seeds (Tomatoes, Cucumbers, Squash): For tomatoes, ferment the seeds in water for a few days to remove the gel coating and inhibit disease. For cucumbers/squash, scrape out seeds, wash thoroughly, and dry.
- Drying: Spread seeds thinly on screens or paper plates in a cool, dry, well-ventilated area for 1-4 weeks. Ensure they are bone-dry before storage. I aim for less than 8% moisture content.
- Storage: Store seeds in airtight containers (glass jars with desiccant packets work well) in a cool, dark, dry place (ideally 40-50°F and 30-40% humidity). Label clearly with variety and date. Properly stored seeds can remain viable for 3-10 years or more.
Step 8: Season Extension & Winterizing
Extend your harvest and protect your garden for the off-season to truly maximize your self sufficient garden from scratch.
- Cold Frames: Simple structures with a transparent top (glass, polycarbonate, or old windows) that sit over garden beds. They trap solar heat, allowing you to grow cold-hardy crops (lettuce, spinach, kale, radishes) well into winter or start seeds earlier in spring. A basic cold frame can be built from 2×6 lumber and a sheet of polycarbonate for under $100.
- Hoop Houses/Low Tunnels: Larger structures made from flexible hoops (PVC pipe or EMT conduit) covered with greenhouse plastic. These provide more space and greater temperature moderation. A 10×20 ft DIY low tunnel kit can cost $200-$500, while a larger, more robust hoop house kit might be $1,000-$3,000. I use a 6×12 ft low tunnel made from 1/2-inch PVC hoops and 6mil greenhouse plastic, which extends my lettuce and spinach harvest by at least
The choice of seeds is crucial for a truly self sufficient garden from scratch.
- Choose Heirloom & Open-Pollinated Seeds: These varieties produce seeds that will grow true to type, meaning you can save seeds from your harvest year after year. F1 hybrids, while often vigorous, will not produce consistent offspring from saved seeds. Reputable seed companies include Baker Creek Heirloom Seeds, High Mowing Organic Seeds, and Seed Savers Exchange. Start with common, reliable varieties like ‘Black Krim’ tomatoes, ‘Provider’ bush beans, ‘Waltham Butternut’ squash, and ‘Black Seeded Simpson’ lettuce.
- Start Seeds Indoors (Optional but Recommended): For longer growing seasons or specific crops, starting seeds indoors gives you a head start. Use seed-starting mix (e.g., Espoma Organic Seed Starter Mix, ~$10 for 16qt bag) in seed trays (Jiffy Professional Greenhouse 72-cell kit, ~$15). Provide adequate light with LED grow lights (Barrina T5 2ft 4-pack LED Grow Lights, 20W each, ~$50) for 14-16 hours a day, positioned 2-4 inches above seedlings. Maintain consistent temperatures (65-75°F for most).
- Direct Sowing vs. Transplanting: Some crops (carrots, radishes, beans, corn) prefer direct sowing into the garden bed. Others (tomatoes, peppers, broccoli, kale) benefit from being started indoors and transplanted. Follow seed packet instructions for planting depths (e.g., lettuce seeds are often surface-sown or planted 1/8 inch deep, while beans are 1 inch deep) and spacing.
- Companion Planting: Strategically plant different species together to enhance growth, deter pests, and attract beneficial insects. For example, planting marigolds near tomatoes can deter nematodes, and basil improves tomato flavor. Nasturtiums can act as a trap crop for aphids.
- Succession Planting: For a continuous harvest, plant small batches of quick-growing crops (lettuce, radishes, cilantro) every 2-3 weeks. As one crop finishes, another is ready to take its place.
Step 6: Pest & Disease Management (Organic)
Maintaining a self sufficient garden from scratch means embracing organic pest and disease control.
- Integrated Pest Management (IPM): This holistic approach combines several strategies.
- Observation: Regularly inspect your plants for early signs of pests or disease. Catching issues early is key.
- Physical Barriers: Use row covers (e.g., Agribon AG-19 floating row cover, 10×20 ft, ~$20) to protect young plants from insect pests like cabbage worms and squash bugs. Install fences (e.g., 2×4 welded wire mesh, 4 ft tall, 50 ft roll ~$70) to keep out deer, rabbits, and other larger animals.
- Hand-Picking: For larger pests like tomato hornworms or squash bugs, simply pick them off and drop them into a bucket of soapy water.
- Companion Planting: As mentioned, certain plants repel pests. Marigolds, garlic, and onions are excellent deterrents.
- Attract Beneficial Insects: Plant flowers like dill, fennel, cosmos, and sweet alyssum to attract ladybugs, lacewings, and parasitic wasps, which prey on common garden pests.
- Organic Sprays & Treatments:
- Neem Oil: An excellent broad-spectrum organic insecticide and fungicide. Bonide Neem Oil Concentrate (16oz, ~$20) can be mixed at a rate of 1-2 tbsp per gallon of water and sprayed on affected plants.
- Insecticidal Soap: Effective against soft-bodied insects like aphids, whiteflies, and spider mites. Garden Safe Insecticidal Soap (24oz ready-to-use, ~$10).
- Bacillus thuringiensis (Bt): A naturally occurring soil bacterium that targets caterpillars and worms. Monterey BT Worm & Caterpillar Killer (16oz, ~$18) is highly effective and safe for beneficial insects.
- Copper or Sulfur Sprays: For fungal diseases like powdery mildew or blight, organic copper (e.g., Bonide Copper Fungicide, ~$15 for 1lb) or sulfur (e.g., Safer Brand Garden Fungicide, ~$10 for 16oz) can be used as a last resort.
Step 7: Harvesting & Seed Saving
The culmination of your efforts is the harvest, and seed saving closes the loop on self-sufficiency.
- Harvesting Techniques:
- Timing: Harvest vegetables at their peak ripeness for best flavor and nutritional value. For example, green beans should snap cleanly, cucumbers should be firm, and tomatoes should be fully colored.
- Frequency: Many crops, like zucchini, cucumbers, and bush beans, produce more if harvested frequently. Pick daily or every other day.
- Tools: Use clean, sharp pruners (e.g., Corona ClassicCUT Bypass Pruner BP 3180, ~$30) or a sharp knife for clean cuts, minimizing damage to the plant.
- Seed Saving: This is where the « self-sufficient » aspect truly shines.
- Selection: Only save seeds from your healthiest, most vigorous plants that show desired traits (disease resistance, good flavor, high yield).
- Isolation: To ensure true-to-type seeds, prevent cross-pollination. This can be challenging for open-pollinated crops that readily cross (e.g., squash, corn). For beginners, focus on self-pollinating plants like beans, peas, lettuce, and tomatoes.
- Processing:
- Dry Seeds (Beans, Peas, Lettuce, Grains): Allow pods/seed heads to dry completely on the plant. Harvest, shell, and clean the seeds, removing chaff.
- Wet Seeds (Tomatoes, Cucumbers, Squash): For tomatoes, ferment the seeds in water for a few days to remove the gel coating and inhibit disease. For cucumbers/squash, scrape out seeds, wash thoroughly, and dry.
- Drying: Spread seeds thinly on screens or paper plates in a cool, dry, well-ventilated area for 1-4 weeks. Ensure they are bone-dry before storage. I aim for less than 8% moisture content.
- Storage: Store seeds in airtight containers (glass jars with desiccant packets work well) in a cool, dark, dry place (ideally 40-50°F and 30-40% humidity). Label clearly with variety and date. Properly stored seeds can remain viable for 3-10 years or more.
Step 8: Season Extension & Winterizing
Extend your harvest and protect your garden for the off-season to truly maximize your self sufficient garden from scratch.
- Cold Frames: Simple structures with a transparent top (glass, polycarbonate, or old windows) that sit over garden beds. They trap solar heat, allowing you to grow cold-hardy crops (lettuce, spinach, kale, radishes) well into winter or start seeds earlier in spring. A basic cold frame can be built from 2×6 lumber and a sheet of polycarbonate for under $100.
- Hoop Houses/Low Tunnels: Larger structures made from flexible hoops (PVC pipe or EMT conduit) covered with greenhouse plastic. These provide more space and greater temperature moderation. A 10×20 ft DIY low tunnel kit can cost $200-$500, while a larger, more robust hoop house kit might be $1,000-$3,000. I use a 6×12 ft low tunnel made from 1/2-inch PVC hoops and 6mil greenhouse plastic, which extends my lettuce and spinach harvest by at least
Step 5: Seed Selection & Planting
The choice of seeds is crucial for a truly self sufficient garden from scratch.
- Choose Heirloom & Open-Pollinated Seeds: These varieties produce seeds that will grow true to type, meaning you can save seeds from your harvest year after year. F1 hybrids, while often vigorous, will not produce consistent offspring from saved seeds. Reputable seed companies include Baker Creek Heirloom Seeds, High Mowing Organic Seeds, and Seed Savers Exchange. Start with common, reliable varieties like ‘Black Krim’ tomatoes, ‘Provider’ bush beans, ‘Waltham Butternut’ squash, and ‘Black Seeded Simpson’ lettuce.
- Start Seeds Indoors (Optional but Recommended): For longer growing seasons or specific crops, starting seeds indoors gives you a head start. Use seed-starting mix (e.g., Espoma Organic Seed Starter Mix, ~$10 for 16qt bag) in seed trays (Jiffy Professional Greenhouse 72-cell kit, ~$15). Provide adequate light with LED grow lights (Barrina T5 2ft 4-pack LED Grow Lights, 20W each, ~$50) for 14-16 hours a day, positioned 2-4 inches above seedlings. Maintain consistent temperatures (65-75°F for most).
- Direct Sowing vs. Transplanting: Some crops (carrots, radishes, beans, corn) prefer direct sowing into the garden bed. Others (tomatoes, peppers, broccoli, kale) benefit from being started indoors and transplanted. Follow seed packet instructions for planting depths (e.g., lettuce seeds are often surface-sown or planted 1/8 inch deep, while beans are 1 inch deep) and spacing.
- Companion Planting: Strategically plant different species together to enhance growth, deter pests, and attract beneficial insects. For example, planting marigolds near tomatoes can deter nematodes, and basil improves tomato flavor. Nasturtiums can act as a trap crop for aphids.
- Succession Planting: For a continuous harvest, plant small batches of quick-growing crops (lettuce, radishes, cilantro) every 2-3 weeks. As one crop finishes, another is ready to take its place.
Step 6: Pest & Disease Management (Organic)
Maintaining a self sufficient garden from scratch means embracing organic pest and disease control.
- Integrated Pest Management (IPM): This holistic approach combines several strategies.
- Observation: Regularly inspect your plants for early signs of pests or disease. Catching issues early is key.
- Physical Barriers: Use row covers (e.g., Agribon AG-19 floating row cover, 10×20 ft, ~$20) to protect young plants from insect pests like cabbage worms and squash bugs. Install fences (e.g., 2×4 welded wire mesh, 4 ft tall, 50 ft roll ~$70) to keep out deer, rabbits, and other larger animals.
- Hand-Picking: For larger pests like tomato hornworms or squash bugs, simply pick them off and drop them into a bucket of soapy water.
- Companion Planting: As mentioned, certain plants repel pests. Marigolds, garlic, and onions are excellent deterrents.
- Attract Beneficial Insects: Plant flowers like dill, fennel, cosmos, and sweet alyssum to attract ladybugs, lacewings, and parasitic wasps, which prey on common garden pests.
- Organic Sprays & Treatments:
- Neem Oil: An excellent broad-spectrum organic insecticide and fungicide. Bonide Neem Oil Concentrate (16oz, ~$20) can be mixed at a rate of 1-2 tbsp per gallon of water and sprayed on affected plants.
- Insecticidal Soap: Effective against soft-bodied insects like aphids, whiteflies, and spider mites. Garden Safe Insecticidal Soap (24oz ready-to-use, ~$10).
- Bacillus thuringiensis (Bt): A naturally occurring soil bacterium that targets caterpillars and worms. Monterey BT Worm & Caterpillar Killer (16oz, ~$18) is highly effective and safe for beneficial insects.
- Copper or Sulfur Sprays: For fungal diseases like powdery mildew or blight, organic copper (e.g., Bonide Copper Fungicide, ~$15 for 1lb) or sulfur (e.g., Safer Brand Garden Fungicide, ~$10 for 16oz) can be used as a last resort.
Step 7: Harvesting & Seed Saving
The culmination of your efforts is the harvest, and seed saving closes the loop on self-sufficiency.
- Harvesting Techniques:
- Timing: Harvest vegetables at their peak ripeness for best flavor and nutritional value. For example, green beans should snap cleanly, cucumbers should be firm, and tomatoes should be fully colored.
- Frequency: Many crops, like zucchini, cucumbers, and bush beans, produce more if harvested frequently. Pick daily or every other day.
- Tools: Use clean, sharp pruners (e.g., Corona ClassicCUT Bypass Pruner BP 3180, ~$30) or a sharp knife for clean cuts, minimizing damage to the plant.
- Seed Saving: This is where the « self-sufficient » aspect truly shines.
- Selection: Only save seeds from your healthiest, most vigorous plants that show desired traits (disease resistance, good flavor, high yield).
- Isolation: To ensure true-to-type seeds, prevent cross-pollination. This can be challenging for open-pollinated crops that readily cross (e.g., squash, corn). For beginners, focus on self-pollinating plants like beans, peas, lettuce, and tomatoes.
- Processing:
- Dry Seeds (Beans, Peas, Lettuce, Grains): Allow pods/seed heads to dry completely on the plant. Harvest, shell, and clean the seeds, removing chaff.
- Wet Seeds (Tomatoes, Cucumbers, Squash): For tomatoes, ferment the seeds in water for a few days to remove the gel coating and inhibit disease. For cucumbers/squash, scrape out seeds, wash thoroughly, and dry.
- Drying: Spread seeds thinly on screens or paper plates in a cool, dry, well-ventilated area for 1-4 weeks. Ensure they are bone-dry before storage. I aim for less than 8% moisture content.
- Storage: Store seeds in airtight containers (glass jars with desiccant packets work well) in a cool, dark, dry place (ideally 40-50°F and 30-40% humidity). Label clearly with variety and date. Properly stored seeds can remain viable for 3-10 years or more.
Step 8: Season Extension & Winterizing
Extend your harvest and protect your garden for the off-season to truly maximize your self sufficient garden from scratch.
- Cold Frames: Simple structures with a transparent top (glass, polycarbonate, or old windows) that sit over garden beds. They trap solar heat, allowing you to grow cold-hardy crops (lettuce, spinach, kale, radishes) well into winter or start seeds earlier in spring. A basic cold frame can be built from 2×6 lumber and a sheet of polycarbonate for under $100.
- Hoop Houses/Low Tunnels: Larger structures made from flexible hoops (PVC pipe or EMT conduit) covered with greenhouse plastic. These provide more space and greater temperature moderation. A 10×20 ft DIY low tunnel kit can cost $200-$500, while a larger, more robust hoop house kit might be $1,000-$3,000. I use a 6×12 ft low tunnel made from 1/2-inch PVC hoops and 6mil greenhouse plastic, which extends my lettuce and spinach harvest by at least
- Rainwater Harvesting: This is my primary source of irrigation water. A 55-gallon rain barrel (e.g., EarthMark Rain Barrel, ~$120-$150) connected to a downspout can collect significant water. For larger needs, I use two 275-gallon IBC totes (Intermediate Bulk Containers, often available used for $100-$200 each from food-grade sources) connected in series. A 1,000 sq ft roof can collect approximately 620 gallons of water for every inch of rainfall. My 1,500 sq ft roof provides ample water for my 600 sq ft garden through multiple barrels and totes.
- Drip Irrigation: This is by far the most water-efficient method, delivering water directly to the plant’s root zone, minimizing evaporation and weed growth.
- Components: A typical drip system includes a pressure regulator (e.g., Rain Bird PRV-10, ~$15), a filter (Rain Bird RBY filter, ~$20), main tubing (1/2-inch poly tubing, 100ft ~$25), smaller feeder lines (1/4-inch tubing), and emitters (0.5 GPH or 1 GPH per plant).
- Kits: For beginners, a starter kit like the Rain Bird Drip Irrigation Garden Kit (model DDI-KIT-1P, ~$40-$60) is excellent for a small garden. For larger setups, I use Netafim Techline CV Drip Line (500ft roll, ~$150-$200), which has pressure-compensating emitters built-in, ensuring even watering across long runs.
- Automation: For true self-sufficiency, consider a battery-powered timer (e.g., Orbit B-Hyve Bluetooth Hose Faucet Timer, ~$50) or a solar-powered timer connected to a small 12V pump.
- Solar-Powered Pumps: For lifting water from a well, pond, or large storage tank to your garden, a solar pump is a game-changer. For a smaller drip system, a Shurflo 2088-594-152 Diaphragm Pump (12V, 3.5 GPM, ~$180) can be powered by a single 100W solar panel (e.g., Renogy 100W Monocrystalline Solar Panel, ~$100) and a small 12V battery (e.g., a 50Ah LiFePO4 battery like the Battle Born 50Ah, ~$450). For larger operations or deeper wells, more robust systems are needed. If you’re looking to build out a comprehensive off-grid power system to support your garden’s water needs, or indeed your entire homestead, you might want to explore resources like the Power Grid Generator complete system guide to understand the full scope of what’s possible in terms of energy independence.
Step 5: Seed Selection & Planting
The choice of seeds is crucial for a truly self sufficient garden from scratch.
- Choose Heirloom & Open-Pollinated Seeds: These varieties produce seeds that will grow true to type, meaning you can save seeds from your harvest year after year. F1 hybrids, while often vigorous, will not produce consistent offspring from saved seeds. Reputable seed companies include Baker Creek Heirloom Seeds, High Mowing Organic Seeds, and Seed Savers Exchange. Start with common, reliable varieties like ‘Black Krim’ tomatoes, ‘Provider’ bush beans, ‘Waltham Butternut’ squash, and ‘Black Seeded Simpson’ lettuce.
- Start Seeds Indoors (Optional but Recommended): For longer growing seasons or specific crops, starting seeds indoors gives you a head start. Use seed-starting mix (e.g., Espoma Organic Seed Starter Mix, ~$10 for 16qt bag) in seed trays (Jiffy Professional Greenhouse 72-cell kit, ~$15). Provide adequate light with LED grow lights (Barrina T5 2ft 4-pack LED Grow Lights, 20W each, ~$50) for 14-16 hours a day, positioned 2-4 inches above seedlings. Maintain consistent temperatures (65-75°F for most).
- Direct Sowing vs. Transplanting: Some crops (carrots, radishes, beans, corn) prefer direct sowing into the garden bed. Others (tomatoes, peppers, broccoli, kale) benefit from being started indoors and transplanted. Follow seed packet instructions for planting depths (e.g., lettuce seeds are often surface-sown or planted 1/8 inch deep, while beans are 1 inch deep) and spacing.
- Companion Planting: Strategically plant different species together to enhance growth, deter pests, and attract beneficial insects. For example, planting marigolds near tomatoes can deter nematodes, and basil improves tomato flavor. Nasturtiums can act as a trap crop for aphids.
- Succession Planting: For a continuous harvest, plant small batches of quick-growing crops (lettuce, radishes, cilantro) every 2-3 weeks. As one crop finishes, another is ready to take its place.
Step 6: Pest & Disease Management (Organic)
Maintaining a self sufficient garden from scratch means embracing organic pest and disease control.
- Integrated Pest Management (IPM): This holistic approach combines several strategies.
- Observation: Regularly inspect your plants for early signs of pests or disease. Catching issues early is key.
- Physical Barriers: Use row covers (e.g., Agribon AG-19 floating row cover, 10×20 ft, ~$20) to protect young plants from insect pests like cabbage worms and squash bugs. Install fences (e.g., 2×4 welded wire mesh, 4 ft tall, 50 ft roll ~$70) to keep out deer, rabbits, and other larger animals.
- Hand-Picking: For larger pests like tomato hornworms or squash bugs, simply pick them off and drop them into a bucket of soapy water.
- Companion Planting: As mentioned, certain plants repel pests. Marigolds, garlic, and onions are excellent deterrents.
- Attract Beneficial Insects: Plant flowers like dill, fennel, cosmos, and sweet alyssum to attract ladybugs, lacewings, and parasitic wasps, which prey on common garden pests.
- Organic Sprays & Treatments:
- Neem Oil: An excellent broad-spectrum organic insecticide and fungicide. Bonide Neem Oil Concentrate (16oz, ~$20) can be mixed at a rate of 1-2 tbsp per gallon of water and sprayed on affected plants.
- Insecticidal Soap: Effective against soft-bodied insects like aphids, whiteflies, and spider mites. Garden Safe Insecticidal Soap (24oz ready-to-use, ~$10).
- Bacillus thuringiensis (Bt): A naturally occurring soil bacterium that targets caterpillars and worms. Monterey BT Worm & Caterpillar Killer (16oz, ~$18) is highly effective and safe for beneficial insects.
- Copper or Sulfur Sprays: For fungal diseases like powdery mildew or blight, organic copper (e.g., Bonide Copper Fungicide, ~$15 for 1lb) or sulfur (e.g., Safer Brand Garden Fungicide, ~$10 for 16oz) can be used as a last resort.
Step 7: Harvesting & Seed Saving
The culmination of your efforts is the harvest, and seed saving closes the loop on self-sufficiency.
- Harvesting Techniques:
- Timing: Harvest vegetables at their peak ripeness for best flavor and nutritional value. For example, green beans should snap cleanly, cucumbers should be firm, and tomatoes should be fully colored.
- Frequency: Many crops, like zucchini, cucumbers, and bush beans, produce more if harvested frequently. Pick daily or every other day.
- Tools: Use clean, sharp pruners (e.g., Corona ClassicCUT Bypass Pruner BP 3180, ~$30) or a sharp knife for clean cuts, minimizing damage to the plant.
- Seed Saving: This is where the « self-sufficient » aspect truly shines.
- Selection: Only save seeds from your healthiest, most vigorous plants that show desired traits (disease resistance, good flavor, high yield).
- Isolation: To ensure true-to-type seeds, prevent cross-pollination. This can be challenging for open-pollinated crops that readily cross (e.g., squash, corn). For beginners, focus on self-pollinating plants like beans, peas, lettuce, and tomatoes.
- Processing:
- Dry Seeds (Beans, Peas, Lettuce, Grains): Allow pods/seed heads to dry completely on the plant. Harvest, shell, and clean the seeds, removing chaff.
- Wet Seeds (Tomatoes, Cucumbers, Squash): For tomatoes, ferment the seeds in water for a few days to remove the gel coating and inhibit disease. For cucumbers/squash, scrape out seeds, wash thoroughly, and dry.
- Drying: Spread seeds thinly on screens or paper plates in a cool, dry, well-ventilated area for 1-4 weeks. Ensure they are bone-dry before storage. I aim for less than 8% moisture content.
- Storage: Store seeds in airtight containers (glass jars with desiccant packets work well) in a cool, dark, dry place (ideally 40-50°F and 30-40% humidity). Label clearly with variety and date. Properly stored seeds can remain viable for 3-10 years or more.
Step 8: Season Extension & Winterizing
Extend your harvest and protect your garden for the off-season to truly maximize your self sufficient garden from scratch.
- Cold Frames: Simple structures with a transparent top (glass, polycarbonate, or old windows) that sit over garden beds. They trap solar heat, allowing you to grow cold-hardy crops (lettuce, spinach, kale, radishes) well into winter or start seeds earlier in spring. A basic cold frame can be built from 2×6 lumber and a sheet of polycarbonate for under $100.
- Hoop Houses/Low Tunnels: Larger structures made from flexible hoops (PVC pipe or EMT conduit) covered with greenhouse plastic. These provide more space and greater temperature moderation. A 10×20 ft DIY low tunnel kit can cost $200-$500, while a larger, more robust hoop house kit might be $1,000-$3,000. I use a 6×12 ft low tunnel made from 1/2-inch PVC hoops and 6mil greenhouse plastic, which extends my lettuce and spinach harvest by at least
Efficient water management is critical for a self sufficient garden from scratch, especially in off-grid living where water resources might be limited.
- Rainwater Harvesting: This is my primary source of irrigation water. A 55-gallon rain barrel (e.g., EarthMark Rain Barrel, ~$120-$150) connected to a downspout can collect significant water. For larger needs, I use two 275-gallon IBC totes (Intermediate Bulk Containers, often available used for $100-$200 each from food-grade sources) connected in series. A 1,000 sq ft roof can collect approximately 620 gallons of water for every inch of rainfall. My 1,500 sq ft roof provides ample water for my 600 sq ft garden through multiple barrels and totes.
- Drip Irrigation: This is by far the most water-efficient method, delivering water directly to the plant’s root zone, minimizing evaporation and weed growth.
- Components: A typical drip system includes a pressure regulator (e.g., Rain Bird PRV-10, ~$15), a filter (Rain Bird RBY filter, ~$20), main tubing (1/2-inch poly tubing, 100ft ~$25), smaller feeder lines (1/4-inch tubing), and emitters (0.5 GPH or 1 GPH per plant).
- Kits: For beginners, a starter kit like the Rain Bird Drip Irrigation Garden Kit (model DDI-KIT-1P, ~$40-$60) is excellent for a small garden. For larger setups, I use Netafim Techline CV Drip Line (500ft roll, ~$150-$200), which has pressure-compensating emitters built-in, ensuring even watering across long runs.
- Automation: For true self-sufficiency, consider a battery-powered timer (e.g., Orbit B-Hyve Bluetooth Hose Faucet Timer, ~$50) or a solar-powered timer connected to a small 12V pump.
- Solar-Powered Pumps: For lifting water from a well, pond, or large storage tank to your garden, a solar pump is a game-changer. For a smaller drip system, a Shurflo 2088-594-152 Diaphragm Pump (12V, 3.5 GPM, ~$180) can be powered by a single 100W solar panel (e.g., Renogy 100W Monocrystalline Solar Panel, ~$100) and a small 12V battery (e.g., a 50Ah LiFePO4 battery like the Battle Born 50Ah, ~$450). For larger operations or deeper wells, more robust systems are needed. If you’re looking to build out a comprehensive off-grid power system to support your garden’s water needs, or indeed your entire homestead, you might want to explore resources like the Power Grid Generator complete system guide to understand the full scope of what’s possible in terms of energy independence.
Step 5: Seed Selection & Planting
The choice of seeds is crucial for a truly self sufficient garden from scratch.
- Choose Heirloom & Open-Pollinated Seeds: These varieties produce seeds that will grow true to type, meaning you can save seeds from your harvest year after year. F1 hybrids, while often vigorous, will not produce consistent offspring from saved seeds. Reputable seed companies include Baker Creek Heirloom Seeds, High Mowing Organic Seeds, and Seed Savers Exchange. Start with common, reliable varieties like ‘Black Krim’ tomatoes, ‘Provider’ bush beans, ‘Waltham Butternut’ squash, and ‘Black Seeded Simpson’ lettuce.
- Start Seeds Indoors (Optional but Recommended): For longer growing seasons or specific crops, starting seeds indoors gives you a head start. Use seed-starting mix (e.g., Espoma Organic Seed Starter Mix, ~$10 for 16qt bag) in seed trays (Jiffy Professional Greenhouse 72-cell kit, ~$15). Provide adequate light with LED grow lights (Barrina T5 2ft 4-pack LED Grow Lights, 20W each, ~$50) for 14-16 hours a day, positioned 2-4 inches above seedlings. Maintain consistent temperatures (65-75°F for most).
- Direct Sowing vs. Transplanting: Some crops (carrots, radishes, beans, corn) prefer direct sowing into the garden bed. Others (tomatoes, peppers, broccoli, kale) benefit from being started indoors and transplanted. Follow seed packet instructions for planting depths (e.g., lettuce seeds are often surface-sown or planted 1/8 inch deep, while beans are 1 inch deep) and spacing.
- Companion Planting: Strategically plant different species together to enhance growth, deter pests, and attract beneficial insects. For example, planting marigolds near tomatoes can deter nematodes, and basil improves tomato flavor. Nasturtiums can act as a trap crop for aphids.
- Succession Planting: For a continuous harvest, plant small batches of quick-growing crops (lettuce, radishes, cilantro) every 2-3 weeks. As one crop finishes, another is ready to take its place.
Step 6: Pest & Disease Management (Organic)
Maintaining a self sufficient garden from scratch means embracing organic pest and disease control.
- Integrated Pest Management (IPM): This holistic approach combines several strategies.
- Observation: Regularly inspect your plants for early signs of pests or disease. Catching issues early is key.
- Physical Barriers: Use row covers (e.g., Agribon AG-19 floating row cover, 10×20 ft, ~$20) to protect young plants from insect pests like cabbage worms and squash bugs. Install fences (e.g., 2×4 welded wire mesh, 4 ft tall, 50 ft roll ~$70) to keep out deer, rabbits, and other larger animals.
- Hand-Picking: For larger pests like tomato hornworms or squash bugs, simply pick them off and drop them into a bucket of soapy water.
- Companion Planting: As mentioned, certain plants repel pests. Marigolds, garlic, and onions are excellent deterrents.
- Attract Beneficial Insects: Plant flowers like dill, fennel, cosmos, and sweet alyssum to attract ladybugs, lacewings, and parasitic wasps, which prey on common garden pests.
- Organic Sprays & Treatments:
- Neem Oil: An excellent broad-spectrum organic insecticide and fungicide. Bonide Neem Oil Concentrate (16oz, ~$20) can be mixed at a rate of 1-2 tbsp per gallon of water and sprayed on affected plants.
- Insecticidal Soap: Effective against soft-bodied insects like aphids, whiteflies, and spider mites. Garden Safe Insecticidal Soap (24oz ready-to-use, ~$10).
- Bacillus thuringiensis (Bt): A naturally occurring soil bacterium that targets caterpillars and worms. Monterey BT Worm & Caterpillar Killer (16oz, ~$18) is highly effective and safe for beneficial insects.
- Copper or Sulfur Sprays: For fungal diseases like powdery mildew or blight, organic copper (e.g., Bonide Copper Fungicide, ~$15 for 1lb) or sulfur (e.g., Safer Brand Garden Fungicide, ~$10 for 16oz) can be used as a last resort.
Step 7: Harvesting & Seed Saving
The culmination of your efforts is the harvest, and seed saving closes the loop on self-sufficiency.
- Harvesting Techniques:
- Timing: Harvest vegetables at their peak ripeness for best flavor and nutritional value. For example, green beans should snap cleanly, cucumbers should be firm, and tomatoes should be fully colored.
- Frequency: Many crops, like zucchini, cucumbers, and bush beans, produce more if harvested frequently. Pick daily or every other day.
- Tools: Use clean, sharp pruners (e.g., Corona ClassicCUT Bypass Pruner BP 3180, ~$30) or a sharp knife for clean cuts, minimizing damage to the plant.
- Seed Saving: This is where the « self-sufficient » aspect truly shines.
- Selection: Only save seeds from your healthiest, most vigorous plants that show desired traits (disease resistance, good flavor, high yield).
- Isolation: To ensure true-to-type seeds, prevent cross-pollination. This can be challenging for open-pollinated crops that readily cross (e.g., squash, corn). For beginners, focus on self-pollinating plants like beans, peas, lettuce, and tomatoes.
- Processing:
- Dry Seeds (Beans, Peas, Lettuce, Grains): Allow pods/seed heads to dry completely on the plant. Harvest, shell, and clean the seeds, removing chaff.
- Wet Seeds (Tomatoes, Cucumbers, Squash): For tomatoes, ferment the seeds in water for a few days to remove the gel coating and inhibit disease. For cucumbers/squash, scrape out seeds, wash thoroughly, and dry.
- Drying: Spread seeds thinly on screens or paper plates in a cool, dry, well-ventilated area for 1-4 weeks. Ensure they are bone-dry before storage. I aim for less than 8% moisture content.
- Storage: Store seeds in airtight containers (glass jars with desiccant packets work well) in a cool, dark, dry place (ideally 40-50°F and 30-40% humidity). Label clearly with variety and date. Properly stored seeds can remain viable for 3-10 years or more.
Step 8: Season Extension & Winterizing
Extend your harvest and protect your garden for the off-season to truly maximize your self sufficient garden from scratch.
- Cold Frames: Simple structures with a transparent top (glass, polycarbonate, or old windows) that sit over garden beds. They trap solar heat, allowing you to grow cold-hardy crops (lettuce, spinach, kale, radishes) well into winter or start seeds earlier in spring. A basic cold frame can be built from 2×6 lumber and a sheet of polycarbonate for under $100.
- Hoop Houses/Low Tunnels: Larger structures made from flexible hoops (PVC pipe or EMT conduit) covered with greenhouse plastic. These provide more space and greater temperature moderation. A 10×20 ft DIY low tunnel kit can cost $200-$500, while a larger, more robust hoop house kit might be $1,000-$3,000. I use a 6×12 ft low tunnel made from 1/2-inch PVC hoops and 6mil greenhouse plastic, which extends my lettuce and spinach harvest by at least
Step 4: Water Management & Irrigation
Efficient water management is critical for a self sufficient garden from scratch, especially in off-grid living where water resources might be limited.
- Rainwater Harvesting: This is my primary source of irrigation water. A 55-gallon rain barrel (e.g., EarthMark Rain Barrel, ~$120-$150) connected to a downspout can collect significant water. For larger needs, I use two 275-gallon IBC totes (Intermediate Bulk Containers, often available used for $100-$200 each from food-grade sources) connected in series. A 1,000 sq ft roof can collect approximately 620 gallons of water for every inch of rainfall. My 1,500 sq ft roof provides ample water for my 600 sq ft garden through multiple barrels and totes.
- Drip Irrigation: This is by far the most water-efficient method, delivering water directly to the plant’s root zone, minimizing evaporation and weed growth.
- Components: A typical drip system includes a pressure regulator (e.g., Rain Bird PRV-10, ~$15), a filter (Rain Bird RBY filter, ~$20), main tubing (1/2-inch poly tubing, 100ft ~$25), smaller feeder lines (1/4-inch tubing), and emitters (0.5 GPH or 1 GPH per plant).
- Kits: For beginners, a starter kit like the Rain Bird Drip Irrigation Garden Kit (model DDI-KIT-1P, ~$40-$60) is excellent for a small garden. For larger setups, I use Netafim Techline CV Drip Line (500ft roll, ~$150-$200), which has pressure-compensating emitters built-in, ensuring even watering across long runs.
- Automation: For true self-sufficiency, consider a battery-powered timer (e.g., Orbit B-Hyve Bluetooth Hose Faucet Timer, ~$50) or a solar-powered timer connected to a small 12V pump.
- Solar-Powered Pumps: For lifting water from a well, pond, or large storage tank to your garden, a solar pump is a game-changer. For a smaller drip system, a Shurflo 2088-594-152 Diaphragm Pump (12V, 3.5 GPM, ~$180) can be powered by a single 100W solar panel (e.g., Renogy 100W Monocrystalline Solar Panel, ~$100) and a small 12V battery (e.g., a 50Ah LiFePO4 battery like the Battle Born 50Ah, ~$450). For larger operations or deeper wells, more robust systems are needed. If you’re looking to build out a comprehensive off-grid power system to support your garden’s water needs, or indeed your entire homestead, you might want to explore resources like the Power Grid Generator complete system guide to understand the full scope of what’s possible in terms of energy independence.
Step 5: Seed Selection & Planting
The choice of seeds is crucial for a truly self sufficient garden from scratch.
- Choose Heirloom & Open-Pollinated Seeds: These varieties produce seeds that will grow true to type, meaning you can save seeds from your harvest year after year. F1 hybrids, while often vigorous, will not produce consistent offspring from saved seeds. Reputable seed companies include Baker Creek Heirloom Seeds, High Mowing Organic Seeds, and Seed Savers Exchange. Start with common, reliable varieties like ‘Black Krim’ tomatoes, ‘Provider’ bush beans, ‘Waltham Butternut’ squash, and ‘Black Seeded Simpson’ lettuce.
- Start Seeds Indoors (Optional but Recommended): For longer growing seasons or specific crops, starting seeds indoors gives you a head start. Use seed-starting mix (e.g., Espoma Organic Seed Starter Mix, ~$10 for 16qt bag) in seed trays (Jiffy Professional Greenhouse 72-cell kit, ~$15). Provide adequate light with LED grow lights (Barrina T5 2ft 4-pack LED Grow Lights, 20W each, ~$50) for 14-16 hours a day, positioned 2-4 inches above seedlings. Maintain consistent temperatures (65-75°F for most).
- Direct Sowing vs. Transplanting: Some crops (carrots, radishes, beans, corn) prefer direct sowing into the garden bed. Others (tomatoes, peppers, broccoli, kale) benefit from being started indoors and transplanted. Follow seed packet instructions for planting depths (e.g., lettuce seeds are often surface-sown or planted 1/8 inch deep, while beans are 1 inch deep) and spacing.
- Companion Planting: Strategically plant different species together to enhance growth, deter pests, and attract beneficial insects. For example, planting marigolds near tomatoes can deter nematodes, and basil improves tomato flavor. Nasturtiums can act as a trap crop for aphids.
- Succession Planting: For a continuous harvest, plant small batches of quick-growing crops (lettuce, radishes, cilantro) every 2-3 weeks. As one crop finishes, another is ready to take its place.
Step 6: Pest & Disease Management (Organic)
Maintaining a self sufficient garden from scratch means embracing organic pest and disease control.
- Integrated Pest Management (IPM): This holistic approach combines several strategies.
- Observation: Regularly inspect your plants for early signs of pests or disease. Catching issues early is key.
- Physical Barriers: Use row covers (e.g., Agribon AG-19 floating row cover, 10×20 ft, ~$20) to protect young plants from insect pests like cabbage worms and squash bugs. Install fences (e.g., 2×4 welded wire mesh, 4 ft tall, 50 ft roll ~$70) to keep out deer, rabbits, and other larger animals.
- Hand-Picking: For larger pests like tomato hornworms or squash bugs, simply pick them off and drop them into a bucket of soapy water.
- Companion Planting: As mentioned, certain plants repel pests. Marigolds, garlic, and onions are excellent deterrents.
- Attract Beneficial Insects: Plant flowers like dill, fennel, cosmos, and sweet alyssum to attract ladybugs, lacewings, and parasitic wasps, which prey on common garden pests.
- Organic Sprays & Treatments:
- Neem Oil: An excellent broad-spectrum organic insecticide and fungicide. Bonide Neem Oil Concentrate (16oz, ~$20) can be mixed at a rate of 1-2 tbsp per gallon of water and sprayed on affected plants.
- Insecticidal Soap: Effective against soft-bodied insects like aphids, whiteflies, and spider mites. Garden Safe Insecticidal Soap (24oz ready-to-use, ~$10).
- Bacillus thuringiensis (Bt): A naturally occurring soil bacterium that targets caterpillars and worms. Monterey BT Worm & Caterpillar Killer (16oz, ~$18) is highly effective and safe for beneficial insects.
- Copper or Sulfur Sprays: For fungal diseases like powdery mildew or blight, organic copper (e.g., Bonide Copper Fungicide, ~$15 for 1lb) or sulfur (e.g., Safer Brand Garden Fungicide, ~$10 for 16oz) can be used as a last resort.
Step 7: Harvesting & Seed Saving
The culmination of your efforts is the harvest, and seed saving closes the loop on self-sufficiency.
- Harvesting Techniques:
- Timing: Harvest vegetables at their peak ripeness for best flavor and nutritional value. For example, green beans should snap cleanly, cucumbers should be firm, and tomatoes should be fully colored.
- Frequency: Many crops, like zucchini, cucumbers, and bush beans, produce more if harvested frequently. Pick daily or every other day.
- Tools: Use clean, sharp pruners (e.g., Corona ClassicCUT Bypass Pruner BP 3180, ~$30) or a sharp knife for clean cuts, minimizing damage to the plant.
- Seed Saving: This is where the « self-sufficient » aspect truly shines.
- Selection: Only save seeds from your healthiest, most vigorous plants that show desired traits (disease resistance, good flavor, high yield).
- Isolation: To ensure true-to-type seeds, prevent cross-pollination. This can be challenging for open-pollinated crops that readily cross (e.g., squash, corn). For beginners, focus on self-pollinating plants like beans, peas, lettuce, and tomatoes.
- Processing:
- Dry Seeds (Beans, Peas, Lettuce, Grains): Allow pods/seed heads to dry completely on the plant. Harvest, shell, and clean the seeds, removing chaff.
- Wet Seeds (Tomatoes, Cucumbers, Squash): For tomatoes, ferment the seeds in water for a few days to remove the gel coating and inhibit disease. For cucumbers/squash, scrape out seeds, wash thoroughly, and dry.
- Drying: Spread seeds thinly on screens or paper plates in a cool, dry, well-ventilated area for 1-4 weeks. Ensure they are bone-dry before storage. I aim for less than 8% moisture content.
- Storage: Store seeds in airtight containers (glass jars with desiccant packets work well) in a cool, dark, dry place (ideally 40-50°F and 30-40% humidity). Label clearly with variety and date. Properly stored seeds can remain viable for 3-10 years or more.
Step 8: Season Extension & Winterizing
Extend your harvest and protect your garden for the off-season to truly maximize your self sufficient garden from scratch.
- Cold Frames: Simple structures with a transparent top (glass, polycarbonate, or old windows) that sit over garden beds. They trap solar heat, allowing you to grow cold-hardy crops (lettuce, spinach, kale, radishes) well into winter or start seeds earlier in spring. A basic cold frame can be built from 2×6 lumber and a sheet of polycarbonate for under $100.
- Hoop Houses/Low Tunnels: Larger structures made from flexible hoops (PVC pipe or EMT conduit) covered with greenhouse plastic. These provide more space and greater temperature moderation. A 10×20 ft DIY low tunnel kit can cost $200-$500, while a larger, more robust hoop house kit might be $1,000-$3,000. I use a 6×12 ft low tunnel made from 1/2-inch PVC hoops and 6mil greenhouse plastic, which extends my lettuce and spinach harvest by at least
- In-Ground Beds: If you have excellent native soil and good drainage, in-ground beds are the most economical. Double-digging (loosening soil two shovel depths) can significantly improve drainage and aeration. For my main garden, I primarily use in-ground beds, but I focus on building up the soil over time with consistent compost additions and cover cropping. I aim for beds that are no wider than 3-4 feet so I can reach the center without stepping on the soil, compacting it.
- Raised Beds: Raised beds offer numerous advantages, especially for poor soil, heavy clay, or rocky areas. They provide better drainage, warm up faster in spring, reduce compaction, and make weeding and harvesting easier on your back.
- Material Options:
- Untreated Cedar: Naturally rot-resistant and chemical-free. A 4×8 ft bed, 12 inches deep, typically requires three 2x12x8 ft cedar boards, costing around $50-$60 per board (total ~$150-$180) plus corner brackets or screws. My first raised beds were cedar and are still going strong after 7 years.
- Galvanized Steel: Durable, long-lasting, and aesthetically pleasing. Brands like Vego Garden offer modular kits. A Vego Garden 17″ Tall 8-in-1 Metal Raised Garden Bed (can be configured to 4×8 ft) costs approximately $250-$300.
- Concrete Blocks/Stones: Very durable but can leach minerals (though generally safe once weathered) and can be expensive.
- Recycled Materials: Pallets (check for chemical treatment stamps like « HT » for heat-treated), old tires (controversial due to potential chemical leaching).
- Filling Raised Beds: Don’t just fill with topsoil. Use a « Hugelkultur » approach (logs, branches, leaves, then compost, then topsoil) or a mixture of 60% good quality topsoil, 30% compost, and 10% perlite or vermiculite for drainage. A 4x8x1 ft raised bed requires about 32 cubic feet (or ~1.2 cubic yards) of soil mix, which can cost $100-$200 depending on your source.
- Material Options:
Step 4: Water Management & Irrigation
Efficient water management is critical for a self sufficient garden from scratch, especially in off-grid living where water resources might be limited.
- Rainwater Harvesting: This is my primary source of irrigation water. A 55-gallon rain barrel (e.g., EarthMark Rain Barrel, ~$120-$150) connected to a downspout can collect significant water. For larger needs, I use two 275-gallon IBC totes (Intermediate Bulk Containers, often available used for $100-$200 each from food-grade sources) connected in series. A 1,000 sq ft roof can collect approximately 620 gallons of water for every inch of rainfall. My 1,500 sq ft roof provides ample water for my 600 sq ft garden through multiple barrels and totes.
- Drip Irrigation: This is by far the most water-efficient method, delivering water directly to the plant’s root zone, minimizing evaporation and weed growth.
- Components: A typical drip system includes a pressure regulator (e.g., Rain Bird PRV-10, ~$15), a filter (Rain Bird RBY filter, ~$20), main tubing (1/2-inch poly tubing, 100ft ~$25), smaller feeder lines (1/4-inch tubing), and emitters (0.5 GPH or 1 GPH per plant).
- Kits: For beginners, a starter kit like the Rain Bird Drip Irrigation Garden Kit (model DDI-KIT-1P, ~$40-$60) is excellent for a small garden. For larger setups, I use Netafim Techline CV Drip Line (500ft roll, ~$150-$200), which has pressure-compensating emitters built-in, ensuring even watering across long runs.
- Automation: For true self-sufficiency, consider a battery-powered timer (e.g., Orbit B-Hyve Bluetooth Hose Faucet Timer, ~$50) or a solar-powered timer connected to a small 12V pump.
- Solar-Powered Pumps: For lifting water from a well, pond, or large storage tank to your garden, a solar pump is a game-changer. For a smaller drip system, a Shurflo 2088-594-152 Diaphragm Pump (12V, 3.5 GPM, ~$180) can be powered by a single 100W solar panel (e.g., Renogy 100W Monocrystalline Solar Panel, ~$100) and a small 12V battery (e.g., a 50Ah LiFePO4 battery like the Battle Born 50Ah, ~$450). For larger operations or deeper wells, more robust systems are needed. If you’re looking to build out a comprehensive off-grid power system to support your garden’s water needs, or indeed your entire homestead, you might want to explore resources like the Power Grid Generator complete system guide to understand the full scope of what’s possible in terms of energy independence.
Step 5: Seed Selection & Planting
The choice of seeds is crucial for a truly self sufficient garden from scratch.
- Choose Heirloom & Open-Pollinated Seeds: These varieties produce seeds that will grow true to type, meaning you can save seeds from your harvest year after year. F1 hybrids, while often vigorous, will not produce consistent offspring from saved seeds. Reputable seed companies include Baker Creek Heirloom Seeds, High Mowing Organic Seeds, and Seed Savers Exchange. Start with common, reliable varieties like ‘Black Krim’ tomatoes, ‘Provider’ bush beans, ‘Waltham Butternut’ squash, and ‘Black Seeded Simpson’ lettuce.
- Start Seeds Indoors (Optional but Recommended): For longer growing seasons or specific crops, starting seeds indoors gives you a head start. Use seed-starting mix (e.g., Espoma Organic Seed Starter Mix, ~$10 for 16qt bag) in seed trays (Jiffy Professional Greenhouse 72-cell kit, ~$15). Provide adequate light with LED grow lights (Barrina T5 2ft 4-pack LED Grow Lights, 20W each, ~$50) for 14-16 hours a day, positioned 2-4 inches above seedlings. Maintain consistent temperatures (65-75°F for most).
- Direct Sowing vs. Transplanting: Some crops (carrots, radishes, beans, corn) prefer direct sowing into the garden bed. Others (tomatoes, peppers, broccoli, kale) benefit from being started indoors and transplanted. Follow seed packet instructions for planting depths (e.g., lettuce seeds are often surface-sown or planted 1/8 inch deep, while beans are 1 inch deep) and spacing.
- Companion Planting: Strategically plant different species together to enhance growth, deter pests, and attract beneficial insects. For example, planting marigolds near tomatoes can deter nematodes, and basil improves tomato flavor. Nasturtiums can act as a trap crop for aphids.
- Succession Planting: For a continuous harvest, plant small batches of quick-growing crops (lettuce, radishes, cilantro) every 2-3 weeks. As one crop finishes, another is ready to take its place.
Step 6: Pest & Disease Management (Organic)
Maintaining a self sufficient garden from scratch means embracing organic pest and disease control.
- Integrated Pest Management (IPM): This holistic approach combines several strategies.
- Observation: Regularly inspect your plants for early signs of pests or disease. Catching issues early is key.
- Physical Barriers: Use row covers (e.g., Agribon AG-19 floating row cover, 10×20 ft, ~$20) to protect young plants from insect pests like cabbage worms and squash bugs. Install fences (e.g., 2×4 welded wire mesh, 4 ft tall, 50 ft roll ~$70) to keep out deer, rabbits, and other larger animals.
- Hand-Picking: For larger pests like tomato hornworms or squash bugs, simply pick them off and drop them into a bucket of soapy water.
- Companion Planting: As mentioned, certain plants repel pests. Marigolds, garlic, and onions are excellent deterrents.
- Attract Beneficial Insects: Plant flowers like dill, fennel, cosmos, and sweet alyssum to attract ladybugs, lacewings, and parasitic wasps, which prey on common garden pests.
- Organic Sprays & Treatments:
- Neem Oil: An excellent broad-spectrum organic insecticide and fungicide. Bonide Neem Oil Concentrate (16oz, ~$20) can be mixed at a rate of 1-2 tbsp per gallon of water and sprayed on affected plants.
- Insecticidal Soap: Effective against soft-bodied insects like aphids, whiteflies, and spider mites. Garden Safe Insecticidal Soap (24oz ready-to-use, ~$10).
- Bacillus thuringiensis (Bt): A naturally occurring soil bacterium that targets caterpillars and worms. Monterey BT Worm & Caterpillar Killer (16oz, ~$18) is highly effective and safe for beneficial insects.
- Copper or Sulfur Sprays: For fungal diseases like powdery mildew or blight, organic copper (e.g., Bonide Copper Fungicide, ~$15 for 1lb) or sulfur (e.g., Safer Brand Garden Fungicide, ~$10 for 16oz) can be used as a last resort.
Step 7: Harvesting & Seed Saving
The culmination of your efforts is the harvest, and seed saving closes the loop on self-sufficiency.
- Harvesting Techniques:
- Timing: Harvest vegetables at their peak ripeness for best flavor and nutritional value. For example, green beans should snap cleanly, cucumbers should be firm, and tomatoes should be fully colored.
- Frequency: Many crops, like zucchini, cucumbers, and bush beans, produce more if harvested frequently. Pick daily or every other day.
- Tools: Use clean, sharp pruners (e.g., Corona ClassicCUT Bypass Pruner BP 3180, ~$30) or a sharp knife for clean cuts, minimizing damage to the plant.
- Seed Saving: This is where the « self-sufficient » aspect truly shines.
- Selection: Only save seeds from your healthiest, most vigorous plants that show desired traits (disease resistance, good flavor, high yield).
- Isolation: To ensure true-to-type seeds, prevent cross-pollination. This can be challenging for open-pollinated crops that readily cross (e.g., squash, corn). For beginners, focus on self-pollinating plants like beans, peas, lettuce, and tomatoes.
- Processing:
- Dry Seeds (Beans, Peas, Lettuce, Grains): Allow pods/seed heads to dry completely on the plant. Harvest, shell, and clean the seeds, removing chaff.
- Wet Seeds (Tomatoes, Cucumbers, Squash): For tomatoes, ferment the seeds in water for a few days to remove the gel coating and inhibit disease. For cucumbers/squash, scrape out seeds, wash thoroughly, and dry.
- Drying: Spread seeds thinly on screens or paper plates in a cool, dry, well-ventilated area for 1-4 weeks. Ensure they are bone-dry before storage. I aim for less than 8% moisture content.
- Storage: Store seeds in airtight containers (glass jars with desiccant packets work well) in a cool, dark, dry place (ideally 40-50°F and 30-40% humidity). Label clearly with variety and date. Properly stored seeds can remain viable for 3-10 years or more.
Step 8: Season Extension & Winterizing
Extend your harvest and protect your garden for the off-season to truly maximize your self sufficient garden from scratch.
- Cold Frames: Simple structures with a transparent top (glass, polycarbonate, or old windows) that sit over garden beds. They trap solar heat, allowing you to grow cold-hardy crops (lettuce, spinach, kale, radishes) well into winter or start seeds earlier in spring. A basic cold frame can be built from 2×6 lumber and a sheet of polycarbonate for under $100.
- Hoop Houses/Low Tunnels: Larger structures made from flexible hoops (PVC pipe or EMT conduit) covered with greenhouse plastic. These provide more space and greater temperature moderation. A 10×20 ft DIY low tunnel kit can cost $200-$500, while a larger, more robust hoop house kit might be $1,000-$3,000. I use a 6×12 ft low tunnel made from 1/2-inch PVC hoops and 6mil greenhouse plastic, which extends my lettuce and spinach harvest by at least
Deciding between raised beds and in-ground beds depends on your soil, budget, and physical capabilities.
- In-Ground Beds: If you have excellent native soil and good drainage, in-ground beds are the most economical. Double-digging (loosening soil two shovel depths) can significantly improve drainage and aeration. For my main garden, I primarily use in-ground beds, but I focus on building up the soil over time with consistent compost additions and cover cropping. I aim for beds that are no wider than 3-4 feet so I can reach the center without stepping on the soil, compacting it.
- Raised Beds: Raised beds offer numerous advantages, especially for poor soil, heavy clay, or rocky areas. They provide better drainage, warm up faster in spring, reduce compaction, and make weeding and harvesting easier on your back.
- Material Options:
- Untreated Cedar: Naturally rot-resistant and chemical-free. A 4×8 ft bed, 12 inches deep, typically requires three 2x12x8 ft cedar boards, costing around $50-$60 per board (total ~$150-$180) plus corner brackets or screws. My first raised beds were cedar and are still going strong after 7 years.
- Galvanized Steel: Durable, long-lasting, and aesthetically pleasing. Brands like Vego Garden offer modular kits. A Vego Garden 17″ Tall 8-in-1 Metal Raised Garden Bed (can be configured to 4×8 ft) costs approximately $250-$300.
- Concrete Blocks/Stones: Very durable but can leach minerals (though generally safe once weathered) and can be expensive.
- Recycled Materials: Pallets (check for chemical treatment stamps like « HT » for heat-treated), old tires (controversial due to potential chemical leaching).
- Filling Raised Beds: Don’t just fill with topsoil. Use a « Hugelkultur » approach (logs, branches, leaves, then compost, then topsoil) or a mixture of 60% good quality topsoil, 30% compost, and 10% perlite or vermiculite for drainage. A 4x8x1 ft raised bed requires about 32 cubic feet (or ~1.2 cubic yards) of soil mix, which can cost $100-$200 depending on your source.
- Material Options:
Step 4: Water Management & Irrigation
Efficient water management is critical for a self sufficient garden from scratch, especially in off-grid living where water resources might be limited.
- Rainwater Harvesting: This is my primary source of irrigation water. A 55-gallon rain barrel (e.g., EarthMark Rain Barrel, ~$120-$150) connected to a downspout can collect significant water. For larger needs, I use two 275-gallon IBC totes (Intermediate Bulk Containers, often available used for $100-$200 each from food-grade sources) connected in series. A 1,000 sq ft roof can collect approximately 620 gallons of water for every inch of rainfall. My 1,500 sq ft roof provides ample water for my 600 sq ft garden through multiple barrels and totes.
- Drip Irrigation: This is by far the most water-efficient method, delivering water directly to the plant’s root zone, minimizing evaporation and weed growth.
- Components: A typical drip system includes a pressure regulator (e.g., Rain Bird PRV-10, ~$15), a filter (Rain Bird RBY filter, ~$20), main tubing (1/2-inch poly tubing, 100ft ~$25), smaller feeder lines (1/4-inch tubing), and emitters (0.5 GPH or 1 GPH per plant).
- Kits: For beginners, a starter kit like the Rain Bird Drip Irrigation Garden Kit (model DDI-KIT-1P, ~$40-$60) is excellent for a small garden. For larger setups, I use Netafim Techline CV Drip Line (500ft roll, ~$150-$200), which has pressure-compensating emitters built-in, ensuring even watering across long runs.
- Automation: For true self-sufficiency, consider a battery-powered timer (e.g., Orbit B-Hyve Bluetooth Hose Faucet Timer, ~$50) or a solar-powered timer connected to a small 12V pump.
- Solar-Powered Pumps: For lifting water from a well, pond, or large storage tank to your garden, a solar pump is a game-changer. For a smaller drip system, a Shurflo 2088-594-152 Diaphragm Pump (12V, 3.5 GPM, ~$180) can be powered by a single 100W solar panel (e.g., Renogy 100W Monocrystalline Solar Panel, ~$100) and a small 12V battery (e.g., a 50Ah LiFePO4 battery like the Battle Born 50Ah, ~$450). For larger operations or deeper wells, more robust systems are needed. If you’re looking to build out a comprehensive off-grid power system to support your garden’s water needs, or indeed your entire homestead, you might want to explore resources like the Power Grid Generator complete system guide to understand the full scope of what’s possible in terms of energy independence.
Step 5: Seed Selection & Planting
The choice of seeds is crucial for a truly self sufficient garden from scratch.
- Choose Heirloom & Open-Pollinated Seeds: These varieties produce seeds that will grow true to type, meaning you can save seeds from your harvest year after year. F1 hybrids, while often vigorous, will not produce consistent offspring from saved seeds. Reputable seed companies include Baker Creek Heirloom Seeds, High Mowing Organic Seeds, and Seed Savers Exchange. Start with common, reliable varieties like ‘Black Krim’ tomatoes, ‘Provider’ bush beans, ‘Waltham Butternut’ squash, and ‘Black Seeded Simpson’ lettuce.
- Start Seeds Indoors (Optional but Recommended): For longer growing seasons or specific crops, starting seeds indoors gives you a head start. Use seed-starting mix (e.g., Espoma Organic Seed Starter Mix, ~$10 for 16qt bag) in seed trays (Jiffy Professional Greenhouse 72-cell kit, ~$15). Provide adequate light with LED grow lights (Barrina T5 2ft 4-pack LED Grow Lights, 20W each, ~$50) for 14-16 hours a day, positioned 2-4 inches above seedlings. Maintain consistent temperatures (65-75°F for most).
- Direct Sowing vs. Transplanting: Some crops (carrots, radishes, beans, corn) prefer direct sowing into the garden bed. Others (tomatoes, peppers, broccoli, kale) benefit from being started indoors and transplanted. Follow seed packet instructions for planting depths (e.g., lettuce seeds are often surface-sown or planted 1/8 inch deep, while beans are 1 inch deep) and spacing.
- Companion Planting: Strategically plant different species together to enhance growth, deter pests, and attract beneficial insects. For example, planting marigolds near tomatoes can deter nematodes, and basil improves tomato flavor. Nasturtiums can act as a trap crop for aphids.
- Succession Planting: For a continuous harvest, plant small batches of quick-growing crops (lettuce, radishes, cilantro) every 2-3 weeks. As one crop finishes, another is ready to take its place.
Step 6: Pest & Disease Management (Organic)
Maintaining a self sufficient garden from scratch means embracing organic pest and disease control.
- Integrated Pest Management (IPM): This holistic approach combines several strategies.
- Observation: Regularly inspect your plants for early signs of pests or disease. Catching issues early is key.
- Physical Barriers: Use row covers (e.g., Agribon AG-19 floating row cover, 10×20 ft, ~$20) to protect young plants from insect pests like cabbage worms and squash bugs. Install fences (e.g., 2×4 welded wire mesh, 4 ft tall, 50 ft roll ~$70) to keep out deer, rabbits, and other larger animals.
- Hand-Picking: For larger pests like tomato hornworms or squash bugs, simply pick them off and drop them into a bucket of soapy water.
- Companion Planting: As mentioned, certain plants repel pests. Marigolds, garlic, and onions are excellent deterrents.
- Attract Beneficial Insects: Plant flowers like dill, fennel, cosmos, and sweet alyssum to attract ladybugs, lacewings, and parasitic wasps, which prey on common garden pests.
- Organic Sprays & Treatments:
- Neem Oil: An excellent broad-spectrum organic insecticide and fungicide. Bonide Neem Oil Concentrate (16oz, ~$20) can be mixed at a rate of 1-2 tbsp per gallon of water and sprayed on affected plants.
- Insecticidal Soap: Effective against soft-bodied insects like aphids, whiteflies, and spider mites. Garden Safe Insecticidal Soap (24oz ready-to-use, ~$10).
- Bacillus thuringiensis (Bt): A naturally occurring soil bacterium that targets caterpillars and worms. Monterey BT Worm & Caterpillar Killer (16oz, ~$18) is highly effective and safe for beneficial insects.
- Copper or Sulfur Sprays: For fungal diseases like powdery mildew or blight, organic copper (e.g., Bonide Copper Fungicide, ~$15 for 1lb) or sulfur (e.g., Safer Brand Garden Fungicide, ~$10 for 16oz) can be used as a last resort.
Step 7: Harvesting & Seed Saving
The culmination of your efforts is the harvest, and seed saving closes the loop on self-sufficiency.
- Harvesting Techniques:
- Timing: Harvest vegetables at their peak ripeness for best flavor and nutritional value. For example, green beans should snap cleanly, cucumbers should be firm, and tomatoes should be fully colored.
- Frequency: Many crops, like zucchini, cucumbers, and bush beans, produce more if harvested frequently. Pick daily or every other day.
- Tools: Use clean, sharp pruners (e.g., Corona ClassicCUT Bypass Pruner BP 3180, ~$30) or a sharp knife for clean cuts, minimizing damage to the plant.
- Seed Saving: This is where the « self-sufficient » aspect truly shines.
- Selection: Only save seeds from your healthiest, most vigorous plants that show desired traits (disease resistance, good flavor, high yield).
- Isolation: To ensure true-to-type seeds, prevent cross-pollination. This can be challenging for open-pollinated crops that readily cross (e.g., squash, corn). For beginners, focus on self-pollinating plants like beans, peas, lettuce, and tomatoes.
- Processing:
- Dry Seeds (Beans, Peas, Lettuce, Grains): Allow pods/seed heads to dry completely on the plant. Harvest, shell, and clean the seeds, removing chaff.
- Wet Seeds (Tomatoes, Cucumbers, Squash): For tomatoes, ferment the seeds in water for a few days to remove the gel coating and inhibit disease. For cucumbers/squash, scrape out seeds, wash thoroughly, and dry.
- Drying: Spread seeds thinly on screens or paper plates in a cool, dry, well-ventilated area for 1-4 weeks. Ensure they are bone-dry before storage. I aim for less than 8% moisture content.
- Storage: Store seeds in airtight containers (glass jars with desiccant packets work well) in a cool, dark, dry place (ideally 40-50°F and 30-40% humidity). Label clearly with variety and date. Properly stored seeds can remain viable for 3-10 years or more.
Step 8: Season Extension & Winterizing
Extend your harvest and protect your garden for the off-season to truly maximize your self sufficient garden from scratch.
- Cold Frames: Simple structures with a transparent top (glass, polycarbonate, or old windows) that sit over garden beds. They trap solar heat, allowing you to grow cold-hardy crops (lettuce, spinach, kale, radishes) well into winter or start seeds earlier in spring. A basic cold frame can be built from 2×6 lumber and a sheet of polycarbonate for under $100.
- Hoop Houses/Low Tunnels: Larger structures made from flexible hoops (PVC pipe or EMT conduit) covered with greenhouse plastic. These provide more space and greater temperature moderation. A 10×20 ft DIY low tunnel kit can cost $200-$500, while a larger, more robust hoop house kit might be $1,000-$3,000. I use a 6×12 ft low tunnel made from 1/2-inch PVC hoops and 6mil greenhouse plastic, which extends my lettuce and spinach harvest by at least
Healthy soil is the bedrock of a productive, self-sufficient garden. You can’t guess what your soil needs; you have to test it.
- Perform a Soil Test: A professional soil test will give you precise data on your soil’s pH, nutrient levels (N-P-K), and organic matter content. I recommend sending a sample to your local agricultural extension office; it typically costs $20-$50 and provides detailed recommendations. Alternatively, for a quick homeowner check, a Rapitest Soil Test Kit (40-test kit, model 1663, ~$20 on Amazon) provides a good baseline for pH, Nitrogen, Phosphorus, and Potash. Aim for a pH between 6.0 and 7.0 for most vegetables.
- Amend for pH Imbalance: If your soil is too acidic (below 6.0), add agricultural lime (dolomitic lime adds magnesium, calcitic lime adds calcium). Apply 5-10 lbs per 100 sq ft for a moderate adjustment. If it’s too alkaline (above 7.0), add elemental sulfur (e.g., Espoma Soil Acidifier, ~$15 for 6.75 lbs) or generous amounts of organic matter like peat moss or pine needles.
- Build Organic Matter: This is the single most important step for long-term soil health. Organic matter improves soil structure, water retention, drainage, and nutrient availability. Incorporate 2-4 inches of high-quality compost into your top 6-12 inches of soil annually. I make my own compost from kitchen scraps, garden waste, and shredded leaves, but you can purchase it. Local nurseries often sell bulk compost for $30-$50 per cubic yard. Aged manure (from chickens, cows, or horses – ensure it’s well-rotted to avoid burning plants) is also excellent.
- Address Nutrient Deficiencies: Based on your soil test, add specific organic amendments. If Nitrogen (N) is low, add blood meal (12-0-0, ~$20 for 3 lbs) or feather meal. For Phosphorus (P), use bone meal (3-15-0, ~$15 for 3 lbs) or rock phosphate. For Potassium (K), greensand (0-0-2.5, ~$25 for 5 lbs) or kelp meal are good choices. I rely heavily on Espoma Organic Garden-tone (5-3-3, ~$25 for an 8lb bag) as a balanced, all-purpose organic fertilizer during planting.
Step 3: Garden Bed Preparation
Deciding between raised beds and in-ground beds depends on your soil, budget, and physical capabilities.
- In-Ground Beds: If you have excellent native soil and good drainage, in-ground beds are the most economical. Double-digging (loosening soil two shovel depths) can significantly improve drainage and aeration. For my main garden, I primarily use in-ground beds, but I focus on building up the soil over time with consistent compost additions and cover cropping. I aim for beds that are no wider than 3-4 feet so I can reach the center without stepping on the soil, compacting it.
- Raised Beds: Raised beds offer numerous advantages, especially for poor soil, heavy clay, or rocky areas. They provide better drainage, warm up faster in spring, reduce compaction, and make weeding and harvesting easier on your back.
- Material Options:
- Untreated Cedar: Naturally rot-resistant and chemical-free. A 4×8 ft bed, 12 inches deep, typically requires three 2x12x8 ft cedar boards, costing around $50-$60 per board (total ~$150-$180) plus corner brackets or screws. My first raised beds were cedar and are still going strong after 7 years.
- Galvanized Steel: Durable, long-lasting, and aesthetically pleasing. Brands like Vego Garden offer modular kits. A Vego Garden 17″ Tall 8-in-1 Metal Raised Garden Bed (can be configured to 4×8 ft) costs approximately $250-$300.
- Concrete Blocks/Stones: Very durable but can leach minerals (though generally safe once weathered) and can be expensive.
- Recycled Materials: Pallets (check for chemical treatment stamps like « HT » for heat-treated), old tires (controversial due to potential chemical leaching).
- Filling Raised Beds: Don’t just fill with topsoil. Use a « Hugelkultur » approach (logs, branches, leaves, then compost, then topsoil) or a mixture of 60% good quality topsoil, 30% compost, and 10% perlite or vermiculite for drainage. A 4x8x1 ft raised bed requires about 32 cubic feet (or ~1.2 cubic yards) of soil mix, which can cost $100-$200 depending on your source.
- Material Options:
Step 4: Water Management & Irrigation
Efficient water management is critical for a self sufficient garden from scratch, especially in off-grid living where water resources might be limited.
- Rainwater Harvesting: This is my primary source of irrigation water. A 55-gallon rain barrel (e.g., EarthMark Rain Barrel, ~$120-$150) connected to a downspout can collect significant water. For larger needs, I use two 275-gallon IBC totes (Intermediate Bulk Containers, often available used for $100-$200 each from food-grade sources) connected in series. A 1,000 sq ft roof can collect approximately 620 gallons of water for every inch of rainfall. My 1,500 sq ft roof provides ample water for my 600 sq ft garden through multiple barrels and totes.
- Drip Irrigation: This is by far the most water-efficient method, delivering water directly to the plant’s root zone, minimizing evaporation and weed growth.
- Components: A typical drip system includes a pressure regulator (e.g., Rain Bird PRV-10, ~$15), a filter (Rain Bird RBY filter, ~$20), main tubing (1/2-inch poly tubing, 100ft ~$25), smaller feeder lines (1/4-inch tubing), and emitters (0.5 GPH or 1 GPH per plant).
- Kits: For beginners, a starter kit like the Rain Bird Drip Irrigation Garden Kit (model DDI-KIT-1P, ~$40-$60) is excellent for a small garden. For larger setups, I use Netafim Techline CV Drip Line (500ft roll, ~$150-$200), which has pressure-compensating emitters built-in, ensuring even watering across long runs.
- Automation: For true self-sufficiency, consider a battery-powered timer (e.g., Orbit B-Hyve Bluetooth Hose Faucet Timer, ~$50) or a solar-powered timer connected to a small 12V pump.
- Solar-Powered Pumps: For lifting water from a well, pond, or large storage tank to your garden, a solar pump is a game-changer. For a smaller drip system, a Shurflo 2088-594-152 Diaphragm Pump (12V, 3.5 GPM, ~$180) can be powered by a single 100W solar panel (e.g., Renogy 100W Monocrystalline Solar Panel, ~$100) and a small 12V battery (e.g., a 50Ah LiFePO4 battery like the Battle Born 50Ah, ~$450). For larger operations or deeper wells, more robust systems are needed. If you’re looking to build out a comprehensive off-grid power system to support your garden’s water needs, or indeed your entire homestead, you might want to explore resources like the Power Grid Generator complete system guide to understand the full scope of what’s possible in terms of energy independence.
Step 5: Seed Selection & Planting
The choice of seeds is crucial for a truly self sufficient garden from scratch.
- Choose Heirloom & Open-Pollinated Seeds: These varieties produce seeds that will grow true to type, meaning you can save seeds from your harvest year after year. F1 hybrids, while often vigorous, will not produce consistent offspring from saved seeds. Reputable seed companies include Baker Creek Heirloom Seeds, High Mowing Organic Seeds, and Seed Savers Exchange. Start with common, reliable varieties like ‘Black Krim’ tomatoes, ‘Provider’ bush beans, ‘Waltham Butternut’ squash, and ‘Black Seeded Simpson’ lettuce.
- Start Seeds Indoors (Optional but Recommended): For longer growing seasons or specific crops, starting seeds indoors gives you a head start. Use seed-starting mix (e.g., Espoma Organic Seed Starter Mix, ~$10 for 16qt bag) in seed trays (Jiffy Professional Greenhouse 72-cell kit, ~$15). Provide adequate light with LED grow lights (Barrina T5 2ft 4-pack LED Grow Lights, 20W each, ~$50) for 14-16 hours a day, positioned 2-4 inches above seedlings. Maintain consistent temperatures (65-75°F for most).
- Direct Sowing vs. Transplanting: Some crops (carrots, radishes, beans, corn) prefer direct sowing into the garden bed. Others (tomatoes, peppers, broccoli, kale) benefit from being started indoors and transplanted. Follow seed packet instructions for planting depths (e.g., lettuce seeds are often surface-sown or planted 1/8 inch deep, while beans are 1 inch deep) and spacing.
- Companion Planting: Strategically plant different species together to enhance growth, deter pests, and attract beneficial insects. For example, planting marigolds near tomatoes can deter nematodes, and basil improves tomato flavor. Nasturtiums can act as a trap crop for aphids.
- Succession Planting: For a continuous harvest, plant small batches of quick-growing crops (lettuce, radishes, cilantro) every 2-3 weeks. As one crop finishes, another is ready to take its place.
Step 6: Pest & Disease Management (Organic)
Maintaining a self sufficient garden from scratch means embracing organic pest and disease control.
- Integrated Pest Management (IPM): This holistic approach combines several strategies.
- Observation: Regularly inspect your plants for early signs of pests or disease. Catching issues early is key.
- Physical Barriers: Use row covers (e.g., Agribon AG-19 floating row cover, 10×20 ft, ~$20) to protect young plants from insect pests like cabbage worms and squash bugs. Install fences (e.g., 2×4 welded wire mesh, 4 ft tall, 50 ft roll ~$70) to keep out deer, rabbits, and other larger animals.
- Hand-Picking: For larger pests like tomato hornworms or squash bugs, simply pick them off and drop them into a bucket of soapy water.
- Companion Planting: As mentioned, certain plants repel pests. Marigolds, garlic, and onions are excellent deterrents.
- Attract Beneficial Insects: Plant flowers like dill, fennel, cosmos, and sweet alyssum to attract ladybugs, lacewings, and parasitic wasps, which prey on common garden pests.
- Organic Sprays & Treatments:
- Neem Oil: An excellent broad-spectrum organic insecticide and fungicide. Bonide Neem Oil Concentrate (16oz, ~$20) can be mixed at a rate of 1-2 tbsp per gallon of water and sprayed on affected plants.
- Insecticidal Soap: Effective against soft-bodied insects like aphids, whiteflies, and spider mites. Garden Safe Insecticidal Soap (24oz ready-to-use, ~$10).
- Bacillus thuringiensis (Bt): A naturally occurring soil bacterium that targets caterpillars and worms. Monterey BT Worm & Caterpillar Killer (16oz, ~$18) is highly effective and safe for beneficial insects.
- Copper or Sulfur Sprays: For fungal diseases like powdery mildew or blight, organic copper (e.g., Bonide Copper Fungicide, ~$15 for 1lb) or sulfur (e.g., Safer Brand Garden Fungicide, ~$10 for 16oz) can be used as a last resort.
Step 7: Harvesting & Seed Saving
The culmination of your efforts is the harvest, and seed saving closes the loop on self-sufficiency.
- Harvesting Techniques:
- Timing: Harvest vegetables at their peak ripeness for best flavor and nutritional value. For example, green beans should snap cleanly, cucumbers should be firm, and tomatoes should be fully colored.
- Frequency: Many crops, like zucchini, cucumbers, and bush beans, produce more if harvested frequently. Pick daily or every other day.
- Tools: Use clean, sharp pruners (e.g., Corona ClassicCUT Bypass Pruner BP 3180, ~$30) or a sharp knife for clean cuts, minimizing damage to the plant.
- Seed Saving: This is where the « self-sufficient » aspect truly shines.
- Selection: Only save seeds from your healthiest, most vigorous plants that show desired traits (disease resistance, good flavor, high yield).
- Isolation: To ensure true-to-type seeds, prevent cross-pollination. This can be challenging for open-pollinated crops that readily cross (e.g., squash, corn). For beginners, focus on self-pollinating plants like beans, peas, lettuce, and tomatoes.
- Processing:
- Dry Seeds (Beans, Peas, Lettuce, Grains): Allow pods/seed heads to dry completely on the plant. Harvest, shell, and clean the seeds, removing chaff.
- Wet Seeds (Tomatoes, Cucumbers, Squash): For tomatoes, ferment the seeds in water for a few days to remove the gel coating and inhibit disease. For cucumbers/squash, scrape out seeds, wash thoroughly, and dry.
- Drying: Spread seeds thinly on screens or paper plates in a cool, dry, well-ventilated area for 1-4 weeks. Ensure they are bone-dry before storage. I aim for less than 8% moisture content.
- Storage: Store seeds in airtight containers (glass jars with desiccant packets work well) in a cool, dark, dry place (ideally 40-50°F and 30-40% humidity). Label clearly with variety and date. Properly stored seeds can remain viable for 3-10 years or more.
Step 8: Season Extension & Winterizing
Extend your harvest and protect your garden for the off-season to truly maximize your self sufficient garden from scratch.
- Cold Frames: Simple structures with a transparent top (glass, polycarbonate, or old windows) that sit over garden beds. They trap solar heat, allowing you to grow cold-hardy crops (lettuce, spinach, kale, radishes) well into winter or start seeds earlier in spring. A basic cold frame can be built from 2×6 lumber and a sheet of polycarbonate for under $100.
- Hoop Houses/Low Tunnels: Larger structures made from flexible hoops (PVC pipe or EMT conduit) covered with greenhouse plastic. These provide more space and greater temperature moderation. A 10×20 ft DIY low tunnel kit can cost $200-$500, while a larger, more robust hoop house kit might be $1,000-$3,000. I use a 6×12 ft low tunnel made from 1/2-inch PVC hoops and 6mil greenhouse plastic, which extends my lettuce and spinach harvest by at least
- Integrated Pest Management (IPM): This holistic approach combines several strategies.
- Observation: Regularly inspect your plants for early signs of pests or disease. Catching issues early is key.
- Physical Barriers: Use row covers (e.g., Agribon AG-19 floating row cover, 10×20 ft, ~$20) to protect young plants from insect pests like cabbage worms and squash bugs. Install fences (e.g., 2×4 welded wire mesh, 4 ft tall, 50 ft roll ~$70) to keep out deer, rabbits, and other larger animals.
- Hand-Picking: For larger pests like tomato hornworms or squash bugs, simply pick them off and drop them into a bucket of soapy water.
- Companion Planting: As mentioned, certain plants repel pests. Marigolds, garlic, and onions are excellent deterrents.
- Attract Beneficial Insects: Plant flowers like dill, fennel, cosmos, and sweet alyssum to attract ladybugs, lacewings, and parasitic wasps, which prey on common garden pests.
- Organic Sprays & Treatments:
- Neem Oil: An excellent broad-spectrum organic insecticide and fungicide. Bonide Neem Oil Concentrate (16oz, ~$20) can be mixed at a rate of 1-2 tbsp per gallon of water and sprayed on affected plants.
- Insecticidal Soap: Effective against soft-bodied insects like aphids, whiteflies, and spider mites. Garden Safe Insecticidal Soap (24oz ready-to-use, ~$10).
- Bacillus thuringiensis (Bt): A naturally occurring soil bacterium that targets caterpillars and worms. Monterey BT Worm & Caterpillar Killer (16oz, ~$18) is highly effective and safe for beneficial insects.
- Copper or Sulfur Sprays: For fungal diseases like powdery mildew or blight, organic copper (e.g., Bonide Copper Fungicide, ~$15 for 1lb) or sulfur (e.g., Safer Brand Garden Fungicide, ~$10 for 16oz) can be used as a last resort.
Step 7: Harvesting & Seed Saving
The culmination of your efforts is the harvest, and seed saving closes the loop on self-sufficiency.
- Harvesting Techniques:
- Timing: Harvest vegetables at their peak ripeness for best flavor and nutritional value. For example, green beans should snap cleanly, cucumbers should be firm, and tomatoes should be fully colored.
- Frequency: Many crops, like zucchini, cucumbers, and bush beans, produce more if harvested frequently. Pick daily or every other day.
- Tools: Use clean, sharp pruners (e.g., Corona ClassicCUT Bypass Pruner BP 3180, ~$30) or a sharp knife for clean cuts, minimizing damage to the plant.
- Seed Saving: This is where the « self-sufficient » aspect truly shines.
- Selection: Only save seeds from your healthiest, most vigorous plants that show desired traits (disease resistance, good flavor, high yield).
- Isolation: To ensure true-to-type seeds, prevent cross-pollination. This can be challenging for open-pollinated crops that readily cross (e.g., squash, corn). For beginners, focus on self-pollinating plants like beans, peas, lettuce, and tomatoes.
- Processing:
- Dry Seeds (Beans, Peas, Lettuce, Grains): Allow pods/seed heads to dry completely on the plant. Harvest, shell, and clean the seeds, removing chaff.
- Wet Seeds (Tomatoes, Cucumbers, Squash): For tomatoes, ferment the seeds in water for a few days to remove the gel coating and inhibit disease. For cucumbers/squash, scrape out seeds, wash thoroughly, and dry.
- Drying: Spread seeds thinly on screens or paper plates in a cool, dry, well-ventilated area for 1-4 weeks. Ensure they are bone-dry before storage. I aim for less than 8% moisture content.
- Storage: Store seeds in airtight containers (glass jars with desiccant packets work well) in a cool, dark, dry place (ideally 40-50°F and 30-40% humidity). Label clearly with variety and date. Properly stored seeds can remain viable for 3-10 years or more.
Step 8: Season Extension & Winterizing
Extend your harvest and protect your garden for the off-season to truly maximize your self sufficient garden from scratch.
- Cold Frames: Simple structures with a transparent top (glass, polycarbonate, or old windows) that sit over garden beds. They trap solar heat, allowing you to grow cold-hardy crops (lettuce, spinach, kale, radishes) well into winter or start seeds earlier in spring. A basic cold frame can be built from 2×6 lumber and a sheet of polycarbonate for under $100.
- Hoop Houses/Low Tunnels: Larger structures made from flexible hoops (PVC pipe or EMT conduit) covered with greenhouse plastic. These provide more space and greater temperature moderation. A 10×20 ft DIY low tunnel kit can cost $200-$500, while a larger, more robust hoop house kit might be $1,000-$3,000. I use a 6×12 ft low tunnel made from 1/2-inch PVC hoops and 6mil greenhouse plastic, which extends my lettuce and spinach harvest by at least
- Choose Heirloom & Open-Pollinated Seeds: These varieties produce seeds that will grow true to type, meaning you can save seeds from your harvest year after year. F1 hybrids, while often vigorous, will not produce consistent offspring from saved seeds. Reputable seed companies include Baker Creek Heirloom Seeds, High Mowing Organic Seeds, and Seed Savers Exchange. Start with common, reliable varieties like ‘Black Krim’ tomatoes, ‘Provider’ bush beans, ‘Waltham Butternut’ squash, and ‘Black Seeded Simpson’ lettuce.
- Start Seeds Indoors (Optional but Recommended): For longer growing seasons or specific crops, starting seeds indoors gives you a head start. Use seed-starting mix (e.g., Espoma Organic Seed Starter Mix, ~$10 for 16qt bag) in seed trays (Jiffy Professional Greenhouse 72-cell kit, ~$15). Provide adequate light with LED grow lights (Barrina T5 2ft 4-pack LED Grow Lights, 20W each, ~$50) for 14-16 hours a day, positioned 2-4 inches above seedlings. Maintain consistent temperatures (65-75°F for most).
- Direct Sowing vs. Transplanting: Some crops (carrots, radishes, beans, corn) prefer direct sowing into the garden bed. Others (tomatoes, peppers, broccoli, kale) benefit from being started indoors and transplanted. Follow seed packet instructions for planting depths (e.g., lettuce seeds are often surface-sown or planted 1/8 inch deep, while beans are 1 inch deep) and spacing.
- Companion Planting: Strategically plant different species together to enhance growth, deter pests, and attract beneficial insects. For example, planting marigolds near tomatoes can deter nematodes, and basil improves tomato flavor. Nasturtiums can act as a trap crop for aphids.
- Succession Planting: For a continuous harvest, plant small batches of quick-growing crops (lettuce, radishes, cilantro) every 2-3 weeks. As one crop finishes, another is ready to take its place.
Step 6: Pest & Disease Management (Organic)
Maintaining a self sufficient garden from scratch means embracing organic pest and disease control.
- Integrated Pest Management (IPM): This holistic approach combines several strategies.
- Observation: Regularly inspect your plants for early signs of pests or disease. Catching issues early is key.
- Physical Barriers: Use row covers (e.g., Agribon AG-19 floating row cover, 10×20 ft, ~$20) to protect young plants from insect pests like cabbage worms and squash bugs. Install fences (e.g., 2×4 welded wire mesh, 4 ft tall, 50 ft roll ~$70) to keep out deer, rabbits, and other larger animals.
- Hand-Picking: For larger pests like tomato hornworms or squash bugs, simply pick them off and drop them into a bucket of soapy water.
- Companion Planting: As mentioned, certain plants repel pests. Marigolds, garlic, and onions are excellent deterrents.
- Attract Beneficial Insects: Plant flowers like dill, fennel, cosmos, and sweet alyssum to attract ladybugs, lacewings, and parasitic wasps, which prey on common garden pests.
- Organic Sprays & Treatments:
- Neem Oil: An excellent broad-spectrum organic insecticide and fungicide. Bonide Neem Oil Concentrate (16oz, ~$20) can be mixed at a rate of 1-2 tbsp per gallon of water and sprayed on affected plants.
- Insecticidal Soap: Effective against soft-bodied insects like aphids, whiteflies, and spider mites. Garden Safe Insecticidal Soap (24oz ready-to-use, ~$10).
- Bacillus thuringiensis (Bt): A naturally occurring soil bacterium that targets caterpillars and worms. Monterey BT Worm & Caterpillar Killer (16oz, ~$18) is highly effective and safe for beneficial insects.
- Copper or Sulfur Sprays: For fungal diseases like powdery mildew or blight, organic copper (e.g., Bonide Copper Fungicide, ~$15 for 1lb) or sulfur (e.g., Safer Brand Garden Fungicide, ~$10 for 16oz) can be used as a last resort.
Step 7: Harvesting & Seed Saving
The culmination of your efforts is the harvest, and seed saving closes the loop on self-sufficiency.
- Harvesting Techniques:
- Timing: Harvest vegetables at their peak ripeness for best flavor and nutritional value. For example, green beans should snap cleanly, cucumbers should be firm, and tomatoes should be fully colored.
- Frequency: Many crops, like zucchini, cucumbers, and bush beans, produce more if harvested frequently. Pick daily or every other day.
- Tools: Use clean, sharp pruners (e.g., Corona ClassicCUT Bypass Pruner BP 3180, ~$30) or a sharp knife for clean cuts, minimizing damage to the plant.
- Seed Saving: This is where the « self-sufficient » aspect truly shines.
- Selection: Only save seeds from your healthiest, most vigorous plants that show desired traits (disease resistance, good flavor, high yield).
- Isolation: To ensure true-to-type seeds, prevent cross-pollination. This can be challenging for open-pollinated crops that readily cross (e.g., squash, corn). For beginners, focus on self-pollinating plants like beans, peas, lettuce, and tomatoes.
- Processing:
- Dry Seeds (Beans, Peas, Lettuce, Grains): Allow pods/seed heads to dry completely on the plant. Harvest, shell, and clean the seeds, removing chaff.
- Wet Seeds (Tomatoes, Cucumbers, Squash): For tomatoes, ferment the seeds in water for a few days to remove the gel coating and inhibit disease. For cucumbers/squash, scrape out seeds, wash thoroughly, and dry.
- Drying: Spread seeds thinly on screens or paper plates in a cool, dry, well-ventilated area for 1-4 weeks. Ensure they are bone-dry before storage. I aim for less than 8% moisture content.
- Storage: Store seeds in airtight containers (glass jars with desiccant packets work well) in a cool, dark, dry place (ideally 40-50°F and 30-40% humidity). Label clearly with variety and date. Properly stored seeds can remain viable for 3-10 years or more.
Step 8: Season Extension & Winterizing
Extend your harvest and protect your garden for the off-season to truly maximize your self sufficient garden from scratch.
- Cold Frames: Simple structures with a transparent top (glass, polycarbonate, or old windows) that sit over garden beds. They trap solar heat, allowing you to grow cold-hardy crops (lettuce, spinach, kale, radishes) well into winter or start seeds earlier in spring. A basic cold frame can be built from 2×6 lumber and a sheet of polycarbonate for under $100.
- Hoop Houses/Low Tunnels: Larger structures made from flexible hoops (PVC pipe or EMT conduit) covered with greenhouse plastic. These provide more space and greater temperature moderation. A 10×20 ft DIY low tunnel kit can cost $200-$500, while a larger, more robust hoop house kit might be $1,000-$3,000. I use a 6×12 ft low tunnel made from 1/2-inch PVC hoops and 6mil greenhouse plastic, which extends my lettuce and spinach harvest by at least
The choice of seeds is crucial for a truly self sufficient garden from scratch.
- Choose Heirloom & Open-Pollinated Seeds: These varieties produce seeds that will grow true to type, meaning you can save seeds from your harvest year after year. F1 hybrids, while often vigorous, will not produce consistent offspring from saved seeds. Reputable seed companies include Baker Creek Heirloom Seeds, High Mowing Organic Seeds, and Seed Savers Exchange. Start with common, reliable varieties like ‘Black Krim’ tomatoes, ‘Provider’ bush beans, ‘Waltham Butternut’ squash, and ‘Black Seeded Simpson’ lettuce.
- Start Seeds Indoors (Optional but Recommended): For longer growing seasons or specific crops, starting seeds indoors gives you a head start. Use seed-starting mix (e.g., Espoma Organic Seed Starter Mix, ~$10 for 16qt bag) in seed trays (Jiffy Professional Greenhouse 72-cell kit, ~$15). Provide adequate light with LED grow lights (Barrina T5 2ft 4-pack LED Grow Lights, 20W each, ~$50) for 14-16 hours a day, positioned 2-4 inches above seedlings. Maintain consistent temperatures (65-75°F for most).
- Direct Sowing vs. Transplanting: Some crops (carrots, radishes, beans, corn) prefer direct sowing into the garden bed. Others (tomatoes, peppers, broccoli, kale) benefit from being started indoors and transplanted. Follow seed packet instructions for planting depths (e.g., lettuce seeds are often surface-sown or planted 1/8 inch deep, while beans are 1 inch deep) and spacing.
- Companion Planting: Strategically plant different species together to enhance growth, deter pests, and attract beneficial insects. For example, planting marigolds near tomatoes can deter nematodes, and basil improves tomato flavor. Nasturtiums can act as a trap crop for aphids.
- Succession Planting: For a continuous harvest, plant small batches of quick-growing crops (lettuce, radishes, cilantro) every 2-3 weeks. As one crop finishes, another is ready to take its place.
Step 6: Pest & Disease Management (Organic)
Maintaining a self sufficient garden from scratch means embracing organic pest and disease control.
- Integrated Pest Management (IPM): This holistic approach combines several strategies.
- Observation: Regularly inspect your plants for early signs of pests or disease. Catching issues early is key.
- Physical Barriers: Use row covers (e.g., Agribon AG-19 floating row cover, 10×20 ft, ~$20) to protect young plants from insect pests like cabbage worms and squash bugs. Install fences (e.g., 2×4 welded wire mesh, 4 ft tall, 50 ft roll ~$70) to keep out deer, rabbits, and other larger animals.
- Hand-Picking: For larger pests like tomato hornworms or squash bugs, simply pick them off and drop them into a bucket of soapy water.
- Companion Planting: As mentioned, certain plants repel pests. Marigolds, garlic, and onions are excellent deterrents.
- Attract Beneficial Insects: Plant flowers like dill, fennel, cosmos, and sweet alyssum to attract ladybugs, lacewings, and parasitic wasps, which prey on common garden pests.
- Organic Sprays & Treatments:
- Neem Oil: An excellent broad-spectrum organic insecticide and fungicide. Bonide Neem Oil Concentrate (16oz, ~$20) can be mixed at a rate of 1-2 tbsp per gallon of water and sprayed on affected plants.
- Insecticidal Soap: Effective against soft-bodied insects like aphids, whiteflies, and spider mites. Garden Safe Insecticidal Soap (24oz ready-to-use, ~$10).
- Bacillus thuringiensis (Bt): A naturally occurring soil bacterium that targets caterpillars and worms. Monterey BT Worm & Caterpillar Killer (16oz, ~$18) is highly effective and safe for beneficial insects.
- Copper or Sulfur Sprays: For fungal diseases like powdery mildew or blight, organic copper (e.g., Bonide Copper Fungicide, ~$15 for 1lb) or sulfur (e.g., Safer Brand Garden Fungicide, ~$10 for 16oz) can be used as a last resort.
Step 7: Harvesting & Seed Saving
The culmination of your efforts is the harvest, and seed saving closes the loop on self-sufficiency.
- Harvesting Techniques:
- Timing: Harvest vegetables at their peak ripeness for best flavor and nutritional value. For example, green beans should snap cleanly, cucumbers should be firm, and tomatoes should be fully colored.
- Frequency: Many crops, like zucchini, cucumbers, and bush beans, produce more if harvested frequently. Pick daily or every other day.
- Tools: Use clean, sharp pruners (e.g., Corona ClassicCUT Bypass Pruner BP 3180, ~$30) or a sharp knife for clean cuts, minimizing damage to the plant.
- Seed Saving: This is where the « self-sufficient » aspect truly shines.
- Selection: Only save seeds from your healthiest, most vigorous plants that show desired traits (disease resistance, good flavor, high yield).
- Isolation: To ensure true-to-type seeds, prevent cross-pollination. This can be challenging for open-pollinated crops that readily cross (e.g., squash, corn). For beginners, focus on self-pollinating plants like beans, peas, lettuce, and tomatoes.
- Processing:
- Dry Seeds (Beans, Peas, Lettuce, Grains): Allow pods/seed heads to dry completely on the plant. Harvest, shell, and clean the seeds, removing chaff.
- Wet Seeds (Tomatoes, Cucumbers, Squash): For tomatoes, ferment the seeds in water for a few days to remove the gel coating and inhibit disease. For cucumbers/squash, scrape out seeds, wash thoroughly, and dry.
- Drying: Spread seeds thinly on screens or paper plates in a cool, dry, well-ventilated area for 1-4 weeks. Ensure they are bone-dry before storage. I aim for less than 8% moisture content.
- Storage: Store seeds in airtight containers (glass jars with desiccant packets work well) in a cool, dark, dry place (ideally 40-50°F and 30-40% humidity). Label clearly with variety and date. Properly stored seeds can remain viable for 3-10 years or more.
Step 8: Season Extension & Winterizing
Extend your harvest and protect your garden for the off-season to truly maximize your self sufficient garden from scratch.
- Cold Frames: Simple structures with a transparent top (glass, polycarbonate, or old windows) that sit over garden beds. They trap solar heat, allowing you to grow cold-hardy crops (lettuce, spinach, kale, radishes) well into winter or start seeds earlier in spring. A basic cold frame can be built from 2×6 lumber and a sheet of polycarbonate for under $100.
- Hoop Houses/Low Tunnels: Larger structures made from flexible hoops (PVC pipe or EMT conduit) covered with greenhouse plastic. These provide more space and greater temperature moderation. A 10×20 ft DIY low tunnel kit can cost $200-$500, while a larger, more robust hoop house kit might be $1,000-$3,000. I use a 6×12 ft low tunnel made from 1/2-inch PVC hoops and 6mil greenhouse plastic, which extends my lettuce and spinach harvest by at least
Step 5: Seed Selection & Planting
The choice of seeds is crucial for a truly self sufficient garden from scratch.
- Choose Heirloom & Open-Pollinated Seeds: These varieties produce seeds that will grow true to type, meaning you can save seeds from your harvest year after year. F1 hybrids, while often vigorous, will not produce consistent offspring from saved seeds. Reputable seed companies include Baker Creek Heirloom Seeds, High Mowing Organic Seeds, and Seed Savers Exchange. Start with common, reliable varieties like ‘Black Krim’ tomatoes, ‘Provider’ bush beans, ‘Waltham Butternut’ squash, and ‘Black Seeded Simpson’ lettuce.
- Start Seeds Indoors (Optional but Recommended): For longer growing seasons or specific crops, starting seeds indoors gives you a head start. Use seed-starting mix (e.g., Espoma Organic Seed Starter Mix, ~$10 for 16qt bag) in seed trays (Jiffy Professional Greenhouse 72-cell kit, ~$15). Provide adequate light with LED grow lights (Barrina T5 2ft 4-pack LED Grow Lights, 20W each, ~$50) for 14-16 hours a day, positioned 2-4 inches above seedlings. Maintain consistent temperatures (65-75°F for most).
- Direct Sowing vs. Transplanting: Some crops (carrots, radishes, beans, corn) prefer direct sowing into the garden bed. Others (tomatoes, peppers, broccoli, kale) benefit from being started indoors and transplanted. Follow seed packet instructions for planting depths (e.g., lettuce seeds are often surface-sown or planted 1/8 inch deep, while beans are 1 inch deep) and spacing.
- Companion Planting: Strategically plant different species together to enhance growth, deter pests, and attract beneficial insects. For example, planting marigolds near tomatoes can deter nematodes, and basil improves tomato flavor. Nasturtiums can act as a trap crop for aphids.
- Succession Planting: For a continuous harvest, plant small batches of quick-growing crops (lettuce, radishes, cilantro) every 2-3 weeks. As one crop finishes, another is ready to take its place.
Step 6: Pest & Disease Management (Organic)
Maintaining a self sufficient garden from scratch means embracing organic pest and disease control.
- Integrated Pest Management (IPM): This holistic approach combines several strategies.
- Observation: Regularly inspect your plants for early signs of pests or disease. Catching issues early is key.
- Physical Barriers: Use row covers (e.g., Agribon AG-19 floating row cover, 10×20 ft, ~$20) to protect young plants from insect pests like cabbage worms and squash bugs. Install fences (e.g., 2×4 welded wire mesh, 4 ft tall, 50 ft roll ~$70) to keep out deer, rabbits, and other larger animals.
- Hand-Picking: For larger pests like tomato hornworms or squash bugs, simply pick them off and drop them into a bucket of soapy water.
- Companion Planting: As mentioned, certain plants repel pests. Marigolds, garlic, and onions are excellent deterrents.
- Attract Beneficial Insects: Plant flowers like dill, fennel, cosmos, and sweet alyssum to attract ladybugs, lacewings, and parasitic wasps, which prey on common garden pests.
- Organic Sprays & Treatments:
- Neem Oil: An excellent broad-spectrum organic insecticide and fungicide. Bonide Neem Oil Concentrate (16oz, ~$20) can be mixed at a rate of 1-2 tbsp per gallon of water and sprayed on affected plants.
- Insecticidal Soap: Effective against soft-bodied insects like aphids, whiteflies, and spider mites. Garden Safe Insecticidal Soap (24oz ready-to-use, ~$10).
- Bacillus thuringiensis (Bt): A naturally occurring soil bacterium that targets caterpillars and worms. Monterey BT Worm & Caterpillar Killer (16oz, ~$18) is highly effective and safe for beneficial insects.
- Copper or Sulfur Sprays: For fungal diseases like powdery mildew or blight, organic copper (e.g., Bonide Copper Fungicide, ~$15 for 1lb) or sulfur (e.g., Safer Brand Garden Fungicide, ~$10 for 16oz) can be used as a last resort.
Step 7: Harvesting & Seed Saving
The culmination of your efforts is the harvest, and seed saving closes the loop on self-sufficiency.
- Harvesting Techniques:
- Timing: Harvest vegetables at their peak ripeness for best flavor and nutritional value. For example, green beans should snap cleanly, cucumbers should be firm, and tomatoes should be fully colored.
- Frequency: Many crops, like zucchini, cucumbers, and bush beans, produce more if harvested frequently. Pick daily or every other day.
- Tools: Use clean, sharp pruners (e.g., Corona ClassicCUT Bypass Pruner BP 3180, ~$30) or a sharp knife for clean cuts, minimizing damage to the plant.
- Seed Saving: This is where the « self-sufficient » aspect truly shines.
- Selection: Only save seeds from your healthiest, most vigorous plants that show desired traits (disease resistance, good flavor, high yield).
- Isolation: To ensure true-to-type seeds, prevent cross-pollination. This can be challenging for open-pollinated crops that readily cross (e.g., squash, corn). For beginners, focus on self-pollinating plants like beans, peas, lettuce, and tomatoes.
- Processing:
- Dry Seeds (Beans, Peas, Lettuce, Grains): Allow pods/seed heads to dry completely on the plant. Harvest, shell, and clean the seeds, removing chaff.
- Wet Seeds (Tomatoes, Cucumbers, Squash): For tomatoes, ferment the seeds in water for a few days to remove the gel coating and inhibit disease. For cucumbers/squash, scrape out seeds, wash thoroughly, and dry.
- Drying: Spread seeds thinly on screens or paper plates in a cool, dry, well-ventilated area for 1-4 weeks. Ensure they are bone-dry before storage. I aim for less than 8% moisture content.
- Storage: Store seeds in airtight containers (glass jars with desiccant packets work well) in a cool, dark, dry place (ideally 40-50°F and 30-40% humidity). Label clearly with variety and date. Properly stored seeds can remain viable for 3-10 years or more.
Step 8: Season Extension & Winterizing
Extend your harvest and protect your garden for the off-season to truly maximize your self sufficient garden from scratch.
- Cold Frames: Simple structures with a transparent top (glass, polycarbonate, or old windows) that sit over garden beds. They trap solar heat, allowing you to grow cold-hardy crops (lettuce, spinach, kale, radishes) well into winter or start seeds earlier in spring. A basic cold frame can be built from 2×6 lumber and a sheet of polycarbonate for under $100.
- Hoop Houses/Low Tunnels: Larger structures made from flexible hoops (PVC pipe or EMT conduit) covered with greenhouse plastic. These provide more space and greater temperature moderation. A 10×20 ft DIY low tunnel kit can cost $200-$500, while a larger, more robust hoop house kit might be $1,000-$3,000. I use a 6×12 ft low tunnel made from 1/2-inch PVC hoops and 6mil greenhouse plastic, which extends my lettuce and spinach harvest by at least
- Rainwater Harvesting: This is my primary source of irrigation water. A 55-gallon rain barrel (e.g., EarthMark Rain Barrel, ~$120-$150) connected to a downspout can collect significant water. For larger needs, I use two 275-gallon IBC totes (Intermediate Bulk Containers, often available used for $100-$200 each from food-grade sources) connected in series. A 1,000 sq ft roof can collect approximately 620 gallons of water for every inch of rainfall. My 1,500 sq ft roof provides ample water for my 600 sq ft garden through multiple barrels and totes.
- Drip Irrigation: This is by far the most water-efficient method, delivering water directly to the plant’s root zone, minimizing evaporation and weed growth.
- Components: A typical drip system includes a pressure regulator (e.g., Rain Bird PRV-10, ~$15), a filter (Rain Bird RBY filter, ~$20), main tubing (1/2-inch poly tubing, 100ft ~$25), smaller feeder lines (1/4-inch tubing), and emitters (0.5 GPH or 1 GPH per plant).
- Kits: For beginners, a starter kit like the Rain Bird Drip Irrigation Garden Kit (model DDI-KIT-1P, ~$40-$60) is excellent for a small garden. For larger setups, I use Netafim Techline CV Drip Line (500ft roll, ~$150-$200), which has pressure-compensating emitters built-in, ensuring even watering across long runs.
- Automation: For true self-sufficiency, consider a battery-powered timer (e.g., Orbit B-Hyve Bluetooth Hose Faucet Timer, ~$50) or a solar-powered timer connected to a small 12V pump.
- Solar-Powered Pumps: For lifting water from a well, pond, or large storage tank to your garden, a solar pump is a game-changer. For a smaller drip system, a Shurflo 2088-594-152 Diaphragm Pump (12V, 3.5 GPM, ~$180) can be powered by a single 100W solar panel (e.g., Renogy 100W Monocrystalline Solar Panel, ~$100) and a small 12V battery (e.g., a 50Ah LiFePO4 battery like the Battle Born 50Ah, ~$450). For larger operations or deeper wells, more robust systems are needed. If you’re looking to build out a comprehensive off-grid power system to support your garden’s water needs, or indeed your entire homestead, you might want to explore resources like the Power Grid Generator complete system guide to understand the full scope of what’s possible in terms of energy independence.
Step 5: Seed Selection & Planting
The choice of seeds is crucial for a truly self sufficient garden from scratch.
- Choose Heirloom & Open-Pollinated Seeds: These varieties produce seeds that will grow true to type, meaning you can save seeds from your harvest year after year. F1 hybrids, while often vigorous, will not produce consistent offspring from saved seeds. Reputable seed companies include Baker Creek Heirloom Seeds, High Mowing Organic Seeds, and Seed Savers Exchange. Start with common, reliable varieties like ‘Black Krim’ tomatoes, ‘Provider’ bush beans, ‘Waltham Butternut’ squash, and ‘Black Seeded Simpson’ lettuce.
- Start Seeds Indoors (Optional but Recommended): For longer growing seasons or specific crops, starting seeds indoors gives you a head start. Use seed-starting mix (e.g., Espoma Organic Seed Starter Mix, ~$10 for 16qt bag) in seed trays (Jiffy Professional Greenhouse 72-cell kit, ~$15). Provide adequate light with LED grow lights (Barrina T5 2ft 4-pack LED Grow Lights, 20W each, ~$50) for 14-16 hours a day, positioned 2-4 inches above seedlings. Maintain consistent temperatures (65-75°F for most).
- Direct Sowing vs. Transplanting: Some crops (carrots, radishes, beans, corn) prefer direct sowing into the garden bed. Others (tomatoes, peppers, broccoli, kale) benefit from being started indoors and transplanted. Follow seed packet instructions for planting depths (e.g., lettuce seeds are often surface-sown or planted 1/8 inch deep, while beans are 1 inch deep) and spacing.
- Companion Planting: Strategically plant different species together to enhance growth, deter pests, and attract beneficial insects. For example, planting marigolds near tomatoes can deter nematodes, and basil improves tomato flavor. Nasturtiums can act as a trap crop for aphids.
- Succession Planting: For a continuous harvest, plant small batches of quick-growing crops (lettuce, radishes, cilantro) every 2-3 weeks. As one crop finishes, another is ready to take its place.
Step 6: Pest & Disease Management (Organic)
Maintaining a self sufficient garden from scratch means embracing organic pest and disease control.
- Integrated Pest Management (IPM): This holistic approach combines several strategies.
- Observation: Regularly inspect your plants for early signs of pests or disease. Catching issues early is key.
- Physical Barriers: Use row covers (e.g., Agribon AG-19 floating row cover, 10×20 ft, ~$20) to protect young plants from insect pests like cabbage worms and squash bugs. Install fences (e.g., 2×4 welded wire mesh, 4 ft tall, 50 ft roll ~$70) to keep out deer, rabbits, and other larger animals.
- Hand-Picking: For larger pests like tomato hornworms or squash bugs, simply pick them off and drop them into a bucket of soapy water.
- Companion Planting: As mentioned, certain plants repel pests. Marigolds, garlic, and onions are excellent deterrents.
- Attract Beneficial Insects: Plant flowers like dill, fennel, cosmos, and sweet alyssum to attract ladybugs, lacewings, and parasitic wasps, which prey on common garden pests.
- Organic Sprays & Treatments:
- Neem Oil: An excellent broad-spectrum organic insecticide and fungicide. Bonide Neem Oil Concentrate (16oz, ~$20) can be mixed at a rate of 1-2 tbsp per gallon of water and sprayed on affected plants.
- Insecticidal Soap: Effective against soft-bodied insects like aphids, whiteflies, and spider mites. Garden Safe Insecticidal Soap (24oz ready-to-use, ~$10).
- Bacillus thuringiensis (Bt): A naturally occurring soil bacterium that targets caterpillars and worms. Monterey BT Worm & Caterpillar Killer (16oz, ~$18) is highly effective and safe for beneficial insects.
- Copper or Sulfur Sprays: For fungal diseases like powdery mildew or blight, organic copper (e.g., Bonide Copper Fungicide, ~$15 for 1lb) or sulfur (e.g., Safer Brand Garden Fungicide, ~$10 for 16oz) can be used as a last resort.
Step 7: Harvesting & Seed Saving
The culmination of your efforts is the harvest, and seed saving closes the loop on self-sufficiency.
- Harvesting Techniques:
- Timing: Harvest vegetables at their peak ripeness for best flavor and nutritional value. For example, green beans should snap cleanly, cucumbers should be firm, and tomatoes should be fully colored.
- Frequency: Many crops, like zucchini, cucumbers, and bush beans, produce more if harvested frequently. Pick daily or every other day.
- Tools: Use clean, sharp pruners (e.g., Corona ClassicCUT Bypass Pruner BP 3180, ~$30) or a sharp knife for clean cuts, minimizing damage to the plant.
- Seed Saving: This is where the « self-sufficient » aspect truly shines.
- Selection: Only save seeds from your healthiest, most vigorous plants that show desired traits (disease resistance, good flavor, high yield).
- Isolation: To ensure true-to-type seeds, prevent cross-pollination. This can be challenging for open-pollinated crops that readily cross (e.g., squash, corn). For beginners, focus on self-pollinating plants like beans, peas, lettuce, and tomatoes.
- Processing:
- Dry Seeds (Beans, Peas, Lettuce, Grains): Allow pods/seed heads to dry completely on the plant. Harvest, shell, and clean the seeds, removing chaff.
- Wet Seeds (Tomatoes, Cucumbers, Squash): For tomatoes, ferment the seeds in water for a few days to remove the gel coating and inhibit disease. For cucumbers/squash, scrape out seeds, wash thoroughly, and dry.
- Drying: Spread seeds thinly on screens or paper plates in a cool, dry, well-ventilated area for 1-4 weeks. Ensure they are bone-dry before storage. I aim for less than 8% moisture content.
- Storage: Store seeds in airtight containers (glass jars with desiccant packets work well) in a cool, dark, dry place (ideally 40-50°F and 30-40% humidity). Label clearly with variety and date. Properly stored seeds can remain viable for 3-10 years or more.
Step 8: Season Extension & Winterizing
Extend your harvest and protect your garden for the off-season to truly maximize your self sufficient garden from scratch.
- Cold Frames: Simple structures with a transparent top (glass, polycarbonate, or old windows) that sit over garden beds. They trap solar heat, allowing you to grow cold-hardy crops (lettuce, spinach, kale, radishes) well into winter or start seeds earlier in spring. A basic cold frame can be built from 2×6 lumber and a sheet of polycarbonate for under $100.
- Hoop Houses/Low Tunnels: Larger structures made from flexible hoops (PVC pipe or EMT conduit) covered with greenhouse plastic. These provide more space and greater temperature moderation. A 10×20 ft DIY low tunnel kit can cost $200-$500, while a larger, more robust hoop house kit might be $1,000-$3,000. I use a 6×12 ft low tunnel made from 1/2-inch PVC hoops and 6mil greenhouse plastic, which extends my lettuce and spinach harvest by at least
Efficient water management is critical for a self sufficient garden from scratch, especially in off-grid living where water resources might be limited.
- Rainwater Harvesting: This is my primary source of irrigation water. A 55-gallon rain barrel (e.g., EarthMark Rain Barrel, ~$120-$150) connected to a downspout can collect significant water. For larger needs, I use two 275-gallon IBC totes (Intermediate Bulk Containers, often available used for $100-$200 each from food-grade sources) connected in series. A 1,000 sq ft roof can collect approximately 620 gallons of water for every inch of rainfall. My 1,500 sq ft roof provides ample water for my 600 sq ft garden through multiple barrels and totes.
- Drip Irrigation: This is by far the most water-efficient method, delivering water directly to the plant’s root zone, minimizing evaporation and weed growth.
- Components: A typical drip system includes a pressure regulator (e.g., Rain Bird PRV-10, ~$15), a filter (Rain Bird RBY filter, ~$20), main tubing (1/2-inch poly tubing, 100ft ~$25), smaller feeder lines (1/4-inch tubing), and emitters (0.5 GPH or 1 GPH per plant).
- Kits: For beginners, a starter kit like the Rain Bird Drip Irrigation Garden Kit (model DDI-KIT-1P, ~$40-$60) is excellent for a small garden. For larger setups, I use Netafim Techline CV Drip Line (500ft roll, ~$150-$200), which has pressure-compensating emitters built-in, ensuring even watering across long runs.
- Automation: For true self-sufficiency, consider a battery-powered timer (e.g., Orbit B-Hyve Bluetooth Hose Faucet Timer, ~$50) or a solar-powered timer connected to a small 12V pump.
- Solar-Powered Pumps: For lifting water from a well, pond, or large storage tank to your garden, a solar pump is a game-changer. For a smaller drip system, a Shurflo 2088-594-152 Diaphragm Pump (12V, 3.5 GPM, ~$180) can be powered by a single 100W solar panel (e.g., Renogy 100W Monocrystalline Solar Panel, ~$100) and a small 12V battery (e.g., a 50Ah LiFePO4 battery like the Battle Born 50Ah, ~$450). For larger operations or deeper wells, more robust systems are needed. If you’re looking to build out a comprehensive off-grid power system to support your garden’s water needs, or indeed your entire homestead, you might want to explore resources like the Power Grid Generator complete system guide to understand the full scope of what’s possible in terms of energy independence.
Step 5: Seed Selection & Planting
The choice of seeds is crucial for a truly self sufficient garden from scratch.
- Choose Heirloom & Open-Pollinated Seeds: These varieties produce seeds that will grow true to type, meaning you can save seeds from your harvest year after year. F1 hybrids, while often vigorous, will not produce consistent offspring from saved seeds. Reputable seed companies include Baker Creek Heirloom Seeds, High Mowing Organic Seeds, and Seed Savers Exchange. Start with common, reliable varieties like ‘Black Krim’ tomatoes, ‘Provider’ bush beans, ‘Waltham Butternut’ squash, and ‘Black Seeded Simpson’ lettuce.
- Start Seeds Indoors (Optional but Recommended): For longer growing seasons or specific crops, starting seeds indoors gives you a head start. Use seed-starting mix (e.g., Espoma Organic Seed Starter Mix, ~$10 for 16qt bag) in seed trays (Jiffy Professional Greenhouse 72-cell kit, ~$15). Provide adequate light with LED grow lights (Barrina T5 2ft 4-pack LED Grow Lights, 20W each, ~$50) for 14-16 hours a day, positioned 2-4 inches above seedlings. Maintain consistent temperatures (65-75°F for most).
- Direct Sowing vs. Transplanting: Some crops (carrots, radishes, beans, corn) prefer direct sowing into the garden bed. Others (tomatoes, peppers, broccoli, kale) benefit from being started indoors and transplanted. Follow seed packet instructions for planting depths (e.g., lettuce seeds are often surface-sown or planted 1/8 inch deep, while beans are 1 inch deep) and spacing.
- Companion Planting: Strategically plant different species together to enhance growth, deter pests, and attract beneficial insects. For example, planting marigolds near tomatoes can deter nematodes, and basil improves tomato flavor. Nasturtiums can act as a trap crop for aphids.
- Succession Planting: For a continuous harvest, plant small batches of quick-growing crops (lettuce, radishes, cilantro) every 2-3 weeks. As one crop finishes, another is ready to take its place.
Step 6: Pest & Disease Management (Organic)
Maintaining a self sufficient garden from scratch means embracing organic pest and disease control.
- Integrated Pest Management (IPM): This holistic approach combines several strategies.
- Observation: Regularly inspect your plants for early signs of pests or disease. Catching issues early is key.
- Physical Barriers: Use row covers (e.g., Agribon AG-19 floating row cover, 10×20 ft, ~$20) to protect young plants from insect pests like cabbage worms and squash bugs. Install fences (e.g., 2×4 welded wire mesh, 4 ft tall, 50 ft roll ~$70) to keep out deer, rabbits, and other larger animals.
- Hand-Picking: For larger pests like tomato hornworms or squash bugs, simply pick them off and drop them into a bucket of soapy water.
- Companion Planting: As mentioned, certain plants repel pests. Marigolds, garlic, and onions are excellent deterrents.
- Attract Beneficial Insects: Plant flowers like dill, fennel, cosmos, and sweet alyssum to attract ladybugs, lacewings, and parasitic wasps, which prey on common garden pests.
- Organic Sprays & Treatments:
- Neem Oil: An excellent broad-spectrum organic insecticide and fungicide. Bonide Neem Oil Concentrate (16oz, ~$20) can be mixed at a rate of 1-2 tbsp per gallon of water and sprayed on affected plants.
- Insecticidal Soap: Effective against soft-bodied insects like aphids, whiteflies, and spider mites. Garden Safe Insecticidal Soap (24oz ready-to-use, ~$10).
- Bacillus thuringiensis (Bt): A naturally occurring soil bacterium that targets caterpillars and worms. Monterey BT Worm & Caterpillar Killer (16oz, ~$18) is highly effective and safe for beneficial insects.
- Copper or Sulfur Sprays: For fungal diseases like powdery mildew or blight, organic copper (e.g., Bonide Copper Fungicide, ~$15 for 1lb) or sulfur (e.g., Safer Brand Garden Fungicide, ~$10 for 16oz) can be used as a last resort.
Step 7: Harvesting & Seed Saving
The culmination of your efforts is the harvest, and seed saving closes the loop on self-sufficiency.
- Harvesting Techniques:
- Timing: Harvest vegetables at their peak ripeness for best flavor and nutritional value. For example, green beans should snap cleanly, cucumbers should be firm, and tomatoes should be fully colored.
- Frequency: Many crops, like zucchini, cucumbers, and bush beans, produce more if harvested frequently. Pick daily or every other day.
- Tools: Use clean, sharp pruners (e.g., Corona ClassicCUT Bypass Pruner BP 3180, ~$30) or a sharp knife for clean cuts, minimizing damage to the plant.
- Seed Saving: This is where the « self-sufficient » aspect truly shines.
- Selection: Only save seeds from your healthiest, most vigorous plants that show desired traits (disease resistance, good flavor, high yield).
- Isolation: To ensure true-to-type seeds, prevent cross-pollination. This can be challenging for open-pollinated crops that readily cross (e.g., squash, corn). For beginners, focus on self-pollinating plants like beans, peas, lettuce, and tomatoes.
- Processing:
- Dry Seeds (Beans, Peas, Lettuce, Grains): Allow pods/seed heads to dry completely on the plant. Harvest, shell, and clean the seeds, removing chaff.
- Wet Seeds (Tomatoes, Cucumbers, Squash): For tomatoes, ferment the seeds in water for a few days to remove the gel coating and inhibit disease. For cucumbers/squash, scrape out seeds, wash thoroughly, and dry.
- Drying: Spread seeds thinly on screens or paper plates in a cool, dry, well-ventilated area for 1-4 weeks. Ensure they are bone-dry before storage. I aim for less than 8% moisture content.
- Storage: Store seeds in airtight containers (glass jars with desiccant packets work well) in a cool, dark, dry place (ideally 40-50°F and 30-40% humidity). Label clearly with variety and date. Properly stored seeds can remain viable for 3-10 years or more.
Step 8: Season Extension & Winterizing
Extend your harvest and protect your garden for the off-season to truly maximize your self sufficient garden from scratch.
- Cold Frames: Simple structures with a transparent top (glass, polycarbonate, or old windows) that sit over garden beds. They trap solar heat, allowing you to grow cold-hardy crops (lettuce, spinach, kale, radishes) well into winter or start seeds earlier in spring. A basic cold frame can be built from 2×6 lumber and a sheet of polycarbonate for under $100.
- Hoop Houses/Low Tunnels: Larger structures made from flexible hoops (PVC pipe or EMT conduit) covered with greenhouse plastic. These provide more space and greater temperature moderation. A 10×20 ft DIY low tunnel kit can cost $200-$500, while a larger, more robust hoop house kit might be $1,000-$3,000. I use a 6×12 ft low tunnel made from 1/2-inch PVC hoops and 6mil greenhouse plastic, which extends my lettuce and spinach harvest by at least
Step 4: Water Management & Irrigation
Efficient water management is critical for a self sufficient garden from scratch, especially in off-grid living where water resources might be limited.
- Rainwater Harvesting: This is my primary source of irrigation water. A 55-gallon rain barrel (e.g., EarthMark Rain Barrel, ~$120-$150) connected to a downspout can collect significant water. For larger needs, I use two 275-gallon IBC totes (Intermediate Bulk Containers, often available used for $100-$200 each from food-grade sources) connected in series. A 1,000 sq ft roof can collect approximately 620 gallons of water for every inch of rainfall. My 1,500 sq ft roof provides ample water for my 600 sq ft garden through multiple barrels and totes.
- Drip Irrigation: This is by far the most water-efficient method, delivering water directly to the plant’s root zone, minimizing evaporation and weed growth.
- Components: A typical drip system includes a pressure regulator (e.g., Rain Bird PRV-10, ~$15), a filter (Rain Bird RBY filter, ~$20), main tubing (1/2-inch poly tubing, 100ft ~$25), smaller feeder lines (1/4-inch tubing), and emitters (0.5 GPH or 1 GPH per plant).
- Kits: For beginners, a starter kit like the Rain Bird Drip Irrigation Garden Kit (model DDI-KIT-1P, ~$40-$60) is excellent for a small garden. For larger setups, I use Netafim Techline CV Drip Line (500ft roll, ~$150-$200), which has pressure-compensating emitters built-in, ensuring even watering across long runs.
- Automation: For true self-sufficiency, consider a battery-powered timer (e.g., Orbit B-Hyve Bluetooth Hose Faucet Timer, ~$50) or a solar-powered timer connected to a small 12V pump.
- Solar-Powered Pumps: For lifting water from a well, pond, or large storage tank to your garden, a solar pump is a game-changer. For a smaller drip system, a Shurflo 2088-594-152 Diaphragm Pump (12V, 3.5 GPM, ~$180) can be powered by a single 100W solar panel (e.g., Renogy 100W Monocrystalline Solar Panel, ~$100) and a small 12V battery (e.g., a 50Ah LiFePO4 battery like the Battle Born 50Ah, ~$450). For larger operations or deeper wells, more robust systems are needed. If you’re looking to build out a comprehensive off-grid power system to support your garden’s water needs, or indeed your entire homestead, you might want to explore resources like the Power Grid Generator complete system guide to understand the full scope of what’s possible in terms of energy independence.
Step 5: Seed Selection & Planting
The choice of seeds is crucial for a truly self sufficient garden from scratch.
- Choose Heirloom & Open-Pollinated Seeds: These varieties produce seeds that will grow true to type, meaning you can save seeds from your harvest year after year. F1 hybrids, while often vigorous, will not produce consistent offspring from saved seeds. Reputable seed companies include Baker Creek Heirloom Seeds, High Mowing Organic Seeds, and Seed Savers Exchange. Start with common, reliable varieties like ‘Black Krim’ tomatoes, ‘Provider’ bush beans, ‘Waltham Butternut’ squash, and ‘Black Seeded Simpson’ lettuce.
- Start Seeds Indoors (Optional but Recommended): For longer growing seasons or specific crops, starting seeds indoors gives you a head start. Use seed-starting mix (e.g., Espoma Organic Seed Starter Mix, ~$10 for 16qt bag) in seed trays (Jiffy Professional Greenhouse 72-cell kit, ~$15). Provide adequate light with LED grow lights (Barrina T5 2ft 4-pack LED Grow Lights, 20W each, ~$50) for 14-16 hours a day, positioned 2-4 inches above seedlings. Maintain consistent temperatures (65-75°F for most).
- Direct Sowing vs. Transplanting: Some crops (carrots, radishes, beans, corn) prefer direct sowing into the garden bed. Others (tomatoes, peppers, broccoli, kale) benefit from being started indoors and transplanted. Follow seed packet instructions for planting depths (e.g., lettuce seeds are often surface-sown or planted 1/8 inch deep, while beans are 1 inch deep) and spacing.
- Companion Planting: Strategically plant different species together to enhance growth, deter pests, and attract beneficial insects. For example, planting marigolds near tomatoes can deter nematodes, and basil improves tomato flavor. Nasturtiums can act as a trap crop for aphids.
- Succession Planting: For a continuous harvest, plant small batches of quick-growing crops (lettuce, radishes, cilantro) every 2-3 weeks. As one crop finishes, another is ready to take its place.
Step 6: Pest & Disease Management (Organic)
Maintaining a self sufficient garden from scratch means embracing organic pest and disease control.
- Integrated Pest Management (IPM): This holistic approach combines several strategies.
- Observation: Regularly inspect your plants for early signs of pests or disease. Catching issues early is key.
- Physical Barriers: Use row covers (e.g., Agribon AG-19 floating row cover, 10×20 ft, ~$20) to protect young plants from insect pests like cabbage worms and squash bugs. Install fences (e.g., 2×4 welded wire mesh, 4 ft tall, 50 ft roll ~$70) to keep out deer, rabbits, and other larger animals.
- Hand-Picking: For larger pests like tomato hornworms or squash bugs, simply pick them off and drop them into a bucket of soapy water.
- Companion Planting: As mentioned, certain plants repel pests. Marigolds, garlic, and onions are excellent deterrents.
- Attract Beneficial Insects: Plant flowers like dill, fennel, cosmos, and sweet alyssum to attract ladybugs, lacewings, and parasitic wasps, which prey on common garden pests.
- Organic Sprays & Treatments:
- Neem Oil: An excellent broad-spectrum organic insecticide and fungicide. Bonide Neem Oil Concentrate (16oz, ~$20) can be mixed at a rate of 1-2 tbsp per gallon of water and sprayed on affected plants.
- Insecticidal Soap: Effective against soft-bodied insects like aphids, whiteflies, and spider mites. Garden Safe Insecticidal Soap (24oz ready-to-use, ~$10).
- Bacillus thuringiensis (Bt): A naturally occurring soil bacterium that targets caterpillars and worms. Monterey BT Worm & Caterpillar Killer (16oz, ~$18) is highly effective and safe for beneficial insects.
- Copper or Sulfur Sprays: For fungal diseases like powdery mildew or blight, organic copper (e.g., Bonide Copper Fungicide, ~$15 for 1lb) or sulfur (e.g., Safer Brand Garden Fungicide, ~$10 for 16oz) can be used as a last resort.
Step 7: Harvesting & Seed Saving
The culmination of your efforts is the harvest, and seed saving closes the loop on self-sufficiency.
- Harvesting Techniques:
- Timing: Harvest vegetables at their peak ripeness for best flavor and nutritional value. For example, green beans should snap cleanly, cucumbers should be firm, and tomatoes should be fully colored.
- Frequency: Many crops, like zucchini, cucumbers, and bush beans, produce more if harvested frequently. Pick daily or every other day.
- Tools: Use clean, sharp pruners (e.g., Corona ClassicCUT Bypass Pruner BP 3180, ~$30) or a sharp knife for clean cuts, minimizing damage to the plant.
- Seed Saving: This is where the « self-sufficient » aspect truly shines.
- Selection: Only save seeds from your healthiest, most vigorous plants that show desired traits (disease resistance, good flavor, high yield).
- Isolation: To ensure true-to-type seeds, prevent cross-pollination. This can be challenging for open-pollinated crops that readily cross (e.g., squash, corn). For beginners, focus on self-pollinating plants like beans, peas, lettuce, and tomatoes.
- Processing:
- Dry Seeds (Beans, Peas, Lettuce, Grains): Allow pods/seed heads to dry completely on the plant. Harvest, shell, and clean the seeds, removing chaff.
- Wet Seeds (Tomatoes, Cucumbers, Squash): For tomatoes, ferment the seeds in water for a few days to remove the gel coating and inhibit disease. For cucumbers/squash, scrape out seeds, wash thoroughly, and dry.
- Drying: Spread seeds thinly on screens or paper plates in a cool, dry, well-ventilated area for 1-4 weeks. Ensure they are bone-dry before storage. I aim for less than 8% moisture content.
- Storage: Store seeds in airtight containers (glass jars with desiccant packets work well) in a cool, dark, dry place (ideally 40-50°F and 30-40% humidity). Label clearly with variety and date. Properly stored seeds can remain viable for 3-10 years or more.
Step 8: Season Extension & Winterizing
Extend your harvest and protect your garden for the off-season to truly maximize your self sufficient garden from scratch.
- Cold Frames: Simple structures with a transparent top (glass, polycarbonate, or old windows) that sit over garden beds. They trap solar heat, allowing you to grow cold-hardy crops (lettuce, spinach, kale, radishes) well into winter or start seeds earlier in spring. A basic cold frame can be built from 2×6 lumber and a sheet of polycarbonate for under $100.
- Hoop Houses/Low Tunnels: Larger structures made from flexible hoops (PVC pipe or EMT conduit) covered with greenhouse plastic. These provide more space and greater temperature moderation. A 10×20 ft DIY low tunnel kit can cost $200-$500, while a larger, more robust hoop house kit might be $1,000-$3,000. I use a 6×12 ft low tunnel made from 1/2-inch PVC hoops and 6mil greenhouse plastic, which extends my lettuce and spinach harvest by at least
- In-Ground Beds: If you have excellent native soil and good drainage, in-ground beds are the most economical. Double-digging (loosening soil two shovel depths) can significantly improve drainage and aeration. For my main garden, I primarily use in-ground beds, but I focus on building up the soil over time with consistent compost additions and cover cropping. I aim for beds that are no wider than 3-4 feet so I can reach the center without stepping on the soil, compacting it.
- Raised Beds: Raised beds offer numerous advantages, especially for poor soil, heavy clay, or rocky areas. They provide better drainage, warm up faster in spring, reduce compaction, and make weeding and harvesting easier on your back.
- Material Options:
- Untreated Cedar: Naturally rot-resistant and chemical-free. A 4×8 ft bed, 12 inches deep, typically requires three 2x12x8 ft cedar boards, costing around $50-$60 per board (total ~$150-$180) plus corner brackets or screws. My first raised beds were cedar and are still going strong after 7 years.
- Galvanized Steel: Durable, long-lasting, and aesthetically pleasing. Brands like Vego Garden offer modular kits. A Vego Garden 17″ Tall 8-in-1 Metal Raised Garden Bed (can be configured to 4×8 ft) costs approximately $250-$300.
- Concrete Blocks/Stones: Very durable but can leach minerals (though generally safe once weathered) and can be expensive.
- Recycled Materials: Pallets (check for chemical treatment stamps like « HT » for heat-treated), old tires (controversial due to potential chemical leaching).
- Filling Raised Beds: Don’t just fill with topsoil. Use a « Hugelkultur » approach (logs, branches, leaves, then compost, then topsoil) or a mixture of 60% good quality topsoil, 30% compost, and 10% perlite or vermiculite for drainage. A 4x8x1 ft raised bed requires about 32 cubic feet (or ~1.2 cubic yards) of soil mix, which can cost $100-$200 depending on your source.
- Material Options:
Step 4: Water Management & Irrigation
Efficient water management is critical for a self sufficient garden from scratch, especially in off-grid living where water resources might be limited.
- Rainwater Harvesting: This is my primary source of irrigation water. A 55-gallon rain barrel (e.g., EarthMark Rain Barrel, ~$120-$150) connected to a downspout can collect significant water. For larger needs, I use two 275-gallon IBC totes (Intermediate Bulk Containers, often available used for $100-$200 each from food-grade sources) connected in series. A 1,000 sq ft roof can collect approximately 620 gallons of water for every inch of rainfall. My 1,500 sq ft roof provides ample water for my 600 sq ft garden through multiple barrels and totes.
- Drip Irrigation: This is by far the most water-efficient method, delivering water directly to the plant’s root zone, minimizing evaporation and weed growth.
- Components: A typical drip system includes a pressure regulator (e.g., Rain Bird PRV-10, ~$15), a filter (Rain Bird RBY filter, ~$20), main tubing (1/2-inch poly tubing, 100ft ~$25), smaller feeder lines (1/4-inch tubing), and emitters (0.5 GPH or 1 GPH per plant).
- Kits: For beginners, a starter kit like the Rain Bird Drip Irrigation Garden Kit (model DDI-KIT-1P, ~$40-$60) is excellent for a small garden. For larger setups, I use Netafim Techline CV Drip Line (500ft roll, ~$150-$200), which has pressure-compensating emitters built-in, ensuring even watering across long runs.
- Automation: For true self-sufficiency, consider a battery-powered timer (e.g., Orbit B-Hyve Bluetooth Hose Faucet Timer, ~$50) or a solar-powered timer connected to a small 12V pump.
- Solar-Powered Pumps: For lifting water from a well, pond, or large storage tank to your garden, a solar pump is a game-changer. For a smaller drip system, a Shurflo 2088-594-152 Diaphragm Pump (12V, 3.5 GPM, ~$180) can be powered by a single 100W solar panel (e.g., Renogy 100W Monocrystalline Solar Panel, ~$100) and a small 12V battery (e.g., a 50Ah LiFePO4 battery like the Battle Born 50Ah, ~$450). For larger operations or deeper wells, more robust systems are needed. If you’re looking to build out a comprehensive off-grid power system to support your garden’s water needs, or indeed your entire homestead, you might want to explore resources like the Power Grid Generator complete system guide to understand the full scope of what’s possible in terms of energy independence.
Step 5: Seed Selection & Planting
The choice of seeds is crucial for a truly self sufficient garden from scratch.
- Choose Heirloom & Open-Pollinated Seeds: These varieties produce seeds that will grow true to type, meaning you can save seeds from your harvest year after year. F1 hybrids, while often vigorous, will not produce consistent offspring from saved seeds. Reputable seed companies include Baker Creek Heirloom Seeds, High Mowing Organic Seeds, and Seed Savers Exchange. Start with common, reliable varieties like ‘Black Krim’ tomatoes, ‘Provider’ bush beans, ‘Waltham Butternut’ squash, and ‘Black Seeded Simpson’ lettuce.
- Start Seeds Indoors (Optional but Recommended): For longer growing seasons or specific crops, starting seeds indoors gives you a head start. Use seed-starting mix (e.g., Espoma Organic Seed Starter Mix, ~$10 for 16qt bag) in seed trays (Jiffy Professional Greenhouse 72-cell kit, ~$15). Provide adequate light with LED grow lights (Barrina T5 2ft 4-pack LED Grow Lights, 20W each, ~$50) for 14-16 hours a day, positioned 2-4 inches above seedlings. Maintain consistent temperatures (65-75°F for most).
- Direct Sowing vs. Transplanting: Some crops (carrots, radishes, beans, corn) prefer direct sowing into the garden bed. Others (tomatoes, peppers, broccoli, kale) benefit from being started indoors and transplanted. Follow seed packet instructions for planting depths (e.g., lettuce seeds are often surface-sown or planted 1/8 inch deep, while beans are 1 inch deep) and spacing.
- Companion Planting: Strategically plant different species together to enhance growth, deter pests, and attract beneficial insects. For example, planting marigolds near tomatoes can deter nematodes, and basil improves tomato flavor. Nasturtiums can act as a trap crop for aphids.
- Succession Planting: For a continuous harvest, plant small batches of quick-growing crops (lettuce, radishes, cilantro) every 2-3 weeks. As one crop finishes, another is ready to take its place.
Step 6: Pest & Disease Management (Organic)
Maintaining a self sufficient garden from scratch means embracing organic pest and disease control.
- Integrated Pest Management (IPM): This holistic approach combines several strategies.
- Observation: Regularly inspect your plants for early signs of pests or disease. Catching issues early is key.
- Physical Barriers: Use row covers (e.g., Agribon AG-19 floating row cover, 10×20 ft, ~$20) to protect young plants from insect pests like cabbage worms and squash bugs. Install fences (e.g., 2×4 welded wire mesh, 4 ft tall, 50 ft roll ~$70) to keep out deer, rabbits, and other larger animals.
- Hand-Picking: For larger pests like tomato hornworms or squash bugs, simply pick them off and drop them into a bucket of soapy water.
- Companion Planting: As mentioned, certain plants repel pests. Marigolds, garlic, and onions are excellent deterrents.
- Attract Beneficial Insects: Plant flowers like dill, fennel, cosmos, and sweet alyssum to attract ladybugs, lacewings, and parasitic wasps, which prey on common garden pests.
- Organic Sprays & Treatments:
- Neem Oil: An excellent broad-spectrum organic insecticide and fungicide. Bonide Neem Oil Concentrate (16oz, ~$20) can be mixed at a rate of 1-2 tbsp per gallon of water and sprayed on affected plants.
- Insecticidal Soap: Effective against soft-bodied insects like aphids, whiteflies, and spider mites. Garden Safe Insecticidal Soap (24oz ready-to-use, ~$10).
- Bacillus thuringiensis (Bt): A naturally occurring soil bacterium that targets caterpillars and worms. Monterey BT Worm & Caterpillar Killer (16oz, ~$18) is highly effective and safe for beneficial insects.
- Copper or Sulfur Sprays: For fungal diseases like powdery mildew or blight, organic copper (e.g., Bonide Copper Fungicide, ~$15 for 1lb) or sulfur (e.g., Safer Brand Garden Fungicide, ~$10 for 16oz) can be used as a last resort.
Step 7: Harvesting & Seed Saving
The culmination of your efforts is the harvest, and seed saving closes the loop on self-sufficiency.
- Harvesting Techniques:
- Timing: Harvest vegetables at their peak ripeness for best flavor and nutritional value. For example, green beans should snap cleanly, cucumbers should be firm, and tomatoes should be fully colored.
- Frequency: Many crops, like zucchini, cucumbers, and bush beans, produce more if harvested frequently. Pick daily or every other day.
- Tools: Use clean, sharp pruners (e.g., Corona ClassicCUT Bypass Pruner BP 3180, ~$30) or a sharp knife for clean cuts, minimizing damage to the plant.
- Seed Saving: This is where the « self-sufficient » aspect truly shines.
- Selection: Only save seeds from your healthiest, most vigorous plants that show desired traits (disease resistance, good flavor, high yield).
- Isolation: To ensure true-to-type seeds, prevent cross-pollination. This can be challenging for open-pollinated crops that readily cross (e.g., squash, corn). For beginners, focus on self-pollinating plants like beans, peas, lettuce, and tomatoes.
- Processing:
- Dry Seeds (Beans, Peas, Lettuce, Grains): Allow pods/seed heads to dry completely on the plant. Harvest, shell, and clean the seeds, removing chaff.
- Wet Seeds (Tomatoes, Cucumbers, Squash): For tomatoes, ferment the seeds in water for a few days to remove the gel coating and inhibit disease. For cucumbers/squash, scrape out seeds, wash thoroughly, and dry.
- Drying: Spread seeds thinly on screens or paper plates in a cool, dry, well-ventilated area for 1-4 weeks. Ensure they are bone-dry before storage. I aim for less than 8% moisture content.
- Storage: Store seeds in airtight containers (glass jars with desiccant packets work well) in a cool, dark, dry place (ideally 40-50°F and 30-40% humidity). Label clearly with variety and date. Properly stored seeds can remain viable for 3-10 years or more.
Step 8: Season Extension & Winterizing
Extend your harvest and protect your garden for the off-season to truly maximize your self sufficient garden from scratch.
- Cold Frames: Simple structures with a transparent top (glass, polycarbonate, or old windows) that sit over garden beds. They trap solar heat, allowing you to grow cold-hardy crops (lettuce, spinach, kale, radishes) well into winter or start seeds earlier in spring. A basic cold frame can be built from 2×6 lumber and a sheet of polycarbonate for under $100.
- Hoop Houses/Low Tunnels: Larger structures made from flexible hoops (PVC pipe or EMT conduit) covered with greenhouse plastic. These provide more space and greater temperature moderation. A 10×20 ft DIY low tunnel kit can cost $200-$500, while a larger, more robust hoop house kit might be $1,000-$3,000. I use a 6×12 ft low tunnel made from 1/2-inch PVC hoops and 6mil greenhouse plastic, which extends my lettuce and spinach harvest by at least
Deciding between raised beds and in-ground beds depends on your soil, budget, and physical capabilities.
- In-Ground Beds: If you have excellent native soil and good drainage, in-ground beds are the most economical. Double-digging (loosening soil two shovel depths) can significantly improve drainage and aeration. For my main garden, I primarily use in-ground beds, but I focus on building up the soil over time with consistent compost additions and cover cropping. I aim for beds that are no wider than 3-4 feet so I can reach the center without stepping on the soil, compacting it.
- Raised Beds: Raised beds offer numerous advantages, especially for poor soil, heavy clay, or rocky areas. They provide better drainage, warm up faster in spring, reduce compaction, and make weeding and harvesting easier on your back.
- Material Options:
- Untreated Cedar: Naturally rot-resistant and chemical-free. A 4×8 ft bed, 12 inches deep, typically requires three 2x12x8 ft cedar boards, costing around $50-$60 per board (total ~$150-$180) plus corner brackets or screws. My first raised beds were cedar and are still going strong after 7 years.
- Galvanized Steel: Durable, long-lasting, and aesthetically pleasing. Brands like Vego Garden offer modular kits. A Vego Garden 17″ Tall 8-in-1 Metal Raised Garden Bed (can be configured to 4×8 ft) costs approximately $250-$300.
- Concrete Blocks/Stones: Very durable but can leach minerals (though generally safe once weathered) and can be expensive.
- Recycled Materials: Pallets (check for chemical treatment stamps like « HT » for heat-treated), old tires (controversial due to potential chemical leaching).
- Filling Raised Beds: Don’t just fill with topsoil. Use a « Hugelkultur » approach (logs, branches, leaves, then compost, then topsoil) or a mixture of 60% good quality topsoil, 30% compost, and 10% perlite or vermiculite for drainage. A 4x8x1 ft raised bed requires about 32 cubic feet (or ~1.2 cubic yards) of soil mix, which can cost $100-$200 depending on your source.
- Material Options:
Step 4: Water Management & Irrigation
Efficient water management is critical for a self sufficient garden from scratch, especially in off-grid living where water resources might be limited.
- Rainwater Harvesting: This is my primary source of irrigation water. A 55-gallon rain barrel (e.g., EarthMark Rain Barrel, ~$120-$150) connected to a downspout can collect significant water. For larger needs, I use two 275-gallon IBC totes (Intermediate Bulk Containers, often available used for $100-$200 each from food-grade sources) connected in series. A 1,000 sq ft roof can collect approximately 620 gallons of water for every inch of rainfall. My 1,500 sq ft roof provides ample water for my 600 sq ft garden through multiple barrels and totes.
- Drip Irrigation: This is by far the most water-efficient method, delivering water directly to the plant’s root zone, minimizing evaporation and weed growth.
- Components: A typical drip system includes a pressure regulator (e.g., Rain Bird PRV-10, ~$15), a filter (Rain Bird RBY filter, ~$20), main tubing (1/2-inch poly tubing, 100ft ~$25), smaller feeder lines (1/4-inch tubing), and emitters (0.5 GPH or 1 GPH per plant).
- Kits: For beginners, a starter kit like the Rain Bird Drip Irrigation Garden Kit (model DDI-KIT-1P, ~$40-$60) is excellent for a small garden. For larger setups, I use Netafim Techline CV Drip Line (500ft roll, ~$150-$200), which has pressure-compensating emitters built-in, ensuring even watering across long runs.
- Automation: For true self-sufficiency, consider a battery-powered timer (e.g., Orbit B-Hyve Bluetooth Hose Faucet Timer, ~$50) or a solar-powered timer connected to a small 12V pump.
- Solar-Powered Pumps: For lifting water from a well, pond, or large storage tank to your garden, a solar pump is a game-changer. For a smaller drip system, a Shurflo 2088-594-152 Diaphragm Pump (12V, 3.5 GPM, ~$180) can be powered by a single 100W solar panel (e.g., Renogy 100W Monocrystalline Solar Panel, ~$100) and a small 12V battery (e.g., a 50Ah LiFePO4 battery like the Battle Born 50Ah, ~$450). For larger operations or deeper wells, more robust systems are needed. If you’re looking to build out a comprehensive off-grid power system to support your garden’s water needs, or indeed your entire homestead, you might want to explore resources like the Power Grid Generator complete system guide to understand the full scope of what’s possible in terms of energy independence.
Step 5: Seed Selection & Planting
The choice of seeds is crucial for a truly self sufficient garden from scratch.
- Choose Heirloom & Open-Pollinated Seeds: These varieties produce seeds that will grow true to type, meaning you can save seeds from your harvest year after year. F1 hybrids, while often vigorous, will not produce consistent offspring from saved seeds. Reputable seed companies include Baker Creek Heirloom Seeds, High Mowing Organic Seeds, and Seed Savers Exchange. Start with common, reliable varieties like ‘Black Krim’ tomatoes, ‘Provider’ bush beans, ‘Waltham Butternut’ squash, and ‘Black Seeded Simpson’ lettuce.
- Start Seeds Indoors (Optional but Recommended): For longer growing seasons or specific crops, starting seeds indoors gives you a head start. Use seed-starting mix (e.g., Espoma Organic Seed Starter Mix, ~$10 for 16qt bag) in seed trays (Jiffy Professional Greenhouse 72-cell kit, ~$15). Provide adequate light with LED grow lights (Barrina T5 2ft 4-pack LED Grow Lights, 20W each, ~$50) for 14-16 hours a day, positioned 2-4 inches above seedlings. Maintain consistent temperatures (65-75°F for most).
- Direct Sowing vs. Transplanting: Some crops (carrots, radishes, beans, corn) prefer direct sowing into the garden bed. Others (tomatoes, peppers, broccoli, kale) benefit from being started indoors and transplanted. Follow seed packet instructions for planting depths (e.g., lettuce seeds are often surface-sown or planted 1/8 inch deep, while beans are 1 inch deep) and spacing.
- Companion Planting: Strategically plant different species together to enhance growth, deter pests, and attract beneficial insects. For example, planting marigolds near tomatoes can deter nematodes, and basil improves tomato flavor. Nasturtiums can act as a trap crop for aphids.
- Succession Planting: For a continuous harvest, plant small batches of quick-growing crops (lettuce, radishes, cilantro) every 2-3 weeks. As one crop finishes, another is ready to take its place.
Step 6: Pest & Disease Management (Organic)
Maintaining a self sufficient garden from scratch means embracing organic pest and disease control.
- Integrated Pest Management (IPM): This holistic approach combines several strategies.
- Observation: Regularly inspect your plants for early signs of pests or disease. Catching issues early is key.
- Physical Barriers: Use row covers (e.g., Agribon AG-19 floating row cover, 10×20 ft, ~$20) to protect young plants from insect pests like cabbage worms and squash bugs. Install fences (e.g., 2×4 welded wire mesh, 4 ft tall, 50 ft roll ~$70) to keep out deer, rabbits, and other larger animals.
- Hand-Picking: For larger pests like tomato hornworms or squash bugs, simply pick them off and drop them into a bucket of soapy water.
- Companion Planting: As mentioned, certain plants repel pests. Marigolds, garlic, and onions are excellent deterrents.
- Attract Beneficial Insects: Plant flowers like dill, fennel, cosmos, and sweet alyssum to attract ladybugs, lacewings, and parasitic wasps, which prey on common garden pests.
- Organic Sprays & Treatments:
- Neem Oil: An excellent broad-spectrum organic insecticide and fungicide. Bonide Neem Oil Concentrate (16oz, ~$20) can be mixed at a rate of 1-2 tbsp per gallon of water and sprayed on affected plants.
- Insecticidal Soap: Effective against soft-bodied insects like aphids, whiteflies, and spider mites. Garden Safe Insecticidal Soap (24oz ready-to-use, ~$10).
- Bacillus thuringiensis (Bt): A naturally occurring soil bacterium that targets caterpillars and worms. Monterey BT Worm & Caterpillar Killer (16oz, ~$18) is highly effective and safe for beneficial insects.
- Copper or Sulfur Sprays: For fungal diseases like powdery mildew or blight, organic copper (e.g., Bonide Copper Fungicide, ~$15 for 1lb) or sulfur (e.g., Safer Brand Garden Fungicide, ~$10 for 16oz) can be used as a last resort.
Step 7: Harvesting & Seed Saving
The culmination of your efforts is the harvest, and seed saving closes the loop on self-sufficiency.
- Harvesting Techniques:
- Timing: Harvest vegetables at their peak ripeness for best flavor and nutritional value. For example, green beans should snap cleanly, cucumbers should be firm, and tomatoes should be fully colored.
- Frequency: Many crops, like zucchini, cucumbers, and bush beans, produce more if harvested frequently. Pick daily or every other day.
- Tools: Use clean, sharp pruners (e.g., Corona ClassicCUT Bypass Pruner BP 3180, ~$30) or a sharp knife for clean cuts, minimizing damage to the plant.
- Seed Saving: This is where the « self-sufficient » aspect truly shines.
- Selection: Only save seeds from your healthiest, most vigorous plants that show desired traits (disease resistance, good flavor, high yield).
- Isolation: To ensure true-to-type seeds, prevent cross-pollination. This can be challenging for open-pollinated crops that readily cross (e.g., squash, corn). For beginners, focus on self-pollinating plants like beans, peas, lettuce, and tomatoes.
- Processing:
- Dry Seeds (Beans, Peas, Lettuce, Grains): Allow pods/seed heads to dry completely on the plant. Harvest, shell, and clean the seeds, removing chaff.
- Wet Seeds (Tomatoes, Cucumbers, Squash): For tomatoes, ferment the seeds in water for a few days to remove the gel coating and inhibit disease. For cucumbers/squash, scrape out seeds, wash thoroughly, and dry.
- Drying: Spread seeds thinly on screens or paper plates in a cool, dry, well-ventilated area for 1-4 weeks. Ensure they are bone-dry before storage. I aim for less than 8% moisture content.
- Storage: Store seeds in airtight containers (glass jars with desiccant packets work well) in a cool, dark, dry place (ideally 40-50°F and 30-40% humidity). Label clearly with variety and date. Properly stored seeds can remain viable for 3-10 years or more.
Step 8: Season Extension & Winterizing
Extend your harvest and protect your garden for the off-season to truly maximize your self sufficient garden from scratch.
- Cold Frames: Simple structures with a transparent top (glass, polycarbonate, or old windows) that sit over garden beds. They trap solar heat, allowing you to grow cold-hardy crops (lettuce, spinach, kale, radishes) well into winter or start seeds earlier in spring. A basic cold frame can be built from 2×6 lumber and a sheet of polycarbonate for under $100.
- Hoop Houses/Low Tunnels: Larger structures made from flexible hoops (PVC pipe or EMT conduit) covered with greenhouse plastic. These provide more space and greater temperature moderation. A 10×20 ft DIY low tunnel kit can cost $200-$500, while a larger, more robust hoop house kit might be $1,000-$3,000. I use a 6×12 ft low tunnel made from 1/2-inch PVC hoops and 6mil greenhouse plastic, which extends my lettuce and spinach harvest by at least
Healthy soil is the bedrock of a productive, self-sufficient garden. You can’t guess what your soil needs; you have to test it.
- Perform a Soil Test: A professional soil test will give you precise data on your soil’s pH, nutrient levels (N-P-K), and organic matter content. I recommend sending a sample to your local agricultural extension office; it typically costs $20-$50 and provides detailed recommendations. Alternatively, for a quick homeowner check, a Rapitest Soil Test Kit (40-test kit, model 1663, ~$20 on Amazon) provides a good baseline for pH, Nitrogen, Phosphorus, and Potash. Aim for a pH between 6.0 and 7.0 for most vegetables.
- Amend for pH Imbalance: If your soil is too acidic (below 6.0), add agricultural lime (dolomitic lime adds magnesium, calcitic lime adds calcium). Apply 5-10 lbs per 100 sq ft for a moderate adjustment. If it’s too alkaline (above 7.0), add elemental sulfur (e.g., Espoma Soil Acidifier, ~$15 for 6.75 lbs) or generous amounts of organic matter like peat moss or pine needles.
- Build Organic Matter: This is the single most important step for long-term soil health. Organic matter improves soil structure, water retention, drainage, and nutrient availability. Incorporate 2-4 inches of high-quality compost into your top 6-12 inches of soil annually. I make my own compost from kitchen scraps, garden waste, and shredded leaves, but you can purchase it. Local nurseries often sell bulk compost for $30-$50 per cubic yard. Aged manure (from chickens, cows, or horses – ensure it’s well-rotted to avoid burning plants) is also excellent.
- Address Nutrient Deficiencies: Based on your soil test, add specific organic amendments. If Nitrogen (N) is low, add blood meal (12-0-0, ~$20 for 3 lbs) or feather meal. For Phosphorus (P), use bone meal (3-15-0, ~$15 for 3 lbs) or rock phosphate. For Potassium (K), greensand (0-0-2.5, ~$25 for 5 lbs) or kelp meal are good choices. I rely heavily on Espoma Organic Garden-tone (5-3-3, ~$25 for an 8lb bag) as a balanced, all-purpose organic fertilizer during planting.
Step 3: Garden Bed Preparation
Deciding between raised beds and in-ground beds depends on your soil, budget, and physical capabilities.
- In-Ground Beds: If you have excellent native soil and good drainage, in-ground beds are the most economical. Double-digging (loosening soil two shovel depths) can significantly improve drainage and aeration. For my main garden, I primarily use in-ground beds, but I focus on building up the soil over time with consistent compost additions and cover cropping. I aim for beds that are no wider than 3-4 feet so I can reach the center without stepping on the soil, compacting it.
- Raised Beds: Raised beds offer numerous advantages, especially for poor soil, heavy clay, or rocky areas. They provide better drainage, warm up faster in spring, reduce compaction, and make weeding and harvesting easier on your back.
- Material Options:
- Untreated Cedar: Naturally rot-resistant and chemical-free. A 4×8 ft bed, 12 inches deep, typically requires three 2x12x8 ft cedar boards, costing around $50-$60 per board (total ~$150-$180) plus corner brackets or screws. My first raised beds were cedar and are still going strong after 7 years.
- Galvanized Steel: Durable, long-lasting, and aesthetically pleasing. Brands like Vego Garden offer modular kits. A Vego Garden 17″ Tall 8-in-1 Metal Raised Garden Bed (can be configured to 4×8 ft) costs approximately $250-$300.
- Concrete Blocks/Stones: Very durable but can leach minerals (though generally safe once weathered) and can be expensive.
- Recycled Materials: Pallets (check for chemical treatment stamps like « HT » for heat-treated), old tires (controversial due to potential chemical leaching).
- Filling Raised Beds: Don’t just fill with topsoil. Use a « Hugelkultur » approach (logs, branches, leaves, then compost, then topsoil) or a mixture of 60% good quality topsoil, 30% compost, and 10% perlite or vermiculite for drainage. A 4x8x1 ft raised bed requires about 32 cubic feet (or ~1.2 cubic yards) of soil mix, which can cost $100-$200 depending on your source.
- Material Options:
Step 4: Water Management & Irrigation
Efficient water management is critical for a self sufficient garden from scratch, especially in off-grid living where water resources might be limited.
- Rainwater Harvesting: This is my primary source of irrigation water. A 55-gallon rain barrel (e.g., EarthMark Rain Barrel, ~$120-$150) connected to a downspout can collect significant water. For larger needs, I use two 275-gallon IBC totes (Intermediate Bulk Containers, often available used for $100-$200 each from food-grade sources) connected in series. A 1,000 sq ft roof can collect approximately 620 gallons of water for every inch of rainfall. My 1,500 sq ft roof provides ample water for my 600 sq ft garden through multiple barrels and totes.
- Drip Irrigation: This is by far the most water-efficient method, delivering water directly to the plant’s root zone, minimizing evaporation and weed growth.
- Components: A typical drip system includes a pressure regulator (e.g., Rain Bird PRV-10, ~$15), a filter (Rain Bird RBY filter, ~$20), main tubing (1/2-inch poly tubing, 100ft ~$25), smaller feeder lines (1/4-inch tubing), and emitters (0.5 GPH or 1 GPH per plant).
- Kits: For beginners, a starter kit like the Rain Bird Drip Irrigation Garden Kit (model DDI-KIT-1P, ~$40-$60) is excellent for a small garden. For larger setups, I use Netafim Techline CV Drip Line (500ft roll, ~$150-$200), which has pressure-compensating emitters built-in, ensuring even watering across long runs.
- Automation: For true self-sufficiency, consider a battery-powered timer (e.g., Orbit B-Hyve Bluetooth Hose Faucet Timer, ~$50) or a solar-powered timer connected to a small 12V pump.
- Solar-Powered Pumps: For lifting water from a well, pond, or large storage tank to your garden, a solar pump is a game-changer. For a smaller drip system, a Shurflo 2088-594-152 Diaphragm Pump (12V, 3.5 GPM, ~$180) can be powered by a single 100W solar panel (e.g., Renogy 100W Monocrystalline Solar Panel, ~$100) and a small 12V battery (e.g., a 50Ah LiFePO4 battery like the Battle Born 50Ah, ~$450). For larger operations or deeper wells, more robust systems are needed. If you’re looking to build out a comprehensive off-grid power system to support your garden’s water needs, or indeed your entire homestead, you might want to explore resources like the Power Grid Generator complete system guide to understand the full scope of what’s possible in terms of energy independence.
Step 5: Seed Selection & Planting
The choice of seeds is crucial for a truly self sufficient garden from scratch.
- Choose Heirloom & Open-Pollinated Seeds: These varieties produce seeds that will grow true to type, meaning you can save seeds from your harvest year after year. F1 hybrids, while often vigorous, will not produce consistent offspring from saved seeds. Reputable seed companies include Baker Creek Heirloom Seeds, High Mowing Organic Seeds, and Seed Savers Exchange. Start with common, reliable varieties like ‘Black Krim’ tomatoes, ‘Provider’ bush beans, ‘Waltham Butternut’ squash, and ‘Black Seeded Simpson’ lettuce.
- Start Seeds Indoors (Optional but Recommended): For longer growing seasons or specific crops, starting seeds indoors gives you a head start. Use seed-starting mix (e.g., Espoma Organic Seed Starter Mix, ~$10 for 16qt bag) in seed trays (Jiffy Professional Greenhouse 72-cell kit, ~$15). Provide adequate light with LED grow lights (Barrina T5 2ft 4-pack LED Grow Lights, 20W each, ~$50) for 14-16 hours a day, positioned 2-4 inches above seedlings. Maintain consistent temperatures (65-75°F for most).
- Direct Sowing vs. Transplanting: Some crops (carrots, radishes, beans, corn) prefer direct sowing into the garden bed. Others (tomatoes, peppers, broccoli, kale) benefit from being started indoors and transplanted. Follow seed packet instructions for planting depths (e.g., lettuce seeds are often surface-sown or planted 1/8 inch deep, while beans are 1 inch deep) and spacing.
- Companion Planting: Strategically plant different species together to enhance growth, deter pests, and attract beneficial insects. For example, planting marigolds near tomatoes can deter nematodes, and basil improves tomato flavor. Nasturtiums can act as a trap crop for aphids.
- Succession Planting: For a continuous harvest, plant small batches of quick-growing crops (lettuce, radishes, cilantro) every 2-3 weeks. As one crop finishes, another is ready to take its place.
Step 6: Pest & Disease Management (Organic)
Maintaining a self sufficient garden from scratch means embracing organic pest and disease control.
- Integrated Pest Management (IPM): This holistic approach combines several strategies.
- Observation: Regularly inspect your plants for early signs of pests or disease. Catching issues early is key.
- Physical Barriers: Use row covers (e.g., Agribon AG-19 floating row cover, 10×20 ft, ~$20) to protect young plants from insect pests like cabbage worms and squash bugs. Install fences (e.g., 2×4 welded wire mesh, 4 ft tall, 50 ft roll ~$70) to keep out deer, rabbits, and other larger animals.
- Hand-Picking: For larger pests like tomato hornworms or squash bugs, simply pick them off and drop them into a bucket of soapy water.
- Companion Planting: As mentioned, certain plants repel pests. Marigolds, garlic, and onions are excellent deterrents.
- Attract Beneficial Insects: Plant flowers like dill, fennel, cosmos, and sweet alyssum to attract ladybugs, lacewings, and parasitic wasps, which prey on common garden pests.
- Organic Sprays & Treatments:
- Neem Oil: An excellent broad-spectrum organic insecticide and fungicide. Bonide Neem Oil Concentrate (16oz, ~$20) can be mixed at a rate of 1-2 tbsp per gallon of water and sprayed on affected plants.
- Insecticidal Soap: Effective against soft-bodied insects like aphids, whiteflies, and spider mites. Garden Safe Insecticidal Soap (24oz ready-to-use, ~$10).
- Bacillus thuringiensis (Bt): A naturally occurring soil bacterium that targets caterpillars and worms. Monterey BT Worm & Caterpillar Killer (16oz, ~$18) is highly effective and safe for beneficial insects.
- Copper or Sulfur Sprays: For fungal diseases like powdery mildew or blight, organic copper (e.g., Bonide Copper Fungicide, ~$15 for 1lb) or sulfur (e.g., Safer Brand Garden Fungicide, ~$10 for 16oz) can be used as a last resort.
Step 7: Harvesting & Seed Saving
The culmination of your efforts is the harvest, and seed saving closes the loop on self-sufficiency.
- Harvesting Techniques:
- Timing: Harvest vegetables at their peak ripeness for best flavor and nutritional value. For example, green beans should snap cleanly, cucumbers should be firm, and tomatoes should be fully colored.
- Frequency: Many crops, like zucchini, cucumbers, and bush beans, produce more if harvested frequently. Pick daily or every other day.
- Tools: Use clean, sharp pruners (e.g., Corona ClassicCUT Bypass Pruner BP 3180, ~$30) or a sharp knife for clean cuts, minimizing damage to the plant.
- Seed Saving: This is where the « self-sufficient » aspect truly shines.
- Selection: Only save seeds from your healthiest, most vigorous plants that show desired traits (disease resistance, good flavor, high yield).
- Isolation: To ensure true-to-type seeds, prevent cross-pollination. This can be challenging for open-pollinated crops that readily cross (e.g., squash, corn). For beginners, focus on self-pollinating plants like beans, peas, lettuce, and tomatoes.
- Processing:
- Dry Seeds (Beans, Peas, Lettuce, Grains): Allow pods/seed heads to dry completely on the plant. Harvest, shell, and clean the seeds, removing chaff.
- Wet Seeds (Tomatoes, Cucumbers, Squash): For tomatoes, ferment the seeds in water for a few days to remove the gel coating and inhibit disease. For cucumbers/squash, scrape out seeds, wash thoroughly, and dry.
- Drying: Spread seeds thinly on screens or paper plates in a cool, dry, well-ventilated area for 1-4 weeks. Ensure they are bone-dry before storage. I aim for less than 8% moisture content.
- Storage: Store seeds in airtight containers (glass jars with desiccant packets work well) in a cool, dark, dry place (ideally 40-50°F and 30-40% humidity). Label clearly with variety and date. Properly stored seeds can remain viable for 3-10 years or more.
Step 8: Season Extension & Winterizing
Extend your harvest and protect your garden for the off-season to truly maximize your self sufficient garden from scratch.
- Cold Frames: Simple structures with a transparent top (glass, polycarbonate, or old windows) that sit over garden beds. They trap solar heat, allowing you to grow cold-hardy crops (lettuce, spinach, kale, radishes) well into winter or start seeds earlier in spring. A basic cold frame can be built from 2×6 lumber and a sheet of polycarbonate for under $100.
- Hoop Houses/Low Tunnels: Larger structures made from flexible hoops (PVC pipe or EMT conduit) covered with greenhouse plastic. These provide more space and greater temperature moderation. A 10×20 ft DIY low tunnel kit can cost $200-$500, while a larger, more robust hoop house kit might be $1,000-$3,000. I use a 6×12 ft low tunnel made from 1/2-inch PVC hoops and 6mil greenhouse plastic, which extends my lettuce and spinach harvest by at least
Maintaining a self sufficient garden from scratch means embracing organic pest and disease control.
- Integrated Pest Management (IPM): This holistic approach combines several strategies.
- Observation: Regularly inspect your plants for early signs of pests or disease. Catching issues early is key.
- Physical Barriers: Use row covers (e.g., Agribon AG-19 floating row cover, 10×20 ft, ~$20) to protect young plants from insect pests like cabbage worms and squash bugs. Install fences (e.g., 2×4 welded wire mesh, 4 ft tall, 50 ft roll ~$70) to keep out deer, rabbits, and other larger animals.
- Hand-Picking: For larger pests like tomato hornworms or squash bugs, simply pick them off and drop them into a bucket of soapy water.
- Companion Planting: As mentioned, certain plants repel pests. Marigolds, garlic, and onions are excellent deterrents.
- Attract Beneficial Insects: Plant flowers like dill, fennel, cosmos, and sweet alyssum to attract ladybugs, lacewings, and parasitic wasps, which prey on common garden pests.
- Organic Sprays & Treatments:
- Neem Oil: An excellent broad-spectrum organic insecticide and fungicide. Bonide Neem Oil Concentrate (16oz, ~$20) can be mixed at a rate of 1-2 tbsp per gallon of water and sprayed on affected plants.
- Insecticidal Soap: Effective against soft-bodied insects like aphids, whiteflies, and spider mites. Garden Safe Insecticidal Soap (24oz ready-to-use, ~$10).
- Bacillus thuringiensis (Bt): A naturally occurring soil bacterium that targets caterpillars and worms. Monterey BT Worm & Caterpillar Killer (16oz, ~$18) is highly effective and safe for beneficial insects.
- Copper or Sulfur Sprays: For fungal diseases like powdery mildew or blight, organic copper (e.g., Bonide Copper Fungicide, ~$15 for 1lb) or sulfur (e.g., Safer Brand Garden Fungicide, ~$10 for 16oz) can be used as a last resort.
Step 7: Harvesting & Seed Saving
The culmination of your efforts is the harvest, and seed saving closes the loop on self-sufficiency.
- Harvesting Techniques:
- Timing: Harvest vegetables at their peak ripeness for best flavor and nutritional value. For example, green beans should snap cleanly, cucumbers should be firm, and tomatoes should be fully colored.
- Frequency: Many crops, like zucchini, cucumbers, and bush beans, produce more if harvested frequently. Pick daily or every other day.
- Tools: Use clean, sharp pruners (e.g., Corona ClassicCUT Bypass Pruner BP 3180, ~$30) or a sharp knife for clean cuts, minimizing damage to the plant.
- Seed Saving: This is where the « self-sufficient » aspect truly shines.
- Selection: Only save seeds from your healthiest, most vigorous plants that show desired traits (disease resistance, good flavor, high yield).
- Isolation: To ensure true-to-type seeds, prevent cross-pollination. This can be challenging for open-pollinated crops that readily cross (e.g., squash, corn). For beginners, focus on self-pollinating plants like beans, peas, lettuce, and tomatoes.
- Processing:
- Dry Seeds (Beans, Peas, Lettuce, Grains): Allow pods/seed heads to dry completely on the plant. Harvest, shell, and clean the seeds, removing chaff.
- Wet Seeds (Tomatoes, Cucumbers, Squash): For tomatoes, ferment the seeds in water for a few days to remove the gel coating and inhibit disease. For cucumbers/squash, scrape out seeds, wash thoroughly, and dry.
- Drying: Spread seeds thinly on screens or paper plates in a cool, dry, well-ventilated area for 1-4 weeks. Ensure they are bone-dry before storage. I aim for less than 8% moisture content.
- Storage: Store seeds in airtight containers (glass jars with desiccant packets work well) in a cool, dark, dry place (ideally 40-50°F and 30-40% humidity). Label clearly with variety and date. Properly stored seeds can remain viable for 3-10 years or more.
Step 8: Season Extension & Winterizing
Extend your harvest and protect your garden for the off-season to truly maximize your self sufficient garden from scratch.
- Cold Frames: Simple structures with a transparent top (glass, polycarbonate, or old windows) that sit over garden beds. They trap solar heat, allowing you to grow cold-hardy crops (lettuce, spinach, kale, radishes) well into winter or start seeds earlier in spring. A basic cold frame can be built from 2×6 lumber and a sheet of polycarbonate for under $100.
- Hoop Houses/Low Tunnels: Larger structures made from flexible hoops (PVC pipe or EMT conduit) covered with greenhouse plastic. These provide more space and greater temperature moderation. A 10×20 ft DIY low tunnel kit can cost $200-$500, while a larger, more robust hoop house kit might be $1,000-$3,000. I use a 6×12 ft low tunnel made from 1/2-inch PVC hoops and 6mil greenhouse plastic, which extends my lettuce and spinach harvest by at least
- Choose Heirloom & Open-Pollinated Seeds: These varieties produce seeds that will grow true to type, meaning you can save seeds from your harvest year after year. F1 hybrids, while often vigorous, will not produce consistent offspring from saved seeds. Reputable seed companies include Baker Creek Heirloom Seeds, High Mowing Organic Seeds, and Seed Savers Exchange. Start with common, reliable varieties like ‘Black Krim’ tomatoes, ‘Provider’ bush beans, ‘Waltham Butternut’ squash, and ‘Black Seeded Simpson’ lettuce.
- Start Seeds Indoors (Optional but Recommended): For longer growing seasons or specific crops, starting seeds indoors gives you a head start. Use seed-starting mix (e.g., Espoma Organic Seed Starter Mix, ~$10 for 16qt bag) in seed trays (Jiffy Professional Greenhouse 72-cell kit, ~$15). Provide adequate light with LED grow lights (Barrina T5 2ft 4-pack LED Grow Lights, 20W each, ~$50) for 14-16 hours a day, positioned 2-4 inches above seedlings. Maintain consistent temperatures (65-75°F for most).
- Direct Sowing vs. Transplanting: Some crops (carrots, radishes, beans, corn) prefer direct sowing into the garden bed. Others (tomatoes, peppers, broccoli, kale) benefit from being started indoors and transplanted. Follow seed packet instructions for planting depths (e.g., lettuce seeds are often surface-sown or planted 1/8 inch deep, while beans are 1 inch deep) and spacing.
- Companion Planting: Strategically plant different species together to enhance growth, deter pests, and attract beneficial insects. For example, planting marigolds near tomatoes can deter nematodes, and basil improves tomato flavor. Nasturtiums can act as a trap crop for aphids.
- Succession Planting: For a continuous harvest, plant small batches of quick-growing crops (lettuce, radishes, cilantro) every 2-3 weeks. As one crop finishes, another is ready to take its place.
Step 6: Pest & Disease Management (Organic)
Maintaining a self sufficient garden from scratch means embracing organic pest and disease control.
- Integrated Pest Management (IPM): This holistic approach combines several strategies.
- Observation: Regularly inspect your plants for early signs of pests or disease. Catching issues early is key.
- Physical Barriers: Use row covers (e.g., Agribon AG-19 floating row cover, 10×20 ft, ~$20) to protect young plants from insect pests like cabbage worms and squash bugs. Install fences (e.g., 2×4 welded wire mesh, 4 ft tall, 50 ft roll ~$70) to keep out deer, rabbits, and other larger animals.
- Hand-Picking: For larger pests like tomato hornworms or squash bugs, simply pick them off and drop them into a bucket of soapy water.
- Companion Planting: As mentioned, certain plants repel pests. Marigolds, garlic, and onions are excellent deterrents.
- Attract Beneficial Insects: Plant flowers like dill, fennel, cosmos, and sweet alyssum to attract ladybugs, lacewings, and parasitic wasps, which prey on common garden pests.
- Organic Sprays & Treatments:
- Neem Oil: An excellent broad-spectrum organic insecticide and fungicide. Bonide Neem Oil Concentrate (16oz, ~$20) can be mixed at a rate of 1-2 tbsp per gallon of water and sprayed on affected plants.
- Insecticidal Soap: Effective against soft-bodied insects like aphids, whiteflies, and spider mites. Garden Safe Insecticidal Soap (24oz ready-to-use, ~$10).
- Bacillus thuringiensis (Bt): A naturally occurring soil bacterium that targets caterpillars and worms. Monterey BT Worm & Caterpillar Killer (16oz, ~$18) is highly effective and safe for beneficial insects.
- Copper or Sulfur Sprays: For fungal diseases like powdery mildew or blight, organic copper (e.g., Bonide Copper Fungicide, ~$15 for 1lb) or sulfur (e.g., Safer Brand Garden Fungicide, ~$10 for 16oz) can be used as a last resort.
Step 7: Harvesting & Seed Saving
The culmination of your efforts is the harvest, and seed saving closes the loop on self-sufficiency.
- Harvesting Techniques:
- Timing: Harvest vegetables at their peak ripeness for best flavor and nutritional value. For example, green beans should snap cleanly, cucumbers should be firm, and tomatoes should be fully colored.
- Frequency: Many crops, like zucchini, cucumbers, and bush beans, produce more if harvested frequently. Pick daily or every other day.
- Tools: Use clean, sharp pruners (e.g., Corona ClassicCUT Bypass Pruner BP 3180, ~$30) or a sharp knife for clean cuts, minimizing damage to the plant.
- Seed Saving: This is where the « self-sufficient » aspect truly shines.
- Selection: Only save seeds from your healthiest, most vigorous plants that show desired traits (disease resistance, good flavor, high yield).
- Isolation: To ensure true-to-type seeds, prevent cross-pollination. This can be challenging for open-pollinated crops that readily cross (e.g., squash, corn). For beginners, focus on self-pollinating plants like beans, peas, lettuce, and tomatoes.
- Processing:
- Dry Seeds (Beans, Peas, Lettuce, Grains): Allow pods/seed heads to dry completely on the plant. Harvest, shell, and clean the seeds, removing chaff.
- Wet Seeds (Tomatoes, Cucumbers, Squash): For tomatoes, ferment the seeds in water for a few days to remove the gel coating and inhibit disease. For cucumbers/squash, scrape out seeds, wash thoroughly, and dry.
- Drying: Spread seeds thinly on screens or paper plates in a cool, dry, well-ventilated area for 1-4 weeks. Ensure they are bone-dry before storage. I aim for less than 8% moisture content.
- Storage: Store seeds in airtight containers (glass jars with desiccant packets work well) in a cool, dark, dry place (ideally 40-50°F and 30-40% humidity). Label clearly with variety and date. Properly stored seeds can remain viable for 3-10 years or more.
Step 8: Season Extension & Winterizing
Extend your harvest and protect your garden for the off-season to truly maximize your self sufficient garden from scratch.
- Cold Frames: Simple structures with a transparent top (glass, polycarbonate, or old windows) that sit over garden beds. They trap solar heat, allowing you to grow cold-hardy crops (lettuce, spinach, kale, radishes) well into winter or start seeds earlier in spring. A basic cold frame can be built from 2×6 lumber and a sheet of polycarbonate for under $100.
- Hoop Houses/Low Tunnels: Larger structures made from flexible hoops (PVC pipe or EMT conduit) covered with greenhouse plastic. These provide more space and greater temperature moderation. A 10×20 ft DIY low tunnel kit can cost $200-$500, while a larger, more robust hoop house kit might be $1,000-$3,000. I use a 6×12 ft low tunnel made from 1/2-inch PVC hoops and 6mil greenhouse plastic, which extends my lettuce and spinach harvest by at least
The choice of seeds is crucial for a truly self sufficient garden from scratch.
- Choose Heirloom & Open-Pollinated Seeds: These varieties produce seeds that will grow true to type, meaning you can save seeds from your harvest year after year. F1 hybrids, while often vigorous, will not produce consistent offspring from saved seeds. Reputable seed companies include Baker Creek Heirloom Seeds, High Mowing Organic Seeds, and Seed Savers Exchange. Start with common, reliable varieties like ‘Black Krim’ tomatoes, ‘Provider’ bush beans, ‘Waltham Butternut’ squash, and ‘Black Seeded Simpson’ lettuce.
- Start Seeds Indoors (Optional but Recommended): For longer growing seasons or specific crops, starting seeds indoors gives you a head start. Use seed-starting mix (e.g., Espoma Organic Seed Starter Mix, ~$10 for 16qt bag) in seed trays (Jiffy Professional Greenhouse 72-cell kit, ~$15). Provide adequate light with LED grow lights (Barrina T5 2ft 4-pack LED Grow Lights, 20W each, ~$50) for 14-16 hours a day, positioned 2-4 inches above seedlings. Maintain consistent temperatures (65-75°F for most).
- Direct Sowing vs. Transplanting: Some crops (carrots, radishes, beans, corn) prefer direct sowing into the garden bed. Others (tomatoes, peppers, broccoli, kale) benefit from being started indoors and transplanted. Follow seed packet instructions for planting depths (e.g., lettuce seeds are often surface-sown or planted 1/8 inch deep, while beans are 1 inch deep) and spacing.
- Companion Planting: Strategically plant different species together to enhance growth, deter pests, and attract beneficial insects. For example, planting marigolds near tomatoes can deter nematodes, and basil improves tomato flavor. Nasturtiums can act as a trap crop for aphids.
- Succession Planting: For a continuous harvest, plant small batches of quick-growing crops (lettuce, radishes, cilantro) every 2-3 weeks. As one crop finishes, another is ready to take its place.
Step 6: Pest & Disease Management (Organic)
Maintaining a self sufficient garden from scratch means embracing organic pest and disease control.
- Integrated Pest Management (IPM): This holistic approach combines several strategies.
- Observation: Regularly inspect your plants for early signs of pests or disease. Catching issues early is key.
- Physical Barriers: Use row covers (e.g., Agribon AG-19 floating row cover, 10×20 ft, ~$20) to protect young plants from insect pests like cabbage worms and squash bugs. Install fences (e.g., 2×4 welded wire mesh, 4 ft tall, 50 ft roll ~$70) to keep out deer, rabbits, and other larger animals.
- Hand-Picking: For larger pests like tomato hornworms or squash bugs, simply pick them off and drop them into a bucket of soapy water.
- Companion Planting: As mentioned, certain plants repel pests. Marigolds, garlic, and onions are excellent deterrents.
- Attract Beneficial Insects: Plant flowers like dill, fennel, cosmos, and sweet alyssum to attract ladybugs, lacewings, and parasitic wasps, which prey on common garden pests.
- Organic Sprays & Treatments:
- Neem Oil: An excellent broad-spectrum organic insecticide and fungicide. Bonide Neem Oil Concentrate (16oz, ~$20) can be mixed at a rate of 1-2 tbsp per gallon of water and sprayed on affected plants.
- Insecticidal Soap: Effective against soft-bodied insects like aphids, whiteflies, and spider mites. Garden Safe Insecticidal Soap (24oz ready-to-use, ~$10).
- Bacillus thuringiensis (Bt): A naturally occurring soil bacterium that targets caterpillars and worms. Monterey BT Worm & Caterpillar Killer (16oz, ~$18) is highly effective and safe for beneficial insects.
- Copper or Sulfur Sprays: For fungal diseases like powdery mildew or blight, organic copper (e.g., Bonide Copper Fungicide, ~$15 for 1lb) or sulfur (e.g., Safer Brand Garden Fungicide, ~$10 for 16oz) can be used as a last resort.
Step 7: Harvesting & Seed Saving
The culmination of your efforts is the harvest, and seed saving closes the loop on self-sufficiency.
- Harvesting Techniques:
- Timing: Harvest vegetables at their peak ripeness for best flavor and nutritional value. For example, green beans should snap cleanly, cucumbers should be firm, and tomatoes should be fully colored.
- Frequency: Many crops, like zucchini, cucumbers, and bush beans, produce more if harvested frequently. Pick daily or every other day.
- Tools: Use clean, sharp pruners (e.g., Corona ClassicCUT Bypass Pruner BP 3180, ~$30) or a sharp knife for clean cuts, minimizing damage to the plant.
- Seed Saving: This is where the « self-sufficient » aspect truly shines.
- Selection: Only save seeds from your healthiest, most vigorous plants that show desired traits (disease resistance, good flavor, high yield).
- Isolation: To ensure true-to-type seeds, prevent cross-pollination. This can be challenging for open-pollinated crops that readily cross (e.g., squash, corn). For beginners, focus on self-pollinating plants like beans, peas, lettuce, and tomatoes.
- Processing:
- Dry Seeds (Beans, Peas, Lettuce, Grains): Allow pods/seed heads to dry completely on the plant. Harvest, shell, and clean the seeds, removing chaff.
- Wet Seeds (Tomatoes, Cucumbers, Squash): For tomatoes, ferment the seeds in water for a few days to remove the gel coating and inhibit disease. For cucumbers/squash, scrape out seeds, wash thoroughly, and dry.
- Drying: Spread seeds thinly on screens or paper plates in a cool, dry, well-ventilated area for 1-4 weeks. Ensure they are bone-dry before storage. I aim for less than 8% moisture content.
- Storage: Store seeds in airtight containers (glass jars with desiccant packets work well) in a cool, dark, dry place (ideally 40-50°F and 30-40% humidity). Label clearly with variety and date. Properly stored seeds can remain viable for 3-10 years or more.
Step 8: Season Extension & Winterizing
Extend your harvest and protect your garden for the off-season to truly maximize your self sufficient garden from scratch.
- Cold Frames: Simple structures with a transparent top (glass, polycarbonate, or old windows) that sit over garden beds. They trap solar heat, allowing you to grow cold-hardy crops (lettuce, spinach, kale, radishes) well into winter or start seeds earlier in spring. A basic cold frame can be built from 2×6 lumber and a sheet of polycarbonate for under $100.
- Hoop Houses/Low Tunnels: Larger structures made from flexible hoops (PVC pipe or EMT conduit) covered with greenhouse plastic. These provide more space and greater temperature moderation. A 10×20 ft DIY low tunnel kit can cost $200-$500, while a larger, more robust hoop house kit might be $1,000-$3,000. I use a 6×12 ft low tunnel made from 1/2-inch PVC hoops and 6mil greenhouse plastic, which extends my lettuce and spinach harvest by at least
Step 5: Seed Selection & Planting
The choice of seeds is crucial for a truly self sufficient garden from scratch.
- Choose Heirloom & Open-Pollinated Seeds: These varieties produce seeds that will grow true to type, meaning you can save seeds from your harvest year after year. F1 hybrids, while often vigorous, will not produce consistent offspring from saved seeds. Reputable seed companies include Baker Creek Heirloom Seeds, High Mowing Organic Seeds, and Seed Savers Exchange. Start with common, reliable varieties like ‘Black Krim’ tomatoes, ‘Provider’ bush beans, ‘Waltham Butternut’ squash, and ‘Black Seeded Simpson’ lettuce.
- Start Seeds Indoors (Optional but Recommended): For longer growing seasons or specific crops, starting seeds indoors gives you a head start. Use seed-starting mix (e.g., Espoma Organic Seed Starter Mix, ~$10 for 16qt bag) in seed trays (Jiffy Professional Greenhouse 72-cell kit, ~$15). Provide adequate light with LED grow lights (Barrina T5 2ft 4-pack LED Grow Lights, 20W each, ~$50) for 14-16 hours a day, positioned 2-4 inches above seedlings. Maintain consistent temperatures (65-75°F for most).
- Direct Sowing vs. Transplanting: Some crops (carrots, radishes, beans, corn) prefer direct sowing into the garden bed. Others (tomatoes, peppers, broccoli, kale) benefit from being started indoors and transplanted. Follow seed packet instructions for planting depths (e.g., lettuce seeds are often surface-sown or planted 1/8 inch deep, while beans are 1 inch deep) and spacing.
- Companion Planting: Strategically plant different species together to enhance growth, deter pests, and attract beneficial insects. For example, planting marigolds near tomatoes can deter nematodes, and basil improves tomato flavor. Nasturtiums can act as a trap crop for aphids.
- Succession Planting: For a continuous harvest, plant small batches of quick-growing crops (lettuce, radishes, cilantro) every 2-3 weeks. As one crop finishes, another is ready to take its place.
Step 6: Pest & Disease Management (Organic)
Maintaining a self sufficient garden from scratch means embracing organic pest and disease control.
- Integrated Pest Management (IPM): This holistic approach combines several strategies.
- Observation: Regularly inspect your plants for early signs of pests or disease. Catching issues early is key.
- Physical Barriers: Use row covers (e.g., Agribon AG-19 floating row cover, 10×20 ft, ~$20) to protect young plants from insect pests like cabbage worms and squash bugs. Install fences (e.g., 2×4 welded wire mesh, 4 ft tall, 50 ft roll ~$70) to keep out deer, rabbits, and other larger animals.
- Hand-Picking: For larger pests like tomato hornworms or squash bugs, simply pick them off and drop them into a bucket of soapy water.
- Companion Planting: As mentioned, certain plants repel pests. Marigolds, garlic, and onions are excellent deterrents.
- Attract Beneficial Insects: Plant flowers like dill, fennel, cosmos, and sweet alyssum to attract ladybugs, lacewings, and parasitic wasps, which prey on common garden pests.
- Organic Sprays & Treatments:
- Neem Oil: An excellent broad-spectrum organic insecticide and fungicide. Bonide Neem Oil Concentrate (16oz, ~$20) can be mixed at a rate of 1-2 tbsp per gallon of water and sprayed on affected plants.
- Insecticidal Soap: Effective against soft-bodied insects like aphids, whiteflies, and spider mites. Garden Safe Insecticidal Soap (24oz ready-to-use, ~$10).
- Bacillus thuringiensis (Bt): A naturally occurring soil bacterium that targets caterpillars and worms. Monterey BT Worm & Caterpillar Killer (16oz, ~$18) is highly effective and safe for beneficial insects.
- Copper or Sulfur Sprays: For fungal diseases like powdery mildew or blight, organic copper (e.g., Bonide Copper Fungicide, ~$15 for 1lb) or sulfur (e.g., Safer Brand Garden Fungicide, ~$10 for 16oz) can be used as a last resort.
Step 7: Harvesting & Seed Saving
The culmination of your efforts is the harvest, and seed saving closes the loop on self-sufficiency.
- Harvesting Techniques:
- Timing: Harvest vegetables at their peak ripeness for best flavor and nutritional value. For example, green beans should snap cleanly, cucumbers should be firm, and tomatoes should be fully colored.
- Frequency: Many crops, like zucchini, cucumbers, and bush beans, produce more if harvested frequently. Pick daily or every other day.
- Tools: Use clean, sharp pruners (e.g., Corona ClassicCUT Bypass Pruner BP 3180, ~$30) or a sharp knife for clean cuts, minimizing damage to the plant.
- Seed Saving: This is where the « self-sufficient » aspect truly shines.
- Selection: Only save seeds from your healthiest, most vigorous plants that show desired traits (disease resistance, good flavor, high yield).
- Isolation: To ensure true-to-type seeds, prevent cross-pollination. This can be challenging for open-pollinated crops that readily cross (e.g., squash, corn). For beginners, focus on self-pollinating plants like beans, peas, lettuce, and tomatoes.
- Processing:
- Dry Seeds (Beans, Peas, Lettuce, Grains): Allow pods/seed heads to dry completely on the plant. Harvest, shell, and clean the seeds, removing chaff.
- Wet Seeds (Tomatoes, Cucumbers, Squash): For tomatoes, ferment the seeds in water for a few days to remove the gel coating and inhibit disease. For cucumbers/squash, scrape out seeds, wash thoroughly, and dry.
- Drying: Spread seeds thinly on screens or paper plates in a cool, dry, well-ventilated area for 1-4 weeks. Ensure they are bone-dry before storage. I aim for less than 8% moisture content.
- Storage: Store seeds in airtight containers (glass jars with desiccant packets work well) in a cool, dark, dry place (ideally 40-50°F and 30-40% humidity). Label clearly with variety and date. Properly stored seeds can remain viable for 3-10 years or more.
Step 8: Season Extension & Winterizing
Extend your harvest and protect your garden for the off-season to truly maximize your self sufficient garden from scratch.
- Cold Frames: Simple structures with a transparent top (glass, polycarbonate, or old windows) that sit over garden beds. They trap solar heat, allowing you to grow cold-hardy crops (lettuce, spinach, kale, radishes) well into winter or start seeds earlier in spring. A basic cold frame can be built from 2×6 lumber and a sheet of polycarbonate for under $100.
- Hoop Houses/Low Tunnels: Larger structures made from flexible hoops (PVC pipe or EMT conduit) covered with greenhouse plastic. These provide more space and greater temperature moderation. A 10×20 ft DIY low tunnel kit can cost $200-$500, while a larger, more robust hoop house kit might be $1,000-$3,000. I use a 6×12 ft low tunnel made from 1/2-inch PVC hoops and 6mil greenhouse plastic, which extends my lettuce and spinach harvest by at least
- Rainwater Harvesting: This is my primary source of irrigation water. A 55-gallon rain barrel (e.g., EarthMark Rain Barrel, ~$120-$150) connected to a downspout can collect significant water. For larger needs, I use two 275-gallon IBC totes (Intermediate Bulk Containers, often available used for $100-$200 each from food-grade sources) connected in series. A 1,000 sq ft roof can collect approximately 620 gallons of water for every inch of rainfall. My 1,500 sq ft roof provides ample water for my 600 sq ft garden through multiple barrels and totes.
- Drip Irrigation: This is by far the most water-efficient method, delivering water directly to the plant’s root zone, minimizing evaporation and weed growth.
- Components: A typical drip system includes a pressure regulator (e.g., Rain Bird PRV-10, ~$15), a filter (Rain Bird RBY filter, ~$20), main tubing (1/2-inch poly tubing, 100ft ~$25), smaller feeder lines (1/4-inch tubing), and emitters (0.5 GPH or 1 GPH per plant).
- Kits: For beginners, a starter kit like the Rain Bird Drip Irrigation Garden Kit (model DDI-KIT-1P, ~$40-$60) is excellent for a small garden. For larger setups, I use Netafim Techline CV Drip Line (500ft roll, ~$150-$200), which has pressure-compensating emitters built-in, ensuring even watering across long runs.
- Automation: For true self-sufficiency, consider a battery-powered timer (e.g., Orbit B-Hyve Bluetooth Hose Faucet Timer, ~$50) or a solar-powered timer connected to a small 12V pump.
- Solar-Powered Pumps: For lifting water from a well, pond, or large storage tank to your garden, a solar pump is a game-changer. For a smaller drip system, a Shurflo 2088-594-152 Diaphragm Pump (12V, 3.5 GPM, ~$180) can be powered by a single 100W solar panel (e.g., Renogy 100W Monocrystalline Solar Panel, ~$100) and a small 12V battery (e.g., a 50Ah LiFePO4 battery like the Battle Born 50Ah, ~$450). For larger operations or deeper wells, more robust systems are needed. If you’re looking to build out a comprehensive off-grid power system to support your garden’s water needs, or indeed your entire homestead, you might want to explore resources like the Power Grid Generator complete system guide to understand the full scope of what’s possible in terms of energy independence.
Step 5: Seed Selection & Planting
The choice of seeds is crucial for a truly self sufficient garden from scratch.
- Choose Heirloom & Open-Pollinated Seeds: These varieties produce seeds that will grow true to type, meaning you can save seeds from your harvest year after year. F1 hybrids, while often vigorous, will not produce consistent offspring from saved seeds. Reputable seed companies include Baker Creek Heirloom Seeds, High Mowing Organic Seeds, and Seed Savers Exchange. Start with common, reliable varieties like ‘Black Krim’ tomatoes, ‘Provider’ bush beans, ‘Waltham Butternut’ squash, and ‘Black Seeded Simpson’ lettuce.
- Start Seeds Indoors (Optional but Recommended): For longer growing seasons or specific crops, starting seeds indoors gives you a head start. Use seed-starting mix (e.g., Espoma Organic Seed Starter Mix, ~$10 for 16qt bag) in seed trays (Jiffy Professional Greenhouse 72-cell kit, ~$15). Provide adequate light with LED grow lights (Barrina T5 2ft 4-pack LED Grow Lights, 20W each, ~$50) for 14-16 hours a day, positioned 2-4 inches above seedlings. Maintain consistent temperatures (65-75°F for most).
- Direct Sowing vs. Transplanting: Some crops (carrots, radishes, beans, corn) prefer direct sowing into the garden bed. Others (tomatoes, peppers, broccoli, kale) benefit from being started indoors and transplanted. Follow seed packet instructions for planting depths (e.g., lettuce seeds are often surface-sown or planted 1/8 inch deep, while beans are 1 inch deep) and spacing.
- Companion Planting: Strategically plant different species together to enhance growth, deter pests, and attract beneficial insects. For example, planting marigolds near tomatoes can deter nematodes, and basil improves tomato flavor. Nasturtiums can act as a trap crop for aphids.
- Succession Planting: For a continuous harvest, plant small batches of quick-growing crops (lettuce, radishes, cilantro) every 2-3 weeks. As one crop finishes, another is ready to take its place.
Step 6: Pest & Disease Management (Organic)
Maintaining a self sufficient garden from scratch means embracing organic pest and disease control.
- Integrated Pest Management (IPM): This holistic approach combines several strategies.
- Observation: Regularly inspect your plants for early signs of pests or disease. Catching issues early is key.
- Physical Barriers: Use row covers (e.g., Agribon AG-19 floating row cover, 10×20 ft, ~$20) to protect young plants from insect pests like cabbage worms and squash bugs. Install fences (e.g., 2×4 welded wire mesh, 4 ft tall, 50 ft roll ~$70) to keep out deer, rabbits, and other larger animals.
- Hand-Picking: For larger pests like tomato hornworms or squash bugs, simply pick them off and drop them into a bucket of soapy water.
- Companion Planting: As mentioned, certain plants repel pests. Marigolds, garlic, and onions are excellent deterrents.
- Attract Beneficial Insects: Plant flowers like dill, fennel, cosmos, and sweet alyssum to attract ladybugs, lacewings, and parasitic wasps, which prey on common garden pests.
- Organic Sprays & Treatments:
- Neem Oil: An excellent broad-spectrum organic insecticide and fungicide. Bonide Neem Oil Concentrate (16oz, ~$20) can be mixed at a rate of 1-2 tbsp per gallon of water and sprayed on affected plants.
- Insecticidal Soap: Effective against soft-bodied insects like aphids, whiteflies, and spider mites. Garden Safe Insecticidal Soap (24oz ready-to-use, ~$10).
- Bacillus thuringiensis (Bt): A naturally occurring soil bacterium that targets caterpillars and worms. Monterey BT Worm & Caterpillar Killer (16oz, ~$18) is highly effective and safe for beneficial insects.
- Copper or Sulfur Sprays: For fungal diseases like powdery mildew or blight, organic copper (e.g., Bonide Copper Fungicide, ~$15 for 1lb) or sulfur (e.g., Safer Brand Garden Fungicide, ~$10 for 16oz) can be used as a last resort.
Step 7: Harvesting & Seed Saving
The culmination of your efforts is the harvest, and seed saving closes the loop on self-sufficiency.
- Harvesting Techniques:
- Timing: Harvest vegetables at their peak ripeness for best flavor and nutritional value. For example, green beans should snap cleanly, cucumbers should be firm, and tomatoes should be fully colored.
- Frequency: Many crops, like zucchini, cucumbers, and bush beans, produce more if harvested frequently. Pick daily or every other day.
- Tools: Use clean, sharp pruners (e.g., Corona ClassicCUT Bypass Pruner BP 3180, ~$30) or a sharp knife for clean cuts, minimizing damage to the plant.
- Seed Saving: This is where the « self-sufficient » aspect truly shines.
- Selection: Only save seeds from your healthiest, most vigorous plants that show desired traits (disease resistance, good flavor, high yield).
- Isolation: To ensure true-to-type seeds, prevent cross-pollination. This can be challenging for open-pollinated crops that readily cross (e.g., squash, corn). For beginners, focus on self-pollinating plants like beans, peas, lettuce, and tomatoes.
- Processing:
- Dry Seeds (Beans, Peas, Lettuce, Grains): Allow pods/seed heads to dry completely on the plant. Harvest, shell, and clean the seeds, removing chaff.
- Wet Seeds (Tomatoes, Cucumbers, Squash): For tomatoes, ferment the seeds in water for a few days to remove the gel coating and inhibit disease. For cucumbers/squash, scrape out seeds, wash thoroughly, and dry.
- Drying: Spread seeds thinly on screens or paper plates in a cool, dry, well-ventilated area for 1-4 weeks. Ensure they are bone-dry before storage. I aim for less than 8% moisture content.
- Storage: Store seeds in airtight containers (glass jars with desiccant packets work well) in a cool, dark, dry place (ideally 40-50°F and 30-40% humidity). Label clearly with variety and date. Properly stored seeds can remain viable for 3-10 years or more.
Step 8: Season Extension & Winterizing
Extend your harvest and protect your garden for the off-season to truly maximize your self sufficient garden from scratch.
- Cold Frames: Simple structures with a transparent top (glass, polycarbonate, or old windows) that sit over garden beds. They trap solar heat, allowing you to grow cold-hardy crops (lettuce, spinach, kale, radishes) well into winter or start seeds earlier in spring. A basic cold frame can be built from 2×6 lumber and a sheet of polycarbonate for under $100.
- Hoop Houses/Low Tunnels: Larger structures made from flexible hoops (PVC pipe or EMT conduit) covered with greenhouse plastic. These provide more space and greater temperature moderation. A 10×20 ft DIY low tunnel kit can cost $200-$500, while a larger, more robust hoop house kit might be $1,000-$3,000. I use a 6×12 ft low tunnel made from 1/2-inch PVC hoops and 6mil greenhouse plastic, which extends my lettuce and spinach harvest by at least
Efficient water management is critical for a self sufficient garden from scratch, especially in off-grid living where water resources might be limited.
- Rainwater Harvesting: This is my primary source of irrigation water. A 55-gallon rain barrel (e.g., EarthMark Rain Barrel, ~$120-$150) connected to a downspout can collect significant water. For larger needs, I use two 275-gallon IBC totes (Intermediate Bulk Containers, often available used for $100-$200 each from food-grade sources) connected in series. A 1,000 sq ft roof can collect approximately 620 gallons of water for every inch of rainfall. My 1,500 sq ft roof provides ample water for my 600 sq ft garden through multiple barrels and totes.
- Drip Irrigation: This is by far the most water-efficient method, delivering water directly to the plant’s root zone, minimizing evaporation and weed growth.
- Components: A typical drip system includes a pressure regulator (e.g., Rain Bird PRV-10, ~$15), a filter (Rain Bird RBY filter, ~$20), main tubing (1/2-inch poly tubing, 100ft ~$25), smaller feeder lines (1/4-inch tubing), and emitters (0.5 GPH or 1 GPH per plant).
- Kits: For beginners, a starter kit like the Rain Bird Drip Irrigation Garden Kit (model DDI-KIT-1P, ~$40-$60) is excellent for a small garden. For larger setups, I use Netafim Techline CV Drip Line (500ft roll, ~$150-$200), which has pressure-compensating emitters built-in, ensuring even watering across long runs.
- Automation: For true self-sufficiency, consider a battery-powered timer (e.g., Orbit B-Hyve Bluetooth Hose Faucet Timer, ~$50) or a solar-powered timer connected to a small 12V pump.
- Solar-Powered Pumps: For lifting water from a well, pond, or large storage tank to your garden, a solar pump is a game-changer. For a smaller drip system, a Shurflo 2088-594-152 Diaphragm Pump (12V, 3.5 GPM, ~$180) can be powered by a single 100W solar panel (e.g., Renogy 100W Monocrystalline Solar Panel, ~$100) and a small 12V battery (e.g., a 50Ah LiFePO4 battery like the Battle Born 50Ah, ~$450). For larger operations or deeper wells, more robust systems are needed. If you’re looking to build out a comprehensive off-grid power system to support your garden’s water needs, or indeed your entire homestead, you might want to explore resources like the Power Grid Generator complete system guide to understand the full scope of what’s possible in terms of energy independence.
Step 5: Seed Selection & Planting
The choice of seeds is crucial for a truly self sufficient garden from scratch.
- Choose Heirloom & Open-Pollinated Seeds: These varieties produce seeds that will grow true to type, meaning you can save seeds from your harvest year after year. F1 hybrids, while often vigorous, will not produce consistent offspring from saved seeds. Reputable seed companies include Baker Creek Heirloom Seeds, High Mowing Organic Seeds, and Seed Savers Exchange. Start with common, reliable varieties like ‘Black Krim’ tomatoes, ‘Provider’ bush beans, ‘Waltham Butternut’ squash, and ‘Black Seeded Simpson’ lettuce.
- Start Seeds Indoors (Optional but Recommended): For longer growing seasons or specific crops, starting seeds indoors gives you a head start. Use seed-starting mix (e.g., Espoma Organic Seed Starter Mix, ~$10 for 16qt bag) in seed trays (Jiffy Professional Greenhouse 72-cell kit, ~$15). Provide adequate light with LED grow lights (Barrina T5 2ft 4-pack LED Grow Lights, 20W each, ~$50) for 14-16 hours a day, positioned 2-4 inches above seedlings. Maintain consistent temperatures (65-75°F for most).
- Direct Sowing vs. Transplanting: Some crops (carrots, radishes, beans, corn) prefer direct sowing into the garden bed. Others (tomatoes, peppers, broccoli, kale) benefit from being started indoors and transplanted. Follow seed packet instructions for planting depths (e.g., lettuce seeds are often surface-sown or planted 1/8 inch deep, while beans are 1 inch deep) and spacing.
- Companion Planting: Strategically plant different species together to enhance growth, deter pests, and attract beneficial insects. For example, planting marigolds near tomatoes can deter nematodes, and basil improves tomato flavor. Nasturtiums can act as a trap crop for aphids.
- Succession Planting: For a continuous harvest, plant small batches of quick-growing crops (lettuce, radishes, cilantro) every 2-3 weeks. As one crop finishes, another is ready to take its place.
Step 6: Pest & Disease Management (Organic)
Maintaining a self sufficient garden from scratch means embracing organic pest and disease control.
- Integrated Pest Management (IPM): This holistic approach combines several strategies.
- Observation: Regularly inspect your plants for early signs of pests or disease. Catching issues early is key.
- Physical Barriers: Use row covers (e.g., Agribon AG-19 floating row cover, 10×20 ft, ~$20) to protect young plants from insect pests like cabbage worms and squash bugs. Install fences (e.g., 2×4 welded wire mesh, 4 ft tall, 50 ft roll ~$70) to keep out deer, rabbits, and other larger animals.
- Hand-Picking: For larger pests like tomato hornworms or squash bugs, simply pick them off and drop them into a bucket of soapy water.
- Companion Planting: As mentioned, certain plants repel pests. Marigolds, garlic, and onions are excellent deterrents.
- Attract Beneficial Insects: Plant flowers like dill, fennel, cosmos, and sweet alyssum to attract ladybugs, lacewings, and parasitic wasps, which prey on common garden pests.
- Organic Sprays & Treatments:
- Neem Oil: An excellent broad-spectrum organic insecticide and fungicide. Bonide Neem Oil Concentrate (16oz, ~$20) can be mixed at a rate of 1-2 tbsp per gallon of water and sprayed on affected plants.
- Insecticidal Soap: Effective against soft-bodied insects like aphids, whiteflies, and spider mites. Garden Safe Insecticidal Soap (24oz ready-to-use, ~$10).
- Bacillus thuringiensis (Bt): A naturally occurring soil bacterium that targets caterpillars and worms. Monterey BT Worm & Caterpillar Killer (16oz, ~$18) is highly effective and safe for beneficial insects.
- Copper or Sulfur Sprays: For fungal diseases like powdery mildew or blight, organic copper (e.g., Bonide Copper Fungicide, ~$15 for 1lb) or sulfur (e.g., Safer Brand Garden Fungicide, ~$10 for 16oz) can be used as a last resort.
Step 7: Harvesting & Seed Saving
The culmination of your efforts is the harvest, and seed saving closes the loop on self-sufficiency.
- Harvesting Techniques:
- Timing: Harvest vegetables at their peak ripeness for best flavor and nutritional value. For example, green beans should snap cleanly, cucumbers should be firm, and tomatoes should be fully colored.
- Frequency: Many crops, like zucchini, cucumbers, and bush beans, produce more if harvested frequently. Pick daily or every other day.
- Tools: Use clean, sharp pruners (e.g., Corona ClassicCUT Bypass Pruner BP 3180, ~$30) or a sharp knife for clean cuts, minimizing damage to the plant.
- Seed Saving: This is where the « self-sufficient » aspect truly shines.
- Selection: Only save seeds from your healthiest, most vigorous plants that show desired traits (disease resistance, good flavor, high yield).
- Isolation: To ensure true-to-type seeds, prevent cross-pollination. This can be challenging for open-pollinated crops that readily cross (e.g., squash, corn). For beginners, focus on self-pollinating plants like beans, peas, lettuce, and tomatoes.
- Processing:
- Dry Seeds (Beans, Peas, Lettuce, Grains): Allow pods/seed heads to dry completely on the plant. Harvest, shell, and clean the seeds, removing chaff.
- Wet Seeds (Tomatoes, Cucumbers, Squash): For tomatoes, ferment the seeds in water for a few days to remove the gel coating and inhibit disease. For cucumbers/squash, scrape out seeds, wash thoroughly, and dry.
- Drying: Spread seeds thinly on screens or paper plates in a cool, dry, well-ventilated area for 1-4 weeks. Ensure they are bone-dry before storage. I aim for less than 8% moisture content.
- Storage: Store seeds in airtight containers (glass jars with desiccant packets work well) in a cool, dark, dry place (ideally 40-50°F and 30-40% humidity). Label clearly with variety and date. Properly stored seeds can remain viable for 3-10 years or more.
Step 8: Season Extension & Winterizing
Extend your harvest and protect your garden for the off-season to truly maximize your self sufficient garden from scratch.
- Cold Frames: Simple structures with a transparent top (glass, polycarbonate, or old windows) that sit over garden beds. They trap solar heat, allowing you to grow cold-hardy crops (lettuce, spinach, kale, radishes) well into winter or start seeds earlier in spring. A basic cold frame can be built from 2×6 lumber and a sheet of polycarbonate for under $100.
- Hoop Houses/Low Tunnels: Larger structures made from flexible hoops (PVC pipe or EMT conduit) covered with greenhouse plastic. These provide more space and greater temperature moderation. A 10×20 ft DIY low tunnel kit can cost $200-$500, while a larger, more robust hoop house kit might be $1,000-$3,000. I use a 6×12 ft low tunnel made from 1/2-inch PVC hoops and 6mil greenhouse plastic, which extends my lettuce and spinach harvest by at least
Step 4: Water Management & Irrigation
Efficient water management is critical for a self sufficient garden from scratch, especially in off-grid living where water resources might be limited.
- Rainwater Harvesting: This is my primary source of irrigation water. A 55-gallon rain barrel (e.g., EarthMark Rain Barrel, ~$120-$150) connected to a downspout can collect significant water. For larger needs, I use two 275-gallon IBC totes (Intermediate Bulk Containers, often available used for $100-$200 each from food-grade sources) connected in series. A 1,000 sq ft roof can collect approximately 620 gallons of water for every inch of rainfall. My 1,500 sq ft roof provides ample water for my 600 sq ft garden through multiple barrels and totes.
- Drip Irrigation: This is by far the most water-efficient method, delivering water directly to the plant’s root zone, minimizing evaporation and weed growth.
- Components: A typical drip system includes a pressure regulator (e.g., Rain Bird PRV-10, ~$15), a filter (Rain Bird RBY filter, ~$20), main tubing (1/2-inch poly tubing, 100ft ~$25), smaller feeder lines (1/4-inch tubing), and emitters (0.5 GPH or 1 GPH per plant).
- Kits: For beginners, a starter kit like the Rain Bird Drip Irrigation Garden Kit (model DDI-KIT-1P, ~$40-$60) is excellent for a small garden. For larger setups, I use Netafim Techline CV Drip Line (500ft roll, ~$150-$200), which has pressure-compensating emitters built-in, ensuring even watering across long runs.
- Automation: For true self-sufficiency, consider a battery-powered timer (e.g., Orbit B-Hyve Bluetooth Hose Faucet Timer, ~$50) or a solar-powered timer connected to a small 12V pump.
- Solar-Powered Pumps: For lifting water from a well, pond, or large storage tank to your garden, a solar pump is a game-changer. For a smaller drip system, a Shurflo 2088-594-152 Diaphragm Pump (12V, 3.5 GPM, ~$180) can be powered by a single 100W solar panel (e.g., Renogy 100W Monocrystalline Solar Panel, ~$100) and a small 12V battery (e.g., a 50Ah LiFePO4 battery like the Battle Born 50Ah, ~$450). For larger operations or deeper wells, more robust systems are needed. If you’re looking to build out a comprehensive off-grid power system to support your garden’s water needs, or indeed your entire homestead, you might want to explore resources like the Power Grid Generator complete system guide to understand the full scope of what’s possible in terms of energy independence.
Step 5: Seed Selection & Planting
The choice of seeds is crucial for a truly self sufficient garden from scratch.
- Choose Heirloom & Open-Pollinated Seeds: These varieties produce seeds that will grow true to type, meaning you can save seeds from your harvest year after year. F1 hybrids, while often vigorous, will not produce consistent offspring from saved seeds. Reputable seed companies include Baker Creek Heirloom Seeds, High Mowing Organic Seeds, and Seed Savers Exchange. Start with common, reliable varieties like ‘Black Krim’ tomatoes, ‘Provider’ bush beans, ‘Waltham Butternut’ squash, and ‘Black Seeded Simpson’ lettuce.
- Start Seeds Indoors (Optional but Recommended): For longer growing seasons or specific crops, starting seeds indoors gives you a head start. Use seed-starting mix (e.g., Espoma Organic Seed Starter Mix, ~$10 for 16qt bag) in seed trays (Jiffy Professional Greenhouse 72-cell kit, ~$15). Provide adequate light with LED grow lights (Barrina T5 2ft 4-pack LED Grow Lights, 20W each, ~$50) for 14-16 hours a day, positioned 2-4 inches above seedlings. Maintain consistent temperatures (65-75°F for most).
- Direct Sowing vs. Transplanting: Some crops (carrots, radishes, beans, corn) prefer direct sowing into the garden bed. Others (tomatoes, peppers, broccoli, kale) benefit from being started indoors and transplanted. Follow seed packet instructions for planting depths (e.g., lettuce seeds are often surface-sown or planted 1/8 inch deep, while beans are 1 inch deep) and spacing.
- Companion Planting: Strategically plant different species together to enhance growth, deter pests, and attract beneficial insects. For example, planting marigolds near tomatoes can deter nematodes, and basil improves tomato flavor. Nasturtiums can act as a trap crop for aphids.
- Succession Planting: For a continuous harvest, plant small batches of quick-growing crops (lettuce, radishes, cilantro) every 2-3 weeks. As one crop finishes, another is ready to take its place.
Step 6: Pest & Disease Management (Organic)
Maintaining a self sufficient garden from scratch means embracing organic pest and disease control.
- Integrated Pest Management (IPM): This holistic approach combines several strategies.
- Observation: Regularly inspect your plants for early signs of pests or disease. Catching issues early is key.
- Physical Barriers: Use row covers (e.g., Agribon AG-19 floating row cover, 10×20 ft, ~$20) to protect young plants from insect pests like cabbage worms and squash bugs. Install fences (e.g., 2×4 welded wire mesh, 4 ft tall, 50 ft roll ~$70) to keep out deer, rabbits, and other larger animals.
- Hand-Picking: For larger pests like tomato hornworms or squash bugs, simply pick them off and drop them into a bucket of soapy water.
- Companion Planting: As mentioned, certain plants repel pests. Marigolds, garlic, and onions are excellent deterrents.
- Attract Beneficial Insects: Plant flowers like dill, fennel, cosmos, and sweet alyssum to attract ladybugs, lacewings, and parasitic wasps, which prey on common garden pests.
- Organic Sprays & Treatments:
- Neem Oil: An excellent broad-spectrum organic insecticide and fungicide. Bonide Neem Oil Concentrate (16oz, ~$20) can be mixed at a rate of 1-2 tbsp per gallon of water and sprayed on affected plants.
- Insecticidal Soap: Effective against soft-bodied insects like aphids, whiteflies, and spider mites. Garden Safe Insecticidal Soap (24oz ready-to-use, ~$10).
- Bacillus thuringiensis (Bt): A naturally occurring soil bacterium that targets caterpillars and worms. Monterey BT Worm & Caterpillar Killer (16oz, ~$18) is highly effective and safe for beneficial insects.
- Copper or Sulfur Sprays: For fungal diseases like powdery mildew or blight, organic copper (e.g., Bonide Copper Fungicide, ~$15 for 1lb) or sulfur (e.g., Safer Brand Garden Fungicide, ~$10 for 16oz) can be used as a last resort.
Step 7: Harvesting & Seed Saving
The culmination of your efforts is the harvest, and seed saving closes the loop on self-sufficiency.
- Harvesting Techniques:
- Timing: Harvest vegetables at their peak ripeness for best flavor and nutritional value. For example, green beans should snap cleanly, cucumbers should be firm, and tomatoes should be fully colored.
- Frequency: Many crops, like zucchini, cucumbers, and bush beans, produce more if harvested frequently. Pick daily or every other day.
- Tools: Use clean, sharp pruners (e.g., Corona ClassicCUT Bypass Pruner BP 3180, ~$30) or a sharp knife for clean cuts, minimizing damage to the plant.
- Seed Saving: This is where the « self-sufficient » aspect truly shines.
- Selection: Only save seeds from your healthiest, most vigorous plants that show desired traits (disease resistance, good flavor, high yield).
- Isolation: To ensure true-to-type seeds, prevent cross-pollination. This can be challenging for open-pollinated crops that readily cross (e.g., squash, corn). For beginners, focus on self-pollinating plants like beans, peas, lettuce, and tomatoes.
- Processing:
- Dry Seeds (Beans, Peas, Lettuce, Grains): Allow pods/seed heads to dry completely on the plant. Harvest, shell, and clean the seeds, removing chaff.
- Wet Seeds (Tomatoes, Cucumbers, Squash): For tomatoes, ferment the seeds in water for a few days to remove the gel coating and inhibit disease. For cucumbers/squash, scrape out seeds, wash thoroughly, and dry.
- Drying: Spread seeds thinly on screens or paper plates in a cool, dry, well-ventilated area for 1-4 weeks. Ensure they are bone-dry before storage. I aim for less than 8% moisture content.
- Storage: Store seeds in airtight containers (glass jars with desiccant packets work well) in a cool, dark, dry place (ideally 40-50°F and 30-40% humidity). Label clearly with variety and date. Properly stored seeds can remain viable for 3-10 years or more.
Step 8: Season Extension & Winterizing
Extend your harvest and protect your garden for the off-season to truly maximize your self sufficient garden from scratch.
- Cold Frames: Simple structures with a transparent top (glass, polycarbonate, or old windows) that sit over garden beds. They trap solar heat, allowing you to grow cold-hardy crops (lettuce, spinach, kale, radishes) well into winter or start seeds earlier in spring. A basic cold frame can be built from 2×6 lumber and a sheet of polycarbonate for under $100.
- Hoop Houses/Low Tunnels: Larger structures made from flexible hoops (PVC pipe or EMT conduit) covered with greenhouse plastic. These provide more space and greater temperature moderation. A 10×20 ft DIY low tunnel kit can cost $200-$500, while a larger, more robust hoop house kit might be $1,000-$3,000. I use a 6×12 ft low tunnel made from 1/2-inch PVC hoops and 6mil greenhouse plastic, which extends my lettuce and spinach harvest by at least
- In-Ground Beds: If you have excellent native soil and good drainage, in-ground beds are the most economical. Double-digging (loosening soil two shovel depths) can significantly improve drainage and aeration. For my main garden, I primarily use in-ground beds, but I focus on building up the soil over time with consistent compost additions and cover cropping. I aim for beds that are no wider than 3-4 feet so I can reach the center without stepping on the soil, compacting it.
- Raised Beds: Raised beds offer numerous advantages, especially for poor soil, heavy clay, or rocky areas. They provide better drainage, warm up faster in spring, reduce compaction, and make weeding and harvesting easier on your back.
- Material Options:
- Untreated Cedar: Naturally rot-resistant and chemical-free. A 4×8 ft bed, 12 inches deep, typically requires three 2x12x8 ft cedar boards, costing around $50-$60 per board (total ~$150-$180) plus corner brackets or screws. My first raised beds were cedar and are still going strong after 7 years.
- Galvanized Steel: Durable, long-lasting, and aesthetically pleasing. Brands like Vego Garden offer modular kits. A Vego Garden 17″ Tall 8-in-1 Metal Raised Garden Bed (can be configured to 4×8 ft) costs approximately $250-$300.
- Concrete Blocks/Stones: Very durable but can leach minerals (though generally safe once weathered) and can be expensive.
- Recycled Materials: Pallets (check for chemical treatment stamps like « HT » for heat-treated), old tires (controversial due to potential chemical leaching).
- Filling Raised Beds: Don’t just fill with topsoil. Use a « Hugelkultur » approach (logs, branches, leaves, then compost, then topsoil) or a mixture of 60% good quality topsoil, 30% compost, and 10% perlite or vermiculite for drainage. A 4x8x1 ft raised bed requires about 32 cubic feet (or ~1.2 cubic yards) of soil mix, which can cost $100-$200 depending on your source.
- Material Options:
Step 4: Water Management & Irrigation
Efficient water management is critical for a self sufficient garden from scratch, especially in off-grid living where water resources might be limited.
- Rainwater Harvesting: This is my primary source of irrigation water. A 55-gallon rain barrel (e.g., EarthMark Rain Barrel, ~$120-$150) connected to a downspout can collect significant water. For larger needs, I use two 275-gallon IBC totes (Intermediate Bulk Containers, often available used for $100-$200 each from food-grade sources) connected in series. A 1,000 sq ft roof can collect approximately 620 gallons of water for every inch of rainfall. My 1,500 sq ft roof provides ample water for my 600 sq ft garden through multiple barrels and totes.
- Drip Irrigation: This is by far the most water-efficient method, delivering water directly to the plant’s root zone, minimizing evaporation and weed growth.
- Components: A typical drip system includes a pressure regulator (e.g., Rain Bird PRV-10, ~$15), a filter (Rain Bird RBY filter, ~$20), main tubing (1/2-inch poly tubing, 100ft ~$25), smaller feeder lines (1/4-inch tubing), and emitters (0.5 GPH or 1 GPH per plant).
- Kits: For beginners, a starter kit like the Rain Bird Drip Irrigation Garden Kit (model DDI-KIT-1P, ~$40-$60) is excellent for a small garden. For larger setups, I use Netafim Techline CV Drip Line (500ft roll, ~$150-$200), which has pressure-compensating emitters built-in, ensuring even watering across long runs.
- Automation: For true self-sufficiency, consider a battery-powered timer (e.g., Orbit B-Hyve Bluetooth Hose Faucet Timer, ~$50) or a solar-powered timer connected to a small 12V pump.
- Solar-Powered Pumps: For lifting water from a well, pond, or large storage tank to your garden, a solar pump is a game-changer. For a smaller drip system, a Shurflo 2088-594-152 Diaphragm Pump (12V, 3.5 GPM, ~$180) can be powered by a single 100W solar panel (e.g., Renogy 100W Monocrystalline Solar Panel, ~$100) and a small 12V battery (e.g., a 50Ah LiFePO4 battery like the Battle Born 50Ah, ~$450). For larger operations or deeper wells, more robust systems are needed. If you’re looking to build out a comprehensive off-grid power system to support your garden’s water needs, or indeed your entire homestead, you might want to explore resources like the Power Grid Generator complete system guide to understand the full scope of what’s possible in terms of energy independence.
Step 5: Seed Selection & Planting
The choice of seeds is crucial for a truly self sufficient garden from scratch.
- Choose Heirloom & Open-Pollinated Seeds: These varieties produce seeds that will grow true to type, meaning you can save seeds from your harvest year after year. F1 hybrids, while often vigorous, will not produce consistent offspring from saved seeds. Reputable seed companies include Baker Creek Heirloom Seeds, High Mowing Organic Seeds, and Seed Savers Exchange. Start with common, reliable varieties like ‘Black Krim’ tomatoes, ‘Provider’ bush beans, ‘Waltham Butternut’ squash, and ‘Black Seeded Simpson’ lettuce.
- Start Seeds Indoors (Optional but Recommended): For longer growing seasons or specific crops, starting seeds indoors gives you a head start. Use seed-starting mix (e.g., Espoma Organic Seed Starter Mix, ~$10 for 16qt bag) in seed trays (Jiffy Professional Greenhouse 72-cell kit, ~$15). Provide adequate light with LED grow lights (Barrina T5 2ft 4-pack LED Grow Lights, 20W each, ~$50) for 14-16 hours a day, positioned 2-4 inches above seedlings. Maintain consistent temperatures (65-75°F for most).
- Direct Sowing vs. Transplanting: Some crops (carrots, radishes, beans, corn) prefer direct sowing into the garden bed. Others (tomatoes, peppers, broccoli, kale) benefit from being started indoors and transplanted. Follow seed packet instructions for planting depths (e.g., lettuce seeds are often surface-sown or planted 1/8 inch deep, while beans are 1 inch deep) and spacing.
- Companion Planting: Strategically plant different species together to enhance growth, deter pests, and attract beneficial insects. For example, planting marigolds near tomatoes can deter nematodes, and basil improves tomato flavor. Nasturtiums can act as a trap crop for aphids.
- Succession Planting: For a continuous harvest, plant small batches of quick-growing crops (lettuce, radishes, cilantro) every 2-3 weeks. As one crop finishes, another is ready to take its place.
Step 6: Pest & Disease Management (Organic)
Maintaining a self sufficient garden from scratch means embracing organic pest and disease control.
- Integrated Pest Management (IPM): This holistic approach combines several strategies.
- Observation: Regularly inspect your plants for early signs of pests or disease. Catching issues early is key.
- Physical Barriers: Use row covers (e.g., Agribon AG-19 floating row cover, 10×20 ft, ~$20) to protect young plants from insect pests like cabbage worms and squash bugs. Install fences (e.g., 2×4 welded wire mesh, 4 ft tall, 50 ft roll ~$70) to keep out deer, rabbits, and other larger animals.
- Hand-Picking: For larger pests like tomato hornworms or squash bugs, simply pick them off and drop them into a bucket of soapy water.
- Companion Planting: As mentioned, certain plants repel pests. Marigolds, garlic, and onions are excellent deterrents.
- Attract Beneficial Insects: Plant flowers like dill, fennel, cosmos, and sweet alyssum to attract ladybugs, lacewings, and parasitic wasps, which prey on common garden pests.
- Organic Sprays & Treatments:
- Neem Oil: An excellent broad-spectrum organic insecticide and fungicide. Bonide Neem Oil Concentrate (16oz, ~$20) can be mixed at a rate of 1-2 tbsp per gallon of water and sprayed on affected plants.
- Insecticidal Soap: Effective against soft-bodied insects like aphids, whiteflies, and spider mites. Garden Safe Insecticidal Soap (24oz ready-to-use, ~$10).
- Bacillus thuringiensis (Bt): A naturally occurring soil bacterium that targets caterpillars and worms. Monterey BT Worm & Caterpillar Killer (16oz, ~$18) is highly effective and safe for beneficial insects.
- Copper or Sulfur Sprays: For fungal diseases like powdery mildew or blight, organic copper (e.g., Bonide Copper Fungicide, ~$15 for 1lb) or sulfur (e.g., Safer Brand Garden Fungicide, ~$10 for 16oz) can be used as a last resort.
Step 7: Harvesting & Seed Saving
The culmination of your efforts is the harvest, and seed saving closes the loop on self-sufficiency.
- Harvesting Techniques:
- Timing: Harvest vegetables at their peak ripeness for best flavor and nutritional value. For example, green beans should snap cleanly, cucumbers should be firm, and tomatoes should be fully colored.
- Frequency: Many crops, like zucchini, cucumbers, and bush beans, produce more if harvested frequently. Pick daily or every other day.
- Tools: Use clean, sharp pruners (e.g., Corona ClassicCUT Bypass Pruner BP 3180, ~$30) or a sharp knife for clean cuts, minimizing damage to the plant.
- Seed Saving: This is where the « self-sufficient » aspect truly shines.
- Selection: Only save seeds from your healthiest, most vigorous plants that show desired traits (disease resistance, good flavor, high yield).
- Isolation: To ensure true-to-type seeds, prevent cross-pollination. This can be challenging for open-pollinated crops that readily cross (e.g., squash, corn). For beginners, focus on self-pollinating plants like beans, peas, lettuce, and tomatoes.
- Processing:
- Dry Seeds (Beans, Peas, Lettuce, Grains): Allow pods/seed heads to dry completely on the plant. Harvest, shell, and clean the seeds, removing chaff.
- Wet Seeds (Tomatoes, Cucumbers, Squash): For tomatoes, ferment the seeds in water for a few days to remove the gel coating and inhibit disease. For cucumbers/squash, scrape out seeds, wash thoroughly, and dry.
- Drying: Spread seeds thinly on screens or paper plates in a cool, dry, well-ventilated area for 1-4 weeks. Ensure they are bone-dry before storage. I aim for less than 8% moisture content.
- Storage: Store seeds in airtight containers (glass jars with desiccant packets work well) in a cool, dark, dry place (ideally 40-50°F and 30-40% humidity). Label clearly with variety and date. Properly stored seeds can remain viable for 3-10 years or more.
Step 8: Season Extension & Winterizing
Extend your harvest and protect your garden for the off-season to truly maximize your self sufficient garden from scratch.
- Cold Frames: Simple structures with a transparent top (glass, polycarbonate, or old windows) that sit over garden beds. They trap solar heat, allowing you to grow cold-hardy crops (lettuce, spinach, kale, radishes) well into winter or start seeds earlier in spring. A basic cold frame can be built from 2×6 lumber and a sheet of polycarbonate for under $100.
- Hoop Houses/Low Tunnels: Larger structures made from flexible hoops (PVC pipe or EMT conduit) covered with greenhouse plastic. These provide more space and greater temperature moderation. A 10×20 ft DIY low tunnel kit can cost $200-$500, while a larger, more robust hoop house kit might be $1,000-$3,000. I use a 6×12 ft low tunnel made from 1/2-inch PVC hoops and 6mil greenhouse plastic, which extends my lettuce and spinach harvest by at least
Deciding between raised beds and in-ground beds depends on your soil, budget, and physical capabilities.
- In-Ground Beds: If you have excellent native soil and good drainage, in-ground beds are the most economical. Double-digging (loosening soil two shovel depths) can significantly improve drainage and aeration. For my main garden, I primarily use in-ground beds, but I focus on building up the soil over time with consistent compost additions and cover cropping. I aim for beds that are no wider than 3-4 feet so I can reach the center without stepping on the soil, compacting it.
- Raised Beds: Raised beds offer numerous advantages, especially for poor soil, heavy clay, or rocky areas. They provide better drainage, warm up faster in spring, reduce compaction, and make weeding and harvesting easier on your back.
- Material Options:
- Untreated Cedar: Naturally rot-resistant and chemical-free. A 4×8 ft bed, 12 inches deep, typically requires three 2x12x8 ft cedar boards, costing around $50-$60 per board (total ~$150-$180) plus corner brackets or screws. My first raised beds were cedar and are still going strong after 7 years.
- Galvanized Steel: Durable, long-lasting, and aesthetically pleasing. Brands like Vego Garden offer modular kits. A Vego Garden 17″ Tall 8-in-1 Metal Raised Garden Bed (can be configured to 4×8 ft) costs approximately $250-$300.
- Concrete Blocks/Stones: Very durable but can leach minerals (though generally safe once weathered) and can be expensive.
- Recycled Materials: Pallets (check for chemical treatment stamps like « HT » for heat-treated), old tires (controversial due to potential chemical leaching).
- Filling Raised Beds: Don’t just fill with topsoil. Use a « Hugelkultur » approach (logs, branches, leaves, then compost, then topsoil) or a mixture of 60% good quality topsoil, 30% compost, and 10% perlite or vermiculite for drainage. A 4x8x1 ft raised bed requires about 32 cubic feet (or ~1.2 cubic yards) of soil mix, which can cost $100-$200 depending on your source.
- Material Options:
Step 4: Water Management & Irrigation
Efficient water management is critical for a self sufficient garden from scratch, especially in off-grid living where water resources might be limited.
- Rainwater Harvesting: This is my primary source of irrigation water. A 55-gallon rain barrel (e.g., EarthMark Rain Barrel, ~$120-$150) connected to a downspout can collect significant water. For larger needs, I use two 275-gallon IBC totes (Intermediate Bulk Containers, often available used for $100-$200 each from food-grade sources) connected in series. A 1,000 sq ft roof can collect approximately 620 gallons of water for every inch of rainfall. My 1,500 sq ft roof provides ample water for my 600 sq ft garden through multiple barrels and totes.
- Drip Irrigation: This is by far the most water-efficient method, delivering water directly to the plant’s root zone, minimizing evaporation and weed growth.
- Components: A typical drip system includes a pressure regulator (e.g., Rain Bird PRV-10, ~$15), a filter (Rain Bird RBY filter, ~$20), main tubing (1/2-inch poly tubing, 100ft ~$25), smaller feeder lines (1/4-inch tubing), and emitters (0.5 GPH or 1 GPH per plant).
- Kits: For beginners, a starter kit like the Rain Bird Drip Irrigation Garden Kit (model DDI-KIT-1P, ~$40-$60) is excellent for a small garden. For larger setups, I use Netafim Techline CV Drip Line (500ft roll, ~$150-$200), which has pressure-compensating emitters built-in, ensuring even watering across long runs.
- Automation: For true self-sufficiency, consider a battery-powered timer (e.g., Orbit B-Hyve Bluetooth Hose Faucet Timer, ~$50) or a solar-powered timer connected to a small 12V pump.
- Solar-Powered Pumps: For lifting water from a well, pond, or large storage tank to your garden, a solar pump is a game-changer. For a smaller drip system, a Shurflo 2088-594-152 Diaphragm Pump (12V, 3.5 GPM, ~$180) can be powered by a single 100W solar panel (e.g., Renogy 100W Monocrystalline Solar Panel, ~$100) and a small 12V battery (e.g., a 50Ah LiFePO4 battery like the Battle Born 50Ah, ~$450). For larger operations or deeper wells, more robust systems are needed. If you’re looking to build out a comprehensive off-grid power system to support your garden’s water needs, or indeed your entire homestead, you might want to explore resources like the Power Grid Generator complete system guide to understand the full scope of what’s possible in terms of energy independence.
Step 5: Seed Selection & Planting
The choice of seeds is crucial for a truly self sufficient garden from scratch.
- Choose Heirloom & Open-Pollinated Seeds: These varieties produce seeds that will grow true to type, meaning you can save seeds from your harvest year after year. F1 hybrids, while often vigorous, will not produce consistent offspring from saved seeds. Reputable seed companies include Baker Creek Heirloom Seeds, High Mowing Organic Seeds, and Seed Savers Exchange. Start with common, reliable varieties like ‘Black Krim’ tomatoes, ‘Provider’ bush beans, ‘Waltham Butternut’ squash, and ‘Black Seeded Simpson’ lettuce.
- Start Seeds Indoors (Optional but Recommended): For longer growing seasons or specific crops, starting seeds indoors gives you a head start. Use seed-starting mix (e.g., Espoma Organic Seed Starter Mix, ~$10 for 16qt bag) in seed trays (Jiffy Professional Greenhouse 72-cell kit, ~$15). Provide adequate light with LED grow lights (Barrina T5 2ft 4-pack LED Grow Lights, 20W each, ~$50) for 14-16 hours a day, positioned 2-4 inches above seedlings. Maintain consistent temperatures (65-75°F for most).
- Direct Sowing vs. Transplanting: Some crops (carrots, radishes, beans, corn) prefer direct sowing into the garden bed. Others (tomatoes, peppers, broccoli, kale) benefit from being started indoors and transplanted. Follow seed packet instructions for planting depths (e.g., lettuce seeds are often surface-sown or planted 1/8 inch deep, while beans are 1 inch deep) and spacing.
- Companion Planting: Strategically plant different species together to enhance growth, deter pests, and attract beneficial insects. For example, planting marigolds near tomatoes can deter nematodes, and basil improves tomato flavor. Nasturtiums can act as a trap crop for aphids.
- Succession Planting: For a continuous harvest, plant small batches of quick-growing crops (lettuce, radishes, cilantro) every 2-3 weeks. As one crop finishes, another is ready to take its place.
Step 6: Pest & Disease Management (Organic)
Maintaining a self sufficient garden from scratch means embracing organic pest and disease control.
- Integrated Pest Management (IPM): This holistic approach combines several strategies.
- Observation: Regularly inspect your plants for early signs of pests or disease. Catching issues early is key.
- Physical Barriers: Use row covers (e.g., Agribon AG-19 floating row cover, 10×20 ft, ~$20) to protect young plants from insect pests like cabbage worms and squash bugs. Install fences (e.g., 2×4 welded wire mesh, 4 ft tall, 50 ft roll ~$70) to keep out deer, rabbits, and other larger animals.
- Hand-Picking: For larger pests like tomato hornworms or squash bugs, simply pick them off and drop them into a bucket of soapy water.
- Companion Planting: As mentioned, certain plants repel pests. Marigolds, garlic, and onions are excellent deterrents.
- Attract Beneficial Insects: Plant flowers like dill, fennel, cosmos, and sweet alyssum to attract ladybugs, lacewings, and parasitic wasps, which prey on common garden pests.
- Organic Sprays & Treatments:
- Neem Oil: An excellent broad-spectrum organic insecticide and fungicide. Bonide Neem Oil Concentrate (16oz, ~$20) can be mixed at a rate of 1-2 tbsp per gallon of water and sprayed on affected plants.
- Insecticidal Soap: Effective against soft-bodied insects like aphids, whiteflies, and spider mites. Garden Safe Insecticidal Soap (24oz ready-to-use, ~$10).
- Bacillus thuringiensis (Bt): A naturally occurring soil bacterium that targets caterpillars and worms. Monterey BT Worm & Caterpillar Killer (16oz, ~$18) is highly effective and safe for beneficial insects.
- Copper or Sulfur Sprays: For fungal diseases like powdery mildew or blight, organic copper (e.g., Bonide Copper Fungicide, ~$15 for 1lb) or sulfur (e.g., Safer Brand Garden Fungicide, ~$10 for 16oz) can be used as a last resort.
Step 7: Harvesting & Seed Saving
The culmination of your efforts is the harvest, and seed saving closes the loop on self-sufficiency.
- Harvesting Techniques:
- Timing: Harvest vegetables at their peak ripeness for best flavor and nutritional value. For example, green beans should snap cleanly, cucumbers should be firm, and tomatoes should be fully colored.
- Frequency: Many crops, like zucchini, cucumbers, and bush beans, produce more if harvested frequently. Pick daily or every other day.
- Tools: Use clean, sharp pruners (e.g., Corona ClassicCUT Bypass Pruner BP 3180, ~$30) or a sharp knife for clean cuts, minimizing damage to the plant.
- Seed Saving: This is where the « self-sufficient » aspect truly shines.
- Selection: Only save seeds from your healthiest, most vigorous plants that show desired traits (disease resistance, good flavor, high yield).
- Isolation: To ensure true-to-type seeds, prevent cross-pollination. This can be challenging for open-pollinated crops that readily cross (e.g., squash, corn). For beginners, focus on self-pollinating plants like beans, peas, lettuce, and tomatoes.
- Processing:
- Dry Seeds (Beans, Peas, Lettuce, Grains): Allow pods/seed heads to dry completely on the plant. Harvest, shell, and clean the seeds, removing chaff.
- Wet Seeds (Tomatoes, Cucumbers, Squash): For tomatoes, ferment the seeds in water for a few days to remove the gel coating and inhibit disease. For cucumbers/squash, scrape out seeds, wash thoroughly, and dry.
- Drying: Spread seeds thinly on screens or paper plates in a cool, dry, well-ventilated area for 1-4 weeks. Ensure they are bone-dry before storage. I aim for less than 8% moisture content.
- Storage: Store seeds in airtight containers (glass jars with desiccant packets work well) in a cool, dark, dry place (ideally 40-50°F and 30-40% humidity). Label clearly with variety and date. Properly stored seeds can remain viable for 3-10 years or more.
Step 8: Season Extension & Winterizing
Extend your harvest and protect your garden for the off-season to truly maximize your self sufficient garden from scratch.
- Cold Frames: Simple structures with a transparent top (glass, polycarbonate, or old windows) that sit over garden beds. They trap solar heat, allowing you to grow cold-hardy crops (lettuce, spinach, kale, radishes) well into winter or start seeds earlier in spring. A basic cold frame can be built from 2×6 lumber and a sheet of polycarbonate for under $100.
- Hoop Houses/Low Tunnels: Larger structures made from flexible hoops (PVC pipe or EMT conduit) covered with greenhouse plastic. These provide more space and greater temperature moderation. A 10×20 ft DIY low tunnel kit can cost $200-$500, while a larger, more robust hoop house kit might be $1,000-$3,000. I use a 6×12 ft low tunnel made from 1/2-inch PVC hoops and 6mil greenhouse plastic, which extends my lettuce and spinach harvest by at least
Healthy soil is the bedrock of a productive, self-sufficient garden. You can’t guess what your soil needs; you have to test it.
- Perform a Soil Test: A professional soil test will give you precise data on your soil’s pH, nutrient levels (N-P-K), and organic matter content. I recommend sending a sample to your local agricultural extension office; it typically costs $20-$50 and provides detailed recommendations. Alternatively, for a quick homeowner check, a Rapitest Soil Test Kit (40-test kit, model 1663, ~$20 on Amazon) provides a good baseline for pH, Nitrogen, Phosphorus, and Potash. Aim for a pH between 6.0 and 7.0 for most vegetables.
- Amend for pH Imbalance: If your soil is too acidic (below 6.0), add agricultural lime (dolomitic lime adds magnesium, calcitic lime adds calcium). Apply 5-10 lbs per 100 sq ft for a moderate adjustment. If it’s too alkaline (above 7.0), add elemental sulfur (e.g., Espoma Soil Acidifier, ~$15 for 6.75 lbs) or generous amounts of organic matter like peat moss or pine needles.
- Build Organic Matter: This is the single most important step for long-term soil health. Organic matter improves soil structure, water retention, drainage, and nutrient availability. Incorporate 2-4 inches of high-quality compost into your top 6-12 inches of soil annually. I make my own compost from kitchen scraps, garden waste, and shredded leaves, but you can purchase it. Local nurseries often sell bulk compost for $30-$50 per cubic yard. Aged manure (from chickens, cows, or horses – ensure it’s well-rotted to avoid burning plants) is also excellent.
- Address Nutrient Deficiencies: Based on your soil test, add specific organic amendments. If Nitrogen (N) is low, add blood meal (12-0-0, ~$20 for 3 lbs) or feather meal. For Phosphorus (P), use bone meal (3-15-0, ~$15 for 3 lbs) or rock phosphate. For Potassium (K), greensand (0-0-2.5, ~$25 for 5 lbs) or kelp meal are good choices. I rely heavily on Espoma Organic Garden-tone (5-3-3, ~$25 for an 8lb bag) as a balanced, all-purpose organic fertilizer during planting.
Step 3: Garden Bed Preparation
Deciding between raised beds and in-ground beds depends on your soil, budget, and physical capabilities.
- In-Ground Beds: If you have excellent native soil and good drainage, in-ground beds are the most economical. Double-digging (loosening soil two shovel depths) can significantly improve drainage and aeration. For my main garden, I primarily use in-ground beds, but I focus on building up the soil over time with consistent compost additions and cover cropping. I aim for beds that are no wider than 3-4 feet so I can reach the center without stepping on the soil, compacting it.
- Raised Beds: Raised beds offer numerous advantages, especially for poor soil, heavy clay, or rocky areas. They provide better drainage, warm up faster in spring, reduce compaction, and make weeding and harvesting easier on your back.
- Material Options:
- Untreated Cedar: Naturally rot-resistant and chemical-free. A 4×8 ft bed, 12 inches deep, typically requires three 2x12x8 ft cedar boards, costing around $50-$60 per board (total ~$150-$180) plus corner brackets or screws. My first raised beds were cedar and are still going strong after 7 years.
- Galvanized Steel: Durable, long-lasting, and aesthetically pleasing. Brands like Vego Garden offer modular kits. A Vego Garden 17″ Tall 8-in-1 Metal Raised Garden Bed (can be configured to 4×8 ft) costs approximately $250-$300.
- Concrete Blocks/Stones: Very durable but can leach minerals (though generally safe once weathered) and can be expensive.
- Recycled Materials: Pallets (check for chemical treatment stamps like « HT » for heat-treated), old tires (controversial due to potential chemical leaching).
- Filling Raised Beds: Don’t just fill with topsoil. Use a « Hugelkultur » approach (logs, branches, leaves, then compost, then topsoil) or a mixture of 60% good quality topsoil, 30% compost, and 10% perlite or vermiculite for drainage. A 4x8x1 ft raised bed requires about 32 cubic feet (or ~1.2 cubic yards) of soil mix, which can cost $100-$200 depending on your source.
- Material Options:
Step 4: Water Management & Irrigation
Efficient water management is critical for a self sufficient garden from scratch, especially in off-grid living where water resources might be limited.
- Rainwater Harvesting: This is my primary source of irrigation water. A 55-gallon rain barrel (e.g., EarthMark Rain Barrel, ~$120-$150) connected to a downspout can collect significant water. For larger needs, I use two 275-gallon IBC totes (Intermediate Bulk Containers, often available used for $100-$200 each from food-grade sources) connected in series. A 1,000 sq ft roof can collect approximately 620 gallons of water for every inch of rainfall. My 1,500 sq ft roof provides ample water for my 600 sq ft garden through multiple barrels and totes.
- Drip Irrigation: This is by far the most water-efficient method, delivering water directly to the plant’s root zone, minimizing evaporation and weed growth.
- Components: A typical drip system includes a pressure regulator (e.g., Rain Bird PRV-10, ~$15), a filter (Rain Bird RBY filter, ~$20), main tubing (1/2-inch poly tubing, 100ft ~$25), smaller feeder lines (1/4-inch tubing), and emitters (0.5 GPH or 1 GPH per plant).
- Kits: For beginners, a starter kit like the Rain Bird Drip Irrigation Garden Kit (model DDI-KIT-1P, ~$40-$60) is excellent for a small garden. For larger setups, I use Netafim Techline CV Drip Line (500ft roll, ~$150-$200), which has pressure-compensating emitters built-in, ensuring even watering across long runs.
- Automation: For true self-sufficiency, consider a battery-powered timer (e.g., Orbit B-Hyve Bluetooth Hose Faucet Timer, ~$50) or a solar-powered timer connected to a small 12V pump.
- Solar-Powered Pumps: For lifting water from a well, pond, or large storage tank to your garden, a solar pump is a game-changer. For a smaller drip system, a Shurflo 2088-594-152 Diaphragm Pump (12V, 3.5 GPM, ~$180) can be powered by a single 100W solar panel (e.g., Renogy 100W Monocrystalline Solar Panel, ~$100) and a small 12V battery (e.g., a 50Ah LiFePO4 battery like the Battle Born 50Ah, ~$450). For larger operations or deeper wells, more robust systems are needed. If you’re looking to build out a comprehensive off-grid power system to support your garden’s water needs, or indeed your entire homestead, you might want to explore resources like the Power Grid Generator complete system guide to understand the full scope of what’s possible in terms of energy independence.
Step 5: Seed Selection & Planting
The choice of seeds is crucial for a truly self sufficient garden from scratch.
- Choose Heirloom & Open-Pollinated Seeds: These varieties produce seeds that will grow true to type, meaning you can save seeds from your harvest year after year. F1 hybrids, while often vigorous, will not produce consistent offspring from saved seeds. Reputable seed companies include Baker Creek Heirloom Seeds, High Mowing Organic Seeds, and Seed Savers Exchange. Start with common, reliable varieties like ‘Black Krim’ tomatoes, ‘Provider’ bush beans, ‘Waltham Butternut’ squash, and ‘Black Seeded Simpson’ lettuce.
- Start Seeds Indoors (Optional but Recommended): For longer growing seasons or specific crops, starting seeds indoors gives you a head start. Use seed-starting mix (e.g., Espoma Organic Seed Starter Mix, ~$10 for 16qt bag) in seed trays (Jiffy Professional Greenhouse 72-cell kit, ~$15). Provide adequate light with LED grow lights (Barrina T5 2ft 4-pack LED Grow Lights, 20W each, ~$50) for 14-16 hours a day, positioned 2-4 inches above seedlings. Maintain consistent temperatures (65-75°F for most).
- Direct Sowing vs. Transplanting: Some crops (carrots, radishes, beans, corn) prefer direct sowing into the garden bed. Others (tomatoes, peppers, broccoli, kale) benefit from being started indoors and transplanted. Follow seed packet instructions for planting depths (e.g., lettuce seeds are often surface-sown or planted 1/8 inch deep, while beans are 1 inch deep) and spacing.
- Companion Planting: Strategically plant different species together to enhance growth, deter pests, and attract beneficial insects. For example, planting marigolds near tomatoes can deter nematodes, and basil improves tomato flavor. Nasturtiums can act as a trap crop for aphids.
- Succession Planting: For a continuous harvest, plant small batches of quick-growing crops (lettuce, radishes, cilantro) every 2-3 weeks. As one crop finishes, another is ready to take its place.
Step 6: Pest & Disease Management (Organic)
Maintaining a self sufficient garden from scratch means embracing organic pest and disease control.
- Integrated Pest Management (IPM): This holistic approach combines several strategies.
- Observation: Regularly inspect your plants for early signs of pests or disease. Catching issues early is key.
- Physical Barriers: Use row covers (e.g., Agribon AG-19 floating row cover, 10×20 ft, ~$20) to protect young plants from insect pests like cabbage worms and squash bugs. Install fences (e.g., 2×4 welded wire mesh, 4 ft tall, 50 ft roll ~$70) to keep out deer, rabbits, and other larger animals.
- Hand-Picking: For larger pests like tomato hornworms or squash bugs, simply pick them off and drop them into a bucket of soapy water.
- Companion Planting: As mentioned, certain plants repel pests. Marigolds, garlic, and onions are excellent deterrents.
- Attract Beneficial Insects: Plant flowers like dill, fennel, cosmos, and sweet alyssum to attract ladybugs, lacewings, and parasitic wasps, which prey on common garden pests.
- Organic Sprays & Treatments:
- Neem Oil: An excellent broad-spectrum organic insecticide and fungicide. Bonide Neem Oil Concentrate (16oz, ~$20) can be mixed at a rate of 1-2 tbsp per gallon of water and sprayed on affected plants.
- Insecticidal Soap: Effective against soft-bodied insects like aphids, whiteflies, and spider mites. Garden Safe Insecticidal Soap (24oz ready-to-use, ~$10).
- Bacillus thuringiensis (Bt): A naturally occurring soil bacterium that targets caterpillars and worms. Monterey BT Worm & Caterpillar Killer (16oz, ~$18) is highly effective and safe for beneficial insects.
- Copper or Sulfur Sprays: For fungal diseases like powdery mildew or blight, organic copper (e.g., Bonide Copper Fungicide, ~$15 for 1lb) or sulfur (e.g., Safer Brand Garden Fungicide, ~$10 for 16oz) can be used as a last resort.
Step 7: Harvesting & Seed Saving
The culmination of your efforts is the harvest, and seed saving closes the loop on self-sufficiency.
- Harvesting Techniques:
- Timing: Harvest vegetables at their peak ripeness for best flavor and nutritional value. For example, green beans should snap cleanly, cucumbers should be firm, and tomatoes should be fully colored.
- Frequency: Many crops, like zucchini, cucumbers, and bush beans, produce more if harvested frequently. Pick daily or every other day.
- Tools: Use clean, sharp pruners (e.g., Corona ClassicCUT Bypass Pruner BP 3180, ~$30) or a sharp knife for clean cuts, minimizing damage to the plant.
- Seed Saving: This is where the « self-sufficient » aspect truly shines.
- Selection: Only save seeds from your healthiest, most vigorous plants that show desired traits (disease resistance, good flavor, high yield).
- Isolation: To ensure true-to-type seeds, prevent cross-pollination. This can be challenging for open-pollinated crops that readily cross (e.g., squash, corn). For beginners, focus on self-pollinating plants like beans, peas, lettuce, and tomatoes.
- Processing:
- Dry Seeds (Beans, Peas, Lettuce, Grains): Allow pods/seed heads to dry completely on the plant. Harvest, shell, and clean the seeds, removing chaff.
- Wet Seeds (Tomatoes, Cucumbers, Squash): For tomatoes, ferment the seeds in water for a few days to remove the gel coating and inhibit disease. For cucumbers/squash, scrape out seeds, wash thoroughly, and dry.
- Drying: Spread seeds thinly on screens or paper plates in a cool, dry, well-ventilated area for 1-4 weeks. Ensure they are bone-dry before storage. I aim for less than 8% moisture content.
- Storage: Store seeds in airtight containers (glass jars with desiccant packets work well) in a cool, dark, dry place (ideally 40-50°F and 30-40% humidity). Label clearly with variety and date. Properly stored seeds can remain viable for 3-10 years or more.
Step 8: Season Extension & Winterizing
Extend your harvest and protect your garden for the off-season to truly maximize your self sufficient garden from scratch.
- Cold Frames: Simple structures with a transparent top (glass, polycarbonate, or old windows) that sit over garden beds. They trap solar heat, allowing you to grow cold-hardy crops (lettuce, spinach, kale, radishes) well into winter or start seeds earlier in spring. A basic cold frame can be built from 2×6 lumber and a sheet of polycarbonate for under $100.
- Hoop Houses/Low Tunnels: Larger structures made from flexible hoops (PVC pipe or EMT conduit) covered with greenhouse plastic. These provide more space and greater temperature moderation. A 10×20 ft DIY low tunnel kit can cost $200-$500, while a larger, more robust hoop house kit might be $1,000-$3,000. I use a 6×12 ft low tunnel made from 1/2-inch PVC hoops and 6mil greenhouse plastic, which extends my lettuce and spinach harvest by at least
Step 6: Pest & Disease Management (Organic)
Maintaining a self sufficient garden from scratch means embracing organic pest and disease control.
- Integrated Pest Management (IPM): This holistic approach combines several strategies.
- Observation: Regularly inspect your plants for early signs of pests or disease. Catching issues early is key.
- Physical Barriers: Use row covers (e.g., Agribon AG-19 floating row cover, 10×20 ft, ~$20) to protect young plants from insect pests like cabbage worms and squash bugs. Install fences (e.g., 2×4 welded wire mesh, 4 ft tall, 50 ft roll ~$70) to keep out deer, rabbits, and other larger animals.
- Hand-Picking: For larger pests like tomato hornworms or squash bugs, simply pick them off and drop them into a bucket of soapy water.
- Companion Planting: As mentioned, certain plants repel pests. Marigolds, garlic, and onions are excellent deterrents.
- Attract Beneficial Insects: Plant flowers like dill, fennel, cosmos, and sweet alyssum to attract ladybugs, lacewings, and parasitic wasps, which prey on common garden pests.
- Organic Sprays & Treatments:
- Neem Oil: An excellent broad-spectrum organic insecticide and fungicide. Bonide Neem Oil Concentrate (16oz, ~$20) can be mixed at a rate of 1-2 tbsp per gallon of water and sprayed on affected plants.
- Insecticidal Soap: Effective against soft-bodied insects like aphids, whiteflies, and spider mites. Garden Safe Insecticidal Soap (24oz ready-to-use, ~$10).
- Bacillus thuringiensis (Bt): A naturally occurring soil bacterium that targets caterpillars and worms. Monterey BT Worm & Caterpillar Killer (16oz, ~$18) is highly effective and safe for beneficial insects.
- Copper or Sulfur Sprays: For fungal diseases like powdery mildew or blight, organic copper (e.g., Bonide Copper Fungicide, ~$15 for 1lb) or sulfur (e.g., Safer Brand Garden Fungicide, ~$10 for 16oz) can be used as a last resort.
Step 7: Harvesting & Seed Saving
The culmination of your efforts is the harvest, and seed saving closes the loop on self-sufficiency.
- Harvesting Techniques:
- Timing: Harvest vegetables at their peak ripeness for best flavor and nutritional value. For example, green beans should snap cleanly, cucumbers should be firm, and tomatoes should be fully colored.
- Frequency: Many crops, like zucchini, cucumbers, and bush beans, produce more if harvested frequently. Pick daily or every other day.
- Tools: Use clean, sharp pruners (e.g., Corona ClassicCUT Bypass Pruner BP 3180, ~$30) or a sharp knife for clean cuts, minimizing damage to the plant.
- Seed Saving: This is where the « self-sufficient » aspect truly shines.
- Selection: Only save seeds from your healthiest, most vigorous plants that show desired traits (disease resistance, good flavor, high yield).
- Isolation: To ensure true-to-type seeds, prevent cross-pollination. This can be challenging for open-pollinated crops that readily cross (e.g., squash, corn). For beginners, focus on self-pollinating plants like beans, peas, lettuce, and tomatoes.
- Processing:
- Dry Seeds (Beans, Peas, Lettuce, Grains): Allow pods/seed heads to dry completely on the plant. Harvest, shell, and clean the seeds, removing chaff.
- Wet Seeds (Tomatoes, Cucumbers, Squash): For tomatoes, ferment the seeds in water for a few days to remove the gel coating and inhibit disease. For cucumbers/squash, scrape out seeds, wash thoroughly, and dry.
- Drying: Spread seeds thinly on screens or paper plates in a cool, dry, well-ventilated area for 1-4 weeks. Ensure they are bone-dry before storage. I aim for less than 8% moisture content.
- Storage: Store seeds in airtight containers (glass jars with desiccant packets work well) in a cool, dark, dry place (ideally 40-50°F and 30-40% humidity). Label clearly with variety and date. Properly stored seeds can remain viable for 3-10 years or more.
Step 8: Season Extension & Winterizing
Extend your harvest and protect your garden for the off-season to truly maximize your self sufficient garden from scratch.
- Cold Frames: Simple structures with a transparent top (glass, polycarbonate, or old windows) that sit over garden beds. They trap solar heat, allowing you to grow cold-hardy crops (lettuce, spinach, kale, radishes) well into winter or start seeds earlier in spring. A basic cold frame can be built from 2×6 lumber and a sheet of polycarbonate for under $100.
- Hoop Houses/Low Tunnels: Larger structures made from flexible hoops (PVC pipe or EMT conduit) covered with greenhouse plastic. These provide more space and greater temperature moderation. A 10×20 ft DIY low tunnel kit can cost $200-$500, while a larger, more robust hoop house kit might be $1,000-$3,000. I use a 6×12 ft low tunnel made from 1/2-inch PVC hoops and 6mil greenhouse plastic, which extends my lettuce and spinach harvest by at least
- Choose Heirloom & Open-Pollinated Seeds: These varieties produce seeds that will grow true to type, meaning you can save seeds from your harvest year after year. F1 hybrids, while often vigorous, will not produce consistent offspring from saved seeds. Reputable seed companies include Baker Creek Heirloom Seeds, High Mowing Organic Seeds, and Seed Savers Exchange. Start with common, reliable varieties like ‘Black Krim’ tomatoes, ‘Provider’ bush beans, ‘Waltham Butternut’ squash, and ‘Black Seeded Simpson’ lettuce.
- Start Seeds Indoors (Optional but Recommended): For longer growing seasons or specific crops, starting seeds indoors gives you a head start. Use seed-starting mix (e.g., Espoma Organic Seed Starter Mix, ~$10 for 16qt bag) in seed trays (Jiffy Professional Greenhouse 72-cell kit, ~$15). Provide adequate light with LED grow lights (Barrina T5 2ft 4-pack LED Grow Lights, 20W each, ~$50) for 14-16 hours a day, positioned 2-4 inches above seedlings. Maintain consistent temperatures (65-75°F for most).
- Direct Sowing vs. Transplanting: Some crops (carrots, radishes, beans, corn) prefer direct sowing into the garden bed. Others (tomatoes, peppers, broccoli, kale) benefit from being started indoors and transplanted. Follow seed packet instructions for planting depths (e.g., lettuce seeds are often surface-sown or planted 1/8 inch deep, while beans are 1 inch deep) and spacing.
- Companion Planting: Strategically plant different species together to enhance growth, deter pests, and attract beneficial insects. For example, planting marigolds near tomatoes can deter nematodes, and basil improves tomato flavor. Nasturtiums can act as a trap crop for aphids.
- Succession Planting: For a continuous harvest, plant small batches of quick-growing crops (lettuce, radishes, cilantro) every 2-3 weeks. As one crop finishes, another is ready to take its place.
Step 6: Pest & Disease Management (Organic)
Maintaining a self sufficient garden from scratch means embracing organic pest and disease control.
- Integrated Pest Management (IPM): This holistic approach combines several strategies.
- Observation: Regularly inspect your plants for early signs of pests or disease. Catching issues early is key.
- Physical Barriers: Use row covers (e.g., Agribon AG-19 floating row cover, 10×20 ft, ~$20) to protect young plants from insect pests like cabbage worms and squash bugs. Install fences (e.g., 2×4 welded wire mesh, 4 ft tall, 50 ft roll ~$70) to keep out deer, rabbits, and other larger animals.
- Hand-Picking: For larger pests like tomato hornworms or squash bugs, simply pick them off and drop them into a bucket of soapy water.
- Companion Planting: As mentioned, certain plants repel pests. Marigolds, garlic, and onions are excellent deterrents.
- Attract Beneficial Insects: Plant flowers like dill, fennel, cosmos, and sweet alyssum to attract ladybugs, lacewings, and parasitic wasps, which prey on common garden pests.
- Organic Sprays & Treatments:
- Neem Oil: An excellent broad-spectrum organic insecticide and fungicide. Bonide Neem Oil Concentrate (16oz, ~$20) can be mixed at a rate of 1-2 tbsp per gallon of water and sprayed on affected plants.
- Insecticidal Soap: Effective against soft-bodied insects like aphids, whiteflies, and spider mites. Garden Safe Insecticidal Soap (24oz ready-to-use, ~$10).
- Bacillus thuringiensis (Bt): A naturally occurring soil bacterium that targets caterpillars and worms. Monterey BT Worm & Caterpillar Killer (16oz, ~$18) is highly effective and safe for beneficial insects.
- Copper or Sulfur Sprays: For fungal diseases like powdery mildew or blight, organic copper (e.g., Bonide Copper Fungicide, ~$15 for 1lb) or sulfur (e.g., Safer Brand Garden Fungicide, ~$10 for 16oz) can be used as a last resort.
Step 7: Harvesting & Seed Saving
The culmination of your efforts is the harvest, and seed saving closes the loop on self-sufficiency.
- Harvesting Techniques:
- Timing: Harvest vegetables at their peak ripeness for best flavor and nutritional value. For example, green beans should snap cleanly, cucumbers should be firm, and tomatoes should be fully colored.
- Frequency: Many crops, like zucchini, cucumbers, and bush beans, produce more if harvested frequently. Pick daily or every other day.
- Tools: Use clean, sharp pruners (e.g., Corona ClassicCUT Bypass Pruner BP 3180, ~$30) or a sharp knife for clean cuts, minimizing damage to the plant.
- Seed Saving: This is where the « self-sufficient » aspect truly shines.
- Selection: Only save seeds from your healthiest, most vigorous plants that show desired traits (disease resistance, good flavor, high yield).
- Isolation: To ensure true-to-type seeds, prevent cross-pollination. This can be challenging for open-pollinated crops that readily cross (e.g., squash, corn). For beginners, focus on self-pollinating plants like beans, peas, lettuce, and tomatoes.
- Processing:
- Dry Seeds (Beans, Peas, Lettuce, Grains): Allow pods/seed heads to dry completely on the plant. Harvest, shell, and clean the seeds, removing chaff.
- Wet Seeds (Tomatoes, Cucumbers, Squash): For tomatoes, ferment the seeds in water for a few days to remove the gel coating and inhibit disease. For cucumbers/squash, scrape out seeds, wash thoroughly, and dry.
- Drying: Spread seeds thinly on screens or paper plates in a cool, dry, well-ventilated area for 1-4 weeks. Ensure they are bone-dry before storage. I aim for less than 8% moisture content.
- Storage: Store seeds in airtight containers (glass jars with desiccant packets work well) in a cool, dark, dry place (ideally 40-50°F and 30-40% humidity). Label clearly with variety and date. Properly stored seeds can remain viable for 3-10 years or more.
Step 8: Season Extension & Winterizing
Extend your harvest and protect your garden for the off-season to truly maximize your self sufficient garden from scratch.
- Cold Frames: Simple structures with a transparent top (glass, polycarbonate, or old windows) that sit over garden beds. They trap solar heat, allowing you to grow cold-hardy crops (lettuce, spinach, kale, radishes) well into winter or start seeds earlier in spring. A basic cold frame can be built from 2×6 lumber and a sheet of polycarbonate for under $100.
- Hoop Houses/Low Tunnels: Larger structures made from flexible hoops (PVC pipe or EMT conduit) covered with greenhouse plastic. These provide more space and greater temperature moderation. A 10×20 ft DIY low tunnel kit can cost $200-$500, while a larger, more robust hoop house kit might be $1,000-$3,000. I use a 6×12 ft low tunnel made from 1/2-inch PVC hoops and 6mil greenhouse plastic, which extends my lettuce and spinach harvest by at least
The choice of seeds is crucial for a truly self sufficient garden from scratch.
- Choose Heirloom & Open-Pollinated Seeds: These varieties produce seeds that will grow true to type, meaning you can save seeds from your harvest year after year. F1 hybrids, while often vigorous, will not produce consistent offspring from saved seeds. Reputable seed companies include Baker Creek Heirloom Seeds, High Mowing Organic Seeds, and Seed Savers Exchange. Start with common, reliable varieties like ‘Black Krim’ tomatoes, ‘Provider’ bush beans, ‘Waltham Butternut’ squash, and ‘Black Seeded Simpson’ lettuce.
- Start Seeds Indoors (Optional but Recommended): For longer growing seasons or specific crops, starting seeds indoors gives you a head start. Use seed-starting mix (e.g., Espoma Organic Seed Starter Mix, ~$10 for 16qt bag) in seed trays (Jiffy Professional Greenhouse 72-cell kit, ~$15). Provide adequate light with LED grow lights (Barrina T5 2ft 4-pack LED Grow Lights, 20W each, ~$50) for 14-16 hours a day, positioned 2-4 inches above seedlings. Maintain consistent temperatures (65-75°F for most).
- Direct Sowing vs. Transplanting: Some crops (carrots, radishes, beans, corn) prefer direct sowing into the garden bed. Others (tomatoes, peppers, broccoli, kale) benefit from being started indoors and transplanted. Follow seed packet instructions for planting depths (e.g., lettuce seeds are often surface-sown or planted 1/8 inch deep, while beans are 1 inch deep) and spacing.
- Companion Planting: Strategically plant different species together to enhance growth, deter pests, and attract beneficial insects. For example, planting marigolds near tomatoes can deter nematodes, and basil improves tomato flavor. Nasturtiums can act as a trap crop for aphids.
- Succession Planting: For a continuous harvest, plant small batches of quick-growing crops (lettuce, radishes, cilantro) every 2-3 weeks. As one crop finishes, another is ready to take its place.
Step 6: Pest & Disease Management (Organic)
Maintaining a self sufficient garden from scratch means embracing organic pest and disease control.
- Integrated Pest Management (IPM): This holistic approach combines several strategies.
- Observation: Regularly inspect your plants for early signs of pests or disease. Catching issues early is key.
- Physical Barriers: Use row covers (e.g., Agribon AG-19 floating row cover, 10×20 ft, ~$20) to protect young plants from insect pests like cabbage worms and squash bugs. Install fences (e.g., 2×4 welded wire mesh, 4 ft tall, 50 ft roll ~$70) to keep out deer, rabbits, and other larger animals.
- Hand-Picking: For larger pests like tomato hornworms or squash bugs, simply pick them off and drop them into a bucket of soapy water.
- Companion Planting: As mentioned, certain plants repel pests. Marigolds, garlic, and onions are excellent deterrents.
- Attract Beneficial Insects: Plant flowers like dill, fennel, cosmos, and sweet alyssum to attract ladybugs, lacewings, and parasitic wasps, which prey on common garden pests.
- Organic Sprays & Treatments:
- Neem Oil: An excellent broad-spectrum organic insecticide and fungicide. Bonide Neem Oil Concentrate (16oz, ~$20) can be mixed at a rate of 1-2 tbsp per gallon of water and sprayed on affected plants.
- Insecticidal Soap: Effective against soft-bodied insects like aphids, whiteflies, and spider mites. Garden Safe Insecticidal Soap (24oz ready-to-use, ~$10).
- Bacillus thuringiensis (Bt): A naturally occurring soil bacterium that targets caterpillars and worms. Monterey BT Worm & Caterpillar Killer (16oz, ~$18) is highly effective and safe for beneficial insects.
- Copper or Sulfur Sprays: For fungal diseases like powdery mildew or blight, organic copper (e.g., Bonide Copper Fungicide, ~$15 for 1lb) or sulfur (e.g., Safer Brand Garden Fungicide, ~$10 for 16oz) can be used as a last resort.
Step 7: Harvesting & Seed Saving
The culmination of your efforts is the harvest, and seed saving closes the loop on self-sufficiency.
- Harvesting Techniques:
- Timing: Harvest vegetables at their peak ripeness for best flavor and nutritional value. For example, green beans should snap cleanly, cucumbers should be firm, and tomatoes should be fully colored.
- Frequency: Many crops, like zucchini, cucumbers, and bush beans, produce more if harvested frequently. Pick daily or every other day.
- Tools: Use clean, sharp pruners (e.g., Corona ClassicCUT Bypass Pruner BP 3180, ~$30) or a sharp knife for clean cuts, minimizing damage to the plant.
- Seed Saving: This is where the « self-sufficient » aspect truly shines.
- Selection: Only save seeds from your healthiest, most vigorous plants that show desired traits (disease resistance, good flavor, high yield).
- Isolation: To ensure true-to-type seeds, prevent cross-pollination. This can be challenging for open-pollinated crops that readily cross (e.g., squash, corn). For beginners, focus on self-pollinating plants like beans, peas, lettuce, and tomatoes.
- Processing:
- Dry Seeds (Beans, Peas, Lettuce, Grains): Allow pods/seed heads to dry completely on the plant. Harvest, shell, and clean the seeds, removing chaff.
- Wet Seeds (Tomatoes, Cucumbers, Squash): For tomatoes, ferment the seeds in water for a few days to remove the gel coating and inhibit disease. For cucumbers/squash, scrape out seeds, wash thoroughly, and dry.
- Drying: Spread seeds thinly on screens or paper plates in a cool, dry, well-ventilated area for 1-4 weeks. Ensure they are bone-dry before storage. I aim for less than 8% moisture content.
- Storage: Store seeds in airtight containers (glass jars with desiccant packets work well) in a cool, dark, dry place (ideally 40-50°F and 30-40% humidity). Label clearly with variety and date. Properly stored seeds can remain viable for 3-10 years or more.
Step 8: Season Extension & Winterizing
Extend your harvest and protect your garden for the off-season to truly maximize your self sufficient garden from scratch.
- Cold Frames: Simple structures with a transparent top (glass, polycarbonate, or old windows) that sit over garden beds. They trap solar heat, allowing you to grow cold-hardy crops (lettuce, spinach, kale, radishes) well into winter or start seeds earlier in spring. A basic cold frame can be built from 2×6 lumber and a sheet of polycarbonate for under $100.
- Hoop Houses/Low Tunnels: Larger structures made from flexible hoops (PVC pipe or EMT conduit) covered with greenhouse plastic. These provide more space and greater temperature moderation. A 10×20 ft DIY low tunnel kit can cost $200-$500, while a larger, more robust hoop house kit might be $1,000-$3,000. I use a 6×12 ft low tunnel made from 1/2-inch PVC hoops and 6mil greenhouse plastic, which extends my lettuce and spinach harvest by at least
Step 5: Seed Selection & Planting
The choice of seeds is crucial for a truly self sufficient garden from scratch.
- Choose Heirloom & Open-Pollinated Seeds: These varieties produce seeds that will grow true to type, meaning you can save seeds from your harvest year after year. F1 hybrids, while often vigorous, will not produce consistent offspring from saved seeds. Reputable seed companies include Baker Creek Heirloom Seeds, High Mowing Organic Seeds, and Seed Savers Exchange. Start with common, reliable varieties like ‘Black Krim’ tomatoes, ‘Provider’ bush beans, ‘Waltham Butternut’ squash, and ‘Black Seeded Simpson’ lettuce.
- Start Seeds Indoors (Optional but Recommended): For longer growing seasons or specific crops, starting seeds indoors gives you a head start. Use seed-starting mix (e.g., Espoma Organic Seed Starter Mix, ~$10 for 16qt bag) in seed trays (Jiffy Professional Greenhouse 72-cell kit, ~$15). Provide adequate light with LED grow lights (Barrina T5 2ft 4-pack LED Grow Lights, 20W each, ~$50) for 14-16 hours a day, positioned 2-4 inches above seedlings. Maintain consistent temperatures (65-75°F for most).
- Direct Sowing vs. Transplanting: Some crops (carrots, radishes, beans, corn) prefer direct sowing into the garden bed. Others (tomatoes, peppers, broccoli, kale) benefit from being started indoors and transplanted. Follow seed packet instructions for planting depths (e.g., lettuce seeds are often surface-sown or planted 1/8 inch deep, while beans are 1 inch deep) and spacing.
- Companion Planting: Strategically plant different species together to enhance growth, deter pests, and attract beneficial insects. For example, planting marigolds near tomatoes can deter nematodes, and basil improves tomato flavor. Nasturtiums can act as a trap crop for aphids.
- Succession Planting: For a continuous harvest, plant small batches of quick-growing crops (lettuce, radishes, cilantro) every 2-3 weeks. As one crop finishes, another is ready to take its place.
Step 6: Pest & Disease Management (Organic)
Maintaining a self sufficient garden from scratch means embracing organic pest and disease control.
- Integrated Pest Management (IPM): This holistic approach combines several strategies.
- Observation: Regularly inspect your plants for early signs of pests or disease. Catching issues early is key.
- Physical Barriers: Use row covers (e.g., Agribon AG-19 floating row cover, 10×20 ft, ~$20) to protect young plants from insect pests like cabbage worms and squash bugs. Install fences (e.g., 2×4 welded wire mesh, 4 ft tall, 50 ft roll ~$70) to keep out deer, rabbits, and other larger animals.
- Hand-Picking: For larger pests like tomato hornworms or squash bugs, simply pick them off and drop them into a bucket of soapy water.
- Companion Planting: As mentioned, certain plants repel pests. Marigolds, garlic, and onions are excellent deterrents.
- Attract Beneficial Insects: Plant flowers like dill, fennel, cosmos, and sweet alyssum to attract ladybugs, lacewings, and parasitic wasps, which prey on common garden pests.
- Organic Sprays & Treatments:
- Neem Oil: An excellent broad-spectrum organic insecticide and fungicide. Bonide Neem Oil Concentrate (16oz, ~$20) can be mixed at a rate of 1-2 tbsp per gallon of water and sprayed on affected plants.
- Insecticidal Soap: Effective against soft-bodied insects like aphids, whiteflies, and spider mites. Garden Safe Insecticidal Soap (24oz ready-to-use, ~$10).
- Bacillus thuringiensis (Bt): A naturally occurring soil bacterium that targets caterpillars and worms. Monterey BT Worm & Caterpillar Killer (16oz, ~$18) is highly effective and safe for beneficial insects.
- Copper or Sulfur Sprays: For fungal diseases like powdery mildew or blight, organic copper (e.g., Bonide Copper Fungicide, ~$15 for 1lb) or sulfur (e.g., Safer Brand Garden Fungicide, ~$10 for 16oz) can be used as a last resort.
Step 7: Harvesting & Seed Saving
The culmination of your efforts is the harvest, and seed saving closes the loop on self-sufficiency.
- Harvesting Techniques:
- Timing: Harvest vegetables at their peak ripeness for best flavor and nutritional value. For example, green beans should snap cleanly, cucumbers should be firm, and tomatoes should be fully colored.
- Frequency: Many crops, like zucchini, cucumbers, and bush beans, produce more if harvested frequently. Pick daily or every other day.
- Tools: Use clean, sharp pruners (e.g., Corona ClassicCUT Bypass Pruner BP 3180, ~$30) or a sharp knife for clean cuts, minimizing damage to the plant.
- Seed Saving: This is where the « self-sufficient » aspect truly shines.
- Selection: Only save seeds from your healthiest, most vigorous plants that show desired traits (disease resistance, good flavor, high yield).
- Isolation: To ensure true-to-type seeds, prevent cross-pollination. This can be challenging for open-pollinated crops that readily cross (e.g., squash, corn). For beginners, focus on self-pollinating plants like beans, peas, lettuce, and tomatoes.
- Processing:
- Dry Seeds (Beans, Peas, Lettuce, Grains): Allow pods/seed heads to dry completely on the plant. Harvest, shell, and clean the seeds, removing chaff.
- Wet Seeds (Tomatoes, Cucumbers, Squash): For tomatoes, ferment the seeds in water for a few days to remove the gel coating and inhibit disease. For cucumbers/squash, scrape out seeds, wash thoroughly, and dry.
- Drying: Spread seeds thinly on screens or paper plates in a cool, dry, well-ventilated area for 1-4 weeks. Ensure they are bone-dry before storage. I aim for less than 8% moisture content.
- Storage: Store seeds in airtight containers (glass jars with desiccant packets work well) in a cool, dark, dry place (ideally 40-50°F and 30-40% humidity). Label clearly with variety and date. Properly stored seeds can remain viable for 3-10 years or more.
Step 8: Season Extension & Winterizing
Extend your harvest and protect your garden for the off-season to truly maximize your self sufficient garden from scratch.
- Cold Frames: Simple structures with a transparent top (glass, polycarbonate, or old windows) that sit over garden beds. They trap solar heat, allowing you to grow cold-hardy crops (lettuce, spinach, kale, radishes) well into winter or start seeds earlier in spring. A basic cold frame can be built from 2×6 lumber and a sheet of polycarbonate for under $100.
- Hoop Houses/Low Tunnels: Larger structures made from flexible hoops (PVC pipe or EMT conduit) covered with greenhouse plastic. These provide more space and greater temperature moderation. A 10×20 ft DIY low tunnel kit can cost $200-$500, while a larger, more robust hoop house kit might be $1,000-$3,000. I use a 6×12 ft low tunnel made from 1/2-inch PVC hoops and 6mil greenhouse plastic, which extends my lettuce and spinach harvest by at least
- Rainwater Harvesting: This is my primary source of irrigation water. A 55-gallon rain barrel (e.g., EarthMark Rain Barrel, ~$120-$150) connected to a downspout can collect significant water. For larger needs, I use two 275-gallon IBC totes (Intermediate Bulk Containers, often available used for $100-$200 each from food-grade sources) connected in series. A 1,000 sq ft roof can collect approximately 620 gallons of water for every inch of rainfall. My 1,500 sq ft roof provides ample water for my 600 sq ft garden through multiple barrels and totes.
- Drip Irrigation: This is by far the most water-efficient method, delivering water directly to the plant’s root zone, minimizing evaporation and weed growth.
- Components: A typical drip system includes a pressure regulator (e.g., Rain Bird PRV-10, ~$15), a filter (Rain Bird RBY filter, ~$20), main tubing (1/2-inch poly tubing, 100ft ~$25), smaller feeder lines (1/4-inch tubing), and emitters (0.5 GPH or 1 GPH per plant).
- Kits: For beginners, a starter kit like the Rain Bird Drip Irrigation Garden Kit (model DDI-KIT-1P, ~$40-$60) is excellent for a small garden. For larger setups, I use Netafim Techline CV Drip Line (500ft roll, ~$150-$200), which has pressure-compensating emitters built-in, ensuring even watering across long runs.
- Automation: For true self-sufficiency, consider a battery-powered timer (e.g., Orbit B-Hyve Bluetooth Hose Faucet Timer, ~$50) or a solar-powered timer connected to a small 12V pump.
- Solar-Powered Pumps: For lifting water from a well, pond, or large storage tank to your garden, a solar pump is a game-changer. For a smaller drip system, a Shurflo 2088-594-152 Diaphragm Pump (12V, 3.5 GPM, ~$180) can be powered by a single 100W solar panel (e.g., Renogy 100W Monocrystalline Solar Panel, ~$100) and a small 12V battery (e.g., a 50Ah LiFePO4 battery like the Battle Born 50Ah, ~$450). For larger operations or deeper wells, more robust systems are needed. If you’re looking to build out a comprehensive off-grid power system to support your garden’s water needs, or indeed your entire homestead, you might want to explore resources like the Power Grid Generator complete system guide to understand the full scope of what’s possible in terms of energy independence.
Step 5: Seed Selection & Planting
The choice of seeds is crucial for a truly self sufficient garden from scratch.
- Choose Heirloom & Open-Pollinated Seeds: These varieties produce seeds that will grow true to type, meaning you can save seeds from your harvest year after year. F1 hybrids, while often vigorous, will not produce consistent offspring from saved seeds. Reputable seed companies include Baker Creek Heirloom Seeds, High Mowing Organic Seeds, and Seed Savers Exchange. Start with common, reliable varieties like ‘Black Krim’ tomatoes, ‘Provider’ bush beans, ‘Waltham Butternut’ squash, and ‘Black Seeded Simpson’ lettuce.
- Start Seeds Indoors (Optional but Recommended): For longer growing seasons or specific crops, starting seeds indoors gives you a head start. Use seed-starting mix (e.g., Espoma Organic Seed Starter Mix, ~$10 for 16qt bag) in seed trays (Jiffy Professional Greenhouse 72-cell kit, ~$15). Provide adequate light with LED grow lights (Barrina T5 2ft 4-pack LED Grow Lights, 20W each, ~$50) for 14-16 hours a day, positioned 2-4 inches above seedlings. Maintain consistent temperatures (65-75°F for most).
- Direct Sowing vs. Transplanting: Some crops (carrots, radishes, beans, corn) prefer direct sowing into the garden bed. Others (tomatoes, peppers, broccoli, kale) benefit from being started indoors and transplanted. Follow seed packet instructions for planting depths (e.g., lettuce seeds are often surface-sown or planted 1/8 inch deep, while beans are 1 inch deep) and spacing.
- Companion Planting: Strategically plant different species together to enhance growth, deter pests, and attract beneficial insects. For example, planting marigolds near tomatoes can deter nematodes, and basil improves tomato flavor. Nasturtiums can act as a trap crop for aphids.
- Succession Planting: For a continuous harvest, plant small batches of quick-growing crops (lettuce, radishes, cilantro) every 2-3 weeks. As one crop finishes, another is ready to take its place.
Step 6: Pest & Disease Management (Organic)
Maintaining a self sufficient garden from scratch means embracing organic pest and disease control.
- Integrated Pest Management (IPM): This holistic approach combines several strategies.
- Observation: Regularly inspect your plants for early signs of pests or disease. Catching issues early is key.
- Physical Barriers: Use row covers (e.g., Agribon AG-19 floating row cover, 10×20 ft, ~$20) to protect young plants from insect pests like cabbage worms and squash bugs. Install fences (e.g., 2×4 welded wire mesh, 4 ft tall, 50 ft roll ~$70) to keep out deer, rabbits, and other larger animals.
- Hand-Picking: For larger pests like tomato hornworms or squash bugs, simply pick them off and drop them into a bucket of soapy water.
- Companion Planting: As mentioned, certain plants repel pests. Marigolds, garlic, and onions are excellent deterrents.
- Attract Beneficial Insects: Plant flowers like dill, fennel, cosmos, and sweet alyssum to attract ladybugs, lacewings, and parasitic wasps, which prey on common garden pests.
- Organic Sprays & Treatments:
- Neem Oil: An excellent broad-spectrum organic insecticide and fungicide. Bonide Neem Oil Concentrate (16oz, ~$20) can be mixed at a rate of 1-2 tbsp per gallon of water and sprayed on affected plants.
- Insecticidal Soap: Effective against soft-bodied insects like aphids, whiteflies, and spider mites. Garden Safe Insecticidal Soap (24oz ready-to-use, ~$10).
- Bacillus thuringiensis (Bt): A naturally occurring soil bacterium that targets caterpillars and worms. Monterey BT Worm & Caterpillar Killer (16oz, ~$18) is highly effective and safe for beneficial insects.
- Copper or Sulfur Sprays: For fungal diseases like powdery mildew or blight, organic copper (e.g., Bonide Copper Fungicide, ~$15 for 1lb) or sulfur (e.g., Safer Brand Garden Fungicide, ~$10 for 16oz) can be used as a last resort.
Step 7: Harvesting & Seed Saving
The culmination of your efforts is the harvest, and seed saving closes the loop on self-sufficiency.
- Harvesting Techniques:
- Timing: Harvest vegetables at their peak ripeness for best flavor and nutritional value. For example, green beans should snap cleanly, cucumbers should be firm, and tomatoes should be fully colored.
- Frequency: Many crops, like zucchini, cucumbers, and bush beans, produce more if harvested frequently. Pick daily or every other day.
- Tools: Use clean, sharp pruners (e.g., Corona ClassicCUT Bypass Pruner BP 3180, ~$30) or a sharp knife for clean cuts, minimizing damage to the plant.
- Seed Saving: This is where the « self-sufficient » aspect truly shines.
- Selection: Only save seeds from your healthiest, most vigorous plants that show desired traits (disease resistance, good flavor, high yield).
- Isolation: To ensure true-to-type seeds, prevent cross-pollination. This can be challenging for open-pollinated crops that readily cross (e.g., squash, corn). For beginners, focus on self-pollinating plants like beans, peas, lettuce, and tomatoes.
- Processing:
- Dry Seeds (Beans, Peas, Lettuce, Grains): Allow pods/seed heads to dry completely on the plant. Harvest, shell, and clean the seeds, removing chaff.
- Wet Seeds (Tomatoes, Cucumbers, Squash): For tomatoes, ferment the seeds in water for a few days to remove the gel coating and inhibit disease. For cucumbers/squash, scrape out seeds, wash thoroughly, and dry.
- Drying: Spread seeds thinly on screens or paper plates in a cool, dry, well-ventilated area for 1-4 weeks. Ensure they are bone-dry before storage. I aim for less than 8% moisture content.
- Storage: Store seeds in airtight containers (glass jars with desiccant packets work well) in a cool, dark, dry place (ideally 40-50°F and 30-40% humidity). Label clearly with variety and date. Properly stored seeds can remain viable for 3-10 years or more.
Step 8: Season Extension & Winterizing
Extend your harvest and protect your garden for the off-season to truly maximize your self sufficient garden from scratch.
- Cold Frames: Simple structures with a transparent top (glass, polycarbonate, or old windows) that sit over garden beds. They trap solar heat, allowing you to grow cold-hardy crops (lettuce, spinach, kale, radishes) well into winter or start seeds earlier in spring. A basic cold frame can be built from 2×6 lumber and a sheet of polycarbonate for under $100.
- Hoop Houses/Low Tunnels: Larger structures made from flexible hoops (PVC pipe or EMT conduit) covered with greenhouse plastic. These provide more space and greater temperature moderation. A 10×20 ft DIY low tunnel kit can cost $200-$500, while a larger, more robust hoop house kit might be $1,000-$3,000. I use a 6×12 ft low tunnel made from 1/2-inch PVC hoops and 6mil greenhouse plastic, which extends my lettuce and spinach harvest by at least
Efficient water management is critical for a self sufficient garden from scratch, especially in off-grid living where water resources might be limited.
- Rainwater Harvesting: This is my primary source of irrigation water. A 55-gallon rain barrel (e.g., EarthMark Rain Barrel, ~$120-$150) connected to a downspout can collect significant water. For larger needs, I use two 275-gallon IBC totes (Intermediate Bulk Containers, often available used for $100-$200 each from food-grade sources) connected in series. A 1,000 sq ft roof can collect approximately 620 gallons of water for every inch of rainfall. My 1,500 sq ft roof provides ample water for my 600 sq ft garden through multiple barrels and totes.
- Drip Irrigation: This is by far the most water-efficient method, delivering water directly to the plant’s root zone, minimizing evaporation and weed growth.
- Components: A typical drip system includes a pressure regulator (e.g., Rain Bird PRV-10, ~$15), a filter (Rain Bird RBY filter, ~$20), main tubing (1/2-inch poly tubing, 100ft ~$25), smaller feeder lines (1/4-inch tubing), and emitters (0.5 GPH or 1 GPH per plant).
- Kits: For beginners, a starter kit like the Rain Bird Drip Irrigation Garden Kit (model DDI-KIT-1P, ~$40-$60) is excellent for a small garden. For larger setups, I use Netafim Techline CV Drip Line (500ft roll, ~$150-$200), which has pressure-compensating emitters built-in, ensuring even watering across long runs.
- Automation: For true self-sufficiency, consider a battery-powered timer (e.g., Orbit B-Hyve Bluetooth Hose Faucet Timer, ~$50) or a solar-powered timer connected to a small 12V pump.
- Solar-Powered Pumps: For lifting water from a well, pond, or large storage tank to your garden, a solar pump is a game-changer. For a smaller drip system, a Shurflo 2088-594-152 Diaphragm Pump (12V, 3.5 GPM, ~$180) can be powered by a single 100W solar panel (e.g., Renogy 100W Monocrystalline Solar Panel, ~$100) and a small 12V battery (e.g., a 50Ah LiFePO4 battery like the Battle Born 50Ah, ~$450). For larger operations or deeper wells, more robust systems are needed. If you’re looking to build out a comprehensive off-grid power system to support your garden’s water needs, or indeed your entire homestead, you might want to explore resources like the Power Grid Generator complete system guide to understand the full scope of what’s possible in terms of energy independence.
Step 5: Seed Selection & Planting
The choice of seeds is crucial for a truly self sufficient garden from scratch.
- Choose Heirloom & Open-Pollinated Seeds: These varieties produce seeds that will grow true to type, meaning you can save seeds from your harvest year after year. F1 hybrids, while often vigorous, will not produce consistent offspring from saved seeds. Reputable seed companies include Baker Creek Heirloom Seeds, High Mowing Organic Seeds, and Seed Savers Exchange. Start with common, reliable varieties like ‘Black Krim’ tomatoes, ‘Provider’ bush beans, ‘Waltham Butternut’ squash, and ‘Black Seeded Simpson’ lettuce.
- Start Seeds Indoors (Optional but Recommended): For longer growing seasons or specific crops, starting seeds indoors gives you a head start. Use seed-starting mix (e.g., Espoma Organic Seed Starter Mix, ~$10 for 16qt bag) in seed trays (Jiffy Professional Greenhouse 72-cell kit, ~$15). Provide adequate light with LED grow lights (Barrina T5 2ft 4-pack LED Grow Lights, 20W each, ~$50) for 14-16 hours a day, positioned 2-4 inches above seedlings. Maintain consistent temperatures (65-75°F for most).
- Direct Sowing vs. Transplanting: Some crops (carrots, radishes, beans, corn) prefer direct sowing into the garden bed. Others (tomatoes, peppers, broccoli, kale) benefit from being started indoors and transplanted. Follow seed packet instructions for planting depths (e.g., lettuce seeds are often surface-sown or planted 1/8 inch deep, while beans are 1 inch deep) and spacing.
- Companion Planting: Strategically plant different species together to enhance growth, deter pests, and attract beneficial insects. For example, planting marigolds near tomatoes can deter nematodes, and basil improves tomato flavor. Nasturtiums can act as a trap crop for aphids.
- Succession Planting: For a continuous harvest, plant small batches of quick-growing crops (lettuce, radishes, cilantro) every 2-3 weeks. As one crop finishes, another is ready to take its place.
Step 6: Pest & Disease Management (Organic)
Maintaining a self sufficient garden from scratch means embracing organic pest and disease control.
- Integrated Pest Management (IPM): This holistic approach combines several strategies.
- Observation: Regularly inspect your plants for early signs of pests or disease. Catching issues early is key.
- Physical Barriers: Use row covers (e.g., Agribon AG-19 floating row cover, 10×20 ft, ~$20) to protect young plants from insect pests like cabbage worms and squash bugs. Install fences (e.g., 2×4 welded wire mesh, 4 ft tall, 50 ft roll ~$70) to keep out deer, rabbits, and other larger animals.
- Hand-Picking: For larger pests like tomato hornworms or squash bugs, simply pick them off and drop them into a bucket of soapy water.
- Companion Planting: As mentioned, certain plants repel pests. Marigolds, garlic, and onions are excellent deterrents.
- Attract Beneficial Insects: Plant flowers like dill, fennel, cosmos, and sweet alyssum to attract ladybugs, lacewings, and parasitic wasps, which prey on common garden pests.
- Organic Sprays & Treatments:
- Neem Oil: An excellent broad-spectrum organic insecticide and fungicide. Bonide Neem Oil Concentrate (16oz, ~$20) can be mixed at a rate of 1-2 tbsp per gallon of water and sprayed on affected plants.
- Insecticidal Soap: Effective against soft-bodied insects like aphids, whiteflies, and spider mites. Garden Safe Insecticidal Soap (24oz ready-to-use, ~$10).
- Bacillus thuringiensis (Bt): A naturally occurring soil bacterium that targets caterpillars and worms. Monterey BT Worm & Caterpillar Killer (16oz, ~$18) is highly effective and safe for beneficial insects.
- Copper or Sulfur Sprays: For fungal diseases like powdery mildew or blight, organic copper (e.g., Bonide Copper Fungicide, ~$15 for 1lb) or sulfur (e.g., Safer Brand Garden Fungicide, ~$10 for 16oz) can be used as a last resort.
Step 7: Harvesting & Seed Saving
The culmination of your efforts is the harvest, and seed saving closes the loop on self-sufficiency.
- Harvesting Techniques:
- Timing: Harvest vegetables at their peak ripeness for best flavor and nutritional value. For example, green beans should snap cleanly, cucumbers should be firm, and tomatoes should be fully colored.
- Frequency: Many crops, like zucchini, cucumbers, and bush beans, produce more if harvested frequently. Pick daily or every other day.
- Tools: Use clean, sharp pruners (e.g., Corona ClassicCUT Bypass Pruner BP 3180, ~$30) or a sharp knife for clean cuts, minimizing damage to the plant.
- Seed Saving: This is where the « self-sufficient » aspect truly shines.
- Selection: Only save seeds from your healthiest, most vigorous plants that show desired traits (disease resistance, good flavor, high yield).
- Isolation: To ensure true-to-type seeds, prevent cross-pollination. This can be challenging for open-pollinated crops that readily cross (e.g., squash, corn). For beginners, focus on self-pollinating plants like beans, peas, lettuce, and tomatoes.
- Processing:
- Dry Seeds (Beans, Peas, Lettuce, Grains): Allow pods/seed heads to dry completely on the plant. Harvest, shell, and clean the seeds, removing chaff.
- Wet Seeds (Tomatoes, Cucumbers, Squash): For tomatoes, ferment the seeds in water for a few days to remove the gel coating and inhibit disease. For cucumbers/squash, scrape out seeds, wash thoroughly, and dry.
- Drying: Spread seeds thinly on screens or paper plates in a cool, dry, well-ventilated area for 1-4 weeks. Ensure they are bone-dry before storage. I aim for less than 8% moisture content.
- Storage: Store seeds in airtight containers (glass jars with desiccant packets work well) in a cool, dark, dry place (ideally 40-50°F and 30-40% humidity). Label clearly with variety and date. Properly stored seeds can remain viable for 3-10 years or more.
Step 8: Season Extension & Winterizing
Extend your harvest and protect your garden for the off-season to truly maximize your self sufficient garden from scratch.
- Cold Frames: Simple structures with a transparent top (glass, polycarbonate, or old windows) that sit over garden beds. They trap solar heat, allowing you to grow cold-hardy crops (lettuce, spinach, kale, radishes) well into winter or start seeds earlier in spring. A basic cold frame can be built from 2×6 lumber and a sheet of polycarbonate for under $100.
- Hoop Houses/Low Tunnels: Larger structures made from flexible hoops (PVC pipe or EMT conduit) covered with greenhouse plastic. These provide more space and greater temperature moderation. A 10×20 ft DIY low tunnel kit can cost $200-$500, while a larger, more robust hoop house kit might be $1,000-$3,000. I use a 6×12 ft low tunnel made from 1/2-inch PVC hoops and 6mil greenhouse plastic, which extends my lettuce and spinach harvest by at least
Step 4: Water Management & Irrigation
Efficient water management is critical for a self sufficient garden from scratch, especially in off-grid living where water resources might be limited.
- Rainwater Harvesting: This is my primary source of irrigation water. A 55-gallon rain barrel (e.g., EarthMark Rain Barrel, ~$120-$150) connected to a downspout can collect significant water. For larger needs, I use two 275-gallon IBC totes (Intermediate Bulk Containers, often available used for $100-$200 each from food-grade sources) connected in series. A 1,000 sq ft roof can collect approximately 620 gallons of water for every inch of rainfall. My 1,500 sq ft roof provides ample water for my 600 sq ft garden through multiple barrels and totes.
- Drip Irrigation: This is by far the most water-efficient method, delivering water directly to the plant’s root zone, minimizing evaporation and weed growth.
- Components: A typical drip system includes a pressure regulator (e.g., Rain Bird PRV-10, ~$15), a filter (Rain Bird RBY filter, ~$20), main tubing (1/2-inch poly tubing, 100ft ~$25), smaller feeder lines (1/4-inch tubing), and emitters (0.5 GPH or 1 GPH per plant).
- Kits: For beginners, a starter kit like the Rain Bird Drip Irrigation Garden Kit (model DDI-KIT-1P, ~$40-$60) is excellent for a small garden. For larger setups, I use Netafim Techline CV Drip Line (500ft roll, ~$150-$200), which has pressure-compensating emitters built-in, ensuring even watering across long runs.
- Automation: For true self-sufficiency, consider a battery-powered timer (e.g., Orbit B-Hyve Bluetooth Hose Faucet Timer, ~$50) or a solar-powered timer connected to a small 12V pump.
- Solar-Powered Pumps: For lifting water from a well, pond, or large storage tank to your garden, a solar pump is a game-changer. For a smaller drip system, a Shurflo 2088-594-152 Diaphragm Pump (12V, 3.5 GPM, ~$180) can be powered by a single 100W solar panel (e.g., Renogy 100W Monocrystalline Solar Panel, ~$100) and a small 12V battery (e.g., a 50Ah LiFePO4 battery like the Battle Born 50Ah, ~$450). For larger operations or deeper wells, more robust systems are needed. If you’re looking to build out a comprehensive off-grid power system to support your garden’s water needs, or indeed your entire homestead, you might want to explore resources like the Power Grid Generator complete system guide to understand the full scope of what’s possible in terms of energy independence.
Step 5: Seed Selection & Planting
The choice of seeds is crucial for a truly self sufficient garden from scratch.
- Choose Heirloom & Open-Pollinated Seeds: These varieties produce seeds that will grow true to type, meaning you can save seeds from your harvest year after year. F1 hybrids, while often vigorous, will not produce consistent offspring from saved seeds. Reputable seed companies include Baker Creek Heirloom Seeds, High Mowing Organic Seeds, and Seed Savers Exchange. Start with common, reliable varieties like ‘Black Krim’ tomatoes, ‘Provider’ bush beans, ‘Waltham Butternut’ squash, and ‘Black Seeded Simpson’ lettuce.
- Start Seeds Indoors (Optional but Recommended): For longer growing seasons or specific crops, starting seeds indoors gives you a head start. Use seed-starting mix (e.g., Espoma Organic Seed Starter Mix, ~$10 for 16qt bag) in seed trays (Jiffy Professional Greenhouse 72-cell kit, ~$15). Provide adequate light with LED grow lights (Barrina T5 2ft 4-pack LED Grow Lights, 20W each, ~$50) for 14-16 hours a day, positioned 2-4 inches above seedlings. Maintain consistent temperatures (65-75°F for most).
- Direct Sowing vs. Transplanting: Some crops (carrots, radishes, beans, corn) prefer direct sowing into the garden bed. Others (tomatoes, peppers, broccoli, kale) benefit from being started indoors and transplanted. Follow seed packet instructions for planting depths (e.g., lettuce seeds are often surface-sown or planted 1/8 inch deep, while beans are 1 inch deep) and spacing.
- Companion Planting: Strategically plant different species together to enhance growth, deter pests, and attract beneficial insects. For example, planting marigolds near tomatoes can deter nematodes, and basil improves tomato flavor. Nasturtiums can act as a trap crop for aphids.
- Succession Planting: For a continuous harvest, plant small batches of quick-growing crops (lettuce, radishes, cilantro) every 2-3 weeks. As one crop finishes, another is ready to take its place.
Step 6: Pest & Disease Management (Organic)
Maintaining a self sufficient garden from scratch means embracing organic pest and disease control.
- Integrated Pest Management (IPM): This holistic approach combines several strategies.
- Observation: Regularly inspect your plants for early signs of pests or disease. Catching issues early is key.
- Physical Barriers: Use row covers (e.g., Agribon AG-19 floating row cover, 10×20 ft, ~$20) to protect young plants from insect pests like cabbage worms and squash bugs. Install fences (e.g., 2×4 welded wire mesh, 4 ft tall, 50 ft roll ~$70) to keep out deer, rabbits, and other larger animals.
- Hand-Picking: For larger pests like tomato hornworms or squash bugs, simply pick them off and drop them into a bucket of soapy water.
- Companion Planting: As mentioned, certain plants repel pests. Marigolds, garlic, and onions are excellent deterrents.
- Attract Beneficial Insects: Plant flowers like dill, fennel, cosmos, and sweet alyssum to attract ladybugs, lacewings, and parasitic wasps, which prey on common garden pests.
- Organic Sprays & Treatments:
- Neem Oil: An excellent broad-spectrum organic insecticide and fungicide. Bonide Neem Oil Concentrate (16oz, ~$20) can be mixed at a rate of 1-2 tbsp per gallon of water and sprayed on affected plants.
- Insecticidal Soap: Effective against soft-bodied insects like aphids, whiteflies, and spider mites. Garden Safe Insecticidal Soap (24oz ready-to-use, ~$10).
- Bacillus thuringiensis (Bt): A naturally occurring soil bacterium that targets caterpillars and worms. Monterey BT Worm & Caterpillar Killer (16oz, ~$18) is highly effective and safe for beneficial insects.
- Copper or Sulfur Sprays: For fungal diseases like powdery mildew or blight, organic copper (e.g., Bonide Copper Fungicide, ~$15 for 1lb) or sulfur (e.g., Safer Brand Garden Fungicide, ~$10 for 16oz) can be used as a last resort.
Step 7: Harvesting & Seed Saving
The culmination of your efforts is the harvest, and seed saving closes the loop on self-sufficiency.
- Harvesting Techniques:
- Timing: Harvest vegetables at their peak ripeness for best flavor and nutritional value. For example, green beans should snap cleanly, cucumbers should be firm, and tomatoes should be fully colored.
- Frequency: Many crops, like zucchini, cucumbers, and bush beans, produce more if harvested frequently. Pick daily or every other day.
- Tools: Use clean, sharp pruners (e.g., Corona ClassicCUT Bypass Pruner BP 3180, ~$30) or a sharp knife for clean cuts, minimizing damage to the plant.
- Seed Saving: This is where the « self-sufficient » aspect truly shines.
- Selection: Only save seeds from your healthiest, most vigorous plants that show desired traits (disease resistance, good flavor, high yield).
- Isolation: To ensure true-to-type seeds, prevent cross-pollination. This can be challenging for open-pollinated crops that readily cross (e.g., squash, corn). For beginners, focus on self-pollinating plants like beans, peas, lettuce, and tomatoes.
- Processing:
- Dry Seeds (Beans, Peas, Lettuce, Grains): Allow pods/seed heads to dry completely on the plant. Harvest, shell, and clean the seeds, removing chaff.
- Wet Seeds (Tomatoes, Cucumbers, Squash): For tomatoes, ferment the seeds in water for a few days to remove the gel coating and inhibit disease. For cucumbers/squash, scrape out seeds, wash thoroughly, and dry.
- Drying: Spread seeds thinly on screens or paper plates in a cool, dry, well-ventilated area for 1-4 weeks. Ensure they are bone-dry before storage. I aim for less than 8% moisture content.
- Storage: Store seeds in airtight containers (glass jars with desiccant packets work well) in a cool, dark, dry place (ideally 40-50°F and 30-40% humidity). Label clearly with variety and date. Properly stored seeds can remain viable for 3-10 years or more.
Step 8: Season Extension & Winterizing
Extend your harvest and protect your garden for the off-season to truly maximize your self sufficient garden from scratch.
- Cold Frames: Simple structures with a transparent top (glass, polycarbonate, or old windows) that sit over garden beds. They trap solar heat, allowing you to grow cold-hardy crops (lettuce, spinach, kale, radishes) well into winter or start seeds earlier in spring. A basic cold frame can be built from 2×6 lumber and a sheet of polycarbonate for under $100.
- Hoop Houses/Low Tunnels: Larger structures made from flexible hoops (PVC pipe or EMT conduit) covered with greenhouse plastic. These provide more space and greater temperature moderation. A 10×20 ft DIY low tunnel kit can cost $200-$500, while a larger, more robust hoop house kit might be $1,000-$3,000. I use a 6×12 ft low tunnel made from 1/2-inch PVC hoops and 6mil greenhouse plastic, which extends my lettuce and spinach harvest by at least
- In-Ground Beds: If you have excellent native soil and good drainage, in-ground beds are the most economical. Double-digging (loosening soil two shovel depths) can significantly improve drainage and aeration. For my main garden, I primarily use in-ground beds, but I focus on building up the soil over time with consistent compost additions and cover cropping. I aim for beds that are no wider than 3-4 feet so I can reach the center without stepping on the soil, compacting it.
- Raised Beds: Raised beds offer numerous advantages, especially for poor soil, heavy clay, or rocky areas. They provide better drainage, warm up faster in spring, reduce compaction, and make weeding and harvesting easier on your back.
- Material Options:
- Untreated Cedar: Naturally rot-resistant and chemical-free. A 4×8 ft bed, 12 inches deep, typically requires three 2x12x8 ft cedar boards, costing around $50-$60 per board (total ~$150-$180) plus corner brackets or screws. My first raised beds were cedar and are still going strong after 7 years.
- Galvanized Steel: Durable, long-lasting, and aesthetically pleasing. Brands like Vego Garden offer modular kits. A Vego Garden 17″ Tall 8-in-1 Metal Raised Garden Bed (can be configured to 4×8 ft) costs approximately $250-$300.
- Concrete Blocks/Stones: Very durable but can leach minerals (though generally safe once weathered) and can be expensive.
- Recycled Materials: Pallets (check for chemical treatment stamps like « HT » for heat-treated), old tires (controversial due to potential chemical leaching).
- Filling Raised Beds: Don’t just fill with topsoil. Use a « Hugelkultur » approach (logs, branches, leaves, then compost, then topsoil) or a mixture of 60% good quality topsoil, 30% compost, and 10% perlite or vermiculite for drainage. A 4x8x1 ft raised bed requires about 32 cubic feet (or ~1.2 cubic yards) of soil mix, which can cost $100-$200 depending on your source.
- Material Options:
Step 4: Water Management & Irrigation
Efficient water management is critical for a self sufficient garden from scratch, especially in off-grid living where water resources might be limited.
- Rainwater Harvesting: This is my primary source of irrigation water. A 55-gallon rain barrel (e.g., EarthMark Rain Barrel, ~$120-$150) connected to a downspout can collect significant water. For larger needs, I use two 275-gallon IBC totes (Intermediate Bulk Containers, often available used for $100-$200 each from food-grade sources) connected in series. A 1,000 sq ft roof can collect approximately 620 gallons of water for every inch of rainfall. My 1,500 sq ft roof provides ample water for my 600 sq ft garden through multiple barrels and totes.
- Drip Irrigation: This is by far the most water-efficient method, delivering water directly to the plant’s root zone, minimizing evaporation and weed growth.
- Components: A typical drip system includes a pressure regulator (e.g., Rain Bird PRV-10, ~$15), a filter (Rain Bird RBY filter, ~$20), main tubing (1/2-inch poly tubing, 100ft ~$25), smaller feeder lines (1/4-inch tubing), and emitters (0.5 GPH or 1 GPH per plant).
- Kits: For beginners, a starter kit like the Rain Bird Drip Irrigation Garden Kit (model DDI-KIT-1P, ~$40-$60) is excellent for a small garden. For larger setups, I use Netafim Techline CV Drip Line (500ft roll, ~$150-$200), which has pressure-compensating emitters built-in, ensuring even watering across long runs.
- Automation: For true self-sufficiency, consider a battery-powered timer (e.g., Orbit B-Hyve Bluetooth Hose Faucet Timer, ~$50) or a solar-powered timer connected to a small 12V pump.
- Solar-Powered Pumps: For lifting water from a well, pond, or large storage tank to your garden, a solar pump is a game-changer. For a smaller drip system, a Shurflo 2088-594-152 Diaphragm Pump (12V, 3.5 GPM, ~$180) can be powered by a single 100W solar panel (e.g., Renogy 100W Monocrystalline Solar Panel, ~$100) and a small 12V battery (e.g., a 50Ah LiFePO4 battery like the Battle Born 50Ah, ~$450). For larger operations or deeper wells, more robust systems are needed. If you’re looking to build out a comprehensive off-grid power system to support your garden’s water needs, or indeed your entire homestead, you might want to explore resources like the Power Grid Generator complete system guide to understand the full scope of what’s possible in terms of energy independence.
Step 5: Seed Selection & Planting
The choice of seeds is crucial for a truly self sufficient garden from scratch.
- Choose Heirloom & Open-Pollinated Seeds: These varieties produce seeds that will grow true to type, meaning you can save seeds from your harvest year after year. F1 hybrids, while often vigorous, will not produce consistent offspring from saved seeds. Reputable seed companies include Baker Creek Heirloom Seeds, High Mowing Organic Seeds, and Seed Savers Exchange. Start with common, reliable varieties like ‘Black Krim’ tomatoes, ‘Provider’ bush beans, ‘Waltham Butternut’ squash, and ‘Black Seeded Simpson’ lettuce.
- Start Seeds Indoors (Optional but Recommended): For longer growing seasons or specific crops, starting seeds indoors gives you a head start. Use seed-starting mix (e.g., Espoma Organic Seed Starter Mix, ~$10 for 16qt bag) in seed trays (Jiffy Professional Greenhouse 72-cell kit, ~$15). Provide adequate light with LED grow lights (Barrina T5 2ft 4-pack LED Grow Lights, 20W each, ~$50) for 14-16 hours a day, positioned 2-4 inches above seedlings. Maintain consistent temperatures (65-75°F for most).
- Direct Sowing vs. Transplanting: Some crops (carrots, radishes, beans, corn) prefer direct sowing into the garden bed. Others (tomatoes, peppers, broccoli, kale) benefit from being started indoors and transplanted. Follow seed packet instructions for planting depths (e.g., lettuce seeds are often surface-sown or planted 1/8 inch deep, while beans are 1 inch deep) and spacing.
- Companion Planting: Strategically plant different species together to enhance growth, deter pests, and attract beneficial insects. For example, planting marigolds near tomatoes can deter nematodes, and basil improves tomato flavor. Nasturtiums can act as a trap crop for aphids.
- Succession Planting: For a continuous harvest, plant small batches of quick-growing crops (lettuce, radishes, cilantro) every 2-3 weeks. As one crop finishes, another is ready to take its place.
Step 6: Pest & Disease Management (Organic)
Maintaining a self sufficient garden from scratch means embracing organic pest and disease control.
- Integrated Pest Management (IPM): This holistic approach combines several strategies.
- Observation: Regularly inspect your plants for early signs of pests or disease. Catching issues early is key.
- Physical Barriers: Use row covers (e.g., Agribon AG-19 floating row cover, 10×20 ft, ~$20) to protect young plants from insect pests like cabbage worms and squash bugs. Install fences (e.g., 2×4 welded wire mesh, 4 ft tall, 50 ft roll ~$70) to keep out deer, rabbits, and other larger animals.
- Hand-Picking: For larger pests like tomato hornworms or squash bugs, simply pick them off and drop them into a bucket of soapy water.
- Companion Planting: As mentioned, certain plants repel pests. Marigolds, garlic, and onions are excellent deterrents.
- Attract Beneficial Insects: Plant flowers like dill, fennel, cosmos, and sweet alyssum to attract ladybugs, lacewings, and parasitic wasps, which prey on common garden pests.
- Organic Sprays & Treatments:
- Neem Oil: An excellent broad-spectrum organic insecticide and fungicide. Bonide Neem Oil Concentrate (16oz, ~$20) can be mixed at a rate of 1-2 tbsp per gallon of water and sprayed on affected plants.
- Insecticidal Soap: Effective against soft-bodied insects like aphids, whiteflies, and spider mites. Garden Safe Insecticidal Soap (24oz ready-to-use, ~$10).
- Bacillus thuringiensis (Bt): A naturally occurring soil bacterium that targets caterpillars and worms. Monterey BT Worm & Caterpillar Killer (16oz, ~$18) is highly effective and safe for beneficial insects.
- Copper or Sulfur Sprays: For fungal diseases like powdery mildew or blight, organic copper (e.g., Bonide Copper Fungicide, ~$15 for 1lb) or sulfur (e.g., Safer Brand Garden Fungicide, ~$10 for 16oz) can be used as a last resort.
Step 7: Harvesting & Seed Saving
The culmination of your efforts is the harvest, and seed saving closes the loop on self-sufficiency.
- Harvesting Techniques:
- Timing: Harvest vegetables at their peak ripeness for best flavor and nutritional value. For example, green beans should snap cleanly, cucumbers should be firm, and tomatoes should be fully colored.
- Frequency: Many crops, like zucchini, cucumbers, and bush beans, produce more if harvested frequently. Pick daily or every other day.
- Tools: Use clean, sharp pruners (e.g., Corona ClassicCUT Bypass Pruner BP 3180, ~$30) or a sharp knife for clean cuts, minimizing damage to the plant.
- Seed Saving: This is where the « self-sufficient » aspect truly shines.
- Selection: Only save seeds from your healthiest, most vigorous plants that show desired traits (disease resistance, good flavor, high yield).
- Isolation: To ensure true-to-type seeds, prevent cross-pollination. This can be challenging for open-pollinated crops that readily cross (e.g., squash, corn). For beginners, focus on self-pollinating plants like beans, peas, lettuce, and tomatoes.
- Processing:
- Dry Seeds (Beans, Peas, Lettuce, Grains): Allow pods/seed heads to dry completely on the plant. Harvest, shell, and clean the seeds, removing chaff.
- Wet Seeds (Tomatoes, Cucumbers, Squash): For tomatoes, ferment the seeds in water for a few days to remove the gel coating and inhibit disease. For cucumbers/squash, scrape out seeds, wash thoroughly, and dry.
- Drying: Spread seeds thinly on screens or paper plates in a cool, dry, well-ventilated area for 1-4 weeks. Ensure they are bone-dry before storage. I aim for less than 8% moisture content.
- Storage: Store seeds in airtight containers (glass jars with desiccant packets work well) in a cool, dark, dry place (ideally 40-50°F and 30-40% humidity). Label clearly with variety and date. Properly stored seeds can remain viable for 3-10 years or more.
Step 8: Season Extension & Winterizing
Extend your harvest and protect your garden for the off-season to truly maximize your self sufficient garden from scratch.
- Cold Frames: Simple structures with a transparent top (glass, polycarbonate, or old windows) that sit over garden beds. They trap solar heat, allowing you to grow cold-hardy crops (lettuce, spinach, kale, radishes) well into winter or start seeds earlier in spring. A basic cold frame can be built from 2×6 lumber and a sheet of polycarbonate for under $100.
- Hoop Houses/Low Tunnels: Larger structures made from flexible hoops (PVC pipe or EMT conduit) covered with greenhouse plastic. These provide more space and greater temperature moderation. A 10×20 ft DIY low tunnel kit can cost $200-$500, while a larger, more robust hoop house kit might be $1,000-$3,000. I use a 6×12 ft low tunnel made from 1/2-inch PVC hoops and 6mil greenhouse plastic, which extends my lettuce and spinach harvest by at least
Deciding between raised beds and in-ground beds depends on your soil, budget, and physical capabilities.
- In-Ground Beds: If you have excellent native soil and good drainage, in-ground beds are the most economical. Double-digging (loosening soil two shovel depths) can significantly improve drainage and aeration. For my main garden, I primarily use in-ground beds, but I focus on building up the soil over time with consistent compost additions and cover cropping. I aim for beds that are no wider than 3-4 feet so I can reach the center without stepping on the soil, compacting it.
- Raised Beds: Raised beds offer numerous advantages, especially for poor soil, heavy clay, or rocky areas. They provide better drainage, warm up faster in spring, reduce compaction, and make weeding and harvesting easier on your back.
- Material Options:
- Untreated Cedar: Naturally rot-resistant and chemical-free. A 4×8 ft bed, 12 inches deep, typically requires three 2x12x8 ft cedar boards, costing around $50-$60 per board (total ~$150-$180) plus corner brackets or screws. My first raised beds were cedar and are still going strong after 7 years.
- Galvanized Steel: Durable, long-lasting, and aesthetically pleasing. Brands like Vego Garden offer modular kits. A Vego Garden 17″ Tall 8-in-1 Metal Raised Garden Bed (can be configured to 4×8 ft) costs approximately $250-$300.
- Concrete Blocks/Stones: Very durable but can leach minerals (though generally safe once weathered) and can be expensive.
- Recycled Materials: Pallets (check for chemical treatment stamps like « HT » for heat-treated), old tires (controversial due to potential chemical leaching).
- Filling Raised Beds: Don’t just fill with topsoil. Use a « Hugelkultur » approach (logs, branches, leaves, then compost, then topsoil) or a mixture of 60% good quality topsoil, 30% compost, and 10% perlite or vermiculite for drainage. A 4x8x1 ft raised bed requires about 32 cubic feet (or ~1.2 cubic yards) of soil mix, which can cost $100-$200 depending on your source.
- Material Options:
Step 4: Water Management & Irrigation
Efficient water management is critical for a self sufficient garden from scratch, especially in off-grid living where water resources might be limited.
- Rainwater Harvesting: This is my primary source of irrigation water. A 55-gallon rain barrel (e.g., EarthMark Rain Barrel, ~$120-$150) connected to a downspout can collect significant water. For larger needs, I use two 275-gallon IBC totes (Intermediate Bulk Containers, often available used for $100-$200 each from food-grade sources) connected in series. A 1,000 sq ft roof can collect approximately 620 gallons of water for every inch of rainfall. My 1,500 sq ft roof provides ample water for my 600 sq ft garden through multiple barrels and totes.
- Drip Irrigation: This is by far the most water-efficient method, delivering water directly to the plant’s root zone, minimizing evaporation and weed growth.
- Components: A typical drip system includes a pressure regulator (e.g., Rain Bird PRV-10, ~$15), a filter (Rain Bird RBY filter, ~$20), main tubing (1/2-inch poly tubing, 100ft ~$25), smaller feeder lines (1/4-inch tubing), and emitters (0.5 GPH or 1 GPH per plant).
- Kits: For beginners, a starter kit like the Rain Bird Drip Irrigation Garden Kit (model DDI-KIT-1P, ~$40-$60) is excellent for a small garden. For larger setups, I use Netafim Techline CV Drip Line (500ft roll, ~$150-$200), which has pressure-compensating emitters built-in, ensuring even watering across long runs.
- Automation: For true self-sufficiency, consider a battery-powered timer (e.g., Orbit B-Hyve Bluetooth Hose Faucet Timer, ~$50) or a solar-powered timer connected to a small 12V pump.
- Solar-Powered Pumps: For lifting water from a well, pond, or large storage tank to your garden, a solar pump is a game-changer. For a smaller drip system, a Shurflo 2088-594-152 Diaphragm Pump (12V, 3.5 GPM, ~$180) can be powered by a single 100W solar panel (e.g., Renogy 100W Monocrystalline Solar Panel, ~$100) and a small 12V battery (e.g., a 50Ah LiFePO4 battery like the Battle Born 50Ah, ~$450). For larger operations or deeper wells, more robust systems are needed. If you’re looking to build out a comprehensive off-grid power system to support your garden’s water needs, or indeed your entire homestead, you might want to explore resources like the Power Grid Generator complete system guide to understand the full scope of what’s possible in terms of energy independence.
Step 5: Seed Selection & Planting
The choice of seeds is crucial for a truly self sufficient garden from scratch.
- Choose Heirloom & Open-Pollinated Seeds: These varieties produce seeds that will grow true to type, meaning you can save seeds from your harvest year after year. F1 hybrids, while often vigorous, will not produce consistent offspring from saved seeds. Reputable seed companies include Baker Creek Heirloom Seeds, High Mowing Organic Seeds, and Seed Savers Exchange. Start with common, reliable varieties like ‘Black Krim’ tomatoes, ‘Provider’ bush beans, ‘Waltham Butternut’ squash, and ‘Black Seeded Simpson’ lettuce.
- Start Seeds Indoors (Optional but Recommended): For longer growing seasons or specific crops, starting seeds indoors gives you a head start. Use seed-starting mix (e.g., Espoma Organic Seed Starter Mix, ~$10 for 16qt bag) in seed trays (Jiffy Professional Greenhouse 72-cell kit, ~$15). Provide adequate light with LED grow lights (Barrina T5 2ft 4-pack LED Grow Lights, 20W each, ~$50) for 14-16 hours a day, positioned 2-4 inches above seedlings. Maintain consistent temperatures (65-75°F for most).
- Direct Sowing vs. Transplanting: Some crops (carrots, radishes, beans, corn) prefer direct sowing into the garden bed. Others (tomatoes, peppers, broccoli, kale) benefit from being started indoors and transplanted. Follow seed packet instructions for planting depths (e.g., lettuce seeds are often surface-sown or planted 1/8 inch deep, while beans are 1 inch deep) and spacing.
- Companion Planting: Strategically plant different species together to enhance growth, deter pests, and attract beneficial insects. For example, planting marigolds near tomatoes can deter nematodes, and basil improves tomato flavor. Nasturtiums can act as a trap crop for aphids.
- Succession Planting: For a continuous harvest, plant small batches of quick-growing crops (lettuce, radishes, cilantro) every 2-3 weeks. As one crop finishes, another is ready to take its place.
Step 6: Pest & Disease Management (Organic)
Maintaining a self sufficient garden from scratch means embracing organic pest and disease control.
- Integrated Pest Management (IPM): This holistic approach combines several strategies.
- Observation: Regularly inspect your plants for early signs of pests or disease. Catching issues early is key.
- Physical Barriers: Use row covers (e.g., Agribon AG-19 floating row cover, 10×20 ft, ~$20) to protect young plants from insect pests like cabbage worms and squash bugs. Install fences (e.g., 2×4 welded wire mesh, 4 ft tall, 50 ft roll ~$70) to keep out deer, rabbits, and other larger animals.
- Hand-Picking: For larger pests like tomato hornworms or squash bugs, simply pick them off and drop them into a bucket of soapy water.
- Companion Planting: As mentioned, certain plants repel pests. Marigolds, garlic, and onions are excellent deterrents.
- Attract Beneficial Insects: Plant flowers like dill, fennel, cosmos, and sweet alyssum to attract ladybugs, lacewings, and parasitic wasps, which prey on common garden pests.
- Organic Sprays & Treatments:
- Neem Oil: An excellent broad-spectrum organic insecticide and fungicide. Bonide Neem Oil Concentrate (16oz, ~$20) can be mixed at a rate of 1-2 tbsp per gallon of water and sprayed on affected plants.
- Insecticidal Soap: Effective against soft-bodied insects like aphids, whiteflies, and spider mites. Garden Safe Insecticidal Soap (24oz ready-to-use, ~$10).
- Bacillus thuringiensis (Bt): A naturally occurring soil bacterium that targets caterpillars and worms. Monterey BT Worm & Caterpillar Killer (16oz, ~$18) is highly effective and safe for beneficial insects.
- Copper or Sulfur Sprays: For fungal diseases like powdery mildew or blight, organic copper (e.g., Bonide Copper Fungicide, ~$15 for 1lb) or sulfur (e.g., Safer Brand Garden Fungicide, ~$10 for 16oz) can be used as a last resort.
Step 7: Harvesting & Seed Saving
The culmination of your efforts is the harvest, and seed saving closes the loop on self-sufficiency.
- Harvesting Techniques:
- Timing: Harvest vegetables at their peak ripeness for best flavor and nutritional value. For example, green beans should snap cleanly, cucumbers should be firm, and tomatoes should be fully colored.
- Frequency: Many crops, like zucchini, cucumbers, and bush beans, produce more if harvested frequently. Pick daily or every other day.
- Tools: Use clean, sharp pruners (e.g., Corona ClassicCUT Bypass Pruner BP 3180, ~$30) or a sharp knife for clean cuts, minimizing damage to the plant.
- Seed Saving: This is where the « self-sufficient » aspect truly shines.
- Selection: Only save seeds from your healthiest, most vigorous plants that show desired traits (disease resistance, good flavor, high yield).
- Isolation: To ensure true-to-type seeds, prevent cross-pollination. This can be challenging for open-pollinated crops that readily cross (e.g., squash, corn). For beginners, focus on self-pollinating plants like beans, peas, lettuce, and tomatoes.
- Processing:
- Dry Seeds (Beans, Peas, Lettuce, Grains): Allow pods/seed heads to dry completely on the plant. Harvest, shell, and clean the seeds, removing chaff.
- Wet Seeds (Tomatoes, Cucumbers, Squash): For tomatoes, ferment the seeds in water for a few days to remove the gel coating and inhibit disease. For cucumbers/squash, scrape out seeds, wash thoroughly, and dry.
- Drying: Spread seeds thinly on screens or paper plates in a cool, dry, well-ventilated area for 1-4 weeks. Ensure they are bone-dry before storage. I aim for less than 8% moisture content.
- Storage: Store seeds in airtight containers (glass jars with desiccant packets work well) in a cool, dark, dry place (ideally 40-50°F and 30-40% humidity). Label clearly with variety and date. Properly stored seeds can remain viable for 3-10 years or more.
Step 8: Season Extension & Winterizing
Extend your harvest and protect your garden for the off-season to truly maximize your self sufficient garden from scratch.
- Cold Frames: Simple structures with a transparent top (glass, polycarbonate, or old windows) that sit over garden beds. They trap solar heat, allowing you to grow cold-hardy crops (lettuce, spinach, kale, radishes) well into winter or start seeds earlier in spring. A basic cold frame can be built from 2×6 lumber and a sheet of polycarbonate for under $100.
- Hoop Houses/Low Tunnels: Larger structures made from flexible hoops (PVC pipe or EMT conduit) covered with greenhouse plastic. These provide more space and greater temperature moderation. A 10×20 ft DIY low tunnel kit can cost $200-$500, while a larger, more robust hoop house kit might be $1,000-$3,000. I use a 6×12 ft low tunnel made from 1/2-inch PVC hoops and 6mil greenhouse plastic, which extends my lettuce and spinach harvest by at least
Healthy soil is the bedrock of a productive, self-sufficient garden. You can’t guess what your soil needs; you have to test it.
- Perform a Soil Test: A professional soil test will give you precise data on your soil’s pH, nutrient levels (N-P-K), and organic matter content. I recommend sending a sample to your local agricultural extension office; it typically costs $20-$50 and provides detailed recommendations. Alternatively, for a quick homeowner check, a Rapitest Soil Test Kit (40-test kit, model 1663, ~$20 on Amazon) provides a good baseline for pH, Nitrogen, Phosphorus, and Potash. Aim for a pH between 6.0 and 7.0 for most vegetables.
- Amend for pH Imbalance: If your soil is too acidic (below 6.0), add agricultural lime (dolomitic lime adds magnesium, calcitic lime adds calcium). Apply 5-10 lbs per 100 sq ft for a moderate adjustment. If it’s too alkaline (above 7.0), add elemental sulfur (e.g., Espoma Soil Acidifier, ~$15 for 6.75 lbs) or generous amounts of organic matter like peat moss or pine needles.
- Build Organic Matter: This is the single most important step for long-term soil health. Organic matter improves soil structure, water retention, drainage, and nutrient availability. Incorporate 2-4 inches of high-quality compost into your top 6-12 inches of soil annually. I make my own compost from kitchen scraps, garden waste, and shredded leaves, but you can purchase it. Local nurseries often sell bulk compost for $30-$50 per cubic yard. Aged manure (from chickens, cows, or horses – ensure it’s well-rotted to avoid burning plants) is also excellent.
- Address Nutrient Deficiencies: Based on your soil test, add specific organic amendments. If Nitrogen (N) is low, add blood meal (12-0-0, ~$20 for 3 lbs) or feather meal. For Phosphorus (P), use bone meal (3-15-0, ~$15 for 3 lbs) or rock phosphate. For Potassium (K), greensand (0-0-2.5, ~$25 for 5 lbs) or kelp meal are good choices. I rely heavily on Espoma Organic Garden-tone (5-3-3, ~$25 for an 8lb bag) as a balanced, all-purpose organic fertilizer during planting.
Step 3: Garden Bed Preparation
Deciding between raised beds and in-ground beds depends on your soil, budget, and physical capabilities.
- In-Ground Beds: If you have excellent native soil and good drainage, in-ground beds are the most economical. Double-digging (loosening soil two shovel depths) can significantly improve drainage and aeration. For my main garden, I primarily use in-ground beds, but I focus on building up the soil over time with consistent compost additions and cover cropping. I aim for beds that are no wider than 3-4 feet so I can reach the center without stepping on the soil, compacting it.
- Raised Beds: Raised beds offer numerous advantages, especially for poor soil, heavy clay, or rocky areas. They provide better drainage, warm up faster in spring, reduce compaction, and make weeding and harvesting easier on your back.
- Material Options:
- Untreated Cedar: Naturally rot-resistant and chemical-free. A 4×8 ft bed, 12 inches deep, typically requires three 2x12x8 ft cedar boards, costing around $50-$60 per board (total ~$150-$180) plus corner brackets or screws. My first raised beds were cedar and are still going strong after 7 years.
- Galvanized Steel: Durable, long-lasting, and aesthetically pleasing. Brands like Vego Garden offer modular kits. A Vego Garden 17″ Tall 8-in-1 Metal Raised Garden Bed (can be configured to 4×8 ft) costs approximately $250-$300.
- Concrete Blocks/Stones: Very durable but can leach minerals (though generally safe once weathered) and can be expensive.
- Recycled Materials: Pallets (check for chemical treatment stamps like « HT » for heat-treated), old tires (controversial due to potential chemical leaching).
- Filling Raised Beds: Don’t just fill with topsoil. Use a « Hugelkultur » approach (logs, branches, leaves, then compost, then topsoil) or a mixture of 60% good quality topsoil, 30% compost, and 10% perlite or vermiculite for drainage. A 4x8x1 ft raised bed requires about 32 cubic feet (or ~1.2 cubic yards) of soil mix, which can cost $100-$200 depending on your source.
- Material Options:
Step 4: Water Management & Irrigation
Efficient water management is critical for a self sufficient garden from scratch, especially in off-grid living where water resources might be limited.
- Rainwater Harvesting: This is my primary source of irrigation water. A 55-gallon rain barrel (e.g., EarthMark Rain Barrel, ~$120-$150) connected to a downspout can collect significant water. For larger needs, I use two 275-gallon IBC totes (Intermediate Bulk Containers, often available used for $100-$200 each from food-grade sources) connected in series. A 1,000 sq ft roof can collect approximately 620 gallons of water for every inch of rainfall. My 1,500 sq ft roof provides ample water for my 600 sq ft garden through multiple barrels and totes.
- Drip Irrigation: This is by far the most water-efficient method, delivering water directly to the plant’s root zone, minimizing evaporation and weed growth.
- Components: A typical drip system includes a pressure regulator (e.g., Rain Bird PRV-10, ~$15), a filter (Rain Bird RBY filter, ~$20), main tubing (1/2-inch poly tubing, 100ft ~$25), smaller feeder lines (1/4-inch tubing), and emitters (0.5 GPH or 1 GPH per plant).
- Kits: For beginners, a starter kit like the Rain Bird Drip Irrigation Garden Kit (model DDI-KIT-1P, ~$40-$60) is excellent for a small garden. For larger setups, I use Netafim Techline CV Drip Line (500ft roll, ~$150-$200), which has pressure-compensating emitters built-in, ensuring even watering across long runs.
- Automation: For true self-sufficiency, consider a battery-powered timer (e.g., Orbit B-Hyve Bluetooth Hose Faucet Timer, ~$50) or a solar-powered timer connected to a small 12V pump.
- Solar-Powered Pumps: For lifting water from a well, pond, or large storage tank to your garden, a solar pump is a game-changer. For a smaller drip system, a Shurflo 2088-594-152 Diaphragm Pump (12V, 3.5 GPM, ~$180) can be powered by a single 100W solar panel (e.g., Renogy 100W Monocrystalline Solar Panel, ~$100) and a small 12V battery (e.g., a 50Ah LiFePO4 battery like the Battle Born 50Ah, ~$450). For larger operations or deeper wells, more robust systems are needed. If you’re looking to build out a comprehensive off-grid power system to support your garden’s water needs, or indeed your entire homestead, you might want to explore resources like the Power Grid Generator complete system guide to understand the full scope of what’s possible in terms of energy independence.
Step 5: Seed Selection & Planting
The choice of seeds is crucial for a truly self sufficient garden from scratch.
- Choose Heirloom & Open-Pollinated Seeds: These varieties produce seeds that will grow true to type, meaning you can save seeds from your harvest year after year. F1 hybrids, while often vigorous, will not produce consistent offspring from saved seeds. Reputable seed companies include Baker Creek Heirloom Seeds, High Mowing Organic Seeds, and Seed Savers Exchange. Start with common, reliable varieties like ‘Black Krim’ tomatoes, ‘Provider’ bush beans, ‘Waltham Butternut’ squash, and ‘Black Seeded Simpson’ lettuce.
- Start Seeds Indoors (Optional but Recommended): For longer growing seasons or specific crops, starting seeds indoors gives you a head start. Use seed-starting mix (e.g., Espoma Organic Seed Starter Mix, ~$10 for 16qt bag) in seed trays (Jiffy Professional Greenhouse 72-cell kit, ~$15). Provide adequate light with LED grow lights (Barrina T5 2ft 4-pack LED Grow Lights, 20W each, ~$50) for 14-16 hours a day, positioned 2-4 inches above seedlings. Maintain consistent temperatures (65-75°F for most).
- Direct Sowing vs. Transplanting: Some crops (carrots, radishes, beans, corn) prefer direct sowing into the garden bed. Others (tomatoes, peppers, broccoli, kale) benefit from being started indoors and transplanted. Follow seed packet instructions for planting depths (e.g., lettuce seeds are often surface-sown or planted 1/8 inch deep, while beans are 1 inch deep) and spacing.
- Companion Planting: Strategically plant different species together to enhance growth, deter pests, and attract beneficial insects. For example, planting marigolds near tomatoes can deter nematodes, and basil improves tomato flavor. Nasturtiums can act as a trap crop for aphids.
- Succession Planting: For a continuous harvest, plant small batches of quick-growing crops (lettuce, radishes, cilantro) every 2-3 weeks. As one crop finishes, another is ready to take its place.
Step 6: Pest & Disease Management (Organic)
Maintaining a self sufficient garden from scratch means embracing organic pest and disease control.
- Integrated Pest Management (IPM): This holistic approach combines several strategies.
- Observation: Regularly inspect your plants for early signs of pests or disease. Catching issues early is key.
- Physical Barriers: Use row covers (e.g., Agribon AG-19 floating row cover, 10×20 ft, ~$20) to protect young plants from insect pests like cabbage worms and squash bugs. Install fences (e.g., 2×4 welded wire mesh, 4 ft tall, 50 ft roll ~$70) to keep out deer, rabbits, and other larger animals.
- Hand-Picking: For larger pests like tomato hornworms or squash bugs, simply pick them off and drop them into a bucket of soapy water.
- Companion Planting: As mentioned, certain plants repel pests. Marigolds, garlic, and onions are excellent deterrents.
- Attract Beneficial Insects: Plant flowers like dill, fennel, cosmos, and sweet alyssum to attract ladybugs, lacewings, and parasitic wasps, which prey on common garden pests.
- Organic Sprays & Treatments:
- Neem Oil: An excellent broad-spectrum organic insecticide and fungicide. Bonide Neem Oil Concentrate (16oz, ~$20) can be mixed at a rate of 1-2 tbsp per gallon of water and sprayed on affected plants.
- Insecticidal Soap: Effective against soft-bodied insects like aphids, whiteflies, and spider mites. Garden Safe Insecticidal Soap (24oz ready-to-use, ~$10).
- Bacillus thuringiensis (Bt): A naturally occurring soil bacterium that targets caterpillars and worms. Monterey BT Worm & Caterpillar Killer (16oz, ~$18) is highly effective and safe for beneficial insects.
- Copper or Sulfur Sprays: For fungal diseases like powdery mildew or blight, organic copper (e.g., Bonide Copper Fungicide, ~$15 for 1lb) or sulfur (e.g., Safer Brand Garden Fungicide, ~$10 for 16oz) can be used as a last resort.
Step 7: Harvesting & Seed Saving
The culmination of your efforts is the harvest, and seed saving closes the loop on self-sufficiency.
- Harvesting Techniques:
- Timing: Harvest vegetables at their peak ripeness for best flavor and nutritional value. For example, green beans should snap cleanly, cucumbers should be firm, and tomatoes should be fully colored.
- Frequency: Many crops, like zucchini, cucumbers, and bush beans, produce more if harvested frequently. Pick daily or every other day.
- Tools: Use clean, sharp pruners (e.g., Corona ClassicCUT Bypass Pruner BP 3180, ~$30) or a sharp knife for clean cuts, minimizing damage to the plant.
- Seed Saving: This is where the « self-sufficient » aspect truly shines.
- Selection: Only save seeds from your healthiest, most vigorous plants that show desired traits (disease resistance, good flavor, high yield).
- Isolation: To ensure true-to-type seeds, prevent cross-pollination. This can be challenging for open-pollinated crops that readily cross (e.g., squash, corn). For beginners, focus on self-pollinating plants like beans, peas, lettuce, and tomatoes.
- Processing:
- Dry Seeds (Beans, Peas, Lettuce, Grains): Allow pods/seed heads to dry completely on the plant. Harvest, shell, and clean the seeds, removing chaff.
- Wet Seeds (Tomatoes, Cucumbers, Squash): For tomatoes, ferment the seeds in water for a few days to remove the gel coating and inhibit disease. For cucumbers/squash, scrape out seeds, wash thoroughly, and dry.
- Drying: Spread seeds thinly on screens or paper plates in a cool, dry, well-ventilated area for 1-4 weeks. Ensure they are bone-dry before storage. I aim for less than 8% moisture content.
- Storage: Store seeds in airtight containers (glass jars with desiccant packets work well) in a cool, dark, dry place (ideally 40-50°F and 30-40% humidity). Label clearly with variety and date. Properly stored seeds can remain viable for 3-10 years or more.
Step 8: Season Extension & Winterizing
Extend your harvest and protect your garden for the off-season to truly maximize your self sufficient garden from scratch.
- Cold Frames: Simple structures with a transparent top (glass, polycarbonate, or old windows) that sit over garden beds. They trap solar heat, allowing you to grow cold-hardy crops (lettuce, spinach, kale, radishes) well into winter or start seeds earlier in spring. A basic cold frame can be built from 2×6 lumber and a sheet of polycarbonate for under $100.
- Hoop Houses/Low Tunnels: Larger structures made from flexible hoops (PVC pipe or EMT conduit) covered with greenhouse plastic. These provide more space and greater temperature moderation. A 10×20 ft DIY low tunnel kit can cost $200-$500, while a larger, more robust hoop house kit might be $1,000-$3,000. I use a 6×12 ft low tunnel made from 1/2-inch PVC hoops and 6mil greenhouse plastic, which extends my lettuce and spinach harvest by at least
- Harvesting Techniques:
- Timing: Harvest vegetables at their peak ripeness for best flavor and nutritional value. For example, green beans should snap cleanly, cucumbers should be firm, and tomatoes should be fully colored.
- Frequency: Many crops, like zucchini, cucumbers, and bush beans, produce more if harvested frequently. Pick daily or every other day.
- Tools: Use clean, sharp pruners (e.g., Corona ClassicCUT Bypass Pruner BP 3180, ~$30) or a sharp knife for clean cuts, minimizing damage to the plant.
- Seed Saving: This is where the « self-sufficient » aspect truly shines.
- Selection: Only save seeds from your healthiest, most vigorous plants that show desired traits (disease resistance, good flavor, high yield).
- Isolation: To ensure true-to-type seeds, prevent cross-pollination. This can be challenging for open-pollinated crops that readily cross (e.g., squash, corn). For beginners, focus on self-pollinating plants like beans, peas, lettuce, and tomatoes.
- Processing:
- Dry Seeds (Beans, Peas, Lettuce, Grains): Allow pods/seed heads to dry completely on the plant. Harvest, shell, and clean the seeds, removing chaff.
- Wet Seeds (Tomatoes, Cucumbers, Squash): For tomatoes, ferment the seeds in water for a few days to remove the gel coating and inhibit disease. For cucumbers/squash, scrape out seeds, wash thoroughly, and dry.
- Drying: Spread seeds thinly on screens or paper plates in a cool, dry, well-ventilated area for 1-4 weeks. Ensure they are bone-dry before storage. I aim for less than 8% moisture content.
- Storage: Store seeds in airtight containers (glass jars with desiccant packets work well) in a cool, dark, dry place (ideally 40-50°F and 30-40% humidity). Label clearly with variety and date. Properly stored seeds can remain viable for 3-10 years or more.
Step 8: Season Extension & Winterizing
Extend your harvest and protect your garden for the off-season to truly maximize your self sufficient garden from scratch.
- Cold Frames: Simple structures with a transparent top (glass, polycarbonate, or old windows) that sit over garden beds. They trap solar heat, allowing you to grow cold-hardy crops (lettuce, spinach, kale, radishes) well into winter or start seeds earlier in spring. A basic cold frame can be built from 2×6 lumber and a sheet of polycarbonate for under $100.
- Hoop Houses/Low Tunnels: Larger structures made from flexible hoops (PVC pipe or EMT conduit) covered with greenhouse plastic. These provide more space and greater temperature moderation. A 10×20 ft DIY low tunnel kit can cost $200-$500, while a larger, more robust hoop house kit might be $1,000-$3,000. I use a 6×12 ft low tunnel made from 1/2-inch PVC hoops and 6mil greenhouse plastic, which extends my lettuce and spinach harvest by at least
Step 6: Pest & Disease Management (Organic)
Maintaining a self sufficient garden from scratch means embracing organic pest and disease control.
- Integrated Pest Management (IPM): This holistic approach combines several strategies.
- Observation: Regularly inspect your plants for early signs of pests or disease. Catching issues early is key.
- Physical Barriers: Use row covers (e.g., Agribon AG-19 floating row cover, 10×20 ft, ~$20) to protect young plants from insect pests like cabbage worms and squash bugs. Install fences (e.g., 2×4 welded wire mesh, 4 ft tall, 50 ft roll ~$70) to keep out deer, rabbits, and other larger animals.
- Hand-Picking: For larger pests like tomato hornworms or squash bugs, simply pick them off and drop them into a bucket of soapy water.
- Companion Planting: As mentioned, certain plants repel pests. Marigolds, garlic, and onions are excellent deterrents.
- Attract Beneficial Insects: Plant flowers like dill, fennel, cosmos, and sweet alyssum to attract ladybugs, lacewings, and parasitic wasps, which prey on common garden pests.
- Organic Sprays & Treatments:
- Neem Oil: An excellent broad-spectrum organic insecticide and fungicide. Bonide Neem Oil Concentrate (16oz, ~$20) can be mixed at a rate of 1-2 tbsp per gallon of water and sprayed on affected plants.
- Insecticidal Soap: Effective against soft-bodied insects like aphids, whiteflies, and spider mites. Garden Safe Insecticidal Soap (24oz ready-to-use, ~$10).
- Bacillus thuringiensis (Bt): A naturally occurring soil bacterium that targets caterpillars and worms. Monterey BT Worm & Caterpillar Killer (16oz, ~$18) is highly effective and safe for beneficial insects.
- Copper or Sulfur Sprays: For fungal diseases like powdery mildew or blight, organic copper (e.g., Bonide Copper Fungicide, ~$15 for 1lb) or sulfur (e.g., Safer Brand Garden Fungicide, ~$10 for 16oz) can be used as a last resort.
Step 7: Harvesting & Seed Saving
The culmination of your efforts is the harvest, and seed saving closes the loop on self-sufficiency.
- Harvesting Techniques:
- Timing: Harvest vegetables at their peak ripeness for best flavor and nutritional value. For example, green beans should snap cleanly, cucumbers should be firm, and tomatoes should be fully colored.
- Frequency: Many crops, like zucchini, cucumbers, and bush beans, produce more if harvested frequently. Pick daily or every other day.
- Tools: Use clean, sharp pruners (e.g., Corona ClassicCUT Bypass Pruner BP 3180, ~$30) or a sharp knife for clean cuts, minimizing damage to the plant.
- Seed Saving: This is where the « self-sufficient » aspect truly shines.
- Selection: Only save seeds from your healthiest, most vigorous plants that show desired traits (disease resistance, good flavor, high yield).
- Isolation: To ensure true-to-type seeds, prevent cross-pollination. This can be challenging for open-pollinated crops that readily cross (e.g., squash, corn). For beginners, focus on self-pollinating plants like beans, peas, lettuce, and tomatoes.
- Processing:
- Dry Seeds (Beans, Peas, Lettuce, Grains): Allow pods/seed heads to dry completely on the plant. Harvest, shell, and clean the seeds, removing chaff.
- Wet Seeds (Tomatoes, Cucumbers, Squash): For tomatoes, ferment the seeds in water for a few days to remove the gel coating and inhibit disease. For cucumbers/squash, scrape out seeds, wash thoroughly, and dry.
- Drying: Spread seeds thinly on screens or paper plates in a cool, dry, well-ventilated area for 1-4 weeks. Ensure they are bone-dry before storage. I aim for less than 8% moisture content.
- Storage: Store seeds in airtight containers (glass jars with desiccant packets work well) in a cool, dark, dry place (ideally 40-50°F and 30-40% humidity). Label clearly with variety and date. Properly stored seeds can remain viable for 3-10 years or more.
Step 8: Season Extension & Winterizing
Extend your harvest and protect your garden for the off-season to truly maximize your self sufficient garden from scratch.
- Cold Frames: Simple structures with a transparent top (glass, polycarbonate, or old windows) that sit over garden beds. They trap solar heat, allowing you to grow cold-hardy crops (lettuce, spinach, kale, radishes) well into winter or start seeds earlier in spring. A basic cold frame can be built from 2×6 lumber and a sheet of polycarbonate for under $100.
- Hoop Houses/Low Tunnels: Larger structures made from flexible hoops (PVC pipe or EMT conduit) covered with greenhouse plastic. These provide more space and greater temperature moderation. A 10×20 ft DIY low tunnel kit can cost $200-$500, while a larger, more robust hoop house kit might be $1,000-$3,000. I use a 6×12 ft low tunnel made from 1/2-inch PVC hoops and 6mil greenhouse plastic, which extends my lettuce and spinach harvest by at least
- Choose Heirloom & Open-Pollinated Seeds: These varieties produce seeds that will grow true to type, meaning you can save seeds from your harvest year after year. F1 hybrids, while often vigorous, will not produce consistent offspring from saved seeds. Reputable seed companies include Baker Creek Heirloom Seeds, High Mowing Organic Seeds, and Seed Savers Exchange. Start with common, reliable varieties like ‘Black Krim’ tomatoes, ‘Provider’ bush beans, ‘Waltham Butternut’ squash, and ‘Black Seeded Simpson’ lettuce.
- Start Seeds Indoors (Optional but Recommended): For longer growing seasons or specific crops, starting seeds indoors gives you a head start. Use seed-starting mix (e.g., Espoma Organic Seed Starter Mix, ~$10 for 16qt bag) in seed trays (Jiffy Professional Greenhouse 72-cell kit, ~$15). Provide adequate light with LED grow lights (Barrina T5 2ft 4-pack LED Grow Lights, 20W each, ~$50) for 14-16 hours a day, positioned 2-4 inches above seedlings. Maintain consistent temperatures (65-75°F for most).
- Direct Sowing vs. Transplanting: Some crops (carrots, radishes, beans, corn) prefer direct sowing into the garden bed. Others (tomatoes, peppers, broccoli, kale) benefit from being started indoors and transplanted. Follow seed packet instructions for planting depths (e.g., lettuce seeds are often surface-sown or planted 1/8 inch deep, while beans are 1 inch deep) and spacing.
- Companion Planting: Strategically plant different species together to enhance growth, deter pests, and attract beneficial insects. For example, planting marigolds near tomatoes can deter nematodes, and basil improves tomato flavor. Nasturtiums can act as a trap crop for aphids.
- Succession Planting: For a continuous harvest, plant small batches of quick-growing crops (lettuce, radishes, cilantro) every 2-3 weeks. As one crop finishes, another is ready to take its place.
Step 6: Pest & Disease Management (Organic)
Maintaining a self sufficient garden from scratch means embracing organic pest and disease control.
- Integrated Pest Management (IPM): This holistic approach combines several strategies.
- Observation: Regularly inspect your plants for early signs of pests or disease. Catching issues early is key.
- Physical Barriers: Use row covers (e.g., Agribon AG-19 floating row cover, 10×20 ft, ~$20) to protect young plants from insect pests like cabbage worms and squash bugs. Install fences (e.g., 2×4 welded wire mesh, 4 ft tall, 50 ft roll ~$70) to keep out deer, rabbits, and other larger animals.
- Hand-Picking: For larger pests like tomato hornworms or squash bugs, simply pick them off and drop them into a bucket of soapy water.
- Companion Planting: As mentioned, certain plants repel pests. Marigolds, garlic, and onions are excellent deterrents.
- Attract Beneficial Insects: Plant flowers like dill, fennel, cosmos, and sweet alyssum to attract ladybugs, lacewings, and parasitic wasps, which prey on common garden pests.
- Organic Sprays & Treatments:
- Neem Oil: An excellent broad-spectrum organic insecticide and fungicide. Bonide Neem Oil Concentrate (16oz, ~$20) can be mixed at a rate of 1-2 tbsp per gallon of water and sprayed on affected plants.
- Insecticidal Soap: Effective against soft-bodied insects like aphids, whiteflies, and spider mites. Garden Safe Insecticidal Soap (24oz ready-to-use, ~$10).
- Bacillus thuringiensis (Bt): A naturally occurring soil bacterium that targets caterpillars and worms. Monterey BT Worm & Caterpillar Killer (16oz, ~$18) is highly effective and safe for beneficial insects.
- Copper or Sulfur Sprays: For fungal diseases like powdery mildew or blight, organic copper (e.g., Bonide Copper Fungicide, ~$15 for 1lb) or sulfur (e.g., Safer Brand Garden Fungicide, ~$10 for 16oz) can be used as a last resort.
Step 7: Harvesting & Seed Saving
The culmination of your efforts is the harvest, and seed saving closes the loop on self-sufficiency.
- Harvesting Techniques:
- Timing: Harvest vegetables at their peak ripeness for best flavor and nutritional value. For example, green beans should snap cleanly, cucumbers should be firm, and tomatoes should be fully colored.
- Frequency: Many crops, like zucchini, cucumbers, and bush beans, produce more if harvested frequently. Pick daily or every other day.
- Tools: Use clean, sharp pruners (e.g., Corona ClassicCUT Bypass Pruner BP 3180, ~$30) or a sharp knife for clean cuts, minimizing damage to the plant.
- Seed Saving: This is where the « self-sufficient » aspect truly shines.
- Selection: Only save seeds from your healthiest, most vigorous plants that show desired traits (disease resistance, good flavor, high yield).
- Isolation: To ensure true-to-type seeds, prevent cross-pollination. This can be challenging for open-pollinated crops that readily cross (e.g., squash, corn). For beginners, focus on self-pollinating plants like beans, peas, lettuce, and tomatoes.
- Processing:
- Dry Seeds (Beans, Peas, Lettuce, Grains): Allow pods/seed heads to dry completely on the plant. Harvest, shell, and clean the seeds, removing chaff.
- Wet Seeds (Tomatoes, Cucumbers, Squash): For tomatoes, ferment the seeds in water for a few days to remove the gel coating and inhibit disease. For cucumbers/squash, scrape out seeds, wash thoroughly, and dry.
- Drying: Spread seeds thinly on screens or paper plates in a cool, dry, well-ventilated area for 1-4 weeks. Ensure they are bone-dry before storage. I aim for less than 8% moisture content.
- Storage: Store seeds in airtight containers (glass jars with desiccant packets work well) in a cool, dark, dry place (ideally 40-50°F and 30-40% humidity). Label clearly with variety and date. Properly stored seeds can remain viable for 3-10 years or more.
Step 8: Season Extension & Winterizing
Extend your harvest and protect your garden for the off-season to truly maximize your self sufficient garden from scratch.
- Cold Frames: Simple structures with a transparent top (glass, polycarbonate, or old windows) that sit over garden beds. They trap solar heat, allowing you to grow cold-hardy crops (lettuce, spinach, kale, radishes) well into winter or start seeds earlier in spring. A basic cold frame can be built from 2×6 lumber and a sheet of polycarbonate for under $100.
- Hoop Houses/Low Tunnels: Larger structures made from flexible hoops (PVC pipe or EMT conduit) covered with greenhouse plastic. These provide more space and greater temperature moderation. A 10×20 ft DIY low tunnel kit can cost $200-$500, while a larger, more robust hoop house kit might be $1,000-$3,000. I use a 6×12 ft low tunnel made from 1/2-inch PVC hoops and 6mil greenhouse plastic, which extends my lettuce and spinach harvest by at least
The choice of seeds is crucial for a truly self sufficient garden from scratch.
- Choose Heirloom & Open-Pollinated Seeds: These varieties produce seeds that will grow true to type, meaning you can save seeds from your harvest year after year. F1 hybrids, while often vigorous, will not produce consistent offspring from saved seeds. Reputable seed companies include Baker Creek Heirloom Seeds, High Mowing Organic Seeds, and Seed Savers Exchange. Start with common, reliable varieties like ‘Black Krim’ tomatoes, ‘Provider’ bush beans, ‘Waltham Butternut’ squash, and ‘Black Seeded Simpson’ lettuce.
- Start Seeds Indoors (Optional but Recommended): For longer growing seasons or specific crops, starting seeds indoors gives you a head start. Use seed-starting mix (e.g., Espoma Organic Seed Starter Mix, ~$10 for 16qt bag) in seed trays (Jiffy Professional Greenhouse 72-cell kit, ~$15). Provide adequate light with LED grow lights (Barrina T5 2ft 4-pack LED Grow Lights, 20W each, ~$50) for 14-16 hours a day, positioned 2-4 inches above seedlings. Maintain consistent temperatures (65-75°F for most).
- Direct Sowing vs. Transplanting: Some crops (carrots, radishes, beans, corn) prefer direct sowing into the garden bed. Others (tomatoes, peppers, broccoli, kale) benefit from being started indoors and transplanted. Follow seed packet instructions for planting depths (e.g., lettuce seeds are often surface-sown or planted 1/8 inch deep, while beans are 1 inch deep) and spacing.
- Companion Planting: Strategically plant different species together to enhance growth, deter pests, and attract beneficial insects. For example, planting marigolds near tomatoes can deter nematodes, and basil improves tomato flavor. Nasturtiums can act as a trap crop for aphids.
- Succession Planting: For a continuous harvest, plant small batches of quick-growing crops (lettuce, radishes, cilantro) every 2-3 weeks. As one crop finishes, another is ready to take its place.
Step 6: Pest & Disease Management (Organic)
Maintaining a self sufficient garden from scratch means embracing organic pest and disease control.
- Integrated Pest Management (IPM): This holistic approach combines several strategies.
- Observation: Regularly inspect your plants for early signs of pests or disease. Catching issues early is key.
- Physical Barriers: Use row covers (e.g., Agribon AG-19 floating row cover, 10×20 ft, ~$20) to protect young plants from insect pests like cabbage worms and squash bugs. Install fences (e.g., 2×4 welded wire mesh, 4 ft tall, 50 ft roll ~$70) to keep out deer, rabbits, and other larger animals.
- Hand-Picking: For larger pests like tomato hornworms or squash bugs, simply pick them off and drop them into a bucket of soapy water.
- Companion Planting: As mentioned, certain plants repel pests. Marigolds, garlic, and onions are excellent deterrents.
- Attract Beneficial Insects: Plant flowers like dill, fennel, cosmos, and sweet alyssum to attract ladybugs, lacewings, and parasitic wasps, which prey on common garden pests.
- Organic Sprays & Treatments:
- Neem Oil: An excellent broad-spectrum organic insecticide and fungicide. Bonide Neem Oil Concentrate (16oz, ~$20) can be mixed at a rate of 1-2 tbsp per gallon of water and sprayed on affected plants.
- Insecticidal Soap: Effective against soft-bodied insects like aphids, whiteflies, and spider mites. Garden Safe Insecticidal Soap (24oz ready-to-use, ~$10).
- Bacillus thuringiensis (Bt): A naturally occurring soil bacterium that targets caterpillars and worms. Monterey BT Worm & Caterpillar Killer (16oz, ~$18) is highly effective and safe for beneficial insects.
- Copper or Sulfur Sprays: For fungal diseases like powdery mildew or blight, organic copper (e.g., Bonide Copper Fungicide, ~$15 for 1lb) or sulfur (e.g., Safer Brand Garden Fungicide, ~$10 for 16oz) can be used as a last resort.
Step 7: Harvesting & Seed Saving
The culmination of your efforts is the harvest, and seed saving closes the loop on self-sufficiency.
- Harvesting Techniques:
- Timing: Harvest vegetables at their peak ripeness for best flavor and nutritional value. For example, green beans should snap cleanly, cucumbers should be firm, and tomatoes should be fully colored.
- Frequency: Many crops, like zucchini, cucumbers, and bush beans, produce more if harvested frequently. Pick daily or every other day.
- Tools: Use clean, sharp pruners (e.g., Corona ClassicCUT Bypass Pruner BP 3180, ~$30) or a sharp knife for clean cuts, minimizing damage to the plant.
- Seed Saving: This is where the « self-sufficient » aspect truly shines.
- Selection: Only save seeds from your healthiest, most vigorous plants that show desired traits (disease resistance, good flavor, high yield).
- Isolation: To ensure true-to-type seeds, prevent cross-pollination. This can be challenging for open-pollinated crops that readily cross (e.g., squash, corn). For beginners, focus on self-pollinating plants like beans, peas, lettuce, and tomatoes.
- Processing:
- Dry Seeds (Beans, Peas, Lettuce, Grains): Allow pods/seed heads to dry completely on the plant. Harvest, shell, and clean the seeds, removing chaff.
- Wet Seeds (Tomatoes, Cucumbers, Squash): For tomatoes, ferment the seeds in water for a few days to remove the gel coating and inhibit disease. For cucumbers/squash, scrape out seeds, wash thoroughly, and dry.
- Drying: Spread seeds thinly on screens or paper plates in a cool, dry, well-ventilated area for 1-4 weeks. Ensure they are bone-dry before storage. I aim for less than 8% moisture content.
- Storage: Store seeds in airtight containers (glass jars with desiccant packets work well) in a cool, dark, dry place (ideally 40-50°F and 30-40% humidity). Label clearly with variety and date. Properly stored seeds can remain viable for 3-10 years or more.
Step 8: Season Extension & Winterizing
Extend your harvest and protect your garden for the off-season to truly maximize your self sufficient garden from scratch.
- Cold Frames: Simple structures with a transparent top (glass, polycarbonate, or old windows) that sit over garden beds. They trap solar heat, allowing you to grow cold-hardy crops (lettuce, spinach, kale, radishes) well into winter or start seeds earlier in spring. A basic cold frame can be built from 2×6 lumber and a sheet of polycarbonate for under $100.
- Hoop Houses/Low Tunnels: Larger structures made from flexible hoops (PVC pipe or EMT conduit) covered with greenhouse plastic. These provide more space and greater temperature moderation. A 10×20 ft DIY low tunnel kit can cost $200-$500, while a larger, more robust hoop house kit might be $1,000-$3,000. I use a 6×12 ft low tunnel made from 1/2-inch PVC hoops and 6mil greenhouse plastic, which extends my lettuce and spinach harvest by at least
Step 5: Seed Selection & Planting
The choice of seeds is crucial for a truly self sufficient garden from scratch.
- Choose Heirloom & Open-Pollinated Seeds: These varieties produce seeds that will grow true to type, meaning you can save seeds from your harvest year after year. F1 hybrids, while often vigorous, will not produce consistent offspring from saved seeds. Reputable seed companies include Baker Creek Heirloom Seeds, High Mowing Organic Seeds, and Seed Savers Exchange. Start with common, reliable varieties like ‘Black Krim’ tomatoes, ‘Provider’ bush beans, ‘Waltham Butternut’ squash, and ‘Black Seeded Simpson’ lettuce.
- Start Seeds Indoors (Optional but Recommended): For longer growing seasons or specific crops, starting seeds indoors gives you a head start. Use seed-starting mix (e.g., Espoma Organic Seed Starter Mix, ~$10 for 16qt bag) in seed trays (Jiffy Professional Greenhouse 72-cell kit, ~$15). Provide adequate light with LED grow lights (Barrina T5 2ft 4-pack LED Grow Lights, 20W each, ~$50) for 14-16 hours a day, positioned 2-4 inches above seedlings. Maintain consistent temperatures (65-75°F for most).
- Direct Sowing vs. Transplanting: Some crops (carrots, radishes, beans, corn) prefer direct sowing into the garden bed. Others (tomatoes, peppers, broccoli, kale) benefit from being started indoors and transplanted. Follow seed packet instructions for planting depths (e.g., lettuce seeds are often surface-sown or planted 1/8 inch deep, while beans are 1 inch deep) and spacing.
- Companion Planting: Strategically plant different species together to enhance growth, deter pests, and attract beneficial insects. For example, planting marigolds near tomatoes can deter nematodes, and basil improves tomato flavor. Nasturtiums can act as a trap crop for aphids.
- Succession Planting: For a continuous harvest, plant small batches of quick-growing crops (lettuce, radishes, cilantro) every 2-3 weeks. As one crop finishes, another is ready to take its place.
Step 6: Pest & Disease Management (Organic)
Maintaining a self sufficient garden from scratch means embracing organic pest and disease control.
- Integrated Pest Management (IPM): This holistic approach combines several strategies.
- Observation: Regularly inspect your plants for early signs of pests or disease. Catching issues early is key.
- Physical Barriers: Use row covers (e.g., Agribon AG-19 floating row cover, 10×20 ft, ~$20) to protect young plants from insect pests like cabbage worms and squash bugs. Install fences (e.g., 2×4 welded wire mesh, 4 ft tall, 50 ft roll ~$70) to keep out deer, rabbits, and other larger animals.
- Hand-Picking: For larger pests like tomato hornworms or squash bugs, simply pick them off and drop them into a bucket of soapy water.
- Companion Planting: As mentioned, certain plants repel pests. Marigolds, garlic, and onions are excellent deterrents.
- Attract Beneficial Insects: Plant flowers like dill, fennel, cosmos, and sweet alyssum to attract ladybugs, lacewings, and parasitic wasps, which prey on common garden pests.
- Organic Sprays & Treatments:
- Neem Oil: An excellent broad-spectrum organic insecticide and fungicide. Bonide Neem Oil Concentrate (16oz, ~$20) can be mixed at a rate of 1-2 tbsp per gallon of water and sprayed on affected plants.
- Insecticidal Soap: Effective against soft-bodied insects like aphids, whiteflies, and spider mites. Garden Safe Insecticidal Soap (24oz ready-to-use, ~$10).
- Bacillus thuringiensis (Bt): A naturally occurring soil bacterium that targets caterpillars and worms. Monterey BT Worm & Caterpillar Killer (16oz, ~$18) is highly effective and safe for beneficial insects.
- Copper or Sulfur Sprays: For fungal diseases like powdery mildew or blight, organic copper (e.g., Bonide Copper Fungicide, ~$15 for 1lb) or sulfur (e.g., Safer Brand Garden Fungicide, ~$10 for 16oz) can be used as a last resort.
Step 7: Harvesting & Seed Saving
The culmination of your efforts is the harvest, and seed saving closes the loop on self-sufficiency.
- Harvesting Techniques:
- Timing: Harvest vegetables at their peak ripeness for best flavor and nutritional value. For example, green beans should snap cleanly, cucumbers should be firm, and tomatoes should be fully colored.
- Frequency: Many crops, like zucchini, cucumbers, and bush beans, produce more if harvested frequently. Pick daily or every other day.
- Tools: Use clean, sharp pruners (e.g., Corona ClassicCUT Bypass Pruner BP 3180, ~$30) or a sharp knife for clean cuts, minimizing damage to the plant.
- Seed Saving: This is where the « self-sufficient » aspect truly shines.
- Selection: Only save seeds from your healthiest, most vigorous plants that show desired traits (disease resistance, good flavor, high yield).
- Isolation: To ensure true-to-type seeds, prevent cross-pollination. This can be challenging for open-pollinated crops that readily cross (e.g., squash, corn). For beginners, focus on self-pollinating plants like beans, peas, lettuce, and tomatoes.
- Processing:
- Dry Seeds (Beans, Peas, Lettuce, Grains): Allow pods/seed heads to dry completely on the plant. Harvest, shell, and clean the seeds, removing chaff.
- Wet Seeds (Tomatoes, Cucumbers, Squash): For tomatoes, ferment the seeds in water for a few days to remove the gel coating and inhibit disease. For cucumbers/squash, scrape out seeds, wash thoroughly, and dry.
- Drying: Spread seeds thinly on screens or paper plates in a cool, dry, well-ventilated area for 1-4 weeks. Ensure they are bone-dry before storage. I aim for less than 8% moisture content.
- Storage: Store seeds in airtight containers (glass jars with desiccant packets work well) in a cool, dark, dry place (ideally 40-50°F and 30-40% humidity). Label clearly with variety and date. Properly stored seeds can remain viable for 3-10 years or more.
Step 8: Season Extension & Winterizing
Extend your harvest and protect your garden for the off-season to truly maximize your self sufficient garden from scratch.
- Cold Frames: Simple structures with a transparent top (glass, polycarbonate, or old windows) that sit over garden beds. They trap solar heat, allowing you to grow cold-hardy crops (lettuce, spinach, kale, radishes) well into winter or start seeds earlier in spring. A basic cold frame can be built from 2×6 lumber and a sheet of polycarbonate for under $100.
- Hoop Houses/Low Tunnels: Larger structures made from flexible hoops (PVC pipe or EMT conduit) covered with greenhouse plastic. These provide more space and greater temperature moderation. A 10×20 ft DIY low tunnel kit can cost $200-$500, while a larger, more robust hoop house kit might be $1,000-$3,000. I use a 6×12 ft low tunnel made from 1/2-inch PVC hoops and 6mil greenhouse plastic, which extends my lettuce and spinach harvest by at least
- Rainwater Harvesting: This is my primary source of irrigation water. A 55-gallon rain barrel (e.g., EarthMark Rain Barrel, ~$120-$150) connected to a downspout can collect significant water. For larger needs, I use two 275-gallon IBC totes (Intermediate Bulk Containers, often available used for $100-$200 each from food-grade sources) connected in series. A 1,000 sq ft roof can collect approximately 620 gallons of water for every inch of rainfall. My 1,500 sq ft roof provides ample water for my 600 sq ft garden through multiple barrels and totes.
- Drip Irrigation: This is by far the most water-efficient method, delivering water directly to the plant’s root zone, minimizing evaporation and weed growth.
- Components: A typical drip system includes a pressure regulator (e.g., Rain Bird PRV-10, ~$15), a filter (Rain Bird RBY filter, ~$20), main tubing (1/2-inch poly tubing, 100ft ~$25), smaller feeder lines (1/4-inch tubing), and emitters (0.5 GPH or 1 GPH per plant).
- Kits: For beginners, a starter kit like the Rain Bird Drip Irrigation Garden Kit (model DDI-KIT-1P, ~$40-$60) is excellent for a small garden. For larger setups, I use Netafim Techline CV Drip Line (500ft roll, ~$150-$200), which has pressure-compensating emitters built-in, ensuring even watering across long runs.
- Automation: For true self-sufficiency, consider a battery-powered timer (e.g., Orbit B-Hyve Bluetooth Hose Faucet Timer, ~$50) or a solar-powered timer connected to a small 12V pump.
- Solar-Powered Pumps: For lifting water from a well, pond, or large storage tank to your garden, a solar pump is a game-changer. For a smaller drip system, a Shurflo 2088-594-152 Diaphragm Pump (12V, 3.5 GPM, ~$180) can be powered by a single 100W solar panel (e.g., Renogy 100W Monocrystalline Solar Panel, ~$100) and a small 12V battery (e.g., a 50Ah LiFePO4 battery like the Battle Born 50Ah, ~$450). For larger operations or deeper wells, more robust systems are needed. If you’re looking to build out a comprehensive off-grid power system to support your garden’s water needs, or indeed your entire homestead, you might want to explore resources like the Power Grid Generator complete system guide to understand the full scope of what’s possible in terms of energy independence.
Step 5: Seed Selection & Planting
The choice of seeds is crucial for a truly self sufficient garden from scratch.
- Choose Heirloom & Open-Pollinated Seeds: These varieties produce seeds that will grow true to type, meaning you can save seeds from your harvest year after year. F1 hybrids, while often vigorous, will not produce consistent offspring from saved seeds. Reputable seed companies include Baker Creek Heirloom Seeds, High Mowing Organic Seeds, and Seed Savers Exchange. Start with common, reliable varieties like ‘Black Krim’ tomatoes, ‘Provider’ bush beans, ‘Waltham Butternut’ squash, and ‘Black Seeded Simpson’ lettuce.
- Start Seeds Indoors (Optional but Recommended): For longer growing seasons or specific crops, starting seeds indoors gives you a head start. Use seed-starting mix (e.g., Espoma Organic Seed Starter Mix, ~$10 for 16qt bag) in seed trays (Jiffy Professional Greenhouse 72-cell kit, ~$15). Provide adequate light with LED grow lights (Barrina T5 2ft 4-pack LED Grow Lights, 20W each, ~$50) for 14-16 hours a day, positioned 2-4 inches above seedlings. Maintain consistent temperatures (65-75°F for most).
- Direct Sowing vs. Transplanting: Some crops (carrots, radishes, beans, corn) prefer direct sowing into the garden bed. Others (tomatoes, peppers, broccoli, kale) benefit from being started indoors and transplanted. Follow seed packet instructions for planting depths (e.g., lettuce seeds are often surface-sown or planted 1/8 inch deep, while beans are 1 inch deep) and spacing.
- Companion Planting: Strategically plant different species together to enhance growth, deter pests, and attract beneficial insects. For example, planting marigolds near tomatoes can deter nematodes, and basil improves tomato flavor. Nasturtiums can act as a trap crop for aphids.
- Succession Planting: For a continuous harvest, plant small batches of quick-growing crops (lettuce, radishes, cilantro) every 2-3 weeks. As one crop finishes, another is ready to take its place.
Step 6: Pest & Disease Management (Organic)
Maintaining a self sufficient garden from scratch means embracing organic pest and disease control.
- Integrated Pest Management (IPM): This holistic approach combines several strategies.
- Observation: Regularly inspect your plants for early signs of pests or disease. Catching issues early is key.
- Physical Barriers: Use row covers (e.g., Agribon AG-19 floating row cover, 10×20 ft, ~$20) to protect young plants from insect pests like cabbage worms and squash bugs. Install fences (e.g., 2×4 welded wire mesh, 4 ft tall, 50 ft roll ~$70) to keep out deer, rabbits, and other larger animals.
- Hand-Picking: For larger pests like tomato hornworms or squash bugs, simply pick them off and drop them into a bucket of soapy water.
- Companion Planting: As mentioned, certain plants repel pests. Marigolds, garlic, and onions are excellent deterrents.
- Attract Beneficial Insects: Plant flowers like dill, fennel, cosmos, and sweet alyssum to attract ladybugs, lacewings, and parasitic wasps, which prey on common garden pests.
- Organic Sprays & Treatments:
- Neem Oil: An excellent broad-spectrum organic insecticide and fungicide. Bonide Neem Oil Concentrate (16oz, ~$20) can be mixed at a rate of 1-2 tbsp per gallon of water and sprayed on affected plants.
- Insecticidal Soap: Effective against soft-bodied insects like aphids, whiteflies, and spider mites. Garden Safe Insecticidal Soap (24oz ready-to-use, ~$10).
- Bacillus thuringiensis (Bt): A naturally occurring soil bacterium that targets caterpillars and worms. Monterey BT Worm & Caterpillar Killer (16oz, ~$18) is highly effective and safe for beneficial insects.
- Copper or Sulfur Sprays: For fungal diseases like powdery mildew or blight, organic copper (e.g., Bonide Copper Fungicide, ~$15 for 1lb) or sulfur (e.g., Safer Brand Garden Fungicide, ~$10 for 16oz) can be used as a last resort.
Step 7: Harvesting & Seed Saving
The culmination of your efforts is the harvest, and seed saving closes the loop on self-sufficiency.
- Harvesting Techniques:
- Timing: Harvest vegetables at their peak ripeness for best flavor and nutritional value. For example, green beans should snap cleanly, cucumbers should be firm, and tomatoes should be fully colored.
- Frequency: Many crops, like zucchini, cucumbers, and bush beans, produce more if harvested frequently. Pick daily or every other day.
- Tools: Use clean, sharp pruners (e.g., Corona ClassicCUT Bypass Pruner BP 3180, ~$30) or a sharp knife for clean cuts, minimizing damage to the plant.
- Seed Saving: This is where the « self-sufficient » aspect truly shines.
- Selection: Only save seeds from your healthiest, most vigorous plants that show desired traits (disease resistance, good flavor, high yield).
- Isolation: To ensure true-to-type seeds, prevent cross-pollination. This can be challenging for open-pollinated crops that readily cross (e.g., squash, corn). For beginners, focus on self-pollinating plants like beans, peas, lettuce, and tomatoes.
- Processing:
- Dry Seeds (Beans, Peas, Lettuce, Grains): Allow pods/seed heads to dry completely on the plant. Harvest, shell, and clean the seeds, removing chaff.
- Wet Seeds (Tomatoes, Cucumbers, Squash): For tomatoes, ferment the seeds in water for a few days to remove the gel coating and inhibit disease. For cucumbers/squash, scrape out seeds, wash thoroughly, and dry.
- Drying: Spread seeds thinly on screens or paper plates in a cool, dry, well-ventilated area for 1-4 weeks. Ensure they are bone-dry before storage. I aim for less than 8% moisture content.
- Storage: Store seeds in airtight containers (glass jars with desiccant packets work well) in a cool, dark, dry place (ideally 40-50°F and 30-40% humidity). Label clearly with variety and date. Properly stored seeds can remain viable for 3-10 years or more.
Step 8: Season Extension & Winterizing
Extend your harvest and protect your garden for the off-season to truly maximize your self sufficient garden from scratch.
- Cold Frames: Simple structures with a transparent top (glass, polycarbonate, or old windows) that sit over garden beds. They trap solar heat, allowing you to grow cold-hardy crops (lettuce, spinach, kale, radishes) well into winter or start seeds earlier in spring. A basic cold frame can be built from 2×6 lumber and a sheet of polycarbonate for under $100.
- Hoop Houses/Low Tunnels: Larger structures made from flexible hoops (PVC pipe or EMT conduit) covered with greenhouse plastic. These provide more space and greater temperature moderation. A 10×20 ft DIY low tunnel kit can cost $200-$500, while a larger, more robust hoop house kit might be $1,000-$3,000. I use a 6×12 ft low tunnel made from 1/2-inch PVC hoops and 6mil greenhouse plastic, which extends my lettuce and spinach harvest by at least
Efficient water management is critical for a self sufficient garden from scratch, especially in off-grid living where water resources might be limited.
- Rainwater Harvesting: This is my primary source of irrigation water. A 55-gallon rain barrel (e.g., EarthMark Rain Barrel, ~$120-$150) connected to a downspout can collect significant water. For larger needs, I use two 275-gallon IBC totes (Intermediate Bulk Containers, often available used for $100-$200 each from food-grade sources) connected in series. A 1,000 sq ft roof can collect approximately 620 gallons of water for every inch of rainfall. My 1,500 sq ft roof provides ample water for my 600 sq ft garden through multiple barrels and totes.
- Drip Irrigation: This is by far the most water-efficient method, delivering water directly to the plant’s root zone, minimizing evaporation and weed growth.
- Components: A typical drip system includes a pressure regulator (e.g., Rain Bird PRV-10, ~$15), a filter (Rain Bird RBY filter, ~$20), main tubing (1/2-inch poly tubing, 100ft ~$25), smaller feeder lines (1/4-inch tubing), and emitters (0.5 GPH or 1 GPH per plant).
- Kits: For beginners, a starter kit like the Rain Bird Drip Irrigation Garden Kit (model DDI-KIT-1P, ~$40-$60) is excellent for a small garden. For larger setups, I use Netafim Techline CV Drip Line (500ft roll, ~$150-$200), which has pressure-compensating emitters built-in, ensuring even watering across long runs.
- Automation: For true self-sufficiency, consider a battery-powered timer (e.g., Orbit B-Hyve Bluetooth Hose Faucet Timer, ~$50) or a solar-powered timer connected to a small 12V pump.
- Solar-Powered Pumps: For lifting water from a well, pond, or large storage tank to your garden, a solar pump is a game-changer. For a smaller drip system, a Shurflo 2088-594-152 Diaphragm Pump (12V, 3.5 GPM, ~$180) can be powered by a single 100W solar panel (e.g., Renogy 100W Monocrystalline Solar Panel, ~$100) and a small 12V battery (e.g., a 50Ah LiFePO4 battery like the Battle Born 50Ah, ~$450). For larger operations or deeper wells, more robust systems are needed. If you’re looking to build out a comprehensive off-grid power system to support your garden’s water needs, or indeed your entire homestead, you might want to explore resources like the Power Grid Generator complete system guide to understand the full scope of what’s possible in terms of energy independence.
Step 5: Seed Selection & Planting
The choice of seeds is crucial for a truly self sufficient garden from scratch.
- Choose Heirloom & Open-Pollinated Seeds: These varieties produce seeds that will grow true to type, meaning you can save seeds from your harvest year after year. F1 hybrids, while often vigorous, will not produce consistent offspring from saved seeds. Reputable seed companies include Baker Creek Heirloom Seeds, High Mowing Organic Seeds, and Seed Savers Exchange. Start with common, reliable varieties like ‘Black Krim’ tomatoes, ‘Provider’ bush beans, ‘Waltham Butternut’ squash, and ‘Black Seeded Simpson’ lettuce.
- Start Seeds Indoors (Optional but Recommended): For longer growing seasons or specific crops, starting seeds indoors gives you a head start. Use seed-starting mix (e.g., Espoma Organic Seed Starter Mix, ~$10 for 16qt bag) in seed trays (Jiffy Professional Greenhouse 72-cell kit, ~$15). Provide adequate light with LED grow lights (Barrina T5 2ft 4-pack LED Grow Lights, 20W each, ~$50) for 14-16 hours a day, positioned 2-4 inches above seedlings. Maintain consistent temperatures (65-75°F for most).
- Direct Sowing vs. Transplanting: Some crops (carrots, radishes, beans, corn) prefer direct sowing into the garden bed. Others (tomatoes, peppers, broccoli, kale) benefit from being started indoors and transplanted. Follow seed packet instructions for planting depths (e.g., lettuce seeds are often surface-sown or planted 1/8 inch deep, while beans are 1 inch deep) and spacing.
- Companion Planting: Strategically plant different species together to enhance growth, deter pests, and attract beneficial insects. For example, planting marigolds near tomatoes can deter nematodes, and basil improves tomato flavor. Nasturtiums can act as a trap crop for aphids.
- Succession Planting: For a continuous harvest, plant small batches of quick-growing crops (lettuce, radishes, cilantro) every 2-3 weeks. As one crop finishes, another is ready to take its place.
Step 6: Pest & Disease Management (Organic)
Maintaining a self sufficient garden from scratch means embracing organic pest and disease control.
- Integrated Pest Management (IPM): This holistic approach combines several strategies.
- Observation: Regularly inspect your plants for early signs of pests or disease. Catching issues early is key.
- Physical Barriers: Use row covers (e.g., Agribon AG-19 floating row cover, 10×20 ft, ~$20) to protect young plants from insect pests like cabbage worms and squash bugs. Install fences (e.g., 2×4 welded wire mesh, 4 ft tall, 50 ft roll ~$70) to keep out deer, rabbits, and other larger animals.
- Hand-Picking: For larger pests like tomato hornworms or squash bugs, simply pick them off and drop them into a bucket of soapy water.
- Companion Planting: As mentioned, certain plants repel pests. Marigolds, garlic, and onions are excellent deterrents.
- Attract Beneficial Insects: Plant flowers like dill, fennel, cosmos, and sweet alyssum to attract ladybugs, lacewings, and parasitic wasps, which prey on common garden pests.
- Organic Sprays & Treatments:
- Neem Oil: An excellent broad-spectrum organic insecticide and fungicide. Bonide Neem Oil Concentrate (16oz, ~$20) can be mixed at a rate of 1-2 tbsp per gallon of water and sprayed on affected plants.
- Insecticidal Soap: Effective against soft-bodied insects like aphids, whiteflies, and spider mites. Garden Safe Insecticidal Soap (24oz ready-to-use, ~$10).
- Bacillus thuringiensis (Bt): A naturally occurring soil bacterium that targets caterpillars and worms. Monterey BT Worm & Caterpillar Killer (16oz, ~$18) is highly effective and safe for beneficial insects.
- Copper or Sulfur Sprays: For fungal diseases like powdery mildew or blight, organic copper (e.g., Bonide Copper Fungicide, ~$15 for 1lb) or sulfur (e.g., Safer Brand Garden Fungicide, ~$10 for 16oz) can be used as a last resort.
Step 7: Harvesting & Seed Saving
The culmination of your efforts is the harvest, and seed saving closes the loop on self-sufficiency.
- Harvesting Techniques:
- Timing: Harvest vegetables at their peak ripeness for best flavor and nutritional value. For example, green beans should snap cleanly, cucumbers should be firm, and tomatoes should be fully colored.
- Frequency: Many crops, like zucchini, cucumbers, and bush beans, produce more if harvested frequently. Pick daily or every other day.
- Tools: Use clean, sharp pruners (e.g., Corona ClassicCUT Bypass Pruner BP 3180, ~$30) or a sharp knife for clean cuts, minimizing damage to the plant.
- Seed Saving: This is where the « self-sufficient » aspect truly shines.
- Selection: Only save seeds from your healthiest, most vigorous plants that show desired traits (disease resistance, good flavor, high yield).
- Isolation: To ensure true-to-type seeds, prevent cross-pollination. This can be challenging for open-pollinated crops that readily cross (e.g., squash, corn). For beginners, focus on self-pollinating plants like beans, peas, lettuce, and tomatoes.
- Processing:
- Dry Seeds (Beans, Peas, Lettuce, Grains): Allow pods/seed heads to dry completely on the plant. Harvest, shell, and clean the seeds, removing chaff.
- Wet Seeds (Tomatoes, Cucumbers, Squash): For tomatoes, ferment the seeds in water for a few days to remove the gel coating and inhibit disease. For cucumbers/squash, scrape out seeds, wash thoroughly, and dry.
- Drying: Spread seeds thinly on screens or paper plates in a cool, dry, well-ventilated area for 1-4 weeks. Ensure they are bone-dry before storage. I aim for less than 8% moisture content.
- Storage: Store seeds in airtight containers (glass jars with desiccant packets work well) in a cool, dark, dry place (ideally 40-50°F and 30-40% humidity). Label clearly with variety and date. Properly stored seeds can remain viable for 3-10 years or more.
Step 8: Season Extension & Winterizing
Extend your harvest and protect your garden for the off-season to truly maximize your self sufficient garden from scratch.
- Cold Frames: Simple structures with a transparent top (glass, polycarbonate, or old windows) that sit over garden beds. They trap solar heat, allowing you to grow cold-hardy crops (lettuce, spinach, kale, radishes) well into winter or start seeds earlier in spring. A basic cold frame can be built from 2×6 lumber and a sheet of polycarbonate for under $100.
- Hoop Houses/Low Tunnels: Larger structures made from flexible hoops (PVC pipe or EMT conduit) covered with greenhouse plastic. These provide more space and greater temperature moderation. A 10×20 ft DIY low tunnel kit can cost $200-$500, while a larger, more robust hoop house kit might be $1,000-$3,000. I use a 6×12 ft low tunnel made from 1/2-inch PVC hoops and 6mil greenhouse plastic, which extends my lettuce and spinach harvest by at least
Step 4: Water Management & Irrigation
Efficient water management is critical for a self sufficient garden from scratch, especially in off-grid living where water resources might be limited.
- Rainwater Harvesting: This is my primary source of irrigation water. A 55-gallon rain barrel (e.g., EarthMark Rain Barrel, ~$120-$150) connected to a downspout can collect significant water. For larger needs, I use two 275-gallon IBC totes (Intermediate Bulk Containers, often available used for $100-$200 each from food-grade sources) connected in series. A 1,000 sq ft roof can collect approximately 620 gallons of water for every inch of rainfall. My 1,500 sq ft roof provides ample water for my 600 sq ft garden through multiple barrels and totes.
- Drip Irrigation: This is by far the most water-efficient method, delivering water directly to the plant’s root zone, minimizing evaporation and weed growth.
- Components: A typical drip system includes a pressure regulator (e.g., Rain Bird PRV-10, ~$15), a filter (Rain Bird RBY filter, ~$20), main tubing (1/2-inch poly tubing, 100ft ~$25), smaller feeder lines (1/4-inch tubing), and emitters (0.5 GPH or 1 GPH per plant).
- Kits: For beginners, a starter kit like the Rain Bird Drip Irrigation Garden Kit (model DDI-KIT-1P, ~$40-$60) is excellent for a small garden. For larger setups, I use Netafim Techline CV Drip Line (500ft roll, ~$150-$200), which has pressure-compensating emitters built-in, ensuring even watering across long runs.
- Automation: For true self-sufficiency, consider a battery-powered timer (e.g., Orbit B-Hyve Bluetooth Hose Faucet Timer, ~$50) or a solar-powered timer connected to a small 12V pump.
- Solar-Powered Pumps: For lifting water from a well, pond, or large storage tank to your garden, a solar pump is a game-changer. For a smaller drip system, a Shurflo 2088-594-152 Diaphragm Pump (12V, 3.5 GPM, ~$180) can be powered by a single 100W solar panel (e.g., Renogy 100W Monocrystalline Solar Panel, ~$100) and a small 12V battery (e.g., a 50Ah LiFePO4 battery like the Battle Born 50Ah, ~$450). For larger operations or deeper wells, more robust systems are needed. If you’re looking to build out a comprehensive off-grid power system to support your garden’s water needs, or indeed your entire homestead, you might want to explore resources like the Power Grid Generator complete system guide to understand the full scope of what’s possible in terms of energy independence.
Step 5: Seed Selection & Planting
The choice of seeds is crucial for a truly self sufficient garden from scratch.
- Choose Heirloom & Open-Pollinated Seeds: These varieties produce seeds that will grow true to type, meaning you can save seeds from your harvest year after year. F1 hybrids, while often vigorous, will not produce consistent offspring from saved seeds. Reputable seed companies include Baker Creek Heirloom Seeds, High Mowing Organic Seeds, and Seed Savers Exchange. Start with common, reliable varieties like ‘Black Krim’ tomatoes, ‘Provider’ bush beans, ‘Waltham Butternut’ squash, and ‘Black Seeded Simpson’ lettuce.
- Start Seeds Indoors (Optional but Recommended): For longer growing seasons or specific crops, starting seeds indoors gives you a head start. Use seed-starting mix (e.g., Espoma Organic Seed Starter Mix, ~$10 for 16qt bag) in seed trays (Jiffy Professional Greenhouse 72-cell kit, ~$15). Provide adequate light with LED grow lights (Barrina T5 2ft 4-pack LED Grow Lights, 20W each, ~$50) for 14-16 hours a day, positioned 2-4 inches above seedlings. Maintain consistent temperatures (65-75°F for most).
- Direct Sowing vs. Transplanting: Some crops (carrots, radishes, beans, corn) prefer direct sowing into the garden bed. Others (tomatoes, peppers, broccoli, kale) benefit from being started indoors and transplanted. Follow seed packet instructions for planting depths (e.g., lettuce seeds are often surface-sown or planted 1/8 inch deep, while beans are 1 inch deep) and spacing.
- Companion Planting: Strategically plant different species together to enhance growth, deter pests, and attract beneficial insects. For example, planting marigolds near tomatoes can deter nematodes, and basil improves tomato flavor. Nasturtiums can act as a trap crop for aphids.
- Succession Planting: For a continuous harvest, plant small batches of quick-growing crops (lettuce, radishes, cilantro) every 2-3 weeks. As one crop finishes, another is ready to take its place.
Step 6: Pest & Disease Management (Organic)
Maintaining a self sufficient garden from scratch means embracing organic pest and disease control.
- Integrated Pest Management (IPM): This holistic approach combines several strategies.
- Observation: Regularly inspect your plants for early signs of pests or disease. Catching issues early is key.
- Physical Barriers: Use row covers (e.g., Agribon AG-19 floating row cover, 10×20 ft, ~$20) to protect young plants from insect pests like cabbage worms and squash bugs. Install fences (e.g., 2×4 welded wire mesh, 4 ft tall, 50 ft roll ~$70) to keep out deer, rabbits, and other larger animals.
- Hand-Picking: For larger pests like tomato hornworms or squash bugs, simply pick them off and drop them into a bucket of soapy water.
- Companion Planting: As mentioned, certain plants repel pests. Marigolds, garlic, and onions are excellent deterrents.
- Attract Beneficial Insects: Plant flowers like dill, fennel, cosmos, and sweet alyssum to attract ladybugs, lacewings, and parasitic wasps, which prey on common garden pests.
- Organic Sprays & Treatments:
- Neem Oil: An excellent broad-spectrum organic insecticide and fungicide. Bonide Neem Oil Concentrate (16oz, ~$20) can be mixed at a rate of 1-2 tbsp per gallon of water and sprayed on affected plants.
- Insecticidal Soap: Effective against soft-bodied insects like aphids, whiteflies, and spider mites. Garden Safe Insecticidal Soap (24oz ready-to-use, ~$10).
- Bacillus thuringiensis (Bt): A naturally occurring soil bacterium that targets caterpillars and worms. Monterey BT Worm & Caterpillar Killer (16oz, ~$18) is highly effective and safe for beneficial insects.
- Copper or Sulfur Sprays: For fungal diseases like powdery mildew or blight, organic copper (e.g., Bonide Copper Fungicide, ~$15 for 1lb) or sulfur (e.g., Safer Brand Garden Fungicide, ~$10 for 16oz) can be used as a last resort.
Step 7: Harvesting & Seed Saving
The culmination of your efforts is the harvest, and seed saving closes the loop on self-sufficiency.
- Harvesting Techniques:
- Timing: Harvest vegetables at their peak ripeness for best flavor and nutritional value. For example, green beans should snap cleanly, cucumbers should be firm, and tomatoes should be fully colored.
- Frequency: Many crops, like zucchini, cucumbers, and bush beans, produce more if harvested frequently. Pick daily or every other day.
- Tools: Use clean, sharp pruners (e.g., Corona ClassicCUT Bypass Pruner BP 3180, ~$30) or a sharp knife for clean cuts, minimizing damage to the plant.
- Seed Saving: This is where the « self-sufficient » aspect truly shines.
- Selection: Only save seeds from your healthiest, most vigorous plants that show desired traits (disease resistance, good flavor, high yield).
- Isolation: To ensure true-to-type seeds, prevent cross-pollination. This can be challenging for open-pollinated crops that readily cross (e.g., squash, corn). For beginners, focus on self-pollinating plants like beans, peas, lettuce, and tomatoes.
- Processing:
- Dry Seeds (Beans, Peas, Lettuce, Grains): Allow pods/seed heads to dry completely on the plant. Harvest, shell, and clean the seeds, removing chaff.
- Wet Seeds (Tomatoes, Cucumbers, Squash): For tomatoes, ferment the seeds in water for a few days to remove the gel coating and inhibit disease. For cucumbers/squash, scrape out seeds, wash thoroughly, and dry.
- Drying: Spread seeds thinly on screens or paper plates in a cool, dry, well-ventilated area for 1-4 weeks. Ensure they are bone-dry before storage. I aim for less than 8% moisture content.
- Storage: Store seeds in airtight containers (glass jars with desiccant packets work well) in a cool, dark, dry place (ideally 40-50°F and 30-40% humidity). Label clearly with variety and date. Properly stored seeds can remain viable for 3-10 years or more.
Step 8: Season Extension & Winterizing
Extend your harvest and protect your garden for the off-season to truly maximize your self sufficient garden from scratch.
- Cold Frames: Simple structures with a transparent top (glass, polycarbonate, or old windows) that sit over garden beds. They trap solar heat, allowing you to grow cold-hardy crops (lettuce, spinach, kale, radishes) well into winter or start seeds earlier in spring. A basic cold frame can be built from 2×6 lumber and a sheet of polycarbonate for under $100.
- Hoop Houses/Low Tunnels: Larger structures made from flexible hoops (PVC pipe or EMT conduit) covered with greenhouse plastic. These provide more space and greater temperature moderation. A 10×20 ft DIY low tunnel kit can cost $200-$500, while a larger, more robust hoop house kit might be $1,000-$3,000. I use a 6×12 ft low tunnel made from 1/2-inch PVC hoops and 6mil greenhouse plastic, which extends my lettuce and spinach harvest by at least
- In-Ground Beds: If you have excellent native soil and good drainage, in-ground beds are the most economical. Double-digging (loosening soil two shovel depths) can significantly improve drainage and aeration. For my main garden, I primarily use in-ground beds, but I focus on building up the soil over time with consistent compost additions and cover cropping. I aim for beds that are no wider than 3-4 feet so I can reach the center without stepping on the soil, compacting it.
- Raised Beds: Raised beds offer numerous advantages, especially for poor soil, heavy clay, or rocky areas. They provide better drainage, warm up faster in spring, reduce compaction, and make weeding and harvesting easier on your back.
- Material Options:
- Untreated Cedar: Naturally rot-resistant and chemical-free. A 4×8 ft bed, 12 inches deep, typically requires three 2x12x8 ft cedar boards, costing around $50-$60 per board (total ~$150-$180) plus corner brackets or screws. My first raised beds were cedar and are still going strong after 7 years.
- Galvanized Steel: Durable, long-lasting, and aesthetically pleasing. Brands like Vego Garden offer modular kits. A Vego Garden 17″ Tall 8-in-1 Metal Raised Garden Bed (can be configured to 4×8 ft) costs approximately $250-$300.
- Concrete Blocks/Stones: Very durable but can leach minerals (though generally safe once weathered) and can be expensive.
- Recycled Materials: Pallets (check for chemical treatment stamps like « HT » for heat-treated), old tires (controversial due to potential chemical leaching).
- Filling Raised Beds: Don’t just fill with topsoil. Use a « Hugelkultur » approach (logs, branches, leaves, then compost, then topsoil) or a mixture of 60% good quality topsoil, 30% compost, and 10% perlite or vermiculite for drainage. A 4x8x1 ft raised bed requires about 32 cubic feet (or ~1.2 cubic yards) of soil mix, which can cost $100-$200 depending on your source.
- Material Options:
Step 4: Water Management & Irrigation
Efficient water management is critical for a self sufficient garden from scratch, especially in off-grid living where water resources might be limited.
- Rainwater Harvesting: This is my primary source of irrigation water. A 55-gallon rain barrel (e.g., EarthMark Rain Barrel, ~$120-$150) connected to a downspout can collect significant water. For larger needs, I use two 275-gallon IBC totes (Intermediate Bulk Containers, often available used for $100-$200 each from food-grade sources) connected in series. A 1,000 sq ft roof can collect approximately 620 gallons of water for every inch of rainfall. My 1,500 sq ft roof provides ample water for my 600 sq ft garden through multiple barrels and totes.
- Drip Irrigation: This is by far the most water-efficient method, delivering water directly to the plant’s root zone, minimizing evaporation and weed growth.
- Components: A typical drip system includes a pressure regulator (e.g., Rain Bird PRV-10, ~$15), a filter (Rain Bird RBY filter, ~$20), main tubing (1/2-inch poly tubing, 100ft ~$25), smaller feeder lines (1/4-inch tubing), and emitters (0.5 GPH or 1 GPH per plant).
- Kits: For beginners, a starter kit like the Rain Bird Drip Irrigation Garden Kit (model DDI-KIT-1P, ~$40-$60) is excellent for a small garden. For larger setups, I use Netafim Techline CV Drip Line (500ft roll, ~$150-$200), which has pressure-compensating emitters built-in, ensuring even watering across long runs.
- Automation: For true self-sufficiency, consider a battery-powered timer (e.g., Orbit B-Hyve Bluetooth Hose Faucet Timer, ~$50) or a solar-powered timer connected to a small 12V pump.
- Solar-Powered Pumps: For lifting water from a well, pond, or large storage tank to your garden, a solar pump is a game-changer. For a smaller drip system, a Shurflo 2088-594-152 Diaphragm Pump (12V, 3.5 GPM, ~$180) can be powered by a single 100W solar panel (e.g., Renogy 100W Monocrystalline Solar Panel, ~$100) and a small 12V battery (e.g., a 50Ah LiFePO4 battery like the Battle Born 50Ah, ~$450). For larger operations or deeper wells, more robust systems are needed. If you’re looking to build out a comprehensive off-grid power system to support your garden’s water needs, or indeed your entire homestead, you might want to explore resources like the Power Grid Generator complete system guide to understand the full scope of what’s possible in terms of energy independence.
Step 5: Seed Selection & Planting
The choice of seeds is crucial for a truly self sufficient garden from scratch.
- Choose Heirloom & Open-Pollinated Seeds: These varieties produce seeds that will grow true to type, meaning you can save seeds from your harvest year after year. F1 hybrids, while often vigorous, will not produce consistent offspring from saved seeds. Reputable seed companies include Baker Creek Heirloom Seeds, High Mowing Organic Seeds, and Seed Savers Exchange. Start with common, reliable varieties like ‘Black Krim’ tomatoes, ‘Provider’ bush beans, ‘Waltham Butternut’ squash, and ‘Black Seeded Simpson’ lettuce.
- Start Seeds Indoors (Optional but Recommended): For longer growing seasons or specific crops, starting seeds indoors gives you a head start. Use seed-starting mix (e.g., Espoma Organic Seed Starter Mix, ~$10 for 16qt bag) in seed trays (Jiffy Professional Greenhouse 72-cell kit, ~$15). Provide adequate light with LED grow lights (Barrina T5 2ft 4-pack LED Grow Lights, 20W each, ~$50) for 14-16 hours a day, positioned 2-4 inches above seedlings. Maintain consistent temperatures (65-75°F for most).
- Direct Sowing vs. Transplanting: Some crops (carrots, radishes, beans, corn) prefer direct sowing into the garden bed. Others (tomatoes, peppers, broccoli, kale) benefit from being started indoors and transplanted. Follow seed packet instructions for planting depths (e.g., lettuce seeds are often surface-sown or planted 1/8 inch deep, while beans are 1 inch deep) and spacing.
- Companion Planting: Strategically plant different species together to enhance growth, deter pests, and attract beneficial insects. For example, planting marigolds near tomatoes can deter nematodes, and basil improves tomato flavor. Nasturtiums can act as a trap crop for aphids.
- Succession Planting: For a continuous harvest, plant small batches of quick-growing crops (lettuce, radishes, cilantro) every 2-3 weeks. As one crop finishes, another is ready to take its place.
Step 6: Pest & Disease Management (Organic)
Maintaining a self sufficient garden from scratch means embracing organic pest and disease control.
- Integrated Pest Management (IPM): This holistic approach combines several strategies.
- Observation: Regularly inspect your plants for early signs of pests or disease. Catching issues early is key.
- Physical Barriers: Use row covers (e.g., Agribon AG-19 floating row cover, 10×20 ft, ~$20) to protect young plants from insect pests like cabbage worms and squash bugs. Install fences (e.g., 2×4 welded wire mesh, 4 ft tall, 50 ft roll ~$70) to keep out deer, rabbits, and other larger animals.
- Hand-Picking: For larger pests like tomato hornworms or squash bugs, simply pick them off and drop them into a bucket of soapy water.
- Companion Planting: As mentioned, certain plants repel pests. Marigolds, garlic, and onions are excellent deterrents.
- Attract Beneficial Insects: Plant flowers like dill, fennel, cosmos, and sweet alyssum to attract ladybugs, lacewings, and parasitic wasps, which prey on common garden pests.
- Organic Sprays & Treatments:
- Neem Oil: An excellent broad-spectrum organic insecticide and fungicide. Bonide Neem Oil Concentrate (16oz, ~$20) can be mixed at a rate of 1-2 tbsp per gallon of water and sprayed on affected plants.
- Insecticidal Soap: Effective against soft-bodied insects like aphids, whiteflies, and spider mites. Garden Safe Insecticidal Soap (24oz ready-to-use, ~$10).
- Bacillus thuringiensis (Bt): A naturally occurring soil bacterium that targets caterpillars and worms. Monterey BT Worm & Caterpillar Killer (16oz, ~$18) is highly effective and safe for beneficial insects.
- Copper or Sulfur Sprays: For fungal diseases like powdery mildew or blight, organic copper (e.g., Bonide Copper Fungicide, ~$15 for 1lb) or sulfur (e.g., Safer Brand Garden Fungicide, ~$10 for 16oz) can be used as a last resort.
Step 7: Harvesting & Seed Saving
The culmination of your efforts is the harvest, and seed saving closes the loop on self-sufficiency.
- Harvesting Techniques:
- Timing: Harvest vegetables at their peak ripeness for best flavor and nutritional value. For example, green beans should snap cleanly, cucumbers should be firm, and tomatoes should be fully colored.
- Frequency: Many crops, like zucchini, cucumbers, and bush beans, produce more if harvested frequently. Pick daily or every other day.
- Tools: Use clean, sharp pruners (e.g., Corona ClassicCUT Bypass Pruner BP 3180, ~$30) or a sharp knife for clean cuts, minimizing damage to the plant.
- Seed Saving: This is where the « self-sufficient » aspect truly shines.
- Selection: Only save seeds from your healthiest, most vigorous plants that show desired traits (disease resistance, good flavor, high yield).
- Isolation: To ensure true-to-type seeds, prevent cross-pollination. This can be challenging for open-pollinated crops that readily cross (e.g., squash, corn). For beginners, focus on self-pollinating plants like beans, peas, lettuce, and tomatoes.
- Processing:
- Dry Seeds (Beans, Peas, Lettuce, Grains): Allow pods/seed heads to dry completely on the plant. Harvest, shell, and clean the seeds, removing chaff.
- Wet Seeds (Tomatoes, Cucumbers, Squash): For tomatoes, ferment the seeds in water for a few days to remove the gel coating and inhibit disease. For cucumbers/squash, scrape out seeds, wash thoroughly, and dry.
- Drying: Spread seeds thinly on screens or paper plates in a cool, dry, well-ventilated area for 1-4 weeks. Ensure they are bone-dry before storage. I aim for less than 8% moisture content.
- Storage: Store seeds in airtight containers (glass jars with desiccant packets work well) in a cool, dark, dry place (ideally 40-50°F and 30-40% humidity). Label clearly with variety and date. Properly stored seeds can remain viable for 3-10 years or more.
Step 8: Season Extension & Winterizing
Extend your harvest and protect your garden for the off-season to truly maximize your self sufficient garden from scratch.
- Cold Frames: Simple structures with a transparent top (glass, polycarbonate, or old windows) that sit over garden beds. They trap solar heat, allowing you to grow cold-hardy crops (lettuce, spinach, kale, radishes) well into winter or start seeds earlier in spring. A basic cold frame can be built from 2×6 lumber and a sheet of polycarbonate for under $100.
- Hoop Houses/Low Tunnels: Larger structures made from flexible hoops (PVC pipe or EMT conduit) covered with greenhouse plastic. These provide more space and greater temperature moderation. A 10×20 ft DIY low tunnel kit can cost $200-$500, while a larger, more robust hoop house kit might be $1,000-$3,000. I use a 6×12 ft low tunnel made from 1/2-inch PVC hoops and 6mil greenhouse plastic, which extends my lettuce and spinach harvest by at least
Deciding between raised beds and in-ground beds depends on your soil, budget, and physical capabilities.
- In-Ground Beds: If you have excellent native soil and good drainage, in-ground beds are the most economical. Double-digging (loosening soil two shovel depths) can significantly improve drainage and aeration. For my main garden, I primarily use in-ground beds, but I focus on building up the soil over time with consistent compost additions and cover cropping. I aim for beds that are no wider than 3-4 feet so I can reach the center without stepping on the soil, compacting it.
- Raised Beds: Raised beds offer numerous advantages, especially for poor soil, heavy clay, or rocky areas. They provide better drainage, warm up faster in spring, reduce compaction, and make weeding and harvesting easier on your back.
- Material Options:
- Untreated Cedar: Naturally rot-resistant and chemical-free. A 4×8 ft bed, 12 inches deep, typically requires three 2x12x8 ft cedar boards, costing around $50-$60 per board (total ~$150-$180) plus corner brackets or screws. My first raised beds were cedar and are still going strong after 7 years.
- Galvanized Steel: Durable, long-lasting, and aesthetically pleasing. Brands like Vego Garden offer modular kits. A Vego Garden 17″ Tall 8-in-1 Metal Raised Garden Bed (can be configured to 4×8 ft) costs approximately $250-$300.
- Concrete Blocks/Stones: Very durable but can leach minerals (though generally safe once weathered) and can be expensive.
- Recycled Materials: Pallets (check for chemical treatment stamps like « HT » for heat-treated), old tires (controversial due to potential chemical leaching).
- Filling Raised Beds: Don’t just fill with topsoil. Use a « Hugelkultur » approach (logs, branches, leaves, then compost, then topsoil) or a mixture of 60% good quality topsoil, 30% compost, and 10% perlite or vermiculite for drainage. A 4x8x1 ft raised bed requires about 32 cubic feet (or ~1.2 cubic yards) of soil mix, which can cost $100-$200 depending on your source.
- Material Options:
Step 4: Water Management & Irrigation
Efficient water management is critical for a self sufficient garden from scratch, especially in off-grid living where water resources might be limited.
- Rainwater Harvesting: This is my primary source of irrigation water. A 55-gallon rain barrel (e.g., EarthMark Rain Barrel, ~$120-$150) connected to a downspout can collect significant water. For larger needs, I use two 275-gallon IBC totes (Intermediate Bulk Containers, often available used for $100-$200 each from food-grade sources) connected in series. A 1,000 sq ft roof can collect approximately 620 gallons of water for every inch of rainfall. My 1,500 sq ft roof provides ample water for my 600 sq ft garden through multiple barrels and totes.
- Drip Irrigation: This is by far the most water-efficient method, delivering water directly to the plant’s root zone, minimizing evaporation and weed growth.
- Components: A typical drip system includes a pressure regulator (e.g., Rain Bird PRV-10, ~$15), a filter (Rain Bird RBY filter, ~$20), main tubing (1/2-inch poly tubing, 100ft ~$25), smaller feeder lines (1/4-inch tubing), and emitters (0.5 GPH or 1 GPH per plant).
- Kits: For beginners, a starter kit like the Rain Bird Drip Irrigation Garden Kit (model DDI-KIT-1P, ~$40-$60) is excellent for a small garden. For larger setups, I use Netafim Techline CV Drip Line (500ft roll, ~$150-$200), which has pressure-compensating emitters built-in, ensuring even watering across long runs.
- Automation: For true self-sufficiency, consider a battery-powered timer (e.g., Orbit B-Hyve Bluetooth Hose Faucet Timer, ~$50) or a solar-powered timer connected to a small 12V pump.
- Solar-Powered Pumps: For lifting water from a well, pond, or large storage tank to your garden, a solar pump is a game-changer. For a smaller drip system, a Shurflo 2088-594-152 Diaphragm Pump (12V, 3.5 GPM, ~$180) can be powered by a single 100W solar panel (e.g., Renogy 100W Monocrystalline Solar Panel, ~$100) and a small 12V battery (e.g., a 50Ah LiFePO4 battery like the Battle Born 50Ah, ~$450). For larger operations or deeper wells, more robust systems are needed. If you’re looking to build out a comprehensive off-grid power system to support your garden’s water needs, or indeed your entire homestead, you might want to explore resources like the Power Grid Generator complete system guide to understand the full scope of what’s possible in terms of energy independence.
Step 5: Seed Selection & Planting
The choice of seeds is crucial for a truly self sufficient garden from scratch.
- Choose Heirloom & Open-Pollinated Seeds: These varieties produce seeds that will grow true to type, meaning you can save seeds from your harvest year after year. F1 hybrids, while often vigorous, will not produce consistent offspring from saved seeds. Reputable seed companies include Baker Creek Heirloom Seeds, High Mowing Organic Seeds, and Seed Savers Exchange. Start with common, reliable varieties like ‘Black Krim’ tomatoes, ‘Provider’ bush beans, ‘Waltham Butternut’ squash, and ‘Black Seeded Simpson’ lettuce.
- Start Seeds Indoors (Optional but Recommended): For longer growing seasons or specific crops, starting seeds indoors gives you a head start. Use seed-starting mix (e.g., Espoma Organic Seed Starter Mix, ~$10 for 16qt bag) in seed trays (Jiffy Professional Greenhouse 72-cell kit, ~$15). Provide adequate light with LED grow lights (Barrina T5 2ft 4-pack LED Grow Lights, 20W each, ~$50) for 14-16 hours a day, positioned 2-4 inches above seedlings. Maintain consistent temperatures (65-75°F for most).
- Direct Sowing vs. Transplanting: Some crops (carrots, radishes, beans, corn) prefer direct sowing into the garden bed. Others (tomatoes, peppers, broccoli, kale) benefit from being started indoors and transplanted. Follow seed packet instructions for planting depths (e.g., lettuce seeds are often surface-sown or planted 1/8 inch deep, while beans are 1 inch deep) and spacing.
- Companion Planting: Strategically plant different species together to enhance growth, deter pests, and attract beneficial insects. For example, planting marigolds near tomatoes can deter nematodes, and basil improves tomato flavor. Nasturtiums can act as a trap crop for aphids.
- Succession Planting: For a continuous harvest, plant small batches of quick-growing crops (lettuce, radishes, cilantro) every 2-3 weeks. As one crop finishes, another is ready to take its place.
Step 6: Pest & Disease Management (Organic)
Maintaining a self sufficient garden from scratch means embracing organic pest and disease control.
- Integrated Pest Management (IPM): This holistic approach combines several strategies.
- Observation: Regularly inspect your plants for early signs of pests or disease. Catching issues early is key.
- Physical Barriers: Use row covers (e.g., Agribon AG-19 floating row cover, 10×20 ft, ~$20) to protect young plants from insect pests like cabbage worms and squash bugs. Install fences (e.g., 2×4 welded wire mesh, 4 ft tall, 50 ft roll ~$70) to keep out deer, rabbits, and other larger animals.
- Hand-Picking: For larger pests like tomato hornworms or squash bugs, simply pick them off and drop them into a bucket of soapy water.
- Companion Planting: As mentioned, certain plants repel pests. Marigolds, garlic, and onions are excellent deterrents.
- Attract Beneficial Insects: Plant flowers like dill, fennel, cosmos, and sweet alyssum to attract ladybugs, lacewings, and parasitic wasps, which prey on common garden pests.
- Organic Sprays & Treatments:
- Neem Oil: An excellent broad-spectrum organic insecticide and fungicide. Bonide Neem Oil Concentrate (16oz, ~$20) can be mixed at a rate of 1-2 tbsp per gallon of water and sprayed on affected plants.
- Insecticidal Soap: Effective against soft-bodied insects like aphids, whiteflies, and spider mites. Garden Safe Insecticidal Soap (24oz ready-to-use, ~$10).
- Bacillus thuringiensis (Bt): A naturally occurring soil bacterium that targets caterpillars and worms. Monterey BT Worm & Caterpillar Killer (16oz, ~$18) is highly effective and safe for beneficial insects.
- Copper or Sulfur Sprays: For fungal diseases like powdery mildew or blight, organic copper (e.g., Bonide Copper Fungicide, ~$15 for 1lb) or sulfur (e.g., Safer Brand Garden Fungicide, ~$10 for 16oz) can be used as a last resort.
Step 7: Harvesting & Seed Saving
The culmination of your efforts is the harvest, and seed saving closes the loop on self-sufficiency.
- Harvesting Techniques:
- Timing: Harvest vegetables at their peak ripeness for best flavor and nutritional value. For example, green beans should snap cleanly, cucumbers should be firm, and tomatoes should be fully colored.
- Frequency: Many crops, like zucchini, cucumbers, and bush beans, produce more if harvested frequently. Pick daily or every other day.
- Tools: Use clean, sharp pruners (e.g., Corona ClassicCUT Bypass Pruner BP 3180, ~$30) or a sharp knife for clean cuts, minimizing damage to the plant.
- Seed Saving: This is where the « self-sufficient » aspect truly shines.
- Selection: Only save seeds from your healthiest, most vigorous plants that show desired traits (disease resistance, good flavor, high yield).
- Isolation: To ensure true-to-type seeds, prevent cross-pollination. This can be challenging for open-pollinated crops that readily cross (e.g., squash, corn). For beginners, focus on self-pollinating plants like beans, peas, lettuce, and tomatoes.
- Processing:
- Dry Seeds (Beans, Peas, Lettuce, Grains): Allow pods/seed heads to dry completely on the plant. Harvest, shell, and clean the seeds, removing chaff.
- Wet Seeds (Tomatoes, Cucumbers, Squash): For tomatoes, ferment the seeds in water for a few days to remove the gel coating and inhibit disease. For cucumbers/squash, scrape out seeds, wash thoroughly, and dry.
- Drying: Spread seeds thinly on screens or paper plates in a cool, dry, well-ventilated area for 1-4 weeks. Ensure they are bone-dry before storage. I aim for less than 8% moisture content.
- Storage: Store seeds in airtight containers (glass jars with desiccant packets work well) in a cool, dark, dry place (ideally 40-50°F and 30-40% humidity). Label clearly with variety and date. Properly stored seeds can remain viable for 3-10 years or more.
Step 8: Season Extension & Winterizing
Extend your harvest and protect your garden for the off-season to truly maximize your self sufficient garden from scratch.
- Cold Frames: Simple structures with a transparent top (glass, polycarbonate, or old windows) that sit over garden beds. They trap solar heat, allowing you to grow cold-hardy crops (lettuce, spinach, kale, radishes) well into winter or start seeds earlier in spring. A basic cold frame can be built from 2×6 lumber and a sheet of polycarbonate for under $100.
- Hoop Houses/Low Tunnels: Larger structures made from flexible hoops (PVC pipe or EMT conduit) covered with greenhouse plastic. These provide more space and greater temperature moderation. A 10×20 ft DIY low tunnel kit can cost $200-$500, while a larger, more robust hoop house kit might be $1,000-$3,000. I use a 6×12 ft low tunnel made from 1/2-inch PVC hoops and 6mil greenhouse plastic, which extends my lettuce and spinach harvest by at least
Healthy soil is the bedrock of a productive, self-sufficient garden. You can’t guess what your soil needs; you have to test it.
- Perform a Soil Test: A professional soil test will give you precise data on your soil’s pH, nutrient levels (N-P-K), and organic matter content. I recommend sending a sample to your local agricultural extension office; it typically costs $20-$50 and provides detailed recommendations. Alternatively, for a quick homeowner check, a Rapitest Soil Test Kit (40-test kit, model 1663, ~$20 on Amazon) provides a good baseline for pH, Nitrogen, Phosphorus, and Potash. Aim for a pH between 6.0 and 7.0 for most vegetables.
- Amend for pH Imbalance: If your soil is too acidic (below 6.0), add agricultural lime (dolomitic lime adds magnesium, calcitic lime adds calcium). Apply 5-10 lbs per 100 sq ft for a moderate adjustment. If it’s too alkaline (above 7.0), add elemental sulfur (e.g., Espoma Soil Acidifier, ~$15 for 6.75 lbs) or generous amounts of organic matter like peat moss or pine needles.
- Build Organic Matter: This is the single most important step for long-term soil health. Organic matter improves soil structure, water retention, drainage, and nutrient availability. Incorporate 2-4 inches of high-quality compost into your top 6-12 inches of soil annually. I make my own compost from kitchen scraps, garden waste, and shredded leaves, but you can purchase it. Local nurseries often sell bulk compost for $30-$50 per cubic yard. Aged manure (from chickens, cows, or horses – ensure it’s well-rotted to avoid burning plants) is also excellent.
- Address Nutrient Deficiencies: Based on your soil test, add specific organic amendments. If Nitrogen (N) is low, add blood meal (12-0-0, ~$20 for 3 lbs) or feather meal. For Phosphorus (P), use bone meal (3-15-0, ~$15 for 3 lbs) or rock phosphate. For Potassium (K), greensand (0-0-2.5, ~$25 for 5 lbs) or kelp meal are good choices. I rely heavily on Espoma Organic Garden-tone (5-3-3, ~$25 for an 8lb bag) as a balanced, all-purpose organic fertilizer during planting.
Step 3: Garden Bed Preparation
Deciding between raised beds and in-ground beds depends on your soil, budget, and physical capabilities.
- In-Ground Beds: If you have excellent native soil and good drainage, in-ground beds are the most economical. Double-digging (loosening soil two shovel depths) can significantly improve drainage and aeration. For my main garden, I primarily use in-ground beds, but I focus on building up the soil over time with consistent compost additions and cover cropping. I aim for beds that are no wider than 3-4 feet so I can reach the center without stepping on the soil, compacting it.
- Raised Beds: Raised beds offer numerous advantages, especially for poor soil, heavy clay, or rocky areas. They provide better drainage, warm up faster in spring, reduce compaction, and make weeding and harvesting easier on your back.
- Material Options:
- Untreated Cedar: Naturally rot-resistant and chemical-free. A 4×8 ft bed, 12 inches deep, typically requires three 2x12x8 ft cedar boards, costing around $50-$60 per board (total ~$150-$180) plus corner brackets or screws. My first raised beds were cedar and are still going strong after 7 years.
- Galvanized Steel: Durable, long-lasting, and aesthetically pleasing. Brands like Vego Garden offer modular kits. A Vego Garden 17″ Tall 8-in-1 Metal Raised Garden Bed (can be configured to 4×8 ft) costs approximately $250-$300.
- Concrete Blocks/Stones: Very durable but can leach minerals (though generally safe once weathered) and can be expensive.
- Recycled Materials: Pallets (check for chemical treatment stamps like « HT » for heat-treated), old tires (controversial due to potential chemical leaching).
- Filling Raised Beds: Don’t just fill with topsoil. Use a « Hugelkultur » approach (logs, branches, leaves, then compost, then topsoil) or a mixture of 60% good quality topsoil, 30% compost, and 10% perlite or vermiculite for drainage. A 4x8x1 ft raised bed requires about 32 cubic feet (or ~1.2 cubic yards) of soil mix, which can cost $100-$200 depending on your source.
- Material Options:
Step 4: Water Management & Irrigation
Efficient water management is critical for a self sufficient garden from scratch, especially in off-grid living where water resources might be limited.
- Rainwater Harvesting: This is my primary source of irrigation water. A 55-gallon rain barrel (e.g., EarthMark Rain Barrel, ~$120-$150) connected to a downspout can collect significant water. For larger needs, I use two 275-gallon IBC totes (Intermediate Bulk Containers, often available used for $100-$200 each from food-grade sources) connected in series. A 1,000 sq ft roof can collect approximately 620 gallons of water for every inch of rainfall. My 1,500 sq ft roof provides ample water for my 600 sq ft garden through multiple barrels and totes.
- Drip Irrigation: This is by far the most water-efficient method, delivering water directly to the plant’s root zone, minimizing evaporation and weed growth.
- Components: A typical drip system includes a pressure regulator (e.g., Rain Bird PRV-10, ~$15), a filter (Rain Bird RBY filter, ~$20), main tubing (1/2-inch poly tubing, 100ft ~$25), smaller feeder lines (1/4-inch tubing), and emitters (0.5 GPH or 1 GPH per plant).
- Kits: For beginners, a starter kit like the Rain Bird Drip Irrigation Garden Kit (model DDI-KIT-1P, ~$40-$60) is excellent for a small garden. For larger setups, I use Netafim Techline CV Drip Line (500ft roll, ~$150-$200), which has pressure-compensating emitters built-in, ensuring even watering across long runs.
- Automation: For true self-sufficiency, consider a battery-powered timer (e.g., Orbit B-Hyve Bluetooth Hose Faucet Timer, ~$50) or a solar-powered timer connected to a small 12V pump.
- Solar-Powered Pumps: For lifting water from a well, pond, or large storage tank to your garden, a solar pump is a game-changer. For a smaller drip system, a Shurflo 2088-594-152 Diaphragm Pump (12V, 3.5 GPM, ~$180) can be powered by a single 100W solar panel (e.g., Renogy 100W Monocrystalline Solar Panel, ~$100) and a small 12V battery (e.g., a 50Ah LiFePO4 battery like the Battle Born 50Ah, ~$450). For larger operations or deeper wells, more robust systems are needed. If you’re looking to build out a comprehensive off-grid power system to support your garden’s water needs, or indeed your entire homestead, you might want to explore resources like the Power Grid Generator complete system guide to understand the full scope of what’s possible in terms of energy independence.
Step 5: Seed Selection & Planting
The choice of seeds is crucial for a truly self sufficient garden from scratch.
- Choose Heirloom & Open-Pollinated Seeds: These varieties produce seeds that will grow true to type, meaning you can save seeds from your harvest year after year. F1 hybrids, while often vigorous, will not produce consistent offspring from saved seeds. Reputable seed companies include Baker Creek Heirloom Seeds, High Mowing Organic Seeds, and Seed Savers Exchange. Start with common, reliable varieties like ‘Black Krim’ tomatoes, ‘Provider’ bush beans, ‘Waltham Butternut’ squash, and ‘Black Seeded Simpson’ lettuce.
- Start Seeds Indoors (Optional but Recommended): For longer growing seasons or specific crops, starting seeds indoors gives you a head start. Use seed-starting mix (e.g., Espoma Organic Seed Starter Mix, ~$10 for 16qt bag) in seed trays (Jiffy Professional Greenhouse 72-cell kit, ~$15). Provide adequate light with LED grow lights (Barrina T5 2ft 4-pack LED Grow Lights, 20W each, ~$50) for 14-16 hours a day, positioned 2-4 inches above seedlings. Maintain consistent temperatures (65-75°F for most).
- Direct Sowing vs. Transplanting: Some crops (carrots, radishes, beans, corn) prefer direct sowing into the garden bed. Others (tomatoes, peppers, broccoli, kale) benefit from being started indoors and transplanted. Follow seed packet instructions for planting depths (e.g., lettuce seeds are often surface-sown or planted 1/8 inch deep, while beans are 1 inch deep) and spacing.
- Companion Planting: Strategically plant different species together to enhance growth, deter pests, and attract beneficial insects. For example, planting marigolds near tomatoes can deter nematodes, and basil improves tomato flavor. Nasturtiums can act as a trap crop for aphids.
- Succession Planting: For a continuous harvest, plant small batches of quick-growing crops (lettuce, radishes, cilantro) every 2-3 weeks. As one crop finishes, another is ready to take its place.
Step 6: Pest & Disease Management (Organic)
Maintaining a self sufficient garden from scratch means embracing organic pest and disease control.
- Integrated Pest Management (IPM): This holistic approach combines several strategies.
- Observation: Regularly inspect your plants for early signs of pests or disease. Catching issues early is key.
- Physical Barriers: Use row covers (e.g., Agribon AG-19 floating row cover, 10×20 ft, ~$20) to protect young plants from insect pests like cabbage worms and squash bugs. Install fences (e.g., 2×4 welded wire mesh, 4 ft tall, 50 ft roll ~$70) to keep out deer, rabbits, and other larger animals.
- Hand-Picking: For larger pests like tomato hornworms or squash bugs, simply pick them off and drop them into a bucket of soapy water.
- Companion Planting: As mentioned, certain plants repel pests. Marigolds, garlic, and onions are excellent deterrents.
- Attract Beneficial Insects: Plant flowers like dill, fennel, cosmos, and sweet alyssum to attract ladybugs, lacewings, and parasitic wasps, which prey on common garden pests.
- Organic Sprays & Treatments:
- Neem Oil: An excellent broad-spectrum organic insecticide and fungicide. Bonide Neem Oil Concentrate (16oz, ~$20) can be mixed at a rate of 1-2 tbsp per gallon of water and sprayed on affected plants.
- Insecticidal Soap: Effective against soft-bodied insects like aphids, whiteflies, and spider mites. Garden Safe Insecticidal Soap (24oz ready-to-use, ~$10).
- Bacillus thuringiensis (Bt): A naturally occurring soil bacterium that targets caterpillars and worms. Monterey BT Worm & Caterpillar Killer (16oz, ~$18) is highly effective and safe for beneficial insects.
- Copper or Sulfur Sprays: For fungal diseases like powdery mildew or blight, organic copper (e.g., Bonide Copper Fungicide, ~$15 for 1lb) or sulfur (e.g., Safer Brand Garden Fungicide, ~$10 for 16oz) can be used as a last resort.
Step 7: Harvesting & Seed Saving
The culmination of your efforts is the harvest, and seed saving closes the loop on self-sufficiency.
- Harvesting Techniques:
- Timing: Harvest vegetables at their peak ripeness for best flavor and nutritional value. For example, green beans should snap cleanly, cucumbers should be firm, and tomatoes should be fully colored.
- Frequency: Many crops, like zucchini, cucumbers, and bush beans, produce more if harvested frequently. Pick daily or every other day.
- Tools: Use clean, sharp pruners (e.g., Corona ClassicCUT Bypass Pruner BP 3180, ~$30) or a sharp knife for clean cuts, minimizing damage to the plant.
- Seed Saving: This is where the « self-sufficient » aspect truly shines.
- Selection: Only save seeds from your healthiest, most vigorous plants that show desired traits (disease resistance, good flavor, high yield).
- Isolation: To ensure true-to-type seeds, prevent cross-pollination. This can be challenging for open-pollinated crops that readily cross (e.g., squash, corn). For beginners, focus on self-pollinating plants like beans, peas, lettuce, and tomatoes.
- Processing:
- Dry Seeds (Beans, Peas, Lettuce, Grains): Allow pods/seed heads to dry completely on the plant. Harvest, shell, and clean the seeds, removing chaff.
- Wet Seeds (Tomatoes, Cucumbers, Squash): For tomatoes, ferment the seeds in water for a few days to remove the gel coating and inhibit disease. For cucumbers/squash, scrape out seeds, wash thoroughly, and dry.
- Drying: Spread seeds thinly on screens or paper plates in a cool, dry, well-ventilated area for 1-4 weeks. Ensure they are bone-dry before storage. I aim for less than 8% moisture content.
- Storage: Store seeds in airtight containers (glass jars with desiccant packets work well) in a cool, dark, dry place (ideally 40-50°F and 30-40% humidity). Label clearly with variety and date. Properly stored seeds can remain viable for 3-10 years or more.
Step 8: Season Extension & Winterizing
Extend your harvest and protect your garden for the off-season to truly maximize your self sufficient garden from scratch.
- Cold Frames: Simple structures with a transparent top (glass, polycarbonate, or old windows) that sit over garden beds. They trap solar heat, allowing you to grow cold-hardy crops (lettuce, spinach, kale, radishes) well into winter or start seeds earlier in spring. A basic cold frame can be built from 2×6 lumber and a sheet of polycarbonate for under $100.
- Hoop Houses/Low Tunnels: Larger structures made from flexible hoops (PVC pipe or EMT conduit) covered with greenhouse plastic. These provide more space and greater temperature moderation. A 10×20 ft DIY low tunnel kit can cost $200-$500, while a larger, more robust hoop house kit might be $1,000-$3,000. I use a 6×12 ft low tunnel made from 1/2-inch PVC hoops and 6mil greenhouse plastic, which extends my lettuce and spinach harvest by at least
- Integrated Pest Management (IPM): This holistic approach combines several strategies.
The culmination of your efforts is the harvest, and seed saving closes the loop on self-sufficiency.
- Harvesting Techniques:
- Timing: Harvest vegetables at their peak ripeness for best flavor and nutritional value. For example, green beans should snap cleanly, cucumbers should be firm, and tomatoes should be fully colored.
- Frequency: Many crops, like zucchini, cucumbers, and bush beans, produce more if harvested frequently. Pick daily or every other day.
- Tools: Use clean, sharp pruners (e.g., Corona ClassicCUT Bypass Pruner BP 3180, ~$30) or a sharp knife for clean cuts, minimizing damage to the plant.
- Seed Saving: This is where the « self-sufficient » aspect truly shines.
- Selection: Only save seeds from your healthiest, most vigorous plants that show desired traits (disease resistance, good flavor, high yield).
- Isolation: To ensure true-to-type seeds, prevent cross-pollination. This can be challenging for open-pollinated crops that readily cross (e.g., squash, corn). For beginners, focus on self-pollinating plants like beans, peas, lettuce, and tomatoes.
- Processing:
- Dry Seeds (Beans, Peas, Lettuce, Grains): Allow pods/seed heads to dry completely on the plant. Harvest, shell, and clean the seeds, removing chaff.
- Wet Seeds (Tomatoes, Cucumbers, Squash): For tomatoes, ferment the seeds in water for a few days to remove the gel coating and inhibit disease. For cucumbers/squash, scrape out seeds, wash thoroughly, and dry.
- Drying: Spread seeds thinly on screens or paper plates in a cool, dry, well-ventilated area for 1-4 weeks. Ensure they are bone-dry before storage. I aim for less than 8% moisture content.
- Storage: Store seeds in airtight containers (glass jars with desiccant packets work well) in a cool, dark, dry place (ideally 40-50°F and 30-40% humidity). Label clearly with variety and date. Properly stored seeds can remain viable for 3-10 years or more.
Step 8: Season Extension & Winterizing
Extend your harvest and protect your garden for the off-season to truly maximize your self sufficient garden from scratch.
- Cold Frames: Simple structures with a transparent top (glass, polycarbonate, or old windows) that sit over garden beds. They trap solar heat, allowing you to grow cold-hardy crops (lettuce, spinach, kale, radishes) well into winter or start seeds earlier in spring. A basic cold frame can be built from 2×6 lumber and a sheet of polycarbonate for under $100.
- Hoop Houses/Low Tunnels: Larger structures made from flexible hoops (PVC pipe or EMT conduit) covered with greenhouse plastic. These provide more space and greater temperature moderation. A 10×20 ft DIY low tunnel kit can cost $200-$500, while a larger, more robust hoop house kit might be $1,000-$3,000. I use a 6×12 ft low tunnel made from 1/2-inch PVC hoops and 6mil greenhouse plastic, which extends my lettuce and spinach harvest by at least
Step 6: Pest & Disease Management (Organic)
Maintaining a self sufficient garden from scratch means embracing organic pest and disease control.
- Integrated Pest Management (IPM): This holistic approach combines several strategies.
- Observation: Regularly inspect your plants for early signs of pests or disease. Catching issues early is key.
- Physical Barriers: Use row covers (e.g., Agribon AG-19 floating row cover, 10×20 ft, ~$20) to protect young plants from insect pests like cabbage worms and squash bugs. Install fences (e.g., 2×4 welded wire mesh, 4 ft tall, 50 ft roll ~$70) to keep out deer, rabbits, and other larger animals.
- Hand-Picking: For larger pests like tomato hornworms or squash bugs, simply pick them off and drop them into a bucket of soapy water.
- Companion Planting: As mentioned, certain plants repel pests. Marigolds, garlic, and onions are excellent deterrents.
- Attract Beneficial Insects: Plant flowers like dill, fennel, cosmos, and sweet alyssum to attract ladybugs, lacewings, and parasitic wasps, which prey on common garden pests.
- Organic Sprays & Treatments:
- Neem Oil: An excellent broad-spectrum organic insecticide and fungicide. Bonide Neem Oil Concentrate (16oz, ~$20) can be mixed at a rate of 1-2 tbsp per gallon of water and sprayed on affected plants.
- Insecticidal Soap: Effective against soft-bodied insects like aphids, whiteflies, and spider mites. Garden Safe Insecticidal Soap (24oz ready-to-use, ~$10).
- Bacillus thuringiensis (Bt): A naturally occurring soil bacterium that targets caterpillars and worms. Monterey BT Worm & Caterpillar Killer (16oz, ~$18) is highly effective and safe for beneficial insects.
- Copper or Sulfur Sprays: For fungal diseases like powdery mildew or blight, organic copper (e.g., Bonide Copper Fungicide, ~$15 for 1lb) or sulfur (e.g., Safer Brand Garden Fungicide, ~$10 for 16oz) can be used as a last resort.
Step 7: Harvesting & Seed Saving
The culmination of your efforts is the harvest, and seed saving closes the loop on self-sufficiency.
- Harvesting Techniques:
- Timing: Harvest vegetables at their peak ripeness for best flavor and nutritional value. For example, green beans should snap cleanly, cucumbers should be firm, and tomatoes should be fully colored.
- Frequency: Many crops, like zucchini, cucumbers, and bush beans, produce more if harvested frequently. Pick daily or every other day.
- Tools: Use clean, sharp pruners (e.g., Corona ClassicCUT Bypass Pruner BP 3180, ~$30) or a sharp knife for clean cuts, minimizing damage to the plant.
- Seed Saving: This is where the « self-sufficient » aspect truly shines.
- Selection: Only save seeds from your healthiest, most vigorous plants that show desired traits (disease resistance, good flavor, high yield).
- Isolation: To ensure true-to-type seeds, prevent cross-pollination. This can be challenging for open-pollinated crops that readily cross (e.g., squash, corn). For beginners, focus on self-pollinating plants like beans, peas, lettuce, and tomatoes.
- Processing:
- Dry Seeds (Beans, Peas, Lettuce, Grains): Allow pods/seed heads to dry completely on the plant. Harvest, shell, and clean the seeds, removing chaff.
- Wet Seeds (Tomatoes, Cucumbers, Squash): For tomatoes, ferment the seeds in water for a few days to remove the gel coating and inhibit disease. For cucumbers/squash, scrape out seeds, wash thoroughly, and dry.
- Drying: Spread seeds thinly on screens or paper plates in a cool, dry, well-ventilated area for 1-4 weeks. Ensure they are bone-dry before storage. I aim for less than 8% moisture content.
- Storage: Store seeds in airtight containers (glass jars with desiccant packets work well) in a cool, dark, dry place (ideally 40-50°F and 30-40% humidity). Label clearly with variety and date. Properly stored seeds can remain viable for 3-10 years or more.
Step 8: Season Extension & Winterizing
Extend your harvest and protect your garden for the off-season to truly maximize your self sufficient garden from scratch.
- Cold Frames: Simple structures with a transparent top (glass, polycarbonate, or old windows) that sit over garden beds. They trap solar heat, allowing you to grow cold-hardy crops (lettuce, spinach, kale, radishes) well into winter or start seeds earlier in spring. A basic cold frame can be built from 2×6 lumber and a sheet of polycarbonate for under $100.
- Hoop Houses/Low Tunnels: Larger structures made from flexible hoops (PVC pipe or EMT conduit) covered with greenhouse plastic. These provide more space and greater temperature moderation. A 10×20 ft DIY low tunnel kit can cost $200-$500, while a larger, more robust hoop house kit might be $1,000-$3,000. I use a 6×12 ft low tunnel made from 1/2-inch PVC hoops and 6mil greenhouse plastic, which extends my lettuce and spinach harvest by at least
- Choose Heirloom & Open-Pollinated Seeds: These varieties produce seeds that will grow true to type, meaning you can save seeds from your harvest year after year. F1 hybrids, while often vigorous, will not produce consistent offspring from saved seeds. Reputable seed companies include Baker Creek Heirloom Seeds, High Mowing Organic Seeds, and Seed Savers Exchange. Start with common, reliable varieties like ‘Black Krim’ tomatoes, ‘Provider’ bush beans, ‘Waltham Butternut’ squash, and ‘Black Seeded Simpson’ lettuce.
- Start Seeds Indoors (Optional but Recommended): For longer growing seasons or specific crops, starting seeds indoors gives you a head start. Use seed-starting mix (e.g., Espoma Organic Seed Starter Mix, ~$10 for 16qt bag) in seed trays (Jiffy Professional Greenhouse 72-cell kit, ~$15). Provide adequate light with LED grow lights (Barrina T5 2ft 4-pack LED Grow Lights, 20W each, ~$50) for 14-16 hours a day, positioned 2-4 inches above seedlings. Maintain consistent temperatures (65-75°F for most).
- Direct Sowing vs. Transplanting: Some crops (carrots, radishes, beans, corn) prefer direct sowing into the garden bed. Others (tomatoes, peppers, broccoli, kale) benefit from being started indoors and transplanted. Follow seed packet instructions for planting depths (e.g., lettuce seeds are often surface-sown or planted 1/8 inch deep, while beans are 1 inch deep) and spacing.
- Companion Planting: Strategically plant different species together to enhance growth, deter pests, and attract beneficial insects. For example, planting marigolds near tomatoes can deter nematodes, and basil improves tomato flavor. Nasturtiums can act as a trap crop for aphids.
- Succession Planting: For a continuous harvest, plant small batches of quick-growing crops (lettuce, radishes, cilantro) every 2-3 weeks. As one crop finishes, another is ready to take its place.
Step 6: Pest & Disease Management (Organic)
Maintaining a self sufficient garden from scratch means embracing organic pest and disease control.
- Integrated Pest Management (IPM): This holistic approach combines several strategies.
- Observation: Regularly inspect your plants for early signs of pests or disease. Catching issues early is key.
- Physical Barriers: Use row covers (e.g., Agribon AG-19 floating row cover, 10×20 ft, ~$20) to protect young plants from insect pests like cabbage worms and squash bugs. Install fences (e.g., 2×4 welded wire mesh, 4 ft tall, 50 ft roll ~$70) to keep out deer, rabbits, and other larger animals.
- Hand-Picking: For larger pests like tomato hornworms or squash bugs, simply pick them off and drop them into a bucket of soapy water.
- Companion Planting: As mentioned, certain plants repel pests. Marigolds, garlic, and onions are excellent deterrents.
- Attract Beneficial Insects: Plant flowers like dill, fennel, cosmos, and sweet alyssum to attract ladybugs, lacewings, and parasitic wasps, which prey on common garden pests.
- Organic Sprays & Treatments:
- Neem Oil: An excellent broad-spectrum organic insecticide and fungicide. Bonide Neem Oil Concentrate (16oz, ~$20) can be mixed at a rate of 1-2 tbsp per gallon of water and sprayed on affected plants.
- Insecticidal Soap: Effective against soft-bodied insects like aphids, whiteflies, and spider mites. Garden Safe Insecticidal Soap (24oz ready-to-use, ~$10).
- Bacillus thuringiensis (Bt): A naturally occurring soil bacterium that targets caterpillars and worms. Monterey BT Worm & Caterpillar Killer (16oz, ~$18) is highly effective and safe for beneficial insects.
- Copper or Sulfur Sprays: For fungal diseases like powdery mildew or blight, organic copper (e.g., Bonide Copper Fungicide, ~$15 for 1lb) or sulfur (e.g., Safer Brand Garden Fungicide, ~$10 for 16oz) can be used as a last resort.
Step 7: Harvesting & Seed Saving
The culmination of your efforts is the harvest, and seed saving closes the loop on self-sufficiency.
- Harvesting Techniques:
- Timing: Harvest vegetables at their peak ripeness for best flavor and nutritional value. For example, green beans should snap cleanly, cucumbers should be firm, and tomatoes should be fully colored.
- Frequency: Many crops, like zucchini, cucumbers, and bush beans, produce more if harvested frequently. Pick daily or every other day.
- Tools: Use clean, sharp pruners (e.g., Corona ClassicCUT Bypass Pruner BP 3180, ~$30) or a sharp knife for clean cuts, minimizing damage to the plant.
- Seed Saving: This is where the « self-sufficient » aspect truly shines.
- Selection: Only save seeds from your healthiest, most vigorous plants that show desired traits (disease resistance, good flavor, high yield).
- Isolation: To ensure true-to-type seeds, prevent cross-pollination. This can be challenging for open-pollinated crops that readily cross (e.g., squash, corn). For beginners, focus on self-pollinating plants like beans, peas, lettuce, and tomatoes.
- Processing:
- Dry Seeds (Beans, Peas, Lettuce, Grains): Allow pods/seed heads to dry completely on the plant. Harvest, shell, and clean the seeds, removing chaff.
- Wet Seeds (Tomatoes, Cucumbers, Squash): For tomatoes, ferment the seeds in water for a few days to remove the gel coating and inhibit disease. For cucumbers/squash, scrape out seeds, wash thoroughly, and dry.
- Drying: Spread seeds thinly on screens or paper plates in a cool, dry, well-ventilated area for 1-4 weeks. Ensure they are bone-dry before storage. I aim for less than 8% moisture content.
- Storage: Store seeds in airtight containers (glass jars with desiccant packets work well) in a cool, dark, dry place (ideally 40-50°F and 30-40% humidity). Label clearly with variety and date. Properly stored seeds can remain viable for 3-10 years or more.
Step 8: Season Extension & Winterizing
Extend your harvest and protect your garden for the off-season to truly maximize your self sufficient garden from scratch.
- Cold Frames: Simple structures with a transparent top (glass, polycarbonate, or old windows) that sit over garden beds. They trap solar heat, allowing you to grow cold-hardy crops (lettuce, spinach, kale, radishes) well into winter or start seeds earlier in spring. A basic cold frame can be built from 2×6 lumber and a sheet of polycarbonate for under $100.
- Hoop Houses/Low Tunnels: Larger structures made from flexible hoops (PVC pipe or EMT conduit) covered with greenhouse plastic. These provide more space and greater temperature moderation. A 10×20 ft DIY low tunnel kit can cost $200-$500, while a larger, more robust hoop house kit might be $1,000-$3,000. I use a 6×12 ft low tunnel made from 1/2-inch PVC hoops and 6mil greenhouse plastic, which extends my lettuce and spinach harvest by at least
The choice of seeds is crucial for a truly self sufficient garden from scratch.
- Choose Heirloom & Open-Pollinated Seeds: These varieties produce seeds that will grow true to type, meaning you can save seeds from your harvest year after year. F1 hybrids, while often vigorous, will not produce consistent offspring from saved seeds. Reputable seed companies include Baker Creek Heirloom Seeds, High Mowing Organic Seeds, and Seed Savers Exchange. Start with common, reliable varieties like ‘Black Krim’ tomatoes, ‘Provider’ bush beans, ‘Waltham Butternut’ squash, and ‘Black Seeded Simpson’ lettuce.
- Start Seeds Indoors (Optional but Recommended): For longer growing seasons or specific crops, starting seeds indoors gives you a head start. Use seed-starting mix (e.g., Espoma Organic Seed Starter Mix, ~$10 for 16qt bag) in seed trays (Jiffy Professional Greenhouse 72-cell kit, ~$15). Provide adequate light with LED grow lights (Barrina T5 2ft 4-pack LED Grow Lights, 20W each, ~$50) for 14-16 hours a day, positioned 2-4 inches above seedlings. Maintain consistent temperatures (65-75°F for most).
- Direct Sowing vs. Transplanting: Some crops (carrots, radishes, beans, corn) prefer direct sowing into the garden bed. Others (tomatoes, peppers, broccoli, kale) benefit from being started indoors and transplanted. Follow seed packet instructions for planting depths (e.g., lettuce seeds are often surface-sown or planted 1/8 inch deep, while beans are 1 inch deep) and spacing.
- Companion Planting: Strategically plant different species together to enhance growth, deter pests, and attract beneficial insects. For example, planting marigolds near tomatoes can deter nematodes, and basil improves tomato flavor. Nasturtiums can act as a trap crop for aphids.
- Succession Planting: For a continuous harvest, plant small batches of quick-growing crops (lettuce, radishes, cilantro) every 2-3 weeks. As one crop finishes, another is ready to take its place.
Step 6: Pest & Disease Management (Organic)
Maintaining a self sufficient garden from scratch means embracing organic pest and disease control.
- Integrated Pest Management (IPM): This holistic approach combines several strategies.
- Observation: Regularly inspect your plants for early signs of pests or disease. Catching issues early is key.
- Physical Barriers: Use row covers (e.g., Agribon AG-19 floating row cover, 10×20 ft, ~$20) to protect young plants from insect pests like cabbage worms and squash bugs. Install fences (e.g., 2×4 welded wire mesh, 4 ft tall, 50 ft roll ~$70) to keep out deer, rabbits, and other larger animals.
- Hand-Picking: For larger pests like tomato hornworms or squash bugs, simply pick them off and drop them into a bucket of soapy water.
- Companion Planting: As mentioned, certain plants repel pests. Marigolds, garlic, and onions are excellent deterrents.
- Attract Beneficial Insects: Plant flowers like dill, fennel, cosmos, and sweet alyssum to attract ladybugs, lacewings, and parasitic wasps, which prey on common garden pests.
- Organic Sprays & Treatments:
- Neem Oil: An excellent broad-spectrum organic insecticide and fungicide. Bonide Neem Oil Concentrate (16oz, ~$20) can be mixed at a rate of 1-2 tbsp per gallon of water and sprayed on affected plants.
- Insecticidal Soap: Effective against soft-bodied insects like aphids, whiteflies, and spider mites. Garden Safe Insecticidal Soap (24oz ready-to-use, ~$10).
- Bacillus thuringiensis (Bt): A naturally occurring soil bacterium that targets caterpillars and worms. Monterey BT Worm & Caterpillar Killer (16oz, ~$18) is highly effective and safe for beneficial insects.
- Copper or Sulfur Sprays: For fungal diseases like powdery mildew or blight, organic copper (e.g., Bonide Copper Fungicide, ~$15 for 1lb) or sulfur (e.g., Safer Brand Garden Fungicide, ~$10 for 16oz) can be used as a last resort.
Step 7: Harvesting & Seed Saving
The culmination of your efforts is the harvest, and seed saving closes the loop on self-sufficiency.
- Harvesting Techniques:
- Timing: Harvest vegetables at their peak ripeness for best flavor and nutritional value. For example, green beans should snap cleanly, cucumbers should be firm, and tomatoes should be fully colored.
- Frequency: Many crops, like zucchini, cucumbers, and bush beans, produce more if harvested frequently. Pick daily or every other day.
- Tools: Use clean, sharp pruners (e.g., Corona ClassicCUT Bypass Pruner BP 3180, ~$30) or a sharp knife for clean cuts, minimizing damage to the plant.
- Seed Saving: This is where the « self-sufficient » aspect truly shines.
- Selection: Only save seeds from your healthiest, most vigorous plants that show desired traits (disease resistance, good flavor, high yield).
- Isolation: To ensure true-to-type seeds, prevent cross-pollination. This can be challenging for open-pollinated crops that readily cross (e.g., squash, corn). For beginners, focus on self-pollinating plants like beans, peas, lettuce, and tomatoes.
- Processing:
- Dry Seeds (Beans, Peas, Lettuce, Grains): Allow pods/seed heads to dry completely on the plant. Harvest, shell, and clean the seeds, removing chaff.
- Wet Seeds (Tomatoes, Cucumbers, Squash): For tomatoes, ferment the seeds in water for a few days to remove the gel coating and inhibit disease. For cucumbers/squash, scrape out seeds, wash thoroughly, and dry.
- Drying: Spread seeds thinly on screens or paper plates in a cool, dry, well-ventilated area for 1-4 weeks. Ensure they are bone-dry before storage. I aim for less than 8% moisture content.
- Storage: Store seeds in airtight containers (glass jars with desiccant packets work well) in a cool, dark, dry place (ideally 40-50°F and 30-40% humidity). Label clearly with variety and date. Properly stored seeds can remain viable for 3-10 years or more.
Step 8: Season Extension & Winterizing
Extend your harvest and protect your garden for the off-season to truly maximize your self sufficient garden from scratch.
- Cold Frames: Simple structures with a transparent top (glass, polycarbonate, or old windows) that sit over garden beds. They trap solar heat, allowing you to grow cold-hardy crops (lettuce, spinach, kale, radishes) well into winter or start seeds earlier in spring. A basic cold frame can be built from 2×6 lumber and a sheet of polycarbonate for under $100.
- Hoop Houses/Low Tunnels: Larger structures made from flexible hoops (PVC pipe or EMT conduit) covered with greenhouse plastic. These provide more space and greater temperature moderation. A 10×20 ft DIY low tunnel kit can cost $200-$500, while a larger, more robust hoop house kit might be $1,000-$3,000. I use a 6×12 ft low tunnel made from 1/2-inch PVC hoops and 6mil greenhouse plastic, which extends my lettuce and spinach harvest by at least
Step 5: Seed Selection & Planting
The choice of seeds is crucial for a truly self sufficient garden from scratch.
- Choose Heirloom & Open-Pollinated Seeds: These varieties produce seeds that will grow true to type, meaning you can save seeds from your harvest year after year. F1 hybrids, while often vigorous, will not produce consistent offspring from saved seeds. Reputable seed companies include Baker Creek Heirloom Seeds, High Mowing Organic Seeds, and Seed Savers Exchange. Start with common, reliable varieties like ‘Black Krim’ tomatoes, ‘Provider’ bush beans, ‘Waltham Butternut’ squash, and ‘Black Seeded Simpson’ lettuce.
- Start Seeds Indoors (Optional but Recommended): For longer growing seasons or specific crops, starting seeds indoors gives you a head start. Use seed-starting mix (e.g., Espoma Organic Seed Starter Mix, ~$10 for 16qt bag) in seed trays (Jiffy Professional Greenhouse 72-cell kit, ~$15). Provide adequate light with LED grow lights (Barrina T5 2ft 4-pack LED Grow Lights, 20W each, ~$50) for 14-16 hours a day, positioned 2-4 inches above seedlings. Maintain consistent temperatures (65-75°F for most).
- Direct Sowing vs. Transplanting: Some crops (carrots, radishes, beans, corn) prefer direct sowing into the garden bed. Others (tomatoes, peppers, broccoli, kale) benefit from being started indoors and transplanted. Follow seed packet instructions for planting depths (e.g., lettuce seeds are often surface-sown or planted 1/8 inch deep, while beans are 1 inch deep) and spacing.
- Companion Planting: Strategically plant different species together to enhance growth, deter pests, and attract beneficial insects. For example, planting marigolds near tomatoes can deter nematodes, and basil improves tomato flavor. Nasturtiums can act as a trap crop for aphids.
- Succession Planting: For a continuous harvest, plant small batches of quick-growing crops (lettuce, radishes, cilantro) every 2-3 weeks. As one crop finishes, another is ready to take its place.
Step 6: Pest & Disease Management (Organic)
Maintaining a self sufficient garden from scratch means embracing organic pest and disease control.
- Integrated Pest Management (IPM): This holistic approach combines several strategies.
- Observation: Regularly inspect your plants for early signs of pests or disease. Catching issues early is key.
- Physical Barriers: Use row covers (e.g., Agribon AG-19 floating row cover, 10×20 ft, ~$20) to protect young plants from insect pests like cabbage worms and squash bugs. Install fences (e.g., 2×4 welded wire mesh, 4 ft tall, 50 ft roll ~$70) to keep out deer, rabbits, and other larger animals.
- Hand-Picking: For larger pests like tomato hornworms or squash bugs, simply pick them off and drop them into a bucket of soapy water.
- Companion Planting: As mentioned, certain plants repel pests. Marigolds, garlic, and onions are excellent deterrents.
- Attract Beneficial Insects: Plant flowers like dill, fennel, cosmos, and sweet alyssum to attract ladybugs, lacewings, and parasitic wasps, which prey on common garden pests.
- Organic Sprays & Treatments:
- Neem Oil: An excellent broad-spectrum organic insecticide and fungicide. Bonide Neem Oil Concentrate (16oz, ~$20) can be mixed at a rate of 1-2 tbsp per gallon of water and sprayed on affected plants.
- Insecticidal Soap: Effective against soft-bodied insects like aphids, whiteflies, and spider mites. Garden Safe Insecticidal Soap (24oz ready-to-use, ~$10).
- Bacillus thuringiensis (Bt): A naturally occurring soil bacterium that targets caterpillars and worms. Monterey BT Worm & Caterpillar Killer (16oz, ~$18) is highly effective and safe for beneficial insects.
- Copper or Sulfur Sprays: For fungal diseases like powdery mildew or blight, organic copper (e.g., Bonide Copper Fungicide, ~$15 for 1lb) or sulfur (e.g., Safer Brand Garden Fungicide, ~$10 for 16oz) can be used as a last resort.
Step 7: Harvesting & Seed Saving
The culmination of your efforts is the harvest, and seed saving closes the loop on self-sufficiency.
- Harvesting Techniques:
- Timing: Harvest vegetables at their peak ripeness for best flavor and nutritional value. For example, green beans should snap cleanly, cucumbers should be firm, and tomatoes should be fully colored.
- Frequency: Many crops, like zucchini, cucumbers, and bush beans, produce more if harvested frequently. Pick daily or every other day.
- Tools: Use clean, sharp pruners (e.g., Corona ClassicCUT Bypass Pruner BP 3180, ~$30) or a sharp knife for clean cuts, minimizing damage to the plant.
- Seed Saving: This is where the « self-sufficient » aspect truly shines.
- Selection: Only save seeds from your healthiest, most vigorous plants that show desired traits (disease resistance, good flavor, high yield).
- Isolation: To ensure true-to-type seeds, prevent cross-pollination. This can be challenging for open-pollinated crops that readily cross (e.g., squash, corn). For beginners, focus on self-pollinating plants like beans, peas, lettuce, and tomatoes.
- Processing:
- Dry Seeds (Beans, Peas, Lettuce, Grains): Allow pods/seed heads to dry completely on the plant. Harvest, shell, and clean the seeds, removing chaff.
- Wet Seeds (Tomatoes, Cucumbers, Squash): For tomatoes, ferment the seeds in water for a few days to remove the gel coating and inhibit disease. For cucumbers/squash, scrape out seeds, wash thoroughly, and dry.
- Drying: Spread seeds thinly on screens or paper plates in a cool, dry, well-ventilated area for 1-4 weeks. Ensure they are bone-dry before storage. I aim for less than 8% moisture content.
- Storage: Store seeds in airtight containers (glass jars with desiccant packets work well) in a cool, dark, dry place (ideally 40-50°F and 30-40% humidity). Label clearly with variety and date. Properly stored seeds can remain viable for 3-10 years or more.
Step 8: Season Extension & Winterizing
Extend your harvest and protect your garden for the off-season to truly maximize your self sufficient garden from scratch.
- Cold Frames: Simple structures with a transparent top (glass, polycarbonate, or old windows) that sit over garden beds. They trap solar heat, allowing you to grow cold-hardy crops (lettuce, spinach, kale, radishes) well into winter or start seeds earlier in spring. A basic cold frame can be built from 2×6 lumber and a sheet of polycarbonate for under $100.
- Hoop Houses/Low Tunnels: Larger structures made from flexible hoops (PVC pipe or EMT conduit) covered with greenhouse plastic. These provide more space and greater temperature moderation. A 10×20 ft DIY low tunnel kit can cost $200-$500, while a larger, more robust hoop house kit might be $1,000-$3,000. I use a 6×12 ft low tunnel made from 1/2-inch PVC hoops and 6mil greenhouse plastic, which extends my lettuce and spinach harvest by at least
- Rainwater Harvesting: This is my primary source of irrigation water. A 55-gallon rain barrel (e.g., EarthMark Rain Barrel, ~$120-$150) connected to a downspout can collect significant water. For larger needs, I use two 275-gallon IBC totes (Intermediate Bulk Containers, often available used for $100-$200 each from food-grade sources) connected in series. A 1,000 sq ft roof can collect approximately 620 gallons of water for every inch of rainfall. My 1,500 sq ft roof provides ample water for my 600 sq ft garden through multiple barrels and totes.
- Drip Irrigation: This is by far the most water-efficient method, delivering water directly to the plant’s root zone, minimizing evaporation and weed growth.
- Components: A typical drip system includes a pressure regulator (e.g., Rain Bird PRV-10, ~$15), a filter (Rain Bird RBY filter, ~$20), main tubing (1/2-inch poly tubing, 100ft ~$25), smaller feeder lines (1/4-inch tubing), and emitters (0.5 GPH or 1 GPH per plant).
- Kits: For beginners, a starter kit like the Rain Bird Drip Irrigation Garden Kit (model DDI-KIT-1P, ~$40-$60) is excellent for a small garden. For larger setups, I use Netafim Techline CV Drip Line (500ft roll, ~$150-$200), which has pressure-compensating emitters built-in, ensuring even watering across long runs.
- Automation: For true self-sufficiency, consider a battery-powered timer (e.g., Orbit B-Hyve Bluetooth Hose Faucet Timer, ~$50) or a solar-powered timer connected to a small 12V pump.
- Solar-Powered Pumps: For lifting water from a well, pond, or large storage tank to your garden, a solar pump is a game-changer. For a smaller drip system, a Shurflo 2088-594-152 Diaphragm Pump (12V, 3.5 GPM, ~$180) can be powered by a single 100W solar panel (e.g., Renogy 100W Monocrystalline Solar Panel, ~$100) and a small 12V battery (e.g., a 50Ah LiFePO4 battery like the Battle Born 50Ah, ~$450). For larger operations or deeper wells, more robust systems are needed. If you’re looking to build out a comprehensive off-grid power system to support your garden’s water needs, or indeed your entire homestead, you might want to explore resources like the Power Grid Generator complete system guide to understand the full scope of what’s possible in terms of energy independence.
Step 5: Seed Selection & Planting
The choice of seeds is crucial for a truly self sufficient garden from scratch.
- Choose Heirloom & Open-Pollinated Seeds: These varieties produce seeds that will grow true to type, meaning you can save seeds from your harvest year after year. F1 hybrids, while often vigorous, will not produce consistent offspring from saved seeds. Reputable seed companies include Baker Creek Heirloom Seeds, High Mowing Organic Seeds, and Seed Savers Exchange. Start with common, reliable varieties like ‘Black Krim’ tomatoes, ‘Provider’ bush beans, ‘Waltham Butternut’ squash, and ‘Black Seeded Simpson’ lettuce.
- Start Seeds Indoors (Optional but Recommended): For longer growing seasons or specific crops, starting seeds indoors gives you a head start. Use seed-starting mix (e.g., Espoma Organic Seed Starter Mix, ~$10 for 16qt bag) in seed trays (Jiffy Professional Greenhouse 72-cell kit, ~$15). Provide adequate light with LED grow lights (Barrina T5 2ft 4-pack LED Grow Lights, 20W each, ~$50) for 14-16 hours a day, positioned 2-4 inches above seedlings. Maintain consistent temperatures (65-75°F for most).
- Direct Sowing vs. Transplanting: Some crops (carrots, radishes, beans, corn) prefer direct sowing into the garden bed. Others (tomatoes, peppers, broccoli, kale) benefit from being started indoors and transplanted. Follow seed packet instructions for planting depths (e.g., lettuce seeds are often surface-sown or planted 1/8 inch deep, while beans are 1 inch deep) and spacing.
- Companion Planting: Strategically plant different species together to enhance growth, deter pests, and attract beneficial insects. For example, planting marigolds near tomatoes can deter nematodes, and basil improves tomato flavor. Nasturtiums can act as a trap crop for aphids.
- Succession Planting: For a continuous harvest, plant small batches of quick-growing crops (lettuce, radishes, cilantro) every 2-3 weeks. As one crop finishes, another is ready to take its place.
Step 6: Pest & Disease Management (Organic)
Maintaining a self sufficient garden from scratch means embracing organic pest and disease control.
- Integrated Pest Management (IPM): This holistic approach combines several strategies.
- Observation: Regularly inspect your plants for early signs of pests or disease. Catching issues early is key.
- Physical Barriers: Use row covers (e.g., Agribon AG-19 floating row cover, 10×20 ft, ~$20) to protect young plants from insect pests like cabbage worms and squash bugs. Install fences (e.g., 2×4 welded wire mesh, 4 ft tall, 50 ft roll ~$70) to keep out deer, rabbits, and other larger animals.
- Hand-Picking: For larger pests like tomato hornworms or squash bugs, simply pick them off and drop them into a bucket of soapy water.
- Companion Planting: As mentioned, certain plants repel pests. Marigolds, garlic, and onions are excellent deterrents.
- Attract Beneficial Insects: Plant flowers like dill, fennel, cosmos, and sweet alyssum to attract ladybugs, lacewings, and parasitic wasps, which prey on common garden pests.
- Organic Sprays & Treatments:
- Neem Oil: An excellent broad-spectrum organic insecticide and fungicide. Bonide Neem Oil Concentrate (16oz, ~$20) can be mixed at a rate of 1-2 tbsp per gallon of water and sprayed on affected plants.
- Insecticidal Soap: Effective against soft-bodied insects like aphids, whiteflies, and spider mites. Garden Safe Insecticidal Soap (24oz ready-to-use, ~$10).
- Bacillus thuringiensis (Bt): A naturally occurring soil bacterium that targets caterpillars and worms. Monterey BT Worm & Caterpillar Killer (16oz, ~$18) is highly effective and safe for beneficial insects.
- Copper or Sulfur Sprays: For fungal diseases like powdery mildew or blight, organic copper (e.g., Bonide Copper Fungicide, ~$15 for 1lb) or sulfur (e.g., Safer Brand Garden Fungicide, ~$10 for 16oz) can be used as a last resort.
Step 7: Harvesting & Seed Saving
The culmination of your efforts is the harvest, and seed saving closes the loop on self-sufficiency.
- Harvesting Techniques:
- Timing: Harvest vegetables at their peak ripeness for best flavor and nutritional value. For example, green beans should snap cleanly, cucumbers should be firm, and tomatoes should be fully colored.
- Frequency: Many crops, like zucchini, cucumbers, and bush beans, produce more if harvested frequently. Pick daily or every other day.
- Tools: Use clean, sharp pruners (e.g., Corona ClassicCUT Bypass Pruner BP 3180, ~$30) or a sharp knife for clean cuts, minimizing damage to the plant.
- Seed Saving: This is where the « self-sufficient » aspect truly shines.
- Selection: Only save seeds from your healthiest, most vigorous plants that show desired traits (disease resistance, good flavor, high yield).
- Isolation: To ensure true-to-type seeds, prevent cross-pollination. This can be challenging for open-pollinated crops that readily cross (e.g., squash, corn). For beginners, focus on self-pollinating plants like beans, peas, lettuce, and tomatoes.
- Processing:
- Dry Seeds (Beans, Peas, Lettuce, Grains): Allow pods/seed heads to dry completely on the plant. Harvest, shell, and clean the seeds, removing chaff.
- Wet Seeds (Tomatoes, Cucumbers, Squash): For tomatoes, ferment the seeds in water for a few days to remove the gel coating and inhibit disease. For cucumbers/squash, scrape out seeds, wash thoroughly, and dry.
- Drying: Spread seeds thinly on screens or paper plates in a cool, dry, well-ventilated area for 1-4 weeks. Ensure they are bone-dry before storage. I aim for less than 8% moisture content.
- Storage: Store seeds in airtight containers (glass jars with desiccant packets work well) in a cool, dark, dry place (ideally 40-50°F and 30-40% humidity). Label clearly with variety and date. Properly stored seeds can remain viable for 3-10 years or more.
Step 8: Season Extension & Winterizing
Extend your harvest and protect your garden for the off-season to truly maximize your self sufficient garden from scratch.
- Cold Frames: Simple structures with a transparent top (glass, polycarbonate, or old windows) that sit over garden beds. They trap solar heat, allowing you to grow cold-hardy crops (lettuce, spinach, kale, radishes) well into winter or start seeds earlier in spring. A basic cold frame can be built from 2×6 lumber and a sheet of polycarbonate for under $100.
- Hoop Houses/Low Tunnels: Larger structures made from flexible hoops (PVC pipe or EMT conduit) covered with greenhouse plastic. These provide more space and greater temperature moderation. A 10×20 ft DIY low tunnel kit can cost $200-$500, while a larger, more robust hoop house kit might be $1,000-$3,000. I use a 6×12 ft low tunnel made from 1/2-inch PVC hoops and 6mil greenhouse plastic, which extends my lettuce and spinach harvest by at least
Efficient water management is critical for a self sufficient garden from scratch, especially in off-grid living where water resources might be limited.
- Rainwater Harvesting: This is my primary source of irrigation water. A 55-gallon rain barrel (e.g., EarthMark Rain Barrel, ~$120-$150) connected to a downspout can collect significant water. For larger needs, I use two 275-gallon IBC totes (Intermediate Bulk Containers, often available used for $100-$200 each from food-grade sources) connected in series. A 1,000 sq ft roof can collect approximately 620 gallons of water for every inch of rainfall. My 1,500 sq ft roof provides ample water for my 600 sq ft garden through multiple barrels and totes.
- Drip Irrigation: This is by far the most water-efficient method, delivering water directly to the plant’s root zone, minimizing evaporation and weed growth.
- Components: A typical drip system includes a pressure regulator (e.g., Rain Bird PRV-10, ~$15), a filter (Rain Bird RBY filter, ~$20), main tubing (1/2-inch poly tubing, 100ft ~$25), smaller feeder lines (1/4-inch tubing), and emitters (0.5 GPH or 1 GPH per plant).
- Kits: For beginners, a starter kit like the Rain Bird Drip Irrigation Garden Kit (model DDI-KIT-1P, ~$40-$60) is excellent for a small garden. For larger setups, I use Netafim Techline CV Drip Line (500ft roll, ~$150-$200), which has pressure-compensating emitters built-in, ensuring even watering across long runs.
- Automation: For true self-sufficiency, consider a battery-powered timer (e.g., Orbit B-Hyve Bluetooth Hose Faucet Timer, ~$50) or a solar-powered timer connected to a small 12V pump.
- Solar-Powered Pumps: For lifting water from a well, pond, or large storage tank to your garden, a solar pump is a game-changer. For a smaller drip system, a Shurflo 2088-594-152 Diaphragm Pump (12V, 3.5 GPM, ~$180) can be powered by a single 100W solar panel (e.g., Renogy 100W Monocrystalline Solar Panel, ~$100) and a small 12V battery (e.g., a 50Ah LiFePO4 battery like the Battle Born 50Ah, ~$450). For larger operations or deeper wells, more robust systems are needed. If you’re looking to build out a comprehensive off-grid power system to support your garden’s water needs, or indeed your entire homestead, you might want to explore resources like the Power Grid Generator complete system guide to understand the full scope of what’s possible in terms of energy independence.
Step 5: Seed Selection & Planting
The choice of seeds is crucial for a truly self sufficient garden from scratch.
- Choose Heirloom & Open-Pollinated Seeds: These varieties produce seeds that will grow true to type, meaning you can save seeds from your harvest year after year. F1 hybrids, while often vigorous, will not produce consistent offspring from saved seeds. Reputable seed companies include Baker Creek Heirloom Seeds, High Mowing Organic Seeds, and Seed Savers Exchange. Start with common, reliable varieties like ‘Black Krim’ tomatoes, ‘Provider’ bush beans, ‘Waltham Butternut’ squash, and ‘Black Seeded Simpson’ lettuce.
- Start Seeds Indoors (Optional but Recommended): For longer growing seasons or specific crops, starting seeds indoors gives you a head start. Use seed-starting mix (e.g., Espoma Organic Seed Starter Mix, ~$10 for 16qt bag) in seed trays (Jiffy Professional Greenhouse 72-cell kit, ~$15). Provide adequate light with LED grow lights (Barrina T5 2ft 4-pack LED Grow Lights, 20W each, ~$50) for 14-16 hours a day, positioned 2-4 inches above seedlings. Maintain consistent temperatures (65-75°F for most).
- Direct Sowing vs. Transplanting: Some crops (carrots, radishes, beans, corn) prefer direct sowing into the garden bed. Others (tomatoes, peppers, broccoli, kale) benefit from being started indoors and transplanted. Follow seed packet instructions for planting depths (e.g., lettuce seeds are often surface-sown or planted 1/8 inch deep, while beans are 1 inch deep) and spacing.
- Companion Planting: Strategically plant different species together to enhance growth, deter pests, and attract beneficial insects. For example, planting marigolds near tomatoes can deter nematodes, and basil improves tomato flavor. Nasturtiums can act as a trap crop for aphids.
- Succession Planting: For a continuous harvest, plant small batches of quick-growing crops (lettuce, radishes, cilantro) every 2-3 weeks. As one crop finishes, another is ready to take its place.
Step 6: Pest & Disease Management (Organic)
Maintaining a self sufficient garden from scratch means embracing organic pest and disease control.
- Integrated Pest Management (IPM): This holistic approach combines several strategies.
- Observation: Regularly inspect your plants for early signs of pests or disease. Catching issues early is key.
- Physical Barriers: Use row covers (e.g., Agribon AG-19 floating row cover, 10×20 ft, ~$20) to protect young plants from insect pests like cabbage worms and squash bugs. Install fences (e.g., 2×4 welded wire mesh, 4 ft tall, 50 ft roll ~$70) to keep out deer, rabbits, and other larger animals.
- Hand-Picking: For larger pests like tomato hornworms or squash bugs, simply pick them off and drop them into a bucket of soapy water.
- Companion Planting: As mentioned, certain plants repel pests. Marigolds, garlic, and onions are excellent deterrents.
- Attract Beneficial Insects: Plant flowers like dill, fennel, cosmos, and sweet alyssum to attract ladybugs, lacewings, and parasitic wasps, which prey on common garden pests.
- Organic Sprays & Treatments:
- Neem Oil: An excellent broad-spectrum organic insecticide and fungicide. Bonide Neem Oil Concentrate (16oz, ~$20) can be mixed at a rate of 1-2 tbsp per gallon of water and sprayed on affected plants.
- Insecticidal Soap: Effective against soft-bodied insects like aphids, whiteflies, and spider mites. Garden Safe Insecticidal Soap (24oz ready-to-use, ~$10).
- Bacillus thuringiensis (Bt): A naturally occurring soil bacterium that targets caterpillars and worms. Monterey BT Worm & Caterpillar Killer (16oz, ~$18) is highly effective and safe for beneficial insects.
- Copper or Sulfur Sprays: For fungal diseases like powdery mildew or blight, organic copper (e.g., Bonide Copper Fungicide, ~$15 for 1lb) or sulfur (e.g., Safer Brand Garden Fungicide, ~$10 for 16oz) can be used as a last resort.
Step 7: Harvesting & Seed Saving
The culmination of your efforts is the harvest, and seed saving closes the loop on self-sufficiency.
- Harvesting Techniques:
- Timing: Harvest vegetables at their peak ripeness for best flavor and nutritional value. For example, green beans should snap cleanly, cucumbers should be firm, and tomatoes should be fully colored.
- Frequency: Many crops, like zucchini, cucumbers, and bush beans, produce more if harvested frequently. Pick daily or every other day.
- Tools: Use clean, sharp pruners (e.g., Corona ClassicCUT Bypass Pruner BP 3180, ~$30) or a sharp knife for clean cuts, minimizing damage to the plant.
- Seed Saving: This is where the « self-sufficient » aspect truly shines.
- Selection: Only save seeds from your healthiest, most vigorous plants that show desired traits (disease resistance, good flavor, high yield).
- Isolation: To ensure true-to-type seeds, prevent cross-pollination. This can be challenging for open-pollinated crops that readily cross (e.g., squash, corn). For beginners, focus on self-pollinating plants like beans, peas, lettuce, and tomatoes.
- Processing:
- Dry Seeds (Beans, Peas, Lettuce, Grains): Allow pods/seed heads to dry completely on the plant. Harvest, shell, and clean the seeds, removing chaff.
- Wet Seeds (Tomatoes, Cucumbers, Squash): For tomatoes, ferment the seeds in water for a few days to remove the gel coating and inhibit disease. For cucumbers/squash, scrape out seeds, wash thoroughly, and dry.
- Drying: Spread seeds thinly on screens or paper plates in a cool, dry, well-ventilated area for 1-4 weeks. Ensure they are bone-dry before storage. I aim for less than 8% moisture content.
- Storage: Store seeds in airtight containers (glass jars with desiccant packets work well) in a cool, dark, dry place (ideally 40-50°F and 30-40% humidity). Label clearly with variety and date. Properly stored seeds can remain viable for 3-10 years or more.
Step 8: Season Extension & Winterizing
Extend your harvest and protect your garden for the off-season to truly maximize your self sufficient garden from scratch.
- Cold Frames: Simple structures with a transparent top (glass, polycarbonate, or old windows) that sit over garden beds. They trap solar heat, allowing you to grow cold-hardy crops (lettuce, spinach, kale, radishes) well into winter or start seeds earlier in spring. A basic cold frame can be built from 2×6 lumber and a sheet of polycarbonate for under $100.
- Hoop Houses/Low Tunnels: Larger structures made from flexible hoops (PVC pipe or EMT conduit) covered with greenhouse plastic. These provide more space and greater temperature moderation. A 10×20 ft DIY low tunnel kit can cost $200-$500, while a larger, more robust hoop house kit might be $1,000-$3,000. I use a 6×12 ft low tunnel made from 1/2-inch PVC hoops and 6mil greenhouse plastic, which extends my lettuce and spinach harvest by at least
Step 4: Water Management & Irrigation
Efficient water management is critical for a self sufficient garden from scratch, especially in off-grid living where water resources might be limited.
- Rainwater Harvesting: This is my primary source of irrigation water. A 55-gallon rain barrel (e.g., EarthMark Rain Barrel, ~$120-$150) connected to a downspout can collect significant water. For larger needs, I use two 275-gallon IBC totes (Intermediate Bulk Containers, often available used for $100-$200 each from food-grade sources) connected in series. A 1,000 sq ft roof can collect approximately 620 gallons of water for every inch of rainfall. My 1,500 sq ft roof provides ample water for my 600 sq ft garden through multiple barrels and totes.
- Drip Irrigation: This is by far the most water-efficient method, delivering water directly to the plant’s root zone, minimizing evaporation and weed growth.
- Components: A typical drip system includes a pressure regulator (e.g., Rain Bird PRV-10, ~$15), a filter (Rain Bird RBY filter, ~$20), main tubing (1/2-inch poly tubing, 100ft ~$25), smaller feeder lines (1/4-inch tubing), and emitters (0.5 GPH or 1 GPH per plant).
- Kits: For beginners, a starter kit like the Rain Bird Drip Irrigation Garden Kit (model DDI-KIT-1P, ~$40-$60) is excellent for a small garden. For larger setups, I use Netafim Techline CV Drip Line (500ft roll, ~$150-$200), which has pressure-compensating emitters built-in, ensuring even watering across long runs.
- Automation: For true self-sufficiency, consider a battery-powered timer (e.g., Orbit B-Hyve Bluetooth Hose Faucet Timer, ~$50) or a solar-powered timer connected to a small 12V pump.
- Solar-Powered Pumps: For lifting water from a well, pond, or large storage tank to your garden, a solar pump is a game-changer. For a smaller drip system, a Shurflo 2088-594-152 Diaphragm Pump (12V, 3.5 GPM, ~$180) can be powered by a single 100W solar panel (e.g., Renogy 100W Monocrystalline Solar Panel, ~$100) and a small 12V battery (e.g., a 50Ah LiFePO4 battery like the Battle Born 50Ah, ~$450). For larger operations or deeper wells, more robust systems are needed. If you’re looking to build out a comprehensive off-grid power system to support your garden’s water needs, or indeed your entire homestead, you might want to explore resources like the Power Grid Generator complete system guide to understand the full scope of what’s possible in terms of energy independence.
Step 5: Seed Selection & Planting
The choice of seeds is crucial for a truly self sufficient garden from scratch.
- Choose Heirloom & Open-Pollinated Seeds: These varieties produce seeds that will grow true to type, meaning you can save seeds from your harvest year after year. F1 hybrids, while often vigorous, will not produce consistent offspring from saved seeds. Reputable seed companies include Baker Creek Heirloom Seeds, High Mowing Organic Seeds, and Seed Savers Exchange. Start with common, reliable varieties like ‘Black Krim’ tomatoes, ‘Provider’ bush beans, ‘Waltham Butternut’ squash, and ‘Black Seeded Simpson’ lettuce.
- Start Seeds Indoors (Optional but Recommended): For longer growing seasons or specific crops, starting seeds indoors gives you a head start. Use seed-starting mix (e.g., Espoma Organic Seed Starter Mix, ~$10 for 16qt bag) in seed trays (Jiffy Professional Greenhouse 72-cell kit, ~$15). Provide adequate light with LED grow lights (Barrina T5 2ft 4-pack LED Grow Lights, 20W each, ~$50) for 14-16 hours a day, positioned 2-4 inches above seedlings. Maintain consistent temperatures (65-75°F for most).
- Direct Sowing vs. Transplanting: Some crops (carrots, radishes, beans, corn) prefer direct sowing into the garden bed. Others (tomatoes, peppers, broccoli, kale) benefit from being started indoors and transplanted. Follow seed packet instructions for planting depths (e.g., lettuce seeds are often surface-sown or planted 1/8 inch deep, while beans are 1 inch deep) and spacing.
- Companion Planting: Strategically plant different species together to enhance growth, deter pests, and attract beneficial insects. For example, planting marigolds near tomatoes can deter nematodes, and basil improves tomato flavor. Nasturtiums can act as a trap crop for aphids.
- Succession Planting: For a continuous harvest, plant small batches of quick-growing crops (lettuce, radishes, cilantro) every 2-3 weeks. As one crop finishes, another is ready to take its place.
Step 6: Pest & Disease Management (Organic)
Maintaining a self sufficient garden from scratch means embracing organic pest and disease control.
- Integrated Pest Management (IPM): This holistic approach combines several strategies.
- Observation: Regularly inspect your plants for early signs of pests or disease. Catching issues early is key.
- Physical Barriers: Use row covers (e.g., Agribon AG-19 floating row cover, 10×20 ft, ~$20) to protect young plants from insect pests like cabbage worms and squash bugs. Install fences (e.g., 2×4 welded wire mesh, 4 ft tall, 50 ft roll ~$70) to keep out deer, rabbits, and other larger animals.
- Hand-Picking: For larger pests like tomato hornworms or squash bugs, simply pick them off and drop them into a bucket of soapy water.
- Companion Planting: As mentioned, certain plants repel pests. Marigolds, garlic, and onions are excellent deterrents.
- Attract Beneficial Insects: Plant flowers like dill, fennel, cosmos, and sweet alyssum to attract ladybugs, lacewings, and parasitic wasps, which prey on common garden pests.
- Organic Sprays & Treatments:
- Neem Oil: An excellent broad-spectrum organic insecticide and fungicide. Bonide Neem Oil Concentrate (16oz, ~$20) can be mixed at a rate of 1-2 tbsp per gallon of water and sprayed on affected plants.
- Insecticidal Soap: Effective against soft-bodied insects like aphids, whiteflies, and spider mites. Garden Safe Insecticidal Soap (24oz ready-to-use, ~$10).
- Bacillus thuringiensis (Bt): A naturally occurring soil bacterium that targets caterpillars and worms. Monterey BT Worm & Caterpillar Killer (16oz, ~$18) is highly effective and safe for beneficial insects.
- Copper or Sulfur Sprays: For fungal diseases like powdery mildew or blight, organic copper (e.g., Bonide Copper Fungicide, ~$15 for 1lb) or sulfur (e.g., Safer Brand Garden Fungicide, ~$10 for 16oz) can be used as a last resort.
Step 7: Harvesting & Seed Saving
The culmination of your efforts is the harvest, and seed saving closes the loop on self-sufficiency.
- Harvesting Techniques:
- Timing: Harvest vegetables at their peak ripeness for best flavor and nutritional value. For example, green beans should snap cleanly, cucumbers should be firm, and tomatoes should be fully colored.
- Frequency: Many crops, like zucchini, cucumbers, and bush beans, produce more if harvested frequently. Pick daily or every other day.
- Tools: Use clean, sharp pruners (e.g., Corona ClassicCUT Bypass Pruner BP 3180, ~$30) or a sharp knife for clean cuts, minimizing damage to the plant.
- Seed Saving: This is where the « self-sufficient » aspect truly shines.
- Selection: Only save seeds from your healthiest, most vigorous plants that show desired traits (disease resistance, good flavor, high yield).
- Isolation: To ensure true-to-type seeds, prevent cross-pollination. This can be challenging for open-pollinated crops that readily cross (e.g., squash, corn). For beginners, focus on self-pollinating plants like beans, peas, lettuce, and tomatoes.
- Processing:
- Dry Seeds (Beans, Peas, Lettuce, Grains): Allow pods/seed heads to dry completely on the plant. Harvest, shell, and clean the seeds, removing chaff.
- Wet Seeds (Tomatoes, Cucumbers, Squash): For tomatoes, ferment the seeds in water for a few days to remove the gel coating and inhibit disease. For cucumbers/squash, scrape out seeds, wash thoroughly, and dry.
- Drying: Spread seeds thinly on screens or paper plates in a cool, dry, well-ventilated area for 1-4 weeks. Ensure they are bone-dry before storage. I aim for less than 8% moisture content.
- Storage: Store seeds in airtight containers (glass jars with desiccant packets work well) in a cool, dark, dry place (ideally 40-50°F and 30-40% humidity). Label clearly with variety and date. Properly stored seeds can remain viable for 3-10 years or more.
Step 8: Season Extension & Winterizing
Extend your harvest and protect your garden for the off-season to truly maximize your self sufficient garden from scratch.
- Cold Frames: Simple structures with a transparent top (glass, polycarbonate, or old windows) that sit over garden beds. They trap solar heat, allowing you to grow cold-hardy crops (lettuce, spinach, kale, radishes) well into winter or start seeds earlier in spring. A basic cold frame can be built from 2×6 lumber and a sheet of polycarbonate for under $100.
- Hoop Houses/Low Tunnels: Larger structures made from flexible hoops (PVC pipe or EMT conduit) covered with greenhouse plastic. These provide more space and greater temperature moderation. A 10×20 ft DIY low tunnel kit can cost $200-$500, while a larger, more robust hoop house kit might be $1,000-$3,000. I use a 6×12 ft low tunnel made from 1/2-inch PVC hoops and 6mil greenhouse plastic, which extends my lettuce and spinach harvest by at least
- In-Ground Beds: If you have excellent native soil and good drainage, in-ground beds are the most economical. Double-digging (loosening soil two shovel depths) can significantly improve drainage and aeration. For my main garden, I primarily use in-ground beds, but I focus on building up the soil over time with consistent compost additions and cover cropping. I aim for beds that are no wider than 3-4 feet so I can reach the center without stepping on the soil, compacting it.
- Raised Beds: Raised beds offer numerous advantages, especially for poor soil, heavy clay, or rocky areas. They provide better drainage, warm up faster in spring, reduce compaction, and make weeding and harvesting easier on your back.
- Material Options:
- Untreated Cedar: Naturally rot-resistant and chemical-free. A 4×8 ft bed, 12 inches deep, typically requires three 2x12x8 ft cedar boards, costing around $50-$60 per board (total ~$150-$180) plus corner brackets or screws. My first raised beds were cedar and are still going strong after 7 years.
- Galvanized Steel: Durable, long-lasting, and aesthetically pleasing. Brands like Vego Garden offer modular kits. A Vego Garden 17″ Tall 8-in-1 Metal Raised Garden Bed (can be configured to 4×8 ft) costs approximately $250-$300.
- Concrete Blocks/Stones: Very durable but can leach minerals (though generally safe once weathered) and can be expensive.
- Recycled Materials: Pallets (check for chemical treatment stamps like « HT » for heat-treated), old tires (controversial due to potential chemical leaching).
- Filling Raised Beds: Don’t just fill with topsoil. Use a « Hugelkultur » approach (logs, branches, leaves, then compost, then topsoil) or a mixture of 60% good quality topsoil, 30% compost, and 10% perlite or vermiculite for drainage. A 4x8x1 ft raised bed requires about 32 cubic feet (or ~1.2 cubic yards) of soil mix, which can cost $100-$200 depending on your source.
- Material Options:
Step 4: Water Management & Irrigation
Efficient water management is critical for a self sufficient garden from scratch, especially in off-grid living where water resources might be limited.
- Rainwater Harvesting: This is my primary source of irrigation water. A 55-gallon rain barrel (e.g., EarthMark Rain Barrel, ~$120-$150) connected to a downspout can collect significant water. For larger needs, I use two 275-gallon IBC totes (Intermediate Bulk Containers, often available used for $100-$200 each from food-grade sources) connected in series. A 1,000 sq ft roof can collect approximately 620 gallons of water for every inch of rainfall. My 1,500 sq ft roof provides ample water for my 600 sq ft garden through multiple barrels and totes.
- Drip Irrigation: This is by far the most water-efficient method, delivering water directly to the plant’s root zone, minimizing evaporation and weed growth.
- Components: A typical drip system includes a pressure regulator (e.g., Rain Bird PRV-10, ~$15), a filter (Rain Bird RBY filter, ~$20), main tubing (1/2-inch poly tubing, 100ft ~$25), smaller feeder lines (1/4-inch tubing), and emitters (0.5 GPH or 1 GPH per plant).
- Kits: For beginners, a starter kit like the Rain Bird Drip Irrigation Garden Kit (model DDI-KIT-1P, ~$40-$60) is excellent for a small garden. For larger setups, I use Netafim Techline CV Drip Line (500ft roll, ~$150-$200), which has pressure-compensating emitters built-in, ensuring even watering across long runs.
- Automation: For true self-sufficiency, consider a battery-powered timer (e.g., Orbit B-Hyve Bluetooth Hose Faucet Timer, ~$50) or a solar-powered timer connected to a small 12V pump.
- Solar-Powered Pumps: For lifting water from a well, pond, or large storage tank to your garden, a solar pump is a game-changer. For a smaller drip system, a Shurflo 2088-594-152 Diaphragm Pump (12V, 3.5 GPM, ~$180) can be powered by a single 100W solar panel (e.g., Renogy 100W Monocrystalline Solar Panel, ~$100) and a small 12V battery (e.g., a 50Ah LiFePO4 battery like the Battle Born 50Ah, ~$450). For larger operations or deeper wells, more robust systems are needed. If you’re looking to build out a comprehensive off-grid power system to support your garden’s water needs, or indeed your entire homestead, you might want to explore resources like the Power Grid Generator complete system guide to understand the full scope of what’s possible in terms of energy independence.
Step 5: Seed Selection & Planting
The choice of seeds is crucial for a truly self sufficient garden from scratch.
- Choose Heirloom & Open-Pollinated Seeds: These varieties produce seeds that will grow true to type, meaning you can save seeds from your harvest year after year. F1 hybrids, while often vigorous, will not produce consistent offspring from saved seeds. Reputable seed companies include Baker Creek Heirloom Seeds, High Mowing Organic Seeds, and Seed Savers Exchange. Start with common, reliable varieties like ‘Black Krim’ tomatoes, ‘Provider’ bush beans, ‘Waltham Butternut’ squash, and ‘Black Seeded Simpson’ lettuce.
- Start Seeds Indoors (Optional but Recommended): For longer growing seasons or specific crops, starting seeds indoors gives you a head start. Use seed-starting mix (e.g., Espoma Organic Seed Starter Mix, ~$10 for 16qt bag) in seed trays (Jiffy Professional Greenhouse 72-cell kit, ~$15). Provide adequate light with LED grow lights (Barrina T5 2ft 4-pack LED Grow Lights, 20W each, ~$50) for 14-16 hours a day, positioned 2-4 inches above seedlings. Maintain consistent temperatures (65-75°F for most).
- Direct Sowing vs. Transplanting: Some crops (carrots, radishes, beans, corn) prefer direct sowing into the garden bed. Others (tomatoes, peppers, broccoli, kale) benefit from being started indoors and transplanted. Follow seed packet instructions for planting depths (e.g., lettuce seeds are often surface-sown or planted 1/8 inch deep, while beans are 1 inch deep) and spacing.
- Companion Planting: Strategically plant different species together to enhance growth, deter pests, and attract beneficial insects. For example, planting marigolds near tomatoes can deter nematodes, and basil improves tomato flavor. Nasturtiums can act as a trap crop for aphids.
- Succession Planting: For a continuous harvest, plant small batches of quick-growing crops (lettuce, radishes, cilantro) every 2-3 weeks. As one crop finishes, another is ready to take its place.
Step 6: Pest & Disease Management (Organic)
Maintaining a self sufficient garden from scratch means embracing organic pest and disease control.
- Integrated Pest Management (IPM): This holistic approach combines several strategies.
- Observation: Regularly inspect your plants for early signs of pests or disease. Catching issues early is key.
- Physical Barriers: Use row covers (e.g., Agribon AG-19 floating row cover, 10×20 ft, ~$20) to protect young plants from insect pests like cabbage worms and squash bugs. Install fences (e.g., 2×4 welded wire mesh, 4 ft tall, 50 ft roll ~$70) to keep out deer, rabbits, and other larger animals.
- Hand-Picking: For larger pests like tomato hornworms or squash bugs, simply pick them off and drop them into a bucket of soapy water.
- Companion Planting: As mentioned, certain plants repel pests. Marigolds, garlic, and onions are excellent deterrents.
- Attract Beneficial Insects: Plant flowers like dill, fennel, cosmos, and sweet alyssum to attract ladybugs, lacewings, and parasitic wasps, which prey on common garden pests.
- Organic Sprays & Treatments:
- Neem Oil: An excellent broad-spectrum organic insecticide and fungicide. Bonide Neem Oil Concentrate (16oz, ~$20) can be mixed at a rate of 1-2 tbsp per gallon of water and sprayed on affected plants.
- Insecticidal Soap: Effective against soft-bodied insects like aphids, whiteflies, and spider mites. Garden Safe Insecticidal Soap (24oz ready-to-use, ~$10).
- Bacillus thuringiensis (Bt): A naturally occurring soil bacterium that targets caterpillars and worms. Monterey BT Worm & Caterpillar Killer (16oz, ~$18) is highly effective and safe for beneficial insects.
- Copper or Sulfur Sprays: For fungal diseases like powdery mildew or blight, organic copper (e.g., Bonide Copper Fungicide, ~$15 for 1lb) or sulfur (e.g., Safer Brand Garden Fungicide, ~$10 for 16oz) can be used as a last resort.
Step 7: Harvesting & Seed Saving
The culmination of your efforts is the harvest, and seed saving closes the loop on self-sufficiency.
- Harvesting Techniques:
- Timing: Harvest vegetables at their peak ripeness for best flavor and nutritional value. For example, green beans should snap cleanly, cucumbers should be firm, and tomatoes should be fully colored.
- Frequency: Many crops, like zucchini, cucumbers, and bush beans, produce more if harvested frequently. Pick daily or every other day.
- Tools: Use clean, sharp pruners (e.g., Corona ClassicCUT Bypass Pruner BP 3180, ~$30) or a sharp knife for clean cuts, minimizing damage to the plant.
- Seed Saving: This is where the « self-sufficient » aspect truly shines.
- Selection: Only save seeds from your healthiest, most vigorous plants that show desired traits (disease resistance, good flavor, high yield).
- Isolation: To ensure true-to-type seeds, prevent cross-pollination. This can be challenging for open-pollinated crops that readily cross (e.g., squash, corn). For beginners, focus on self-pollinating plants like beans, peas, lettuce, and tomatoes.
- Processing:
- Dry Seeds (Beans, Peas, Lettuce, Grains): Allow pods/seed heads to dry completely on the plant. Harvest, shell, and clean the seeds, removing chaff.
- Wet Seeds (Tomatoes, Cucumbers, Squash): For tomatoes, ferment the seeds in water for a few days to remove the gel coating and inhibit disease. For cucumbers/squash, scrape out seeds, wash thoroughly, and dry.
- Drying: Spread seeds thinly on screens or paper plates in a cool, dry, well-ventilated area for 1-4 weeks. Ensure they are bone-dry before storage. I aim for less than 8% moisture content.
- Storage: Store seeds in airtight containers (glass jars with desiccant packets work well) in a cool, dark, dry place (ideally 40-50°F and 30-40% humidity). Label clearly with variety and date. Properly stored seeds can remain viable for 3-10 years or more.
Step 8: Season Extension & Winterizing
Extend your harvest and protect your garden for the off-season to truly maximize your self sufficient garden from scratch.
- Cold Frames: Simple structures with a transparent top (glass, polycarbonate, or old windows) that sit over garden beds. They trap solar heat, allowing you to grow cold-hardy crops (lettuce, spinach, kale, radishes) well into winter or start seeds earlier in spring. A basic cold frame can be built from 2×6 lumber and a sheet of polycarbonate for under $100.
- Hoop Houses/Low Tunnels: Larger structures made from flexible hoops (PVC pipe or EMT conduit) covered with greenhouse plastic. These provide more space and greater temperature moderation. A 10×20 ft DIY low tunnel kit can cost $200-$500, while a larger, more robust hoop house kit might be $1,000-$3,000. I use a 6×12 ft low tunnel made from 1/2-inch PVC hoops and 6mil greenhouse plastic, which extends my lettuce and spinach harvest by at least
Deciding between raised beds and in-ground beds depends on your soil, budget, and physical capabilities.
- In-Ground Beds: If you have excellent native soil and good drainage, in-ground beds are the most economical. Double-digging (loosening soil two shovel depths) can significantly improve drainage and aeration. For my main garden, I primarily use in-ground beds, but I focus on building up the soil over time with consistent compost additions and cover cropping. I aim for beds that are no wider than 3-4 feet so I can reach the center without stepping on the soil, compacting it.
- Raised Beds: Raised beds offer numerous advantages, especially for poor soil, heavy clay, or rocky areas. They provide better drainage, warm up faster in spring, reduce compaction, and make weeding and harvesting easier on your back.
- Material Options:
- Untreated Cedar: Naturally rot-resistant and chemical-free. A 4×8 ft bed, 12 inches deep, typically requires three 2x12x8 ft cedar boards, costing around $50-$60 per board (total ~$150-$180) plus corner brackets or screws. My first raised beds were cedar and are still going strong after 7 years.
- Galvanized Steel: Durable, long-lasting, and aesthetically pleasing. Brands like Vego Garden offer modular kits. A Vego Garden 17″ Tall 8-in-1 Metal Raised Garden Bed (can be configured to 4×8 ft) costs approximately $250-$300.
- Concrete Blocks/Stones: Very durable but can leach minerals (though generally safe once weathered) and can be expensive.
- Recycled Materials: Pallets (check for chemical treatment stamps like « HT » for heat-treated), old tires (controversial due to potential chemical leaching).
- Filling Raised Beds: Don’t just fill with topsoil. Use a « Hugelkultur » approach (logs, branches, leaves, then compost, then topsoil) or a mixture of 60% good quality topsoil, 30% compost, and 10% perlite or vermiculite for drainage. A 4x8x1 ft raised bed requires about 32 cubic feet (or ~1.2 cubic yards) of soil mix, which can cost $100-$200 depending on your source.
- Material Options:
Step 4: Water Management & Irrigation
Efficient water management is critical for a self sufficient garden from scratch, especially in off-grid living where water resources might be limited.
- Rainwater Harvesting: This is my primary source of irrigation water. A 55-gallon rain barrel (e.g., EarthMark Rain Barrel, ~$120-$150) connected to a downspout can collect significant water. For larger needs, I use two 275-gallon IBC totes (Intermediate Bulk Containers, often available used for $100-$200 each from food-grade sources) connected in series. A 1,000 sq ft roof can collect approximately 620 gallons of water for every inch of rainfall. My 1,500 sq ft roof provides ample water for my 600 sq ft garden through multiple barrels and totes.
- Drip Irrigation: This is by far the most water-efficient method, delivering water directly to the plant’s root zone, minimizing evaporation and weed growth.
- Components: A typical drip system includes a pressure regulator (e.g., Rain Bird PRV-10, ~$15), a filter (Rain Bird RBY filter, ~$20), main tubing (1/2-inch poly tubing, 100ft ~$25), smaller feeder lines (1/4-inch tubing), and emitters (0.5 GPH or 1 GPH per plant).
- Kits: For beginners, a starter kit like the Rain Bird Drip Irrigation Garden Kit (model DDI-KIT-1P, ~$40-$60) is excellent for a small garden. For larger setups, I use Netafim Techline CV Drip Line (500ft roll, ~$150-$200), which has pressure-compensating emitters built-in, ensuring even watering across long runs.
- Automation: For true self-sufficiency, consider a battery-powered timer (e.g., Orbit B-Hyve Bluetooth Hose Faucet Timer, ~$50) or a solar-powered timer connected to a small 12V pump.
- Solar-Powered Pumps: For lifting water from a well, pond, or large storage tank to your garden, a solar pump is a game-changer. For a smaller drip system, a Shurflo 2088-594-152 Diaphragm Pump (12V, 3.5 GPM, ~$180) can be powered by a single 100W solar panel (e.g., Renogy 100W Monocrystalline Solar Panel, ~$100) and a small 12V battery (e.g., a 50Ah LiFePO4 battery like the Battle Born 50Ah, ~$450). For larger operations or deeper wells, more robust systems are needed. If you’re looking to build out a comprehensive off-grid power system to support your garden’s water needs, or indeed your entire homestead, you might want to explore resources like the Power Grid Generator complete system guide to understand the full scope of what’s possible in terms of energy independence.
Step 5: Seed Selection & Planting
The choice of seeds is crucial for a truly self sufficient garden from scratch.
- Choose Heirloom & Open-Pollinated Seeds: These varieties produce seeds that will grow true to type, meaning you can save seeds from your harvest year after year. F1 hybrids, while often vigorous, will not produce consistent offspring from saved seeds. Reputable seed companies include Baker Creek Heirloom Seeds, High Mowing Organic Seeds, and Seed Savers Exchange. Start with common, reliable varieties like ‘Black Krim’ tomatoes, ‘Provider’ bush beans, ‘Waltham Butternut’ squash, and ‘Black Seeded Simpson’ lettuce.
- Start Seeds Indoors (Optional but Recommended): For longer growing seasons or specific crops, starting seeds indoors gives you a head start. Use seed-starting mix (e.g., Espoma Organic Seed Starter Mix, ~$10 for 16qt bag) in seed trays (Jiffy Professional Greenhouse 72-cell kit, ~$15). Provide adequate light with LED grow lights (Barrina T5 2ft 4-pack LED Grow Lights, 20W each, ~$50) for 14-16 hours a day, positioned 2-4 inches above seedlings. Maintain consistent temperatures (65-75°F for most).
- Direct Sowing vs. Transplanting: Some crops (carrots, radishes, beans, corn) prefer direct sowing into the garden bed. Others (tomatoes, peppers, broccoli, kale) benefit from being started indoors and transplanted. Follow seed packet instructions for planting depths (e.g., lettuce seeds are often surface-sown or planted 1/8 inch deep, while beans are 1 inch deep) and spacing.
- Companion Planting: Strategically plant different species together to enhance growth, deter pests, and attract beneficial insects. For example, planting marigolds near tomatoes can deter nematodes, and basil improves tomato flavor. Nasturtiums can act as a trap crop for aphids.
- Succession Planting: For a continuous harvest, plant small batches of quick-growing crops (lettuce, radishes, cilantro) every 2-3 weeks. As one crop finishes, another is ready to take its place.
Step 6: Pest & Disease Management (Organic)
Maintaining a self sufficient garden from scratch means embracing organic pest and disease control.
- Integrated Pest Management (IPM): This holistic approach combines several strategies.
- Observation: Regularly inspect your plants for early signs of pests or disease. Catching issues early is key.
- Physical Barriers: Use row covers (e.g., Agribon AG-19 floating row cover, 10×20 ft, ~$20) to protect young plants from insect pests like cabbage worms and squash bugs. Install fences (e.g., 2×4 welded wire mesh, 4 ft tall, 50 ft roll ~$70) to keep out deer, rabbits, and other larger animals.
- Hand-Picking: For larger pests like tomato hornworms or squash bugs, simply pick them off and drop them into a bucket of soapy water.
- Companion Planting: As mentioned, certain plants repel pests. Marigolds, garlic, and onions are excellent deterrents.
- Attract Beneficial Insects: Plant flowers like dill, fennel, cosmos, and sweet alyssum to attract ladybugs, lacewings, and parasitic wasps, which prey on common garden pests.
- Organic Sprays & Treatments:
- Neem Oil: An excellent broad-spectrum organic insecticide and fungicide. Bonide Neem Oil Concentrate (16oz, ~$20) can be mixed at a rate of 1-2 tbsp per gallon of water and sprayed on affected plants.
- Insecticidal Soap: Effective against soft-bodied insects like aphids, whiteflies, and spider mites. Garden Safe Insecticidal Soap (24oz ready-to-use, ~$10).
- Bacillus thuringiensis (Bt): A naturally occurring soil bacterium that targets caterpillars and worms. Monterey BT Worm & Caterpillar Killer (16oz, ~$18) is highly effective and safe for beneficial insects.
- Copper or Sulfur Sprays: For fungal diseases like powdery mildew or blight, organic copper (e.g., Bonide Copper Fungicide, ~$15 for 1lb) or sulfur (e.g., Safer Brand Garden Fungicide, ~$10 for 16oz) can be used as a last resort.
Step 7: Harvesting & Seed Saving
The culmination of your efforts is the harvest, and seed saving closes the loop on self-sufficiency.
- Harvesting Techniques:
- Timing: Harvest vegetables at their peak ripeness for best flavor and nutritional value. For example, green beans should snap cleanly, cucumbers should be firm, and tomatoes should be fully colored.
- Frequency: Many crops, like zucchini, cucumbers, and bush beans, produce more if harvested frequently. Pick daily or every other day.
- Tools: Use clean, sharp pruners (e.g., Corona ClassicCUT Bypass Pruner BP 3180, ~$30) or a sharp knife for clean cuts, minimizing damage to the plant.
- Seed Saving: This is where the « self-sufficient » aspect truly shines.
- Selection: Only save seeds from your healthiest, most vigorous plants that show desired traits (disease resistance, good flavor, high yield).
- Isolation: To ensure true-to-type seeds, prevent cross-pollination. This can be challenging for open-pollinated crops that readily cross (e.g., squash, corn). For beginners, focus on self-pollinating plants like beans, peas, lettuce, and tomatoes.
- Processing:
- Dry Seeds (Beans, Peas, Lettuce, Grains): Allow pods/seed heads to dry completely on the plant. Harvest, shell, and clean the seeds, removing chaff.
- Wet Seeds (Tomatoes, Cucumbers, Squash): For tomatoes, ferment the seeds in water for a few days to remove the gel coating and inhibit disease. For cucumbers/squash, scrape out seeds, wash thoroughly, and dry.
- Drying: Spread seeds thinly on screens or paper plates in a cool, dry, well-ventilated area for 1-4 weeks. Ensure they are bone-dry before storage. I aim for less than 8% moisture content.
- Storage: Store seeds in airtight containers (glass jars with desiccant packets work well) in a cool, dark, dry place (ideally 40-50°F and 30-40% humidity). Label clearly with variety and date. Properly stored seeds can remain viable for 3-10 years or more.
Step 8: Season Extension & Winterizing
Extend your harvest and protect your garden for the off-season to truly maximize your self sufficient garden from scratch.
- Cold Frames: Simple structures with a transparent top (glass, polycarbonate, or old windows) that sit over garden beds. They trap solar heat, allowing you to grow cold-hardy crops (lettuce, spinach, kale, radishes) well into winter or start seeds earlier in spring. A basic cold frame can be built from 2×6 lumber and a sheet of polycarbonate for under $100.
- Hoop Houses/Low Tunnels: Larger structures made from flexible hoops (PVC pipe or EMT conduit) covered with greenhouse plastic. These provide more space and greater temperature moderation. A 10×20 ft DIY low tunnel kit can cost $200-$500, while a larger, more robust hoop house kit might be $1,000-$3,000. I use a 6×12 ft low tunnel made from 1/2-inch PVC hoops and 6mil greenhouse plastic, which extends my lettuce and spinach harvest by at least
Healthy soil is the bedrock of a productive, self-sufficient garden. You can’t guess what your soil needs; you have to test it.
- Perform a Soil Test: A professional soil test will give you precise data on your soil’s pH, nutrient levels (N-P-K), and organic matter content. I recommend sending a sample to your local agricultural extension office; it typically costs $20-$50 and provides detailed recommendations. Alternatively, for a quick homeowner check, a Rapitest Soil Test Kit (40-test kit, model 1663, ~$20 on Amazon) provides a good baseline for pH, Nitrogen, Phosphorus, and Potash. Aim for a pH between 6.0 and 7.0 for most vegetables.
- Amend for pH Imbalance: If your soil is too acidic (below 6.0), add agricultural lime (dolomitic lime adds magnesium, calcitic lime adds calcium). Apply 5-10 lbs per 100 sq ft for a moderate adjustment. If it’s too alkaline (above 7.0), add elemental sulfur (e.g., Espoma Soil Acidifier, ~$15 for 6.75 lbs) or generous amounts of organic matter like peat moss or pine needles.
- Build Organic Matter: This is the single most important step for long-term soil health. Organic matter improves soil structure, water retention, drainage, and nutrient availability. Incorporate 2-4 inches of high-quality compost into your top 6-12 inches of soil annually. I make my own compost from kitchen scraps, garden waste, and shredded leaves, but you can purchase it. Local nurseries often sell bulk compost for $30-$50 per cubic yard. Aged manure (from chickens, cows, or horses – ensure it’s well-rotted to avoid burning plants) is also excellent.
- Address Nutrient Deficiencies: Based on your soil test, add specific organic amendments. If Nitrogen (N) is low, add blood meal (12-0-0, ~$20 for 3 lbs) or feather meal. For Phosphorus (P), use bone meal (3-15-0, ~$15 for 3 lbs) or rock phosphate. For Potassium (K), greensand (0-0-2.5, ~$25 for 5 lbs) or kelp meal are good choices. I rely heavily on Espoma Organic Garden-tone (5-3-3, ~$25 for an 8lb bag) as a balanced, all-purpose organic fertilizer during planting.
Step 3: Garden Bed Preparation
Deciding between raised beds and in-ground beds depends on your soil, budget, and physical capabilities.
- In-Ground Beds: If you have excellent native soil and good drainage, in-ground beds are the most economical. Double-digging (loosening soil two shovel depths) can significantly improve drainage and aeration. For my main garden, I primarily use in-ground beds, but I focus on building up the soil over time with consistent compost additions and cover cropping. I aim for beds that are no wider than 3-4 feet so I can reach the center without stepping on the soil, compacting it.
- Raised Beds: Raised beds offer numerous advantages, especially for poor soil, heavy clay, or rocky areas. They provide better drainage, warm up faster in spring, reduce compaction, and make weeding and harvesting easier on your back.
- Material Options:
- Untreated Cedar: Naturally rot-resistant and chemical-free. A 4×8 ft bed, 12 inches deep, typically requires three 2x12x8 ft cedar boards, costing around $50-$60 per board (total ~$150-$180) plus corner brackets or screws. My first raised beds were cedar and are still going strong after 7 years.
- Galvanized Steel: Durable, long-lasting, and aesthetically pleasing. Brands like Vego Garden offer modular kits. A Vego Garden 17″ Tall 8-in-1 Metal Raised Garden Bed (can be configured to 4×8 ft) costs approximately $250-$300.
- Concrete Blocks/Stones: Very durable but can leach minerals (though generally safe once weathered) and can be expensive.
- Recycled Materials: Pallets (check for chemical treatment stamps like « HT » for heat-treated), old tires (controversial due to potential chemical leaching).
- Filling Raised Beds: Don’t just fill with topsoil. Use a « Hugelkultur » approach (logs, branches, leaves, then compost, then topsoil) or a mixture of 60% good quality topsoil, 30% compost, and 10% perlite or vermiculite for drainage. A 4x8x1 ft raised bed requires about 32 cubic feet (or ~1.2 cubic yards) of soil mix, which can cost $100-$200 depending on your source.
- Material Options:
Step 4: Water Management & Irrigation
Efficient water management is critical for a self sufficient garden from scratch, especially in off-grid living where water resources might be limited.
- Rainwater Harvesting: This is my primary source of irrigation water. A 55-gallon rain barrel (e.g., EarthMark Rain Barrel, ~$120-$150) connected to a downspout can collect significant water. For larger needs, I use two 275-gallon IBC totes (Intermediate Bulk Containers, often available used for $100-$200 each from food-grade sources) connected in series. A 1,000 sq ft roof can collect approximately 620 gallons of water for every inch of rainfall. My 1,500 sq ft roof provides ample water for my 600 sq ft garden through multiple barrels and totes.
- Drip Irrigation: This is by far the most water-efficient method, delivering water directly to the plant’s root zone, minimizing evaporation and weed growth.
- Components: A typical drip system includes a pressure regulator (e.g., Rain Bird PRV-10, ~$15), a filter (Rain Bird RBY filter, ~$20), main tubing (1/2-inch poly tubing, 100ft ~$25), smaller feeder lines (1/4-inch tubing), and emitters (0.5 GPH or 1 GPH per plant).
- Kits: For beginners, a starter kit like the Rain Bird Drip Irrigation Garden Kit (model DDI-KIT-1P, ~$40-$60) is excellent for a small garden. For larger setups, I use Netafim Techline CV Drip Line (500ft roll, ~$150-$200), which has pressure-compensating emitters built-in, ensuring even watering across long runs.
- Automation: For true self-sufficiency, consider a battery-powered timer (e.g., Orbit B-Hyve Bluetooth Hose Faucet Timer, ~$50) or a solar-powered timer connected to a small 12V pump.
- Solar-Powered Pumps: For lifting water from a well, pond, or large storage tank to your garden, a solar pump is a game-changer. For a smaller drip system, a Shurflo 2088-594-152 Diaphragm Pump (12V, 3.5 GPM, ~$180) can be powered by a single 100W solar panel (e.g., Renogy 100W Monocrystalline Solar Panel, ~$100) and a small 12V battery (e.g., a 50Ah LiFePO4 battery like the Battle Born 50Ah, ~$450). For larger operations or deeper wells, more robust systems are needed. If you’re looking to build out a comprehensive off-grid power system to support your garden’s water needs, or indeed your entire homestead, you might want to explore resources like the Power Grid Generator complete system guide to understand the full scope of what’s possible in terms of energy independence.
Step 5: Seed Selection & Planting
The choice of seeds is crucial for a truly self sufficient garden from scratch.
- Choose Heirloom & Open-Pollinated Seeds: These varieties produce seeds that will grow true to type, meaning you can save seeds from your harvest year after year. F1 hybrids, while often vigorous, will not produce consistent offspring from saved seeds. Reputable seed companies include Baker Creek Heirloom Seeds, High Mowing Organic Seeds, and Seed Savers Exchange. Start with common, reliable varieties like ‘Black Krim’ tomatoes, ‘Provider’ bush beans, ‘Waltham Butternut’ squash, and ‘Black Seeded Simpson’ lettuce.
- Start Seeds Indoors (Optional but Recommended): For longer growing seasons or specific crops, starting seeds indoors gives you a head start. Use seed-starting mix (e.g., Espoma Organic Seed Starter Mix, ~$10 for 16qt bag) in seed trays (Jiffy Professional Greenhouse 72-cell kit, ~$15). Provide adequate light with LED grow lights (Barrina T5 2ft 4-pack LED Grow Lights, 20W each, ~$50) for 14-16 hours a day, positioned 2-4 inches above seedlings. Maintain consistent temperatures (65-75°F for most).
- Direct Sowing vs. Transplanting: Some crops (carrots, radishes, beans, corn) prefer direct sowing into the garden bed. Others (tomatoes, peppers, broccoli, kale) benefit from being started indoors and transplanted. Follow seed packet instructions for planting depths (e.g., lettuce seeds are often surface-sown or planted 1/8 inch deep, while beans are 1 inch deep) and spacing.
- Companion Planting: Strategically plant different species together to enhance growth, deter pests, and attract beneficial insects. For example, planting marigolds near tomatoes can deter nematodes, and basil improves tomato flavor. Nasturtiums can act as a trap crop for aphids.
- Succession Planting: For a continuous harvest, plant small batches of quick-growing crops (lettuce, radishes, cilantro) every 2-3 weeks. As one crop finishes, another is ready to take its place.
Step 6: Pest & Disease Management (Organic)
Maintaining a self sufficient garden from scratch means embracing organic pest and disease control.
- Integrated Pest Management (IPM): This holistic approach combines several strategies.
- Observation: Regularly inspect your plants for early signs of pests or disease. Catching issues early is key.
- Physical Barriers: Use row covers (e.g., Agribon AG-19 floating row cover, 10×20 ft, ~$20) to protect young plants from insect pests like cabbage worms and squash bugs. Install fences (e.g., 2×4 welded wire mesh, 4 ft tall, 50 ft roll ~$70) to keep out deer, rabbits, and other larger animals.
- Hand-Picking: For larger pests like tomato hornworms or squash bugs, simply pick them off and drop them into a bucket of soapy water.
- Companion Planting: As mentioned, certain plants repel pests. Marigolds, garlic, and onions are excellent deterrents.
- Attract Beneficial Insects: Plant flowers like dill, fennel, cosmos, and sweet alyssum to attract ladybugs, lacewings, and parasitic wasps, which prey on common garden pests.
- Organic Sprays & Treatments:
- Neem Oil: An excellent broad-spectrum organic insecticide and fungicide. Bonide Neem Oil Concentrate (16oz, ~$20) can be mixed at a rate of 1-2 tbsp per gallon of water and sprayed on affected plants.
- Insecticidal Soap: Effective against soft-bodied insects like aphids, whiteflies, and spider mites. Garden Safe Insecticidal Soap (24oz ready-to-use, ~$10).
- Bacillus thuringiensis (Bt): A naturally occurring soil bacterium that targets caterpillars and worms. Monterey BT Worm & Caterpillar Killer (16oz, ~$18) is highly effective and safe for beneficial insects.
- Copper or Sulfur Sprays: For fungal diseases like powdery mildew or blight, organic copper (e.g., Bonide Copper Fungicide, ~$15 for 1lb) or sulfur (e.g., Safer Brand Garden Fungicide, ~$10 for 16oz) can be used as a last resort.
Step 7: Harvesting & Seed Saving
The culmination of your efforts is the harvest, and seed saving closes the loop on self-sufficiency.
- Harvesting Techniques:
- Timing: Harvest vegetables at their peak ripeness for best flavor and nutritional value. For example, green beans should snap cleanly, cucumbers should be firm, and tomatoes should be fully colored.
- Frequency: Many crops, like zucchini, cucumbers, and bush beans, produce more if harvested frequently. Pick daily or every other day.
- Tools: Use clean, sharp pruners (e.g., Corona ClassicCUT Bypass Pruner BP 3180, ~$30) or a sharp knife for clean cuts, minimizing damage to the plant.
- Seed Saving: This is where the « self-sufficient » aspect truly shines.
- Selection: Only save seeds from your healthiest, most vigorous plants that show desired traits (disease resistance, good flavor, high yield).
- Isolation: To ensure true-to-type seeds, prevent cross-pollination. This can be challenging for open-pollinated crops that readily cross (e.g., squash, corn). For beginners, focus on self-pollinating plants like beans, peas, lettuce, and tomatoes.
- Processing:
- Dry Seeds (Beans, Peas, Lettuce, Grains): Allow pods/seed heads to dry completely on the plant. Harvest, shell, and clean the seeds, removing chaff.
- Wet Seeds (Tomatoes, Cucumbers, Squash): For tomatoes, ferment the seeds in water for a few days to remove the gel coating and inhibit disease. For cucumbers/squash, scrape out seeds, wash thoroughly, and dry.
- Drying: Spread seeds thinly on screens or paper plates in a cool, dry, well-ventilated area for 1-4 weeks. Ensure they are bone-dry before storage. I aim for less than 8% moisture content.
- Storage: Store seeds in airtight containers (glass jars with desiccant packets work well) in a cool, dark, dry place (ideally 40-50°F and 30-40% humidity). Label clearly with variety and date. Properly stored seeds can remain viable for 3-10 years or more.
Step 8: Season Extension & Winterizing
Extend your harvest and protect your garden for the off-season to truly maximize your self sufficient garden from scratch.
- Cold Frames: Simple structures with a transparent top (glass, polycarbonate, or old windows) that sit over garden beds. They trap solar heat, allowing you to grow cold-hardy crops (lettuce, spinach, kale, radishes) well into winter or start seeds earlier in spring. A basic cold frame can be built from 2×6 lumber and a sheet of polycarbonate for under $100.
- Hoop Houses/Low Tunnels: Larger structures made from flexible hoops (PVC pipe or EMT conduit) covered with greenhouse plastic. These provide more space and greater temperature moderation. A 10×20 ft DIY low tunnel kit can cost $200-$500, while a larger, more robust hoop house kit might be $1,000-$3,000. I use a 6×12 ft low tunnel made from 1/2-inch PVC hoops and 6mil greenhouse plastic, which extends my lettuce and spinach harvest by at least
- Integrated Pest Management (IPM): This holistic approach combines several strategies.
Step 7: Harvesting & Seed Saving
The culmination of your efforts is the harvest, and seed saving closes the loop on self-sufficiency.
- Harvesting Techniques:
- Timing: Harvest vegetables at their peak ripeness for best flavor and nutritional value. For example, green beans should snap cleanly, cucumbers should be firm, and tomatoes should be fully colored.
- Frequency: Many crops, like zucchini, cucumbers, and bush beans, produce more if harvested frequently. Pick daily or every other day.
- Tools: Use clean, sharp pruners (e.g., Corona ClassicCUT Bypass Pruner BP 3180, ~$30) or a sharp knife for clean cuts, minimizing damage to the plant.
- Seed Saving: This is where the « self-sufficient » aspect truly shines.
- Selection: Only save seeds from your healthiest, most vigorous plants that show desired traits (disease resistance, good flavor, high yield).
- Isolation: To ensure true-to-type seeds, prevent cross-pollination. This can be challenging for open-pollinated crops that readily cross (e.g., squash, corn). For beginners, focus on self-pollinating plants like beans, peas, lettuce, and tomatoes.
- Processing:
- Dry Seeds (Beans, Peas, Lettuce, Grains): Allow pods/seed heads to dry completely on the plant. Harvest, shell, and clean the seeds, removing chaff.
- Wet Seeds (Tomatoes, Cucumbers, Squash): For tomatoes, ferment the seeds in water for a few days to remove the gel coating and inhibit disease. For cucumbers/squash, scrape out seeds, wash thoroughly, and dry.
- Drying: Spread seeds thinly on screens or paper plates in a cool, dry, well-ventilated area for 1-4 weeks. Ensure they are bone-dry before storage. I aim for less than 8% moisture content.
- Storage: Store seeds in airtight containers (glass jars with desiccant packets work well) in a cool, dark, dry place (ideally 40-50°F and 30-40% humidity). Label clearly with variety and date. Properly stored seeds can remain viable for 3-10 years or more.
Step 8: Season Extension & Winterizing
Extend your harvest and protect your garden for the off-season to truly maximize your self sufficient garden from scratch.
- Cold Frames: Simple structures with a transparent top (glass, polycarbonate, or old windows) that sit over garden beds. They trap solar heat, allowing you to grow cold-hardy crops (lettuce, spinach, kale, radishes) well into winter or start seeds earlier in spring. A basic cold frame can be built from 2×6 lumber and a sheet of polycarbonate for under $100.
- Hoop Houses/Low Tunnels: Larger structures made from flexible hoops (PVC pipe or EMT conduit) covered with greenhouse plastic. These provide more space and greater temperature moderation. A 10×20 ft DIY low tunnel kit can cost $200-$500, while a larger, more robust hoop house kit might be $1,000-$3,000. I use a 6×12 ft low tunnel made from 1/2-inch PVC hoops and 6mil greenhouse plastic, which extends my lettuce and spinach harvest by at least
Step 6: Pest & Disease Management (Organic)
Maintaining a self sufficient garden from scratch means embracing organic pest and disease control.
- Integrated Pest Management (IPM): This holistic approach combines several strategies.
- Observation: Regularly inspect your plants for early signs of pests or disease. Catching issues early is key.
- Physical Barriers: Use row covers (e.g., Agribon AG-19 floating row cover, 10×20 ft, ~$20) to protect young plants from insect pests like cabbage worms and squash bugs. Install fences (e.g., 2×4 welded wire mesh, 4 ft tall, 50 ft roll ~$70) to keep out deer, rabbits, and other larger animals.
- Hand-Picking: For larger pests like tomato hornworms or squash bugs, simply pick them off and drop them into a bucket of soapy water.
- Companion Planting: As mentioned, certain plants repel pests. Marigolds, garlic, and onions are excellent deterrents.
- Attract Beneficial Insects: Plant flowers like dill, fennel, cosmos, and sweet alyssum to attract ladybugs, lacewings, and parasitic wasps, which prey on common garden pests.
- Organic Sprays & Treatments:
- Neem Oil: An excellent broad-spectrum organic insecticide and fungicide. Bonide Neem Oil Concentrate (16oz, ~$20) can be mixed at a rate of 1-2 tbsp per gallon of water and sprayed on affected plants.
- Insecticidal Soap: Effective against soft-bodied insects like aphids, whiteflies, and spider mites. Garden Safe Insecticidal Soap (24oz ready-to-use, ~$10).
- Bacillus thuringiensis (Bt): A naturally occurring soil bacterium that targets caterpillars and worms. Monterey BT Worm & Caterpillar Killer (16oz, ~$18) is highly effective and safe for beneficial insects.
- Copper or Sulfur Sprays: For fungal diseases like powdery mildew or blight, organic copper (e.g., Bonide Copper Fungicide, ~$15 for 1lb) or sulfur (e.g., Safer Brand Garden Fungicide, ~$10 for 16oz) can be used as a last resort.
Step 7: Harvesting & Seed Saving
The culmination of your efforts is the harvest, and seed saving closes the loop on self-sufficiency.
- Harvesting Techniques:
- Timing: Harvest vegetables at their peak ripeness for best flavor and nutritional value. For example, green beans should snap cleanly, cucumbers should be firm, and tomatoes should be fully colored.
- Frequency: Many crops, like zucchini, cucumbers, and bush beans, produce more if harvested frequently. Pick daily or every other day.
- Tools: Use clean, sharp pruners (e.g., Corona ClassicCUT Bypass Pruner BP 3180, ~$30) or a sharp knife for clean cuts, minimizing damage to the plant.
- Seed Saving: This is where the « self-sufficient » aspect truly shines.
- Selection: Only save seeds from your healthiest, most vigorous plants that show desired traits (disease resistance, good flavor, high yield).
- Isolation: To ensure true-to-type seeds, prevent cross-pollination. This can be challenging for open-pollinated crops that readily cross (e.g., squash, corn). For beginners, focus on self-pollinating plants like beans, peas, lettuce, and tomatoes.
- Processing:
- Dry Seeds (Beans, Peas, Lettuce, Grains): Allow pods/seed heads to dry completely on the plant. Harvest, shell, and clean the seeds, removing chaff.
- Wet Seeds (Tomatoes, Cucumbers, Squash): For tomatoes, ferment the seeds in water for a few days to remove the gel coating and inhibit disease. For cucumbers/squash, scrape out seeds, wash thoroughly, and dry.
- Drying: Spread seeds thinly on screens or paper plates in a cool, dry, well-ventilated area for 1-4 weeks. Ensure they are bone-dry before storage. I aim for less than 8% moisture content.
- Storage: Store seeds in airtight containers (glass jars with desiccant packets work well) in a cool, dark, dry place (ideally 40-50°F and 30-40% humidity). Label clearly with variety and date. Properly stored seeds can remain viable for 3-10 years or more.
Step 8: Season Extension & Winterizing
Extend your harvest and protect your garden for the off-season to truly maximize your self sufficient garden from scratch.
- Cold Frames: Simple structures with a transparent top (glass, polycarbonate, or old windows) that sit over garden beds. They trap solar heat, allowing you to grow cold-hardy crops (lettuce, spinach, kale, radishes) well into winter or start seeds earlier in spring. A basic cold frame can be built from 2×6 lumber and a sheet of polycarbonate for under $100.
- Hoop Houses/Low Tunnels: Larger structures made from flexible hoops (PVC pipe or EMT conduit) covered with greenhouse plastic. These provide more space and greater temperature moderation. A 10×20 ft DIY low tunnel kit can cost $200-$500, while a larger, more robust hoop house kit might be $1,000-$3,000. I use a 6×12 ft low tunnel made from 1/2-inch PVC hoops and 6mil greenhouse plastic, which extends my lettuce and spinach harvest by at least
- Choose Heirloom & Open-Pollinated Seeds: These varieties produce seeds that will grow true to type, meaning you can save seeds from your harvest year after year. F1 hybrids, while often vigorous, will not produce consistent offspring from saved seeds. Reputable seed companies include Baker Creek Heirloom Seeds, High Mowing Organic Seeds, and Seed Savers Exchange. Start with common, reliable varieties like ‘Black Krim’ tomatoes, ‘Provider’ bush beans, ‘Waltham Butternut’ squash, and ‘Black Seeded Simpson’ lettuce.
- Start Seeds Indoors (Optional but Recommended): For longer growing seasons or specific crops, starting seeds indoors gives you a head start. Use seed-starting mix (e.g., Espoma Organic Seed Starter Mix, ~$10 for 16qt bag) in seed trays (Jiffy Professional Greenhouse 72-cell kit, ~$15). Provide adequate light with LED grow lights (Barrina T5 2ft 4-pack LED Grow Lights, 20W each, ~$50) for 14-16 hours a day, positioned 2-4 inches above seedlings. Maintain consistent temperatures (65-75°F for most).
- Direct Sowing vs. Transplanting: Some crops (carrots, radishes, beans, corn) prefer direct sowing into the garden bed. Others (tomatoes, peppers, broccoli, kale) benefit from being started indoors and transplanted. Follow seed packet instructions for planting depths (e.g., lettuce seeds are often surface-sown or planted 1/8 inch deep, while beans are 1 inch deep) and spacing.
- Companion Planting: Strategically plant different species together to enhance growth, deter pests, and attract beneficial insects. For example, planting marigolds near tomatoes can deter nematodes, and basil improves tomato flavor. Nasturtiums can act as a trap crop for aphids.
- Succession Planting: For a continuous harvest, plant small batches of quick-growing crops (lettuce, radishes, cilantro) every 2-3 weeks. As one crop finishes, another is ready to take its place.
Step 6: Pest & Disease Management (Organic)
Maintaining a self sufficient garden from scratch means embracing organic pest and disease control.
- Integrated Pest Management (IPM): This holistic approach combines several strategies.
- Observation: Regularly inspect your plants for early signs of pests or disease. Catching issues early is key.
- Physical Barriers: Use row covers (e.g., Agribon AG-19 floating row cover, 10×20 ft, ~$20) to protect young plants from insect pests like cabbage worms and squash bugs. Install fences (e.g., 2×4 welded wire mesh, 4 ft tall, 50 ft roll ~$70) to keep out deer, rabbits, and other larger animals.
- Hand-Picking: For larger pests like tomato hornworms or squash bugs, simply pick them off and drop them into a bucket of soapy water.
- Companion Planting: As mentioned, certain plants repel pests. Marigolds, garlic, and onions are excellent deterrents.
- Attract Beneficial Insects: Plant flowers like dill, fennel, cosmos, and sweet alyssum to attract ladybugs, lacewings, and parasitic wasps, which prey on common garden pests.
- Organic Sprays & Treatments:
- Neem Oil: An excellent broad-spectrum organic insecticide and fungicide. Bonide Neem Oil Concentrate (16oz, ~$20) can be mixed at a rate of 1-2 tbsp per gallon of water and sprayed on affected plants.
- Insecticidal Soap: Effective against soft-bodied insects like aphids, whiteflies, and spider mites. Garden Safe Insecticidal Soap (24oz ready-to-use, ~$10).
- Bacillus thuringiensis (Bt): A naturally occurring soil bacterium that targets caterpillars and worms. Monterey BT Worm & Caterpillar Killer (16oz, ~$18) is highly effective and safe for beneficial insects.
- Copper or Sulfur Sprays: For fungal diseases like powdery mildew or blight, organic copper (e.g., Bonide Copper Fungicide, ~$15 for 1lb) or sulfur (e.g., Safer Brand Garden Fungicide, ~$10 for 16oz) can be used as a last resort.
Step 7: Harvesting & Seed Saving
The culmination of your efforts is the harvest, and seed saving closes the loop on self-sufficiency.
- Harvesting Techniques:
- Timing: Harvest vegetables at their peak ripeness for best flavor and nutritional value. For example, green beans should snap cleanly, cucumbers should be firm, and tomatoes should be fully colored.
- Frequency: Many crops, like zucchini, cucumbers, and bush beans, produce more if harvested frequently. Pick daily or every other day.
- Tools: Use clean, sharp pruners (e.g., Corona ClassicCUT Bypass Pruner BP 3180, ~$30) or a sharp knife for clean cuts, minimizing damage to the plant.
- Seed Saving: This is where the « self-sufficient » aspect truly shines.
- Selection: Only save seeds from your healthiest, most vigorous plants that show desired traits (disease resistance, good flavor, high yield).
- Isolation: To ensure true-to-type seeds, prevent cross-pollination. This can be challenging for open-pollinated crops that readily cross (e.g., squash, corn). For beginners, focus on self-pollinating plants like beans, peas, lettuce, and tomatoes.
- Processing:
- Dry Seeds (Beans, Peas, Lettuce, Grains): Allow pods/seed heads to dry completely on the plant. Harvest, shell, and clean the seeds, removing chaff.
- Wet Seeds (Tomatoes, Cucumbers, Squash): For tomatoes, ferment the seeds in water for a few days to remove the gel coating and inhibit disease. For cucumbers/squash, scrape out seeds, wash thoroughly, and dry.
- Drying: Spread seeds thinly on screens or paper plates in a cool, dry, well-ventilated area for 1-4 weeks. Ensure they are bone-dry before storage. I aim for less than 8% moisture content.
- Storage: Store seeds in airtight containers (glass jars with desiccant packets work well) in a cool, dark, dry place (ideally 40-50°F and 30-40% humidity). Label clearly with variety and date. Properly stored seeds can remain viable for 3-10 years or more.
Step 8: Season Extension & Winterizing
Extend your harvest and protect your garden for the off-season to truly maximize your self sufficient garden from scratch.
- Cold Frames: Simple structures with a transparent top (glass, polycarbonate, or old windows) that sit over garden beds. They trap solar heat, allowing you to grow cold-hardy crops (lettuce, spinach, kale, radishes) well into winter or start seeds earlier in spring. A basic cold frame can be built from 2×6 lumber and a sheet of polycarbonate for under $100.
- Hoop Houses/Low Tunnels: Larger structures made from flexible hoops (PVC pipe or EMT conduit) covered with greenhouse plastic. These provide more space and greater temperature moderation. A 10×20 ft DIY low tunnel kit can cost $200-$500, while a larger, more robust hoop house kit might be $1,000-$3,000. I use a 6×12 ft low tunnel made from 1/2-inch PVC hoops and 6mil greenhouse plastic, which extends my lettuce and spinach harvest by at least
The choice of seeds is crucial for a truly self sufficient garden from scratch.
- Choose Heirloom & Open-Pollinated Seeds: These varieties produce seeds that will grow true to type, meaning you can save seeds from your harvest year after year. F1 hybrids, while often vigorous, will not produce consistent offspring from saved seeds. Reputable seed companies include Baker Creek Heirloom Seeds, High Mowing Organic Seeds, and Seed Savers Exchange. Start with common, reliable varieties like ‘Black Krim’ tomatoes, ‘Provider’ bush beans, ‘Waltham Butternut’ squash, and ‘Black Seeded Simpson’ lettuce.
- Start Seeds Indoors (Optional but Recommended): For longer growing seasons or specific crops, starting seeds indoors gives you a head start. Use seed-starting mix (e.g., Espoma Organic Seed Starter Mix, ~$10 for 16qt bag) in seed trays (Jiffy Professional Greenhouse 72-cell kit, ~$15). Provide adequate light with LED grow lights (Barrina T5 2ft 4-pack LED Grow Lights, 20W each, ~$50) for 14-16 hours a day, positioned 2-4 inches above seedlings. Maintain consistent temperatures (65-75°F for most).
- Direct Sowing vs. Transplanting: Some crops (carrots, radishes, beans, corn) prefer direct sowing into the garden bed. Others (tomatoes, peppers, broccoli, kale) benefit from being started indoors and transplanted. Follow seed packet instructions for planting depths (e.g., lettuce seeds are often surface-sown or planted 1/8 inch deep, while beans are 1 inch deep) and spacing.
- Companion Planting: Strategically plant different species together to enhance growth, deter pests, and attract beneficial insects. For example, planting marigolds near tomatoes can deter nematodes, and basil improves tomato flavor. Nasturtiums can act as a trap crop for aphids.
- Succession Planting: For a continuous harvest, plant small batches of quick-growing crops (lettuce, radishes, cilantro) every 2-3 weeks. As one crop finishes, another is ready to take its place.
Step 6: Pest & Disease Management (Organic)
Maintaining a self sufficient garden from scratch means embracing organic pest and disease control.
- Integrated Pest Management (IPM): This holistic approach combines several strategies.
- Observation: Regularly inspect your plants for early signs of pests or disease. Catching issues early is key.
- Physical Barriers: Use row covers (e.g., Agribon AG-19 floating row cover, 10×20 ft, ~$20) to protect young plants from insect pests like cabbage worms and squash bugs. Install fences (e.g., 2×4 welded wire mesh, 4 ft tall, 50 ft roll ~$70) to keep out deer, rabbits, and other larger animals.
- Hand-Picking: For larger pests like tomato hornworms or squash bugs, simply pick them off and drop them into a bucket of soapy water.
- Companion Planting: As mentioned, certain plants repel pests. Marigolds, garlic, and onions are excellent deterrents.
- Attract Beneficial Insects: Plant flowers like dill, fennel, cosmos, and sweet alyssum to attract ladybugs, lacewings, and parasitic wasps, which prey on common garden pests.
- Organic Sprays & Treatments:
- Neem Oil: An excellent broad-spectrum organic insecticide and fungicide. Bonide Neem Oil Concentrate (16oz, ~$20) can be mixed at a rate of 1-2 tbsp per gallon of water and sprayed on affected plants.
- Insecticidal Soap: Effective against soft-bodied insects like aphids, whiteflies, and spider mites. Garden Safe Insecticidal Soap (24oz ready-to-use, ~$10).
- Bacillus thuringiensis (Bt): A naturally occurring soil bacterium that targets caterpillars and worms. Monterey BT Worm & Caterpillar Killer (16oz, ~$18) is highly effective and safe for beneficial insects.
- Copper or Sulfur Sprays: For fungal diseases like powdery mildew or blight, organic copper (e.g., Bonide Copper Fungicide, ~$15 for 1lb) or sulfur (e.g., Safer Brand Garden Fungicide, ~$10 for 16oz) can be used as a last resort.
Step 7: Harvesting & Seed Saving
The culmination of your efforts is the harvest, and seed saving closes the loop on self-sufficiency.
- Harvesting Techniques:
- Timing: Harvest vegetables at their peak ripeness for best flavor and nutritional value. For example, green beans should snap cleanly, cucumbers should be firm, and tomatoes should be fully colored.
- Frequency: Many crops, like zucchini, cucumbers, and bush beans, produce more if harvested frequently. Pick daily or every other day.
- Tools: Use clean, sharp pruners (e.g., Corona ClassicCUT Bypass Pruner BP 3180, ~$30) or a sharp knife for clean cuts, minimizing damage to the plant.
- Seed Saving: This is where the « self-sufficient » aspect truly shines.
- Selection: Only save seeds from your healthiest, most vigorous plants that show desired traits (disease resistance, good flavor, high yield).
- Isolation: To ensure true-to-type seeds, prevent cross-pollination. This can be challenging for open-pollinated crops that readily cross (e.g., squash, corn). For beginners, focus on self-pollinating plants like beans, peas, lettuce, and tomatoes.
- Processing:
- Dry Seeds (Beans, Peas, Lettuce, Grains): Allow pods/seed heads to dry completely on the plant. Harvest, shell, and clean the seeds, removing chaff.
- Wet Seeds (Tomatoes, Cucumbers, Squash): For tomatoes, ferment the seeds in water for a few days to remove the gel coating and inhibit disease. For cucumbers/squash, scrape out seeds, wash thoroughly, and dry.
- Drying: Spread seeds thinly on screens or paper plates in a cool, dry, well-ventilated area for 1-4 weeks. Ensure they are bone-dry before storage. I aim for less than 8% moisture content.
- Storage: Store seeds in airtight containers (glass jars with desiccant packets work well) in a cool, dark, dry place (ideally 40-50°F and 30-40% humidity). Label clearly with variety and date. Properly stored seeds can remain viable for 3-10 years or more.
Step 8: Season Extension & Winterizing
Extend your harvest and protect your garden for the off-season to truly maximize your self sufficient garden from scratch.
- Cold Frames: Simple structures with a transparent top (glass, polycarbonate, or old windows) that sit over garden beds. They trap solar heat, allowing you to grow cold-hardy crops (lettuce, spinach, kale, radishes) well into winter or start seeds earlier in spring. A basic cold frame can be built from 2×6 lumber and a sheet of polycarbonate for under $100.
- Hoop Houses/Low Tunnels: Larger structures made from flexible hoops (PVC pipe or EMT conduit) covered with greenhouse plastic. These provide more space and greater temperature moderation. A 10×20 ft DIY low tunnel kit can cost $200-$500, while a larger, more robust hoop house kit might be $1,000-$3,000. I use a 6×12 ft low tunnel made from 1/2-inch PVC hoops and 6mil greenhouse plastic, which extends my lettuce and spinach harvest by at least
Step 5: Seed Selection & Planting
The choice of seeds is crucial for a truly self sufficient garden from scratch.
- Choose Heirloom & Open-Pollinated Seeds: These varieties produce seeds that will grow true to type, meaning you can save seeds from your harvest year after year. F1 hybrids, while often vigorous, will not produce consistent offspring from saved seeds. Reputable seed companies include Baker Creek Heirloom Seeds, High Mowing Organic Seeds, and Seed Savers Exchange. Start with common, reliable varieties like ‘Black Krim’ tomatoes, ‘Provider’ bush beans, ‘Waltham Butternut’ squash, and ‘Black Seeded Simpson’ lettuce.
- Start Seeds Indoors (Optional but Recommended): For longer growing seasons or specific crops, starting seeds indoors gives you a head start. Use seed-starting mix (e.g., Espoma Organic Seed Starter Mix, ~$10 for 16qt bag) in seed trays (Jiffy Professional Greenhouse 72-cell kit, ~$15). Provide adequate light with LED grow lights (Barrina T5 2ft 4-pack LED Grow Lights, 20W each, ~$50) for 14-16 hours a day, positioned 2-4 inches above seedlings. Maintain consistent temperatures (65-75°F for most).
- Direct Sowing vs. Transplanting: Some crops (carrots, radishes, beans, corn) prefer direct sowing into the garden bed. Others (tomatoes, peppers, broccoli, kale) benefit from being started indoors and transplanted. Follow seed packet instructions for planting depths (e.g., lettuce seeds are often surface-sown or planted 1/8 inch deep, while beans are 1 inch deep) and spacing.
- Companion Planting: Strategically plant different species together to enhance growth, deter pests, and attract beneficial insects. For example, planting marigolds near tomatoes can deter nematodes, and basil improves tomato flavor. Nasturtiums can act as a trap crop for aphids.
- Succession Planting: For a continuous harvest, plant small batches of quick-growing crops (lettuce, radishes, cilantro) every 2-3 weeks. As one crop finishes, another is ready to take its place.
Step 6: Pest & Disease Management (Organic)
Maintaining a self sufficient garden from scratch means embracing organic pest and disease control.
- Integrated Pest Management (IPM): This holistic approach combines several strategies.
- Observation: Regularly inspect your plants for early signs of pests or disease. Catching issues early is key.
- Physical Barriers: Use row covers (e.g., Agribon AG-19 floating row cover, 10×20 ft, ~$20) to protect young plants from insect pests like cabbage worms and squash bugs. Install fences (e.g., 2×4 welded wire mesh, 4 ft tall, 50 ft roll ~$70) to keep out deer, rabbits, and other larger animals.
- Hand-Picking: For larger pests like tomato hornworms or squash bugs, simply pick them off and drop them into a bucket of soapy water.
- Companion Planting: As mentioned, certain plants repel pests. Marigolds, garlic, and onions are excellent deterrents.
- Attract Beneficial Insects: Plant flowers like dill, fennel, cosmos, and sweet alyssum to attract ladybugs, lacewings, and parasitic wasps, which prey on common garden pests.
- Organic Sprays & Treatments:
- Neem Oil: An excellent broad-spectrum organic insecticide and fungicide. Bonide Neem Oil Concentrate (16oz, ~$20) can be mixed at a rate of 1-2 tbsp per gallon of water and sprayed on affected plants.
- Insecticidal Soap: Effective against soft-bodied insects like aphids, whiteflies, and spider mites. Garden Safe Insecticidal Soap (24oz ready-to-use, ~$10).
- Bacillus thuringiensis (Bt): A naturally occurring soil bacterium that targets caterpillars and worms. Monterey BT Worm & Caterpillar Killer (16oz, ~$18) is highly effective and safe for beneficial insects.
- Copper or Sulfur Sprays: For fungal diseases like powdery mildew or blight, organic copper (e.g., Bonide Copper Fungicide, ~$15 for 1lb) or sulfur (e.g., Safer Brand Garden Fungicide, ~$10 for 16oz) can be used as a last resort.
Step 7: Harvesting & Seed Saving
The culmination of your efforts is the harvest, and seed saving closes the loop on self-sufficiency.
- Harvesting Techniques:
- Timing: Harvest vegetables at their peak ripeness for best flavor and nutritional value. For example, green beans should snap cleanly, cucumbers should be firm, and tomatoes should be fully colored.
- Frequency: Many crops, like zucchini, cucumbers, and bush beans, produce more if harvested frequently. Pick daily or every other day.
- Tools: Use clean, sharp pruners (e.g., Corona ClassicCUT Bypass Pruner BP 3180, ~$30) or a sharp knife for clean cuts, minimizing damage to the plant.
- Seed Saving: This is where the « self-sufficient » aspect truly shines.
- Selection: Only save seeds from your healthiest, most vigorous plants that show desired traits (disease resistance, good flavor, high yield).
- Isolation: To ensure true-to-type seeds, prevent cross-pollination. This can be challenging for open-pollinated crops that readily cross (e.g., squash, corn). For beginners, focus on self-pollinating plants like beans, peas, lettuce, and tomatoes.
- Processing:
- Dry Seeds (Beans, Peas, Lettuce, Grains): Allow pods/seed heads to dry completely on the plant. Harvest, shell, and clean the seeds, removing chaff.
- Wet Seeds (Tomatoes, Cucumbers, Squash): For tomatoes, ferment the seeds in water for a few days to remove the gel coating and inhibit disease. For cucumbers/squash, scrape out seeds, wash thoroughly, and dry.
- Drying: Spread seeds thinly on screens or paper plates in a cool, dry, well-ventilated area for 1-4 weeks. Ensure they are bone-dry before storage. I aim for less than 8% moisture content.
- Storage: Store seeds in airtight containers (glass jars with desiccant packets work well) in a cool, dark, dry place (ideally 40-50°F and 30-40% humidity). Label clearly with variety and date. Properly stored seeds can remain viable for 3-10 years or more.
Step 8: Season Extension & Winterizing
Extend your harvest and protect your garden for the off-season to truly maximize your self sufficient garden from scratch.
- Cold Frames: Simple structures with a transparent top (glass, polycarbonate, or old windows) that sit over garden beds. They trap solar heat, allowing you to grow cold-hardy crops (lettuce, spinach, kale, radishes) well into winter or start seeds earlier in spring. A basic cold frame can be built from 2×6 lumber and a sheet of polycarbonate for under $100.
- Hoop Houses/Low Tunnels: Larger structures made from flexible hoops (PVC pipe or EMT conduit) covered with greenhouse plastic. These provide more space and greater temperature moderation. A 10×20 ft DIY low tunnel kit can cost $200-$500, while a larger, more robust hoop house kit might be $1,000-$3,000. I use a 6×12 ft low tunnel made from 1/2-inch PVC hoops and 6mil greenhouse plastic, which extends my lettuce and spinach harvest by at least
- Rainwater Harvesting: This is my primary source of irrigation water. A 55-gallon rain barrel (e.g., EarthMark Rain Barrel, ~$120-$150) connected to a downspout can collect significant water. For larger needs, I use two 275-gallon IBC totes (Intermediate Bulk Containers, often available used for $100-$200 each from food-grade sources) connected in series. A 1,000 sq ft roof can collect approximately 620 gallons of water for every inch of rainfall. My 1,500 sq ft roof provides ample water for my 600 sq ft garden through multiple barrels and totes.
- Drip Irrigation: This is by far the most water-efficient method, delivering water directly to the plant’s root zone, minimizing evaporation and weed growth.
- Components: A typical drip system includes a pressure regulator (e.g., Rain Bird PRV-10, ~$15), a filter (Rain Bird RBY filter, ~$20), main tubing (1/2-inch poly tubing, 100ft ~$25), smaller feeder lines (1/4-inch tubing), and emitters (0.5 GPH or 1 GPH per plant).
- Kits: For beginners, a starter kit like the Rain Bird Drip Irrigation Garden Kit (model DDI-KIT-1P, ~$40-$60) is excellent for a small garden. For larger setups, I use Netafim Techline CV Drip Line (500ft roll, ~$150-$200), which has pressure-compensating emitters built-in, ensuring even watering across long runs.
- Automation: For true self-sufficiency, consider a battery-powered timer (e.g., Orbit B-Hyve Bluetooth Hose Faucet Timer, ~$50) or a solar-powered timer connected to a small 12V pump.
- Solar-Powered Pumps: For lifting water from a well, pond, or large storage tank to your garden, a solar pump is a game-changer. For a smaller drip system, a Shurflo 2088-594-152 Diaphragm Pump (12V, 3.5 GPM, ~$180) can be powered by a single 100W solar panel (e.g., Renogy 100W Monocrystalline Solar Panel, ~$100) and a small 12V battery (e.g., a 50Ah LiFePO4 battery like the Battle Born 50Ah, ~$450). For larger operations or deeper wells, more robust systems are needed. If you’re looking to build out a comprehensive off-grid power system to support your garden’s water needs, or indeed your entire homestead, you might want to explore resources like the Power Grid Generator complete system guide to understand the full scope of what’s possible in terms of energy independence.
Step 5: Seed Selection & Planting
The choice of seeds is crucial for a truly self sufficient garden from scratch.
- Choose Heirloom & Open-Pollinated Seeds: These varieties produce seeds that will grow true to type, meaning you can save seeds from your harvest year after year. F1 hybrids, while often vigorous, will not produce consistent offspring from saved seeds. Reputable seed companies include Baker Creek Heirloom Seeds, High Mowing Organic Seeds, and Seed Savers Exchange. Start with common, reliable varieties like ‘Black Krim’ tomatoes, ‘Provider’ bush beans, ‘Waltham Butternut’ squash, and ‘Black Seeded Simpson’ lettuce.
- Start Seeds Indoors (Optional but Recommended): For longer growing seasons or specific crops, starting seeds indoors gives you a head start. Use seed-starting mix (e.g., Espoma Organic Seed Starter Mix, ~$10 for 16qt bag) in seed trays (Jiffy Professional Greenhouse 72-cell kit, ~$15). Provide adequate light with LED grow lights (Barrina T5 2ft 4-pack LED Grow Lights, 20W each, ~$50) for 14-16 hours a day, positioned 2-4 inches above seedlings. Maintain consistent temperatures (65-75°F for most).
- Direct Sowing vs. Transplanting: Some crops (carrots, radishes, beans, corn) prefer direct sowing into the garden bed. Others (tomatoes, peppers, broccoli, kale) benefit from being started indoors and transplanted. Follow seed packet instructions for planting depths (e.g., lettuce seeds are often surface-sown or planted 1/8 inch deep, while beans are 1 inch deep) and spacing.
- Companion Planting: Strategically plant different species together to enhance growth, deter pests, and attract beneficial insects. For example, planting marigolds near tomatoes can deter nematodes, and basil improves tomato flavor. Nasturtiums can act as a trap crop for aphids.
- Succession Planting: For a continuous harvest, plant small batches of quick-growing crops (lettuce, radishes, cilantro) every 2-3 weeks. As one crop finishes, another is ready to take its place.
Step 6: Pest & Disease Management (Organic)
Maintaining a self sufficient garden from scratch means embracing organic pest and disease control.
- Integrated Pest Management (IPM): This holistic approach combines several strategies.
- Observation: Regularly inspect your plants for early signs of pests or disease. Catching issues early is key.
- Physical Barriers: Use row covers (e.g., Agribon AG-19 floating row cover, 10×20 ft, ~$20) to protect young plants from insect pests like cabbage worms and squash bugs. Install fences (e.g., 2×4 welded wire mesh, 4 ft tall, 50 ft roll ~$70) to keep out deer, rabbits, and other larger animals.
- Hand-Picking: For larger pests like tomato hornworms or squash bugs, simply pick them off and drop them into a bucket of soapy water.
- Companion Planting: As mentioned, certain plants repel pests. Marigolds, garlic, and onions are excellent deterrents.
- Attract Beneficial Insects: Plant flowers like dill, fennel, cosmos, and sweet alyssum to attract ladybugs, lacewings, and parasitic wasps, which prey on common garden pests.
- Organic Sprays & Treatments:
- Neem Oil: An excellent broad-spectrum organic insecticide and fungicide. Bonide Neem Oil Concentrate (16oz, ~$20) can be mixed at a rate of 1-2 tbsp per gallon of water and sprayed on affected plants.
- Insecticidal Soap: Effective against soft-bodied insects like aphids, whiteflies, and spider mites. Garden Safe Insecticidal Soap (24oz ready-to-use, ~$10).
- Bacillus thuringiensis (Bt): A naturally occurring soil bacterium that targets caterpillars and worms. Monterey BT Worm & Caterpillar Killer (16oz, ~$18) is highly effective and safe for beneficial insects.
- Copper or Sulfur Sprays: For fungal diseases like powdery mildew or blight, organic copper (e.g., Bonide Copper Fungicide, ~$15 for 1lb) or sulfur (e.g., Safer Brand Garden Fungicide, ~$10 for 16oz) can be used as a last resort.
Step 7: Harvesting & Seed Saving
The culmination of your efforts is the harvest, and seed saving closes the loop on self-sufficiency.
- Harvesting Techniques:
- Timing: Harvest vegetables at their peak ripeness for best flavor and nutritional value. For example, green beans should snap cleanly, cucumbers should be firm, and tomatoes should be fully colored.
- Frequency: Many crops, like zucchini, cucumbers, and bush beans, produce more if harvested frequently. Pick daily or every other day.
- Tools: Use clean, sharp pruners (e.g., Corona ClassicCUT Bypass Pruner BP 3180, ~$30) or a sharp knife for clean cuts, minimizing damage to the plant.
- Seed Saving: This is where the « self-sufficient » aspect truly shines.
- Selection: Only save seeds from your healthiest, most vigorous plants that show desired traits (disease resistance, good flavor, high yield).
- Isolation: To ensure true-to-type seeds, prevent cross-pollination. This can be challenging for open-pollinated crops that readily cross (e.g., squash, corn). For beginners, focus on self-pollinating plants like beans, peas, lettuce, and tomatoes.
- Processing:
- Dry Seeds (Beans, Peas, Lettuce, Grains): Allow pods/seed heads to dry completely on the plant. Harvest, shell, and clean the seeds, removing chaff.
- Wet Seeds (Tomatoes, Cucumbers, Squash): For tomatoes, ferment the seeds in water for a few days to remove the gel coating and inhibit disease. For cucumbers/squash, scrape out seeds, wash thoroughly, and dry.
- Drying: Spread seeds thinly on screens or paper plates in a cool, dry, well-ventilated area for 1-4 weeks. Ensure they are bone-dry before storage. I aim for less than 8% moisture content.
- Storage: Store seeds in airtight containers (glass jars with desiccant packets work well) in a cool, dark, dry place (ideally 40-50°F and 30-40% humidity). Label clearly with variety and date. Properly stored seeds can remain viable for 3-10 years or more.
Step 8: Season Extension & Winterizing
Extend your harvest and protect your garden for the off-season to truly maximize your self sufficient garden from scratch.
- Cold Frames: Simple structures with a transparent top (glass, polycarbonate, or old windows) that sit over garden beds. They trap solar heat, allowing you to grow cold-hardy crops (lettuce, spinach, kale, radishes) well into winter or start seeds earlier in spring. A basic cold frame can be built from 2×6 lumber and a sheet of polycarbonate for under $100.
- Hoop Houses/Low Tunnels: Larger structures made from flexible hoops (PVC pipe or EMT conduit) covered with greenhouse plastic. These provide more space and greater temperature moderation. A 10×20 ft DIY low tunnel kit can cost $200-$500, while a larger, more robust hoop house kit might be $1,000-$3,000. I use a 6×12 ft low tunnel made from 1/2-inch PVC hoops and 6mil greenhouse plastic, which extends my lettuce and spinach harvest by at least
Efficient water management is critical for a self sufficient garden from scratch, especially in off-grid living where water resources might be limited.
- Rainwater Harvesting: This is my primary source of irrigation water. A 55-gallon rain barrel (e.g., EarthMark Rain Barrel, ~$120-$150) connected to a downspout can collect significant water. For larger needs, I use two 275-gallon IBC totes (Intermediate Bulk Containers, often available used for $100-$200 each from food-grade sources) connected in series. A 1,000 sq ft roof can collect approximately 620 gallons of water for every inch of rainfall. My 1,500 sq ft roof provides ample water for my 600 sq ft garden through multiple barrels and totes.
- Drip Irrigation: This is by far the most water-efficient method, delivering water directly to the plant’s root zone, minimizing evaporation and weed growth.
- Components: A typical drip system includes a pressure regulator (e.g., Rain Bird PRV-10, ~$15), a filter (Rain Bird RBY filter, ~$20), main tubing (1/2-inch poly tubing, 100ft ~$25), smaller feeder lines (1/4-inch tubing), and emitters (0.5 GPH or 1 GPH per plant).
- Kits: For beginners, a starter kit like the Rain Bird Drip Irrigation Garden Kit (model DDI-KIT-1P, ~$40-$60) is excellent for a small garden. For larger setups, I use Netafim Techline CV Drip Line (500ft roll, ~$150-$200), which has pressure-compensating emitters built-in, ensuring even watering across long runs.
- Automation: For true self-sufficiency, consider a battery-powered timer (e.g., Orbit B-Hyve Bluetooth Hose Faucet Timer, ~$50) or a solar-powered timer connected to a small 12V pump.
- Solar-Powered Pumps: For lifting water from a well, pond, or large storage tank to your garden, a solar pump is a game-changer. For a smaller drip system, a Shurflo 2088-594-152 Diaphragm Pump (12V, 3.5 GPM, ~$180) can be powered by a single 100W solar panel (e.g., Renogy 100W Monocrystalline Solar Panel, ~$100) and a small 12V battery (e.g., a 50Ah LiFePO4 battery like the Battle Born 50Ah, ~$450). For larger operations or deeper wells, more robust systems are needed. If you’re looking to build out a comprehensive off-grid power system to support your garden’s water needs, or indeed your entire homestead, you might want to explore resources like the Power Grid Generator complete system guide to understand the full scope of what’s possible in terms of energy independence.
Step 5: Seed Selection & Planting
The choice of seeds is crucial for a truly self sufficient garden from scratch.
- Choose Heirloom & Open-Pollinated Seeds: These varieties produce seeds that will grow true to type, meaning you can save seeds from your harvest year after year. F1 hybrids, while often vigorous, will not produce consistent offspring from saved seeds. Reputable seed companies include Baker Creek Heirloom Seeds, High Mowing Organic Seeds, and Seed Savers Exchange. Start with common, reliable varieties like ‘Black Krim’ tomatoes, ‘Provider’ bush beans, ‘Waltham Butternut’ squash, and ‘Black Seeded Simpson’ lettuce.
- Start Seeds Indoors (Optional but Recommended): For longer growing seasons or specific crops, starting seeds indoors gives you a head start. Use seed-starting mix (e.g., Espoma Organic Seed Starter Mix, ~$10 for 16qt bag) in seed trays (Jiffy Professional Greenhouse 72-cell kit, ~$15). Provide adequate light with LED grow lights (Barrina T5 2ft 4-pack LED Grow Lights, 20W each, ~$50) for 14-16 hours a day, positioned 2-4 inches above seedlings. Maintain consistent temperatures (65-75°F for most).
- Direct Sowing vs. Transplanting: Some crops (carrots, radishes, beans, corn) prefer direct sowing into the garden bed. Others (tomatoes, peppers, broccoli, kale) benefit from being started indoors and transplanted. Follow seed packet instructions for planting depths (e.g., lettuce seeds are often surface-sown or planted 1/8 inch deep, while beans are 1 inch deep) and spacing.
- Companion Planting: Strategically plant different species together to enhance growth, deter pests, and attract beneficial insects. For example, planting marigolds near tomatoes can deter nematodes, and basil improves tomato flavor. Nasturtiums can act as a trap crop for aphids.
- Succession Planting: For a continuous harvest, plant small batches of quick-growing crops (lettuce, radishes, cilantro) every 2-3 weeks. As one crop finishes, another is ready to take its place.
Step 6: Pest & Disease Management (Organic)
Maintaining a self sufficient garden from scratch means embracing organic pest and disease control.
- Integrated Pest Management (IPM): This holistic approach combines several strategies.
- Observation: Regularly inspect your plants for early signs of pests or disease. Catching issues early is key.
- Physical Barriers: Use row covers (e.g., Agribon AG-19 floating row cover, 10×20 ft, ~$20) to protect young plants from insect pests like cabbage worms and squash bugs. Install fences (e.g., 2×4 welded wire mesh, 4 ft tall, 50 ft roll ~$70) to keep out deer, rabbits, and other larger animals.
- Hand-Picking: For larger pests like tomato hornworms or squash bugs, simply pick them off and drop them into a bucket of soapy water.
- Companion Planting: As mentioned, certain plants repel pests. Marigolds, garlic, and onions are excellent deterrents.
- Attract Beneficial Insects: Plant flowers like dill, fennel, cosmos, and sweet alyssum to attract ladybugs, lacewings, and parasitic wasps, which prey on common garden pests.
- Organic Sprays & Treatments:
- Neem Oil: An excellent broad-spectrum organic insecticide and fungicide. Bonide Neem Oil Concentrate (16oz, ~$20) can be mixed at a rate of 1-2 tbsp per gallon of water and sprayed on affected plants.
- Insecticidal Soap: Effective against soft-bodied insects like aphids, whiteflies, and spider mites. Garden Safe Insecticidal Soap (24oz ready-to-use, ~$10).
- Bacillus thuringiensis (Bt): A naturally occurring soil bacterium that targets caterpillars and worms. Monterey BT Worm & Caterpillar Killer (16oz, ~$18) is highly effective and safe for beneficial insects.
- Copper or Sulfur Sprays: For fungal diseases like powdery mildew or blight, organic copper (e.g., Bonide Copper Fungicide, ~$15 for 1lb) or sulfur (e.g., Safer Brand Garden Fungicide, ~$10 for 16oz) can be used as a last resort.
Step 7: Harvesting & Seed Saving
The culmination of your efforts is the harvest, and seed saving closes the loop on self-sufficiency.
- Harvesting Techniques:
- Timing: Harvest vegetables at their peak ripeness for best flavor and nutritional value. For example, green beans should snap cleanly, cucumbers should be firm, and tomatoes should be fully colored.
- Frequency: Many crops, like zucchini, cucumbers, and bush beans, produce more if harvested frequently. Pick daily or every other day.
- Tools: Use clean, sharp pruners (e.g., Corona ClassicCUT Bypass Pruner BP 3180, ~$30) or a sharp knife for clean cuts, minimizing damage to the plant.
- Seed Saving: This is where the « self-sufficient » aspect truly shines.
- Selection: Only save seeds from your healthiest, most vigorous plants that show desired traits (disease resistance, good flavor, high yield).
- Isolation: To ensure true-to-type seeds, prevent cross-pollination. This can be challenging for open-pollinated crops that readily cross (e.g., squash, corn). For beginners, focus on self-pollinating plants like beans, peas, lettuce, and tomatoes.
- Processing:
- Dry Seeds (Beans, Peas, Lettuce, Grains): Allow pods/seed heads to dry completely on the plant. Harvest, shell, and clean the seeds, removing chaff.
- Wet Seeds (Tomatoes, Cucumbers, Squash): For tomatoes, ferment the seeds in water for a few days to remove the gel coating and inhibit disease. For cucumbers/squash, scrape out seeds, wash thoroughly, and dry.
- Drying: Spread seeds thinly on screens or paper plates in a cool, dry, well-ventilated area for 1-4 weeks. Ensure they are bone-dry before storage. I aim for less than 8% moisture content.
- Storage: Store seeds in airtight containers (glass jars with desiccant packets work well) in a cool, dark, dry place (ideally 40-50°F and 30-40% humidity). Label clearly with variety and date. Properly stored seeds can remain viable for 3-10 years or more.
Step 8: Season Extension & Winterizing
Extend your harvest and protect your garden for the off-season to truly maximize your self sufficient garden from scratch.
- Cold Frames: Simple structures with a transparent top (glass, polycarbonate, or old windows) that sit over garden beds. They trap solar heat, allowing you to grow cold-hardy crops (lettuce, spinach, kale, radishes) well into winter or start seeds earlier in spring. A basic cold frame can be built from 2×6 lumber and a sheet of polycarbonate for under $100.
- Hoop Houses/Low Tunnels: Larger structures made from flexible hoops (PVC pipe or EMT conduit) covered with greenhouse plastic. These provide more space and greater temperature moderation. A 10×20 ft DIY low tunnel kit can cost $200-$500, while a larger, more robust hoop house kit might be $1,000-$3,000. I use a 6×12 ft low tunnel made from 1/2-inch PVC hoops and 6mil greenhouse plastic, which extends my lettuce and spinach harvest by at least
Step 4: Water Management & Irrigation
Efficient water management is critical for a self sufficient garden from scratch, especially in off-grid living where water resources might be limited.
- Rainwater Harvesting: This is my primary source of irrigation water. A 55-gallon rain barrel (e.g., EarthMark Rain Barrel, ~$120-$150) connected to a downspout can collect significant water. For larger needs, I use two 275-gallon IBC totes (Intermediate Bulk Containers, often available used for $100-$200 each from food-grade sources) connected in series. A 1,000 sq ft roof can collect approximately 620 gallons of water for every inch of rainfall. My 1,500 sq ft roof provides ample water for my 600 sq ft garden through multiple barrels and totes.
- Drip Irrigation: This is by far the most water-efficient method, delivering water directly to the plant’s root zone, minimizing evaporation and weed growth.
- Components: A typical drip system includes a pressure regulator (e.g., Rain Bird PRV-10, ~$15), a filter (Rain Bird RBY filter, ~$20), main tubing (1/2-inch poly tubing, 100ft ~$25), smaller feeder lines (1/4-inch tubing), and emitters (0.5 GPH or 1 GPH per plant).
- Kits: For beginners, a starter kit like the Rain Bird Drip Irrigation Garden Kit (model DDI-KIT-1P, ~$40-$60) is excellent for a small garden. For larger setups, I use Netafim Techline CV Drip Line (500ft roll, ~$150-$200), which has pressure-compensating emitters built-in, ensuring even watering across long runs.
- Automation: For true self-sufficiency, consider a battery-powered timer (e.g., Orbit B-Hyve Bluetooth Hose Faucet Timer, ~$50) or a solar-powered timer connected to a small 12V pump.
- Solar-Powered Pumps: For lifting water from a well, pond, or large storage tank to your garden, a solar pump is a game-changer. For a smaller drip system, a Shurflo 2088-594-152 Diaphragm Pump (12V, 3.5 GPM, ~$180) can be powered by a single 100W solar panel (e.g., Renogy 100W Monocrystalline Solar Panel, ~$100) and a small 12V battery (e.g., a 50Ah LiFePO4 battery like the Battle Born 50Ah, ~$450). For larger operations or deeper wells, more robust systems are needed. If you’re looking to build out a comprehensive off-grid power system to support your garden’s water needs, or indeed your entire homestead, you might want to explore resources like the Power Grid Generator complete system guide to understand the full scope of what’s possible in terms of energy independence.
Step 5: Seed Selection & Planting
The choice of seeds is crucial for a truly self sufficient garden from scratch.
- Choose Heirloom & Open-Pollinated Seeds: These varieties produce seeds that will grow true to type, meaning you can save seeds from your harvest year after year. F1 hybrids, while often vigorous, will not produce consistent offspring from saved seeds. Reputable seed companies include Baker Creek Heirloom Seeds, High Mowing Organic Seeds, and Seed Savers Exchange. Start with common, reliable varieties like ‘Black Krim’ tomatoes, ‘Provider’ bush beans, ‘Waltham Butternut’ squash, and ‘Black Seeded Simpson’ lettuce.
- Start Seeds Indoors (Optional but Recommended): For longer growing seasons or specific crops, starting seeds indoors gives you a head start. Use seed-starting mix (e.g., Espoma Organic Seed Starter Mix, ~$10 for 16qt bag) in seed trays (Jiffy Professional Greenhouse 72-cell kit, ~$15). Provide adequate light with LED grow lights (Barrina T5 2ft 4-pack LED Grow Lights, 20W each, ~$50) for 14-16 hours a day, positioned 2-4 inches above seedlings. Maintain consistent temperatures (65-75°F for most).
- Direct Sowing vs. Transplanting: Some crops (carrots, radishes, beans, corn) prefer direct sowing into the garden bed. Others (tomatoes, peppers, broccoli, kale) benefit from being started indoors and transplanted. Follow seed packet instructions for planting depths (e.g., lettuce seeds are often surface-sown or planted 1/8 inch deep, while beans are 1 inch deep) and spacing.
- Companion Planting: Strategically plant different species together to enhance growth, deter pests, and attract beneficial insects. For example, planting marigolds near tomatoes can deter nematodes, and basil improves tomato flavor. Nasturtiums can act as a trap crop for aphids.
- Succession Planting: For a continuous harvest, plant small batches of quick-growing crops (lettuce, radishes, cilantro) every 2-3 weeks. As one crop finishes, another is ready to take its place.
Step 6: Pest & Disease Management (Organic)
Maintaining a self sufficient garden from scratch means embracing organic pest and disease control.
- Integrated Pest Management (IPM): This holistic approach combines several strategies.
- Observation: Regularly inspect your plants for early signs of pests or disease. Catching issues early is key.
- Physical Barriers: Use row covers (e.g., Agribon AG-19 floating row cover, 10×20 ft, ~$20) to protect young plants from insect pests like cabbage worms and squash bugs. Install fences (e.g., 2×4 welded wire mesh, 4 ft tall, 50 ft roll ~$70) to keep out deer, rabbits, and other larger animals.
- Hand-Picking: For larger pests like tomato hornworms or squash bugs, simply pick them off and drop them into a bucket of soapy water.
- Companion Planting: As mentioned, certain plants repel pests. Marigolds, garlic, and onions are excellent deterrents.
- Attract Beneficial Insects: Plant flowers like dill, fennel, cosmos, and sweet alyssum to attract ladybugs, lacewings, and parasitic wasps, which prey on common garden pests.
- Organic Sprays & Treatments:
- Neem Oil: An excellent broad-spectrum organic insecticide and fungicide. Bonide Neem Oil Concentrate (16oz, ~$20) can be mixed at a rate of 1-2 tbsp per gallon of water and sprayed on affected plants.
- Insecticidal Soap: Effective against soft-bodied insects like aphids, whiteflies, and spider mites. Garden Safe Insecticidal Soap (24oz ready-to-use, ~$10).
- Bacillus thuringiensis (Bt): A naturally occurring soil bacterium that targets caterpillars and worms. Monterey BT Worm & Caterpillar Killer (16oz, ~$18) is highly effective and safe for beneficial insects.
- Copper or Sulfur Sprays: For fungal diseases like powdery mildew or blight, organic copper (e.g., Bonide Copper Fungicide, ~$15 for 1lb) or sulfur (e.g., Safer Brand Garden Fungicide, ~$10 for 16oz) can be used as a last resort.
Step 7: Harvesting & Seed Saving
The culmination of your efforts is the harvest, and seed saving closes the loop on self-sufficiency.
- Harvesting Techniques:
- Timing: Harvest vegetables at their peak ripeness for best flavor and nutritional value. For example, green beans should snap cleanly, cucumbers should be firm, and tomatoes should be fully colored.
- Frequency: Many crops, like zucchini, cucumbers, and bush beans, produce more if harvested frequently. Pick daily or every other day.
- Tools: Use clean, sharp pruners (e.g., Corona ClassicCUT Bypass Pruner BP 3180, ~$30) or a sharp knife for clean cuts, minimizing damage to the plant.
- Seed Saving: This is where the « self-sufficient » aspect truly shines.
- Selection: Only save seeds from your healthiest, most vigorous plants that show desired traits (disease resistance, good flavor, high yield).
- Isolation: To ensure true-to-type seeds, prevent cross-pollination. This can be challenging for open-pollinated crops that readily cross (e.g., squash, corn). For beginners, focus on self-pollinating plants like beans, peas, lettuce, and tomatoes.
- Processing:
- Dry Seeds (Beans, Peas, Lettuce, Grains): Allow pods/seed heads to dry completely on the plant. Harvest, shell, and clean the seeds, removing chaff.
- Wet Seeds (Tomatoes, Cucumbers, Squash): For tomatoes, ferment the seeds in water for a few days to remove the gel coating and inhibit disease. For cucumbers/squash, scrape out seeds, wash thoroughly, and dry.
- Drying: Spread seeds thinly on screens or paper plates in a cool, dry, well-ventilated area for 1-4 weeks. Ensure they are bone-dry before storage. I aim for less than 8% moisture content.
- Storage: Store seeds in airtight containers (glass jars with desiccant packets work well) in a cool, dark, dry place (ideally 40-50°F and 30-40% humidity). Label clearly with variety and date. Properly stored seeds can remain viable for 3-10 years or more.
Step 8: Season Extension & Winterizing
Extend your harvest and protect your garden for the off-season to truly maximize your self sufficient garden from scratch.
- Cold Frames: Simple structures with a transparent top (glass, polycarbonate, or old windows) that sit over garden beds. They trap solar heat, allowing you to grow cold-hardy crops (lettuce, spinach, kale, radishes) well into winter or start seeds earlier in spring. A basic cold frame can be built from 2×6 lumber and a sheet of polycarbonate for under $100.
- Hoop Houses/Low Tunnels: Larger structures made from flexible hoops (PVC pipe or EMT conduit) covered with greenhouse plastic. These provide more space and greater temperature moderation. A 10×20 ft DIY low tunnel kit can cost $200-$500, while a larger, more robust hoop house kit might be $1,000-$3,000. I use a 6×12 ft low tunnel made from 1/2-inch PVC hoops and 6mil greenhouse plastic, which extends my lettuce and spinach harvest by at least
- In-Ground Beds: If you have excellent native soil and good drainage, in-ground beds are the most economical. Double-digging (loosening soil two shovel depths) can significantly improve drainage and aeration. For my main garden, I primarily use in-ground beds, but I focus on building up the soil over time with consistent compost additions and cover cropping. I aim for beds that are no wider than 3-4 feet so I can reach the center without stepping on the soil, compacting it.
- Raised Beds: Raised beds offer numerous advantages, especially for poor soil, heavy clay, or rocky areas. They provide better drainage, warm up faster in spring, reduce compaction, and make weeding and harvesting easier on your back.
- Material Options:
- Untreated Cedar: Naturally rot-resistant and chemical-free. A 4×8 ft bed, 12 inches deep, typically requires three 2x12x8 ft cedar boards, costing around $50-$60 per board (total ~$150-$180) plus corner brackets or screws. My first raised beds were cedar and are still going strong after 7 years.
- Galvanized Steel: Durable, long-lasting, and aesthetically pleasing. Brands like Vego Garden offer modular kits. A Vego Garden 17″ Tall 8-in-1 Metal Raised Garden Bed (can be configured to 4×8 ft) costs approximately $250-$300.
- Concrete Blocks/Stones: Very durable but can leach minerals (though generally safe once weathered) and can be expensive.
- Recycled Materials: Pallets (check for chemical treatment stamps like « HT » for heat-treated), old tires (controversial due to potential chemical leaching).
- Filling Raised Beds: Don’t just fill with topsoil. Use a « Hugelkultur » approach (logs, branches, leaves, then compost, then topsoil) or a mixture of 60% good quality topsoil, 30% compost, and 10% perlite or vermiculite for drainage. A 4x8x1 ft raised bed requires about 32 cubic feet (or ~1.2 cubic yards) of soil mix, which can cost $100-$200 depending on your source.
- Material Options:
Step 4: Water Management & Irrigation
Efficient water management is critical for a self sufficient garden from scratch, especially in off-grid living where water resources might be limited.
- Rainwater Harvesting: This is my primary source of irrigation water. A 55-gallon rain barrel (e.g., EarthMark Rain Barrel, ~$120-$150) connected to a downspout can collect significant water. For larger needs, I use two 275-gallon IBC totes (Intermediate Bulk Containers, often available used for $100-$200 each from food-grade sources) connected in series. A 1,000 sq ft roof can collect approximately 620 gallons of water for every inch of rainfall. My 1,500 sq ft roof provides ample water for my 600 sq ft garden through multiple barrels and totes.
- Drip Irrigation: This is by far the most water-efficient method, delivering water directly to the plant’s root zone, minimizing evaporation and weed growth.
- Components: A typical drip system includes a pressure regulator (e.g., Rain Bird PRV-10, ~$15), a filter (Rain Bird RBY filter, ~$20), main tubing (1/2-inch poly tubing, 100ft ~$25), smaller feeder lines (1/4-inch tubing), and emitters (0.5 GPH or 1 GPH per plant).
- Kits: For beginners, a starter kit like the Rain Bird Drip Irrigation Garden Kit (model DDI-KIT-1P, ~$40-$60) is excellent for a small garden. For larger setups, I use Netafim Techline CV Drip Line (500ft roll, ~$150-$200), which has pressure-compensating emitters built-in, ensuring even watering across long runs.
- Automation: For true self-sufficiency, consider a battery-powered timer (e.g., Orbit B-Hyve Bluetooth Hose Faucet Timer, ~$50) or a solar-powered timer connected to a small 12V pump.
- Solar-Powered Pumps: For lifting water from a well, pond, or large storage tank to your garden, a solar pump is a game-changer. For a smaller drip system, a Shurflo 2088-594-152 Diaphragm Pump (12V, 3.5 GPM, ~$180) can be powered by a single 100W solar panel (e.g., Renogy 100W Monocrystalline Solar Panel, ~$100) and a small 12V battery (e.g., a 50Ah LiFePO4 battery like the Battle Born 50Ah, ~$450). For larger operations or deeper wells, more robust systems are needed. If you’re looking to build out a comprehensive off-grid power system to support your garden’s water needs, or indeed your entire homestead, you might want to explore resources like the Power Grid Generator complete system guide to understand the full scope of what’s possible in terms of energy independence.
Step 5: Seed Selection & Planting
The choice of seeds is crucial for a truly self sufficient garden from scratch.
- Choose Heirloom & Open-Pollinated Seeds: These varieties produce seeds that will grow true to type, meaning you can save seeds from your harvest year after year. F1 hybrids, while often vigorous, will not produce consistent offspring from saved seeds. Reputable seed companies include Baker Creek Heirloom Seeds, High Mowing Organic Seeds, and Seed Savers Exchange. Start with common, reliable varieties like ‘Black Krim’ tomatoes, ‘Provider’ bush beans, ‘Waltham Butternut’ squash, and ‘Black Seeded Simpson’ lettuce.
- Start Seeds Indoors (Optional but Recommended): For longer growing seasons or specific crops, starting seeds indoors gives you a head start. Use seed-starting mix (e.g., Espoma Organic Seed Starter Mix, ~$10 for 16qt bag) in seed trays (Jiffy Professional Greenhouse 72-cell kit, ~$15). Provide adequate light with LED grow lights (Barrina T5 2ft 4-pack LED Grow Lights, 20W each, ~$50) for 14-16 hours a day, positioned 2-4 inches above seedlings. Maintain consistent temperatures (65-75°F for most).
- Direct Sowing vs. Transplanting: Some crops (carrots, radishes, beans, corn) prefer direct sowing into the garden bed. Others (tomatoes, peppers, broccoli, kale) benefit from being started indoors and transplanted. Follow seed packet instructions for planting depths (e.g., lettuce seeds are often surface-sown or planted 1/8 inch deep, while beans are 1 inch deep) and spacing.
- Companion Planting: Strategically plant different species together to enhance growth, deter pests, and attract beneficial insects. For example, planting marigolds near tomatoes can deter nematodes, and basil improves tomato flavor. Nasturtiums can act as a trap crop for aphids.
- Succession Planting: For a continuous harvest, plant small batches of quick-growing crops (lettuce, radishes, cilantro) every 2-3 weeks. As one crop finishes, another is ready to take its place.
Step 6: Pest & Disease Management (Organic)
Maintaining a self sufficient garden from scratch means embracing organic pest and disease control.
- Integrated Pest Management (IPM): This holistic approach combines several strategies.
- Observation: Regularly inspect your plants for early signs of pests or disease. Catching issues early is key.
- Physical Barriers: Use row covers (e.g., Agribon AG-19 floating row cover, 10×20 ft, ~$20) to protect young plants from insect pests like cabbage worms and squash bugs. Install fences (e.g., 2×4 welded wire mesh, 4 ft tall, 50 ft roll ~$70) to keep out deer, rabbits, and other larger animals.
- Hand-Picking: For larger pests like tomato hornworms or squash bugs, simply pick them off and drop them into a bucket of soapy water.
- Companion Planting: As mentioned, certain plants repel pests. Marigolds, garlic, and onions are excellent deterrents.
- Attract Beneficial Insects: Plant flowers like dill, fennel, cosmos, and sweet alyssum to attract ladybugs, lacewings, and parasitic wasps, which prey on common garden pests.
- Organic Sprays & Treatments:
- Neem Oil: An excellent broad-spectrum organic insecticide and fungicide. Bonide Neem Oil Concentrate (16oz, ~$20) can be mixed at a rate of 1-2 tbsp per gallon of water and sprayed on affected plants.
- Insecticidal Soap: Effective against soft-bodied insects like aphids, whiteflies, and spider mites. Garden Safe Insecticidal Soap (24oz ready-to-use, ~$10).
- Bacillus thuringiensis (Bt): A naturally occurring soil bacterium that targets caterpillars and worms. Monterey BT Worm & Caterpillar Killer (16oz, ~$18) is highly effective and safe for beneficial insects.
- Copper or Sulfur Sprays: For fungal diseases like powdery mildew or blight, organic copper (e.g., Bonide Copper Fungicide, ~$15 for 1lb) or sulfur (e.g., Safer Brand Garden Fungicide, ~$10 for 16oz) can be used as a last resort.
Step 7: Harvesting & Seed Saving
The culmination of your efforts is the harvest, and seed saving closes the loop on self-sufficiency.
- Harvesting Techniques:
- Timing: Harvest vegetables at their peak ripeness for best flavor and nutritional value. For example, green beans should snap cleanly, cucumbers should be firm, and tomatoes should be fully colored.
- Frequency: Many crops, like zucchini, cucumbers, and bush beans, produce more if harvested frequently. Pick daily or every other day.
- Tools: Use clean, sharp pruners (e.g., Corona ClassicCUT Bypass Pruner BP 3180, ~$30) or a sharp knife for clean cuts, minimizing damage to the plant.
- Seed Saving: This is where the « self-sufficient » aspect truly shines.
- Selection: Only save seeds from your healthiest, most vigorous plants that show desired traits (disease resistance, good flavor, high yield).
- Isolation: To ensure true-to-type seeds, prevent cross-pollination. This can be challenging for open-pollinated crops that readily cross (e.g., squash, corn). For beginners, focus on self-pollinating plants like beans, peas, lettuce, and tomatoes.
- Processing:
- Dry Seeds (Beans, Peas, Lettuce, Grains): Allow pods/seed heads to dry completely on the plant. Harvest, shell, and clean the seeds, removing chaff.
- Wet Seeds (Tomatoes, Cucumbers, Squash): For tomatoes, ferment the seeds in water for a few days to remove the gel coating and inhibit disease. For cucumbers/squash, scrape out seeds, wash thoroughly, and dry.
- Drying: Spread seeds thinly on screens or paper plates in a cool, dry, well-ventilated area for 1-4 weeks. Ensure they are bone-dry before storage. I aim for less than 8% moisture content.
- Storage: Store seeds in airtight containers (glass jars with desiccant packets work well) in a cool, dark, dry place (ideally 40-50°F and 30-40% humidity). Label clearly with variety and date. Properly stored seeds can remain viable for 3-10 years or more.
Step 8: Season Extension & Winterizing
Extend your harvest and protect your garden for the off-season to truly maximize your self sufficient garden from scratch.
- Cold Frames: Simple structures with a transparent top (glass, polycarbonate, or old windows) that sit over garden beds. They trap solar heat, allowing you to grow cold-hardy crops (lettuce, spinach, kale, radishes) well into winter or start seeds earlier in spring. A basic cold frame can be built from 2×6 lumber and a sheet of polycarbonate for under $100.
- Hoop Houses/Low Tunnels: Larger structures made from flexible hoops (PVC pipe or EMT conduit) covered with greenhouse plastic. These provide more space and greater temperature moderation. A 10×20 ft DIY low tunnel kit can cost $200-$500, while a larger, more robust hoop house kit might be $1,000-$3,000. I use a 6×12 ft low tunnel made from 1/2-inch PVC hoops and 6mil greenhouse plastic, which extends my lettuce and spinach harvest by at least
Deciding between raised beds and in-ground beds depends on your soil, budget, and physical capabilities.
- In-Ground Beds: If you have excellent native soil and good drainage, in-ground beds are the most economical. Double-digging (loosening soil two shovel depths) can significantly improve drainage and aeration. For my main garden, I primarily use in-ground beds, but I focus on building up the soil over time with consistent compost additions and cover cropping. I aim for beds that are no wider than 3-4 feet so I can reach the center without stepping on the soil, compacting it.
- Raised Beds: Raised beds offer numerous advantages, especially for poor soil, heavy clay, or rocky areas. They provide better drainage, warm up faster in spring, reduce compaction, and make weeding and harvesting easier on your back.
- Material Options:
- Untreated Cedar: Naturally rot-resistant and chemical-free. A 4×8 ft bed, 12 inches deep, typically requires three 2x12x8 ft cedar boards, costing around $50-$60 per board (total ~$150-$180) plus corner brackets or screws. My first raised beds were cedar and are still going strong after 7 years.
- Galvanized Steel: Durable, long-lasting, and aesthetically pleasing. Brands like Vego Garden offer modular kits. A Vego Garden 17″ Tall 8-in-1 Metal Raised Garden Bed (can be configured to 4×8 ft) costs approximately $250-$300.
- Concrete Blocks/Stones: Very durable but can leach minerals (though generally safe once weathered) and can be expensive.
- Recycled Materials: Pallets (check for chemical treatment stamps like « HT » for heat-treated), old tires (controversial due to potential chemical leaching).
- Filling Raised Beds: Don’t just fill with topsoil. Use a « Hugelkultur » approach (logs, branches, leaves, then compost, then topsoil) or a mixture of 60% good quality topsoil, 30% compost, and 10% perlite or vermiculite for drainage. A 4x8x1 ft raised bed requires about 32 cubic feet (or ~1.2 cubic yards) of soil mix, which can cost $100-$200 depending on your source.
- Material Options:
Step 4: Water Management & Irrigation
Efficient water management is critical for a self sufficient garden from scratch, especially in off-grid living where water resources might be limited.
- Rainwater Harvesting: This is my primary source of irrigation water. A 55-gallon rain barrel (e.g., EarthMark Rain Barrel, ~$120-$150) connected to a downspout can collect significant water. For larger needs, I use two 275-gallon IBC totes (Intermediate Bulk Containers, often available used for $100-$200 each from food-grade sources) connected in series. A 1,000 sq ft roof can collect approximately 620 gallons of water for every inch of rainfall. My 1,500 sq ft roof provides ample water for my 600 sq ft garden through multiple barrels and totes.
- Drip Irrigation: This is by far the most water-efficient method, delivering water directly to the plant’s root zone, minimizing evaporation and weed growth.
- Components: A typical drip system includes a pressure regulator (e.g., Rain Bird PRV-10, ~$15), a filter (Rain Bird RBY filter, ~$20), main tubing (1/2-inch poly tubing, 100ft ~$25), smaller feeder lines (1/4-inch tubing), and emitters (0.5 GPH or 1 GPH per plant).
- Kits: For beginners, a starter kit like the Rain Bird Drip Irrigation Garden Kit (model DDI-KIT-1P, ~$40-$60) is excellent for a small garden. For larger setups, I use Netafim Techline CV Drip Line (500ft roll, ~$150-$200), which has pressure-compensating emitters built-in, ensuring even watering across long runs.
- Automation: For true self-sufficiency, consider a battery-powered timer (e.g., Orbit B-Hyve Bluetooth Hose Faucet Timer, ~$50) or a solar-powered timer connected to a small 12V pump.
- Solar-Powered Pumps: For lifting water from a well, pond, or large storage tank to your garden, a solar pump is a game-changer. For a smaller drip system, a Shurflo 2088-594-152 Diaphragm Pump (12V, 3.5 GPM, ~$180) can be powered by a single 100W solar panel (e.g., Renogy 100W Monocrystalline Solar Panel, ~$100) and a small 12V battery (e.g., a 50Ah LiFePO4 battery like the Battle Born 50Ah, ~$450). For larger operations or deeper wells, more robust systems are needed. If you’re looking to build out a comprehensive off-grid power system to support your garden’s water needs, or indeed your entire homestead, you might want to explore resources like the Power Grid Generator complete system guide to understand the full scope of what’s possible in terms of energy independence.
Step 5: Seed Selection & Planting
The choice of seeds is crucial for a truly self sufficient garden from scratch.
- Choose Heirloom & Open-Pollinated Seeds: These varieties produce seeds that will grow true to type, meaning you can save seeds from your harvest year after year. F1 hybrids, while often vigorous, will not produce consistent offspring from saved seeds. Reputable seed companies include Baker Creek Heirloom Seeds, High Mowing Organic Seeds, and Seed Savers Exchange. Start with common, reliable varieties like ‘Black Krim’ tomatoes, ‘Provider’ bush beans, ‘Waltham Butternut’ squash, and ‘Black Seeded Simpson’ lettuce.
- Start Seeds Indoors (Optional but Recommended): For longer growing seasons or specific crops, starting seeds indoors gives you a head start. Use seed-starting mix (e.g., Espoma Organic Seed Starter Mix, ~$10 for 16qt bag) in seed trays (Jiffy Professional Greenhouse 72-cell kit, ~$15). Provide adequate light with LED grow lights (Barrina T5 2ft 4-pack LED Grow Lights, 20W each, ~$50) for 14-16 hours a day, positioned 2-4 inches above seedlings. Maintain consistent temperatures (65-75°F for most).
- Direct Sowing vs. Transplanting: Some crops (carrots, radishes, beans, corn) prefer direct sowing into the garden bed. Others (tomatoes, peppers, broccoli, kale) benefit from being started indoors and transplanted. Follow seed packet instructions for planting depths (e.g., lettuce seeds are often surface-sown or planted 1/8 inch deep, while beans are 1 inch deep) and spacing.
- Companion Planting: Strategically plant different species together to enhance growth, deter pests, and attract beneficial insects. For example, planting marigolds near tomatoes can deter nematodes, and basil improves tomato flavor. Nasturtiums can act as a trap crop for aphids.
- Succession Planting: For a continuous harvest, plant small batches of quick-growing crops (lettuce, radishes, cilantro) every 2-3 weeks. As one crop finishes, another is ready to take its place.
Step 6: Pest & Disease Management (Organic)
Maintaining a self sufficient garden from scratch means embracing organic pest and disease control.
- Integrated Pest Management (IPM): This holistic approach combines several strategies.
- Observation: Regularly inspect your plants for early signs of pests or disease. Catching issues early is key.
- Physical Barriers: Use row covers (e.g., Agribon AG-19 floating row cover, 10×20 ft, ~$20) to protect young plants from insect pests like cabbage worms and squash bugs. Install fences (e.g., 2×4 welded wire mesh, 4 ft tall, 50 ft roll ~$70) to keep out deer, rabbits, and other larger animals.
- Hand-Picking: For larger pests like tomato hornworms or squash bugs, simply pick them off and drop them into a bucket of soapy water.
- Companion Planting: As mentioned, certain plants repel pests. Marigolds, garlic, and onions are excellent deterrents.
- Attract Beneficial Insects: Plant flowers like dill, fennel, cosmos, and sweet alyssum to attract ladybugs, lacewings, and parasitic wasps, which prey on common garden pests.
- Organic Sprays & Treatments:
- Neem Oil: An excellent broad-spectrum organic insecticide and fungicide. Bonide Neem Oil Concentrate (16oz, ~$20) can be mixed at a rate of 1-2 tbsp per gallon of water and sprayed on affected plants.
- Insecticidal Soap: Effective against soft-bodied insects like aphids, whiteflies, and spider mites. Garden Safe Insecticidal Soap (24oz ready-to-use, ~$10).
- Bacillus thuringiensis (Bt): A naturally occurring soil bacterium that targets caterpillars and worms. Monterey BT Worm & Caterpillar Killer (16oz, ~$18) is highly effective and safe for beneficial insects.
- Copper or Sulfur Sprays: For fungal diseases like powdery mildew or blight, organic copper (e.g., Bonide Copper Fungicide, ~$15 for 1lb) or sulfur (e.g., Safer Brand Garden Fungicide, ~$10 for 16oz) can be used as a last resort.
Step 7: Harvesting & Seed Saving
The culmination of your efforts is the harvest, and seed saving closes the loop on self-sufficiency.
- Harvesting Techniques:
- Timing: Harvest vegetables at their peak ripeness for best flavor and nutritional value. For example, green beans should snap cleanly, cucumbers should be firm, and tomatoes should be fully colored.
- Frequency: Many crops, like zucchini, cucumbers, and bush beans, produce more if harvested frequently. Pick daily or every other day.
- Tools: Use clean, sharp pruners (e.g., Corona ClassicCUT Bypass Pruner BP 3180, ~$30) or a sharp knife for clean cuts, minimizing damage to the plant.
- Seed Saving: This is where the « self-sufficient » aspect truly shines.
- Selection: Only save seeds from your healthiest, most vigorous plants that show desired traits (disease resistance, good flavor, high yield).
- Isolation: To ensure true-to-type seeds, prevent cross-pollination. This can be challenging for open-pollinated crops that readily cross (e.g., squash, corn). For beginners, focus on self-pollinating plants like beans, peas, lettuce, and tomatoes.
- Processing:
- Dry Seeds (Beans, Peas, Lettuce, Grains): Allow pods/seed heads to dry completely on the plant. Harvest, shell, and clean the seeds, removing chaff.
- Wet Seeds (Tomatoes, Cucumbers, Squash): For tomatoes, ferment the seeds in water for a few days to remove the gel coating and inhibit disease. For cucumbers/squash, scrape out seeds, wash thoroughly, and dry.
- Drying: Spread seeds thinly on screens or paper plates in a cool, dry, well-ventilated area for 1-4 weeks. Ensure they are bone-dry before storage. I aim for less than 8% moisture content.
- Storage: Store seeds in airtight containers (glass jars with desiccant packets work well) in a cool, dark, dry place (ideally 40-50°F and 30-40% humidity). Label clearly with variety and date. Properly stored seeds can remain viable for 3-10 years or more.
Step 8: Season Extension & Winterizing
Extend your harvest and protect your garden for the off-season to truly maximize your self sufficient garden from scratch.
- Cold Frames: Simple structures with a transparent top (glass, polycarbonate, or old windows) that sit over garden beds. They trap solar heat, allowing you to grow cold-hardy crops (lettuce, spinach, kale, radishes) well into winter or start seeds earlier in spring. A basic cold frame can be built from 2×6 lumber and a sheet of polycarbonate for under $100.
- Hoop Houses/Low Tunnels: Larger structures made from flexible hoops (PVC pipe or EMT conduit) covered with greenhouse plastic. These provide more space and greater temperature moderation. A 10×20 ft DIY low tunnel kit can cost $200-$500, while a larger, more robust hoop house kit might be $1,000-$3,000. I use a 6×12 ft low tunnel made from 1/2-inch PVC hoops and 6mil greenhouse plastic, which extends my lettuce and spinach harvest by at least
Healthy soil is the bedrock of a productive, self-sufficient garden. You can’t guess what your soil needs; you have to test it.
- Perform a Soil Test: A professional soil test will give you precise data on your soil’s pH, nutrient levels (N-P-K), and organic matter content. I recommend sending a sample to your local agricultural extension office; it typically costs $20-$50 and provides detailed recommendations. Alternatively, for a quick homeowner check, a Rapitest Soil Test Kit (40-test kit, model 1663, ~$20 on Amazon) provides a good baseline for pH, Nitrogen, Phosphorus, and Potash. Aim for a pH between 6.0 and 7.0 for most vegetables.
- Amend for pH Imbalance: If your soil is too acidic (below 6.0), add agricultural lime (dolomitic lime adds magnesium, calcitic lime adds calcium). Apply 5-10 lbs per 100 sq ft for a moderate adjustment. If it’s too alkaline (above 7.0), add elemental sulfur (e.g., Espoma Soil Acidifier, ~$15 for 6.75 lbs) or generous amounts of organic matter like peat moss or pine needles.
- Build Organic Matter: This is the single most important step for long-term soil health. Organic matter improves soil structure, water retention, drainage, and nutrient availability. Incorporate 2-4 inches of high-quality compost into your top 6-12 inches of soil annually. I make my own compost from kitchen scraps, garden waste, and shredded leaves, but you can purchase it. Local nurseries often sell bulk compost for $30-$50 per cubic yard. Aged manure (from chickens, cows, or horses – ensure it’s well-rotted to avoid burning plants) is also excellent.
- Address Nutrient Deficiencies: Based on your soil test, add specific organic amendments. If Nitrogen (N) is low, add blood meal (12-0-0, ~$20 for 3 lbs) or feather meal. For Phosphorus (P), use bone meal (3-15-0, ~$15 for 3 lbs) or rock phosphate. For Potassium (K), greensand (0-0-2.5, ~$25 for 5 lbs) or kelp meal are good choices. I rely heavily on Espoma Organic Garden-tone (5-3-3, ~$25 for an 8lb bag) as a balanced, all-purpose organic fertilizer during planting.
Step 3: Garden Bed Preparation
Deciding between raised beds and in-ground beds depends on your soil, budget, and physical capabilities.
- In-Ground Beds: If you have excellent native soil and good drainage, in-ground beds are the most economical. Double-digging (loosening soil two shovel depths) can significantly improve drainage and aeration. For my main garden, I primarily use in-ground beds, but I focus on building up the soil over time with consistent compost additions and cover cropping. I aim for beds that are no wider than 3-4 feet so I can reach the center without stepping on the soil, compacting it.
- Raised Beds: Raised beds offer numerous advantages, especially for poor soil, heavy clay, or rocky areas. They provide better drainage, warm up faster in spring, reduce compaction, and make weeding and harvesting easier on your back.
- Material Options:
- Untreated Cedar: Naturally rot-resistant and chemical-free. A 4×8 ft bed, 12 inches deep, typically requires three 2x12x8 ft cedar boards, costing around $50-$60 per board (total ~$150-$180) plus corner brackets or screws. My first raised beds were cedar and are still going strong after 7 years.
- Galvanized Steel: Durable, long-lasting, and aesthetically pleasing. Brands like Vego Garden offer modular kits. A Vego Garden 17″ Tall 8-in-1 Metal Raised Garden Bed (can be configured to 4×8 ft) costs approximately $250-$300.
- Concrete Blocks/Stones: Very durable but can leach minerals (though generally safe once weathered) and can be expensive.
- Recycled Materials: Pallets (check for chemical treatment stamps like « HT » for heat-treated), old tires (controversial due to potential chemical leaching).
- Filling Raised Beds: Don’t just fill with topsoil. Use a « Hugelkultur » approach (logs, branches, leaves, then compost, then topsoil) or a mixture of 60% good quality topsoil, 30% compost, and 10% perlite or vermiculite for drainage. A 4x8x1 ft raised bed requires about 32 cubic feet (or ~1.2 cubic yards) of soil mix, which can cost $100-$200 depending on your source.
- Material Options:
Step 4: Water Management & Irrigation
Efficient water management is critical for a self sufficient garden from scratch, especially in off-grid living where water resources might be limited.
- Rainwater Harvesting: This is my primary source of irrigation water. A 55-gallon rain barrel (e.g., EarthMark Rain Barrel, ~$120-$150) connected to a downspout can collect significant water. For larger needs, I use two 275-gallon IBC totes (Intermediate Bulk Containers, often available used for $100-$200 each from food-grade sources) connected in series. A 1,000 sq ft roof can collect approximately 620 gallons of water for every inch of rainfall. My 1,500 sq ft roof provides ample water for my 600 sq ft garden through multiple barrels and totes.
- Drip Irrigation: This is by far the most water-efficient method, delivering water directly to the plant’s root zone, minimizing evaporation and weed growth.
- Components: A typical drip system includes a pressure regulator (e.g., Rain Bird PRV-10, ~$15), a filter (Rain Bird RBY filter, ~$20), main tubing (1/2-inch poly tubing, 100ft ~$25), smaller feeder lines (1/4-inch tubing), and emitters (0.5 GPH or 1 GPH per plant).
- Kits: For beginners, a starter kit like the Rain Bird Drip Irrigation Garden Kit (model DDI-KIT-1P, ~$40-$60) is excellent for a small garden. For larger setups, I use Netafim Techline CV Drip Line (500ft roll, ~$150-$200), which has pressure-compensating emitters built-in, ensuring even watering across long runs.
- Automation: For true self-sufficiency, consider a battery-powered timer (e.g., Orbit B-Hyve Bluetooth Hose Faucet Timer, ~$50) or a solar-powered timer connected to a small 12V pump.
- Solar-Powered Pumps: For lifting water from a well, pond, or large storage tank to your garden, a solar pump is a game-changer. For a smaller drip system, a Shurflo 2088-594-152 Diaphragm Pump (12V, 3.5 GPM, ~$180) can be powered by a single 100W solar panel (e.g., Renogy 100W Monocrystalline Solar Panel, ~$100) and a small 12V battery (e.g., a 50Ah LiFePO4 battery like the Battle Born 50Ah, ~$450). For larger operations or deeper wells, more robust systems are needed. If you’re looking to build out a comprehensive off-grid power system to support your garden’s water needs, or indeed your entire homestead, you might want to explore resources like the Power Grid Generator complete system guide to understand the full scope of what’s possible in terms of energy independence.
Step 5: Seed Selection & Planting
The choice of seeds is crucial for a truly self sufficient garden from scratch.
- Choose Heirloom & Open-Pollinated Seeds: These varieties produce seeds that will grow true to type, meaning you can save seeds from your harvest year after year. F1 hybrids, while often vigorous, will not produce consistent offspring from saved seeds. Reputable seed companies include Baker Creek Heirloom Seeds, High Mowing Organic Seeds, and Seed Savers Exchange. Start with common, reliable varieties like ‘Black Krim’ tomatoes, ‘Provider’ bush beans, ‘Waltham Butternut’ squash, and ‘Black Seeded Simpson’ lettuce.
- Start Seeds Indoors (Optional but Recommended): For longer growing seasons or specific crops, starting seeds indoors gives you a head start. Use seed-starting mix (e.g., Espoma Organic Seed Starter Mix, ~$10 for 16qt bag) in seed trays (Jiffy Professional Greenhouse 72-cell kit, ~$15). Provide adequate light with LED grow lights (Barrina T5 2ft 4-pack LED Grow Lights, 20W each, ~$50) for 14-16 hours a day, positioned 2-4 inches above seedlings. Maintain consistent temperatures (65-75°F for most).
- Direct Sowing vs. Transplanting: Some crops (carrots, radishes, beans, corn) prefer direct sowing into the garden bed. Others (tomatoes, peppers, broccoli, kale) benefit from being started indoors and transplanted. Follow seed packet instructions for planting depths (e.g., lettuce seeds are often surface-sown or planted 1/8 inch deep, while beans are 1 inch deep) and spacing.
- Companion Planting: Strategically plant different species together to enhance growth, deter pests, and attract beneficial insects. For example, planting marigolds near tomatoes can deter nematodes, and basil improves tomato flavor. Nasturtiums can act as a trap crop for aphids.
- Succession Planting: For a continuous harvest, plant small batches of quick-growing crops (lettuce, radishes, cilantro) every 2-3 weeks. As one crop finishes, another is ready to take its place.
Step 6: Pest & Disease Management (Organic)
Maintaining a self sufficient garden from scratch means embracing organic pest and disease control.
- Integrated Pest Management (IPM): This holistic approach combines several strategies.
- Observation: Regularly inspect your plants for early signs of pests or disease. Catching issues early is key.
- Physical Barriers: Use row covers (e.g., Agribon AG-19 floating row cover, 10×20 ft, ~$20) to protect young plants from insect pests like cabbage worms and squash bugs. Install fences (e.g., 2×4 welded wire mesh, 4 ft tall, 50 ft roll ~$70) to keep out deer, rabbits, and other larger animals.
- Hand-Picking: For larger pests like tomato hornworms or squash bugs, simply pick them off and drop them into a bucket of soapy water.
- Companion Planting: As mentioned, certain plants repel pests. Marigolds, garlic, and onions are excellent deterrents.
- Attract Beneficial Insects: Plant flowers like dill, fennel, cosmos, and sweet alyssum to attract ladybugs, lacewings, and parasitic wasps, which prey on common garden pests.
- Organic Sprays & Treatments:
- Neem Oil: An excellent broad-spectrum organic insecticide and fungicide. Bonide Neem Oil Concentrate (16oz, ~$20) can be mixed at a rate of 1-2 tbsp per gallon of water and sprayed on affected plants.
- Insecticidal Soap: Effective against soft-bodied insects like aphids, whiteflies, and spider mites. Garden Safe Insecticidal Soap (24oz ready-to-use, ~$10).
- Bacillus thuringiensis (Bt): A naturally occurring soil bacterium that targets caterpillars and worms. Monterey BT Worm & Caterpillar Killer (16oz, ~$18) is highly effective and safe for beneficial insects.
- Copper or Sulfur Sprays: For fungal diseases like powdery mildew or blight, organic copper (e.g., Bonide Copper Fungicide, ~$15 for 1lb) or sulfur (e.g., Safer Brand Garden Fungicide, ~$10 for 16oz) can be used as a last resort.
Step 7: Harvesting & Seed Saving
The culmination of your efforts is the harvest, and seed saving closes the loop on self-sufficiency.
- Harvesting Techniques:
- Timing: Harvest vegetables at their peak ripeness for best flavor and nutritional value. For example, green beans should snap cleanly, cucumbers should be firm, and tomatoes should be fully colored.
- Frequency: Many crops, like zucchini, cucumbers, and bush beans, produce more if harvested frequently. Pick daily or every other day.
- Tools: Use clean, sharp pruners (e.g., Corona ClassicCUT Bypass Pruner BP 3180, ~$30) or a sharp knife for clean cuts, minimizing damage to the plant.
- Seed Saving: This is where the « self-sufficient » aspect truly shines.
- Selection: Only save seeds from your healthiest, most vigorous plants that show desired traits (disease resistance, good flavor, high yield).
- Isolation: To ensure true-to-type seeds, prevent cross-pollination. This can be challenging for open-pollinated crops that readily cross (e.g., squash, corn). For beginners, focus on self-pollinating plants like beans, peas, lettuce, and tomatoes.
- Processing:
- Dry Seeds (Beans, Peas, Lettuce, Grains): Allow pods/seed heads to dry completely on the plant. Harvest, shell, and clean the seeds, removing chaff.
- Wet Seeds (Tomatoes, Cucumbers, Squash): For tomatoes, ferment the seeds in water for a few days to remove the gel coating and inhibit disease. For cucumbers/squash, scrape out seeds, wash thoroughly, and dry.
- Drying: Spread seeds thinly on screens or paper plates in a cool, dry, well-ventilated area for 1-4 weeks. Ensure they are bone-dry before storage. I aim for less than 8% moisture content.
- Storage: Store seeds in airtight containers (glass jars with desiccant packets work well) in a cool, dark, dry place (ideally 40-50°F and 30-40% humidity). Label clearly with variety and date. Properly stored seeds can remain viable for 3-10 years or more.
Step 8: Season Extension & Winterizing
Extend your harvest and protect your garden for the off-season to truly maximize your self sufficient garden from scratch.
- Cold Frames: Simple structures with a transparent top (glass, polycarbonate, or old windows) that sit over garden beds. They trap solar heat, allowing you to grow cold-hardy crops (lettuce, spinach, kale, radishes) well into winter or start seeds earlier in spring. A basic cold frame can be built from 2×6 lumber and a sheet of polycarbonate for under $100.
- Hoop Houses/Low Tunnels: Larger structures made from flexible hoops (PVC pipe or EMT conduit) covered with greenhouse plastic. These provide more space and greater temperature moderation. A 10×20 ft DIY low tunnel kit can cost $200-$500, while a larger, more robust hoop house kit might be $1,000-$3,000. I use a 6×12 ft low tunnel made from 1/2-inch PVC hoops and 6mil greenhouse plastic, which extends my lettuce and spinach harvest by at least
- Integrated Pest Management (IPM): This holistic approach combines several strategies.
- Integrated Pest Management (IPM): This holistic approach combines several strategies.
- Observation: Regularly inspect your plants for early signs of pests or disease. Catching issues early is key.
- Physical Barriers: Use row covers (e.g., Agribon AG-19 floating row cover, 10×20 ft, ~$20) to protect young plants from insect pests like cabbage worms and squash bugs. Install fences (e.g., 2×4 welded wire mesh, 4 ft tall, 50 ft roll ~$70) to keep out deer, rabbits, and other larger animals.
- Hand-Picking: For larger pests like tomato hornworms or squash bugs, simply pick them off and drop them into a bucket of soapy water.
- Companion Planting: As mentioned, certain plants repel pests. Marigolds, garlic, and onions are excellent deterrents.
- Attract Beneficial Insects: Plant flowers like dill, fennel, cosmos, and sweet alyssum to attract ladybugs, lacewings, and parasitic wasps, which prey on common garden pests.
- Organic Sprays & Treatments:
- Neem Oil: An excellent broad-spectrum organic insecticide and fungicide. Bonide Neem Oil Concentrate (16oz, ~$20) can be mixed at a rate of 1-2 tbsp per gallon of water and sprayed on affected plants.
- Insecticidal Soap: Effective against soft-bodied insects like aphids, whiteflies, and spider mites. Garden Safe Insecticidal Soap (24oz ready-to-use, ~$10).
- Bacillus thuringiensis (Bt): A naturally occurring soil bacterium that targets caterpillars and worms. Monterey BT Worm & Caterpillar Killer (16oz, ~$18) is highly effective and safe for beneficial insects.
- Copper or Sulfur Sprays: For fungal diseases like powdery mildew or blight, organic copper (e.g., Bonide Copper Fungicide, ~$15 for 1lb) or sulfur (e.g., Safer Brand Garden Fungicide, ~$10 for 16oz) can be used as a last resort.
Step 7: Harvesting & Seed Saving
The culmination of your efforts is the harvest, and seed saving closes the loop on self-sufficiency.
- Harvesting Techniques:
- Timing: Harvest vegetables at their peak ripeness for best flavor and nutritional value. For example, green beans should snap cleanly, cucumbers should be firm, and tomatoes should be fully colored.
- Frequency: Many crops, like zucchini, cucumbers, and bush beans, produce more if harvested frequently. Pick daily or every other day.
- Tools: Use clean, sharp pruners (e.g., Corona ClassicCUT Bypass Pruner BP 3180, ~$30) or a sharp knife for clean cuts, minimizing damage to the plant.
- Seed Saving: This is where the « self-sufficient » aspect truly shines.
- Selection: Only save seeds from your healthiest, most vigorous plants that show desired traits (disease resistance, good flavor, high yield).
- Isolation: To ensure true-to-type seeds, prevent cross-pollination. This can be challenging for open-pollinated crops that readily cross (e.g., squash, corn). For beginners, focus on self-pollinating plants like beans, peas, lettuce, and tomatoes.
- Processing:
- Dry Seeds (Beans, Peas, Lettuce, Grains): Allow pods/seed heads to dry completely on the plant. Harvest, shell, and clean the seeds, removing chaff.
- Wet Seeds (Tomatoes, Cucumbers, Squash): For tomatoes, ferment the seeds in water for a few days to remove the gel coating and inhibit disease. For cucumbers/squash, scrape out seeds, wash thoroughly, and dry.
- Drying: Spread seeds thinly on screens or paper plates in a cool, dry, well-ventilated area for 1-4 weeks. Ensure they are bone-dry before storage. I aim for less than 8% moisture content.
- Storage: Store seeds in airtight containers (glass jars with desiccant packets work well) in a cool, dark, dry place (ideally 40-50°F and 30-40% humidity). Label clearly with variety and date. Properly stored seeds can remain viable for 3-10 years or more.
Step 8: Season Extension & Winterizing
Extend your harvest and protect your garden for the off-season to truly maximize your self sufficient garden from scratch.
- Cold Frames: Simple structures with a transparent top (glass, polycarbonate, or old windows) that sit over garden beds. They trap solar heat, allowing you to grow cold-hardy crops (lettuce, spinach, kale, radishes) well into winter or start seeds earlier in spring. A basic cold frame can be built from 2×6 lumber and a sheet of polycarbonate for under $100.
- Hoop Houses/Low Tunnels: Larger structures made from flexible hoops (PVC pipe or EMT conduit) covered with greenhouse plastic. These provide more space and greater temperature moderation. A 10×20 ft DIY low tunnel kit can cost $200-$500, while a larger, more robust hoop house kit might be $1,000-$3,000. I use a 6×12 ft low tunnel made from 1/2-inch PVC hoops and 6mil greenhouse plastic, which extends my lettuce and spinach harvest by at least
Step 6: Pest & Disease Management (Organic)
Maintaining a self sufficient garden from scratch means embracing organic pest and disease control.
- Integrated Pest Management (IPM): This holistic approach combines several strategies.
- Observation: Regularly inspect your plants for early signs of pests or disease. Catching issues early is key.
- Physical Barriers: Use row covers (e.g., Agribon AG-19 floating row cover, 10×20 ft, ~$20) to protect young plants from insect pests like cabbage worms and squash bugs. Install fences (e.g., 2×4 welded wire mesh, 4 ft tall, 50 ft roll ~$70) to keep out deer, rabbits, and other larger animals.
- Hand-Picking: For larger pests like tomato hornworms or squash bugs, simply pick them off and drop them into a bucket of soapy water.
- Companion Planting: As mentioned, certain plants repel pests. Marigolds, garlic, and onions are excellent deterrents.
- Attract Beneficial Insects: Plant flowers like dill, fennel, cosmos, and sweet alyssum to attract ladybugs, lacewings, and parasitic wasps, which prey on common garden pests.
- Organic Sprays & Treatments:
- Neem Oil: An excellent broad-spectrum organic insecticide and fungicide. Bonide Neem Oil Concentrate (16oz, ~$20) can be mixed at a rate of 1-2 tbsp per gallon of water and sprayed on affected plants.
- Insecticidal Soap: Effective against soft-bodied insects like aphids, whiteflies, and spider mites. Garden Safe Insecticidal Soap (24oz ready-to-use, ~$10).
- Bacillus thuringiensis (Bt): A naturally occurring soil bacterium that targets caterpillars and worms. Monterey BT Worm & Caterpillar Killer (16oz, ~$18) is highly effective and safe for beneficial insects.
- Copper or Sulfur Sprays: For fungal diseases like powdery mildew or blight, organic copper (e.g., Bonide Copper Fungicide, ~$15 for 1lb) or sulfur (e.g., Safer Brand Garden Fungicide, ~$10 for 16oz) can be used as a last resort.
Step 7: Harvesting & Seed Saving
The culmination of your efforts is the harvest, and seed saving closes the loop on self-sufficiency.
- Harvesting Techniques:
- Timing: Harvest vegetables at their peak ripeness for best flavor and nutritional value. For example, green beans should snap cleanly, cucumbers should be firm, and tomatoes should be fully colored.
- Frequency: Many crops, like zucchini, cucumbers, and bush beans, produce more if harvested frequently. Pick daily or every other day.
- Tools: Use clean, sharp pruners (e.g., Corona ClassicCUT Bypass Pruner BP 3180, ~$30) or a sharp knife for clean cuts, minimizing damage to the plant.
- Seed Saving: This is where the « self-sufficient » aspect truly shines.
- Selection: Only save seeds from your healthiest, most vigorous plants that show desired traits (disease resistance, good flavor, high yield).
- Isolation: To ensure true-to-type seeds, prevent cross-pollination. This can be challenging for open-pollinated crops that readily cross (e.g., squash, corn). For beginners, focus on self-pollinating plants like beans, peas, lettuce, and tomatoes.
- Processing:
- Dry Seeds (Beans, Peas, Lettuce, Grains): Allow pods/seed heads to dry completely on the plant. Harvest, shell, and clean the seeds, removing chaff.
- Wet Seeds (Tomatoes, Cucumbers, Squash): For tomatoes, ferment the seeds in water for a few days to remove the gel coating and inhibit disease. For cucumbers/squash, scrape out seeds, wash thoroughly, and dry.
- Drying: Spread seeds thinly on screens or paper plates in a cool, dry, well-ventilated area for 1-4 weeks. Ensure they are bone-dry before storage. I aim for less than 8% moisture content.
- Storage: Store seeds in airtight containers (glass jars with desiccant packets work well) in a cool, dark, dry place (ideally 40-50°F and 30-40% humidity). Label clearly with variety and date. Properly stored seeds can remain viable for 3-10 years or more.
Step 8: Season Extension & Winterizing
Extend your harvest and protect your garden for the off-season to truly maximize your self sufficient garden from scratch.
- Cold Frames: Simple structures with a transparent top (glass, polycarbonate, or old windows) that sit over garden beds. They trap solar heat, allowing you to grow cold-hardy crops (lettuce, spinach, kale, radishes) well into winter or start seeds earlier in spring. A basic cold frame can be built from 2×6 lumber and a sheet of polycarbonate for under $100.
- Hoop Houses/Low Tunnels: Larger structures made from flexible hoops (PVC pipe or EMT conduit) covered with greenhouse plastic. These provide more space and greater temperature moderation. A 10×20 ft DIY low tunnel kit can cost $200-$500, while a larger, more robust hoop house kit might be $1,000-$3,000. I use a 6×12 ft low tunnel made from 1/2-inch PVC hoops and 6mil greenhouse plastic, which extends my lettuce and spinach harvest by at least
- Choose Heirloom & Open-Pollinated Seeds: These varieties produce seeds that will grow true to type, meaning you can save seeds from your harvest year after year. F1 hybrids, while often vigorous, will not produce consistent offspring from saved seeds. Reputable seed companies include Baker Creek Heirloom Seeds, High Mowing Organic Seeds, and Seed Savers Exchange. Start with common, reliable varieties like ‘Black Krim’ tomatoes, ‘Provider’ bush beans, ‘Waltham Butternut’ squash, and ‘Black Seeded Simpson’ lettuce.
- Start Seeds Indoors (Optional but Recommended): For longer growing seasons or specific crops, starting seeds indoors gives you a head start. Use seed-starting mix (e.g., Espoma Organic Seed Starter Mix, ~$10 for 16qt bag) in seed trays (Jiffy Professional Greenhouse 72-cell kit, ~$15). Provide adequate light with LED grow lights (Barrina T5 2ft 4-pack LED Grow Lights, 20W each, ~$50) for 14-16 hours a day, positioned 2-4 inches above seedlings. Maintain consistent temperatures (65-75°F for most).
- Direct Sowing vs. Transplanting: Some crops (carrots, radishes, beans, corn) prefer direct sowing into the garden bed. Others (tomatoes, peppers, broccoli, kale) benefit from being started indoors and transplanted. Follow seed packet instructions for planting depths (e.g., lettuce seeds are often surface-sown or planted 1/8 inch deep, while beans are 1 inch deep) and spacing.
- Companion Planting: Strategically plant different species together to enhance growth, deter pests, and attract beneficial insects. For example, planting marigolds near tomatoes can deter nematodes, and basil improves tomato flavor. Nasturtiums can act as a trap crop for aphids.
- Succession Planting: For a continuous harvest, plant small batches of quick-growing crops (lettuce, radishes, cilantro) every 2-3 weeks. As one crop finishes, another is ready to take its place.
Step 6: Pest & Disease Management (Organic)
Maintaining a self sufficient garden from scratch means embracing organic pest and disease control.
- Integrated Pest Management (IPM): This holistic approach combines several strategies.
- Observation: Regularly inspect your plants for early signs of pests or disease. Catching issues early is key.
- Physical Barriers: Use row covers (e.g., Agribon AG-19 floating row cover, 10×20 ft, ~$20) to protect young plants from insect pests like cabbage worms and squash bugs. Install fences (e.g., 2×4 welded wire mesh, 4 ft tall, 50 ft roll ~$70) to keep out deer, rabbits, and other larger animals.
- Hand-Picking: For larger pests like tomato hornworms or squash bugs, simply pick them off and drop them into a bucket of soapy water.
- Companion Planting: As mentioned, certain plants repel pests. Marigolds, garlic, and onions are excellent deterrents.
- Attract Beneficial Insects: Plant flowers like dill, fennel, cosmos, and sweet alyssum to attract ladybugs, lacewings, and parasitic wasps, which prey on common garden pests.
- Organic Sprays & Treatments:
- Neem Oil: An excellent broad-spectrum organic insecticide and fungicide. Bonide Neem Oil Concentrate (16oz, ~$20) can be mixed at a rate of 1-2 tbsp per gallon of water and sprayed on affected plants.
- Insecticidal Soap: Effective against soft-bodied insects like aphids, whiteflies, and spider mites. Garden Safe Insecticidal Soap (24oz ready-to-use, ~$10).
- Bacillus thuringiensis (Bt): A naturally occurring soil bacterium that targets caterpillars and worms. Monterey BT Worm & Caterpillar Killer (16oz, ~$18) is highly effective and safe for beneficial insects.
- Copper or Sulfur Sprays: For fungal diseases like powdery mildew or blight, organic copper (e.g., Bonide Copper Fungicide, ~$15 for 1lb) or sulfur (e.g., Safer Brand Garden Fungicide, ~$10 for 16oz) can be used as a last resort.
Step 7: Harvesting & Seed Saving
The culmination of your efforts is the harvest, and seed saving closes the loop on self-sufficiency.
- Harvesting Techniques:
- Timing: Harvest vegetables at their peak ripeness for best flavor and nutritional value. For example, green beans should snap cleanly, cucumbers should be firm, and tomatoes should be fully colored.
- Frequency: Many crops, like zucchini, cucumbers, and bush beans, produce more if harvested frequently. Pick daily or every other day.
- Tools: Use clean, sharp pruners (e.g., Corona ClassicCUT Bypass Pruner BP 3180, ~$30) or a sharp knife for clean cuts, minimizing damage to the plant.
- Seed Saving: This is where the « self-sufficient » aspect truly shines.
- Selection: Only save seeds from your healthiest, most vigorous plants that show desired traits (disease resistance, good flavor, high yield).
- Isolation: To ensure true-to-type seeds, prevent cross-pollination. This can be challenging for open-pollinated crops that readily cross (e.g., squash, corn). For beginners, focus on self-pollinating plants like beans, peas, lettuce, and tomatoes.
- Processing:
- Dry Seeds (Beans, Peas, Lettuce, Grains): Allow pods/seed heads to dry completely on the plant. Harvest, shell, and clean the seeds, removing chaff.
- Wet Seeds (Tomatoes, Cucumbers, Squash): For tomatoes, ferment the seeds in water for a few days to remove the gel coating and inhibit disease. For cucumbers/squash, scrape out seeds, wash thoroughly, and dry.
- Drying: Spread seeds thinly on screens or paper plates in a cool, dry, well-ventilated area for 1-4 weeks. Ensure they are bone-dry before storage. I aim for less than 8% moisture content.
- Storage: Store seeds in airtight containers (glass jars with desiccant packets work well) in a cool, dark, dry place (ideally 40-50°F and 30-40% humidity). Label clearly with variety and date. Properly stored seeds can remain viable for 3-10 years or more.
Step 8: Season Extension & Winterizing
Extend your harvest and protect your garden for the off-season to truly maximize your self sufficient garden from scratch.
- Cold Frames: Simple structures with a transparent top (glass, polycarbonate, or old windows) that sit over garden beds. They trap solar heat, allowing you to grow cold-hardy crops (lettuce, spinach, kale, radishes) well into winter or start seeds earlier in spring. A basic cold frame can be built from 2×6 lumber and a sheet of polycarbonate for under $100.
- Hoop Houses/Low Tunnels: Larger structures made from flexible hoops (PVC pipe or EMT conduit) covered with greenhouse plastic. These provide more space and greater temperature moderation. A 10×20 ft DIY low tunnel kit can cost $200-$500, while a larger, more robust hoop house kit might be $1,000-$3,000. I use a 6×12 ft low tunnel made from 1/2-inch PVC hoops and 6mil greenhouse plastic, which extends my lettuce and spinach harvest by at least
The choice of seeds is crucial for a truly self sufficient garden from scratch.
- Choose Heirloom & Open-Pollinated Seeds: These varieties produce seeds that will grow true to type, meaning you can save seeds from your harvest year after year. F1 hybrids, while often vigorous, will not produce consistent offspring from saved seeds. Reputable seed companies include Baker Creek Heirloom Seeds, High Mowing Organic Seeds, and Seed Savers Exchange. Start with common, reliable varieties like ‘Black Krim’ tomatoes, ‘Provider’ bush beans, ‘Waltham Butternut’ squash, and ‘Black Seeded Simpson’ lettuce.
- Start Seeds Indoors (Optional but Recommended): For longer growing seasons or specific crops, starting seeds indoors gives you a head start. Use seed-starting mix (e.g., Espoma Organic Seed Starter Mix, ~$10 for 16qt bag) in seed trays (Jiffy Professional Greenhouse 72-cell kit, ~$15). Provide adequate light with LED grow lights (Barrina T5 2ft 4-pack LED Grow Lights, 20W each, ~$50) for 14-16 hours a day, positioned 2-4 inches above seedlings. Maintain consistent temperatures (65-75°F for most).
- Direct Sowing vs. Transplanting: Some crops (carrots, radishes, beans, corn) prefer direct sowing into the garden bed. Others (tomatoes, peppers, broccoli, kale) benefit from being started indoors and transplanted. Follow seed packet instructions for planting depths (e.g., lettuce seeds are often surface-sown or planted 1/8 inch deep, while beans are 1 inch deep) and spacing.
- Companion Planting: Strategically plant different species together to enhance growth, deter pests, and attract beneficial insects. For example, planting marigolds near tomatoes can deter nematodes, and basil improves tomato flavor. Nasturtiums can act as a trap crop for aphids.
- Succession Planting: For a continuous harvest, plant small batches of quick-growing crops (lettuce, radishes, cilantro) every 2-3 weeks. As one crop finishes, another is ready to take its place.
Step 6: Pest & Disease Management (Organic)
Maintaining a self sufficient garden from scratch means embracing organic pest and disease control.
- Integrated Pest Management (IPM): This holistic approach combines several strategies.
- Observation: Regularly inspect your plants for early signs of pests or disease. Catching issues early is key.
- Physical Barriers: Use row covers (e.g., Agribon AG-19 floating row cover, 10×20 ft, ~$20) to protect young plants from insect pests like cabbage worms and squash bugs. Install fences (e.g., 2×4 welded wire mesh, 4 ft tall, 50 ft roll ~$70) to keep out deer, rabbits, and other larger animals.
- Hand-Picking: For larger pests like tomato hornworms or squash bugs, simply pick them off and drop them into a bucket of soapy water.
- Companion Planting: As mentioned, certain plants repel pests. Marigolds, garlic, and onions are excellent deterrents.
- Attract Beneficial Insects: Plant flowers like dill, fennel, cosmos, and sweet alyssum to attract ladybugs, lacewings, and parasitic wasps, which prey on common garden pests.
- Organic Sprays & Treatments:
- Neem Oil: An excellent broad-spectrum organic insecticide and fungicide. Bonide Neem Oil Concentrate (16oz, ~$20) can be mixed at a rate of 1-2 tbsp per gallon of water and sprayed on affected plants.
- Insecticidal Soap: Effective against soft-bodied insects like aphids, whiteflies, and spider mites. Garden Safe Insecticidal Soap (24oz ready-to-use, ~$10).
- Bacillus thuringiensis (Bt): A naturally occurring soil bacterium that targets caterpillars and worms. Monterey BT Worm & Caterpillar Killer (16oz, ~$18) is highly effective and safe for beneficial insects.
- Copper or Sulfur Sprays: For fungal diseases like powdery mildew or blight, organic copper (e.g., Bonide Copper Fungicide, ~$15 for 1lb) or sulfur (e.g., Safer Brand Garden Fungicide, ~$10 for 16oz) can be used as a last resort.
Step 7: Harvesting & Seed Saving
The culmination of your efforts is the harvest, and seed saving closes the loop on self-sufficiency.
- Harvesting Techniques:
- Timing: Harvest vegetables at their peak ripeness for best flavor and nutritional value. For example, green beans should snap cleanly, cucumbers should be firm, and tomatoes should be fully colored.
- Frequency: Many crops, like zucchini, cucumbers, and bush beans, produce more if harvested frequently. Pick daily or every other day.
- Tools: Use clean, sharp pruners (e.g., Corona ClassicCUT Bypass Pruner BP 3180, ~$30) or a sharp knife for clean cuts, minimizing damage to the plant.
- Seed Saving: This is where the « self-sufficient » aspect truly shines.
- Selection: Only save seeds from your healthiest, most vigorous plants that show desired traits (disease resistance, good flavor, high yield).
- Isolation: To ensure true-to-type seeds, prevent cross-pollination. This can be challenging for open-pollinated crops that readily cross (e.g., squash, corn). For beginners, focus on self-pollinating plants like beans, peas, lettuce, and tomatoes.
- Processing:
- Dry Seeds (Beans, Peas, Lettuce, Grains): Allow pods/seed heads to dry completely on the plant. Harvest, shell, and clean the seeds, removing chaff.
- Wet Seeds (Tomatoes, Cucumbers, Squash): For tomatoes, ferment the seeds in water for a few days to remove the gel coating and inhibit disease. For cucumbers/squash, scrape out seeds, wash thoroughly, and dry.
- Drying: Spread seeds thinly on screens or paper plates in a cool, dry, well-ventilated area for 1-4 weeks. Ensure they are bone-dry before storage. I aim for less than 8% moisture content.
- Storage: Store seeds in airtight containers (glass jars with desiccant packets work well) in a cool, dark, dry place (ideally 40-50°F and 30-40% humidity). Label clearly with variety and date. Properly stored seeds can remain viable for 3-10 years or more.
Step 8: Season Extension & Winterizing
Extend your harvest and protect your garden for the off-season to truly maximize your self sufficient garden from scratch.
- Cold Frames: Simple structures with a transparent top (glass, polycarbonate, or old windows) that sit over garden beds. They trap solar heat, allowing you to grow cold-hardy crops (lettuce, spinach, kale, radishes) well into winter or start seeds earlier in spring. A basic cold frame can be built from 2×6 lumber and a sheet of polycarbonate for under $100.
- Hoop Houses/Low Tunnels: Larger structures made from flexible hoops (PVC pipe or EMT conduit) covered with greenhouse plastic. These provide more space and greater temperature moderation. A 10×20 ft DIY low tunnel kit can cost $200-$500, while a larger, more robust hoop house kit might be $1,000-$3,000. I use a 6×12 ft low tunnel made from 1/2-inch PVC hoops and 6mil greenhouse plastic, which extends my lettuce and spinach harvest by at least
Step 5: Seed Selection & Planting
The choice of seeds is crucial for a truly self sufficient garden from scratch.
- Choose Heirloom & Open-Pollinated Seeds: These varieties produce seeds that will grow true to type, meaning you can save seeds from your harvest year after year. F1 hybrids, while often vigorous, will not produce consistent offspring from saved seeds. Reputable seed companies include Baker Creek Heirloom Seeds, High Mowing Organic Seeds, and Seed Savers Exchange. Start with common, reliable varieties like ‘Black Krim’ tomatoes, ‘Provider’ bush beans, ‘Waltham Butternut’ squash, and ‘Black Seeded Simpson’ lettuce.
- Start Seeds Indoors (Optional but Recommended): For longer growing seasons or specific crops, starting seeds indoors gives you a head start. Use seed-starting mix (e.g., Espoma Organic Seed Starter Mix, ~$10 for 16qt bag) in seed trays (Jiffy Professional Greenhouse 72-cell kit, ~$15). Provide adequate light with LED grow lights (Barrina T5 2ft 4-pack LED Grow Lights, 20W each, ~$50) for 14-16 hours a day, positioned 2-4 inches above seedlings. Maintain consistent temperatures (65-75°F for most).
- Direct Sowing vs. Transplanting: Some crops (carrots, radishes, beans, corn) prefer direct sowing into the garden bed. Others (tomatoes, peppers, broccoli, kale) benefit from being started indoors and transplanted. Follow seed packet instructions for planting depths (e.g., lettuce seeds are often surface-sown or planted 1/8 inch deep, while beans are 1 inch deep) and spacing.
- Companion Planting: Strategically plant different species together to enhance growth, deter pests, and attract beneficial insects. For example, planting marigolds near tomatoes can deter nematodes, and basil improves tomato flavor. Nasturtiums can act as a trap crop for aphids.
- Succession Planting: For a continuous harvest, plant small batches of quick-growing crops (lettuce, radishes, cilantro) every 2-3 weeks. As one crop finishes, another is ready to take its place.
Step 6: Pest & Disease Management (Organic)
Maintaining a self sufficient garden from scratch means embracing organic pest and disease control.
- Integrated Pest Management (IPM): This holistic approach combines several strategies.
- Observation: Regularly inspect your plants for early signs of pests or disease. Catching issues early is key.
- Physical Barriers: Use row covers (e.g., Agribon AG-19 floating row cover, 10×20 ft, ~$20) to protect young plants from insect pests like cabbage worms and squash bugs. Install fences (e.g., 2×4 welded wire mesh, 4 ft tall, 50 ft roll ~$70) to keep out deer, rabbits, and other larger animals.
- Hand-Picking: For larger pests like tomato hornworms or squash bugs, simply pick them off and drop them into a bucket of soapy water.
- Companion Planting: As mentioned, certain plants repel pests. Marigolds, garlic, and onions are excellent deterrents.
- Attract Beneficial Insects: Plant flowers like dill, fennel, cosmos, and sweet alyssum to attract ladybugs, lacewings, and parasitic wasps, which prey on common garden pests.
- Organic Sprays & Treatments:
- Neem Oil: An excellent broad-spectrum organic insecticide and fungicide. Bonide Neem Oil Concentrate (16oz, ~$20) can be mixed at a rate of 1-2 tbsp per gallon of water and sprayed on affected plants.
- Insecticidal Soap: Effective against soft-bodied insects like aphids, whiteflies, and spider mites. Garden Safe Insecticidal Soap (24oz ready-to-use, ~$10).
- Bacillus thuringiensis (Bt): A naturally occurring soil bacterium that targets caterpillars and worms. Monterey BT Worm & Caterpillar Killer (16oz, ~$18) is highly effective and safe for beneficial insects.
- Copper or Sulfur Sprays: For fungal diseases like powdery mildew or blight, organic copper (e.g., Bonide Copper Fungicide, ~$15 for 1lb) or sulfur (e.g., Safer Brand Garden Fungicide, ~$10 for 16oz) can be used as a last resort.
Step 7: Harvesting & Seed Saving
The culmination of your efforts is the harvest, and seed saving closes the loop on self-sufficiency.
- Harvesting Techniques:
- Timing: Harvest vegetables at their peak ripeness for best flavor and nutritional value. For example, green beans should snap cleanly, cucumbers should be firm, and tomatoes should be fully colored.
- Frequency: Many crops, like zucchini, cucumbers, and bush beans, produce more if harvested frequently. Pick daily or every other day.
- Tools: Use clean, sharp pruners (e.g., Corona ClassicCUT Bypass Pruner BP 3180, ~$30) or a sharp knife for clean cuts, minimizing damage to the plant.
- Seed Saving: This is where the « self-sufficient » aspect truly shines.
- Selection: Only save seeds from your healthiest, most vigorous plants that show desired traits (disease resistance, good flavor, high yield).
- Isolation: To ensure true-to-type seeds, prevent cross-pollination. This can be challenging for open-pollinated crops that readily cross (e.g., squash, corn). For beginners, focus on self-pollinating plants like beans, peas, lettuce, and tomatoes.
- Processing:
- Dry Seeds (Beans, Peas, Lettuce, Grains): Allow pods/seed heads to dry completely on the plant. Harvest, shell, and clean the seeds, removing chaff.
- Wet Seeds (Tomatoes, Cucumbers, Squash): For tomatoes, ferment the seeds in water for a few days to remove the gel coating and inhibit disease. For cucumbers/squash, scrape out seeds, wash thoroughly, and dry.
- Drying: Spread seeds thinly on screens or paper plates in a cool, dry, well-ventilated area for 1-4 weeks. Ensure they are bone-dry before storage. I aim for less than 8% moisture content.
- Storage: Store seeds in airtight containers (glass jars with desiccant packets work well) in a cool, dark, dry place (ideally 40-50°F and 30-40% humidity). Label clearly with variety and date. Properly stored seeds can remain viable for 3-10 years or more.
Step 8: Season Extension & Winterizing
Extend your harvest and protect your garden for the off-season to truly maximize your self sufficient garden from scratch.
- Cold Frames: Simple structures with a transparent top (glass, polycarbonate, or old windows) that sit over garden beds. They trap solar heat, allowing you to grow cold-hardy crops (lettuce, spinach, kale, radishes) well into winter or start seeds earlier in spring. A basic cold frame can be built from 2×6 lumber and a sheet of polycarbonate for under $100.
- Hoop Houses/Low Tunnels: Larger structures made from flexible hoops (PVC pipe or EMT conduit) covered with greenhouse plastic. These provide more space and greater temperature moderation. A 10×20 ft DIY low tunnel kit can cost $200-$500, while a larger, more robust hoop house kit might be $1,000-$3,000. I use a 6×12 ft low tunnel made from 1/2-inch PVC hoops and 6mil greenhouse plastic, which extends my lettuce and spinach harvest by at least
- Rainwater Harvesting: This is my primary source of irrigation water. A 55-gallon rain barrel (e.g., EarthMark Rain Barrel, ~$120-$150) connected to a downspout can collect significant water. For larger needs, I use two 275-gallon IBC totes (Intermediate Bulk Containers, often available used for $100-$200 each from food-grade sources) connected in series. A 1,000 sq ft roof can collect approximately 620 gallons of water for every inch of rainfall. My 1,500 sq ft roof provides ample water for my 600 sq ft garden through multiple barrels and totes.
- Drip Irrigation: This is by far the most water-efficient method, delivering water directly to the plant’s root zone, minimizing evaporation and weed growth.
- Components: A typical drip system includes a pressure regulator (e.g., Rain Bird PRV-10, ~$15), a filter (Rain Bird RBY filter, ~$20), main tubing (1/2-inch poly tubing, 100ft ~$25), smaller feeder lines (1/4-inch tubing), and emitters (0.5 GPH or 1 GPH per plant).
- Kits: For beginners, a starter kit like the Rain Bird Drip Irrigation Garden Kit (model DDI-KIT-1P, ~$40-$60) is excellent for a small garden. For larger setups, I use Netafim Techline CV Drip Line (500ft roll, ~$150-$200), which has pressure-compensating emitters built-in, ensuring even watering across long runs.
- Automation: For true self-sufficiency, consider a battery-powered timer (e.g., Orbit B-Hyve Bluetooth Hose Faucet Timer, ~$50) or a solar-powered timer connected to a small 12V pump.
- Solar-Powered Pumps: For lifting water from a well, pond, or large storage tank to your garden, a solar pump is a game-changer. For a smaller drip system, a Shurflo 2088-594-152 Diaphragm Pump (12V, 3.5 GPM, ~$180) can be powered by a single 100W solar panel (e.g., Renogy 100W Monocrystalline Solar Panel, ~$100) and a small 12V battery (e.g., a 50Ah LiFePO4 battery like the Battle Born 50Ah, ~$450). For larger operations or deeper wells, more robust systems are needed. If you’re looking to build out a comprehensive off-grid power system to support your garden’s water needs, or indeed your entire homestead, you might want to explore resources like the Power Grid Generator complete system guide to understand the full scope of what’s possible in terms of energy independence.
Step 5: Seed Selection & Planting
The choice of seeds is crucial for a truly self sufficient garden from scratch.
- Choose Heirloom & Open-Pollinated Seeds: These varieties produce seeds that will grow true to type, meaning you can save seeds from your harvest year after year. F1 hybrids, while often vigorous, will not produce consistent offspring from saved seeds. Reputable seed companies include Baker Creek Heirloom Seeds, High Mowing Organic Seeds, and Seed Savers Exchange. Start with common, reliable varieties like ‘Black Krim’ tomatoes, ‘Provider’ bush beans, ‘Waltham Butternut’ squash, and ‘Black Seeded Simpson’ lettuce.
- Start Seeds Indoors (Optional but Recommended): For longer growing seasons or specific crops, starting seeds indoors gives you a head start. Use seed-starting mix (e.g., Espoma Organic Seed Starter Mix, ~$10 for 16qt bag) in seed trays (Jiffy Professional Greenhouse 72-cell kit, ~$15). Provide adequate light with LED grow lights (Barrina T5 2ft 4-pack LED Grow Lights, 20W each, ~$50) for 14-16 hours a day, positioned 2-4 inches above seedlings. Maintain consistent temperatures (65-75°F for most).
- Direct Sowing vs. Transplanting: Some crops (carrots, radishes, beans, corn) prefer direct sowing into the garden bed. Others (tomatoes, peppers, broccoli, kale) benefit from being started indoors and transplanted. Follow seed packet instructions for planting depths (e.g., lettuce seeds are often surface-sown or planted 1/8 inch deep, while beans are 1 inch deep) and spacing.
- Companion Planting: Strategically plant different species together to enhance growth, deter pests, and attract beneficial insects. For example, planting marigolds near tomatoes can deter nematodes, and basil improves tomato flavor. Nasturtiums can act as a trap crop for aphids.
- Succession Planting: For a continuous harvest, plant small batches of quick-growing crops (lettuce, radishes, cilantro) every 2-3 weeks. As one crop finishes, another is ready to take its place.
Step 6: Pest & Disease Management (Organic)
Maintaining a self sufficient garden from scratch means embracing organic pest and disease control.
- Integrated Pest Management (IPM): This holistic approach combines several strategies.
- Observation: Regularly inspect your plants for early signs of pests or disease. Catching issues early is key.
- Physical Barriers: Use row covers (e.g., Agribon AG-19 floating row cover, 10×20 ft, ~$20) to protect young plants from insect pests like cabbage worms and squash bugs. Install fences (e.g., 2×4 welded wire mesh, 4 ft tall, 50 ft roll ~$70) to keep out deer, rabbits, and other larger animals.
- Hand-Picking: For larger pests like tomato hornworms or squash bugs, simply pick them off and drop them into a bucket of soapy water.
- Companion Planting: As mentioned, certain plants repel pests. Marigolds, garlic, and onions are excellent deterrents.
- Attract Beneficial Insects: Plant flowers like dill, fennel, cosmos, and sweet alyssum to attract ladybugs, lacewings, and parasitic wasps, which prey on common garden pests.
- Organic Sprays & Treatments:
- Neem Oil: An excellent broad-spectrum organic insecticide and fungicide. Bonide Neem Oil Concentrate (16oz, ~$20) can be mixed at a rate of 1-2 tbsp per gallon of water and sprayed on affected plants.
- Insecticidal Soap: Effective against soft-bodied insects like aphids, whiteflies, and spider mites. Garden Safe Insecticidal Soap (24oz ready-to-use, ~$10).
- Bacillus thuringiensis (Bt): A naturally occurring soil bacterium that targets caterpillars and worms. Monterey BT Worm & Caterpillar Killer (16oz, ~$18) is highly effective and safe for beneficial insects.
- Copper or Sulfur Sprays: For fungal diseases like powdery mildew or blight, organic copper (e.g., Bonide Copper Fungicide, ~$15 for 1lb) or sulfur (e.g., Safer Brand Garden Fungicide, ~$10 for 16oz) can be used as a last resort.
Step 7: Harvesting & Seed Saving
The culmination of your efforts is the harvest, and seed saving closes the loop on self-sufficiency.
- Harvesting Techniques:
- Timing: Harvest vegetables at their peak ripeness for best flavor and nutritional value. For example, green beans should snap cleanly, cucumbers should be firm, and tomatoes should be fully colored.
- Frequency: Many crops, like zucchini, cucumbers, and bush beans, produce more if harvested frequently. Pick daily or every other day.
- Tools: Use clean, sharp pruners (e.g., Corona ClassicCUT Bypass Pruner BP 3180, ~$30) or a sharp knife for clean cuts, minimizing damage to the plant.
- Seed Saving: This is where the « self-sufficient » aspect truly shines.
- Selection: Only save seeds from your healthiest, most vigorous plants that show desired traits (disease resistance, good flavor, high yield).
- Isolation: To ensure true-to-type seeds, prevent cross-pollination. This can be challenging for open-pollinated crops that readily cross (e.g., squash, corn). For beginners, focus on self-pollinating plants like beans, peas, lettuce, and tomatoes.
- Processing:
- Dry Seeds (Beans, Peas, Lettuce, Grains): Allow pods/seed heads to dry completely on the plant. Harvest, shell, and clean the seeds, removing chaff.
- Wet Seeds (Tomatoes, Cucumbers, Squash): For tomatoes, ferment the seeds in water for a few days to remove the gel coating and inhibit disease. For cucumbers/squash, scrape out seeds, wash thoroughly, and dry.
- Drying: Spread seeds thinly on screens or paper plates in a cool, dry, well-ventilated area for 1-4 weeks. Ensure they are bone-dry before storage. I aim for less than 8% moisture content.
- Storage: Store seeds in airtight containers (glass jars with desiccant packets work well) in a cool, dark, dry place (ideally 40-50°F and 30-40% humidity). Label clearly with variety and date. Properly stored seeds can remain viable for 3-10 years or more.
Step 8: Season Extension & Winterizing
Extend your harvest and protect your garden for the off-season to truly maximize your self sufficient garden from scratch.
- Cold Frames: Simple structures with a transparent top (glass, polycarbonate, or old windows) that sit over garden beds. They trap solar heat, allowing you to grow cold-hardy crops (lettuce, spinach, kale, radishes) well into winter or start seeds earlier in spring. A basic cold frame can be built from 2×6 lumber and a sheet of polycarbonate for under $100.
- Hoop Houses/Low Tunnels: Larger structures made from flexible hoops (PVC pipe or EMT conduit) covered with greenhouse plastic. These provide more space and greater temperature moderation. A 10×20 ft DIY low tunnel kit can cost $200-$500, while a larger, more robust hoop house kit might be $1,000-$3,000. I use a 6×12 ft low tunnel made from 1/2-inch PVC hoops and 6mil greenhouse plastic, which extends my lettuce and spinach harvest by at least
Efficient water management is critical for a self sufficient garden from scratch, especially in off-grid living where water resources might be limited.
- Rainwater Harvesting: This is my primary source of irrigation water. A 55-gallon rain barrel (e.g., EarthMark Rain Barrel, ~$120-$150) connected to a downspout can collect significant water. For larger needs, I use two 275-gallon IBC totes (Intermediate Bulk Containers, often available used for $100-$200 each from food-grade sources) connected in series. A 1,000 sq ft roof can collect approximately 620 gallons of water for every inch of rainfall. My 1,500 sq ft roof provides ample water for my 600 sq ft garden through multiple barrels and totes.
- Drip Irrigation: This is by far the most water-efficient method, delivering water directly to the plant’s root zone, minimizing evaporation and weed growth.
- Components: A typical drip system includes a pressure regulator (e.g., Rain Bird PRV-10, ~$15), a filter (Rain Bird RBY filter, ~$20), main tubing (1/2-inch poly tubing, 100ft ~$25), smaller feeder lines (1/4-inch tubing), and emitters (0.5 GPH or 1 GPH per plant).
- Kits: For beginners, a starter kit like the Rain Bird Drip Irrigation Garden Kit (model DDI-KIT-1P, ~$40-$60) is excellent for a small garden. For larger setups, I use Netafim Techline CV Drip Line (500ft roll, ~$150-$200), which has pressure-compensating emitters built-in, ensuring even watering across long runs.
- Automation: For true self-sufficiency, consider a battery-powered timer (e.g., Orbit B-Hyve Bluetooth Hose Faucet Timer, ~$50) or a solar-powered timer connected to a small 12V pump.
- Solar-Powered Pumps: For lifting water from a well, pond, or large storage tank to your garden, a solar pump is a game-changer. For a smaller drip system, a Shurflo 2088-594-152 Diaphragm Pump (12V, 3.5 GPM, ~$180) can be powered by a single 100W solar panel (e.g., Renogy 100W Monocrystalline Solar Panel, ~$100) and a small 12V battery (e.g., a 50Ah LiFePO4 battery like the Battle Born 50Ah, ~$450). For larger operations or deeper wells, more robust systems are needed. If you’re looking to build out a comprehensive off-grid power system to support your garden’s water needs, or indeed your entire homestead, you might want to explore resources like the Power Grid Generator complete system guide to understand the full scope of what’s possible in terms of energy independence.
Step 5: Seed Selection & Planting
The choice of seeds is crucial for a truly self sufficient garden from scratch.
- Choose Heirloom & Open-Pollinated Seeds: These varieties produce seeds that will grow true to type, meaning you can save seeds from your harvest year after year. F1 hybrids, while often vigorous, will not produce consistent offspring from saved seeds. Reputable seed companies include Baker Creek Heirloom Seeds, High Mowing Organic Seeds, and Seed Savers Exchange. Start with common, reliable varieties like ‘Black Krim’ tomatoes, ‘Provider’ bush beans, ‘Waltham Butternut’ squash, and ‘Black Seeded Simpson’ lettuce.
- Start Seeds Indoors (Optional but Recommended): For longer growing seasons or specific crops, starting seeds indoors gives you a head start. Use seed-starting mix (e.g., Espoma Organic Seed Starter Mix, ~$10 for 16qt bag) in seed trays (Jiffy Professional Greenhouse 72-cell kit, ~$15). Provide adequate light with LED grow lights (Barrina T5 2ft 4-pack LED Grow Lights, 20W each, ~$50) for 14-16 hours a day, positioned 2-4 inches above seedlings. Maintain consistent temperatures (65-75°F for most).
- Direct Sowing vs. Transplanting: Some crops (carrots, radishes, beans, corn) prefer direct sowing into the garden bed. Others (tomatoes, peppers, broccoli, kale) benefit from being started indoors and transplanted. Follow seed packet instructions for planting depths (e.g., lettuce seeds are often surface-sown or planted 1/8 inch deep, while beans are 1 inch deep) and spacing.
- Companion Planting: Strategically plant different species together to enhance growth, deter pests, and attract beneficial insects. For example, planting marigolds near tomatoes can deter nematodes, and basil improves tomato flavor. Nasturtiums can act as a trap crop for aphids.
- Succession Planting: For a continuous harvest, plant small batches of quick-growing crops (lettuce, radishes, cilantro) every 2-3 weeks. As one crop finishes, another is ready to take its place.
Step 6: Pest & Disease Management (Organic)
Maintaining a self sufficient garden from scratch means embracing organic pest and disease control.
- Integrated Pest Management (IPM): This holistic approach combines several strategies.
- Observation: Regularly inspect your plants for early signs of pests or disease. Catching issues early is key.
- Physical Barriers: Use row covers (e.g., Agribon AG-19 floating row cover, 10×20 ft, ~$20) to protect young plants from insect pests like cabbage worms and squash bugs. Install fences (e.g., 2×4 welded wire mesh, 4 ft tall, 50 ft roll ~$70) to keep out deer, rabbits, and other larger animals.
- Hand-Picking: For larger pests like tomato hornworms or squash bugs, simply pick them off and drop them into a bucket of soapy water.
- Companion Planting: As mentioned, certain plants repel pests. Marigolds, garlic, and onions are excellent deterrents.
- Attract Beneficial Insects: Plant flowers like dill, fennel, cosmos, and sweet alyssum to attract ladybugs, lacewings, and parasitic wasps, which prey on common garden pests.
- Organic Sprays & Treatments:
- Neem Oil: An excellent broad-spectrum organic insecticide and fungicide. Bonide Neem Oil Concentrate (16oz, ~$20) can be mixed at a rate of 1-2 tbsp per gallon of water and sprayed on affected plants.
- Insecticidal Soap: Effective against soft-bodied insects like aphids, whiteflies, and spider mites. Garden Safe Insecticidal Soap (24oz ready-to-use, ~$10).
- Bacillus thuringiensis (Bt): A naturally occurring soil bacterium that targets caterpillars and worms. Monterey BT Worm & Caterpillar Killer (16oz, ~$18) is highly effective and safe for beneficial insects.
- Copper or Sulfur Sprays: For fungal diseases like powdery mildew or blight, organic copper (e.g., Bonide Copper Fungicide, ~$15 for 1lb) or sulfur (e.g., Safer Brand Garden Fungicide, ~$10 for 16oz) can be used as a last resort.
Step 7: Harvesting & Seed Saving
The culmination of your efforts is the harvest, and seed saving closes the loop on self-sufficiency.
- Harvesting Techniques:
- Timing: Harvest vegetables at their peak ripeness for best flavor and nutritional value. For example, green beans should snap cleanly, cucumbers should be firm, and tomatoes should be fully colored.
- Frequency: Many crops, like zucchini, cucumbers, and bush beans, produce more if harvested frequently. Pick daily or every other day.
- Tools: Use clean, sharp pruners (e.g., Corona ClassicCUT Bypass Pruner BP 3180, ~$30) or a sharp knife for clean cuts, minimizing damage to the plant.
- Seed Saving: This is where the « self-sufficient » aspect truly shines.
- Selection: Only save seeds from your healthiest, most vigorous plants that show desired traits (disease resistance, good flavor, high yield).
- Isolation: To ensure true-to-type seeds, prevent cross-pollination. This can be challenging for open-pollinated crops that readily cross (e.g., squash, corn). For beginners, focus on self-pollinating plants like beans, peas, lettuce, and tomatoes.
- Processing:
- Dry Seeds (Beans, Peas, Lettuce, Grains): Allow pods/seed heads to dry completely on the plant. Harvest, shell, and clean the seeds, removing chaff.
- Wet Seeds (Tomatoes, Cucumbers, Squash): For tomatoes, ferment the seeds in water for a few days to remove the gel coating and inhibit disease. For cucumbers/squash, scrape out seeds, wash thoroughly, and dry.
- Drying: Spread seeds thinly on screens or paper plates in a cool, dry, well-ventilated area for 1-4 weeks. Ensure they are bone-dry before storage. I aim for less than 8% moisture content.
- Storage: Store seeds in airtight containers (glass jars with desiccant packets work well) in a cool, dark, dry place (ideally 40-50°F and 30-40% humidity). Label clearly with variety and date. Properly stored seeds can remain viable for 3-10 years or more.
Step 8: Season Extension & Winterizing
Extend your harvest and protect your garden for the off-season to truly maximize your self sufficient garden from scratch.
- Cold Frames: Simple structures with a transparent top (glass, polycarbonate, or old windows) that sit over garden beds. They trap solar heat, allowing you to grow cold-hardy crops (lettuce, spinach, kale, radishes) well into winter or start seeds earlier in spring. A basic cold frame can be built from 2×6 lumber and a sheet of polycarbonate for under $100.
- Hoop Houses/Low Tunnels: Larger structures made from flexible hoops (PVC pipe or EMT conduit) covered with greenhouse plastic. These provide more space and greater temperature moderation. A 10×20 ft DIY low tunnel kit can cost $200-$500, while a larger, more robust hoop house kit might be $1,000-$3,000. I use a 6×12 ft low tunnel made from 1/2-inch PVC hoops and 6mil greenhouse plastic, which extends my lettuce and spinach harvest by at least
Step 4: Water Management & Irrigation
Efficient water management is critical for a self sufficient garden from scratch, especially in off-grid living where water resources might be limited.
- Rainwater Harvesting: This is my primary source of irrigation water. A 55-gallon rain barrel (e.g., EarthMark Rain Barrel, ~$120-$150) connected to a downspout can collect significant water. For larger needs, I use two 275-gallon IBC totes (Intermediate Bulk Containers, often available used for $100-$200 each from food-grade sources) connected in series. A 1,000 sq ft roof can collect approximately 620 gallons of water for every inch of rainfall. My 1,500 sq ft roof provides ample water for my 600 sq ft garden through multiple barrels and totes.
- Drip Irrigation: This is by far the most water-efficient method, delivering water directly to the plant’s root zone, minimizing evaporation and weed growth.
- Components: A typical drip system includes a pressure regulator (e.g., Rain Bird PRV-10, ~$15), a filter (Rain Bird RBY filter, ~$20), main tubing (1/2-inch poly tubing, 100ft ~$25), smaller feeder lines (1/4-inch tubing), and emitters (0.5 GPH or 1 GPH per plant).
- Kits: For beginners, a starter kit like the Rain Bird Drip Irrigation Garden Kit (model DDI-KIT-1P, ~$40-$60) is excellent for a small garden. For larger setups, I use Netafim Techline CV Drip Line (500ft roll, ~$150-$200), which has pressure-compensating emitters built-in, ensuring even watering across long runs.
- Automation: For true self-sufficiency, consider a battery-powered timer (e.g., Orbit B-Hyve Bluetooth Hose Faucet Timer, ~$50) or a solar-powered timer connected to a small 12V pump.
- Solar-Powered Pumps: For lifting water from a well, pond, or large storage tank to your garden, a solar pump is a game-changer. For a smaller drip system, a Shurflo 2088-594-152 Diaphragm Pump (12V, 3.5 GPM, ~$180) can be powered by a single 100W solar panel (e.g., Renogy 100W Monocrystalline Solar Panel, ~$100) and a small 12V battery (e.g., a 50Ah LiFePO4 battery like the Battle Born 50Ah, ~$450). For larger operations or deeper wells, more robust systems are needed. If you’re looking to build out a comprehensive off-grid power system to support your garden’s water needs, or indeed your entire homestead, you might want to explore resources like the Power Grid Generator complete system guide to understand the full scope of what’s possible in terms of energy independence.
Step 5: Seed Selection & Planting
The choice of seeds is crucial for a truly self sufficient garden from scratch.
- Choose Heirloom & Open-Pollinated Seeds: These varieties produce seeds that will grow true to type, meaning you can save seeds from your harvest year after year. F1 hybrids, while often vigorous, will not produce consistent offspring from saved seeds. Reputable seed companies include Baker Creek Heirloom Seeds, High Mowing Organic Seeds, and Seed Savers Exchange. Start with common, reliable varieties like ‘Black Krim’ tomatoes, ‘Provider’ bush beans, ‘Waltham Butternut’ squash, and ‘Black Seeded Simpson’ lettuce.
- Start Seeds Indoors (Optional but Recommended): For longer growing seasons or specific crops, starting seeds indoors gives you a head start. Use seed-starting mix (e.g., Espoma Organic Seed Starter Mix, ~$10 for 16qt bag) in seed trays (Jiffy Professional Greenhouse 72-cell kit, ~$15). Provide adequate light with LED grow lights (Barrina T5 2ft 4-pack LED Grow Lights, 20W each, ~$50) for 14-16 hours a day, positioned 2-4 inches above seedlings. Maintain consistent temperatures (65-75°F for most).
- Direct Sowing vs. Transplanting: Some crops (carrots, radishes, beans, corn) prefer direct sowing into the garden bed. Others (tomatoes, peppers, broccoli, kale) benefit from being started indoors and transplanted. Follow seed packet instructions for planting depths (e.g., lettuce seeds are often surface-sown or planted 1/8 inch deep, while beans are 1 inch deep) and spacing.
- Companion Planting: Strategically plant different species together to enhance growth, deter pests, and attract beneficial insects. For example, planting marigolds near tomatoes can deter nematodes, and basil improves tomato flavor. Nasturtiums can act as a trap crop for aphids.
- Succession Planting: For a continuous harvest, plant small batches of quick-growing crops (lettuce, radishes, cilantro) every 2-3 weeks. As one crop finishes, another is ready to take its place.
Step 6: Pest & Disease Management (Organic)
Maintaining a self sufficient garden from scratch means embracing organic pest and disease control.
- Integrated Pest Management (IPM): This holistic approach combines several strategies.
- Observation: Regularly inspect your plants for early signs of pests or disease. Catching issues early is key.
- Physical Barriers: Use row covers (e.g., Agribon AG-19 floating row cover, 10×20 ft, ~$20) to protect young plants from insect pests like cabbage worms and squash bugs. Install fences (e.g., 2×4 welded wire mesh, 4 ft tall, 50 ft roll ~$70) to keep out deer, rabbits, and other larger animals.
- Hand-Picking: For larger pests like tomato hornworms or squash bugs, simply pick them off and drop them into a bucket of soapy water.
- Companion Planting: As mentioned, certain plants repel pests. Marigolds, garlic, and onions are excellent deterrents.
- Attract Beneficial Insects: Plant flowers like dill, fennel, cosmos, and sweet alyssum to attract ladybugs, lacewings, and parasitic wasps, which prey on common garden pests.
- Organic Sprays & Treatments:
- Neem Oil: An excellent broad-spectrum organic insecticide and fungicide. Bonide Neem Oil Concentrate (16oz, ~$20) can be mixed at a rate of 1-2 tbsp per gallon of water and sprayed on affected plants.
- Insecticidal Soap: Effective against soft-bodied insects like aphids, whiteflies, and spider mites. Garden Safe Insecticidal Soap (24oz ready-to-use, ~$10).
- Bacillus thuringiensis (Bt): A naturally occurring soil bacterium that targets caterpillars and worms. Monterey BT Worm & Caterpillar Killer (16oz, ~$18) is highly effective and safe for beneficial insects.
- Copper or Sulfur Sprays: For fungal diseases like powdery mildew or blight, organic copper (e.g., Bonide Copper Fungicide, ~$15 for 1lb) or sulfur (e.g., Safer Brand Garden Fungicide, ~$10 for 16oz) can be used as a last resort.
Step 7: Harvesting & Seed Saving
The culmination of your efforts is the harvest, and seed saving closes the loop on self-sufficiency.
- Harvesting Techniques:
- Timing: Harvest vegetables at their peak ripeness for best flavor and nutritional value. For example, green beans should snap cleanly, cucumbers should be firm, and tomatoes should be fully colored.
- Frequency: Many crops, like zucchini, cucumbers, and bush beans, produce more if harvested frequently. Pick daily or every other day.
- Tools: Use clean, sharp pruners (e.g., Corona ClassicCUT Bypass Pruner BP 3180, ~$30) or a sharp knife for clean cuts, minimizing damage to the plant.
- Seed Saving: This is where the « self-sufficient » aspect truly shines.
- Selection: Only save seeds from your healthiest, most vigorous plants that show desired traits (disease resistance, good flavor, high yield).
- Isolation: To ensure true-to-type seeds, prevent cross-pollination. This can be challenging for open-pollinated crops that readily cross (e.g., squash, corn). For beginners, focus on self-pollinating plants like beans, peas, lettuce, and tomatoes.
- Processing:
- Dry Seeds (Beans, Peas, Lettuce, Grains): Allow pods/seed heads to dry completely on the plant. Harvest, shell, and clean the seeds, removing chaff.
- Wet Seeds (Tomatoes, Cucumbers, Squash): For tomatoes, ferment the seeds in water for a few days to remove the gel coating and inhibit disease. For cucumbers/squash, scrape out seeds, wash thoroughly, and dry.
- Drying: Spread seeds thinly on screens or paper plates in a cool, dry, well-ventilated area for 1-4 weeks. Ensure they are bone-dry before storage. I aim for less than 8% moisture content.
- Storage: Store seeds in airtight containers (glass jars with desiccant packets work well) in a cool, dark, dry place (ideally 40-50°F and 30-40% humidity). Label clearly with variety and date. Properly stored seeds can remain viable for 3-10 years or more.
Step 8: Season Extension & Winterizing
Extend your harvest and protect your garden for the off-season to truly maximize your self sufficient garden from scratch.
- Cold Frames: Simple structures with a transparent top (glass, polycarbonate, or old windows) that sit over garden beds. They trap solar heat, allowing you to grow cold-hardy crops (lettuce, spinach, kale, radishes) well into winter or start seeds earlier in spring. A basic cold frame can be built from 2×6 lumber and a sheet of polycarbonate for under $100.
- Hoop Houses/Low Tunnels: Larger structures made from flexible hoops (PVC pipe or EMT conduit) covered with greenhouse plastic. These provide more space and greater temperature moderation. A 10×20 ft DIY low tunnel kit can cost $200-$500, while a larger, more robust hoop house kit might be $1,000-$3,000. I use a 6×12 ft low tunnel made from 1/2-inch PVC hoops and 6mil greenhouse plastic, which extends my lettuce and spinach harvest by at least
- In-Ground Beds: If you have excellent native soil and good drainage, in-ground beds are the most economical. Double-digging (loosening soil two shovel depths) can significantly improve drainage and aeration. For my main garden, I primarily use in-ground beds, but I focus on building up the soil over time with consistent compost additions and cover cropping. I aim for beds that are no wider than 3-4 feet so I can reach the center without stepping on the soil, compacting it.
- Raised Beds: Raised beds offer numerous advantages, especially for poor soil, heavy clay, or rocky areas. They provide better drainage, warm up faster in spring, reduce compaction, and make weeding and harvesting easier on your back.
- Material Options:
- Untreated Cedar: Naturally rot-resistant and chemical-free. A 4×8 ft bed, 12 inches deep, typically requires three 2x12x8 ft cedar boards, costing around $50-$60 per board (total ~$150-$180) plus corner brackets or screws. My first raised beds were cedar and are still going strong after 7 years.
- Galvanized Steel: Durable, long-lasting, and aesthetically pleasing. Brands like Vego Garden offer modular kits. A Vego Garden 17″ Tall 8-in-1 Metal Raised Garden Bed (can be configured to 4×8 ft) costs approximately $250-$300.
- Concrete Blocks/Stones: Very durable but can leach minerals (though generally safe once weathered) and can be expensive.
- Recycled Materials: Pallets (check for chemical treatment stamps like « HT » for heat-treated), old tires (controversial due to potential chemical leaching).
- Filling Raised Beds: Don’t just fill with topsoil. Use a « Hugelkultur » approach (logs, branches, leaves, then compost, then topsoil) or a mixture of 60% good quality topsoil, 30% compost, and 10% perlite or vermiculite for drainage. A 4x8x1 ft raised bed requires about 32 cubic feet (or ~1.2 cubic yards) of soil mix, which can cost $100-$200 depending on your source.
- Material Options:
Step 4: Water Management & Irrigation
Efficient water management is critical for a self sufficient garden from scratch, especially in off-grid living where water resources might be limited.
- Rainwater Harvesting: This is my primary source of irrigation water. A 55-gallon rain barrel (e.g., EarthMark Rain Barrel, ~$120-$150) connected to a downspout can collect significant water. For larger needs, I use two 275-gallon IBC totes (Intermediate Bulk Containers, often available used for $100-$200 each from food-grade sources) connected in series. A 1,000 sq ft roof can collect approximately 620 gallons of water for every inch of rainfall. My 1,500 sq ft roof provides ample water for my 600 sq ft garden through multiple barrels and totes.
- Drip Irrigation: This is by far the most water-efficient method, delivering water directly to the plant’s root zone, minimizing evaporation and weed growth.
- Components: A typical drip system includes a pressure regulator (e.g., Rain Bird PRV-10, ~$15), a filter (Rain Bird RBY filter, ~$20), main tubing (1/2-inch poly tubing, 100ft ~$25), smaller feeder lines (1/4-inch tubing), and emitters (0.5 GPH or 1 GPH per plant).
- Kits: For beginners, a starter kit like the Rain Bird Drip Irrigation Garden Kit (model DDI-KIT-1P, ~$40-$60) is excellent for a small garden. For larger setups, I use Netafim Techline CV Drip Line (500ft roll, ~$150-$200), which has pressure-compensating emitters built-in, ensuring even watering across long runs.
- Automation: For true self-sufficiency, consider a battery-powered timer (e.g., Orbit B-Hyve Bluetooth Hose Faucet Timer, ~$50) or a solar-powered timer connected to a small 12V pump.
- Solar-Powered Pumps: For lifting water from a well, pond, or large storage tank to your garden, a solar pump is a game-changer. For a smaller drip system, a Shurflo 2088-594-152 Diaphragm Pump (12V, 3.5 GPM, ~$180) can be powered by a single 100W solar panel (e.g., Renogy 100W Monocrystalline Solar Panel, ~$100) and a small 12V battery (e.g., a 50Ah LiFePO4 battery like the Battle Born 50Ah, ~$450). For larger operations or deeper wells, more robust systems are needed. If you’re looking to build out a comprehensive off-grid power system to support your garden’s water needs, or indeed your entire homestead, you might want to explore resources like the Power Grid Generator complete system guide to understand the full scope of what’s possible in terms of energy independence.
Step 5: Seed Selection & Planting
The choice of seeds is crucial for a truly self sufficient garden from scratch.
- Choose Heirloom & Open-Pollinated Seeds: These varieties produce seeds that will grow true to type, meaning you can save seeds from your harvest year after year. F1 hybrids, while often vigorous, will not produce consistent offspring from saved seeds. Reputable seed companies include Baker Creek Heirloom Seeds, High Mowing Organic Seeds, and Seed Savers Exchange. Start with common, reliable varieties like ‘Black Krim’ tomatoes, ‘Provider’ bush beans, ‘Waltham Butternut’ squash, and ‘Black Seeded Simpson’ lettuce.
- Start Seeds Indoors (Optional but Recommended): For longer growing seasons or specific crops, starting seeds indoors gives you a head start. Use seed-starting mix (e.g., Espoma Organic Seed Starter Mix, ~$10 for 16qt bag) in seed trays (Jiffy Professional Greenhouse 72-cell kit, ~$15). Provide adequate light with LED grow lights (Barrina T5 2ft 4-pack LED Grow Lights, 20W each, ~$50) for 14-16 hours a day, positioned 2-4 inches above seedlings. Maintain consistent temperatures (65-75°F for most).
- Direct Sowing vs. Transplanting: Some crops (carrots, radishes, beans, corn) prefer direct sowing into the garden bed. Others (tomatoes, peppers, broccoli, kale) benefit from being started indoors and transplanted. Follow seed packet instructions for planting depths (e.g., lettuce seeds are often surface-sown or planted 1/8 inch deep, while beans are 1 inch deep) and spacing.
- Companion Planting: Strategically plant different species together to enhance growth, deter pests, and attract beneficial insects. For example, planting marigolds near tomatoes can deter nematodes, and basil improves tomato flavor. Nasturtiums can act as a trap crop for aphids.
- Succession Planting: For a continuous harvest, plant small batches of quick-growing crops (lettuce, radishes, cilantro) every 2-3 weeks. As one crop finishes, another is ready to take its place.
Step 6: Pest & Disease Management (Organic)
Maintaining a self sufficient garden from scratch means embracing organic pest and disease control.
- Integrated Pest Management (IPM): This holistic approach combines several strategies.
- Observation: Regularly inspect your plants for early signs of pests or disease. Catching issues early is key.
- Physical Barriers: Use row covers (e.g., Agribon AG-19 floating row cover, 10×20 ft, ~$20) to protect young plants from insect pests like cabbage worms and squash bugs. Install fences (e.g., 2×4 welded wire mesh, 4 ft tall, 50 ft roll ~$70) to keep out deer, rabbits, and other larger animals.
- Hand-Picking: For larger pests like tomato hornworms or squash bugs, simply pick them off and drop them into a bucket of soapy water.
- Companion Planting: As mentioned, certain plants repel pests. Marigolds, garlic, and onions are excellent deterrents.
- Attract Beneficial Insects: Plant flowers like dill, fennel, cosmos, and sweet alyssum to attract ladybugs, lacewings, and parasitic wasps, which prey on common garden pests.
- Organic Sprays & Treatments:
- Neem Oil: An excellent broad-spectrum organic insecticide and fungicide. Bonide Neem Oil Concentrate (16oz, ~$20) can be mixed at a rate of 1-2 tbsp per gallon of water and sprayed on affected plants.
- Insecticidal Soap: Effective against soft-bodied insects like aphids, whiteflies, and spider mites. Garden Safe Insecticidal Soap (24oz ready-to-use, ~$10).
- Bacillus thuringiensis (Bt): A naturally occurring soil bacterium that targets caterpillars and worms. Monterey BT Worm & Caterpillar Killer (16oz, ~$18) is highly effective and safe for beneficial insects.
- Copper or Sulfur Sprays: For fungal diseases like powdery mildew or blight, organic copper (e.g., Bonide Copper Fungicide, ~$15 for 1lb) or sulfur (e.g., Safer Brand Garden Fungicide, ~$10 for 16oz) can be used as a last resort.
Step 7: Harvesting & Seed Saving
The culmination of your efforts is the harvest, and seed saving closes the loop on self-sufficiency.
- Harvesting Techniques:
- Timing: Harvest vegetables at their peak ripeness for best flavor and nutritional value. For example, green beans should snap cleanly, cucumbers should be firm, and tomatoes should be fully colored.
- Frequency: Many crops, like zucchini, cucumbers, and bush beans, produce more if harvested frequently. Pick daily or every other day.
- Tools: Use clean, sharp pruners (e.g., Corona ClassicCUT Bypass Pruner BP 3180, ~$30) or a sharp knife for clean cuts, minimizing damage to the plant.
- Seed Saving: This is where the « self-sufficient » aspect truly shines.
- Selection: Only save seeds from your healthiest, most vigorous plants that show desired traits (disease resistance, good flavor, high yield).
- Isolation: To ensure true-to-type seeds, prevent cross-pollination. This can be challenging for open-pollinated crops that readily cross (e.g., squash, corn). For beginners, focus on self-pollinating plants like beans, peas, lettuce, and tomatoes.
- Processing:
- Dry Seeds (Beans, Peas, Lettuce, Grains): Allow pods/seed heads to dry completely on the plant. Harvest, shell, and clean the seeds, removing chaff.
- Wet Seeds (Tomatoes, Cucumbers, Squash): For tomatoes, ferment the seeds in water for a few days to remove the gel coating and inhibit disease. For cucumbers/squash, scrape out seeds, wash thoroughly, and dry.
- Drying: Spread seeds thinly on screens or paper plates in a cool, dry, well-ventilated area for 1-4 weeks. Ensure they are bone-dry before storage. I aim for less than 8% moisture content.
- Storage: Store seeds in airtight containers (glass jars with desiccant packets work well) in a cool, dark, dry place (ideally 40-50°F and 30-40% humidity). Label clearly with variety and date. Properly stored seeds can remain viable for 3-10 years or more.
Step 8: Season Extension & Winterizing
Extend your harvest and protect your garden for the off-season to truly maximize your self sufficient garden from scratch.
- Cold Frames: Simple structures with a transparent top (glass, polycarbonate, or old windows) that sit over garden beds. They trap solar heat, allowing you to grow cold-hardy crops (lettuce, spinach, kale, radishes) well into winter or start seeds earlier in spring. A basic cold frame can be built from 2×6 lumber and a sheet of polycarbonate for under $100.
- Hoop Houses/Low Tunnels: Larger structures made from flexible hoops (PVC pipe or EMT conduit) covered with greenhouse plastic. These provide more space and greater temperature moderation. A 10×20 ft DIY low tunnel kit can cost $200-$500, while a larger, more robust hoop house kit might be $1,000-$3,000. I use a 6×12 ft low tunnel made from 1/2-inch PVC hoops and 6mil greenhouse plastic, which extends my lettuce and spinach harvest by at least
Deciding between raised beds and in-ground beds depends on your soil, budget, and physical capabilities.
- In-Ground Beds: If you have excellent native soil and good drainage, in-ground beds are the most economical. Double-digging (loosening soil two shovel depths) can significantly improve drainage and aeration. For my main garden, I primarily use in-ground beds, but I focus on building up the soil over time with consistent compost additions and cover cropping. I aim for beds that are no wider than 3-4 feet so I can reach the center without stepping on the soil, compacting it.
- Raised Beds: Raised beds offer numerous advantages, especially for poor soil, heavy clay, or rocky areas. They provide better drainage, warm up faster in spring, reduce compaction, and make weeding and harvesting easier on your back.
- Material Options:
- Untreated Cedar: Naturally rot-resistant and chemical-free. A 4×8 ft bed, 12 inches deep, typically requires three 2x12x8 ft cedar boards, costing around $50-$60 per board (total ~$150-$180) plus corner brackets or screws. My first raised beds were cedar and are still going strong after 7 years.
- Galvanized Steel: Durable, long-lasting, and aesthetically pleasing. Brands like Vego Garden offer modular kits. A Vego Garden 17″ Tall 8-in-1 Metal Raised Garden Bed (can be configured to 4×8 ft) costs approximately $250-$300.
- Concrete Blocks/Stones: Very durable but can leach minerals (though generally safe once weathered) and can be expensive.
- Recycled Materials: Pallets (check for chemical treatment stamps like « HT » for heat-treated), old tires (controversial due to potential chemical leaching).
- Filling Raised Beds: Don’t just fill with topsoil. Use a « Hugelkultur » approach (logs, branches, leaves, then compost, then topsoil) or a mixture of 60% good quality topsoil, 30% compost, and 10% perlite or vermiculite for drainage. A 4x8x1 ft raised bed requires about 32 cubic feet (or ~1.2 cubic yards) of soil mix, which can cost $100-$200 depending on your source.
- Material Options:
Step 4: Water Management & Irrigation
Efficient water management is critical for a self sufficient garden from scratch, especially in off-grid living where water resources might be limited.
- Rainwater Harvesting: This is my primary source of irrigation water. A 55-gallon rain barrel (e.g., EarthMark Rain Barrel, ~$120-$150) connected to a downspout can collect significant water. For larger needs, I use two 275-gallon IBC totes (Intermediate Bulk Containers, often available used for $100-$200 each from food-grade sources) connected in series. A 1,000 sq ft roof can collect approximately 620 gallons of water for every inch of rainfall. My 1,500 sq ft roof provides ample water for my 600 sq ft garden through multiple barrels and totes.
- Drip Irrigation: This is by far the most water-efficient method, delivering water directly to the plant’s root zone, minimizing evaporation and weed growth.
- Components: A typical drip system includes a pressure regulator (e.g., Rain Bird PRV-10, ~$15), a filter (Rain Bird RBY filter, ~$20), main tubing (1/2-inch poly tubing, 100ft ~$25), smaller feeder lines (1/4-inch tubing), and emitters (0.5 GPH or 1 GPH per plant).
- Kits: For beginners, a starter kit like the Rain Bird Drip Irrigation Garden Kit (model DDI-KIT-1P, ~$40-$60) is excellent for a small garden. For larger setups, I use Netafim Techline CV Drip Line (500ft roll, ~$150-$200), which has pressure-compensating emitters built-in, ensuring even watering across long runs.
- Automation: For true self-sufficiency, consider a battery-powered timer (e.g., Orbit B-Hyve Bluetooth Hose Faucet Timer, ~$50) or a solar-powered timer connected to a small 12V pump.
- Solar-Powered Pumps: For lifting water from a well, pond, or large storage tank to your garden, a solar pump is a game-changer. For a smaller drip system, a Shurflo 2088-594-152 Diaphragm Pump (12V, 3.5 GPM, ~$180) can be powered by a single 100W solar panel (e.g., Renogy 100W Monocrystalline Solar Panel, ~$100) and a small 12V battery (e.g., a 50Ah LiFePO4 battery like the Battle Born 50Ah, ~$450). For larger operations or deeper wells, more robust systems are needed. If you’re looking to build out a comprehensive off-grid power system to support your garden’s water needs, or indeed your entire homestead, you might want to explore resources like the Power Grid Generator complete system guide to understand the full scope of what’s possible in terms of energy independence.
Step 5: Seed Selection & Planting
The choice of seeds is crucial for a truly self sufficient garden from scratch.
- Choose Heirloom & Open-Pollinated Seeds: These varieties produce seeds that will grow true to type, meaning you can save seeds from your harvest year after year. F1 hybrids, while often vigorous, will not produce consistent offspring from saved seeds. Reputable seed companies include Baker Creek Heirloom Seeds, High Mowing Organic Seeds, and Seed Savers Exchange. Start with common, reliable varieties like ‘Black Krim’ tomatoes, ‘Provider’ bush beans, ‘Waltham Butternut’ squash, and ‘Black Seeded Simpson’ lettuce.
- Start Seeds Indoors (Optional but Recommended): For longer growing seasons or specific crops, starting seeds indoors gives you a head start. Use seed-starting mix (e.g., Espoma Organic Seed Starter Mix, ~$10 for 16qt bag) in seed trays (Jiffy Professional Greenhouse 72-cell kit, ~$15). Provide adequate light with LED grow lights (Barrina T5 2ft 4-pack LED Grow Lights, 20W each, ~$50) for 14-16 hours a day, positioned 2-4 inches above seedlings. Maintain consistent temperatures (65-75°F for most).
- Direct Sowing vs. Transplanting: Some crops (carrots, radishes, beans, corn) prefer direct sowing into the garden bed. Others (tomatoes, peppers, broccoli, kale) benefit from being started indoors and transplanted. Follow seed packet instructions for planting depths (e.g., lettuce seeds are often surface-sown or planted 1/8 inch deep, while beans are 1 inch deep) and spacing.
- Companion Planting: Strategically plant different species together to enhance growth, deter pests, and attract beneficial insects. For example, planting marigolds near tomatoes can deter nematodes, and basil improves tomato flavor. Nasturtiums can act as a trap crop for aphids.
- Succession Planting: For a continuous harvest, plant small batches of quick-growing crops (lettuce, radishes, cilantro) every 2-3 weeks. As one crop finishes, another is ready to take its place.
Step 6: Pest & Disease Management (Organic)
Maintaining a self sufficient garden from scratch means embracing organic pest and disease control.
- Integrated Pest Management (IPM): This holistic approach combines several strategies.
- Observation: Regularly inspect your plants for early signs of pests or disease. Catching issues early is key.
- Physical Barriers: Use row covers (e.g., Agribon AG-19 floating row cover, 10×20 ft, ~$20) to protect young plants from insect pests like cabbage worms and squash bugs. Install fences (e.g., 2×4 welded wire mesh, 4 ft tall, 50 ft roll ~$70) to keep out deer, rabbits, and other larger animals.
- Hand-Picking: For larger pests like tomato hornworms or squash bugs, simply pick them off and drop them into a bucket of soapy water.
- Companion Planting: As mentioned, certain plants repel pests. Marigolds, garlic, and onions are excellent deterrents.
- Attract Beneficial Insects: Plant flowers like dill, fennel, cosmos, and sweet alyssum to attract ladybugs, lacewings, and parasitic wasps, which prey on common garden pests.
- Organic Sprays & Treatments:
- Neem Oil: An excellent broad-spectrum organic insecticide and fungicide. Bonide Neem Oil Concentrate (16oz, ~$20) can be mixed at a rate of 1-2 tbsp per gallon of water and sprayed on affected plants.
- Insecticidal Soap: Effective against soft-bodied insects like aphids, whiteflies, and spider mites. Garden Safe Insecticidal Soap (24oz ready-to-use, ~$10).
- Bacillus thuringiensis (Bt): A naturally occurring soil bacterium that targets caterpillars and worms. Monterey BT Worm & Caterpillar Killer (16oz, ~$18) is highly effective and safe for beneficial insects.
- Copper or Sulfur Sprays: For fungal diseases like powdery mildew or blight, organic copper (e.g., Bonide Copper Fungicide, ~$15 for 1lb) or sulfur (e.g., Safer Brand Garden Fungicide, ~$10 for 16oz) can be used as a last resort.
Step 7: Harvesting & Seed Saving
The culmination of your efforts is the harvest, and seed saving closes the loop on self-sufficiency.
- Harvesting Techniques:
- Timing: Harvest vegetables at their peak ripeness for best flavor and nutritional value. For example, green beans should snap cleanly, cucumbers should be firm, and tomatoes should be fully colored.
- Frequency: Many crops, like zucchini, cucumbers, and bush beans, produce more if harvested frequently. Pick daily or every other day.
- Tools: Use clean, sharp pruners (e.g., Corona ClassicCUT Bypass Pruner BP 3180, ~$30) or a sharp knife for clean cuts, minimizing damage to the plant.
- Seed Saving: This is where the « self-sufficient » aspect truly shines.
- Selection: Only save seeds from your healthiest, most vigorous plants that show desired traits (disease resistance, good flavor, high yield).
- Isolation: To ensure true-to-type seeds, prevent cross-pollination. This can be challenging for open-pollinated crops that readily cross (e.g., squash, corn). For beginners, focus on self-pollinating plants like beans, peas, lettuce, and tomatoes.
- Processing:
- Dry Seeds (Beans, Peas, Lettuce, Grains): Allow pods/seed heads to dry completely on the plant. Harvest, shell, and clean the seeds, removing chaff.
- Wet Seeds (Tomatoes, Cucumbers, Squash): For tomatoes, ferment the seeds in water for a few days to remove the gel coating and inhibit disease. For cucumbers/squash, scrape out seeds, wash thoroughly, and dry.
- Drying: Spread seeds thinly on screens or paper plates in a cool, dry, well-ventilated area for 1-4 weeks. Ensure they are bone-dry before storage. I aim for less than 8% moisture content.
- Storage: Store seeds in airtight containers (glass jars with desiccant packets work well) in a cool, dark, dry place (ideally 40-50°F and 30-40% humidity). Label clearly with variety and date. Properly stored seeds can remain viable for 3-10 years or more.
Step 8: Season Extension & Winterizing
Extend your harvest and protect your garden for the off-season to truly maximize your self sufficient garden from scratch.
- Cold Frames: Simple structures with a transparent top (glass, polycarbonate, or old windows) that sit over garden beds. They trap solar heat, allowing you to grow cold-hardy crops (lettuce, spinach, kale, radishes) well into winter or start seeds earlier in spring. A basic cold frame can be built from 2×6 lumber and a sheet of polycarbonate for under $100.
- Hoop Houses/Low Tunnels: Larger structures made from flexible hoops (PVC pipe or EMT conduit) covered with greenhouse plastic. These provide more space and greater temperature moderation. A 10×20 ft DIY low tunnel kit can cost $200-$500, while a larger, more robust hoop house kit might be $1,000-$3,000. I use a 6×12 ft low tunnel made from 1/2-inch PVC hoops and 6mil greenhouse plastic, which extends my lettuce and spinach harvest by at least
Healthy soil is the bedrock of a productive, self-sufficient garden. You can’t guess what your soil needs; you have to test it.
- Perform a Soil Test: A professional soil test will give you precise data on your soil’s pH, nutrient levels (N-P-K), and organic matter content. I recommend sending a sample to your local agricultural extension office; it typically costs $20-$50 and provides detailed recommendations. Alternatively, for a quick homeowner check, a Rapitest Soil Test Kit (40-test kit, model 1663, ~$20 on Amazon) provides a good baseline for pH, Nitrogen, Phosphorus, and Potash. Aim for a pH between 6.0 and 7.0 for most vegetables.
- Amend for pH Imbalance: If your soil is too acidic (below 6.0), add agricultural lime (dolomitic lime adds magnesium, calcitic lime adds calcium). Apply 5-10 lbs per 100 sq ft for a moderate adjustment. If it’s too alkaline (above 7.0), add elemental sulfur (e.g., Espoma Soil Acidifier, ~$15 for 6.75 lbs) or generous amounts of organic matter like peat moss or pine needles.
- Build Organic Matter: This is the single most important step for long-term soil health. Organic matter improves soil structure, water retention, drainage, and nutrient availability. Incorporate 2-4 inches of high-quality compost into your top 6-12 inches of soil annually. I make my own compost from kitchen scraps, garden waste, and shredded leaves, but you can purchase it. Local nurseries often sell bulk compost for $30-$50 per cubic yard. Aged manure (from chickens, cows, or horses – ensure it’s well-rotted to avoid burning plants) is also excellent.
- Address Nutrient Deficiencies: Based on your soil test, add specific organic amendments. If Nitrogen (N) is low, add blood meal (12-0-0, ~$20 for 3 lbs) or feather meal. For Phosphorus (P), use bone meal (3-15-0, ~$15 for 3 lbs) or rock phosphate. For Potassium (K), greensand (0-0-2.5, ~$25 for 5 lbs) or kelp meal are good choices. I rely heavily on Espoma Organic Garden-tone (5-3-3, ~$25 for an 8lb bag) as a balanced, all-purpose organic fertilizer during planting.
Step 3: Garden Bed Preparation
Deciding between raised beds and in-ground beds depends on your soil, budget, and physical capabilities.
- In-Ground Beds: If you have excellent native soil and good drainage, in-ground beds are the most economical. Double-digging (loosening soil two shovel depths) can significantly improve drainage and aeration. For my main garden, I primarily use in-ground beds, but I focus on building up the soil over time with consistent compost additions and cover cropping. I aim for beds that are no wider than 3-4 feet so I can reach the center without stepping on the soil, compacting it.
- Raised Beds: Raised beds offer numerous advantages, especially for poor soil, heavy clay, or rocky areas. They provide better drainage, warm up faster in spring, reduce compaction, and make weeding and harvesting easier on your back.
- Material Options:
- Untreated Cedar: Naturally rot-resistant and chemical-free. A 4×8 ft bed, 12 inches deep, typically requires three 2x12x8 ft cedar boards, costing around $50-$60 per board (total ~$150-$180) plus corner brackets or screws. My first raised beds were cedar and are still going strong after 7 years.
- Galvanized Steel: Durable, long-lasting, and aesthetically pleasing. Brands like Vego Garden offer modular kits. A Vego Garden 17″ Tall 8-in-1 Metal Raised Garden Bed (can be configured to 4×8 ft) costs approximately $250-$300.
- Concrete Blocks/Stones: Very durable but can leach minerals (though generally safe once weathered) and can be expensive.
- Recycled Materials: Pallets (check for chemical treatment stamps like « HT » for heat-treated), old tires (controversial due to potential chemical leaching).
- Filling Raised Beds: Don’t just fill with topsoil. Use a « Hugelkultur » approach (logs, branches, leaves, then compost, then topsoil) or a mixture of 60% good quality topsoil, 30% compost, and 10% perlite or vermiculite for drainage. A 4x8x1 ft raised bed requires about 32 cubic feet (or ~1.2 cubic yards) of soil mix, which can cost $100-$200 depending on your source.
- Material Options:
Step 4: Water Management & Irrigation
Efficient water management is critical for a self sufficient garden from scratch, especially in off-grid living where water resources might be limited.
- Rainwater Harvesting: This is my primary source of irrigation water. A 55-gallon rain barrel (e.g., EarthMark Rain Barrel, ~$120-$150) connected to a downspout can collect significant water. For larger needs, I use two 275-gallon IBC totes (Intermediate Bulk Containers, often available used for $100-$200 each from food-grade sources) connected in series. A 1,000 sq ft roof can collect approximately 620 gallons of water for every inch of rainfall. My 1,500 sq ft roof provides ample water for my 600 sq ft garden through multiple barrels and totes.
- Drip Irrigation: This is by far the most water-efficient method, delivering water directly to the plant’s root zone, minimizing evaporation and weed growth.
- Components: A typical drip system includes a pressure regulator (e.g., Rain Bird PRV-10, ~$15), a filter (Rain Bird RBY filter, ~$20), main tubing (1/2-inch poly tubing, 100ft ~$25), smaller feeder lines (1/4-inch tubing), and emitters (0.5 GPH or 1 GPH per plant).
- Kits: For beginners, a starter kit like the Rain Bird Drip Irrigation Garden Kit (model DDI-KIT-1P, ~$40-$60) is excellent for a small garden. For larger setups, I use Netafim Techline CV Drip Line (500ft roll, ~$150-$200), which has pressure-compensating emitters built-in, ensuring even watering across long runs.
- Automation: For true self-sufficiency, consider a battery-powered timer (e.g., Orbit B-Hyve Bluetooth Hose Faucet Timer, ~$50) or a solar-powered timer connected to a small 12V pump.
- Solar-Powered Pumps: For lifting water from a well, pond, or large storage tank to your garden, a solar pump is a game-changer. For a smaller drip system, a Shurflo 2088-594-152 Diaphragm Pump (12V, 3.5 GPM, ~$180) can be powered by a single 100W solar panel (e.g., Renogy 100W Monocrystalline Solar Panel, ~$100) and a small 12V battery (e.g., a 50Ah LiFePO4 battery like the Battle Born 50Ah, ~$450). For larger operations or deeper wells, more robust systems are needed. If you’re looking to build out a comprehensive off-grid power system to support your garden’s water needs, or indeed your entire homestead, you might want to explore resources like the Power Grid Generator complete system guide to understand the full scope of what’s possible in terms of energy independence.
Step 5: Seed Selection & Planting
The choice of seeds is crucial for a truly self sufficient garden from scratch.
- Choose Heirloom & Open-Pollinated Seeds: These varieties produce seeds that will grow true to type, meaning you can save seeds from your harvest year after year. F1 hybrids, while often vigorous, will not produce consistent offspring from saved seeds. Reputable seed companies include Baker Creek Heirloom Seeds, High Mowing Organic Seeds, and Seed Savers Exchange. Start with common, reliable varieties like ‘Black Krim’ tomatoes, ‘Provider’ bush beans, ‘Waltham Butternut’ squash, and ‘Black Seeded Simpson’ lettuce.
- Start Seeds Indoors (Optional but Recommended): For longer growing seasons or specific crops, starting seeds indoors gives you a head start. Use seed-starting mix (e.g., Espoma Organic Seed Starter Mix, ~$10 for 16qt bag) in seed trays (Jiffy Professional Greenhouse 72-cell kit, ~$15). Provide adequate light with LED grow lights (Barrina T5 2ft 4-pack LED Grow Lights, 20W each, ~$50) for 14-16 hours a day, positioned 2-4 inches above seedlings. Maintain consistent temperatures (65-75°F for most).
- Direct Sowing vs. Transplanting: Some crops (carrots, radishes, beans, corn) prefer direct sowing into the garden bed. Others (tomatoes, peppers, broccoli, kale) benefit from being started indoors and transplanted. Follow seed packet instructions for planting depths (e.g., lettuce seeds are often surface-sown or planted 1/8 inch deep, while beans are 1 inch deep) and spacing.
- Companion Planting: Strategically plant different species together to enhance growth, deter pests, and attract beneficial insects. For example, planting marigolds near tomatoes can deter nematodes, and basil improves tomato flavor. Nasturtiums can act as a trap crop for aphids.
- Succession Planting: For a continuous harvest, plant small batches of quick-growing crops (lettuce, radishes, cilantro) every 2-3 weeks. As one crop finishes, another is ready to take its place.
Step 6: Pest & Disease Management (Organic)
Maintaining a self sufficient garden from scratch means embracing organic pest and disease control.
- Integrated Pest Management (IPM): This holistic approach combines several strategies.
- Observation: Regularly inspect your plants for early signs of pests or disease. Catching issues early is key.
- Physical Barriers: Use row covers (e.g., Agribon AG-19 floating row cover, 10×20 ft, ~$20) to protect young plants from insect pests like cabbage worms and squash bugs. Install fences (e.g., 2×4 welded wire mesh, 4 ft tall, 50 ft roll ~$70) to keep out deer, rabbits, and other larger animals.
- Hand-Picking: For larger pests like tomato hornworms or squash bugs, simply pick them off and drop them into a bucket of soapy water.
- Companion Planting: As mentioned, certain plants repel pests. Marigolds, garlic, and onions are excellent deterrents.
- Attract Beneficial Insects: Plant flowers like dill, fennel, cosmos, and sweet alyssum to attract ladybugs, lacewings, and parasitic wasps, which prey on common garden pests.
- Organic Sprays & Treatments:
- Neem Oil: An excellent broad-spectrum organic insecticide and fungicide. Bonide Neem Oil Concentrate (16oz, ~$20) can be mixed at a rate of 1-2 tbsp per gallon of water and sprayed on affected plants.
- Insecticidal Soap: Effective against soft-bodied insects like aphids, whiteflies, and spider mites. Garden Safe Insecticidal Soap (24oz ready-to-use, ~$10).
- Bacillus thuringiensis (Bt): A naturally occurring soil bacterium that targets caterpillars and worms. Monterey BT Worm & Caterpillar Killer (16oz, ~$18) is highly effective and safe for beneficial insects.
- Copper or Sulfur Sprays: For fungal diseases like powdery mildew or blight, organic copper (e.g., Bonide Copper Fungicide, ~$15 for 1lb) or sulfur (e.g., Safer Brand Garden Fungicide, ~$10 for 16oz) can be used as a last resort.
Step 7: Harvesting & Seed Saving
The culmination of your efforts is the harvest, and seed saving closes the loop on self-sufficiency.
- Harvesting Techniques:
- Timing: Harvest vegetables at their peak ripeness for best flavor and nutritional value. For example, green beans should snap cleanly, cucumbers should be firm, and tomatoes should be fully colored.
- Frequency: Many crops, like zucchini, cucumbers, and bush beans, produce more if harvested frequently. Pick daily or every other day.
- Tools: Use clean, sharp pruners (e.g., Corona ClassicCUT Bypass Pruner BP 3180, ~$30) or a sharp knife for clean cuts, minimizing damage to the plant.
- Seed Saving: This is where the « self-sufficient » aspect truly shines.
- Selection: Only save seeds from your healthiest, most vigorous plants that show desired traits (disease resistance, good flavor, high yield).
- Isolation: To ensure true-to-type seeds, prevent cross-pollination. This can be challenging for open-pollinated crops that readily cross (e.g., squash, corn). For beginners, focus on self-pollinating plants like beans, peas, lettuce, and tomatoes.
- Processing:
- Dry Seeds (Beans, Peas, Lettuce, Grains): Allow pods/seed heads to dry completely on the plant. Harvest, shell, and clean the seeds, removing chaff.
- Wet Seeds (Tomatoes, Cucumbers, Squash): For tomatoes, ferment the seeds in water for a few days to remove the gel coating and inhibit disease. For cucumbers/squash, scrape out seeds, wash thoroughly, and dry.
- Drying: Spread seeds thinly on screens or paper plates in a cool, dry, well-ventilated area for 1-4 weeks. Ensure they are bone-dry before storage. I aim for less than 8% moisture content.
- Storage: Store seeds in airtight containers (glass jars with desiccant packets work well) in a cool, dark, dry place (ideally 40-50°F and 30-40% humidity). Label clearly with variety and date. Properly stored seeds can remain viable for 3-10 years or more.
Step 8: Season Extension & Winterizing
Extend your harvest and protect your garden for the off-season to truly maximize your self sufficient garden from scratch.
- Cold Frames: Simple structures with a transparent top (glass, polycarbonate, or old windows) that sit over garden beds. They trap solar heat, allowing you to grow cold-hardy crops (lettuce, spinach, kale, radishes) well into winter or start seeds earlier in spring. A basic cold frame can be built from 2×6 lumber and a sheet of polycarbonate for under $100.
- Hoop Houses/Low Tunnels: Larger structures made from flexible hoops (PVC pipe or EMT conduit) covered with greenhouse plastic. These provide more space and greater temperature moderation. A 10×20 ft DIY low tunnel kit can cost $200-$500, while a larger, more robust hoop house kit might be $1,000-$3,000. I use a 6×12 ft low tunnel made from 1/2-inch PVC hoops and 6mil greenhouse plastic, which extends my lettuce and spinach harvest by at least
- Integrated Pest Management (IPM): This holistic approach combines several strategies.
Maintaining a self sufficient garden from scratch means embracing organic pest and disease control.
- Integrated Pest Management (IPM): This holistic approach combines several strategies.
- Observation: Regularly inspect your plants for early signs of pests or disease. Catching issues early is key.
- Physical Barriers: Use row covers (e.g., Agribon AG-19 floating row cover, 10×20 ft, ~$20) to protect young plants from insect pests like cabbage worms and squash bugs. Install fences (e.g., 2×4 welded wire mesh, 4 ft tall, 50 ft roll ~$70) to keep out deer, rabbits, and other larger animals.
- Hand-Picking: For larger pests like tomato hornworms or squash bugs, simply pick them off and drop them into a bucket of soapy water.
- Companion Planting: As mentioned, certain plants repel pests. Marigolds, garlic, and onions are excellent deterrents.
- Attract Beneficial Insects: Plant flowers like dill, fennel, cosmos, and sweet alyssum to attract ladybugs, lacewings, and parasitic wasps, which prey on common garden pests.
- Organic Sprays & Treatments:
- Neem Oil: An excellent broad-spectrum organic insecticide and fungicide. Bonide Neem Oil Concentrate (16oz, ~$20) can be mixed at a rate of 1-2 tbsp per gallon of water and sprayed on affected plants.
- Insecticidal Soap: Effective against soft-bodied insects like aphids, whiteflies, and spider mites. Garden Safe Insecticidal Soap (24oz ready-to-use, ~$10).
- Bacillus thuringiensis (Bt): A naturally occurring soil bacterium that targets caterpillars and worms. Monterey BT Worm & Caterpillar Killer (16oz, ~$18) is highly effective and safe for beneficial insects.
- Copper or Sulfur Sprays: For fungal diseases like powdery mildew or blight, organic copper (e.g., Bonide Copper Fungicide, ~$15 for 1lb) or sulfur (e.g., Safer Brand Garden Fungicide, ~$10 for 16oz) can be used as a last resort.
Step 7: Harvesting & Seed Saving
The culmination of your efforts is the harvest, and seed saving closes the loop on self-sufficiency.
- Harvesting Techniques:
- Timing: Harvest vegetables at their peak ripeness for best flavor and nutritional value. For example, green beans should snap cleanly, cucumbers should be firm, and tomatoes should be fully colored.
- Frequency: Many crops, like zucchini, cucumbers, and bush beans, produce more if harvested frequently. Pick daily or every other day.
- Tools: Use clean, sharp pruners (e.g., Corona ClassicCUT Bypass Pruner BP 3180, ~$30) or a sharp knife for clean cuts, minimizing damage to the plant.
- Seed Saving: This is where the « self-sufficient » aspect truly shines.
- Selection: Only save seeds from your healthiest, most vigorous plants that show desired traits (disease resistance, good flavor, high yield).
- Isolation: To ensure true-to-type seeds, prevent cross-pollination. This can be challenging for open-pollinated crops that readily cross (e.g., squash, corn). For beginners, focus on self-pollinating plants like beans, peas, lettuce, and tomatoes.
- Processing:
- Dry Seeds (Beans, Peas, Lettuce, Grains): Allow pods/seed heads to dry completely on the plant. Harvest, shell, and clean the seeds, removing chaff.
- Wet Seeds (Tomatoes, Cucumbers, Squash): For tomatoes, ferment the seeds in water for a few days to remove the gel coating and inhibit disease. For cucumbers/squash, scrape out seeds, wash thoroughly, and dry.
- Drying: Spread seeds thinly on screens or paper plates in a cool, dry, well-ventilated area for 1-4 weeks. Ensure they are bone-dry before storage. I aim for less than 8% moisture content.
- Storage: Store seeds in airtight containers (glass jars with desiccant packets work well) in a cool, dark, dry place (ideally 40-50°F and 30-40% humidity). Label clearly with variety and date. Properly stored seeds can remain viable for 3-10 years or more.
Step 8: Season Extension & Winterizing
Extend your harvest and protect your garden for the off-season to truly maximize your self sufficient garden from scratch.
- Cold Frames: Simple structures with a transparent top (glass, polycarbonate, or old windows) that sit over garden beds. They trap solar heat, allowing you to grow cold-hardy crops (lettuce, spinach, kale, radishes) well into winter or start seeds earlier in spring. A basic cold frame can be built from 2×6 lumber and a sheet of polycarbonate for under $100.
- Hoop Houses/Low Tunnels: Larger structures made from flexible hoops (PVC pipe or EMT conduit) covered with greenhouse plastic. These provide more space and greater temperature moderation. A 10×20 ft DIY low tunnel kit can cost $200-$500, while a larger, more robust hoop house kit might be $1,000-$3,000. I use a 6×12 ft low tunnel made from 1/2-inch PVC hoops and 6mil greenhouse plastic, which extends my lettuce and spinach harvest by at least
Step 6: Pest & Disease Management (Organic)
Maintaining a self sufficient garden from scratch means embracing organic pest and disease control.
- Integrated Pest Management (IPM): This holistic approach combines several strategies.
- Observation: Regularly inspect your plants for early signs of pests or disease. Catching issues early is key.
- Physical Barriers: Use row covers (e.g., Agribon AG-19 floating row cover, 10×20 ft, ~$20) to protect young plants from insect pests like cabbage worms and squash bugs. Install fences (e.g., 2×4 welded wire mesh, 4 ft tall, 50 ft roll ~$70) to keep out deer, rabbits, and other larger animals.
- Hand-Picking: For larger pests like tomato hornworms or squash bugs, simply pick them off and drop them into a bucket of soapy water.
- Companion Planting: As mentioned, certain plants repel pests. Marigolds, garlic, and onions are excellent deterrents.
- Attract Beneficial Insects: Plant flowers like dill, fennel, cosmos, and sweet alyssum to attract ladybugs, lacewings, and parasitic wasps, which prey on common garden pests.
- Organic Sprays & Treatments:
- Neem Oil: An excellent broad-spectrum organic insecticide and fungicide. Bonide Neem Oil Concentrate (16oz, ~$20) can be mixed at a rate of 1-2 tbsp per gallon of water and sprayed on affected plants.
- Insecticidal Soap: Effective against soft-bodied insects like aphids, whiteflies, and spider mites. Garden Safe Insecticidal Soap (24oz ready-to-use, ~$10).
- Bacillus thuringiensis (Bt): A naturally occurring soil bacterium that targets caterpillars and worms. Monterey BT Worm & Caterpillar Killer (16oz, ~$18) is highly effective and safe for beneficial insects.
- Copper or Sulfur Sprays: For fungal diseases like powdery mildew or blight, organic copper (e.g., Bonide Copper Fungicide, ~$15 for 1lb) or sulfur (e.g., Safer Brand Garden Fungicide, ~$10 for 16oz) can be used as a last resort.
Step 7: Harvesting & Seed Saving
The culmination of your efforts is the harvest, and seed saving closes the loop on self-sufficiency.
- Harvesting Techniques:
- Timing: Harvest vegetables at their peak ripeness for best flavor and nutritional value. For example, green beans should snap cleanly, cucumbers should be firm, and tomatoes should be fully colored.
- Frequency: Many crops, like zucchini, cucumbers, and bush beans, produce more if harvested frequently. Pick daily or every other day.
- Tools: Use clean, sharp pruners (e.g., Corona ClassicCUT Bypass Pruner BP 3180, ~$30) or a sharp knife for clean cuts, minimizing damage to the plant.
- Seed Saving: This is where the « self-sufficient » aspect truly shines.
- Selection: Only save seeds from your healthiest, most vigorous plants that show desired traits (disease resistance, good flavor, high yield).
- Isolation: To ensure true-to-type seeds, prevent cross-pollination. This can be challenging for open-pollinated crops that readily cross (e.g., squash, corn). For beginners, focus on self-pollinating plants like beans, peas, lettuce, and tomatoes.
- Processing:
- Dry Seeds (Beans, Peas, Lettuce, Grains): Allow pods/seed heads to dry completely on the plant. Harvest, shell, and clean the seeds, removing chaff.
- Wet Seeds (Tomatoes, Cucumbers, Squash): For tomatoes, ferment the seeds in water for a few days to remove the gel coating and inhibit disease. For cucumbers/squash, scrape out seeds, wash thoroughly, and dry.
- Drying: Spread seeds thinly on screens or paper plates in a cool, dry, well-ventilated area for 1-4 weeks. Ensure they are bone-dry before storage. I aim for less than 8% moisture content.
- Storage: Store seeds in airtight containers (glass jars with desiccant packets work well) in a cool, dark, dry place (ideally 40-50°F and 30-40% humidity). Label clearly with variety and date. Properly stored seeds can remain viable for 3-10 years or more.
Step 8: Season Extension & Winterizing
Extend your harvest and protect your garden for the off-season to truly maximize your self sufficient garden from scratch.
- Cold Frames: Simple structures with a transparent top (glass, polycarbonate, or old windows) that sit over garden beds. They trap solar heat, allowing you to grow cold-hardy crops (lettuce, spinach, kale, radishes) well into winter or start seeds earlier in spring. A basic cold frame can be built from 2×6 lumber and a sheet of polycarbonate for under $100.
- Hoop Houses/Low Tunnels: Larger structures made from flexible hoops (PVC pipe or EMT conduit) covered with greenhouse plastic. These provide more space and greater temperature moderation. A 10×20 ft DIY low tunnel kit can cost $200-$500, while a larger, more robust hoop house kit might be $1,000-$3,000. I use a 6×12 ft low tunnel made from 1/2-inch PVC hoops and 6mil greenhouse plastic, which extends my lettuce and spinach harvest by at least
- Choose Heirloom & Open-Pollinated Seeds: These varieties produce seeds that will grow true to type, meaning you can save seeds from your harvest year after year. F1 hybrids, while often vigorous, will not produce consistent offspring from saved seeds. Reputable seed companies include Baker Creek Heirloom Seeds, High Mowing Organic Seeds, and Seed Savers Exchange. Start with common, reliable varieties like ‘Black Krim’ tomatoes, ‘Provider’ bush beans, ‘Waltham Butternut’ squash, and ‘Black Seeded Simpson’ lettuce.
- Start Seeds Indoors (Optional but Recommended): For longer growing seasons or specific crops, starting seeds indoors gives you a head start. Use seed-starting mix (e.g., Espoma Organic Seed Starter Mix, ~$10 for 16qt bag) in seed trays (Jiffy Professional Greenhouse 72-cell kit, ~$15). Provide adequate light with LED grow lights (Barrina T5 2ft 4-pack LED Grow Lights, 20W each, ~$50) for 14-16 hours a day, positioned 2-4 inches above seedlings. Maintain consistent temperatures (65-75°F for most).
- Direct Sowing vs. Transplanting: Some crops (carrots, radishes, beans, corn) prefer direct sowing into the garden bed. Others (tomatoes, peppers, broccoli, kale) benefit from being started indoors and transplanted. Follow seed packet instructions for planting depths (e.g., lettuce seeds are often surface-sown or planted 1/8 inch deep, while beans are 1 inch deep) and spacing.
- Companion Planting: Strategically plant different species together to enhance growth, deter pests, and attract beneficial insects. For example, planting marigolds near tomatoes can deter nematodes, and basil improves tomato flavor. Nasturtiums can act as a trap crop for aphids.
- Succession Planting: For a continuous harvest, plant small batches of quick-growing crops (lettuce, radishes, cilantro) every 2-3 weeks. As one crop finishes, another is ready to take its place.
Step 6: Pest & Disease Management (Organic)
Maintaining a self sufficient garden from scratch means embracing organic pest and disease control.
- Integrated Pest Management (IPM): This holistic approach combines several strategies.
- Observation: Regularly inspect your plants for early signs of pests or disease. Catching issues early is key.
- Physical Barriers: Use row covers (e.g., Agribon AG-19 floating row cover, 10×20 ft, ~$20) to protect young plants from insect pests like cabbage worms and squash bugs. Install fences (e.g., 2×4 welded wire mesh, 4 ft tall, 50 ft roll ~$70) to keep out deer, rabbits, and other larger animals.
- Hand-Picking: For larger pests like tomato hornworms or squash bugs, simply pick them off and drop them into a bucket of soapy water.
- Companion Planting: As mentioned, certain plants repel pests. Marigolds, garlic, and onions are excellent deterrents.
- Attract Beneficial Insects: Plant flowers like dill, fennel, cosmos, and sweet alyssum to attract ladybugs, lacewings, and parasitic wasps, which prey on common garden pests.
- Organic Sprays & Treatments:
- Neem Oil: An excellent broad-spectrum organic insecticide and fungicide. Bonide Neem Oil Concentrate (16oz, ~$20) can be mixed at a rate of 1-2 tbsp per gallon of water and sprayed on affected plants.
- Insecticidal Soap: Effective against soft-bodied insects like aphids, whiteflies, and spider mites. Garden Safe Insecticidal Soap (24oz ready-to-use, ~$10).
- Bacillus thuringiensis (Bt): A naturally occurring soil bacterium that targets caterpillars and worms. Monterey BT Worm & Caterpillar Killer (16oz, ~$18) is highly effective and safe for beneficial insects.
- Copper or Sulfur Sprays: For fungal diseases like powdery mildew or blight, organic copper (e.g., Bonide Copper Fungicide, ~$15 for 1lb) or sulfur (e.g., Safer Brand Garden Fungicide, ~$10 for 16oz) can be used as a last resort.
Step 7: Harvesting & Seed Saving
The culmination of your efforts is the harvest, and seed saving closes the loop on self-sufficiency.
- Harvesting Techniques:
- Timing: Harvest vegetables at their peak ripeness for best flavor and nutritional value. For example, green beans should snap cleanly, cucumbers should be firm, and tomatoes should be fully colored.
- Frequency: Many crops, like zucchini, cucumbers, and bush beans, produce more if harvested frequently. Pick daily or every other day.
- Tools: Use clean, sharp pruners (e.g., Corona ClassicCUT Bypass Pruner BP 3180, ~$30) or a sharp knife for clean cuts, minimizing damage to the plant.
- Seed Saving: This is where the « self-sufficient » aspect truly shines.
- Selection: Only save seeds from your healthiest, most vigorous plants that show desired traits (disease resistance, good flavor, high yield).
- Isolation: To ensure true-to-type seeds, prevent cross-pollination. This can be challenging for open-pollinated crops that readily cross (e.g., squash, corn). For beginners, focus on self-pollinating plants like beans, peas, lettuce, and tomatoes.
- Processing:
- Dry Seeds (Beans, Peas, Lettuce, Grains): Allow pods/seed heads to dry completely on the plant. Harvest, shell, and clean the seeds, removing chaff.
- Wet Seeds (Tomatoes, Cucumbers, Squash): For tomatoes, ferment the seeds in water for a few days to remove the gel coating and inhibit disease. For cucumbers/squash, scrape out seeds, wash thoroughly, and dry.
- Drying: Spread seeds thinly on screens or paper plates in a cool, dry, well-ventilated area for 1-4 weeks. Ensure they are bone-dry before storage. I aim for less than 8% moisture content.
- Storage: Store seeds in airtight containers (glass jars with desiccant packets work well) in a cool, dark, dry place (ideally 40-50°F and 30-40% humidity). Label clearly with variety and date. Properly stored seeds can remain viable for 3-10 years or more.
Step 8: Season Extension & Winterizing
Extend your harvest and protect your garden for the off-season to truly maximize your self sufficient garden from scratch.
- Cold Frames: Simple structures with a transparent top (glass, polycarbonate, or old windows) that sit over garden beds. They trap solar heat, allowing you to grow cold-hardy crops (lettuce, spinach, kale, radishes) well into winter or start seeds earlier in spring. A basic cold frame can be built from 2×6 lumber and a sheet of polycarbonate for under $100.
- Hoop Houses/Low Tunnels: Larger structures made from flexible hoops (PVC pipe or EMT conduit) covered with greenhouse plastic. These provide more space and greater temperature moderation. A 10×20 ft DIY low tunnel kit can cost $200-$500, while a larger, more robust hoop house kit might be $1,000-$3,000. I use a 6×12 ft low tunnel made from 1/2-inch PVC hoops and 6mil greenhouse plastic, which extends my lettuce and spinach harvest by at least
The choice of seeds is crucial for a truly self sufficient garden from scratch.
- Choose Heirloom & Open-Pollinated Seeds: These varieties produce seeds that will grow true to type, meaning you can save seeds from your harvest year after year. F1 hybrids, while often vigorous, will not produce consistent offspring from saved seeds. Reputable seed companies include Baker Creek Heirloom Seeds, High Mowing Organic Seeds, and Seed Savers Exchange. Start with common, reliable varieties like ‘Black Krim’ tomatoes, ‘Provider’ bush beans, ‘Waltham Butternut’ squash, and ‘Black Seeded Simpson’ lettuce.
- Start Seeds Indoors (Optional but Recommended): For longer growing seasons or specific crops, starting seeds indoors gives you a head start. Use seed-starting mix (e.g., Espoma Organic Seed Starter Mix, ~$10 for 16qt bag) in seed trays (Jiffy Professional Greenhouse 72-cell kit, ~$15). Provide adequate light with LED grow lights (Barrina T5 2ft 4-pack LED Grow Lights, 20W each, ~$50) for 14-16 hours a day, positioned 2-4 inches above seedlings. Maintain consistent temperatures (65-75°F for most).
- Direct Sowing vs. Transplanting: Some crops (carrots, radishes, beans, corn) prefer direct sowing into the garden bed. Others (tomatoes, peppers, broccoli, kale) benefit from being started indoors and transplanted. Follow seed packet instructions for planting depths (e.g., lettuce seeds are often surface-sown or planted 1/8 inch deep, while beans are 1 inch deep) and spacing.
- Companion Planting: Strategically plant different species together to enhance growth, deter pests, and attract beneficial insects. For example, planting marigolds near tomatoes can deter nematodes, and basil improves tomato flavor. Nasturtiums can act as a trap crop for aphids.
- Succession Planting: For a continuous harvest, plant small batches of quick-growing crops (lettuce, radishes, cilantro) every 2-3 weeks. As one crop finishes, another is ready to take its place.
Step 6: Pest & Disease Management (Organic)
Maintaining a self sufficient garden from scratch means embracing organic pest and disease control.
- Integrated Pest Management (IPM): This holistic approach combines several strategies.
- Observation: Regularly inspect your plants for early signs of pests or disease. Catching issues early is key.
- Physical Barriers: Use row covers (e.g., Agribon AG-19 floating row cover, 10×20 ft, ~$20) to protect young plants from insect pests like cabbage worms and squash bugs. Install fences (e.g., 2×4 welded wire mesh, 4 ft tall, 50 ft roll ~$70) to keep out deer, rabbits, and other larger animals.
- Hand-Picking: For larger pests like tomato hornworms or squash bugs, simply pick them off and drop them into a bucket of soapy water.
- Companion Planting: As mentioned, certain plants repel pests. Marigolds, garlic, and onions are excellent deterrents.
- Attract Beneficial Insects: Plant flowers like dill, fennel, cosmos, and sweet alyssum to attract ladybugs, lacewings, and parasitic wasps, which prey on common garden pests.
- Organic Sprays & Treatments:
- Neem Oil: An excellent broad-spectrum organic insecticide and fungicide. Bonide Neem Oil Concentrate (16oz, ~$20) can be mixed at a rate of 1-2 tbsp per gallon of water and sprayed on affected plants.
- Insecticidal Soap: Effective against soft-bodied insects like aphids, whiteflies, and spider mites. Garden Safe Insecticidal Soap (24oz ready-to-use, ~$10).
- Bacillus thuringiensis (Bt): A naturally occurring soil bacterium that targets caterpillars and worms. Monterey BT Worm & Caterpillar Killer (16oz, ~$18) is highly effective and safe for beneficial insects.
- Copper or Sulfur Sprays: For fungal diseases like powdery mildew or blight, organic copper (e.g., Bonide Copper Fungicide, ~$15 for 1lb) or sulfur (e.g., Safer Brand Garden Fungicide, ~$10 for 16oz) can be used as a last resort.
Step 7: Harvesting & Seed Saving
The culmination of your efforts is the harvest, and seed saving closes the loop on self-sufficiency.
- Harvesting Techniques:
- Timing: Harvest vegetables at their peak ripeness for best flavor and nutritional value. For example, green beans should snap cleanly, cucumbers should be firm, and tomatoes should be fully colored.
- Frequency: Many crops, like zucchini, cucumbers, and bush beans, produce more if harvested frequently. Pick daily or every other day.
- Tools: Use clean, sharp pruners (e.g., Corona ClassicCUT Bypass Pruner BP 3180, ~$30) or a sharp knife for clean cuts, minimizing damage to the plant.
- Seed Saving: This is where the « self-sufficient » aspect truly shines.
- Selection: Only save seeds from your healthiest, most vigorous plants that show desired traits (disease resistance, good flavor, high yield).
- Isolation: To ensure true-to-type seeds, prevent cross-pollination. This can be challenging for open-pollinated crops that readily cross (e.g., squash, corn). For beginners, focus on self-pollinating plants like beans, peas, lettuce, and tomatoes.
- Processing:
- Dry Seeds (Beans, Peas, Lettuce, Grains): Allow pods/seed heads to dry completely on the plant. Harvest, shell, and clean the seeds, removing chaff.
- Wet Seeds (Tomatoes, Cucumbers, Squash): For tomatoes, ferment the seeds in water for a few days to remove the gel coating and inhibit disease. For cucumbers/squash, scrape out seeds, wash thoroughly, and dry.
- Drying: Spread seeds thinly on screens or paper plates in a cool, dry, well-ventilated area for 1-4 weeks. Ensure they are bone-dry before storage. I aim for less than 8% moisture content.
- Storage: Store seeds in airtight containers (glass jars with desiccant packets work well) in a cool, dark, dry place (ideally 40-50°F and 30-40% humidity). Label clearly with variety and date. Properly stored seeds can remain viable for 3-10 years or more.
Step 8: Season Extension & Winterizing
Extend your harvest and protect your garden for the off-season to truly maximize your self sufficient garden from scratch.
- Cold Frames: Simple structures with a transparent top (glass, polycarbonate, or old windows) that sit over garden beds. They trap solar heat, allowing you to grow cold-hardy crops (lettuce, spinach, kale, radishes) well into winter or start seeds earlier in spring. A basic cold frame can be built from 2×6 lumber and a sheet of polycarbonate for under $100.
- Hoop Houses/Low Tunnels: Larger structures made from flexible hoops (PVC pipe or EMT conduit) covered with greenhouse plastic. These provide more space and greater temperature moderation. A 10×20 ft DIY low tunnel kit can cost $200-$500, while a larger, more robust hoop house kit might be $1,000-$3,000. I use a 6×12 ft low tunnel made from 1/2-inch PVC hoops and 6mil greenhouse plastic, which extends my lettuce and spinach harvest by at least
Step 5: Seed Selection & Planting
The choice of seeds is crucial for a truly self sufficient garden from scratch.
- Choose Heirloom & Open-Pollinated Seeds: These varieties produce seeds that will grow true to type, meaning you can save seeds from your harvest year after year. F1 hybrids, while often vigorous, will not produce consistent offspring from saved seeds. Reputable seed companies include Baker Creek Heirloom Seeds, High Mowing Organic Seeds, and Seed Savers Exchange. Start with common, reliable varieties like ‘Black Krim’ tomatoes, ‘Provider’ bush beans, ‘Waltham Butternut’ squash, and ‘Black Seeded Simpson’ lettuce.
- Start Seeds Indoors (Optional but Recommended): For longer growing seasons or specific crops, starting seeds indoors gives you a head start. Use seed-starting mix (e.g., Espoma Organic Seed Starter Mix, ~$10 for 16qt bag) in seed trays (Jiffy Professional Greenhouse 72-cell kit, ~$15). Provide adequate light with LED grow lights (Barrina T5 2ft 4-pack LED Grow Lights, 20W each, ~$50) for 14-16 hours a day, positioned 2-4 inches above seedlings. Maintain consistent temperatures (65-75°F for most).
- Direct Sowing vs. Transplanting: Some crops (carrots, radishes, beans, corn) prefer direct sowing into the garden bed. Others (tomatoes, peppers, broccoli, kale) benefit from being started indoors and transplanted. Follow seed packet instructions for planting depths (e.g., lettuce seeds are often surface-sown or planted 1/8 inch deep, while beans are 1 inch deep) and spacing.
- Companion Planting: Strategically plant different species together to enhance growth, deter pests, and attract beneficial insects. For example, planting marigolds near tomatoes can deter nematodes, and basil improves tomato flavor. Nasturtiums can act as a trap crop for aphids.
- Succession Planting: For a continuous harvest, plant small batches of quick-growing crops (lettuce, radishes, cilantro) every 2-3 weeks. As one crop finishes, another is ready to take its place.
Step 6: Pest & Disease Management (Organic)
Maintaining a self sufficient garden from scratch means embracing organic pest and disease control.
- Integrated Pest Management (IPM): This holistic approach combines several strategies.
- Observation: Regularly inspect your plants for early signs of pests or disease. Catching issues early is key.
- Physical Barriers: Use row covers (e.g., Agribon AG-19 floating row cover, 10×20 ft, ~$20) to protect young plants from insect pests like cabbage worms and squash bugs. Install fences (e.g., 2×4 welded wire mesh, 4 ft tall, 50 ft roll ~$70) to keep out deer, rabbits, and other larger animals.
- Hand-Picking: For larger pests like tomato hornworms or squash bugs, simply pick them off and drop them into a bucket of soapy water.
- Companion Planting: As mentioned, certain plants repel pests. Marigolds, garlic, and onions are excellent deterrents.
- Attract Beneficial Insects: Plant flowers like dill, fennel, cosmos, and sweet alyssum to attract ladybugs, lacewings, and parasitic wasps, which prey on common garden pests.
- Organic Sprays & Treatments:
- Neem Oil: An excellent broad-spectrum organic insecticide and fungicide. Bonide Neem Oil Concentrate (16oz, ~$20) can be mixed at a rate of 1-2 tbsp per gallon of water and sprayed on affected plants.
- Insecticidal Soap: Effective against soft-bodied insects like aphids, whiteflies, and spider mites. Garden Safe Insecticidal Soap (24oz ready-to-use, ~$10).
- Bacillus thuringiensis (Bt): A naturally occurring soil bacterium that targets caterpillars and worms. Monterey BT Worm & Caterpillar Killer (16oz, ~$18) is highly effective and safe for beneficial insects.
- Copper or Sulfur Sprays: For fungal diseases like powdery mildew or blight, organic copper (e.g., Bonide Copper Fungicide, ~$15 for 1lb) or sulfur (e.g., Safer Brand Garden Fungicide, ~$10 for 16oz) can be used as a last resort.
Step 7: Harvesting & Seed Saving
The culmination of your efforts is the harvest, and seed saving closes the loop on self-sufficiency.
- Harvesting Techniques:
- Timing: Harvest vegetables at their peak ripeness for best flavor and nutritional value. For example, green beans should snap cleanly, cucumbers should be firm, and tomatoes should be fully colored.
- Frequency: Many crops, like zucchini, cucumbers, and bush beans, produce more if harvested frequently. Pick daily or every other day.
- Tools: Use clean, sharp pruners (e.g., Corona ClassicCUT Bypass Pruner BP 3180, ~$30) or a sharp knife for clean cuts, minimizing damage to the plant.
- Seed Saving: This is where the « self-sufficient » aspect truly shines.
- Selection: Only save seeds from your healthiest, most vigorous plants that show desired traits (disease resistance, good flavor, high yield).
- Isolation: To ensure true-to-type seeds, prevent cross-pollination. This can be challenging for open-pollinated crops that readily cross (e.g., squash, corn). For beginners, focus on self-pollinating plants like beans, peas, lettuce, and tomatoes.
- Processing:
- Dry Seeds (Beans, Peas, Lettuce, Grains): Allow pods/seed heads to dry completely on the plant. Harvest, shell, and clean the seeds, removing chaff.
- Wet Seeds (Tomatoes, Cucumbers, Squash): For tomatoes, ferment the seeds in water for a few days to remove the gel coating and inhibit disease. For cucumbers/squash, scrape out seeds, wash thoroughly, and dry.
- Drying: Spread seeds thinly on screens or paper plates in a cool, dry, well-ventilated area for 1-4 weeks. Ensure they are bone-dry before storage. I aim for less than 8% moisture content.
- Storage: Store seeds in airtight containers (glass jars with desiccant packets work well) in a cool, dark, dry place (ideally 40-50°F and 30-40% humidity). Label clearly with variety and date. Properly stored seeds can remain viable for 3-10 years or more.
Step 8: Season Extension & Winterizing
Extend your harvest and protect your garden for the off-season to truly maximize your self sufficient garden from scratch.
- Cold Frames: Simple structures with a transparent top (glass, polycarbonate, or old windows) that sit over garden beds. They trap solar heat, allowing you to grow cold-hardy crops (lettuce, spinach, kale, radishes) well into winter or start seeds earlier in spring. A basic cold frame can be built from 2×6 lumber and a sheet of polycarbonate for under $100.
- Hoop Houses/Low Tunnels: Larger structures made from flexible hoops (PVC pipe or EMT conduit) covered with greenhouse plastic. These provide more space and greater temperature moderation. A 10×20 ft DIY low tunnel kit can cost $200-$500, while a larger, more robust hoop house kit might be $1,000-$3,000. I use a 6×12 ft low tunnel made from 1/2-inch PVC hoops and 6mil greenhouse plastic, which extends my lettuce and spinach harvest by at least
- Rainwater Harvesting: This is my primary source of irrigation water. A 55-gallon rain barrel (e.g., EarthMark Rain Barrel, ~$120-$150) connected to a downspout can collect significant water. For larger needs, I use two 275-gallon IBC totes (Intermediate Bulk Containers, often available used for $100-$200 each from food-grade sources) connected in series. A 1,000 sq ft roof can collect approximately 620 gallons of water for every inch of rainfall. My 1,500 sq ft roof provides ample water for my 600 sq ft garden through multiple barrels and totes.
- Drip Irrigation: This is by far the most water-efficient method, delivering water directly to the plant’s root zone, minimizing evaporation and weed growth.
- Components: A typical drip system includes a pressure regulator (e.g., Rain Bird PRV-10, ~$15), a filter (Rain Bird RBY filter, ~$20), main tubing (1/2-inch poly tubing, 100ft ~$25), smaller feeder lines (1/4-inch tubing), and emitters (0.5 GPH or 1 GPH per plant).
- Kits: For beginners, a starter kit like the Rain Bird Drip Irrigation Garden Kit (model DDI-KIT-1P, ~$40-$60) is excellent for a small garden. For larger setups, I use Netafim Techline CV Drip Line (500ft roll, ~$150-$200), which has pressure-compensating emitters built-in, ensuring even watering across long runs.
- Automation: For true self-sufficiency, consider a battery-powered timer (e.g., Orbit B-Hyve Bluetooth Hose Faucet Timer, ~$50) or a solar-powered timer connected to a small 12V pump.
- Solar-Powered Pumps: For lifting water from a well, pond, or large storage tank to your garden, a solar pump is a game-changer. For a smaller drip system, a Shurflo 2088-594-152 Diaphragm Pump (12V, 3.5 GPM, ~$180) can be powered by a single 100W solar panel (e.g., Renogy 100W Monocrystalline Solar Panel, ~$100) and a small 12V battery (e.g., a 50Ah LiFePO4 battery like the Battle Born 50Ah, ~$450). For larger operations or deeper wells, more robust systems are needed. If you’re looking to build out a comprehensive off-grid power system to support your garden’s water needs, or indeed your entire homestead, you might want to explore resources like the Power Grid Generator complete system guide to understand the full scope of what’s possible in terms of energy independence.
Step 5: Seed Selection & Planting
The choice of seeds is crucial for a truly self sufficient garden from scratch.
- Choose Heirloom & Open-Pollinated Seeds: These varieties produce seeds that will grow true to type, meaning you can save seeds from your harvest year after year. F1 hybrids, while often vigorous, will not produce consistent offspring from saved seeds. Reputable seed companies include Baker Creek Heirloom Seeds, High Mowing Organic Seeds, and Seed Savers Exchange. Start with common, reliable varieties like ‘Black Krim’ tomatoes, ‘Provider’ bush beans, ‘Waltham Butternut’ squash, and ‘Black Seeded Simpson’ lettuce.
- Start Seeds Indoors (Optional but Recommended): For longer growing seasons or specific crops, starting seeds indoors gives you a head start. Use seed-starting mix (e.g., Espoma Organic Seed Starter Mix, ~$10 for 16qt bag) in seed trays (Jiffy Professional Greenhouse 72-cell kit, ~$15). Provide adequate light with LED grow lights (Barrina T5 2ft 4-pack LED Grow Lights, 20W each, ~$50) for 14-16 hours a day, positioned 2-4 inches above seedlings. Maintain consistent temperatures (65-75°F for most).
- Direct Sowing vs. Transplanting: Some crops (carrots, radishes, beans, corn) prefer direct sowing into the garden bed. Others (tomatoes, peppers, broccoli, kale) benefit from being started indoors and transplanted. Follow seed packet instructions for planting depths (e.g., lettuce seeds are often surface-sown or planted 1/8 inch deep, while beans are 1 inch deep) and spacing.
- Companion Planting: Strategically plant different species together to enhance growth, deter pests, and attract beneficial insects. For example, planting marigolds near tomatoes can deter nematodes, and basil improves tomato flavor. Nasturtiums can act as a trap crop for aphids.
- Succession Planting: For a continuous harvest, plant small batches of quick-growing crops (lettuce, radishes, cilantro) every 2-3 weeks. As one crop finishes, another is ready to take its place.
Step 6: Pest & Disease Management (Organic)
Maintaining a self sufficient garden from scratch means embracing organic pest and disease control.
- Integrated Pest Management (IPM): This holistic approach combines several strategies.
- Observation: Regularly inspect your plants for early signs of pests or disease. Catching issues early is key.
- Physical Barriers: Use row covers (e.g., Agribon AG-19 floating row cover, 10×20 ft, ~$20) to protect young plants from insect pests like cabbage worms and squash bugs. Install fences (e.g., 2×4 welded wire mesh, 4 ft tall, 50 ft roll ~$70) to keep out deer, rabbits, and other larger animals.
- Hand-Picking: For larger pests like tomato hornworms or squash bugs, simply pick them off and drop them into a bucket of soapy water.
- Companion Planting: As mentioned, certain plants repel pests. Marigolds, garlic, and onions are excellent deterrents.
- Attract Beneficial Insects: Plant flowers like dill, fennel, cosmos, and sweet alyssum to attract ladybugs, lacewings, and parasitic wasps, which prey on common garden pests.
- Organic Sprays & Treatments:
- Neem Oil: An excellent broad-spectrum organic insecticide and fungicide. Bonide Neem Oil Concentrate (16oz, ~$20) can be mixed at a rate of 1-2 tbsp per gallon of water and sprayed on affected plants.
- Insecticidal Soap: Effective against soft-bodied insects like aphids, whiteflies, and spider mites. Garden Safe Insecticidal Soap (24oz ready-to-use, ~$10).
- Bacillus thuringiensis (Bt): A naturally occurring soil bacterium that targets caterpillars and worms. Monterey BT Worm & Caterpillar Killer (16oz, ~$18) is highly effective and safe for beneficial insects.
- Copper or Sulfur Sprays: For fungal diseases like powdery mildew or blight, organic copper (e.g., Bonide Copper Fungicide, ~$15 for 1lb) or sulfur (e.g., Safer Brand Garden Fungicide, ~$10 for 16oz) can be used as a last resort.
Step 7: Harvesting & Seed Saving
The culmination of your efforts is the harvest, and seed saving closes the loop on self-sufficiency.
- Harvesting Techniques:
- Timing: Harvest vegetables at their peak ripeness for best flavor and nutritional value. For example, green beans should snap cleanly, cucumbers should be firm, and tomatoes should be fully colored.
- Frequency: Many crops, like zucchini, cucumbers, and bush beans, produce more if harvested frequently. Pick daily or every other day.
- Tools: Use clean, sharp pruners (e.g., Corona ClassicCUT Bypass Pruner BP 3180, ~$30) or a sharp knife for clean cuts, minimizing damage to the plant.
- Seed Saving: This is where the « self-sufficient » aspect truly shines.
- Selection: Only save seeds from your healthiest, most vigorous plants that show desired traits (disease resistance, good flavor, high yield).
- Isolation: To ensure true-to-type seeds, prevent cross-pollination. This can be challenging for open-pollinated crops that readily cross (e.g., squash, corn). For beginners, focus on self-pollinating plants like beans, peas, lettuce, and tomatoes.
- Processing:
- Dry Seeds (Beans, Peas, Lettuce, Grains): Allow pods/seed heads to dry completely on the plant. Harvest, shell, and clean the seeds, removing chaff.
- Wet Seeds (Tomatoes, Cucumbers, Squash): For tomatoes, ferment the seeds in water for a few days to remove the gel coating and inhibit disease. For cucumbers/squash, scrape out seeds, wash thoroughly, and dry.
- Drying: Spread seeds thinly on screens or paper plates in a cool, dry, well-ventilated area for 1-4 weeks. Ensure they are bone-dry before storage. I aim for less than 8% moisture content.
- Storage: Store seeds in airtight containers (glass jars with desiccant packets work well) in a cool, dark, dry place (ideally 40-50°F and 30-40% humidity). Label clearly with variety and date. Properly stored seeds can remain viable for 3-10 years or more.
Step 8: Season Extension & Winterizing
Extend your harvest and protect your garden for the off-season to truly maximize your self sufficient garden from scratch.
- Cold Frames: Simple structures with a transparent top (glass, polycarbonate, or old windows) that sit over garden beds. They trap solar heat, allowing you to grow cold-hardy crops (lettuce, spinach, kale, radishes) well into winter or start seeds earlier in spring. A basic cold frame can be built from 2×6 lumber and a sheet of polycarbonate for under $100.
- Hoop Houses/Low Tunnels: Larger structures made from flexible hoops (PVC pipe or EMT conduit) covered with greenhouse plastic. These provide more space and greater temperature moderation. A 10×20 ft DIY low tunnel kit can cost $200-$500, while a larger, more robust hoop house kit might be $1,000-$3,000. I use a 6×12 ft low tunnel made from 1/2-inch PVC hoops and 6mil greenhouse plastic, which extends my lettuce and spinach harvest by at least
Efficient water management is critical for a self sufficient garden from scratch, especially in off-grid living where water resources might be limited.
- Rainwater Harvesting: This is my primary source of irrigation water. A 55-gallon rain barrel (e.g., EarthMark Rain Barrel, ~$120-$150) connected to a downspout can collect significant water. For larger needs, I use two 275-gallon IBC totes (Intermediate Bulk Containers, often available used for $100-$200 each from food-grade sources) connected in series. A 1,000 sq ft roof can collect approximately 620 gallons of water for every inch of rainfall. My 1,500 sq ft roof provides ample water for my 600 sq ft garden through multiple barrels and totes.
- Drip Irrigation: This is by far the most water-efficient method, delivering water directly to the plant’s root zone, minimizing evaporation and weed growth.
- Components: A typical drip system includes a pressure regulator (e.g., Rain Bird PRV-10, ~$15), a filter (Rain Bird RBY filter, ~$20), main tubing (1/2-inch poly tubing, 100ft ~$25), smaller feeder lines (1/4-inch tubing), and emitters (0.5 GPH or 1 GPH per plant).
- Kits: For beginners, a starter kit like the Rain Bird Drip Irrigation Garden Kit (model DDI-KIT-1P, ~$40-$60) is excellent for a small garden. For larger setups, I use Netafim Techline CV Drip Line (500ft roll, ~$150-$200), which has pressure-compensating emitters built-in, ensuring even watering across long runs.
- Automation: For true self-sufficiency, consider a battery-powered timer (e.g., Orbit B-Hyve Bluetooth Hose Faucet Timer, ~$50) or a solar-powered timer connected to a small 12V pump.
- Solar-Powered Pumps: For lifting water from a well, pond, or large storage tank to your garden, a solar pump is a game-changer. For a smaller drip system, a Shurflo 2088-594-152 Diaphragm Pump (12V, 3.5 GPM, ~$180) can be powered by a single 100W solar panel (e.g., Renogy 100W Monocrystalline Solar Panel, ~$100) and a small 12V battery (e.g., a 50Ah LiFePO4 battery like the Battle Born 50Ah, ~$450). For larger operations or deeper wells, more robust systems are needed. If you’re looking to build out a comprehensive off-grid power system to support your garden’s water needs, or indeed your entire homestead, you might want to explore resources like the Power Grid Generator complete system guide to understand the full scope of what’s possible in terms of energy independence.
Step 5: Seed Selection & Planting
The choice of seeds is crucial for a truly self sufficient garden from scratch.
- Choose Heirloom & Open-Pollinated Seeds: These varieties produce seeds that will grow true to type, meaning you can save seeds from your harvest year after year. F1 hybrids, while often vigorous, will not produce consistent offspring from saved seeds. Reputable seed companies include Baker Creek Heirloom Seeds, High Mowing Organic Seeds, and Seed Savers Exchange. Start with common, reliable varieties like ‘Black Krim’ tomatoes, ‘Provider’ bush beans, ‘Waltham Butternut’ squash, and ‘Black Seeded Simpson’ lettuce.
- Start Seeds Indoors (Optional but Recommended): For longer growing seasons or specific crops, starting seeds indoors gives you a head start. Use seed-starting mix (e.g., Espoma Organic Seed Starter Mix, ~$10 for 16qt bag) in seed trays (Jiffy Professional Greenhouse 72-cell kit, ~$15). Provide adequate light with LED grow lights (Barrina T5 2ft 4-pack LED Grow Lights, 20W each, ~$50) for 14-16 hours a day, positioned 2-4 inches above seedlings. Maintain consistent temperatures (65-75°F for most).
- Direct Sowing vs. Transplanting: Some crops (carrots, radishes, beans, corn) prefer direct sowing into the garden bed. Others (tomatoes, peppers, broccoli, kale) benefit from being started indoors and transplanted. Follow seed packet instructions for planting depths (e.g., lettuce seeds are often surface-sown or planted 1/8 inch deep, while beans are 1 inch deep) and spacing.
- Companion Planting: Strategically plant different species together to enhance growth, deter pests, and attract beneficial insects. For example, planting marigolds near tomatoes can deter nematodes, and basil improves tomato flavor. Nasturtiums can act as a trap crop for aphids.
- Succession Planting: For a continuous harvest, plant small batches of quick-growing crops (lettuce, radishes, cilantro) every 2-3 weeks. As one crop finishes, another is ready to take its place.
Step 6: Pest & Disease Management (Organic)
Maintaining a self sufficient garden from scratch means embracing organic pest and disease control.
- Integrated Pest Management (IPM): This holistic approach combines several strategies.
- Observation: Regularly inspect your plants for early signs of pests or disease. Catching issues early is key.
- Physical Barriers: Use row covers (e.g., Agribon AG-19 floating row cover, 10×20 ft, ~$20) to protect young plants from insect pests like cabbage worms and squash bugs. Install fences (e.g., 2×4 welded wire mesh, 4 ft tall, 50 ft roll ~$70) to keep out deer, rabbits, and other larger animals.
- Hand-Picking: For larger pests like tomato hornworms or squash bugs, simply pick them off and drop them into a bucket of soapy water.
- Companion Planting: As mentioned, certain plants repel pests. Marigolds, garlic, and onions are excellent deterrents.
- Attract Beneficial Insects: Plant flowers like dill, fennel, cosmos, and sweet alyssum to attract ladybugs, lacewings, and parasitic wasps, which prey on common garden pests.
- Organic Sprays & Treatments:
- Neem Oil: An excellent broad-spectrum organic insecticide and fungicide. Bonide Neem Oil Concentrate (16oz, ~$20) can be mixed at a rate of 1-2 tbsp per gallon of water and sprayed on affected plants.
- Insecticidal Soap: Effective against soft-bodied insects like aphids, whiteflies, and spider mites. Garden Safe Insecticidal Soap (24oz ready-to-use, ~$10).
- Bacillus thuringiensis (Bt): A naturally occurring soil bacterium that targets caterpillars and worms. Monterey BT Worm & Caterpillar Killer (16oz, ~$18) is highly effective and safe for beneficial insects.
- Copper or Sulfur Sprays: For fungal diseases like powdery mildew or blight, organic copper (e.g., Bonide Copper Fungicide, ~$15 for 1lb) or sulfur (e.g., Safer Brand Garden Fungicide, ~$10 for 16oz) can be used as a last resort.
Step 7: Harvesting & Seed Saving
The culmination of your efforts is the harvest, and seed saving closes the loop on self-sufficiency.
- Harvesting Techniques:
- Timing: Harvest vegetables at their peak ripeness for best flavor and nutritional value. For example, green beans should snap cleanly, cucumbers should be firm, and tomatoes should be fully colored.
- Frequency: Many crops, like zucchini, cucumbers, and bush beans, produce more if harvested frequently. Pick daily or every other day.
- Tools: Use clean, sharp pruners (e.g., Corona ClassicCUT Bypass Pruner BP 3180, ~$30) or a sharp knife for clean cuts, minimizing damage to the plant.
- Seed Saving: This is where the « self-sufficient » aspect truly shines.
- Selection: Only save seeds from your healthiest, most vigorous plants that show desired traits (disease resistance, good flavor, high yield).
- Isolation: To ensure true-to-type seeds, prevent cross-pollination. This can be challenging for open-pollinated crops that readily cross (e.g., squash, corn). For beginners, focus on self-pollinating plants like beans, peas, lettuce, and tomatoes.
- Processing:
- Dry Seeds (Beans, Peas, Lettuce, Grains): Allow pods/seed heads to dry completely on the plant. Harvest, shell, and clean the seeds, removing chaff.
- Wet Seeds (Tomatoes, Cucumbers, Squash): For tomatoes, ferment the seeds in water for a few days to remove the gel coating and inhibit disease. For cucumbers/squash, scrape out seeds, wash thoroughly, and dry.
- Drying: Spread seeds thinly on screens or paper plates in a cool, dry, well-ventilated area for 1-4 weeks. Ensure they are bone-dry before storage. I aim for less than 8% moisture content.
- Storage: Store seeds in airtight containers (glass jars with desiccant packets work well) in a cool, dark, dry place (ideally 40-50°F and 30-40% humidity). Label clearly with variety and date. Properly stored seeds can remain viable for 3-10 years or more.
Step 8: Season Extension & Winterizing
Extend your harvest and protect your garden for the off-season to truly maximize your self sufficient garden from scratch.
- Cold Frames: Simple structures with a transparent top (glass, polycarbonate, or old windows) that sit over garden beds. They trap solar heat, allowing you to grow cold-hardy crops (lettuce, spinach, kale, radishes) well into winter or start seeds earlier in spring. A basic cold frame can be built from 2×6 lumber and a sheet of polycarbonate for under $100.
- Hoop Houses/Low Tunnels: Larger structures made from flexible hoops (PVC pipe or EMT conduit) covered with greenhouse plastic. These provide more space and greater temperature moderation. A 10×20 ft DIY low tunnel kit can cost $200-$500, while a larger, more robust hoop house kit might be $1,000-$3,000. I use a 6×12 ft low tunnel made from 1/2-inch PVC hoops and 6mil greenhouse plastic, which extends my lettuce and spinach harvest by at least
Step 4: Water Management & Irrigation
Efficient water management is critical for a self sufficient garden from scratch, especially in off-grid living where water resources might be limited.
- Rainwater Harvesting: This is my primary source of irrigation water. A 55-gallon rain barrel (e.g., EarthMark Rain Barrel, ~$120-$150) connected to a downspout can collect significant water. For larger needs, I use two 275-gallon IBC totes (Intermediate Bulk Containers, often available used for $100-$200 each from food-grade sources) connected in series. A 1,000 sq ft roof can collect approximately 620 gallons of water for every inch of rainfall. My 1,500 sq ft roof provides ample water for my 600 sq ft garden through multiple barrels and totes.
- Drip Irrigation: This is by far the most water-efficient method, delivering water directly to the plant’s root zone, minimizing evaporation and weed growth.
- Components: A typical drip system includes a pressure regulator (e.g., Rain Bird PRV-10, ~$15), a filter (Rain Bird RBY filter, ~$20), main tubing (1/2-inch poly tubing, 100ft ~$25), smaller feeder lines (1/4-inch tubing), and emitters (0.5 GPH or 1 GPH per plant).
- Kits: For beginners, a starter kit like the Rain Bird Drip Irrigation Garden Kit (model DDI-KIT-1P, ~$40-$60) is excellent for a small garden. For larger setups, I use Netafim Techline CV Drip Line (500ft roll, ~$150-$200), which has pressure-compensating emitters built-in, ensuring even watering across long runs.
- Automation: For true self-sufficiency, consider a battery-powered timer (e.g., Orbit B-Hyve Bluetooth Hose Faucet Timer, ~$50) or a solar-powered timer connected to a small 12V pump.
- Solar-Powered Pumps: For lifting water from a well, pond, or large storage tank to your garden, a solar pump is a game-changer. For a smaller drip system, a Shurflo 2088-594-152 Diaphragm Pump (12V, 3.5 GPM, ~$180) can be powered by a single 100W solar panel (e.g., Renogy 100W Monocrystalline Solar Panel, ~$100) and a small 12V battery (e.g., a 50Ah LiFePO4 battery like the Battle Born 50Ah, ~$450). For larger operations or deeper wells, more robust systems are needed. If you’re looking to build out a comprehensive off-grid power system to support your garden’s water needs, or indeed your entire homestead, you might want to explore resources like the Power Grid Generator complete system guide to understand the full scope of what’s possible in terms of energy independence.
Step 5: Seed Selection & Planting
The choice of seeds is crucial for a truly self sufficient garden from scratch.
- Choose Heirloom & Open-Pollinated Seeds: These varieties produce seeds that will grow true to type, meaning you can save seeds from your harvest year after year. F1 hybrids, while often vigorous, will not produce consistent offspring from saved seeds. Reputable seed companies include Baker Creek Heirloom Seeds, High Mowing Organic Seeds, and Seed Savers Exchange. Start with common, reliable varieties like ‘Black Krim’ tomatoes, ‘Provider’ bush beans, ‘Waltham Butternut’ squash, and ‘Black Seeded Simpson’ lettuce.
- Start Seeds Indoors (Optional but Recommended): For longer growing seasons or specific crops, starting seeds indoors gives you a head start. Use seed-starting mix (e.g., Espoma Organic Seed Starter Mix, ~$10 for 16qt bag) in seed trays (Jiffy Professional Greenhouse 72-cell kit, ~$15). Provide adequate light with LED grow lights (Barrina T5 2ft 4-pack LED Grow Lights, 20W each, ~$50) for 14-16 hours a day, positioned 2-4 inches above seedlings. Maintain consistent temperatures (65-75°F for most).
- Direct Sowing vs. Transplanting: Some crops (carrots, radishes, beans, corn) prefer direct sowing into the garden bed. Others (tomatoes, peppers, broccoli, kale) benefit from being started indoors and transplanted. Follow seed packet instructions for planting depths (e.g., lettuce seeds are often surface-sown or planted 1/8 inch deep, while beans are 1 inch deep) and spacing.
- Companion Planting: Strategically plant different species together to enhance growth, deter pests, and attract beneficial insects. For example, planting marigolds near tomatoes can deter nematodes, and basil improves tomato flavor. Nasturtiums can act as a trap crop for aphids.
- Succession Planting: For a continuous harvest, plant small batches of quick-growing crops (lettuce, radishes, cilantro) every 2-3 weeks. As one crop finishes, another is ready to take its place.
Step 6: Pest & Disease Management (Organic)
Maintaining a self sufficient garden from scratch means embracing organic pest and disease control.
- Integrated Pest Management (IPM): This holistic approach combines several strategies.
- Observation: Regularly inspect your plants for early signs of pests or disease. Catching issues early is key.
- Physical Barriers: Use row covers (e.g., Agribon AG-19 floating row cover, 10×20 ft, ~$20) to protect young plants from insect pests like cabbage worms and squash bugs. Install fences (e.g., 2×4 welded wire mesh, 4 ft tall, 50 ft roll ~$70) to keep out deer, rabbits, and other larger animals.
- Hand-Picking: For larger pests like tomato hornworms or squash bugs, simply pick them off and drop them into a bucket of soapy water.
- Companion Planting: As mentioned, certain plants repel pests. Marigolds, garlic, and onions are excellent deterrents.
- Attract Beneficial Insects: Plant flowers like dill, fennel, cosmos, and sweet alyssum to attract ladybugs, lacewings, and parasitic wasps, which prey on common garden pests.
- Organic Sprays & Treatments:
- Neem Oil: An excellent broad-spectrum organic insecticide and fungicide. Bonide Neem Oil Concentrate (16oz, ~$20) can be mixed at a rate of 1-2 tbsp per gallon of water and sprayed on affected plants.
- Insecticidal Soap: Effective against soft-bodied insects like aphids, whiteflies, and spider mites. Garden Safe Insecticidal Soap (24oz ready-to-use, ~$10).
- Bacillus thuringiensis (Bt): A naturally occurring soil bacterium that targets caterpillars and worms. Monterey BT Worm & Caterpillar Killer (16oz, ~$18) is highly effective and safe for beneficial insects.
- Copper or Sulfur Sprays: For fungal diseases like powdery mildew or blight, organic copper (e.g., Bonide Copper Fungicide, ~$15 for 1lb) or sulfur (e.g., Safer Brand Garden Fungicide, ~$10 for 16oz) can be used as a last resort.
Step 7: Harvesting & Seed Saving
The culmination of your efforts is the harvest, and seed saving closes the loop on self-sufficiency.
- Harvesting Techniques:
- Timing: Harvest vegetables at their peak ripeness for best flavor and nutritional value. For example, green beans should snap cleanly, cucumbers should be firm, and tomatoes should be fully colored.
- Frequency: Many crops, like zucchini, cucumbers, and bush beans, produce more if harvested frequently. Pick daily or every other day.
- Tools: Use clean, sharp pruners (e.g., Corona ClassicCUT Bypass Pruner BP 3180, ~$30) or a sharp knife for clean cuts, minimizing damage to the plant.
- Seed Saving: This is where the « self-sufficient » aspect truly shines.
- Selection: Only save seeds from your healthiest, most vigorous plants that show desired traits (disease resistance, good flavor, high yield).
- Isolation: To ensure true-to-type seeds, prevent cross-pollination. This can be challenging for open-pollinated crops that readily cross (e.g., squash, corn). For beginners, focus on self-pollinating plants like beans, peas, lettuce, and tomatoes.
- Processing:
- Dry Seeds (Beans, Peas, Lettuce, Grains): Allow pods/seed heads to dry completely on the plant. Harvest, shell, and clean the seeds, removing chaff.
- Wet Seeds (Tomatoes, Cucumbers, Squash): For tomatoes, ferment the seeds in water for a few days to remove the gel coating and inhibit disease. For cucumbers/squash, scrape out seeds, wash thoroughly, and dry.
- Drying: Spread seeds thinly on screens or paper plates in a cool, dry, well-ventilated area for 1-4 weeks. Ensure they are bone-dry before storage. I aim for less than 8% moisture content.
- Storage: Store seeds in airtight containers (glass jars with desiccant packets work well) in a cool, dark, dry place (ideally 40-50°F and 30-40% humidity). Label clearly with variety and date. Properly stored seeds can remain viable for 3-10 years or more.
Step 8: Season Extension & Winterizing
Extend your harvest and protect your garden for the off-season to truly maximize your self sufficient garden from scratch.
- Cold Frames: Simple structures with a transparent top (glass, polycarbonate, or old windows) that sit over garden beds. They trap solar heat, allowing you to grow cold-hardy crops (lettuce, spinach, kale, radishes) well into winter or start seeds earlier in spring. A basic cold frame can be built from 2×6 lumber and a sheet of polycarbonate for under $100.
- Hoop Houses/Low Tunnels: Larger structures made from flexible hoops (PVC pipe or EMT conduit) covered with greenhouse plastic. These provide more space and greater temperature moderation. A 10×20 ft DIY low tunnel kit can cost $200-$500, while a larger, more robust hoop house kit might be $1,000-$3,000. I use a 6×12 ft low tunnel made from 1/2-inch PVC hoops and 6mil greenhouse plastic, which extends my lettuce and spinach harvest by at least
- In-Ground Beds: If you have excellent native soil and good drainage, in-ground beds are the most economical. Double-digging (loosening soil two shovel depths) can significantly improve drainage and aeration. For my main garden, I primarily use in-ground beds, but I focus on building up the soil over time with consistent compost additions and cover cropping. I aim for beds that are no wider than 3-4 feet so I can reach the center without stepping on the soil, compacting it.
- Raised Beds: Raised beds offer numerous advantages, especially for poor soil, heavy clay, or rocky areas. They provide better drainage, warm up faster in spring, reduce compaction, and make weeding and harvesting easier on your back.
- Material Options:
- Untreated Cedar: Naturally rot-resistant and chemical-free. A 4×8 ft bed, 12 inches deep, typically requires three 2x12x8 ft cedar boards, costing around $50-$60 per board (total ~$150-$180) plus corner brackets or screws. My first raised beds were cedar and are still going strong after 7 years.
- Galvanized Steel: Durable, long-lasting, and aesthetically pleasing. Brands like Vego Garden offer modular kits. A Vego Garden 17″ Tall 8-in-1 Metal Raised Garden Bed (can be configured to 4×8 ft) costs approximately $250-$300.
- Concrete Blocks/Stones: Very durable but can leach minerals (though generally safe once weathered) and can be expensive.
- Recycled Materials: Pallets (check for chemical treatment stamps like « HT » for heat-treated), old tires (controversial due to potential chemical leaching).
- Filling Raised Beds: Don’t just fill with topsoil. Use a « Hugelkultur » approach (logs, branches, leaves, then compost, then topsoil) or a mixture of 60% good quality topsoil, 30% compost, and 10% perlite or vermiculite for drainage. A 4x8x1 ft raised bed requires about 32 cubic feet (or ~1.2 cubic yards) of soil mix, which can cost $100-$200 depending on your source.
- Material Options:
Step 4: Water Management & Irrigation
Efficient water management is critical for a self sufficient garden from scratch, especially in off-grid living where water resources might be limited.
- Rainwater Harvesting: This is my primary source of irrigation water. A 55-gallon rain barrel (e.g., EarthMark Rain Barrel, ~$120-$150) connected to a downspout can collect significant water. For larger needs, I use two 275-gallon IBC totes (Intermediate Bulk Containers, often available used for $100-$200 each from food-grade sources) connected in series. A 1,000 sq ft roof can collect approximately 620 gallons of water for every inch of rainfall. My 1,500 sq ft roof provides ample water for my 600 sq ft garden through multiple barrels and totes.
- Drip Irrigation: This is by far the most water-efficient method, delivering water directly to the plant’s root zone, minimizing evaporation and weed growth.
- Components: A typical drip system includes a pressure regulator (e.g., Rain Bird PRV-10, ~$15), a filter (Rain Bird RBY filter, ~$20), main tubing (1/2-inch poly tubing, 100ft ~$25), smaller feeder lines (1/4-inch tubing), and emitters (0.5 GPH or 1 GPH per plant).
- Kits: For beginners, a starter kit like the Rain Bird Drip Irrigation Garden Kit (model DDI-KIT-1P, ~$40-$60) is excellent for a small garden. For larger setups, I use Netafim Techline CV Drip Line (500ft roll, ~$150-$200), which has pressure-compensating emitters built-in, ensuring even watering across long runs.
- Automation: For true self-sufficiency, consider a battery-powered timer (e.g., Orbit B-Hyve Bluetooth Hose Faucet Timer, ~$50) or a solar-powered timer connected to a small 12V pump.
- Solar-Powered Pumps: For lifting water from a well, pond, or large storage tank to your garden, a solar pump is a game-changer. For a smaller drip system, a Shurflo 2088-594-152 Diaphragm Pump (12V, 3.5 GPM, ~$180) can be powered by a single 100W solar panel (e.g., Renogy 100W Monocrystalline Solar Panel, ~$100) and a small 12V battery (e.g., a 50Ah LiFePO4 battery like the Battle Born 50Ah, ~$450). For larger operations or deeper wells, more robust systems are needed. If you’re looking to build out a comprehensive off-grid power system to support your garden’s water needs, or indeed your entire homestead, you might want to explore resources like the Power Grid Generator complete system guide to understand the full scope of what’s possible in terms of energy independence.
Step 5: Seed Selection & Planting
The choice of seeds is crucial for a truly self sufficient garden from scratch.
- Choose Heirloom & Open-Pollinated Seeds: These varieties produce seeds that will grow true to type, meaning you can save seeds from your harvest year after year. F1 hybrids, while often vigorous, will not produce consistent offspring from saved seeds. Reputable seed companies include Baker Creek Heirloom Seeds, High Mowing Organic Seeds, and Seed Savers Exchange. Start with common, reliable varieties like ‘Black Krim’ tomatoes, ‘Provider’ bush beans, ‘Waltham Butternut’ squash, and ‘Black Seeded Simpson’ lettuce.
- Start Seeds Indoors (Optional but Recommended): For longer growing seasons or specific crops, starting seeds indoors gives you a head start. Use seed-starting mix (e.g., Espoma Organic Seed Starter Mix, ~$10 for 16qt bag) in seed trays (Jiffy Professional Greenhouse 72-cell kit, ~$15). Provide adequate light with LED grow lights (Barrina T5 2ft 4-pack LED Grow Lights, 20W each, ~$50) for 14-16 hours a day, positioned 2-4 inches above seedlings. Maintain consistent temperatures (65-75°F for most).
- Direct Sowing vs. Transplanting: Some crops (carrots, radishes, beans, corn) prefer direct sowing into the garden bed. Others (tomatoes, peppers, broccoli, kale) benefit from being started indoors and transplanted. Follow seed packet instructions for planting depths (e.g., lettuce seeds are often surface-sown or planted 1/8 inch deep, while beans are 1 inch deep) and spacing.
- Companion Planting: Strategically plant different species together to enhance growth, deter pests, and attract beneficial insects. For example, planting marigolds near tomatoes can deter nematodes, and basil improves tomato flavor. Nasturtiums can act as a trap crop for aphids.
- Succession Planting: For a continuous harvest, plant small batches of quick-growing crops (lettuce, radishes, cilantro) every 2-3 weeks. As one crop finishes, another is ready to take its place.
Step 6: Pest & Disease Management (Organic)
Maintaining a self sufficient garden from scratch means embracing organic pest and disease control.
- Integrated Pest Management (IPM): This holistic approach combines several strategies.
- Observation: Regularly inspect your plants for early signs of pests or disease. Catching issues early is key.
- Physical Barriers: Use row covers (e.g., Agribon AG-19 floating row cover, 10×20 ft, ~$20) to protect young plants from insect pests like cabbage worms and squash bugs. Install fences (e.g., 2×4 welded wire mesh, 4 ft tall, 50 ft roll ~$70) to keep out deer, rabbits, and other larger animals.
- Hand-Picking: For larger pests like tomato hornworms or squash bugs, simply pick them off and drop them into a bucket of soapy water.
- Companion Planting: As mentioned, certain plants repel pests. Marigolds, garlic, and onions are excellent deterrents.
- Attract Beneficial Insects: Plant flowers like dill, fennel, cosmos, and sweet alyssum to attract ladybugs, lacewings, and parasitic wasps, which prey on common garden pests.
- Organic Sprays & Treatments:
- Neem Oil: An excellent broad-spectrum organic insecticide and fungicide. Bonide Neem Oil Concentrate (16oz, ~$20) can be mixed at a rate of 1-2 tbsp per gallon of water and sprayed on affected plants.
- Insecticidal Soap: Effective against soft-bodied insects like aphids, whiteflies, and spider mites. Garden Safe Insecticidal Soap (24oz ready-to-use, ~$10).
- Bacillus thuringiensis (Bt): A naturally occurring soil bacterium that targets caterpillars and worms. Monterey BT Worm & Caterpillar Killer (16oz, ~$18) is highly effective and safe for beneficial insects.
- Copper or Sulfur Sprays: For fungal diseases like powdery mildew or blight, organic copper (e.g., Bonide Copper Fungicide, ~$15 for 1lb) or sulfur (e.g., Safer Brand Garden Fungicide, ~$10 for 16oz) can be used as a last resort.
Step 7: Harvesting & Seed Saving
The culmination of your efforts is the harvest, and seed saving closes the loop on self-sufficiency.
- Harvesting Techniques:
- Timing: Harvest vegetables at their peak ripeness for best flavor and nutritional value. For example, green beans should snap cleanly, cucumbers should be firm, and tomatoes should be fully colored.
- Frequency: Many crops, like zucchini, cucumbers, and bush beans, produce more if harvested frequently. Pick daily or every other day.
- Tools: Use clean, sharp pruners (e.g., Corona ClassicCUT Bypass Pruner BP 3180, ~$30) or a sharp knife for clean cuts, minimizing damage to the plant.
- Seed Saving: This is where the « self-sufficient » aspect truly shines.
- Selection: Only save seeds from your healthiest, most vigorous plants that show desired traits (disease resistance, good flavor, high yield).
- Isolation: To ensure true-to-type seeds, prevent cross-pollination. This can be challenging for open-pollinated crops that readily cross (e.g., squash, corn). For beginners, focus on self-pollinating plants like beans, peas, lettuce, and tomatoes.
- Processing:
- Dry Seeds (Beans, Peas, Lettuce, Grains): Allow pods/seed heads to dry completely on the plant. Harvest, shell, and clean the seeds, removing chaff.
- Wet Seeds (Tomatoes, Cucumbers, Squash): For tomatoes, ferment the seeds in water for a few days to remove the gel coating and inhibit disease. For cucumbers/squash, scrape out seeds, wash thoroughly, and dry.
- Drying: Spread seeds thinly on screens or paper plates in a cool, dry, well-ventilated area for 1-4 weeks. Ensure they are bone-dry before storage. I aim for less than 8% moisture content.
- Storage: Store seeds in airtight containers (glass jars with desiccant packets work well) in a cool, dark, dry place (ideally 40-50°F and 30-40% humidity). Label clearly with variety and date. Properly stored seeds can remain viable for 3-10 years or more.
Step 8: Season Extension & Winterizing
Extend your harvest and protect your garden for the off-season to truly maximize your self sufficient garden from scratch.
- Cold Frames: Simple structures with a transparent top (glass, polycarbonate, or old windows) that sit over garden beds. They trap solar heat, allowing you to grow cold-hardy crops (lettuce, spinach, kale, radishes) well into winter or start seeds earlier in spring. A basic cold frame can be built from 2×6 lumber and a sheet of polycarbonate for under $100.
- Hoop Houses/Low Tunnels: Larger structures made from flexible hoops (PVC pipe or EMT conduit) covered with greenhouse plastic. These provide more space and greater temperature moderation. A 10×20 ft DIY low tunnel kit can cost $200-$500, while a larger, more robust hoop house kit might be $1,000-$3,000. I use a 6×12 ft low tunnel made from 1/2-inch PVC hoops and 6mil greenhouse plastic, which extends my lettuce and spinach harvest by at least
Deciding between raised beds and in-ground beds depends on your soil, budget, and physical capabilities.
- In-Ground Beds: If you have excellent native soil and good drainage, in-ground beds are the most economical. Double-digging (loosening soil two shovel depths) can significantly improve drainage and aeration. For my main garden, I primarily use in-ground beds, but I focus on building up the soil over time with consistent compost additions and cover cropping. I aim for beds that are no wider than 3-4 feet so I can reach the center without stepping on the soil, compacting it.
- Raised Beds: Raised beds offer numerous advantages, especially for poor soil, heavy clay, or rocky areas. They provide better drainage, warm up faster in spring, reduce compaction, and make weeding and harvesting easier on your back.
- Material Options:
- Untreated Cedar: Naturally rot-resistant and chemical-free. A 4×8 ft bed, 12 inches deep, typically requires three 2x12x8 ft cedar boards, costing around $50-$60 per board (total ~$150-$180) plus corner brackets or screws. My first raised beds were cedar and are still going strong after 7 years.
- Galvanized Steel: Durable, long-lasting, and aesthetically pleasing. Brands like Vego Garden offer modular kits. A Vego Garden 17″ Tall 8-in-1 Metal Raised Garden Bed (can be configured to 4×8 ft) costs approximately $250-$300.
- Concrete Blocks/Stones: Very durable but can leach minerals (though generally safe once weathered) and can be expensive.
- Recycled Materials: Pallets (check for chemical treatment stamps like « HT » for heat-treated), old tires (controversial due to potential chemical leaching).
- Filling Raised Beds: Don’t just fill with topsoil. Use a « Hugelkultur » approach (logs, branches, leaves, then compost, then topsoil) or a mixture of 60% good quality topsoil, 30% compost, and 10% perlite or vermiculite for drainage. A 4x8x1 ft raised bed requires about 32 cubic feet (or ~1.2 cubic yards) of soil mix, which can cost $100-$200 depending on your source.
- Material Options:
Step 4: Water Management & Irrigation
Efficient water management is critical for a self sufficient garden from scratch, especially in off-grid living where water resources might be limited.
- Rainwater Harvesting: This is my primary source of irrigation water. A 55-gallon rain barrel (e.g., EarthMark Rain Barrel, ~$120-$150) connected to a downspout can collect significant water. For larger needs, I use two 275-gallon IBC totes (Intermediate Bulk Containers, often available used for $100-$200 each from food-grade sources) connected in series. A 1,000 sq ft roof can collect approximately 620 gallons of water for every inch of rainfall. My 1,500 sq ft roof provides ample water for my 600 sq ft garden through multiple barrels and totes.
- Drip Irrigation: This is by far the most water-efficient method, delivering water directly to the plant’s root zone, minimizing evaporation and weed growth.
- Components: A typical drip system includes a pressure regulator (e.g., Rain Bird PRV-10, ~$15), a filter (Rain Bird RBY filter, ~$20), main tubing (1/2-inch poly tubing, 100ft ~$25), smaller feeder lines (1/4-inch tubing), and emitters (0.5 GPH or 1 GPH per plant).
- Kits: For beginners, a starter kit like the Rain Bird Drip Irrigation Garden Kit (model DDI-KIT-1P, ~$40-$60) is excellent for a small garden. For larger setups, I use Netafim Techline CV Drip Line (500ft roll, ~$150-$200), which has pressure-compensating emitters built-in, ensuring even watering across long runs.
- Automation: For true self-sufficiency, consider a battery-powered timer (e.g., Orbit B-Hyve Bluetooth Hose Faucet Timer, ~$50) or a solar-powered timer connected to a small 12V pump.
- Solar-Powered Pumps: For lifting water from a well, pond, or large storage tank to your garden, a solar pump is a game-changer. For a smaller drip system, a Shurflo 2088-594-152 Diaphragm Pump (12V, 3.5 GPM, ~$180) can be powered by a single 100W solar panel (e.g., Renogy 100W Monocrystalline Solar Panel, ~$100) and a small 12V battery (e.g., a 50Ah LiFePO4 battery like the Battle Born 50Ah, ~$450). For larger operations or deeper wells, more robust systems are needed. If you’re looking to build out a comprehensive off-grid power system to support your garden’s water needs, or indeed your entire homestead, you might want to explore resources like the Power Grid Generator complete system guide to understand the full scope of what’s possible in terms of energy independence.
Step 5: Seed Selection & Planting
The choice of seeds is crucial for a truly self sufficient garden from scratch.
- Choose Heirloom & Open-Pollinated Seeds: These varieties produce seeds that will grow true to type, meaning you can save seeds from your harvest year after year. F1 hybrids, while often vigorous, will not produce consistent offspring from saved seeds. Reputable seed companies include Baker Creek Heirloom Seeds, High Mowing Organic Seeds, and Seed Savers Exchange. Start with common, reliable varieties like ‘Black Krim’ tomatoes, ‘Provider’ bush beans, ‘Waltham Butternut’ squash, and ‘Black Seeded Simpson’ lettuce.
- Start Seeds Indoors (Optional but Recommended): For longer growing seasons or specific crops, starting seeds indoors gives you a head start. Use seed-starting mix (e.g., Espoma Organic Seed Starter Mix, ~$10 for 16qt bag) in seed trays (Jiffy Professional Greenhouse 72-cell kit, ~$15). Provide adequate light with LED grow lights (Barrina T5 2ft 4-pack LED Grow Lights, 20W each, ~$50) for 14-16 hours a day, positioned 2-4 inches above seedlings. Maintain consistent temperatures (65-75°F for most).
- Direct Sowing vs. Transplanting: Some crops (carrots, radishes, beans, corn) prefer direct sowing into the garden bed. Others (tomatoes, peppers, broccoli, kale) benefit from being started indoors and transplanted. Follow seed packet instructions for planting depths (e.g., lettuce seeds are often surface-sown or planted 1/8 inch deep, while beans are 1 inch deep) and spacing.
- Companion Planting: Strategically plant different species together to enhance growth, deter pests, and attract beneficial insects. For example, planting marigolds near tomatoes can deter nematodes, and basil improves tomato flavor. Nasturtiums can act as a trap crop for aphids.
- Succession Planting: For a continuous harvest, plant small batches of quick-growing crops (lettuce, radishes, cilantro) every 2-3 weeks. As one crop finishes, another is ready to take its place.
Step 6: Pest & Disease Management (Organic)
Maintaining a self sufficient garden from scratch means embracing organic pest and disease control.
- Integrated Pest Management (IPM): This holistic approach combines several strategies.
- Observation: Regularly inspect your plants for early signs of pests or disease. Catching issues early is key.
- Physical Barriers: Use row covers (e.g., Agribon AG-19 floating row cover, 10×20 ft, ~$20) to protect young plants from insect pests like cabbage worms and squash bugs. Install fences (e.g., 2×4 welded wire mesh, 4 ft tall, 50 ft roll ~$70) to keep out deer, rabbits, and other larger animals.
- Hand-Picking: For larger pests like tomato hornworms or squash bugs, simply pick them off and drop them into a bucket of soapy water.
- Companion Planting: As mentioned, certain plants repel pests. Marigolds, garlic, and onions are excellent deterrents.
- Attract Beneficial Insects: Plant flowers like dill, fennel, cosmos, and sweet alyssum to attract ladybugs, lacewings, and parasitic wasps, which prey on common garden pests.
- Organic Sprays & Treatments:
- Neem Oil: An excellent broad-spectrum organic insecticide and fungicide. Bonide Neem Oil Concentrate (16oz, ~$20) can be mixed at a rate of 1-2 tbsp per gallon of water and sprayed on affected plants.
- Insecticidal Soap: Effective against soft-bodied insects like aphids, whiteflies, and spider mites. Garden Safe Insecticidal Soap (24oz ready-to-use, ~$10).
- Bacillus thuringiensis (Bt): A naturally occurring soil bacterium that targets caterpillars and worms. Monterey BT Worm & Caterpillar Killer (16oz, ~$18) is highly effective and safe for beneficial insects.
- Copper or Sulfur Sprays: For fungal diseases like powdery mildew or blight, organic copper (e.g., Bonide Copper Fungicide, ~$15 for 1lb) or sulfur (e.g., Safer Brand Garden Fungicide, ~$10 for 16oz) can be used as a last resort.
Step 7: Harvesting & Seed Saving
The culmination of your efforts is the harvest, and seed saving closes the loop on self-sufficiency.
- Harvesting Techniques:
- Timing: Harvest vegetables at their peak ripeness for best flavor and nutritional value. For example, green beans should snap cleanly, cucumbers should be firm, and tomatoes should be fully colored.
- Frequency: Many crops, like zucchini, cucumbers, and bush beans, produce more if harvested frequently. Pick daily or every other day.
- Tools: Use clean, sharp pruners (e.g., Corona ClassicCUT Bypass Pruner BP 3180, ~$30) or a sharp knife for clean cuts, minimizing damage to the plant.
- Seed Saving: This is where the « self-sufficient » aspect truly shines.
- Selection: Only save seeds from your healthiest, most vigorous plants that show desired traits (disease resistance, good flavor, high yield).
- Isolation: To ensure true-to-type seeds, prevent cross-pollination. This can be challenging for open-pollinated crops that readily cross (e.g., squash, corn). For beginners, focus on self-pollinating plants like beans, peas, lettuce, and tomatoes.
- Processing:
- Dry Seeds (Beans, Peas, Lettuce, Grains): Allow pods/seed heads to dry completely on the plant. Harvest, shell, and clean the seeds, removing chaff.
- Wet Seeds (Tomatoes, Cucumbers, Squash): For tomatoes, ferment the seeds in water for a few days to remove the gel coating and inhibit disease. For cucumbers/squash, scrape out seeds, wash thoroughly, and dry.
- Drying: Spread seeds thinly on screens or paper plates in a cool, dry, well-ventilated area for 1-4 weeks. Ensure they are bone-dry before storage. I aim for less than 8% moisture content.
- Storage: Store seeds in airtight containers (glass jars with desiccant packets work well) in a cool, dark, dry place (ideally 40-50°F and 30-40% humidity). Label clearly with variety and date. Properly stored seeds can remain viable for 3-10 years or more.
Step 8: Season Extension & Winterizing
Extend your harvest and protect your garden for the off-season to truly maximize your self sufficient garden from scratch.
- Cold Frames: Simple structures with a transparent top (glass, polycarbonate, or old windows) that sit over garden beds. They trap solar heat, allowing you to grow cold-hardy crops (lettuce, spinach, kale, radishes) well into winter or start seeds earlier in spring. A basic cold frame can be built from 2×6 lumber and a sheet of polycarbonate for under $100.
- Hoop Houses/Low Tunnels: Larger structures made from flexible hoops (PVC pipe or EMT conduit) covered with greenhouse plastic. These provide more space and greater temperature moderation. A 10×20 ft DIY low tunnel kit can cost $200-$500, while a larger, more robust hoop house kit might be $1,000-$3,000. I use a 6×12 ft low tunnel made from 1/2-inch PVC hoops and 6mil greenhouse plastic, which extends my lettuce and spinach harvest by at least
Healthy soil is the bedrock of a productive, self-sufficient garden. You can’t guess what your soil needs; you have to test it.
- Perform a Soil Test: A professional soil test will give you precise data on your soil’s pH, nutrient levels (N-P-K), and organic matter content. I recommend sending a sample to your local agricultural extension office; it typically costs $20-$50 and provides detailed recommendations. Alternatively, for a quick homeowner check, a Rapitest Soil Test Kit (40-test kit, model 1663, ~$20 on Amazon) provides a good baseline for pH, Nitrogen, Phosphorus, and Potash. Aim for a pH between 6.0 and 7.0 for most vegetables.
- Amend for pH Imbalance: If your soil is too acidic (below 6.0), add agricultural lime (dolomitic lime adds magnesium, calcitic lime adds calcium). Apply 5-10 lbs per 100 sq ft for a moderate adjustment. If it’s too alkaline (above 7.0), add elemental sulfur (e.g., Espoma Soil Acidifier, ~$15 for 6.75 lbs) or generous amounts of organic matter like peat moss or pine needles.
- Build Organic Matter: This is the single most important step for long-term soil health. Organic matter improves soil structure, water retention, drainage, and nutrient availability. Incorporate 2-4 inches of high-quality compost into your top 6-12 inches of soil annually. I make my own compost from kitchen scraps, garden waste, and shredded leaves, but you can purchase it. Local nurseries often sell bulk compost for $30-$50 per cubic yard. Aged manure (from chickens, cows, or horses – ensure it’s well-rotted to avoid burning plants) is also excellent.
- Address Nutrient Deficiencies: Based on your soil test, add specific organic amendments. If Nitrogen (N) is low, add blood meal (12-0-0, ~$20 for 3 lbs) or feather meal. For Phosphorus (P), use bone meal (3-15-0, ~$15 for 3 lbs) or rock phosphate. For Potassium (K), greensand (0-0-2.5, ~$25 for 5 lbs) or kelp meal are good choices. I rely heavily on Espoma Organic Garden-tone (5-3-3, ~$25 for an 8lb bag) as a balanced, all-purpose organic fertilizer during planting.
Step 3: Garden Bed Preparation
Deciding between raised beds and in-ground beds depends on your soil, budget, and physical capabilities.
- In-Ground Beds: If you have excellent native soil and good drainage, in-ground beds are the most economical. Double-digging (loosening soil two shovel depths) can significantly improve drainage and aeration. For my main garden, I primarily use in-ground beds, but I focus on building up the soil over time with consistent compost additions and cover cropping. I aim for beds that are no wider than 3-4 feet so I can reach the center without stepping on the soil, compacting it.
- Raised Beds: Raised beds offer numerous advantages, especially for poor soil, heavy clay, or rocky areas. They provide better drainage, warm up faster in spring, reduce compaction, and make weeding and harvesting easier on your back.
- Material Options:
- Untreated Cedar: Naturally rot-resistant and chemical-free. A 4×8 ft bed, 12 inches deep, typically requires three 2x12x8 ft cedar boards, costing around $50-$60 per board (total ~$150-$180) plus corner brackets or screws. My first raised beds were cedar and are still going strong after 7 years.
- Galvanized Steel: Durable, long-lasting, and aesthetically pleasing. Brands like Vego Garden offer modular kits. A Vego Garden 17″ Tall 8-in-1 Metal Raised Garden Bed (can be configured to 4×8 ft) costs approximately $250-$300.
- Concrete Blocks/Stones: Very durable but can leach minerals (though generally safe once weathered) and can be expensive.
- Recycled Materials: Pallets (check for chemical treatment stamps like « HT » for heat-treated), old tires (controversial due to potential chemical leaching).
- Filling Raised Beds: Don’t just fill with topsoil. Use a « Hugelkultur » approach (logs, branches, leaves, then compost, then topsoil) or a mixture of 60% good quality topsoil, 30% compost, and 10% perlite or vermiculite for drainage. A 4x8x1 ft raised bed requires about 32 cubic feet (or ~1.2 cubic yards) of soil mix, which can cost $100-$200 depending on your source.
- Material Options:
Step 4: Water Management & Irrigation
Efficient water management is critical for a self sufficient garden from scratch, especially in off-grid living where water resources might be limited.
- Rainwater Harvesting: This is my primary source of irrigation water. A 55-gallon rain barrel (e.g., EarthMark Rain Barrel, ~$120-$150) connected to a downspout can collect significant water. For larger needs, I use two 275-gallon IBC totes (Intermediate Bulk Containers, often available used for $100-$200 each from food-grade sources) connected in series. A 1,000 sq ft roof can collect approximately 620 gallons of water for every inch of rainfall. My 1,500 sq ft roof provides ample water for my 600 sq ft garden through multiple barrels and totes.
- Drip Irrigation: This is by far the most water-efficient method, delivering water directly to the plant’s root zone, minimizing evaporation and weed growth.
- Components: A typical drip system includes a pressure regulator (e.g., Rain Bird PRV-10, ~$15), a filter (Rain Bird RBY filter, ~$20), main tubing (1/2-inch poly tubing, 100ft ~$25), smaller feeder lines (1/4-inch tubing), and emitters (0.5 GPH or 1 GPH per plant).
- Kits: For beginners, a starter kit like the Rain Bird Drip Irrigation Garden Kit (model DDI-KIT-1P, ~$40-$60) is excellent for a small garden. For larger setups, I use Netafim Techline CV Drip Line (500ft roll, ~$150-$200), which has pressure-compensating emitters built-in, ensuring even watering across long runs.
- Automation: For true self-sufficiency, consider a battery-powered timer (e.g., Orbit B-Hyve Bluetooth Hose Faucet Timer, ~$50) or a solar-powered timer connected to a small 12V pump.
- Solar-Powered Pumps: For lifting water from a well, pond, or large storage tank to your garden, a solar pump is a game-changer. For a smaller drip system, a Shurflo 2088-594-152 Diaphragm Pump (12V, 3.5 GPM, ~$180) can be powered by a single 100W solar panel (e.g., Renogy 100W Monocrystalline Solar Panel, ~$100) and a small 12V battery (e.g., a 50Ah LiFePO4 battery like the Battle Born 50Ah, ~$450). For larger operations or deeper wells, more robust systems are needed. If you’re looking to build out a comprehensive off-grid power system to support your garden’s water needs, or indeed your entire homestead, you might want to explore resources like the Power Grid Generator complete system guide to understand the full scope of what’s possible in terms of energy independence.
Step 5: Seed Selection & Planting
The choice of seeds is crucial for a truly self sufficient garden from scratch.
- Choose Heirloom & Open-Pollinated Seeds: These varieties produce seeds that will grow true to type, meaning you can save seeds from your harvest year after year. F1 hybrids, while often vigorous, will not produce consistent offspring from saved seeds. Reputable seed companies include Baker Creek Heirloom Seeds, High Mowing Organic Seeds, and Seed Savers Exchange. Start with common, reliable varieties like ‘Black Krim’ tomatoes, ‘Provider’ bush beans, ‘Waltham Butternut’ squash, and ‘Black Seeded Simpson’ lettuce.
- Start Seeds Indoors (Optional but Recommended): For longer growing seasons or specific crops, starting seeds indoors gives you a head start. Use seed-starting mix (e.g., Espoma Organic Seed Starter Mix, ~$10 for 16qt bag) in seed trays (Jiffy Professional Greenhouse 72-cell kit, ~$15). Provide adequate light with LED grow lights (Barrina T5 2ft 4-pack LED Grow Lights, 20W each, ~$50) for 14-16 hours a day, positioned 2-4 inches above seedlings. Maintain consistent temperatures (65-75°F for most).
- Direct Sowing vs. Transplanting: Some crops (carrots, radishes, beans, corn) prefer direct sowing into the garden bed. Others (tomatoes, peppers, broccoli, kale) benefit from being started indoors and transplanted. Follow seed packet instructions for planting depths (e.g., lettuce seeds are often surface-sown or planted 1/8 inch deep, while beans are 1 inch deep) and spacing.
- Companion Planting: Strategically plant different species together to enhance growth, deter pests, and attract beneficial insects. For example, planting marigolds near tomatoes can deter nematodes, and basil improves tomato flavor. Nasturtiums can act as a trap crop for aphids.
- Succession Planting: For a continuous harvest, plant small batches of quick-growing crops (lettuce, radishes, cilantro) every 2-3 weeks. As one crop finishes, another is ready to take its place.
Step 6: Pest & Disease Management (Organic)
Maintaining a self sufficient garden from scratch means embracing organic pest and disease control.
- Integrated Pest Management (IPM): This holistic approach combines several strategies.
- Observation: Regularly inspect your plants for early signs of pests or disease. Catching issues early is key.
- Physical Barriers: Use row covers (e.g., Agribon AG-19 floating row cover, 10×20 ft, ~$20) to protect young plants from insect pests like cabbage worms and squash bugs. Install fences (e.g., 2×4 welded wire mesh, 4 ft tall, 50 ft roll ~$70) to keep out deer, rabbits, and other larger animals.
- Hand-Picking: For larger pests like tomato hornworms or squash bugs, simply pick them off and drop them into a bucket of soapy water.
- Companion Planting: As mentioned, certain plants repel pests. Marigolds, garlic, and onions are excellent deterrents.
- Attract Beneficial Insects: Plant flowers like dill, fennel, cosmos, and sweet alyssum to attract ladybugs, lacewings, and parasitic wasps, which prey on common garden pests.
- Organic Sprays & Treatments:
- Neem Oil: An excellent broad-spectrum organic insecticide and fungicide. Bonide Neem Oil Concentrate (16oz, ~$20) can be mixed at a rate of 1-2 tbsp per gallon of water and sprayed on affected plants.
- Insecticidal Soap: Effective against soft-bodied insects like aphids, whiteflies, and spider mites. Garden Safe Insecticidal Soap (24oz ready-to-use, ~$10).
- Bacillus thuringiensis (Bt): A naturally occurring soil bacterium that targets caterpillars and worms. Monterey BT Worm & Caterpillar Killer (16oz, ~$18) is highly effective and safe for beneficial insects.
- Copper or Sulfur Sprays: For fungal diseases like powdery mildew or blight, organic copper (e.g., Bonide Copper Fungicide, ~$15 for 1lb) or sulfur (e.g., Safer Brand Garden Fungicide, ~$10 for 16oz) can be used as a last resort.
Step 7: Harvesting & Seed Saving
The culmination of your efforts is the harvest, and seed saving closes the loop on self-sufficiency.
- Harvesting Techniques:
- Timing: Harvest vegetables at their peak ripeness for best flavor and nutritional value. For example, green beans should snap cleanly, cucumbers should be firm, and tomatoes should be fully colored.
- Frequency: Many crops, like zucchini, cucumbers, and bush beans, produce more if harvested frequently. Pick daily or every other day.
- Tools: Use clean, sharp pruners (e.g., Corona ClassicCUT Bypass Pruner BP 3180, ~$30) or a sharp knife for clean cuts, minimizing damage to the plant.
- Seed Saving: This is where the « self-sufficient » aspect truly shines.
- Selection: Only save seeds from your healthiest, most vigorous plants that show desired traits (disease resistance, good flavor, high yield).
- Isolation: To ensure true-to-type seeds, prevent cross-pollination. This can be challenging for open-pollinated crops that readily cross (e.g., squash, corn). For beginners, focus on self-pollinating plants like beans, peas, lettuce, and tomatoes.
- Processing:
- Dry Seeds (Beans, Peas, Lettuce, Grains): Allow pods/seed heads to dry completely on the plant. Harvest, shell, and clean the seeds, removing chaff.
- Wet Seeds (Tomatoes, Cucumbers, Squash): For tomatoes, ferment the seeds in water for a few days to remove the gel coating and inhibit disease. For cucumbers/squash, scrape out seeds, wash thoroughly, and dry.
- Drying: Spread seeds thinly on screens or paper plates in a cool, dry, well-ventilated area for 1-4 weeks. Ensure they are bone-dry before storage. I aim for less than 8% moisture content.
- Storage: Store seeds in airtight containers (glass jars with desiccant packets work well) in a cool, dark, dry place (ideally 40-50°F and 30-40% humidity). Label clearly with variety and date. Properly stored seeds can remain viable for 3-10 years or more.
Step 8: Season Extension & Winterizing
Extend your harvest and protect your garden for the off-season to truly maximize your self sufficient garden from scratch.
- Cold Frames: Simple structures with a transparent top (glass, polycarbonate, or old windows) that sit over garden beds. They trap solar heat, allowing you to grow cold-hardy crops (lettuce, spinach, kale, radishes) well into winter or start seeds earlier in spring. A basic cold frame can be built from 2×6 lumber and a sheet of polycarbonate for under $100.
- Hoop Houses/Low Tunnels: Larger structures made from flexible hoops (PVC pipe or EMT conduit) covered with greenhouse plastic. These provide more space and greater temperature moderation. A 10×20 ft DIY low tunnel kit can cost $200-$500, while a larger, more robust hoop house kit might be $1,000-$3,000. I use a 6×12 ft low tunnel made from 1/2-inch PVC hoops and 6mil greenhouse plastic, which extends my lettuce and spinach harvest by at least
- Integrated Pest Management (IPM): This holistic approach combines several strategies.
- Harvesting Techniques:
- Timing: Harvest vegetables at their peak ripeness for best flavor and nutritional value. For example, green beans should snap cleanly, cucumbers should be firm, and tomatoes should be fully colored.
- Frequency: Many crops, like zucchini, cucumbers, and bush beans, produce more if harvested frequently. Pick daily or every other day.
- Tools: Use clean, sharp pruners (e.g., Corona ClassicCUT Bypass Pruner BP 3180, ~$30) or a sharp knife for clean cuts, minimizing damage to the plant.
- Seed Saving: This is where the « self-sufficient » aspect truly shines.
- Selection: Only save seeds from your healthiest, most vigorous plants that show desired traits (disease resistance, good flavor, high yield).
- Isolation: To ensure true-to-type seeds, prevent cross-pollination. This can be challenging for open-pollinated crops that readily cross (e.g., squash, corn). For beginners, focus on self-pollinating plants like beans, peas, lettuce, and tomatoes.
- Processing:
- Dry Seeds (Beans, Peas, Lettuce, Grains): Allow pods/seed heads to dry completely on the plant. Harvest, shell, and clean the seeds, removing chaff.
- Wet Seeds (Tomatoes, Cucumbers, Squash): For tomatoes, ferment the seeds in water for a few days to remove the gel coating and inhibit disease. For cucumbers/squash, scrape out seeds, wash thoroughly, and dry.
- Drying: Spread seeds thinly on screens or paper plates in a cool, dry, well-ventilated area for 1-4 weeks. Ensure they are bone-dry before storage. I aim for less than 8% moisture content.
- Storage: Store seeds in airtight containers (glass jars with desiccant packets work well) in a cool, dark, dry place (ideally 40-50°F and 30-40% humidity). Label clearly with variety and date. Properly stored seeds can remain viable for 3-10 years or more.
Step 8: Season Extension & Winterizing
Extend your harvest and protect your garden for the off-season to truly maximize your self sufficient garden from scratch.
- Cold Frames: Simple structures with a transparent top (glass, polycarbonate, or old windows) that sit over garden beds. They trap solar heat, allowing you to grow cold-hardy crops (lettuce, spinach, kale, radishes) well into winter or start seeds earlier in spring. A basic cold frame can be built from 2×6 lumber and a sheet of polycarbonate for under $100.
- Hoop Houses/Low Tunnels: Larger structures made from flexible hoops (PVC pipe or EMT conduit) covered with greenhouse plastic. These provide more space and greater temperature moderation. A 10×20 ft DIY low tunnel kit can cost $200-$500, while a larger, more robust hoop house kit might be $1,000-$3,000. I use a 6×12 ft low tunnel made from 1/2-inch PVC hoops and 6mil greenhouse plastic, which extends my lettuce and spinach harvest by at least
Maintaining a self sufficient garden from scratch means embracing organic pest and disease control.
- Integrated Pest Management (IPM): This holistic approach combines several strategies.
- Observation: Regularly inspect your plants for early signs of pests or disease. Catching issues early is key.
- Physical Barriers: Use row covers (e.g., Agribon AG-19 floating row cover, 10×20 ft, ~$20) to protect young plants from insect pests like cabbage worms and squash bugs. Install fences (e.g., 2×4 welded wire mesh, 4 ft tall, 50 ft roll ~$70) to keep out deer, rabbits, and other larger animals.
- Hand-Picking: For larger pests like tomato hornworms or squash bugs, simply pick them off and drop them into a bucket of soapy water.
- Companion Planting: As mentioned, certain plants repel pests. Marigolds, garlic, and onions are excellent deterrents.
- Attract Beneficial Insects: Plant flowers like dill, fennel, cosmos, and sweet alyssum to attract ladybugs, lacewings, and parasitic wasps, which prey on common garden pests.
- Organic Sprays & Treatments:
- Neem Oil: An excellent broad-spectrum organic insecticide and fungicide. Bonide Neem Oil Concentrate (16oz, ~$20) can be mixed at a rate of 1-2 tbsp per gallon of water and sprayed on affected plants.
- Insecticidal Soap: Effective against soft-bodied insects like aphids, whiteflies, and spider mites. Garden Safe Insecticidal Soap (24oz ready-to-use, ~$10).
- Bacillus thuringiensis (Bt): A naturally occurring soil bacterium that targets caterpillars and worms. Monterey BT Worm & Caterpillar Killer (16oz, ~$18) is highly effective and safe for beneficial insects.
- Copper or Sulfur Sprays: For fungal diseases like powdery mildew or blight, organic copper (e.g., Bonide Copper Fungicide, ~$15 for 1lb) or sulfur (e.g., Safer Brand Garden Fungicide, ~$10 for 16oz) can be used as a last resort.
Step 7: Harvesting & Seed Saving
The culmination of your efforts is the harvest, and seed saving closes the loop on self-sufficiency.
- Harvesting Techniques:
- Timing: Harvest vegetables at their peak ripeness for best flavor and nutritional value. For example, green beans should snap cleanly, cucumbers should be firm, and tomatoes should be fully colored.
- Frequency: Many crops, like zucchini, cucumbers, and bush beans, produce more if harvested frequently. Pick daily or every other day.
- Tools: Use clean, sharp pruners (e.g., Corona ClassicCUT Bypass Pruner BP 3180, ~$30) or a sharp knife for clean cuts, minimizing damage to the plant.
- Seed Saving: This is where the « self-sufficient » aspect truly shines.
- Selection: Only save seeds from your healthiest, most vigorous plants that show desired traits (disease resistance, good flavor, high yield).
- Isolation: To ensure true-to-type seeds, prevent cross-pollination. This can be challenging for open-pollinated crops that readily cross (e.g., squash, corn). For beginners, focus on self-pollinating plants like beans, peas, lettuce, and tomatoes.
- Processing:
- Dry Seeds (Beans, Peas, Lettuce, Grains): Allow pods/seed heads to dry completely on the plant. Harvest, shell, and clean the seeds, removing chaff.
- Wet Seeds (Tomatoes, Cucumbers, Squash): For tomatoes, ferment the seeds in water for a few days to remove the gel coating and inhibit disease. For cucumbers/squash, scrape out seeds, wash thoroughly, and dry.
- Drying: Spread seeds thinly on screens or paper plates in a cool, dry, well-ventilated area for 1-4 weeks. Ensure they are bone-dry before storage. I aim for less than 8% moisture content.
- Storage: Store seeds in airtight containers (glass jars with desiccant packets work well) in a cool, dark, dry place (ideally 40-50°F and 30-40% humidity). Label clearly with variety and date. Properly stored seeds can remain viable for 3-10 years or more.
Step 8: Season Extension & Winterizing
Extend your harvest and protect your garden for the off-season to truly maximize your self sufficient garden from scratch.
- Cold Frames: Simple structures with a transparent top (glass, polycarbonate, or old windows) that sit over garden beds. They trap solar heat, allowing you to grow cold-hardy crops (lettuce, spinach, kale, radishes) well into winter or start seeds earlier in spring. A basic cold frame can be built from 2×6 lumber and a sheet of polycarbonate for under $100.
- Hoop Houses/Low Tunnels: Larger structures made from flexible hoops (PVC pipe or EMT conduit) covered with greenhouse plastic. These provide more space and greater temperature moderation. A 10×20 ft DIY low tunnel kit can cost $200-$500, while a larger, more robust hoop house kit might be $1,000-$3,000. I use a 6×12 ft low tunnel made from 1/2-inch PVC hoops and 6mil greenhouse plastic, which extends my lettuce and spinach harvest by at least
Step 6: Pest & Disease Management (Organic)
Maintaining a self sufficient garden from scratch means embracing organic pest and disease control.
- Integrated Pest Management (IPM): This holistic approach combines several strategies.
- Observation: Regularly inspect your plants for early signs of pests or disease. Catching issues early is key.
- Physical Barriers: Use row covers (e.g., Agribon AG-19 floating row cover, 10×20 ft, ~$20) to protect young plants from insect pests like cabbage worms and squash bugs. Install fences (e.g., 2×4 welded wire mesh, 4 ft tall, 50 ft roll ~$70) to keep out deer, rabbits, and other larger animals.
- Hand-Picking: For larger pests like tomato hornworms or squash bugs, simply pick them off and drop them into a bucket of soapy water.
- Companion Planting: As mentioned, certain plants repel pests. Marigolds, garlic, and onions are excellent deterrents.
- Attract Beneficial Insects: Plant flowers like dill, fennel, cosmos, and sweet alyssum to attract ladybugs, lacewings, and parasitic wasps, which prey on common garden pests.
- Organic Sprays & Treatments:
- Neem Oil: An excellent broad-spectrum organic insecticide and fungicide. Bonide Neem Oil Concentrate (16oz, ~$20) can be mixed at a rate of 1-2 tbsp per gallon of water and sprayed on affected plants.
- Insecticidal Soap: Effective against soft-bodied insects like aphids, whiteflies, and spider mites. Garden Safe Insecticidal Soap (24oz ready-to-use, ~$10).
- Bacillus thuringiensis (Bt): A naturally occurring soil bacterium that targets caterpillars and worms. Monterey BT Worm & Caterpillar Killer (16oz, ~$18) is highly effective and safe for beneficial insects.
- Copper or Sulfur Sprays: For fungal diseases like powdery mildew or blight, organic copper (e.g., Bonide Copper Fungicide, ~$15 for 1lb) or sulfur (e.g., Safer Brand Garden Fungicide, ~$10 for 16oz) can be used as a last resort.
Step 7: Harvesting & Seed Saving
The culmination of your efforts is the harvest, and seed saving closes the loop on self-sufficiency.
- Harvesting Techniques:
- Timing: Harvest vegetables at their peak ripeness for best flavor and nutritional value. For example, green beans should snap cleanly, cucumbers should be firm, and tomatoes should be fully colored.
- Frequency: Many crops, like zucchini, cucumbers, and bush beans, produce more if harvested frequently. Pick daily or every other day.
- Tools: Use clean, sharp pruners (e.g., Corona ClassicCUT Bypass Pruner BP 3180, ~$30) or a sharp knife for clean cuts, minimizing damage to the plant.
- Seed Saving: This is where the « self-sufficient » aspect truly shines.
- Selection: Only save seeds from your healthiest, most vigorous plants that show desired traits (disease resistance, good flavor, high yield).
- Isolation: To ensure true-to-type seeds, prevent cross-pollination. This can be challenging for open-pollinated crops that readily cross (e.g., squash, corn). For beginners, focus on self-pollinating plants like beans, peas, lettuce, and tomatoes.
- Processing:
- Dry Seeds (Beans, Peas, Lettuce, Grains): Allow pods/seed heads to dry completely on the plant. Harvest, shell, and clean the seeds, removing chaff.
- Wet Seeds (Tomatoes, Cucumbers, Squash): For tomatoes, ferment the seeds in water for a few days to remove the gel coating and inhibit disease. For cucumbers/squash, scrape out seeds, wash thoroughly, and dry.
- Drying: Spread seeds thinly on screens or paper plates in a cool, dry, well-ventilated area for 1-4 weeks. Ensure they are bone-dry before storage. I aim for less than 8% moisture content.
- Storage: Store seeds in airtight containers (glass jars with desiccant packets work well) in a cool, dark, dry place (ideally 40-50°F and 30-40% humidity). Label clearly with variety and date. Properly stored seeds can remain viable for 3-10 years or more.
Step 8: Season Extension & Winterizing
Extend your harvest and protect your garden for the off-season to truly maximize your self sufficient garden from scratch.
- Cold Frames: Simple structures with a transparent top (glass, polycarbonate, or old windows) that sit over garden beds. They trap solar heat, allowing you to grow cold-hardy crops (lettuce, spinach, kale, radishes) well into winter or start seeds earlier in spring. A basic cold frame can be built from 2×6 lumber and a sheet of polycarbonate for under $100.
- Hoop Houses/Low Tunnels: Larger structures made from flexible hoops (PVC pipe or EMT conduit) covered with greenhouse plastic. These provide more space and greater temperature moderation. A 10×20 ft DIY low tunnel kit can cost $200-$500, while a larger, more robust hoop house kit might be $1,000-$3,000. I use a 6×12 ft low tunnel made from 1/2-inch PVC hoops and 6mil greenhouse plastic, which extends my lettuce and spinach harvest by at least
- Choose Heirloom & Open-Pollinated Seeds: These varieties produce seeds that will grow true to type, meaning you can save seeds from your harvest year after year. F1 hybrids, while often vigorous, will not produce consistent offspring from saved seeds. Reputable seed companies include Baker Creek Heirloom Seeds, High Mowing Organic Seeds, and Seed Savers Exchange. Start with common, reliable varieties like ‘Black Krim’ tomatoes, ‘Provider’ bush beans, ‘Waltham Butternut’ squash, and ‘Black Seeded Simpson’ lettuce.
- Start Seeds Indoors (Optional but Recommended): For longer growing seasons or specific crops, starting seeds indoors gives you a head start. Use seed-starting mix (e.g., Espoma Organic Seed Starter Mix, ~$10 for 16qt bag) in seed trays (Jiffy Professional Greenhouse 72-cell kit, ~$15). Provide adequate light with LED grow lights (Barrina T5 2ft 4-pack LED Grow Lights, 20W each, ~$50) for 14-16 hours a day, positioned 2-4 inches above seedlings. Maintain consistent temperatures (65-75°F for most).
- Direct Sowing vs. Transplanting: Some crops (carrots, radishes, beans, corn) prefer direct sowing into the garden bed. Others (tomatoes, peppers, broccoli, kale) benefit from being started indoors and transplanted. Follow seed packet instructions for planting depths (e.g., lettuce seeds are often surface-sown or planted 1/8 inch deep, while beans are 1 inch deep) and spacing.
- Companion Planting: Strategically plant different species together to enhance growth, deter pests, and attract beneficial insects. For example, planting marigolds near tomatoes can deter nematodes, and basil improves tomato flavor. Nasturtiums can act as a trap crop for aphids.
- Succession Planting: For a continuous harvest, plant small batches of quick-growing crops (lettuce, radishes, cilantro) every 2-3 weeks. As one crop finishes, another is ready to take its place.
Step 6: Pest & Disease Management (Organic)
Maintaining a self sufficient garden from scratch means embracing organic pest and disease control.
- Integrated Pest Management (IPM): This holistic approach combines several strategies.
- Observation: Regularly inspect your plants for early signs of pests or disease. Catching issues early is key.
- Physical Barriers: Use row covers (e.g., Agribon AG-19 floating row cover, 10×20 ft, ~$20) to protect young plants from insect pests like cabbage worms and squash bugs. Install fences (e.g., 2×4 welded wire mesh, 4 ft tall, 50 ft roll ~$70) to keep out deer, rabbits, and other larger animals.
- Hand-Picking: For larger pests like tomato hornworms or squash bugs, simply pick them off and drop them into a bucket of soapy water.
- Companion Planting: As mentioned, certain plants repel pests. Marigolds, garlic, and onions are excellent deterrents.
- Attract Beneficial Insects: Plant flowers like dill, fennel, cosmos, and sweet alyssum to attract ladybugs, lacewings, and parasitic wasps, which prey on common garden pests.
- Organic Sprays & Treatments:
- Neem Oil: An excellent broad-spectrum organic insecticide and fungicide. Bonide Neem Oil Concentrate (16oz, ~$20) can be mixed at a rate of 1-2 tbsp per gallon of water and sprayed on affected plants.
- Insecticidal Soap: Effective against soft-bodied insects like aphids, whiteflies, and spider mites. Garden Safe Insecticidal Soap (24oz ready-to-use, ~$10).
- Bacillus thuringiensis (Bt): A naturally occurring soil bacterium that targets caterpillars and worms. Monterey BT Worm & Caterpillar Killer (16oz, ~$18) is highly effective and safe for beneficial insects.
- Copper or Sulfur Sprays: For fungal diseases like powdery mildew or blight, organic copper (e.g., Bonide Copper Fungicide, ~$15 for 1lb) or sulfur (e.g., Safer Brand Garden Fungicide, ~$10 for 16oz) can be used as a last resort.
Step 7: Harvesting & Seed Saving
The culmination of your efforts is the harvest, and seed saving closes the loop on self-sufficiency.
- Harvesting Techniques:
- Timing: Harvest vegetables at their peak ripeness for best flavor and nutritional value. For example, green beans should snap cleanly, cucumbers should be firm, and tomatoes should be fully colored.
- Frequency: Many crops, like zucchini, cucumbers, and bush beans, produce more if harvested frequently. Pick daily or every other day.
- Tools: Use clean, sharp pruners (e.g., Corona ClassicCUT Bypass Pruner BP 3180, ~$30) or a sharp knife for clean cuts, minimizing damage to the plant.
- Seed Saving: This is where the « self-sufficient » aspect truly shines.
- Selection: Only save seeds from your healthiest, most vigorous plants that show desired traits (disease resistance, good flavor, high yield).
- Isolation: To ensure true-to-type seeds, prevent cross-pollination. This can be challenging for open-pollinated crops that readily cross (e.g., squash, corn). For beginners, focus on self-pollinating plants like beans, peas, lettuce, and tomatoes.
- Processing:
- Dry Seeds (Beans, Peas, Lettuce, Grains): Allow pods/seed heads to dry completely on the plant. Harvest, shell, and clean the seeds, removing chaff.
- Wet Seeds (Tomatoes, Cucumbers, Squash): For tomatoes, ferment the seeds in water for a few days to remove the gel coating and inhibit disease. For cucumbers/squash, scrape out seeds, wash thoroughly, and dry.
- Drying: Spread seeds thinly on screens or paper plates in a cool, dry, well-ventilated area for 1-4 weeks. Ensure they are bone-dry before storage. I aim for less than 8% moisture content.
- Storage: Store seeds in airtight containers (glass jars with desiccant packets work well) in a cool, dark, dry place (ideally 40-50°F and 30-40% humidity). Label clearly with variety and date. Properly stored seeds can remain viable for 3-10 years or more.
Step 8: Season Extension & Winterizing
Extend your harvest and protect your garden for the off-season to truly maximize your self sufficient garden from scratch.
- Cold Frames: Simple structures with a transparent top (glass, polycarbonate, or old windows) that sit over garden beds. They trap solar heat, allowing you to grow cold-hardy crops (lettuce, spinach, kale, radishes) well into winter or start seeds earlier in spring. A basic cold frame can be built from 2×6 lumber and a sheet of polycarbonate for under $100.
- Hoop Houses/Low Tunnels: Larger structures made from flexible hoops (PVC pipe or EMT conduit) covered with greenhouse plastic. These provide more space and greater temperature moderation. A 10×20 ft DIY low tunnel kit can cost $200-$500, while a larger, more robust hoop house kit might be $1,000-$3,000. I use a 6×12 ft low tunnel made from 1/2-inch PVC hoops and 6mil greenhouse plastic, which extends my lettuce and spinach harvest by at least
The choice of seeds is crucial for a truly self sufficient garden from scratch.
- Choose Heirloom & Open-Pollinated Seeds: These varieties produce seeds that will grow true to type, meaning you can save seeds from your harvest year after year. F1 hybrids, while often vigorous, will not produce consistent offspring from saved seeds. Reputable seed companies include Baker Creek Heirloom Seeds, High Mowing Organic Seeds, and Seed Savers Exchange. Start with common, reliable varieties like ‘Black Krim’ tomatoes, ‘Provider’ bush beans, ‘Waltham Butternut’ squash, and ‘Black Seeded Simpson’ lettuce.
- Start Seeds Indoors (Optional but Recommended): For longer growing seasons or specific crops, starting seeds indoors gives you a head start. Use seed-starting mix (e.g., Espoma Organic Seed Starter Mix, ~$10 for 16qt bag) in seed trays (Jiffy Professional Greenhouse 72-cell kit, ~$15). Provide adequate light with LED grow lights (Barrina T5 2ft 4-pack LED Grow Lights, 20W each, ~$50) for 14-16 hours a day, positioned 2-4 inches above seedlings. Maintain consistent temperatures (65-75°F for most).
- Direct Sowing vs. Transplanting: Some crops (carrots, radishes, beans, corn) prefer direct sowing into the garden bed. Others (tomatoes, peppers, broccoli, kale) benefit from being started indoors and transplanted. Follow seed packet instructions for planting depths (e.g., lettuce seeds are often surface-sown or planted 1/8 inch deep, while beans are 1 inch deep) and spacing.
- Companion Planting: Strategically plant different species together to enhance growth, deter pests, and attract beneficial insects. For example, planting marigolds near tomatoes can deter nematodes, and basil improves tomato flavor. Nasturtiums can act as a trap crop for aphids.
- Succession Planting: For a continuous harvest, plant small batches of quick-growing crops (lettuce, radishes, cilantro) every 2-3 weeks. As one crop finishes, another is ready to take its place.
Step 6: Pest & Disease Management (Organic)
Maintaining a self sufficient garden from scratch means embracing organic pest and disease control.
- Integrated Pest Management (IPM): This holistic approach combines several strategies.
- Observation: Regularly inspect your plants for early signs of pests or disease. Catching issues early is key.
- Physical Barriers: Use row covers (e.g., Agribon AG-19 floating row cover, 10×20 ft, ~$20) to protect young plants from insect pests like cabbage worms and squash bugs. Install fences (e.g., 2×4 welded wire mesh, 4 ft tall, 50 ft roll ~$70) to keep out deer, rabbits, and other larger animals.
- Hand-Picking: For larger pests like tomato hornworms or squash bugs, simply pick them off and drop them into a bucket of soapy water.
- Companion Planting: As mentioned, certain plants repel pests. Marigolds, garlic, and onions are excellent deterrents.
- Attract Beneficial Insects: Plant flowers like dill, fennel, cosmos, and sweet alyssum to attract ladybugs, lacewings, and parasitic wasps, which prey on common garden pests.
- Organic Sprays & Treatments:
- Neem Oil: An excellent broad-spectrum organic insecticide and fungicide. Bonide Neem Oil Concentrate (16oz, ~$20) can be mixed at a rate of 1-2 tbsp per gallon of water and sprayed on affected plants.
- Insecticidal Soap: Effective against soft-bodied insects like aphids, whiteflies, and spider mites. Garden Safe Insecticidal Soap (24oz ready-to-use, ~$10).
- Bacillus thuringiensis (Bt): A naturally occurring soil bacterium that targets caterpillars and worms. Monterey BT Worm & Caterpillar Killer (16oz, ~$18) is highly effective and safe for beneficial insects.
- Copper or Sulfur Sprays: For fungal diseases like powdery mildew or blight, organic copper (e.g., Bonide Copper Fungicide, ~$15 for 1lb) or sulfur (e.g., Safer Brand Garden Fungicide, ~$10 for 16oz) can be used as a last resort.
Step 7: Harvesting & Seed Saving
The culmination of your efforts is the harvest, and seed saving closes the loop on self-sufficiency.
- Harvesting Techniques:
- Timing: Harvest vegetables at their peak ripeness for best flavor and nutritional value. For example, green beans should snap cleanly, cucumbers should be firm, and tomatoes should be fully colored.
- Frequency: Many crops, like zucchini, cucumbers, and bush beans, produce more if harvested frequently. Pick daily or every other day.
- Tools: Use clean, sharp pruners (e.g., Corona ClassicCUT Bypass Pruner BP 3180, ~$30) or a sharp knife for clean cuts, minimizing damage to the plant.
- Seed Saving: This is where the « self-sufficient » aspect truly shines.
- Selection: Only save seeds from your healthiest, most vigorous plants that show desired traits (disease resistance, good flavor, high yield).
- Isolation: To ensure true-to-type seeds, prevent cross-pollination. This can be challenging for open-pollinated crops that readily cross (e.g., squash, corn). For beginners, focus on self-pollinating plants like beans, peas, lettuce, and tomatoes.
- Processing:
- Dry Seeds (Beans, Peas, Lettuce, Grains): Allow pods/seed heads to dry completely on the plant. Harvest, shell, and clean the seeds, removing chaff.
- Wet Seeds (Tomatoes, Cucumbers, Squash): For tomatoes, ferment the seeds in water for a few days to remove the gel coating and inhibit disease. For cucumbers/squash, scrape out seeds, wash thoroughly, and dry.
- Drying: Spread seeds thinly on screens or paper plates in a cool, dry, well-ventilated area for 1-4 weeks. Ensure they are bone-dry before storage. I aim for less than 8% moisture content.
- Storage: Store seeds in airtight containers (glass jars with desiccant packets work well) in a cool, dark, dry place (ideally 40-50°F and 30-40% humidity). Label clearly with variety and date. Properly stored seeds can remain viable for 3-10 years or more.
Step 8: Season Extension & Winterizing
Extend your harvest and protect your garden for the off-season to truly maximize your self sufficient garden from scratch.
- Cold Frames: Simple structures with a transparent top (glass, polycarbonate, or old windows) that sit over garden beds. They trap solar heat, allowing you to grow cold-hardy crops (lettuce, spinach, kale, radishes) well into winter or start seeds earlier in spring. A basic cold frame can be built from 2×6 lumber and a sheet of polycarbonate for under $100.
- Hoop Houses/Low Tunnels: Larger structures made from flexible hoops (PVC pipe or EMT conduit) covered with greenhouse plastic. These provide more space and greater temperature moderation. A 10×20 ft DIY low tunnel kit can cost $200-$500, while a larger, more robust hoop house kit might be $1,000-$3,000. I use a 6×12 ft low tunnel made from 1/2-inch PVC hoops and 6mil greenhouse plastic, which extends my lettuce and spinach harvest by at least
Step 5: Seed Selection & Planting
The choice of seeds is crucial for a truly self sufficient garden from scratch.
- Choose Heirloom & Open-Pollinated Seeds: These varieties produce seeds that will grow true to type, meaning you can save seeds from your harvest year after year. F1 hybrids, while often vigorous, will not produce consistent offspring from saved seeds. Reputable seed companies include Baker Creek Heirloom Seeds, High Mowing Organic Seeds, and Seed Savers Exchange. Start with common, reliable varieties like ‘Black Krim’ tomatoes, ‘Provider’ bush beans, ‘Waltham Butternut’ squash, and ‘Black Seeded Simpson’ lettuce.
- Start Seeds Indoors (Optional but Recommended): For longer growing seasons or specific crops, starting seeds indoors gives you a head start. Use seed-starting mix (e.g., Espoma Organic Seed Starter Mix, ~$10 for 16qt bag) in seed trays (Jiffy Professional Greenhouse 72-cell kit, ~$15). Provide adequate light with LED grow lights (Barrina T5 2ft 4-pack LED Grow Lights, 20W each, ~$50) for 14-16 hours a day, positioned 2-4 inches above seedlings. Maintain consistent temperatures (65-75°F for most).
- Direct Sowing vs. Transplanting: Some crops (carrots, radishes, beans, corn) prefer direct sowing into the garden bed. Others (tomatoes, peppers, broccoli, kale) benefit from being started indoors and transplanted. Follow seed packet instructions for planting depths (e.g., lettuce seeds are often surface-sown or planted 1/8 inch deep, while beans are 1 inch deep) and spacing.
- Companion Planting: Strategically plant different species together to enhance growth, deter pests, and attract beneficial insects. For example, planting marigolds near tomatoes can deter nematodes, and basil improves tomato flavor. Nasturtiums can act as a trap crop for aphids.
- Succession Planting: For a continuous harvest, plant small batches of quick-growing crops (lettuce, radishes, cilantro) every 2-3 weeks. As one crop finishes, another is ready to take its place.
Step 6: Pest & Disease Management (Organic)
Maintaining a self sufficient garden from scratch means embracing organic pest and disease control.
- Integrated Pest Management (IPM): This holistic approach combines several strategies.
- Observation: Regularly inspect your plants for early signs of pests or disease. Catching issues early is key.
- Physical Barriers: Use row covers (e.g., Agribon AG-19 floating row cover, 10×20 ft, ~$20) to protect young plants from insect pests like cabbage worms and squash bugs. Install fences (e.g., 2×4 welded wire mesh, 4 ft tall, 50 ft roll ~$70) to keep out deer, rabbits, and other larger animals.
- Hand-Picking: For larger pests like tomato hornworms or squash bugs, simply pick them off and drop them into a bucket of soapy water.
- Companion Planting: As mentioned, certain plants repel pests. Marigolds, garlic, and onions are excellent deterrents.
- Attract Beneficial Insects: Plant flowers like dill, fennel, cosmos, and sweet alyssum to attract ladybugs, lacewings, and parasitic wasps, which prey on common garden pests.
- Organic Sprays & Treatments:
- Neem Oil: An excellent broad-spectrum organic insecticide and fungicide. Bonide Neem Oil Concentrate (16oz, ~$20) can be mixed at a rate of 1-2 tbsp per gallon of water and sprayed on affected plants.
- Insecticidal Soap: Effective against soft-bodied insects like aphids, whiteflies, and spider mites. Garden Safe Insecticidal Soap (24oz ready-to-use, ~$10).
- Bacillus thuringiensis (Bt): A naturally occurring soil bacterium that targets caterpillars and worms. Monterey BT Worm & Caterpillar Killer (16oz, ~$18) is highly effective and safe for beneficial insects.
- Copper or Sulfur Sprays: For fungal diseases like powdery mildew or blight, organic copper (e.g., Bonide Copper Fungicide, ~$15 for 1lb) or sulfur (e.g., Safer Brand Garden Fungicide, ~$10 for 16oz) can be used as a last resort.
Step 7: Harvesting & Seed Saving
The culmination of your efforts is the harvest, and seed saving closes the loop on self-sufficiency.
- Harvesting Techniques:
- Timing: Harvest vegetables at their peak ripeness for best flavor and nutritional value. For example, green beans should snap cleanly, cucumbers should be firm, and tomatoes should be fully colored.
- Frequency: Many crops, like zucchini, cucumbers, and bush beans, produce more if harvested frequently. Pick daily or every other day.
- Tools: Use clean, sharp pruners (e.g., Corona ClassicCUT Bypass Pruner BP 3180, ~$30) or a sharp knife for clean cuts, minimizing damage to the plant.
- Seed Saving: This is where the « self-sufficient » aspect truly shines.
- Selection: Only save seeds from your healthiest, most vigorous plants that show desired traits (disease resistance, good flavor, high yield).
- Isolation: To ensure true-to-type seeds, prevent cross-pollination. This can be challenging for open-pollinated crops that readily cross (e.g., squash, corn). For beginners, focus on self-pollinating plants like beans, peas, lettuce, and tomatoes.
- Processing:
- Dry Seeds (Beans, Peas, Lettuce, Grains): Allow pods/seed heads to dry completely on the plant. Harvest, shell, and clean the seeds, removing chaff.
- Wet Seeds (Tomatoes, Cucumbers, Squash): For tomatoes, ferment the seeds in water for a few days to remove the gel coating and inhibit disease. For cucumbers/squash, scrape out seeds, wash thoroughly, and dry.
- Drying: Spread seeds thinly on screens or paper plates in a cool, dry, well-ventilated area for 1-4 weeks. Ensure they are bone-dry before storage. I aim for less than 8% moisture content.
- Storage: Store seeds in airtight containers (glass jars with desiccant packets work well) in a cool, dark, dry place (ideally 40-50°F and 30-40% humidity). Label clearly with variety and date. Properly stored seeds can remain viable for 3-10 years or more.
Step 8: Season Extension & Winterizing
Extend your harvest and protect your garden for the off-season to truly maximize your self sufficient garden from scratch.
- Cold Frames: Simple structures with a transparent top (glass, polycarbonate, or old windows) that sit over garden beds. They trap solar heat, allowing you to grow cold-hardy crops (lettuce, spinach, kale, radishes) well into winter or start seeds earlier in spring. A basic cold frame can be built from 2×6 lumber and a sheet of polycarbonate for under $100.
- Hoop Houses/Low Tunnels: Larger structures made from flexible hoops (PVC pipe or EMT conduit) covered with greenhouse plastic. These provide more space and greater temperature moderation. A 10×20 ft DIY low tunnel kit can cost $200-$500, while a larger, more robust hoop house kit might be $1,000-$3,000. I use a 6×12 ft low tunnel made from 1/2-inch PVC hoops and 6mil greenhouse plastic, which extends my lettuce and spinach harvest by at least
- Rainwater Harvesting: This is my primary source of irrigation water. A 55-gallon rain barrel (e.g., EarthMark Rain Barrel, ~$120-$150) connected to a downspout can collect significant water. For larger needs, I use two 275-gallon IBC totes (Intermediate Bulk Containers, often available used for $100-$200 each from food-grade sources) connected in series. A 1,000 sq ft roof can collect approximately 620 gallons of water for every inch of rainfall. My 1,500 sq ft roof provides ample water for my 600 sq ft garden through multiple barrels and totes.
- Drip Irrigation: This is by far the most water-efficient method, delivering water directly to the plant’s root zone, minimizing evaporation and weed growth.
- Components: A typical drip system includes a pressure regulator (e.g., Rain Bird PRV-10, ~$15), a filter (Rain Bird RBY filter, ~$20), main tubing (1/2-inch poly tubing, 100ft ~$25), smaller feeder lines (1/4-inch tubing), and emitters (0.5 GPH or 1 GPH per plant).
- Kits: For beginners, a starter kit like the Rain Bird Drip Irrigation Garden Kit (model DDI-KIT-1P, ~$40-$60) is excellent for a small garden. For larger setups, I use Netafim Techline CV Drip Line (500ft roll, ~$150-$200), which has pressure-compensating emitters built-in, ensuring even watering across long runs.
- Automation: For true self-sufficiency, consider a battery-powered timer (e.g., Orbit B-Hyve Bluetooth Hose Faucet Timer, ~$50) or a solar-powered timer connected to a small 12V pump.
- Solar-Powered Pumps: For lifting water from a well, pond, or large storage tank to your garden, a solar pump is a game-changer. For a smaller drip system, a Shurflo 2088-594-152 Diaphragm Pump (12V, 3.5 GPM, ~$180) can be powered by a single 100W solar panel (e.g., Renogy 100W Monocrystalline Solar Panel, ~$100) and a small 12V battery (e.g., a 50Ah LiFePO4 battery like the Battle Born 50Ah, ~$450). For larger operations or deeper wells, more robust systems are needed. If you’re looking to build out a comprehensive off-grid power system to support your garden’s water needs, or indeed your entire homestead, you might want to explore resources like the Power Grid Generator complete system guide to understand the full scope of what’s possible in terms of energy independence.
Step 5: Seed Selection & Planting
The choice of seeds is crucial for a truly self sufficient garden from scratch.
- Choose Heirloom & Open-Pollinated Seeds: These varieties produce seeds that will grow true to type, meaning you can save seeds from your harvest year after year. F1 hybrids, while often vigorous, will not produce consistent offspring from saved seeds. Reputable seed companies include Baker Creek Heirloom Seeds, High Mowing Organic Seeds, and Seed Savers Exchange. Start with common, reliable varieties like ‘Black Krim’ tomatoes, ‘Provider’ bush beans, ‘Waltham Butternut’ squash, and ‘Black Seeded Simpson’ lettuce.
- Start Seeds Indoors (Optional but Recommended): For longer growing seasons or specific crops, starting seeds indoors gives you a head start. Use seed-starting mix (e.g., Espoma Organic Seed Starter Mix, ~$10 for 16qt bag) in seed trays (Jiffy Professional Greenhouse 72-cell kit, ~$15). Provide adequate light with LED grow lights (Barrina T5 2ft 4-pack LED Grow Lights, 20W each, ~$50) for 14-16 hours a day, positioned 2-4 inches above seedlings. Maintain consistent temperatures (65-75°F for most).
- Direct Sowing vs. Transplanting: Some crops (carrots, radishes, beans, corn) prefer direct sowing into the garden bed. Others (tomatoes, peppers, broccoli, kale) benefit from being started indoors and transplanted. Follow seed packet instructions for planting depths (e.g., lettuce seeds are often surface-sown or planted 1/8 inch deep, while beans are 1 inch deep) and spacing.
- Companion Planting: Strategically plant different species together to enhance growth, deter pests, and attract beneficial insects. For example, planting marigolds near tomatoes can deter nematodes, and basil improves tomato flavor. Nasturtiums can act as a trap crop for aphids.
- Succession Planting: For a continuous harvest, plant small batches of quick-growing crops (lettuce, radishes, cilantro) every 2-3 weeks. As one crop finishes, another is ready to take its place.
Step 6: Pest & Disease Management (Organic)
Maintaining a self sufficient garden from scratch means embracing organic pest and disease control.
- Integrated Pest Management (IPM): This holistic approach combines several strategies.
- Observation: Regularly inspect your plants for early signs of pests or disease. Catching issues early is key.
- Physical Barriers: Use row covers (e.g., Agribon AG-19 floating row cover, 10×20 ft, ~$20) to protect young plants from insect pests like cabbage worms and squash bugs. Install fences (e.g., 2×4 welded wire mesh, 4 ft tall, 50 ft roll ~$70) to keep out deer, rabbits, and other larger animals.
- Hand-Picking: For larger pests like tomato hornworms or squash bugs, simply pick them off and drop them into a bucket of soapy water.
- Companion Planting: As mentioned, certain plants repel pests. Marigolds, garlic, and onions are excellent deterrents.
- Attract Beneficial Insects: Plant flowers like dill, fennel, cosmos, and sweet alyssum to attract ladybugs, lacewings, and parasitic wasps, which prey on common garden pests.
- Organic Sprays & Treatments:
- Neem Oil: An excellent broad-spectrum organic insecticide and fungicide. Bonide Neem Oil Concentrate (16oz, ~$20) can be mixed at a rate of 1-2 tbsp per gallon of water and sprayed on affected plants.
- Insecticidal Soap: Effective against soft-bodied insects like aphids, whiteflies, and spider mites. Garden Safe Insecticidal Soap (24oz ready-to-use, ~$10).
- Bacillus thuringiensis (Bt): A naturally occurring soil bacterium that targets caterpillars and worms. Monterey BT Worm & Caterpillar Killer (16oz, ~$18) is highly effective and safe for beneficial insects.
- Copper or Sulfur Sprays: For fungal diseases like powdery mildew or blight, organic copper (e.g., Bonide Copper Fungicide, ~$15 for 1lb) or sulfur (e.g., Safer Brand Garden Fungicide, ~$10 for 16oz) can be used as a last resort.
Step 7: Harvesting & Seed Saving
The culmination of your efforts is the harvest, and seed saving closes the loop on self-sufficiency.
- Harvesting Techniques:
- Timing: Harvest vegetables at their peak ripeness for best flavor and nutritional value. For example, green beans should snap cleanly, cucumbers should be firm, and tomatoes should be fully colored.
- Frequency: Many crops, like zucchini, cucumbers, and bush beans, produce more if harvested frequently. Pick daily or every other day.
- Tools: Use clean, sharp pruners (e.g., Corona ClassicCUT Bypass Pruner BP 3180, ~$30) or a sharp knife for clean cuts, minimizing damage to the plant.
- Seed Saving: This is where the « self-sufficient » aspect truly shines.
- Selection: Only save seeds from your healthiest, most vigorous plants that show desired traits (disease resistance, good flavor, high yield).
- Isolation: To ensure true-to-type seeds, prevent cross-pollination. This can be challenging for open-pollinated crops that readily cross (e.g., squash, corn). For beginners, focus on self-pollinating plants like beans, peas, lettuce, and tomatoes.
- Processing:
- Dry Seeds (Beans, Peas, Lettuce, Grains): Allow pods/seed heads to dry completely on the plant. Harvest, shell, and clean the seeds, removing chaff.
- Wet Seeds (Tomatoes, Cucumbers, Squash): For tomatoes, ferment the seeds in water for a few days to remove the gel coating and inhibit disease. For cucumbers/squash, scrape out seeds, wash thoroughly, and dry.
- Drying: Spread seeds thinly on screens or paper plates in a cool, dry, well-ventilated area for 1-4 weeks. Ensure they are bone-dry before storage. I aim for less than 8% moisture content.
- Storage: Store seeds in airtight containers (glass jars with desiccant packets work well) in a cool, dark, dry place (ideally 40-50°F and 30-40% humidity). Label clearly with variety and date. Properly stored seeds can remain viable for 3-10 years or more.
Step 8: Season Extension & Winterizing
Extend your harvest and protect your garden for the off-season to truly maximize your self sufficient garden from scratch.
- Cold Frames: Simple structures with a transparent top (glass, polycarbonate, or old windows) that sit over garden beds. They trap solar heat, allowing you to grow cold-hardy crops (lettuce, spinach, kale, radishes) well into winter or start seeds earlier in spring. A basic cold frame can be built from 2×6 lumber and a sheet of polycarbonate for under $100.
- Hoop Houses/Low Tunnels: Larger structures made from flexible hoops (PVC pipe or EMT conduit) covered with greenhouse plastic. These provide more space and greater temperature moderation. A 10×20 ft DIY low tunnel kit can cost $200-$500, while a larger, more robust hoop house kit might be $1,000-$3,000. I use a 6×12 ft low tunnel made from 1/2-inch PVC hoops and 6mil greenhouse plastic, which extends my lettuce and spinach harvest by at least
Efficient water management is critical for a self sufficient garden from scratch, especially in off-grid living where water resources might be limited.
- Rainwater Harvesting: This is my primary source of irrigation water. A 55-gallon rain barrel (e.g., EarthMark Rain Barrel, ~$120-$150) connected to a downspout can collect significant water. For larger needs, I use two 275-gallon IBC totes (Intermediate Bulk Containers, often available used for $100-$200 each from food-grade sources) connected in series. A 1,000 sq ft roof can collect approximately 620 gallons of water for every inch of rainfall. My 1,500 sq ft roof provides ample water for my 600 sq ft garden through multiple barrels and totes.
- Drip Irrigation: This is by far the most water-efficient method, delivering water directly to the plant’s root zone, minimizing evaporation and weed growth.
- Components: A typical drip system includes a pressure regulator (e.g., Rain Bird PRV-10, ~$15), a filter (Rain Bird RBY filter, ~$20), main tubing (1/2-inch poly tubing, 100ft ~$25), smaller feeder lines (1/4-inch tubing), and emitters (0.5 GPH or 1 GPH per plant).
- Kits: For beginners, a starter kit like the Rain Bird Drip Irrigation Garden Kit (model DDI-KIT-1P, ~$40-$60) is excellent for a small garden. For larger setups, I use Netafim Techline CV Drip Line (500ft roll, ~$150-$200), which has pressure-compensating emitters built-in, ensuring even watering across long runs.
- Automation: For true self-sufficiency, consider a battery-powered timer (e.g., Orbit B-Hyve Bluetooth Hose Faucet Timer, ~$50) or a solar-powered timer connected to a small 12V pump.
- Solar-Powered Pumps: For lifting water from a well, pond, or large storage tank to your garden, a solar pump is a game-changer. For a smaller drip system, a Shurflo 2088-594-152 Diaphragm Pump (12V, 3.5 GPM, ~$180) can be powered by a single 100W solar panel (e.g., Renogy 100W Monocrystalline Solar Panel, ~$100) and a small 12V battery (e.g., a 50Ah LiFePO4 battery like the Battle Born 50Ah, ~$450). For larger operations or deeper wells, more robust systems are needed. If you’re looking to build out a comprehensive off-grid power system to support your garden’s water needs, or indeed your entire homestead, you might want to explore resources like the Power Grid Generator complete system guide to understand the full scope of what’s possible in terms of energy independence.
Step 5: Seed Selection & Planting
The choice of seeds is crucial for a truly self sufficient garden from scratch.
- Choose Heirloom & Open-Pollinated Seeds: These varieties produce seeds that will grow true to type, meaning you can save seeds from your harvest year after year. F1 hybrids, while often vigorous, will not produce consistent offspring from saved seeds. Reputable seed companies include Baker Creek Heirloom Seeds, High Mowing Organic Seeds, and Seed Savers Exchange. Start with common, reliable varieties like ‘Black Krim’ tomatoes, ‘Provider’ bush beans, ‘Waltham Butternut’ squash, and ‘Black Seeded Simpson’ lettuce.
- Start Seeds Indoors (Optional but Recommended): For longer growing seasons or specific crops, starting seeds indoors gives you a head start. Use seed-starting mix (e.g., Espoma Organic Seed Starter Mix, ~$10 for 16qt bag) in seed trays (Jiffy Professional Greenhouse 72-cell kit, ~$15). Provide adequate light with LED grow lights (Barrina T5 2ft 4-pack LED Grow Lights, 20W each, ~$50) for 14-16 hours a day, positioned 2-4 inches above seedlings. Maintain consistent temperatures (65-75°F for most).
- Direct Sowing vs. Transplanting: Some crops (carrots, radishes, beans, corn) prefer direct sowing into the garden bed. Others (tomatoes, peppers, broccoli, kale) benefit from being started indoors and transplanted. Follow seed packet instructions for planting depths (e.g., lettuce seeds are often surface-sown or planted 1/8 inch deep, while beans are 1 inch deep) and spacing.
- Companion Planting: Strategically plant different species together to enhance growth, deter pests, and attract beneficial insects. For example, planting marigolds near tomatoes can deter nematodes, and basil improves tomato flavor. Nasturtiums can act as a trap crop for aphids.
- Succession Planting: For a continuous harvest, plant small batches of quick-growing crops (lettuce, radishes, cilantro) every 2-3 weeks. As one crop finishes, another is ready to take its place.
Step 6: Pest & Disease Management (Organic)
Maintaining a self sufficient garden from scratch means embracing organic pest and disease control.
- Integrated Pest Management (IPM): This holistic approach combines several strategies.
- Observation: Regularly inspect your plants for early signs of pests or disease. Catching issues early is key.
- Physical Barriers: Use row covers (e.g., Agribon AG-19 floating row cover, 10×20 ft, ~$20) to protect young plants from insect pests like cabbage worms and squash bugs. Install fences (e.g., 2×4 welded wire mesh, 4 ft tall, 50 ft roll ~$70) to keep out deer, rabbits, and other larger animals.
- Hand-Picking: For larger pests like tomato hornworms or squash bugs, simply pick them off and drop them into a bucket of soapy water.
- Companion Planting: As mentioned, certain plants repel pests. Marigolds, garlic, and onions are excellent deterrents.
- Attract Beneficial Insects: Plant flowers like dill, fennel, cosmos, and sweet alyssum to attract ladybugs, lacewings, and parasitic wasps, which prey on common garden pests.
- Organic Sprays & Treatments:
- Neem Oil: An excellent broad-spectrum organic insecticide and fungicide. Bonide Neem Oil Concentrate (16oz, ~$20) can be mixed at a rate of 1-2 tbsp per gallon of water and sprayed on affected plants.
- Insecticidal Soap: Effective against soft-bodied insects like aphids, whiteflies, and spider mites. Garden Safe Insecticidal Soap (24oz ready-to-use, ~$10).
- Bacillus thuringiensis (Bt): A naturally occurring soil bacterium that targets caterpillars and worms. Monterey BT Worm & Caterpillar Killer (16oz, ~$18) is highly effective and safe for beneficial insects.
- Copper or Sulfur Sprays: For fungal diseases like powdery mildew or blight, organic copper (e.g., Bonide Copper Fungicide, ~$15 for 1lb) or sulfur (e.g., Safer Brand Garden Fungicide, ~$10 for 16oz) can be used as a last resort.
Step 7: Harvesting & Seed Saving
The culmination of your efforts is the harvest, and seed saving closes the loop on self-sufficiency.
- Harvesting Techniques:
- Timing: Harvest vegetables at their peak ripeness for best flavor and nutritional value. For example, green beans should snap cleanly, cucumbers should be firm, and tomatoes should be fully colored.
- Frequency: Many crops, like zucchini, cucumbers, and bush beans, produce more if harvested frequently. Pick daily or every other day.
- Tools: Use clean, sharp pruners (e.g., Corona ClassicCUT Bypass Pruner BP 3180, ~$30) or a sharp knife for clean cuts, minimizing damage to the plant.
- Seed Saving: This is where the « self-sufficient » aspect truly shines.
- Selection: Only save seeds from your healthiest, most vigorous plants that show desired traits (disease resistance, good flavor, high yield).
- Isolation: To ensure true-to-type seeds, prevent cross-pollination. This can be challenging for open-pollinated crops that readily cross (e.g., squash, corn). For beginners, focus on self-pollinating plants like beans, peas, lettuce, and tomatoes.
- Processing:
- Dry Seeds (Beans, Peas, Lettuce, Grains): Allow pods/seed heads to dry completely on the plant. Harvest, shell, and clean the seeds, removing chaff.
- Wet Seeds (Tomatoes, Cucumbers, Squash): For tomatoes, ferment the seeds in water for a few days to remove the gel coating and inhibit disease. For cucumbers/squash, scrape out seeds, wash thoroughly, and dry.
- Drying: Spread seeds thinly on screens or paper plates in a cool, dry, well-ventilated area for 1-4 weeks. Ensure they are bone-dry before storage. I aim for less than 8% moisture content.
- Storage: Store seeds in airtight containers (glass jars with desiccant packets work well) in a cool, dark, dry place (ideally 40-50°F and 30-40% humidity). Label clearly with variety and date. Properly stored seeds can remain viable for 3-10 years or more.
Step 8: Season Extension & Winterizing
Extend your harvest and protect your garden for the off-season to truly maximize your self sufficient garden from scratch.
- Cold Frames: Simple structures with a transparent top (glass, polycarbonate, or old windows) that sit over garden beds. They trap solar heat, allowing you to grow cold-hardy crops (lettuce, spinach, kale, radishes) well into winter or start seeds earlier in spring. A basic cold frame can be built from 2×6 lumber and a sheet of polycarbonate for under $100.
- Hoop Houses/Low Tunnels: Larger structures made from flexible hoops (PVC pipe or EMT conduit) covered with greenhouse plastic. These provide more space and greater temperature moderation. A 10×20 ft DIY low tunnel kit can cost $200-$500, while a larger, more robust hoop house kit might be $1,000-$3,000. I use a 6×12 ft low tunnel made from 1/2-inch PVC hoops and 6mil greenhouse plastic, which extends my lettuce and spinach harvest by at least
Step 4: Water Management & Irrigation
Efficient water management is critical for a self sufficient garden from scratch, especially in off-grid living where water resources might be limited.
- Rainwater Harvesting: This is my primary source of irrigation water. A 55-gallon rain barrel (e.g., EarthMark Rain Barrel, ~$120-$150) connected to a downspout can collect significant water. For larger needs, I use two 275-gallon IBC totes (Intermediate Bulk Containers, often available used for $100-$200 each from food-grade sources) connected in series. A 1,000 sq ft roof can collect approximately 620 gallons of water for every inch of rainfall. My 1,500 sq ft roof provides ample water for my 600 sq ft garden through multiple barrels and totes.
- Drip Irrigation: This is by far the most water-efficient method, delivering water directly to the plant’s root zone, minimizing evaporation and weed growth.
- Components: A typical drip system includes a pressure regulator (e.g., Rain Bird PRV-10, ~$15), a filter (Rain Bird RBY filter, ~$20), main tubing (1/2-inch poly tubing, 100ft ~$25), smaller feeder lines (1/4-inch tubing), and emitters (0.5 GPH or 1 GPH per plant).
- Kits: For beginners, a starter kit like the Rain Bird Drip Irrigation Garden Kit (model DDI-KIT-1P, ~$40-$60) is excellent for a small garden. For larger setups, I use Netafim Techline CV Drip Line (500ft roll, ~$150-$200), which has pressure-compensating emitters built-in, ensuring even watering across long runs.
- Automation: For true self-sufficiency, consider a battery-powered timer (e.g., Orbit B-Hyve Bluetooth Hose Faucet Timer, ~$50) or a solar-powered timer connected to a small 12V pump.
- Solar-Powered Pumps: For lifting water from a well, pond, or large storage tank to your garden, a solar pump is a game-changer. For a smaller drip system, a Shurflo 2088-594-152 Diaphragm Pump (12V, 3.5 GPM, ~$180) can be powered by a single 100W solar panel (e.g., Renogy 100W Monocrystalline Solar Panel, ~$100) and a small 12V battery (e.g., a 50Ah LiFePO4 battery like the Battle Born 50Ah, ~$450). For larger operations or deeper wells, more robust systems are needed. If you’re looking to build out a comprehensive off-grid power system to support your garden’s water needs, or indeed your entire homestead, you might want to explore resources like the Power Grid Generator complete system guide to understand the full scope of what’s possible in terms of energy independence.
Step 5: Seed Selection & Planting
The choice of seeds is crucial for a truly self sufficient garden from scratch.
- Choose Heirloom & Open-Pollinated Seeds: These varieties produce seeds that will grow true to type, meaning you can save seeds from your harvest year after year. F1 hybrids, while often vigorous, will not produce consistent offspring from saved seeds. Reputable seed companies include Baker Creek Heirloom Seeds, High Mowing Organic Seeds, and Seed Savers Exchange. Start with common, reliable varieties like ‘Black Krim’ tomatoes, ‘Provider’ bush beans, ‘Waltham Butternut’ squash, and ‘Black Seeded Simpson’ lettuce.
- Start Seeds Indoors (Optional but Recommended): For longer growing seasons or specific crops, starting seeds indoors gives you a head start. Use seed-starting mix (e.g., Espoma Organic Seed Starter Mix, ~$10 for 16qt bag) in seed trays (Jiffy Professional Greenhouse 72-cell kit, ~$15). Provide adequate light with LED grow lights (Barrina T5 2ft 4-pack LED Grow Lights, 20W each, ~$50) for 14-16 hours a day, positioned 2-4 inches above seedlings. Maintain consistent temperatures (65-75°F for most).
- Direct Sowing vs. Transplanting: Some crops (carrots, radishes, beans, corn) prefer direct sowing into the garden bed. Others (tomatoes, peppers, broccoli, kale) benefit from being started indoors and transplanted. Follow seed packet instructions for planting depths (e.g., lettuce seeds are often surface-sown or planted 1/8 inch deep, while beans are 1 inch deep) and spacing.
- Companion Planting: Strategically plant different species together to enhance growth, deter pests, and attract beneficial insects. For example, planting marigolds near tomatoes can deter nematodes, and basil improves tomato flavor. Nasturtiums can act as a trap crop for aphids.
- Succession Planting: For a continuous harvest, plant small batches of quick-growing crops (lettuce, radishes, cilantro) every 2-3 weeks. As one crop finishes, another is ready to take its place.
Step 6: Pest & Disease Management (Organic)
Maintaining a self sufficient garden from scratch means embracing organic pest and disease control.
- Integrated Pest Management (IPM): This holistic approach combines several strategies.
- Observation: Regularly inspect your plants for early signs of pests or disease. Catching issues early is key.
- Physical Barriers: Use row covers (e.g., Agribon AG-19 floating row cover, 10×20 ft, ~$20) to protect young plants from insect pests like cabbage worms and squash bugs. Install fences (e.g., 2×4 welded wire mesh, 4 ft tall, 50 ft roll ~$70) to keep out deer, rabbits, and other larger animals.
- Hand-Picking: For larger pests like tomato hornworms or squash bugs, simply pick them off and drop them into a bucket of soapy water.
- Companion Planting: As mentioned, certain plants repel pests. Marigolds, garlic, and onions are excellent deterrents.
- Attract Beneficial Insects: Plant flowers like dill, fennel, cosmos, and sweet alyssum to attract ladybugs, lacewings, and parasitic wasps, which prey on common garden pests.
- Organic Sprays & Treatments:
- Neem Oil: An excellent broad-spectrum organic insecticide and fungicide. Bonide Neem Oil Concentrate (16oz, ~$20) can be mixed at a rate of 1-2 tbsp per gallon of water and sprayed on affected plants.
- Insecticidal Soap: Effective against soft-bodied insects like aphids, whiteflies, and spider mites. Garden Safe Insecticidal Soap (24oz ready-to-use, ~$10).
- Bacillus thuringiensis (Bt): A naturally occurring soil bacterium that targets caterpillars and worms. Monterey BT Worm & Caterpillar Killer (16oz, ~$18) is highly effective and safe for beneficial insects.
- Copper or Sulfur Sprays: For fungal diseases like powdery mildew or blight, organic copper (e.g., Bonide Copper Fungicide, ~$15 for 1lb) or sulfur (e.g., Safer Brand Garden Fungicide, ~$10 for 16oz) can be used as a last resort.
Step 7: Harvesting & Seed Saving
The culmination of your efforts is the harvest, and seed saving closes the loop on self-sufficiency.
- Harvesting Techniques:
- Timing: Harvest vegetables at their peak ripeness for best flavor and nutritional value. For example, green beans should snap cleanly, cucumbers should be firm, and tomatoes should be fully colored.
- Frequency: Many crops, like zucchini, cucumbers, and bush beans, produce more if harvested frequently. Pick daily or every other day.
- Tools: Use clean, sharp pruners (e.g., Corona ClassicCUT Bypass Pruner BP 3180, ~$30) or a sharp knife for clean cuts, minimizing damage to the plant.
- Seed Saving: This is where the « self-sufficient » aspect truly shines.
- Selection: Only save seeds from your healthiest, most vigorous plants that show desired traits (disease resistance, good flavor, high yield).
- Isolation: To ensure true-to-type seeds, prevent cross-pollination. This can be challenging for open-pollinated crops that readily cross (e.g., squash, corn). For beginners, focus on self-pollinating plants like beans, peas, lettuce, and tomatoes.
- Processing:
- Dry Seeds (Beans, Peas, Lettuce, Grains): Allow pods/seed heads to dry completely on the plant. Harvest, shell, and clean the seeds, removing chaff.
- Wet Seeds (Tomatoes, Cucumbers, Squash): For tomatoes, ferment the seeds in water for a few days to remove the gel coating and inhibit disease. For cucumbers/squash, scrape out seeds, wash thoroughly, and dry.
- Drying: Spread seeds thinly on screens or paper plates in a cool, dry, well-ventilated area for 1-4 weeks. Ensure they are bone-dry before storage. I aim for less than 8% moisture content.
- Storage: Store seeds in airtight containers (glass jars with desiccant packets work well) in a cool, dark, dry place (ideally 40-50°F and 30-40% humidity). Label clearly with variety and date. Properly stored seeds can remain viable for 3-10 years or more.
Step 8: Season Extension & Winterizing
Extend your harvest and protect your garden for the off-season to truly maximize your self sufficient garden from scratch.
- Cold Frames: Simple structures with a transparent top (glass, polycarbonate, or old windows) that sit over garden beds. They trap solar heat, allowing you to grow cold-hardy crops (lettuce, spinach, kale, radishes) well into winter or start seeds earlier in spring. A basic cold frame can be built from 2×6 lumber and a sheet of polycarbonate for under $100.
- Hoop Houses/Low Tunnels: Larger structures made from flexible hoops (PVC pipe or EMT conduit) covered with greenhouse plastic. These provide more space and greater temperature moderation. A 10×20 ft DIY low tunnel kit can cost $200-$500, while a larger, more robust hoop house kit might be $1,000-$3,000. I use a 6×12 ft low tunnel made from 1/2-inch PVC hoops and 6mil greenhouse plastic, which extends my lettuce and spinach harvest by at least
- In-Ground Beds: If you have excellent native soil and good drainage, in-ground beds are the most economical. Double-digging (loosening soil two shovel depths) can significantly improve drainage and aeration. For my main garden, I primarily use in-ground beds, but I focus on building up the soil over time with consistent compost additions and cover cropping. I aim for beds that are no wider than 3-4 feet so I can reach the center without stepping on the soil, compacting it.
- Raised Beds: Raised beds offer numerous advantages, especially for poor soil, heavy clay, or rocky areas. They provide better drainage, warm up faster in spring, reduce compaction, and make weeding and harvesting easier on your back.
- Material Options:
- Untreated Cedar: Naturally rot-resistant and chemical-free. A 4×8 ft bed, 12 inches deep, typically requires three 2x12x8 ft cedar boards, costing around $50-$60 per board (total ~$150-$180) plus corner brackets or screws. My first raised beds were cedar and are still going strong after 7 years.
- Galvanized Steel: Durable, long-lasting, and aesthetically pleasing. Brands like Vego Garden offer modular kits. A Vego Garden 17″ Tall 8-in-1 Metal Raised Garden Bed (can be configured to 4×8 ft) costs approximately $250-$300.
- Concrete Blocks/Stones: Very durable but can leach minerals (though generally safe once weathered) and can be expensive.
- Recycled Materials: Pallets (check for chemical treatment stamps like « HT » for heat-treated), old tires (controversial due to potential chemical leaching).
- Filling Raised Beds: Don’t just fill with topsoil. Use a « Hugelkultur » approach (logs, branches, leaves, then compost, then topsoil) or a mixture of 60% good quality topsoil, 30% compost, and 10% perlite or vermiculite for drainage. A 4x8x1 ft raised bed requires about 32 cubic feet (or ~1.2 cubic yards) of soil mix, which can cost $100-$200 depending on your source.
- Material Options:
Step 4: Water Management & Irrigation
Efficient water management is critical for a self sufficient garden from scratch, especially in off-grid living where water resources might be limited.
- Rainwater Harvesting: This is my primary source of irrigation water. A 55-gallon rain barrel (e.g., EarthMark Rain Barrel, ~$120-$150) connected to a downspout can collect significant water. For larger needs, I use two 275-gallon IBC totes (Intermediate Bulk Containers, often available used for $100-$200 each from food-grade sources) connected in series. A 1,000 sq ft roof can collect approximately 620 gallons of water for every inch of rainfall. My 1,500 sq ft roof provides ample water for my 600 sq ft garden through multiple barrels and totes.
- Drip Irrigation: This is by far the most water-efficient method, delivering water directly to the plant’s root zone, minimizing evaporation and weed growth.
- Components: A typical drip system includes a pressure regulator (e.g., Rain Bird PRV-10, ~$15), a filter (Rain Bird RBY filter, ~$20), main tubing (1/2-inch poly tubing, 100ft ~$25), smaller feeder lines (1/4-inch tubing), and emitters (0.5 GPH or 1 GPH per plant).
- Kits: For beginners, a starter kit like the Rain Bird Drip Irrigation Garden Kit (model DDI-KIT-1P, ~$40-$60) is excellent for a small garden. For larger setups, I use Netafim Techline CV Drip Line (500ft roll, ~$150-$200), which has pressure-compensating emitters built-in, ensuring even watering across long runs.
- Automation: For true self-sufficiency, consider a battery-powered timer (e.g., Orbit B-Hyve Bluetooth Hose Faucet Timer, ~$50) or a solar-powered timer connected to a small 12V pump.
- Solar-Powered Pumps: For lifting water from a well, pond, or large storage tank to your garden, a solar pump is a game-changer. For a smaller drip system, a Shurflo 2088-594-152 Diaphragm Pump (12V, 3.5 GPM, ~$180) can be powered by a single 100W solar panel (e.g., Renogy 100W Monocrystalline Solar Panel, ~$100) and a small 12V battery (e.g., a 50Ah LiFePO4 battery like the Battle Born 50Ah, ~$450). For larger operations or deeper wells, more robust systems are needed. If you’re looking to build out a comprehensive off-grid power system to support your garden’s water needs, or indeed your entire homestead, you might want to explore resources like the Power Grid Generator complete system guide to understand the full scope of what’s possible in terms of energy independence.
Step 5: Seed Selection & Planting
The choice of seeds is crucial for a truly self sufficient garden from scratch.
- Choose Heirloom & Open-Pollinated Seeds: These varieties produce seeds that will grow true to type, meaning you can save seeds from your harvest year after year. F1 hybrids, while often vigorous, will not produce consistent offspring from saved seeds. Reputable seed companies include Baker Creek Heirloom Seeds, High Mowing Organic Seeds, and Seed Savers Exchange. Start with common, reliable varieties like ‘Black Krim’ tomatoes, ‘Provider’ bush beans, ‘Waltham Butternut’ squash, and ‘Black Seeded Simpson’ lettuce.
- Start Seeds Indoors (Optional but Recommended): For longer growing seasons or specific crops, starting seeds indoors gives you a head start. Use seed-starting mix (e.g., Espoma Organic Seed Starter Mix, ~$10 for 16qt bag) in seed trays (Jiffy Professional Greenhouse 72-cell kit, ~$15). Provide adequate light with LED grow lights (Barrina T5 2ft 4-pack LED Grow Lights, 20W each, ~$50) for 14-16 hours a day, positioned 2-4 inches above seedlings. Maintain consistent temperatures (65-75°F for most).
- Direct Sowing vs. Transplanting: Some crops (carrots, radishes, beans, corn) prefer direct sowing into the garden bed. Others (tomatoes, peppers, broccoli, kale) benefit from being started indoors and transplanted. Follow seed packet instructions for planting depths (e.g., lettuce seeds are often surface-sown or planted 1/8 inch deep, while beans are 1 inch deep) and spacing.
- Companion Planting: Strategically plant different species together to enhance growth, deter pests, and attract beneficial insects. For example, planting marigolds near tomatoes can deter nematodes, and basil improves tomato flavor. Nasturtiums can act as a trap crop for aphids.
- Succession Planting: For a continuous harvest, plant small batches of quick-growing crops (lettuce, radishes, cilantro) every 2-3 weeks. As one crop finishes, another is ready to take its place.
Step 6: Pest & Disease Management (Organic)
Maintaining a self sufficient garden from scratch means embracing organic pest and disease control.
- Integrated Pest Management (IPM): This holistic approach combines several strategies.
- Observation: Regularly inspect your plants for early signs of pests or disease. Catching issues early is key.
- Physical Barriers: Use row covers (e.g., Agribon AG-19 floating row cover, 10×20 ft, ~$20) to protect young plants from insect pests like cabbage worms and squash bugs. Install fences (e.g., 2×4 welded wire mesh, 4 ft tall, 50 ft roll ~$70) to keep out deer, rabbits, and other larger animals.
- Hand-Picking: For larger pests like tomato hornworms or squash bugs, simply pick them off and drop them into a bucket of soapy water.
- Companion Planting: As mentioned, certain plants repel pests. Marigolds, garlic, and onions are excellent deterrents.
- Attract Beneficial Insects: Plant flowers like dill, fennel, cosmos, and sweet alyssum to attract ladybugs, lacewings, and parasitic wasps, which prey on common garden pests.
- Organic Sprays & Treatments:
- Neem Oil: An excellent broad-spectrum organic insecticide and fungicide. Bonide Neem Oil Concentrate (16oz, ~$20) can be mixed at a rate of 1-2 tbsp per gallon of water and sprayed on affected plants.
- Insecticidal Soap: Effective against soft-bodied insects like aphids, whiteflies, and spider mites. Garden Safe Insecticidal Soap (24oz ready-to-use, ~$10).
- Bacillus thuringiensis (Bt): A naturally occurring soil bacterium that targets caterpillars and worms. Monterey BT Worm & Caterpillar Killer (16oz, ~$18) is highly effective and safe for beneficial insects.
- Copper or Sulfur Sprays: For fungal diseases like powdery mildew or blight, organic copper (e.g., Bonide Copper Fungicide, ~$15 for 1lb) or sulfur (e.g., Safer Brand Garden Fungicide, ~$10 for 16oz) can be used as a last resort.
Step 7: Harvesting & Seed Saving
The culmination of your efforts is the harvest, and seed saving closes the loop on self-sufficiency.
- Harvesting Techniques:
- Timing: Harvest vegetables at their peak ripeness for best flavor and nutritional value. For example, green beans should snap cleanly, cucumbers should be firm, and tomatoes should be fully colored.
- Frequency: Many crops, like zucchini, cucumbers, and bush beans, produce more if harvested frequently. Pick daily or every other day.
- Tools: Use clean, sharp pruners (e.g., Corona ClassicCUT Bypass Pruner BP 3180, ~$30) or a sharp knife for clean cuts, minimizing damage to the plant.
- Seed Saving: This is where the « self-sufficient » aspect truly shines.
- Selection: Only save seeds from your healthiest, most vigorous plants that show desired traits (disease resistance, good flavor, high yield).
- Isolation: To ensure true-to-type seeds, prevent cross-pollination. This can be challenging for open-pollinated crops that readily cross (e.g., squash, corn). For beginners, focus on self-pollinating plants like beans, peas, lettuce, and tomatoes.
- Processing:
- Dry Seeds (Beans, Peas, Lettuce, Grains): Allow pods/seed heads to dry completely on the plant. Harvest, shell, and clean the seeds, removing chaff.
- Wet Seeds (Tomatoes, Cucumbers, Squash): For tomatoes, ferment the seeds in water for a few days to remove the gel coating and inhibit disease. For cucumbers/squash, scrape out seeds, wash thoroughly, and dry.
- Drying: Spread seeds thinly on screens or paper plates in a cool, dry, well-ventilated area for 1-4 weeks. Ensure they are bone-dry before storage. I aim for less than 8% moisture content.
- Storage: Store seeds in airtight containers (glass jars with desiccant packets work well) in a cool, dark, dry place (ideally 40-50°F and 30-40% humidity). Label clearly with variety and date. Properly stored seeds can remain viable for 3-10 years or more.
Step 8: Season Extension & Winterizing
Extend your harvest and protect your garden for the off-season to truly maximize your self sufficient garden from scratch.
- Cold Frames: Simple structures with a transparent top (glass, polycarbonate, or old windows) that sit over garden beds. They trap solar heat, allowing you to grow cold-hardy crops (lettuce, spinach, kale, radishes) well into winter or start seeds earlier in spring. A basic cold frame can be built from 2×6 lumber and a sheet of polycarbonate for under $100.
- Hoop Houses/Low Tunnels: Larger structures made from flexible hoops (PVC pipe or EMT conduit) covered with greenhouse plastic. These provide more space and greater temperature moderation. A 10×20 ft DIY low tunnel kit can cost $200-$500, while a larger, more robust hoop house kit might be $1,000-$3,000. I use a 6×12 ft low tunnel made from 1/2-inch PVC hoops and 6mil greenhouse plastic, which extends my lettuce and spinach harvest by at least
Deciding between raised beds and in-ground beds depends on your soil, budget, and physical capabilities.
- In-Ground Beds: If you have excellent native soil and good drainage, in-ground beds are the most economical. Double-digging (loosening soil two shovel depths) can significantly improve drainage and aeration. For my main garden, I primarily use in-ground beds, but I focus on building up the soil over time with consistent compost additions and cover cropping. I aim for beds that are no wider than 3-4 feet so I can reach the center without stepping on the soil, compacting it.
- Raised Beds: Raised beds offer numerous advantages, especially for poor soil, heavy clay, or rocky areas. They provide better drainage, warm up faster in spring, reduce compaction, and make weeding and harvesting easier on your back.
- Material Options:
- Untreated Cedar: Naturally rot-resistant and chemical-free. A 4×8 ft bed, 12 inches deep, typically requires three 2x12x8 ft cedar boards, costing around $50-$60 per board (total ~$150-$180) plus corner brackets or screws. My first raised beds were cedar and are still going strong after 7 years.
- Galvanized Steel: Durable, long-lasting, and aesthetically pleasing. Brands like Vego Garden offer modular kits. A Vego Garden 17″ Tall 8-in-1 Metal Raised Garden Bed (can be configured to 4×8 ft) costs approximately $250-$300.
- Concrete Blocks/Stones: Very durable but can leach minerals (though generally safe once weathered) and can be expensive.
- Recycled Materials: Pallets (check for chemical treatment stamps like « HT » for heat-treated), old tires (controversial due to potential chemical leaching).
- Filling Raised Beds: Don’t just fill with topsoil. Use a « Hugelkultur » approach (logs, branches, leaves, then compost, then topsoil) or a mixture of 60% good quality topsoil, 30% compost, and 10% perlite or vermiculite for drainage. A 4x8x1 ft raised bed requires about 32 cubic feet (or ~1.2 cubic yards) of soil mix, which can cost $100-$200 depending on your source.
- Material Options:
Step 4: Water Management & Irrigation
Efficient water management is critical for a self sufficient garden from scratch, especially in off-grid living where water resources might be limited.
- Rainwater Harvesting: This is my primary source of irrigation water. A 55-gallon rain barrel (e.g., EarthMark Rain Barrel, ~$120-$150) connected to a downspout can collect significant water. For larger needs, I use two 275-gallon IBC totes (Intermediate Bulk Containers, often available used for $100-$200 each from food-grade sources) connected in series. A 1,000 sq ft roof can collect approximately 620 gallons of water for every inch of rainfall. My 1,500 sq ft roof provides ample water for my 600 sq ft garden through multiple barrels and totes.
- Drip Irrigation: This is by far the most water-efficient method, delivering water directly to the plant’s root zone, minimizing evaporation and weed growth.
- Components: A typical drip system includes a pressure regulator (e.g., Rain Bird PRV-10, ~$15), a filter (Rain Bird RBY filter, ~$20), main tubing (1/2-inch poly tubing, 100ft ~$25), smaller feeder lines (1/4-inch tubing), and emitters (0.5 GPH or 1 GPH per plant).
- Kits: For beginners, a starter kit like the Rain Bird Drip Irrigation Garden Kit (model DDI-KIT-1P, ~$40-$60) is excellent for a small garden. For larger setups, I use Netafim Techline CV Drip Line (500ft roll, ~$150-$200), which has pressure-compensating emitters built-in, ensuring even watering across long runs.
- Automation: For true self-sufficiency, consider a battery-powered timer (e.g., Orbit B-Hyve Bluetooth Hose Faucet Timer, ~$50) or a solar-powered timer connected to a small 12V pump.
- Solar-Powered Pumps: For lifting water from a well, pond, or large storage tank to your garden, a solar pump is a game-changer. For a smaller drip system, a Shurflo 2088-594-152 Diaphragm Pump (12V, 3.5 GPM, ~$180) can be powered by a single 100W solar panel (e.g., Renogy 100W Monocrystalline Solar Panel, ~$100) and a small 12V battery (e.g., a 50Ah LiFePO4 battery like the Battle Born 50Ah, ~$450). For larger operations or deeper wells, more robust systems are needed. If you’re looking to build out a comprehensive off-grid power system to support your garden’s water needs, or indeed your entire homestead, you might want to explore resources like the Power Grid Generator complete system guide to understand the full scope of what’s possible in terms of energy independence.
Step 5: Seed Selection & Planting
The choice of seeds is crucial for a truly self sufficient garden from scratch.
- Choose Heirloom & Open-Pollinated Seeds: These varieties produce seeds that will grow true to type, meaning you can save seeds from your harvest year after year. F1 hybrids, while often vigorous, will not produce consistent offspring from saved seeds. Reputable seed companies include Baker Creek Heirloom Seeds, High Mowing Organic Seeds, and Seed Savers Exchange. Start with common, reliable varieties like ‘Black Krim’ tomatoes, ‘Provider’ bush beans, ‘Waltham Butternut’ squash, and ‘Black Seeded Simpson’ lettuce.
- Start Seeds Indoors (Optional but Recommended): For longer growing seasons or specific crops, starting seeds indoors gives you a head start. Use seed-starting mix (e.g., Espoma Organic Seed Starter Mix, ~$10 for 16qt bag) in seed trays (Jiffy Professional Greenhouse 72-cell kit, ~$15). Provide adequate light with LED grow lights (Barrina T5 2ft 4-pack LED Grow Lights, 20W each, ~$50) for 14-16 hours a day, positioned 2-4 inches above seedlings. Maintain consistent temperatures (65-75°F for most).
- Direct Sowing vs. Transplanting: Some crops (carrots, radishes, beans, corn) prefer direct sowing into the garden bed. Others (tomatoes, peppers, broccoli, kale) benefit from being started indoors and transplanted. Follow seed packet instructions for planting depths (e.g., lettuce seeds are often surface-sown or planted 1/8 inch deep, while beans are 1 inch deep) and spacing.
- Companion Planting: Strategically plant different species together to enhance growth, deter pests, and attract beneficial insects. For example, planting marigolds near tomatoes can deter nematodes, and basil improves tomato flavor. Nasturtiums can act as a trap crop for aphids.
- Succession Planting: For a continuous harvest, plant small batches of quick-growing crops (lettuce, radishes, cilantro) every 2-3 weeks. As one crop finishes, another is ready to take its place.
Step 6: Pest & Disease Management (Organic)
Maintaining a self sufficient garden from scratch means embracing organic pest and disease control.
- Integrated Pest Management (IPM): This holistic approach combines several strategies.
- Observation: Regularly inspect your plants for early signs of pests or disease. Catching issues early is key.
- Physical Barriers: Use row covers (e.g., Agribon AG-19 floating row cover, 10×20 ft, ~$20) to protect young plants from insect pests like cabbage worms and squash bugs. Install fences (e.g., 2×4 welded wire mesh, 4 ft tall, 50 ft roll ~$70) to keep out deer, rabbits, and other larger animals.
- Hand-Picking: For larger pests like tomato hornworms or squash bugs, simply pick them off and drop them into a bucket of soapy water.
- Companion Planting: As mentioned, certain plants repel pests. Marigolds, garlic, and onions are excellent deterrents.
- Attract Beneficial Insects: Plant flowers like dill, fennel, cosmos, and sweet alyssum to attract ladybugs, lacewings, and parasitic wasps, which prey on common garden pests.
- Organic Sprays & Treatments:
- Neem Oil: An excellent broad-spectrum organic insecticide and fungicide. Bonide Neem Oil Concentrate (16oz, ~$20) can be mixed at a rate of 1-2 tbsp per gallon of water and sprayed on affected plants.
- Insecticidal Soap: Effective against soft-bodied insects like aphids, whiteflies, and spider mites. Garden Safe Insecticidal Soap (24oz ready-to-use, ~$10).
- Bacillus thuringiensis (Bt): A naturally occurring soil bacterium that targets caterpillars and worms. Monterey BT Worm & Caterpillar Killer (16oz, ~$18) is highly effective and safe for beneficial insects.
- Copper or Sulfur Sprays: For fungal diseases like powdery mildew or blight, organic copper (e.g., Bonide Copper Fungicide, ~$15 for 1lb) or sulfur (e.g., Safer Brand Garden Fungicide, ~$10 for 16oz) can be used as a last resort.
Step 7: Harvesting & Seed Saving
The culmination of your efforts is the harvest, and seed saving closes the loop on self-sufficiency.
- Harvesting Techniques:
- Timing: Harvest vegetables at their peak ripeness for best flavor and nutritional value. For example, green beans should snap cleanly, cucumbers should be firm, and tomatoes should be fully colored.
- Frequency: Many crops, like zucchini, cucumbers, and bush beans, produce more if harvested frequently. Pick daily or every other day.
- Tools: Use clean, sharp pruners (e.g., Corona ClassicCUT Bypass Pruner BP 3180, ~$30) or a sharp knife for clean cuts, minimizing damage to the plant.
- Seed Saving: This is where the « self-sufficient » aspect truly shines.
- Selection: Only save seeds from your healthiest, most vigorous plants that show desired traits (disease resistance, good flavor, high yield).
- Isolation: To ensure true-to-type seeds, prevent cross-pollination. This can be challenging for open-pollinated crops that readily cross (e.g., squash, corn). For beginners, focus on self-pollinating plants like beans, peas, lettuce, and tomatoes.
- Processing:
- Dry Seeds (Beans, Peas, Lettuce, Grains): Allow pods/seed heads to dry completely on the plant. Harvest, shell, and clean the seeds, removing chaff.
- Wet Seeds (Tomatoes, Cucumbers, Squash): For tomatoes, ferment the seeds in water for a few days to remove the gel coating and inhibit disease. For cucumbers/squash, scrape out seeds, wash thoroughly, and dry.
- Drying: Spread seeds thinly on screens or paper plates in a cool, dry, well-ventilated area for 1-4 weeks. Ensure they are bone-dry before storage. I aim for less than 8% moisture content.
- Storage: Store seeds in airtight containers (glass jars with desiccant packets work well) in a cool, dark, dry place (ideally 40-50°F and 30-40% humidity). Label clearly with variety and date. Properly stored seeds can remain viable for 3-10 years or more.
Step 8: Season Extension & Winterizing
Extend your harvest and protect your garden for the off-season to truly maximize your self sufficient garden from scratch.
- Cold Frames: Simple structures with a transparent top (glass, polycarbonate, or old windows) that sit over garden beds. They trap solar heat, allowing you to grow cold-hardy crops (lettuce, spinach, kale, radishes) well into winter or start seeds earlier in spring. A basic cold frame can be built from 2×6 lumber and a sheet of polycarbonate for under $100.
- Hoop Houses/Low Tunnels: Larger structures made from flexible hoops (PVC pipe or EMT conduit) covered with greenhouse plastic. These provide more space and greater temperature moderation. A 10×20 ft DIY low tunnel kit can cost $200-$500, while a larger, more robust hoop house kit might be $1,000-$3,000. I use a 6×12 ft low tunnel made from 1/2-inch PVC hoops and 6mil greenhouse plastic, which extends my lettuce and spinach harvest by at least
Healthy soil is the bedrock of a productive, self-sufficient garden. You can’t guess what your soil needs; you have to test it.
- Perform a Soil Test: A professional soil test will give you precise data on your soil’s pH, nutrient levels (N-P-K), and organic matter content. I recommend sending a sample to your local agricultural extension office; it typically costs $20-$50 and provides detailed recommendations. Alternatively, for a quick homeowner check, a Rapitest Soil Test Kit (40-test kit, model 1663, ~$20 on Amazon) provides a good baseline for pH, Nitrogen, Phosphorus, and Potash. Aim for a pH between 6.0 and 7.0 for most vegetables.
- Amend for pH Imbalance: If your soil is too acidic (below 6.0), add agricultural lime (dolomitic lime adds magnesium, calcitic lime adds calcium). Apply 5-10 lbs per 100 sq ft for a moderate adjustment. If it’s too alkaline (above 7.0), add elemental sulfur (e.g., Espoma Soil Acidifier, ~$15 for 6.75 lbs) or generous amounts of organic matter like peat moss or pine needles.
- Build Organic Matter: This is the single most important step for long-term soil health. Organic matter improves soil structure, water retention, drainage, and nutrient availability. Incorporate 2-4 inches of high-quality compost into your top 6-12 inches of soil annually. I make my own compost from kitchen scraps, garden waste, and shredded leaves, but you can purchase it. Local nurseries often sell bulk compost for $30-$50 per cubic yard. Aged manure (from chickens, cows, or horses – ensure it’s well-rotted to avoid burning plants) is also excellent.
- Address Nutrient Deficiencies: Based on your soil test, add specific organic amendments. If Nitrogen (N) is low, add blood meal (12-0-0, ~$20 for 3 lbs) or feather meal. For Phosphorus (P), use bone meal (3-15-0, ~$15 for 3 lbs) or rock phosphate. For Potassium (K), greensand (0-0-2.5, ~$25 for 5 lbs) or kelp meal are good choices. I rely heavily on Espoma Organic Garden-tone (5-3-3, ~$25 for an 8lb bag) as a balanced, all-purpose organic fertilizer during planting.
Step 3: Garden Bed Preparation
Deciding between raised beds and in-ground beds depends on your soil, budget, and physical capabilities.
- In-Ground Beds: If you have excellent native soil and good drainage, in-ground beds are the most economical. Double-digging (loosening soil two shovel depths) can significantly improve drainage and aeration. For my main garden, I primarily use in-ground beds, but I focus on building up the soil over time with consistent compost additions and cover cropping. I aim for beds that are no wider than 3-4 feet so I can reach the center without stepping on the soil, compacting it.
- Raised Beds: Raised beds offer numerous advantages, especially for poor soil, heavy clay, or rocky areas. They provide better drainage, warm up faster in spring, reduce compaction, and make weeding and harvesting easier on your back.
- Material Options:
- Untreated Cedar: Naturally rot-resistant and chemical-free. A 4×8 ft bed, 12 inches deep, typically requires three 2x12x8 ft cedar boards, costing around $50-$60 per board (total ~$150-$180) plus corner brackets or screws. My first raised beds were cedar and are still going strong after 7 years.
- Galvanized Steel: Durable, long-lasting, and aesthetically pleasing. Brands like Vego Garden offer modular kits. A Vego Garden 17″ Tall 8-in-1 Metal Raised Garden Bed (can be configured to 4×8 ft) costs approximately $250-$300.
- Concrete Blocks/Stones: Very durable but can leach minerals (though generally safe once weathered) and can be expensive.
- Recycled Materials: Pallets (check for chemical treatment stamps like « HT » for heat-treated), old tires (controversial due to potential chemical leaching).
- Filling Raised Beds: Don’t just fill with topsoil. Use a « Hugelkultur » approach (logs, branches, leaves, then compost, then topsoil) or a mixture of 60% good quality topsoil, 30% compost, and 10% perlite or vermiculite for drainage. A 4x8x1 ft raised bed requires about 32 cubic feet (or ~1.2 cubic yards) of soil mix, which can cost $100-$200 depending on your source.
- Material Options:
Step 4: Water Management & Irrigation
Efficient water management is critical for a self sufficient garden from scratch, especially in off-grid living where water resources might be limited.
- Rainwater Harvesting: This is my primary source of irrigation water. A 55-gallon rain barrel (e.g., EarthMark Rain Barrel, ~$120-$150) connected to a downspout can collect significant water. For larger needs, I use two 275-gallon IBC totes (Intermediate Bulk Containers, often available used for $100-$200 each from food-grade sources) connected in series. A 1,000 sq ft roof can collect approximately 620 gallons of water for every inch of rainfall. My 1,500 sq ft roof provides ample water for my 600 sq ft garden through multiple barrels and totes.
- Drip Irrigation: This is by far the most water-efficient method, delivering water directly to the plant’s root zone, minimizing evaporation and weed growth.
- Components: A typical drip system includes a pressure regulator (e.g., Rain Bird PRV-10, ~$15), a filter (Rain Bird RBY filter, ~$20), main tubing (1/2-inch poly tubing, 100ft ~$25), smaller feeder lines (1/4-inch tubing), and emitters (0.5 GPH or 1 GPH per plant).
- Kits: For beginners, a starter kit like the Rain Bird Drip Irrigation Garden Kit (model DDI-KIT-1P, ~$40-$60) is excellent for a small garden. For larger setups, I use Netafim Techline CV Drip Line (500ft roll, ~$150-$200), which has pressure-compensating emitters built-in, ensuring even watering across long runs.
- Automation: For true self-sufficiency, consider a battery-powered timer (e.g., Orbit B-Hyve Bluetooth Hose Faucet Timer, ~$50) or a solar-powered timer connected to a small 12V pump.
- Solar-Powered Pumps: For lifting water from a well, pond, or large storage tank to your garden, a solar pump is a game-changer. For a smaller drip system, a Shurflo 2088-594-152 Diaphragm Pump (12V, 3.5 GPM, ~$180) can be powered by a single 100W solar panel (e.g., Renogy 100W Monocrystalline Solar Panel, ~$100) and a small 12V battery (e.g., a 50Ah LiFePO4 battery like the Battle Born 50Ah, ~$450). For larger operations or deeper wells, more robust systems are needed. If you’re looking to build out a comprehensive off-grid power system to support your garden’s water needs, or indeed your entire homestead, you might want to explore resources like the Power Grid Generator complete system guide to understand the full scope of what’s possible in terms of energy independence.
Step 5: Seed Selection & Planting
The choice of seeds is crucial for a truly self sufficient garden from scratch.
- Choose Heirloom & Open-Pollinated Seeds: These varieties produce seeds that will grow true to type, meaning you can save seeds from your harvest year after year. F1 hybrids, while often vigorous, will not produce consistent offspring from saved seeds. Reputable seed companies include Baker Creek Heirloom Seeds, High Mowing Organic Seeds, and Seed Savers Exchange. Start with common, reliable varieties like ‘Black Krim’ tomatoes, ‘Provider’ bush beans, ‘Waltham Butternut’ squash, and ‘Black Seeded Simpson’ lettuce.
- Start Seeds Indoors (Optional but Recommended): For longer growing seasons or specific crops, starting seeds indoors gives you a head start. Use seed-starting mix (e.g., Espoma Organic Seed Starter Mix, ~$10 for 16qt bag) in seed trays (Jiffy Professional Greenhouse 72-cell kit, ~$15). Provide adequate light with LED grow lights (Barrina T5 2ft 4-pack LED Grow Lights, 20W each, ~$50) for 14-16 hours a day, positioned 2-4 inches above seedlings. Maintain consistent temperatures (65-75°F for most).
- Direct Sowing vs. Transplanting: Some crops (carrots, radishes, beans, corn) prefer direct sowing into the garden bed. Others (tomatoes, peppers, broccoli, kale) benefit from being started indoors and transplanted. Follow seed packet instructions for planting depths (e.g., lettuce seeds are often surface-sown or planted 1/8 inch deep, while beans are 1 inch deep) and spacing.
- Companion Planting: Strategically plant different species together to enhance growth, deter pests, and attract beneficial insects. For example, planting marigolds near tomatoes can deter nematodes, and basil improves tomato flavor. Nasturtiums can act as a trap crop for aphids.
- Succession Planting: For a continuous harvest, plant small batches of quick-growing crops (lettuce, radishes, cilantro) every 2-3 weeks. As one crop finishes, another is ready to take its place.
Step 6: Pest & Disease Management (Organic)
Maintaining a self sufficient garden from scratch means embracing organic pest and disease control.
- Integrated Pest Management (IPM): This holistic approach combines several strategies.
- Observation: Regularly inspect your plants for early signs of pests or disease. Catching issues early is key.
- Physical Barriers: Use row covers (e.g., Agribon AG-19 floating row cover, 10×20 ft, ~$20) to protect young plants from insect pests like cabbage worms and squash bugs. Install fences (e.g., 2×4 welded wire mesh, 4 ft tall, 50 ft roll ~$70) to keep out deer, rabbits, and other larger animals.
- Hand-Picking: For larger pests like tomato hornworms or squash bugs, simply pick them off and drop them into a bucket of soapy water.
- Companion Planting: As mentioned, certain plants repel pests. Marigolds, garlic, and onions are excellent deterrents.
- Attract Beneficial Insects: Plant flowers like dill, fennel, cosmos, and sweet alyssum to attract ladybugs, lacewings, and parasitic wasps, which prey on common garden pests.
- Organic Sprays & Treatments:
- Neem Oil: An excellent broad-spectrum organic insecticide and fungicide. Bonide Neem Oil Concentrate (16oz, ~$20) can be mixed at a rate of 1-2 tbsp per gallon of water and sprayed on affected plants.
- Insecticidal Soap: Effective against soft-bodied insects like aphids, whiteflies, and spider mites. Garden Safe Insecticidal Soap (24oz ready-to-use, ~$10).
- Bacillus thuringiensis (Bt): A naturally occurring soil bacterium that targets caterpillars and worms. Monterey BT Worm & Caterpillar Killer (16oz, ~$18) is highly effective and safe for beneficial insects.
- Copper or Sulfur Sprays: For fungal diseases like powdery mildew or blight, organic copper (e.g., Bonide Copper Fungicide, ~$15 for 1lb) or sulfur (e.g., Safer Brand Garden Fungicide, ~$10 for 16oz) can be used as a last resort.
Step 7: Harvesting & Seed Saving
The culmination of your efforts is the harvest, and seed saving closes the loop on self-sufficiency.
- Harvesting Techniques:
- Timing: Harvest vegetables at their peak ripeness for best flavor and nutritional value. For example, green beans should snap cleanly, cucumbers should be firm, and tomatoes should be fully colored.
- Frequency: Many crops, like zucchini, cucumbers, and bush beans, produce more if harvested frequently. Pick daily or every other day.
- Tools: Use clean, sharp pruners (e.g., Corona ClassicCUT Bypass Pruner BP 3180, ~$30) or a sharp knife for clean cuts, minimizing damage to the plant.
- Seed Saving: This is where the « self-sufficient » aspect truly shines.
- Selection: Only save seeds from your healthiest, most vigorous plants that show desired traits (disease resistance, good flavor, high yield).
- Isolation: To ensure true-to-type seeds, prevent cross-pollination. This can be challenging for open-pollinated crops that readily cross (e.g., squash, corn). For beginners, focus on self-pollinating plants like beans, peas, lettuce, and tomatoes.
- Processing:
- Dry Seeds (Beans, Peas, Lettuce, Grains): Allow pods/seed heads to dry completely on the plant. Harvest, shell, and clean the seeds, removing chaff.
- Wet Seeds (Tomatoes, Cucumbers, Squash): For tomatoes, ferment the seeds in water for a few days to remove the gel coating and inhibit disease. For cucumbers/squash, scrape out seeds, wash thoroughly, and dry.
- Drying: Spread seeds thinly on screens or paper plates in a cool, dry, well-ventilated area for 1-4 weeks. Ensure they are bone-dry before storage. I aim for less than 8% moisture content.
- Storage: Store seeds in airtight containers (glass jars with desiccant packets work well) in a cool, dark, dry place (ideally 40-50°F and 30-40% humidity). Label clearly with variety and date. Properly stored seeds can remain viable for 3-10 years or more.
Step 8: Season Extension & Winterizing
Extend your harvest and protect your garden for the off-season to truly maximize your self sufficient garden from scratch.
- Cold Frames: Simple structures with a transparent top (glass, polycarbonate, or old windows) that sit over garden beds. They trap solar heat, allowing you to grow cold-hardy crops (lettuce, spinach, kale, radishes) well into winter or start seeds earlier in spring. A basic cold frame can be built from 2×6 lumber and a sheet of polycarbonate for under $100.
- Hoop Houses/Low Tunnels: Larger structures made from flexible hoops (PVC pipe or EMT conduit) covered with greenhouse plastic. These provide more space and greater temperature moderation. A 10×20 ft DIY low tunnel kit can cost $200-$500, while a larger, more robust hoop house kit might be $1,000-$3,000. I use a 6×12 ft low tunnel made from 1/2-inch PVC hoops and 6mil greenhouse plastic, which extends my lettuce and spinach harvest by at least
- Integrated Pest Management (IPM): This holistic approach combines several strategies.
- Integrated Pest Management (IPM): This holistic approach combines several strategies.
The culmination of your efforts is the harvest, and seed saving closes the loop on self-sufficiency.
- Harvesting Techniques:
- Timing: Harvest vegetables at their peak ripeness for best flavor and nutritional value. For example, green beans should snap cleanly, cucumbers should be firm, and tomatoes should be fully colored.
- Frequency: Many crops, like zucchini, cucumbers, and bush beans, produce more if harvested frequently. Pick daily or every other day.
- Tools: Use clean, sharp pruners (e.g., Corona ClassicCUT Bypass Pruner BP 3180, ~$30) or a sharp knife for clean cuts, minimizing damage to the plant.
- Seed Saving: This is where the « self-sufficient » aspect truly shines.
- Selection: Only save seeds from your healthiest, most vigorous plants that show desired traits (disease resistance, good flavor, high yield).
- Isolation: To ensure true-to-type seeds, prevent cross-pollination. This can be challenging for open-pollinated crops that readily cross (e.g., squash, corn). For beginners, focus on self-pollinating plants like beans, peas, lettuce, and tomatoes.
- Processing:
- Dry Seeds (Beans, Peas, Lettuce, Grains): Allow pods/seed heads to dry completely on the plant. Harvest, shell, and clean the seeds, removing chaff.
- Wet Seeds (Tomatoes, Cucumbers, Squash): For tomatoes, ferment the seeds in water for a few days to remove the gel coating and inhibit disease. For cucumbers/squash, scrape out seeds, wash thoroughly, and dry.
- Drying: Spread seeds thinly on screens or paper plates in a cool, dry, well-ventilated area for 1-4 weeks. Ensure they are bone-dry before storage. I aim for less than 8% moisture content.
- Storage: Store seeds in airtight containers (glass jars with desiccant packets work well) in a cool, dark, dry place (ideally 40-50°F and 30-40% humidity). Label clearly with variety and date. Properly stored seeds can remain viable for 3-10 years or more.
Step 8: Season Extension & Winterizing
Extend your harvest and protect your garden for the off-season to truly maximize your self sufficient garden from scratch.
- Cold Frames: Simple structures with a transparent top (glass, polycarbonate, or old windows) that sit over garden beds. They trap solar heat, allowing you to grow cold-hardy crops (lettuce, spinach, kale, radishes) well into winter or start seeds earlier in spring. A basic cold frame can be built from 2×6 lumber and a sheet of polycarbonate for under $100.
- Hoop Houses/Low Tunnels: Larger structures made from flexible hoops (PVC pipe or EMT conduit) covered with greenhouse plastic. These provide more space and greater temperature moderation. A 10×20 ft DIY low tunnel kit can cost $200-$500, while a larger, more robust hoop house kit might be $1,000-$3,000. I use a 6×12 ft low tunnel made from 1/2-inch PVC hoops and 6mil greenhouse plastic, which extends my lettuce and spinach harvest by at least
Maintaining a self sufficient garden from scratch means embracing organic pest and disease control.
- Integrated Pest Management (IPM): This holistic approach combines several strategies.
- Observation: Regularly inspect your plants for early signs of pests or disease. Catching issues early is key.
- Physical Barriers: Use row covers (e.g., Agribon AG-19 floating row cover, 10×20 ft, ~$20) to protect young plants from insect pests like cabbage worms and squash bugs. Install fences (e.g., 2×4 welded wire mesh, 4 ft tall, 50 ft roll ~$70) to keep out deer, rabbits, and other larger animals.
- Hand-Picking: For larger pests like tomato hornworms or squash bugs, simply pick them off and drop them into a bucket of soapy water.
- Companion Planting: As mentioned, certain plants repel pests. Marigolds, garlic, and onions are excellent deterrents.
- Attract Beneficial Insects: Plant flowers like dill, fennel, cosmos, and sweet alyssum to attract ladybugs, lacewings, and parasitic wasps, which prey on common garden pests.
- Organic Sprays & Treatments:
- Neem Oil: An excellent broad-spectrum organic insecticide and fungicide. Bonide Neem Oil Concentrate (16oz, ~$20) can be mixed at a rate of 1-2 tbsp per gallon of water and sprayed on affected plants.
- Insecticidal Soap: Effective against soft-bodied insects like aphids, whiteflies, and spider mites. Garden Safe Insecticidal Soap (24oz ready-to-use, ~$10).
- Bacillus thuringiensis (Bt): A naturally occurring soil bacterium that targets caterpillars and worms. Monterey BT Worm & Caterpillar Killer (16oz, ~$18) is highly effective and safe for beneficial insects.
- Copper or Sulfur Sprays: For fungal diseases like powdery mildew or blight, organic copper (e.g., Bonide Copper Fungicide, ~$15 for 1lb) or sulfur (e.g., Safer Brand Garden Fungicide, ~$10 for 16oz) can be used as a last resort.
Step 7: Harvesting & Seed Saving
The culmination of your efforts is the harvest, and seed saving closes the loop on self-sufficiency.
- Harvesting Techniques:
- Timing: Harvest vegetables at their peak ripeness for best flavor and nutritional value. For example, green beans should snap cleanly, cucumbers should be firm, and tomatoes should be fully colored.
- Frequency: Many crops, like zucchini, cucumbers, and bush beans, produce more if harvested frequently. Pick daily or every other day.
- Tools: Use clean, sharp pruners (e.g., Corona ClassicCUT Bypass Pruner BP 3180, ~$30) or a sharp knife for clean cuts, minimizing damage to the plant.
- Seed Saving: This is where the « self-sufficient » aspect truly shines.
- Selection: Only save seeds from your healthiest, most vigorous plants that show desired traits (disease resistance, good flavor, high yield).
- Isolation: To ensure true-to-type seeds, prevent cross-pollination. This can be challenging for open-pollinated crops that readily cross (e.g., squash, corn). For beginners, focus on self-pollinating plants like beans, peas, lettuce, and tomatoes.
- Processing:
- Dry Seeds (Beans, Peas, Lettuce, Grains): Allow pods/seed heads to dry completely on the plant. Harvest, shell, and clean the seeds, removing chaff.
- Wet Seeds (Tomatoes, Cucumbers, Squash): For tomatoes, ferment the seeds in water for a few days to remove the gel coating and inhibit disease. For cucumbers/squash, scrape out seeds, wash thoroughly, and dry.
- Drying: Spread seeds thinly on screens or paper plates in a cool, dry, well-ventilated area for 1-4 weeks. Ensure they are bone-dry before storage. I aim for less than 8% moisture content.
- Storage: Store seeds in airtight containers (glass jars with desiccant packets work well) in a cool, dark, dry place (ideally 40-50°F and 30-40% humidity). Label clearly with variety and date. Properly stored seeds can remain viable for 3-10 years or more.
Step 8: Season Extension & Winterizing
Extend your harvest and protect your garden for the off-season to truly maximize your self sufficient garden from scratch.
- Cold Frames: Simple structures with a transparent top (glass, polycarbonate, or old windows) that sit over garden beds. They trap solar heat, allowing you to grow cold-hardy crops (lettuce, spinach, kale, radishes) well into winter or start seeds earlier in spring. A basic cold frame can be built from 2×6 lumber and a sheet of polycarbonate for under $100.
- Hoop Houses/Low Tunnels: Larger structures made from flexible hoops (PVC pipe or EMT conduit) covered with greenhouse plastic. These provide more space and greater temperature moderation. A 10×20 ft DIY low tunnel kit can cost $200-$500, while a larger, more robust hoop house kit might be $1,000-$3,000. I use a 6×12 ft low tunnel made from 1/2-inch PVC hoops and 6mil greenhouse plastic, which extends my lettuce and spinach harvest by at least
Step 6: Pest & Disease Management (Organic)
Maintaining a self sufficient garden from scratch means embracing organic pest and disease control.
- Integrated Pest Management (IPM): This holistic approach combines several strategies.
- Observation: Regularly inspect your plants for early signs of pests or disease. Catching issues early is key.
- Physical Barriers: Use row covers (e.g., Agribon AG-19 floating row cover, 10×20 ft, ~$20) to protect young plants from insect pests like cabbage worms and squash bugs. Install fences (e.g., 2×4 welded wire mesh, 4 ft tall, 50 ft roll ~$70) to keep out deer, rabbits, and other larger animals.
- Hand-Picking: For larger pests like tomato hornworms or squash bugs, simply pick them off and drop them into a bucket of soapy water.
- Companion Planting: As mentioned, certain plants repel pests. Marigolds, garlic, and onions are excellent deterrents.
- Attract Beneficial Insects: Plant flowers like dill, fennel, cosmos, and sweet alyssum to attract ladybugs, lacewings, and parasitic wasps, which prey on common garden pests.
- Organic Sprays & Treatments:
- Neem Oil: An excellent broad-spectrum organic insecticide and fungicide. Bonide Neem Oil Concentrate (16oz, ~$20) can be mixed at a rate of 1-2 tbsp per gallon of water and sprayed on affected plants.
- Insecticidal Soap: Effective against soft-bodied insects like aphids, whiteflies, and spider mites. Garden Safe Insecticidal Soap (24oz ready-to-use, ~$10).
- Bacillus thuringiensis (Bt): A naturally occurring soil bacterium that targets caterpillars and worms. Monterey BT Worm & Caterpillar Killer (16oz, ~$18) is highly effective and safe for beneficial insects.
- Copper or Sulfur Sprays: For fungal diseases like powdery mildew or blight, organic copper (e.g., Bonide Copper Fungicide, ~$15 for 1lb) or sulfur (e.g., Safer Brand Garden Fungicide, ~$10 for 16oz) can be used as a last resort.
Step 7: Harvesting & Seed Saving
The culmination of your efforts is the harvest, and seed saving closes the loop on self-sufficiency.
- Harvesting Techniques:
- Timing: Harvest vegetables at their peak ripeness for best flavor and nutritional value. For example, green beans should snap cleanly, cucumbers should be firm, and tomatoes should be fully colored.
- Frequency: Many crops, like zucchini, cucumbers, and bush beans, produce more if harvested frequently. Pick daily or every other day.
- Tools: Use clean, sharp pruners (e.g., Corona ClassicCUT Bypass Pruner BP 3180, ~$30) or a sharp knife for clean cuts, minimizing damage to the plant.
- Seed Saving: This is where the « self-sufficient » aspect truly shines.
- Selection: Only save seeds from your healthiest, most vigorous plants that show desired traits (disease resistance, good flavor, high yield).
- Isolation: To ensure true-to-type seeds, prevent cross-pollination. This can be challenging for open-pollinated crops that readily cross (e.g., squash, corn). For beginners, focus on self-pollinating plants like beans, peas, lettuce, and tomatoes.
- Processing:
- Dry Seeds (Beans, Peas, Lettuce, Grains): Allow pods/seed heads to dry completely on the plant. Harvest, shell, and clean the seeds, removing chaff.
- Wet Seeds (Tomatoes, Cucumbers, Squash): For tomatoes, ferment the seeds in water for a few days to remove the gel coating and inhibit disease. For cucumbers/squash, scrape out seeds, wash thoroughly, and dry.
- Drying: Spread seeds thinly on screens or paper plates in a cool, dry, well-ventilated area for 1-4 weeks. Ensure they are bone-dry before storage. I aim for less than 8% moisture content.
- Storage: Store seeds in airtight containers (glass jars with desiccant packets work well) in a cool, dark, dry place (ideally 40-50°F and 30-40% humidity). Label clearly with variety and date. Properly stored seeds can remain viable for 3-10 years or more.
Step 8: Season Extension & Winterizing
Extend your harvest and protect your garden for the off-season to truly maximize your self sufficient garden from scratch.
- Cold Frames: Simple structures with a transparent top (glass, polycarbonate, or old windows) that sit over garden beds. They trap solar heat, allowing you to grow cold-hardy crops (lettuce, spinach, kale, radishes) well into winter or start seeds earlier in spring. A basic cold frame can be built from 2×6 lumber and a sheet of polycarbonate for under $100.
- Hoop Houses/Low Tunnels: Larger structures made from flexible hoops (PVC pipe or EMT conduit) covered with greenhouse plastic. These provide more space and greater temperature moderation. A 10×20 ft DIY low tunnel kit can cost $200-$500, while a larger, more robust hoop house kit might be $1,000-$3,000. I use a 6×12 ft low tunnel made from 1/2-inch PVC hoops and 6mil greenhouse plastic, which extends my lettuce and spinach harvest by at least
- Choose Heirloom & Open-Pollinated Seeds: These varieties produce seeds that will grow true to type, meaning you can save seeds from your harvest year after year. F1 hybrids, while often vigorous, will not produce consistent offspring from saved seeds. Reputable seed companies include Baker Creek Heirloom Seeds, High Mowing Organic Seeds, and Seed Savers Exchange. Start with common, reliable varieties like ‘Black Krim’ tomatoes, ‘Provider’ bush beans, ‘Waltham Butternut’ squash, and ‘Black Seeded Simpson’ lettuce.
- Start Seeds Indoors (Optional but Recommended): For longer growing seasons or specific crops, starting seeds indoors gives you a head start. Use seed-starting mix (e.g., Espoma Organic Seed Starter Mix, ~$10 for 16qt bag) in seed trays (Jiffy Professional Greenhouse 72-cell kit, ~$15). Provide adequate light with LED grow lights (Barrina T5 2ft 4-pack LED Grow Lights, 20W each, ~$50) for 14-16 hours a day, positioned 2-4 inches above seedlings. Maintain consistent temperatures (65-75°F for most).
- Direct Sowing vs. Transplanting: Some crops (carrots, radishes, beans, corn) prefer direct sowing into the garden bed. Others (tomatoes, peppers, broccoli, kale) benefit from being started indoors and transplanted. Follow seed packet instructions for planting depths (e.g., lettuce seeds are often surface-sown or planted 1/8 inch deep, while beans are 1 inch deep) and spacing.
- Companion Planting: Strategically plant different species together to enhance growth, deter pests, and attract beneficial insects. For example, planting marigolds near tomatoes can deter nematodes, and basil improves tomato flavor. Nasturtiums can act as a trap crop for aphids.
- Succession Planting: For a continuous harvest, plant small batches of quick-growing crops (lettuce, radishes, cilantro) every 2-3 weeks. As one crop finishes, another is ready to take its place.
Step 6: Pest & Disease Management (Organic)
Maintaining a self sufficient garden from scratch means embracing organic pest and disease control.
- Integrated Pest Management (IPM): This holistic approach combines several strategies.
- Observation: Regularly inspect your plants for early signs of pests or disease. Catching issues early is key.
- Physical Barriers: Use row covers (e.g., Agribon AG-19 floating row cover, 10×20 ft, ~$20) to protect young plants from insect pests like cabbage worms and squash bugs. Install fences (e.g., 2×4 welded wire mesh, 4 ft tall, 50 ft roll ~$70) to keep out deer, rabbits, and other larger animals.
- Hand-Picking: For larger pests like tomato hornworms or squash bugs, simply pick them off and drop them into a bucket of soapy water.
- Companion Planting: As mentioned, certain plants repel pests. Marigolds, garlic, and onions are excellent deterrents.
- Attract Beneficial Insects: Plant flowers like dill, fennel, cosmos, and sweet alyssum to attract ladybugs, lacewings, and parasitic wasps, which prey on common garden pests.
- Organic Sprays & Treatments:
- Neem Oil: An excellent broad-spectrum organic insecticide and fungicide. Bonide Neem Oil Concentrate (16oz, ~$20) can be mixed at a rate of 1-2 tbsp per gallon of water and sprayed on affected plants.
- Insecticidal Soap: Effective against soft-bodied insects like aphids, whiteflies, and spider mites. Garden Safe Insecticidal Soap (24oz ready-to-use, ~$10).
- Bacillus thuringiensis (Bt): A naturally occurring soil bacterium that targets caterpillars and worms. Monterey BT Worm & Caterpillar Killer (16oz, ~$18) is highly effective and safe for beneficial insects.
- Copper or Sulfur Sprays: For fungal diseases like powdery mildew or blight, organic copper (e.g., Bonide Copper Fungicide, ~$15 for 1lb) or sulfur (e.g., Safer Brand Garden Fungicide, ~$10 for 16oz) can be used as a last resort.
Step 7: Harvesting & Seed Saving
The culmination of your efforts is the harvest, and seed saving closes the loop on self-sufficiency.
- Harvesting Techniques:
- Timing: Harvest vegetables at their peak ripeness for best flavor and nutritional value. For example, green beans should snap cleanly, cucumbers should be firm, and tomatoes should be fully colored.
- Frequency: Many crops, like zucchini, cucumbers, and bush beans, produce more if harvested frequently. Pick daily or every other day.
- Tools: Use clean, sharp pruners (e.g., Corona ClassicCUT Bypass Pruner BP 3180, ~$30) or a sharp knife for clean cuts, minimizing damage to the plant.
- Seed Saving: This is where the « self-sufficient » aspect truly shines.
- Selection: Only save seeds from your healthiest, most vigorous plants that show desired traits (disease resistance, good flavor, high yield).
- Isolation: To ensure true-to-type seeds, prevent cross-pollination. This can be challenging for open-pollinated crops that readily cross (e.g., squash, corn). For beginners, focus on self-pollinating plants like beans, peas, lettuce, and tomatoes.
- Processing:
- Dry Seeds (Beans, Peas, Lettuce, Grains): Allow pods/seed heads to dry completely on the plant. Harvest, shell, and clean the seeds, removing chaff.
- Wet Seeds (Tomatoes, Cucumbers, Squash): For tomatoes, ferment the seeds in water for a few days to remove the gel coating and inhibit disease. For cucumbers/squash, scrape out seeds, wash thoroughly, and dry.
- Drying: Spread seeds thinly on screens or paper plates in a cool, dry, well-ventilated area for 1-4 weeks. Ensure they are bone-dry before storage. I aim for less than 8% moisture content.
- Storage: Store seeds in airtight containers (glass jars with desiccant packets work well) in a cool, dark, dry place (ideally 40-50°F and 30-40% humidity). Label clearly with variety and date. Properly stored seeds can remain viable for 3-10 years or more.
Step 8: Season Extension & Winterizing
Extend your harvest and protect your garden for the off-season to truly maximize your self sufficient garden from scratch.
- Cold Frames: Simple structures with a transparent top (glass, polycarbonate, or old windows) that sit over garden beds. They trap solar heat, allowing you to grow cold-hardy crops (lettuce, spinach, kale, radishes) well into winter or start seeds earlier in spring. A basic cold frame can be built from 2×6 lumber and a sheet of polycarbonate for under $100.
- Hoop Houses/Low Tunnels: Larger structures made from flexible hoops (PVC pipe or EMT conduit) covered with greenhouse plastic. These provide more space and greater temperature moderation. A 10×20 ft DIY low tunnel kit can cost $200-$500, while a larger, more robust hoop house kit might be $1,000-$3,000. I use a 6×12 ft low tunnel made from 1/2-inch PVC hoops and 6mil greenhouse plastic, which extends my lettuce and spinach harvest by at least
The choice of seeds is crucial for a truly self sufficient garden from scratch.
- Choose Heirloom & Open-Pollinated Seeds: These varieties produce seeds that will grow true to type, meaning you can save seeds from your harvest year after year. F1 hybrids, while often vigorous, will not produce consistent offspring from saved seeds. Reputable seed companies include Baker Creek Heirloom Seeds, High Mowing Organic Seeds, and Seed Savers Exchange. Start with common, reliable varieties like ‘Black Krim’ tomatoes, ‘Provider’ bush beans, ‘Waltham Butternut’ squash, and ‘Black Seeded Simpson’ lettuce.
- Start Seeds Indoors (Optional but Recommended): For longer growing seasons or specific crops, starting seeds indoors gives you a head start. Use seed-starting mix (e.g., Espoma Organic Seed Starter Mix, ~$10 for 16qt bag) in seed trays (Jiffy Professional Greenhouse 72-cell kit, ~$15). Provide adequate light with LED grow lights (Barrina T5 2ft 4-pack LED Grow Lights, 20W each, ~$50) for 14-16 hours a day, positioned 2-4 inches above seedlings. Maintain consistent temperatures (65-75°F for most).
- Direct Sowing vs. Transplanting: Some crops (carrots, radishes, beans, corn) prefer direct sowing into the garden bed. Others (tomatoes, peppers, broccoli, kale) benefit from being started indoors and transplanted. Follow seed packet instructions for planting depths (e.g., lettuce seeds are often surface-sown or planted 1/8 inch deep, while beans are 1 inch deep) and spacing.
- Companion Planting: Strategically plant different species together to enhance growth, deter pests, and attract beneficial insects. For example, planting marigolds near tomatoes can deter nematodes, and basil improves tomato flavor. Nasturtiums can act as a trap crop for aphids.
- Succession Planting: For a continuous harvest, plant small batches of quick-growing crops (lettuce, radishes, cilantro) every 2-3 weeks. As one crop finishes, another is ready to take its place.
Step 6: Pest & Disease Management (Organic)
Maintaining a self sufficient garden from scratch means embracing organic pest and disease control.
- Integrated Pest Management (IPM): This holistic approach combines several strategies.
- Observation: Regularly inspect your plants for early signs of pests or disease. Catching issues early is key.
- Physical Barriers: Use row covers (e.g., Agribon AG-19 floating row cover, 10×20 ft, ~$20) to protect young plants from insect pests like cabbage worms and squash bugs. Install fences (e.g., 2×4 welded wire mesh, 4 ft tall, 50 ft roll ~$70) to keep out deer, rabbits, and other larger animals.
- Hand-Picking: For larger pests like tomato hornworms or squash bugs, simply pick them off and drop them into a bucket of soapy water.
- Companion Planting: As mentioned, certain plants repel pests. Marigolds, garlic, and onions are excellent deterrents.
- Attract Beneficial Insects: Plant flowers like dill, fennel, cosmos, and sweet alyssum to attract ladybugs, lacewings, and parasitic wasps, which prey on common garden pests.
- Organic Sprays & Treatments:
- Neem Oil: An excellent broad-spectrum organic insecticide and fungicide. Bonide Neem Oil Concentrate (16oz, ~$20) can be mixed at a rate of 1-2 tbsp per gallon of water and sprayed on affected plants.
- Insecticidal Soap: Effective against soft-bodied insects like aphids, whiteflies, and spider mites. Garden Safe Insecticidal Soap (24oz ready-to-use, ~$10).
- Bacillus thuringiensis (Bt): A naturally occurring soil bacterium that targets caterpillars and worms. Monterey BT Worm & Caterpillar Killer (16oz, ~$18) is highly effective and safe for beneficial insects.
- Copper or Sulfur Sprays: For fungal diseases like powdery mildew or blight, organic copper (e.g., Bonide Copper Fungicide, ~$15 for 1lb) or sulfur (e.g., Safer Brand Garden Fungicide, ~$10 for 16oz) can be used as a last resort.
Step 7: Harvesting & Seed Saving
The culmination of your efforts is the harvest, and seed saving closes the loop on self-sufficiency.
- Harvesting Techniques:
- Timing: Harvest vegetables at their peak ripeness for best flavor and nutritional value. For example, green beans should snap cleanly, cucumbers should be firm, and tomatoes should be fully colored.
- Frequency: Many crops, like zucchini, cucumbers, and bush beans, produce more if harvested frequently. Pick daily or every other day.
- Tools: Use clean, sharp pruners (e.g., Corona ClassicCUT Bypass Pruner BP 3180, ~$30) or a sharp knife for clean cuts, minimizing damage to the plant.
- Seed Saving: This is where the « self-sufficient » aspect truly shines.
- Selection: Only save seeds from your healthiest, most vigorous plants that show desired traits (disease resistance, good flavor, high yield).
- Isolation: To ensure true-to-type seeds, prevent cross-pollination. This can be challenging for open-pollinated crops that readily cross (e.g., squash, corn). For beginners, focus on self-pollinating plants like beans, peas, lettuce, and tomatoes.
- Processing:
- Dry Seeds (Beans, Peas, Lettuce, Grains): Allow pods/seed heads to dry completely on the plant. Harvest, shell, and clean the seeds, removing chaff.
- Wet Seeds (Tomatoes, Cucumbers, Squash): For tomatoes, ferment the seeds in water for a few days to remove the gel coating and inhibit disease. For cucumbers/squash, scrape out seeds, wash thoroughly, and dry.
- Drying: Spread seeds thinly on screens or paper plates in a cool, dry, well-ventilated area for 1-4 weeks. Ensure they are bone-dry before storage. I aim for less than 8% moisture content.
- Storage: Store seeds in airtight containers (glass jars with desiccant packets work well) in a cool, dark, dry place (ideally 40-50°F and 30-40% humidity). Label clearly with variety and date. Properly stored seeds can remain viable for 3-10 years or more.
Step 8: Season Extension & Winterizing
Extend your harvest and protect your garden for the off-season to truly maximize your self sufficient garden from scratch.
- Cold Frames: Simple structures with a transparent top (glass, polycarbonate, or old windows) that sit over garden beds. They trap solar heat, allowing you to grow cold-hardy crops (lettuce, spinach, kale, radishes) well into winter or start seeds earlier in spring. A basic cold frame can be built from 2×6 lumber and a sheet of polycarbonate for under $100.
- Hoop Houses/Low Tunnels: Larger structures made from flexible hoops (PVC pipe or EMT conduit) covered with greenhouse plastic. These provide more space and greater temperature moderation. A 10×20 ft DIY low tunnel kit can cost $200-$500, while a larger, more robust hoop house kit might be $1,000-$3,000. I use a 6×12 ft low tunnel made from 1/2-inch PVC hoops and 6mil greenhouse plastic, which extends my lettuce and spinach harvest by at least
Step 5: Seed Selection & Planting
The choice of seeds is crucial for a truly self sufficient garden from scratch.
- Choose Heirloom & Open-Pollinated Seeds: These varieties produce seeds that will grow true to type, meaning you can save seeds from your harvest year after year. F1 hybrids, while often vigorous, will not produce consistent offspring from saved seeds. Reputable seed companies include Baker Creek Heirloom Seeds, High Mowing Organic Seeds, and Seed Savers Exchange. Start with common, reliable varieties like ‘Black Krim’ tomatoes, ‘Provider’ bush beans, ‘Waltham Butternut’ squash, and ‘Black Seeded Simpson’ lettuce.
- Start Seeds Indoors (Optional but Recommended): For longer growing seasons or specific crops, starting seeds indoors gives you a head start. Use seed-starting mix (e.g., Espoma Organic Seed Starter Mix, ~$10 for 16qt bag) in seed trays (Jiffy Professional Greenhouse 72-cell kit, ~$15). Provide adequate light with LED grow lights (Barrina T5 2ft 4-pack LED Grow Lights, 20W each, ~$50) for 14-16 hours a day, positioned 2-4 inches above seedlings. Maintain consistent temperatures (65-75°F for most).
- Direct Sowing vs. Transplanting: Some crops (carrots, radishes, beans, corn) prefer direct sowing into the garden bed. Others (tomatoes, peppers, broccoli, kale) benefit from being started indoors and transplanted. Follow seed packet instructions for planting depths (e.g., lettuce seeds are often surface-sown or planted 1/8 inch deep, while beans are 1 inch deep) and spacing.
- Companion Planting: Strategically plant different species together to enhance growth, deter pests, and attract beneficial insects. For example, planting marigolds near tomatoes can deter nematodes, and basil improves tomato flavor. Nasturtiums can act as a trap crop for aphids.
- Succession Planting: For a continuous harvest, plant small batches of quick-growing crops (lettuce, radishes, cilantro) every 2-3 weeks. As one crop finishes, another is ready to take its place.
Step 6: Pest & Disease Management (Organic)
Maintaining a self sufficient garden from scratch means embracing organic pest and disease control.
- Integrated Pest Management (IPM): This holistic approach combines several strategies.
- Observation: Regularly inspect your plants for early signs of pests or disease. Catching issues early is key.
- Physical Barriers: Use row covers (e.g., Agribon AG-19 floating row cover, 10×20 ft, ~$20) to protect young plants from insect pests like cabbage worms and squash bugs. Install fences (e.g., 2×4 welded wire mesh, 4 ft tall, 50 ft roll ~$70) to keep out deer, rabbits, and other larger animals.
- Hand-Picking: For larger pests like tomato hornworms or squash bugs, simply pick them off and drop them into a bucket of soapy water.
- Companion Planting: As mentioned, certain plants repel pests. Marigolds, garlic, and onions are excellent deterrents.
- Attract Beneficial Insects: Plant flowers like dill, fennel, cosmos, and sweet alyssum to attract ladybugs, lacewings, and parasitic wasps, which prey on common garden pests.
- Organic Sprays & Treatments:
- Neem Oil: An excellent broad-spectrum organic insecticide and fungicide. Bonide Neem Oil Concentrate (16oz, ~$20) can be mixed at a rate of 1-2 tbsp per gallon of water and sprayed on affected plants.
- Insecticidal Soap: Effective against soft-bodied insects like aphids, whiteflies, and spider mites. Garden Safe Insecticidal Soap (24oz ready-to-use, ~$10).
- Bacillus thuringiensis (Bt): A naturally occurring soil bacterium that targets caterpillars and worms. Monterey BT Worm & Caterpillar Killer (16oz, ~$18) is highly effective and safe for beneficial insects.
- Copper or Sulfur Sprays: For fungal diseases like powdery mildew or blight, organic copper (e.g., Bonide Copper Fungicide, ~$15 for 1lb) or sulfur (e.g., Safer Brand Garden Fungicide, ~$10 for 16oz) can be used as a last resort.
Step 7: Harvesting & Seed Saving
The culmination of your efforts is the harvest, and seed saving closes the loop on self-sufficiency.
- Harvesting Techniques:
- Timing: Harvest vegetables at their peak ripeness for best flavor and nutritional value. For example, green beans should snap cleanly, cucumbers should be firm, and tomatoes should be fully colored.
- Frequency: Many crops, like zucchini, cucumbers, and bush beans, produce more if harvested frequently. Pick daily or every other day.
- Tools: Use clean, sharp pruners (e.g., Corona ClassicCUT Bypass Pruner BP 3180, ~$30) or a sharp knife for clean cuts, minimizing damage to the plant.
- Seed Saving: This is where the « self-sufficient » aspect truly shines.
- Selection: Only save seeds from your healthiest, most vigorous plants that show desired traits (disease resistance, good flavor, high yield).
- Isolation: To ensure true-to-type seeds, prevent cross-pollination. This can be challenging for open-pollinated crops that readily cross (e.g., squash, corn). For beginners, focus on self-pollinating plants like beans, peas, lettuce, and tomatoes.
- Processing:
- Dry Seeds (Beans, Peas, Lettuce, Grains): Allow pods/seed heads to dry completely on the plant. Harvest, shell, and clean the seeds, removing chaff.
- Wet Seeds (Tomatoes, Cucumbers, Squash): For tomatoes, ferment the seeds in water for a few days to remove the gel coating and inhibit disease. For cucumbers/squash, scrape out seeds, wash thoroughly, and dry.
- Drying: Spread seeds thinly on screens or paper plates in a cool, dry, well-ventilated area for 1-4 weeks. Ensure they are bone-dry before storage. I aim for less than 8% moisture content.
- Storage: Store seeds in airtight containers (glass jars with desiccant packets work well) in a cool, dark, dry place (ideally 40-50°F and 30-40% humidity). Label clearly with variety and date. Properly stored seeds can remain viable for 3-10 years or more.
Step 8: Season Extension & Winterizing
Extend your harvest and protect your garden for the off-season to truly maximize your self sufficient garden from scratch.
- Cold Frames: Simple structures with a transparent top (glass, polycarbonate, or old windows) that sit over garden beds. They trap solar heat, allowing you to grow cold-hardy crops (lettuce, spinach, kale, radishes) well into winter or start seeds earlier in spring. A basic cold frame can be built from 2×6 lumber and a sheet of polycarbonate for under $100.
- Hoop Houses/Low Tunnels: Larger structures made from flexible hoops (PVC pipe or EMT conduit) covered with greenhouse plastic. These provide more space and greater temperature moderation. A 10×20 ft DIY low tunnel kit can cost $200-$500, while a larger, more robust hoop house kit might be $1,000-$3,000. I use a 6×12 ft low tunnel made from 1/2-inch PVC hoops and 6mil greenhouse plastic, which extends my lettuce and spinach harvest by at least
- Rainwater Harvesting: This is my primary source of irrigation water. A 55-gallon rain barrel (e.g., EarthMark Rain Barrel, ~$120-$150) connected to a downspout can collect significant water. For larger needs, I use two 275-gallon IBC totes (Intermediate Bulk Containers, often available used for $100-$200 each from food-grade sources) connected in series. A 1,000 sq ft roof can collect approximately 620 gallons of water for every inch of rainfall. My 1,500 sq ft roof provides ample water for my 600 sq ft garden through multiple barrels and totes.
- Drip Irrigation: This is by far the most water-efficient method, delivering water directly to the plant’s root zone, minimizing evaporation and weed growth.
- Components: A typical drip system includes a pressure regulator (e.g., Rain Bird PRV-10, ~$15), a filter (Rain Bird RBY filter, ~$20), main tubing (1/2-inch poly tubing, 100ft ~$25), smaller feeder lines (1/4-inch tubing), and emitters (0.5 GPH or 1 GPH per plant).
- Kits: For beginners, a starter kit like the Rain Bird Drip Irrigation Garden Kit (model DDI-KIT-1P, ~$40-$60) is excellent for a small garden. For larger setups, I use Netafim Techline CV Drip Line (500ft roll, ~$150-$200), which has pressure-compensating emitters built-in, ensuring even watering across long runs.
- Automation: For true self-sufficiency, consider a battery-powered timer (e.g., Orbit B-Hyve Bluetooth Hose Faucet Timer, ~$50) or a solar-powered timer connected to a small 12V pump.
- Solar-Powered Pumps: For lifting water from a well, pond, or large storage tank to your garden, a solar pump is a game-changer. For a smaller drip system, a Shurflo 2088-594-152 Diaphragm Pump (12V, 3.5 GPM, ~$180) can be powered by a single 100W solar panel (e.g., Renogy 100W Monocrystalline Solar Panel, ~$100) and a small 12V battery (e.g., a 50Ah LiFePO4 battery like the Battle Born 50Ah, ~$450). For larger operations or deeper wells, more robust systems are needed. If you’re looking to build out a comprehensive off-grid power system to support your garden’s water needs, or indeed your entire homestead, you might want to explore resources like the Power Grid Generator complete system guide to understand the full scope of what’s possible in terms of energy independence.
Step 5: Seed Selection & Planting
The choice of seeds is crucial for a truly self sufficient garden from scratch.
- Choose Heirloom & Open-Pollinated Seeds: These varieties produce seeds that will grow true to type, meaning you can save seeds from your harvest year after year. F1 hybrids, while often vigorous, will not produce consistent offspring from saved seeds. Reputable seed companies include Baker Creek Heirloom Seeds, High Mowing Organic Seeds, and Seed Savers Exchange. Start with common, reliable varieties like ‘Black Krim’ tomatoes, ‘Provider’ bush beans, ‘Waltham Butternut’ squash, and ‘Black Seeded Simpson’ lettuce.
- Start Seeds Indoors (Optional but Recommended): For longer growing seasons or specific crops, starting seeds indoors gives you a head start. Use seed-starting mix (e.g., Espoma Organic Seed Starter Mix, ~$10 for 16qt bag) in seed trays (Jiffy Professional Greenhouse 72-cell kit, ~$15). Provide adequate light with LED grow lights (Barrina T5 2ft 4-pack LED Grow Lights, 20W each, ~$50) for 14-16 hours a day, positioned 2-4 inches above seedlings. Maintain consistent temperatures (65-75°F for most).
- Direct Sowing vs. Transplanting: Some crops (carrots, radishes, beans, corn) prefer direct sowing into the garden bed. Others (tomatoes, peppers, broccoli, kale) benefit from being started indoors and transplanted. Follow seed packet instructions for planting depths (e.g., lettuce seeds are often surface-sown or planted 1/8 inch deep, while beans are 1 inch deep) and spacing.
- Companion Planting: Strategically plant different species together to enhance growth, deter pests, and attract beneficial insects. For example, planting marigolds near tomatoes can deter nematodes, and basil improves tomato flavor. Nasturtiums can act as a trap crop for aphids.
- Succession Planting: For a continuous harvest, plant small batches of quick-growing crops (lettuce, radishes, cilantro) every 2-3 weeks. As one crop finishes, another is ready to take its place.
Step 6: Pest & Disease Management (Organic)
Maintaining a self sufficient garden from scratch means embracing organic pest and disease control.
- Integrated Pest Management (IPM): This holistic approach combines several strategies.
- Observation: Regularly inspect your plants for early signs of pests or disease. Catching issues early is key.
- Physical Barriers: Use row covers (e.g., Agribon AG-19 floating row cover, 10×20 ft, ~$20) to protect young plants from insect pests like cabbage worms and squash bugs. Install fences (e.g., 2×4 welded wire mesh, 4 ft tall, 50 ft roll ~$70) to keep out deer, rabbits, and other larger animals.
- Hand-Picking: For larger pests like tomato hornworms or squash bugs, simply pick them off and drop them into a bucket of soapy water.
- Companion Planting: As mentioned, certain plants repel pests. Marigolds, garlic, and onions are excellent deterrents.
- Attract Beneficial Insects: Plant flowers like dill, fennel, cosmos, and sweet alyssum to attract ladybugs, lacewings, and parasitic wasps, which prey on common garden pests.
- Organic Sprays & Treatments:
- Neem Oil: An excellent broad-spectrum organic insecticide and fungicide. Bonide Neem Oil Concentrate (16oz, ~$20) can be mixed at a rate of 1-2 tbsp per gallon of water and sprayed on affected plants.
- Insecticidal Soap: Effective against soft-bodied insects like aphids, whiteflies, and spider mites. Garden Safe Insecticidal Soap (24oz ready-to-use, ~$10).
- Bacillus thuringiensis (Bt): A naturally occurring soil bacterium that targets caterpillars and worms. Monterey BT Worm & Caterpillar Killer (16oz, ~$18) is highly effective and safe for beneficial insects.
- Copper or Sulfur Sprays: For fungal diseases like powdery mildew or blight, organic copper (e.g., Bonide Copper Fungicide, ~$15 for 1lb) or sulfur (e.g., Safer Brand Garden Fungicide, ~$10 for 16oz) can be used as a last resort.
Step 7: Harvesting & Seed Saving
The culmination of your efforts is the harvest, and seed saving closes the loop on self-sufficiency.
- Harvesting Techniques:
- Timing: Harvest vegetables at their peak ripeness for best flavor and nutritional value. For example, green beans should snap cleanly, cucumbers should be firm, and tomatoes should be fully colored.
- Frequency: Many crops, like zucchini, cucumbers, and bush beans, produce more if harvested frequently. Pick daily or every other day.
- Tools: Use clean, sharp pruners (e.g., Corona ClassicCUT Bypass Pruner BP 3180, ~$30) or a sharp knife for clean cuts, minimizing damage to the plant.
- Seed Saving: This is where the « self-sufficient » aspect truly shines.
- Selection: Only save seeds from your healthiest, most vigorous plants that show desired traits (disease resistance, good flavor, high yield).
- Isolation: To ensure true-to-type seeds, prevent cross-pollination. This can be challenging for open-pollinated crops that readily cross (e.g., squash, corn). For beginners, focus on self-pollinating plants like beans, peas, lettuce, and tomatoes.
- Processing:
- Dry Seeds (Beans, Peas, Lettuce, Grains): Allow pods/seed heads to dry completely on the plant. Harvest, shell, and clean the seeds, removing chaff.
- Wet Seeds (Tomatoes, Cucumbers, Squash): For tomatoes, ferment the seeds in water for a few days to remove the gel coating and inhibit disease. For cucumbers/squash, scrape out seeds, wash thoroughly, and dry.
- Drying: Spread seeds thinly on screens or paper plates in a cool, dry, well-ventilated area for 1-4 weeks. Ensure they are bone-dry before storage. I aim for less than 8% moisture content.
- Storage: Store seeds in airtight containers (glass jars with desiccant packets work well) in a cool, dark, dry place (ideally 40-50°F and 30-40% humidity). Label clearly with variety and date. Properly stored seeds can remain viable for 3-10 years or more.
Step 8: Season Extension & Winterizing
Extend your harvest and protect your garden for the off-season to truly maximize your self sufficient garden from scratch.
- Cold Frames: Simple structures with a transparent top (glass, polycarbonate, or old windows) that sit over garden beds. They trap solar heat, allowing you to grow cold-hardy crops (lettuce, spinach, kale, radishes) well into winter or start seeds earlier in spring. A basic cold frame can be built from 2×6 lumber and a sheet of polycarbonate for under $100.
- Hoop Houses/Low Tunnels: Larger structures made from flexible hoops (PVC pipe or EMT conduit) covered with greenhouse plastic. These provide more space and greater temperature moderation. A 10×20 ft DIY low tunnel kit can cost $200-$500, while a larger, more robust hoop house kit might be $1,000-$3,000. I use a 6×12 ft low tunnel made from 1/2-inch PVC hoops and 6mil greenhouse plastic, which extends my lettuce and spinach harvest by at least
Efficient water management is critical for a self sufficient garden from scratch, especially in off-grid living where water resources might be limited.
- Rainwater Harvesting: This is my primary source of irrigation water. A 55-gallon rain barrel (e.g., EarthMark Rain Barrel, ~$120-$150) connected to a downspout can collect significant water. For larger needs, I use two 275-gallon IBC totes (Intermediate Bulk Containers, often available used for $100-$200 each from food-grade sources) connected in series. A 1,000 sq ft roof can collect approximately 620 gallons of water for every inch of rainfall. My 1,500 sq ft roof provides ample water for my 600 sq ft garden through multiple barrels and totes.
- Drip Irrigation: This is by far the most water-efficient method, delivering water directly to the plant’s root zone, minimizing evaporation and weed growth.
- Components: A typical drip system includes a pressure regulator (e.g., Rain Bird PRV-10, ~$15), a filter (Rain Bird RBY filter, ~$20), main tubing (1/2-inch poly tubing, 100ft ~$25), smaller feeder lines (1/4-inch tubing), and emitters (0.5 GPH or 1 GPH per plant).
- Kits: For beginners, a starter kit like the Rain Bird Drip Irrigation Garden Kit (model DDI-KIT-1P, ~$40-$60) is excellent for a small garden. For larger setups, I use Netafim Techline CV Drip Line (500ft roll, ~$150-$200), which has pressure-compensating emitters built-in, ensuring even watering across long runs.
- Automation: For true self-sufficiency, consider a battery-powered timer (e.g., Orbit B-Hyve Bluetooth Hose Faucet Timer, ~$50) or a solar-powered timer connected to a small 12V pump.
- Solar-Powered Pumps: For lifting water from a well, pond, or large storage tank to your garden, a solar pump is a game-changer. For a smaller drip system, a Shurflo 2088-594-152 Diaphragm Pump (12V, 3.5 GPM, ~$180) can be powered by a single 100W solar panel (e.g., Renogy 100W Monocrystalline Solar Panel, ~$100) and a small 12V battery (e.g., a 50Ah LiFePO4 battery like the Battle Born 50Ah, ~$450). For larger operations or deeper wells, more robust systems are needed. If you’re looking to build out a comprehensive off-grid power system to support your garden’s water needs, or indeed your entire homestead, you might want to explore resources like the Power Grid Generator complete system guide to understand the full scope of what’s possible in terms of energy independence.
Step 5: Seed Selection & Planting
The choice of seeds is crucial for a truly self sufficient garden from scratch.
- Choose Heirloom & Open-Pollinated Seeds: These varieties produce seeds that will grow true to type, meaning you can save seeds from your harvest year after year. F1 hybrids, while often vigorous, will not produce consistent offspring from saved seeds. Reputable seed companies include Baker Creek Heirloom Seeds, High Mowing Organic Seeds, and Seed Savers Exchange. Start with common, reliable varieties like ‘Black Krim’ tomatoes, ‘Provider’ bush beans, ‘Waltham Butternut’ squash, and ‘Black Seeded Simpson’ lettuce.
- Start Seeds Indoors (Optional but Recommended): For longer growing seasons or specific crops, starting seeds indoors gives you a head start. Use seed-starting mix (e.g., Espoma Organic Seed Starter Mix, ~$10 for 16qt bag) in seed trays (Jiffy Professional Greenhouse 72-cell kit, ~$15). Provide adequate light with LED grow lights (Barrina T5 2ft 4-pack LED Grow Lights, 20W each, ~$50) for 14-16 hours a day, positioned 2-4 inches above seedlings. Maintain consistent temperatures (65-75°F for most).
- Direct Sowing vs. Transplanting: Some crops (carrots, radishes, beans, corn) prefer direct sowing into the garden bed. Others (tomatoes, peppers, broccoli, kale) benefit from being started indoors and transplanted. Follow seed packet instructions for planting depths (e.g., lettuce seeds are often surface-sown or planted 1/8 inch deep, while beans are 1 inch deep) and spacing.
- Companion Planting: Strategically plant different species together to enhance growth, deter pests, and attract beneficial insects. For example, planting marigolds near tomatoes can deter nematodes, and basil improves tomato flavor. Nasturtiums can act as a trap crop for aphids.
- Succession Planting: For a continuous harvest, plant small batches of quick-growing crops (lettuce, radishes, cilantro) every 2-3 weeks. As one crop finishes, another is ready to take its place.
Step 6: Pest & Disease Management (Organic)
Maintaining a self sufficient garden from scratch means embracing organic pest and disease control.
- Integrated Pest Management (IPM): This holistic approach combines several strategies.
- Observation: Regularly inspect your plants for early signs of pests or disease. Catching issues early is key.
- Physical Barriers: Use row covers (e.g., Agribon AG-19 floating row cover, 10×20 ft, ~$20) to protect young plants from insect pests like cabbage worms and squash bugs. Install fences (e.g., 2×4 welded wire mesh, 4 ft tall, 50 ft roll ~$70) to keep out deer, rabbits, and other larger animals.
- Hand-Picking: For larger pests like tomato hornworms or squash bugs, simply pick them off and drop them into a bucket of soapy water.
- Companion Planting: As mentioned, certain plants repel pests. Marigolds, garlic, and onions are excellent deterrents.
- Attract Beneficial Insects: Plant flowers like dill, fennel, cosmos, and sweet alyssum to attract ladybugs, lacewings, and parasitic wasps, which prey on common garden pests.
- Organic Sprays & Treatments:
- Neem Oil: An excellent broad-spectrum organic insecticide and fungicide. Bonide Neem Oil Concentrate (16oz, ~$20) can be mixed at a rate of 1-2 tbsp per gallon of water and sprayed on affected plants.
- Insecticidal Soap: Effective against soft-bodied insects like aphids, whiteflies, and spider mites. Garden Safe Insecticidal Soap (24oz ready-to-use, ~$10).
- Bacillus thuringiensis (Bt): A naturally occurring soil bacterium that targets caterpillars and worms. Monterey BT Worm & Caterpillar Killer (16oz, ~$18) is highly effective and safe for beneficial insects.
- Copper or Sulfur Sprays: For fungal diseases like powdery mildew or blight, organic copper (e.g., Bonide Copper Fungicide, ~$15 for 1lb) or sulfur (e.g., Safer Brand Garden Fungicide, ~$10 for 16oz) can be used as a last resort.
Step 7: Harvesting & Seed Saving
The culmination of your efforts is the harvest, and seed saving closes the loop on self-sufficiency.
- Harvesting Techniques:
- Timing: Harvest vegetables at their peak ripeness for best flavor and nutritional value. For example, green beans should snap cleanly, cucumbers should be firm, and tomatoes should be fully colored.
- Frequency: Many crops, like zucchini, cucumbers, and bush beans, produce more if harvested frequently. Pick daily or every other day.
- Tools: Use clean, sharp pruners (e.g., Corona ClassicCUT Bypass Pruner BP 3180, ~$30) or a sharp knife for clean cuts, minimizing damage to the plant.
- Seed Saving: This is where the « self-sufficient » aspect truly shines.
- Selection: Only save seeds from your healthiest, most vigorous plants that show desired traits (disease resistance, good flavor, high yield).
- Isolation: To ensure true-to-type seeds, prevent cross-pollination. This can be challenging for open-pollinated crops that readily cross (e.g., squash, corn). For beginners, focus on self-pollinating plants like beans, peas, lettuce, and tomatoes.
- Processing:
- Dry Seeds (Beans, Peas, Lettuce, Grains): Allow pods/seed heads to dry completely on the plant. Harvest, shell, and clean the seeds, removing chaff.
- Wet Seeds (Tomatoes, Cucumbers, Squash): For tomatoes, ferment the seeds in water for a few days to remove the gel coating and inhibit disease. For cucumbers/squash, scrape out seeds, wash thoroughly, and dry.
- Drying: Spread seeds thinly on screens or paper plates in a cool, dry, well-ventilated area for 1-4 weeks. Ensure they are bone-dry before storage. I aim for less than 8% moisture content.
- Storage: Store seeds in airtight containers (glass jars with desiccant packets work well) in a cool, dark, dry place (ideally 40-50°F and 30-40% humidity). Label clearly with variety and date. Properly stored seeds can remain viable for 3-10 years or more.
Step 8: Season Extension & Winterizing
Extend your harvest and protect your garden for the off-season to truly maximize your self sufficient garden from scratch.
- Cold Frames: Simple structures with a transparent top (glass, polycarbonate, or old windows) that sit over garden beds. They trap solar heat, allowing you to grow cold-hardy crops (lettuce, spinach, kale, radishes) well into winter or start seeds earlier in spring. A basic cold frame can be built from 2×6 lumber and a sheet of polycarbonate for under $100.
- Hoop Houses/Low Tunnels: Larger structures made from flexible hoops (PVC pipe or EMT conduit) covered with greenhouse plastic. These provide more space and greater temperature moderation. A 10×20 ft DIY low tunnel kit can cost $200-$500, while a larger, more robust hoop house kit might be $1,000-$3,000. I use a 6×12 ft low tunnel made from 1/2-inch PVC hoops and 6mil greenhouse plastic, which extends my lettuce and spinach harvest by at least
Step 4: Water Management & Irrigation
Efficient water management is critical for a self sufficient garden from scratch, especially in off-grid living where water resources might be limited.
- Rainwater Harvesting: This is my primary source of irrigation water. A 55-gallon rain barrel (e.g., EarthMark Rain Barrel, ~$120-$150) connected to a downspout can collect significant water. For larger needs, I use two 275-gallon IBC totes (Intermediate Bulk Containers, often available used for $100-$200 each from food-grade sources) connected in series. A 1,000 sq ft roof can collect approximately 620 gallons of water for every inch of rainfall. My 1,500 sq ft roof provides ample water for my 600 sq ft garden through multiple barrels and totes.
- Drip Irrigation: This is by far the most water-efficient method, delivering water directly to the plant’s root zone, minimizing evaporation and weed growth.
- Components: A typical drip system includes a pressure regulator (e.g., Rain Bird PRV-10, ~$15), a filter (Rain Bird RBY filter, ~$20), main tubing (1/2-inch poly tubing, 100ft ~$25), smaller feeder lines (1/4-inch tubing), and emitters (0.5 GPH or 1 GPH per plant).
- Kits: For beginners, a starter kit like the Rain Bird Drip Irrigation Garden Kit (model DDI-KIT-1P, ~$40-$60) is excellent for a small garden. For larger setups, I use Netafim Techline CV Drip Line (500ft roll, ~$150-$200), which has pressure-compensating emitters built-in, ensuring even watering across long runs.
- Automation: For true self-sufficiency, consider a battery-powered timer (e.g., Orbit B-Hyve Bluetooth Hose Faucet Timer, ~$50) or a solar-powered timer connected to a small 12V pump.
- Solar-Powered Pumps: For lifting water from a well, pond, or large storage tank to your garden, a solar pump is a game-changer. For a smaller drip system, a Shurflo 2088-594-152 Diaphragm Pump (12V, 3.5 GPM, ~$180) can be powered by a single 100W solar panel (e.g., Renogy 100W Monocrystalline Solar Panel, ~$100) and a small 12V battery (e.g., a 50Ah LiFePO4 battery like the Battle Born 50Ah, ~$450). For larger operations or deeper wells, more robust systems are needed. If you’re looking to build out a comprehensive off-grid power system to support your garden’s water needs, or indeed your entire homestead, you might want to explore resources like the Power Grid Generator complete system guide to understand the full scope of what’s possible in terms of energy independence.
Step 5: Seed Selection & Planting
The choice of seeds is crucial for a truly self sufficient garden from scratch.
- Choose Heirloom & Open-Pollinated Seeds: These varieties produce seeds that will grow true to type, meaning you can save seeds from your harvest year after year. F1 hybrids, while often vigorous, will not produce consistent offspring from saved seeds. Reputable seed companies include Baker Creek Heirloom Seeds, High Mowing Organic Seeds, and Seed Savers Exchange. Start with common, reliable varieties like ‘Black Krim’ tomatoes, ‘Provider’ bush beans, ‘Waltham Butternut’ squash, and ‘Black Seeded Simpson’ lettuce.
- Start Seeds Indoors (Optional but Recommended): For longer growing seasons or specific crops, starting seeds indoors gives you a head start. Use seed-starting mix (e.g., Espoma Organic Seed Starter Mix, ~$10 for 16qt bag) in seed trays (Jiffy Professional Greenhouse 72-cell kit, ~$15). Provide adequate light with LED grow lights (Barrina T5 2ft 4-pack LED Grow Lights, 20W each, ~$50) for 14-16 hours a day, positioned 2-4 inches above seedlings. Maintain consistent temperatures (65-75°F for most).
- Direct Sowing vs. Transplanting: Some crops (carrots, radishes, beans, corn) prefer direct sowing into the garden bed. Others (tomatoes, peppers, broccoli, kale) benefit from being started indoors and transplanted. Follow seed packet instructions for planting depths (e.g., lettuce seeds are often surface-sown or planted 1/8 inch deep, while beans are 1 inch deep) and spacing.
- Companion Planting: Strategically plant different species together to enhance growth, deter pests, and attract beneficial insects. For example, planting marigolds near tomatoes can deter nematodes, and basil improves tomato flavor. Nasturtiums can act as a trap crop for aphids.
- Succession Planting: For a continuous harvest, plant small batches of quick-growing crops (lettuce, radishes, cilantro) every 2-3 weeks. As one crop finishes, another is ready to take its place.
Step 6: Pest & Disease Management (Organic)
Maintaining a self sufficient garden from scratch means embracing organic pest and disease control.
- Integrated Pest Management (IPM): This holistic approach combines several strategies.
- Observation: Regularly inspect your plants for early signs of pests or disease. Catching issues early is key.
- Physical Barriers: Use row covers (e.g., Agribon AG-19 floating row cover, 10×20 ft, ~$20) to protect young plants from insect pests like cabbage worms and squash bugs. Install fences (e.g., 2×4 welded wire mesh, 4 ft tall, 50 ft roll ~$70) to keep out deer, rabbits, and other larger animals.
- Hand-Picking: For larger pests like tomato hornworms or squash bugs, simply pick them off and drop them into a bucket of soapy water.
- Companion Planting: As mentioned, certain plants repel pests. Marigolds, garlic, and onions are excellent deterrents.
- Attract Beneficial Insects: Plant flowers like dill, fennel, cosmos, and sweet alyssum to attract ladybugs, lacewings, and parasitic wasps, which prey on common garden pests.
- Organic Sprays & Treatments:
- Neem Oil: An excellent broad-spectrum organic insecticide and fungicide. Bonide Neem Oil Concentrate (16oz, ~$20) can be mixed at a rate of 1-2 tbsp per gallon of water and sprayed on affected plants.
- Insecticidal Soap: Effective against soft-bodied insects like aphids, whiteflies, and spider mites. Garden Safe Insecticidal Soap (24oz ready-to-use, ~$10).
- Bacillus thuringiensis (Bt): A naturally occurring soil bacterium that targets caterpillars and worms. Monterey BT Worm & Caterpillar Killer (16oz, ~$18) is highly effective and safe for beneficial insects.
- Copper or Sulfur Sprays: For fungal diseases like powdery mildew or blight, organic copper (e.g., Bonide Copper Fungicide, ~$15 for 1lb) or sulfur (e.g., Safer Brand Garden Fungicide, ~$10 for 16oz) can be used as a last resort.
Step 7: Harvesting & Seed Saving
The culmination of your efforts is the harvest, and seed saving closes the loop on self-sufficiency.
- Harvesting Techniques:
- Timing: Harvest vegetables at their peak ripeness for best flavor and nutritional value. For example, green beans should snap cleanly, cucumbers should be firm, and tomatoes should be fully colored.
- Frequency: Many crops, like zucchini, cucumbers, and bush beans, produce more if harvested frequently. Pick daily or every other day.
- Tools: Use clean, sharp pruners (e.g., Corona ClassicCUT Bypass Pruner BP 3180, ~$30) or a sharp knife for clean cuts, minimizing damage to the plant.
- Seed Saving: This is where the « self-sufficient » aspect truly shines.
- Selection: Only save seeds from your healthiest, most vigorous plants that show desired traits (disease resistance, good flavor, high yield).
- Isolation: To ensure true-to-type seeds, prevent cross-pollination. This can be challenging for open-pollinated crops that readily cross (e.g., squash, corn). For beginners, focus on self-pollinating plants like beans, peas, lettuce, and tomatoes.
- Processing:
- Dry Seeds (Beans, Peas, Lettuce, Grains): Allow pods/seed heads to dry completely on the plant. Harvest, shell, and clean the seeds, removing chaff.
- Wet Seeds (Tomatoes, Cucumbers, Squash): For tomatoes, ferment the seeds in water for a few days to remove the gel coating and inhibit disease. For cucumbers/squash, scrape out seeds, wash thoroughly, and dry.
- Drying: Spread seeds thinly on screens or paper plates in a cool, dry, well-ventilated area for 1-4 weeks. Ensure they are bone-dry before storage. I aim for less than 8% moisture content.
- Storage: Store seeds in airtight containers (glass jars with desiccant packets work well) in a cool, dark, dry place (ideally 40-50°F and 30-40% humidity). Label clearly with variety and date. Properly stored seeds can remain viable for 3-10 years or more.
Step 8: Season Extension & Winterizing
Extend your harvest and protect your garden for the off-season to truly maximize your self sufficient garden from scratch.
- Cold Frames: Simple structures with a transparent top (glass, polycarbonate, or old windows) that sit over garden beds. They trap solar heat, allowing you to grow cold-hardy crops (lettuce, spinach, kale, radishes) well into winter or start seeds earlier in spring. A basic cold frame can be built from 2×6 lumber and a sheet of polycarbonate for under $100.
- Hoop Houses/Low Tunnels: Larger structures made from flexible hoops (PVC pipe or EMT conduit) covered with greenhouse plastic. These provide more space and greater temperature moderation. A 10×20 ft DIY low tunnel kit can cost $200-$500, while a larger, more robust hoop house kit might be $1,000-$3,000. I use a 6×12 ft low tunnel made from 1/2-inch PVC hoops and 6mil greenhouse plastic, which extends my lettuce and spinach harvest by at least
- In-Ground Beds: If you have excellent native soil and good drainage, in-ground beds are the most economical. Double-digging (loosening soil two shovel depths) can significantly improve drainage and aeration. For my main garden, I primarily use in-ground beds, but I focus on building up the soil over time with consistent compost additions and cover cropping. I aim for beds that are no wider than 3-4 feet so I can reach the center without stepping on the soil, compacting it.
- Raised Beds: Raised beds offer numerous advantages, especially for poor soil, heavy clay, or rocky areas. They provide better drainage, warm up faster in spring, reduce compaction, and make weeding and harvesting easier on your back.
- Material Options:
- Untreated Cedar: Naturally rot-resistant and chemical-free. A 4×8 ft bed, 12 inches deep, typically requires three 2x12x8 ft cedar boards, costing around $50-$60 per board (total ~$150-$180) plus corner brackets or screws. My first raised beds were cedar and are still going strong after 7 years.
- Galvanized Steel: Durable, long-lasting, and aesthetically pleasing. Brands like Vego Garden offer modular kits. A Vego Garden 17″ Tall 8-in-1 Metal Raised Garden Bed (can be configured to 4×8 ft) costs approximately $250-$300.
- Concrete Blocks/Stones: Very durable but can leach minerals (though generally safe once weathered) and can be expensive.
- Recycled Materials: Pallets (check for chemical treatment stamps like « HT » for heat-treated), old tires (controversial due to potential chemical leaching).
- Filling Raised Beds: Don’t just fill with topsoil. Use a « Hugelkultur » approach (logs, branches, leaves, then compost, then topsoil) or a mixture of 60% good quality topsoil, 30% compost, and 10% perlite or vermiculite for drainage. A 4x8x1 ft raised bed requires about 32 cubic feet (or ~1.2 cubic yards) of soil mix, which can cost $100-$200 depending on your source.
- Material Options:
Step 4: Water Management & Irrigation
Efficient water management is critical for a self sufficient garden from scratch, especially in off-grid living where water resources might be limited.
- Rainwater Harvesting: This is my primary source of irrigation water. A 55-gallon rain barrel (e.g., EarthMark Rain Barrel, ~$120-$150) connected to a downspout can collect significant water. For larger needs, I use two 275-gallon IBC totes (Intermediate Bulk Containers, often available used for $100-$200 each from food-grade sources) connected in series. A 1,000 sq ft roof can collect approximately 620 gallons of water for every inch of rainfall. My 1,500 sq ft roof provides ample water for my 600 sq ft garden through multiple barrels and totes.
- Drip Irrigation: This is by far the most water-efficient method, delivering water directly to the plant’s root zone, minimizing evaporation and weed growth.
- Components: A typical drip system includes a pressure regulator (e.g., Rain Bird PRV-10, ~$15), a filter (Rain Bird RBY filter, ~$20), main tubing (1/2-inch poly tubing, 100ft ~$25), smaller feeder lines (1/4-inch tubing), and emitters (0.5 GPH or 1 GPH per plant).
- Kits: For beginners, a starter kit like the Rain Bird Drip Irrigation Garden Kit (model DDI-KIT-1P, ~$40-$60) is excellent for a small garden. For larger setups, I use Netafim Techline CV Drip Line (500ft roll, ~$150-$200), which has pressure-compensating emitters built-in, ensuring even watering across long runs.
- Automation: For true self-sufficiency, consider a battery-powered timer (e.g., Orbit B-Hyve Bluetooth Hose Faucet Timer, ~$50) or a solar-powered timer connected to a small 12V pump.
- Solar-Powered Pumps: For lifting water from a well, pond, or large storage tank to your garden, a solar pump is a game-changer. For a smaller drip system, a Shurflo 2088-594-152 Diaphragm Pump (12V, 3.5 GPM, ~$180) can be powered by a single 100W solar panel (e.g., Renogy 100W Monocrystalline Solar Panel, ~$100) and a small 12V battery (e.g., a 50Ah LiFePO4 battery like the Battle Born 50Ah, ~$450). For larger operations or deeper wells, more robust systems are needed. If you’re looking to build out a comprehensive off-grid power system to support your garden’s water needs, or indeed your entire homestead, you might want to explore resources like the Power Grid Generator complete system guide to understand the full scope of what’s possible in terms of energy independence.
Step 5: Seed Selection & Planting
The choice of seeds is crucial for a truly self sufficient garden from scratch.
- Choose Heirloom & Open-Pollinated Seeds: These varieties produce seeds that will grow true to type, meaning you can save seeds from your harvest year after year. F1 hybrids, while often vigorous, will not produce consistent offspring from saved seeds. Reputable seed companies include Baker Creek Heirloom Seeds, High Mowing Organic Seeds, and Seed Savers Exchange. Start with common, reliable varieties like ‘Black Krim’ tomatoes, ‘Provider’ bush beans, ‘Waltham Butternut’ squash, and ‘Black Seeded Simpson’ lettuce.
- Start Seeds Indoors (Optional but Recommended): For longer growing seasons or specific crops, starting seeds indoors gives you a head start. Use seed-starting mix (e.g., Espoma Organic Seed Starter Mix, ~$10 for 16qt bag) in seed trays (Jiffy Professional Greenhouse 72-cell kit, ~$15). Provide adequate light with LED grow lights (Barrina T5 2ft 4-pack LED Grow Lights, 20W each, ~$50) for 14-16 hours a day, positioned 2-4 inches above seedlings. Maintain consistent temperatures (65-75°F for most).
- Direct Sowing vs. Transplanting: Some crops (carrots, radishes, beans, corn) prefer direct sowing into the garden bed. Others (tomatoes, peppers, broccoli, kale) benefit from being started indoors and transplanted. Follow seed packet instructions for planting depths (e.g., lettuce seeds are often surface-sown or planted 1/8 inch deep, while beans are 1 inch deep) and spacing.
- Companion Planting: Strategically plant different species together to enhance growth, deter pests, and attract beneficial insects. For example, planting marigolds near tomatoes can deter nematodes, and basil improves tomato flavor. Nasturtiums can act as a trap crop for aphids.
- Succession Planting: For a continuous harvest, plant small batches of quick-growing crops (lettuce, radishes, cilantro) every 2-3 weeks. As one crop finishes, another is ready to take its place.
Step 6: Pest & Disease Management (Organic)
Maintaining a self sufficient garden from scratch means embracing organic pest and disease control.
- Integrated Pest Management (IPM): This holistic approach combines several strategies.
- Observation: Regularly inspect your plants for early signs of pests or disease. Catching issues early is key.
- Physical Barriers: Use row covers (e.g., Agribon AG-19 floating row cover, 10×20 ft, ~$20) to protect young plants from insect pests like cabbage worms and squash bugs. Install fences (e.g., 2×4 welded wire mesh, 4 ft tall, 50 ft roll ~$70) to keep out deer, rabbits, and other larger animals.
- Hand-Picking: For larger pests like tomato hornworms or squash bugs, simply pick them off and drop them into a bucket of soapy water.
- Companion Planting: As mentioned, certain plants repel pests. Marigolds, garlic, and onions are excellent deterrents.
- Attract Beneficial Insects: Plant flowers like dill, fennel, cosmos, and sweet alyssum to attract ladybugs, lacewings, and parasitic wasps, which prey on common garden pests.
- Organic Sprays & Treatments:
- Neem Oil: An excellent broad-spectrum organic insecticide and fungicide. Bonide Neem Oil Concentrate (16oz, ~$20) can be mixed at a rate of 1-2 tbsp per gallon of water and sprayed on affected plants.
- Insecticidal Soap: Effective against soft-bodied insects like aphids, whiteflies, and spider mites. Garden Safe Insecticidal Soap (24oz ready-to-use, ~$10).
- Bacillus thuringiensis (Bt): A naturally occurring soil bacterium that targets caterpillars and worms. Monterey BT Worm & Caterpillar Killer (16oz, ~$18) is highly effective and safe for beneficial insects.
- Copper or Sulfur Sprays: For fungal diseases like powdery mildew or blight, organic copper (e.g., Bonide Copper Fungicide, ~$15 for 1lb) or sulfur (e.g., Safer Brand Garden Fungicide, ~$10 for 16oz) can be used as a last resort.
Step 7: Harvesting & Seed Saving
The culmination of your efforts is the harvest, and seed saving closes the loop on self-sufficiency.
- Harvesting Techniques:
- Timing: Harvest vegetables at their peak ripeness for best flavor and nutritional value. For example, green beans should snap cleanly, cucumbers should be firm, and tomatoes should be fully colored.
- Frequency: Many crops, like zucchini, cucumbers, and bush beans, produce more if harvested frequently. Pick daily or every other day.
- Tools: Use clean, sharp pruners (e.g., Corona ClassicCUT Bypass Pruner BP 3180, ~$30) or a sharp knife for clean cuts, minimizing damage to the plant.
- Seed Saving: This is where the « self-sufficient » aspect truly shines.
- Selection: Only save seeds from your healthiest, most vigorous plants that show desired traits (disease resistance, good flavor, high yield).
- Isolation: To ensure true-to-type seeds, prevent cross-pollination. This can be challenging for open-pollinated crops that readily cross (e.g., squash, corn). For beginners, focus on self-pollinating plants like beans, peas, lettuce, and tomatoes.
- Processing:
- Dry Seeds (Beans, Peas, Lettuce, Grains): Allow pods/seed heads to dry completely on the plant. Harvest, shell, and clean the seeds, removing chaff.
- Wet Seeds (Tomatoes, Cucumbers, Squash): For tomatoes, ferment the seeds in water for a few days to remove the gel coating and inhibit disease. For cucumbers/squash, scrape out seeds, wash thoroughly, and dry.
- Drying: Spread seeds thinly on screens or paper plates in a cool, dry, well-ventilated area for 1-4 weeks. Ensure they are bone-dry before storage. I aim for less than 8% moisture content.
- Storage: Store seeds in airtight containers (glass jars with desiccant packets work well) in a cool, dark, dry place (ideally 40-50°F and 30-40% humidity). Label clearly with variety and date. Properly stored seeds can remain viable for 3-10 years or more.
Step 8: Season Extension & Winterizing
Extend your harvest and protect your garden for the off-season to truly maximize your self sufficient garden from scratch.
- Cold Frames: Simple structures with a transparent top (glass, polycarbonate, or old windows) that sit over garden beds. They trap solar heat, allowing you to grow cold-hardy crops (lettuce, spinach, kale, radishes) well into winter or start seeds earlier in spring. A basic cold frame can be built from 2×6 lumber and a sheet of polycarbonate for under $100.
- Hoop Houses/Low Tunnels: Larger structures made from flexible hoops (PVC pipe or EMT conduit) covered with greenhouse plastic. These provide more space and greater temperature moderation. A 10×20 ft DIY low tunnel kit can cost $200-$500, while a larger, more robust hoop house kit might be $1,000-$3,000. I use a 6×12 ft low tunnel made from 1/2-inch PVC hoops and 6mil greenhouse plastic, which extends my lettuce and spinach harvest by at least
Deciding between raised beds and in-ground beds depends on your soil, budget, and physical capabilities.
- In-Ground Beds: If you have excellent native soil and good drainage, in-ground beds are the most economical. Double-digging (loosening soil two shovel depths) can significantly improve drainage and aeration. For my main garden, I primarily use in-ground beds, but I focus on building up the soil over time with consistent compost additions and cover cropping. I aim for beds that are no wider than 3-4 feet so I can reach the center without stepping on the soil, compacting it.
- Raised Beds: Raised beds offer numerous advantages, especially for poor soil, heavy clay, or rocky areas. They provide better drainage, warm up faster in spring, reduce compaction, and make weeding and harvesting easier on your back.
- Material Options:
- Untreated Cedar: Naturally rot-resistant and chemical-free. A 4×8 ft bed, 12 inches deep, typically requires three 2x12x8 ft cedar boards, costing around $50-$60 per board (total ~$150-$180) plus corner brackets or screws. My first raised beds were cedar and are still going strong after 7 years.
- Galvanized Steel: Durable, long-lasting, and aesthetically pleasing. Brands like Vego Garden offer modular kits. A Vego Garden 17″ Tall 8-in-1 Metal Raised Garden Bed (can be configured to 4×8 ft) costs approximately $250-$300.
- Concrete Blocks/Stones: Very durable but can leach minerals (though generally safe once weathered) and can be expensive.
- Recycled Materials: Pallets (check for chemical treatment stamps like « HT » for heat-treated), old tires (controversial due to potential chemical leaching).
- Filling Raised Beds: Don’t just fill with topsoil. Use a « Hugelkultur » approach (logs, branches, leaves, then compost, then topsoil) or a mixture of 60% good quality topsoil, 30% compost, and 10% perlite or vermiculite for drainage. A 4x8x1 ft raised bed requires about 32 cubic feet (or ~1.2 cubic yards) of soil mix, which can cost $100-$200 depending on your source.
- Material Options:
Step 4: Water Management & Irrigation
Efficient water management is critical for a self sufficient garden from scratch, especially in off-grid living where water resources might be limited.
- Rainwater Harvesting: This is my primary source of irrigation water. A 55-gallon rain barrel (e.g., EarthMark Rain Barrel, ~$120-$150) connected to a downspout can collect significant water. For larger needs, I use two 275-gallon IBC totes (Intermediate Bulk Containers, often available used for $100-$200 each from food-grade sources) connected in series. A 1,000 sq ft roof can collect approximately 620 gallons of water for every inch of rainfall. My 1,500 sq ft roof provides ample water for my 600 sq ft garden through multiple barrels and totes.
- Drip Irrigation: This is by far the most water-efficient method, delivering water directly to the plant’s root zone, minimizing evaporation and weed growth.
- Components: A typical drip system includes a pressure regulator (e.g., Rain Bird PRV-10, ~$15), a filter (Rain Bird RBY filter, ~$20), main tubing (1/2-inch poly tubing, 100ft ~$25), smaller feeder lines (1/4-inch tubing), and emitters (0.5 GPH or 1 GPH per plant).
- Kits: For beginners, a starter kit like the Rain Bird Drip Irrigation Garden Kit (model DDI-KIT-1P, ~$40-$60) is excellent for a small garden. For larger setups, I use Netafim Techline CV Drip Line (500ft roll, ~$150-$200), which has pressure-compensating emitters built-in, ensuring even watering across long runs.
- Automation: For true self-sufficiency, consider a battery-powered timer (e.g., Orbit B-Hyve Bluetooth Hose Faucet Timer, ~$50) or a solar-powered timer connected to a small 12V pump.
- Solar-Powered Pumps: For lifting water from a well, pond, or large storage tank to your garden, a solar pump is a game-changer. For a smaller drip system, a Shurflo 2088-594-152 Diaphragm Pump (12V, 3.5 GPM, ~$180) can be powered by a single 100W solar panel (e.g., Renogy 100W Monocrystalline Solar Panel, ~$100) and a small 12V battery (e.g., a 50Ah LiFePO4 battery like the Battle Born 50Ah, ~$450). For larger operations or deeper wells, more robust systems are needed. If you’re looking to build out a comprehensive off-grid power system to support your garden’s water needs, or indeed your entire homestead, you might want to explore resources like the Power Grid Generator complete system guide to understand the full scope of what’s possible in terms of energy independence.
Step 5: Seed Selection & Planting
The choice of seeds is crucial for a truly self sufficient garden from scratch.
- Choose Heirloom & Open-Pollinated Seeds: These varieties produce seeds that will grow true to type, meaning you can save seeds from your harvest year after year. F1 hybrids, while often vigorous, will not produce consistent offspring from saved seeds. Reputable seed companies include Baker Creek Heirloom Seeds, High Mowing Organic Seeds, and Seed Savers Exchange. Start with common, reliable varieties like ‘Black Krim’ tomatoes, ‘Provider’ bush beans, ‘Waltham Butternut’ squash, and ‘Black Seeded Simpson’ lettuce.
- Start Seeds Indoors (Optional but Recommended): For longer growing seasons or specific crops, starting seeds indoors gives you a head start. Use seed-starting mix (e.g., Espoma Organic Seed Starter Mix, ~$10 for 16qt bag) in seed trays (Jiffy Professional Greenhouse 72-cell kit, ~$15). Provide adequate light with LED grow lights (Barrina T5 2ft 4-pack LED Grow Lights, 20W each, ~$50) for 14-16 hours a day, positioned 2-4 inches above seedlings. Maintain consistent temperatures (65-75°F for most).
- Direct Sowing vs. Transplanting: Some crops (carrots, radishes, beans, corn) prefer direct sowing into the garden bed. Others (tomatoes, peppers, broccoli, kale) benefit from being started indoors and transplanted. Follow seed packet instructions for planting depths (e.g., lettuce seeds are often surface-sown or planted 1/8 inch deep, while beans are 1 inch deep) and spacing.
- Companion Planting: Strategically plant different species together to enhance growth, deter pests, and attract beneficial insects. For example, planting marigolds near tomatoes can deter nematodes, and basil improves tomato flavor. Nasturtiums can act as a trap crop for aphids.
- Succession Planting: For a continuous harvest, plant small batches of quick-growing crops (lettuce, radishes, cilantro) every 2-3 weeks. As one crop finishes, another is ready to take its place.
Step 6: Pest & Disease Management (Organic)
Maintaining a self sufficient garden from scratch means embracing organic pest and disease control.
- Integrated Pest Management (IPM): This holistic approach combines several strategies.
- Observation: Regularly inspect your plants for early signs of pests or disease. Catching issues early is key.
- Physical Barriers: Use row covers (e.g., Agribon AG-19 floating row cover, 10×20 ft, ~$20) to protect young plants from insect pests like cabbage worms and squash bugs. Install fences (e.g., 2×4 welded wire mesh, 4 ft tall, 50 ft roll ~$70) to keep out deer, rabbits, and other larger animals.
- Hand-Picking: For larger pests like tomato hornworms or squash bugs, simply pick them off and drop them into a bucket of soapy water.
- Companion Planting: As mentioned, certain plants repel pests. Marigolds, garlic, and onions are excellent deterrents.
- Attract Beneficial Insects: Plant flowers like dill, fennel, cosmos, and sweet alyssum to attract ladybugs, lacewings, and parasitic wasps, which prey on common garden pests.
- Organic Sprays & Treatments:
- Neem Oil: An excellent broad-spectrum organic insecticide and fungicide. Bonide Neem Oil Concentrate (16oz, ~$20) can be mixed at a rate of 1-2 tbsp per gallon of water and sprayed on affected plants.
- Insecticidal Soap: Effective against soft-bodied insects like aphids, whiteflies, and spider mites. Garden Safe Insecticidal Soap (24oz ready-to-use, ~$10).
- Bacillus thuringiensis (Bt): A naturally occurring soil bacterium that targets caterpillars and worms. Monterey BT Worm & Caterpillar Killer (16oz, ~$18) is highly effective and safe for beneficial insects.
- Copper or Sulfur Sprays: For fungal diseases like powdery mildew or blight, organic copper (e.g., Bonide Copper Fungicide, ~$15 for 1lb) or sulfur (e.g., Safer Brand Garden Fungicide, ~$10 for 16oz) can be used as a last resort.
Step 7: Harvesting & Seed Saving
The culmination of your efforts is the harvest, and seed saving closes the loop on self-sufficiency.
- Harvesting Techniques:
- Timing: Harvest vegetables at their peak ripeness for best flavor and nutritional value. For example, green beans should snap cleanly, cucumbers should be firm, and tomatoes should be fully colored.
- Frequency: Many crops, like zucchini, cucumbers, and bush beans, produce more if harvested frequently. Pick daily or every other day.
- Tools: Use clean, sharp pruners (e.g., Corona ClassicCUT Bypass Pruner BP 3180, ~$30) or a sharp knife for clean cuts, minimizing damage to the plant.
- Seed Saving: This is where the « self-sufficient » aspect truly shines.
- Selection: Only save seeds from your healthiest, most vigorous plants that show desired traits (disease resistance, good flavor, high yield).
- Isolation: To ensure true-to-type seeds, prevent cross-pollination. This can be challenging for open-pollinated crops that readily cross (e.g., squash, corn). For beginners, focus on self-pollinating plants like beans, peas, lettuce, and tomatoes.
- Processing:
- Dry Seeds (Beans, Peas, Lettuce, Grains): Allow pods/seed heads to dry completely on the plant. Harvest, shell, and clean the seeds, removing chaff.
- Wet Seeds (Tomatoes, Cucumbers, Squash): For tomatoes, ferment the seeds in water for a few days to remove the gel coating and inhibit disease. For cucumbers/squash, scrape out seeds, wash thoroughly, and dry.
- Drying: Spread seeds thinly on screens or paper plates in a cool, dry, well-ventilated area for 1-4 weeks. Ensure they are bone-dry before storage. I aim for less than 8% moisture content.
- Storage: Store seeds in airtight containers (glass jars with desiccant packets work well) in a cool, dark, dry place (ideally 40-50°F and 30-40% humidity). Label clearly with variety and date. Properly stored seeds can remain viable for 3-10 years or more.
Step 8: Season Extension & Winterizing
Extend your harvest and protect your garden for the off-season to truly maximize your self sufficient garden from scratch.
- Cold Frames: Simple structures with a transparent top (glass, polycarbonate, or old windows) that sit over garden beds. They trap solar heat, allowing you to grow cold-hardy crops (lettuce, spinach, kale, radishes) well into winter or start seeds earlier in spring. A basic cold frame can be built from 2×6 lumber and a sheet of polycarbonate for under $100.
- Hoop Houses/Low Tunnels: Larger structures made from flexible hoops (PVC pipe or EMT conduit) covered with greenhouse plastic. These provide more space and greater temperature moderation. A 10×20 ft DIY low tunnel kit can cost $200-$500, while a larger, more robust hoop house kit might be $1,000-$3,000. I use a 6×12 ft low tunnel made from 1/2-inch PVC hoops and 6mil greenhouse plastic, which extends my lettuce and spinach harvest by at least
Healthy soil is the bedrock of a productive, self-sufficient garden. You can’t guess what your soil needs; you have to test it.
- Perform a Soil Test: A professional soil test will give you precise data on your soil’s pH, nutrient levels (N-P-K), and organic matter content. I recommend sending a sample to your local agricultural extension office; it typically costs $20-$50 and provides detailed recommendations. Alternatively, for a quick homeowner check, a Rapitest Soil Test Kit (40-test kit, model 1663, ~$20 on Amazon) provides a good baseline for pH, Nitrogen, Phosphorus, and Potash. Aim for a pH between 6.0 and 7.0 for most vegetables.
- Amend for pH Imbalance: If your soil is too acidic (below 6.0), add agricultural lime (dolomitic lime adds magnesium, calcitic lime adds calcium). Apply 5-10 lbs per 100 sq ft for a moderate adjustment. If it’s too alkaline (above 7.0), add elemental sulfur (e.g., Espoma Soil Acidifier, ~$15 for 6.75 lbs) or generous amounts of organic matter like peat moss or pine needles.
- Build Organic Matter: This is the single most important step for long-term soil health. Organic matter improves soil structure, water retention, drainage, and nutrient availability. Incorporate 2-4 inches of high-quality compost into your top 6-12 inches of soil annually. I make my own compost from kitchen scraps, garden waste, and shredded leaves, but you can purchase it. Local nurseries often sell bulk compost for $30-$50 per cubic yard. Aged manure (from chickens, cows, or horses – ensure it’s well-rotted to avoid burning plants) is also excellent.
- Address Nutrient Deficiencies: Based on your soil test, add specific organic amendments. If Nitrogen (N) is low, add blood meal (12-0-0, ~$20 for 3 lbs) or feather meal. For Phosphorus (P), use bone meal (3-15-0, ~$15 for 3 lbs) or rock phosphate. For Potassium (K), greensand (0-0-2.5, ~$25 for 5 lbs) or kelp meal are good choices. I rely heavily on Espoma Organic Garden-tone (5-3-3, ~$25 for an 8lb bag) as a balanced, all-purpose organic fertilizer during planting.
Step 3: Garden Bed Preparation
Deciding between raised beds and in-ground beds depends on your soil, budget, and physical capabilities.
- In-Ground Beds: If you have excellent native soil and good drainage, in-ground beds are the most economical. Double-digging (loosening soil two shovel depths) can significantly improve drainage and aeration. For my main garden, I primarily use in-ground beds, but I focus on building up the soil over time with consistent compost additions and cover cropping. I aim for beds that are no wider than 3-4 feet so I can reach the center without stepping on the soil, compacting it.
- Raised Beds: Raised beds offer numerous advantages, especially for poor soil, heavy clay, or rocky areas. They provide better drainage, warm up faster in spring, reduce compaction, and make weeding and harvesting easier on your back.
- Material Options:
- Untreated Cedar: Naturally rot-resistant and chemical-free. A 4×8 ft bed, 12 inches deep, typically requires three 2x12x8 ft cedar boards, costing around $50-$60 per board (total ~$150-$180) plus corner brackets or screws. My first raised beds were cedar and are still going strong after 7 years.
- Galvanized Steel: Durable, long-lasting, and aesthetically pleasing. Brands like Vego Garden offer modular kits. A Vego Garden 17″ Tall 8-in-1 Metal Raised Garden Bed (can be configured to 4×8 ft) costs approximately $250-$300.
- Concrete Blocks/Stones: Very durable but can leach minerals (though generally safe once weathered) and can be expensive.
- Recycled Materials: Pallets (check for chemical treatment stamps like « HT » for heat-treated), old tires (controversial due to potential chemical leaching).
- Filling Raised Beds: Don’t just fill with topsoil. Use a « Hugelkultur » approach (logs, branches, leaves, then compost, then topsoil) or a mixture of 60% good quality topsoil, 30% compost, and 10% perlite or vermiculite for drainage. A 4x8x1 ft raised bed requires about 32 cubic feet (or ~1.2 cubic yards) of soil mix, which can cost $100-$200 depending on your source.
- Material Options:
Step 4: Water Management & Irrigation
Efficient water management is critical for a self sufficient garden from scratch, especially in off-grid living where water resources might be limited.
- Rainwater Harvesting: This is my primary source of irrigation water. A 55-gallon rain barrel (e.g., EarthMark Rain Barrel, ~$120-$150) connected to a downspout can collect significant water. For larger needs, I use two 275-gallon IBC totes (Intermediate Bulk Containers, often available used for $100-$200 each from food-grade sources) connected in series. A 1,000 sq ft roof can collect approximately 620 gallons of water for every inch of rainfall. My 1,500 sq ft roof provides ample water for my 600 sq ft garden through multiple barrels and totes.
- Drip Irrigation: This is by far the most water-efficient method, delivering water directly to the plant’s root zone, minimizing evaporation and weed growth.
- Components: A typical drip system includes a pressure regulator (e.g., Rain Bird PRV-10, ~$15), a filter (Rain Bird RBY filter, ~$20), main tubing (1/2-inch poly tubing, 100ft ~$25), smaller feeder lines (1/4-inch tubing), and emitters (0.5 GPH or 1 GPH per plant).
- Kits: For beginners, a starter kit like the Rain Bird Drip Irrigation Garden Kit (model DDI-KIT-1P, ~$40-$60) is excellent for a small garden. For larger setups, I use Netafim Techline CV Drip Line (500ft roll, ~$150-$200), which has pressure-compensating emitters built-in, ensuring even watering across long runs.
- Automation: For true self-sufficiency, consider a battery-powered timer (e.g., Orbit B-Hyve Bluetooth Hose Faucet Timer, ~$50) or a solar-powered timer connected to a small 12V pump.
- Solar-Powered Pumps: For lifting water from a well, pond, or large storage tank to your garden, a solar pump is a game-changer. For a smaller drip system, a Shurflo 2088-594-152 Diaphragm Pump (12V, 3.5 GPM, ~$180) can be powered by a single 100W solar panel (e.g., Renogy 100W Monocrystalline Solar Panel, ~$100) and a small 12V battery (e.g., a 50Ah LiFePO4 battery like the Battle Born 50Ah, ~$450). For larger operations or deeper wells, more robust systems are needed. If you’re looking to build out a comprehensive off-grid power system to support your garden’s water needs, or indeed your entire homestead, you might want to explore resources like the Power Grid Generator complete system guide to understand the full scope of what’s possible in terms of energy independence.
Step 5: Seed Selection & Planting
The choice of seeds is crucial for a truly self sufficient garden from scratch.
- Choose Heirloom & Open-Pollinated Seeds: These varieties produce seeds that will grow true to type, meaning you can save seeds from your harvest year after year. F1 hybrids, while often vigorous, will not produce consistent offspring from saved seeds. Reputable seed companies include Baker Creek Heirloom Seeds, High Mowing Organic Seeds, and Seed Savers Exchange. Start with common, reliable varieties like ‘Black Krim’ tomatoes, ‘Provider’ bush beans, ‘Waltham Butternut’ squash, and ‘Black Seeded Simpson’ lettuce.
- Start Seeds Indoors (Optional but Recommended): For longer growing seasons or specific crops, starting seeds indoors gives you a head start. Use seed-starting mix (e.g., Espoma Organic Seed Starter Mix, ~$10 for 16qt bag) in seed trays (Jiffy Professional Greenhouse 72-cell kit, ~$15). Provide adequate light with LED grow lights (Barrina T5 2ft 4-pack LED Grow Lights, 20W each, ~$50) for 14-16 hours a day, positioned 2-4 inches above seedlings. Maintain consistent temperatures (65-75°F for most).
- Direct Sowing vs. Transplanting: Some crops (carrots, radishes, beans, corn) prefer direct sowing into the garden bed. Others (tomatoes, peppers, broccoli, kale) benefit from being started indoors and transplanted. Follow seed packet instructions for planting depths (e.g., lettuce seeds are often surface-sown or planted 1/8 inch deep, while beans are 1 inch deep) and spacing.
- Companion Planting: Strategically plant different species together to enhance growth, deter pests, and attract beneficial insects. For example, planting marigolds near tomatoes can deter nematodes, and basil improves tomato flavor. Nasturtiums can act as a trap crop for aphids.
- Succession Planting: For a continuous harvest, plant small batches of quick-growing crops (lettuce, radishes, cilantro) every 2-3 weeks. As one crop finishes, another is ready to take its place.
Step 6: Pest & Disease Management (Organic)
Maintaining a self sufficient garden from scratch means embracing organic pest and disease control.
- Integrated Pest Management (IPM): This holistic approach combines several strategies.
- Observation: Regularly inspect your plants for early signs of pests or disease. Catching issues early is key.
- Physical Barriers: Use row covers (e.g., Agribon AG-19 floating row cover, 10×20 ft, ~$20) to protect young plants from insect pests like cabbage worms and squash bugs. Install fences (e.g., 2×4 welded wire mesh, 4 ft tall, 50 ft roll ~$70) to keep out deer, rabbits, and other larger animals.
- Hand-Picking: For larger pests like tomato hornworms or squash bugs, simply pick them off and drop them into a bucket of soapy water.
- Companion Planting: As mentioned, certain plants repel pests. Marigolds, garlic, and onions are excellent deterrents.
- Attract Beneficial Insects: Plant flowers like dill, fennel, cosmos, and sweet alyssum to attract ladybugs, lacewings, and parasitic wasps, which prey on common garden pests.
- Organic Sprays & Treatments:
- Neem Oil: An excellent broad-spectrum organic insecticide and fungicide. Bonide Neem Oil Concentrate (16oz, ~$20) can be mixed at a rate of 1-2 tbsp per gallon of water and sprayed on affected plants.
- Insecticidal Soap: Effective against soft-bodied insects like aphids, whiteflies, and spider mites. Garden Safe Insecticidal Soap (24oz ready-to-use, ~$10).
- Bacillus thuringiensis (Bt): A naturally occurring soil bacterium that targets caterpillars and worms. Monterey BT Worm & Caterpillar Killer (16oz, ~$18) is highly effective and safe for beneficial insects.
- Copper or Sulfur Sprays: For fungal diseases like powdery mildew or blight, organic copper (e.g., Bonide Copper Fungicide, ~$15 for 1lb) or sulfur (e.g., Safer Brand Garden Fungicide, ~$10 for 16oz) can be used as a last resort.
Step 7: Harvesting & Seed Saving
The culmination of your efforts is the harvest, and seed saving closes the loop on self-sufficiency.
- Harvesting Techniques:
- Timing: Harvest vegetables at their peak ripeness for best flavor and nutritional value. For example, green beans should snap cleanly, cucumbers should be firm, and tomatoes should be fully colored.
- Frequency: Many crops, like zucchini, cucumbers, and bush beans, produce more if harvested frequently. Pick daily or every other day.
- Tools: Use clean, sharp pruners (e.g., Corona ClassicCUT Bypass Pruner BP 3180, ~$30) or a sharp knife for clean cuts, minimizing damage to the plant.
- Seed Saving: This is where the « self-sufficient » aspect truly shines.
- Selection: Only save seeds from your healthiest, most vigorous plants that show desired traits (disease resistance, good flavor, high yield).
- Isolation: To ensure true-to-type seeds, prevent cross-pollination. This can be challenging for open-pollinated crops that readily cross (e.g., squash, corn). For beginners, focus on self-pollinating plants like beans, peas, lettuce, and tomatoes.
- Processing:
- Dry Seeds (Beans, Peas, Lettuce, Grains): Allow pods/seed heads to dry completely on the plant. Harvest, shell, and clean the seeds, removing chaff.
- Wet Seeds (Tomatoes, Cucumbers, Squash): For tomatoes, ferment the seeds in water for a few days to remove the gel coating and inhibit disease. For cucumbers/squash, scrape out seeds, wash thoroughly, and dry.
- Drying: Spread seeds thinly on screens or paper plates in a cool, dry, well-ventilated area for 1-4 weeks. Ensure they are bone-dry before storage. I aim for less than 8% moisture content.
- Storage: Store seeds in airtight containers (glass jars with desiccant packets work well) in a cool, dark, dry place (ideally 40-50°F and 30-40% humidity). Label clearly with variety and date. Properly stored seeds can remain viable for 3-10 years or more.
Step 8: Season Extension & Winterizing
Extend your harvest and protect your garden for the off-season to truly maximize your self sufficient garden from scratch.
- Cold Frames: Simple structures with a transparent top (glass, polycarbonate, or old windows) that sit over garden beds. They trap solar heat, allowing you to grow cold-hardy crops (lettuce, spinach, kale, radishes) well into winter or start seeds earlier in spring. A basic cold frame can be built from 2×6 lumber and a sheet of polycarbonate for under $100.
- Hoop Houses/Low Tunnels: Larger structures made from flexible hoops (PVC pipe or EMT conduit) covered with greenhouse plastic. These provide more space and greater temperature moderation. A 10×20 ft DIY low tunnel kit can cost $200-$500, while a larger, more robust hoop house kit might be $1,000-$3,000. I use a 6×12 ft low tunnel made from 1/2-inch PVC hoops and 6mil greenhouse plastic, which extends my lettuce and spinach harvest by at least
- Integrated Pest Management (IPM): This holistic approach combines several strategies.
- Integrated Pest Management (IPM): This holistic approach combines several strategies.
Step 7: Harvesting & Seed Saving
The culmination of your efforts is the harvest, and seed saving closes the loop on self-sufficiency.
- Harvesting Techniques:
- Timing: Harvest vegetables at their peak ripeness for best flavor and nutritional value. For example, green beans should snap cleanly, cucumbers should be firm, and tomatoes should be fully colored.
- Frequency: Many crops, like zucchini, cucumbers, and bush beans, produce more if harvested frequently. Pick daily or every other day.
- Tools: Use clean, sharp pruners (e.g., Corona ClassicCUT Bypass Pruner BP 3180, ~$30) or a sharp knife for clean cuts, minimizing damage to the plant.
- Seed Saving: This is where the « self-sufficient » aspect truly shines.
- Selection: Only save seeds from your healthiest, most vigorous plants that show desired traits (disease resistance, good flavor, high yield).
- Isolation: To ensure true-to-type seeds, prevent cross-pollination. This can be challenging for open-pollinated crops that readily cross (e.g., squash, corn). For beginners, focus on self-pollinating plants like beans, peas, lettuce, and tomatoes.
- Processing:
- Dry Seeds (Beans, Peas, Lettuce, Grains): Allow pods/seed heads to dry completely on the plant. Harvest, shell, and clean the seeds, removing chaff.
- Wet Seeds (Tomatoes, Cucumbers, Squash): For tomatoes, ferment the seeds in water for a few days to remove the gel coating and inhibit disease. For cucumbers/squash, scrape out seeds, wash thoroughly, and dry.
- Drying: Spread seeds thinly on screens or paper plates in a cool, dry, well-ventilated area for 1-4 weeks. Ensure they are bone-dry before storage. I aim for less than 8% moisture content.
- Storage: Store seeds in airtight containers (glass jars with desiccant packets work well) in a cool, dark, dry place (ideally 40-50°F and 30-40% humidity). Label clearly with variety and date. Properly stored seeds can remain viable for 3-10 years or more.
Step 8: Season Extension & Winterizing
Extend your harvest and protect your garden for the off-season to truly maximize your self sufficient garden from scratch.
- Cold Frames: Simple structures with a transparent top (glass, polycarbonate, or old windows) that sit over garden beds. They trap solar heat, allowing you to grow cold-hardy crops (lettuce, spinach, kale, radishes) well into winter or start seeds earlier in spring. A basic cold frame can be built from 2×6 lumber and a sheet of polycarbonate for under $100.
- Hoop Houses/Low Tunnels: Larger structures made from flexible hoops (PVC pipe or EMT conduit) covered with greenhouse plastic. These provide more space and greater temperature moderation. A 10×20 ft DIY low tunnel kit can cost $200-$500, while a larger, more robust hoop house kit might be $1,000-$3,000. I use a 6×12 ft low tunnel made from 1/2-inch PVC hoops and 6mil greenhouse plastic, which extends my lettuce and spinach harvest by at least
Maintaining a self sufficient garden from scratch means embracing organic pest and disease control.
- Integrated Pest Management (IPM): This holistic approach combines several strategies.
- Observation: Regularly inspect your plants for early signs of pests or disease. Catching issues early is key.
- Physical Barriers: Use row covers (e.g., Agribon AG-19 floating row cover, 10×20 ft, ~$20) to protect young plants from insect pests like cabbage worms and squash bugs. Install fences (e.g., 2×4 welded wire mesh, 4 ft tall, 50 ft roll ~$70) to keep out deer, rabbits, and other larger animals.
- Hand-Picking: For larger pests like tomato hornworms or squash bugs, simply pick them off and drop them into a bucket of soapy water.
- Companion Planting: As mentioned, certain plants repel pests. Marigolds, garlic, and onions are excellent deterrents.
- Attract Beneficial Insects: Plant flowers like dill, fennel, cosmos, and sweet alyssum to attract ladybugs, lacewings, and parasitic wasps, which prey on common garden pests.
- Organic Sprays & Treatments:
- Neem Oil: An excellent broad-spectrum organic insecticide and fungicide. Bonide Neem Oil Concentrate (16oz, ~$20) can be mixed at a rate of 1-2 tbsp per gallon of water and sprayed on affected plants.
- Insecticidal Soap: Effective against soft-bodied insects like aphids, whiteflies, and spider mites. Garden Safe Insecticidal Soap (24oz ready-to-use, ~$10).
- Bacillus thuringiensis (Bt): A naturally occurring soil bacterium that targets caterpillars and worms. Monterey BT Worm & Caterpillar Killer (16oz, ~$18) is highly effective and safe for beneficial insects.
- Copper or Sulfur Sprays: For fungal diseases like powdery mildew or blight, organic copper (e.g., Bonide Copper Fungicide, ~$15 for 1lb) or sulfur (e.g., Safer Brand Garden Fungicide, ~$10 for 16oz) can be used as a last resort.
Step 7: Harvesting & Seed Saving
The culmination of your efforts is the harvest, and seed saving closes the loop on self-sufficiency.
- Harvesting Techniques:
- Timing: Harvest vegetables at their peak ripeness for best flavor and nutritional value. For example, green beans should snap cleanly, cucumbers should be firm, and tomatoes should be fully colored.
- Frequency: Many crops, like zucchini, cucumbers, and bush beans, produce more if harvested frequently. Pick daily or every other day.
- Tools: Use clean, sharp pruners (e.g., Corona ClassicCUT Bypass Pruner BP 3180, ~$30) or a sharp knife for clean cuts, minimizing damage to the plant.
- Seed Saving: This is where the « self-sufficient » aspect truly shines.
- Selection: Only save seeds from your healthiest, most vigorous plants that show desired traits (disease resistance, good flavor, high yield).
- Isolation: To ensure true-to-type seeds, prevent cross-pollination. This can be challenging for open-pollinated crops that readily cross (e.g., squash, corn). For beginners, focus on self-pollinating plants like beans, peas, lettuce, and tomatoes.
- Processing:
- Dry Seeds (Beans, Peas, Lettuce, Grains): Allow pods/seed heads to dry completely on the plant. Harvest, shell, and clean the seeds, removing chaff.
- Wet Seeds (Tomatoes, Cucumbers, Squash): For tomatoes, ferment the seeds in water for a few days to remove the gel coating and inhibit disease. For cucumbers/squash, scrape out seeds, wash thoroughly, and dry.
- Drying: Spread seeds thinly on screens or paper plates in a cool, dry, well-ventilated area for 1-4 weeks. Ensure they are bone-dry before storage. I aim for less than 8% moisture content.
- Storage: Store seeds in airtight containers (glass jars with desiccant packets work well) in a cool, dark, dry place (ideally 40-50°F and 30-40% humidity). Label clearly with variety and date. Properly stored seeds can remain viable for 3-10 years or more.
Step 8: Season Extension & Winterizing
Extend your harvest and protect your garden for the off-season to truly maximize your self sufficient garden from scratch.
- Cold Frames: Simple structures with a transparent top (glass, polycarbonate, or old windows) that sit over garden beds. They trap solar heat, allowing you to grow cold-hardy crops (lettuce, spinach, kale, radishes) well into winter or start seeds earlier in spring. A basic cold frame can be built from 2×6 lumber and a sheet of polycarbonate for under $100.
- Hoop Houses/Low Tunnels: Larger structures made from flexible hoops (PVC pipe or EMT conduit) covered with greenhouse plastic. These provide more space and greater temperature moderation. A 10×20 ft DIY low tunnel kit can cost $200-$500, while a larger, more robust hoop house kit might be $1,000-$3,000. I use a 6×12 ft low tunnel made from 1/2-inch PVC hoops and 6mil greenhouse plastic, which extends my lettuce and spinach harvest by at least
Step 6: Pest & Disease Management (Organic)
Maintaining a self sufficient garden from scratch means embracing organic pest and disease control.
- Integrated Pest Management (IPM): This holistic approach combines several strategies.
- Observation: Regularly inspect your plants for early signs of pests or disease. Catching issues early is key.
- Physical Barriers: Use row covers (e.g., Agribon AG-19 floating row cover, 10×20 ft, ~$20) to protect young plants from insect pests like cabbage worms and squash bugs. Install fences (e.g., 2×4 welded wire mesh, 4 ft tall, 50 ft roll ~$70) to keep out deer, rabbits, and other larger animals.
- Hand-Picking: For larger pests like tomato hornworms or squash bugs, simply pick them off and drop them into a bucket of soapy water.
- Companion Planting: As mentioned, certain plants repel pests. Marigolds, garlic, and onions are excellent deterrents.
- Attract Beneficial Insects: Plant flowers like dill, fennel, cosmos, and sweet alyssum to attract ladybugs, lacewings, and parasitic wasps, which prey on common garden pests.
- Organic Sprays & Treatments:
- Neem Oil: An excellent broad-spectrum organic insecticide and fungicide. Bonide Neem Oil Concentrate (16oz, ~$20) can be mixed at a rate of 1-2 tbsp per gallon of water and sprayed on affected plants.
- Insecticidal Soap: Effective against soft-bodied insects like aphids, whiteflies, and spider mites. Garden Safe Insecticidal Soap (24oz ready-to-use, ~$10).
- Bacillus thuringiensis (Bt): A naturally occurring soil bacterium that targets caterpillars and worms. Monterey BT Worm & Caterpillar Killer (16oz, ~$18) is highly effective and safe for beneficial insects.
- Copper or Sulfur Sprays: For fungal diseases like powdery mildew or blight, organic copper (e.g., Bonide Copper Fungicide, ~$15 for 1lb) or sulfur (e.g., Safer Brand Garden Fungicide, ~$10 for 16oz) can be used as a last resort.
Step 7: Harvesting & Seed Saving
The culmination of your efforts is the harvest, and seed saving closes the loop on self-sufficiency.
- Harvesting Techniques:
- Timing: Harvest vegetables at their peak ripeness for best flavor and nutritional value. For example, green beans should snap cleanly, cucumbers should be firm, and tomatoes should be fully colored.
- Frequency: Many crops, like zucchini, cucumbers, and bush beans, produce more if harvested frequently. Pick daily or every other day.
- Tools: Use clean, sharp pruners (e.g., Corona ClassicCUT Bypass Pruner BP 3180, ~$30) or a sharp knife for clean cuts, minimizing damage to the plant.
- Seed Saving: This is where the « self-sufficient » aspect truly shines.
- Selection: Only save seeds from your healthiest, most vigorous plants that show desired traits (disease resistance, good flavor, high yield).
- Isolation: To ensure true-to-type seeds, prevent cross-pollination. This can be challenging for open-pollinated crops that readily cross (e.g., squash, corn). For beginners, focus on self-pollinating plants like beans, peas, lettuce, and tomatoes.
- Processing:
- Dry Seeds (Beans, Peas, Lettuce, Grains): Allow pods/seed heads to dry completely on the plant. Harvest, shell, and clean the seeds, removing chaff.
- Wet Seeds (Tomatoes, Cucumbers, Squash): For tomatoes, ferment the seeds in water for a few days to remove the gel coating and inhibit disease. For cucumbers/squash, scrape out seeds, wash thoroughly, and dry.
- Drying: Spread seeds thinly on screens or paper plates in a cool, dry, well-ventilated area for 1-4 weeks. Ensure they are bone-dry before storage. I aim for less than 8% moisture content.
- Storage: Store seeds in airtight containers (glass jars with desiccant packets work well) in a cool, dark, dry place (ideally 40-50°F and 30-40% humidity). Label clearly with variety and date. Properly stored seeds can remain viable for 3-10 years or more.
Step 8: Season Extension & Winterizing
Extend your harvest and protect your garden for the off-season to truly maximize your self sufficient garden from scratch.
- Cold Frames: Simple structures with a transparent top (glass, polycarbonate, or old windows) that sit over garden beds. They trap solar heat, allowing you to grow cold-hardy crops (lettuce, spinach, kale, radishes) well into winter or start seeds earlier in spring. A basic cold frame can be built from 2×6 lumber and a sheet of polycarbonate for under $100.
- Hoop Houses/Low Tunnels: Larger structures made from flexible hoops (PVC pipe or EMT conduit) covered with greenhouse plastic. These provide more space and greater temperature moderation. A 10×20 ft DIY low tunnel kit can cost $200-$500, while a larger, more robust hoop house kit might be $1,000-$3,000. I use a 6×12 ft low tunnel made from 1/2-inch PVC hoops and 6mil greenhouse plastic, which extends my lettuce and spinach harvest by at least
- Choose Heirloom & Open-Pollinated Seeds: These varieties produce seeds that will grow true to type, meaning you can save seeds from your harvest year after year. F1 hybrids, while often vigorous, will not produce consistent offspring from saved seeds. Reputable seed companies include Baker Creek Heirloom Seeds, High Mowing Organic Seeds, and Seed Savers Exchange. Start with common, reliable varieties like ‘Black Krim’ tomatoes, ‘Provider’ bush beans, ‘Waltham Butternut’ squash, and ‘Black Seeded Simpson’ lettuce.
- Start Seeds Indoors (Optional but Recommended): For longer growing seasons or specific crops, starting seeds indoors gives you a head start. Use seed-starting mix (e.g., Espoma Organic Seed Starter Mix, ~$10 for 16qt bag) in seed trays (Jiffy Professional Greenhouse 72-cell kit, ~$15). Provide adequate light with LED grow lights (Barrina T5 2ft 4-pack LED Grow Lights, 20W each, ~$50) for 14-16 hours a day, positioned 2-4 inches above seedlings. Maintain consistent temperatures (65-75°F for most).
- Direct Sowing vs. Transplanting: Some crops (carrots, radishes, beans, corn) prefer direct sowing into the garden bed. Others (tomatoes, peppers, broccoli, kale) benefit from being started indoors and transplanted. Follow seed packet instructions for planting depths (e.g., lettuce seeds are often surface-sown or planted 1/8 inch deep, while beans are 1 inch deep) and spacing.
- Companion Planting: Strategically plant different species together to enhance growth, deter pests, and attract beneficial insects. For example, planting marigolds near tomatoes can deter nematodes, and basil improves tomato flavor. Nasturtiums can act as a trap crop for aphids.
- Succession Planting: For a continuous harvest, plant small batches of quick-growing crops (lettuce, radishes, cilantro) every 2-3 weeks. As one crop finishes, another is ready to take its place.
Step 6: Pest & Disease Management (Organic)
Maintaining a self sufficient garden from scratch means embracing organic pest and disease control.
- Integrated Pest Management (IPM): This holistic approach combines several strategies.
- Observation: Regularly inspect your plants for early signs of pests or disease. Catching issues early is key.
- Physical Barriers: Use row covers (e.g., Agribon AG-19 floating row cover, 10×20 ft, ~$20) to protect young plants from insect pests like cabbage worms and squash bugs. Install fences (e.g., 2×4 welded wire mesh, 4 ft tall, 50 ft roll ~$70) to keep out deer, rabbits, and other larger animals.
- Hand-Picking: For larger pests like tomato hornworms or squash bugs, simply pick them off and drop them into a bucket of soapy water.
- Companion Planting: As mentioned, certain plants repel pests. Marigolds, garlic, and onions are excellent deterrents.
- Attract Beneficial Insects: Plant flowers like dill, fennel, cosmos, and sweet alyssum to attract ladybugs, lacewings, and parasitic wasps, which prey on common garden pests.
- Organic Sprays & Treatments:
- Neem Oil: An excellent broad-spectrum organic insecticide and fungicide. Bonide Neem Oil Concentrate (16oz, ~$20) can be mixed at a rate of 1-2 tbsp per gallon of water and sprayed on affected plants.
- Insecticidal Soap: Effective against soft-bodied insects like aphids, whiteflies, and spider mites. Garden Safe Insecticidal Soap (24oz ready-to-use, ~$10).
- Bacillus thuringiensis (Bt): A naturally occurring soil bacterium that targets caterpillars and worms. Monterey BT Worm & Caterpillar Killer (16oz, ~$18) is highly effective and safe for beneficial insects.
- Copper or Sulfur Sprays: For fungal diseases like powdery mildew or blight, organic copper (e.g., Bonide Copper Fungicide, ~$15 for 1lb) or sulfur (e.g., Safer Brand Garden Fungicide, ~$10 for 16oz) can be used as a last resort.
Step 7: Harvesting & Seed Saving
The culmination of your efforts is the harvest, and seed saving closes the loop on self-sufficiency.
- Harvesting Techniques:
- Timing: Harvest vegetables at their peak ripeness for best flavor and nutritional value. For example, green beans should snap cleanly, cucumbers should be firm, and tomatoes should be fully colored.
- Frequency: Many crops, like zucchini, cucumbers, and bush beans, produce more if harvested frequently. Pick daily or every other day.
- Tools: Use clean, sharp pruners (e.g., Corona ClassicCUT Bypass Pruner BP 3180, ~$30) or a sharp knife for clean cuts, minimizing damage to the plant.
- Seed Saving: This is where the « self-sufficient » aspect truly shines.
- Selection: Only save seeds from your healthiest, most vigorous plants that show desired traits (disease resistance, good flavor, high yield).
- Isolation: To ensure true-to-type seeds, prevent cross-pollination. This can be challenging for open-pollinated crops that readily cross (e.g., squash, corn). For beginners, focus on self-pollinating plants like beans, peas, lettuce, and tomatoes.
- Processing:
- Dry Seeds (Beans, Peas, Lettuce, Grains): Allow pods/seed heads to dry completely on the plant. Harvest, shell, and clean the seeds, removing chaff.
- Wet Seeds (Tomatoes, Cucumbers, Squash): For tomatoes, ferment the seeds in water for a few days to remove the gel coating and inhibit disease. For cucumbers/squash, scrape out seeds, wash thoroughly, and dry.
- Drying: Spread seeds thinly on screens or paper plates in a cool, dry, well-ventilated area for 1-4 weeks. Ensure they are bone-dry before storage. I aim for less than 8% moisture content.
- Storage: Store seeds in airtight containers (glass jars with desiccant packets work well) in a cool, dark, dry place (ideally 40-50°F and 30-40% humidity). Label clearly with variety and date. Properly stored seeds can remain viable for 3-10 years or more.
Step 8: Season Extension & Winterizing
Extend your harvest and protect your garden for the off-season to truly maximize your self sufficient garden from scratch.
- Cold Frames: Simple structures with a transparent top (glass, polycarbonate, or old windows) that sit over garden beds. They trap solar heat, allowing you to grow cold-hardy crops (lettuce, spinach, kale, radishes) well into winter or start seeds earlier in spring. A basic cold frame can be built from 2×6 lumber and a sheet of polycarbonate for under $100.
- Hoop Houses/Low Tunnels: Larger structures made from flexible hoops (PVC pipe or EMT conduit) covered with greenhouse plastic. These provide more space and greater temperature moderation. A 10×20 ft DIY low tunnel kit can cost $200-$500, while a larger, more robust hoop house kit might be $1,000-$3,000. I use a 6×12 ft low tunnel made from 1/2-inch PVC hoops and 6mil greenhouse plastic, which extends my lettuce and spinach harvest by at least
The choice of seeds is crucial for a truly self sufficient garden from scratch.
- Choose Heirloom & Open-Pollinated Seeds: These varieties produce seeds that will grow true to type, meaning you can save seeds from your harvest year after year. F1 hybrids, while often vigorous, will not produce consistent offspring from saved seeds. Reputable seed companies include Baker Creek Heirloom Seeds, High Mowing Organic Seeds, and Seed Savers Exchange. Start with common, reliable varieties like ‘Black Krim’ tomatoes, ‘Provider’ bush beans, ‘Waltham Butternut’ squash, and ‘Black Seeded Simpson’ lettuce.
- Start Seeds Indoors (Optional but Recommended): For longer growing seasons or specific crops, starting seeds indoors gives you a head start. Use seed-starting mix (e.g., Espoma Organic Seed Starter Mix, ~$10 for 16qt bag) in seed trays (Jiffy Professional Greenhouse 72-cell kit, ~$15). Provide adequate light with LED grow lights (Barrina T5 2ft 4-pack LED Grow Lights, 20W each, ~$50) for 14-16 hours a day, positioned 2-4 inches above seedlings. Maintain consistent temperatures (65-75°F for most).
- Direct Sowing vs. Transplanting: Some crops (carrots, radishes, beans, corn) prefer direct sowing into the garden bed. Others (tomatoes, peppers, broccoli, kale) benefit from being started indoors and transplanted. Follow seed packet instructions for planting depths (e.g., lettuce seeds are often surface-sown or planted 1/8 inch deep, while beans are 1 inch deep) and spacing.
- Companion Planting: Strategically plant different species together to enhance growth, deter pests, and attract beneficial insects. For example, planting marigolds near tomatoes can deter nematodes, and basil improves tomato flavor. Nasturtiums can act as a trap crop for aphids.
- Succession Planting: For a continuous harvest, plant small batches of quick-growing crops (lettuce, radishes, cilantro) every 2-3 weeks. As one crop finishes, another is ready to take its place.
Step 6: Pest & Disease Management (Organic)
Maintaining a self sufficient garden from scratch means embracing organic pest and disease control.
- Integrated Pest Management (IPM): This holistic approach combines several strategies.
- Observation: Regularly inspect your plants for early signs of pests or disease. Catching issues early is key.
- Physical Barriers: Use row covers (e.g., Agribon AG-19 floating row cover, 10×20 ft, ~$20) to protect young plants from insect pests like cabbage worms and squash bugs. Install fences (e.g., 2×4 welded wire mesh, 4 ft tall, 50 ft roll ~$70) to keep out deer, rabbits, and other larger animals.
- Hand-Picking: For larger pests like tomato hornworms or squash bugs, simply pick them off and drop them into a bucket of soapy water.
- Companion Planting: As mentioned, certain plants repel pests. Marigolds, garlic, and onions are excellent deterrents.
- Attract Beneficial Insects: Plant flowers like dill, fennel, cosmos, and sweet alyssum to attract ladybugs, lacewings, and parasitic wasps, which prey on common garden pests.
- Organic Sprays & Treatments:
- Neem Oil: An excellent broad-spectrum organic insecticide and fungicide. Bonide Neem Oil Concentrate (16oz, ~$20) can be mixed at a rate of 1-2 tbsp per gallon of water and sprayed on affected plants.
- Insecticidal Soap: Effective against soft-bodied insects like aphids, whiteflies, and spider mites. Garden Safe Insecticidal Soap (24oz ready-to-use, ~$10).
- Bacillus thuringiensis (Bt): A naturally occurring soil bacterium that targets caterpillars and worms. Monterey BT Worm & Caterpillar Killer (16oz, ~$18) is highly effective and safe for beneficial insects.
- Copper or Sulfur Sprays: For fungal diseases like powdery mildew or blight, organic copper (e.g., Bonide Copper Fungicide, ~$15 for 1lb) or sulfur (e.g., Safer Brand Garden Fungicide, ~$10 for 16oz) can be used as a last resort.
Step 7: Harvesting & Seed Saving
The culmination of your efforts is the harvest, and seed saving closes the loop on self-sufficiency.
- Harvesting Techniques:
- Timing: Harvest vegetables at their peak ripeness for best flavor and nutritional value. For example, green beans should snap cleanly, cucumbers should be firm, and tomatoes should be fully colored.
- Frequency: Many crops, like zucchini, cucumbers, and bush beans, produce more if harvested frequently. Pick daily or every other day.
- Tools: Use clean, sharp pruners (e.g., Corona ClassicCUT Bypass Pruner BP 3180, ~$30) or a sharp knife for clean cuts, minimizing damage to the plant.
- Seed Saving: This is where the « self-sufficient » aspect truly shines.
- Selection: Only save seeds from your healthiest, most vigorous plants that show desired traits (disease resistance, good flavor, high yield).
- Isolation: To ensure true-to-type seeds, prevent cross-pollination. This can be challenging for open-pollinated crops that readily cross (e.g., squash, corn). For beginners, focus on self-pollinating plants like beans, peas, lettuce, and tomatoes.
- Processing:
- Dry Seeds (Beans, Peas, Lettuce, Grains): Allow pods/seed heads to dry completely on the plant. Harvest, shell, and clean the seeds, removing chaff.
- Wet Seeds (Tomatoes, Cucumbers, Squash): For tomatoes, ferment the seeds in water for a few days to remove the gel coating and inhibit disease. For cucumbers/squash, scrape out seeds, wash thoroughly, and dry.
- Drying: Spread seeds thinly on screens or paper plates in a cool, dry, well-ventilated area for 1-4 weeks. Ensure they are bone-dry before storage. I aim for less than 8% moisture content.
- Storage: Store seeds in airtight containers (glass jars with desiccant packets work well) in a cool, dark, dry place (ideally 40-50°F and 30-40% humidity). Label clearly with variety and date. Properly stored seeds can remain viable for 3-10 years or more.
Step 8: Season Extension & Winterizing
Extend your harvest and protect your garden for the off-season to truly maximize your self sufficient garden from scratch.
- Cold Frames: Simple structures with a transparent top (glass, polycarbonate, or old windows) that sit over garden beds. They trap solar heat, allowing you to grow cold-hardy crops (lettuce, spinach, kale, radishes) well into winter or start seeds earlier in spring. A basic cold frame can be built from 2×6 lumber and a sheet of polycarbonate for under $100.
- Hoop Houses/Low Tunnels: Larger structures made from flexible hoops (PVC pipe or EMT conduit) covered with greenhouse plastic. These provide more space and greater temperature moderation. A 10×20 ft DIY low tunnel kit can cost $200-$500, while a larger, more robust hoop house kit might be $1,000-$3,000. I use a 6×12 ft low tunnel made from 1/2-inch PVC hoops and 6mil greenhouse plastic, which extends my lettuce and spinach harvest by at least
Step 5: Seed Selection & Planting
The choice of seeds is crucial for a truly self sufficient garden from scratch.
- Choose Heirloom & Open-Pollinated Seeds: These varieties produce seeds that will grow true to type, meaning you can save seeds from your harvest year after year. F1 hybrids, while often vigorous, will not produce consistent offspring from saved seeds. Reputable seed companies include Baker Creek Heirloom Seeds, High Mowing Organic Seeds, and Seed Savers Exchange. Start with common, reliable varieties like ‘Black Krim’ tomatoes, ‘Provider’ bush beans, ‘Waltham Butternut’ squash, and ‘Black Seeded Simpson’ lettuce.
- Start Seeds Indoors (Optional but Recommended): For longer growing seasons or specific crops, starting seeds indoors gives you a head start. Use seed-starting mix (e.g., Espoma Organic Seed Starter Mix, ~$10 for 16qt bag) in seed trays (Jiffy Professional Greenhouse 72-cell kit, ~$15). Provide adequate light with LED grow lights (Barrina T5 2ft 4-pack LED Grow Lights, 20W each, ~$50) for 14-16 hours a day, positioned 2-4 inches above seedlings. Maintain consistent temperatures (65-75°F for most).
- Direct Sowing vs. Transplanting: Some crops (carrots, radishes, beans, corn) prefer direct sowing into the garden bed. Others (tomatoes, peppers, broccoli, kale) benefit from being started indoors and transplanted. Follow seed packet instructions for planting depths (e.g., lettuce seeds are often surface-sown or planted 1/8 inch deep, while beans are 1 inch deep) and spacing.
- Companion Planting: Strategically plant different species together to enhance growth, deter pests, and attract beneficial insects. For example, planting marigolds near tomatoes can deter nematodes, and basil improves tomato flavor. Nasturtiums can act as a trap crop for aphids.
- Succession Planting: For a continuous harvest, plant small batches of quick-growing crops (lettuce, radishes, cilantro) every 2-3 weeks. As one crop finishes, another is ready to take its place.
Step 6: Pest & Disease Management (Organic)
Maintaining a self sufficient garden from scratch means embracing organic pest and disease control.
- Integrated Pest Management (IPM): This holistic approach combines several strategies.
- Observation: Regularly inspect your plants for early signs of pests or disease. Catching issues early is key.
- Physical Barriers: Use row covers (e.g., Agribon AG-19 floating row cover, 10×20 ft, ~$20) to protect young plants from insect pests like cabbage worms and squash bugs. Install fences (e.g., 2×4 welded wire mesh, 4 ft tall, 50 ft roll ~$70) to keep out deer, rabbits, and other larger animals.
- Hand-Picking: For larger pests like tomato hornworms or squash bugs, simply pick them off and drop them into a bucket of soapy water.
- Companion Planting: As mentioned, certain plants repel pests. Marigolds, garlic, and onions are excellent deterrents.
- Attract Beneficial Insects: Plant flowers like dill, fennel, cosmos, and sweet alyssum to attract ladybugs, lacewings, and parasitic wasps, which prey on common garden pests.
- Organic Sprays & Treatments:
- Neem Oil: An excellent broad-spectrum organic insecticide and fungicide. Bonide Neem Oil Concentrate (16oz, ~$20) can be mixed at a rate of 1-2 tbsp per gallon of water and sprayed on affected plants.
- Insecticidal Soap: Effective against soft-bodied insects like aphids, whiteflies, and spider mites. Garden Safe Insecticidal Soap (24oz ready-to-use, ~$10).
- Bacillus thuringiensis (Bt): A naturally occurring soil bacterium that targets caterpillars and worms. Monterey BT Worm & Caterpillar Killer (16oz, ~$18) is highly effective and safe for beneficial insects.
- Copper or Sulfur Sprays: For fungal diseases like powdery mildew or blight, organic copper (e.g., Bonide Copper Fungicide, ~$15 for 1lb) or sulfur (e.g., Safer Brand Garden Fungicide, ~$10 for 16oz) can be used as a last resort.
Step 7: Harvesting & Seed Saving
The culmination of your efforts is the harvest, and seed saving closes the loop on self-sufficiency.
- Harvesting Techniques:
- Timing: Harvest vegetables at their peak ripeness for best flavor and nutritional value. For example, green beans should snap cleanly, cucumbers should be firm, and tomatoes should be fully colored.
- Frequency: Many crops, like zucchini, cucumbers, and bush beans, produce more if harvested frequently. Pick daily or every other day.
- Tools: Use clean, sharp pruners (e.g., Corona ClassicCUT Bypass Pruner BP 3180, ~$30) or a sharp knife for clean cuts, minimizing damage to the plant.
- Seed Saving: This is where the « self-sufficient » aspect truly shines.
- Selection: Only save seeds from your healthiest, most vigorous plants that show desired traits (disease resistance, good flavor, high yield).
- Isolation: To ensure true-to-type seeds, prevent cross-pollination. This can be challenging for open-pollinated crops that readily cross (e.g., squash, corn). For beginners, focus on self-pollinating plants like beans, peas, lettuce, and tomatoes.
- Processing:
- Dry Seeds (Beans, Peas, Lettuce, Grains): Allow pods/seed heads to dry completely on the plant. Harvest, shell, and clean the seeds, removing chaff.
- Wet Seeds (Tomatoes, Cucumbers, Squash): For tomatoes, ferment the seeds in water for a few days to remove the gel coating and inhibit disease. For cucumbers/squash, scrape out seeds, wash thoroughly, and dry.
- Drying: Spread seeds thinly on screens or paper plates in a cool, dry, well-ventilated area for 1-4 weeks. Ensure they are bone-dry before storage. I aim for less than 8% moisture content.
- Storage: Store seeds in airtight containers (glass jars with desiccant packets work well) in a cool, dark, dry place (ideally 40-50°F and 30-40% humidity). Label clearly with variety and date. Properly stored seeds can remain viable for 3-10 years or more.
Step 8: Season Extension & Winterizing
Extend your harvest and protect your garden for the off-season to truly maximize your self sufficient garden from scratch.
- Cold Frames: Simple structures with a transparent top (glass, polycarbonate, or old windows) that sit over garden beds. They trap solar heat, allowing you to grow cold-hardy crops (lettuce, spinach, kale, radishes) well into winter or start seeds earlier in spring. A basic cold frame can be built from 2×6 lumber and a sheet of polycarbonate for under $100.
- Hoop Houses/Low Tunnels: Larger structures made from flexible hoops (PVC pipe or EMT conduit) covered with greenhouse plastic. These provide more space and greater temperature moderation. A 10×20 ft DIY low tunnel kit can cost $200-$500, while a larger, more robust hoop house kit might be $1,000-$3,000. I use a 6×12 ft low tunnel made from 1/2-inch PVC hoops and 6mil greenhouse plastic, which extends my lettuce and spinach harvest by at least
- Rainwater Harvesting: This is my primary source of irrigation water. A 55-gallon rain barrel (e.g., EarthMark Rain Barrel, ~$120-$150) connected to a downspout can collect significant water. For larger needs, I use two 275-gallon IBC totes (Intermediate Bulk Containers, often available used for $100-$200 each from food-grade sources) connected in series. A 1,000 sq ft roof can collect approximately 620 gallons of water for every inch of rainfall. My 1,500 sq ft roof provides ample water for my 600 sq ft garden through multiple barrels and totes.
- Drip Irrigation: This is by far the most water-efficient method, delivering water directly to the plant’s root zone, minimizing evaporation and weed growth.
- Components: A typical drip system includes a pressure regulator (e.g., Rain Bird PRV-10, ~$15), a filter (Rain Bird RBY filter, ~$20), main tubing (1/2-inch poly tubing, 100ft ~$25), smaller feeder lines (1/4-inch tubing), and emitters (0.5 GPH or 1 GPH per plant).
- Kits: For beginners, a starter kit like the Rain Bird Drip Irrigation Garden Kit (model DDI-KIT-1P, ~$40-$60) is excellent for a small garden. For larger setups, I use Netafim Techline CV Drip Line (500ft roll, ~$150-$200), which has pressure-compensating emitters built-in, ensuring even watering across long runs.
- Automation: For true self-sufficiency, consider a battery-powered timer (e.g., Orbit B-Hyve Bluetooth Hose Faucet Timer, ~$50) or a solar-powered timer connected to a small 12V pump.
- Solar-Powered Pumps: For lifting water from a well, pond, or large storage tank to your garden, a solar pump is a game-changer. For a smaller drip system, a Shurflo 2088-594-152 Diaphragm Pump (12V, 3.5 GPM, ~$180) can be powered by a single 100W solar panel (e.g., Renogy 100W Monocrystalline Solar Panel, ~$100) and a small 12V battery (e.g., a 50Ah LiFePO4 battery like the Battle Born 50Ah, ~$450). For larger operations or deeper wells, more robust systems are needed. If you’re looking to build out a comprehensive off-grid power system to support your garden’s water needs, or indeed your entire homestead, you might want to explore resources like the Power Grid Generator complete system guide to understand the full scope of what’s possible in terms of energy independence.
Step 5: Seed Selection & Planting
The choice of seeds is crucial for a truly self sufficient garden from scratch.
- Choose Heirloom & Open-Pollinated Seeds: These varieties produce seeds that will grow true to type, meaning you can save seeds from your harvest year after year. F1 hybrids, while often vigorous, will not produce consistent offspring from saved seeds. Reputable seed companies include Baker Creek Heirloom Seeds, High Mowing Organic Seeds, and Seed Savers Exchange. Start with common, reliable varieties like ‘Black Krim’ tomatoes, ‘Provider’ bush beans, ‘Waltham Butternut’ squash, and ‘Black Seeded Simpson’ lettuce.
- Start Seeds Indoors (Optional but Recommended): For longer growing seasons or specific crops, starting seeds indoors gives you a head start. Use seed-starting mix (e.g., Espoma Organic Seed Starter Mix, ~$10 for 16qt bag) in seed trays (Jiffy Professional Greenhouse 72-cell kit, ~$15). Provide adequate light with LED grow lights (Barrina T5 2ft 4-pack LED Grow Lights, 20W each, ~$50) for 14-16 hours a day, positioned 2-4 inches above seedlings. Maintain consistent temperatures (65-75°F for most).
- Direct Sowing vs. Transplanting: Some crops (carrots, radishes, beans, corn) prefer direct sowing into the garden bed. Others (tomatoes, peppers, broccoli, kale) benefit from being started indoors and transplanted. Follow seed packet instructions for planting depths (e.g., lettuce seeds are often surface-sown or planted 1/8 inch deep, while beans are 1 inch deep) and spacing.
- Companion Planting: Strategically plant different species together to enhance growth, deter pests, and attract beneficial insects. For example, planting marigolds near tomatoes can deter nematodes, and basil improves tomato flavor. Nasturtiums can act as a trap crop for aphids.
- Succession Planting: For a continuous harvest, plant small batches of quick-growing crops (lettuce, radishes, cilantro) every 2-3 weeks. As one crop finishes, another is ready to take its place.
Step 6: Pest & Disease Management (Organic)
Maintaining a self sufficient garden from scratch means embracing organic pest and disease control.
- Integrated Pest Management (IPM): This holistic approach combines several strategies.
- Observation: Regularly inspect your plants for early signs of pests or disease. Catching issues early is key.
- Physical Barriers: Use row covers (e.g., Agribon AG-19 floating row cover, 10×20 ft, ~$20) to protect young plants from insect pests like cabbage worms and squash bugs. Install fences (e.g., 2×4 welded wire mesh, 4 ft tall, 50 ft roll ~$70) to keep out deer, rabbits, and other larger animals.
- Hand-Picking: For larger pests like tomato hornworms or squash bugs, simply pick them off and drop them into a bucket of soapy water.
- Companion Planting: As mentioned, certain plants repel pests. Marigolds, garlic, and onions are excellent deterrents.
- Attract Beneficial Insects: Plant flowers like dill, fennel, cosmos, and sweet alyssum to attract ladybugs, lacewings, and parasitic wasps, which prey on common garden pests.
- Organic Sprays & Treatments:
- Neem Oil: An excellent broad-spectrum organic insecticide and fungicide. Bonide Neem Oil Concentrate (16oz, ~$20) can be mixed at a rate of 1-2 tbsp per gallon of water and sprayed on affected plants.
- Insecticidal Soap: Effective against soft-bodied insects like aphids, whiteflies, and spider mites. Garden Safe Insecticidal Soap (24oz ready-to-use, ~$10).
- Bacillus thuringiensis (Bt): A naturally occurring soil bacterium that targets caterpillars and worms. Monterey BT Worm & Caterpillar Killer (16oz, ~$18) is highly effective and safe for beneficial insects.
- Copper or Sulfur Sprays: For fungal diseases like powdery mildew or blight, organic copper (e.g., Bonide Copper Fungicide, ~$15 for 1lb) or sulfur (e.g., Safer Brand Garden Fungicide, ~$10 for 16oz) can be used as a last resort.
Step 7: Harvesting & Seed Saving
The culmination of your efforts is the harvest, and seed saving closes the loop on self-sufficiency.
- Harvesting Techniques:
- Timing: Harvest vegetables at their peak ripeness for best flavor and nutritional value. For example, green beans should snap cleanly, cucumbers should be firm, and tomatoes should be fully colored.
- Frequency: Many crops, like zucchini, cucumbers, and bush beans, produce more if harvested frequently. Pick daily or every other day.
- Tools: Use clean, sharp pruners (e.g., Corona ClassicCUT Bypass Pruner BP 3180, ~$30) or a sharp knife for clean cuts, minimizing damage to the plant.
- Seed Saving: This is where the « self-sufficient » aspect truly shines.
- Selection: Only save seeds from your healthiest, most vigorous plants that show desired traits (disease resistance, good flavor, high yield).
- Isolation: To ensure true-to-type seeds, prevent cross-pollination. This can be challenging for open-pollinated crops that readily cross (e.g., squash, corn). For beginners, focus on self-pollinating plants like beans, peas, lettuce, and tomatoes.
- Processing:
- Dry Seeds (Beans, Peas, Lettuce, Grains): Allow pods/seed heads to dry completely on the plant. Harvest, shell, and clean the seeds, removing chaff.
- Wet Seeds (Tomatoes, Cucumbers, Squash): For tomatoes, ferment the seeds in water for a few days to remove the gel coating and inhibit disease. For cucumbers/squash, scrape out seeds, wash thoroughly, and dry.
- Drying: Spread seeds thinly on screens or paper plates in a cool, dry, well-ventilated area for 1-4 weeks. Ensure they are bone-dry before storage. I aim for less than 8% moisture content.
- Storage: Store seeds in airtight containers (glass jars with desiccant packets work well) in a cool, dark, dry place (ideally 40-50°F and 30-40% humidity). Label clearly with variety and date. Properly stored seeds can remain viable for 3-10 years or more.
Step 8: Season Extension & Winterizing
Extend your harvest and protect your garden for the off-season to truly maximize your self sufficient garden from scratch.
- Cold Frames: Simple structures with a transparent top (glass, polycarbonate, or old windows) that sit over garden beds. They trap solar heat, allowing you to grow cold-hardy crops (lettuce, spinach, kale, radishes) well into winter or start seeds earlier in spring. A basic cold frame can be built from 2×6 lumber and a sheet of polycarbonate for under $100.
- Hoop Houses/Low Tunnels: Larger structures made from flexible hoops (PVC pipe or EMT conduit) covered with greenhouse plastic. These provide more space and greater temperature moderation. A 10×20 ft DIY low tunnel kit can cost $200-$500, while a larger, more robust hoop house kit might be $1,000-$3,000. I use a 6×12 ft low tunnel made from 1/2-inch PVC hoops and 6mil greenhouse plastic, which extends my lettuce and spinach harvest by at least
Efficient water management is critical for a self sufficient garden from scratch, especially in off-grid living where water resources might be limited.
- Rainwater Harvesting: This is my primary source of irrigation water. A 55-gallon rain barrel (e.g., EarthMark Rain Barrel, ~$120-$150) connected to a downspout can collect significant water. For larger needs, I use two 275-gallon IBC totes (Intermediate Bulk Containers, often available used for $100-$200 each from food-grade sources) connected in series. A 1,000 sq ft roof can collect approximately 620 gallons of water for every inch of rainfall. My 1,500 sq ft roof provides ample water for my 600 sq ft garden through multiple barrels and totes.
- Drip Irrigation: This is by far the most water-efficient method, delivering water directly to the plant’s root zone, minimizing evaporation and weed growth.
- Components: A typical drip system includes a pressure regulator (e.g., Rain Bird PRV-10, ~$15), a filter (Rain Bird RBY filter, ~$20), main tubing (1/2-inch poly tubing, 100ft ~$25), smaller feeder lines (1/4-inch tubing), and emitters (0.5 GPH or 1 GPH per plant).
- Kits: For beginners, a starter kit like the Rain Bird Drip Irrigation Garden Kit (model DDI-KIT-1P, ~$40-$60) is excellent for a small garden. For larger setups, I use Netafim Techline CV Drip Line (500ft roll, ~$150-$200), which has pressure-compensating emitters built-in, ensuring even watering across long runs.
- Automation: For true self-sufficiency, consider a battery-powered timer (e.g., Orbit B-Hyve Bluetooth Hose Faucet Timer, ~$50) or a solar-powered timer connected to a small 12V pump.
- Solar-Powered Pumps: For lifting water from a well, pond, or large storage tank to your garden, a solar pump is a game-changer. For a smaller drip system, a Shurflo 2088-594-152 Diaphragm Pump (12V, 3.5 GPM, ~$180) can be powered by a single 100W solar panel (e.g., Renogy 100W Monocrystalline Solar Panel, ~$100) and a small 12V battery (e.g., a 50Ah LiFePO4 battery like the Battle Born 50Ah, ~$450). For larger operations or deeper wells, more robust systems are needed. If you’re looking to build out a comprehensive off-grid power system to support your garden’s water needs, or indeed your entire homestead, you might want to explore resources like the Power Grid Generator complete system guide to understand the full scope of what’s possible in terms of energy independence.
Step 5: Seed Selection & Planting
The choice of seeds is crucial for a truly self sufficient garden from scratch.
- Choose Heirloom & Open-Pollinated Seeds: These varieties produce seeds that will grow true to type, meaning you can save seeds from your harvest year after year. F1 hybrids, while often vigorous, will not produce consistent offspring from saved seeds. Reputable seed companies include Baker Creek Heirloom Seeds, High Mowing Organic Seeds, and Seed Savers Exchange. Start with common, reliable varieties like ‘Black Krim’ tomatoes, ‘Provider’ bush beans, ‘Waltham Butternut’ squash, and ‘Black Seeded Simpson’ lettuce.
- Start Seeds Indoors (Optional but Recommended): For longer growing seasons or specific crops, starting seeds indoors gives you a head start. Use seed-starting mix (e.g., Espoma Organic Seed Starter Mix, ~$10 for 16qt bag) in seed trays (Jiffy Professional Greenhouse 72-cell kit, ~$15). Provide adequate light with LED grow lights (Barrina T5 2ft 4-pack LED Grow Lights, 20W each, ~$50) for 14-16 hours a day, positioned 2-4 inches above seedlings. Maintain consistent temperatures (65-75°F for most).
- Direct Sowing vs. Transplanting: Some crops (carrots, radishes, beans, corn) prefer direct sowing into the garden bed. Others (tomatoes, peppers, broccoli, kale) benefit from being started indoors and transplanted. Follow seed packet instructions for planting depths (e.g., lettuce seeds are often surface-sown or planted 1/8 inch deep, while beans are 1 inch deep) and spacing.
- Companion Planting: Strategically plant different species together to enhance growth, deter pests, and attract beneficial insects. For example, planting marigolds near tomatoes can deter nematodes, and basil improves tomato flavor. Nasturtiums can act as a trap crop for aphids.
- Succession Planting: For a continuous harvest, plant small batches of quick-growing crops (lettuce, radishes, cilantro) every 2-3 weeks. As one crop finishes, another is ready to take its place.
Step 6: Pest & Disease Management (Organic)
Maintaining a self sufficient garden from scratch means embracing organic pest and disease control.
- Integrated Pest Management (IPM): This holistic approach combines several strategies.
- Observation: Regularly inspect your plants for early signs of pests or disease. Catching issues early is key.
- Physical Barriers: Use row covers (e.g., Agribon AG-19 floating row cover, 10×20 ft, ~$20) to protect young plants from insect pests like cabbage worms and squash bugs. Install fences (e.g., 2×4 welded wire mesh, 4 ft tall, 50 ft roll ~$70) to keep out deer, rabbits, and other larger animals.
- Hand-Picking: For larger pests like tomato hornworms or squash bugs, simply pick them off and drop them into a bucket of soapy water.
- Companion Planting: As mentioned, certain plants repel pests. Marigolds, garlic, and onions are excellent deterrents.
- Attract Beneficial Insects: Plant flowers like dill, fennel, cosmos, and sweet alyssum to attract ladybugs, lacewings, and parasitic wasps, which prey on common garden pests.
- Organic Sprays & Treatments:
- Neem Oil: An excellent broad-spectrum organic insecticide and fungicide. Bonide Neem Oil Concentrate (16oz, ~$20) can be mixed at a rate of 1-2 tbsp per gallon of water and sprayed on affected plants.
- Insecticidal Soap: Effective against soft-bodied insects like aphids, whiteflies, and spider mites. Garden Safe Insecticidal Soap (24oz ready-to-use, ~$10).
- Bacillus thuringiensis (Bt): A naturally occurring soil bacterium that targets caterpillars and worms. Monterey BT Worm & Caterpillar Killer (16oz, ~$18) is highly effective and safe for beneficial insects.
- Copper or Sulfur Sprays: For fungal diseases like powdery mildew or blight, organic copper (e.g., Bonide Copper Fungicide, ~$15 for 1lb) or sulfur (e.g., Safer Brand Garden Fungicide, ~$10 for 16oz) can be used as a last resort.
Step 7: Harvesting & Seed Saving
The culmination of your efforts is the harvest, and seed saving closes the loop on self-sufficiency.
- Harvesting Techniques:
- Timing: Harvest vegetables at their peak ripeness for best flavor and nutritional value. For example, green beans should snap cleanly, cucumbers should be firm, and tomatoes should be fully colored.
- Frequency: Many crops, like zucchini, cucumbers, and bush beans, produce more if harvested frequently. Pick daily or every other day.
- Tools: Use clean, sharp pruners (e.g., Corona ClassicCUT Bypass Pruner BP 3180, ~$30) or a sharp knife for clean cuts, minimizing damage to the plant.
- Seed Saving: This is where the « self-sufficient » aspect truly shines.
- Selection: Only save seeds from your healthiest, most vigorous plants that show desired traits (disease resistance, good flavor, high yield).
- Isolation: To ensure true-to-type seeds, prevent cross-pollination. This can be challenging for open-pollinated crops that readily cross (e.g., squash, corn). For beginners, focus on self-pollinating plants like beans, peas, lettuce, and tomatoes.
- Processing:
- Dry Seeds (Beans, Peas, Lettuce, Grains): Allow pods/seed heads to dry completely on the plant. Harvest, shell, and clean the seeds, removing chaff.
- Wet Seeds (Tomatoes, Cucumbers, Squash): For tomatoes, ferment the seeds in water for a few days to remove the gel coating and inhibit disease. For cucumbers/squash, scrape out seeds, wash thoroughly, and dry.
- Drying: Spread seeds thinly on screens or paper plates in a cool, dry, well-ventilated area for 1-4 weeks. Ensure they are bone-dry before storage. I aim for less than 8% moisture content.
- Storage: Store seeds in airtight containers (glass jars with desiccant packets work well) in a cool, dark, dry place (ideally 40-50°F and 30-40% humidity). Label clearly with variety and date. Properly stored seeds can remain viable for 3-10 years or more.
Step 8: Season Extension & Winterizing
Extend your harvest and protect your garden for the off-season to truly maximize your self sufficient garden from scratch.
- Cold Frames: Simple structures with a transparent top (glass, polycarbonate, or old windows) that sit over garden beds. They trap solar heat, allowing you to grow cold-hardy crops (lettuce, spinach, kale, radishes) well into winter or start seeds earlier in spring. A basic cold frame can be built from 2×6 lumber and a sheet of polycarbonate for under $100.
- Hoop Houses/Low Tunnels: Larger structures made from flexible hoops (PVC pipe or EMT conduit) covered with greenhouse plastic. These provide more space and greater temperature moderation. A 10×20 ft DIY low tunnel kit can cost $200-$500, while a larger, more robust hoop house kit might be $1,000-$3,000. I use a 6×12 ft low tunnel made from 1/2-inch PVC hoops and 6mil greenhouse plastic, which extends my lettuce and spinach harvest by at least
Step 4: Water Management & Irrigation
Efficient water management is critical for a self sufficient garden from scratch, especially in off-grid living where water resources might be limited.
- Rainwater Harvesting: This is my primary source of irrigation water. A 55-gallon rain barrel (e.g., EarthMark Rain Barrel, ~$120-$150) connected to a downspout can collect significant water. For larger needs, I use two 275-gallon IBC totes (Intermediate Bulk Containers, often available used for $100-$200 each from food-grade sources) connected in series. A 1,000 sq ft roof can collect approximately 620 gallons of water for every inch of rainfall. My 1,500 sq ft roof provides ample water for my 600 sq ft garden through multiple barrels and totes.
- Drip Irrigation: This is by far the most water-efficient method, delivering water directly to the plant’s root zone, minimizing evaporation and weed growth.
- Components: A typical drip system includes a pressure regulator (e.g., Rain Bird PRV-10, ~$15), a filter (Rain Bird RBY filter, ~$20), main tubing (1/2-inch poly tubing, 100ft ~$25), smaller feeder lines (1/4-inch tubing), and emitters (0.5 GPH or 1 GPH per plant).
- Kits: For beginners, a starter kit like the Rain Bird Drip Irrigation Garden Kit (model DDI-KIT-1P, ~$40-$60) is excellent for a small garden. For larger setups, I use Netafim Techline CV Drip Line (500ft roll, ~$150-$200), which has pressure-compensating emitters built-in, ensuring even watering across long runs.
- Automation: For true self-sufficiency, consider a battery-powered timer (e.g., Orbit B-Hyve Bluetooth Hose Faucet Timer, ~$50) or a solar-powered timer connected to a small 12V pump.
- Solar-Powered Pumps: For lifting water from a well, pond, or large storage tank to your garden, a solar pump is a game-changer. For a smaller drip system, a Shurflo 2088-594-152 Diaphragm Pump (12V, 3.5 GPM, ~$180) can be powered by a single 100W solar panel (e.g., Renogy 100W Monocrystalline Solar Panel, ~$100) and a small 12V battery (e.g., a 50Ah LiFePO4 battery like the Battle Born 50Ah, ~$450). For larger operations or deeper wells, more robust systems are needed. If you’re looking to build out a comprehensive off-grid power system to support your garden’s water needs, or indeed your entire homestead, you might want to explore resources like the Power Grid Generator complete system guide to understand the full scope of what’s possible in terms of energy independence.
Step 5: Seed Selection & Planting
The choice of seeds is crucial for a truly self sufficient garden from scratch.
- Choose Heirloom & Open-Pollinated Seeds: These varieties produce seeds that will grow true to type, meaning you can save seeds from your harvest year after year. F1 hybrids, while often vigorous, will not produce consistent offspring from saved seeds. Reputable seed companies include Baker Creek Heirloom Seeds, High Mowing Organic Seeds, and Seed Savers Exchange. Start with common, reliable varieties like ‘Black Krim’ tomatoes, ‘Provider’ bush beans, ‘Waltham Butternut’ squash, and ‘Black Seeded Simpson’ lettuce.
- Start Seeds Indoors (Optional but Recommended): For longer growing seasons or specific crops, starting seeds indoors gives you a head start. Use seed-starting mix (e.g., Espoma Organic Seed Starter Mix, ~$10 for 16qt bag) in seed trays (Jiffy Professional Greenhouse 72-cell kit, ~$15). Provide adequate light with LED grow lights (Barrina T5 2ft 4-pack LED Grow Lights, 20W each, ~$50) for 14-16 hours a day, positioned 2-4 inches above seedlings. Maintain consistent temperatures (65-75°F for most).
- Direct Sowing vs. Transplanting: Some crops (carrots, radishes, beans, corn) prefer direct sowing into the garden bed. Others (tomatoes, peppers, broccoli, kale) benefit from being started indoors and transplanted. Follow seed packet instructions for planting depths (e.g., lettuce seeds are often surface-sown or planted 1/8 inch deep, while beans are 1 inch deep) and spacing.
- Companion Planting: Strategically plant different species together to enhance growth, deter pests, and attract beneficial insects. For example, planting marigolds near tomatoes can deter nematodes, and basil improves tomato flavor. Nasturtiums can act as a trap crop for aphids.
- Succession Planting: For a continuous harvest, plant small batches of quick-growing crops (lettuce, radishes, cilantro) every 2-3 weeks. As one crop finishes, another is ready to take its place.
Step 6: Pest & Disease Management (Organic)
Maintaining a self sufficient garden from scratch means embracing organic pest and disease control.
- Integrated Pest Management (IPM): This holistic approach combines several strategies.
- Observation: Regularly inspect your plants for early signs of pests or disease. Catching issues early is key.
- Physical Barriers: Use row covers (e.g., Agribon AG-19 floating row cover, 10×20 ft, ~$20) to protect young plants from insect pests like cabbage worms and squash bugs. Install fences (e.g., 2×4 welded wire mesh, 4 ft tall, 50 ft roll ~$70) to keep out deer, rabbits, and other larger animals.
- Hand-Picking: For larger pests like tomato hornworms or squash bugs, simply pick them off and drop them into a bucket of soapy water.
- Companion Planting: As mentioned, certain plants repel pests. Marigolds, garlic, and onions are excellent deterrents.
- Attract Beneficial Insects: Plant flowers like dill, fennel, cosmos, and sweet alyssum to attract ladybugs, lacewings, and parasitic wasps, which prey on common garden pests.
- Organic Sprays & Treatments:
- Neem Oil: An excellent broad-spectrum organic insecticide and fungicide. Bonide Neem Oil Concentrate (16oz, ~$20) can be mixed at a rate of 1-2 tbsp per gallon of water and sprayed on affected plants.
- Insecticidal Soap: Effective against soft-bodied insects like aphids, whiteflies, and spider mites. Garden Safe Insecticidal Soap (24oz ready-to-use, ~$10).
- Bacillus thuringiensis (Bt): A naturally occurring soil bacterium that targets caterpillars and worms. Monterey BT Worm & Caterpillar Killer (16oz, ~$18) is highly effective and safe for beneficial insects.
- Copper or Sulfur Sprays: For fungal diseases like powdery mildew or blight, organic copper (e.g., Bonide Copper Fungicide, ~$15 for 1lb) or sulfur (e.g., Safer Brand Garden Fungicide, ~$10 for 16oz) can be used as a last resort.
Step 7: Harvesting & Seed Saving
The culmination of your efforts is the harvest, and seed saving closes the loop on self-sufficiency.
- Harvesting Techniques:
- Timing: Harvest vegetables at their peak ripeness for best flavor and nutritional value. For example, green beans should snap cleanly, cucumbers should be firm, and tomatoes should be fully colored.
- Frequency: Many crops, like zucchini, cucumbers, and bush beans, produce more if harvested frequently. Pick daily or every other day.
- Tools: Use clean, sharp pruners (e.g., Corona ClassicCUT Bypass Pruner BP 3180, ~$30) or a sharp knife for clean cuts, minimizing damage to the plant.
- Seed Saving: This is where the « self-sufficient » aspect truly shines.
- Selection: Only save seeds from your healthiest, most vigorous plants that show desired traits (disease resistance, good flavor, high yield).
- Isolation: To ensure true-to-type seeds, prevent cross-pollination. This can be challenging for open-pollinated crops that readily cross (e.g., squash, corn). For beginners, focus on self-pollinating plants like beans, peas, lettuce, and tomatoes.
- Processing:
- Dry Seeds (Beans, Peas, Lettuce, Grains): Allow pods/seed heads to dry completely on the plant. Harvest, shell, and clean the seeds, removing chaff.
- Wet Seeds (Tomatoes, Cucumbers, Squash): For tomatoes, ferment the seeds in water for a few days to remove the gel coating and inhibit disease. For cucumbers/squash, scrape out seeds, wash thoroughly, and dry.
- Drying: Spread seeds thinly on screens or paper plates in a cool, dry, well-ventilated area for 1-4 weeks. Ensure they are bone-dry before storage. I aim for less than 8% moisture content.
- Storage: Store seeds in airtight containers (glass jars with desiccant packets work well) in a cool, dark, dry place (ideally 40-50°F and 30-40% humidity). Label clearly with variety and date. Properly stored seeds can remain viable for 3-10 years or more.
Step 8: Season Extension & Winterizing
Extend your harvest and protect your garden for the off-season to truly maximize your self sufficient garden from scratch.
- Cold Frames: Simple structures with a transparent top (glass, polycarbonate, or old windows) that sit over garden beds. They trap solar heat, allowing you to grow cold-hardy crops (lettuce, spinach, kale, radishes) well into winter or start seeds earlier in spring. A basic cold frame can be built from 2×6 lumber and a sheet of polycarbonate for under $100.
- Hoop Houses/Low Tunnels: Larger structures made from flexible hoops (PVC pipe or EMT conduit) covered with greenhouse plastic. These provide more space and greater temperature moderation. A 10×20 ft DIY low tunnel kit can cost $200-$500, while a larger, more robust hoop house kit might be $1,000-$3,000. I use a 6×12 ft low tunnel made from 1/2-inch PVC hoops and 6mil greenhouse plastic, which extends my lettuce and spinach harvest by at least
- In-Ground Beds: If you have excellent native soil and good drainage, in-ground beds are the most economical. Double-digging (loosening soil two shovel depths) can significantly improve drainage and aeration. For my main garden, I primarily use in-ground beds, but I focus on building up the soil over time with consistent compost additions and cover cropping. I aim for beds that are no wider than 3-4 feet so I can reach the center without stepping on the soil, compacting it.
- Raised Beds: Raised beds offer numerous advantages, especially for poor soil, heavy clay, or rocky areas. They provide better drainage, warm up faster in spring, reduce compaction, and make weeding and harvesting easier on your back.
- Material Options:
- Untreated Cedar: Naturally rot-resistant and chemical-free. A 4×8 ft bed, 12 inches deep, typically requires three 2x12x8 ft cedar boards, costing around $50-$60 per board (total ~$150-$180) plus corner brackets or screws. My first raised beds were cedar and are still going strong after 7 years.
- Galvanized Steel: Durable, long-lasting, and aesthetically pleasing. Brands like Vego Garden offer modular kits. A Vego Garden 17″ Tall 8-in-1 Metal Raised Garden Bed (can be configured to 4×8 ft) costs approximately $250-$300.
- Concrete Blocks/Stones: Very durable but can leach minerals (though generally safe once weathered) and can be expensive.
- Recycled Materials: Pallets (check for chemical treatment stamps like « HT » for heat-treated), old tires (controversial due to potential chemical leaching).
- Filling Raised Beds: Don’t just fill with topsoil. Use a « Hugelkultur » approach (logs, branches, leaves, then compost, then topsoil) or a mixture of 60% good quality topsoil, 30% compost, and 10% perlite or vermiculite for drainage. A 4x8x1 ft raised bed requires about 32 cubic feet (or ~1.2 cubic yards) of soil mix, which can cost $100-$200 depending on your source.
- Material Options:
Step 4: Water Management & Irrigation
Efficient water management is critical for a self sufficient garden from scratch, especially in off-grid living where water resources might be limited.
- Rainwater Harvesting: This is my primary source of irrigation water. A 55-gallon rain barrel (e.g., EarthMark Rain Barrel, ~$120-$150) connected to a downspout can collect significant water. For larger needs, I use two 275-gallon IBC totes (Intermediate Bulk Containers, often available used for $100-$200 each from food-grade sources) connected in series. A 1,000 sq ft roof can collect approximately 620 gallons of water for every inch of rainfall. My 1,500 sq ft roof provides ample water for my 600 sq ft garden through multiple barrels and totes.
- Drip Irrigation: This is by far the most water-efficient method, delivering water directly to the plant’s root zone, minimizing evaporation and weed growth.
- Components: A typical drip system includes a pressure regulator (e.g., Rain Bird PRV-10, ~$15), a filter (Rain Bird RBY filter, ~$20), main tubing (1/2-inch poly tubing, 100ft ~$25), smaller feeder lines (1/4-inch tubing), and emitters (0.5 GPH or 1 GPH per plant).
- Kits: For beginners, a starter kit like the Rain Bird Drip Irrigation Garden Kit (model DDI-KIT-1P, ~$40-$60) is excellent for a small garden. For larger setups, I use Netafim Techline CV Drip Line (500ft roll, ~$150-$200), which has pressure-compensating emitters built-in, ensuring even watering across long runs.
- Automation: For true self-sufficiency, consider a battery-powered timer (e.g., Orbit B-Hyve Bluetooth Hose Faucet Timer, ~$50) or a solar-powered timer connected to a small 12V pump.
- Solar-Powered Pumps: For lifting water from a well, pond, or large storage tank to your garden, a solar pump is a game-changer. For a smaller drip system, a Shurflo 2088-594-152 Diaphragm Pump (12V, 3.5 GPM, ~$180) can be powered by a single 100W solar panel (e.g., Renogy 100W Monocrystalline Solar Panel, ~$100) and a small 12V battery (e.g., a 50Ah LiFePO4 battery like the Battle Born 50Ah, ~$450). For larger operations or deeper wells, more robust systems are needed. If you’re looking to build out a comprehensive off-grid power system to support your garden’s water needs, or indeed your entire homestead, you might want to explore resources like the Power Grid Generator complete system guide to understand the full scope of what’s possible in terms of energy independence.
Step 5: Seed Selection & Planting
The choice of seeds is crucial for a truly self sufficient garden from scratch.
- Choose Heirloom & Open-Pollinated Seeds: These varieties produce seeds that will grow true to type, meaning you can save seeds from your harvest year after year. F1 hybrids, while often vigorous, will not produce consistent offspring from saved seeds. Reputable seed companies include Baker Creek Heirloom Seeds, High Mowing Organic Seeds, and Seed Savers Exchange. Start with common, reliable varieties like ‘Black Krim’ tomatoes, ‘Provider’ bush beans, ‘Waltham Butternut’ squash, and ‘Black Seeded Simpson’ lettuce.
- Start Seeds Indoors (Optional but Recommended): For longer growing seasons or specific crops, starting seeds indoors gives you a head start. Use seed-starting mix (e.g., Espoma Organic Seed Starter Mix, ~$10 for 16qt bag) in seed trays (Jiffy Professional Greenhouse 72-cell kit, ~$15). Provide adequate light with LED grow lights (Barrina T5 2ft 4-pack LED Grow Lights, 20W each, ~$50) for 14-16 hours a day, positioned 2-4 inches above seedlings. Maintain consistent temperatures (65-75°F for most).
- Direct Sowing vs. Transplanting: Some crops (carrots, radishes, beans, corn) prefer direct sowing into the garden bed. Others (tomatoes, peppers, broccoli, kale) benefit from being started indoors and transplanted. Follow seed packet instructions for planting depths (e.g., lettuce seeds are often surface-sown or planted 1/8 inch deep, while beans are 1 inch deep) and spacing.
- Companion Planting: Strategically plant different species together to enhance growth, deter pests, and attract beneficial insects. For example, planting marigolds near tomatoes can deter nematodes, and basil improves tomato flavor. Nasturtiums can act as a trap crop for aphids.
- Succession Planting: For a continuous harvest, plant small batches of quick-growing crops (lettuce, radishes, cilantro) every 2-3 weeks. As one crop finishes, another is ready to take its place.
Step 6: Pest & Disease Management (Organic)
Maintaining a self sufficient garden from scratch means embracing organic pest and disease control.
- Integrated Pest Management (IPM): This holistic approach combines several strategies.
- Observation: Regularly inspect your plants for early signs of pests or disease. Catching issues early is key.
- Physical Barriers: Use row covers (e.g., Agribon AG-19 floating row cover, 10×20 ft, ~$20) to protect young plants from insect pests like cabbage worms and squash bugs. Install fences (e.g., 2×4 welded wire mesh, 4 ft tall, 50 ft roll ~$70) to keep out deer, rabbits, and other larger animals.
- Hand-Picking: For larger pests like tomato hornworms or squash bugs, simply pick them off and drop them into a bucket of soapy water.
- Companion Planting: As mentioned, certain plants repel pests. Marigolds, garlic, and onions are excellent deterrents.
- Attract Beneficial Insects: Plant flowers like dill, fennel, cosmos, and sweet alyssum to attract ladybugs, lacewings, and parasitic wasps, which prey on common garden pests.
- Organic Sprays & Treatments:
- Neem Oil: An excellent broad-spectrum organic insecticide and fungicide. Bonide Neem Oil Concentrate (16oz, ~$20) can be mixed at a rate of 1-2 tbsp per gallon of water and sprayed on affected plants.
- Insecticidal Soap: Effective against soft-bodied insects like aphids, whiteflies, and spider mites. Garden Safe Insecticidal Soap (24oz ready-to-use, ~$10).
- Bacillus thuringiensis (Bt): A naturally occurring soil bacterium that targets caterpillars and worms. Monterey BT Worm & Caterpillar Killer (16oz, ~$18) is highly effective and safe for beneficial insects.
- Copper or Sulfur Sprays: For fungal diseases like powdery mildew or blight, organic copper (e.g., Bonide Copper Fungicide, ~$15 for 1lb) or sulfur (e.g., Safer Brand Garden Fungicide, ~$10 for 16oz) can be used as a last resort.
Step 7: Harvesting & Seed Saving
The culmination of your efforts is the harvest, and seed saving closes the loop on self-sufficiency.
- Harvesting Techniques:
- Timing: Harvest vegetables at their peak ripeness for best flavor and nutritional value. For example, green beans should snap cleanly, cucumbers should be firm, and tomatoes should be fully colored.
- Frequency: Many crops, like zucchini, cucumbers, and bush beans, produce more if harvested frequently. Pick daily or every other day.
- Tools: Use clean, sharp pruners (e.g., Corona ClassicCUT Bypass Pruner BP 3180, ~$30) or a sharp knife for clean cuts, minimizing damage to the plant.
- Seed Saving: This is where the « self-sufficient » aspect truly shines.
- Selection: Only save seeds from your healthiest, most vigorous plants that show desired traits (disease resistance, good flavor, high yield).
- Isolation: To ensure true-to-type seeds, prevent cross-pollination. This can be challenging for open-pollinated crops that readily cross (e.g., squash, corn). For beginners, focus on self-pollinating plants like beans, peas, lettuce, and tomatoes.
- Processing:
- Dry Seeds (Beans, Peas, Lettuce, Grains): Allow pods/seed heads to dry completely on the plant. Harvest, shell, and clean the seeds, removing chaff.
- Wet Seeds (Tomatoes, Cucumbers, Squash): For tomatoes, ferment the seeds in water for a few days to remove the gel coating and inhibit disease. For cucumbers/squash, scrape out seeds, wash thoroughly, and dry.
- Drying: Spread seeds thinly on screens or paper plates in a cool, dry, well-ventilated area for 1-4 weeks. Ensure they are bone-dry before storage. I aim for less than 8% moisture content.
- Storage: Store seeds in airtight containers (glass jars with desiccant packets work well) in a cool, dark, dry place (ideally 40-50°F and 30-40% humidity). Label clearly with variety and date. Properly stored seeds can remain viable for 3-10 years or more.
Step 8: Season Extension & Winterizing
Extend your harvest and protect your garden for the off-season to truly maximize your self sufficient garden from scratch.
- Cold Frames: Simple structures with a transparent top (glass, polycarbonate, or old windows) that sit over garden beds. They trap solar heat, allowing you to grow cold-hardy crops (lettuce, spinach, kale, radishes) well into winter or start seeds earlier in spring. A basic cold frame can be built from 2×6 lumber and a sheet of polycarbonate for under $100.
- Hoop Houses/Low Tunnels: Larger structures made from flexible hoops (PVC pipe or EMT conduit) covered with greenhouse plastic. These provide more space and greater temperature moderation. A 10×20 ft DIY low tunnel kit can cost $200-$500, while a larger, more robust hoop house kit might be $1,000-$3,000. I use a 6×12 ft low tunnel made from 1/2-inch PVC hoops and 6mil greenhouse plastic, which extends my lettuce and spinach harvest by at least
Deciding between raised beds and in-ground beds depends on your soil, budget, and physical capabilities.
- In-Ground Beds: If you have excellent native soil and good drainage, in-ground beds are the most economical. Double-digging (loosening soil two shovel depths) can significantly improve drainage and aeration. For my main garden, I primarily use in-ground beds, but I focus on building up the soil over time with consistent compost additions and cover cropping. I aim for beds that are no wider than 3-4 feet so I can reach the center without stepping on the soil, compacting it.
- Raised Beds: Raised beds offer numerous advantages, especially for poor soil, heavy clay, or rocky areas. They provide better drainage, warm up faster in spring, reduce compaction, and make weeding and harvesting easier on your back.
- Material Options:
- Untreated Cedar: Naturally rot-resistant and chemical-free. A 4×8 ft bed, 12 inches deep, typically requires three 2x12x8 ft cedar boards, costing around $50-$60 per board (total ~$150-$180) plus corner brackets or screws. My first raised beds were cedar and are still going strong after 7 years.
- Galvanized Steel: Durable, long-lasting, and aesthetically pleasing. Brands like Vego Garden offer modular kits. A Vego Garden 17″ Tall 8-in-1 Metal Raised Garden Bed (can be configured to 4×8 ft) costs approximately $250-$300.
- Concrete Blocks/Stones: Very durable but can leach minerals (though generally safe once weathered) and can be expensive.
- Recycled Materials: Pallets (check for chemical treatment stamps like « HT » for heat-treated), old tires (controversial due to potential chemical leaching).
- Filling Raised Beds: Don’t just fill with topsoil. Use a « Hugelkultur » approach (logs, branches, leaves, then compost, then topsoil) or a mixture of 60% good quality topsoil, 30% compost, and 10% perlite or vermiculite for drainage. A 4x8x1 ft raised bed requires about 32 cubic feet (or ~1.2 cubic yards) of soil mix, which can cost $100-$200 depending on your source.
- Material Options:
Step 4: Water Management & Irrigation
Efficient water management is critical for a self sufficient garden from scratch, especially in off-grid living where water resources might be limited.
- Rainwater Harvesting: This is my primary source of irrigation water. A 55-gallon rain barrel (e.g., EarthMark Rain Barrel, ~$120-$150) connected to a downspout can collect significant water. For larger needs, I use two 275-gallon IBC totes (Intermediate Bulk Containers, often available used for $100-$200 each from food-grade sources) connected in series. A 1,000 sq ft roof can collect approximately 620 gallons of water for every inch of rainfall. My 1,500 sq ft roof provides ample water for my 600 sq ft garden through multiple barrels and totes.
- Drip Irrigation: This is by far the most water-efficient method, delivering water directly to the plant’s root zone, minimizing evaporation and weed growth.
- Components: A typical drip system includes a pressure regulator (e.g., Rain Bird PRV-10, ~$15), a filter (Rain Bird RBY filter, ~$20), main tubing (1/2-inch poly tubing, 100ft ~$25), smaller feeder lines (1/4-inch tubing), and emitters (0.5 GPH or 1 GPH per plant).
- Kits: For beginners, a starter kit like the Rain Bird Drip Irrigation Garden Kit (model DDI-KIT-1P, ~$40-$60) is excellent for a small garden. For larger setups, I use Netafim Techline CV Drip Line (500ft roll, ~$150-$200), which has pressure-compensating emitters built-in, ensuring even watering across long runs.
- Automation: For true self-sufficiency, consider a battery-powered timer (e.g., Orbit B-Hyve Bluetooth Hose Faucet Timer, ~$50) or a solar-powered timer connected to a small 12V pump.
- Solar-Powered Pumps: For lifting water from a well, pond, or large storage tank to your garden, a solar pump is a game-changer. For a smaller drip system, a Shurflo 2088-594-152 Diaphragm Pump (12V, 3.5 GPM, ~$180) can be powered by a single 100W solar panel (e.g., Renogy 100W Monocrystalline Solar Panel, ~$100) and a small 12V battery (e.g., a 50Ah LiFePO4 battery like the Battle Born 50Ah, ~$450). For larger operations or deeper wells, more robust systems are needed. If you’re looking to build out a comprehensive off-grid power system to support your garden’s water needs, or indeed your entire homestead, you might want to explore resources like the Power Grid Generator complete system guide to understand the full scope of what’s possible in terms of energy independence.
Step 5: Seed Selection & Planting
The choice of seeds is crucial for a truly self sufficient garden from scratch.
- Choose Heirloom & Open-Pollinated Seeds: These varieties produce seeds that will grow true to type, meaning you can save seeds from your harvest year after year. F1 hybrids, while often vigorous, will not produce consistent offspring from saved seeds. Reputable seed companies include Baker Creek Heirloom Seeds, High Mowing Organic Seeds, and Seed Savers Exchange. Start with common, reliable varieties like ‘Black Krim’ tomatoes, ‘Provider’ bush beans, ‘Waltham Butternut’ squash, and ‘Black Seeded Simpson’ lettuce.
- Start Seeds Indoors (Optional but Recommended): For longer growing seasons or specific crops, starting seeds indoors gives you a head start. Use seed-starting mix (e.g., Espoma Organic Seed Starter Mix, ~$10 for 16qt bag) in seed trays (Jiffy Professional Greenhouse 72-cell kit, ~$15). Provide adequate light with LED grow lights (Barrina T5 2ft 4-pack LED Grow Lights, 20W each, ~$50) for 14-16 hours a day, positioned 2-4 inches above seedlings. Maintain consistent temperatures (65-75°F for most).
- Direct Sowing vs. Transplanting: Some crops (carrots, radishes, beans, corn) prefer direct sowing into the garden bed. Others (tomatoes, peppers, broccoli, kale) benefit from being started indoors and transplanted. Follow seed packet instructions for planting depths (e.g., lettuce seeds are often surface-sown or planted 1/8 inch deep, while beans are 1 inch deep) and spacing.
- Companion Planting: Strategically plant different species together to enhance growth, deter pests, and attract beneficial insects. For example, planting marigolds near tomatoes can deter nematodes, and basil improves tomato flavor. Nasturtiums can act as a trap crop for aphids.
- Succession Planting: For a continuous harvest, plant small batches of quick-growing crops (lettuce, radishes, cilantro) every 2-3 weeks. As one crop finishes, another is ready to take its place.
Step 6: Pest & Disease Management (Organic)
Maintaining a self sufficient garden from scratch means embracing organic pest and disease control.
- Integrated Pest Management (IPM): This holistic approach combines several strategies.
- Observation: Regularly inspect your plants for early signs of pests or disease. Catching issues early is key.
- Physical Barriers: Use row covers (e.g., Agribon AG-19 floating row cover, 10×20 ft, ~$20) to protect young plants from insect pests like cabbage worms and squash bugs. Install fences (e.g., 2×4 welded wire mesh, 4 ft tall, 50 ft roll ~$70) to keep out deer, rabbits, and other larger animals.
- Hand-Picking: For larger pests like tomato hornworms or squash bugs, simply pick them off and drop them into a bucket of soapy water.
- Companion Planting: As mentioned, certain plants repel pests. Marigolds, garlic, and onions are excellent deterrents.
- Attract Beneficial Insects: Plant flowers like dill, fennel, cosmos, and sweet alyssum to attract ladybugs, lacewings, and parasitic wasps, which prey on common garden pests.
- Organic Sprays & Treatments:
- Neem Oil: An excellent broad-spectrum organic insecticide and fungicide. Bonide Neem Oil Concentrate (16oz, ~$20) can be mixed at a rate of 1-2 tbsp per gallon of water and sprayed on affected plants.
- Insecticidal Soap: Effective against soft-bodied insects like aphids, whiteflies, and spider mites. Garden Safe Insecticidal Soap (24oz ready-to-use, ~$10).
- Bacillus thuringiensis (Bt): A naturally occurring soil bacterium that targets caterpillars and worms. Monterey BT Worm & Caterpillar Killer (16oz, ~$18) is highly effective and safe for beneficial insects.
- Copper or Sulfur Sprays: For fungal diseases like powdery mildew or blight, organic copper (e.g., Bonide Copper Fungicide, ~$15 for 1lb) or sulfur (e.g., Safer Brand Garden Fungicide, ~$10 for 16oz) can be used as a last resort.
Step 7: Harvesting & Seed Saving
The culmination of your efforts is the harvest, and seed saving closes the loop on self-sufficiency.
- Harvesting Techniques:
- Timing: Harvest vegetables at their peak ripeness for best flavor and nutritional value. For example, green beans should snap cleanly, cucumbers should be firm, and tomatoes should be fully colored.
- Frequency: Many crops, like zucchini, cucumbers, and bush beans, produce more if harvested frequently. Pick daily or every other day.
- Tools: Use clean, sharp pruners (e.g., Corona ClassicCUT Bypass Pruner BP 3180, ~$30) or a sharp knife for clean cuts, minimizing damage to the plant.
- Seed Saving: This is where the « self-sufficient » aspect truly shines.
- Selection: Only save seeds from your healthiest, most vigorous plants that show desired traits (disease resistance, good flavor, high yield).
- Isolation: To ensure true-to-type seeds, prevent cross-pollination. This can be challenging for open-pollinated crops that readily cross (e.g., squash, corn). For beginners, focus on self-pollinating plants like beans, peas, lettuce, and tomatoes.
- Processing:
- Dry Seeds (Beans, Peas, Lettuce, Grains): Allow pods/seed heads to dry completely on the plant. Harvest, shell, and clean the seeds, removing chaff.
- Wet Seeds (Tomatoes, Cucumbers, Squash): For tomatoes, ferment the seeds in water for a few days to remove the gel coating and inhibit disease. For cucumbers/squash, scrape out seeds, wash thoroughly, and dry.
- Drying: Spread seeds thinly on screens or paper plates in a cool, dry, well-ventilated area for 1-4 weeks. Ensure they are bone-dry before storage. I aim for less than 8% moisture content.
- Storage: Store seeds in airtight containers (glass jars with desiccant packets work well) in a cool, dark, dry place (ideally 40-50°F and 30-40% humidity). Label clearly with variety and date. Properly stored seeds can remain viable for 3-10 years or more.
Step 8: Season Extension & Winterizing
Extend your harvest and protect your garden for the off-season to truly maximize your self sufficient garden from scratch.
- Cold Frames: Simple structures with a transparent top (glass, polycarbonate, or old windows) that sit over garden beds. They trap solar heat, allowing you to grow cold-hardy crops (lettuce, spinach, kale, radishes) well into winter or start seeds earlier in spring. A basic cold frame can be built from 2×6 lumber and a sheet of polycarbonate for under $100.
- Hoop Houses/Low Tunnels: Larger structures made from flexible hoops (PVC pipe or EMT conduit) covered with greenhouse plastic. These provide more space and greater temperature moderation. A 10×20 ft DIY low tunnel kit can cost $200-$500, while a larger, more robust hoop house kit might be $1,000-$3,000. I use a 6×12 ft low tunnel made from 1/2-inch PVC hoops and 6mil greenhouse plastic, which extends my lettuce and spinach harvest by at least
Healthy soil is the bedrock of a productive, self-sufficient garden. You can’t guess what your soil needs; you have to test it.
- Perform a Soil Test: A professional soil test will give you precise data on your soil’s pH, nutrient levels (N-P-K), and organic matter content. I recommend sending a sample to your local agricultural extension office; it typically costs $20-$50 and provides detailed recommendations. Alternatively, for a quick homeowner check, a Rapitest Soil Test Kit (40-test kit, model 1663, ~$20 on Amazon) provides a good baseline for pH, Nitrogen, Phosphorus, and Potash. Aim for a pH between 6.0 and 7.0 for most vegetables.
- Amend for pH Imbalance: If your soil is too acidic (below 6.0), add agricultural lime (dolomitic lime adds magnesium, calcitic lime adds calcium). Apply 5-10 lbs per 100 sq ft for a moderate adjustment. If it’s too alkaline (above 7.0), add elemental sulfur (e.g., Espoma Soil Acidifier, ~$15 for 6.75 lbs) or generous amounts of organic matter like peat moss or pine needles.
- Build Organic Matter: This is the single most important step for long-term soil health. Organic matter improves soil structure, water retention, drainage, and nutrient availability. Incorporate 2-4 inches of high-quality compost into your top 6-12 inches of soil annually. I make my own compost from kitchen scraps, garden waste, and shredded leaves, but you can purchase it. Local nurseries often sell bulk compost for $30-$50 per cubic yard. Aged manure (from chickens, cows, or horses – ensure it’s well-rotted to avoid burning plants) is also excellent.
- Address Nutrient Deficiencies: Based on your soil test, add specific organic amendments. If Nitrogen (N) is low, add blood meal (12-0-0, ~$20 for 3 lbs) or feather meal. For Phosphorus (P), use bone meal (3-15-0, ~$15 for 3 lbs) or rock phosphate. For Potassium (K), greensand (0-0-2.5, ~$25 for 5 lbs) or kelp meal are good choices. I rely heavily on Espoma Organic Garden-tone (5-3-3, ~$25 for an 8lb bag) as a balanced, all-purpose organic fertilizer during planting.
Step 3: Garden Bed Preparation
Deciding between raised beds and in-ground beds depends on your soil, budget, and physical capabilities.
- In-Ground Beds: If you have excellent native soil and good drainage, in-ground beds are the most economical. Double-digging (loosening soil two shovel depths) can significantly improve drainage and aeration. For my main garden, I primarily use in-ground beds, but I focus on building up the soil over time with consistent compost additions and cover cropping. I aim for beds that are no wider than 3-4 feet so I can reach the center without stepping on the soil, compacting it.
- Raised Beds: Raised beds offer numerous advantages, especially for poor soil, heavy clay, or rocky areas. They provide better drainage, warm up faster in spring, reduce compaction, and make weeding and harvesting easier on your back.
- Material Options:
- Untreated Cedar: Naturally rot-resistant and chemical-free. A 4×8 ft bed, 12 inches deep, typically requires three 2x12x8 ft cedar boards, costing around $50-$60 per board (total ~$150-$180) plus corner brackets or screws. My first raised beds were cedar and are still going strong after 7 years.
- Galvanized Steel: Durable, long-lasting, and aesthetically pleasing. Brands like Vego Garden offer modular kits. A Vego Garden 17″ Tall 8-in-1 Metal Raised Garden Bed (can be configured to 4×8 ft) costs approximately $250-$300.
- Concrete Blocks/Stones: Very durable but can leach minerals (though generally safe once weathered) and can be expensive.
- Recycled Materials: Pallets (check for chemical treatment stamps like « HT » for heat-treated), old tires (controversial due to potential chemical leaching).
- Filling Raised Beds: Don’t just fill with topsoil. Use a « Hugelkultur » approach (logs, branches, leaves, then compost, then topsoil) or a mixture of 60% good quality topsoil, 30% compost, and 10% perlite or vermiculite for drainage. A 4x8x1 ft raised bed requires about 32 cubic feet (or ~1.2 cubic yards) of soil mix, which can cost $100-$200 depending on your source.
- Material Options:
Step 4: Water Management & Irrigation
Efficient water management is critical for a self sufficient garden from scratch, especially in off-grid living where water resources might be limited.
- Rainwater Harvesting: This is my primary source of irrigation water. A 55-gallon rain barrel (e.g., EarthMark Rain Barrel, ~$120-$150) connected to a downspout can collect significant water. For larger needs, I use two 275-gallon IBC totes (Intermediate Bulk Containers, often available used for $100-$200 each from food-grade sources) connected in series. A 1,000 sq ft roof can collect approximately 620 gallons of water for every inch of rainfall. My 1,500 sq ft roof provides ample water for my 600 sq ft garden through multiple barrels and totes.
- Drip Irrigation: This is by far the most water-efficient method, delivering water directly to the plant’s root zone, minimizing evaporation and weed growth.
- Components: A typical drip system includes a pressure regulator (e.g., Rain Bird PRV-10, ~$15), a filter (Rain Bird RBY filter, ~$20), main tubing (1/2-inch poly tubing, 100ft ~$25), smaller feeder lines (1/4-inch tubing), and emitters (0.5 GPH or 1 GPH per plant).
- Kits: For beginners, a starter kit like the Rain Bird Drip Irrigation Garden Kit (model DDI-KIT-1P, ~$40-$60) is excellent for a small garden. For larger setups, I use Netafim Techline CV Drip Line (500ft roll, ~$150-$200), which has pressure-compensating emitters built-in, ensuring even watering across long runs.
- Automation: For true self-sufficiency, consider a battery-powered timer (e.g., Orbit B-Hyve Bluetooth Hose Faucet Timer, ~$50) or a solar-powered timer connected to a small 12V pump.
- Solar-Powered Pumps: For lifting water from a well, pond, or large storage tank to your garden, a solar pump is a game-changer. For a smaller drip system, a Shurflo 2088-594-152 Diaphragm Pump (12V, 3.5 GPM, ~$180) can be powered by a single 100W solar panel (e.g., Renogy 100W Monocrystalline Solar Panel, ~$100) and a small 12V battery (e.g., a 50Ah LiFePO4 battery like the Battle Born 50Ah, ~$450). For larger operations or deeper wells, more robust systems are needed. If you’re looking to build out a comprehensive off-grid power system to support your garden’s water needs, or indeed your entire homestead, you might want to explore resources like the Power Grid Generator complete system guide to understand the full scope of what’s possible in terms of energy independence.
Step 5: Seed Selection & Planting
The choice of seeds is crucial for a truly self sufficient garden from scratch.
- Choose Heirloom & Open-Pollinated Seeds: These varieties produce seeds that will grow true to type, meaning you can save seeds from your harvest year after year. F1 hybrids, while often vigorous, will not produce consistent offspring from saved seeds. Reputable seed companies include Baker Creek Heirloom Seeds, High Mowing Organic Seeds, and Seed Savers Exchange. Start with common, reliable varieties like ‘Black Krim’ tomatoes, ‘Provider’ bush beans, ‘Waltham Butternut’ squash, and ‘Black Seeded Simpson’ lettuce.
- Start Seeds Indoors (Optional but Recommended): For longer growing seasons or specific crops, starting seeds indoors gives you a head start. Use seed-starting mix (e.g., Espoma Organic Seed Starter Mix, ~$10 for 16qt bag) in seed trays (Jiffy Professional Greenhouse 72-cell kit, ~$15). Provide adequate light with LED grow lights (Barrina T5 2ft 4-pack LED Grow Lights, 20W each, ~$50) for 14-16 hours a day, positioned 2-4 inches above seedlings. Maintain consistent temperatures (65-75°F for most).
- Direct Sowing vs. Transplanting: Some crops (carrots, radishes, beans, corn) prefer direct sowing into the garden bed. Others (tomatoes, peppers, broccoli, kale) benefit from being started indoors and transplanted. Follow seed packet instructions for planting depths (e.g., lettuce seeds are often surface-sown or planted 1/8 inch deep, while beans are 1 inch deep) and spacing.
- Companion Planting: Strategically plant different species together to enhance growth, deter pests, and attract beneficial insects. For example, planting marigolds near tomatoes can deter nematodes, and basil improves tomato flavor. Nasturtiums can act as a trap crop for aphids.
- Succession Planting: For a continuous harvest, plant small batches of quick-growing crops (lettuce, radishes, cilantro) every 2-3 weeks. As one crop finishes, another is ready to take its place.
Step 6: Pest & Disease Management (Organic)
Maintaining a self sufficient garden from scratch means embracing organic pest and disease control.
- Integrated Pest Management (IPM): This holistic approach combines several strategies.
- Observation: Regularly inspect your plants for early signs of pests or disease. Catching issues early is key.
- Physical Barriers: Use row covers (e.g., Agribon AG-19 floating row cover, 10×20 ft, ~$20) to protect young plants from insect pests like cabbage worms and squash bugs. Install fences (e.g., 2×4 welded wire mesh, 4 ft tall, 50 ft roll ~$70) to keep out deer, rabbits, and other larger animals.
- Hand-Picking: For larger pests like tomato hornworms or squash bugs, simply pick them off and drop them into a bucket of soapy water.
- Companion Planting: As mentioned, certain plants repel pests. Marigolds, garlic, and onions are excellent deterrents.
- Attract Beneficial Insects: Plant flowers like dill, fennel, cosmos, and sweet alyssum to attract ladybugs, lacewings, and parasitic wasps, which prey on common garden pests.
- Organic Sprays & Treatments:
- Neem Oil: An excellent broad-spectrum organic insecticide and fungicide. Bonide Neem Oil Concentrate (16oz, ~$20) can be mixed at a rate of 1-2 tbsp per gallon of water and sprayed on affected plants.
- Insecticidal Soap: Effective against soft-bodied insects like aphids, whiteflies, and spider mites. Garden Safe Insecticidal Soap (24oz ready-to-use, ~$10).
- Bacillus thuringiensis (Bt): A naturally occurring soil bacterium that targets caterpillars and worms. Monterey BT Worm & Caterpillar Killer (16oz, ~$18) is highly effective and safe for beneficial insects.
- Copper or Sulfur Sprays: For fungal diseases like powdery mildew or blight, organic copper (e.g., Bonide Copper Fungicide, ~$15 for 1lb) or sulfur (e.g., Safer Brand Garden Fungicide, ~$10 for 16oz) can be used as a last resort.
Step 7: Harvesting & Seed Saving
The culmination of your efforts is the harvest, and seed saving closes the loop on self-sufficiency.
- Harvesting Techniques:
- Timing: Harvest vegetables at their peak ripeness for best flavor and nutritional value. For example, green beans should snap cleanly, cucumbers should be firm, and tomatoes should be fully colored.
- Frequency: Many crops, like zucchini, cucumbers, and bush beans, produce more if harvested frequently. Pick daily or every other day.
- Tools: Use clean, sharp pruners (e.g., Corona ClassicCUT Bypass Pruner BP 3180, ~$30) or a sharp knife for clean cuts, minimizing damage to the plant.
- Seed Saving: This is where the « self-sufficient » aspect truly shines.
- Selection: Only save seeds from your healthiest, most vigorous plants that show desired traits (disease resistance, good flavor, high yield).
- Isolation: To ensure true-to-type seeds, prevent cross-pollination. This can be challenging for open-pollinated crops that readily cross (e.g., squash, corn). For beginners, focus on self-pollinating plants like beans, peas, lettuce, and tomatoes.
- Processing:
- Dry Seeds (Beans, Peas, Lettuce, Grains): Allow pods/seed heads to dry completely on the plant. Harvest, shell, and clean the seeds, removing chaff.
- Wet Seeds (Tomatoes, Cucumbers, Squash): For tomatoes, ferment the seeds in water for a few days to remove the gel coating and inhibit disease. For cucumbers/squash, scrape out seeds, wash thoroughly, and dry.
- Drying: Spread seeds thinly on screens or paper plates in a cool, dry, well-ventilated area for 1-4 weeks. Ensure they are bone-dry before storage. I aim for less than 8% moisture content.
- Storage: Store seeds in airtight containers (glass jars with desiccant packets work well) in a cool, dark, dry place (ideally 40-50°F and 30-40% humidity). Label clearly with variety and date. Properly stored seeds can remain viable for 3-10 years or more.
Step 8: Season Extension & Winterizing
Extend your harvest and protect your garden for the off-season to truly maximize your self sufficient garden from scratch.
- Cold Frames: Simple structures with a transparent top (glass, polycarbonate, or old windows) that sit over garden beds. They trap solar heat, allowing you to grow cold-hardy crops (lettuce, spinach, kale, radishes) well into winter or start seeds earlier in spring. A basic cold frame can be built from 2×6 lumber and a sheet of polycarbonate for under $100.
- Hoop Houses/Low Tunnels: Larger structures made from flexible hoops (PVC pipe or EMT conduit) covered with greenhouse plastic. These provide more space and greater temperature moderation. A 10×20 ft DIY low tunnel kit can cost $200-$500, while a larger, more robust hoop house kit might be $1,000-$3,000. I use a 6×12 ft low tunnel made from 1/2-inch PVC hoops and 6mil greenhouse plastic, which extends my lettuce and spinach harvest by at least
- Integrated Pest Management (IPM): This holistic approach combines several strategies.
- Integrated Pest Management (IPM): This holistic approach combines several strategies.
- Integrated Pest Management (IPM): This holistic approach combines several strategies.
- Observation: Regularly inspect your plants for early signs of pests or disease. Catching issues early is key.
- Physical Barriers: Use row covers (e.g., Agribon AG-19 floating row cover, 10×20 ft, ~$20) to protect young plants from insect pests like cabbage worms and squash bugs. Install fences (e.g., 2×4 welded wire mesh, 4 ft tall, 50 ft roll ~$70) to keep out deer, rabbits, and other larger animals.
- Hand-Picking: For larger pests like tomato hornworms or squash bugs, simply pick them off and drop them into a bucket of soapy water.
- Companion Planting: As mentioned, certain plants repel pests. Marigolds, garlic, and onions are excellent deterrents.
- Attract Beneficial Insects: Plant flowers like dill, fennel, cosmos, and sweet alyssum to attract ladybugs, lacewings, and parasitic wasps, which prey on common garden pests.
- Organic Sprays & Treatments:
- Neem Oil: An excellent broad-spectrum organic insecticide and fungicide. Bonide Neem Oil Concentrate (16oz, ~$20) can be mixed at a rate of 1-2 tbsp per gallon of water and sprayed on affected plants.
- Insecticidal Soap: Effective against soft-bodied insects like aphids, whiteflies, and spider mites. Garden Safe Insecticidal Soap (24oz ready-to-use, ~$10).
- Bacillus thuringiensis (Bt): A naturally occurring soil bacterium that targets caterpillars and worms. Monterey BT Worm & Caterpillar Killer (16oz, ~$18) is highly effective and safe for beneficial insects.
- Copper or Sulfur Sprays: For fungal diseases like powdery mildew or blight, organic copper (e.g., Bonide Copper Fungicide, ~$15 for 1lb) or sulfur (e.g., Safer Brand Garden Fungicide, ~$10 for 16oz) can be used as a last resort.
Step 7: Harvesting & Seed Saving
The culmination of your efforts is the harvest, and seed saving closes the loop on self-sufficiency.
- Harvesting Techniques:
- Timing: Harvest vegetables at their peak ripeness for best flavor and nutritional value. For example, green beans should snap cleanly, cucumbers should be firm, and tomatoes should be fully colored.
- Frequency: Many crops, like zucchini, cucumbers, and bush beans, produce more if harvested frequently. Pick daily or every other day.
- Tools: Use clean, sharp pruners (e.g., Corona ClassicCUT Bypass Pruner BP 3180, ~$30) or a sharp knife for clean cuts, minimizing damage to the plant.
- Seed Saving: This is where the « self-sufficient » aspect truly shines.
- Selection: Only save seeds from your healthiest, most vigorous plants that show desired traits (disease resistance, good flavor, high yield).
- Isolation: To ensure true-to-type seeds, prevent cross-pollination. This can be challenging for open-pollinated crops that readily cross (e.g., squash, corn). For beginners, focus on self-pollinating plants like beans, peas, lettuce, and tomatoes.
- Processing:
- Dry Seeds (Beans, Peas, Lettuce, Grains): Allow pods/seed heads to dry completely on the plant. Harvest, shell, and clean the seeds, removing chaff.
- Wet Seeds (Tomatoes, Cucumbers, Squash): For tomatoes, ferment the seeds in water for a few days to remove the gel coating and inhibit disease. For cucumbers/squash, scrape out seeds, wash thoroughly, and dry.
- Drying: Spread seeds thinly on screens or paper plates in a cool, dry, well-ventilated area for 1-4 weeks. Ensure they are bone-dry before storage. I aim for less than 8% moisture content.
- Storage: Store seeds in airtight containers (glass jars with desiccant packets work well) in a cool, dark, dry place (ideally 40-50°F and 30-40% humidity). Label clearly with variety and date. Properly stored seeds can remain viable for 3-10 years or more.
Step 8: Season Extension & Winterizing
Extend your harvest and protect your garden for the off-season to truly maximize your self sufficient garden from scratch.
- Cold Frames: Simple structures with a transparent top (glass, polycarbonate, or old windows) that sit over garden beds. They trap solar heat, allowing you to grow cold-hardy crops (lettuce, spinach, kale, radishes) well into winter or start seeds earlier in spring. A basic cold frame can be built from 2×6 lumber and a sheet of polycarbonate for under $100.
- Hoop Houses/Low Tunnels: Larger structures made from flexible hoops (PVC pipe or EMT conduit) covered with greenhouse plastic. These provide more space and greater temperature moderation. A 10×20 ft DIY low tunnel kit can cost $200-$500, while a larger, more robust hoop house kit might be $1,000-$3,000. I use a 6×12 ft low tunnel made from 1/2-inch PVC hoops and 6mil greenhouse plastic, which extends my lettuce and spinach harvest by at least
Maintaining a self sufficient garden from scratch means embracing organic pest and disease control.
- Integrated Pest Management (IPM): This holistic approach combines several strategies.
- Observation: Regularly inspect your plants for early signs of pests or disease. Catching issues early is key.
- Physical Barriers: Use row covers (e.g., Agribon AG-19 floating row cover, 10×20 ft, ~$20) to protect young plants from insect pests like cabbage worms and squash bugs. Install fences (e.g., 2×4 welded wire mesh, 4 ft tall, 50 ft roll ~$70) to keep out deer, rabbits, and other larger animals.
- Hand-Picking: For larger pests like tomato hornworms or squash bugs, simply pick them off and drop them into a bucket of soapy water.
- Companion Planting: As mentioned, certain plants repel pests. Marigolds, garlic, and onions are excellent deterrents.
- Attract Beneficial Insects: Plant flowers like dill, fennel, cosmos, and sweet alyssum to attract ladybugs, lacewings, and parasitic wasps, which prey on common garden pests.
- Organic Sprays & Treatments:
- Neem Oil: An excellent broad-spectrum organic insecticide and fungicide. Bonide Neem Oil Concentrate (16oz, ~$20) can be mixed at a rate of 1-2 tbsp per gallon of water and sprayed on affected plants.
- Insecticidal Soap: Effective against soft-bodied insects like aphids, whiteflies, and spider mites. Garden Safe Insecticidal Soap (24oz ready-to-use, ~$10).
- Bacillus thuringiensis (Bt): A naturally occurring soil bacterium that targets caterpillars and worms. Monterey BT Worm & Caterpillar Killer (16oz, ~$18) is highly effective and safe for beneficial insects.
- Copper or Sulfur Sprays: For fungal diseases like powdery mildew or blight, organic copper (e.g., Bonide Copper Fungicide, ~$15 for 1lb) or sulfur (e.g., Safer Brand Garden Fungicide, ~$10 for 16oz) can be used as a last resort.
Step 7: Harvesting & Seed Saving
The culmination of your efforts is the harvest, and seed saving closes the loop on self-sufficiency.
- Harvesting Techniques:
- Timing: Harvest vegetables at their peak ripeness for best flavor and nutritional value. For example, green beans should snap cleanly, cucumbers should be firm, and tomatoes should be fully colored.
- Frequency: Many crops, like zucchini, cucumbers, and bush beans, produce more if harvested frequently. Pick daily or every other day.
- Tools: Use clean, sharp pruners (e.g., Corona ClassicCUT Bypass Pruner BP 3180, ~$30) or a sharp knife for clean cuts, minimizing damage to the plant.
- Seed Saving: This is where the « self-sufficient » aspect truly shines.
- Selection: Only save seeds from your healthiest, most vigorous plants that show desired traits (disease resistance, good flavor, high yield).
- Isolation: To ensure true-to-type seeds, prevent cross-pollination. This can be challenging for open-pollinated crops that readily cross (e.g., squash, corn). For beginners, focus on self-pollinating plants like beans, peas, lettuce, and tomatoes.
- Processing:
- Dry Seeds (Beans, Peas, Lettuce, Grains): Allow pods/seed heads to dry completely on the plant. Harvest, shell, and clean the seeds, removing chaff.
- Wet Seeds (Tomatoes, Cucumbers, Squash): For tomatoes, ferment the seeds in water for a few days to remove the gel coating and inhibit disease. For cucumbers/squash, scrape out seeds, wash thoroughly, and dry.
- Drying: Spread seeds thinly on screens or paper plates in a cool, dry, well-ventilated area for 1-4 weeks. Ensure they are bone-dry before storage. I aim for less than 8% moisture content.
- Storage: Store seeds in airtight containers (glass jars with desiccant packets work well) in a cool, dark, dry place (ideally 40-50°F and 30-40% humidity). Label clearly with variety and date. Properly stored seeds can remain viable for 3-10 years or more.
Step 8: Season Extension & Winterizing
Extend your harvest and protect your garden for the off-season to truly maximize your self sufficient garden from scratch.
- Cold Frames: Simple structures with a transparent top (glass, polycarbonate, or old windows) that sit over garden beds. They trap solar heat, allowing you to grow cold-hardy crops (lettuce, spinach, kale, radishes) well into winter or start seeds earlier in spring. A basic cold frame can be built from 2×6 lumber and a sheet of polycarbonate for under $100.
- Hoop Houses/Low Tunnels: Larger structures made from flexible hoops (PVC pipe or EMT conduit) covered with greenhouse plastic. These provide more space and greater temperature moderation. A 10×20 ft DIY low tunnel kit can cost $200-$500, while a larger, more robust hoop house kit might be $1,000-$3,000. I use a 6×12 ft low tunnel made from 1/2-inch PVC hoops and 6mil greenhouse plastic, which extends my lettuce and spinach harvest by at least
Step 6: Pest & Disease Management (Organic)
Maintaining a self sufficient garden from scratch means embracing organic pest and disease control.
- Integrated Pest Management (IPM): This holistic approach combines several strategies.
- Observation: Regularly inspect your plants for early signs of pests or disease. Catching issues early is key.
- Physical Barriers: Use row covers (e.g., Agribon AG-19 floating row cover, 10×20 ft, ~$20) to protect young plants from insect pests like cabbage worms and squash bugs. Install fences (e.g., 2×4 welded wire mesh, 4 ft tall, 50 ft roll ~$70) to keep out deer, rabbits, and other larger animals.
- Hand-Picking: For larger pests like tomato hornworms or squash bugs, simply pick them off and drop them into a bucket of soapy water.
- Companion Planting: As mentioned, certain plants repel pests. Marigolds, garlic, and onions are excellent deterrents.
- Attract Beneficial Insects: Plant flowers like dill, fennel, cosmos, and sweet alyssum to attract ladybugs, lacewings, and parasitic wasps, which prey on common garden pests.
- Organic Sprays & Treatments:
- Neem Oil: An excellent broad-spectrum organic insecticide and fungicide. Bonide Neem Oil Concentrate (16oz, ~$20) can be mixed at a rate of 1-2 tbsp per gallon of water and sprayed on affected plants.
- Insecticidal Soap: Effective against soft-bodied insects like aphids, whiteflies, and spider mites. Garden Safe Insecticidal Soap (24oz ready-to-use, ~$10).
- Bacillus thuringiensis (Bt): A naturally occurring soil bacterium that targets caterpillars and worms. Monterey BT Worm & Caterpillar Killer (16oz, ~$18) is highly effective and safe for beneficial insects.
- Copper or Sulfur Sprays: For fungal diseases like powdery mildew or blight, organic copper (e.g., Bonide Copper Fungicide, ~$15 for 1lb) or sulfur (e.g., Safer Brand Garden Fungicide, ~$10 for 16oz) can be used as a last resort.
Step 7: Harvesting & Seed Saving
The culmination of your efforts is the harvest, and seed saving closes the loop on self-sufficiency.
- Harvesting Techniques:
- Timing: Harvest vegetables at their peak ripeness for best flavor and nutritional value. For example, green beans should snap cleanly, cucumbers should be firm, and tomatoes should be fully colored.
- Frequency: Many crops, like zucchini, cucumbers, and bush beans, produce more if harvested frequently. Pick daily or every other day.
- Tools: Use clean, sharp pruners (e.g., Corona ClassicCUT Bypass Pruner BP 3180, ~$30) or a sharp knife for clean cuts, minimizing damage to the plant.
- Seed Saving: This is where the « self-sufficient » aspect truly shines.
- Selection: Only save seeds from your healthiest, most vigorous plants that show desired traits (disease resistance, good flavor, high yield).
- Isolation: To ensure true-to-type seeds, prevent cross-pollination. This can be challenging for open-pollinated crops that readily cross (e.g., squash, corn). For beginners, focus on self-pollinating plants like beans, peas, lettuce, and tomatoes.
- Processing:
- Dry Seeds (Beans, Peas, Lettuce, Grains): Allow pods/seed heads to dry completely on the plant. Harvest, shell, and clean the seeds, removing chaff.
- Wet Seeds (Tomatoes, Cucumbers, Squash): For tomatoes, ferment the seeds in water for a few days to remove the gel coating and inhibit disease. For cucumbers/squash, scrape out seeds, wash thoroughly, and dry.
- Drying: Spread seeds thinly on screens or paper plates in a cool, dry, well-ventilated area for 1-4 weeks. Ensure they are bone-dry before storage. I aim for less than 8% moisture content.
- Storage: Store seeds in airtight containers (glass jars with desiccant packets work well) in a cool, dark, dry place (ideally 40-50°F and 30-40% humidity). Label clearly with variety and date. Properly stored seeds can remain viable for 3-10 years or more.
Step 8: Season Extension & Winterizing
Extend your harvest and protect your garden for the off-season to truly maximize your self sufficient garden from scratch.
- Cold Frames: Simple structures with a transparent top (glass, polycarbonate, or old windows) that sit over garden beds. They trap solar heat, allowing you to grow cold-hardy crops (lettuce, spinach, kale, radishes) well into winter or start seeds earlier in spring. A basic cold frame can be built from 2×6 lumber and a sheet of polycarbonate for under $100.
- Hoop Houses/Low Tunnels: Larger structures made from flexible hoops (PVC pipe or EMT conduit) covered with greenhouse plastic. These provide more space and greater temperature moderation. A 10×20 ft DIY low tunnel kit can cost $200-$500, while a larger, more robust hoop house kit might be $1,000-$3,000. I use a 6×12 ft low tunnel made from 1/2-inch PVC hoops and 6mil greenhouse plastic, which extends my lettuce and spinach harvest by at least
- Choose Heirloom & Open-Pollinated Seeds: These varieties produce seeds that will grow true to type, meaning you can save seeds from your harvest year after year. F1 hybrids, while often vigorous, will not produce consistent offspring from saved seeds. Reputable seed companies include Baker Creek Heirloom Seeds, High Mowing Organic Seeds, and Seed Savers Exchange. Start with common, reliable varieties like ‘Black Krim’ tomatoes, ‘Provider’ bush beans, ‘Waltham Butternut’ squash, and ‘Black Seeded Simpson’ lettuce.
- Start Seeds Indoors (Optional but Recommended): For longer growing seasons or specific crops, starting seeds indoors gives you a head start. Use seed-starting mix (e.g., Espoma Organic Seed Starter Mix, ~$10 for 16qt bag) in seed trays (Jiffy Professional Greenhouse 72-cell kit, ~$15). Provide adequate light with LED grow lights (Barrina T5 2ft 4-pack LED Grow Lights, 20W each, ~$50) for 14-16 hours a day, positioned 2-4 inches above seedlings. Maintain consistent temperatures (65-75°F for most).
- Direct Sowing vs. Transplanting: Some crops (carrots, radishes, beans, corn) prefer direct sowing into the garden bed. Others (tomatoes, peppers, broccoli, kale) benefit from being started indoors and transplanted. Follow seed packet instructions for planting depths (e.g., lettuce seeds are often surface-sown or planted 1/8 inch deep, while beans are 1 inch deep) and spacing.
- Companion Planting: Strategically plant different species together to enhance growth, deter pests, and attract beneficial insects. For example, planting marigolds near tomatoes can deter nematodes, and basil improves tomato flavor. Nasturtiums can act as a trap crop for aphids.
- Succession Planting: For a continuous harvest, plant small batches of quick-growing crops (lettuce, radishes, cilantro) every 2-3 weeks. As one crop finishes, another is ready to take its place.
Step 6: Pest & Disease Management (Organic)
Maintaining a self sufficient garden from scratch means embracing organic pest and disease control.
- Integrated Pest Management (IPM): This holistic approach combines several strategies.
- Observation: Regularly inspect your plants for early signs of pests or disease. Catching issues early is key.
- Physical Barriers: Use row covers (e.g., Agribon AG-19 floating row cover, 10×20 ft, ~$20) to protect young plants from insect pests like cabbage worms and squash bugs. Install fences (e.g., 2×4 welded wire mesh, 4 ft tall, 50 ft roll ~$70) to keep out deer, rabbits, and other larger animals.
- Hand-Picking: For larger pests like tomato hornworms or squash bugs, simply pick them off and drop them into a bucket of soapy water.
- Companion Planting: As mentioned, certain plants repel pests. Marigolds, garlic, and onions are excellent deterrents.
- Attract Beneficial Insects: Plant flowers like dill, fennel, cosmos, and sweet alyssum to attract ladybugs, lacewings, and parasitic wasps, which prey on common garden pests.
- Organic Sprays & Treatments:
- Neem Oil: An excellent broad-spectrum organic insecticide and fungicide. Bonide Neem Oil Concentrate (16oz, ~$20) can be mixed at a rate of 1-2 tbsp per gallon of water and sprayed on affected plants.
- Insecticidal Soap: Effective against soft-bodied insects like aphids, whiteflies, and spider mites. Garden Safe Insecticidal Soap (24oz ready-to-use, ~$10).
- Bacillus thuringiensis (Bt): A naturally occurring soil bacterium that targets caterpillars and worms. Monterey BT Worm & Caterpillar Killer (16oz, ~$18) is highly effective and safe for beneficial insects.
- Copper or Sulfur Sprays: For fungal diseases like powdery mildew or blight, organic copper (e.g., Bonide Copper Fungicide, ~$15 for 1lb) or sulfur (e.g., Safer Brand Garden Fungicide, ~$10 for 16oz) can be used as a last resort.
Step 7: Harvesting & Seed Saving
The culmination of your efforts is the harvest, and seed saving closes the loop on self-sufficiency.
- Harvesting Techniques:
- Timing: Harvest vegetables at their peak ripeness for best flavor and nutritional value. For example, green beans should snap cleanly, cucumbers should be firm, and tomatoes should be fully colored.
- Frequency: Many crops, like zucchini, cucumbers, and bush beans, produce more if harvested frequently. Pick daily or every other day.
- Tools: Use clean, sharp pruners (e.g., Corona ClassicCUT Bypass Pruner BP 3180, ~$30) or a sharp knife for clean cuts, minimizing damage to the plant.
- Seed Saving: This is where the « self-sufficient » aspect truly shines.
- Selection: Only save seeds from your healthiest, most vigorous plants that show desired traits (disease resistance, good flavor, high yield).
- Isolation: To ensure true-to-type seeds, prevent cross-pollination. This can be challenging for open-pollinated crops that readily cross (e.g., squash, corn). For beginners, focus on self-pollinating plants like beans, peas, lettuce, and tomatoes.
- Processing:
- Dry Seeds (Beans, Peas, Lettuce, Grains): Allow pods/seed heads to dry completely on the plant. Harvest, shell, and clean the seeds, removing chaff.
- Wet Seeds (Tomatoes, Cucumbers, Squash): For tomatoes, ferment the seeds in water for a few days to remove the gel coating and inhibit disease. For cucumbers/squash, scrape out seeds, wash thoroughly, and dry.
- Drying: Spread seeds thinly on screens or paper plates in a cool, dry, well-ventilated area for 1-4 weeks. Ensure they are bone-dry before storage. I aim for less than 8% moisture content.
- Storage: Store seeds in airtight containers (glass jars with desiccant packets work well) in a cool, dark, dry place (ideally 40-50°F and 30-40% humidity). Label clearly with variety and date. Properly stored seeds can remain viable for 3-10 years or more.
Step 8: Season Extension & Winterizing
Extend your harvest and protect your garden for the off-season to truly maximize your self sufficient garden from scratch.
- Cold Frames: Simple structures with a transparent top (glass, polycarbonate, or old windows) that sit over garden beds. They trap solar heat, allowing you to grow cold-hardy crops (lettuce, spinach, kale, radishes) well into winter or start seeds earlier in spring. A basic cold frame can be built from 2×6 lumber and a sheet of polycarbonate for under $100.
- Hoop Houses/Low Tunnels: Larger structures made from flexible hoops (PVC pipe or EMT conduit) covered with greenhouse plastic. These provide more space and greater temperature moderation. A 10×20 ft DIY low tunnel kit can cost $200-$500, while a larger, more robust hoop house kit might be $1,000-$3,000. I use a 6×12 ft low tunnel made from 1/2-inch PVC hoops and 6mil greenhouse plastic, which extends my lettuce and spinach harvest by at least
The choice of seeds is crucial for a truly self sufficient garden from scratch.
- Choose Heirloom & Open-Pollinated Seeds: These varieties produce seeds that will grow true to type, meaning you can save seeds from your harvest year after year. F1 hybrids, while often vigorous, will not produce consistent offspring from saved seeds. Reputable seed companies include Baker Creek Heirloom Seeds, High Mowing Organic Seeds, and Seed Savers Exchange. Start with common, reliable varieties like ‘Black Krim’ tomatoes, ‘Provider’ bush beans, ‘Waltham Butternut’ squash, and ‘Black Seeded Simpson’ lettuce.
- Start Seeds Indoors (Optional but Recommended): For longer growing seasons or specific crops, starting seeds indoors gives you a head start. Use seed-starting mix (e.g., Espoma Organic Seed Starter Mix, ~$10 for 16qt bag) in seed trays (Jiffy Professional Greenhouse 72-cell kit, ~$15). Provide adequate light with LED grow lights (Barrina T5 2ft 4-pack LED Grow Lights, 20W each, ~$50) for 14-16 hours a day, positioned 2-4 inches above seedlings. Maintain consistent temperatures (65-75°F for most).
- Direct Sowing vs. Transplanting: Some crops (carrots, radishes, beans, corn) prefer direct sowing into the garden bed. Others (tomatoes, peppers, broccoli, kale) benefit from being started indoors and transplanted. Follow seed packet instructions for planting depths (e.g., lettuce seeds are often surface-sown or planted 1/8 inch deep, while beans are 1 inch deep) and spacing.
- Companion Planting: Strategically plant different species together to enhance growth, deter pests, and attract beneficial insects. For example, planting marigolds near tomatoes can deter nematodes, and basil improves tomato flavor. Nasturtiums can act as a trap crop for aphids.
- Succession Planting: For a continuous harvest, plant small batches of quick-growing crops (lettuce, radishes, cilantro) every 2-3 weeks. As one crop finishes, another is ready to take its place.
Step 6: Pest & Disease Management (Organic)
Maintaining a self sufficient garden from scratch means embracing organic pest and disease control.
- Integrated Pest Management (IPM): This holistic approach combines several strategies.
- Observation: Regularly inspect your plants for early signs of pests or disease. Catching issues early is key.
- Physical Barriers: Use row covers (e.g., Agribon AG-19 floating row cover, 10×20 ft, ~$20) to protect young plants from insect pests like cabbage worms and squash bugs. Install fences (e.g., 2×4 welded wire mesh, 4 ft tall, 50 ft roll ~$70) to keep out deer, rabbits, and other larger animals.
- Hand-Picking: For larger pests like tomato hornworms or squash bugs, simply pick them off and drop them into a bucket of soapy water.
- Companion Planting: As mentioned, certain plants repel pests. Marigolds, garlic, and onions are excellent deterrents.
- Attract Beneficial Insects: Plant flowers like dill, fennel, cosmos, and sweet alyssum to attract ladybugs, lacewings, and parasitic wasps, which prey on common garden pests.
- Organic Sprays & Treatments:
- Neem Oil: An excellent broad-spectrum organic insecticide and fungicide. Bonide Neem Oil Concentrate (16oz, ~$20) can be mixed at a rate of 1-2 tbsp per gallon of water and sprayed on affected plants.
- Insecticidal Soap: Effective against soft-bodied insects like aphids, whiteflies, and spider mites. Garden Safe Insecticidal Soap (24oz ready-to-use, ~$10).
- Bacillus thuringiensis (Bt): A naturally occurring soil bacterium that targets caterpillars and worms. Monterey BT Worm & Caterpillar Killer (16oz, ~$18) is highly effective and safe for beneficial insects.
- Copper or Sulfur Sprays: For fungal diseases like powdery mildew or blight, organic copper (e.g., Bonide Copper Fungicide, ~$15 for 1lb) or sulfur (e.g., Safer Brand Garden Fungicide, ~$10 for 16oz) can be used as a last resort.
Step 7: Harvesting & Seed Saving
The culmination of your efforts is the harvest, and seed saving closes the loop on self-sufficiency.
- Harvesting Techniques:
- Timing: Harvest vegetables at their peak ripeness for best flavor and nutritional value. For example, green beans should snap cleanly, cucumbers should be firm, and tomatoes should be fully colored.
- Frequency: Many crops, like zucchini, cucumbers, and bush beans, produce more if harvested frequently. Pick daily or every other day.
- Tools: Use clean, sharp pruners (e.g., Corona ClassicCUT Bypass Pruner BP 3180, ~$30) or a sharp knife for clean cuts, minimizing damage to the plant.
- Seed Saving: This is where the « self-sufficient » aspect truly shines.
- Selection: Only save seeds from your healthiest, most vigorous plants that show desired traits (disease resistance, good flavor, high yield).
- Isolation: To ensure true-to-type seeds, prevent cross-pollination. This can be challenging for open-pollinated crops that readily cross (e.g., squash, corn). For beginners, focus on self-pollinating plants like beans, peas, lettuce, and tomatoes.
- Processing:
- Dry Seeds (Beans, Peas, Lettuce, Grains): Allow pods/seed heads to dry completely on the plant. Harvest, shell, and clean the seeds, removing chaff.
- Wet Seeds (Tomatoes, Cucumbers, Squash): For tomatoes, ferment the seeds in water for a few days to remove the gel coating and inhibit disease. For cucumbers/squash, scrape out seeds, wash thoroughly, and dry.
- Drying: Spread seeds thinly on screens or paper plates in a cool, dry, well-ventilated area for 1-4 weeks. Ensure they are bone-dry before storage. I aim for less than 8% moisture content.
- Storage: Store seeds in airtight containers (glass jars with desiccant packets work well) in a cool, dark, dry place (ideally 40-50°F and 30-40% humidity). Label clearly with variety and date. Properly stored seeds can remain viable for 3-10 years or more.
Step 8: Season Extension & Winterizing
Extend your harvest and protect your garden for the off-season to truly maximize your self sufficient garden from scratch.
- Cold Frames: Simple structures with a transparent top (glass, polycarbonate, or old windows) that sit over garden beds. They trap solar heat, allowing you to grow cold-hardy crops (lettuce, spinach, kale, radishes) well into winter or start seeds earlier in spring. A basic cold frame can be built from 2×6 lumber and a sheet of polycarbonate for under $100.
- Hoop Houses/Low Tunnels: Larger structures made from flexible hoops (PVC pipe or EMT conduit) covered with greenhouse plastic. These provide more space and greater temperature moderation. A 10×20 ft DIY low tunnel kit can cost $200-$500, while a larger, more robust hoop house kit might be $1,000-$3,000. I use a 6×12 ft low tunnel made from 1/2-inch PVC hoops and 6mil greenhouse plastic, which extends my lettuce and spinach harvest by at least
Step 5: Seed Selection & Planting
The choice of seeds is crucial for a truly self sufficient garden from scratch.
- Choose Heirloom & Open-Pollinated Seeds: These varieties produce seeds that will grow true to type, meaning you can save seeds from your harvest year after year. F1 hybrids, while often vigorous, will not produce consistent offspring from saved seeds. Reputable seed companies include Baker Creek Heirloom Seeds, High Mowing Organic Seeds, and Seed Savers Exchange. Start with common, reliable varieties like ‘Black Krim’ tomatoes, ‘Provider’ bush beans, ‘Waltham Butternut’ squash, and ‘Black Seeded Simpson’ lettuce.
- Start Seeds Indoors (Optional but Recommended): For longer growing seasons or specific crops, starting seeds indoors gives you a head start. Use seed-starting mix (e.g., Espoma Organic Seed Starter Mix, ~$10 for 16qt bag) in seed trays (Jiffy Professional Greenhouse 72-cell kit, ~$15). Provide adequate light with LED grow lights (Barrina T5 2ft 4-pack LED Grow Lights, 20W each, ~$50) for 14-16 hours a day, positioned 2-4 inches above seedlings. Maintain consistent temperatures (65-75°F for most).
- Direct Sowing vs. Transplanting: Some crops (carrots, radishes, beans, corn) prefer direct sowing into the garden bed. Others (tomatoes, peppers, broccoli, kale) benefit from being started indoors and transplanted. Follow seed packet instructions for planting depths (e.g., lettuce seeds are often surface-sown or planted 1/8 inch deep, while beans are 1 inch deep) and spacing.
- Companion Planting: Strategically plant different species together to enhance growth, deter pests, and attract beneficial insects. For example, planting marigolds near tomatoes can deter nematodes, and basil improves tomato flavor. Nasturtiums can act as a trap crop for aphids.
- Succession Planting: For a continuous harvest, plant small batches of quick-growing crops (lettuce, radishes, cilantro) every 2-3 weeks. As one crop finishes, another is ready to take its place.
Step 6: Pest & Disease Management (Organic)
Maintaining a self sufficient garden from scratch means embracing organic pest and disease control.
- Integrated Pest Management (IPM): This holistic approach combines several strategies.
- Observation: Regularly inspect your plants for early signs of pests or disease. Catching issues early is key.
- Physical Barriers: Use row covers (e.g., Agribon AG-19 floating row cover, 10×20 ft, ~$20) to protect young plants from insect pests like cabbage worms and squash bugs. Install fences (e.g., 2×4 welded wire mesh, 4 ft tall, 50 ft roll ~$70) to keep out deer, rabbits, and other larger animals.
- Hand-Picking: For larger pests like tomato hornworms or squash bugs, simply pick them off and drop them into a bucket of soapy water.
- Companion Planting: As mentioned, certain plants repel pests. Marigolds, garlic, and onions are excellent deterrents.
- Attract Beneficial Insects: Plant flowers like dill, fennel, cosmos, and sweet alyssum to attract ladybugs, lacewings, and parasitic wasps, which prey on common garden pests.
- Organic Sprays & Treatments:
- Neem Oil: An excellent broad-spectrum organic insecticide and fungicide. Bonide Neem Oil Concentrate (16oz, ~$20) can be mixed at a rate of 1-2 tbsp per gallon of water and sprayed on affected plants.
- Insecticidal Soap: Effective against soft-bodied insects like aphids, whiteflies, and spider mites. Garden Safe Insecticidal Soap (24oz ready-to-use, ~$10).
- Bacillus thuringiensis (Bt): A naturally occurring soil bacterium that targets caterpillars and worms. Monterey BT Worm & Caterpillar Killer (16oz, ~$18) is highly effective and safe for beneficial insects.
- Copper or Sulfur Sprays: For fungal diseases like powdery mildew or blight, organic copper (e.g., Bonide Copper Fungicide, ~$15 for 1lb) or sulfur (e.g., Safer Brand Garden Fungicide, ~$10 for 16oz) can be used as a last resort.
Step 7: Harvesting & Seed Saving
The culmination of your efforts is the harvest, and seed saving closes the loop on self-sufficiency.
- Harvesting Techniques:
- Timing: Harvest vegetables at their peak ripeness for best flavor and nutritional value. For example, green beans should snap cleanly, cucumbers should be firm, and tomatoes should be fully colored.
- Frequency: Many crops, like zucchini, cucumbers, and bush beans, produce more if harvested frequently. Pick daily or every other day.
- Tools: Use clean, sharp pruners (e.g., Corona ClassicCUT Bypass Pruner BP 3180, ~$30) or a sharp knife for clean cuts, minimizing damage to the plant.
- Seed Saving: This is where the « self-sufficient » aspect truly shines.
- Selection: Only save seeds from your healthiest, most vigorous plants that show desired traits (disease resistance, good flavor, high yield).
- Isolation: To ensure true-to-type seeds, prevent cross-pollination. This can be challenging for open-pollinated crops that readily cross (e.g., squash, corn). For beginners, focus on self-pollinating plants like beans, peas, lettuce, and tomatoes.
- Processing:
- Dry Seeds (Beans, Peas, Lettuce, Grains): Allow pods/seed heads to dry completely on the plant. Harvest, shell, and clean the seeds, removing chaff.
- Wet Seeds (Tomatoes, Cucumbers, Squash): For tomatoes, ferment the seeds in water for a few days to remove the gel coating and inhibit disease. For cucumbers/squash, scrape out seeds, wash thoroughly, and dry.
- Drying: Spread seeds thinly on screens or paper plates in a cool, dry, well-ventilated area for 1-4 weeks. Ensure they are bone-dry before storage. I aim for less than 8% moisture content.
- Storage: Store seeds in airtight containers (glass jars with desiccant packets work well) in a cool, dark, dry place (ideally 40-50°F and 30-40% humidity). Label clearly with variety and date. Properly stored seeds can remain viable for 3-10 years or more.
Step 8: Season Extension & Winterizing
Extend your harvest and protect your garden for the off-season to truly maximize your self sufficient garden from scratch.
- Cold Frames: Simple structures with a transparent top (glass, polycarbonate, or old windows) that sit over garden beds. They trap solar heat, allowing you to grow cold-hardy crops (lettuce, spinach, kale, radishes) well into winter or start seeds earlier in spring. A basic cold frame can be built from 2×6 lumber and a sheet of polycarbonate for under $100.
- Hoop Houses/Low Tunnels: Larger structures made from flexible hoops (PVC pipe or EMT conduit) covered with greenhouse plastic. These provide more space and greater temperature moderation. A 10×20 ft DIY low tunnel kit can cost $200-$500, while a larger, more robust hoop house kit might be $1,000-$3,000. I use a 6×12 ft low tunnel made from 1/2-inch PVC hoops and 6mil greenhouse plastic, which extends my lettuce and spinach harvest by at least
- Rainwater Harvesting: This is my primary source of irrigation water. A 55-gallon rain barrel (e.g., EarthMark Rain Barrel, ~$120-$150) connected to a downspout can collect significant water. For larger needs, I use two 275-gallon IBC totes (Intermediate Bulk Containers, often available used for $100-$200 each from food-grade sources) connected in series. A 1,000 sq ft roof can collect approximately 620 gallons of water for every inch of rainfall. My 1,500 sq ft roof provides ample water for my 600 sq ft garden through multiple barrels and totes.
- Drip Irrigation: This is by far the most water-efficient method, delivering water directly to the plant’s root zone, minimizing evaporation and weed growth.
- Components: A typical drip system includes a pressure regulator (e.g., Rain Bird PRV-10, ~$15), a filter (Rain Bird RBY filter, ~$20), main tubing (1/2-inch poly tubing, 100ft ~$25), smaller feeder lines (1/4-inch tubing), and emitters (0.5 GPH or 1 GPH per plant).
- Kits: For beginners, a starter kit like the Rain Bird Drip Irrigation Garden Kit (model DDI-KIT-1P, ~$40-$60) is excellent for a small garden. For larger setups, I use Netafim Techline CV Drip Line (500ft roll, ~$150-$200), which has pressure-compensating emitters built-in, ensuring even watering across long runs.
- Automation: For true self-sufficiency, consider a battery-powered timer (e.g., Orbit B-Hyve Bluetooth Hose Faucet Timer, ~$50) or a solar-powered timer connected to a small 12V pump.
- Solar-Powered Pumps: For lifting water from a well, pond, or large storage tank to your garden, a solar pump is a game-changer. For a smaller drip system, a Shurflo 2088-594-152 Diaphragm Pump (12V, 3.5 GPM, ~$180) can be powered by a single 100W solar panel (e.g., Renogy 100W Monocrystalline Solar Panel, ~$100) and a small 12V battery (e.g., a 50Ah LiFePO4 battery like the Battle Born 50Ah, ~$450). For larger operations or deeper wells, more robust systems are needed. If you’re looking to build out a comprehensive off-grid power system to support your garden’s water needs, or indeed your entire homestead, you might want to explore resources like the Power Grid Generator complete system guide to understand the full scope of what’s possible in terms of energy independence.
Step 5: Seed Selection & Planting
The choice of seeds is crucial for a truly self sufficient garden from scratch.
- Choose Heirloom & Open-Pollinated Seeds: These varieties produce seeds that will grow true to type, meaning you can save seeds from your harvest year after year. F1 hybrids, while often vigorous, will not produce consistent offspring from saved seeds. Reputable seed companies include Baker Creek Heirloom Seeds, High Mowing Organic Seeds, and Seed Savers Exchange. Start with common, reliable varieties like ‘Black Krim’ tomatoes, ‘Provider’ bush beans, ‘Waltham Butternut’ squash, and ‘Black Seeded Simpson’ lettuce.
- Start Seeds Indoors (Optional but Recommended): For longer growing seasons or specific crops, starting seeds indoors gives you a head start. Use seed-starting mix (e.g., Espoma Organic Seed Starter Mix, ~$10 for 16qt bag) in seed trays (Jiffy Professional Greenhouse 72-cell kit, ~$15). Provide adequate light with LED grow lights (Barrina T5 2ft 4-pack LED Grow Lights, 20W each, ~$50) for 14-16 hours a day, positioned 2-4 inches above seedlings. Maintain consistent temperatures (65-75°F for most).
- Direct Sowing vs. Transplanting: Some crops (carrots, radishes, beans, corn) prefer direct sowing into the garden bed. Others (tomatoes, peppers, broccoli, kale) benefit from being started indoors and transplanted. Follow seed packet instructions for planting depths (e.g., lettuce seeds are often surface-sown or planted 1/8 inch deep, while beans are 1 inch deep) and spacing.
- Companion Planting: Strategically plant different species together to enhance growth, deter pests, and attract beneficial insects. For example, planting marigolds near tomatoes can deter nematodes, and basil improves tomato flavor. Nasturtiums can act as a trap crop for aphids.
- Succession Planting: For a continuous harvest, plant small batches of quick-growing crops (lettuce, radishes, cilantro) every 2-3 weeks. As one crop finishes, another is ready to take its place.
Step 6: Pest & Disease Management (Organic)
Maintaining a self sufficient garden from scratch means embracing organic pest and disease control.
- Integrated Pest Management (IPM): This holistic approach combines several strategies.
- Observation: Regularly inspect your plants for early signs of pests or disease. Catching issues early is key.
- Physical Barriers: Use row covers (e.g., Agribon AG-19 floating row cover, 10×20 ft, ~$20) to protect young plants from insect pests like cabbage worms and squash bugs. Install fences (e.g., 2×4 welded wire mesh, 4 ft tall, 50 ft roll ~$70) to keep out deer, rabbits, and other larger animals.
- Hand-Picking: For larger pests like tomato hornworms or squash bugs, simply pick them off and drop them into a bucket of soapy water.
- Companion Planting: As mentioned, certain plants repel pests. Marigolds, garlic, and onions are excellent deterrents.
- Attract Beneficial Insects: Plant flowers like dill, fennel, cosmos, and sweet alyssum to attract ladybugs, lacewings, and parasitic wasps, which prey on common garden pests.
- Organic Sprays & Treatments:
- Neem Oil: An excellent broad-spectrum organic insecticide and fungicide. Bonide Neem Oil Concentrate (16oz, ~$20) can be mixed at a rate of 1-2 tbsp per gallon of water and sprayed on affected plants.
- Insecticidal Soap: Effective against soft-bodied insects like aphids, whiteflies, and spider mites. Garden Safe Insecticidal Soap (24oz ready-to-use, ~$10).
- Bacillus thuringiensis (Bt): A naturally occurring soil bacterium that targets caterpillars and worms. Monterey BT Worm & Caterpillar Killer (16oz, ~$18) is highly effective and safe for beneficial insects.
- Copper or Sulfur Sprays: For fungal diseases like powdery mildew or blight, organic copper (e.g., Bonide Copper Fungicide, ~$15 for 1lb) or sulfur (e.g., Safer Brand Garden Fungicide, ~$10 for 16oz) can be used as a last resort.
Step 7: Harvesting & Seed Saving
The culmination of your efforts is the harvest, and seed saving closes the loop on self-sufficiency.
- Harvesting Techniques:
- Timing: Harvest vegetables at their peak ripeness for best flavor and nutritional value. For example, green beans should snap cleanly, cucumbers should be firm, and tomatoes should be fully colored.
- Frequency: Many crops, like zucchini, cucumbers, and bush beans, produce more if harvested frequently. Pick daily or every other day.
- Tools: Use clean, sharp pruners (e.g., Corona ClassicCUT Bypass Pruner BP 3180, ~$30) or a sharp knife for clean cuts, minimizing damage to the plant.
- Seed Saving: This is where the « self-sufficient » aspect truly shines.
- Selection: Only save seeds from your healthiest, most vigorous plants that show desired traits (disease resistance, good flavor, high yield).
- Isolation: To ensure true-to-type seeds, prevent cross-pollination. This can be challenging for open-pollinated crops that readily cross (e.g., squash, corn). For beginners, focus on self-pollinating plants like beans, peas, lettuce, and tomatoes.
- Processing:
- Dry Seeds (Beans, Peas, Lettuce, Grains): Allow pods/seed heads to dry completely on the plant. Harvest, shell, and clean the seeds, removing chaff.
- Wet Seeds (Tomatoes, Cucumbers, Squash): For tomatoes, ferment the seeds in water for a few days to remove the gel coating and inhibit disease. For cucumbers/squash, scrape out seeds, wash thoroughly, and dry.
- Drying: Spread seeds thinly on screens or paper plates in a cool, dry, well-ventilated area for 1-4 weeks. Ensure they are bone-dry before storage. I aim for less than 8% moisture content.
- Storage: Store seeds in airtight containers (glass jars with desiccant packets work well) in a cool, dark, dry place (ideally 40-50°F and 30-40% humidity). Label clearly with variety and date. Properly stored seeds can remain viable for 3-10 years or more.
Step 8: Season Extension & Winterizing
Extend your harvest and protect your garden for the off-season to truly maximize your self sufficient garden from scratch.
- Cold Frames: Simple structures with a transparent top (glass, polycarbonate, or old windows) that sit over garden beds. They trap solar heat, allowing you to grow cold-hardy crops (lettuce, spinach, kale, radishes) well into winter or start seeds earlier in spring. A basic cold frame can be built from 2×6 lumber and a sheet of polycarbonate for under $100.
- Hoop Houses/Low Tunnels: Larger structures made from flexible hoops (PVC pipe or EMT conduit) covered with greenhouse plastic. These provide more space and greater temperature moderation. A 10×20 ft DIY low tunnel kit can cost $200-$500, while a larger, more robust hoop house kit might be $1,000-$3,000. I use a 6×12 ft low tunnel made from 1/2-inch PVC hoops and 6mil greenhouse plastic, which extends my lettuce and spinach harvest by at least
Efficient water management is critical for a self sufficient garden from scratch, especially in off-grid living where water resources might be limited.
- Rainwater Harvesting: This is my primary source of irrigation water. A 55-gallon rain barrel (e.g., EarthMark Rain Barrel, ~$120-$150) connected to a downspout can collect significant water. For larger needs, I use two 275-gallon IBC totes (Intermediate Bulk Containers, often available used for $100-$200 each from food-grade sources) connected in series. A 1,000 sq ft roof can collect approximately 620 gallons of water for every inch of rainfall. My 1,500 sq ft roof provides ample water for my 600 sq ft garden through multiple barrels and totes.
- Drip Irrigation: This is by far the most water-efficient method, delivering water directly to the plant’s root zone, minimizing evaporation and weed growth.
- Components: A typical drip system includes a pressure regulator (e.g., Rain Bird PRV-10, ~$15), a filter (Rain Bird RBY filter, ~$20), main tubing (1/2-inch poly tubing, 100ft ~$25), smaller feeder lines (1/4-inch tubing), and emitters (0.5 GPH or 1 GPH per plant).
- Kits: For beginners, a starter kit like the Rain Bird Drip Irrigation Garden Kit (model DDI-KIT-1P, ~$40-$60) is excellent for a small garden. For larger setups, I use Netafim Techline CV Drip Line (500ft roll, ~$150-$200), which has pressure-compensating emitters built-in, ensuring even watering across long runs.
- Automation: For true self-sufficiency, consider a battery-powered timer (e.g., Orbit B-Hyve Bluetooth Hose Faucet Timer, ~$50) or a solar-powered timer connected to a small 12V pump.
- Solar-Powered Pumps: For lifting water from a well, pond, or large storage tank to your garden, a solar pump is a game-changer. For a smaller drip system, a Shurflo 2088-594-152 Diaphragm Pump (12V, 3.5 GPM, ~$180) can be powered by a single 100W solar panel (e.g., Renogy 100W Monocrystalline Solar Panel, ~$100) and a small 12V battery (e.g., a 50Ah LiFePO4 battery like the Battle Born 50Ah, ~$450). For larger operations or deeper wells, more robust systems are needed. If you’re looking to build out a comprehensive off-grid power system to support your garden’s water needs, or indeed your entire homestead, you might want to explore resources like the Power Grid Generator complete system guide to understand the full scope of what’s possible in terms of energy independence.
Step 5: Seed Selection & Planting
The choice of seeds is crucial for a truly self sufficient garden from scratch.
- Choose Heirloom & Open-Pollinated Seeds: These varieties produce seeds that will grow true to type, meaning you can save seeds from your harvest year after year. F1 hybrids, while often vigorous, will not produce consistent offspring from saved seeds. Reputable seed companies include Baker Creek Heirloom Seeds, High Mowing Organic Seeds, and Seed Savers Exchange. Start with common, reliable varieties like ‘Black Krim’ tomatoes, ‘Provider’ bush beans, ‘Waltham Butternut’ squash, and ‘Black Seeded Simpson’ lettuce.
- Start Seeds Indoors (Optional but Recommended): For longer growing seasons or specific crops, starting seeds indoors gives you a head start. Use seed-starting mix (e.g., Espoma Organic Seed Starter Mix, ~$10 for 16qt bag) in seed trays (Jiffy Professional Greenhouse 72-cell kit, ~$15). Provide adequate light with LED grow lights (Barrina T5 2ft 4-pack LED Grow Lights, 20W each, ~$50) for 14-16 hours a day, positioned 2-4 inches above seedlings. Maintain consistent temperatures (65-75°F for most).
- Direct Sowing vs. Transplanting: Some crops (carrots, radishes, beans, corn) prefer direct sowing into the garden bed. Others (tomatoes, peppers, broccoli, kale) benefit from being started indoors and transplanted. Follow seed packet instructions for planting depths (e.g., lettuce seeds are often surface-sown or planted 1/8 inch deep, while beans are 1 inch deep) and spacing.
- Companion Planting: Strategically plant different species together to enhance growth, deter pests, and attract beneficial insects. For example, planting marigolds near tomatoes can deter nematodes, and basil improves tomato flavor. Nasturtiums can act as a trap crop for aphids.
- Succession Planting: For a continuous harvest, plant small batches of quick-growing crops (lettuce, radishes, cilantro) every 2-3 weeks. As one crop finishes, another is ready to take its place.
Step 6: Pest & Disease Management (Organic)
Maintaining a self sufficient garden from scratch means embracing organic pest and disease control.
- Integrated Pest Management (IPM): This holistic approach combines several strategies.
- Observation: Regularly inspect your plants for early signs of pests or disease. Catching issues early is key.
- Physical Barriers: Use row covers (e.g., Agribon AG-19 floating row cover, 10×20 ft, ~$20) to protect young plants from insect pests like cabbage worms and squash bugs. Install fences (e.g., 2×4 welded wire mesh, 4 ft tall, 50 ft roll ~$70) to keep out deer, rabbits, and other larger animals.
- Hand-Picking: For larger pests like tomato hornworms or squash bugs, simply pick them off and drop them into a bucket of soapy water.
- Companion Planting: As mentioned, certain plants repel pests. Marigolds, garlic, and onions are excellent deterrents.
- Attract Beneficial Insects: Plant flowers like dill, fennel, cosmos, and sweet alyssum to attract ladybugs, lacewings, and parasitic wasps, which prey on common garden pests.
- Organic Sprays & Treatments:
- Neem Oil: An excellent broad-spectrum organic insecticide and fungicide. Bonide Neem Oil Concentrate (16oz, ~$20) can be mixed at a rate of 1-2 tbsp per gallon of water and sprayed on affected plants.
- Insecticidal Soap: Effective against soft-bodied insects like aphids, whiteflies, and spider mites. Garden Safe Insecticidal Soap (24oz ready-to-use, ~$10).
- Bacillus thuringiensis (Bt): A naturally occurring soil bacterium that targets caterpillars and worms. Monterey BT Worm & Caterpillar Killer (16oz, ~$18) is highly effective and safe for beneficial insects.
- Copper or Sulfur Sprays: For fungal diseases like powdery mildew or blight, organic copper (e.g., Bonide Copper Fungicide, ~$15 for 1lb) or sulfur (e.g., Safer Brand Garden Fungicide, ~$10 for 16oz) can be used as a last resort.
Step 7: Harvesting & Seed Saving
The culmination of your efforts is the harvest, and seed saving closes the loop on self-sufficiency.
- Harvesting Techniques:
- Timing: Harvest vegetables at their peak ripeness for best flavor and nutritional value. For example, green beans should snap cleanly, cucumbers should be firm, and tomatoes should be fully colored.
- Frequency: Many crops, like zucchini, cucumbers, and bush beans, produce more if harvested frequently. Pick daily or every other day.
- Tools: Use clean, sharp pruners (e.g., Corona ClassicCUT Bypass Pruner BP 3180, ~$30) or a sharp knife for clean cuts, minimizing damage to the plant.
- Seed Saving: This is where the « self-sufficient » aspect truly shines.
- Selection: Only save seeds from your healthiest, most vigorous plants that show desired traits (disease resistance, good flavor, high yield).
- Isolation: To ensure true-to-type seeds, prevent cross-pollination. This can be challenging for open-pollinated crops that readily cross (e.g., squash, corn). For beginners, focus on self-pollinating plants like beans, peas, lettuce, and tomatoes.
- Processing:
- Dry Seeds (Beans, Peas, Lettuce, Grains): Allow pods/seed heads to dry completely on the plant. Harvest, shell, and clean the seeds, removing chaff.
- Wet Seeds (Tomatoes, Cucumbers, Squash): For tomatoes, ferment the seeds in water for a few days to remove the gel coating and inhibit disease. For cucumbers/squash, scrape out seeds, wash thoroughly, and dry.
- Drying: Spread seeds thinly on screens or paper plates in a cool, dry, well-ventilated area for 1-4 weeks. Ensure they are bone-dry before storage. I aim for less than 8% moisture content.
- Storage: Store seeds in airtight containers (glass jars with desiccant packets work well) in a cool, dark, dry place (ideally 40-50°F and 30-40% humidity). Label clearly with variety and date. Properly stored seeds can remain viable for 3-10 years or more.
Step 8: Season Extension & Winterizing
Extend your harvest and protect your garden for the off-season to truly maximize your self sufficient garden from scratch.
- Cold Frames: Simple structures with a transparent top (glass, polycarbonate, or old windows) that sit over garden beds. They trap solar heat, allowing you to grow cold-hardy crops (lettuce, spinach, kale, radishes) well into winter or start seeds earlier in spring. A basic cold frame can be built from 2×6 lumber and a sheet of polycarbonate for under $100.
- Hoop Houses/Low Tunnels: Larger structures made from flexible hoops (PVC pipe or EMT conduit) covered with greenhouse plastic. These provide more space and greater temperature moderation. A 10×20 ft DIY low tunnel kit can cost $200-$500, while a larger, more robust hoop house kit might be $1,000-$3,000. I use a 6×12 ft low tunnel made from 1/2-inch PVC hoops and 6mil greenhouse plastic, which extends my lettuce and spinach harvest by at least
Step 4: Water Management & Irrigation
Efficient water management is critical for a self sufficient garden from scratch, especially in off-grid living where water resources might be limited.
- Rainwater Harvesting: This is my primary source of irrigation water. A 55-gallon rain barrel (e.g., EarthMark Rain Barrel, ~$120-$150) connected to a downspout can collect significant water. For larger needs, I use two 275-gallon IBC totes (Intermediate Bulk Containers, often available used for $100-$200 each from food-grade sources) connected in series. A 1,000 sq ft roof can collect approximately 620 gallons of water for every inch of rainfall. My 1,500 sq ft roof provides ample water for my 600 sq ft garden through multiple barrels and totes.
- Drip Irrigation: This is by far the most water-efficient method, delivering water directly to the plant’s root zone, minimizing evaporation and weed growth.
- Components: A typical drip system includes a pressure regulator (e.g., Rain Bird PRV-10, ~$15), a filter (Rain Bird RBY filter, ~$20), main tubing (1/2-inch poly tubing, 100ft ~$25), smaller feeder lines (1/4-inch tubing), and emitters (0.5 GPH or 1 GPH per plant).
- Kits: For beginners, a starter kit like the Rain Bird Drip Irrigation Garden Kit (model DDI-KIT-1P, ~$40-$60) is excellent for a small garden. For larger setups, I use Netafim Techline CV Drip Line (500ft roll, ~$150-$200), which has pressure-compensating emitters built-in, ensuring even watering across long runs.
- Automation: For true self-sufficiency, consider a battery-powered timer (e.g., Orbit B-Hyve Bluetooth Hose Faucet Timer, ~$50) or a solar-powered timer connected to a small 12V pump.
- Solar-Powered Pumps: For lifting water from a well, pond, or large storage tank to your garden, a solar pump is a game-changer. For a smaller drip system, a Shurflo 2088-594-152 Diaphragm Pump (12V, 3.5 GPM, ~$180) can be powered by a single 100W solar panel (e.g., Renogy 100W Monocrystalline Solar Panel, ~$100) and a small 12V battery (e.g., a 50Ah LiFePO4 battery like the Battle Born 50Ah, ~$450). For larger operations or deeper wells, more robust systems are needed. If you’re looking to build out a comprehensive off-grid power system to support your garden’s water needs, or indeed your entire homestead, you might want to explore resources like the Power Grid Generator complete system guide to understand the full scope of what’s possible in terms of energy independence.
Step 5: Seed Selection & Planting
The choice of seeds is crucial for a truly self sufficient garden from scratch.
- Choose Heirloom & Open-Pollinated Seeds: These varieties produce seeds that will grow true to type, meaning you can save seeds from your harvest year after year. F1 hybrids, while often vigorous, will not produce consistent offspring from saved seeds. Reputable seed companies include Baker Creek Heirloom Seeds, High Mowing Organic Seeds, and Seed Savers Exchange. Start with common, reliable varieties like ‘Black Krim’ tomatoes, ‘Provider’ bush beans, ‘Waltham Butternut’ squash, and ‘Black Seeded Simpson’ lettuce.
- Start Seeds Indoors (Optional but Recommended): For longer growing seasons or specific crops, starting seeds indoors gives you a head start. Use seed-starting mix (e.g., Espoma Organic Seed Starter Mix, ~$10 for 16qt bag) in seed trays (Jiffy Professional Greenhouse 72-cell kit, ~$15). Provide adequate light with LED grow lights (Barrina T5 2ft 4-pack LED Grow Lights, 20W each, ~$50) for 14-16 hours a day, positioned 2-4 inches above seedlings. Maintain consistent temperatures (65-75°F for most).
- Direct Sowing vs. Transplanting: Some crops (carrots, radishes, beans, corn) prefer direct sowing into the garden bed. Others (tomatoes, peppers, broccoli, kale) benefit from being started indoors and transplanted. Follow seed packet instructions for planting depths (e.g., lettuce seeds are often surface-sown or planted 1/8 inch deep, while beans are 1 inch deep) and spacing.
- Companion Planting: Strategically plant different species together to enhance growth, deter pests, and attract beneficial insects. For example, planting marigolds near tomatoes can deter nematodes, and basil improves tomato flavor. Nasturtiums can act as a trap crop for aphids.
- Succession Planting: For a continuous harvest, plant small batches of quick-growing crops (lettuce, radishes, cilantro) every 2-3 weeks. As one crop finishes, another is ready to take its place.
Step 6: Pest & Disease Management (Organic)
Maintaining a self sufficient garden from scratch means embracing organic pest and disease control.
- Integrated Pest Management (IPM): This holistic approach combines several strategies.
- Observation: Regularly inspect your plants for early signs of pests or disease. Catching issues early is key.
- Physical Barriers: Use row covers (e.g., Agribon AG-19 floating row cover, 10×20 ft, ~$20) to protect young plants from insect pests like cabbage worms and squash bugs. Install fences (e.g., 2×4 welded wire mesh, 4 ft tall, 50 ft roll ~$70) to keep out deer, rabbits, and other larger animals.
- Hand-Picking: For larger pests like tomato hornworms or squash bugs, simply pick them off and drop them into a bucket of soapy water.
- Companion Planting: As mentioned, certain plants repel pests. Marigolds, garlic, and onions are excellent deterrents.
- Attract Beneficial Insects: Plant flowers like dill, fennel, cosmos, and sweet alyssum to attract ladybugs, lacewings, and parasitic wasps, which prey on common garden pests.
- Organic Sprays & Treatments:
- Neem Oil: An excellent broad-spectrum organic insecticide and fungicide. Bonide Neem Oil Concentrate (16oz, ~$20) can be mixed at a rate of 1-2 tbsp per gallon of water and sprayed on affected plants.
- Insecticidal Soap: Effective against soft-bodied insects like aphids, whiteflies, and spider mites. Garden Safe Insecticidal Soap (24oz ready-to-use, ~$10).
- Bacillus thuringiensis (Bt): A naturally occurring soil bacterium that targets caterpillars and worms. Monterey BT Worm & Caterpillar Killer (16oz, ~$18) is highly effective and safe for beneficial insects.
- Copper or Sulfur Sprays: For fungal diseases like powdery mildew or blight, organic copper (e.g., Bonide Copper Fungicide, ~$15 for 1lb) or sulfur (e.g., Safer Brand Garden Fungicide, ~$10 for 16oz) can be used as a last resort.
Step 7: Harvesting & Seed Saving
The culmination of your efforts is the harvest, and seed saving closes the loop on self-sufficiency.
- Harvesting Techniques:
- Timing: Harvest vegetables at their peak ripeness for best flavor and nutritional value. For example, green beans should snap cleanly, cucumbers should be firm, and tomatoes should be fully colored.
- Frequency: Many crops, like zucchini, cucumbers, and bush beans, produce more if harvested frequently. Pick daily or every other day.
- Tools: Use clean, sharp pruners (e.g., Corona ClassicCUT Bypass Pruner BP 3180, ~$30) or a sharp knife for clean cuts, minimizing damage to the plant.
- Seed Saving: This is where the « self-sufficient » aspect truly shines.
- Selection: Only save seeds from your healthiest, most vigorous plants that show desired traits (disease resistance, good flavor, high yield).
- Isolation: To ensure true-to-type seeds, prevent cross-pollination. This can be challenging for open-pollinated crops that readily cross (e.g., squash, corn). For beginners, focus on self-pollinating plants like beans, peas, lettuce, and tomatoes.
- Processing:
- Dry Seeds (Beans, Peas, Lettuce, Grains): Allow pods/seed heads to dry completely on the plant. Harvest, shell, and clean the seeds, removing chaff.
- Wet Seeds (Tomatoes, Cucumbers, Squash): For tomatoes, ferment the seeds in water for a few days to remove the gel coating and inhibit disease. For cucumbers/squash, scrape out seeds, wash thoroughly, and dry.
- Drying: Spread seeds thinly on screens or paper plates in a cool, dry, well-ventilated area for 1-4 weeks. Ensure they are bone-dry before storage. I aim for less than 8% moisture content.
- Storage: Store seeds in airtight containers (glass jars with desiccant packets work well) in a cool, dark, dry place (ideally 40-50°F and 30-40% humidity). Label clearly with variety and date. Properly stored seeds can remain viable for 3-10 years or more.
Step 8: Season Extension & Winterizing
Extend your harvest and protect your garden for the off-season to truly maximize your self sufficient garden from scratch.
- Cold Frames: Simple structures with a transparent top (glass, polycarbonate, or old windows) that sit over garden beds. They trap solar heat, allowing you to grow cold-hardy crops (lettuce, spinach, kale, radishes) well into winter or start seeds earlier in spring. A basic cold frame can be built from 2×6 lumber and a sheet of polycarbonate for under $100.
- Hoop Houses/Low Tunnels: Larger structures made from flexible hoops (PVC pipe or EMT conduit) covered with greenhouse plastic. These provide more space and greater temperature moderation. A 10×20 ft DIY low tunnel kit can cost $200-$500, while a larger, more robust hoop house kit might be $1,000-$3,000. I use a 6×12 ft low tunnel made from 1/2-inch PVC hoops and 6mil greenhouse plastic, which extends my lettuce and spinach harvest by at least
- In-Ground Beds: If you have excellent native soil and good drainage, in-ground beds are the most economical. Double-digging (loosening soil two shovel depths) can significantly improve drainage and aeration. For my main garden, I primarily use in-ground beds, but I focus on building up the soil over time with consistent compost additions and cover cropping. I aim for beds that are no wider than 3-4 feet so I can reach the center without stepping on the soil, compacting it.
- Raised Beds: Raised beds offer numerous advantages, especially for poor soil, heavy clay, or rocky areas. They provide better drainage, warm up faster in spring, reduce compaction, and make weeding and harvesting easier on your back.
- Material Options:
- Untreated Cedar: Naturally rot-resistant and chemical-free. A 4×8 ft bed, 12 inches deep, typically requires three 2x12x8 ft cedar boards, costing around $50-$60 per board (total ~$150-$180) plus corner brackets or screws. My first raised beds were cedar and are still going strong after 7 years.
- Galvanized Steel: Durable, long-lasting, and aesthetically pleasing. Brands like Vego Garden offer modular kits. A Vego Garden 17″ Tall 8-in-1 Metal Raised Garden Bed (can be configured to 4×8 ft) costs approximately $250-$300.
- Concrete Blocks/Stones: Very durable but can leach minerals (though generally safe once weathered) and can be expensive.
- Recycled Materials: Pallets (check for chemical treatment stamps like « HT » for heat-treated), old tires (controversial due to potential chemical leaching).
- Filling Raised Beds: Don’t just fill with topsoil. Use a « Hugelkultur » approach (logs, branches, leaves, then compost, then topsoil) or a mixture of 60% good quality topsoil, 30% compost, and 10% perlite or vermiculite for drainage. A 4x8x1 ft raised bed requires about 32 cubic feet (or ~1.2 cubic yards) of soil mix, which can cost $100-$200 depending on your source.
- Material Options:
Step 4: Water Management & Irrigation
Efficient water management is critical for a self sufficient garden from scratch, especially in off-grid living where water resources might be limited.
- Rainwater Harvesting: This is my primary source of irrigation water. A 55-gallon rain barrel (e.g., EarthMark Rain Barrel, ~$120-$150) connected to a downspout can collect significant water. For larger needs, I use two 275-gallon IBC totes (Intermediate Bulk Containers, often available used for $100-$200 each from food-grade sources) connected in series. A 1,000 sq ft roof can collect approximately 620 gallons of water for every inch of rainfall. My 1,500 sq ft roof provides ample water for my 600 sq ft garden through multiple barrels and totes.
- Drip Irrigation: This is by far the most water-efficient method, delivering water directly to the plant’s root zone, minimizing evaporation and weed growth.
- Components: A typical drip system includes a pressure regulator (e.g., Rain Bird PRV-10, ~$15), a filter (Rain Bird RBY filter, ~$20), main tubing (1/2-inch poly tubing, 100ft ~$25), smaller feeder lines (1/4-inch tubing), and emitters (0.5 GPH or 1 GPH per plant).
- Kits: For beginners, a starter kit like the Rain Bird Drip Irrigation Garden Kit (model DDI-KIT-1P, ~$40-$60) is excellent for a small garden. For larger setups, I use Netafim Techline CV Drip Line (500ft roll, ~$150-$200), which has pressure-compensating emitters built-in, ensuring even watering across long runs.
- Automation: For true self-sufficiency, consider a battery-powered timer (e.g., Orbit B-Hyve Bluetooth Hose Faucet Timer, ~$50) or a solar-powered timer connected to a small 12V pump.
- Solar-Powered Pumps: For lifting water from a well, pond, or large storage tank to your garden, a solar pump is a game-changer. For a smaller drip system, a Shurflo 2088-594-152 Diaphragm Pump (12V, 3.5 GPM, ~$180) can be powered by a single 100W solar panel (e.g., Renogy 100W Monocrystalline Solar Panel, ~$100) and a small 12V battery (e.g., a 50Ah LiFePO4 battery like the Battle Born 50Ah, ~$450). For larger operations or deeper wells, more robust systems are needed. If you’re looking to build out a comprehensive off-grid power system to support your garden’s water needs, or indeed your entire homestead, you might want to explore resources like the Power Grid Generator complete system guide to understand the full scope of what’s possible in terms of energy independence.
Step 5: Seed Selection & Planting
The choice of seeds is crucial for a truly self sufficient garden from scratch.
- Choose Heirloom & Open-Pollinated Seeds: These varieties produce seeds that will grow true to type, meaning you can save seeds from your harvest year after year. F1 hybrids, while often vigorous, will not produce consistent offspring from saved seeds. Reputable seed companies include Baker Creek Heirloom Seeds, High Mowing Organic Seeds, and Seed Savers Exchange. Start with common, reliable varieties like ‘Black Krim’ tomatoes, ‘Provider’ bush beans, ‘Waltham Butternut’ squash, and ‘Black Seeded Simpson’ lettuce.
- Start Seeds Indoors (Optional but Recommended): For longer growing seasons or specific crops, starting seeds indoors gives you a head start. Use seed-starting mix (e.g., Espoma Organic Seed Starter Mix, ~$10 for 16qt bag) in seed trays (Jiffy Professional Greenhouse 72-cell kit, ~$15). Provide adequate light with LED grow lights (Barrina T5 2ft 4-pack LED Grow Lights, 20W each, ~$50) for 14-16 hours a day, positioned 2-4 inches above seedlings. Maintain consistent temperatures (65-75°F for most).
- Direct Sowing vs. Transplanting: Some crops (carrots, radishes, beans, corn) prefer direct sowing into the garden bed. Others (tomatoes, peppers, broccoli, kale) benefit from being started indoors and transplanted. Follow seed packet instructions for planting depths (e.g., lettuce seeds are often surface-sown or planted 1/8 inch deep, while beans are 1 inch deep) and spacing.
- Companion Planting: Strategically plant different species together to enhance growth, deter pests, and attract beneficial insects. For example, planting marigolds near tomatoes can deter nematodes, and basil improves tomato flavor. Nasturtiums can act as a trap crop for aphids.
- Succession Planting: For a continuous harvest, plant small batches of quick-growing crops (lettuce, radishes, cilantro) every 2-3 weeks. As one crop finishes, another is ready to take its place.
Step 6: Pest & Disease Management (Organic)
Maintaining a self sufficient garden from scratch means embracing organic pest and disease control.
- Integrated Pest Management (IPM): This holistic approach combines several strategies.
- Observation: Regularly inspect your plants for early signs of pests or disease. Catching issues early is key.
- Physical Barriers: Use row covers (e.g., Agribon AG-19 floating row cover, 10×20 ft, ~$20) to protect young plants from insect pests like cabbage worms and squash bugs. Install fences (e.g., 2×4 welded wire mesh, 4 ft tall, 50 ft roll ~$70) to keep out deer, rabbits, and other larger animals.
- Hand-Picking: For larger pests like tomato hornworms or squash bugs, simply pick them off and drop them into a bucket of soapy water.
- Companion Planting: As mentioned, certain plants repel pests. Marigolds, garlic, and onions are excellent deterrents.
- Attract Beneficial Insects: Plant flowers like dill, fennel, cosmos, and sweet alyssum to attract ladybugs, lacewings, and parasitic wasps, which prey on common garden pests.
- Organic Sprays & Treatments:
- Neem Oil: An excellent broad-spectrum organic insecticide and fungicide. Bonide Neem Oil Concentrate (16oz, ~$20) can be mixed at a rate of 1-2 tbsp per gallon of water and sprayed on affected plants.
- Insecticidal Soap: Effective against soft-bodied insects like aphids, whiteflies, and spider mites. Garden Safe Insecticidal Soap (24oz ready-to-use, ~$10).
- Bacillus thuringiensis (Bt): A naturally occurring soil bacterium that targets caterpillars and worms. Monterey BT Worm & Caterpillar Killer (16oz, ~$18) is highly effective and safe for beneficial insects.
- Copper or Sulfur Sprays: For fungal diseases like powdery mildew or blight, organic copper (e.g., Bonide Copper Fungicide, ~$15 for 1lb) or sulfur (e.g., Safer Brand Garden Fungicide, ~$10 for 16oz) can be used as a last resort.
Step 7: Harvesting & Seed Saving
The culmination of your efforts is the harvest, and seed saving closes the loop on self-sufficiency.
- Harvesting Techniques:
- Timing: Harvest vegetables at their peak ripeness for best flavor and nutritional value. For example, green beans should snap cleanly, cucumbers should be firm, and tomatoes should be fully colored.
- Frequency: Many crops, like zucchini, cucumbers, and bush beans, produce more if harvested frequently. Pick daily or every other day.
- Tools: Use clean, sharp pruners (e.g., Corona ClassicCUT Bypass Pruner BP 3180, ~$30) or a sharp knife for clean cuts, minimizing damage to the plant.
- Seed Saving: This is where the « self-sufficient » aspect truly shines.
- Selection: Only save seeds from your healthiest, most vigorous plants that show desired traits (disease resistance, good flavor, high yield).
- Isolation: To ensure true-to-type seeds, prevent cross-pollination. This can be challenging for open-pollinated crops that readily cross (e.g., squash, corn). For beginners, focus on self-pollinating plants like beans, peas, lettuce, and tomatoes.
- Processing:
- Dry Seeds (Beans, Peas, Lettuce, Grains): Allow pods/seed heads to dry completely on the plant. Harvest, shell, and clean the seeds, removing chaff.
- Wet Seeds (Tomatoes, Cucumbers, Squash): For tomatoes, ferment the seeds in water for a few days to remove the gel coating and inhibit disease. For cucumbers/squash, scrape out seeds, wash thoroughly, and dry.
- Drying: Spread seeds thinly on screens or paper plates in a cool, dry, well-ventilated area for 1-4 weeks. Ensure they are bone-dry before storage. I aim for less than 8% moisture content.
- Storage: Store seeds in airtight containers (glass jars with desiccant packets work well) in a cool, dark, dry place (ideally 40-50°F and 30-40% humidity). Label clearly with variety and date. Properly stored seeds can remain viable for 3-10 years or more.
Step 8: Season Extension & Winterizing
Extend your harvest and protect your garden for the off-season to truly maximize your self sufficient garden from scratch.
- Cold Frames: Simple structures with a transparent top (glass, polycarbonate, or old windows) that sit over garden beds. They trap solar heat, allowing you to grow cold-hardy crops (lettuce, spinach, kale, radishes) well into winter or start seeds earlier in spring. A basic cold frame can be built from 2×6 lumber and a sheet of polycarbonate for under $100.
- Hoop Houses/Low Tunnels: Larger structures made from flexible hoops (PVC pipe or EMT conduit) covered with greenhouse plastic. These provide more space and greater temperature moderation. A 10×20 ft DIY low tunnel kit can cost $200-$500, while a larger, more robust hoop house kit might be $1,000-$3,000. I use a 6×12 ft low tunnel made from 1/2-inch PVC hoops and 6mil greenhouse plastic, which extends my lettuce and spinach harvest by at least
Deciding between raised beds and in-ground beds depends on your soil, budget, and physical capabilities.
- In-Ground Beds: If you have excellent native soil and good drainage, in-ground beds are the most economical. Double-digging (loosening soil two shovel depths) can significantly improve drainage and aeration. For my main garden, I primarily use in-ground beds, but I focus on building up the soil over time with consistent compost additions and cover cropping. I aim for beds that are no wider than 3-4 feet so I can reach the center without stepping on the soil, compacting it.
- Raised Beds: Raised beds offer numerous advantages, especially for poor soil, heavy clay, or rocky areas. They provide better drainage, warm up faster in spring, reduce compaction, and make weeding and harvesting easier on your back.
- Material Options:
- Untreated Cedar: Naturally rot-resistant and chemical-free. A 4×8 ft bed, 12 inches deep, typically requires three 2x12x8 ft cedar boards, costing around $50-$60 per board (total ~$150-$180) plus corner brackets or screws. My first raised beds were cedar and are still going strong after 7 years.
- Galvanized Steel: Durable, long-lasting, and aesthetically pleasing. Brands like Vego Garden offer modular kits. A Vego Garden 17″ Tall 8-in-1 Metal Raised Garden Bed (can be configured to 4×8 ft) costs approximately $250-$300.
- Concrete Blocks/Stones: Very durable but can leach minerals (though generally safe once weathered) and can be expensive.
- Recycled Materials: Pallets (check for chemical treatment stamps like « HT » for heat-treated), old tires (controversial due to potential chemical leaching).
- Filling Raised Beds: Don’t just fill with topsoil. Use a « Hugelkultur » approach (logs, branches, leaves, then compost, then topsoil) or a mixture of 60% good quality topsoil, 30% compost, and 10% perlite or vermiculite for drainage. A 4x8x1 ft raised bed requires about 32 cubic feet (or ~1.2 cubic yards) of soil mix, which can cost $100-$200 depending on your source.
- Material Options:
Step 4: Water Management & Irrigation
Efficient water management is critical for a self sufficient garden from scratch, especially in off-grid living where water resources might be limited.
- Rainwater Harvesting: This is my primary source of irrigation water. A 55-gallon rain barrel (e.g., EarthMark Rain Barrel, ~$120-$150) connected to a downspout can collect significant water. For larger needs, I use two 275-gallon IBC totes (Intermediate Bulk Containers, often available used for $100-$200 each from food-grade sources) connected in series. A 1,000 sq ft roof can collect approximately 620 gallons of water for every inch of rainfall. My 1,500 sq ft roof provides ample water for my 600 sq ft garden through multiple barrels and totes.
- Drip Irrigation: This is by far the most water-efficient method, delivering water directly to the plant’s root zone, minimizing evaporation and weed growth.
- Components: A typical drip system includes a pressure regulator (e.g., Rain Bird PRV-10, ~$15), a filter (Rain Bird RBY filter, ~$20), main tubing (1/2-inch poly tubing, 100ft ~$25), smaller feeder lines (1/4-inch tubing), and emitters (0.5 GPH or 1 GPH per plant).
- Kits: For beginners, a starter kit like the Rain Bird Drip Irrigation Garden Kit (model DDI-KIT-1P, ~$40-$60) is excellent for a small garden. For larger setups, I use Netafim Techline CV Drip Line (500ft roll, ~$150-$200), which has pressure-compensating emitters built-in, ensuring even watering across long runs.
- Automation: For true self-sufficiency, consider a battery-powered timer (e.g., Orbit B-Hyve Bluetooth Hose Faucet Timer, ~$50) or a solar-powered timer connected to a small 12V pump.
- Solar-Powered Pumps: For lifting water from a well, pond, or large storage tank to your garden, a solar pump is a game-changer. For a smaller drip system, a Shurflo 2088-594-152 Diaphragm Pump (12V, 3.5 GPM, ~$180) can be powered by a single 100W solar panel (e.g., Renogy 100W Monocrystalline Solar Panel, ~$100) and a small 12V battery (e.g., a 50Ah LiFePO4 battery like the Battle Born 50Ah, ~$450). For larger operations or deeper wells, more robust systems are needed. If you’re looking to build out a comprehensive off-grid power system to support your garden’s water needs, or indeed your entire homestead, you might want to explore resources like the Power Grid Generator complete system guide to understand the full scope of what’s possible in terms of energy independence.
Step 5: Seed Selection & Planting
The choice of seeds is crucial for a truly self sufficient garden from scratch.
- Choose Heirloom & Open-Pollinated Seeds: These varieties produce seeds that will grow true to type, meaning you can save seeds from your harvest year after year. F1 hybrids, while often vigorous, will not produce consistent offspring from saved seeds. Reputable seed companies include Baker Creek Heirloom Seeds, High Mowing Organic Seeds, and Seed Savers Exchange. Start with common, reliable varieties like ‘Black Krim’ tomatoes, ‘Provider’ bush beans, ‘Waltham Butternut’ squash, and ‘Black Seeded Simpson’ lettuce.
- Start Seeds Indoors (Optional but Recommended): For longer growing seasons or specific crops, starting seeds indoors gives you a head start. Use seed-starting mix (e.g., Espoma Organic Seed Starter Mix, ~$10 for 16qt bag) in seed trays (Jiffy Professional Greenhouse 72-cell kit, ~$15). Provide adequate light with LED grow lights (Barrina T5 2ft 4-pack LED Grow Lights, 20W each, ~$50) for 14-16 hours a day, positioned 2-4 inches above seedlings. Maintain consistent temperatures (65-75°F for most).
- Direct Sowing vs. Transplanting: Some crops (carrots, radishes, beans, corn) prefer direct sowing into the garden bed. Others (tomatoes, peppers, broccoli, kale) benefit from being started indoors and transplanted. Follow seed packet instructions for planting depths (e.g., lettuce seeds are often surface-sown or planted 1/8 inch deep, while beans are 1 inch deep) and spacing.
- Companion Planting: Strategically plant different species together to enhance growth, deter pests, and attract beneficial insects. For example, planting marigolds near tomatoes can deter nematodes, and basil improves tomato flavor. Nasturtiums can act as a trap crop for aphids.
- Succession Planting: For a continuous harvest, plant small batches of quick-growing crops (lettuce, radishes, cilantro) every 2-3 weeks. As one crop finishes, another is ready to take its place.
Step 6: Pest & Disease Management (Organic)
Maintaining a self sufficient garden from scratch means embracing organic pest and disease control.
- Integrated Pest Management (IPM): This holistic approach combines several strategies.
- Observation: Regularly inspect your plants for early signs of pests or disease. Catching issues early is key.
- Physical Barriers: Use row covers (e.g., Agribon AG-19 floating row cover, 10×20 ft, ~$20) to protect young plants from insect pests like cabbage worms and squash bugs. Install fences (e.g., 2×4 welded wire mesh, 4 ft tall, 50 ft roll ~$70) to keep out deer, rabbits, and other larger animals.
- Hand-Picking: For larger pests like tomato hornworms or squash bugs, simply pick them off and drop them into a bucket of soapy water.
- Companion Planting: As mentioned, certain plants repel pests. Marigolds, garlic, and onions are excellent deterrents.
- Attract Beneficial Insects: Plant flowers like dill, fennel, cosmos, and sweet alyssum to attract ladybugs, lacewings, and parasitic wasps, which prey on common garden pests.
- Organic Sprays & Treatments:
- Neem Oil: An excellent broad-spectrum organic insecticide and fungicide. Bonide Neem Oil Concentrate (16oz, ~$20) can be mixed at a rate of 1-2 tbsp per gallon of water and sprayed on affected plants.
- Insecticidal Soap: Effective against soft-bodied insects like aphids, whiteflies, and spider mites. Garden Safe Insecticidal Soap (24oz ready-to-use, ~$10).
- Bacillus thuringiensis (Bt): A naturally occurring soil bacterium that targets caterpillars and worms. Monterey BT Worm & Caterpillar Killer (16oz, ~$18) is highly effective and safe for beneficial insects.
- Copper or Sulfur Sprays: For fungal diseases like powdery mildew or blight, organic copper (e.g., Bonide Copper Fungicide, ~$15 for 1lb) or sulfur (e.g., Safer Brand Garden Fungicide, ~$10 for 16oz) can be used as a last resort.
Step 7: Harvesting & Seed Saving
The culmination of your efforts is the harvest, and seed saving closes the loop on self-sufficiency.
- Harvesting Techniques:
- Timing: Harvest vegetables at their peak ripeness for best flavor and nutritional value. For example, green beans should snap cleanly, cucumbers should be firm, and tomatoes should be fully colored.
- Frequency: Many crops, like zucchini, cucumbers, and bush beans, produce more if harvested frequently. Pick daily or every other day.
- Tools: Use clean, sharp pruners (e.g., Corona ClassicCUT Bypass Pruner BP 3180, ~$30) or a sharp knife for clean cuts, minimizing damage to the plant.
- Seed Saving: This is where the « self-sufficient » aspect truly shines.
- Selection: Only save seeds from your healthiest, most vigorous plants that show desired traits (disease resistance, good flavor, high yield).
- Isolation: To ensure true-to-type seeds, prevent cross-pollination. This can be challenging for open-pollinated crops that readily cross (e.g., squash, corn). For beginners, focus on self-pollinating plants like beans, peas, lettuce, and tomatoes.
- Processing:
- Dry Seeds (Beans, Peas, Lettuce, Grains): Allow pods/seed heads to dry completely on the plant. Harvest, shell, and clean the seeds, removing chaff.
- Wet Seeds (Tomatoes, Cucumbers, Squash): For tomatoes, ferment the seeds in water for a few days to remove the gel coating and inhibit disease. For cucumbers/squash, scrape out seeds, wash thoroughly, and dry.
- Drying: Spread seeds thinly on screens or paper plates in a cool, dry, well-ventilated area for 1-4 weeks. Ensure they are bone-dry before storage. I aim for less than 8% moisture content.
- Storage: Store seeds in airtight containers (glass jars with desiccant packets work well) in a cool, dark, dry place (ideally 40-50°F and 30-40% humidity). Label clearly with variety and date. Properly stored seeds can remain viable for 3-10 years or more.
Step 8: Season Extension & Winterizing
Extend your harvest and protect your garden for the off-season to truly maximize your self sufficient garden from scratch.
- Cold Frames: Simple structures with a transparent top (glass, polycarbonate, or old windows) that sit over garden beds. They trap solar heat, allowing you to grow cold-hardy crops (lettuce, spinach, kale, radishes) well into winter or start seeds earlier in spring. A basic cold frame can be built from 2×6 lumber and a sheet of polycarbonate for under $100.
- Hoop Houses/Low Tunnels: Larger structures made from flexible hoops (PVC pipe or EMT conduit) covered with greenhouse plastic. These provide more space and greater temperature moderation. A 10×20 ft DIY low tunnel kit can cost $200-$500, while a larger, more robust hoop house kit might be $1,000-$3,000. I use a 6×12 ft low tunnel made from 1/2-inch PVC hoops and 6mil greenhouse plastic, which extends my lettuce and spinach harvest by at least
Healthy soil is the bedrock of a productive, self-sufficient garden. You can’t guess what your soil needs; you have to test it.
- Perform a Soil Test: A professional soil test will give you precise data on your soil’s pH, nutrient levels (N-P-K), and organic matter content. I recommend sending a sample to your local agricultural extension office; it typically costs $20-$50 and provides detailed recommendations. Alternatively, for a quick homeowner check, a Rapitest Soil Test Kit (40-test kit, model 1663, ~$20 on Amazon) provides a good baseline for pH, Nitrogen, Phosphorus, and Potash. Aim for a pH between 6.0 and 7.0 for most vegetables.
- Amend for pH Imbalance: If your soil is too acidic (below 6.0), add agricultural lime (dolomitic lime adds magnesium, calcitic lime adds calcium). Apply 5-10 lbs per 100 sq ft for a moderate adjustment. If it’s too alkaline (above 7.0), add elemental sulfur (e.g., Espoma Soil Acidifier, ~$15 for 6.75 lbs) or generous amounts of organic matter like peat moss or pine needles.
- Build Organic Matter: This is the single most important step for long-term soil health. Organic matter improves soil structure, water retention, drainage, and nutrient availability. Incorporate 2-4 inches of high-quality compost into your top 6-12 inches of soil annually. I make my own compost from kitchen scraps, garden waste, and shredded leaves, but you can purchase it. Local nurseries often sell bulk compost for $30-$50 per cubic yard. Aged manure (from chickens, cows, or horses – ensure it’s well-rotted to avoid burning plants) is also excellent.
- Address Nutrient Deficiencies: Based on your soil test, add specific organic amendments. If Nitrogen (N) is low, add blood meal (12-0-0, ~$20 for 3 lbs) or feather meal. For Phosphorus (P), use bone meal (3-15-0, ~$15 for 3 lbs) or rock phosphate. For Potassium (K), greensand (0-0-2.5, ~$25 for 5 lbs) or kelp meal are good choices. I rely heavily on Espoma Organic Garden-tone (5-3-3, ~$25 for an 8lb bag) as a balanced, all-purpose organic fertilizer during planting.
Step 3: Garden Bed Preparation
Deciding between raised beds and in-ground beds depends on your soil, budget, and physical capabilities.
- In-Ground Beds: If you have excellent native soil and good drainage, in-ground beds are the most economical. Double-digging (loosening soil two shovel depths) can significantly improve drainage and aeration. For my main garden, I primarily use in-ground beds, but I focus on building up the soil over time with consistent compost additions and cover cropping. I aim for beds that are no wider than 3-4 feet so I can reach the center without stepping on the soil, compacting it.
- Raised Beds: Raised beds offer numerous advantages, especially for poor soil, heavy clay, or rocky areas. They provide better drainage, warm up faster in spring, reduce compaction, and make weeding and harvesting easier on your back.
- Material Options:
- Untreated Cedar: Naturally rot-resistant and chemical-free. A 4×8 ft bed, 12 inches deep, typically requires three 2x12x8 ft cedar boards, costing around $50-$60 per board (total ~$150-$180) plus corner brackets or screws. My first raised beds were cedar and are still going strong after 7 years.
- Galvanized Steel: Durable, long-lasting, and aesthetically pleasing. Brands like Vego Garden offer modular kits. A Vego Garden 17″ Tall 8-in-1 Metal Raised Garden Bed (can be configured to 4×8 ft) costs approximately $250-$300.
- Concrete Blocks/Stones: Very durable but can leach minerals (though generally safe once weathered) and can be expensive.
- Recycled Materials: Pallets (check for chemical treatment stamps like « HT » for heat-treated), old tires (controversial due to potential chemical leaching).
- Filling Raised Beds: Don’t just fill with topsoil. Use a « Hugelkultur » approach (logs, branches, leaves, then compost, then topsoil) or a mixture of 60% good quality topsoil, 30% compost, and 10% perlite or vermiculite for drainage. A 4x8x1 ft raised bed requires about 32 cubic feet (or ~1.2 cubic yards) of soil mix, which can cost $100-$200 depending on your source.
- Material Options:
Step 4: Water Management & Irrigation
Efficient water management is critical for a self sufficient garden from scratch, especially in off-grid living where water resources might be limited.
- Rainwater Harvesting: This is my primary source of irrigation water. A 55-gallon rain barrel (e.g., EarthMark Rain Barrel, ~$120-$150) connected to a downspout can collect significant water. For larger needs, I use two 275-gallon IBC totes (Intermediate Bulk Containers, often available used for $100-$200 each from food-grade sources) connected in series. A 1,000 sq ft roof can collect approximately 620 gallons of water for every inch of rainfall. My 1,500 sq ft roof provides ample water for my 600 sq ft garden through multiple barrels and totes.
- Drip Irrigation: This is by far the most water-efficient method, delivering water directly to the plant’s root zone, minimizing evaporation and weed growth.
- Components: A typical drip system includes a pressure regulator (e.g., Rain Bird PRV-10, ~$15), a filter (Rain Bird RBY filter, ~$20), main tubing (1/2-inch poly tubing, 100ft ~$25), smaller feeder lines (1/4-inch tubing), and emitters (0.5 GPH or 1 GPH per plant).
- Kits: For beginners, a starter kit like the Rain Bird Drip Irrigation Garden Kit (model DDI-KIT-1P, ~$40-$60) is excellent for a small garden. For larger setups, I use Netafim Techline CV Drip Line (500ft roll, ~$150-$200), which has pressure-compensating emitters built-in, ensuring even watering across long runs.
- Automation: For true self-sufficiency, consider a battery-powered timer (e.g., Orbit B-Hyve Bluetooth Hose Faucet Timer, ~$50) or a solar-powered timer connected to a small 12V pump.
- Solar-Powered Pumps: For lifting water from a well, pond, or large storage tank to your garden, a solar pump is a game-changer. For a smaller drip system, a Shurflo 2088-594-152 Diaphragm Pump (12V, 3.5 GPM, ~$180) can be powered by a single 100W solar panel (e.g., Renogy 100W Monocrystalline Solar Panel, ~$100) and a small 12V battery (e.g., a 50Ah LiFePO4 battery like the Battle Born 50Ah, ~$450). For larger operations or deeper wells, more robust systems are needed. If you’re looking to build out a comprehensive off-grid power system to support your garden’s water needs, or indeed your entire homestead, you might want to explore resources like the Power Grid Generator complete system guide to understand the full scope of what’s possible in terms of energy independence.
Step 5: Seed Selection & Planting
The choice of seeds is crucial for a truly self sufficient garden from scratch.
- Choose Heirloom & Open-Pollinated Seeds: These varieties produce seeds that will grow true to type, meaning you can save seeds from your harvest year after year. F1 hybrids, while often vigorous, will not produce consistent offspring from saved seeds. Reputable seed companies include Baker Creek Heirloom Seeds, High Mowing Organic Seeds, and Seed Savers Exchange. Start with common, reliable varieties like ‘Black Krim’ tomatoes, ‘Provider’ bush beans, ‘Waltham Butternut’ squash, and ‘Black Seeded Simpson’ lettuce.
- Start Seeds Indoors (Optional but Recommended): For longer growing seasons or specific crops, starting seeds indoors gives you a head start. Use seed-starting mix (e.g., Espoma Organic Seed Starter Mix, ~$10 for 16qt bag) in seed trays (Jiffy Professional Greenhouse 72-cell kit, ~$15). Provide adequate light with LED grow lights (Barrina T5 2ft 4-pack LED Grow Lights, 20W each, ~$50) for 14-16 hours a day, positioned 2-4 inches above seedlings. Maintain consistent temperatures (65-75°F for most).
- Direct Sowing vs. Transplanting: Some crops (carrots, radishes, beans, corn) prefer direct sowing into the garden bed. Others (tomatoes, peppers, broccoli, kale) benefit from being started indoors and transplanted. Follow seed packet instructions for planting depths (e.g., lettuce seeds are often surface-sown or planted 1/8 inch deep, while beans are 1 inch deep) and spacing.
- Companion Planting: Strategically plant different species together to enhance growth, deter pests, and attract beneficial insects. For example, planting marigolds near tomatoes can deter nematodes, and basil improves tomato flavor. Nasturtiums can act as a trap crop for aphids.
- Succession Planting: For a continuous harvest, plant small batches of quick-growing crops (lettuce, radishes, cilantro) every 2-3 weeks. As one crop finishes, another is ready to take its place.
Step 6: Pest & Disease Management (Organic)
Maintaining a self sufficient garden from scratch means embracing organic pest and disease control.
- Integrated Pest Management (IPM): This holistic approach combines several strategies.
- Observation: Regularly inspect your plants for early signs of pests or disease. Catching issues early is key.
- Physical Barriers: Use row covers (e.g., Agribon AG-19 floating row cover, 10×20 ft, ~$20) to protect young plants from insect pests like cabbage worms and squash bugs. Install fences (e.g., 2×4 welded wire mesh, 4 ft tall, 50 ft roll ~$70) to keep out deer, rabbits, and other larger animals.
- Hand-Picking: For larger pests like tomato hornworms or squash bugs, simply pick them off and drop them into a bucket of soapy water.
- Companion Planting: As mentioned, certain plants repel pests. Marigolds, garlic, and onions are excellent deterrents.
- Attract Beneficial Insects: Plant flowers like dill, fennel, cosmos, and sweet alyssum to attract ladybugs, lacewings, and parasitic wasps, which prey on common garden pests.
- Organic Sprays & Treatments:
- Neem Oil: An excellent broad-spectrum organic insecticide and fungicide. Bonide Neem Oil Concentrate (16oz, ~$20) can be mixed at a rate of 1-2 tbsp per gallon of water and sprayed on affected plants.
- Insecticidal Soap: Effective against soft-bodied insects like aphids, whiteflies, and spider mites. Garden Safe Insecticidal Soap (24oz ready-to-use, ~$10).
- Bacillus thuringiensis (Bt): A naturally occurring soil bacterium that targets caterpillars and worms. Monterey BT Worm & Caterpillar Killer (16oz, ~$18) is highly effective and safe for beneficial insects.
- Copper or Sulfur Sprays: For fungal diseases like powdery mildew or blight, organic copper (e.g., Bonide Copper Fungicide, ~$15 for 1lb) or sulfur (e.g., Safer Brand Garden Fungicide, ~$10 for 16oz) can be used as a last resort.
Step 7: Harvesting & Seed Saving
The culmination of your efforts is the harvest, and seed saving closes the loop on self-sufficiency.
- Harvesting Techniques:
- Timing: Harvest vegetables at their peak ripeness for best flavor and nutritional value. For example, green beans should snap cleanly, cucumbers should be firm, and tomatoes should be fully colored.
- Frequency: Many crops, like zucchini, cucumbers, and bush beans, produce more if harvested frequently. Pick daily or every other day.
- Tools: Use clean, sharp pruners (e.g., Corona ClassicCUT Bypass Pruner BP 3180, ~$30) or a sharp knife for clean cuts, minimizing damage to the plant.
- Seed Saving: This is where the « self-sufficient » aspect truly shines.
- Selection: Only save seeds from your healthiest, most vigorous plants that show desired traits (disease resistance, good flavor, high yield).
- Isolation: To ensure true-to-type seeds, prevent cross-pollination. This can be challenging for open-pollinated crops that readily cross (e.g., squash, corn). For beginners, focus on self-pollinating plants like beans, peas, lettuce, and tomatoes.
- Processing:
- Dry Seeds (Beans, Peas, Lettuce, Grains): Allow pods/seed heads to dry completely on the plant. Harvest, shell, and clean the seeds, removing chaff.
- Wet Seeds (Tomatoes, Cucumbers, Squash): For tomatoes, ferment the seeds in water for a few days to remove the gel coating and inhibit disease. For cucumbers/squash, scrape out seeds, wash thoroughly, and dry.
- Drying: Spread seeds thinly on screens or paper plates in a cool, dry, well-ventilated area for 1-4 weeks. Ensure they are bone-dry before storage. I aim for less than 8% moisture content.
- Storage: Store seeds in airtight containers (glass jars with desiccant packets work well) in a cool, dark, dry place (ideally 40-50°F and 30-40% humidity). Label clearly with variety and date. Properly stored seeds can remain viable for 3-10 years or more.
Step 8: Season Extension & Winterizing
Extend your harvest and protect your garden for the off-season to truly maximize your self sufficient garden from scratch.
- Cold Frames: Simple structures with a transparent top (glass, polycarbonate, or old windows) that sit over garden beds. They trap solar heat, allowing you to grow cold-hardy crops (lettuce, spinach, kale, radishes) well into winter or start seeds earlier in spring. A basic cold frame can be built from 2×6 lumber and a sheet of polycarbonate for under $100.
- Hoop Houses/Low Tunnels: Larger structures made from flexible hoops (PVC pipe or EMT conduit) covered with greenhouse plastic. These provide more space and greater temperature moderation. A 10×20 ft DIY low tunnel kit can cost $200-$500, while a larger, more robust hoop house kit might be $1,000-$3,000. I use a 6×12 ft low tunnel made from 1/2-inch PVC hoops and 6mil greenhouse plastic, which extends my lettuce and spinach harvest by at least
- Integrated Pest Management (IPM): This holistic approach combines several strategies.
- Integrated Pest Management (IPM): This holistic approach combines several strategies.
- Harvesting Techniques:
- Timing: Harvest vegetables at their peak ripeness for best flavor and nutritional value. For example, green beans should snap cleanly, cucumbers should be firm, and tomatoes should be fully colored.
- Frequency: Many crops, like zucchini, cucumbers, and bush beans, produce more if harvested frequently. Pick daily or every other day.
- Tools: Use clean, sharp pruners (e.g., Corona ClassicCUT Bypass Pruner BP 3180, ~$30) or a sharp knife for clean cuts, minimizing damage to the plant.
- Seed Saving: This is where the « self-sufficient » aspect truly shines.
- Selection: Only save seeds from your healthiest, most vigorous plants that show desired traits (disease resistance, good flavor, high yield).
- Isolation: To ensure true-to-type seeds, prevent cross-pollination. This can be challenging for open-pollinated crops that readily cross (e.g., squash, corn). For beginners, focus on self-pollinating plants like beans, peas, lettuce, and tomatoes.
- Processing:
- Dry Seeds (Beans, Peas, Lettuce, Grains): Allow pods/seed heads to dry completely on the plant. Harvest, shell, and clean the seeds, removing chaff.
- Wet Seeds (Tomatoes, Cucumbers, Squash): For tomatoes, ferment the seeds in water for a few days to remove the gel coating and inhibit disease. For cucumbers/squash, scrape out seeds, wash thoroughly, and dry.
- Drying: Spread seeds thinly on screens or paper plates in a cool, dry, well-ventilated area for 1-4 weeks. Ensure they are bone-dry before storage. I aim for less than 8% moisture content.
- Storage: Store seeds in airtight containers (glass jars with desiccant packets work well) in a cool, dark, dry place (ideally 40-50°F and 30-40% humidity). Label clearly with variety and date. Properly stored seeds can remain viable for 3-10 years or more.
Step 8: Season Extension & Winterizing
Extend your harvest and protect your garden for the off-season to truly maximize your self sufficient garden from scratch.
- Cold Frames: Simple structures with a transparent top (glass, polycarbonate, or old windows) that sit over garden beds. They trap solar heat, allowing you to grow cold-hardy crops (lettuce, spinach, kale, radishes) well into winter or start seeds earlier in spring. A basic cold frame can be built from 2×6 lumber and a sheet of polycarbonate for under $100.
- Hoop Houses/Low Tunnels: Larger structures made from flexible hoops (PVC pipe or EMT conduit) covered with greenhouse plastic. These provide more space and greater temperature moderation. A 10×20 ft DIY low tunnel kit can cost $200-$500, while a larger, more robust hoop house kit might be $1,000-$3,000. I use a 6×12 ft low tunnel made from 1/2-inch PVC hoops and 6mil greenhouse plastic, which extends my lettuce and spinach harvest by at least
- Integrated Pest Management (IPM): This holistic approach combines several strategies.
- Observation: Regularly inspect your plants for early signs of pests or disease. Catching issues early is key.
- Physical Barriers: Use row covers (e.g., Agribon AG-19 floating row cover, 10×20 ft, ~$20) to protect young plants from insect pests like cabbage worms and squash bugs. Install fences (e.g., 2×4 welded wire mesh, 4 ft tall, 50 ft roll ~$70) to keep out deer, rabbits, and other larger animals.
- Hand-Picking: For larger pests like tomato hornworms or squash bugs, simply pick them off and drop them into a bucket of soapy water.
- Companion Planting: As mentioned, certain plants repel pests. Marigolds, garlic, and onions are excellent deterrents.
- Attract Beneficial Insects: Plant flowers like dill, fennel, cosmos, and sweet alyssum to attract ladybugs, lacewings, and parasitic wasps, which prey on common garden pests.
- Organic Sprays & Treatments:
- Neem Oil: An excellent broad-spectrum organic insecticide and fungicide. Bonide Neem Oil Concentrate (16oz, ~$20) can be mixed at a rate of 1-2 tbsp per gallon of water and sprayed on affected plants.
- Insecticidal Soap: Effective against soft-bodied insects like aphids, whiteflies, and spider mites. Garden Safe Insecticidal Soap (24oz ready-to-use, ~$10).
- Bacillus thuringiensis (Bt): A naturally occurring soil bacterium that targets caterpillars and worms. Monterey BT Worm & Caterpillar Killer (16oz, ~$18) is highly effective and safe for beneficial insects.
- Copper or Sulfur Sprays: For fungal diseases like powdery mildew or blight, organic copper (e.g., Bonide Copper Fungicide, ~$15 for 1lb) or sulfur (e.g., Safer Brand Garden Fungicide, ~$10 for 16oz) can be used as a last resort.
Step 7: Harvesting & Seed Saving
The culmination of your efforts is the harvest, and seed saving closes the loop on self-sufficiency.
- Harvesting Techniques:
- Timing: Harvest vegetables at their peak ripeness for best flavor and nutritional value. For example, green beans should snap cleanly, cucumbers should be firm, and tomatoes should be fully colored.
- Frequency: Many crops, like zucchini, cucumbers, and bush beans, produce more if harvested frequently. Pick daily or every other day.
- Tools: Use clean, sharp pruners (e.g., Corona ClassicCUT Bypass Pruner BP 3180, ~$30) or a sharp knife for clean cuts, minimizing damage to the plant.
- Seed Saving: This is where the « self-sufficient » aspect truly shines.
- Selection: Only save seeds from your healthiest, most vigorous plants that show desired traits (disease resistance, good flavor, high yield).
- Isolation: To ensure true-to-type seeds, prevent cross-pollination. This can be challenging for open-pollinated crops that readily cross (e.g., squash, corn). For beginners, focus on self-pollinating plants like beans, peas, lettuce, and tomatoes.
- Processing:
- Dry Seeds (Beans, Peas, Lettuce, Grains): Allow pods/seed heads to dry completely on the plant. Harvest, shell, and clean the seeds, removing chaff.
- Wet Seeds (Tomatoes, Cucumbers, Squash): For tomatoes, ferment the seeds in water for a few days to remove the gel coating and inhibit disease. For cucumbers/squash, scrape out seeds, wash thoroughly, and dry.
- Drying: Spread seeds thinly on screens or paper plates in a cool, dry, well-ventilated area for 1-4 weeks. Ensure they are bone-dry before storage. I aim for less than 8% moisture content.
- Storage: Store seeds in airtight containers (glass jars with desiccant packets work well) in a cool, dark, dry place (ideally 40-50°F and 30-40% humidity). Label clearly with variety and date. Properly stored seeds can remain viable for 3-10 years or more.
Step 8: Season Extension & Winterizing
Extend your harvest and protect your garden for the off-season to truly maximize your self sufficient garden from scratch.
- Cold Frames: Simple structures with a transparent top (glass, polycarbonate, or old windows) that sit over garden beds. They trap solar heat, allowing you to grow cold-hardy crops (lettuce, spinach, kale, radishes) well into winter or start seeds earlier in spring. A basic cold frame can be built from 2×6 lumber and a sheet of polycarbonate for under $100.
- Hoop Houses/Low Tunnels: Larger structures made from flexible hoops (PVC pipe or EMT conduit) covered with greenhouse plastic. These provide more space and greater temperature moderation. A 10×20 ft DIY low tunnel kit can cost $200-$500, while a larger, more robust hoop house kit might be $1,000-$3,000. I use a 6×12 ft low tunnel made from 1/2-inch PVC hoops and 6mil greenhouse plastic, which extends my lettuce and spinach harvest by at least
Maintaining a self sufficient garden from scratch means embracing organic pest and disease control.
- Integrated Pest Management (IPM): This holistic approach combines several strategies.
- Observation: Regularly inspect your plants for early signs of pests or disease. Catching issues early is key.
- Physical Barriers: Use row covers (e.g., Agribon AG-19 floating row cover, 10×20 ft, ~$20) to protect young plants from insect pests like cabbage worms and squash bugs. Install fences (e.g., 2×4 welded wire mesh, 4 ft tall, 50 ft roll ~$70) to keep out deer, rabbits, and other larger animals.
- Hand-Picking: For larger pests like tomato hornworms or squash bugs, simply pick them off and drop them into a bucket of soapy water.
- Companion Planting: As mentioned, certain plants repel pests. Marigolds, garlic, and onions are excellent deterrents.
- Attract Beneficial Insects: Plant flowers like dill, fennel, cosmos, and sweet alyssum to attract ladybugs, lacewings, and parasitic wasps, which prey on common garden pests.
- Organic Sprays & Treatments:
- Neem Oil: An excellent broad-spectrum organic insecticide and fungicide. Bonide Neem Oil Concentrate (16oz, ~$20) can be mixed at a rate of 1-2 tbsp per gallon of water and sprayed on affected plants.
- Insecticidal Soap: Effective against soft-bodied insects like aphids, whiteflies, and spider mites. Garden Safe Insecticidal Soap (24oz ready-to-use, ~$10).
- Bacillus thuringiensis (Bt): A naturally occurring soil bacterium that targets caterpillars and worms. Monterey BT Worm & Caterpillar Killer (16oz, ~$18) is highly effective and safe for beneficial insects.
- Copper or Sulfur Sprays: For fungal diseases like powdery mildew or blight, organic copper (e.g., Bonide Copper Fungicide, ~$15 for 1lb) or sulfur (e.g., Safer Brand Garden Fungicide, ~$10 for 16oz) can be used as a last resort.
Step 7: Harvesting & Seed Saving
The culmination of your efforts is the harvest, and seed saving closes the loop on self-sufficiency.
- Harvesting Techniques:
- Timing: Harvest vegetables at their peak ripeness for best flavor and nutritional value. For example, green beans should snap cleanly, cucumbers should be firm, and tomatoes should be fully colored.
- Frequency: Many crops, like zucchini, cucumbers, and bush beans, produce more if harvested frequently. Pick daily or every other day.
- Tools: Use clean, sharp pruners (e.g., Corona ClassicCUT Bypass Pruner BP 3180, ~$30) or a sharp knife for clean cuts, minimizing damage to the plant.
- Seed Saving: This is where the « self-sufficient » aspect truly shines.
- Selection: Only save seeds from your healthiest, most vigorous plants that show desired traits (disease resistance, good flavor, high yield).
- Isolation: To ensure true-to-type seeds, prevent cross-pollination. This can be challenging for open-pollinated crops that readily cross (e.g., squash, corn). For beginners, focus on self-pollinating plants like beans, peas, lettuce, and tomatoes.
- Processing:
- Dry Seeds (Beans, Peas, Lettuce, Grains): Allow pods/seed heads to dry completely on the plant. Harvest, shell, and clean the seeds, removing chaff.
- Wet Seeds (Tomatoes, Cucumbers, Squash): For tomatoes, ferment the seeds in water for a few days to remove the gel coating and inhibit disease. For cucumbers/squash, scrape out seeds, wash thoroughly, and dry.
- Drying: Spread seeds thinly on screens or paper plates in a cool, dry, well-ventilated area for 1-4 weeks. Ensure they are bone-dry before storage. I aim for less than 8% moisture content.
- Storage: Store seeds in airtight containers (glass jars with desiccant packets work well) in a cool, dark, dry place (ideally 40-50°F and 30-40% humidity). Label clearly with variety and date. Properly stored seeds can remain viable for 3-10 years or more.
Step 8: Season Extension & Winterizing
Extend your harvest and protect your garden for the off-season to truly maximize your self sufficient garden from scratch.
- Cold Frames: Simple structures with a transparent top (glass, polycarbonate, or old windows) that sit over garden beds. They trap solar heat, allowing you to grow cold-hardy crops (lettuce, spinach, kale, radishes) well into winter or start seeds earlier in spring. A basic cold frame can be built from 2×6 lumber and a sheet of polycarbonate for under $100.
- Hoop Houses/Low Tunnels: Larger structures made from flexible hoops (PVC pipe or EMT conduit) covered with greenhouse plastic. These provide more space and greater temperature moderation. A 10×20 ft DIY low tunnel kit can cost $200-$500, while a larger, more robust hoop house kit might be $1,000-$3,000. I use a 6×12 ft low tunnel made from 1/2-inch PVC hoops and 6mil greenhouse plastic, which extends my lettuce and spinach harvest by at least
Step 6: Pest & Disease Management (Organic)
Maintaining a self sufficient garden from scratch means embracing organic pest and disease control.
- Integrated Pest Management (IPM): This holistic approach combines several strategies.
- Observation: Regularly inspect your plants for early signs of pests or disease. Catching issues early is key.
- Physical Barriers: Use row covers (e.g., Agribon AG-19 floating row cover, 10×20 ft, ~$20) to protect young plants from insect pests like cabbage worms and squash bugs. Install fences (e.g., 2×4 welded wire mesh, 4 ft tall, 50 ft roll ~$70) to keep out deer, rabbits, and other larger animals.
- Hand-Picking: For larger pests like tomato hornworms or squash bugs, simply pick them off and drop them into a bucket of soapy water.
- Companion Planting: As mentioned, certain plants repel pests. Marigolds, garlic, and onions are excellent deterrents.
- Attract Beneficial Insects: Plant flowers like dill, fennel, cosmos, and sweet alyssum to attract ladybugs, lacewings, and parasitic wasps, which prey on common garden pests.
- Organic Sprays & Treatments:
- Neem Oil: An excellent broad-spectrum organic insecticide and fungicide. Bonide Neem Oil Concentrate (16oz, ~$20) can be mixed at a rate of 1-2 tbsp per gallon of water and sprayed on affected plants.
- Insecticidal Soap: Effective against soft-bodied insects like aphids, whiteflies, and spider mites. Garden Safe Insecticidal Soap (24oz ready-to-use, ~$10).
- Bacillus thuringiensis (Bt): A naturally occurring soil bacterium that targets caterpillars and worms. Monterey BT Worm & Caterpillar Killer (16oz, ~$18) is highly effective and safe for beneficial insects.
- Copper or Sulfur Sprays: For fungal diseases like powdery mildew or blight, organic copper (e.g., Bonide Copper Fungicide, ~$15 for 1lb) or sulfur (e.g., Safer Brand Garden Fungicide, ~$10 for 16oz) can be used as a last resort.
Step 7: Harvesting & Seed Saving
The culmination of your efforts is the harvest, and seed saving closes the loop on self-sufficiency.
- Harvesting Techniques:
- Timing: Harvest vegetables at their peak ripeness for best flavor and nutritional value. For example, green beans should snap cleanly, cucumbers should be firm, and tomatoes should be fully colored.
- Frequency: Many crops, like zucchini, cucumbers, and bush beans, produce more if harvested frequently. Pick daily or every other day.
- Tools: Use clean, sharp pruners (e.g., Corona ClassicCUT Bypass Pruner BP 3180, ~$30) or a sharp knife for clean cuts, minimizing damage to the plant.
- Seed Saving: This is where the « self-sufficient » aspect truly shines.
- Selection: Only save seeds from your healthiest, most vigorous plants that show desired traits (disease resistance, good flavor, high yield).
- Isolation: To ensure true-to-type seeds, prevent cross-pollination. This can be challenging for open-pollinated crops that readily cross (e.g., squash, corn). For beginners, focus on self-pollinating plants like beans, peas, lettuce, and tomatoes.
- Processing:
- Dry Seeds (Beans, Peas, Lettuce, Grains): Allow pods/seed heads to dry completely on the plant. Harvest, shell, and clean the seeds, removing chaff.
- Wet Seeds (Tomatoes, Cucumbers, Squash): For tomatoes, ferment the seeds in water for a few days to remove the gel coating and inhibit disease. For cucumbers/squash, scrape out seeds, wash thoroughly, and dry.
- Drying: Spread seeds thinly on screens or paper plates in a cool, dry, well-ventilated area for 1-4 weeks. Ensure they are bone-dry before storage. I aim for less than 8% moisture content.
- Storage: Store seeds in airtight containers (glass jars with desiccant packets work well) in a cool, dark, dry place (ideally 40-50°F and 30-40% humidity). Label clearly with variety and date. Properly stored seeds can remain viable for 3-10 years or more.
Step 8: Season Extension & Winterizing
Extend your harvest and protect your garden for the off-season to truly maximize your self sufficient garden from scratch.
- Cold Frames: Simple structures with a transparent top (glass, polycarbonate, or old windows) that sit over garden beds. They trap solar heat, allowing you to grow cold-hardy crops (lettuce, spinach, kale, radishes) well into winter or start seeds earlier in spring. A basic cold frame can be built from 2×6 lumber and a sheet of polycarbonate for under $100.
- Hoop Houses/Low Tunnels: Larger structures made from flexible hoops (PVC pipe or EMT conduit) covered with greenhouse plastic. These provide more space and greater temperature moderation. A 10×20 ft DIY low tunnel kit can cost $200-$500, while a larger, more robust hoop house kit might be $1,000-$3,000. I use a 6×12 ft low tunnel made from 1/2-inch PVC hoops and 6mil greenhouse plastic, which extends my lettuce and spinach harvest by at least
- Choose Heirloom & Open-Pollinated Seeds: These varieties produce seeds that will grow true to type, meaning you can save seeds from your harvest year after year. F1 hybrids, while often vigorous, will not produce consistent offspring from saved seeds. Reputable seed companies include Baker Creek Heirloom Seeds, High Mowing Organic Seeds, and Seed Savers Exchange. Start with common, reliable varieties like ‘Black Krim’ tomatoes, ‘Provider’ bush beans, ‘Waltham Butternut’ squash, and ‘Black Seeded Simpson’ lettuce.
- Start Seeds Indoors (Optional but Recommended): For longer growing seasons or specific crops, starting seeds indoors gives you a head start. Use seed-starting mix (e.g., Espoma Organic Seed Starter Mix, ~$10 for 16qt bag) in seed trays (Jiffy Professional Greenhouse 72-cell kit, ~$15). Provide adequate light with LED grow lights (Barrina T5 2ft 4-pack LED Grow Lights, 20W each, ~$50) for 14-16 hours a day, positioned 2-4 inches above seedlings. Maintain consistent temperatures (65-75°F for most).
- Direct Sowing vs. Transplanting: Some crops (carrots, radishes, beans, corn) prefer direct sowing into the garden bed. Others (tomatoes, peppers, broccoli, kale) benefit from being started indoors and transplanted. Follow seed packet instructions for planting depths (e.g., lettuce seeds are often surface-sown or planted 1/8 inch deep, while beans are 1 inch deep) and spacing.
- Companion Planting: Strategically plant different species together to enhance growth, deter pests, and attract beneficial insects. For example, planting marigolds near tomatoes can deter nematodes, and basil improves tomato flavor. Nasturtiums can act as a trap crop for aphids.
- Succession Planting: For a continuous harvest, plant small batches of quick-growing crops (lettuce, radishes, cilantro) every 2-3 weeks. As one crop finishes, another is ready to take its place.
Step 6: Pest & Disease Management (Organic)
Maintaining a self sufficient garden from scratch means embracing organic pest and disease control.
- Integrated Pest Management (IPM): This holistic approach combines several strategies.
- Observation: Regularly inspect your plants for early signs of pests or disease. Catching issues early is key.
- Physical Barriers: Use row covers (e.g., Agribon AG-19 floating row cover, 10×20 ft, ~$20) to protect young plants from insect pests like cabbage worms and squash bugs. Install fences (e.g., 2×4 welded wire mesh, 4 ft tall, 50 ft roll ~$70) to keep out deer, rabbits, and other larger animals.
- Hand-Picking: For larger pests like tomato hornworms or squash bugs, simply pick them off and drop them into a bucket of soapy water.
- Companion Planting: As mentioned, certain plants repel pests. Marigolds, garlic, and onions are excellent deterrents.
- Attract Beneficial Insects: Plant flowers like dill, fennel, cosmos, and sweet alyssum to attract ladybugs, lacewings, and parasitic wasps, which prey on common garden pests.
- Organic Sprays & Treatments:
- Neem Oil: An excellent broad-spectrum organic insecticide and fungicide. Bonide Neem Oil Concentrate (16oz, ~$20) can be mixed at a rate of 1-2 tbsp per gallon of water and sprayed on affected plants.
- Insecticidal Soap: Effective against soft-bodied insects like aphids, whiteflies, and spider mites. Garden Safe Insecticidal Soap (24oz ready-to-use, ~$10).
- Bacillus thuringiensis (Bt): A naturally occurring soil bacterium that targets caterpillars and worms. Monterey BT Worm & Caterpillar Killer (16oz, ~$18) is highly effective and safe for beneficial insects.
- Copper or Sulfur Sprays: For fungal diseases like powdery mildew or blight, organic copper (e.g., Bonide Copper Fungicide, ~$15 for 1lb) or sulfur (e.g., Safer Brand Garden Fungicide, ~$10 for 16oz) can be used as a last resort.
Step 7: Harvesting & Seed Saving
The culmination of your efforts is the harvest, and seed saving closes the loop on self-sufficiency.
- Harvesting Techniques:
- Timing: Harvest vegetables at their peak ripeness for best flavor and nutritional value. For example, green beans should snap cleanly, cucumbers should be firm, and tomatoes should be fully colored.
- Frequency: Many crops, like zucchini, cucumbers, and bush beans, produce more if harvested frequently. Pick daily or every other day.
- Tools: Use clean, sharp pruners (e.g., Corona ClassicCUT Bypass Pruner BP 3180, ~$30) or a sharp knife for clean cuts, minimizing damage to the plant.
- Seed Saving: This is where the « self-sufficient » aspect truly shines.
- Selection: Only save seeds from your healthiest, most vigorous plants that show desired traits (disease resistance, good flavor, high yield).
- Isolation: To ensure true-to-type seeds, prevent cross-pollination. This can be challenging for open-pollinated crops that readily cross (e.g., squash, corn). For beginners, focus on self-pollinating plants like beans, peas, lettuce, and tomatoes.
- Processing:
- Dry Seeds (Beans, Peas, Lettuce, Grains): Allow pods/seed heads to dry completely on the plant. Harvest, shell, and clean the seeds, removing chaff.
- Wet Seeds (Tomatoes, Cucumbers, Squash): For tomatoes, ferment the seeds in water for a few days to remove the gel coating and inhibit disease. For cucumbers/squash, scrape out seeds, wash thoroughly, and dry.
- Drying: Spread seeds thinly on screens or paper plates in a cool, dry, well-ventilated area for 1-4 weeks. Ensure they are bone-dry before storage. I aim for less than 8% moisture content.
- Storage: Store seeds in airtight containers (glass jars with desiccant packets work well) in a cool, dark, dry place (ideally 40-50°F and 30-40% humidity). Label clearly with variety and date. Properly stored seeds can remain viable for 3-10 years or more.
Step 8: Season Extension & Winterizing
Extend your harvest and protect your garden for the off-season to truly maximize your self sufficient garden from scratch.
- Cold Frames: Simple structures with a transparent top (glass, polycarbonate, or old windows) that sit over garden beds. They trap solar heat, allowing you to grow cold-hardy crops (lettuce, spinach, kale, radishes) well into winter or start seeds earlier in spring. A basic cold frame can be built from 2×6 lumber and a sheet of polycarbonate for under $100.
- Hoop Houses/Low Tunnels: Larger structures made from flexible hoops (PVC pipe or EMT conduit) covered with greenhouse plastic. These provide more space and greater temperature moderation. A 10×20 ft DIY low tunnel kit can cost $200-$500, while a larger, more robust hoop house kit might be $1,000-$3,000. I use a 6×12 ft low tunnel made from 1/2-inch PVC hoops and 6mil greenhouse plastic, which extends my lettuce and spinach harvest by at least
The choice of seeds is crucial for a truly self sufficient garden from scratch.
- Choose Heirloom & Open-Pollinated Seeds: These varieties produce seeds that will grow true to type, meaning you can save seeds from your harvest year after year. F1 hybrids, while often vigorous, will not produce consistent offspring from saved seeds. Reputable seed companies include Baker Creek Heirloom Seeds, High Mowing Organic Seeds, and Seed Savers Exchange. Start with common, reliable varieties like ‘Black Krim’ tomatoes, ‘Provider’ bush beans, ‘Waltham Butternut’ squash, and ‘Black Seeded Simpson’ lettuce.
- Start Seeds Indoors (Optional but Recommended): For longer growing seasons or specific crops, starting seeds indoors gives you a head start. Use seed-starting mix (e.g., Espoma Organic Seed Starter Mix, ~$10 for 16qt bag) in seed trays (Jiffy Professional Greenhouse 72-cell kit, ~$15). Provide adequate light with LED grow lights (Barrina T5 2ft 4-pack LED Grow Lights, 20W each, ~$50) for 14-16 hours a day, positioned 2-4 inches above seedlings. Maintain consistent temperatures (65-75°F for most).
- Direct Sowing vs. Transplanting: Some crops (carrots, radishes, beans, corn) prefer direct sowing into the garden bed. Others (tomatoes, peppers, broccoli, kale) benefit from being started indoors and transplanted. Follow seed packet instructions for planting depths (e.g., lettuce seeds are often surface-sown or planted 1/8 inch deep, while beans are 1 inch deep) and spacing.
- Companion Planting: Strategically plant different species together to enhance growth, deter pests, and attract beneficial insects. For example, planting marigolds near tomatoes can deter nematodes, and basil improves tomato flavor. Nasturtiums can act as a trap crop for aphids.
- Succession Planting: For a continuous harvest, plant small batches of quick-growing crops (lettuce, radishes, cilantro) every 2-3 weeks. As one crop finishes, another is ready to take its place.
Step 6: Pest & Disease Management (Organic)
Maintaining a self sufficient garden from scratch means embracing organic pest and disease control.
- Integrated Pest Management (IPM): This holistic approach combines several strategies.
- Observation: Regularly inspect your plants for early signs of pests or disease. Catching issues early is key.
- Physical Barriers: Use row covers (e.g., Agribon AG-19 floating row cover, 10×20 ft, ~$20) to protect young plants from insect pests like cabbage worms and squash bugs. Install fences (e.g., 2×4 welded wire mesh, 4 ft tall, 50 ft roll ~$70) to keep out deer, rabbits, and other larger animals.
- Hand-Picking: For larger pests like tomato hornworms or squash bugs, simply pick them off and drop them into a bucket of soapy water.
- Companion Planting: As mentioned, certain plants repel pests. Marigolds, garlic, and onions are excellent deterrents.
- Attract Beneficial Insects: Plant flowers like dill, fennel, cosmos, and sweet alyssum to attract ladybugs, lacewings, and parasitic wasps, which prey on common garden pests.
- Organic Sprays & Treatments:
- Neem Oil: An excellent broad-spectrum organic insecticide and fungicide. Bonide Neem Oil Concentrate (16oz, ~$20) can be mixed at a rate of 1-2 tbsp per gallon of water and sprayed on affected plants.
- Insecticidal Soap: Effective against soft-bodied insects like aphids, whiteflies, and spider mites. Garden Safe Insecticidal Soap (24oz ready-to-use, ~$10).
- Bacillus thuringiensis (Bt): A naturally occurring soil bacterium that targets caterpillars and worms. Monterey BT Worm & Caterpillar Killer (16oz, ~$18) is highly effective and safe for beneficial insects.
- Copper or Sulfur Sprays: For fungal diseases like powdery mildew or blight, organic copper (e.g., Bonide Copper Fungicide, ~$15 for 1lb) or sulfur (e.g., Safer Brand Garden Fungicide, ~$10 for 16oz) can be used as a last resort.
Step 7: Harvesting & Seed Saving
The culmination of your efforts is the harvest, and seed saving closes the loop on self-sufficiency.
- Harvesting Techniques:
- Timing: Harvest vegetables at their peak ripeness for best flavor and nutritional value. For example, green beans should snap cleanly, cucumbers should be firm, and tomatoes should be fully colored.
- Frequency: Many crops, like zucchini, cucumbers, and bush beans, produce more if harvested frequently. Pick daily or every other day.
- Tools: Use clean, sharp pruners (e.g., Corona ClassicCUT Bypass Pruner BP 3180, ~$30) or a sharp knife for clean cuts, minimizing damage to the plant.
- Seed Saving: This is where the « self-sufficient » aspect truly shines.
- Selection: Only save seeds from your healthiest, most vigorous plants that show desired traits (disease resistance, good flavor, high yield).
- Isolation: To ensure true-to-type seeds, prevent cross-pollination. This can be challenging for open-pollinated crops that readily cross (e.g., squash, corn). For beginners, focus on self-pollinating plants like beans, peas, lettuce, and tomatoes.
- Processing:
- Dry Seeds (Beans, Peas, Lettuce, Grains): Allow pods/seed heads to dry completely on the plant. Harvest, shell, and clean the seeds, removing chaff.
- Wet Seeds (Tomatoes, Cucumbers, Squash): For tomatoes, ferment the seeds in water for a few days to remove the gel coating and inhibit disease. For cucumbers/squash, scrape out seeds, wash thoroughly, and dry.
- Drying: Spread seeds thinly on screens or paper plates in a cool, dry, well-ventilated area for 1-4 weeks. Ensure they are bone-dry before storage. I aim for less than 8% moisture content.
- Storage: Store seeds in airtight containers (glass jars with desiccant packets work well) in a cool, dark, dry place (ideally 40-50°F and 30-40% humidity). Label clearly with variety and date. Properly stored seeds can remain viable for 3-10 years or more.
Step 8: Season Extension & Winterizing
Extend your harvest and protect your garden for the off-season to truly maximize your self sufficient garden from scratch.
- Cold Frames: Simple structures with a transparent top (glass, polycarbonate, or old windows) that sit over garden beds. They trap solar heat, allowing you to grow cold-hardy crops (lettuce, spinach, kale, radishes) well into winter or start seeds earlier in spring. A basic cold frame can be built from 2×6 lumber and a sheet of polycarbonate for under $100.
- Hoop Houses/Low Tunnels: Larger structures made from flexible hoops (PVC pipe or EMT conduit) covered with greenhouse plastic. These provide more space and greater temperature moderation. A 10×20 ft DIY low tunnel kit can cost $200-$500, while a larger, more robust hoop house kit might be $1,000-$3,000. I use a 6×12 ft low tunnel made from 1/2-inch PVC hoops and 6mil greenhouse plastic, which extends my lettuce and spinach harvest by at least
Step 5: Seed Selection & Planting
The choice of seeds is crucial for a truly self sufficient garden from scratch.
- Choose Heirloom & Open-Pollinated Seeds: These varieties produce seeds that will grow true to type, meaning you can save seeds from your harvest year after year. F1 hybrids, while often vigorous, will not produce consistent offspring from saved seeds. Reputable seed companies include Baker Creek Heirloom Seeds, High Mowing Organic Seeds, and Seed Savers Exchange. Start with common, reliable varieties like ‘Black Krim’ tomatoes, ‘Provider’ bush beans, ‘Waltham Butternut’ squash, and ‘Black Seeded Simpson’ lettuce.
- Start Seeds Indoors (Optional but Recommended): For longer growing seasons or specific crops, starting seeds indoors gives you a head start. Use seed-starting mix (e.g., Espoma Organic Seed Starter Mix, ~$10 for 16qt bag) in seed trays (Jiffy Professional Greenhouse 72-cell kit, ~$15). Provide adequate light with LED grow lights (Barrina T5 2ft 4-pack LED Grow Lights, 20W each, ~$50) for 14-16 hours a day, positioned 2-4 inches above seedlings. Maintain consistent temperatures (65-75°F for most).
- Direct Sowing vs. Transplanting: Some crops (carrots, radishes, beans, corn) prefer direct sowing into the garden bed. Others (tomatoes, peppers, broccoli, kale) benefit from being started indoors and transplanted. Follow seed packet instructions for planting depths (e.g., lettuce seeds are often surface-sown or planted 1/8 inch deep, while beans are 1 inch deep) and spacing.
- Companion Planting: Strategically plant different species together to enhance growth, deter pests, and attract beneficial insects. For example, planting marigolds near tomatoes can deter nematodes, and basil improves tomato flavor. Nasturtiums can act as a trap crop for aphids.
- Succession Planting: For a continuous harvest, plant small batches of quick-growing crops (lettuce, radishes, cilantro) every 2-3 weeks. As one crop finishes, another is ready to take its place.
Step 6: Pest & Disease Management (Organic)
Maintaining a self sufficient garden from scratch means embracing organic pest and disease control.
- Integrated Pest Management (IPM): This holistic approach combines several strategies.
- Observation: Regularly inspect your plants for early signs of pests or disease. Catching issues early is key.
- Physical Barriers: Use row covers (e.g., Agribon AG-19 floating row cover, 10×20 ft, ~$20) to protect young plants from insect pests like cabbage worms and squash bugs. Install fences (e.g., 2×4 welded wire mesh, 4 ft tall, 50 ft roll ~$70) to keep out deer, rabbits, and other larger animals.
- Hand-Picking: For larger pests like tomato hornworms or squash bugs, simply pick them off and drop them into a bucket of soapy water.
- Companion Planting: As mentioned, certain plants repel pests. Marigolds, garlic, and onions are excellent deterrents.
- Attract Beneficial Insects: Plant flowers like dill, fennel, cosmos, and sweet alyssum to attract ladybugs, lacewings, and parasitic wasps, which prey on common garden pests.
- Organic Sprays & Treatments:
- Neem Oil: An excellent broad-spectrum organic insecticide and fungicide. Bonide Neem Oil Concentrate (16oz, ~$20) can be mixed at a rate of 1-2 tbsp per gallon of water and sprayed on affected plants.
- Insecticidal Soap: Effective against soft-bodied insects like aphids, whiteflies, and spider mites. Garden Safe Insecticidal Soap (24oz ready-to-use, ~$10).
- Bacillus thuringiensis (Bt): A naturally occurring soil bacterium that targets caterpillars and worms. Monterey BT Worm & Caterpillar Killer (16oz, ~$18) is highly effective and safe for beneficial insects.
- Copper or Sulfur Sprays: For fungal diseases like powdery mildew or blight, organic copper (e.g., Bonide Copper Fungicide, ~$15 for 1lb) or sulfur (e.g., Safer Brand Garden Fungicide, ~$10 for 16oz) can be used as a last resort.
Step 7: Harvesting & Seed Saving
The culmination of your efforts is the harvest, and seed saving closes the loop on self-sufficiency.
- Harvesting Techniques:
- Timing: Harvest vegetables at their peak ripeness for best flavor and nutritional value. For example, green beans should snap cleanly, cucumbers should be firm, and tomatoes should be fully colored.
- Frequency: Many crops, like zucchini, cucumbers, and bush beans, produce more if harvested frequently. Pick daily or every other day.
- Tools: Use clean, sharp pruners (e.g., Corona ClassicCUT Bypass Pruner BP 3180, ~$30) or a sharp knife for clean cuts, minimizing damage to the plant.
- Seed Saving: This is where the « self-sufficient » aspect truly shines.
- Selection: Only save seeds from your healthiest, most vigorous plants that show desired traits (disease resistance, good flavor, high yield).
- Isolation: To ensure true-to-type seeds, prevent cross-pollination. This can be challenging for open-pollinated crops that readily cross (e.g., squash, corn). For beginners, focus on self-pollinating plants like beans, peas, lettuce, and tomatoes.
- Processing:
- Dry Seeds (Beans, Peas, Lettuce, Grains): Allow pods/seed heads to dry completely on the plant. Harvest, shell, and clean the seeds, removing chaff.
- Wet Seeds (Tomatoes, Cucumbers, Squash): For tomatoes, ferment the seeds in water for a few days to remove the gel coating and inhibit disease. For cucumbers/squash, scrape out seeds, wash thoroughly, and dry.
- Drying: Spread seeds thinly on screens or paper plates in a cool, dry, well-ventilated area for 1-4 weeks. Ensure they are bone-dry before storage. I aim for less than 8% moisture content.
- Storage: Store seeds in airtight containers (glass jars with desiccant packets work well) in a cool, dark, dry place (ideally 40-50°F and 30-40% humidity). Label clearly with variety and date. Properly stored seeds can remain viable for 3-10 years or more.
Step 8: Season Extension & Winterizing
Extend your harvest and protect your garden for the off-season to truly maximize your self sufficient garden from scratch.
- Cold Frames: Simple structures with a transparent top (glass, polycarbonate, or old windows) that sit over garden beds. They trap solar heat, allowing you to grow cold-hardy crops (lettuce, spinach, kale, radishes) well into winter or start seeds earlier in spring. A basic cold frame can be built from 2×6 lumber and a sheet of polycarbonate for under $100.
- Hoop Houses/Low Tunnels: Larger structures made from flexible hoops (PVC pipe or EMT conduit) covered with greenhouse plastic. These provide more space and greater temperature moderation. A 10×20 ft DIY low tunnel kit can cost $200-$500, while a larger, more robust hoop house kit might be $1,000-$3,000. I use a 6×12 ft low tunnel made from 1/2-inch PVC hoops and 6mil greenhouse plastic, which extends my lettuce and spinach harvest by at least
- Rainwater Harvesting: This is my primary source of irrigation water. A 55-gallon rain barrel (e.g., EarthMark Rain Barrel, ~$120-$150) connected to a downspout can collect significant water. For larger needs, I use two 275-gallon IBC totes (Intermediate Bulk Containers, often available used for $100-$200 each from food-grade sources) connected in series. A 1,000 sq ft roof can collect approximately 620 gallons of water for every inch of rainfall. My 1,500 sq ft roof provides ample water for my 600 sq ft garden through multiple barrels and totes.
- Drip Irrigation: This is by far the most water-efficient method, delivering water directly to the plant’s root zone, minimizing evaporation and weed growth.
- Components: A typical drip system includes a pressure regulator (e.g., Rain Bird PRV-10, ~$15), a filter (Rain Bird RBY filter, ~$20), main tubing (1/2-inch poly tubing, 100ft ~$25), smaller feeder lines (1/4-inch tubing), and emitters (0.5 GPH or 1 GPH per plant).
- Kits: For beginners, a starter kit like the Rain Bird Drip Irrigation Garden Kit (model DDI-KIT-1P, ~$40-$60) is excellent for a small garden. For larger setups, I use Netafim Techline CV Drip Line (500ft roll, ~$150-$200), which has pressure-compensating emitters built-in, ensuring even watering across long runs.
- Automation: For true self-sufficiency, consider a battery-powered timer (e.g., Orbit B-Hyve Bluetooth Hose Faucet Timer, ~$50) or a solar-powered timer connected to a small 12V pump.
- Solar-Powered Pumps: For lifting water from a well, pond, or large storage tank to your garden, a solar pump is a game-changer. For a smaller drip system, a Shurflo 2088-594-152 Diaphragm Pump (12V, 3.5 GPM, ~$180) can be powered by a single 100W solar panel (e.g., Renogy 100W Monocrystalline Solar Panel, ~$100) and a small 12V battery (e.g., a 50Ah LiFePO4 battery like the Battle Born 50Ah, ~$450). For larger operations or deeper wells, more robust systems are needed. If you’re looking to build out a comprehensive off-grid power system to support your garden’s water needs, or indeed your entire homestead, you might want to explore resources like the Power Grid Generator complete system guide to understand the full scope of what’s possible in terms of energy independence.
Step 5: Seed Selection & Planting
The choice of seeds is crucial for a truly self sufficient garden from scratch.
- Choose Heirloom & Open-Pollinated Seeds: These varieties produce seeds that will grow true to type, meaning you can save seeds from your harvest year after year. F1 hybrids, while often vigorous, will not produce consistent offspring from saved seeds. Reputable seed companies include Baker Creek Heirloom Seeds, High Mowing Organic Seeds, and Seed Savers Exchange. Start with common, reliable varieties like ‘Black Krim’ tomatoes, ‘Provider’ bush beans, ‘Waltham Butternut’ squash, and ‘Black Seeded Simpson’ lettuce.
- Start Seeds Indoors (Optional but Recommended): For longer growing seasons or specific crops, starting seeds indoors gives you a head start. Use seed-starting mix (e.g., Espoma Organic Seed Starter Mix, ~$10 for 16qt bag) in seed trays (Jiffy Professional Greenhouse 72-cell kit, ~$15). Provide adequate light with LED grow lights (Barrina T5 2ft 4-pack LED Grow Lights, 20W each, ~$50) for 14-16 hours a day, positioned 2-4 inches above seedlings. Maintain consistent temperatures (65-75°F for most).
- Direct Sowing vs. Transplanting: Some crops (carrots, radishes, beans, corn) prefer direct sowing into the garden bed. Others (tomatoes, peppers, broccoli, kale) benefit from being started indoors and transplanted. Follow seed packet instructions for planting depths (e.g., lettuce seeds are often surface-sown or planted 1/8 inch deep, while beans are 1 inch deep) and spacing.
- Companion Planting: Strategically plant different species together to enhance growth, deter pests, and attract beneficial insects. For example, planting marigolds near tomatoes can deter nematodes, and basil improves tomato flavor. Nasturtiums can act as a trap crop for aphids.
- Succession Planting: For a continuous harvest, plant small batches of quick-growing crops (lettuce, radishes, cilantro) every 2-3 weeks. As one crop finishes, another is ready to take its place.
Step 6: Pest & Disease Management (Organic)
Maintaining a self sufficient garden from scratch means embracing organic pest and disease control.
- Integrated Pest Management (IPM): This holistic approach combines several strategies.
- Observation: Regularly inspect your plants for early signs of pests or disease. Catching issues early is key.
- Physical Barriers: Use row covers (e.g., Agribon AG-19 floating row cover, 10×20 ft, ~$20) to protect young plants from insect pests like cabbage worms and squash bugs. Install fences (e.g., 2×4 welded wire mesh, 4 ft tall, 50 ft roll ~$70) to keep out deer, rabbits, and other larger animals.
- Hand-Picking: For larger pests like tomato hornworms or squash bugs, simply pick them off and drop them into a bucket of soapy water.
- Companion Planting: As mentioned, certain plants repel pests. Marigolds, garlic, and onions are excellent deterrents.
- Attract Beneficial Insects: Plant flowers like dill, fennel, cosmos, and sweet alyssum to attract ladybugs, lacewings, and parasitic wasps, which prey on common garden pests.
- Organic Sprays & Treatments:
- Neem Oil: An excellent broad-spectrum organic insecticide and fungicide. Bonide Neem Oil Concentrate (16oz, ~$20) can be mixed at a rate of 1-2 tbsp per gallon of water and sprayed on affected plants.
- Insecticidal Soap: Effective against soft-bodied insects like aphids, whiteflies, and spider mites. Garden Safe Insecticidal Soap (24oz ready-to-use, ~$10).
- Bacillus thuringiensis (Bt): A naturally occurring soil bacterium that targets caterpillars and worms. Monterey BT Worm & Caterpillar Killer (16oz, ~$18) is highly effective and safe for beneficial insects.
- Copper or Sulfur Sprays: For fungal diseases like powdery mildew or blight, organic copper (e.g., Bonide Copper Fungicide, ~$15 for 1lb) or sulfur (e.g., Safer Brand Garden Fungicide, ~$10 for 16oz) can be used as a last resort.
Step 7: Harvesting & Seed Saving
The culmination of your efforts is the harvest, and seed saving closes the loop on self-sufficiency.
- Harvesting Techniques:
- Timing: Harvest vegetables at their peak ripeness for best flavor and nutritional value. For example, green beans should snap cleanly, cucumbers should be firm, and tomatoes should be fully colored.
- Frequency: Many crops, like zucchini, cucumbers, and bush beans, produce more if harvested frequently. Pick daily or every other day.
- Tools: Use clean, sharp pruners (e.g., Corona ClassicCUT Bypass Pruner BP 3180, ~$30) or a sharp knife for clean cuts, minimizing damage to the plant.
- Seed Saving: This is where the « self-sufficient » aspect truly shines.
- Selection: Only save seeds from your healthiest, most vigorous plants that show desired traits (disease resistance, good flavor, high yield).
- Isolation: To ensure true-to-type seeds, prevent cross-pollination. This can be challenging for open-pollinated crops that readily cross (e.g., squash, corn). For beginners, focus on self-pollinating plants like beans, peas, lettuce, and tomatoes.
- Processing:
- Dry Seeds (Beans, Peas, Lettuce, Grains): Allow pods/seed heads to dry completely on the plant. Harvest, shell, and clean the seeds, removing chaff.
- Wet Seeds (Tomatoes, Cucumbers, Squash): For tomatoes, ferment the seeds in water for a few days to remove the gel coating and inhibit disease. For cucumbers/squash, scrape out seeds, wash thoroughly, and dry.
- Drying: Spread seeds thinly on screens or paper plates in a cool, dry, well-ventilated area for 1-4 weeks. Ensure they are bone-dry before storage. I aim for less than 8% moisture content.
- Storage: Store seeds in airtight containers (glass jars with desiccant packets work well) in a cool, dark, dry place (ideally 40-50°F and 30-40% humidity). Label clearly with variety and date. Properly stored seeds can remain viable for 3-10 years or more.
Step 8: Season Extension & Winterizing
Extend your harvest and protect your garden for the off-season to truly maximize your self sufficient garden from scratch.
- Cold Frames: Simple structures with a transparent top (glass, polycarbonate, or old windows) that sit over garden beds. They trap solar heat, allowing you to grow cold-hardy crops (lettuce, spinach, kale, radishes) well into winter or start seeds earlier in spring. A basic cold frame can be built from 2×6 lumber and a sheet of polycarbonate for under $100.
- Hoop Houses/Low Tunnels: Larger structures made from flexible hoops (PVC pipe or EMT conduit) covered with greenhouse plastic. These provide more space and greater temperature moderation. A 10×20 ft DIY low tunnel kit can cost $200-$500, while a larger, more robust hoop house kit might be $1,000-$3,000. I use a 6×12 ft low tunnel made from 1/2-inch PVC hoops and 6mil greenhouse plastic, which extends my lettuce and spinach harvest by at least
Efficient water management is critical for a self sufficient garden from scratch, especially in off-grid living where water resources might be limited.
- Rainwater Harvesting: This is my primary source of irrigation water. A 55-gallon rain barrel (e.g., EarthMark Rain Barrel, ~$120-$150) connected to a downspout can collect significant water. For larger needs, I use two 275-gallon IBC totes (Intermediate Bulk Containers, often available used for $100-$200 each from food-grade sources) connected in series. A 1,000 sq ft roof can collect approximately 620 gallons of water for every inch of rainfall. My 1,500 sq ft roof provides ample water for my 600 sq ft garden through multiple barrels and totes.
- Drip Irrigation: This is by far the most water-efficient method, delivering water directly to the plant’s root zone, minimizing evaporation and weed growth.
- Components: A typical drip system includes a pressure regulator (e.g., Rain Bird PRV-10, ~$15), a filter (Rain Bird RBY filter, ~$20), main tubing (1/2-inch poly tubing, 100ft ~$25), smaller feeder lines (1/4-inch tubing), and emitters (0.5 GPH or 1 GPH per plant).
- Kits: For beginners, a starter kit like the Rain Bird Drip Irrigation Garden Kit (model DDI-KIT-1P, ~$40-$60) is excellent for a small garden. For larger setups, I use Netafim Techline CV Drip Line (500ft roll, ~$150-$200), which has pressure-compensating emitters built-in, ensuring even watering across long runs.
- Automation: For true self-sufficiency, consider a battery-powered timer (e.g., Orbit B-Hyve Bluetooth Hose Faucet Timer, ~$50) or a solar-powered timer connected to a small 12V pump.
- Solar-Powered Pumps: For lifting water from a well, pond, or large storage tank to your garden, a solar pump is a game-changer. For a smaller drip system, a Shurflo 2088-594-152 Diaphragm Pump (12V, 3.5 GPM, ~$180) can be powered by a single 100W solar panel (e.g., Renogy 100W Monocrystalline Solar Panel, ~$100) and a small 12V battery (e.g., a 50Ah LiFePO4 battery like the Battle Born 50Ah, ~$450). For larger operations or deeper wells, more robust systems are needed. If you’re looking to build out a comprehensive off-grid power system to support your garden’s water needs, or indeed your entire homestead, you might want to explore resources like the Power Grid Generator complete system guide to understand the full scope of what’s possible in terms of energy independence.
Step 5: Seed Selection & Planting
The choice of seeds is crucial for a truly self sufficient garden from scratch.
- Choose Heirloom & Open-Pollinated Seeds: These varieties produce seeds that will grow true to type, meaning you can save seeds from your harvest year after year. F1 hybrids, while often vigorous, will not produce consistent offspring from saved seeds. Reputable seed companies include Baker Creek Heirloom Seeds, High Mowing Organic Seeds, and Seed Savers Exchange. Start with common, reliable varieties like ‘Black Krim’ tomatoes, ‘Provider’ bush beans, ‘Waltham Butternut’ squash, and ‘Black Seeded Simpson’ lettuce.
- Start Seeds Indoors (Optional but Recommended): For longer growing seasons or specific crops, starting seeds indoors gives you a head start. Use seed-starting mix (e.g., Espoma Organic Seed Starter Mix, ~$10 for 16qt bag) in seed trays (Jiffy Professional Greenhouse 72-cell kit, ~$15). Provide adequate light with LED grow lights (Barrina T5 2ft 4-pack LED Grow Lights, 20W each, ~$50) for 14-16 hours a day, positioned 2-4 inches above seedlings. Maintain consistent temperatures (65-75°F for most).
- Direct Sowing vs. Transplanting: Some crops (carrots, radishes, beans, corn) prefer direct sowing into the garden bed. Others (tomatoes, peppers, broccoli, kale) benefit from being started indoors and transplanted. Follow seed packet instructions for planting depths (e.g., lettuce seeds are often surface-sown or planted 1/8 inch deep, while beans are 1 inch deep) and spacing.
- Companion Planting: Strategically plant different species together to enhance growth, deter pests, and attract beneficial insects. For example, planting marigolds near tomatoes can deter nematodes, and basil improves tomato flavor. Nasturtiums can act as a trap crop for aphids.
- Succession Planting: For a continuous harvest, plant small batches of quick-growing crops (lettuce, radishes, cilantro) every 2-3 weeks. As one crop finishes, another is ready to take its place.
Step 6: Pest & Disease Management (Organic)
Maintaining a self sufficient garden from scratch means embracing organic pest and disease control.
- Integrated Pest Management (IPM): This holistic approach combines several strategies.
- Observation: Regularly inspect your plants for early signs of pests or disease. Catching issues early is key.
- Physical Barriers: Use row covers (e.g., Agribon AG-19 floating row cover, 10×20 ft, ~$20) to protect young plants from insect pests like cabbage worms and squash bugs. Install fences (e.g., 2×4 welded wire mesh, 4 ft tall, 50 ft roll ~$70) to keep out deer, rabbits, and other larger animals.
- Hand-Picking: For larger pests like tomato hornworms or squash bugs, simply pick them off and drop them into a bucket of soapy water.
- Companion Planting: As mentioned, certain plants repel pests. Marigolds, garlic, and onions are excellent deterrents.
- Attract Beneficial Insects: Plant flowers like dill, fennel, cosmos, and sweet alyssum to attract ladybugs, lacewings, and parasitic wasps, which prey on common garden pests.
- Organic Sprays & Treatments:
- Neem Oil: An excellent broad-spectrum organic insecticide and fungicide. Bonide Neem Oil Concentrate (16oz, ~$20) can be mixed at a rate of 1-2 tbsp per gallon of water and sprayed on affected plants.
- Insecticidal Soap: Effective against soft-bodied insects like aphids, whiteflies, and spider mites. Garden Safe Insecticidal Soap (24oz ready-to-use, ~$10).
- Bacillus thuringiensis (Bt): A naturally occurring soil bacterium that targets caterpillars and worms. Monterey BT Worm & Caterpillar Killer (16oz, ~$18) is highly effective and safe for beneficial insects.
- Copper or Sulfur Sprays: For fungal diseases like powdery mildew or blight, organic copper (e.g., Bonide Copper Fungicide, ~$15 for 1lb) or sulfur (e.g., Safer Brand Garden Fungicide, ~$10 for 16oz) can be used as a last resort.
Step 7: Harvesting & Seed Saving
The culmination of your efforts is the harvest, and seed saving closes the loop on self-sufficiency.
- Harvesting Techniques:
- Timing: Harvest vegetables at their peak ripeness for best flavor and nutritional value. For example, green beans should snap cleanly, cucumbers should be firm, and tomatoes should be fully colored.
- Frequency: Many crops, like zucchini, cucumbers, and bush beans, produce more if harvested frequently. Pick daily or every other day.
- Tools: Use clean, sharp pruners (e.g., Corona ClassicCUT Bypass Pruner BP 3180, ~$30) or a sharp knife for clean cuts, minimizing damage to the plant.
- Seed Saving: This is where the « self-sufficient » aspect truly shines.
- Selection: Only save seeds from your healthiest, most vigorous plants that show desired traits (disease resistance, good flavor, high yield).
- Isolation: To ensure true-to-type seeds, prevent cross-pollination. This can be challenging for open-pollinated crops that readily cross (e.g., squash, corn). For beginners, focus on self-pollinating plants like beans, peas, lettuce, and tomatoes.
- Processing:
- Dry Seeds (Beans, Peas, Lettuce, Grains): Allow pods/seed heads to dry completely on the plant. Harvest, shell, and clean the seeds, removing chaff.
- Wet Seeds (Tomatoes, Cucumbers, Squash): For tomatoes, ferment the seeds in water for a few days to remove the gel coating and inhibit disease. For cucumbers/squash, scrape out seeds, wash thoroughly, and dry.
- Drying: Spread seeds thinly on screens or paper plates in a cool, dry, well-ventilated area for 1-4 weeks. Ensure they are bone-dry before storage. I aim for less than 8% moisture content.
- Storage: Store seeds in airtight containers (glass jars with desiccant packets work well) in a cool, dark, dry place (ideally 40-50°F and 30-40% humidity). Label clearly with variety and date. Properly stored seeds can remain viable for 3-10 years or more.
Step 8: Season Extension & Winterizing
Extend your harvest and protect your garden for the off-season to truly maximize your self sufficient garden from scratch.
- Cold Frames: Simple structures with a transparent top (glass, polycarbonate, or old windows) that sit over garden beds. They trap solar heat, allowing you to grow cold-hardy crops (lettuce, spinach, kale, radishes) well into winter or start seeds earlier in spring. A basic cold frame can be built from 2×6 lumber and a sheet of polycarbonate for under $100.
- Hoop Houses/Low Tunnels: Larger structures made from flexible hoops (PVC pipe or EMT conduit) covered with greenhouse plastic. These provide more space and greater temperature moderation. A 10×20 ft DIY low tunnel kit can cost $200-$500, while a larger, more robust hoop house kit might be $1,000-$3,000. I use a 6×12 ft low tunnel made from 1/2-inch PVC hoops and 6mil greenhouse plastic, which extends my lettuce and spinach harvest by at least
Step 4: Water Management & Irrigation
Efficient water management is critical for a self sufficient garden from scratch, especially in off-grid living where water resources might be limited.
- Rainwater Harvesting: This is my primary source of irrigation water. A 55-gallon rain barrel (e.g., EarthMark Rain Barrel, ~$120-$150) connected to a downspout can collect significant water. For larger needs, I use two 275-gallon IBC totes (Intermediate Bulk Containers, often available used for $100-$200 each from food-grade sources) connected in series. A 1,000 sq ft roof can collect approximately 620 gallons of water for every inch of rainfall. My 1,500 sq ft roof provides ample water for my 600 sq ft garden through multiple barrels and totes.
- Drip Irrigation: This is by far the most water-efficient method, delivering water directly to the plant’s root zone, minimizing evaporation and weed growth.
- Components: A typical drip system includes a pressure regulator (e.g., Rain Bird PRV-10, ~$15), a filter (Rain Bird RBY filter, ~$20), main tubing (1/2-inch poly tubing, 100ft ~$25), smaller feeder lines (1/4-inch tubing), and emitters (0.5 GPH or 1 GPH per plant).
- Kits: For beginners, a starter kit like the Rain Bird Drip Irrigation Garden Kit (model DDI-KIT-1P, ~$40-$60) is excellent for a small garden. For larger setups, I use Netafim Techline CV Drip Line (500ft roll, ~$150-$200), which has pressure-compensating emitters built-in, ensuring even watering across long runs.
- Automation: For true self-sufficiency, consider a battery-powered timer (e.g., Orbit B-Hyve Bluetooth Hose Faucet Timer, ~$50) or a solar-powered timer connected to a small 12V pump.
- Solar-Powered Pumps: For lifting water from a well, pond, or large storage tank to your garden, a solar pump is a game-changer. For a smaller drip system, a Shurflo 2088-594-152 Diaphragm Pump (12V, 3.5 GPM, ~$180) can be powered by a single 100W solar panel (e.g., Renogy 100W Monocrystalline Solar Panel, ~$100) and a small 12V battery (e.g., a 50Ah LiFePO4 battery like the Battle Born 50Ah, ~$450). For larger operations or deeper wells, more robust systems are needed. If you’re looking to build out a comprehensive off-grid power system to support your garden’s water needs, or indeed your entire homestead, you might want to explore resources like the Power Grid Generator complete system guide to understand the full scope of what’s possible in terms of energy independence.
Step 5: Seed Selection & Planting
The choice of seeds is crucial for a truly self sufficient garden from scratch.
- Choose Heirloom & Open-Pollinated Seeds: These varieties produce seeds that will grow true to type, meaning you can save seeds from your harvest year after year. F1 hybrids, while often vigorous, will not produce consistent offspring from saved seeds. Reputable seed companies include Baker Creek Heirloom Seeds, High Mowing Organic Seeds, and Seed Savers Exchange. Start with common, reliable varieties like ‘Black Krim’ tomatoes, ‘Provider’ bush beans, ‘Waltham Butternut’ squash, and ‘Black Seeded Simpson’ lettuce.
- Start Seeds Indoors (Optional but Recommended): For longer growing seasons or specific crops, starting seeds indoors gives you a head start. Use seed-starting mix (e.g., Espoma Organic Seed Starter Mix, ~$10 for 16qt bag) in seed trays (Jiffy Professional Greenhouse 72-cell kit, ~$15). Provide adequate light with LED grow lights (Barrina T5 2ft 4-pack LED Grow Lights, 20W each, ~$50) for 14-16 hours a day, positioned 2-4 inches above seedlings. Maintain consistent temperatures (65-75°F for most).
- Direct Sowing vs. Transplanting: Some crops (carrots, radishes, beans, corn) prefer direct sowing into the garden bed. Others (tomatoes, peppers, broccoli, kale) benefit from being started indoors and transplanted. Follow seed packet instructions for planting depths (e.g., lettuce seeds are often surface-sown or planted 1/8 inch deep, while beans are 1 inch deep) and spacing.
- Companion Planting: Strategically plant different species together to enhance growth, deter pests, and attract beneficial insects. For example, planting marigolds near tomatoes can deter nematodes, and basil improves tomato flavor. Nasturtiums can act as a trap crop for aphids.
- Succession Planting: For a continuous harvest, plant small batches of quick-growing crops (lettuce, radishes, cilantro) every 2-3 weeks. As one crop finishes, another is ready to take its place.
Step 6: Pest & Disease Management (Organic)
Maintaining a self sufficient garden from scratch means embracing organic pest and disease control.
- Integrated Pest Management (IPM): This holistic approach combines several strategies.
- Observation: Regularly inspect your plants for early signs of pests or disease. Catching issues early is key.
- Physical Barriers: Use row covers (e.g., Agribon AG-19 floating row cover, 10×20 ft, ~$20) to protect young plants from insect pests like cabbage worms and squash bugs. Install fences (e.g., 2×4 welded wire mesh, 4 ft tall, 50 ft roll ~$70) to keep out deer, rabbits, and other larger animals.
- Hand-Picking: For larger pests like tomato hornworms or squash bugs, simply pick them off and drop them into a bucket of soapy water.
- Companion Planting: As mentioned, certain plants repel pests. Marigolds, garlic, and onions are excellent deterrents.
- Attract Beneficial Insects: Plant flowers like dill, fennel, cosmos, and sweet alyssum to attract ladybugs, lacewings, and parasitic wasps, which prey on common garden pests.
- Organic Sprays & Treatments:
- Neem Oil: An excellent broad-spectrum organic insecticide and fungicide. Bonide Neem Oil Concentrate (16oz, ~$20) can be mixed at a rate of 1-2 tbsp per gallon of water and sprayed on affected plants.
- Insecticidal Soap: Effective against soft-bodied insects like aphids, whiteflies, and spider mites. Garden Safe Insecticidal Soap (24oz ready-to-use, ~$10).
- Bacillus thuringiensis (Bt): A naturally occurring soil bacterium that targets caterpillars and worms. Monterey BT Worm & Caterpillar Killer (16oz, ~$18) is highly effective and safe for beneficial insects.
- Copper or Sulfur Sprays: For fungal diseases like powdery mildew or blight, organic copper (e.g., Bonide Copper Fungicide, ~$15 for 1lb) or sulfur (e.g., Safer Brand Garden Fungicide, ~$10 for 16oz) can be used as a last resort.
Step 7: Harvesting & Seed Saving
The culmination of your efforts is the harvest, and seed saving closes the loop on self-sufficiency.
- Harvesting Techniques:
- Timing: Harvest vegetables at their peak ripeness for best flavor and nutritional value. For example, green beans should snap cleanly, cucumbers should be firm, and tomatoes should be fully colored.
- Frequency: Many crops, like zucchini, cucumbers, and bush beans, produce more if harvested frequently. Pick daily or every other day.
- Tools: Use clean, sharp pruners (e.g., Corona ClassicCUT Bypass Pruner BP 3180, ~$30) or a sharp knife for clean cuts, minimizing damage to the plant.
- Seed Saving: This is where the « self-sufficient » aspect truly shines.
- Selection: Only save seeds from your healthiest, most vigorous plants that show desired traits (disease resistance, good flavor, high yield).
- Isolation: To ensure true-to-type seeds, prevent cross-pollination. This can be challenging for open-pollinated crops that readily cross (e.g., squash, corn). For beginners, focus on self-pollinating plants like beans, peas, lettuce, and tomatoes.
- Processing:
- Dry Seeds (Beans, Peas, Lettuce, Grains): Allow pods/seed heads to dry completely on the plant. Harvest, shell, and clean the seeds, removing chaff.
- Wet Seeds (Tomatoes, Cucumbers, Squash): For tomatoes, ferment the seeds in water for a few days to remove the gel coating and inhibit disease. For cucumbers/squash, scrape out seeds, wash thoroughly, and dry.
- Drying: Spread seeds thinly on screens or paper plates in a cool, dry, well-ventilated area for 1-4 weeks. Ensure they are bone-dry before storage. I aim for less than 8% moisture content.
- Storage: Store seeds in airtight containers (glass jars with desiccant packets work well) in a cool, dark, dry place (ideally 40-50°F and 30-40% humidity). Label clearly with variety and date. Properly stored seeds can remain viable for 3-10 years or more.
Step 8: Season Extension & Winterizing
Extend your harvest and protect your garden for the off-season to truly maximize your self sufficient garden from scratch.
- Cold Frames: Simple structures with a transparent top (glass, polycarbonate, or old windows) that sit over garden beds. They trap solar heat, allowing you to grow cold-hardy crops (lettuce, spinach, kale, radishes) well into winter or start seeds earlier in spring. A basic cold frame can be built from 2×6 lumber and a sheet of polycarbonate for under $100.
- Hoop Houses/Low Tunnels: Larger structures made from flexible hoops (PVC pipe or EMT conduit) covered with greenhouse plastic. These provide more space and greater temperature moderation. A 10×20 ft DIY low tunnel kit can cost $200-$500, while a larger, more robust hoop house kit might be $1,000-$3,000. I use a 6×12 ft low tunnel made from 1/2-inch PVC hoops and 6mil greenhouse plastic, which extends my lettuce and spinach harvest by at least
- In-Ground Beds: If you have excellent native soil and good drainage, in-ground beds are the most economical. Double-digging (loosening soil two shovel depths) can significantly improve drainage and aeration. For my main garden, I primarily use in-ground beds, but I focus on building up the soil over time with consistent compost additions and cover cropping. I aim for beds that are no wider than 3-4 feet so I can reach the center without stepping on the soil, compacting it.
- Raised Beds: Raised beds offer numerous advantages, especially for poor soil, heavy clay, or rocky areas. They provide better drainage, warm up faster in spring, reduce compaction, and make weeding and harvesting easier on your back.
- Material Options:
- Untreated Cedar: Naturally rot-resistant and chemical-free. A 4×8 ft bed, 12 inches deep, typically requires three 2x12x8 ft cedar boards, costing around $50-$60 per board (total ~$150-$180) plus corner brackets or screws. My first raised beds were cedar and are still going strong after 7 years.
- Galvanized Steel: Durable, long-lasting, and aesthetically pleasing. Brands like Vego Garden offer modular kits. A Vego Garden 17″ Tall 8-in-1 Metal Raised Garden Bed (can be configured to 4×8 ft) costs approximately $250-$300.
- Concrete Blocks/Stones: Very durable but can leach minerals (though generally safe once weathered) and can be expensive.
- Recycled Materials: Pallets (check for chemical treatment stamps like « HT » for heat-treated), old tires (controversial due to potential chemical leaching).
- Filling Raised Beds: Don’t just fill with topsoil. Use a « Hugelkultur » approach (logs, branches, leaves, then compost, then topsoil) or a mixture of 60% good quality topsoil, 30% compost, and 10% perlite or vermiculite for drainage. A 4x8x1 ft raised bed requires about 32 cubic feet (or ~1.2 cubic yards) of soil mix, which can cost $100-$200 depending on your source.
- Material Options:
Step 4: Water Management & Irrigation
Efficient water management is critical for a self sufficient garden from scratch, especially in off-grid living where water resources might be limited.
- Rainwater Harvesting: This is my primary source of irrigation water. A 55-gallon rain barrel (e.g., EarthMark Rain Barrel, ~$120-$150) connected to a downspout can collect significant water. For larger needs, I use two 275-gallon IBC totes (Intermediate Bulk Containers, often available used for $100-$200 each from food-grade sources) connected in series. A 1,000 sq ft roof can collect approximately 620 gallons of water for every inch of rainfall. My 1,500 sq ft roof provides ample water for my 600 sq ft garden through multiple barrels and totes.
- Drip Irrigation: This is by far the most water-efficient method, delivering water directly to the plant’s root zone, minimizing evaporation and weed growth.
- Components: A typical drip system includes a pressure regulator (e.g., Rain Bird PRV-10, ~$15), a filter (Rain Bird RBY filter, ~$20), main tubing (1/2-inch poly tubing, 100ft ~$25), smaller feeder lines (1/4-inch tubing), and emitters (0.5 GPH or 1 GPH per plant).
- Kits: For beginners, a starter kit like the Rain Bird Drip Irrigation Garden Kit (model DDI-KIT-1P, ~$40-$60) is excellent for a small garden. For larger setups, I use Netafim Techline CV Drip Line (500ft roll, ~$150-$200), which has pressure-compensating emitters built-in, ensuring even watering across long runs.
- Automation: For true self-sufficiency, consider a battery-powered timer (e.g., Orbit B-Hyve Bluetooth Hose Faucet Timer, ~$50) or a solar-powered timer connected to a small 12V pump.
- Solar-Powered Pumps: For lifting water from a well, pond, or large storage tank to your garden, a solar pump is a game-changer. For a smaller drip system, a Shurflo 2088-594-152 Diaphragm Pump (12V, 3.5 GPM, ~$180) can be powered by a single 100W solar panel (e.g., Renogy 100W Monocrystalline Solar Panel, ~$100) and a small 12V battery (e.g., a 50Ah LiFePO4 battery like the Battle Born 50Ah, ~$450). For larger operations or deeper wells, more robust systems are needed. If you’re looking to build out a comprehensive off-grid power system to support your garden’s water needs, or indeed your entire homestead, you might want to explore resources like the Power Grid Generator complete system guide to understand the full scope of what’s possible in terms of energy independence.
Step 5: Seed Selection & Planting
The choice of seeds is crucial for a truly self sufficient garden from scratch.
- Choose Heirloom & Open-Pollinated Seeds: These varieties produce seeds that will grow true to type, meaning you can save seeds from your harvest year after year. F1 hybrids, while often vigorous, will not produce consistent offspring from saved seeds. Reputable seed companies include Baker Creek Heirloom Seeds, High Mowing Organic Seeds, and Seed Savers Exchange. Start with common, reliable varieties like ‘Black Krim’ tomatoes, ‘Provider’ bush beans, ‘Waltham Butternut’ squash, and ‘Black Seeded Simpson’ lettuce.
- Start Seeds Indoors (Optional but Recommended): For longer growing seasons or specific crops, starting seeds indoors gives you a head start. Use seed-starting mix (e.g., Espoma Organic Seed Starter Mix, ~$10 for 16qt bag) in seed trays (Jiffy Professional Greenhouse 72-cell kit, ~$15). Provide adequate light with LED grow lights (Barrina T5 2ft 4-pack LED Grow Lights, 20W each, ~$50) for 14-16 hours a day, positioned 2-4 inches above seedlings. Maintain consistent temperatures (65-75°F for most).
- Direct Sowing vs. Transplanting: Some crops (carrots, radishes, beans, corn) prefer direct sowing into the garden bed. Others (tomatoes, peppers, broccoli, kale) benefit from being started indoors and transplanted. Follow seed packet instructions for planting depths (e.g., lettuce seeds are often surface-sown or planted 1/8 inch deep, while beans are 1 inch deep) and spacing.
- Companion Planting: Strategically plant different species together to enhance growth, deter pests, and attract beneficial insects. For example, planting marigolds near tomatoes can deter nematodes, and basil improves tomato flavor. Nasturtiums can act as a trap crop for aphids.
- Succession Planting: For a continuous harvest, plant small batches of quick-growing crops (lettuce, radishes, cilantro) every 2-3 weeks. As one crop finishes, another is ready to take its place.
Step 6: Pest & Disease Management (Organic)
Maintaining a self sufficient garden from scratch means embracing organic pest and disease control.
- Integrated Pest Management (IPM): This holistic approach combines several strategies.
- Observation: Regularly inspect your plants for early signs of pests or disease. Catching issues early is key.
- Physical Barriers: Use row covers (e.g., Agribon AG-19 floating row cover, 10×20 ft, ~$20) to protect young plants from insect pests like cabbage worms and squash bugs. Install fences (e.g., 2×4 welded wire mesh, 4 ft tall, 50 ft roll ~$70) to keep out deer, rabbits, and other larger animals.
- Hand-Picking: For larger pests like tomato hornworms or squash bugs, simply pick them off and drop them into a bucket of soapy water.
- Companion Planting: As mentioned, certain plants repel pests. Marigolds, garlic, and onions are excellent deterrents.
- Attract Beneficial Insects: Plant flowers like dill, fennel, cosmos, and sweet alyssum to attract ladybugs, lacewings, and parasitic wasps, which prey on common garden pests.
- Organic Sprays & Treatments:
- Neem Oil: An excellent broad-spectrum organic insecticide and fungicide. Bonide Neem Oil Concentrate (16oz, ~$20) can be mixed at a rate of 1-2 tbsp per gallon of water and sprayed on affected plants.
- Insecticidal Soap: Effective against soft-bodied insects like aphids, whiteflies, and spider mites. Garden Safe Insecticidal Soap (24oz ready-to-use, ~$10).
- Bacillus thuringiensis (Bt): A naturally occurring soil bacterium that targets caterpillars and worms. Monterey BT Worm & Caterpillar Killer (16oz, ~$18) is highly effective and safe for beneficial insects.
- Copper or Sulfur Sprays: For fungal diseases like powdery mildew or blight, organic copper (e.g., Bonide Copper Fungicide, ~$15 for 1lb) or sulfur (e.g., Safer Brand Garden Fungicide, ~$10 for 16oz) can be used as a last resort.
Step 7: Harvesting & Seed Saving
The culmination of your efforts is the harvest, and seed saving closes the loop on self-sufficiency.
- Harvesting Techniques:
- Timing: Harvest vegetables at their peak ripeness for best flavor and nutritional value. For example, green beans should snap cleanly, cucumbers should be firm, and tomatoes should be fully colored.
- Frequency: Many crops, like zucchini, cucumbers, and bush beans, produce more if harvested frequently. Pick daily or every other day.
- Tools: Use clean, sharp pruners (e.g., Corona ClassicCUT Bypass Pruner BP 3180, ~$30) or a sharp knife for clean cuts, minimizing damage to the plant.
- Seed Saving: This is where the « self-sufficient » aspect truly shines.
- Selection: Only save seeds from your healthiest, most vigorous plants that show desired traits (disease resistance, good flavor, high yield).
- Isolation: To ensure true-to-type seeds, prevent cross-pollination. This can be challenging for open-pollinated crops that readily cross (e.g., squash, corn). For beginners, focus on self-pollinating plants like beans, peas, lettuce, and tomatoes.
- Processing:
- Dry Seeds (Beans, Peas, Lettuce, Grains): Allow pods/seed heads to dry completely on the plant. Harvest, shell, and clean the seeds, removing chaff.
- Wet Seeds (Tomatoes, Cucumbers, Squash): For tomatoes, ferment the seeds in water for a few days to remove the gel coating and inhibit disease. For cucumbers/squash, scrape out seeds, wash thoroughly, and dry.
- Drying: Spread seeds thinly on screens or paper plates in a cool, dry, well-ventilated area for 1-4 weeks. Ensure they are bone-dry before storage. I aim for less than 8% moisture content.
- Storage: Store seeds in airtight containers (glass jars with desiccant packets work well) in a cool, dark, dry place (ideally 40-50°F and 30-40% humidity). Label clearly with variety and date. Properly stored seeds can remain viable for 3-10 years or more.
Step 8: Season Extension & Winterizing
Extend your harvest and protect your garden for the off-season to truly maximize your self sufficient garden from scratch.
- Cold Frames: Simple structures with a transparent top (glass, polycarbonate, or old windows) that sit over garden beds. They trap solar heat, allowing you to grow cold-hardy crops (lettuce, spinach, kale, radishes) well into winter or start seeds earlier in spring. A basic cold frame can be built from 2×6 lumber and a sheet of polycarbonate for under $100.
- Hoop Houses/Low Tunnels: Larger structures made from flexible hoops (PVC pipe or EMT conduit) covered with greenhouse plastic. These provide more space and greater temperature moderation. A 10×20 ft DIY low tunnel kit can cost $200-$500, while a larger, more robust hoop house kit might be $1,000-$3,000. I use a 6×12 ft low tunnel made from 1/2-inch PVC hoops and 6mil greenhouse plastic, which extends my lettuce and spinach harvest by at least
Deciding between raised beds and in-ground beds depends on your soil, budget, and physical capabilities.
- In-Ground Beds: If you have excellent native soil and good drainage, in-ground beds are the most economical. Double-digging (loosening soil two shovel depths) can significantly improve drainage and aeration. For my main garden, I primarily use in-ground beds, but I focus on building up the soil over time with consistent compost additions and cover cropping. I aim for beds that are no wider than 3-4 feet so I can reach the center without stepping on the soil, compacting it.
- Raised Beds: Raised beds offer numerous advantages, especially for poor soil, heavy clay, or rocky areas. They provide better drainage, warm up faster in spring, reduce compaction, and make weeding and harvesting easier on your back.
- Material Options:
- Untreated Cedar: Naturally rot-resistant and chemical-free. A 4×8 ft bed, 12 inches deep, typically requires three 2x12x8 ft cedar boards, costing around $50-$60 per board (total ~$150-$180) plus corner brackets or screws. My first raised beds were cedar and are still going strong after 7 years.
- Galvanized Steel: Durable, long-lasting, and aesthetically pleasing. Brands like Vego Garden offer modular kits. A Vego Garden 17″ Tall 8-in-1 Metal Raised Garden Bed (can be configured to 4×8 ft) costs approximately $250-$300.
- Concrete Blocks/Stones: Very durable but can leach minerals (though generally safe once weathered) and can be expensive.
- Recycled Materials: Pallets (check for chemical treatment stamps like « HT » for heat-treated), old tires (controversial due to potential chemical leaching).
- Filling Raised Beds: Don’t just fill with topsoil. Use a « Hugelkultur » approach (logs, branches, leaves, then compost, then topsoil) or a mixture of 60% good quality topsoil, 30% compost, and 10% perlite or vermiculite for drainage. A 4x8x1 ft raised bed requires about 32 cubic feet (or ~1.2 cubic yards) of soil mix, which can cost $100-$200 depending on your source.
- Material Options:
Step 4: Water Management & Irrigation
Efficient water management is critical for a self sufficient garden from scratch, especially in off-grid living where water resources might be limited.
- Rainwater Harvesting: This is my primary source of irrigation water. A 55-gallon rain barrel (e.g., EarthMark Rain Barrel, ~$120-$150) connected to a downspout can collect significant water. For larger needs, I use two 275-gallon IBC totes (Intermediate Bulk Containers, often available used for $100-$200 each from food-grade sources) connected in series. A 1,000 sq ft roof can collect approximately 620 gallons of water for every inch of rainfall. My 1,500 sq ft roof provides ample water for my 600 sq ft garden through multiple barrels and totes.
- Drip Irrigation: This is by far the most water-efficient method, delivering water directly to the plant’s root zone, minimizing evaporation and weed growth.
- Components: A typical drip system includes a pressure regulator (e.g., Rain Bird PRV-10, ~$15), a filter (Rain Bird RBY filter, ~$20), main tubing (1/2-inch poly tubing, 100ft ~$25), smaller feeder lines (1/4-inch tubing), and emitters (0.5 GPH or 1 GPH per plant).
- Kits: For beginners, a starter kit like the Rain Bird Drip Irrigation Garden Kit (model DDI-KIT-1P, ~$40-$60) is excellent for a small garden. For larger setups, I use Netafim Techline CV Drip Line (500ft roll, ~$150-$200), which has pressure-compensating emitters built-in, ensuring even watering across long runs.
- Automation: For true self-sufficiency, consider a battery-powered timer (e.g., Orbit B-Hyve Bluetooth Hose Faucet Timer, ~$50) or a solar-powered timer connected to a small 12V pump.
- Solar-Powered Pumps: For lifting water from a well, pond, or large storage tank to your garden, a solar pump is a game-changer. For a smaller drip system, a Shurflo 2088-594-152 Diaphragm Pump (12V, 3.5 GPM, ~$180) can be powered by a single 100W solar panel (e.g., Renogy 100W Monocrystalline Solar Panel, ~$100) and a small 12V battery (e.g., a 50Ah LiFePO4 battery like the Battle Born 50Ah, ~$450). For larger operations or deeper wells, more robust systems are needed. If you’re looking to build out a comprehensive off-grid power system to support your garden’s water needs, or indeed your entire homestead, you might want to explore resources like the Power Grid Generator complete system guide to understand the full scope of what’s possible in terms of energy independence.
Step 5: Seed Selection & Planting
The choice of seeds is crucial for a truly self sufficient garden from scratch.
- Choose Heirloom & Open-Pollinated Seeds: These varieties produce seeds that will grow true to type, meaning you can save seeds from your harvest year after year. F1 hybrids, while often vigorous, will not produce consistent offspring from saved seeds. Reputable seed companies include Baker Creek Heirloom Seeds, High Mowing Organic Seeds, and Seed Savers Exchange. Start with common, reliable varieties like ‘Black Krim’ tomatoes, ‘Provider’ bush beans, ‘Waltham Butternut’ squash, and ‘Black Seeded Simpson’ lettuce.
- Start Seeds Indoors (Optional but Recommended): For longer growing seasons or specific crops, starting seeds indoors gives you a head start. Use seed-starting mix (e.g., Espoma Organic Seed Starter Mix, ~$10 for 16qt bag) in seed trays (Jiffy Professional Greenhouse 72-cell kit, ~$15). Provide adequate light with LED grow lights (Barrina T5 2ft 4-pack LED Grow Lights, 20W each, ~$50) for 14-16 hours a day, positioned 2-4 inches above seedlings. Maintain consistent temperatures (65-75°F for most).
- Direct Sowing vs. Transplanting: Some crops (carrots, radishes, beans, corn) prefer direct sowing into the garden bed. Others (tomatoes, peppers, broccoli, kale) benefit from being started indoors and transplanted. Follow seed packet instructions for planting depths (e.g., lettuce seeds are often surface-sown or planted 1/8 inch deep, while beans are 1 inch deep) and spacing.
- Companion Planting: Strategically plant different species together to enhance growth, deter pests, and attract beneficial insects. For example, planting marigolds near tomatoes can deter nematodes, and basil improves tomato flavor. Nasturtiums can act as a trap crop for aphids.
- Succession Planting: For a continuous harvest, plant small batches of quick-growing crops (lettuce, radishes, cilantro) every 2-3 weeks. As one crop finishes, another is ready to take its place.
Step 6: Pest & Disease Management (Organic)
Maintaining a self sufficient garden from scratch means embracing organic pest and disease control.
- Integrated Pest Management (IPM): This holistic approach combines several strategies.
- Observation: Regularly inspect your plants for early signs of pests or disease. Catching issues early is key.
- Physical Barriers: Use row covers (e.g., Agribon AG-19 floating row cover, 10×20 ft, ~$20) to protect young plants from insect pests like cabbage worms and squash bugs. Install fences (e.g., 2×4 welded wire mesh, 4 ft tall, 50 ft roll ~$70) to keep out deer, rabbits, and other larger animals.
- Hand-Picking: For larger pests like tomato hornworms or squash bugs, simply pick them off and drop them into a bucket of soapy water.
- Companion Planting: As mentioned, certain plants repel pests. Marigolds, garlic, and onions are excellent deterrents.
- Attract Beneficial Insects: Plant flowers like dill, fennel, cosmos, and sweet alyssum to attract ladybugs, lacewings, and parasitic wasps, which prey on common garden pests.
- Organic Sprays & Treatments:
- Neem Oil: An excellent broad-spectrum organic insecticide and fungicide. Bonide Neem Oil Concentrate (16oz, ~$20) can be mixed at a rate of 1-2 tbsp per gallon of water and sprayed on affected plants.
- Insecticidal Soap: Effective against soft-bodied insects like aphids, whiteflies, and spider mites. Garden Safe Insecticidal Soap (24oz ready-to-use, ~$10).
- Bacillus thuringiensis (Bt): A naturally occurring soil bacterium that targets caterpillars and worms. Monterey BT Worm & Caterpillar Killer (16oz, ~$18) is highly effective and safe for beneficial insects.
- Copper or Sulfur Sprays: For fungal diseases like powdery mildew or blight, organic copper (e.g., Bonide Copper Fungicide, ~$15 for 1lb) or sulfur (e.g., Safer Brand Garden Fungicide, ~$10 for 16oz) can be used as a last resort.
Step 7: Harvesting & Seed Saving
The culmination of your efforts is the harvest, and seed saving closes the loop on self-sufficiency.
- Harvesting Techniques:
- Timing: Harvest vegetables at their peak ripeness for best flavor and nutritional value. For example, green beans should snap cleanly, cucumbers should be firm, and tomatoes should be fully colored.
- Frequency: Many crops, like zucchini, cucumbers, and bush beans, produce more if harvested frequently. Pick daily or every other day.
- Tools: Use clean, sharp pruners (e.g., Corona ClassicCUT Bypass Pruner BP 3180, ~$30) or a sharp knife for clean cuts, minimizing damage to the plant.
- Seed Saving: This is where the « self-sufficient » aspect truly shines.
- Selection: Only save seeds from your healthiest, most vigorous plants that show desired traits (disease resistance, good flavor, high yield).
- Isolation: To ensure true-to-type seeds, prevent cross-pollination. This can be challenging for open-pollinated crops that readily cross (e.g., squash, corn). For beginners, focus on self-pollinating plants like beans, peas, lettuce, and tomatoes.
- Processing:
- Dry Seeds (Beans, Peas, Lettuce, Grains): Allow pods/seed heads to dry completely on the plant. Harvest, shell, and clean the seeds, removing chaff.
- Wet Seeds (Tomatoes, Cucumbers, Squash): For tomatoes, ferment the seeds in water for a few days to remove the gel coating and inhibit disease. For cucumbers/squash, scrape out seeds, wash thoroughly, and dry.
- Drying: Spread seeds thinly on screens or paper plates in a cool, dry, well-ventilated area for 1-4 weeks. Ensure they are bone-dry before storage. I aim for less than 8% moisture content.
- Storage: Store seeds in airtight containers (glass jars with desiccant packets work well) in a cool, dark, dry place (ideally 40-50°F and 30-40% humidity). Label clearly with variety and date. Properly stored seeds can remain viable for 3-10 years or more.
Step 8: Season Extension & Winterizing
Extend your harvest and protect your garden for the off-season to truly maximize your self sufficient garden from scratch.
- Cold Frames: Simple structures with a transparent top (glass, polycarbonate, or old windows) that sit over garden beds. They trap solar heat, allowing you to grow cold-hardy crops (lettuce, spinach, kale, radishes) well into winter or start seeds earlier in spring. A basic cold frame can be built from 2×6 lumber and a sheet of polycarbonate for under $100.
- Hoop Houses/Low Tunnels: Larger structures made from flexible hoops (PVC pipe or EMT conduit) covered with greenhouse plastic. These provide more space and greater temperature moderation. A 10×20 ft DIY low tunnel kit can cost $200-$500, while a larger, more robust hoop house kit might be $1,000-$3,000. I use a 6×12 ft low tunnel made from 1/2-inch PVC hoops and 6mil greenhouse plastic, which extends my lettuce and spinach harvest by at least
Healthy soil is the bedrock of a productive, self-sufficient garden. You can’t guess what your soil needs; you have to test it.
- Perform a Soil Test: A professional soil test will give you precise data on your soil’s pH, nutrient levels (N-P-K), and organic matter content. I recommend sending a sample to your local agricultural extension office; it typically costs $20-$50 and provides detailed recommendations. Alternatively, for a quick homeowner check, a Rapitest Soil Test Kit (40-test kit, model 1663, ~$20 on Amazon) provides a good baseline for pH, Nitrogen, Phosphorus, and Potash. Aim for a pH between 6.0 and 7.0 for most vegetables.
- Amend for pH Imbalance: If your soil is too acidic (below 6.0), add agricultural lime (dolomitic lime adds magnesium, calcitic lime adds calcium). Apply 5-10 lbs per 100 sq ft for a moderate adjustment. If it’s too alkaline (above 7.0), add elemental sulfur (e.g., Espoma Soil Acidifier, ~$15 for 6.75 lbs) or generous amounts of organic matter like peat moss or pine needles.
- Build Organic Matter: This is the single most important step for long-term soil health. Organic matter improves soil structure, water retention, drainage, and nutrient availability. Incorporate 2-4 inches of high-quality compost into your top 6-12 inches of soil annually. I make my own compost from kitchen scraps, garden waste, and shredded leaves, but you can purchase it. Local nurseries often sell bulk compost for $30-$50 per cubic yard. Aged manure (from chickens, cows, or horses – ensure it’s well-rotted to avoid burning plants) is also excellent.
- Address Nutrient Deficiencies: Based on your soil test, add specific organic amendments. If Nitrogen (N) is low, add blood meal (12-0-0, ~$20 for 3 lbs) or feather meal. For Phosphorus (P), use bone meal (3-15-0, ~$15 for 3 lbs) or rock phosphate. For Potassium (K), greensand (0-0-2.5, ~$25 for 5 lbs) or kelp meal are good choices. I rely heavily on Espoma Organic Garden-tone (5-3-3, ~$25 for an 8lb bag) as a balanced, all-purpose organic fertilizer during planting.
Step 3: Garden Bed Preparation
Deciding between raised beds and in-ground beds depends on your soil, budget, and physical capabilities.
- In-Ground Beds: If you have excellent native soil and good drainage, in-ground beds are the most economical. Double-digging (loosening soil two shovel depths) can significantly improve drainage and aeration. For my main garden, I primarily use in-ground beds, but I focus on building up the soil over time with consistent compost additions and cover cropping. I aim for beds that are no wider than 3-4 feet so I can reach the center without stepping on the soil, compacting it.
- Raised Beds: Raised beds offer numerous advantages, especially for poor soil, heavy clay, or rocky areas. They provide better drainage, warm up faster in spring, reduce compaction, and make weeding and harvesting easier on your back.
- Material Options:
- Untreated Cedar: Naturally rot-resistant and chemical-free. A 4×8 ft bed, 12 inches deep, typically requires three 2x12x8 ft cedar boards, costing around $50-$60 per board (total ~$150-$180) plus corner brackets or screws. My first raised beds were cedar and are still going strong after 7 years.
- Galvanized Steel: Durable, long-lasting, and aesthetically pleasing. Brands like Vego Garden offer modular kits. A Vego Garden 17″ Tall 8-in-1 Metal Raised Garden Bed (can be configured to 4×8 ft) costs approximately $250-$300.
- Concrete Blocks/Stones: Very durable but can leach minerals (though generally safe once weathered) and can be expensive.
- Recycled Materials: Pallets (check for chemical treatment stamps like « HT » for heat-treated), old tires (controversial due to potential chemical leaching).
- Filling Raised Beds: Don’t just fill with topsoil. Use a « Hugelkultur » approach (logs, branches, leaves, then compost, then topsoil) or a mixture of 60% good quality topsoil, 30% compost, and 10% perlite or vermiculite for drainage. A 4x8x1 ft raised bed requires about 32 cubic feet (or ~1.2 cubic yards) of soil mix, which can cost $100-$200 depending on your source.
- Material Options:
Step 4: Water Management & Irrigation
Efficient water management is critical for a self sufficient garden from scratch, especially in off-grid living where water resources might be limited.
- Rainwater Harvesting: This is my primary source of irrigation water. A 55-gallon rain barrel (e.g., EarthMark Rain Barrel, ~$120-$150) connected to a downspout can collect significant water. For larger needs, I use two 275-gallon IBC totes (Intermediate Bulk Containers, often available used for $100-$200 each from food-grade sources) connected in series. A 1,000 sq ft roof can collect approximately 620 gallons of water for every inch of rainfall. My 1,500 sq ft roof provides ample water for my 600 sq ft garden through multiple barrels and totes.
- Drip Irrigation: This is by far the most water-efficient method, delivering water directly to the plant’s root zone, minimizing evaporation and weed growth.
- Components: A typical drip system includes a pressure regulator (e.g., Rain Bird PRV-10, ~$15), a filter (Rain Bird RBY filter, ~$20), main tubing (1/2-inch poly tubing, 100ft ~$25), smaller feeder lines (1/4-inch tubing), and emitters (0.5 GPH or 1 GPH per plant).
- Kits: For beginners, a starter kit like the Rain Bird Drip Irrigation Garden Kit (model DDI-KIT-1P, ~$40-$60) is excellent for a small garden. For larger setups, I use Netafim Techline CV Drip Line (500ft roll, ~$150-$200), which has pressure-compensating emitters built-in, ensuring even watering across long runs.
- Automation: For true self-sufficiency, consider a battery-powered timer (e.g., Orbit B-Hyve Bluetooth Hose Faucet Timer, ~$50) or a solar-powered timer connected to a small 12V pump.
- Solar-Powered Pumps: For lifting water from a well, pond, or large storage tank to your garden, a solar pump is a game-changer. For a smaller drip system, a Shurflo 2088-594-152 Diaphragm Pump (12V, 3.5 GPM, ~$180) can be powered by a single 100W solar panel (e.g., Renogy 100W Monocrystalline Solar Panel, ~$100) and a small 12V battery (e.g., a 50Ah LiFePO4 battery like the Battle Born 50Ah, ~$450). For larger operations or deeper wells, more robust systems are needed. If you’re looking to build out a comprehensive off-grid power system to support your garden’s water needs, or indeed your entire homestead, you might want to explore resources like the Power Grid Generator complete system guide to understand the full scope of what’s possible in terms of energy independence.
Step 5: Seed Selection & Planting
The choice of seeds is crucial for a truly self sufficient garden from scratch.
- Choose Heirloom & Open-Pollinated Seeds: These varieties produce seeds that will grow true to type, meaning you can save seeds from your harvest year after year. F1 hybrids, while often vigorous, will not produce consistent offspring from saved seeds. Reputable seed companies include Baker Creek Heirloom Seeds, High Mowing Organic Seeds, and Seed Savers Exchange. Start with common, reliable varieties like ‘Black Krim’ tomatoes, ‘Provider’ bush beans, ‘Waltham Butternut’ squash, and ‘Black Seeded Simpson’ lettuce.
- Start Seeds Indoors (Optional but Recommended): For longer growing seasons or specific crops, starting seeds indoors gives you a head start. Use seed-starting mix (e.g., Espoma Organic Seed Starter Mix, ~$10 for 16qt bag) in seed trays (Jiffy Professional Greenhouse 72-cell kit, ~$15). Provide adequate light with LED grow lights (Barrina T5 2ft 4-pack LED Grow Lights, 20W each, ~$50) for 14-16 hours a day, positioned 2-4 inches above seedlings. Maintain consistent temperatures (65-75°F for most).
- Direct Sowing vs. Transplanting: Some crops (carrots, radishes, beans, corn) prefer direct sowing into the garden bed. Others (tomatoes, peppers, broccoli, kale) benefit from being started indoors and transplanted. Follow seed packet instructions for planting depths (e.g., lettuce seeds are often surface-sown or planted 1/8 inch deep, while beans are 1 inch deep) and spacing.
- Companion Planting: Strategically plant different species together to enhance growth, deter pests, and attract beneficial insects. For example, planting marigolds near tomatoes can deter nematodes, and basil improves tomato flavor. Nasturtiums can act as a trap crop for aphids.
- Succession Planting: For a continuous harvest, plant small batches of quick-growing crops (lettuce, radishes, cilantro) every 2-3 weeks. As one crop finishes, another is ready to take its place.
Step 6: Pest & Disease Management (Organic)
Maintaining a self sufficient garden from scratch means embracing organic pest and disease control.
- Integrated Pest Management (IPM): This holistic approach combines several strategies.
- Observation: Regularly inspect your plants for early signs of pests or disease. Catching issues early is key.
- Physical Barriers: Use row covers (e.g., Agribon AG-19 floating row cover, 10×20 ft, ~$20) to protect young plants from insect pests like cabbage worms and squash bugs. Install fences (e.g., 2×4 welded wire mesh, 4 ft tall, 50 ft roll ~$70) to keep out deer, rabbits, and other larger animals.
- Hand-Picking: For larger pests like tomato hornworms or squash bugs, simply pick them off and drop them into a bucket of soapy water.
- Companion Planting: As mentioned, certain plants repel pests. Marigolds, garlic, and onions are excellent deterrents.
- Attract Beneficial Insects: Plant flowers like dill, fennel, cosmos, and sweet alyssum to attract ladybugs, lacewings, and parasitic wasps, which prey on common garden pests.
- Organic Sprays & Treatments:
- Neem Oil: An excellent broad-spectrum organic insecticide and fungicide. Bonide Neem Oil Concentrate (16oz, ~$20) can be mixed at a rate of 1-2 tbsp per gallon of water and sprayed on affected plants.
- Insecticidal Soap: Effective against soft-bodied insects like aphids, whiteflies, and spider mites. Garden Safe Insecticidal Soap (24oz ready-to-use, ~$10).
- Bacillus thuringiensis (Bt): A naturally occurring soil bacterium that targets caterpillars and worms. Monterey BT Worm & Caterpillar Killer (16oz, ~$18) is highly effective and safe for beneficial insects.
- Copper or Sulfur Sprays: For fungal diseases like powdery mildew or blight, organic copper (e.g., Bonide Copper Fungicide, ~$15 for 1lb) or sulfur (e.g., Safer Brand Garden Fungicide, ~$10 for 16oz) can be used as a last resort.
Step 7: Harvesting & Seed Saving
The culmination of your efforts is the harvest, and seed saving closes the loop on self-sufficiency.
- Harvesting Techniques:
- Timing: Harvest vegetables at their peak ripeness for best flavor and nutritional value. For example, green beans should snap cleanly, cucumbers should be firm, and tomatoes should be fully colored.
- Frequency: Many crops, like zucchini, cucumbers, and bush beans, produce more if harvested frequently. Pick daily or every other day.
- Tools: Use clean, sharp pruners (e.g., Corona ClassicCUT Bypass Pruner BP 3180, ~$30) or a sharp knife for clean cuts, minimizing damage to the plant.
- Seed Saving: This is where the « self-sufficient » aspect truly shines.
- Selection: Only save seeds from your healthiest, most vigorous plants that show desired traits (disease resistance, good flavor, high yield).
- Isolation: To ensure true-to-type seeds, prevent cross-pollination. This can be challenging for open-pollinated crops that readily cross (e.g., squash, corn). For beginners, focus on self-pollinating plants like beans, peas, lettuce, and tomatoes.
- Processing:
- Dry Seeds (Beans, Peas, Lettuce, Grains): Allow pods/seed heads to dry completely on the plant. Harvest, shell, and clean the seeds, removing chaff.
- Wet Seeds (Tomatoes, Cucumbers, Squash): For tomatoes, ferment the seeds in water for a few days to remove the gel coating and inhibit disease. For cucumbers/squash, scrape out seeds, wash thoroughly, and dry.
- Drying: Spread seeds thinly on screens or paper plates in a cool, dry, well-ventilated area for 1-4 weeks. Ensure they are bone-dry before storage. I aim for less than 8% moisture content.
- Storage: Store seeds in airtight containers (glass jars with desiccant packets work well) in a cool, dark, dry place (ideally 40-50°F and 30-40% humidity). Label clearly with variety and date. Properly stored seeds can remain viable for 3-10 years or more.
Step 8: Season Extension & Winterizing
Extend your harvest and protect your garden for the off-season to truly maximize your self sufficient garden from scratch.
- Cold Frames: Simple structures with a transparent top (glass, polycarbonate, or old windows) that sit over garden beds. They trap solar heat, allowing you to grow cold-hardy crops (lettuce, spinach, kale, radishes) well into winter or start seeds earlier in spring. A basic cold frame can be built from 2×6 lumber and a sheet of polycarbonate for under $100.
- Hoop Houses/Low Tunnels: Larger structures made from flexible hoops (PVC pipe or EMT conduit) covered with greenhouse plastic. These provide more space and greater temperature moderation. A 10×20 ft DIY low tunnel kit can cost $200-$500, while a larger, more robust hoop house kit might be $1,000-$3,000. I use a 6×12 ft low tunnel made from 1/2-inch PVC hoops and 6mil greenhouse plastic, which extends my lettuce and spinach harvest by at least
- Integrated Pest Management (IPM): This holistic approach combines several strategies.
- Integrated Pest Management (IPM): This holistic approach combines several strategies.
- Integrated Pest Management (IPM): This holistic approach combines several strategies.
The culmination of your efforts is the harvest, and seed saving closes the loop on self-sufficiency.
- Harvesting Techniques:
- Timing: Harvest vegetables at their peak ripeness for best flavor and nutritional value. For example, green beans should snap cleanly, cucumbers should be firm, and tomatoes should be fully colored.
- Frequency: Many crops, like zucchini, cucumbers, and bush beans, produce more if harvested frequently. Pick daily or every other day.
- Tools: Use clean, sharp pruners (e.g., Corona ClassicCUT Bypass Pruner BP 3180, ~$30) or a sharp knife for clean cuts, minimizing damage to the plant.
- Seed Saving: This is where the « self-sufficient » aspect truly shines.
- Selection: Only save seeds from your healthiest, most vigorous plants that show desired traits (disease resistance, good flavor, high yield).
- Isolation: To ensure true-to-type seeds, prevent cross-pollination. This can be challenging for open-pollinated crops that readily cross (e.g., squash, corn). For beginners, focus on self-pollinating plants like beans, peas, lettuce, and tomatoes.
- Processing:
- Dry Seeds (Beans, Peas, Lettuce, Grains): Allow pods/seed heads to dry completely on the plant. Harvest, shell, and clean the seeds, removing chaff.
- Wet Seeds (Tomatoes, Cucumbers, Squash): For tomatoes, ferment the seeds in water for a few days to remove the gel coating and inhibit disease. For cucumbers/squash, scrape out seeds, wash thoroughly, and dry.
- Drying: Spread seeds thinly on screens or paper plates in a cool, dry, well-ventilated area for 1-4 weeks. Ensure they are bone-dry before storage. I aim for less than 8% moisture content.
- Storage: Store seeds in airtight containers (glass jars with desiccant packets work well) in a cool, dark, dry place (ideally 40-50°F and 30-40% humidity). Label clearly with variety and date. Properly stored seeds can remain viable for 3-10 years or more.
Step 8: Season Extension & Winterizing
Extend your harvest and protect your garden for the off-season to truly maximize your self sufficient garden from scratch.
- Cold Frames: Simple structures with a transparent top (glass, polycarbonate, or old windows) that sit over garden beds. They trap solar heat, allowing you to grow cold-hardy crops (lettuce, spinach, kale, radishes) well into winter or start seeds earlier in spring. A basic cold frame can be built from 2×6 lumber and a sheet of polycarbonate for under $100.
- Hoop Houses/Low Tunnels: Larger structures made from flexible hoops (PVC pipe or EMT conduit) covered with greenhouse plastic. These provide more space and greater temperature moderation. A 10×20 ft DIY low tunnel kit can cost $200-$500, while a larger, more robust hoop house kit might be $1,000-$3,000. I use a 6×12 ft low tunnel made from 1/2-inch PVC hoops and 6mil greenhouse plastic, which extends my lettuce and spinach harvest by at least
- Integrated Pest Management (IPM): This holistic approach combines several strategies.
- Observation: Regularly inspect your plants for early signs of pests or disease. Catching issues early is key.
- Physical Barriers: Use row covers (e.g., Agribon AG-19 floating row cover, 10×20 ft, ~$20) to protect young plants from insect pests like cabbage worms and squash bugs. Install fences (e.g., 2×4 welded wire mesh, 4 ft tall, 50 ft roll ~$70) to keep out deer, rabbits, and other larger animals.
- Hand-Picking: For larger pests like tomato hornworms or squash bugs, simply pick them off and drop them into a bucket of soapy water.
- Companion Planting: As mentioned, certain plants repel pests. Marigolds, garlic, and onions are excellent deterrents.
- Attract Beneficial Insects: Plant flowers like dill, fennel, cosmos, and sweet alyssum to attract ladybugs, lacewings, and parasitic wasps, which prey on common garden pests.
- Organic Sprays & Treatments:
- Neem Oil: An excellent broad-spectrum organic insecticide and fungicide. Bonide Neem Oil Concentrate (16oz, ~$20) can be mixed at a rate of 1-2 tbsp per gallon of water and sprayed on affected plants.
- Insecticidal Soap: Effective against soft-bodied insects like aphids, whiteflies, and spider mites. Garden Safe Insecticidal Soap (24oz ready-to-use, ~$10).
- Bacillus thuringiensis (Bt): A naturally occurring soil bacterium that targets caterpillars and worms. Monterey BT Worm & Caterpillar Killer (16oz, ~$18) is highly effective and safe for beneficial insects.
- Copper or Sulfur Sprays: For fungal diseases like powdery mildew or blight, organic copper (e.g., Bonide Copper Fungicide, ~$15 for 1lb) or sulfur (e.g., Safer Brand Garden Fungicide, ~$10 for 16oz) can be used as a last resort.
Step 7: Harvesting & Seed Saving
The culmination of your efforts is the harvest, and seed saving closes the loop on self-sufficiency.
- Harvesting Techniques:
- Timing: Harvest vegetables at their peak ripeness for best flavor and nutritional value. For example, green beans should snap cleanly, cucumbers should be firm, and tomatoes should be fully colored.
- Frequency: Many crops, like zucchini, cucumbers, and bush beans, produce more if harvested frequently. Pick daily or every other day.
- Tools: Use clean, sharp pruners (e.g., Corona ClassicCUT Bypass Pruner BP 3180, ~$30) or a sharp knife for clean cuts, minimizing damage to the plant.
- Seed Saving: This is where the « self-sufficient » aspect truly shines.
- Selection: Only save seeds from your healthiest, most vigorous plants that show desired traits (disease resistance, good flavor, high yield).
- Isolation: To ensure true-to-type seeds, prevent cross-pollination. This can be challenging for open-pollinated crops that readily cross (e.g., squash, corn). For beginners, focus on self-pollinating plants like beans, peas, lettuce, and tomatoes.
- Processing:
- Dry Seeds (Beans, Peas, Lettuce, Grains): Allow pods/seed heads to dry completely on the plant. Harvest, shell, and clean the seeds, removing chaff.
- Wet Seeds (Tomatoes, Cucumbers, Squash): For tomatoes, ferment the seeds in water for a few days to remove the gel coating and inhibit disease. For cucumbers/squash, scrape out seeds, wash thoroughly, and dry.
- Drying: Spread seeds thinly on screens or paper plates in a cool, dry, well-ventilated area for 1-4 weeks. Ensure they are bone-dry before storage. I aim for less than 8% moisture content.
- Storage: Store seeds in airtight containers (glass jars with desiccant packets work well) in a cool, dark, dry place (ideally 40-50°F and 30-40% humidity). Label clearly with variety and date. Properly stored seeds can remain viable for 3-10 years or more.
Step 8: Season Extension & Winterizing
Extend your harvest and protect your garden for the off-season to truly maximize your self sufficient garden from scratch.
- Cold Frames: Simple structures with a transparent top (glass, polycarbonate, or old windows) that sit over garden beds. They trap solar heat, allowing you to grow cold-hardy crops (lettuce, spinach, kale, radishes) well into winter or start seeds earlier in spring. A basic cold frame can be built from 2×6 lumber and a sheet of polycarbonate for under $100.
- Hoop Houses/Low Tunnels: Larger structures made from flexible hoops (PVC pipe or EMT conduit) covered with greenhouse plastic. These provide more space and greater temperature moderation. A 10×20 ft DIY low tunnel kit can cost $200-$500, while a larger, more robust hoop house kit might be $1,000-$3,000. I use a 6×12 ft low tunnel made from 1/2-inch PVC hoops and 6mil greenhouse plastic, which extends my lettuce and spinach harvest by at least
Maintaining a self sufficient garden from scratch means embracing organic pest and disease control.
- Integrated Pest Management (IPM): This holistic approach combines several strategies.
- Observation: Regularly inspect your plants for early signs of pests or disease. Catching issues early is key.
- Physical Barriers: Use row covers (e.g., Agribon AG-19 floating row cover, 10×20 ft, ~$20) to protect young plants from insect pests like cabbage worms and squash bugs. Install fences (e.g., 2×4 welded wire mesh, 4 ft tall, 50 ft roll ~$70) to keep out deer, rabbits, and other larger animals.
- Hand-Picking: For larger pests like tomato hornworms or squash bugs, simply pick them off and drop them into a bucket of soapy water.
- Companion Planting: As mentioned, certain plants repel pests. Marigolds, garlic, and onions are excellent deterrents.
- Attract Beneficial Insects: Plant flowers like dill, fennel, cosmos, and sweet alyssum to attract ladybugs, lacewings, and parasitic wasps, which prey on common garden pests.
- Organic Sprays & Treatments:
- Neem Oil: An excellent broad-spectrum organic insecticide and fungicide. Bonide Neem Oil Concentrate (16oz, ~$20) can be mixed at a rate of 1-2 tbsp per gallon of water and sprayed on affected plants.
- Insecticidal Soap: Effective against soft-bodied insects like aphids, whiteflies, and spider mites. Garden Safe Insecticidal Soap (24oz ready-to-use, ~$10).
- Bacillus thuringiensis (Bt): A naturally occurring soil bacterium that targets caterpillars and worms. Monterey BT Worm & Caterpillar Killer (16oz, ~$18) is highly effective and safe for beneficial insects.
- Copper or Sulfur Sprays: For fungal diseases like powdery mildew or blight, organic copper (e.g., Bonide Copper Fungicide, ~$15 for 1lb) or sulfur (e.g., Safer Brand Garden Fungicide, ~$10 for 16oz) can be used as a last resort.
Step 7: Harvesting & Seed Saving
The culmination of your efforts is the harvest, and seed saving closes the loop on self-sufficiency.
- Harvesting Techniques:
- Timing: Harvest vegetables at their peak ripeness for best flavor and nutritional value. For example, green beans should snap cleanly, cucumbers should be firm, and tomatoes should be fully colored.
- Frequency: Many crops, like zucchini, cucumbers, and bush beans, produce more if harvested frequently. Pick daily or every other day.
- Tools: Use clean, sharp pruners (e.g., Corona ClassicCUT Bypass Pruner BP 3180, ~$30) or a sharp knife for clean cuts, minimizing damage to the plant.
- Seed Saving: This is where the « self-sufficient » aspect truly shines.
- Selection: Only save seeds from your healthiest, most vigorous plants that show desired traits (disease resistance, good flavor, high yield).
- Isolation: To ensure true-to-type seeds, prevent cross-pollination. This can be challenging for open-pollinated crops that readily cross (e.g., squash, corn). For beginners, focus on self-pollinating plants like beans, peas, lettuce, and tomatoes.
- Processing:
- Dry Seeds (Beans, Peas, Lettuce, Grains): Allow pods/seed heads to dry completely on the plant. Harvest, shell, and clean the seeds, removing chaff.
- Wet Seeds (Tomatoes, Cucumbers, Squash): For tomatoes, ferment the seeds in water for a few days to remove the gel coating and inhibit disease. For cucumbers/squash, scrape out seeds, wash thoroughly, and dry.
- Drying: Spread seeds thinly on screens or paper plates in a cool, dry, well-ventilated area for 1-4 weeks. Ensure they are bone-dry before storage. I aim for less than 8% moisture content.
- Storage: Store seeds in airtight containers (glass jars with desiccant packets work well) in a cool, dark, dry place (ideally 40-50°F and 30-40% humidity). Label clearly with variety and date. Properly stored seeds can remain viable for 3-10 years or more.
Step 8: Season Extension & Winterizing
Extend your harvest and protect your garden for the off-season to truly maximize your self sufficient garden from scratch.
- Cold Frames: Simple structures with a transparent top (glass, polycarbonate, or old windows) that sit over garden beds. They trap solar heat, allowing you to grow cold-hardy crops (lettuce, spinach, kale, radishes) well into winter or start seeds earlier in spring. A basic cold frame can be built from 2×6 lumber and a sheet of polycarbonate for under $100.
- Hoop Houses/Low Tunnels: Larger structures made from flexible hoops (PVC pipe or EMT conduit) covered with greenhouse plastic. These provide more space and greater temperature moderation. A 10×20 ft DIY low tunnel kit can cost $200-$500, while a larger, more robust hoop house kit might be $1,000-$3,000. I use a 6×12 ft low tunnel made from 1/2-inch PVC hoops and 6mil greenhouse plastic, which extends my lettuce and spinach harvest by at least
Step 6: Pest & Disease Management (Organic)
Maintaining a self sufficient garden from scratch means embracing organic pest and disease control.
- Integrated Pest Management (IPM): This holistic approach combines several strategies.
- Observation: Regularly inspect your plants for early signs of pests or disease. Catching issues early is key.
- Physical Barriers: Use row covers (e.g., Agribon AG-19 floating row cover, 10×20 ft, ~$20) to protect young plants from insect pests like cabbage worms and squash bugs. Install fences (e.g., 2×4 welded wire mesh, 4 ft tall, 50 ft roll ~$70) to keep out deer, rabbits, and other larger animals.
- Hand-Picking: For larger pests like tomato hornworms or squash bugs, simply pick them off and drop them into a bucket of soapy water.
- Companion Planting: As mentioned, certain plants repel pests. Marigolds, garlic, and onions are excellent deterrents.
- Attract Beneficial Insects: Plant flowers like dill, fennel, cosmos, and sweet alyssum to attract ladybugs, lacewings, and parasitic wasps, which prey on common garden pests.
- Organic Sprays & Treatments:
- Neem Oil: An excellent broad-spectrum organic insecticide and fungicide. Bonide Neem Oil Concentrate (16oz, ~$20) can be mixed at a rate of 1-2 tbsp per gallon of water and sprayed on affected plants.
- Insecticidal Soap: Effective against soft-bodied insects like aphids, whiteflies, and spider mites. Garden Safe Insecticidal Soap (24oz ready-to-use, ~$10).
- Bacillus thuringiensis (Bt): A naturally occurring soil bacterium that targets caterpillars and worms. Monterey BT Worm & Caterpillar Killer (16oz, ~$18) is highly effective and safe for beneficial insects.
- Copper or Sulfur Sprays: For fungal diseases like powdery mildew or blight, organic copper (e.g., Bonide Copper Fungicide, ~$15 for 1lb) or sulfur (e.g., Safer Brand Garden Fungicide, ~$10 for 16oz) can be used as a last resort.
Step 7: Harvesting & Seed Saving
The culmination of your efforts is the harvest, and seed saving closes the loop on self-sufficiency.
- Harvesting Techniques:
- Timing: Harvest vegetables at their peak ripeness for best flavor and nutritional value. For example, green beans should snap cleanly, cucumbers should be firm, and tomatoes should be fully colored.
- Frequency: Many crops, like zucchini, cucumbers, and bush beans, produce more if harvested frequently. Pick daily or every other day.
- Tools: Use clean, sharp pruners (e.g., Corona ClassicCUT Bypass Pruner BP 3180, ~$30) or a sharp knife for clean cuts, minimizing damage to the plant.
- Seed Saving: This is where the « self-sufficient » aspect truly shines.
- Selection: Only save seeds from your healthiest, most vigorous plants that show desired traits (disease resistance, good flavor, high yield).
- Isolation: To ensure true-to-type seeds, prevent cross-pollination. This can be challenging for open-pollinated crops that readily cross (e.g., squash, corn). For beginners, focus on self-pollinating plants like beans, peas, lettuce, and tomatoes.
- Processing:
- Dry Seeds (Beans, Peas, Lettuce, Grains): Allow pods/seed heads to dry completely on the plant. Harvest, shell, and clean the seeds, removing chaff.
- Wet Seeds (Tomatoes, Cucumbers, Squash): For tomatoes, ferment the seeds in water for a few days to remove the gel coating and inhibit disease. For cucumbers/squash, scrape out seeds, wash thoroughly, and dry.
- Drying: Spread seeds thinly on screens or paper plates in a cool, dry, well-ventilated area for 1-4 weeks. Ensure they are bone-dry before storage. I aim for less than 8% moisture content.
- Storage: Store seeds in airtight containers (glass jars with desiccant packets work well) in a cool, dark, dry place (ideally 40-50°F and 30-40% humidity). Label clearly with variety and date. Properly stored seeds can remain viable for 3-10 years or more.
Step 8: Season Extension & Winterizing
Extend your harvest and protect your garden for the off-season to truly maximize your self sufficient garden from scratch.
- Cold Frames: Simple structures with a transparent top (glass, polycarbonate, or old windows) that sit over garden beds. They trap solar heat, allowing you to grow cold-hardy crops (lettuce, spinach, kale, radishes) well into winter or start seeds earlier in spring. A basic cold frame can be built from 2×6 lumber and a sheet of polycarbonate for under $100.
- Hoop Houses/Low Tunnels: Larger structures made from flexible hoops (PVC pipe or EMT conduit) covered with greenhouse plastic. These provide more space and greater temperature moderation. A 10×20 ft DIY low tunnel kit can cost $200-$500, while a larger, more robust hoop house kit might be $1,000-$3,000. I use a 6×12 ft low tunnel made from 1/2-inch PVC hoops and 6mil greenhouse plastic, which extends my lettuce and spinach harvest by at least
- Choose Heirloom & Open-Pollinated Seeds: These varieties produce seeds that will grow true to type, meaning you can save seeds from your harvest year after year. F1 hybrids, while often vigorous, will not produce consistent offspring from saved seeds. Reputable seed companies include Baker Creek Heirloom Seeds, High Mowing Organic Seeds, and Seed Savers Exchange. Start with common, reliable varieties like ‘Black Krim’ tomatoes, ‘Provider’ bush beans, ‘Waltham Butternut’ squash, and ‘Black Seeded Simpson’ lettuce.
- Start Seeds Indoors (Optional but Recommended): For longer growing seasons or specific crops, starting seeds indoors gives you a head start. Use seed-starting mix (e.g., Espoma Organic Seed Starter Mix, ~$10 for 16qt bag) in seed trays (Jiffy Professional Greenhouse 72-cell kit, ~$15). Provide adequate light with LED grow lights (Barrina T5 2ft 4-pack LED Grow Lights, 20W each, ~$50) for 14-16 hours a day, positioned 2-4 inches above seedlings. Maintain consistent temperatures (65-75°F for most).
- Direct Sowing vs. Transplanting: Some crops (carrots, radishes, beans, corn) prefer direct sowing into the garden bed. Others (tomatoes, peppers, broccoli, kale) benefit from being started indoors and transplanted. Follow seed packet instructions for planting depths (e.g., lettuce seeds are often surface-sown or planted 1/8 inch deep, while beans are 1 inch deep) and spacing.
- Companion Planting: Strategically plant different species together to enhance growth, deter pests, and attract beneficial insects. For example, planting marigolds near tomatoes can deter nematodes, and basil improves tomato flavor. Nasturtiums can act as a trap crop for aphids.
- Succession Planting: For a continuous harvest, plant small batches of quick-growing crops (lettuce, radishes, cilantro) every 2-3 weeks. As one crop finishes, another is ready to take its place.
Step 6: Pest & Disease Management (Organic)
Maintaining a self sufficient garden from scratch means embracing organic pest and disease control.
- Integrated Pest Management (IPM): This holistic approach combines several strategies.
- Observation: Regularly inspect your plants for early signs of pests or disease. Catching issues early is key.
- Physical Barriers: Use row covers (e.g., Agribon AG-19 floating row cover, 10×20 ft, ~$20) to protect young plants from insect pests like cabbage worms and squash bugs. Install fences (e.g., 2×4 welded wire mesh, 4 ft tall, 50 ft roll ~$70) to keep out deer, rabbits, and other larger animals.
- Hand-Picking: For larger pests like tomato hornworms or squash bugs, simply pick them off and drop them into a bucket of soapy water.
- Companion Planting: As mentioned, certain plants repel pests. Marigolds, garlic, and onions are excellent deterrents.
- Attract Beneficial Insects: Plant flowers like dill, fennel, cosmos, and sweet alyssum to attract ladybugs, lacewings, and parasitic wasps, which prey on common garden pests.
- Organic Sprays & Treatments:
- Neem Oil: An excellent broad-spectrum organic insecticide and fungicide. Bonide Neem Oil Concentrate (16oz, ~$20) can be mixed at a rate of 1-2 tbsp per gallon of water and sprayed on affected plants.
- Insecticidal Soap: Effective against soft-bodied insects like aphids, whiteflies, and spider mites. Garden Safe Insecticidal Soap (24oz ready-to-use, ~$10).
- Bacillus thuringiensis (Bt): A naturally occurring soil bacterium that targets caterpillars and worms. Monterey BT Worm & Caterpillar Killer (16oz, ~$18) is highly effective and safe for beneficial insects.
- Copper or Sulfur Sprays: For fungal diseases like powdery mildew or blight, organic copper (e.g., Bonide Copper Fungicide, ~$15 for 1lb) or sulfur (e.g., Safer Brand Garden Fungicide, ~$10 for 16oz) can be used as a last resort.
Step 7: Harvesting & Seed Saving
The culmination of your efforts is the harvest, and seed saving closes the loop on self-sufficiency.
- Harvesting Techniques:
- Timing: Harvest vegetables at their peak ripeness for best flavor and nutritional value. For example, green beans should snap cleanly, cucumbers should be firm, and tomatoes should be fully colored.
- Frequency: Many crops, like zucchini, cucumbers, and bush beans, produce more if harvested frequently. Pick daily or every other day.
- Tools: Use clean, sharp pruners (e.g., Corona ClassicCUT Bypass Pruner BP 3180, ~$30) or a sharp knife for clean cuts, minimizing damage to the plant.
- Seed Saving: This is where the « self-sufficient » aspect truly shines.
- Selection: Only save seeds from your healthiest, most vigorous plants that show desired traits (disease resistance, good flavor, high yield).
- Isolation: To ensure true-to-type seeds, prevent cross-pollination. This can be challenging for open-pollinated crops that readily cross (e.g., squash, corn). For beginners, focus on self-pollinating plants like beans, peas, lettuce, and tomatoes.
- Processing:
- Dry Seeds (Beans, Peas, Lettuce, Grains): Allow pods/seed heads to dry completely on the plant. Harvest, shell, and clean the seeds, removing chaff.
- Wet Seeds (Tomatoes, Cucumbers, Squash): For tomatoes, ferment the seeds in water for a few days to remove the gel coating and inhibit disease. For cucumbers/squash, scrape out seeds, wash thoroughly, and dry.
- Drying: Spread seeds thinly on screens or paper plates in a cool, dry, well-ventilated area for 1-4 weeks. Ensure they are bone-dry before storage. I aim for less than 8% moisture content.
- Storage: Store seeds in airtight containers (glass jars with desiccant packets work well) in a cool, dark, dry place (ideally 40-50°F and 30-40% humidity). Label clearly with variety and date. Properly stored seeds can remain viable for 3-10 years or more.
Step 8: Season Extension & Winterizing
Extend your harvest and protect your garden for the off-season to truly maximize your self sufficient garden from scratch.
- Cold Frames: Simple structures with a transparent top (glass, polycarbonate, or old windows) that sit over garden beds. They trap solar heat, allowing you to grow cold-hardy crops (lettuce, spinach, kale, radishes) well into winter or start seeds earlier in spring. A basic cold frame can be built from 2×6 lumber and a sheet of polycarbonate for under $100.
- Hoop Houses/Low Tunnels: Larger structures made from flexible hoops (PVC pipe or EMT conduit) covered with greenhouse plastic. These provide more space and greater temperature moderation. A 10×20 ft DIY low tunnel kit can cost $200-$500, while a larger, more robust hoop house kit might be $1,000-$3,000. I use a 6×12 ft low tunnel made from 1/2-inch PVC hoops and 6mil greenhouse plastic, which extends my lettuce and spinach harvest by at least
The choice of seeds is crucial for a truly self sufficient garden from scratch.
- Choose Heirloom & Open-Pollinated Seeds: These varieties produce seeds that will grow true to type, meaning you can save seeds from your harvest year after year. F1 hybrids, while often vigorous, will not produce consistent offspring from saved seeds. Reputable seed companies include Baker Creek Heirloom Seeds, High Mowing Organic Seeds, and Seed Savers Exchange. Start with common, reliable varieties like ‘Black Krim’ tomatoes, ‘Provider’ bush beans, ‘Waltham Butternut’ squash, and ‘Black Seeded Simpson’ lettuce.
- Start Seeds Indoors (Optional but Recommended): For longer growing seasons or specific crops, starting seeds indoors gives you a head start. Use seed-starting mix (e.g., Espoma Organic Seed Starter Mix, ~$10 for 16qt bag) in seed trays (Jiffy Professional Greenhouse 72-cell kit, ~$15). Provide adequate light with LED grow lights (Barrina T5 2ft 4-pack LED Grow Lights, 20W each, ~$50) for 14-16 hours a day, positioned 2-4 inches above seedlings. Maintain consistent temperatures (65-75°F for most).
- Direct Sowing vs. Transplanting: Some crops (carrots, radishes, beans, corn) prefer direct sowing into the garden bed. Others (tomatoes, peppers, broccoli, kale) benefit from being started indoors and transplanted. Follow seed packet instructions for planting depths (e.g., lettuce seeds are often surface-sown or planted 1/8 inch deep, while beans are 1 inch deep) and spacing.
- Companion Planting: Strategically plant different species together to enhance growth, deter pests, and attract beneficial insects. For example, planting marigolds near tomatoes can deter nematodes, and basil improves tomato flavor. Nasturtiums can act as a trap crop for aphids.
- Succession Planting: For a continuous harvest, plant small batches of quick-growing crops (lettuce, radishes, cilantro) every 2-3 weeks. As one crop finishes, another is ready to take its place.
Step 6: Pest & Disease Management (Organic)
Maintaining a self sufficient garden from scratch means embracing organic pest and disease control.
- Integrated Pest Management (IPM): This holistic approach combines several strategies.
- Observation: Regularly inspect your plants for early signs of pests or disease. Catching issues early is key.
- Physical Barriers: Use row covers (e.g., Agribon AG-19 floating row cover, 10×20 ft, ~$20) to protect young plants from insect pests like cabbage worms and squash bugs. Install fences (e.g., 2×4 welded wire mesh, 4 ft tall, 50 ft roll ~$70) to keep out deer, rabbits, and other larger animals.
- Hand-Picking: For larger pests like tomato hornworms or squash bugs, simply pick them off and drop them into a bucket of soapy water.
- Companion Planting: As mentioned, certain plants repel pests. Marigolds, garlic, and onions are excellent deterrents.
- Attract Beneficial Insects: Plant flowers like dill, fennel, cosmos, and sweet alyssum to attract ladybugs, lacewings, and parasitic wasps, which prey on common garden pests.
- Organic Sprays & Treatments:
- Neem Oil: An excellent broad-spectrum organic insecticide and fungicide. Bonide Neem Oil Concentrate (16oz, ~$20) can be mixed at a rate of 1-2 tbsp per gallon of water and sprayed on affected plants.
- Insecticidal Soap: Effective against soft-bodied insects like aphids, whiteflies, and spider mites. Garden Safe Insecticidal Soap (24oz ready-to-use, ~$10).
- Bacillus thuringiensis (Bt): A naturally occurring soil bacterium that targets caterpillars and worms. Monterey BT Worm & Caterpillar Killer (16oz, ~$18) is highly effective and safe for beneficial insects.
- Copper or Sulfur Sprays: For fungal diseases like powdery mildew or blight, organic copper (e.g., Bonide Copper Fungicide, ~$15 for 1lb) or sulfur (e.g., Safer Brand Garden Fungicide, ~$10 for 16oz) can be used as a last resort.
Step 7: Harvesting & Seed Saving
The culmination of your efforts is the harvest, and seed saving closes the loop on self-sufficiency.
- Harvesting Techniques:
- Timing: Harvest vegetables at their peak ripeness for best flavor and nutritional value. For example, green beans should snap cleanly, cucumbers should be firm, and tomatoes should be fully colored.
- Frequency: Many crops, like zucchini, cucumbers, and bush beans, produce more if harvested frequently. Pick daily or every other day.
- Tools: Use clean, sharp pruners (e.g., Corona ClassicCUT Bypass Pruner BP 3180, ~$30) or a sharp knife for clean cuts, minimizing damage to the plant.
- Seed Saving: This is where the « self-sufficient » aspect truly shines.
- Selection: Only save seeds from your healthiest, most vigorous plants that show desired traits (disease resistance, good flavor, high yield).
- Isolation: To ensure true-to-type seeds, prevent cross-pollination. This can be challenging for open-pollinated crops that readily cross (e.g., squash, corn). For beginners, focus on self-pollinating plants like beans, peas, lettuce, and tomatoes.
- Processing:
- Dry Seeds (Beans, Peas, Lettuce, Grains): Allow pods/seed heads to dry completely on the plant. Harvest, shell, and clean the seeds, removing chaff.
- Wet Seeds (Tomatoes, Cucumbers, Squash): For tomatoes, ferment the seeds in water for a few days to remove the gel coating and inhibit disease. For cucumbers/squash, scrape out seeds, wash thoroughly, and dry.
- Drying: Spread seeds thinly on screens or paper plates in a cool, dry, well-ventilated area for 1-4 weeks. Ensure they are bone-dry before storage. I aim for less than 8% moisture content.
- Storage: Store seeds in airtight containers (glass jars with desiccant packets work well) in a cool, dark, dry place (ideally 40-50°F and 30-40% humidity). Label clearly with variety and date. Properly stored seeds can remain viable for 3-10 years or more.
Step 8: Season Extension & Winterizing
Extend your harvest and protect your garden for the off-season to truly maximize your self sufficient garden from scratch.
- Cold Frames: Simple structures with a transparent top (glass, polycarbonate, or old windows) that sit over garden beds. They trap solar heat, allowing you to grow cold-hardy crops (lettuce, spinach, kale, radishes) well into winter or start seeds earlier in spring. A basic cold frame can be built from 2×6 lumber and a sheet of polycarbonate for under $100.
- Hoop Houses/Low Tunnels: Larger structures made from flexible hoops (PVC pipe or EMT conduit) covered with greenhouse plastic. These provide more space and greater temperature moderation. A 10×20 ft DIY low tunnel kit can cost $200-$500, while a larger, more robust hoop house kit might be $1,000-$3,000. I use a 6×12 ft low tunnel made from 1/2-inch PVC hoops and 6mil greenhouse plastic, which extends my lettuce and spinach harvest by at least
Step 5: Seed Selection & Planting
The choice of seeds is crucial for a truly self sufficient garden from scratch.
- Choose Heirloom & Open-Pollinated Seeds: These varieties produce seeds that will grow true to type, meaning you can save seeds from your harvest year after year. F1 hybrids, while often vigorous, will not produce consistent offspring from saved seeds. Reputable seed companies include Baker Creek Heirloom Seeds, High Mowing Organic Seeds, and Seed Savers Exchange. Start with common, reliable varieties like ‘Black Krim’ tomatoes, ‘Provider’ bush beans, ‘Waltham Butternut’ squash, and ‘Black Seeded Simpson’ lettuce.
- Start Seeds Indoors (Optional but Recommended): For longer growing seasons or specific crops, starting seeds indoors gives you a head start. Use seed-starting mix (e.g., Espoma Organic Seed Starter Mix, ~$10 for 16qt bag) in seed trays (Jiffy Professional Greenhouse 72-cell kit, ~$15). Provide adequate light with LED grow lights (Barrina T5 2ft 4-pack LED Grow Lights, 20W each, ~$50) for 14-16 hours a day, positioned 2-4 inches above seedlings. Maintain consistent temperatures (65-75°F for most).
- Direct Sowing vs. Transplanting: Some crops (carrots, radishes, beans, corn) prefer direct sowing into the garden bed. Others (tomatoes, peppers, broccoli, kale) benefit from being started indoors and transplanted. Follow seed packet instructions for planting depths (e.g., lettuce seeds are often surface-sown or planted 1/8 inch deep, while beans are 1 inch deep) and spacing.
- Companion Planting: Strategically plant different species together to enhance growth, deter pests, and attract beneficial insects. For example, planting marigolds near tomatoes can deter nematodes, and basil improves tomato flavor. Nasturtiums can act as a trap crop for aphids.
- Succession Planting: For a continuous harvest, plant small batches of quick-growing crops (lettuce, radishes, cilantro) every 2-3 weeks. As one crop finishes, another is ready to take its place.
Step 6: Pest & Disease Management (Organic)
Maintaining a self sufficient garden from scratch means embracing organic pest and disease control.
- Integrated Pest Management (IPM): This holistic approach combines several strategies.
- Observation: Regularly inspect your plants for early signs of pests or disease. Catching issues early is key.
- Physical Barriers: Use row covers (e.g., Agribon AG-19 floating row cover, 10×20 ft, ~$20) to protect young plants from insect pests like cabbage worms and squash bugs. Install fences (e.g., 2×4 welded wire mesh, 4 ft tall, 50 ft roll ~$70) to keep out deer, rabbits, and other larger animals.
- Hand-Picking: For larger pests like tomato hornworms or squash bugs, simply pick them off and drop them into a bucket of soapy water.
- Companion Planting: As mentioned, certain plants repel pests. Marigolds, garlic, and onions are excellent deterrents.
- Attract Beneficial Insects: Plant flowers like dill, fennel, cosmos, and sweet alyssum to attract ladybugs, lacewings, and parasitic wasps, which prey on common garden pests.
- Organic Sprays & Treatments:
- Neem Oil: An excellent broad-spectrum organic insecticide and fungicide. Bonide Neem Oil Concentrate (16oz, ~$20) can be mixed at a rate of 1-2 tbsp per gallon of water and sprayed on affected plants.
- Insecticidal Soap: Effective against soft-bodied insects like aphids, whiteflies, and spider mites. Garden Safe Insecticidal Soap (24oz ready-to-use, ~$10).
- Bacillus thuringiensis (Bt): A naturally occurring soil bacterium that targets caterpillars and worms. Monterey BT Worm & Caterpillar Killer (16oz, ~$18) is highly effective and safe for beneficial insects.
- Copper or Sulfur Sprays: For fungal diseases like powdery mildew or blight, organic copper (e.g., Bonide Copper Fungicide, ~$15 for 1lb) or sulfur (e.g., Safer Brand Garden Fungicide, ~$10 for 16oz) can be used as a last resort.
Step 7: Harvesting & Seed Saving
The culmination of your efforts is the harvest, and seed saving closes the loop on self-sufficiency.
- Harvesting Techniques:
- Timing: Harvest vegetables at their peak ripeness for best flavor and nutritional value. For example, green beans should snap cleanly, cucumbers should be firm, and tomatoes should be fully colored.
- Frequency: Many crops, like zucchini, cucumbers, and bush beans, produce more if harvested frequently. Pick daily or every other day.
- Tools: Use clean, sharp pruners (e.g., Corona ClassicCUT Bypass Pruner BP 3180, ~$30) or a sharp knife for clean cuts, minimizing damage to the plant.
- Seed Saving: This is where the « self-sufficient » aspect truly shines.
- Selection: Only save seeds from your healthiest, most vigorous plants that show desired traits (disease resistance, good flavor, high yield).
- Isolation: To ensure true-to-type seeds, prevent cross-pollination. This can be challenging for open-pollinated crops that readily cross (e.g., squash, corn). For beginners, focus on self-pollinating plants like beans, peas, lettuce, and tomatoes.
- Processing:
- Dry Seeds (Beans, Peas, Lettuce, Grains): Allow pods/seed heads to dry completely on the plant. Harvest, shell, and clean the seeds, removing chaff.
- Wet Seeds (Tomatoes, Cucumbers, Squash): For tomatoes, ferment the seeds in water for a few days to remove the gel coating and inhibit disease. For cucumbers/squash, scrape out seeds, wash thoroughly, and dry.
- Drying: Spread seeds thinly on screens or paper plates in a cool, dry, well-ventilated area for 1-4 weeks. Ensure they are bone-dry before storage. I aim for less than 8% moisture content.
- Storage: Store seeds in airtight containers (glass jars with desiccant packets work well) in a cool, dark, dry place (ideally 40-50°F and 30-40% humidity). Label clearly with variety and date. Properly stored seeds can remain viable for 3-10 years or more.
Step 8: Season Extension & Winterizing
Extend your harvest and protect your garden for the off-season to truly maximize your self sufficient garden from scratch.
- Cold Frames: Simple structures with a transparent top (glass, polycarbonate, or old windows) that sit over garden beds. They trap solar heat, allowing you to grow cold-hardy crops (lettuce, spinach, kale, radishes) well into winter or start seeds earlier in spring. A basic cold frame can be built from 2×6 lumber and a sheet of polycarbonate for under $100.
- Hoop Houses/Low Tunnels: Larger structures made from flexible hoops (PVC pipe or EMT conduit) covered with greenhouse plastic. These provide more space and greater temperature moderation. A 10×20 ft DIY low tunnel kit can cost $200-$500, while a larger, more robust hoop house kit might be $1,000-$3,000. I use a 6×12 ft low tunnel made from 1/2-inch PVC hoops and 6mil greenhouse plastic, which extends my lettuce and spinach harvest by at least
- Rainwater Harvesting: This is my primary source of irrigation water. A 55-gallon rain barrel (e.g., EarthMark Rain Barrel, ~$120-$150) connected to a downspout can collect significant water. For larger needs, I use two 275-gallon IBC totes (Intermediate Bulk Containers, often available used for $100-$200 each from food-grade sources) connected in series. A 1,000 sq ft roof can collect approximately 620 gallons of water for every inch of rainfall. My 1,500 sq ft roof provides ample water for my 600 sq ft garden through multiple barrels and totes.
- Drip Irrigation: This is by far the most water-efficient method, delivering water directly to the plant’s root zone, minimizing evaporation and weed growth.
- Components: A typical drip system includes a pressure regulator (e.g., Rain Bird PRV-10, ~$15), a filter (Rain Bird RBY filter, ~$20), main tubing (1/2-inch poly tubing, 100ft ~$25), smaller feeder lines (1/4-inch tubing), and emitters (0.5 GPH or 1 GPH per plant).
- Kits: For beginners, a starter kit like the Rain Bird Drip Irrigation Garden Kit (model DDI-KIT-1P, ~$40-$60) is excellent for a small garden. For larger setups, I use Netafim Techline CV Drip Line (500ft roll, ~$150-$200), which has pressure-compensating emitters built-in, ensuring even watering across long runs.
- Automation: For true self-sufficiency, consider a battery-powered timer (e.g., Orbit B-Hyve Bluetooth Hose Faucet Timer, ~$50) or a solar-powered timer connected to a small 12V pump.
- Solar-Powered Pumps: For lifting water from a well, pond, or large storage tank to your garden, a solar pump is a game-changer. For a smaller drip system, a Shurflo 2088-594-152 Diaphragm Pump (12V, 3.5 GPM, ~$180) can be powered by a single 100W solar panel (e.g., Renogy 100W Monocrystalline Solar Panel, ~$100) and a small 12V battery (e.g., a 50Ah LiFePO4 battery like the Battle Born 50Ah, ~$450). For larger operations or deeper wells, more robust systems are needed. If you’re looking to build out a comprehensive off-grid power system to support your garden’s water needs, or indeed your entire homestead, you might want to explore resources like the Power Grid Generator complete system guide to understand the full scope of what’s possible in terms of energy independence.
Step 5: Seed Selection & Planting
The choice of seeds is crucial for a truly self sufficient garden from scratch.
- Choose Heirloom & Open-Pollinated Seeds: These varieties produce seeds that will grow true to type, meaning you can save seeds from your harvest year after year. F1 hybrids, while often vigorous, will not produce consistent offspring from saved seeds. Reputable seed companies include Baker Creek Heirloom Seeds, High Mowing Organic Seeds, and Seed Savers Exchange. Start with common, reliable varieties like ‘Black Krim’ tomatoes, ‘Provider’ bush beans, ‘Waltham Butternut’ squash, and ‘Black Seeded Simpson’ lettuce.
- Start Seeds Indoors (Optional but Recommended): For longer growing seasons or specific crops, starting seeds indoors gives you a head start. Use seed-starting mix (e.g., Espoma Organic Seed Starter Mix, ~$10 for 16qt bag) in seed trays (Jiffy Professional Greenhouse 72-cell kit, ~$15). Provide adequate light with LED grow lights (Barrina T5 2ft 4-pack LED Grow Lights, 20W each, ~$50) for 14-16 hours a day, positioned 2-4 inches above seedlings. Maintain consistent temperatures (65-75°F for most).
- Direct Sowing vs. Transplanting: Some crops (carrots, radishes, beans, corn) prefer direct sowing into the garden bed. Others (tomatoes, peppers, broccoli, kale) benefit from being started indoors and transplanted. Follow seed packet instructions for planting depths (e.g., lettuce seeds are often surface-sown or planted 1/8 inch deep, while beans are 1 inch deep) and spacing.
- Companion Planting: Strategically plant different species together to enhance growth, deter pests, and attract beneficial insects. For example, planting marigolds near tomatoes can deter nematodes, and basil improves tomato flavor. Nasturtiums can act as a trap crop for aphids.
- Succession Planting: For a continuous harvest, plant small batches of quick-growing crops (lettuce, radishes, cilantro) every 2-3 weeks. As one crop finishes, another is ready to take its place.
Step 6: Pest & Disease Management (Organic)
Maintaining a self sufficient garden from scratch means embracing organic pest and disease control.
- Integrated Pest Management (IPM): This holistic approach combines several strategies.
- Observation: Regularly inspect your plants for early signs of pests or disease. Catching issues early is key.
- Physical Barriers: Use row covers (e.g., Agribon AG-19 floating row cover, 10×20 ft, ~$20) to protect young plants from insect pests like cabbage worms and squash bugs. Install fences (e.g., 2×4 welded wire mesh, 4 ft tall, 50 ft roll ~$70) to keep out deer, rabbits, and other larger animals.
- Hand-Picking: For larger pests like tomato hornworms or squash bugs, simply pick them off and drop them into a bucket of soapy water.
- Companion Planting: As mentioned, certain plants repel pests. Marigolds, garlic, and onions are excellent deterrents.
- Attract Beneficial Insects: Plant flowers like dill, fennel, cosmos, and sweet alyssum to attract ladybugs, lacewings, and parasitic wasps, which prey on common garden pests.
- Organic Sprays & Treatments:
- Neem Oil: An excellent broad-spectrum organic insecticide and fungicide. Bonide Neem Oil Concentrate (16oz, ~$20) can be mixed at a rate of 1-2 tbsp per gallon of water and sprayed on affected plants.
- Insecticidal Soap: Effective against soft-bodied insects like aphids, whiteflies, and spider mites. Garden Safe Insecticidal Soap (24oz ready-to-use, ~$10).
- Bacillus thuringiensis (Bt): A naturally occurring soil bacterium that targets caterpillars and worms. Monterey BT Worm & Caterpillar Killer (16oz, ~$18) is highly effective and safe for beneficial insects.
- Copper or Sulfur Sprays: For fungal diseases like powdery mildew or blight, organic copper (e.g., Bonide Copper Fungicide, ~$15 for 1lb) or sulfur (e.g., Safer Brand Garden Fungicide, ~$10 for 16oz) can be used as a last resort.
Step 7: Harvesting & Seed Saving
The culmination of your efforts is the harvest, and seed saving closes the loop on self-sufficiency.
- Harvesting Techniques:
- Timing: Harvest vegetables at their peak ripeness for best flavor and nutritional value. For example, green beans should snap cleanly, cucumbers should be firm, and tomatoes should be fully colored.
- Frequency: Many crops, like zucchini, cucumbers, and bush beans, produce more if harvested frequently. Pick daily or every other day.
- Tools: Use clean, sharp pruners (e.g., Corona ClassicCUT Bypass Pruner BP 3180, ~$30) or a sharp knife for clean cuts, minimizing damage to the plant.
- Seed Saving: This is where the « self-sufficient » aspect truly shines.
- Selection: Only save seeds from your healthiest, most vigorous plants that show desired traits (disease resistance, good flavor, high yield).
- Isolation: To ensure true-to-type seeds, prevent cross-pollination. This can be challenging for open-pollinated crops that readily cross (e.g., squash, corn). For beginners, focus on self-pollinating plants like beans, peas, lettuce, and tomatoes.
- Processing:
- Dry Seeds (Beans, Peas, Lettuce, Grains): Allow pods/seed heads to dry completely on the plant. Harvest, shell, and clean the seeds, removing chaff.
- Wet Seeds (Tomatoes, Cucumbers, Squash): For tomatoes, ferment the seeds in water for a few days to remove the gel coating and inhibit disease. For cucumbers/squash, scrape out seeds, wash thoroughly, and dry.
- Drying: Spread seeds thinly on screens or paper plates in a cool, dry, well-ventilated area for 1-4 weeks. Ensure they are bone-dry before storage. I aim for less than 8% moisture content.
- Storage: Store seeds in airtight containers (glass jars with desiccant packets work well) in a cool, dark, dry place (ideally 40-50°F and 30-40% humidity). Label clearly with variety and date. Properly stored seeds can remain viable for 3-10 years or more.
Step 8: Season Extension & Winterizing
Extend your harvest and protect your garden for the off-season to truly maximize your self sufficient garden from scratch.
- Cold Frames: Simple structures with a transparent top (glass, polycarbonate, or old windows) that sit over garden beds. They trap solar heat, allowing you to grow cold-hardy crops (lettuce, spinach, kale, radishes) well into winter or start seeds earlier in spring. A basic cold frame can be built from 2×6 lumber and a sheet of polycarbonate for under $100.
- Hoop Houses/Low Tunnels: Larger structures made from flexible hoops (PVC pipe or EMT conduit) covered with greenhouse plastic. These provide more space and greater temperature moderation. A 10×20 ft DIY low tunnel kit can cost $200-$500, while a larger, more robust hoop house kit might be $1,000-$3,000. I use a 6×12 ft low tunnel made from 1/2-inch PVC hoops and 6mil greenhouse plastic, which extends my lettuce and spinach harvest by at least
Efficient water management is critical for a self sufficient garden from scratch, especially in off-grid living where water resources might be limited.
- Rainwater Harvesting: This is my primary source of irrigation water. A 55-gallon rain barrel (e.g., EarthMark Rain Barrel, ~$120-$150) connected to a downspout can collect significant water. For larger needs, I use two 275-gallon IBC totes (Intermediate Bulk Containers, often available used for $100-$200 each from food-grade sources) connected in series. A 1,000 sq ft roof can collect approximately 620 gallons of water for every inch of rainfall. My 1,500 sq ft roof provides ample water for my 600 sq ft garden through multiple barrels and totes.
- Drip Irrigation: This is by far the most water-efficient method, delivering water directly to the plant’s root zone, minimizing evaporation and weed growth.
- Components: A typical drip system includes a pressure regulator (e.g., Rain Bird PRV-10, ~$15), a filter (Rain Bird RBY filter, ~$20), main tubing (1/2-inch poly tubing, 100ft ~$25), smaller feeder lines (1/4-inch tubing), and emitters (0.5 GPH or 1 GPH per plant).
- Kits: For beginners, a starter kit like the Rain Bird Drip Irrigation Garden Kit (model DDI-KIT-1P, ~$40-$60) is excellent for a small garden. For larger setups, I use Netafim Techline CV Drip Line (500ft roll, ~$150-$200), which has pressure-compensating emitters built-in, ensuring even watering across long runs.
- Automation: For true self-sufficiency, consider a battery-powered timer (e.g., Orbit B-Hyve Bluetooth Hose Faucet Timer, ~$50) or a solar-powered timer connected to a small 12V pump.
- Solar-Powered Pumps: For lifting water from a well, pond, or large storage tank to your garden, a solar pump is a game-changer. For a smaller drip system, a Shurflo 2088-594-152 Diaphragm Pump (12V, 3.5 GPM, ~$180) can be powered by a single 100W solar panel (e.g., Renogy 100W Monocrystalline Solar Panel, ~$100) and a small 12V battery (e.g., a 50Ah LiFePO4 battery like the Battle Born 50Ah, ~$450). For larger operations or deeper wells, more robust systems are needed. If you’re looking to build out a comprehensive off-grid power system to support your garden’s water needs, or indeed your entire homestead, you might want to explore resources like the Power Grid Generator complete system guide to understand the full scope of what’s possible in terms of energy independence.
Step 5: Seed Selection & Planting
The choice of seeds is crucial for a truly self sufficient garden from scratch.
- Choose Heirloom & Open-Pollinated Seeds: These varieties produce seeds that will grow true to type, meaning you can save seeds from your harvest year after year. F1 hybrids, while often vigorous, will not produce consistent offspring from saved seeds. Reputable seed companies include Baker Creek Heirloom Seeds, High Mowing Organic Seeds, and Seed Savers Exchange. Start with common, reliable varieties like ‘Black Krim’ tomatoes, ‘Provider’ bush beans, ‘Waltham Butternut’ squash, and ‘Black Seeded Simpson’ lettuce.
- Start Seeds Indoors (Optional but Recommended): For longer growing seasons or specific crops, starting seeds indoors gives you a head start. Use seed-starting mix (e.g., Espoma Organic Seed Starter Mix, ~$10 for 16qt bag) in seed trays (Jiffy Professional Greenhouse 72-cell kit, ~$15). Provide adequate light with LED grow lights (Barrina T5 2ft 4-pack LED Grow Lights, 20W each, ~$50) for 14-16 hours a day, positioned 2-4 inches above seedlings. Maintain consistent temperatures (65-75°F for most).
- Direct Sowing vs. Transplanting: Some crops (carrots, radishes, beans, corn) prefer direct sowing into the garden bed. Others (tomatoes, peppers, broccoli, kale) benefit from being started indoors and transplanted. Follow seed packet instructions for planting depths (e.g., lettuce seeds are often surface-sown or planted 1/8 inch deep, while beans are 1 inch deep) and spacing.
- Companion Planting: Strategically plant different species together to enhance growth, deter pests, and attract beneficial insects. For example, planting marigolds near tomatoes can deter nematodes, and basil improves tomato flavor. Nasturtiums can act as a trap crop for aphids.
- Succession Planting: For a continuous harvest, plant small batches of quick-growing crops (lettuce, radishes, cilantro) every 2-3 weeks. As one crop finishes, another is ready to take its place.
Step 6: Pest & Disease Management (Organic)
Maintaining a self sufficient garden from scratch means embracing organic pest and disease control.
- Integrated Pest Management (IPM): This holistic approach combines several strategies.
- Observation: Regularly inspect your plants for early signs of pests or disease. Catching issues early is key.
- Physical Barriers: Use row covers (e.g., Agribon AG-19 floating row cover, 10×20 ft, ~$20) to protect young plants from insect pests like cabbage worms and squash bugs. Install fences (e.g., 2×4 welded wire mesh, 4 ft tall, 50 ft roll ~$70) to keep out deer, rabbits, and other larger animals.
- Hand-Picking: For larger pests like tomato hornworms or squash bugs, simply pick them off and drop them into a bucket of soapy water.
- Companion Planting: As mentioned, certain plants repel pests. Marigolds, garlic, and onions are excellent deterrents.
- Attract Beneficial Insects: Plant flowers like dill, fennel, cosmos, and sweet alyssum to attract ladybugs, lacewings, and parasitic wasps, which prey on common garden pests.
- Organic Sprays & Treatments:
- Neem Oil: An excellent broad-spectrum organic insecticide and fungicide. Bonide Neem Oil Concentrate (16oz, ~$20) can be mixed at a rate of 1-2 tbsp per gallon of water and sprayed on affected plants.
- Insecticidal Soap: Effective against soft-bodied insects like aphids, whiteflies, and spider mites. Garden Safe Insecticidal Soap (24oz ready-to-use, ~$10).
- Bacillus thuringiensis (Bt): A naturally occurring soil bacterium that targets caterpillars and worms. Monterey BT Worm & Caterpillar Killer (16oz, ~$18) is highly effective and safe for beneficial insects.
- Copper or Sulfur Sprays: For fungal diseases like powdery mildew or blight, organic copper (e.g., Bonide Copper Fungicide, ~$15 for 1lb) or sulfur (e.g., Safer Brand Garden Fungicide, ~$10 for 16oz) can be used as a last resort.
Step 7: Harvesting & Seed Saving
The culmination of your efforts is the harvest, and seed saving closes the loop on self-sufficiency.
- Harvesting Techniques:
- Timing: Harvest vegetables at their peak ripeness for best flavor and nutritional value. For example, green beans should snap cleanly, cucumbers should be firm, and tomatoes should be fully colored.
- Frequency: Many crops, like zucchini, cucumbers, and bush beans, produce more if harvested frequently. Pick daily or every other day.
- Tools: Use clean, sharp pruners (e.g., Corona ClassicCUT Bypass Pruner BP 3180, ~$30) or a sharp knife for clean cuts, minimizing damage to the plant.
- Seed Saving: This is where the « self-sufficient » aspect truly shines.
- Selection: Only save seeds from your healthiest, most vigorous plants that show desired traits (disease resistance, good flavor, high yield).
- Isolation: To ensure true-to-type seeds, prevent cross-pollination. This can be challenging for open-pollinated crops that readily cross (e.g., squash, corn). For beginners, focus on self-pollinating plants like beans, peas, lettuce, and tomatoes.
- Processing:
- Dry Seeds (Beans, Peas, Lettuce, Grains): Allow pods/seed heads to dry completely on the plant. Harvest, shell, and clean the seeds, removing chaff.
- Wet Seeds (Tomatoes, Cucumbers, Squash): For tomatoes, ferment the seeds in water for a few days to remove the gel coating and inhibit disease. For cucumbers/squash, scrape out seeds, wash thoroughly, and dry.
- Drying: Spread seeds thinly on screens or paper plates in a cool, dry, well-ventilated area for 1-4 weeks. Ensure they are bone-dry before storage. I aim for less than 8% moisture content.
- Storage: Store seeds in airtight containers (glass jars with desiccant packets work well) in a cool, dark, dry place (ideally 40-50°F and 30-40% humidity). Label clearly with variety and date. Properly stored seeds can remain viable for 3-10 years or more.
Step 8: Season Extension & Winterizing
Extend your harvest and protect your garden for the off-season to truly maximize your self sufficient garden from scratch.
- Cold Frames: Simple structures with a transparent top (glass, polycarbonate, or old windows) that sit over garden beds. They trap solar heat, allowing you to grow cold-hardy crops (lettuce, spinach, kale, radishes) well into winter or start seeds earlier in spring. A basic cold frame can be built from 2×6 lumber and a sheet of polycarbonate for under $100.
- Hoop Houses/Low Tunnels: Larger structures made from flexible hoops (PVC pipe or EMT conduit) covered with greenhouse plastic. These provide more space and greater temperature moderation. A 10×20 ft DIY low tunnel kit can cost $200-$500, while a larger, more robust hoop house kit might be $1,000-$3,000. I use a 6×12 ft low tunnel made from 1/2-inch PVC hoops and 6mil greenhouse plastic, which extends my lettuce and spinach harvest by at least
Step 4: Water Management & Irrigation
Efficient water management is critical for a self sufficient garden from scratch, especially in off-grid living where water resources might be limited.
- Rainwater Harvesting: This is my primary source of irrigation water. A 55-gallon rain barrel (e.g., EarthMark Rain Barrel, ~$120-$150) connected to a downspout can collect significant water. For larger needs, I use two 275-gallon IBC totes (Intermediate Bulk Containers, often available used for $100-$200 each from food-grade sources) connected in series. A 1,000 sq ft roof can collect approximately 620 gallons of water for every inch of rainfall. My 1,500 sq ft roof provides ample water for my 600 sq ft garden through multiple barrels and totes.
- Drip Irrigation: This is by far the most water-efficient method, delivering water directly to the plant’s root zone, minimizing evaporation and weed growth.
- Components: A typical drip system includes a pressure regulator (e.g., Rain Bird PRV-10, ~$15), a filter (Rain Bird RBY filter, ~$20), main tubing (1/2-inch poly tubing, 100ft ~$25), smaller feeder lines (1/4-inch tubing), and emitters (0.5 GPH or 1 GPH per plant).
- Kits: For beginners, a starter kit like the Rain Bird Drip Irrigation Garden Kit (model DDI-KIT-1P, ~$40-$60) is excellent for a small garden. For larger setups, I use Netafim Techline CV Drip Line (500ft roll, ~$150-$200), which has pressure-compensating emitters built-in, ensuring even watering across long runs.
- Automation: For true self-sufficiency, consider a battery-powered timer (e.g., Orbit B-Hyve Bluetooth Hose Faucet Timer, ~$50) or a solar-powered timer connected to a small 12V pump.
- Solar-Powered Pumps: For lifting water from a well, pond, or large storage tank to your garden, a solar pump is a game-changer. For a smaller drip system, a Shurflo 2088-594-152 Diaphragm Pump (12V, 3.5 GPM, ~$180) can be powered by a single 100W solar panel (e.g., Renogy 100W Monocrystalline Solar Panel, ~$100) and a small 12V battery (e.g., a 50Ah LiFePO4 battery like the Battle Born 50Ah, ~$450). For larger operations or deeper wells, more robust systems are needed. If you’re looking to build out a comprehensive off-grid power system to support your garden’s water needs, or indeed your entire homestead, you might want to explore resources like the Power Grid Generator complete system guide to understand the full scope of what’s possible in terms of energy independence.
Step 5: Seed Selection & Planting
The choice of seeds is crucial for a truly self sufficient garden from scratch.
- Choose Heirloom & Open-Pollinated Seeds: These varieties produce seeds that will grow true to type, meaning you can save seeds from your harvest year after year. F1 hybrids, while often vigorous, will not produce consistent offspring from saved seeds. Reputable seed companies include Baker Creek Heirloom Seeds, High Mowing Organic Seeds, and Seed Savers Exchange. Start with common, reliable varieties like ‘Black Krim’ tomatoes, ‘Provider’ bush beans, ‘Waltham Butternut’ squash, and ‘Black Seeded Simpson’ lettuce.
- Start Seeds Indoors (Optional but Recommended): For longer growing seasons or specific crops, starting seeds indoors gives you a head start. Use seed-starting mix (e.g., Espoma Organic Seed Starter Mix, ~$10 for 16qt bag) in seed trays (Jiffy Professional Greenhouse 72-cell kit, ~$15). Provide adequate light with LED grow lights (Barrina T5 2ft 4-pack LED Grow Lights, 20W each, ~$50) for 14-16 hours a day, positioned 2-4 inches above seedlings. Maintain consistent temperatures (65-75°F for most).
- Direct Sowing vs. Transplanting: Some crops (carrots, radishes, beans, corn) prefer direct sowing into the garden bed. Others (tomatoes, peppers, broccoli, kale) benefit from being started indoors and transplanted. Follow seed packet instructions for planting depths (e.g., lettuce seeds are often surface-sown or planted 1/8 inch deep, while beans are 1 inch deep) and spacing.
- Companion Planting: Strategically plant different species together to enhance growth, deter pests, and attract beneficial insects. For example, planting marigolds near tomatoes can deter nematodes, and basil improves tomato flavor. Nasturtiums can act as a trap crop for aphids.
- Succession Planting: For a continuous harvest, plant small batches of quick-growing crops (lettuce, radishes, cilantro) every 2-3 weeks. As one crop finishes, another is ready to take its place.
Step 6: Pest & Disease Management (Organic)
Maintaining a self sufficient garden from scratch means embracing organic pest and disease control.
- Integrated Pest Management (IPM): This holistic approach combines several strategies.
- Observation: Regularly inspect your plants for early signs of pests or disease. Catching issues early is key.
- Physical Barriers: Use row covers (e.g., Agribon AG-19 floating row cover, 10×20 ft, ~$20) to protect young plants from insect pests like cabbage worms and squash bugs. Install fences (e.g., 2×4 welded wire mesh, 4 ft tall, 50 ft roll ~$70) to keep out deer, rabbits, and other larger animals.
- Hand-Picking: For larger pests like tomato hornworms or squash bugs, simply pick them off and drop them into a bucket of soapy water.
- Companion Planting: As mentioned, certain plants repel pests. Marigolds, garlic, and onions are excellent deterrents.
- Attract Beneficial Insects: Plant flowers like dill, fennel, cosmos, and sweet alyssum to attract ladybugs, lacewings, and parasitic wasps, which prey on common garden pests.
- Organic Sprays & Treatments:
- Neem Oil: An excellent broad-spectrum organic insecticide and fungicide. Bonide Neem Oil Concentrate (16oz, ~$20) can be mixed at a rate of 1-2 tbsp per gallon of water and sprayed on affected plants.
- Insecticidal Soap: Effective against soft-bodied insects like aphids, whiteflies, and spider mites. Garden Safe Insecticidal Soap (24oz ready-to-use, ~$10).
- Bacillus thuringiensis (Bt): A naturally occurring soil bacterium that targets caterpillars and worms. Monterey BT Worm & Caterpillar Killer (16oz, ~$18) is highly effective and safe for beneficial insects.
- Copper or Sulfur Sprays: For fungal diseases like powdery mildew or blight, organic copper (e.g., Bonide Copper Fungicide, ~$15 for 1lb) or sulfur (e.g., Safer Brand Garden Fungicide, ~$10 for 16oz) can be used as a last resort.
Step 7: Harvesting & Seed Saving
The culmination of your efforts is the harvest, and seed saving closes the loop on self-sufficiency.
- Harvesting Techniques:
- Timing: Harvest vegetables at their peak ripeness for best flavor and nutritional value. For example, green beans should snap cleanly, cucumbers should be firm, and tomatoes should be fully colored.
- Frequency: Many crops, like zucchini, cucumbers, and bush beans, produce more if harvested frequently. Pick daily or every other day.
- Tools: Use clean, sharp pruners (e.g., Corona ClassicCUT Bypass Pruner BP 3180, ~$30) or a sharp knife for clean cuts, minimizing damage to the plant.
- Seed Saving: This is where the « self-sufficient » aspect truly shines.
- Selection: Only save seeds from your healthiest, most vigorous plants that show desired traits (disease resistance, good flavor, high yield).
- Isolation: To ensure true-to-type seeds, prevent cross-pollination. This can be challenging for open-pollinated crops that readily cross (e.g., squash, corn). For beginners, focus on self-pollinating plants like beans, peas, lettuce, and tomatoes.
- Processing:
- Dry Seeds (Beans, Peas, Lettuce, Grains): Allow pods/seed heads to dry completely on the plant. Harvest, shell, and clean the seeds, removing chaff.
- Wet Seeds (Tomatoes, Cucumbers, Squash): For tomatoes, ferment the seeds in water for a few days to remove the gel coating and inhibit disease. For cucumbers/squash, scrape out seeds, wash thoroughly, and dry.
- Drying: Spread seeds thinly on screens or paper plates in a cool, dry, well-ventilated area for 1-4 weeks. Ensure they are bone-dry before storage. I aim for less than 8% moisture content.
- Storage: Store seeds in airtight containers (glass jars with desiccant packets work well) in a cool, dark, dry place (ideally 40-50°F and 30-40% humidity). Label clearly with variety and date. Properly stored seeds can remain viable for 3-10 years or more.
Step 8: Season Extension & Winterizing
Extend your harvest and protect your garden for the off-season to truly maximize your self sufficient garden from scratch.
- Cold Frames: Simple structures with a transparent top (glass, polycarbonate, or old windows) that sit over garden beds. They trap solar heat, allowing you to grow cold-hardy crops (lettuce, spinach, kale, radishes) well into winter or start seeds earlier in spring. A basic cold frame can be built from 2×6 lumber and a sheet of polycarbonate for under $100.
- Hoop Houses/Low Tunnels: Larger structures made from flexible hoops (PVC pipe or EMT conduit) covered with greenhouse plastic. These provide more space and greater temperature moderation. A 10×20 ft DIY low tunnel kit can cost $200-$500, while a larger, more robust hoop house kit might be $1,000-$3,000. I use a 6×12 ft low tunnel made from 1/2-inch PVC hoops and 6mil greenhouse plastic, which extends my lettuce and spinach harvest by at least
- In-Ground Beds: If you have excellent native soil and good drainage, in-ground beds are the most economical. Double-digging (loosening soil two shovel depths) can significantly improve drainage and aeration. For my main garden, I primarily use in-ground beds, but I focus on building up the soil over time with consistent compost additions and cover cropping. I aim for beds that are no wider than 3-4 feet so I can reach the center without stepping on the soil, compacting it.
- Raised Beds: Raised beds offer numerous advantages, especially for poor soil, heavy clay, or rocky areas. They provide better drainage, warm up faster in spring, reduce compaction, and make weeding and harvesting easier on your back.
- Material Options:
- Untreated Cedar: Naturally rot-resistant and chemical-free. A 4×8 ft bed, 12 inches deep, typically requires three 2x12x8 ft cedar boards, costing around $50-$60 per board (total ~$150-$180) plus corner brackets or screws. My first raised beds were cedar and are still going strong after 7 years.
- Galvanized Steel: Durable, long-lasting, and aesthetically pleasing. Brands like Vego Garden offer modular kits. A Vego Garden 17″ Tall 8-in-1 Metal Raised Garden Bed (can be configured to 4×8 ft) costs approximately $250-$300.
- Concrete Blocks/Stones: Very durable but can leach minerals (though generally safe once weathered) and can be expensive.
- Recycled Materials: Pallets (check for chemical treatment stamps like « HT » for heat-treated), old tires (controversial due to potential chemical leaching).
- Filling Raised Beds: Don’t just fill with topsoil. Use a « Hugelkultur » approach (logs, branches, leaves, then compost, then topsoil) or a mixture of 60% good quality topsoil, 30% compost, and 10% perlite or vermiculite for drainage. A 4x8x1 ft raised bed requires about 32 cubic feet (or ~1.2 cubic yards) of soil mix, which can cost $100-$200 depending on your source.
- Material Options:
Step 4: Water Management & Irrigation
Efficient water management is critical for a self sufficient garden from scratch, especially in off-grid living where water resources might be limited.
- Rainwater Harvesting: This is my primary source of irrigation water. A 55-gallon rain barrel (e.g., EarthMark Rain Barrel, ~$120-$150) connected to a downspout can collect significant water. For larger needs, I use two 275-gallon IBC totes (Intermediate Bulk Containers, often available used for $100-$200 each from food-grade sources) connected in series. A 1,000 sq ft roof can collect approximately 620 gallons of water for every inch of rainfall. My 1,500 sq ft roof provides ample water for my 600 sq ft garden through multiple barrels and totes.
- Drip Irrigation: This is by far the most water-efficient method, delivering water directly to the plant’s root zone, minimizing evaporation and weed growth.
- Components: A typical drip system includes a pressure regulator (e.g., Rain Bird PRV-10, ~$15), a filter (Rain Bird RBY filter, ~$20), main tubing (1/2-inch poly tubing, 100ft ~$25), smaller feeder lines (1/4-inch tubing), and emitters (0.5 GPH or 1 GPH per plant).
- Kits: For beginners, a starter kit like the Rain Bird Drip Irrigation Garden Kit (model DDI-KIT-1P, ~$40-$60) is excellent for a small garden. For larger setups, I use Netafim Techline CV Drip Line (500ft roll, ~$150-$200), which has pressure-compensating emitters built-in, ensuring even watering across long runs.
- Automation: For true self-sufficiency, consider a battery-powered timer (e.g., Orbit B-Hyve Bluetooth Hose Faucet Timer, ~$50) or a solar-powered timer connected to a small 12V pump.
- Solar-Powered Pumps: For lifting water from a well, pond, or large storage tank to your garden, a solar pump is a game-changer. For a smaller drip system, a Shurflo 2088-594-152 Diaphragm Pump (12V, 3.5 GPM, ~$180) can be powered by a single 100W solar panel (e.g., Renogy 100W Monocrystalline Solar Panel, ~$100) and a small 12V battery (e.g., a 50Ah LiFePO4 battery like the Battle Born 50Ah, ~$450). For larger operations or deeper wells, more robust systems are needed. If you’re looking to build out a comprehensive off-grid power system to support your garden’s water needs, or indeed your entire homestead, you might want to explore resources like the Power Grid Generator complete system guide to understand the full scope of what’s possible in terms of energy independence.
Step 5: Seed Selection & Planting
The choice of seeds is crucial for a truly self sufficient garden from scratch.
- Choose Heirloom & Open-Pollinated Seeds: These varieties produce seeds that will grow true to type, meaning you can save seeds from your harvest year after year. F1 hybrids, while often vigorous, will not produce consistent offspring from saved seeds. Reputable seed companies include Baker Creek Heirloom Seeds, High Mowing Organic Seeds, and Seed Savers Exchange. Start with common, reliable varieties like ‘Black Krim’ tomatoes, ‘Provider’ bush beans, ‘Waltham Butternut’ squash, and ‘Black Seeded Simpson’ lettuce.
- Start Seeds Indoors (Optional but Recommended): For longer growing seasons or specific crops, starting seeds indoors gives you a head start. Use seed-starting mix (e.g., Espoma Organic Seed Starter Mix, ~$10 for 16qt bag) in seed trays (Jiffy Professional Greenhouse 72-cell kit, ~$15). Provide adequate light with LED grow lights (Barrina T5 2ft 4-pack LED Grow Lights, 20W each, ~$50) for 14-16 hours a day, positioned 2-4 inches above seedlings. Maintain consistent temperatures (65-75°F for most).
- Direct Sowing vs. Transplanting: Some crops (carrots, radishes, beans, corn) prefer direct sowing into the garden bed. Others (tomatoes, peppers, broccoli, kale) benefit from being started indoors and transplanted. Follow seed packet instructions for planting depths (e.g., lettuce seeds are often surface-sown or planted 1/8 inch deep, while beans are 1 inch deep) and spacing.
- Companion Planting: Strategically plant different species together to enhance growth, deter pests, and attract beneficial insects. For example, planting marigolds near tomatoes can deter nematodes, and basil improves tomato flavor. Nasturtiums can act as a trap crop for aphids.
- Succession Planting: For a continuous harvest, plant small batches of quick-growing crops (lettuce, radishes, cilantro) every 2-3 weeks. As one crop finishes, another is ready to take its place.
Step 6: Pest & Disease Management (Organic)
Maintaining a self sufficient garden from scratch means embracing organic pest and disease control.
- Integrated Pest Management (IPM): This holistic approach combines several strategies.
- Observation: Regularly inspect your plants for early signs of pests or disease. Catching issues early is key.
- Physical Barriers: Use row covers (e.g., Agribon AG-19 floating row cover, 10×20 ft, ~$20) to protect young plants from insect pests like cabbage worms and squash bugs. Install fences (e.g., 2×4 welded wire mesh, 4 ft tall, 50 ft roll ~$70) to keep out deer, rabbits, and other larger animals.
- Hand-Picking: For larger pests like tomato hornworms or squash bugs, simply pick them off and drop them into a bucket of soapy water.
- Companion Planting: As mentioned, certain plants repel pests. Marigolds, garlic, and onions are excellent deterrents.
- Attract Beneficial Insects: Plant flowers like dill, fennel, cosmos, and sweet alyssum to attract ladybugs, lacewings, and parasitic wasps, which prey on common garden pests.
- Organic Sprays & Treatments:
- Neem Oil: An excellent broad-spectrum organic insecticide and fungicide. Bonide Neem Oil Concentrate (16oz, ~$20) can be mixed at a rate of 1-2 tbsp per gallon of water and sprayed on affected plants.
- Insecticidal Soap: Effective against soft-bodied insects like aphids, whiteflies, and spider mites. Garden Safe Insecticidal Soap (24oz ready-to-use, ~$10).
- Bacillus thuringiensis (Bt): A naturally occurring soil bacterium that targets caterpillars and worms. Monterey BT Worm & Caterpillar Killer (16oz, ~$18) is highly effective and safe for beneficial insects.
- Copper or Sulfur Sprays: For fungal diseases like powdery mildew or blight, organic copper (e.g., Bonide Copper Fungicide, ~$15 for 1lb) or sulfur (e.g., Safer Brand Garden Fungicide, ~$10 for 16oz) can be used as a last resort.
Step 7: Harvesting & Seed Saving
The culmination of your efforts is the harvest, and seed saving closes the loop on self-sufficiency.
- Harvesting Techniques:
- Timing: Harvest vegetables at their peak ripeness for best flavor and nutritional value. For example, green beans should snap cleanly, cucumbers should be firm, and tomatoes should be fully colored.
- Frequency: Many crops, like zucchini, cucumbers, and bush beans, produce more if harvested frequently. Pick daily or every other day.
- Tools: Use clean, sharp pruners (e.g., Corona ClassicCUT Bypass Pruner BP 3180, ~$30) or a sharp knife for clean cuts, minimizing damage to the plant.
- Seed Saving: This is where the « self-sufficient » aspect truly shines.
- Selection: Only save seeds from your healthiest, most vigorous plants that show desired traits (disease resistance, good flavor, high yield).
- Isolation: To ensure true-to-type seeds, prevent cross-pollination. This can be challenging for open-pollinated crops that readily cross (e.g., squash, corn). For beginners, focus on self-pollinating plants like beans, peas, lettuce, and tomatoes.
- Processing:
- Dry Seeds (Beans, Peas, Lettuce, Grains): Allow pods/seed heads to dry completely on the plant. Harvest, shell, and clean the seeds, removing chaff.
- Wet Seeds (Tomatoes, Cucumbers, Squash): For tomatoes, ferment the seeds in water for a few days to remove the gel coating and inhibit disease. For cucumbers/squash, scrape out seeds, wash thoroughly, and dry.
- Drying: Spread seeds thinly on screens or paper plates in a cool, dry, well-ventilated area for 1-4 weeks. Ensure they are bone-dry before storage. I aim for less than 8% moisture content.
- Storage: Store seeds in airtight containers (glass jars with desiccant packets work well) in a cool, dark, dry place (ideally 40-50°F and 30-40% humidity). Label clearly with variety and date. Properly stored seeds can remain viable for 3-10 years or more.
Step 8: Season Extension & Winterizing
Extend your harvest and protect your garden for the off-season to truly maximize your self sufficient garden from scratch.
- Cold Frames: Simple structures with a transparent top (glass, polycarbonate, or old windows) that sit over garden beds. They trap solar heat, allowing you to grow cold-hardy crops (lettuce, spinach, kale, radishes) well into winter or start seeds earlier in spring. A basic cold frame can be built from 2×6 lumber and a sheet of polycarbonate for under $100.
- Hoop Houses/Low Tunnels: Larger structures made from flexible hoops (PVC pipe or EMT conduit) covered with greenhouse plastic. These provide more space and greater temperature moderation. A 10×20 ft DIY low tunnel kit can cost $200-$500, while a larger, more robust hoop house kit might be $1,000-$3,000. I use a 6×12 ft low tunnel made from 1/2-inch PVC hoops and 6mil greenhouse plastic, which extends my lettuce and spinach harvest by at least
Deciding between raised beds and in-ground beds depends on your soil, budget, and physical capabilities.
- In-Ground Beds: If you have excellent native soil and good drainage, in-ground beds are the most economical. Double-digging (loosening soil two shovel depths) can significantly improve drainage and aeration. For my main garden, I primarily use in-ground beds, but I focus on building up the soil over time with consistent compost additions and cover cropping. I aim for beds that are no wider than 3-4 feet so I can reach the center without stepping on the soil, compacting it.
- Raised Beds: Raised beds offer numerous advantages, especially for poor soil, heavy clay, or rocky areas. They provide better drainage, warm up faster in spring, reduce compaction, and make weeding and harvesting easier on your back.
- Material Options:
- Untreated Cedar: Naturally rot-resistant and chemical-free. A 4×8 ft bed, 12 inches deep, typically requires three 2x12x8 ft cedar boards, costing around $50-$60 per board (total ~$150-$180) plus corner brackets or screws. My first raised beds were cedar and are still going strong after 7 years.
- Galvanized Steel: Durable, long-lasting, and aesthetically pleasing. Brands like Vego Garden offer modular kits. A Vego Garden 17″ Tall 8-in-1 Metal Raised Garden Bed (can be configured to 4×8 ft) costs approximately $250-$300.
- Concrete Blocks/Stones: Very durable but can leach minerals (though generally safe once weathered) and can be expensive.
- Recycled Materials: Pallets (check for chemical treatment stamps like « HT » for heat-treated), old tires (controversial due to potential chemical leaching).
- Filling Raised Beds: Don’t just fill with topsoil. Use a « Hugelkultur » approach (logs, branches, leaves, then compost, then topsoil) or a mixture of 60% good quality topsoil, 30% compost, and 10% perlite or vermiculite for drainage. A 4x8x1 ft raised bed requires about 32 cubic feet (or ~1.2 cubic yards) of soil mix, which can cost $100-$200 depending on your source.
- Material Options:
Step 4: Water Management & Irrigation
Efficient water management is critical for a self sufficient garden from scratch, especially in off-grid living where water resources might be limited.
- Rainwater Harvesting: This is my primary source of irrigation water. A 55-gallon rain barrel (e.g., EarthMark Rain Barrel, ~$120-$150) connected to a downspout can collect significant water. For larger needs, I use two 275-gallon IBC totes (Intermediate Bulk Containers, often available used for $100-$200 each from food-grade sources) connected in series. A 1,000 sq ft roof can collect approximately 620 gallons of water for every inch of rainfall. My 1,500 sq ft roof provides ample water for my 600 sq ft garden through multiple barrels and totes.
- Drip Irrigation: This is by far the most water-efficient method, delivering water directly to the plant’s root zone, minimizing evaporation and weed growth.
- Components: A typical drip system includes a pressure regulator (e.g., Rain Bird PRV-10, ~$15), a filter (Rain Bird RBY filter, ~$20), main tubing (1/2-inch poly tubing, 100ft ~$25), smaller feeder lines (1/4-inch tubing), and emitters (0.5 GPH or 1 GPH per plant).
- Kits: For beginners, a starter kit like the Rain Bird Drip Irrigation Garden Kit (model DDI-KIT-1P, ~$40-$60) is excellent for a small garden. For larger setups, I use Netafim Techline CV Drip Line (500ft roll, ~$150-$200), which has pressure-compensating emitters built-in, ensuring even watering across long runs.
- Automation: For true self-sufficiency, consider a battery-powered timer (e.g., Orbit B-Hyve Bluetooth Hose Faucet Timer, ~$50) or a solar-powered timer connected to a small 12V pump.
- Solar-Powered Pumps: For lifting water from a well, pond, or large storage tank to your garden, a solar pump is a game-changer. For a smaller drip system, a Shurflo 2088-594-152 Diaphragm Pump (12V, 3.5 GPM, ~$180) can be powered by a single 100W solar panel (e.g., Renogy 100W Monocrystalline Solar Panel, ~$100) and a small 12V battery (e.g., a 50Ah LiFePO4 battery like the Battle Born 50Ah, ~$450). For larger operations or deeper wells, more robust systems are needed. If you’re looking to build out a comprehensive off-grid power system to support your garden’s water needs, or indeed your entire homestead, you might want to explore resources like the Power Grid Generator complete system guide to understand the full scope of what’s possible in terms of energy independence.
Step 5: Seed Selection & Planting
The choice of seeds is crucial for a truly self sufficient garden from scratch.
- Choose Heirloom & Open-Pollinated Seeds: These varieties produce seeds that will grow true to type, meaning you can save seeds from your harvest year after year. F1 hybrids, while often vigorous, will not produce consistent offspring from saved seeds. Reputable seed companies include Baker Creek Heirloom Seeds, High Mowing Organic Seeds, and Seed Savers Exchange. Start with common, reliable varieties like ‘Black Krim’ tomatoes, ‘Provider’ bush beans, ‘Waltham Butternut’ squash, and ‘Black Seeded Simpson’ lettuce.
- Start Seeds Indoors (Optional but Recommended): For longer growing seasons or specific crops, starting seeds indoors gives you a head start. Use seed-starting mix (e.g., Espoma Organic Seed Starter Mix, ~$10 for 16qt bag) in seed trays (Jiffy Professional Greenhouse 72-cell kit, ~$15). Provide adequate light with LED grow lights (Barrina T5 2ft 4-pack LED Grow Lights, 20W each, ~$50) for 14-16 hours a day, positioned 2-4 inches above seedlings. Maintain consistent temperatures (65-75°F for most).
- Direct Sowing vs. Transplanting: Some crops (carrots, radishes, beans, corn) prefer direct sowing into the garden bed. Others (tomatoes, peppers, broccoli, kale) benefit from being started indoors and transplanted. Follow seed packet instructions for planting depths (e.g., lettuce seeds are often surface-sown or planted 1/8 inch deep, while beans are 1 inch deep) and spacing.
- Companion Planting: Strategically plant different species together to enhance growth, deter pests, and attract beneficial insects. For example, planting marigolds near tomatoes can deter nematodes, and basil improves tomato flavor. Nasturtiums can act as a trap crop for aphids.
- Succession Planting: For a continuous harvest, plant small batches of quick-growing crops (lettuce, radishes, cilantro) every 2-3 weeks. As one crop finishes, another is ready to take its place.
Step 6: Pest & Disease Management (Organic)
Maintaining a self sufficient garden from scratch means embracing organic pest and disease control.
- Integrated Pest Management (IPM): This holistic approach combines several strategies.
- Observation: Regularly inspect your plants for early signs of pests or disease. Catching issues early is key.
- Physical Barriers: Use row covers (e.g., Agribon AG-19 floating row cover, 10×20 ft, ~$20) to protect young plants from insect pests like cabbage worms and squash bugs. Install fences (e.g., 2×4 welded wire mesh, 4 ft tall, 50 ft roll ~$70) to keep out deer, rabbits, and other larger animals.
- Hand-Picking: For larger pests like tomato hornworms or squash bugs, simply pick them off and drop them into a bucket of soapy water.
- Companion Planting: As mentioned, certain plants repel pests. Marigolds, garlic, and onions are excellent deterrents.
- Attract Beneficial Insects: Plant flowers like dill, fennel, cosmos, and sweet alyssum to attract ladybugs, lacewings, and parasitic wasps, which prey on common garden pests.
- Organic Sprays & Treatments:
- Neem Oil: An excellent broad-spectrum organic insecticide and fungicide. Bonide Neem Oil Concentrate (16oz, ~$20) can be mixed at a rate of 1-2 tbsp per gallon of water and sprayed on affected plants.
- Insecticidal Soap: Effective against soft-bodied insects like aphids, whiteflies, and spider mites. Garden Safe Insecticidal Soap (24oz ready-to-use, ~$10).
- Bacillus thuringiensis (Bt): A naturally occurring soil bacterium that targets caterpillars and worms. Monterey BT Worm & Caterpillar Killer (16oz, ~$18) is highly effective and safe for beneficial insects.
- Copper or Sulfur Sprays: For fungal diseases like powdery mildew or blight, organic copper (e.g., Bonide Copper Fungicide, ~$15 for 1lb) or sulfur (e.g., Safer Brand Garden Fungicide, ~$10 for 16oz) can be used as a last resort.
Step 7: Harvesting & Seed Saving
The culmination of your efforts is the harvest, and seed saving closes the loop on self-sufficiency.
- Harvesting Techniques:
- Timing: Harvest vegetables at their peak ripeness for best flavor and nutritional value. For example, green beans should snap cleanly, cucumbers should be firm, and tomatoes should be fully colored.
- Frequency: Many crops, like zucchini, cucumbers, and bush beans, produce more if harvested frequently. Pick daily or every other day.
- Tools: Use clean, sharp pruners (e.g., Corona ClassicCUT Bypass Pruner BP 3180, ~$30) or a sharp knife for clean cuts, minimizing damage to the plant.
- Seed Saving: This is where the « self-sufficient » aspect truly shines.
- Selection: Only save seeds from your healthiest, most vigorous plants that show desired traits (disease resistance, good flavor, high yield).
- Isolation: To ensure true-to-type seeds, prevent cross-pollination. This can be challenging for open-pollinated crops that readily cross (e.g., squash, corn). For beginners, focus on self-pollinating plants like beans, peas, lettuce, and tomatoes.
- Processing:
- Dry Seeds (Beans, Peas, Lettuce, Grains): Allow pods/seed heads to dry completely on the plant. Harvest, shell, and clean the seeds, removing chaff.
- Wet Seeds (Tomatoes, Cucumbers, Squash): For tomatoes, ferment the seeds in water for a few days to remove the gel coating and inhibit disease. For cucumbers/squash, scrape out seeds, wash thoroughly, and dry.
- Drying: Spread seeds thinly on screens or paper plates in a cool, dry, well-ventilated area for 1-4 weeks. Ensure they are bone-dry before storage. I aim for less than 8% moisture content.
- Storage: Store seeds in airtight containers (glass jars with desiccant packets work well) in a cool, dark, dry place (ideally 40-50°F and 30-40% humidity). Label clearly with variety and date. Properly stored seeds can remain viable for 3-10 years or more.
Step 8: Season Extension & Winterizing
Extend your harvest and protect your garden for the off-season to truly maximize your self sufficient garden from scratch.
- Cold Frames: Simple structures with a transparent top (glass, polycarbonate, or old windows) that sit over garden beds. They trap solar heat, allowing you to grow cold-hardy crops (lettuce, spinach, kale, radishes) well into winter or start seeds earlier in spring. A basic cold frame can be built from 2×6 lumber and a sheet of polycarbonate for under $100.
- Hoop Houses/Low Tunnels: Larger structures made from flexible hoops (PVC pipe or EMT conduit) covered with greenhouse plastic. These provide more space and greater temperature moderation. A 10×20 ft DIY low tunnel kit can cost $200-$500, while a larger, more robust hoop house kit might be $1,000-$3,000. I use a 6×12 ft low tunnel made from 1/2-inch PVC hoops and 6mil greenhouse plastic, which extends my lettuce and spinach harvest by at least
Healthy soil is the bedrock of a productive, self-sufficient garden. You can’t guess what your soil needs; you have to test it.
- Perform a Soil Test: A professional soil test will give you precise data on your soil’s pH, nutrient levels (N-P-K), and organic matter content. I recommend sending a sample to your local agricultural extension office; it typically costs $20-$50 and provides detailed recommendations. Alternatively, for a quick homeowner check, a Rapitest Soil Test Kit (40-test kit, model 1663, ~$20 on Amazon) provides a good baseline for pH, Nitrogen, Phosphorus, and Potash. Aim for a pH between 6.0 and 7.0 for most vegetables.
- Amend for pH Imbalance: If your soil is too acidic (below 6.0), add agricultural lime (dolomitic lime adds magnesium, calcitic lime adds calcium). Apply 5-10 lbs per 100 sq ft for a moderate adjustment. If it’s too alkaline (above 7.0), add elemental sulfur (e.g., Espoma Soil Acidifier, ~$15 for 6.75 lbs) or generous amounts of organic matter like peat moss or pine needles.
- Build Organic Matter: This is the single most important step for long-term soil health. Organic matter improves soil structure, water retention, drainage, and nutrient availability. Incorporate 2-4 inches of high-quality compost into your top 6-12 inches of soil annually. I make my own compost from kitchen scraps, garden waste, and shredded leaves, but you can purchase it. Local nurseries often sell bulk compost for $30-$50 per cubic yard. Aged manure (from chickens, cows, or horses – ensure it’s well-rotted to avoid burning plants) is also excellent.
- Address Nutrient Deficiencies: Based on your soil test, add specific organic amendments. If Nitrogen (N) is low, add blood meal (12-0-0, ~$20 for 3 lbs) or feather meal. For Phosphorus (P), use bone meal (3-15-0, ~$15 for 3 lbs) or rock phosphate. For Potassium (K), greensand (0-0-2.5, ~$25 for 5 lbs) or kelp meal are good choices. I rely heavily on Espoma Organic Garden-tone (5-3-3, ~$25 for an 8lb bag) as a balanced, all-purpose organic fertilizer during planting.
Step 3: Garden Bed Preparation
Deciding between raised beds and in-ground beds depends on your soil, budget, and physical capabilities.
- In-Ground Beds: If you have excellent native soil and good drainage, in-ground beds are the most economical. Double-digging (loosening soil two shovel depths) can significantly improve drainage and aeration. For my main garden, I primarily use in-ground beds, but I focus on building up the soil over time with consistent compost additions and cover cropping. I aim for beds that are no wider than 3-4 feet so I can reach the center without stepping on the soil, compacting it.
- Raised Beds: Raised beds offer numerous advantages, especially for poor soil, heavy clay, or rocky areas. They provide better drainage, warm up faster in spring, reduce compaction, and make weeding and harvesting easier on your back.
- Material Options:
- Untreated Cedar: Naturally rot-resistant and chemical-free. A 4×8 ft bed, 12 inches deep, typically requires three 2x12x8 ft cedar boards, costing around $50-$60 per board (total ~$150-$180) plus corner brackets or screws. My first raised beds were cedar and are still going strong after 7 years.
- Galvanized Steel: Durable, long-lasting, and aesthetically pleasing. Brands like Vego Garden offer modular kits. A Vego Garden 17″ Tall 8-in-1 Metal Raised Garden Bed (can be configured to 4×8 ft) costs approximately $250-$300.
- Concrete Blocks/Stones: Very durable but can leach minerals (though generally safe once weathered) and can be expensive.
- Recycled Materials: Pallets (check for chemical treatment stamps like « HT » for heat-treated), old tires (controversial due to potential chemical leaching).
- Filling Raised Beds: Don’t just fill with topsoil. Use a « Hugelkultur » approach (logs, branches, leaves, then compost, then topsoil) or a mixture of 60% good quality topsoil, 30% compost, and 10% perlite or vermiculite for drainage. A 4x8x1 ft raised bed requires about 32 cubic feet (or ~1.2 cubic yards) of soil mix, which can cost $100-$200 depending on your source.
- Material Options:
Step 4: Water Management & Irrigation
Efficient water management is critical for a self sufficient garden from scratch, especially in off-grid living where water resources might be limited.
- Rainwater Harvesting: This is my primary source of irrigation water. A 55-gallon rain barrel (e.g., EarthMark Rain Barrel, ~$120-$150) connected to a downspout can collect significant water. For larger needs, I use two 275-gallon IBC totes (Intermediate Bulk Containers, often available used for $100-$200 each from food-grade sources) connected in series. A 1,000 sq ft roof can collect approximately 620 gallons of water for every inch of rainfall. My 1,500 sq ft roof provides ample water for my 600 sq ft garden through multiple barrels and totes.
- Drip Irrigation: This is by far the most water-efficient method, delivering water directly to the plant’s root zone, minimizing evaporation and weed growth.
- Components: A typical drip system includes a pressure regulator (e.g., Rain Bird PRV-10, ~$15), a filter (Rain Bird RBY filter, ~$20), main tubing (1/2-inch poly tubing, 100ft ~$25), smaller feeder lines (1/4-inch tubing), and emitters (0.5 GPH or 1 GPH per plant).
- Kits: For beginners, a starter kit like the Rain Bird Drip Irrigation Garden Kit (model DDI-KIT-1P, ~$40-$60) is excellent for a small garden. For larger setups, I use Netafim Techline CV Drip Line (500ft roll, ~$150-$200), which has pressure-compensating emitters built-in, ensuring even watering across long runs.
- Automation: For true self-sufficiency, consider a battery-powered timer (e.g., Orbit B-Hyve Bluetooth Hose Faucet Timer, ~$50) or a solar-powered timer connected to a small 12V pump.
- Solar-Powered Pumps: For lifting water from a well, pond, or large storage tank to your garden, a solar pump is a game-changer. For a smaller drip system, a Shurflo 2088-594-152 Diaphragm Pump (12V, 3.5 GPM, ~$180) can be powered by a single 100W solar panel (e.g., Renogy 100W Monocrystalline Solar Panel, ~$100) and a small 12V battery (e.g., a 50Ah LiFePO4 battery like the Battle Born 50Ah, ~$450). For larger operations or deeper wells, more robust systems are needed. If you’re looking to build out a comprehensive off-grid power system to support your garden’s water needs, or indeed your entire homestead, you might want to explore resources like the Power Grid Generator complete system guide to understand the full scope of what’s possible in terms of energy independence.
Step 5: Seed Selection & Planting
The choice of seeds is crucial for a truly self sufficient garden from scratch.
- Choose Heirloom & Open-Pollinated Seeds: These varieties produce seeds that will grow true to type, meaning you can save seeds from your harvest year after year. F1 hybrids, while often vigorous, will not produce consistent offspring from saved seeds. Reputable seed companies include Baker Creek Heirloom Seeds, High Mowing Organic Seeds, and Seed Savers Exchange. Start with common, reliable varieties like ‘Black Krim’ tomatoes, ‘Provider’ bush beans, ‘Waltham Butternut’ squash, and ‘Black Seeded Simpson’ lettuce.
- Start Seeds Indoors (Optional but Recommended): For longer growing seasons or specific crops, starting seeds indoors gives you a head start. Use seed-starting mix (e.g., Espoma Organic Seed Starter Mix, ~$10 for 16qt bag) in seed trays (Jiffy Professional Greenhouse 72-cell kit, ~$15). Provide adequate light with LED grow lights (Barrina T5 2ft 4-pack LED Grow Lights, 20W each, ~$50) for 14-16 hours a day, positioned 2-4 inches above seedlings. Maintain consistent temperatures (65-75°F for most).
- Direct Sowing vs. Transplanting: Some crops (carrots, radishes, beans, corn) prefer direct sowing into the garden bed. Others (tomatoes, peppers, broccoli, kale) benefit from being started indoors and transplanted. Follow seed packet instructions for planting depths (e.g., lettuce seeds are often surface-sown or planted 1/8 inch deep, while beans are 1 inch deep) and spacing.
- Companion Planting: Strategically plant different species together to enhance growth, deter pests, and attract beneficial insects. For example, planting marigolds near tomatoes can deter nematodes, and basil improves tomato flavor. Nasturtiums can act as a trap crop for aphids.
- Succession Planting: For a continuous harvest, plant small batches of quick-growing crops (lettuce, radishes, cilantro) every 2-3 weeks. As one crop finishes, another is ready to take its place.
Step 6: Pest & Disease Management (Organic)
Maintaining a self sufficient garden from scratch means embracing organic pest and disease control.
- Integrated Pest Management (IPM): This holistic approach combines several strategies.
- Observation: Regularly inspect your plants for early signs of pests or disease. Catching issues early is key.
- Physical Barriers: Use row covers (e.g., Agribon AG-19 floating row cover, 10×20 ft, ~$20) to protect young plants from insect pests like cabbage worms and squash bugs. Install fences (e.g., 2×4 welded wire mesh, 4 ft tall, 50 ft roll ~$70) to keep out deer, rabbits, and other larger animals.
- Hand-Picking: For larger pests like tomato hornworms or squash bugs, simply pick them off and drop them into a bucket of soapy water.
- Companion Planting: As mentioned, certain plants repel pests. Marigolds, garlic, and onions are excellent deterrents.
- Attract Beneficial Insects: Plant flowers like dill, fennel, cosmos, and sweet alyssum to attract ladybugs, lacewings, and parasitic wasps, which prey on common garden pests.
- Organic Sprays & Treatments:
- Neem Oil: An excellent broad-spectrum organic insecticide and fungicide. Bonide Neem Oil Concentrate (16oz, ~$20) can be mixed at a rate of 1-2 tbsp per gallon of water and sprayed on affected plants.
- Insecticidal Soap: Effective against soft-bodied insects like aphids, whiteflies, and spider mites. Garden Safe Insecticidal Soap (24oz ready-to-use, ~$10).
- Bacillus thuringiensis (Bt): A naturally occurring soil bacterium that targets caterpillars and worms. Monterey BT Worm & Caterpillar Killer (16oz, ~$18) is highly effective and safe for beneficial insects.
- Copper or Sulfur Sprays: For fungal diseases like powdery mildew or blight, organic copper (e.g., Bonide Copper Fungicide, ~$15 for 1lb) or sulfur (e.g., Safer Brand Garden Fungicide, ~$10 for 16oz) can be used as a last resort.
Step 7: Harvesting & Seed Saving
The culmination of your efforts is the harvest, and seed saving closes the loop on self-sufficiency.
- Harvesting Techniques:
- Timing: Harvest vegetables at their peak ripeness for best flavor and nutritional value. For example, green beans should snap cleanly, cucumbers should be firm, and tomatoes should be fully colored.
- Frequency: Many crops, like zucchini, cucumbers, and bush beans, produce more if harvested frequently. Pick daily or every other day.
- Tools: Use clean, sharp pruners (e.g., Corona ClassicCUT Bypass Pruner BP 3180, ~$30) or a sharp knife for clean cuts, minimizing damage to the plant.
- Seed Saving: This is where the « self-sufficient » aspect truly shines.
- Selection: Only save seeds from your healthiest, most vigorous plants that show desired traits (disease resistance, good flavor, high yield).
- Isolation: To ensure true-to-type seeds, prevent cross-pollination. This can be challenging for open-pollinated crops that readily cross (e.g., squash, corn). For beginners, focus on self-pollinating plants like beans, peas, lettuce, and tomatoes.
- Processing:
- Dry Seeds (Beans, Peas, Lettuce, Grains): Allow pods/seed heads to dry completely on the plant. Harvest, shell, and clean the seeds, removing chaff.
- Wet Seeds (Tomatoes, Cucumbers, Squash): For tomatoes, ferment the seeds in water for a few days to remove the gel coating and inhibit disease. For cucumbers/squash, scrape out seeds, wash thoroughly, and dry.
- Drying: Spread seeds thinly on screens or paper plates in a cool, dry, well-ventilated area for 1-4 weeks. Ensure they are bone-dry before storage. I aim for less than 8% moisture content.
- Storage: Store seeds in airtight containers (glass jars with desiccant packets work well) in a cool, dark, dry place (ideally 40-50°F and 30-40% humidity). Label clearly with variety and date. Properly stored seeds can remain viable for 3-10 years or more.
Step 8: Season Extension & Winterizing
Extend your harvest and protect your garden for the off-season to truly maximize your self sufficient garden from scratch.
- Cold Frames: Simple structures with a transparent top (glass, polycarbonate, or old windows) that sit over garden beds. They trap solar heat, allowing you to grow cold-hardy crops (lettuce, spinach, kale, radishes) well into winter or start seeds earlier in spring. A basic cold frame can be built from 2×6 lumber and a sheet of polycarbonate for under $100.
- Hoop Houses/Low Tunnels: Larger structures made from flexible hoops (PVC pipe or EMT conduit) covered with greenhouse plastic. These provide more space and greater temperature moderation. A 10×20 ft DIY low tunnel kit can cost $200-$500, while a larger, more robust hoop house kit might be $1,000-$3,000. I use a 6×12 ft low tunnel made from 1/2-inch PVC hoops and 6mil greenhouse plastic, which extends my lettuce and spinach harvest by at least
- Integrated Pest Management (IPM): This holistic approach combines several strategies.
- Integrated Pest Management (IPM): This holistic approach combines several strategies.
- Integrated Pest Management (IPM): This holistic approach combines several strategies.
Step 7: Harvesting & Seed Saving
The culmination of your efforts is the harvest, and seed saving closes the loop on self-sufficiency.
- Harvesting Techniques:
- Timing: Harvest vegetables at their peak ripeness for best flavor and nutritional value. For example, green beans should snap cleanly, cucumbers should be firm, and tomatoes should be fully colored.
- Frequency: Many crops, like zucchini, cucumbers, and bush beans, produce more if harvested frequently. Pick daily or every other day.
- Tools: Use clean, sharp pruners (e.g., Corona ClassicCUT Bypass Pruner BP 3180, ~$30) or a sharp knife for clean cuts, minimizing damage to the plant.
- Seed Saving: This is where the « self-sufficient » aspect truly shines.
- Selection: Only save seeds from your healthiest, most vigorous plants that show desired traits (disease resistance, good flavor, high yield).
- Isolation: To ensure true-to-type seeds, prevent cross-pollination. This can be challenging for open-pollinated crops that readily cross (e.g., squash, corn). For beginners, focus on self-pollinating plants like beans, peas, lettuce, and tomatoes.
- Processing:
- Dry Seeds (Beans, Peas, Lettuce, Grains): Allow pods/seed heads to dry completely on the plant. Harvest, shell, and clean the seeds, removing chaff.
- Wet Seeds (Tomatoes, Cucumbers, Squash): For tomatoes, ferment the seeds in water for a few days to remove the gel coating and inhibit disease. For cucumbers/squash, scrape out seeds, wash thoroughly, and dry.
- Drying: Spread seeds thinly on screens or paper plates in a cool, dry, well-ventilated area for 1-4 weeks. Ensure they are bone-dry before storage. I aim for less than 8% moisture content.
- Storage: Store seeds in airtight containers (glass jars with desiccant packets work well) in a cool, dark, dry place (ideally 40-50°F and 30-40% humidity). Label clearly with variety and date. Properly stored seeds can remain viable for 3-10 years or more.
Step 8: Season Extension & Winterizing
Extend your harvest and protect your garden for the off-season to truly maximize your self sufficient garden from scratch.
- Cold Frames: Simple structures with a transparent top (glass, polycarbonate, or old windows) that sit over garden beds. They trap solar heat, allowing you to grow cold-hardy crops (lettuce, spinach, kale, radishes) well into winter or start seeds earlier in spring. A basic cold frame can be built from 2×6 lumber and a sheet of polycarbonate for under $100.
- Hoop Houses/Low Tunnels: Larger structures made from flexible hoops (PVC pipe or EMT conduit) covered with greenhouse plastic. These provide more space and greater temperature moderation. A 10×20 ft DIY low tunnel kit can cost $200-$500, while a larger, more robust hoop house kit might be $1,000-$3,000. I use a 6×12 ft low tunnel made from 1/2-inch PVC hoops and 6mil greenhouse plastic, which extends my lettuce and spinach harvest by at least
- Integrated Pest Management (IPM): This holistic approach combines several strategies.
- Observation: Regularly inspect your plants for early signs of pests or disease. Catching issues early is key.
- Physical Barriers: Use row covers (e.g., Agribon AG-19 floating row cover, 10×20 ft, ~$20) to protect young plants from insect pests like cabbage worms and squash bugs. Install fences (e.g., 2×4 welded wire mesh, 4 ft tall, 50 ft roll ~$70) to keep out deer, rabbits, and other larger animals.
- Hand-Picking: For larger pests like tomato hornworms or squash bugs, simply pick them off and drop them into a bucket of soapy water.
- Companion Planting: As mentioned, certain plants repel pests. Marigolds, garlic, and onions are excellent deterrents.
- Attract Beneficial Insects: Plant flowers like dill, fennel, cosmos, and sweet alyssum to attract ladybugs, lacewings, and parasitic wasps, which prey on common garden pests.
- Organic Sprays & Treatments:
- Neem Oil: An excellent broad-spectrum organic insecticide and fungicide. Bonide Neem Oil Concentrate (16oz, ~$20) can be mixed at a rate of 1-2 tbsp per gallon of water and sprayed on affected plants.
- Insecticidal Soap: Effective against soft-bodied insects like aphids, whiteflies, and spider mites. Garden Safe Insecticidal Soap (24oz ready-to-use, ~$10).
- Bacillus thuringiensis (Bt): A naturally occurring soil bacterium that targets caterpillars and worms. Monterey BT Worm & Caterpillar Killer (16oz, ~$18) is highly effective and safe for beneficial insects.
- Copper or Sulfur Sprays: For fungal diseases like powdery mildew or blight, organic copper (e.g., Bonide Copper Fungicide, ~$15 for 1lb) or sulfur (e.g., Safer Brand Garden Fungicide, ~$10 for 16oz) can be used as a last resort.
Step 7: Harvesting & Seed Saving
The culmination of your efforts is the harvest, and seed saving closes the loop on self-sufficiency.
- Harvesting Techniques:
- Timing: Harvest vegetables at their peak ripeness for best flavor and nutritional value. For example, green beans should snap cleanly, cucumbers should be firm, and tomatoes should be fully colored.
- Frequency: Many crops, like zucchini, cucumbers, and bush beans, produce more if harvested frequently. Pick daily or every other day.
- Tools: Use clean, sharp pruners (e.g., Corona ClassicCUT Bypass Pruner BP 3180, ~$30) or a sharp knife for clean cuts, minimizing damage to the plant.
- Seed Saving: This is where the « self-sufficient » aspect truly shines.
- Selection: Only save seeds from your healthiest, most vigorous plants that show desired traits (disease resistance, good flavor, high yield).
- Isolation: To ensure true-to-type seeds, prevent cross-pollination. This can be challenging for open-pollinated crops that readily cross (e.g., squash, corn). For beginners, focus on self-pollinating plants like beans, peas, lettuce, and tomatoes.
- Processing:
- Dry Seeds (Beans, Peas, Lettuce, Grains): Allow pods/seed heads to dry completely on the plant. Harvest, shell, and clean the seeds, removing chaff.
- Wet Seeds (Tomatoes, Cucumbers, Squash): For tomatoes, ferment the seeds in water for a few days to remove the gel coating and inhibit disease. For cucumbers/squash, scrape out seeds, wash thoroughly, and dry.
- Drying: Spread seeds thinly on screens or paper plates in a cool, dry, well-ventilated area for 1-4 weeks. Ensure they are bone-dry before storage. I aim for less than 8% moisture content.
- Storage: Store seeds in airtight containers (glass jars with desiccant packets work well) in a cool, dark, dry place (ideally 40-50°F and 30-40% humidity). Label clearly with variety and date. Properly stored seeds can remain viable for 3-10 years or more.
Step 8: Season Extension & Winterizing
Extend your harvest and protect your garden for the off-season to truly maximize your self sufficient garden from scratch.
- Cold Frames: Simple structures with a transparent top (glass, polycarbonate, or old windows) that sit over garden beds. They trap solar heat, allowing you to grow cold-hardy crops (lettuce, spinach, kale, radishes) well into winter or start seeds earlier in spring. A basic cold frame can be built from 2×6 lumber and a sheet of polycarbonate for under $100.
- Hoop Houses/Low Tunnels: Larger structures made from flexible hoops (PVC pipe or EMT conduit) covered with greenhouse plastic. These provide more space and greater temperature moderation. A 10×20 ft DIY low tunnel kit can cost $200-$500, while a larger, more robust hoop house kit might be $1,000-$3,000. I use a 6×12 ft low tunnel made from 1/2-inch PVC hoops and 6mil greenhouse plastic, which extends my lettuce and spinach harvest by at least
Maintaining a self sufficient garden from scratch means embracing organic pest and disease control.
- Integrated Pest Management (IPM): This holistic approach combines several strategies.
- Observation: Regularly inspect your plants for early signs of pests or disease. Catching issues early is key.
- Physical Barriers: Use row covers (e.g., Agribon AG-19 floating row cover, 10×20 ft, ~$20) to protect young plants from insect pests like cabbage worms and squash bugs. Install fences (e.g., 2×4 welded wire mesh, 4 ft tall, 50 ft roll ~$70) to keep out deer, rabbits, and other larger animals.
- Hand-Picking: For larger pests like tomato hornworms or squash bugs, simply pick them off and drop them into a bucket of soapy water.
- Companion Planting: As mentioned, certain plants repel pests. Marigolds, garlic, and onions are excellent deterrents.
- Attract Beneficial Insects: Plant flowers like dill, fennel, cosmos, and sweet alyssum to attract ladybugs, lacewings, and parasitic wasps, which prey on common garden pests.
- Organic Sprays & Treatments:
- Neem Oil: An excellent broad-spectrum organic insecticide and fungicide. Bonide Neem Oil Concentrate (16oz, ~$20) can be mixed at a rate of 1-2 tbsp per gallon of water and sprayed on affected plants.
- Insecticidal Soap: Effective against soft-bodied insects like aphids, whiteflies, and spider mites. Garden Safe Insecticidal Soap (24oz ready-to-use, ~$10).
- Bacillus thuringiensis (Bt): A naturally occurring soil bacterium that targets caterpillars and worms. Monterey BT Worm & Caterpillar Killer (16oz, ~$18) is highly effective and safe for beneficial insects.
- Copper or Sulfur Sprays: For fungal diseases like powdery mildew or blight, organic copper (e.g., Bonide Copper Fungicide, ~$15 for 1lb) or sulfur (e.g., Safer Brand Garden Fungicide, ~$10 for 16oz) can be used as a last resort.
Step 7: Harvesting & Seed Saving
The culmination of your efforts is the harvest, and seed saving closes the loop on self-sufficiency.
- Harvesting Techniques:
- Timing: Harvest vegetables at their peak ripeness for best flavor and nutritional value. For example, green beans should snap cleanly, cucumbers should be firm, and tomatoes should be fully colored.
- Frequency: Many crops, like zucchini, cucumbers, and bush beans, produce more if harvested frequently. Pick daily or every other day.
- Tools: Use clean, sharp pruners (e.g., Corona ClassicCUT Bypass Pruner BP 3180, ~$30) or a sharp knife for clean cuts, minimizing damage to the plant.
- Seed Saving: This is where the « self-sufficient » aspect truly shines.
- Selection: Only save seeds from your healthiest, most vigorous plants that show desired traits (disease resistance, good flavor, high yield).
- Isolation: To ensure true-to-type seeds, prevent cross-pollination. This can be challenging for open-pollinated crops that readily cross (e.g., squash, corn). For beginners, focus on self-pollinating plants like beans, peas, lettuce, and tomatoes.
- Processing:
- Dry Seeds (Beans, Peas, Lettuce, Grains): Allow pods/seed heads to dry completely on the plant. Harvest, shell, and clean the seeds, removing chaff.
- Wet Seeds (Tomatoes, Cucumbers, Squash): For tomatoes, ferment the seeds in water for a few days to remove the gel coating and inhibit disease. For cucumbers/squash, scrape out seeds, wash thoroughly, and dry.
- Drying: Spread seeds thinly on screens or paper plates in a cool, dry, well-ventilated area for 1-4 weeks. Ensure they are bone-dry before storage. I aim for less than 8% moisture content.
- Storage: Store seeds in airtight containers (glass jars with desiccant packets work well) in a cool, dark, dry place (ideally 40-50°F and 30-40% humidity). Label clearly with variety and date. Properly stored seeds can remain viable for 3-10 years or more.
Step 8: Season Extension & Winterizing
Extend your harvest and protect your garden for the off-season to truly maximize your self sufficient garden from scratch.
- Cold Frames: Simple structures with a transparent top (glass, polycarbonate, or old windows) that sit over garden beds. They trap solar heat, allowing you to grow cold-hardy crops (lettuce, spinach, kale, radishes) well into winter or start seeds earlier in spring. A basic cold frame can be built from 2×6 lumber and a sheet of polycarbonate for under $100.
- Hoop Houses/Low Tunnels: Larger structures made from flexible hoops (PVC pipe or EMT conduit) covered with greenhouse plastic. These provide more space and greater temperature moderation. A 10×20 ft DIY low tunnel kit can cost $200-$500, while a larger, more robust hoop house kit might be $1,000-$3,000. I use a 6×12 ft low tunnel made from 1/2-inch PVC hoops and 6mil greenhouse plastic, which extends my lettuce and spinach harvest by at least
Step 6: Pest & Disease Management (Organic)
Maintaining a self sufficient garden from scratch means embracing organic pest and disease control.
- Integrated Pest Management (IPM): This holistic approach combines several strategies.
- Observation: Regularly inspect your plants for early signs of pests or disease. Catching issues early is key.
- Physical Barriers: Use row covers (e.g., Agribon AG-19 floating row cover, 10×20 ft, ~$20) to protect young plants from insect pests like cabbage worms and squash bugs. Install fences (e.g., 2×4 welded wire mesh, 4 ft tall, 50 ft roll ~$70) to keep out deer, rabbits, and other larger animals.
- Hand-Picking: For larger pests like tomato hornworms or squash bugs, simply pick them off and drop them into a bucket of soapy water.
- Companion Planting: As mentioned, certain plants repel pests. Marigolds, garlic, and onions are excellent deterrents.
- Attract Beneficial Insects: Plant flowers like dill, fennel, cosmos, and sweet alyssum to attract ladybugs, lacewings, and parasitic wasps, which prey on common garden pests.
- Organic Sprays & Treatments:
- Neem Oil: An excellent broad-spectrum organic insecticide and fungicide. Bonide Neem Oil Concentrate (16oz, ~$20) can be mixed at a rate of 1-2 tbsp per gallon of water and sprayed on affected plants.
- Insecticidal Soap: Effective against soft-bodied insects like aphids, whiteflies, and spider mites. Garden Safe Insecticidal Soap (24oz ready-to-use, ~$10).
- Bacillus thuringiensis (Bt): A naturally occurring soil bacterium that targets caterpillars and worms. Monterey BT Worm & Caterpillar Killer (16oz, ~$18) is highly effective and safe for beneficial insects.
- Copper or Sulfur Sprays: For fungal diseases like powdery mildew or blight, organic copper (e.g., Bonide Copper Fungicide, ~$15 for 1lb) or sulfur (e.g., Safer Brand Garden Fungicide, ~$10 for 16oz) can be used as a last resort.
Step 7: Harvesting & Seed Saving
The culmination of your efforts is the harvest, and seed saving closes the loop on self-sufficiency.
- Harvesting Techniques:
- Timing: Harvest vegetables at their peak ripeness for best flavor and nutritional value. For example, green beans should snap cleanly, cucumbers should be firm, and tomatoes should be fully colored.
- Frequency: Many crops, like zucchini, cucumbers, and bush beans, produce more if harvested frequently. Pick daily or every other day.
- Tools: Use clean, sharp pruners (e.g., Corona ClassicCUT Bypass Pruner BP 3180, ~$30) or a sharp knife for clean cuts, minimizing damage to the plant.
- Seed Saving: This is where the « self-sufficient » aspect truly shines.
- Selection: Only save seeds from your healthiest, most vigorous plants that show desired traits (disease resistance, good flavor, high yield).
- Isolation: To ensure true-to-type seeds, prevent cross-pollination. This can be challenging for open-pollinated crops that readily cross (e.g., squash, corn). For beginners, focus on self-pollinating plants like beans, peas, lettuce, and tomatoes.
- Processing:
- Dry Seeds (Beans, Peas, Lettuce, Grains): Allow pods/seed heads to dry completely on the plant. Harvest, shell, and clean the seeds, removing chaff.
- Wet Seeds (Tomatoes, Cucumbers, Squash): For tomatoes, ferment the seeds in water for a few days to remove the gel coating and inhibit disease. For cucumbers/squash, scrape out seeds, wash thoroughly, and dry.
- Drying: Spread seeds thinly on screens or paper plates in a cool, dry, well-ventilated area for 1-4 weeks. Ensure they are bone-dry before storage. I aim for less than 8% moisture content.
- Storage: Store seeds in airtight containers (glass jars with desiccant packets work well) in a cool, dark, dry place (ideally 40-50°F and 30-40% humidity). Label clearly with variety and date. Properly stored seeds can remain viable for 3-10 years or more.
Step 8: Season Extension & Winterizing
Extend your harvest and protect your garden for the off-season to truly maximize your self sufficient garden from scratch.
- Cold Frames: Simple structures with a transparent top (glass, polycarbonate, or old windows) that sit over garden beds. They trap solar heat, allowing you to grow cold-hardy crops (lettuce, spinach, kale, radishes) well into winter or start seeds earlier in spring. A basic cold frame can be built from 2×6 lumber and a sheet of polycarbonate for under $100.
- Hoop Houses/Low Tunnels: Larger structures made from flexible hoops (PVC pipe or EMT conduit) covered with greenhouse plastic. These provide more space and greater temperature moderation. A 10×20 ft DIY low tunnel kit can cost $200-$500, while a larger, more robust hoop house kit might be $1,000-$3,000. I use a 6×12 ft low tunnel made from 1/2-inch PVC hoops and 6mil greenhouse plastic, which extends my lettuce and spinach harvest by at least
- Choose Heirloom & Open-Pollinated Seeds: These varieties produce seeds that will grow true to type, meaning you can save seeds from your harvest year after year. F1 hybrids, while often vigorous, will not produce consistent offspring from saved seeds. Reputable seed companies include Baker Creek Heirloom Seeds, High Mowing Organic Seeds, and Seed Savers Exchange. Start with common, reliable varieties like ‘Black Krim’ tomatoes, ‘Provider’ bush beans, ‘Waltham Butternut’ squash, and ‘Black Seeded Simpson’ lettuce.
- Start Seeds Indoors (Optional but Recommended): For longer growing seasons or specific crops, starting seeds indoors gives you a head start. Use seed-starting mix (e.g., Espoma Organic Seed Starter Mix, ~$10 for 16qt bag) in seed trays (Jiffy Professional Greenhouse 72-cell kit, ~$15). Provide adequate light with LED grow lights (Barrina T5 2ft 4-pack LED Grow Lights, 20W each, ~$50) for 14-16 hours a day, positioned 2-4 inches above seedlings. Maintain consistent temperatures (65-75°F for most).
- Direct Sowing vs. Transplanting: Some crops (carrots, radishes, beans, corn) prefer direct sowing into the garden bed. Others (tomatoes, peppers, broccoli, kale) benefit from being started indoors and transplanted. Follow seed packet instructions for planting depths (e.g., lettuce seeds are often surface-sown or planted 1/8 inch deep, while beans are 1 inch deep) and spacing.
- Companion Planting: Strategically plant different species together to enhance growth, deter pests, and attract beneficial insects. For example, planting marigolds near tomatoes can deter nematodes, and basil improves tomato flavor. Nasturtiums can act as a trap crop for aphids.
- Succession Planting: For a continuous harvest, plant small batches of quick-growing crops (lettuce, radishes, cilantro) every 2-3 weeks. As one crop finishes, another is ready to take its place.
Step 6: Pest & Disease Management (Organic)
Maintaining a self sufficient garden from scratch means embracing organic pest and disease control.
- Integrated Pest Management (IPM): This holistic approach combines several strategies.
- Observation: Regularly inspect your plants for early signs of pests or disease. Catching issues early is key.
- Physical Barriers: Use row covers (e.g., Agribon AG-19 floating row cover, 10×20 ft, ~$20) to protect young plants from insect pests like cabbage worms and squash bugs. Install fences (e.g., 2×4 welded wire mesh, 4 ft tall, 50 ft roll ~$70) to keep out deer, rabbits, and other larger animals.
- Hand-Picking: For larger pests like tomato hornworms or squash bugs, simply pick them off and drop them into a bucket of soapy water.
- Companion Planting: As mentioned, certain plants repel pests. Marigolds, garlic, and onions are excellent deterrents.
- Attract Beneficial Insects: Plant flowers like dill, fennel, cosmos, and sweet alyssum to attract ladybugs, lacewings, and parasitic wasps, which prey on common garden pests.
- Organic Sprays & Treatments:
- Neem Oil: An excellent broad-spectrum organic insecticide and fungicide. Bonide Neem Oil Concentrate (16oz, ~$20) can be mixed at a rate of 1-2 tbsp per gallon of water and sprayed on affected plants.
- Insecticidal Soap: Effective against soft-bodied insects like aphids, whiteflies, and spider mites. Garden Safe Insecticidal Soap (24oz ready-to-use, ~$10).
- Bacillus thuringiensis (Bt): A naturally occurring soil bacterium that targets caterpillars and worms. Monterey BT Worm & Caterpillar Killer (16oz, ~$18) is highly effective and safe for beneficial insects.
- Copper or Sulfur Sprays: For fungal diseases like powdery mildew or blight, organic copper (e.g., Bonide Copper Fungicide, ~$15 for 1lb) or sulfur (e.g., Safer Brand Garden Fungicide, ~$10 for 16oz) can be used as a last resort.
Step 7: Harvesting & Seed Saving
The culmination of your efforts is the harvest, and seed saving closes the loop on self-sufficiency.
- Harvesting Techniques:
- Timing: Harvest vegetables at their peak ripeness for best flavor and nutritional value. For example, green beans should snap cleanly, cucumbers should be firm, and tomatoes should be fully colored.
- Frequency: Many crops, like zucchini, cucumbers, and bush beans, produce more if harvested frequently. Pick daily or every other day.
- Tools: Use clean, sharp pruners (e.g., Corona ClassicCUT Bypass Pruner BP 3180, ~$30) or a sharp knife for clean cuts, minimizing damage to the plant.
- Seed Saving: This is where the « self-sufficient » aspect truly shines.
- Selection: Only save seeds from your healthiest, most vigorous plants that show desired traits (disease resistance, good flavor, high yield).
- Isolation: To ensure true-to-type seeds, prevent cross-pollination. This can be challenging for open-pollinated crops that readily cross (e.g., squash, corn). For beginners, focus on self-pollinating plants like beans, peas, lettuce, and tomatoes.
- Processing:
- Dry Seeds (Beans, Peas, Lettuce, Grains): Allow pods/seed heads to dry completely on the plant. Harvest, shell, and clean the seeds, removing chaff.
- Wet Seeds (Tomatoes, Cucumbers, Squash): For tomatoes, ferment the seeds in water for a few days to remove the gel coating and inhibit disease. For cucumbers/squash, scrape out seeds, wash thoroughly, and dry.
- Drying: Spread seeds thinly on screens or paper plates in a cool, dry, well-ventilated area for 1-4 weeks. Ensure they are bone-dry before storage. I aim for less than 8% moisture content.
- Storage: Store seeds in airtight containers (glass jars with desiccant packets work well) in a cool, dark, dry place (ideally 40-50°F and 30-40% humidity). Label clearly with variety and date. Properly stored seeds can remain viable for 3-10 years or more.
Step 8: Season Extension & Winterizing
Extend your harvest and protect your garden for the off-season to truly maximize your self sufficient garden from scratch.
- Cold Frames: Simple structures with a transparent top (glass, polycarbonate, or old windows) that sit over garden beds. They trap solar heat, allowing you to grow cold-hardy crops (lettuce, spinach, kale, radishes) well into winter or start seeds earlier in spring. A basic cold frame can be built from 2×6 lumber and a sheet of polycarbonate for under $100.
- Hoop Houses/Low Tunnels: Larger structures made from flexible hoops (PVC pipe or EMT conduit) covered with greenhouse plastic. These provide more space and greater temperature moderation. A 10×20 ft DIY low tunnel kit can cost $200-$500, while a larger, more robust hoop house kit might be $1,000-$3,000. I use a 6×12 ft low tunnel made from 1/2-inch PVC hoops and 6mil greenhouse plastic, which extends my lettuce and spinach harvest by at least
The choice of seeds is crucial for a truly self sufficient garden from scratch.
- Choose Heirloom & Open-Pollinated Seeds: These varieties produce seeds that will grow true to type, meaning you can save seeds from your harvest year after year. F1 hybrids, while often vigorous, will not produce consistent offspring from saved seeds. Reputable seed companies include Baker Creek Heirloom Seeds, High Mowing Organic Seeds, and Seed Savers Exchange. Start with common, reliable varieties like ‘Black Krim’ tomatoes, ‘Provider’ bush beans, ‘Waltham Butternut’ squash, and ‘Black Seeded Simpson’ lettuce.
- Start Seeds Indoors (Optional but Recommended): For longer growing seasons or specific crops, starting seeds indoors gives you a head start. Use seed-starting mix (e.g., Espoma Organic Seed Starter Mix, ~$10 for 16qt bag) in seed trays (Jiffy Professional Greenhouse 72-cell kit, ~$15). Provide adequate light with LED grow lights (Barrina T5 2ft 4-pack LED Grow Lights, 20W each, ~$50) for 14-16 hours a day, positioned 2-4 inches above seedlings. Maintain consistent temperatures (65-75°F for most).
- Direct Sowing vs. Transplanting: Some crops (carrots, radishes, beans, corn) prefer direct sowing into the garden bed. Others (tomatoes, peppers, broccoli, kale) benefit from being started indoors and transplanted. Follow seed packet instructions for planting depths (e.g., lettuce seeds are often surface-sown or planted 1/8 inch deep, while beans are 1 inch deep) and spacing.
- Companion Planting: Strategically plant different species together to enhance growth, deter pests, and attract beneficial insects. For example, planting marigolds near tomatoes can deter nematodes, and basil improves tomato flavor. Nasturtiums can act as a trap crop for aphids.
- Succession Planting: For a continuous harvest, plant small batches of quick-growing crops (lettuce, radishes, cilantro) every 2-3 weeks. As one crop finishes, another is ready to take its place.
Step 6: Pest & Disease Management (Organic)
Maintaining a self sufficient garden from scratch means embracing organic pest and disease control.
- Integrated Pest Management (IPM): This holistic approach combines several strategies.
- Observation: Regularly inspect your plants for early signs of pests or disease. Catching issues early is key.
- Physical Barriers: Use row covers (e.g., Agribon AG-19 floating row cover, 10×20 ft, ~$20) to protect young plants from insect pests like cabbage worms and squash bugs. Install fences (e.g., 2×4 welded wire mesh, 4 ft tall, 50 ft roll ~$70) to keep out deer, rabbits, and other larger animals.
- Hand-Picking: For larger pests like tomato hornworms or squash bugs, simply pick them off and drop them into a bucket of soapy water.
- Companion Planting: As mentioned, certain plants repel pests. Marigolds, garlic, and onions are excellent deterrents.
- Attract Beneficial Insects: Plant flowers like dill, fennel, cosmos, and sweet alyssum to attract ladybugs, lacewings, and parasitic wasps, which prey on common garden pests.
- Organic Sprays & Treatments:
- Neem Oil: An excellent broad-spectrum organic insecticide and fungicide. Bonide Neem Oil Concentrate (16oz, ~$20) can be mixed at a rate of 1-2 tbsp per gallon of water and sprayed on affected plants.
- Insecticidal Soap: Effective against soft-bodied insects like aphids, whiteflies, and spider mites. Garden Safe Insecticidal Soap (24oz ready-to-use, ~$10).
- Bacillus thuringiensis (Bt): A naturally occurring soil bacterium that targets caterpillars and worms. Monterey BT Worm & Caterpillar Killer (16oz, ~$18) is highly effective and safe for beneficial insects.
- Copper or Sulfur Sprays: For fungal diseases like powdery mildew or blight, organic copper (e.g., Bonide Copper Fungicide, ~$15 for 1lb) or sulfur (e.g., Safer Brand Garden Fungicide, ~$10 for 16oz) can be used as a last resort.
Step 7: Harvesting & Seed Saving
The culmination of your efforts is the harvest, and seed saving closes the loop on self-sufficiency.
- Harvesting Techniques:
- Timing: Harvest vegetables at their peak ripeness for best flavor and nutritional value. For example, green beans should snap cleanly, cucumbers should be firm, and tomatoes should be fully colored.
- Frequency: Many crops, like zucchini, cucumbers, and bush beans, produce more if harvested frequently. Pick daily or every other day.
- Tools: Use clean, sharp pruners (e.g., Corona ClassicCUT Bypass Pruner BP 3180, ~$30) or a sharp knife for clean cuts, minimizing damage to the plant.
- Seed Saving: This is where the « self-sufficient » aspect truly shines.
- Selection: Only save seeds from your healthiest, most vigorous plants that show desired traits (disease resistance, good flavor, high yield).
- Isolation: To ensure true-to-type seeds, prevent cross-pollination. This can be challenging for open-pollinated crops that readily cross (e.g., squash, corn). For beginners, focus on self-pollinating plants like beans, peas, lettuce, and tomatoes.
- Processing:
- Dry Seeds (Beans, Peas, Lettuce, Grains): Allow pods/seed heads to dry completely on the plant. Harvest, shell, and clean the seeds, removing chaff.
- Wet Seeds (Tomatoes, Cucumbers, Squash): For tomatoes, ferment the seeds in water for a few days to remove the gel coating and inhibit disease. For cucumbers/squash, scrape out seeds, wash thoroughly, and dry.
- Drying: Spread seeds thinly on screens or paper plates in a cool, dry, well-ventilated area for 1-4 weeks. Ensure they are bone-dry before storage. I aim for less than 8% moisture content.
- Storage: Store seeds in airtight containers (glass jars with desiccant packets work well) in a cool, dark, dry place (ideally 40-50°F and 30-40% humidity). Label clearly with variety and date. Properly stored seeds can remain viable for 3-10 years or more.
Step 8: Season Extension & Winterizing
Extend your harvest and protect your garden for the off-season to truly maximize your self sufficient garden from scratch.
- Cold Frames: Simple structures with a transparent top (glass, polycarbonate, or old windows) that sit over garden beds. They trap solar heat, allowing you to grow cold-hardy crops (lettuce, spinach, kale, radishes) well into winter or start seeds earlier in spring. A basic cold frame can be built from 2×6 lumber and a sheet of polycarbonate for under $100.
- Hoop Houses/Low Tunnels: Larger structures made from flexible hoops (PVC pipe or EMT conduit) covered with greenhouse plastic. These provide more space and greater temperature moderation. A 10×20 ft DIY low tunnel kit can cost $200-$500, while a larger, more robust hoop house kit might be $1,000-$3,000. I use a 6×12 ft low tunnel made from 1/2-inch PVC hoops and 6mil greenhouse plastic, which extends my lettuce and spinach harvest by at least
Step 5: Seed Selection & Planting
The choice of seeds is crucial for a truly self sufficient garden from scratch.
- Choose Heirloom & Open-Pollinated Seeds: These varieties produce seeds that will grow true to type, meaning you can save seeds from your harvest year after year. F1 hybrids, while often vigorous, will not produce consistent offspring from saved seeds. Reputable seed companies include Baker Creek Heirloom Seeds, High Mowing Organic Seeds, and Seed Savers Exchange. Start with common, reliable varieties like ‘Black Krim’ tomatoes, ‘Provider’ bush beans, ‘Waltham Butternut’ squash, and ‘Black Seeded Simpson’ lettuce.
- Start Seeds Indoors (Optional but Recommended): For longer growing seasons or specific crops, starting seeds indoors gives you a head start. Use seed-starting mix (e.g., Espoma Organic Seed Starter Mix, ~$10 for 16qt bag) in seed trays (Jiffy Professional Greenhouse 72-cell kit, ~$15). Provide adequate light with LED grow lights (Barrina T5 2ft 4-pack LED Grow Lights, 20W each, ~$50) for 14-16 hours a day, positioned 2-4 inches above seedlings. Maintain consistent temperatures (65-75°F for most).
- Direct Sowing vs. Transplanting: Some crops (carrots, radishes, beans, corn) prefer direct sowing into the garden bed. Others (tomatoes, peppers, broccoli, kale) benefit from being started indoors and transplanted. Follow seed packet instructions for planting depths (e.g., lettuce seeds are often surface-sown or planted 1/8 inch deep, while beans are 1 inch deep) and spacing.
- Companion Planting: Strategically plant different species together to enhance growth, deter pests, and attract beneficial insects. For example, planting marigolds near tomatoes can deter nematodes, and basil improves tomato flavor. Nasturtiums can act as a trap crop for aphids.
- Succession Planting: For a continuous harvest, plant small batches of quick-growing crops (lettuce, radishes, cilantro) every 2-3 weeks. As one crop finishes, another is ready to take its place.
Step 6: Pest & Disease Management (Organic)
Maintaining a self sufficient garden from scratch means embracing organic pest and disease control.
- Integrated Pest Management (IPM): This holistic approach combines several strategies.
- Observation: Regularly inspect your plants for early signs of pests or disease. Catching issues early is key.
- Physical Barriers: Use row covers (e.g., Agribon AG-19 floating row cover, 10×20 ft, ~$20) to protect young plants from insect pests like cabbage worms and squash bugs. Install fences (e.g., 2×4 welded wire mesh, 4 ft tall, 50 ft roll ~$70) to keep out deer, rabbits, and other larger animals.
- Hand-Picking: For larger pests like tomato hornworms or squash bugs, simply pick them off and drop them into a bucket of soapy water.
- Companion Planting: As mentioned, certain plants repel pests. Marigolds, garlic, and onions are excellent deterrents.
- Attract Beneficial Insects: Plant flowers like dill, fennel, cosmos, and sweet alyssum to attract ladybugs, lacewings, and parasitic wasps, which prey on common garden pests.
- Organic Sprays & Treatments:
- Neem Oil: An excellent broad-spectrum organic insecticide and fungicide. Bonide Neem Oil Concentrate (16oz, ~$20) can be mixed at a rate of 1-2 tbsp per gallon of water and sprayed on affected plants.
- Insecticidal Soap: Effective against soft-bodied insects like aphids, whiteflies, and spider mites. Garden Safe Insecticidal Soap (24oz ready-to-use, ~$10).
- Bacillus thuringiensis (Bt): A naturally occurring soil bacterium that targets caterpillars and worms. Monterey BT Worm & Caterpillar Killer (16oz, ~$18) is highly effective and safe for beneficial insects.
- Copper or Sulfur Sprays: For fungal diseases like powdery mildew or blight, organic copper (e.g., Bonide Copper Fungicide, ~$15 for 1lb) or sulfur (e.g., Safer Brand Garden Fungicide, ~$10 for 16oz) can be used as a last resort.
Step 7: Harvesting & Seed Saving
The culmination of your efforts is the harvest, and seed saving closes the loop on self-sufficiency.
- Harvesting Techniques:
- Timing: Harvest vegetables at their peak ripeness for best flavor and nutritional value. For example, green beans should snap cleanly, cucumbers should be firm, and tomatoes should be fully colored.
- Frequency: Many crops, like zucchini, cucumbers, and bush beans, produce more if harvested frequently. Pick daily or every other day.
- Tools: Use clean, sharp pruners (e.g., Corona ClassicCUT Bypass Pruner BP 3180, ~$30) or a sharp knife for clean cuts, minimizing damage to the plant.
- Seed Saving: This is where the « self-sufficient » aspect truly shines.
- Selection: Only save seeds from your healthiest, most vigorous plants that show desired traits (disease resistance, good flavor, high yield).
- Isolation: To ensure true-to-type seeds, prevent cross-pollination. This can be challenging for open-pollinated crops that readily cross (e.g., squash, corn). For beginners, focus on self-pollinating plants like beans, peas, lettuce, and tomatoes.
- Processing:
- Dry Seeds (Beans, Peas, Lettuce, Grains): Allow pods/seed heads to dry completely on the plant. Harvest, shell, and clean the seeds, removing chaff.
- Wet Seeds (Tomatoes, Cucumbers, Squash): For tomatoes, ferment the seeds in water for a few days to remove the gel coating and inhibit disease. For cucumbers/squash, scrape out seeds, wash thoroughly, and dry.
- Drying: Spread seeds thinly on screens or paper plates in a cool, dry, well-ventilated area for 1-4 weeks. Ensure they are bone-dry before storage. I aim for less than 8% moisture content.
- Storage: Store seeds in airtight containers (glass jars with desiccant packets work well) in a cool, dark, dry place (ideally 40-50°F and 30-40% humidity). Label clearly with variety and date. Properly stored seeds can remain viable for 3-10 years or more.
Step 8: Season Extension & Winterizing
Extend your harvest and protect your garden for the off-season to truly maximize your self sufficient garden from scratch.
- Cold Frames: Simple structures with a transparent top (glass, polycarbonate, or old windows) that sit over garden beds. They trap solar heat, allowing you to grow cold-hardy crops (lettuce, spinach, kale, radishes) well into winter or start seeds earlier in spring. A basic cold frame can be built from 2×6 lumber and a sheet of polycarbonate for under $100.
- Hoop Houses/Low Tunnels: Larger structures made from flexible hoops (PVC pipe or EMT conduit) covered with greenhouse plastic. These provide more space and greater temperature moderation. A 10×20 ft DIY low tunnel kit can cost $200-$500, while a larger, more robust hoop house kit might be $1,000-$3,000. I use a 6×12 ft low tunnel made from 1/2-inch PVC hoops and 6mil greenhouse plastic, which extends my lettuce and spinach harvest by at least
- Rainwater Harvesting: This is my primary source of irrigation water. A 55-gallon rain barrel (e.g., EarthMark Rain Barrel, ~$120-$150) connected to a downspout can collect significant water. For larger needs, I use two 275-gallon IBC totes (Intermediate Bulk Containers, often available used for $100-$200 each from food-grade sources) connected in series. A 1,000 sq ft roof can collect approximately 620 gallons of water for every inch of rainfall. My 1,500 sq ft roof provides ample water for my 600 sq ft garden through multiple barrels and totes.
- Drip Irrigation: This is by far the most water-efficient method, delivering water directly to the plant’s root zone, minimizing evaporation and weed growth.
- Components: A typical drip system includes a pressure regulator (e.g., Rain Bird PRV-10, ~$15), a filter (Rain Bird RBY filter, ~$20), main tubing (1/2-inch poly tubing, 100ft ~$25), smaller feeder lines (1/4-inch tubing), and emitters (0.5 GPH or 1 GPH per plant).
- Kits: For beginners, a starter kit like the Rain Bird Drip Irrigation Garden Kit (model DDI-KIT-1P, ~$40-$60) is excellent for a small garden. For larger setups, I use Netafim Techline CV Drip Line (500ft roll, ~$150-$200), which has pressure-compensating emitters built-in, ensuring even watering across long runs.
- Automation: For true self-sufficiency, consider a battery-powered timer (e.g., Orbit B-Hyve Bluetooth Hose Faucet Timer, ~$50) or a solar-powered timer connected to a small 12V pump.
- Solar-Powered Pumps: For lifting water from a well, pond, or large storage tank to your garden, a solar pump is a game-changer. For a smaller drip system, a Shurflo 2088-594-152 Diaphragm Pump (12V, 3.5 GPM, ~$180) can be powered by a single 100W solar panel (e.g., Renogy 100W Monocrystalline Solar Panel, ~$100) and a small 12V battery (e.g., a 50Ah LiFePO4 battery like the Battle Born 50Ah, ~$450). For larger operations or deeper wells, more robust systems are needed. If you’re looking to build out a comprehensive off-grid power system to support your garden’s water needs, or indeed your entire homestead, you might want to explore resources like the Power Grid Generator complete system guide to understand the full scope of what’s possible in terms of energy independence.
Step 5: Seed Selection & Planting
The choice of seeds is crucial for a truly self sufficient garden from scratch.
- Choose Heirloom & Open-Pollinated Seeds: These varieties produce seeds that will grow true to type, meaning you can save seeds from your harvest year after year. F1 hybrids, while often vigorous, will not produce consistent offspring from saved seeds. Reputable seed companies include Baker Creek Heirloom Seeds, High Mowing Organic Seeds, and Seed Savers Exchange. Start with common, reliable varieties like ‘Black Krim’ tomatoes, ‘Provider’ bush beans, ‘Waltham Butternut’ squash, and ‘Black Seeded Simpson’ lettuce.
- Start Seeds Indoors (Optional but Recommended): For longer growing seasons or specific crops, starting seeds indoors gives you a head start. Use seed-starting mix (e.g., Espoma Organic Seed Starter Mix, ~$10 for 16qt bag) in seed trays (Jiffy Professional Greenhouse 72-cell kit, ~$15). Provide adequate light with LED grow lights (Barrina T5 2ft 4-pack LED Grow Lights, 20W each, ~$50) for 14-16 hours a day, positioned 2-4 inches above seedlings. Maintain consistent temperatures (65-75°F for most).
- Direct Sowing vs. Transplanting: Some crops (carrots, radishes, beans, corn) prefer direct sowing into the garden bed. Others (tomatoes, peppers, broccoli, kale) benefit from being started indoors and transplanted. Follow seed packet instructions for planting depths (e.g., lettuce seeds are often surface-sown or planted 1/8 inch deep, while beans are 1 inch deep) and spacing.
- Companion Planting: Strategically plant different species together to enhance growth, deter pests, and attract beneficial insects. For example, planting marigolds near tomatoes can deter nematodes, and basil improves tomato flavor. Nasturtiums can act as a trap crop for aphids.
- Succession Planting: For a continuous harvest, plant small batches of quick-growing crops (lettuce, radishes, cilantro) every 2-3 weeks. As one crop finishes, another is ready to take its place.
Step 6: Pest & Disease Management (Organic)
Maintaining a self sufficient garden from scratch means embracing organic pest and disease control.
- Integrated Pest Management (IPM): This holistic approach combines several strategies.
- Observation: Regularly inspect your plants for early signs of pests or disease. Catching issues early is key.
- Physical Barriers: Use row covers (e.g., Agribon AG-19 floating row cover, 10×20 ft, ~$20) to protect young plants from insect pests like cabbage worms and squash bugs. Install fences (e.g., 2×4 welded wire mesh, 4 ft tall, 50 ft roll ~$70) to keep out deer, rabbits, and other larger animals.
- Hand-Picking: For larger pests like tomato hornworms or squash bugs, simply pick them off and drop them into a bucket of soapy water.
- Companion Planting: As mentioned, certain plants repel pests. Marigolds, garlic, and onions are excellent deterrents.
- Attract Beneficial Insects: Plant flowers like dill, fennel, cosmos, and sweet alyssum to attract ladybugs, lacewings, and parasitic wasps, which prey on common garden pests.
- Organic Sprays & Treatments:
- Neem Oil: An excellent broad-spectrum organic insecticide and fungicide. Bonide Neem Oil Concentrate (16oz, ~$20) can be mixed at a rate of 1-2 tbsp per gallon of water and sprayed on affected plants.
- Insecticidal Soap: Effective against soft-bodied insects like aphids, whiteflies, and spider mites. Garden Safe Insecticidal Soap (24oz ready-to-use, ~$10).
- Bacillus thuringiensis (Bt): A naturally occurring soil bacterium that targets caterpillars and worms. Monterey BT Worm & Caterpillar Killer (16oz, ~$18) is highly effective and safe for beneficial insects.
- Copper or Sulfur Sprays: For fungal diseases like powdery mildew or blight, organic copper (e.g., Bonide Copper Fungicide, ~$15 for 1lb) or sulfur (e.g., Safer Brand Garden Fungicide, ~$10 for 16oz) can be used as a last resort.
Step 7: Harvesting & Seed Saving
The culmination of your efforts is the harvest, and seed saving closes the loop on self-sufficiency.
- Harvesting Techniques:
- Timing: Harvest vegetables at their peak ripeness for best flavor and nutritional value. For example, green beans should snap cleanly, cucumbers should be firm, and tomatoes should be fully colored.
- Frequency: Many crops, like zucchini, cucumbers, and bush beans, produce more if harvested frequently. Pick daily or every other day.
- Tools: Use clean, sharp pruners (e.g., Corona ClassicCUT Bypass Pruner BP 3180, ~$30) or a sharp knife for clean cuts, minimizing damage to the plant.
- Seed Saving: This is where the « self-sufficient » aspect truly shines.
- Selection: Only save seeds from your healthiest, most vigorous plants that show desired traits (disease resistance, good flavor, high yield).
- Isolation: To ensure true-to-type seeds, prevent cross-pollination. This can be challenging for open-pollinated crops that readily cross (e.g., squash, corn). For beginners, focus on self-pollinating plants like beans, peas, lettuce, and tomatoes.
- Processing:
- Dry Seeds (Beans, Peas, Lettuce, Grains): Allow pods/seed heads to dry completely on the plant. Harvest, shell, and clean the seeds, removing chaff.
- Wet Seeds (Tomatoes, Cucumbers, Squash): For tomatoes, ferment the seeds in water for a few days to remove the gel coating and inhibit disease. For cucumbers/squash, scrape out seeds, wash thoroughly, and dry.
- Drying: Spread seeds thinly on screens or paper plates in a cool, dry, well-ventilated area for 1-4 weeks. Ensure they are bone-dry before storage. I aim for less than 8% moisture content.
- Storage: Store seeds in airtight containers (glass jars with desiccant packets work well) in a cool, dark, dry place (ideally 40-50°F and 30-40% humidity). Label clearly with variety and date. Properly stored seeds can remain viable for 3-10 years or more.
Step 8: Season Extension & Winterizing
Extend your harvest and protect your garden for the off-season to truly maximize your self sufficient garden from scratch.
- Cold Frames: Simple structures with a transparent top (glass, polycarbonate, or old windows) that sit over garden beds. They trap solar heat, allowing you to grow cold-hardy crops (lettuce, spinach, kale, radishes) well into winter or start seeds earlier in spring. A basic cold frame can be built from 2×6 lumber and a sheet of polycarbonate for under $100.
- Hoop Houses/Low Tunnels: Larger structures made from flexible hoops (PVC pipe or EMT conduit) covered with greenhouse plastic. These provide more space and greater temperature moderation. A 10×20 ft DIY low tunnel kit can cost $200-$500, while a larger, more robust hoop house kit might be $1,000-$3,000. I use a 6×12 ft low tunnel made from 1/2-inch PVC hoops and 6mil greenhouse plastic, which extends my lettuce and spinach harvest by at least
Efficient water management is critical for a self sufficient garden from scratch, especially in off-grid living where water resources might be limited.
- Rainwater Harvesting: This is my primary source of irrigation water. A 55-gallon rain barrel (e.g., EarthMark Rain Barrel, ~$120-$150) connected to a downspout can collect significant water. For larger needs, I use two 275-gallon IBC totes (Intermediate Bulk Containers, often available used for $100-$200 each from food-grade sources) connected in series. A 1,000 sq ft roof can collect approximately 620 gallons of water for every inch of rainfall. My 1,500 sq ft roof provides ample water for my 600 sq ft garden through multiple barrels and totes.
- Drip Irrigation: This is by far the most water-efficient method, delivering water directly to the plant’s root zone, minimizing evaporation and weed growth.
- Components: A typical drip system includes a pressure regulator (e.g., Rain Bird PRV-10, ~$15), a filter (Rain Bird RBY filter, ~$20), main tubing (1/2-inch poly tubing, 100ft ~$25), smaller feeder lines (1/4-inch tubing), and emitters (0.5 GPH or 1 GPH per plant).
- Kits: For beginners, a starter kit like the Rain Bird Drip Irrigation Garden Kit (model DDI-KIT-1P, ~$40-$60) is excellent for a small garden. For larger setups, I use Netafim Techline CV Drip Line (500ft roll, ~$150-$200), which has pressure-compensating emitters built-in, ensuring even watering across long runs.
- Automation: For true self-sufficiency, consider a battery-powered timer (e.g., Orbit B-Hyve Bluetooth Hose Faucet Timer, ~$50) or a solar-powered timer connected to a small 12V pump.
- Solar-Powered Pumps: For lifting water from a well, pond, or large storage tank to your garden, a solar pump is a game-changer. For a smaller drip system, a Shurflo 2088-594-152 Diaphragm Pump (12V, 3.5 GPM, ~$180) can be powered by a single 100W solar panel (e.g., Renogy 100W Monocrystalline Solar Panel, ~$100) and a small 12V battery (e.g., a 50Ah LiFePO4 battery like the Battle Born 50Ah, ~$450). For larger operations or deeper wells, more robust systems are needed. If you’re looking to build out a comprehensive off-grid power system to support your garden’s water needs, or indeed your entire homestead, you might want to explore resources like the Power Grid Generator complete system guide to understand the full scope of what’s possible in terms of energy independence.
Step 5: Seed Selection & Planting
The choice of seeds is crucial for a truly self sufficient garden from scratch.
- Choose Heirloom & Open-Pollinated Seeds: These varieties produce seeds that will grow true to type, meaning you can save seeds from your harvest year after year. F1 hybrids, while often vigorous, will not produce consistent offspring from saved seeds. Reputable seed companies include Baker Creek Heirloom Seeds, High Mowing Organic Seeds, and Seed Savers Exchange. Start with common, reliable varieties like ‘Black Krim’ tomatoes, ‘Provider’ bush beans, ‘Waltham Butternut’ squash, and ‘Black Seeded Simpson’ lettuce.
- Start Seeds Indoors (Optional but Recommended): For longer growing seasons or specific crops, starting seeds indoors gives you a head start. Use seed-starting mix (e.g., Espoma Organic Seed Starter Mix, ~$10 for 16qt bag) in seed trays (Jiffy Professional Greenhouse 72-cell kit, ~$15). Provide adequate light with LED grow lights (Barrina T5 2ft 4-pack LED Grow Lights, 20W each, ~$50) for 14-16 hours a day, positioned 2-4 inches above seedlings. Maintain consistent temperatures (65-75°F for most).
- Direct Sowing vs. Transplanting: Some crops (carrots, radishes, beans, corn) prefer direct sowing into the garden bed. Others (tomatoes, peppers, broccoli, kale) benefit from being started indoors and transplanted. Follow seed packet instructions for planting depths (e.g., lettuce seeds are often surface-sown or planted 1/8 inch deep, while beans are 1 inch deep) and spacing.
- Companion Planting: Strategically plant different species together to enhance growth, deter pests, and attract beneficial insects. For example, planting marigolds near tomatoes can deter nematodes, and basil improves tomato flavor. Nasturtiums can act as a trap crop for aphids.
- Succession Planting: For a continuous harvest, plant small batches of quick-growing crops (lettuce, radishes, cilantro) every 2-3 weeks. As one crop finishes, another is ready to take its place.
Step 6: Pest & Disease Management (Organic)
Maintaining a self sufficient garden from scratch means embracing organic pest and disease control.
- Integrated Pest Management (IPM): This holistic approach combines several strategies.
- Observation: Regularly inspect your plants for early signs of pests or disease. Catching issues early is key.
- Physical Barriers: Use row covers (e.g., Agribon AG-19 floating row cover, 10×20 ft, ~$20) to protect young plants from insect pests like cabbage worms and squash bugs. Install fences (e.g., 2×4 welded wire mesh, 4 ft tall, 50 ft roll ~$70) to keep out deer, rabbits, and other larger animals.
- Hand-Picking: For larger pests like tomato hornworms or squash bugs, simply pick them off and drop them into a bucket of soapy water.
- Companion Planting: As mentioned, certain plants repel pests. Marigolds, garlic, and onions are excellent deterrents.
- Attract Beneficial Insects: Plant flowers like dill, fennel, cosmos, and sweet alyssum to attract ladybugs, lacewings, and parasitic wasps, which prey on common garden pests.
- Organic Sprays & Treatments:
- Neem Oil: An excellent broad-spectrum organic insecticide and fungicide. Bonide Neem Oil Concentrate (16oz, ~$20) can be mixed at a rate of 1-2 tbsp per gallon of water and sprayed on affected plants.
- Insecticidal Soap: Effective against soft-bodied insects like aphids, whiteflies, and spider mites. Garden Safe Insecticidal Soap (24oz ready-to-use, ~$10).
- Bacillus thuringiensis (Bt): A naturally occurring soil bacterium that targets caterpillars and worms. Monterey BT Worm & Caterpillar Killer (16oz, ~$18) is highly effective and safe for beneficial insects.
- Copper or Sulfur Sprays: For fungal diseases like powdery mildew or blight, organic copper (e.g., Bonide Copper Fungicide, ~$15 for 1lb) or sulfur (e.g., Safer Brand Garden Fungicide, ~$10 for 16oz) can be used as a last resort.
Step 7: Harvesting & Seed Saving
The culmination of your efforts is the harvest, and seed saving closes the loop on self-sufficiency.
- Harvesting Techniques:
- Timing: Harvest vegetables at their peak ripeness for best flavor and nutritional value. For example, green beans should snap cleanly, cucumbers should be firm, and tomatoes should be fully colored.
- Frequency: Many crops, like zucchini, cucumbers, and bush beans, produce more if harvested frequently. Pick daily or every other day.
- Tools: Use clean, sharp pruners (e.g., Corona ClassicCUT Bypass Pruner BP 3180, ~$30) or a sharp knife for clean cuts, minimizing damage to the plant.
- Seed Saving: This is where the « self-sufficient » aspect truly shines.
- Selection: Only save seeds from your healthiest, most vigorous plants that show desired traits (disease resistance, good flavor, high yield).
- Isolation: To ensure true-to-type seeds, prevent cross-pollination. This can be challenging for open-pollinated crops that readily cross (e.g., squash, corn). For beginners, focus on self-pollinating plants like beans, peas, lettuce, and tomatoes.
- Processing:
- Dry Seeds (Beans, Peas, Lettuce, Grains): Allow pods/seed heads to dry completely on the plant. Harvest, shell, and clean the seeds, removing chaff.
- Wet Seeds (Tomatoes, Cucumbers, Squash): For tomatoes, ferment the seeds in water for a few days to remove the gel coating and inhibit disease. For cucumbers/squash, scrape out seeds, wash thoroughly, and dry.
- Drying: Spread seeds thinly on screens or paper plates in a cool, dry, well-ventilated area for 1-4 weeks. Ensure they are bone-dry before storage. I aim for less than 8% moisture content.
- Storage: Store seeds in airtight containers (glass jars with desiccant packets work well) in a cool, dark, dry place (ideally 40-50°F and 30-40% humidity). Label clearly with variety and date. Properly stored seeds can remain viable for 3-10 years or more.
Step 8: Season Extension & Winterizing
Extend your harvest and protect your garden for the off-season to truly maximize your self sufficient garden from scratch.
- Cold Frames: Simple structures with a transparent top (glass, polycarbonate, or old windows) that sit over garden beds. They trap solar heat, allowing you to grow cold-hardy crops (lettuce, spinach, kale, radishes) well into winter or start seeds earlier in spring. A basic cold frame can be built from 2×6 lumber and a sheet of polycarbonate for under $100.
- Hoop Houses/Low Tunnels: Larger structures made from flexible hoops (PVC pipe or EMT conduit) covered with greenhouse plastic. These provide more space and greater temperature moderation. A 10×20 ft DIY low tunnel kit can cost $200-$500, while a larger, more robust hoop house kit might be $1,000-$3,000. I use a 6×12 ft low tunnel made from 1/2-inch PVC hoops and 6mil greenhouse plastic, which extends my lettuce and spinach harvest by at least
Step 4: Water Management & Irrigation
Efficient water management is critical for a self sufficient garden from scratch, especially in off-grid living where water resources might be limited.
- Rainwater Harvesting: This is my primary source of irrigation water. A 55-gallon rain barrel (e.g., EarthMark Rain Barrel, ~$120-$150) connected to a downspout can collect significant water. For larger needs, I use two 275-gallon IBC totes (Intermediate Bulk Containers, often available used for $100-$200 each from food-grade sources) connected in series. A 1,000 sq ft roof can collect approximately 620 gallons of water for every inch of rainfall. My 1,500 sq ft roof provides ample water for my 600 sq ft garden through multiple barrels and totes.
- Drip Irrigation: This is by far the most water-efficient method, delivering water directly to the plant’s root zone, minimizing evaporation and weed growth.
- Components: A typical drip system includes a pressure regulator (e.g., Rain Bird PRV-10, ~$15), a filter (Rain Bird RBY filter, ~$20), main tubing (1/2-inch poly tubing, 100ft ~$25), smaller feeder lines (1/4-inch tubing), and emitters (0.5 GPH or 1 GPH per plant).
- Kits: For beginners, a starter kit like the Rain Bird Drip Irrigation Garden Kit (model DDI-KIT-1P, ~$40-$60) is excellent for a small garden. For larger setups, I use Netafim Techline CV Drip Line (500ft roll, ~$150-$200), which has pressure-compensating emitters built-in, ensuring even watering across long runs.
- Automation: For true self-sufficiency, consider a battery-powered timer (e.g., Orbit B-Hyve Bluetooth Hose Faucet Timer, ~$50) or a solar-powered timer connected to a small 12V pump.
- Solar-Powered Pumps: For lifting water from a well, pond, or large storage tank to your garden, a solar pump is a game-changer. For a smaller drip system, a Shurflo 2088-594-152 Diaphragm Pump (12V, 3.5 GPM, ~$180) can be powered by a single 100W solar panel (e.g., Renogy 100W Monocrystalline Solar Panel, ~$100) and a small 12V battery (e.g., a 50Ah LiFePO4 battery like the Battle Born 50Ah, ~$450). For larger operations or deeper wells, more robust systems are needed. If you’re looking to build out a comprehensive off-grid power system to support your garden’s water needs, or indeed your entire homestead, you might want to explore resources like the Power Grid Generator complete system guide to understand the full scope of what’s possible in terms of energy independence.
Step 5: Seed Selection & Planting
The choice of seeds is crucial for a truly self sufficient garden from scratch.
- Choose Heirloom & Open-Pollinated Seeds: These varieties produce seeds that will grow true to type, meaning you can save seeds from your harvest year after year. F1 hybrids, while often vigorous, will not produce consistent offspring from saved seeds. Reputable seed companies include Baker Creek Heirloom Seeds, High Mowing Organic Seeds, and Seed Savers Exchange. Start with common, reliable varieties like ‘Black Krim’ tomatoes, ‘Provider’ bush beans, ‘Waltham Butternut’ squash, and ‘Black Seeded Simpson’ lettuce.
- Start Seeds Indoors (Optional but Recommended): For longer growing seasons or specific crops, starting seeds indoors gives you a head start. Use seed-starting mix (e.g., Espoma Organic Seed Starter Mix, ~$10 for 16qt bag) in seed trays (Jiffy Professional Greenhouse 72-cell kit, ~$15). Provide adequate light with LED grow lights (Barrina T5 2ft 4-pack LED Grow Lights, 20W each, ~$50) for 14-16 hours a day, positioned 2-4 inches above seedlings. Maintain consistent temperatures (65-75°F for most).
- Direct Sowing vs. Transplanting: Some crops (carrots, radishes, beans, corn) prefer direct sowing into the garden bed. Others (tomatoes, peppers, broccoli, kale) benefit from being started indoors and transplanted. Follow seed packet instructions for planting depths (e.g., lettuce seeds are often surface-sown or planted 1/8 inch deep, while beans are 1 inch deep) and spacing.
- Companion Planting: Strategically plant different species together to enhance growth, deter pests, and attract beneficial insects. For example, planting marigolds near tomatoes can deter nematodes, and basil improves tomato flavor. Nasturtiums can act as a trap crop for aphids.
- Succession Planting: For a continuous harvest, plant small batches of quick-growing crops (lettuce, radishes, cilantro) every 2-3 weeks. As one crop finishes, another is ready to take its place.
Step 6: Pest & Disease Management (Organic)
Maintaining a self sufficient garden from scratch means embracing organic pest and disease control.
- Integrated Pest Management (IPM): This holistic approach combines several strategies.
- Observation: Regularly inspect your plants for early signs of pests or disease. Catching issues early is key.
- Physical Barriers: Use row covers (e.g., Agribon AG-19 floating row cover, 10×20 ft, ~$20) to protect young plants from insect pests like cabbage worms and squash bugs. Install fences (e.g., 2×4 welded wire mesh, 4 ft tall, 50 ft roll ~$70) to keep out deer, rabbits, and other larger animals.
- Hand-Picking: For larger pests like tomato hornworms or squash bugs, simply pick them off and drop them into a bucket of soapy water.
- Companion Planting: As mentioned, certain plants repel pests. Marigolds, garlic, and onions are excellent deterrents.
- Attract Beneficial Insects: Plant flowers like dill, fennel, cosmos, and sweet alyssum to attract ladybugs, lacewings, and parasitic wasps, which prey on common garden pests.
- Organic Sprays & Treatments:
- Neem Oil: An excellent broad-spectrum organic insecticide and fungicide. Bonide Neem Oil Concentrate (16oz, ~$20) can be mixed at a rate of 1-2 tbsp per gallon of water and sprayed on affected plants.
- Insecticidal Soap: Effective against soft-bodied insects like aphids, whiteflies, and spider mites. Garden Safe Insecticidal Soap (24oz ready-to-use, ~$10).
- Bacillus thuringiensis (Bt): A naturally occurring soil bacterium that targets caterpillars and worms. Monterey BT Worm & Caterpillar Killer (16oz, ~$18) is highly effective and safe for beneficial insects.
- Copper or Sulfur Sprays: For fungal diseases like powdery mildew or blight, organic copper (e.g., Bonide Copper Fungicide, ~$15 for 1lb) or sulfur (e.g., Safer Brand Garden Fungicide, ~$10 for 16oz) can be used as a last resort.
Step 7: Harvesting & Seed Saving
The culmination of your efforts is the harvest, and seed saving closes the loop on self-sufficiency.
- Harvesting Techniques:
- Timing: Harvest vegetables at their peak ripeness for best flavor and nutritional value. For example, green beans should snap cleanly, cucumbers should be firm, and tomatoes should be fully colored.
- Frequency: Many crops, like zucchini, cucumbers, and bush beans, produce more if harvested frequently. Pick daily or every other day.
- Tools: Use clean, sharp pruners (e.g., Corona ClassicCUT Bypass Pruner BP 3180, ~$30) or a sharp knife for clean cuts, minimizing damage to the plant.
- Seed Saving: This is where the « self-sufficient » aspect truly shines.
- Selection: Only save seeds from your healthiest, most vigorous plants that show desired traits (disease resistance, good flavor, high yield).
- Isolation: To ensure true-to-type seeds, prevent cross-pollination. This can be challenging for open-pollinated crops that readily cross (e.g., squash, corn). For beginners, focus on self-pollinating plants like beans, peas, lettuce, and tomatoes.
- Processing:
- Dry Seeds (Beans, Peas, Lettuce, Grains): Allow pods/seed heads to dry completely on the plant. Harvest, shell, and clean the seeds, removing chaff.
- Wet Seeds (Tomatoes, Cucumbers, Squash): For tomatoes, ferment the seeds in water for a few days to remove the gel coating and inhibit disease. For cucumbers/squash, scrape out seeds, wash thoroughly, and dry.
- Drying: Spread seeds thinly on screens or paper plates in a cool, dry, well-ventilated area for 1-4 weeks. Ensure they are bone-dry before storage. I aim for less than 8% moisture content.
- Storage: Store seeds in airtight containers (glass jars with desiccant packets work well) in a cool, dark, dry place (ideally 40-50°F and 30-40% humidity). Label clearly with variety and date. Properly stored seeds can remain viable for 3-10 years or more.
Step 8: Season Extension & Winterizing
Extend your harvest and protect your garden for the off-season to truly maximize your self sufficient garden from scratch.
- Cold Frames: Simple structures with a transparent top (glass, polycarbonate, or old windows) that sit over garden beds. They trap solar heat, allowing you to grow cold-hardy crops (lettuce, spinach, kale, radishes) well into winter or start seeds earlier in spring. A basic cold frame can be built from 2×6 lumber and a sheet of polycarbonate for under $100.
- Hoop Houses/Low Tunnels: Larger structures made from flexible hoops (PVC pipe or EMT conduit) covered with greenhouse plastic. These provide more space and greater temperature moderation. A 10×20 ft DIY low tunnel kit can cost $200-$500, while a larger, more robust hoop house kit might be $1,000-$3,000. I use a 6×12 ft low tunnel made from 1/2-inch PVC hoops and 6mil greenhouse plastic, which extends my lettuce and spinach harvest by at least
- In-Ground Beds: If you have excellent native soil and good drainage, in-ground beds are the most economical. Double-digging (loosening soil two shovel depths) can significantly improve drainage and aeration. For my main garden, I primarily use in-ground beds, but I focus on building up the soil over time with consistent compost additions and cover cropping. I aim for beds that are no wider than 3-4 feet so I can reach the center without stepping on the soil, compacting it.
- Raised Beds: Raised beds offer numerous advantages, especially for poor soil, heavy clay, or rocky areas. They provide better drainage, warm up faster in spring, reduce compaction, and make weeding and harvesting easier on your back.
- Material Options:
- Untreated Cedar: Naturally rot-resistant and chemical-free. A 4×8 ft bed, 12 inches deep, typically requires three 2x12x8 ft cedar boards, costing around $50-$60 per board (total ~$150-$180) plus corner brackets or screws. My first raised beds were cedar and are still going strong after 7 years.
- Galvanized Steel: Durable, long-lasting, and aesthetically pleasing. Brands like Vego Garden offer modular kits. A Vego Garden 17″ Tall 8-in-1 Metal Raised Garden Bed (can be configured to 4×8 ft) costs approximately $250-$300.
- Concrete Blocks/Stones: Very durable but can leach minerals (though generally safe once weathered) and can be expensive.
- Recycled Materials: Pallets (check for chemical treatment stamps like « HT » for heat-treated), old tires (controversial due to potential chemical leaching).
- Filling Raised Beds: Don’t just fill with topsoil. Use a « Hugelkultur » approach (logs, branches, leaves, then compost, then topsoil) or a mixture of 60% good quality topsoil, 30% compost, and 10% perlite or vermiculite for drainage. A 4x8x1 ft raised bed requires about 32 cubic feet (or ~1.2 cubic yards) of soil mix, which can cost $100-$200 depending on your source.
- Material Options:
Step 4: Water Management & Irrigation
Efficient water management is critical for a self sufficient garden from scratch, especially in off-grid living where water resources might be limited.
- Rainwater Harvesting: This is my primary source of irrigation water. A 55-gallon rain barrel (e.g., EarthMark Rain Barrel, ~$120-$150) connected to a downspout can collect significant water. For larger needs, I use two 275-gallon IBC totes (Intermediate Bulk Containers, often available used for $100-$200 each from food-grade sources) connected in series. A 1,000 sq ft roof can collect approximately 620 gallons of water for every inch of rainfall. My 1,500 sq ft roof provides ample water for my 600 sq ft garden through multiple barrels and totes.
- Drip Irrigation: This is by far the most water-efficient method, delivering water directly to the plant’s root zone, minimizing evaporation and weed growth.
- Components: A typical drip system includes a pressure regulator (e.g., Rain Bird PRV-10, ~$15), a filter (Rain Bird RBY filter, ~$20), main tubing (1/2-inch poly tubing, 100ft ~$25), smaller feeder lines (1/4-inch tubing), and emitters (0.5 GPH or 1 GPH per plant).
- Kits: For beginners, a starter kit like the Rain Bird Drip Irrigation Garden Kit (model DDI-KIT-1P, ~$40-$60) is excellent for a small garden. For larger setups, I use Netafim Techline CV Drip Line (500ft roll, ~$150-$200), which has pressure-compensating emitters built-in, ensuring even watering across long runs.
- Automation: For true self-sufficiency, consider a battery-powered timer (e.g., Orbit B-Hyve Bluetooth Hose Faucet Timer, ~$50) or a solar-powered timer connected to a small 12V pump.
- Solar-Powered Pumps: For lifting water from a well, pond, or large storage tank to your garden, a solar pump is a game-changer. For a smaller drip system, a Shurflo 2088-594-152 Diaphragm Pump (12V, 3.5 GPM, ~$180) can be powered by a single 100W solar panel (e.g., Renogy 100W Monocrystalline Solar Panel, ~$100) and a small 12V battery (e.g., a 50Ah LiFePO4 battery like the Battle Born 50Ah, ~$450). For larger operations or deeper wells, more robust systems are needed. If you’re looking to build out a comprehensive off-grid power system to support your garden’s water needs, or indeed your entire homestead, you might want to explore resources like the Power Grid Generator complete system guide to understand the full scope of what’s possible in terms of energy independence.
Step 5: Seed Selection & Planting
The choice of seeds is crucial for a truly self sufficient garden from scratch.
- Choose Heirloom & Open-Pollinated Seeds: These varieties produce seeds that will grow true to type, meaning you can save seeds from your harvest year after year. F1 hybrids, while often vigorous, will not produce consistent offspring from saved seeds. Reputable seed companies include Baker Creek Heirloom Seeds, High Mowing Organic Seeds, and Seed Savers Exchange. Start with common, reliable varieties like ‘Black Krim’ tomatoes, ‘Provider’ bush beans, ‘Waltham Butternut’ squash, and ‘Black Seeded Simpson’ lettuce.
- Start Seeds Indoors (Optional but Recommended): For longer growing seasons or specific crops, starting seeds indoors gives you a head start. Use seed-starting mix (e.g., Espoma Organic Seed Starter Mix, ~$10 for 16qt bag) in seed trays (Jiffy Professional Greenhouse 72-cell kit, ~$15). Provide adequate light with LED grow lights (Barrina T5 2ft 4-pack LED Grow Lights, 20W each, ~$50) for 14-16 hours a day, positioned 2-4 inches above seedlings. Maintain consistent temperatures (65-75°F for most).
- Direct Sowing vs. Transplanting: Some crops (carrots, radishes, beans, corn) prefer direct sowing into the garden bed. Others (tomatoes, peppers, broccoli, kale) benefit from being started indoors and transplanted. Follow seed packet instructions for planting depths (e.g., lettuce seeds are often surface-sown or planted 1/8 inch deep, while beans are 1 inch deep) and spacing.
- Companion Planting: Strategically plant different species together to enhance growth, deter pests, and attract beneficial insects. For example, planting marigolds near tomatoes can deter nematodes, and basil improves tomato flavor. Nasturtiums can act as a trap crop for aphids.
- Succession Planting: For a continuous harvest, plant small batches of quick-growing crops (lettuce, radishes, cilantro) every 2-3 weeks. As one crop finishes, another is ready to take its place.
Step 6: Pest & Disease Management (Organic)
Maintaining a self sufficient garden from scratch means embracing organic pest and disease control.
- Integrated Pest Management (IPM): This holistic approach combines several strategies.
- Observation: Regularly inspect your plants for early signs of pests or disease. Catching issues early is key.
- Physical Barriers: Use row covers (e.g., Agribon AG-19 floating row cover, 10×20 ft, ~$20) to protect young plants from insect pests like cabbage worms and squash bugs. Install fences (e.g., 2×4 welded wire mesh, 4 ft tall, 50 ft roll ~$70) to keep out deer, rabbits, and other larger animals.
- Hand-Picking: For larger pests like tomato hornworms or squash bugs, simply pick them off and drop them into a bucket of soapy water.
- Companion Planting: As mentioned, certain plants repel pests. Marigolds, garlic, and onions are excellent deterrents.
- Attract Beneficial Insects: Plant flowers like dill, fennel, cosmos, and sweet alyssum to attract ladybugs, lacewings, and parasitic wasps, which prey on common garden pests.
- Organic Sprays & Treatments:
- Neem Oil: An excellent broad-spectrum organic insecticide and fungicide. Bonide Neem Oil Concentrate (16oz, ~$20) can be mixed at a rate of 1-2 tbsp per gallon of water and sprayed on affected plants.
- Insecticidal Soap: Effective against soft-bodied insects like aphids, whiteflies, and spider mites. Garden Safe Insecticidal Soap (24oz ready-to-use, ~$10).
- Bacillus thuringiensis (Bt): A naturally occurring soil bacterium that targets caterpillars and worms. Monterey BT Worm & Caterpillar Killer (16oz, ~$18) is highly effective and safe for beneficial insects.
- Copper or Sulfur Sprays: For fungal diseases like powdery mildew or blight, organic copper (e.g., Bonide Copper Fungicide, ~$15 for 1lb) or sulfur (e.g., Safer Brand Garden Fungicide, ~$10 for 16oz) can be used as a last resort.
Step 7: Harvesting & Seed Saving
The culmination of your efforts is the harvest, and seed saving closes the loop on self-sufficiency.
- Harvesting Techniques:
- Timing: Harvest vegetables at their peak ripeness for best flavor and nutritional value. For example, green beans should snap cleanly, cucumbers should be firm, and tomatoes should be fully colored.
- Frequency: Many crops, like zucchini, cucumbers, and bush beans, produce more if harvested frequently. Pick daily or every other day.
- Tools: Use clean, sharp pruners (e.g., Corona ClassicCUT Bypass Pruner BP 3180, ~$30) or a sharp knife for clean cuts, minimizing damage to the plant.
- Seed Saving: This is where the « self-sufficient » aspect truly shines.
- Selection: Only save seeds from your healthiest, most vigorous plants that show desired traits (disease resistance, good flavor, high yield).
- Isolation: To ensure true-to-type seeds, prevent cross-pollination. This can be challenging for open-pollinated crops that readily cross (e.g., squash, corn). For beginners, focus on self-pollinating plants like beans, peas, lettuce, and tomatoes.
- Processing:
- Dry Seeds (Beans, Peas, Lettuce, Grains): Allow pods/seed heads to dry completely on the plant. Harvest, shell, and clean the seeds, removing chaff.
- Wet Seeds (Tomatoes, Cucumbers, Squash): For tomatoes, ferment the seeds in water for a few days to remove the gel coating and inhibit disease. For cucumbers/squash, scrape out seeds, wash thoroughly, and dry.
- Drying: Spread seeds thinly on screens or paper plates in a cool, dry, well-ventilated area for 1-4 weeks. Ensure they are bone-dry before storage. I aim for less than 8% moisture content.
- Storage: Store seeds in airtight containers (glass jars with desiccant packets work well) in a cool, dark, dry place (ideally 40-50°F and 30-40% humidity). Label clearly with variety and date. Properly stored seeds can remain viable for 3-10 years or more.
Step 8: Season Extension & Winterizing
Extend your harvest and protect your garden for the off-season to truly maximize your self sufficient garden from scratch.
- Cold Frames: Simple structures with a transparent top (glass, polycarbonate, or old windows) that sit over garden beds. They trap solar heat, allowing you to grow cold-hardy crops (lettuce, spinach, kale, radishes) well into winter or start seeds earlier in spring. A basic cold frame can be built from 2×6 lumber and a sheet of polycarbonate for under $100.
- Hoop Houses/Low Tunnels: Larger structures made from flexible hoops (PVC pipe or EMT conduit) covered with greenhouse plastic. These provide more space and greater temperature moderation. A 10×20 ft DIY low tunnel kit can cost $200-$500, while a larger, more robust hoop house kit might be $1,000-$3,000. I use a 6×12 ft low tunnel made from 1/2-inch PVC hoops and 6mil greenhouse plastic, which extends my lettuce and spinach harvest by at least
Deciding between raised beds and in-ground beds depends on your soil, budget, and physical capabilities.
- In-Ground Beds: If you have excellent native soil and good drainage, in-ground beds are the most economical. Double-digging (loosening soil two shovel depths) can significantly improve drainage and aeration. For my main garden, I primarily use in-ground beds, but I focus on building up the soil over time with consistent compost additions and cover cropping. I aim for beds that are no wider than 3-4 feet so I can reach the center without stepping on the soil, compacting it.
- Raised Beds: Raised beds offer numerous advantages, especially for poor soil, heavy clay, or rocky areas. They provide better drainage, warm up faster in spring, reduce compaction, and make weeding and harvesting easier on your back.
- Material Options:
- Untreated Cedar: Naturally rot-resistant and chemical-free. A 4×8 ft bed, 12 inches deep, typically requires three 2x12x8 ft cedar boards, costing around $50-$60 per board (total ~$150-$180) plus corner brackets or screws. My first raised beds were cedar and are still going strong after 7 years.
- Galvanized Steel: Durable, long-lasting, and aesthetically pleasing. Brands like Vego Garden offer modular kits. A Vego Garden 17″ Tall 8-in-1 Metal Raised Garden Bed (can be configured to 4×8 ft) costs approximately $250-$300.
- Concrete Blocks/Stones: Very durable but can leach minerals (though generally safe once weathered) and can be expensive.
- Recycled Materials: Pallets (check for chemical treatment stamps like « HT » for heat-treated), old tires (controversial due to potential chemical leaching).
- Filling Raised Beds: Don’t just fill with topsoil. Use a « Hugelkultur » approach (logs, branches, leaves, then compost, then topsoil) or a mixture of 60% good quality topsoil, 30% compost, and 10% perlite or vermiculite for drainage. A 4x8x1 ft raised bed requires about 32 cubic feet (or ~1.2 cubic yards) of soil mix, which can cost $100-$200 depending on your source.
- Material Options:
Step 4: Water Management & Irrigation
Efficient water management is critical for a self sufficient garden from scratch, especially in off-grid living where water resources might be limited.
- Rainwater Harvesting: This is my primary source of irrigation water. A 55-gallon rain barrel (e.g., EarthMark Rain Barrel, ~$120-$150) connected to a downspout can collect significant water. For larger needs, I use two 275-gallon IBC totes (Intermediate Bulk Containers, often available used for $100-$200 each from food-grade sources) connected in series. A 1,000 sq ft roof can collect approximately 620 gallons of water for every inch of rainfall. My 1,500 sq ft roof provides ample water for my 600 sq ft garden through multiple barrels and totes.
- Drip Irrigation: This is by far the most water-efficient method, delivering water directly to the plant’s root zone, minimizing evaporation and weed growth.
- Components: A typical drip system includes a pressure regulator (e.g., Rain Bird PRV-10, ~$15), a filter (Rain Bird RBY filter, ~$20), main tubing (1/2-inch poly tubing, 100ft ~$25), smaller feeder lines (1/4-inch tubing), and emitters (0.5 GPH or 1 GPH per plant).
- Kits: For beginners, a starter kit like the Rain Bird Drip Irrigation Garden Kit (model DDI-KIT-1P, ~$40-$60) is excellent for a small garden. For larger setups, I use Netafim Techline CV Drip Line (500ft roll, ~$150-$200), which has pressure-compensating emitters built-in, ensuring even watering across long runs.
- Automation: For true self-sufficiency, consider a battery-powered timer (e.g., Orbit B-Hyve Bluetooth Hose Faucet Timer, ~$50) or a solar-powered timer connected to a small 12V pump.
- Solar-Powered Pumps: For lifting water from a well, pond, or large storage tank to your garden, a solar pump is a game-changer. For a smaller drip system, a Shurflo 2088-594-152 Diaphragm Pump (12V, 3.5 GPM, ~$180) can be powered by a single 100W solar panel (e.g., Renogy 100W Monocrystalline Solar Panel, ~$100) and a small 12V battery (e.g., a 50Ah LiFePO4 battery like the Battle Born 50Ah, ~$450). For larger operations or deeper wells, more robust systems are needed. If you’re looking to build out a comprehensive off-grid power system to support your garden’s water needs, or indeed your entire homestead, you might want to explore resources like the Power Grid Generator complete system guide to understand the full scope of what’s possible in terms of energy independence.
Step 5: Seed Selection & Planting
The choice of seeds is crucial for a truly self sufficient garden from scratch.
- Choose Heirloom & Open-Pollinated Seeds: These varieties produce seeds that will grow true to type, meaning you can save seeds from your harvest year after year. F1 hybrids, while often vigorous, will not produce consistent offspring from saved seeds. Reputable seed companies include Baker Creek Heirloom Seeds, High Mowing Organic Seeds, and Seed Savers Exchange. Start with common, reliable varieties like ‘Black Krim’ tomatoes, ‘Provider’ bush beans, ‘Waltham Butternut’ squash, and ‘Black Seeded Simpson’ lettuce.
- Start Seeds Indoors (Optional but Recommended): For longer growing seasons or specific crops, starting seeds indoors gives you a head start. Use seed-starting mix (e.g., Espoma Organic Seed Starter Mix, ~$10 for 16qt bag) in seed trays (Jiffy Professional Greenhouse 72-cell kit, ~$15). Provide adequate light with LED grow lights (Barrina T5 2ft 4-pack LED Grow Lights, 20W each, ~$50) for 14-16 hours a day, positioned 2-4 inches above seedlings. Maintain consistent temperatures (65-75°F for most).
- Direct Sowing vs. Transplanting: Some crops (carrots, radishes, beans, corn) prefer direct sowing into the garden bed. Others (tomatoes, peppers, broccoli, kale) benefit from being started indoors and transplanted. Follow seed packet instructions for planting depths (e.g., lettuce seeds are often surface-sown or planted 1/8 inch deep, while beans are 1 inch deep) and spacing.
- Companion Planting: Strategically plant different species together to enhance growth, deter pests, and attract beneficial insects. For example, planting marigolds near tomatoes can deter nematodes, and basil improves tomato flavor. Nasturtiums can act as a trap crop for aphids.
- Succession Planting: For a continuous harvest, plant small batches of quick-growing crops (lettuce, radishes, cilantro) every 2-3 weeks. As one crop finishes, another is ready to take its place.
Step 6: Pest & Disease Management (Organic)
Maintaining a self sufficient garden from scratch means embracing organic pest and disease control.
- Integrated Pest Management (IPM): This holistic approach combines several strategies.
- Observation: Regularly inspect your plants for early signs of pests or disease. Catching issues early is key.
- Physical Barriers: Use row covers (e.g., Agribon AG-19 floating row cover, 10×20 ft, ~$20) to protect young plants from insect pests like cabbage worms and squash bugs. Install fences (e.g., 2×4 welded wire mesh, 4 ft tall, 50 ft roll ~$70) to keep out deer, rabbits, and other larger animals.
- Hand-Picking: For larger pests like tomato hornworms or squash bugs, simply pick them off and drop them into a bucket of soapy water.
- Companion Planting: As mentioned, certain plants repel pests. Marigolds, garlic, and onions are excellent deterrents.
- Attract Beneficial Insects: Plant flowers like dill, fennel, cosmos, and sweet alyssum to attract ladybugs, lacewings, and parasitic wasps, which prey on common garden pests.
- Organic Sprays & Treatments:
- Neem Oil: An excellent broad-spectrum organic insecticide and fungicide. Bonide Neem Oil Concentrate (16oz, ~$20) can be mixed at a rate of 1-2 tbsp per gallon of water and sprayed on affected plants.
- Insecticidal Soap: Effective against soft-bodied insects like aphids, whiteflies, and spider mites. Garden Safe Insecticidal Soap (24oz ready-to-use, ~$10).
- Bacillus thuringiensis (Bt): A naturally occurring soil bacterium that targets caterpillars and worms. Monterey BT Worm & Caterpillar Killer (16oz, ~$18) is highly effective and safe for beneficial insects.
- Copper or Sulfur Sprays: For fungal diseases like powdery mildew or blight, organic copper (e.g., Bonide Copper Fungicide, ~$15 for 1lb) or sulfur (e.g., Safer Brand Garden Fungicide, ~$10 for 16oz) can be used as a last resort.
Step 7: Harvesting & Seed Saving
The culmination of your efforts is the harvest, and seed saving closes the loop on self-sufficiency.
- Harvesting Techniques:
- Timing: Harvest vegetables at their peak ripeness for best flavor and nutritional value. For example, green beans should snap cleanly, cucumbers should be firm, and tomatoes should be fully colored.
- Frequency: Many crops, like zucchini, cucumbers, and bush beans, produce more if harvested frequently. Pick daily or every other day.
- Tools: Use clean, sharp pruners (e.g., Corona ClassicCUT Bypass Pruner BP 3180, ~$30) or a sharp knife for clean cuts, minimizing damage to the plant.
- Seed Saving: This is where the « self-sufficient » aspect truly shines.
- Selection: Only save seeds from your healthiest, most vigorous plants that show desired traits (disease resistance, good flavor, high yield).
- Isolation: To ensure true-to-type seeds, prevent cross-pollination. This can be challenging for open-pollinated crops that readily cross (e.g., squash, corn). For beginners, focus on self-pollinating plants like beans, peas, lettuce, and tomatoes.
- Processing:
- Dry Seeds (Beans, Peas, Lettuce, Grains): Allow pods/seed heads to dry completely on the plant. Harvest, shell, and clean the seeds, removing chaff.
- Wet Seeds (Tomatoes, Cucumbers, Squash): For tomatoes, ferment the seeds in water for a few days to remove the gel coating and inhibit disease. For cucumbers/squash, scrape out seeds, wash thoroughly, and dry.
- Drying: Spread seeds thinly on screens or paper plates in a cool, dry, well-ventilated area for 1-4 weeks. Ensure they are bone-dry before storage. I aim for less than 8% moisture content.
- Storage: Store seeds in airtight containers (glass jars with desiccant packets work well) in a cool, dark, dry place (ideally 40-50°F and 30-40% humidity). Label clearly with variety and date. Properly stored seeds can remain viable for 3-10 years or more.
Step 8: Season Extension & Winterizing
Extend your harvest and protect your garden for the off-season to truly maximize your self sufficient garden from scratch.
- Cold Frames: Simple structures with a transparent top (glass, polycarbonate, or old windows) that sit over garden beds. They trap solar heat, allowing you to grow cold-hardy crops (lettuce, spinach, kale, radishes) well into winter or start seeds earlier in spring. A basic cold frame can be built from 2×6 lumber and a sheet of polycarbonate for under $100.
- Hoop Houses/Low Tunnels: Larger structures made from flexible hoops (PVC pipe or EMT conduit) covered with greenhouse plastic. These provide more space and greater temperature moderation. A 10×20 ft DIY low tunnel kit can cost $200-$500, while a larger, more robust hoop house kit might be $1,000-$3,000. I use a 6×12 ft low tunnel made from 1/2-inch PVC hoops and 6mil greenhouse plastic, which extends my lettuce and spinach harvest by at least
Healthy soil is the bedrock of a productive, self-sufficient garden. You can’t guess what your soil needs; you have to test it.
- Perform a Soil Test: A professional soil test will give you precise data on your soil’s pH, nutrient levels (N-P-K), and organic matter content. I recommend sending a sample to your local agricultural extension office; it typically costs $20-$50 and provides detailed recommendations. Alternatively, for a quick homeowner check, a Rapitest Soil Test Kit (40-test kit, model 1663, ~$20 on Amazon) provides a good baseline for pH, Nitrogen, Phosphorus, and Potash. Aim for a pH between 6.0 and 7.0 for most vegetables.
- Amend for pH Imbalance: If your soil is too acidic (below 6.0), add agricultural lime (dolomitic lime adds magnesium, calcitic lime adds calcium). Apply 5-10 lbs per 100 sq ft for a moderate adjustment. If it’s too alkaline (above 7.0), add elemental sulfur (e.g., Espoma Soil Acidifier, ~$15 for 6.75 lbs) or generous amounts of organic matter like peat moss or pine needles.
- Build Organic Matter: This is the single most important step for long-term soil health. Organic matter improves soil structure, water retention, drainage, and nutrient availability. Incorporate 2-4 inches of high-quality compost into your top 6-12 inches of soil annually. I make my own compost from kitchen scraps, garden waste, and shredded leaves, but you can purchase it. Local nurseries often sell bulk compost for $30-$50 per cubic yard. Aged manure (from chickens, cows, or horses – ensure it’s well-rotted to avoid burning plants) is also excellent.
- Address Nutrient Deficiencies: Based on your soil test, add specific organic amendments. If Nitrogen (N) is low, add blood meal (12-0-0, ~$20 for 3 lbs) or feather meal. For Phosphorus (P), use bone meal (3-15-0, ~$15 for 3 lbs) or rock phosphate. For Potassium (K), greensand (0-0-2.5, ~$25 for 5 lbs) or kelp meal are good choices. I rely heavily on Espoma Organic Garden-tone (5-3-3, ~$25 for an 8lb bag) as a balanced, all-purpose organic fertilizer during planting.
Step 3: Garden Bed Preparation
Deciding between raised beds and in-ground beds depends on your soil, budget, and physical capabilities.
- In-Ground Beds: If you have excellent native soil and good drainage, in-ground beds are the most economical. Double-digging (loosening soil two shovel depths) can significantly improve drainage and aeration. For my main garden, I primarily use in-ground beds, but I focus on building up the soil over time with consistent compost additions and cover cropping. I aim for beds that are no wider than 3-4 feet so I can reach the center without stepping on the soil, compacting it.
- Raised Beds: Raised beds offer numerous advantages, especially for poor soil, heavy clay, or rocky areas. They provide better drainage, warm up faster in spring, reduce compaction, and make weeding and harvesting easier on your back.
- Material Options:
- Untreated Cedar: Naturally rot-resistant and chemical-free. A 4×8 ft bed, 12 inches deep, typically requires three 2x12x8 ft cedar boards, costing around $50-$60 per board (total ~$150-$180) plus corner brackets or screws. My first raised beds were cedar and are still going strong after 7 years.
- Galvanized Steel: Durable, long-lasting, and aesthetically pleasing. Brands like Vego Garden offer modular kits. A Vego Garden 17″ Tall 8-in-1 Metal Raised Garden Bed (can be configured to 4×8 ft) costs approximately $250-$300.
- Concrete Blocks/Stones: Very durable but can leach minerals (though generally safe once weathered) and can be expensive.
- Recycled Materials: Pallets (check for chemical treatment stamps like « HT » for heat-treated), old tires (controversial due to potential chemical leaching).
- Filling Raised Beds: Don’t just fill with topsoil. Use a « Hugelkultur » approach (logs, branches, leaves, then compost, then topsoil) or a mixture of 60% good quality topsoil, 30% compost, and 10% perlite or vermiculite for drainage. A 4x8x1 ft raised bed requires about 32 cubic feet (or ~1.2 cubic yards) of soil mix, which can cost $100-$200 depending on your source.
- Material Options:
Step 4: Water Management & Irrigation
Efficient water management is critical for a self sufficient garden from scratch, especially in off-grid living where water resources might be limited.
- Rainwater Harvesting: This is my primary source of irrigation water. A 55-gallon rain barrel (e.g., EarthMark Rain Barrel, ~$120-$150) connected to a downspout can collect significant water. For larger needs, I use two 275-gallon IBC totes (Intermediate Bulk Containers, often available used for $100-$200 each from food-grade sources) connected in series. A 1,000 sq ft roof can collect approximately 620 gallons of water for every inch of rainfall. My 1,500 sq ft roof provides ample water for my 600 sq ft garden through multiple barrels and totes.
- Drip Irrigation: This is by far the most water-efficient method, delivering water directly to the plant’s root zone, minimizing evaporation and weed growth.
- Components: A typical drip system includes a pressure regulator (e.g., Rain Bird PRV-10, ~$15), a filter (Rain Bird RBY filter, ~$20), main tubing (1/2-inch poly tubing, 100ft ~$25), smaller feeder lines (1/4-inch tubing), and emitters (0.5 GPH or 1 GPH per plant).
- Kits: For beginners, a starter kit like the Rain Bird Drip Irrigation Garden Kit (model DDI-KIT-1P, ~$40-$60) is excellent for a small garden. For larger setups, I use Netafim Techline CV Drip Line (500ft roll, ~$150-$200), which has pressure-compensating emitters built-in, ensuring even watering across long runs.
- Automation: For true self-sufficiency, consider a battery-powered timer (e.g., Orbit B-Hyve Bluetooth Hose Faucet Timer, ~$50) or a solar-powered timer connected to a small 12V pump.
- Solar-Powered Pumps: For lifting water from a well, pond, or large storage tank to your garden, a solar pump is a game-changer. For a smaller drip system, a Shurflo 2088-594-152 Diaphragm Pump (12V, 3.5 GPM, ~$180) can be powered by a single 100W solar panel (e.g., Renogy 100W Monocrystalline Solar Panel, ~$100) and a small 12V battery (e.g., a 50Ah LiFePO4 battery like the Battle Born 50Ah, ~$450). For larger operations or deeper wells, more robust systems are needed. If you’re looking to build out a comprehensive off-grid power system to support your garden’s water needs, or indeed your entire homestead, you might want to explore resources like the Power Grid Generator complete system guide to understand the full scope of what’s possible in terms of energy independence.
Step 5: Seed Selection & Planting
The choice of seeds is crucial for a truly self sufficient garden from scratch.
- Choose Heirloom & Open-Pollinated Seeds: These varieties produce seeds that will grow true to type, meaning you can save seeds from your harvest year after year. F1 hybrids, while often vigorous, will not produce consistent offspring from saved seeds. Reputable seed companies include Baker Creek Heirloom Seeds, High Mowing Organic Seeds, and Seed Savers Exchange. Start with common, reliable varieties like ‘Black Krim’ tomatoes, ‘Provider’ bush beans, ‘Waltham Butternut’ squash, and ‘Black Seeded Simpson’ lettuce.
- Start Seeds Indoors (Optional but Recommended): For longer growing seasons or specific crops, starting seeds indoors gives you a head start. Use seed-starting mix (e.g., Espoma Organic Seed Starter Mix, ~$10 for 16qt bag) in seed trays (Jiffy Professional Greenhouse 72-cell kit, ~$15). Provide adequate light with LED grow lights (Barrina T5 2ft 4-pack LED Grow Lights, 20W each, ~$50) for 14-16 hours a day, positioned 2-4 inches above seedlings. Maintain consistent temperatures (65-75°F for most).
- Direct Sowing vs. Transplanting: Some crops (carrots, radishes, beans, corn) prefer direct sowing into the garden bed. Others (tomatoes, peppers, broccoli, kale) benefit from being started indoors and transplanted. Follow seed packet instructions for planting depths (e.g., lettuce seeds are often surface-sown or planted 1/8 inch deep, while beans are 1 inch deep) and spacing.
- Companion Planting: Strategically plant different species together to enhance growth, deter pests, and attract beneficial insects. For example, planting marigolds near tomatoes can deter nematodes, and basil improves tomato flavor. Nasturtiums can act as a trap crop for aphids.
- Succession Planting: For a continuous harvest, plant small batches of quick-growing crops (lettuce, radishes, cilantro) every 2-3 weeks. As one crop finishes, another is ready to take its place.
Step 6: Pest & Disease Management (Organic)
Maintaining a self sufficient garden from scratch means embracing organic pest and disease control.
- Integrated Pest Management (IPM): This holistic approach combines several strategies.
- Observation: Regularly inspect your plants for early signs of pests or disease. Catching issues early is key.
- Physical Barriers: Use row covers (e.g., Agribon AG-19 floating row cover, 10×20 ft, ~$20) to protect young plants from insect pests like cabbage worms and squash bugs. Install fences (e.g., 2×4 welded wire mesh, 4 ft tall, 50 ft roll ~$70) to keep out deer, rabbits, and other larger animals.
- Hand-Picking: For larger pests like tomato hornworms or squash bugs, simply pick them off and drop them into a bucket of soapy water.
- Companion Planting: As mentioned, certain plants repel pests. Marigolds, garlic, and onions are excellent deterrents.
- Attract Beneficial Insects: Plant flowers like dill, fennel, cosmos, and sweet alyssum to attract ladybugs, lacewings, and parasitic wasps, which prey on common garden pests.
- Organic Sprays & Treatments:
- Neem Oil: An excellent broad-spectrum organic insecticide and fungicide. Bonide Neem Oil Concentrate (16oz, ~$20) can be mixed at a rate of 1-2 tbsp per gallon of water and sprayed on affected plants.
- Insecticidal Soap: Effective against soft-bodied insects like aphids, whiteflies, and spider mites. Garden Safe Insecticidal Soap (24oz ready-to-use, ~$10).
- Bacillus thuringiensis (Bt): A naturally occurring soil bacterium that targets caterpillars and worms. Monterey BT Worm & Caterpillar Killer (16oz, ~$18) is highly effective and safe for beneficial insects.
- Copper or Sulfur Sprays: For fungal diseases like powdery mildew or blight, organic copper (e.g., Bonide Copper Fungicide, ~$15 for 1lb) or sulfur (e.g., Safer Brand Garden Fungicide, ~$10 for 16oz) can be used as a last resort.
Step 7: Harvesting & Seed Saving
The culmination of your efforts is the harvest, and seed saving closes the loop on self-sufficiency.
- Harvesting Techniques:
- Timing: Harvest vegetables at their peak ripeness for best flavor and nutritional value. For example, green beans should snap cleanly, cucumbers should be firm, and tomatoes should be fully colored.
- Frequency: Many crops, like zucchini, cucumbers, and bush beans, produce more if harvested frequently. Pick daily or every other day.
- Tools: Use clean, sharp pruners (e.g., Corona ClassicCUT Bypass Pruner BP 3180, ~$30) or a sharp knife for clean cuts, minimizing damage to the plant.
- Seed Saving: This is where the « self-sufficient » aspect truly shines.
- Selection: Only save seeds from your healthiest, most vigorous plants that show desired traits (disease resistance, good flavor, high yield).
- Isolation: To ensure true-to-type seeds, prevent cross-pollination. This can be challenging for open-pollinated crops that readily cross (e.g., squash, corn). For beginners, focus on self-pollinating plants like beans, peas, lettuce, and tomatoes.
- Processing:
- Dry Seeds (Beans, Peas, Lettuce, Grains): Allow pods/seed heads to dry completely on the plant. Harvest, shell, and clean the seeds, removing chaff.
- Wet Seeds (Tomatoes, Cucumbers, Squash): For tomatoes, ferment the seeds in water for a few days to remove the gel coating and inhibit disease. For cucumbers/squash, scrape out seeds, wash thoroughly, and dry.
- Drying: Spread seeds thinly on screens or paper plates in a cool, dry, well-ventilated area for 1-4 weeks. Ensure they are bone-dry before storage. I aim for less than 8% moisture content.
- Storage: Store seeds in airtight containers (glass jars with desiccant packets work well) in a cool, dark, dry place (ideally 40-50°F and 30-40% humidity). Label clearly with variety and date. Properly stored seeds can remain viable for 3-10 years or more.
Step 8: Season Extension & Winterizing
Extend your harvest and protect your garden for the off-season to truly maximize your self sufficient garden from scratch.
- Cold Frames: Simple structures with a transparent top (glass, polycarbonate, or old windows) that sit over garden beds. They trap solar heat, allowing you to grow cold-hardy crops (lettuce, spinach, kale, radishes) well into winter or start seeds earlier in spring. A basic cold frame can be built from 2×6 lumber and a sheet of polycarbonate for under $100.
- Hoop Houses/Low Tunnels: Larger structures made from flexible hoops (PVC pipe or EMT conduit) covered with greenhouse plastic. These provide more space and greater temperature moderation. A 10×20 ft DIY low tunnel kit can cost $200-$500, while a larger, more robust hoop house kit might be $1,000-$3,000. I use a 6×12 ft low tunnel made from 1/2-inch PVC hoops and 6mil greenhouse plastic, which extends my lettuce and spinach harvest by at least
- Integrated Pest Management (IPM): This holistic approach combines several strategies.
- Integrated Pest Management (IPM): This holistic approach combines several strategies.
- Integrated Pest Management (IPM): This holistic approach combines several strategies.
- Harvesting Techniques:
- Timing: Harvest vegetables at their peak ripeness for best flavor and nutritional value. For example, green beans should snap cleanly, cucumbers should be firm, and tomatoes should be fully colored.
- Frequency: Many crops, like zucchini, cucumbers, and bush beans, produce more if harvested frequently. Pick daily or every other day.
- Tools: Use clean, sharp pruners (e.g., Corona ClassicCUT Bypass Pruner BP 3180, ~$30) or a sharp knife for clean cuts, minimizing damage to the plant.
- Seed Saving: This is where the « self-sufficient » aspect truly shines.
- Selection: Only save seeds from your healthiest, most vigorous plants that show desired traits (disease resistance, good flavor, high yield).
- Isolation: To ensure true-to-type seeds, prevent cross-pollination. This can be challenging for open-pollinated crops that readily cross (e.g., squash, corn). For beginners, focus on self-pollinating plants like beans, peas, lettuce, and tomatoes.
- Processing:
- Dry Seeds (Beans, Peas, Lettuce, Grains): Allow pods/seed heads to dry completely on the plant. Harvest, shell, and clean the seeds, removing chaff.
- Wet Seeds (Tomatoes, Cucumbers, Squash): For tomatoes, ferment the seeds in water for a few days to remove the gel coating and inhibit disease. For cucumbers/squash, scrape out seeds, wash thoroughly, and dry.
- Drying: Spread seeds thinly on screens or paper plates in a cool, dry, well-ventilated area for 1-4 weeks. Ensure they are bone-dry before storage. I aim for less than 8% moisture content.
- Storage: Store seeds in airtight containers (glass jars with desiccant packets work well) in a cool, dark, dry place (ideally 40-50°F and 30-40% humidity). Label clearly with variety and date. Properly stored seeds can remain viable for 3-10 years or more.
Step 8: Season Extension & Winterizing
Extend your harvest and protect your garden for the off-season to truly maximize your self sufficient garden from scratch.
- Cold Frames: Simple structures with a transparent top (glass, polycarbonate, or old windows) that sit over garden beds. They trap solar heat, allowing you to grow cold-hardy crops (lettuce, spinach, kale, radishes) well into winter or start seeds earlier in spring. A basic cold frame can be built from 2×6 lumber and a sheet of polycarbonate for under $100.
- Hoop Houses/Low Tunnels: Larger structures made from flexible hoops (PVC pipe or EMT conduit) covered with greenhouse plastic. These provide more space and greater temperature moderation. A 10×20 ft DIY low tunnel kit can cost $200-$500, while a larger, more robust hoop house kit might be $1,000-$3,000. I use a 6×12 ft low tunnel made from 1/2-inch PVC hoops and 6mil greenhouse plastic, which extends my lettuce and spinach harvest by at least
Step 7: Harvesting & Seed Saving
The culmination of your efforts is the harvest, and seed saving closes the loop on self-sufficiency.
- Harvesting Techniques:
- Timing: Harvest vegetables at their peak ripeness for best flavor and nutritional value. For example, green beans should snap cleanly, cucumbers should be firm, and tomatoes should be fully colored.
- Frequency: Many crops, like zucchini, cucumbers, and bush beans, produce more if harvested frequently. Pick daily or every other day.
- Tools: Use clean, sharp pruners (e.g., Corona ClassicCUT Bypass Pruner BP 3180, ~$30) or a sharp knife for clean cuts, minimizing damage to the plant.
- Seed Saving: This is where the « self-sufficient » aspect truly shines.
- Selection: Only save seeds from your healthiest, most vigorous plants that show desired traits (disease resistance, good flavor, high yield).
- Isolation: To ensure true-to-type seeds, prevent cross-pollination. This can be challenging for open-pollinated crops that readily cross (e.g., squash, corn). For beginners, focus on self-pollinating plants like beans, peas, lettuce, and tomatoes.
- Processing:
- Dry Seeds (Beans, Peas, Lettuce, Grains): Allow pods/seed heads to dry completely on the plant. Harvest, shell, and clean the seeds, removing chaff.
- Wet Seeds (Tomatoes, Cucumbers, Squash): For tomatoes, ferment the seeds in water for a few days to remove the gel coating and inhibit disease. For cucumbers/squash, scrape out seeds, wash thoroughly, and dry.
- Drying: Spread seeds thinly on screens or paper plates in a cool, dry, well-ventilated area for 1-4 weeks. Ensure they are bone-dry before storage. I aim for less than 8% moisture content.
- Storage: Store seeds in airtight containers (glass jars with desiccant packets work well) in a cool, dark, dry place (ideally 40-50°F and 30-40% humidity). Label clearly with variety and date. Properly stored seeds can remain viable for 3-10 years or more.
Step 8: Season Extension & Winterizing
Extend your harvest and protect your garden for the off-season to truly maximize your self sufficient garden from scratch.
- Cold Frames: Simple structures with a transparent top (glass, polycarbonate, or old windows) that sit over garden beds. They trap solar heat, allowing you to grow cold-hardy crops (lettuce, spinach, kale, radishes) well into winter or start seeds earlier in spring. A basic cold frame can be built from 2×6 lumber and a sheet of polycarbonate for under $100.
- Hoop Houses/Low Tunnels: Larger structures made from flexible hoops (PVC pipe or EMT conduit) covered with greenhouse plastic. These provide more space and greater temperature moderation. A 10×20 ft DIY low tunnel kit can cost $200-$500, while a larger, more robust hoop house kit might be $1,000-$3,000. I use a 6×12 ft low tunnel made from 1/2-inch PVC hoops and 6mil greenhouse plastic, which extends my lettuce and spinach harvest by at least
- Integrated Pest Management (IPM): This holistic approach combines several strategies.
- Observation: Regularly inspect your plants for early signs of pests or disease. Catching issues early is key.
- Physical Barriers: Use row covers (e.g., Agribon AG-19 floating row cover, 10×20 ft, ~$20) to protect young plants from insect pests like cabbage worms and squash bugs. Install fences (e.g., 2×4 welded wire mesh, 4 ft tall, 50 ft roll ~$70) to keep out deer, rabbits, and other larger animals.
- Hand-Picking: For larger pests like tomato hornworms or squash bugs, simply pick them off and drop them into a bucket of soapy water.
- Companion Planting: As mentioned, certain plants repel pests. Marigolds, garlic, and onions are excellent deterrents.
- Attract Beneficial Insects: Plant flowers like dill, fennel, cosmos, and sweet alyssum to attract ladybugs, lacewings, and parasitic wasps, which prey on common garden pests.
- Organic Sprays & Treatments:
- Neem Oil: An excellent broad-spectrum organic insecticide and fungicide. Bonide Neem Oil Concentrate (16oz, ~$20) can be mixed at a rate of 1-2 tbsp per gallon of water and sprayed on affected plants.
- Insecticidal Soap: Effective against soft-bodied insects like aphids, whiteflies, and spider mites. Garden Safe Insecticidal Soap (24oz ready-to-use, ~$10).
- Bacillus thuringiensis (Bt): A naturally occurring soil bacterium that targets caterpillars and worms. Monterey BT Worm & Caterpillar Killer (16oz, ~$18) is highly effective and safe for beneficial insects.
- Copper or Sulfur Sprays: For fungal diseases like powdery mildew or blight, organic copper (e.g., Bonide Copper Fungicide, ~$15 for 1lb) or sulfur (e.g., Safer Brand Garden Fungicide, ~$10 for 16oz) can be used as a last resort.
Step 7: Harvesting & Seed Saving
The culmination of your efforts is the harvest, and seed saving closes the loop on self-sufficiency.
- Harvesting Techniques:
- Timing: Harvest vegetables at their peak ripeness for best flavor and nutritional value. For example, green beans should snap cleanly, cucumbers should be firm, and tomatoes should be fully colored.
- Frequency: Many crops, like zucchini, cucumbers, and bush beans, produce more if harvested frequently. Pick daily or every other day.
- Tools: Use clean, sharp pruners (e.g., Corona ClassicCUT Bypass Pruner BP 3180, ~$30) or a sharp knife for clean cuts, minimizing damage to the plant.
- Seed Saving: This is where the « self-sufficient » aspect truly shines.
- Selection: Only save seeds from your healthiest, most vigorous plants that show desired traits (disease resistance, good flavor, high yield).
- Isolation: To ensure true-to-type seeds, prevent cross-pollination. This can be challenging for open-pollinated crops that readily cross (e.g., squash, corn). For beginners, focus on self-pollinating plants like beans, peas, lettuce, and tomatoes.
- Processing:
- Dry Seeds (Beans, Peas, Lettuce, Grains): Allow pods/seed heads to dry completely on the plant. Harvest, shell, and clean the seeds, removing chaff.
- Wet Seeds (Tomatoes, Cucumbers, Squash): For tomatoes, ferment the seeds in water for a few days to remove the gel coating and inhibit disease. For cucumbers/squash, scrape out seeds, wash thoroughly, and dry.
- Drying: Spread seeds thinly on screens or paper plates in a cool, dry, well-ventilated area for 1-4 weeks. Ensure they are bone-dry before storage. I aim for less than 8% moisture content.
- Storage: Store seeds in airtight containers (glass jars with desiccant packets work well) in a cool, dark, dry place (ideally 40-50°F and 30-40% humidity). Label clearly with variety and date. Properly stored seeds can remain viable for 3-10 years or more.
Step 8: Season Extension & Winterizing
Extend your harvest and protect your garden for the off-season to truly maximize your self sufficient garden from scratch.
- Cold Frames: Simple structures with a transparent top (glass, polycarbonate, or old windows) that sit over garden beds. They trap solar heat, allowing you to grow cold-hardy crops (lettuce, spinach, kale, radishes) well into winter or start seeds earlier in spring. A basic cold frame can be built from 2×6 lumber and a sheet of polycarbonate for under $100.
- Hoop Houses/Low Tunnels: Larger structures made from flexible hoops (PVC pipe or EMT conduit) covered with greenhouse plastic. These provide more space and greater temperature moderation. A 10×20 ft DIY low tunnel kit can cost $200-$500, while a larger, more robust hoop house kit might be $1,000-$3,000. I use a 6×12 ft low tunnel made from 1/2-inch PVC hoops and 6mil greenhouse plastic, which extends my lettuce and spinach harvest by at least
Maintaining a self sufficient garden from scratch means embracing organic pest and disease control.
- Integrated Pest Management (IPM): This holistic approach combines several strategies.
- Observation: Regularly inspect your plants for early signs of pests or disease. Catching issues early is key.
- Physical Barriers: Use row covers (e.g., Agribon AG-19 floating row cover, 10×20 ft, ~$20) to protect young plants from insect pests like cabbage worms and squash bugs. Install fences (e.g., 2×4 welded wire mesh, 4 ft tall, 50 ft roll ~$70) to keep out deer, rabbits, and other larger animals.
- Hand-Picking: For larger pests like tomato hornworms or squash bugs, simply pick them off and drop them into a bucket of soapy water.
- Companion Planting: As mentioned, certain plants repel pests. Marigolds, garlic, and onions are excellent deterrents.
- Attract Beneficial Insects: Plant flowers like dill, fennel, cosmos, and sweet alyssum to attract ladybugs, lacewings, and parasitic wasps, which prey on common garden pests.
- Organic Sprays & Treatments:
- Neem Oil: An excellent broad-spectrum organic insecticide and fungicide. Bonide Neem Oil Concentrate (16oz, ~$20) can be mixed at a rate of 1-2 tbsp per gallon of water and sprayed on affected plants.
- Insecticidal Soap: Effective against soft-bodied insects like aphids, whiteflies, and spider mites. Garden Safe Insecticidal Soap (24oz ready-to-use, ~$10).
- Bacillus thuringiensis (Bt): A naturally occurring soil bacterium that targets caterpillars and worms. Monterey BT Worm & Caterpillar Killer (16oz, ~$18) is highly effective and safe for beneficial insects.
- Copper or Sulfur Sprays: For fungal diseases like powdery mildew or blight, organic copper (e.g., Bonide Copper Fungicide, ~$15 for 1lb) or sulfur (e.g., Safer Brand Garden Fungicide, ~$10 for 16oz) can be used as a last resort.
Step 7: Harvesting & Seed Saving
The culmination of your efforts is the harvest, and seed saving closes the loop on self-sufficiency.
- Harvesting Techniques:
- Timing: Harvest vegetables at their peak ripeness for best flavor and nutritional value. For example, green beans should snap cleanly, cucumbers should be firm, and tomatoes should be fully colored.
- Frequency: Many crops, like zucchini, cucumbers, and bush beans, produce more if harvested frequently. Pick daily or every other day.
- Tools: Use clean, sharp pruners (e.g., Corona ClassicCUT Bypass Pruner BP 3180, ~$30) or a sharp knife for clean cuts, minimizing damage to the plant.
- Seed Saving: This is where the « self-sufficient » aspect truly shines.
- Selection: Only save seeds from your healthiest, most vigorous plants that show desired traits (disease resistance, good flavor, high yield).
- Isolation: To ensure true-to-type seeds, prevent cross-pollination. This can be challenging for open-pollinated crops that readily cross (e.g., squash, corn). For beginners, focus on self-pollinating plants like beans, peas, lettuce, and tomatoes.
- Processing:
- Dry Seeds (Beans, Peas, Lettuce, Grains): Allow pods/seed heads to dry completely on the plant. Harvest, shell, and clean the seeds, removing chaff.
- Wet Seeds (Tomatoes, Cucumbers, Squash): For tomatoes, ferment the seeds in water for a few days to remove the gel coating and inhibit disease. For cucumbers/squash, scrape out seeds, wash thoroughly, and dry.
- Drying: Spread seeds thinly on screens or paper plates in a cool, dry, well-ventilated area for 1-4 weeks. Ensure they are bone-dry before storage. I aim for less than 8% moisture content.
- Storage: Store seeds in airtight containers (glass jars with desiccant packets work well) in a cool, dark, dry place (ideally 40-50°F and 30-40% humidity). Label clearly with variety and date. Properly stored seeds can remain viable for 3-10 years or more.
Step 8: Season Extension & Winterizing
Extend your harvest and protect your garden for the off-season to truly maximize your self sufficient garden from scratch.
- Cold Frames: Simple structures with a transparent top (glass, polycarbonate, or old windows) that sit over garden beds. They trap solar heat, allowing you to grow cold-hardy crops (lettuce, spinach, kale, radishes) well into winter or start seeds earlier in spring. A basic cold frame can be built from 2×6 lumber and a sheet of polycarbonate for under $100.
- Hoop Houses/Low Tunnels: Larger structures made from flexible hoops (PVC pipe or EMT conduit) covered with greenhouse plastic. These provide more space and greater temperature moderation. A 10×20 ft DIY low tunnel kit can cost $200-$500, while a larger, more robust hoop house kit might be $1,000-$3,000. I use a 6×12 ft low tunnel made from 1/2-inch PVC hoops and 6mil greenhouse plastic, which extends my lettuce and spinach harvest by at least
Step 6: Pest & Disease Management (Organic)
Maintaining a self sufficient garden from scratch means embracing organic pest and disease control.
- Integrated Pest Management (IPM): This holistic approach combines several strategies.
- Observation: Regularly inspect your plants for early signs of pests or disease. Catching issues early is key.
- Physical Barriers: Use row covers (e.g., Agribon AG-19 floating row cover, 10×20 ft, ~$20) to protect young plants from insect pests like cabbage worms and squash bugs. Install fences (e.g., 2×4 welded wire mesh, 4 ft tall, 50 ft roll ~$70) to keep out deer, rabbits, and other larger animals.
- Hand-Picking: For larger pests like tomato hornworms or squash bugs, simply pick them off and drop them into a bucket of soapy water.
- Companion Planting: As mentioned, certain plants repel pests. Marigolds, garlic, and onions are excellent deterrents.
- Attract Beneficial Insects: Plant flowers like dill, fennel, cosmos, and sweet alyssum to attract ladybugs, lacewings, and parasitic wasps, which prey on common garden pests.
- Organic Sprays & Treatments:
- Neem Oil: An excellent broad-spectrum organic insecticide and fungicide. Bonide Neem Oil Concentrate (16oz, ~$20) can be mixed at a rate of 1-2 tbsp per gallon of water and sprayed on affected plants.
- Insecticidal Soap: Effective against soft-bodied insects like aphids, whiteflies, and spider mites. Garden Safe Insecticidal Soap (24oz ready-to-use, ~$10).
- Bacillus thuringiensis (Bt): A naturally occurring soil bacterium that targets caterpillars and worms. Monterey BT Worm & Caterpillar Killer (16oz, ~$18) is highly effective and safe for beneficial insects.
- Copper or Sulfur Sprays: For fungal diseases like powdery mildew or blight, organic copper (e.g., Bonide Copper Fungicide, ~$15 for 1lb) or sulfur (e.g., Safer Brand Garden Fungicide, ~$10 for 16oz) can be used as a last resort.
Step 7: Harvesting & Seed Saving
The culmination of your efforts is the harvest, and seed saving closes the loop on self-sufficiency.
- Harvesting Techniques:
- Timing: Harvest vegetables at their peak ripeness for best flavor and nutritional value. For example, green beans should snap cleanly, cucumbers should be firm, and tomatoes should be fully colored.
- Frequency: Many crops, like zucchini, cucumbers, and bush beans, produce more if harvested frequently. Pick daily or every other day.
- Tools: Use clean, sharp pruners (e.g., Corona ClassicCUT Bypass Pruner BP 3180, ~$30) or a sharp knife for clean cuts, minimizing damage to the plant.
- Seed Saving: This is where the « self-sufficient » aspect truly shines.
- Selection: Only save seeds from your healthiest, most vigorous plants that show desired traits (disease resistance, good flavor, high yield).
- Isolation: To ensure true-to-type seeds, prevent cross-pollination. This can be challenging for open-pollinated crops that readily cross (e.g., squash, corn). For beginners, focus on self-pollinating plants like beans, peas, lettuce, and tomatoes.
- Processing:
- Dry Seeds (Beans, Peas, Lettuce, Grains): Allow pods/seed heads to dry completely on the plant. Harvest, shell, and clean the seeds, removing chaff.
- Wet Seeds (Tomatoes, Cucumbers, Squash): For tomatoes, ferment the seeds in water for a few days to remove the gel coating and inhibit disease. For cucumbers/squash, scrape out seeds, wash thoroughly, and dry.
- Drying: Spread seeds thinly on screens or paper plates in a cool, dry, well-ventilated area for 1-4 weeks. Ensure they are bone-dry before storage. I aim for less than 8% moisture content.
- Storage: Store seeds in airtight containers (glass jars with desiccant packets work well) in a cool, dark, dry place (ideally 40-50°F and 30-40% humidity). Label clearly with variety and date. Properly stored seeds can remain viable for 3-10 years or more.
Step 8: Season Extension & Winterizing
Extend your harvest and protect your garden for the off-season to truly maximize your self sufficient garden from scratch.
- Cold Frames: Simple structures with a transparent top (glass, polycarbonate, or old windows) that sit over garden beds. They trap solar heat, allowing you to grow cold-hardy crops (lettuce, spinach, kale, radishes) well into winter or start seeds earlier in spring. A basic cold frame can be built from 2×6 lumber and a sheet of polycarbonate for under $100.
- Hoop Houses/Low Tunnels: Larger structures made from flexible hoops (PVC pipe or EMT conduit) covered with greenhouse plastic. These provide more space and greater temperature moderation. A 10×20 ft DIY low tunnel kit can cost $200-$500, while a larger, more robust hoop house kit might be $1,000-$3,000. I use a 6×12 ft low tunnel made from 1/2-inch PVC hoops and 6mil greenhouse plastic, which extends my lettuce and spinach harvest by at least
- Choose Heirloom & Open-Pollinated Seeds: These varieties produce seeds that will grow true to type, meaning you can save seeds from your harvest year after year. F1 hybrids, while often vigorous, will not produce consistent offspring from saved seeds. Reputable seed companies include Baker Creek Heirloom Seeds, High Mowing Organic Seeds, and Seed Savers Exchange. Start with common, reliable varieties like ‘Black Krim’ tomatoes, ‘Provider’ bush beans, ‘Waltham Butternut’ squash, and ‘Black Seeded Simpson’ lettuce.
- Start Seeds Indoors (Optional but Recommended): For longer growing seasons or specific crops, starting seeds indoors gives you a head start. Use seed-starting mix (e.g., Espoma Organic Seed Starter Mix, ~$10 for 16qt bag) in seed trays (Jiffy Professional Greenhouse 72-cell kit, ~$15). Provide adequate light with LED grow lights (Barrina T5 2ft 4-pack LED Grow Lights, 20W each, ~$50) for 14-16 hours a day, positioned 2-4 inches above seedlings. Maintain consistent temperatures (65-75°F for most).
- Direct Sowing vs. Transplanting: Some crops (carrots, radishes, beans, corn) prefer direct sowing into the garden bed. Others (tomatoes, peppers, broccoli, kale) benefit from being started indoors and transplanted. Follow seed packet instructions for planting depths (e.g., lettuce seeds are often surface-sown or planted 1/8 inch deep, while beans are 1 inch deep) and spacing.
- Companion Planting: Strategically plant different species together to enhance growth, deter pests, and attract beneficial insects. For example, planting marigolds near tomatoes can deter nematodes, and basil improves tomato flavor. Nasturtiums can act as a trap crop for aphids.
- Succession Planting: For a continuous harvest, plant small batches of quick-growing crops (lettuce, radishes, cilantro) every 2-3 weeks. As one crop finishes, another is ready to take its place.
Step 6: Pest & Disease Management (Organic)
Maintaining a self sufficient garden from scratch means embracing organic pest and disease control.
- Integrated Pest Management (IPM): This holistic approach combines several strategies.
- Observation: Regularly inspect your plants for early signs of pests or disease. Catching issues early is key.
- Physical Barriers: Use row covers (e.g., Agribon AG-19 floating row cover, 10×20 ft, ~$20) to protect young plants from insect pests like cabbage worms and squash bugs. Install fences (e.g., 2×4 welded wire mesh, 4 ft tall, 50 ft roll ~$70) to keep out deer, rabbits, and other larger animals.
- Hand-Picking: For larger pests like tomato hornworms or squash bugs, simply pick them off and drop them into a bucket of soapy water.
- Companion Planting: As mentioned, certain plants repel pests. Marigolds, garlic, and onions are excellent deterrents.
- Attract Beneficial Insects: Plant flowers like dill, fennel, cosmos, and sweet alyssum to attract ladybugs, lacewings, and parasitic wasps, which prey on common garden pests.
- Organic Sprays & Treatments:
- Neem Oil: An excellent broad-spectrum organic insecticide and fungicide. Bonide Neem Oil Concentrate (16oz, ~$20) can be mixed at a rate of 1-2 tbsp per gallon of water and sprayed on affected plants.
- Insecticidal Soap: Effective against soft-bodied insects like aphids, whiteflies, and spider mites. Garden Safe Insecticidal Soap (24oz ready-to-use, ~$10).
- Bacillus thuringiensis (Bt): A naturally occurring soil bacterium that targets caterpillars and worms. Monterey BT Worm & Caterpillar Killer (16oz, ~$18) is highly effective and safe for beneficial insects.
- Copper or Sulfur Sprays: For fungal diseases like powdery mildew or blight, organic copper (e.g., Bonide Copper Fungicide, ~$15 for 1lb) or sulfur (e.g., Safer Brand Garden Fungicide, ~$10 for 16oz) can be used as a last resort.
Step 7: Harvesting & Seed Saving
The culmination of your efforts is the harvest, and seed saving closes the loop on self-sufficiency.
- Harvesting Techniques:
- Timing: Harvest vegetables at their peak ripeness for best flavor and nutritional value. For example, green beans should snap cleanly, cucumbers should be firm, and tomatoes should be fully colored.
- Frequency: Many crops, like zucchini, cucumbers, and bush beans, produce more if harvested frequently. Pick daily or every other day.
- Tools: Use clean, sharp pruners (e.g., Corona ClassicCUT Bypass Pruner BP 3180, ~$30) or a sharp knife for clean cuts, minimizing damage to the plant.
- Seed Saving: This is where the « self-sufficient » aspect truly shines.
- Selection: Only save seeds from your healthiest, most vigorous plants that show desired traits (disease resistance, good flavor, high yield).
- Isolation: To ensure true-to-type seeds, prevent cross-pollination. This can be challenging for open-pollinated crops that readily cross (e.g., squash, corn). For beginners, focus on self-pollinating plants like beans, peas, lettuce, and tomatoes.
- Processing:
- Dry Seeds (Beans, Peas, Lettuce, Grains): Allow pods/seed heads to dry completely on the plant. Harvest, shell, and clean the seeds, removing chaff.
- Wet Seeds (Tomatoes, Cucumbers, Squash): For tomatoes, ferment the seeds in water for a few days to remove the gel coating and inhibit disease. For cucumbers/squash, scrape out seeds, wash thoroughly, and dry.
- Drying: Spread seeds thinly on screens or paper plates in a cool, dry, well-ventilated area for 1-4 weeks. Ensure they are bone-dry before storage. I aim for less than 8% moisture content.
- Storage: Store seeds in airtight containers (glass jars with desiccant packets work well) in a cool, dark, dry place (ideally 40-50°F and 30-40% humidity). Label clearly with variety and date. Properly stored seeds can remain viable for 3-10 years or more.
Step 8: Season Extension & Winterizing
Extend your harvest and protect your garden for the off-season to truly maximize your self sufficient garden from scratch.
- Cold Frames: Simple structures with a transparent top (glass, polycarbonate, or old windows) that sit over garden beds. They trap solar heat, allowing you to grow cold-hardy crops (lettuce, spinach, kale, radishes) well into winter or start seeds earlier in spring. A basic cold frame can be built from 2×6 lumber and a sheet of polycarbonate for under $100.
- Hoop Houses/Low Tunnels: Larger structures made from flexible hoops (PVC pipe or EMT conduit) covered with greenhouse plastic. These provide more space and greater temperature moderation. A 10×20 ft DIY low tunnel kit can cost $200-$500, while a larger, more robust hoop house kit might be $1,000-$3,000. I use a 6×12 ft low tunnel made from 1/2-inch PVC hoops and 6mil greenhouse plastic, which extends my lettuce and spinach harvest by at least
The choice of seeds is crucial for a truly self sufficient garden from scratch.
- Choose Heirloom & Open-Pollinated Seeds: These varieties produce seeds that will grow true to type, meaning you can save seeds from your harvest year after year. F1 hybrids, while often vigorous, will not produce consistent offspring from saved seeds. Reputable seed companies include Baker Creek Heirloom Seeds, High Mowing Organic Seeds, and Seed Savers Exchange. Start with common, reliable varieties like ‘Black Krim’ tomatoes, ‘Provider’ bush beans, ‘Waltham Butternut’ squash, and ‘Black Seeded Simpson’ lettuce.
- Start Seeds Indoors (Optional but Recommended): For longer growing seasons or specific crops, starting seeds indoors gives you a head start. Use seed-starting mix (e.g., Espoma Organic Seed Starter Mix, ~$10 for 16qt bag) in seed trays (Jiffy Professional Greenhouse 72-cell kit, ~$15). Provide adequate light with LED grow lights (Barrina T5 2ft 4-pack LED Grow Lights, 20W each, ~$50) for 14-16 hours a day, positioned 2-4 inches above seedlings. Maintain consistent temperatures (65-75°F for most).
- Direct Sowing vs. Transplanting: Some crops (carrots, radishes, beans, corn) prefer direct sowing into the garden bed. Others (tomatoes, peppers, broccoli, kale) benefit from being started indoors and transplanted. Follow seed packet instructions for planting depths (e.g., lettuce seeds are often surface-sown or planted 1/8 inch deep, while beans are 1 inch deep) and spacing.
- Companion Planting: Strategically plant different species together to enhance growth, deter pests, and attract beneficial insects. For example, planting marigolds near tomatoes can deter nematodes, and basil improves tomato flavor. Nasturtiums can act as a trap crop for aphids.
- Succession Planting: For a continuous harvest, plant small batches of quick-growing crops (lettuce, radishes, cilantro) every 2-3 weeks. As one crop finishes, another is ready to take its place.
Step 6: Pest & Disease Management (Organic)
Maintaining a self sufficient garden from scratch means embracing organic pest and disease control.
- Integrated Pest Management (IPM): This holistic approach combines several strategies.
- Observation: Regularly inspect your plants for early signs of pests or disease. Catching issues early is key.
- Physical Barriers: Use row covers (e.g., Agribon AG-19 floating row cover, 10×20 ft, ~$20) to protect young plants from insect pests like cabbage worms and squash bugs. Install fences (e.g., 2×4 welded wire mesh, 4 ft tall, 50 ft roll ~$70) to keep out deer, rabbits, and other larger animals.
- Hand-Picking: For larger pests like tomato hornworms or squash bugs, simply pick them off and drop them into a bucket of soapy water.
- Companion Planting: As mentioned, certain plants repel pests. Marigolds, garlic, and onions are excellent deterrents.
- Attract Beneficial Insects: Plant flowers like dill, fennel, cosmos, and sweet alyssum to attract ladybugs, lacewings, and parasitic wasps, which prey on common garden pests.
- Organic Sprays & Treatments:
- Neem Oil: An excellent broad-spectrum organic insecticide and fungicide. Bonide Neem Oil Concentrate (16oz, ~$20) can be mixed at a rate of 1-2 tbsp per gallon of water and sprayed on affected plants.
- Insecticidal Soap: Effective against soft-bodied insects like aphids, whiteflies, and spider mites. Garden Safe Insecticidal Soap (24oz ready-to-use, ~$10).
- Bacillus thuringiensis (Bt): A naturally occurring soil bacterium that targets caterpillars and worms. Monterey BT Worm & Caterpillar Killer (16oz, ~$18) is highly effective and safe for beneficial insects.
- Copper or Sulfur Sprays: For fungal diseases like powdery mildew or blight, organic copper (e.g., Bonide Copper Fungicide, ~$15 for 1lb) or sulfur (e.g., Safer Brand Garden Fungicide, ~$10 for 16oz) can be used as a last resort.
Step 7: Harvesting & Seed Saving
The culmination of your efforts is the harvest, and seed saving closes the loop on self-sufficiency.
- Harvesting Techniques:
- Timing: Harvest vegetables at their peak ripeness for best flavor and nutritional value. For example, green beans should snap cleanly, cucumbers should be firm, and tomatoes should be fully colored.
- Frequency: Many crops, like zucchini, cucumbers, and bush beans, produce more if harvested frequently. Pick daily or every other day.
- Tools: Use clean, sharp pruners (e.g., Corona ClassicCUT Bypass Pruner BP 3180, ~$30) or a sharp knife for clean cuts, minimizing damage to the plant.
- Seed Saving: This is where the « self-sufficient » aspect truly shines.
- Selection: Only save seeds from your healthiest, most vigorous plants that show desired traits (disease resistance, good flavor, high yield).
- Isolation: To ensure true-to-type seeds, prevent cross-pollination. This can be challenging for open-pollinated crops that readily cross (e.g., squash, corn). For beginners, focus on self-pollinating plants like beans, peas, lettuce, and tomatoes.
- Processing:
- Dry Seeds (Beans, Peas, Lettuce, Grains): Allow pods/seed heads to dry completely on the plant. Harvest, shell, and clean the seeds, removing chaff.
- Wet Seeds (Tomatoes, Cucumbers, Squash): For tomatoes, ferment the seeds in water for a few days to remove the gel coating and inhibit disease. For cucumbers/squash, scrape out seeds, wash thoroughly, and dry.
- Drying: Spread seeds thinly on screens or paper plates in a cool, dry, well-ventilated area for 1-4 weeks. Ensure they are bone-dry before storage. I aim for less than 8% moisture content.
- Storage: Store seeds in airtight containers (glass jars with desiccant packets work well) in a cool, dark, dry place (ideally 40-50°F and 30-40% humidity). Label clearly with variety and date. Properly stored seeds can remain viable for 3-10 years or more.
Step 8: Season Extension & Winterizing
Extend your harvest and protect your garden for the off-season to truly maximize your self sufficient garden from scratch.
- Cold Frames: Simple structures with a transparent top (glass, polycarbonate, or old windows) that sit over garden beds. They trap solar heat, allowing you to grow cold-hardy crops (lettuce, spinach, kale, radishes) well into winter or start seeds earlier in spring. A basic cold frame can be built from 2×6 lumber and a sheet of polycarbonate for under $100.
- Hoop Houses/Low Tunnels: Larger structures made from flexible hoops (PVC pipe or EMT conduit) covered with greenhouse plastic. These provide more space and greater temperature moderation. A 10×20 ft DIY low tunnel kit can cost $200-$500, while a larger, more robust hoop house kit might be $1,000-$3,000. I use a 6×12 ft low tunnel made from 1/2-inch PVC hoops and 6mil greenhouse plastic, which extends my lettuce and spinach harvest by at least
Step 5: Seed Selection & Planting
The choice of seeds is crucial for a truly self sufficient garden from scratch.
- Choose Heirloom & Open-Pollinated Seeds: These varieties produce seeds that will grow true to type, meaning you can save seeds from your harvest year after year. F1 hybrids, while often vigorous, will not produce consistent offspring from saved seeds. Reputable seed companies include Baker Creek Heirloom Seeds, High Mowing Organic Seeds, and Seed Savers Exchange. Start with common, reliable varieties like ‘Black Krim’ tomatoes, ‘Provider’ bush beans, ‘Waltham Butternut’ squash, and ‘Black Seeded Simpson’ lettuce.
- Start Seeds Indoors (Optional but Recommended): For longer growing seasons or specific crops, starting seeds indoors gives you a head start. Use seed-starting mix (e.g., Espoma Organic Seed Starter Mix, ~$10 for 16qt bag) in seed trays (Jiffy Professional Greenhouse 72-cell kit, ~$15). Provide adequate light with LED grow lights (Barrina T5 2ft 4-pack LED Grow Lights, 20W each, ~$50) for 14-16 hours a day, positioned 2-4 inches above seedlings. Maintain consistent temperatures (65-75°F for most).
- Direct Sowing vs. Transplanting: Some crops (carrots, radishes, beans, corn) prefer direct sowing into the garden bed. Others (tomatoes, peppers, broccoli, kale) benefit from being started indoors and transplanted. Follow seed packet instructions for planting depths (e.g., lettuce seeds are often surface-sown or planted 1/8 inch deep, while beans are 1 inch deep) and spacing.
- Companion Planting: Strategically plant different species together to enhance growth, deter pests, and attract beneficial insects. For example, planting marigolds near tomatoes can deter nematodes, and basil improves tomato flavor. Nasturtiums can act as a trap crop for aphids.
- Succession Planting: For a continuous harvest, plant small batches of quick-growing crops (lettuce, radishes, cilantro) every 2-3 weeks. As one crop finishes, another is ready to take its place.
Step 6: Pest & Disease Management (Organic)
Maintaining a self sufficient garden from scratch means embracing organic pest and disease control.
- Integrated Pest Management (IPM): This holistic approach combines several strategies.
- Observation: Regularly inspect your plants for early signs of pests or disease. Catching issues early is key.
- Physical Barriers: Use row covers (e.g., Agribon AG-19 floating row cover, 10×20 ft, ~$20) to protect young plants from insect pests like cabbage worms and squash bugs. Install fences (e.g., 2×4 welded wire mesh, 4 ft tall, 50 ft roll ~$70) to keep out deer, rabbits, and other larger animals.
- Hand-Picking: For larger pests like tomato hornworms or squash bugs, simply pick them off and drop them into a bucket of soapy water.
- Companion Planting: As mentioned, certain plants repel pests. Marigolds, garlic, and onions are excellent deterrents.
- Attract Beneficial Insects: Plant flowers like dill, fennel, cosmos, and sweet alyssum to attract ladybugs, lacewings, and parasitic wasps, which prey on common garden pests.
- Organic Sprays & Treatments:
- Neem Oil: An excellent broad-spectrum organic insecticide and fungicide. Bonide Neem Oil Concentrate (16oz, ~$20) can be mixed at a rate of 1-2 tbsp per gallon of water and sprayed on affected plants.
- Insecticidal Soap: Effective against soft-bodied insects like aphids, whiteflies, and spider mites. Garden Safe Insecticidal Soap (24oz ready-to-use, ~$10).
- Bacillus thuringiensis (Bt): A naturally occurring soil bacterium that targets caterpillars and worms. Monterey BT Worm & Caterpillar Killer (16oz, ~$18) is highly effective and safe for beneficial insects.
- Copper or Sulfur Sprays: For fungal diseases like powdery mildew or blight, organic copper (e.g., Bonide Copper Fungicide, ~$15 for 1lb) or sulfur (e.g., Safer Brand Garden Fungicide, ~$10 for 16oz) can be used as a last resort.
Step 7: Harvesting & Seed Saving
The culmination of your efforts is the harvest, and seed saving closes the loop on self-sufficiency.
- Harvesting Techniques:
- Timing: Harvest vegetables at their peak ripeness for best flavor and nutritional value. For example, green beans should snap cleanly, cucumbers should be firm, and tomatoes should be fully colored.
- Frequency: Many crops, like zucchini, cucumbers, and bush beans, produce more if harvested frequently. Pick daily or every other day.
- Tools: Use clean, sharp pruners (e.g., Corona ClassicCUT Bypass Pruner BP 3180, ~$30) or a sharp knife for clean cuts, minimizing damage to the plant.
- Seed Saving: This is where the « self-sufficient » aspect truly shines.
- Selection: Only save seeds from your healthiest, most vigorous plants that show desired traits (disease resistance, good flavor, high yield).
- Isolation: To ensure true-to-type seeds, prevent cross-pollination. This can be challenging for open-pollinated crops that readily cross (e.g., squash, corn). For beginners, focus on self-pollinating plants like beans, peas, lettuce, and tomatoes.
- Processing:
- Dry Seeds (Beans, Peas, Lettuce, Grains): Allow pods/seed heads to dry completely on the plant. Harvest, shell, and clean the seeds, removing chaff.
- Wet Seeds (Tomatoes, Cucumbers, Squash): For tomatoes, ferment the seeds in water for a few days to remove the gel coating and inhibit disease. For cucumbers/squash, scrape out seeds, wash thoroughly, and dry.
- Drying: Spread seeds thinly on screens or paper plates in a cool, dry, well-ventilated area for 1-4 weeks. Ensure they are bone-dry before storage. I aim for less than 8% moisture content.
- Storage: Store seeds in airtight containers (glass jars with desiccant packets work well) in a cool, dark, dry place (ideally 40-50°F and 30-40% humidity). Label clearly with variety and date. Properly stored seeds can remain viable for 3-10 years or more.
Step 8: Season Extension & Winterizing
Extend your harvest and protect your garden for the off-season to truly maximize your self sufficient garden from scratch.
- Cold Frames: Simple structures with a transparent top (glass, polycarbonate, or old windows) that sit over garden beds. They trap solar heat, allowing you to grow cold-hardy crops (lettuce, spinach, kale, radishes) well into winter or start seeds earlier in spring. A basic cold frame can be built from 2×6 lumber and a sheet of polycarbonate for under $100.
- Hoop Houses/Low Tunnels: Larger structures made from flexible hoops (PVC pipe or EMT conduit) covered with greenhouse plastic. These provide more space and greater temperature moderation. A 10×20 ft DIY low tunnel kit can cost $200-$500, while a larger, more robust hoop house kit might be $1,000-$3,000. I use a 6×12 ft low tunnel made from 1/2-inch PVC hoops and 6mil greenhouse plastic, which extends my lettuce and spinach harvest by at least
- Rainwater Harvesting: This is my primary source of irrigation water. A 55-gallon rain barrel (e.g., EarthMark Rain Barrel, ~$120-$150) connected to a downspout can collect significant water. For larger needs, I use two 275-gallon IBC totes (Intermediate Bulk Containers, often available used for $100-$200 each from food-grade sources) connected in series. A 1,000 sq ft roof can collect approximately 620 gallons of water for every inch of rainfall. My 1,500 sq ft roof provides ample water for my 600 sq ft garden through multiple barrels and totes.
- Drip Irrigation: This is by far the most water-efficient method, delivering water directly to the plant’s root zone, minimizing evaporation and weed growth.
- Components: A typical drip system includes a pressure regulator (e.g., Rain Bird PRV-10, ~$15), a filter (Rain Bird RBY filter, ~$20), main tubing (1/2-inch poly tubing, 100ft ~$25), smaller feeder lines (1/4-inch tubing), and emitters (0.5 GPH or 1 GPH per plant).
- Kits: For beginners, a starter kit like the Rain Bird Drip Irrigation Garden Kit (model DDI-KIT-1P, ~$40-$60) is excellent for a small garden. For larger setups, I use Netafim Techline CV Drip Line (500ft roll, ~$150-$200), which has pressure-compensating emitters built-in, ensuring even watering across long runs.
- Automation: For true self-sufficiency, consider a battery-powered timer (e.g., Orbit B-Hyve Bluetooth Hose Faucet Timer, ~$50) or a solar-powered timer connected to a small 12V pump.
- Solar-Powered Pumps: For lifting water from a well, pond, or large storage tank to your garden, a solar pump is a game-changer. For a smaller drip system, a Shurflo 2088-594-152 Diaphragm Pump (12V, 3.5 GPM, ~$180) can be powered by a single 100W solar panel (e.g., Renogy 100W Monocrystalline Solar Panel, ~$100) and a small 12V battery (e.g., a 50Ah LiFePO4 battery like the Battle Born 50Ah, ~$450). For larger operations or deeper wells, more robust systems are needed. If you’re looking to build out a comprehensive off-grid power system to support your garden’s water needs, or indeed your entire homestead, you might want to explore resources like the Power Grid Generator complete system guide to understand the full scope of what’s possible in terms of energy independence.
Step 5: Seed Selection & Planting
The choice of seeds is crucial for a truly self sufficient garden from scratch.
- Choose Heirloom & Open-Pollinated Seeds: These varieties produce seeds that will grow true to type, meaning you can save seeds from your harvest year after year. F1 hybrids, while often vigorous, will not produce consistent offspring from saved seeds. Reputable seed companies include Baker Creek Heirloom Seeds, High Mowing Organic Seeds, and Seed Savers Exchange. Start with common, reliable varieties like ‘Black Krim’ tomatoes, ‘Provider’ bush beans, ‘Waltham Butternut’ squash, and ‘Black Seeded Simpson’ lettuce.
- Start Seeds Indoors (Optional but Recommended): For longer growing seasons or specific crops, starting seeds indoors gives you a head start. Use seed-starting mix (e.g., Espoma Organic Seed Starter Mix, ~$10 for 16qt bag) in seed trays (Jiffy Professional Greenhouse 72-cell kit, ~$15). Provide adequate light with LED grow lights (Barrina T5 2ft 4-pack LED Grow Lights, 20W each, ~$50) for 14-16 hours a day, positioned 2-4 inches above seedlings. Maintain consistent temperatures (65-75°F for most).
- Direct Sowing vs. Transplanting: Some crops (carrots, radishes, beans, corn) prefer direct sowing into the garden bed. Others (tomatoes, peppers, broccoli, kale) benefit from being started indoors and transplanted. Follow seed packet instructions for planting depths (e.g., lettuce seeds are often surface-sown or planted 1/8 inch deep, while beans are 1 inch deep) and spacing.
- Companion Planting: Strategically plant different species together to enhance growth, deter pests, and attract beneficial insects. For example, planting marigolds near tomatoes can deter nematodes, and basil improves tomato flavor. Nasturtiums can act as a trap crop for aphids.
- Succession Planting: For a continuous harvest, plant small batches of quick-growing crops (lettuce, radishes, cilantro) every 2-3 weeks. As one crop finishes, another is ready to take its place.
Step 6: Pest & Disease Management (Organic)
Maintaining a self sufficient garden from scratch means embracing organic pest and disease control.
- Integrated Pest Management (IPM): This holistic approach combines several strategies.
- Observation: Regularly inspect your plants for early signs of pests or disease. Catching issues early is key.
- Physical Barriers: Use row covers (e.g., Agribon AG-19 floating row cover, 10×20 ft, ~$20) to protect young plants from insect pests like cabbage worms and squash bugs. Install fences (e.g., 2×4 welded wire mesh, 4 ft tall, 50 ft roll ~$70) to keep out deer, rabbits, and other larger animals.
- Hand-Picking: For larger pests like tomato hornworms or squash bugs, simply pick them off and drop them into a bucket of soapy water.
- Companion Planting: As mentioned, certain plants repel pests. Marigolds, garlic, and onions are excellent deterrents.
- Attract Beneficial Insects: Plant flowers like dill, fennel, cosmos, and sweet alyssum to attract ladybugs, lacewings, and parasitic wasps, which prey on common garden pests.
- Organic Sprays & Treatments:
- Neem Oil: An excellent broad-spectrum organic insecticide and fungicide. Bonide Neem Oil Concentrate (16oz, ~$20) can be mixed at a rate of 1-2 tbsp per gallon of water and sprayed on affected plants.
- Insecticidal Soap: Effective against soft-bodied insects like aphids, whiteflies, and spider mites. Garden Safe Insecticidal Soap (24oz ready-to-use, ~$10).
- Bacillus thuringiensis (Bt): A naturally occurring soil bacterium that targets caterpillars and worms. Monterey BT Worm & Caterpillar Killer (16oz, ~$18) is highly effective and safe for beneficial insects.
- Copper or Sulfur Sprays: For fungal diseases like powdery mildew or blight, organic copper (e.g., Bonide Copper Fungicide, ~$15 for 1lb) or sulfur (e.g., Safer Brand Garden Fungicide, ~$10 for 16oz) can be used as a last resort.
Step 7: Harvesting & Seed Saving
The culmination of your efforts is the harvest, and seed saving closes the loop on self-sufficiency.
- Harvesting Techniques:
- Timing: Harvest vegetables at their peak ripeness for best flavor and nutritional value. For example, green beans should snap cleanly, cucumbers should be firm, and tomatoes should be fully colored.
- Frequency: Many crops, like zucchini, cucumbers, and bush beans, produce more if harvested frequently. Pick daily or every other day.
- Tools: Use clean, sharp pruners (e.g., Corona ClassicCUT Bypass Pruner BP 3180, ~$30) or a sharp knife for clean cuts, minimizing damage to the plant.
- Seed Saving: This is where the « self-sufficient » aspect truly shines.
- Selection: Only save seeds from your healthiest, most vigorous plants that show desired traits (disease resistance, good flavor, high yield).
- Isolation: To ensure true-to-type seeds, prevent cross-pollination. This can be challenging for open-pollinated crops that readily cross (e.g., squash, corn). For beginners, focus on self-pollinating plants like beans, peas, lettuce, and tomatoes.
- Processing:
- Dry Seeds (Beans, Peas, Lettuce, Grains): Allow pods/seed heads to dry completely on the plant. Harvest, shell, and clean the seeds, removing chaff.
- Wet Seeds (Tomatoes, Cucumbers, Squash): For tomatoes, ferment the seeds in water for a few days to remove the gel coating and inhibit disease. For cucumbers/squash, scrape out seeds, wash thoroughly, and dry.
- Drying: Spread seeds thinly on screens or paper plates in a cool, dry, well-ventilated area for 1-4 weeks. Ensure they are bone-dry before storage. I aim for less than 8% moisture content.
- Storage: Store seeds in airtight containers (glass jars with desiccant packets work well) in a cool, dark, dry place (ideally 40-50°F and 30-40% humidity). Label clearly with variety and date. Properly stored seeds can remain viable for 3-10 years or more.
Step 8: Season Extension & Winterizing
Extend your harvest and protect your garden for the off-season to truly maximize your self sufficient garden from scratch.
- Cold Frames: Simple structures with a transparent top (glass, polycarbonate, or old windows) that sit over garden beds. They trap solar heat, allowing you to grow cold-hardy crops (lettuce, spinach, kale, radishes) well into winter or start seeds earlier in spring. A basic cold frame can be built from 2×6 lumber and a sheet of polycarbonate for under $100.
- Hoop Houses/Low Tunnels: Larger structures made from flexible hoops (PVC pipe or EMT conduit) covered with greenhouse plastic. These provide more space and greater temperature moderation. A 10×20 ft DIY low tunnel kit can cost $200-$500, while a larger, more robust hoop house kit might be $1,000-$3,000. I use a 6×12 ft low tunnel made from 1/2-inch PVC hoops and 6mil greenhouse plastic, which extends my lettuce and spinach harvest by at least
Efficient water management is critical for a self sufficient garden from scratch, especially in off-grid living where water resources might be limited.
- Rainwater Harvesting: This is my primary source of irrigation water. A 55-gallon rain barrel (e.g., EarthMark Rain Barrel, ~$120-$150) connected to a downspout can collect significant water. For larger needs, I use two 275-gallon IBC totes (Intermediate Bulk Containers, often available used for $100-$200 each from food-grade sources) connected in series. A 1,000 sq ft roof can collect approximately 620 gallons of water for every inch of rainfall. My 1,500 sq ft roof provides ample water for my 600 sq ft garden through multiple barrels and totes.
- Drip Irrigation: This is by far the most water-efficient method, delivering water directly to the plant’s root zone, minimizing evaporation and weed growth.
- Components: A typical drip system includes a pressure regulator (e.g., Rain Bird PRV-10, ~$15), a filter (Rain Bird RBY filter, ~$20), main tubing (1/2-inch poly tubing, 100ft ~$25), smaller feeder lines (1/4-inch tubing), and emitters (0.5 GPH or 1 GPH per plant).
- Kits: For beginners, a starter kit like the Rain Bird Drip Irrigation Garden Kit (model DDI-KIT-1P, ~$40-$60) is excellent for a small garden. For larger setups, I use Netafim Techline CV Drip Line (500ft roll, ~$150-$200), which has pressure-compensating emitters built-in, ensuring even watering across long runs.
- Automation: For true self-sufficiency, consider a battery-powered timer (e.g., Orbit B-Hyve Bluetooth Hose Faucet Timer, ~$50) or a solar-powered timer connected to a small 12V pump.
- Solar-Powered Pumps: For lifting water from a well, pond, or large storage tank to your garden, a solar pump is a game-changer. For a smaller drip system, a Shurflo 2088-594-152 Diaphragm Pump (12V, 3.5 GPM, ~$180) can be powered by a single 100W solar panel (e.g., Renogy 100W Monocrystalline Solar Panel, ~$100) and a small 12V battery (e.g., a 50Ah LiFePO4 battery like the Battle Born 50Ah, ~$450). For larger operations or deeper wells, more robust systems are needed. If you’re looking to build out a comprehensive off-grid power system to support your garden’s water needs, or indeed your entire homestead, you might want to explore resources like the Power Grid Generator complete system guide to understand the full scope of what’s possible in terms of energy independence.
Step 5: Seed Selection & Planting
The choice of seeds is crucial for a truly self sufficient garden from scratch.
- Choose Heirloom & Open-Pollinated Seeds: These varieties produce seeds that will grow true to type, meaning you can save seeds from your harvest year after year. F1 hybrids, while often vigorous, will not produce consistent offspring from saved seeds. Reputable seed companies include Baker Creek Heirloom Seeds, High Mowing Organic Seeds, and Seed Savers Exchange. Start with common, reliable varieties like ‘Black Krim’ tomatoes, ‘Provider’ bush beans, ‘Waltham Butternut’ squash, and ‘Black Seeded Simpson’ lettuce.
- Start Seeds Indoors (Optional but Recommended): For longer growing seasons or specific crops, starting seeds indoors gives you a head start. Use seed-starting mix (e.g., Espoma Organic Seed Starter Mix, ~$10 for 16qt bag) in seed trays (Jiffy Professional Greenhouse 72-cell kit, ~$15). Provide adequate light with LED grow lights (Barrina T5 2ft 4-pack LED Grow Lights, 20W each, ~$50) for 14-16 hours a day, positioned 2-4 inches above seedlings. Maintain consistent temperatures (65-75°F for most).
- Direct Sowing vs. Transplanting: Some crops (carrots, radishes, beans, corn) prefer direct sowing into the garden bed. Others (tomatoes, peppers, broccoli, kale) benefit from being started indoors and transplanted. Follow seed packet instructions for planting depths (e.g., lettuce seeds are often surface-sown or planted 1/8 inch deep, while beans are 1 inch deep) and spacing.
- Companion Planting: Strategically plant different species together to enhance growth, deter pests, and attract beneficial insects. For example, planting marigolds near tomatoes can deter nematodes, and basil improves tomato flavor. Nasturtiums can act as a trap crop for aphids.
- Succession Planting: For a continuous harvest, plant small batches of quick-growing crops (lettuce, radishes, cilantro) every 2-3 weeks. As one crop finishes, another is ready to take its place.
Step 6: Pest & Disease Management (Organic)
Maintaining a self sufficient garden from scratch means embracing organic pest and disease control.
- Integrated Pest Management (IPM): This holistic approach combines several strategies.
- Observation: Regularly inspect your plants for early signs of pests or disease. Catching issues early is key.
- Physical Barriers: Use row covers (e.g., Agribon AG-19 floating row cover, 10×20 ft, ~$20) to protect young plants from insect pests like cabbage worms and squash bugs. Install fences (e.g., 2×4 welded wire mesh, 4 ft tall, 50 ft roll ~$70) to keep out deer, rabbits, and other larger animals.
- Hand-Picking: For larger pests like tomato hornworms or squash bugs, simply pick them off and drop them into a bucket of soapy water.
- Companion Planting: As mentioned, certain plants repel pests. Marigolds, garlic, and onions are excellent deterrents.
- Attract Beneficial Insects: Plant flowers like dill, fennel, cosmos, and sweet alyssum to attract ladybugs, lacewings, and parasitic wasps, which prey on common garden pests.
- Organic Sprays & Treatments:
- Neem Oil: An excellent broad-spectrum organic insecticide and fungicide. Bonide Neem Oil Concentrate (16oz, ~$20) can be mixed at a rate of 1-2 tbsp per gallon of water and sprayed on affected plants.
- Insecticidal Soap: Effective against soft-bodied insects like aphids, whiteflies, and spider mites. Garden Safe Insecticidal Soap (24oz ready-to-use, ~$10).
- Bacillus thuringiensis (Bt): A naturally occurring soil bacterium that targets caterpillars and worms. Monterey BT Worm & Caterpillar Killer (16oz, ~$18) is highly effective and safe for beneficial insects.
- Copper or Sulfur Sprays: For fungal diseases like powdery mildew or blight, organic copper (e.g., Bonide Copper Fungicide, ~$15 for 1lb) or sulfur (e.g., Safer Brand Garden Fungicide, ~$10 for 16oz) can be used as a last resort.
Step 7: Harvesting & Seed Saving
The culmination of your efforts is the harvest, and seed saving closes the loop on self-sufficiency.
- Harvesting Techniques:
- Timing: Harvest vegetables at their peak ripeness for best flavor and nutritional value. For example, green beans should snap cleanly, cucumbers should be firm, and tomatoes should be fully colored.
- Frequency: Many crops, like zucchini, cucumbers, and bush beans, produce more if harvested frequently. Pick daily or every other day.
- Tools: Use clean, sharp pruners (e.g., Corona ClassicCUT Bypass Pruner BP 3180, ~$30) or a sharp knife for clean cuts, minimizing damage to the plant.
- Seed Saving: This is where the « self-sufficient » aspect truly shines.
- Selection: Only save seeds from your healthiest, most vigorous plants that show desired traits (disease resistance, good flavor, high yield).
- Isolation: To ensure true-to-type seeds, prevent cross-pollination. This can be challenging for open-pollinated crops that readily cross (e.g., squash, corn). For beginners, focus on self-pollinating plants like beans, peas, lettuce, and tomatoes.
- Processing:
- Dry Seeds (Beans, Peas, Lettuce, Grains): Allow pods/seed heads to dry completely on the plant. Harvest, shell, and clean the seeds, removing chaff.
- Wet Seeds (Tomatoes, Cucumbers, Squash): For tomatoes, ferment the seeds in water for a few days to remove the gel coating and inhibit disease. For cucumbers/squash, scrape out seeds, wash thoroughly, and dry.
- Drying: Spread seeds thinly on screens or paper plates in a cool, dry, well-ventilated area for 1-4 weeks. Ensure they are bone-dry before storage. I aim for less than 8% moisture content.
- Storage: Store seeds in airtight containers (glass jars with desiccant packets work well) in a cool, dark, dry place (ideally 40-50°F and 30-40% humidity). Label clearly with variety and date. Properly stored seeds can remain viable for 3-10 years or more.
Step 8: Season Extension & Winterizing
Extend your harvest and protect your garden for the off-season to truly maximize your self sufficient garden from scratch.
- Cold Frames: Simple structures with a transparent top (glass, polycarbonate, or old windows) that sit over garden beds. They trap solar heat, allowing you to grow cold-hardy crops (lettuce, spinach, kale, radishes) well into winter or start seeds earlier in spring. A basic cold frame can be built from 2×6 lumber and a sheet of polycarbonate for under $100.
- Hoop Houses/Low Tunnels: Larger structures made from flexible hoops (PVC pipe or EMT conduit) covered with greenhouse plastic. These provide more space and greater temperature moderation. A 10×20 ft DIY low tunnel kit can cost $200-$500, while a larger, more robust hoop house kit might be $1,000-$3,000. I use a 6×12 ft low tunnel made from 1/2-inch PVC hoops and 6mil greenhouse plastic, which extends my lettuce and spinach harvest by at least
Step 4: Water Management & Irrigation
Efficient water management is critical for a self sufficient garden from scratch, especially in off-grid living where water resources might be limited.
- Rainwater Harvesting: This is my primary source of irrigation water. A 55-gallon rain barrel (e.g., EarthMark Rain Barrel, ~$120-$150) connected to a downspout can collect significant water. For larger needs, I use two 275-gallon IBC totes (Intermediate Bulk Containers, often available used for $100-$200 each from food-grade sources) connected in series. A 1,000 sq ft roof can collect approximately 620 gallons of water for every inch of rainfall. My 1,500 sq ft roof provides ample water for my 600 sq ft garden through multiple barrels and totes.
- Drip Irrigation: This is by far the most water-efficient method, delivering water directly to the plant’s root zone, minimizing evaporation and weed growth.
- Components: A typical drip system includes a pressure regulator (e.g., Rain Bird PRV-10, ~$15), a filter (Rain Bird RBY filter, ~$20), main tubing (1/2-inch poly tubing, 100ft ~$25), smaller feeder lines (1/4-inch tubing), and emitters (0.5 GPH or 1 GPH per plant).
- Kits: For beginners, a starter kit like the Rain Bird Drip Irrigation Garden Kit (model DDI-KIT-1P, ~$40-$60) is excellent for a small garden. For larger setups, I use Netafim Techline CV Drip Line (500ft roll, ~$150-$200), which has pressure-compensating emitters built-in, ensuring even watering across long runs.
- Automation: For true self-sufficiency, consider a battery-powered timer (e.g., Orbit B-Hyve Bluetooth Hose Faucet Timer, ~$50) or a solar-powered timer connected to a small 12V pump.
- Solar-Powered Pumps: For lifting water from a well, pond, or large storage tank to your garden, a solar pump is a game-changer. For a smaller drip system, a Shurflo 2088-594-152 Diaphragm Pump (12V, 3.5 GPM, ~$180) can be powered by a single 100W solar panel (e.g., Renogy 100W Monocrystalline Solar Panel, ~$100) and a small 12V battery (e.g., a 50Ah LiFePO4 battery like the Battle Born 50Ah, ~$450). For larger operations or deeper wells, more robust systems are needed. If you’re looking to build out a comprehensive off-grid power system to support your garden’s water needs, or indeed your entire homestead, you might want to explore resources like the Power Grid Generator complete system guide to understand the full scope of what’s possible in terms of energy independence.
Step 5: Seed Selection & Planting
The choice of seeds is crucial for a truly self sufficient garden from scratch.
- Choose Heirloom & Open-Pollinated Seeds: These varieties produce seeds that will grow true to type, meaning you can save seeds from your harvest year after year. F1 hybrids, while often vigorous, will not produce consistent offspring from saved seeds. Reputable seed companies include Baker Creek Heirloom Seeds, High Mowing Organic Seeds, and Seed Savers Exchange. Start with common, reliable varieties like ‘Black Krim’ tomatoes, ‘Provider’ bush beans, ‘Waltham Butternut’ squash, and ‘Black Seeded Simpson’ lettuce.
- Start Seeds Indoors (Optional but Recommended): For longer growing seasons or specific crops, starting seeds indoors gives you a head start. Use seed-starting mix (e.g., Espoma Organic Seed Starter Mix, ~$10 for 16qt bag) in seed trays (Jiffy Professional Greenhouse 72-cell kit, ~$15). Provide adequate light with LED grow lights (Barrina T5 2ft 4-pack LED Grow Lights, 20W each, ~$50) for 14-16 hours a day, positioned 2-4 inches above seedlings. Maintain consistent temperatures (65-75°F for most).
- Direct Sowing vs. Transplanting: Some crops (carrots, radishes, beans, corn) prefer direct sowing into the garden bed. Others (tomatoes, peppers, broccoli, kale) benefit from being started indoors and transplanted. Follow seed packet instructions for planting depths (e.g., lettuce seeds are often surface-sown or planted 1/8 inch deep, while beans are 1 inch deep) and spacing.
- Companion Planting: Strategically plant different species together to enhance growth, deter pests, and attract beneficial insects. For example, planting marigolds near tomatoes can deter nematodes, and basil improves tomato flavor. Nasturtiums can act as a trap crop for aphids.
- Succession Planting: For a continuous harvest, plant small batches of quick-growing crops (lettuce, radishes, cilantro) every 2-3 weeks. As one crop finishes, another is ready to take its place.
Step 6: Pest & Disease Management (Organic)
Maintaining a self sufficient garden from scratch means embracing organic pest and disease control.
- Integrated Pest Management (IPM): This holistic approach combines several strategies.
- Observation: Regularly inspect your plants for early signs of pests or disease. Catching issues early is key.
- Physical Barriers: Use row covers (e.g., Agribon AG-19 floating row cover, 10×20 ft, ~$20) to protect young plants from insect pests like cabbage worms and squash bugs. Install fences (e.g., 2×4 welded wire mesh, 4 ft tall, 50 ft roll ~$70) to keep out deer, rabbits, and other larger animals.
- Hand-Picking: For larger pests like tomato hornworms or squash bugs, simply pick them off and drop them into a bucket of soapy water.
- Companion Planting: As mentioned, certain plants repel pests. Marigolds, garlic, and onions are excellent deterrents.
- Attract Beneficial Insects: Plant flowers like dill, fennel, cosmos, and sweet alyssum to attract ladybugs, lacewings, and parasitic wasps, which prey on common garden pests.
- Organic Sprays & Treatments:
- Neem Oil: An excellent broad-spectrum organic insecticide and fungicide. Bonide Neem Oil Concentrate (16oz, ~$20) can be mixed at a rate of 1-2 tbsp per gallon of water and sprayed on affected plants.
- Insecticidal Soap: Effective against soft-bodied insects like aphids, whiteflies, and spider mites. Garden Safe Insecticidal Soap (24oz ready-to-use, ~$10).
- Bacillus thuringiensis (Bt): A naturally occurring soil bacterium that targets caterpillars and worms. Monterey BT Worm & Caterpillar Killer (16oz, ~$18) is highly effective and safe for beneficial insects.
- Copper or Sulfur Sprays: For fungal diseases like powdery mildew or blight, organic copper (e.g., Bonide Copper Fungicide, ~$15 for 1lb) or sulfur (e.g., Safer Brand Garden Fungicide, ~$10 for 16oz) can be used as a last resort.
Step 7: Harvesting & Seed Saving
The culmination of your efforts is the harvest, and seed saving closes the loop on self-sufficiency.
- Harvesting Techniques:
- Timing: Harvest vegetables at their peak ripeness for best flavor and nutritional value. For example, green beans should snap cleanly, cucumbers should be firm, and tomatoes should be fully colored.
- Frequency: Many crops, like zucchini, cucumbers, and bush beans, produce more if harvested frequently. Pick daily or every other day.
- Tools: Use clean, sharp pruners (e.g., Corona ClassicCUT Bypass Pruner BP 3180, ~$30) or a sharp knife for clean cuts, minimizing damage to the plant.
- Seed Saving: This is where the « self-sufficient » aspect truly shines.
- Selection: Only save seeds from your healthiest, most vigorous plants that show desired traits (disease resistance, good flavor, high yield).
- Isolation: To ensure true-to-type seeds, prevent cross-pollination. This can be challenging for open-pollinated crops that readily cross (e.g., squash, corn). For beginners, focus on self-pollinating plants like beans, peas, lettuce, and tomatoes.
- Processing:
- Dry Seeds (Beans, Peas, Lettuce, Grains): Allow pods/seed heads to dry completely on the plant. Harvest, shell, and clean the seeds, removing chaff.
- Wet Seeds (Tomatoes, Cucumbers, Squash): For tomatoes, ferment the seeds in water for a few days to remove the gel coating and inhibit disease. For cucumbers/squash, scrape out seeds, wash thoroughly, and dry.
- Drying: Spread seeds thinly on screens or paper plates in a cool, dry, well-ventilated area for 1-4 weeks. Ensure they are bone-dry before storage. I aim for less than 8% moisture content.
- Storage: Store seeds in airtight containers (glass jars with desiccant packets work well) in a cool, dark, dry place (ideally 40-50°F and 30-40% humidity). Label clearly with variety and date. Properly stored seeds can remain viable for 3-10 years or more.
Step 8: Season Extension & Winterizing
Extend your harvest and protect your garden for the off-season to truly maximize your self sufficient garden from scratch.
- Cold Frames: Simple structures with a transparent top (glass, polycarbonate, or old windows) that sit over garden beds. They trap solar heat, allowing you to grow cold-hardy crops (lettuce, spinach, kale, radishes) well into winter or start seeds earlier in spring. A basic cold frame can be built from 2×6 lumber and a sheet of polycarbonate for under $100.
- Hoop Houses/Low Tunnels: Larger structures made from flexible hoops (PVC pipe or EMT conduit) covered with greenhouse plastic. These provide more space and greater temperature moderation. A 10×20 ft DIY low tunnel kit can cost $200-$500, while a larger, more robust hoop house kit might be $1,000-$3,000. I use a 6×12 ft low tunnel made from 1/2-inch PVC hoops and 6mil greenhouse plastic, which extends my lettuce and spinach harvest by at least
- In-Ground Beds: If you have excellent native soil and good drainage, in-ground beds are the most economical. Double-digging (loosening soil two shovel depths) can significantly improve drainage and aeration. For my main garden, I primarily use in-ground beds, but I focus on building up the soil over time with consistent compost additions and cover cropping. I aim for beds that are no wider than 3-4 feet so I can reach the center without stepping on the soil, compacting it.
- Raised Beds: Raised beds offer numerous advantages, especially for poor soil, heavy clay, or rocky areas. They provide better drainage, warm up faster in spring, reduce compaction, and make weeding and harvesting easier on your back.
- Material Options:
- Untreated Cedar: Naturally rot-resistant and chemical-free. A 4×8 ft bed, 12 inches deep, typically requires three 2x12x8 ft cedar boards, costing around $50-$60 per board (total ~$150-$180) plus corner brackets or screws. My first raised beds were cedar and are still going strong after 7 years.
- Galvanized Steel: Durable, long-lasting, and aesthetically pleasing. Brands like Vego Garden offer modular kits. A Vego Garden 17″ Tall 8-in-1 Metal Raised Garden Bed (can be configured to 4×8 ft) costs approximately $250-$300.
- Concrete Blocks/Stones: Very durable but can leach minerals (though generally safe once weathered) and can be expensive.
- Recycled Materials: Pallets (check for chemical treatment stamps like « HT » for heat-treated), old tires (controversial due to potential chemical leaching).
- Filling Raised Beds: Don’t just fill with topsoil. Use a « Hugelkultur » approach (logs, branches, leaves, then compost, then topsoil) or a mixture of 60% good quality topsoil, 30% compost, and 10% perlite or vermiculite for drainage. A 4x8x1 ft raised bed requires about 32 cubic feet (or ~1.2 cubic yards) of soil mix, which can cost $100-$200 depending on your source.
- Material Options:
Step 4: Water Management & Irrigation
Efficient water management is critical for a self sufficient garden from scratch, especially in off-grid living where water resources might be limited.
- Rainwater Harvesting: This is my primary source of irrigation water. A 55-gallon rain barrel (e.g., EarthMark Rain Barrel, ~$120-$150) connected to a downspout can collect significant water. For larger needs, I use two 275-gallon IBC totes (Intermediate Bulk Containers, often available used for $100-$200 each from food-grade sources) connected in series. A 1,000 sq ft roof can collect approximately 620 gallons of water for every inch of rainfall. My 1,500 sq ft roof provides ample water for my 600 sq ft garden through multiple barrels and totes.
- Drip Irrigation: This is by far the most water-efficient method, delivering water directly to the plant’s root zone, minimizing evaporation and weed growth.
- Components: A typical drip system includes a pressure regulator (e.g., Rain Bird PRV-10, ~$15), a filter (Rain Bird RBY filter, ~$20), main tubing (1/2-inch poly tubing, 100ft ~$25), smaller feeder lines (1/4-inch tubing), and emitters (0.5 GPH or 1 GPH per plant).
- Kits: For beginners, a starter kit like the Rain Bird Drip Irrigation Garden Kit (model DDI-KIT-1P, ~$40-$60) is excellent for a small garden. For larger setups, I use Netafim Techline CV Drip Line (500ft roll, ~$150-$200), which has pressure-compensating emitters built-in, ensuring even watering across long runs.
- Automation: For true self-sufficiency, consider a battery-powered timer (e.g., Orbit B-Hyve Bluetooth Hose Faucet Timer, ~$50) or a solar-powered timer connected to a small 12V pump.
- Solar-Powered Pumps: For lifting water from a well, pond, or large storage tank to your garden, a solar pump is a game-changer. For a smaller drip system, a Shurflo 2088-594-152 Diaphragm Pump (12V, 3.5 GPM, ~$180) can be powered by a single 100W solar panel (e.g., Renogy 100W Monocrystalline Solar Panel, ~$100) and a small 12V battery (e.g., a 50Ah LiFePO4 battery like the Battle Born 50Ah, ~$450). For larger operations or deeper wells, more robust systems are needed. If you’re looking to build out a comprehensive off-grid power system to support your garden’s water needs, or indeed your entire homestead, you might want to explore resources like the Power Grid Generator complete system guide to understand the full scope of what’s possible in terms of energy independence.
Step 5: Seed Selection & Planting
The choice of seeds is crucial for a truly self sufficient garden from scratch.
- Choose Heirloom & Open-Pollinated Seeds: These varieties produce seeds that will grow true to type, meaning you can save seeds from your harvest year after year. F1 hybrids, while often vigorous, will not produce consistent offspring from saved seeds. Reputable seed companies include Baker Creek Heirloom Seeds, High Mowing Organic Seeds, and Seed Savers Exchange. Start with common, reliable varieties like ‘Black Krim’ tomatoes, ‘Provider’ bush beans, ‘Waltham Butternut’ squash, and ‘Black Seeded Simpson’ lettuce.
- Start Seeds Indoors (Optional but Recommended): For longer growing seasons or specific crops, starting seeds indoors gives you a head start. Use seed-starting mix (e.g., Espoma Organic Seed Starter Mix, ~$10 for 16qt bag) in seed trays (Jiffy Professional Greenhouse 72-cell kit, ~$15). Provide adequate light with LED grow lights (Barrina T5 2ft 4-pack LED Grow Lights, 20W each, ~$50) for 14-16 hours a day, positioned 2-4 inches above seedlings. Maintain consistent temperatures (65-75°F for most).
- Direct Sowing vs. Transplanting: Some crops (carrots, radishes, beans, corn) prefer direct sowing into the garden bed. Others (tomatoes, peppers, broccoli, kale) benefit from being started indoors and transplanted. Follow seed packet instructions for planting depths (e.g., lettuce seeds are often surface-sown or planted 1/8 inch deep, while beans are 1 inch deep) and spacing.
- Companion Planting: Strategically plant different species together to enhance growth, deter pests, and attract beneficial insects. For example, planting marigolds near tomatoes can deter nematodes, and basil improves tomato flavor. Nasturtiums can act as a trap crop for aphids.
- Succession Planting: For a continuous harvest, plant small batches of quick-growing crops (lettuce, radishes, cilantro) every 2-3 weeks. As one crop finishes, another is ready to take its place.
Step 6: Pest & Disease Management (Organic)
Maintaining a self sufficient garden from scratch means embracing organic pest and disease control.
- Integrated Pest Management (IPM): This holistic approach combines several strategies.
- Observation: Regularly inspect your plants for early signs of pests or disease. Catching issues early is key.
- Physical Barriers: Use row covers (e.g., Agribon AG-19 floating row cover, 10×20 ft, ~$20) to protect young plants from insect pests like cabbage worms and squash bugs. Install fences (e.g., 2×4 welded wire mesh, 4 ft tall, 50 ft roll ~$70) to keep out deer, rabbits, and other larger animals.
- Hand-Picking: For larger pests like tomato hornworms or squash bugs, simply pick them off and drop them into a bucket of soapy water.
- Companion Planting: As mentioned, certain plants repel pests. Marigolds, garlic, and onions are excellent deterrents.
- Attract Beneficial Insects: Plant flowers like dill, fennel, cosmos, and sweet alyssum to attract ladybugs, lacewings, and parasitic wasps, which prey on common garden pests.
- Organic Sprays & Treatments:
- Neem Oil: An excellent broad-spectrum organic insecticide and fungicide. Bonide Neem Oil Concentrate (16oz, ~$20) can be mixed at a rate of 1-2 tbsp per gallon of water and sprayed on affected plants.
- Insecticidal Soap: Effective against soft-bodied insects like aphids, whiteflies, and spider mites. Garden Safe Insecticidal Soap (24oz ready-to-use, ~$10).
- Bacillus thuringiensis (Bt): A naturally occurring soil bacterium that targets caterpillars and worms. Monterey BT Worm & Caterpillar Killer (16oz, ~$18) is highly effective and safe for beneficial insects.
- Copper or Sulfur Sprays: For fungal diseases like powdery mildew or blight, organic copper (e.g., Bonide Copper Fungicide, ~$15 for 1lb) or sulfur (e.g., Safer Brand Garden Fungicide, ~$10 for 16oz) can be used as a last resort.
Step 7: Harvesting & Seed Saving
The culmination of your efforts is the harvest, and seed saving closes the loop on self-sufficiency.
- Harvesting Techniques:
- Timing: Harvest vegetables at their peak ripeness for best flavor and nutritional value. For example, green beans should snap cleanly, cucumbers should be firm, and tomatoes should be fully colored.
- Frequency: Many crops, like zucchini, cucumbers, and bush beans, produce more if harvested frequently. Pick daily or every other day.
- Tools: Use clean, sharp pruners (e.g., Corona ClassicCUT Bypass Pruner BP 3180, ~$30) or a sharp knife for clean cuts, minimizing damage to the plant.
- Seed Saving: This is where the « self-sufficient » aspect truly shines.
- Selection: Only save seeds from your healthiest, most vigorous plants that show desired traits (disease resistance, good flavor, high yield).
- Isolation: To ensure true-to-type seeds, prevent cross-pollination. This can be challenging for open-pollinated crops that readily cross (e.g., squash, corn). For beginners, focus on self-pollinating plants like beans, peas, lettuce, and tomatoes.
- Processing:
- Dry Seeds (Beans, Peas, Lettuce, Grains): Allow pods/seed heads to dry completely on the plant. Harvest, shell, and clean the seeds, removing chaff.
- Wet Seeds (Tomatoes, Cucumbers, Squash): For tomatoes, ferment the seeds in water for a few days to remove the gel coating and inhibit disease. For cucumbers/squash, scrape out seeds, wash thoroughly, and dry.
- Drying: Spread seeds thinly on screens or paper plates in a cool, dry, well-ventilated area for 1-4 weeks. Ensure they are bone-dry before storage. I aim for less than 8% moisture content.
- Storage: Store seeds in airtight containers (glass jars with desiccant packets work well) in a cool, dark, dry place (ideally 40-50°F and 30-40% humidity). Label clearly with variety and date. Properly stored seeds can remain viable for 3-10 years or more.
Step 8: Season Extension & Winterizing
Extend your harvest and protect your garden for the off-season to truly maximize your self sufficient garden from scratch.
- Cold Frames: Simple structures with a transparent top (glass, polycarbonate, or old windows) that sit over garden beds. They trap solar heat, allowing you to grow cold-hardy crops (lettuce, spinach, kale, radishes) well into winter or start seeds earlier in spring. A basic cold frame can be built from 2×6 lumber and a sheet of polycarbonate for under $100.
- Hoop Houses/Low Tunnels: Larger structures made from flexible hoops (PVC pipe or EMT conduit) covered with greenhouse plastic. These provide more space and greater temperature moderation. A 10×20 ft DIY low tunnel kit can cost $200-$500, while a larger, more robust hoop house kit might be $1,000-$3,000. I use a 6×12 ft low tunnel made from 1/2-inch PVC hoops and 6mil greenhouse plastic, which extends my lettuce and spinach harvest by at least
Deciding between raised beds and in-ground beds depends on your soil, budget, and physical capabilities.
- In-Ground Beds: If you have excellent native soil and good drainage, in-ground beds are the most economical. Double-digging (loosening soil two shovel depths) can significantly improve drainage and aeration. For my main garden, I primarily use in-ground beds, but I focus on building up the soil over time with consistent compost additions and cover cropping. I aim for beds that are no wider than 3-4 feet so I can reach the center without stepping on the soil, compacting it.
- Raised Beds: Raised beds offer numerous advantages, especially for poor soil, heavy clay, or rocky areas. They provide better drainage, warm up faster in spring, reduce compaction, and make weeding and harvesting easier on your back.
- Material Options:
- Untreated Cedar: Naturally rot-resistant and chemical-free. A 4×8 ft bed, 12 inches deep, typically requires three 2x12x8 ft cedar boards, costing around $50-$60 per board (total ~$150-$180) plus corner brackets or screws. My first raised beds were cedar and are still going strong after 7 years.
- Galvanized Steel: Durable, long-lasting, and aesthetically pleasing. Brands like Vego Garden offer modular kits. A Vego Garden 17″ Tall 8-in-1 Metal Raised Garden Bed (can be configured to 4×8 ft) costs approximately $250-$300.
- Concrete Blocks/Stones: Very durable but can leach minerals (though generally safe once weathered) and can be expensive.
- Recycled Materials: Pallets (check for chemical treatment stamps like « HT » for heat-treated), old tires (controversial due to potential chemical leaching).
- Filling Raised Beds: Don’t just fill with topsoil. Use a « Hugelkultur » approach (logs, branches, leaves, then compost, then topsoil) or a mixture of 60% good quality topsoil, 30% compost, and 10% perlite or vermiculite for drainage. A 4x8x1 ft raised bed requires about 32 cubic feet (or ~1.2 cubic yards) of soil mix, which can cost $100-$200 depending on your source.
- Material Options:
Step 4: Water Management & Irrigation
Efficient water management is critical for a self sufficient garden from scratch, especially in off-grid living where water resources might be limited.
- Rainwater Harvesting: This is my primary source of irrigation water. A 55-gallon rain barrel (e.g., EarthMark Rain Barrel, ~$120-$150) connected to a downspout can collect significant water. For larger needs, I use two 275-gallon IBC totes (Intermediate Bulk Containers, often available used for $100-$200 each from food-grade sources) connected in series. A 1,000 sq ft roof can collect approximately 620 gallons of water for every inch of rainfall. My 1,500 sq ft roof provides ample water for my 600 sq ft garden through multiple barrels and totes.
- Drip Irrigation: This is by far the most water-efficient method, delivering water directly to the plant’s root zone, minimizing evaporation and weed growth.
- Components: A typical drip system includes a pressure regulator (e.g., Rain Bird PRV-10, ~$15), a filter (Rain Bird RBY filter, ~$20), main tubing (1/2-inch poly tubing, 100ft ~$25), smaller feeder lines (1/4-inch tubing), and emitters (0.5 GPH or 1 GPH per plant).
- Kits: For beginners, a starter kit like the Rain Bird Drip Irrigation Garden Kit (model DDI-KIT-1P, ~$40-$60) is excellent for a small garden. For larger setups, I use Netafim Techline CV Drip Line (500ft roll, ~$150-$200), which has pressure-compensating emitters built-in, ensuring even watering across long runs.
- Automation: For true self-sufficiency, consider a battery-powered timer (e.g., Orbit B-Hyve Bluetooth Hose Faucet Timer, ~$50) or a solar-powered timer connected to a small 12V pump.
- Solar-Powered Pumps: For lifting water from a well, pond, or large storage tank to your garden, a solar pump is a game-changer. For a smaller drip system, a Shurflo 2088-594-152 Diaphragm Pump (12V, 3.5 GPM, ~$180) can be powered by a single 100W solar panel (e.g., Renogy 100W Monocrystalline Solar Panel, ~$100) and a small 12V battery (e.g., a 50Ah LiFePO4 battery like the Battle Born 50Ah, ~$450). For larger operations or deeper wells, more robust systems are needed. If you’re looking to build out a comprehensive off-grid power system to support your garden’s water needs, or indeed your entire homestead, you might want to explore resources like the Power Grid Generator complete system guide to understand the full scope of what’s possible in terms of energy independence.
Step 5: Seed Selection & Planting
The choice of seeds is crucial for a truly self sufficient garden from scratch.
- Choose Heirloom & Open-Pollinated Seeds: These varieties produce seeds that will grow true to type, meaning you can save seeds from your harvest year after year. F1 hybrids, while often vigorous, will not produce consistent offspring from saved seeds. Reputable seed companies include Baker Creek Heirloom Seeds, High Mowing Organic Seeds, and Seed Savers Exchange. Start with common, reliable varieties like ‘Black Krim’ tomatoes, ‘Provider’ bush beans, ‘Waltham Butternut’ squash, and ‘Black Seeded Simpson’ lettuce.
- Start Seeds Indoors (Optional but Recommended): For longer growing seasons or specific crops, starting seeds indoors gives you a head start. Use seed-starting mix (e.g., Espoma Organic Seed Starter Mix, ~$10 for 16qt bag) in seed trays (Jiffy Professional Greenhouse 72-cell kit, ~$15). Provide adequate light with LED grow lights (Barrina T5 2ft 4-pack LED Grow Lights, 20W each, ~$50) for 14-16 hours a day, positioned 2-4 inches above seedlings. Maintain consistent temperatures (65-75°F for most).
- Direct Sowing vs. Transplanting: Some crops (carrots, radishes, beans, corn) prefer direct sowing into the garden bed. Others (tomatoes, peppers, broccoli, kale) benefit from being started indoors and transplanted. Follow seed packet instructions for planting depths (e.g., lettuce seeds are often surface-sown or planted 1/8 inch deep, while beans are 1 inch deep) and spacing.
- Companion Planting: Strategically plant different species together to enhance growth, deter pests, and attract beneficial insects. For example, planting marigolds near tomatoes can deter nematodes, and basil improves tomato flavor. Nasturtiums can act as a trap crop for aphids.
- Succession Planting: For a continuous harvest, plant small batches of quick-growing crops (lettuce, radishes, cilantro) every 2-3 weeks. As one crop finishes, another is ready to take its place.
Step 6: Pest & Disease Management (Organic)
Maintaining a self sufficient garden from scratch means embracing organic pest and disease control.
- Integrated Pest Management (IPM): This holistic approach combines several strategies.
- Observation: Regularly inspect your plants for early signs of pests or disease. Catching issues early is key.
- Physical Barriers: Use row covers (e.g., Agribon AG-19 floating row cover, 10×20 ft, ~$20) to protect young plants from insect pests like cabbage worms and squash bugs. Install fences (e.g., 2×4 welded wire mesh, 4 ft tall, 50 ft roll ~$70) to keep out deer, rabbits, and other larger animals.
- Hand-Picking: For larger pests like tomato hornworms or squash bugs, simply pick them off and drop them into a bucket of soapy water.
- Companion Planting: As mentioned, certain plants repel pests. Marigolds, garlic, and onions are excellent deterrents.
- Attract Beneficial Insects: Plant flowers like dill, fennel, cosmos, and sweet alyssum to attract ladybugs, lacewings, and parasitic wasps, which prey on common garden pests.
- Organic Sprays & Treatments:
- Neem Oil: An excellent broad-spectrum organic insecticide and fungicide. Bonide Neem Oil Concentrate (16oz, ~$20) can be mixed at a rate of 1-2 tbsp per gallon of water and sprayed on affected plants.
- Insecticidal Soap: Effective against soft-bodied insects like aphids, whiteflies, and spider mites. Garden Safe Insecticidal Soap (24oz ready-to-use, ~$10).
- Bacillus thuringiensis (Bt): A naturally occurring soil bacterium that targets caterpillars and worms. Monterey BT Worm & Caterpillar Killer (16oz, ~$18) is highly effective and safe for beneficial insects.
- Copper or Sulfur Sprays: For fungal diseases like powdery mildew or blight, organic copper (e.g., Bonide Copper Fungicide, ~$15 for 1lb) or sulfur (e.g., Safer Brand Garden Fungicide, ~$10 for 16oz) can be used as a last resort.
Step 7: Harvesting & Seed Saving
The culmination of your efforts is the harvest, and seed saving closes the loop on self-sufficiency.
- Harvesting Techniques:
- Timing: Harvest vegetables at their peak ripeness for best flavor and nutritional value. For example, green beans should snap cleanly, cucumbers should be firm, and tomatoes should be fully colored.
- Frequency: Many crops, like zucchini, cucumbers, and bush beans, produce more if harvested frequently. Pick daily or every other day.
- Tools: Use clean, sharp pruners (e.g., Corona ClassicCUT Bypass Pruner BP 3180, ~$30) or a sharp knife for clean cuts, minimizing damage to the plant.
- Seed Saving: This is where the « self-sufficient » aspect truly shines.
- Selection: Only save seeds from your healthiest, most vigorous plants that show desired traits (disease resistance, good flavor, high yield).
- Isolation: To ensure true-to-type seeds, prevent cross-pollination. This can be challenging for open-pollinated crops that readily cross (e.g., squash, corn). For beginners, focus on self-pollinating plants like beans, peas, lettuce, and tomatoes.
- Processing:
- Dry Seeds (Beans, Peas, Lettuce, Grains): Allow pods/seed heads to dry completely on the plant. Harvest, shell, and clean the seeds, removing chaff.
- Wet Seeds (Tomatoes, Cucumbers, Squash): For tomatoes, ferment the seeds in water for a few days to remove the gel coating and inhibit disease. For cucumbers/squash, scrape out seeds, wash thoroughly, and dry.
- Drying: Spread seeds thinly on screens or paper plates in a cool, dry, well-ventilated area for 1-4 weeks. Ensure they are bone-dry before storage. I aim for less than 8% moisture content.
- Storage: Store seeds in airtight containers (glass jars with desiccant packets work well) in a cool, dark, dry place (ideally 40-50°F and 30-40% humidity). Label clearly with variety and date. Properly stored seeds can remain viable for 3-10 years or more.
Step 8: Season Extension & Winterizing
Extend your harvest and protect your garden for the off-season to truly maximize your self sufficient garden from scratch.
- Cold Frames: Simple structures with a transparent top (glass, polycarbonate, or old windows) that sit over garden beds. They trap solar heat, allowing you to grow cold-hardy crops (lettuce, spinach, kale, radishes) well into winter or start seeds earlier in spring. A basic cold frame can be built from 2×6 lumber and a sheet of polycarbonate for under $100.
- Hoop Houses/Low Tunnels: Larger structures made from flexible hoops (PVC pipe or EMT conduit) covered with greenhouse plastic. These provide more space and greater temperature moderation. A 10×20 ft DIY low tunnel kit can cost $200-$500, while a larger, more robust hoop house kit might be $1,000-$3,000. I use a 6×12 ft low tunnel made from 1/2-inch PVC hoops and 6mil greenhouse plastic, which extends my lettuce and spinach harvest by at least
Healthy soil is the bedrock of a productive, self-sufficient garden. You can’t guess what your soil needs; you have to test it.
- Perform a Soil Test: A professional soil test will give you precise data on your soil’s pH, nutrient levels (N-P-K), and organic matter content. I recommend sending a sample to your local agricultural extension office; it typically costs $20-$50 and provides detailed recommendations. Alternatively, for a quick homeowner check, a Rapitest Soil Test Kit (40-test kit, model 1663, ~$20 on Amazon) provides a good baseline for pH, Nitrogen, Phosphorus, and Potash. Aim for a pH between 6.0 and 7.0 for most vegetables.
- Amend for pH Imbalance: If your soil is too acidic (below 6.0), add agricultural lime (dolomitic lime adds magnesium, calcitic lime adds calcium). Apply 5-10 lbs per 100 sq ft for a moderate adjustment. If it’s too alkaline (above 7.0), add elemental sulfur (e.g., Espoma Soil Acidifier, ~$15 for 6.75 lbs) or generous amounts of organic matter like peat moss or pine needles.
- Build Organic Matter: This is the single most important step for long-term soil health. Organic matter improves soil structure, water retention, drainage, and nutrient availability. Incorporate 2-4 inches of high-quality compost into your top 6-12 inches of soil annually. I make my own compost from kitchen scraps, garden waste, and shredded leaves, but you can purchase it. Local nurseries often sell bulk compost for $30-$50 per cubic yard. Aged manure (from chickens, cows, or horses – ensure it’s well-rotted to avoid burning plants) is also excellent.
- Address Nutrient Deficiencies: Based on your soil test, add specific organic amendments. If Nitrogen (N) is low, add blood meal (12-0-0, ~$20 for 3 lbs) or feather meal. For Phosphorus (P), use bone meal (3-15-0, ~$15 for 3 lbs) or rock phosphate. For Potassium (K), greensand (0-0-2.5, ~$25 for 5 lbs) or kelp meal are good choices. I rely heavily on Espoma Organic Garden-tone (5-3-3, ~$25 for an 8lb bag) as a balanced, all-purpose organic fertilizer during planting.
Step 3: Garden Bed Preparation
Deciding between raised beds and in-ground beds depends on your soil, budget, and physical capabilities.
- In-Ground Beds: If you have excellent native soil and good drainage, in-ground beds are the most economical. Double-digging (loosening soil two shovel depths) can significantly improve drainage and aeration. For my main garden, I primarily use in-ground beds, but I focus on building up the soil over time with consistent compost additions and cover cropping. I aim for beds that are no wider than 3-4 feet so I can reach the center without stepping on the soil, compacting it.
- Raised Beds: Raised beds offer numerous advantages, especially for poor soil, heavy clay, or rocky areas. They provide better drainage, warm up faster in spring, reduce compaction, and make weeding and harvesting easier on your back.
- Material Options:
- Untreated Cedar: Naturally rot-resistant and chemical-free. A 4×8 ft bed, 12 inches deep, typically requires three 2x12x8 ft cedar boards, costing around $50-$60 per board (total ~$150-$180) plus corner brackets or screws. My first raised beds were cedar and are still going strong after 7 years.
- Galvanized Steel: Durable, long-lasting, and aesthetically pleasing. Brands like Vego Garden offer modular kits. A Vego Garden 17″ Tall 8-in-1 Metal Raised Garden Bed (can be configured to 4×8 ft) costs approximately $250-$300.
- Concrete Blocks/Stones: Very durable but can leach minerals (though generally safe once weathered) and can be expensive.
- Recycled Materials: Pallets (check for chemical treatment stamps like « HT » for heat-treated), old tires (controversial due to potential chemical leaching).
- Filling Raised Beds: Don’t just fill with topsoil. Use a « Hugelkultur » approach (logs, branches, leaves, then compost, then topsoil) or a mixture of 60% good quality topsoil, 30% compost, and 10% perlite or vermiculite for drainage. A 4x8x1 ft raised bed requires about 32 cubic feet (or ~1.2 cubic yards) of soil mix, which can cost $100-$200 depending on your source.
- Material Options:
Step 4: Water Management & Irrigation
Efficient water management is critical for a self sufficient garden from scratch, especially in off-grid living where water resources might be limited.
- Rainwater Harvesting: This is my primary source of irrigation water. A 55-gallon rain barrel (e.g., EarthMark Rain Barrel, ~$120-$150) connected to a downspout can collect significant water. For larger needs, I use two 275-gallon IBC totes (Intermediate Bulk Containers, often available used for $100-$200 each from food-grade sources) connected in series. A 1,000 sq ft roof can collect approximately 620 gallons of water for every inch of rainfall. My 1,500 sq ft roof provides ample water for my 600 sq ft garden through multiple barrels and totes.
- Drip Irrigation: This is by far the most water-efficient method, delivering water directly to the plant’s root zone, minimizing evaporation and weed growth.
- Components: A typical drip system includes a pressure regulator (e.g., Rain Bird PRV-10, ~$15), a filter (Rain Bird RBY filter, ~$20), main tubing (1/2-inch poly tubing, 100ft ~$25), smaller feeder lines (1/4-inch tubing), and emitters (0.5 GPH or 1 GPH per plant).
- Kits: For beginners, a starter kit like the Rain Bird Drip Irrigation Garden Kit (model DDI-KIT-1P, ~$40-$60) is excellent for a small garden. For larger setups, I use Netafim Techline CV Drip Line (500ft roll, ~$150-$200), which has pressure-compensating emitters built-in, ensuring even watering across long runs.
- Automation: For true self-sufficiency, consider a battery-powered timer (e.g., Orbit B-Hyve Bluetooth Hose Faucet Timer, ~$50) or a solar-powered timer connected to a small 12V pump.
- Solar-Powered Pumps: For lifting water from a well, pond, or large storage tank to your garden, a solar pump is a game-changer. For a smaller drip system, a Shurflo 2088-594-152 Diaphragm Pump (12V, 3.5 GPM, ~$180) can be powered by a single 100W solar panel (e.g., Renogy 100W Monocrystalline Solar Panel, ~$100) and a small 12V battery (e.g., a 50Ah LiFePO4 battery like the Battle Born 50Ah, ~$450). For larger operations or deeper wells, more robust systems are needed. If you’re looking to build out a comprehensive off-grid power system to support your garden’s water needs, or indeed your entire homestead, you might want to explore resources like the Power Grid Generator complete system guide to understand the full scope of what’s possible in terms of energy independence.
Step 5: Seed Selection & Planting
The choice of seeds is crucial for a truly self sufficient garden from scratch.
- Choose Heirloom & Open-Pollinated Seeds: These varieties produce seeds that will grow true to type, meaning you can save seeds from your harvest year after year. F1 hybrids, while often vigorous, will not produce consistent offspring from saved seeds. Reputable seed companies include Baker Creek Heirloom Seeds, High Mowing Organic Seeds, and Seed Savers Exchange. Start with common, reliable varieties like ‘Black Krim’ tomatoes, ‘Provider’ bush beans, ‘Waltham Butternut’ squash, and ‘Black Seeded Simpson’ lettuce.
- Start Seeds Indoors (Optional but Recommended): For longer growing seasons or specific crops, starting seeds indoors gives you a head start. Use seed-starting mix (e.g., Espoma Organic Seed Starter Mix, ~$10 for 16qt bag) in seed trays (Jiffy Professional Greenhouse 72-cell kit, ~$15). Provide adequate light with LED grow lights (Barrina T5 2ft 4-pack LED Grow Lights, 20W each, ~$50) for 14-16 hours a day, positioned 2-4 inches above seedlings. Maintain consistent temperatures (65-75°F for most).
- Direct Sowing vs. Transplanting: Some crops (carrots, radishes, beans, corn) prefer direct sowing into the garden bed. Others (tomatoes, peppers, broccoli, kale) benefit from being started indoors and transplanted. Follow seed packet instructions for planting depths (e.g., lettuce seeds are often surface-sown or planted 1/8 inch deep, while beans are 1 inch deep) and spacing.
- Companion Planting: Strategically plant different species together to enhance growth, deter pests, and attract beneficial insects. For example, planting marigolds near tomatoes can deter nematodes, and basil improves tomato flavor. Nasturtiums can act as a trap crop for aphids.
- Succession Planting: For a continuous harvest, plant small batches of quick-growing crops (lettuce, radishes, cilantro) every 2-3 weeks. As one crop finishes, another is ready to take its place.
Step 6: Pest & Disease Management (Organic)
Maintaining a self sufficient garden from scratch means embracing organic pest and disease control.
- Integrated Pest Management (IPM): This holistic approach combines several strategies.
- Observation: Regularly inspect your plants for early signs of pests or disease. Catching issues early is key.
- Physical Barriers: Use row covers (e.g., Agribon AG-19 floating row cover, 10×20 ft, ~$20) to protect young plants from insect pests like cabbage worms and squash bugs. Install fences (e.g., 2×4 welded wire mesh, 4 ft tall, 50 ft roll ~$70) to keep out deer, rabbits, and other larger animals.
- Hand-Picking: For larger pests like tomato hornworms or squash bugs, simply pick them off and drop them into a bucket of soapy water.
- Companion Planting: As mentioned, certain plants repel pests. Marigolds, garlic, and onions are excellent deterrents.
- Attract Beneficial Insects: Plant flowers like dill, fennel, cosmos, and sweet alyssum to attract ladybugs, lacewings, and parasitic wasps, which prey on common garden pests.
- Organic Sprays & Treatments:
- Neem Oil: An excellent broad-spectrum organic insecticide and fungicide. Bonide Neem Oil Concentrate (16oz, ~$20) can be mixed at a rate of 1-2 tbsp per gallon of water and sprayed on affected plants.
- Insecticidal Soap: Effective against soft-bodied insects like aphids, whiteflies, and spider mites. Garden Safe Insecticidal Soap (24oz ready-to-use, ~$10).
- Bacillus thuringiensis (Bt): A naturally occurring soil bacterium that targets caterpillars and worms. Monterey BT Worm & Caterpillar Killer (16oz, ~$18) is highly effective and safe for beneficial insects.
- Copper or Sulfur Sprays: For fungal diseases like powdery mildew or blight, organic copper (e.g., Bonide Copper Fungicide, ~$15 for 1lb) or sulfur (e.g., Safer Brand Garden Fungicide, ~$10 for 16oz) can be used as a last resort.
Step 7: Harvesting & Seed Saving
The culmination of your efforts is the harvest, and seed saving closes the loop on self-sufficiency.
- Harvesting Techniques:
- Timing: Harvest vegetables at their peak ripeness for best flavor and nutritional value. For example, green beans should snap cleanly, cucumbers should be firm, and tomatoes should be fully colored.
- Frequency: Many crops, like zucchini, cucumbers, and bush beans, produce more if harvested frequently. Pick daily or every other day.
- Tools: Use clean, sharp pruners (e.g., Corona ClassicCUT Bypass Pruner BP 3180, ~$30) or a sharp knife for clean cuts, minimizing damage to the plant.
- Seed Saving: This is where the « self-sufficient » aspect truly shines.
- Selection: Only save seeds from your healthiest, most vigorous plants that show desired traits (disease resistance, good flavor, high yield).
- Isolation: To ensure true-to-type seeds, prevent cross-pollination. This can be challenging for open-pollinated crops that readily cross (e.g., squash, corn). For beginners, focus on self-pollinating plants like beans, peas, lettuce, and tomatoes.
- Processing:
- Dry Seeds (Beans, Peas, Lettuce, Grains): Allow pods/seed heads to dry completely on the plant. Harvest, shell, and clean the seeds, removing chaff.
- Wet Seeds (Tomatoes, Cucumbers, Squash): For tomatoes, ferment the seeds in water for a few days to remove the gel coating and inhibit disease. For cucumbers/squash, scrape out seeds, wash thoroughly, and dry.
- Drying: Spread seeds thinly on screens or paper plates in a cool, dry, well-ventilated area for 1-4 weeks. Ensure they are bone-dry before storage. I aim for less than 8% moisture content.
- Storage: Store seeds in airtight containers (glass jars with desiccant packets work well) in a cool, dark, dry place (ideally 40-50°F and 30-40% humidity). Label clearly with variety and date. Properly stored seeds can remain viable for 3-10 years or more.
Step 8: Season Extension & Winterizing
Extend your harvest and protect your garden for the off-season to truly maximize your self sufficient garden from scratch.
- Cold Frames: Simple structures with a transparent top (glass, polycarbonate, or old windows) that sit over garden beds. They trap solar heat, allowing you to grow cold-hardy crops (lettuce, spinach, kale, radishes) well into winter or start seeds earlier in spring. A basic cold frame can be built from 2×6 lumber and a sheet of polycarbonate for under $100.
- Hoop Houses/Low Tunnels: Larger structures made from flexible hoops (PVC pipe or EMT conduit) covered with greenhouse plastic. These provide more space and greater temperature moderation. A 10×20 ft DIY low tunnel kit can cost $200-$500, while a larger, more robust hoop house kit might be $1,000-$3,000. I use a 6×12 ft low tunnel made from 1/2-inch PVC hoops and 6mil greenhouse plastic, which extends my lettuce and spinach harvest by at least
- Integrated Pest Management (IPM): This holistic approach combines several strategies.
- Integrated Pest Management (IPM): This holistic approach combines several strategies.
- Integrated Pest Management (IPM): This holistic approach combines several strategies.
- Harvesting Techniques:
The culmination of your efforts is the harvest, and seed saving closes the loop on self-sufficiency.
- Harvesting Techniques:
- Timing: Harvest vegetables at their peak ripeness for best flavor and nutritional value. For example, green beans should snap cleanly, cucumbers should be firm, and tomatoes should be fully colored.
- Frequency: Many crops, like zucchini, cucumbers, and bush beans, produce more if harvested frequently. Pick daily or every other day.
- Tools: Use clean, sharp pruners (e.g., Corona ClassicCUT Bypass Pruner BP 3180, ~$30) or a sharp knife for clean cuts, minimizing damage to the plant.
- Seed Saving: This is where the « self-sufficient » aspect truly shines.
- Selection: Only save seeds from your healthiest, most vigorous plants that show desired traits (disease resistance, good flavor, high yield).
- Isolation: To ensure true-to-type seeds, prevent cross-pollination. This can be challenging for open-pollinated crops that readily cross (e.g., squash, corn). For beginners, focus on self-pollinating plants like beans, peas, lettuce, and tomatoes.
- Processing:
- Dry Seeds (Beans, Peas, Lettuce, Grains): Allow pods/seed heads to dry completely on the plant. Harvest, shell, and clean the seeds, removing chaff.
- Wet Seeds (Tomatoes, Cucumbers, Squash): For tomatoes, ferment the seeds in water for a few days to remove the gel coating and inhibit disease. For cucumbers/squash, scrape out seeds, wash thoroughly, and dry.
- Drying: Spread seeds thinly on screens or paper plates in a cool, dry, well-ventilated area for 1-4 weeks. Ensure they are bone-dry before storage. I aim for less than 8% moisture content.
- Storage: Store seeds in airtight containers (glass jars with desiccant packets work well) in a cool, dark, dry place (ideally 40-50°F and 30-40% humidity). Label clearly with variety and date. Properly stored seeds can remain viable for 3-10 years or more.
Step 8: Season Extension & Winterizing
Extend your harvest and protect your garden for the off-season to truly maximize your self sufficient garden from scratch.
- Cold Frames: Simple structures with a transparent top (glass, polycarbonate, or old windows) that sit over garden beds. They trap solar heat, allowing you to grow cold-hardy crops (lettuce, spinach, kale, radishes) well into winter or start seeds earlier in spring. A basic cold frame can be built from 2×6 lumber and a sheet of polycarbonate for under $100.
- Hoop Houses/Low Tunnels: Larger structures made from flexible hoops (PVC pipe or EMT conduit) covered with greenhouse plastic. These provide more space and greater temperature moderation. A 10×20 ft DIY low tunnel kit can cost $200-$500, while a larger, more robust hoop house kit might be $1,000-$3,000. I use a 6×12 ft low tunnel made from 1/2-inch PVC hoops and 6mil greenhouse plastic, which extends my lettuce and spinach harvest by at least
Step 7: Harvesting & Seed Saving
The culmination of your efforts is the harvest, and seed saving closes the loop on self-sufficiency.
- Harvesting Techniques:
- Timing: Harvest vegetables at their peak ripeness for best flavor and nutritional value. For example, green beans should snap cleanly, cucumbers should be firm, and tomatoes should be fully colored.
- Frequency: Many crops, like zucchini, cucumbers, and bush beans, produce more if harvested frequently. Pick daily or every other day.
- Tools: Use clean, sharp pruners (e.g., Corona ClassicCUT Bypass Pruner BP 3180, ~$30) or a sharp knife for clean cuts, minimizing damage to the plant.
- Seed Saving: This is where the « self-sufficient » aspect truly shines.
- Selection: Only save seeds from your healthiest, most vigorous plants that show desired traits (disease resistance, good flavor, high yield).
- Isolation: To ensure true-to-type seeds, prevent cross-pollination. This can be challenging for open-pollinated crops that readily cross (e.g., squash, corn). For beginners, focus on self-pollinating plants like beans, peas, lettuce, and tomatoes.
- Processing:
- Dry Seeds (Beans, Peas, Lettuce, Grains): Allow pods/seed heads to dry completely on the plant. Harvest, shell, and clean the seeds, removing chaff.
- Wet Seeds (Tomatoes, Cucumbers, Squash): For tomatoes, ferment the seeds in water for a few days to remove the gel coating and inhibit disease. For cucumbers/squash, scrape out seeds, wash thoroughly, and dry.
- Drying: Spread seeds thinly on screens or paper plates in a cool, dry, well-ventilated area for 1-4 weeks. Ensure they are bone-dry before storage. I aim for less than 8% moisture content.
- Storage: Store seeds in airtight containers (glass jars with desiccant packets work well) in a cool, dark, dry place (ideally 40-50°F and 30-40% humidity). Label clearly with variety and date. Properly stored seeds can remain viable for 3-10 years or more.
Step 8: Season Extension & Winterizing
Extend your harvest and protect your garden for the off-season to truly maximize your self sufficient garden from scratch.
- Cold Frames: Simple structures with a transparent top (glass, polycarbonate, or old windows) that sit over garden beds. They trap solar heat, allowing you to grow cold-hardy crops (lettuce, spinach, kale, radishes) well into winter or start seeds earlier in spring. A basic cold frame can be built from 2×6 lumber and a sheet of polycarbonate for under $100.
- Hoop Houses/Low Tunnels: Larger structures made from flexible hoops (PVC pipe or EMT conduit) covered with greenhouse plastic. These provide more space and greater temperature moderation. A 10×20 ft DIY low tunnel kit can cost $200-$500, while a larger, more robust hoop house kit might be $1,000-$3,000. I use a 6×12 ft low tunnel made from 1/2-inch PVC hoops and 6mil greenhouse plastic, which extends my lettuce and spinach harvest by at least
- Integrated Pest Management (IPM): This holistic approach combines several strategies.
- Observation: Regularly inspect your plants for early signs of pests or disease. Catching issues early is key.
- Physical Barriers: Use row covers (e.g., Agribon AG-19 floating row cover, 10×20 ft, ~$20) to protect young plants from insect pests like cabbage worms and squash bugs. Install fences (e.g., 2×4 welded wire mesh, 4 ft tall, 50 ft roll ~$70) to keep out deer, rabbits, and other larger animals.
- Hand-Picking: For larger pests like tomato hornworms or squash bugs, simply pick them off and drop them into a bucket of soapy water.
- Companion Planting: As mentioned, certain plants repel pests. Marigolds, garlic, and onions are excellent deterrents.
- Attract Beneficial Insects: Plant flowers like dill, fennel, cosmos, and sweet alyssum to attract ladybugs, lacewings, and parasitic wasps, which prey on common garden pests.
- Organic Sprays & Treatments:
- Neem Oil: An excellent broad-spectrum organic insecticide and fungicide. Bonide Neem Oil Concentrate (16oz, ~$20) can be mixed at a rate of 1-2 tbsp per gallon of water and sprayed on affected plants.
- Insecticidal Soap: Effective against soft-bodied insects like aphids, whiteflies, and spider mites. Garden Safe Insecticidal Soap (24oz ready-to-use, ~$10).
- Bacillus thuringiensis (Bt): A naturally occurring soil bacterium that targets caterpillars and worms. Monterey BT Worm & Caterpillar Killer (16oz, ~$18) is highly effective and safe for beneficial insects.
- Copper or Sulfur Sprays: For fungal diseases like powdery mildew or blight, organic copper (e.g., Bonide Copper Fungicide, ~$15 for 1lb) or sulfur (e.g., Safer Brand Garden Fungicide, ~$10 for 16oz) can be used as a last resort.
Step 7: Harvesting & Seed Saving
The culmination of your efforts is the harvest, and seed saving closes the loop on self-sufficiency.
- Harvesting Techniques:
- Timing: Harvest vegetables at their peak ripeness for best flavor and nutritional value. For example, green beans should snap cleanly, cucumbers should be firm, and tomatoes should be fully colored.
- Frequency: Many crops, like zucchini, cucumbers, and bush beans, produce more if harvested frequently. Pick daily or every other day.
- Tools: Use clean, sharp pruners (e.g., Corona ClassicCUT Bypass Pruner BP 3180, ~$30) or a sharp knife for clean cuts, minimizing damage to the plant.
- Seed Saving: This is where the « self-sufficient » aspect truly shines.
- Selection: Only save seeds from your healthiest, most vigorous plants that show desired traits (disease resistance, good flavor, high yield).
- Isolation: To ensure true-to-type seeds, prevent cross-pollination. This can be challenging for open-pollinated crops that readily cross (e.g., squash, corn). For beginners, focus on self-pollinating plants like beans, peas, lettuce, and tomatoes.
- Processing:
- Dry Seeds (Beans, Peas, Lettuce, Grains): Allow pods/seed heads to dry completely on the plant. Harvest, shell, and clean the seeds, removing chaff.
- Wet Seeds (Tomatoes, Cucumbers, Squash): For tomatoes, ferment the seeds in water for a few days to remove the gel coating and inhibit disease. For cucumbers/squash, scrape out seeds, wash thoroughly, and dry.
- Drying: Spread seeds thinly on screens or paper plates in a cool, dry, well-ventilated area for 1-4 weeks. Ensure they are bone-dry before storage. I aim for less than 8% moisture content.
- Storage: Store seeds in airtight containers (glass jars with desiccant packets work well) in a cool, dark, dry place (ideally 40-50°F and 30-40% humidity). Label clearly with variety and date. Properly stored seeds can remain viable for 3-10 years or more.
Step 8: Season Extension & Winterizing
Extend your harvest and protect your garden for the off-season to truly maximize your self sufficient garden from scratch.
- Cold Frames: Simple structures with a transparent top (glass, polycarbonate, or old windows) that sit over garden beds. They trap solar heat, allowing you to grow cold-hardy crops (lettuce, spinach, kale, radishes) well into winter or start seeds earlier in spring. A basic cold frame can be built from 2×6 lumber and a sheet of polycarbonate for under $100.
- Hoop Houses/Low Tunnels: Larger structures made from flexible hoops (PVC pipe or EMT conduit) covered with greenhouse plastic. These provide more space and greater temperature moderation. A 10×20 ft DIY low tunnel kit can cost $200-$500, while a larger, more robust hoop house kit might be $1,000-$3,000. I use a 6×12 ft low tunnel made from 1/2-inch PVC hoops and 6mil greenhouse plastic, which extends my lettuce and spinach harvest by at least
Maintaining a self sufficient garden from scratch means embracing organic pest and disease control.
- Integrated Pest Management (IPM): This holistic approach combines several strategies.
- Observation: Regularly inspect your plants for early signs of pests or disease. Catching issues early is key.
- Physical Barriers: Use row covers (e.g., Agribon AG-19 floating row cover, 10×20 ft, ~$20) to protect young plants from insect pests like cabbage worms and squash bugs. Install fences (e.g., 2×4 welded wire mesh, 4 ft tall, 50 ft roll ~$70) to keep out deer, rabbits, and other larger animals.
- Hand-Picking: For larger pests like tomato hornworms or squash bugs, simply pick them off and drop them into a bucket of soapy water.
- Companion Planting: As mentioned, certain plants repel pests. Marigolds, garlic, and onions are excellent deterrents.
- Attract Beneficial Insects: Plant flowers like dill, fennel, cosmos, and sweet alyssum to attract ladybugs, lacewings, and parasitic wasps, which prey on common garden pests.
- Organic Sprays & Treatments:
- Neem Oil: An excellent broad-spectrum organic insecticide and fungicide. Bonide Neem Oil Concentrate (16oz, ~$20) can be mixed at a rate of 1-2 tbsp per gallon of water and sprayed on affected plants.
- Insecticidal Soap: Effective against soft-bodied insects like aphids, whiteflies, and spider mites. Garden Safe Insecticidal Soap (24oz ready-to-use, ~$10).
- Bacillus thuringiensis (Bt): A naturally occurring soil bacterium that targets caterpillars and worms. Monterey BT Worm & Caterpillar Killer (16oz, ~$18) is highly effective and safe for beneficial insects.
- Copper or Sulfur Sprays: For fungal diseases like powdery mildew or blight, organic copper (e.g., Bonide Copper Fungicide, ~$15 for 1lb) or sulfur (e.g., Safer Brand Garden Fungicide, ~$10 for 16oz) can be used as a last resort.
Step 7: Harvesting & Seed Saving
The culmination of your efforts is the harvest, and seed saving closes the loop on self-sufficiency.
- Harvesting Techniques:
- Timing: Harvest vegetables at their peak ripeness for best flavor and nutritional value. For example, green beans should snap cleanly, cucumbers should be firm, and tomatoes should be fully colored.
- Frequency: Many crops, like zucchini, cucumbers, and bush beans, produce more if harvested frequently. Pick daily or every other day.
- Tools: Use clean, sharp pruners (e.g., Corona ClassicCUT Bypass Pruner BP 3180, ~$30) or a sharp knife for clean cuts, minimizing damage to the plant.
- Seed Saving: This is where the « self-sufficient » aspect truly shines.
- Selection: Only save seeds from your healthiest, most vigorous plants that show desired traits (disease resistance, good flavor, high yield).
- Isolation: To ensure true-to-type seeds, prevent cross-pollination. This can be challenging for open-pollinated crops that readily cross (e.g., squash, corn). For beginners, focus on self-pollinating plants like beans, peas, lettuce, and tomatoes.
- Processing:
- Dry Seeds (Beans, Peas, Lettuce, Grains): Allow pods/seed heads to dry completely on the plant. Harvest, shell, and clean the seeds, removing chaff.
- Wet Seeds (Tomatoes, Cucumbers, Squash): For tomatoes, ferment the seeds in water for a few days to remove the gel coating and inhibit disease. For cucumbers/squash, scrape out seeds, wash thoroughly, and dry.
- Drying: Spread seeds thinly on screens or paper plates in a cool, dry, well-ventilated area for 1-4 weeks. Ensure they are bone-dry before storage. I aim for less than 8% moisture content.
- Storage: Store seeds in airtight containers (glass jars with desiccant packets work well) in a cool, dark, dry place (ideally 40-50°F and 30-40% humidity). Label clearly with variety and date. Properly stored seeds can remain viable for 3-10 years or more.
Step 8: Season Extension & Winterizing
Extend your harvest and protect your garden for the off-season to truly maximize your self sufficient garden from scratch.
- Cold Frames: Simple structures with a transparent top (glass, polycarbonate, or old windows) that sit over garden beds. They trap solar heat, allowing you to grow cold-hardy crops (lettuce, spinach, kale, radishes) well into winter or start seeds earlier in spring. A basic cold frame can be built from 2×6 lumber and a sheet of polycarbonate for under $100.
- Hoop Houses/Low Tunnels: Larger structures made from flexible hoops (PVC pipe or EMT conduit) covered with greenhouse plastic. These provide more space and greater temperature moderation. A 10×20 ft DIY low tunnel kit can cost $200-$500, while a larger, more robust hoop house kit might be $1,000-$3,000. I use a 6×12 ft low tunnel made from 1/2-inch PVC hoops and 6mil greenhouse plastic, which extends my lettuce and spinach harvest by at least
Step 6: Pest & Disease Management (Organic)
Maintaining a self sufficient garden from scratch means embracing organic pest and disease control.
- Integrated Pest Management (IPM): This holistic approach combines several strategies.
- Observation: Regularly inspect your plants for early signs of pests or disease. Catching issues early is key.
- Physical Barriers: Use row covers (e.g., Agribon AG-19 floating row cover, 10×20 ft, ~$20) to protect young plants from insect pests like cabbage worms and squash bugs. Install fences (e.g., 2×4 welded wire mesh, 4 ft tall, 50 ft roll ~$70) to keep out deer, rabbits, and other larger animals.
- Hand-Picking: For larger pests like tomato hornworms or squash bugs, simply pick them off and drop them into a bucket of soapy water.
- Companion Planting: As mentioned, certain plants repel pests. Marigolds, garlic, and onions are excellent deterrents.
- Attract Beneficial Insects: Plant flowers like dill, fennel, cosmos, and sweet alyssum to attract ladybugs, lacewings, and parasitic wasps, which prey on common garden pests.
- Organic Sprays & Treatments:
- Neem Oil: An excellent broad-spectrum organic insecticide and fungicide. Bonide Neem Oil Concentrate (16oz, ~$20) can be mixed at a rate of 1-2 tbsp per gallon of water and sprayed on affected plants.
- Insecticidal Soap: Effective against soft-bodied insects like aphids, whiteflies, and spider mites. Garden Safe Insecticidal Soap (24oz ready-to-use, ~$10).
- Bacillus thuringiensis (Bt): A naturally occurring soil bacterium that targets caterpillars and worms. Monterey BT Worm & Caterpillar Killer (16oz, ~$18) is highly effective and safe for beneficial insects.
- Copper or Sulfur Sprays: For fungal diseases like powdery mildew or blight, organic copper (e.g., Bonide Copper Fungicide, ~$15 for 1lb) or sulfur (e.g., Safer Brand Garden Fungicide, ~$10 for 16oz) can be used as a last resort.
Step 7: Harvesting & Seed Saving
The culmination of your efforts is the harvest, and seed saving closes the loop on self-sufficiency.
- Harvesting Techniques:
- Timing: Harvest vegetables at their peak ripeness for best flavor and nutritional value. For example, green beans should snap cleanly, cucumbers should be firm, and tomatoes should be fully colored.
- Frequency: Many crops, like zucchini, cucumbers, and bush beans, produce more if harvested frequently. Pick daily or every other day.
- Tools: Use clean, sharp pruners (e.g., Corona ClassicCUT Bypass Pruner BP 3180, ~$30) or a sharp knife for clean cuts, minimizing damage to the plant.
- Seed Saving: This is where the « self-sufficient » aspect truly shines.
- Selection: Only save seeds from your healthiest, most vigorous plants that show desired traits (disease resistance, good flavor, high yield).
- Isolation: To ensure true-to-type seeds, prevent cross-pollination. This can be challenging for open-pollinated crops that readily cross (e.g., squash, corn). For beginners, focus on self-pollinating plants like beans, peas, lettuce, and tomatoes.
- Processing:
- Dry Seeds (Beans, Peas, Lettuce, Grains): Allow pods/seed heads to dry completely on the plant. Harvest, shell, and clean the seeds, removing chaff.
- Wet Seeds (Tomatoes, Cucumbers, Squash): For tomatoes, ferment the seeds in water for a few days to remove the gel coating and inhibit disease. For cucumbers/squash, scrape out seeds, wash thoroughly, and dry.
- Drying: Spread seeds thinly on screens or paper plates in a cool, dry, well-ventilated area for 1-4 weeks. Ensure they are bone-dry before storage. I aim for less than 8% moisture content.
- Storage: Store seeds in airtight containers (glass jars with desiccant packets work well) in a cool, dark, dry place (ideally 40-50°F and 30-40% humidity). Label clearly with variety and date. Properly stored seeds can remain viable for 3-10 years or more.
Step 8: Season Extension & Winterizing
Extend your harvest and protect your garden for the off-season to truly maximize your self sufficient garden from scratch.
- Cold Frames: Simple structures with a transparent top (glass, polycarbonate, or old windows) that sit over garden beds. They trap solar heat, allowing you to grow cold-hardy crops (lettuce, spinach, kale, radishes) well into winter or start seeds earlier in spring. A basic cold frame can be built from 2×6 lumber and a sheet of polycarbonate for under $100.
- Hoop Houses/Low Tunnels: Larger structures made from flexible hoops (PVC pipe or EMT conduit) covered with greenhouse plastic. These provide more space and greater temperature moderation. A 10×20 ft DIY low tunnel kit can cost $200-$500, while a larger, more robust hoop house kit might be $1,000-$3,000. I use a 6×12 ft low tunnel made from 1/2-inch PVC hoops and 6mil greenhouse plastic, which extends my lettuce and spinach harvest by at least
- Choose Heirloom & Open-Pollinated Seeds: These varieties produce seeds that will grow true to type, meaning you can save seeds from your harvest year after year. F1 hybrids, while often vigorous, will not produce consistent offspring from saved seeds. Reputable seed companies include Baker Creek Heirloom Seeds, High Mowing Organic Seeds, and Seed Savers Exchange. Start with common, reliable varieties like ‘Black Krim’ tomatoes, ‘Provider’ bush beans, ‘Waltham Butternut’ squash, and ‘Black Seeded Simpson’ lettuce.
- Start Seeds Indoors (Optional but Recommended): For longer growing seasons or specific crops, starting seeds indoors gives you a head start. Use seed-starting mix (e.g., Espoma Organic Seed Starter Mix, ~$10 for 16qt bag) in seed trays (Jiffy Professional Greenhouse 72-cell kit, ~$15). Provide adequate light with LED grow lights (Barrina T5 2ft 4-pack LED Grow Lights, 20W each, ~$50) for 14-16 hours a day, positioned 2-4 inches above seedlings. Maintain consistent temperatures (65-75°F for most).
- Direct Sowing vs. Transplanting: Some crops (carrots, radishes, beans, corn) prefer direct sowing into the garden bed. Others (tomatoes, peppers, broccoli, kale) benefit from being started indoors and transplanted. Follow seed packet instructions for planting depths (e.g., lettuce seeds are often surface-sown or planted 1/8 inch deep, while beans are 1 inch deep) and spacing.
- Companion Planting: Strategically plant different species together to enhance growth, deter pests, and attract beneficial insects. For example, planting marigolds near tomatoes can deter nematodes, and basil improves tomato flavor. Nasturtiums can act as a trap crop for aphids.
- Succession Planting: For a continuous harvest, plant small batches of quick-growing crops (lettuce, radishes, cilantro) every 2-3 weeks. As one crop finishes, another is ready to take its place.
Step 6: Pest & Disease Management (Organic)
Maintaining a self sufficient garden from scratch means embracing organic pest and disease control.
- Integrated Pest Management (IPM): This holistic approach combines several strategies.
- Observation: Regularly inspect your plants for early signs of pests or disease. Catching issues early is key.
- Physical Barriers: Use row covers (e.g., Agribon AG-19 floating row cover, 10×20 ft, ~$20) to protect young plants from insect pests like cabbage worms and squash bugs. Install fences (e.g., 2×4 welded wire mesh, 4 ft tall, 50 ft roll ~$70) to keep out deer, rabbits, and other larger animals.
- Hand-Picking: For larger pests like tomato hornworms or squash bugs, simply pick them off and drop them into a bucket of soapy water.
- Companion Planting: As mentioned, certain plants repel pests. Marigolds, garlic, and onions are excellent deterrents.
- Attract Beneficial Insects: Plant flowers like dill, fennel, cosmos, and sweet alyssum to attract ladybugs, lacewings, and parasitic wasps, which prey on common garden pests.
- Organic Sprays & Treatments:
- Neem Oil: An excellent broad-spectrum organic insecticide and fungicide. Bonide Neem Oil Concentrate (16oz, ~$20) can be mixed at a rate of 1-2 tbsp per gallon of water and sprayed on affected plants.
- Insecticidal Soap: Effective against soft-bodied insects like aphids, whiteflies, and spider mites. Garden Safe Insecticidal Soap (24oz ready-to-use, ~$10).
- Bacillus thuringiensis (Bt): A naturally occurring soil bacterium that targets caterpillars and worms. Monterey BT Worm & Caterpillar Killer (16oz, ~$18) is highly effective and safe for beneficial insects.
- Copper or Sulfur Sprays: For fungal diseases like powdery mildew or blight, organic copper (e.g., Bonide Copper Fungicide, ~$15 for 1lb) or sulfur (e.g., Safer Brand Garden Fungicide, ~$10 for 16oz) can be used as a last resort.
Step 7: Harvesting & Seed Saving
The culmination of your efforts is the harvest, and seed saving closes the loop on self-sufficiency.
- Harvesting Techniques:
- Timing: Harvest vegetables at their peak ripeness for best flavor and nutritional value. For example, green beans should snap cleanly, cucumbers should be firm, and tomatoes should be fully colored.
- Frequency: Many crops, like zucchini, cucumbers, and bush beans, produce more if harvested frequently. Pick daily or every other day.
- Tools: Use clean, sharp pruners (e.g., Corona ClassicCUT Bypass Pruner BP 3180, ~$30) or a sharp knife for clean cuts, minimizing damage to the plant.
- Seed Saving: This is where the « self-sufficient » aspect truly shines.
- Selection: Only save seeds from your healthiest, most vigorous plants that show desired traits (disease resistance, good flavor, high yield).
- Isolation: To ensure true-to-type seeds, prevent cross-pollination. This can be challenging for open-pollinated crops that readily cross (e.g., squash, corn). For beginners, focus on self-pollinating plants like beans, peas, lettuce, and tomatoes.
- Processing:
- Dry Seeds (Beans, Peas, Lettuce, Grains): Allow pods/seed heads to dry completely on the plant. Harvest, shell, and clean the seeds, removing chaff.
- Wet Seeds (Tomatoes, Cucumbers, Squash): For tomatoes, ferment the seeds in water for a few days to remove the gel coating and inhibit disease. For cucumbers/squash, scrape out seeds, wash thoroughly, and dry.
- Drying: Spread seeds thinly on screens or paper plates in a cool, dry, well-ventilated area for 1-4 weeks. Ensure they are bone-dry before storage. I aim for less than 8% moisture content.
- Storage: Store seeds in airtight containers (glass jars with desiccant packets work well) in a cool, dark, dry place (ideally 40-50°F and 30-40% humidity). Label clearly with variety and date. Properly stored seeds can remain viable for 3-10 years or more.
Step 8: Season Extension & Winterizing
Extend your harvest and protect your garden for the off-season to truly maximize your self sufficient garden from scratch.
- Cold Frames: Simple structures with a transparent top (glass, polycarbonate, or old windows) that sit over garden beds. They trap solar heat, allowing you to grow cold-hardy crops (lettuce, spinach, kale, radishes) well into winter or start seeds earlier in spring. A basic cold frame can be built from 2×6 lumber and a sheet of polycarbonate for under $100.
- Hoop Houses/Low Tunnels: Larger structures made from flexible hoops (PVC pipe or EMT conduit) covered with greenhouse plastic. These provide more space and greater temperature moderation. A 10×20 ft DIY low tunnel kit can cost $200-$500, while a larger, more robust hoop house kit might be $1,000-$3,000. I use a 6×12 ft low tunnel made from 1/2-inch PVC hoops and 6mil greenhouse plastic, which extends my lettuce and spinach harvest by at least
The choice of seeds is crucial for a truly self sufficient garden from scratch.
- Choose Heirloom & Open-Pollinated Seeds: These varieties produce seeds that will grow true to type, meaning you can save seeds from your harvest year after year. F1 hybrids, while often vigorous, will not produce consistent offspring from saved seeds. Reputable seed companies include Baker Creek Heirloom Seeds, High Mowing Organic Seeds, and Seed Savers Exchange. Start with common, reliable varieties like ‘Black Krim’ tomatoes, ‘Provider’ bush beans, ‘Waltham Butternut’ squash, and ‘Black Seeded Simpson’ lettuce.
- Start Seeds Indoors (Optional but Recommended): For longer growing seasons or specific crops, starting seeds indoors gives you a head start. Use seed-starting mix (e.g., Espoma Organic Seed Starter Mix, ~$10 for 16qt bag) in seed trays (Jiffy Professional Greenhouse 72-cell kit, ~$15). Provide adequate light with LED grow lights (Barrina T5 2ft 4-pack LED Grow Lights, 20W each, ~$50) for 14-16 hours a day, positioned 2-4 inches above seedlings. Maintain consistent temperatures (65-75°F for most).
- Direct Sowing vs. Transplanting: Some crops (carrots, radishes, beans, corn) prefer direct sowing into the garden bed. Others (tomatoes, peppers, broccoli, kale) benefit from being started indoors and transplanted. Follow seed packet instructions for planting depths (e.g., lettuce seeds are often surface-sown or planted 1/8 inch deep, while beans are 1 inch deep) and spacing.
- Companion Planting: Strategically plant different species together to enhance growth, deter pests, and attract beneficial insects. For example, planting marigolds near tomatoes can deter nematodes, and basil improves tomato flavor. Nasturtiums can act as a trap crop for aphids.
- Succession Planting: For a continuous harvest, plant small batches of quick-growing crops (lettuce, radishes, cilantro) every 2-3 weeks. As one crop finishes, another is ready to take its place.
Step 6: Pest & Disease Management (Organic)
Maintaining a self sufficient garden from scratch means embracing organic pest and disease control.
- Integrated Pest Management (IPM): This holistic approach combines several strategies.
- Observation: Regularly inspect your plants for early signs of pests or disease. Catching issues early is key.
- Physical Barriers: Use row covers (e.g., Agribon AG-19 floating row cover, 10×20 ft, ~$20) to protect young plants from insect pests like cabbage worms and squash bugs. Install fences (e.g., 2×4 welded wire mesh, 4 ft tall, 50 ft roll ~$70) to keep out deer, rabbits, and other larger animals.
- Hand-Picking: For larger pests like tomato hornworms or squash bugs, simply pick them off and drop them into a bucket of soapy water.
- Companion Planting: As mentioned, certain plants repel pests. Marigolds, garlic, and onions are excellent deterrents.
- Attract Beneficial Insects: Plant flowers like dill, fennel, cosmos, and sweet alyssum to attract ladybugs, lacewings, and parasitic wasps, which prey on common garden pests.
- Organic Sprays & Treatments:
- Neem Oil: An excellent broad-spectrum organic insecticide and fungicide. Bonide Neem Oil Concentrate (16oz, ~$20) can be mixed at a rate of 1-2 tbsp per gallon of water and sprayed on affected plants.
- Insecticidal Soap: Effective against soft-bodied insects like aphids, whiteflies, and spider mites. Garden Safe Insecticidal Soap (24oz ready-to-use, ~$10).
- Bacillus thuringiensis (Bt): A naturally occurring soil bacterium that targets caterpillars and worms. Monterey BT Worm & Caterpillar Killer (16oz, ~$18) is highly effective and safe for beneficial insects.
- Copper or Sulfur Sprays: For fungal diseases like powdery mildew or blight, organic copper (e.g., Bonide Copper Fungicide, ~$15 for 1lb) or sulfur (e.g., Safer Brand Garden Fungicide, ~$10 for 16oz) can be used as a last resort.
Step 7: Harvesting & Seed Saving
The culmination of your efforts is the harvest, and seed saving closes the loop on self-sufficiency.
- Harvesting Techniques:
- Timing: Harvest vegetables at their peak ripeness for best flavor and nutritional value. For example, green beans should snap cleanly, cucumbers should be firm, and tomatoes should be fully colored.
- Frequency: Many crops, like zucchini, cucumbers, and bush beans, produce more if harvested frequently. Pick daily or every other day.
- Tools: Use clean, sharp pruners (e.g., Corona ClassicCUT Bypass Pruner BP 3180, ~$30) or a sharp knife for clean cuts, minimizing damage to the plant.
- Seed Saving: This is where the « self-sufficient » aspect truly shines.
- Selection: Only save seeds from your healthiest, most vigorous plants that show desired traits (disease resistance, good flavor, high yield).
- Isolation: To ensure true-to-type seeds, prevent cross-pollination. This can be challenging for open-pollinated crops that readily cross (e.g., squash, corn). For beginners, focus on self-pollinating plants like beans, peas, lettuce, and tomatoes.
- Processing:
- Dry Seeds (Beans, Peas, Lettuce, Grains): Allow pods/seed heads to dry completely on the plant. Harvest, shell, and clean the seeds, removing chaff.
- Wet Seeds (Tomatoes, Cucumbers, Squash): For tomatoes, ferment the seeds in water for a few days to remove the gel coating and inhibit disease. For cucumbers/squash, scrape out seeds, wash thoroughly, and dry.
- Drying: Spread seeds thinly on screens or paper plates in a cool, dry, well-ventilated area for 1-4 weeks. Ensure they are bone-dry before storage. I aim for less than 8% moisture content.
- Storage: Store seeds in airtight containers (glass jars with desiccant packets work well) in a cool, dark, dry place (ideally 40-50°F and 30-40% humidity). Label clearly with variety and date. Properly stored seeds can remain viable for 3-10 years or more.
Step 8: Season Extension & Winterizing
Extend your harvest and protect your garden for the off-season to truly maximize your self sufficient garden from scratch.
- Cold Frames: Simple structures with a transparent top (glass, polycarbonate, or old windows) that sit over garden beds. They trap solar heat, allowing you to grow cold-hardy crops (lettuce, spinach, kale, radishes) well into winter or start seeds earlier in spring. A basic cold frame can be built from 2×6 lumber and a sheet of polycarbonate for under $100.
- Hoop Houses/Low Tunnels: Larger structures made from flexible hoops (PVC pipe or EMT conduit) covered with greenhouse plastic. These provide more space and greater temperature moderation. A 10×20 ft DIY low tunnel kit can cost $200-$500, while a larger, more robust hoop house kit might be $1,000-$3,000. I use a 6×12 ft low tunnel made from 1/2-inch PVC hoops and 6mil greenhouse plastic, which extends my lettuce and spinach harvest by at least
Step 5: Seed Selection & Planting
The choice of seeds is crucial for a truly self sufficient garden from scratch.
- Choose Heirloom & Open-Pollinated Seeds: These varieties produce seeds that will grow true to type, meaning you can save seeds from your harvest year after year. F1 hybrids, while often vigorous, will not produce consistent offspring from saved seeds. Reputable seed companies include Baker Creek Heirloom Seeds, High Mowing Organic Seeds, and Seed Savers Exchange. Start with common, reliable varieties like ‘Black Krim’ tomatoes, ‘Provider’ bush beans, ‘Waltham Butternut’ squash, and ‘Black Seeded Simpson’ lettuce.
- Start Seeds Indoors (Optional but Recommended): For longer growing seasons or specific crops, starting seeds indoors gives you a head start. Use seed-starting mix (e.g., Espoma Organic Seed Starter Mix, ~$10 for 16qt bag) in seed trays (Jiffy Professional Greenhouse 72-cell kit, ~$15). Provide adequate light with LED grow lights (Barrina T5 2ft 4-pack LED Grow Lights, 20W each, ~$50) for 14-16 hours a day, positioned 2-4 inches above seedlings. Maintain consistent temperatures (65-75°F for most).
- Direct Sowing vs. Transplanting: Some crops (carrots, radishes, beans, corn) prefer direct sowing into the garden bed. Others (tomatoes, peppers, broccoli, kale) benefit from being started indoors and transplanted. Follow seed packet instructions for planting depths (e.g., lettuce seeds are often surface-sown or planted 1/8 inch deep, while beans are 1 inch deep) and spacing.
- Companion Planting: Strategically plant different species together to enhance growth, deter pests, and attract beneficial insects. For example, planting marigolds near tomatoes can deter nematodes, and basil improves tomato flavor. Nasturtiums can act as a trap crop for aphids.
- Succession Planting: For a continuous harvest, plant small batches of quick-growing crops (lettuce, radishes, cilantro) every 2-3 weeks. As one crop finishes, another is ready to take its place.
Step 6: Pest & Disease Management (Organic)
Maintaining a self sufficient garden from scratch means embracing organic pest and disease control.
- Integrated Pest Management (IPM): This holistic approach combines several strategies.
- Observation: Regularly inspect your plants for early signs of pests or disease. Catching issues early is key.
- Physical Barriers: Use row covers (e.g., Agribon AG-19 floating row cover, 10×20 ft, ~$20) to protect young plants from insect pests like cabbage worms and squash bugs. Install fences (e.g., 2×4 welded wire mesh, 4 ft tall, 50 ft roll ~$70) to keep out deer, rabbits, and other larger animals.
- Hand-Picking: For larger pests like tomato hornworms or squash bugs, simply pick them off and drop them into a bucket of soapy water.
- Companion Planting: As mentioned, certain plants repel pests. Marigolds, garlic, and onions are excellent deterrents.
- Attract Beneficial Insects: Plant flowers like dill, fennel, cosmos, and sweet alyssum to attract ladybugs, lacewings, and parasitic wasps, which prey on common garden pests.
- Organic Sprays & Treatments:
- Neem Oil: An excellent broad-spectrum organic insecticide and fungicide. Bonide Neem Oil Concentrate (16oz, ~$20) can be mixed at a rate of 1-2 tbsp per gallon of water and sprayed on affected plants.
- Insecticidal Soap: Effective against soft-bodied insects like aphids, whiteflies, and spider mites. Garden Safe Insecticidal Soap (24oz ready-to-use, ~$10).
- Bacillus thuringiensis (Bt): A naturally occurring soil bacterium that targets caterpillars and worms. Monterey BT Worm & Caterpillar Killer (16oz, ~$18) is highly effective and safe for beneficial insects.
- Copper or Sulfur Sprays: For fungal diseases like powdery mildew or blight, organic copper (e.g., Bonide Copper Fungicide, ~$15 for 1lb) or sulfur (e.g., Safer Brand Garden Fungicide, ~$10 for 16oz) can be used as a last resort.
Step 7: Harvesting & Seed Saving
The culmination of your efforts is the harvest, and seed saving closes the loop on self-sufficiency.
- Harvesting Techniques:
- Timing: Harvest vegetables at their peak ripeness for best flavor and nutritional value. For example, green beans should snap cleanly, cucumbers should be firm, and tomatoes should be fully colored.
- Frequency: Many crops, like zucchini, cucumbers, and bush beans, produce more if harvested frequently. Pick daily or every other day.
- Tools: Use clean, sharp pruners (e.g., Corona ClassicCUT Bypass Pruner BP 3180, ~$30) or a sharp knife for clean cuts, minimizing damage to the plant.
- Seed Saving: This is where the « self-sufficient » aspect truly shines.
- Selection: Only save seeds from your healthiest, most vigorous plants that show desired traits (disease resistance, good flavor, high yield).
- Isolation: To ensure true-to-type seeds, prevent cross-pollination. This can be challenging for open-pollinated crops that readily cross (e.g., squash, corn). For beginners, focus on self-pollinating plants like beans, peas, lettuce, and tomatoes.
- Processing:
- Dry Seeds (Beans, Peas, Lettuce, Grains): Allow pods/seed heads to dry completely on the plant. Harvest, shell, and clean the seeds, removing chaff.
- Wet Seeds (Tomatoes, Cucumbers, Squash): For tomatoes, ferment the seeds in water for a few days to remove the gel coating and inhibit disease. For cucumbers/squash, scrape out seeds, wash thoroughly, and dry.
- Drying: Spread seeds thinly on screens or paper plates in a cool, dry, well-ventilated area for 1-4 weeks. Ensure they are bone-dry before storage. I aim for less than 8% moisture content.
- Storage: Store seeds in airtight containers (glass jars with desiccant packets work well) in a cool, dark, dry place (ideally 40-50°F and 30-40% humidity). Label clearly with variety and date. Properly stored seeds can remain viable for 3-10 years or more.
Step 8: Season Extension & Winterizing
Extend your harvest and protect your garden for the off-season to truly maximize your self sufficient garden from scratch.
- Cold Frames: Simple structures with a transparent top (glass, polycarbonate, or old windows) that sit over garden beds. They trap solar heat, allowing you to grow cold-hardy crops (lettuce, spinach, kale, radishes) well into winter or start seeds earlier in spring. A basic cold frame can be built from 2×6 lumber and a sheet of polycarbonate for under $100.
- Hoop Houses/Low Tunnels: Larger structures made from flexible hoops (PVC pipe or EMT conduit) covered with greenhouse plastic. These provide more space and greater temperature moderation. A 10×20 ft DIY low tunnel kit can cost $200-$500, while a larger, more robust hoop house kit might be $1,000-$3,000. I use a 6×12 ft low tunnel made from 1/2-inch PVC hoops and 6mil greenhouse plastic, which extends my lettuce and spinach harvest by at least
- Rainwater Harvesting: This is my primary source of irrigation water. A 55-gallon rain barrel (e.g., EarthMark Rain Barrel, ~$120-$150) connected to a downspout can collect significant water. For larger needs, I use two 275-gallon IBC totes (Intermediate Bulk Containers, often available used for $100-$200 each from food-grade sources) connected in series. A 1,000 sq ft roof can collect approximately 620 gallons of water for every inch of rainfall. My 1,500 sq ft roof provides ample water for my 600 sq ft garden through multiple barrels and totes.
- Drip Irrigation: This is by far the most water-efficient method, delivering water directly to the plant’s root zone, minimizing evaporation and weed growth.
- Components: A typical drip system includes a pressure regulator (e.g., Rain Bird PRV-10, ~$15), a filter (Rain Bird RBY filter, ~$20), main tubing (1/2-inch poly tubing, 100ft ~$25), smaller feeder lines (1/4-inch tubing), and emitters (0.5 GPH or 1 GPH per plant).
- Kits: For beginners, a starter kit like the Rain Bird Drip Irrigation Garden Kit (model DDI-KIT-1P, ~$40-$60) is excellent for a small garden. For larger setups, I use Netafim Techline CV Drip Line (500ft roll, ~$150-$200), which has pressure-compensating emitters built-in, ensuring even watering across long runs.
- Automation: For true self-sufficiency, consider a battery-powered timer (e.g., Orbit B-Hyve Bluetooth Hose Faucet Timer, ~$50) or a solar-powered timer connected to a small 12V pump.
- Solar-Powered Pumps: For lifting water from a well, pond, or large storage tank to your garden, a solar pump is a game-changer. For a smaller drip system, a Shurflo 2088-594-152 Diaphragm Pump (12V, 3.5 GPM, ~$180) can be powered by a single 100W solar panel (e.g., Renogy 100W Monocrystalline Solar Panel, ~$100) and a small 12V battery (e.g., a 50Ah LiFePO4 battery like the Battle Born 50Ah, ~$450). For larger operations or deeper wells, more robust systems are needed. If you’re looking to build out a comprehensive off-grid power system to support your garden’s water needs, or indeed your entire homestead, you might want to explore resources like the Power Grid Generator complete system guide to understand the full scope of what’s possible in terms of energy independence.
Step 5: Seed Selection & Planting
The choice of seeds is crucial for a truly self sufficient garden from scratch.
- Choose Heirloom & Open-Pollinated Seeds: These varieties produce seeds that will grow true to type, meaning you can save seeds from your harvest year after year. F1 hybrids, while often vigorous, will not produce consistent offspring from saved seeds. Reputable seed companies include Baker Creek Heirloom Seeds, High Mowing Organic Seeds, and Seed Savers Exchange. Start with common, reliable varieties like ‘Black Krim’ tomatoes, ‘Provider’ bush beans, ‘Waltham Butternut’ squash, and ‘Black Seeded Simpson’ lettuce.
- Start Seeds Indoors (Optional but Recommended): For longer growing seasons or specific crops, starting seeds indoors gives you a head start. Use seed-starting mix (e.g., Espoma Organic Seed Starter Mix, ~$10 for 16qt bag) in seed trays (Jiffy Professional Greenhouse 72-cell kit, ~$15). Provide adequate light with LED grow lights (Barrina T5 2ft 4-pack LED Grow Lights, 20W each, ~$50) for 14-16 hours a day, positioned 2-4 inches above seedlings. Maintain consistent temperatures (65-75°F for most).
- Direct Sowing vs. Transplanting: Some crops (carrots, radishes, beans, corn) prefer direct sowing into the garden bed. Others (tomatoes, peppers, broccoli, kale) benefit from being started indoors and transplanted. Follow seed packet instructions for planting depths (e.g., lettuce seeds are often surface-sown or planted 1/8 inch deep, while beans are 1 inch deep) and spacing.
- Companion Planting: Strategically plant different species together to enhance growth, deter pests, and attract beneficial insects. For example, planting marigolds near tomatoes can deter nematodes, and basil improves tomato flavor. Nasturtiums can act as a trap crop for aphids.
- Succession Planting: For a continuous harvest, plant small batches of quick-growing crops (lettuce, radishes, cilantro) every 2-3 weeks. As one crop finishes, another is ready to take its place.
Step 6: Pest & Disease Management (Organic)
Maintaining a self sufficient garden from scratch means embracing organic pest and disease control.
- Integrated Pest Management (IPM): This holistic approach combines several strategies.
- Observation: Regularly inspect your plants for early signs of pests or disease. Catching issues early is key.
- Physical Barriers: Use row covers (e.g., Agribon AG-19 floating row cover, 10×20 ft, ~$20) to protect young plants from insect pests like cabbage worms and squash bugs. Install fences (e.g., 2×4 welded wire mesh, 4 ft tall, 50 ft roll ~$70) to keep out deer, rabbits, and other larger animals.
- Hand-Picking: For larger pests like tomato hornworms or squash bugs, simply pick them off and drop them into a bucket of soapy water.
- Companion Planting: As mentioned, certain plants repel pests. Marigolds, garlic, and onions are excellent deterrents.
- Attract Beneficial Insects: Plant flowers like dill, fennel, cosmos, and sweet alyssum to attract ladybugs, lacewings, and parasitic wasps, which prey on common garden pests.
- Organic Sprays & Treatments:
- Neem Oil: An excellent broad-spectrum organic insecticide and fungicide. Bonide Neem Oil Concentrate (16oz, ~$20) can be mixed at a rate of 1-2 tbsp per gallon of water and sprayed on affected plants.
- Insecticidal Soap: Effective against soft-bodied insects like aphids, whiteflies, and spider mites. Garden Safe Insecticidal Soap (24oz ready-to-use, ~$10).
- Bacillus thuringiensis (Bt): A naturally occurring soil bacterium that targets caterpillars and worms. Monterey BT Worm & Caterpillar Killer (16oz, ~$18) is highly effective and safe for beneficial insects.
- Copper or Sulfur Sprays: For fungal diseases like powdery mildew or blight, organic copper (e.g., Bonide Copper Fungicide, ~$15 for 1lb) or sulfur (e.g., Safer Brand Garden Fungicide, ~$10 for 16oz) can be used as a last resort.
Step 7: Harvesting & Seed Saving
The culmination of your efforts is the harvest, and seed saving closes the loop on self-sufficiency.
- Harvesting Techniques:
- Timing: Harvest vegetables at their peak ripeness for best flavor and nutritional value. For example, green beans should snap cleanly, cucumbers should be firm, and tomatoes should be fully colored.
- Frequency: Many crops, like zucchini, cucumbers, and bush beans, produce more if harvested frequently. Pick daily or every other day.
- Tools: Use clean, sharp pruners (e.g., Corona ClassicCUT Bypass Pruner BP 3180, ~$30) or a sharp knife for clean cuts, minimizing damage to the plant.
- Seed Saving: This is where the « self-sufficient » aspect truly shines.
- Selection: Only save seeds from your healthiest, most vigorous plants that show desired traits (disease resistance, good flavor, high yield).
- Isolation: To ensure true-to-type seeds, prevent cross-pollination. This can be challenging for open-pollinated crops that readily cross (e.g., squash, corn). For beginners, focus on self-pollinating plants like beans, peas, lettuce, and tomatoes.
- Processing:
- Dry Seeds (Beans, Peas, Lettuce, Grains): Allow pods/seed heads to dry completely on the plant. Harvest, shell, and clean the seeds, removing chaff.
- Wet Seeds (Tomatoes, Cucumbers, Squash): For tomatoes, ferment the seeds in water for a few days to remove the gel coating and inhibit disease. For cucumbers/squash, scrape out seeds, wash thoroughly, and dry.
- Drying: Spread seeds thinly on screens or paper plates in a cool, dry, well-ventilated area for 1-4 weeks. Ensure they are bone-dry before storage. I aim for less than 8% moisture content.
- Storage: Store seeds in airtight containers (glass jars with desiccant packets work well) in a cool, dark, dry place (ideally 40-50°F and 30-40% humidity). Label clearly with variety and date. Properly stored seeds can remain viable for 3-10 years or more.
Step 8: Season Extension & Winterizing
Extend your harvest and protect your garden for the off-season to truly maximize your self sufficient garden from scratch.
- Cold Frames: Simple structures with a transparent top (glass, polycarbonate, or old windows) that sit over garden beds. They trap solar heat, allowing you to grow cold-hardy crops (lettuce, spinach, kale, radishes) well into winter or start seeds earlier in spring. A basic cold frame can be built from 2×6 lumber and a sheet of polycarbonate for under $100.
- Hoop Houses/Low Tunnels: Larger structures made from flexible hoops (PVC pipe or EMT conduit) covered with greenhouse plastic. These provide more space and greater temperature moderation. A 10×20 ft DIY low tunnel kit can cost $200-$500, while a larger, more robust hoop house kit might be $1,000-$3,000. I use a 6×12 ft low tunnel made from 1/2-inch PVC hoops and 6mil greenhouse plastic, which extends my lettuce and spinach harvest by at least
Efficient water management is critical for a self sufficient garden from scratch, especially in off-grid living where water resources might be limited.
- Rainwater Harvesting: This is my primary source of irrigation water. A 55-gallon rain barrel (e.g., EarthMark Rain Barrel, ~$120-$150) connected to a downspout can collect significant water. For larger needs, I use two 275-gallon IBC totes (Intermediate Bulk Containers, often available used for $100-$200 each from food-grade sources) connected in series. A 1,000 sq ft roof can collect approximately 620 gallons of water for every inch of rainfall. My 1,500 sq ft roof provides ample water for my 600 sq ft garden through multiple barrels and totes.
- Drip Irrigation: This is by far the most water-efficient method, delivering water directly to the plant’s root zone, minimizing evaporation and weed growth.
- Components: A typical drip system includes a pressure regulator (e.g., Rain Bird PRV-10, ~$15), a filter (Rain Bird RBY filter, ~$20), main tubing (1/2-inch poly tubing, 100ft ~$25), smaller feeder lines (1/4-inch tubing), and emitters (0.5 GPH or 1 GPH per plant).
- Kits: For beginners, a starter kit like the Rain Bird Drip Irrigation Garden Kit (model DDI-KIT-1P, ~$40-$60) is excellent for a small garden. For larger setups, I use Netafim Techline CV Drip Line (500ft roll, ~$150-$200), which has pressure-compensating emitters built-in, ensuring even watering across long runs.
- Automation: For true self-sufficiency, consider a battery-powered timer (e.g., Orbit B-Hyve Bluetooth Hose Faucet Timer, ~$50) or a solar-powered timer connected to a small 12V pump.
- Solar-Powered Pumps: For lifting water from a well, pond, or large storage tank to your garden, a solar pump is a game-changer. For a smaller drip system, a Shurflo 2088-594-152 Diaphragm Pump (12V, 3.5 GPM, ~$180) can be powered by a single 100W solar panel (e.g., Renogy 100W Monocrystalline Solar Panel, ~$100) and a small 12V battery (e.g., a 50Ah LiFePO4 battery like the Battle Born 50Ah, ~$450). For larger operations or deeper wells, more robust systems are needed. If you’re looking to build out a comprehensive off-grid power system to support your garden’s water needs, or indeed your entire homestead, you might want to explore resources like the Power Grid Generator complete system guide to understand the full scope of what’s possible in terms of energy independence.
Step 5: Seed Selection & Planting
The choice of seeds is crucial for a truly self sufficient garden from scratch.
- Choose Heirloom & Open-Pollinated Seeds: These varieties produce seeds that will grow true to type, meaning you can save seeds from your harvest year after year. F1 hybrids, while often vigorous, will not produce consistent offspring from saved seeds. Reputable seed companies include Baker Creek Heirloom Seeds, High Mowing Organic Seeds, and Seed Savers Exchange. Start with common, reliable varieties like ‘Black Krim’ tomatoes, ‘Provider’ bush beans, ‘Waltham Butternut’ squash, and ‘Black Seeded Simpson’ lettuce.
- Start Seeds Indoors (Optional but Recommended): For longer growing seasons or specific crops, starting seeds indoors gives you a head start. Use seed-starting mix (e.g., Espoma Organic Seed Starter Mix, ~$10 for 16qt bag) in seed trays (Jiffy Professional Greenhouse 72-cell kit, ~$15). Provide adequate light with LED grow lights (Barrina T5 2ft 4-pack LED Grow Lights, 20W each, ~$50) for 14-16 hours a day, positioned 2-4 inches above seedlings. Maintain consistent temperatures (65-75°F for most).
- Direct Sowing vs. Transplanting: Some crops (carrots, radishes, beans, corn) prefer direct sowing into the garden bed. Others (tomatoes, peppers, broccoli, kale) benefit from being started indoors and transplanted. Follow seed packet instructions for planting depths (e.g., lettuce seeds are often surface-sown or planted 1/8 inch deep, while beans are 1 inch deep) and spacing.
- Companion Planting: Strategically plant different species together to enhance growth, deter pests, and attract beneficial insects. For example, planting marigolds near tomatoes can deter nematodes, and basil improves tomato flavor. Nasturtiums can act as a trap crop for aphids.
- Succession Planting: For a continuous harvest, plant small batches of quick-growing crops (lettuce, radishes, cilantro) every 2-3 weeks. As one crop finishes, another is ready to take its place.
Step 6: Pest & Disease Management (Organic)
Maintaining a self sufficient garden from scratch means embracing organic pest and disease control.
- Integrated Pest Management (IPM): This holistic approach combines several strategies.
- Observation: Regularly inspect your plants for early signs of pests or disease. Catching issues early is key.
- Physical Barriers: Use row covers (e.g., Agribon AG-19 floating row cover, 10×20 ft, ~$20) to protect young plants from insect pests like cabbage worms and squash bugs. Install fences (e.g., 2×4 welded wire mesh, 4 ft tall, 50 ft roll ~$70) to keep out deer, rabbits, and other larger animals.
- Hand-Picking: For larger pests like tomato hornworms or squash bugs, simply pick them off and drop them into a bucket of soapy water.
- Companion Planting: As mentioned, certain plants repel pests. Marigolds, garlic, and onions are excellent deterrents.
- Attract Beneficial Insects: Plant flowers like dill, fennel, cosmos, and sweet alyssum to attract ladybugs, lacewings, and parasitic wasps, which prey on common garden pests.
- Organic Sprays & Treatments:
- Neem Oil: An excellent broad-spectrum organic insecticide and fungicide. Bonide Neem Oil Concentrate (16oz, ~$20) can be mixed at a rate of 1-2 tbsp per gallon of water and sprayed on affected plants.
- Insecticidal Soap: Effective against soft-bodied insects like aphids, whiteflies, and spider mites. Garden Safe Insecticidal Soap (24oz ready-to-use, ~$10).
- Bacillus thuringiensis (Bt): A naturally occurring soil bacterium that targets caterpillars and worms. Monterey BT Worm & Caterpillar Killer (16oz, ~$18) is highly effective and safe for beneficial insects.
- Copper or Sulfur Sprays: For fungal diseases like powdery mildew or blight, organic copper (e.g., Bonide Copper Fungicide, ~$15 for 1lb) or sulfur (e.g., Safer Brand Garden Fungicide, ~$10 for 16oz) can be used as a last resort.
Step 7: Harvesting & Seed Saving
The culmination of your efforts is the harvest, and seed saving closes the loop on self-sufficiency.
- Harvesting Techniques:
- Timing: Harvest vegetables at their peak ripeness for best flavor and nutritional value. For example, green beans should snap cleanly, cucumbers should be firm, and tomatoes should be fully colored.
- Frequency: Many crops, like zucchini, cucumbers, and bush beans, produce more if harvested frequently. Pick daily or every other day.
- Tools: Use clean, sharp pruners (e.g., Corona ClassicCUT Bypass Pruner BP 3180, ~$30) or a sharp knife for clean cuts, minimizing damage to the plant.
- Seed Saving: This is where the « self-sufficient » aspect truly shines.
- Selection: Only save seeds from your healthiest, most vigorous plants that show desired traits (disease resistance, good flavor, high yield).
- Isolation: To ensure true-to-type seeds, prevent cross-pollination. This can be challenging for open-pollinated crops that readily cross (e.g., squash, corn). For beginners, focus on self-pollinating plants like beans, peas, lettuce, and tomatoes.
- Processing:
- Dry Seeds (Beans, Peas, Lettuce, Grains): Allow pods/seed heads to dry completely on the plant. Harvest, shell, and clean the seeds, removing chaff.
- Wet Seeds (Tomatoes, Cucumbers, Squash): For tomatoes, ferment the seeds in water for a few days to remove the gel coating and inhibit disease. For cucumbers/squash, scrape out seeds, wash thoroughly, and dry.
- Drying: Spread seeds thinly on screens or paper plates in a cool, dry, well-ventilated area for 1-4 weeks. Ensure they are bone-dry before storage. I aim for less than 8% moisture content.
- Storage: Store seeds in airtight containers (glass jars with desiccant packets work well) in a cool, dark, dry place (ideally 40-50°F and 30-40% humidity). Label clearly with variety and date. Properly stored seeds can remain viable for 3-10 years or more.
Step 8: Season Extension & Winterizing
Extend your harvest and protect your garden for the off-season to truly maximize your self sufficient garden from scratch.
- Cold Frames: Simple structures with a transparent top (glass, polycarbonate, or old windows) that sit over garden beds. They trap solar heat, allowing you to grow cold-hardy crops (lettuce, spinach, kale, radishes) well into winter or start seeds earlier in spring. A basic cold frame can be built from 2×6 lumber and a sheet of polycarbonate for under $100.
- Hoop Houses/Low Tunnels: Larger structures made from flexible hoops (PVC pipe or EMT conduit) covered with greenhouse plastic. These provide more space and greater temperature moderation. A 10×20 ft DIY low tunnel kit can cost $200-$500, while a larger, more robust hoop house kit might be $1,000-$3,000. I use a 6×12 ft low tunnel made from 1/2-inch PVC hoops and 6mil greenhouse plastic, which extends my lettuce and spinach harvest by at least
Step 4: Water Management & Irrigation
Efficient water management is critical for a self sufficient garden from scratch, especially in off-grid living where water resources might be limited.
- Rainwater Harvesting: This is my primary source of irrigation water. A 55-gallon rain barrel (e.g., EarthMark Rain Barrel, ~$120-$150) connected to a downspout can collect significant water. For larger needs, I use two 275-gallon IBC totes (Intermediate Bulk Containers, often available used for $100-$200 each from food-grade sources) connected in series. A 1,000 sq ft roof can collect approximately 620 gallons of water for every inch of rainfall. My 1,500 sq ft roof provides ample water for my 600 sq ft garden through multiple barrels and totes.
- Drip Irrigation: This is by far the most water-efficient method, delivering water directly to the plant’s root zone, minimizing evaporation and weed growth.
- Components: A typical drip system includes a pressure regulator (e.g., Rain Bird PRV-10, ~$15), a filter (Rain Bird RBY filter, ~$20), main tubing (1/2-inch poly tubing, 100ft ~$25), smaller feeder lines (1/4-inch tubing), and emitters (0.5 GPH or 1 GPH per plant).
- Kits: For beginners, a starter kit like the Rain Bird Drip Irrigation Garden Kit (model DDI-KIT-1P, ~$40-$60) is excellent for a small garden. For larger setups, I use Netafim Techline CV Drip Line (500ft roll, ~$150-$200), which has pressure-compensating emitters built-in, ensuring even watering across long runs.
- Automation: For true self-sufficiency, consider a battery-powered timer (e.g., Orbit B-Hyve Bluetooth Hose Faucet Timer, ~$50) or a solar-powered timer connected to a small 12V pump.
- Solar-Powered Pumps: For lifting water from a well, pond, or large storage tank to your garden, a solar pump is a game-changer. For a smaller drip system, a Shurflo 2088-594-152 Diaphragm Pump (12V, 3.5 GPM, ~$180) can be powered by a single 100W solar panel (e.g., Renogy 100W Monocrystalline Solar Panel, ~$100) and a small 12V battery (e.g., a 50Ah LiFePO4 battery like the Battle Born 50Ah, ~$450). For larger operations or deeper wells, more robust systems are needed. If you’re looking to build out a comprehensive off-grid power system to support your garden’s water needs, or indeed your entire homestead, you might want to explore resources like the Power Grid Generator complete system guide to understand the full scope of what’s possible in terms of energy independence.
Step 5: Seed Selection & Planting
The choice of seeds is crucial for a truly self sufficient garden from scratch.
- Choose Heirloom & Open-Pollinated Seeds: These varieties produce seeds that will grow true to type, meaning you can save seeds from your harvest year after year. F1 hybrids, while often vigorous, will not produce consistent offspring from saved seeds. Reputable seed companies include Baker Creek Heirloom Seeds, High Mowing Organic Seeds, and Seed Savers Exchange. Start with common, reliable varieties like ‘Black Krim’ tomatoes, ‘Provider’ bush beans, ‘Waltham Butternut’ squash, and ‘Black Seeded Simpson’ lettuce.
- Start Seeds Indoors (Optional but Recommended): For longer growing seasons or specific crops, starting seeds indoors gives you a head start. Use seed-starting mix (e.g., Espoma Organic Seed Starter Mix, ~$10 for 16qt bag) in seed trays (Jiffy Professional Greenhouse 72-cell kit, ~$15). Provide adequate light with LED grow lights (Barrina T5 2ft 4-pack LED Grow Lights, 20W each, ~$50) for 14-16 hours a day, positioned 2-4 inches above seedlings. Maintain consistent temperatures (65-75°F for most).
- Direct Sowing vs. Transplanting: Some crops (carrots, radishes, beans, corn) prefer direct sowing into the garden bed. Others (tomatoes, peppers, broccoli, kale) benefit from being started indoors and transplanted. Follow seed packet instructions for planting depths (e.g., lettuce seeds are often surface-sown or planted 1/8 inch deep, while beans are 1 inch deep) and spacing.
- Companion Planting: Strategically plant different species together to enhance growth, deter pests, and attract beneficial insects. For example, planting marigolds near tomatoes can deter nematodes, and basil improves tomato flavor. Nasturtiums can act as a trap crop for aphids.
- Succession Planting: For a continuous harvest, plant small batches of quick-growing crops (lettuce, radishes, cilantro) every 2-3 weeks. As one crop finishes, another is ready to take its place.
Step 6: Pest & Disease Management (Organic)
Maintaining a self sufficient garden from scratch means embracing organic pest and disease control.
- Integrated Pest Management (IPM): This holistic approach combines several strategies.
- Observation: Regularly inspect your plants for early signs of pests or disease. Catching issues early is key.
- Physical Barriers: Use row covers (e.g., Agribon AG-19 floating row cover, 10×20 ft, ~$20) to protect young plants from insect pests like cabbage worms and squash bugs. Install fences (e.g., 2×4 welded wire mesh, 4 ft tall, 50 ft roll ~$70) to keep out deer, rabbits, and other larger animals.
- Hand-Picking: For larger pests like tomato hornworms or squash bugs, simply pick them off and drop them into a bucket of soapy water.
- Companion Planting: As mentioned, certain plants repel pests. Marigolds, garlic, and onions are excellent deterrents.
- Attract Beneficial Insects: Plant flowers like dill, fennel, cosmos, and sweet alyssum to attract ladybugs, lacewings, and parasitic wasps, which prey on common garden pests.
- Organic Sprays & Treatments:
- Neem Oil: An excellent broad-spectrum organic insecticide and fungicide. Bonide Neem Oil Concentrate (16oz, ~$20) can be mixed at a rate of 1-2 tbsp per gallon of water and sprayed on affected plants.
- Insecticidal Soap: Effective against soft-bodied insects like aphids, whiteflies, and spider mites. Garden Safe Insecticidal Soap (24oz ready-to-use, ~$10).
- Bacillus thuringiensis (Bt): A naturally occurring soil bacterium that targets caterpillars and worms. Monterey BT Worm & Caterpillar Killer (16oz, ~$18) is highly effective and safe for beneficial insects.
- Copper or Sulfur Sprays: For fungal diseases like powdery mildew or blight, organic copper (e.g., Bonide Copper Fungicide, ~$15 for 1lb) or sulfur (e.g., Safer Brand Garden Fungicide, ~$10 for 16oz) can be used as a last resort.
Step 7: Harvesting & Seed Saving
The culmination of your efforts is the harvest, and seed saving closes the loop on self-sufficiency.
- Harvesting Techniques:
- Timing: Harvest vegetables at their peak ripeness for best flavor and nutritional value. For example, green beans should snap cleanly, cucumbers should be firm, and tomatoes should be fully colored.
- Frequency: Many crops, like zucchini, cucumbers, and bush beans, produce more if harvested frequently. Pick daily or every other day.
- Tools: Use clean, sharp pruners (e.g., Corona ClassicCUT Bypass Pruner BP 3180, ~$30) or a sharp knife for clean cuts, minimizing damage to the plant.
- Seed Saving: This is where the « self-sufficient » aspect truly shines.
- Selection: Only save seeds from your healthiest, most vigorous plants that show desired traits (disease resistance, good flavor, high yield).
- Isolation: To ensure true-to-type seeds, prevent cross-pollination. This can be challenging for open-pollinated crops that readily cross (e.g., squash, corn). For beginners, focus on self-pollinating plants like beans, peas, lettuce, and tomatoes.
- Processing:
- Dry Seeds (Beans, Peas, Lettuce, Grains): Allow pods/seed heads to dry completely on the plant. Harvest, shell, and clean the seeds, removing chaff.
- Wet Seeds (Tomatoes, Cucumbers, Squash): For tomatoes, ferment the seeds in water for a few days to remove the gel coating and inhibit disease. For cucumbers/squash, scrape out seeds, wash thoroughly, and dry.
- Drying: Spread seeds thinly on screens or paper plates in a cool, dry, well-ventilated area for 1-4 weeks. Ensure they are bone-dry before storage. I aim for less than 8% moisture content.
- Storage: Store seeds in airtight containers (glass jars with desiccant packets work well) in a cool, dark, dry place (ideally 40-50°F and 30-40% humidity). Label clearly with variety and date. Properly stored seeds can remain viable for 3-10 years or more.
Step 8: Season Extension & Winterizing
Extend your harvest and protect your garden for the off-season to truly maximize your self sufficient garden from scratch.
- Cold Frames: Simple structures with a transparent top (glass, polycarbonate, or old windows) that sit over garden beds. They trap solar heat, allowing you to grow cold-hardy crops (lettuce, spinach, kale, radishes) well into winter or start seeds earlier in spring. A basic cold frame can be built from 2×6 lumber and a sheet of polycarbonate for under $100.
- Hoop Houses/Low Tunnels: Larger structures made from flexible hoops (PVC pipe or EMT conduit) covered with greenhouse plastic. These provide more space and greater temperature moderation. A 10×20 ft DIY low tunnel kit can cost $200-$500, while a larger, more robust hoop house kit might be $1,000-$3,000. I use a 6×12 ft low tunnel made from 1/2-inch PVC hoops and 6mil greenhouse plastic, which extends my lettuce and spinach harvest by at least
- In-Ground Beds: If you have excellent native soil and good drainage, in-ground beds are the most economical. Double-digging (loosening soil two shovel depths) can significantly improve drainage and aeration. For my main garden, I primarily use in-ground beds, but I focus on building up the soil over time with consistent compost additions and cover cropping. I aim for beds that are no wider than 3-4 feet so I can reach the center without stepping on the soil, compacting it.
- Raised Beds: Raised beds offer numerous advantages, especially for poor soil, heavy clay, or rocky areas. They provide better drainage, warm up faster in spring, reduce compaction, and make weeding and harvesting easier on your back.
- Material Options:
- Untreated Cedar: Naturally rot-resistant and chemical-free. A 4×8 ft bed, 12 inches deep, typically requires three 2x12x8 ft cedar boards, costing around $50-$60 per board (total ~$150-$180) plus corner brackets or screws. My first raised beds were cedar and are still going strong after 7 years.
- Galvanized Steel: Durable, long-lasting, and aesthetically pleasing. Brands like Vego Garden offer modular kits. A Vego Garden 17″ Tall 8-in-1 Metal Raised Garden Bed (can be configured to 4×8 ft) costs approximately $250-$300.
- Concrete Blocks/Stones: Very durable but can leach minerals (though generally safe once weathered) and can be expensive.
- Recycled Materials: Pallets (check for chemical treatment stamps like « HT » for heat-treated), old tires (controversial due to potential chemical leaching).
- Filling Raised Beds: Don’t just fill with topsoil. Use a « Hugelkultur » approach (logs, branches, leaves, then compost, then topsoil) or a mixture of 60% good quality topsoil, 30% compost, and 10% perlite or vermiculite for drainage. A 4x8x1 ft raised bed requires about 32 cubic feet (or ~1.2 cubic yards) of soil mix, which can cost $100-$200 depending on your source.
- Material Options:
Step 4: Water Management & Irrigation
Efficient water management is critical for a self sufficient garden from scratch, especially in off-grid living where water resources might be limited.
- Rainwater Harvesting: This is my primary source of irrigation water. A 55-gallon rain barrel (e.g., EarthMark Rain Barrel, ~$120-$150) connected to a downspout can collect significant water. For larger needs, I use two 275-gallon IBC totes (Intermediate Bulk Containers, often available used for $100-$200 each from food-grade sources) connected in series. A 1,000 sq ft roof can collect approximately 620 gallons of water for every inch of rainfall. My 1,500 sq ft roof provides ample water for my 600 sq ft garden through multiple barrels and totes.
- Drip Irrigation: This is by far the most water-efficient method, delivering water directly to the plant’s root zone, minimizing evaporation and weed growth.
- Components: A typical drip system includes a pressure regulator (e.g., Rain Bird PRV-10, ~$15), a filter (Rain Bird RBY filter, ~$20), main tubing (1/2-inch poly tubing, 100ft ~$25), smaller feeder lines (1/4-inch tubing), and emitters (0.5 GPH or 1 GPH per plant).
- Kits: For beginners, a starter kit like the Rain Bird Drip Irrigation Garden Kit (model DDI-KIT-1P, ~$40-$60) is excellent for a small garden. For larger setups, I use Netafim Techline CV Drip Line (500ft roll, ~$150-$200), which has pressure-compensating emitters built-in, ensuring even watering across long runs.
- Automation: For true self-sufficiency, consider a battery-powered timer (e.g., Orbit B-Hyve Bluetooth Hose Faucet Timer, ~$50) or a solar-powered timer connected to a small 12V pump.
- Solar-Powered Pumps: For lifting water from a well, pond, or large storage tank to your garden, a solar pump is a game-changer. For a smaller drip system, a Shurflo 2088-594-152 Diaphragm Pump (12V, 3.5 GPM, ~$180) can be powered by a single 100W solar panel (e.g., Renogy 100W Monocrystalline Solar Panel, ~$100) and a small 12V battery (e.g., a 50Ah LiFePO4 battery like the Battle Born 50Ah, ~$450). For larger operations or deeper wells, more robust systems are needed. If you’re looking to build out a comprehensive off-grid power system to support your garden’s water needs, or indeed your entire homestead, you might want to explore resources like the Power Grid Generator complete system guide to understand the full scope of what’s possible in terms of energy independence.
Step 5: Seed Selection & Planting
The choice of seeds is crucial for a truly self sufficient garden from scratch.
- Choose Heirloom & Open-Pollinated Seeds: These varieties produce seeds that will grow true to type, meaning you can save seeds from your harvest year after year. F1 hybrids, while often vigorous, will not produce consistent offspring from saved seeds. Reputable seed companies include Baker Creek Heirloom Seeds, High Mowing Organic Seeds, and Seed Savers Exchange. Start with common, reliable varieties like ‘Black Krim’ tomatoes, ‘Provider’ bush beans, ‘Waltham Butternut’ squash, and ‘Black Seeded Simpson’ lettuce.
- Start Seeds Indoors (Optional but Recommended): For longer growing seasons or specific crops, starting seeds indoors gives you a head start. Use seed-starting mix (e.g., Espoma Organic Seed Starter Mix, ~$10 for 16qt bag) in seed trays (Jiffy Professional Greenhouse 72-cell kit, ~$15). Provide adequate light with LED grow lights (Barrina T5 2ft 4-pack LED Grow Lights, 20W each, ~$50) for 14-16 hours a day, positioned 2-4 inches above seedlings. Maintain consistent temperatures (65-75°F for most).
- Direct Sowing vs. Transplanting: Some crops (carrots, radishes, beans, corn) prefer direct sowing into the garden bed. Others (tomatoes, peppers, broccoli, kale) benefit from being started indoors and transplanted. Follow seed packet instructions for planting depths (e.g., lettuce seeds are often surface-sown or planted 1/8 inch deep, while beans are 1 inch deep) and spacing.
- Companion Planting: Strategically plant different species together to enhance growth, deter pests, and attract beneficial insects. For example, planting marigolds near tomatoes can deter nematodes, and basil improves tomato flavor. Nasturtiums can act as a trap crop for aphids.
- Succession Planting: For a continuous harvest, plant small batches of quick-growing crops (lettuce, radishes, cilantro) every 2-3 weeks. As one crop finishes, another is ready to take its place.
Step 6: Pest & Disease Management (Organic)
Maintaining a self sufficient garden from scratch means embracing organic pest and disease control.
- Integrated Pest Management (IPM): This holistic approach combines several strategies.
- Observation: Regularly inspect your plants for early signs of pests or disease. Catching issues early is key.
- Physical Barriers: Use row covers (e.g., Agribon AG-19 floating row cover, 10×20 ft, ~$20) to protect young plants from insect pests like cabbage worms and squash bugs. Install fences (e.g., 2×4 welded wire mesh, 4 ft tall, 50 ft roll ~$70) to keep out deer, rabbits, and other larger animals.
- Hand-Picking: For larger pests like tomato hornworms or squash bugs, simply pick them off and drop them into a bucket of soapy water.
- Companion Planting: As mentioned, certain plants repel pests. Marigolds, garlic, and onions are excellent deterrents.
- Attract Beneficial Insects: Plant flowers like dill, fennel, cosmos, and sweet alyssum to attract ladybugs, lacewings, and parasitic wasps, which prey on common garden pests.
- Organic Sprays & Treatments:
- Neem Oil: An excellent broad-spectrum organic insecticide and fungicide. Bonide Neem Oil Concentrate (16oz, ~$20) can be mixed at a rate of 1-2 tbsp per gallon of water and sprayed on affected plants.
- Insecticidal Soap: Effective against soft-bodied insects like aphids, whiteflies, and spider mites. Garden Safe Insecticidal Soap (24oz ready-to-use, ~$10).
- Bacillus thuringiensis (Bt): A naturally occurring soil bacterium that targets caterpillars and worms. Monterey BT Worm & Caterpillar Killer (16oz, ~$18) is highly effective and safe for beneficial insects.
- Copper or Sulfur Sprays: For fungal diseases like powdery mildew or blight, organic copper (e.g., Bonide Copper Fungicide, ~$15 for 1lb) or sulfur (e.g., Safer Brand Garden Fungicide, ~$10 for 16oz) can be used as a last resort.
Step 7: Harvesting & Seed Saving
The culmination of your efforts is the harvest, and seed saving closes the loop on self-sufficiency.
- Harvesting Techniques:
- Timing: Harvest vegetables at their peak ripeness for best flavor and nutritional value. For example, green beans should snap cleanly, cucumbers should be firm, and tomatoes should be fully colored.
- Frequency: Many crops, like zucchini, cucumbers, and bush beans, produce more if harvested frequently. Pick daily or every other day.
- Tools: Use clean, sharp pruners (e.g., Corona ClassicCUT Bypass Pruner BP 3180, ~$30) or a sharp knife for clean cuts, minimizing damage to the plant.
- Seed Saving: This is where the « self-sufficient » aspect truly shines.
- Selection: Only save seeds from your healthiest, most vigorous plants that show desired traits (disease resistance, good flavor, high yield).
- Isolation: To ensure true-to-type seeds, prevent cross-pollination. This can be challenging for open-pollinated crops that readily cross (e.g., squash, corn). For beginners, focus on self-pollinating plants like beans, peas, lettuce, and tomatoes.
- Processing:
- Dry Seeds (Beans, Peas, Lettuce, Grains): Allow pods/seed heads to dry completely on the plant. Harvest, shell, and clean the seeds, removing chaff.
- Wet Seeds (Tomatoes, Cucumbers, Squash): For tomatoes, ferment the seeds in water for a few days to remove the gel coating and inhibit disease. For cucumbers/squash, scrape out seeds, wash thoroughly, and dry.
- Drying: Spread seeds thinly on screens or paper plates in a cool, dry, well-ventilated area for 1-4 weeks. Ensure they are bone-dry before storage. I aim for less than 8% moisture content.
- Storage: Store seeds in airtight containers (glass jars with desiccant packets work well) in a cool, dark, dry place (ideally 40-50°F and 30-40% humidity). Label clearly with variety and date. Properly stored seeds can remain viable for 3-10 years or more.
Step 8: Season Extension & Winterizing
Extend your harvest and protect your garden for the off-season to truly maximize your self sufficient garden from scratch.
- Cold Frames: Simple structures with a transparent top (glass, polycarbonate, or old windows) that sit over garden beds. They trap solar heat, allowing you to grow cold-hardy crops (lettuce, spinach, kale, radishes) well into winter or start seeds earlier in spring. A basic cold frame can be built from 2×6 lumber and a sheet of polycarbonate for under $100.
- Hoop Houses/Low Tunnels: Larger structures made from flexible hoops (PVC pipe or EMT conduit) covered with greenhouse plastic. These provide more space and greater temperature moderation. A 10×20 ft DIY low tunnel kit can cost $200-$500, while a larger, more robust hoop house kit might be $1,000-$3,000. I use a 6×12 ft low tunnel made from 1/2-inch PVC hoops and 6mil greenhouse plastic, which extends my lettuce and spinach harvest by at least
Deciding between raised beds and in-ground beds depends on your soil, budget, and physical capabilities.
- In-Ground Beds: If you have excellent native soil and good drainage, in-ground beds are the most economical. Double-digging (loosening soil two shovel depths) can significantly improve drainage and aeration. For my main garden, I primarily use in-ground beds, but I focus on building up the soil over time with consistent compost additions and cover cropping. I aim for beds that are no wider than 3-4 feet so I can reach the center without stepping on the soil, compacting it.
- Raised Beds: Raised beds offer numerous advantages, especially for poor soil, heavy clay, or rocky areas. They provide better drainage, warm up faster in spring, reduce compaction, and make weeding and harvesting easier on your back.
- Material Options:
- Untreated Cedar: Naturally rot-resistant and chemical-free. A 4×8 ft bed, 12 inches deep, typically requires three 2x12x8 ft cedar boards, costing around $50-$60 per board (total ~$150-$180) plus corner brackets or screws. My first raised beds were cedar and are still going strong after 7 years.
- Galvanized Steel: Durable, long-lasting, and aesthetically pleasing. Brands like Vego Garden offer modular kits. A Vego Garden 17″ Tall 8-in-1 Metal Raised Garden Bed (can be configured to 4×8 ft) costs approximately $250-$300.
- Concrete Blocks/Stones: Very durable but can leach minerals (though generally safe once weathered) and can be expensive.
- Recycled Materials: Pallets (check for chemical treatment stamps like « HT » for heat-treated), old tires (controversial due to potential chemical leaching).
- Filling Raised Beds: Don’t just fill with topsoil. Use a « Hugelkultur » approach (logs, branches, leaves, then compost, then topsoil) or a mixture of 60% good quality topsoil, 30% compost, and 10% perlite or vermiculite for drainage. A 4x8x1 ft raised bed requires about 32 cubic feet (or ~1.2 cubic yards) of soil mix, which can cost $100-$200 depending on your source.
- Material Options:
Step 4: Water Management & Irrigation
Efficient water management is critical for a self sufficient garden from scratch, especially in off-grid living where water resources might be limited.
- Rainwater Harvesting: This is my primary source of irrigation water. A 55-gallon rain barrel (e.g., EarthMark Rain Barrel, ~$120-$150) connected to a downspout can collect significant water. For larger needs, I use two 275-gallon IBC totes (Intermediate Bulk Containers, often available used for $100-$200 each from food-grade sources) connected in series. A 1,000 sq ft roof can collect approximately 620 gallons of water for every inch of rainfall. My 1,500 sq ft roof provides ample water for my 600 sq ft garden through multiple barrels and totes.
- Drip Irrigation: This is by far the most water-efficient method, delivering water directly to the plant’s root zone, minimizing evaporation and weed growth.
- Components: A typical drip system includes a pressure regulator (e.g., Rain Bird PRV-10, ~$15), a filter (Rain Bird RBY filter, ~$20), main tubing (1/2-inch poly tubing, 100ft ~$25), smaller feeder lines (1/4-inch tubing), and emitters (0.5 GPH or 1 GPH per plant).
- Kits: For beginners, a starter kit like the Rain Bird Drip Irrigation Garden Kit (model DDI-KIT-1P, ~$40-$60) is excellent for a small garden. For larger setups, I use Netafim Techline CV Drip Line (500ft roll, ~$150-$200), which has pressure-compensating emitters built-in, ensuring even watering across long runs.
- Automation: For true self-sufficiency, consider a battery-powered timer (e.g., Orbit B-Hyve Bluetooth Hose Faucet Timer, ~$50) or a solar-powered timer connected to a small 12V pump.
- Solar-Powered Pumps: For lifting water from a well, pond, or large storage tank to your garden, a solar pump is a game-changer. For a smaller drip system, a Shurflo 2088-594-152 Diaphragm Pump (12V, 3.5 GPM, ~$180) can be powered by a single 100W solar panel (e.g., Renogy 100W Monocrystalline Solar Panel, ~$100) and a small 12V battery (e.g., a 50Ah LiFePO4 battery like the Battle Born 50Ah, ~$450). For larger operations or deeper wells, more robust systems are needed. If you’re looking to build out a comprehensive off-grid power system to support your garden’s water needs, or indeed your entire homestead, you might want to explore resources like the Power Grid Generator complete system guide to understand the full scope of what’s possible in terms of energy independence.
Step 5: Seed Selection & Planting
The choice of seeds is crucial for a truly self sufficient garden from scratch.
- Choose Heirloom & Open-Pollinated Seeds: These varieties produce seeds that will grow true to type, meaning you can save seeds from your harvest year after year. F1 hybrids, while often vigorous, will not produce consistent offspring from saved seeds. Reputable seed companies include Baker Creek Heirloom Seeds, High Mowing Organic Seeds, and Seed Savers Exchange. Start with common, reliable varieties like ‘Black Krim’ tomatoes, ‘Provider’ bush beans, ‘Waltham Butternut’ squash, and ‘Black Seeded Simpson’ lettuce.
- Start Seeds Indoors (Optional but Recommended): For longer growing seasons or specific crops, starting seeds indoors gives you a head start. Use seed-starting mix (e.g., Espoma Organic Seed Starter Mix, ~$10 for 16qt bag) in seed trays (Jiffy Professional Greenhouse 72-cell kit, ~$15). Provide adequate light with LED grow lights (Barrina T5 2ft 4-pack LED Grow Lights, 20W each, ~$50) for 14-16 hours a day, positioned 2-4 inches above seedlings. Maintain consistent temperatures (65-75°F for most).
- Direct Sowing vs. Transplanting: Some crops (carrots, radishes, beans, corn) prefer direct sowing into the garden bed. Others (tomatoes, peppers, broccoli, kale) benefit from being started indoors and transplanted. Follow seed packet instructions for planting depths (e.g., lettuce seeds are often surface-sown or planted 1/8 inch deep, while beans are 1 inch deep) and spacing.
- Companion Planting: Strategically plant different species together to enhance growth, deter pests, and attract beneficial insects. For example, planting marigolds near tomatoes can deter nematodes, and basil improves tomato flavor. Nasturtiums can act as a trap crop for aphids.
- Succession Planting: For a continuous harvest, plant small batches of quick-growing crops (lettuce, radishes, cilantro) every 2-3 weeks. As one crop finishes, another is ready to take its place.
Step 6: Pest & Disease Management (Organic)
Maintaining a self sufficient garden from scratch means embracing organic pest and disease control.
- Integrated Pest Management (IPM): This holistic approach combines several strategies.
- Observation: Regularly inspect your plants for early signs of pests or disease. Catching issues early is key.
- Physical Barriers: Use row covers (e.g., Agribon AG-19 floating row cover, 10×20 ft, ~$20) to protect young plants from insect pests like cabbage worms and squash bugs. Install fences (e.g., 2×4 welded wire mesh, 4 ft tall, 50 ft roll ~$70) to keep out deer, rabbits, and other larger animals.
- Hand-Picking: For larger pests like tomato hornworms or squash bugs, simply pick them off and drop them into a bucket of soapy water.
- Companion Planting: As mentioned, certain plants repel pests. Marigolds, garlic, and onions are excellent deterrents.
- Attract Beneficial Insects: Plant flowers like dill, fennel, cosmos, and sweet alyssum to attract ladybugs, lacewings, and parasitic wasps, which prey on common garden pests.
- Organic Sprays & Treatments:
- Neem Oil: An excellent broad-spectrum organic insecticide and fungicide. Bonide Neem Oil Concentrate (16oz, ~$20) can be mixed at a rate of 1-2 tbsp per gallon of water and sprayed on affected plants.
- Insecticidal Soap: Effective against soft-bodied insects like aphids, whiteflies, and spider mites. Garden Safe Insecticidal Soap (24oz ready-to-use, ~$10).
- Bacillus thuringiensis (Bt): A naturally occurring soil bacterium that targets caterpillars and worms. Monterey BT Worm & Caterpillar Killer (16oz, ~$18) is highly effective and safe for beneficial insects.
- Copper or Sulfur Sprays: For fungal diseases like powdery mildew or blight, organic copper (e.g., Bonide Copper Fungicide, ~$15 for 1lb) or sulfur (e.g., Safer Brand Garden Fungicide, ~$10 for 16oz) can be used as a last resort.
Step 7: Harvesting & Seed Saving
The culmination of your efforts is the harvest, and seed saving closes the loop on self-sufficiency.
- Harvesting Techniques:
- Timing: Harvest vegetables at their peak ripeness for best flavor and nutritional value. For example, green beans should snap cleanly, cucumbers should be firm, and tomatoes should be fully colored.
- Frequency: Many crops, like zucchini, cucumbers, and bush beans, produce more if harvested frequently. Pick daily or every other day.
- Tools: Use clean, sharp pruners (e.g., Corona ClassicCUT Bypass Pruner BP 3180, ~$30) or a sharp knife for clean cuts, minimizing damage to the plant.
- Seed Saving: This is where the « self-sufficient » aspect truly shines.
- Selection: Only save seeds from your healthiest, most vigorous plants that show desired traits (disease resistance, good flavor, high yield).
- Isolation: To ensure true-to-type seeds, prevent cross-pollination. This can be challenging for open-pollinated crops that readily cross (e.g., squash, corn). For beginners, focus on self-pollinating plants like beans, peas, lettuce, and tomatoes.
- Processing:
- Dry Seeds (Beans, Peas, Lettuce, Grains): Allow pods/seed heads to dry completely on the plant. Harvest, shell, and clean the seeds, removing chaff.
- Wet Seeds (Tomatoes, Cucumbers, Squash): For tomatoes, ferment the seeds in water for a few days to remove the gel coating and inhibit disease. For cucumbers/squash, scrape out seeds, wash thoroughly, and dry.
- Drying: Spread seeds thinly on screens or paper plates in a cool, dry, well-ventilated area for 1-4 weeks. Ensure they are bone-dry before storage. I aim for less than 8% moisture content.
- Storage: Store seeds in airtight containers (glass jars with desiccant packets work well) in a cool, dark, dry place (ideally 40-50°F and 30-40% humidity). Label clearly with variety and date. Properly stored seeds can remain viable for 3-10 years or more.
Step 8: Season Extension & Winterizing
Extend your harvest and protect your garden for the off-season to truly maximize your self sufficient garden from scratch.
- Cold Frames: Simple structures with a transparent top (glass, polycarbonate, or old windows) that sit over garden beds. They trap solar heat, allowing you to grow cold-hardy crops (lettuce, spinach, kale, radishes) well into winter or start seeds earlier in spring. A basic cold frame can be built from 2×6 lumber and a sheet of polycarbonate for under $100.
- Hoop Houses/Low Tunnels: Larger structures made from flexible hoops (PVC pipe or EMT conduit) covered with greenhouse plastic. These provide more space and greater temperature moderation. A 10×20 ft DIY low tunnel kit can cost $200-$500, while a larger, more robust hoop house kit might be $1,000-$3,000. I use a 6×12 ft low tunnel made from 1/2-inch PVC hoops and 6mil greenhouse plastic, which extends my lettuce and spinach harvest by at least
Healthy soil is the bedrock of a productive, self-sufficient garden. You can’t guess what your soil needs; you have to test it.
- Perform a Soil Test: A professional soil test will give you precise data on your soil’s pH, nutrient levels (N-P-K), and organic matter content. I recommend sending a sample to your local agricultural extension office; it typically costs $20-$50 and provides detailed recommendations. Alternatively, for a quick homeowner check, a Rapitest Soil Test Kit (40-test kit, model 1663, ~$20 on Amazon) provides a good baseline for pH, Nitrogen, Phosphorus, and Potash. Aim for a pH between 6.0 and 7.0 for most vegetables.
- Amend for pH Imbalance: If your soil is too acidic (below 6.0), add agricultural lime (dolomitic lime adds magnesium, calcitic lime adds calcium). Apply 5-10 lbs per 100 sq ft for a moderate adjustment. If it’s too alkaline (above 7.0), add elemental sulfur (e.g., Espoma Soil Acidifier, ~$15 for 6.75 lbs) or generous amounts of organic matter like peat moss or pine needles.
- Build Organic Matter: This is the single most important step for long-term soil health. Organic matter improves soil structure, water retention, drainage, and nutrient availability. Incorporate 2-4 inches of high-quality compost into your top 6-12 inches of soil annually. I make my own compost from kitchen scraps, garden waste, and shredded leaves, but you can purchase it. Local nurseries often sell bulk compost for $30-$50 per cubic yard. Aged manure (from chickens, cows, or horses – ensure it’s well-rotted to avoid burning plants) is also excellent.
- Address Nutrient Deficiencies: Based on your soil test, add specific organic amendments. If Nitrogen (N) is low, add blood meal (12-0-0, ~$20 for 3 lbs) or feather meal. For Phosphorus (P), use bone meal (3-15-0, ~$15 for 3 lbs) or rock phosphate. For Potassium (K), greensand (0-0-2.5, ~$25 for 5 lbs) or kelp meal are good choices. I rely heavily on Espoma Organic Garden-tone (5-3-3, ~$25 for an 8lb bag) as a balanced, all-purpose organic fertilizer during planting.
Step 3: Garden Bed Preparation
Deciding between raised beds and in-ground beds depends on your soil, budget, and physical capabilities.
- In-Ground Beds: If you have excellent native soil and good drainage, in-ground beds are the most economical. Double-digging (loosening soil two shovel depths) can significantly improve drainage and aeration. For my main garden, I primarily use in-ground beds, but I focus on building up the soil over time with consistent compost additions and cover cropping. I aim for beds that are no wider than 3-4 feet so I can reach the center without stepping on the soil, compacting it.
- Raised Beds: Raised beds offer numerous advantages, especially for poor soil, heavy clay, or rocky areas. They provide better drainage, warm up faster in spring, reduce compaction, and make weeding and harvesting easier on your back.
- Material Options:
- Untreated Cedar: Naturally rot-resistant and chemical-free. A 4×8 ft bed, 12 inches deep, typically requires three 2x12x8 ft cedar boards, costing around $50-$60 per board (total ~$150-$180) plus corner brackets or screws. My first raised beds were cedar and are still going strong after 7 years.
- Galvanized Steel: Durable, long-lasting, and aesthetically pleasing. Brands like Vego Garden offer modular kits. A Vego Garden 17″ Tall 8-in-1 Metal Raised Garden Bed (can be configured to 4×8 ft) costs approximately $250-$300.
- Concrete Blocks/Stones: Very durable but can leach minerals (though generally safe once weathered) and can be expensive.
- Recycled Materials: Pallets (check for chemical treatment stamps like « HT » for heat-treated), old tires (controversial due to potential chemical leaching).
- Filling Raised Beds: Don’t just fill with topsoil. Use a « Hugelkultur » approach (logs, branches, leaves, then compost, then topsoil) or a mixture of 60% good quality topsoil, 30% compost, and 10% perlite or vermiculite for drainage. A 4x8x1 ft raised bed requires about 32 cubic feet (or ~1.2 cubic yards) of soil mix, which can cost $100-$200 depending on your source.
- Material Options:
Step 4: Water Management & Irrigation
Efficient water management is critical for a self sufficient garden from scratch, especially in off-grid living where water resources might be limited.
- Rainwater Harvesting: This is my primary source of irrigation water. A 55-gallon rain barrel (e.g., EarthMark Rain Barrel, ~$120-$150) connected to a downspout can collect significant water. For larger needs, I use two 275-gallon IBC totes (Intermediate Bulk Containers, often available used for $100-$200 each from food-grade sources) connected in series. A 1,000 sq ft roof can collect approximately 620 gallons of water for every inch of rainfall. My 1,500 sq ft roof provides ample water for my 600 sq ft garden through multiple barrels and totes.
- Drip Irrigation: This is by far the most water-efficient method, delivering water directly to the plant’s root zone, minimizing evaporation and weed growth.
- Components: A typical drip system includes a pressure regulator (e.g., Rain Bird PRV-10, ~$15), a filter (Rain Bird RBY filter, ~$20), main tubing (1/2-inch poly tubing, 100ft ~$25), smaller feeder lines (1/4-inch tubing), and emitters (0.5 GPH or 1 GPH per plant).
- Kits: For beginners, a starter kit like the Rain Bird Drip Irrigation Garden Kit (model DDI-KIT-1P, ~$40-$60) is excellent for a small garden. For larger setups, I use Netafim Techline CV Drip Line (500ft roll, ~$150-$200), which has pressure-compensating emitters built-in, ensuring even watering across long runs.
- Automation: For true self-sufficiency, consider a battery-powered timer (e.g., Orbit B-Hyve Bluetooth Hose Faucet Timer, ~$50) or a solar-powered timer connected to a small 12V pump.
- Solar-Powered Pumps: For lifting water from a well, pond, or large storage tank to your garden, a solar pump is a game-changer. For a smaller drip system, a Shurflo 2088-594-152 Diaphragm Pump (12V, 3.5 GPM, ~$180) can be powered by a single 100W solar panel (e.g., Renogy 100W Monocrystalline Solar Panel, ~$100) and a small 12V battery (e.g., a 50Ah LiFePO4 battery like the Battle Born 50Ah, ~$450). For larger operations or deeper wells, more robust systems are needed. If you’re looking to build out a comprehensive off-grid power system to support your garden’s water needs, or indeed your entire homestead, you might want to explore resources like the Power Grid Generator complete system guide to understand the full scope of what’s possible in terms of energy independence.
Step 5: Seed Selection & Planting
The choice of seeds is crucial for a truly self sufficient garden from scratch.
- Choose Heirloom & Open-Pollinated Seeds: These varieties produce seeds that will grow true to type, meaning you can save seeds from your harvest year after year. F1 hybrids, while often vigorous, will not produce consistent offspring from saved seeds. Reputable seed companies include Baker Creek Heirloom Seeds, High Mowing Organic Seeds, and Seed Savers Exchange. Start with common, reliable varieties like ‘Black Krim’ tomatoes, ‘Provider’ bush beans, ‘Waltham Butternut’ squash, and ‘Black Seeded Simpson’ lettuce.
- Start Seeds Indoors (Optional but Recommended): For longer growing seasons or specific crops, starting seeds indoors gives you a head start. Use seed-starting mix (e.g., Espoma Organic Seed Starter Mix, ~$10 for 16qt bag) in seed trays (Jiffy Professional Greenhouse 72-cell kit, ~$15). Provide adequate light with LED grow lights (Barrina T5 2ft 4-pack LED Grow Lights, 20W each, ~$50) for 14-16 hours a day, positioned 2-4 inches above seedlings. Maintain consistent temperatures (65-75°F for most).
- Direct Sowing vs. Transplanting: Some crops (carrots, radishes, beans, corn) prefer direct sowing into the garden bed. Others (tomatoes, peppers, broccoli, kale) benefit from being started indoors and transplanted. Follow seed packet instructions for planting depths (e.g., lettuce seeds are often surface-sown or planted 1/8 inch deep, while beans are 1 inch deep) and spacing.
- Companion Planting: Strategically plant different species together to enhance growth, deter pests, and attract beneficial insects. For example, planting marigolds near tomatoes can deter nematodes, and basil improves tomato flavor. Nasturtiums can act as a trap crop for aphids.
- Succession Planting: For a continuous harvest, plant small batches of quick-growing crops (lettuce, radishes, cilantro) every 2-3 weeks. As one crop finishes, another is ready to take its place.
Step 6: Pest & Disease Management (Organic)
Maintaining a self sufficient garden from scratch means embracing organic pest and disease control.
- Integrated Pest Management (IPM): This holistic approach combines several strategies.
- Observation: Regularly inspect your plants for early signs of pests or disease. Catching issues early is key.
- Physical Barriers: Use row covers (e.g., Agribon AG-19 floating row cover, 10×20 ft, ~$20) to protect young plants from insect pests like cabbage worms and squash bugs. Install fences (e.g., 2×4 welded wire mesh, 4 ft tall, 50 ft roll ~$70) to keep out deer, rabbits, and other larger animals.
- Hand-Picking: For larger pests like tomato hornworms or squash bugs, simply pick them off and drop them into a bucket of soapy water.
- Companion Planting: As mentioned, certain plants repel pests. Marigolds, garlic, and onions are excellent deterrents.
- Attract Beneficial Insects: Plant flowers like dill, fennel, cosmos, and sweet alyssum to attract ladybugs, lacewings, and parasitic wasps, which prey on common garden pests.
- Organic Sprays & Treatments:
- Neem Oil: An excellent broad-spectrum organic insecticide and fungicide. Bonide Neem Oil Concentrate (16oz, ~$20) can be mixed at a rate of 1-2 tbsp per gallon of water and sprayed on affected plants.
- Insecticidal Soap: Effective against soft-bodied insects like aphids, whiteflies, and spider mites. Garden Safe Insecticidal Soap (24oz ready-to-use, ~$10).
- Bacillus thuringiensis (Bt): A naturally occurring soil bacterium that targets caterpillars and worms. Monterey BT Worm & Caterpillar Killer (16oz, ~$18) is highly effective and safe for beneficial insects.
- Copper or Sulfur Sprays: For fungal diseases like powdery mildew or blight, organic copper (e.g., Bonide Copper Fungicide, ~$15 for 1lb) or sulfur (e.g., Safer Brand Garden Fungicide, ~$10 for 16oz) can be used as a last resort.
Step 7: Harvesting & Seed Saving
The culmination of your efforts is the harvest, and seed saving closes the loop on self-sufficiency.
- Harvesting Techniques:
- Timing: Harvest vegetables at their peak ripeness for best flavor and nutritional value. For example, green beans should snap cleanly, cucumbers should be firm, and tomatoes should be fully colored.
- Frequency: Many crops, like zucchini, cucumbers, and bush beans, produce more if harvested frequently. Pick daily or every other day.
- Tools: Use clean, sharp pruners (e.g., Corona ClassicCUT Bypass Pruner BP 3180, ~$30) or a sharp knife for clean cuts, minimizing damage to the plant.
- Seed Saving: This is where the « self-sufficient » aspect truly shines.
- Selection: Only save seeds from your healthiest, most vigorous plants that show desired traits (disease resistance, good flavor, high yield).
- Isolation: To ensure true-to-type seeds, prevent cross-pollination. This can be challenging for open-pollinated crops that readily cross (e.g., squash, corn). For beginners, focus on self-pollinating plants like beans, peas, lettuce, and tomatoes.
- Processing:
- Dry Seeds (Beans, Peas, Lettuce, Grains): Allow pods/seed heads to dry completely on the plant. Harvest, shell, and clean the seeds, removing chaff.
- Wet Seeds (Tomatoes, Cucumbers, Squash): For tomatoes, ferment the seeds in water for a few days to remove the gel coating and inhibit disease. For cucumbers/squash, scrape out seeds, wash thoroughly, and dry.
- Drying: Spread seeds thinly on screens or paper plates in a cool, dry, well-ventilated area for 1-4 weeks. Ensure they are bone-dry before storage. I aim for less than 8% moisture content.
- Storage: Store seeds in airtight containers (glass jars with desiccant packets work well) in a cool, dark, dry place (ideally 40-50°F and 30-40% humidity). Label clearly with variety and date. Properly stored seeds can remain viable for 3-10 years or more.
Step 8: Season Extension & Winterizing
Extend your harvest and protect your garden for the off-season to truly maximize your self sufficient garden from scratch.
- Cold Frames: Simple structures with a transparent top (glass, polycarbonate, or old windows) that sit over garden beds. They trap solar heat, allowing you to grow cold-hardy crops (lettuce, spinach, kale, radishes) well into winter or start seeds earlier in spring. A basic cold frame can be built from 2×6 lumber and a sheet of polycarbonate for under $100.
- Hoop Houses/Low Tunnels: Larger structures made from flexible hoops (PVC pipe or EMT conduit) covered with greenhouse plastic. These provide more space and greater temperature moderation. A 10×20 ft DIY low tunnel kit can cost $200-$500, while a larger, more robust hoop house kit might be $1,000-$3,000. I use a 6×12 ft low tunnel made from 1/2-inch PVC hoops and 6mil greenhouse plastic, which extends my lettuce and spinach harvest by at least
- Integrated Pest Management (IPM): This holistic approach combines several strategies.
- Integrated Pest Management (IPM): This holistic approach combines several strategies.
- Integrated Pest Management (IPM): This holistic approach combines several strategies.
- Harvesting Techniques:
- Harvesting Techniques:
- Timing: Harvest vegetables at their peak ripeness for best flavor and nutritional value. For example, green beans should snap cleanly, cucumbers should be firm, and tomatoes should be fully colored.
- Frequency: Many crops, like zucchini, cucumbers, and bush beans, produce more if harvested frequently. Pick daily or every other day.
- Tools: Use clean, sharp pruners (e.g., Corona ClassicCUT Bypass Pruner BP 3180, ~$30) or a sharp knife for clean cuts, minimizing damage to the plant.
- Seed Saving: This is where the « self-sufficient » aspect truly shines.
- Selection: Only save seeds from your healthiest, most vigorous plants that show desired traits (disease resistance, good flavor, high yield).
- Isolation: To ensure true-to-type seeds, prevent cross-pollination. This can be challenging for open-pollinated crops that readily cross (e.g., squash, corn). For beginners, focus on self-pollinating plants like beans, peas, lettuce, and tomatoes.
- Processing:
- Dry Seeds (Beans, Peas, Lettuce, Grains): Allow pods/seed heads to dry completely on the plant. Harvest, shell, and clean the seeds, removing chaff.
- Wet Seeds (Tomatoes, Cucumbers, Squash): For tomatoes, ferment the seeds in water for a few days to remove the gel coating and inhibit disease. For cucumbers/squash, scrape out seeds, wash thoroughly, and dry.
- Drying: Spread seeds thinly on screens or paper plates in a cool, dry, well-ventilated area for 1-4 weeks. Ensure they are bone-dry before storage. I aim for less than 8% moisture content.
- Storage: Store seeds in airtight containers (glass jars with desiccant packets work well) in a cool, dark, dry place (ideally 40-50°F and 30-40% humidity). Label clearly with variety and date. Properly stored seeds can remain viable for 3-10 years or more.
Step 8: Season Extension & Winterizing
Extend your harvest and protect your garden for the off-season to truly maximize your self sufficient garden from scratch.
- Cold Frames: Simple structures with a transparent top (glass, polycarbonate, or old windows) that sit over garden beds. They trap solar heat, allowing you to grow cold-hardy crops (lettuce, spinach, kale, radishes) well into winter or start seeds earlier in spring. A basic cold frame can be built from 2×6 lumber and a sheet of polycarbonate for under $100.
- Hoop Houses/Low Tunnels: Larger structures made from flexible hoops (PVC pipe or EMT conduit) covered with greenhouse plastic. These provide more space and greater temperature moderation. A 10×20 ft DIY low tunnel kit can cost $200-$500, while a larger, more robust hoop house kit might be $1,000-$3,000. I use a 6×12 ft low tunnel made from 1/2-inch PVC hoops and 6mil greenhouse plastic, which extends my lettuce and spinach harvest by at least
The culmination of your efforts is the harvest, and seed saving closes the loop on self-sufficiency.
- Harvesting Techniques:
- Timing: Harvest vegetables at their peak ripeness for best flavor and nutritional value. For example, green beans should snap cleanly, cucumbers should be firm, and tomatoes should be fully colored.
- Frequency: Many crops, like zucchini, cucumbers, and bush beans, produce more if harvested frequently. Pick daily or every other day.
- Tools: Use clean, sharp pruners (e.g., Corona ClassicCUT Bypass Pruner BP 3180, ~$30) or a sharp knife for clean cuts, minimizing damage to the plant.
- Seed Saving: This is where the « self-sufficient » aspect truly shines.
- Selection: Only save seeds from your healthiest, most vigorous plants that show desired traits (disease resistance, good flavor, high yield).
- Isolation: To ensure true-to-type seeds, prevent cross-pollination. This can be challenging for open-pollinated crops that readily cross (e.g., squash, corn). For beginners, focus on self-pollinating plants like beans, peas, lettuce, and tomatoes.
- Processing:
- Dry Seeds (Beans, Peas, Lettuce, Grains): Allow pods/seed heads to dry completely on the plant. Harvest, shell, and clean the seeds, removing chaff.
- Wet Seeds (Tomatoes, Cucumbers, Squash): For tomatoes, ferment the seeds in water for a few days to remove the gel coating and inhibit disease. For cucumbers/squash, scrape out seeds, wash thoroughly, and dry.
- Drying: Spread seeds thinly on screens or paper plates in a cool, dry, well-ventilated area for 1-4 weeks. Ensure they are bone-dry before storage. I aim for less than 8% moisture content.
- Storage: Store seeds in airtight containers (glass jars with desiccant packets work well) in a cool, dark, dry place (ideally 40-50°F and 30-40% humidity). Label clearly with variety and date. Properly stored seeds can remain viable for 3-10 years or more.
Step 8: Season Extension & Winterizing
Extend your harvest and protect your garden for the off-season to truly maximize your self sufficient garden from scratch.
- Cold Frames: Simple structures with a transparent top (glass, polycarbonate, or old windows) that sit over garden beds. They trap solar heat, allowing you to grow cold-hardy crops (lettuce, spinach, kale, radishes) well into winter or start seeds earlier in spring. A basic cold frame can be built from 2×6 lumber and a sheet of polycarbonate for under $100.
- Hoop Houses/Low Tunnels: Larger structures made from flexible hoops (PVC pipe or EMT conduit) covered with greenhouse plastic. These provide more space and greater temperature moderation. A 10×20 ft DIY low tunnel kit can cost $200-$500, while a larger, more robust hoop house kit might be $1,000-$3,000. I use a 6×12 ft low tunnel made from 1/2-inch PVC hoops and 6mil greenhouse plastic, which extends my lettuce and spinach harvest by at least
Step 7: Harvesting & Seed Saving
The culmination of your efforts is the harvest, and seed saving closes the loop on self-sufficiency.
- Harvesting Techniques:
- Timing: Harvest vegetables at their peak ripeness for best flavor and nutritional value. For example, green beans should snap cleanly, cucumbers should be firm, and tomatoes should be fully colored.
- Frequency: Many crops, like zucchini, cucumbers, and bush beans, produce more if harvested frequently. Pick daily or every other day.
- Tools: Use clean, sharp pruners (e.g., Corona ClassicCUT Bypass Pruner BP 3180, ~$30) or a sharp knife for clean cuts, minimizing damage to the plant.
- Seed Saving: This is where the « self-sufficient » aspect truly shines.
- Selection: Only save seeds from your healthiest, most vigorous plants that show desired traits (disease resistance, good flavor, high yield).
- Isolation: To ensure true-to-type seeds, prevent cross-pollination. This can be challenging for open-pollinated crops that readily cross (e.g., squash, corn). For beginners, focus on self-pollinating plants like beans, peas, lettuce, and tomatoes.
- Processing:
- Dry Seeds (Beans, Peas, Lettuce, Grains): Allow pods/seed heads to dry completely on the plant. Harvest, shell, and clean the seeds, removing chaff.
- Wet Seeds (Tomatoes, Cucumbers, Squash): For tomatoes, ferment the seeds in water for a few days to remove the gel coating and inhibit disease. For cucumbers/squash, scrape out seeds, wash thoroughly, and dry.
- Drying: Spread seeds thinly on screens or paper plates in a cool, dry, well-ventilated area for 1-4 weeks. Ensure they are bone-dry before storage. I aim for less than 8% moisture content.
- Storage: Store seeds in airtight containers (glass jars with desiccant packets work well) in a cool, dark, dry place (ideally 40-50°F and 30-40% humidity). Label clearly with variety and date. Properly stored seeds can remain viable for 3-10 years or more.
Step 8: Season Extension & Winterizing
Extend your harvest and protect your garden for the off-season to truly maximize your self sufficient garden from scratch.
- Cold Frames: Simple structures with a transparent top (glass, polycarbonate, or old windows) that sit over garden beds. They trap solar heat, allowing you to grow cold-hardy crops (lettuce, spinach, kale, radishes) well into winter or start seeds earlier in spring. A basic cold frame can be built from 2×6 lumber and a sheet of polycarbonate for under $100.
- Hoop Houses/Low Tunnels: Larger structures made from flexible hoops (PVC pipe or EMT conduit) covered with greenhouse plastic. These provide more space and greater temperature moderation. A 10×20 ft DIY low tunnel kit can cost $200-$500, while a larger, more robust hoop house kit might be $1,000-$3,000. I use a 6×12 ft low tunnel made from 1/2-inch PVC hoops and 6mil greenhouse plastic, which extends my lettuce and spinach harvest by at least
- Integrated Pest Management (IPM): This holistic approach combines several strategies.
- Observation: Regularly inspect your plants for early signs of pests or disease. Catching issues early is key.
- Physical Barriers: Use row covers (e.g., Agribon AG-19 floating row cover, 10×20 ft, ~$20) to protect young plants from insect pests like cabbage worms and squash bugs. Install fences (e.g., 2×4 welded wire mesh, 4 ft tall, 50 ft roll ~$70) to keep out deer, rabbits, and other larger animals.
- Hand-Picking: For larger pests like tomato hornworms or squash bugs, simply pick them off and drop them into a bucket of soapy water.
- Companion Planting: As mentioned, certain plants repel pests. Marigolds, garlic, and onions are excellent deterrents.
- Attract Beneficial Insects: Plant flowers like dill, fennel, cosmos, and sweet alyssum to attract ladybugs, lacewings, and parasitic wasps, which prey on common garden pests.
- Organic Sprays & Treatments:
- Neem Oil: An excellent broad-spectrum organic insecticide and fungicide. Bonide Neem Oil Concentrate (16oz, ~$20) can be mixed at a rate of 1-2 tbsp per gallon of water and sprayed on affected plants.
- Insecticidal Soap: Effective against soft-bodied insects like aphids, whiteflies, and spider mites. Garden Safe Insecticidal Soap (24oz ready-to-use, ~$10).
- Bacillus thuringiensis (Bt): A naturally occurring soil bacterium that targets caterpillars and worms. Monterey BT Worm & Caterpillar Killer (16oz, ~$18) is highly effective and safe for beneficial insects.
- Copper or Sulfur Sprays: For fungal diseases like powdery mildew or blight, organic copper (e.g., Bonide Copper Fungicide, ~$15 for 1lb) or sulfur (e.g., Safer Brand Garden Fungicide, ~$10 for 16oz) can be used as a last resort.
Step 7: Harvesting & Seed Saving
The culmination of your efforts is the harvest, and seed saving closes the loop on self-sufficiency.
- Harvesting Techniques:
- Timing: Harvest vegetables at their peak ripeness for best flavor and nutritional value. For example, green beans should snap cleanly, cucumbers should be firm, and tomatoes should be fully colored.
- Frequency: Many crops, like zucchini, cucumbers, and bush beans, produce more if harvested frequently. Pick daily or every other day.
- Tools: Use clean, sharp pruners (e.g., Corona ClassicCUT Bypass Pruner BP 3180, ~$30) or a sharp knife for clean cuts, minimizing damage to the plant.
- Seed Saving: This is where the « self-sufficient » aspect truly shines.
- Selection: Only save seeds from your healthiest, most vigorous plants that show desired traits (disease resistance, good flavor, high yield).
- Isolation: To ensure true-to-type seeds, prevent cross-pollination. This can be challenging for open-pollinated crops that readily cross (e.g., squash, corn). For beginners, focus on self-pollinating plants like beans, peas, lettuce, and tomatoes.
- Processing:
- Dry Seeds (Beans, Peas, Lettuce, Grains): Allow pods/seed heads to dry completely on the plant. Harvest, shell, and clean the seeds, removing chaff.
- Wet Seeds (Tomatoes, Cucumbers, Squash): For tomatoes, ferment the seeds in water for a few days to remove the gel coating and inhibit disease. For cucumbers/squash, scrape out seeds, wash thoroughly, and dry.
- Drying: Spread seeds thinly on screens or paper plates in a cool, dry, well-ventilated area for 1-4 weeks. Ensure they are bone-dry before storage. I aim for less than 8% moisture content.
- Storage: Store seeds in airtight containers (glass jars with desiccant packets work well) in a cool, dark, dry place (ideally 40-50°F and 30-40% humidity). Label clearly with variety and date. Properly stored seeds can remain viable for 3-10 years or more.
Step 8: Season Extension & Winterizing
Extend your harvest and protect your garden for the off-season to truly maximize your self sufficient garden from scratch.
- Cold Frames: Simple structures with a transparent top (glass, polycarbonate, or old windows) that sit over garden beds. They trap solar heat, allowing you to grow cold-hardy crops (lettuce, spinach, kale, radishes) well into winter or start seeds earlier in spring. A basic cold frame can be built from 2×6 lumber and a sheet of polycarbonate for under $100.
- Hoop Houses/Low Tunnels: Larger structures made from flexible hoops (PVC pipe or EMT conduit) covered with greenhouse plastic. These provide more space and greater temperature moderation. A 10×20 ft DIY low tunnel kit can cost $200-$500, while a larger, more robust hoop house kit might be $1,000-$3,000. I use a 6×12 ft low tunnel made from 1/2-inch PVC hoops and 6mil greenhouse plastic, which extends my lettuce and spinach harvest by at least
Maintaining a self sufficient garden from scratch means embracing organic pest and disease control.
- Integrated Pest Management (IPM): This holistic approach combines several strategies.
- Observation: Regularly inspect your plants for early signs of pests or disease. Catching issues early is key.
- Physical Barriers: Use row covers (e.g., Agribon AG-19 floating row cover, 10×20 ft, ~$20) to protect young plants from insect pests like cabbage worms and squash bugs. Install fences (e.g., 2×4 welded wire mesh, 4 ft tall, 50 ft roll ~$70) to keep out deer, rabbits, and other larger animals.
- Hand-Picking: For larger pests like tomato hornworms or squash bugs, simply pick them off and drop them into a bucket of soapy water.
- Companion Planting: As mentioned, certain plants repel pests. Marigolds, garlic, and onions are excellent deterrents.
- Attract Beneficial Insects: Plant flowers like dill, fennel, cosmos, and sweet alyssum to attract ladybugs, lacewings, and parasitic wasps, which prey on common garden pests.
- Organic Sprays & Treatments:
- Neem Oil: An excellent broad-spectrum organic insecticide and fungicide. Bonide Neem Oil Concentrate (16oz, ~$20) can be mixed at a rate of 1-2 tbsp per gallon of water and sprayed on affected plants.
- Insecticidal Soap: Effective against soft-bodied insects like aphids, whiteflies, and spider mites. Garden Safe Insecticidal Soap (24oz ready-to-use, ~$10).
- Bacillus thuringiensis (Bt): A naturally occurring soil bacterium that targets caterpillars and worms. Monterey BT Worm & Caterpillar Killer (16oz, ~$18) is highly effective and safe for beneficial insects.
- Copper or Sulfur Sprays: For fungal diseases like powdery mildew or blight, organic copper (e.g., Bonide Copper Fungicide, ~$15 for 1lb) or sulfur (e.g., Safer Brand Garden Fungicide, ~$10 for 16oz) can be used as a last resort.
Step 7: Harvesting & Seed Saving
The culmination of your efforts is the harvest, and seed saving closes the loop on self-sufficiency.
- Harvesting Techniques:
- Timing: Harvest vegetables at their peak ripeness for best flavor and nutritional value. For example, green beans should snap cleanly, cucumbers should be firm, and tomatoes should be fully colored.
- Frequency: Many crops, like zucchini, cucumbers, and bush beans, produce more if harvested frequently. Pick daily or every other day.
- Tools: Use clean, sharp pruners (e.g., Corona ClassicCUT Bypass Pruner BP 3180, ~$30) or a sharp knife for clean cuts, minimizing damage to the plant.
- Seed Saving: This is where the « self-sufficient » aspect truly shines.
- Selection: Only save seeds from your healthiest, most vigorous plants that show desired traits (disease resistance, good flavor, high yield).
- Isolation: To ensure true-to-type seeds, prevent cross-pollination. This can be challenging for open-pollinated crops that readily cross (e.g., squash, corn). For beginners, focus on self-pollinating plants like beans, peas, lettuce, and tomatoes.
- Processing:
- Dry Seeds (Beans, Peas, Lettuce, Grains): Allow pods/seed heads to dry completely on the plant. Harvest, shell, and clean the seeds, removing chaff.
- Wet Seeds (Tomatoes, Cucumbers, Squash): For tomatoes, ferment the seeds in water for a few days to remove the gel coating and inhibit disease. For cucumbers/squash, scrape out seeds, wash thoroughly, and dry.
- Drying: Spread seeds thinly on screens or paper plates in a cool, dry, well-ventilated area for 1-4 weeks. Ensure they are bone-dry before storage. I aim for less than 8% moisture content.
- Storage: Store seeds in airtight containers (glass jars with desiccant packets work well) in a cool, dark, dry place (ideally 40-50°F and 30-40% humidity). Label clearly with variety and date. Properly stored seeds can remain viable for 3-10 years or more.
Step 8: Season Extension & Winterizing
Extend your harvest and protect your garden for the off-season to truly maximize your self sufficient garden from scratch.
- Cold Frames: Simple structures with a transparent top (glass, polycarbonate, or old windows) that sit over garden beds. They trap solar heat, allowing you to grow cold-hardy crops (lettuce, spinach, kale, radishes) well into winter or start seeds earlier in spring. A basic cold frame can be built from 2×6 lumber and a sheet of polycarbonate for under $100.
- Hoop Houses/Low Tunnels: Larger structures made from flexible hoops (PVC pipe or EMT conduit) covered with greenhouse plastic. These provide more space and greater temperature moderation. A 10×20 ft DIY low tunnel kit can cost $200-$500, while a larger, more robust hoop house kit might be $1,000-$3,000. I use a 6×12 ft low tunnel made from 1/2-inch PVC hoops and 6mil greenhouse plastic, which extends my lettuce and spinach harvest by at least
Step 6: Pest & Disease Management (Organic)
Maintaining a self sufficient garden from scratch means embracing organic pest and disease control.
- Integrated Pest Management (IPM): This holistic approach combines several strategies.
- Observation: Regularly inspect your plants for early signs of pests or disease. Catching issues early is key.
- Physical Barriers: Use row covers (e.g., Agribon AG-19 floating row cover, 10×20 ft, ~$20) to protect young plants from insect pests like cabbage worms and squash bugs. Install fences (e.g., 2×4 welded wire mesh, 4 ft tall, 50 ft roll ~$70) to keep out deer, rabbits, and other larger animals.
- Hand-Picking: For larger pests like tomato hornworms or squash bugs, simply pick them off and drop them into a bucket of soapy water.
- Companion Planting: As mentioned, certain plants repel pests. Marigolds, garlic, and onions are excellent deterrents.
- Attract Beneficial Insects: Plant flowers like dill, fennel, cosmos, and sweet alyssum to attract ladybugs, lacewings, and parasitic wasps, which prey on common garden pests.
- Organic Sprays & Treatments:
- Neem Oil: An excellent broad-spectrum organic insecticide and fungicide. Bonide Neem Oil Concentrate (16oz, ~$20) can be mixed at a rate of 1-2 tbsp per gallon of water and sprayed on affected plants.
- Insecticidal Soap: Effective against soft-bodied insects like aphids, whiteflies, and spider mites. Garden Safe Insecticidal Soap (24oz ready-to-use, ~$10).
- Bacillus thuringiensis (Bt): A naturally occurring soil bacterium that targets caterpillars and worms. Monterey BT Worm & Caterpillar Killer (16oz, ~$18) is highly effective and safe for beneficial insects.
- Copper or Sulfur Sprays: For fungal diseases like powdery mildew or blight, organic copper (e.g., Bonide Copper Fungicide, ~$15 for 1lb) or sulfur (e.g., Safer Brand Garden Fungicide, ~$10 for 16oz) can be used as a last resort.
Step 7: Harvesting & Seed Saving
The culmination of your efforts is the harvest, and seed saving closes the loop on self-sufficiency.
- Harvesting Techniques:
- Timing: Harvest vegetables at their peak ripeness for best flavor and nutritional value. For example, green beans should snap cleanly, cucumbers should be firm, and tomatoes should be fully colored.
- Frequency: Many crops, like zucchini, cucumbers, and bush beans, produce more if harvested frequently. Pick daily or every other day.
- Tools: Use clean, sharp pruners (e.g., Corona ClassicCUT Bypass Pruner BP 3180, ~$30) or a sharp knife for clean cuts, minimizing damage to the plant.
- Seed Saving: This is where the « self-sufficient » aspect truly shines.
- Selection: Only save seeds from your healthiest, most vigorous plants that show desired traits (disease resistance, good flavor, high yield).
- Isolation: To ensure true-to-type seeds, prevent cross-pollination. This can be challenging for open-pollinated crops that readily cross (e.g., squash, corn). For beginners, focus on self-pollinating plants like beans, peas, lettuce, and tomatoes.
- Processing:
- Dry Seeds (Beans, Peas, Lettuce, Grains): Allow pods/seed heads to dry completely on the plant. Harvest, shell, and clean the seeds, removing chaff.
- Wet Seeds (Tomatoes, Cucumbers, Squash): For tomatoes, ferment the seeds in water for a few days to remove the gel coating and inhibit disease. For cucumbers/squash, scrape out seeds, wash thoroughly, and dry.
- Drying: Spread seeds thinly on screens or paper plates in a cool, dry, well-ventilated area for 1-4 weeks. Ensure they are bone-dry before storage. I aim for less than 8% moisture content.
- Storage: Store seeds in airtight containers (glass jars with desiccant packets work well) in a cool, dark, dry place (ideally 40-50°F and 30-40% humidity). Label clearly with variety and date. Properly stored seeds can remain viable for 3-10 years or more.
Step 8: Season Extension & Winterizing
Extend your harvest and protect your garden for the off-season to truly maximize your self sufficient garden from scratch.
- Cold Frames: Simple structures with a transparent top (glass, polycarbonate, or old windows) that sit over garden beds. They trap solar heat, allowing you to grow cold-hardy crops (lettuce, spinach, kale, radishes) well into winter or start seeds earlier in spring. A basic cold frame can be built from 2×6 lumber and a sheet of polycarbonate for under $100.
- Hoop Houses/Low Tunnels: Larger structures made from flexible hoops (PVC pipe or EMT conduit) covered with greenhouse plastic. These provide more space and greater temperature moderation. A 10×20 ft DIY low tunnel kit can cost $200-$500, while a larger, more robust hoop house kit might be $1,000-$3,000. I use a 6×12 ft low tunnel made from 1/2-inch PVC hoops and 6mil greenhouse plastic, which extends my lettuce and spinach harvest by at least
- Choose Heirloom & Open-Pollinated Seeds: These varieties produce seeds that will grow true to type, meaning you can save seeds from your harvest year after year. F1 hybrids, while often vigorous, will not produce consistent offspring from saved seeds. Reputable seed companies include Baker Creek Heirloom Seeds, High Mowing Organic Seeds, and Seed Savers Exchange. Start with common, reliable varieties like ‘Black Krim’ tomatoes, ‘Provider’ bush beans, ‘Waltham Butternut’ squash, and ‘Black Seeded Simpson’ lettuce.
- Start Seeds Indoors (Optional but Recommended): For longer growing seasons or specific crops, starting seeds indoors gives you a head start. Use seed-starting mix (e.g., Espoma Organic Seed Starter Mix, ~$10 for 16qt bag) in seed trays (Jiffy Professional Greenhouse 72-cell kit, ~$15). Provide adequate light with LED grow lights (Barrina T5 2ft 4-pack LED Grow Lights, 20W each, ~$50) for 14-16 hours a day, positioned 2-4 inches above seedlings. Maintain consistent temperatures (65-75°F for most).
- Direct Sowing vs. Transplanting: Some crops (carrots, radishes, beans, corn) prefer direct sowing into the garden bed. Others (tomatoes, peppers, broccoli, kale) benefit from being started indoors and transplanted. Follow seed packet instructions for planting depths (e.g., lettuce seeds are often surface-sown or planted 1/8 inch deep, while beans are 1 inch deep) and spacing.
- Companion Planting: Strategically plant different species together to enhance growth, deter pests, and attract beneficial insects. For example, planting marigolds near tomatoes can deter nematodes, and basil improves tomato flavor. Nasturtiums can act as a trap crop for aphids.
- Succession Planting: For a continuous harvest, plant small batches of quick-growing crops (lettuce, radishes, cilantro) every 2-3 weeks. As one crop finishes, another is ready to take its place.
Step 6: Pest & Disease Management (Organic)
Maintaining a self sufficient garden from scratch means embracing organic pest and disease control.
- Integrated Pest Management (IPM): This holistic approach combines several strategies.
- Observation: Regularly inspect your plants for early signs of pests or disease. Catching issues early is key.
- Physical Barriers: Use row covers (e.g., Agribon AG-19 floating row cover, 10×20 ft, ~$20) to protect young plants from insect pests like cabbage worms and squash bugs. Install fences (e.g., 2×4 welded wire mesh, 4 ft tall, 50 ft roll ~$70) to keep out deer, rabbits, and other larger animals.
- Hand-Picking: For larger pests like tomato hornworms or squash bugs, simply pick them off and drop them into a bucket of soapy water.
- Companion Planting: As mentioned, certain plants repel pests. Marigolds, garlic, and onions are excellent deterrents.
- Attract Beneficial Insects: Plant flowers like dill, fennel, cosmos, and sweet alyssum to attract ladybugs, lacewings, and parasitic wasps, which prey on common garden pests.
- Organic Sprays & Treatments:
- Neem Oil: An excellent broad-spectrum organic insecticide and fungicide. Bonide Neem Oil Concentrate (16oz, ~$20) can be mixed at a rate of 1-2 tbsp per gallon of water and sprayed on affected plants.
- Insecticidal Soap: Effective against soft-bodied insects like aphids, whiteflies, and spider mites. Garden Safe Insecticidal Soap (24oz ready-to-use, ~$10).
- Bacillus thuringiensis (Bt): A naturally occurring soil bacterium that targets caterpillars and worms. Monterey BT Worm & Caterpillar Killer (16oz, ~$18) is highly effective and safe for beneficial insects.
- Copper or Sulfur Sprays: For fungal diseases like powdery mildew or blight, organic copper (e.g., Bonide Copper Fungicide, ~$15 for 1lb) or sulfur (e.g., Safer Brand Garden Fungicide, ~$10 for 16oz) can be used as a last resort.
Step 7: Harvesting & Seed Saving
The culmination of your efforts is the harvest, and seed saving closes the loop on self-sufficiency.
- Harvesting Techniques:
- Timing: Harvest vegetables at their peak ripeness for best flavor and nutritional value. For example, green beans should snap cleanly, cucumbers should be firm, and tomatoes should be fully colored.
- Frequency: Many crops, like zucchini, cucumbers, and bush beans, produce more if harvested frequently. Pick daily or every other day.
- Tools: Use clean, sharp pruners (e.g., Corona ClassicCUT Bypass Pruner BP 3180, ~$30) or a sharp knife for clean cuts, minimizing damage to the plant.
- Seed Saving: This is where the « self-sufficient » aspect truly shines.
- Selection: Only save seeds from your healthiest, most vigorous plants that show desired traits (disease resistance, good flavor, high yield).
- Isolation: To ensure true-to-type seeds, prevent cross-pollination. This can be challenging for open-pollinated crops that readily cross (e.g., squash, corn). For beginners, focus on self-pollinating plants like beans, peas, lettuce, and tomatoes.
- Processing:
- Dry Seeds (Beans, Peas, Lettuce, Grains): Allow pods/seed heads to dry completely on the plant. Harvest, shell, and clean the seeds, removing chaff.
- Wet Seeds (Tomatoes, Cucumbers, Squash): For tomatoes, ferment the seeds in water for a few days to remove the gel coating and inhibit disease. For cucumbers/squash, scrape out seeds, wash thoroughly, and dry.
- Drying: Spread seeds thinly on screens or paper plates in a cool, dry, well-ventilated area for 1-4 weeks. Ensure they are bone-dry before storage. I aim for less than 8% moisture content.
- Storage: Store seeds in airtight containers (glass jars with desiccant packets work well) in a cool, dark, dry place (ideally 40-50°F and 30-40% humidity). Label clearly with variety and date. Properly stored seeds can remain viable for 3-10 years or more.
Step 8: Season Extension & Winterizing
Extend your harvest and protect your garden for the off-season to truly maximize your self sufficient garden from scratch.
- Cold Frames: Simple structures with a transparent top (glass, polycarbonate, or old windows) that sit over garden beds. They trap solar heat, allowing you to grow cold-hardy crops (lettuce, spinach, kale, radishes) well into winter or start seeds earlier in spring. A basic cold frame can be built from 2×6 lumber and a sheet of polycarbonate for under $100.
- Hoop Houses/Low Tunnels: Larger structures made from flexible hoops (PVC pipe or EMT conduit) covered with greenhouse plastic. These provide more space and greater temperature moderation. A 10×20 ft DIY low tunnel kit can cost $200-$500, while a larger, more robust hoop house kit might be $1,000-$3,000. I use a 6×12 ft low tunnel made from 1/2-inch PVC hoops and 6mil greenhouse plastic, which extends my lettuce and spinach harvest by at least
The choice of seeds is crucial for a truly self sufficient garden from scratch.
- Choose Heirloom & Open-Pollinated Seeds: These varieties produce seeds that will grow true to type, meaning you can save seeds from your harvest year after year. F1 hybrids, while often vigorous, will not produce consistent offspring from saved seeds. Reputable seed companies include Baker Creek Heirloom Seeds, High Mowing Organic Seeds, and Seed Savers Exchange. Start with common, reliable varieties like ‘Black Krim’ tomatoes, ‘Provider’ bush beans, ‘Waltham Butternut’ squash, and ‘Black Seeded Simpson’ lettuce.
- Start Seeds Indoors (Optional but Recommended): For longer growing seasons or specific crops, starting seeds indoors gives you a head start. Use seed-starting mix (e.g., Espoma Organic Seed Starter Mix, ~$10 for 16qt bag) in seed trays (Jiffy Professional Greenhouse 72-cell kit, ~$15). Provide adequate light with LED grow lights (Barrina T5 2ft 4-pack LED Grow Lights, 20W each, ~$50) for 14-16 hours a day, positioned 2-4 inches above seedlings. Maintain consistent temperatures (65-75°F for most).
- Direct Sowing vs. Transplanting: Some crops (carrots, radishes, beans, corn) prefer direct sowing into the garden bed. Others (tomatoes, peppers, broccoli, kale) benefit from being started indoors and transplanted. Follow seed packet instructions for planting depths (e.g., lettuce seeds are often surface-sown or planted 1/8 inch deep, while beans are 1 inch deep) and spacing.
- Companion Planting: Strategically plant different species together to enhance growth, deter pests, and attract beneficial insects. For example, planting marigolds near tomatoes can deter nematodes, and basil improves tomato flavor. Nasturtiums can act as a trap crop for aphids.
- Succession Planting: For a continuous harvest, plant small batches of quick-growing crops (lettuce, radishes, cilantro) every 2-3 weeks. As one crop finishes, another is ready to take its place.
Step 6: Pest & Disease Management (Organic)
Maintaining a self sufficient garden from scratch means embracing organic pest and disease control.
- Integrated Pest Management (IPM): This holistic approach combines several strategies.
- Observation: Regularly inspect your plants for early signs of pests or disease. Catching issues early is key.
- Physical Barriers: Use row covers (e.g., Agribon AG-19 floating row cover, 10×20 ft, ~$20) to protect young plants from insect pests like cabbage worms and squash bugs. Install fences (e.g., 2×4 welded wire mesh, 4 ft tall, 50 ft roll ~$70) to keep out deer, rabbits, and other larger animals.
- Hand-Picking: For larger pests like tomato hornworms or squash bugs, simply pick them off and drop them into a bucket of soapy water.
- Companion Planting: As mentioned, certain plants repel pests. Marigolds, garlic, and onions are excellent deterrents.
- Attract Beneficial Insects: Plant flowers like dill, fennel, cosmos, and sweet alyssum to attract ladybugs, lacewings, and parasitic wasps, which prey on common garden pests.
- Organic Sprays & Treatments:
- Neem Oil: An excellent broad-spectrum organic insecticide and fungicide. Bonide Neem Oil Concentrate (16oz, ~$20) can be mixed at a rate of 1-2 tbsp per gallon of water and sprayed on affected plants.
- Insecticidal Soap: Effective against soft-bodied insects like aphids, whiteflies, and spider mites. Garden Safe Insecticidal Soap (24oz ready-to-use, ~$10).
- Bacillus thuringiensis (Bt): A naturally occurring soil bacterium that targets caterpillars and worms. Monterey BT Worm & Caterpillar Killer (16oz, ~$18) is highly effective and safe for beneficial insects.
- Copper or Sulfur Sprays: For fungal diseases like powdery mildew or blight, organic copper (e.g., Bonide Copper Fungicide, ~$15 for 1lb) or sulfur (e.g., Safer Brand Garden Fungicide, ~$10 for 16oz) can be used as a last resort.
Step 7: Harvesting & Seed Saving
The culmination of your efforts is the harvest, and seed saving closes the loop on self-sufficiency.
- Harvesting Techniques:
- Timing: Harvest vegetables at their peak ripeness for best flavor and nutritional value. For example, green beans should snap cleanly, cucumbers should be firm, and tomatoes should be fully colored.
- Frequency: Many crops, like zucchini, cucumbers, and bush beans, produce more if harvested frequently. Pick daily or every other day.
- Tools: Use clean, sharp pruners (e.g., Corona ClassicCUT Bypass Pruner BP 3180, ~$30) or a sharp knife for clean cuts, minimizing damage to the plant.
- Seed Saving: This is where the « self-sufficient » aspect truly shines.
- Selection: Only save seeds from your healthiest, most vigorous plants that show desired traits (disease resistance, good flavor, high yield).
- Isolation: To ensure true-to-type seeds, prevent cross-pollination. This can be challenging for open-pollinated crops that readily cross (e.g., squash, corn). For beginners, focus on self-pollinating plants like beans, peas, lettuce, and tomatoes.
- Processing:
- Dry Seeds (Beans, Peas, Lettuce, Grains): Allow pods/seed heads to dry completely on the plant. Harvest, shell, and clean the seeds, removing chaff.
- Wet Seeds (Tomatoes, Cucumbers, Squash): For tomatoes, ferment the seeds in water for a few days to remove the gel coating and inhibit disease. For cucumbers/squash, scrape out seeds, wash thoroughly, and dry.
- Drying: Spread seeds thinly on screens or paper plates in a cool, dry, well-ventilated area for 1-4 weeks. Ensure they are bone-dry before storage. I aim for less than 8% moisture content.
- Storage: Store seeds in airtight containers (glass jars with desiccant packets work well) in a cool, dark, dry place (ideally 40-50°F and 30-40% humidity). Label clearly with variety and date. Properly stored seeds can remain viable for 3-10 years or more.
Step 8: Season Extension & Winterizing
Extend your harvest and protect your garden for the off-season to truly maximize your self sufficient garden from scratch.
- Cold Frames: Simple structures with a transparent top (glass, polycarbonate, or old windows) that sit over garden beds. They trap solar heat, allowing you to grow cold-hardy crops (lettuce, spinach, kale, radishes) well into winter or start seeds earlier in spring. A basic cold frame can be built from 2×6 lumber and a sheet of polycarbonate for under $100.
- Hoop Houses/Low Tunnels: Larger structures made from flexible hoops (PVC pipe or EMT conduit) covered with greenhouse plastic. These provide more space and greater temperature moderation. A 10×20 ft DIY low tunnel kit can cost $200-$500, while a larger, more robust hoop house kit might be $1,000-$3,000. I use a 6×12 ft low tunnel made from 1/2-inch PVC hoops and 6mil greenhouse plastic, which extends my lettuce and spinach harvest by at least
Step 5: Seed Selection & Planting
The choice of seeds is crucial for a truly self sufficient garden from scratch.
- Choose Heirloom & Open-Pollinated Seeds: These varieties produce seeds that will grow true to type, meaning you can save seeds from your harvest year after year. F1 hybrids, while often vigorous, will not produce consistent offspring from saved seeds. Reputable seed companies include Baker Creek Heirloom Seeds, High Mowing Organic Seeds, and Seed Savers Exchange. Start with common, reliable varieties like ‘Black Krim’ tomatoes, ‘Provider’ bush beans, ‘Waltham Butternut’ squash, and ‘Black Seeded Simpson’ lettuce.
- Start Seeds Indoors (Optional but Recommended): For longer growing seasons or specific crops, starting seeds indoors gives you a head start. Use seed-starting mix (e.g., Espoma Organic Seed Starter Mix, ~$10 for 16qt bag) in seed trays (Jiffy Professional Greenhouse 72-cell kit, ~$15). Provide adequate light with LED grow lights (Barrina T5 2ft 4-pack LED Grow Lights, 20W each, ~$50) for 14-16 hours a day, positioned 2-4 inches above seedlings. Maintain consistent temperatures (65-75°F for most).
- Direct Sowing vs. Transplanting: Some crops (carrots, radishes, beans, corn) prefer direct sowing into the garden bed. Others (tomatoes, peppers, broccoli, kale) benefit from being started indoors and transplanted. Follow seed packet instructions for planting depths (e.g., lettuce seeds are often surface-sown or planted 1/8 inch deep, while beans are 1 inch deep) and spacing.
- Companion Planting: Strategically plant different species together to enhance growth, deter pests, and attract beneficial insects. For example, planting marigolds near tomatoes can deter nematodes, and basil improves tomato flavor. Nasturtiums can act as a trap crop for aphids.
- Succession Planting: For a continuous harvest, plant small batches of quick-growing crops (lettuce, radishes, cilantro) every 2-3 weeks. As one crop finishes, another is ready to take its place.
Step 6: Pest & Disease Management (Organic)
Maintaining a self sufficient garden from scratch means embracing organic pest and disease control.
- Integrated Pest Management (IPM): This holistic approach combines several strategies.
- Observation: Regularly inspect your plants for early signs of pests or disease. Catching issues early is key.
- Physical Barriers: Use row covers (e.g., Agribon AG-19 floating row cover, 10×20 ft, ~$20) to protect young plants from insect pests like cabbage worms and squash bugs. Install fences (e.g., 2×4 welded wire mesh, 4 ft tall, 50 ft roll ~$70) to keep out deer, rabbits, and other larger animals.
- Hand-Picking: For larger pests like tomato hornworms or squash bugs, simply pick them off and drop them into a bucket of soapy water.
- Companion Planting: As mentioned, certain plants repel pests. Marigolds, garlic, and onions are excellent deterrents.
- Attract Beneficial Insects: Plant flowers like dill, fennel, cosmos, and sweet alyssum to attract ladybugs, lacewings, and parasitic wasps, which prey on common garden pests.
- Organic Sprays & Treatments:
- Neem Oil: An excellent broad-spectrum organic insecticide and fungicide. Bonide Neem Oil Concentrate (16oz, ~$20) can be mixed at a rate of 1-2 tbsp per gallon of water and sprayed on affected plants.
- Insecticidal Soap: Effective against soft-bodied insects like aphids, whiteflies, and spider mites. Garden Safe Insecticidal Soap (24oz ready-to-use, ~$10).
- Bacillus thuringiensis (Bt): A naturally occurring soil bacterium that targets caterpillars and worms. Monterey BT Worm & Caterpillar Killer (16oz, ~$18) is highly effective and safe for beneficial insects.
- Copper or Sulfur Sprays: For fungal diseases like powdery mildew or blight, organic copper (e.g., Bonide Copper Fungicide, ~$15 for 1lb) or sulfur (e.g., Safer Brand Garden Fungicide, ~$10 for 16oz) can be used as a last resort.
Step 7: Harvesting & Seed Saving
The culmination of your efforts is the harvest, and seed saving closes the loop on self-sufficiency.
- Harvesting Techniques:
- Timing: Harvest vegetables at their peak ripeness for best flavor and nutritional value. For example, green beans should snap cleanly, cucumbers should be firm, and tomatoes should be fully colored.
- Frequency: Many crops, like zucchini, cucumbers, and bush beans, produce more if harvested frequently. Pick daily or every other day.
- Tools: Use clean, sharp pruners (e.g., Corona ClassicCUT Bypass Pruner BP 3180, ~$30) or a sharp knife for clean cuts, minimizing damage to the plant.
- Seed Saving: This is where the « self-sufficient » aspect truly shines.
- Selection: Only save seeds from your healthiest, most vigorous plants that show desired traits (disease resistance, good flavor, high yield).
- Isolation: To ensure true-to-type seeds, prevent cross-pollination. This can be challenging for open-pollinated crops that readily cross (e.g., squash, corn). For beginners, focus on self-pollinating plants like beans, peas, lettuce, and tomatoes.
- Processing:
- Dry Seeds (Beans, Peas, Lettuce, Grains): Allow pods/seed heads to dry completely on the plant. Harvest, shell, and clean the seeds, removing chaff.
- Wet Seeds (Tomatoes, Cucumbers, Squash): For tomatoes, ferment the seeds in water for a few days to remove the gel coating and inhibit disease. For cucumbers/squash, scrape out seeds, wash thoroughly, and dry.
- Drying: Spread seeds thinly on screens or paper plates in a cool, dry, well-ventilated area for 1-4 weeks. Ensure they are bone-dry before storage. I aim for less than 8% moisture content.
- Storage: Store seeds in airtight containers (glass jars with desiccant packets work well) in a cool, dark, dry place (ideally 40-50°F and 30-40% humidity). Label clearly with variety and date. Properly stored seeds can remain viable for 3-10 years or more.
Step 8: Season Extension & Winterizing
Extend your harvest and protect your garden for the off-season to truly maximize your self sufficient garden from scratch.
- Cold Frames: Simple structures with a transparent top (glass, polycarbonate, or old windows) that sit over garden beds. They trap solar heat, allowing you to grow cold-hardy crops (lettuce, spinach, kale, radishes) well into winter or start seeds earlier in spring. A basic cold frame can be built from 2×6 lumber and a sheet of polycarbonate for under $100.
- Hoop Houses/Low Tunnels: Larger structures made from flexible hoops (PVC pipe or EMT conduit) covered with greenhouse plastic. These provide more space and greater temperature moderation. A 10×20 ft DIY low tunnel kit can cost $200-$500, while a larger, more robust hoop house kit might be $1,000-$3,000. I use a 6×12 ft low tunnel made from 1/2-inch PVC hoops and 6mil greenhouse plastic, which extends my lettuce and spinach harvest by at least
- Rainwater Harvesting: This is my primary source of irrigation water. A 55-gallon rain barrel (e.g., EarthMark Rain Barrel, ~$120-$150) connected to a downspout can collect significant water. For larger needs, I use two 275-gallon IBC totes (Intermediate Bulk Containers, often available used for $100-$200 each from food-grade sources) connected in series. A 1,000 sq ft roof can collect approximately 620 gallons of water for every inch of rainfall. My 1,500 sq ft roof provides ample water for my 600 sq ft garden through multiple barrels and totes.
- Drip Irrigation: This is by far the most water-efficient method, delivering water directly to the plant’s root zone, minimizing evaporation and weed growth.
- Components: A typical drip system includes a pressure regulator (e.g., Rain Bird PRV-10, ~$15), a filter (Rain Bird RBY filter, ~$20), main tubing (1/2-inch poly tubing, 100ft ~$25), smaller feeder lines (1/4-inch tubing), and emitters (0.5 GPH or 1 GPH per plant).
- Kits: For beginners, a starter kit like the Rain Bird Drip Irrigation Garden Kit (model DDI-KIT-1P, ~$40-$60) is excellent for a small garden. For larger setups, I use Netafim Techline CV Drip Line (500ft roll, ~$150-$200), which has pressure-compensating emitters built-in, ensuring even watering across long runs.
- Automation: For true self-sufficiency, consider a battery-powered timer (e.g., Orbit B-Hyve Bluetooth Hose Faucet Timer, ~$50) or a solar-powered timer connected to a small 12V pump.
- Solar-Powered Pumps: For lifting water from a well, pond, or large storage tank to your garden, a solar pump is a game-changer. For a smaller drip system, a Shurflo 2088-594-152 Diaphragm Pump (12V, 3.5 GPM, ~$180) can be powered by a single 100W solar panel (e.g., Renogy 100W Monocrystalline Solar Panel, ~$100) and a small 12V battery (e.g., a 50Ah LiFePO4 battery like the Battle Born 50Ah, ~$450). For larger operations or deeper wells, more robust systems are needed. If you’re looking to build out a comprehensive off-grid power system to support your garden’s water needs, or indeed your entire homestead, you might want to explore resources like the Power Grid Generator complete system guide to understand the full scope of what’s possible in terms of energy independence.
Step 5: Seed Selection & Planting
The choice of seeds is crucial for a truly self sufficient garden from scratch.
- Choose Heirloom & Open-Pollinated Seeds: These varieties produce seeds that will grow true to type, meaning you can save seeds from your harvest year after year. F1 hybrids, while often vigorous, will not produce consistent offspring from saved seeds. Reputable seed companies include Baker Creek Heirloom Seeds, High Mowing Organic Seeds, and Seed Savers Exchange. Start with common, reliable varieties like ‘Black Krim’ tomatoes, ‘Provider’ bush beans, ‘Waltham Butternut’ squash, and ‘Black Seeded Simpson’ lettuce.
- Start Seeds Indoors (Optional but Recommended): For longer growing seasons or specific crops, starting seeds indoors gives you a head start. Use seed-starting mix (e.g., Espoma Organic Seed Starter Mix, ~$10 for 16qt bag) in seed trays (Jiffy Professional Greenhouse 72-cell kit, ~$15). Provide adequate light with LED grow lights (Barrina T5 2ft 4-pack LED Grow Lights, 20W each, ~$50) for 14-16 hours a day, positioned 2-4 inches above seedlings. Maintain consistent temperatures (65-75°F for most).
- Direct Sowing vs. Transplanting: Some crops (carrots, radishes, beans, corn) prefer direct sowing into the garden bed. Others (tomatoes, peppers, broccoli, kale) benefit from being started indoors and transplanted. Follow seed packet instructions for planting depths (e.g., lettuce seeds are often surface-sown or planted 1/8 inch deep, while beans are 1 inch deep) and spacing.
- Companion Planting: Strategically plant different species together to enhance growth, deter pests, and attract beneficial insects. For example, planting marigolds near tomatoes can deter nematodes, and basil improves tomato flavor. Nasturtiums can act as a trap crop for aphids.
- Succession Planting: For a continuous harvest, plant small batches of quick-growing crops (lettuce, radishes, cilantro) every 2-3 weeks. As one crop finishes, another is ready to take its place.
Step 6: Pest & Disease Management (Organic)
Maintaining a self sufficient garden from scratch means embracing organic pest and disease control.
- Integrated Pest Management (IPM): This holistic approach combines several strategies.
- Observation: Regularly inspect your plants for early signs of pests or disease. Catching issues early is key.
- Physical Barriers: Use row covers (e.g., Agribon AG-19 floating row cover, 10×20 ft, ~$20) to protect young plants from insect pests like cabbage worms and squash bugs. Install fences (e.g., 2×4 welded wire mesh, 4 ft tall, 50 ft roll ~$70) to keep out deer, rabbits, and other larger animals.
- Hand-Picking: For larger pests like tomato hornworms or squash bugs, simply pick them off and drop them into a bucket of soapy water.
- Companion Planting: As mentioned, certain plants repel pests. Marigolds, garlic, and onions are excellent deterrents.
- Attract Beneficial Insects: Plant flowers like dill, fennel, cosmos, and sweet alyssum to attract ladybugs, lacewings, and parasitic wasps, which prey on common garden pests.
- Organic Sprays & Treatments:
- Neem Oil: An excellent broad-spectrum organic insecticide and fungicide. Bonide Neem Oil Concentrate (16oz, ~$20) can be mixed at a rate of 1-2 tbsp per gallon of water and sprayed on affected plants.
- Insecticidal Soap: Effective against soft-bodied insects like aphids, whiteflies, and spider mites. Garden Safe Insecticidal Soap (24oz ready-to-use, ~$10).
- Bacillus thuringiensis (Bt): A naturally occurring soil bacterium that targets caterpillars and worms. Monterey BT Worm & Caterpillar Killer (16oz, ~$18) is highly effective and safe for beneficial insects.
- Copper or Sulfur Sprays: For fungal diseases like powdery mildew or blight, organic copper (e.g., Bonide Copper Fungicide, ~$15 for 1lb) or sulfur (e.g., Safer Brand Garden Fungicide, ~$10 for 16oz) can be used as a last resort.
Step 7: Harvesting & Seed Saving
The culmination of your efforts is the harvest, and seed saving closes the loop on self-sufficiency.
- Harvesting Techniques:
- Timing: Harvest vegetables at their peak ripeness for best flavor and nutritional value. For example, green beans should snap cleanly, cucumbers should be firm, and tomatoes should be fully colored.
- Frequency: Many crops, like zucchini, cucumbers, and bush beans, produce more if harvested frequently. Pick daily or every other day.
- Tools: Use clean, sharp pruners (e.g., Corona ClassicCUT Bypass Pruner BP 3180, ~$30) or a sharp knife for clean cuts, minimizing damage to the plant.
- Seed Saving: This is where the « self-sufficient » aspect truly shines.
- Selection: Only save seeds from your healthiest, most vigorous plants that show desired traits (disease resistance, good flavor, high yield).
- Isolation: To ensure true-to-type seeds, prevent cross-pollination. This can be challenging for open-pollinated crops that readily cross (e.g., squash, corn). For beginners, focus on self-pollinating plants like beans, peas, lettuce, and tomatoes.
- Processing:
- Dry Seeds (Beans, Peas, Lettuce, Grains): Allow pods/seed heads to dry completely on the plant. Harvest, shell, and clean the seeds, removing chaff.
- Wet Seeds (Tomatoes, Cucumbers, Squash): For tomatoes, ferment the seeds in water for a few days to remove the gel coating and inhibit disease. For cucumbers/squash, scrape out seeds, wash thoroughly, and dry.
- Drying: Spread seeds thinly on screens or paper plates in a cool, dry, well-ventilated area for 1-4 weeks. Ensure they are bone-dry before storage. I aim for less than 8% moisture content.
- Storage: Store seeds in airtight containers (glass jars with desiccant packets work well) in a cool, dark, dry place (ideally 40-50°F and 30-40% humidity). Label clearly with variety and date. Properly stored seeds can remain viable for 3-10 years or more.
Step 8: Season Extension & Winterizing
Extend your harvest and protect your garden for the off-season to truly maximize your self sufficient garden from scratch.
- Cold Frames: Simple structures with a transparent top (glass, polycarbonate, or old windows) that sit over garden beds. They trap solar heat, allowing you to grow cold-hardy crops (lettuce, spinach, kale, radishes) well into winter or start seeds earlier in spring. A basic cold frame can be built from 2×6 lumber and a sheet of polycarbonate for under $100.
- Hoop Houses/Low Tunnels: Larger structures made from flexible hoops (PVC pipe or EMT conduit) covered with greenhouse plastic. These provide more space and greater temperature moderation. A 10×20 ft DIY low tunnel kit can cost $200-$500, while a larger, more robust hoop house kit might be $1,000-$3,000. I use a 6×12 ft low tunnel made from 1/2-inch PVC hoops and 6mil greenhouse plastic, which extends my lettuce and spinach harvest by at least
Efficient water management is critical for a self sufficient garden from scratch, especially in off-grid living where water resources might be limited.
- Rainwater Harvesting: This is my primary source of irrigation water. A 55-gallon rain barrel (e.g., EarthMark Rain Barrel, ~$120-$150) connected to a downspout can collect significant water. For larger needs, I use two 275-gallon IBC totes (Intermediate Bulk Containers, often available used for $100-$200 each from food-grade sources) connected in series. A 1,000 sq ft roof can collect approximately 620 gallons of water for every inch of rainfall. My 1,500 sq ft roof provides ample water for my 600 sq ft garden through multiple barrels and totes.
- Drip Irrigation: This is by far the most water-efficient method, delivering water directly to the plant’s root zone, minimizing evaporation and weed growth.
- Components: A typical drip system includes a pressure regulator (e.g., Rain Bird PRV-10, ~$15), a filter (Rain Bird RBY filter, ~$20), main tubing (1/2-inch poly tubing, 100ft ~$25), smaller feeder lines (1/4-inch tubing), and emitters (0.5 GPH or 1 GPH per plant).
- Kits: For beginners, a starter kit like the Rain Bird Drip Irrigation Garden Kit (model DDI-KIT-1P, ~$40-$60) is excellent for a small garden. For larger setups, I use Netafim Techline CV Drip Line (500ft roll, ~$150-$200), which has pressure-compensating emitters built-in, ensuring even watering across long runs.
- Automation: For true self-sufficiency, consider a battery-powered timer (e.g., Orbit B-Hyve Bluetooth Hose Faucet Timer, ~$50) or a solar-powered timer connected to a small 12V pump.
- Solar-Powered Pumps: For lifting water from a well, pond, or large storage tank to your garden, a solar pump is a game-changer. For a smaller drip system, a Shurflo 2088-594-152 Diaphragm Pump (12V, 3.5 GPM, ~$180) can be powered by a single 100W solar panel (e.g., Renogy 100W Monocrystalline Solar Panel, ~$100) and a small 12V battery (e.g., a 50Ah LiFePO4 battery like the Battle Born 50Ah, ~$450). For larger operations or deeper wells, more robust systems are needed. If you’re looking to build out a comprehensive off-grid power system to support your garden’s water needs, or indeed your entire homestead, you might want to explore resources like the Power Grid Generator complete system guide to understand the full scope of what’s possible in terms of energy independence.
Step 5: Seed Selection & Planting
The choice of seeds is crucial for a truly self sufficient garden from scratch.
- Choose Heirloom & Open-Pollinated Seeds: These varieties produce seeds that will grow true to type, meaning you can save seeds from your harvest year after year. F1 hybrids, while often vigorous, will not produce consistent offspring from saved seeds. Reputable seed companies include Baker Creek Heirloom Seeds, High Mowing Organic Seeds, and Seed Savers Exchange. Start with common, reliable varieties like ‘Black Krim’ tomatoes, ‘Provider’ bush beans, ‘Waltham Butternut’ squash, and ‘Black Seeded Simpson’ lettuce.
- Start Seeds Indoors (Optional but Recommended): For longer growing seasons or specific crops, starting seeds indoors gives you a head start. Use seed-starting mix (e.g., Espoma Organic Seed Starter Mix, ~$10 for 16qt bag) in seed trays (Jiffy Professional Greenhouse 72-cell kit, ~$15). Provide adequate light with LED grow lights (Barrina T5 2ft 4-pack LED Grow Lights, 20W each, ~$50) for 14-16 hours a day, positioned 2-4 inches above seedlings. Maintain consistent temperatures (65-75°F for most).
- Direct Sowing vs. Transplanting: Some crops (carrots, radishes, beans, corn) prefer direct sowing into the garden bed. Others (tomatoes, peppers, broccoli, kale) benefit from being started indoors and transplanted. Follow seed packet instructions for planting depths (e.g., lettuce seeds are often surface-sown or planted 1/8 inch deep, while beans are 1 inch deep) and spacing.
- Companion Planting: Strategically plant different species together to enhance growth, deter pests, and attract beneficial insects. For example, planting marigolds near tomatoes can deter nematodes, and basil improves tomato flavor. Nasturtiums can act as a trap crop for aphids.
- Succession Planting: For a continuous harvest, plant small batches of quick-growing crops (lettuce, radishes, cilantro) every 2-3 weeks. As one crop finishes, another is ready to take its place.
Step 6: Pest & Disease Management (Organic)
Maintaining a self sufficient garden from scratch means embracing organic pest and disease control.
- Integrated Pest Management (IPM): This holistic approach combines several strategies.
- Observation: Regularly inspect your plants for early signs of pests or disease. Catching issues early is key.
- Physical Barriers: Use row covers (e.g., Agribon AG-19 floating row cover, 10×20 ft, ~$20) to protect young plants from insect pests like cabbage worms and squash bugs. Install fences (e.g., 2×4 welded wire mesh, 4 ft tall, 50 ft roll ~$70) to keep out deer, rabbits, and other larger animals.
- Hand-Picking: For larger pests like tomato hornworms or squash bugs, simply pick them off and drop them into a bucket of soapy water.
- Companion Planting: As mentioned, certain plants repel pests. Marigolds, garlic, and onions are excellent deterrents.
- Attract Beneficial Insects: Plant flowers like dill, fennel, cosmos, and sweet alyssum to attract ladybugs, lacewings, and parasitic wasps, which prey on common garden pests.
- Organic Sprays & Treatments:
- Neem Oil: An excellent broad-spectrum organic insecticide and fungicide. Bonide Neem Oil Concentrate (16oz, ~$20) can be mixed at a rate of 1-2 tbsp per gallon of water and sprayed on affected plants.
- Insecticidal Soap: Effective against soft-bodied insects like aphids, whiteflies, and spider mites. Garden Safe Insecticidal Soap (24oz ready-to-use, ~$10).
- Bacillus thuringiensis (Bt): A naturally occurring soil bacterium that targets caterpillars and worms. Monterey BT Worm & Caterpillar Killer (16oz, ~$18) is highly effective and safe for beneficial insects.
- Copper or Sulfur Sprays: For fungal diseases like powdery mildew or blight, organic copper (e.g., Bonide Copper Fungicide, ~$15 for 1lb) or sulfur (e.g., Safer Brand Garden Fungicide, ~$10 for 16oz) can be used as a last resort.
Step 7: Harvesting & Seed Saving
The culmination of your efforts is the harvest, and seed saving closes the loop on self-sufficiency.
- Harvesting Techniques:
- Timing: Harvest vegetables at their peak ripeness for best flavor and nutritional value. For example, green beans should snap cleanly, cucumbers should be firm, and tomatoes should be fully colored.
- Frequency: Many crops, like zucchini, cucumbers, and bush beans, produce more if harvested frequently. Pick daily or every other day.
- Tools: Use clean, sharp pruners (e.g., Corona ClassicCUT Bypass Pruner BP 3180, ~$30) or a sharp knife for clean cuts, minimizing damage to the plant.
- Seed Saving: This is where the « self-sufficient » aspect truly shines.
- Selection: Only save seeds from your healthiest, most vigorous plants that show desired traits (disease resistance, good flavor, high yield).
- Isolation: To ensure true-to-type seeds, prevent cross-pollination. This can be challenging for open-pollinated crops that readily cross (e.g., squash, corn). For beginners, focus on self-pollinating plants like beans, peas, lettuce, and tomatoes.
- Processing:
- Dry Seeds (Beans, Peas, Lettuce, Grains): Allow pods/seed heads to dry completely on the plant. Harvest, shell, and clean the seeds, removing chaff.
- Wet Seeds (Tomatoes, Cucumbers, Squash): For tomatoes, ferment the seeds in water for a few days to remove the gel coating and inhibit disease. For cucumbers/squash, scrape out seeds, wash thoroughly, and dry.
- Drying: Spread seeds thinly on screens or paper plates in a cool, dry, well-ventilated area for 1-4 weeks. Ensure they are bone-dry before storage. I aim for less than 8% moisture content.
- Storage: Store seeds in airtight containers (glass jars with desiccant packets work well) in a cool, dark, dry place (ideally 40-50°F and 30-40% humidity). Label clearly with variety and date. Properly stored seeds can remain viable for 3-10 years or more.
Step 8: Season Extension & Winterizing
Extend your harvest and protect your garden for the off-season to truly maximize your self sufficient garden from scratch.
- Cold Frames: Simple structures with a transparent top (glass, polycarbonate, or old windows) that sit over garden beds. They trap solar heat, allowing you to grow cold-hardy crops (lettuce, spinach, kale, radishes) well into winter or start seeds earlier in spring. A basic cold frame can be built from 2×6 lumber and a sheet of polycarbonate for under $100.
- Hoop Houses/Low Tunnels: Larger structures made from flexible hoops (PVC pipe or EMT conduit) covered with greenhouse plastic. These provide more space and greater temperature moderation. A 10×20 ft DIY low tunnel kit can cost $200-$500, while a larger, more robust hoop house kit might be $1,000-$3,000. I use a 6×12 ft low tunnel made from 1/2-inch PVC hoops and 6mil greenhouse plastic, which extends my lettuce and spinach harvest by at least
Step 4: Water Management & Irrigation
Efficient water management is critical for a self sufficient garden from scratch, especially in off-grid living where water resources might be limited.
- Rainwater Harvesting: This is my primary source of irrigation water. A 55-gallon rain barrel (e.g., EarthMark Rain Barrel, ~$120-$150) connected to a downspout can collect significant water. For larger needs, I use two 275-gallon IBC totes (Intermediate Bulk Containers, often available used for $100-$200 each from food-grade sources) connected in series. A 1,000 sq ft roof can collect approximately 620 gallons of water for every inch of rainfall. My 1,500 sq ft roof provides ample water for my 600 sq ft garden through multiple barrels and totes.
- Drip Irrigation: This is by far the most water-efficient method, delivering water directly to the plant’s root zone, minimizing evaporation and weed growth.
- Components: A typical drip system includes a pressure regulator (e.g., Rain Bird PRV-10, ~$15), a filter (Rain Bird RBY filter, ~$20), main tubing (1/2-inch poly tubing, 100ft ~$25), smaller feeder lines (1/4-inch tubing), and emitters (0.5 GPH or 1 GPH per plant).
- Kits: For beginners, a starter kit like the Rain Bird Drip Irrigation Garden Kit (model DDI-KIT-1P, ~$40-$60) is excellent for a small garden. For larger setups, I use Netafim Techline CV Drip Line (500ft roll, ~$150-$200), which has pressure-compensating emitters built-in, ensuring even watering across long runs.
- Automation: For true self-sufficiency, consider a battery-powered timer (e.g., Orbit B-Hyve Bluetooth Hose Faucet Timer, ~$50) or a solar-powered timer connected to a small 12V pump.
- Solar-Powered Pumps: For lifting water from a well, pond, or large storage tank to your garden, a solar pump is a game-changer. For a smaller drip system, a Shurflo 2088-594-152 Diaphragm Pump (12V, 3.5 GPM, ~$180) can be powered by a single 100W solar panel (e.g., Renogy 100W Monocrystalline Solar Panel, ~$100) and a small 12V battery (e.g., a 50Ah LiFePO4 battery like the Battle Born 50Ah, ~$450). For larger operations or deeper wells, more robust systems are needed. If you’re looking to build out a comprehensive off-grid power system to support your garden’s water needs, or indeed your entire homestead, you might want to explore resources like the Power Grid Generator complete system guide to understand the full scope of what’s possible in terms of energy independence.
Step 5: Seed Selection & Planting
The choice of seeds is crucial for a truly self sufficient garden from scratch.
- Choose Heirloom & Open-Pollinated Seeds: These varieties produce seeds that will grow true to type, meaning you can save seeds from your harvest year after year. F1 hybrids, while often vigorous, will not produce consistent offspring from saved seeds. Reputable seed companies include Baker Creek Heirloom Seeds, High Mowing Organic Seeds, and Seed Savers Exchange. Start with common, reliable varieties like ‘Black Krim’ tomatoes, ‘Provider’ bush beans, ‘Waltham Butternut’ squash, and ‘Black Seeded Simpson’ lettuce.
- Start Seeds Indoors (Optional but Recommended): For longer growing seasons or specific crops, starting seeds indoors gives you a head start. Use seed-starting mix (e.g., Espoma Organic Seed Starter Mix, ~$10 for 16qt bag) in seed trays (Jiffy Professional Greenhouse 72-cell kit, ~$15). Provide adequate light with LED grow lights (Barrina T5 2ft 4-pack LED Grow Lights, 20W each, ~$50) for 14-16 hours a day, positioned 2-4 inches above seedlings. Maintain consistent temperatures (65-75°F for most).
- Direct Sowing vs. Transplanting: Some crops (carrots, radishes, beans, corn) prefer direct sowing into the garden bed. Others (tomatoes, peppers, broccoli, kale) benefit from being started indoors and transplanted. Follow seed packet instructions for planting depths (e.g., lettuce seeds are often surface-sown or planted 1/8 inch deep, while beans are 1 inch deep) and spacing.
- Companion Planting: Strategically plant different species together to enhance growth, deter pests, and attract beneficial insects. For example, planting marigolds near tomatoes can deter nematodes, and basil improves tomato flavor. Nasturtiums can act as a trap crop for aphids.
- Succession Planting: For a continuous harvest, plant small batches of quick-growing crops (lettuce, radishes, cilantro) every 2-3 weeks. As one crop finishes, another is ready to take its place.
Step 6: Pest & Disease Management (Organic)
Maintaining a self sufficient garden from scratch means embracing organic pest and disease control.
- Integrated Pest Management (IPM): This holistic approach combines several strategies.
- Observation: Regularly inspect your plants for early signs of pests or disease. Catching issues early is key.
- Physical Barriers: Use row covers (e.g., Agribon AG-19 floating row cover, 10×20 ft, ~$20) to protect young plants from insect pests like cabbage worms and squash bugs. Install fences (e.g., 2×4 welded wire mesh, 4 ft tall, 50 ft roll ~$70) to keep out deer, rabbits, and other larger animals.
- Hand-Picking: For larger pests like tomato hornworms or squash bugs, simply pick them off and drop them into a bucket of soapy water.
- Companion Planting: As mentioned, certain plants repel pests. Marigolds, garlic, and onions are excellent deterrents.
- Attract Beneficial Insects: Plant flowers like dill, fennel, cosmos, and sweet alyssum to attract ladybugs, lacewings, and parasitic wasps, which prey on common garden pests.
- Organic Sprays & Treatments:
- Neem Oil: An excellent broad-spectrum organic insecticide and fungicide. Bonide Neem Oil Concentrate (16oz, ~$20) can be mixed at a rate of 1-2 tbsp per gallon of water and sprayed on affected plants.
- Insecticidal Soap: Effective against soft-bodied insects like aphids, whiteflies, and spider mites. Garden Safe Insecticidal Soap (24oz ready-to-use, ~$10).
- Bacillus thuringiensis (Bt): A naturally occurring soil bacterium that targets caterpillars and worms. Monterey BT Worm & Caterpillar Killer (16oz, ~$18) is highly effective and safe for beneficial insects.
- Copper or Sulfur Sprays: For fungal diseases like powdery mildew or blight, organic copper (e.g., Bonide Copper Fungicide, ~$15 for 1lb) or sulfur (e.g., Safer Brand Garden Fungicide, ~$10 for 16oz) can be used as a last resort.
Step 7: Harvesting & Seed Saving
The culmination of your efforts is the harvest, and seed saving closes the loop on self-sufficiency.
- Harvesting Techniques:
- Timing: Harvest vegetables at their peak ripeness for best flavor and nutritional value. For example, green beans should snap cleanly, cucumbers should be firm, and tomatoes should be fully colored.
- Frequency: Many crops, like zucchini, cucumbers, and bush beans, produce more if harvested frequently. Pick daily or every other day.
- Tools: Use clean, sharp pruners (e.g., Corona ClassicCUT Bypass Pruner BP 3180, ~$30) or a sharp knife for clean cuts, minimizing damage to the plant.
- Seed Saving: This is where the « self-sufficient » aspect truly shines.
- Selection: Only save seeds from your healthiest, most vigorous plants that show desired traits (disease resistance, good flavor, high yield).
- Isolation: To ensure true-to-type seeds, prevent cross-pollination. This can be challenging for open-pollinated crops that readily cross (e.g., squash, corn). For beginners, focus on self-pollinating plants like beans, peas, lettuce, and tomatoes.
- Processing:
- Dry Seeds (Beans, Peas, Lettuce, Grains): Allow pods/seed heads to dry completely on the plant. Harvest, shell, and clean the seeds, removing chaff.
- Wet Seeds (Tomatoes, Cucumbers, Squash): For tomatoes, ferment the seeds in water for a few days to remove the gel coating and inhibit disease. For cucumbers/squash, scrape out seeds, wash thoroughly, and dry.
- Drying: Spread seeds thinly on screens or paper plates in a cool, dry, well-ventilated area for 1-4 weeks. Ensure they are bone-dry before storage. I aim for less than 8% moisture content.
- Storage: Store seeds in airtight containers (glass jars with desiccant packets work well) in a cool, dark, dry place (ideally 40-50°F and 30-40% humidity). Label clearly with variety and date. Properly stored seeds can remain viable for 3-10 years or more.
Step 8: Season Extension & Winterizing
Extend your harvest and protect your garden for the off-season to truly maximize your self sufficient garden from scratch.
- Cold Frames: Simple structures with a transparent top (glass, polycarbonate, or old windows) that sit over garden beds. They trap solar heat, allowing you to grow cold-hardy crops (lettuce, spinach, kale, radishes) well into winter or start seeds earlier in spring. A basic cold frame can be built from 2×6 lumber and a sheet of polycarbonate for under $100.
- Hoop Houses/Low Tunnels: Larger structures made from flexible hoops (PVC pipe or EMT conduit) covered with greenhouse plastic. These provide more space and greater temperature moderation. A 10×20 ft DIY low tunnel kit can cost $200-$500, while a larger, more robust hoop house kit might be $1,000-$3,000. I use a 6×12 ft low tunnel made from 1/2-inch PVC hoops and 6mil greenhouse plastic, which extends my lettuce and spinach harvest by at least
- In-Ground Beds: If you have excellent native soil and good drainage, in-ground beds are the most economical. Double-digging (loosening soil two shovel depths) can significantly improve drainage and aeration. For my main garden, I primarily use in-ground beds, but I focus on building up the soil over time with consistent compost additions and cover cropping. I aim for beds that are no wider than 3-4 feet so I can reach the center without stepping on the soil, compacting it.
- Raised Beds: Raised beds offer numerous advantages, especially for poor soil, heavy clay, or rocky areas. They provide better drainage, warm up faster in spring, reduce compaction, and make weeding and harvesting easier on your back.
- Material Options:
- Untreated Cedar: Naturally rot-resistant and chemical-free. A 4×8 ft bed, 12 inches deep, typically requires three 2x12x8 ft cedar boards, costing around $50-$60 per board (total ~$150-$180) plus corner brackets or screws. My first raised beds were cedar and are still going strong after 7 years.
- Galvanized Steel: Durable, long-lasting, and aesthetically pleasing. Brands like Vego Garden offer modular kits. A Vego Garden 17″ Tall 8-in-1 Metal Raised Garden Bed (can be configured to 4×8 ft) costs approximately $250-$300.
- Concrete Blocks/Stones: Very durable but can leach minerals (though generally safe once weathered) and can be expensive.
- Recycled Materials: Pallets (check for chemical treatment stamps like « HT » for heat-treated), old tires (controversial due to potential chemical leaching).
- Filling Raised Beds: Don’t just fill with topsoil. Use a « Hugelkultur » approach (logs, branches, leaves, then compost, then topsoil) or a mixture of 60% good quality topsoil, 30% compost, and 10% perlite or vermiculite for drainage. A 4x8x1 ft raised bed requires about 32 cubic feet (or ~1.2 cubic yards) of soil mix, which can cost $100-$200 depending on your source.
- Material Options:
Step 4: Water Management & Irrigation
Efficient water management is critical for a self sufficient garden from scratch, especially in off-grid living where water resources might be limited.
- Rainwater Harvesting: This is my primary source of irrigation water. A 55-gallon rain barrel (e.g., EarthMark Rain Barrel, ~$120-$150) connected to a downspout can collect significant water. For larger needs, I use two 275-gallon IBC totes (Intermediate Bulk Containers, often available used for $100-$200 each from food-grade sources) connected in series. A 1,000 sq ft roof can collect approximately 620 gallons of water for every inch of rainfall. My 1,500 sq ft roof provides ample water for my 600 sq ft garden through multiple barrels and totes.
- Drip Irrigation: This is by far the most water-efficient method, delivering water directly to the plant’s root zone, minimizing evaporation and weed growth.
- Components: A typical drip system includes a pressure regulator (e.g., Rain Bird PRV-10, ~$15), a filter (Rain Bird RBY filter, ~$20), main tubing (1/2-inch poly tubing, 100ft ~$25), smaller feeder lines (1/4-inch tubing), and emitters (0.5 GPH or 1 GPH per plant).
- Kits: For beginners, a starter kit like the Rain Bird Drip Irrigation Garden Kit (model DDI-KIT-1P, ~$40-$60) is excellent for a small garden. For larger setups, I use Netafim Techline CV Drip Line (500ft roll, ~$150-$200), which has pressure-compensating emitters built-in, ensuring even watering across long runs.
- Automation: For true self-sufficiency, consider a battery-powered timer (e.g., Orbit B-Hyve Bluetooth Hose Faucet Timer, ~$50) or a solar-powered timer connected to a small 12V pump.
- Solar-Powered Pumps: For lifting water from a well, pond, or large storage tank to your garden, a solar pump is a game-changer. For a smaller drip system, a Shurflo 2088-594-152 Diaphragm Pump (12V, 3.5 GPM, ~$180) can be powered by a single 100W solar panel (e.g., Renogy 100W Monocrystalline Solar Panel, ~$100) and a small 12V battery (e.g., a 50Ah LiFePO4 battery like the Battle Born 50Ah, ~$450). For larger operations or deeper wells, more robust systems are needed. If you’re looking to build out a comprehensive off-grid power system to support your garden’s water needs, or indeed your entire homestead, you might want to explore resources like the Power Grid Generator complete system guide to understand the full scope of what’s possible in terms of energy independence.
Step 5: Seed Selection & Planting
The choice of seeds is crucial for a truly self sufficient garden from scratch.
- Choose Heirloom & Open-Pollinated Seeds: These varieties produce seeds that will grow true to type, meaning you can save seeds from your harvest year after year. F1 hybrids, while often vigorous, will not produce consistent offspring from saved seeds. Reputable seed companies include Baker Creek Heirloom Seeds, High Mowing Organic Seeds, and Seed Savers Exchange. Start with common, reliable varieties like ‘Black Krim’ tomatoes, ‘Provider’ bush beans, ‘Waltham Butternut’ squash, and ‘Black Seeded Simpson’ lettuce.
- Start Seeds Indoors (Optional but Recommended): For longer growing seasons or specific crops, starting seeds indoors gives you a head start. Use seed-starting mix (e.g., Espoma Organic Seed Starter Mix, ~$10 for 16qt bag) in seed trays (Jiffy Professional Greenhouse 72-cell kit, ~$15). Provide adequate light with LED grow lights (Barrina T5 2ft 4-pack LED Grow Lights, 20W each, ~$50) for 14-16 hours a day, positioned 2-4 inches above seedlings. Maintain consistent temperatures (65-75°F for most).
- Direct Sowing vs. Transplanting: Some crops (carrots, radishes, beans, corn) prefer direct sowing into the garden bed. Others (tomatoes, peppers, broccoli, kale) benefit from being started indoors and transplanted. Follow seed packet instructions for planting depths (e.g., lettuce seeds are often surface-sown or planted 1/8 inch deep, while beans are 1 inch deep) and spacing.
- Companion Planting: Strategically plant different species together to enhance growth, deter pests, and attract beneficial insects. For example, planting marigolds near tomatoes can deter nematodes, and basil improves tomato flavor. Nasturtiums can act as a trap crop for aphids.
- Succession Planting: For a continuous harvest, plant small batches of quick-growing crops (lettuce, radishes, cilantro) every 2-3 weeks. As one crop finishes, another is ready to take its place.
Step 6: Pest & Disease Management (Organic)
Maintaining a self sufficient garden from scratch means embracing organic pest and disease control.
- Integrated Pest Management (IPM): This holistic approach combines several strategies.
- Observation: Regularly inspect your plants for early signs of pests or disease. Catching issues early is key.
- Physical Barriers: Use row covers (e.g., Agribon AG-19 floating row cover, 10×20 ft, ~$20) to protect young plants from insect pests like cabbage worms and squash bugs. Install fences (e.g., 2×4 welded wire mesh, 4 ft tall, 50 ft roll ~$70) to keep out deer, rabbits, and other larger animals.
- Hand-Picking: For larger pests like tomato hornworms or squash bugs, simply pick them off and drop them into a bucket of soapy water.
- Companion Planting: As mentioned, certain plants repel pests. Marigolds, garlic, and onions are excellent deterrents.
- Attract Beneficial Insects: Plant flowers like dill, fennel, cosmos, and sweet alyssum to attract ladybugs, lacewings, and parasitic wasps, which prey on common garden pests.
- Organic Sprays & Treatments:
- Neem Oil: An excellent broad-spectrum organic insecticide and fungicide. Bonide Neem Oil Concentrate (16oz, ~$20) can be mixed at a rate of 1-2 tbsp per gallon of water and sprayed on affected plants.
- Insecticidal Soap: Effective against soft-bodied insects like aphids, whiteflies, and spider mites. Garden Safe Insecticidal Soap (24oz ready-to-use, ~$10).
- Bacillus thuringiensis (Bt): A naturally occurring soil bacterium that targets caterpillars and worms. Monterey BT Worm & Caterpillar Killer (16oz, ~$18) is highly effective and safe for beneficial insects.
- Copper or Sulfur Sprays: For fungal diseases like powdery mildew or blight, organic copper (e.g., Bonide Copper Fungicide, ~$15 for 1lb) or sulfur (e.g., Safer Brand Garden Fungicide, ~$10 for 16oz) can be used as a last resort.
Step 7: Harvesting & Seed Saving
The culmination of your efforts is the harvest, and seed saving closes the loop on self-sufficiency.
- Harvesting Techniques:
- Timing: Harvest vegetables at their peak ripeness for best flavor and nutritional value. For example, green beans should snap cleanly, cucumbers should be firm, and tomatoes should be fully colored.
- Frequency: Many crops, like zucchini, cucumbers, and bush beans, produce more if harvested frequently. Pick daily or every other day.
- Tools: Use clean, sharp pruners (e.g., Corona ClassicCUT Bypass Pruner BP 3180, ~$30) or a sharp knife for clean cuts, minimizing damage to the plant.
- Seed Saving: This is where the « self-sufficient » aspect truly shines.
- Selection: Only save seeds from your healthiest, most vigorous plants that show desired traits (disease resistance, good flavor, high yield).
- Isolation: To ensure true-to-type seeds, prevent cross-pollination. This can be challenging for open-pollinated crops that readily cross (e.g., squash, corn). For beginners, focus on self-pollinating plants like beans, peas, lettuce, and tomatoes.
- Processing:
- Dry Seeds (Beans, Peas, Lettuce, Grains): Allow pods/seed heads to dry completely on the plant. Harvest, shell, and clean the seeds, removing chaff.
- Wet Seeds (Tomatoes, Cucumbers, Squash): For tomatoes, ferment the seeds in water for a few days to remove the gel coating and inhibit disease. For cucumbers/squash, scrape out seeds, wash thoroughly, and dry.
- Drying: Spread seeds thinly on screens or paper plates in a cool, dry, well-ventilated area for 1-4 weeks. Ensure they are bone-dry before storage. I aim for less than 8% moisture content.
- Storage: Store seeds in airtight containers (glass jars with desiccant packets work well) in a cool, dark, dry place (ideally 40-50°F and 30-40% humidity). Label clearly with variety and date. Properly stored seeds can remain viable for 3-10 years or more.
Step 8: Season Extension & Winterizing
Extend your harvest and protect your garden for the off-season to truly maximize your self sufficient garden from scratch.
- Cold Frames: Simple structures with a transparent top (glass, polycarbonate, or old windows) that sit over garden beds. They trap solar heat, allowing you to grow cold-hardy crops (lettuce, spinach, kale, radishes) well into winter or start seeds earlier in spring. A basic cold frame can be built from 2×6 lumber and a sheet of polycarbonate for under $100.
- Hoop Houses/Low Tunnels: Larger structures made from flexible hoops (PVC pipe or EMT conduit) covered with greenhouse plastic. These provide more space and greater temperature moderation. A 10×20 ft DIY low tunnel kit can cost $200-$500, while a larger, more robust hoop house kit might be $1,000-$3,000. I use a 6×12 ft low tunnel made from 1/2-inch PVC hoops and 6mil greenhouse plastic, which extends my lettuce and spinach harvest by at least
Deciding between raised beds and in-ground beds depends on your soil, budget, and physical capabilities.
- In-Ground Beds: If you have excellent native soil and good drainage, in-ground beds are the most economical. Double-digging (loosening soil two shovel depths) can significantly improve drainage and aeration. For my main garden, I primarily use in-ground beds, but I focus on building up the soil over time with consistent compost additions and cover cropping. I aim for beds that are no wider than 3-4 feet so I can reach the center without stepping on the soil, compacting it.
- Raised Beds: Raised beds offer numerous advantages, especially for poor soil, heavy clay, or rocky areas. They provide better drainage, warm up faster in spring, reduce compaction, and make weeding and harvesting easier on your back.
- Material Options:
- Untreated Cedar: Naturally rot-resistant and chemical-free. A 4×8 ft bed, 12 inches deep, typically requires three 2x12x8 ft cedar boards, costing around $50-$60 per board (total ~$150-$180) plus corner brackets or screws. My first raised beds were cedar and are still going strong after 7 years.
- Galvanized Steel: Durable, long-lasting, and aesthetically pleasing. Brands like Vego Garden offer modular kits. A Vego Garden 17″ Tall 8-in-1 Metal Raised Garden Bed (can be configured to 4×8 ft) costs approximately $250-$300.
- Concrete Blocks/Stones: Very durable but can leach minerals (though generally safe once weathered) and can be expensive.
- Recycled Materials: Pallets (check for chemical treatment stamps like « HT » for heat-treated), old tires (controversial due to potential chemical leaching).
- Filling Raised Beds: Don’t just fill with topsoil. Use a « Hugelkultur » approach (logs, branches, leaves, then compost, then topsoil) or a mixture of 60% good quality topsoil, 30% compost, and 10% perlite or vermiculite for drainage. A 4x8x1 ft raised bed requires about 32 cubic feet (or ~1.2 cubic yards) of soil mix, which can cost $100-$200 depending on your source.
- Material Options:
Step 4: Water Management & Irrigation
Efficient water management is critical for a self sufficient garden from scratch, especially in off-grid living where water resources might be limited.
- Rainwater Harvesting: This is my primary source of irrigation water. A 55-gallon rain barrel (e.g., EarthMark Rain Barrel, ~$120-$150) connected to a downspout can collect significant water. For larger needs, I use two 275-gallon IBC totes (Intermediate Bulk Containers, often available used for $100-$200 each from food-grade sources) connected in series. A 1,000 sq ft roof can collect approximately 620 gallons of water for every inch of rainfall. My 1,500 sq ft roof provides ample water for my 600 sq ft garden through multiple barrels and totes.
- Drip Irrigation: This is by far the most water-efficient method, delivering water directly to the plant’s root zone, minimizing evaporation and weed growth.
- Components: A typical drip system includes a pressure regulator (e.g., Rain Bird PRV-10, ~$15), a filter (Rain Bird RBY filter, ~$20), main tubing (1/2-inch poly tubing, 100ft ~$25), smaller feeder lines (1/4-inch tubing), and emitters (0.5 GPH or 1 GPH per plant).
- Kits: For beginners, a starter kit like the Rain Bird Drip Irrigation Garden Kit (model DDI-KIT-1P, ~$40-$60) is excellent for a small garden. For larger setups, I use Netafim Techline CV Drip Line (500ft roll, ~$150-$200), which has pressure-compensating emitters built-in, ensuring even watering across long runs.
- Automation: For true self-sufficiency, consider a battery-powered timer (e.g., Orbit B-Hyve Bluetooth Hose Faucet Timer, ~$50) or a solar-powered timer connected to a small 12V pump.
- Solar-Powered Pumps: For lifting water from a well, pond, or large storage tank to your garden, a solar pump is a game-changer. For a smaller drip system, a Shurflo 2088-594-152 Diaphragm Pump (12V, 3.5 GPM, ~$180) can be powered by a single 100W solar panel (e.g., Renogy 100W Monocrystalline Solar Panel, ~$100) and a small 12V battery (e.g., a 50Ah LiFePO4 battery like the Battle Born 50Ah, ~$450). For larger operations or deeper wells, more robust systems are needed. If you’re looking to build out a comprehensive off-grid power system to support your garden’s water needs, or indeed your entire homestead, you might want to explore resources like the Power Grid Generator complete system guide to understand the full scope of what’s possible in terms of energy independence.
Step 5: Seed Selection & Planting
The choice of seeds is crucial for a truly self sufficient garden from scratch.
- Choose Heirloom & Open-Pollinated Seeds: These varieties produce seeds that will grow true to type, meaning you can save seeds from your harvest year after year. F1 hybrids, while often vigorous, will not produce consistent offspring from saved seeds. Reputable seed companies include Baker Creek Heirloom Seeds, High Mowing Organic Seeds, and Seed Savers Exchange. Start with common, reliable varieties like ‘Black Krim’ tomatoes, ‘Provider’ bush beans, ‘Waltham Butternut’ squash, and ‘Black Seeded Simpson’ lettuce.
- Start Seeds Indoors (Optional but Recommended): For longer growing seasons or specific crops, starting seeds indoors gives you a head start. Use seed-starting mix (e.g., Espoma Organic Seed Starter Mix, ~$10 for 16qt bag) in seed trays (Jiffy Professional Greenhouse 72-cell kit, ~$15). Provide adequate light with LED grow lights (Barrina T5 2ft 4-pack LED Grow Lights, 20W each, ~$50) for 14-16 hours a day, positioned 2-4 inches above seedlings. Maintain consistent temperatures (65-75°F for most).
- Direct Sowing vs. Transplanting: Some crops (carrots, radishes, beans, corn) prefer direct sowing into the garden bed. Others (tomatoes, peppers, broccoli, kale) benefit from being started indoors and transplanted. Follow seed packet instructions for planting depths (e.g., lettuce seeds are often surface-sown or planted 1/8 inch deep, while beans are 1 inch deep) and spacing.
- Companion Planting: Strategically plant different species together to enhance growth, deter pests, and attract beneficial insects. For example, planting marigolds near tomatoes can deter nematodes, and basil improves tomato flavor. Nasturtiums can act as a trap crop for aphids.
- Succession Planting: For a continuous harvest, plant small batches of quick-growing crops (lettuce, radishes, cilantro) every 2-3 weeks. As one crop finishes, another is ready to take its place.
Step 6: Pest & Disease Management (Organic)
Maintaining a self sufficient garden from scratch means embracing organic pest and disease control.
- Integrated Pest Management (IPM): This holistic approach combines several strategies.
- Observation: Regularly inspect your plants for early signs of pests or disease. Catching issues early is key.
- Physical Barriers: Use row covers (e.g., Agribon AG-19 floating row cover, 10×20 ft, ~$20) to protect young plants from insect pests like cabbage worms and squash bugs. Install fences (e.g., 2×4 welded wire mesh, 4 ft tall, 50 ft roll ~$70) to keep out deer, rabbits, and other larger animals.
- Hand-Picking: For larger pests like tomato hornworms or squash bugs, simply pick them off and drop them into a bucket of soapy water.
- Companion Planting: As mentioned, certain plants repel pests. Marigolds, garlic, and onions are excellent deterrents.
- Attract Beneficial Insects: Plant flowers like dill, fennel, cosmos, and sweet alyssum to attract ladybugs, lacewings, and parasitic wasps, which prey on common garden pests.
- Organic Sprays & Treatments:
- Neem Oil: An excellent broad-spectrum organic insecticide and fungicide. Bonide Neem Oil Concentrate (16oz, ~$20) can be mixed at a rate of 1-2 tbsp per gallon of water and sprayed on affected plants.
- Insecticidal Soap: Effective against soft-bodied insects like aphids, whiteflies, and spider mites. Garden Safe Insecticidal Soap (24oz ready-to-use, ~$10).
- Bacillus thuringiensis (Bt): A naturally occurring soil bacterium that targets caterpillars and worms. Monterey BT Worm & Caterpillar Killer (16oz, ~$18) is highly effective and safe for beneficial insects.
- Copper or Sulfur Sprays: For fungal diseases like powdery mildew or blight, organic copper (e.g., Bonide Copper Fungicide, ~$15 for 1lb) or sulfur (e.g., Safer Brand Garden Fungicide, ~$10 for 16oz) can be used as a last resort.
Step 7: Harvesting & Seed Saving
The culmination of your efforts is the harvest, and seed saving closes the loop on self-sufficiency.
- Harvesting Techniques:
- Timing: Harvest vegetables at their peak ripeness for best flavor and nutritional value. For example, green beans should snap cleanly, cucumbers should be firm, and tomatoes should be fully colored.
- Frequency: Many crops, like zucchini, cucumbers, and bush beans, produce more if harvested frequently. Pick daily or every other day.
- Tools: Use clean, sharp pruners (e.g., Corona ClassicCUT Bypass Pruner BP 3180, ~$30) or a sharp knife for clean cuts, minimizing damage to the plant.
- Seed Saving: This is where the « self-sufficient » aspect truly shines.
- Selection: Only save seeds from your healthiest, most vigorous plants that show desired traits (disease resistance, good flavor, high yield).
- Isolation: To ensure true-to-type seeds, prevent cross-pollination. This can be challenging for open-pollinated crops that readily cross (e.g., squash, corn). For beginners, focus on self-pollinating plants like beans, peas, lettuce, and tomatoes.
- Processing:
- Dry Seeds (Beans, Peas, Lettuce, Grains): Allow pods/seed heads to dry completely on the plant. Harvest, shell, and clean the seeds, removing chaff.
- Wet Seeds (Tomatoes, Cucumbers, Squash): For tomatoes, ferment the seeds in water for a few days to remove the gel coating and inhibit disease. For cucumbers/squash, scrape out seeds, wash thoroughly, and dry.
- Drying: Spread seeds thinly on screens or paper plates in a cool, dry, well-ventilated area for 1-4 weeks. Ensure they are bone-dry before storage. I aim for less than 8% moisture content.
- Storage: Store seeds in airtight containers (glass jars with desiccant packets work well) in a cool, dark, dry place (ideally 40-50°F and 30-40% humidity). Label clearly with variety and date. Properly stored seeds can remain viable for 3-10 years or more.
Step 8: Season Extension & Winterizing
Extend your harvest and protect your garden for the off-season to truly maximize your self sufficient garden from scratch.
- Cold Frames: Simple structures with a transparent top (glass, polycarbonate, or old windows) that sit over garden beds. They trap solar heat, allowing you to grow cold-hardy crops (lettuce, spinach, kale, radishes) well into winter or start seeds earlier in spring. A basic cold frame can be built from 2×6 lumber and a sheet of polycarbonate for under $100.
- Hoop Houses/Low Tunnels: Larger structures made from flexible hoops (PVC pipe or EMT conduit) covered with greenhouse plastic. These provide more space and greater temperature moderation. A 10×20 ft DIY low tunnel kit can cost $200-$500, while a larger, more robust hoop house kit might be $1,000-$3,000. I use a 6×12 ft low tunnel made from 1/2-inch PVC hoops and 6mil greenhouse plastic, which extends my lettuce and spinach harvest by at least
Healthy soil is the bedrock of a productive, self-sufficient garden. You can’t guess what your soil needs; you have to test it.
- Perform a Soil Test: A professional soil test will give you precise data on your soil’s pH, nutrient levels (N-P-K), and organic matter content. I recommend sending a sample to your local agricultural extension office; it typically costs $20-$50 and provides detailed recommendations. Alternatively, for a quick homeowner check, a Rapitest Soil Test Kit (40-test kit, model 1663, ~$20 on Amazon) provides a good baseline for pH, Nitrogen, Phosphorus, and Potash. Aim for a pH between 6.0 and 7.0 for most vegetables.
- Amend for pH Imbalance: If your soil is too acidic (below 6.0), add agricultural lime (dolomitic lime adds magnesium, calcitic lime adds calcium). Apply 5-10 lbs per 100 sq ft for a moderate adjustment. If it’s too alkaline (above 7.0), add elemental sulfur (e.g., Espoma Soil Acidifier, ~$15 for 6.75 lbs) or generous amounts of organic matter like peat moss or pine needles.
- Build Organic Matter: This is the single most important step for long-term soil health. Organic matter improves soil structure, water retention, drainage, and nutrient availability. Incorporate 2-4 inches of high-quality compost into your top 6-12 inches of soil annually. I make my own compost from kitchen scraps, garden waste, and shredded leaves, but you can purchase it. Local nurseries often sell bulk compost for $30-$50 per cubic yard. Aged manure (from chickens, cows, or horses – ensure it’s well-rotted to avoid burning plants) is also excellent.
- Address Nutrient Deficiencies: Based on your soil test, add specific organic amendments. If Nitrogen (N) is low, add blood meal (12-0-0, ~$20 for 3 lbs) or feather meal. For Phosphorus (P), use bone meal (3-15-0, ~$15 for 3 lbs) or rock phosphate. For Potassium (K), greensand (0-0-2.5, ~$25 for 5 lbs) or kelp meal are good choices. I rely heavily on Espoma Organic Garden-tone (5-3-3, ~$25 for an 8lb bag) as a balanced, all-purpose organic fertilizer during planting.
Step 3: Garden Bed Preparation
Deciding between raised beds and in-ground beds depends on your soil, budget, and physical capabilities.
- In-Ground Beds: If you have excellent native soil and good drainage, in-ground beds are the most economical. Double-digging (loosening soil two shovel depths) can significantly improve drainage and aeration. For my main garden, I primarily use in-ground beds, but I focus on building up the soil over time with consistent compost additions and cover cropping. I aim for beds that are no wider than 3-4 feet so I can reach the center without stepping on the soil, compacting it.
- Raised Beds: Raised beds offer numerous advantages, especially for poor soil, heavy clay, or rocky areas. They provide better drainage, warm up faster in spring, reduce compaction, and make weeding and harvesting easier on your back.
- Material Options:
- Untreated Cedar: Naturally rot-resistant and chemical-free. A 4×8 ft bed, 12 inches deep, typically requires three 2x12x8 ft cedar boards, costing around $50-$60 per board (total ~$150-$180) plus corner brackets or screws. My first raised beds were cedar and are still going strong after 7 years.
- Galvanized Steel: Durable, long-lasting, and aesthetically pleasing. Brands like Vego Garden offer modular kits. A Vego Garden 17″ Tall 8-in-1 Metal Raised Garden Bed (can be configured to 4×8 ft) costs approximately $250-$300.
- Concrete Blocks/Stones: Very durable but can leach minerals (though generally safe once weathered) and can be expensive.
- Recycled Materials: Pallets (check for chemical treatment stamps like « HT » for heat-treated), old tires (controversial due to potential chemical leaching).
- Filling Raised Beds: Don’t just fill with topsoil. Use a « Hugelkultur » approach (logs, branches, leaves, then compost, then topsoil) or a mixture of 60% good quality topsoil, 30% compost, and 10% perlite or vermiculite for drainage. A 4x8x1 ft raised bed requires about 32 cubic feet (or ~1.2 cubic yards) of soil mix, which can cost $100-$200 depending on your source.
- Material Options:
Step 4: Water Management & Irrigation
Efficient water management is critical for a self sufficient garden from scratch, especially in off-grid living where water resources might be limited.
- Rainwater Harvesting: This is my primary source of irrigation water. A 55-gallon rain barrel (e.g., EarthMark Rain Barrel, ~$120-$150) connected to a downspout can collect significant water. For larger needs, I use two 275-gallon IBC totes (Intermediate Bulk Containers, often available used for $100-$200 each from food-grade sources) connected in series. A 1,000 sq ft roof can collect approximately 620 gallons of water for every inch of rainfall. My 1,500 sq ft roof provides ample water for my 600 sq ft garden through multiple barrels and totes.
- Drip Irrigation: This is by far the most water-efficient method, delivering water directly to the plant’s root zone, minimizing evaporation and weed growth.
- Components: A typical drip system includes a pressure regulator (e.g., Rain Bird PRV-10, ~$15), a filter (Rain Bird RBY filter, ~$20), main tubing (1/2-inch poly tubing, 100ft ~$25), smaller feeder lines (1/4-inch tubing), and emitters (0.5 GPH or 1 GPH per plant).
- Kits: For beginners, a starter kit like the Rain Bird Drip Irrigation Garden Kit (model DDI-KIT-1P, ~$40-$60) is excellent for a small garden. For larger setups, I use Netafim Techline CV Drip Line (500ft roll, ~$150-$200), which has pressure-compensating emitters built-in, ensuring even watering across long runs.
- Automation: For true self-sufficiency, consider a battery-powered timer (e.g., Orbit B-Hyve Bluetooth Hose Faucet Timer, ~$50) or a solar-powered timer connected to a small 12V pump.
- Solar-Powered Pumps: For lifting water from a well, pond, or large storage tank to your garden, a solar pump is a game-changer. For a smaller drip system, a Shurflo 2088-594-152 Diaphragm Pump (12V, 3.5 GPM, ~$180) can be powered by a single 100W solar panel (e.g., Renogy 100W Monocrystalline Solar Panel, ~$100) and a small 12V battery (e.g., a 50Ah LiFePO4 battery like the Battle Born 50Ah, ~$450). For larger operations or deeper wells, more robust systems are needed. If you’re looking to build out a comprehensive off-grid power system to support your garden’s water needs, or indeed your entire homestead, you might want to explore resources like the Power Grid Generator complete system guide to understand the full scope of what’s possible in terms of energy independence.
Step 5: Seed Selection & Planting
The choice of seeds is crucial for a truly self sufficient garden from scratch.
- Choose Heirloom & Open-Pollinated Seeds: These varieties produce seeds that will grow true to type, meaning you can save seeds from your harvest year after year. F1 hybrids, while often vigorous, will not produce consistent offspring from saved seeds. Reputable seed companies include Baker Creek Heirloom Seeds, High Mowing Organic Seeds, and Seed Savers Exchange. Start with common, reliable varieties like ‘Black Krim’ tomatoes, ‘Provider’ bush beans, ‘Waltham Butternut’ squash, and ‘Black Seeded Simpson’ lettuce.
- Start Seeds Indoors (Optional but Recommended): For longer growing seasons or specific crops, starting seeds indoors gives you a head start. Use seed-starting mix (e.g., Espoma Organic Seed Starter Mix, ~$10 for 16qt bag) in seed trays (Jiffy Professional Greenhouse 72-cell kit, ~$15). Provide adequate light with LED grow lights (Barrina T5 2ft 4-pack LED Grow Lights, 20W each, ~$50) for 14-16 hours a day, positioned 2-4 inches above seedlings. Maintain consistent temperatures (65-75°F for most).
- Direct Sowing vs. Transplanting: Some crops (carrots, radishes, beans, corn) prefer direct sowing into the garden bed. Others (tomatoes, peppers, broccoli, kale) benefit from being started indoors and transplanted. Follow seed packet instructions for planting depths (e.g., lettuce seeds are often surface-sown or planted 1/8 inch deep, while beans are 1 inch deep) and spacing.
- Companion Planting: Strategically plant different species together to enhance growth, deter pests, and attract beneficial insects. For example, planting marigolds near tomatoes can deter nematodes, and basil improves tomato flavor. Nasturtiums can act as a trap crop for aphids.
- Succession Planting: For a continuous harvest, plant small batches of quick-growing crops (lettuce, radishes, cilantro) every 2-3 weeks. As one crop finishes, another is ready to take its place.
Step 6: Pest & Disease Management (Organic)
Maintaining a self sufficient garden from scratch means embracing organic pest and disease control.
- Integrated Pest Management (IPM): This holistic approach combines several strategies.
- Observation: Regularly inspect your plants for early signs of pests or disease. Catching issues early is key.
- Physical Barriers: Use row covers (e.g., Agribon AG-19 floating row cover, 10×20 ft, ~$20) to protect young plants from insect pests like cabbage worms and squash bugs. Install fences (e.g., 2×4 welded wire mesh, 4 ft tall, 50 ft roll ~$70) to keep out deer, rabbits, and other larger animals.
- Hand-Picking: For larger pests like tomato hornworms or squash bugs, simply pick them off and drop them into a bucket of soapy water.
- Companion Planting: As mentioned, certain plants repel pests. Marigolds, garlic, and onions are excellent deterrents.
- Attract Beneficial Insects: Plant flowers like dill, fennel, cosmos, and sweet alyssum to attract ladybugs, lacewings, and parasitic wasps, which prey on common garden pests.
- Organic Sprays & Treatments:
- Neem Oil: An excellent broad-spectrum organic insecticide and fungicide. Bonide Neem Oil Concentrate (16oz, ~$20) can be mixed at a rate of 1-2 tbsp per gallon of water and sprayed on affected plants.
- Insecticidal Soap: Effective against soft-bodied insects like aphids, whiteflies, and spider mites. Garden Safe Insecticidal Soap (24oz ready-to-use, ~$10).
- Bacillus thuringiensis (Bt): A naturally occurring soil bacterium that targets caterpillars and worms. Monterey BT Worm & Caterpillar Killer (16oz, ~$18) is highly effective and safe for beneficial insects.
- Copper or Sulfur Sprays: For fungal diseases like powdery mildew or blight, organic copper (e.g., Bonide Copper Fungicide, ~$15 for 1lb) or sulfur (e.g., Safer Brand Garden Fungicide, ~$10 for 16oz) can be used as a last resort.
Step 7: Harvesting & Seed Saving
The culmination of your efforts is the harvest, and seed saving closes the loop on self-sufficiency.
- Harvesting Techniques:
- Timing: Harvest vegetables at their peak ripeness for best flavor and nutritional value. For example, green beans should snap cleanly, cucumbers should be firm, and tomatoes should be fully colored.
- Frequency: Many crops, like zucchini, cucumbers, and bush beans, produce more if harvested frequently. Pick daily or every other day.
- Tools: Use clean, sharp pruners (e.g., Corona ClassicCUT Bypass Pruner BP 3180, ~$30) or a sharp knife for clean cuts, minimizing damage to the plant.
- Seed Saving: This is where the « self-sufficient » aspect truly shines.
- Selection: Only save seeds from your healthiest, most vigorous plants that show desired traits (disease resistance, good flavor, high yield).
- Isolation: To ensure true-to-type seeds, prevent cross-pollination. This can be challenging for open-pollinated crops that readily cross (e.g., squash, corn). For beginners, focus on self-pollinating plants like beans, peas, lettuce, and tomatoes.
- Processing:
- Dry Seeds (Beans, Peas, Lettuce, Grains): Allow pods/seed heads to dry completely on the plant. Harvest, shell, and clean the seeds, removing chaff.
- Wet Seeds (Tomatoes, Cucumbers, Squash): For tomatoes, ferment the seeds in water for a few days to remove the gel coating and inhibit disease. For cucumbers/squash, scrape out seeds, wash thoroughly, and dry.
- Drying: Spread seeds thinly on screens or paper plates in a cool, dry, well-ventilated area for 1-4 weeks. Ensure they are bone-dry before storage. I aim for less than 8% moisture content.
- Storage: Store seeds in airtight containers (glass jars with desiccant packets work well) in a cool, dark, dry place (ideally 40-50°F and 30-40% humidity). Label clearly with variety and date. Properly stored seeds can remain viable for 3-10 years or more.
Step 8: Season Extension & Winterizing
Extend your harvest and protect your garden for the off-season to truly maximize your self sufficient garden from scratch.
- Cold Frames: Simple structures with a transparent top (glass, polycarbonate, or old windows) that sit over garden beds. They trap solar heat, allowing you to grow cold-hardy crops (lettuce, spinach, kale, radishes) well into winter or start seeds earlier in spring. A basic cold frame can be built from 2×6 lumber and a sheet of polycarbonate for under $100.
- Hoop Houses/Low Tunnels: Larger structures made from flexible hoops (PVC pipe or EMT conduit) covered with greenhouse plastic. These provide more space and greater temperature moderation. A 10×20 ft DIY low tunnel kit can cost $200-$500, while a larger, more robust hoop house kit might be $1,000-$3,000. I use a 6×12 ft low tunnel made from 1/2-inch PVC hoops and 6mil greenhouse plastic, which extends my lettuce and spinach harvest by at least
- Integrated Pest Management (IPM): This holistic approach combines several strategies.
- Integrated Pest Management (IPM): This holistic approach combines several strategies.
- Integrated Pest Management (IPM): This holistic approach combines several strategies.
- Harvesting Techniques:
- Harvesting Techniques: