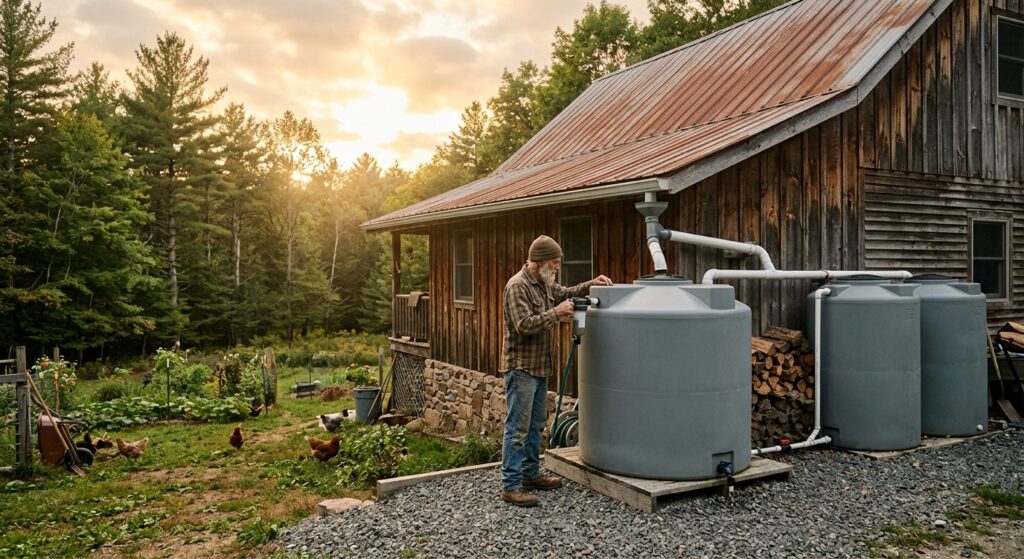
How to Collect and Store Rainwater for Off-Grid Use
The well ran dry on August 14th. That is the date burned into the memory of every off-grid homesteader who has watched a pump sputter and cough while a garden withers and a family goes without. If you rely on a single water source and that source fails, nothing else on your property matters — not the solar panels, not the root cellar, not the carefully stocked pantry. Water is the one resource that cannot wait.
The frustrating part is that most rural and off-grid properties receive enough annual rainfall to meet a household’s water needs — but almost all of it runs off rooftops, soaks into the ground, and disappears. A 1,500-square-foot metal roof receiving 40 inches of rain per year can theoretically yield more than 37,000 gallons. That is enough water for a family of four for an entire year. Without a system to capture it, every drop is wasted.
This guide covers everything you need to know about how to collect rainwater off grid — from calculating your roof’s collection potential to first-flush diverters, tank selection, filtration for drinking water, legal considerations by state, freeze protection, and connecting your system to irrigation or household plumbing. By the end, you will have a clear plan for building a rainwater harvesting system sized to your land and your needs.
Quick Answer: How Rainwater Collection Works Off Grid
A rainwater harvesting system captures rain from your roof, routes it through gutters and downspouts, passes it through a first-flush diverter to discard the initial dirty runoff, then stores the clean water in one or more tanks. For drinking water, you add a filtration train (sediment filter, carbon filter, UV sterilizer). The core formula for estimating collection potential is:
- Roof square footage × Monthly rainfall (inches) × 0.623 = Gallons collected
- Example: 1,200 sq ft roof × 3 inches rain × 0.623 = 2,243 gallons per month
- The 0.623 factor accounts for unit conversion and a standard 10% loss from evaporation and splash
- Metal and tile roofs are most efficient; asphalt shingles are fine for irrigation, questionable for drinking
- First-flush diverters are non-negotiable — they discard the first inch of rainfall that carries bird droppings, pollen, and roof grit
- Tank options range from 55-gallon rain barrels ($40–$80) to 5,000-gallon poly tanks ($800–$1,500) to 275-gallon IBC totes ($100–$200 used)
- Most US states now permit rainwater harvesting; a handful still have restrictions or permit requirements
Calculating Your Collection Potential
The Roof Area Formula
Before you spend a dollar on tanks or gutters, run the math on your specific roof. Measure the footprint of your structure — not the slope length, but the horizontal square footage of the area the roof covers. A 30×40 foot cabin has a 1,200-square-foot collection area regardless of roof pitch.
Plug your numbers into the formula: Roof sq ft × Rainfall inches × 0.623 = Gallons. The 0.623 constant is derived from the fact that one inch of rain on one square foot of surface equals 0.0623 gallons, and the formula bakes in roughly 10% system losses. For a more conservative real-world estimate, use 0.56 instead of 0.623.
Regional Rainfall Reference
Use your local NOAA monthly average rainfall data — available free at weather.gov — to build a month-by-month collection forecast. This tells you which months you will have a surplus to store and which months you will be drawing down reserves. Most of the US Pacific Coast sees heavy winter rains and dry summers, while the Southeast is more consistent year-round.
Collection Calculator Table: Roof Size × Monthly Rainfall by Region
| Roof Size (sq ft) | 1″ Rain/Month | 2″ Rain/Month | 3″ Rain/Month | 4″ Rain/Month | 5″ Rain/Month |
|---|---|---|---|---|---|
| 500 | 312 gal | 623 gal | 935 gal | 1,246 gal | 1,558 gal |
| 1,000 | 623 gal | 1,246 gal | 1,869 gal | 2,492 gal | 3,115 gal |
| 1,500 | 935 gal | 1,869 gal | 2,804 gal | 3,738 gal | 4,673 gal |
| 2,000 | 1,246 gal | 2,492 gal | 3,738 gal | 4,984 gal | 6,230 gal |
| 2,500 | 1,558 gal | 3,115 gal | 4,673 gal | 6,230 gal | 7,788 gal |
| 3,000 | 1,869 gal | 3,738 gal | 5,607 gal | 7,476 gal | 9,345 gal |
Based on formula: sq ft × inches × 0.623. Assumes ~10% system loss already deducted.
Gutters, Downspouts, and the First-Flush Diverter
Gutter Setup for Rainwater Harvesting
Standard 5-inch K-style aluminum gutters work well for most residential-scale systems. If your roof is larger than 2,000 square feet or you get heavy downpours, step up to 6-inch gutters to handle peak flow without overflow. Slope your gutters at least 1/8 inch per linear foot toward the downspout. Leaf guards are worth the investment — debris clogs are the number one maintenance headache in harvesting systems.
Keep gutters clean. A single decomposing leaf mat in a gutter introduces tannins, bacteria, and sediment that will foul your tank faster than any other source. Budget one cleaning per season in forested areas, twice per year in more open settings.
Why First-Flush Diverters Are Non-Negotiable
The first inch of rainfall on any roof collects everything that has accumulated since the last rain: bird and rodent droppings, pollen, dust, insect debris, degraded roofing material, and atmospheric pollution. Allowing this water into your storage tank introduces bacteria, heavy metals, and organic matter that will degrade water quality and overwhelm your filtration system.
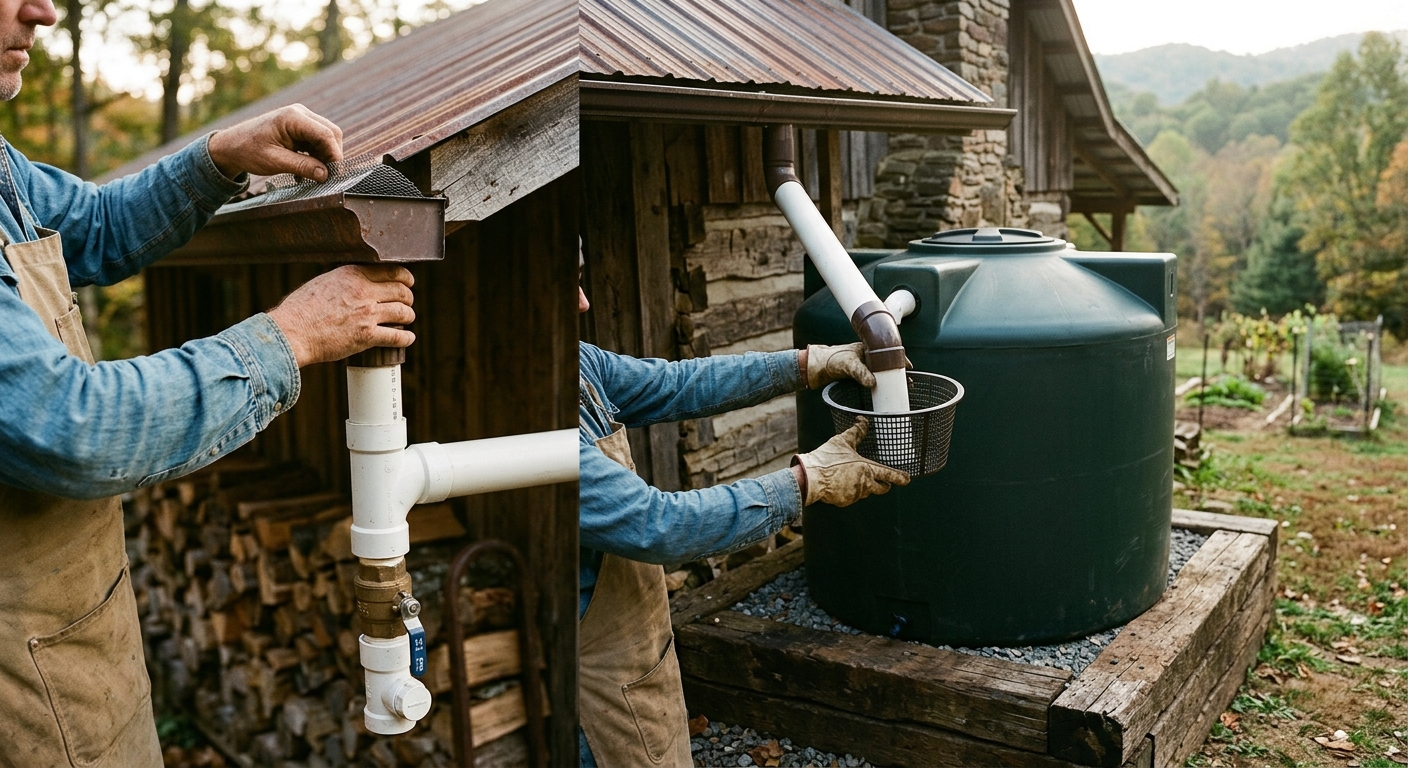
A first-flush diverter is a simple standpipe installed between the downspout and the collection inlet. The first flow of water fills the standpipe and is slowly drained away via a small bleed hole (typically a 1/16-inch orifice). Once the standpipe is full, subsequent cleaner rainwater flows past and into the tank. Size your diverter at one gallon of capacity per 100 square feet of roof area. For a 1,500-square-foot roof, you need a 15-gallon first-flush chamber.
You can buy pre-made first-flush diverter kits from companies like Rain Harvesting Supplies or Wisy for $30–$80, or build one from 4-inch PVC pipe, an end cap, and a brass ball valve for about $12 in materials.
Downspout Routing
Route your downspouts to a central collection point if possible — it simplifies tank placement and monitoring. Use flexible downspout connectors to make the connection to your first-flush diverter removable for cleaning. Install a fine-mesh screen (100–200 mesh) at the tank inlet as a final debris barrier before water enters storage.
Tank Options: Rain Barrels, IBC Totes, Poly Tanks, and Cisterns
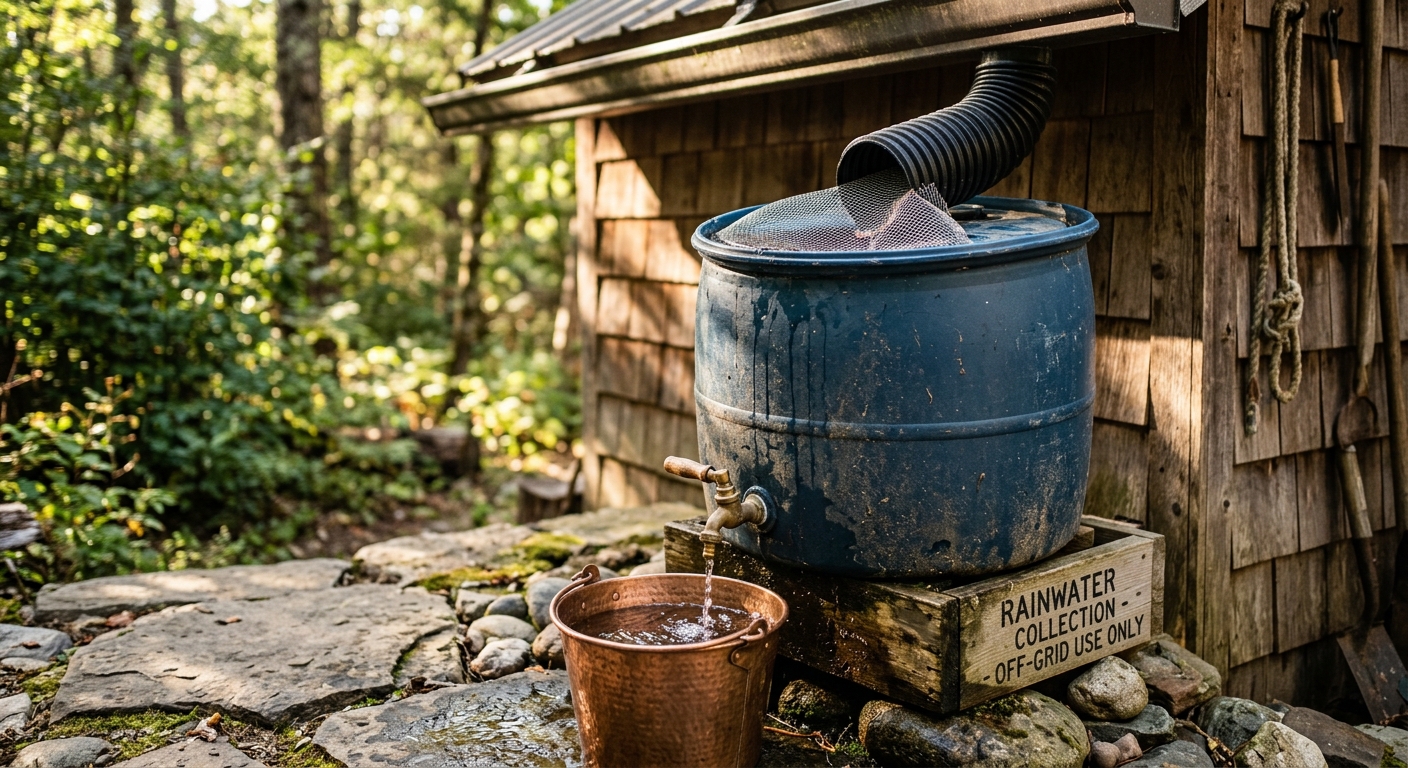
Rain Barrels (55–100 Gallons)
Rain barrels are the entry point for most people learning how to collect rainwater off grid. A standard 55-gallon food-grade polyethylene barrel costs $40–$80 new or $15–$30 used (former food-grade containers from restaurants or food distributors). Link multiple barrels in series with a short piece of 1-inch PVC at the overflow port of each barrel to expand capacity. The main drawbacks are limited volume, vulnerability to algae growth if light penetrates (use opaque barrels only), and pressure head that is too low for anything but gravity drip irrigation.
IBC Totes (275–330 Gallons)
Intermediate Bulk Containers are the workhorse of small off-grid rainwater systems. A used food-grade IBC tote costs $100–$200 at farm supply auctions, Craigslist, or through food manufacturers. They hold 275–330 gallons, have a large top opening for cleaning, and come with a 2-inch bottom valve already installed. Stack two totes and connect them with a level pipe at the bottom for 550–660 gallons at minimal cost. Wrap them in black plastic or paint them with exterior latex to block light and prevent algae. IBC frames are galvanized steel — check for corrosion before buying used units.
Polyethylene Tanks (500–10,000 Gallons)
For serious off-grid water independence, a dedicated food-grade poly tank is the right choice. Manufacturers like Norwesco, Chem-Tainer, and Snyder Industries produce UV-stabilized, FDA-approved tanks designed specifically for potable water storage. Costs run approximately $0.30–$0.50 per gallon of capacity. A 1,500-gallon tank costs $450–$750; a 5,000-gallon tank runs $1,200–$1,800. These tanks are the cleanest, most durable option and are warrantied for outdoor use. They require a stable, level pad — either compacted gravel or a concrete slab — and must be supported fully to prevent side-wall stress cracking.
Buried Cisterns (1,000–50,000+ Gallons)
Buried concrete or polyethylene cisterns offer the largest storage volume, protection from UV degradation, thermal stability that reduces algae growth, and freeze protection down to about 4 feet of cover in most US climates. A professionally installed 5,000-gallon buried fiberglass cistern runs $3,000–$6,000 installed, depending on region and soil conditions. This is the appropriate choice for a primary household water supply. Concrete cisterns can leach lime, raising pH — seal with a food-safe epoxy coating before use.
Tank Comparison Table
| Tank Type | Capacity Range | Cost (approx.) | Best Use | Pros | Cons |
|---|---|---|---|---|---|
| Rain Barrel | 55–100 gal | $15–$80 | Garden irrigation | Low cost, DIY-friendly | Very limited volume, low pressure |
| IBC Tote | 275–330 gal | $100–$200 used | Irrigation + backup | Affordable, stackable | Needs light blocking, used quality varies |
| Poly Tank (above ground) | 500–10,000 gal | $0.30–$0.50/gal | Primary household | Clean, warrantied, wide sizes | Visible, needs level pad |
| Buried Cistern | 1,000–50,000+ gal | $3,000–$6,000+ installed | Primary household | Freeze-proof, UV-proof, large volume | High install cost, harder to inspect |
Filtration: Making Rainwater Safe for Drinking
Stored rainwater is not safe to drink without treatment. Even perfectly collected water from a clean metal roof can harbor Legionella, E. coli, Giardia, and other pathogens — particularly after it has sat in a warm tank for several days. A three-stage filtration train is the standard approach for a rainwater harvesting system supplying household drinking water.
Stage 1: Sediment Filter (5–20 Micron)
A whole-house sediment filter cartridge removes particulates — dirt, rust, organic debris — that make it past your inlet screen. Use a 20-micron pre-filter followed by a 5-micron stage, or a single dual-gradient cartridge. Standard 10-inch Big Blue housings from Pentek or 3M Filtrete are cost-effective and accept widely available replacement cartridges ($5–$15 each). Change every 3–6 months or when flow rate drops noticeably.
Stage 2: Activated Carbon Filter
A 10-inch carbon block cartridge (0.5–5 micron) removes chlorine, volatile organic compounds, herbicides, pesticides, and most taste and odor issues. For rainwater, the primary concern is atmospheric pollutants and any leachate from roofing materials. Catalytic carbon blocks from brands like Pentek EP-10 or Watts PWFPB5-975 handle this effectively. Replace every 6–12 months.
Stage 3: UV Sterilizer
UV treatment is the final and most critical step for biological safety. A UV sterilizer exposes water to ultraviolet light at 254 nanometers, destroying the DNA of bacteria, viruses, and protozoa without adding chemicals. Flow rate must be matched to the UV unit’s rated capacity — a unit rated for 6 GPM cannot adequately treat water flowing at 8 GPM. VIQUA (formerly Trojan UV) and Ultraviolet Systems USA are reliable brands. Budget $150–$400 for the unit and replace the UV lamp annually.
For drinking water, always run your UV after filtration — turbid water blocks UV penetration. If your sediment and carbon stages are doing their job, UV will handle biological contaminants completely.
Legal Status of Rainwater Harvesting by US State
The legal landscape around rainwater collection has changed dramatically in the past decade. As of 2025, the majority of US states explicitly permit residential rainwater harvesting, and many actively encourage it through rebate programs and technical assistance.
No restrictions: Most states including Texas, Georgia, Florida, North Carolina, Tennessee, Missouri, and the vast majority of the Eastern US have no restrictions and often provide incentives. Texas even exempts rainwater harvesting equipment from sales tax.
Permits or volume limits: A handful of states require registration or limit collection volumes. Colorado now allows up to 110 gallons per household (two 55-gallon barrels) for residential use without a permit — a significant change from its historical restrictions. Oregon allows collection from rooftops for outdoor use without a permit but has requirements for potable use.
Check your county: Even in permissive states, some counties or municipalities layer additional requirements on top of state law — particularly around potable use or systems above a certain storage volume. Always verify with your local health department before building a system intended for drinking water.
The American Rainwater Catchment Systems Association (ARCSA) maintains an up-to-date state-by-state legal summary at arcsa.org.
Winter Freeze Protection
An unprotected above-ground water tank will crack in a hard freeze, and the resulting loss — of water and equipment — is expensive and avoidable. Your freeze protection strategy depends on your climate zone.
USDA Zones 7 and warmer (average winter minimum above 0°F): Wrap above-ground tanks with closed-cell foam pipe insulation or fiberglass tank wrap. Insulate all exposed pipes and valves with pipe heat tape backed by foam insulation. Drain barrels and exposed lines before the first hard freeze if you do not have a heated space.
Zones 5–6 (winters down to -20°F): Move smaller tanks into an insulated outbuilding, root cellar, or heated crawl space. For fixed large tanks, use a stock tank heater ($30–$60 at farm supply stores) or a submersible aquarium heater to prevent freezing. A 100-watt heater is sufficient for most tanks in moderate cold snaps.
Zones 4 and colder: Buried cisterns at 4+ feet depth are the only practical solution for year-round storage. Above-ground systems must be drained completely for winter. Design your rain barrel setup so every valve, pipe, and fitting can drain by gravity — no low spots that hold water.
Overflow Management
Every tank needs an overflow outlet, and that overflow needs somewhere to go. During heavy rains, a 2,000-gallon tank can fill in a single storm — and an unmanaged overflow will erode soil, flood outbuildings, and undermine foundations. Install a 2-inch overflow pipe at the top of each tank, directed to a French drain, a bermed infiltration basin, or a secondary tank in series. Size your overflow pipe to match your downspout diameter or larger. A mosquito-proof screen at the overflow outlet prevents breeding in standing water.
Connecting to Garden Irrigation and Household Use
Drip Irrigation
Gravity-fed drip irrigation is the most efficient use of harvested rainwater. Elevating a 275-gallon IBC tote 2–3 feet on a sturdy platform generates 1–1.5 PSI of pressure at the drip emitters — more than sufficient for standard 0.5–1 GPH emitters from Rain Bird or DripWorks. A 3/4-inch ball valve at the tank outlet feeds a main supply line; 1/2-inch poly tubing branches off to garden beds. Add a 150-mesh Y-filter at the head of the system to catch any sediment before it clogs emitters. A 275-gallon tote elevated 3 feet on a standard IBC cage will supply a 1,500-square-foot garden for 3–5 days without rain.
Household Pressure System
To use rainwater in a household plumbing system, you need a pump and a pressure tank. A shallow-well jet pump (for tanks within 25 vertical feet of the pump) or a submersible pump handles this well. Popular choices include the Wayne PC4 (1/2 HP, around $120) or the Goulds J5S for larger applications ($250–$350). Pair the pump with a 20-gallon pressure tank to reduce pump cycling — the Flotec FP7100T is a common choice at $90–$130. Set the pressure switch to 30/50 PSI for most off-grid household applications. Install a check valve between the pump and the pressure tank, and a sediment filter at the pump inlet to protect the pump from grit in the stored water.
Common Mistakes and How to Avoid Them
- Skipping the first-flush diverter: This is the most common and costliest mistake. Contaminated water fouls tanks, clogs filters, and creates a biological hazard. Install the diverter before the first rain.
- Under-sizing storage: Calculate your driest two-month stretch and size storage to bridge that gap. If you get 3 inches in June but only 0.5 inches in August, you need storage capacity for the August gap.
- Using light-permeable tanks: Clear or translucent tanks grow algae rapidly. All storage tanks must be opaque — dark green, black, or UV-stabilized blue poly only.
- Skipping overflow design: The first serious rainstorm will expose a missing overflow outlet in dramatic fashion. Plan overflow routing before the system is installed.
- Not testing water before drinking: Even with proper filtration, test your drinking water for coliform bacteria at least once per year. County health departments often provide low-cost or free testing kits.
- Asphalt shingle roofs for drinking water: Asphalt shingles leach polycyclic aromatic hydrocarbons (PAHs) and zinc. Use roof water from asphalt shingles for irrigation only. Metal roofs (galvanized, aluminum, painted steel) and clay or concrete tile are safe for potable harvesting with proper filtration.
💧 Is Your Water Supply Ready?
Collecting rain is step one — but storing it safely and having a backup plan is what separates prepared homesteaders from those who run dry in August. The SmartWaterBox system shows you how to build a complete off-grid water solution that works year-round.
*Affiliate link — we may earn a commission at no cost to you.
The Bottom Line
A well-designed rainwater harvesting system gives you genuine water independence — the ability to live and grow food without a well, a municipal hookup, or a water truck. The math is on your side: most US properties receive enough rainfall to supply a household if that water is captured rather than wasted. Start by calculating your roof’s collection potential, install a properly sized first-flush diverter, and choose tank storage that matches your driest-month gap. Add filtration appropriate for your end use — sediment and carbon filters for irrigation, plus UV treatment for drinking water — and you have a system that will serve you for decades with minimal maintenance.
If you want to go deeper on the storage and backup side of water independence, The SmartWaterBox system walks you through building a complete off-grid water solution — from collection and storage to year-round redundancy that keeps working even when August turns brutal.
Have questions about your specific situation? Drop them in the comments below — we read every one. If this guide helped you, share it with someone planning their off-grid setup.